Icon

Hub Creation

By bhargav nelluri

Hub refers to a central point in their supply chain network where packages are received, sorted, and then sent out for delivery.

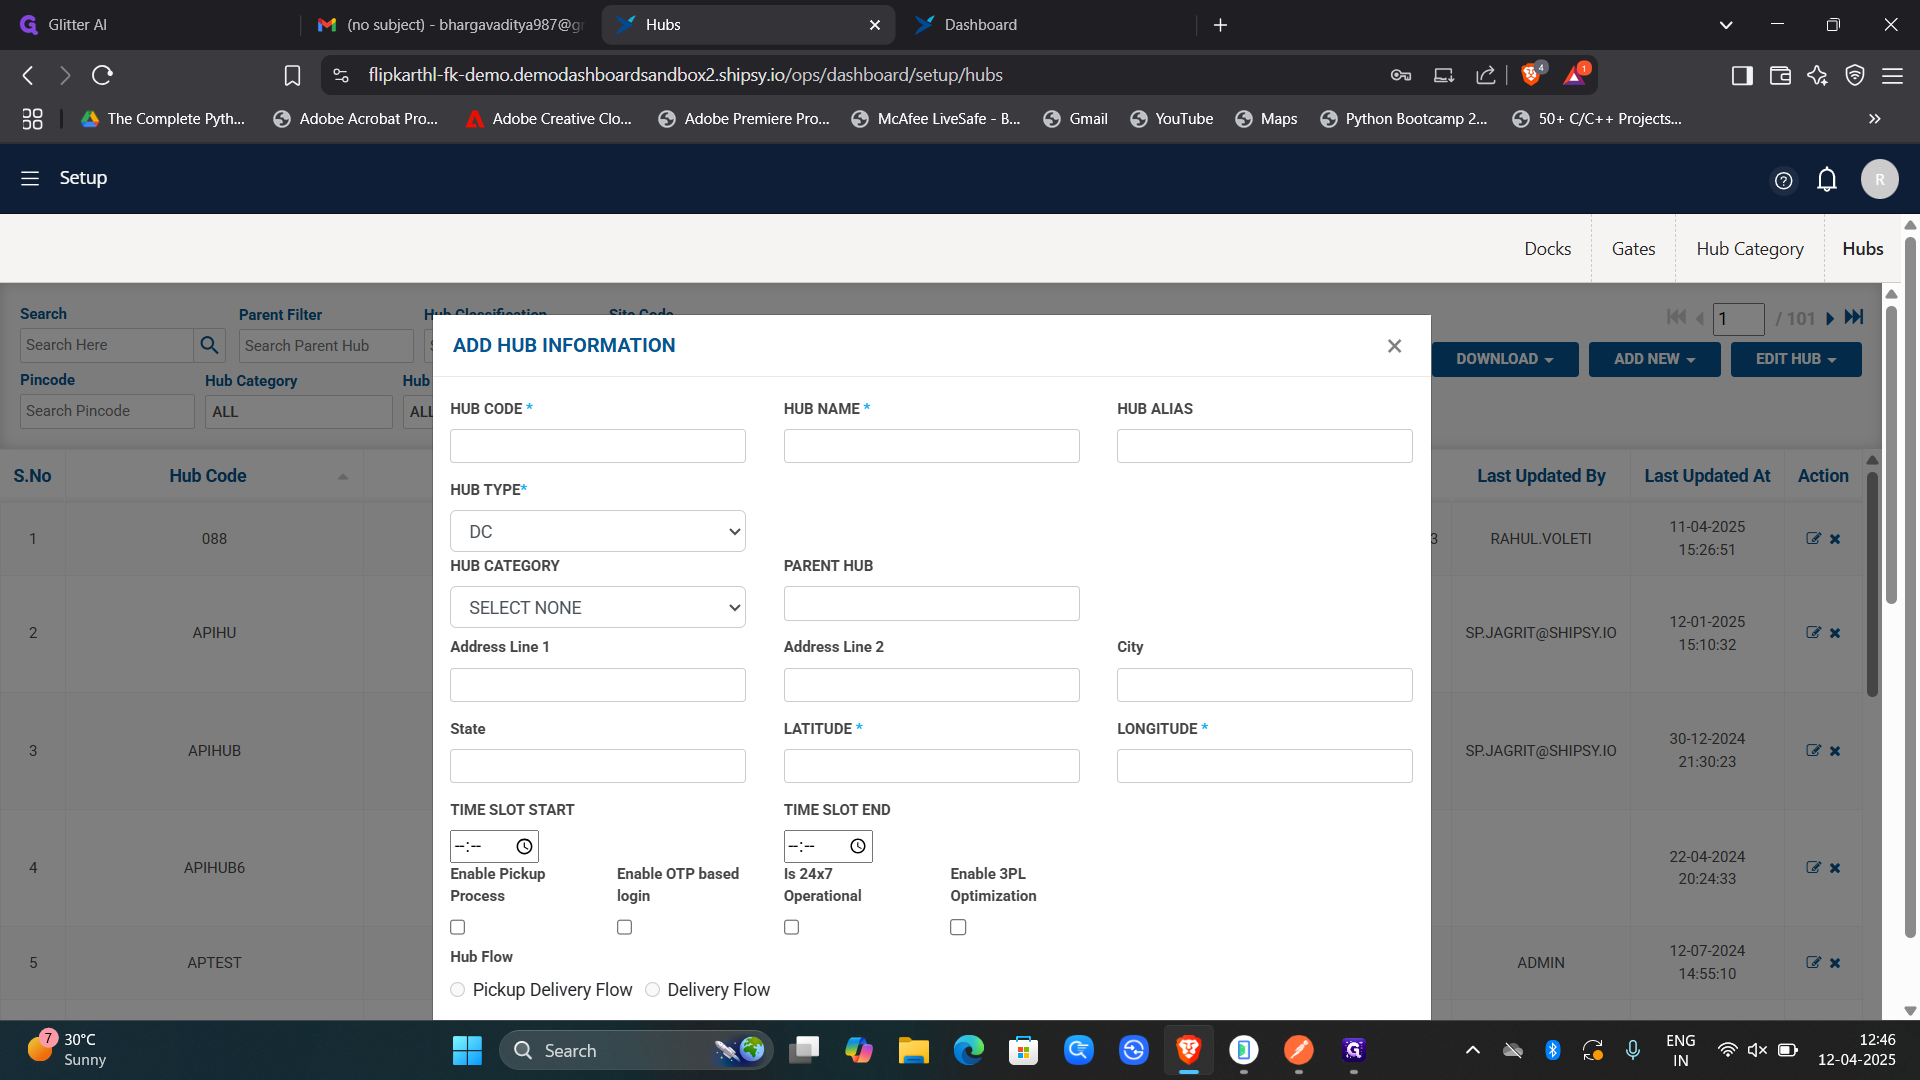
To create a hub in FlipkartHL, you first need to sign in to the platform. After signing in, navigate to the hamburger menu (☰) located at the top left corner of the screen. From there, go to the "Setep" option, then select "Assets." In the "Hubs" section, you will find the option to create a new hub. Click on the "ADD NEW" button at the top right, and then choose "New Hub." Begin by assigning a unique code to the new hub and giving it an appropriate name. Next, select the "Ondemand" option and choose the relevant cluster. For the hub flow, select "Pickup Delivery Flow" since the hub will handle both pickups and deliveries. One of the most critical parts of the hub creation process is entering the correct latitude and longitude coordinates and the address of the creating hub, as any error here can lead to significant operational issues. After carefully filling in all the details, click on "Add Hub." With that, the new hub named "077" will be successfully created.

1
For creating a hub we need to first sign in to flipkarthl.
Step #1: For creating a hub we need to first sign in to flipkarthl.
2
after sign in go to hamburger menu (☰) that is present at the top left of the screen.
Step #2: after sign in go to hamburger menu (☰) that is present at the top left of the screen.
3
go to setep option.
Step #3: go to setep option.
4
go to the assets option.
Step #4: go to the assets option.
5
here in hubs option we can create the new hub.
Step #5: here in hubs option we can create the new hub.
6
at the right top we see a option named as ADD NEW click on it.
Step #6: at the right top we see a option named as ADD NEW click on it.
7
Click on New Hub.
Step #7: Click on New Hub.
8
here give a code to that new hub.
Step #8: here give a code to that new hub.
9
give the hub a name.
Step #9: give the hub a name.
10
Click on ondemand.
Step #10: Click on ondemand.
11
here choose the cluster option.
Step #11: here choose the cluster option.
12
chose hub flow as pickup delivery flow because we are doing both pick up and delivary.
Step #12: chose hub flow as pickup delivery flow because we are doing both pick up and delivary.
13
here is the main part of the hub creation they are giving its latitudes and longitudes and the address.
Step #13: here is the main part of the hub creation they are giving its latitudes and longitudes and the address.
14
we have to give them very carefully without any error or it will cause many problems.
Step #14: we have to give them very carefully without any error or it will cause many problems.
15
after click on add hub.
Step #15: after click on add hub.
16
here we have a new hub with name 077.
Step #16: here we have a new hub with name 077.

Hub Creation