Transfers Guide.
This is a step-by-step guide for Transfer pallets.
By Josh Robinson
1
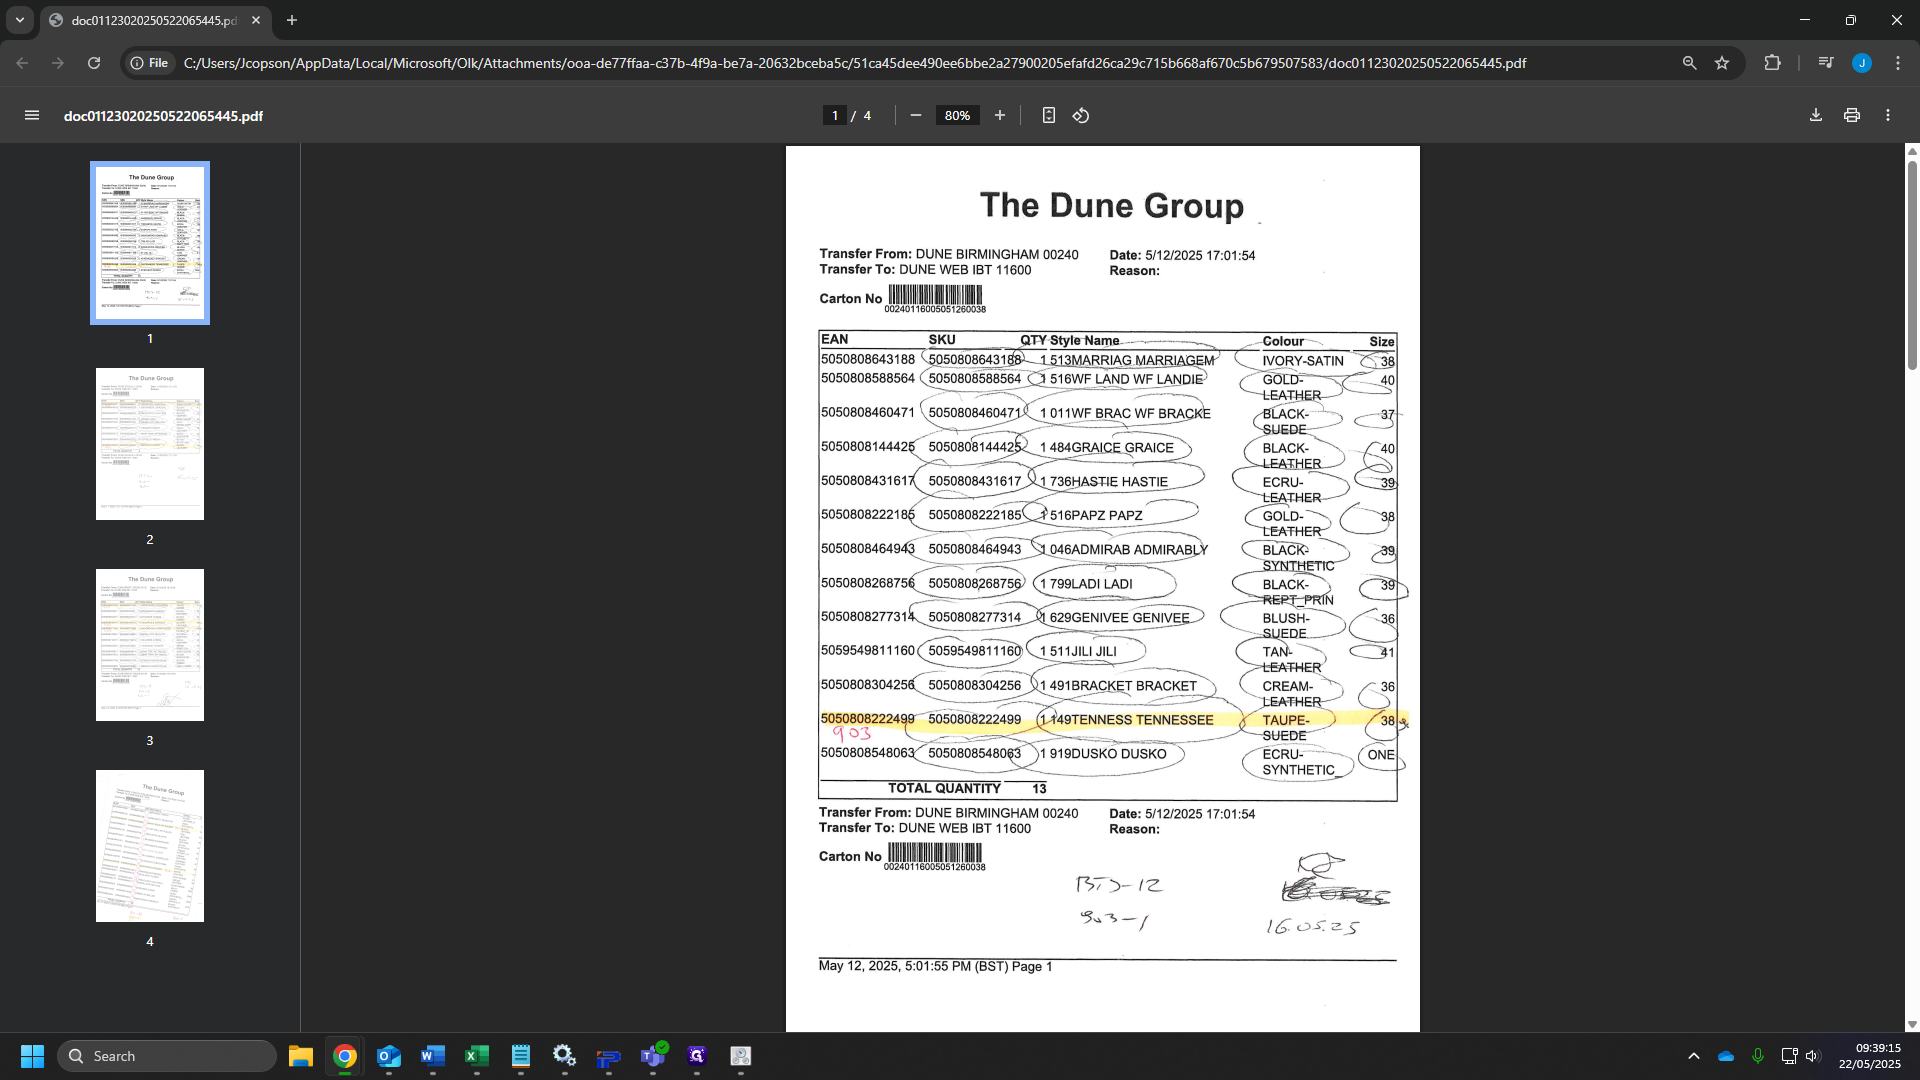
When receiving a transfer batch, this is what you will see, First sort through your batch and scan any faulty items (903,905 these are usually highlighted as below) to Rebecca Scattergood via email.
2
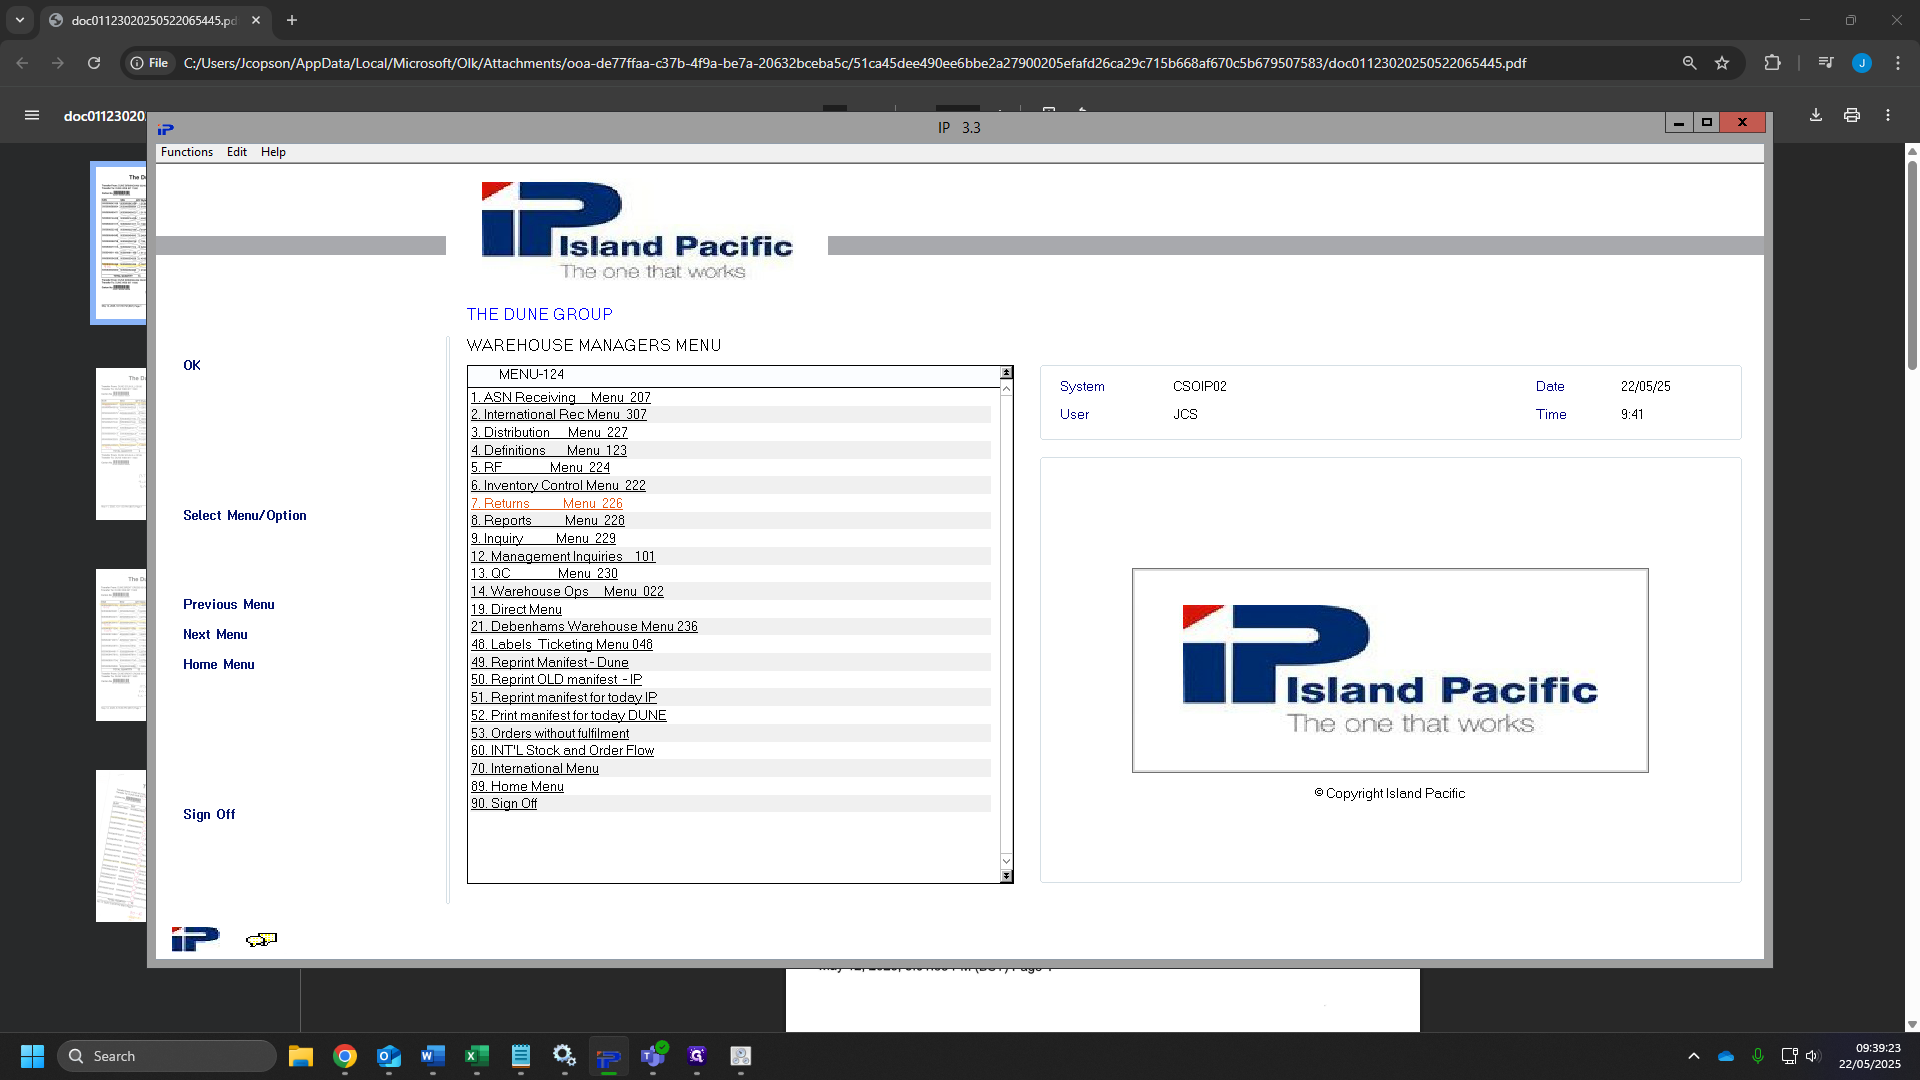
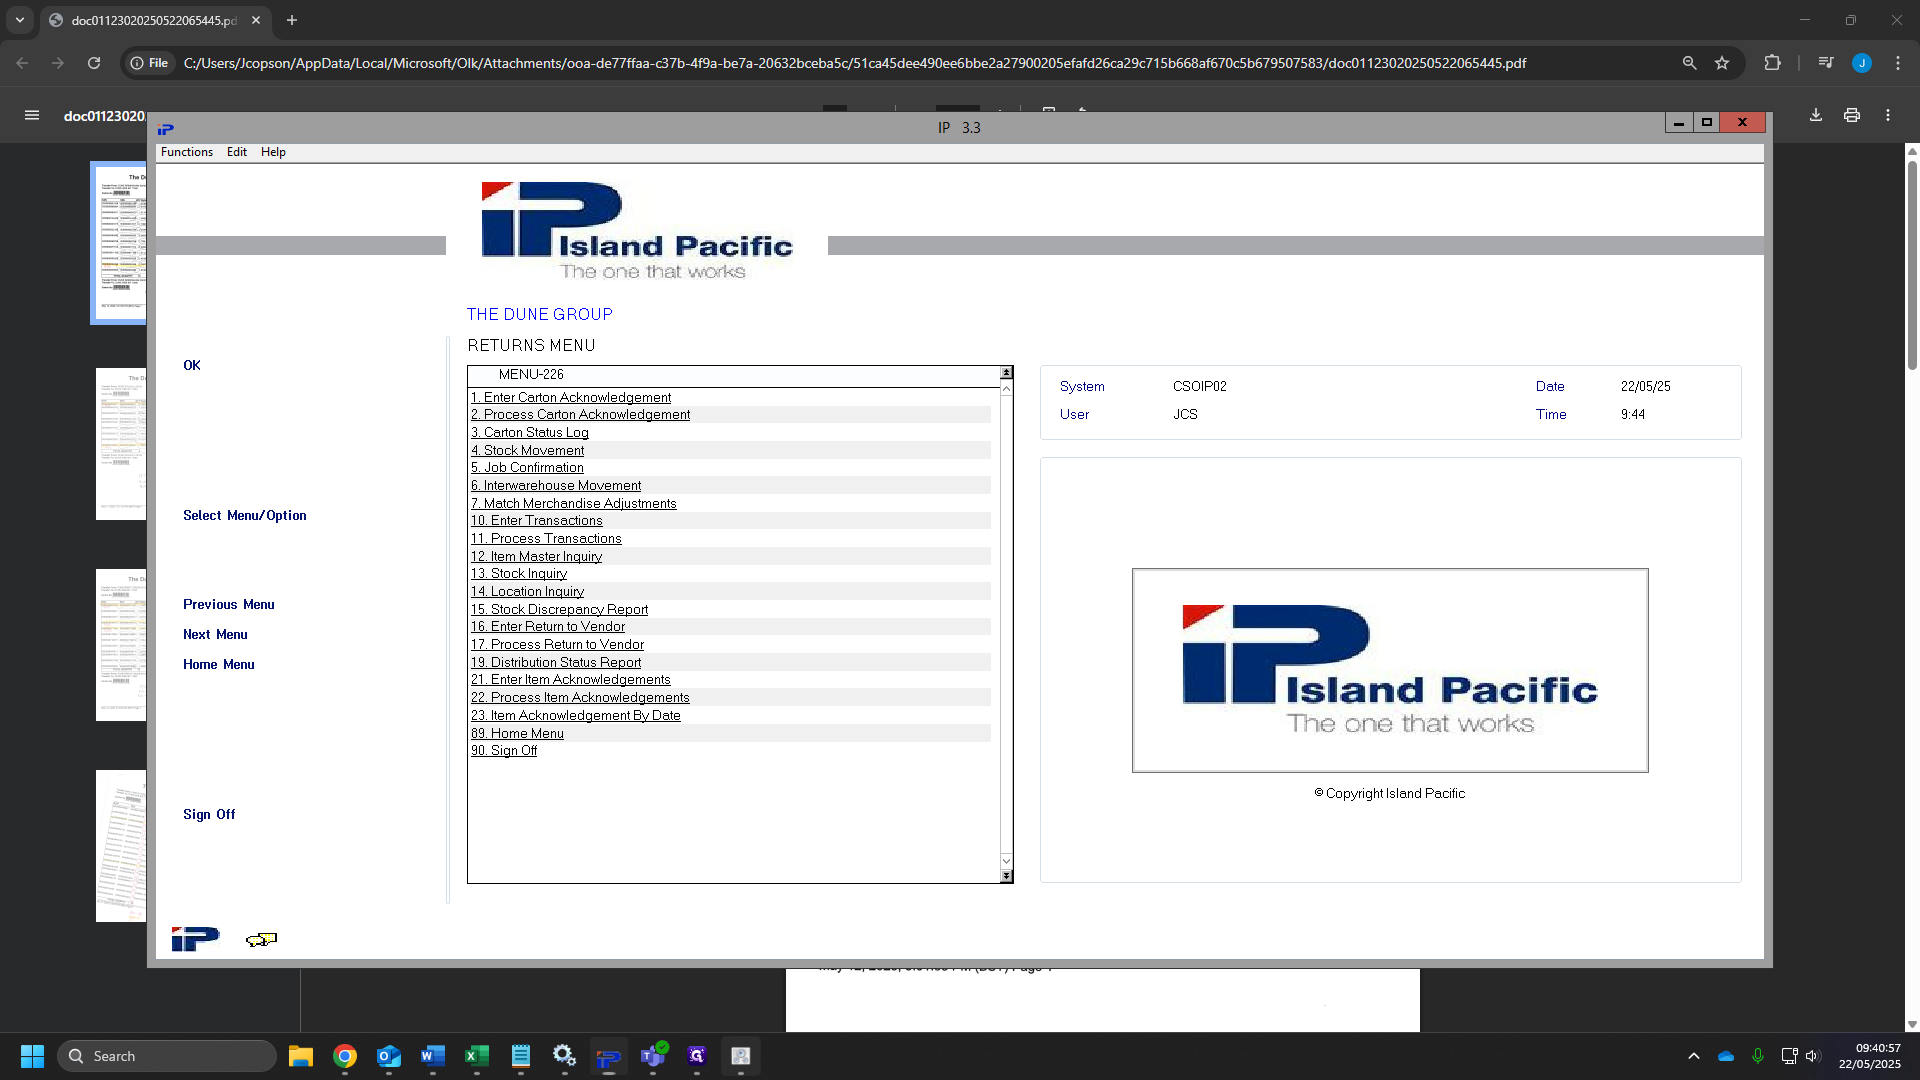
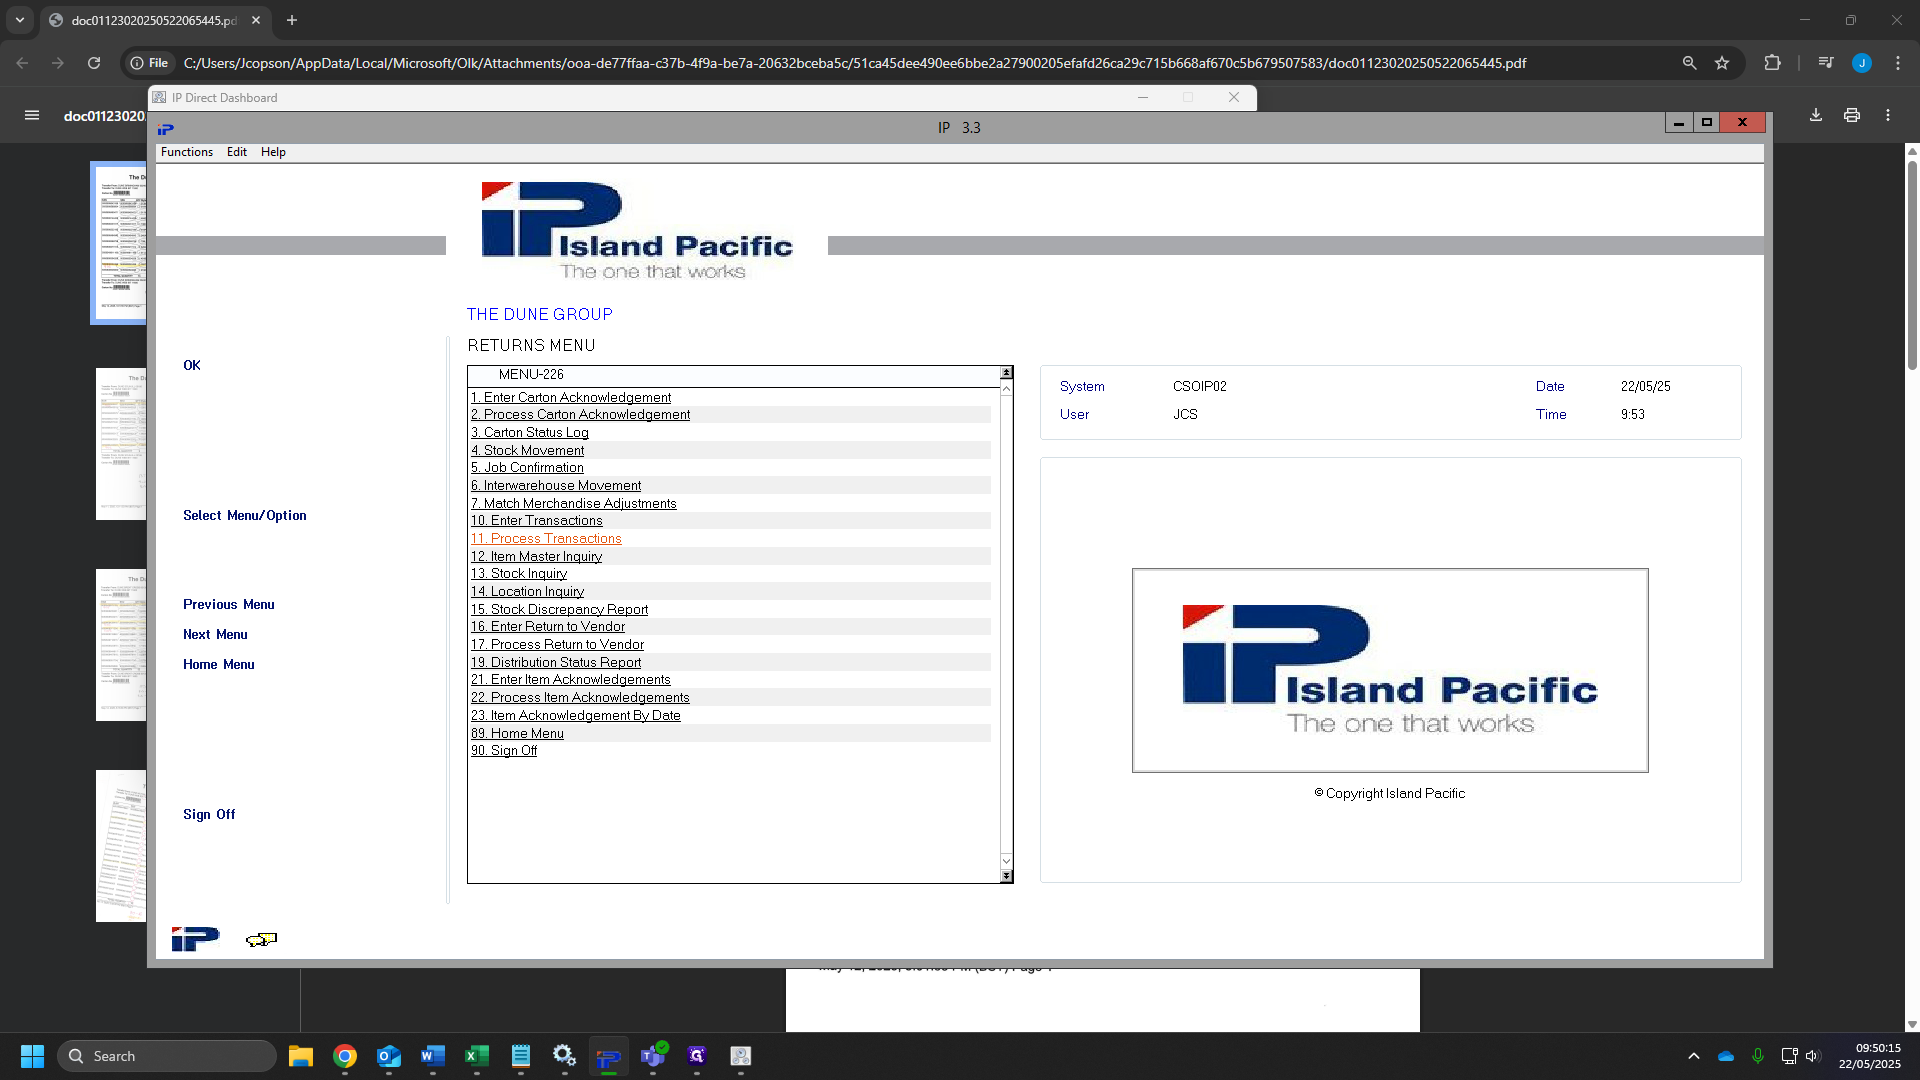
Click on "7. Returns"
3
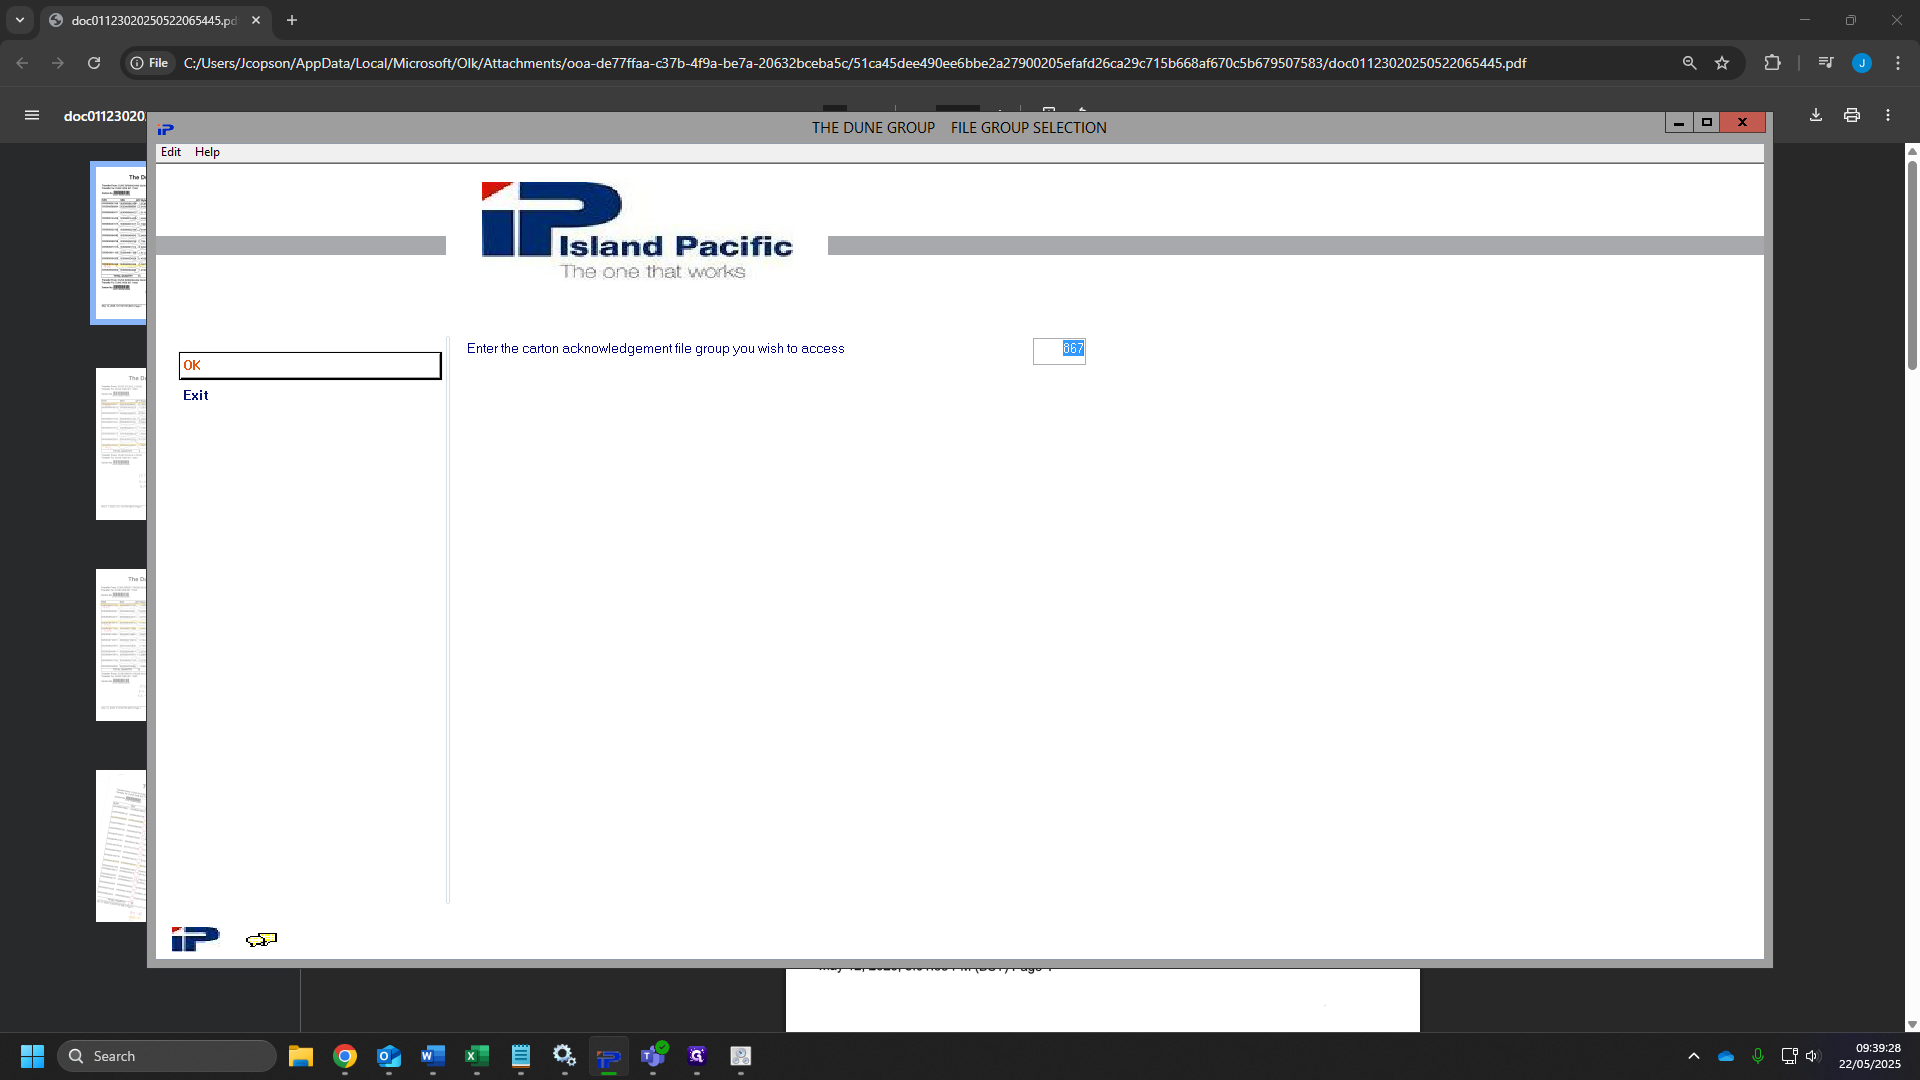
Click on "1. Enter Carton Acknowledgement"

4
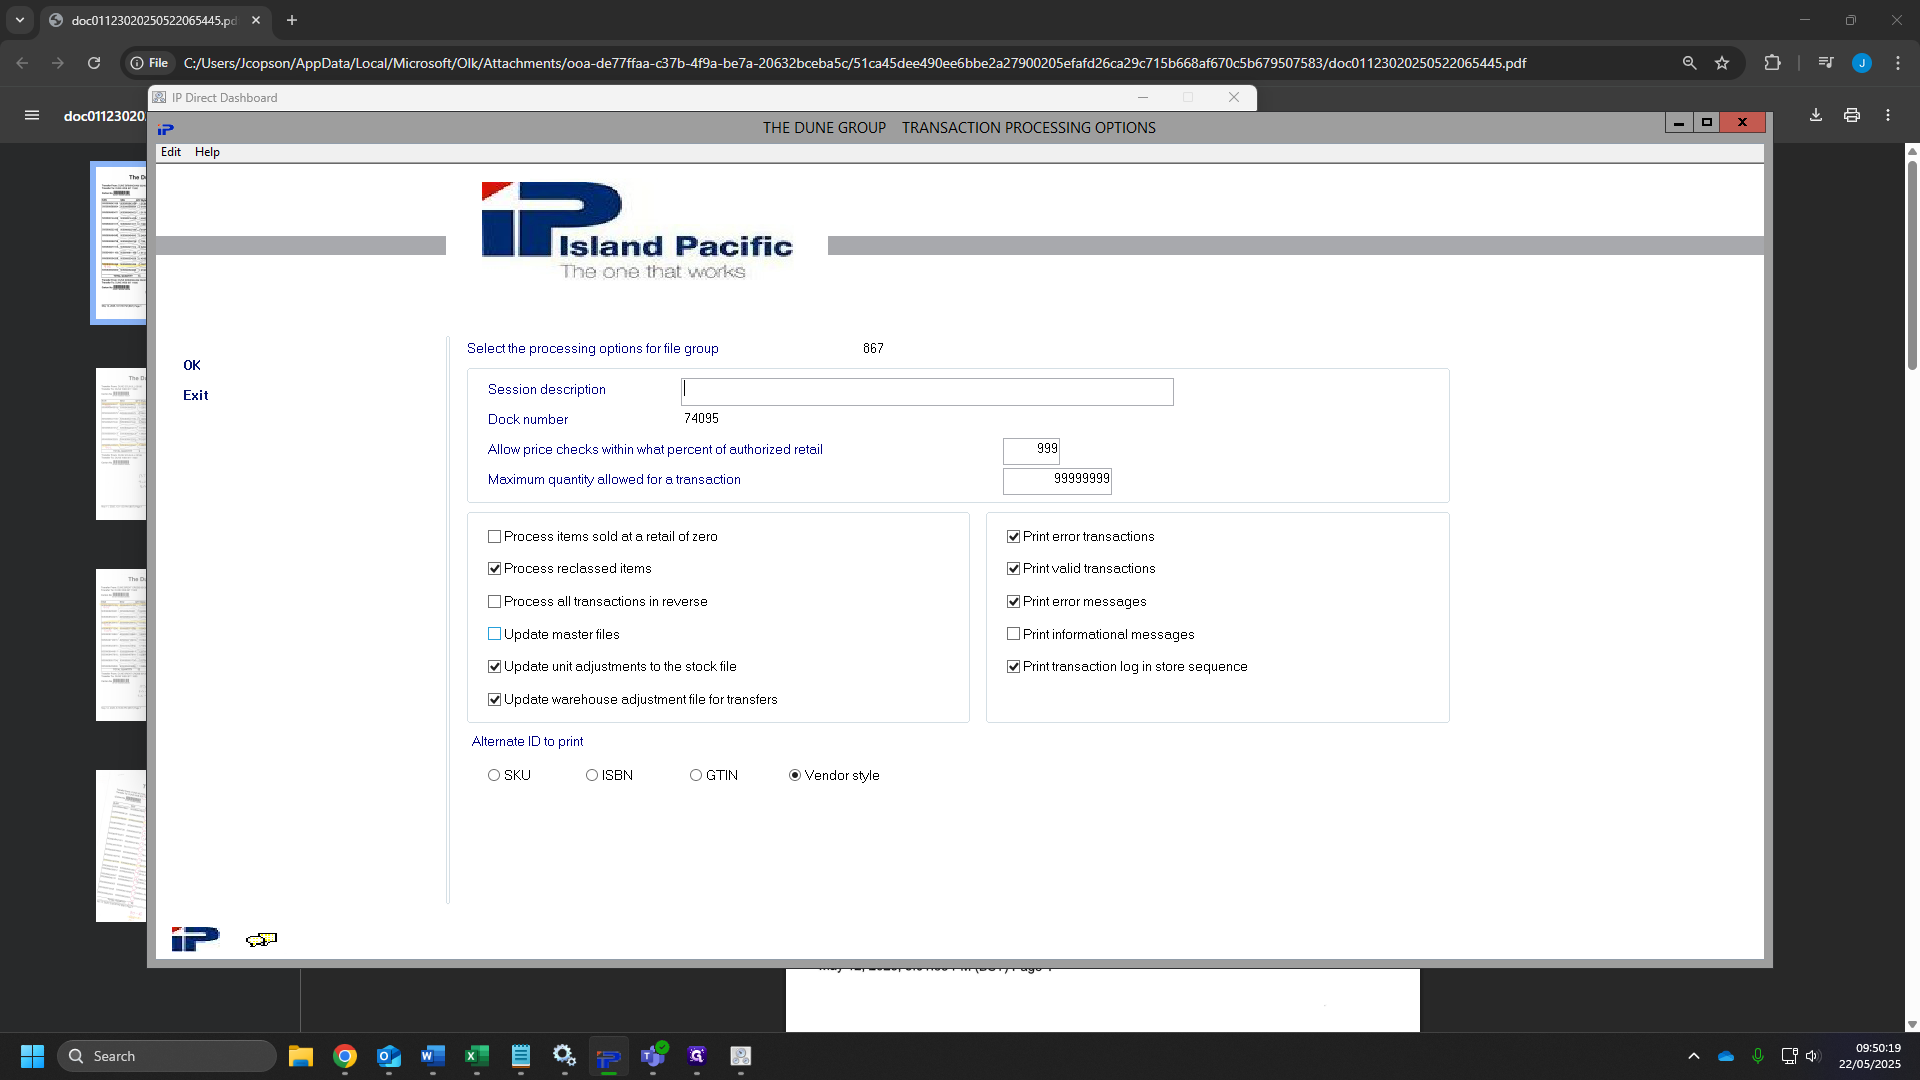
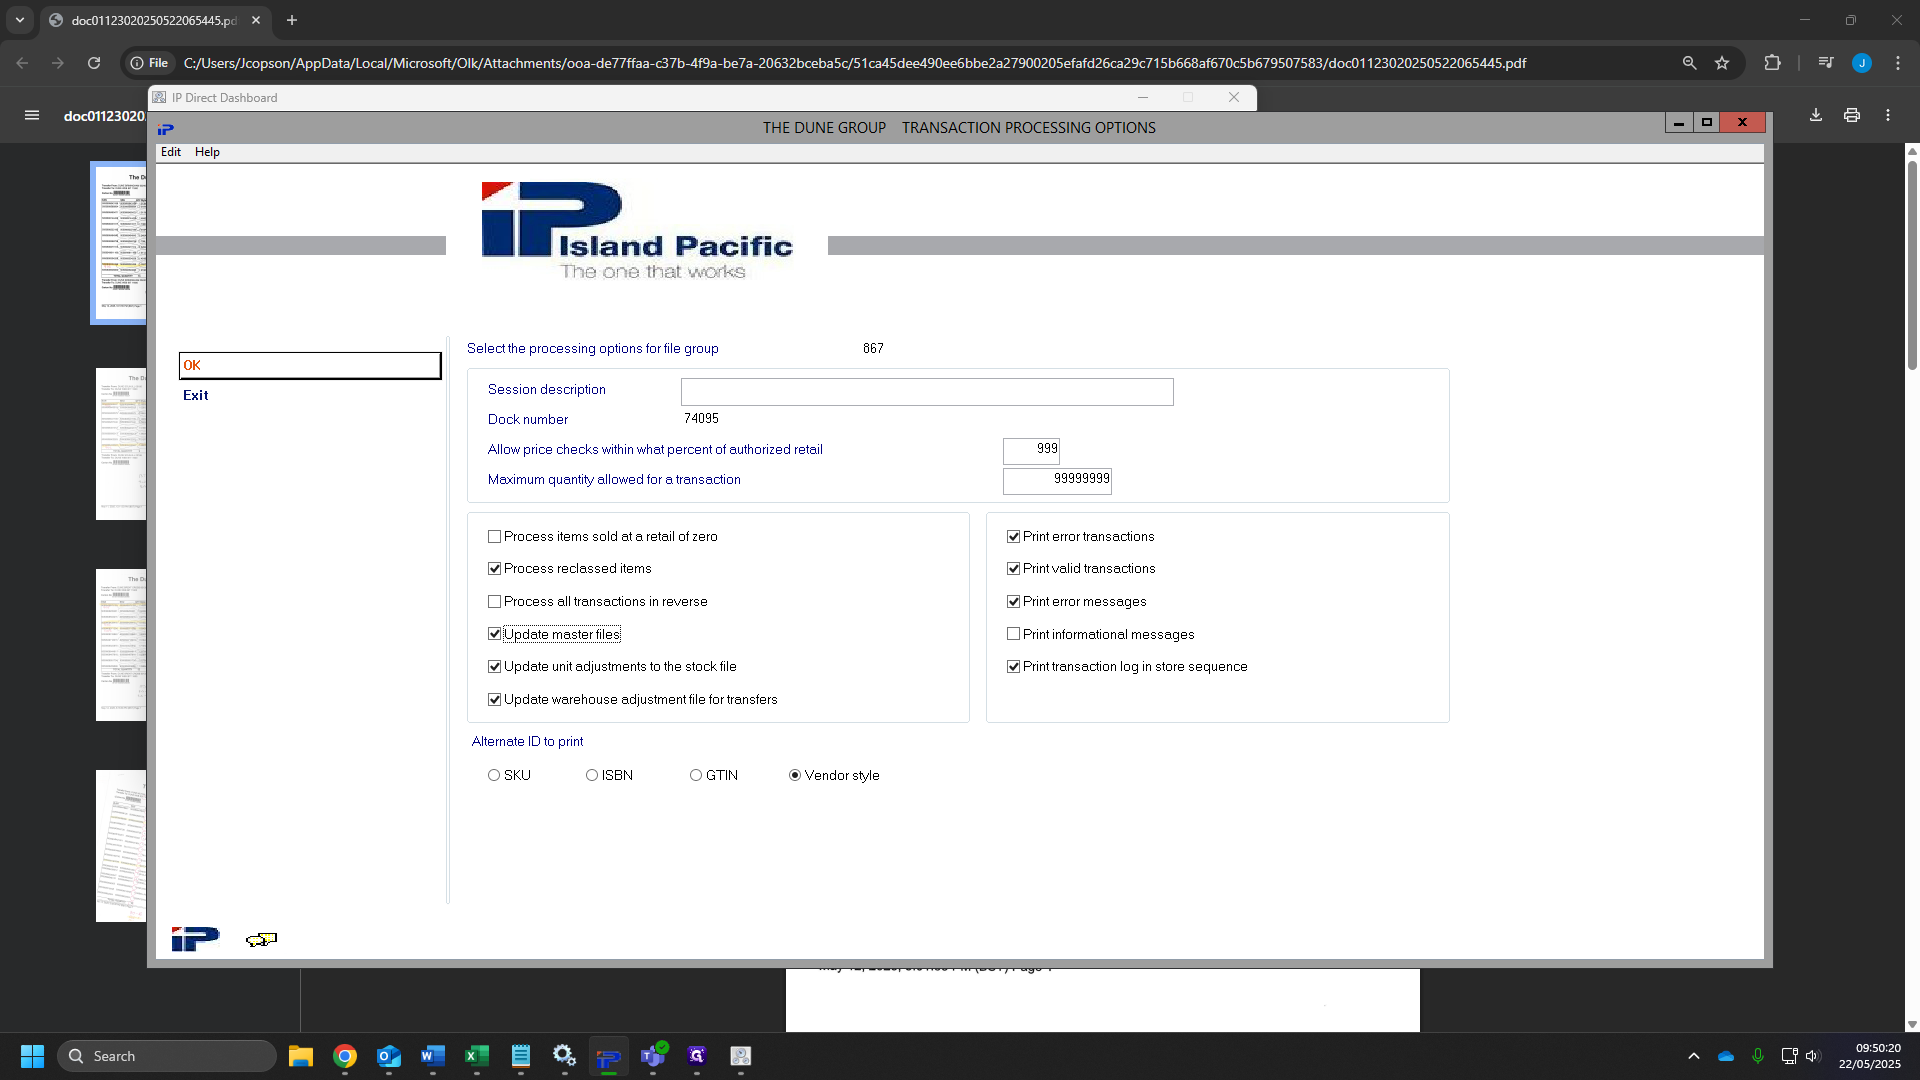
Click "OK"
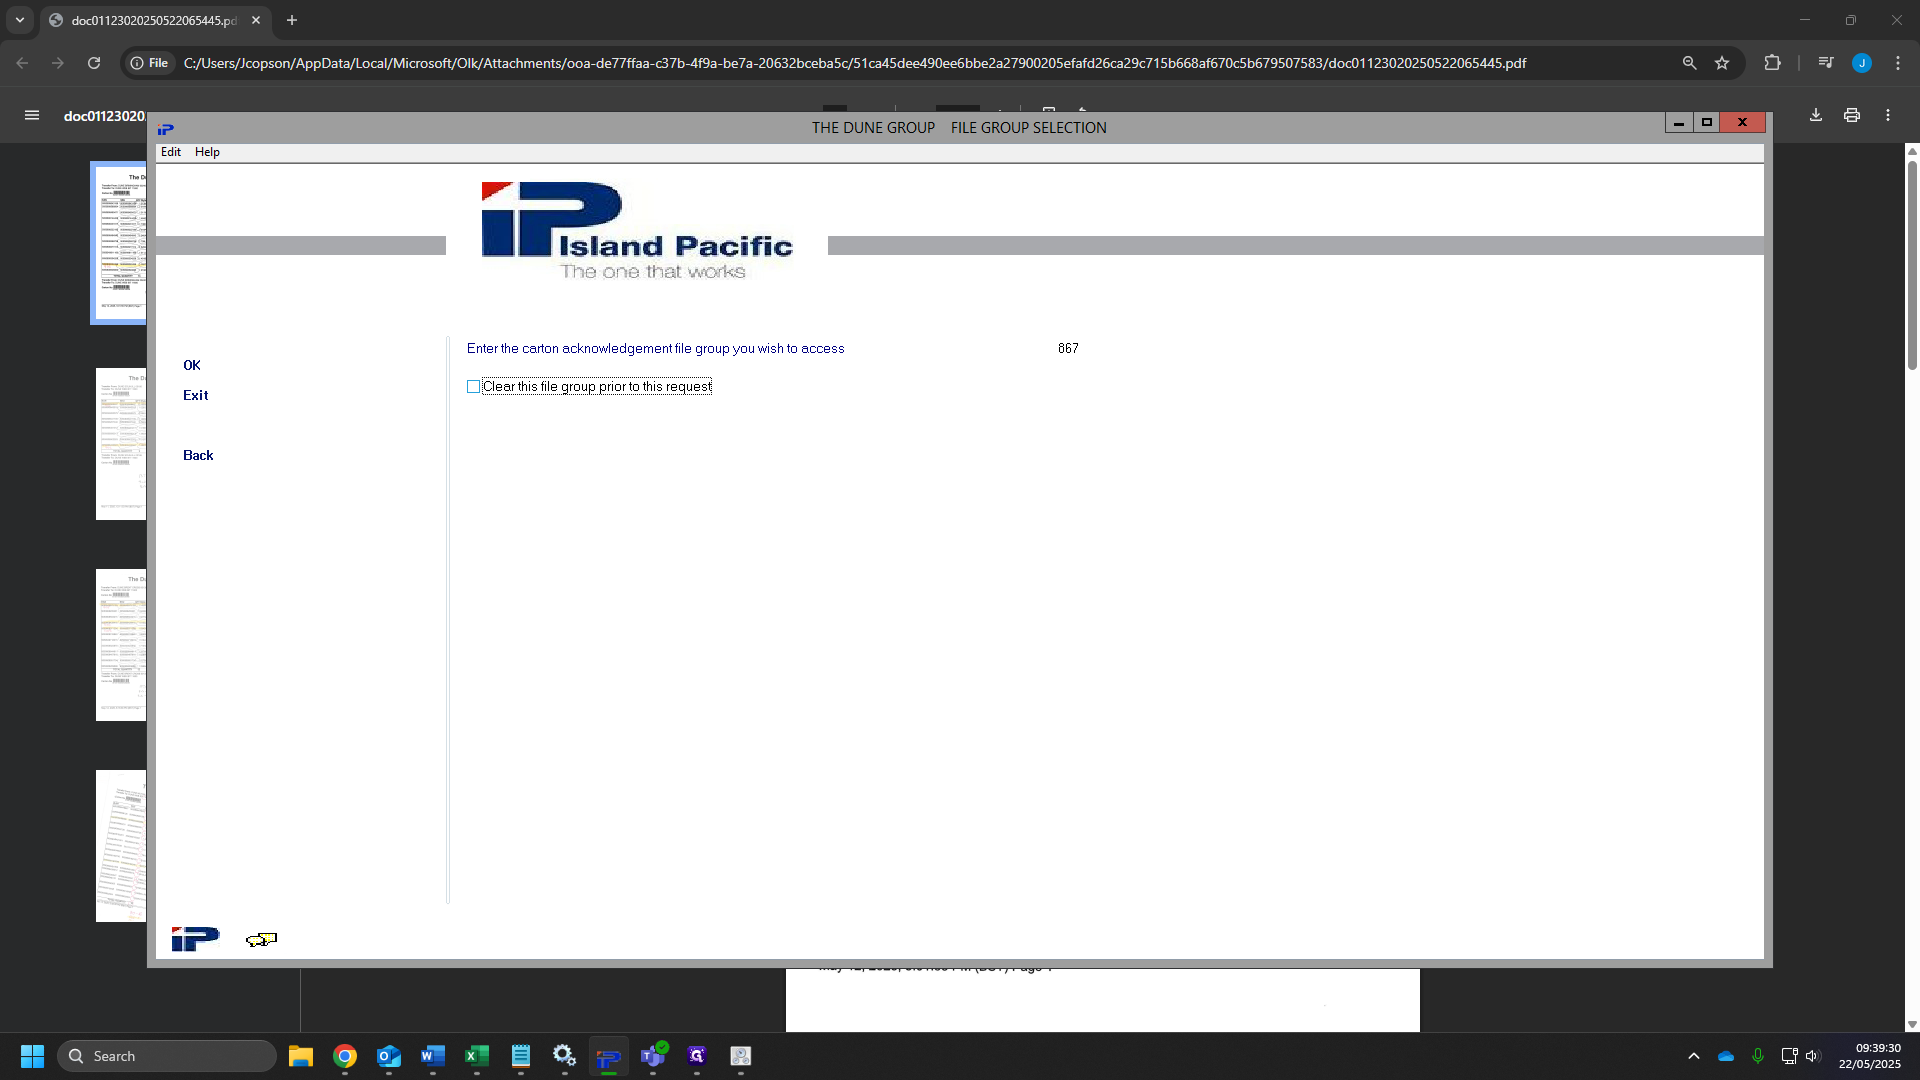
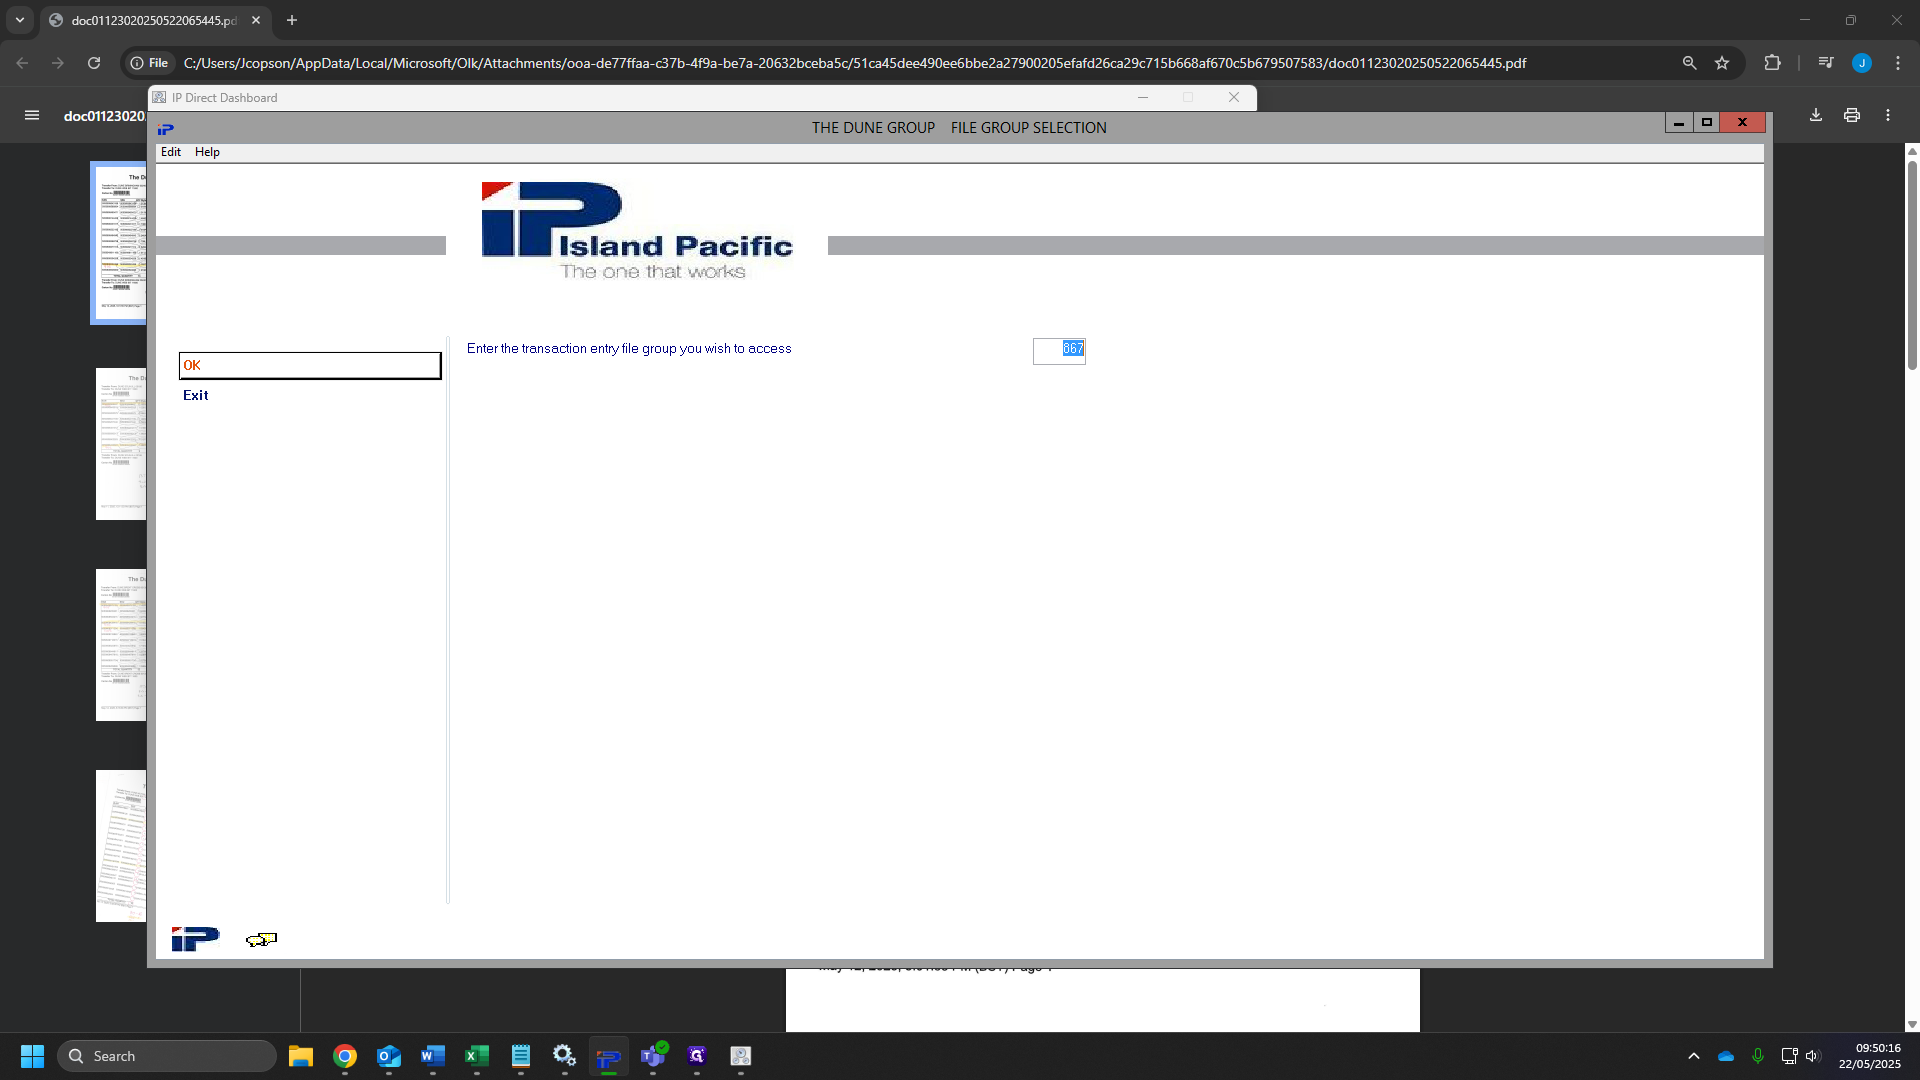
5
Tick the "Clear this file group prior to this request" box.
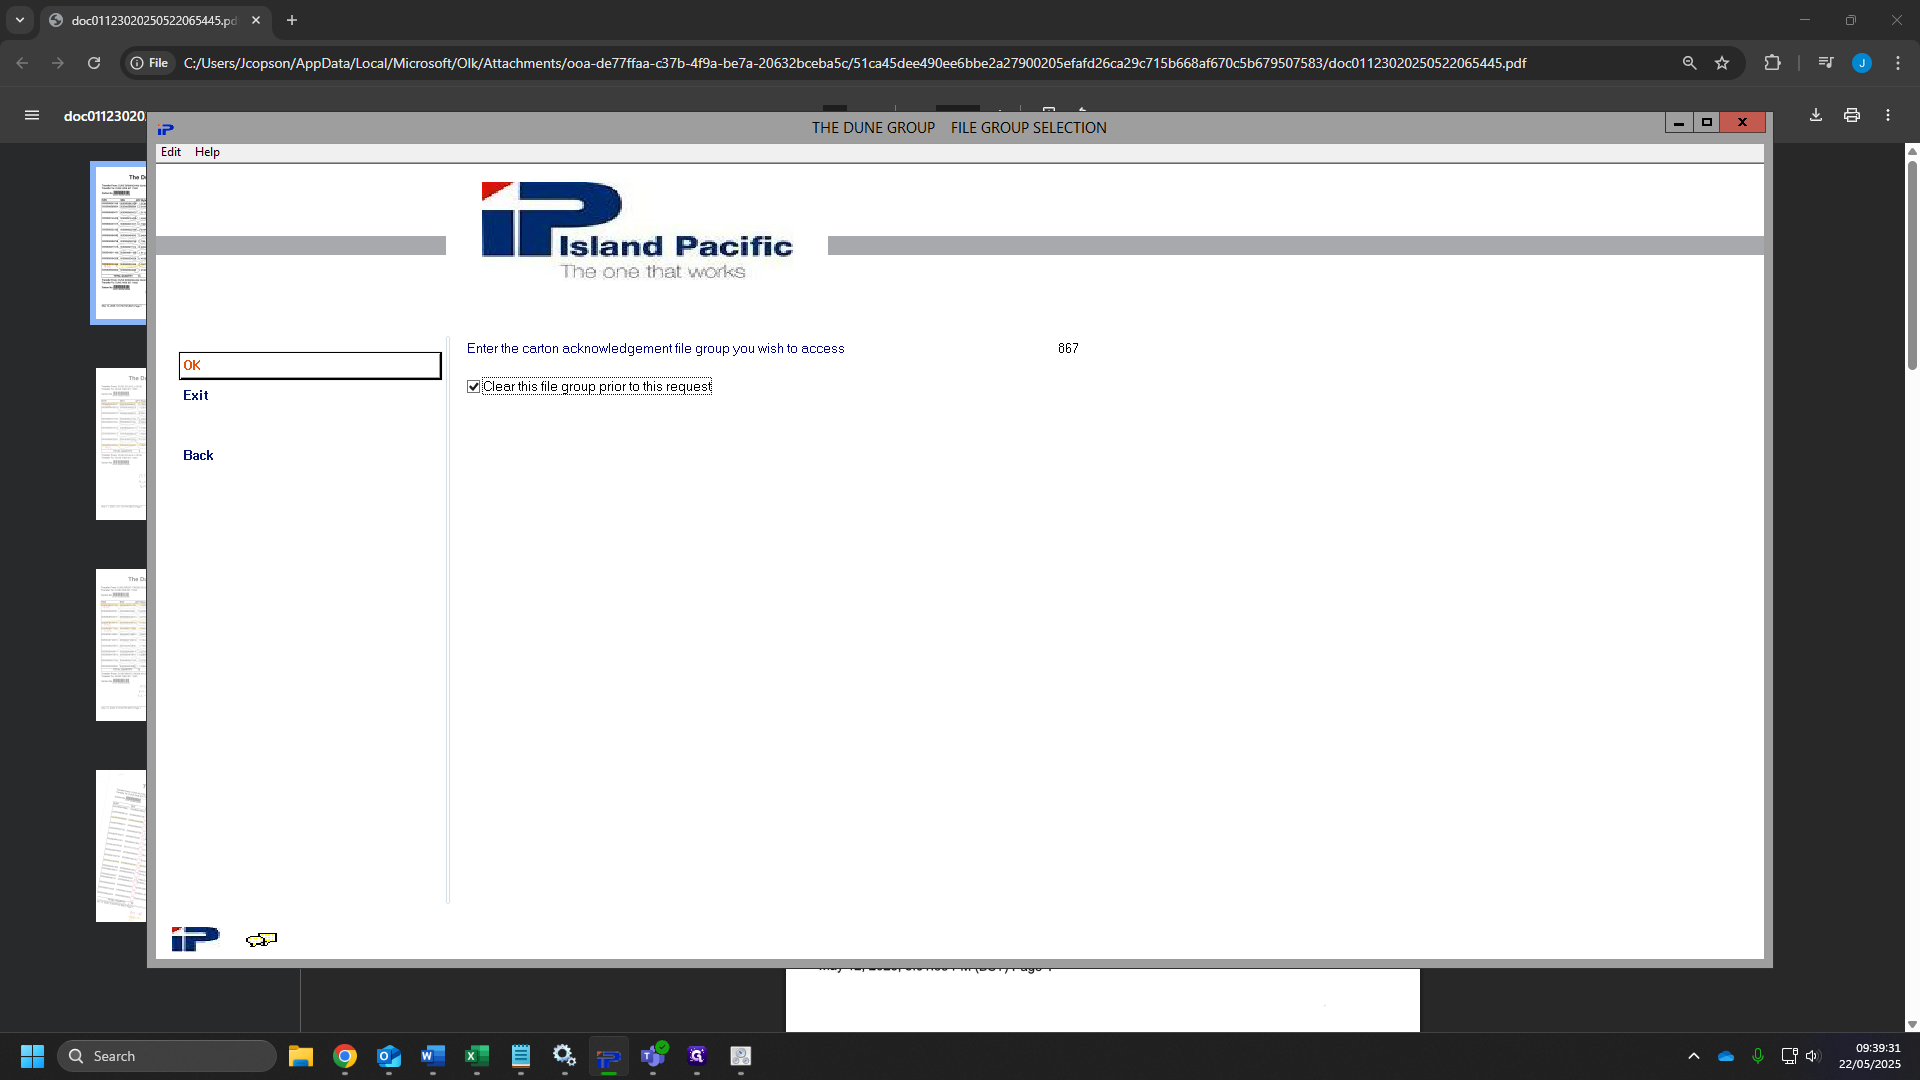
6
Click "OK".
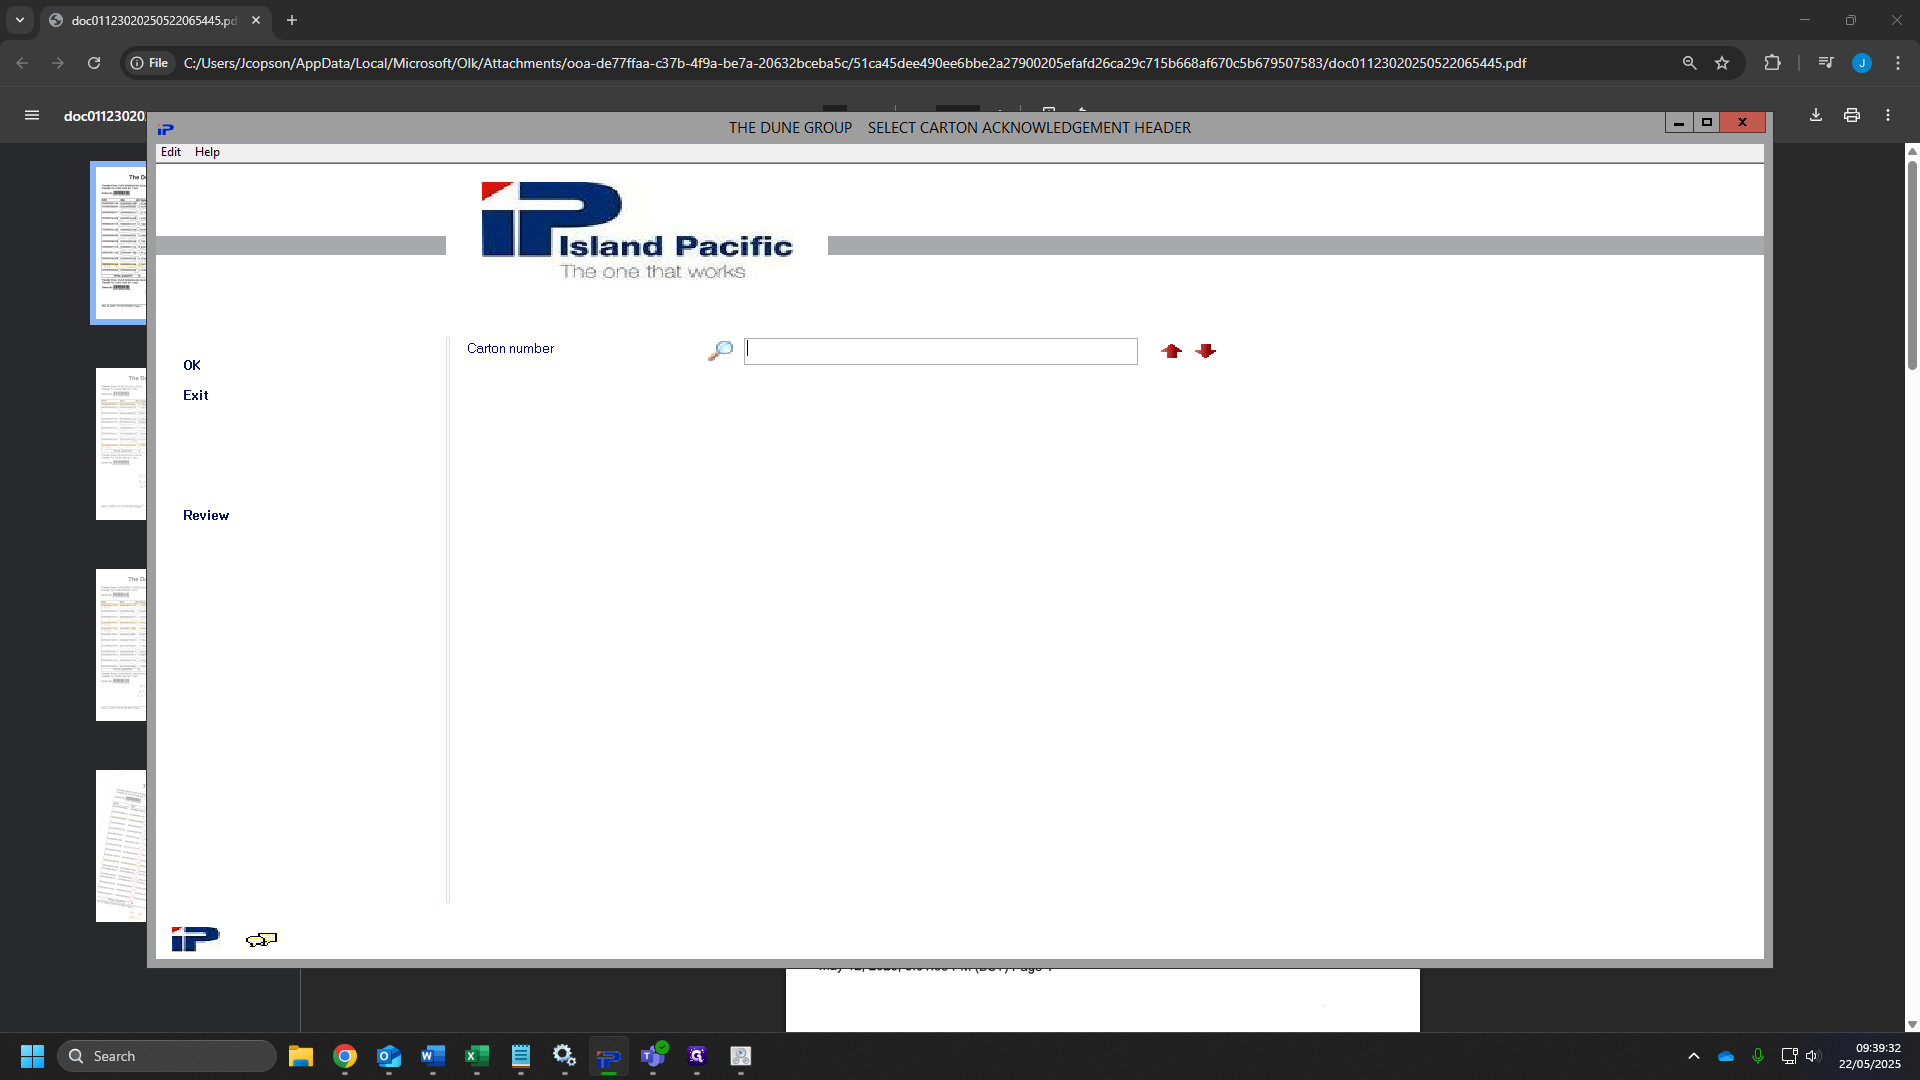
7
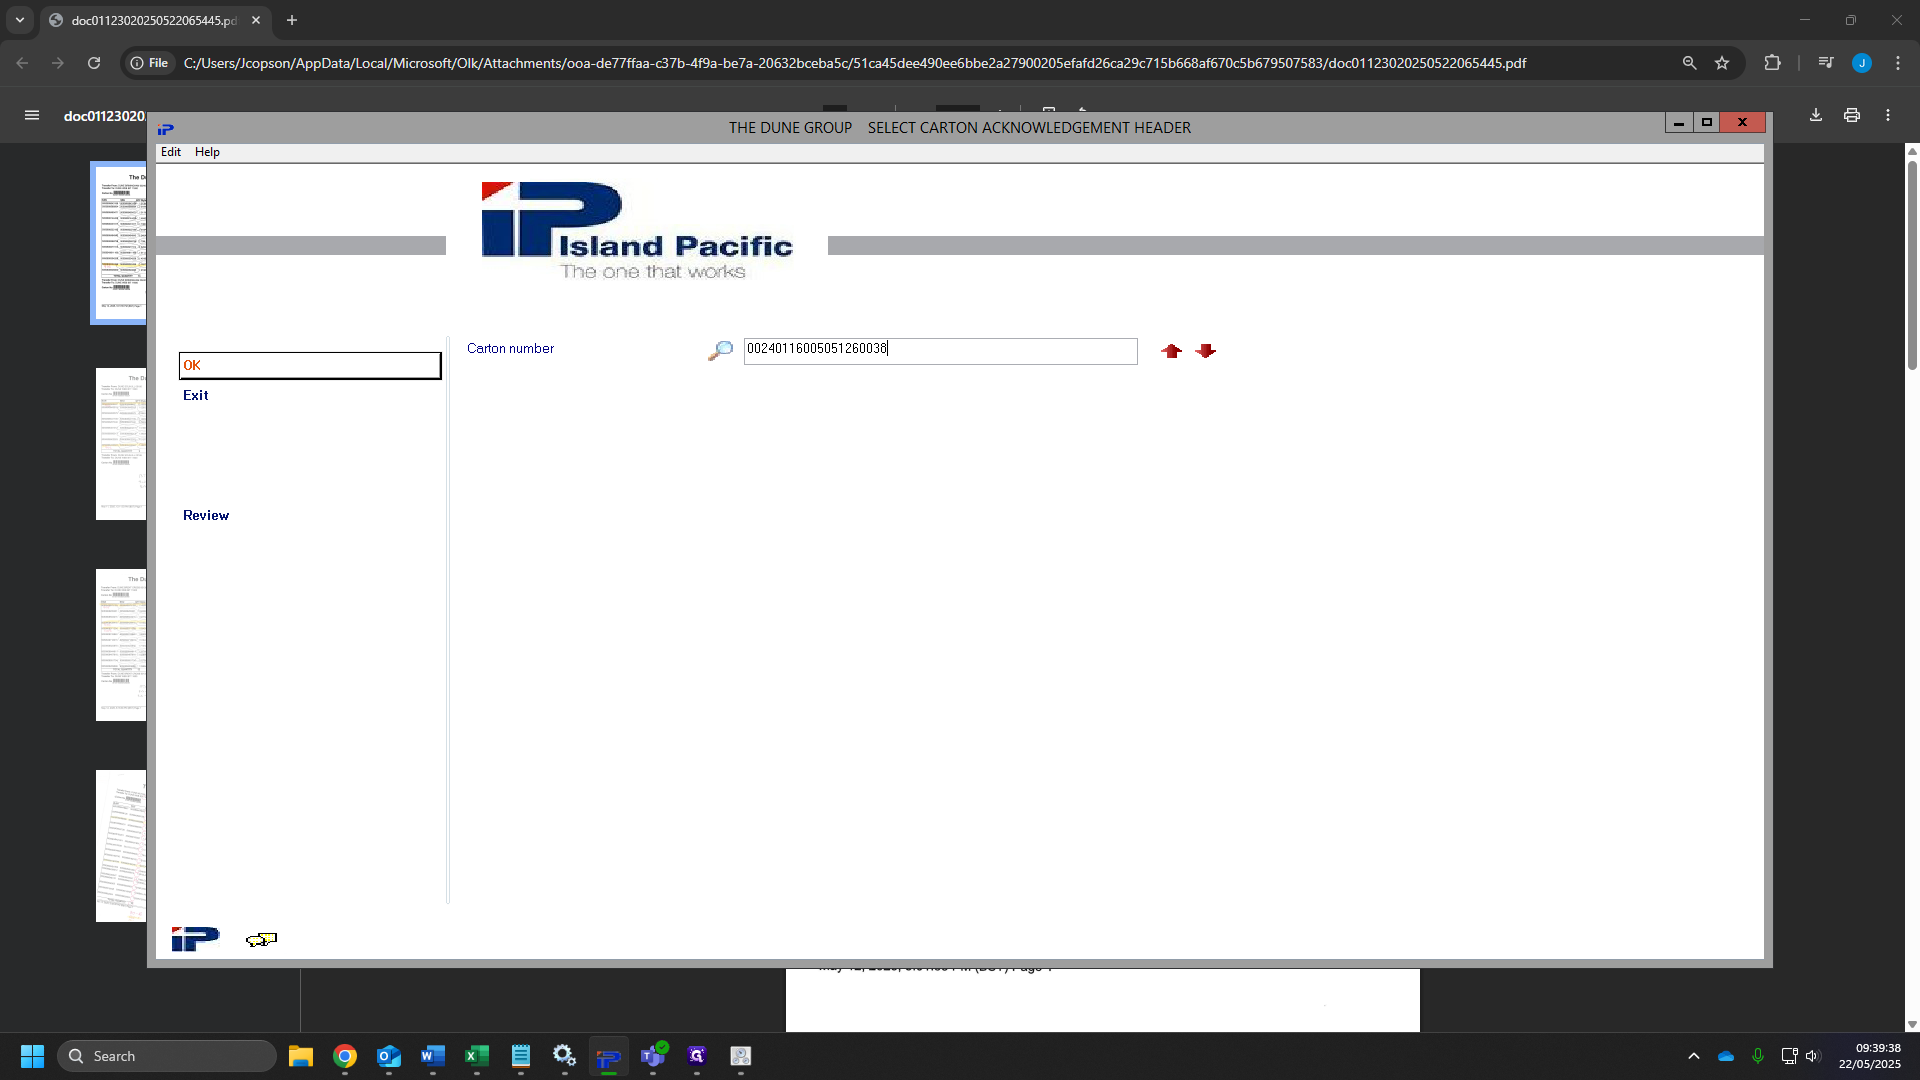
Here, we click the "carton number" box and we scan our bar-code on all the sheets we have.
8
Click "OK"
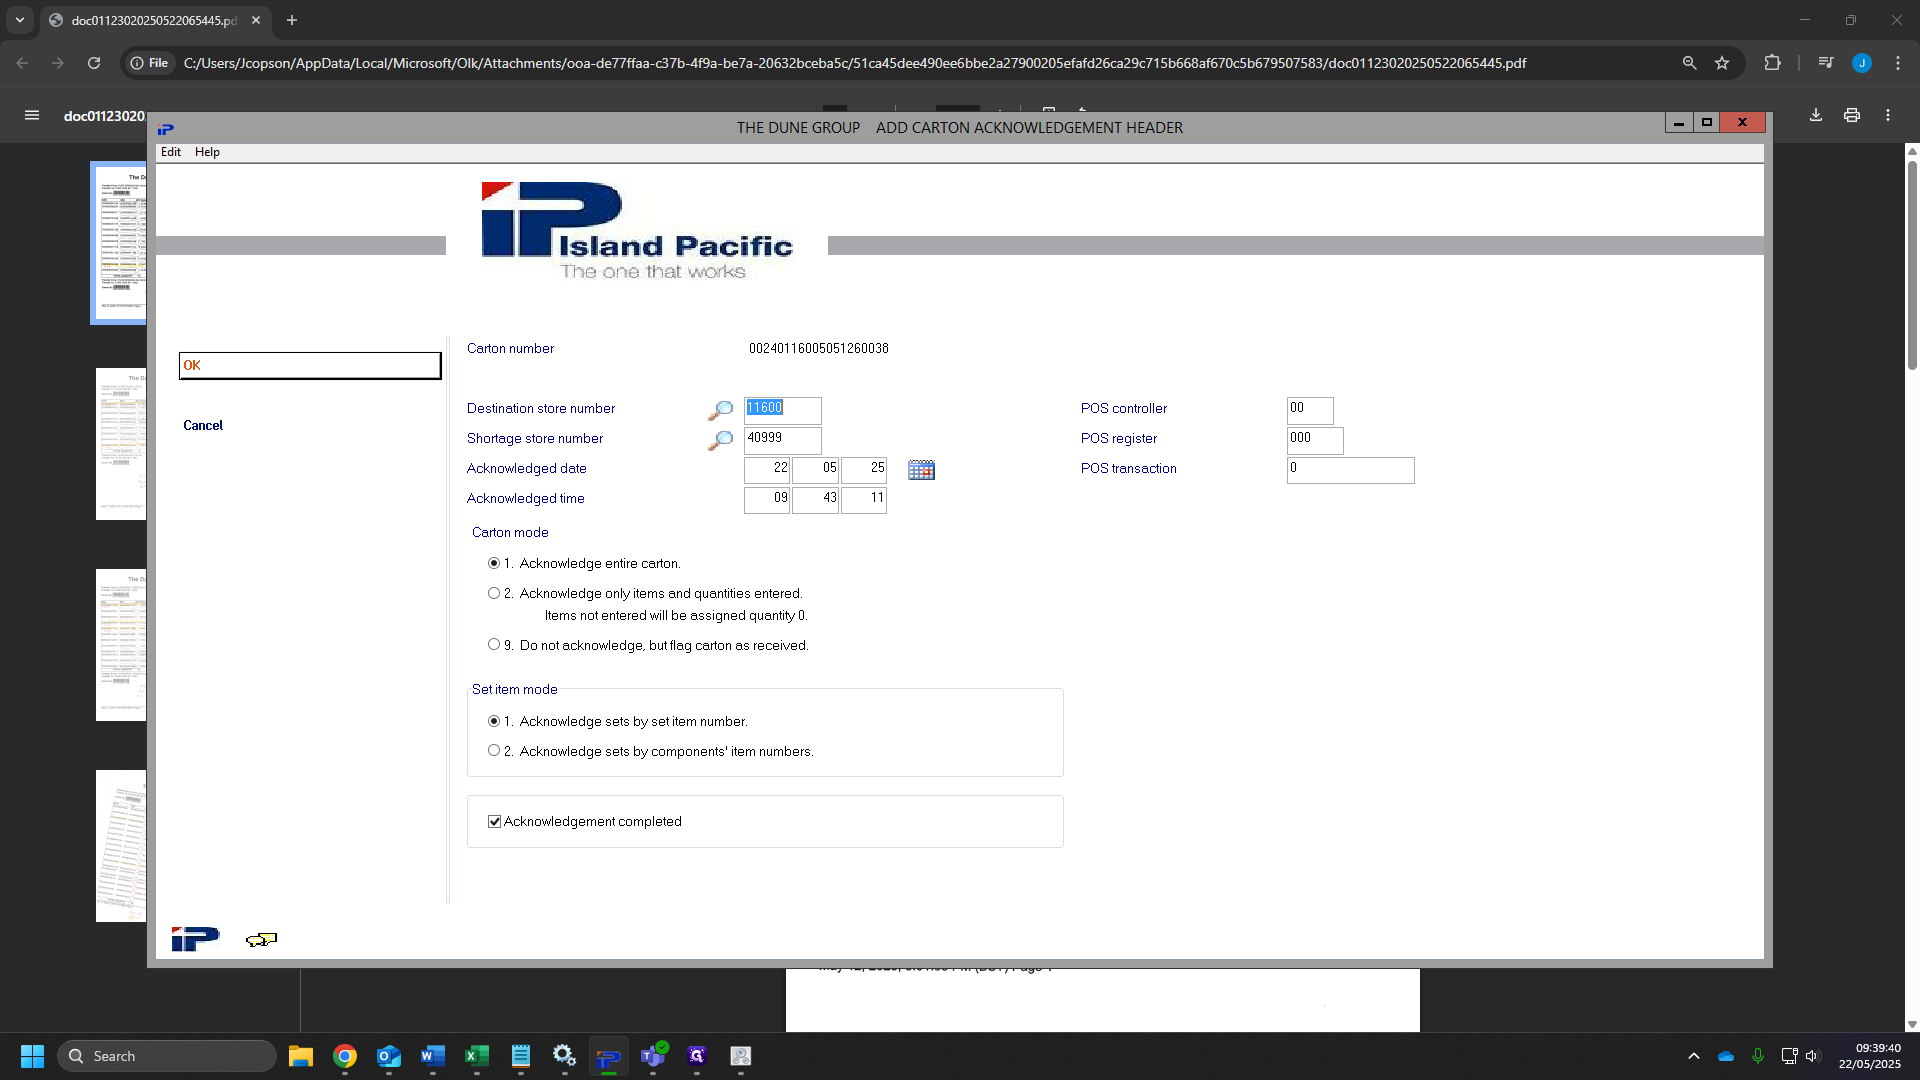
9
Then click "OK" again.
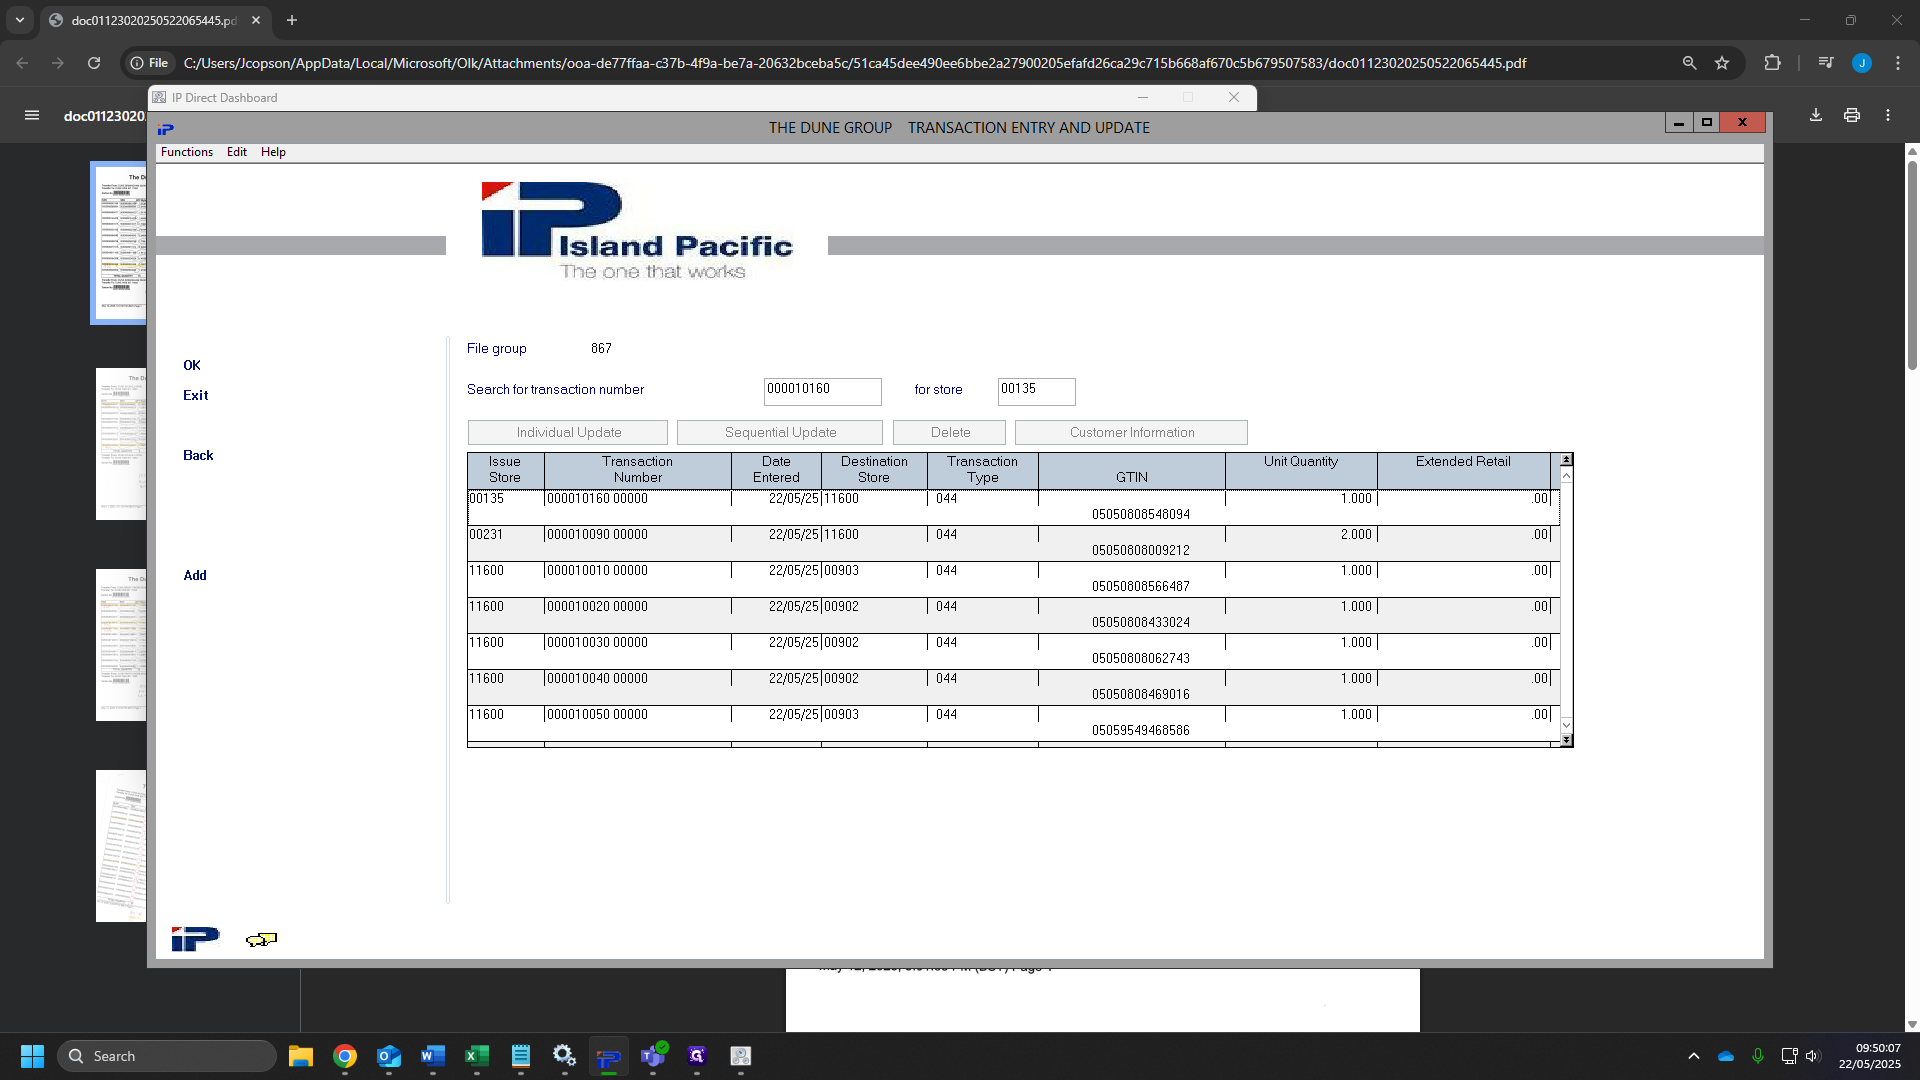
10
Once you have scanned all of your sheets, Click "Exit"

11
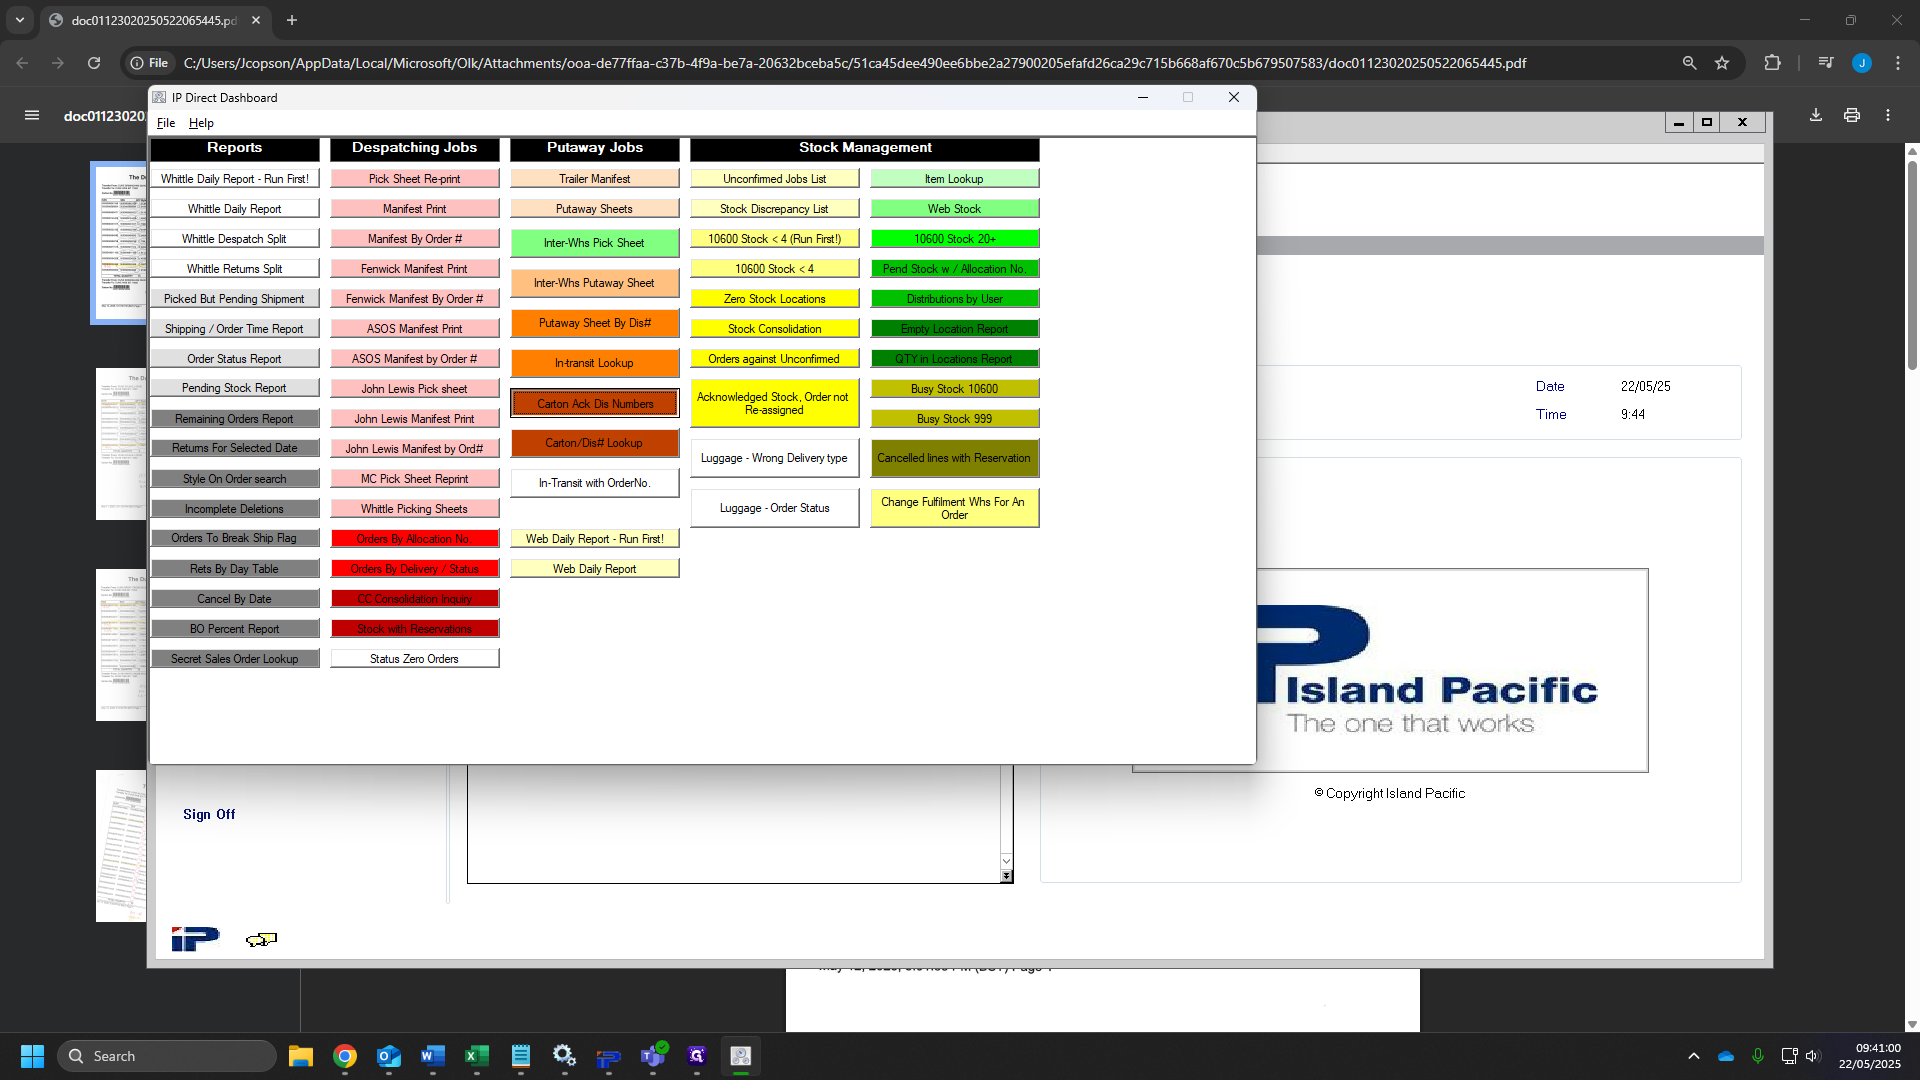
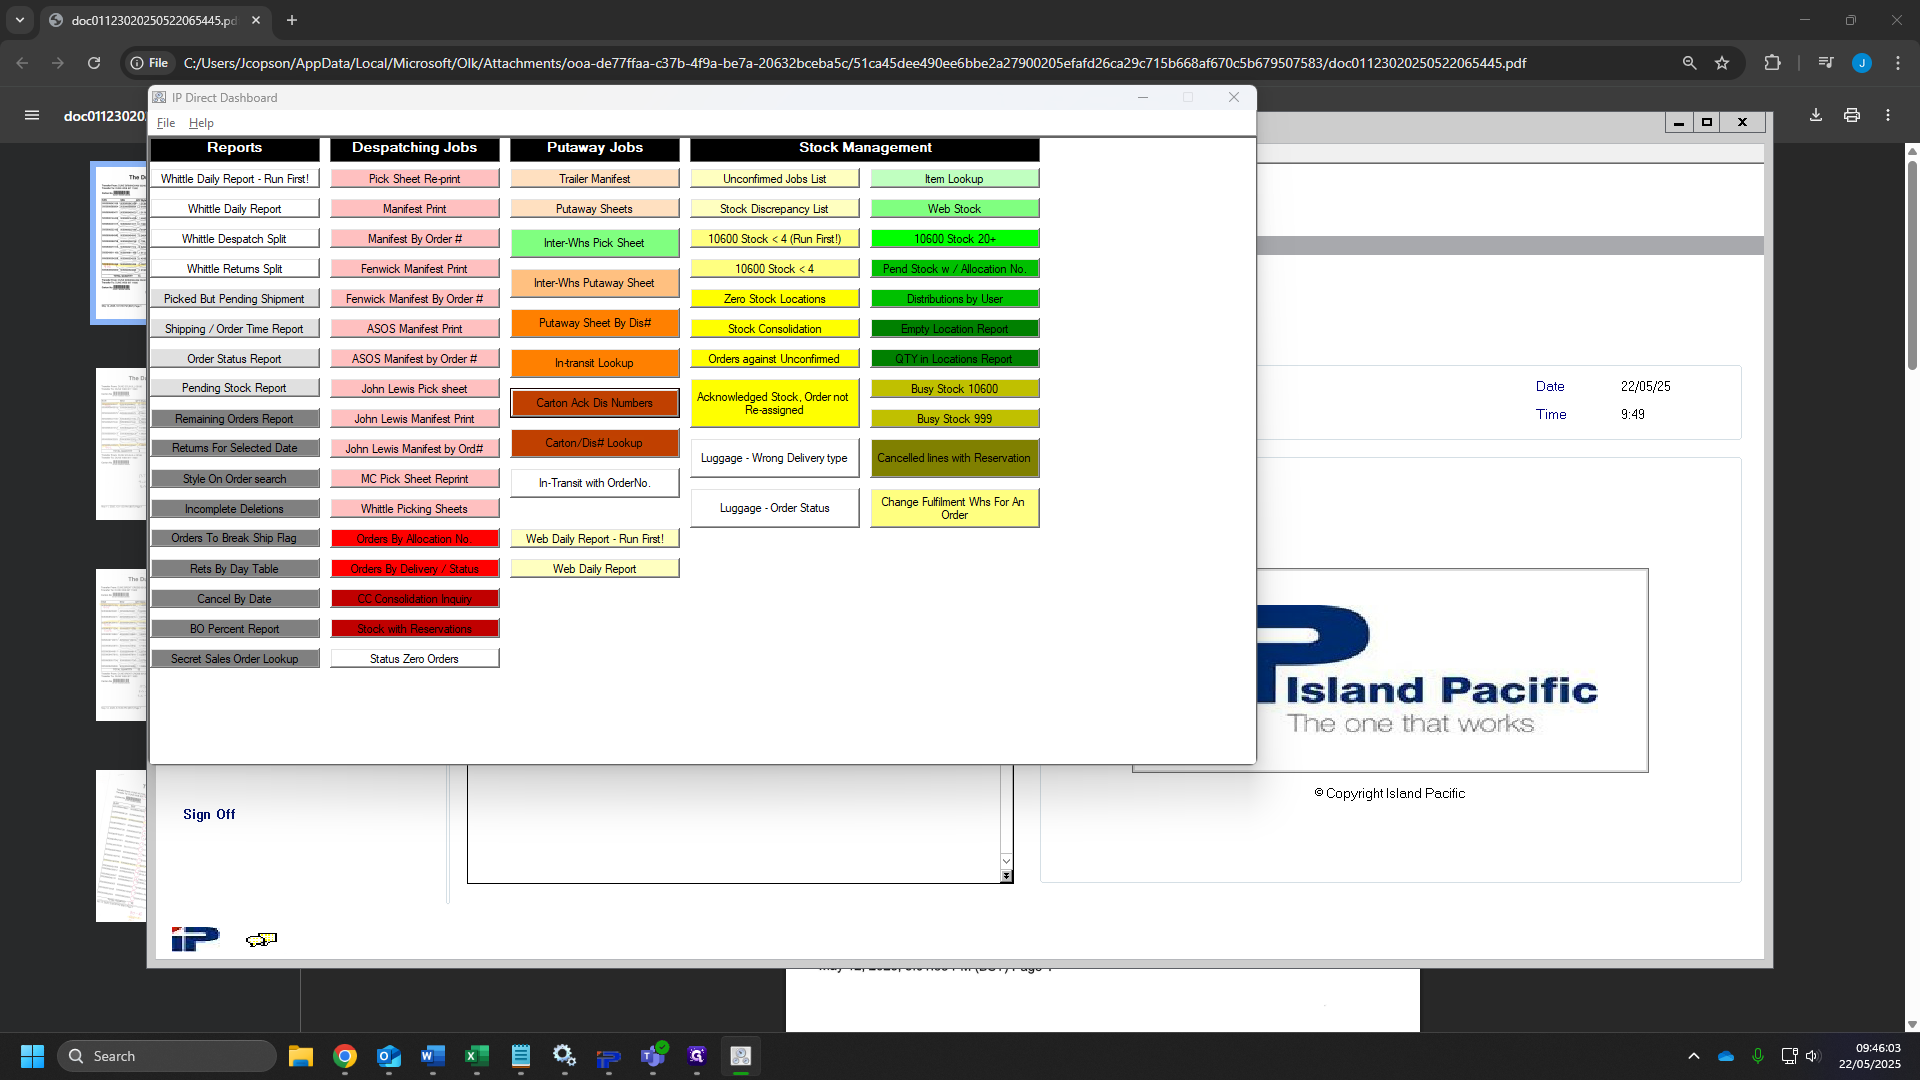
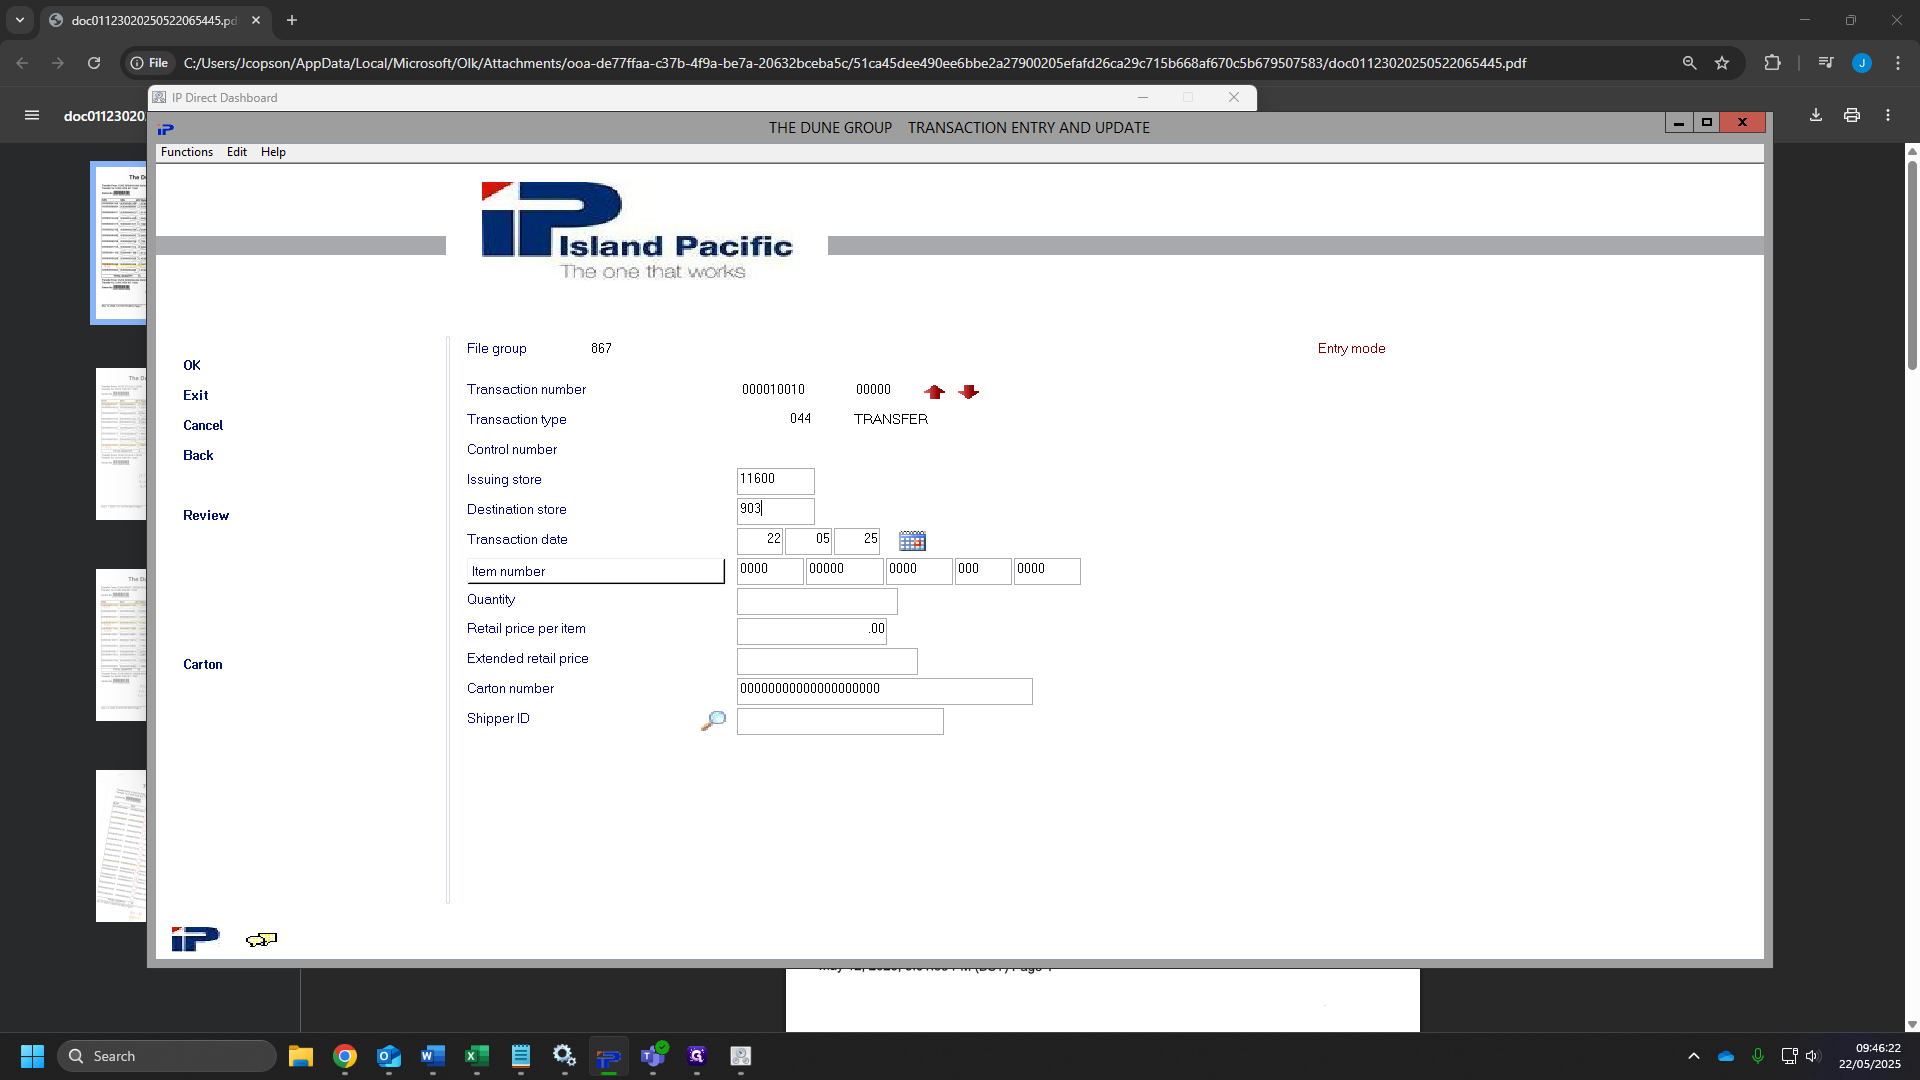
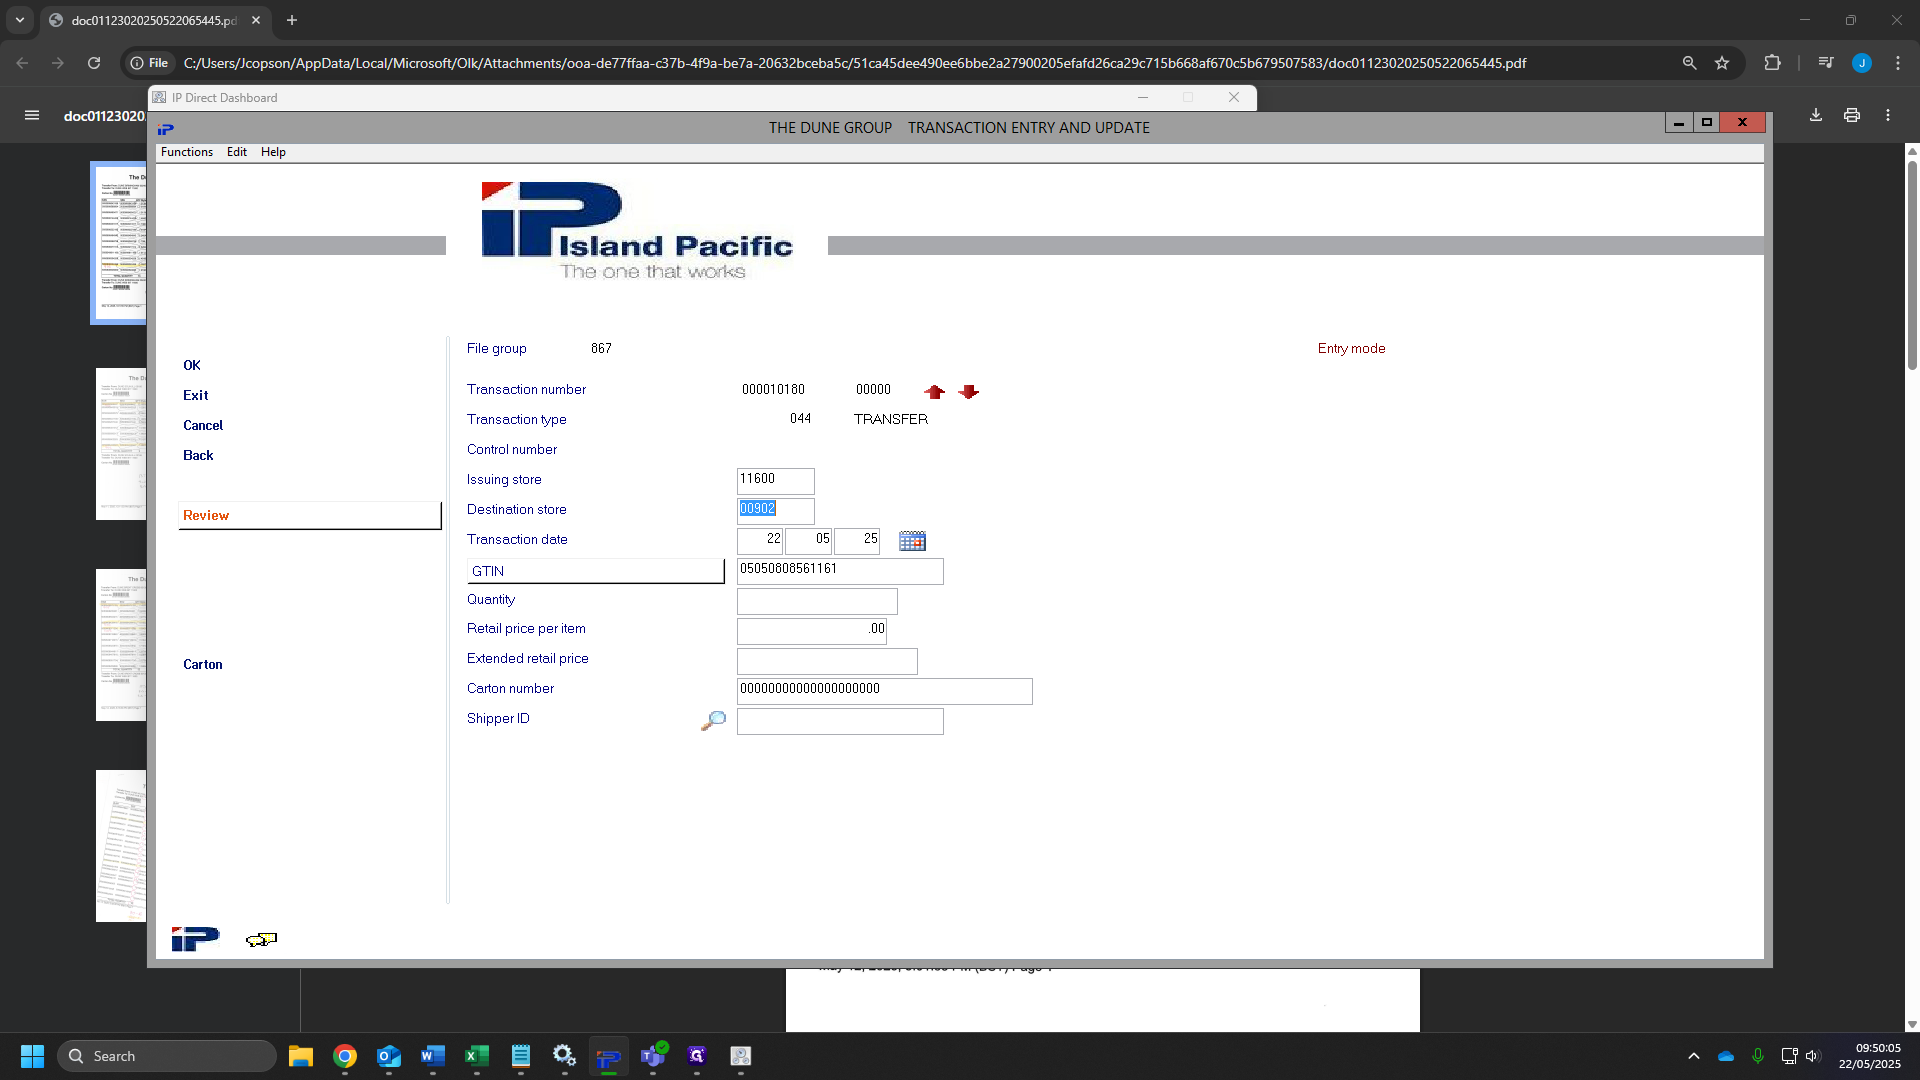
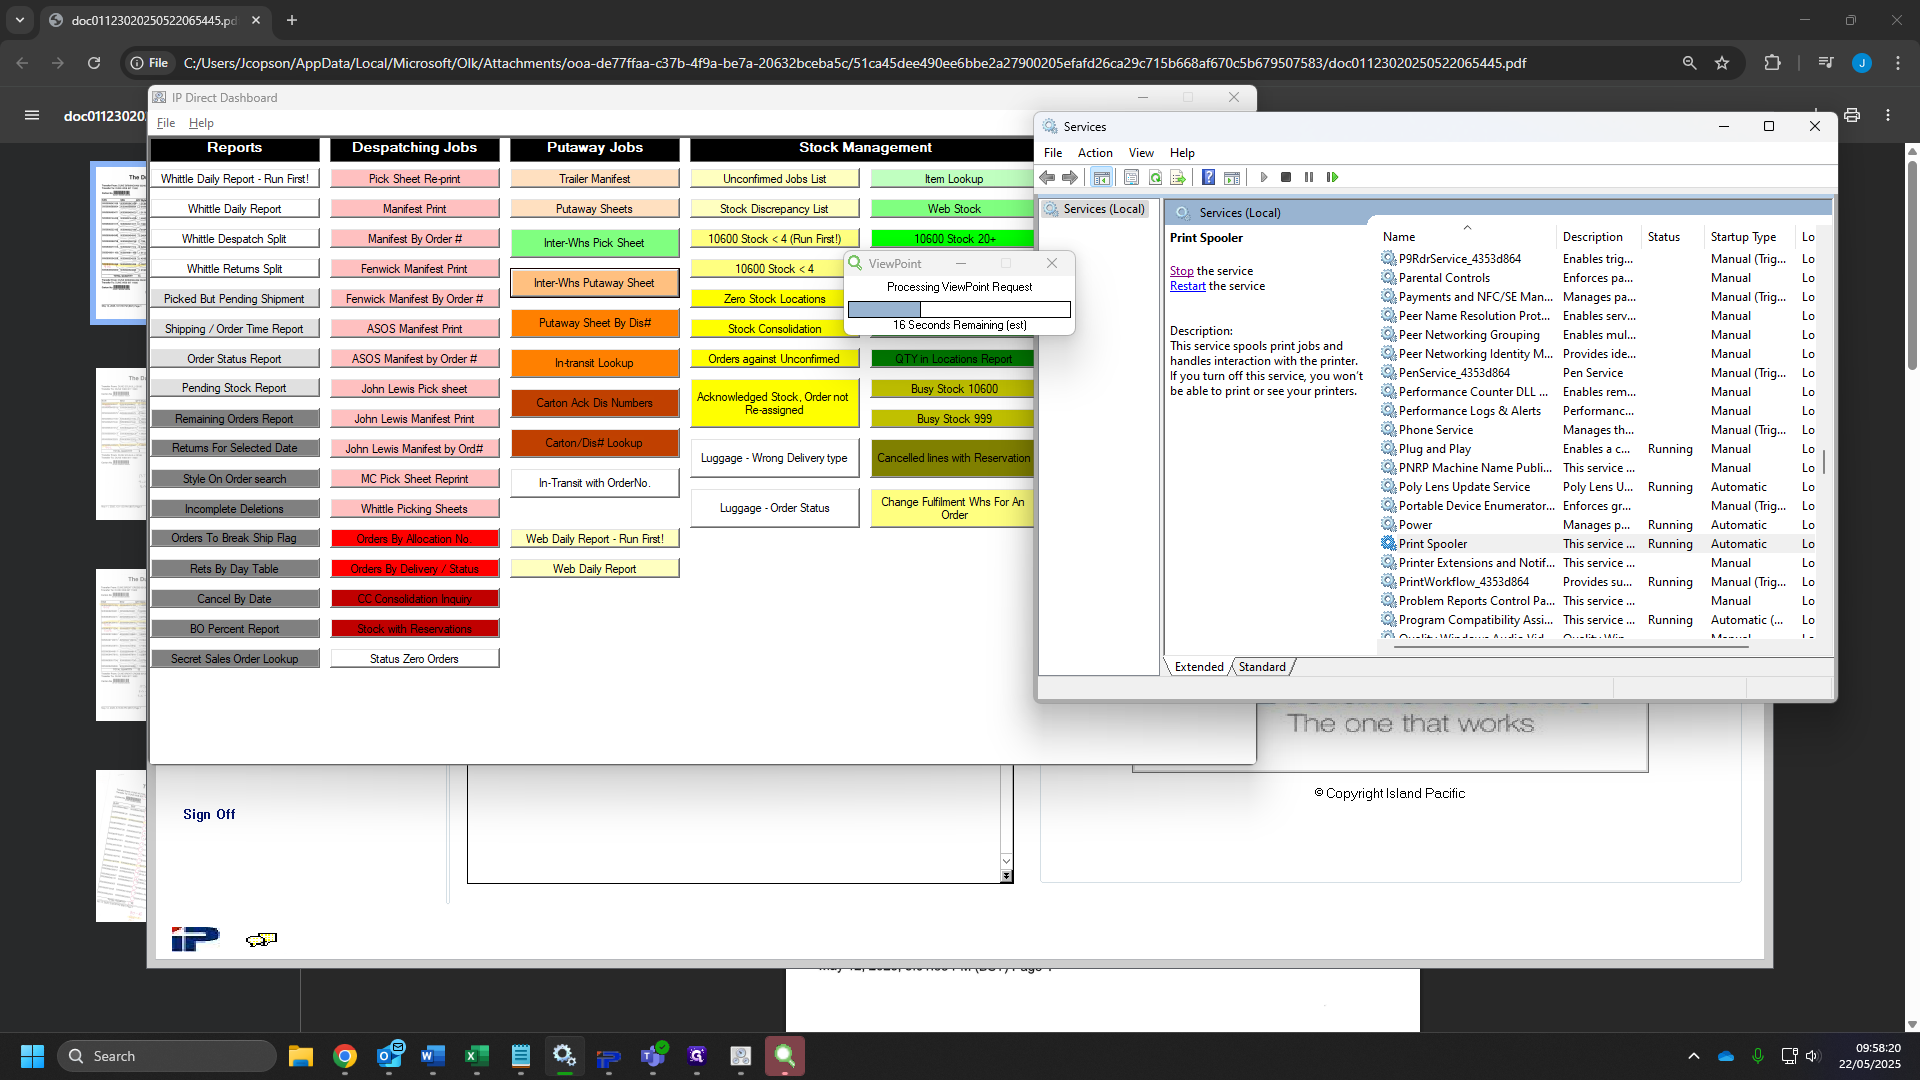
Now we head to IP Direct Dashboard.
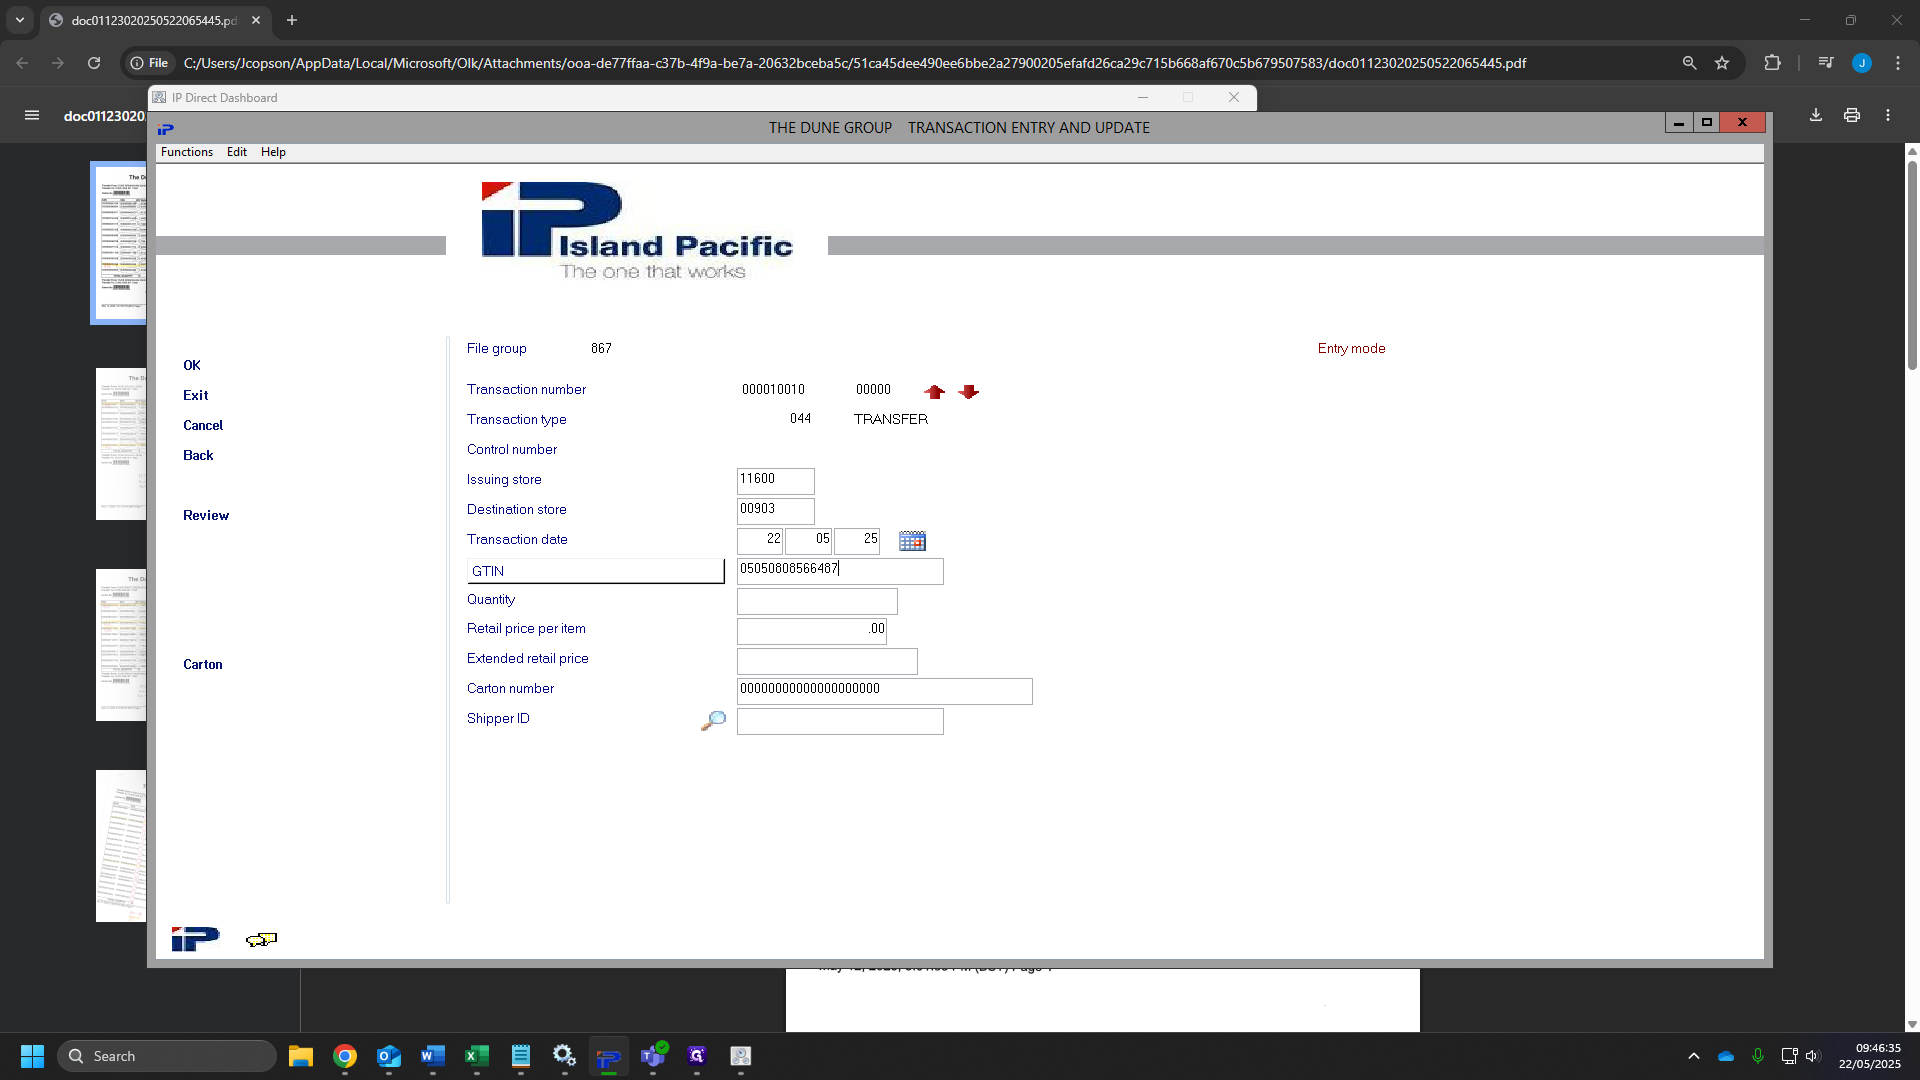
12
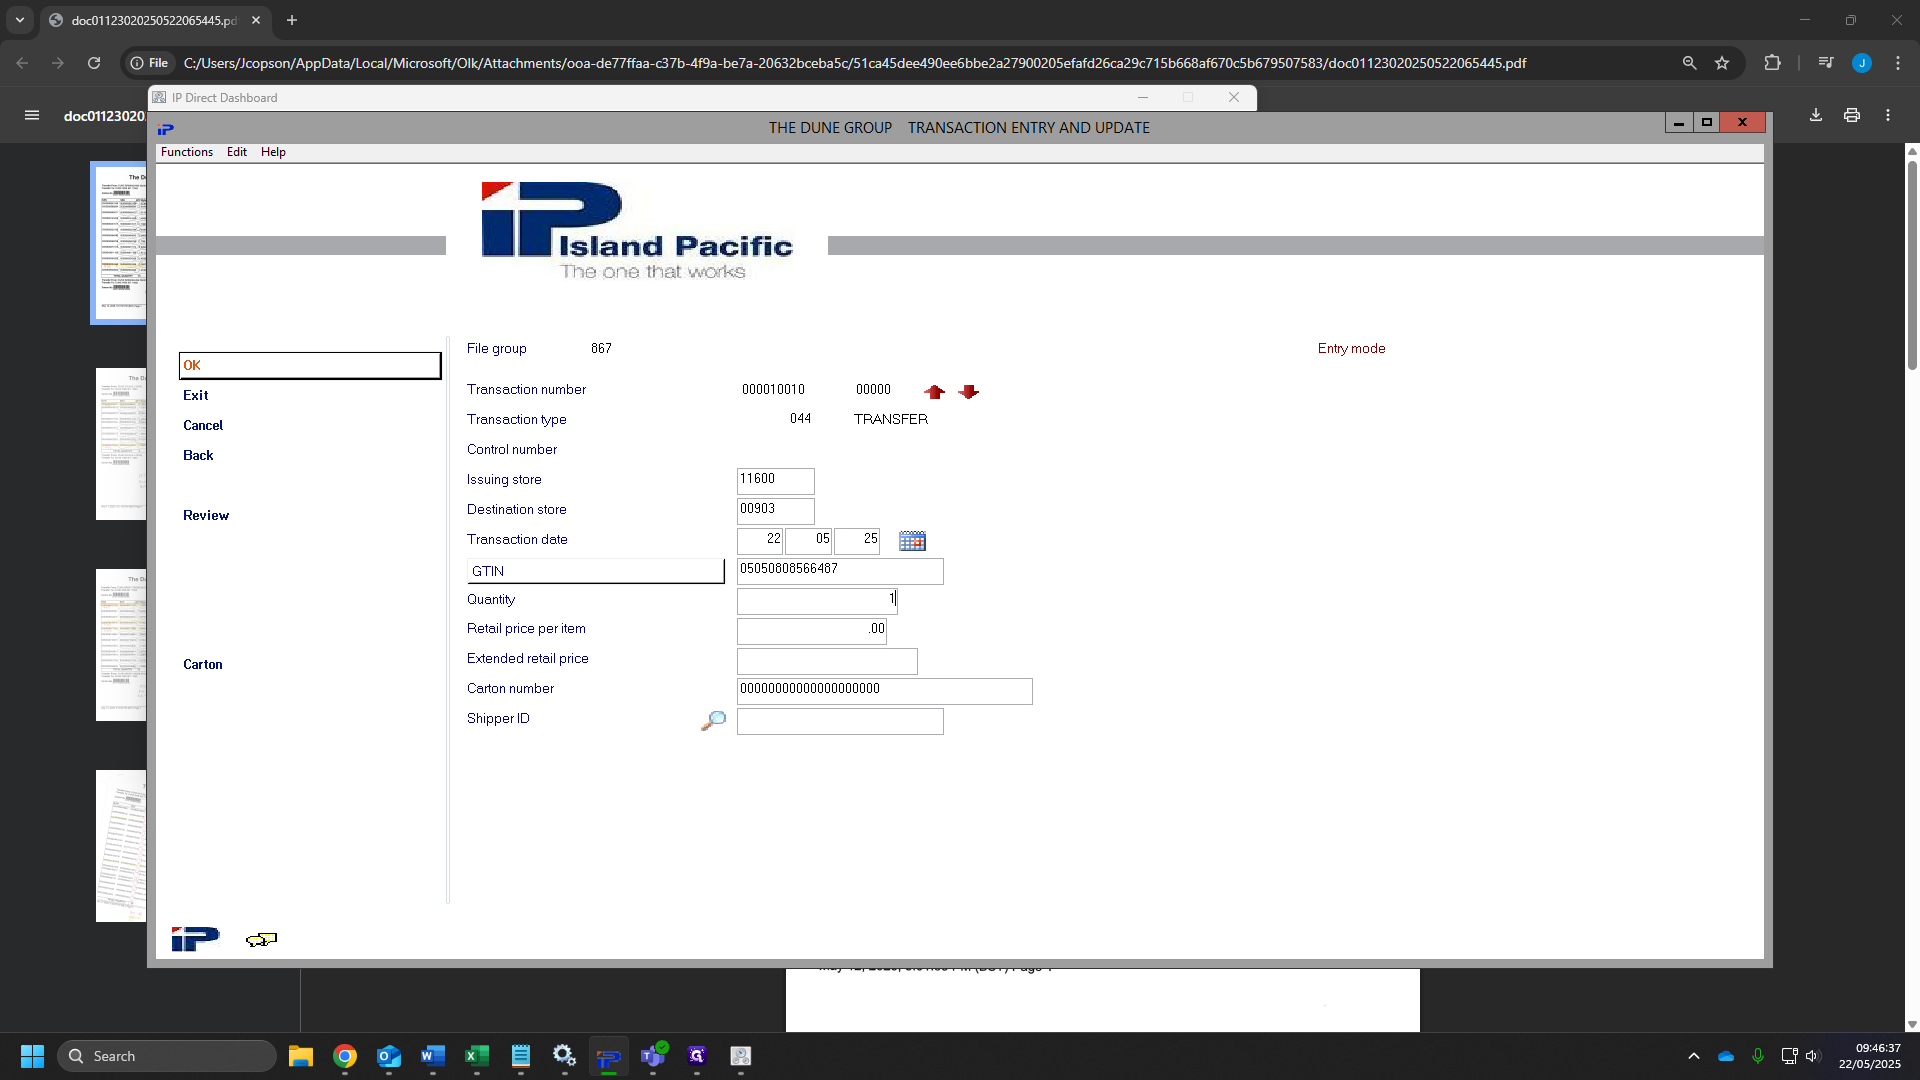
Click on "Carton Ack Dis Numbers"
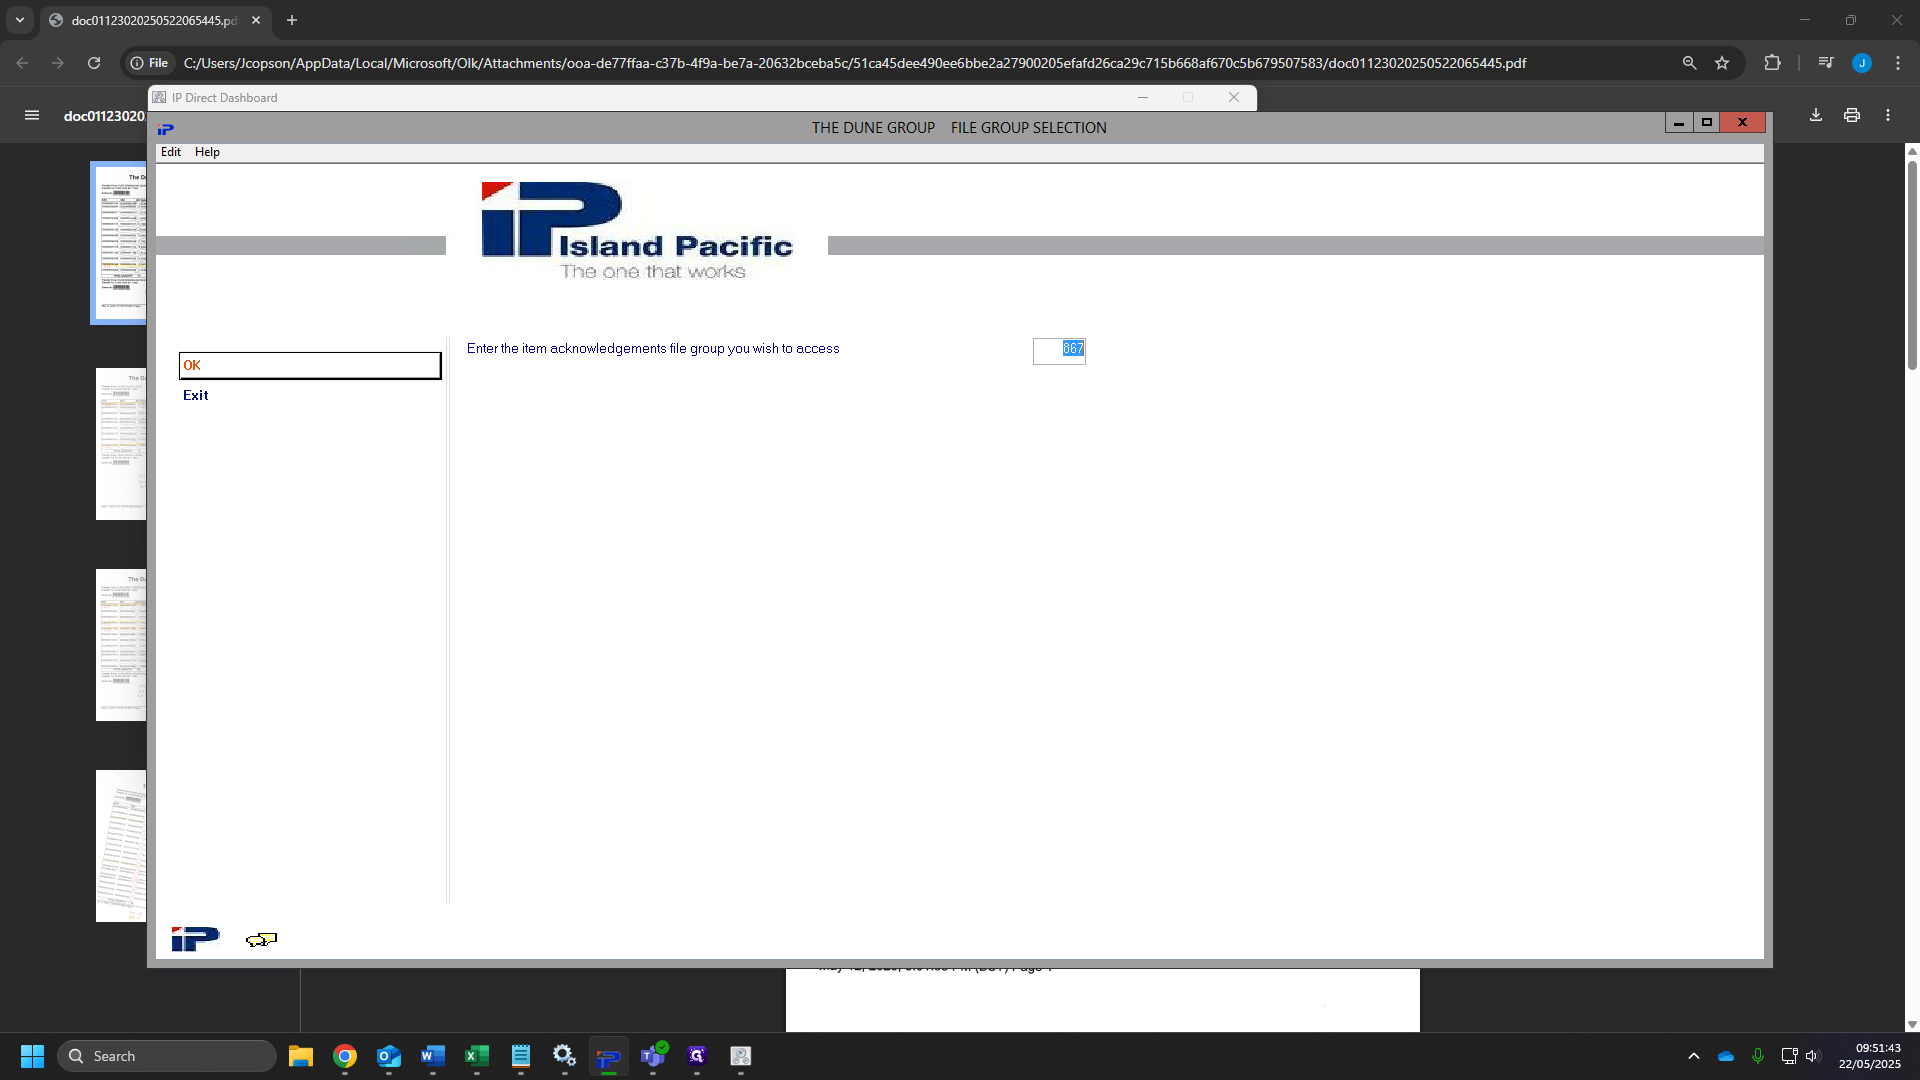
13
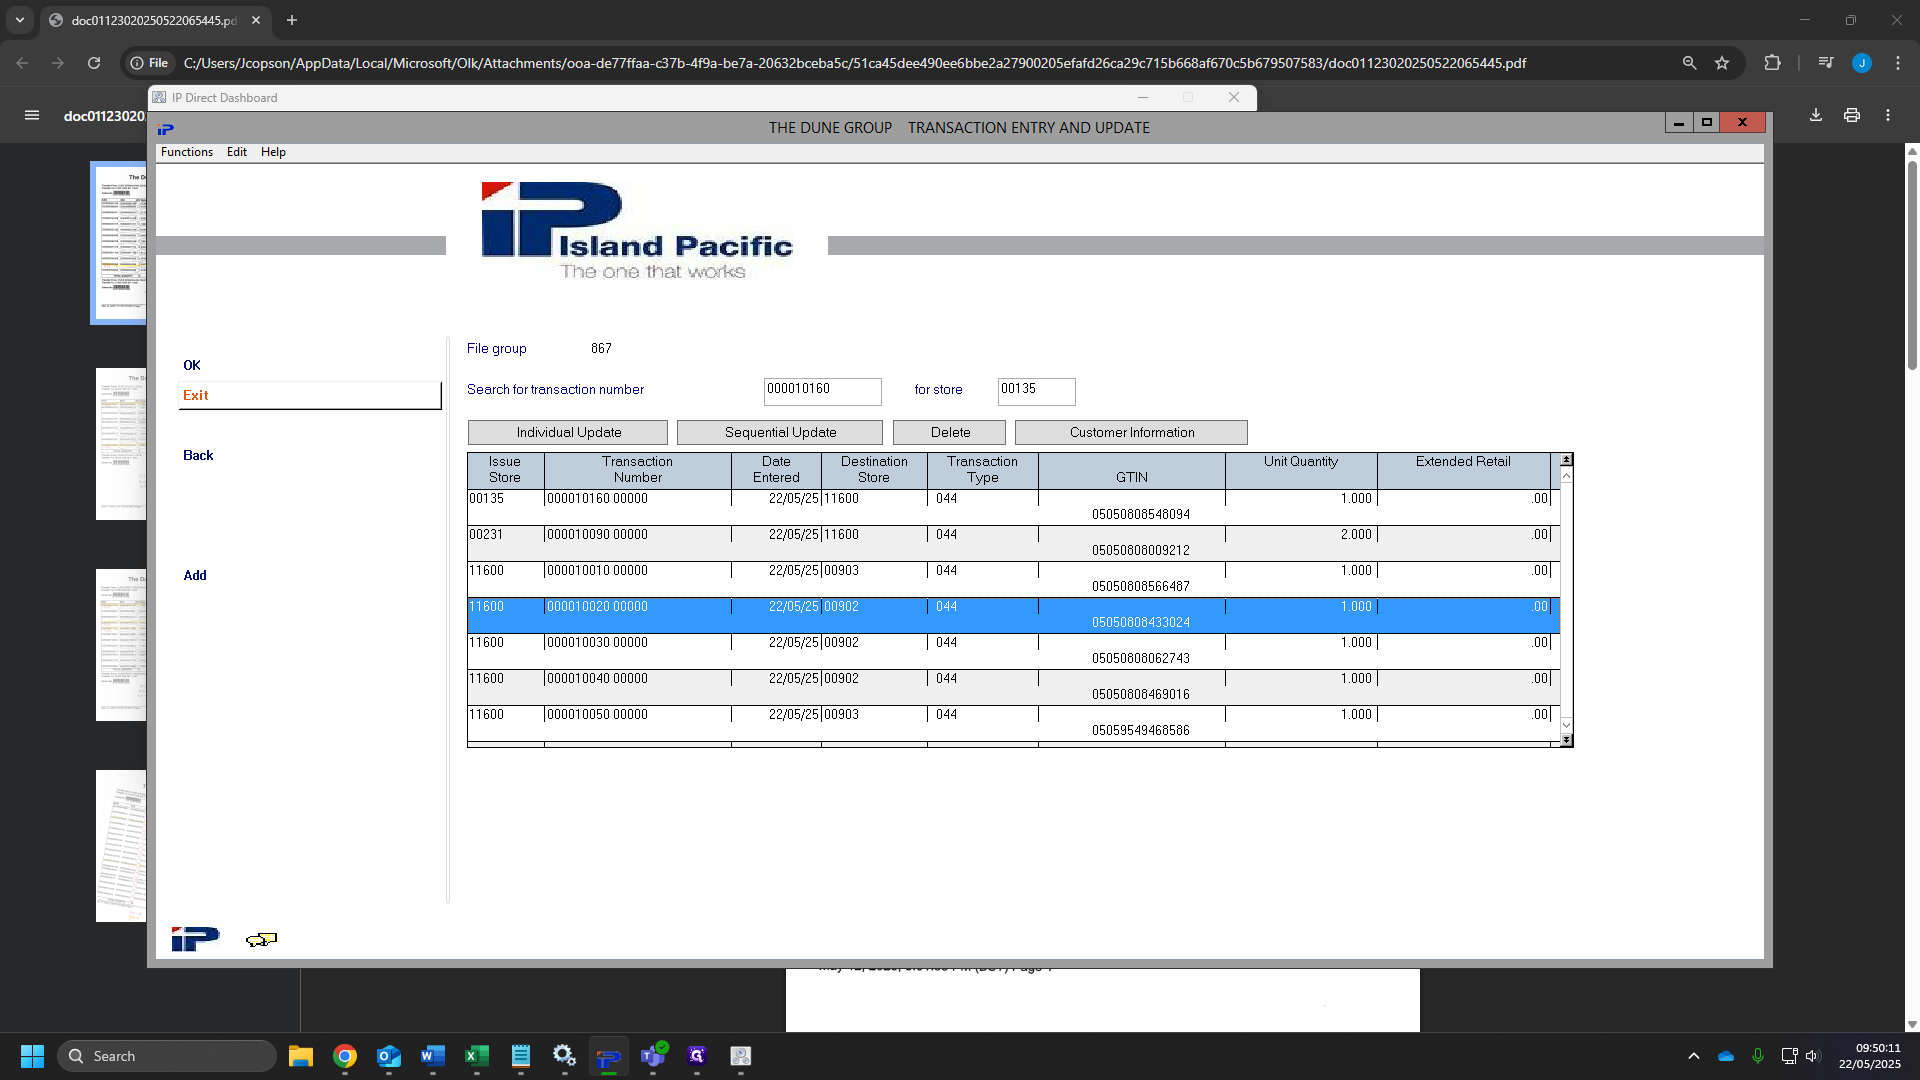
Click here and type your file group, this can be seen in step 4.

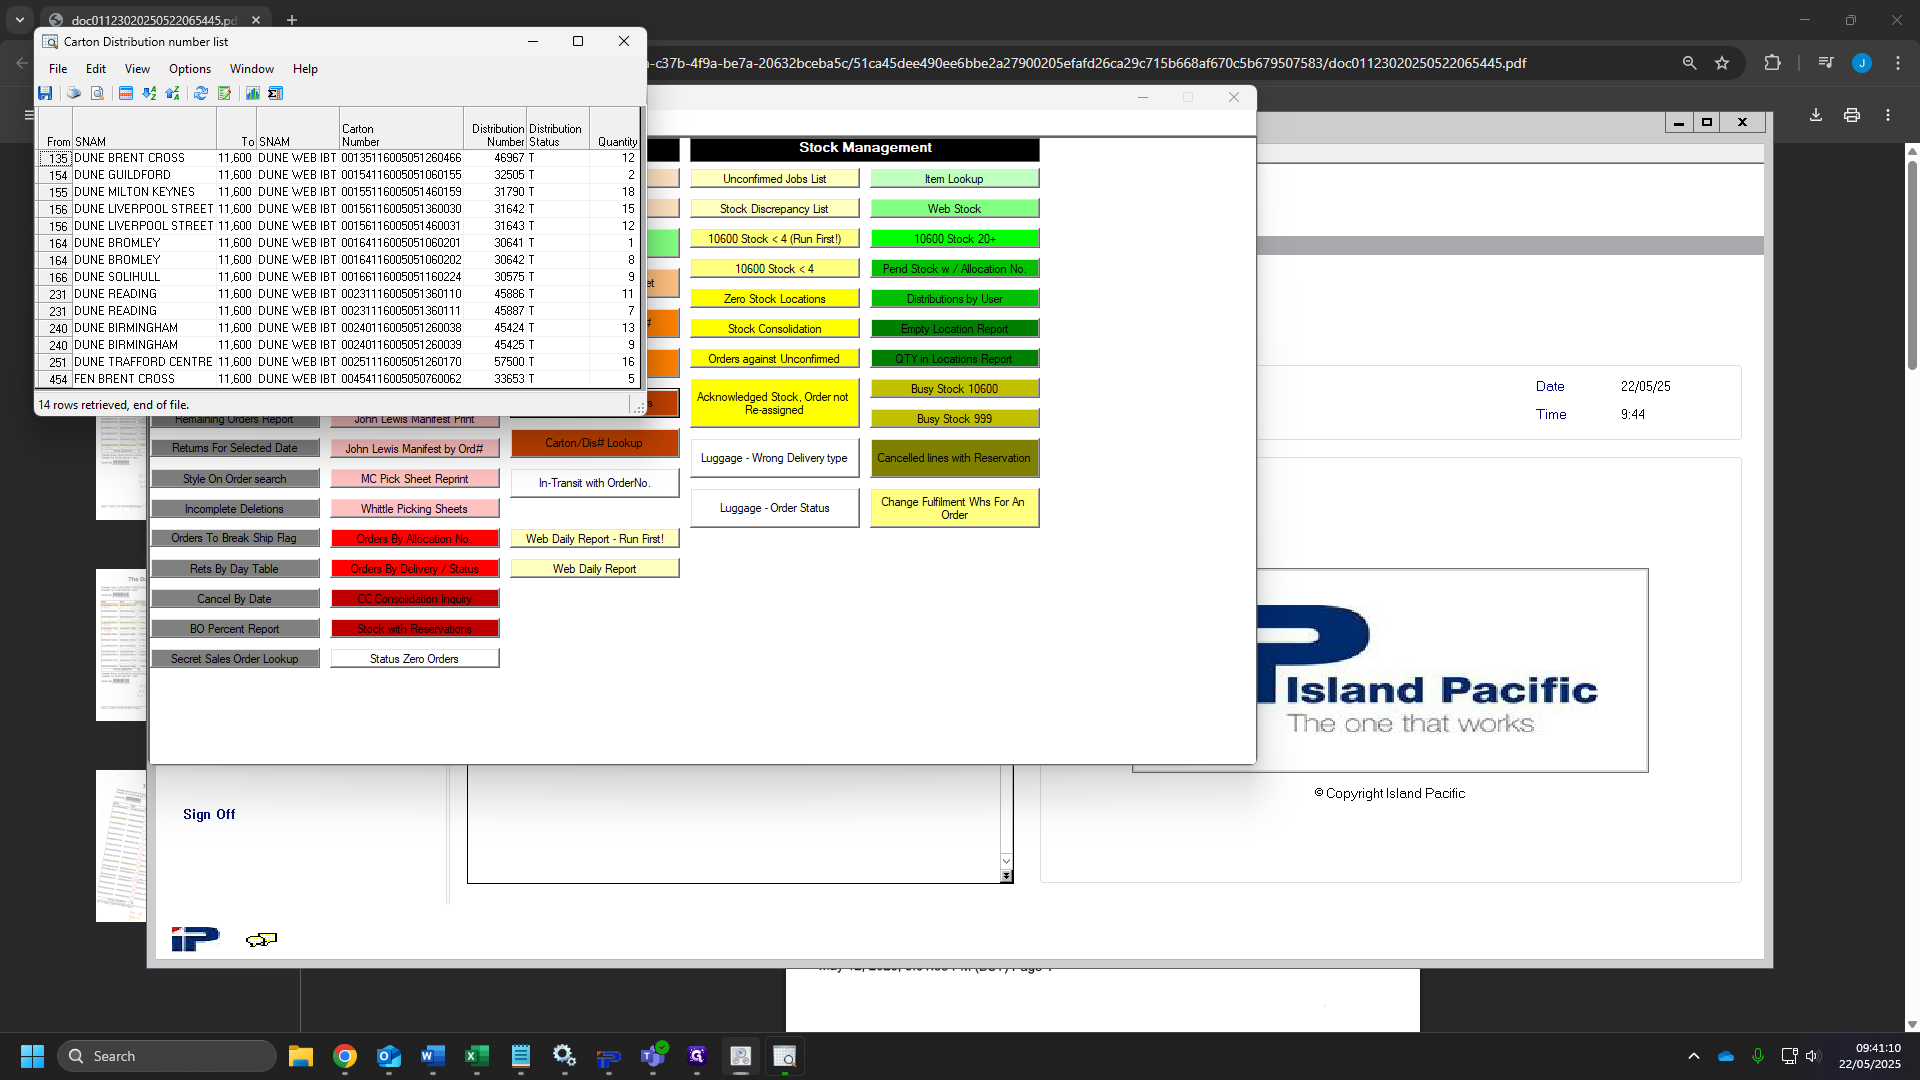
14
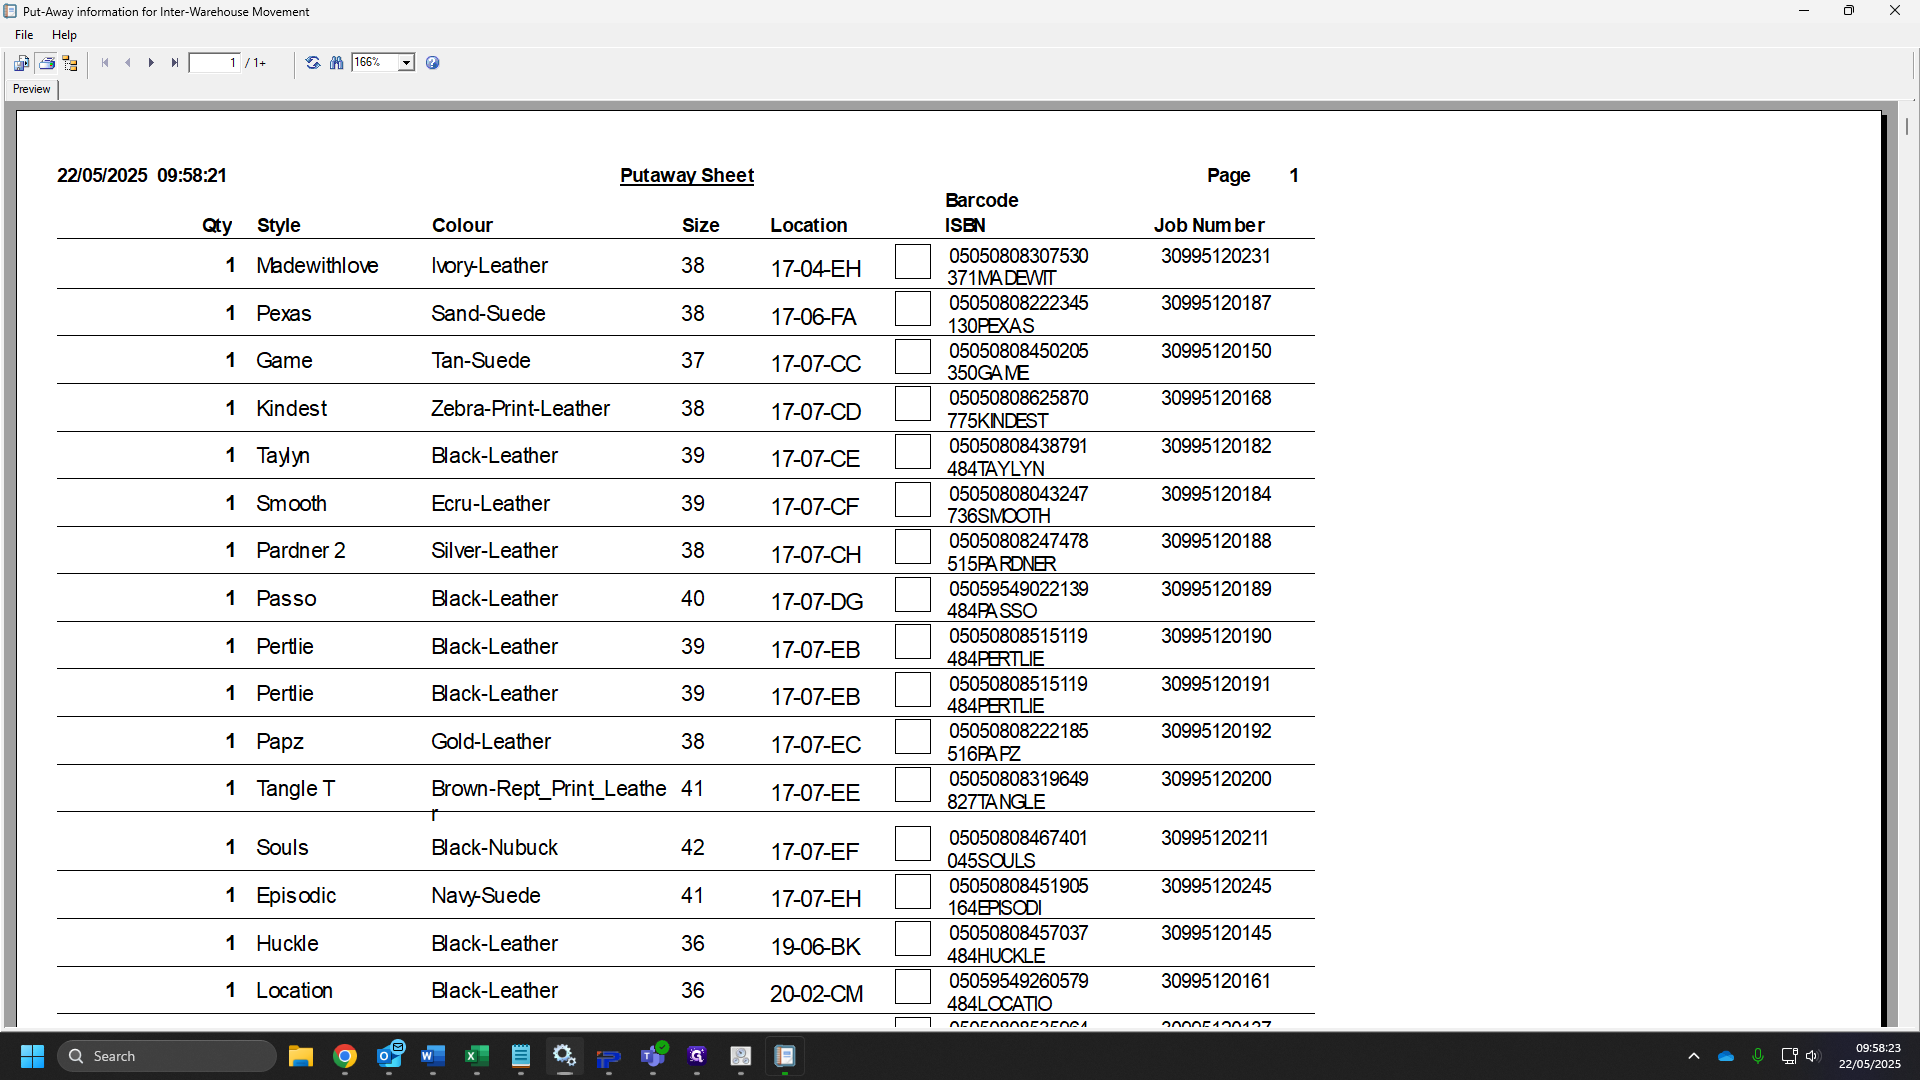
This will load up the follow report. We now need to match the carton number with the sheet - this can be found under the bar code. Once you have the correct sheet, write the distribution number on this.
15
Once you have all the distributions wrote on your sheets, We can exit this window. Sort your sheets into distribution number order - lowest-highest.

16
Head back to IP once you have all of your distributions in order.
17
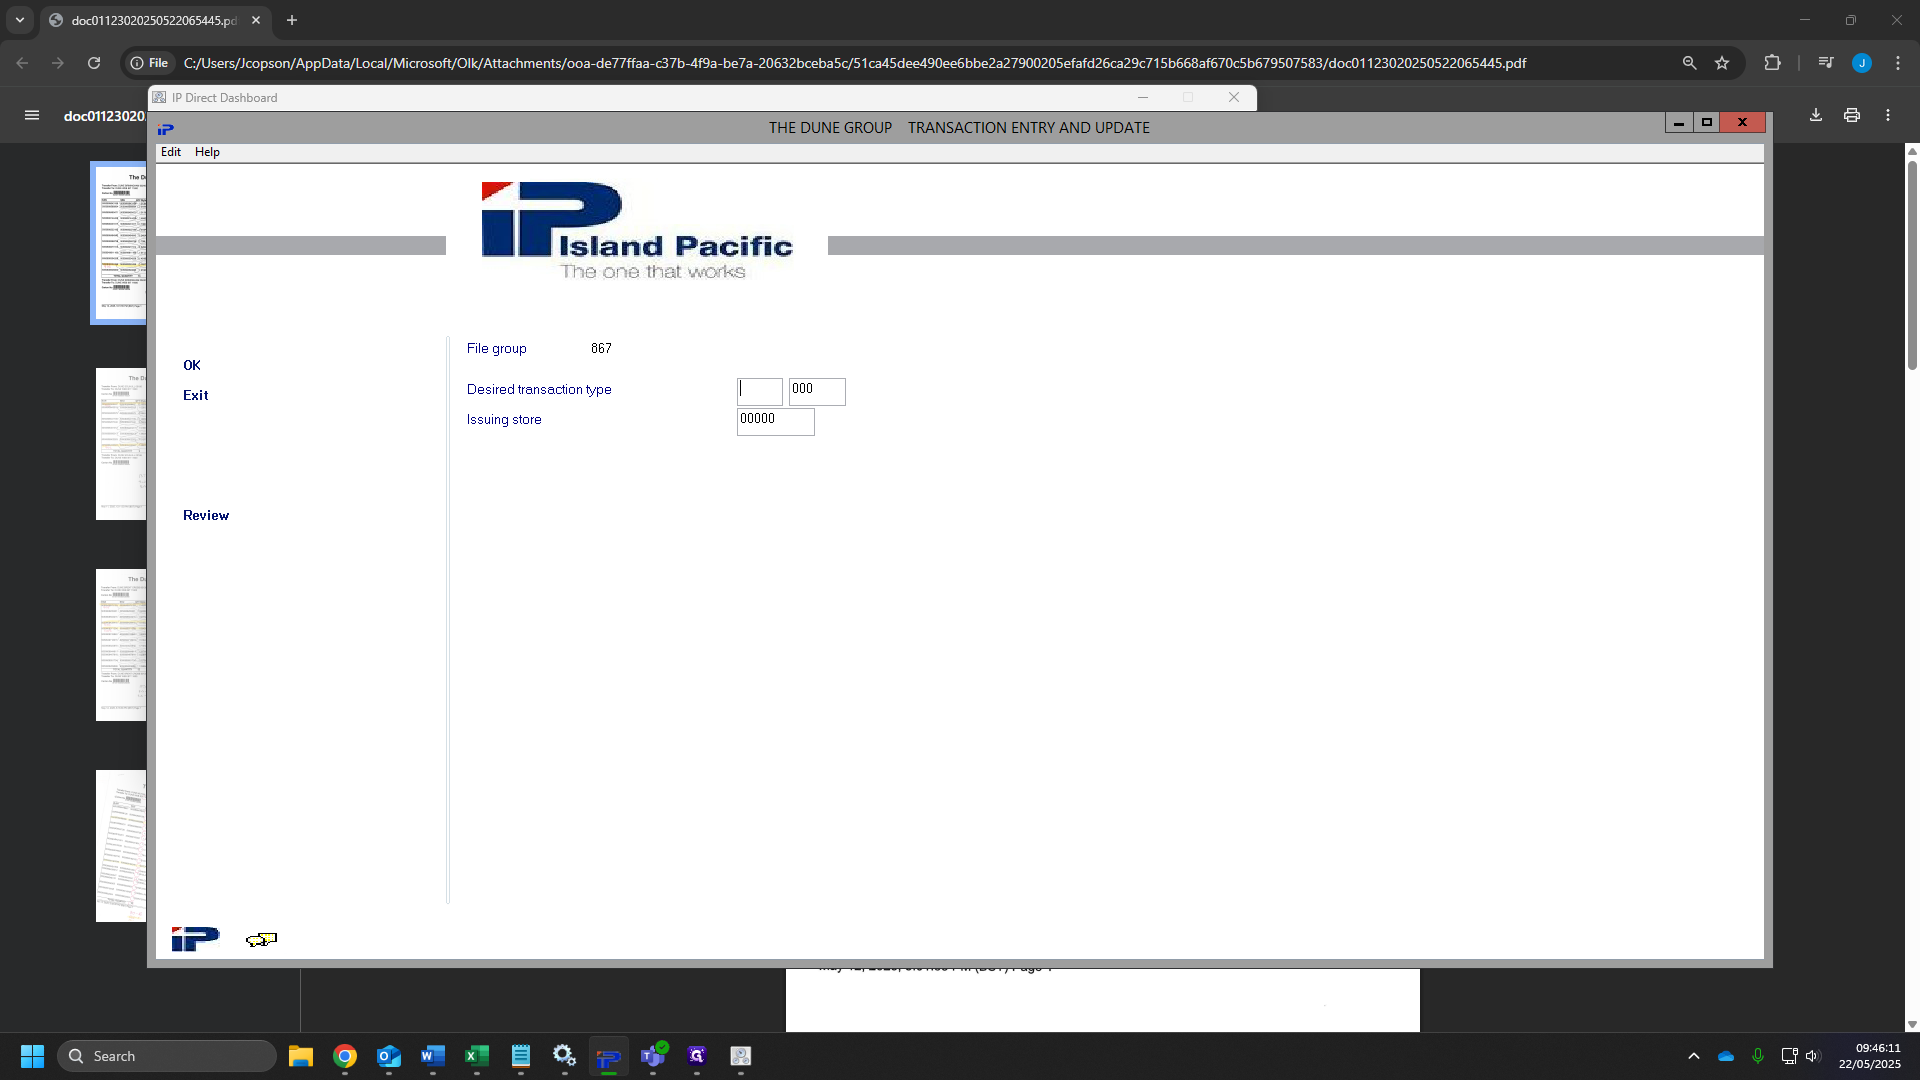
Click on "11. Process Transactions"

18
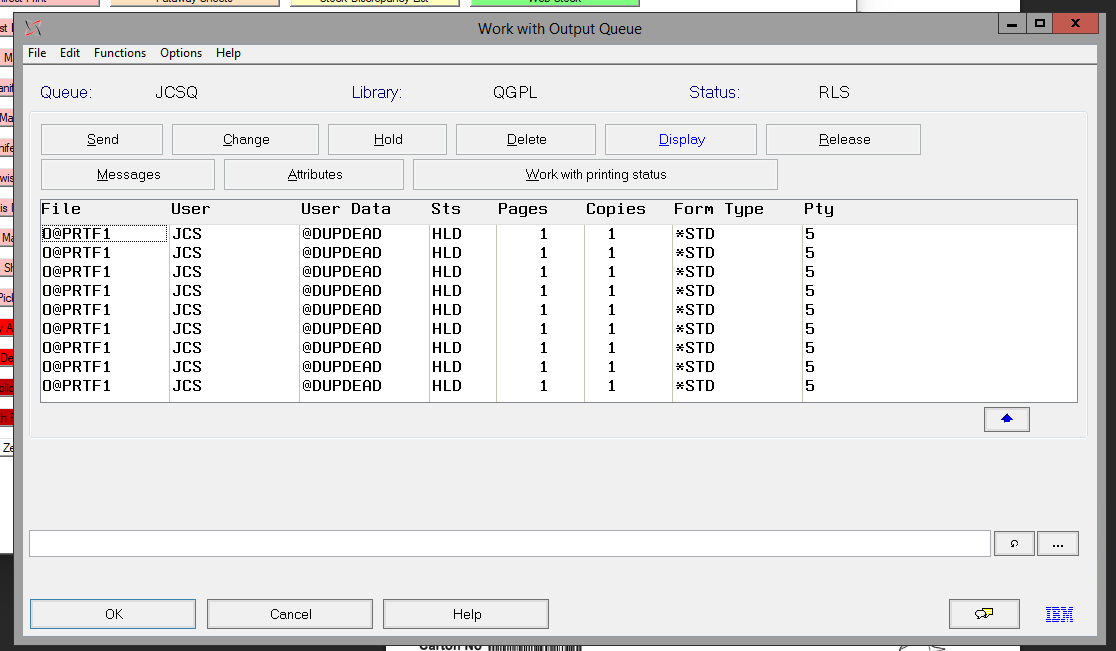
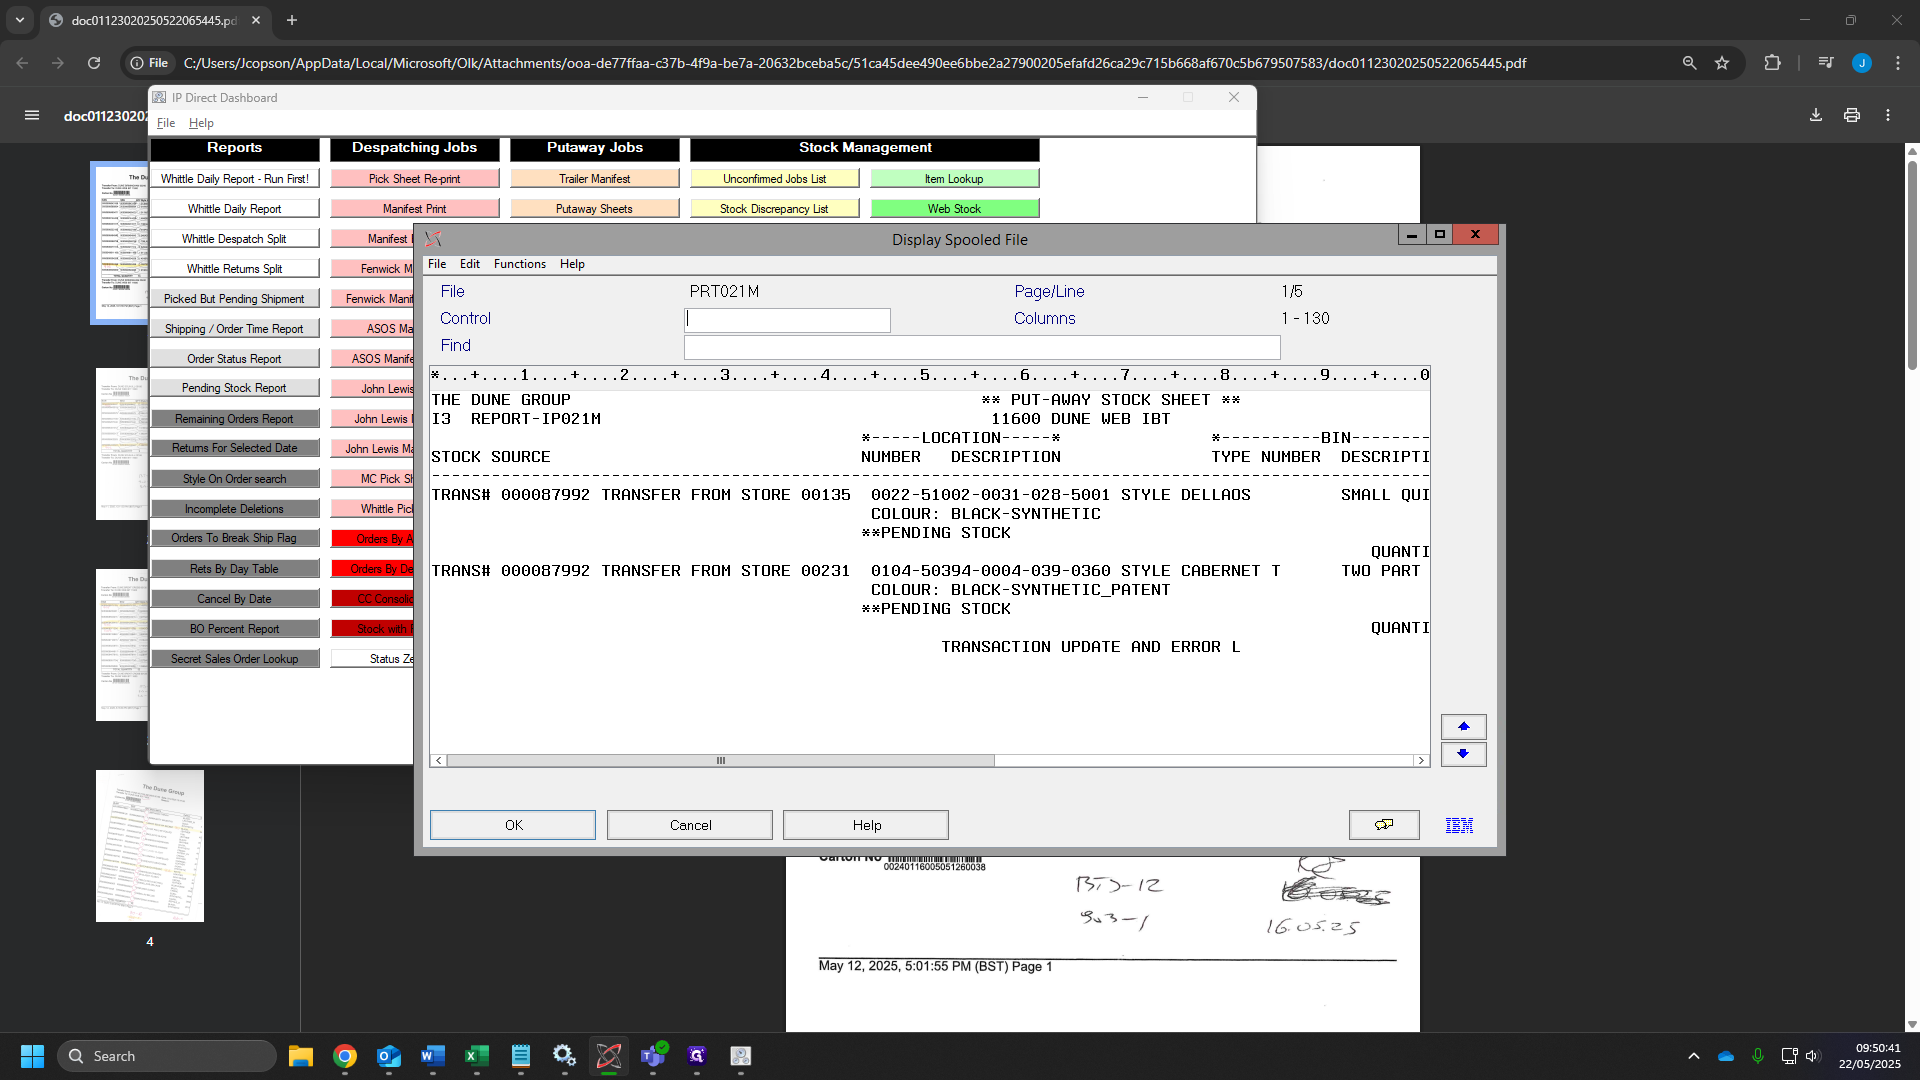
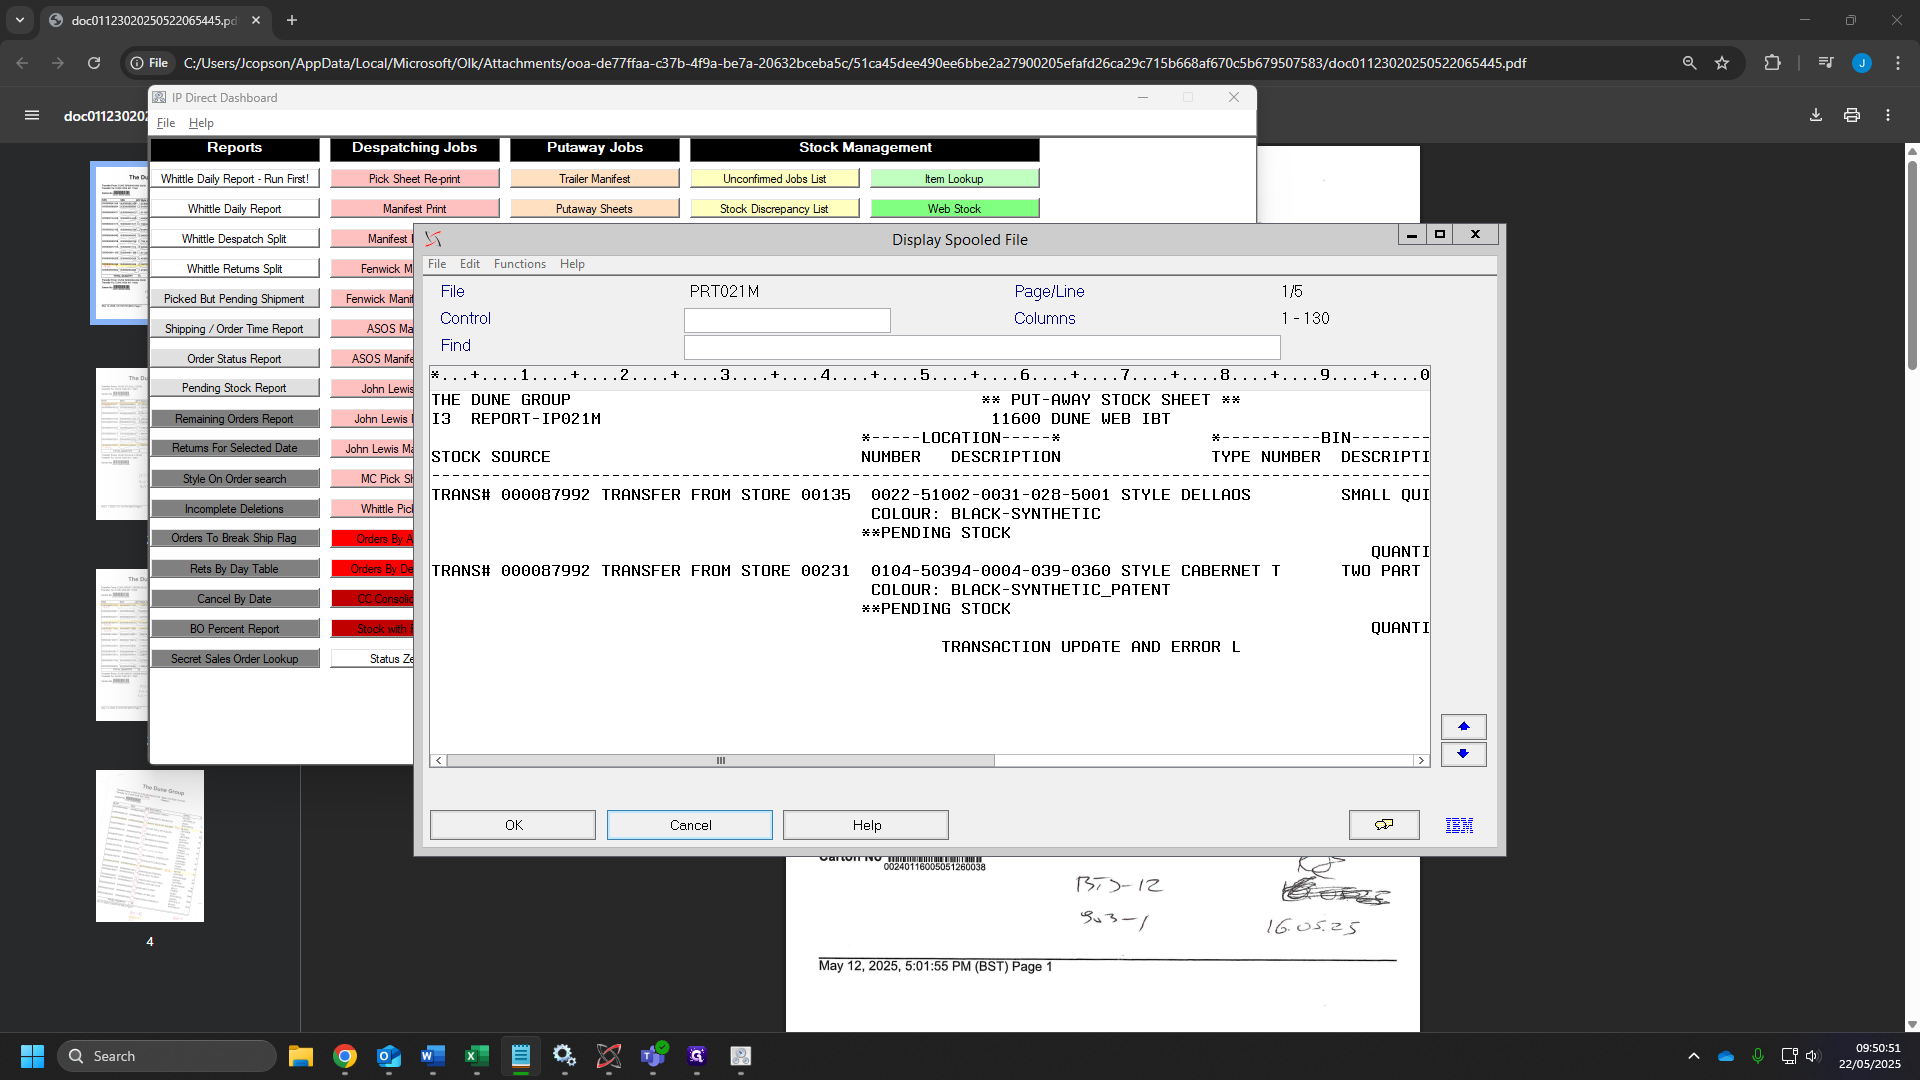
Click "OK"

19
Tick the "Clear this file group prior to this request"

20
Click "OK"

21
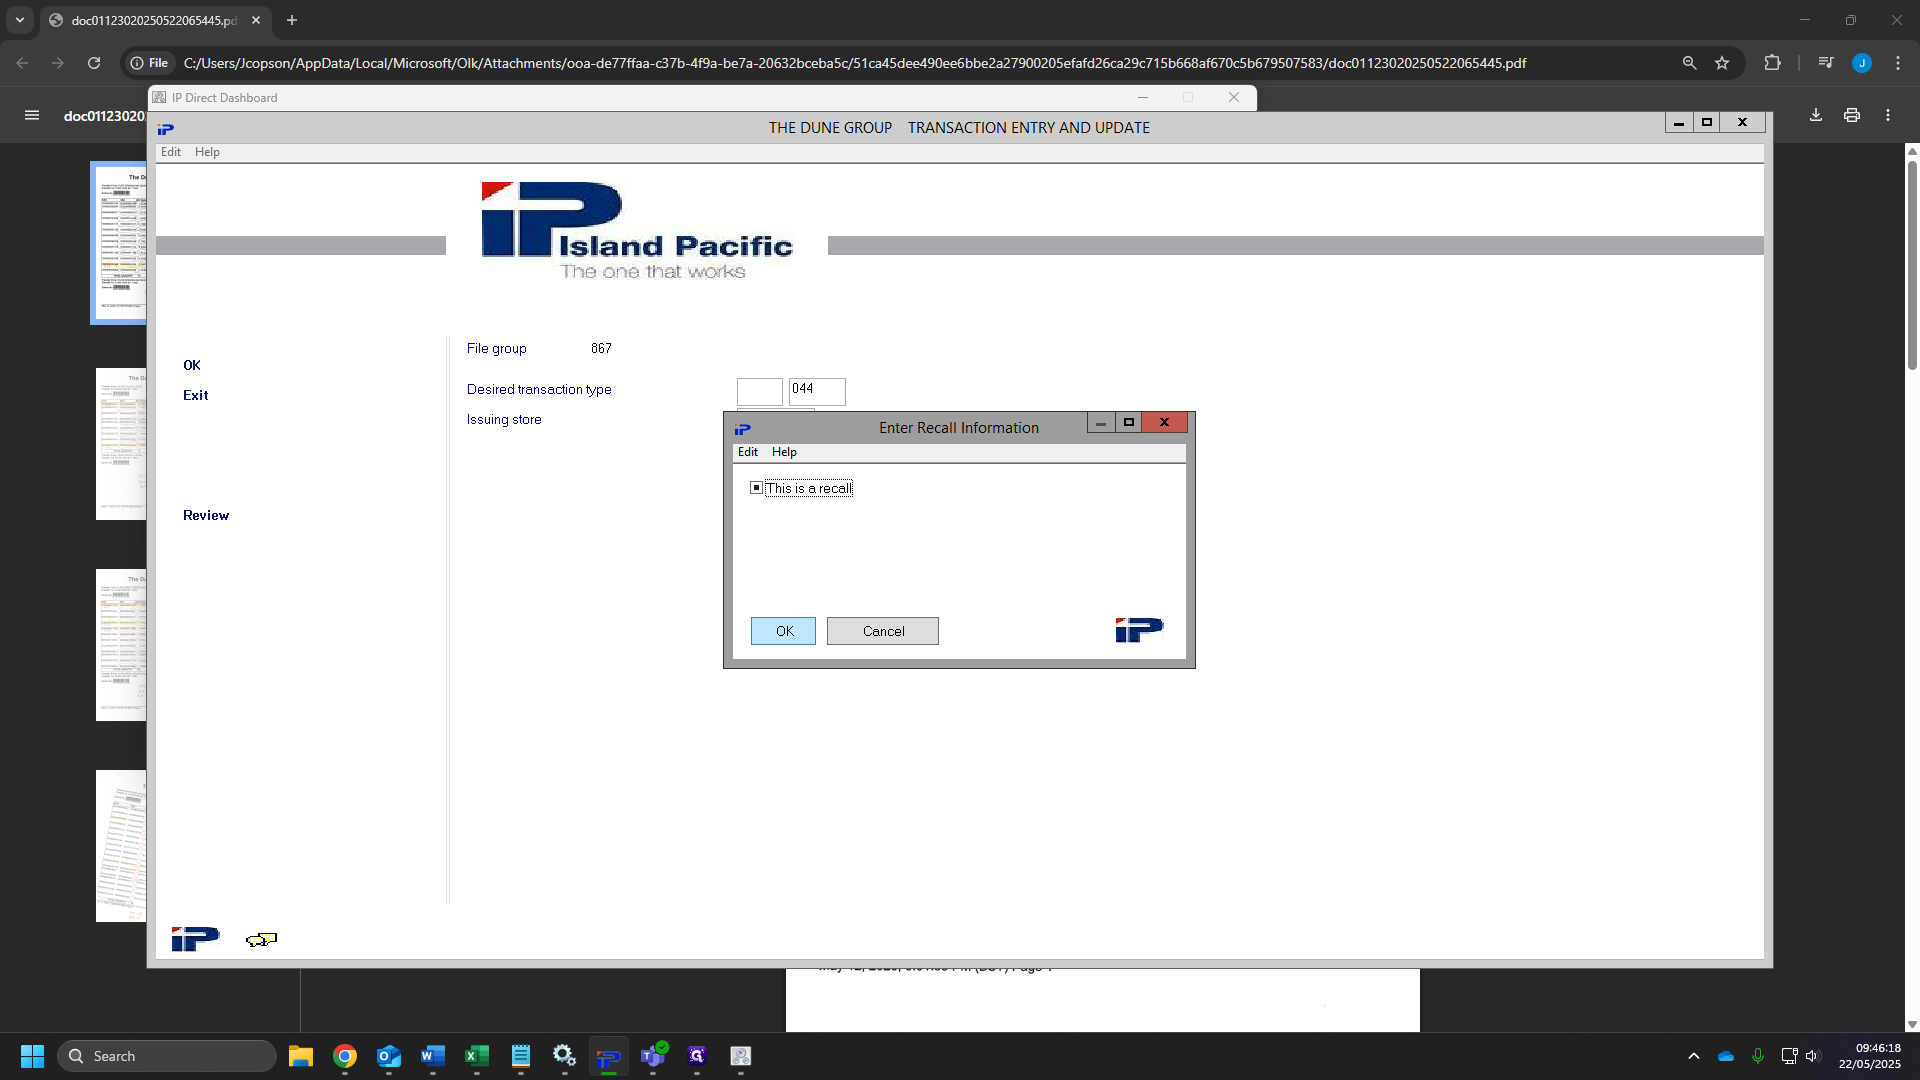
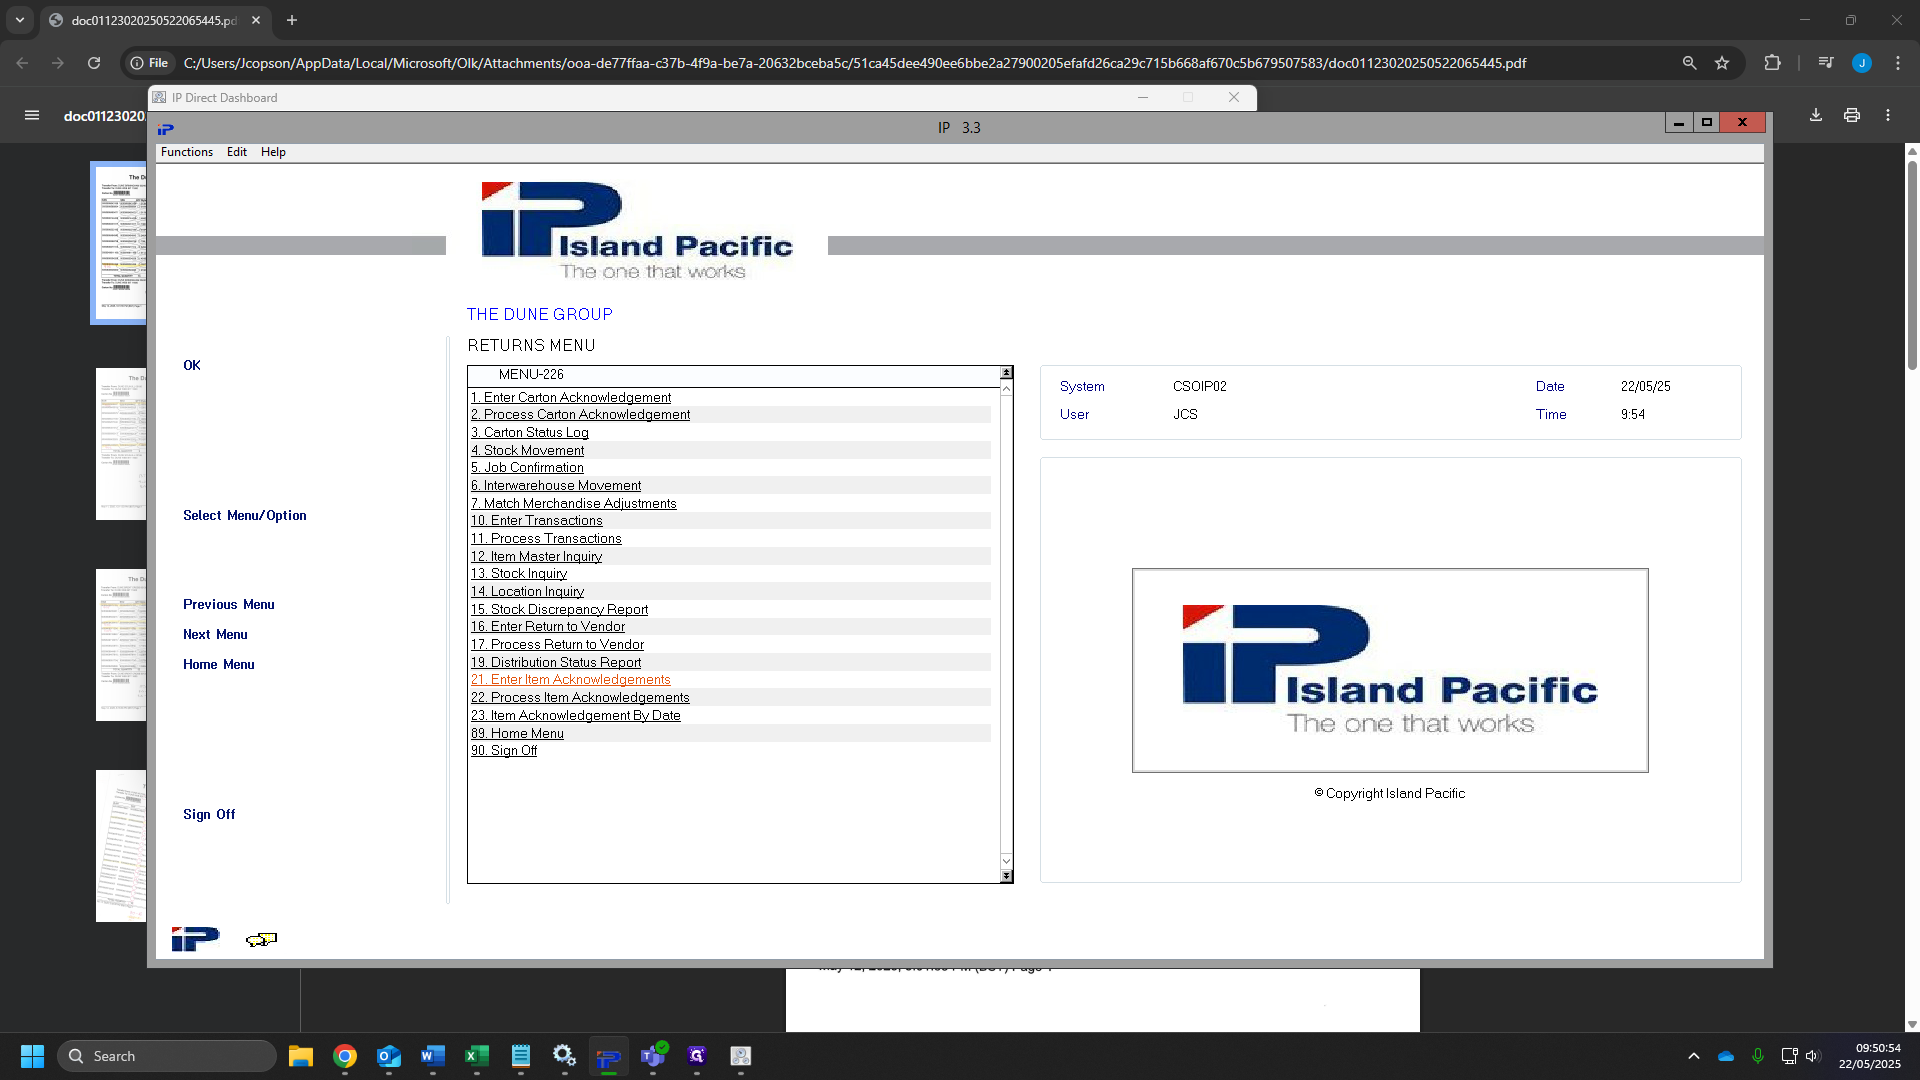
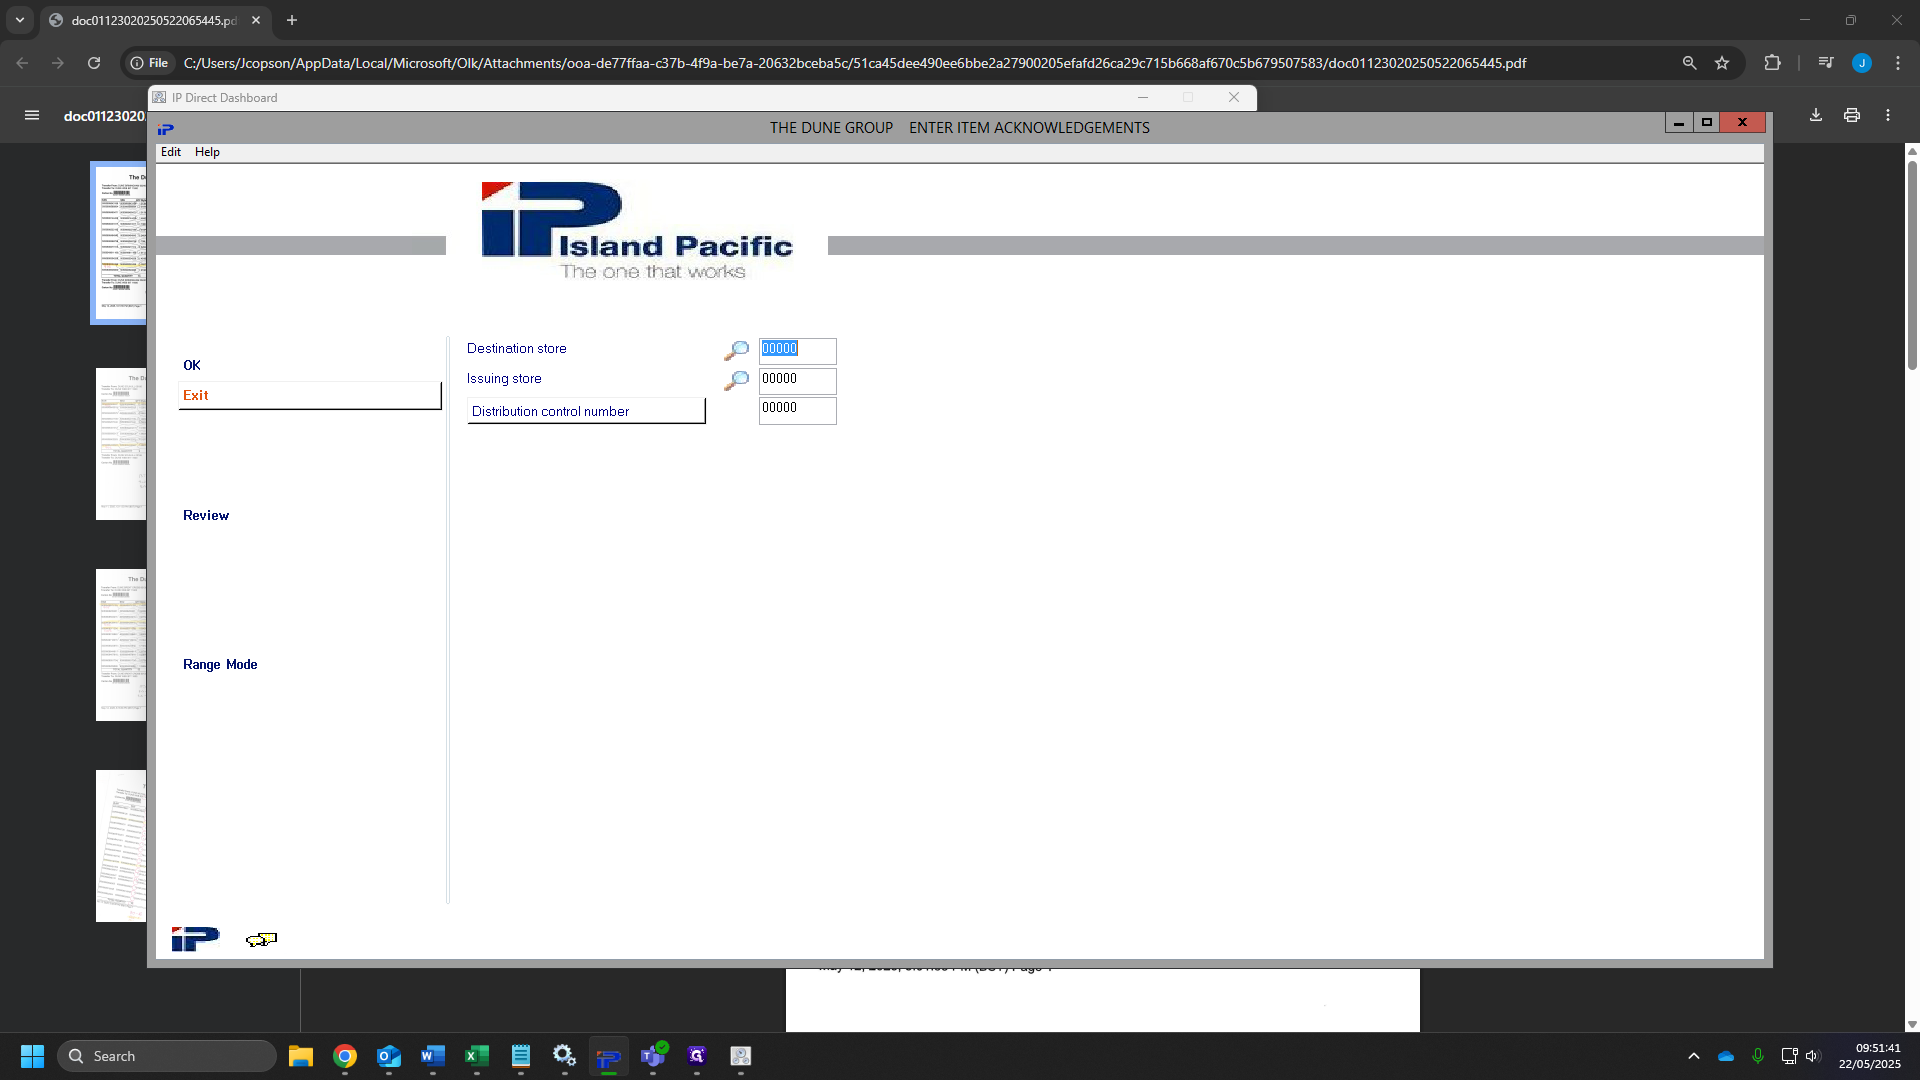
In the second box of desired transaction type we will type "044"
22
In the issuing store box we will type "11600" and press enter.

23
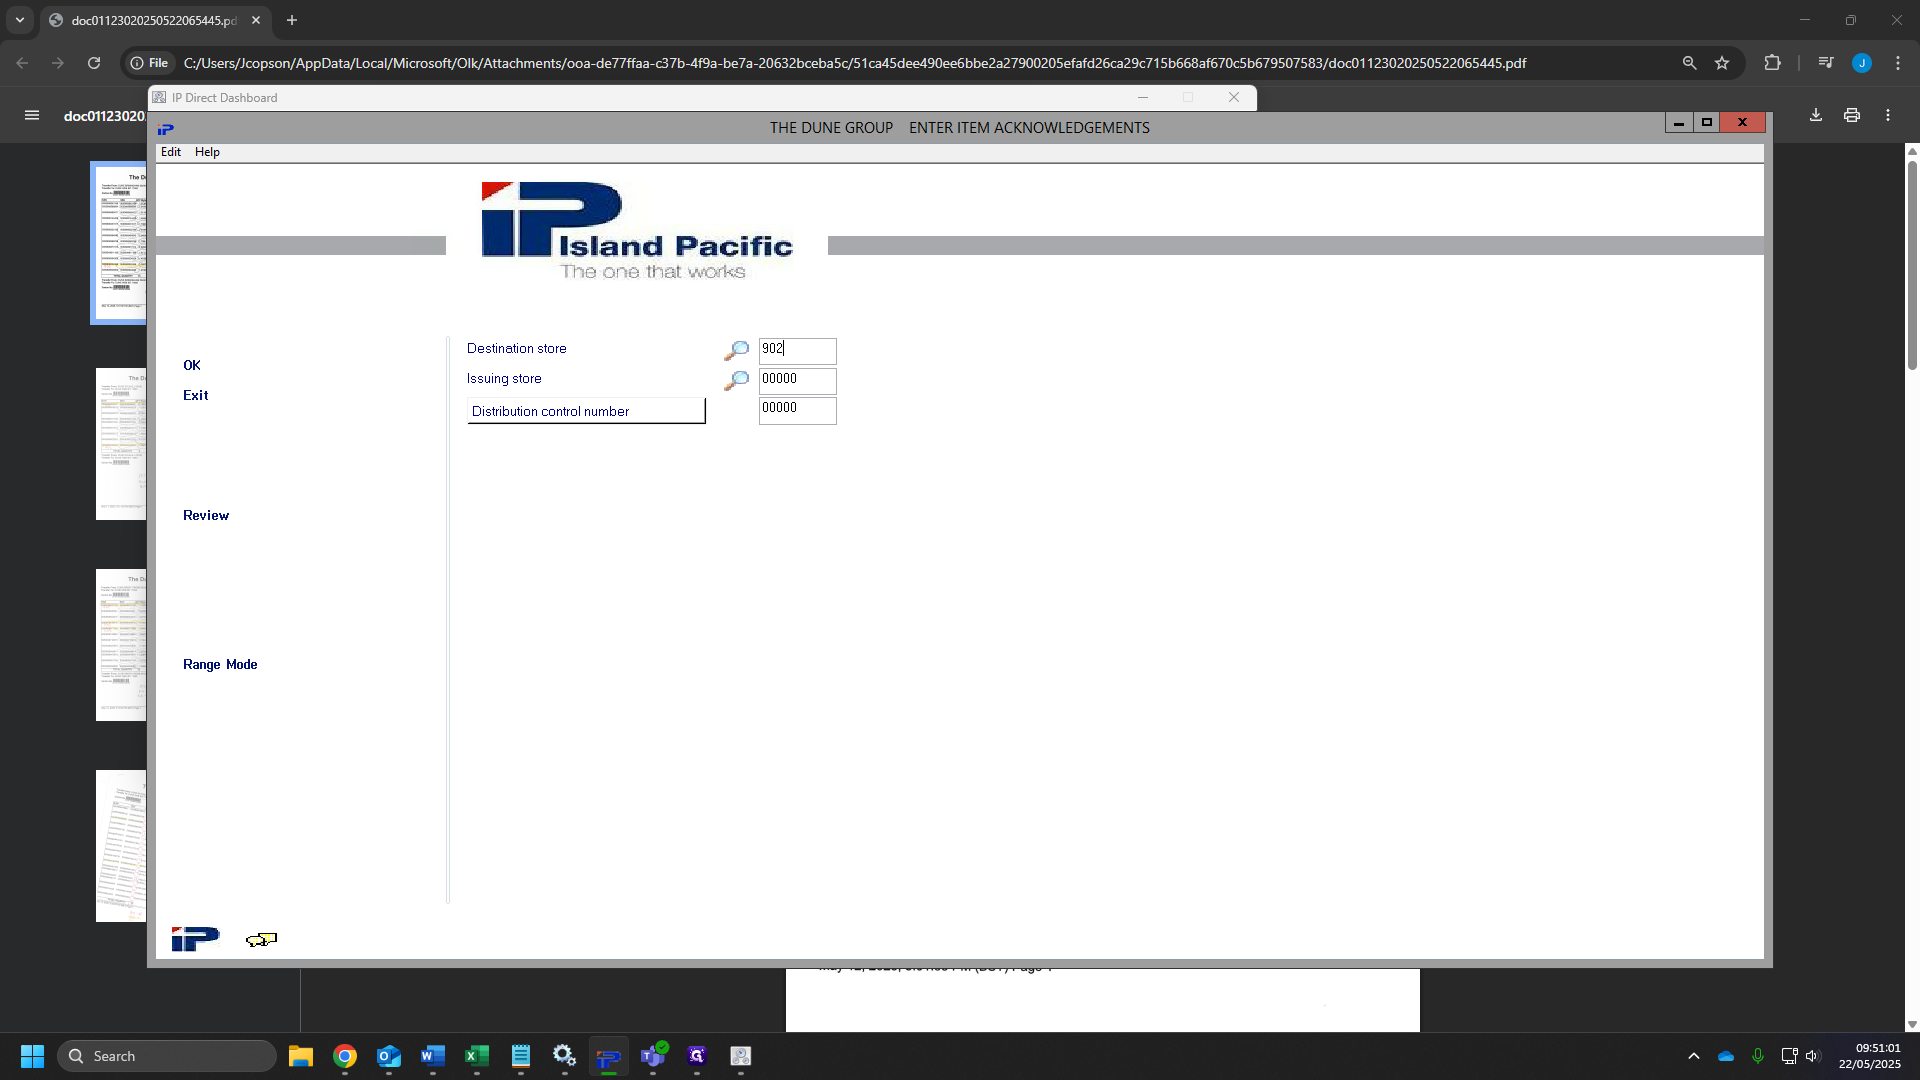
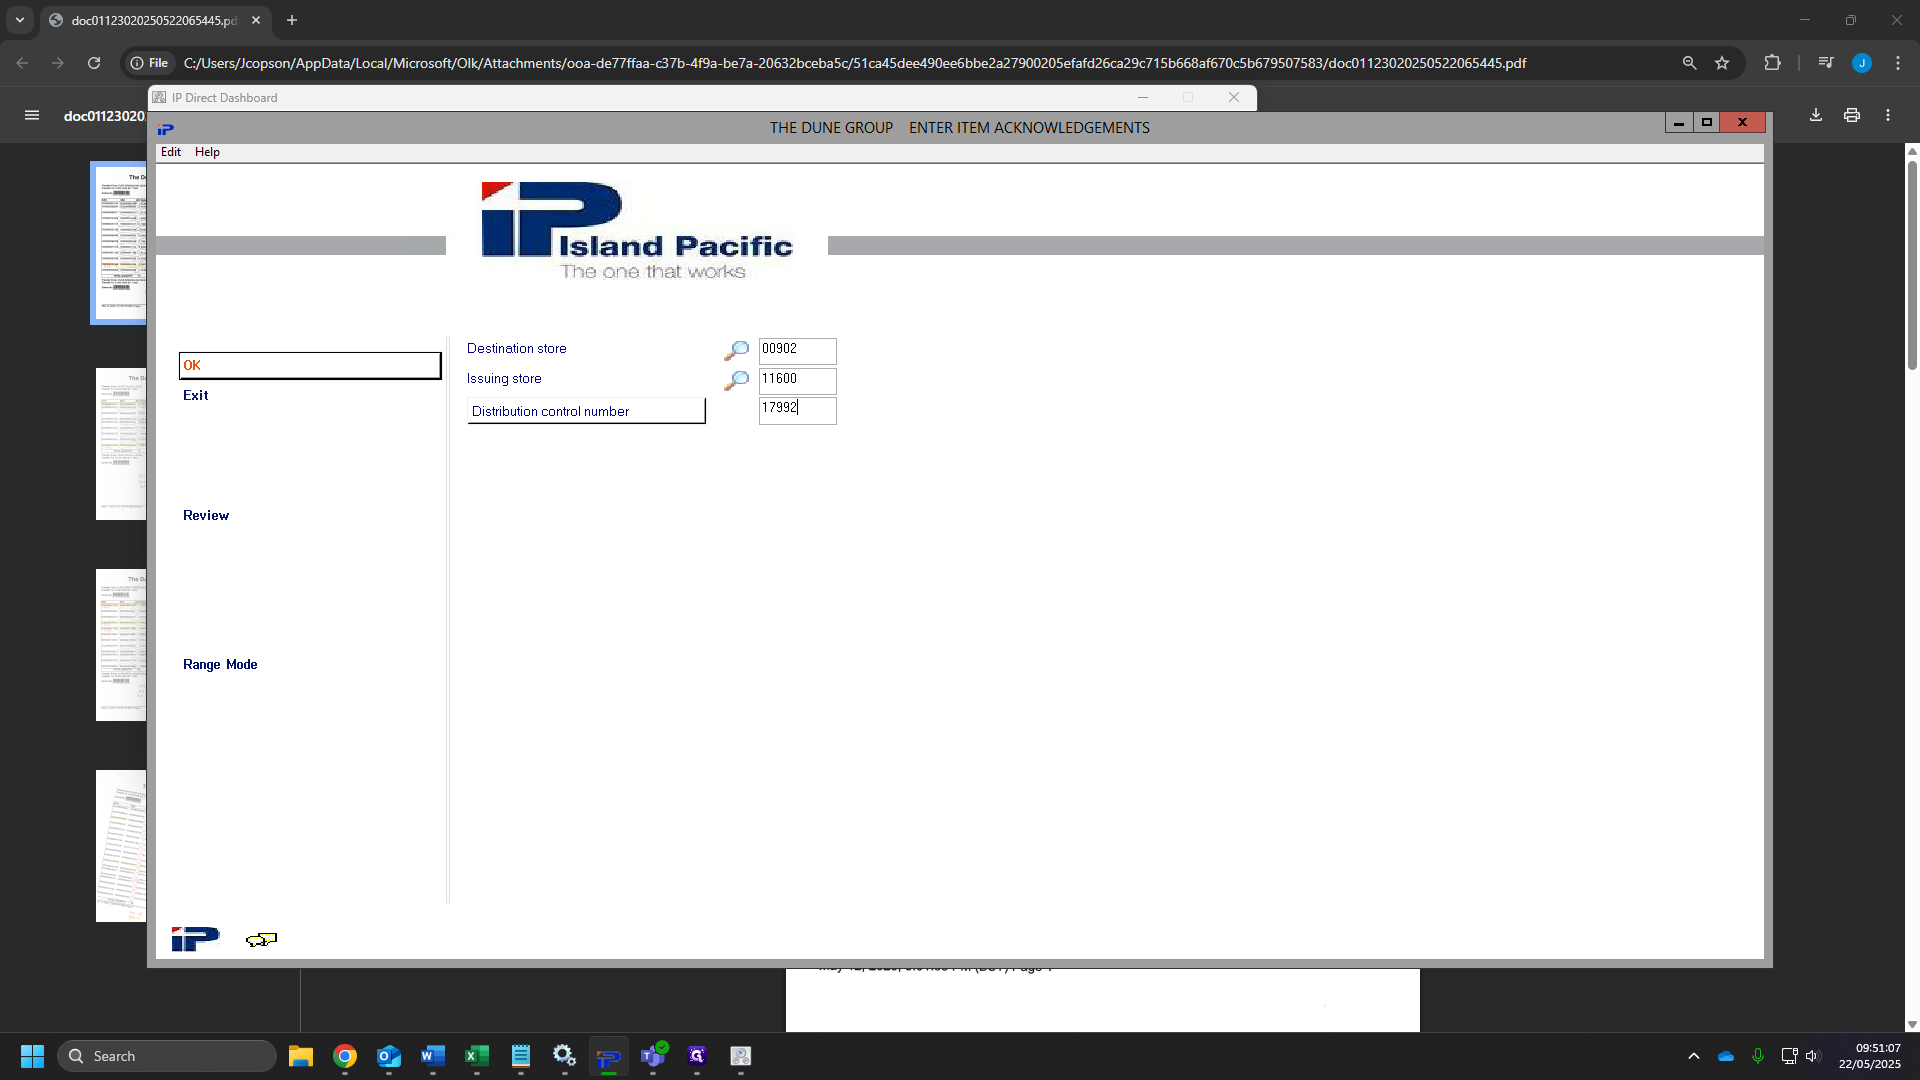
Click on "OK"
24
For the destination type, check your sheets and use the faulty store. (903,905,902)
25
Click Item number box until you get to GTIN, Then select the box and add your GTIN in.

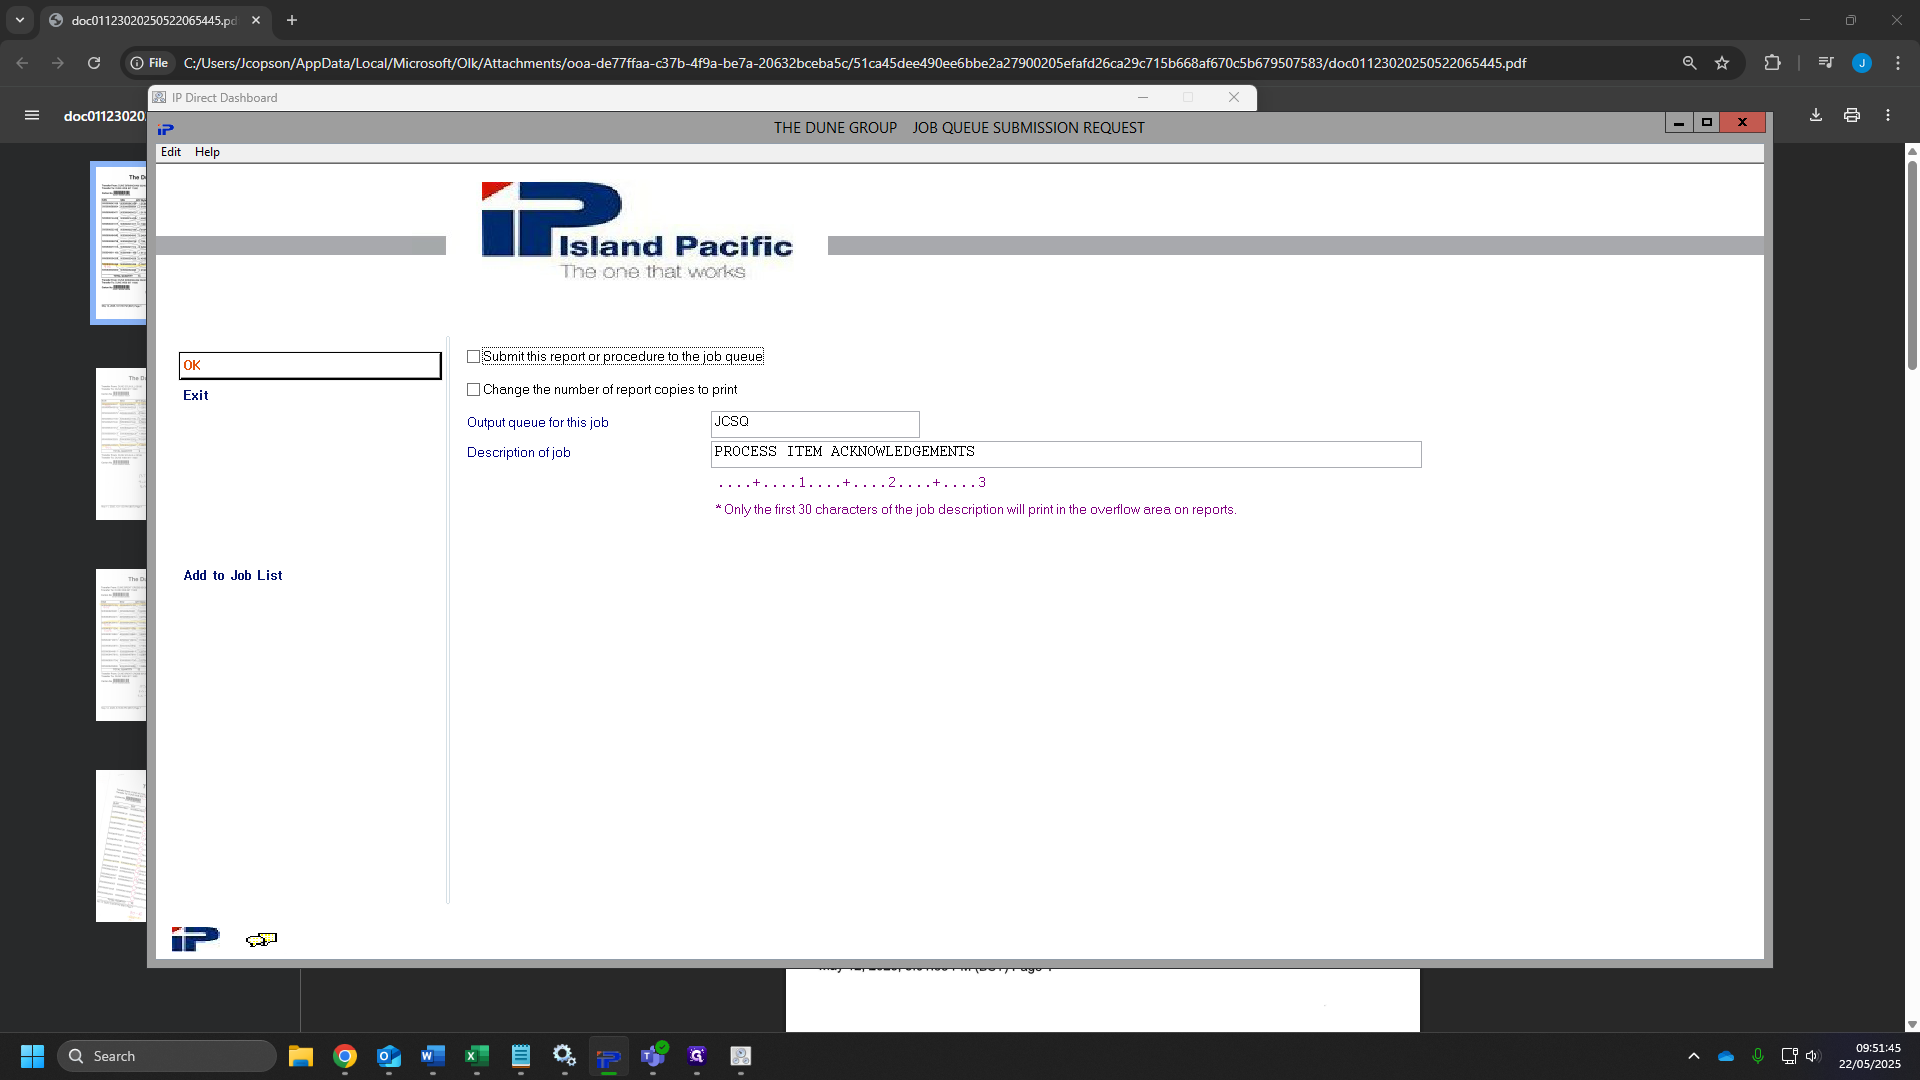
26
Click here and add your quantity.
27
Click "OK" and repeat this for all of the items you want moving.
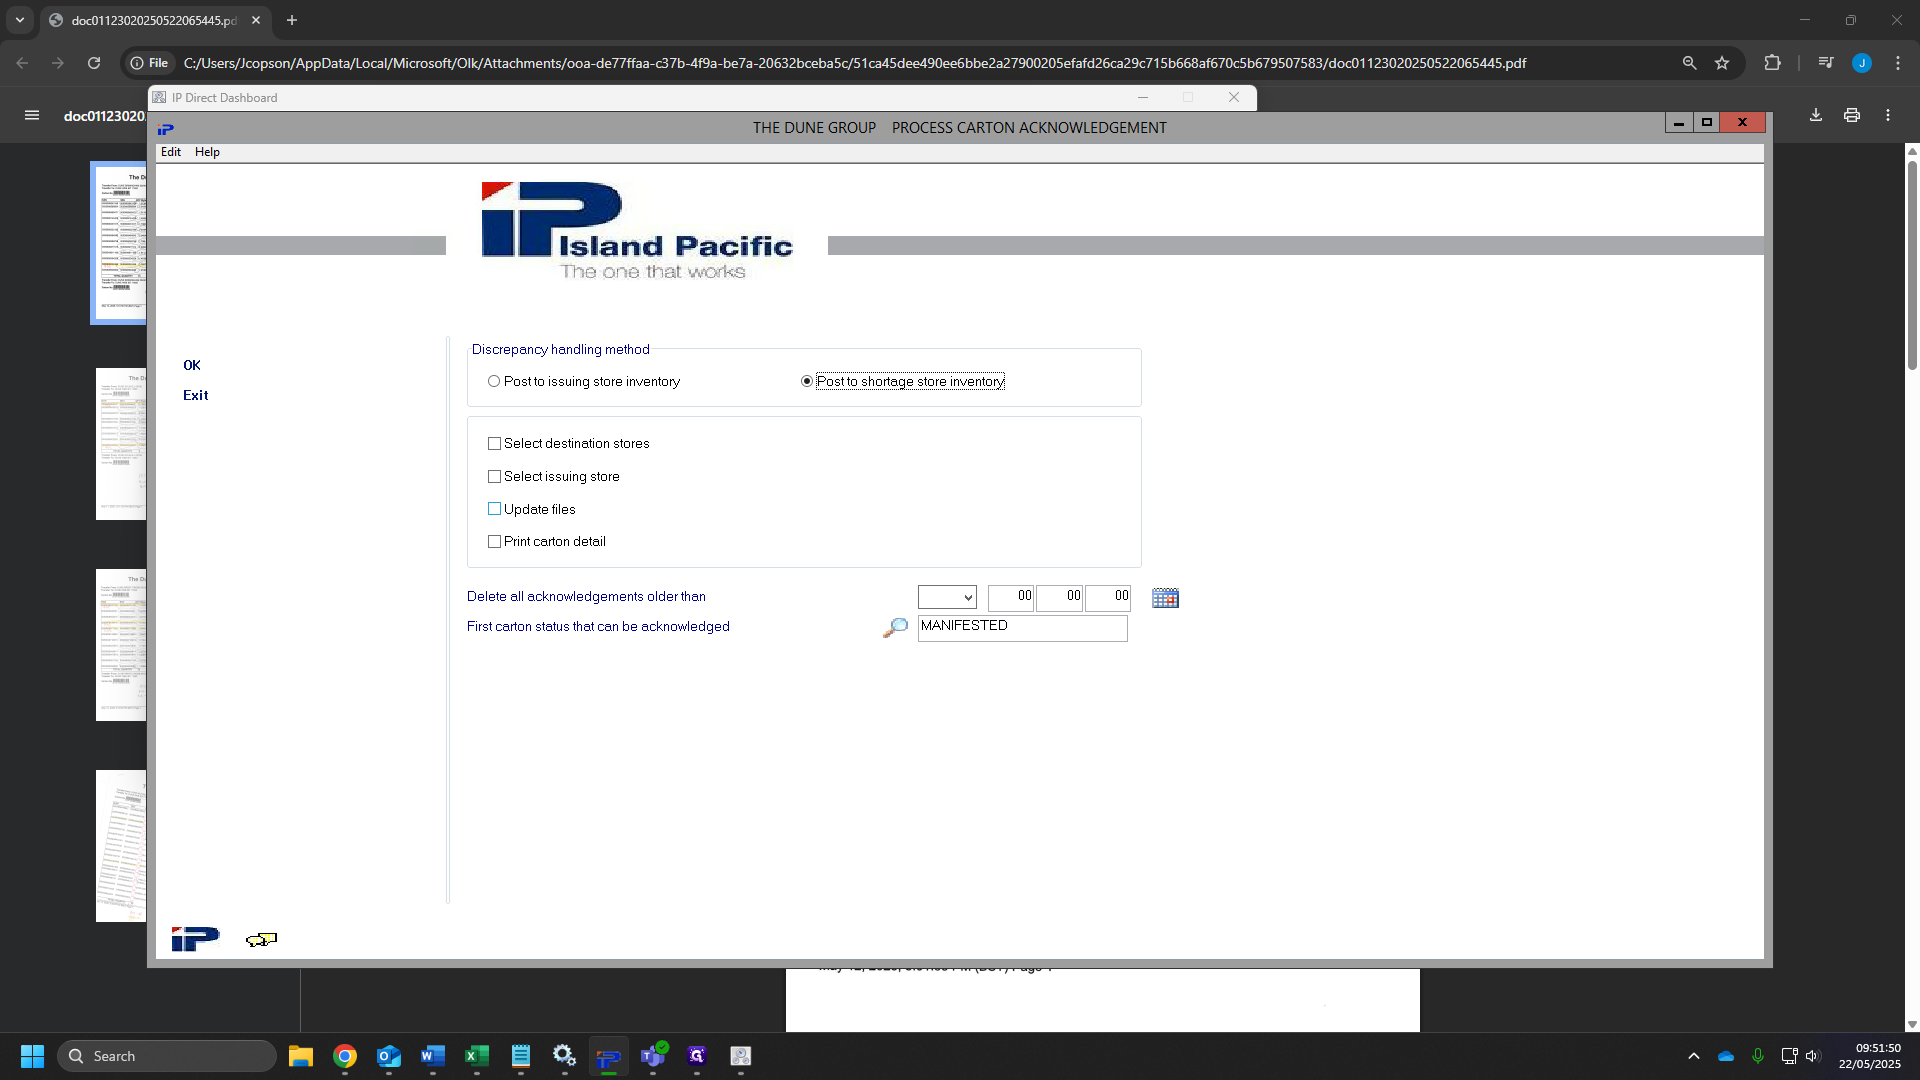
28
Once you have finished, you can click "review" to check.
29
This will show all of the movements you want to make.
30
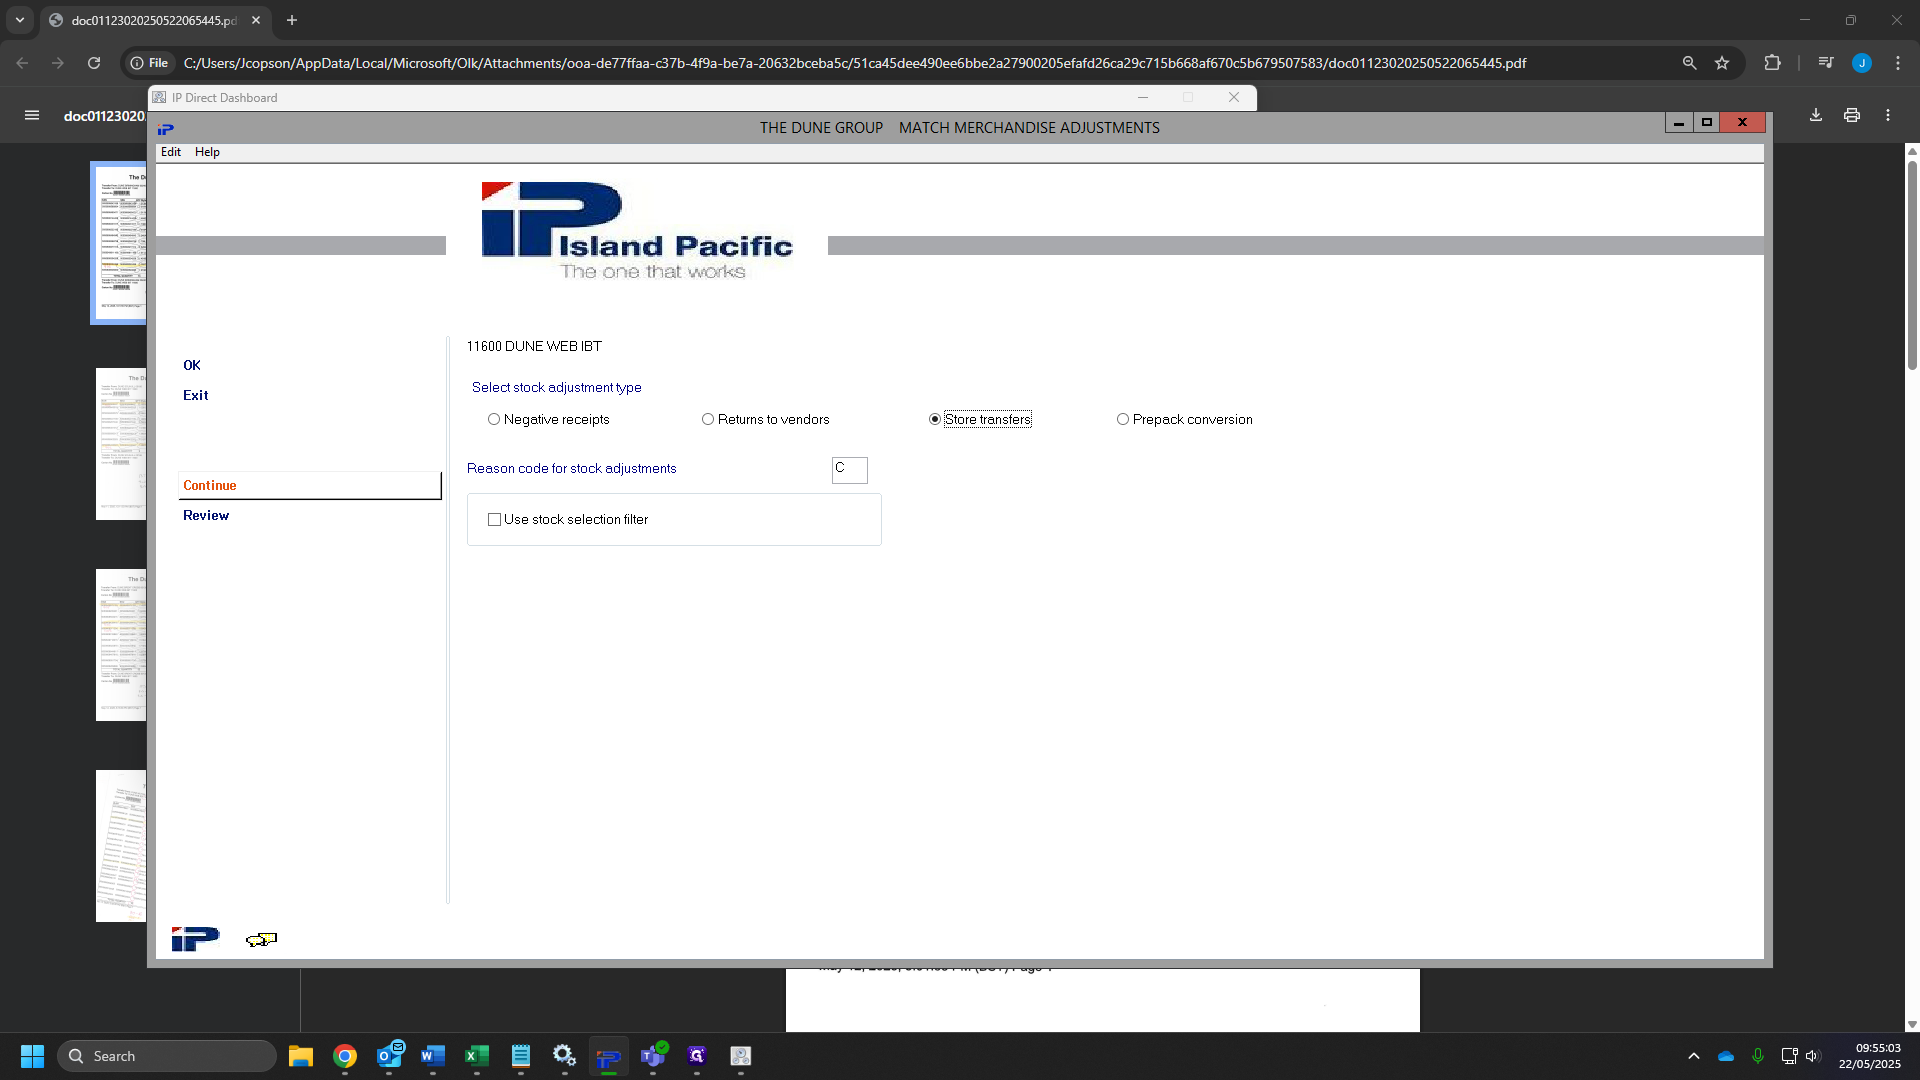
Once you are happy with your movements, click "EXIT"
31
Click on "11. Process Transactions"
32
Click "OK"
33
Click "OK" again.

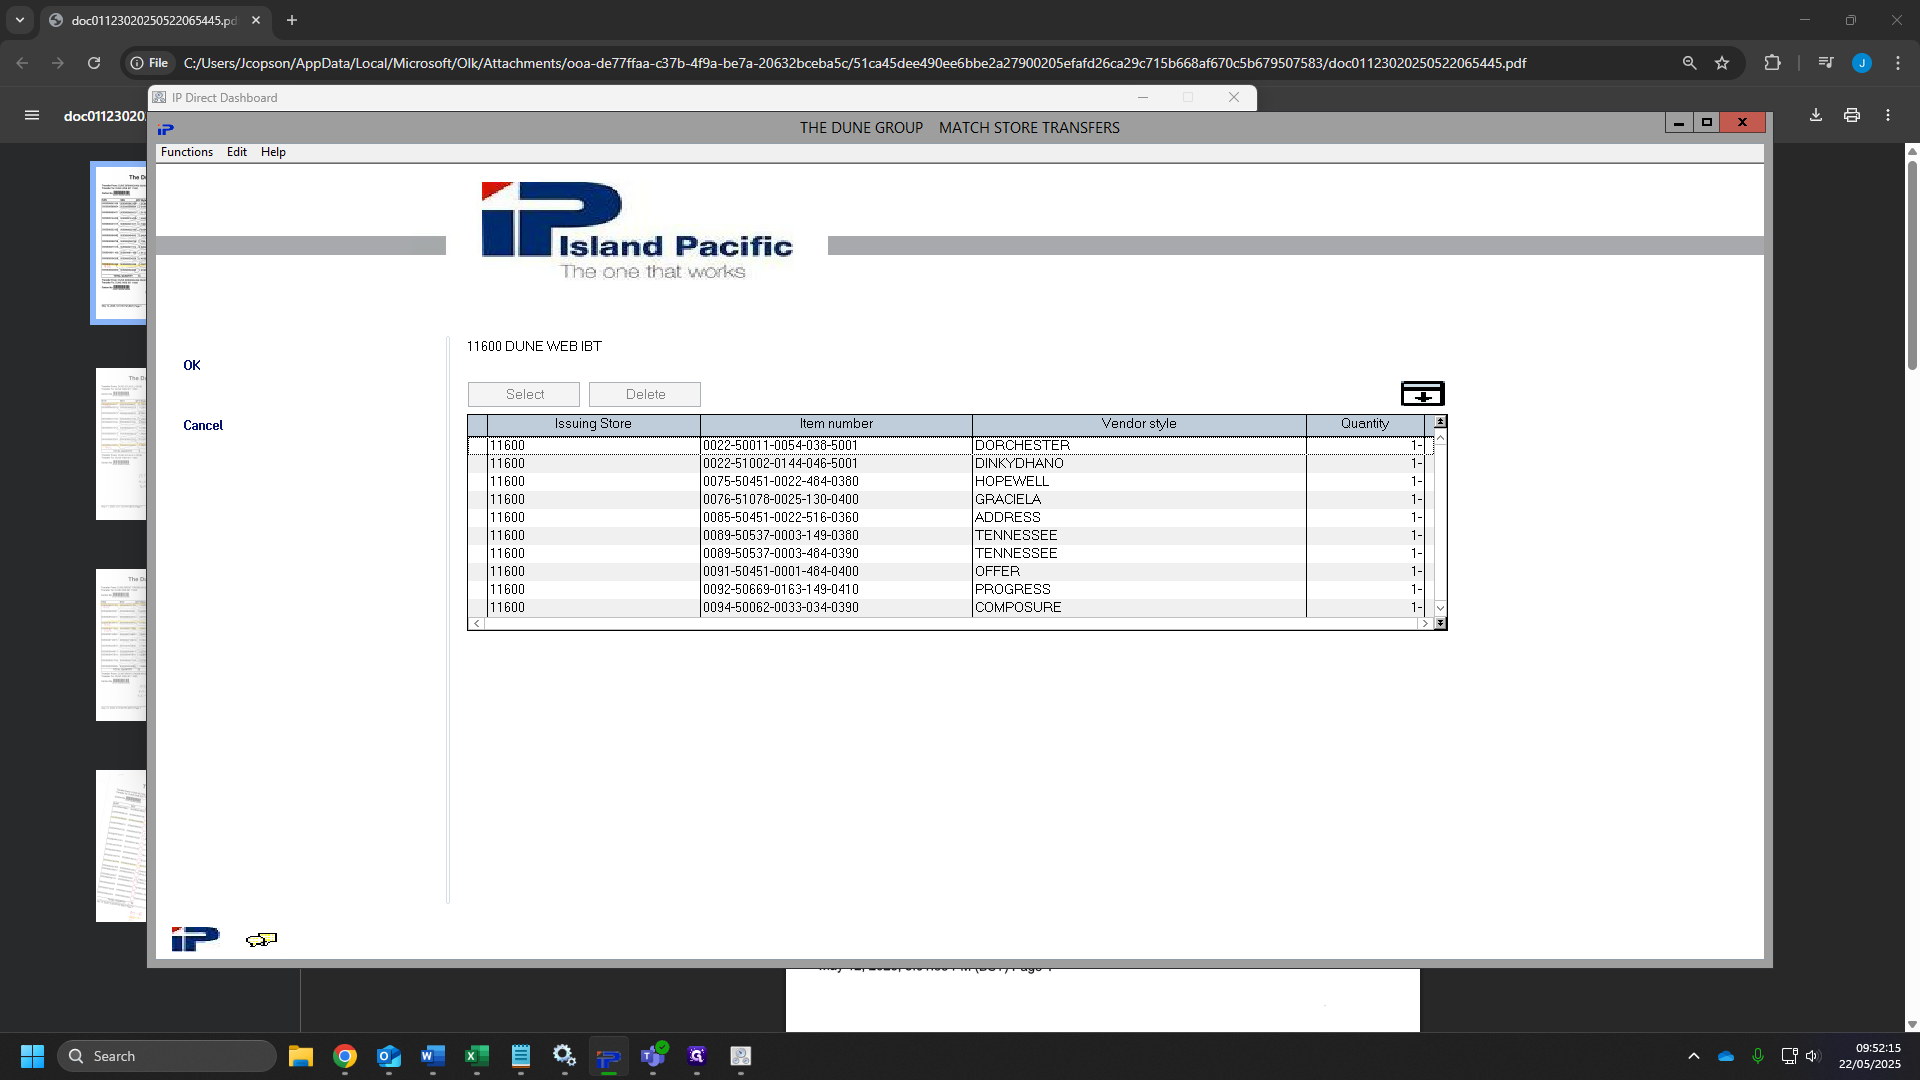
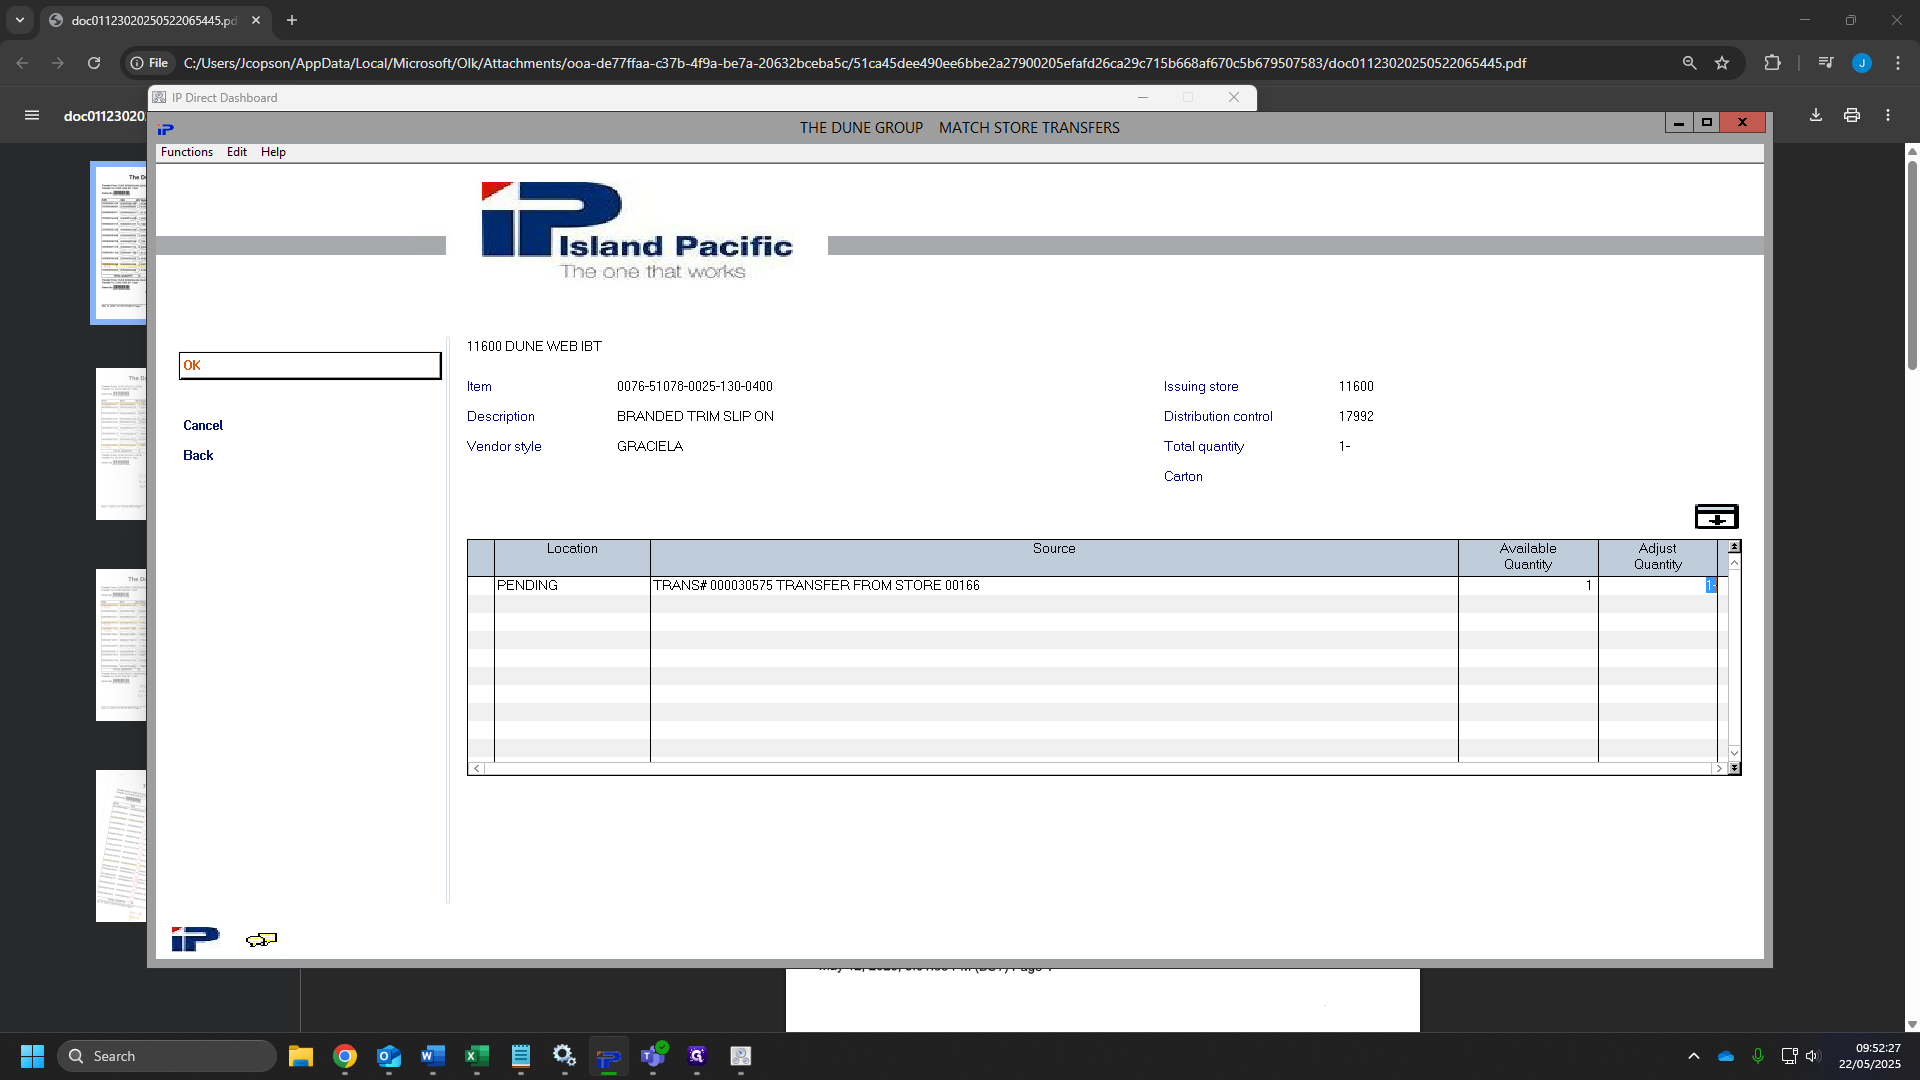
34
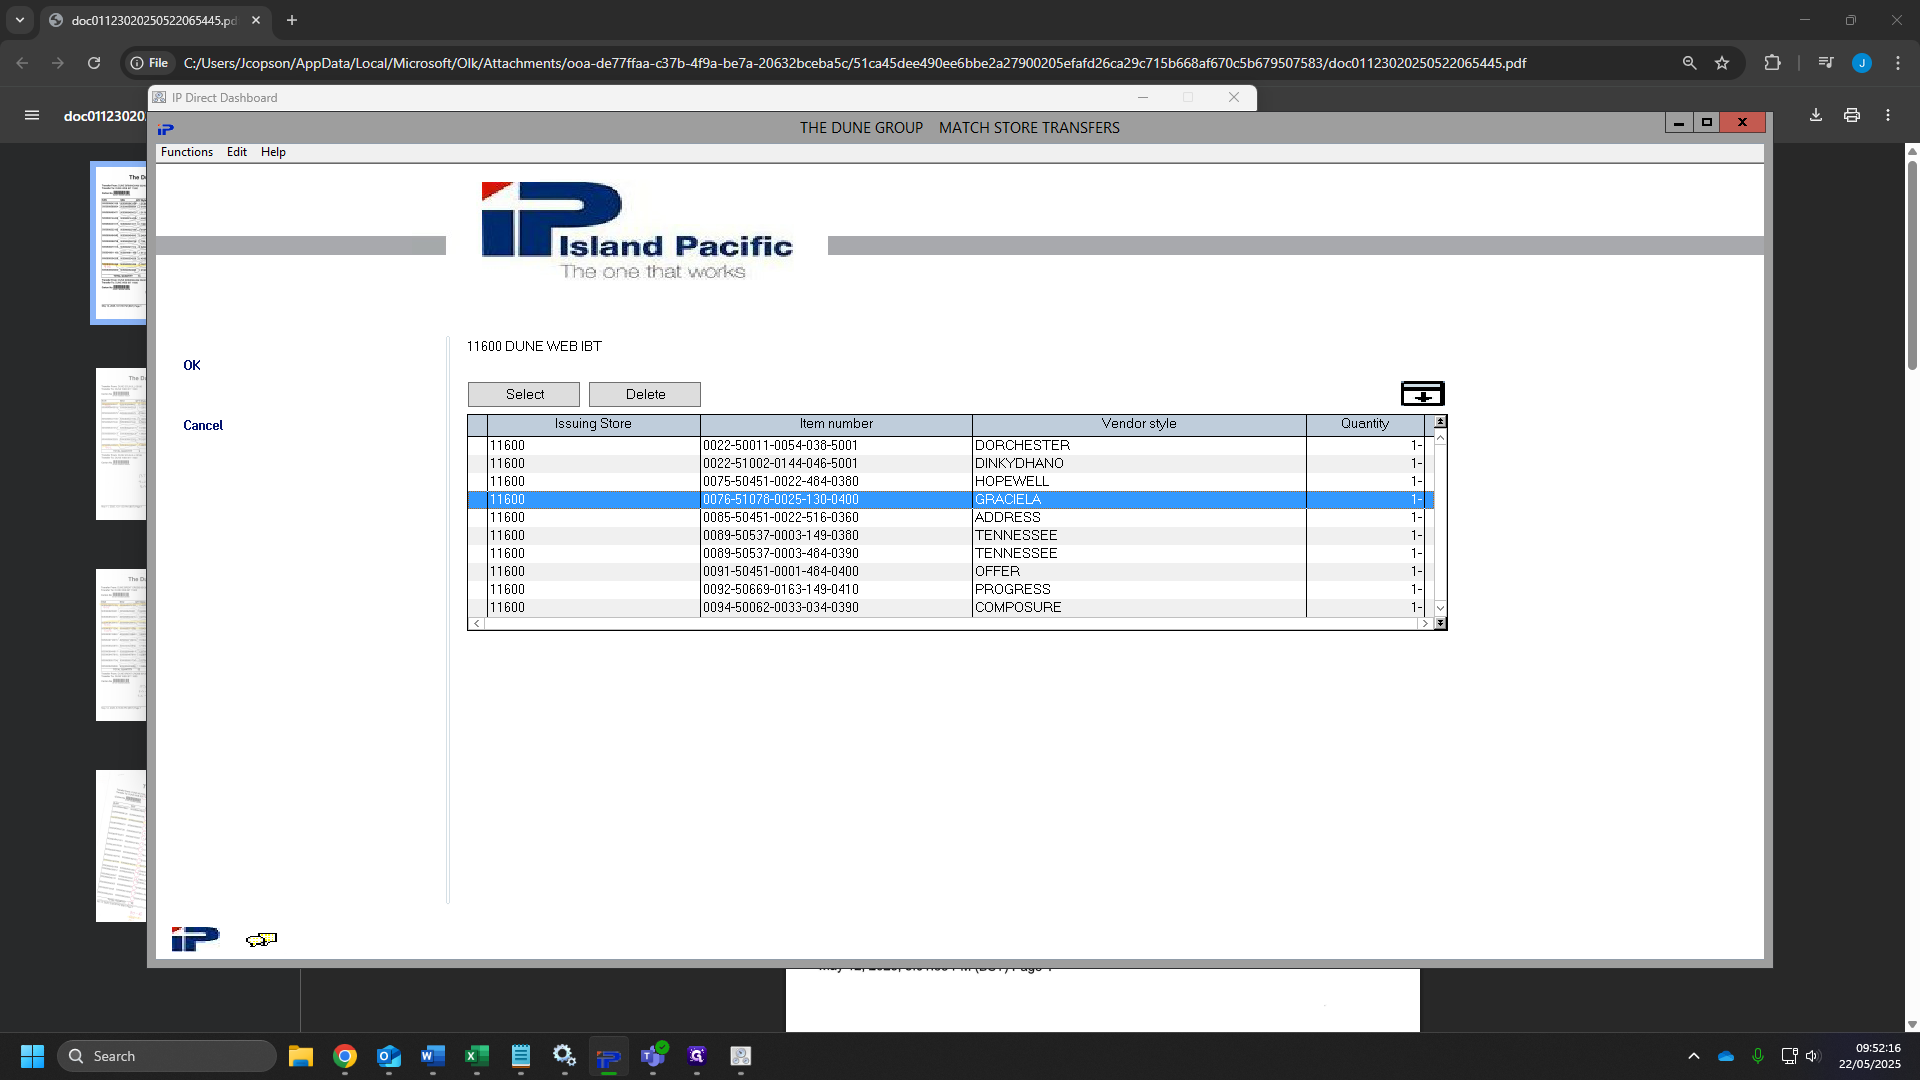
Tick the box for "Update master files"
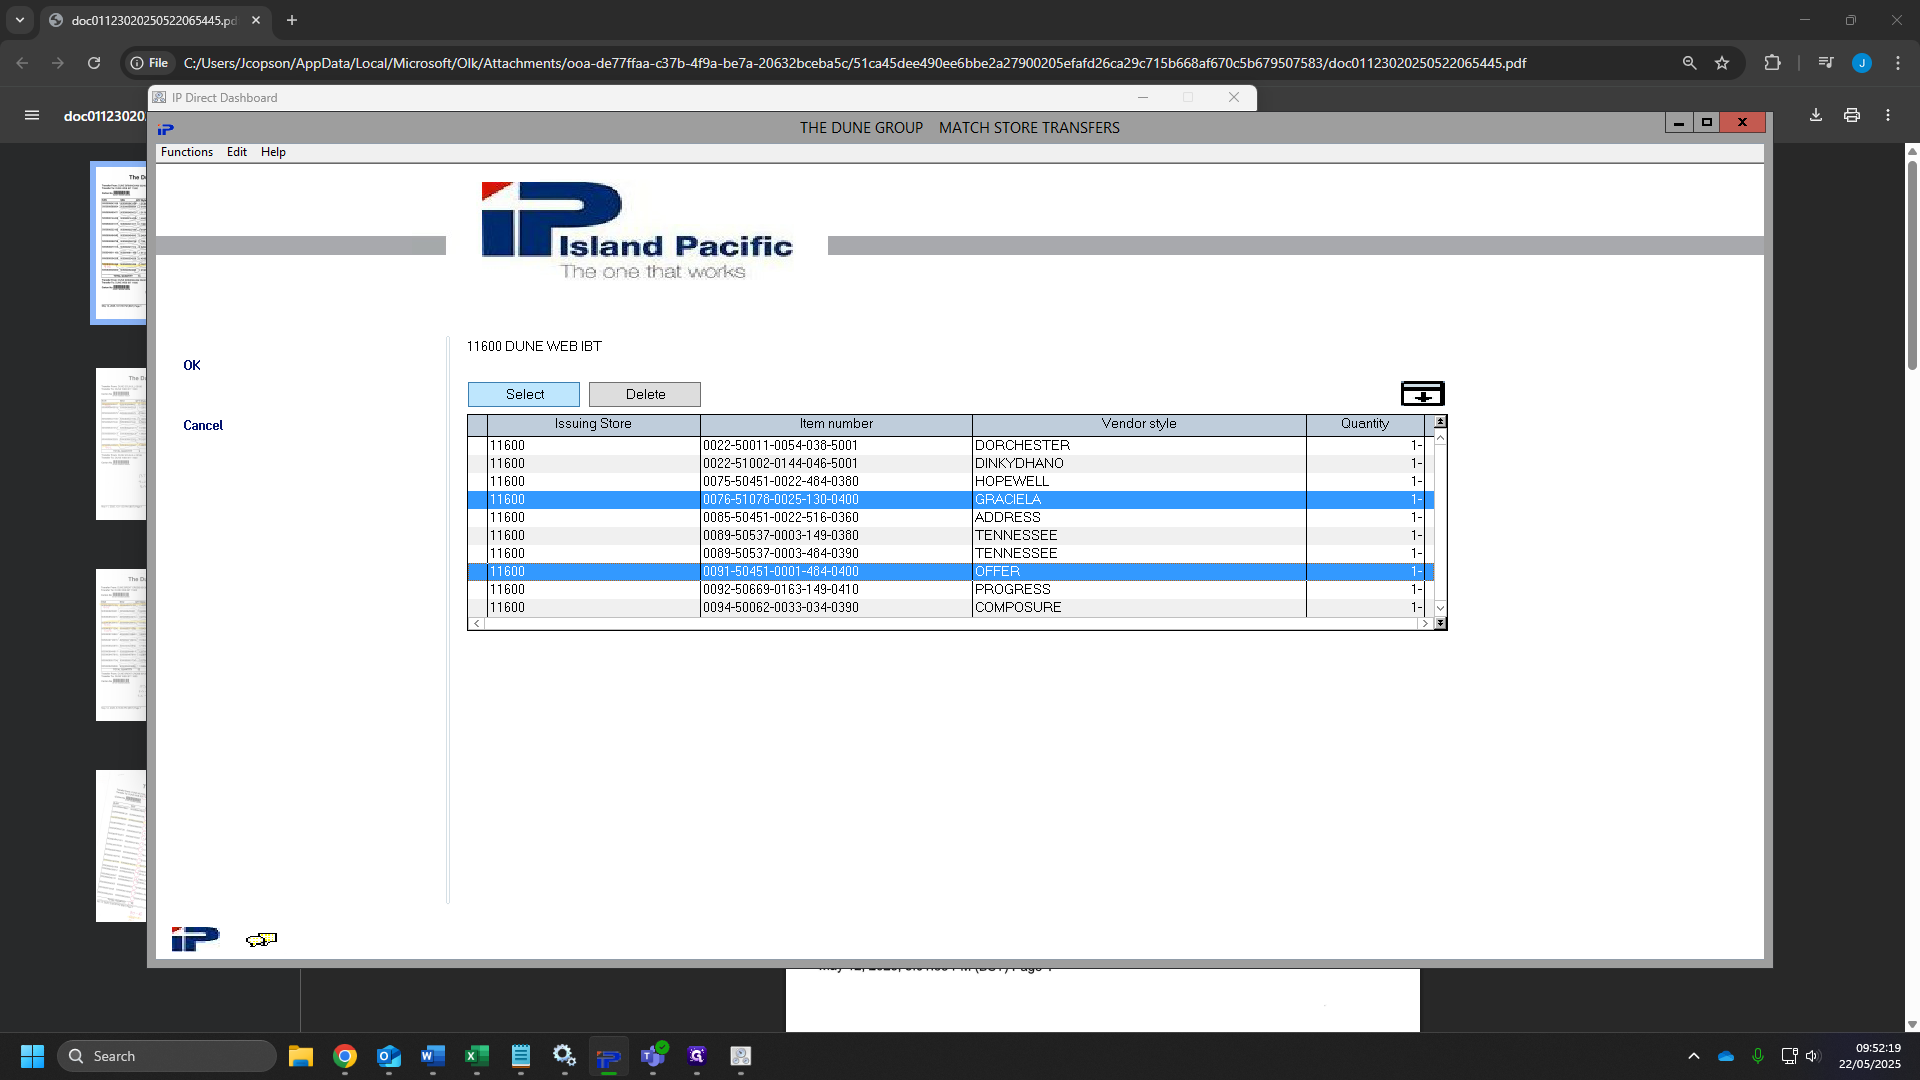
35
Click "OK"
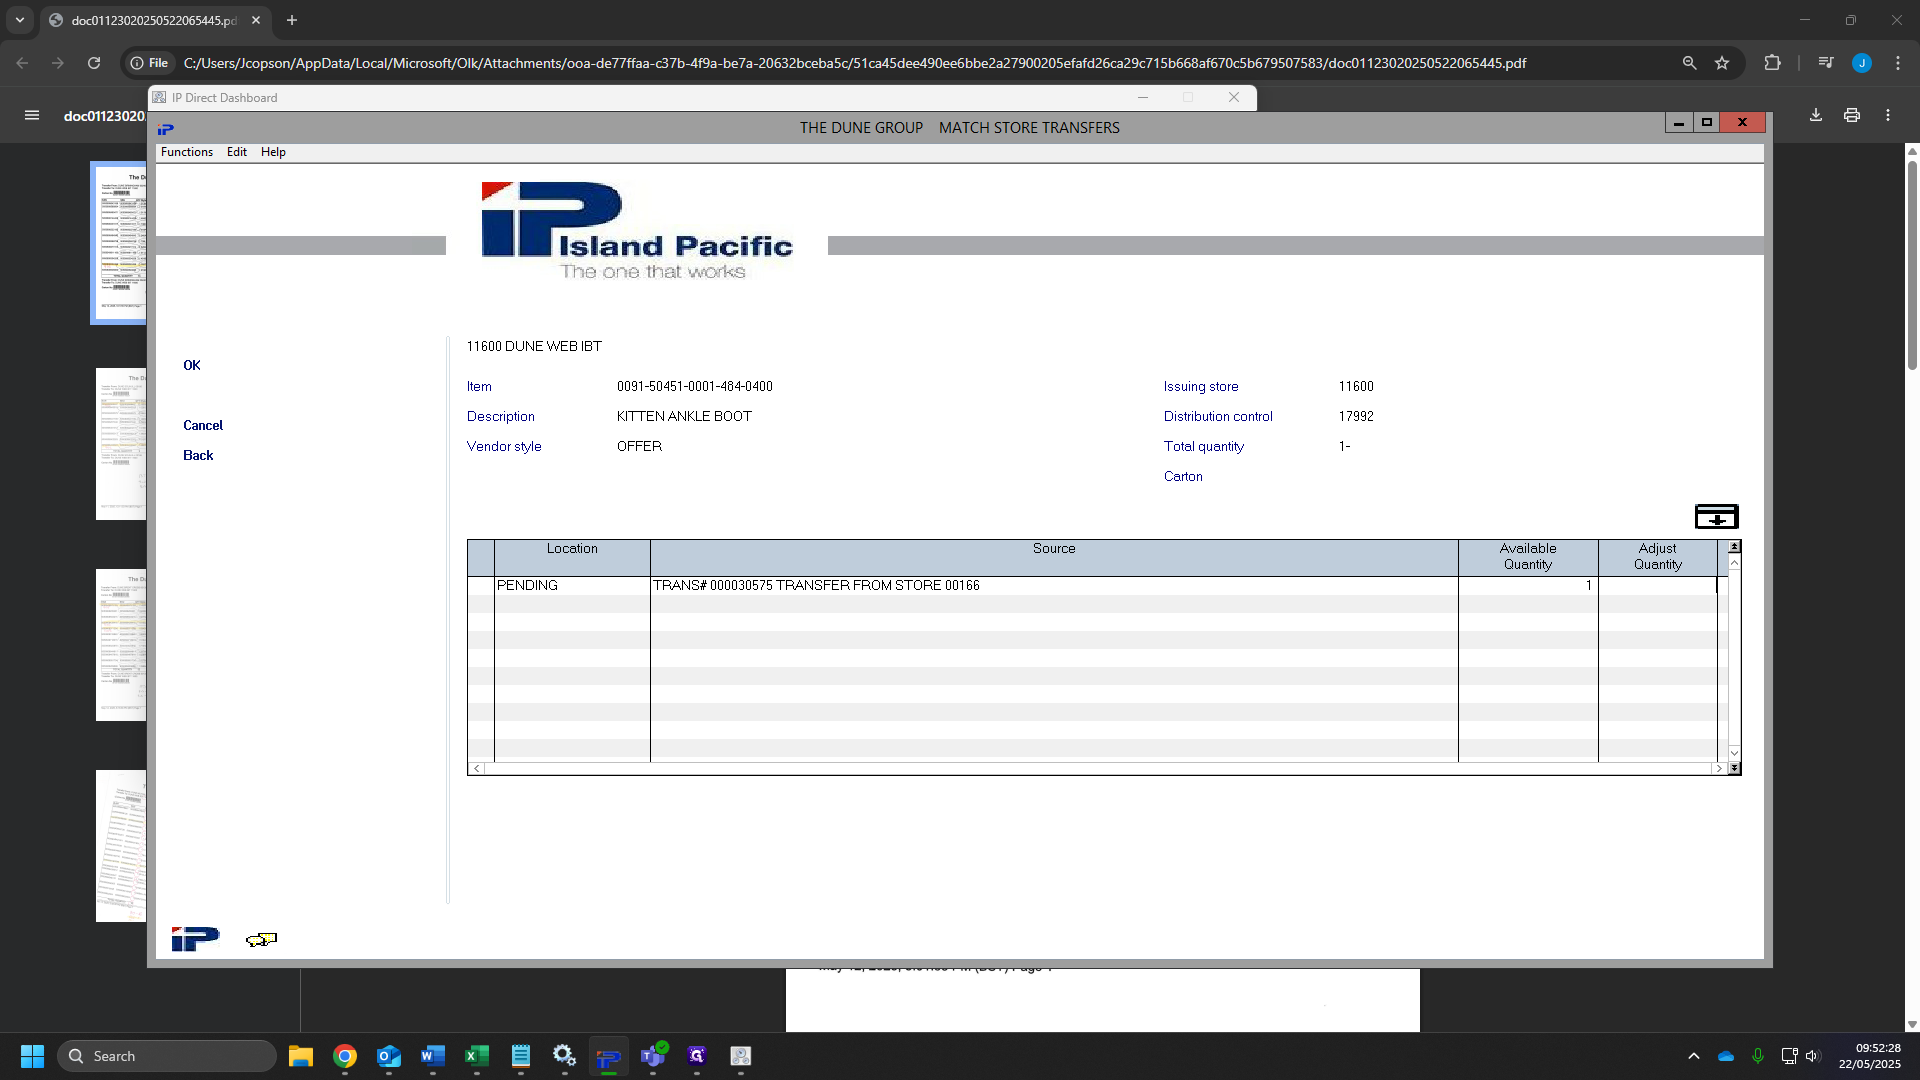
36
Click "OK" again.

37
Click "OK" for a third time. This will bring you back to the main menu. Now press SHIFT + F8, then SHIFT +F6.

38
This will bring you to this menu.
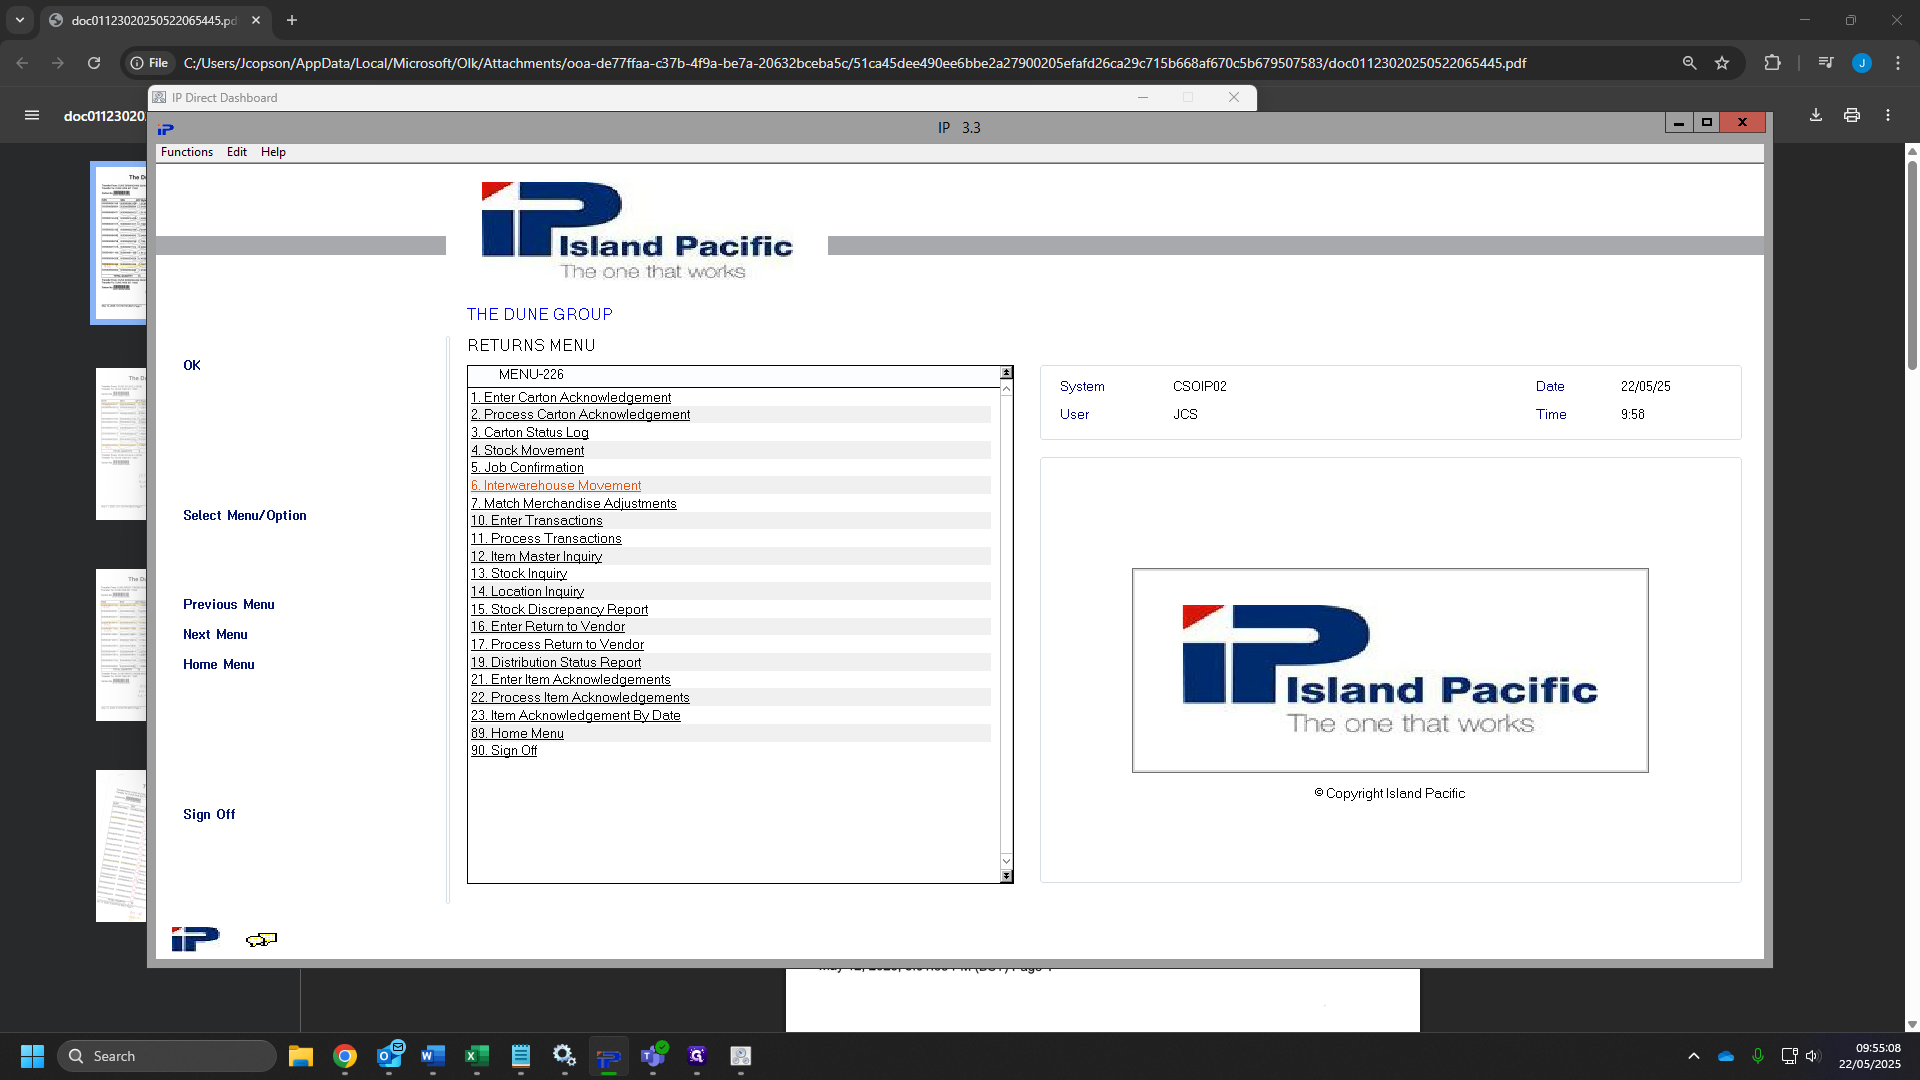
39
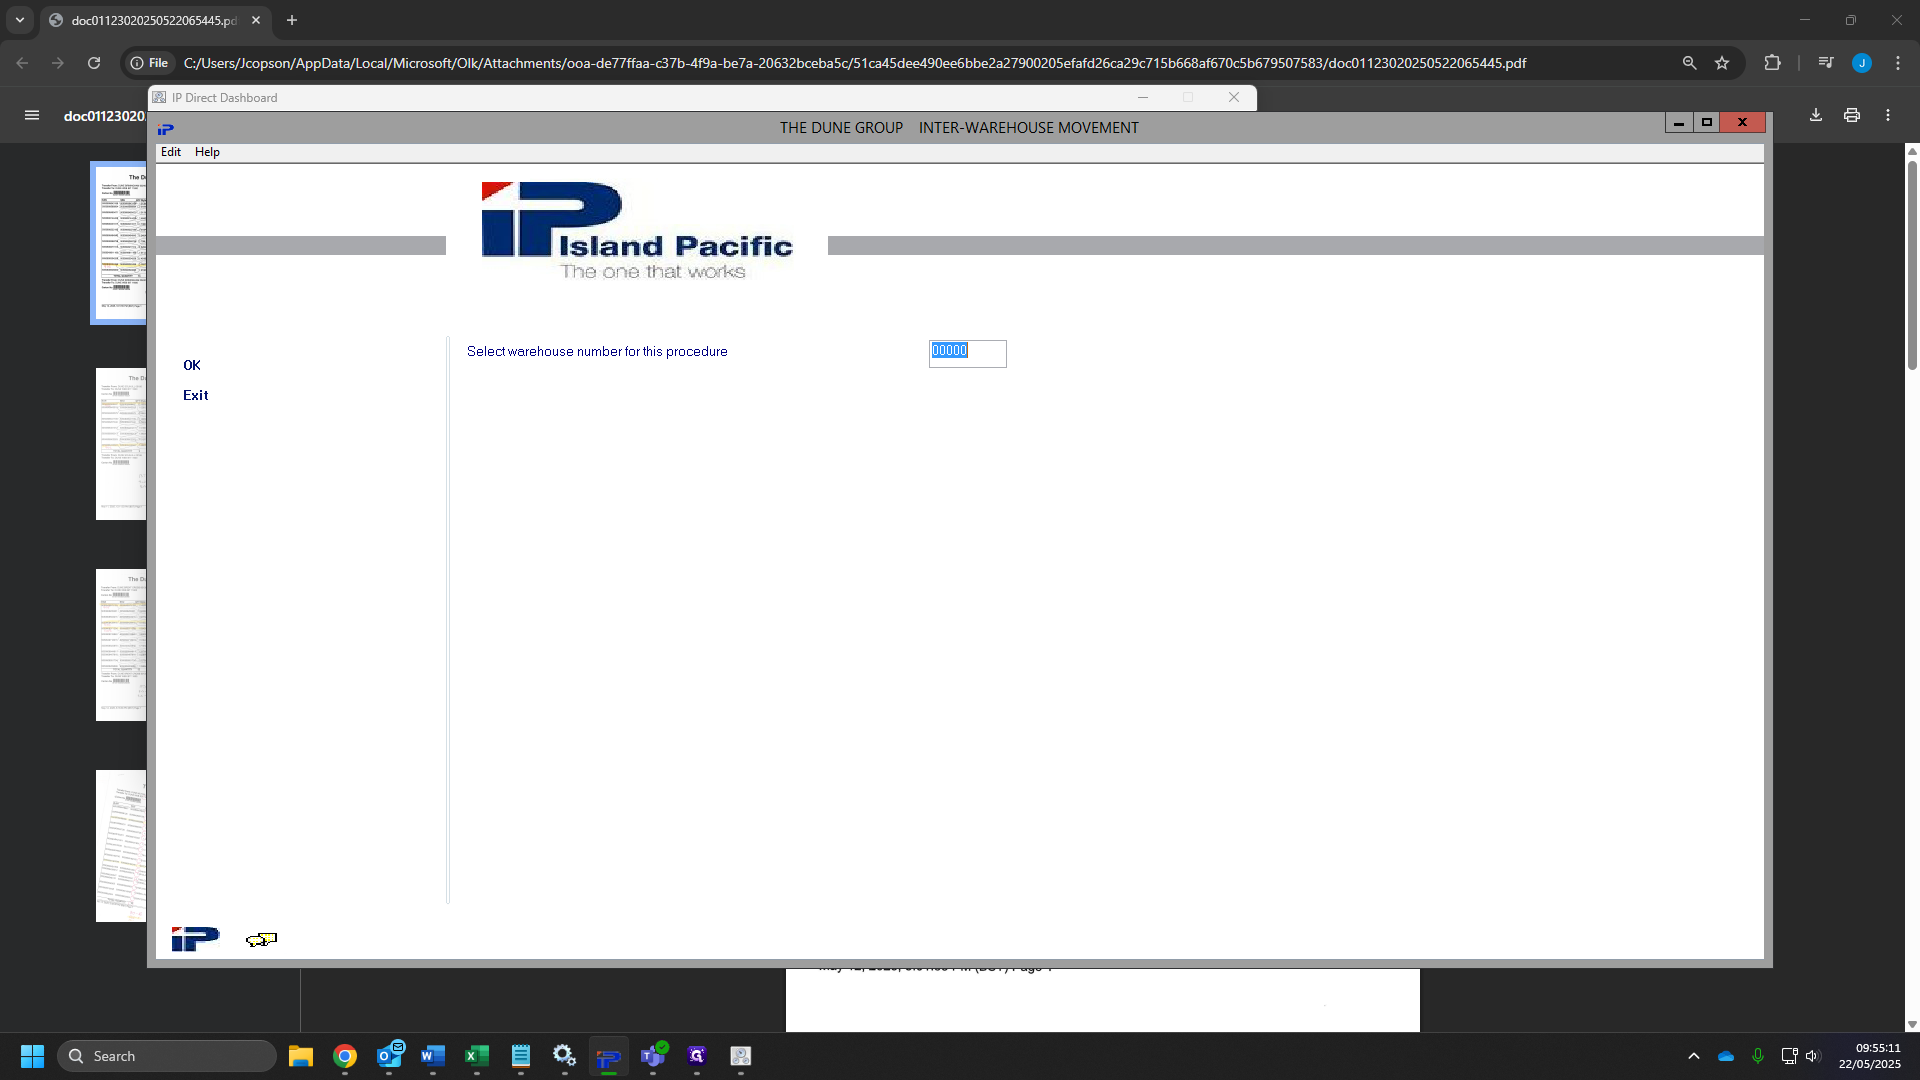
Page up to find your movement (in the screenshot this shows as "PRT021M"), this is usually at the bottom, but you may find you have "HLD" jobs like the below screenshot. Click this once you have found it.

40
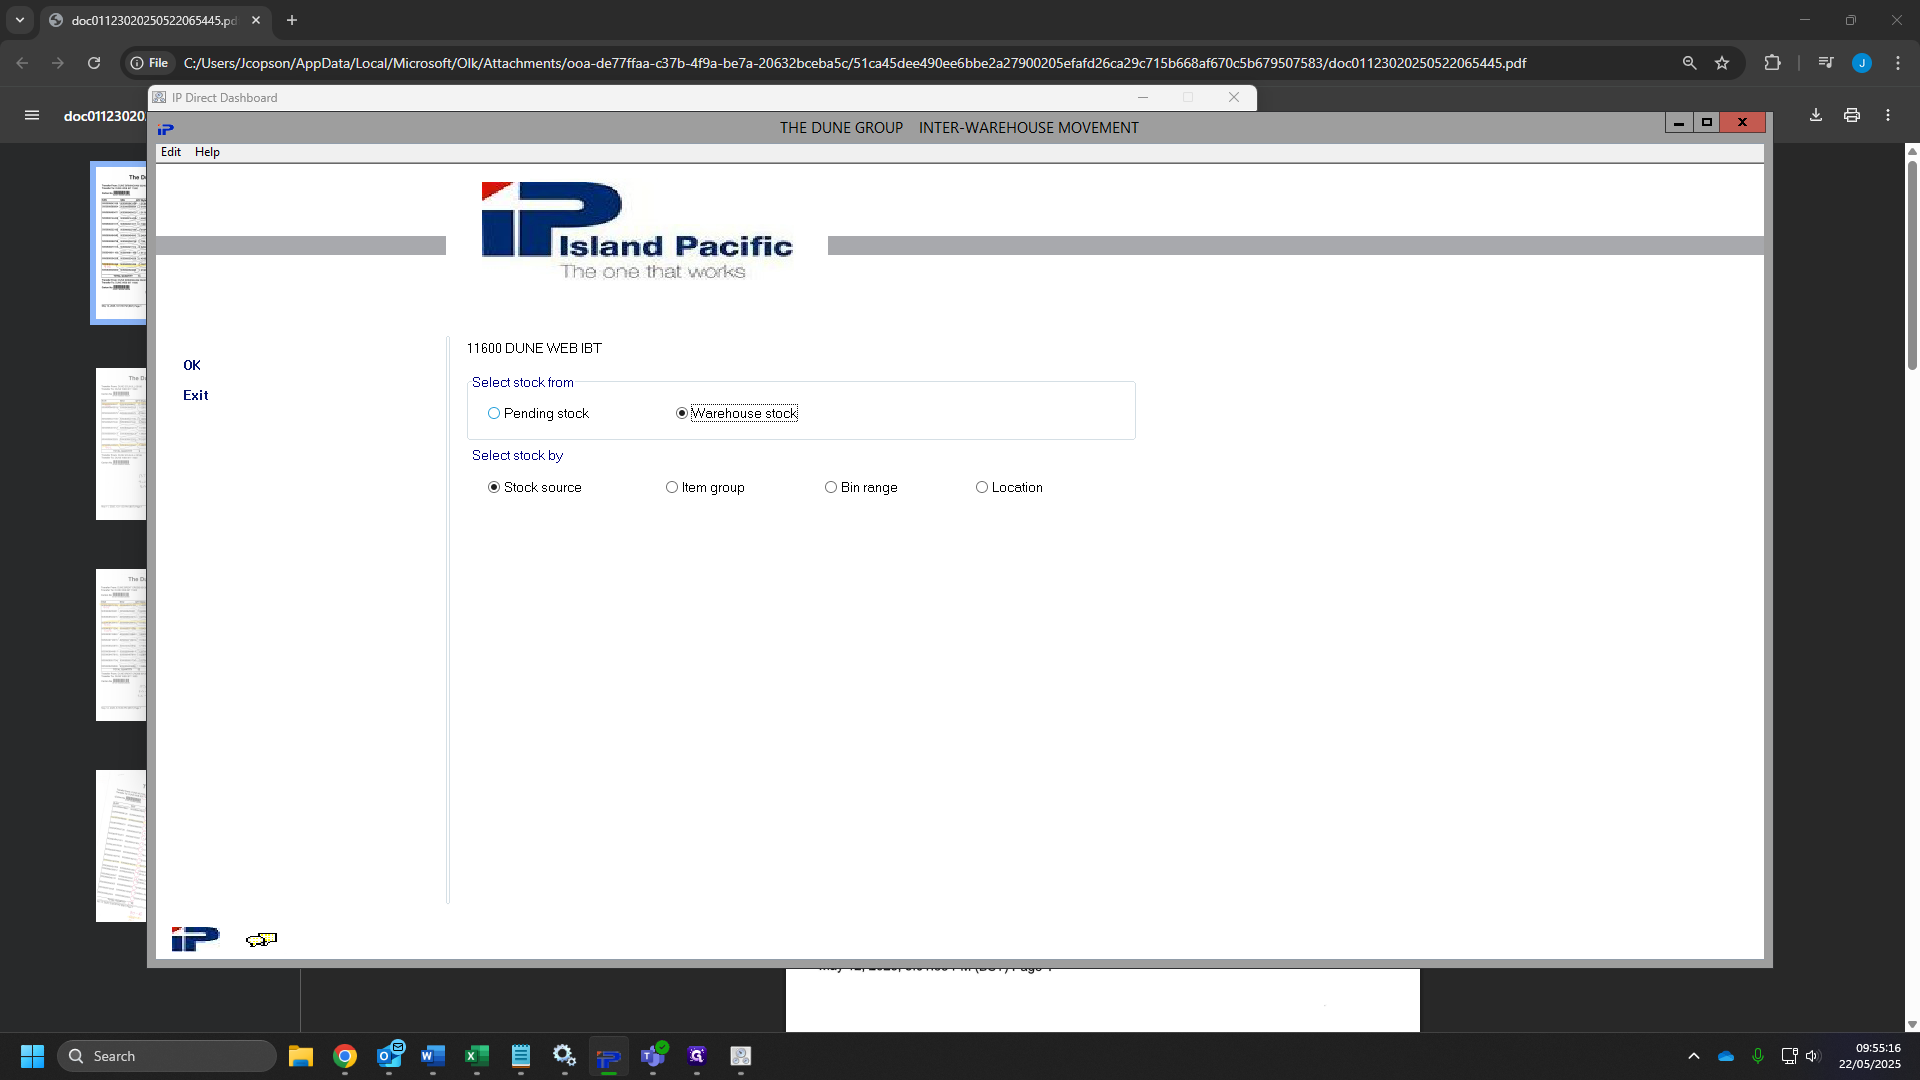
Click on "DISPLAY"

41
Here you will find your distribution number. Type this into a notepad.
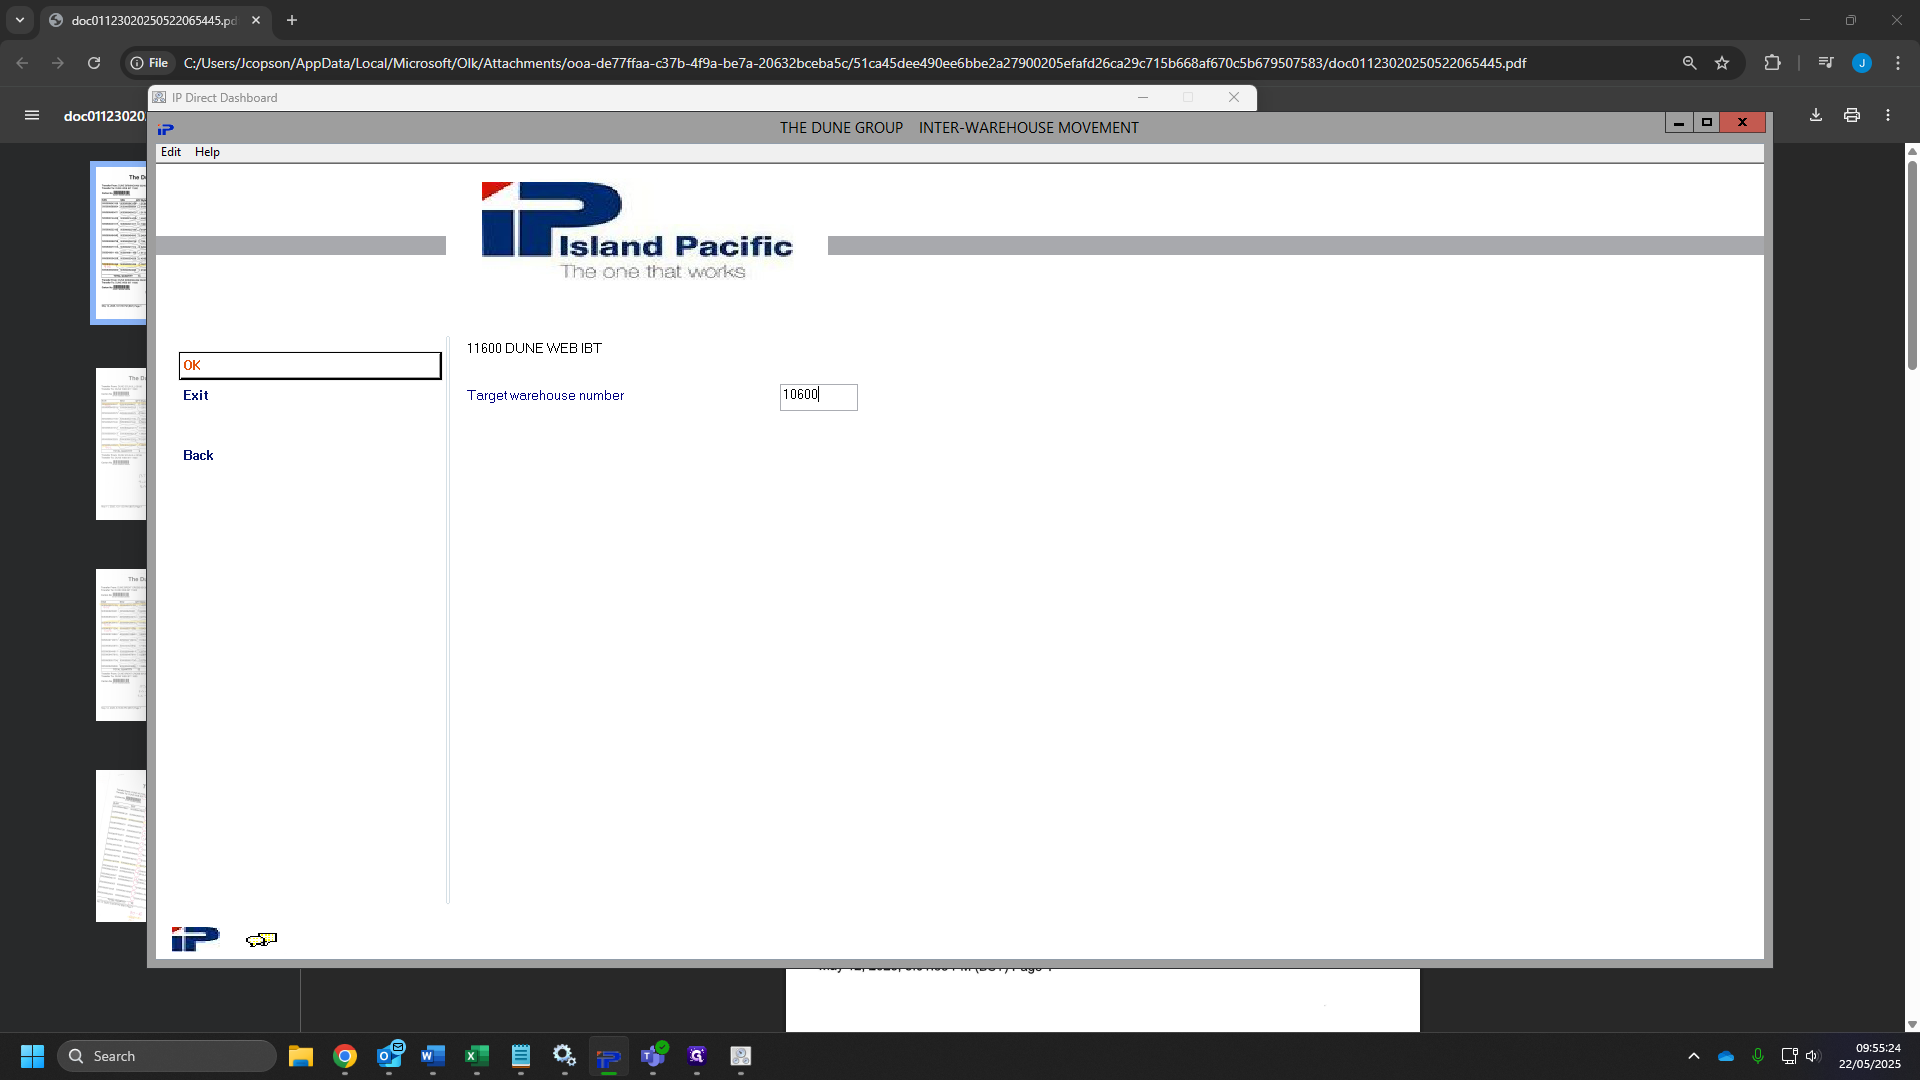
42
Click on "Cancel"
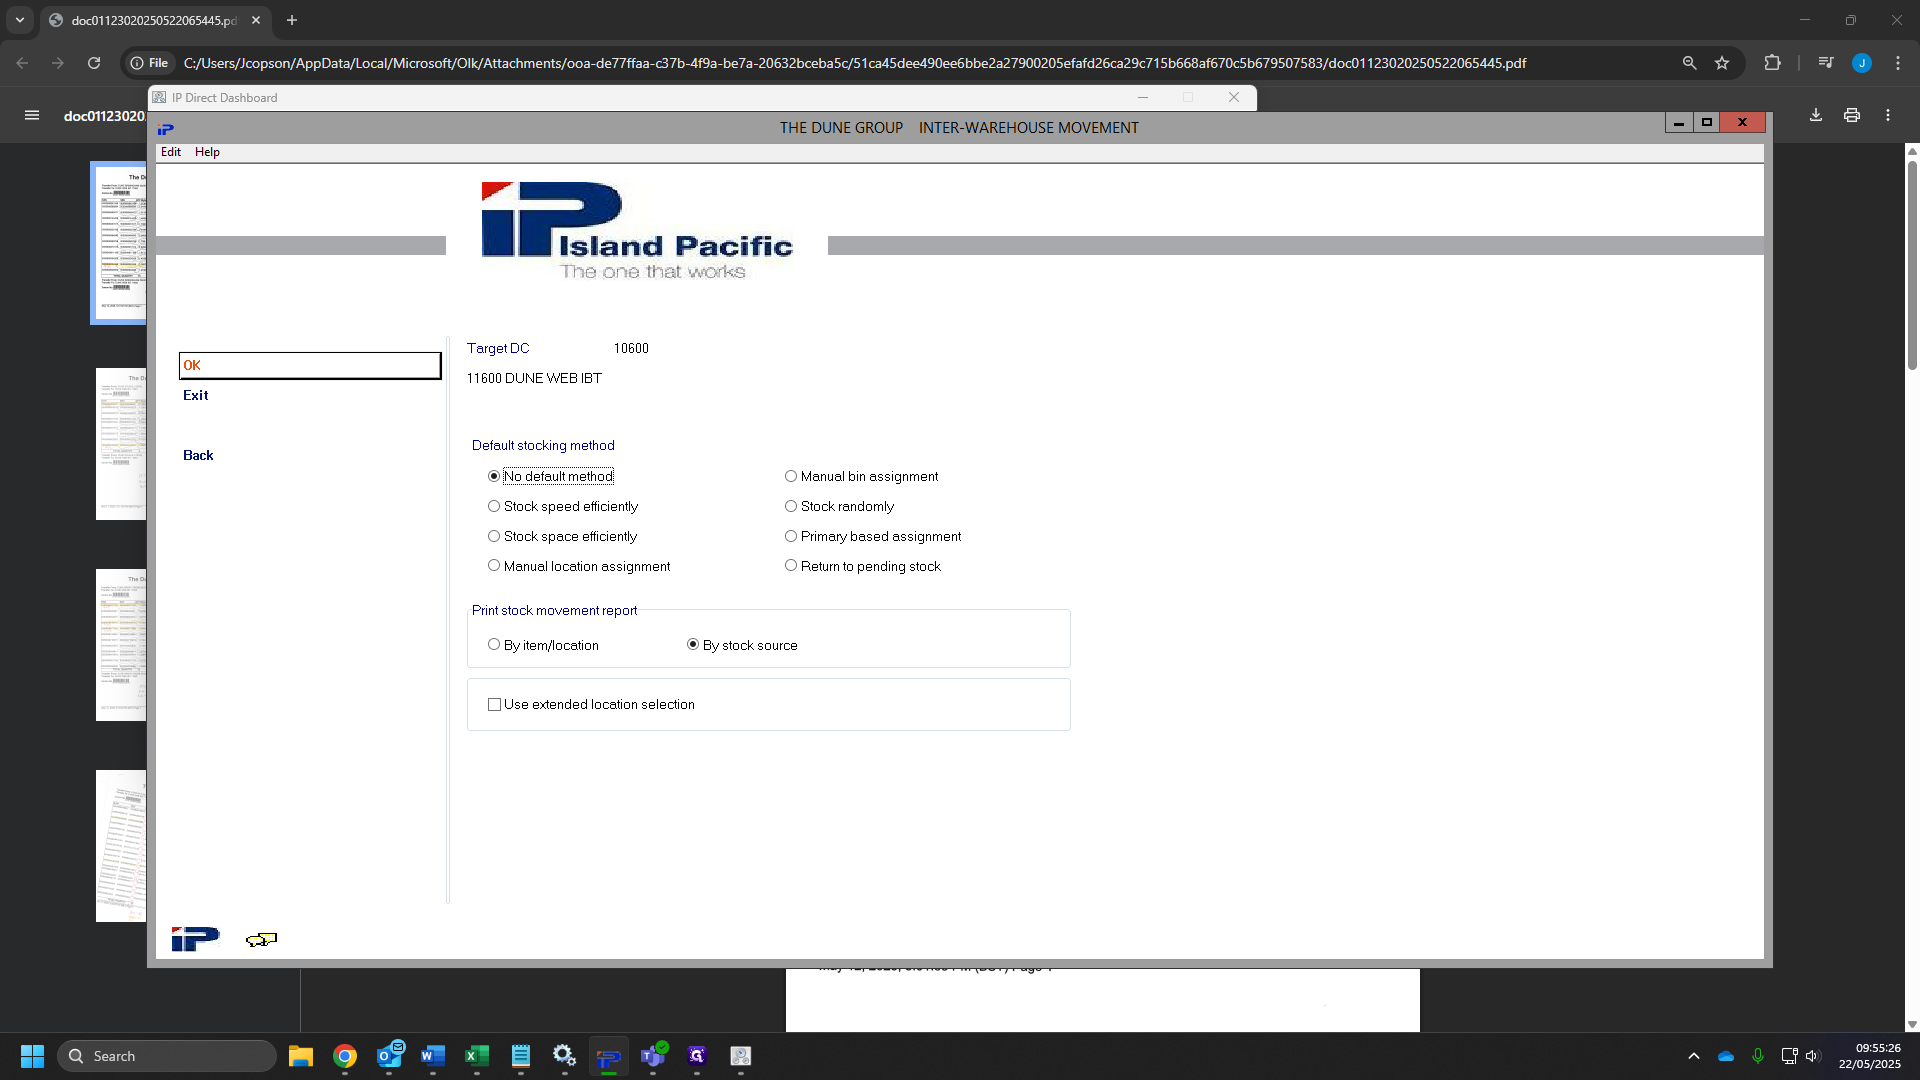
43
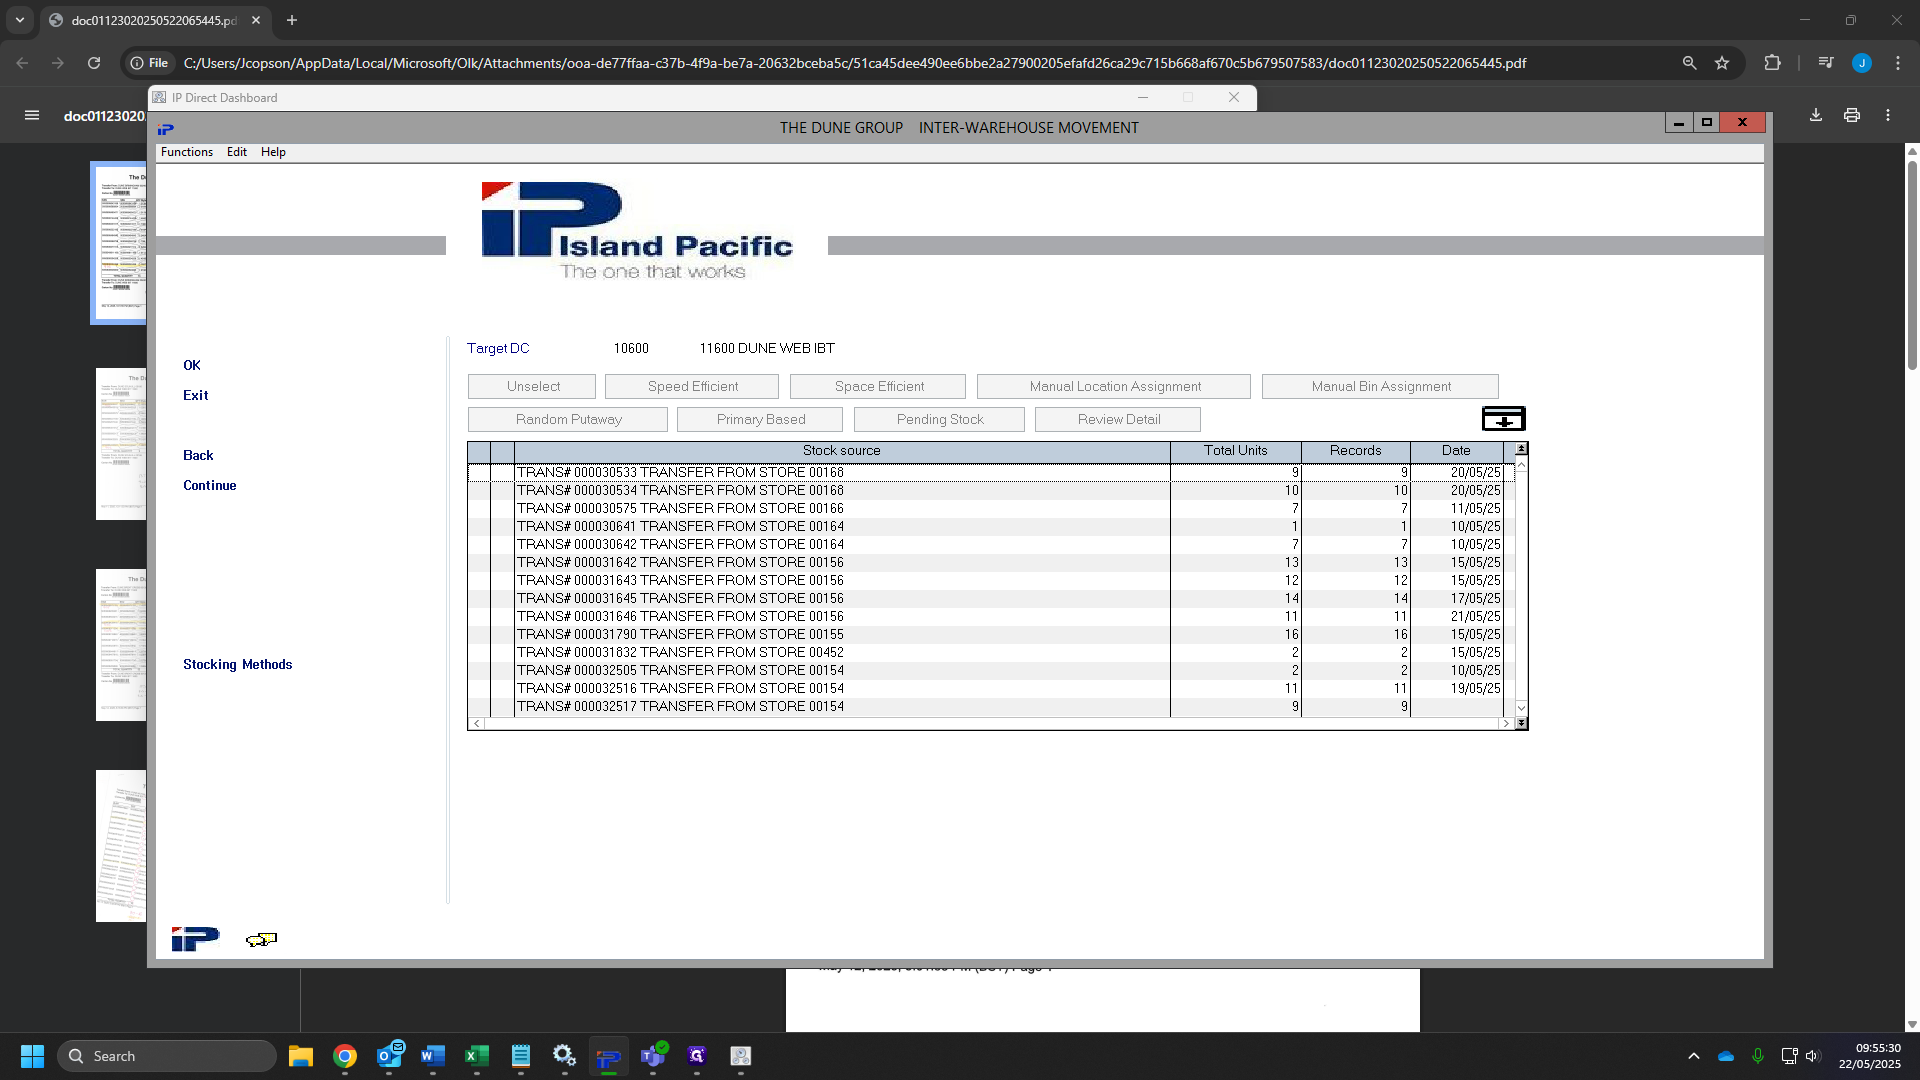
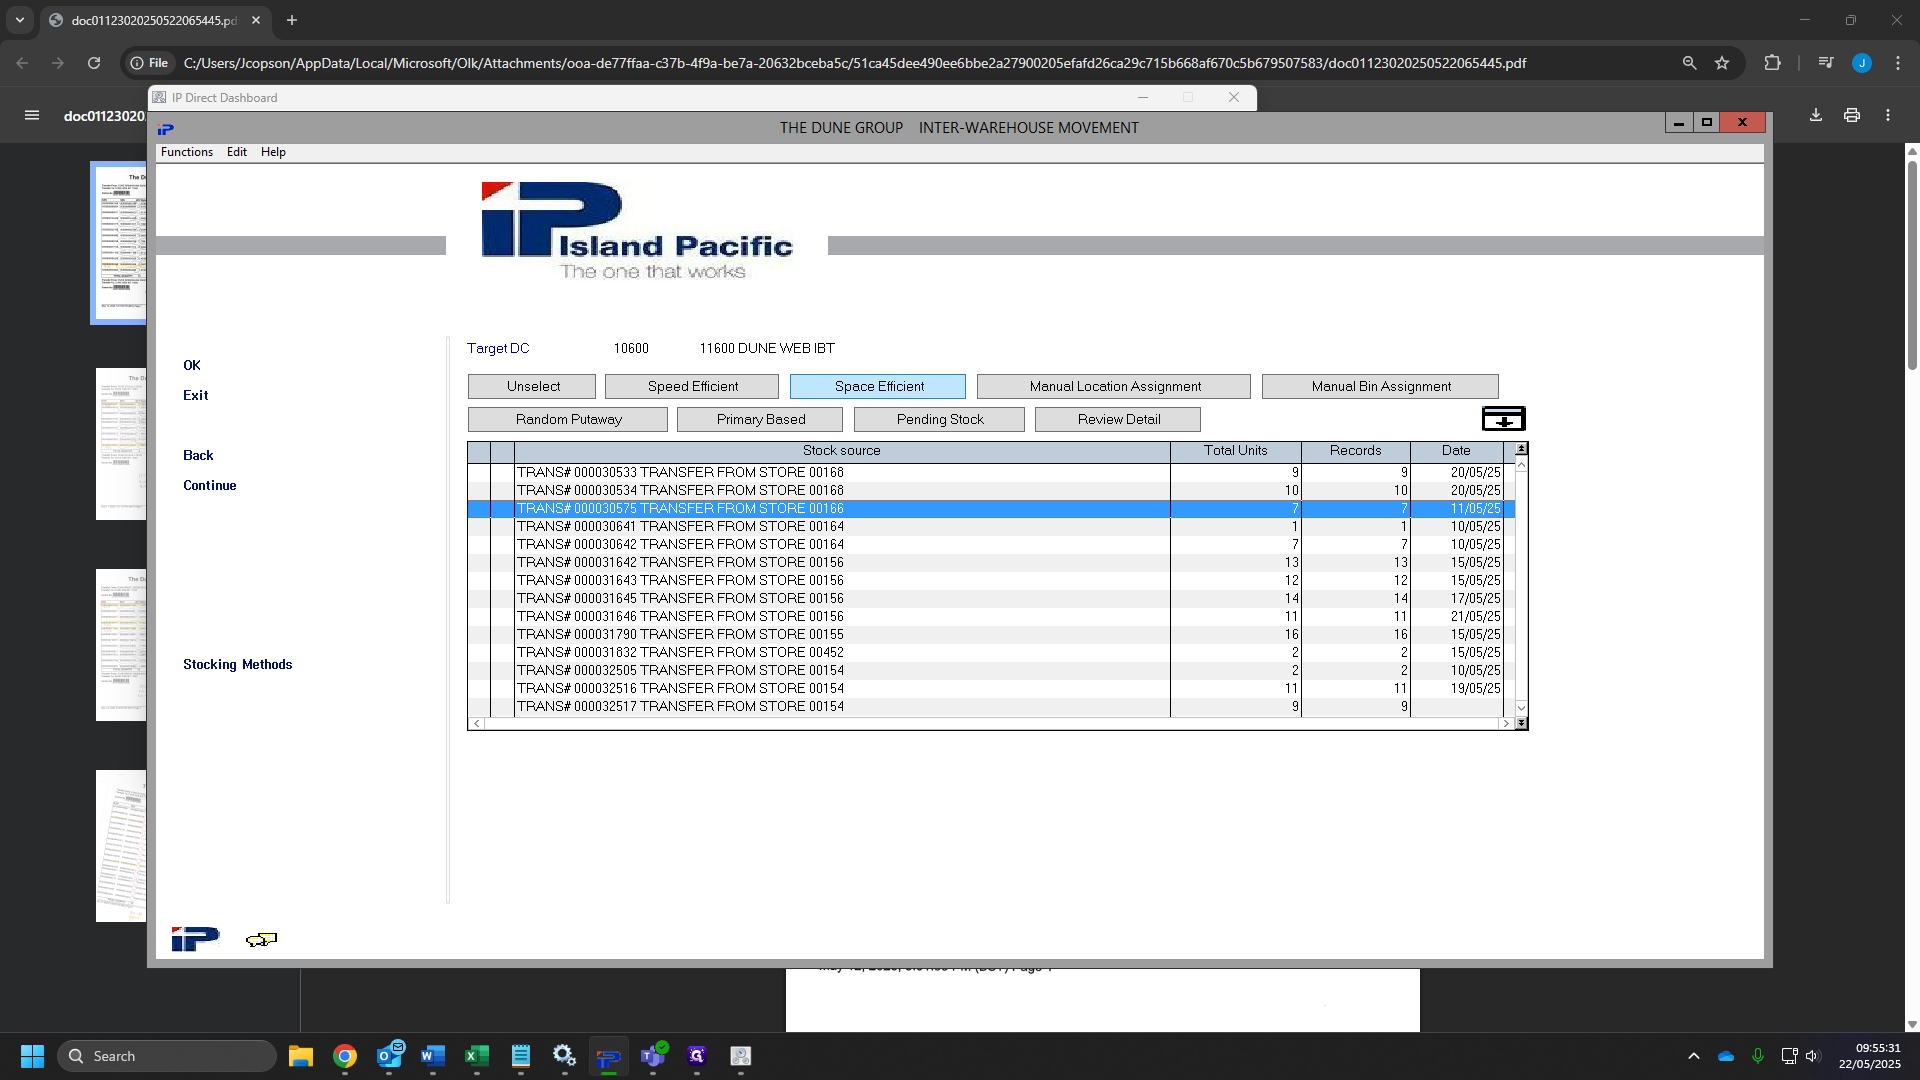
Click on "Cancel" again.

44
Click on "21. Enter item ackowledgements"
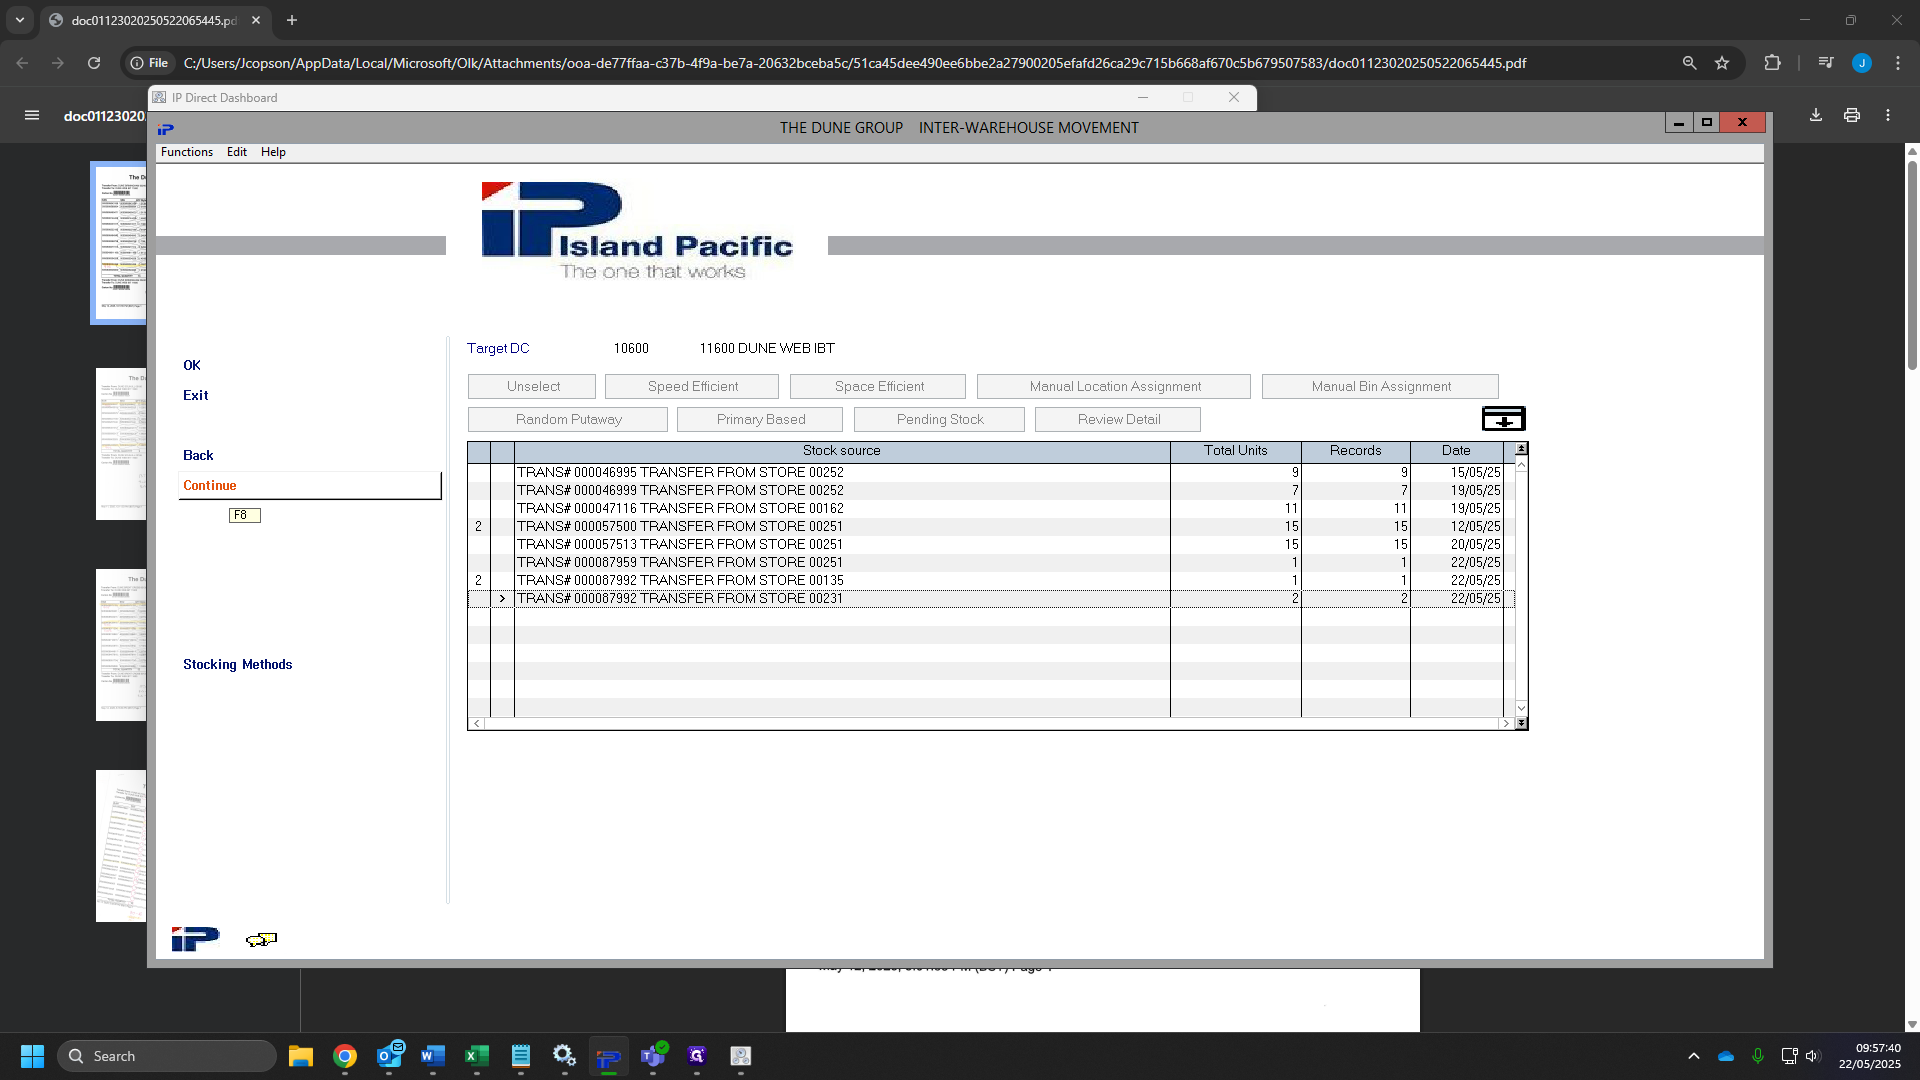
45
Click "OK"

46
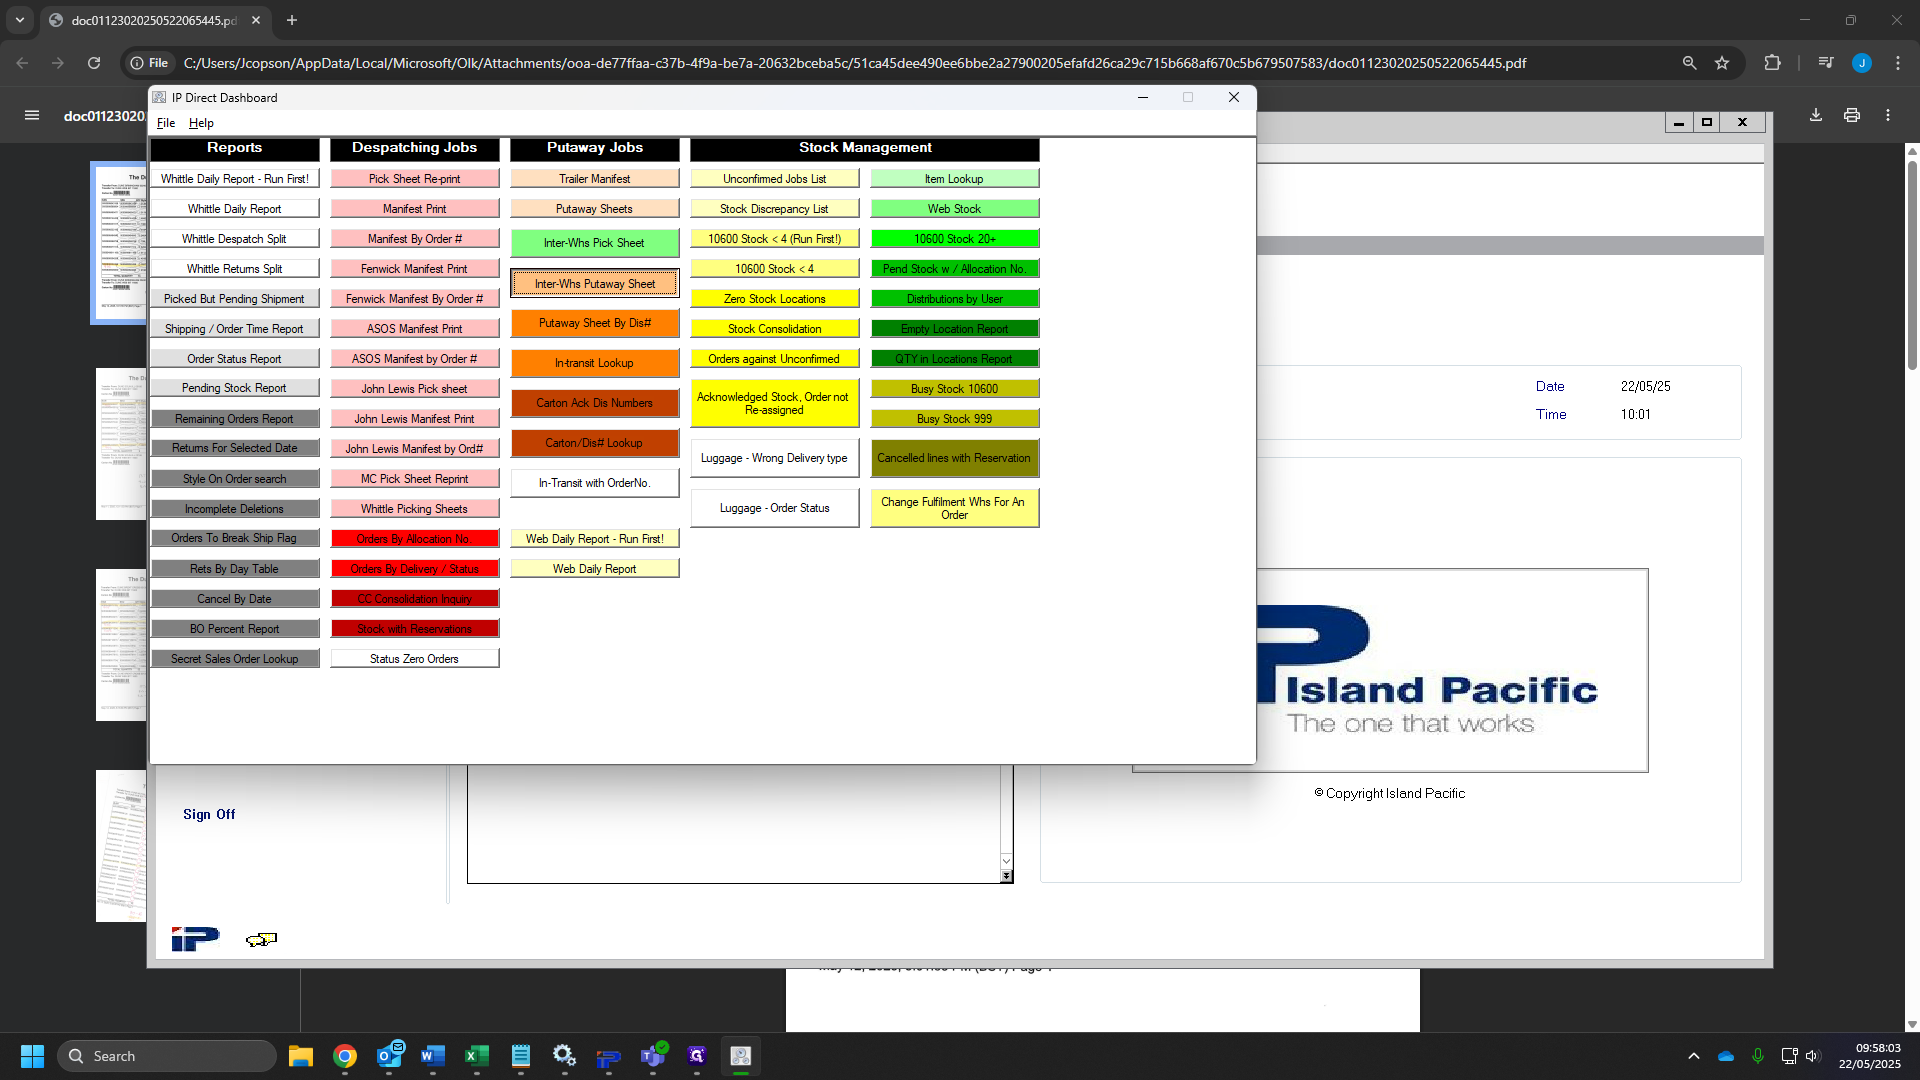
Tick the box "Clear this file group prior to this request"

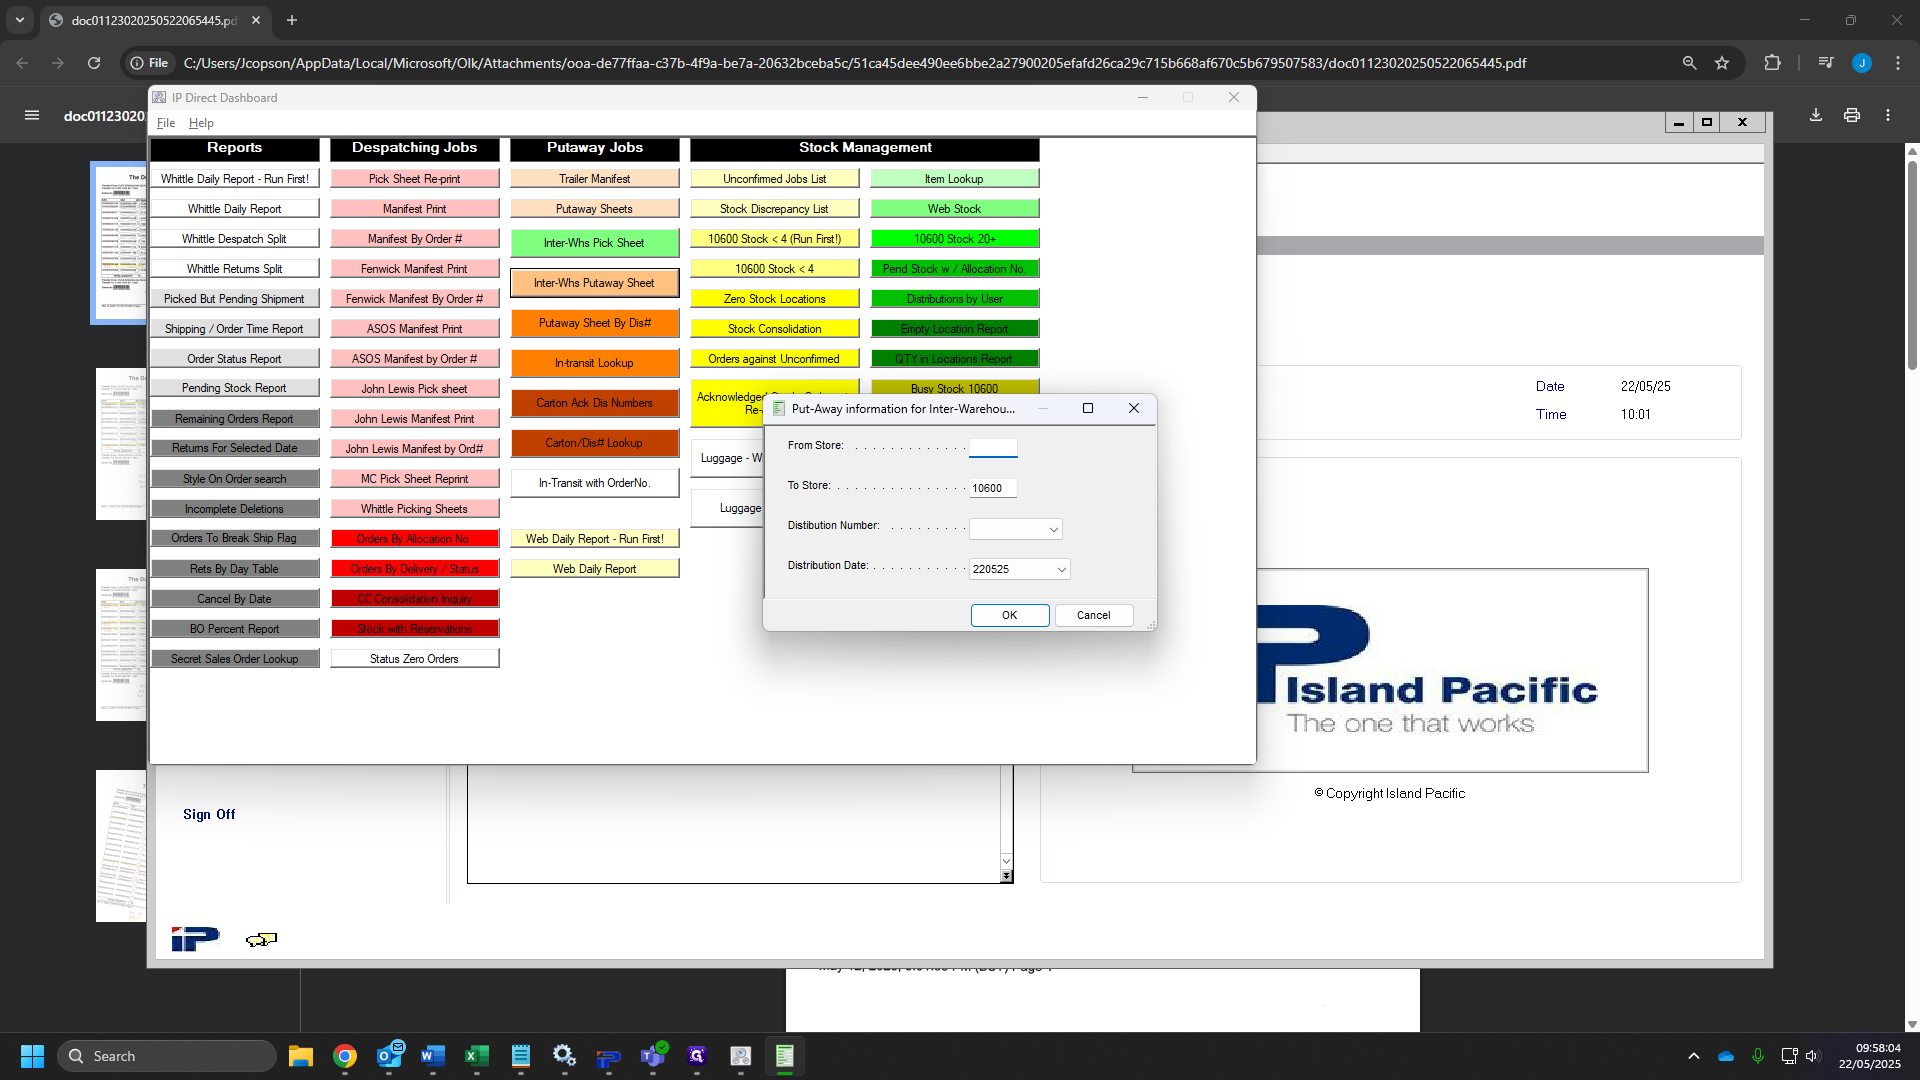
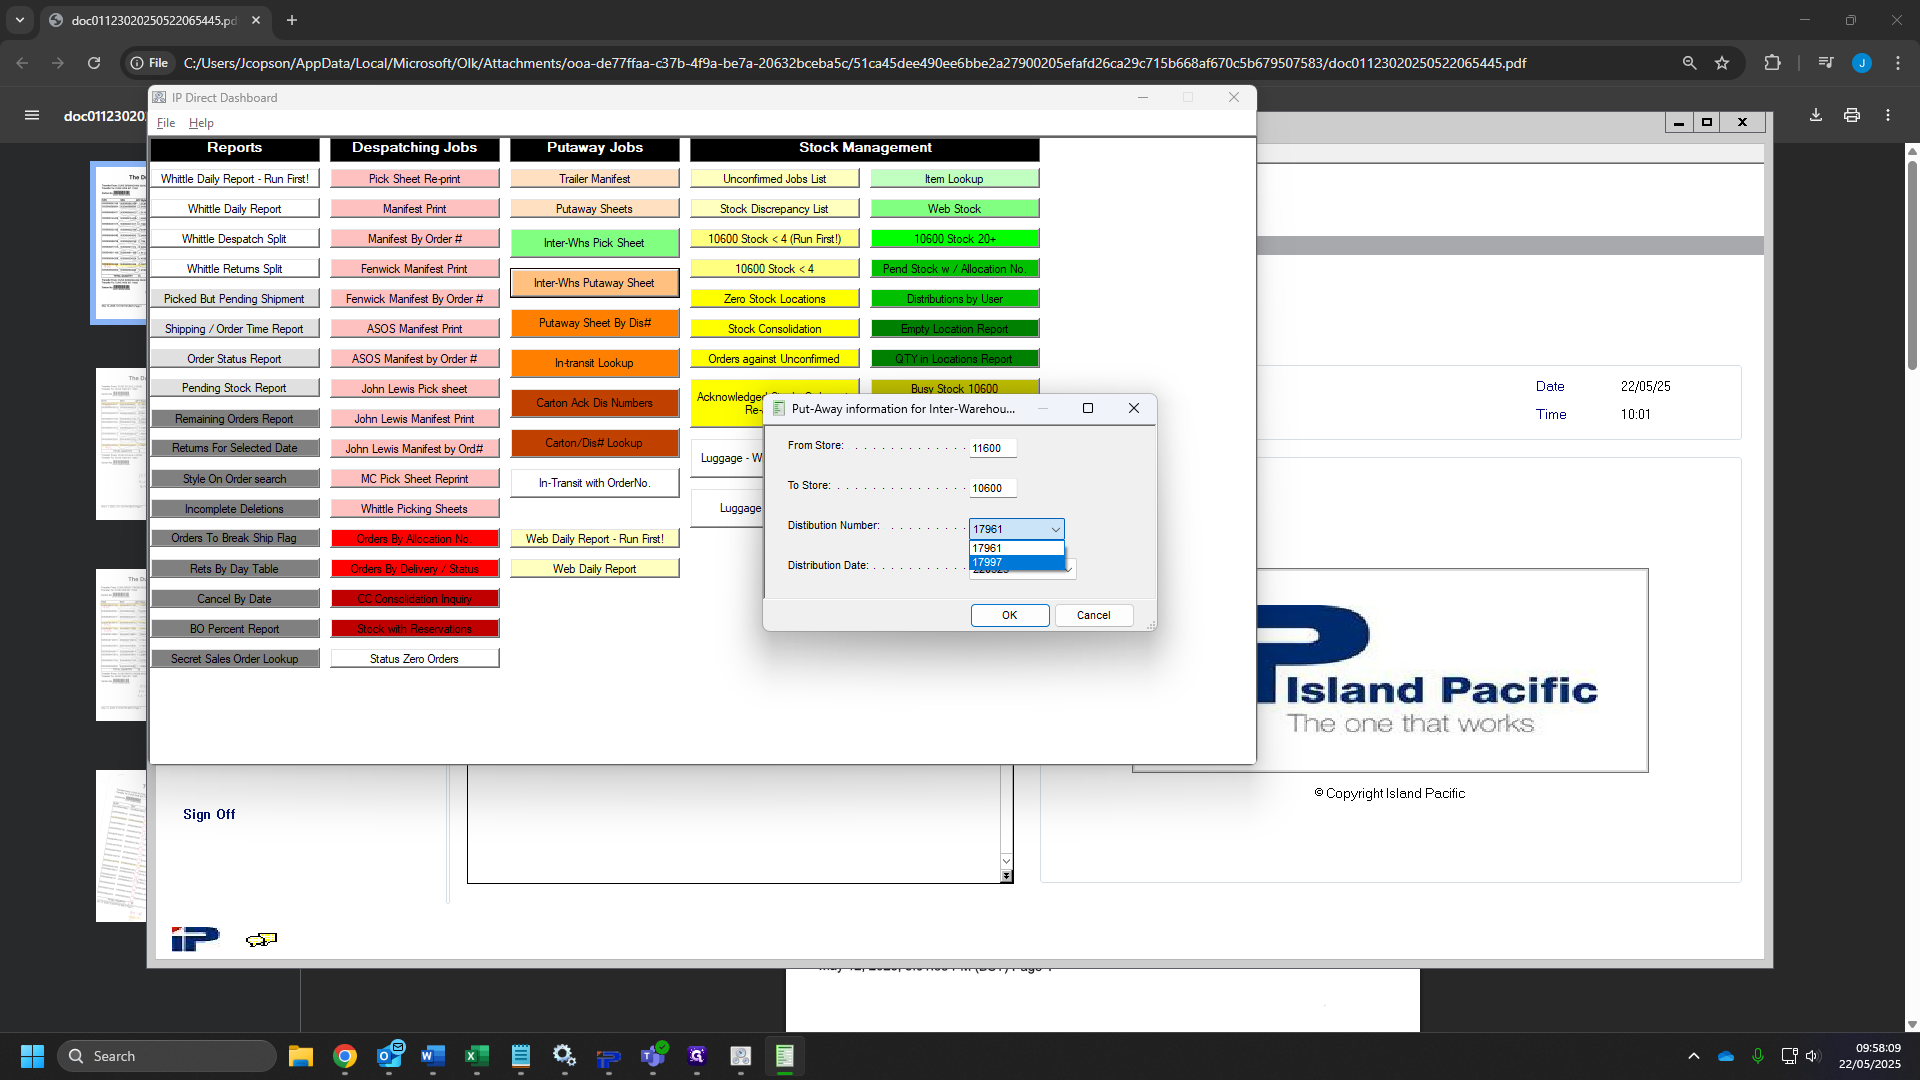
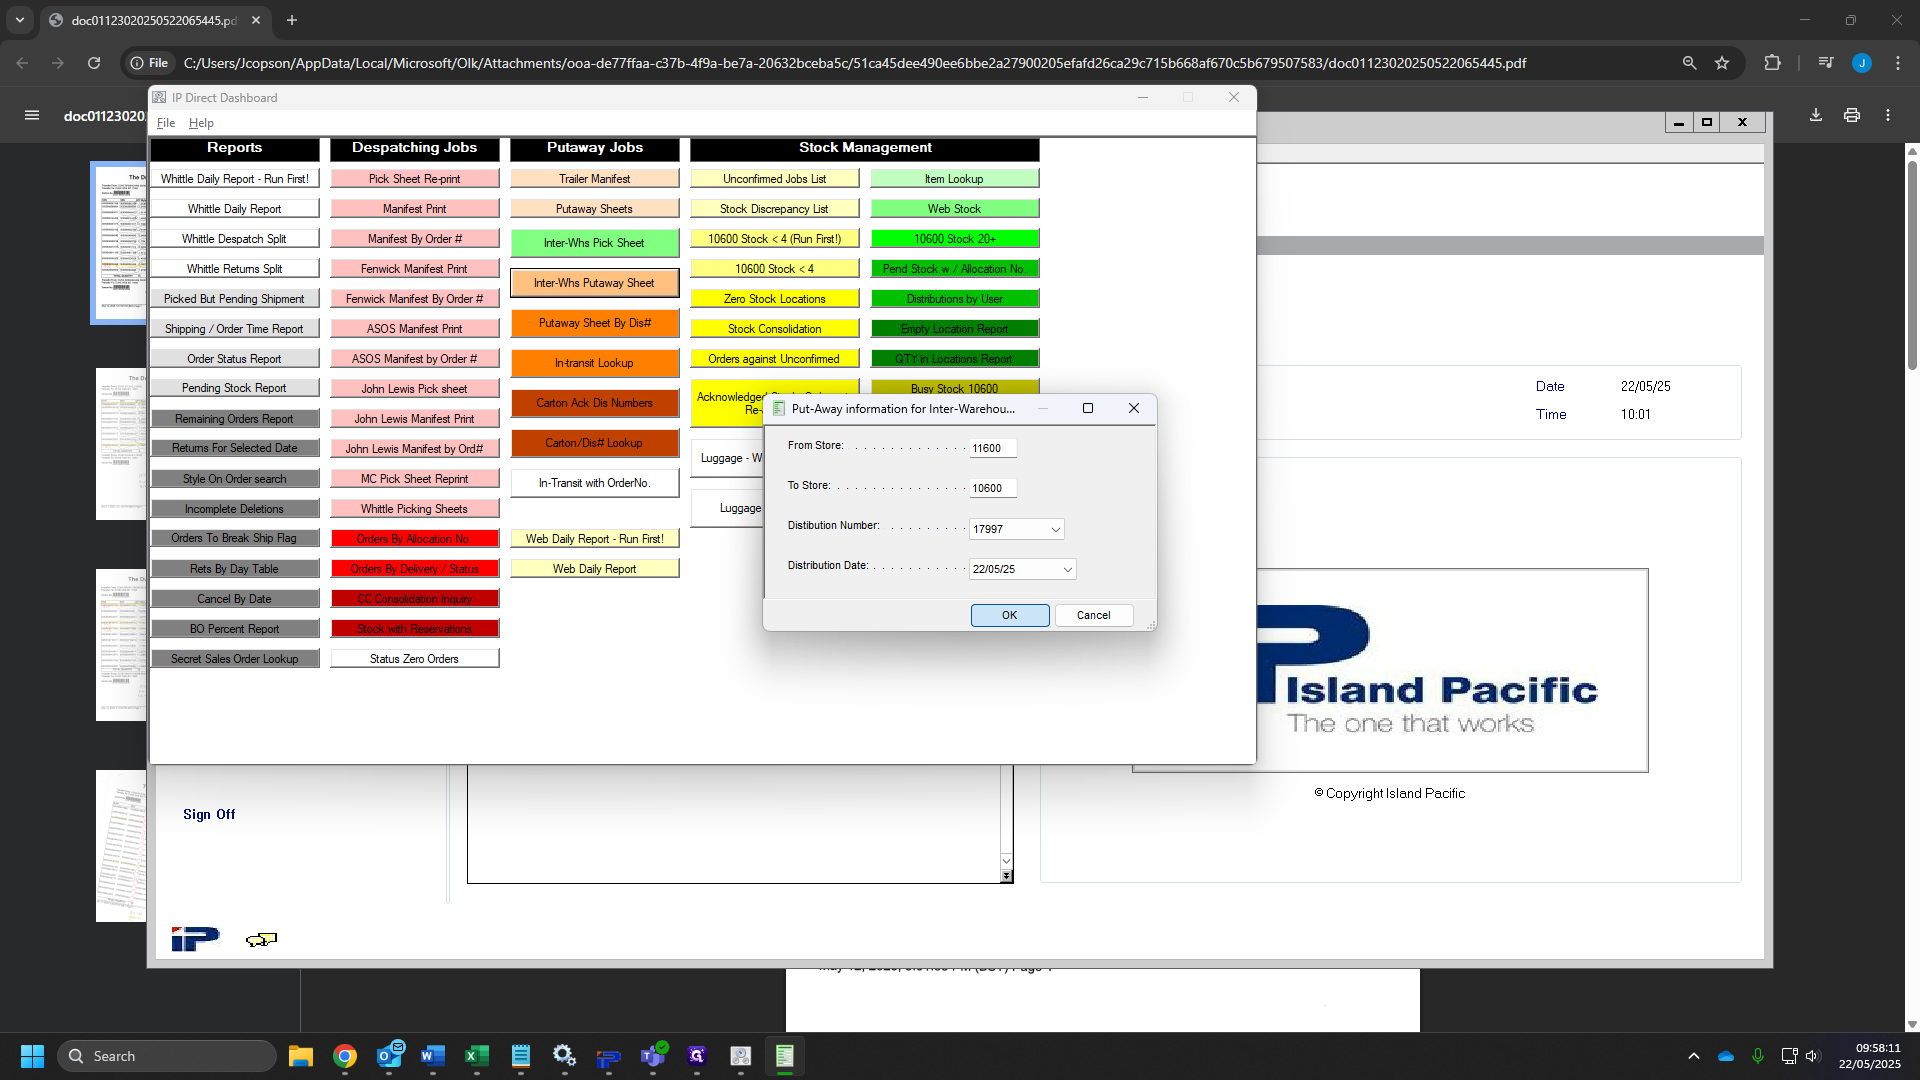
47
Click "OK"

48
For the destination store add your faulty store and issuing store as "11600".
49
For the distribution control number add the number you added from your notepad.

50
Click "OK"
51
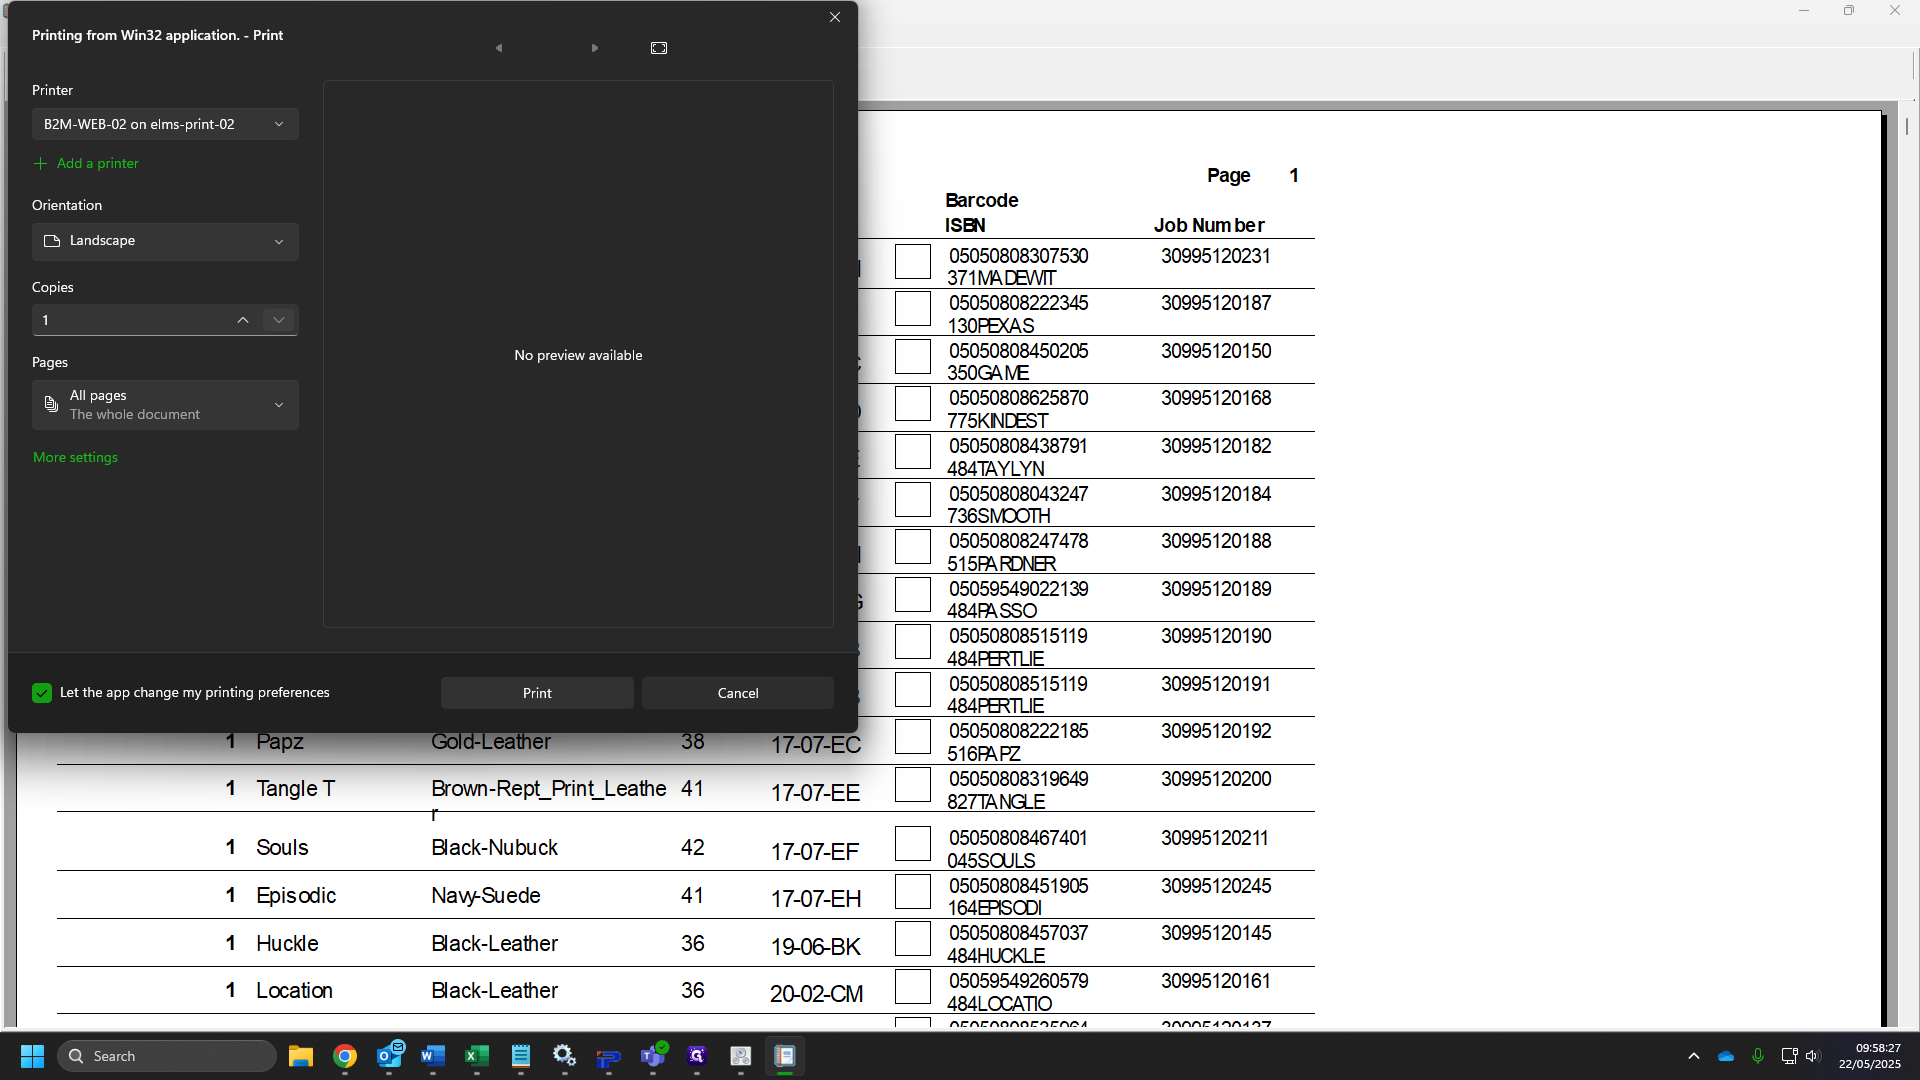
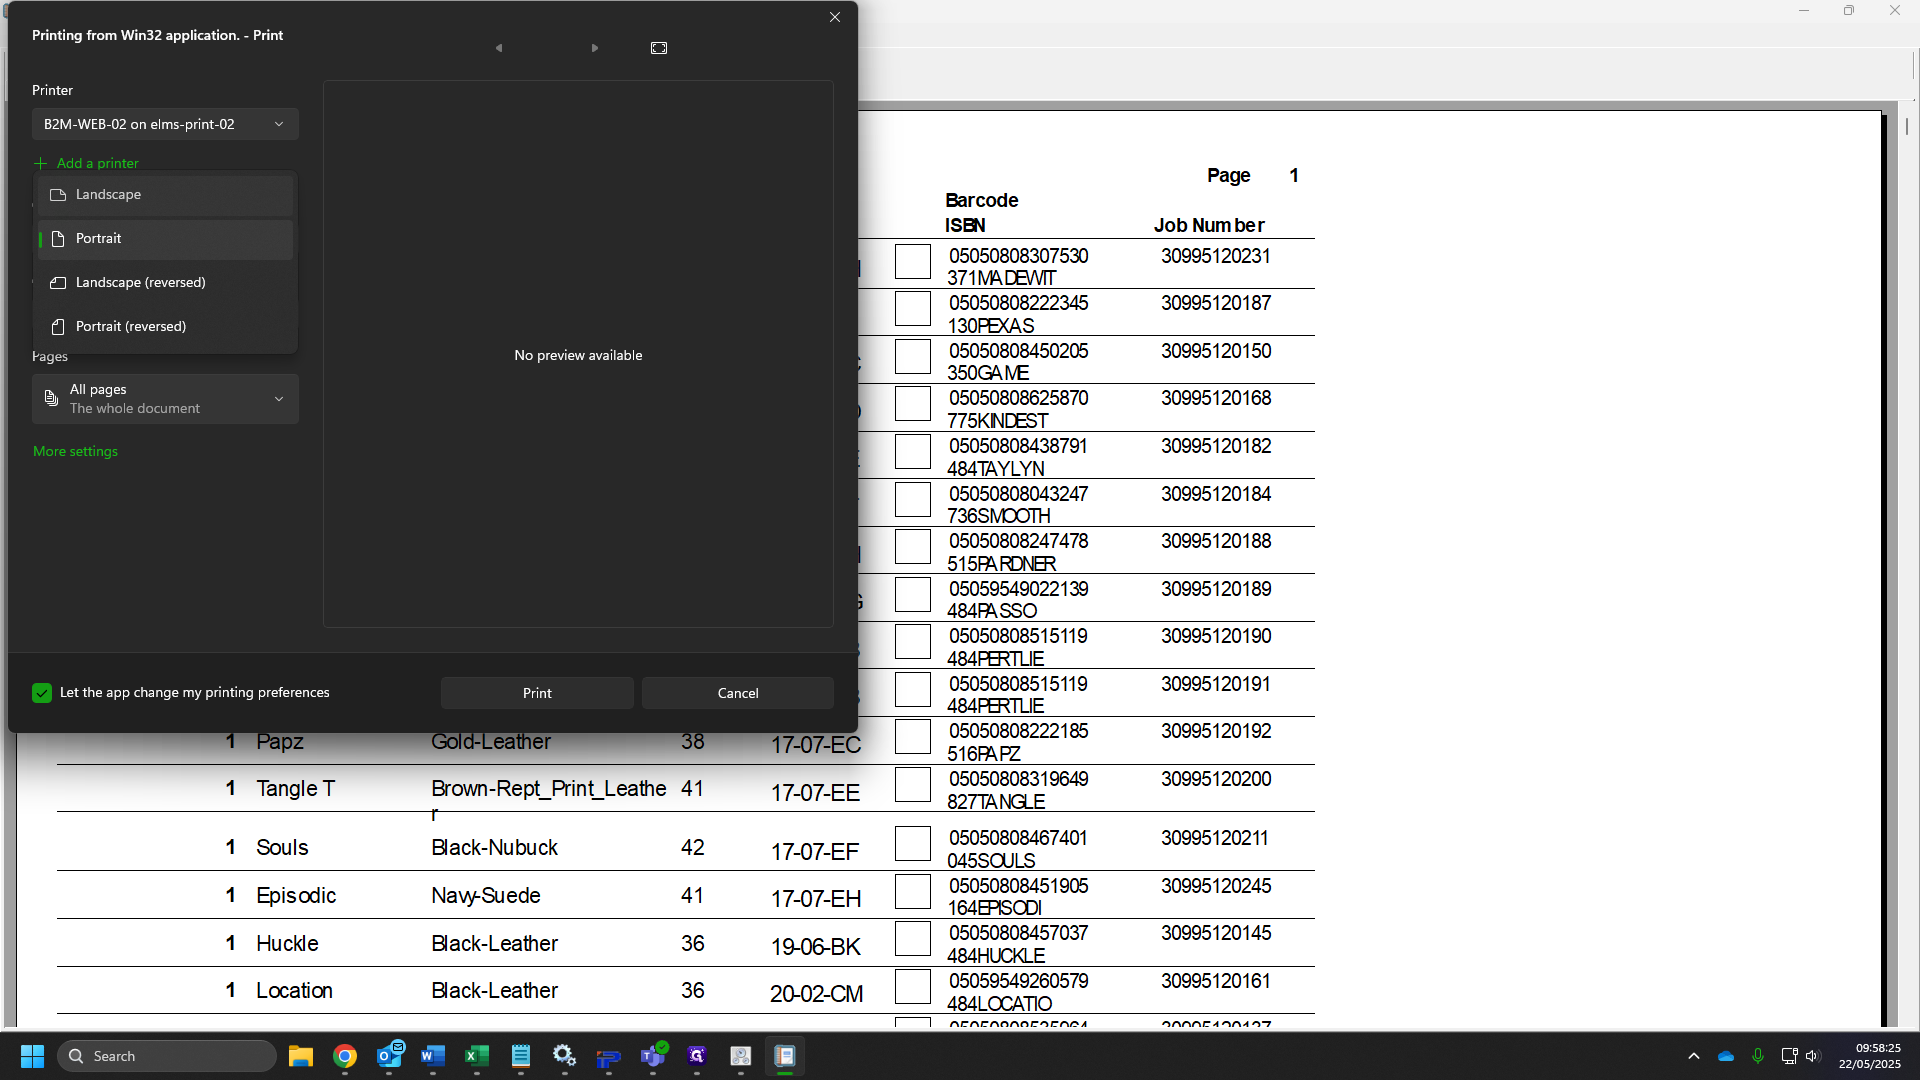
Click "OK" again.

52
Click on "Exit"
53
Click on "21. Process item acknowledgements"

54
Click "OK"
55
Click "OK" Again

56
Click "OK" for a third time.
57
Click on "2. Process Carton Acknowledgement"

58
Click "OK"

59
Click on "Update files"
60
Click "OK"

61
Click "OK"

62
Click on "7. Match merchandise adjustments"

63
Select the box "select warehouse number for this procedure" and type "11600"
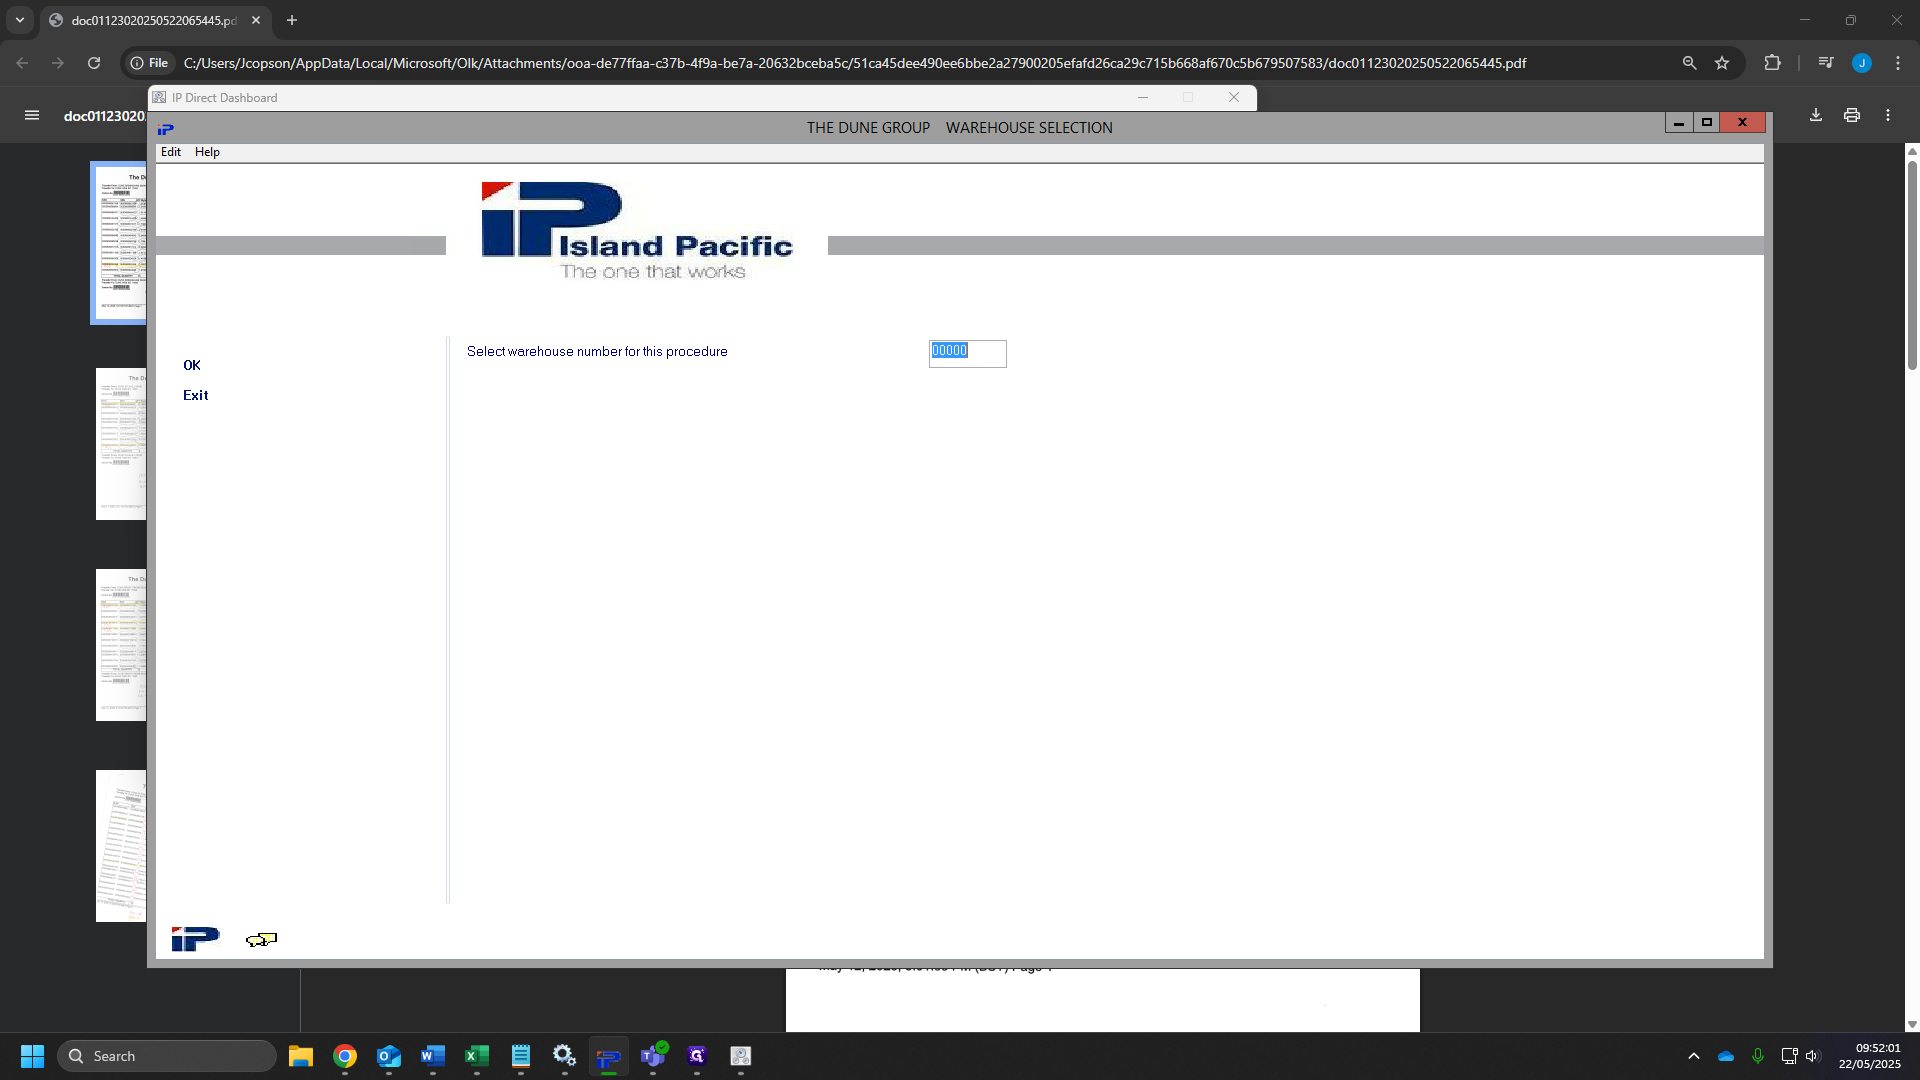
64
Click on "OK"

65
Tick on "Store transfers"
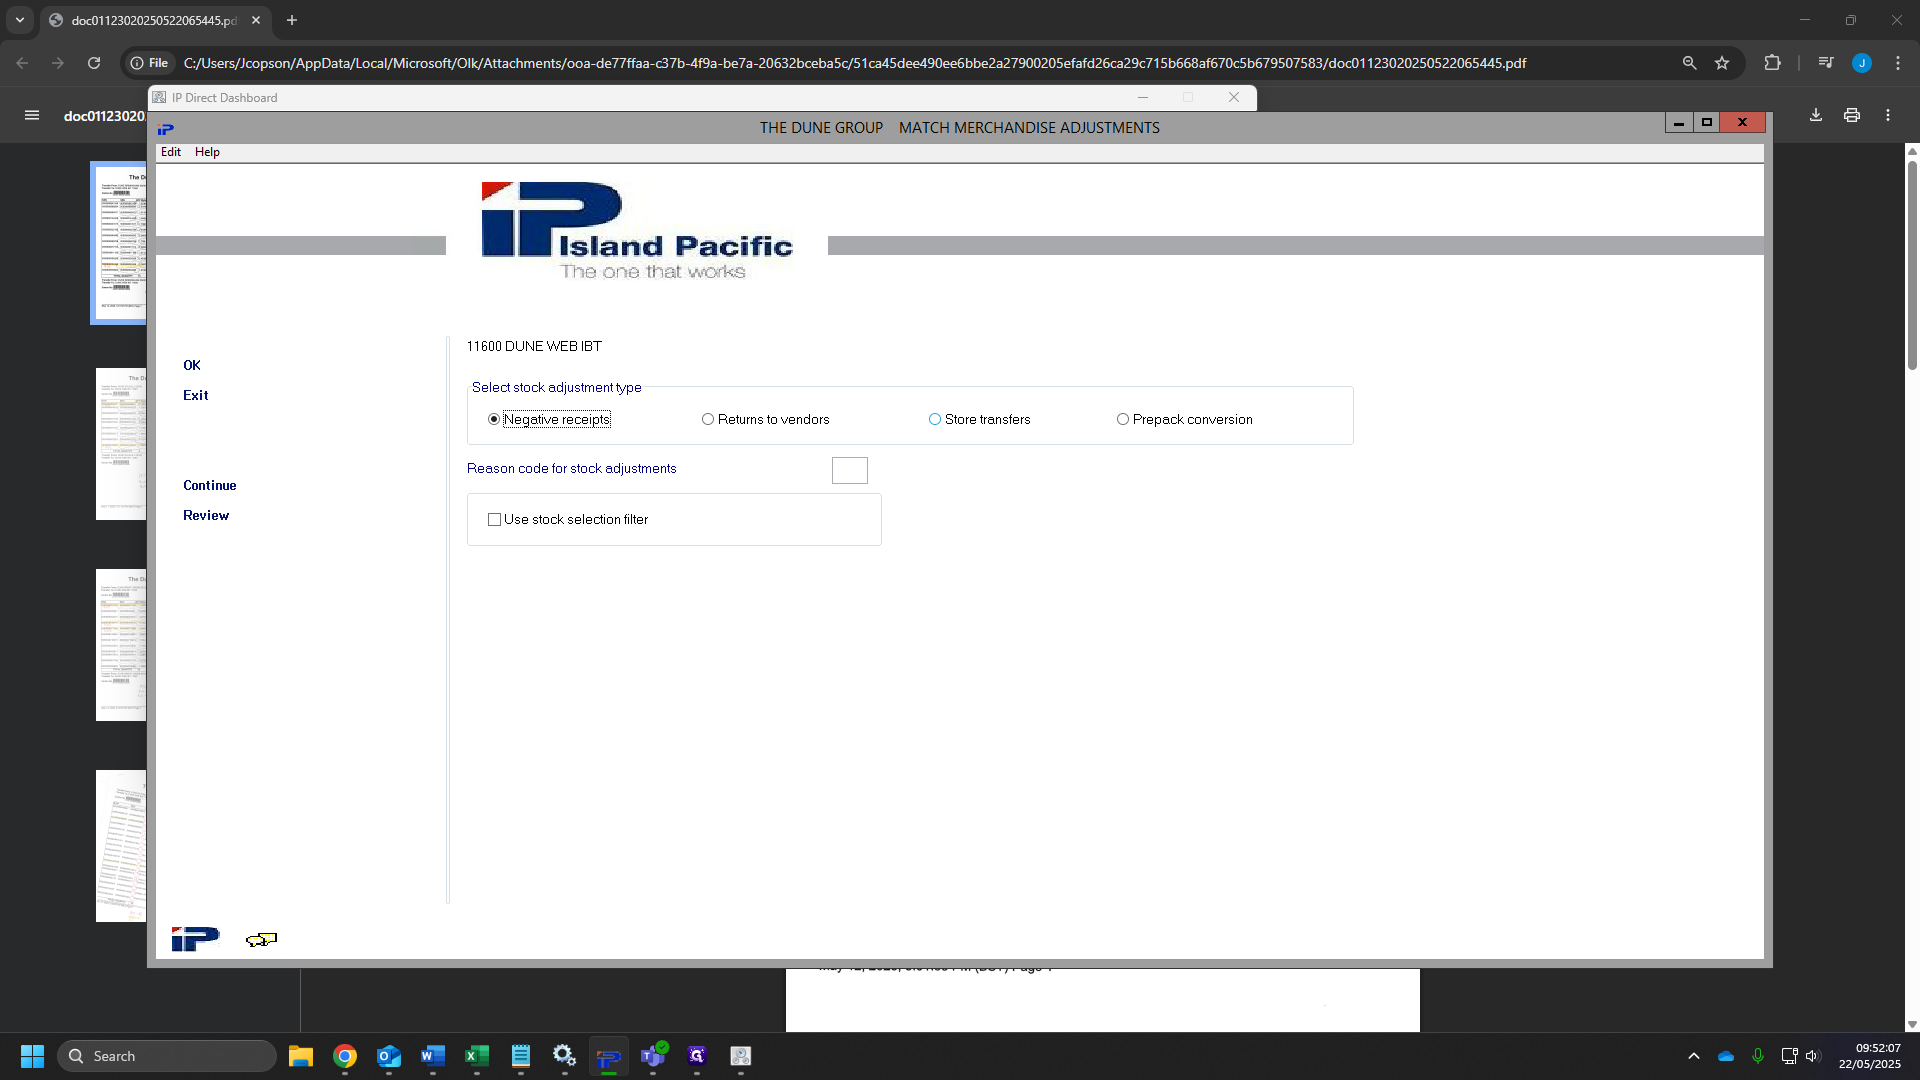
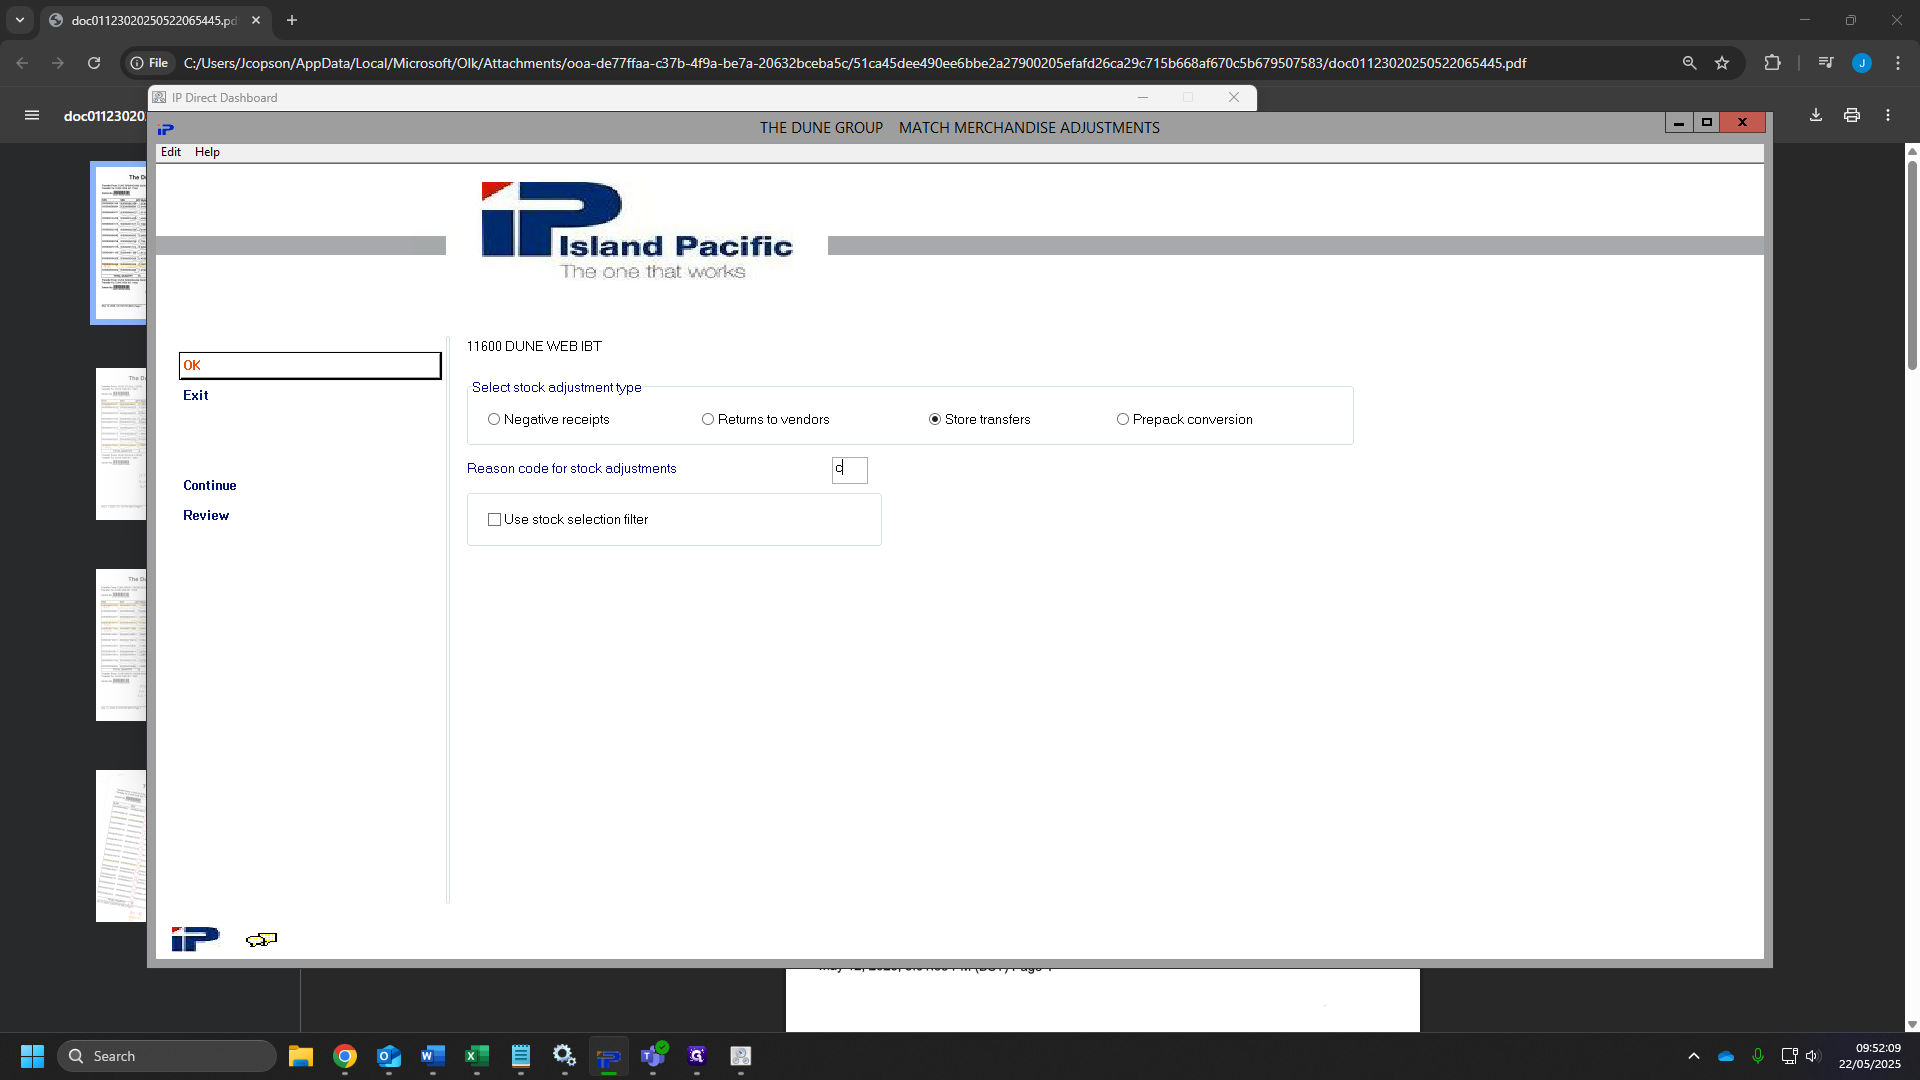
66
Click the box "reason code for stock adjustments" and type "C"

67
Click "OK"
68
Click "OK" Again.
69
Check your sheets for the faulty item,
70
Find your items and click them.
71
Click on "Select"
72
Click on "Quantity"

73
Click on "Adjust Quantity"
74
Type "-1"
75
Click on "OK"

76
Click on "OK"
77
Once you have been through all of your sheets go back and click continue.
78
Click "OK"
79
Click on "Interwarehouse Movement"
80
Click the box and type "11600"
81
Click "OK"

82
Click on "O Pending stock"
83
Click "OK"

84
Click "OK"

85
Click the box "target warehouse number" and type "10600"

86
Click on "OK"
87
Click "OK"
88
Find the transfer numbers from your sheet.
89
Highlight your number and click "Space efficient"
90
Do this for all of your of your sheets.

91
Click "Continue" once you have selected all of your transfers.
92
Click "OK"

93
Click "OK"

94
Head back to IP Dashboard and click " Inter Whs putaway sheet"
95
Click "from store and type "11600"
96
Selcet the drop down menu on Distribution Number, yours should always be the at the bottom.

97
Select this .
98
Click the drop down for the distribution date.

99
Click on the date with the slashes eg: "22/05/25"

100
Click on "OK"
101
Open "Services"
102
Click on "Stop the service" on Print spooler.
103
Click here
104
Click on "Portrait"

105
Change to "Landscape"
106
Click on "Print"