Copy an existing form to a Campaign using the new Checkout Feature
This is a step-by-step guide for Donation Management - Cal State East Bay Educational Foundation and #GivingTuesday - Donate Today - Cal State East Bay Educational Foundation
By Nyiema Bayfield
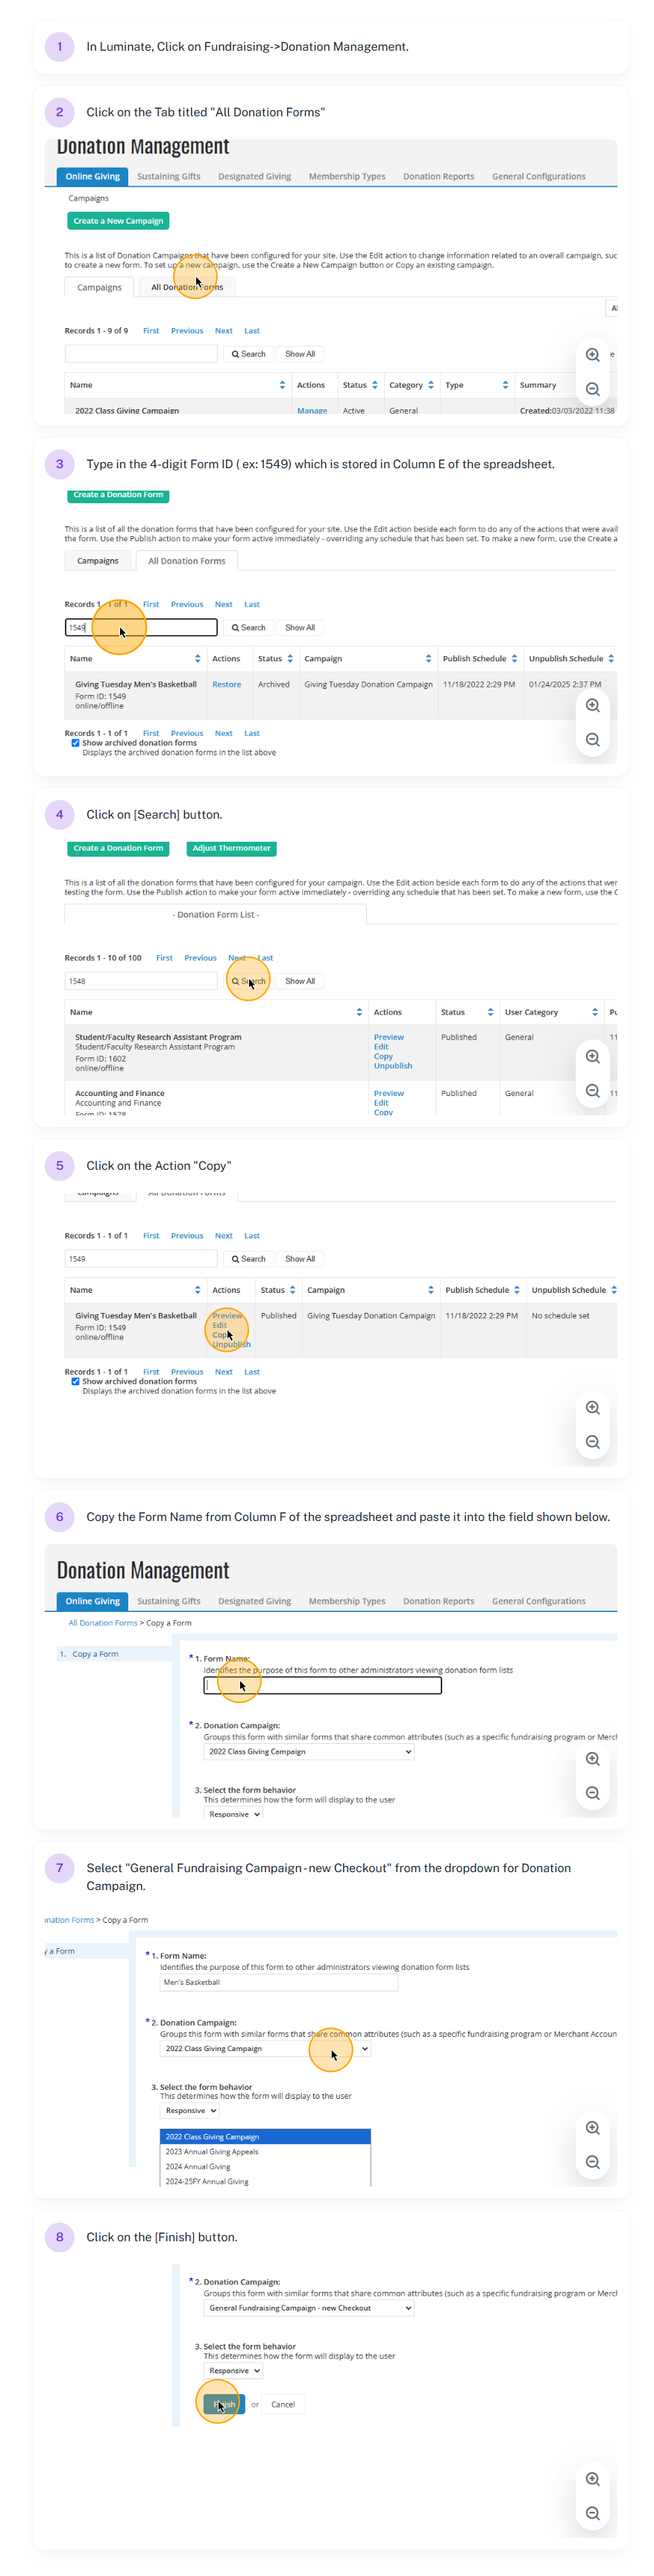
PART 1 - COPYING AN EXISTING FORM TO A CAMPAIGN USING THE NEW CHECKOUT FEATURE
1
PART 1 - COPYING AN EN EXISTING FORM TO A CAMPAIGN WITH THE NEW CHECKOUT ENABLED
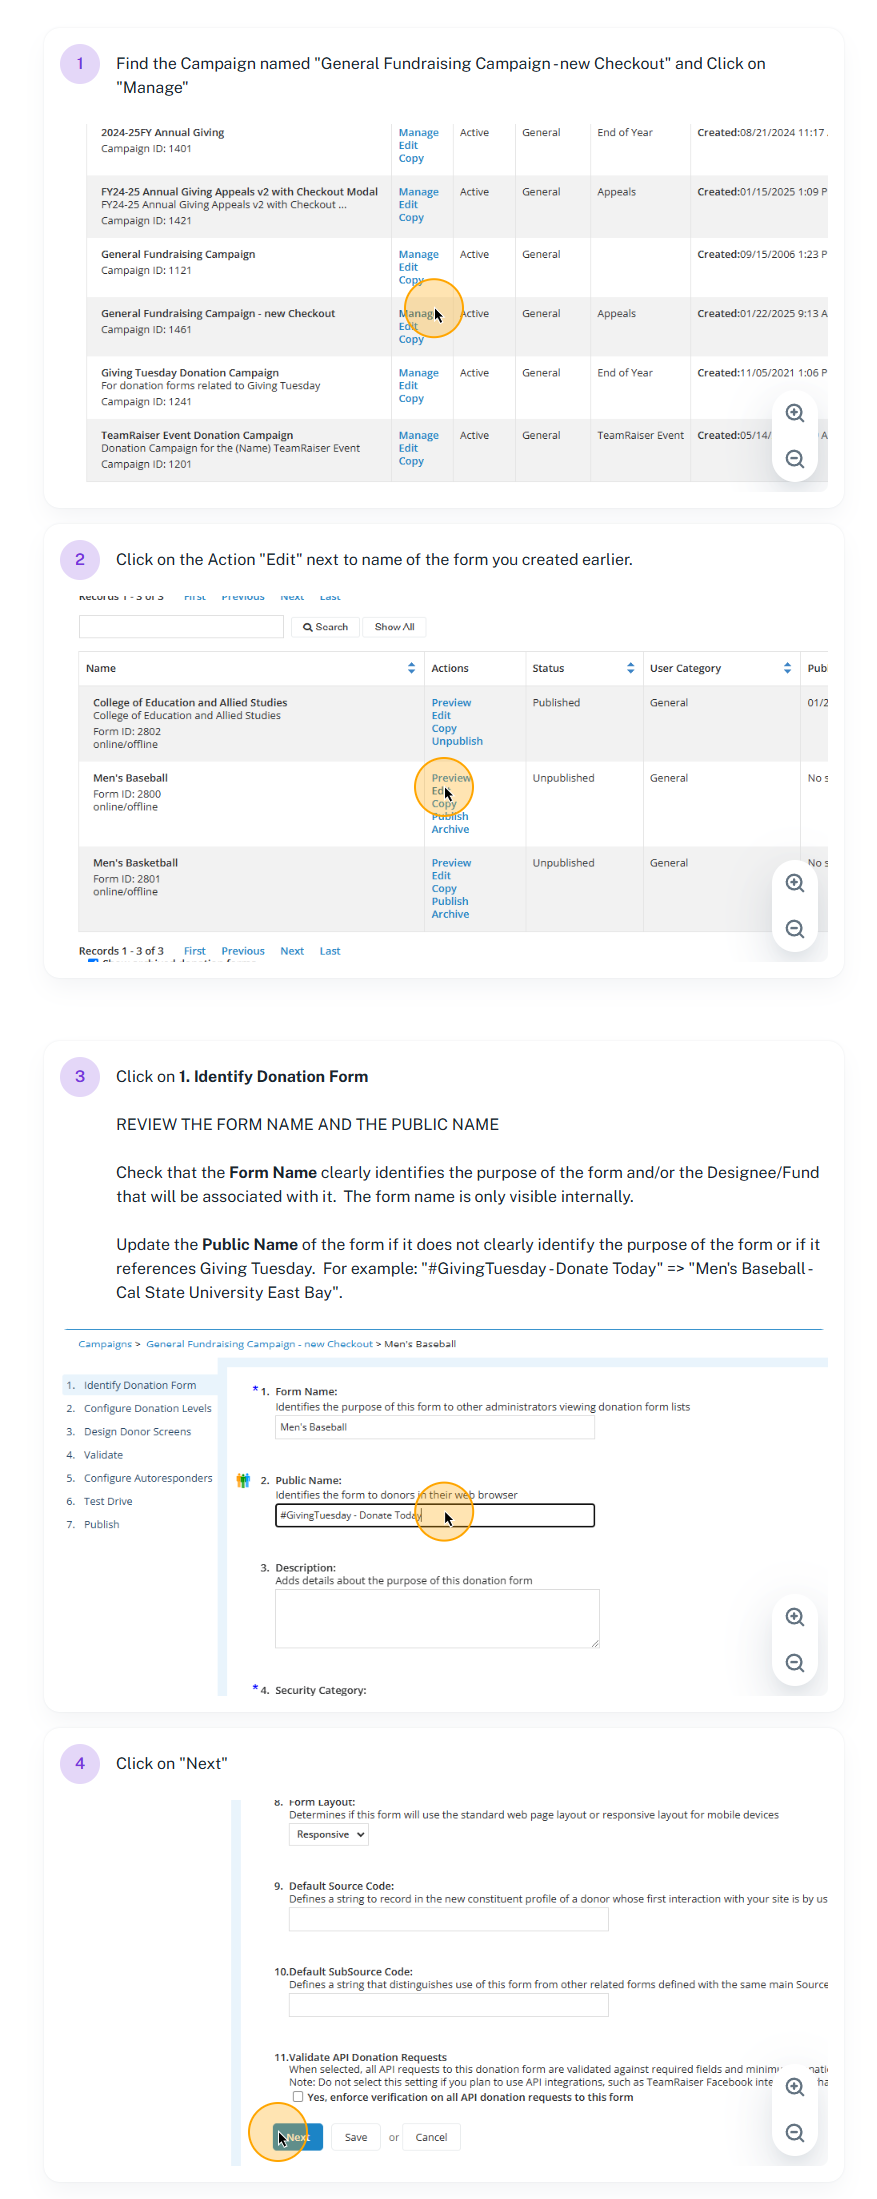
PART 2 - MODIFYING THE FORM YOU CREATED
2
Locate the New Form and Modify the Name and Description
3
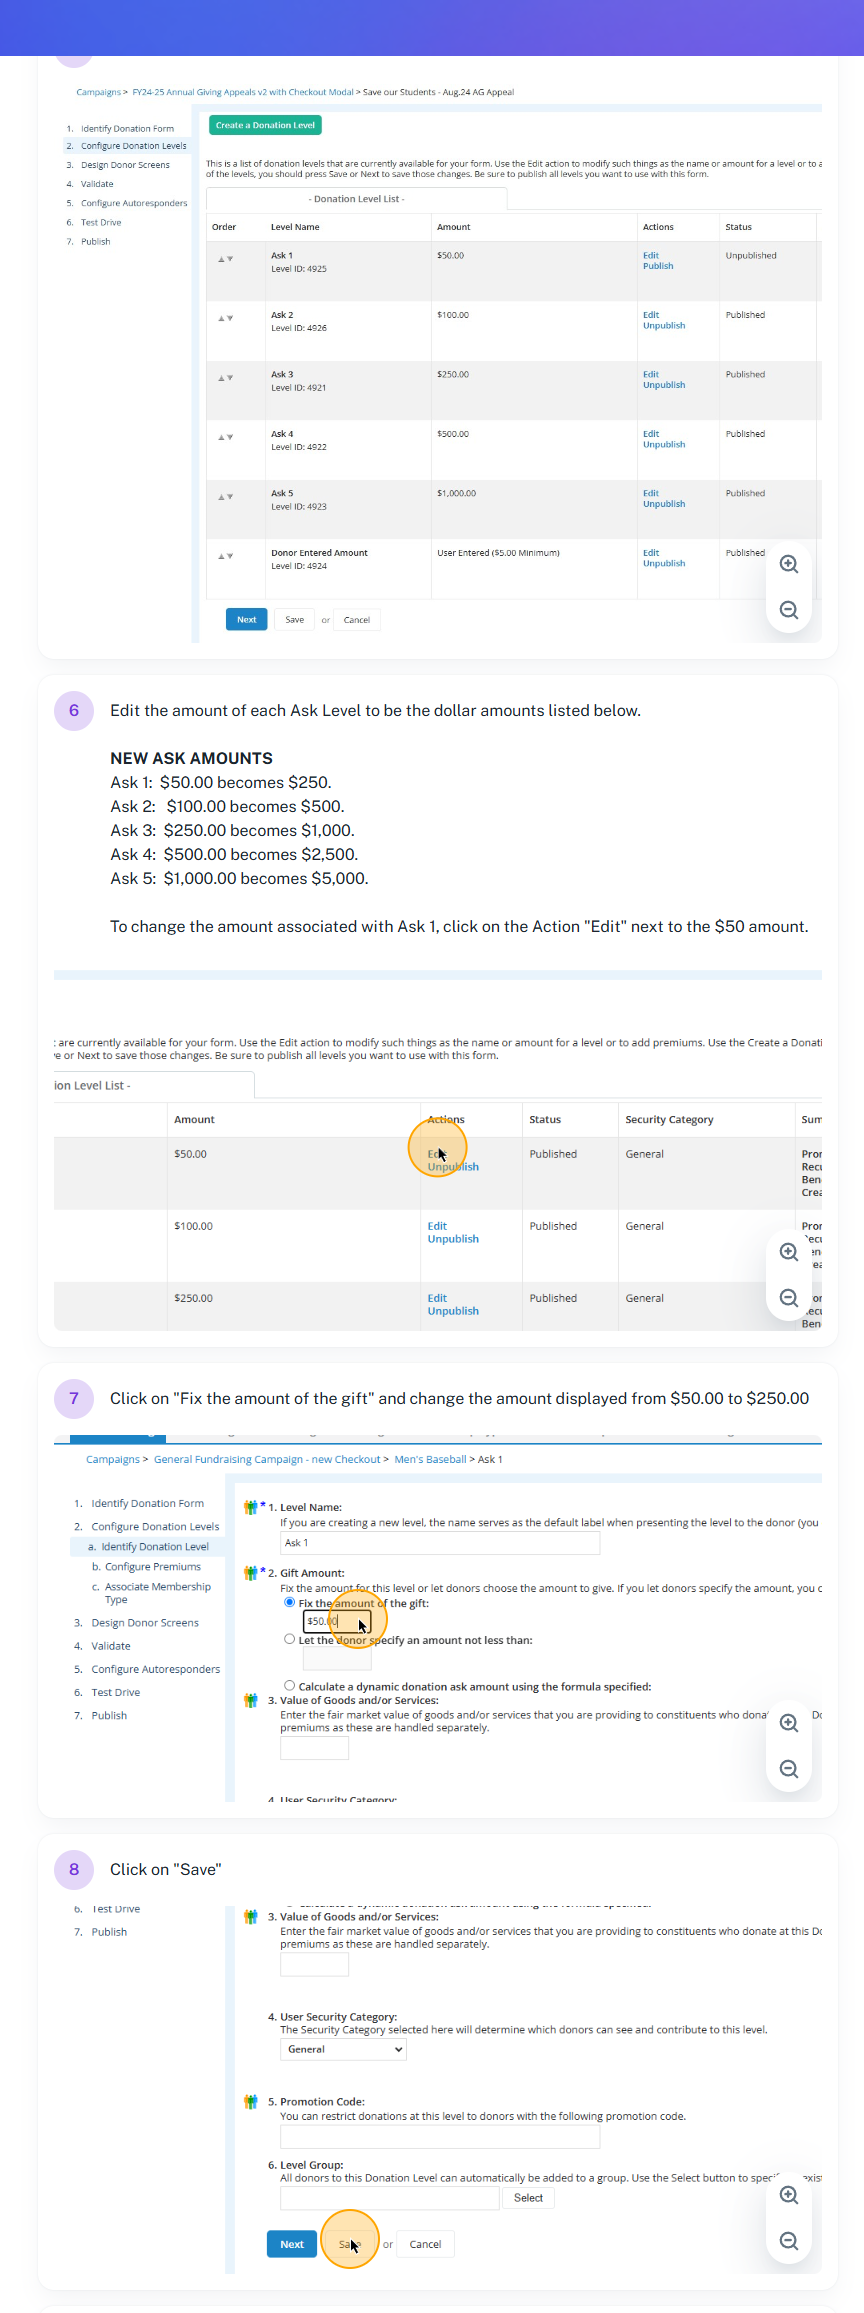
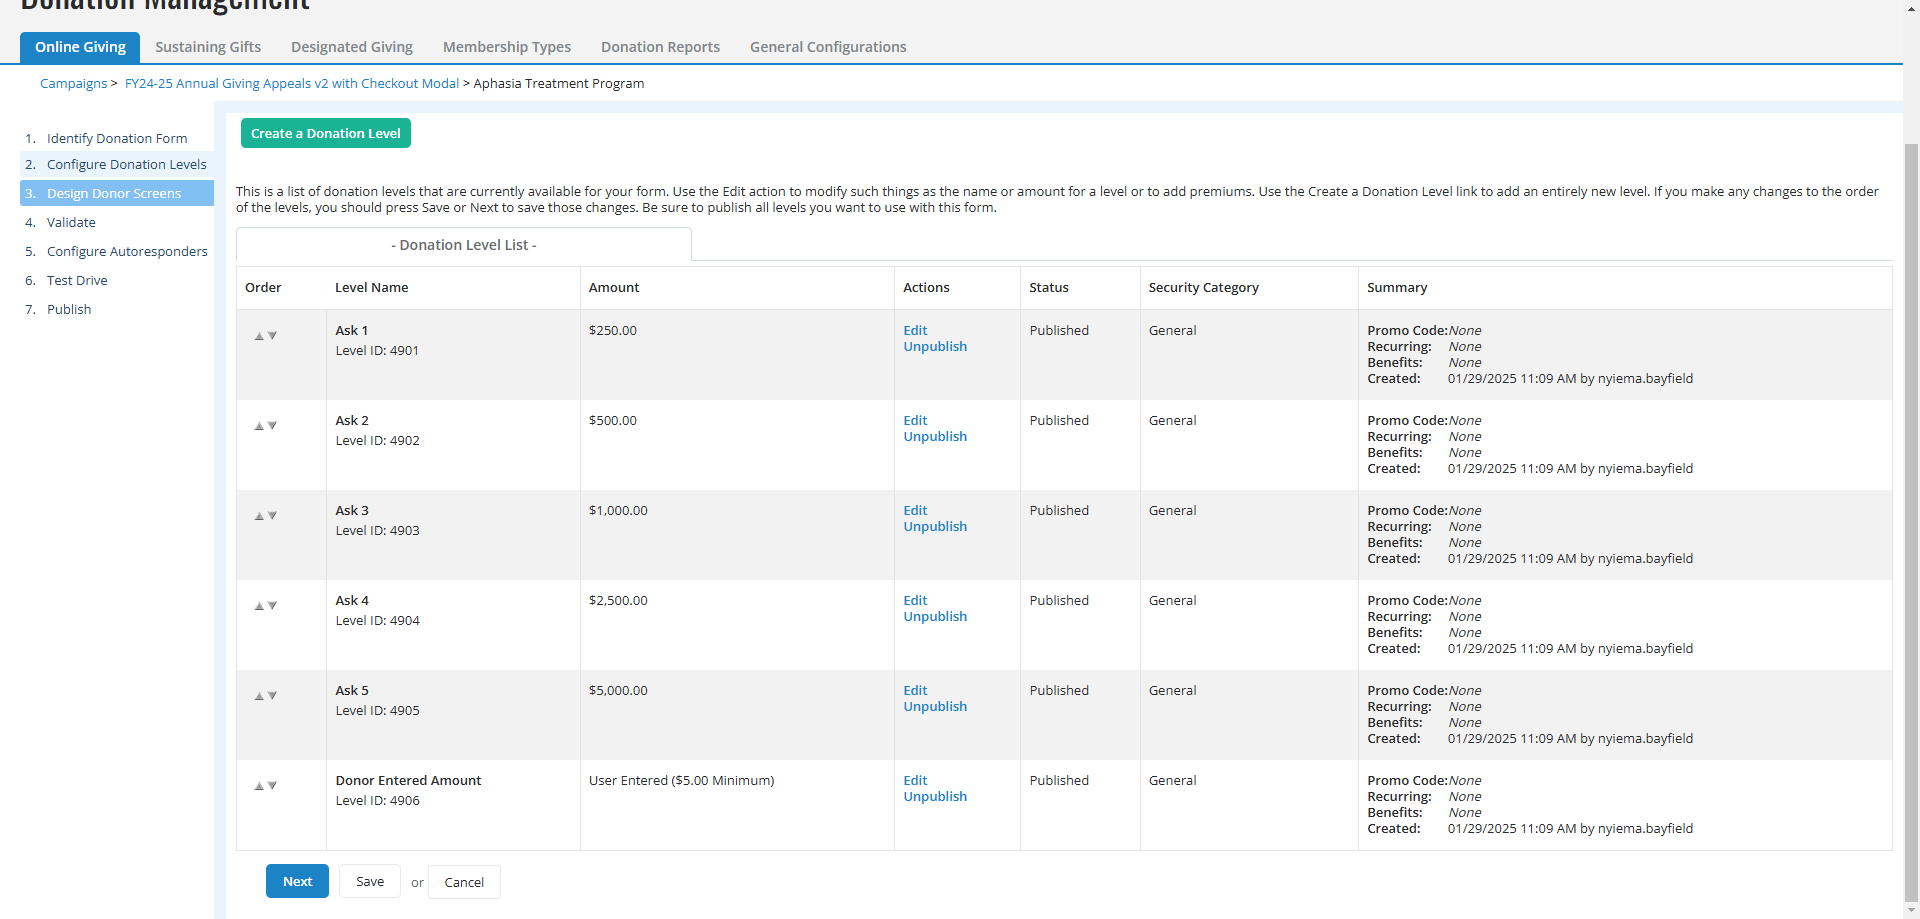
Update the Donation Levels
4
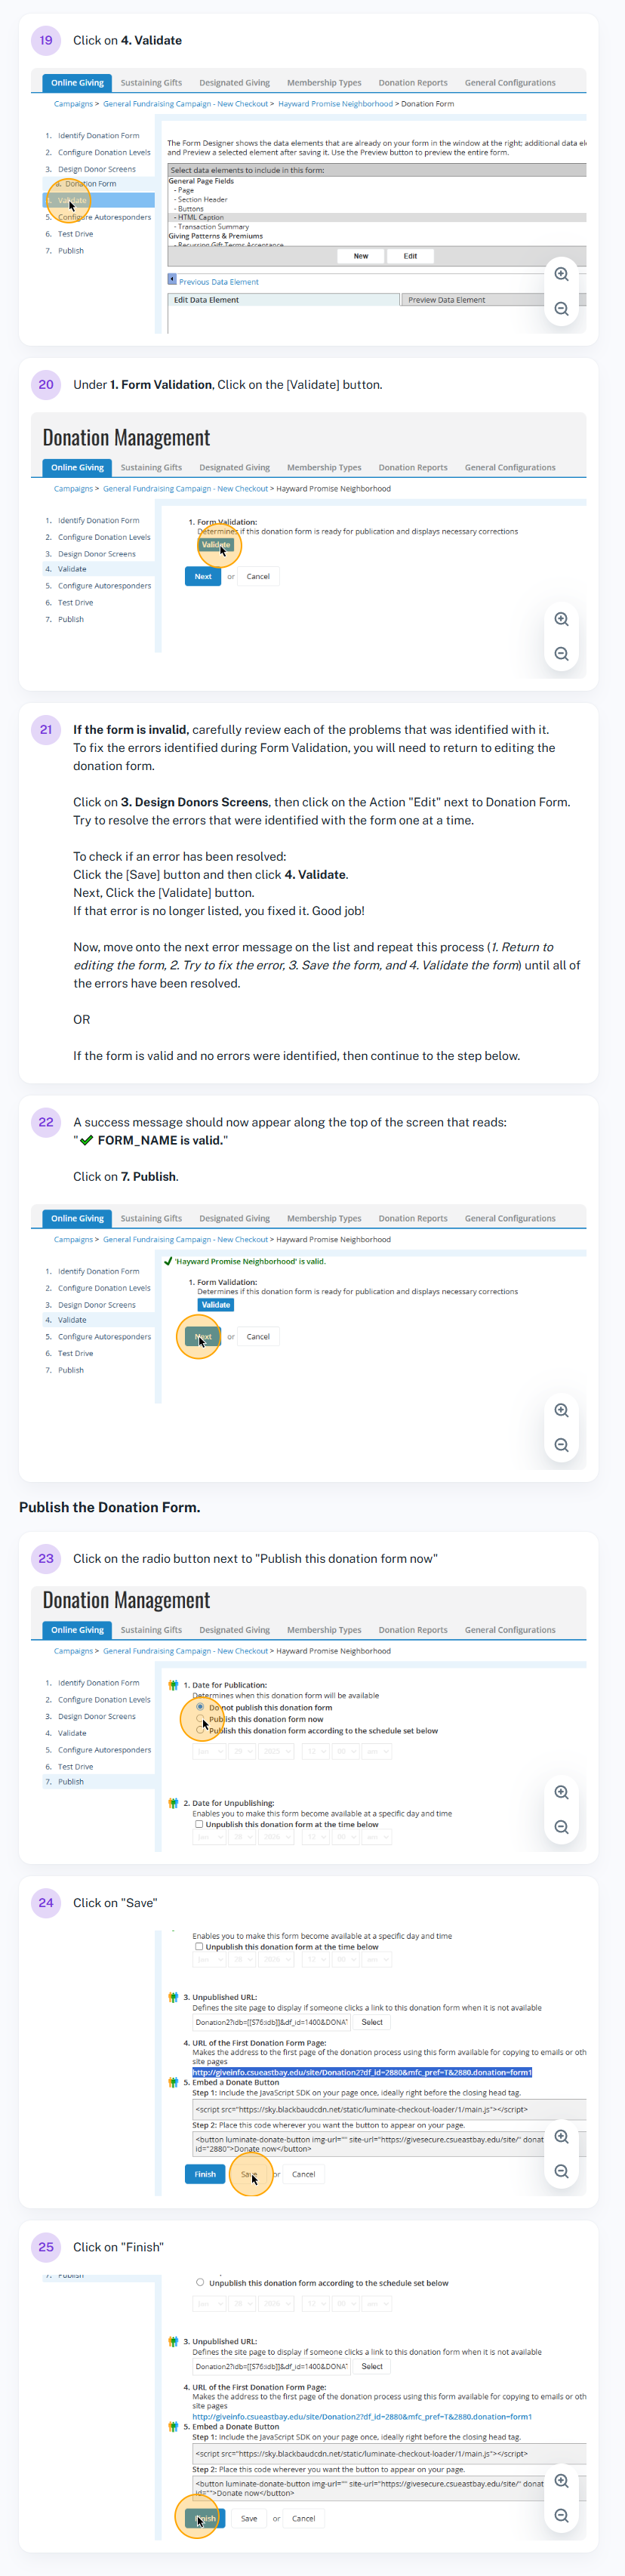
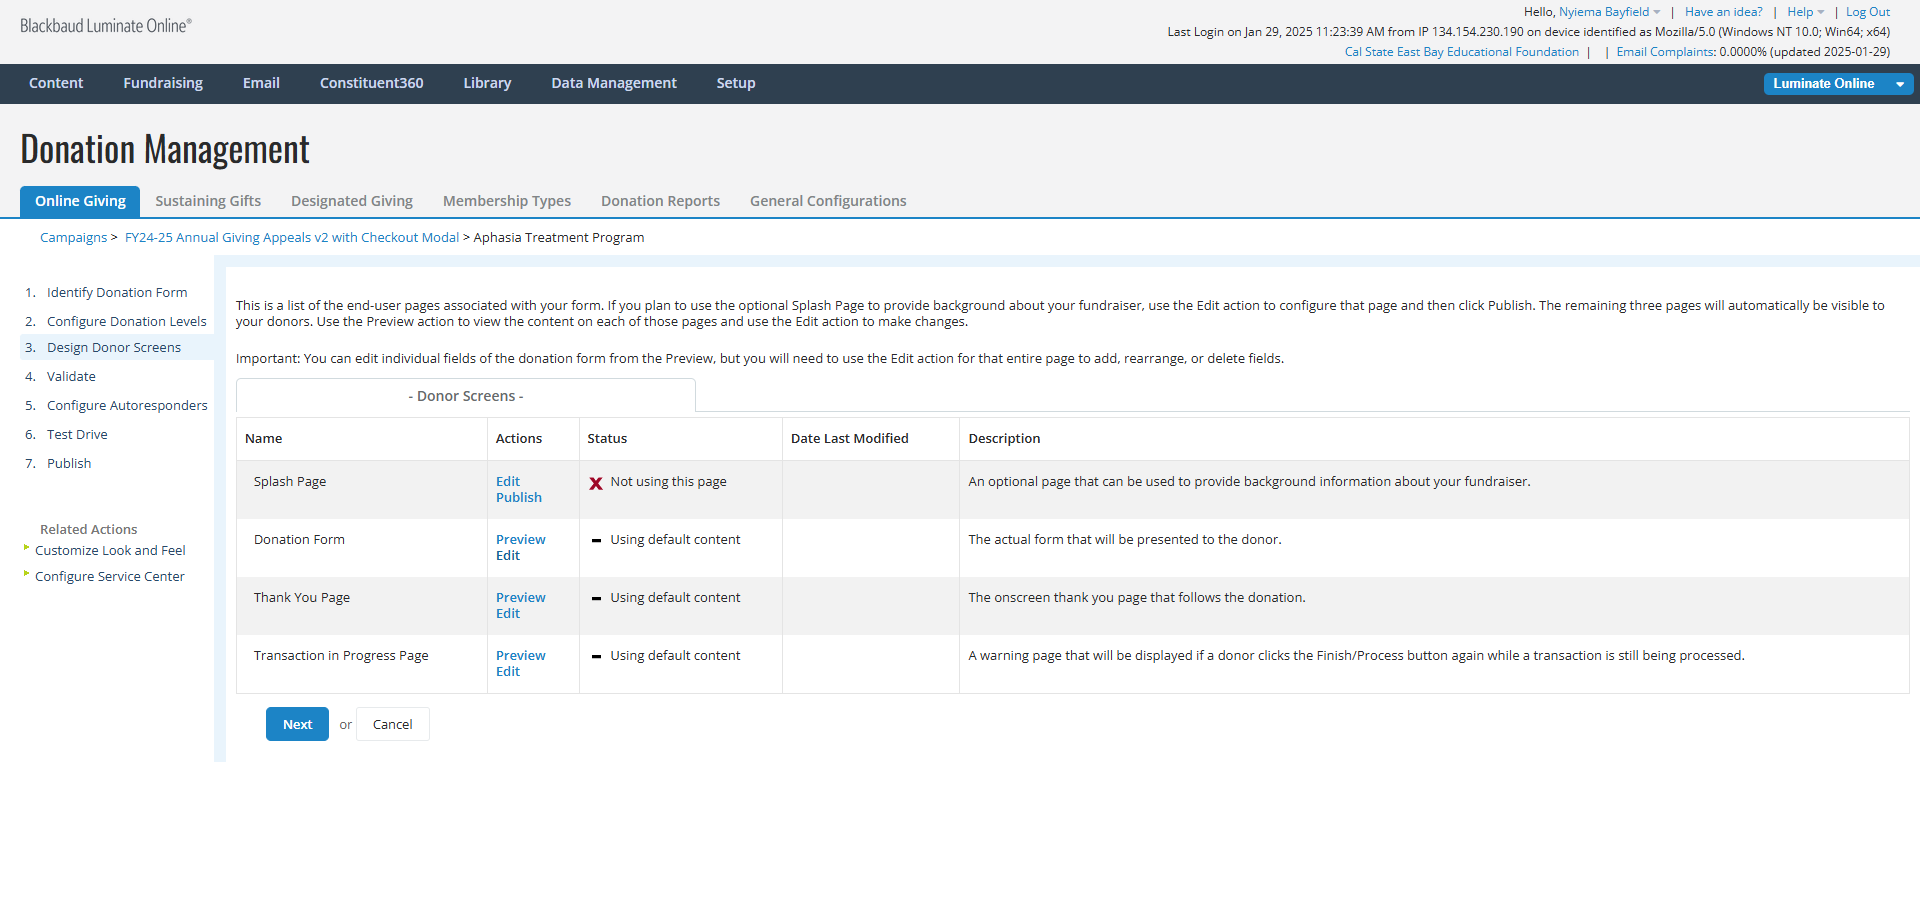
Click on 3. Design Donor Screens
5
Click on "Edit"
STEP 1. REVIEW AND EDIT THE CONTENT SHOWN ON THE FORM
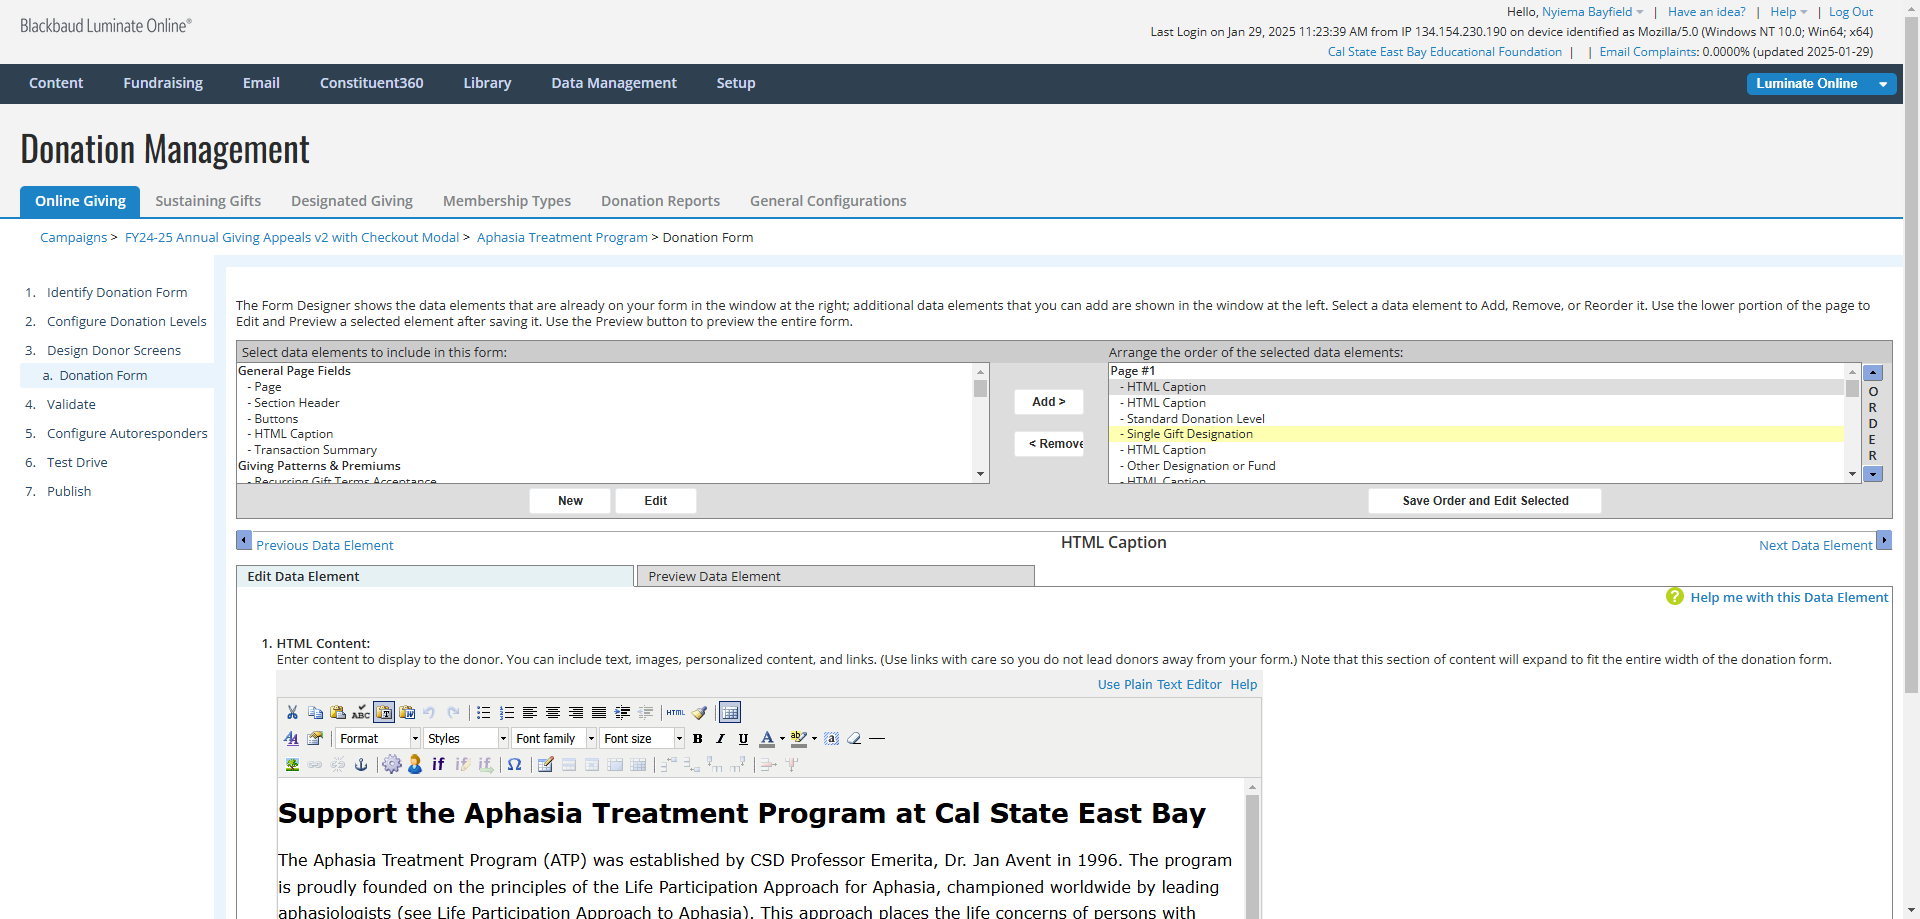
6
In the top right panel, Click on the first "HTML Caption" element.
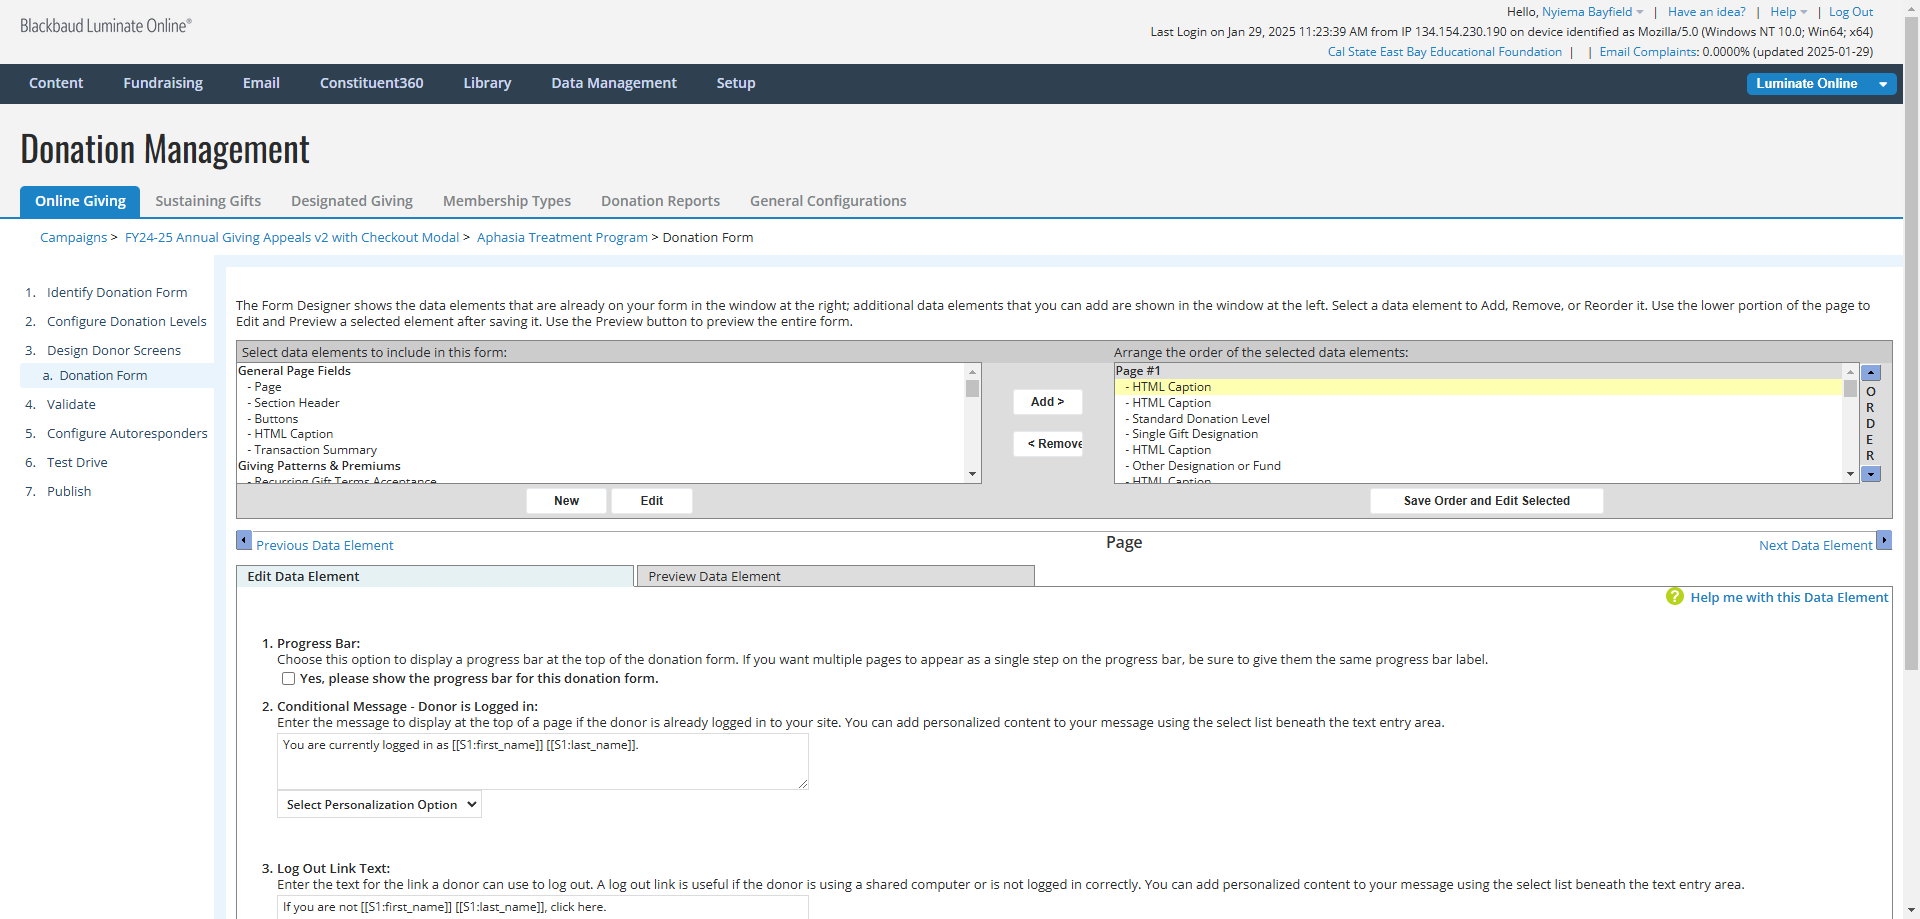
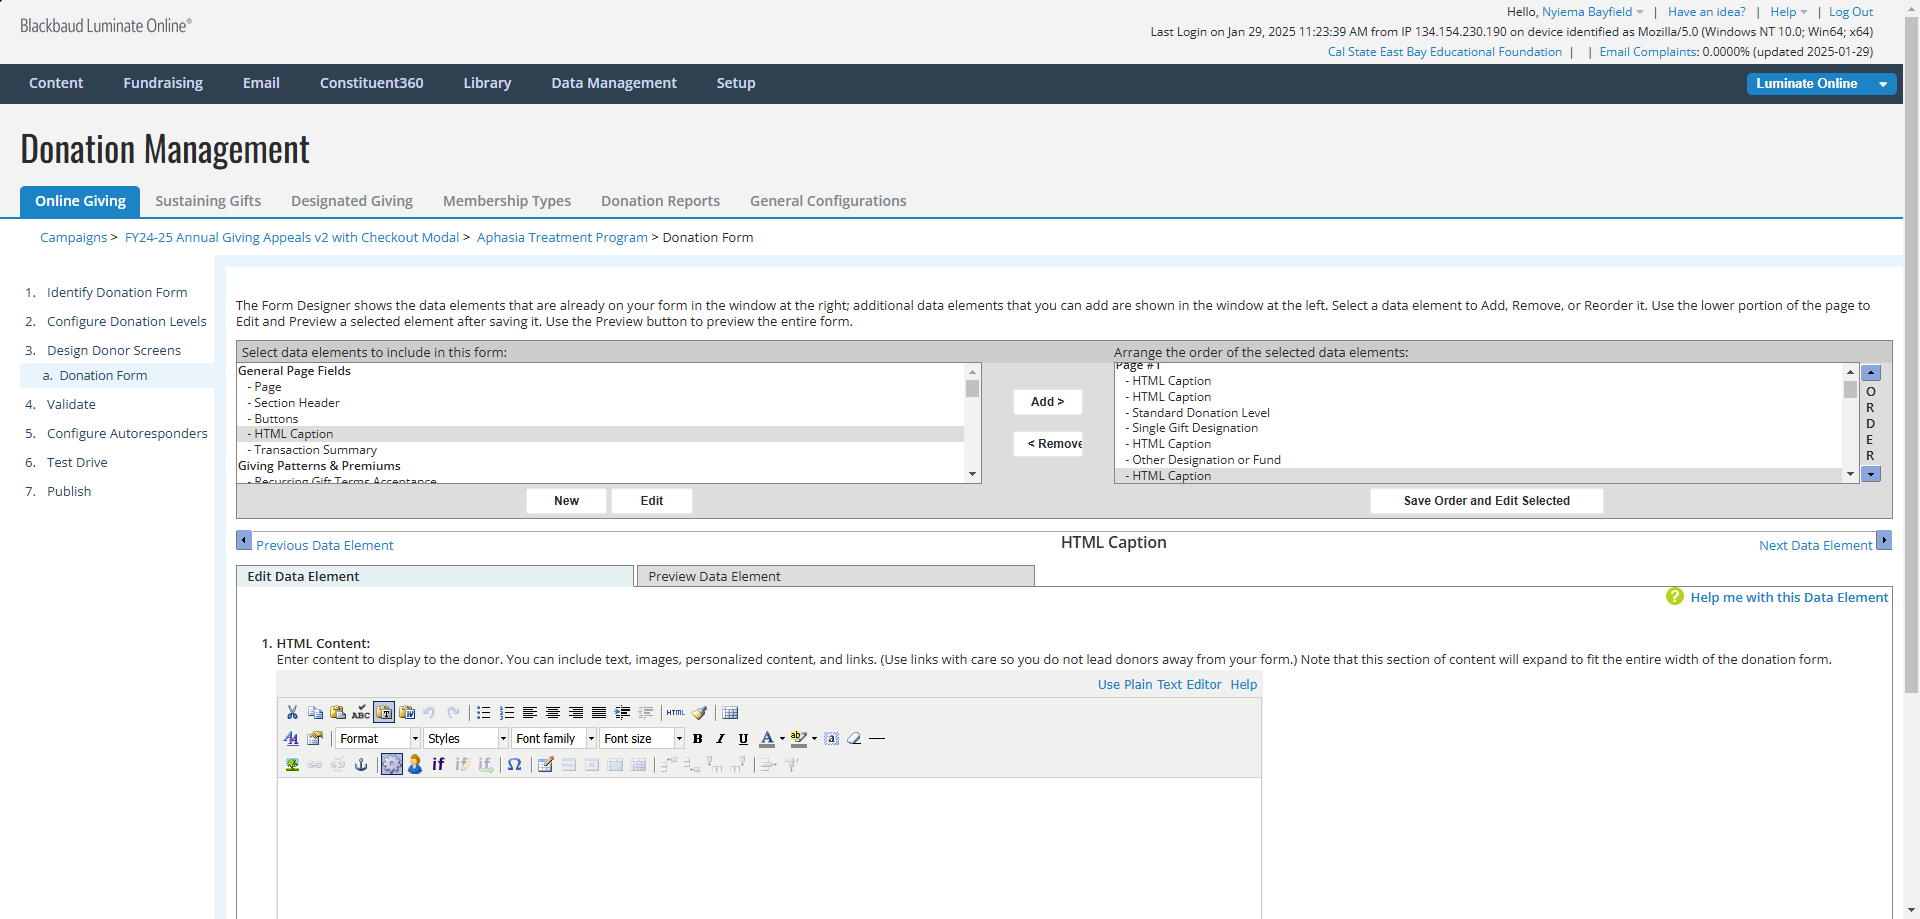
7
Click on the [Save Order and Edit Selected] button.
![Step #7: Click on the [Save Order and Edit Selected] button.](https://di8mn0rali2ic.cloudfront.net/uploads/723f3eab-3de0-4fed-a4d9-4140f72ab79a/c441c65d-9ad5-4c9d-b61f-05af0c5fcc22.png)
8
Use the HTML Content editor to review and make changes to the content (text, pictures, links, etc) that will be shown at the top of the donation form.
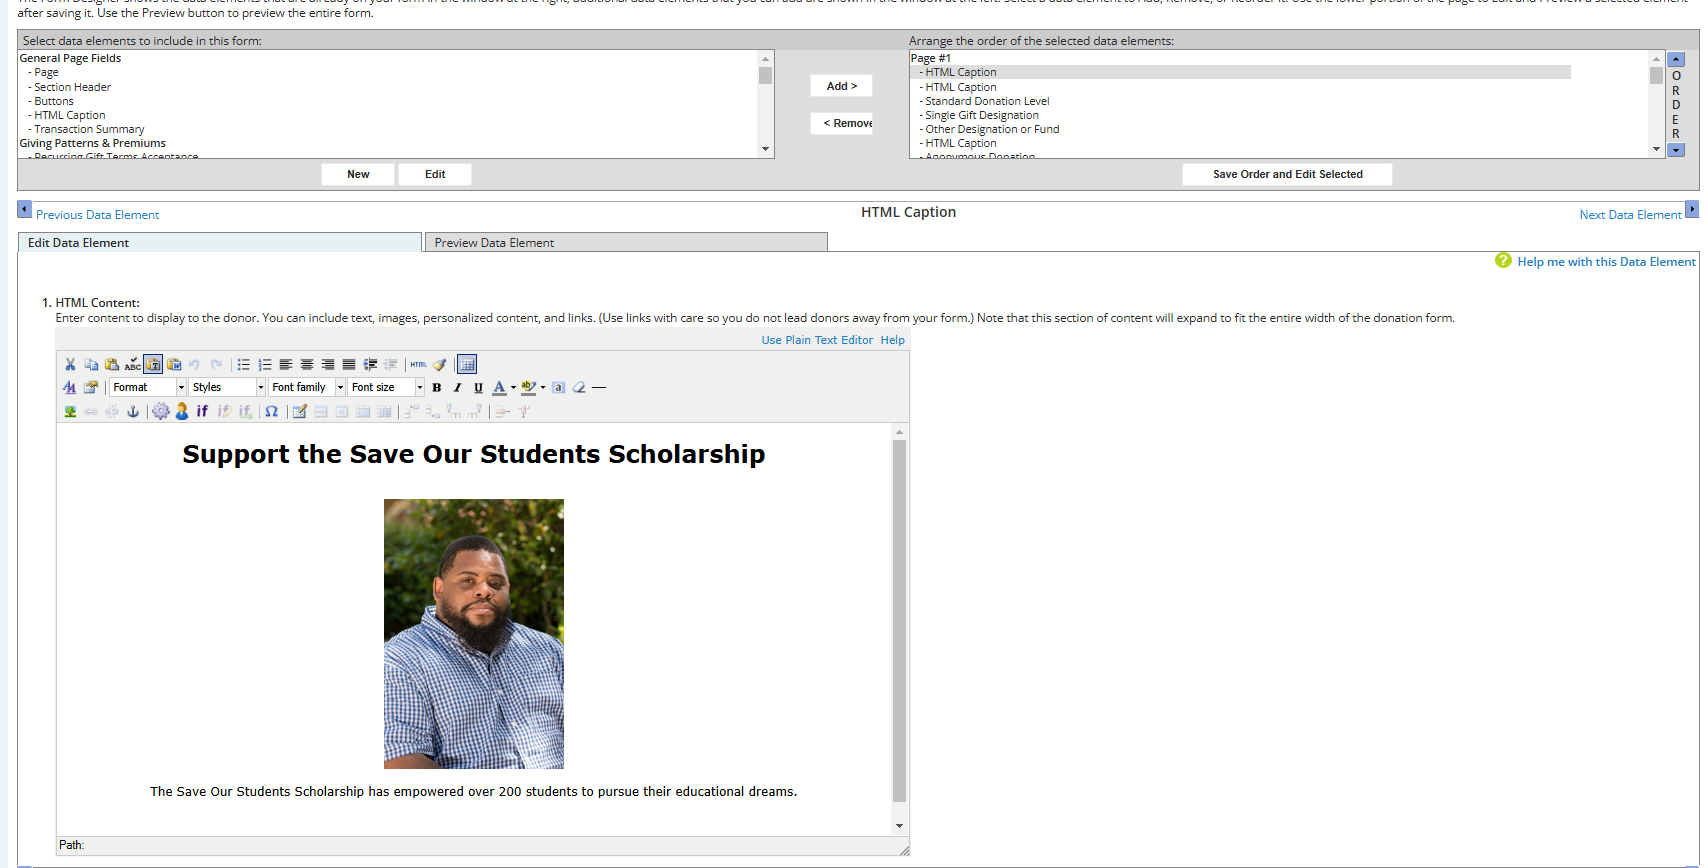
9
WARNING: Don't forget to remove any references to Giving Tuesday or other fundraising challenges that are outdated -- like in the example shown below.
If no changes are needed or you've finished editing the content, Click on the [Save] button.
If no changes are needed or you've finished editing the content, Click on the [Save] button.
![Step #9: WARNING: Don't forget to remove any references to Giving Tuesday or other fundraising challenges that are outdated -- like in the example shown below.If no changes are needed or you've finished editing the content, Click on the [Save] button.](https://di8mn0rali2ic.cloudfront.net/uploads/723f3eab-3de0-4fed-a4d9-4140f72ab79a/93970a98-270c-46d6-a37a-03d5efc71342.png)
10
If no changes are needed or you've finished making changes to the content, Click on the [Save] button to exit the HTML Content editor.
11
Click on [Save Order and Edit Selected] button.
![Step #11: Click on [Save Order and Edit Selected] button.](https://di8mn0rali2ic.cloudfront.net/uploads/723f3eab-3de0-4fed-a4d9-4140f72ab79a/ba77426b-acac-43eb-84bc-b219bbba74b8.png)
STEP 2. ADD DESIGNEES TO THE FORM
12
In the top right panel, Click on "Single Gift Designation"
13
Click on [Save Order and Edit Selected] button.
![Step #13: Click on [Save Order and Edit Selected] button.](https://di8mn0rali2ic.cloudfront.net/uploads/723f3eab-3de0-4fed-a4d9-4140f72ab79a/26dd4ce1-a06f-4e2a-894b-7fe8097b7472.png)
14
Scroll down to 6. Eligible Designees and Click on "Change List of Designees"
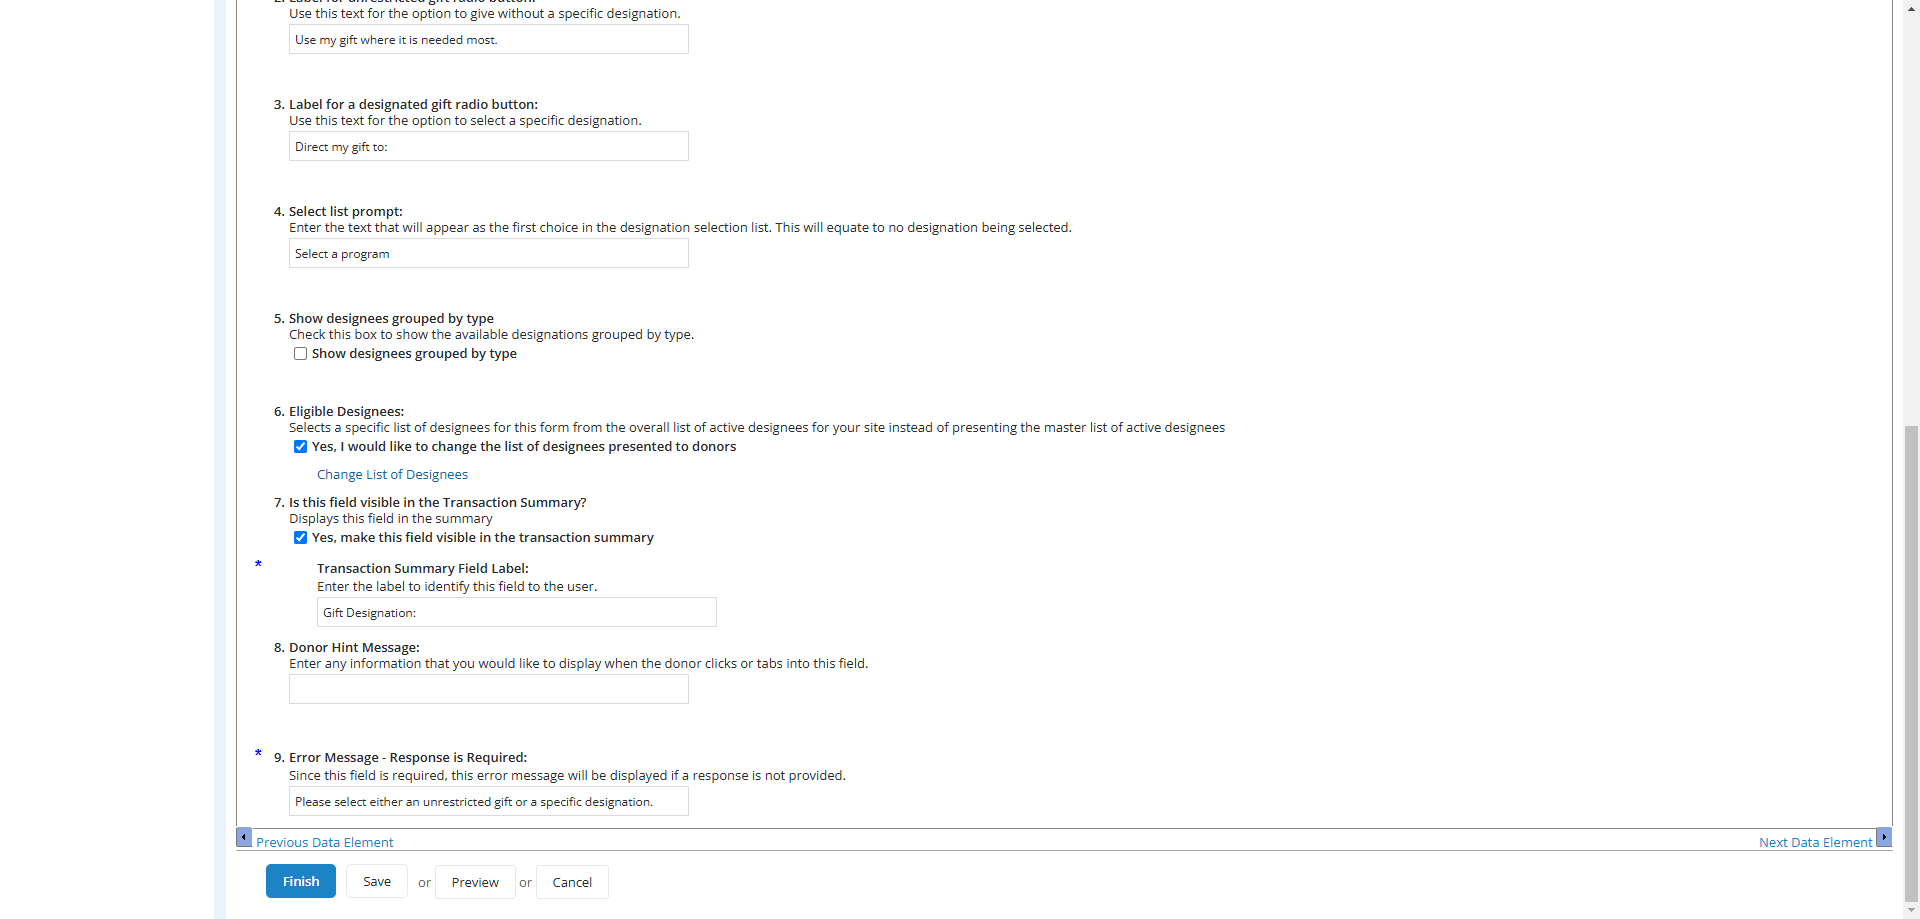
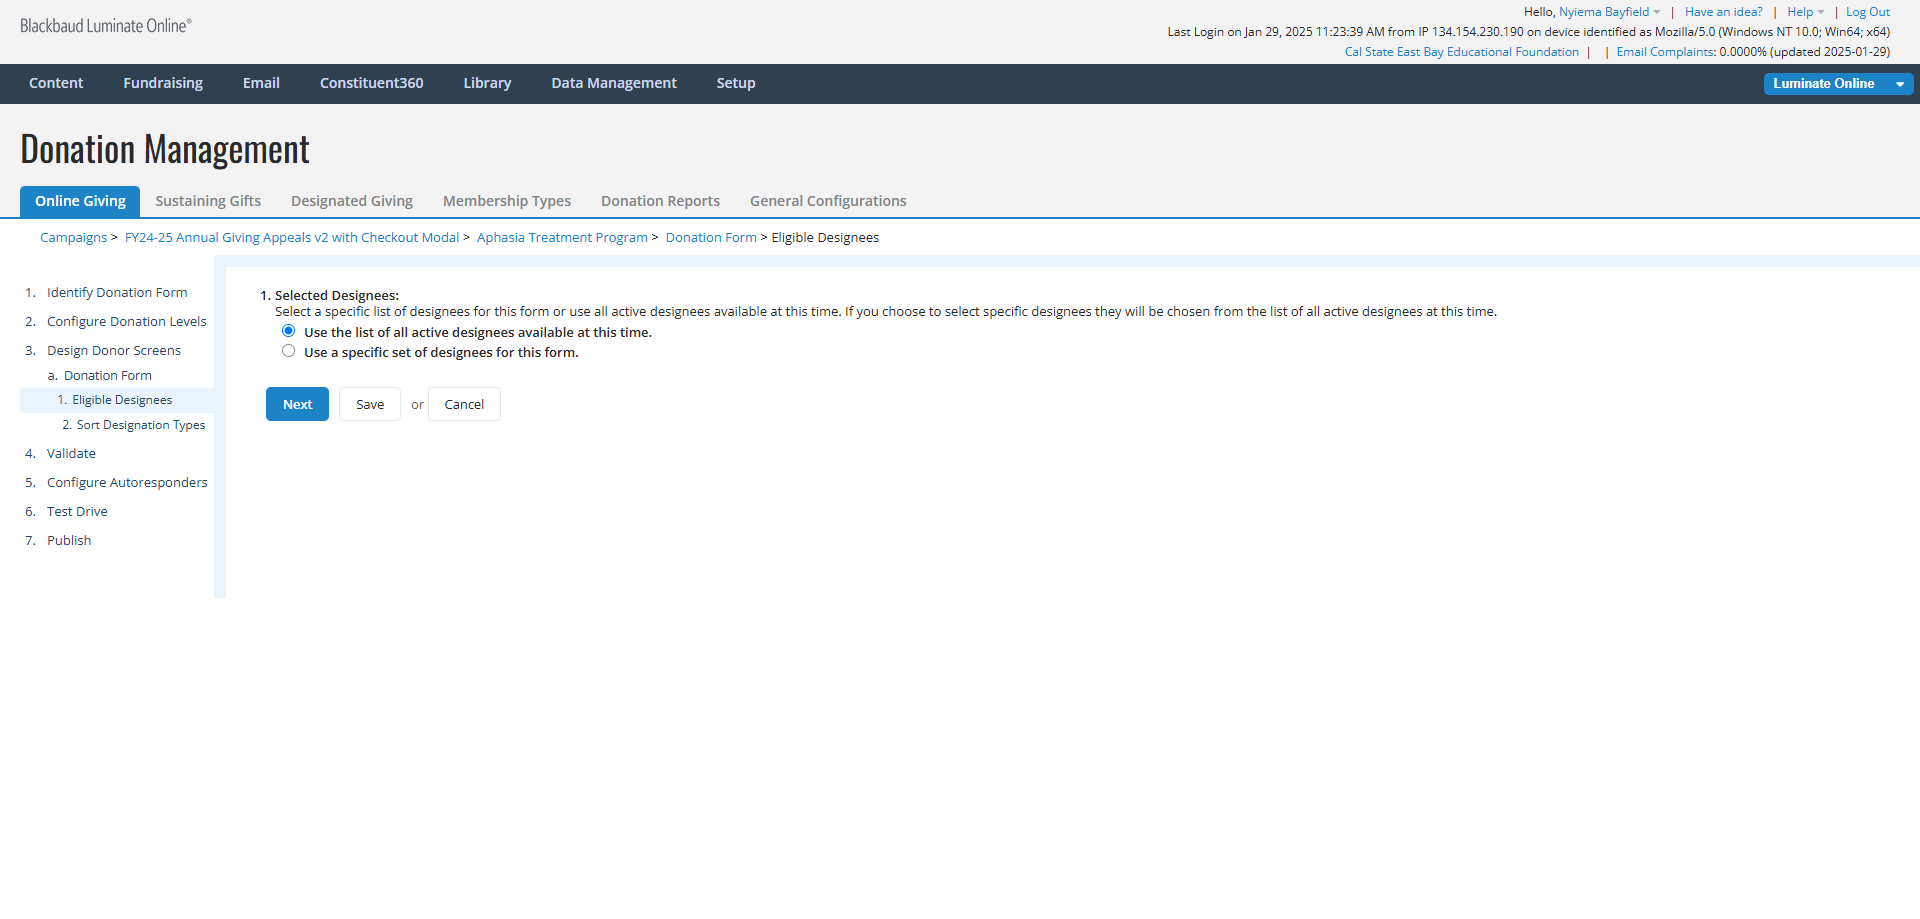
15
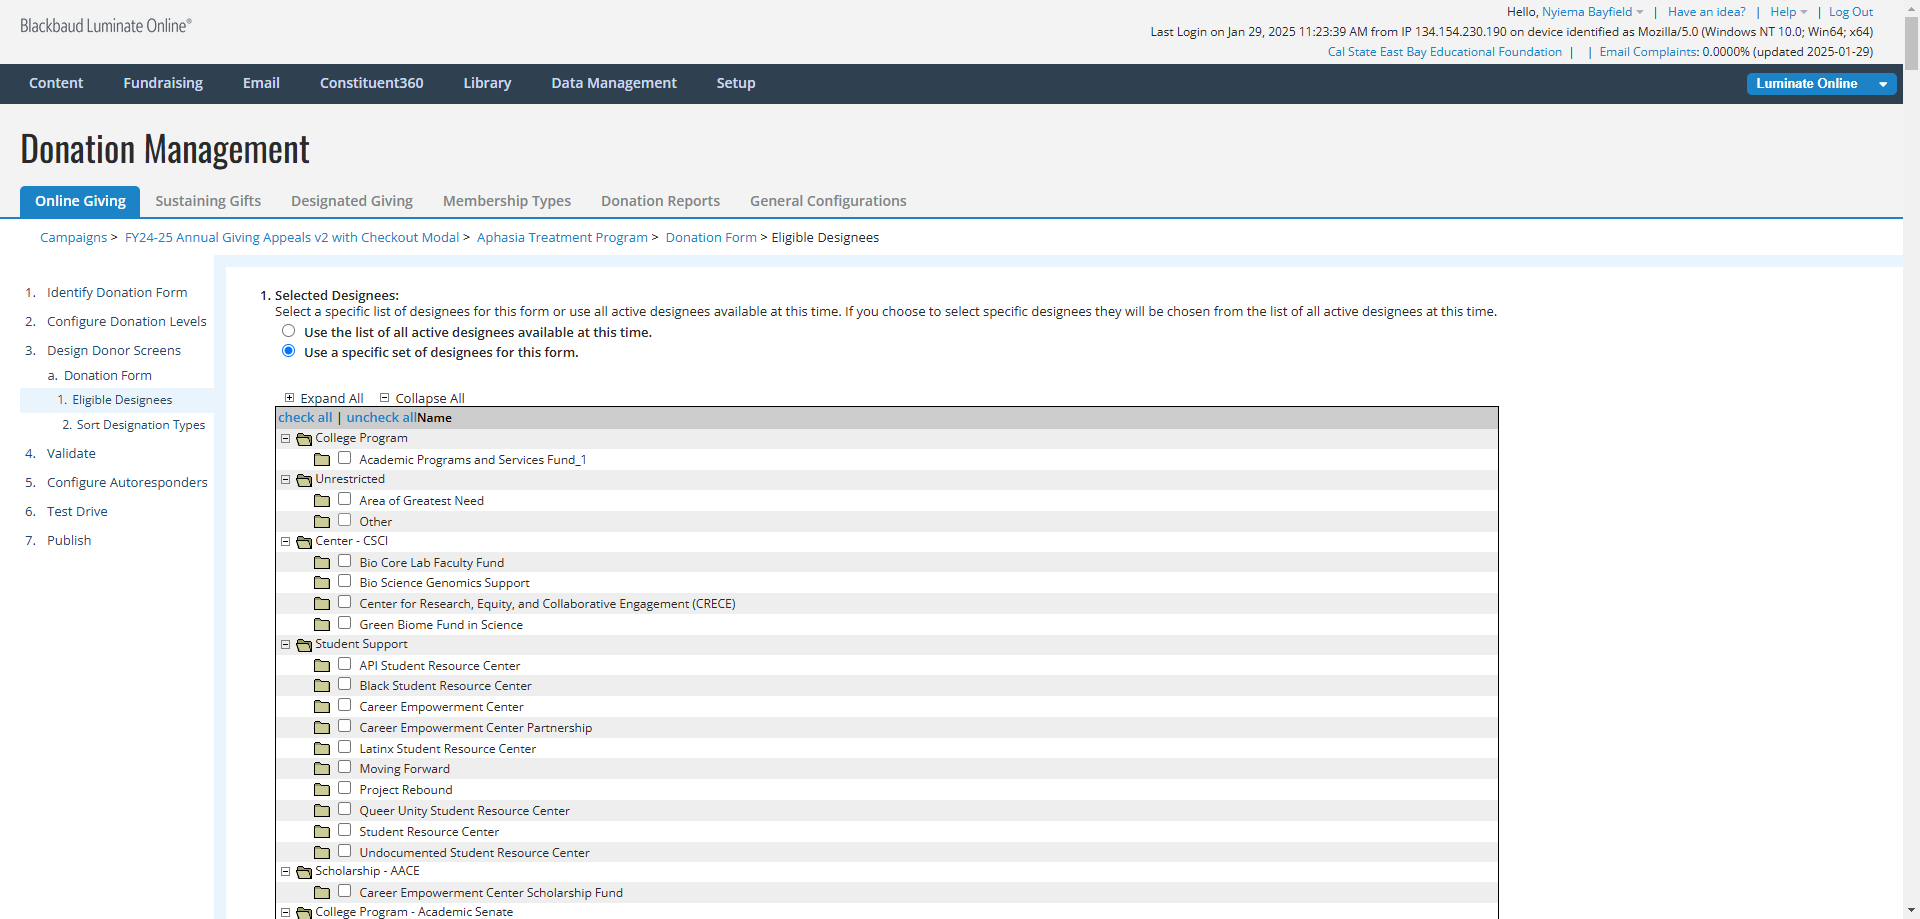
Click on the radio button next to "Use a specific set of designees for this form"
16
Click on "uncheck all"
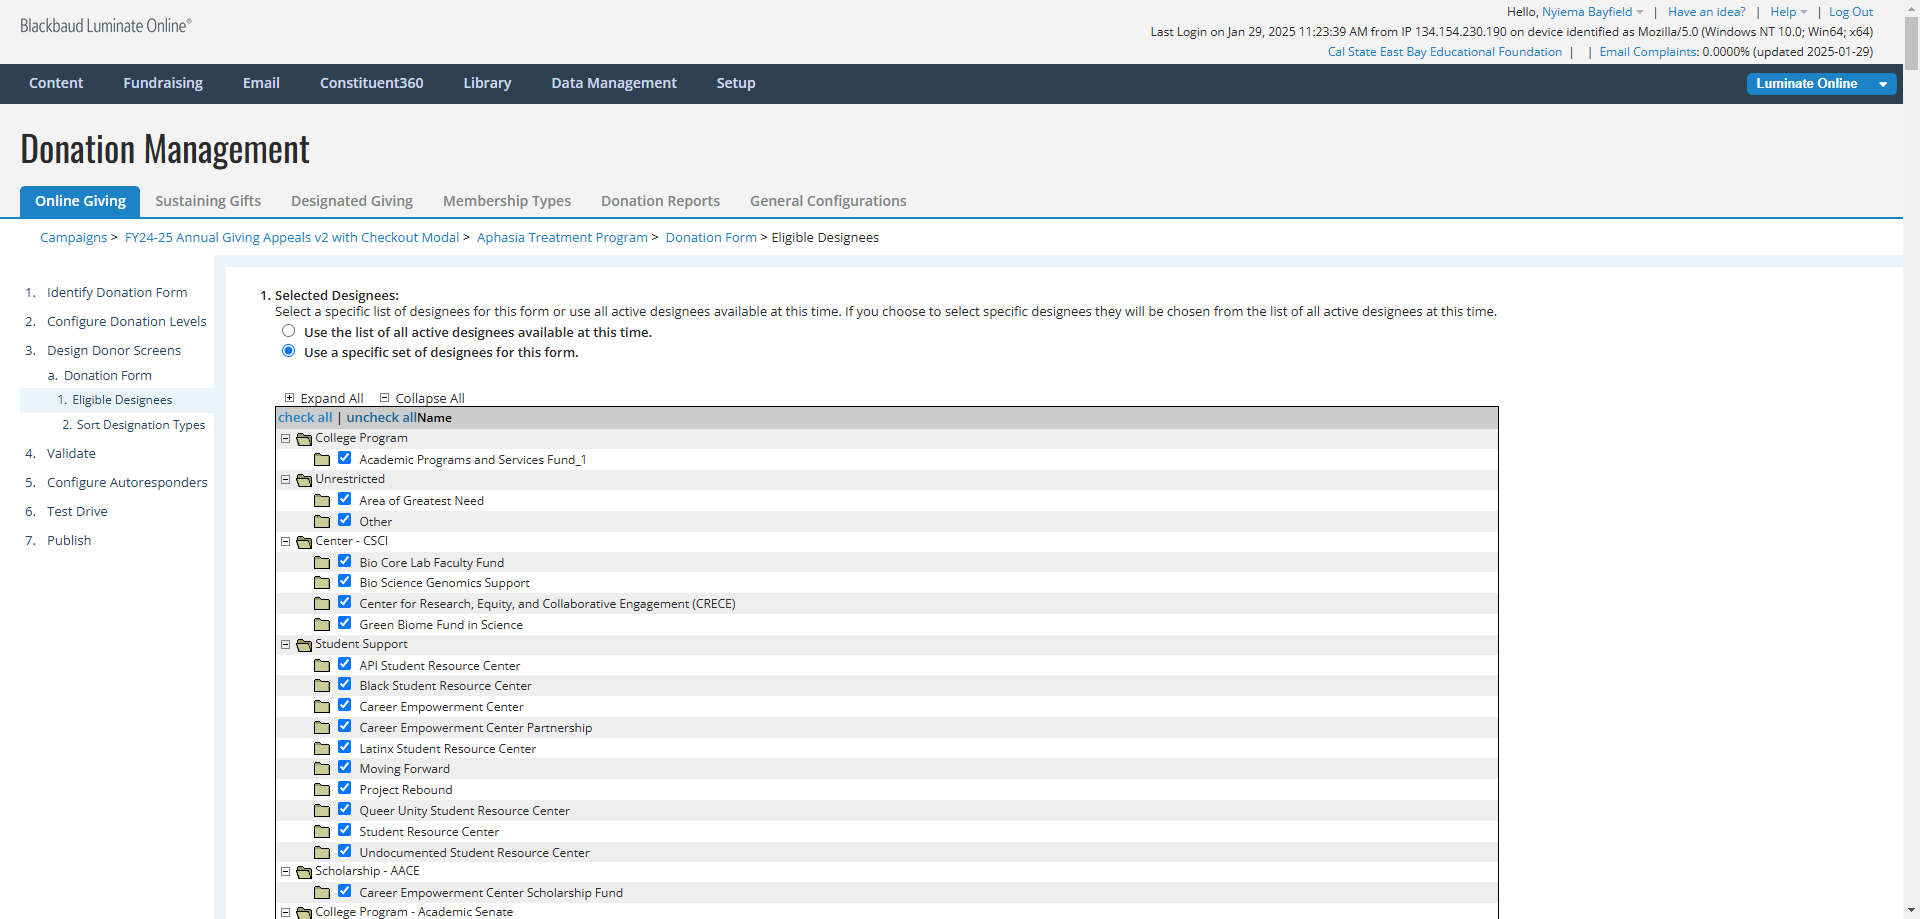
17
Under the heading "Unrestricted", click the box next to "Other" to select it as a Designee.
18
To add additional designees, click the box next to each of their names.
19
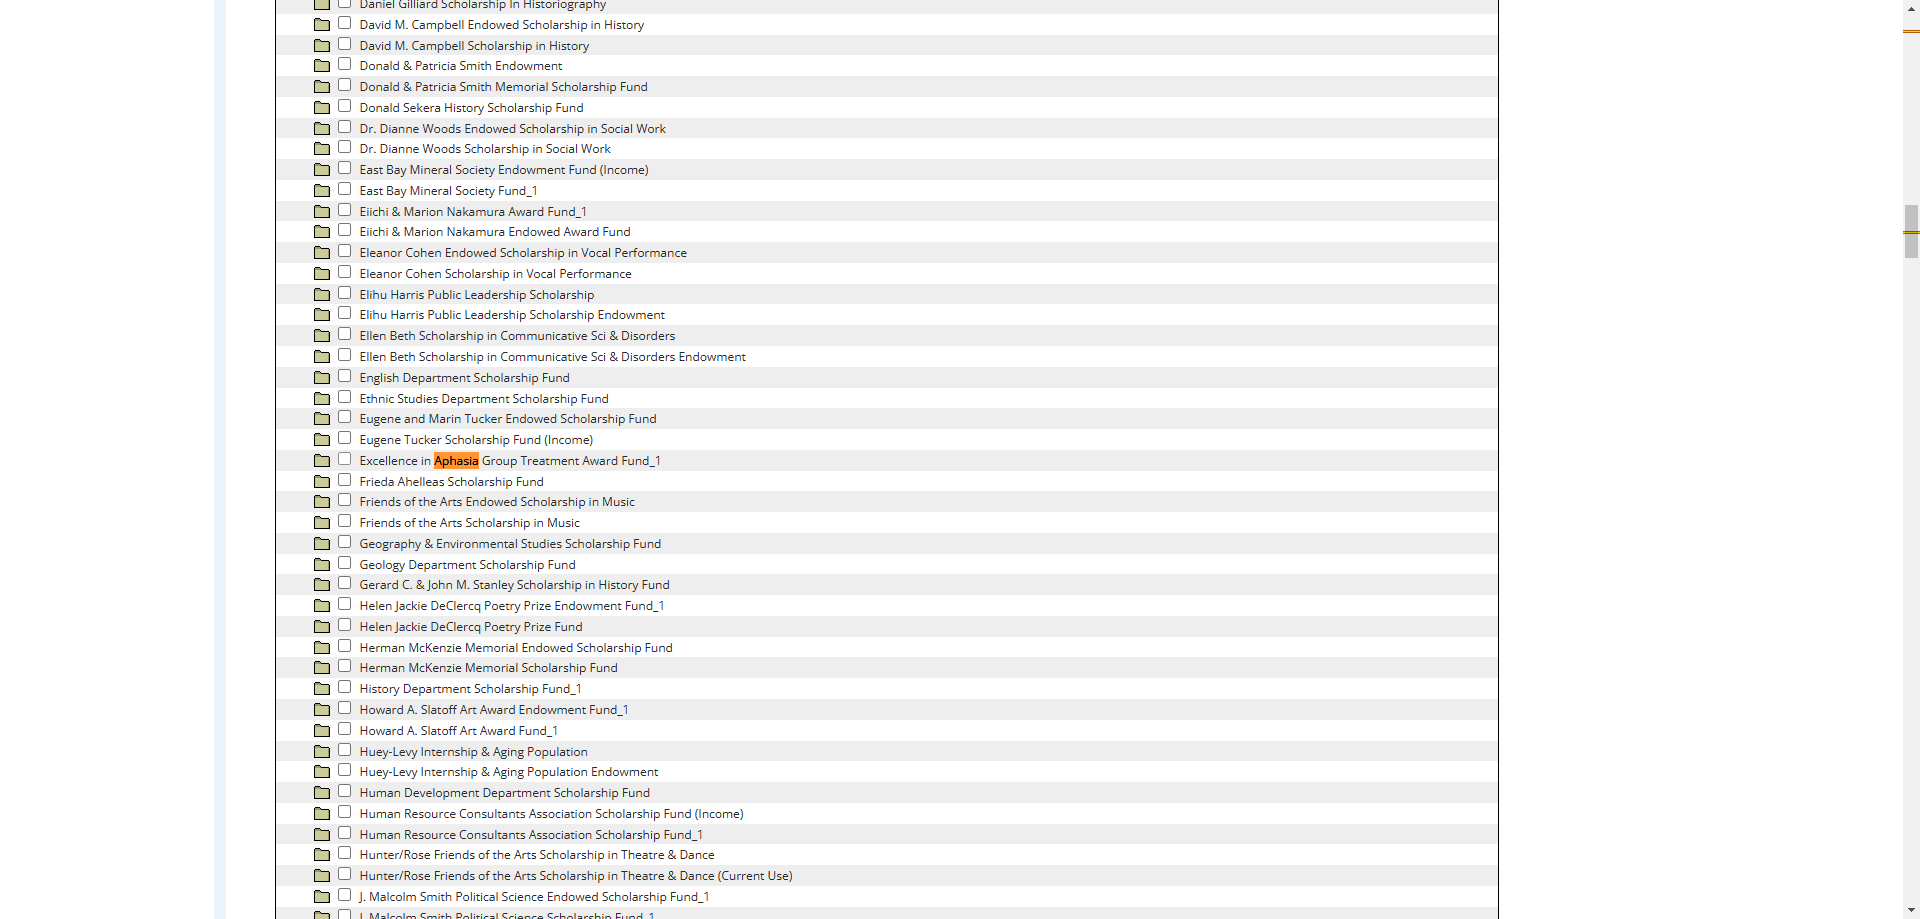
When all of the designees have been selected, scroll down to the bottom of the screen and Click on the [Save] button.
![Step #19: When all of the designees have been selected, scroll down to the bottom of the screen and Click on the [Save] button.](https://di8mn0rali2ic.cloudfront.net/uploads/723f3eab-3de0-4fed-a4d9-4140f72ab79a/e2b6141c-1215-4bf6-97e4-5c926ff06e30.png)
STEP 3. SORT HOW DESIGNEES ARE LISTED
20
Sort Designation Types

STEP 4. ADD THE MATCHING GIFTS SEARCH COMPONENT
21
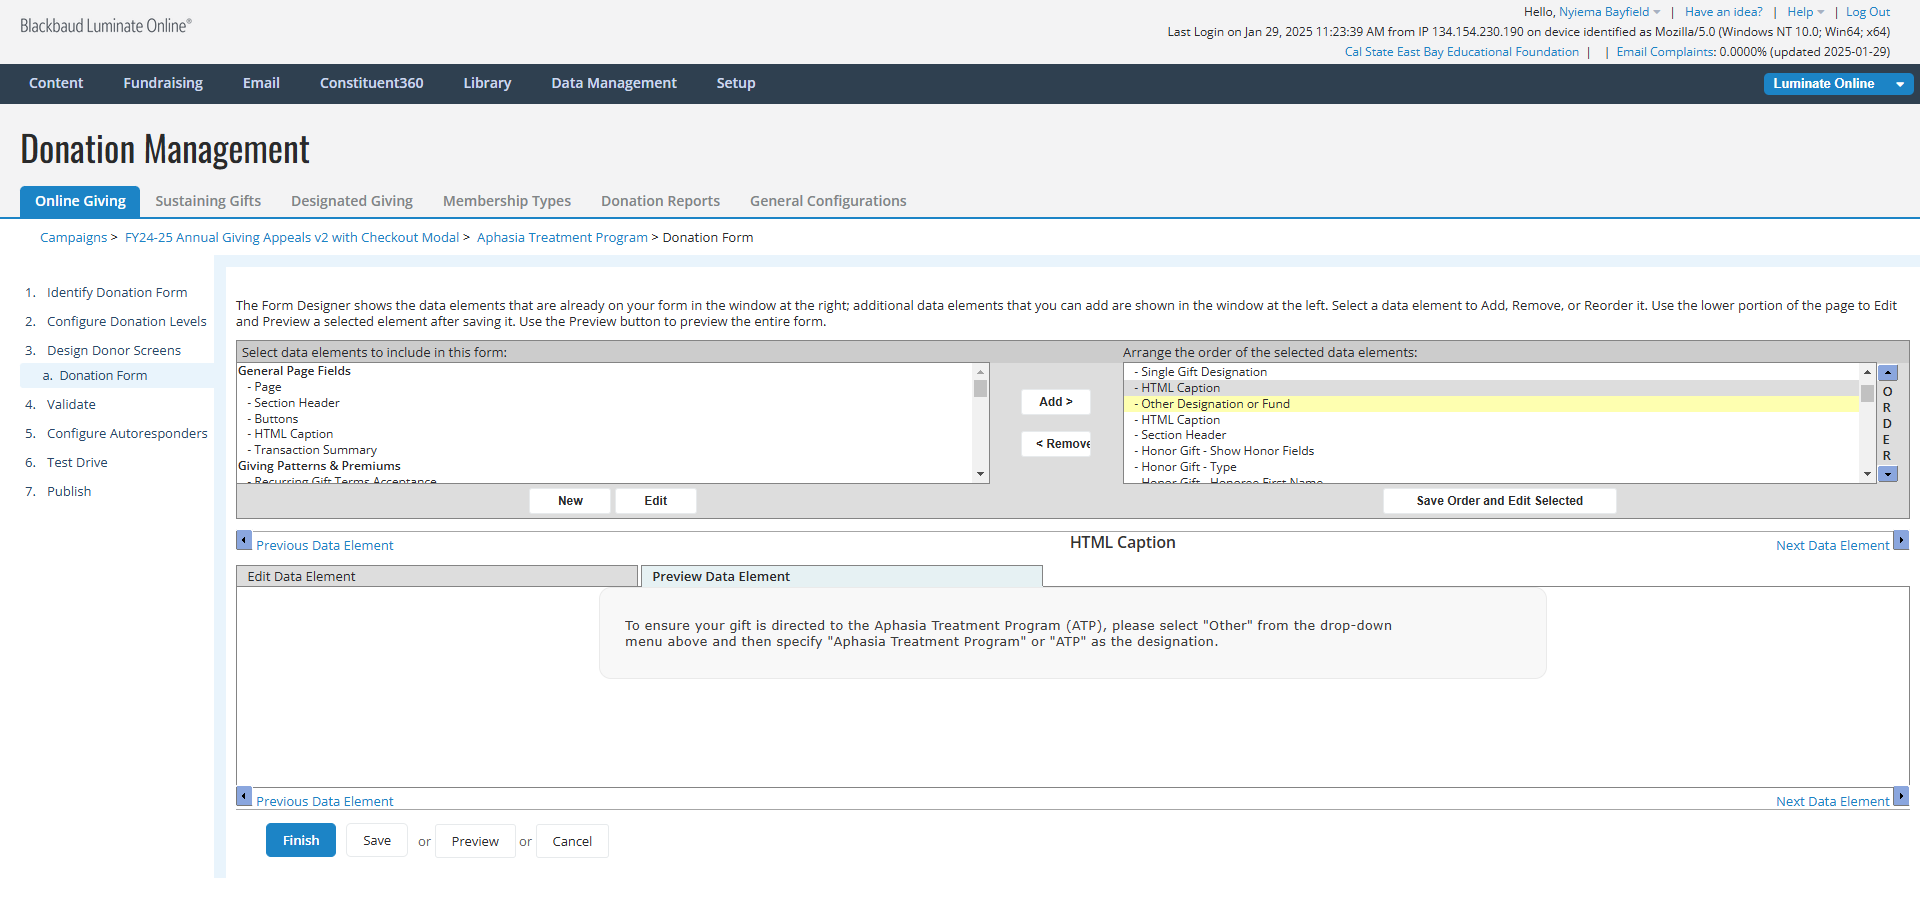
In the top right panel, Click on "Other Designation or Fund"
22
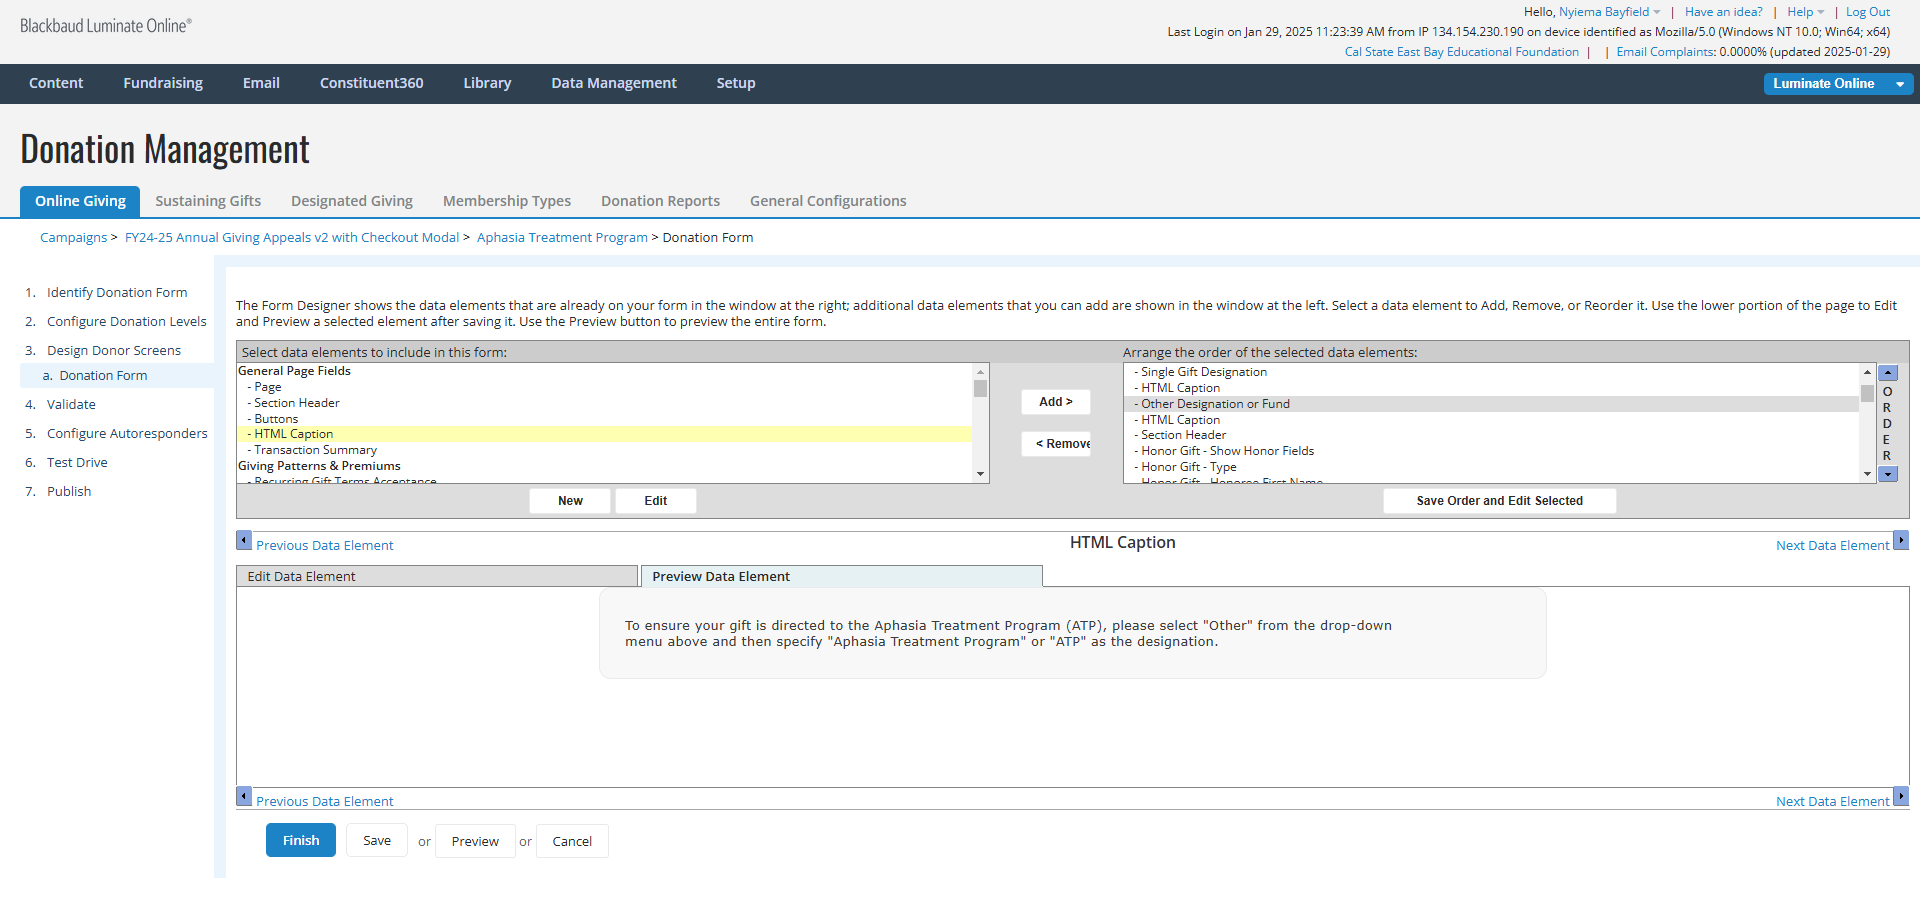
In the top left panel, Click on "HTML Caption"
23
Click on [Add >] button.
![Step #23: Click on [Add >] button.](https://di8mn0rali2ic.cloudfront.net/uploads/723f3eab-3de0-4fed-a4d9-4140f72ab79a/7b641fed-6a48-4df5-8569-e5030b73386d.png)
24
Click on [Save Order and Edit Selected] button
![Step #24: Click on [Save Order and Edit Selected] button](https://di8mn0rali2ic.cloudfront.net/uploads/723f3eab-3de0-4fed-a4d9-4140f72ab79a/5315d6b5-c3dd-4630-8d4c-0564c03f938a.png)
25
In the HTML Content Editor, click on the Components icon.
Note: It looks like a "cog" and is in the bottom row between the anchor and person.
Note: It looks like a "cog" and is in the bottom row between the anchor and person.
26
Click on [Save Order and Edit Selected] button.
![Step #26: Click on [Save Order and Edit Selected] button.](https://di8mn0rali2ic.cloudfront.net/uploads/723f3eab-3de0-4fed-a4d9-4140f72ab79a/826bc034-7d24-4404-9232-01625c010b34.png)
STEP 5. CHANGE TEXT OF BUTTONS
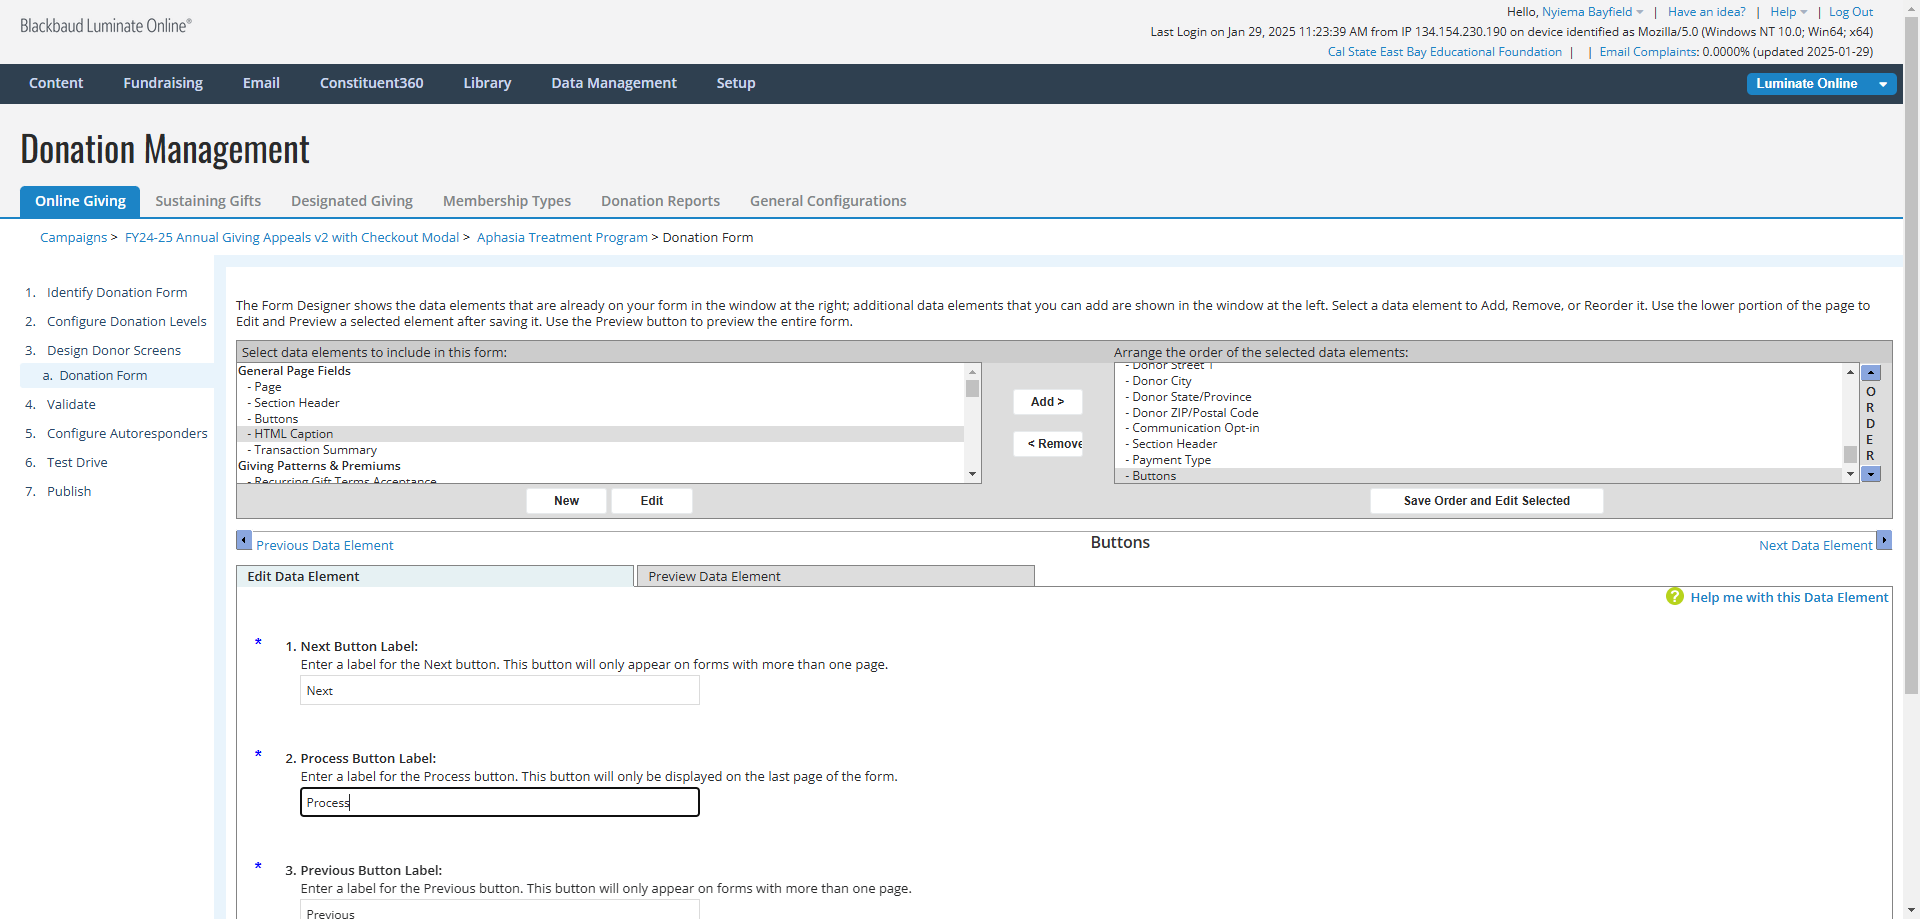
27
In the top right panel, Click on "Buttons"

28
Click on [Save Order and Edit Selected] button.
![Step #28: Click on [Save Order and Edit Selected] button.](https://di8mn0rali2ic.cloudfront.net/uploads/723f3eab-3de0-4fed-a4d9-4140f72ab79a/da1194ce-849f-45da-808d-896336b8f3ee.png)
29
Click on the box below 2. Process Button Label and change the text to "Submit"
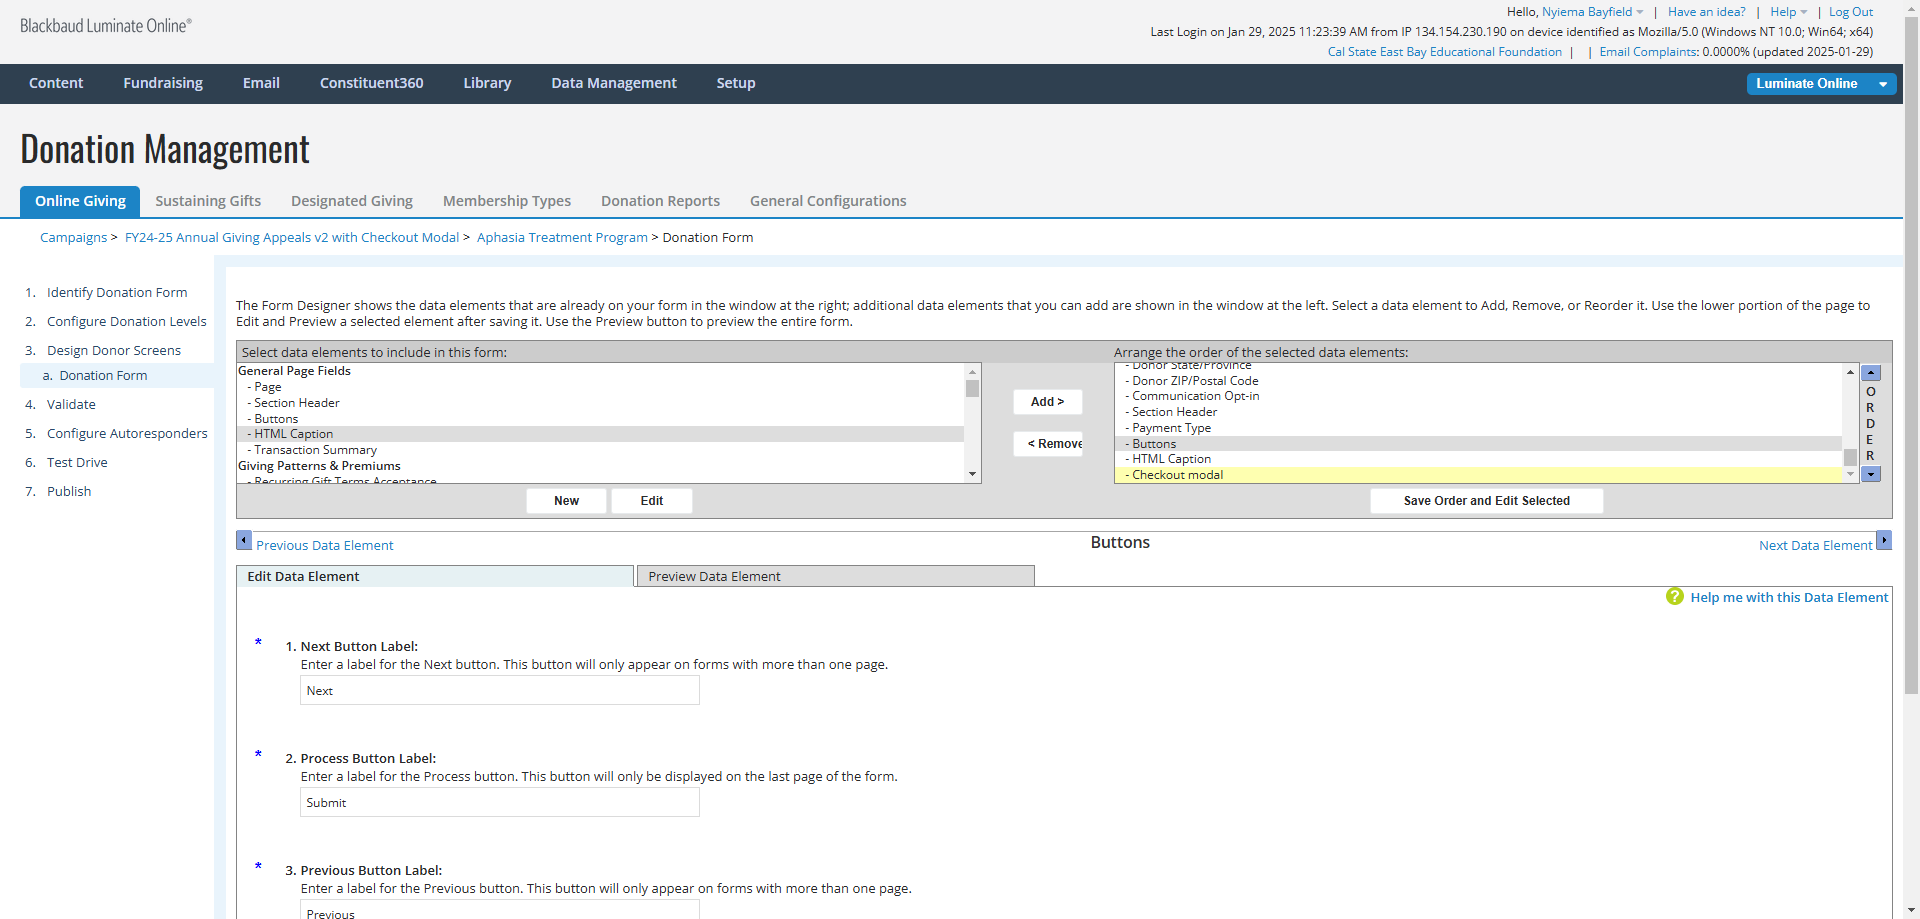
30
Click on [Save] button.
![Step #30: Click on [Save] button.](https://di8mn0rali2ic.cloudfront.net/uploads/723f3eab-3de0-4fed-a4d9-4140f72ab79a/55049cc9-644d-47e3-80b6-af5f5becff8b.png)
STEP 6. REMOVE CHECKOUT MODAL
31
In the top right panel, Click on "Checkout modal"
32
Click on [< Remove] button.
![Step #32: Click on [< Remove] button.](https://di8mn0rali2ic.cloudfront.net/uploads/723f3eab-3de0-4fed-a4d9-4140f72ab79a/4afb5526-ed8f-4cba-8f9a-a055169af440.png)
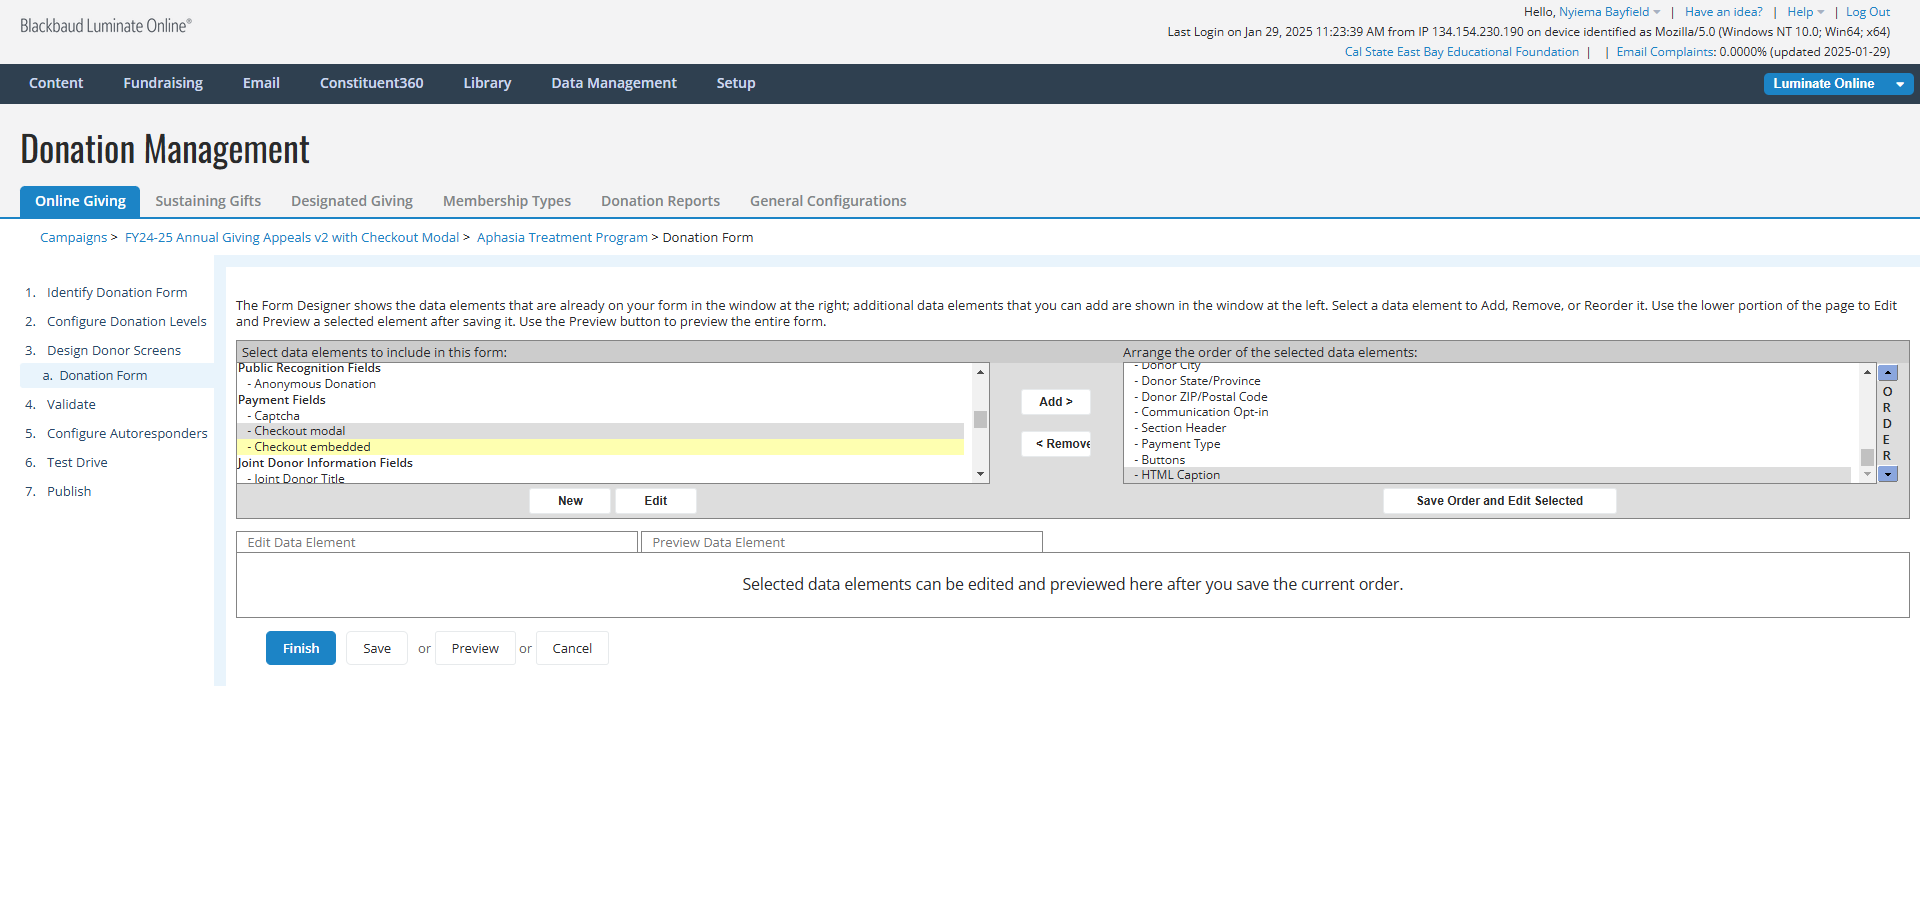
STEP 7. ADD CHECKOUT EMBEDDED
33
In the top left panel, Click on "Checkout embedded".
34
In the top right panel, Click on "Section Header"

35
Click on [Add >] button.
![Step #35: Click on [Add >] button.](https://di8mn0rali2ic.cloudfront.net/uploads/723f3eab-3de0-4fed-a4d9-4140f72ab79a/bdfa5111-ff5c-42a0-956c-dbca1fcde756.png)
STEP 8. ADD SECTION HEADING FOR PAYMENT DETAILS
36
In the top right panel, Click on "Section Header".
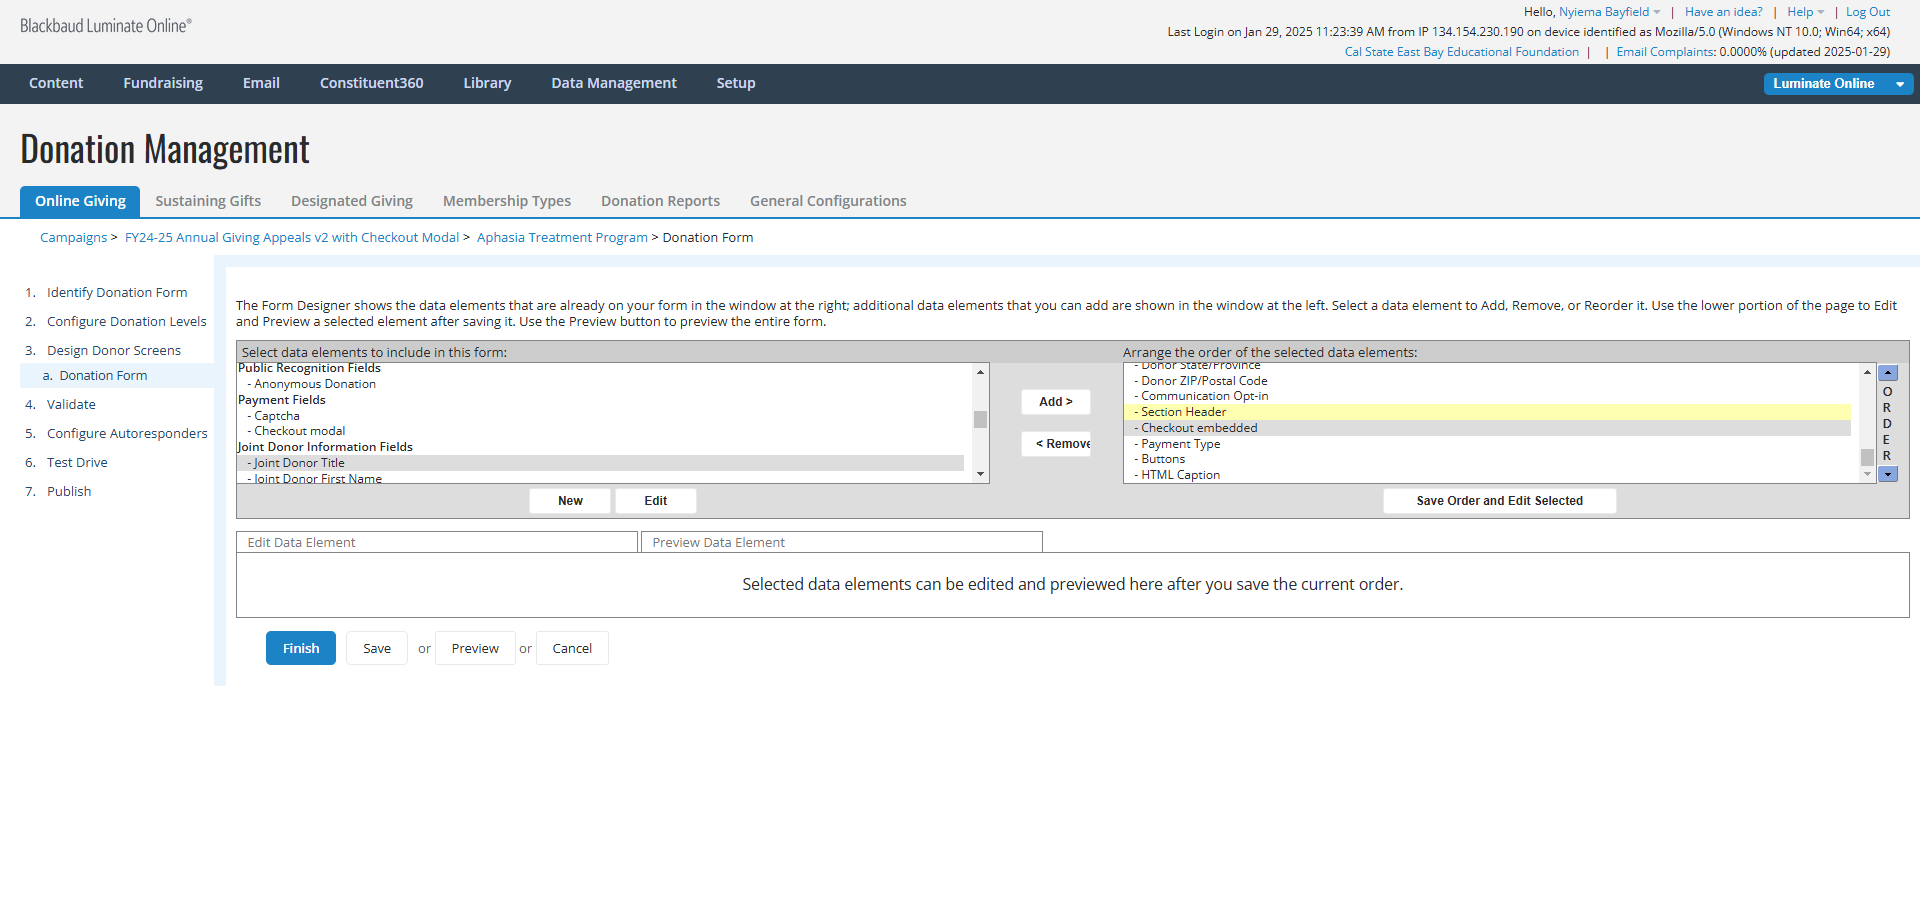
37
In the top left panel, Click on "Section Header"
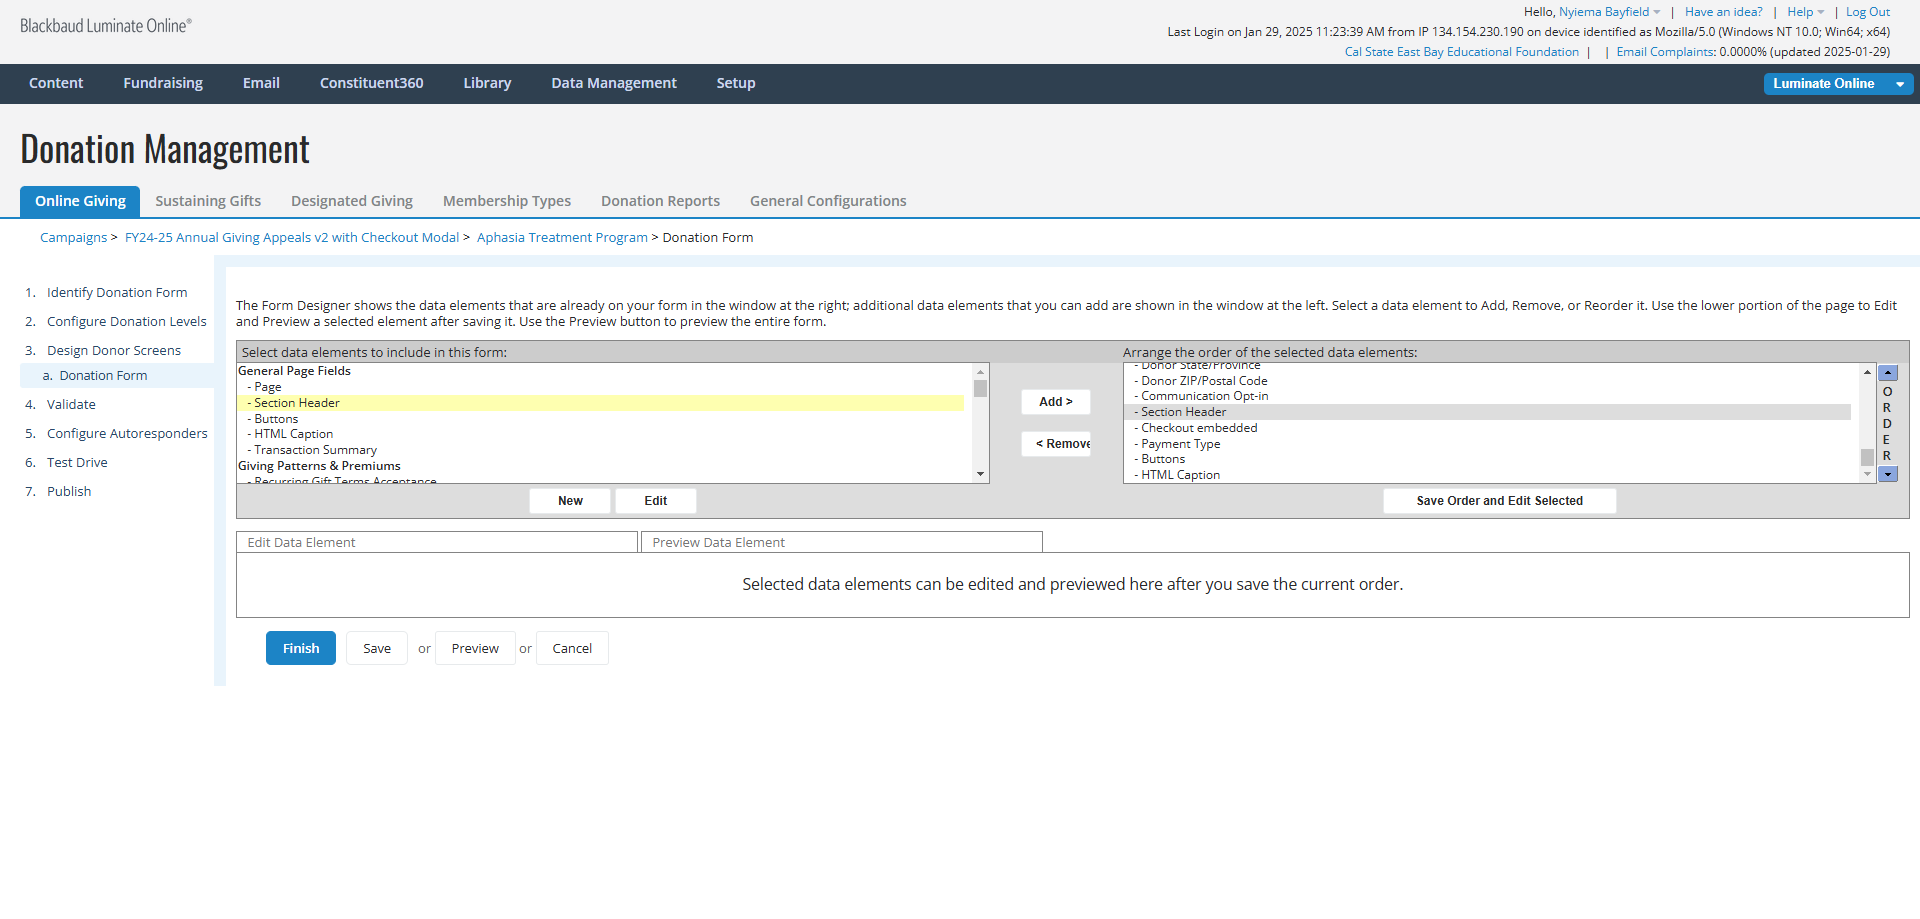
38
Click on [Add >] button.
![Step #38: Click on [Add >] button.](https://di8mn0rali2ic.cloudfront.net/uploads/723f3eab-3de0-4fed-a4d9-4140f72ab79a/19c327a2-312d-44ff-901c-5360372f27a0.png)
39
Click on [Save Order and Edit Selected] button.
![Step #39: Click on [Save Order and Edit Selected] button.](https://di8mn0rali2ic.cloudfront.net/uploads/723f3eab-3de0-4fed-a4d9-4140f72ab79a/fcc414f7-6d28-4c43-a8da-07ef10406ef4.png)
40
Click in the field below 1. Section Header and change the text from "Section Header" to "Payment Details"
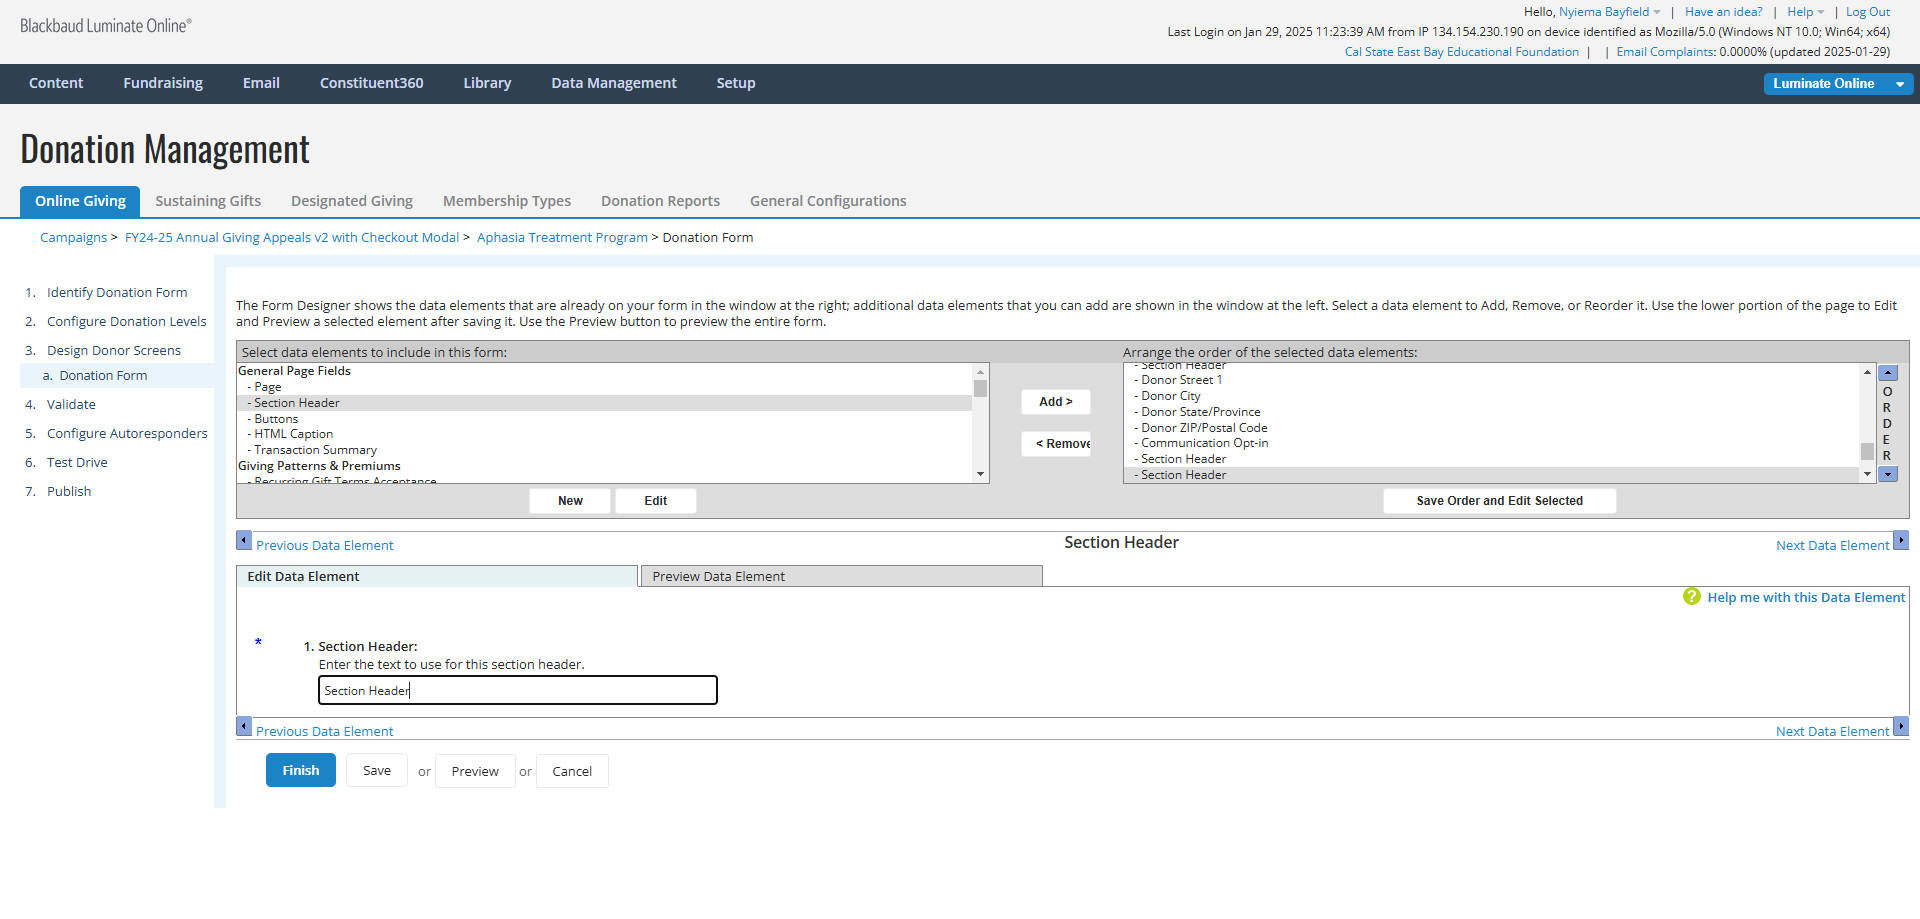
41
Click on [Save] button.
![Step #41: Click on [Save] button.](https://di8mn0rali2ic.cloudfront.net/uploads/723f3eab-3de0-4fed-a4d9-4140f72ab79a/46967079-76f5-4398-9c8a-8d2d373363f5.png)
STEP 9. EXAMINE THE PREVIEW
42
Click on [Preview] button.
![Step #42: Click on [Preview] button.](https://di8mn0rali2ic.cloudfront.net/uploads/723f3eab-3de0-4fed-a4d9-4140f72ab79a/45738724-5acd-4ed1-9e61-043db8540a15.png)
43
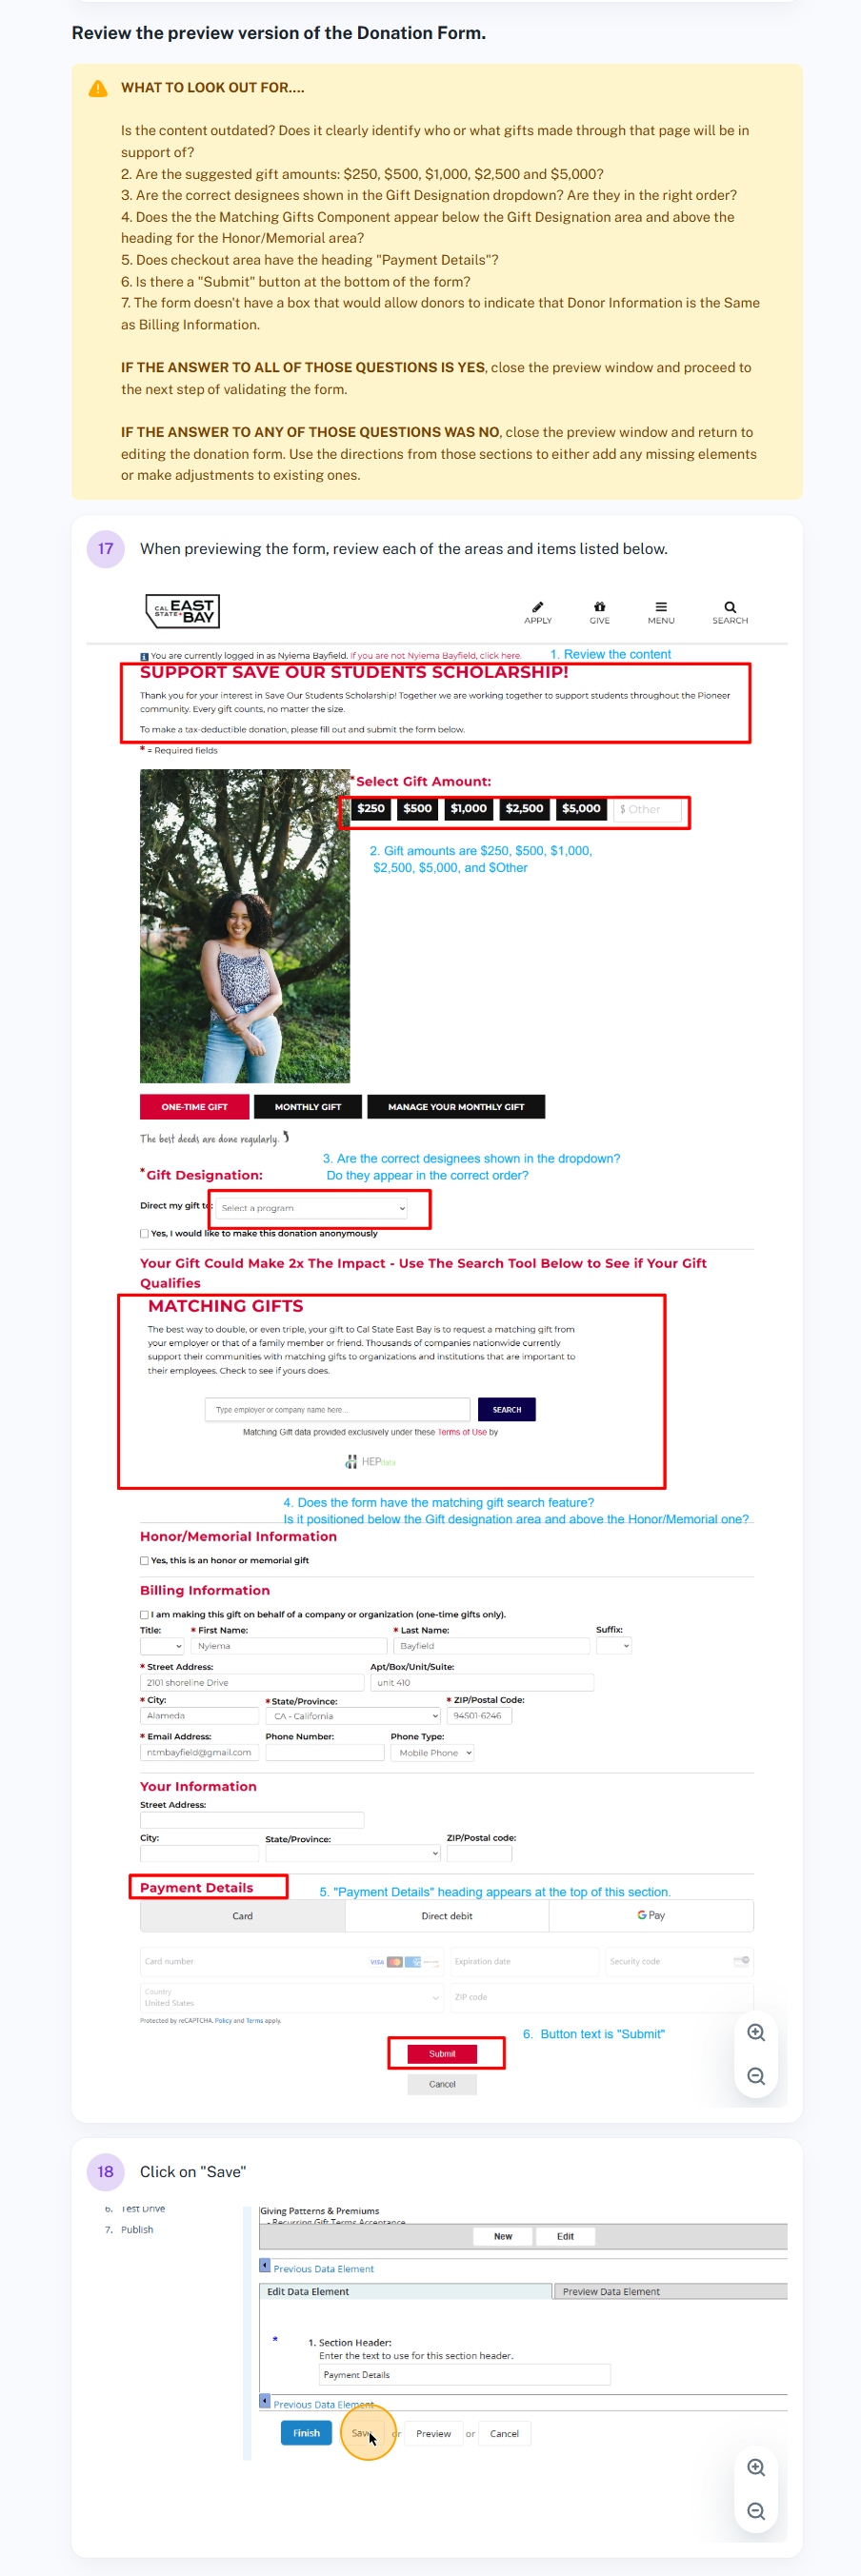
44
Click on [Save] button.
![Step #44: Click on [Save] button.](https://di8mn0rali2ic.cloudfront.net/uploads/723f3eab-3de0-4fed-a4d9-4140f72ab79a/cf601726-8950-4ab3-8b13-4f59b3b138d3.png)
STEP 11. VALIDATE AND PUBLISH THE NEW FORM
45