Icon

WMS : ARROW FOODS - ORDER FULFILLMENT FLOW WITH SALES UOM

By Shipsy

Quick Navigation

  1. SKU Pack Master Setup - Slides 1-8

  2. Order Creation - Slides 9-17

  3. Picklist Generation - Slides 18-21

  4. Picklist Confirmation - Slides 22-26

  5. Invoice Generation - Slides 27-36

  6. Shipment & Manifest - Slides 37-43

  7. Dispatch Report - Slides 44-49

SKU Pack Master Setup

Navigate: Masters > SKU Pack Master

  1. Create new SKU Pack

  2. Define Pack IDs (CON/CASE/PALLET) with quantities

  3. Enable Sales & Purchase UOM

  4. Save configuration

1
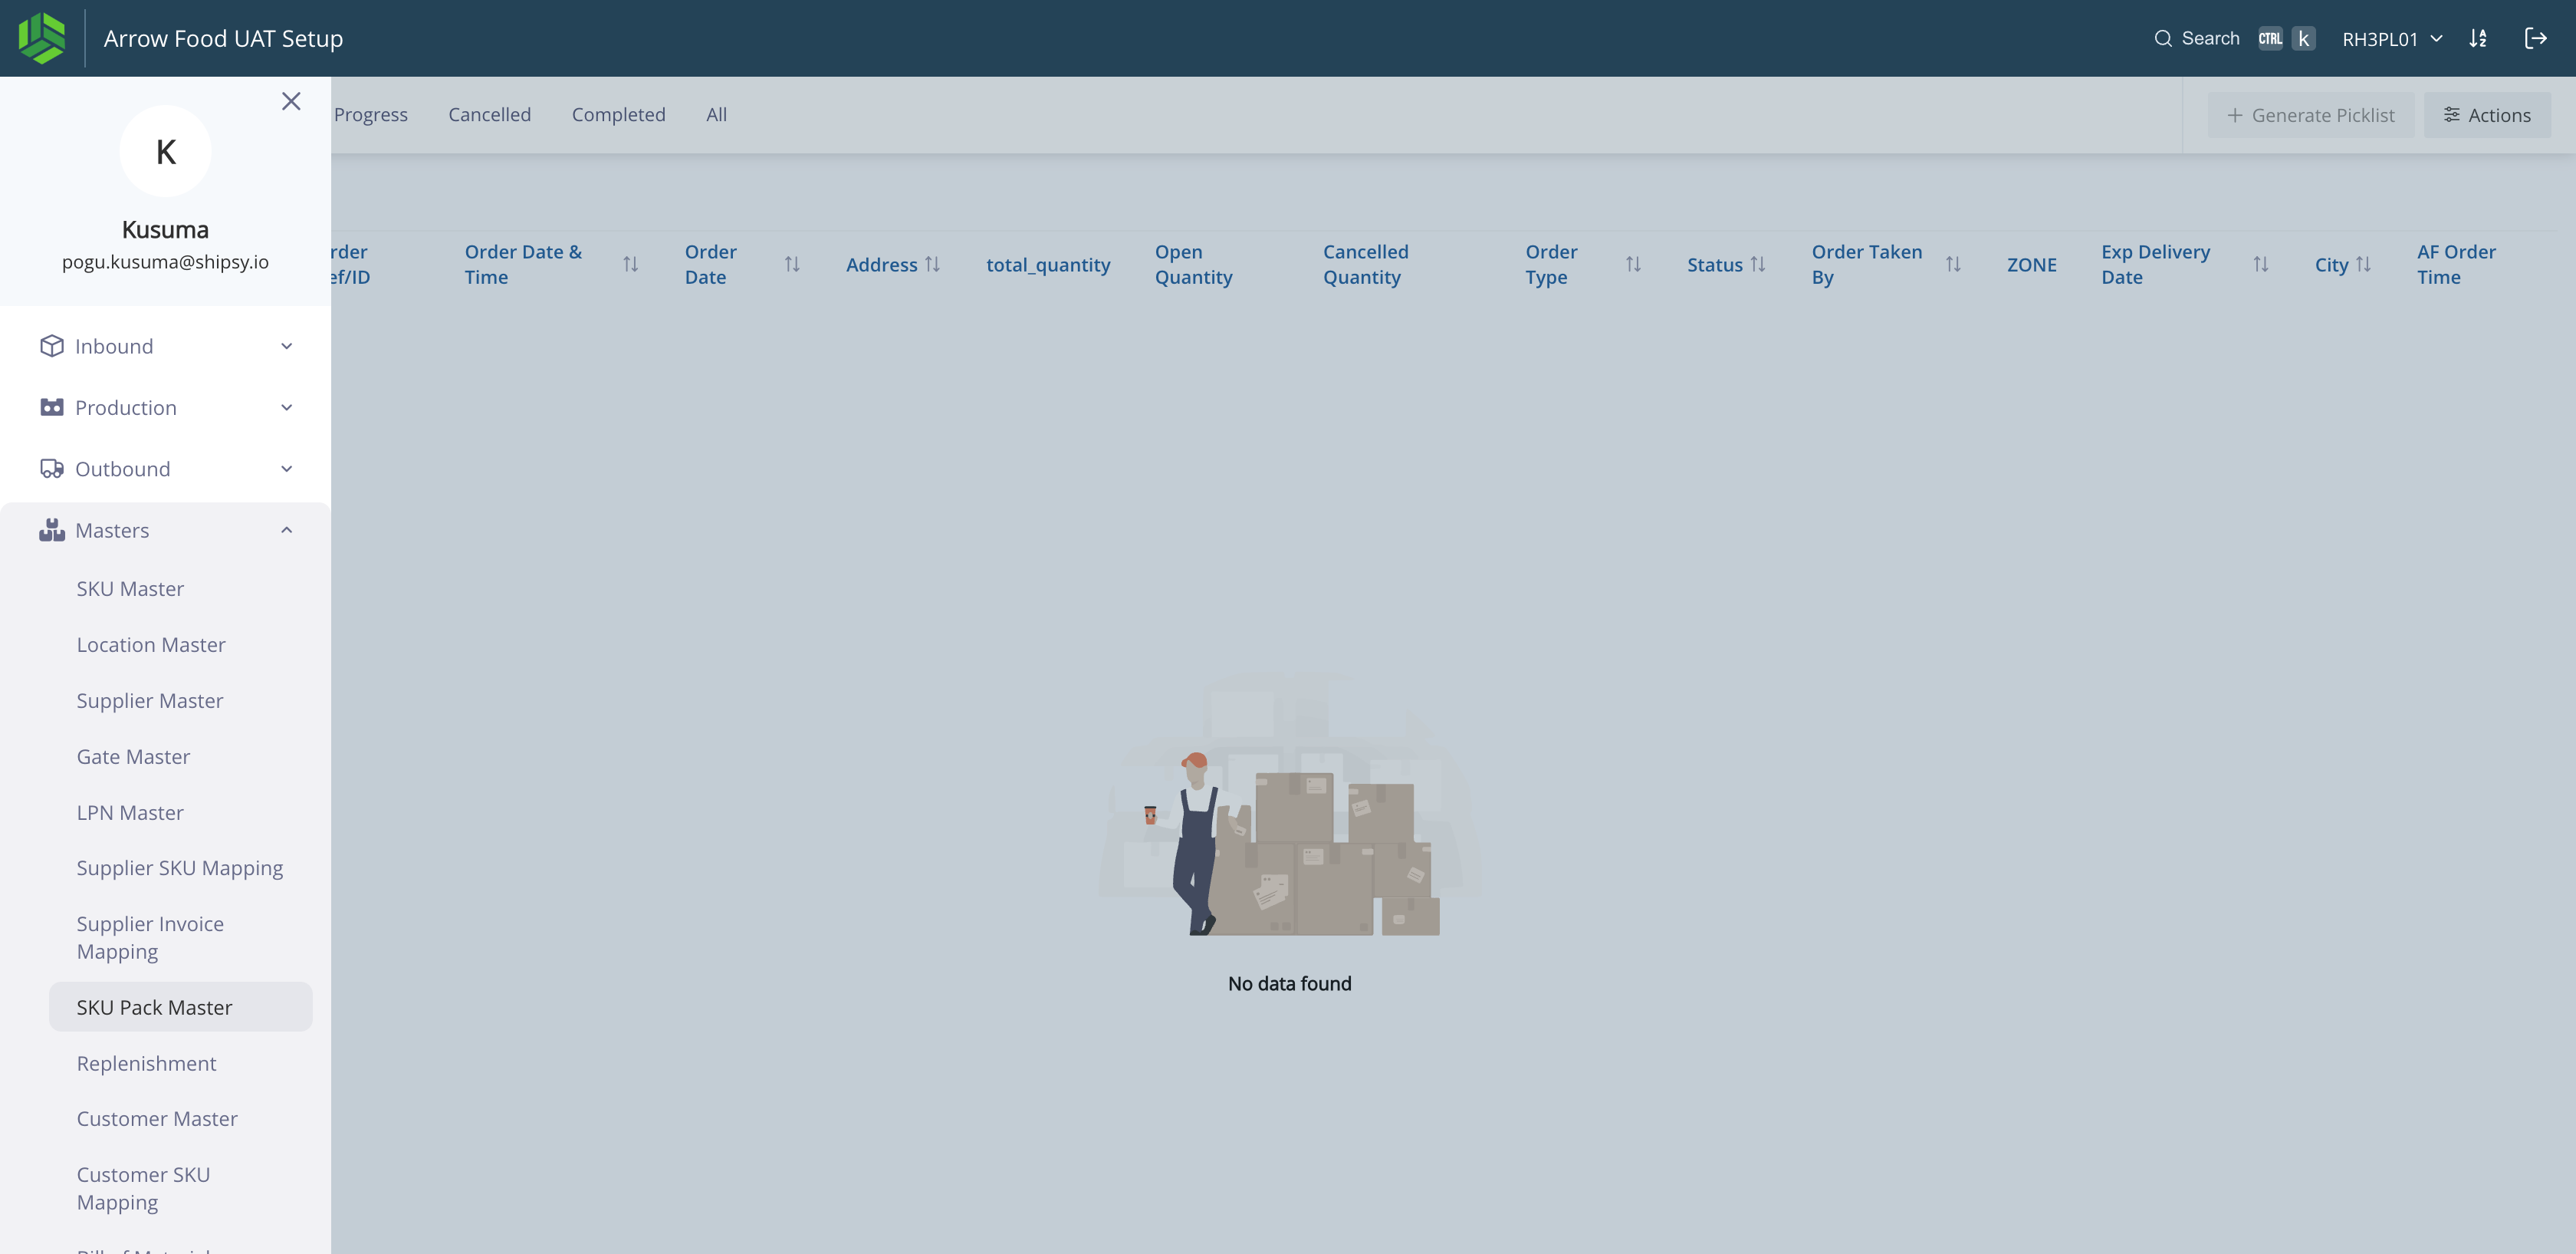
Navigate to Masters > SKU Pack Master.
Step #1: Navigate to Masters > SKU Pack Master.
2
Click on "+ New SKU Pack"
Step #2: Click on "+ New SKU Pack"
3
Select the SKU code for which PACK ID is to be defined.
Step #3: Select the SKU code for which PACK ID is to be defined.
4
Add PACK ID and quantity to be packed with this PACK ID.
Step #4: Add PACK ID and quantity to be packed with this PACK ID.
5
Enable SALES UOM to used this Pack ID while order creation.
Step #5: Enable SALES UOM to used this Pack ID while order creation.
6
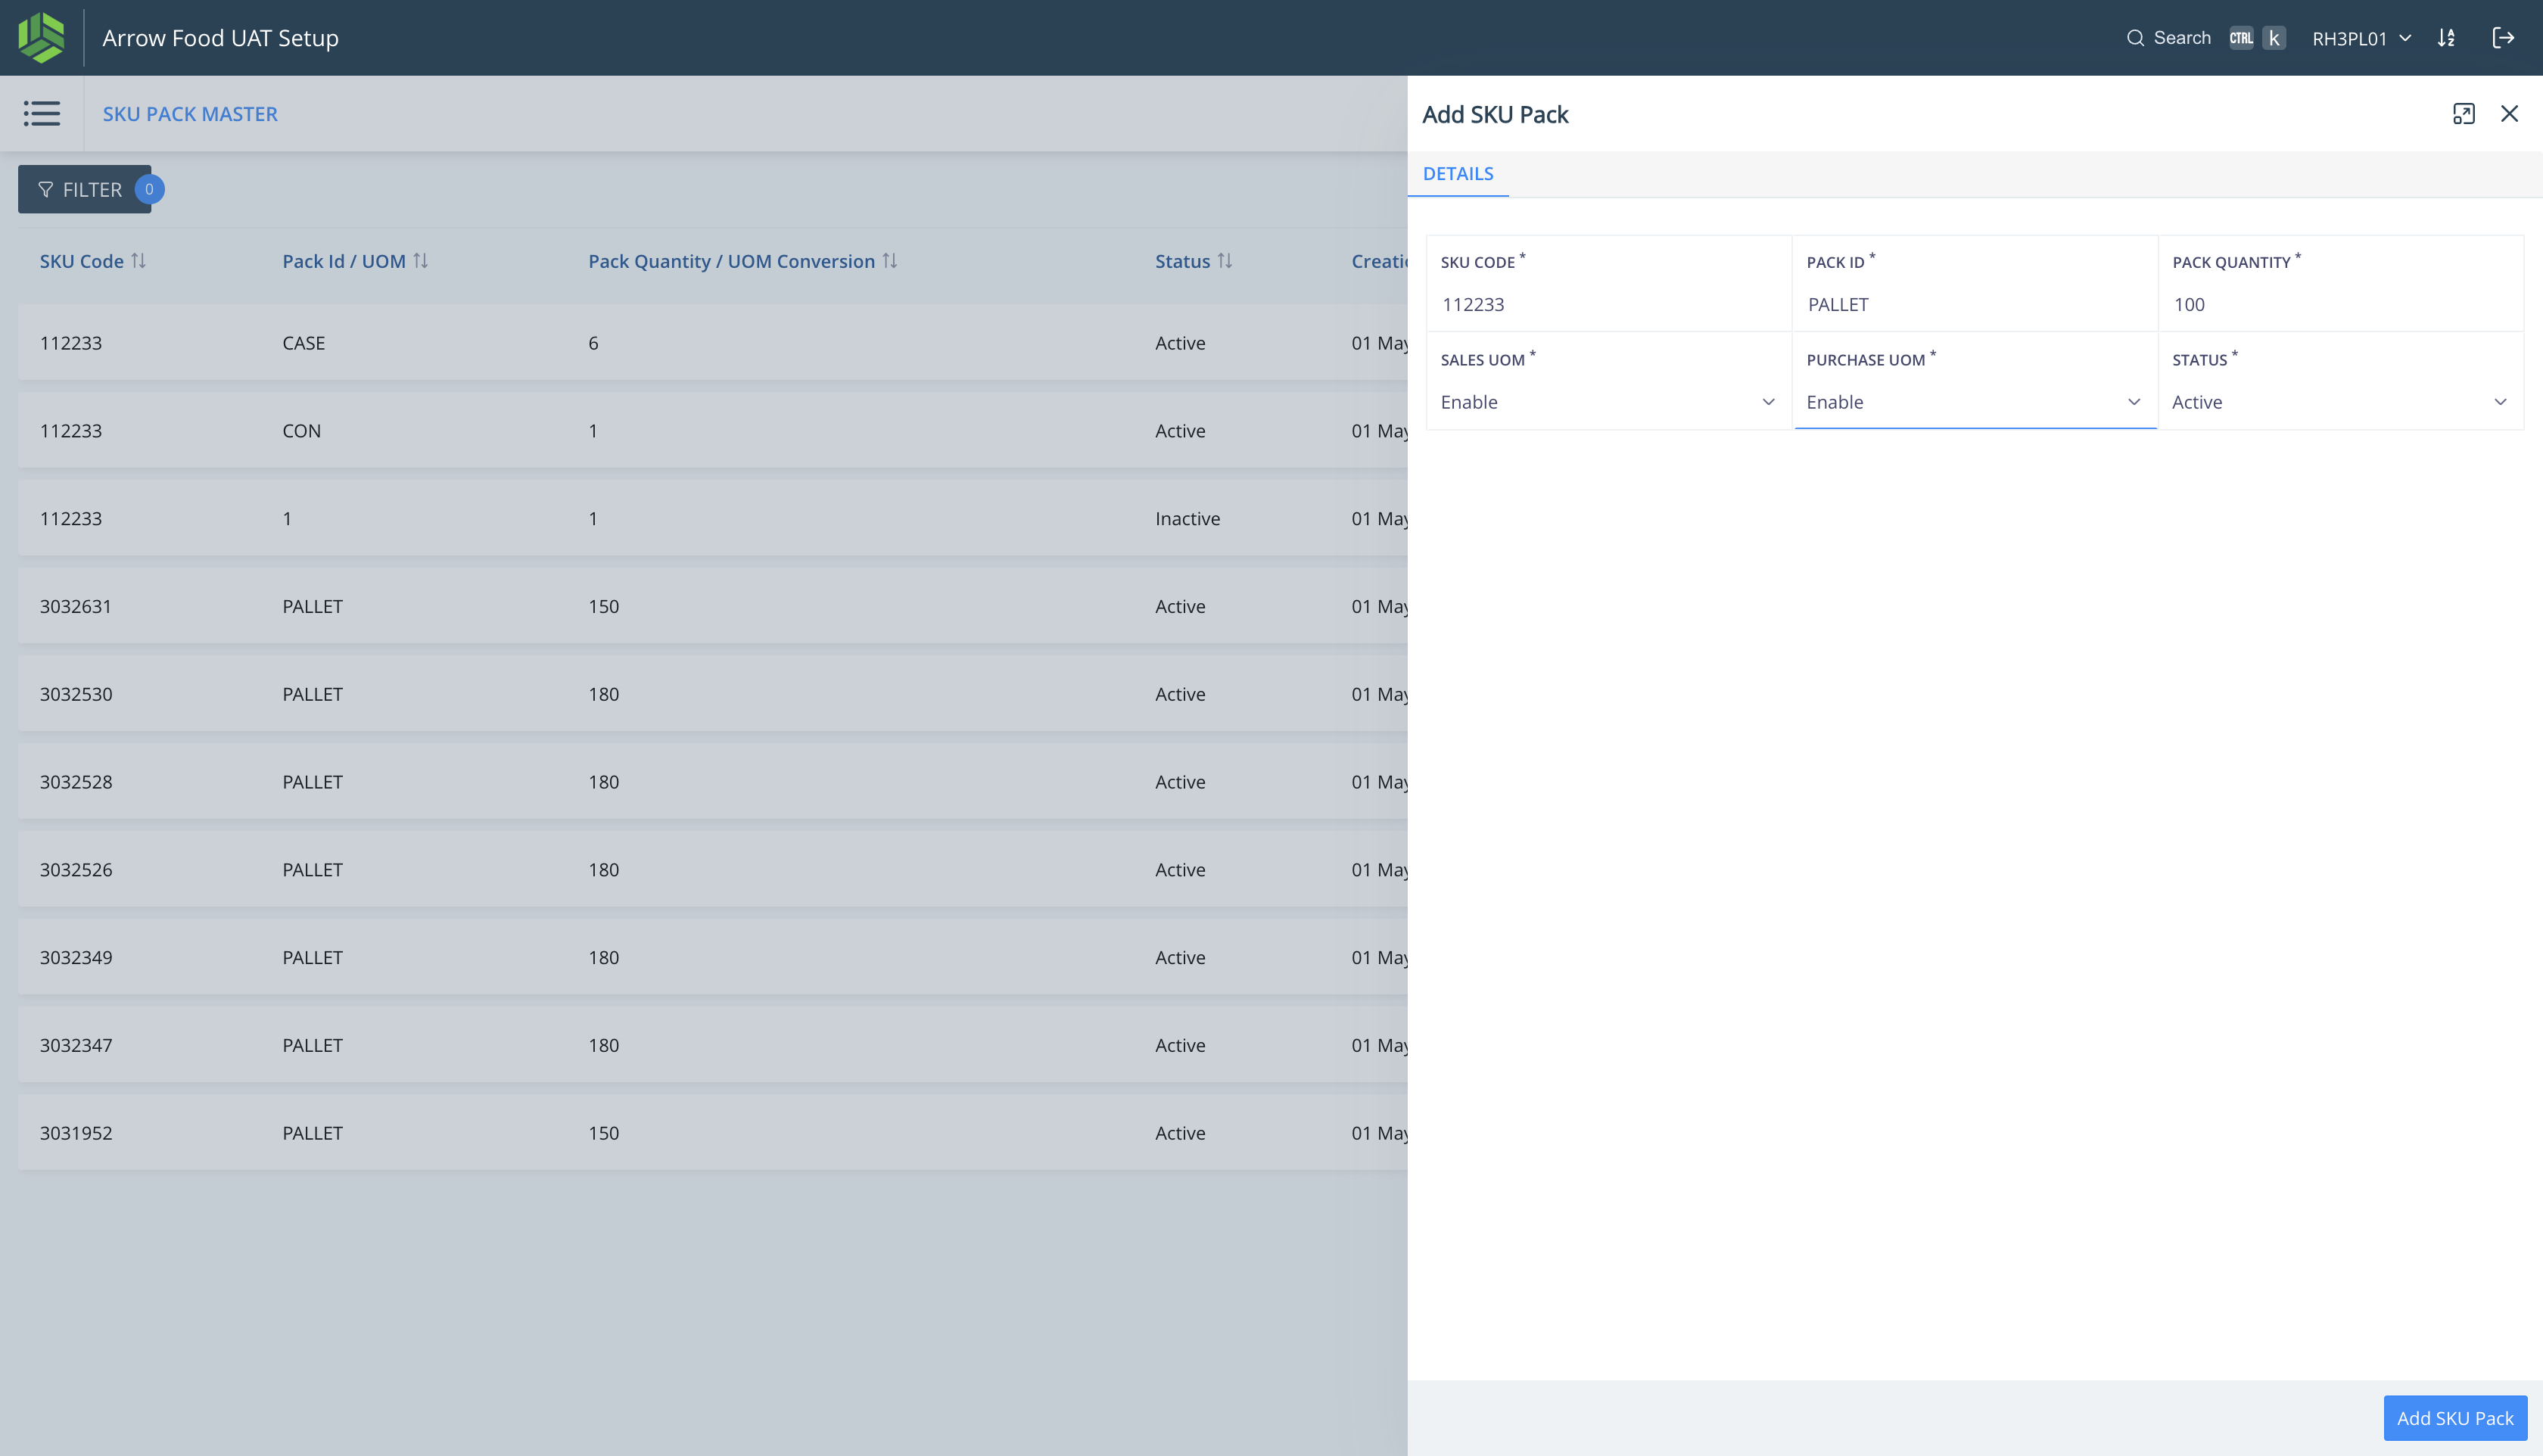
Enable PURCHASE UOM to receive the quantity with this PACK ID.
Step #6: Enable PURCHASE UOM to receive the quantity with this PACK ID.
7
Click on "Add SKU Pack"
Step #7: Click on "Add SKU Pack"
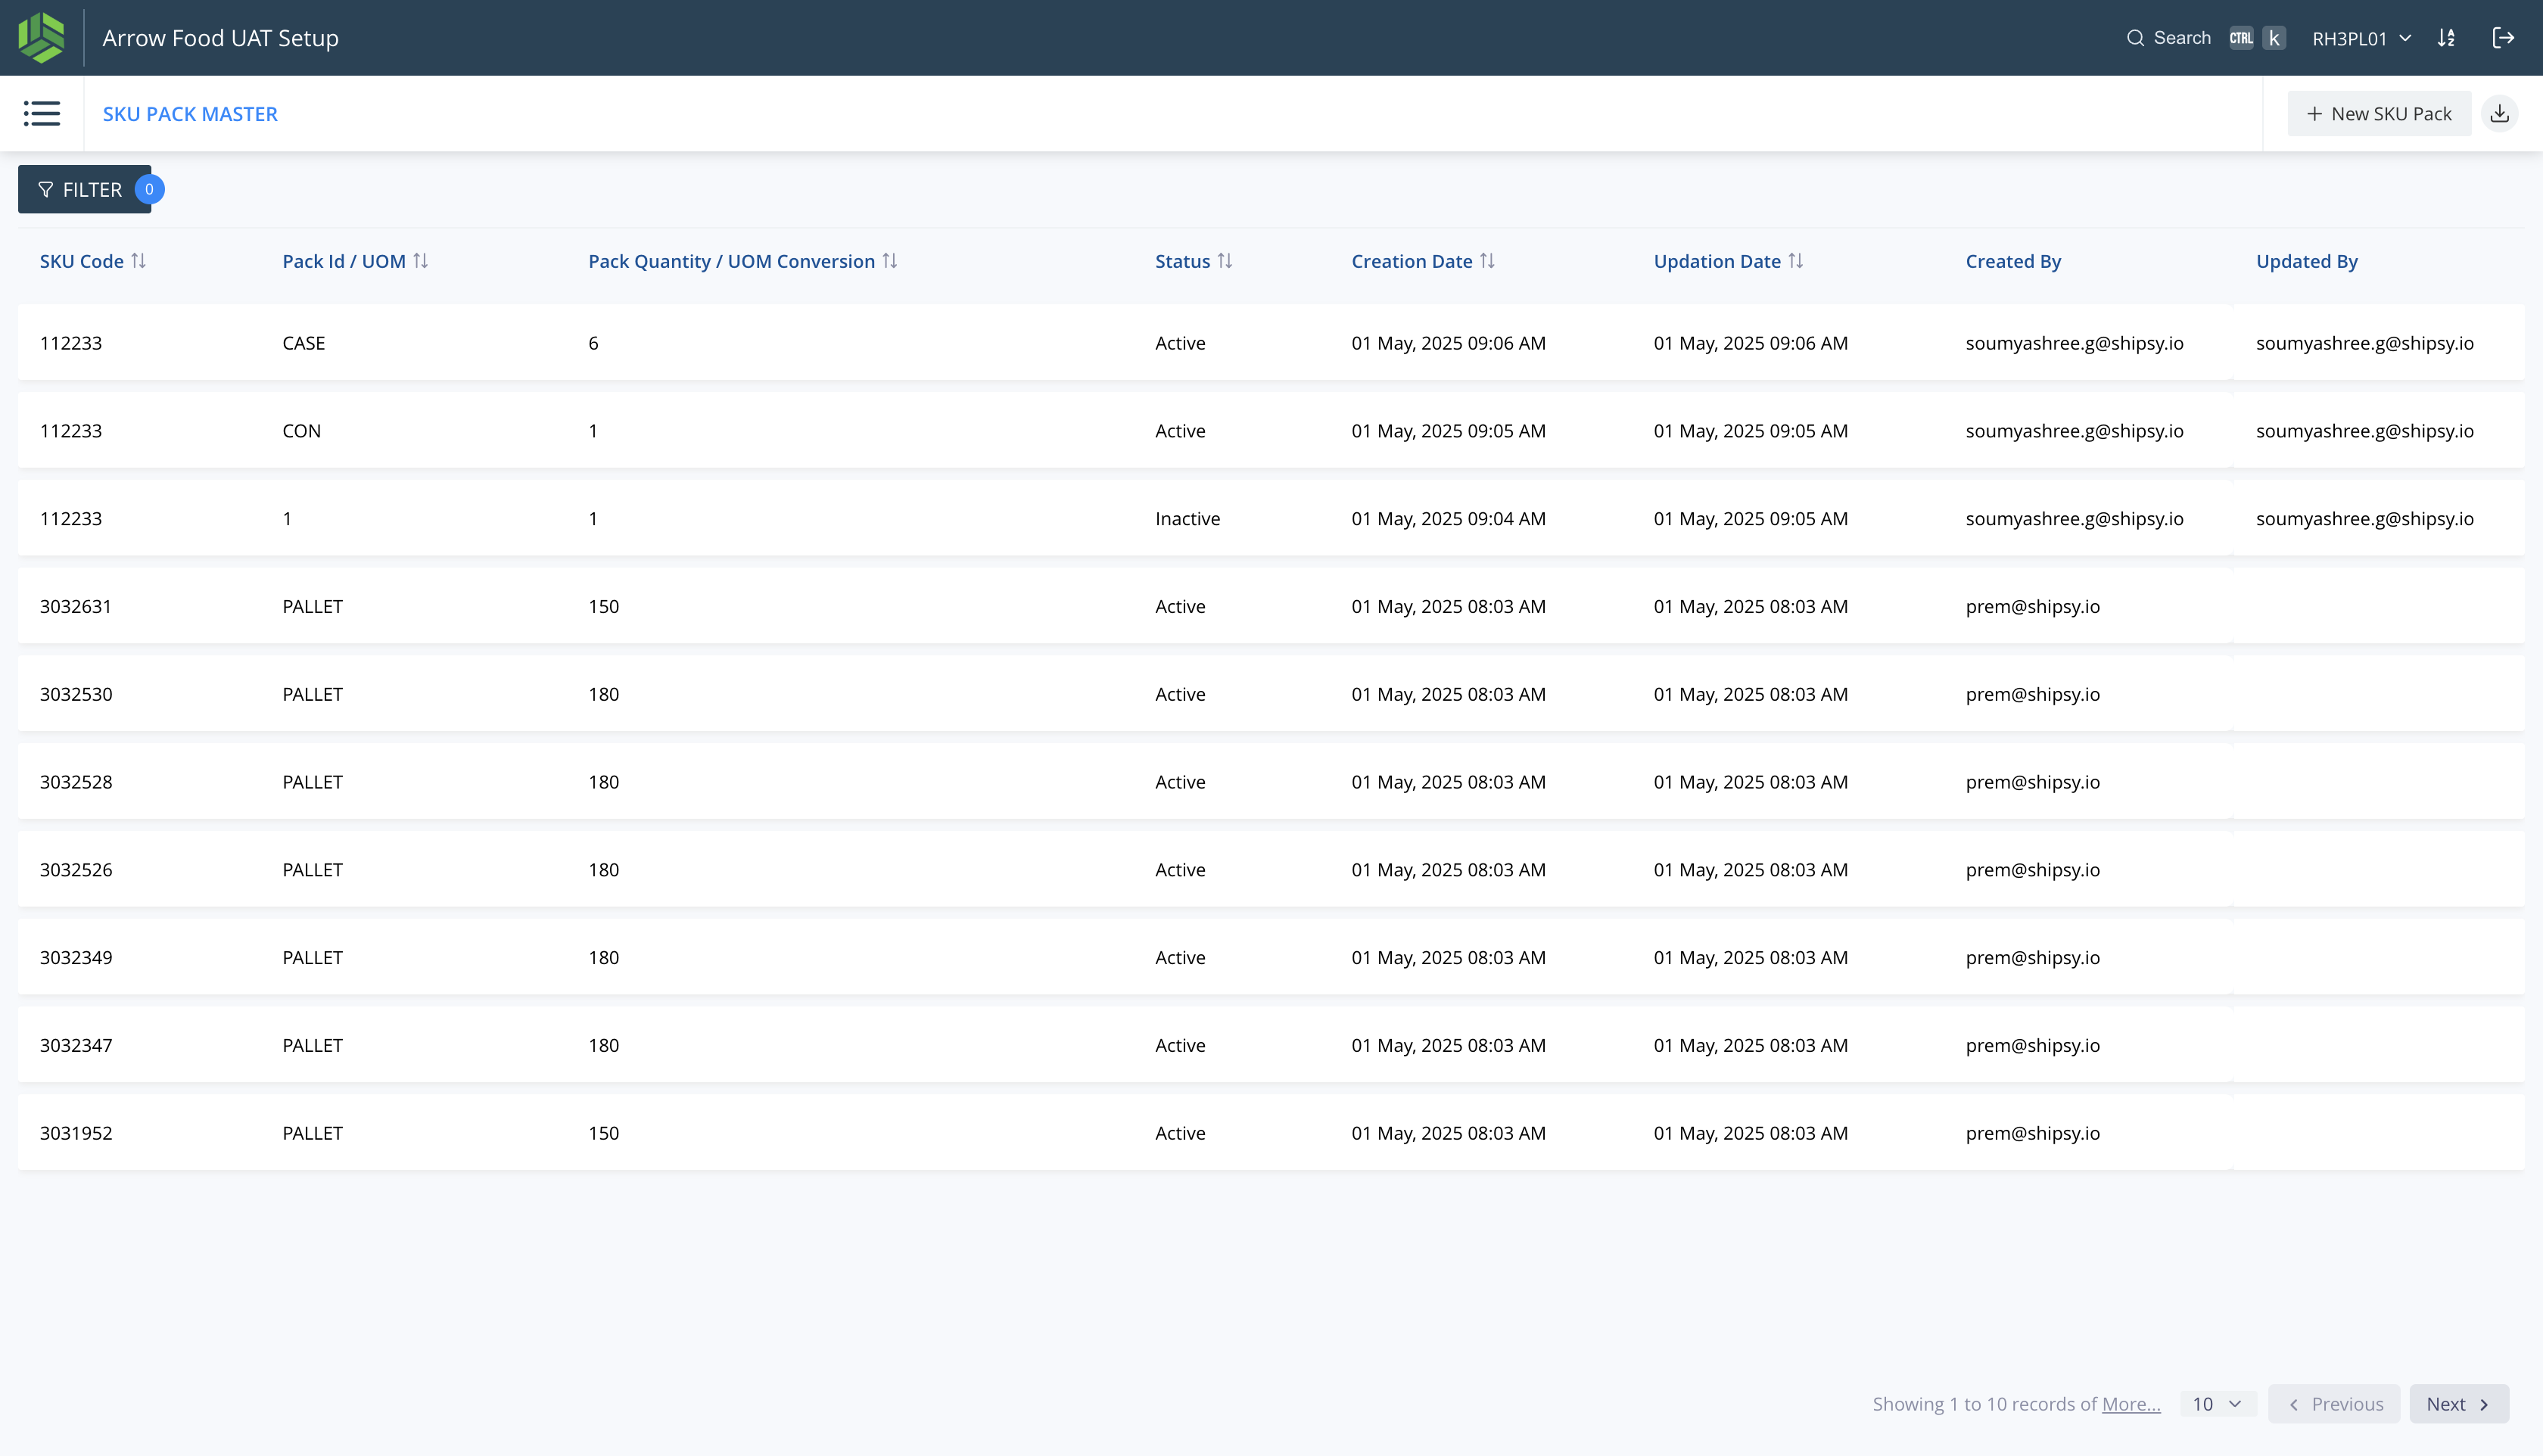
8
We can see that SKU code 112233 has 3 Pack Ids - CON, CASE and PALLET with respective Pack Quantities 1, 6 and 100.
Step #8: We can see that SKU code 112233 has 3 Pack Ids - CON, CASE and PALLET with respective Pack Quantities 1, 6 and 100.

Order Creation with Sales UOM

Navigate: Outbound > Orders

  1. Actions > Create Order

  2. Add order & customer details

  3. Select SKUs with Sales UOM

  4. Create order

9
Navigate to Outbound > Orders page.
Step #9: Navigate to Outbound > Orders page.
10
Click on "Actions" and click on "Create Order".
Step #10: Click on "Actions" and click on "Create Order".
11
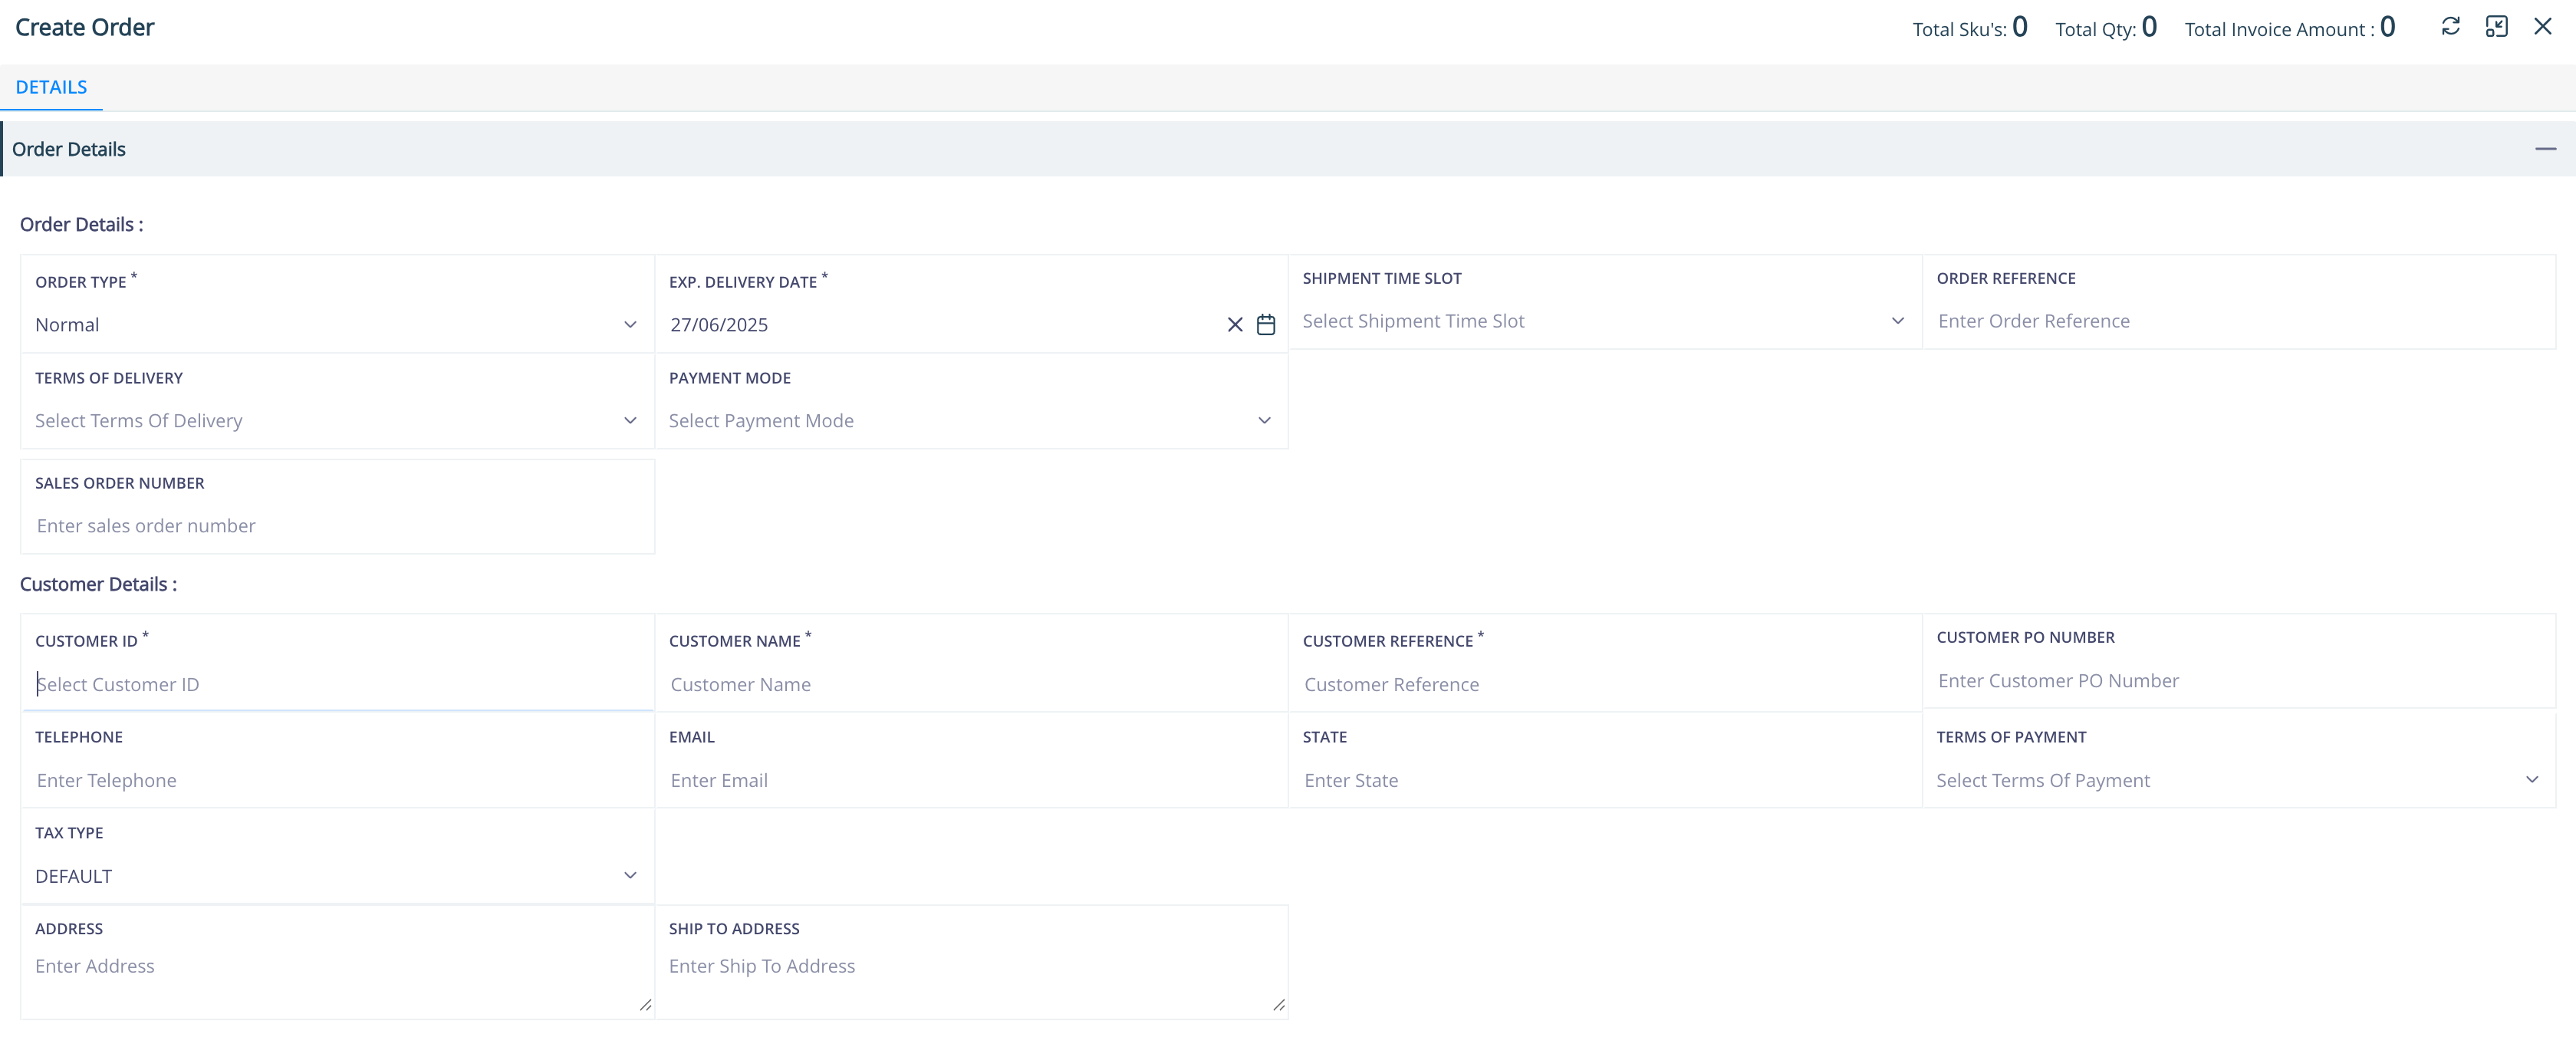
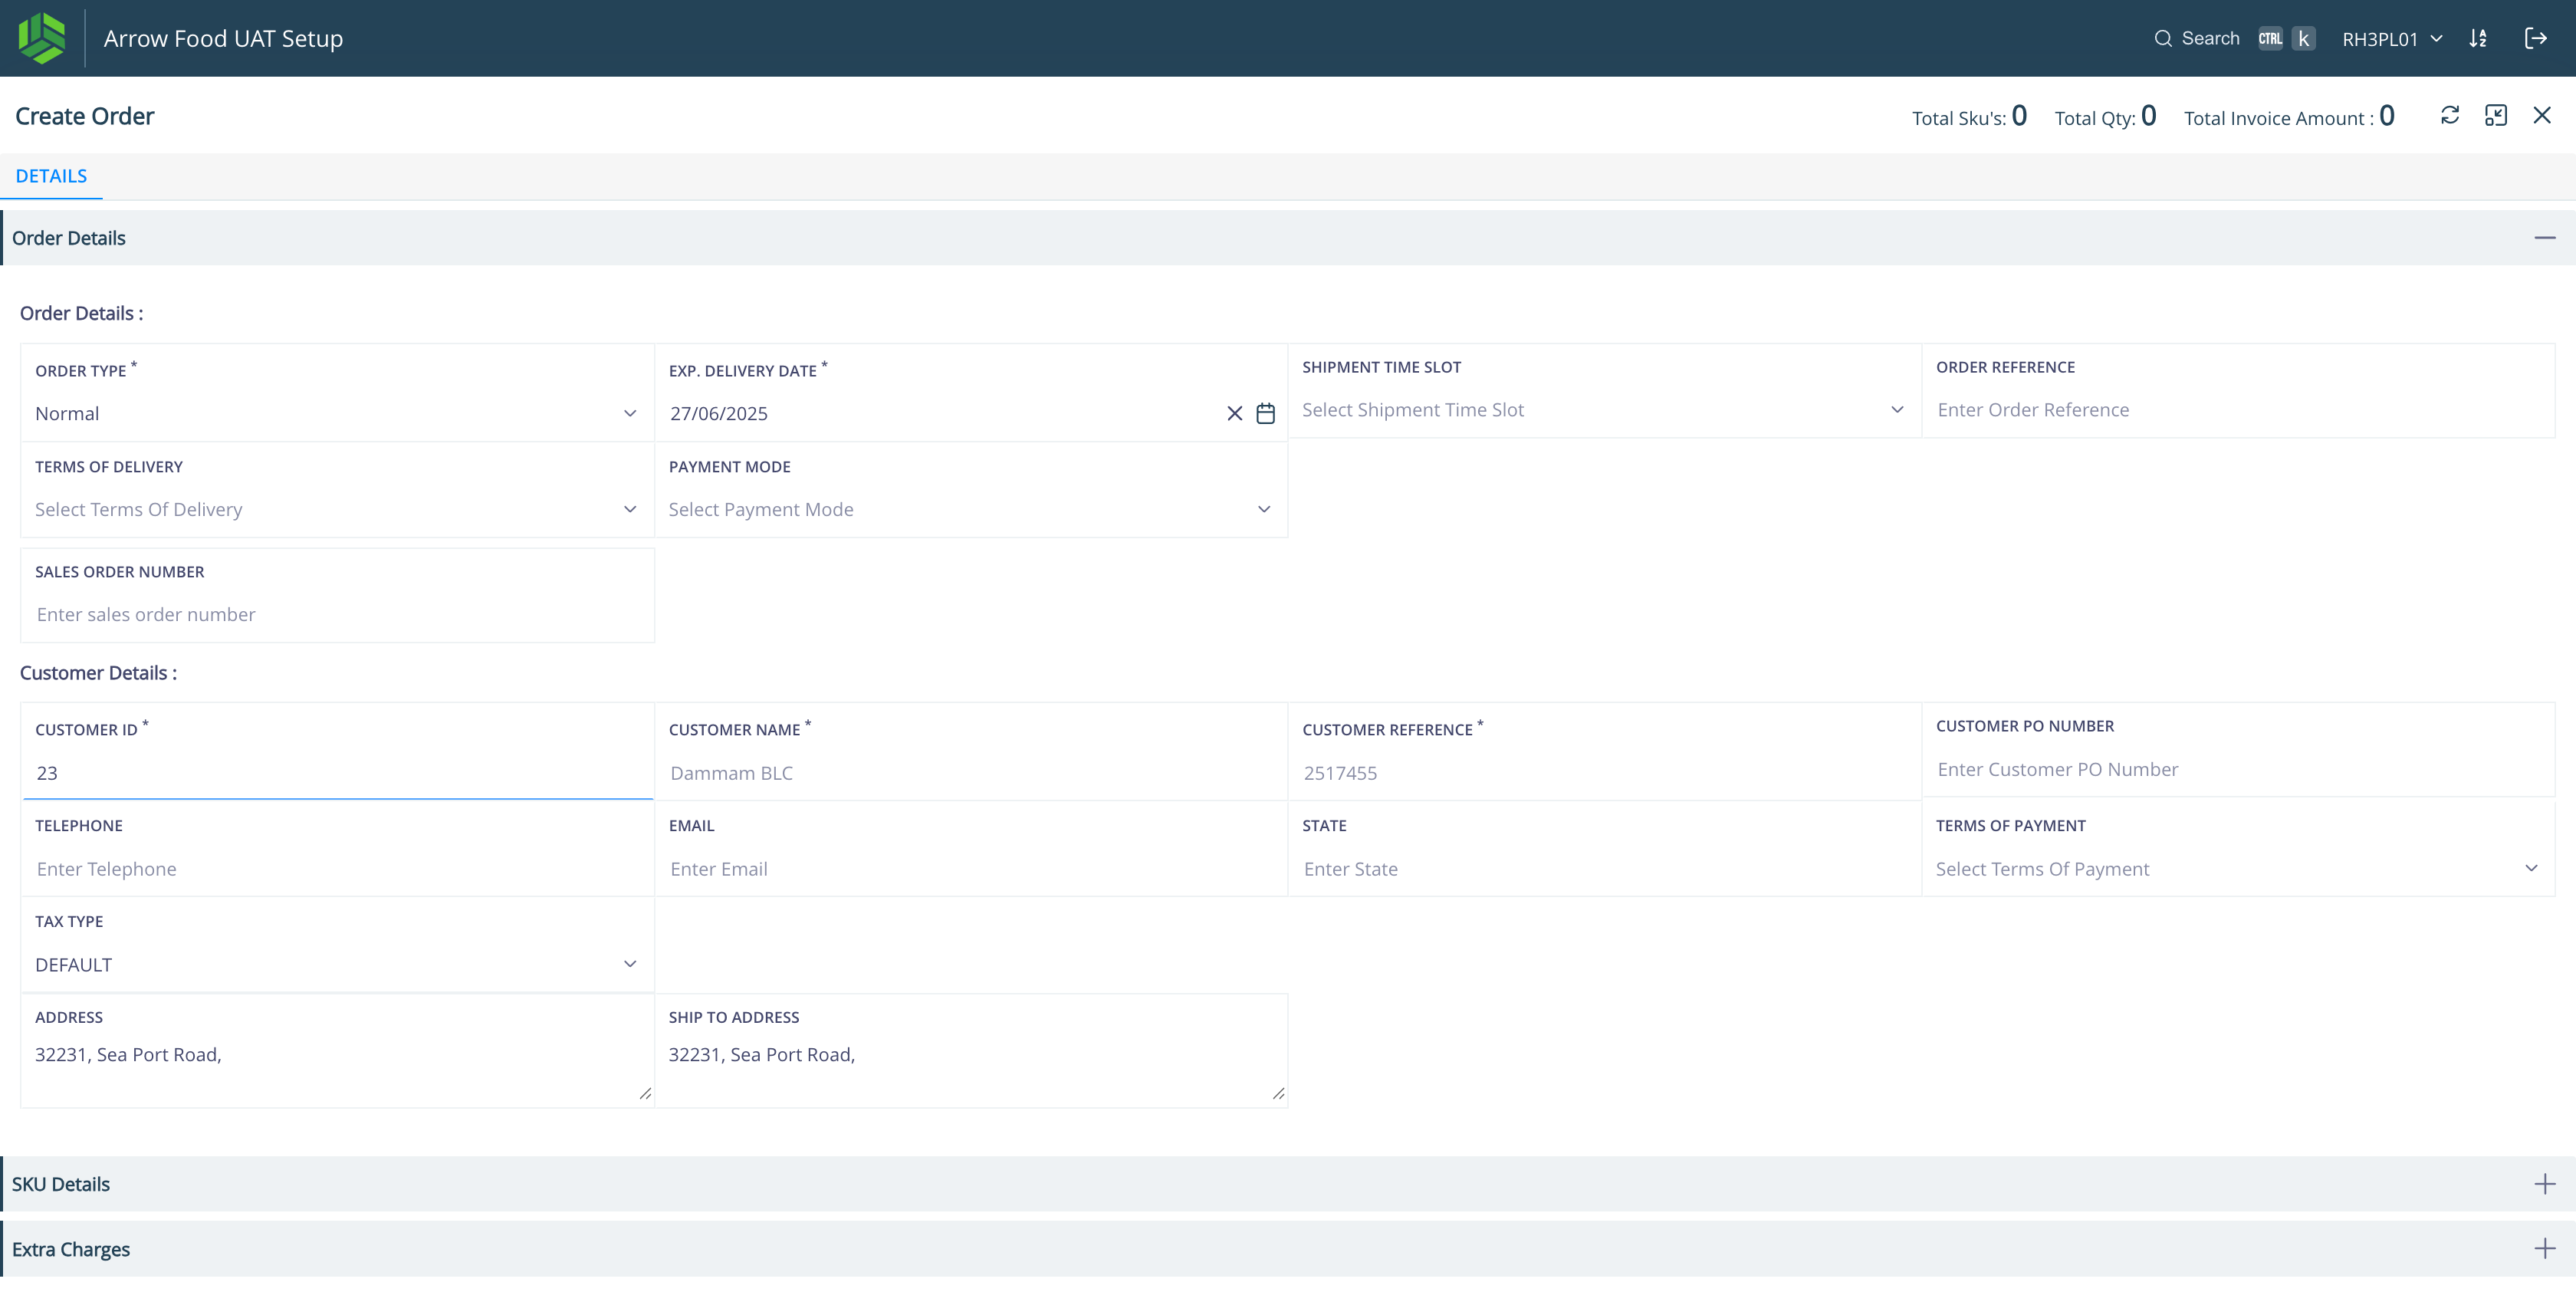
Add necessary Order Details
Step #11: Add necessary Order Details
12
Add necessary Customer Details
Step #12: Add necessary Customer Details
13
Click on SKU Details to add SKUs for this Order.
Step #13: Click on SKU Details to add SKUs for this Order.
14
Choose the SKUs for the order.
Step #14: Choose the SKUs for the order.
15
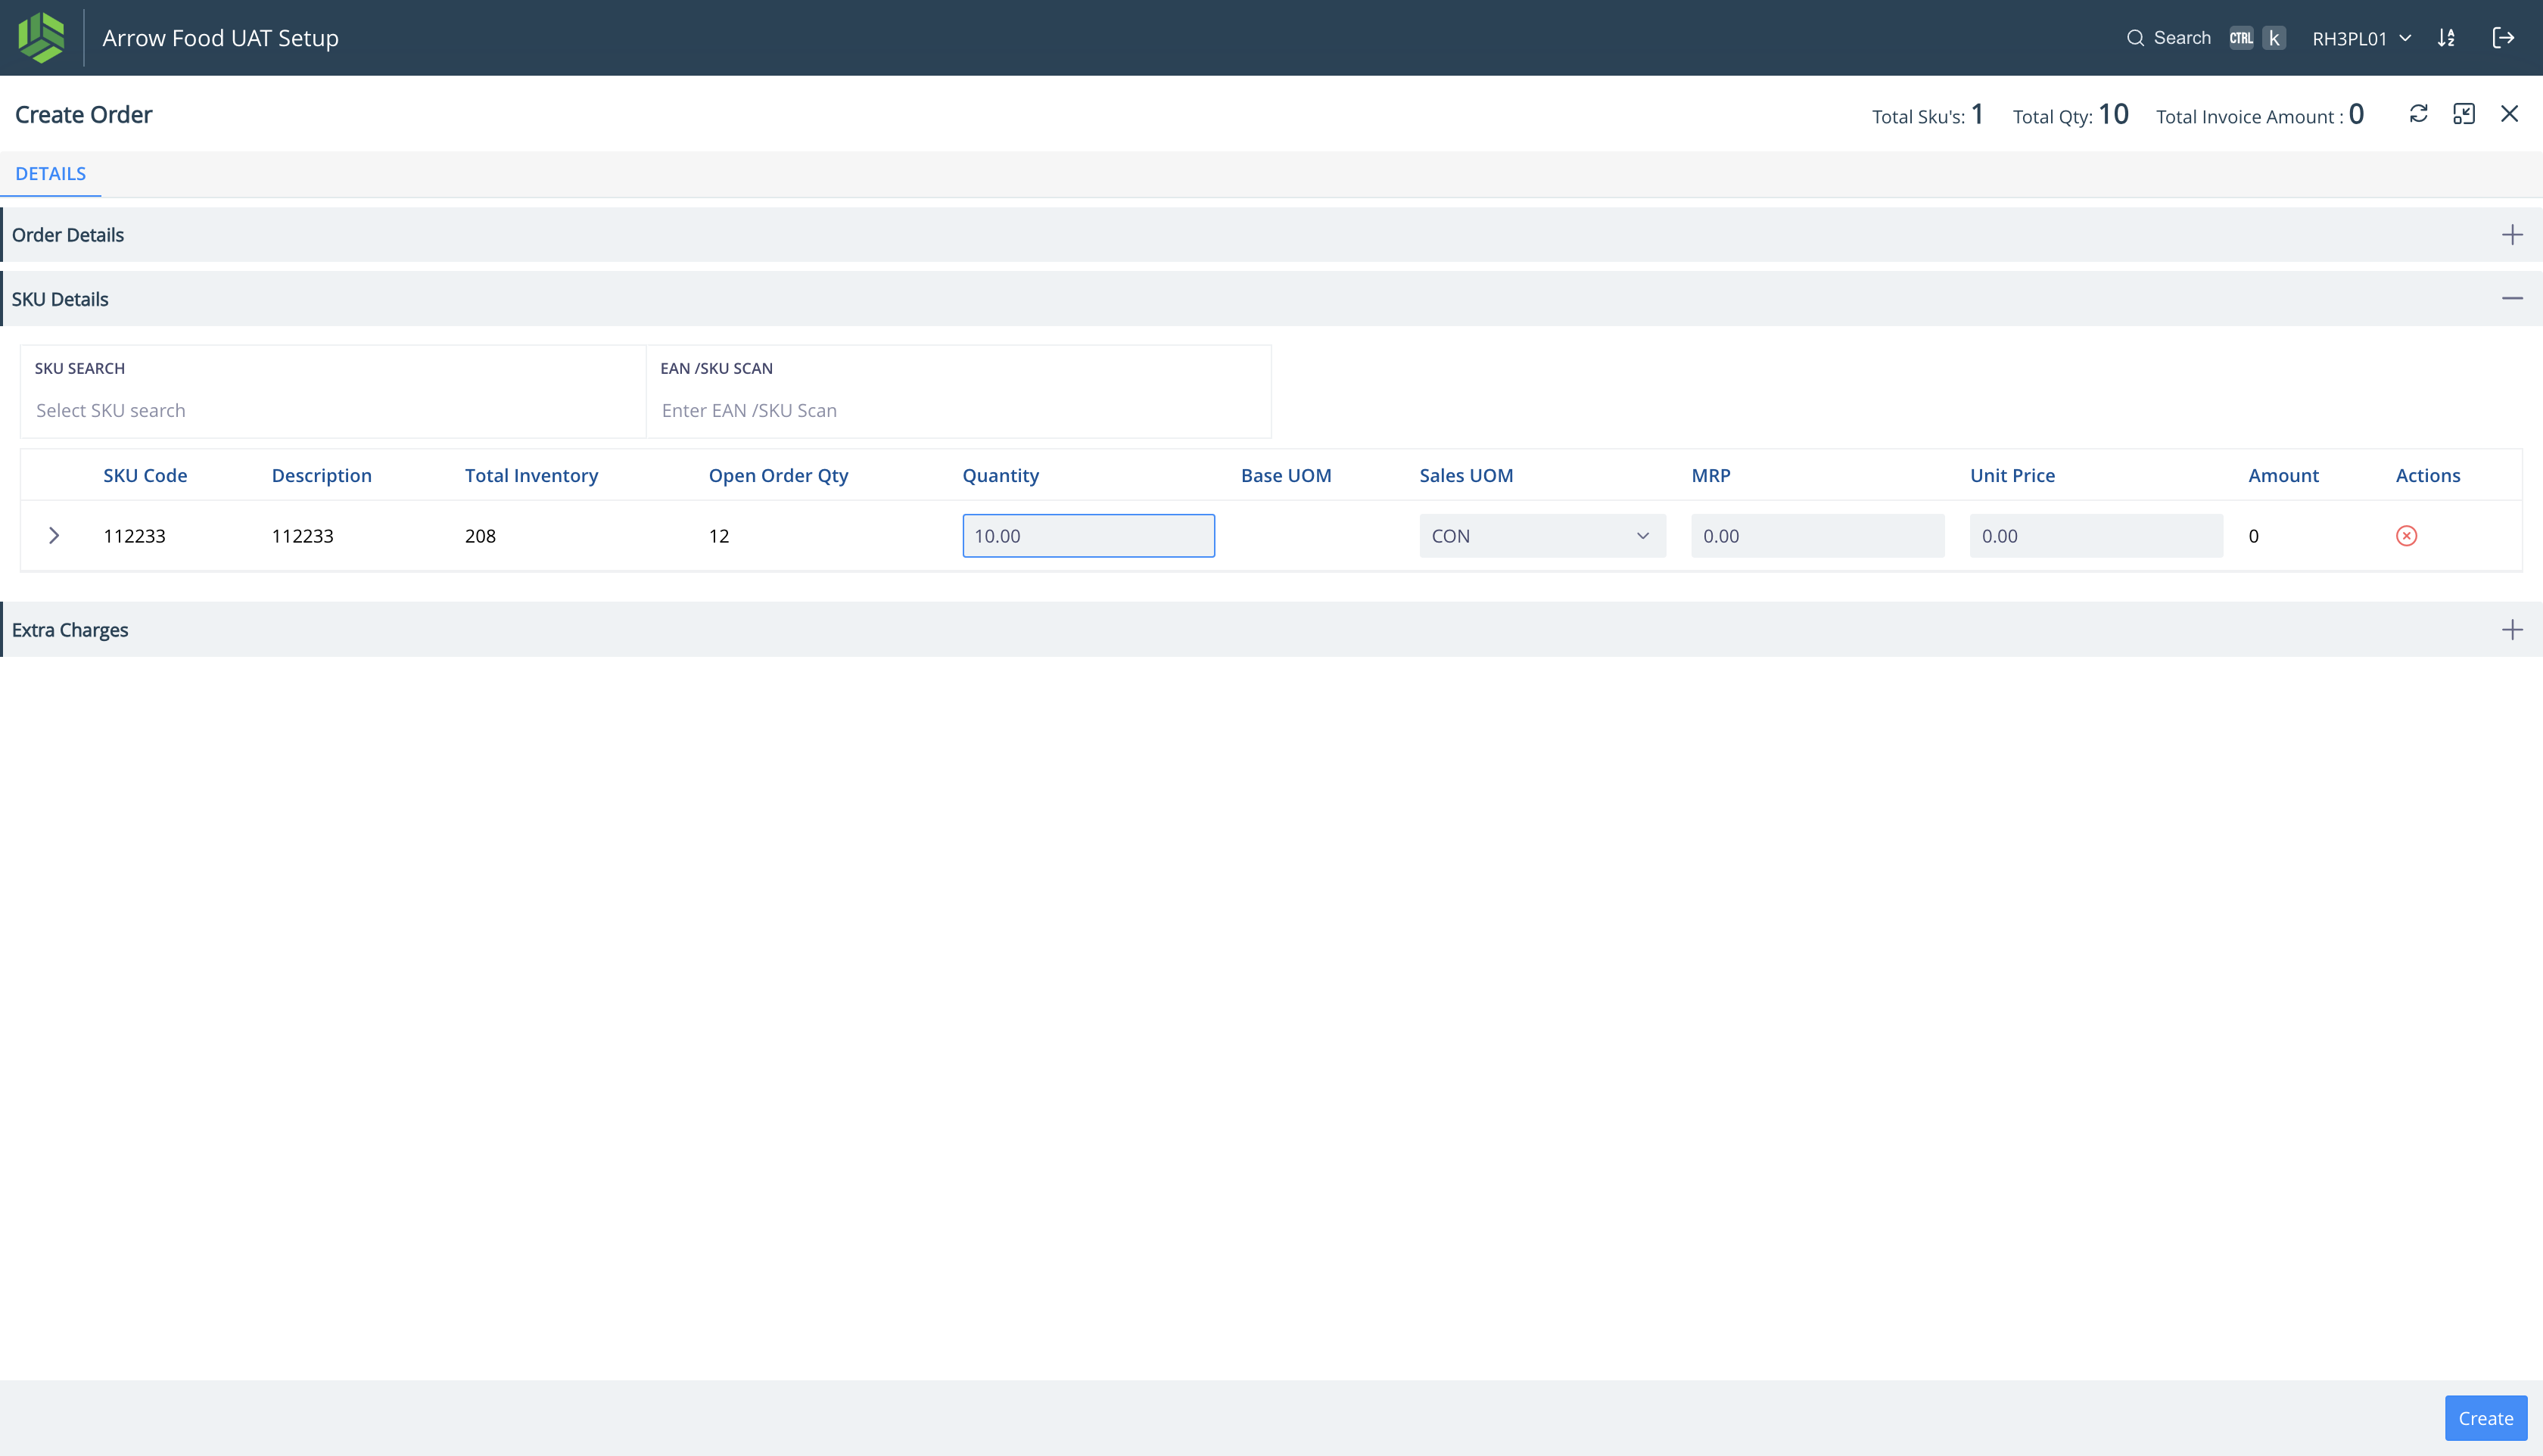
Select the "Sales UOM" .
Step #15: Select the "Sales UOM" .
16
Add Quantity for the SKU. Click on "Create".
Step #16: Add Quantity for the SKU. Click on "Create".
17
Order is created Successfully.
Step #17: Order is created Successfully.

PICKLIST GENERATION

Navigate: Outbound > Orders

  1. Select orders

  2. Click on Generate picklist

  3. Select the Pick type (Single Order Picklist, Multi Order Picklist)

  4. Orders move to In Progress.

18
There are 2 orders with same SKU "112233" and different Sales UOM - CON and CASE. Select the orders to create picklist.
Step #18: There are 2 orders with same SKU "112233" and different Sales UOM - CON and CASE. Select the orders to create picklist.
19
Click on "Generate Picklist".
Step #19: Click on "Generate Picklist".
20
Click on "Single Order Picklist"
Step #20: Click on "Single Order Picklist"
21
Once picklist is created for the orders, they disappear from Open Orders.
Step #21: Once picklist is created for the orders, they disappear from Open Orders.

PICKLIST CONFIRMATION

Navigate: Outbound > Confirm Picklist

  1. Select picklist ID

  2. Update picked quantities

  3. Confirm each picklist

22
Navigate to Outbound > Confirm Picklist where picklists generated can be viewed and confirmed."
Step #22: Navigate to Outbound  > Confirm Picklist where picklists generated can be viewed and confirmed."
23
Select each picklist to confirm. Here we select Picklist ID "1122"
Step #23: Select each picklist to confirm. Here we select Picklist ID "1122"
24
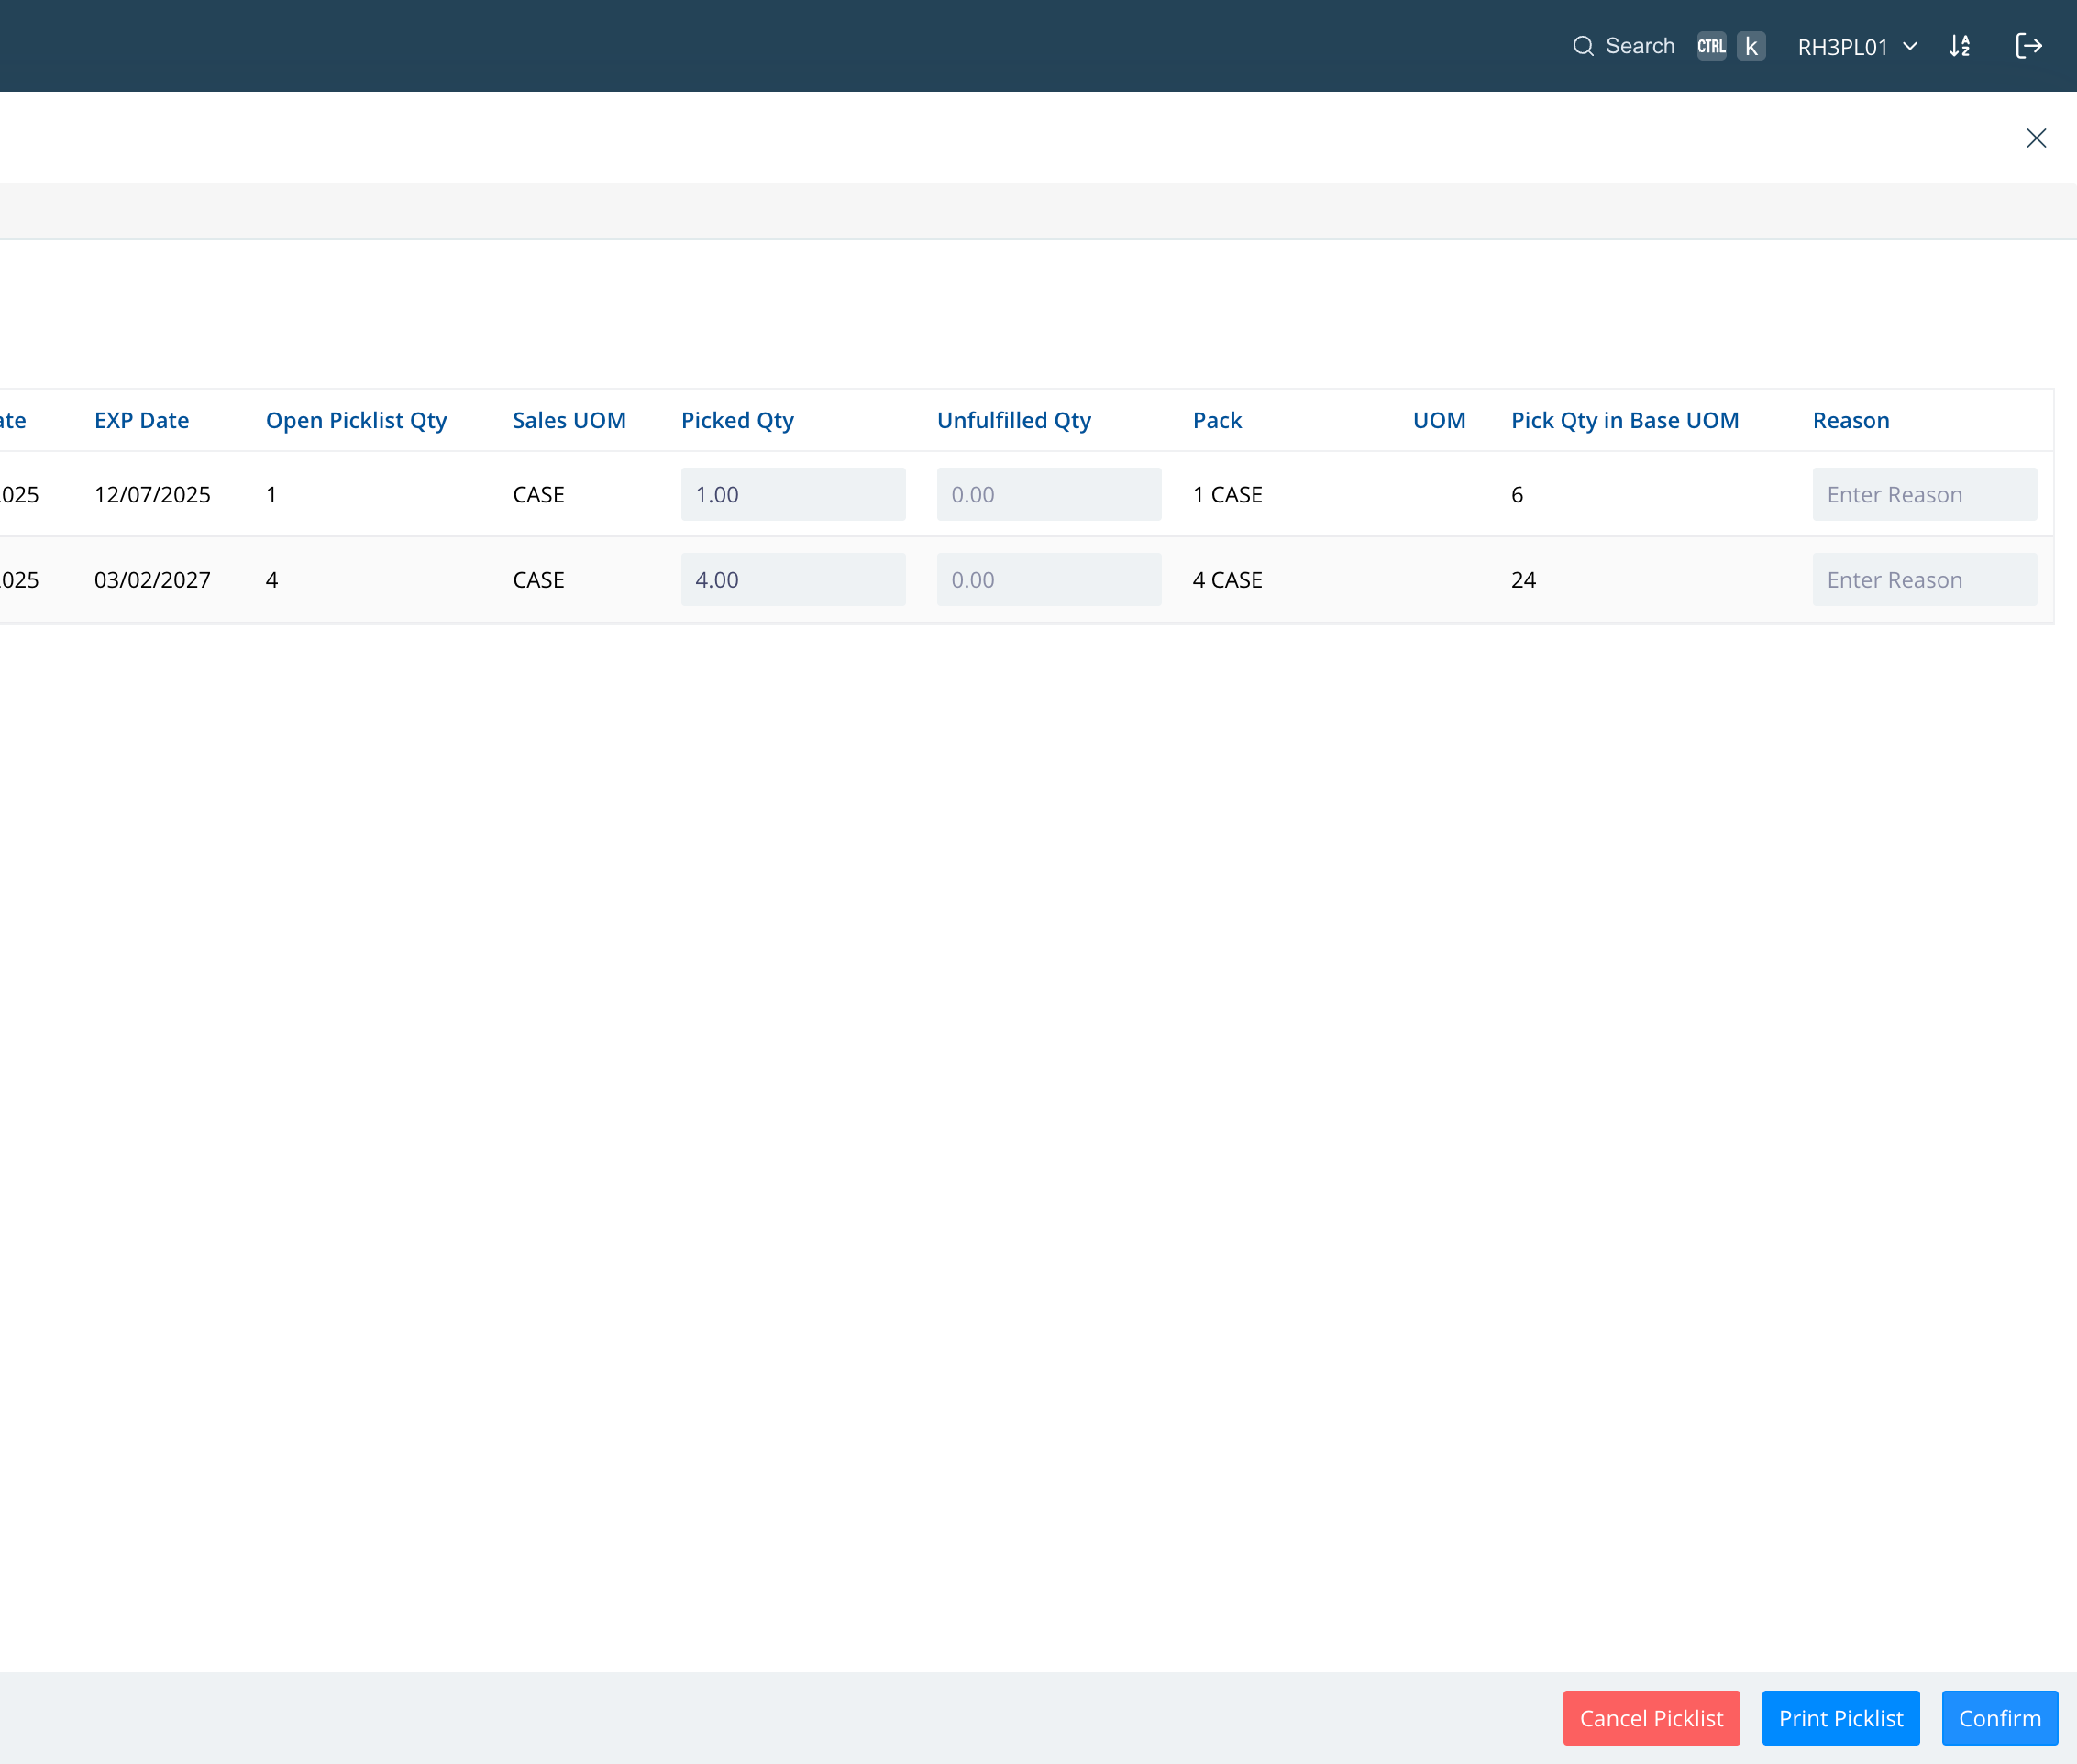
Update the Picked Quantity based on physical picked quantity.
Step #24: Update the Picked Quantity based on physical picked quantity.
25
Click on "Confirm". This will confirm the picked quantity of the picklist.
Step #25: Click on "Confirm". This will confirm the picked quantity of the picklist.
26
Perform the same for all the picklists.
Step #26: Perform the same for all the picklists.

INVOICE GENERATION

Navigate: Outbound > Customer Invoices

  1. Select processed orders

  2. Actions > Generate Invoice

  3. Add driver details & generate

  4. Print Invoice

27
Navigate to Outbound > Customer Invoices
Step #27: Navigate to Outbound > Customer Invoices
28
Select the Processed Order for which Invoice is to be generated.
Step #28: Select the Processed Order for which Invoice is to be generated.
29
Click on "Actions"
Step #29: Click on "Actions"
30
Click on "Generate Invoice"
Step #30: Click on "Generate Invoice"
31
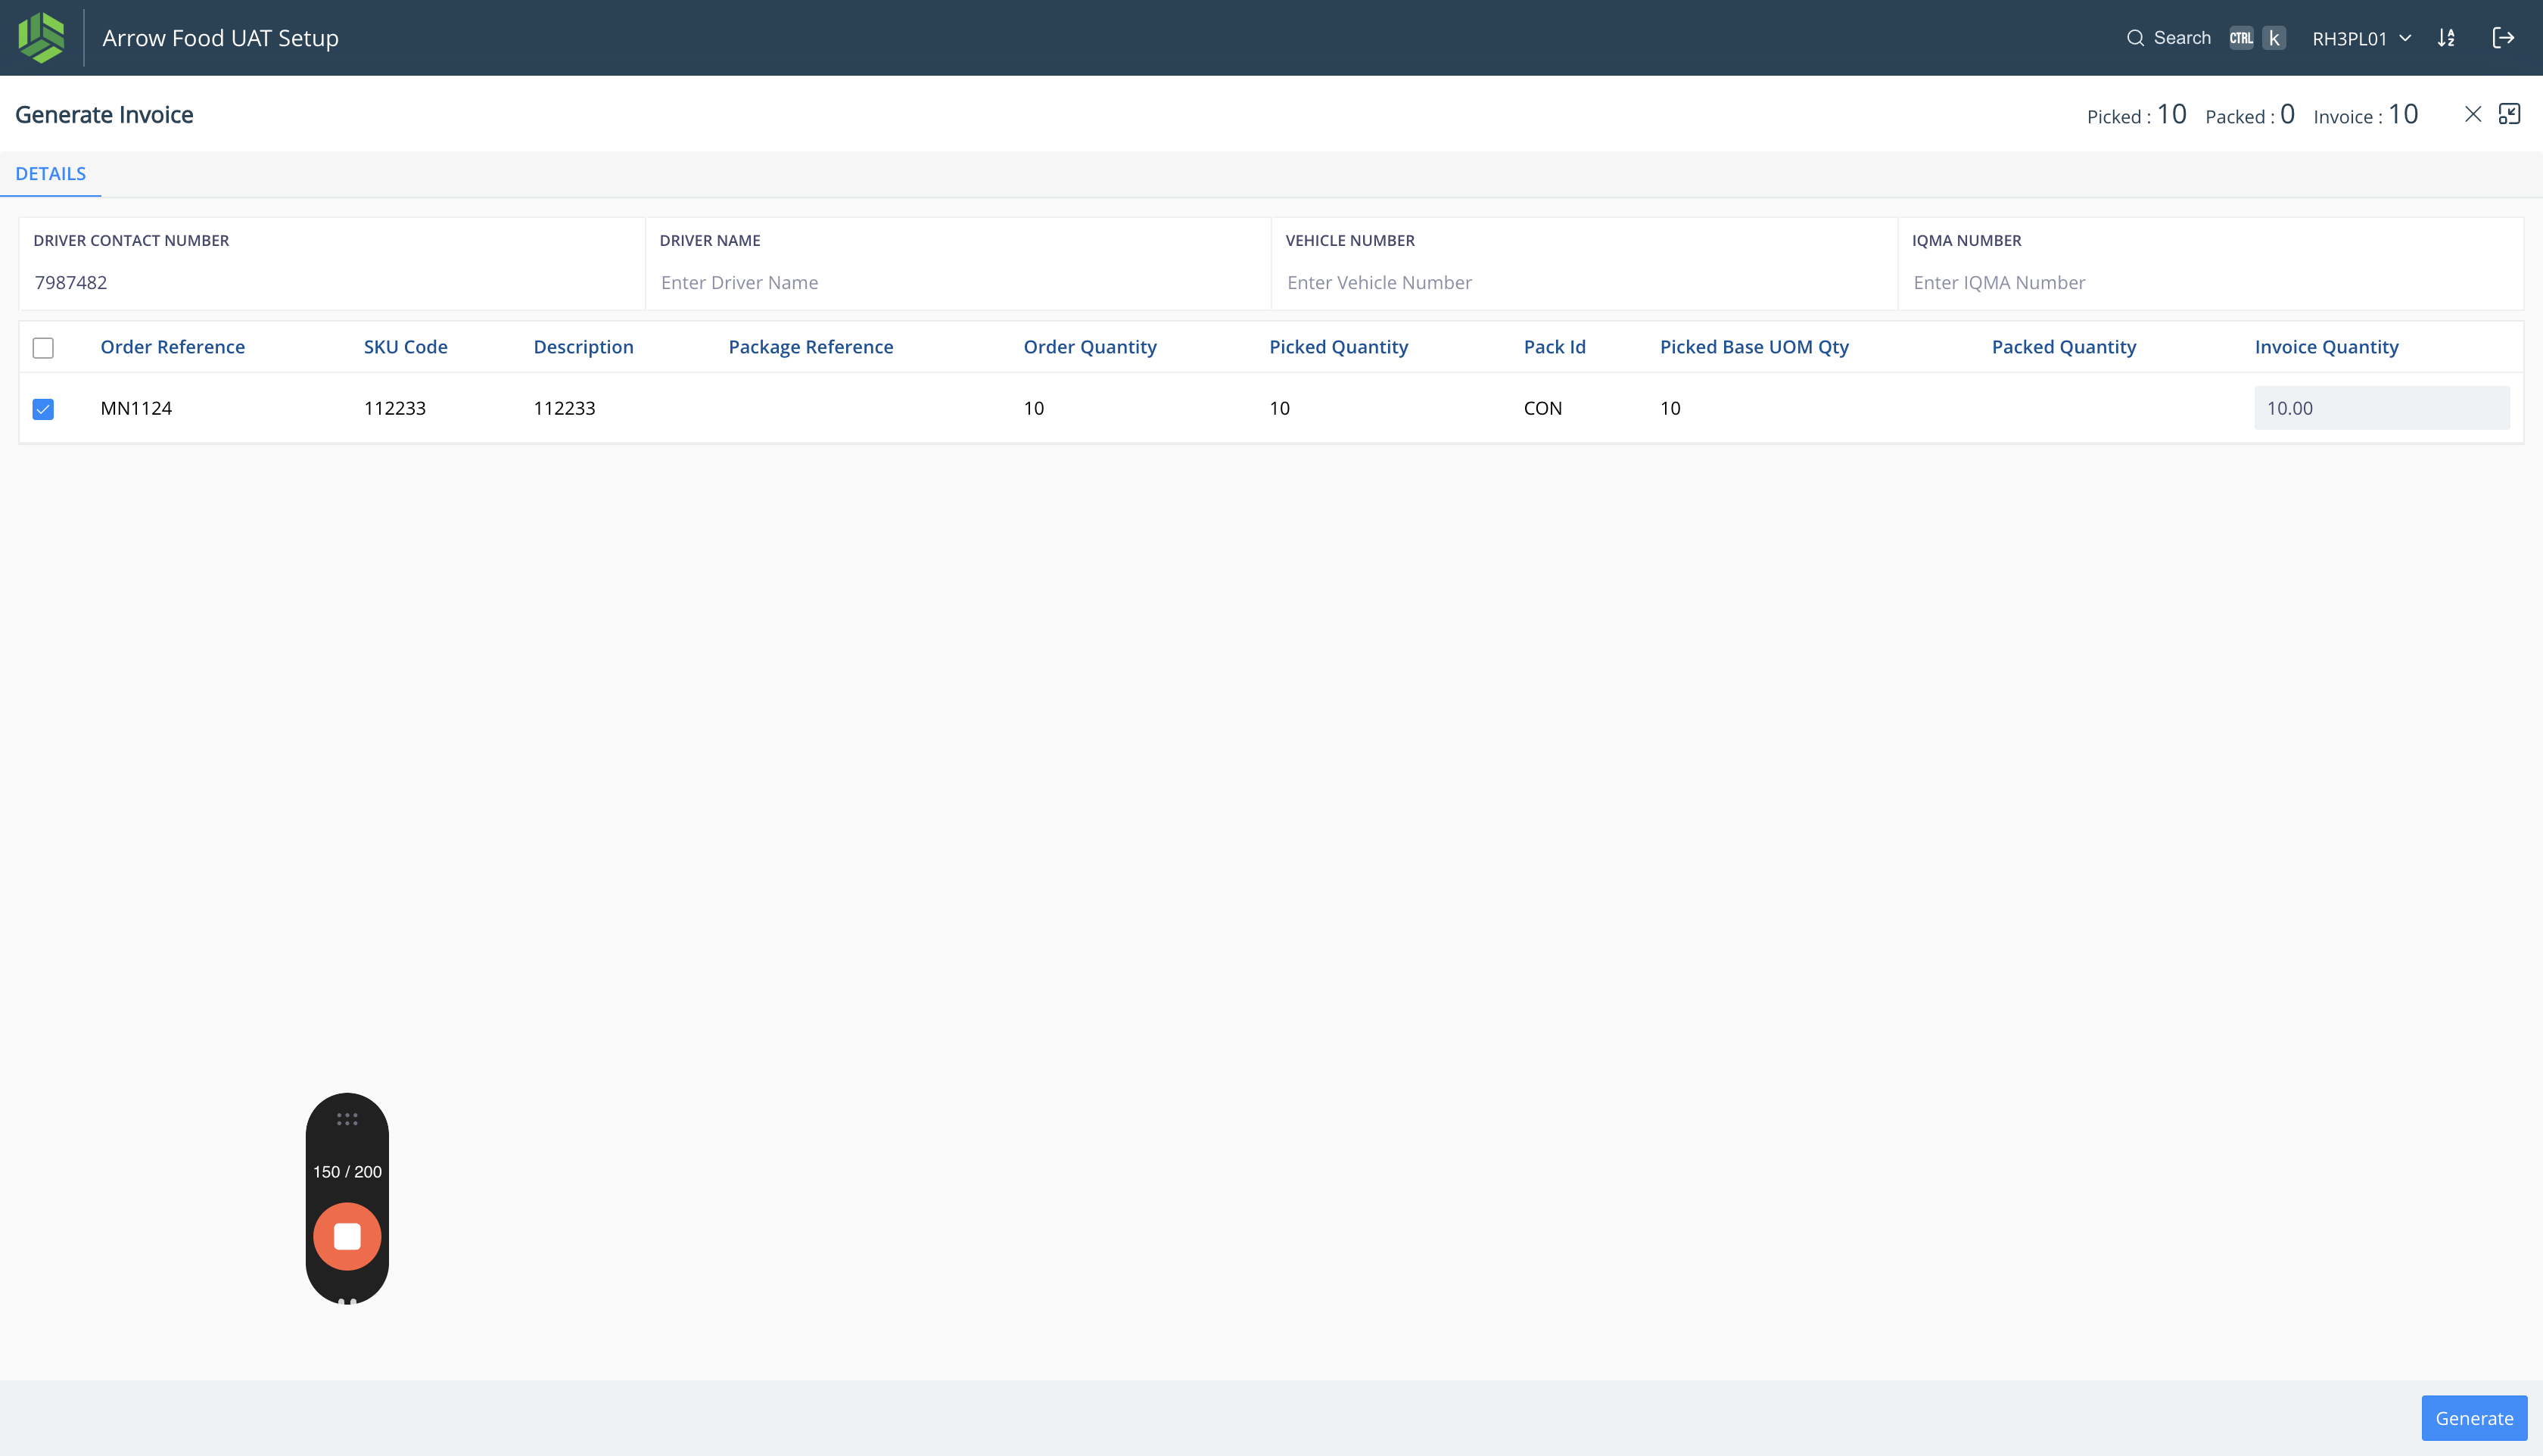
Enter the Driver Details
Step #31: Enter the Driver Details
32
Click here
Step #32: Click here
33
Click on "Generate"
Step #33: Click on "Generate"
34
Click on "Print Invoice"
Step #34: Click on "Print Invoice"
35
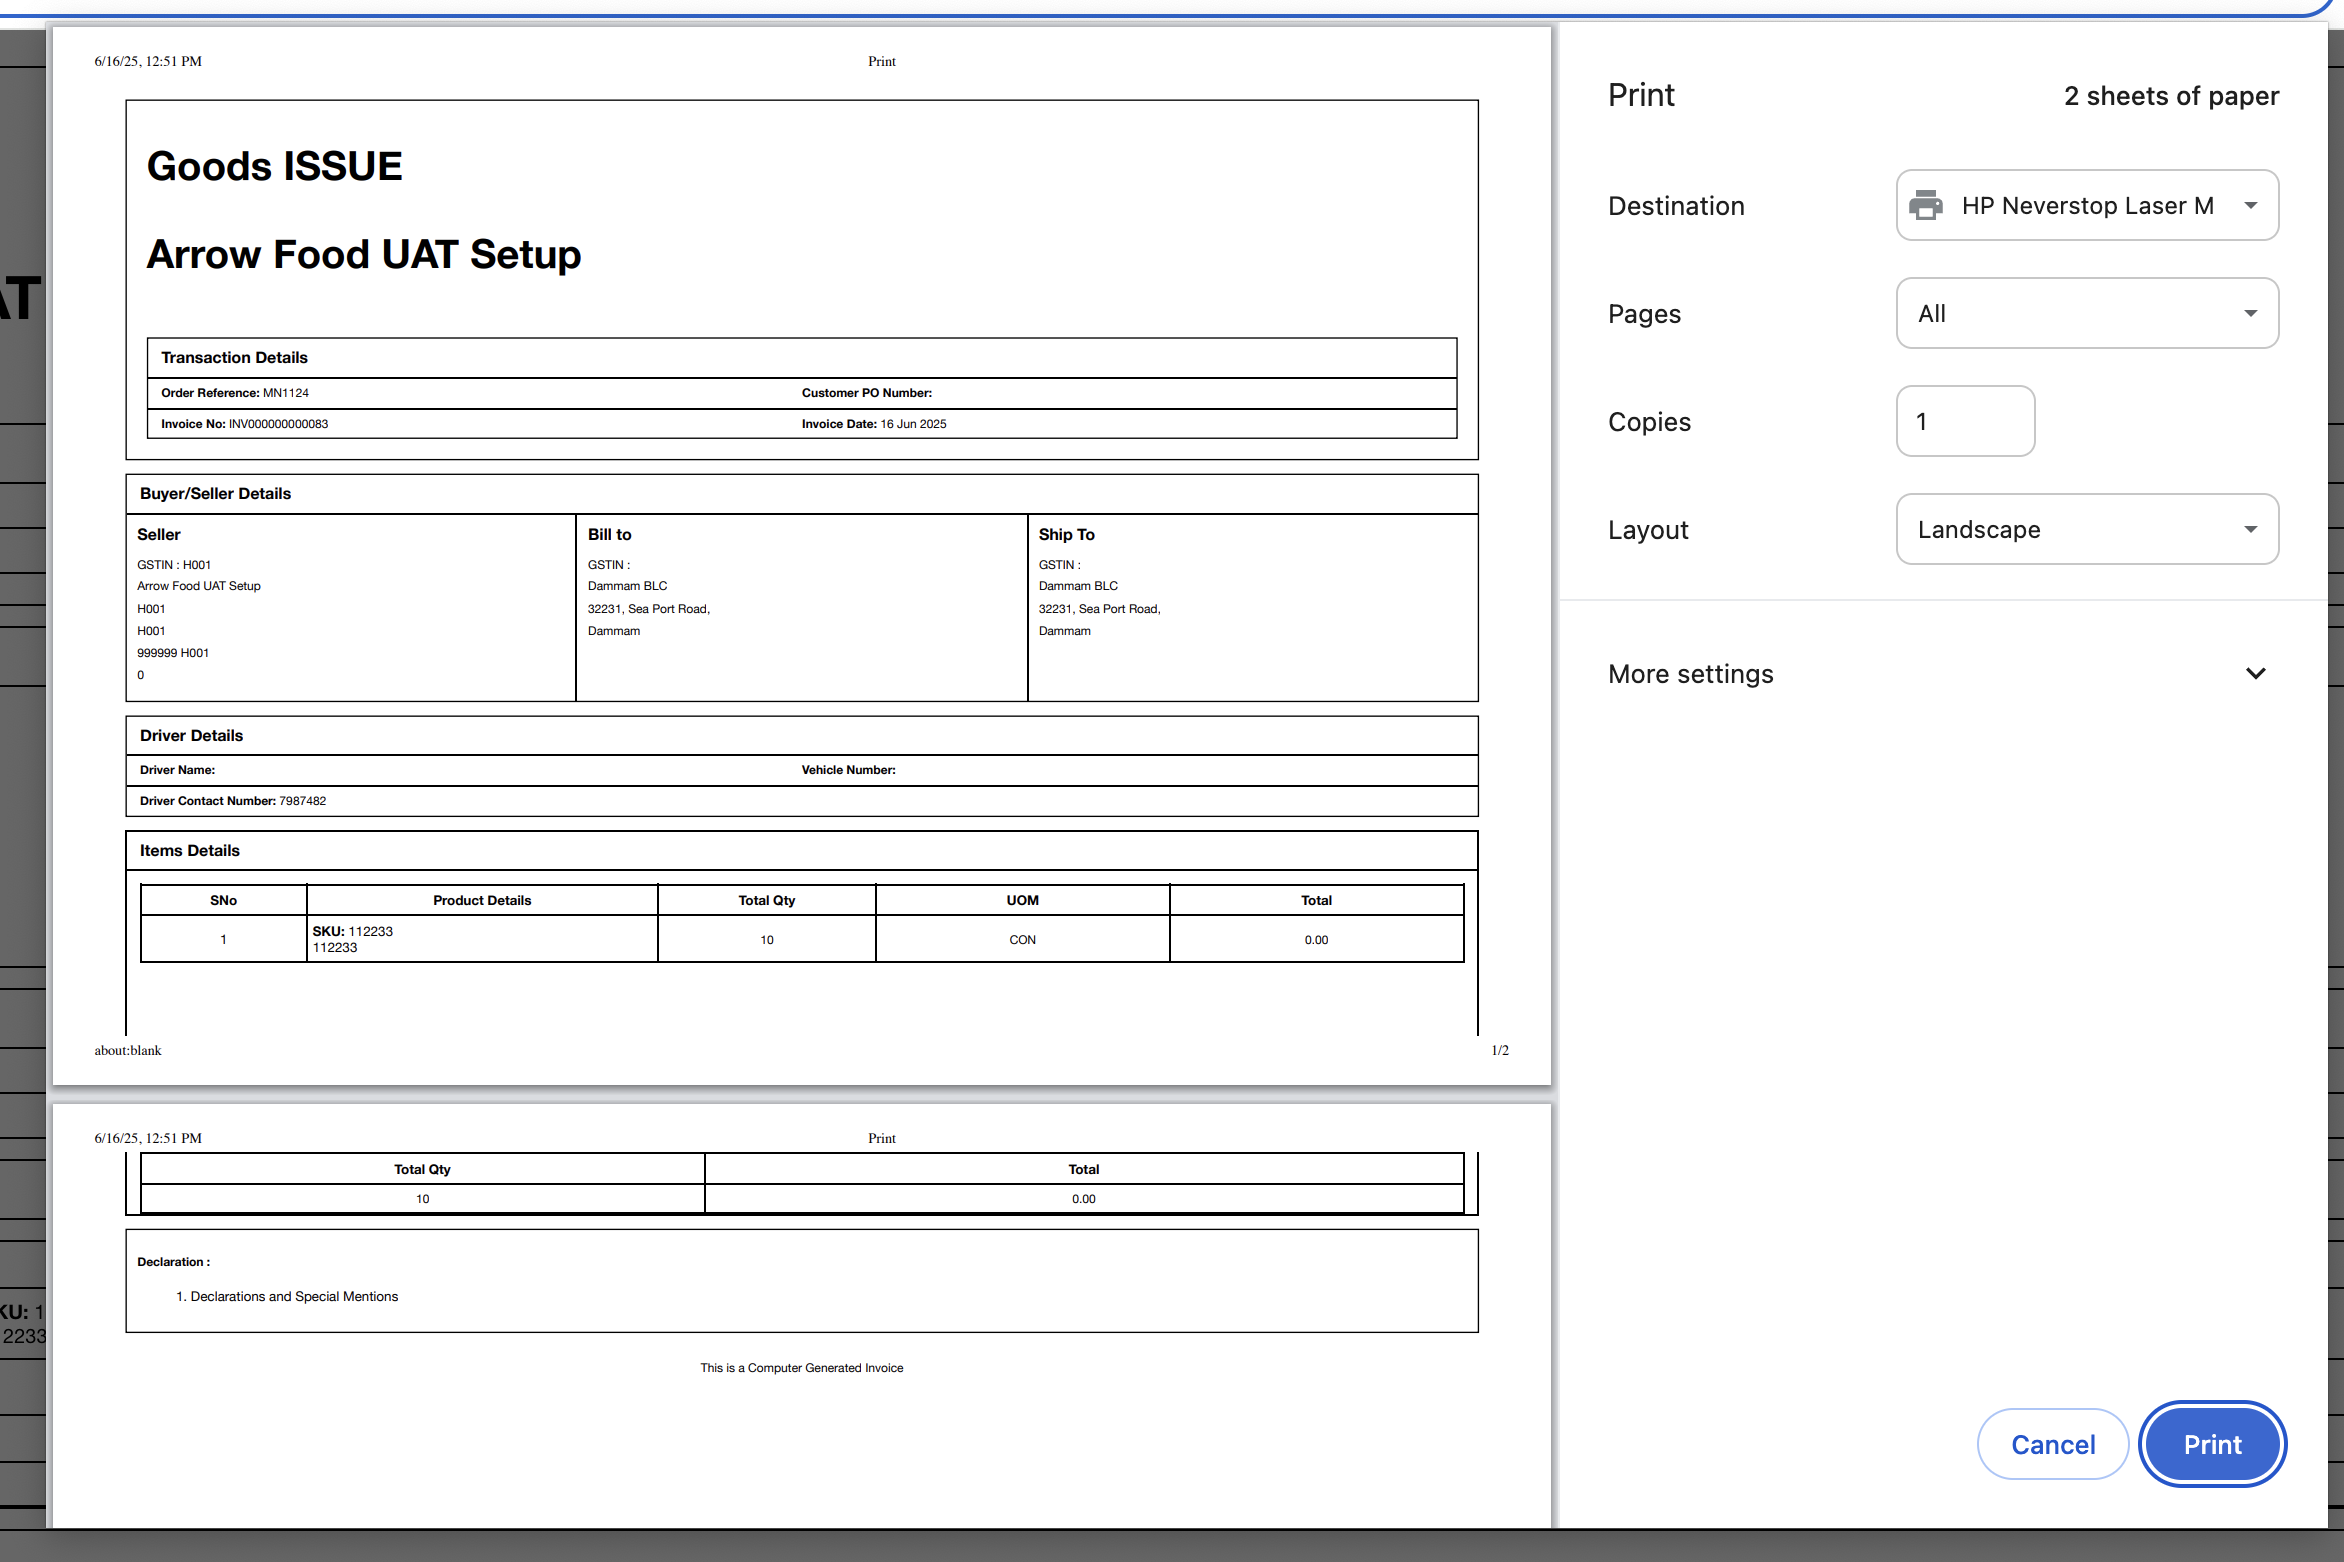
We get a pop up to print the invoice.
Step #35: We get a pop up to print the invoice.
36
Select each picklist to generate invoice.
Step #36: Select each picklist to generate invoice.

SHIPMENT AND MANIFEST

  1. Shipment -> Auto Shipment is generated against each invoice is created.

  2. Manifest -> Select the shipments to create Manifest through Web UI.

Navigate: Outbound > Shipment

  1. Auto shipment created per invoice - visible in View Shipment tab

  2. Select shipments > Create Manifest

  3. Add truck dates & loading details

  4. Create manifest

37
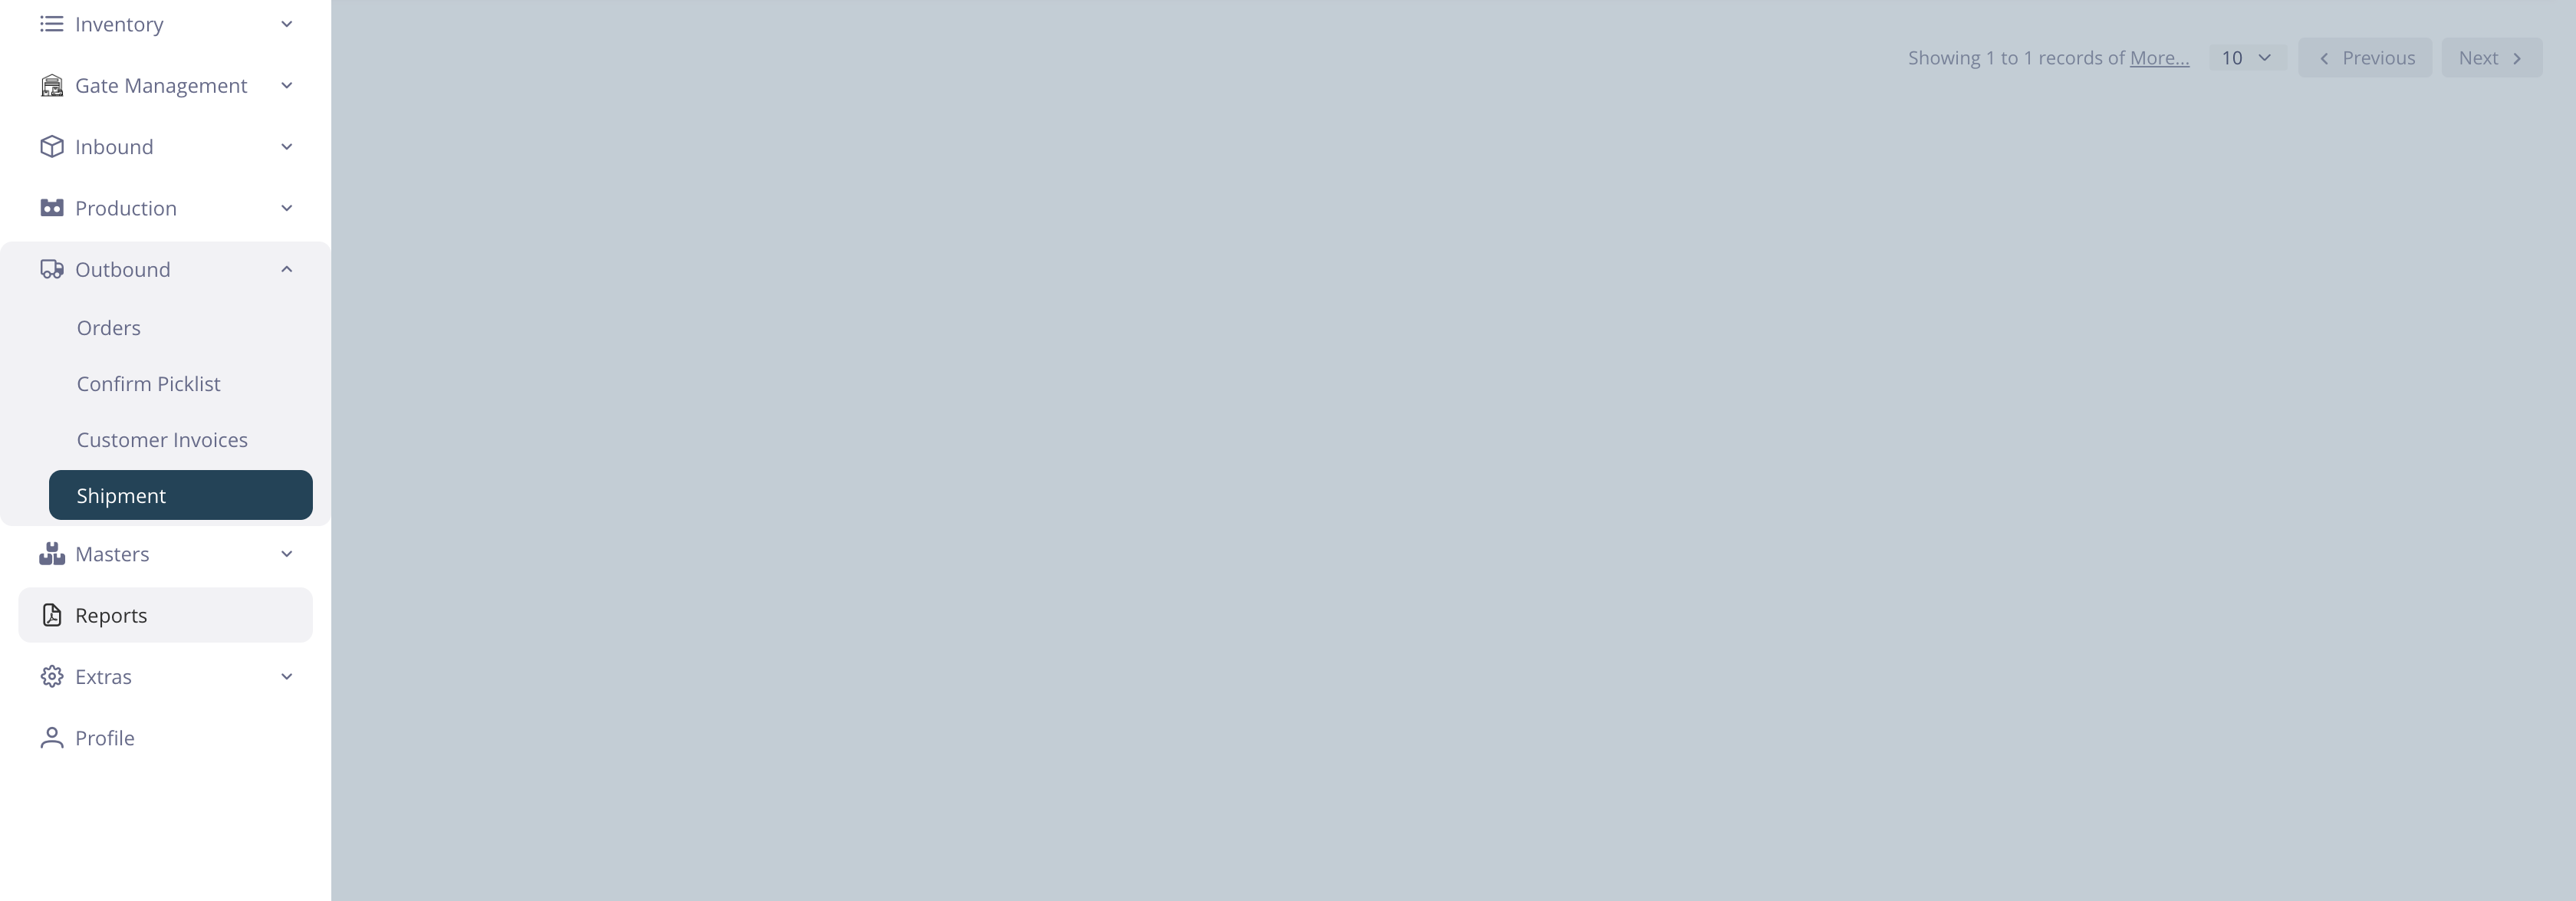
Navigate to Outbound > Shipment
Step #37: Navigate to Outbound > Shipment
38
Select a single shipment or multiple shipments for which Manifest is to be created.
Step #38: Select a single shipment or multiple shipments for which Manifest is to be created.
39
Click on "Actions" and choose "Create Manifest".
Step #39: Click on "Actions" and choose "Create Manifest".
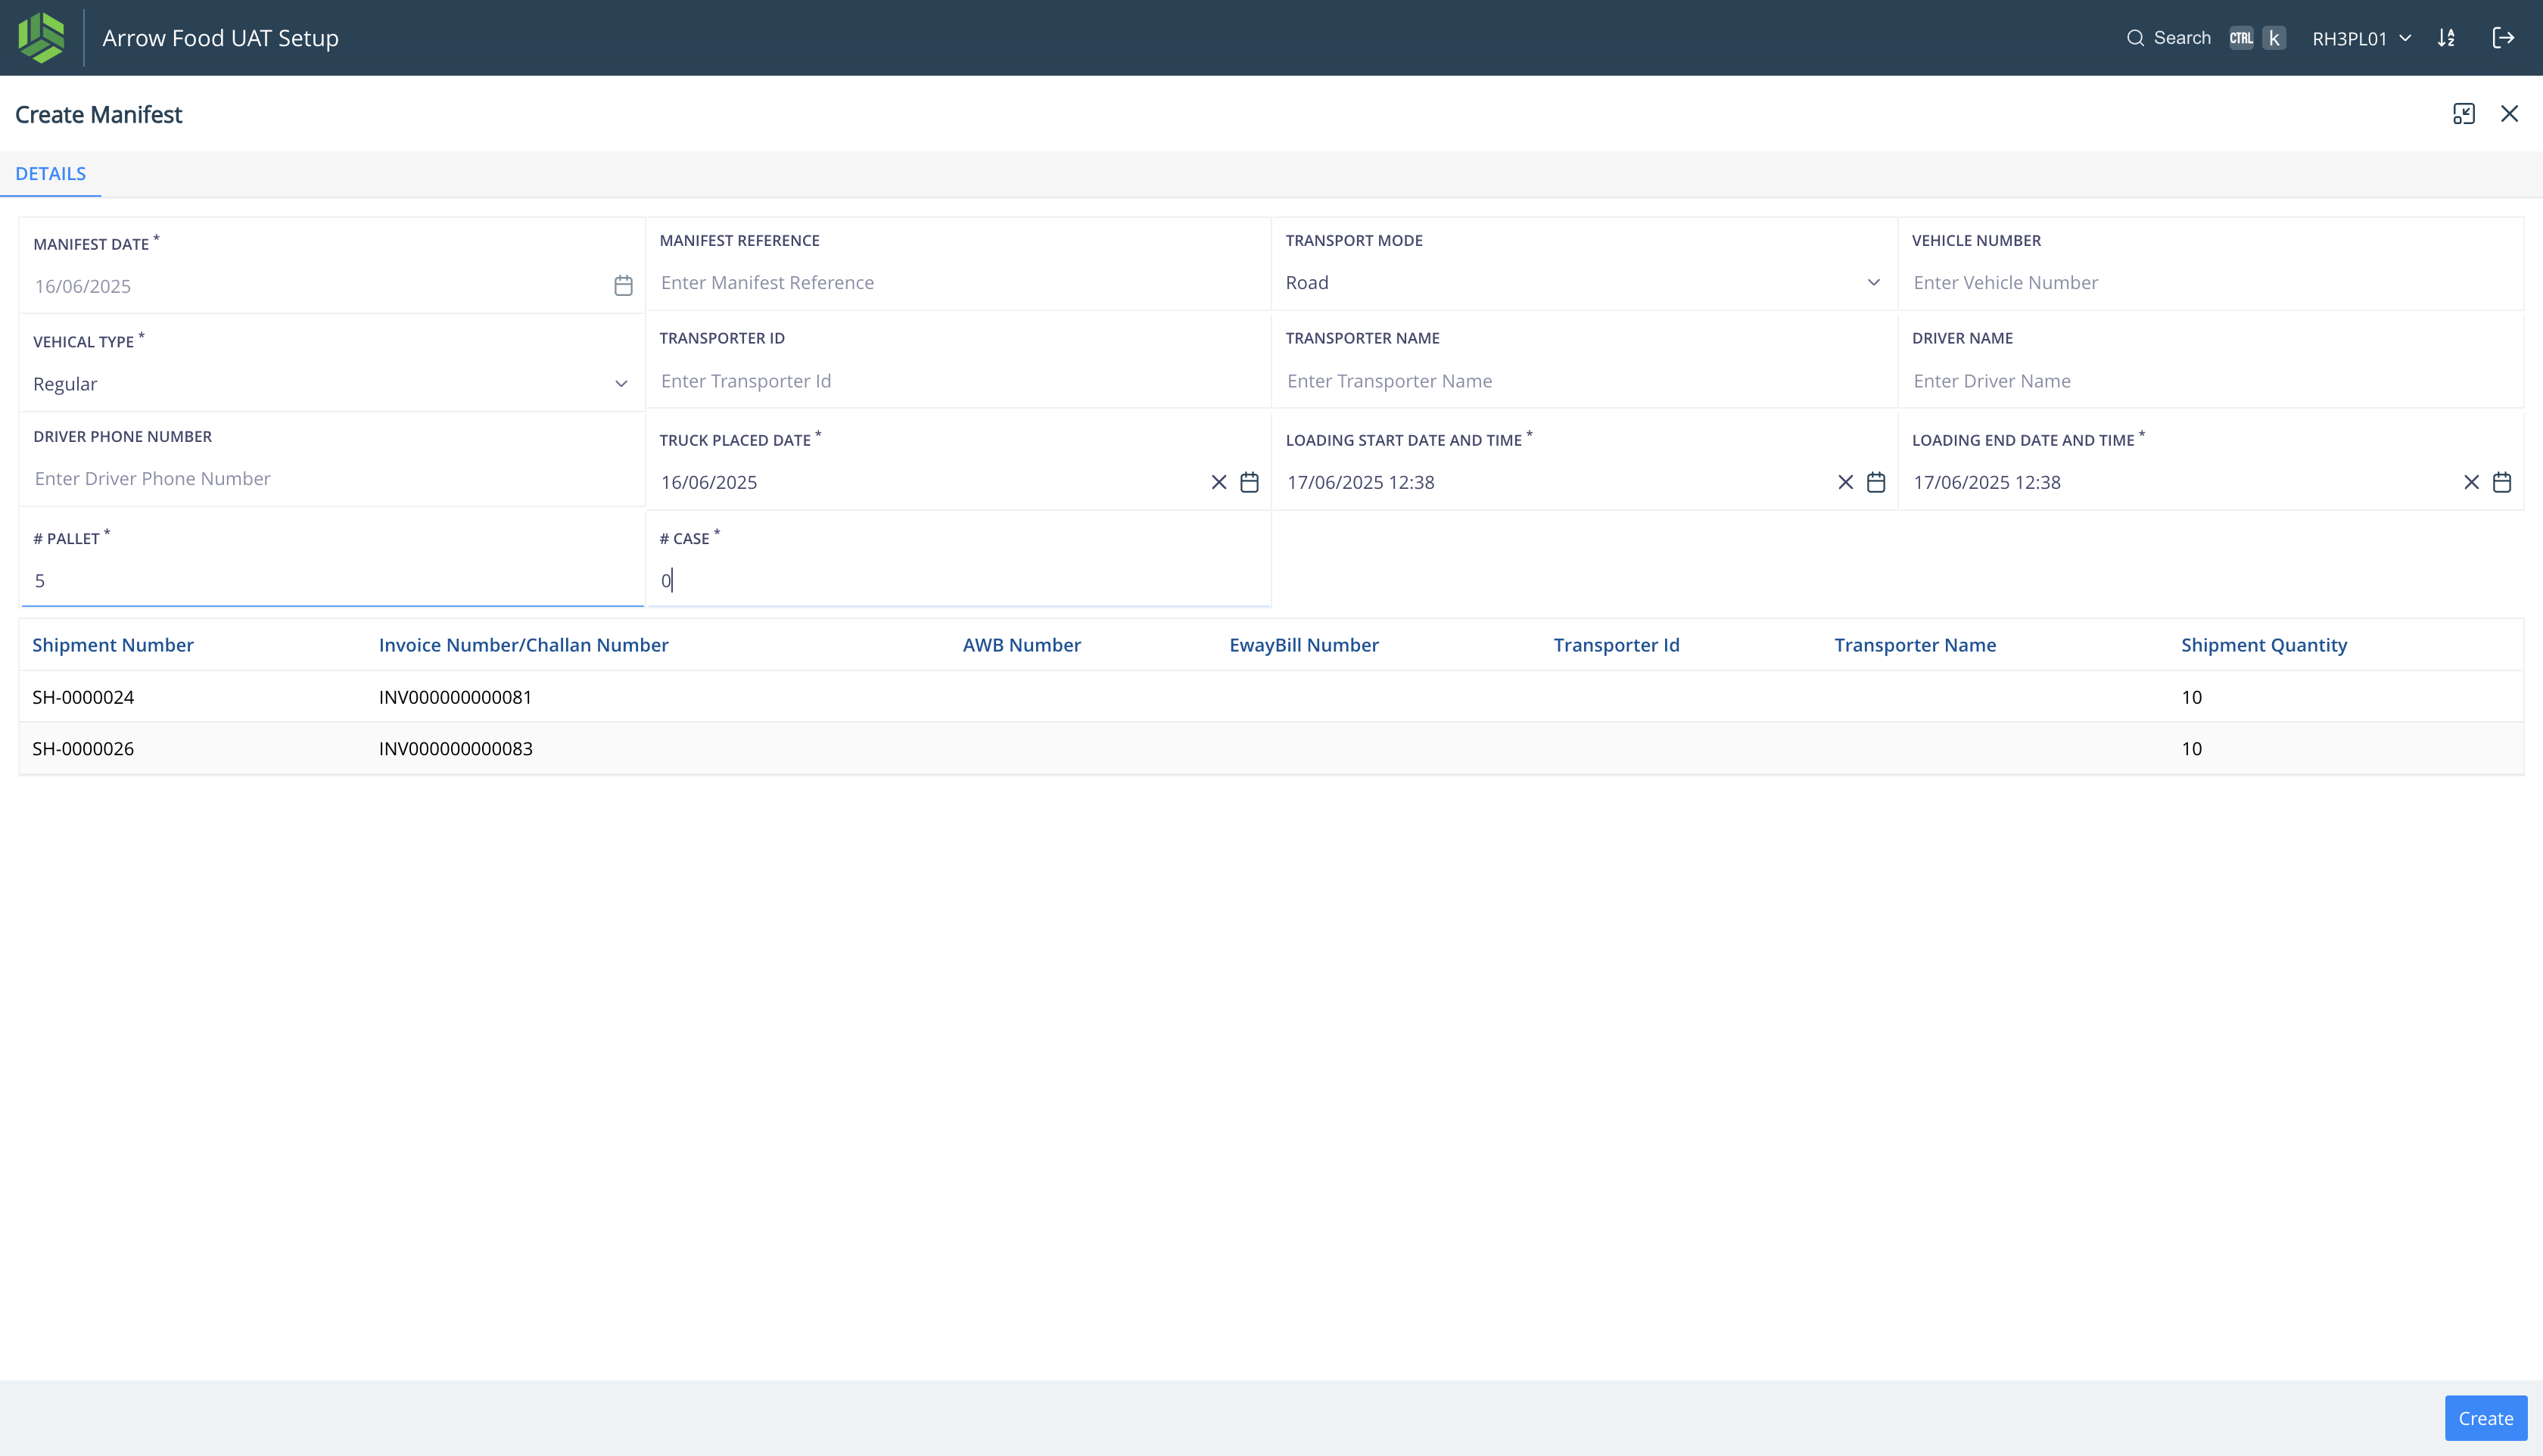
40
Add the mandatory details which included "Truck Placed Date", "Loading Start Date and Time", "Loading End Date and Time", "PALLET" and "CASE".
Step #40: Add the mandatory details which included "Truck Placed Date", "Loading Start Date and Time", "Loading End Date and Time", "PALLET" and "CASE".
41
Click on "Create".
Step #41: Click on "Create".
42
Now the Manifest is created successfully.
Step #42: Now the Manifest is created successfully.
43
All the manifests created can be viewed at Manifest Tab.
Step #43: All the manifests created can be viewed at Manifest Tab.

DISPATCH REPORT

Navigate: Reports

  1. Select "Dispatch Report"

  2. Set date filters

  3. Generate & download report

44
Navigate to Reports.
Step #44: Navigate to Reports.
45
Click on the dropdown.
Step #45: Click on the dropdown.
46
Click on "Arrow Foods - Dispatch Report"
Step #46: Click on "Arrow Foods - Dispatch Report"
47
Select the filters necessary. For example "FROM DATE" . Click on "Generate Report"
Step #47: Select the filters necessary. For example "FROM DATE" . Click on "Generate Report"
48
Once the Report is generated, we can download it from the right side panel. Click on the download icon to download the report.
Step #48: Once the Report is generated, we can download it from the right side panel. Click on the download icon to download the report.
49
View the dispatch report for detailed information of all invoices created and its manifest details.
Step #49: View the dispatch report for detailed information of all invoices created and its manifest details.