How to A/B Test an Automated Email Flow
Learn how to optimize your email marketing by setting up an A/B test for an automated email flow. Discover how to test subject lines, layouts, and send distributions.
By Simra Azam
A/B testing your email flows is a great way to optimize open rates, click rates, and overall conversions. Follow these steps to set up an A/B test for an existing email block in your automated flow.
Create the A/B Test
1
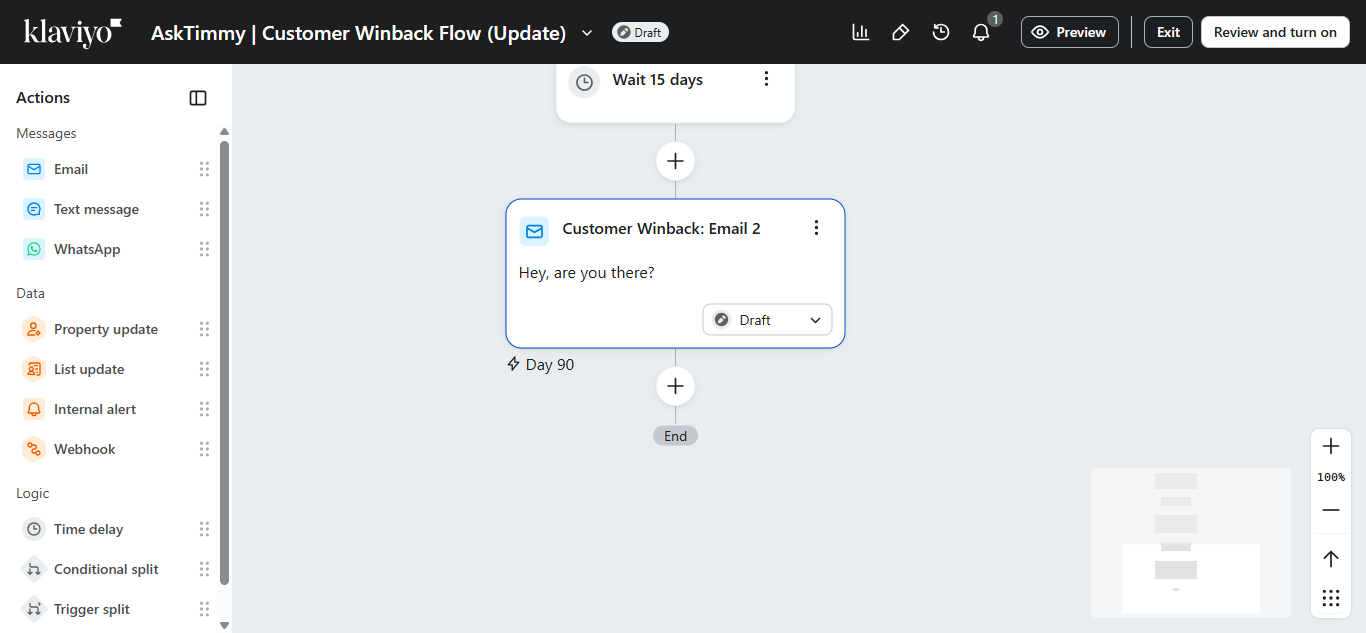
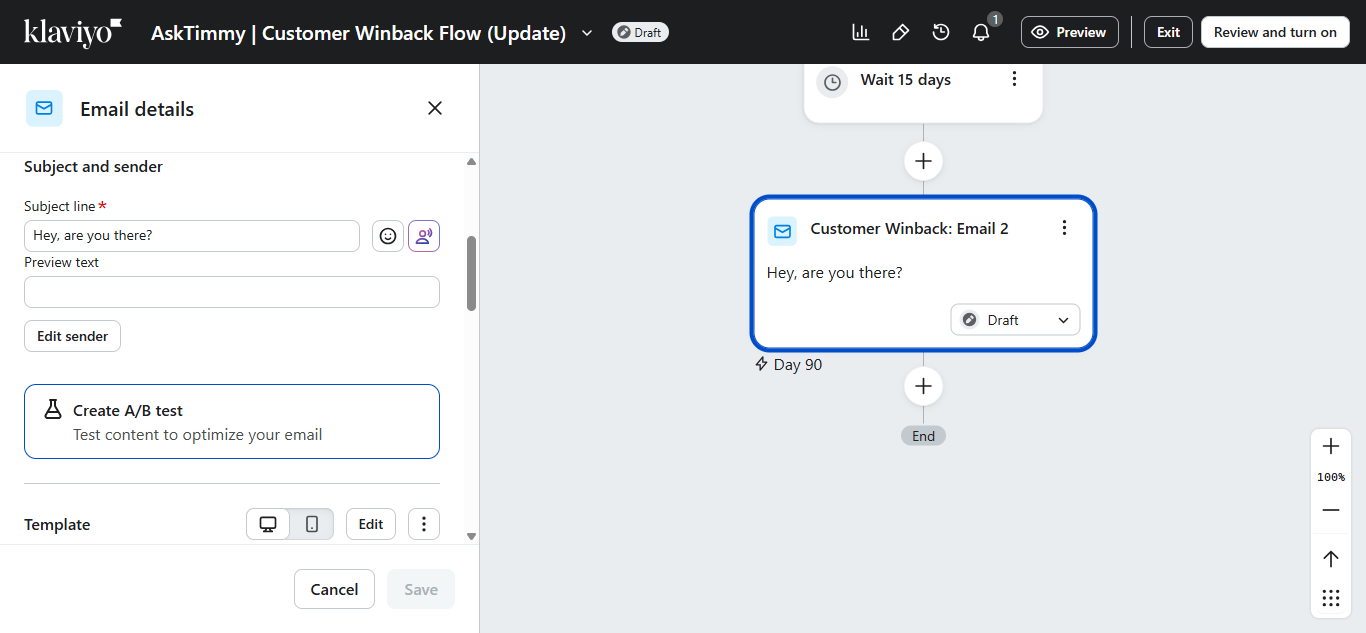
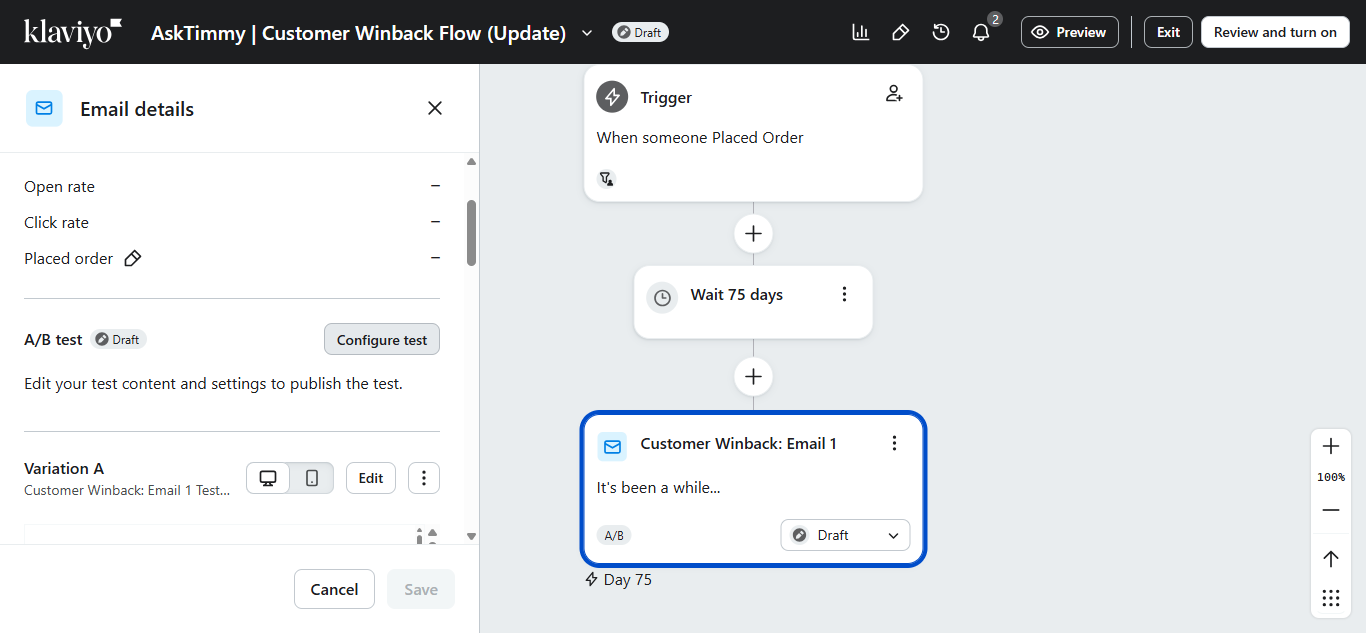
Select the email block in your flow (e.g., Customer Winback) to open its settings.
2
Click Create A/B test in the left sidebar menu.
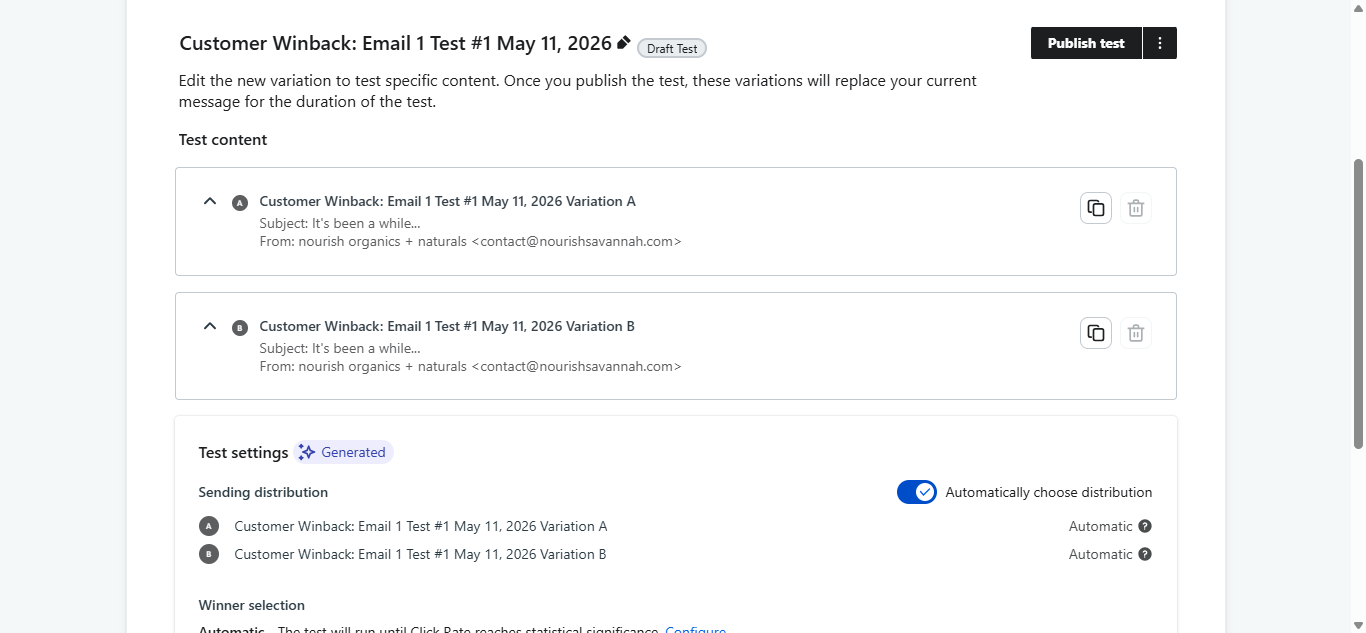
Configure Your Variations
3
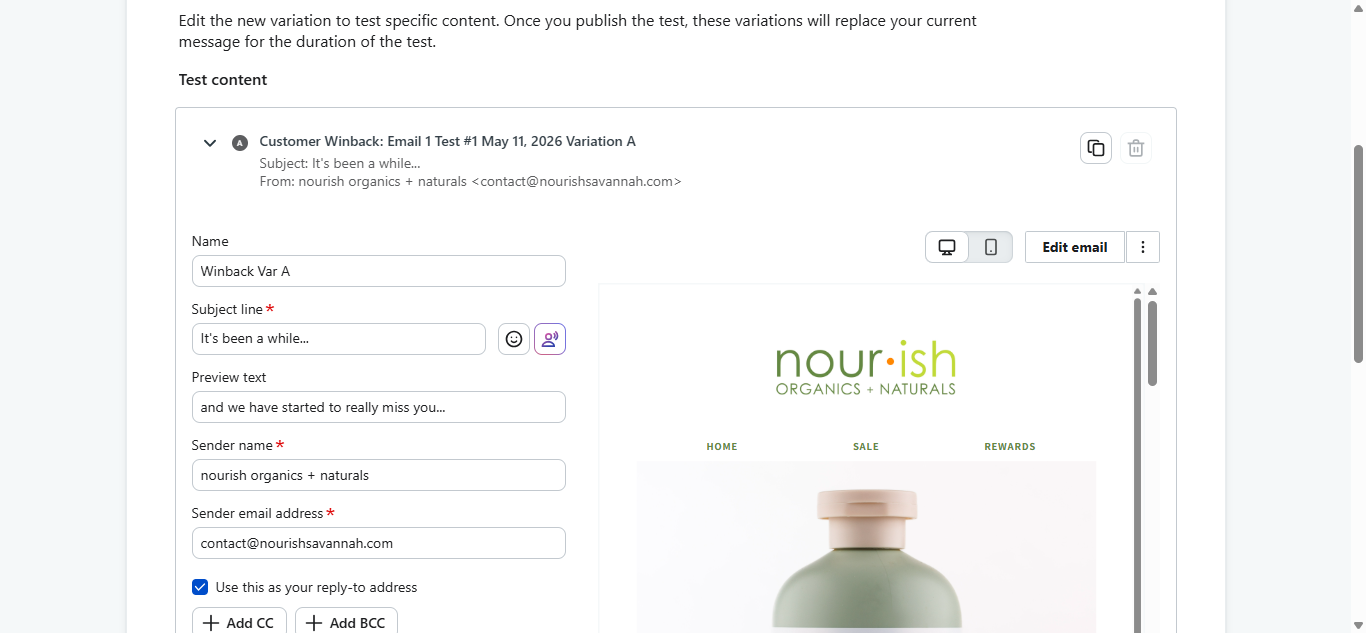
Rename your first variation (e.g., Winback Var A) to keep your reporting clean.
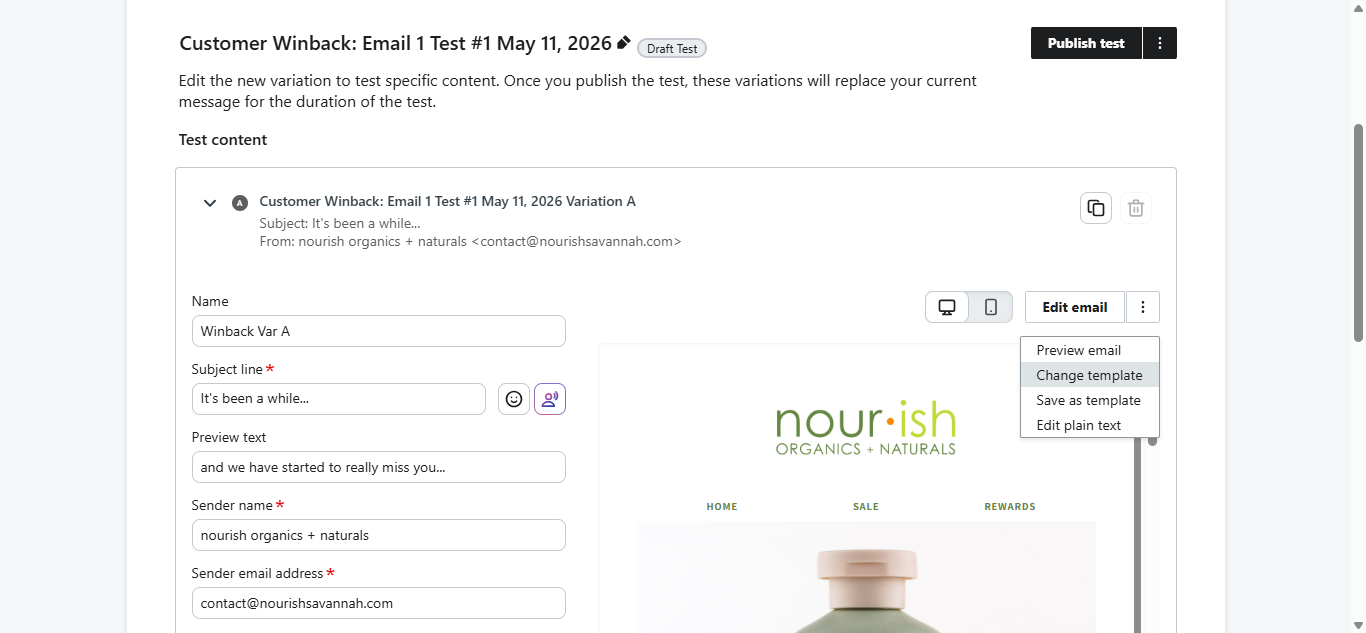
4
Click Edit email to modify the content, subject line, or sender details for this variation.
5
Select your second variation to edit its details.
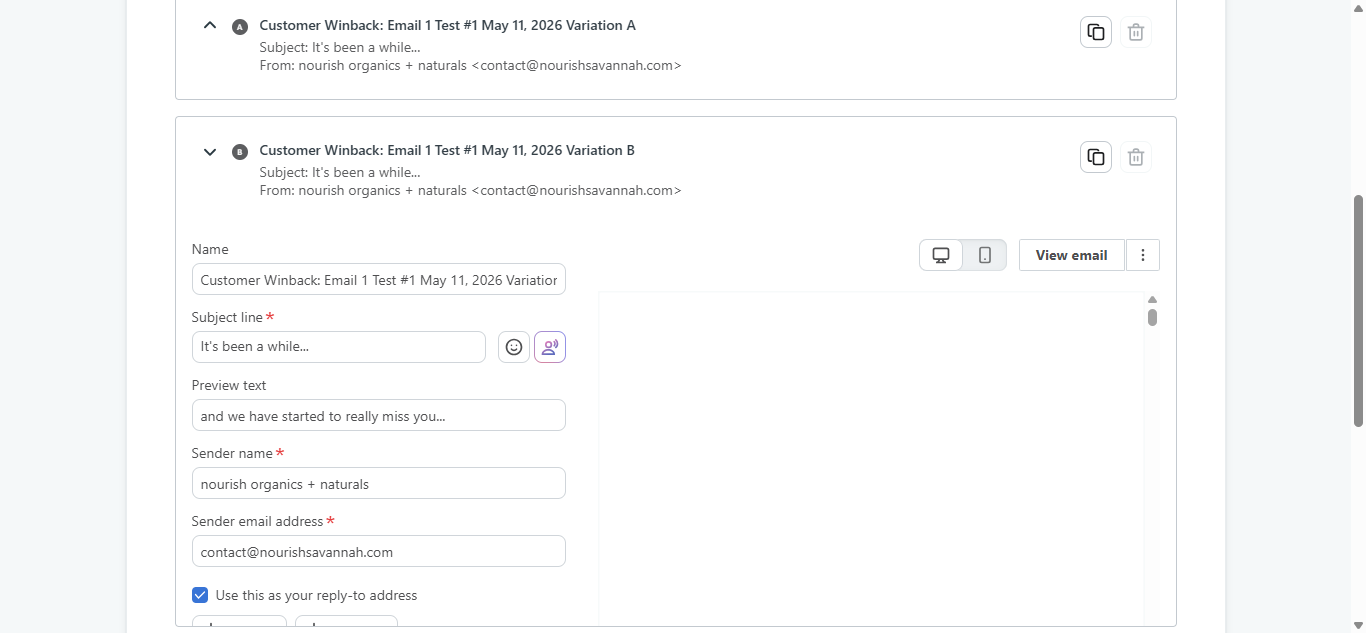
6
Rename this variation as well (e.g., Winback Var B).
7
To test an entirely different design instead of just subject lines or preview text, click the dropdown next to the edit button and select Change template.
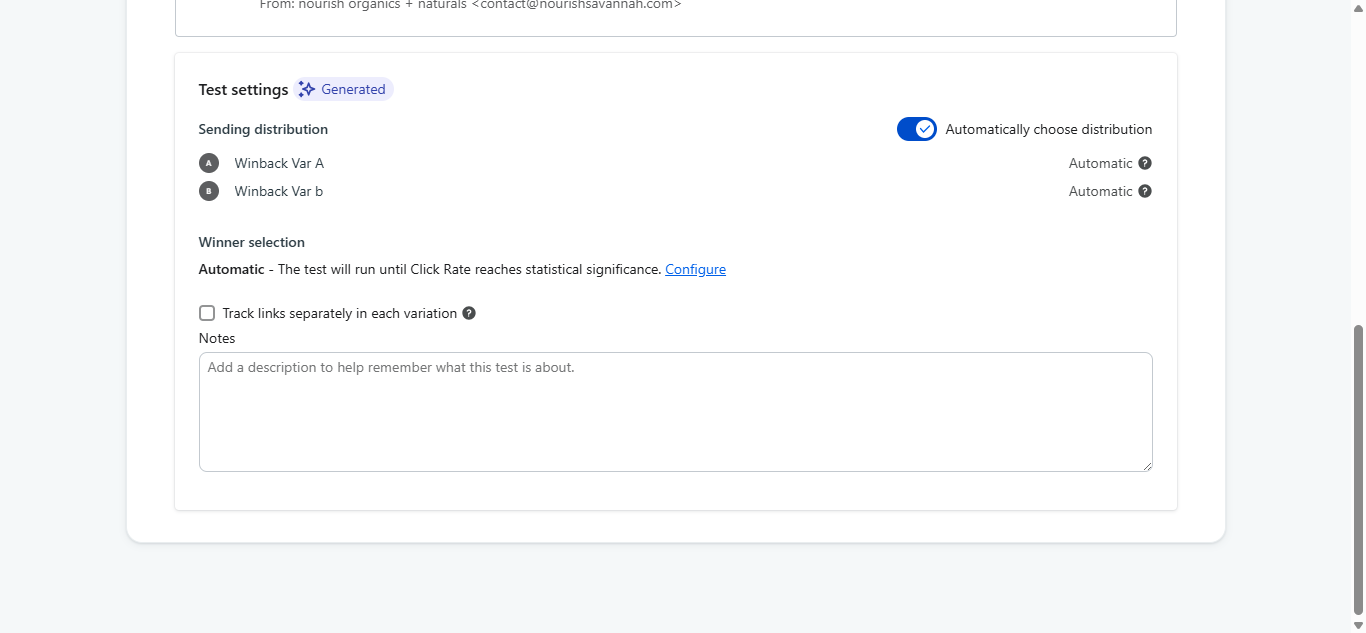
Configure Test Settings
8
Click Configure test to set the rules for your A/B test.
9
Adjust the sending distribution percentages to define the traffic split between your variations.
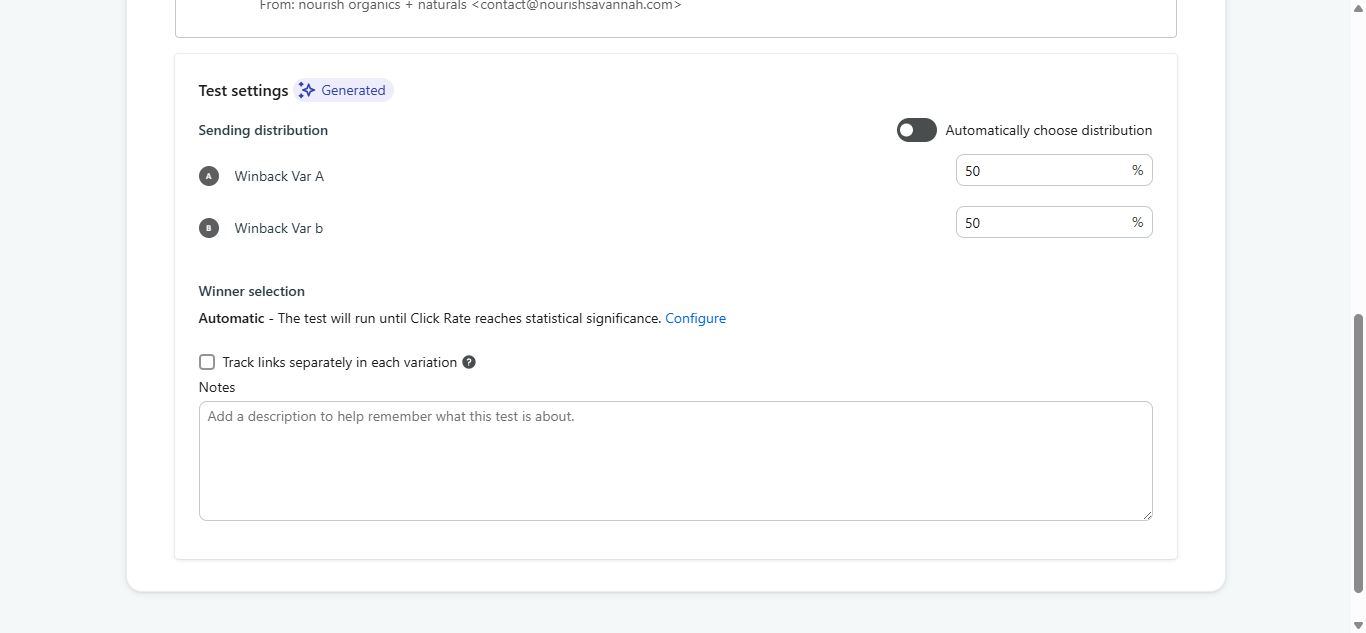
10
Click Configure under Winner selection settings to choose your winning metric (such as Click Rate) and determine if the test should end automatically.
11
Once your variations and rules are ready, click Publish test in the top right corner.