How to Add a Company Database in OrderWise
Learn how to configure a new company database connection in OrderWise and log in via Remote Desktop Connection.
By Lee Higgins
Logging into OrderWise on a new server might require you to add the specific company database connection before you can authenticate. Follow these steps to configure a new database connection and log in securely.
Connect to the Remote Server
1
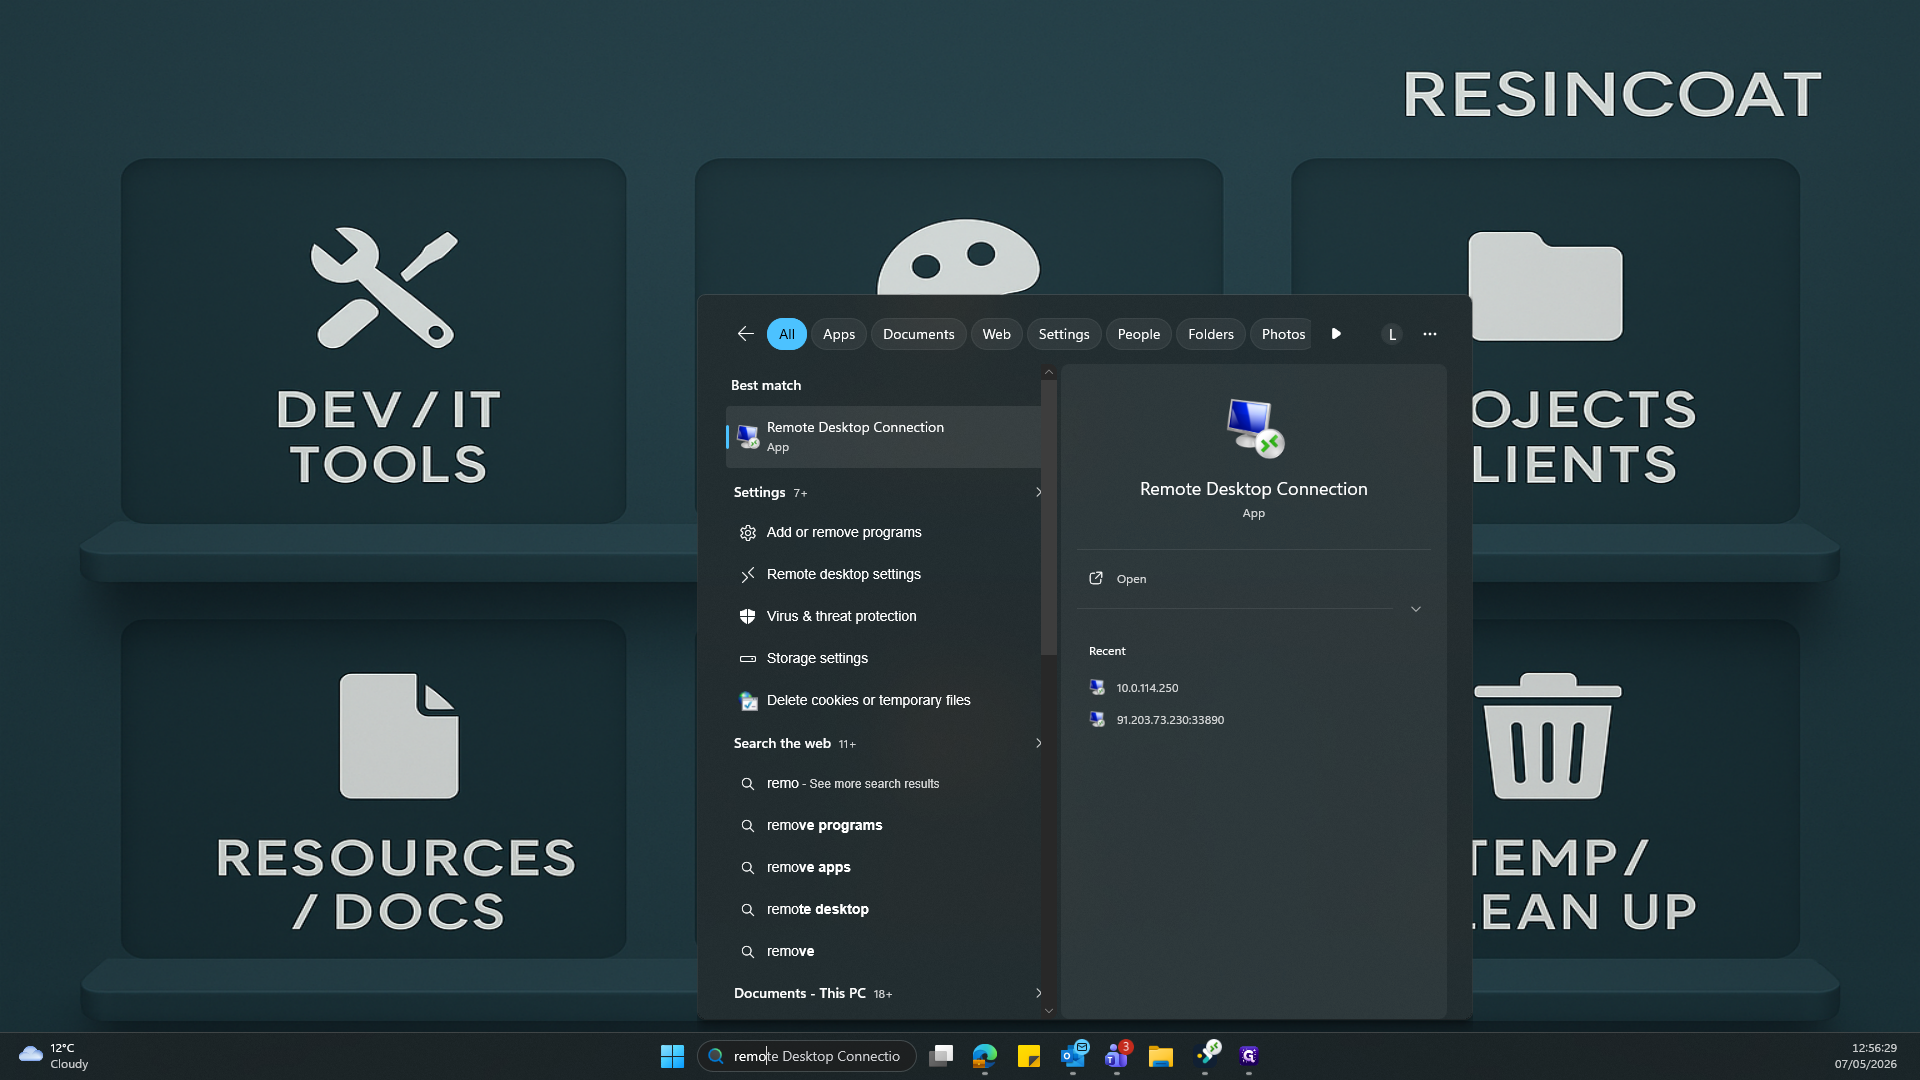
Search for and launch Remote Desktop Connection from your Windows start menu.
2
Enter the required server IP address (e.g.,
10.0.114.250) and click Connect.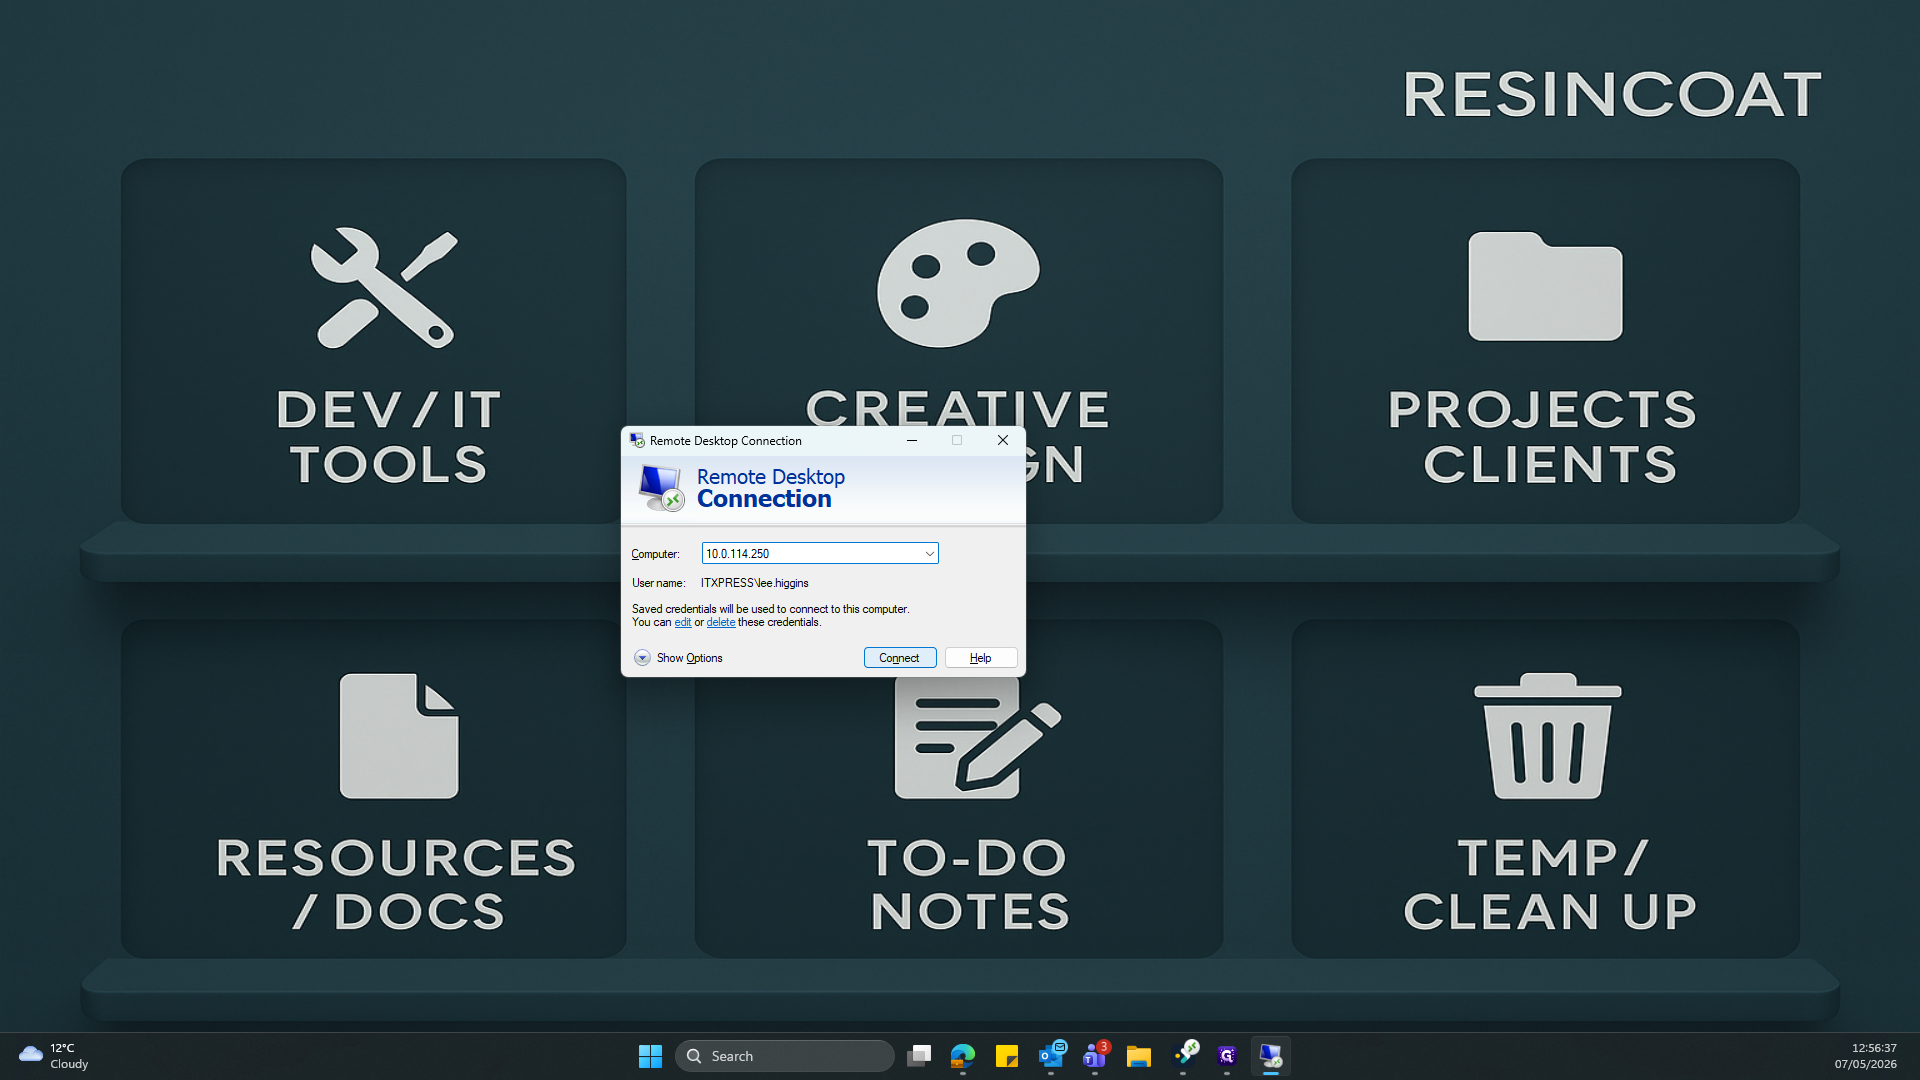
Configure the OrderWise Database
3
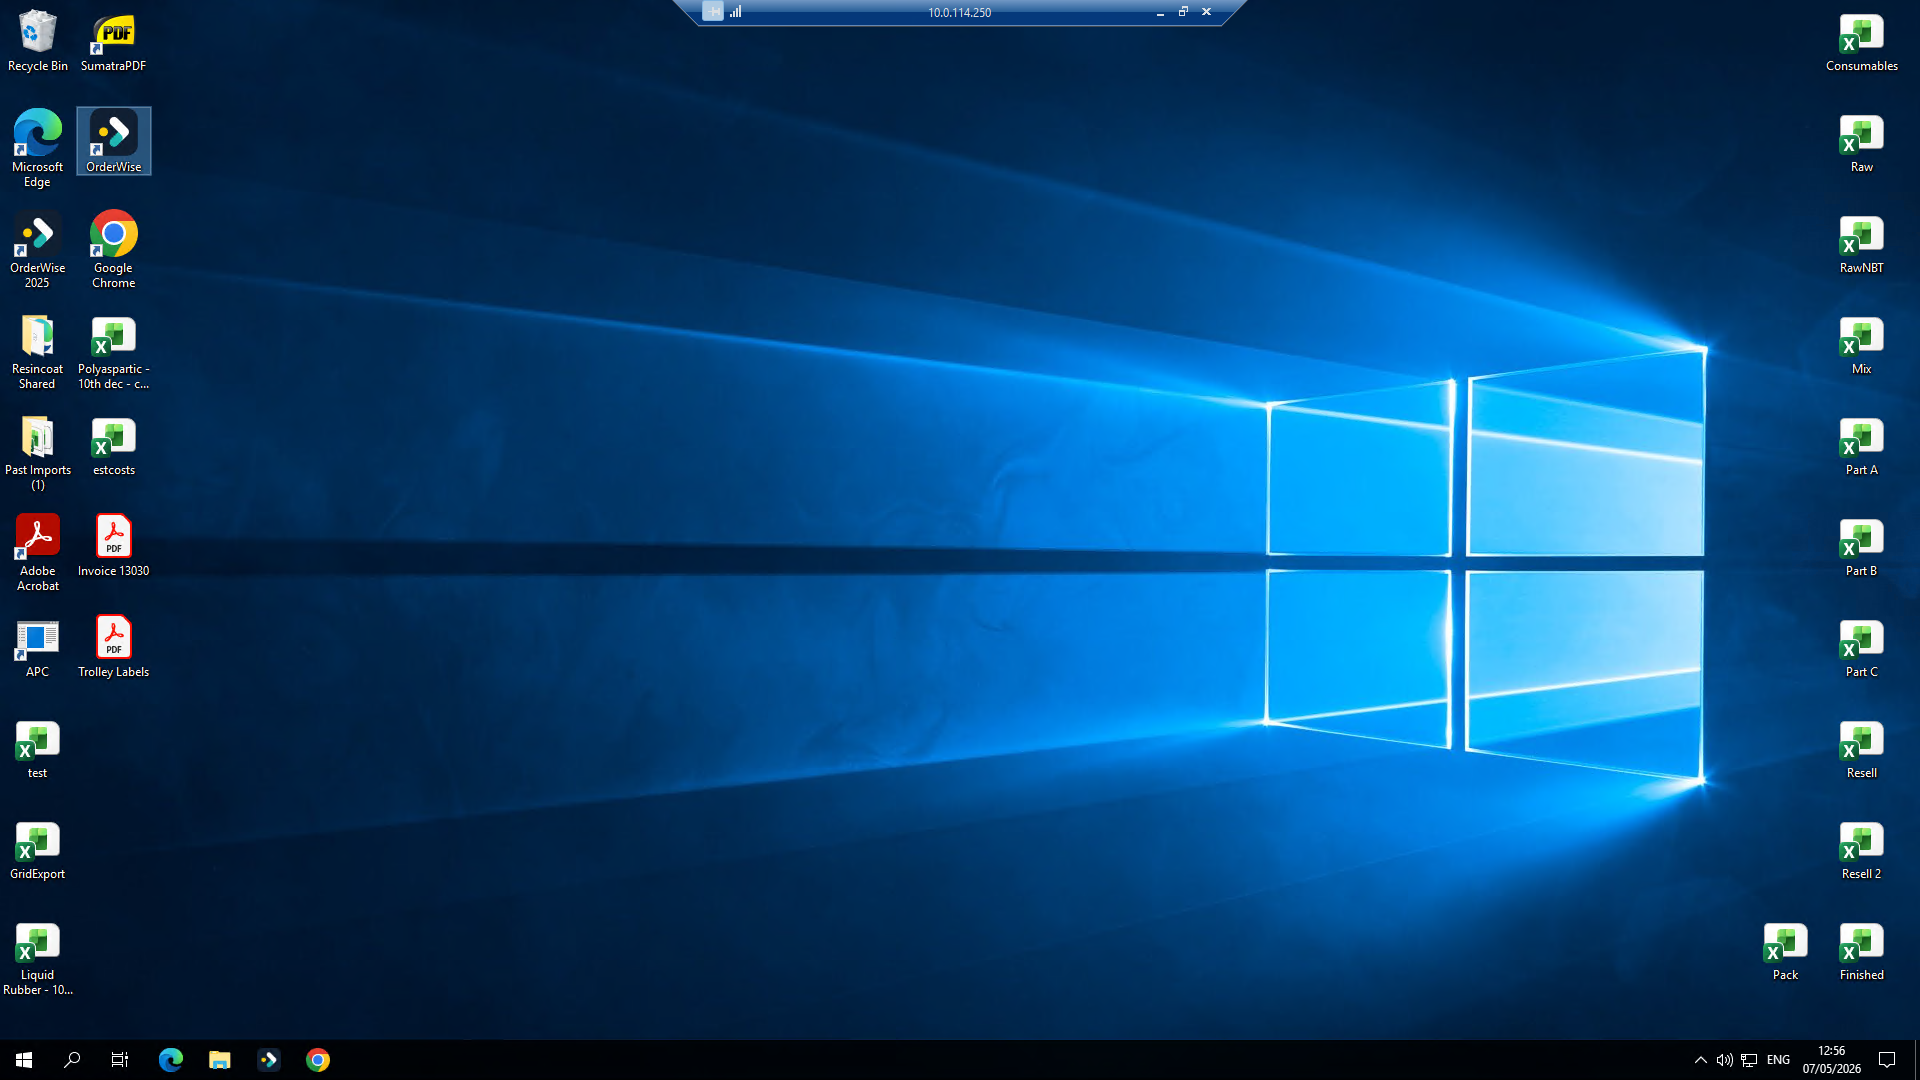
Once your remote desktop session loads, double-click the OrderWise shortcut on the desktop.
4
From the initial OrderWise login prompt, open the Manage Companies dialog and click Add in the toolbar.
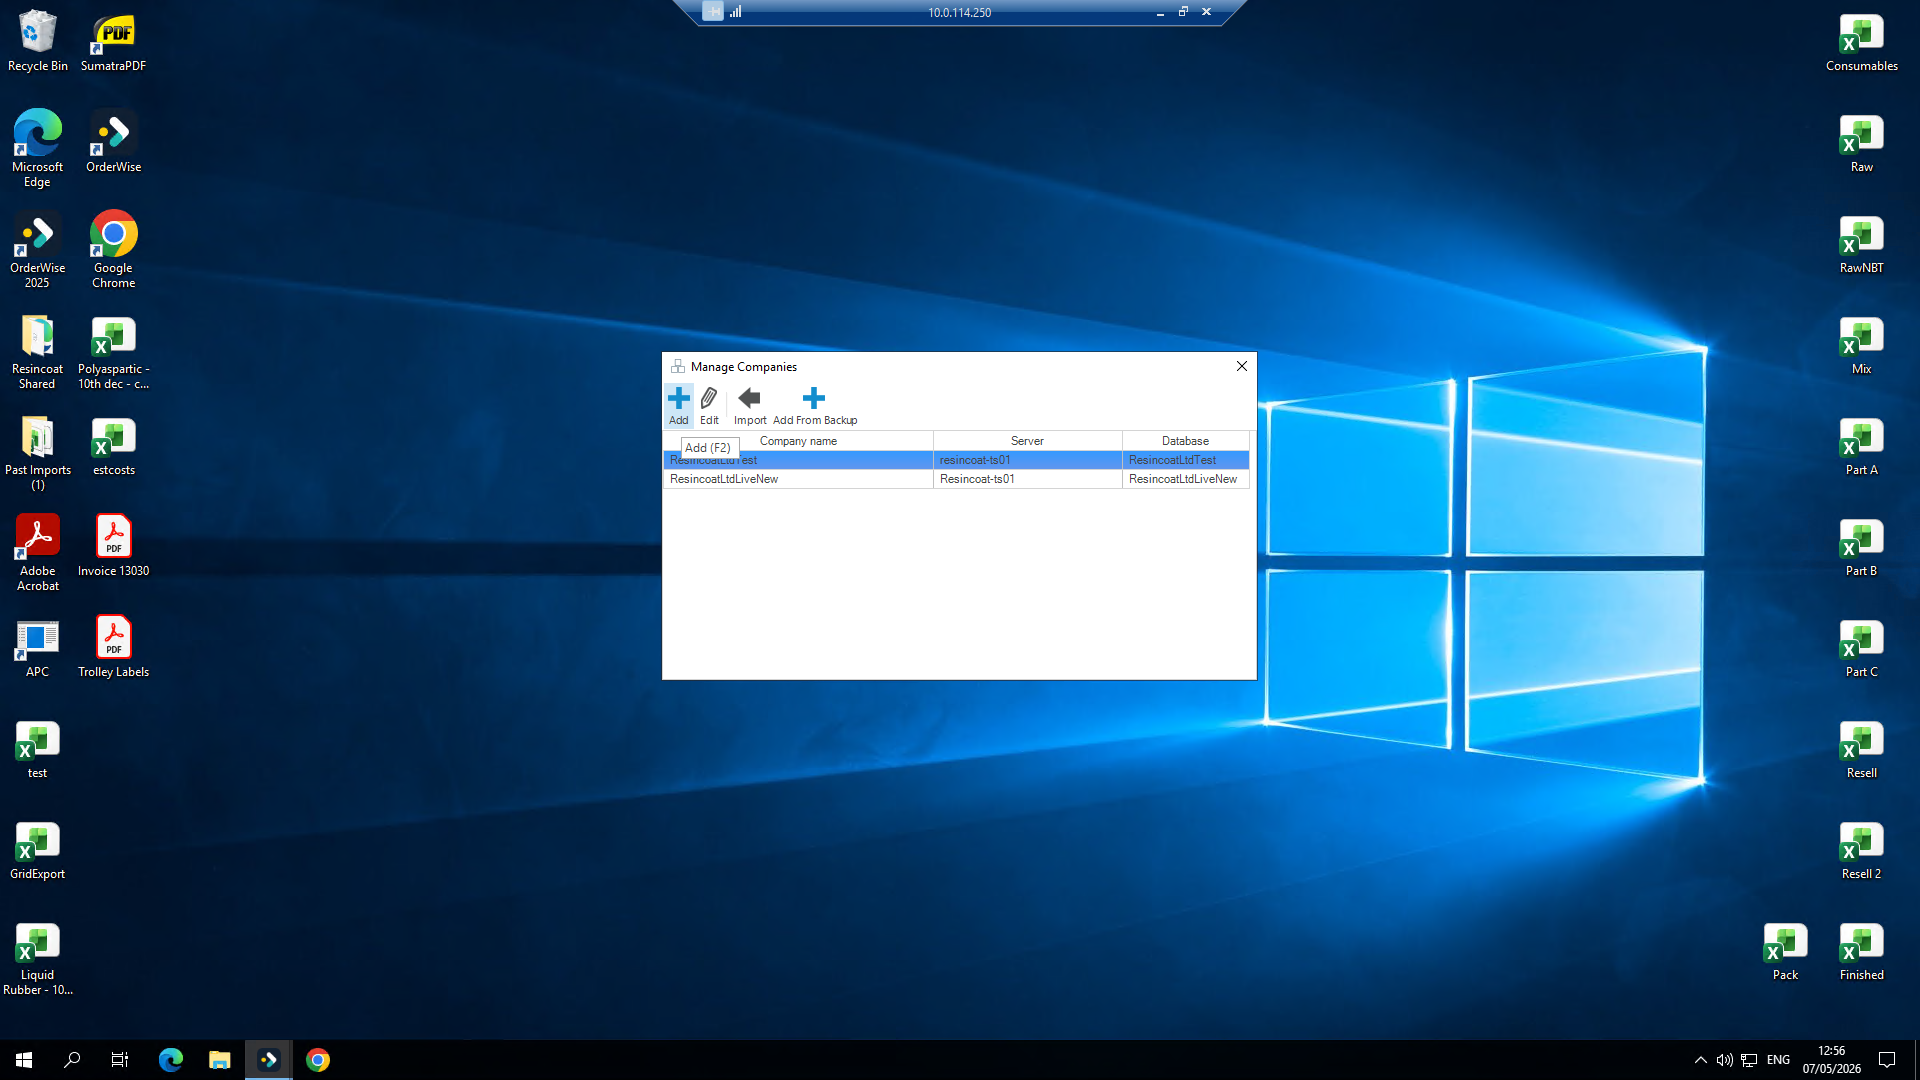
5
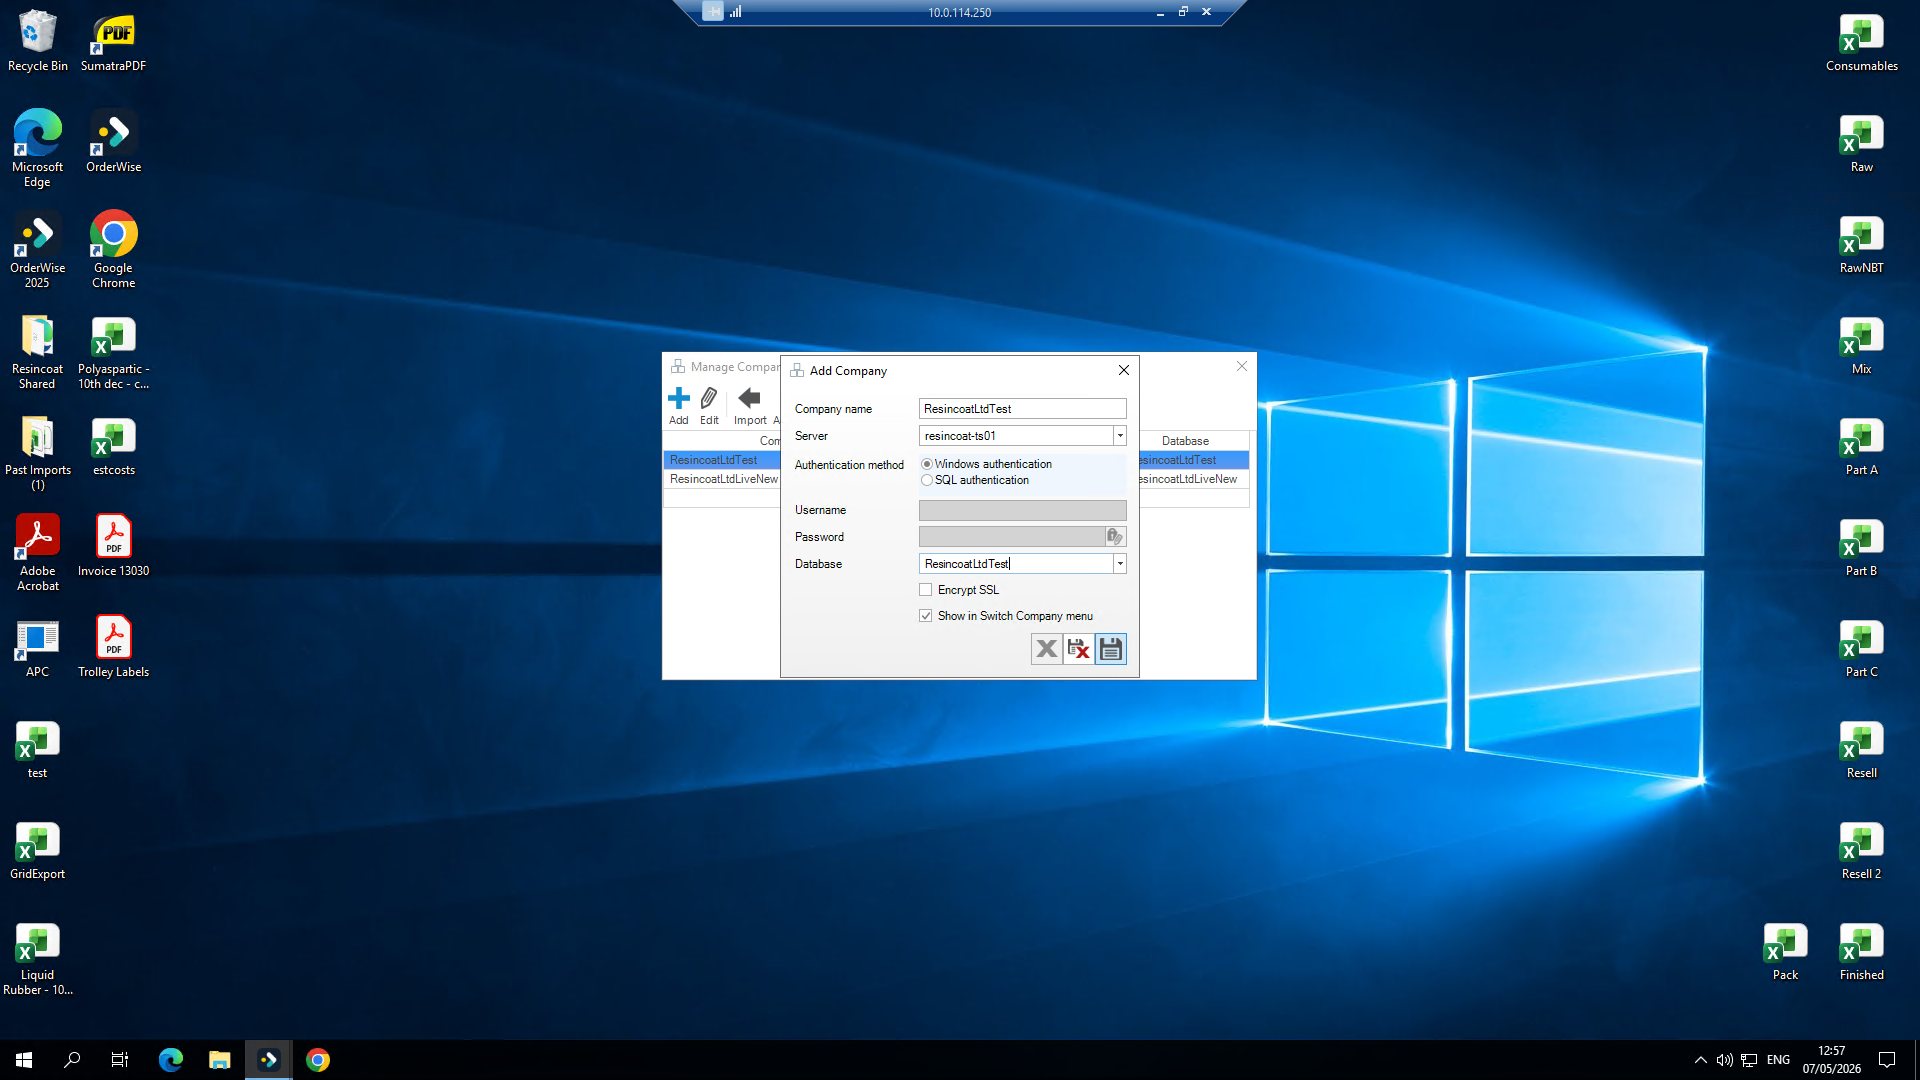
Fill out the company or server details in the top fields.
6
Ensure you toggle the option to show this company in your main switch company menu.

7
Click into the Database field and type the exact name of the database you are trying to connect to.
8
Click the Save icon at the bottom of the form to apply your configuration.
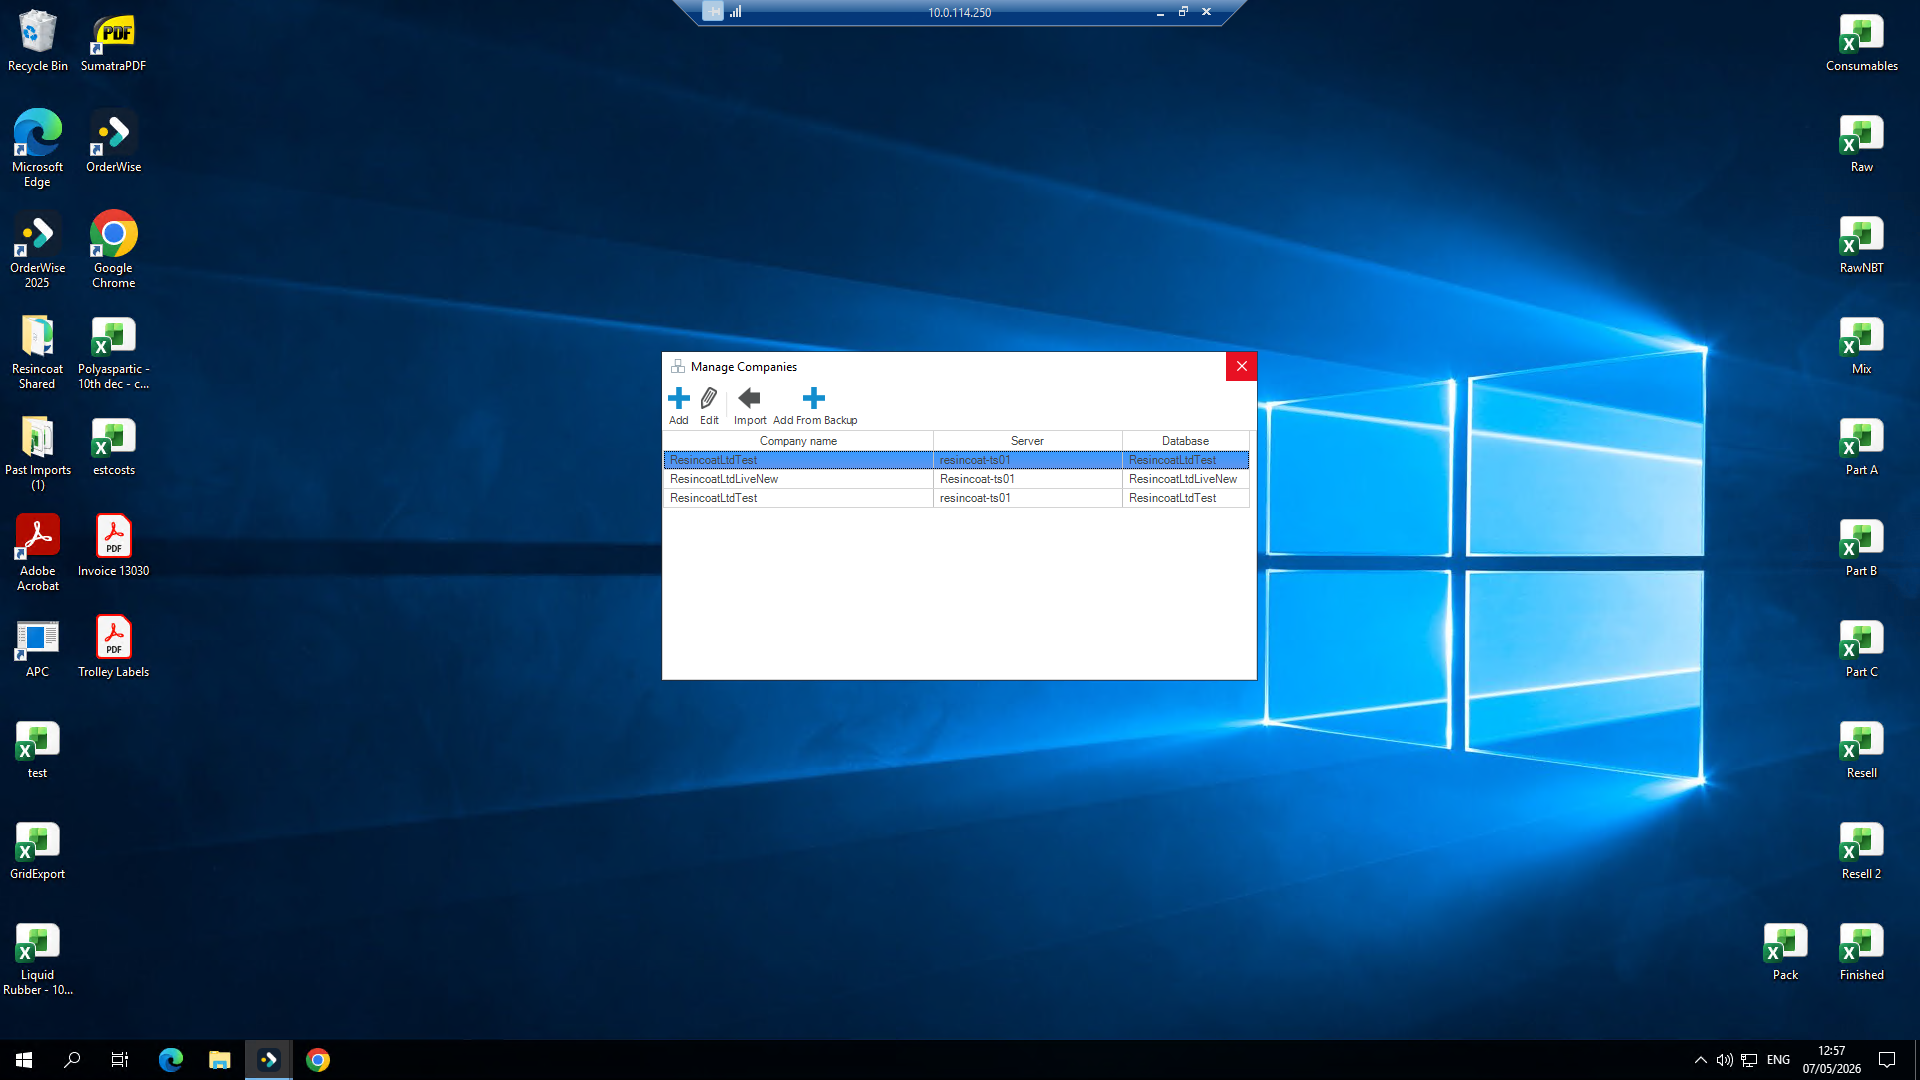
9
Click the × at the top right to close the Manage Companies window and return to the login screen.
Log In
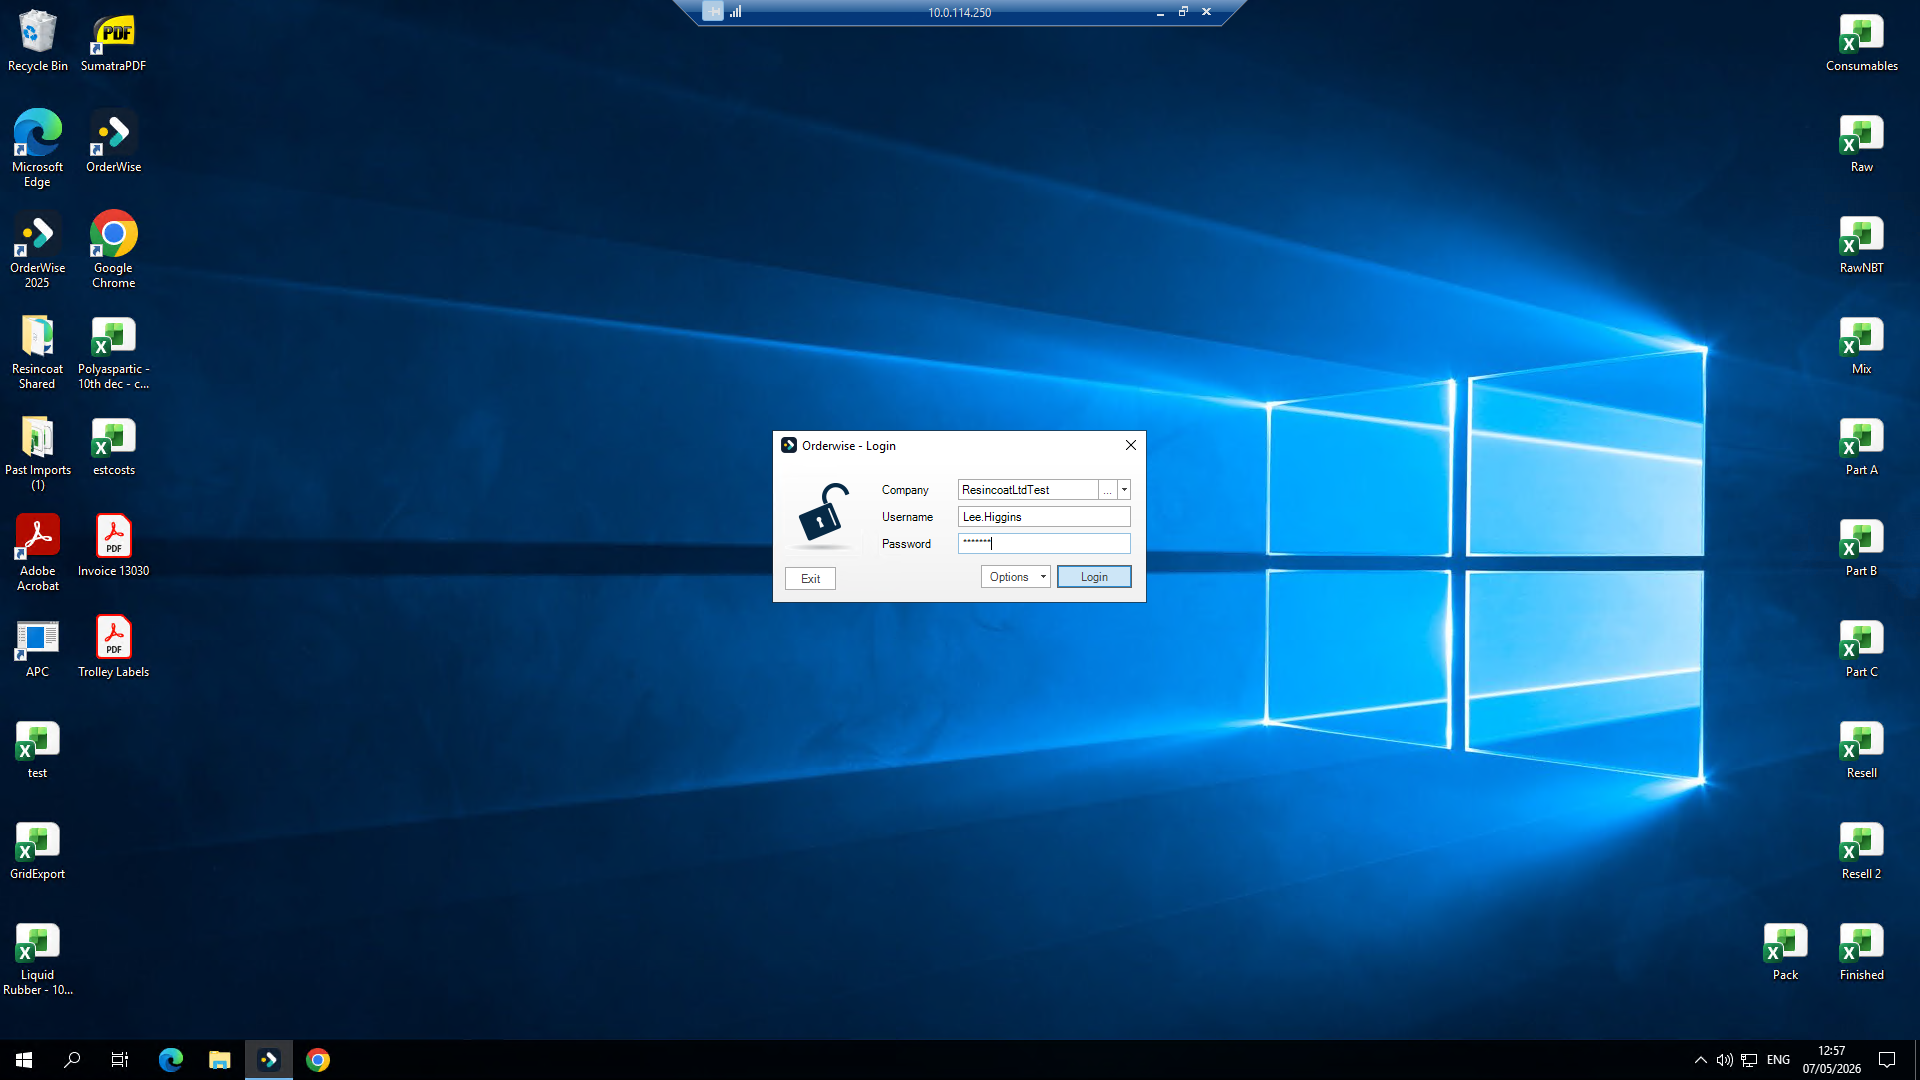
10
Select your newly added company from the dropdown menu, then enter your designated username and password.
11
Click Login to access your OrderWise dashboard.