Icon

How to Add an ISA Top-Up via a Service Case

Learn how to record a product top-up recommendation via a service case, accept the proposal, and create the draft implementation plan.

By Elliott Potter

Adding a top-up to an existing client plan through a service case involves creating a recommendation, attaching the top-up details to an active policy, and accepting the proposal to move it into implementation. Follow these steps to log a top-up and generate the corresponding draft.

1. Create the Recommendation
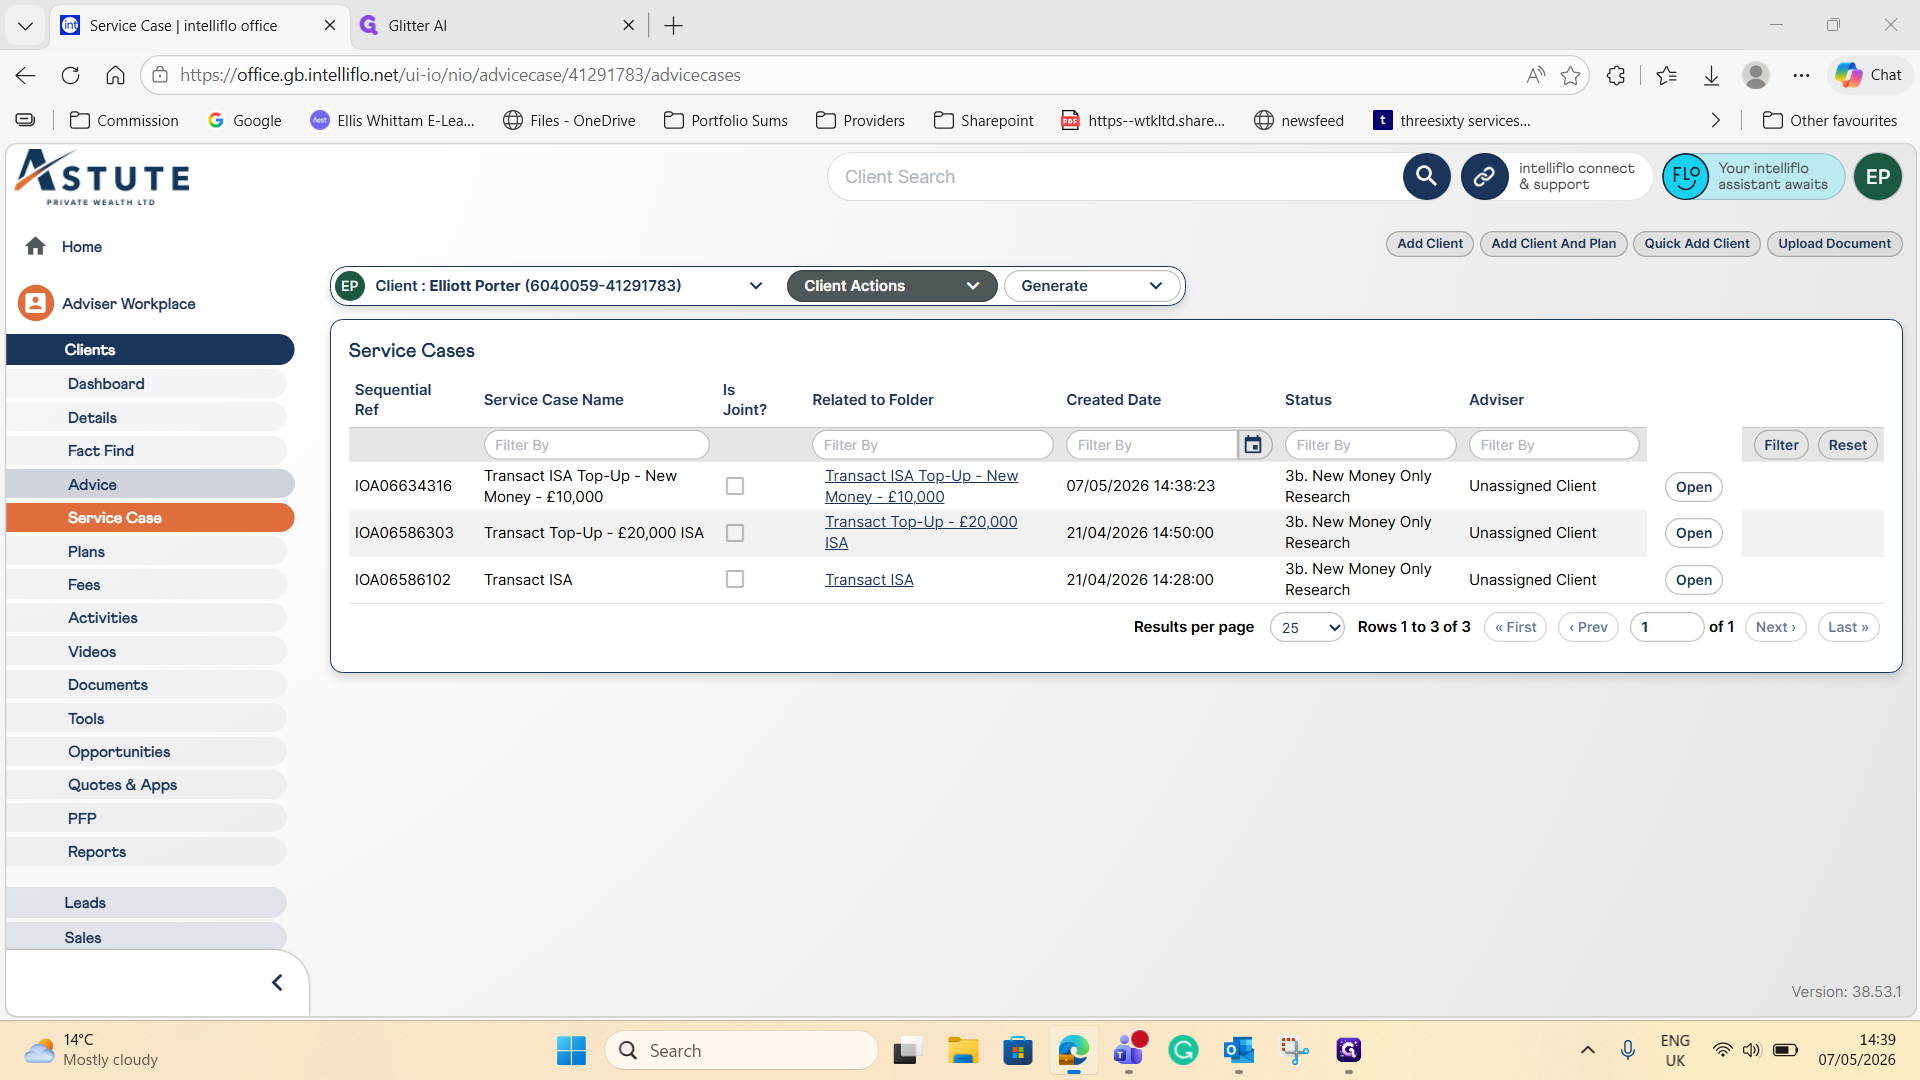
1
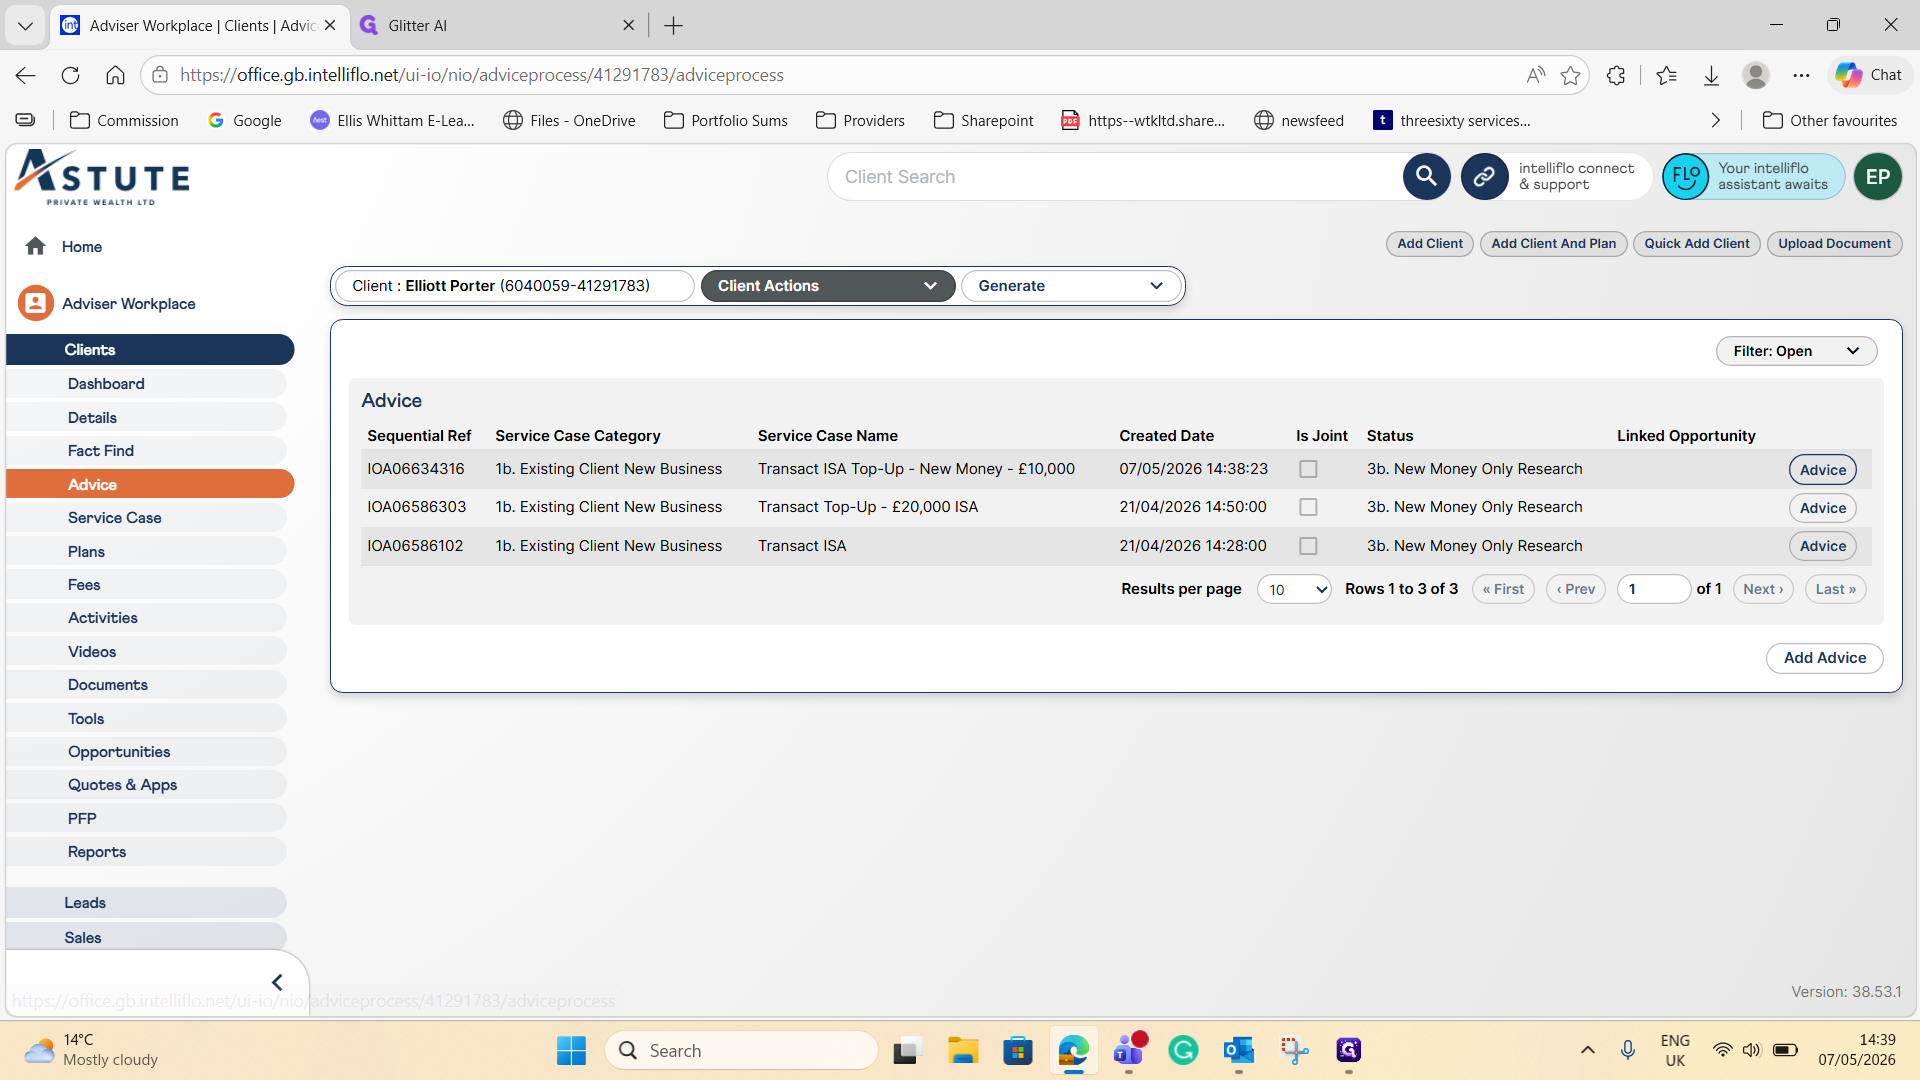
Click Open on the relevant service case
Step #1: Click Open on the relevant service case

in your client's dashboard. 2.

2
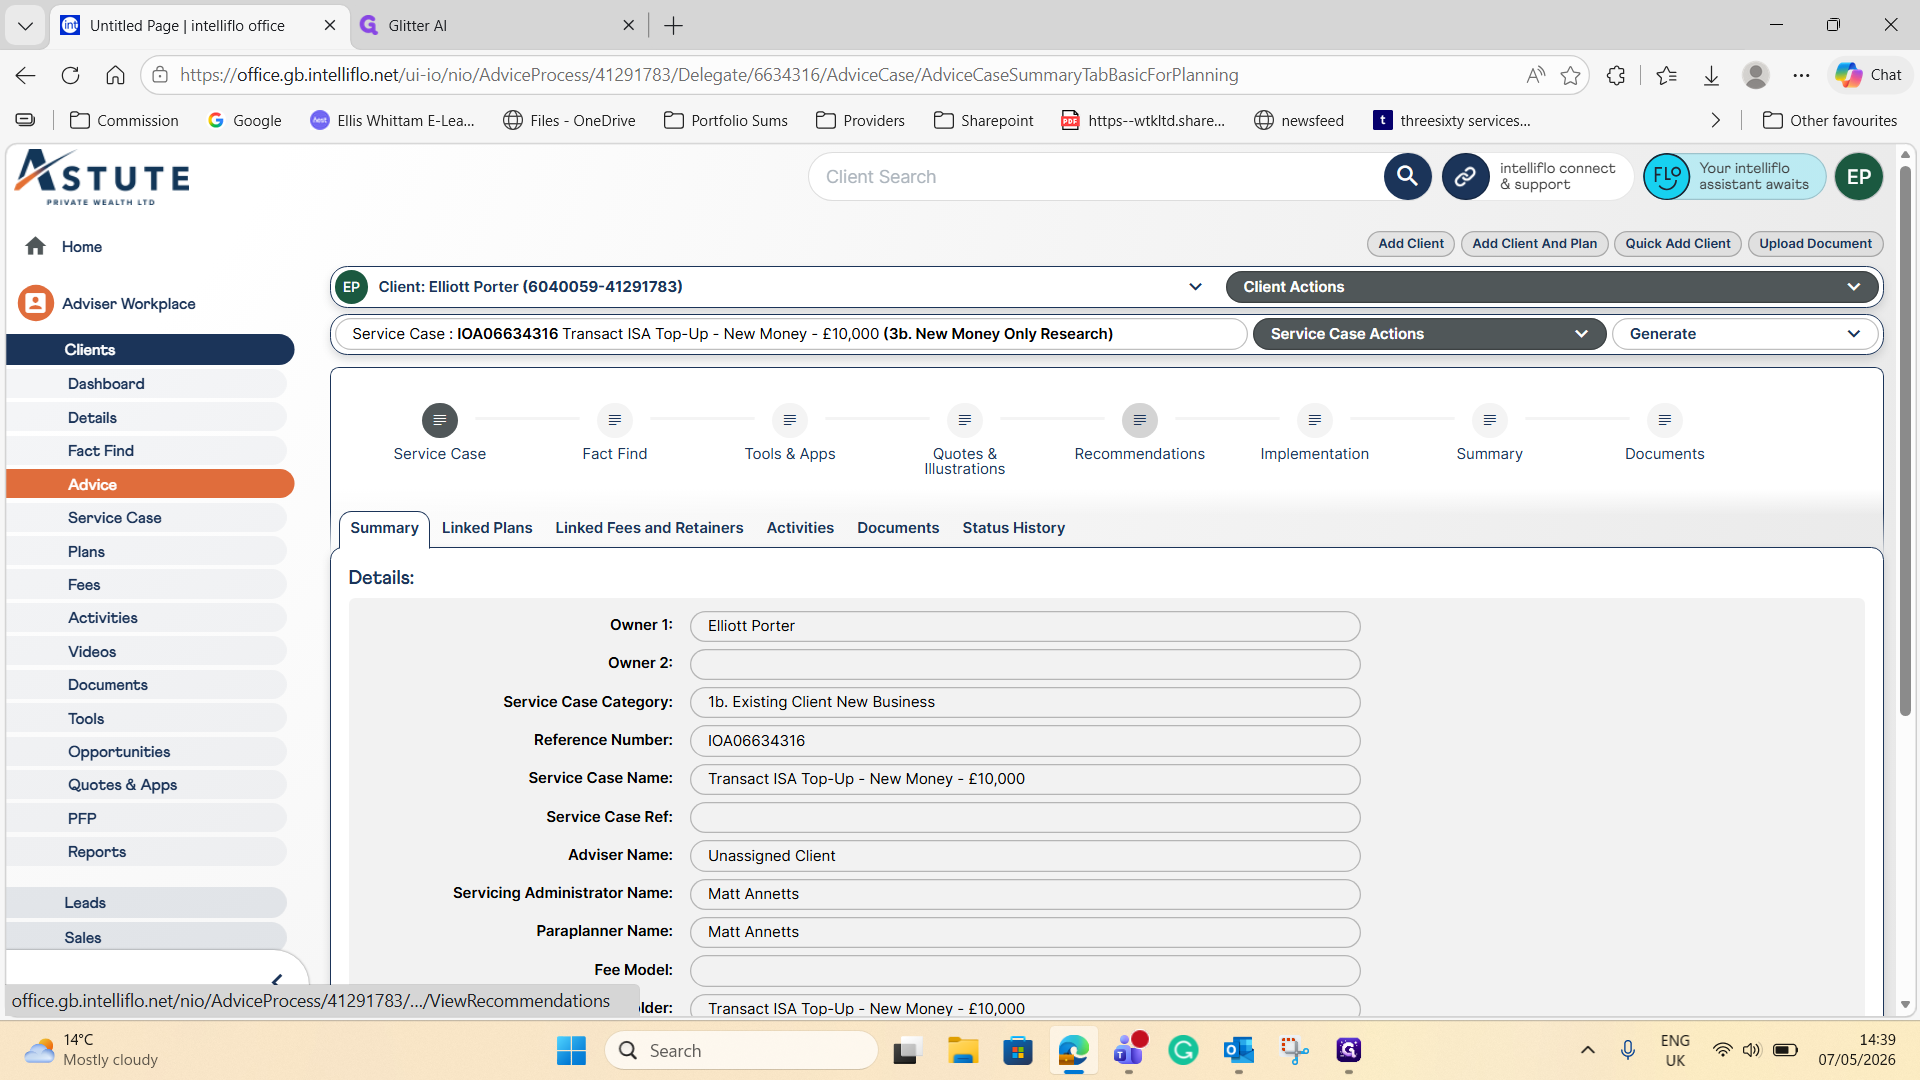
Navigate to the Advice tab
Step #2: Navigate to the Advice tab

. 3.

3
Click the View Recommendations link
Step #3: Click the View Recommendations link

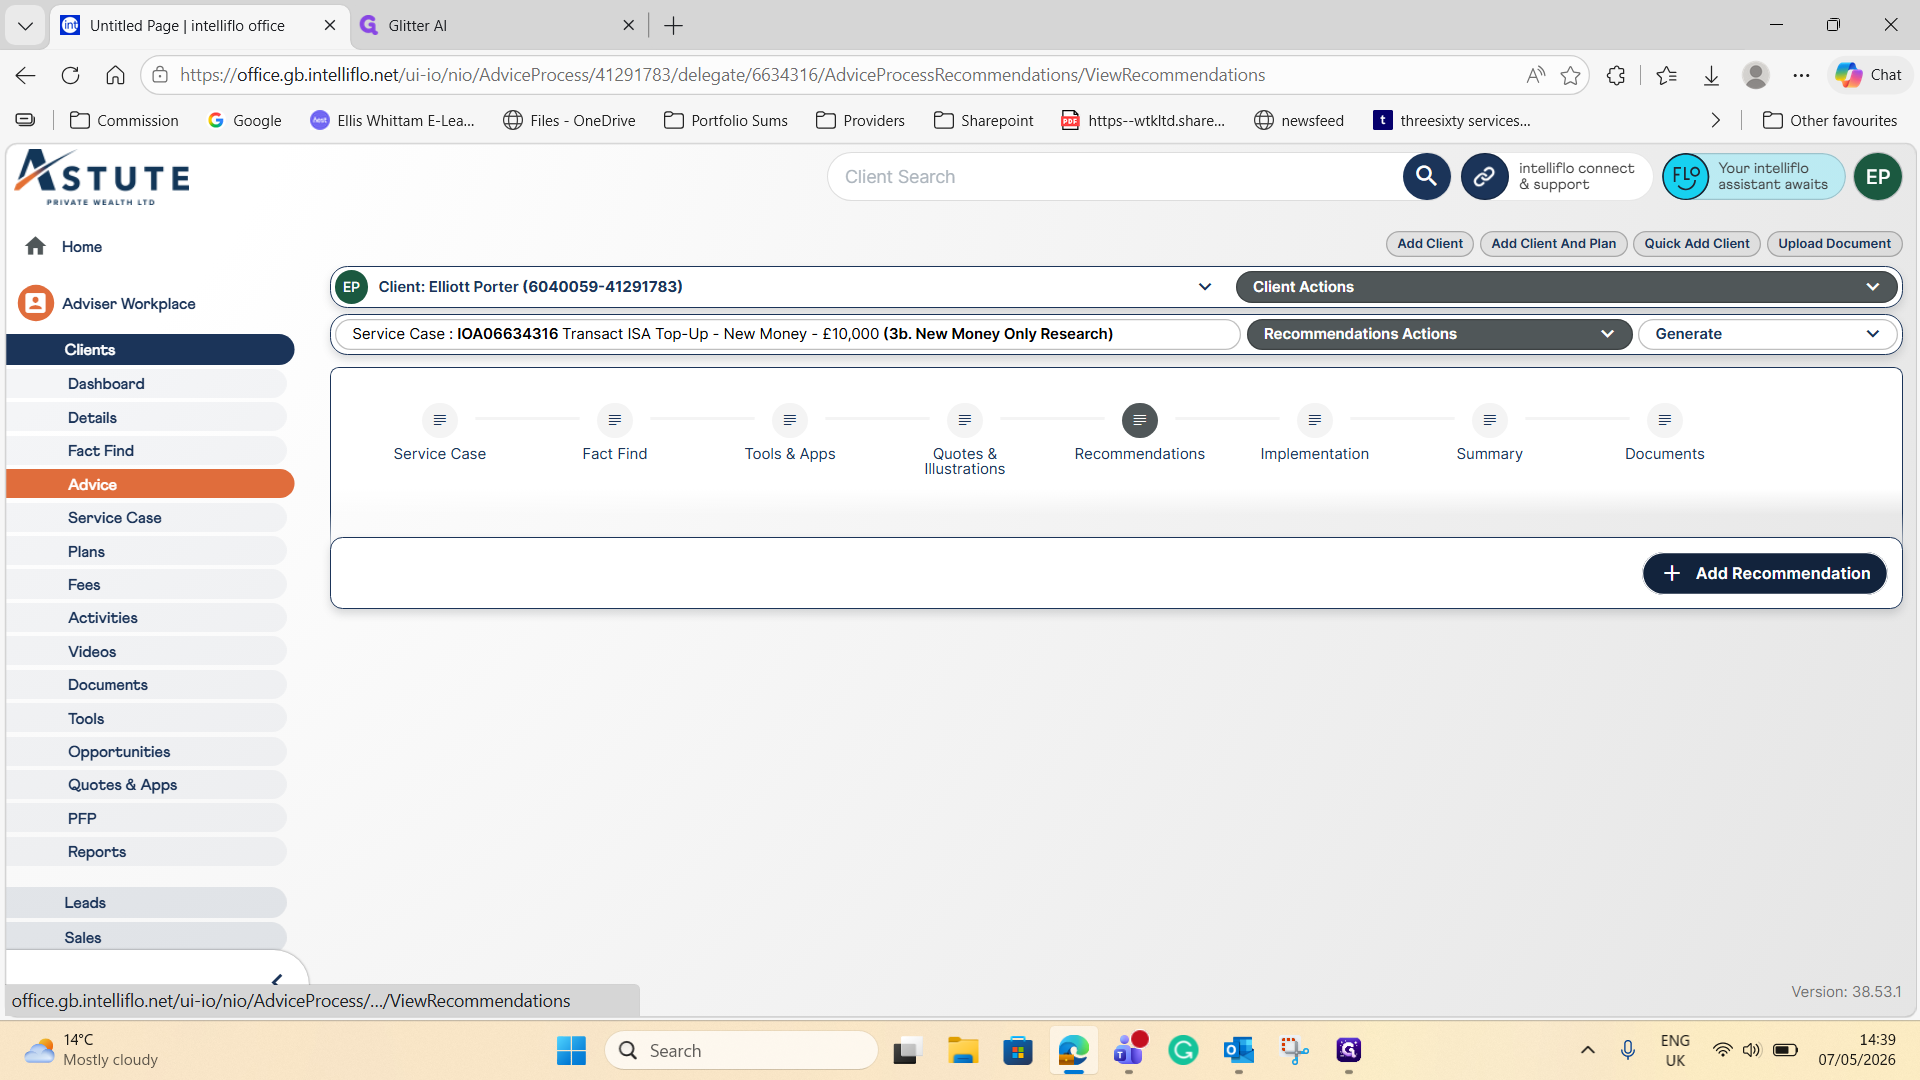
. 4.

4
Click + Add Recommendation
Step #4: Click + Add Recommendation

. 5.

5
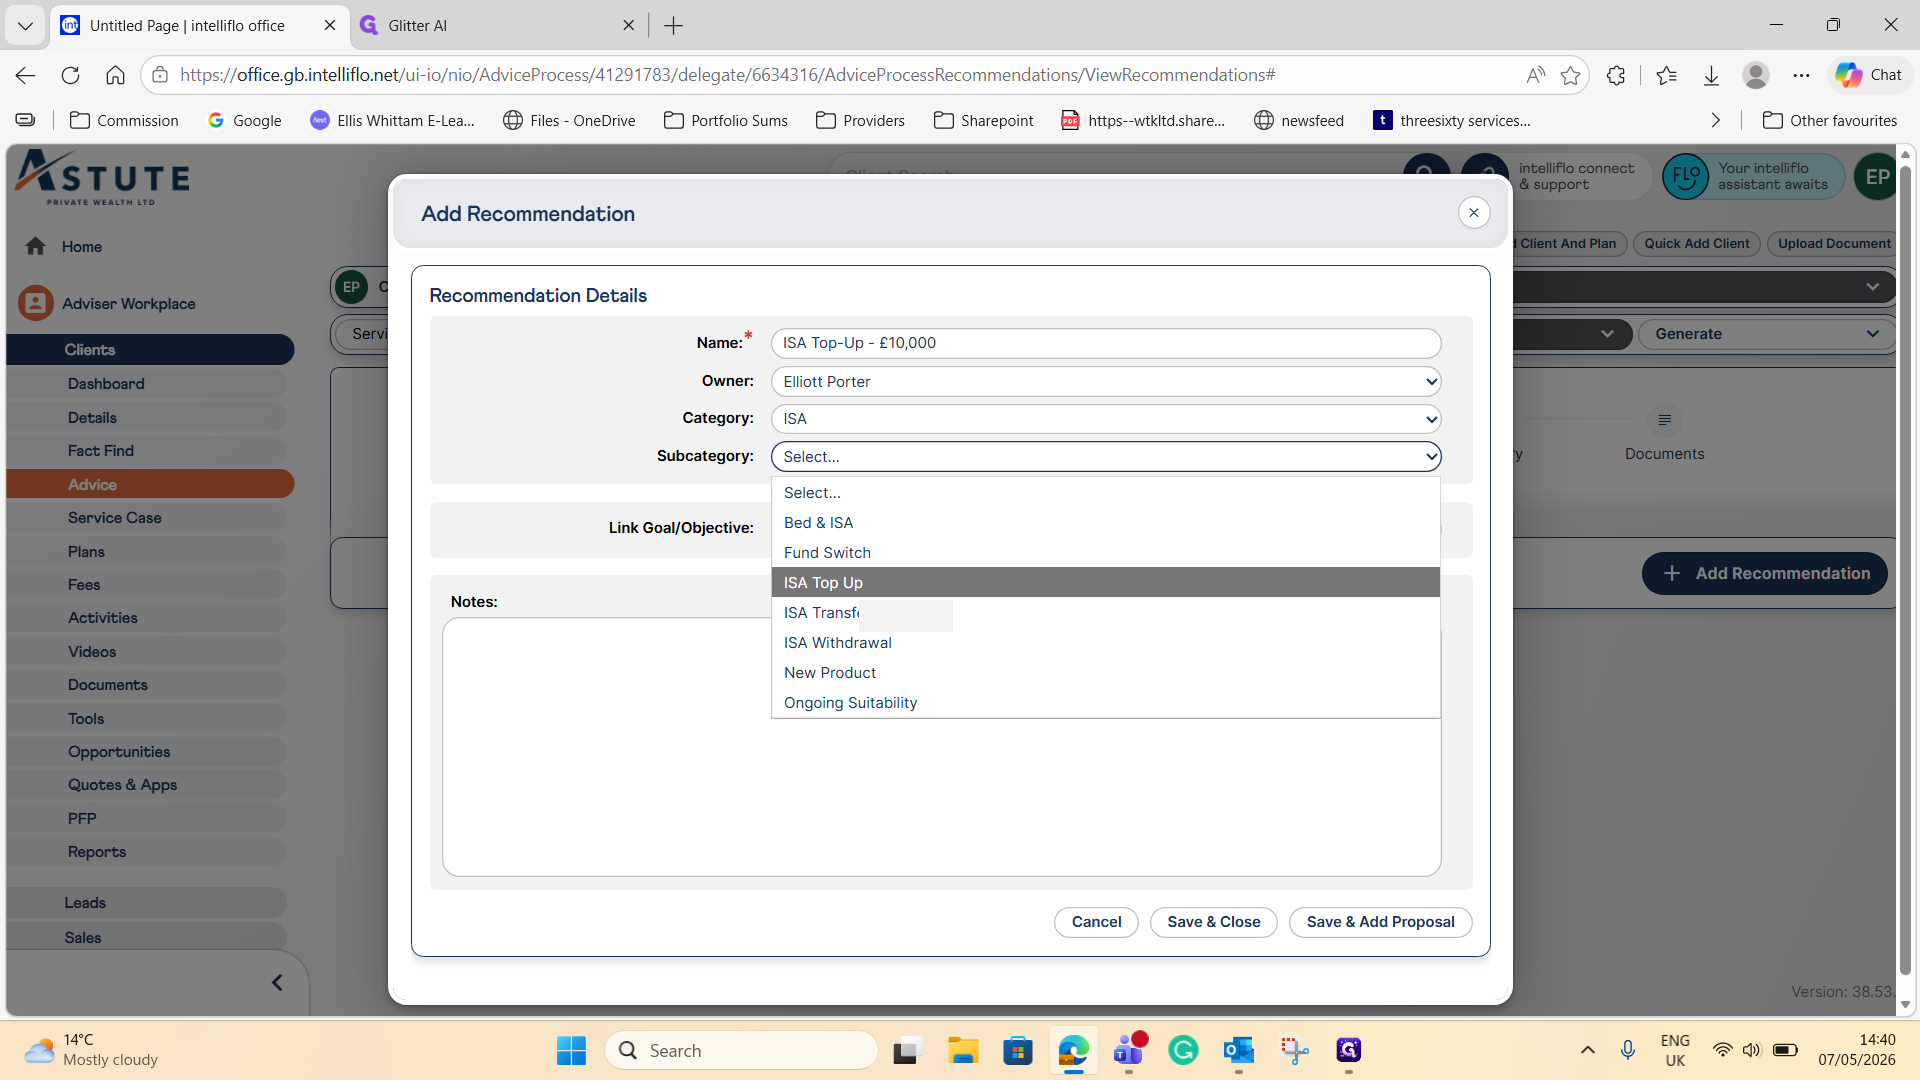
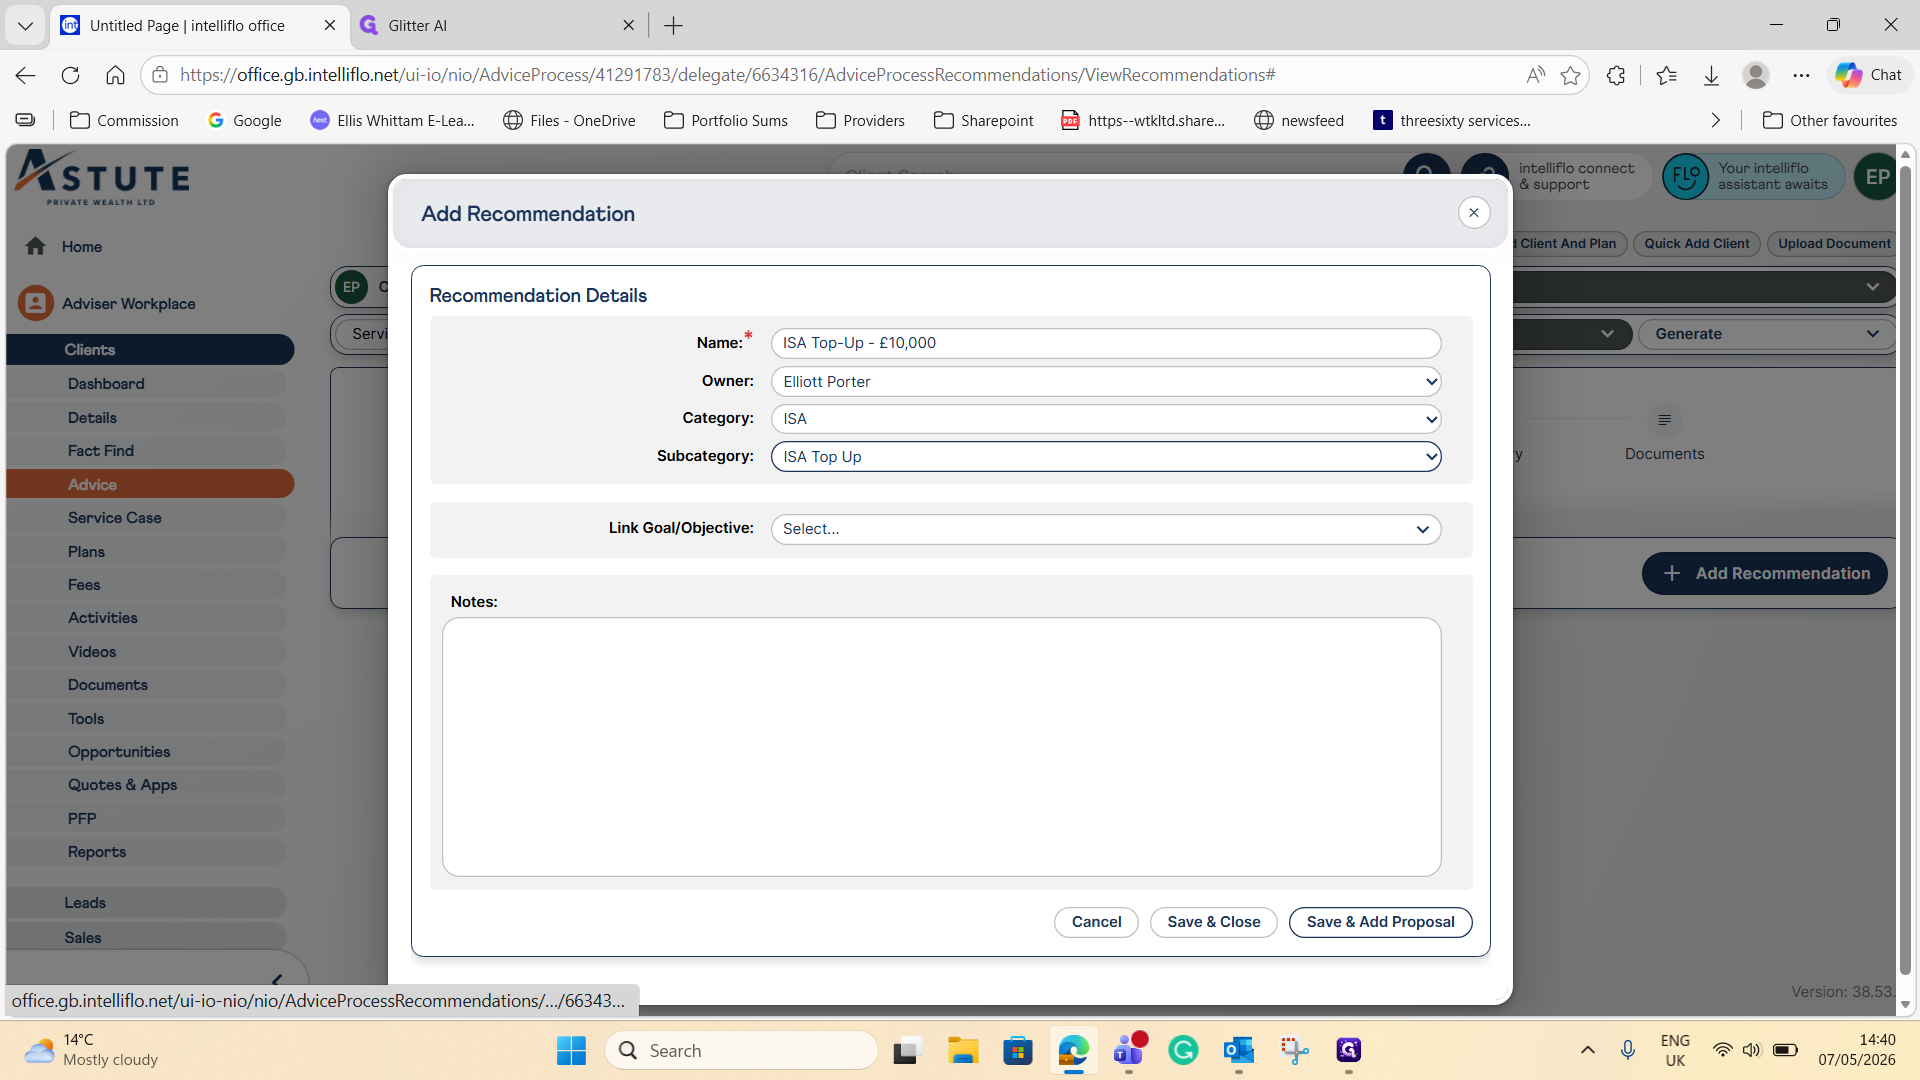
Enter a clear name for the recommendation

(for example, "ISA Top-Up - £10,000"). 6.
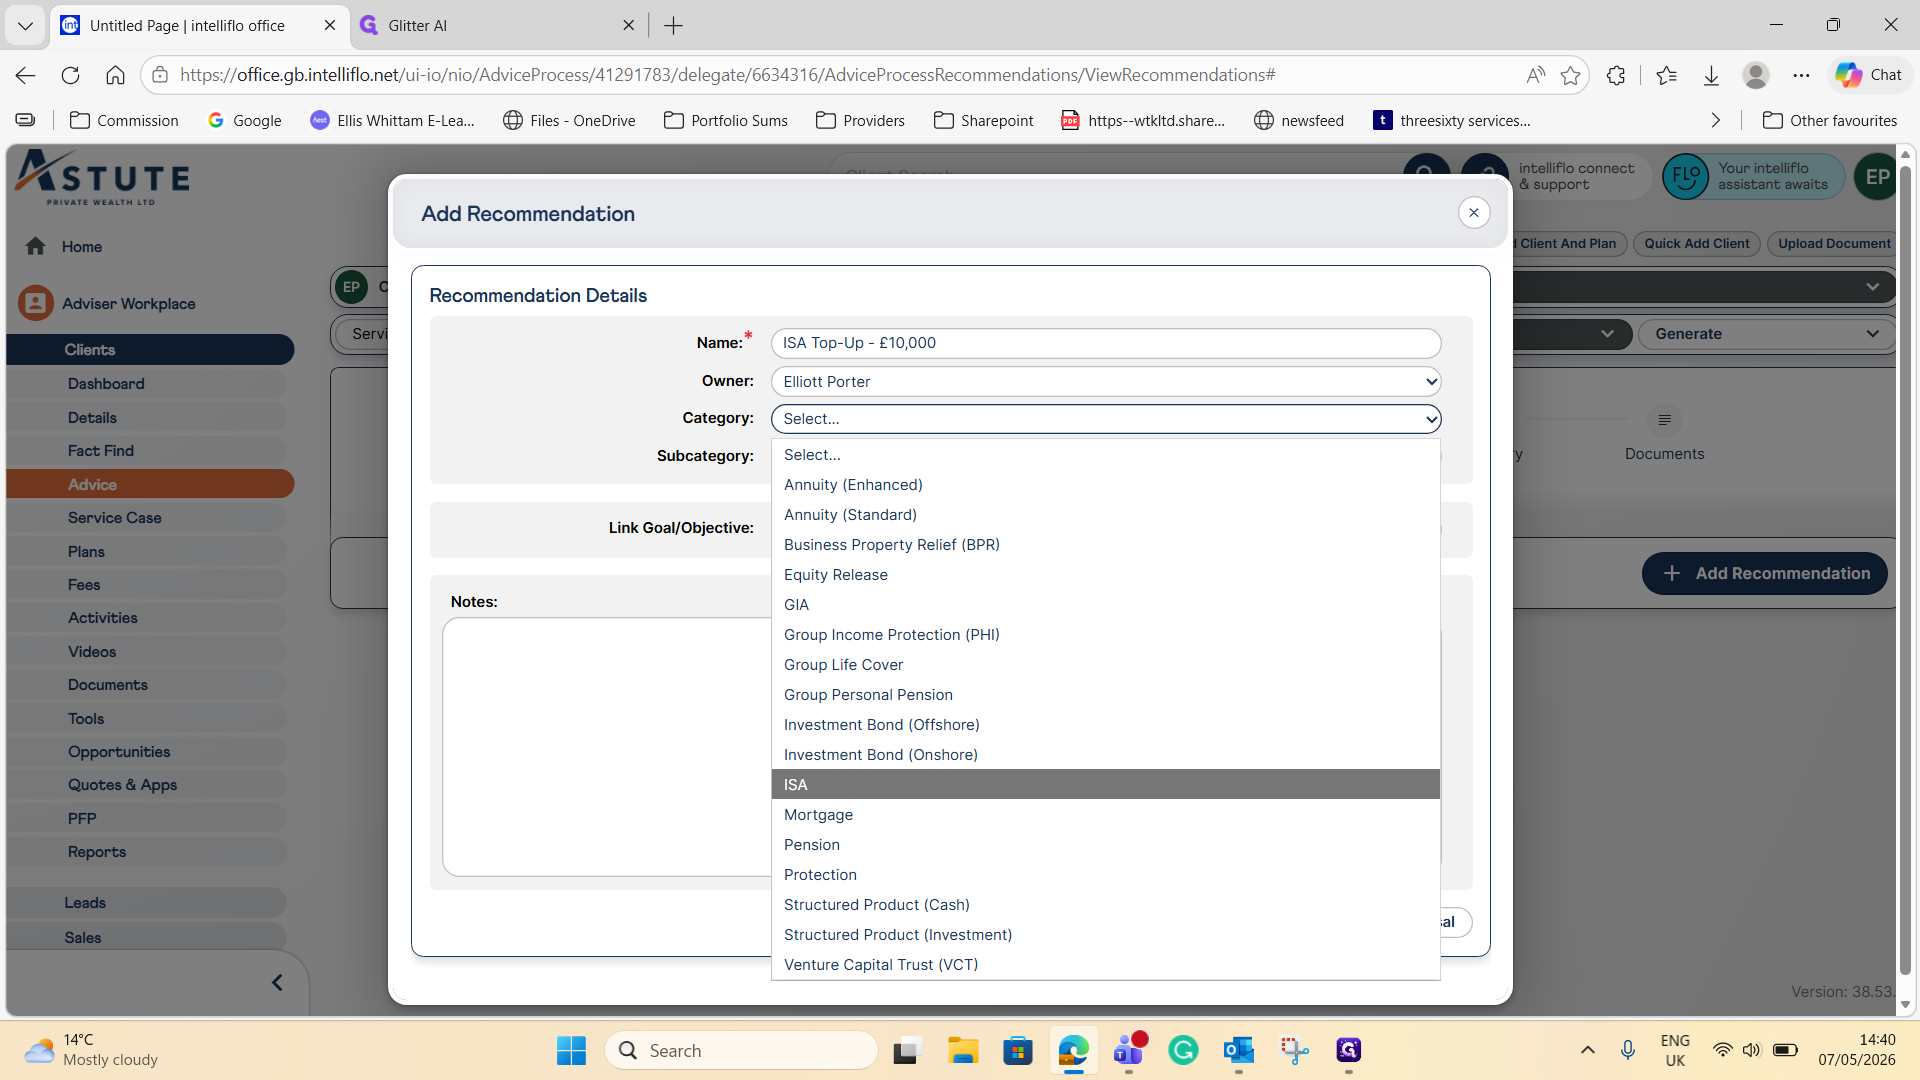
6
Select the Category for the product
Step #6: Select the Category for the product

(e.g., ISA). 7.

7
Choose ISA Top Up from the Subcategory dropdown
Step #7: Choose ISA Top Up from the Subcategory dropdown

. 8.

8
Click Save & Add Proposal
Step #8: Click Save & Add Proposal

.

2. Configure the Proposal Details

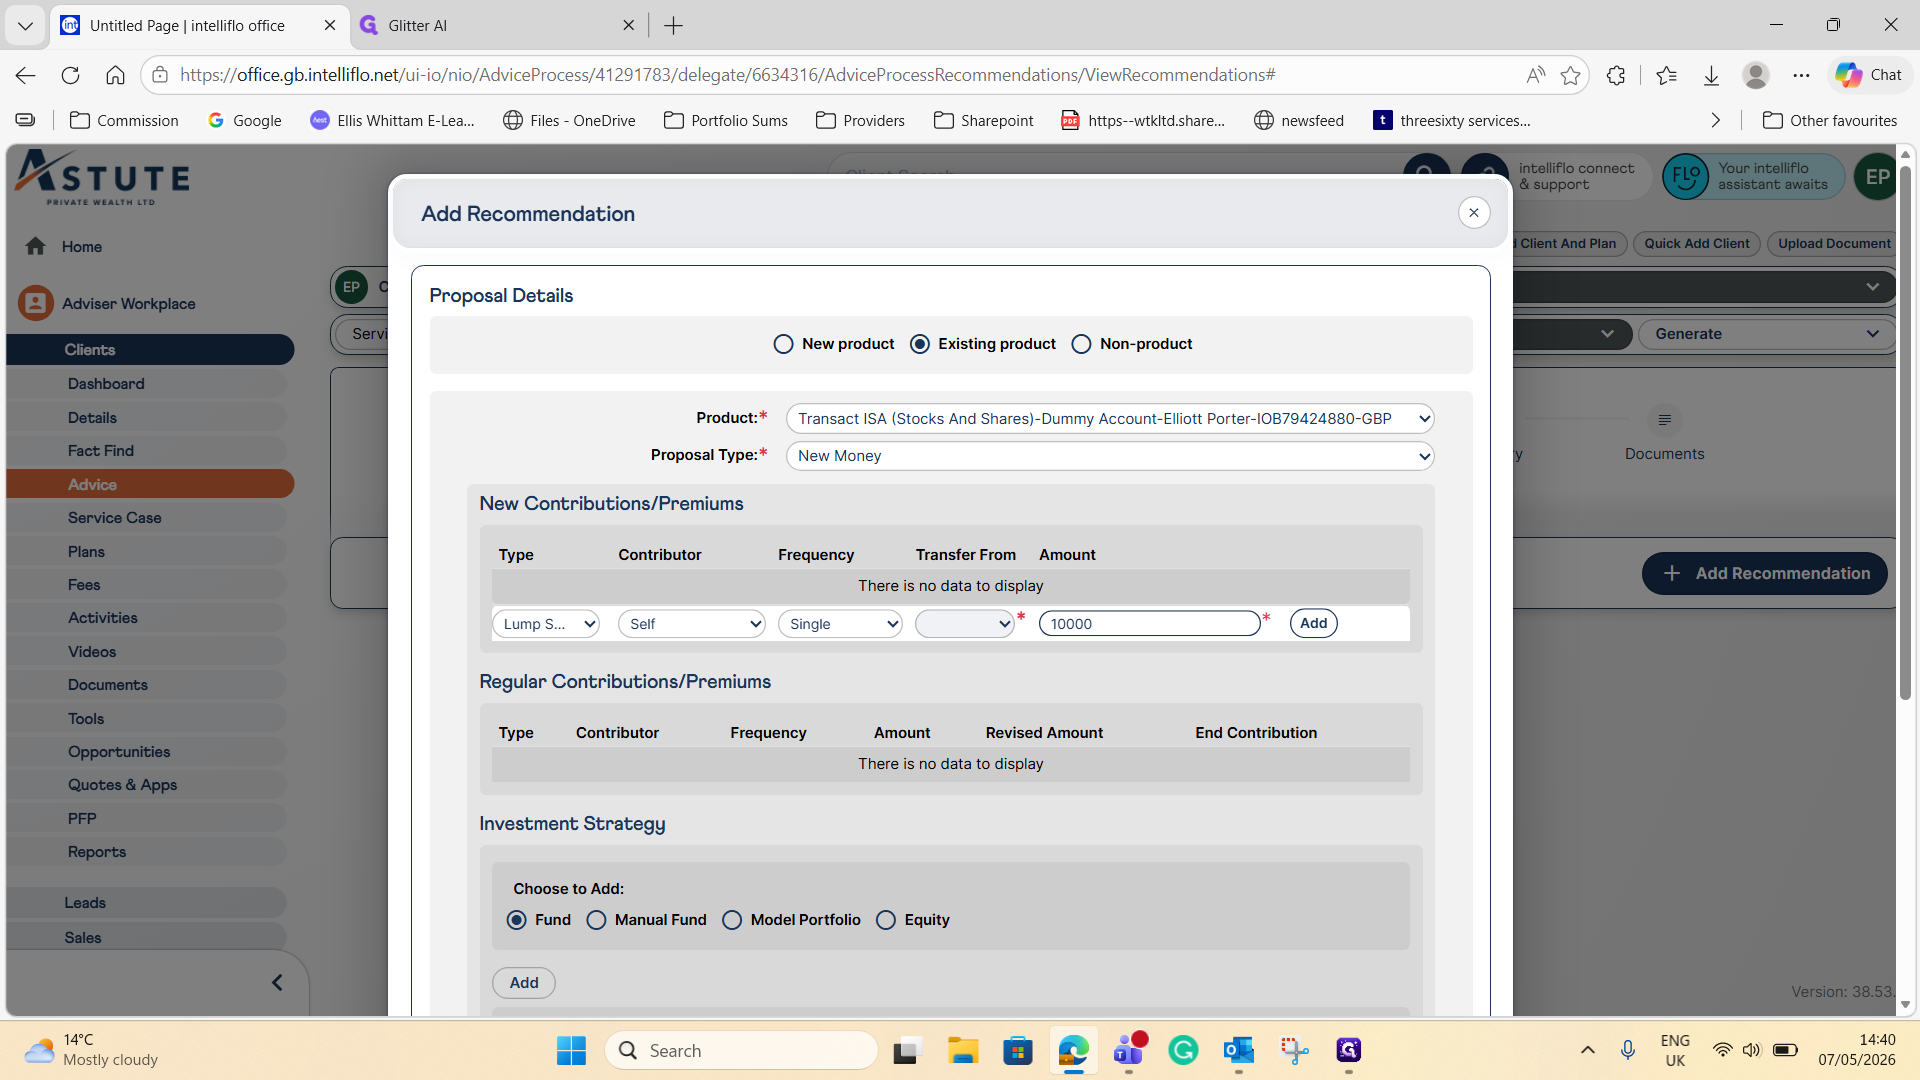
Because you are topping up an existing plan, you need to map this proposal to the existing product rather than creating a new one.
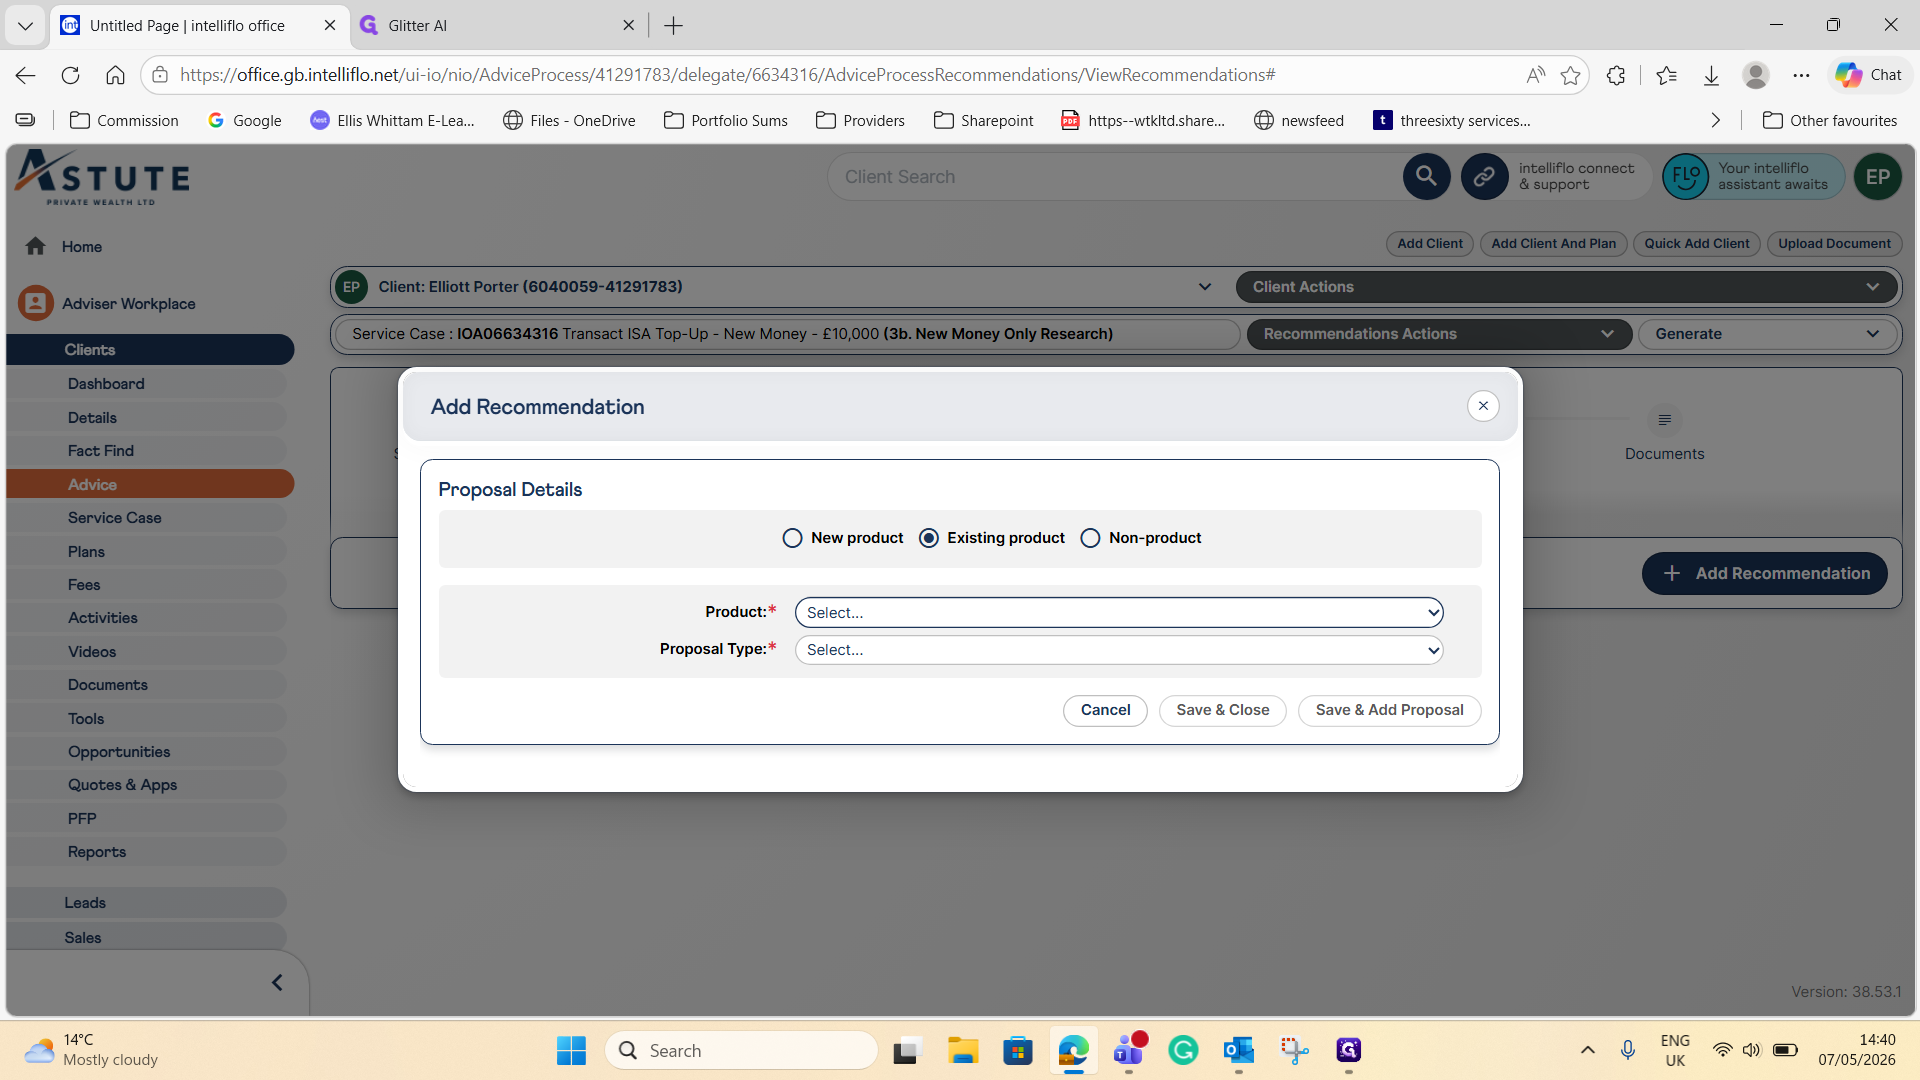
9
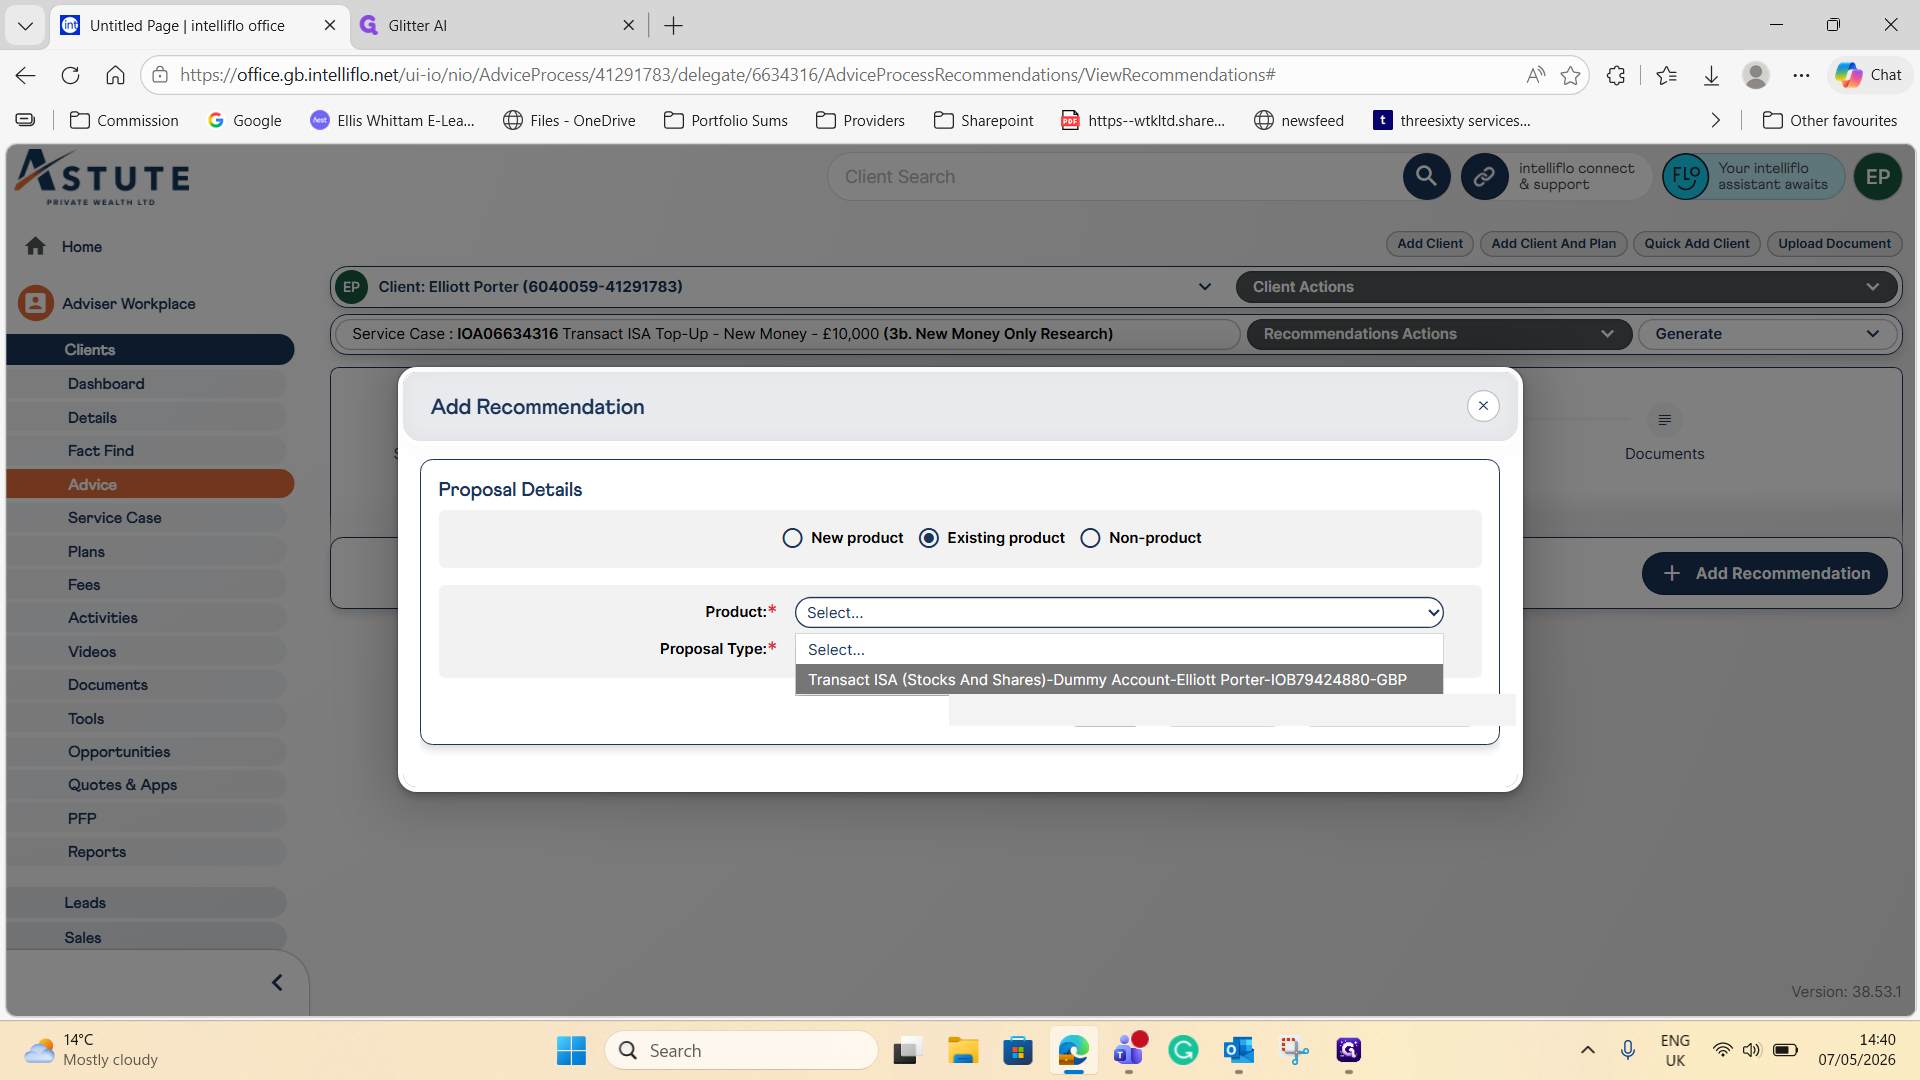
Select Existing product
Step #9: Select Existing product

. 2.

10
Choose the existing ISA account from the Product dropdown
Step #10: Choose the existing ISA account from the Product dropdown

. 3.

11
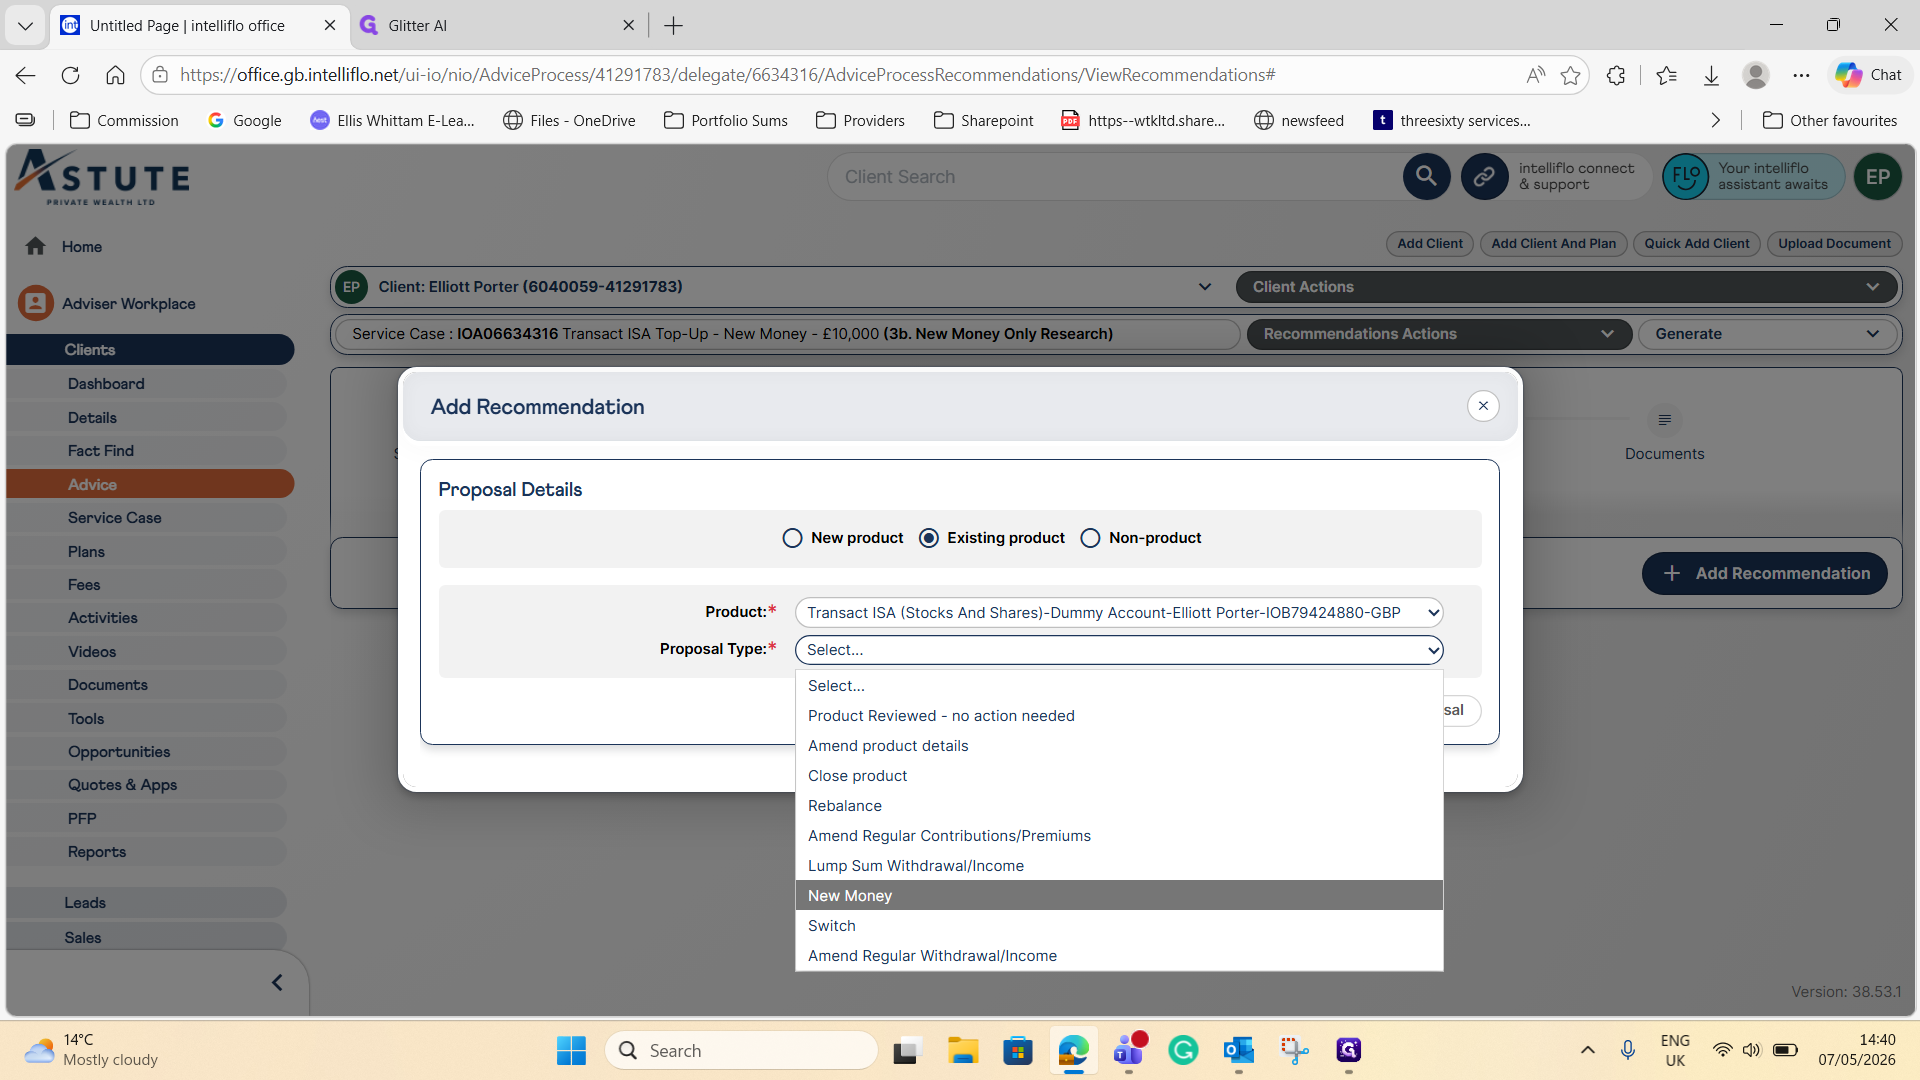
Set the Proposal Type to New Money
Step #11: Set the Proposal Type to New Money

. 4.

12
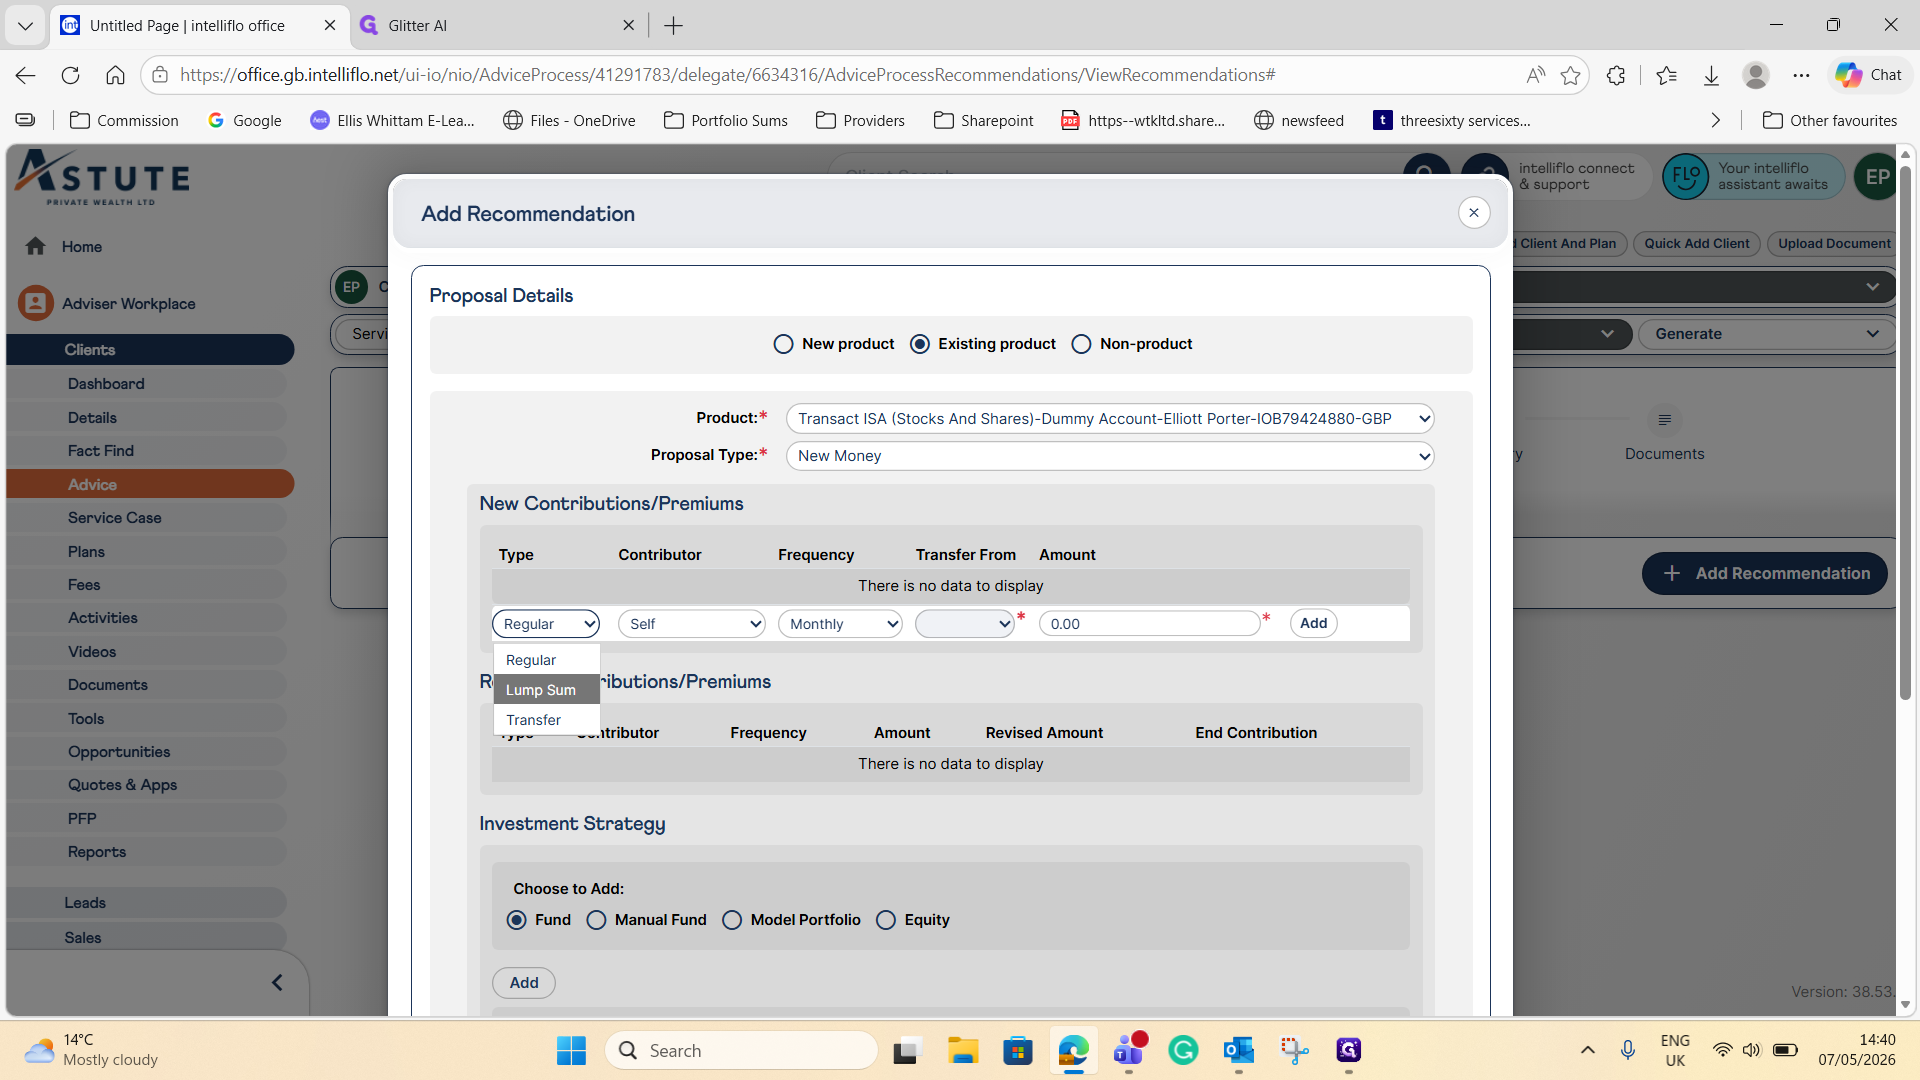
Select Lump Sum as the contribution type
Step #12: Select Lump Sum as the contribution type

under the New Contributions/Premiums section. 5.

13
Enter the new money amount

. 6.

14
Click Add
Step #14: Click Add

to stage the contribution. 7.

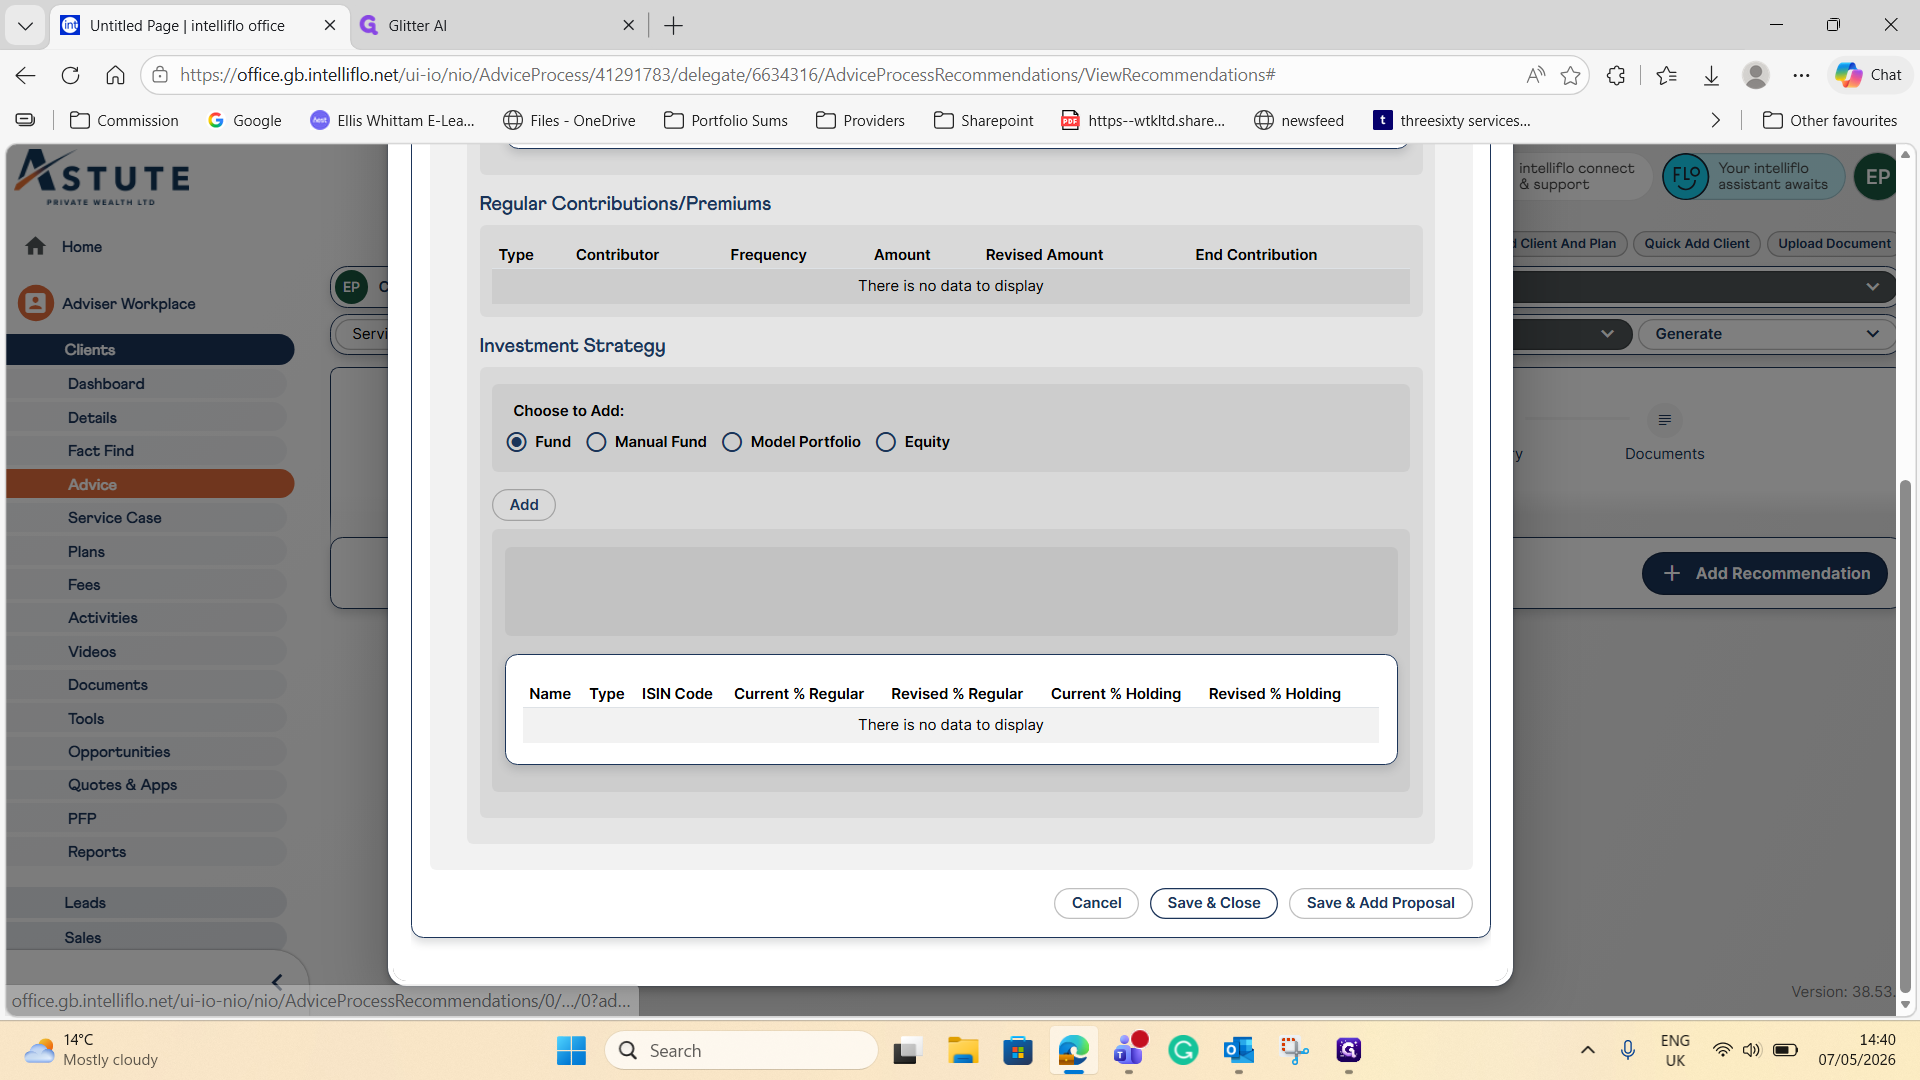
15
Click Save & Close
Step #15: Click Save & Close

.

3. Accept the Recommendation

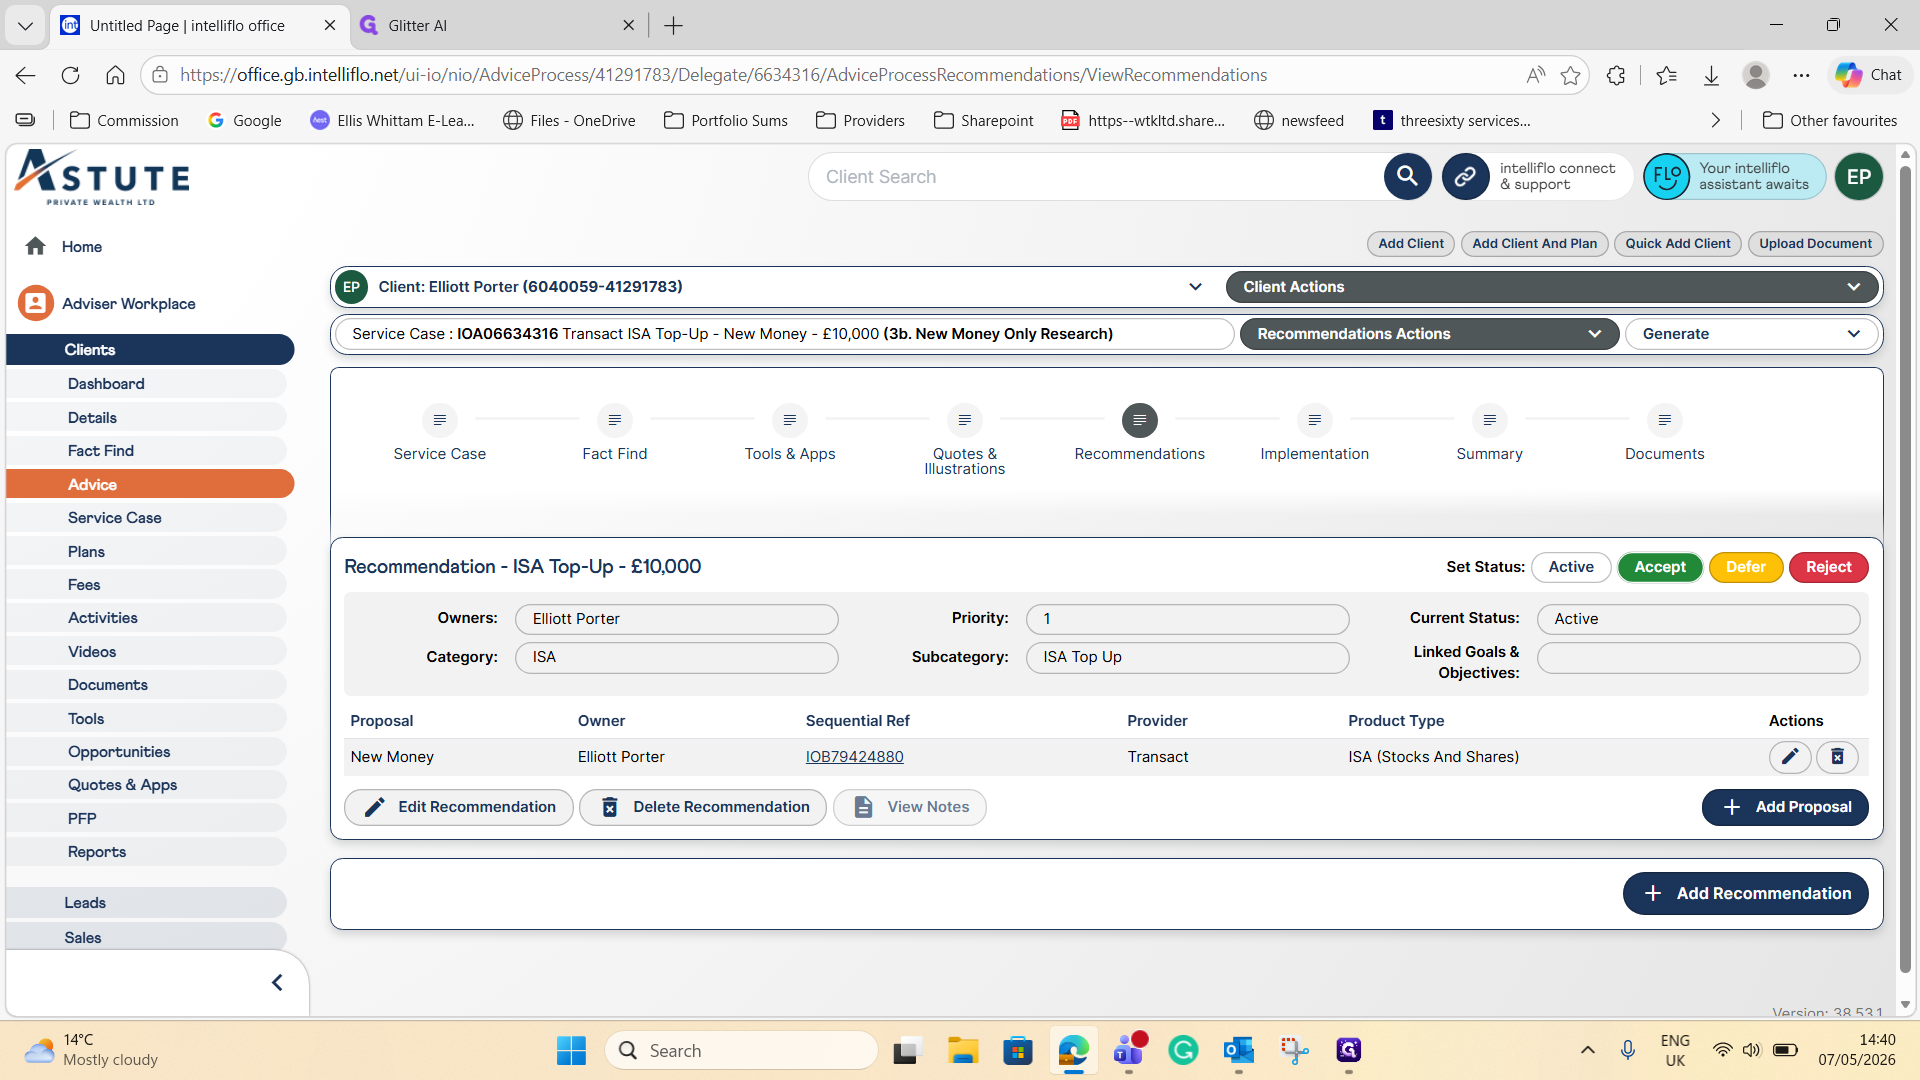
16
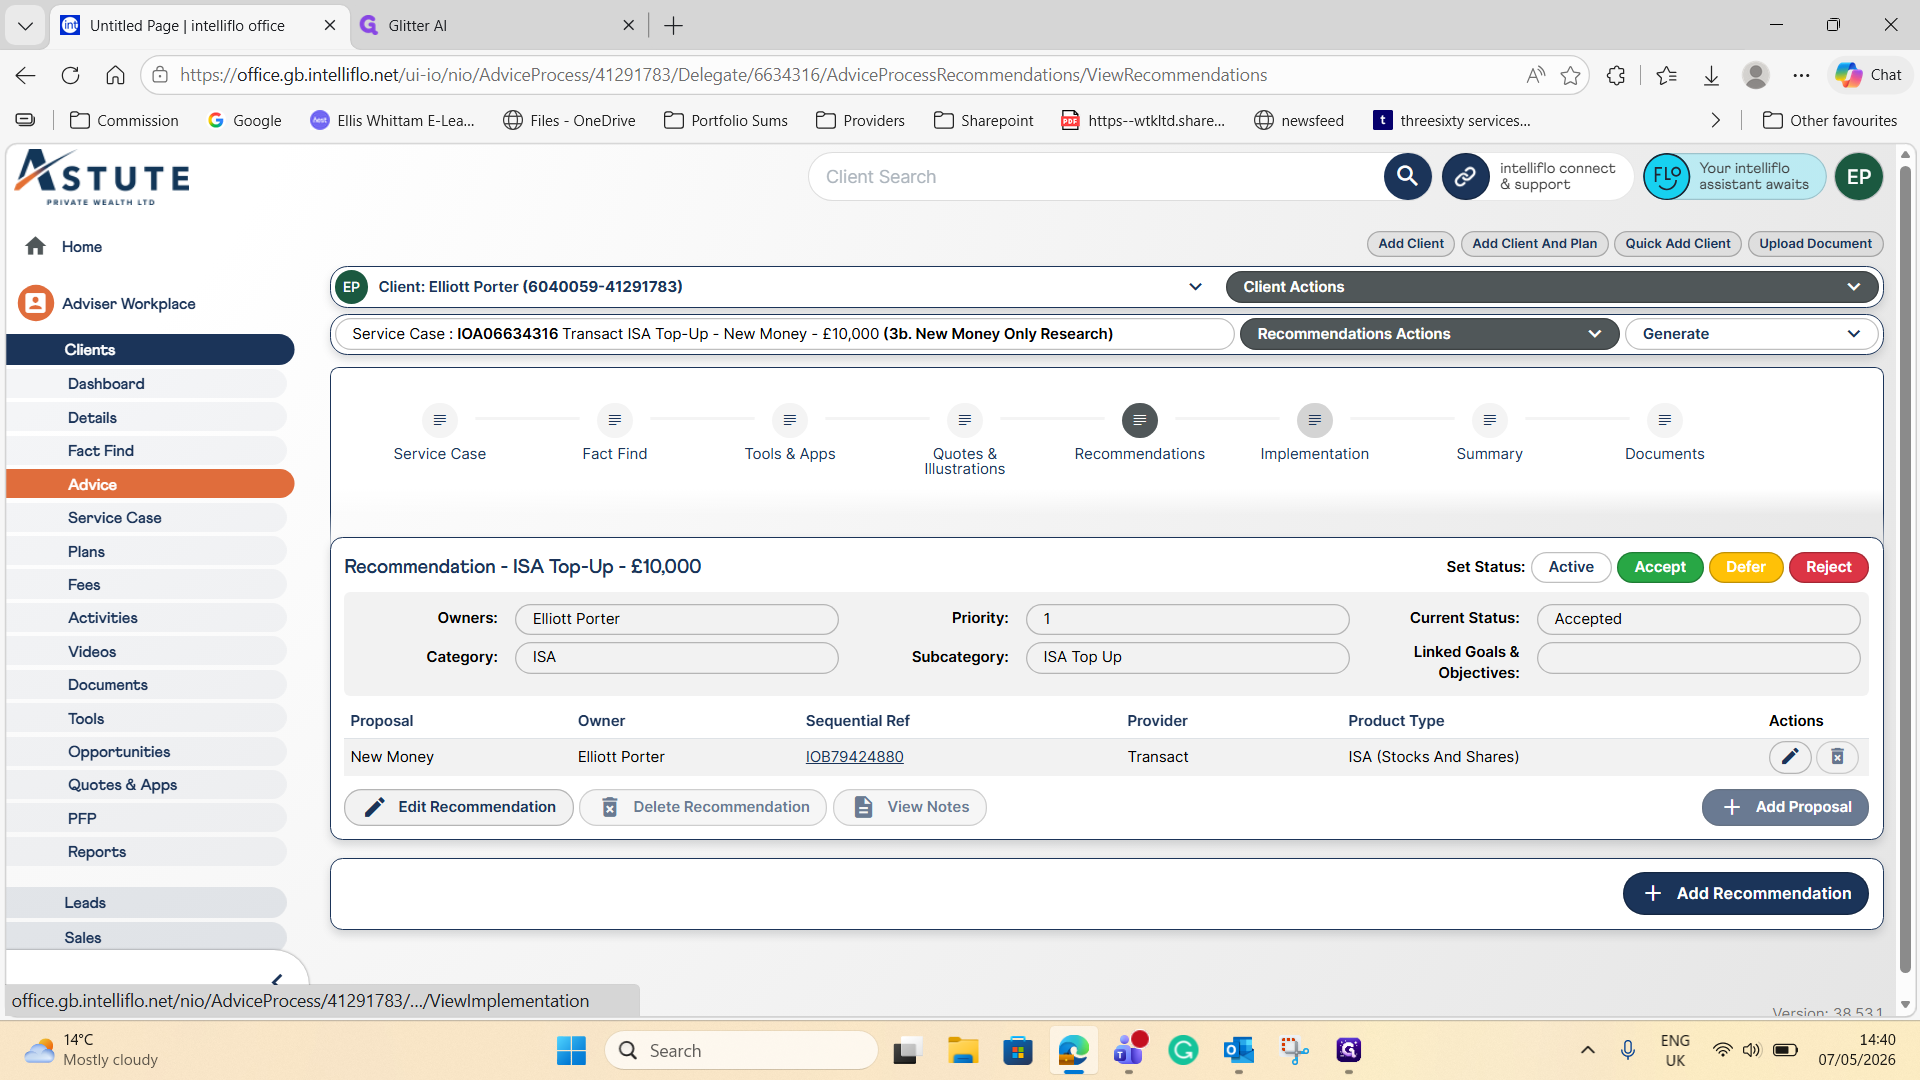
Click Accept
Step #16: Click Accept

on the recommendation line item to change its status from active to accepted. 2.
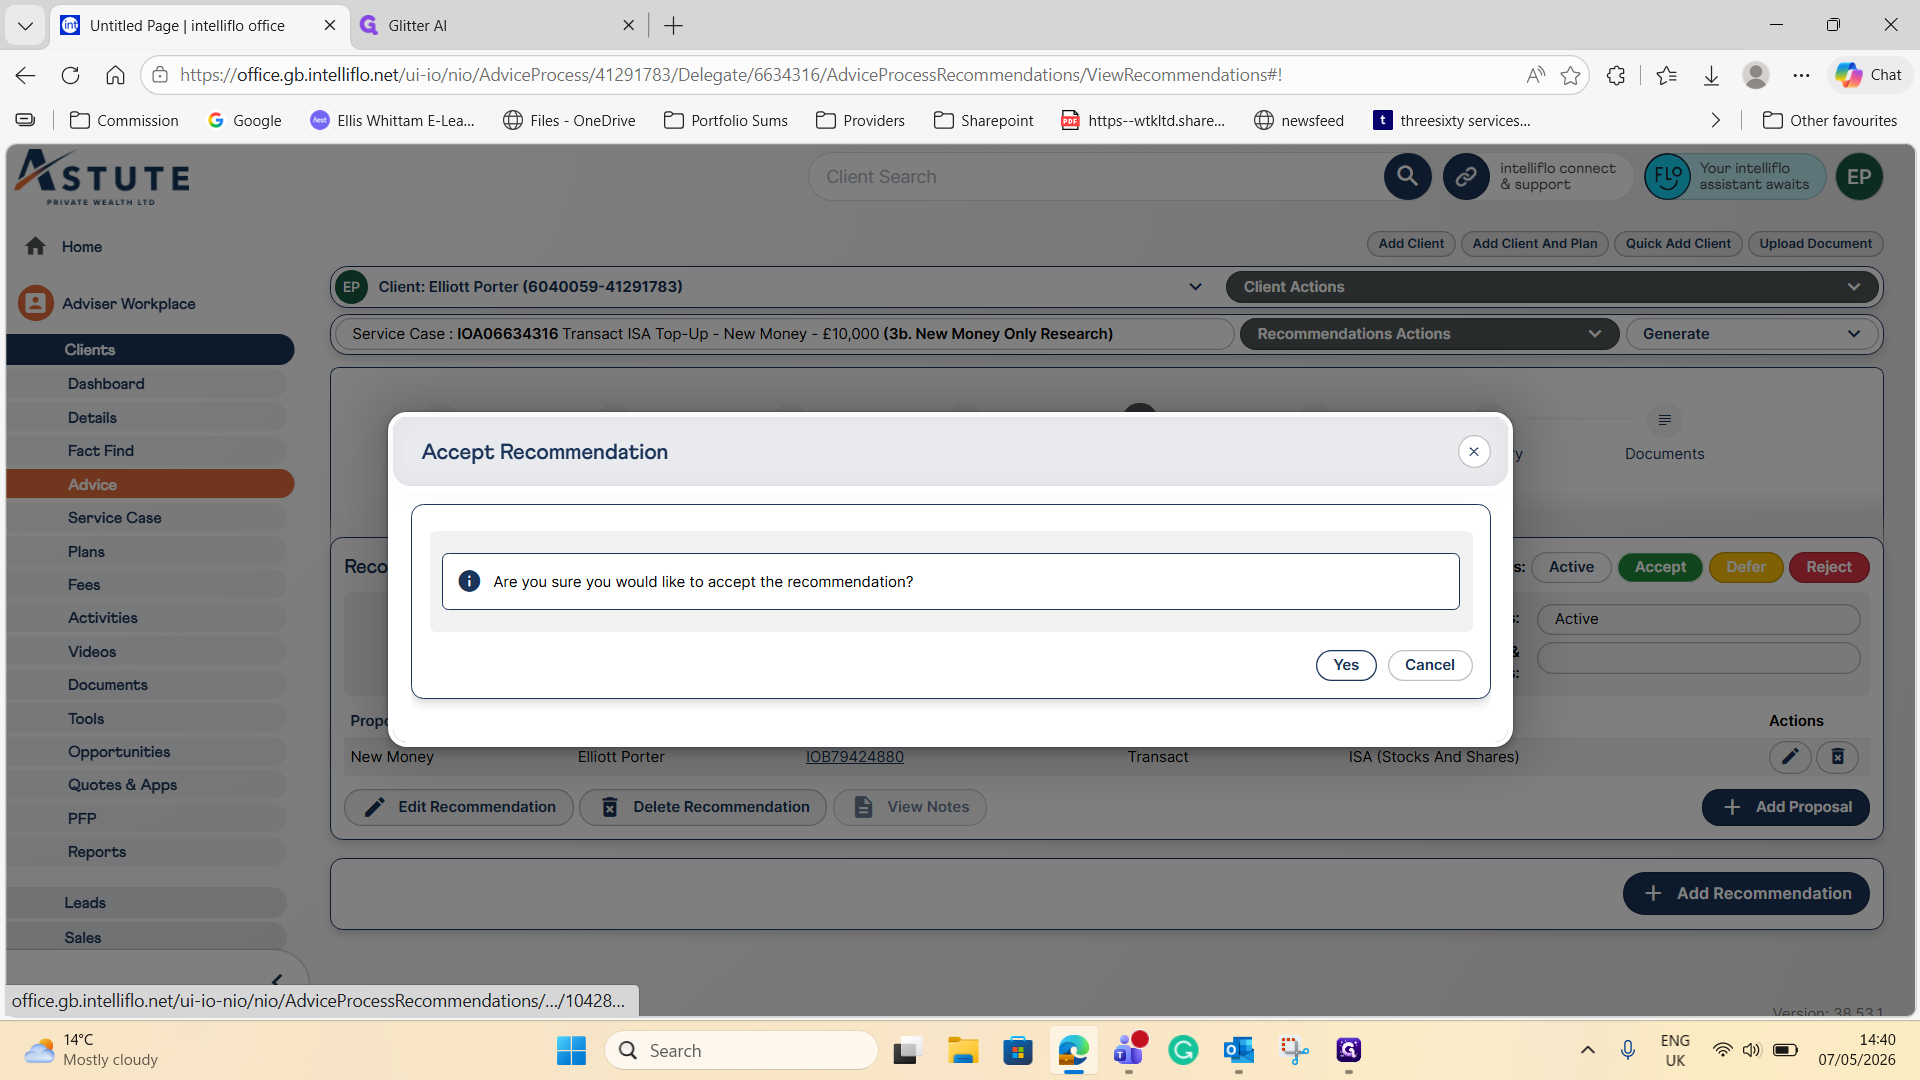
17
Click Yes
Step #17: Click Yes

to confirm.

4. Implement the Top-Up

Now that the advice is accepted, you can action the implementation to make the draft top-up live in the background.
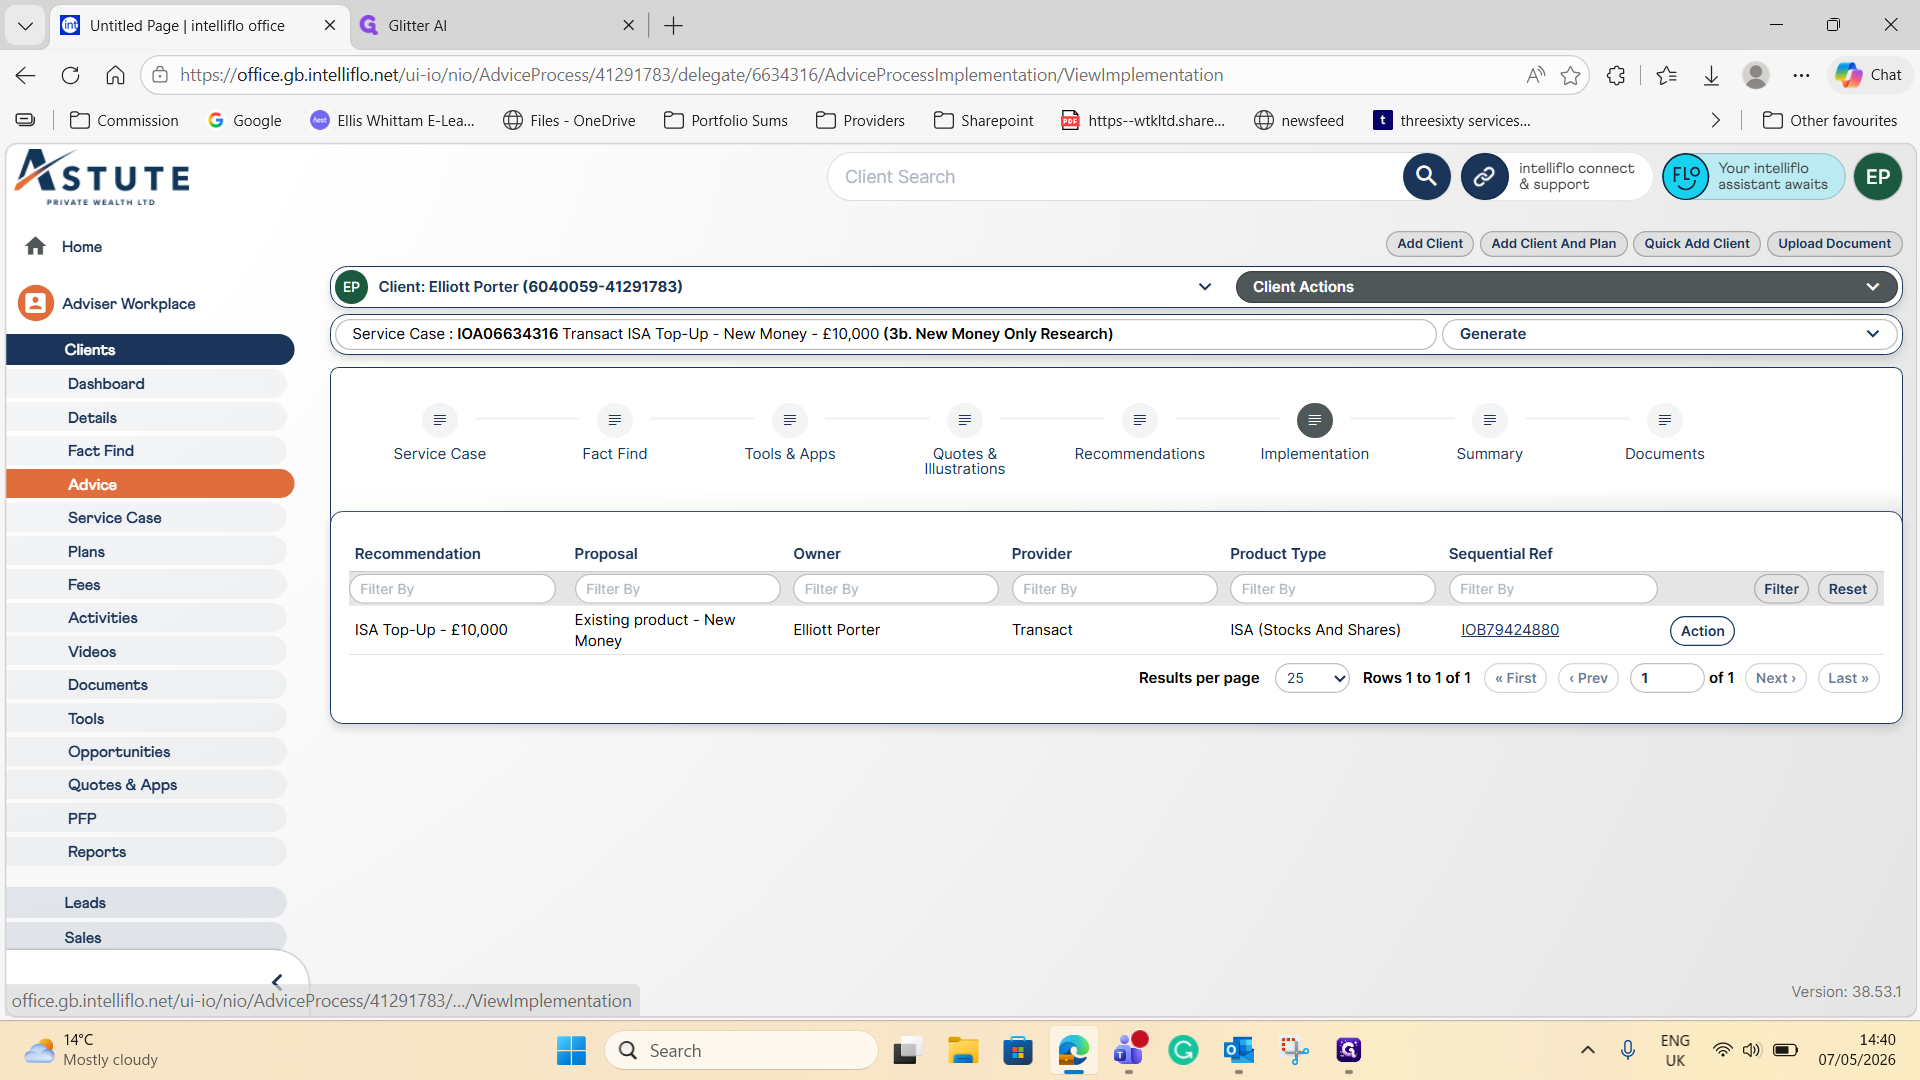
18
Navigate to the Implementation tab
Step #18: Navigate to the Implementation tab

in your workflow. 2.

19
Click Action
Step #19: Click Action

next to the accepted top-up case. 3.

20
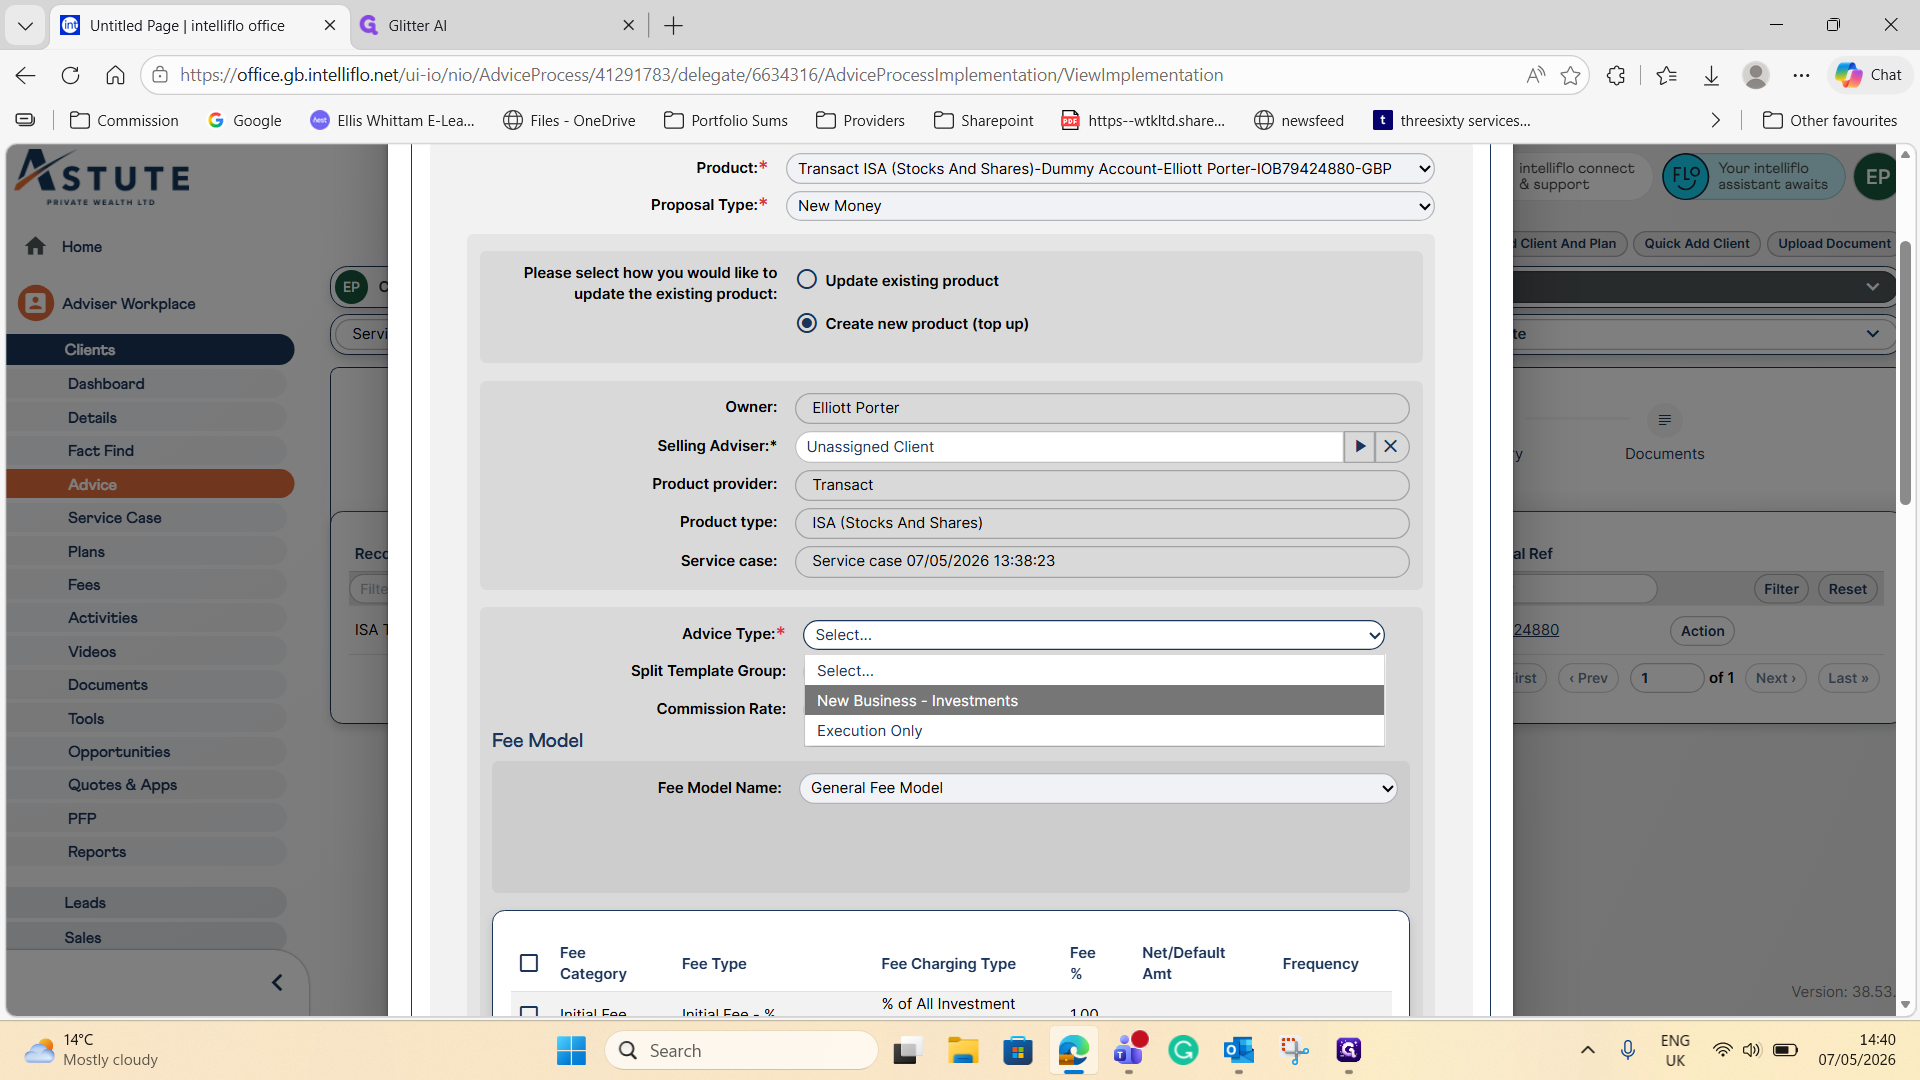
Select New Business - Investments for the Advice Type
Step #20: Select New Business - Investments for the Advice Type

. 4.

21
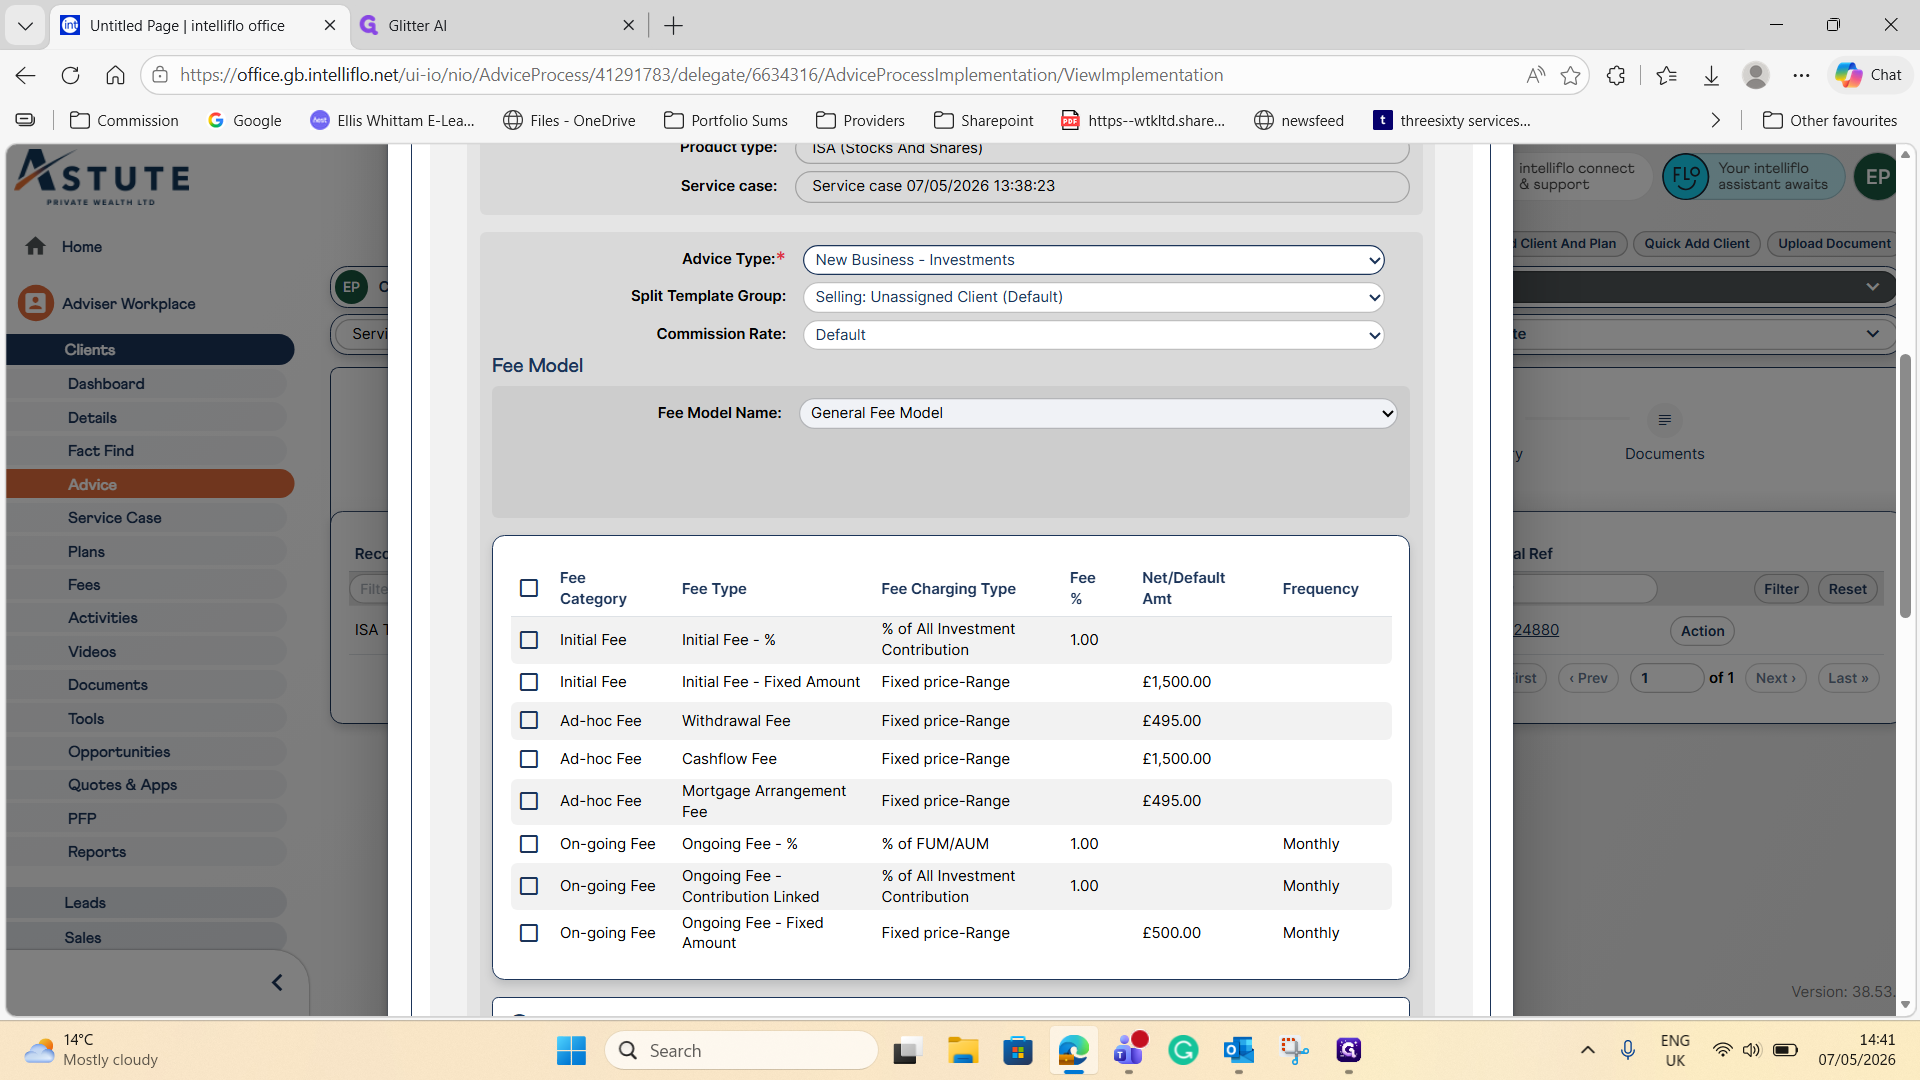
Select your initial fee model
Step #21: Select your initial fee model

from the dropdown.

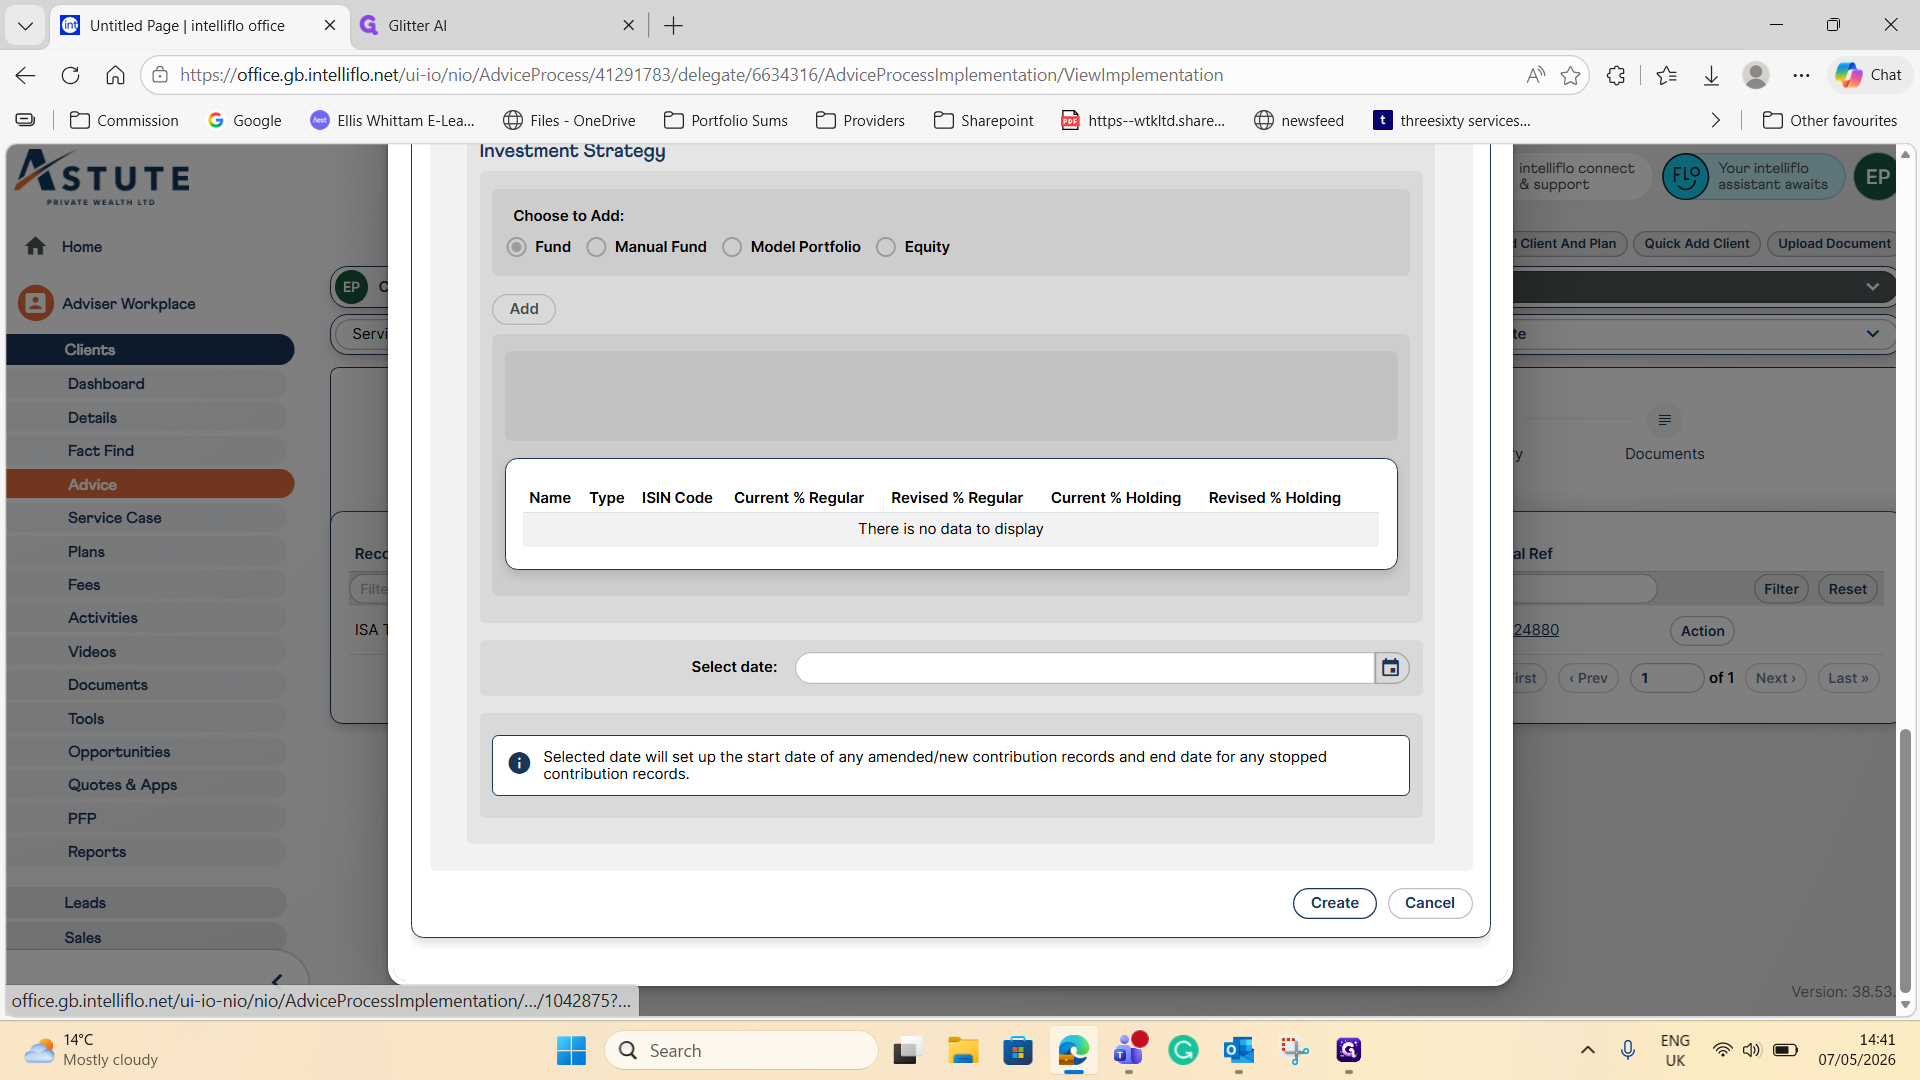
22
Click Create
Step #22: Click Create

.

5. Verify the Draft Plan

Once created, you can verify that the system successfully generated the top-up draft attached to the client's master plan.
23
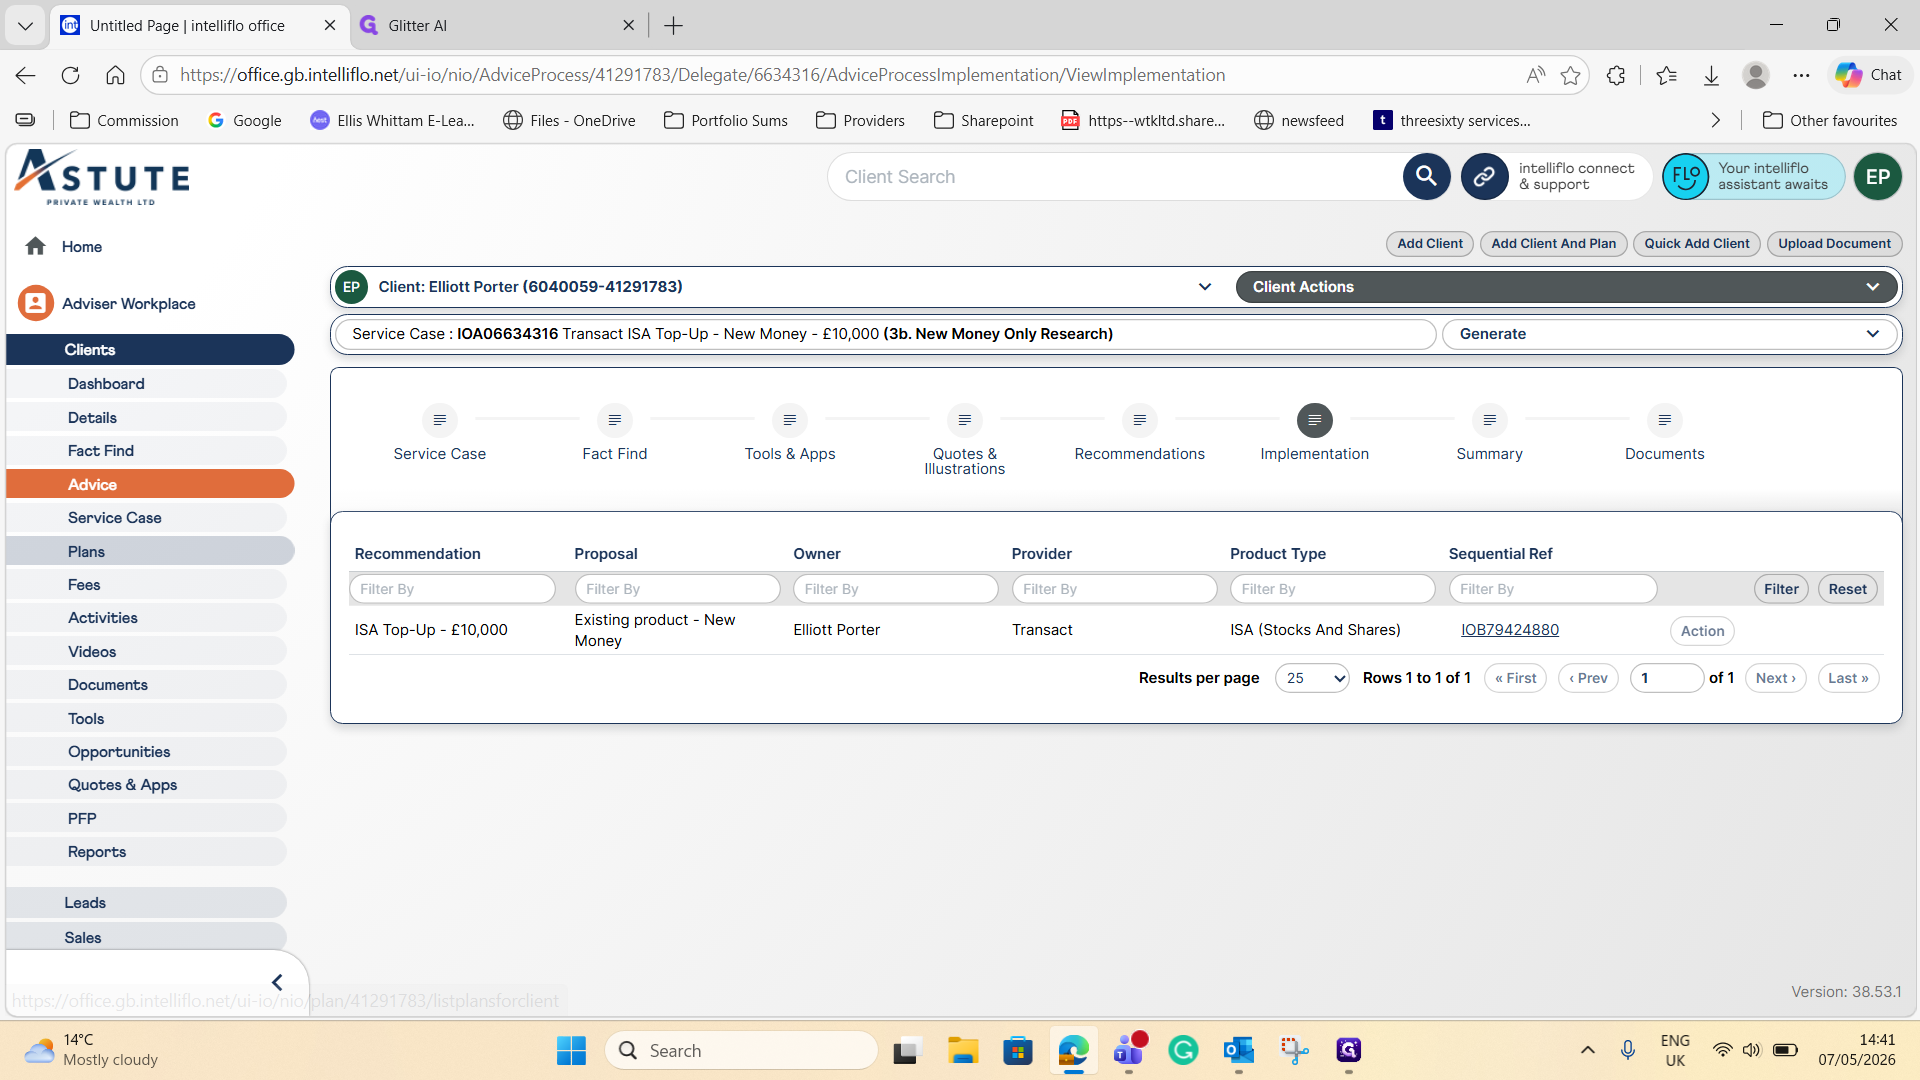
Open the resulting implementation record
Step #23: Open the resulting implementation record

or go directly to the client's plans. 2.
24
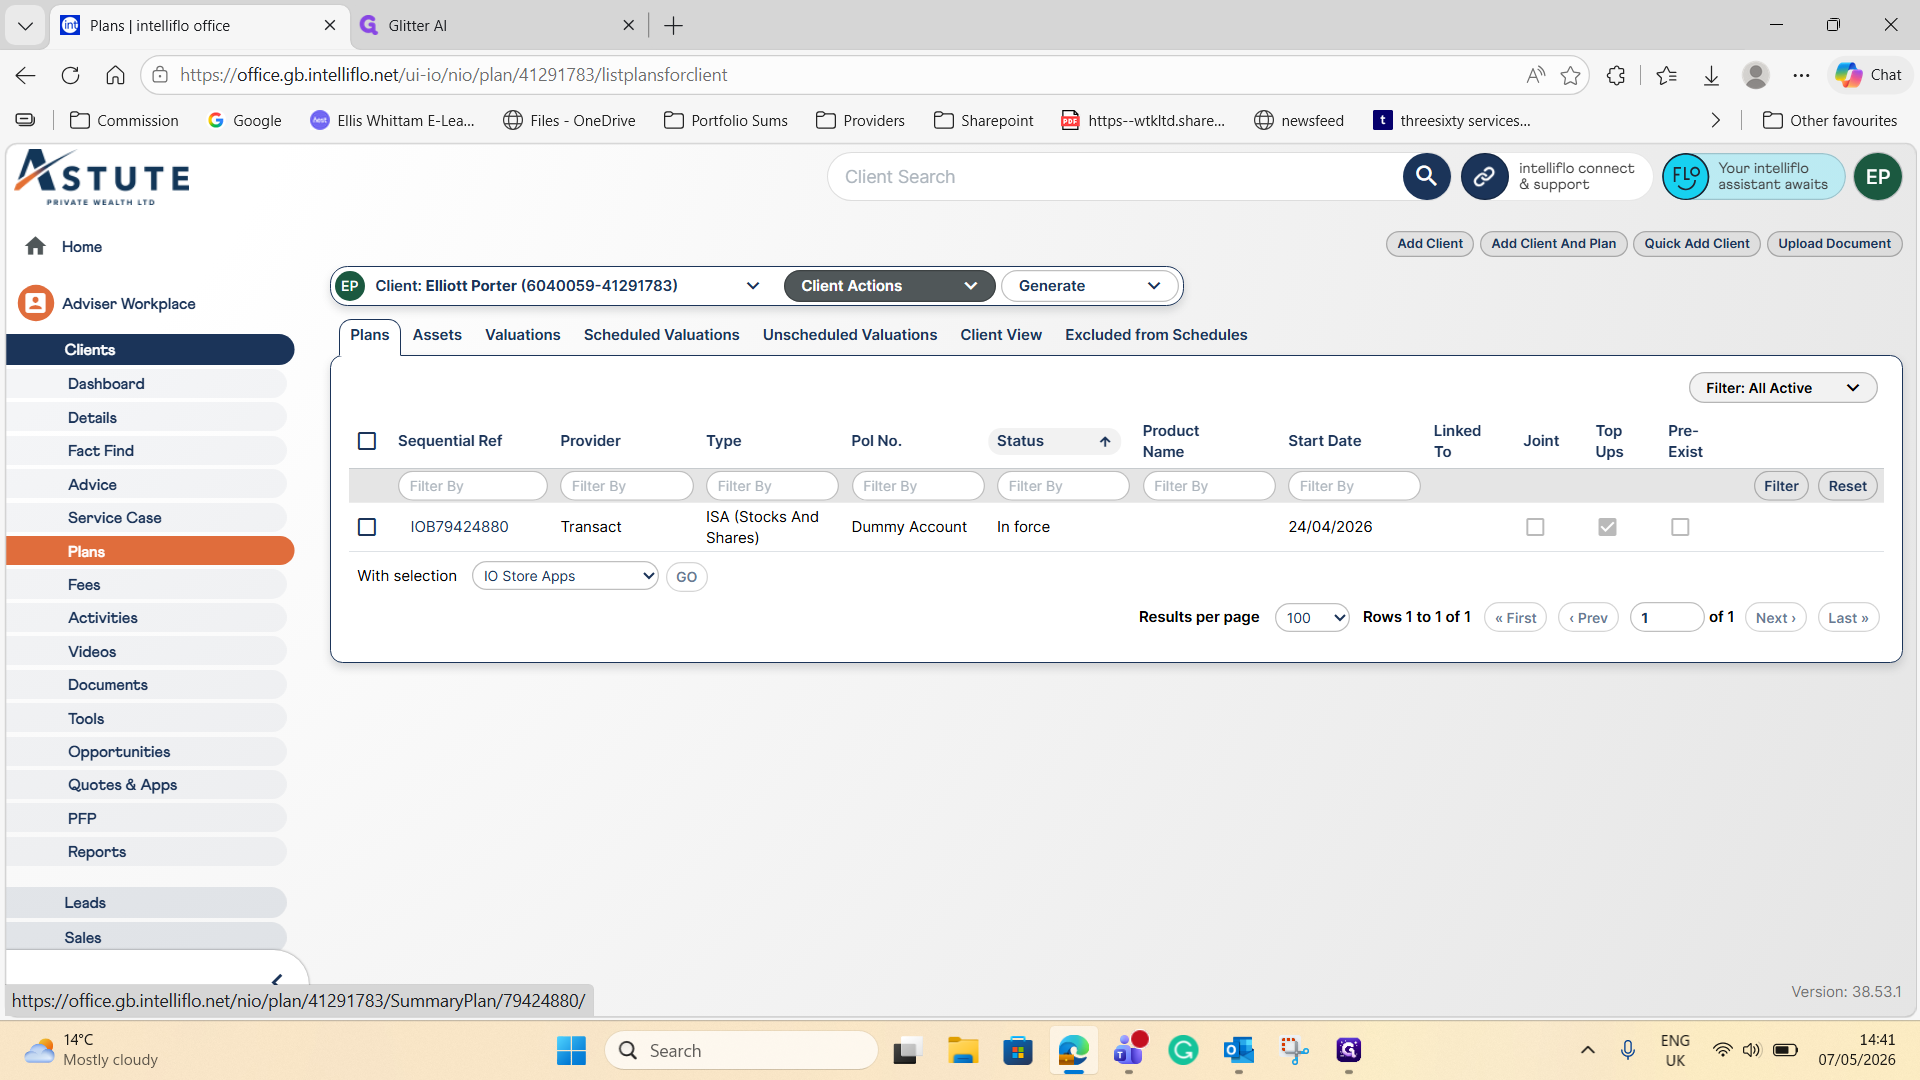
Click the relevant plan number
Step #24: Click the relevant plan number

to open its details. 3.

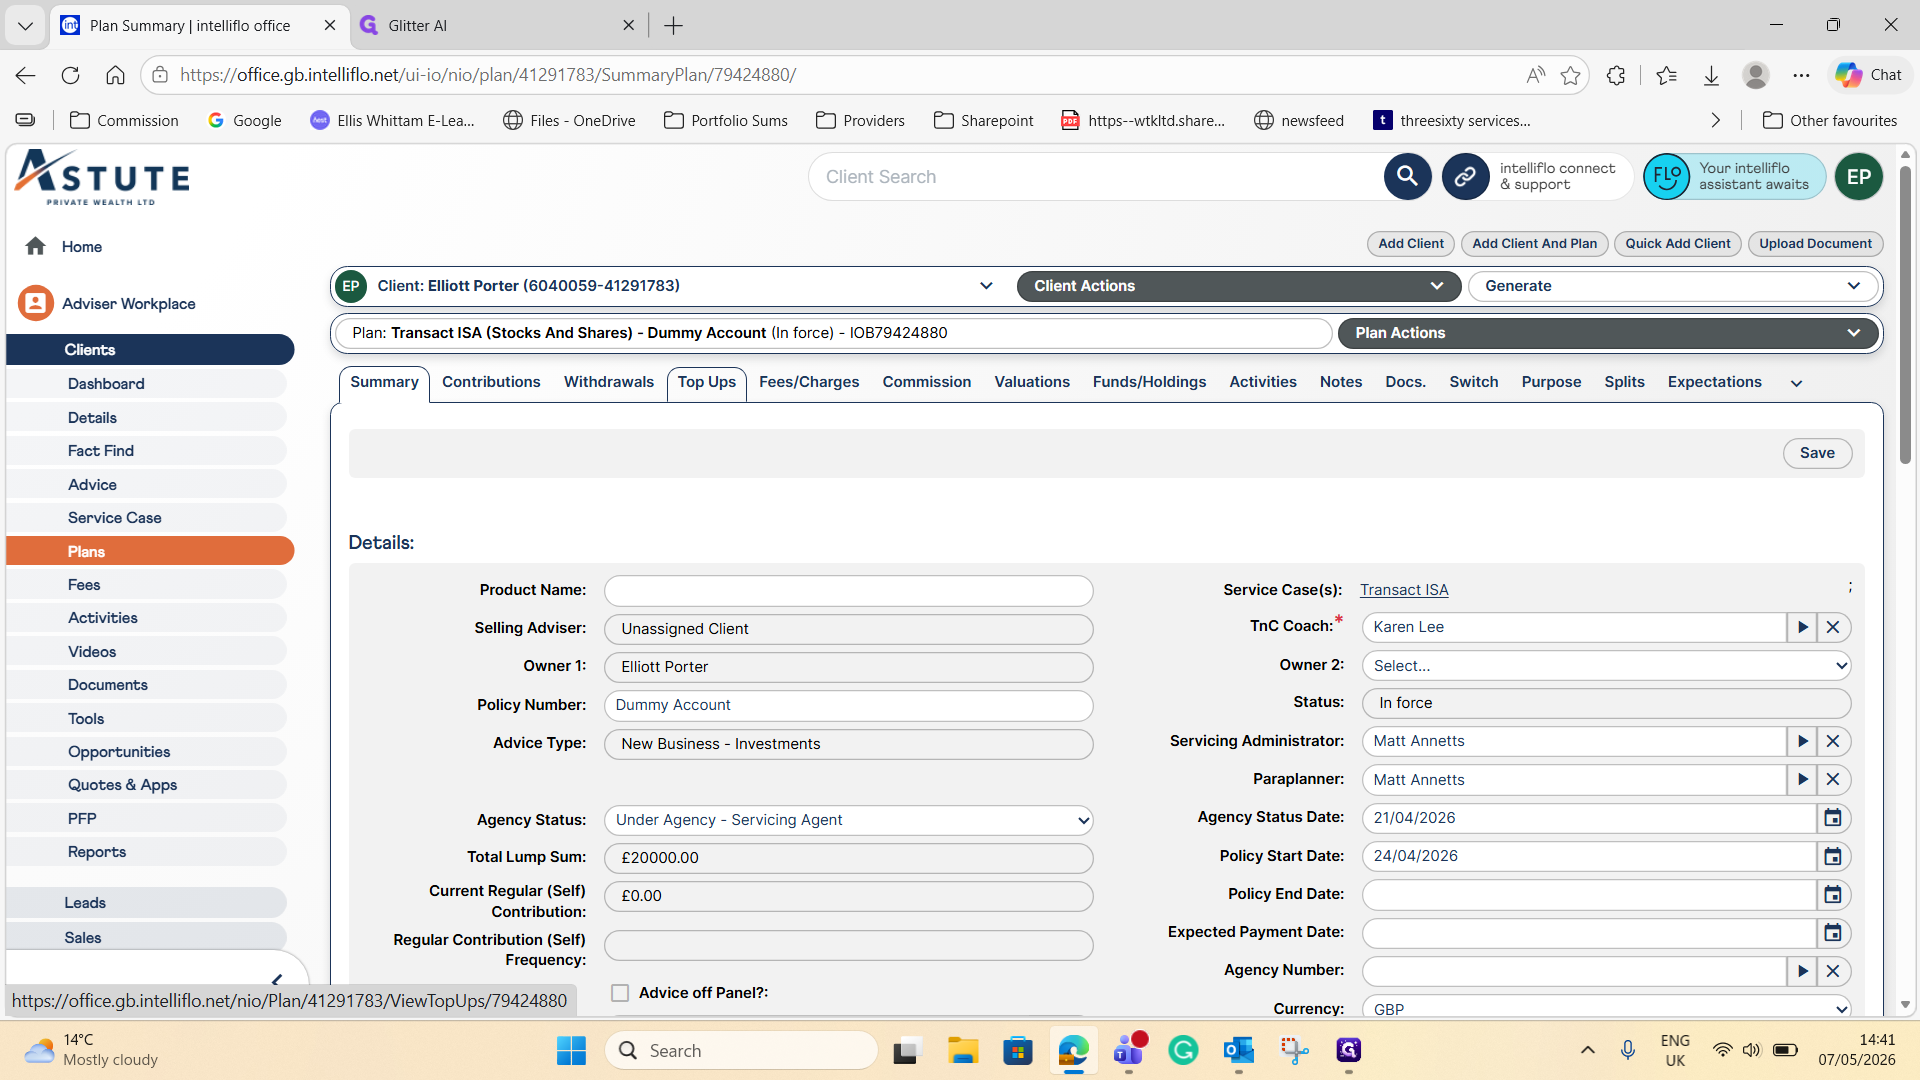
25
Navigate to the Top Ups tab
Step #25: Navigate to the Top Ups tab

to confirm your new top-up exists and is currently in a "Draft" status.

How to Add an ISA Top-Up via a Service Case