
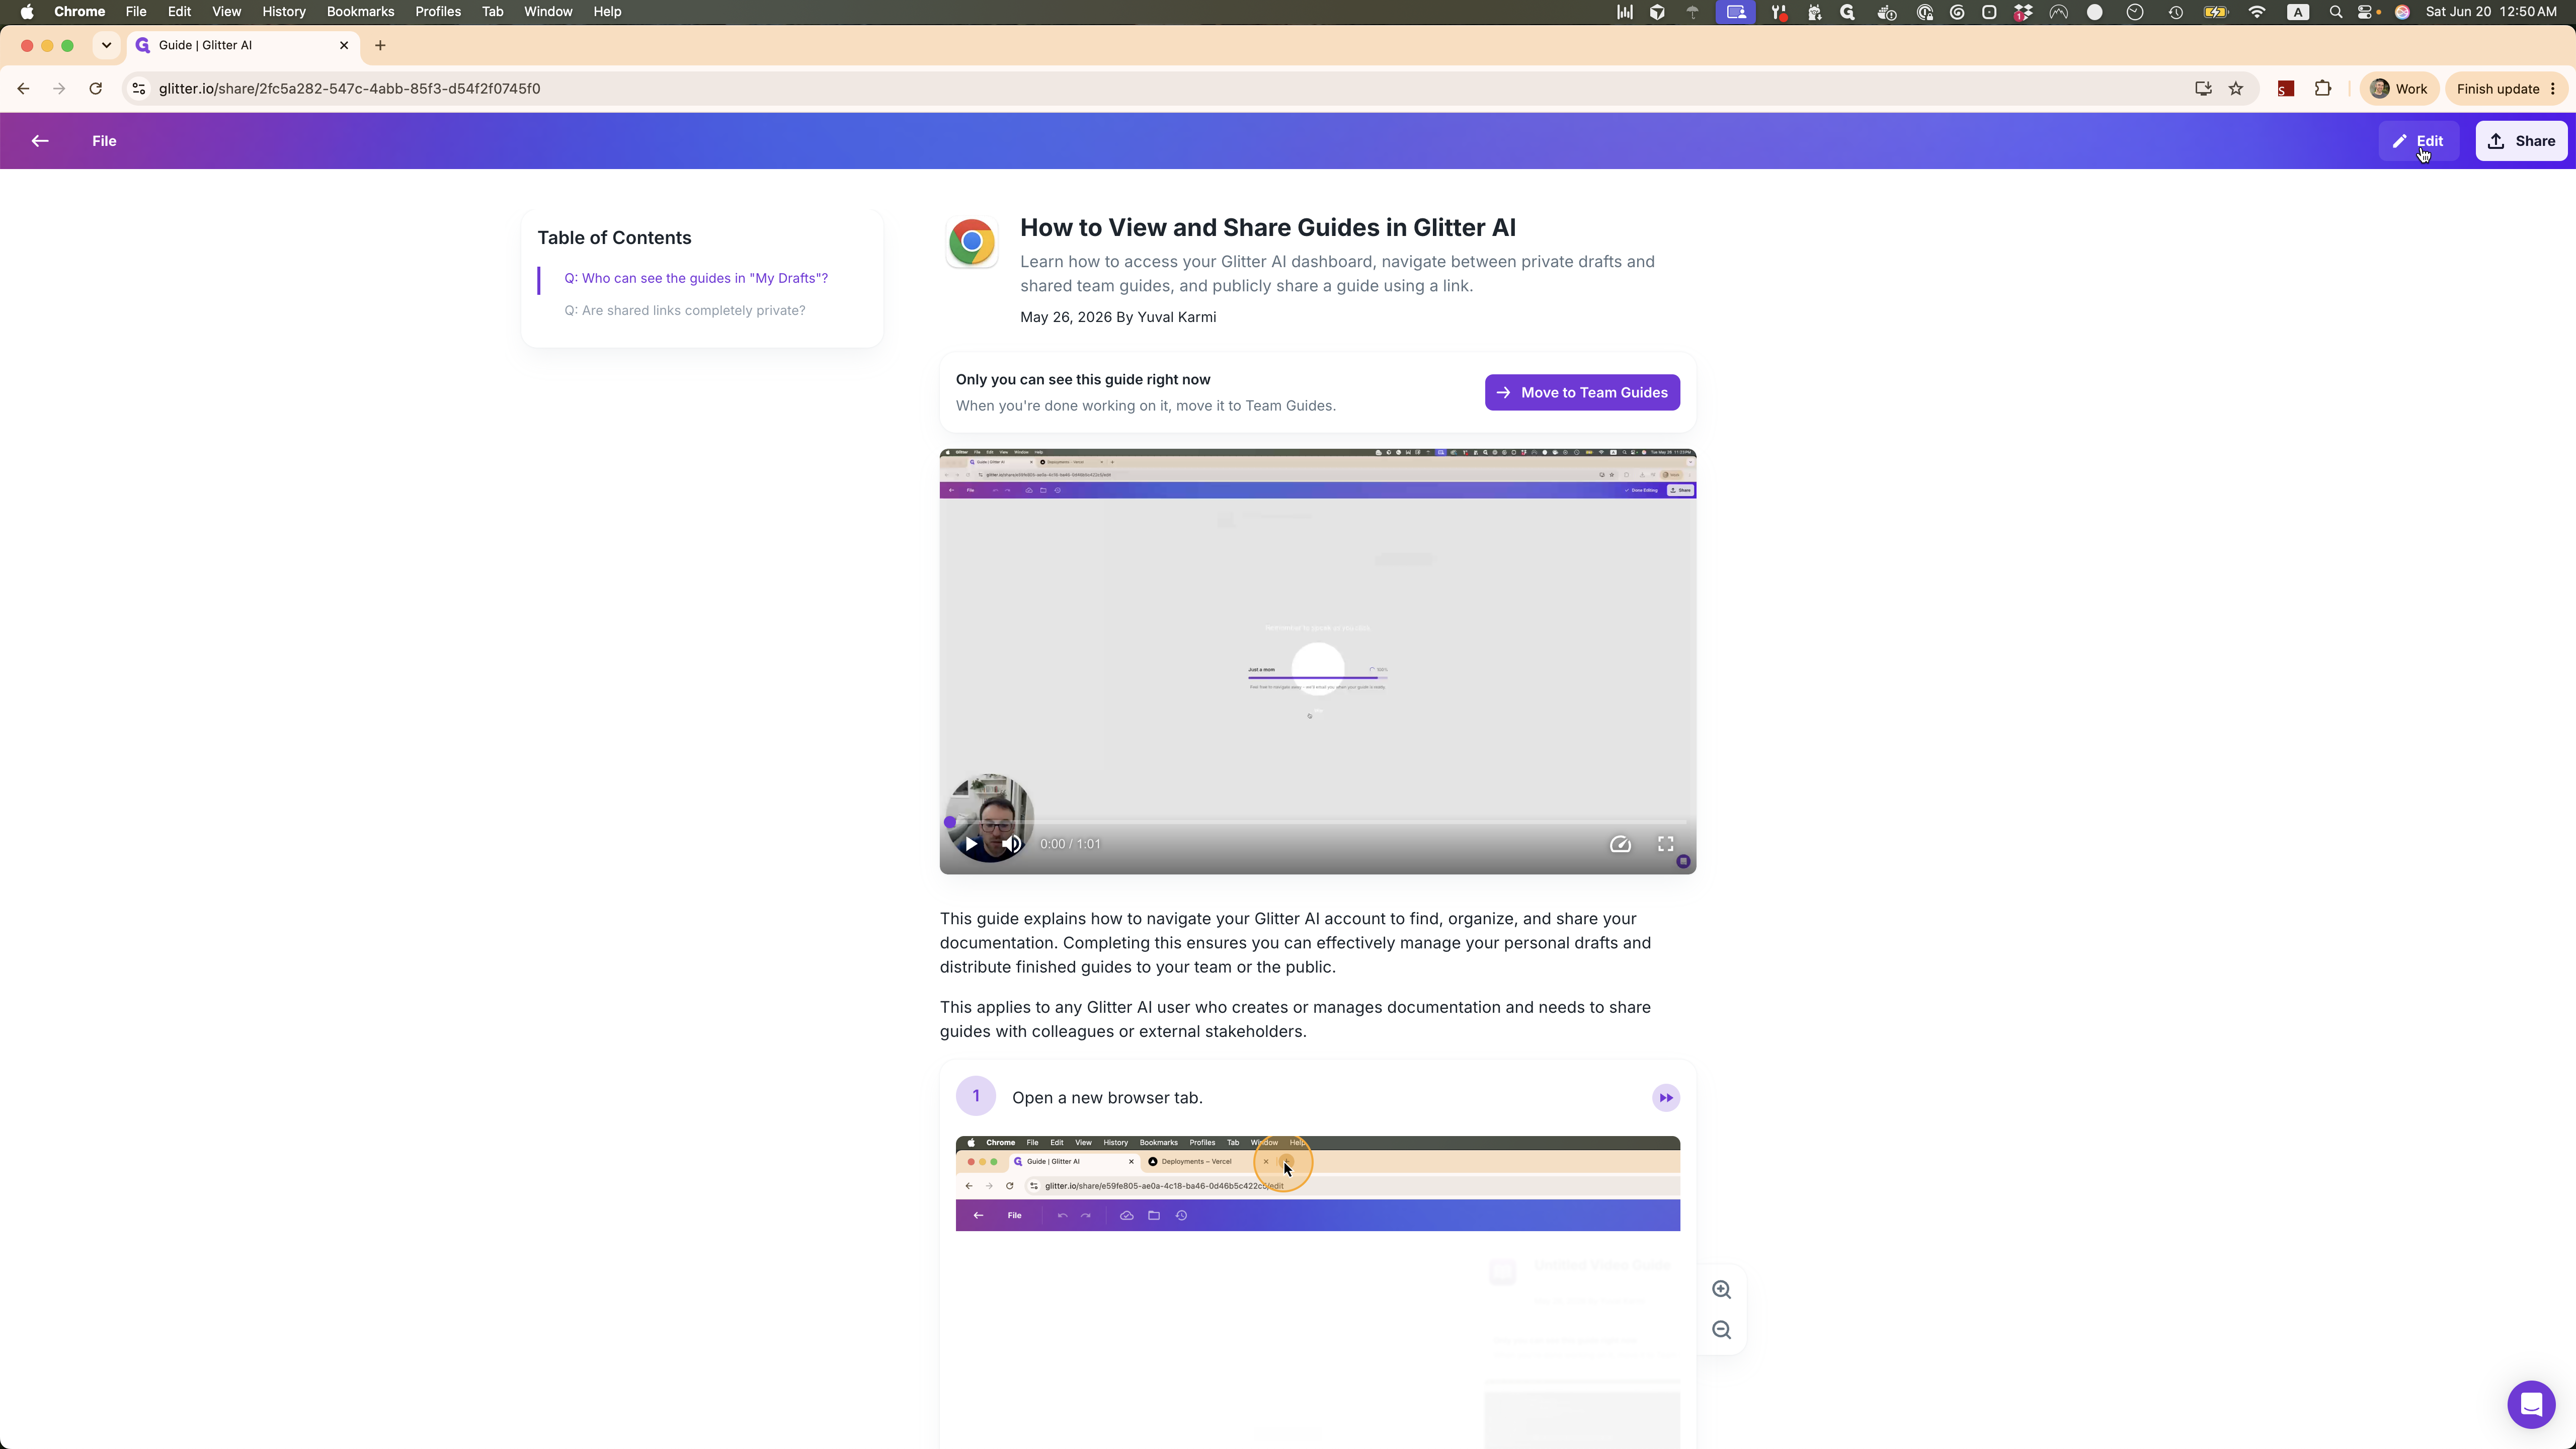
How to Add a Screenshot to a Guide in Glitter AI
Learn how to upload and insert manual screenshot steps into your existing Glitter AI guides.
By Yuval Karmi
This guide explains how to manually upload and insert a screenshot into an existing step-by-step guide in Glitter AI. Completing this ensures your documentation provides comprehensive visual context for readers following along.
This workflow applies to guide creators, technical writers, or support team members who need to edit and enhance their Glitter AI documentation.
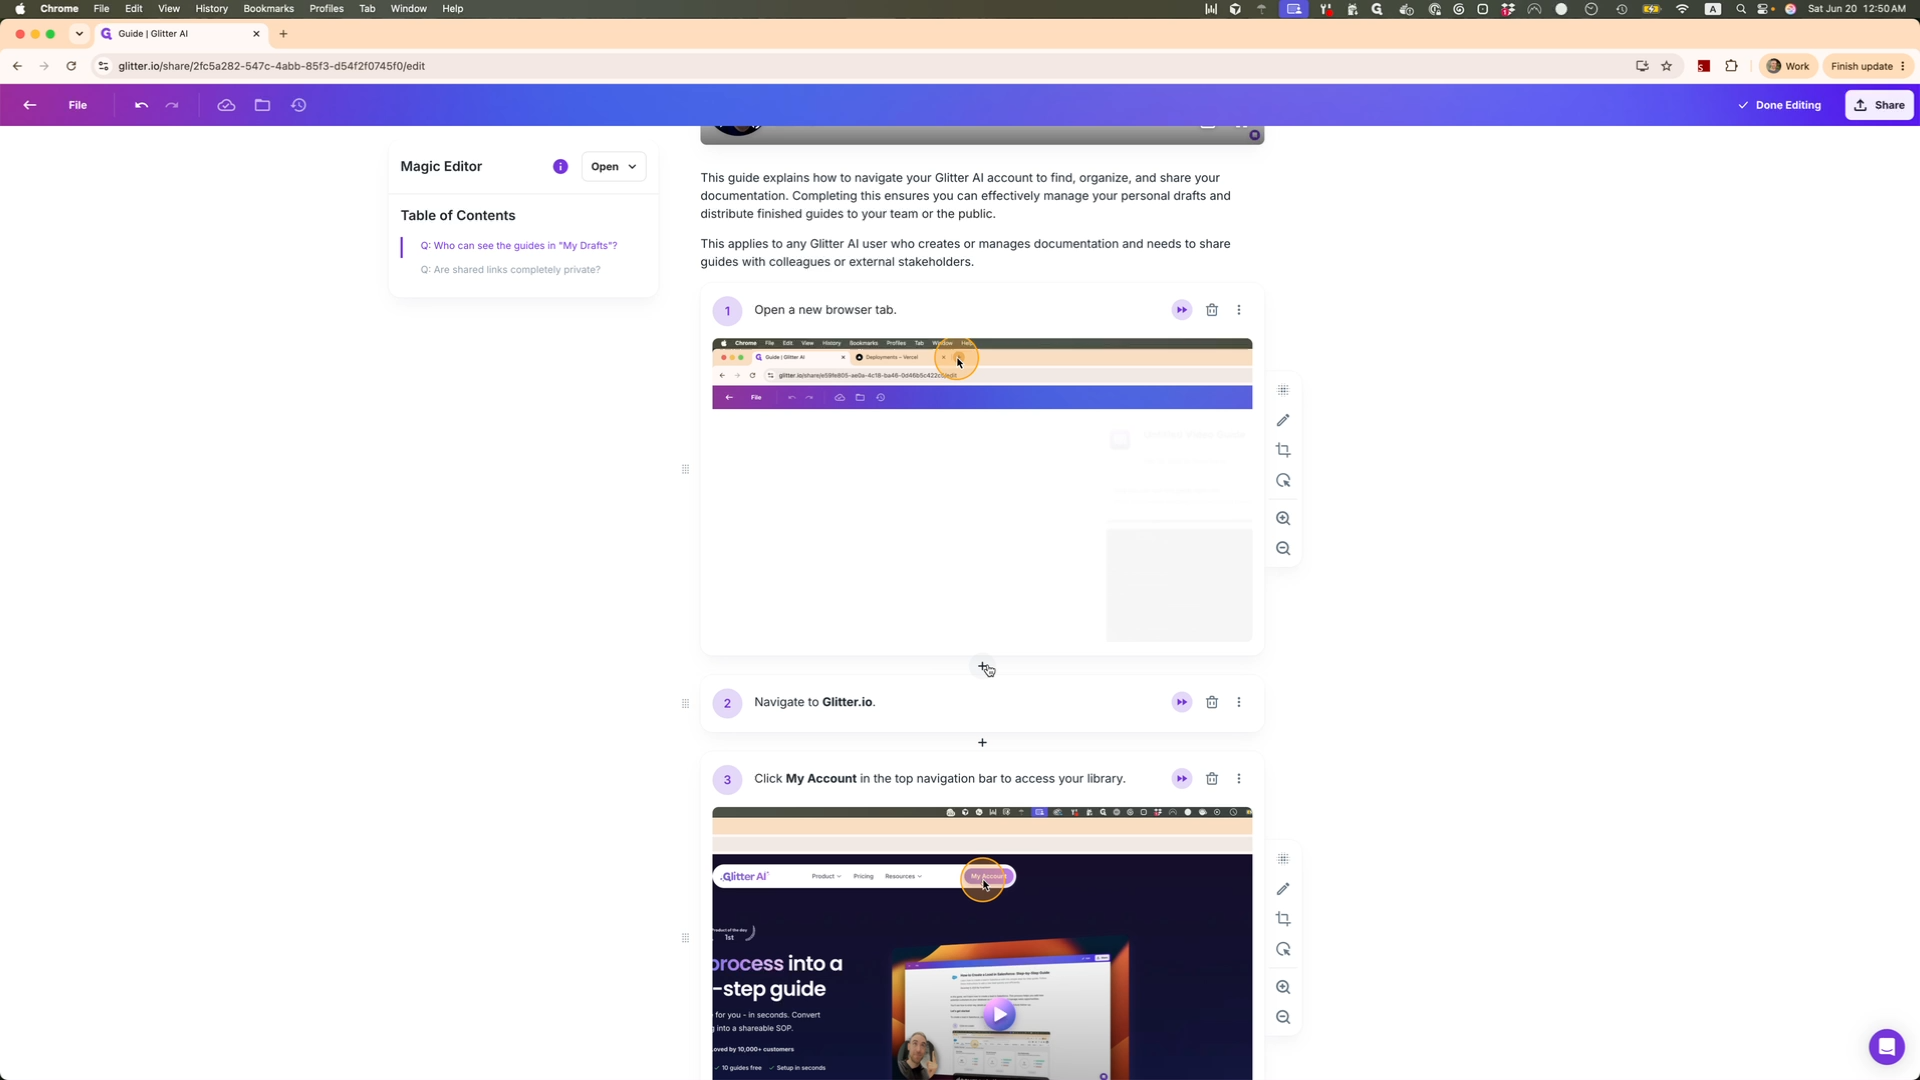
Open the Guide Editor
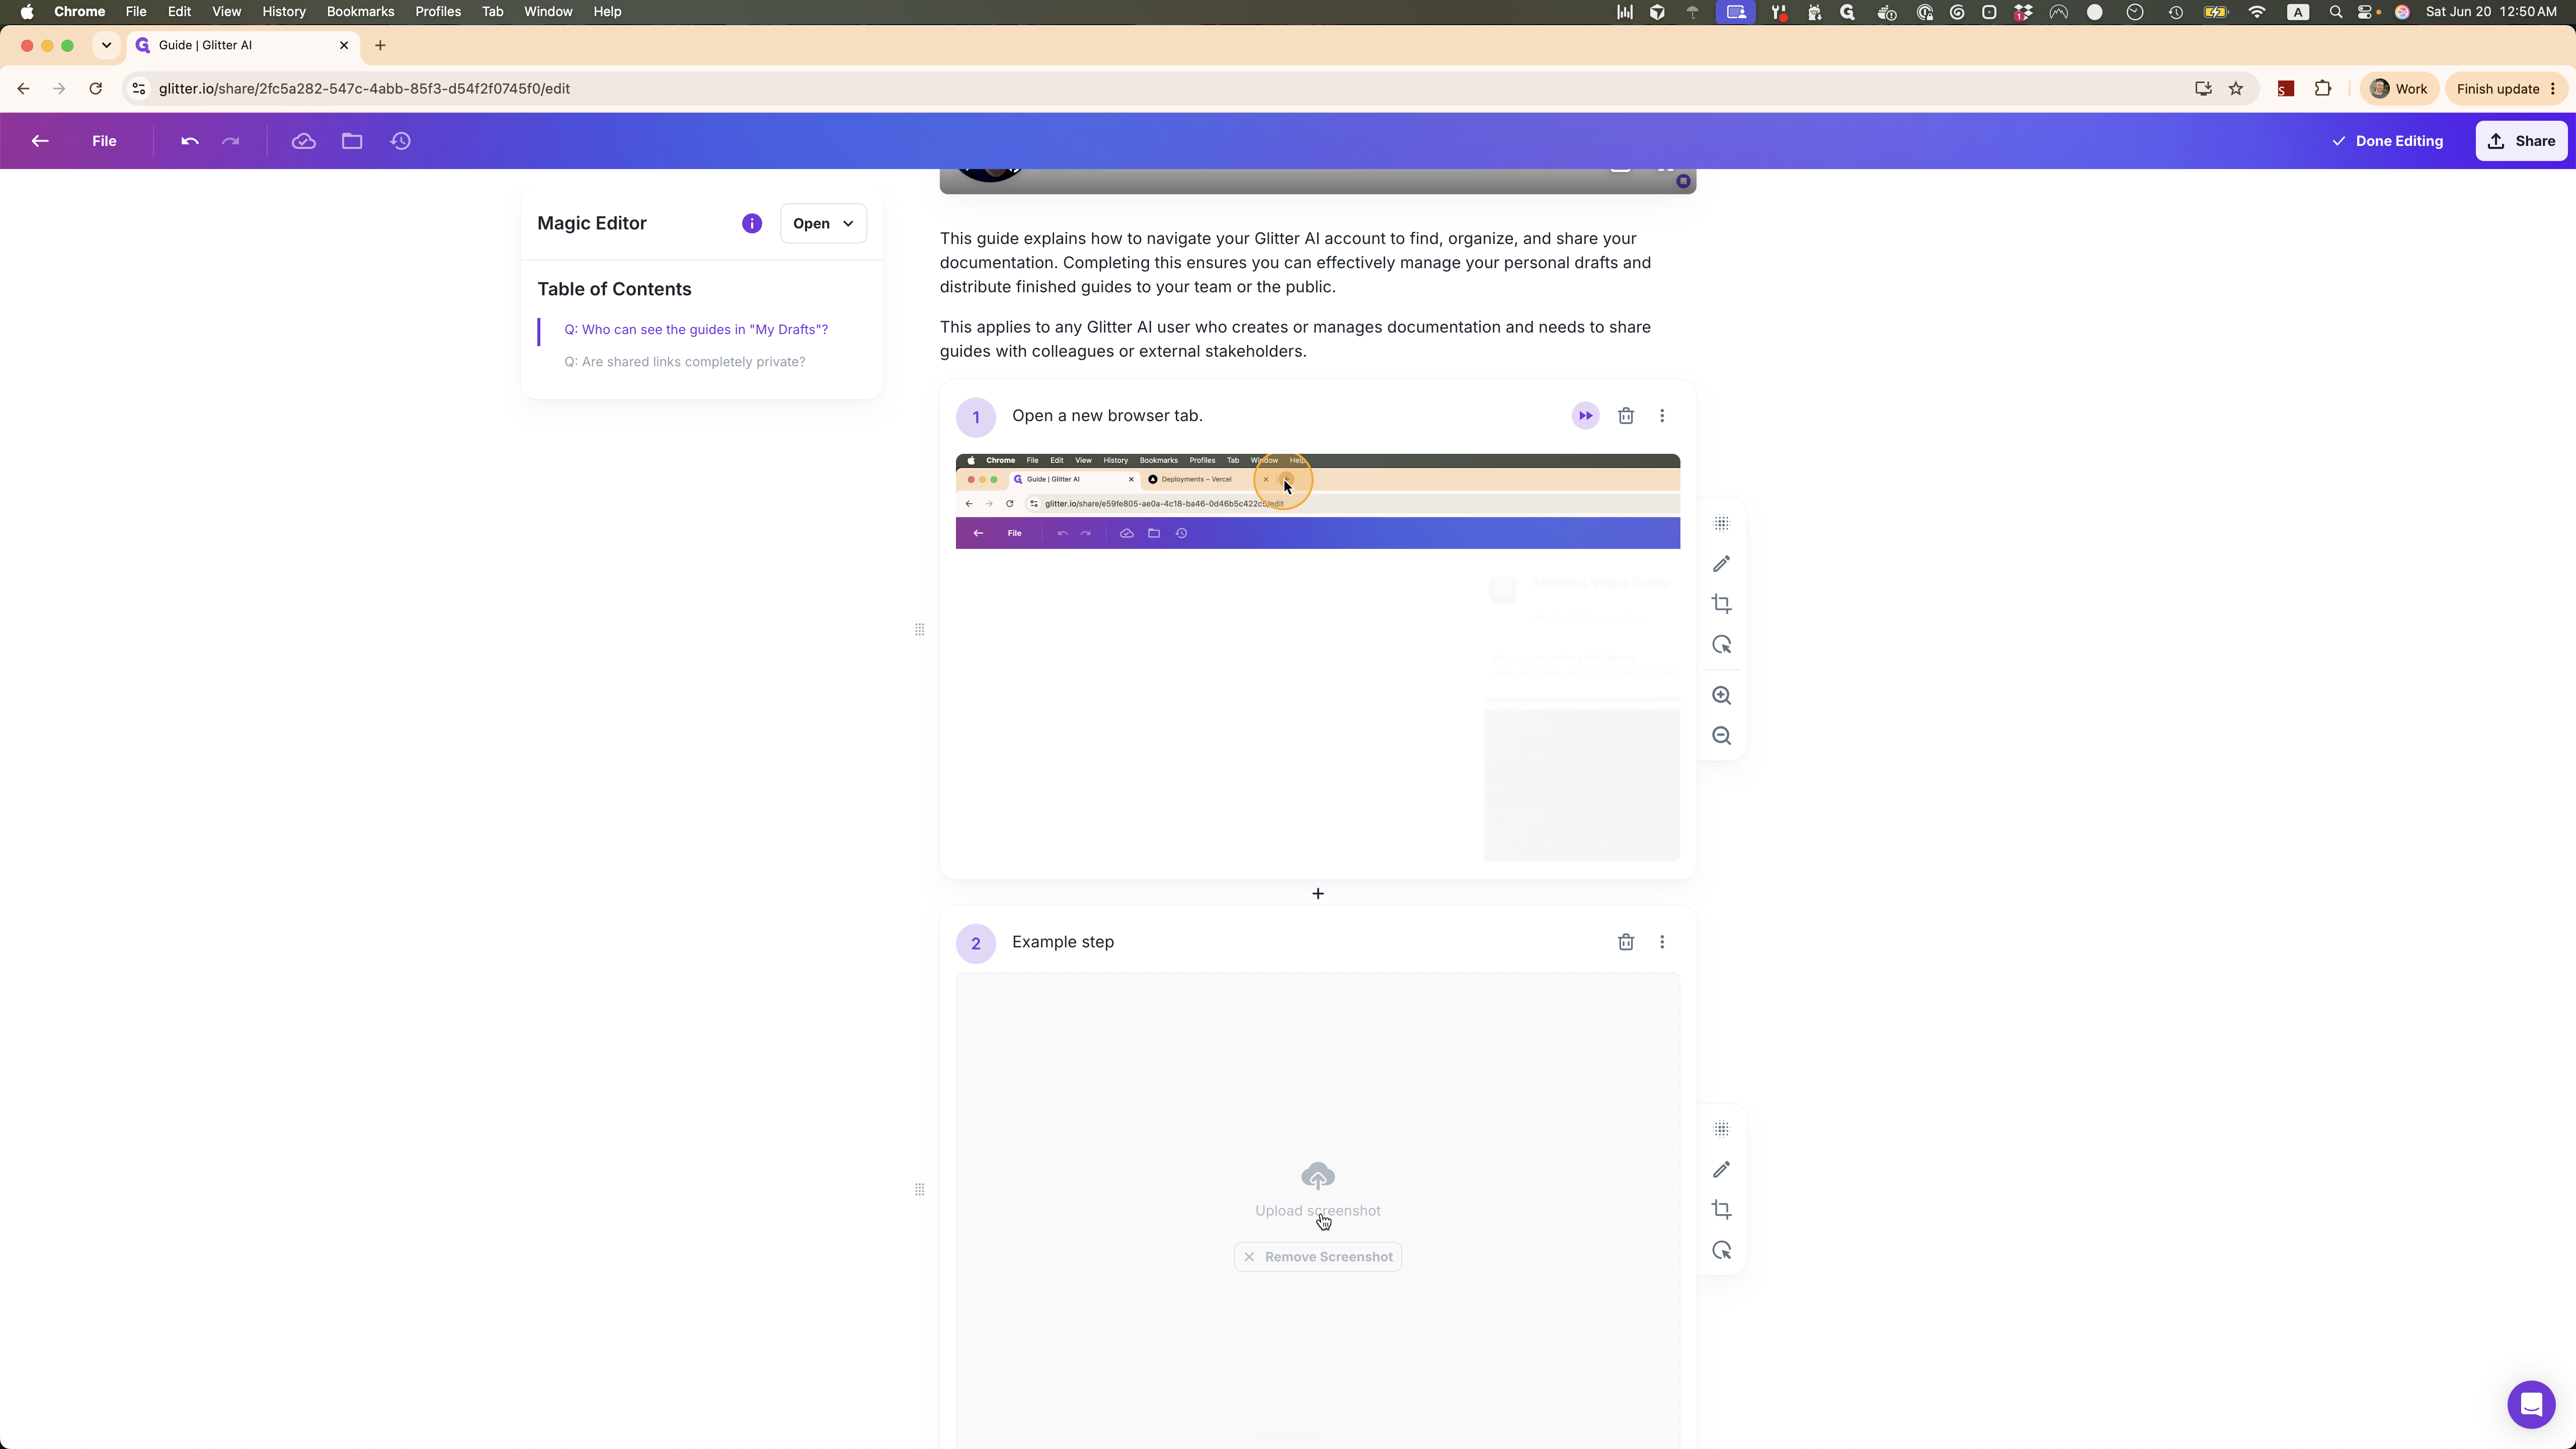
1
Click Edit to switch your guide into edit mode.
2
Click the plus button in between two existing steps where you'd like to add a new step
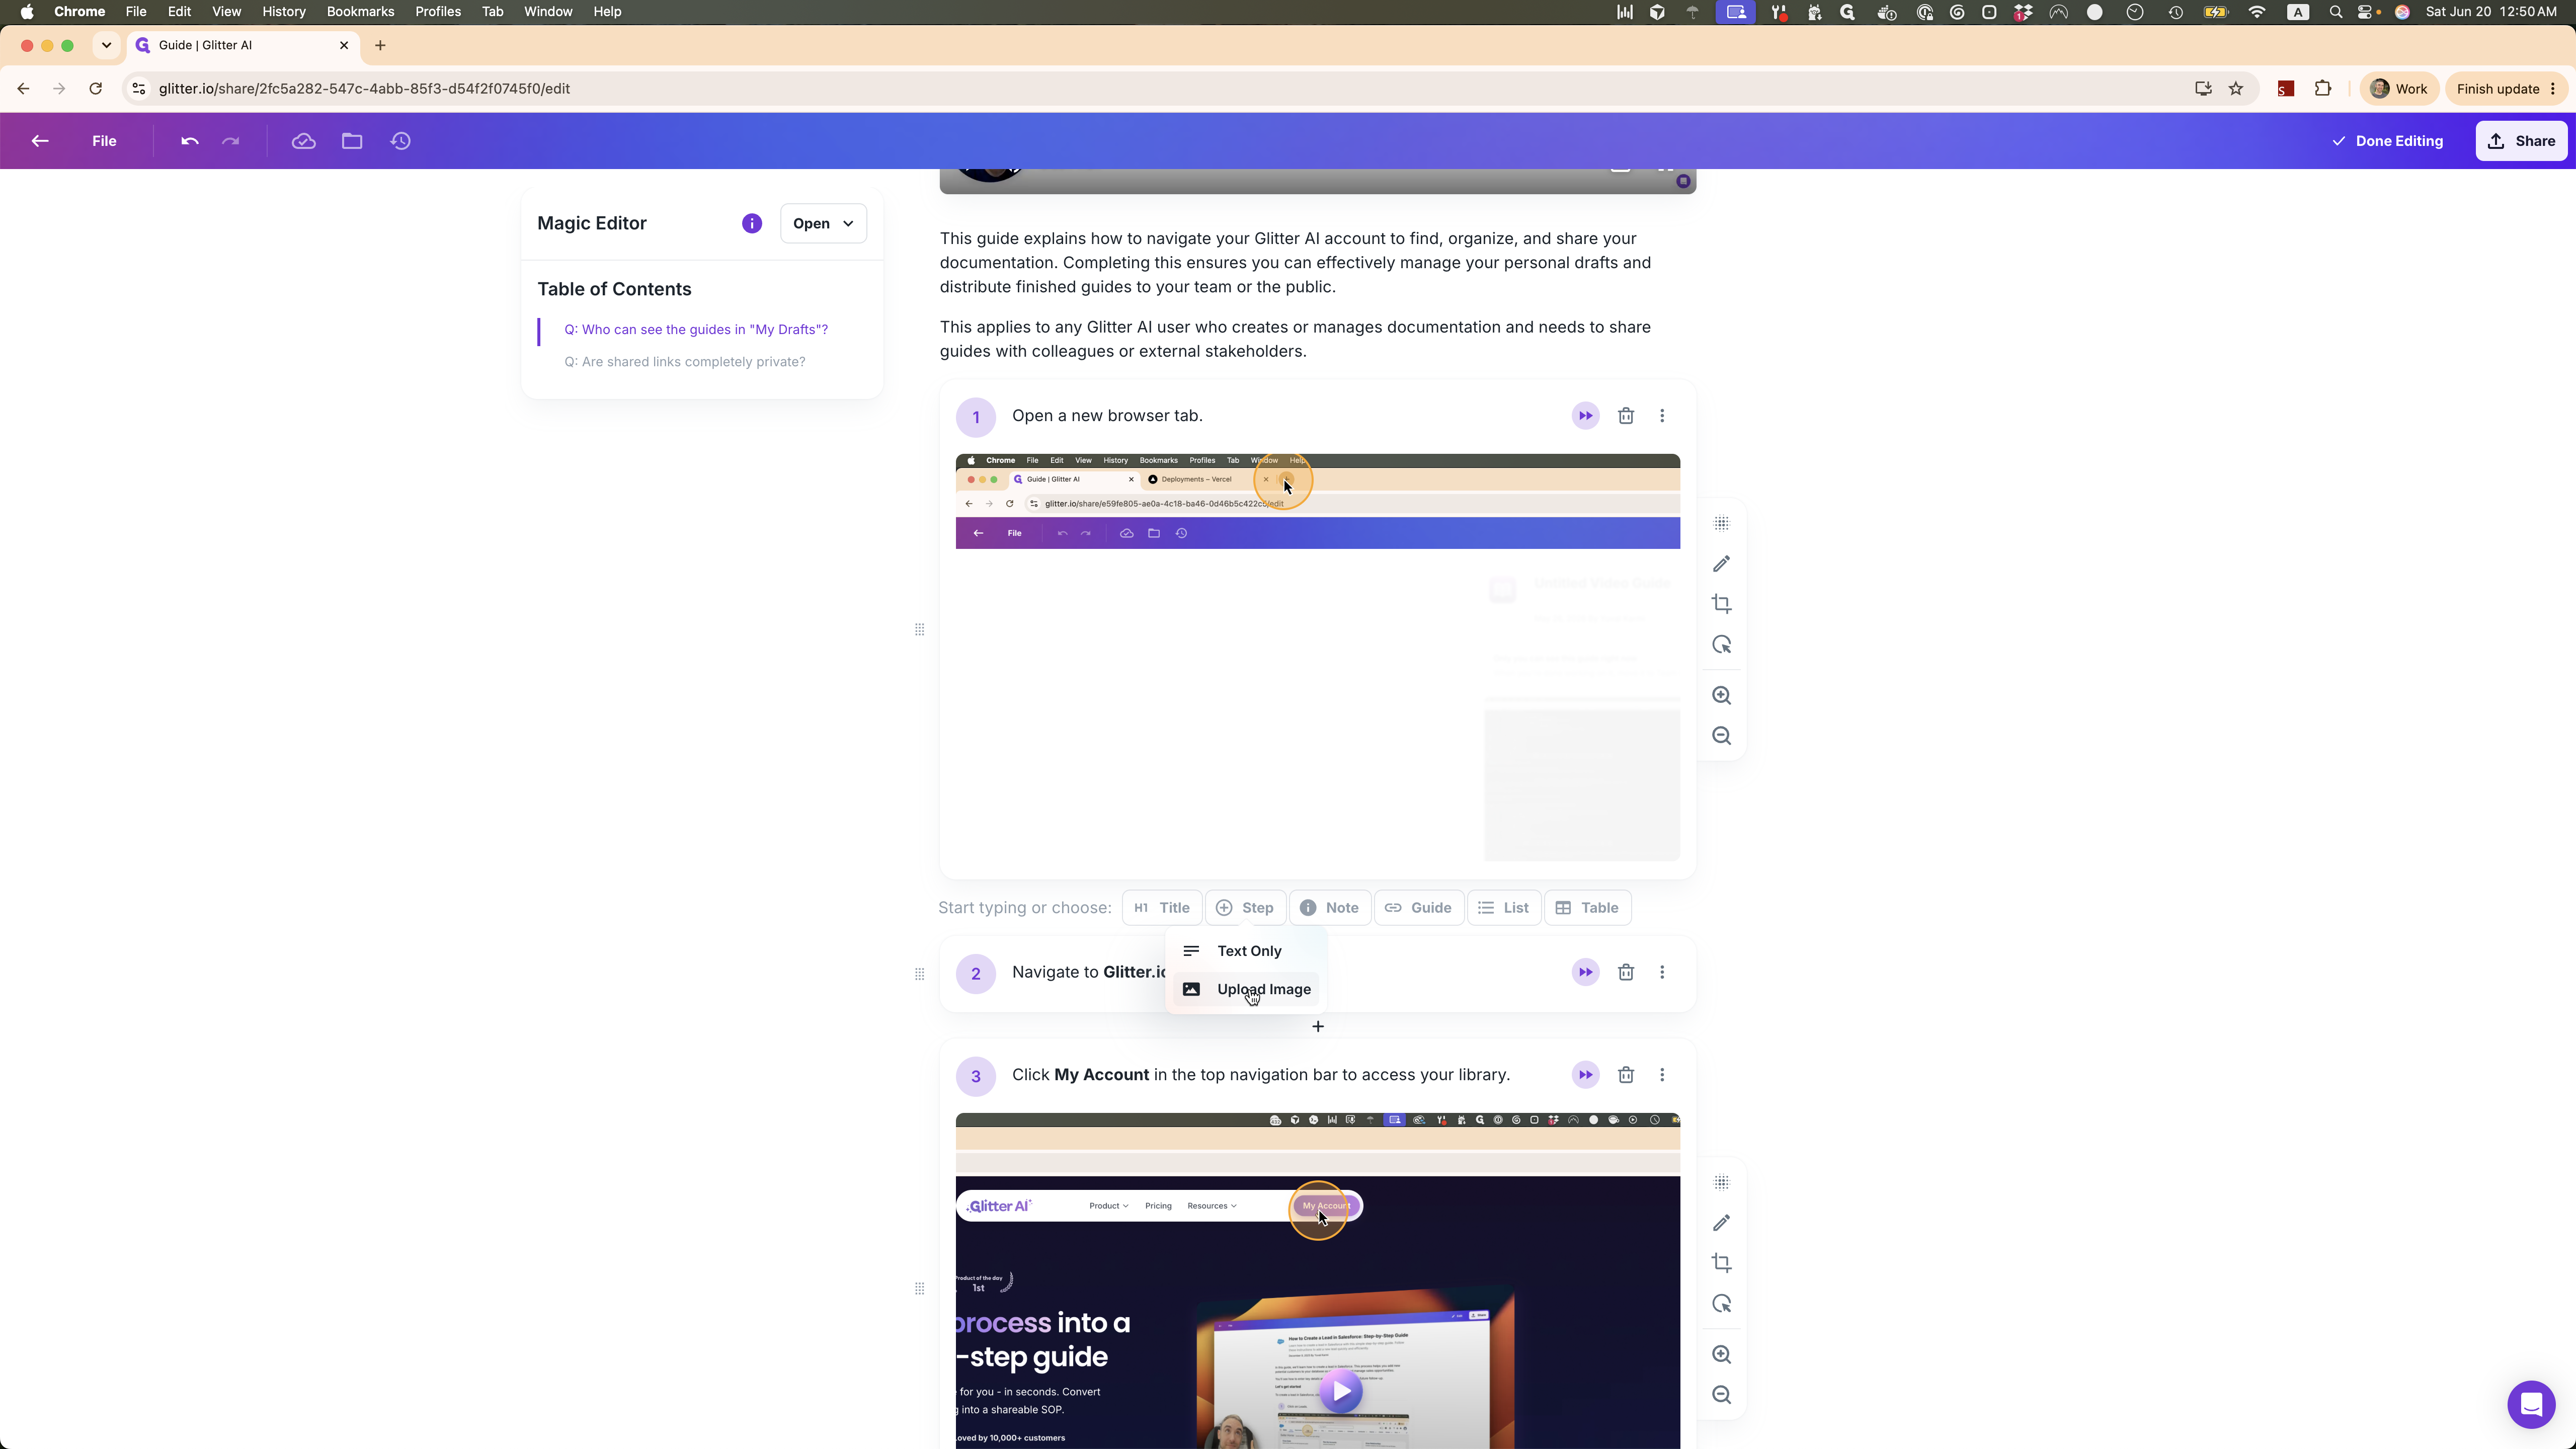
Insert a New Image Step
3
Hover your cursor between two existing steps where you want the new image to appear and click the + Step button.
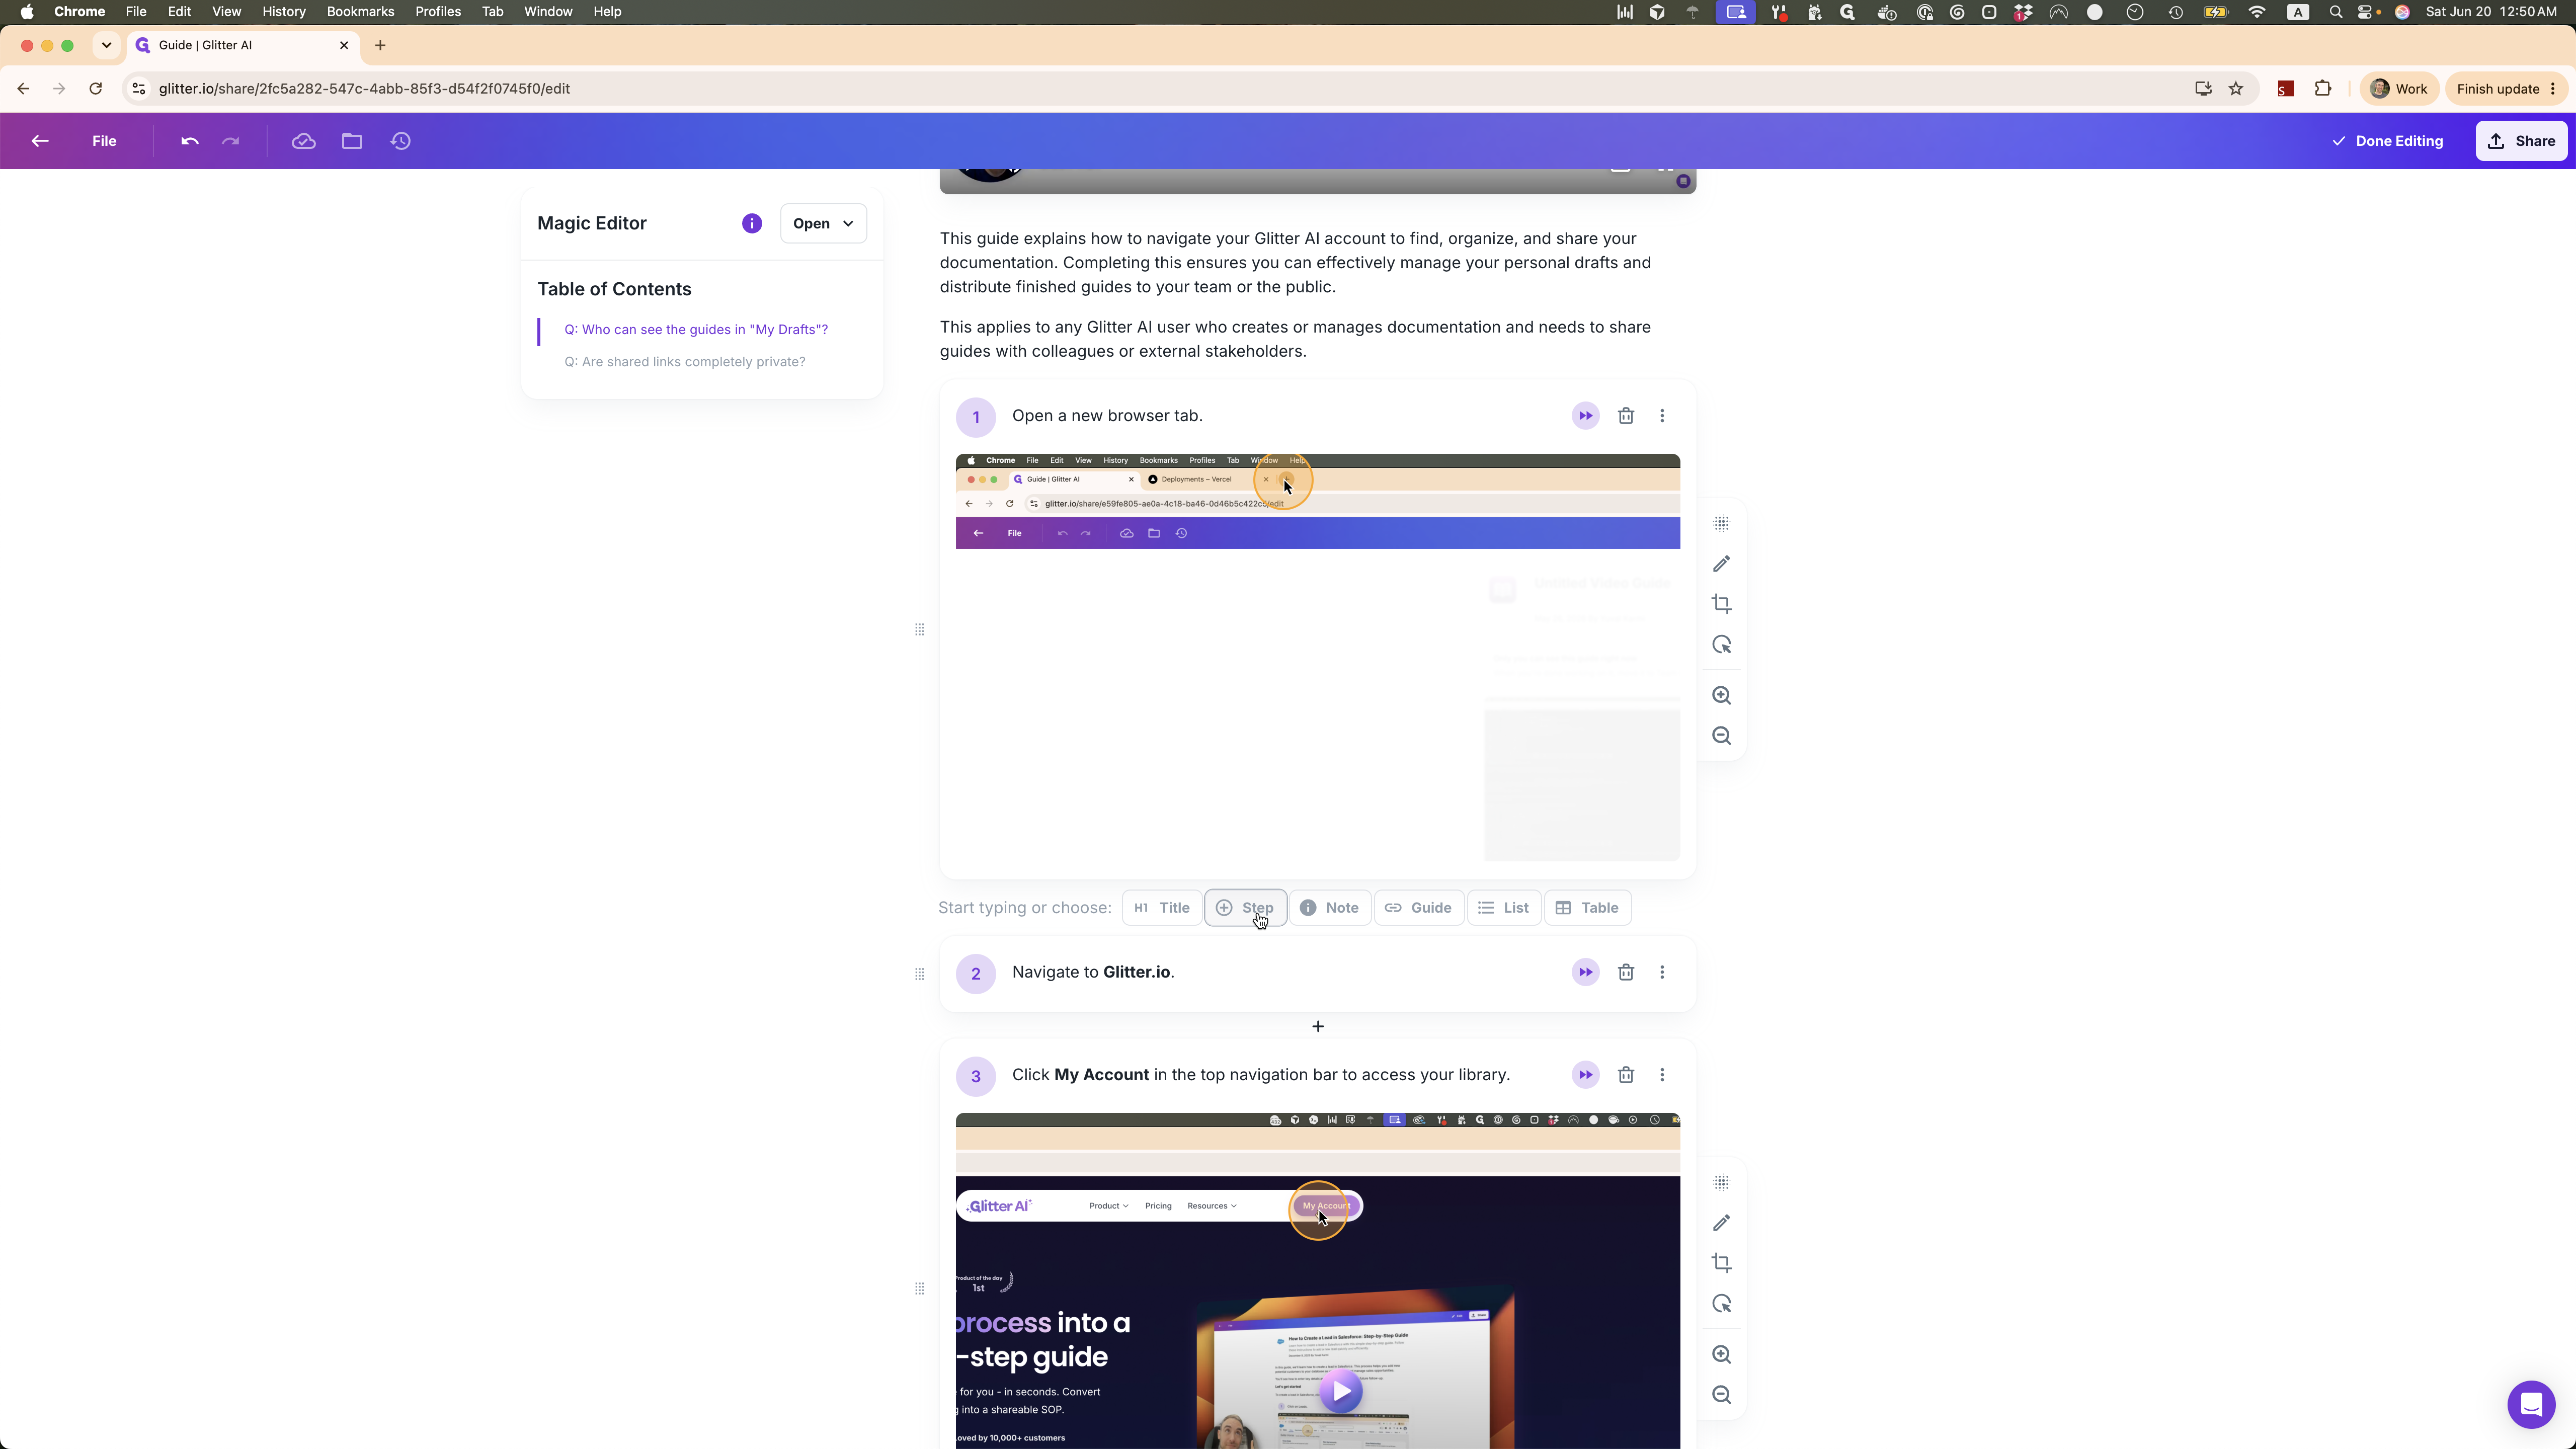
4
Select Upload Image from the context menu.
Upload the Screenshot
5
Type a descriptive instruction or caption for the new step in the text box provided.
6
Click Upload screenshot to open your file browser and choose the image you want to add.
Q: What if I don't see the plus button to add a new step?
A: If you are currently focused inside a text field, the plus button won't appear. Instead, navigate to the end of your paragraph and press the Enter key to bring up the content insertion menu.