Icon

How to Add and Configure a New User in Aircall

Learn how to provision a new user in Aircall, assign them to teams, define their timezone and availability, and configure essential call preferences.

By HCA Support

This guide walks you through creating a new user profile in Aircall and comprehensively configuring their roles, team assignments, availability, and routing preferences. The goal is to ensure a new team member is correctly set up to handle incoming and outgoing calls in their correct timezone and support queues.

This guide is intended for system administrators or IT support personnel who handle user provisioning and onboarding inside the Aircall platform.

Navigating to User Creation
1
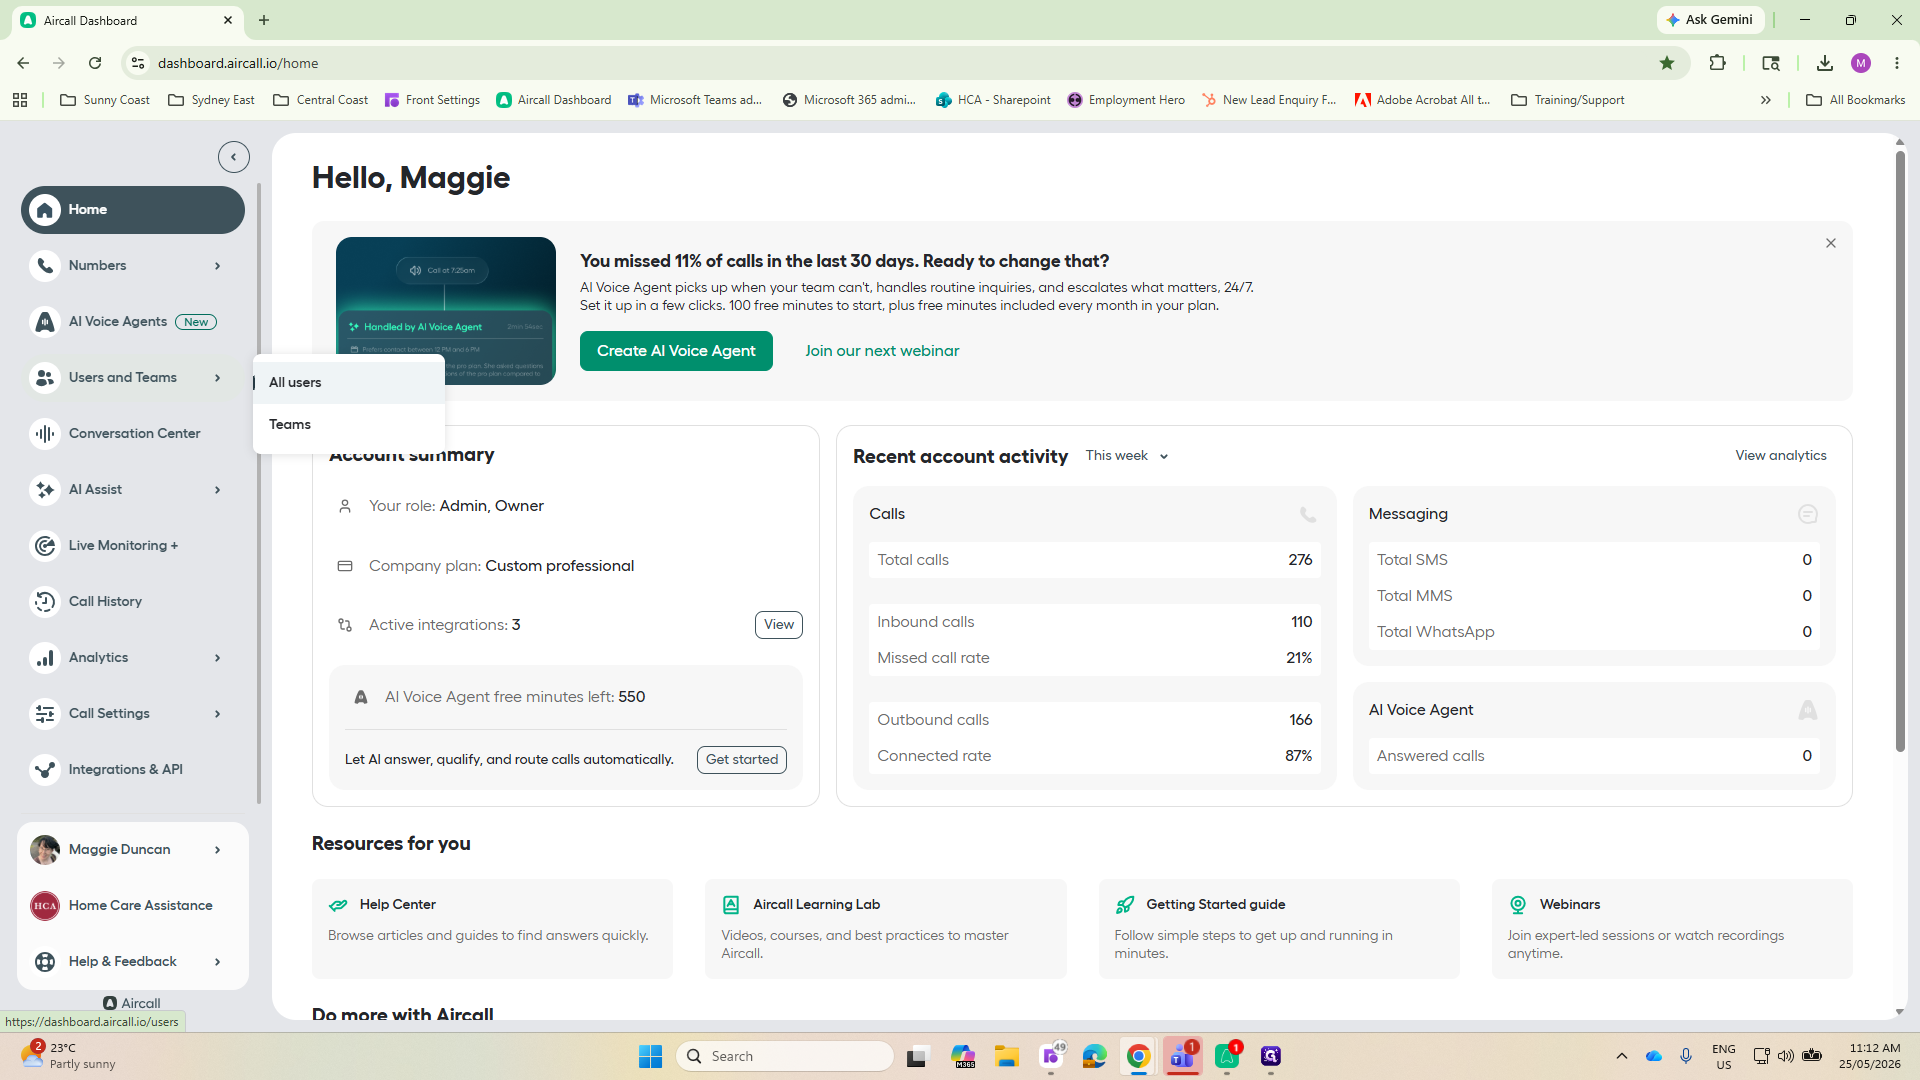
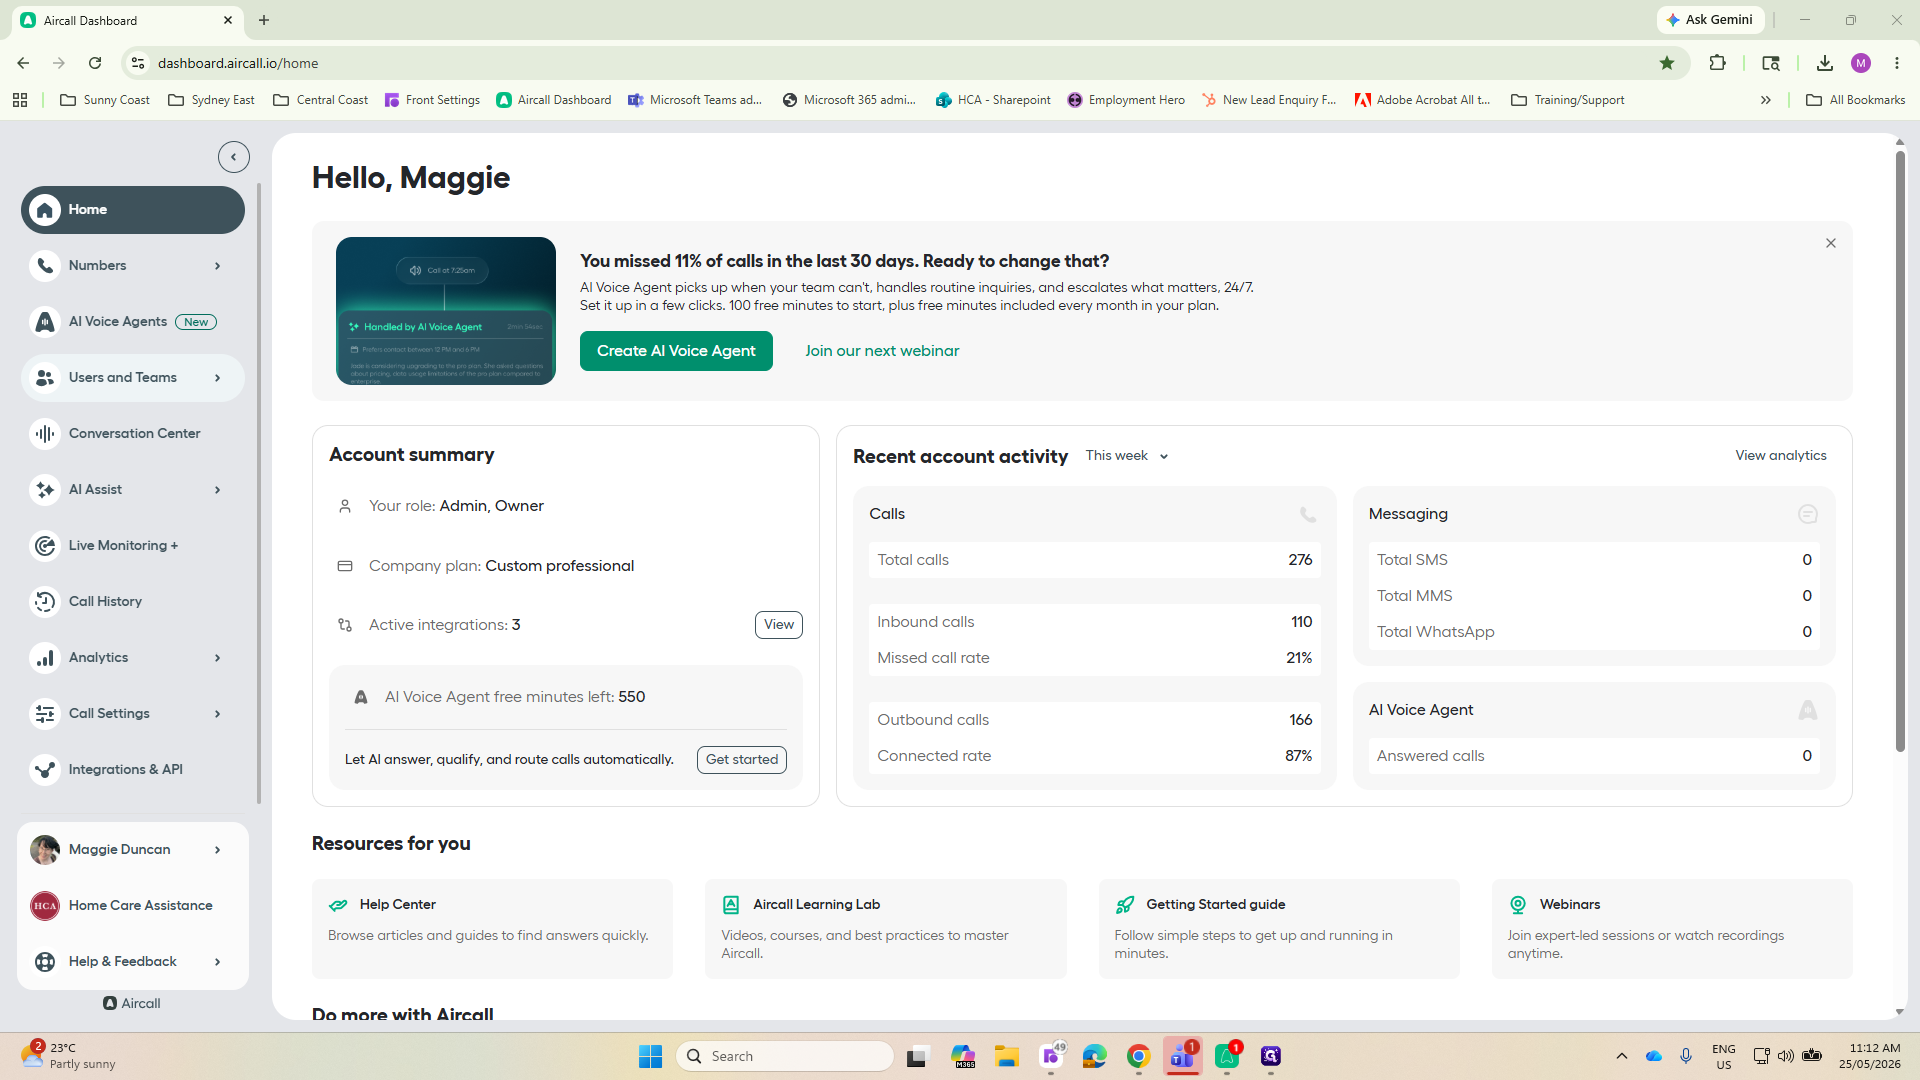
Go to dashboard.aircall.io and click Users and Teams in the left sidebar navigation.
Step #1: Go to dashboard.aircall.io and click Users and Teams in the left sidebar navigation.
2
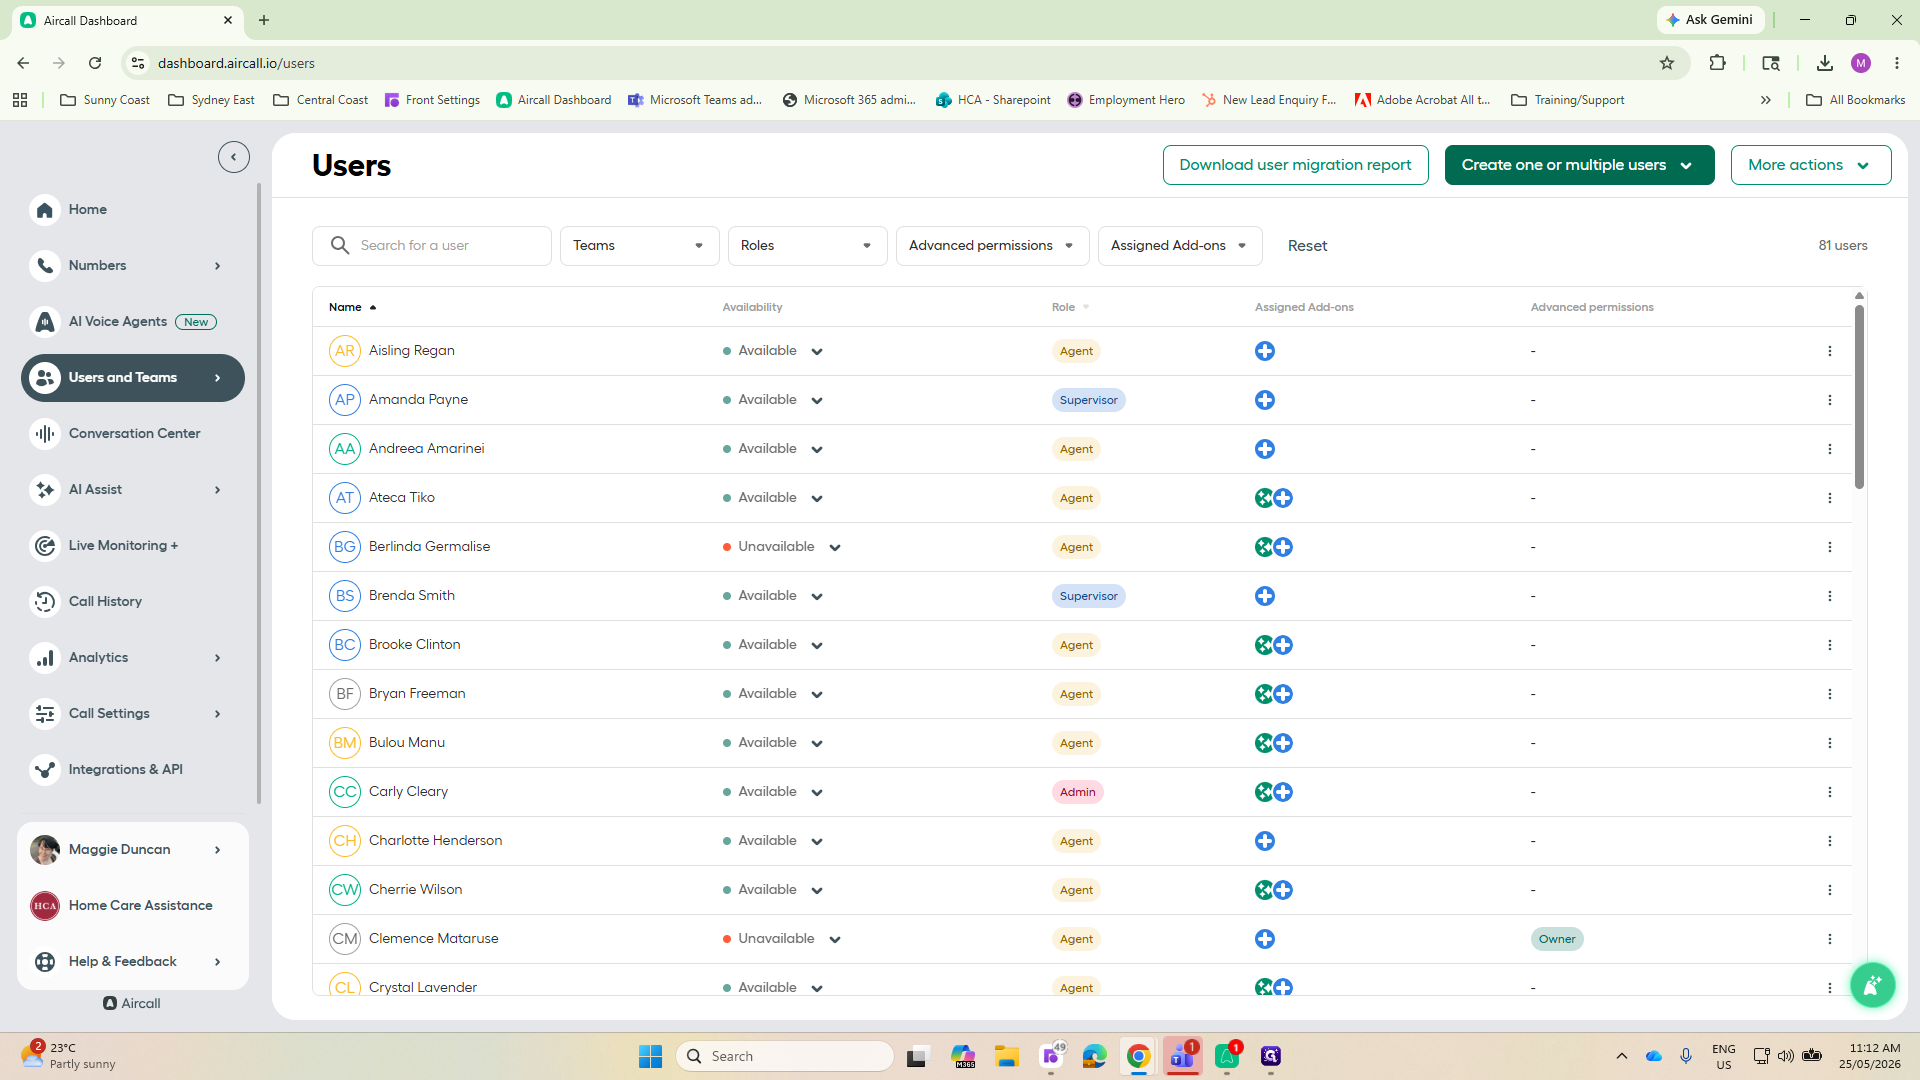
Select All users from the expanded menu.
Step #2: Select All users from the expanded menu.
3
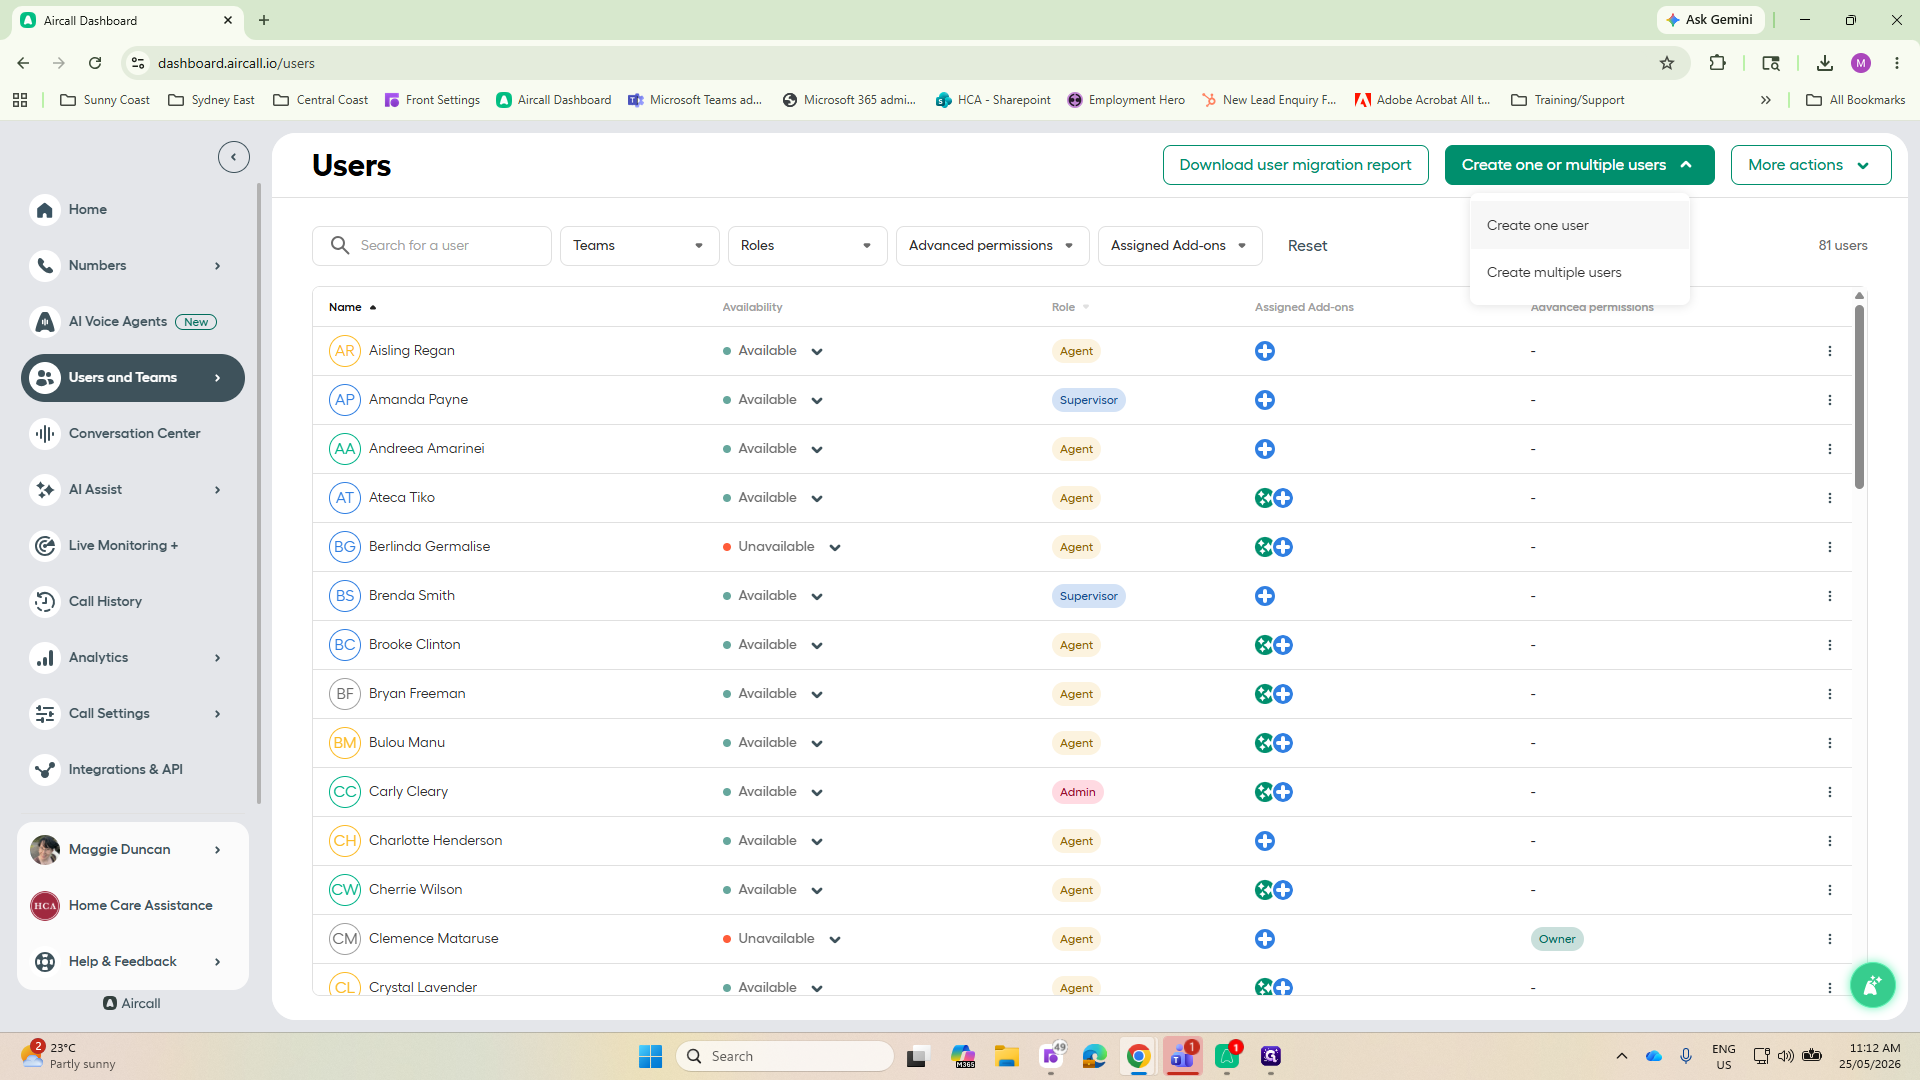
Click the green Create one or multiple users button in the top right corner.
Step #3: Click the green Create one or multiple users button in the top right corner.
4
Select Create one user from the dropdown menu.
Step #4: Select Create one user from the dropdown menu.

Entering Details and Assigning a Role

5
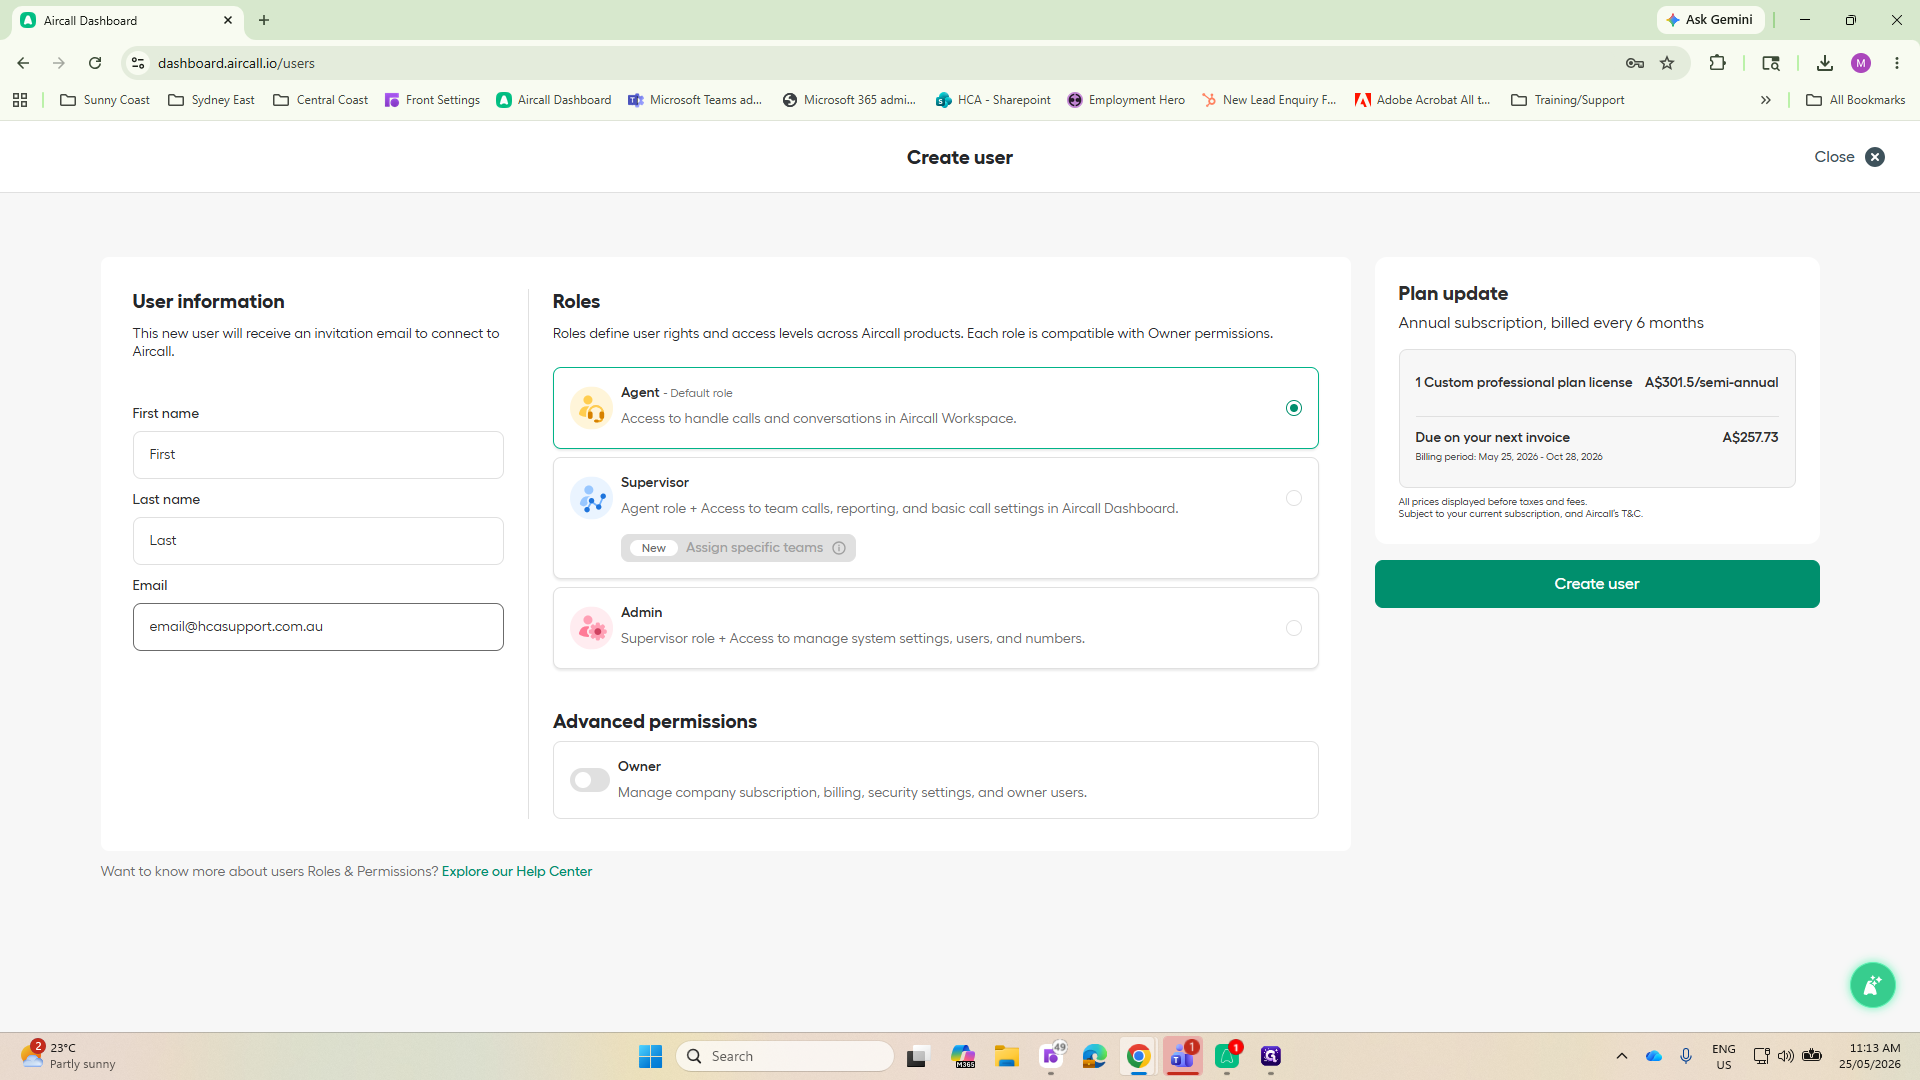
Enter the user's first name, last name, and email address in the provided fields.

Before creating the user, you must select an appropriate role.

Role

When to use

Configuration Options

Agent

The default choice for standard team members taking calls.

Basic setup; handles calls on assigned teams automatically.

Supervisor

For team leads or managers.

Can be restricted to view specific teams or exclusively monitor specific phone numbers.

Admin / Owner

For system administrators or business owners.

Full system access. Rarely assigned to new standard users.

6
Select the Agent role, which is the default setting for most standard users.
Step #6: Select the Agent role, which is the default setting for most standard users.

Once the details and role are finalized, click the button to create the user. The new user's profile configuration window will automatically open.

Assigning Teams

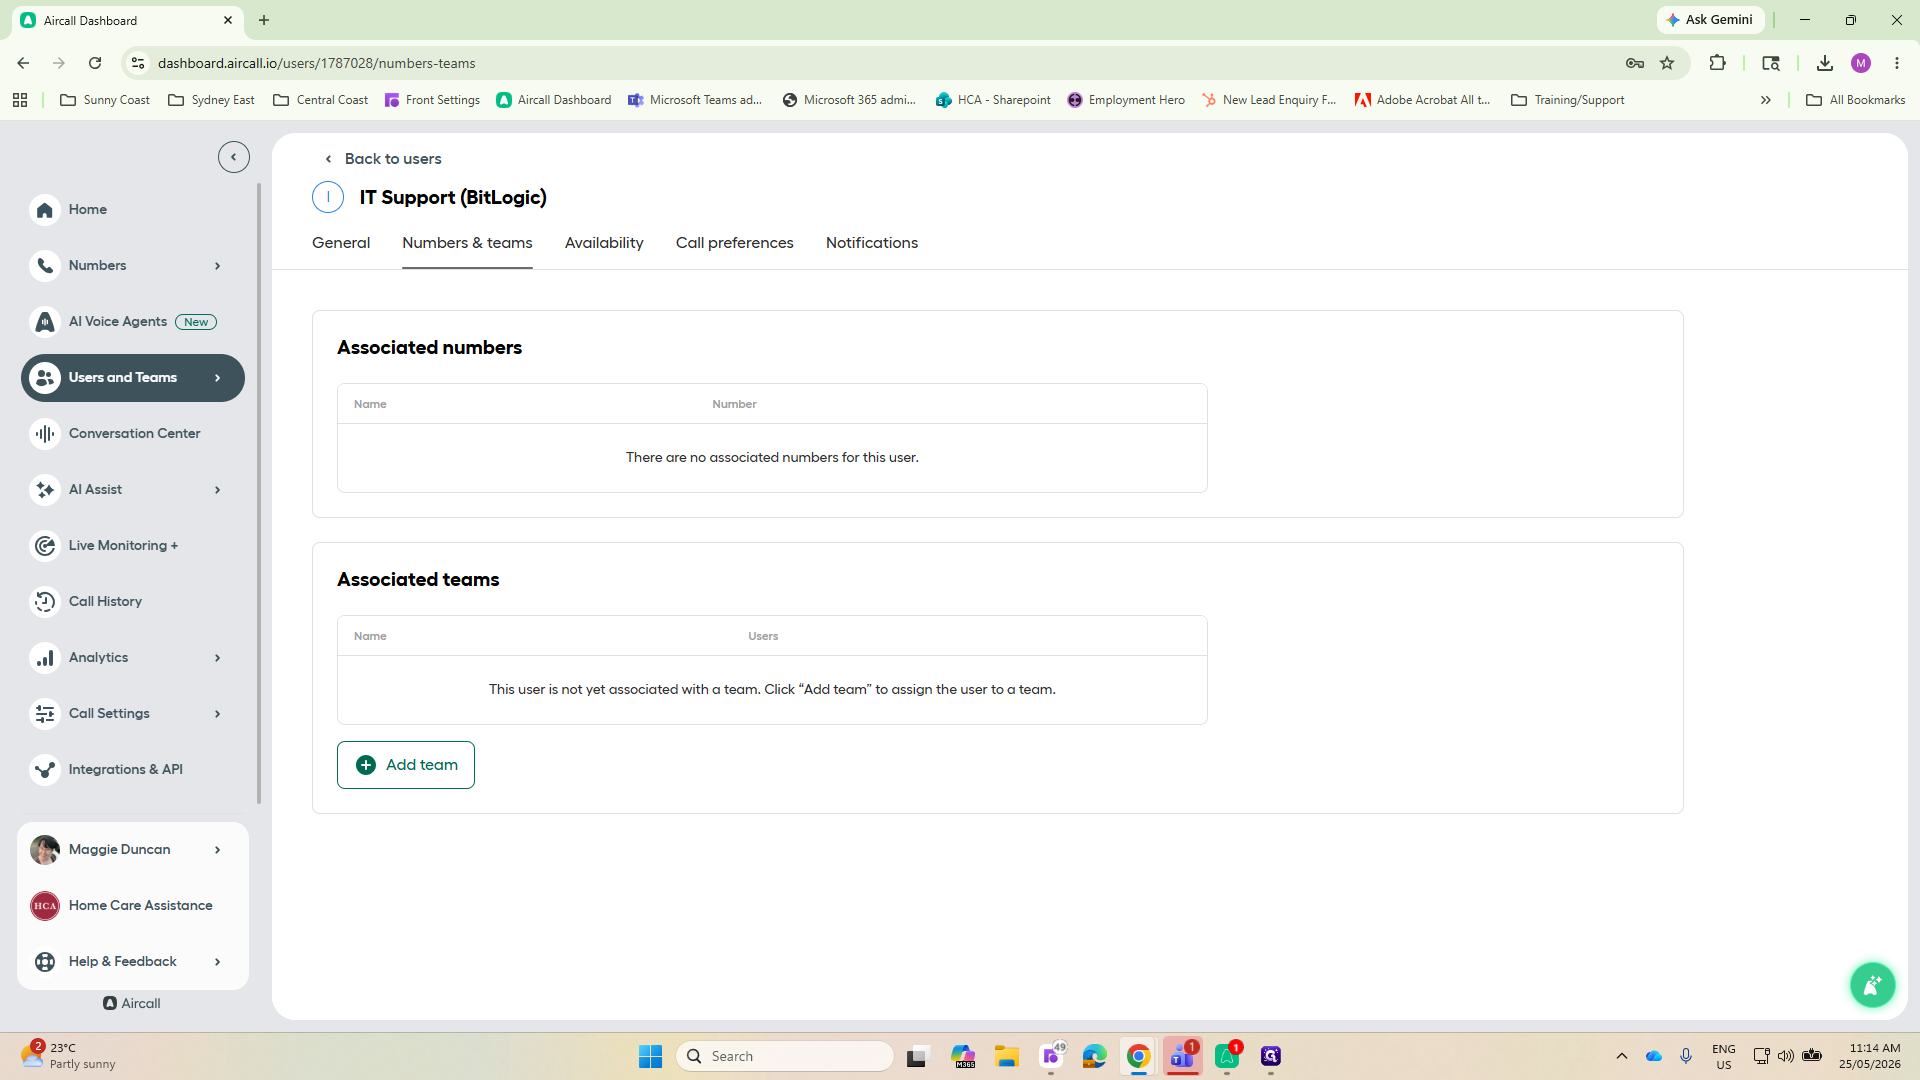
A user's associated numbers are automatically inherited based on the teams they join.
7
Click + Add team at the bottom of the Numbers & teams tab.
Step #7: Click + Add team at the bottom of the Numbers & teams tab.
8
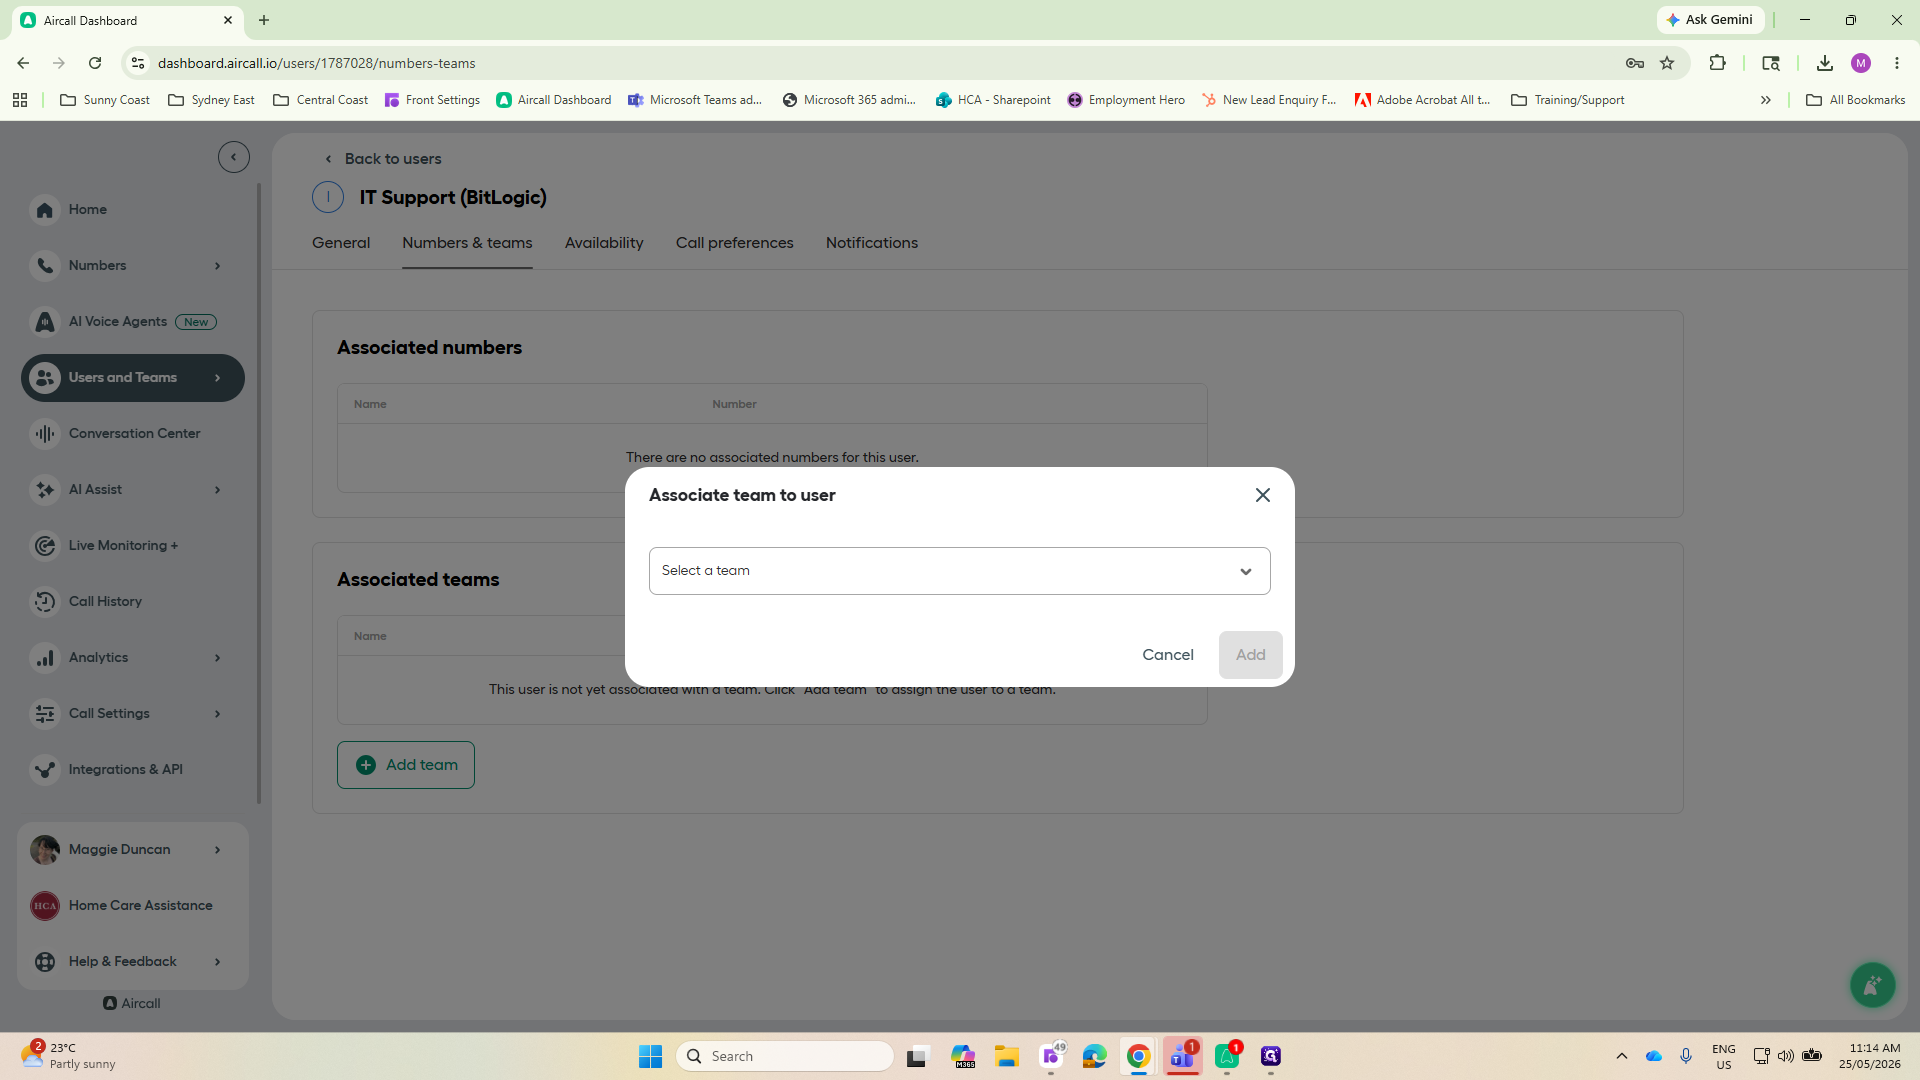
Click the Select a team dropdown in the modal.
Step #8: Click the Select a team dropdown in the modal.
9
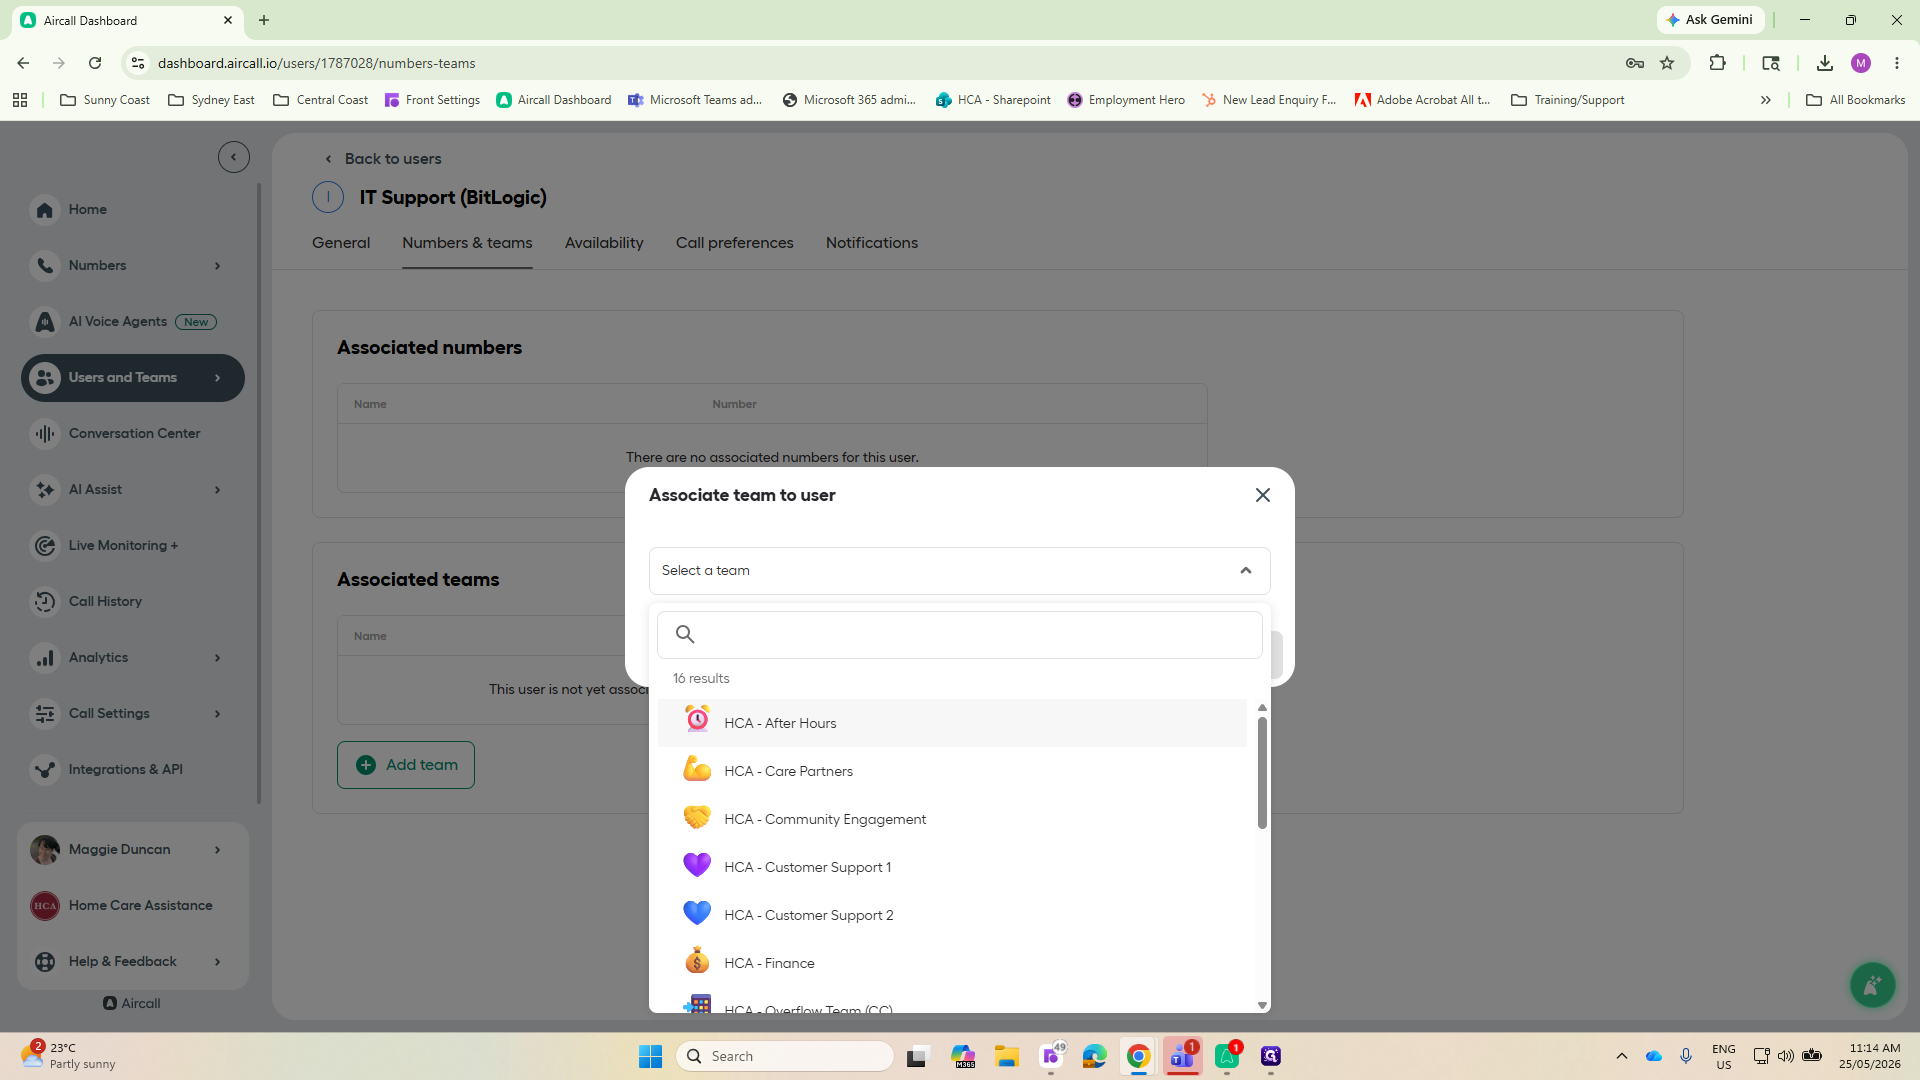
Search for and select the desired team (e.g., HCA - After Hours) from the list.
Step #9: Search for and select the desired team (e.g., HCA - After Hours) from the list.
10
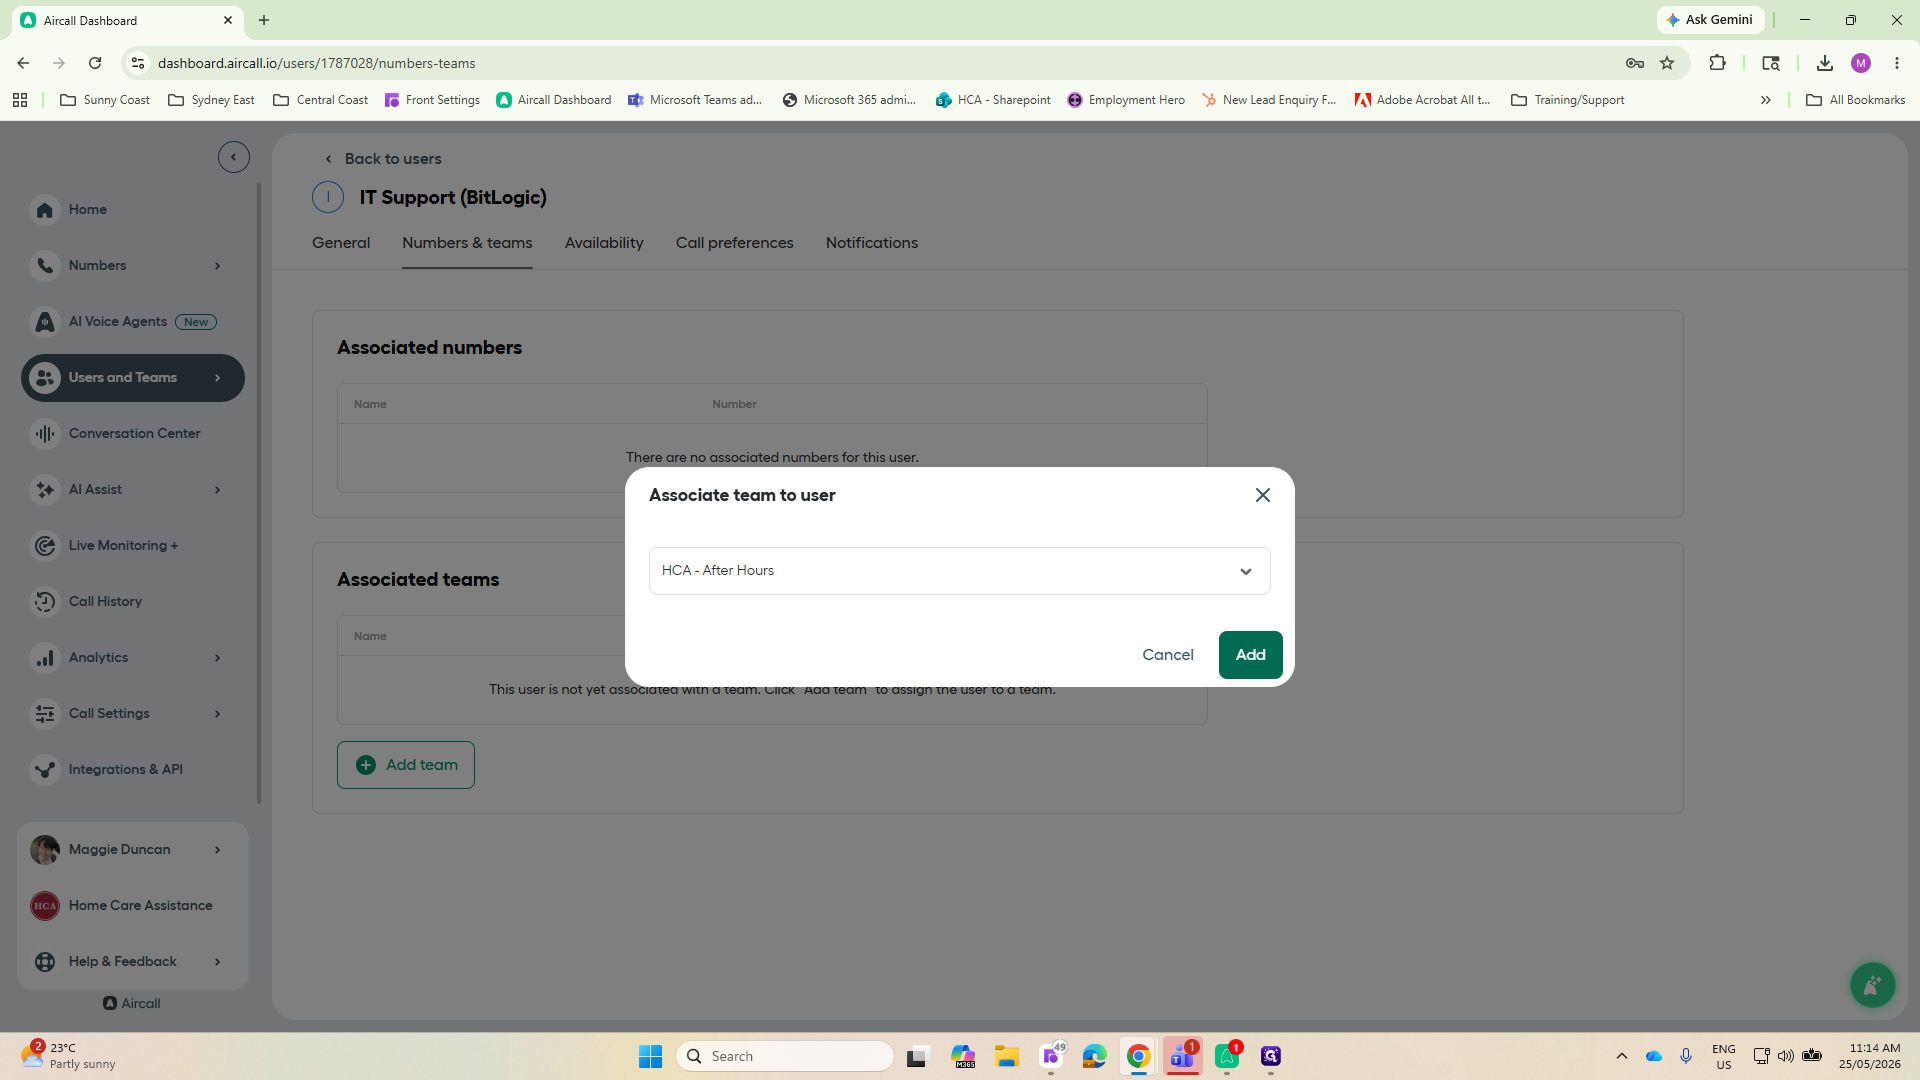
Click Add to confirm the team association.
Step #10: Click Add to confirm the team association.

Configuring Availability Settings
11
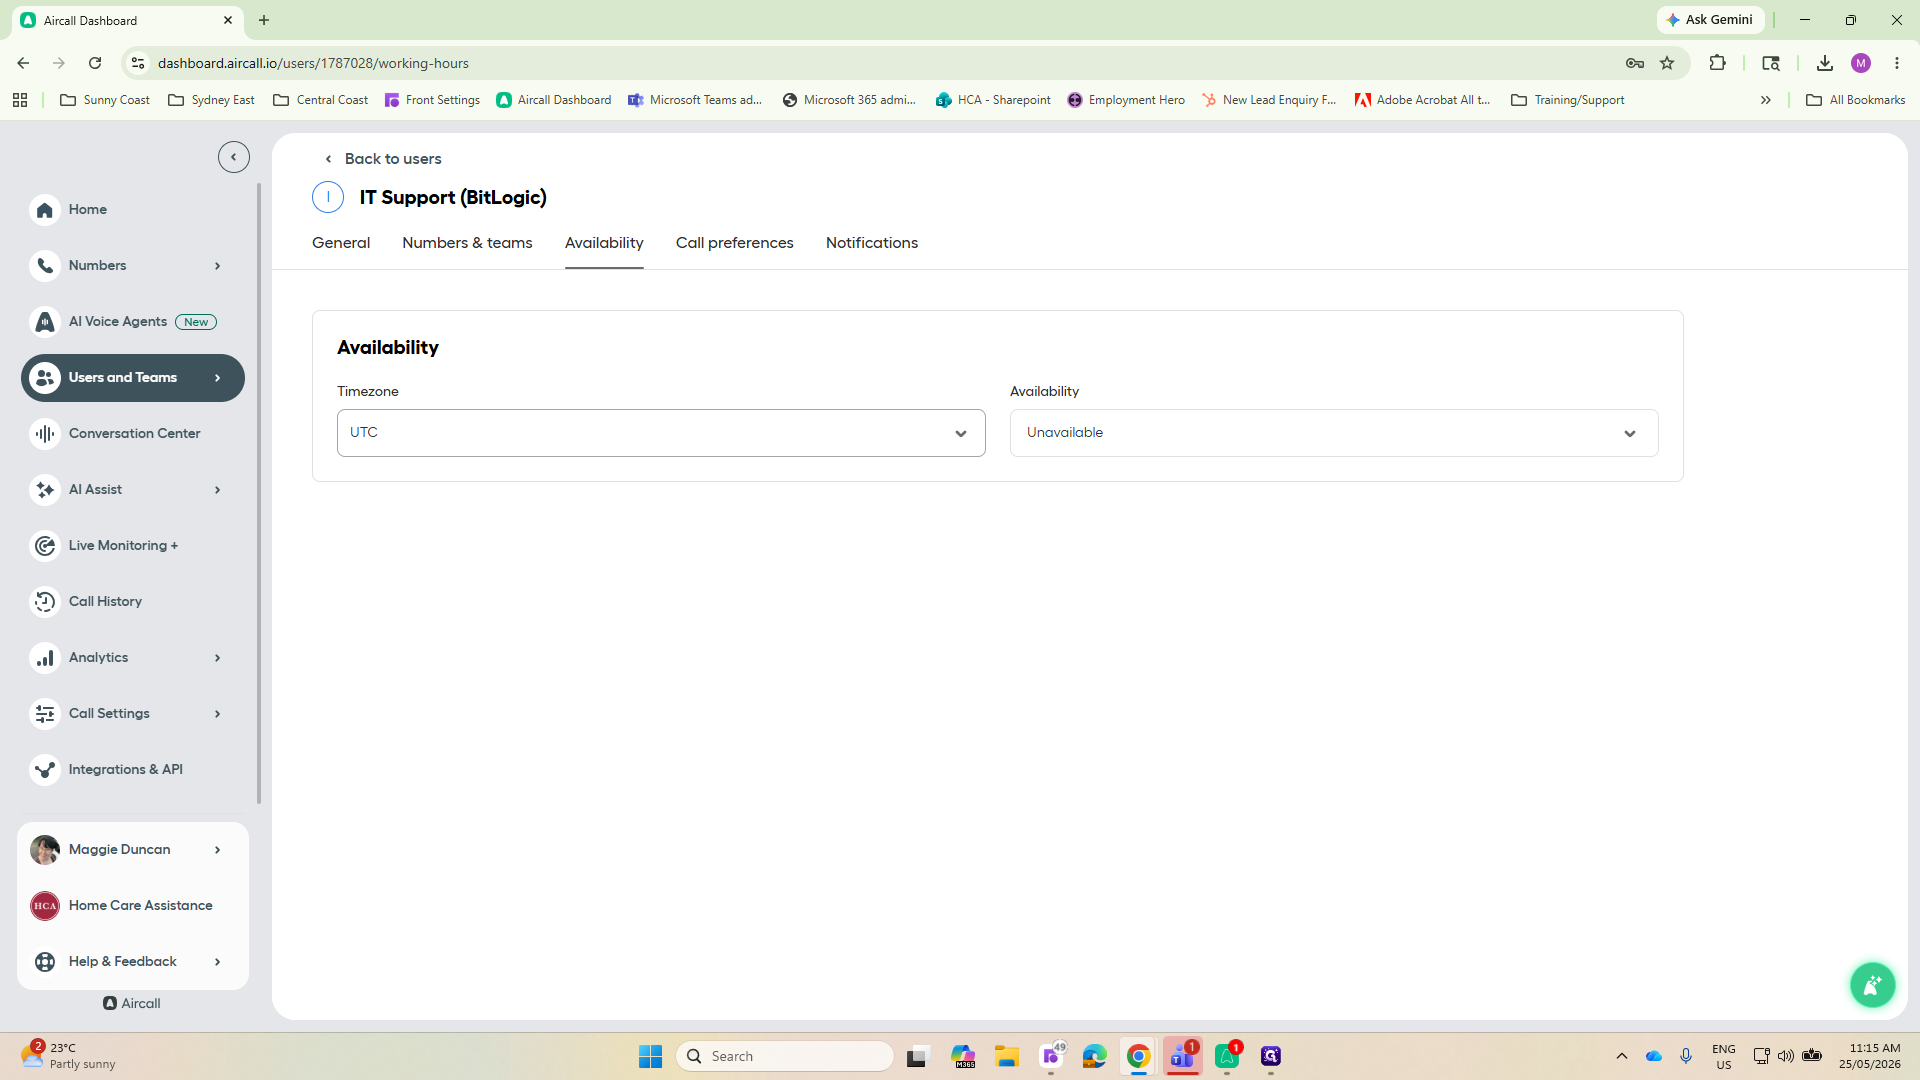
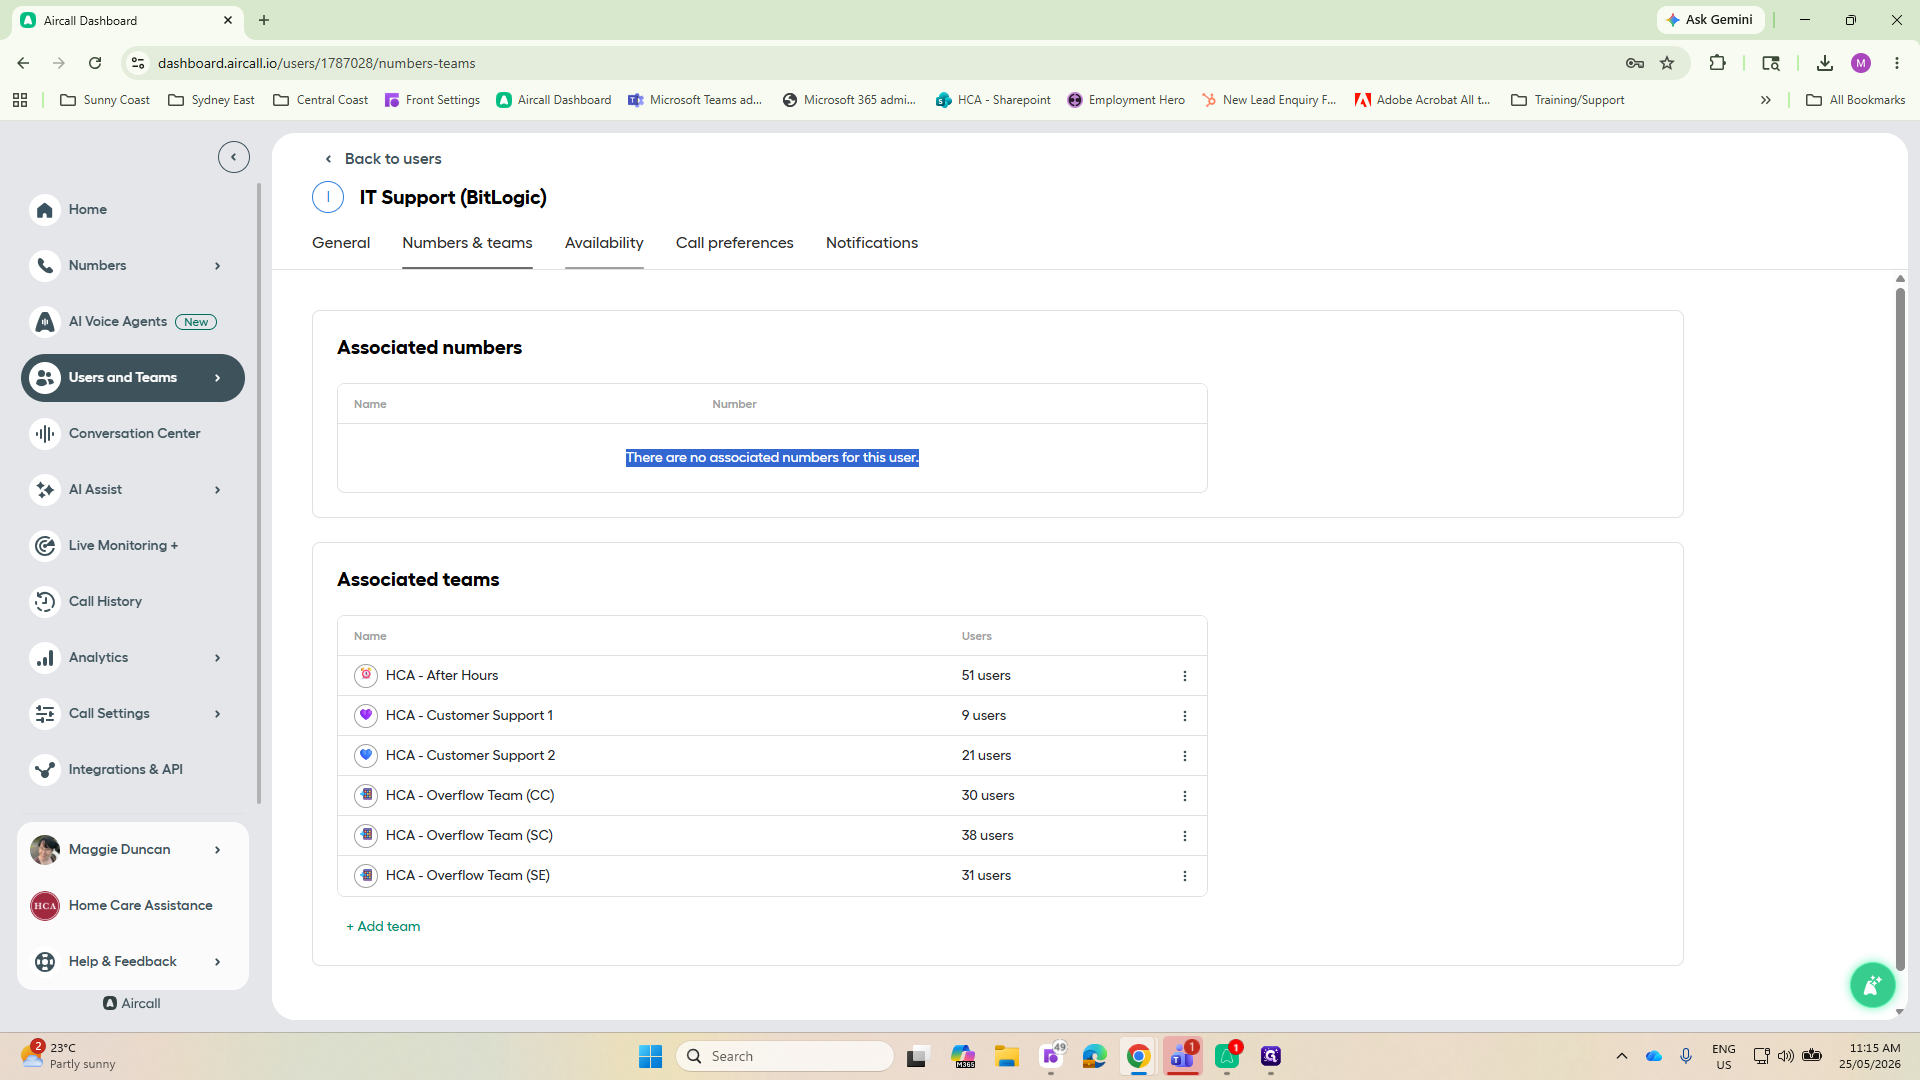
Navigate to the Availability tab using the top menu.
Step #11: Navigate to the Availability tab using the top menu.
12
Click the Timezone dropdown to open the search field.
Step #12: Click the Timezone dropdown to open the search field.
13
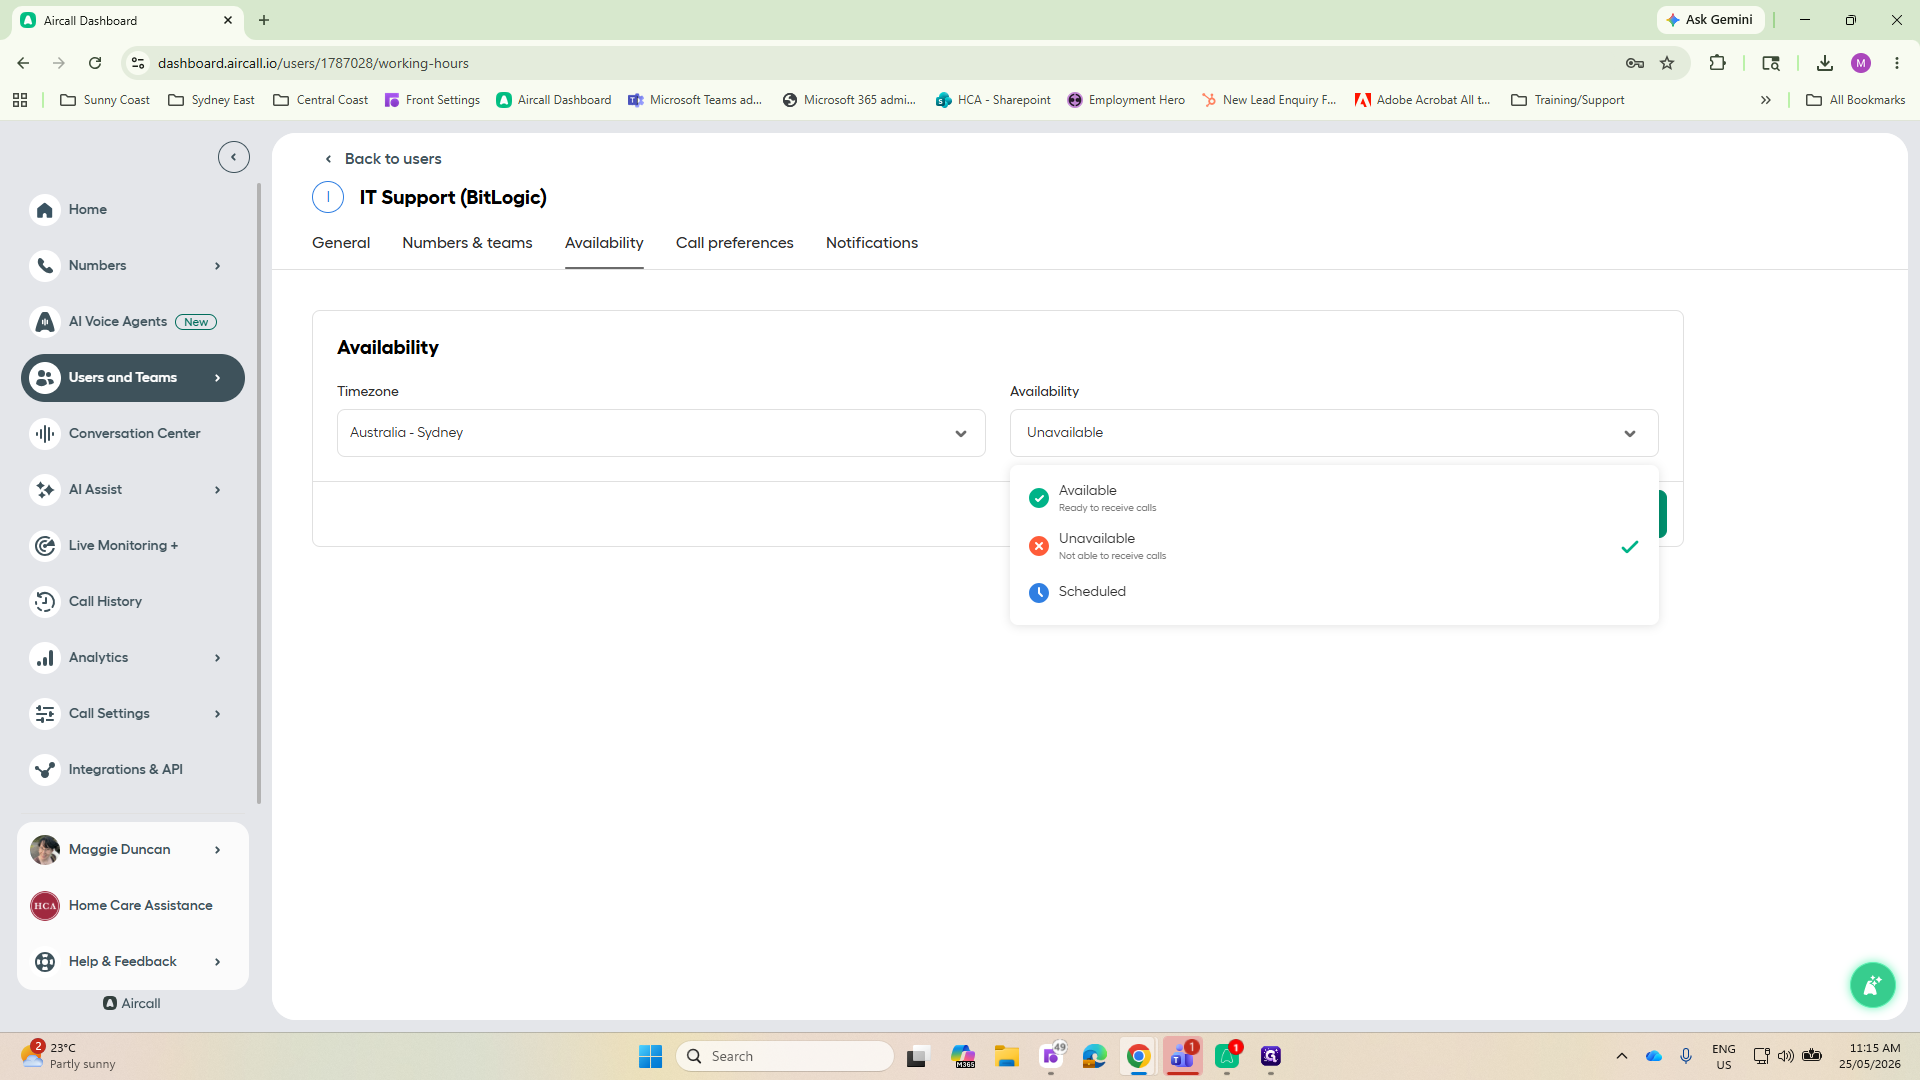
Search for and select the user's local timezone (e.g., Australia - Sydney or Pacific - Fiji).
14
Click the status dropdown and ensure it is set to Available.
Step #14: Click the status dropdown and ensure it is set to Available.
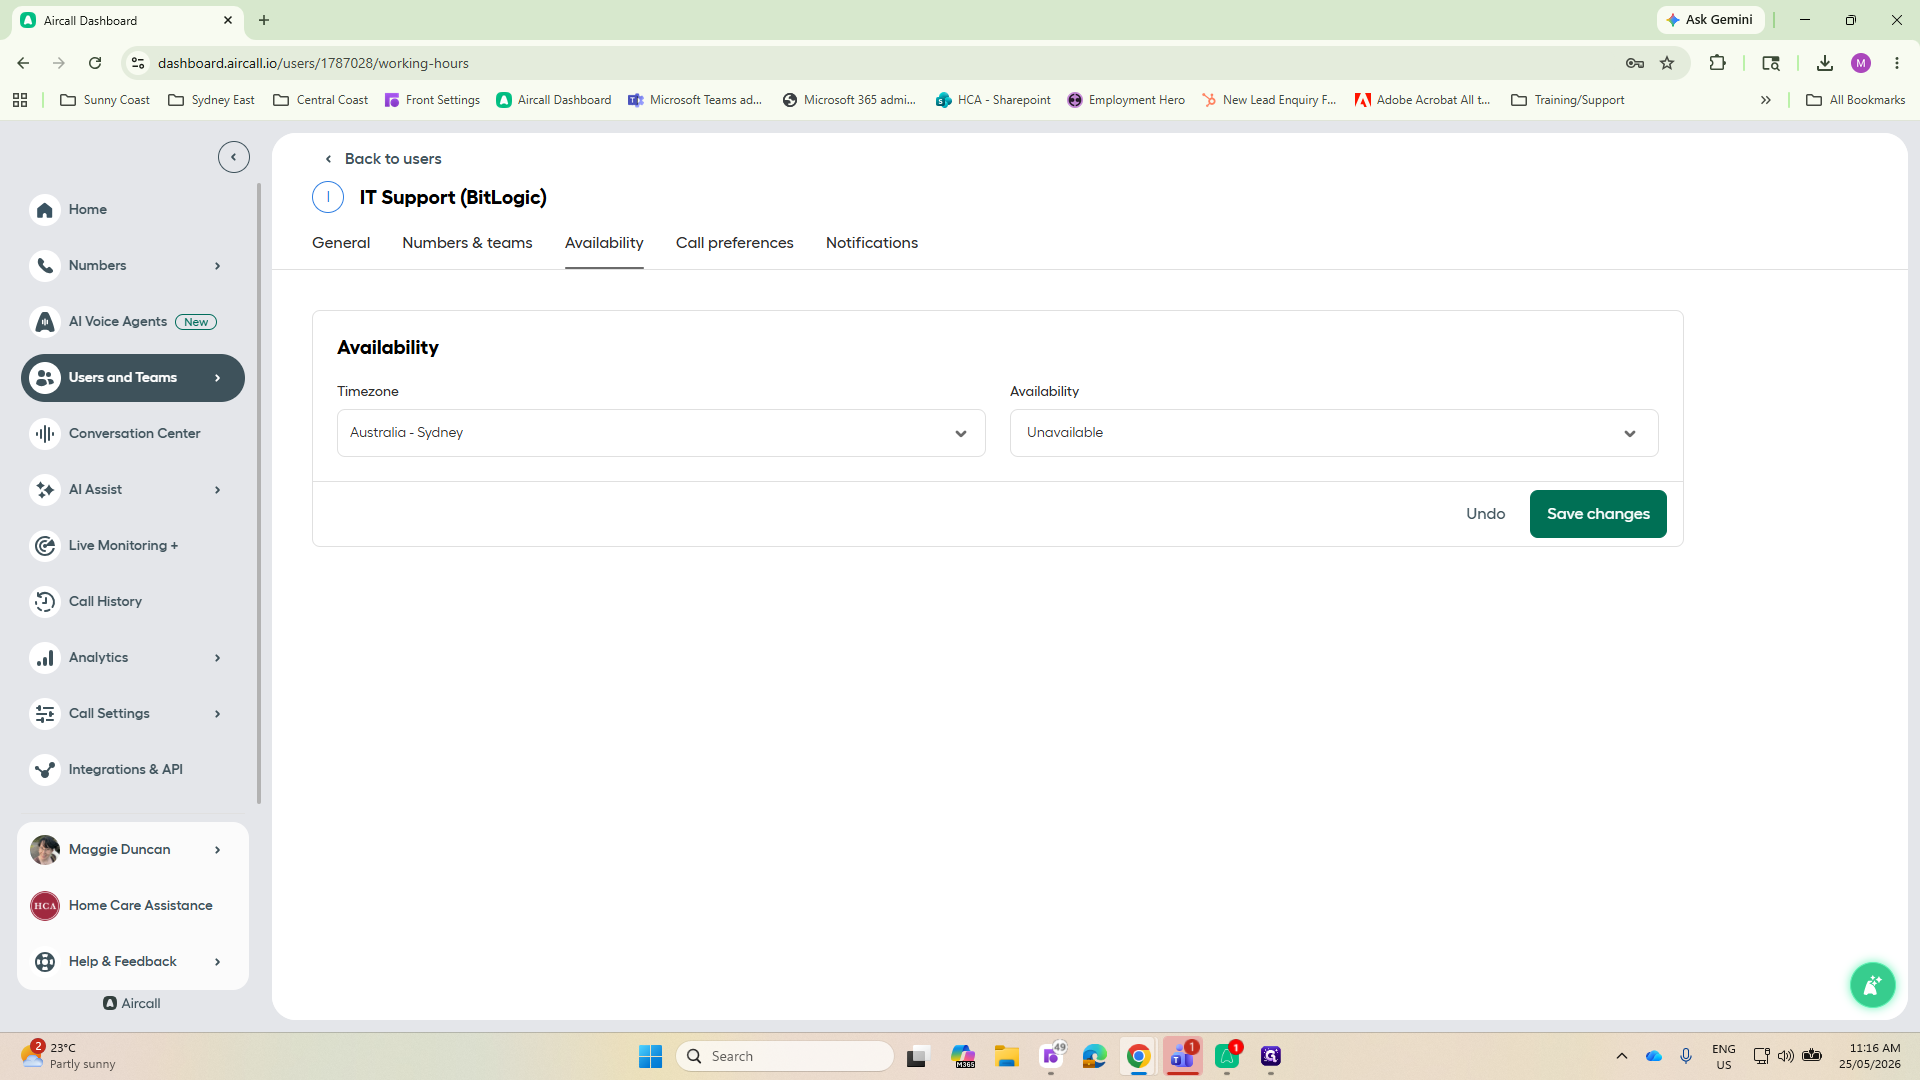
15
Click Save changes.
Step #15: Click Save changes.

Setting Call Preferences and Notifications
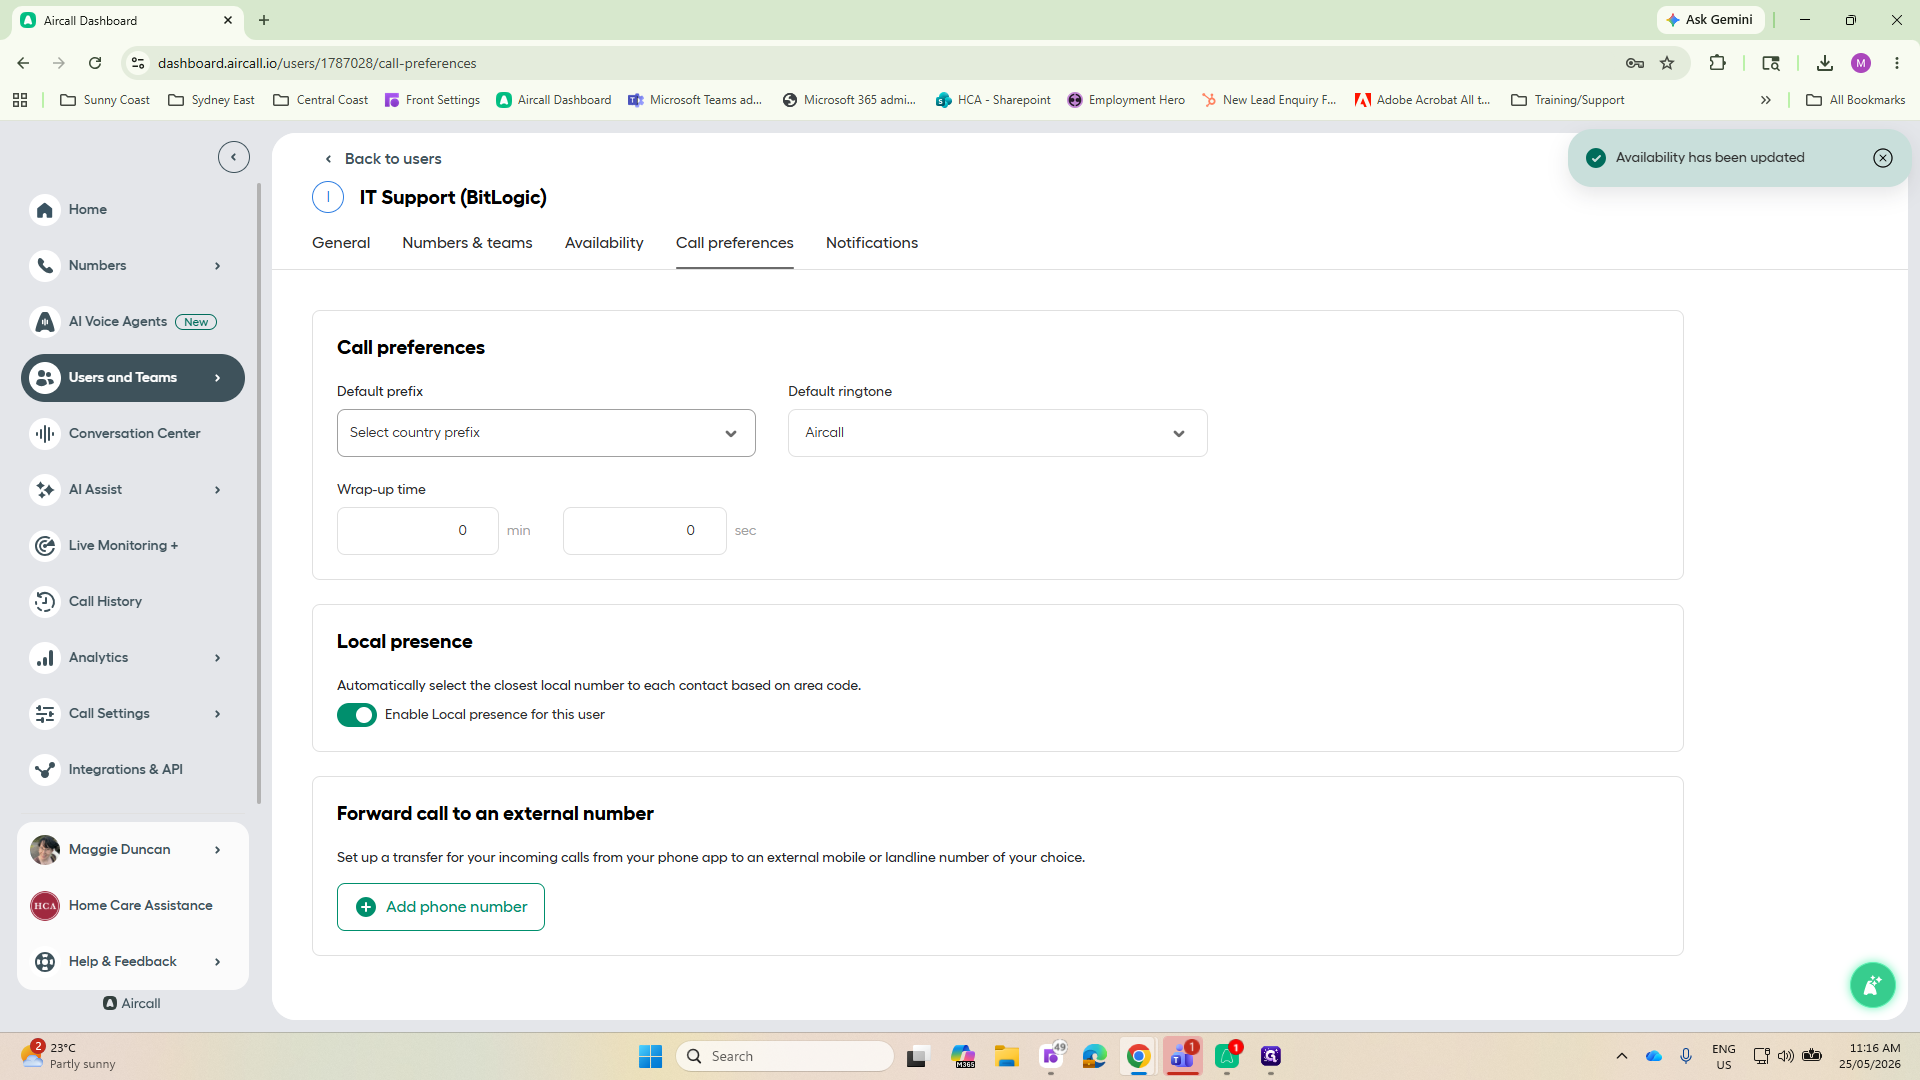
16
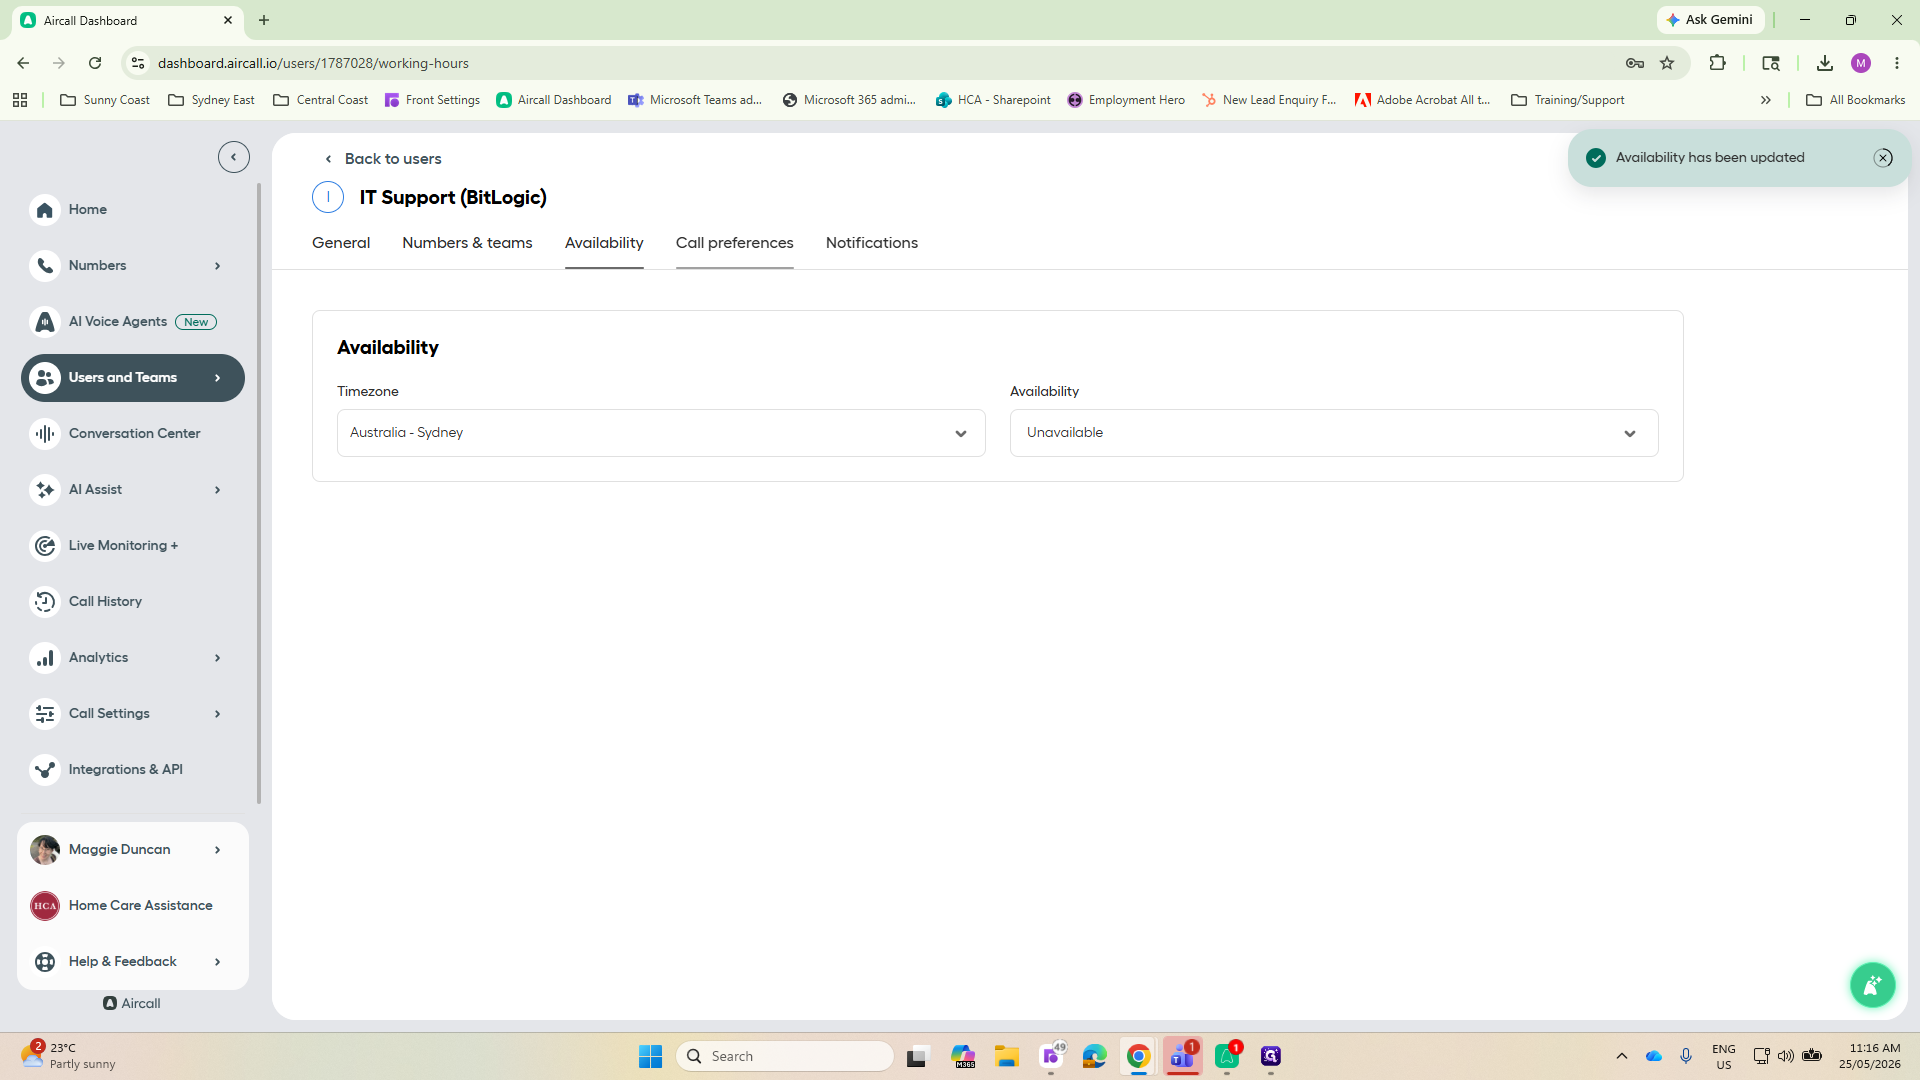
Navigate to the Call preferences tab.
Step #16: Navigate to the Call preferences tab.
17
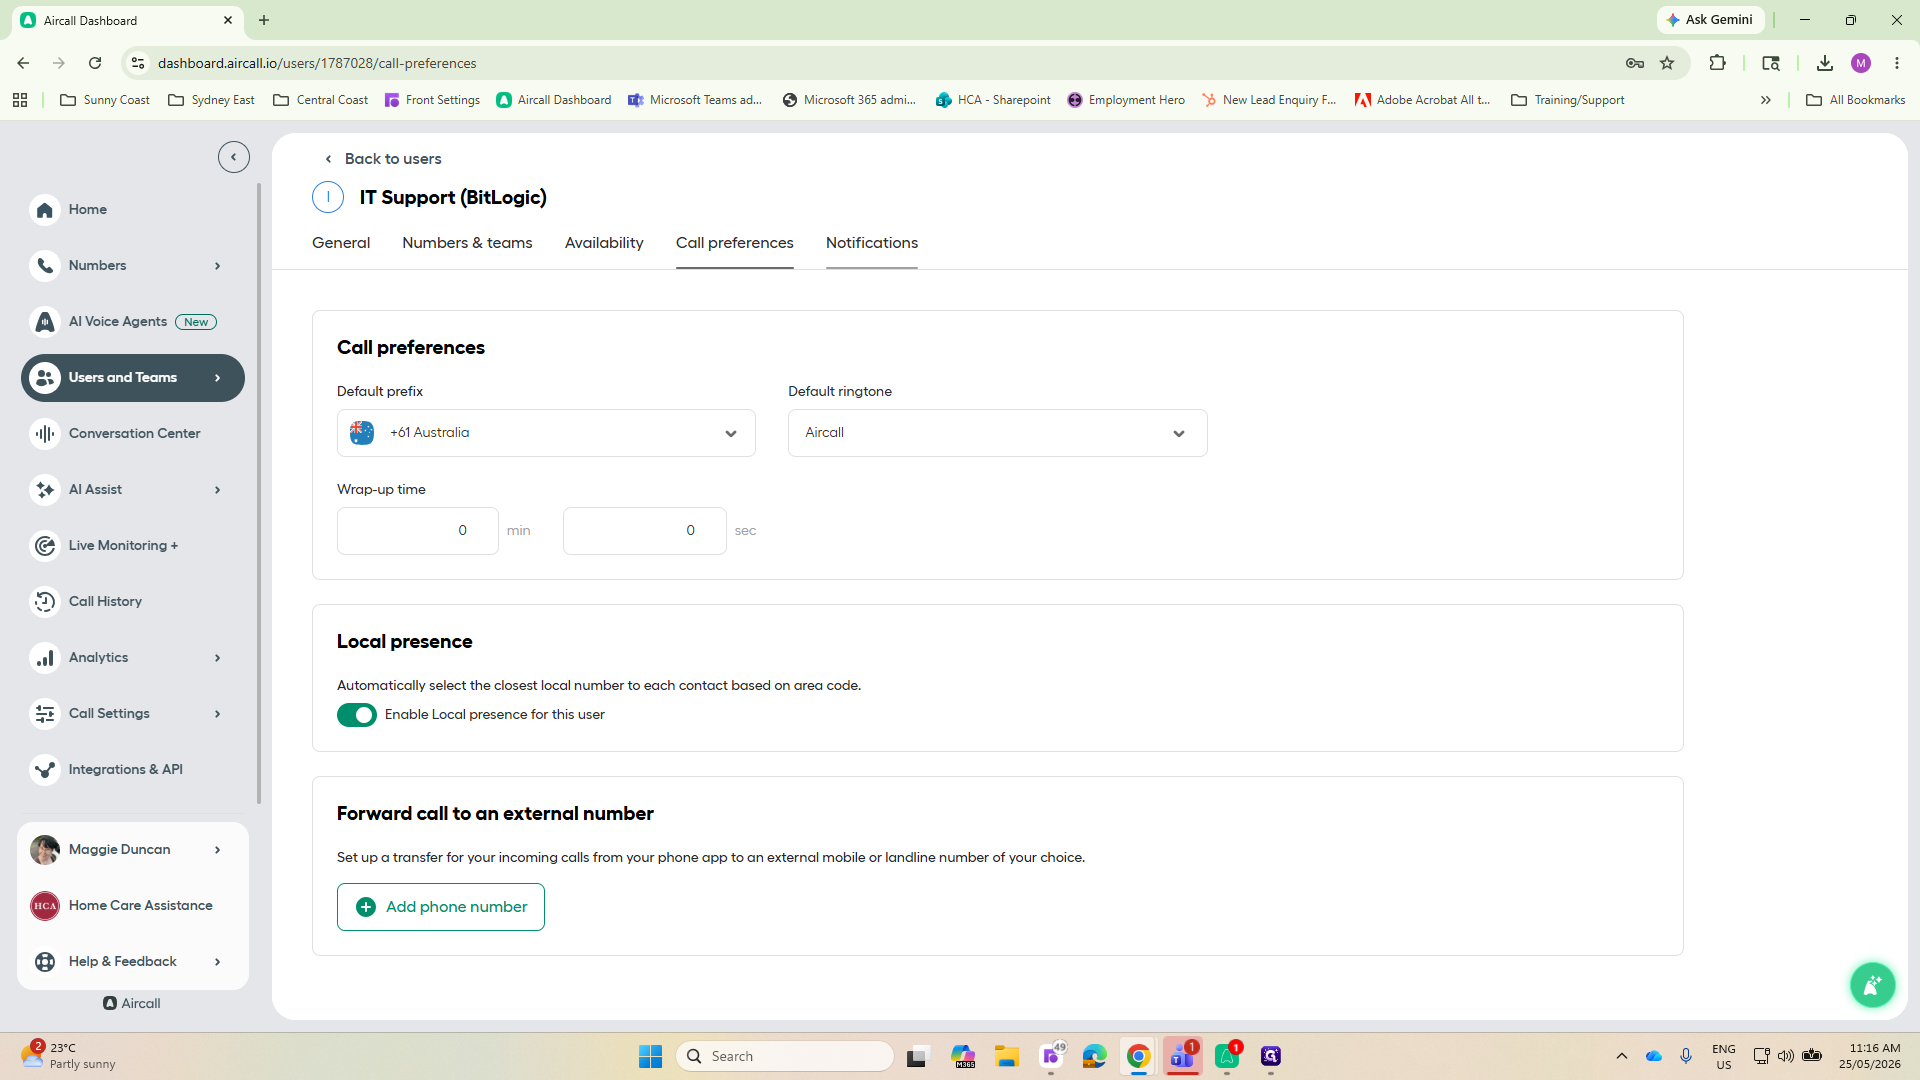
Click the Select country prefix dropdown.
Step #17: Click the Select country prefix dropdown.
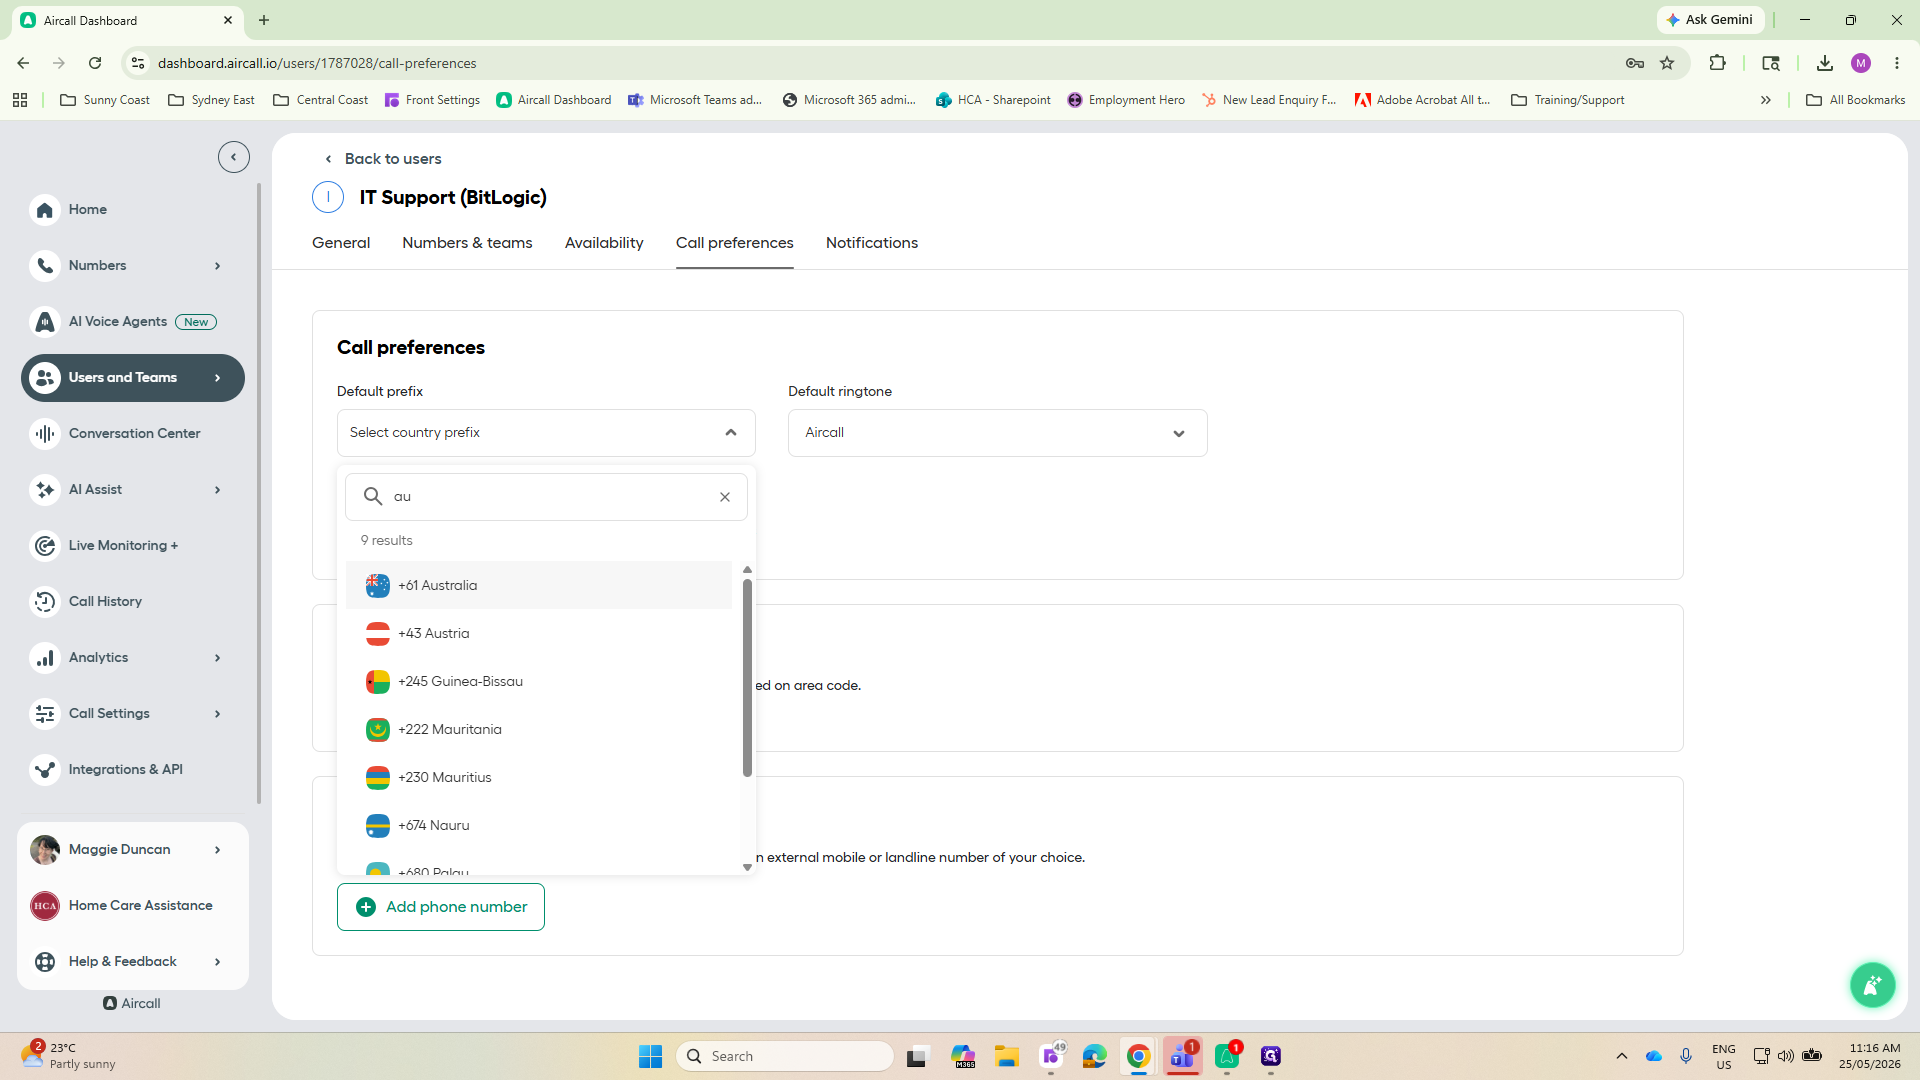
18
Search for and select the user's default prefix (e.g., +61 Australia). (Customer Service Team should also be set to default Australia.)
Step #18: Search for and select the user's default prefix (e.g., +61 Australia). (Customer Service Team should also be set to default Australia.)

You can optionally define a wrap-up time here. Wrap-up time provides a brief buffer period after a call ends before the system begins routing new calls to the user.
19
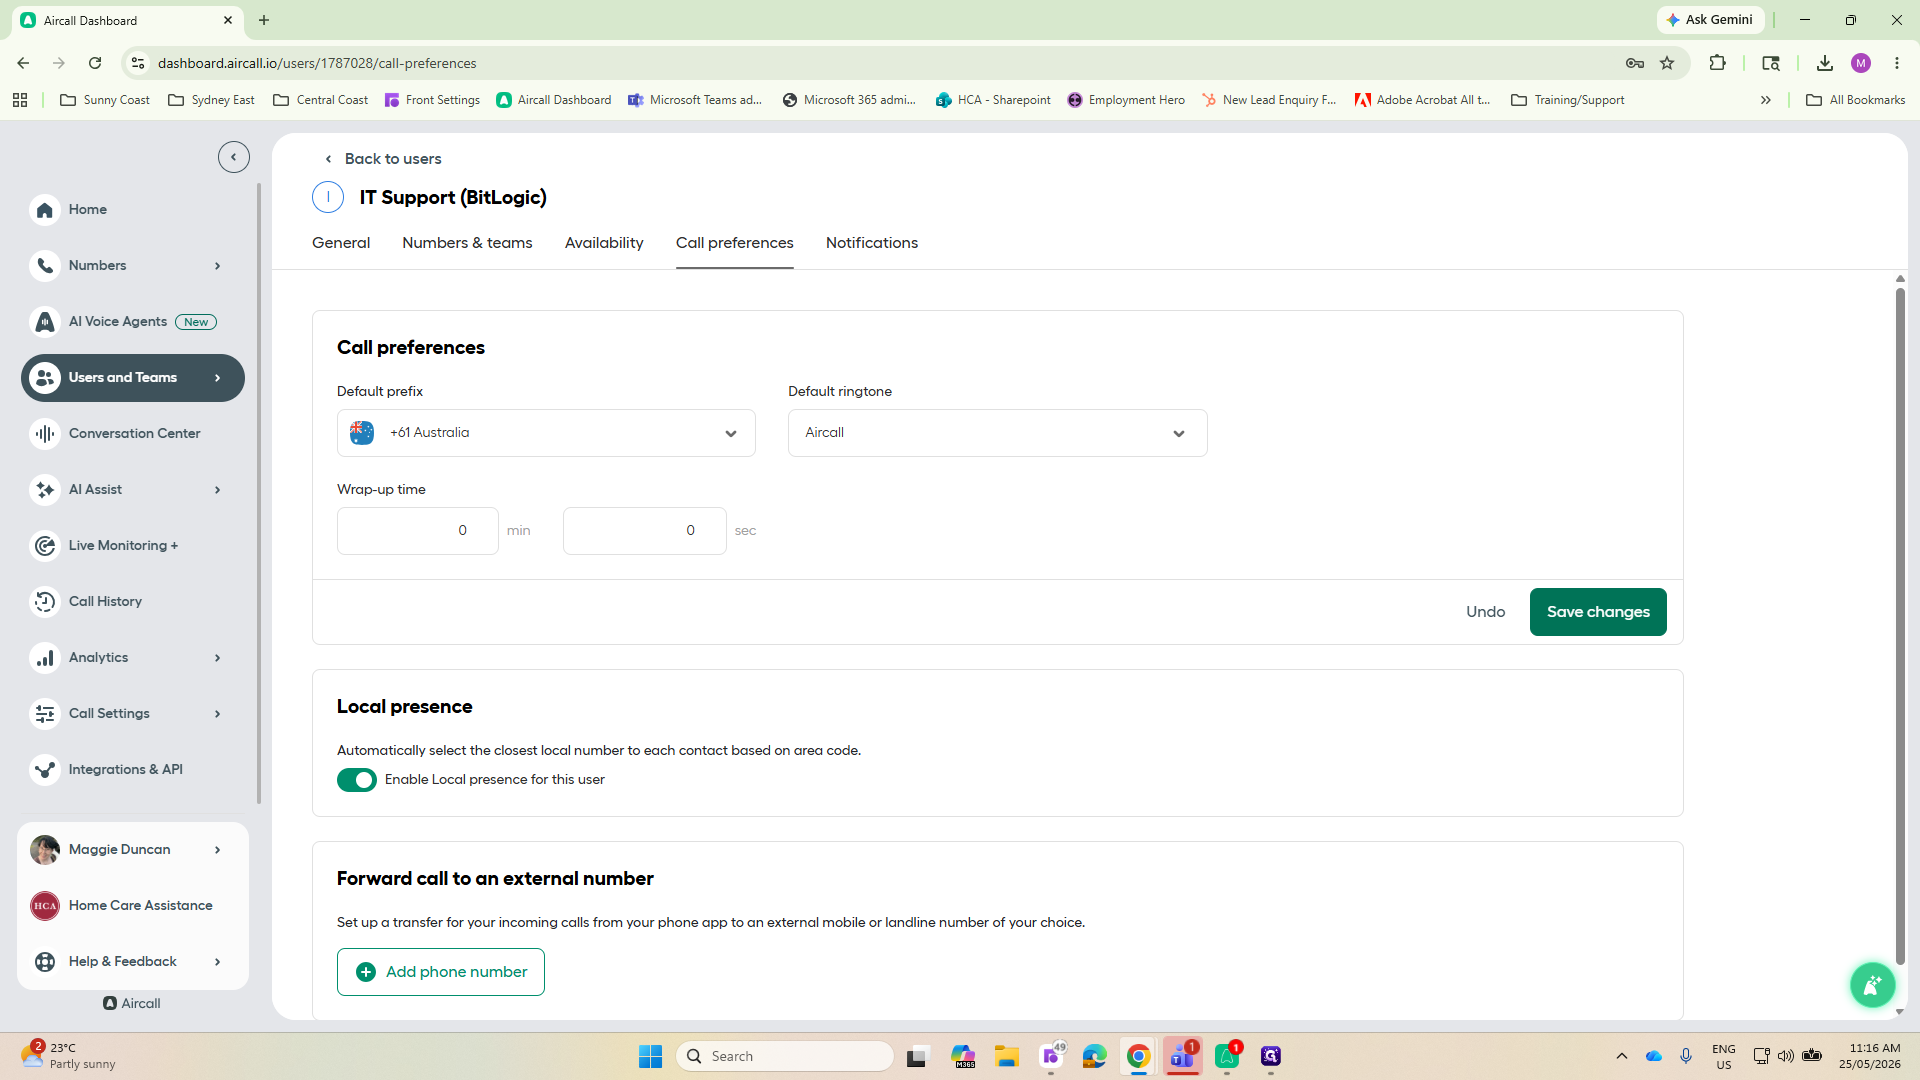
Click Save changes to update the preferences.
Step #19: Click Save changes to update the preferences.
20
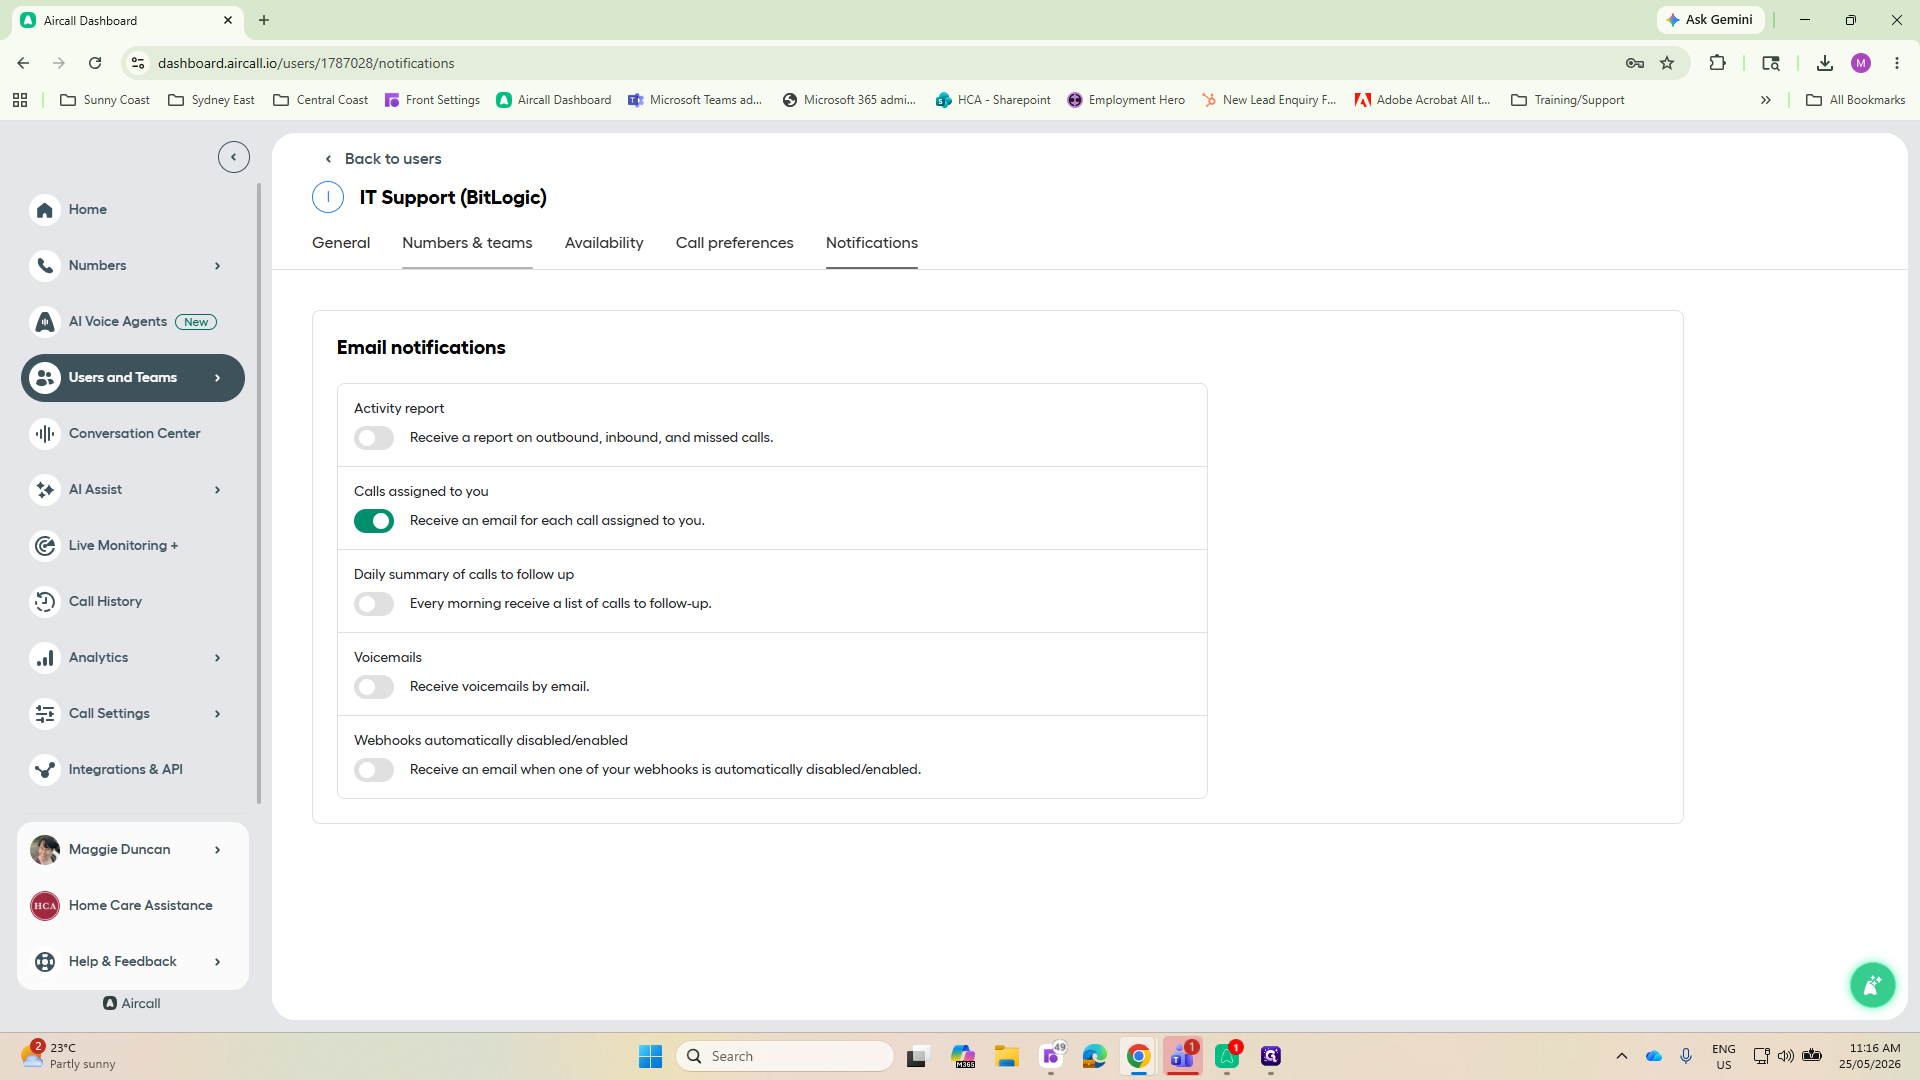
Navigate to the Notifications tab.
Step #20: Navigate to the Notifications tab.
21
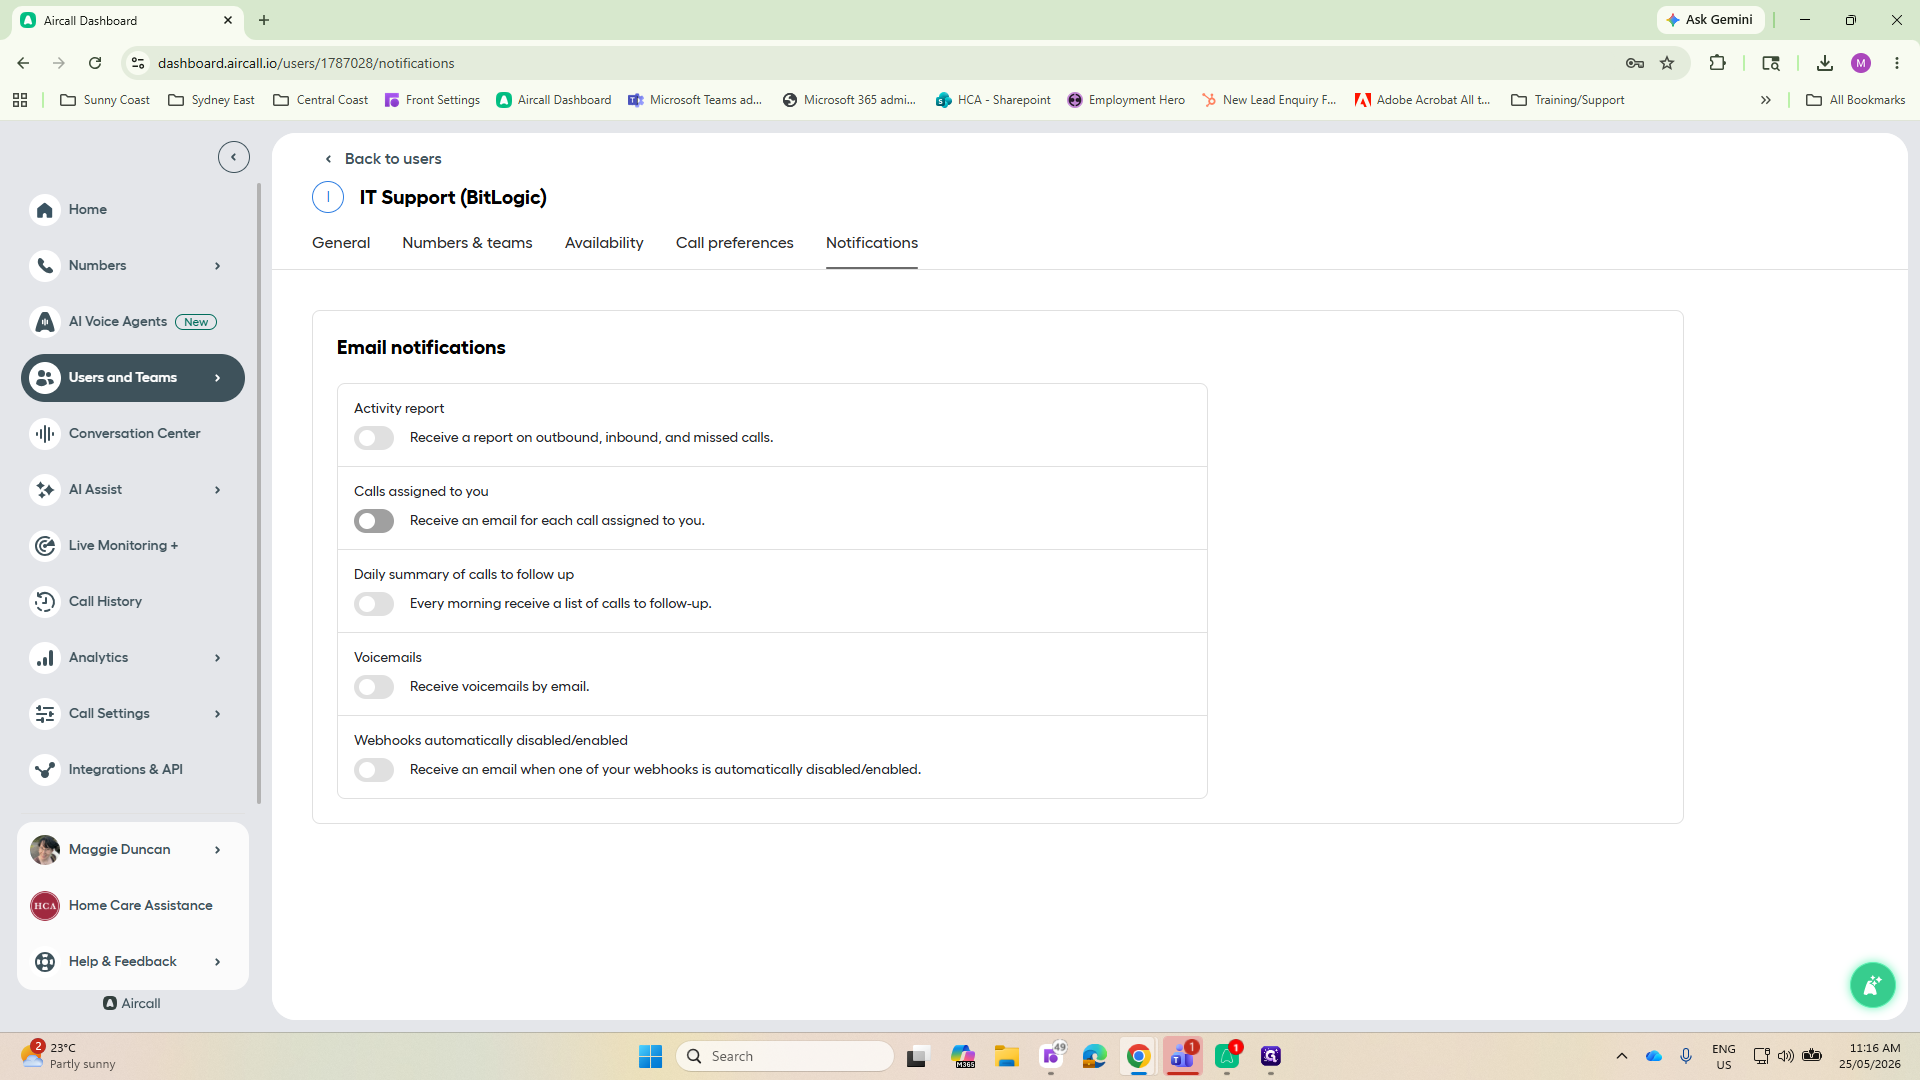
Toggle on the setting to receive an email for Calls assigned to you.
Step #21: Toggle on the setting to receive an email for Calls assigned to you.

Finalizing Setup and Add-ons

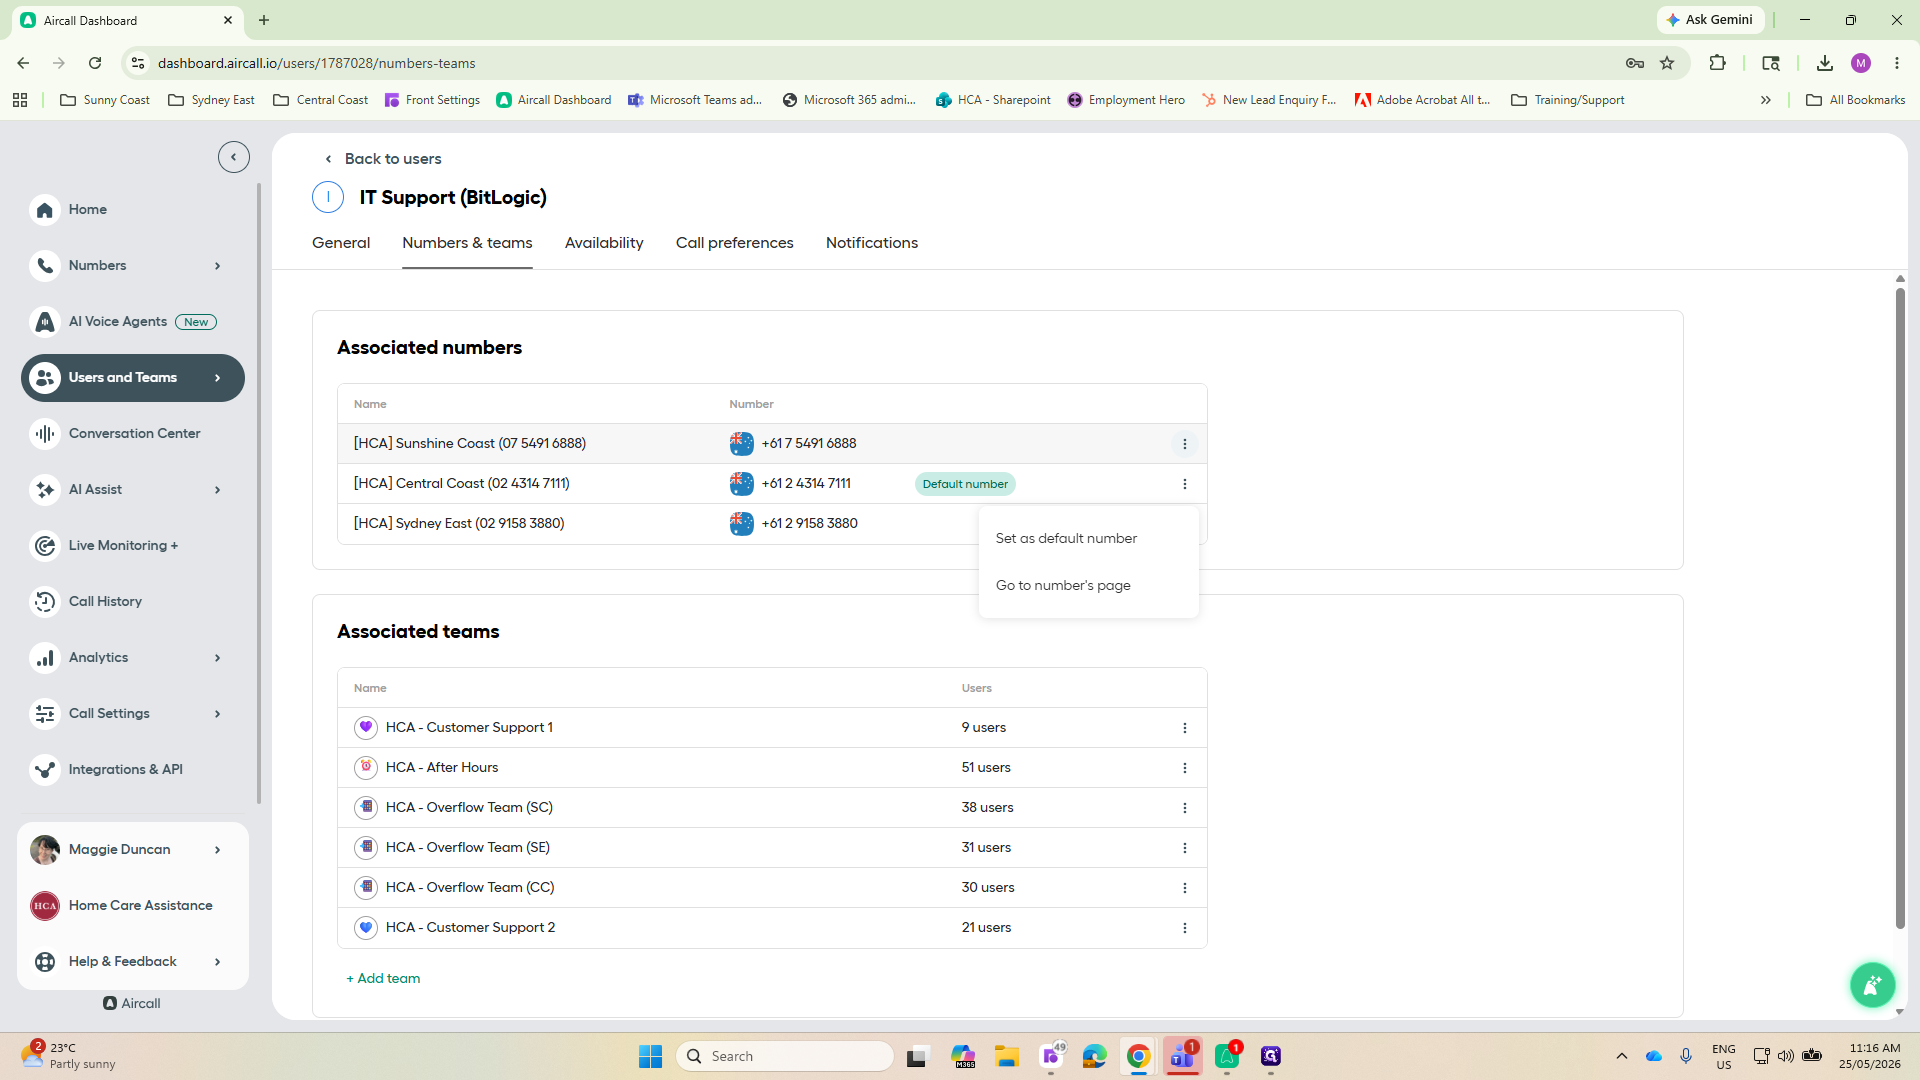
Once associated teams are added, you can designate which phone number should act as the default for outgoing calls.
22
Navigate back to the Numbers & teams tab.
Step #22: Navigate back to the Numbers & teams tab.
23
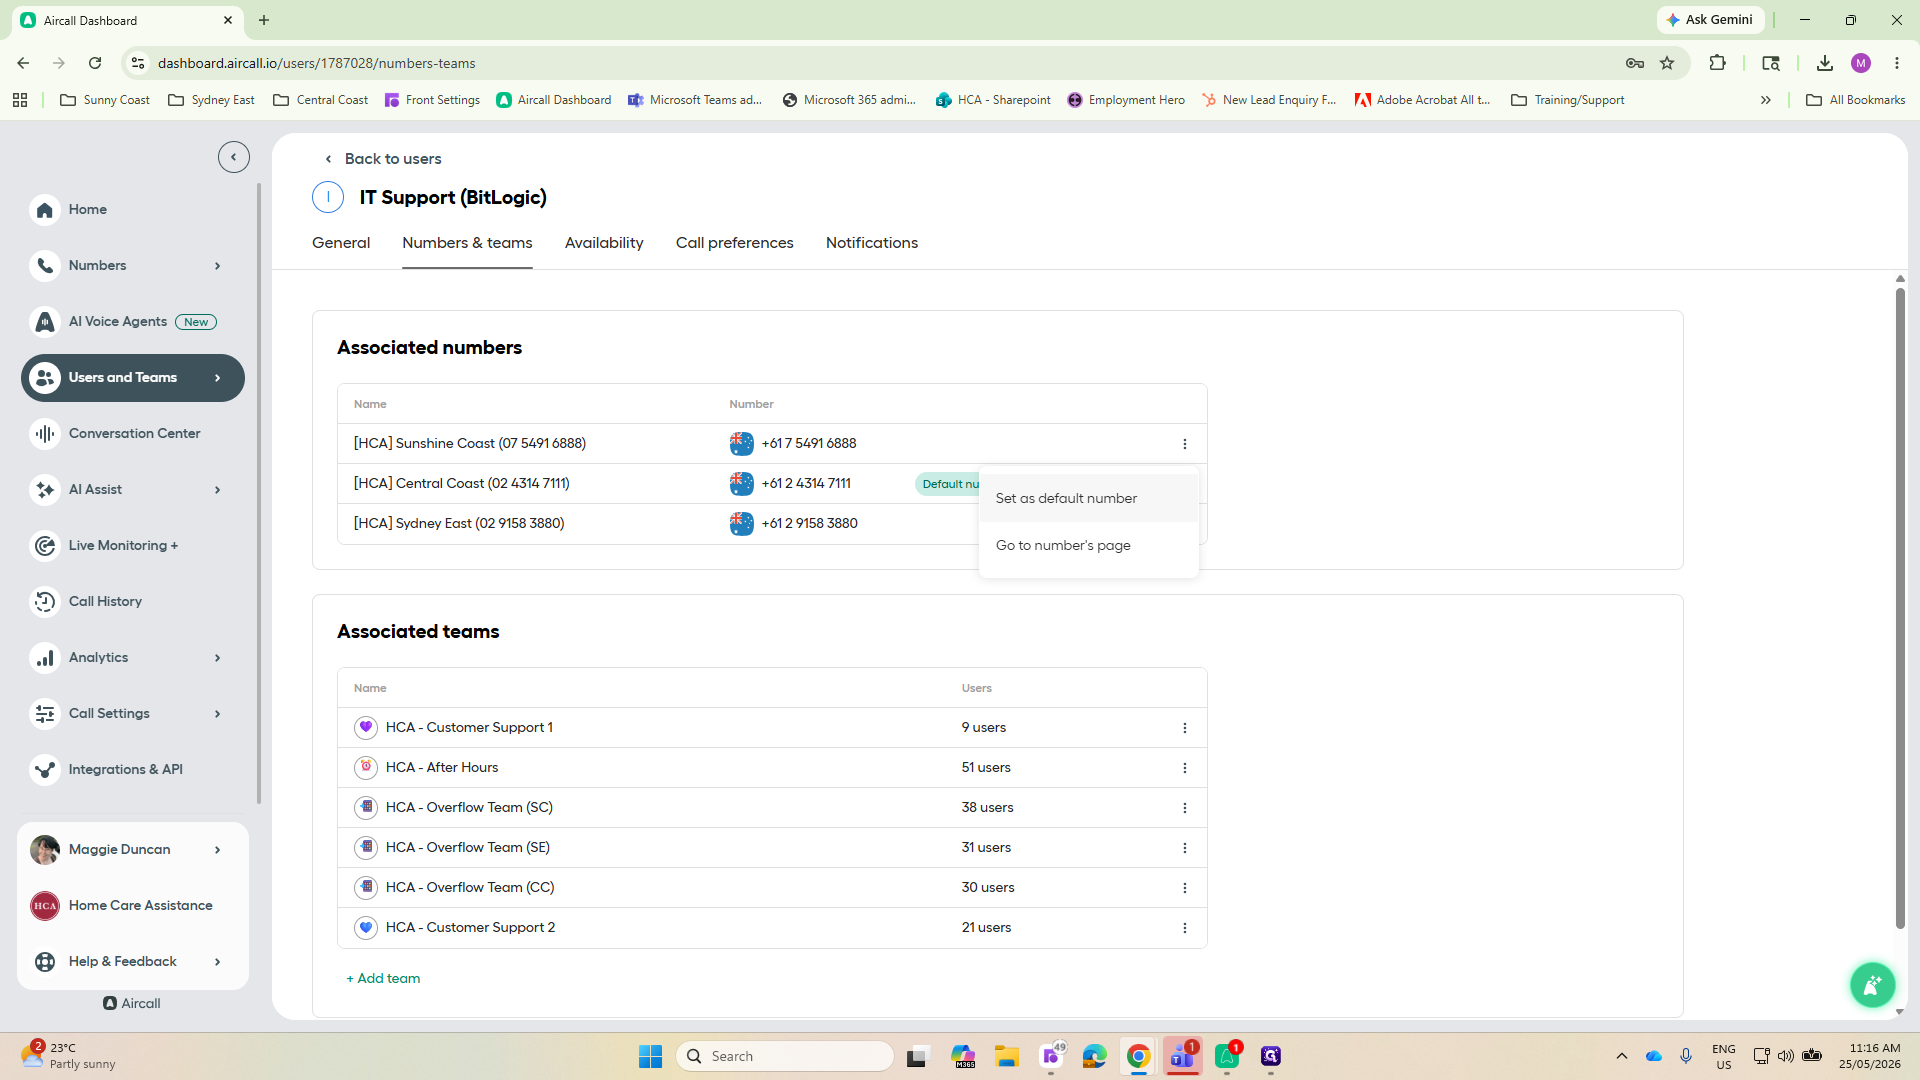
Click the options icon (three dots) next to the specific phone number you wish to use.
Step #23: Click the options icon (three dots) next to the specific phone number you wish to use.
24
Select Set as default number from the pop-up menu.
Step #24: Select Set as default number from the pop-up menu.

Finally, apply any necessary add-ons (like AI Assist) from the main directory.
25
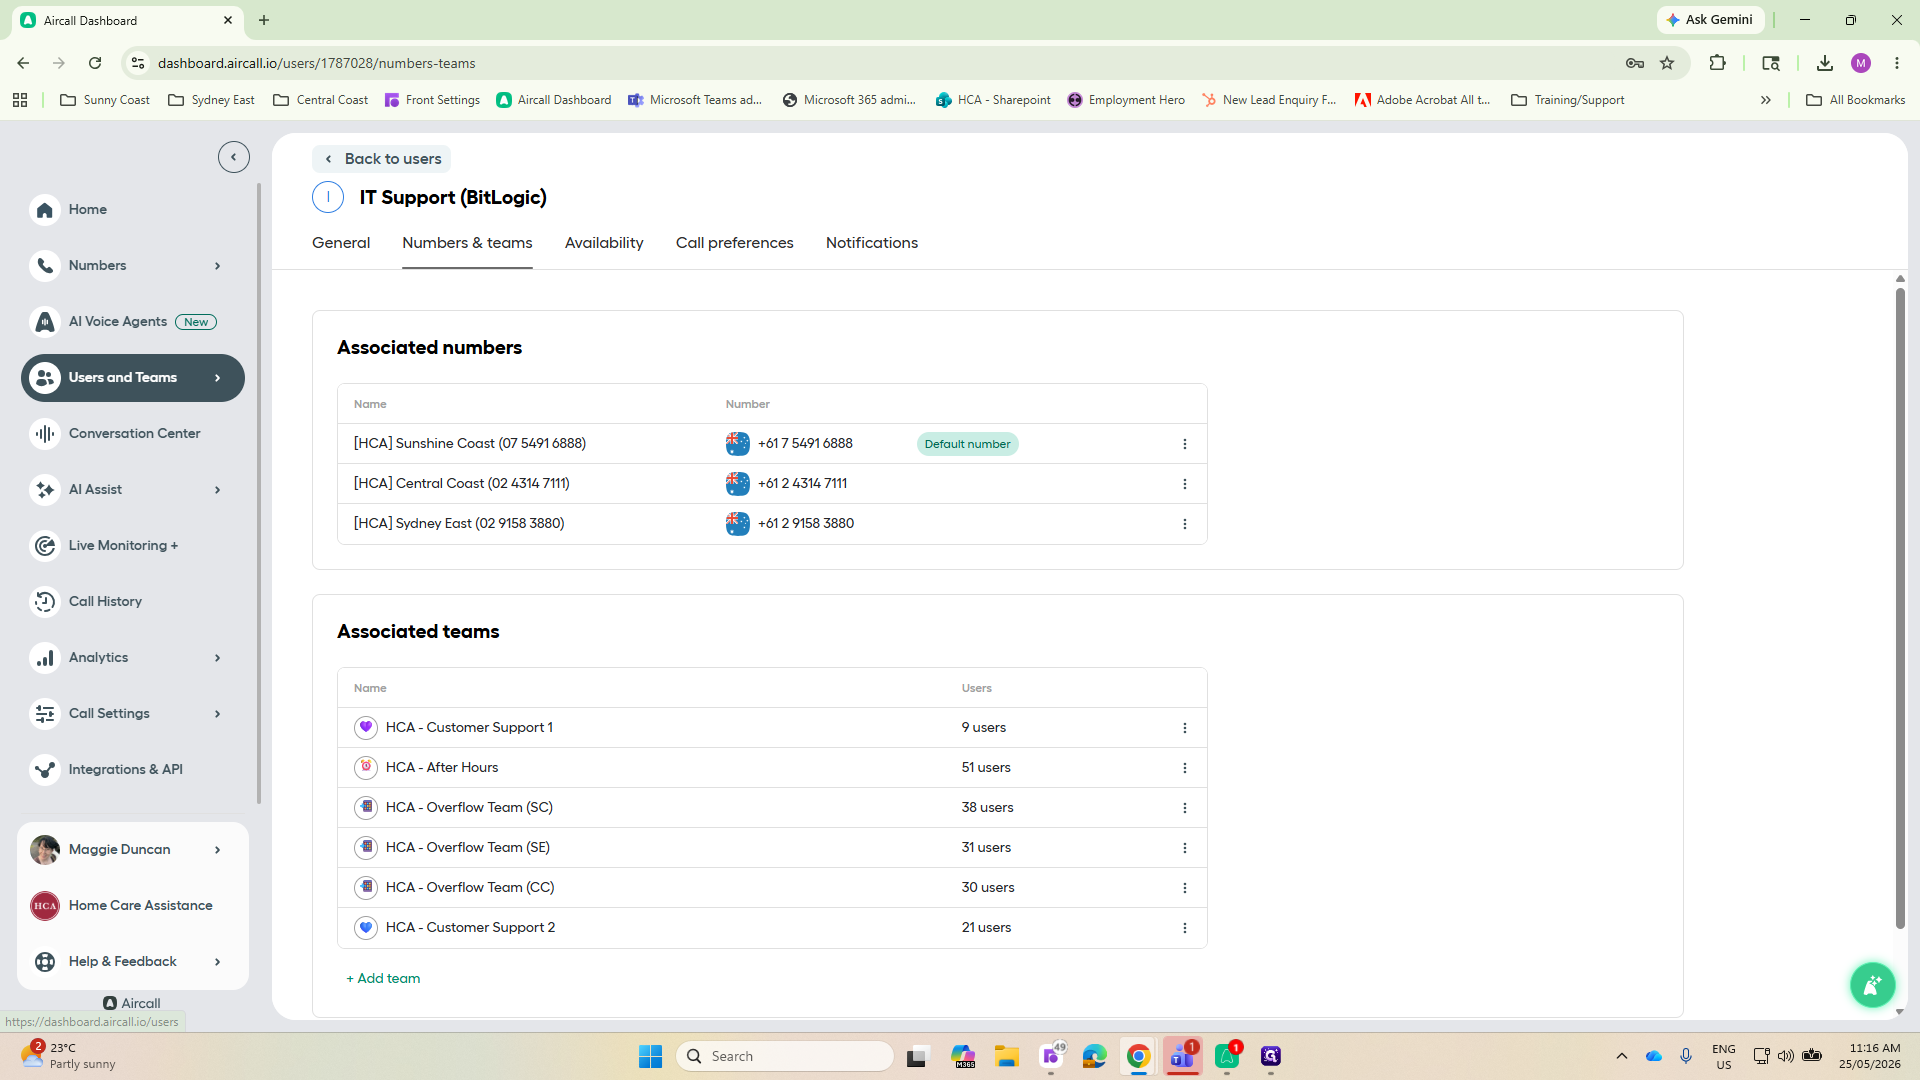
Click Back to users in the upper left to return to the main directory.
Step #25: Click Back to users in the upper left to return to the main directory.
26
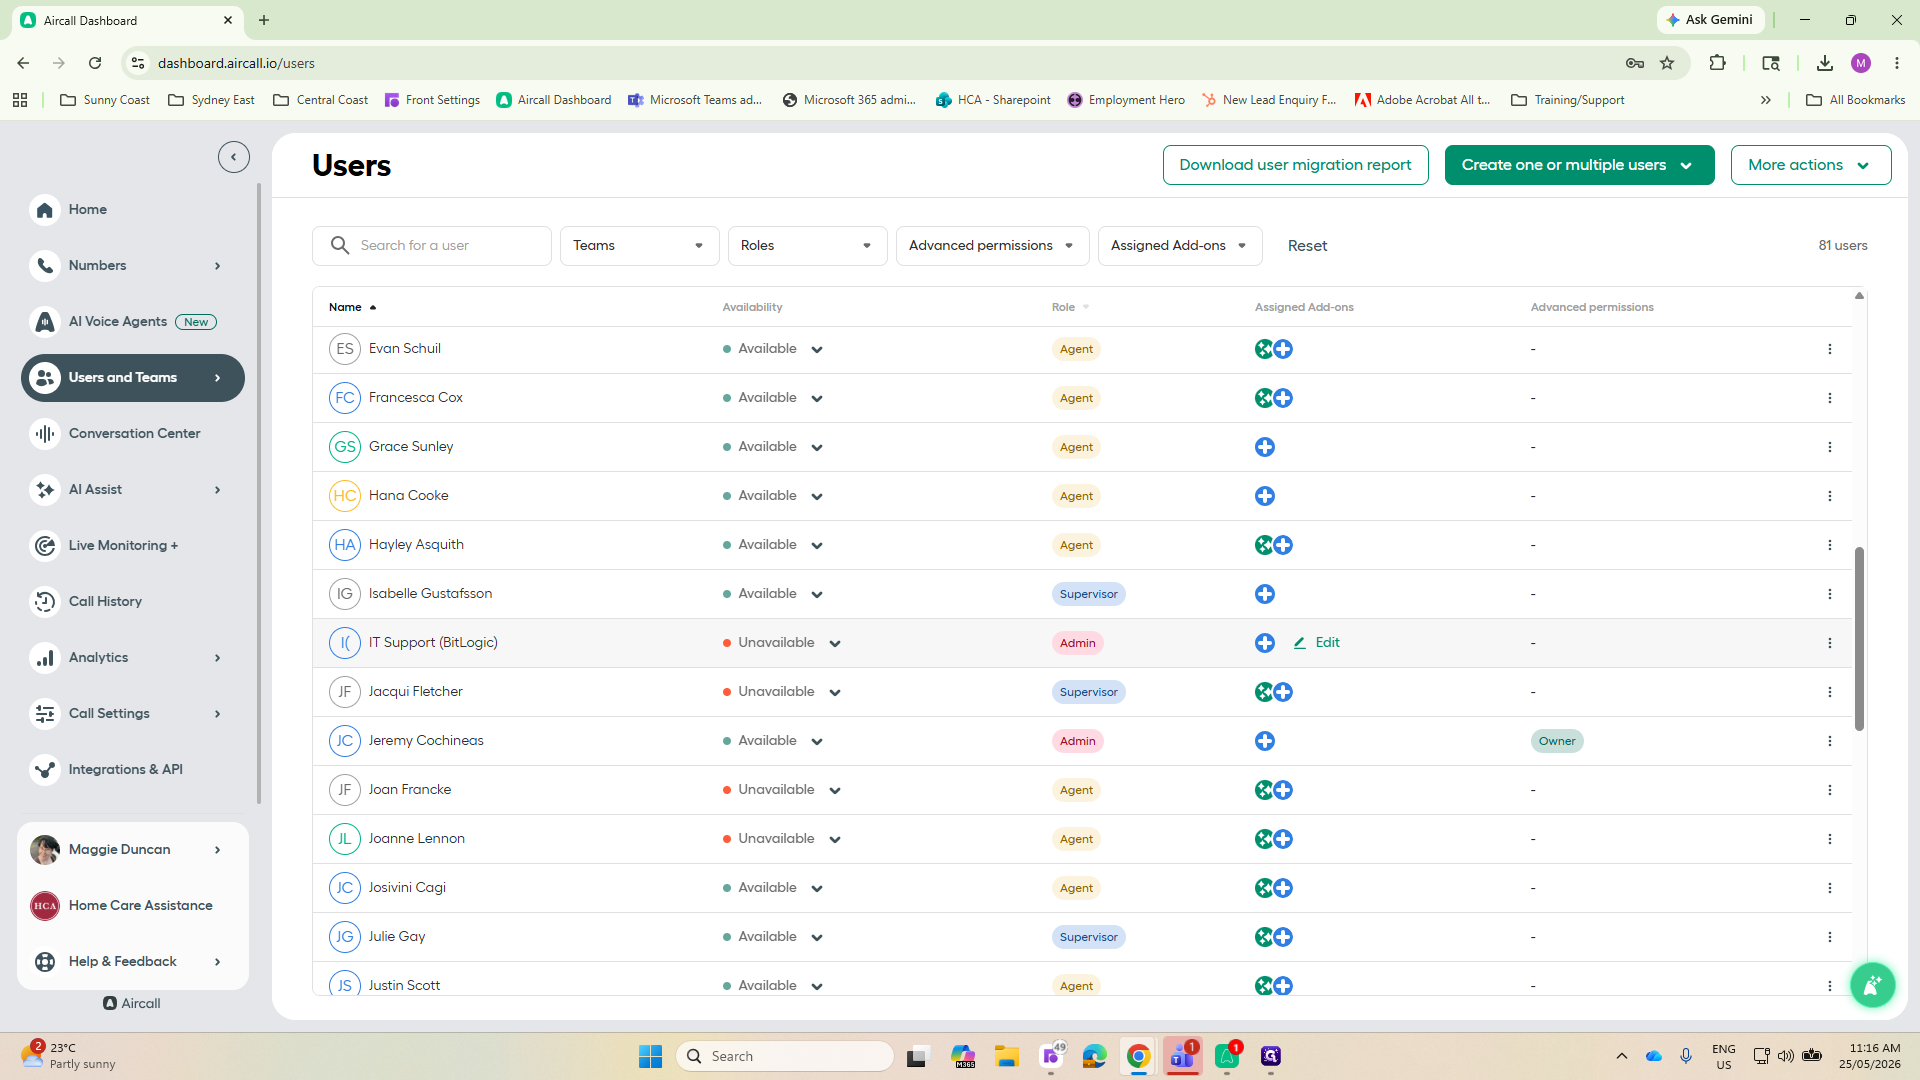
Click Edit in the Assigned Add-ons column next to the new user and enable any required services. NOTE: Only give AI Assist to users who are using the phones a lot and need to take notes or will need the summary and transcription services. Not all users need AI Assist.
Step #26: Click Edit in the Assigned Add-ons column next to the new user and enable any required services. NOTE: Only give AI Assist to users who are using the phones a lot and need to take notes or will need the summary and transcription services. Not all users need AI Assist.

FAQ

Q: Why do I need to add customer service users to overflow teams if they aren't technically the overflow staff?

A: Overflow calls come through to the entire business, but your primary customer service team still needs to be assigned to those overflow queues. This ensures that the system will still ring available customer service agents while concurrently calling the rest of the team.

Q: Can I assign specific phone numbers to an Agent role directly?

A: Yes. Granular control over specific phone numbers is possible by going to the phone number in Numbers, clicking Teams & Users inside that number, going down to the Call and data access section and clicking + Add a user to search and add them to the phone number. This WON'T allow them to take incoming calls from this number, it will simply allow them to USE the number to make outgoing calls. They must be part of the incoming call flow (added to a team that takes incoming calls) in order to get incoming calls. However this can be a good way to give phone number access to someone who doesn't generally take incoming calls.

Glossary

Term

Definition

Agent Role

The standard user profile inside Aircall, granting normal capabilities for taking and making calls on assigned teams.

Wrap-up Time

An optional buffer period provided to an agent immediately after finishing a call before the system automatically routes the next call to them.

AI Assist

An Aircall feature add-on that provides real-time transcription and conversation analysis during active phone calls.