How to Automate Failed Order Recovery Emails

Learn how to import contacts, map customer fields, design segmented email templates, and create automated workflows to recover failed orders.

By Reservety

This guide explains how to import customer contact lists and set up automated email workflows to target specific segments.

Completing this process allows you to proactively recover lost revenue by following up on abandoned carts or failed orders automatically.

This workflow is intended for marketing managers and store administrators. You will typically configure this automation once to run continuously in the background for ongoing order recovery.

Importing Contacts and Mapping Fields

To begin, you need a list of target customers in your automation dashboard.
1
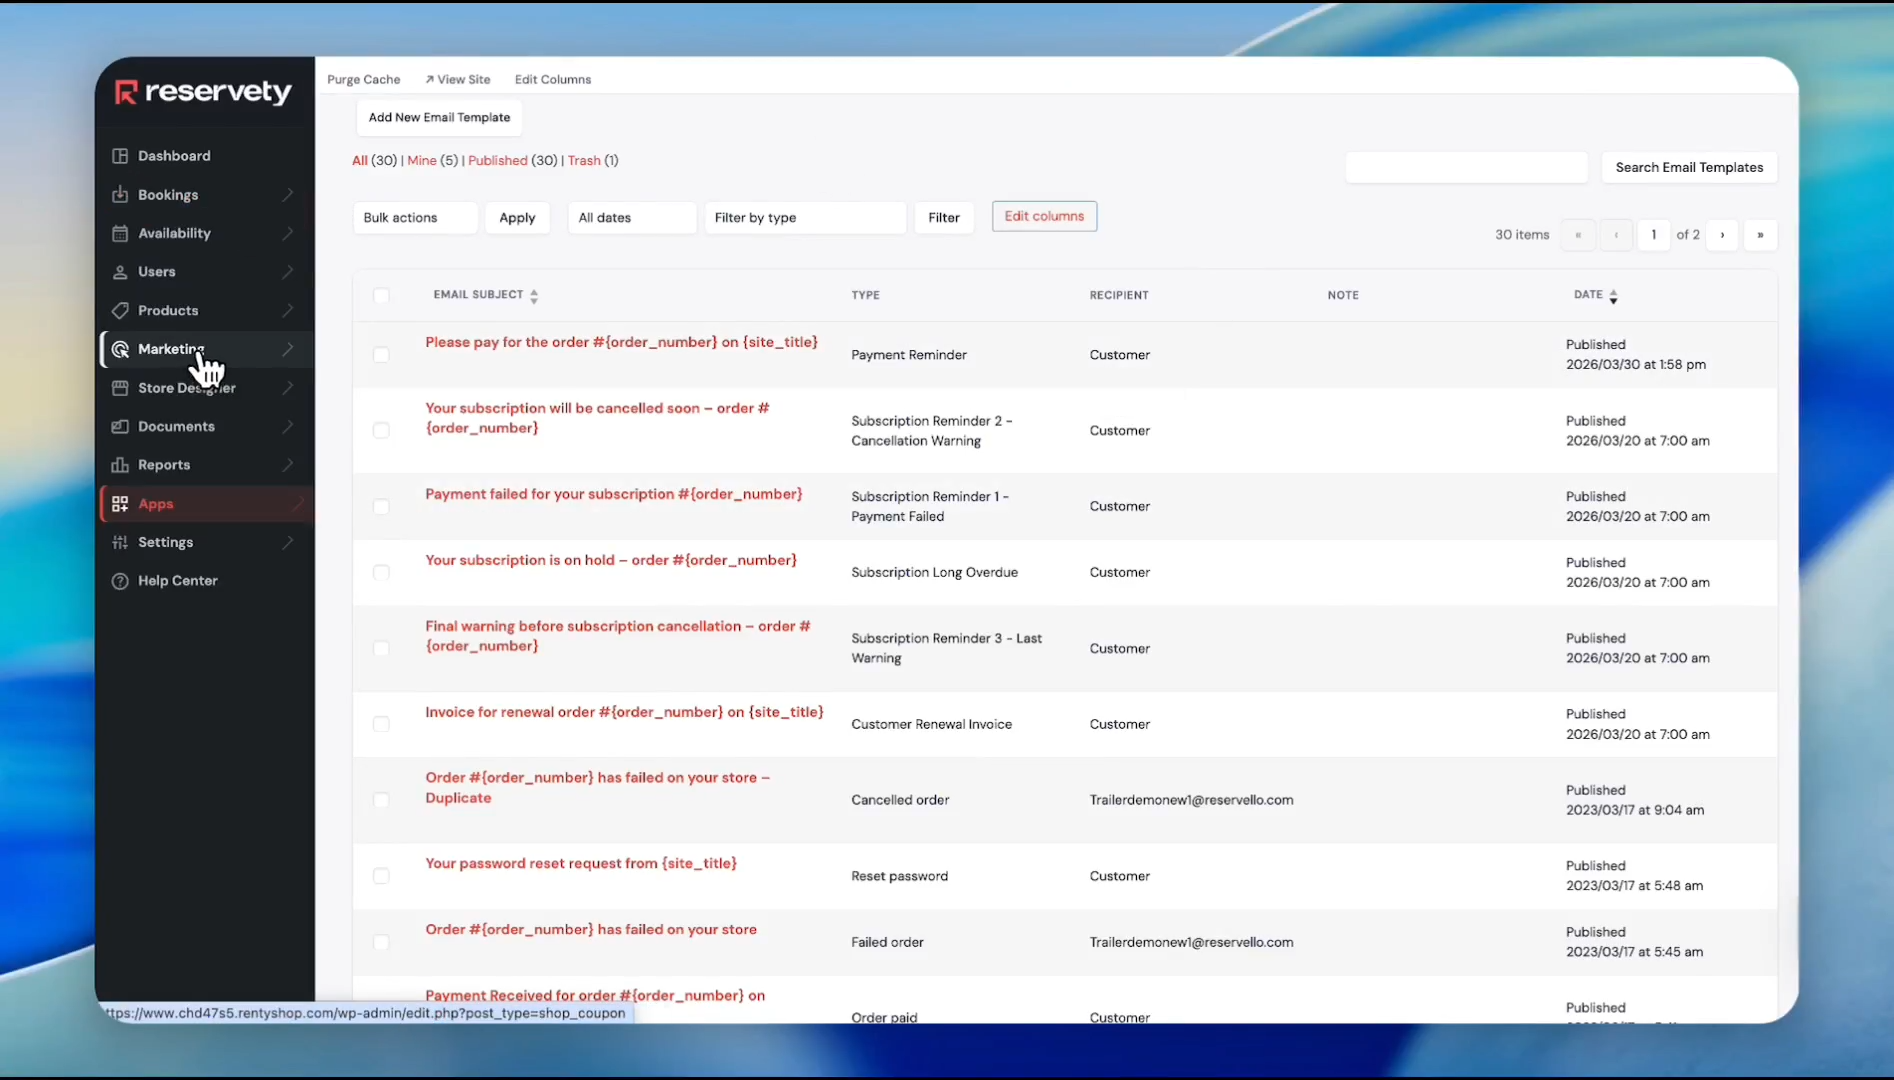
Hover over the Marketing menu in the main dashboard navigation.
Step #1: Hover over the Marketing menu in the main dashboard navigation.
2
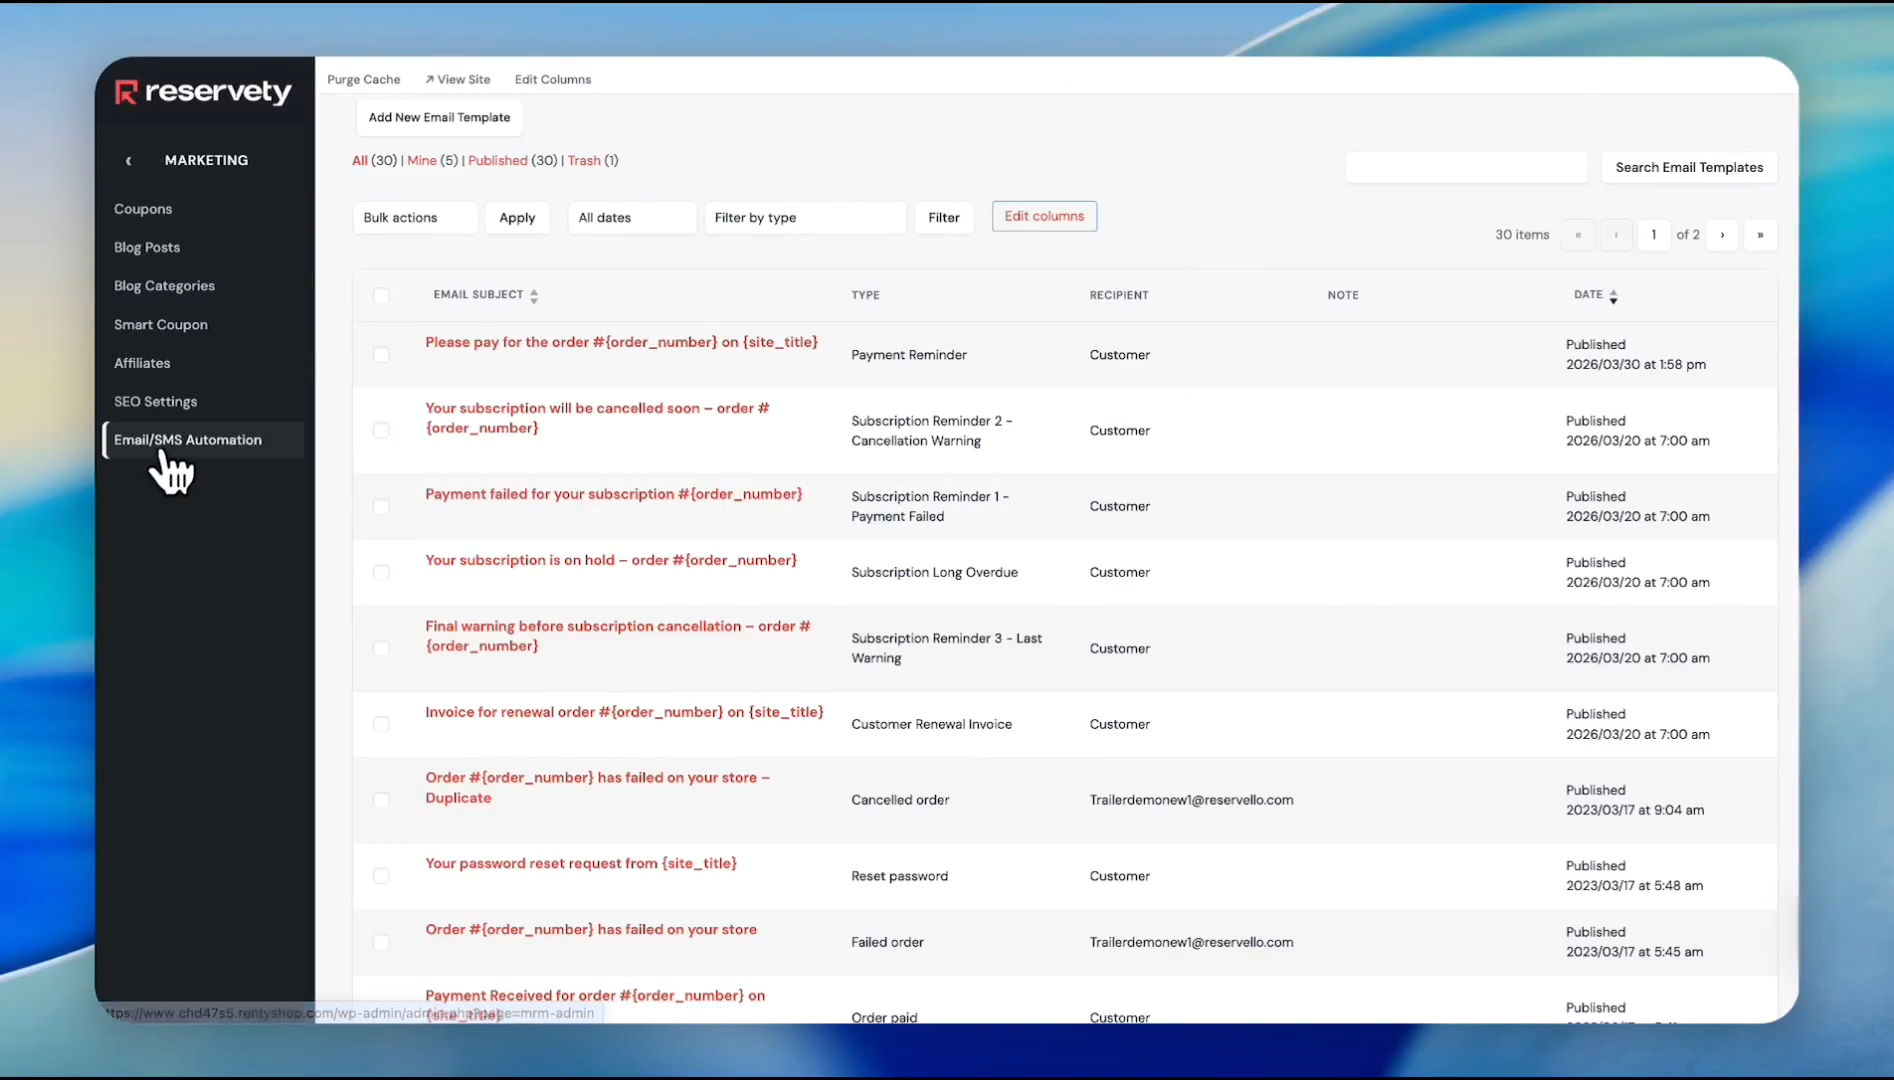
Click the Email/SMS Automation sub-menu item.
Step #2: Click the Email/SMS Automation sub-menu item.
3
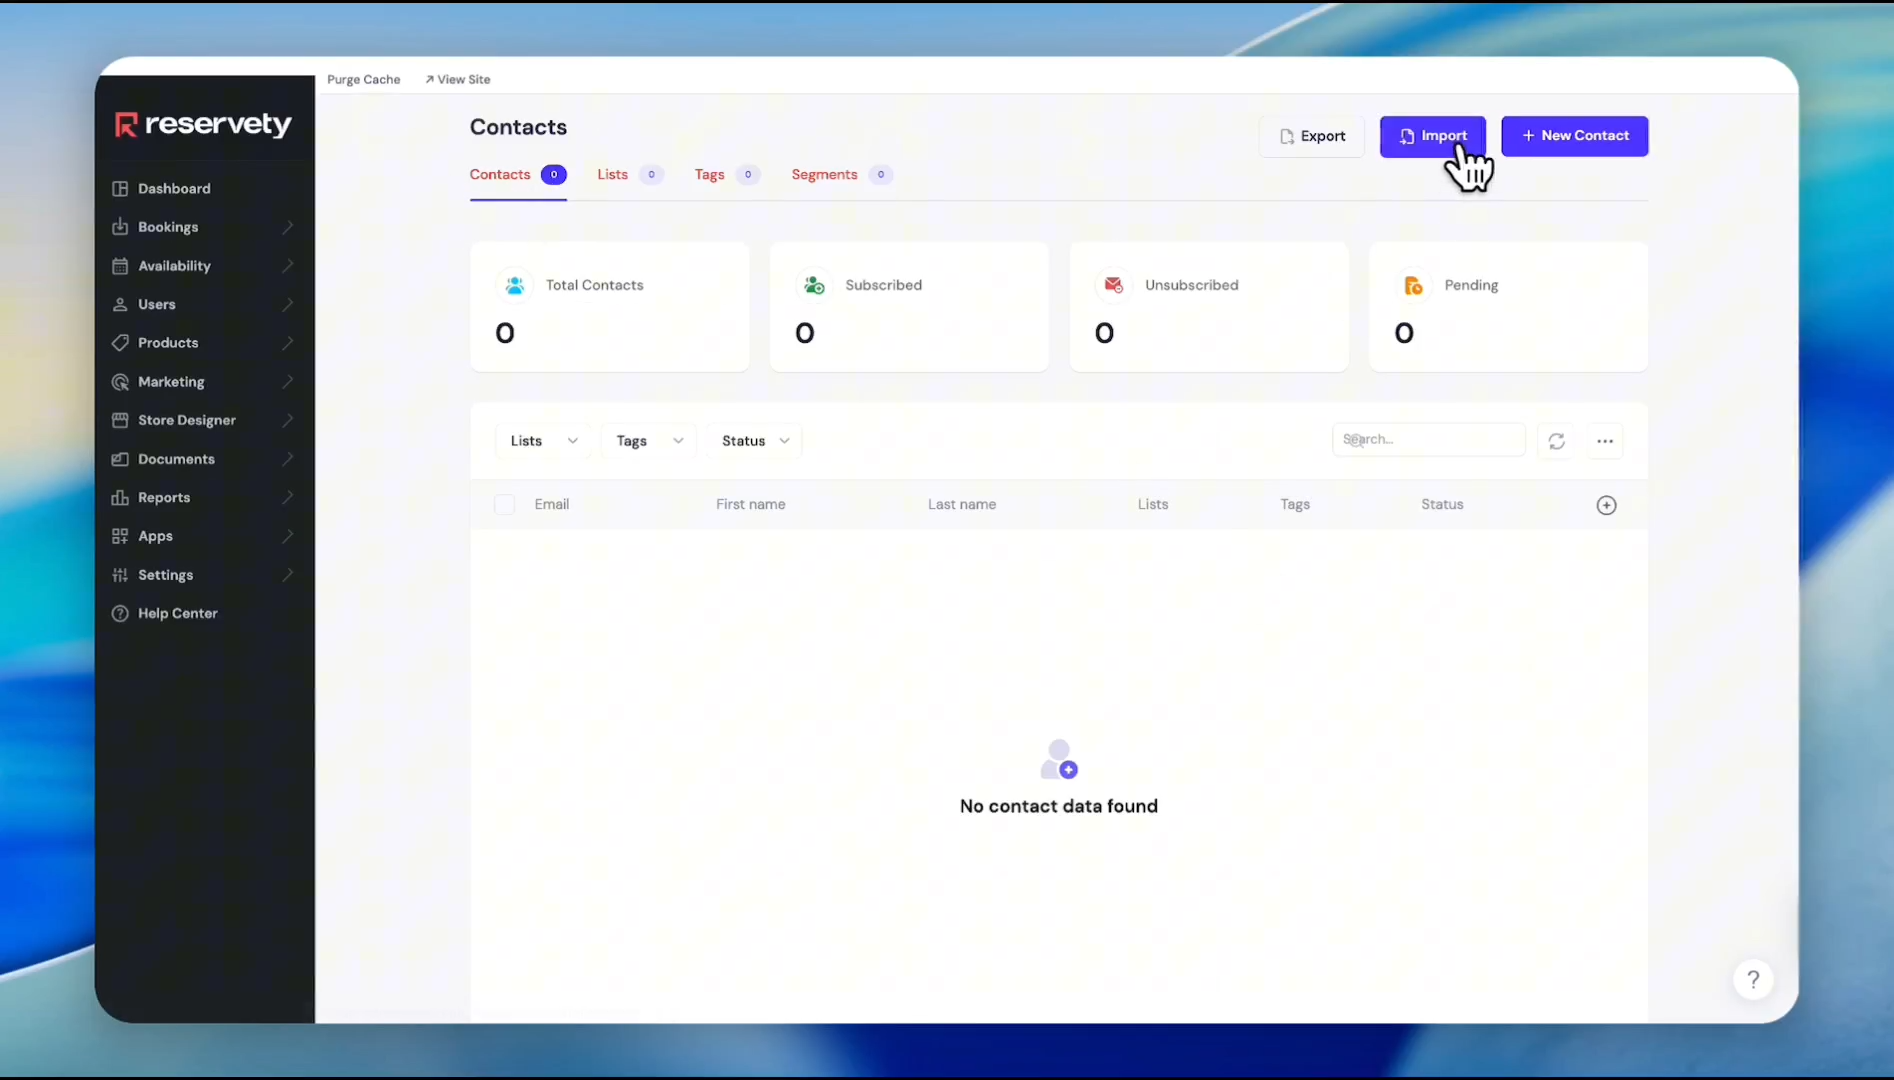
Click the Import button to start adding contacts.
Step #3: Click the Import button to start adding contacts.

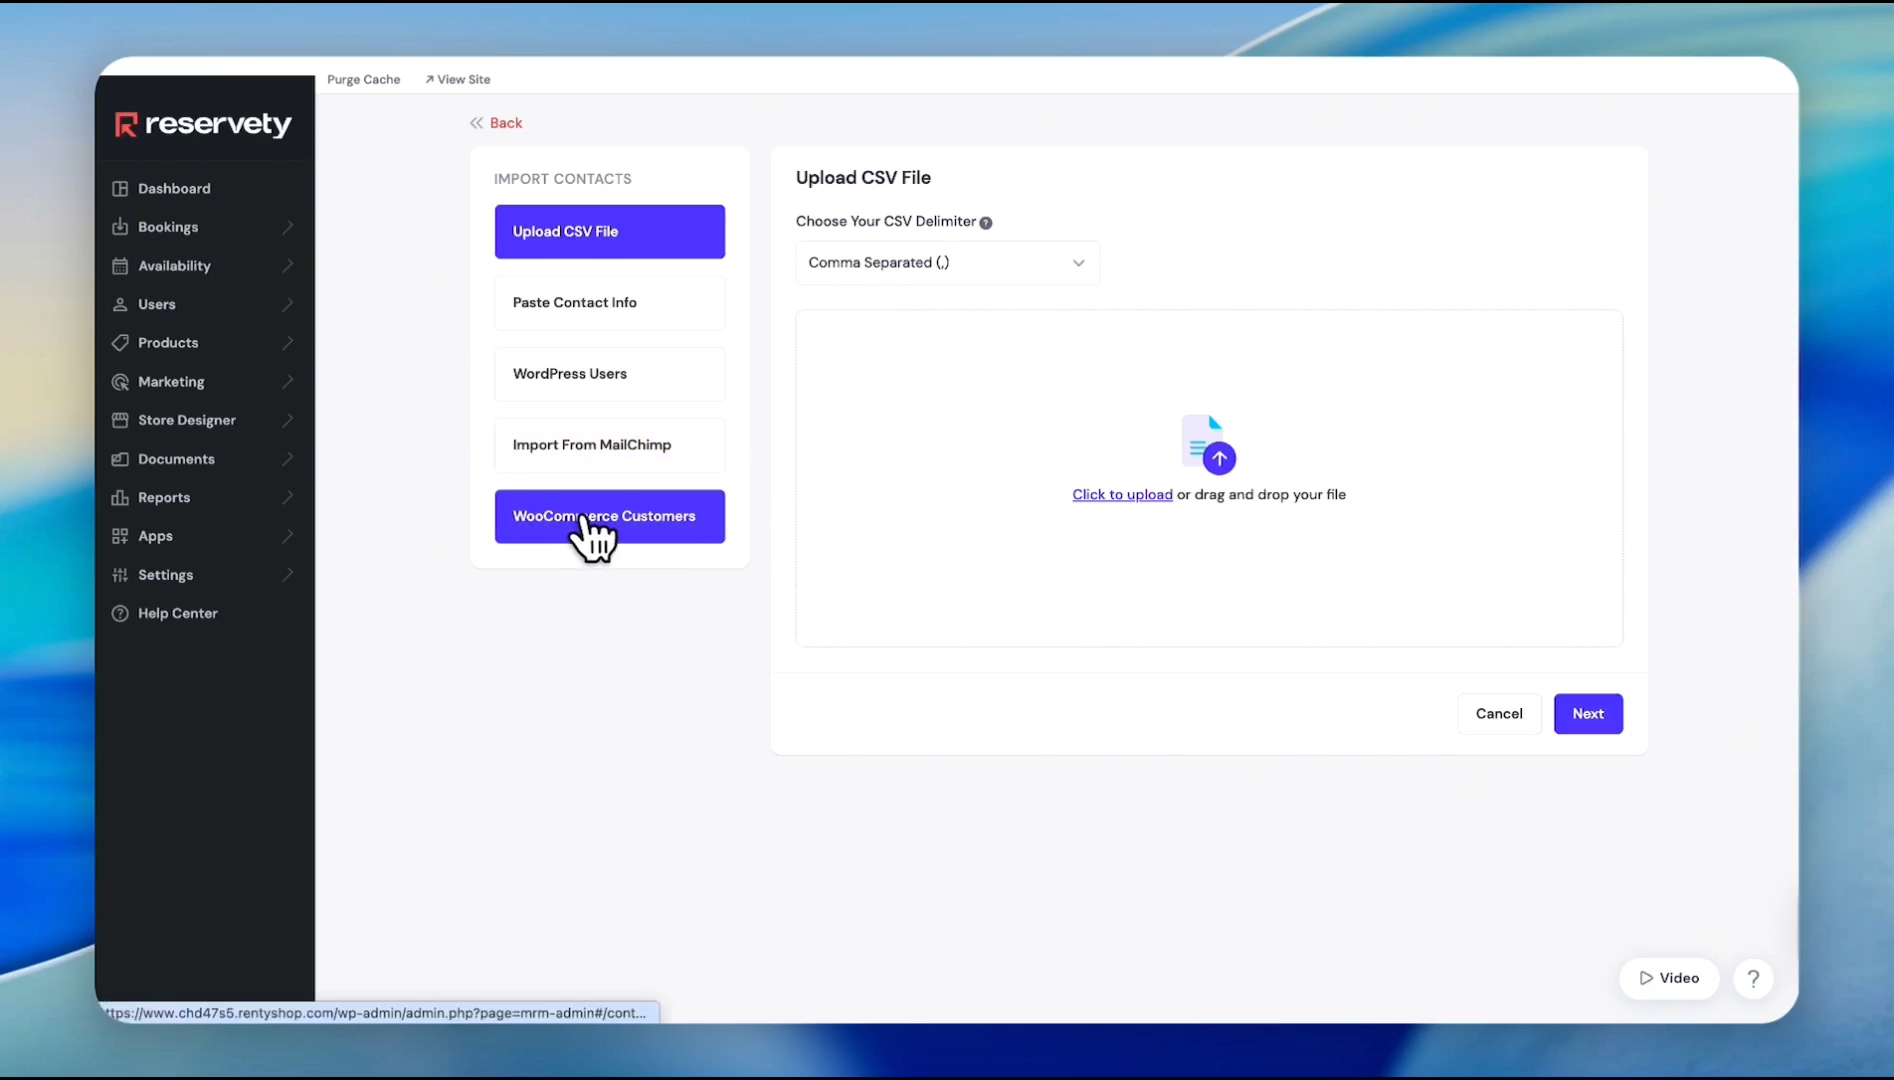
You have several options for importing contact data into the system:

Import Method

Description

CSV File

Upload a spreadsheet containing existing customer records.

Copy/Paste

Manually paste contact information directly into the input field.

MailChimp

Sync your lists directly from an integrated MailChimp account.

WooCommerce

Import customer profiles and past order details directly from your store.

4
Select the Import From WooCommerce Customers option.
Step #4: Select the Import From WooCommerce Customers option.

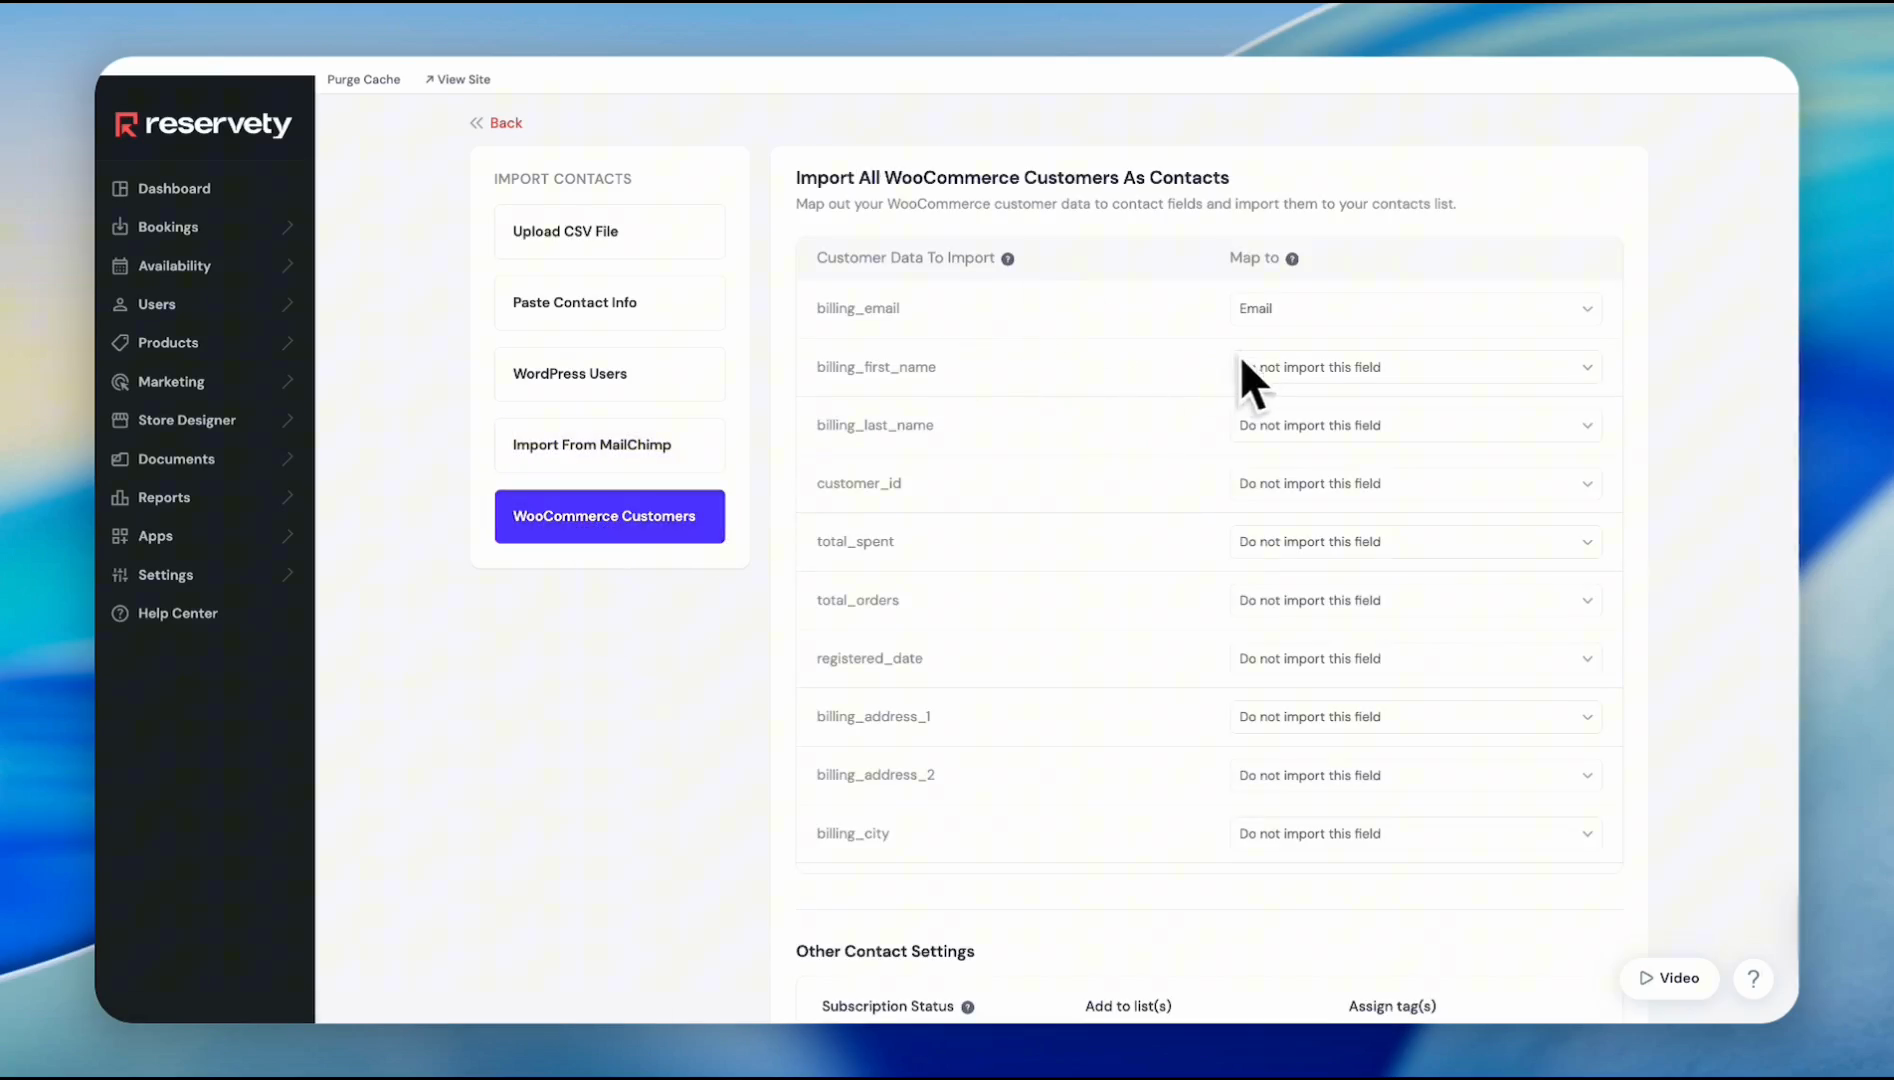
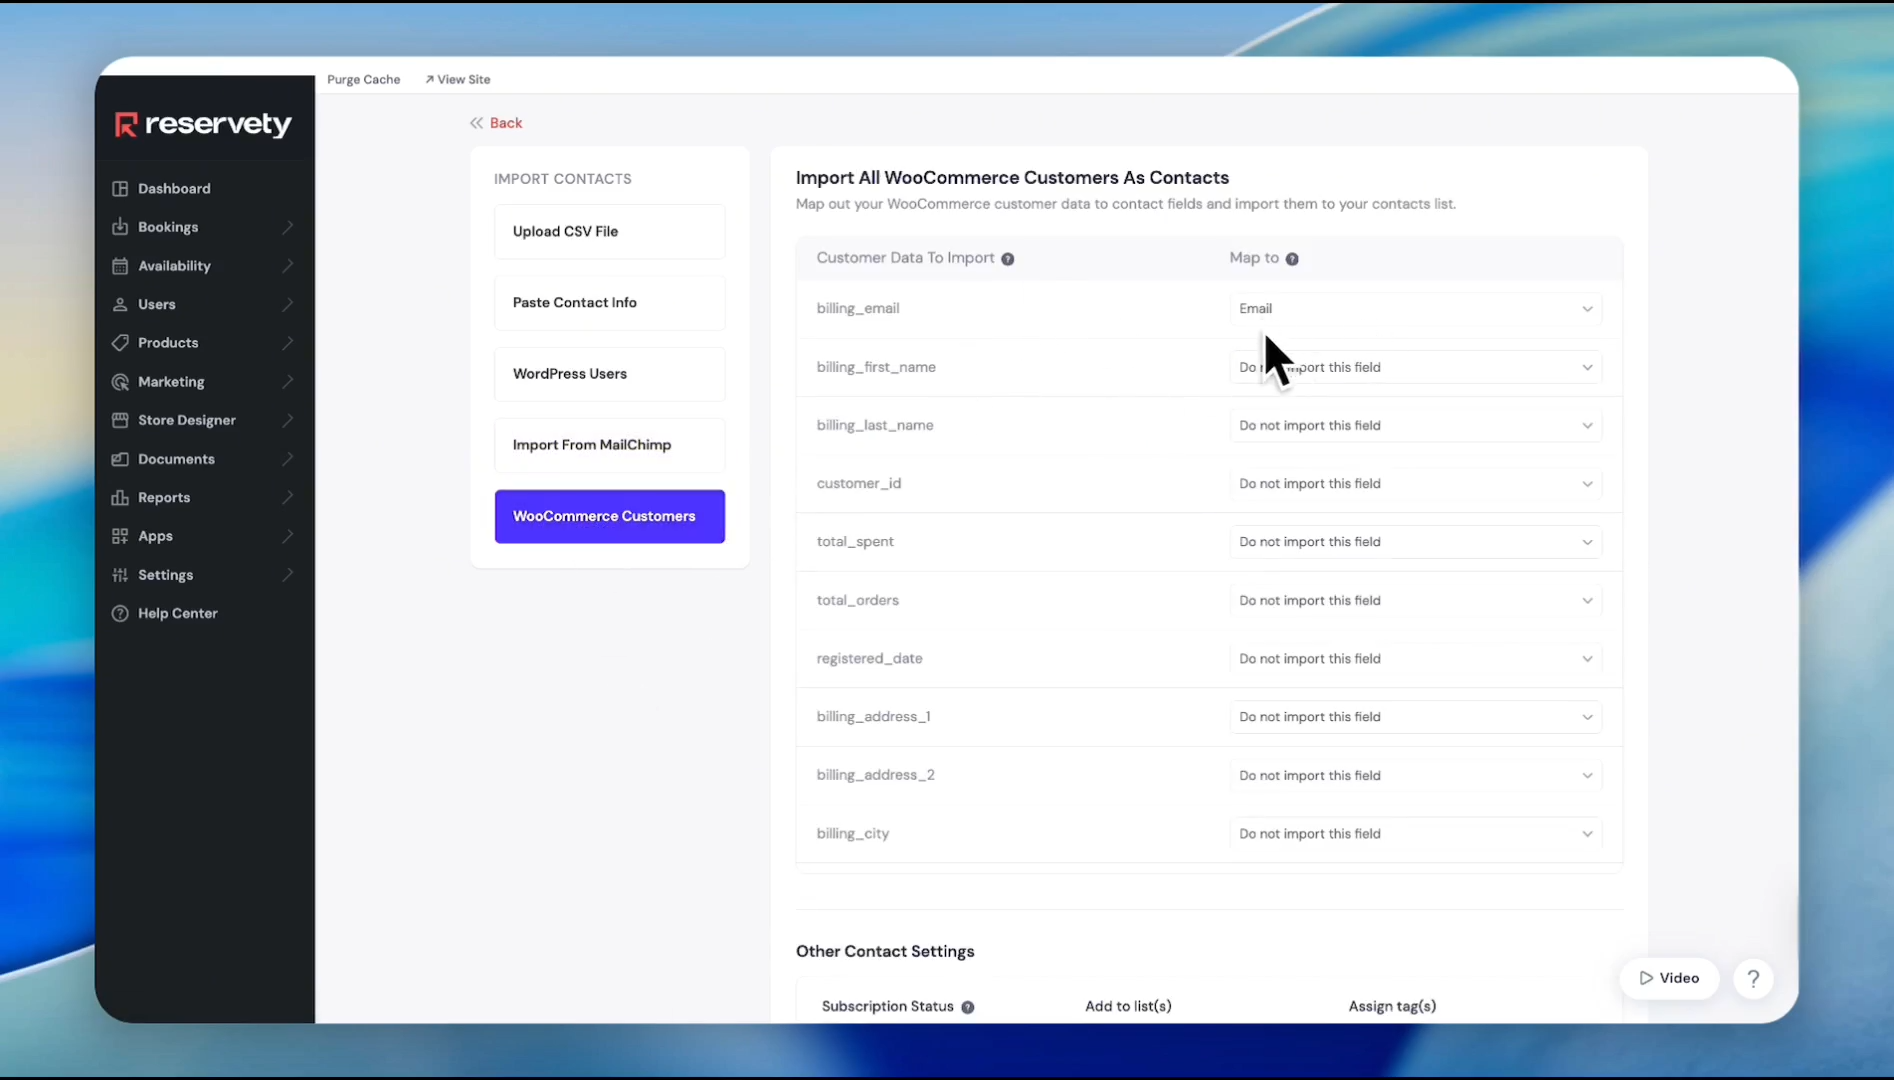
Next, map your WooCommerce data fields to the correct contact attributes.
5
Click the drop-down menu for billing_email.
Step #5: Click the drop-down menu for billing_email.
6
Select Email.
Step #6: Select Email.
7
Click the drop-down menu for billing_first_name.
Step #7: Click the drop-down menu for billing_first_name.
8
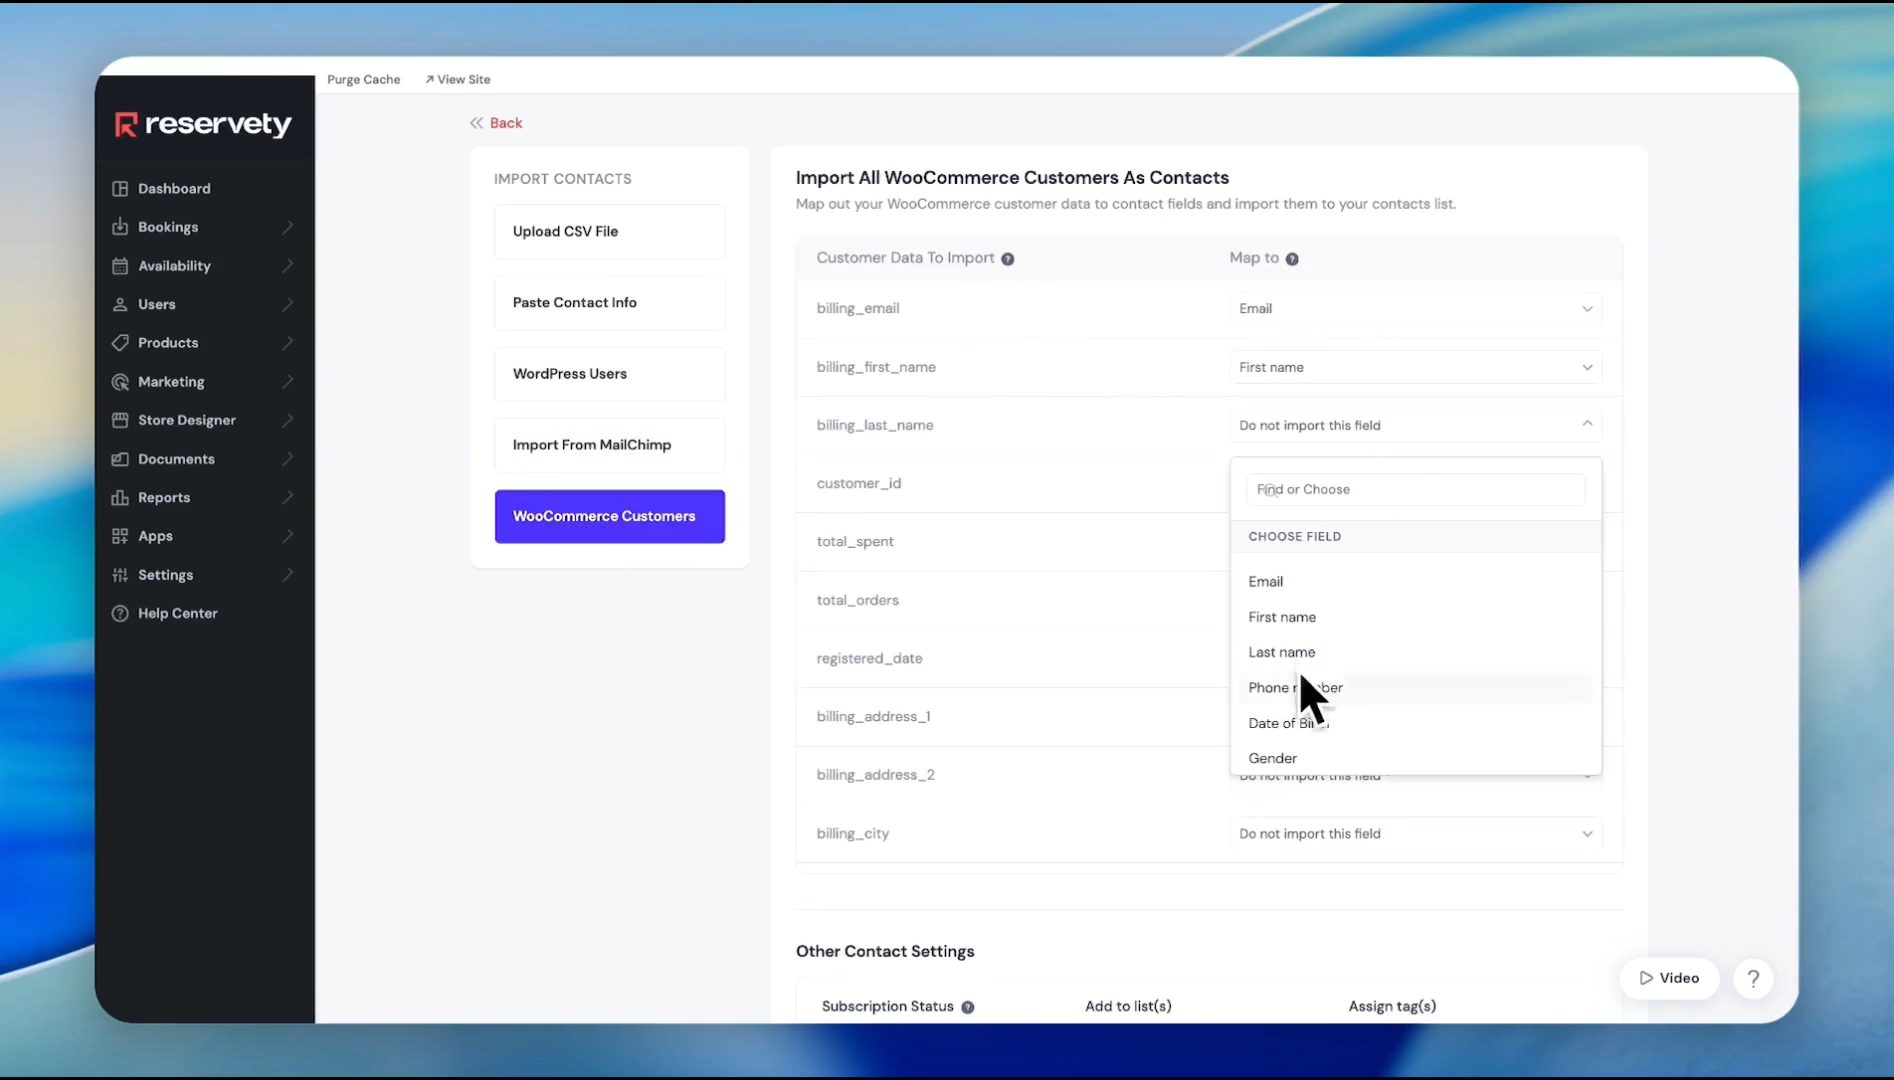
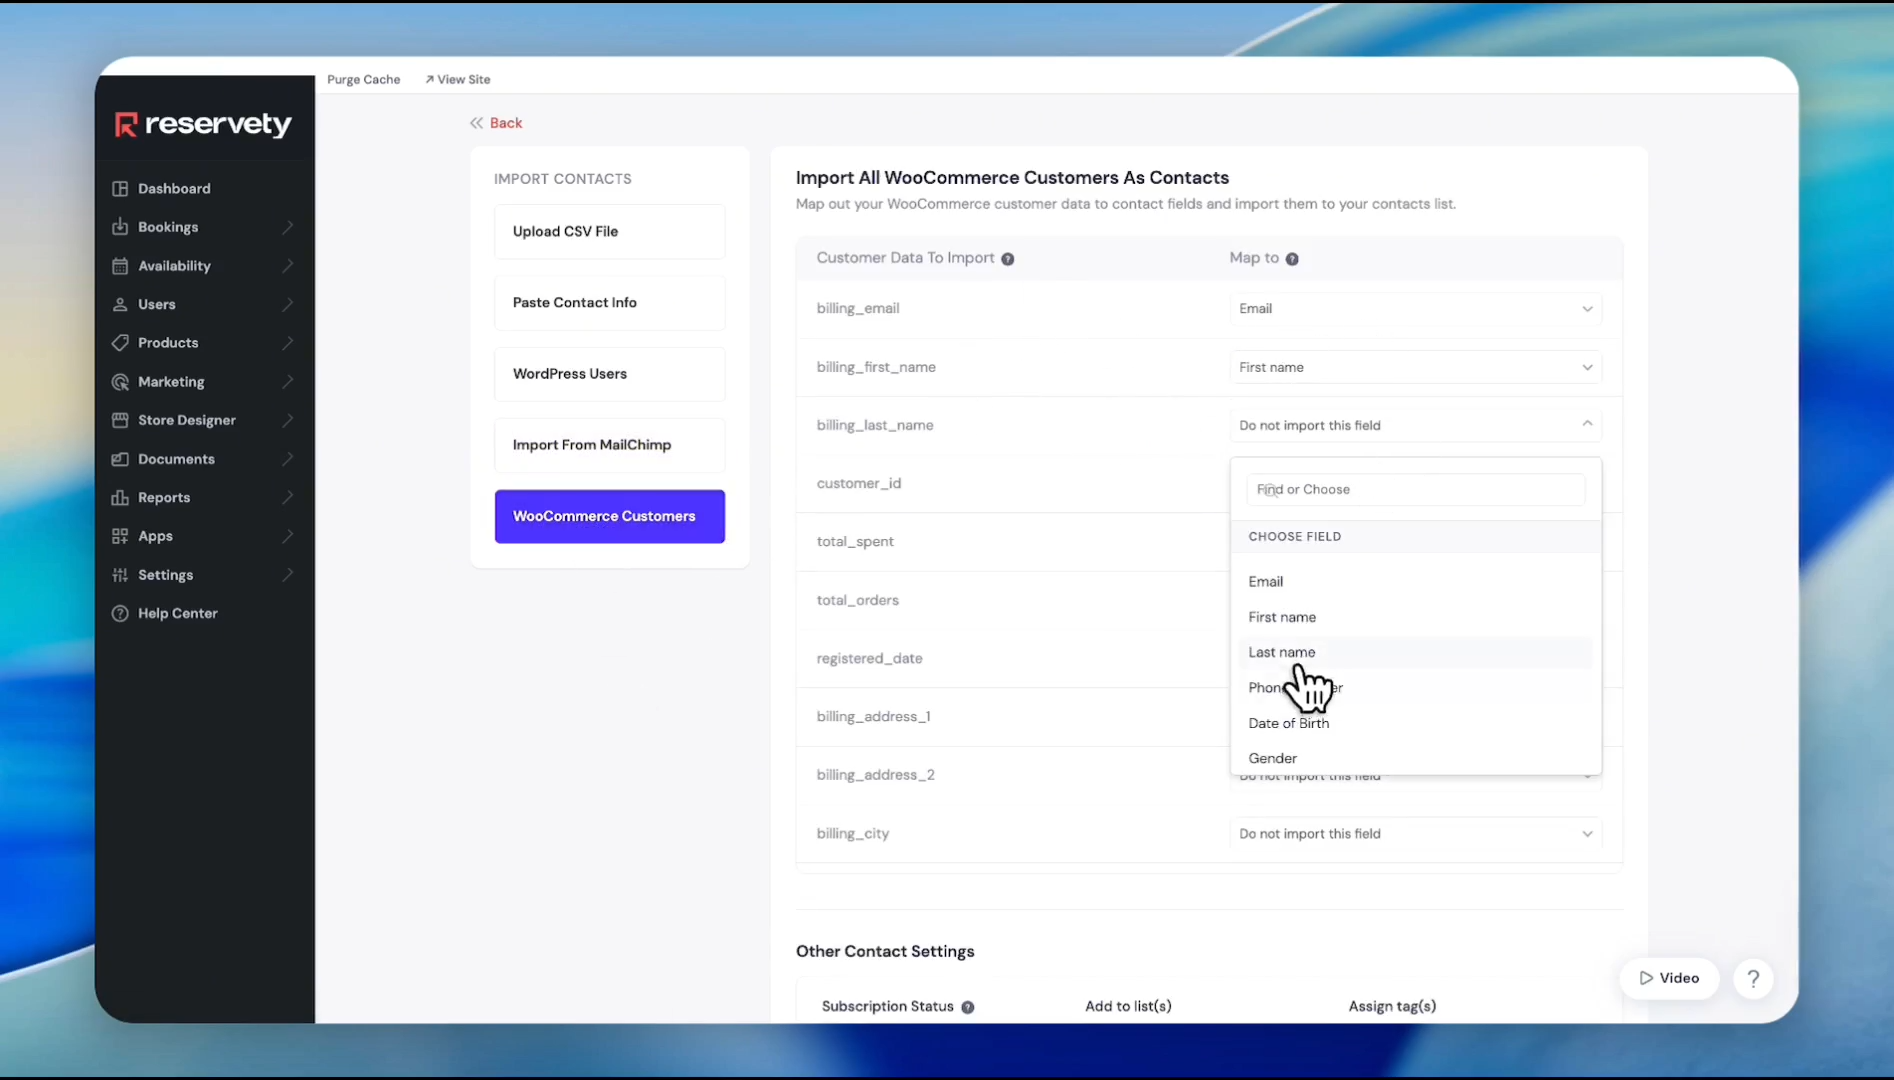
Click the drop-down menu for billing_last_name.
Step #8: Click the drop-down menu for billing_last_name.
9
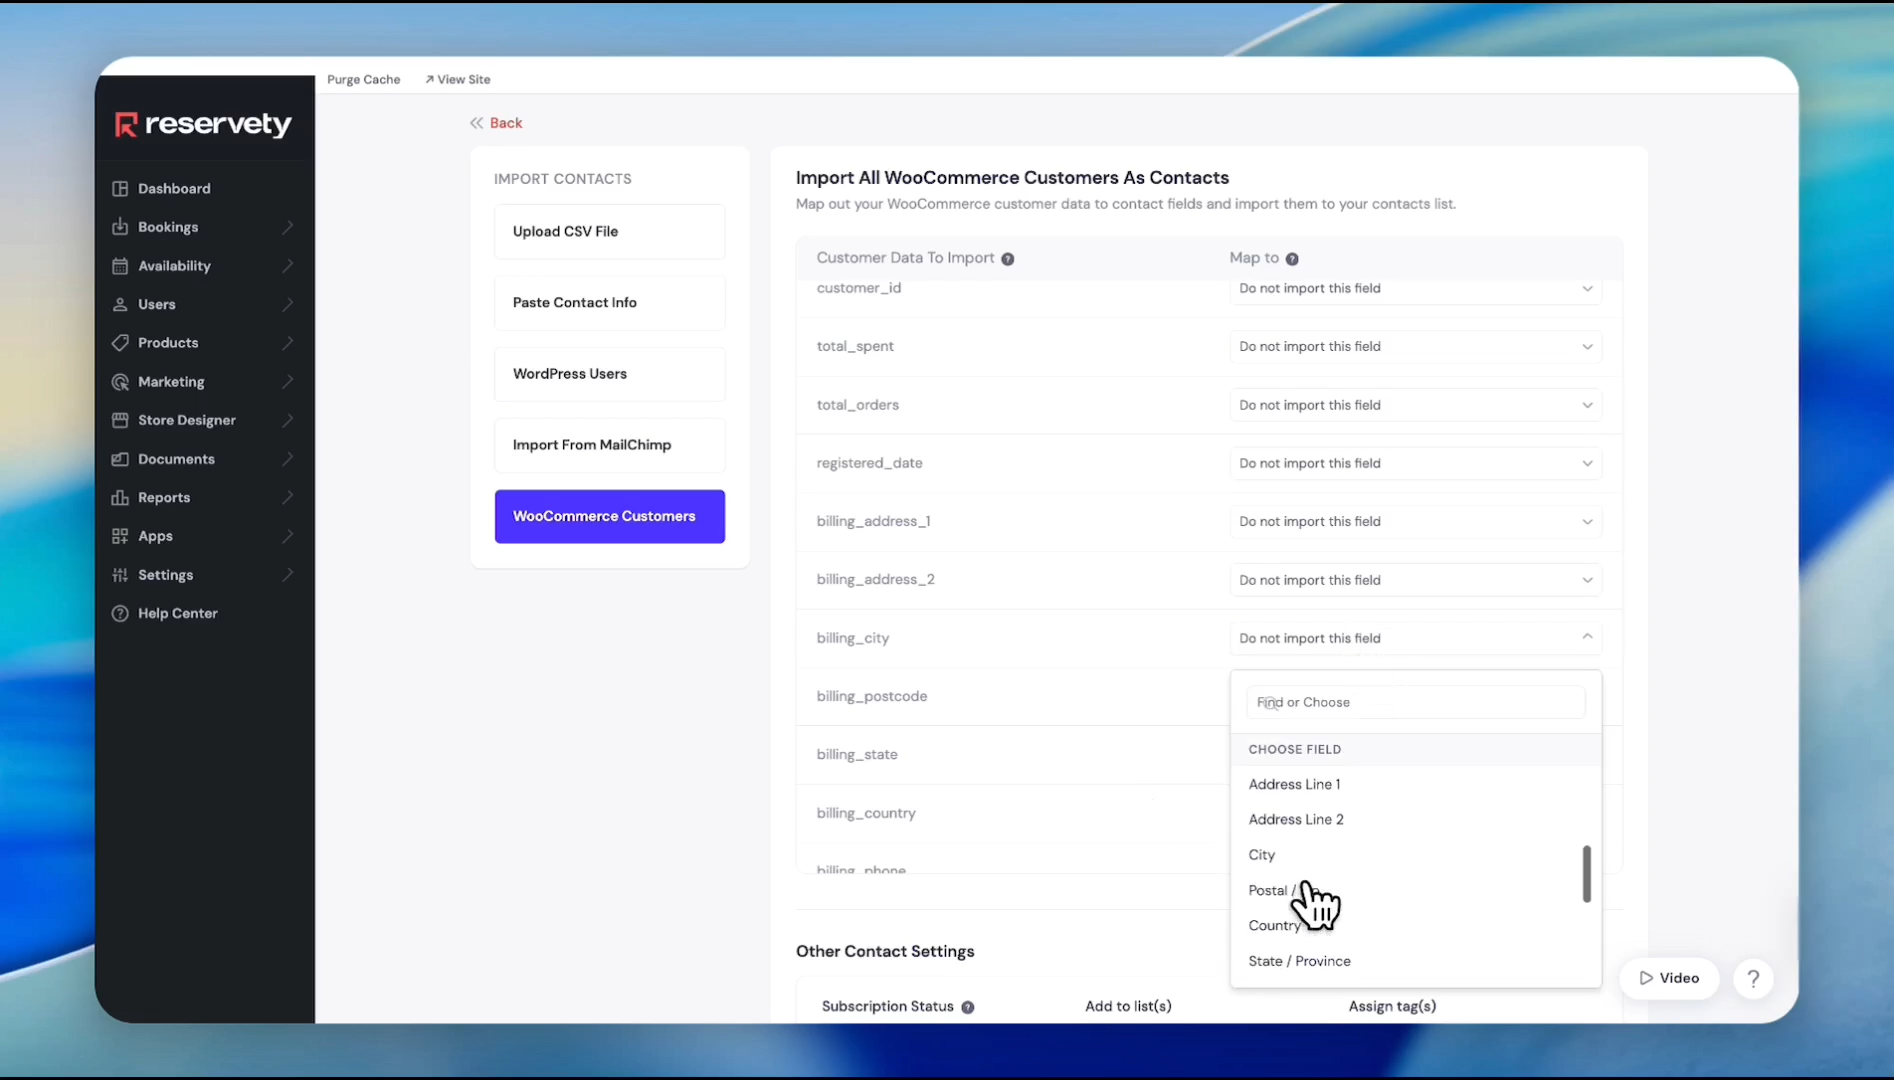
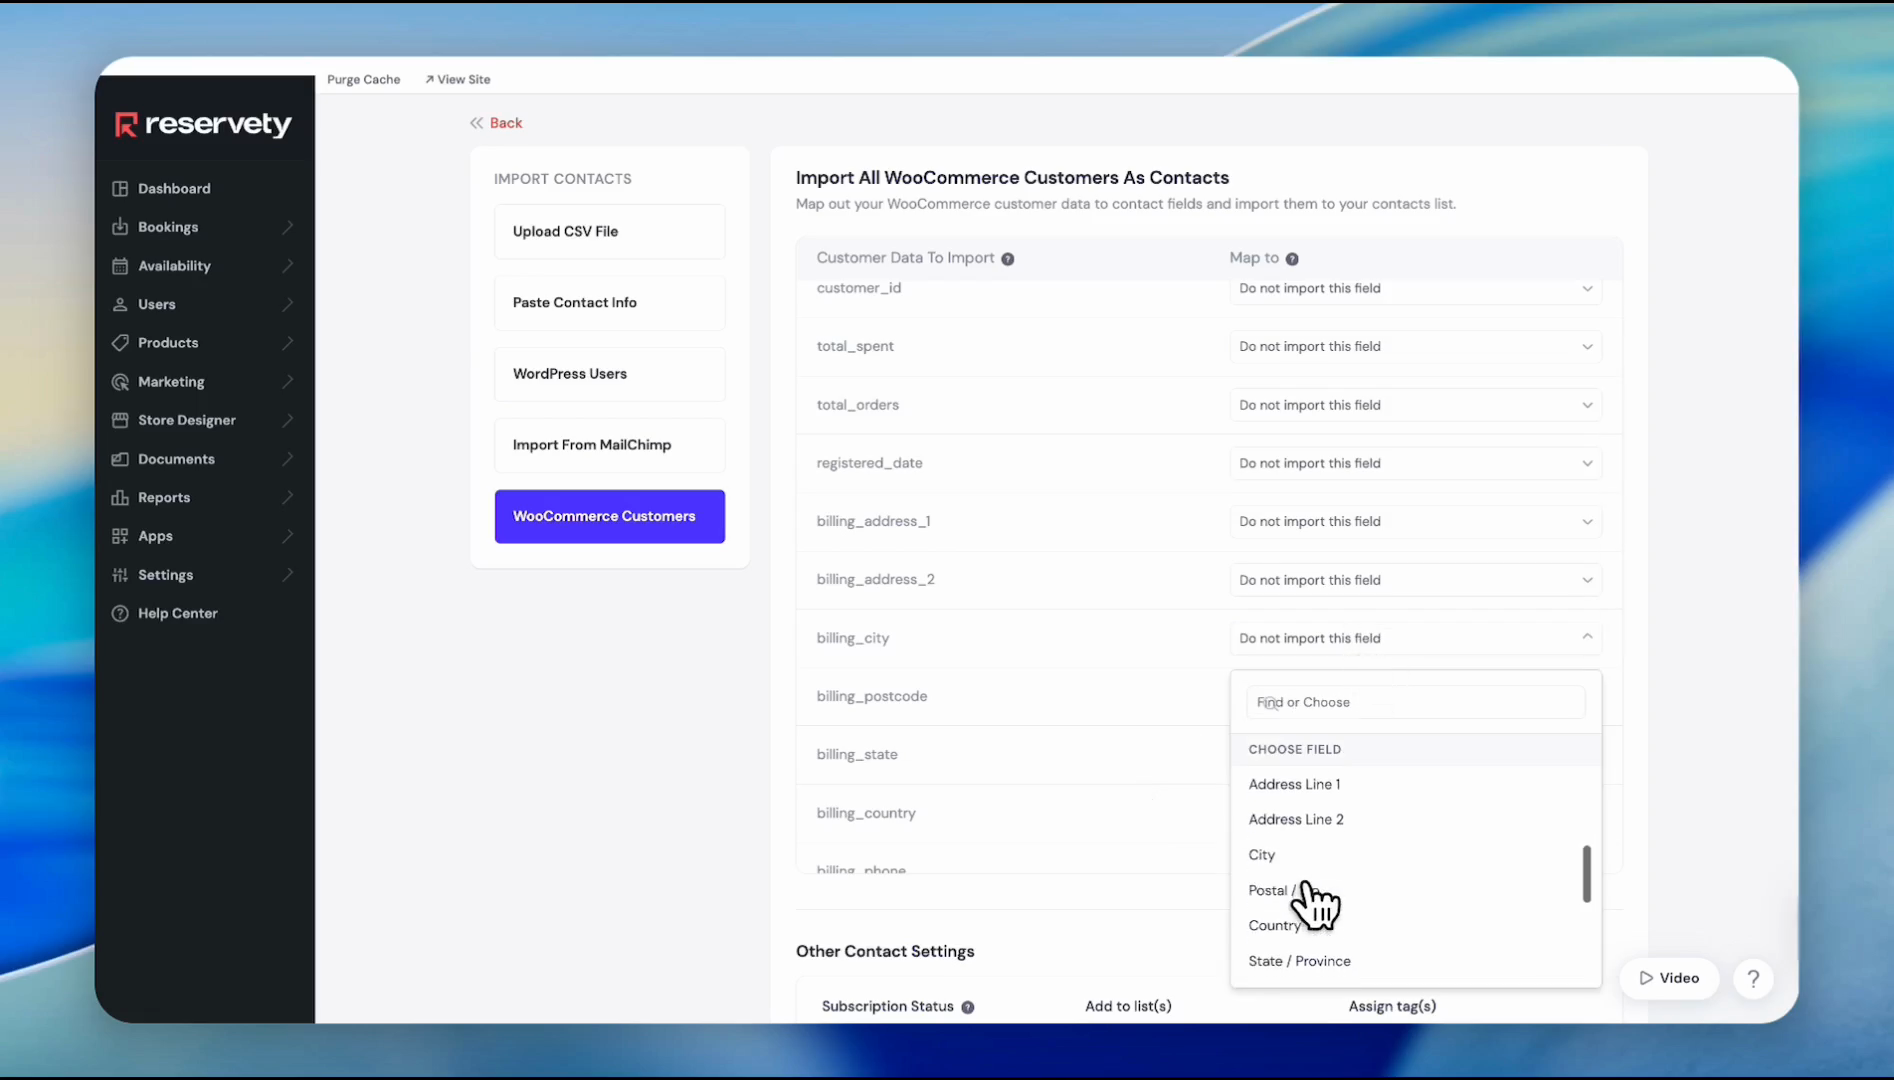
Click the drop-down menu for billing_city.
Step #9: Click the drop-down menu for billing_city.
10
Click the drop-down menu for billing_postcode.
Step #10: Click the drop-down menu for billing_postcode.

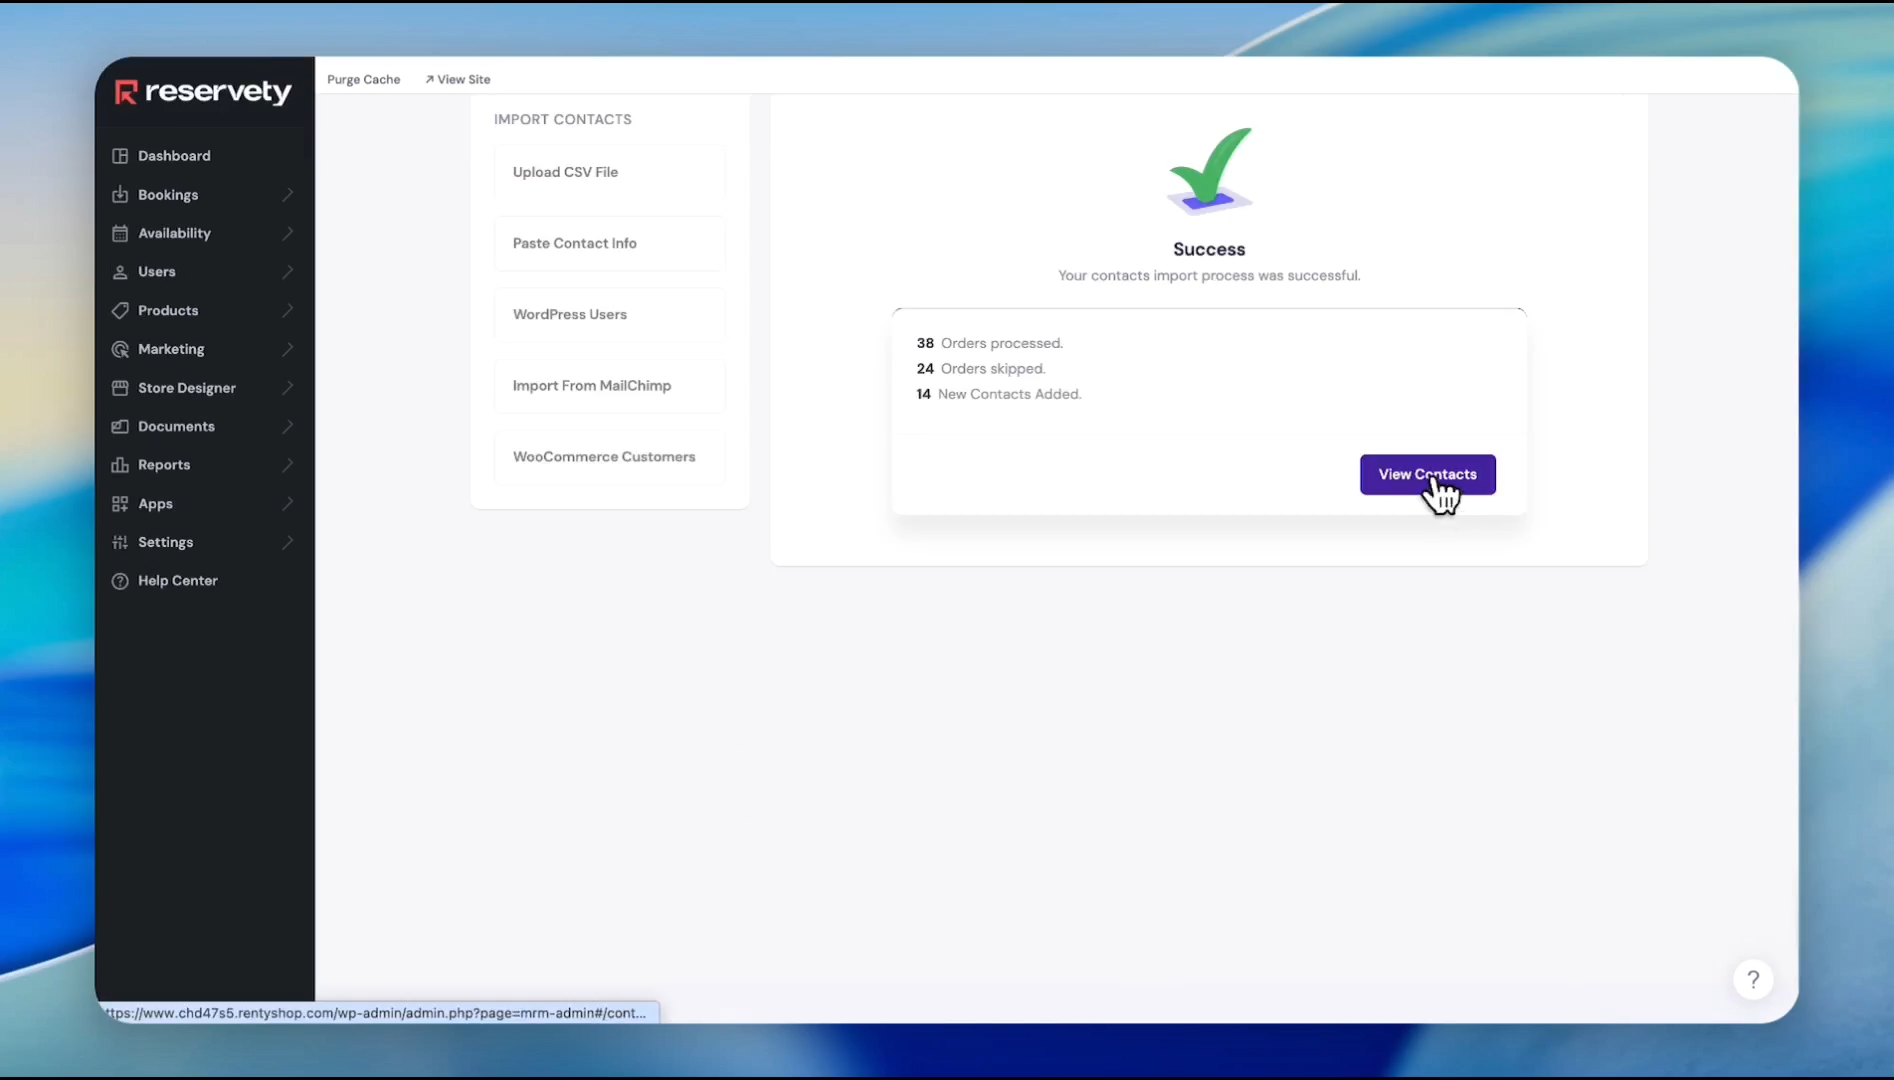
After finalizing mapping configurations and applying any subscription filters, complete the import.
11
Click View Contacts to confirm the import was successful.
Step #11: Click View Contacts to confirm the import was successful.

Setting up the Automation Workflow
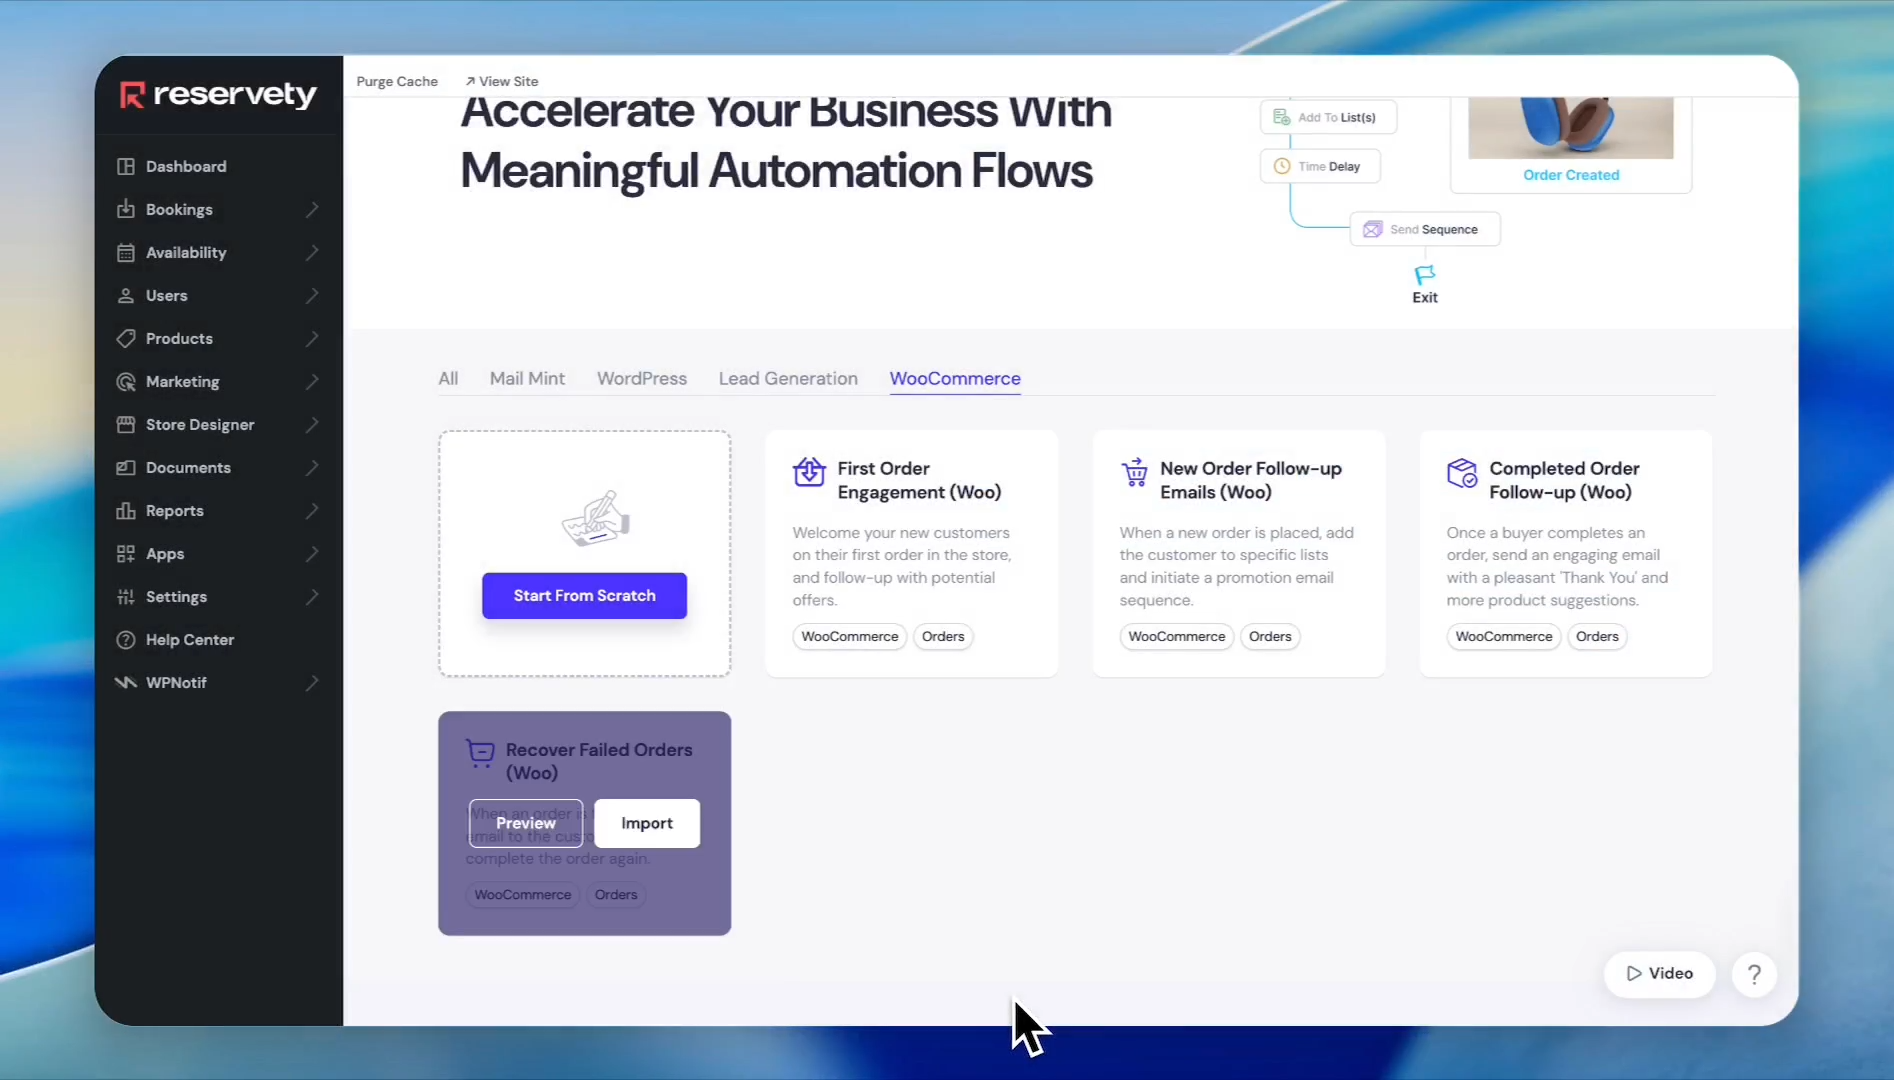
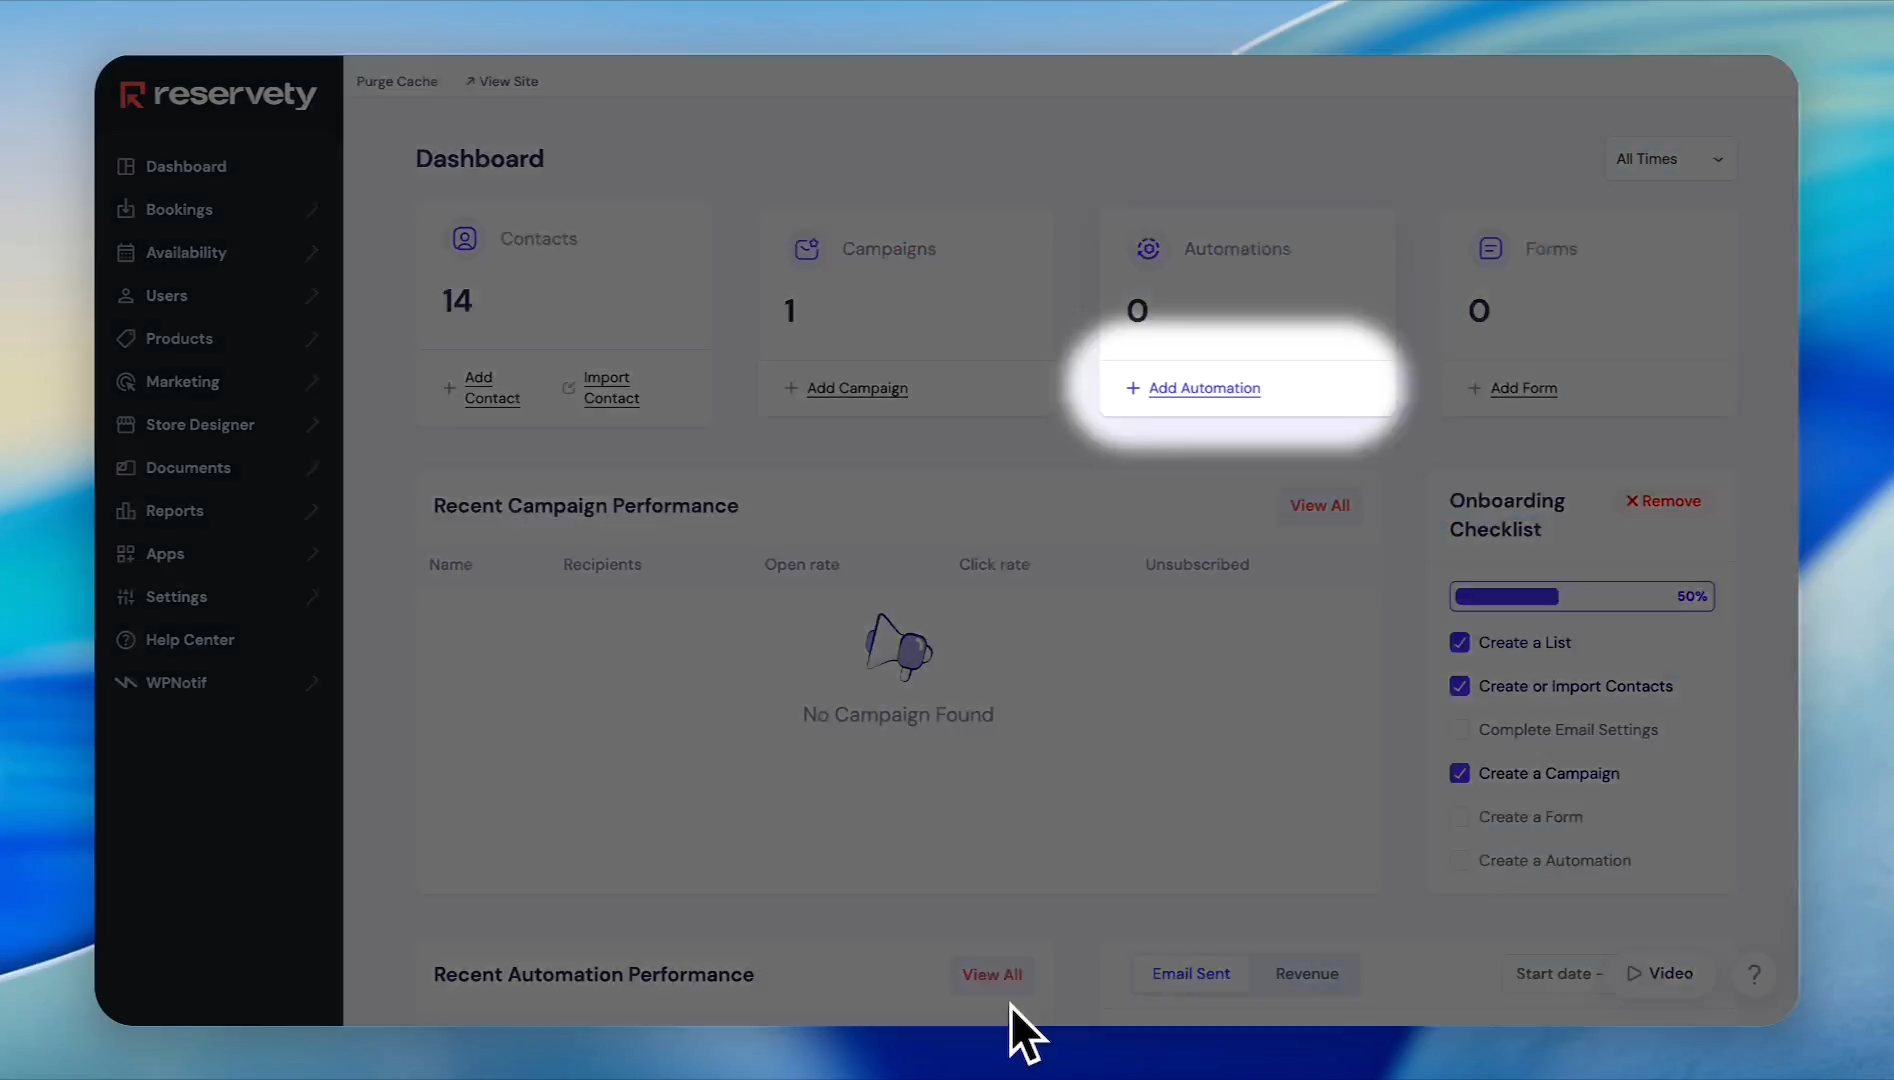
12
Click Add Automation in the automation panel to access your campaigns.
Step #12: Click Add Automation in the automation panel to access your campaigns.
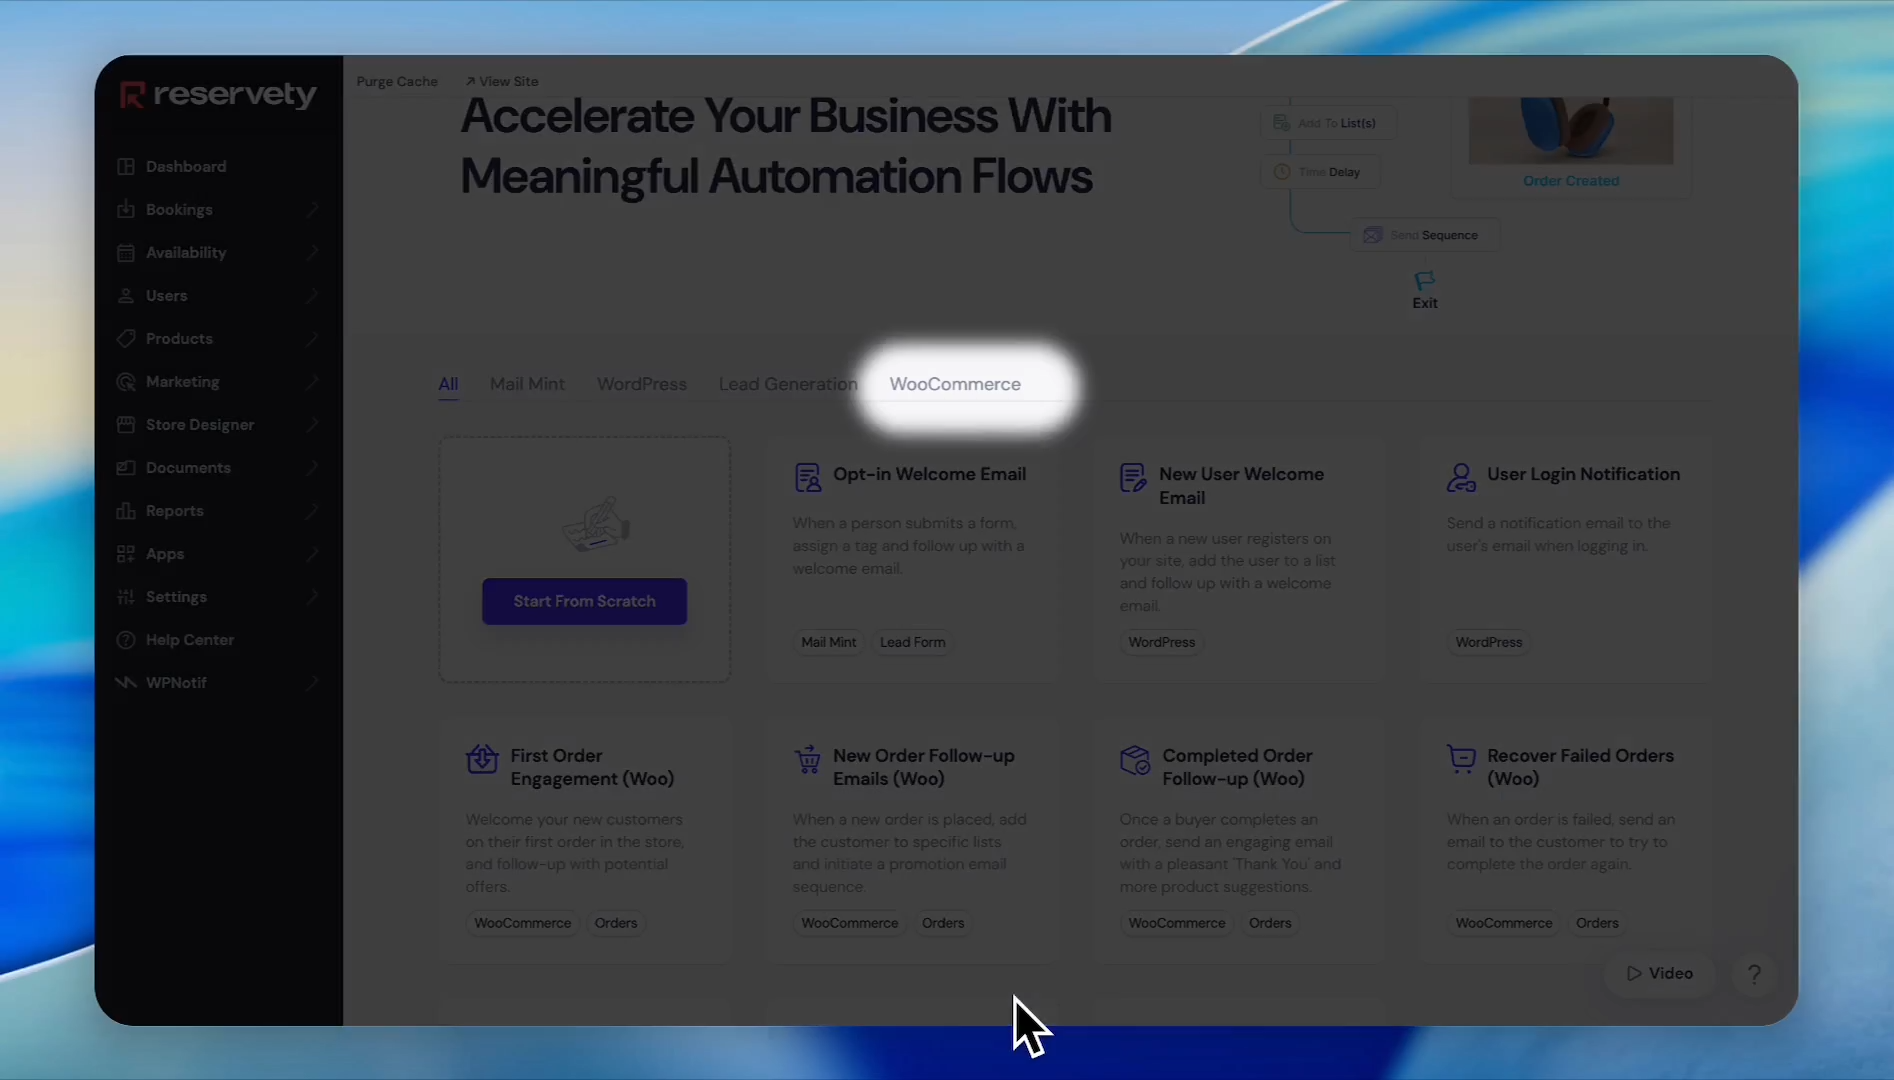
13
Click the WooCommerce tab to browse e-commerce specific templates.
Step #13: Click the WooCommerce tab to browse e-commerce specific templates.
14
Locate the "Recover failed orders" template and click Import.
Step #14: Locate the "Recover failed orders" template and click Import.

Creating the Email Sequence

Now you need an email design to send out when the automation triggers.
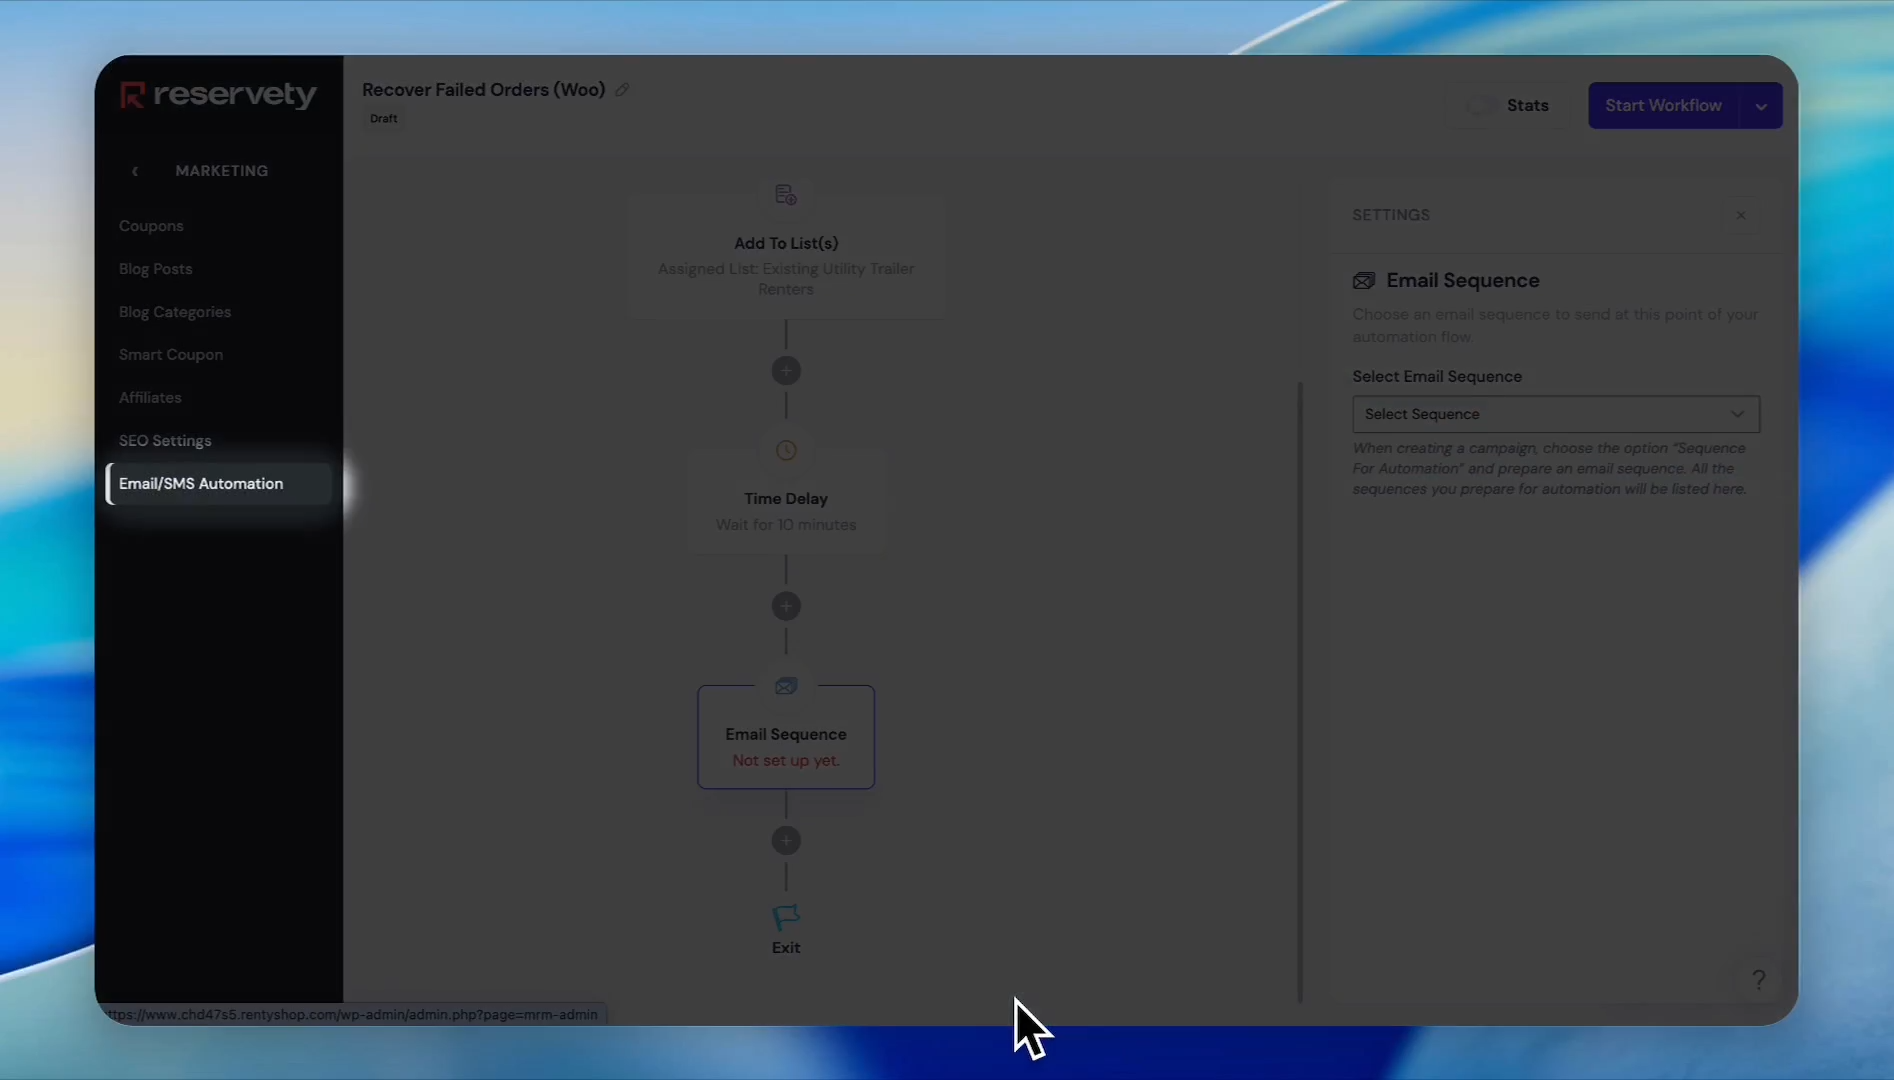
15
Return to the side menu and click Email/SMS Automation.
Step #15: Return to the side menu and click Email/SMS Automation.
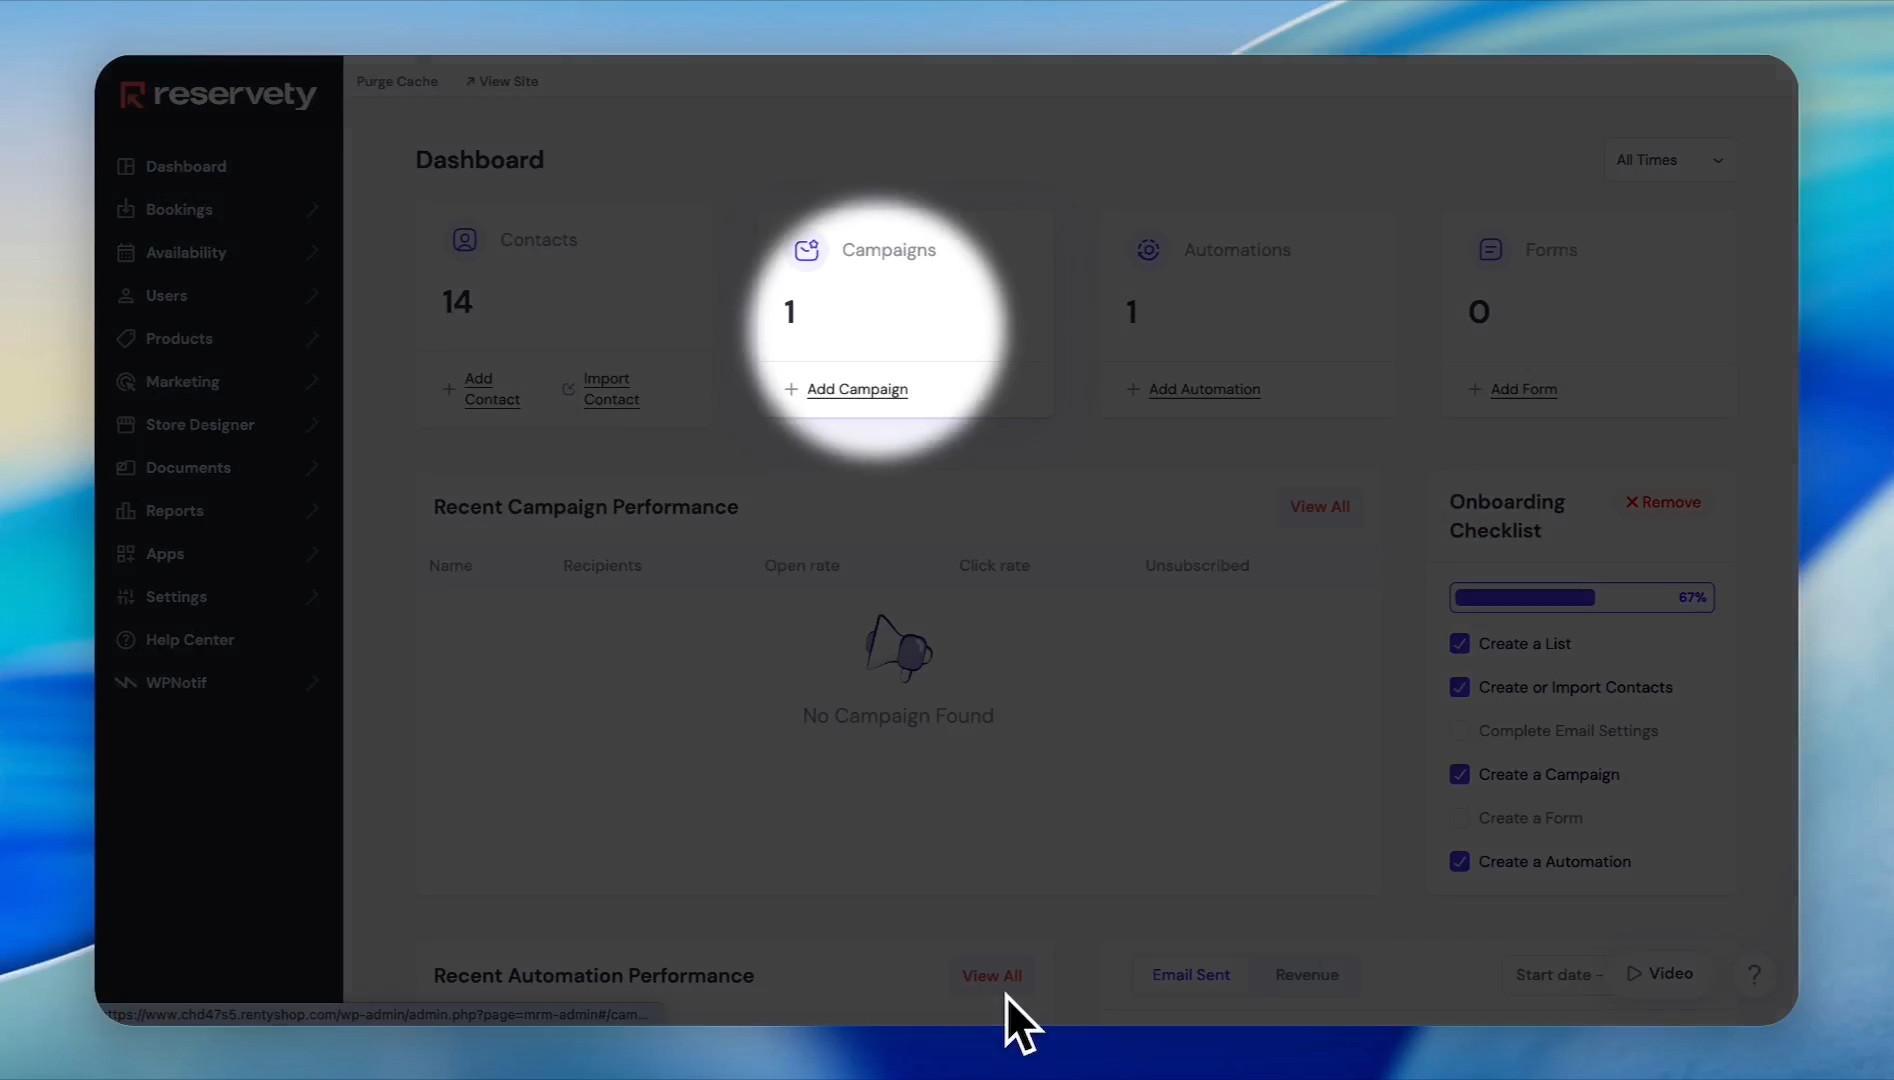
16
Click View All under Campaigns and create new campaign for Abandoned Carts.
Step #16: Click View All under Campaigns and create new campaign for Abandoned Carts.
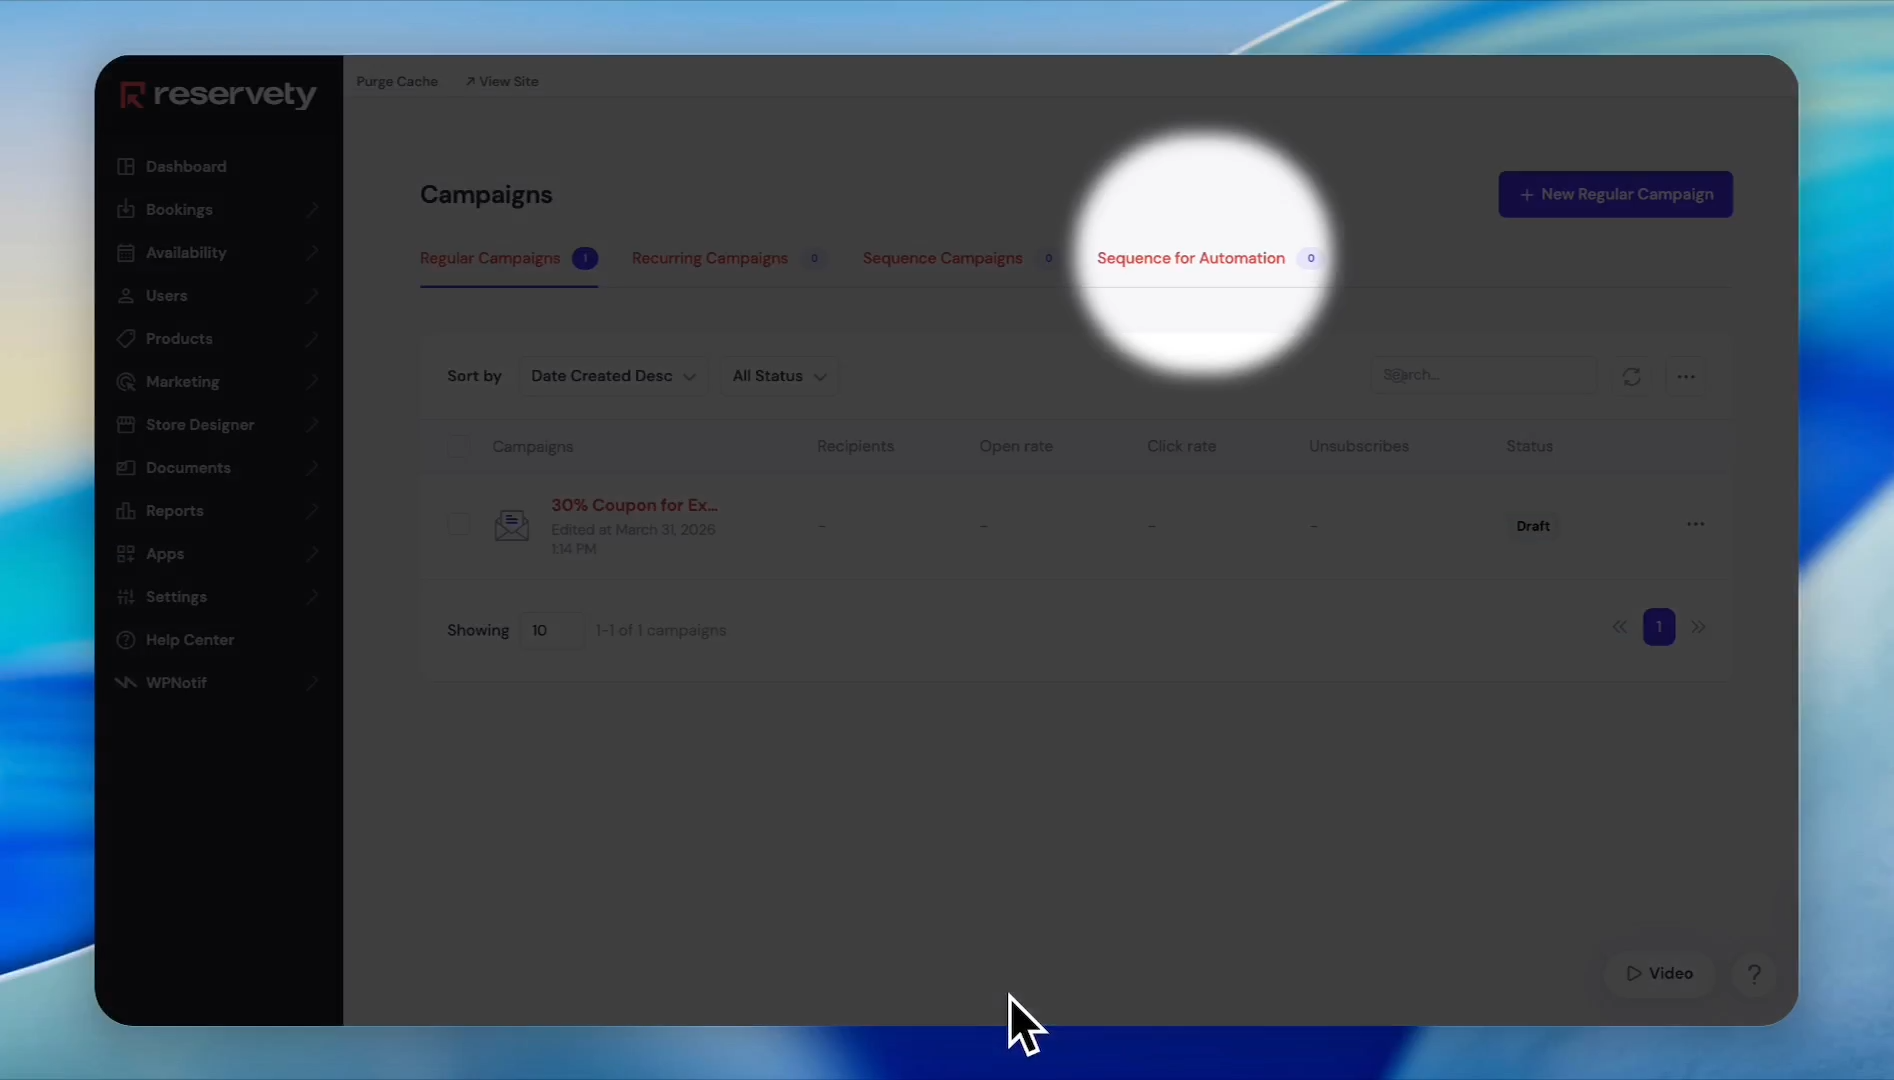
17
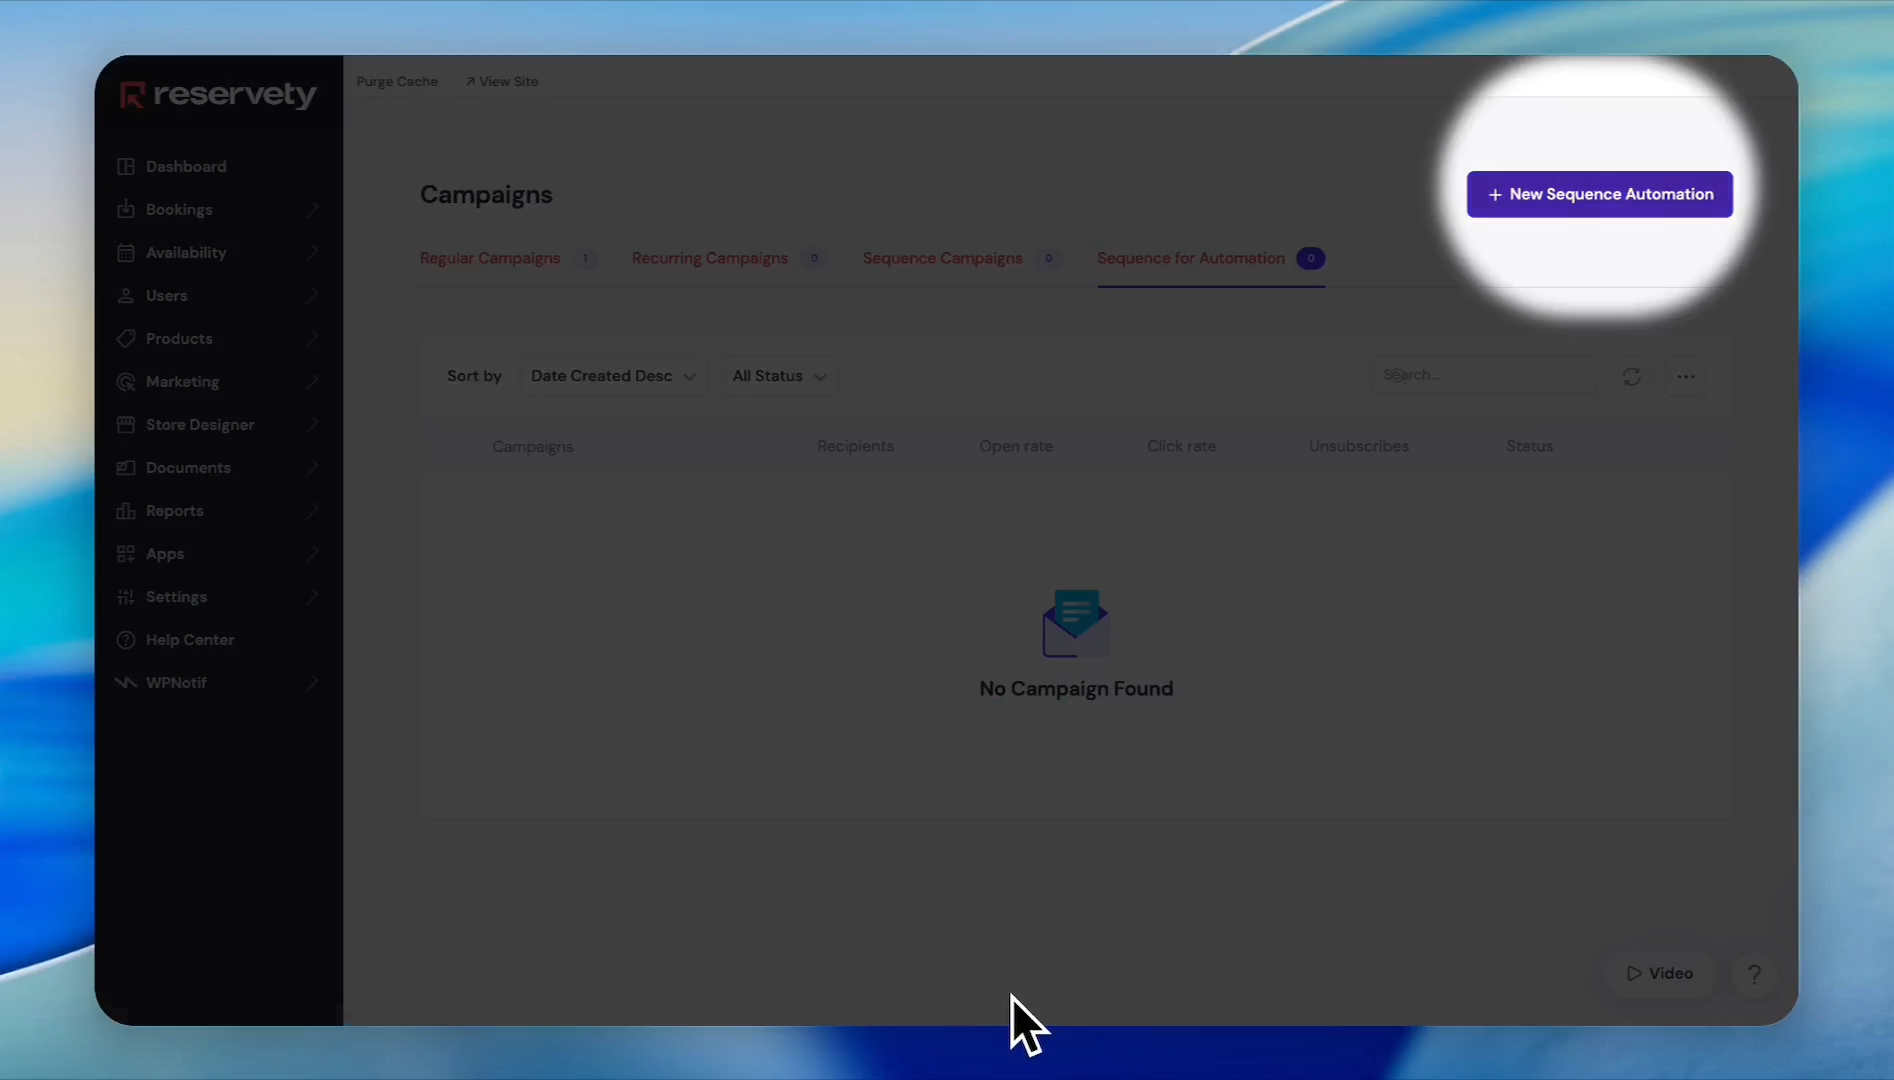
Select the Sequence for Automation tab.
Step #17: Select the Sequence for Automation tab.
18
Click New Sequence Automation.
Step #18: Click New Sequence Automation.
19
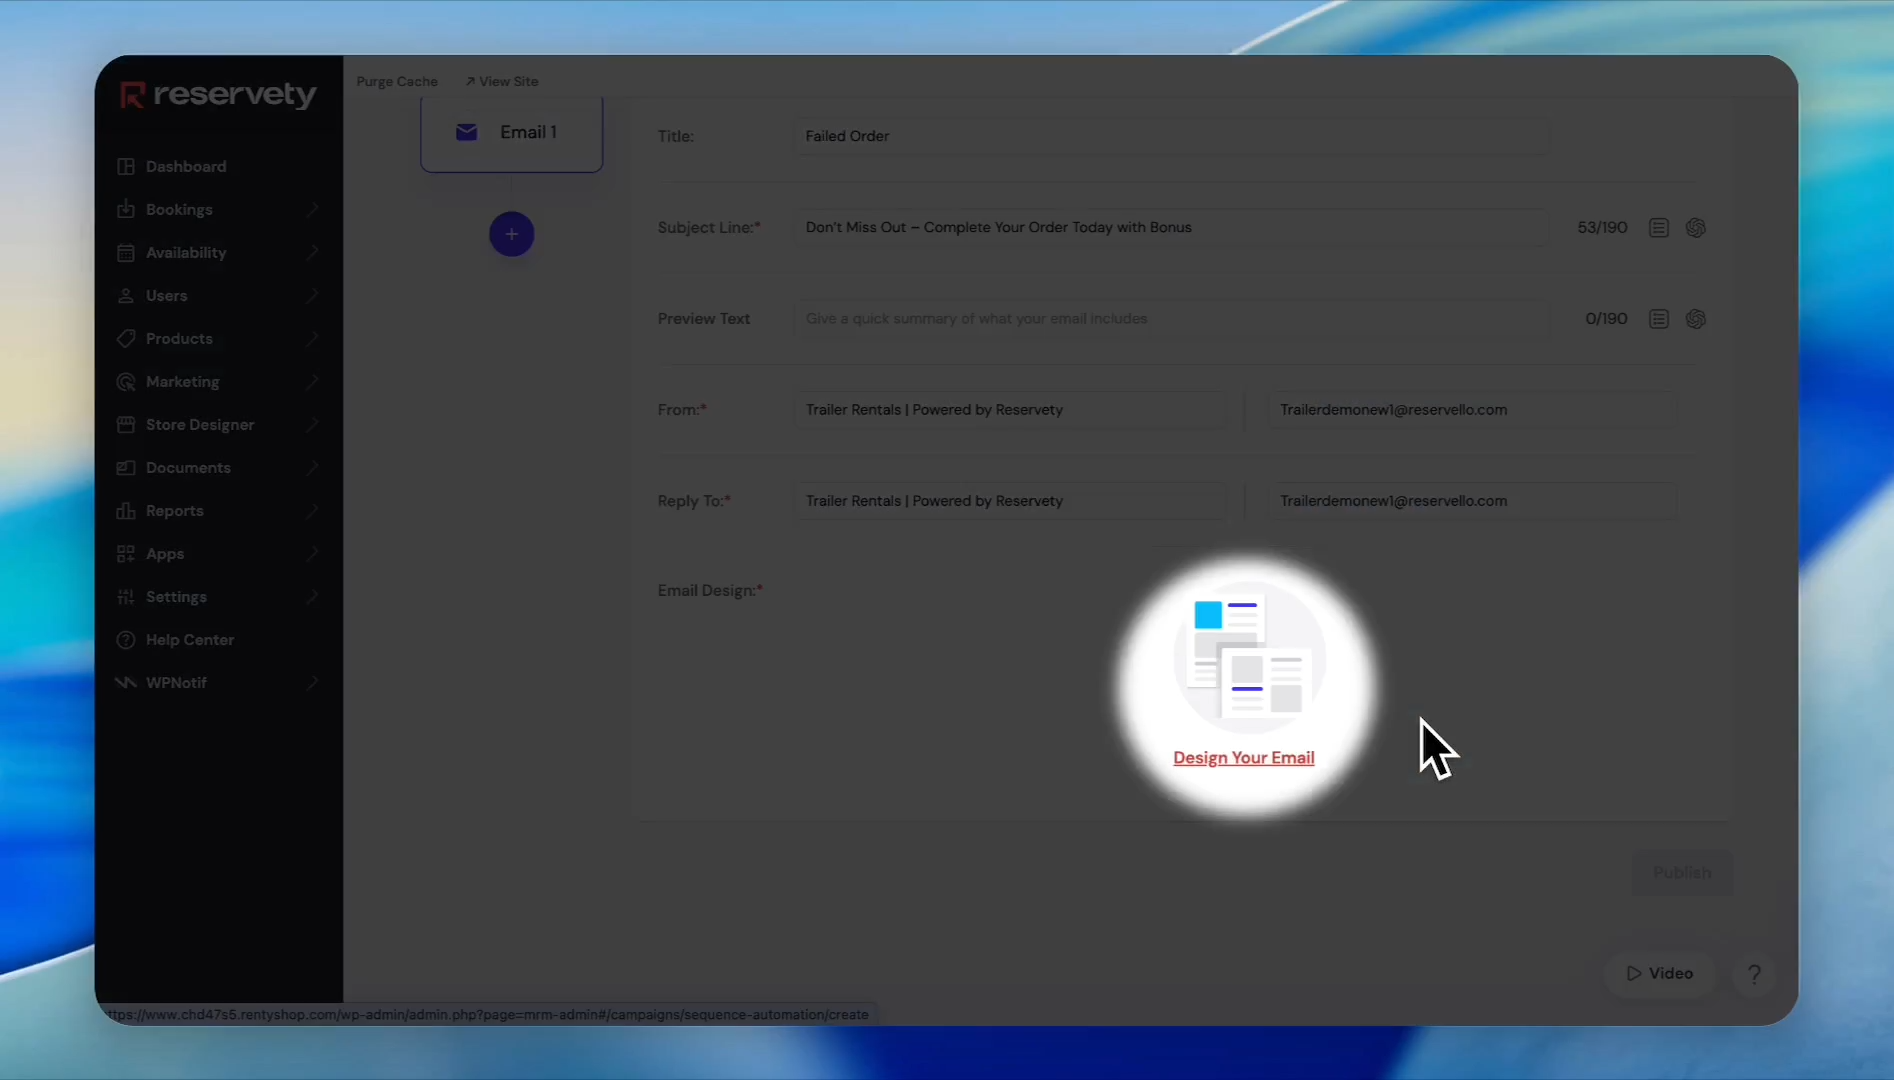
Enter a clear title and a compelling subject line for your recovery email.
20
Click Design Your Email to open the builder.
Step #20: Click Design Your Email to open the builder.
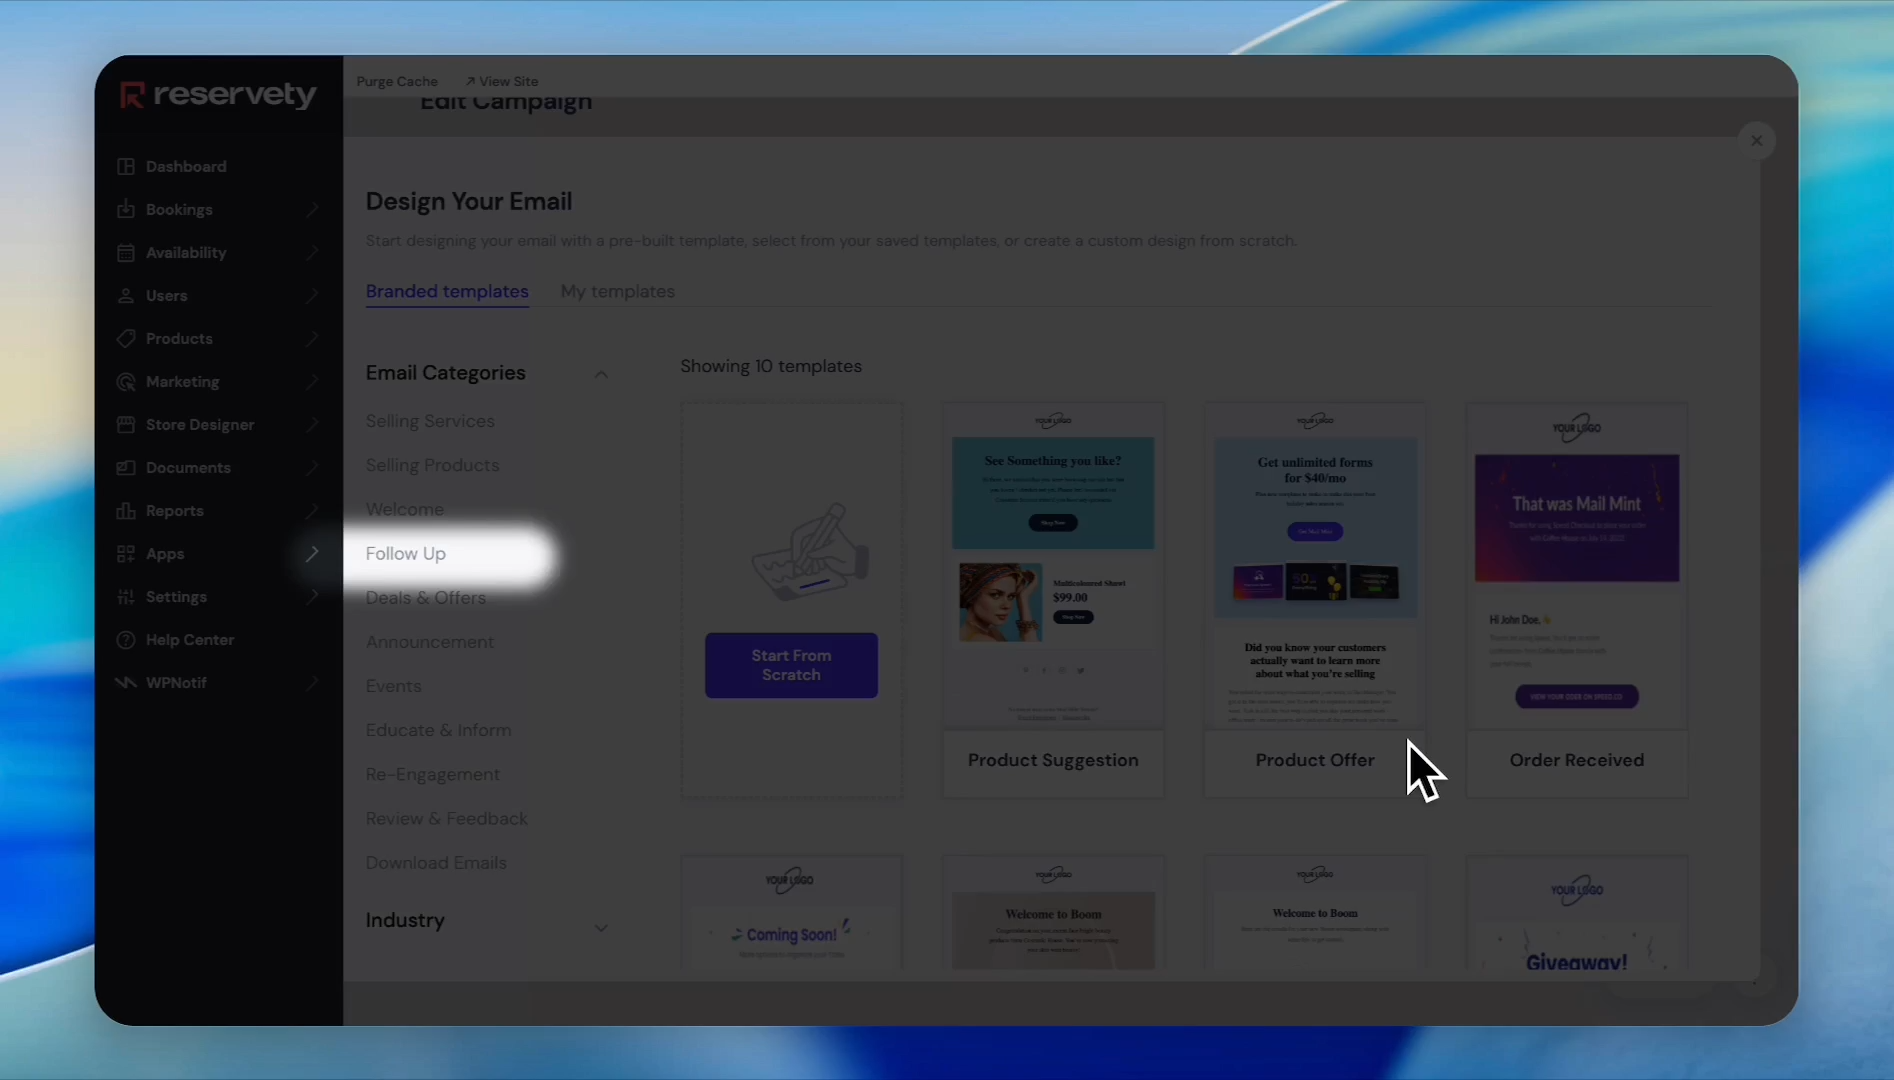
21
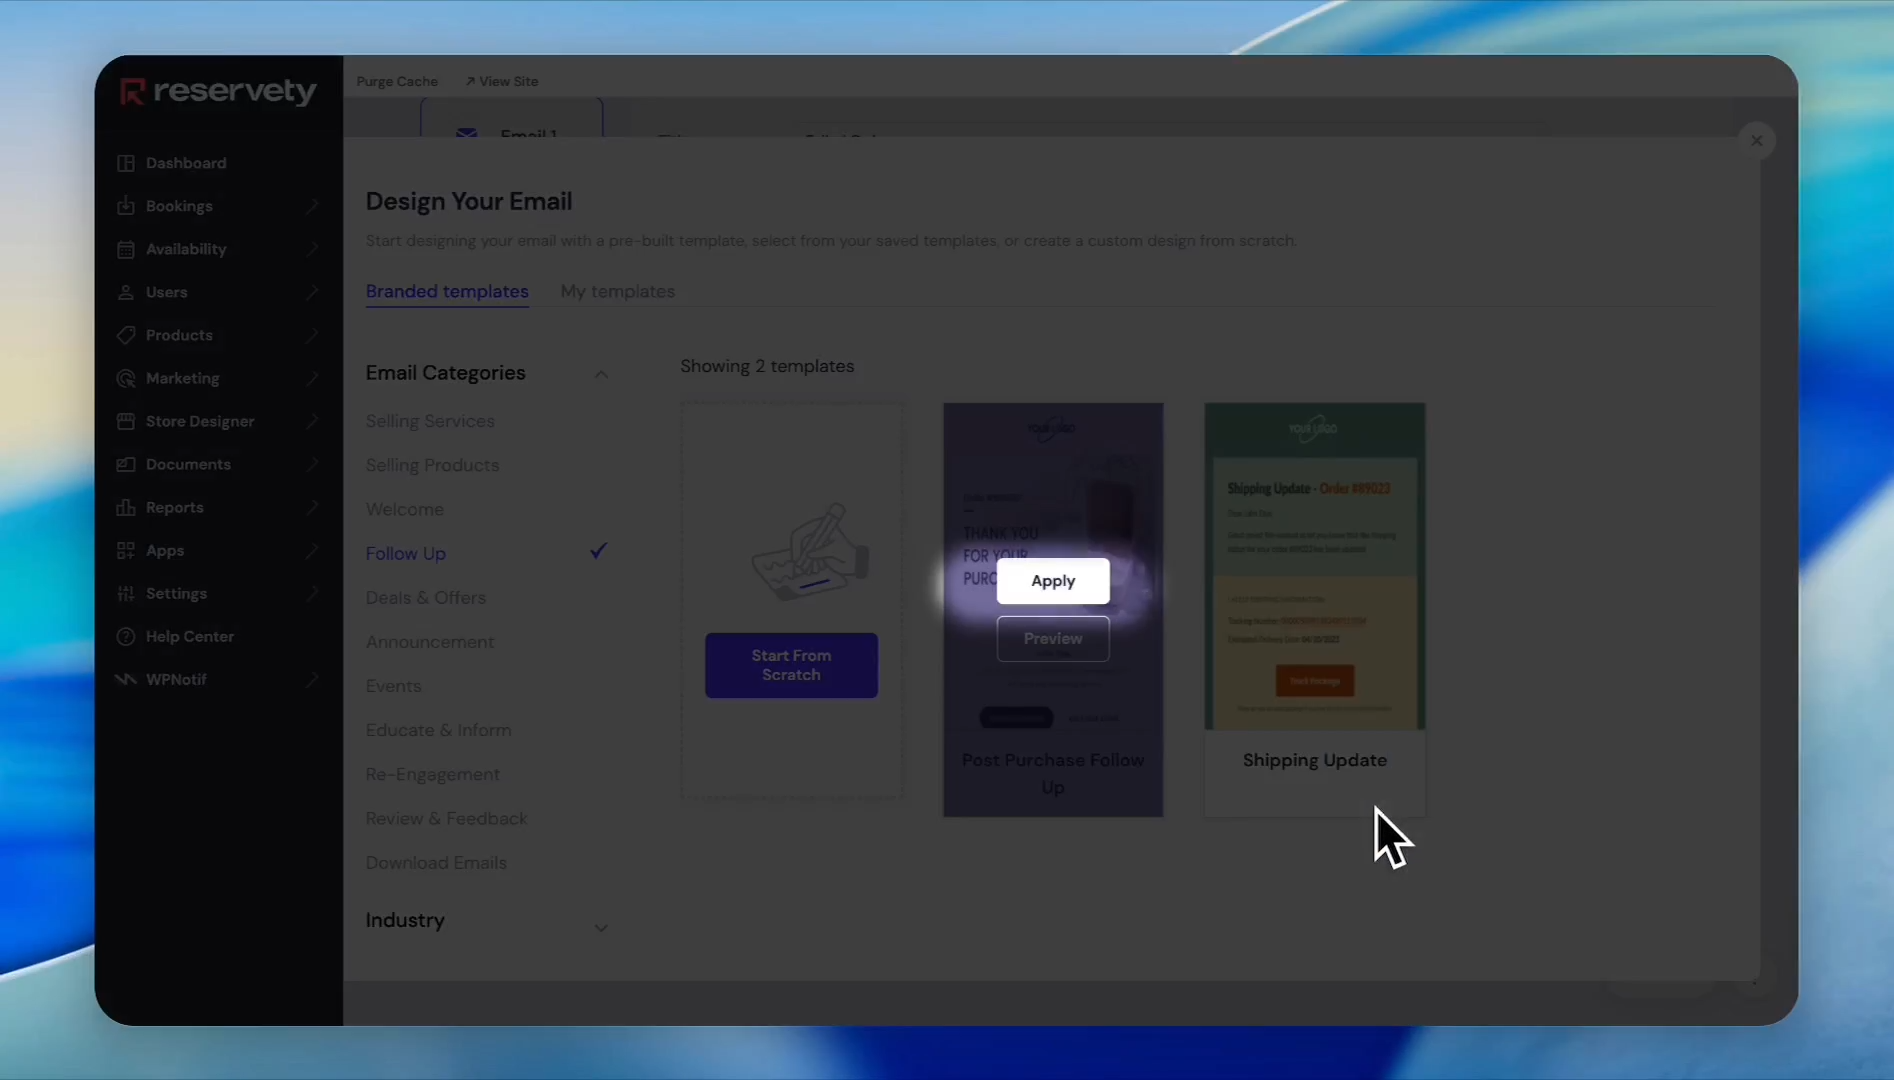
Select the Follow Up category from the sidebar menu.
Step #21: Select the Follow Up category from the sidebar menu.
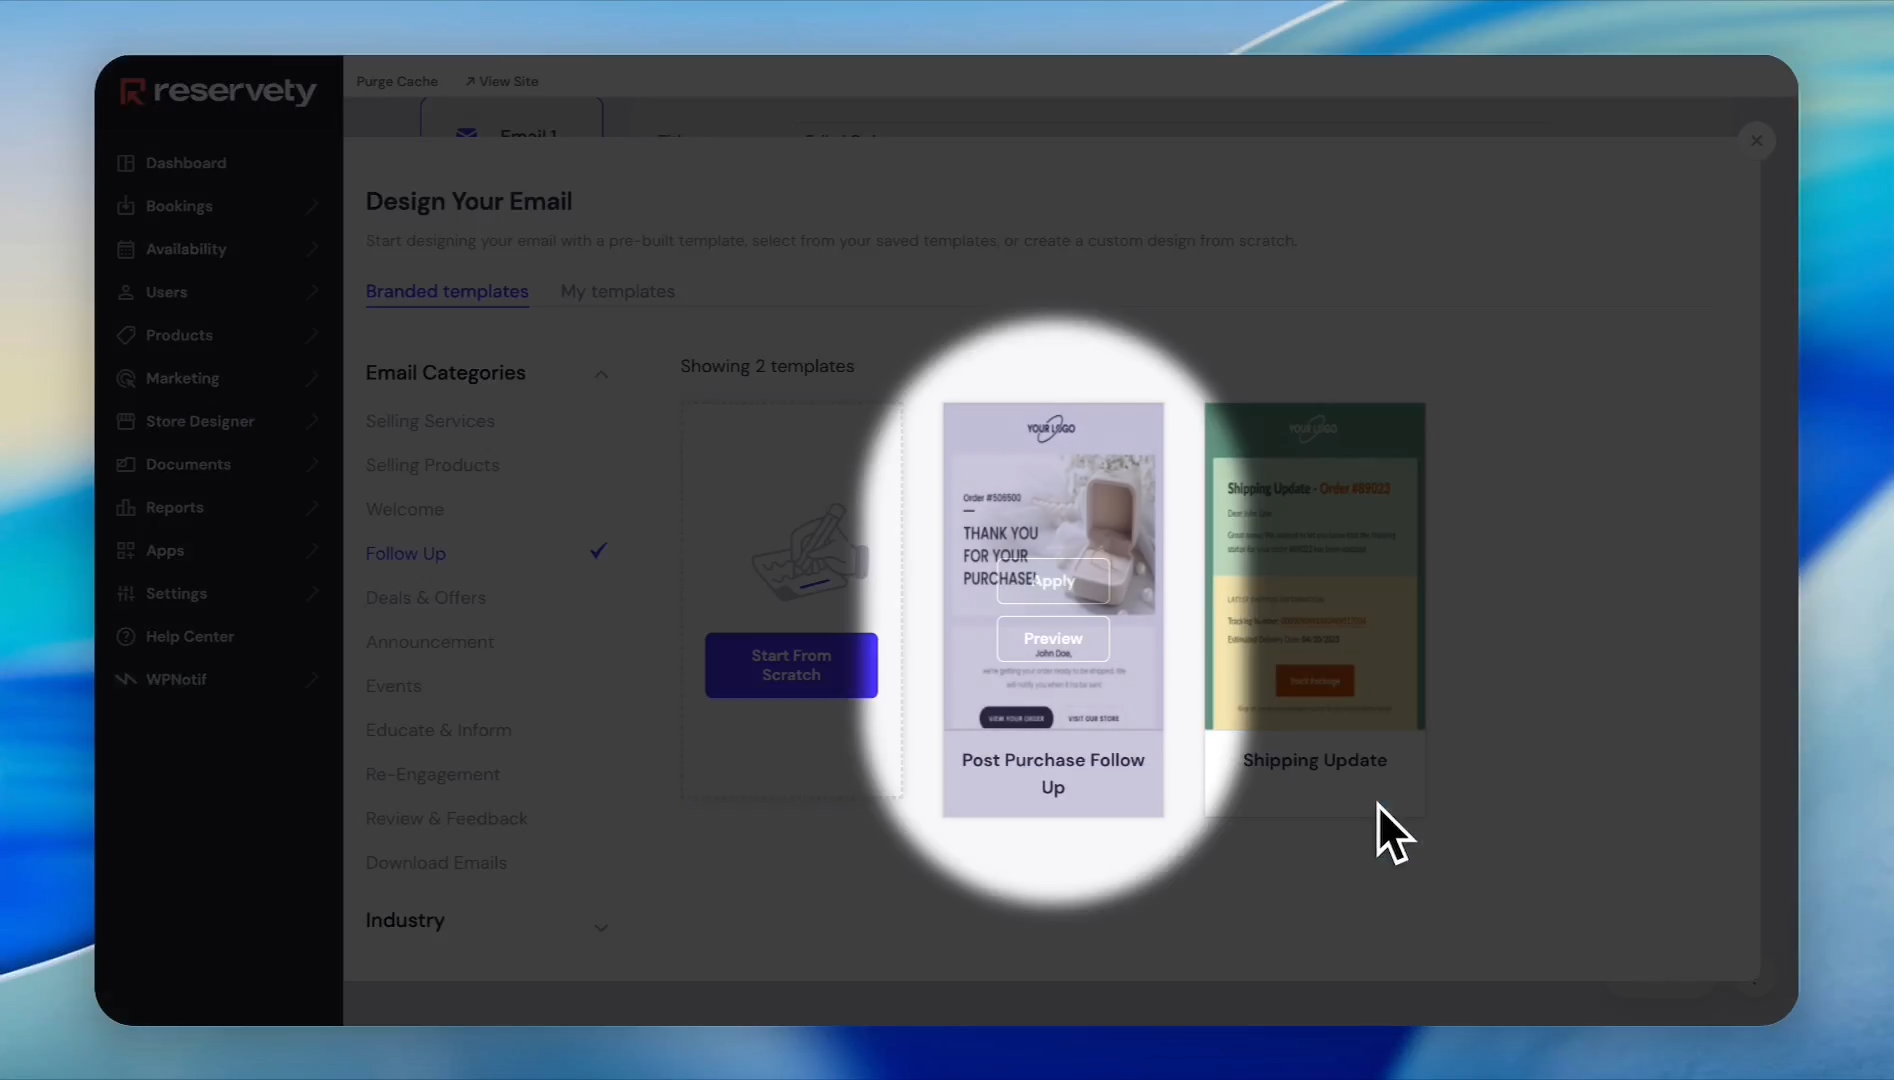
22
Select an email template that fits your brand.
Step #22: Select an email template that fits your brand.
23
Click Apply on your chosen template.
Step #23: Click Apply on your chosen template.

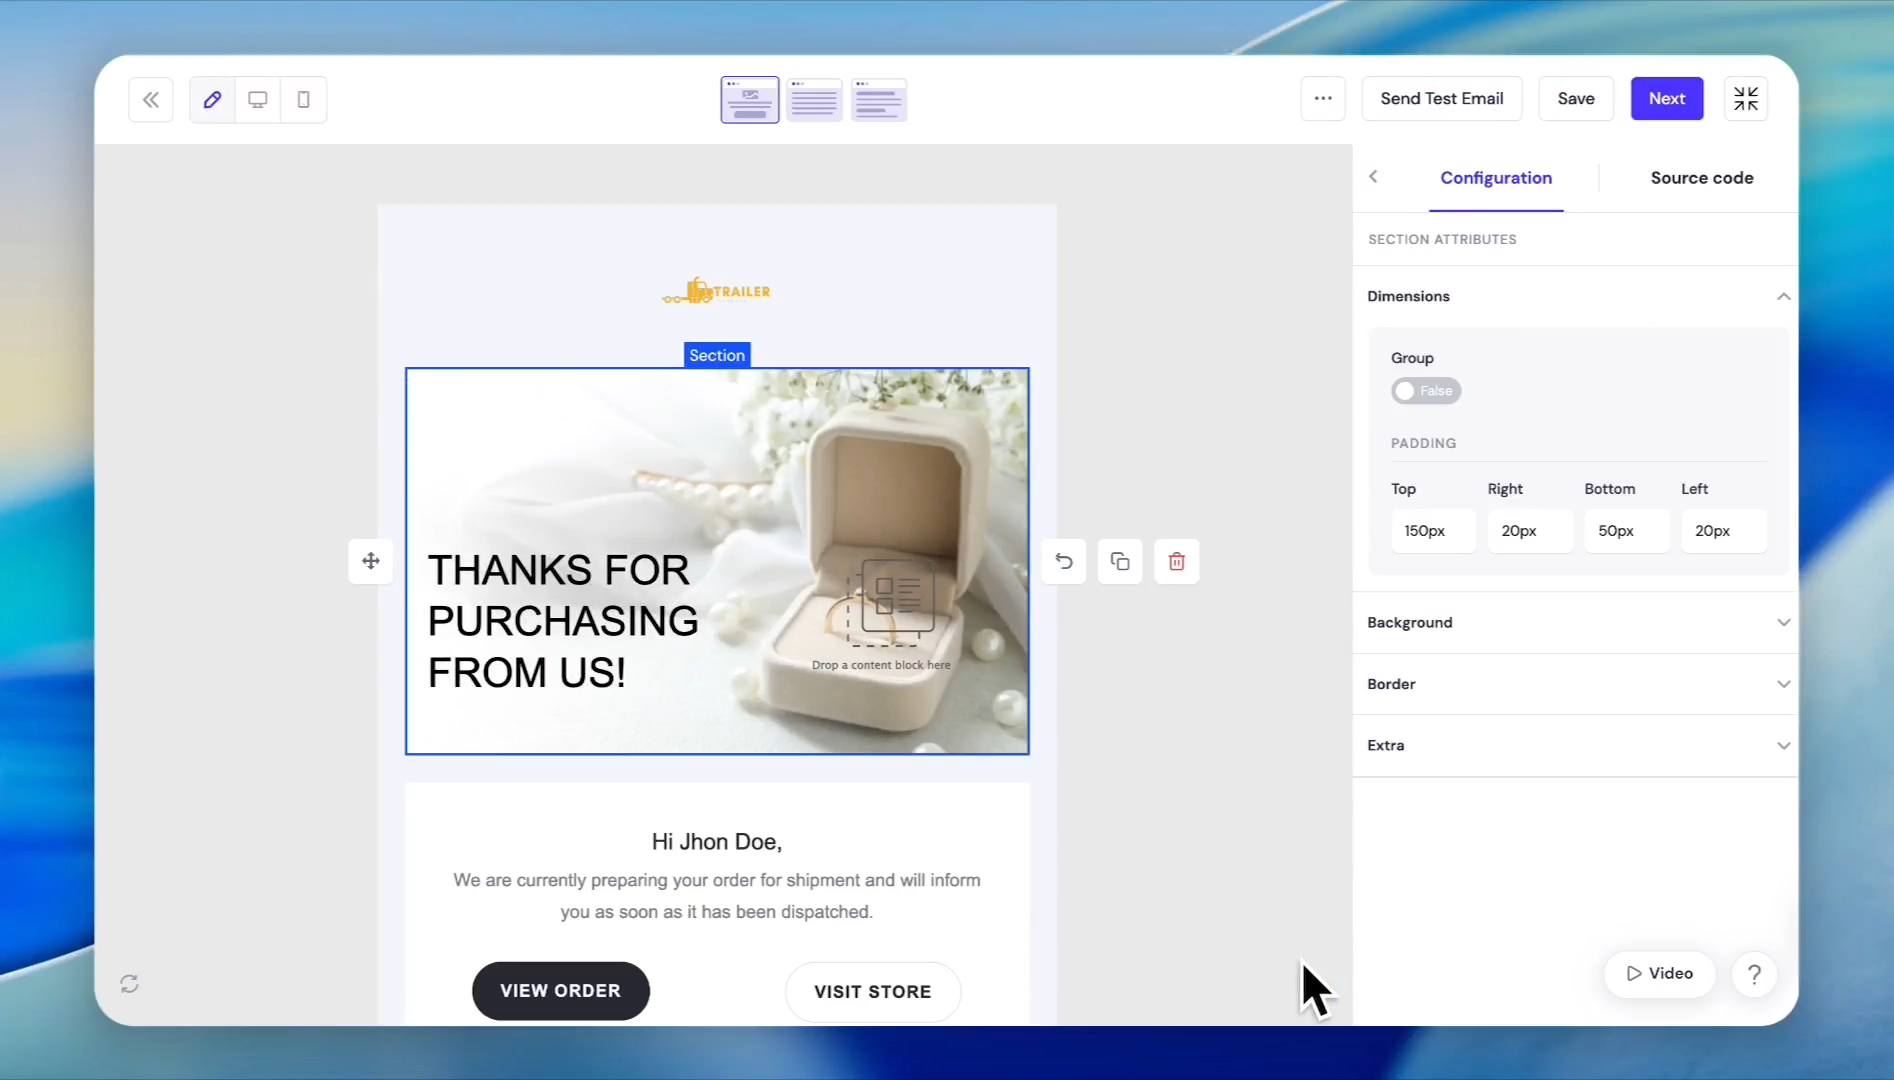
Customize the chosen template to match your brand styling.
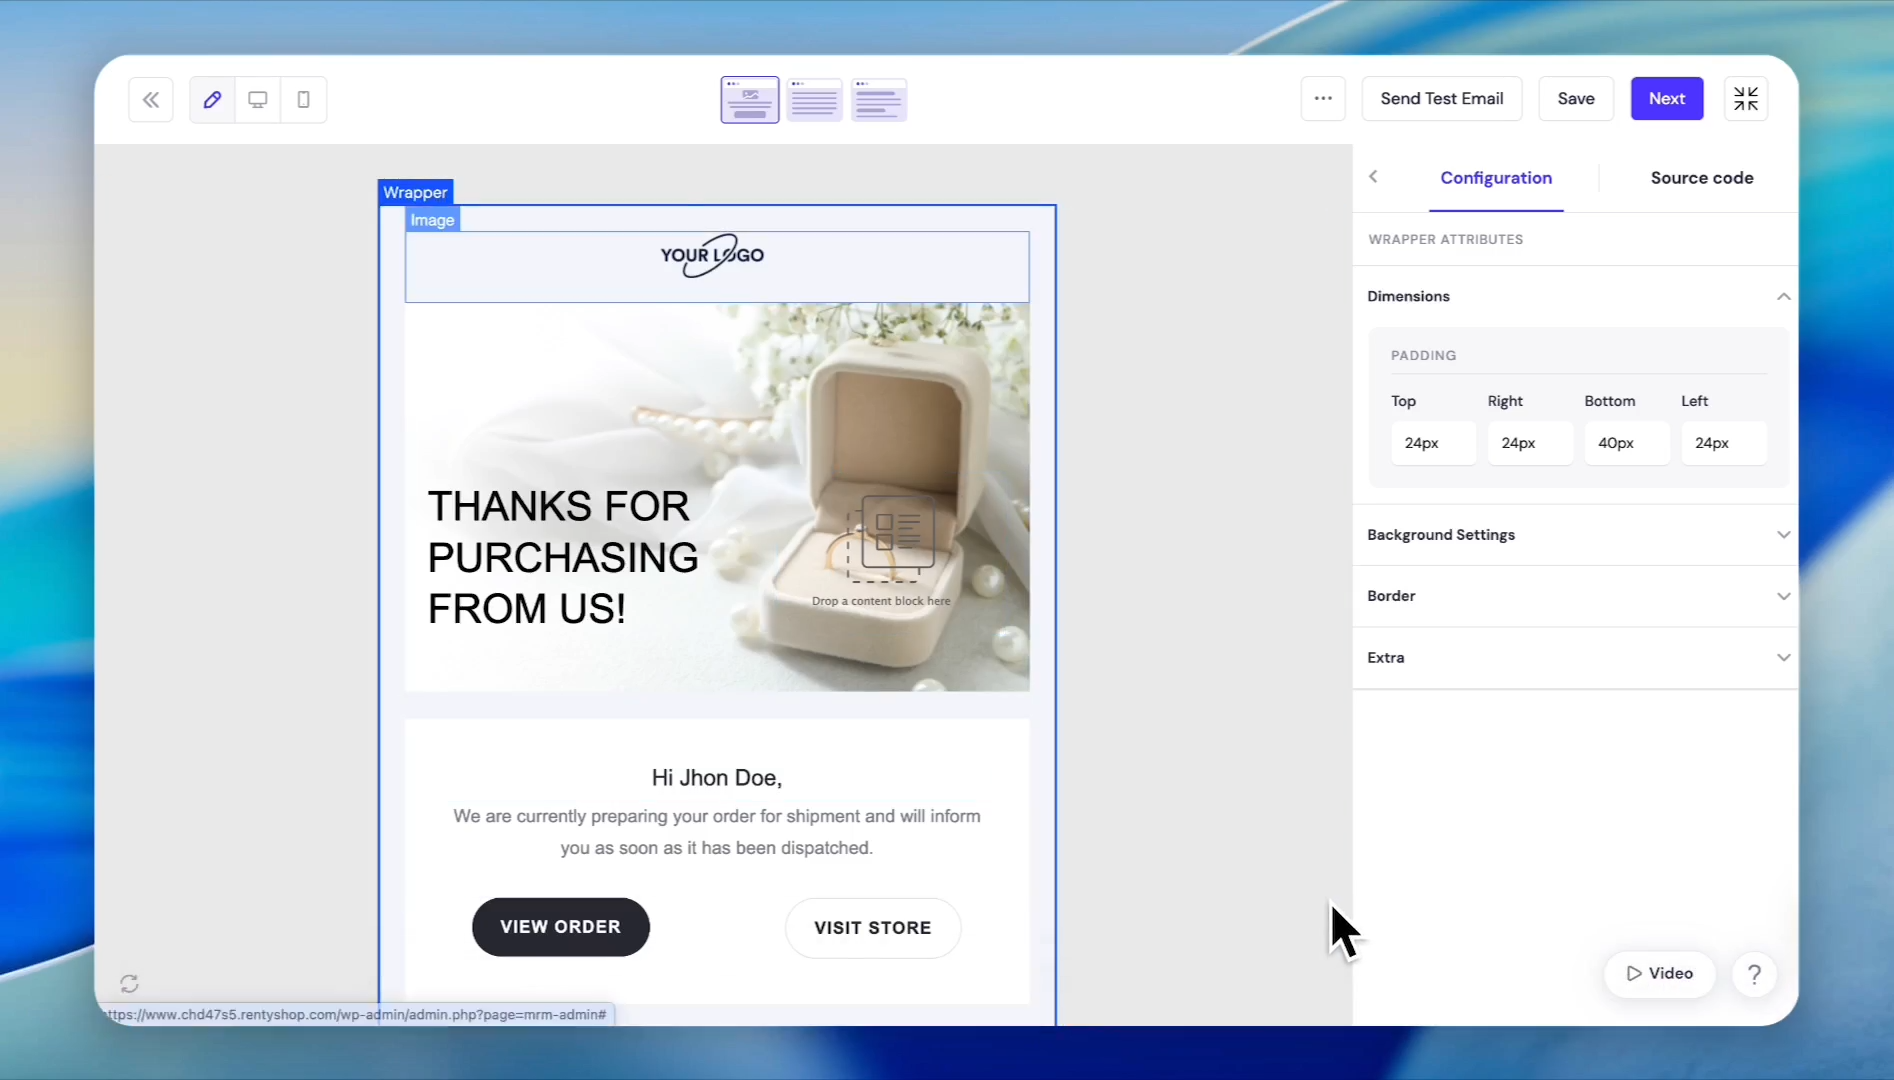
24
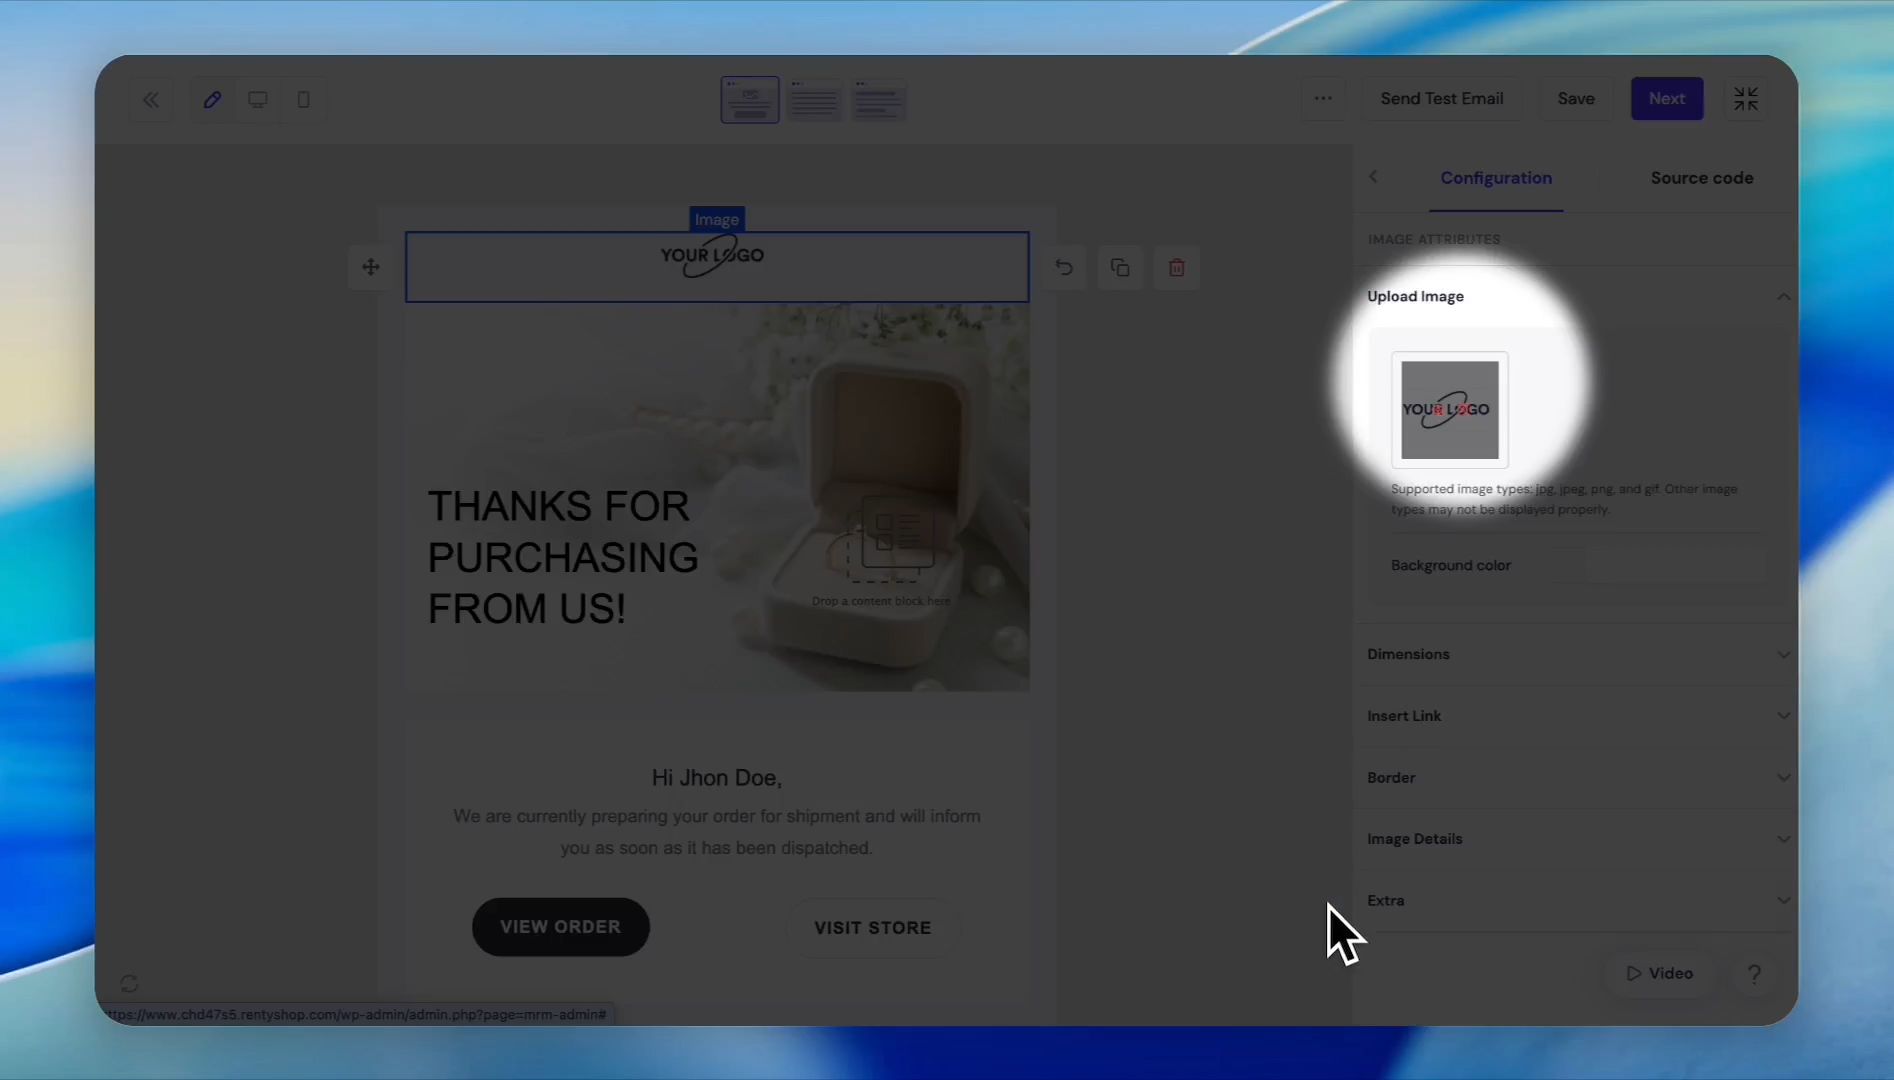
Click the placeholder logo block at the top of the template.
Step #24: Click the placeholder logo block at the top of the template.
25
Click Upload in the side panel.
Step #25: Click Upload in the side panel.
26
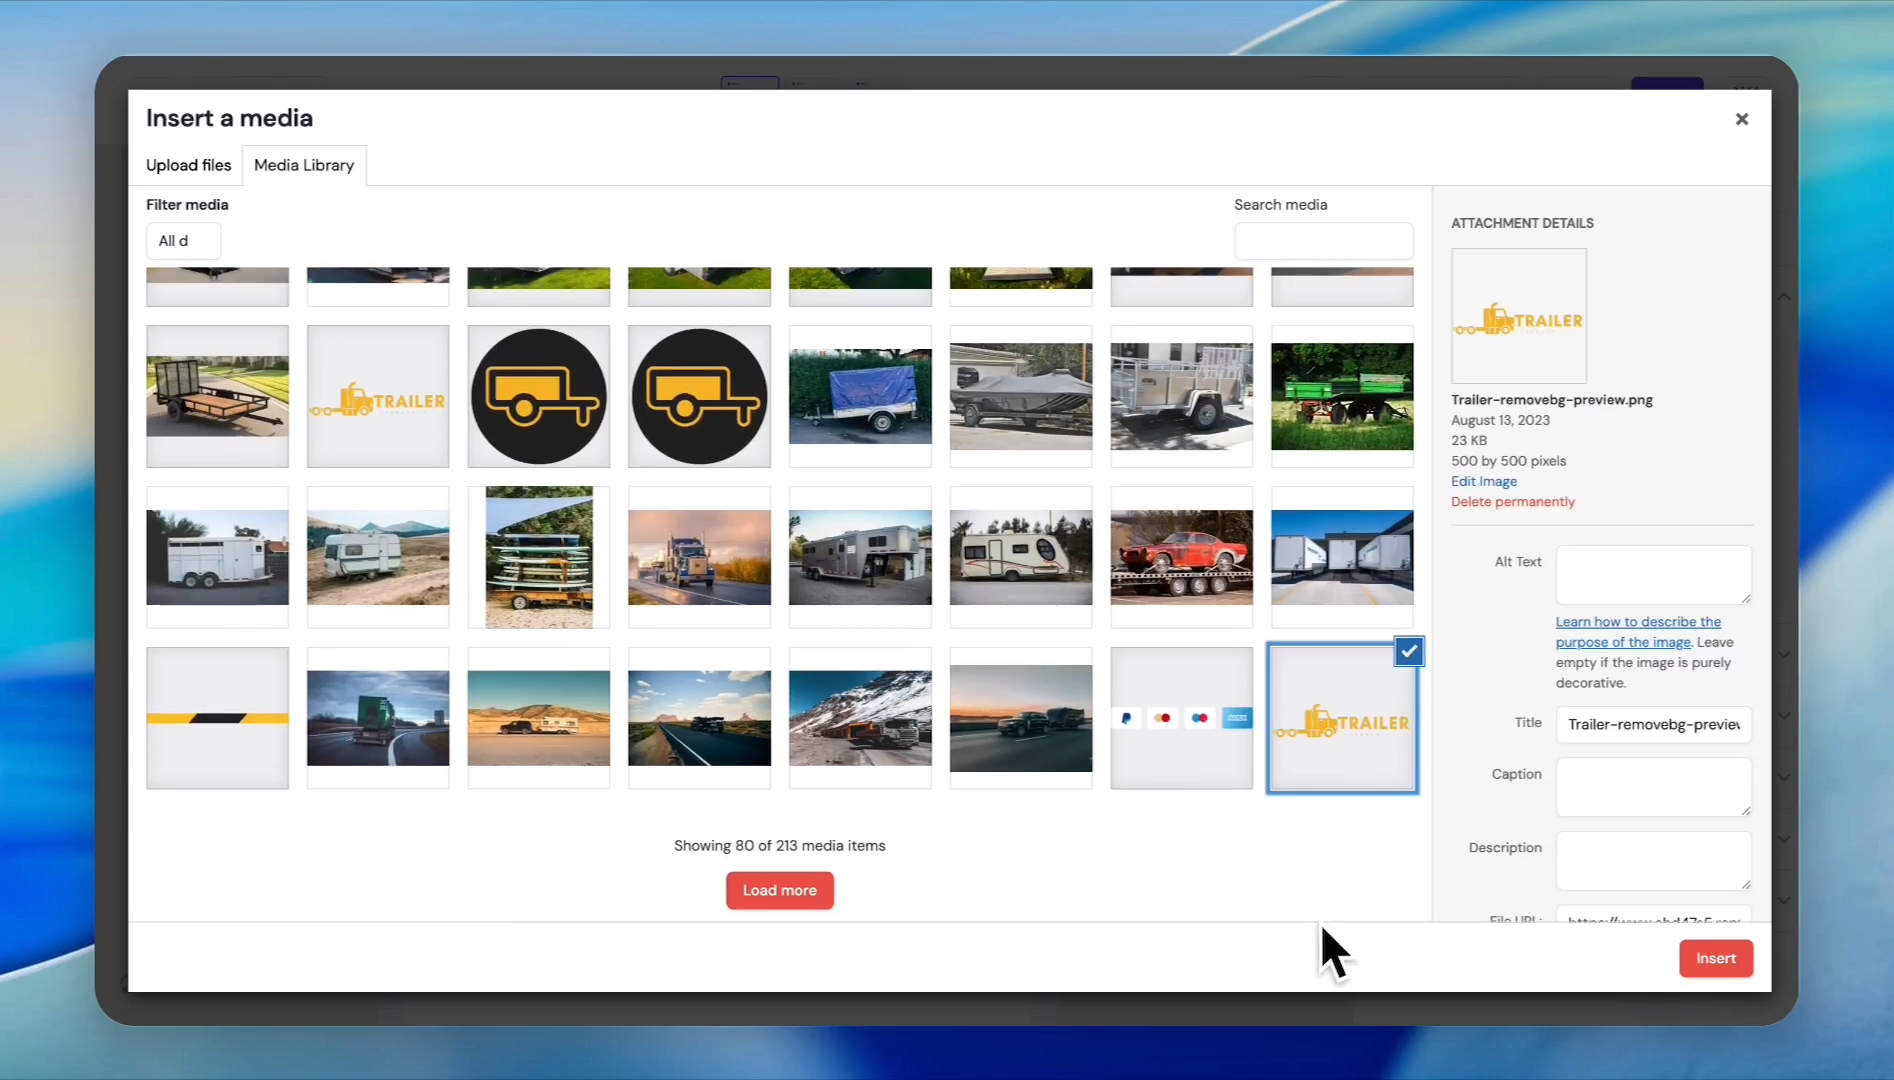
Select your company logo from the media library.
Step #26: Select your company logo from the media library.
27
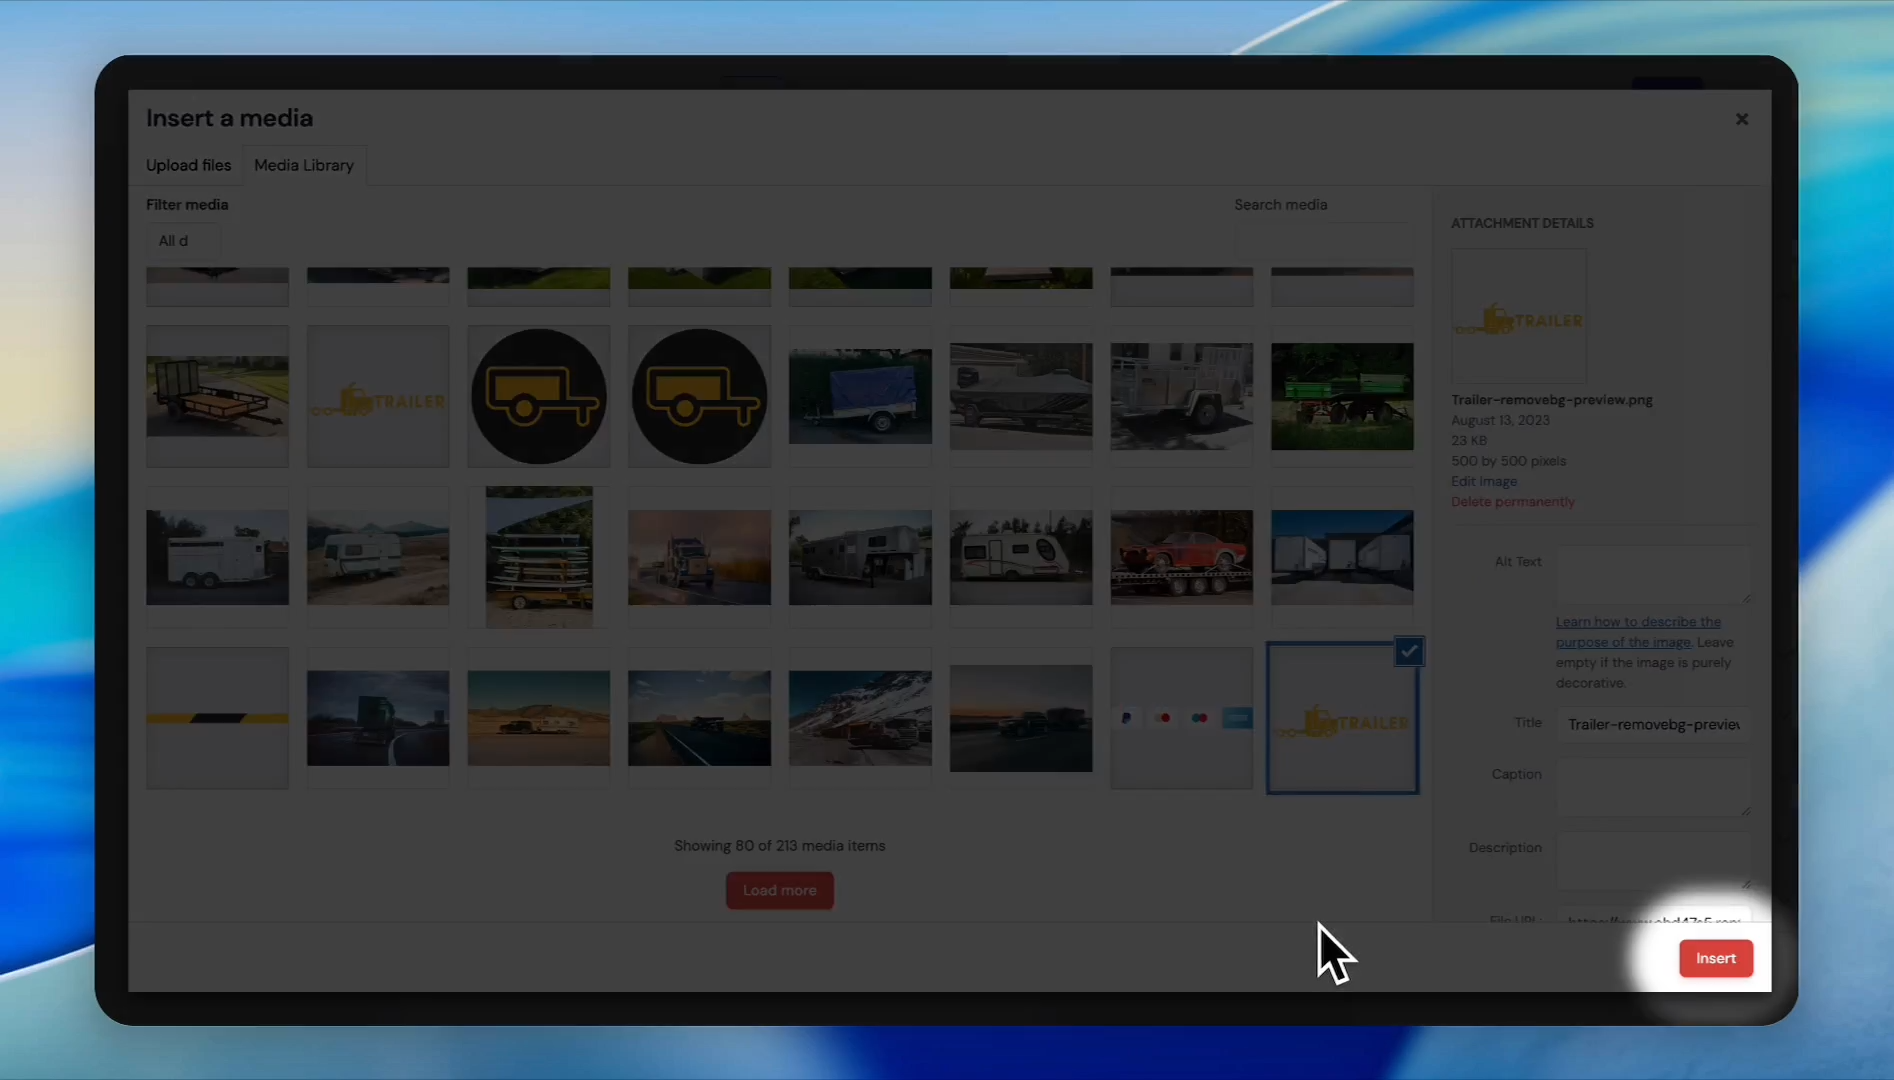
Click Insert.
Step #27: Click Insert.
28
Click the garbage can icon to delete any unwanted placeholder text or images.
Step #28: Click the garbage can icon to delete any unwanted placeholder text or images.
29
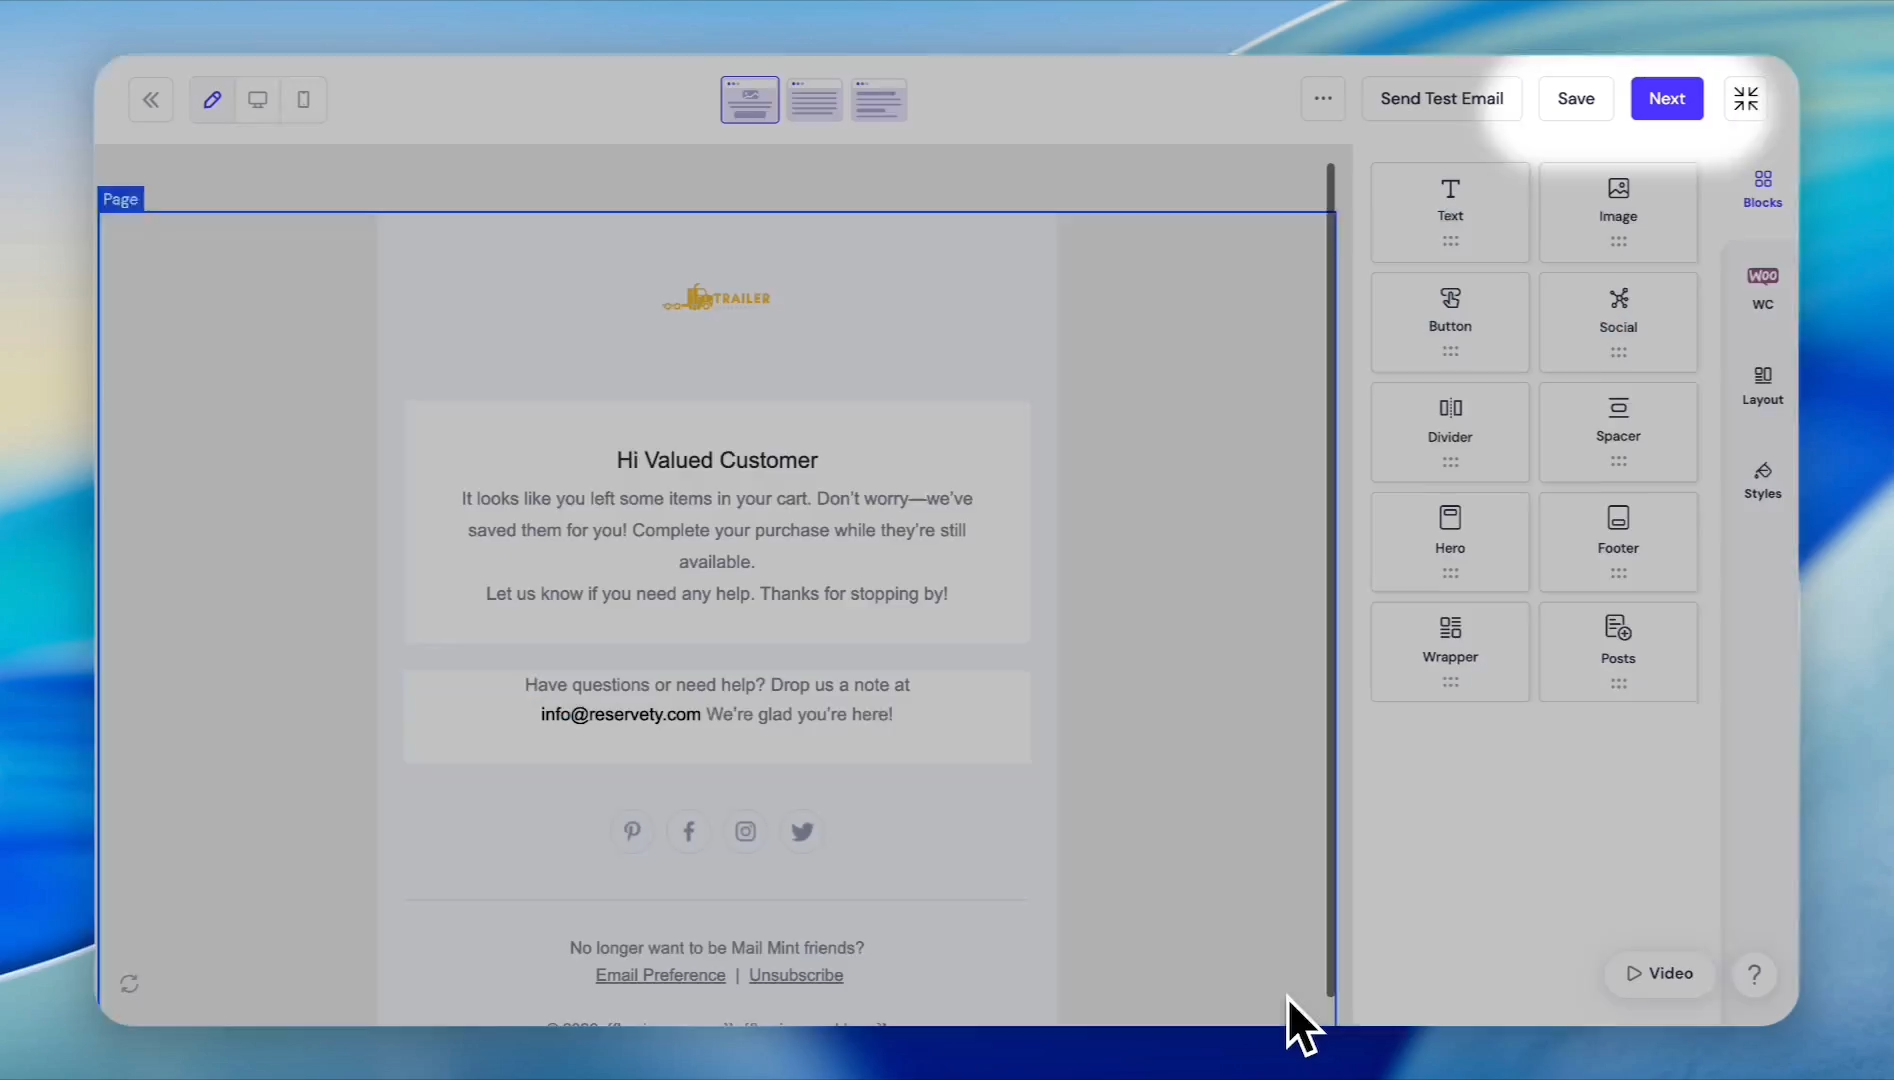
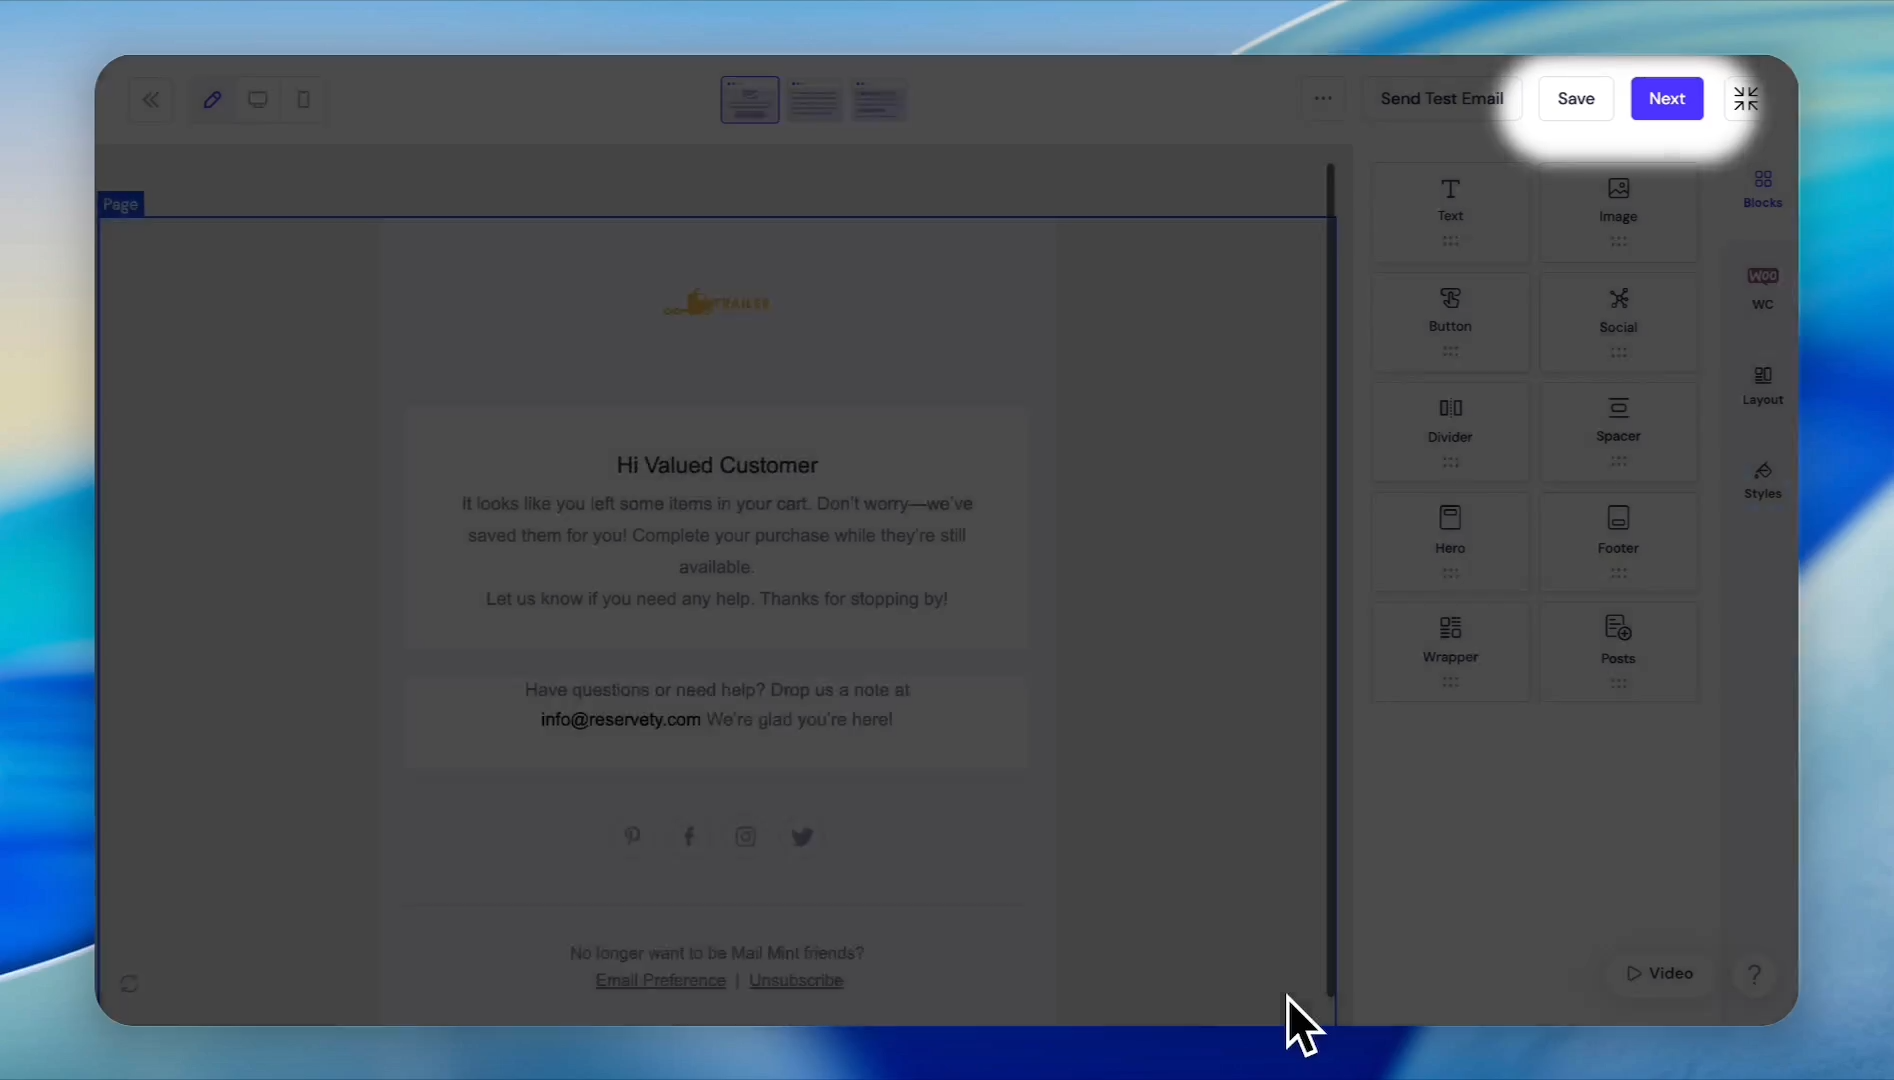
Click Next in the top right corner once your design is complete.
Step #29: Click Next in the top right corner once your design is complete.
30
Click Publish to save your new sequence.
Step #30: Click Publish to save your new sequence.

Finalizing and Launching the Workflow

Link your newly designed sequence back to the automation workflow.
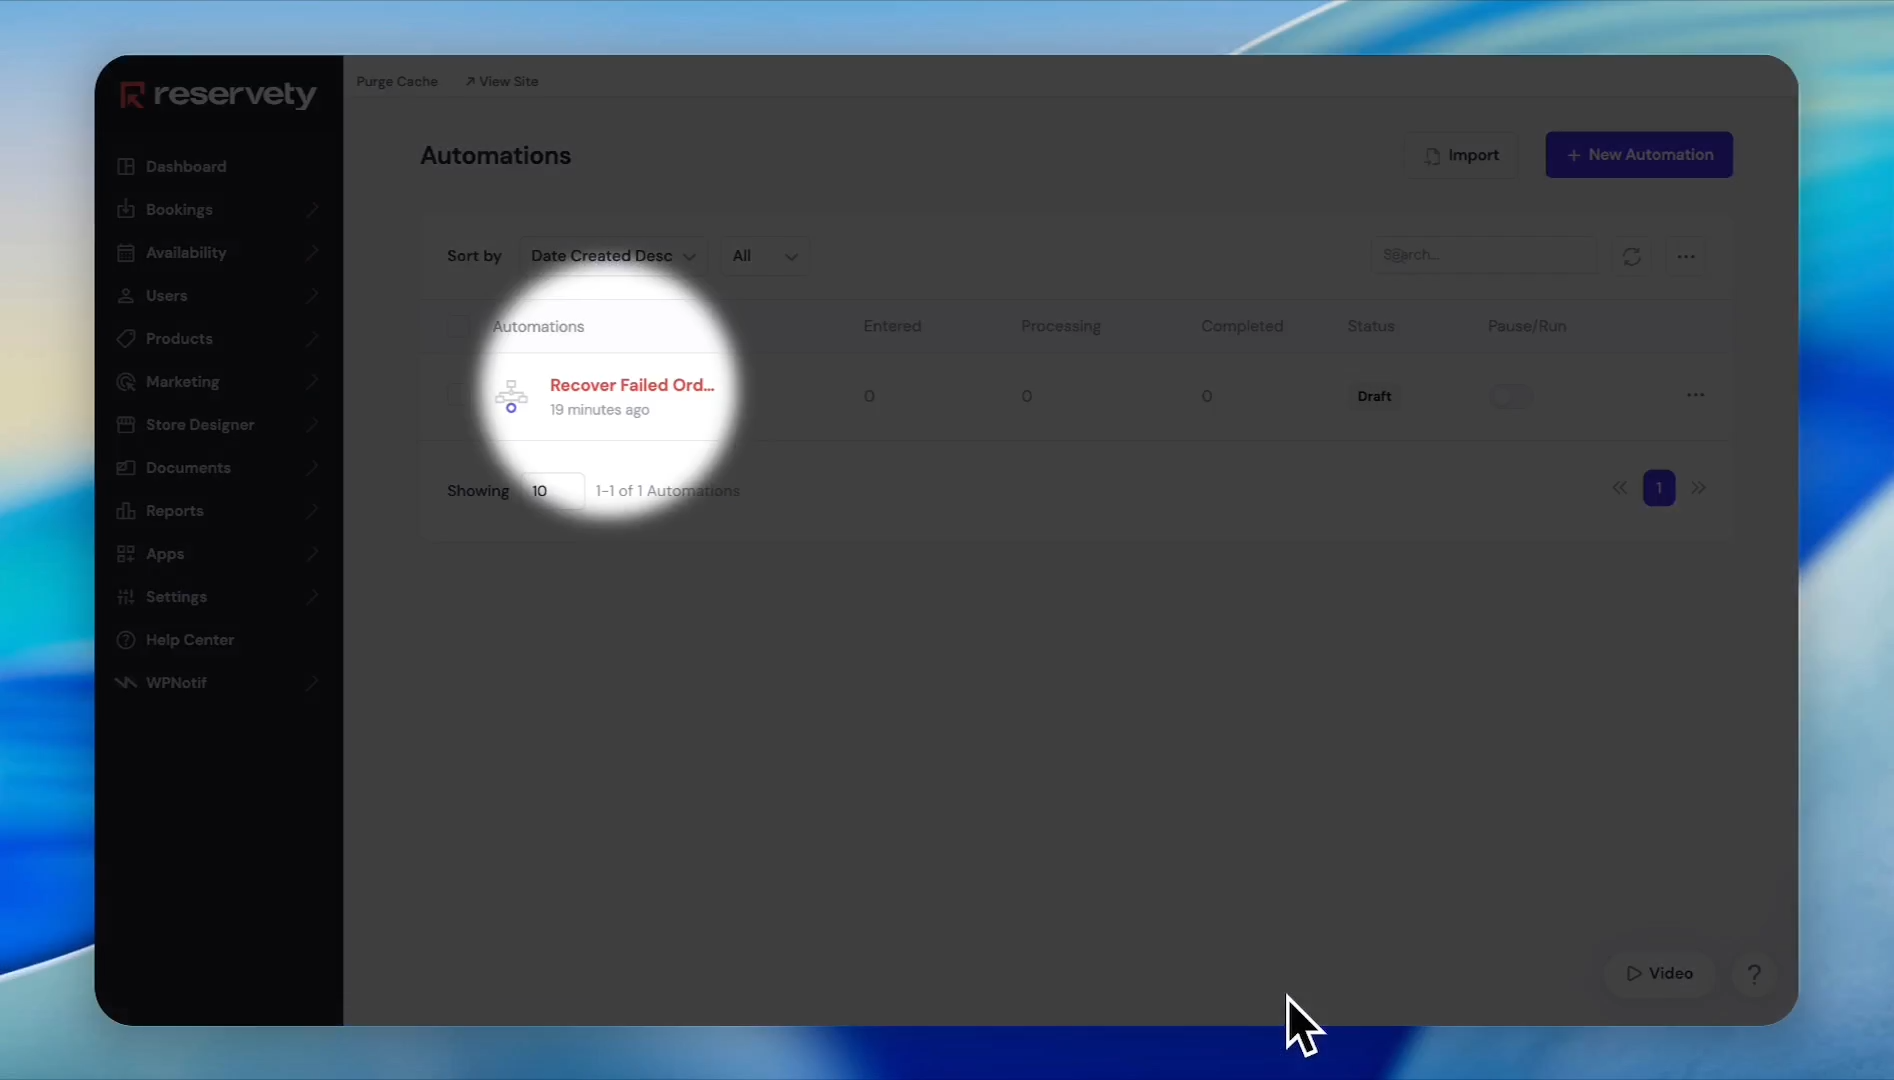
31
Return to Automations and click on the Recover Failed Orders workflow to edit it.
Step #31: Return to Automations and click on the Recover Failed Orders workflow to edit it.
32
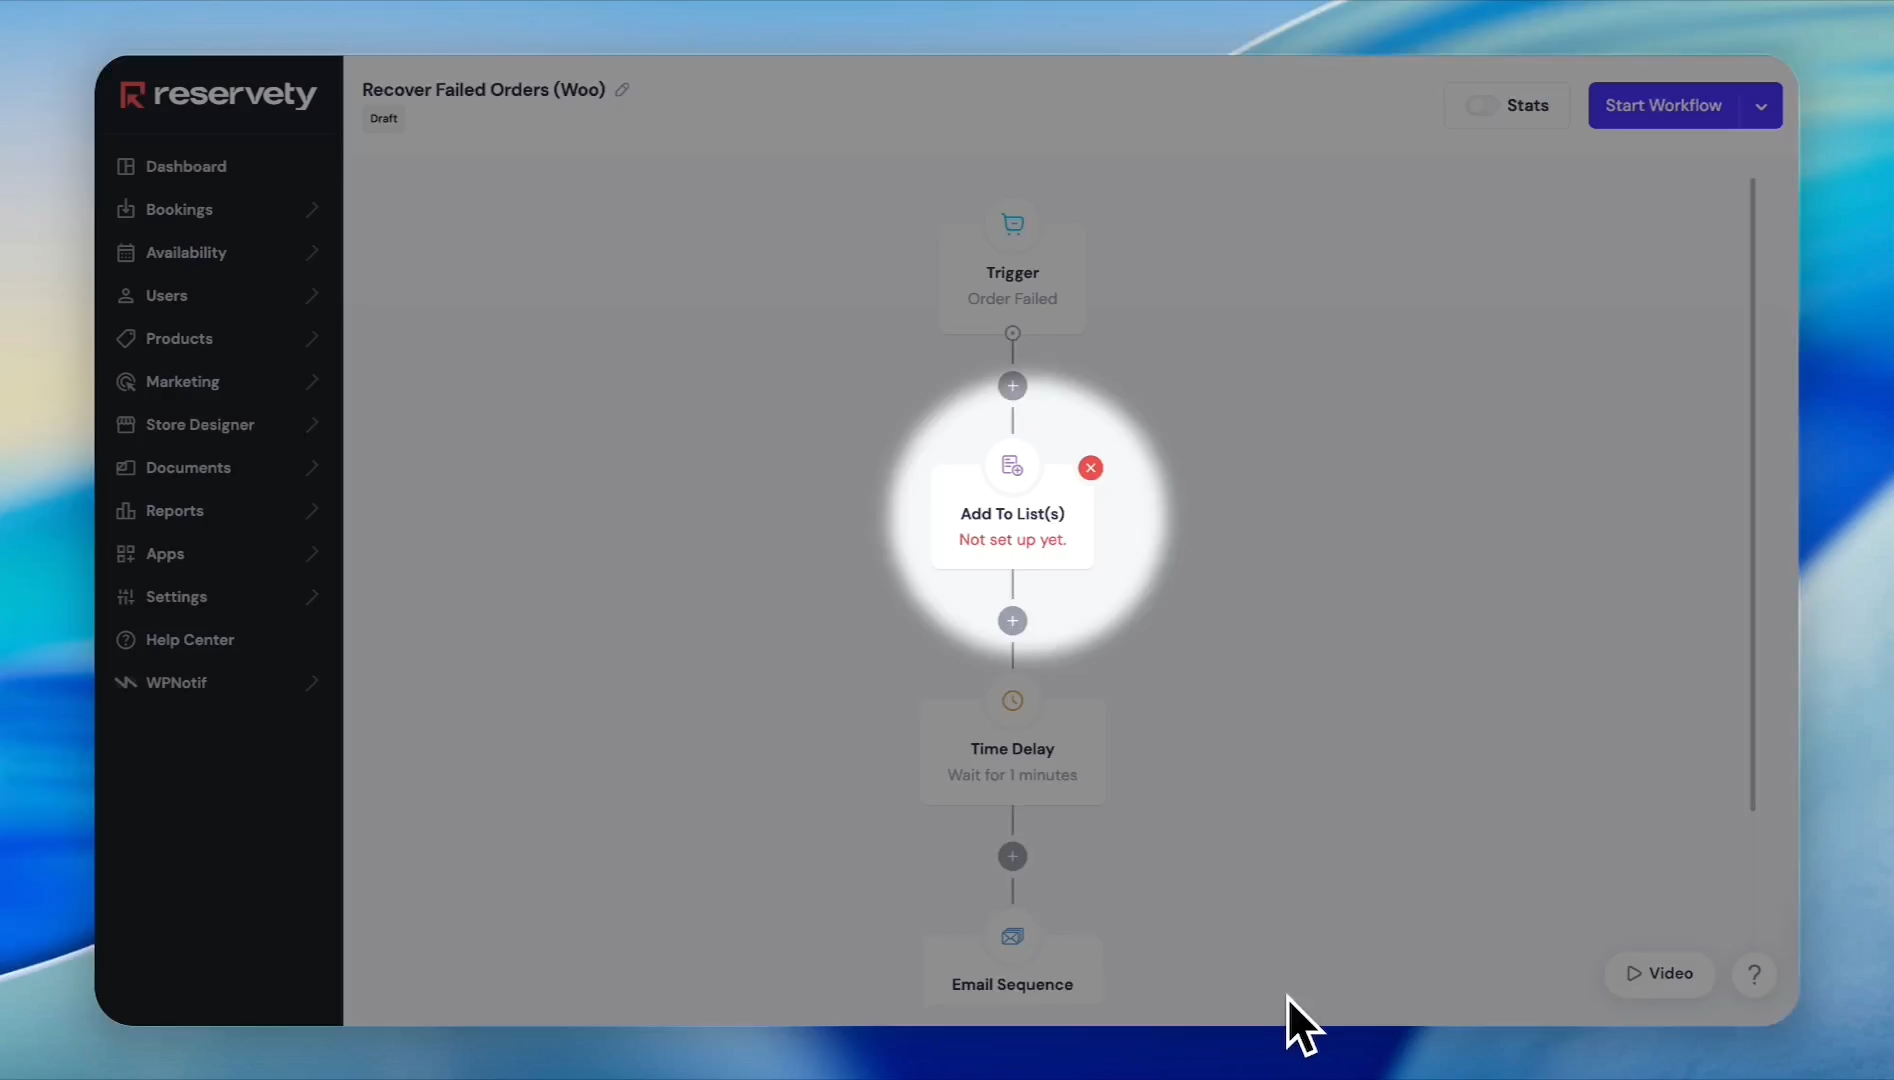
Click the Add To List(s) node in the workflow builder.
Step #32: Click the Add To List(s) node in the workflow builder.
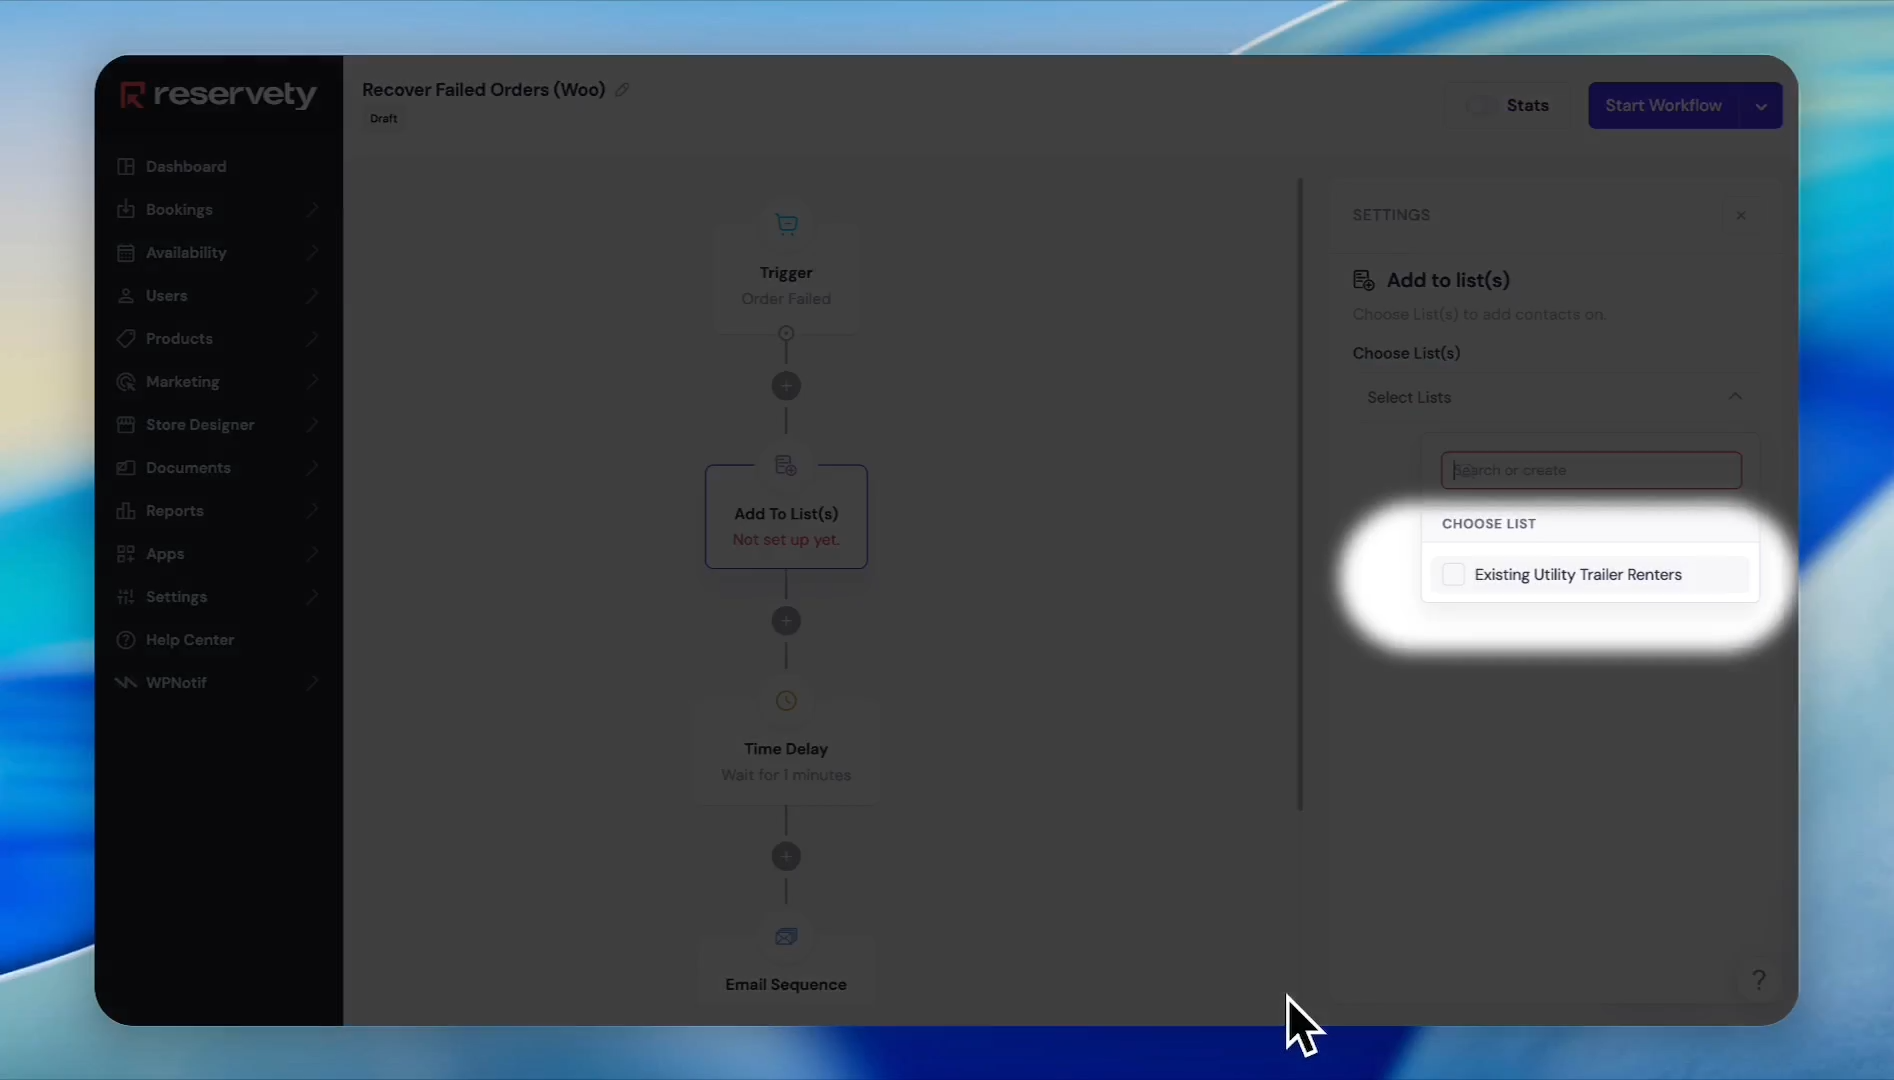
33
Check the box for your desired contact segment (e.g., Existing Utility Trailer Renters).
Step #33: Check the box for your desired contact segment (e.g., Existing Utility Trailer Renters).
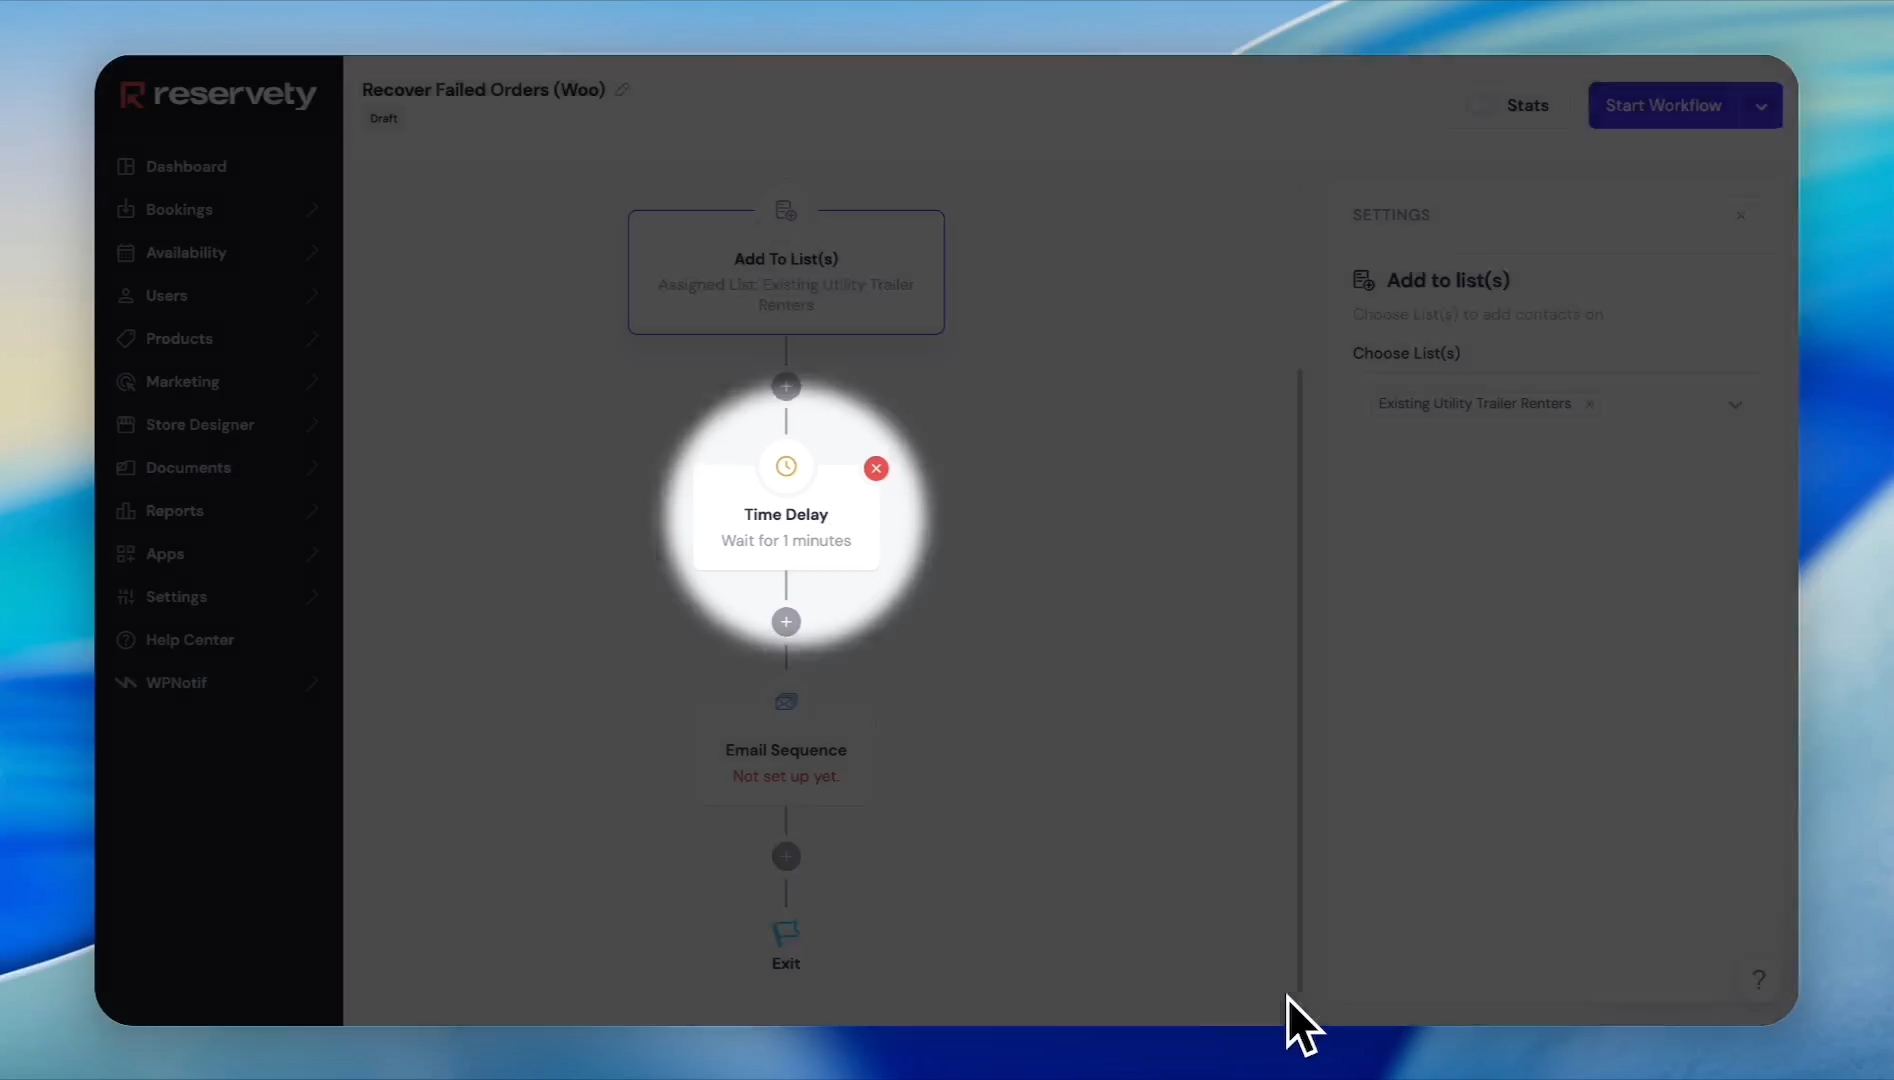
34
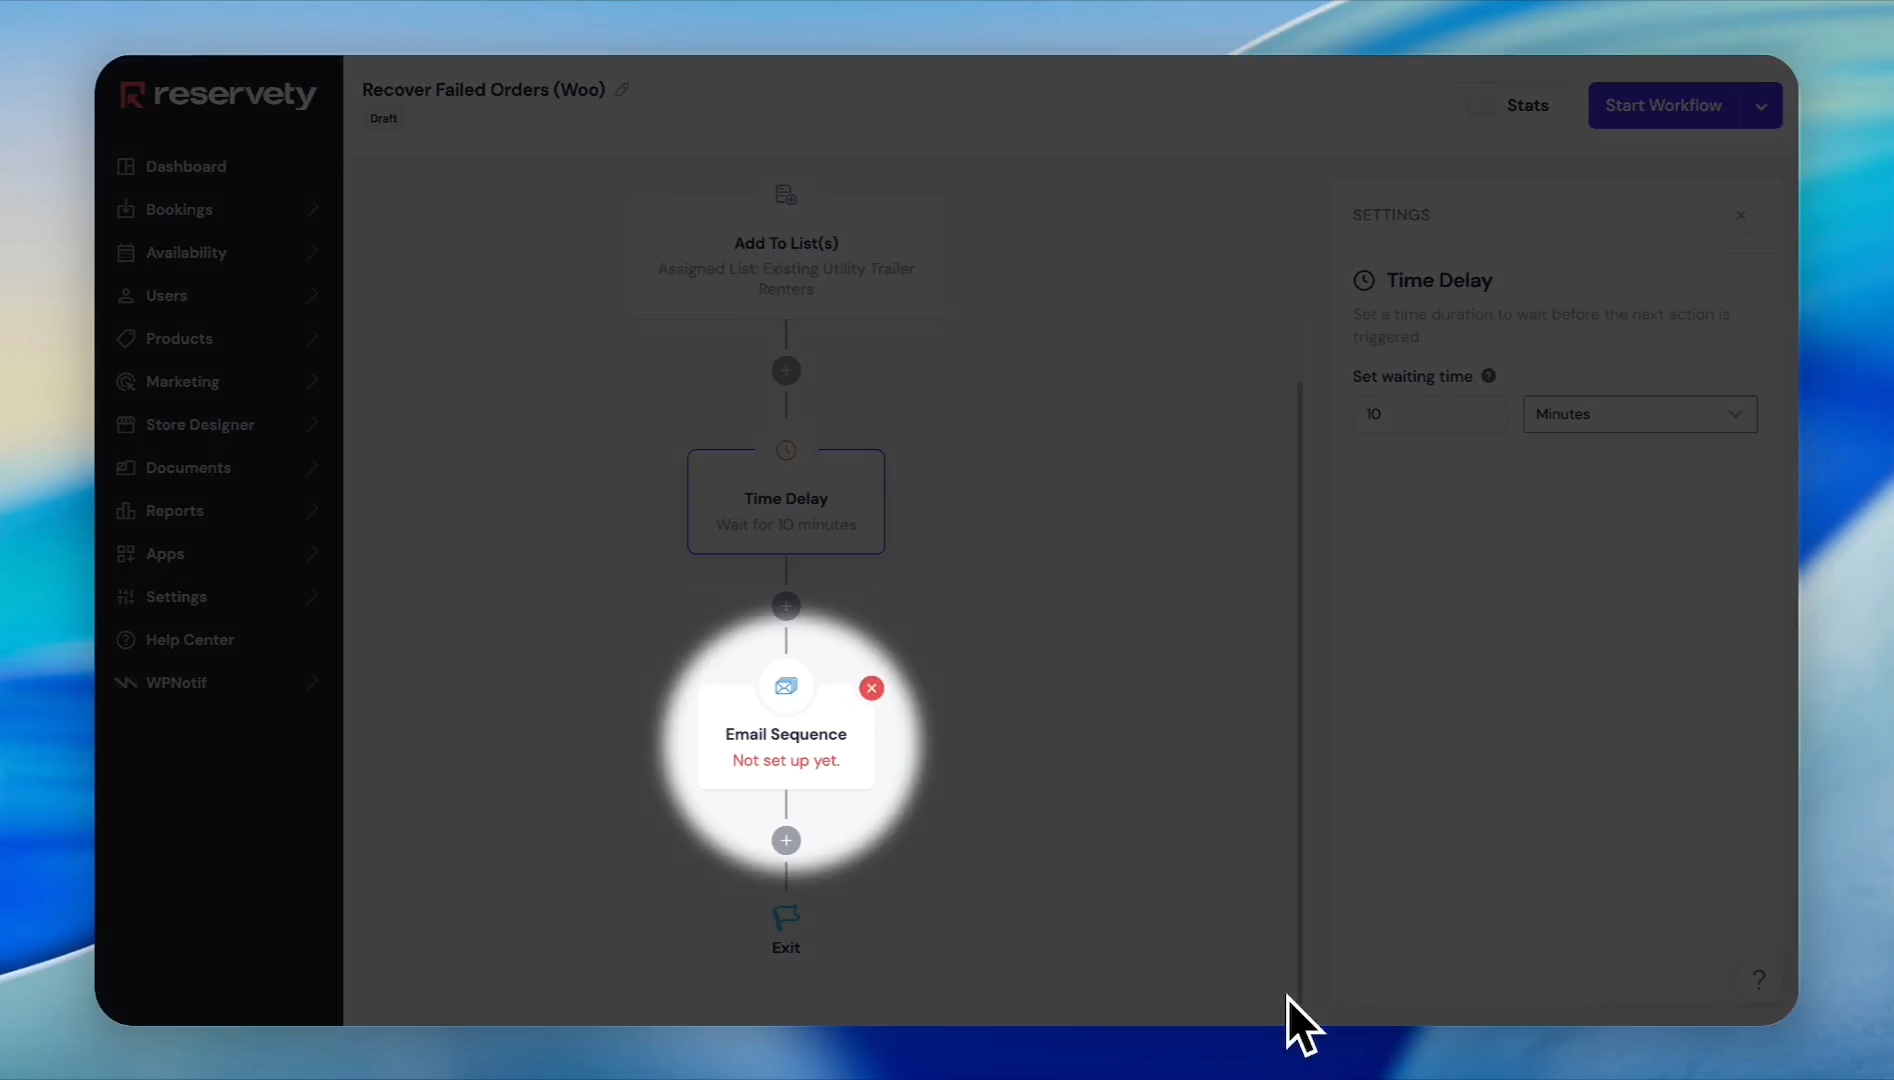
Click the Time Delay node.
Step #34: Click the Time Delay node.
35
Type 10 to set a 10-minute wait period after the failure trigger occurs.
36
Click the Email Sequence node.
Step #36: Click the Email Sequence node.
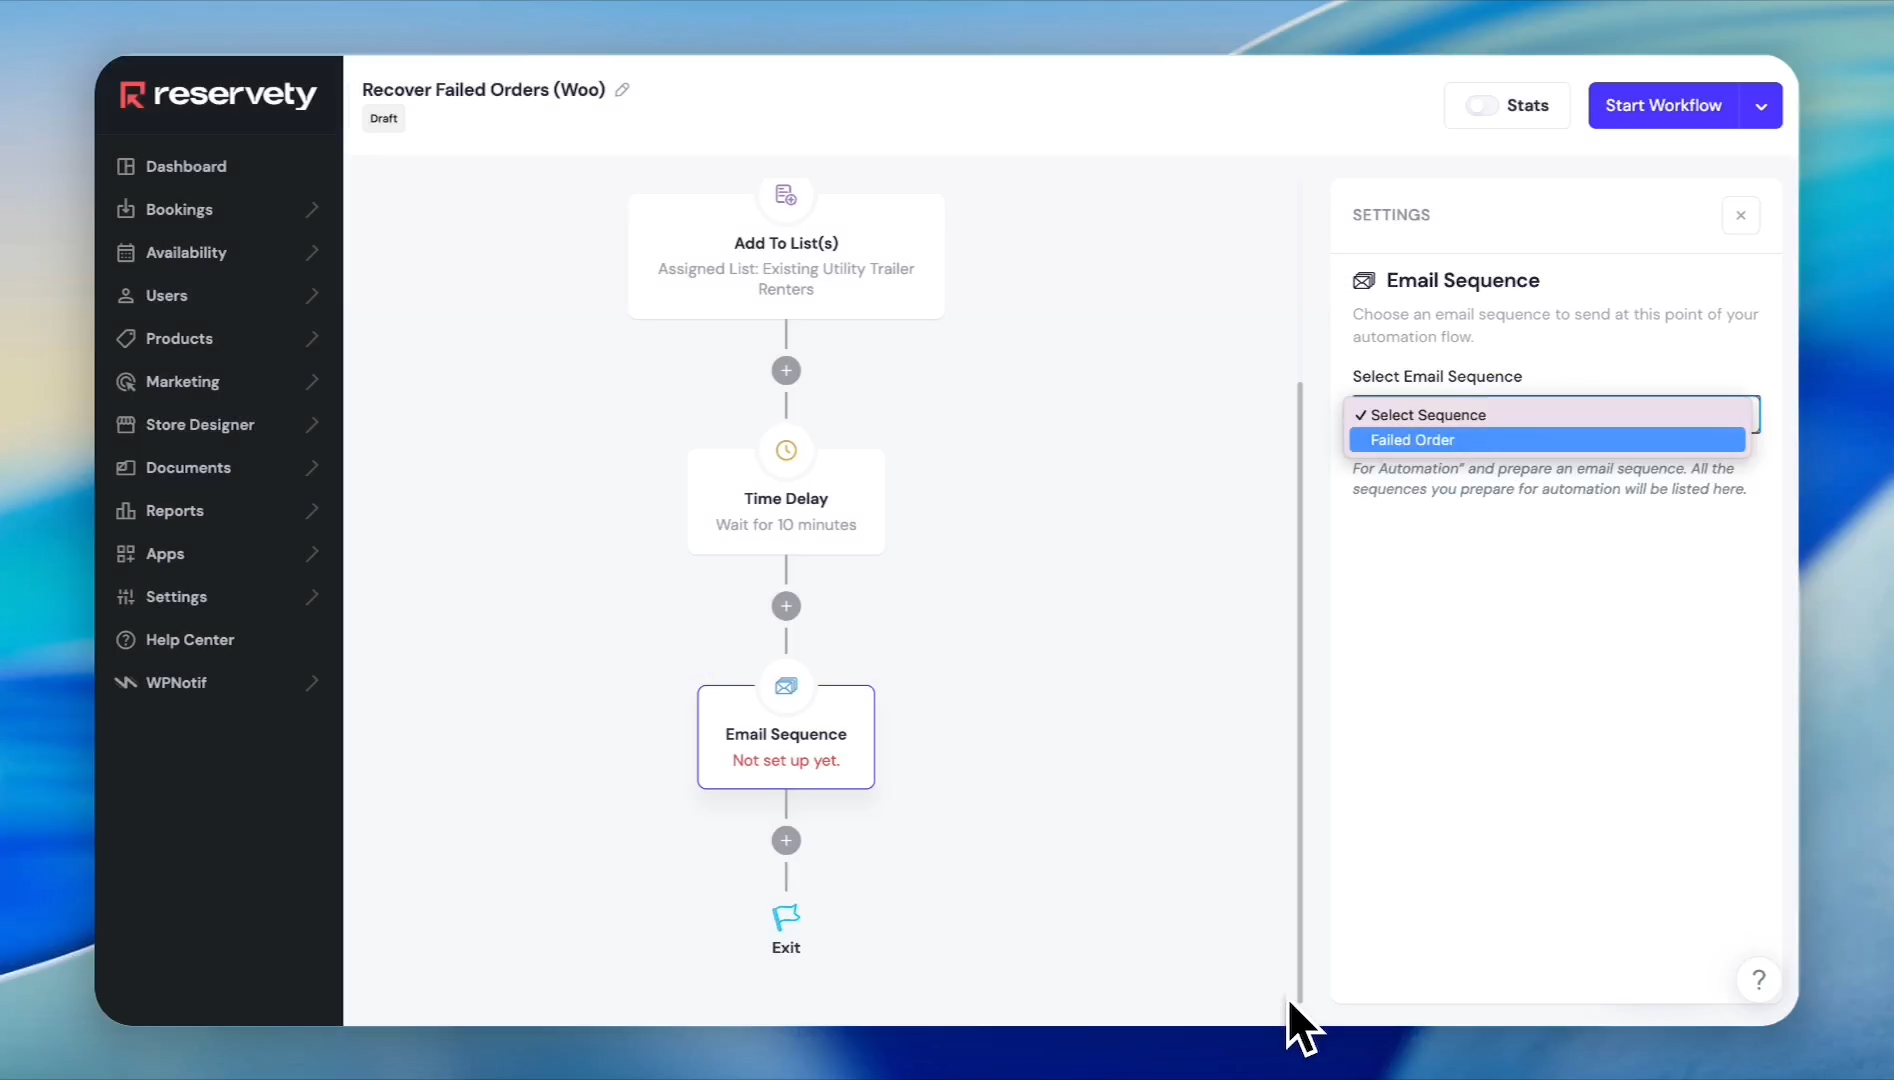
37
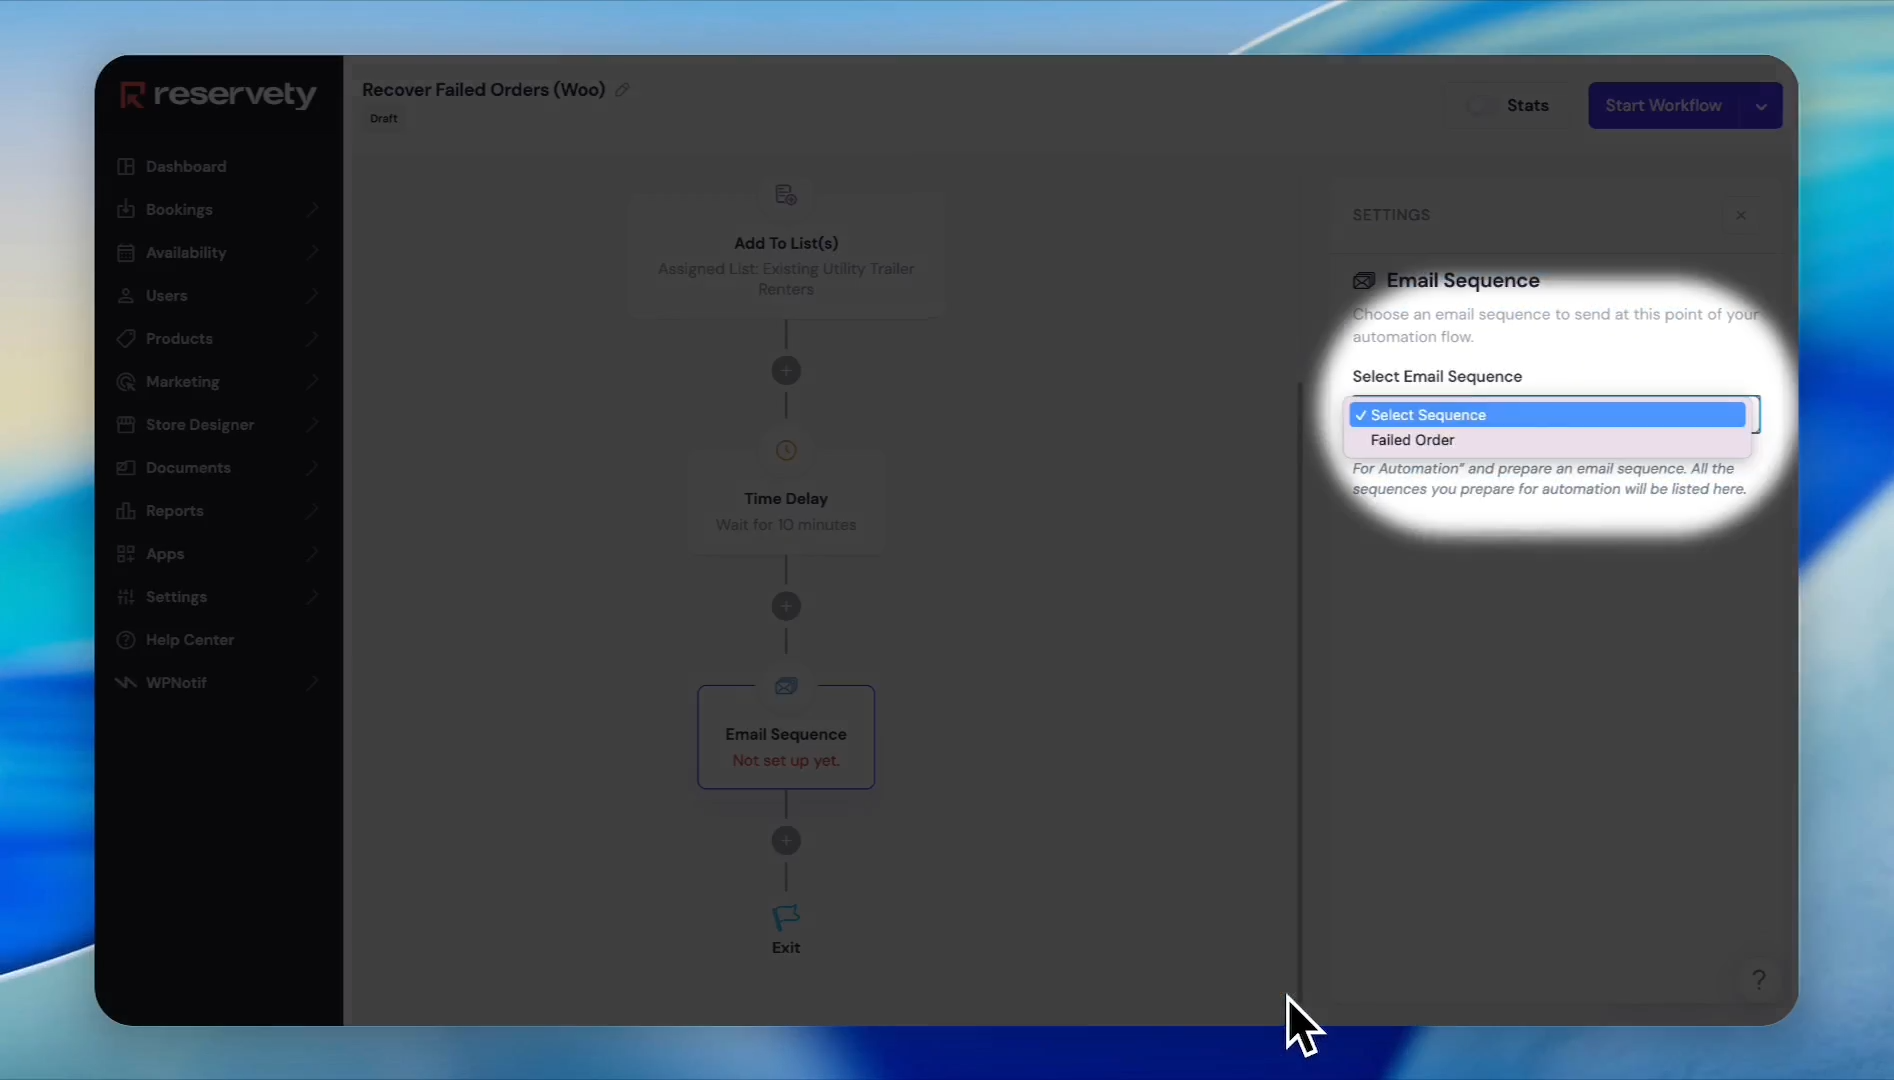
Click Select Email Sequence.
Step #37: Click Select Email Sequence.
38
Select the "Failed Order" sequence you just created.
Step #38: Select the "Failed Order" sequence you just created.
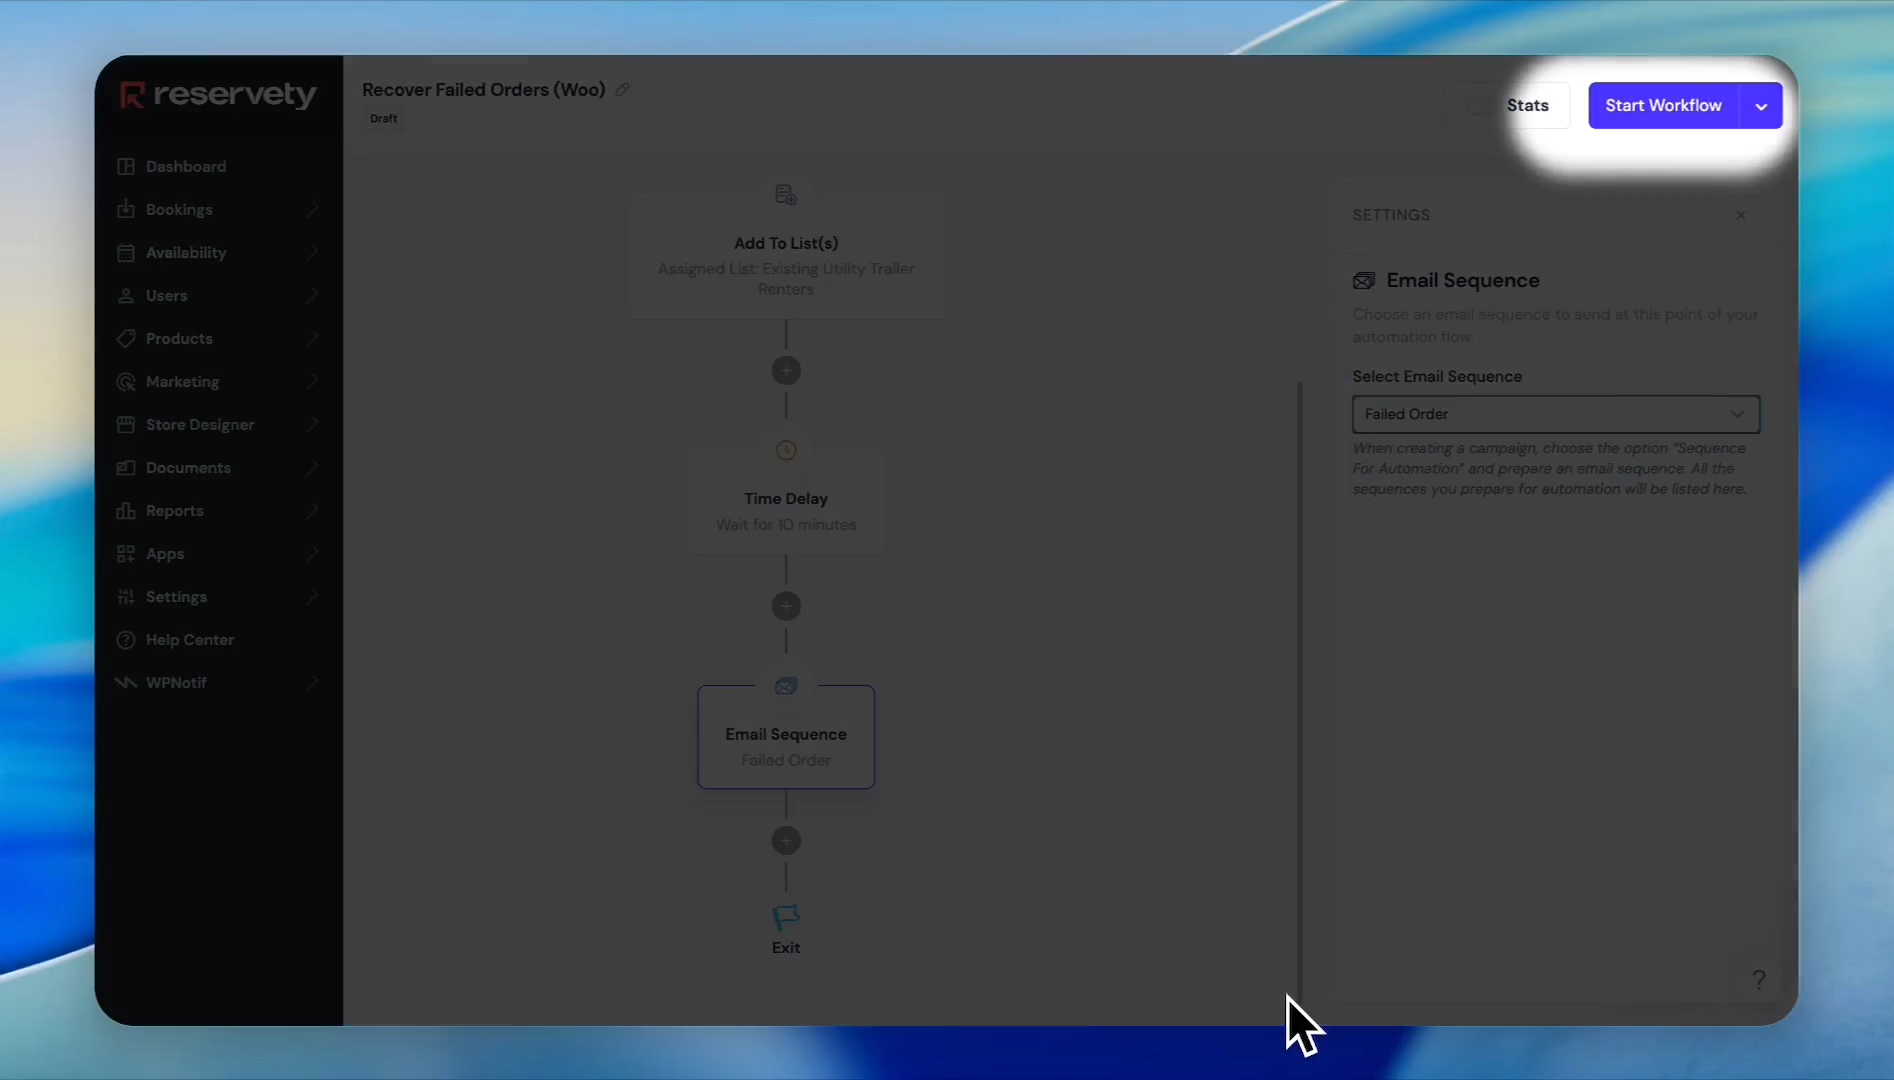
39
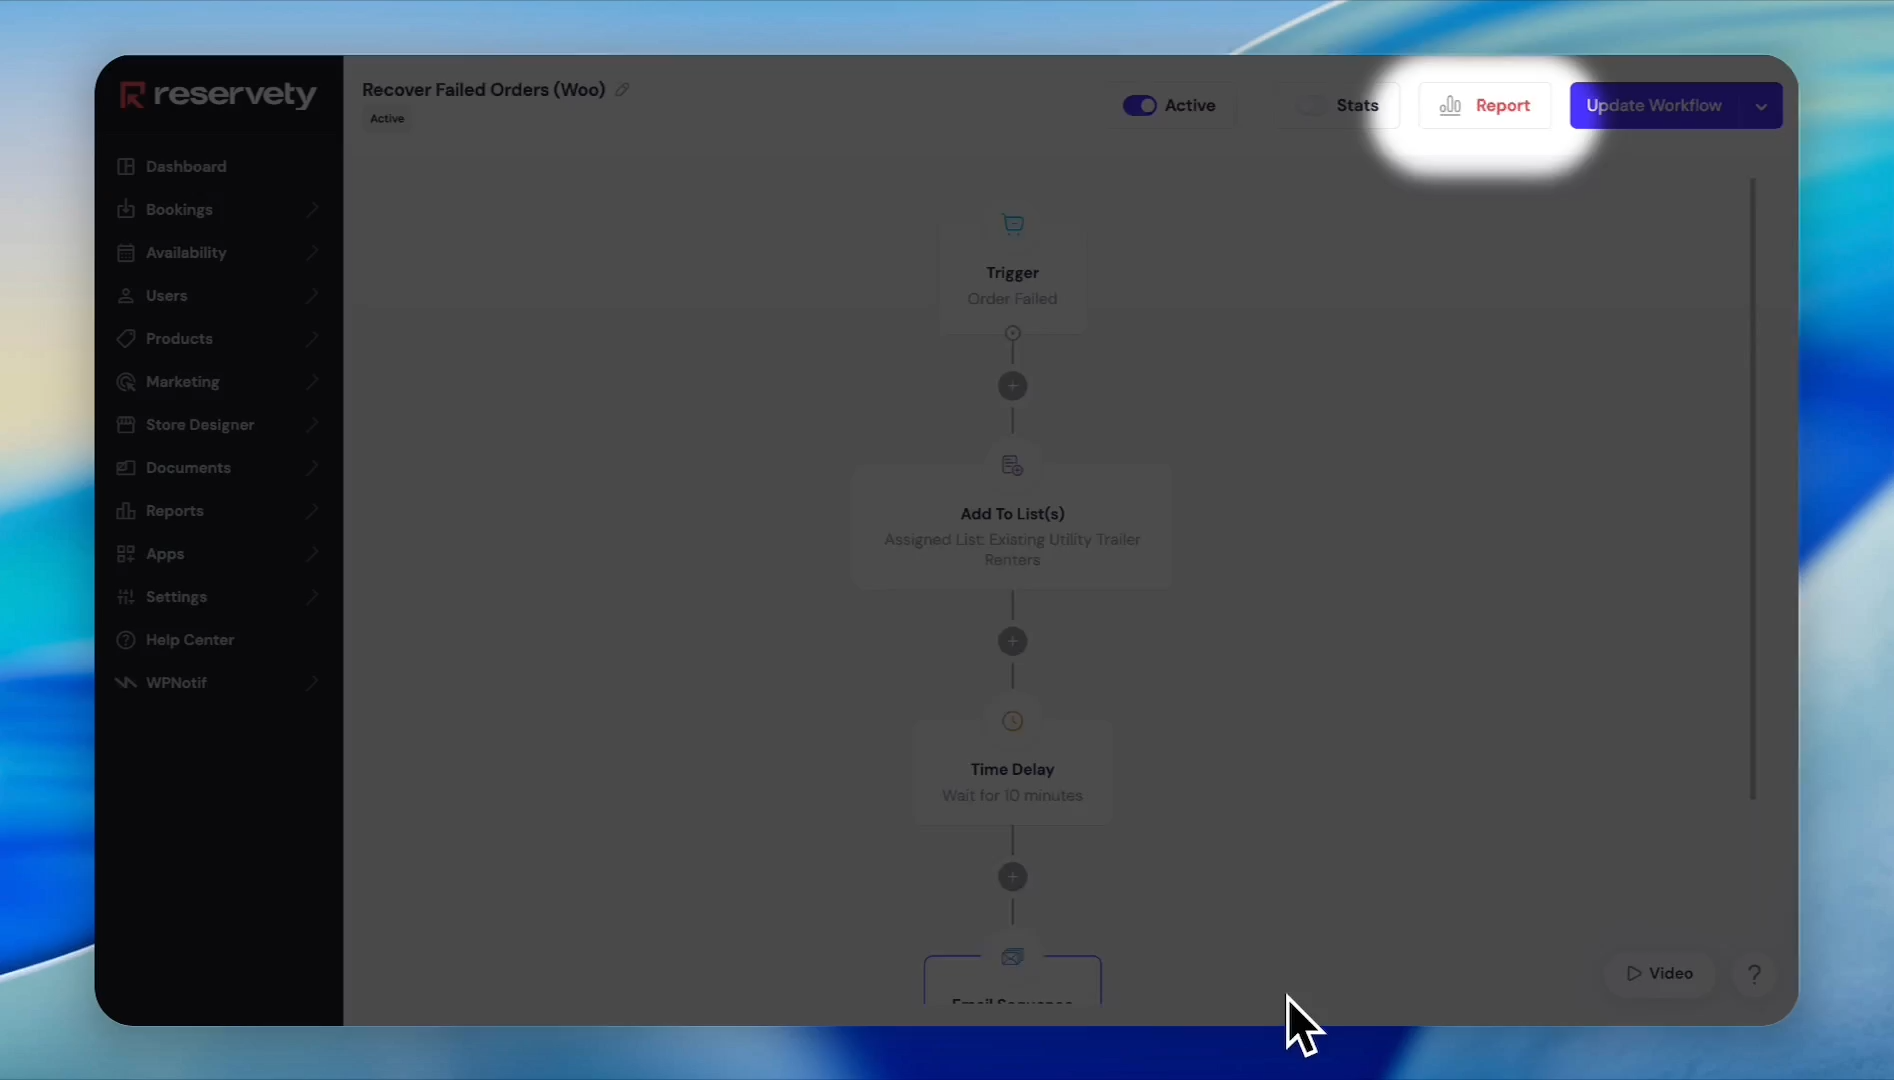
Click Start Workflow to activate the automation.
Step #39: Click Start Workflow to activate the automation.
40
Click Report in the top navigation to track your ongoing campaign performance metrics.
Step #40: Click Report in the top navigation to track your ongoing campaign performance metrics.

Q: Can I import contacts from sources other than WooCommerce?

A: Yes, you can import contacts by uploading a CSV file, manually pasting contact details, or directly integrating an existing MailChimp account.

Q: When does the failed order email get sent to the customer?

A: The timing is fully customizable. You can configure a time delay step in the automation workflow builder, such as waiting 10 minutes after a failed order attempt, before dispatching the recovery email.

Q: Do I have to build the recovery workflow entirely from scratch?

A: No, you can use pre-built templates. Navigate to the WooCommerce tab in your automation dashboard to import pre-configured workflows like the "Recover failed orders" flow.

Term

Definition

Automation Workflow

A systematic series of actions, lists, and delays triggered automatically by specific customer events like a failed order.

Field Mapping

The process of connecting source data categories (like WooCommerce billing information) to the equivalent contact attributes in the marketing system.

Email Sequence

A pre-designed automated email template designated to be dispatched as part of an active workflow campaign.