Beyond Tier 1 Case Managers: How to Review Your Caseload in PowerSchool

Learn how case managers can generate caseload reports, correct student data, and review admissions documents using PowerSchool at the start of the year.

By Cindy Warner-Dobrowski

This guide is intended for case managers and explains how to generate and review a caseload report using PowerSchool. By completing this workflow, you will verify student information, check incoming admissions recommendations, and access essential student documentation for the upcoming academic year.

Accessing Your Caseload in PowerSchool

At the beginning of the year, start by referencing the PR-12 workflow in the Student Services Handbook.
1
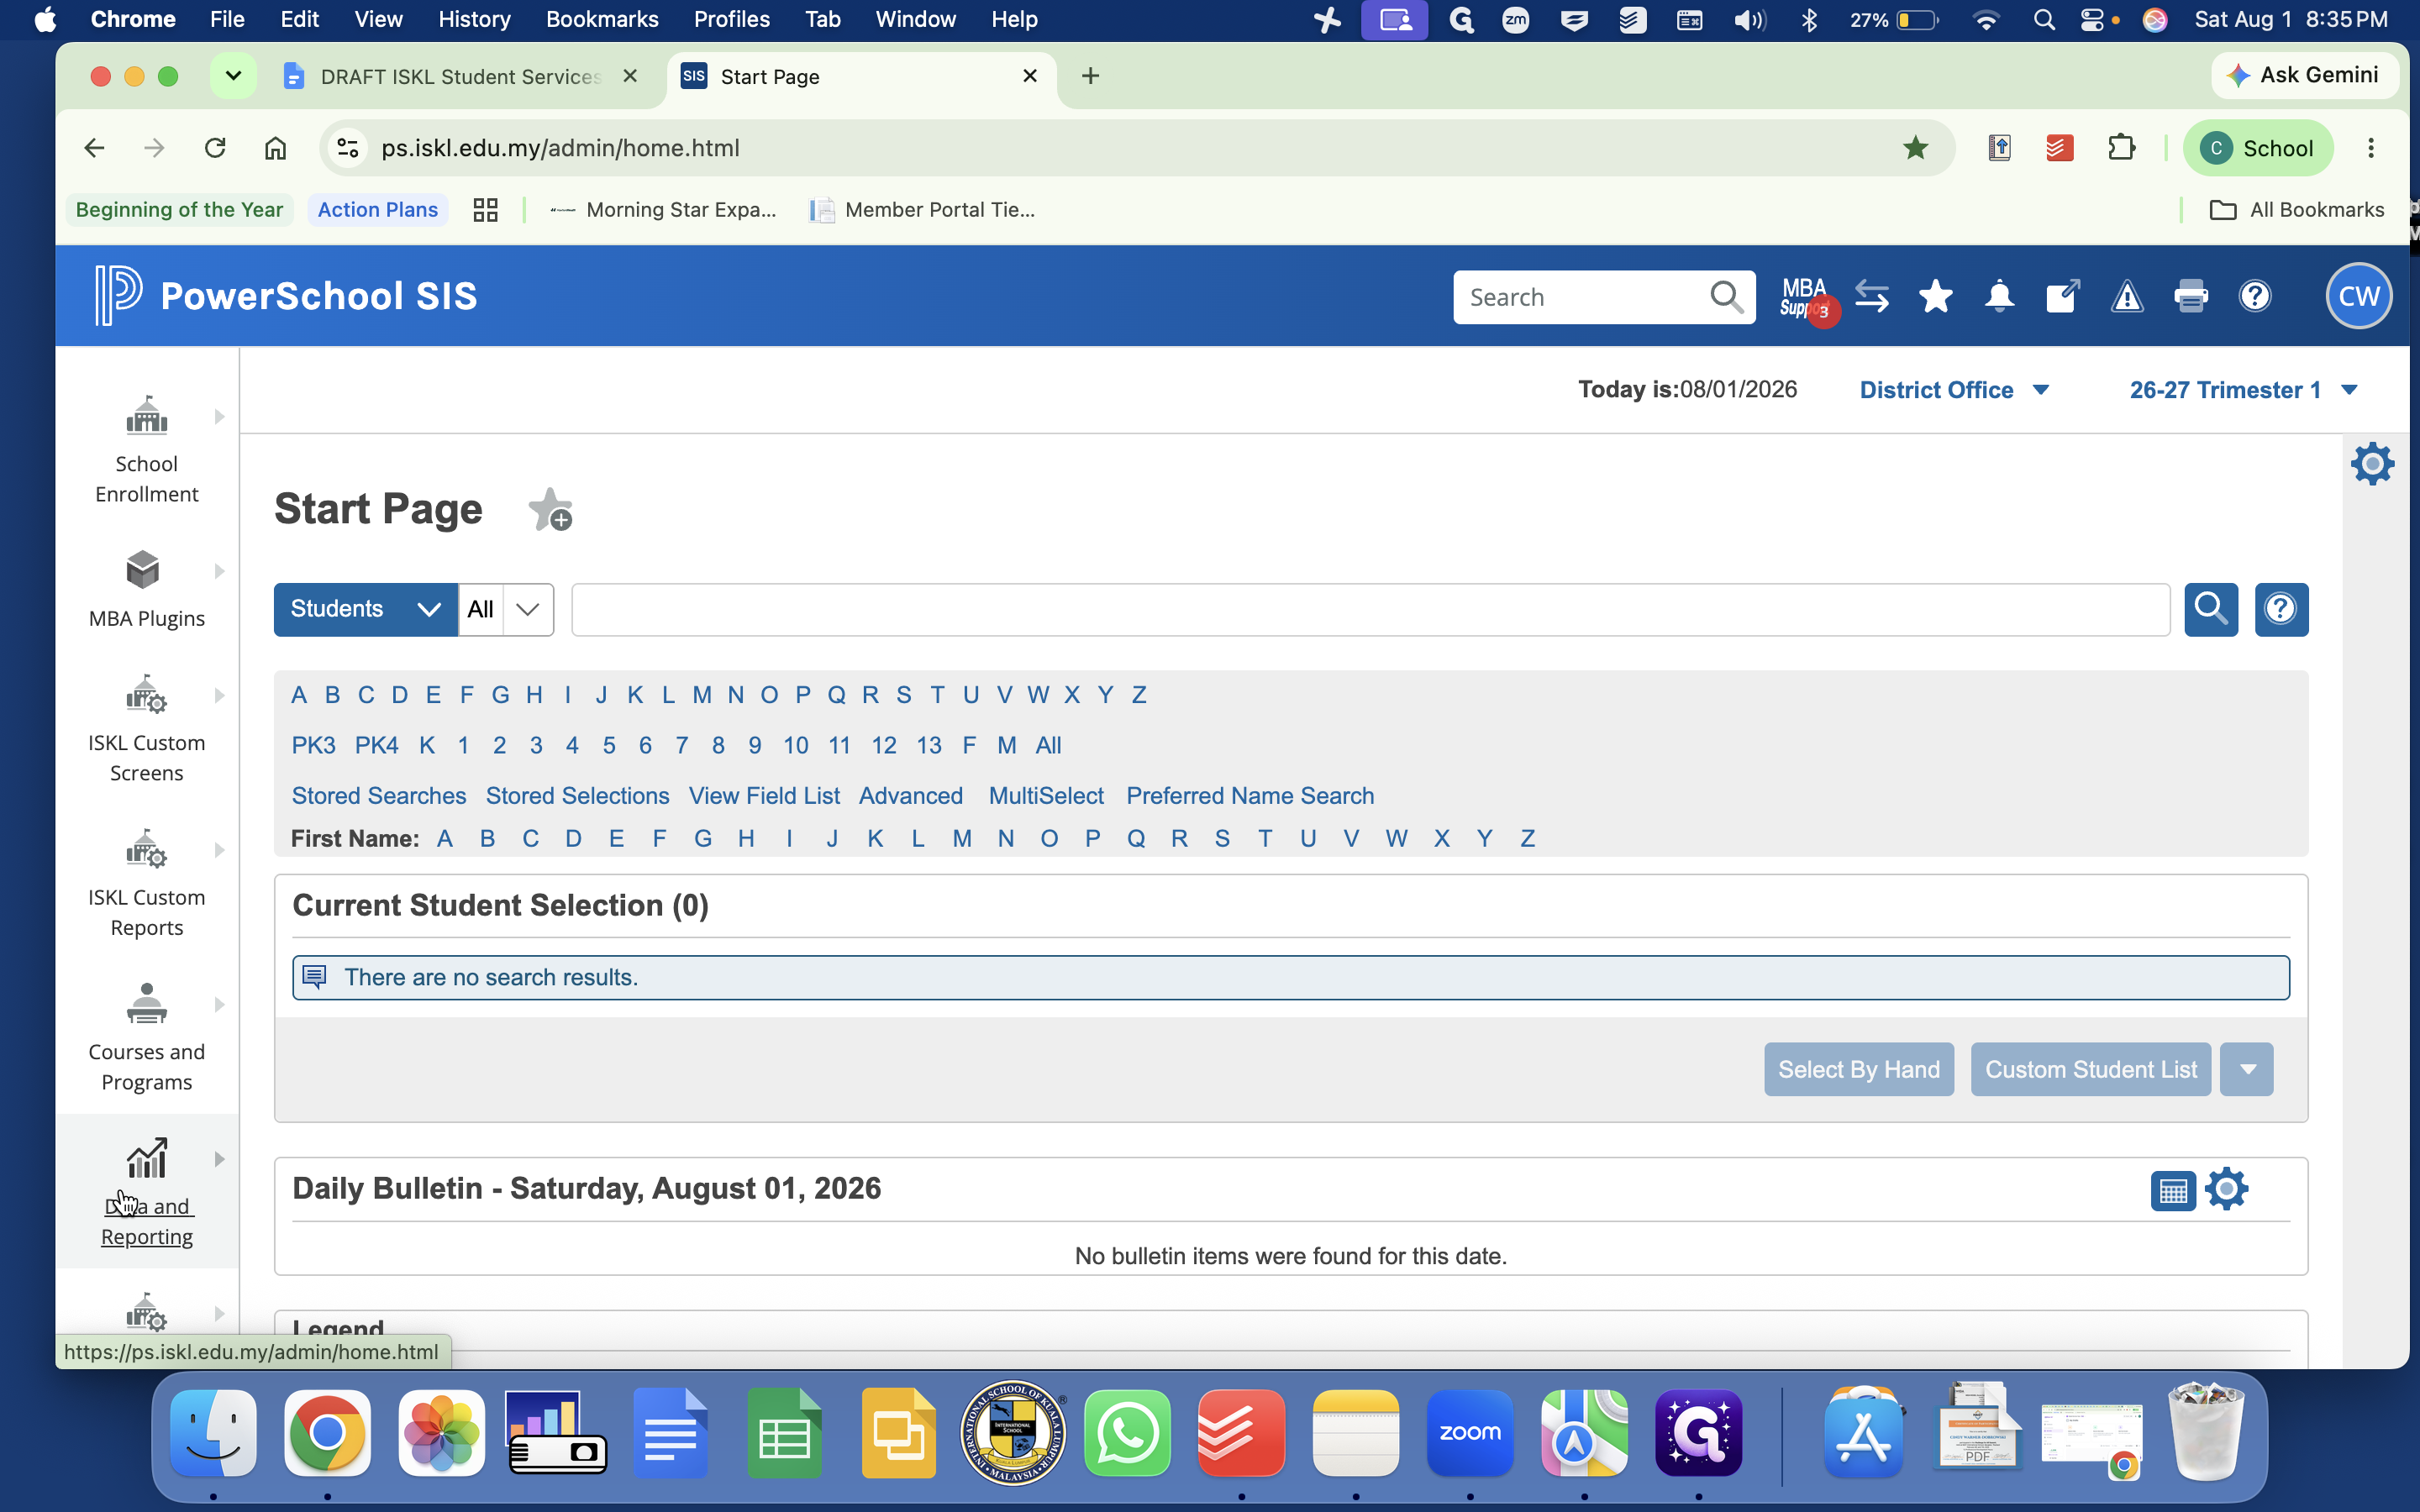
Log into PowerSchool Admin and navigate to Data and Reporting in the left sidebar.
Step #1: Log into PowerSchool Admin and navigate to Data and Reporting in the left sidebar.
2
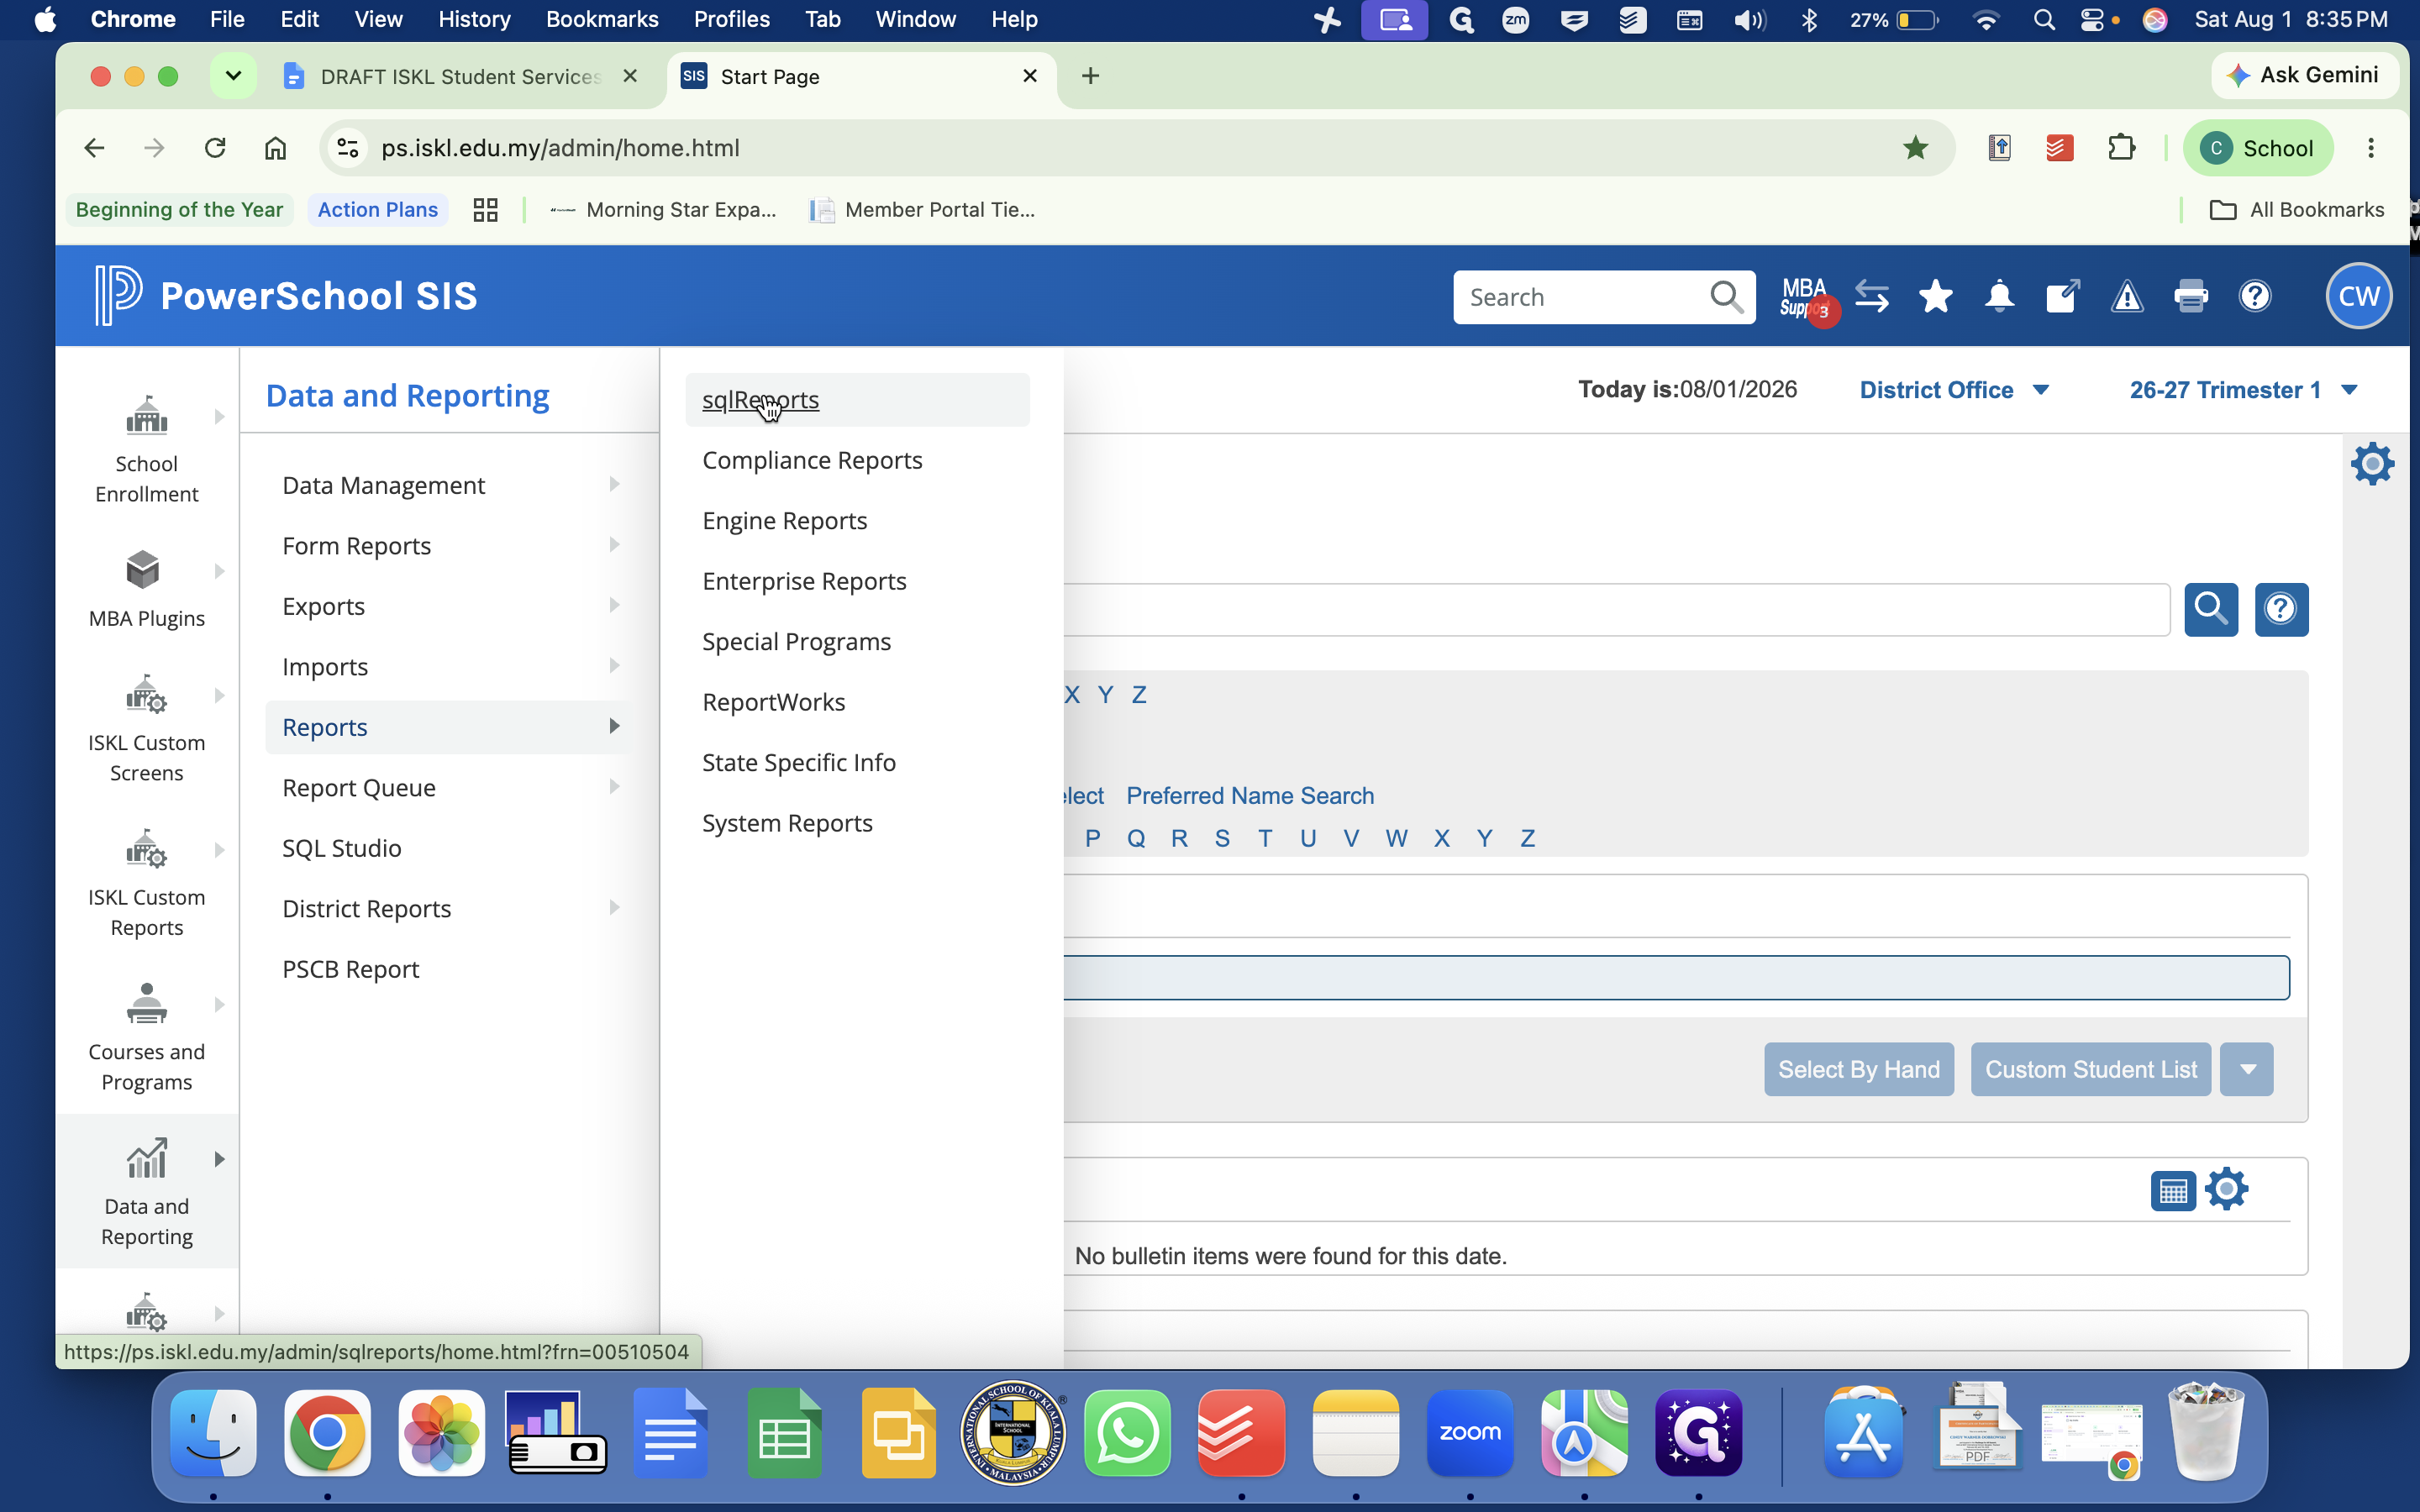
Select Reports and then click sqlReports.
Step #2: Select Reports and then click sqlReports.
3
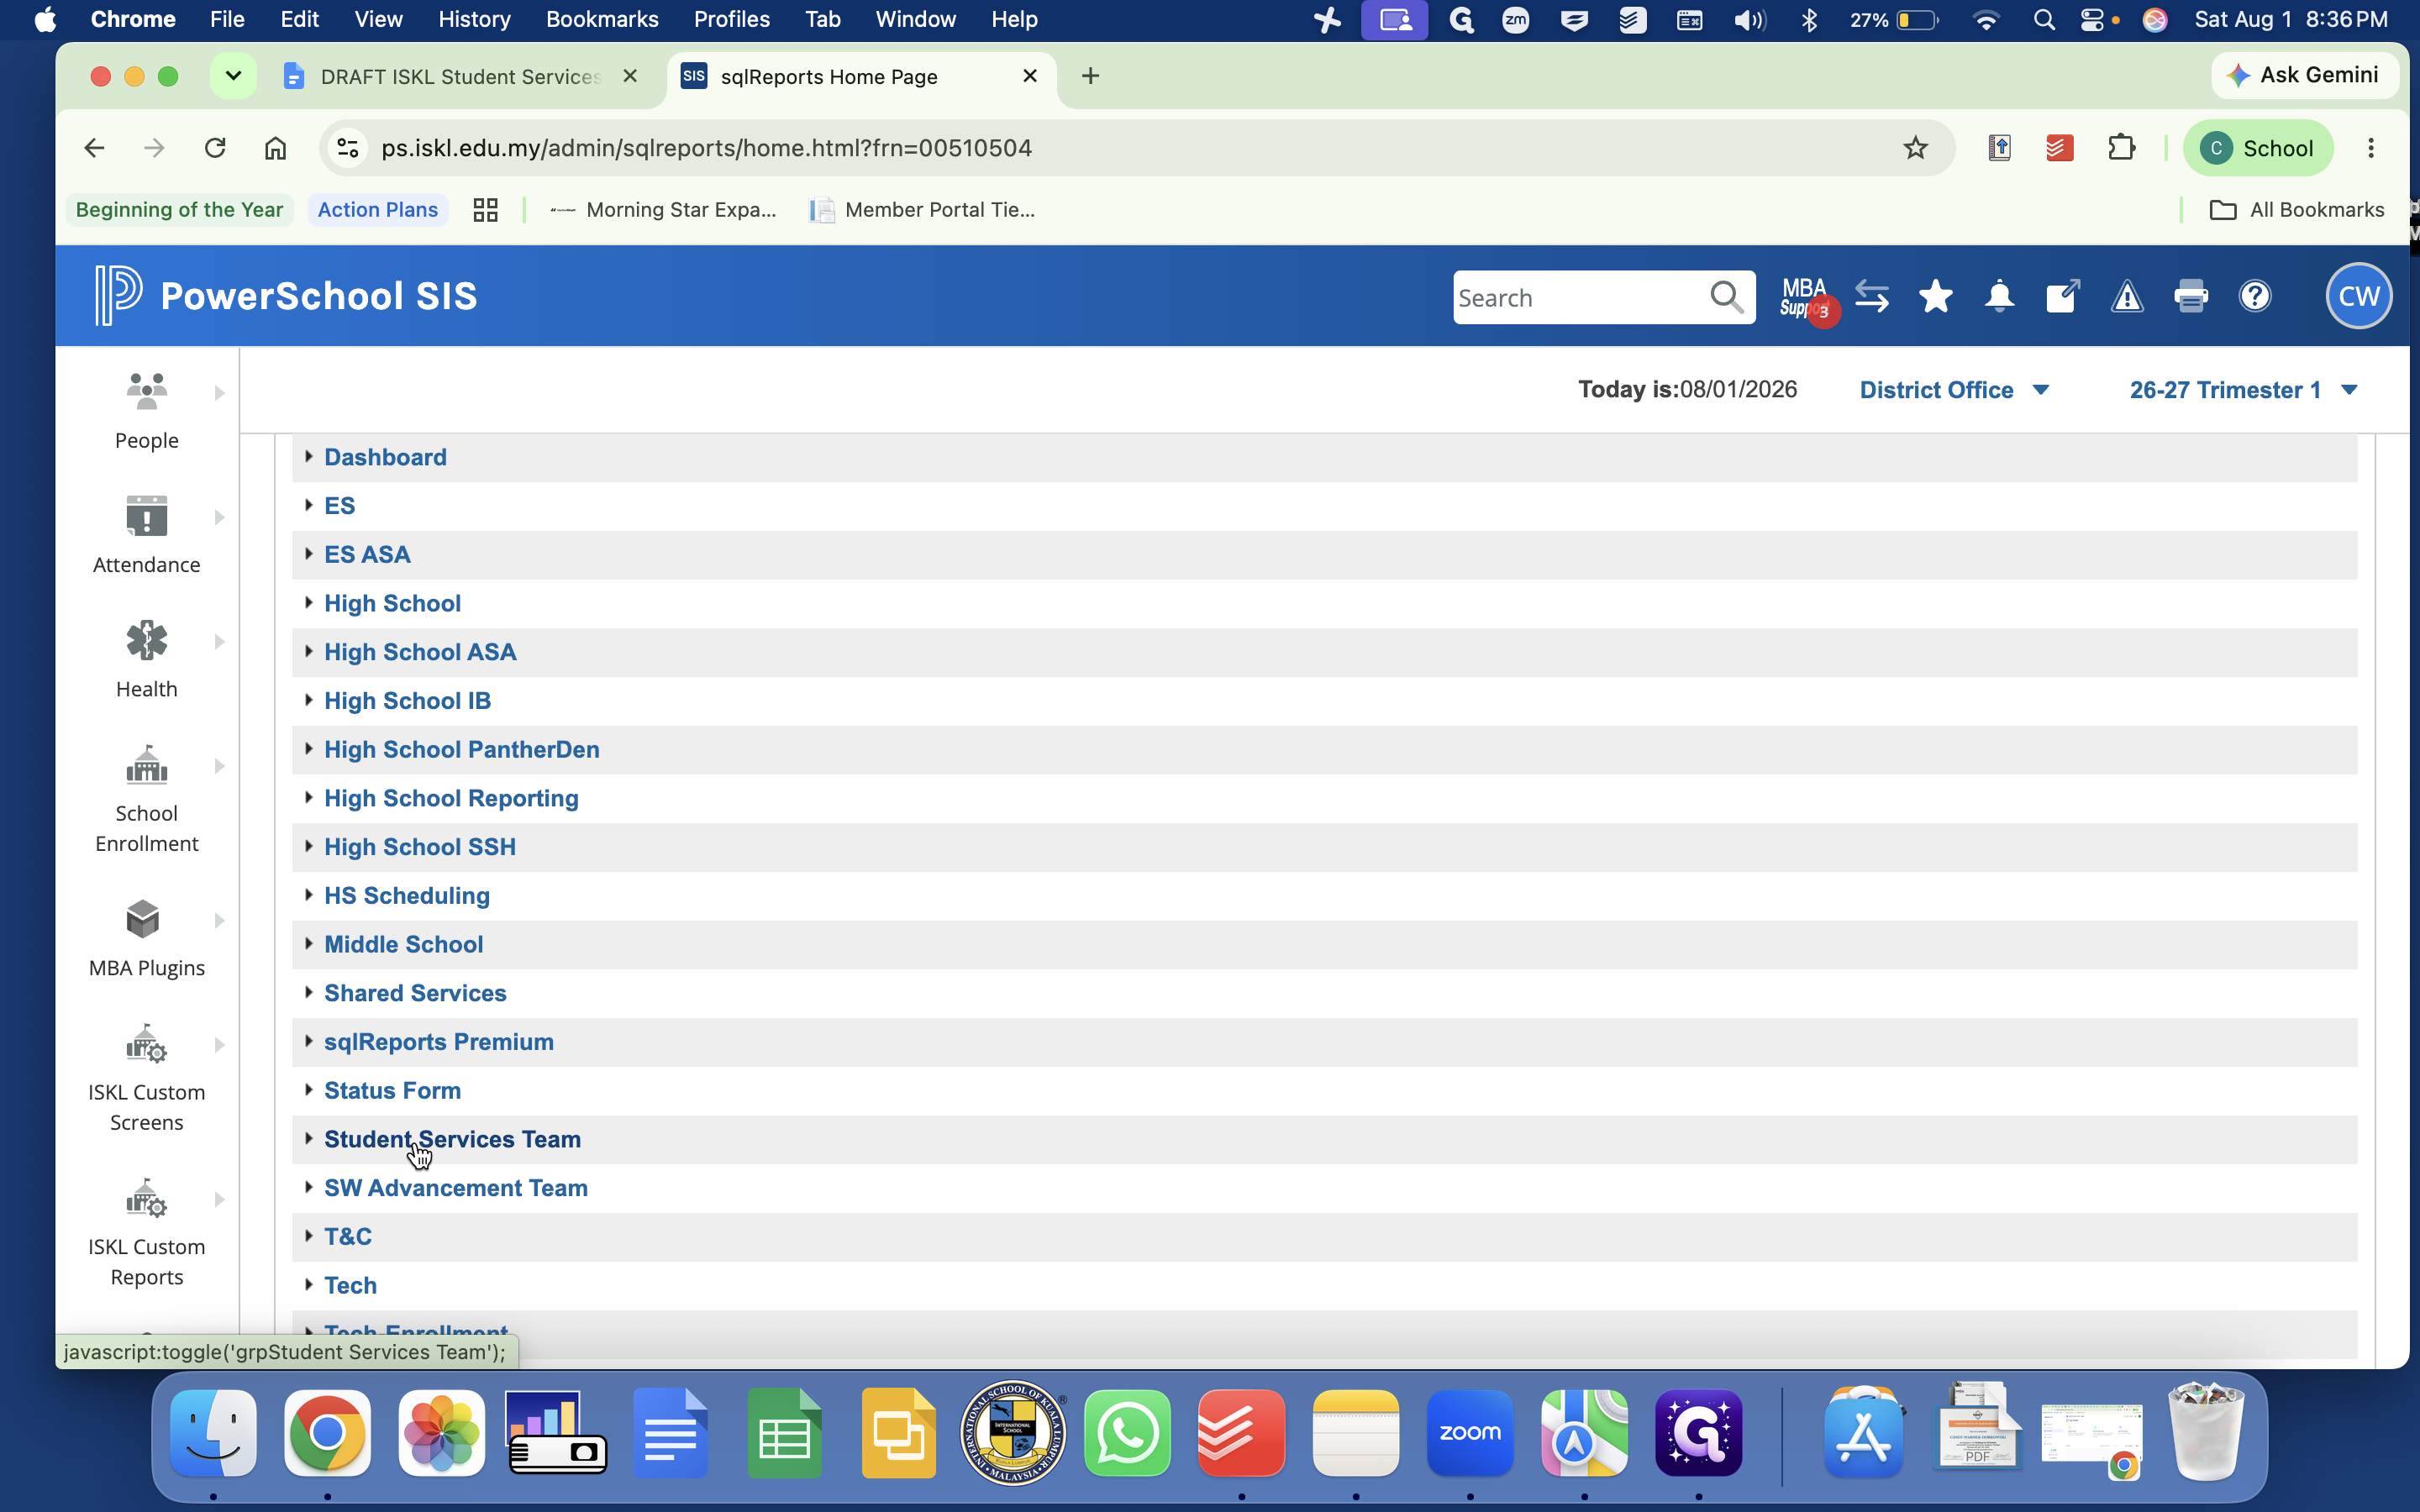
Click Student Services Team to open a menu of available caseload management reports.
Step #3: Click Student Services Team to open a menu of available caseload management reports.
4
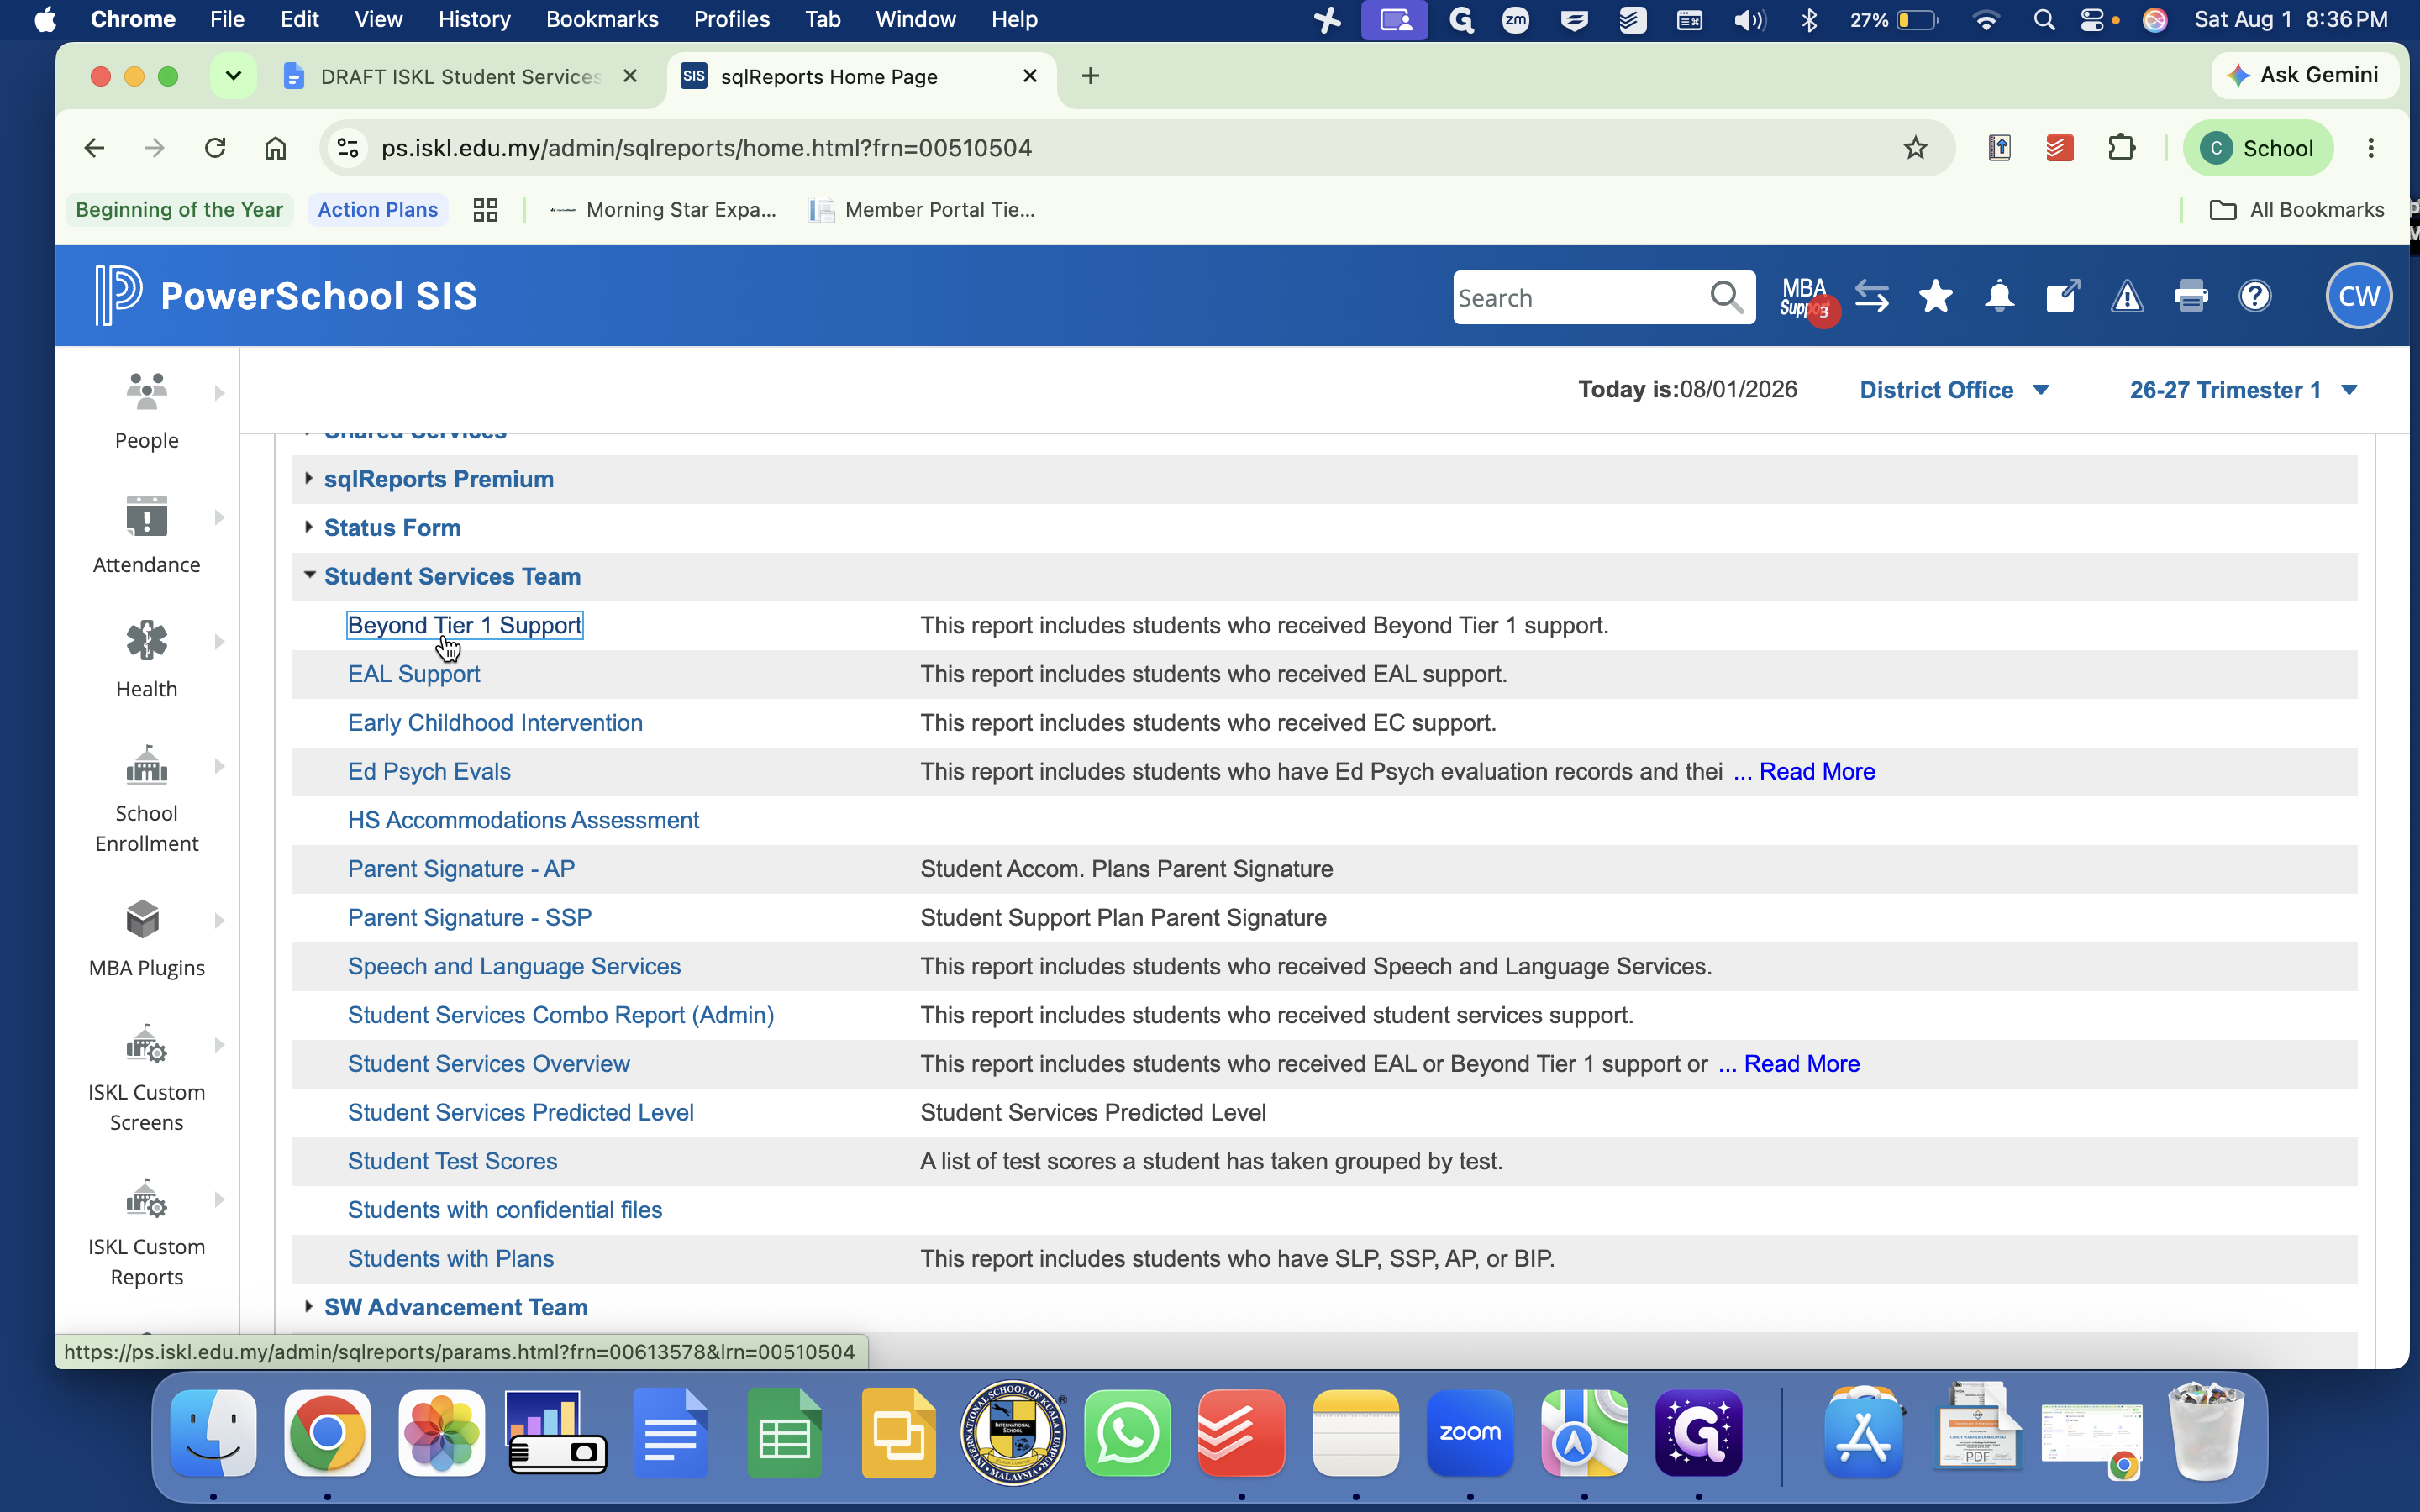
Select the Beyond Tier 1 Support report.
Step #4: Select the Beyond Tier 1 Support report.
5
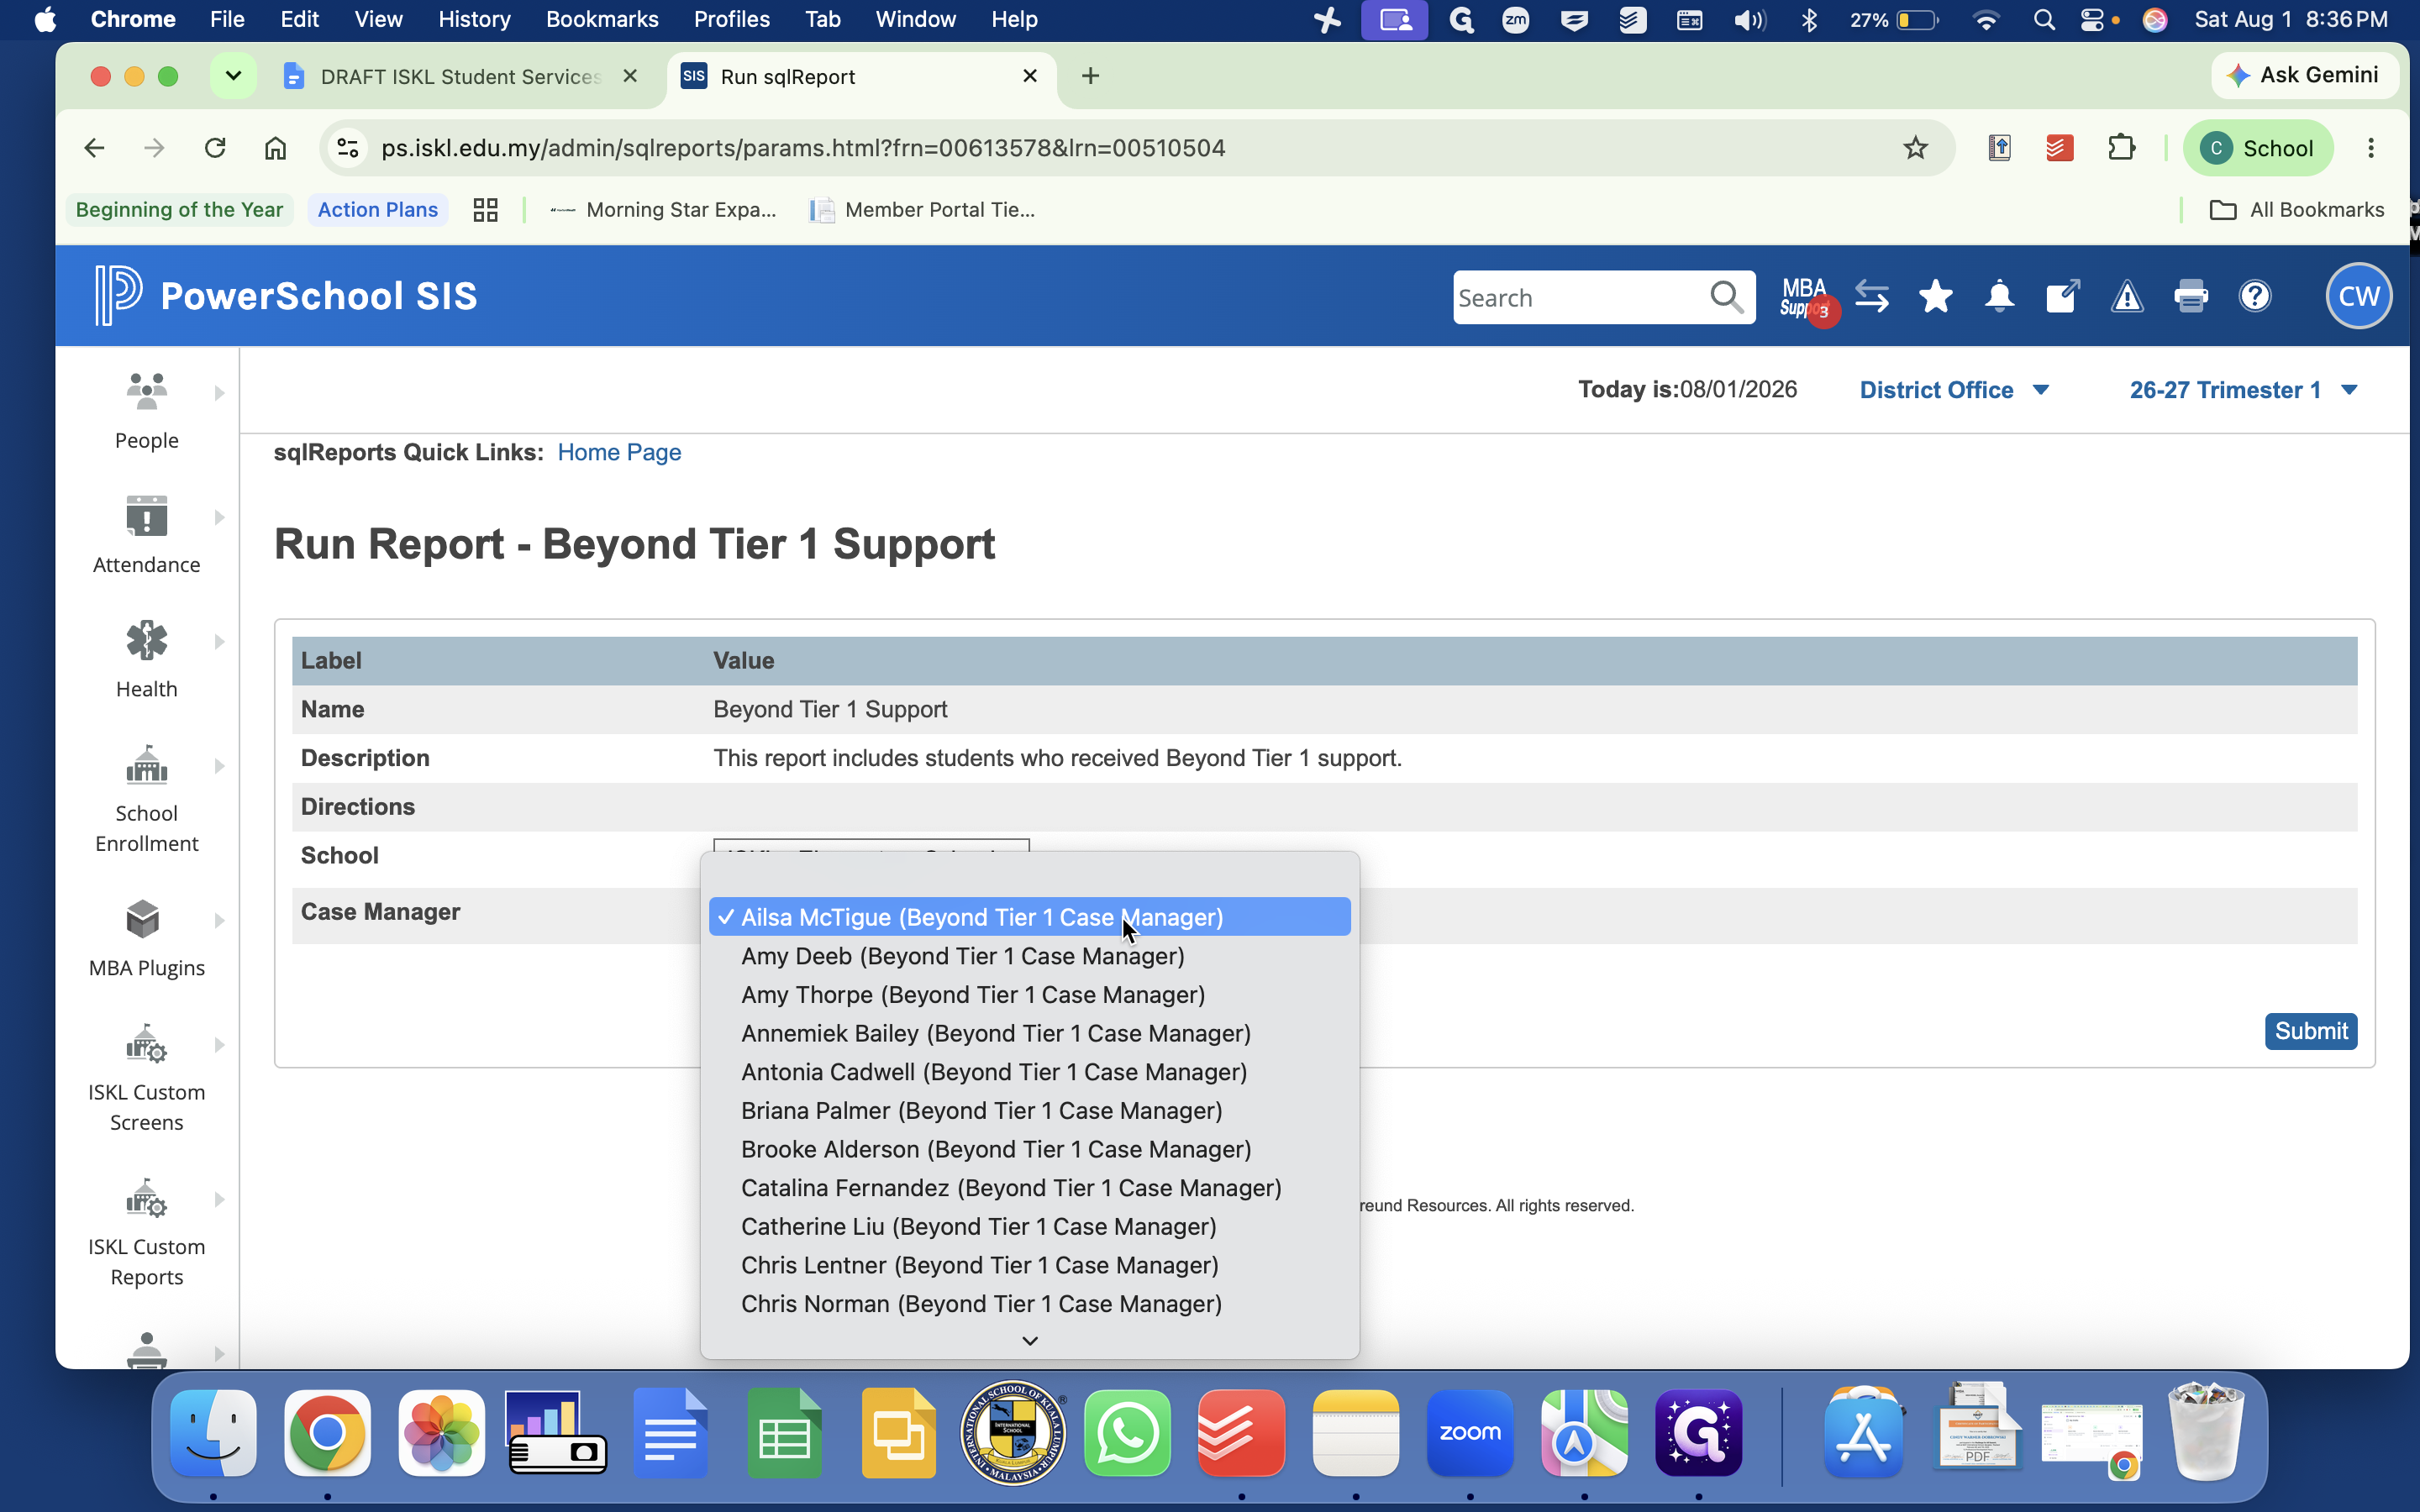
Select your name from the Case Manager dropdown menu.
Step #5: Select your name from the Case Manager dropdown menu.
6
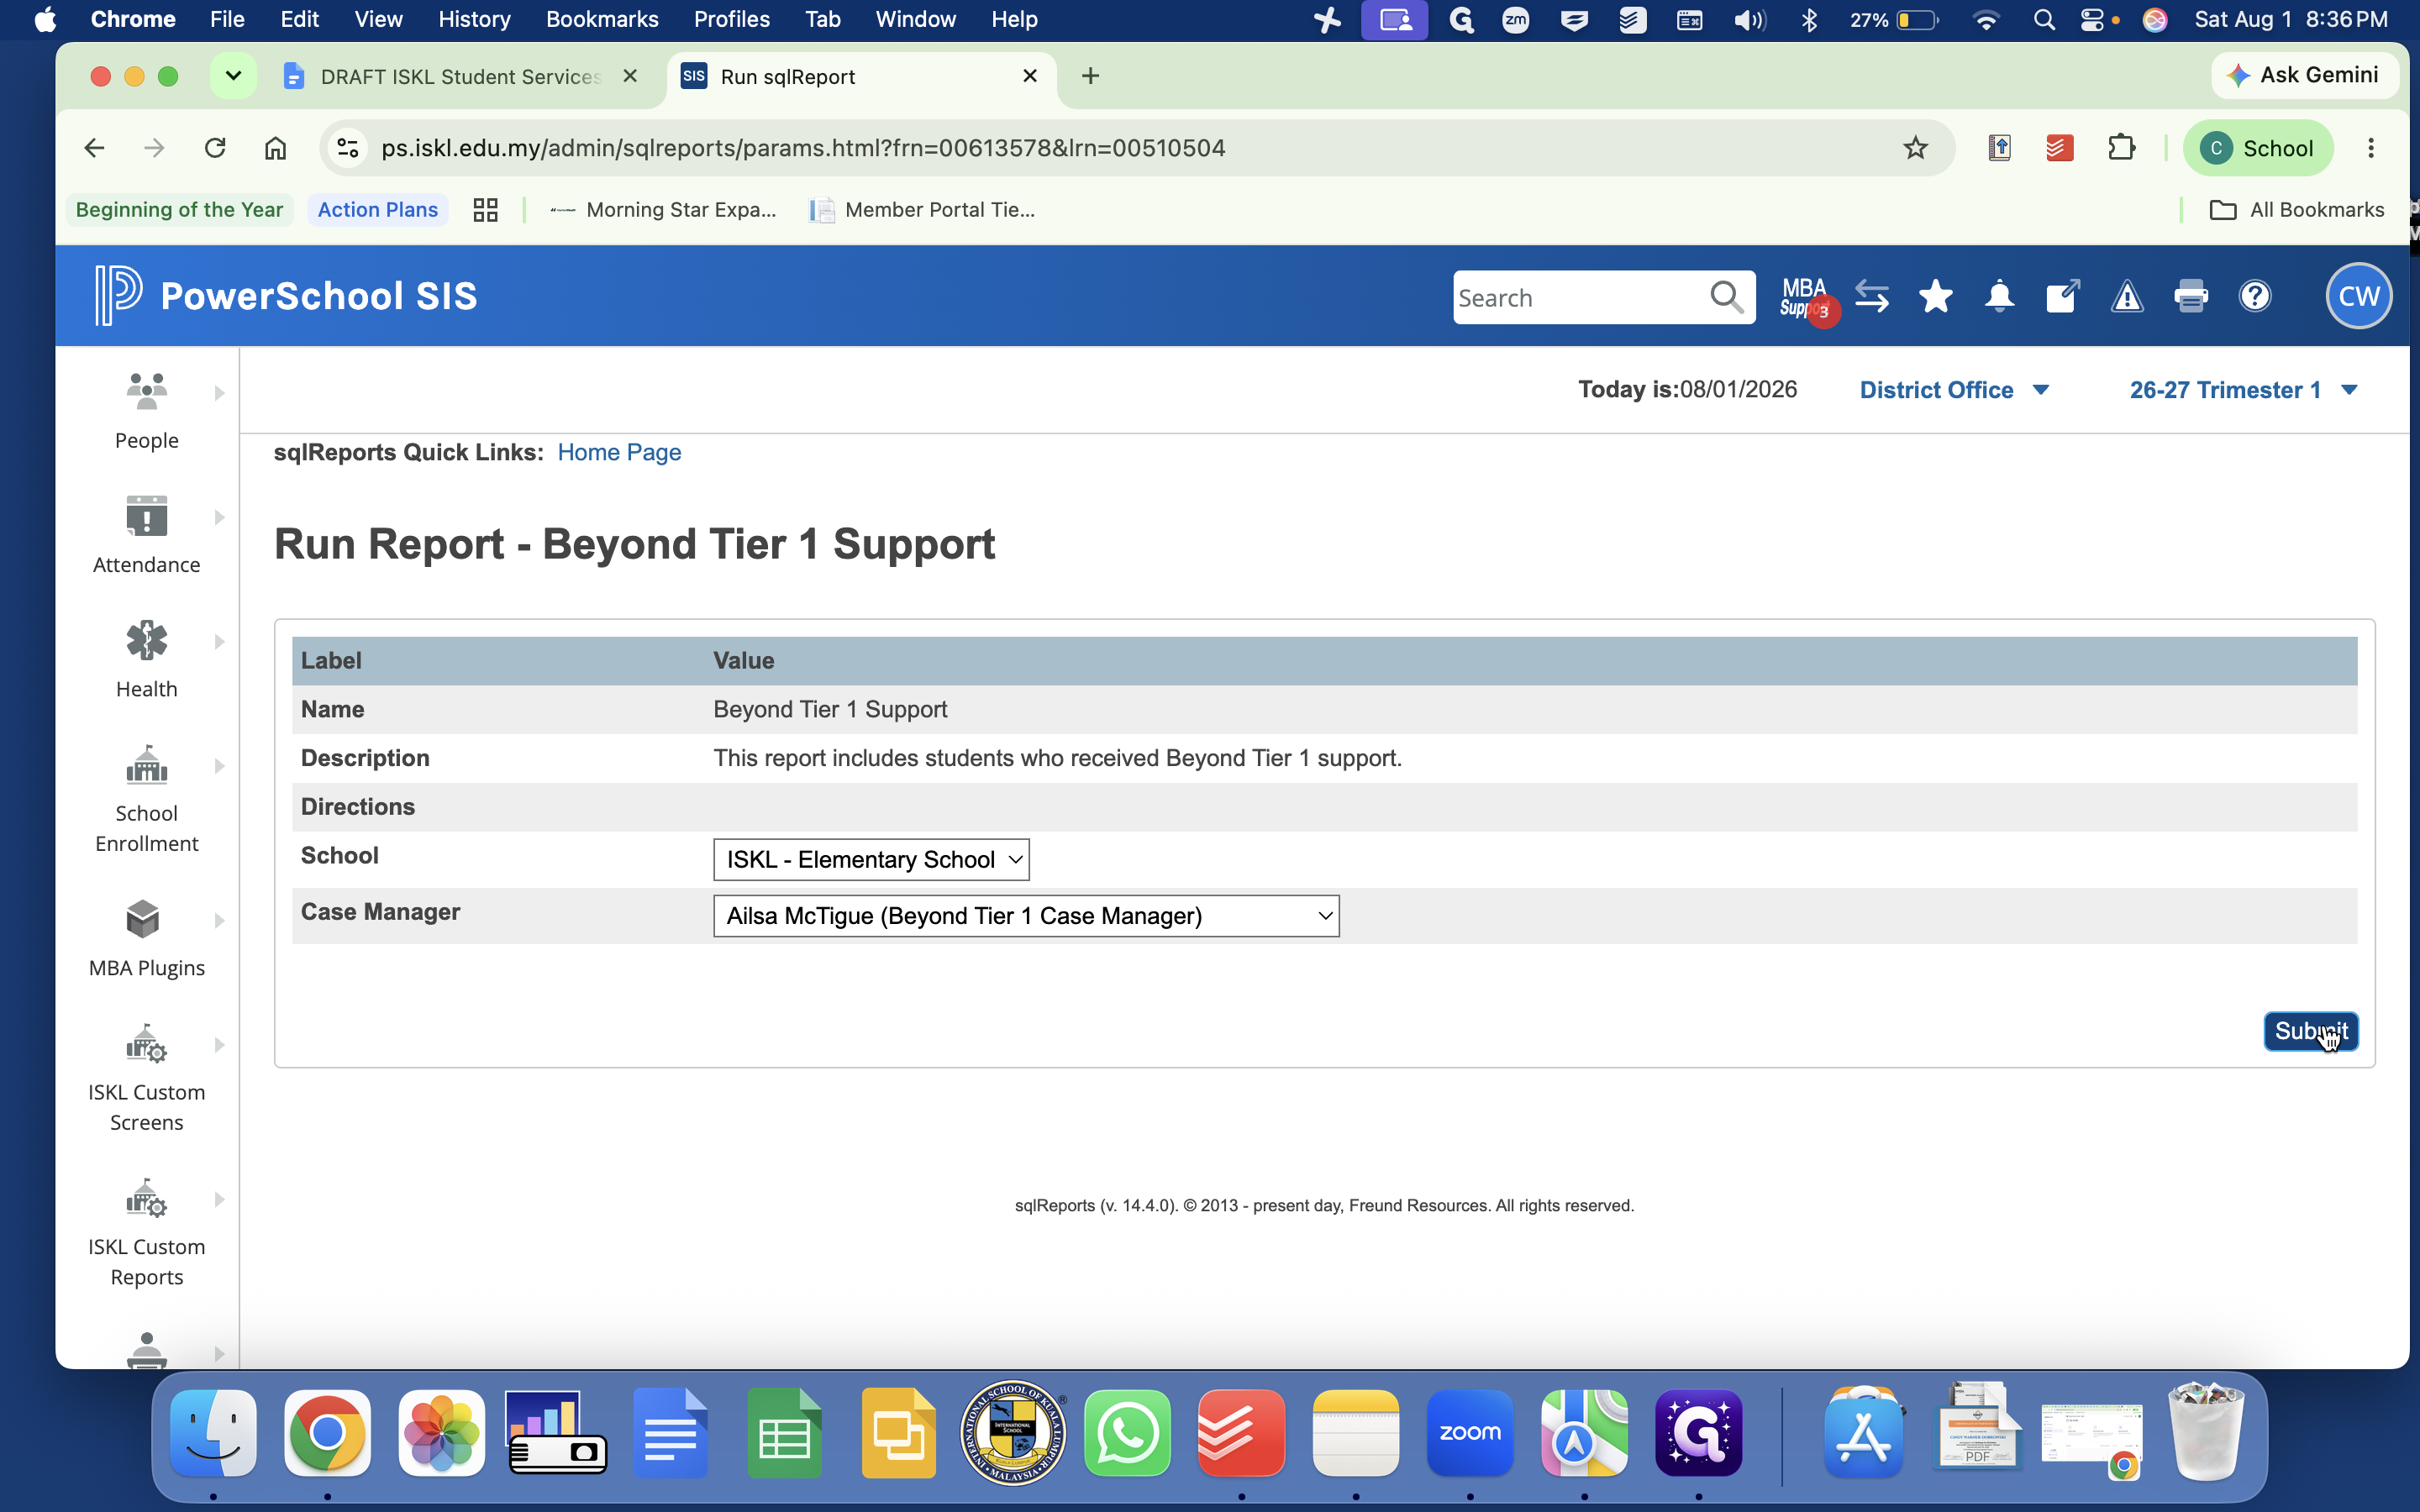
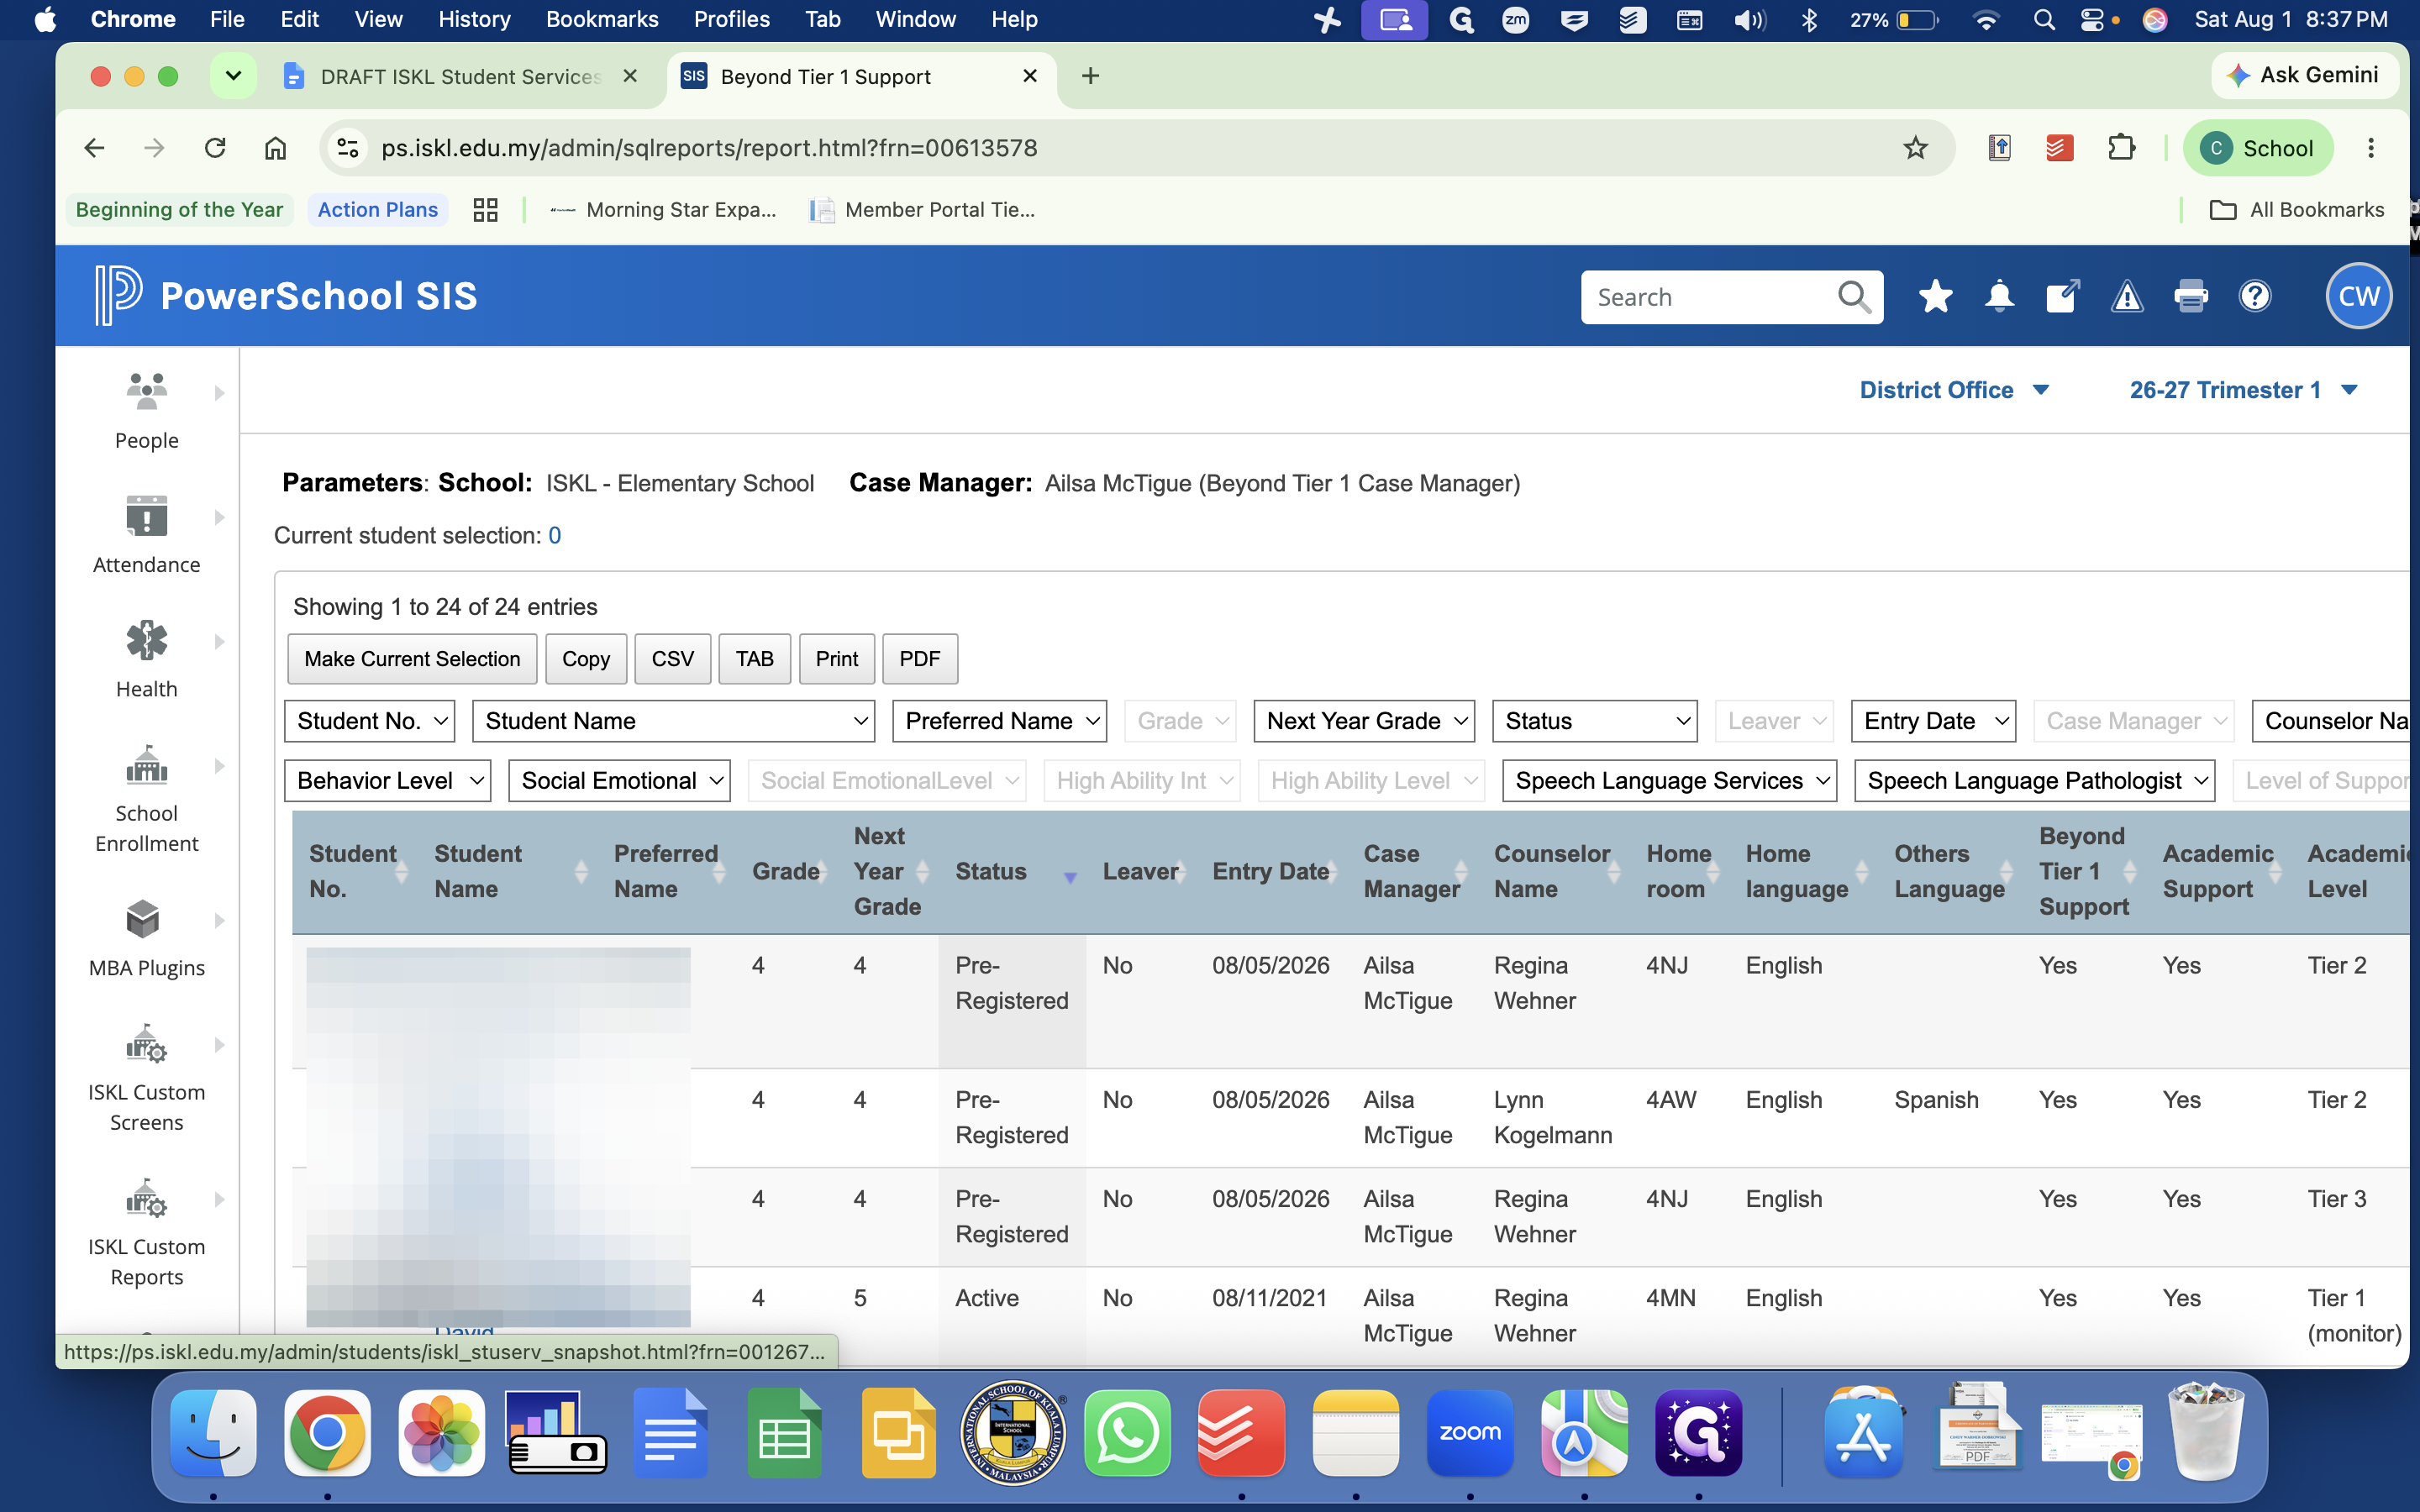
Click Submit to view the list of students on your caseload.
Step #6: Click Submit to view the list of students on your caseload.

Reviewing and Correcting Student Data
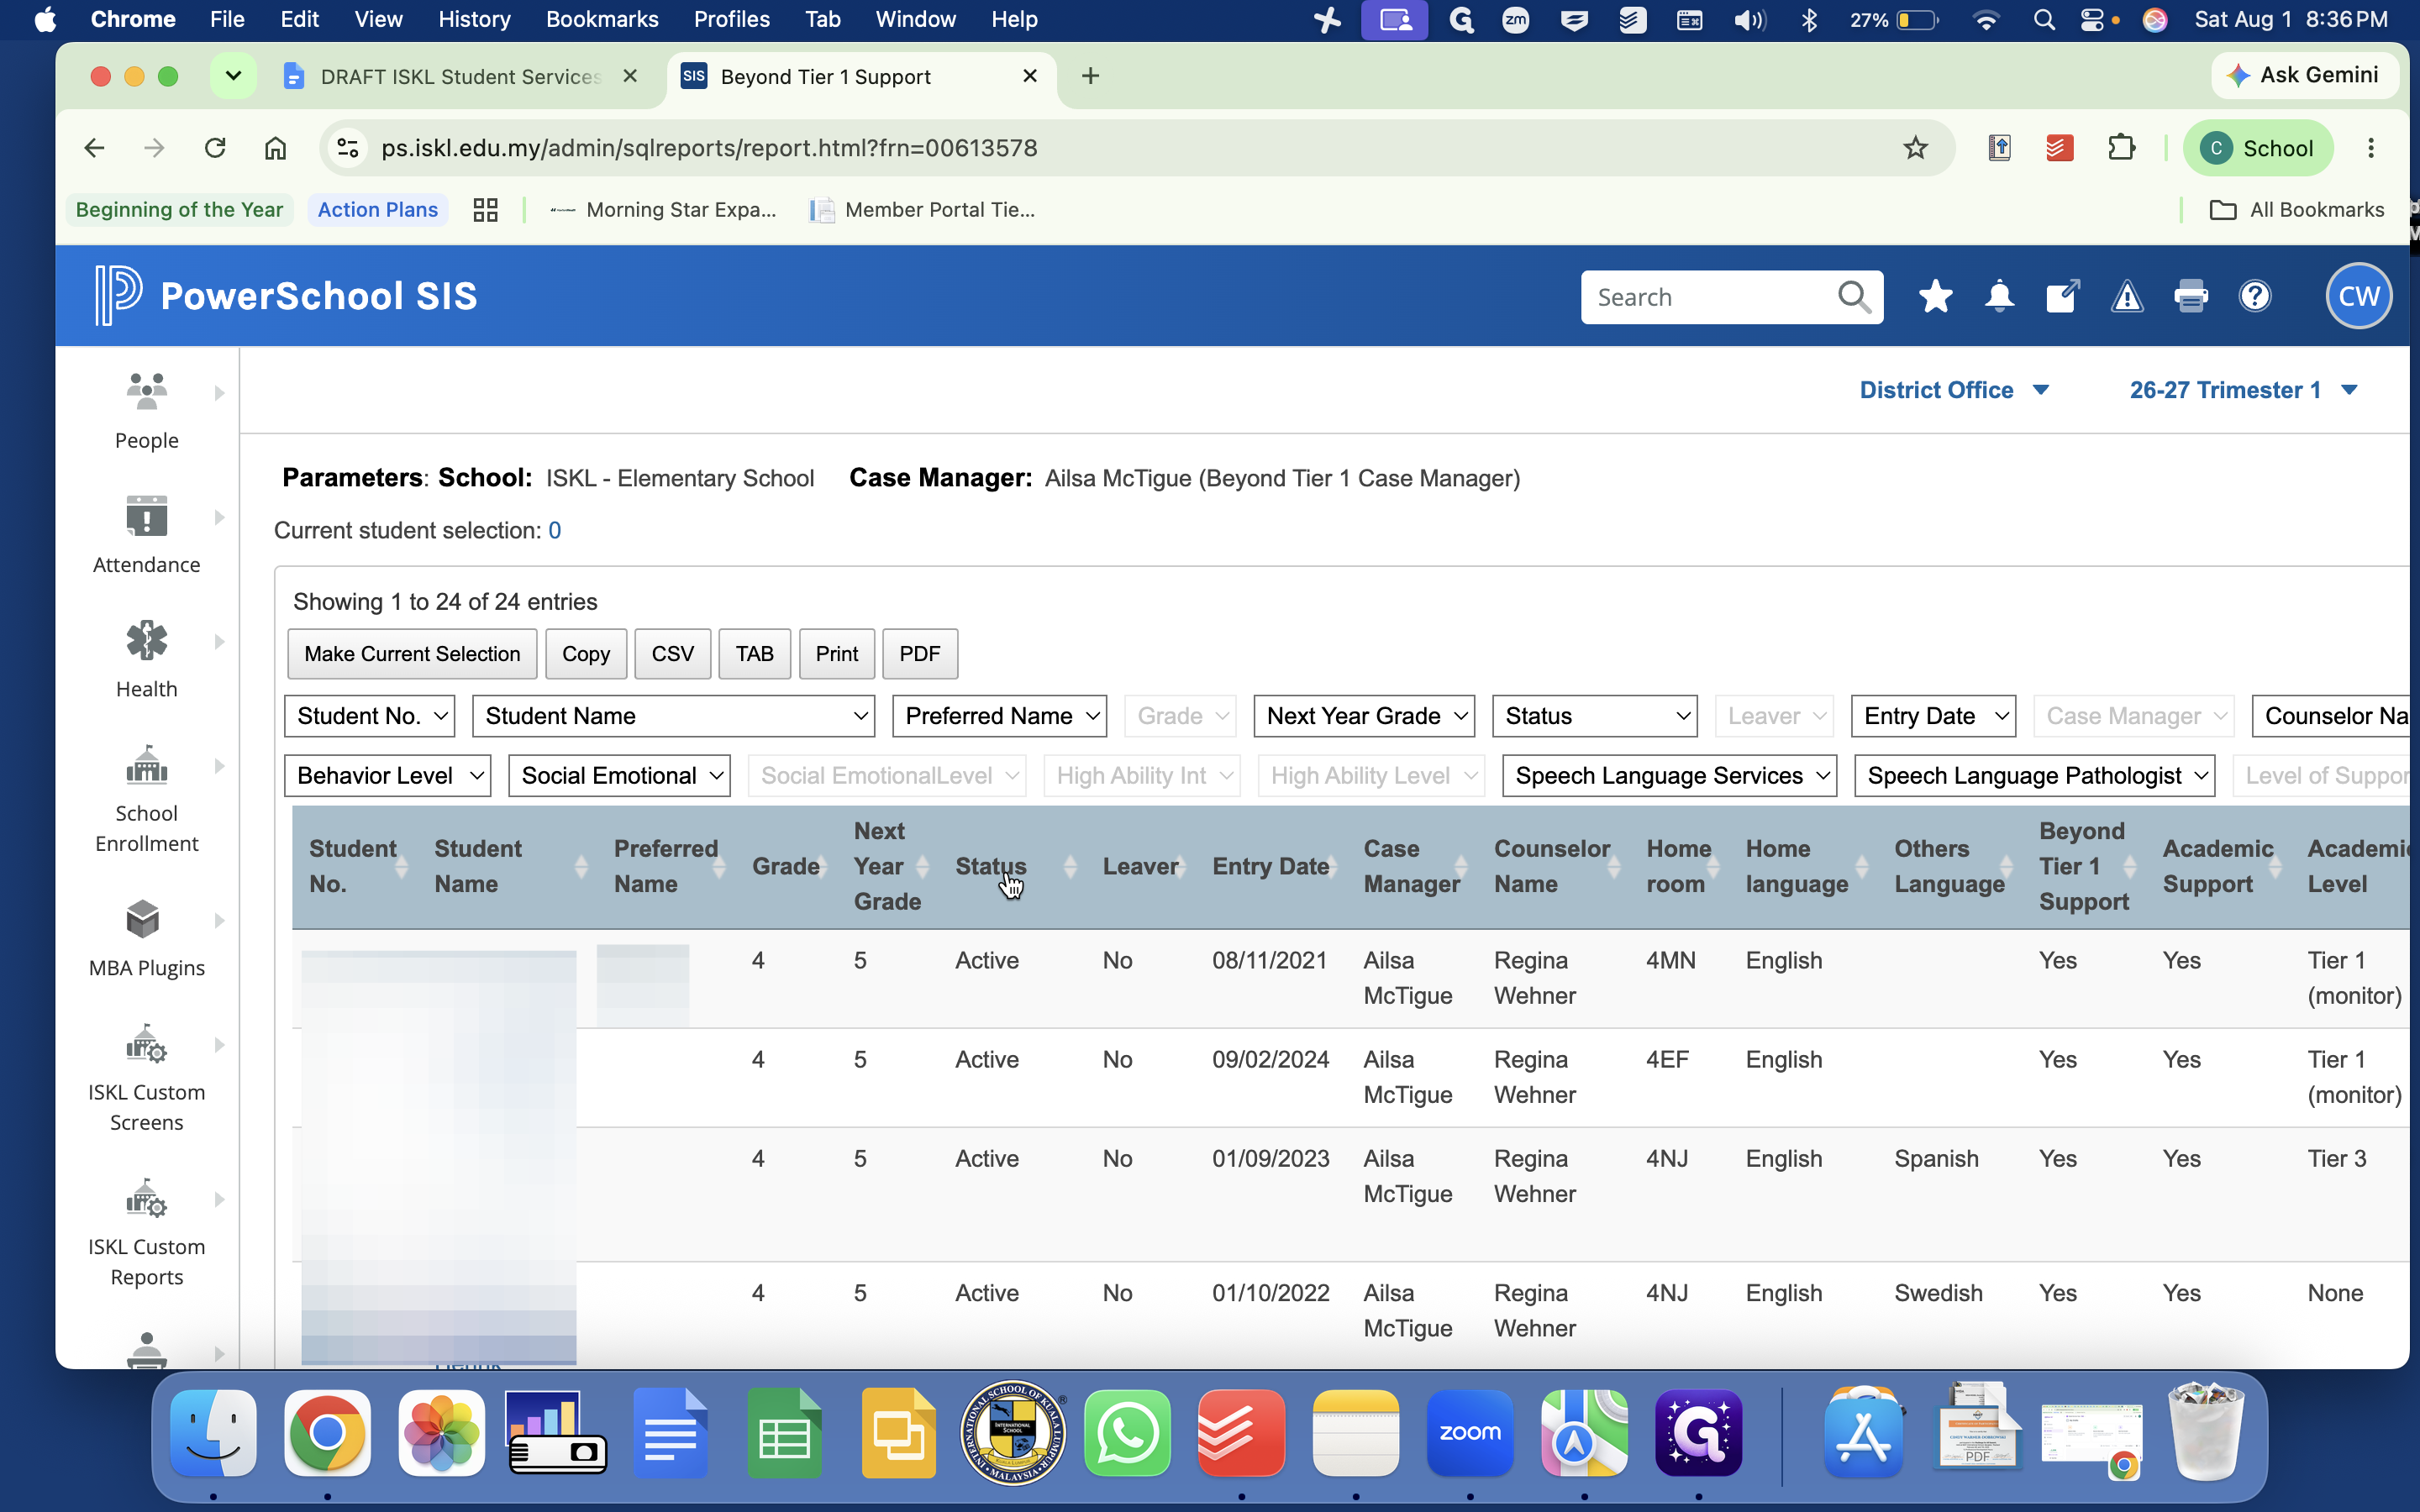
7
Click the Status column header to filter or sort your students.
Step #7: Click the Status column header to filter or sort your students.

When reviewing your caseload, you will encounter two primary student statuses:

Status

Description

Active

Currently enrolled students actively attending the school.

Pre-registered

Upcoming students who will be joining the school, displayed alongside their expected entry dates.

8
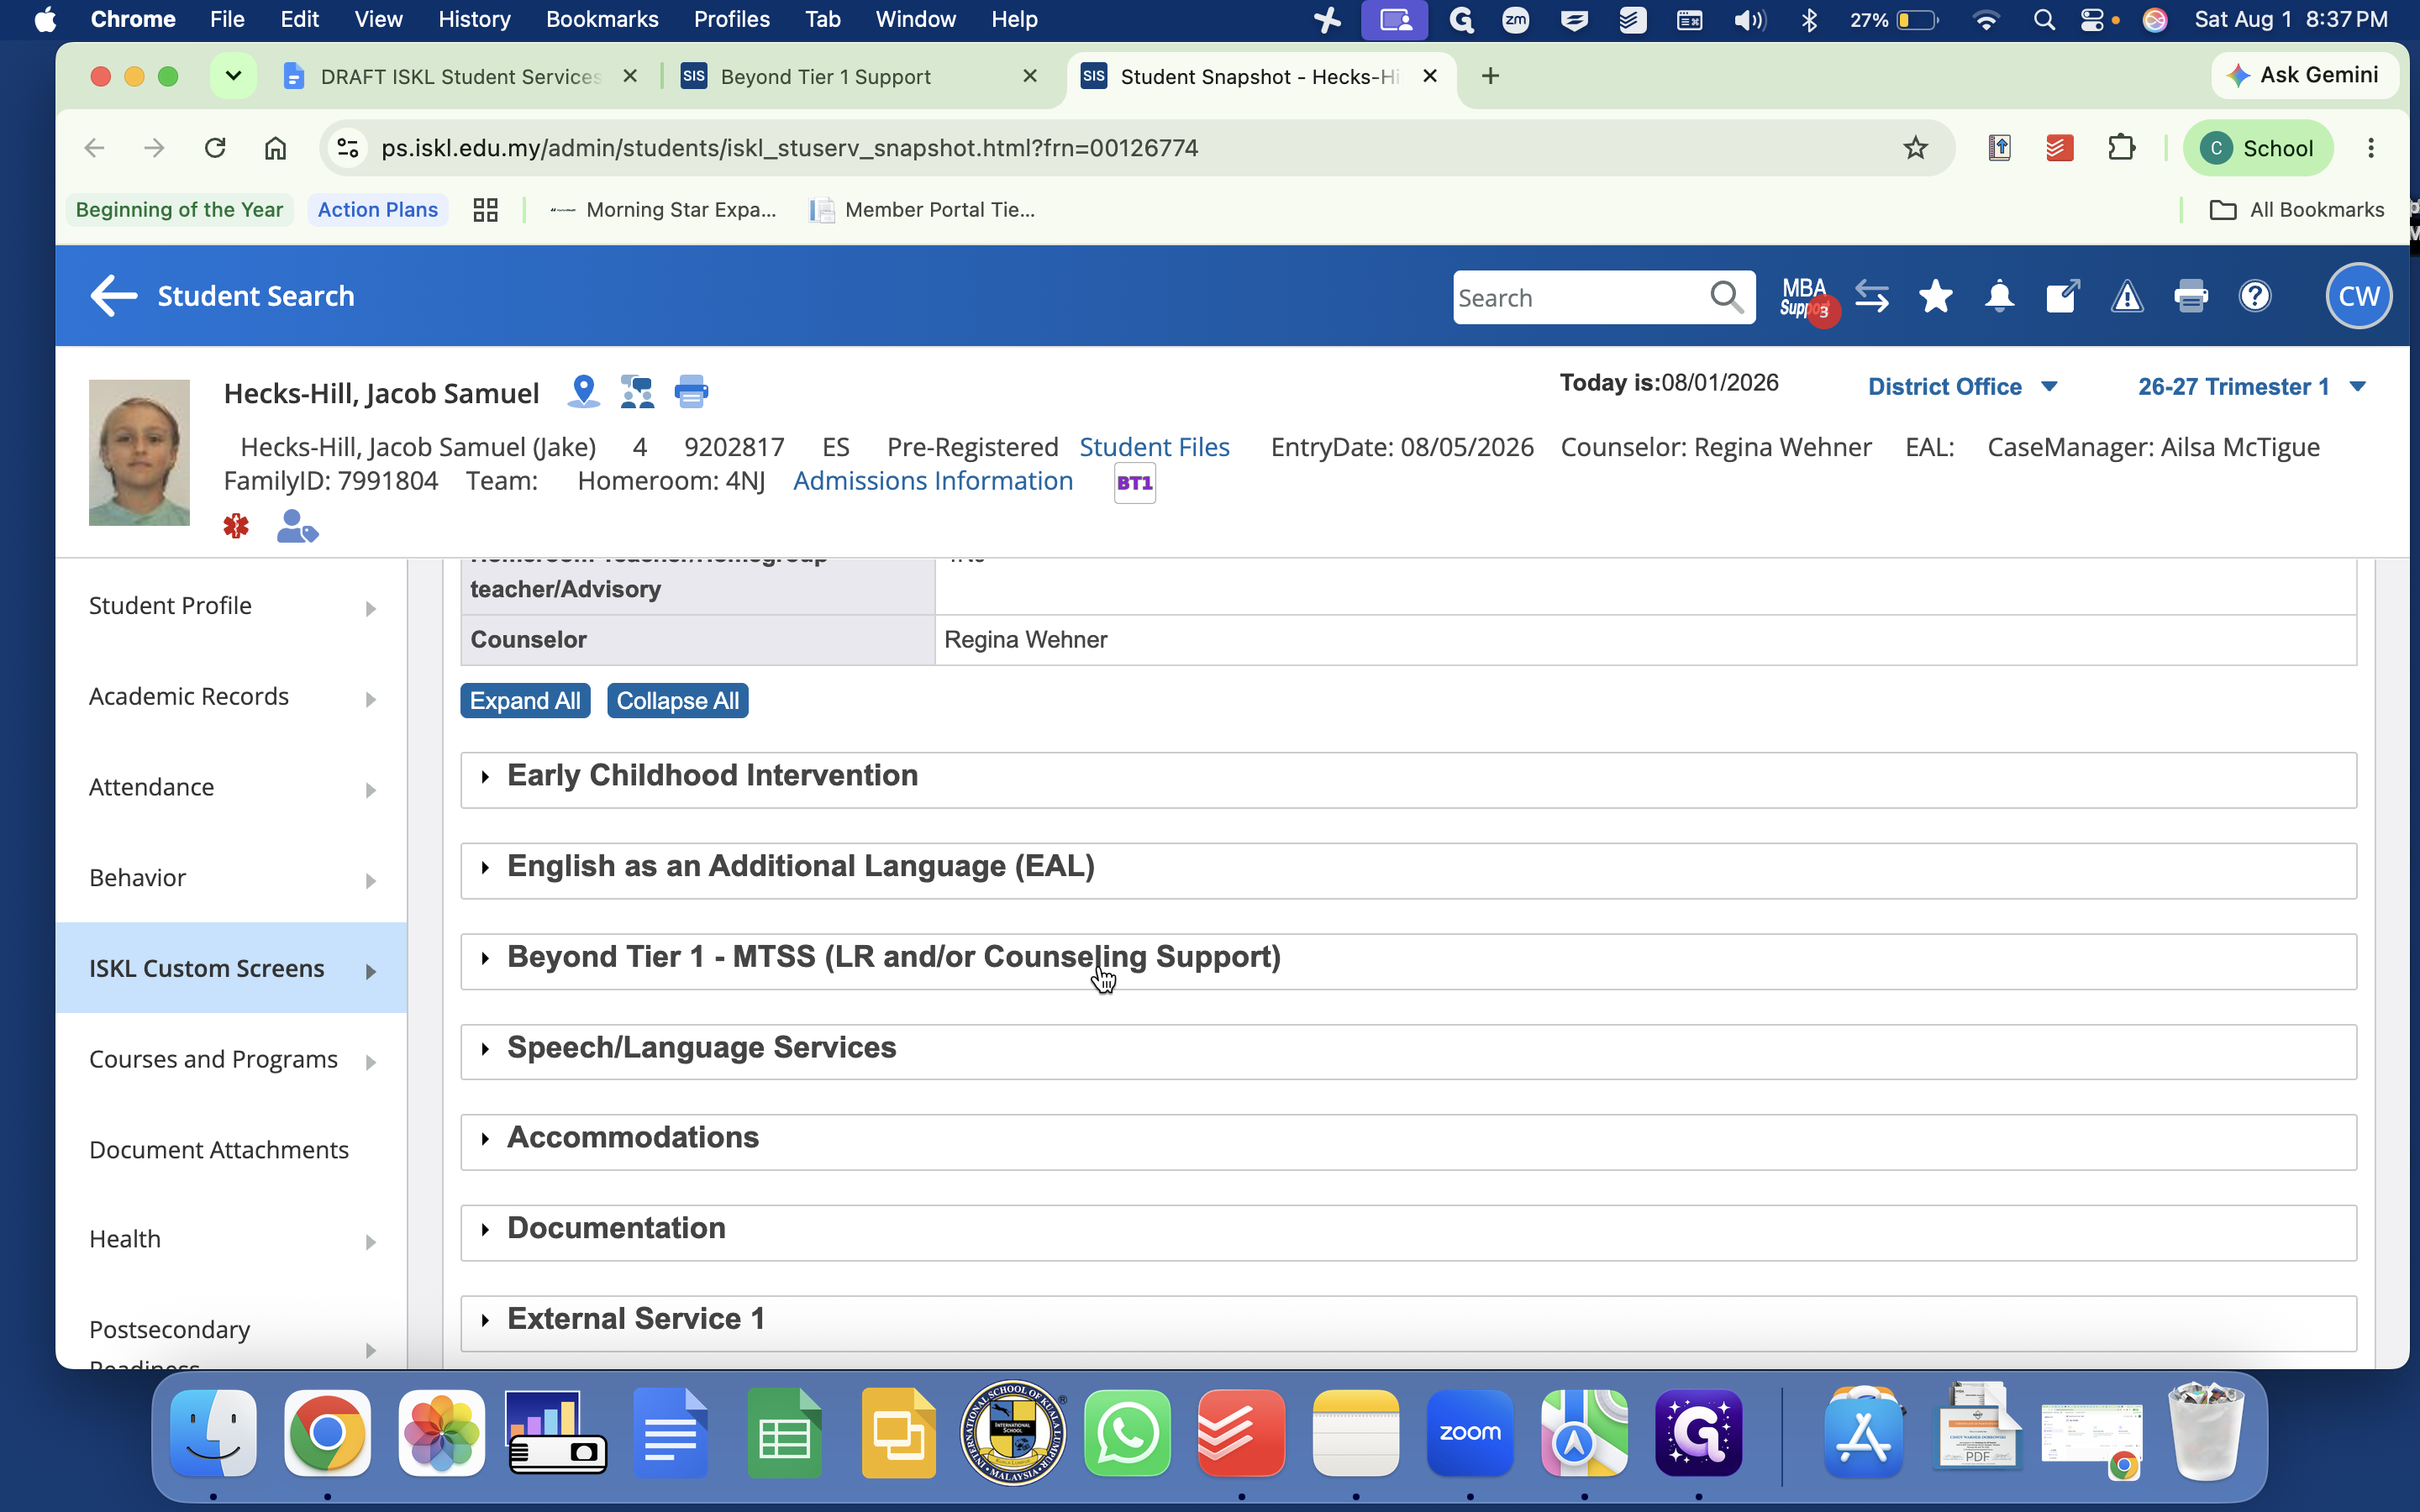
Review the list to ensure all fields are correct. If you notice any errors, click on the student's name to open their record.
Step #8: Review the list to ensure all fields are correct. If you notice any errors, click on the student's name to open their record.
9
Correct the necessary fields in the student snapshot under the Beyond Tier 1 - MTSS section, then click Submit to save your changes.
Step #9: Correct the necessary fields in the student snapshot under the Beyond Tier 1 - MTSS section, then click Submit to save your changes.

Checking Document Attachments

10
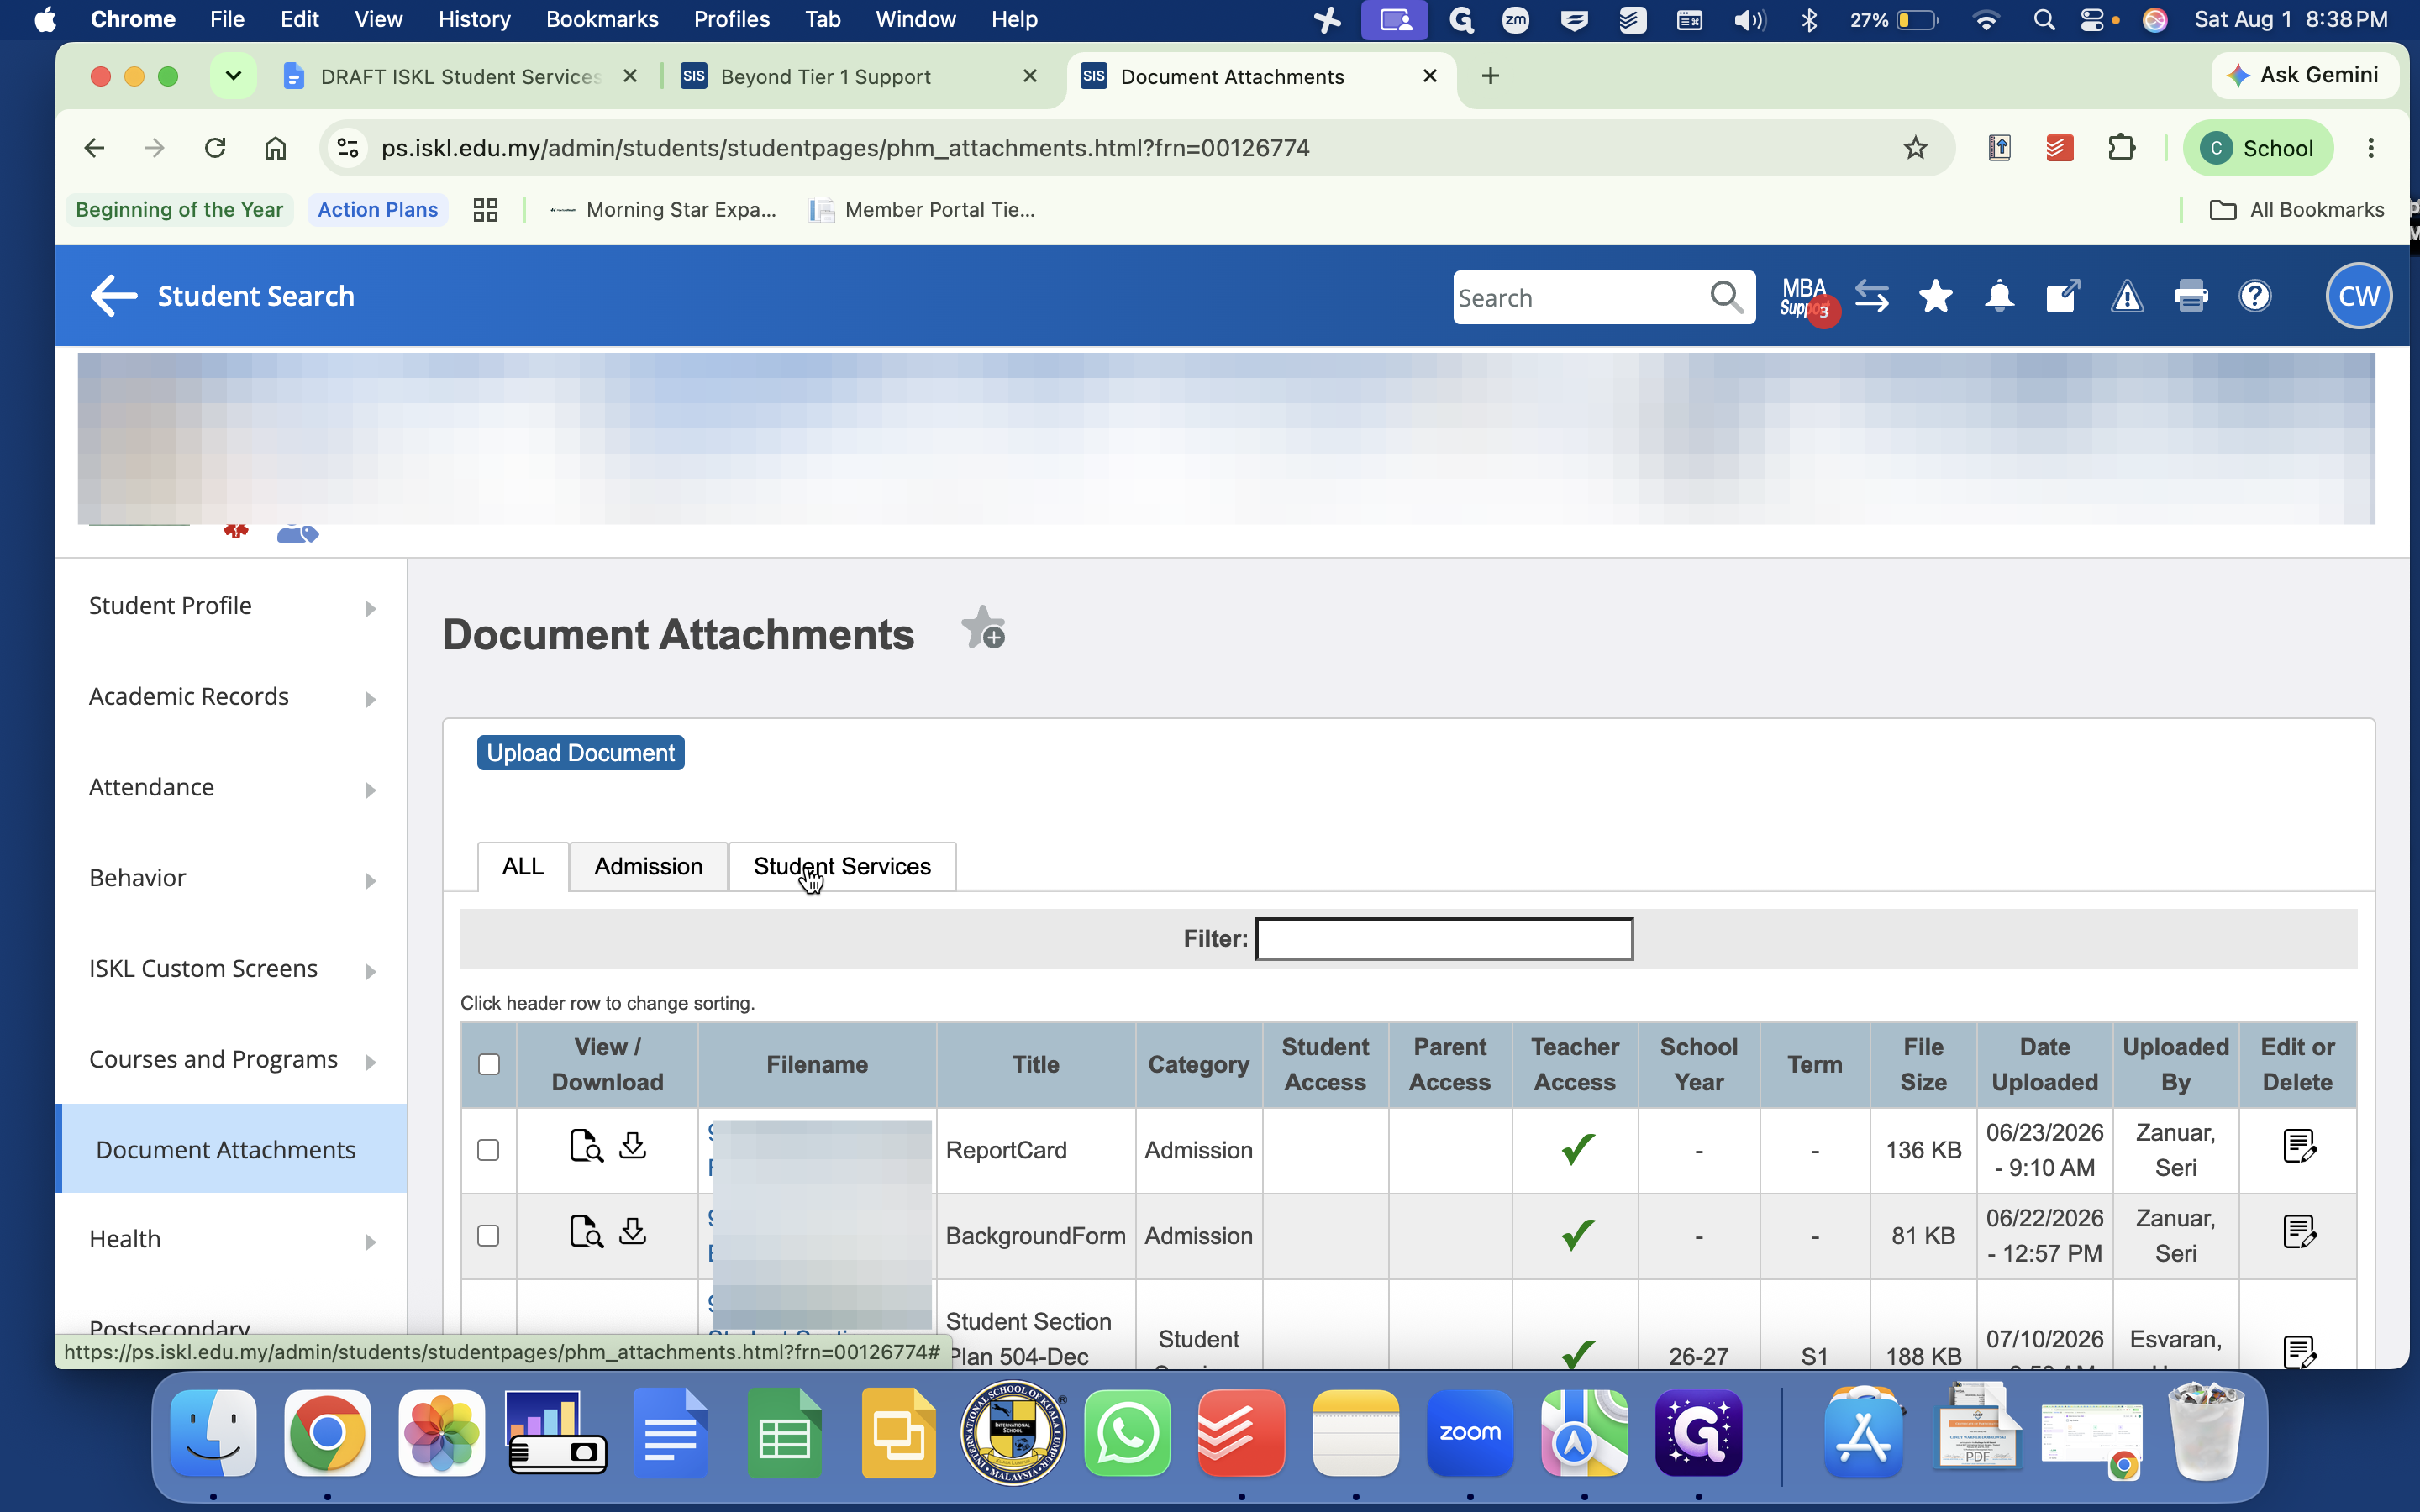
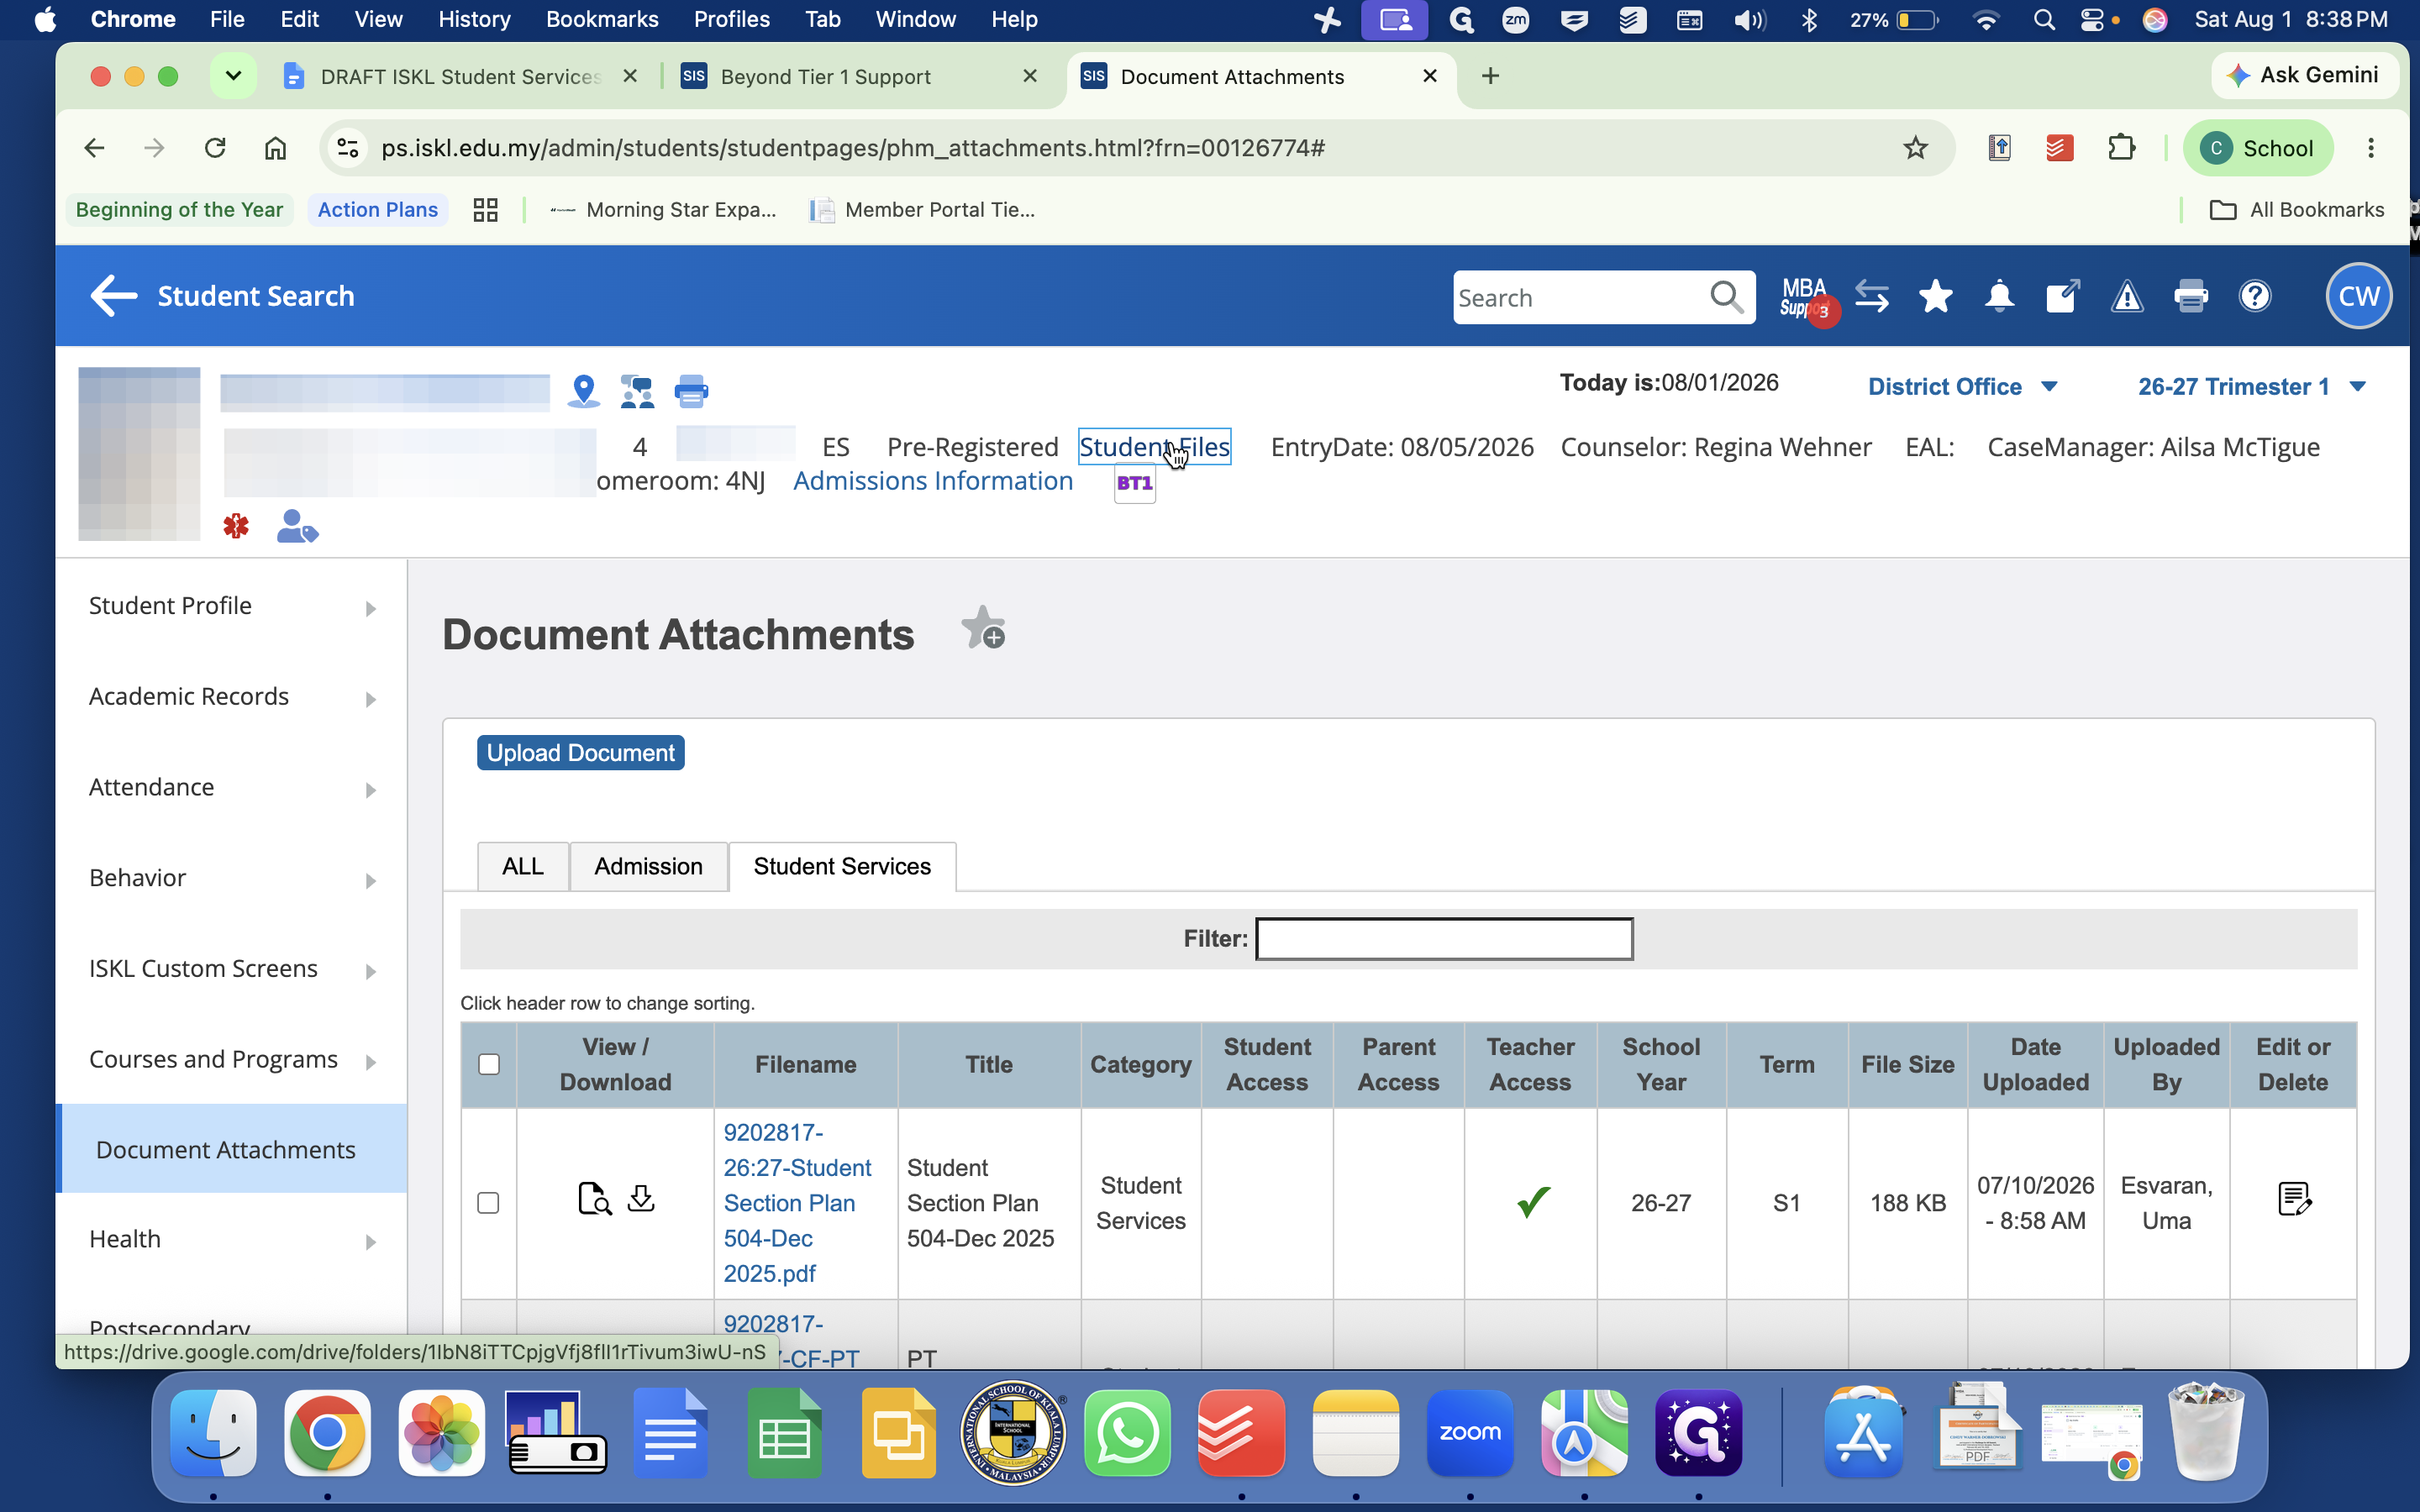
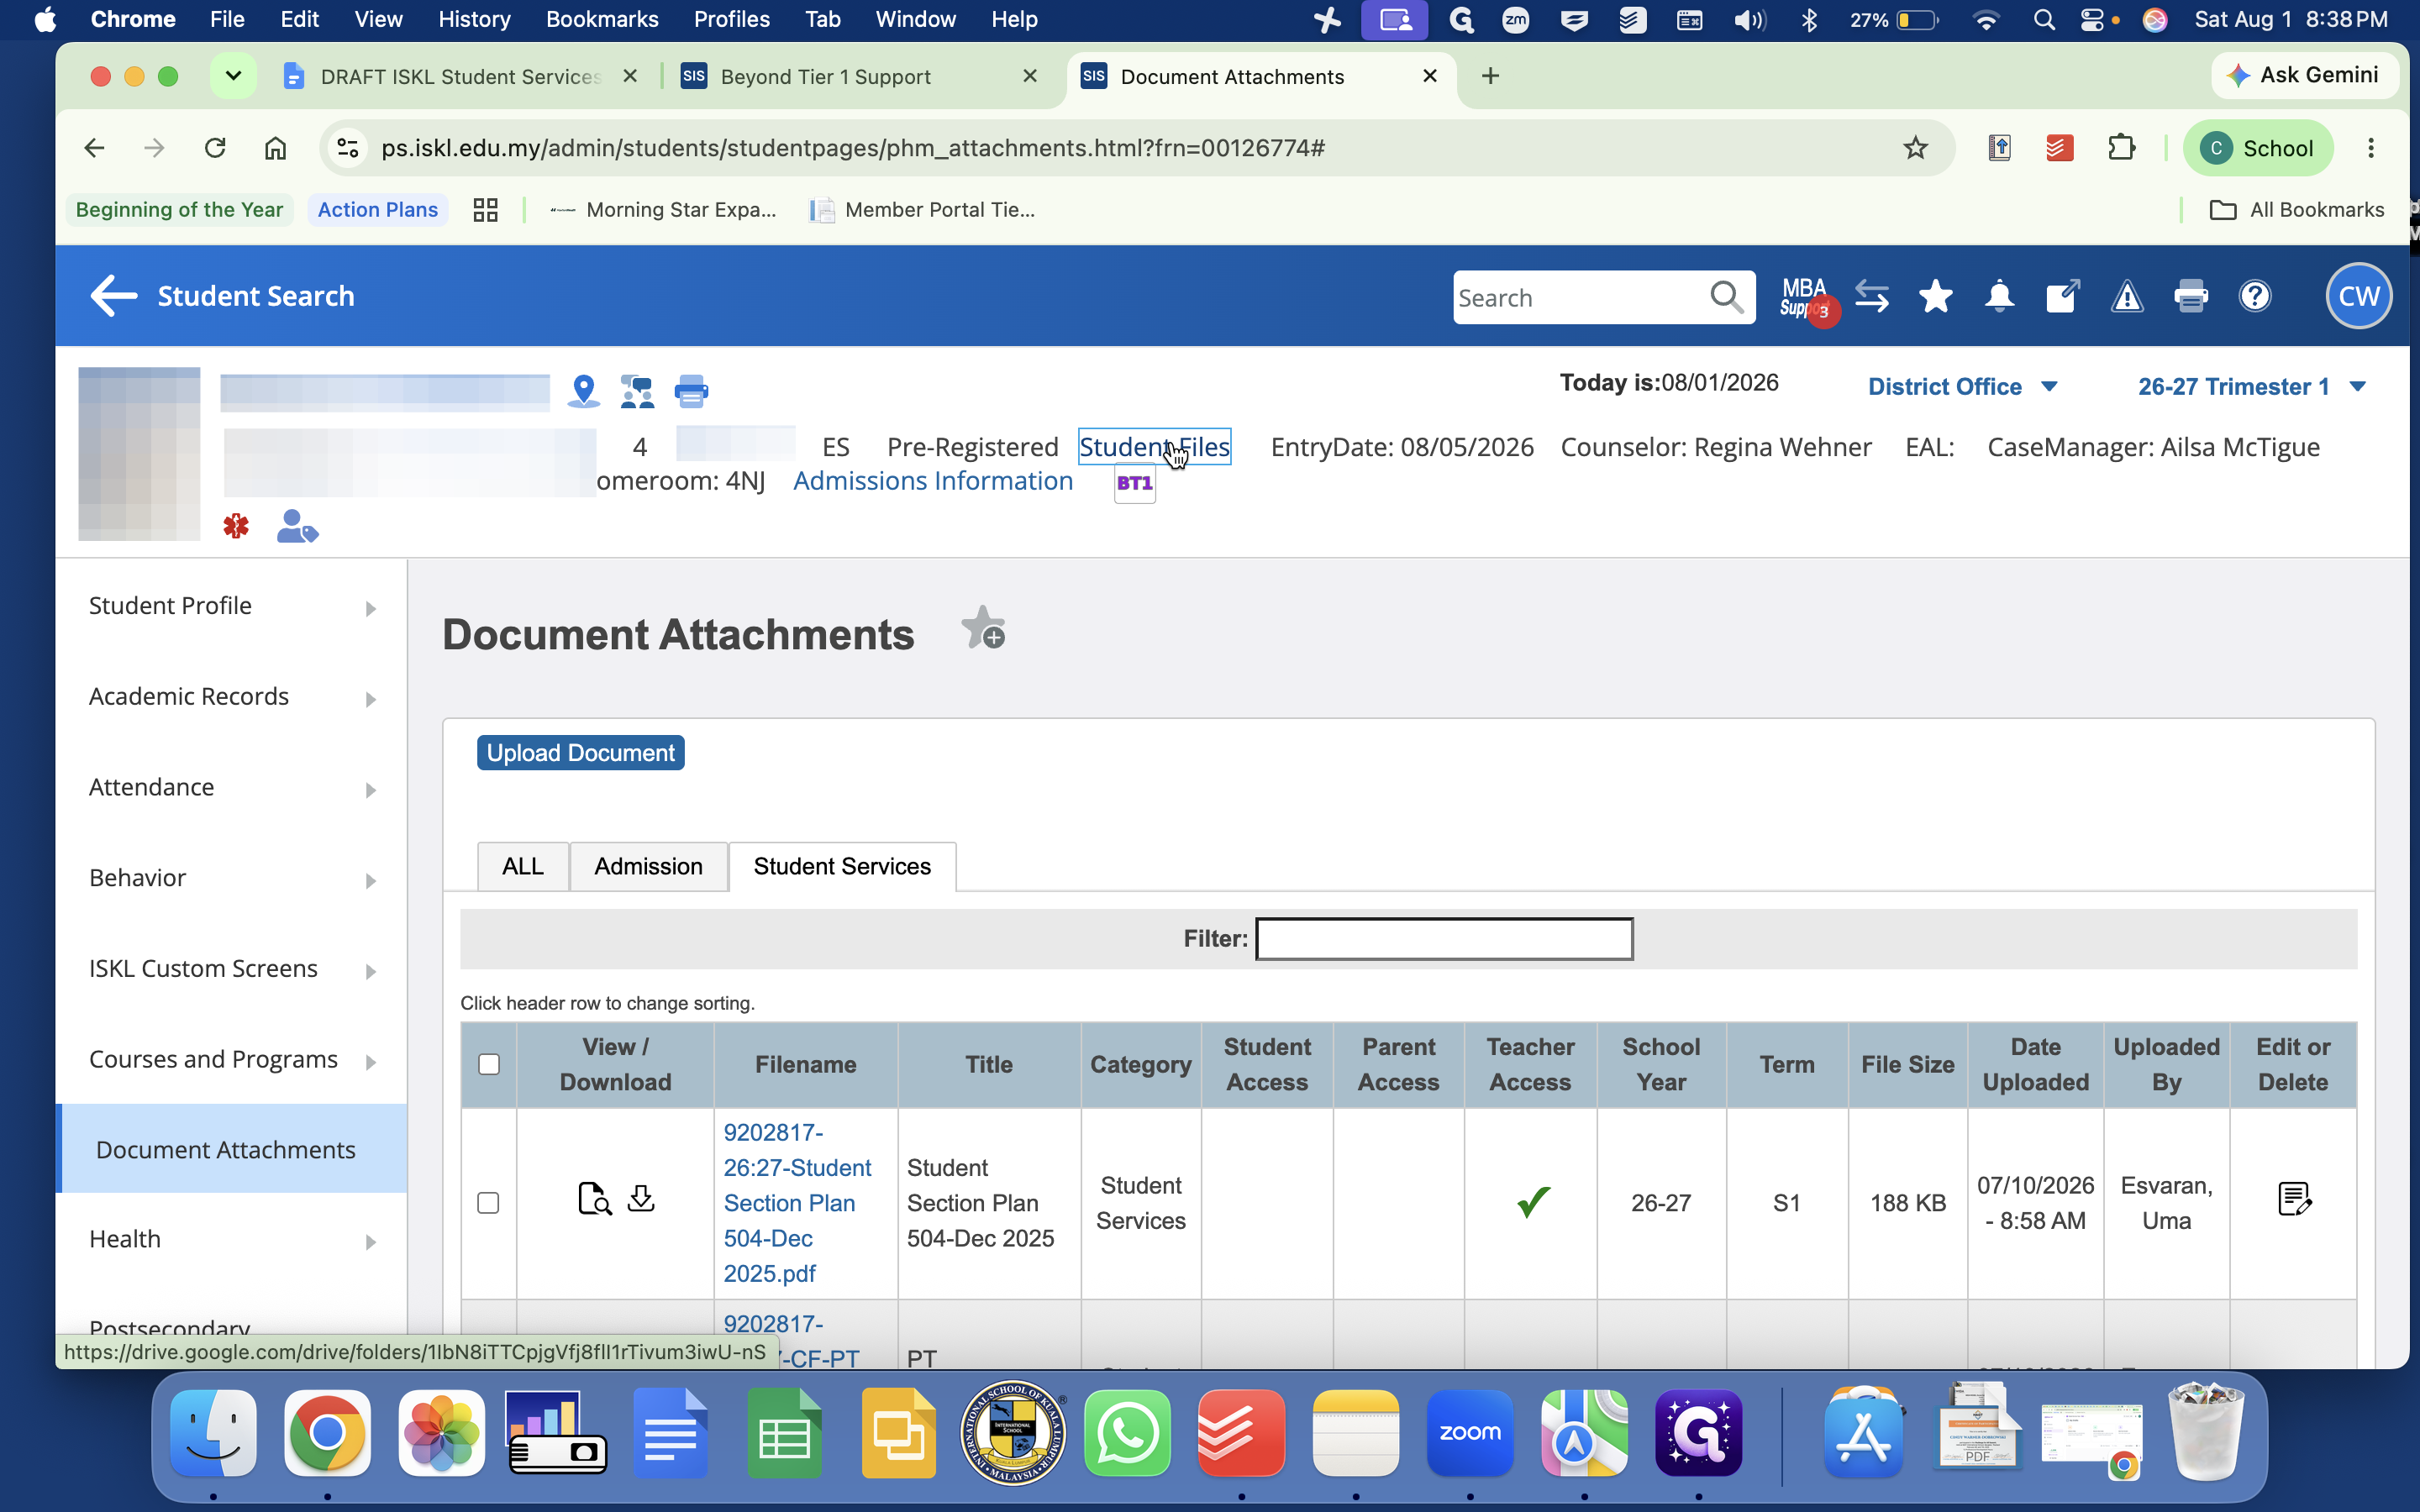
To access uploaded files for any student, click Document Attachments in the left sidebar.
Step #10: To access uploaded files for any student, click Document Attachments in the left sidebar.
11
Click the Student Services tab to review historical plans, consent forms, and evaluation reports.
Step #11: Click the Student Services tab to review historical plans, consent forms, and evaluation reports.
12
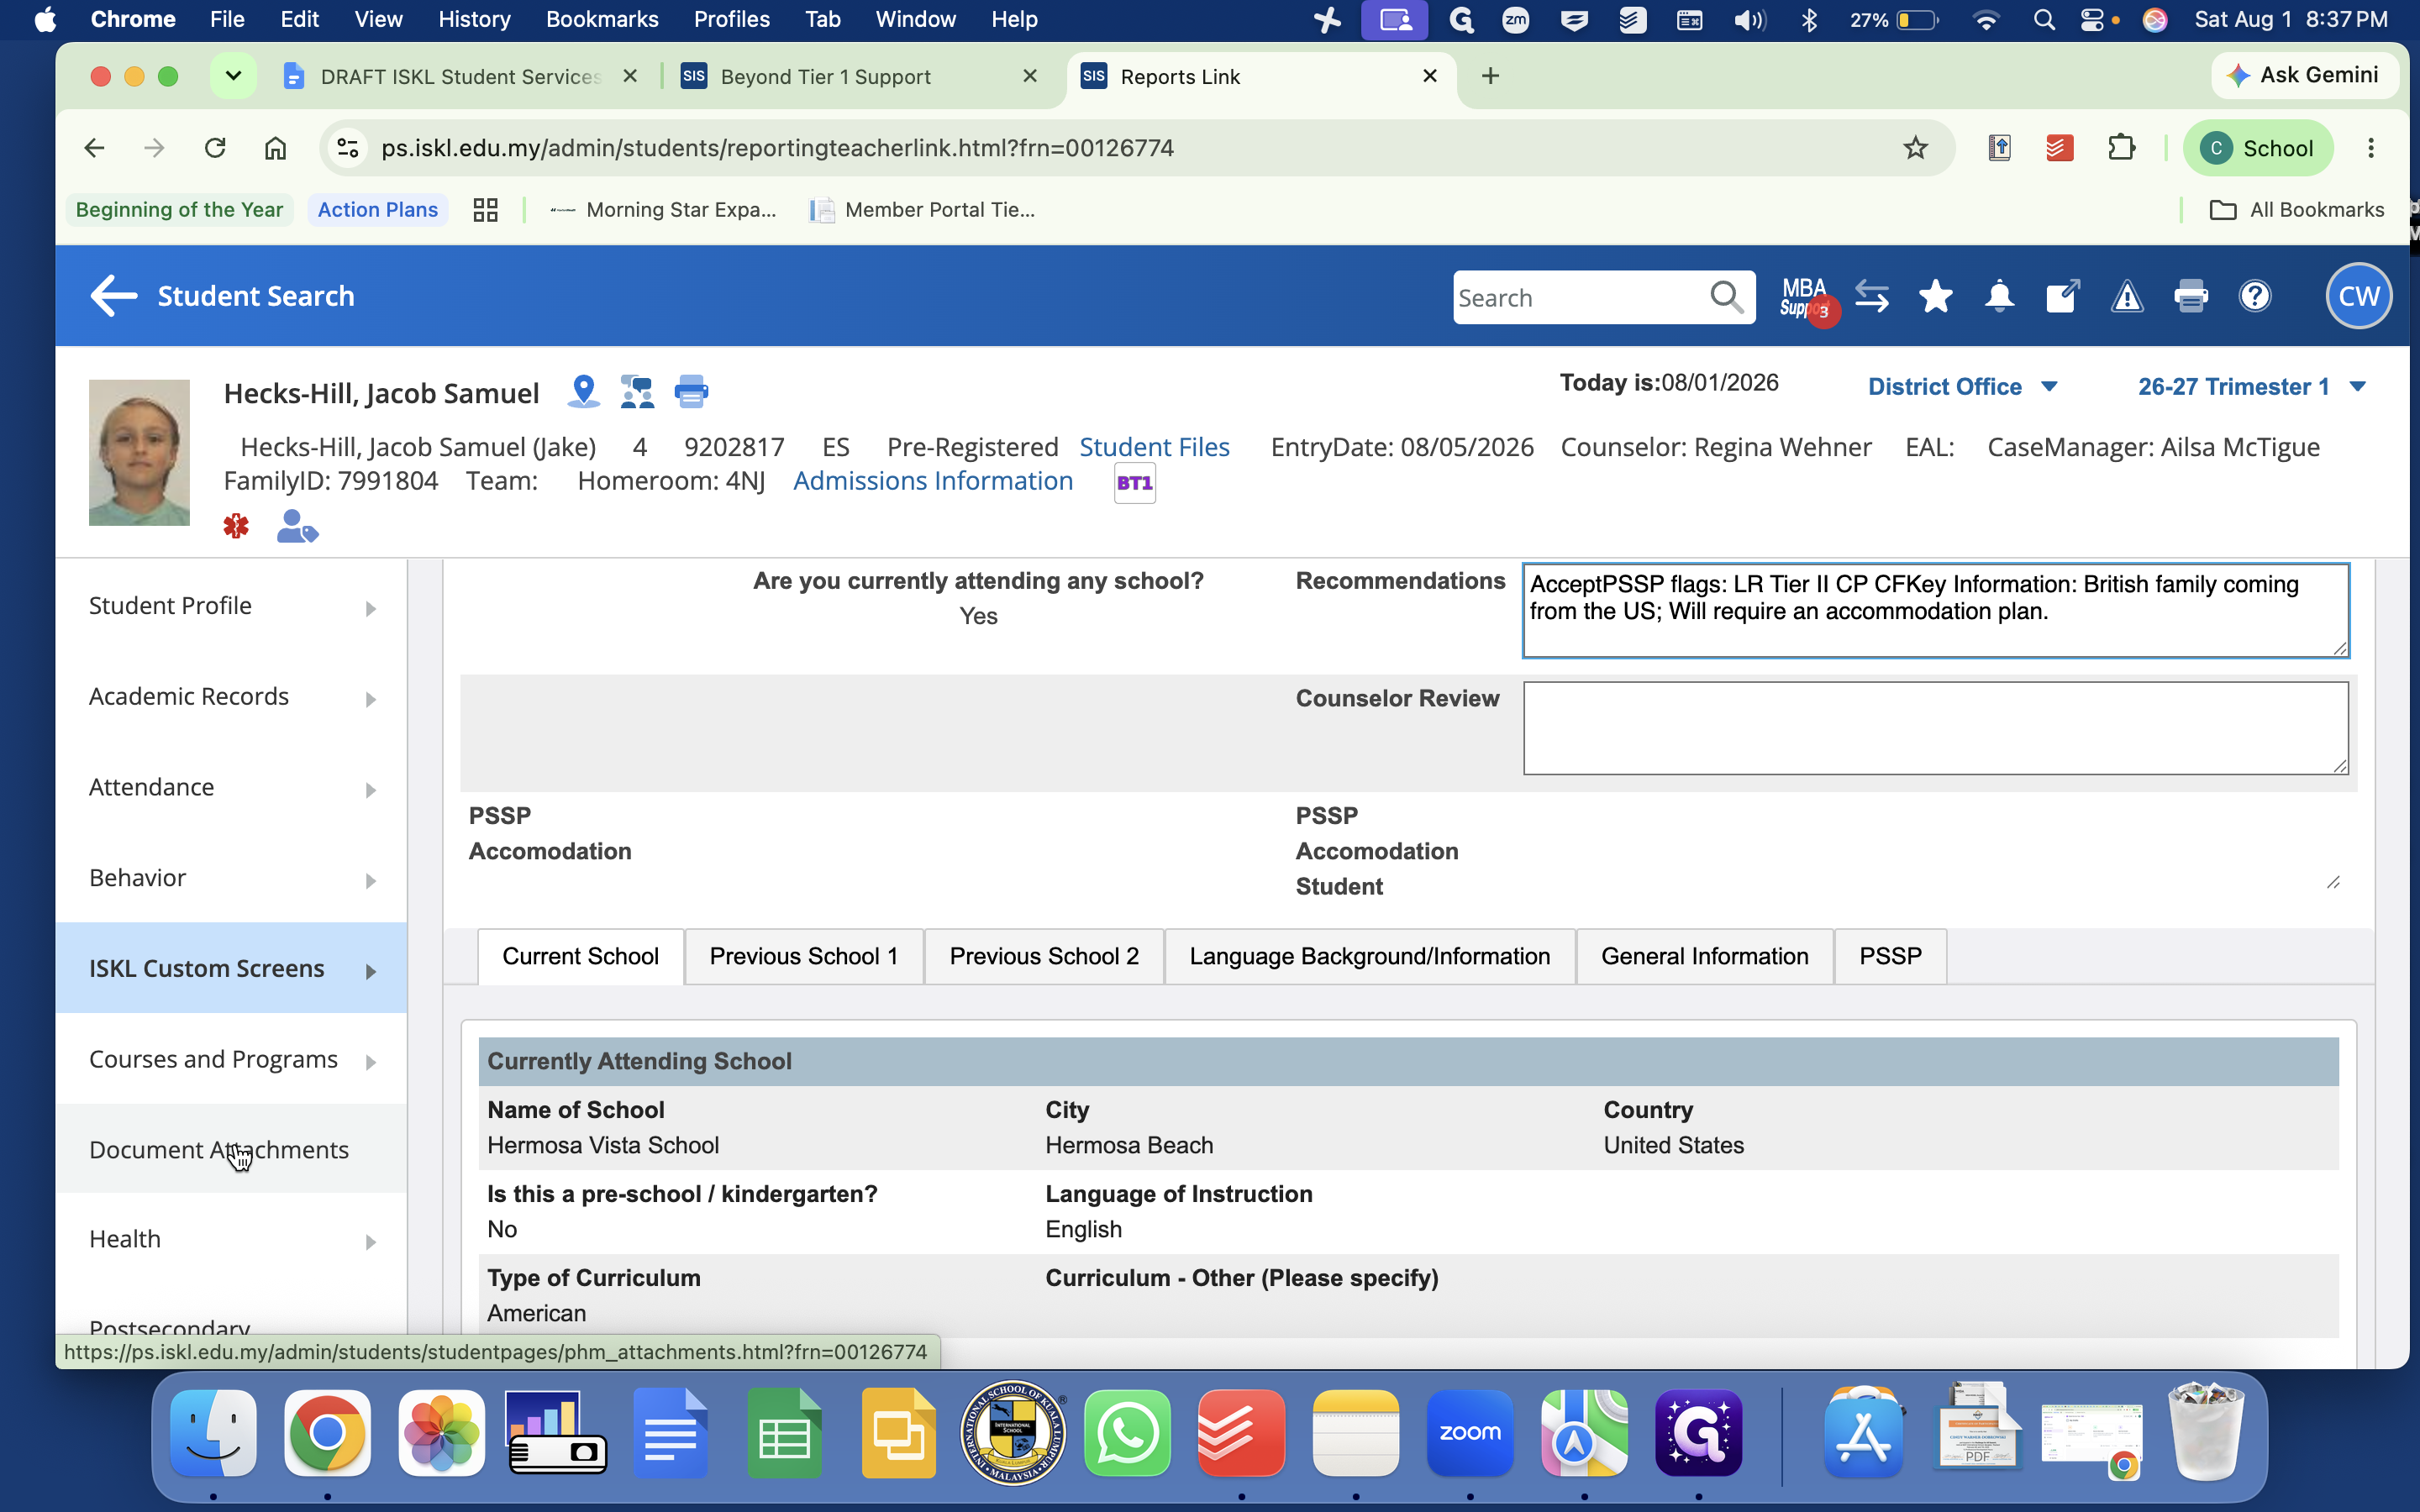
Click the Student Files link at the top of the page to access the auto-generated Google Drive folder containing the student's meeting minutes and related Google Documents.
Step #12: Click the Student Files link at the top of the page to access the auto-generated Google Drive folder containing the student's meeting minutes and related Google Documents.
13
Click the Admissions Information link at the top of the page to access key information from the Admissions file review. Reference Open Apply for more detailed information.
Step #13: Click the Admissions Information link at the top of the page to access key information from the Admissions file review. Reference Open Apply for more detailed information.

Q: What is the difference between active and pre-registered statuses?

A: Active refers to currently enrolled students taking classes. Pre-registered refers to students who have enrolled but will be joining the school at a later entry date.

Q: How can I access SQL Reports faster next time?

A: Click the star icon next to SQL Reports in PowerSchool to favorite it. This allows you to jump directly to your reports from the PowerSchool start page.

Q: Where do I find admissions files for brand-new students?

A: Navigate to ISKL Custom Screens and select the Admission Reporting View. This section contains OpenApply data and key recommendations from their admissions file review. For more detailed information, refer to Open Apply.

Term

Definition

SQL Reports

A custom reporting tool within PowerSchool used to extract specific administrative data, such as student service caseloads.

Beyond Tier 1 Support

A specific Multi-Tiered System of Supports (MTSS) report detailing students who receive additional learning or counseling support.

OpenApply

An external admissions and enrollment management platform used to collect information on prospective and new students.

ISKL Custom Screens

A customized directory in PowerSchool tracking specialized school data, such as admission views and unique student services metrics.