How to Capture Photos and Submit Projects for AI Review in SiteCapture

Learn how to locate projects, capture customer and survey photos, review AI validations, and complete project statuses in the SiteCapture app.

By Usama

This guide provides instructions on how to locate a project in the SiteCapture mobile app, document it with required photos, process those images through automated validation, and finalize the project's status. Completing these steps ensures all required site data is accurately collected and automatically reviewed for quality assurance.

This workflow is primarily used by field technicians, site surveyors, and contractors. It applies when they are on-site and need to capture required documentation and clear automated review checks before closing out a job.
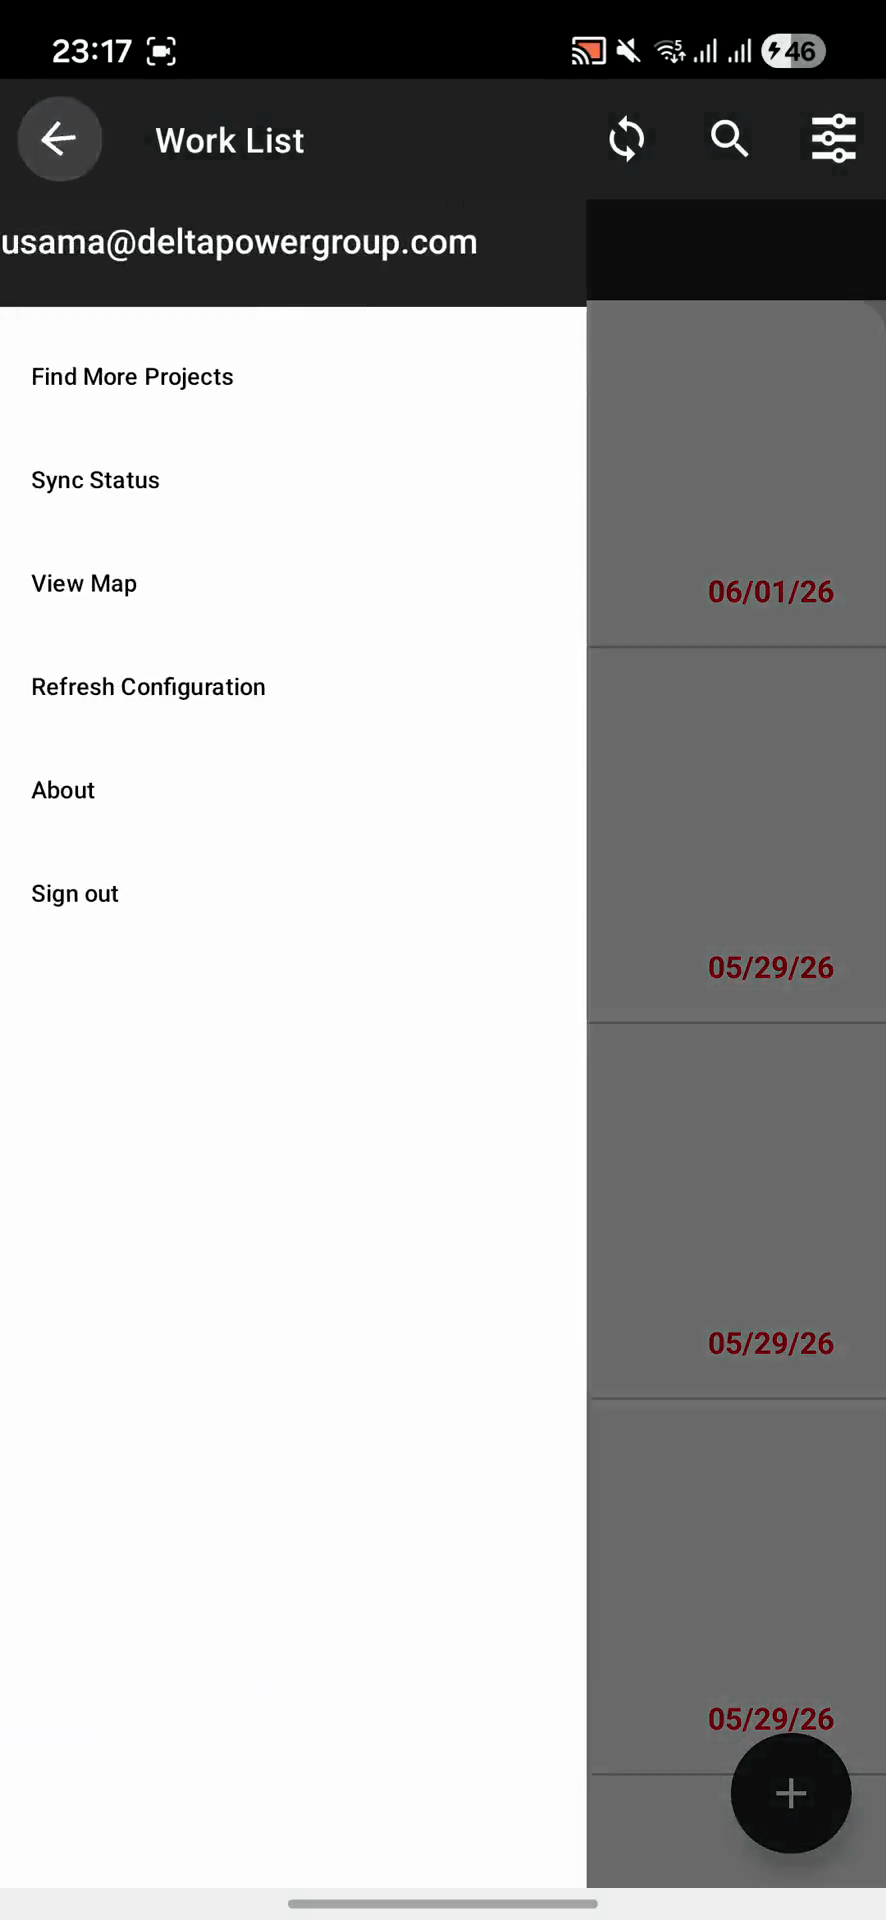
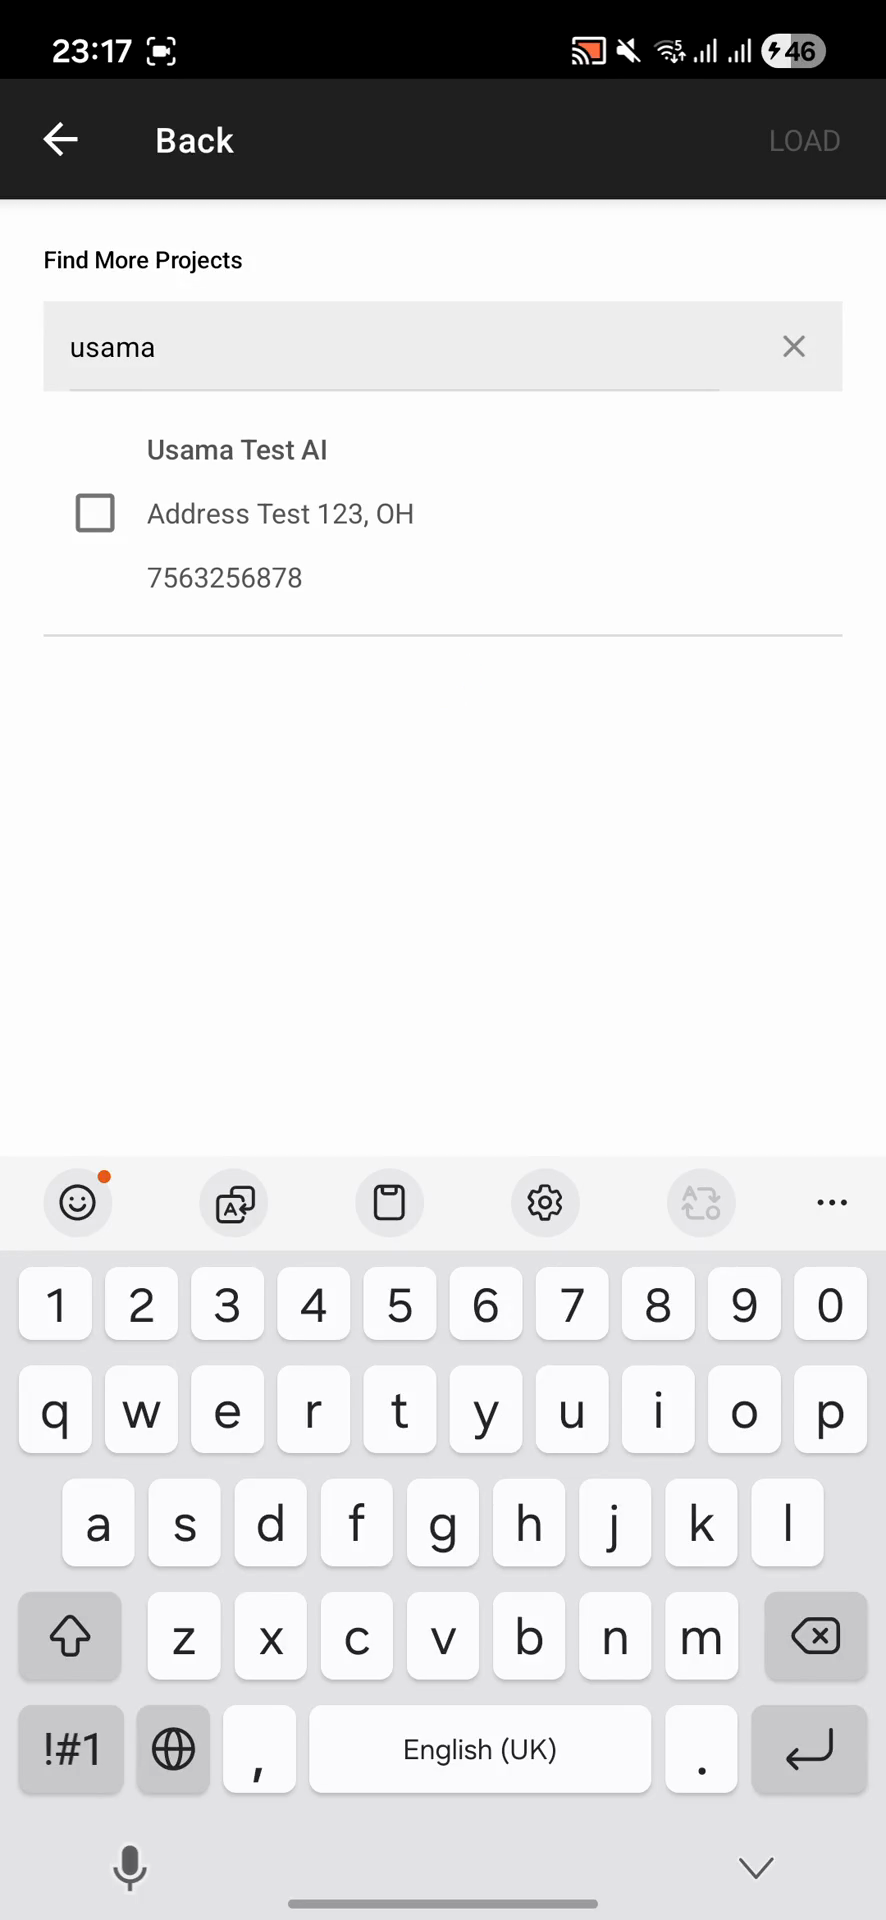
Locate the Project

1
Open the SiteCapture app on your device.
Step #1: Open the SiteCapture app on your device.
2
Tap the menu icon in the top-left corner of the screen.
Step #2: Tap the menu icon in the top-left corner of the screen.
3
Select Find More Projects from the sidebar menu.
Step #3: Select Find More Projects from the sidebar menu.
4
Type the name of the project you are looking for into the search field.
5
Tap on the project name from the search results to open the project details.
Step #5: Tap on the project name from the search results to open the project details.

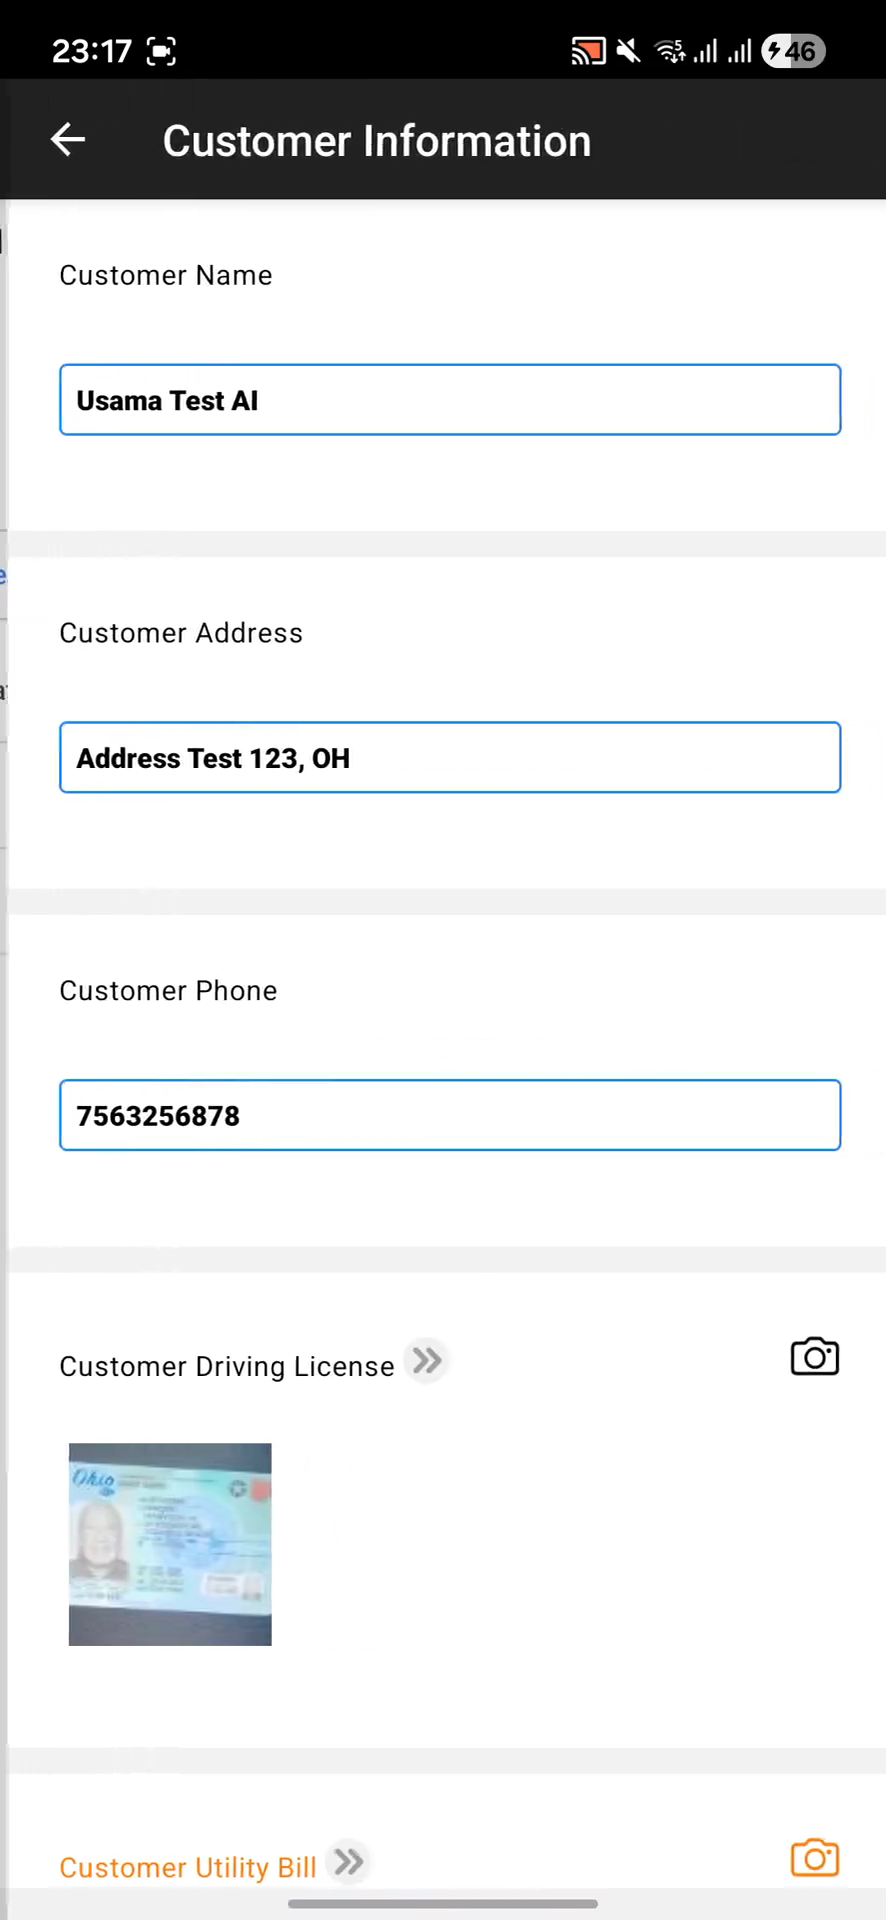
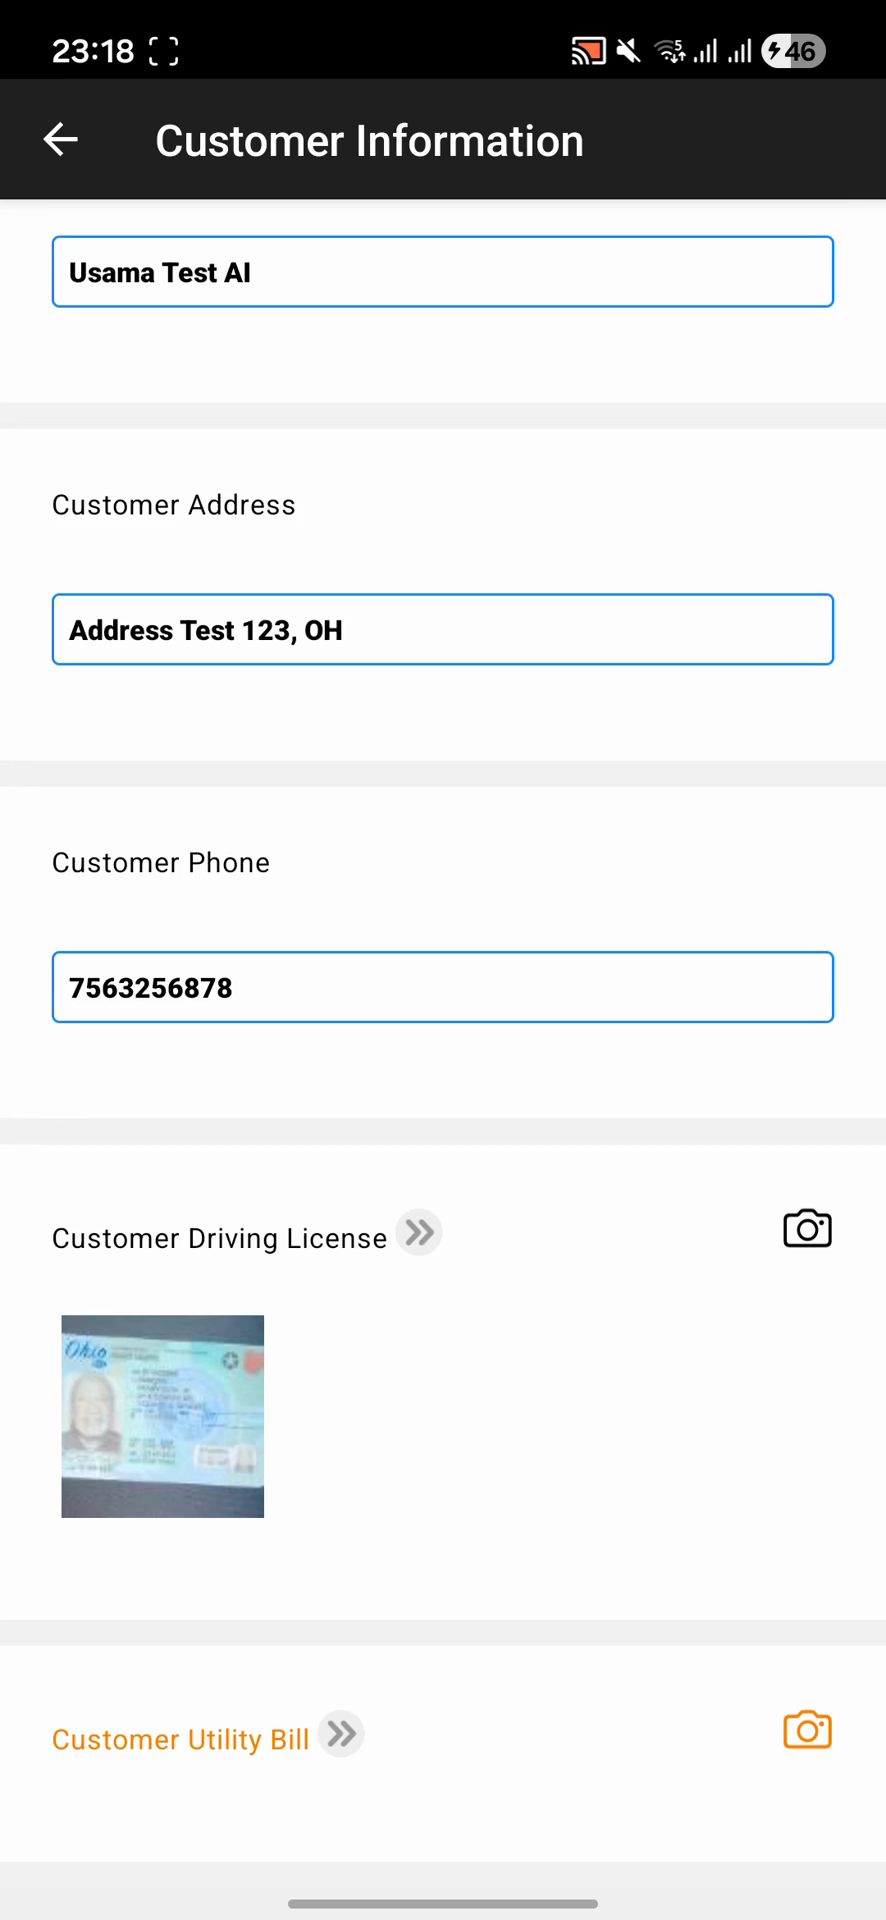
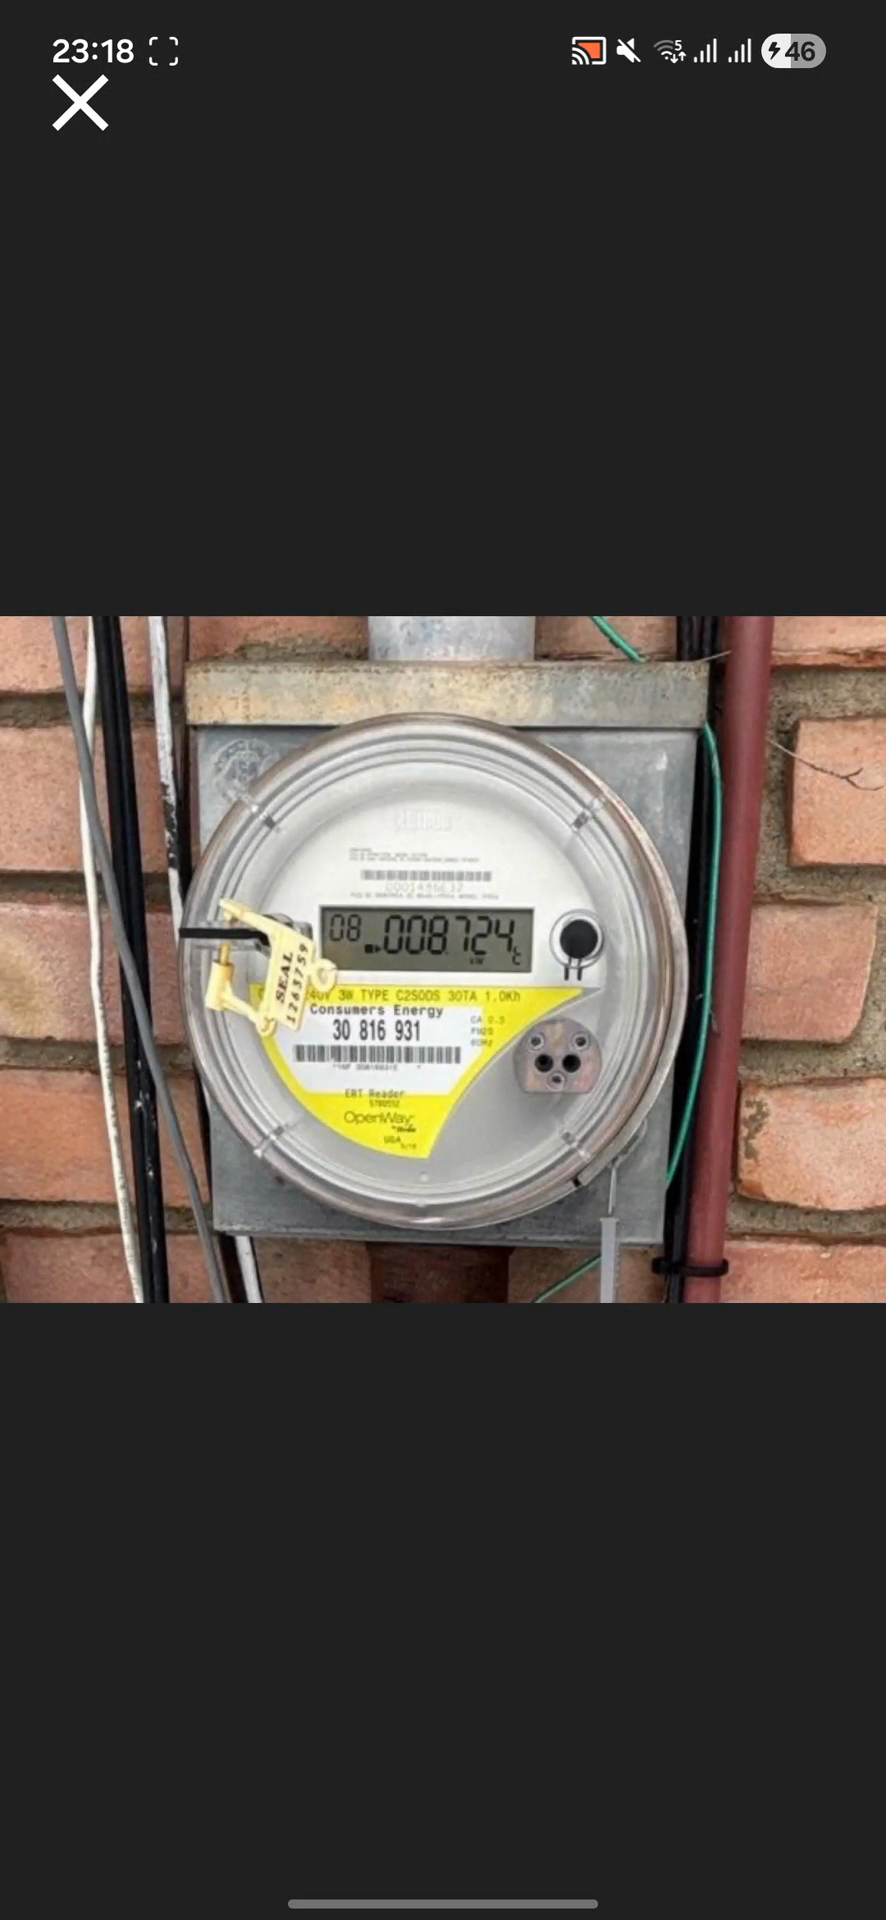
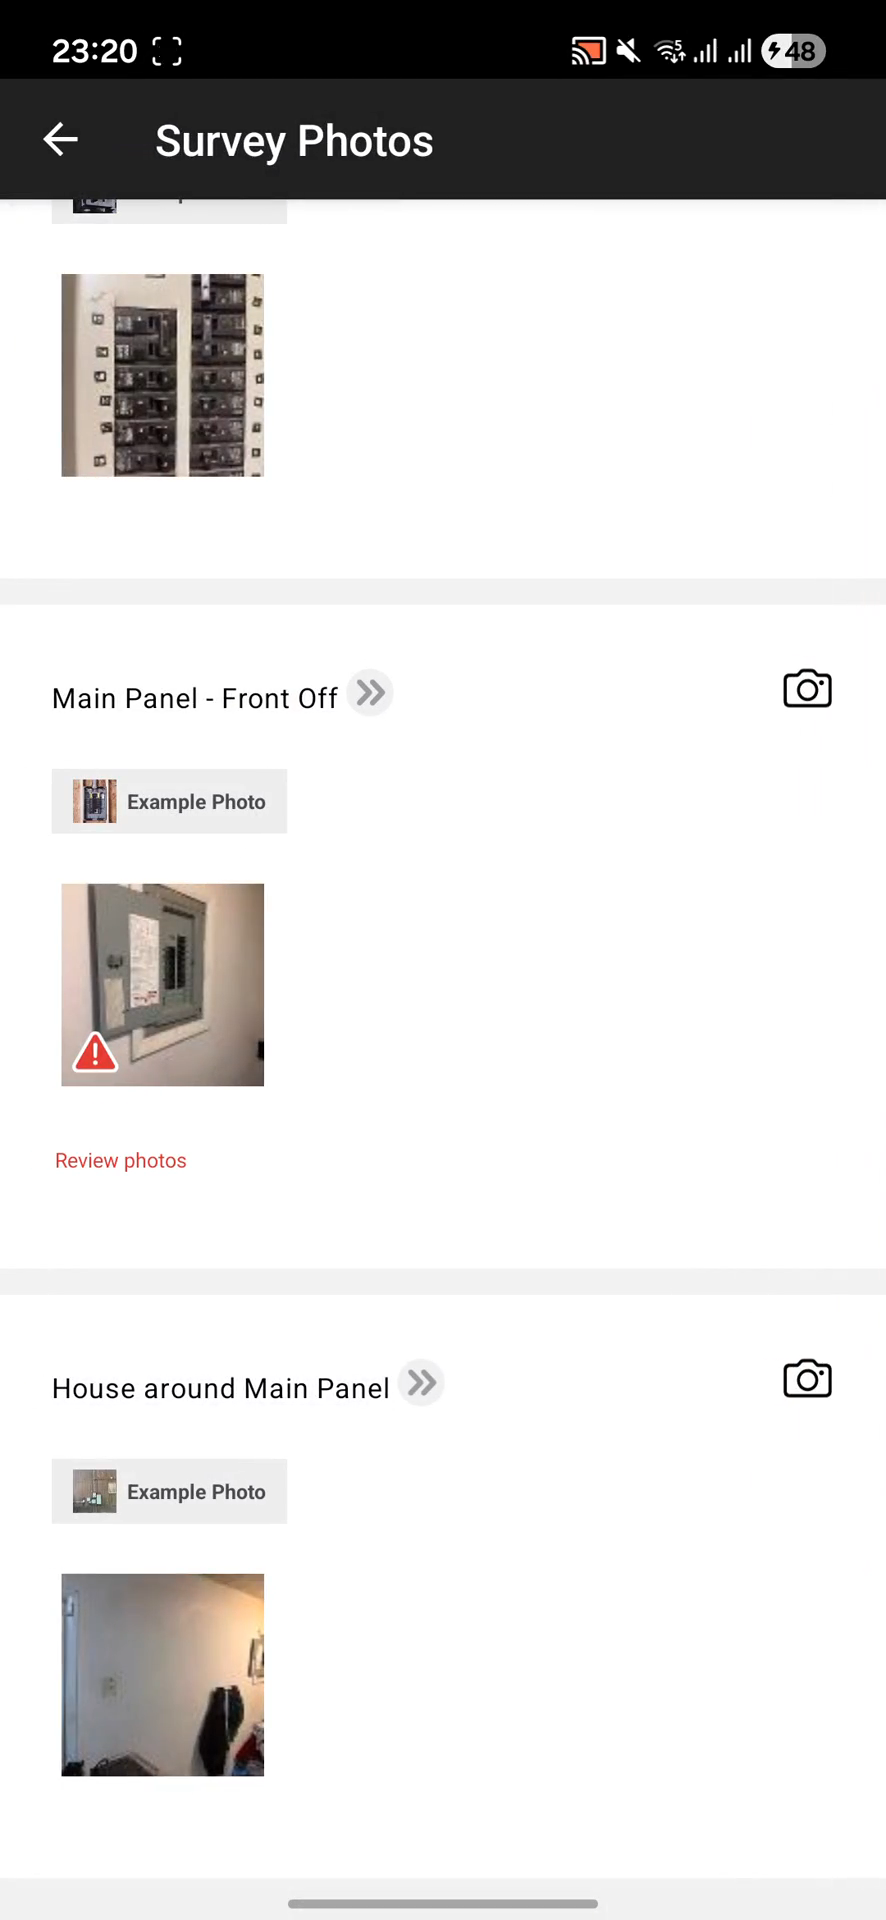
Capture and Sync Photos

6
Tap Customer Information & Survey Photos to access the relevant form fields.
Step #6: Tap Customer Information & Survey Photos to access the relevant form fields.
7
Tap the camera icon next to the each field for example "Customer Driving License" field to open the camera.
Step #7: Tap the camera icon next to the each field for example "Customer Driving License" field to open the camera.
8
Tap the shutter button at the bottom of the screen to take the picture.
Step #8: Tap the shutter button at the bottom of the screen to take the picture.
9
Tap the back arrow in the top-left corner to return to the main project view.
Step #9: Tap the back arrow in the top-left corner to return to the main project view.
10
Tap Survey Photos to begin capturing site images.
Step #10: Tap Survey Photos to begin capturing site images.
11
Tap the camera icon in the Survey Photos section to capture a photos of all the fields.
Step #11: Tap the camera icon in the Survey Photos section to capture a photos of all the fields.
12
Click on the "Example Photo" to capture the best photos
Step #12: Click on the "Example Photo" to capture the best photos

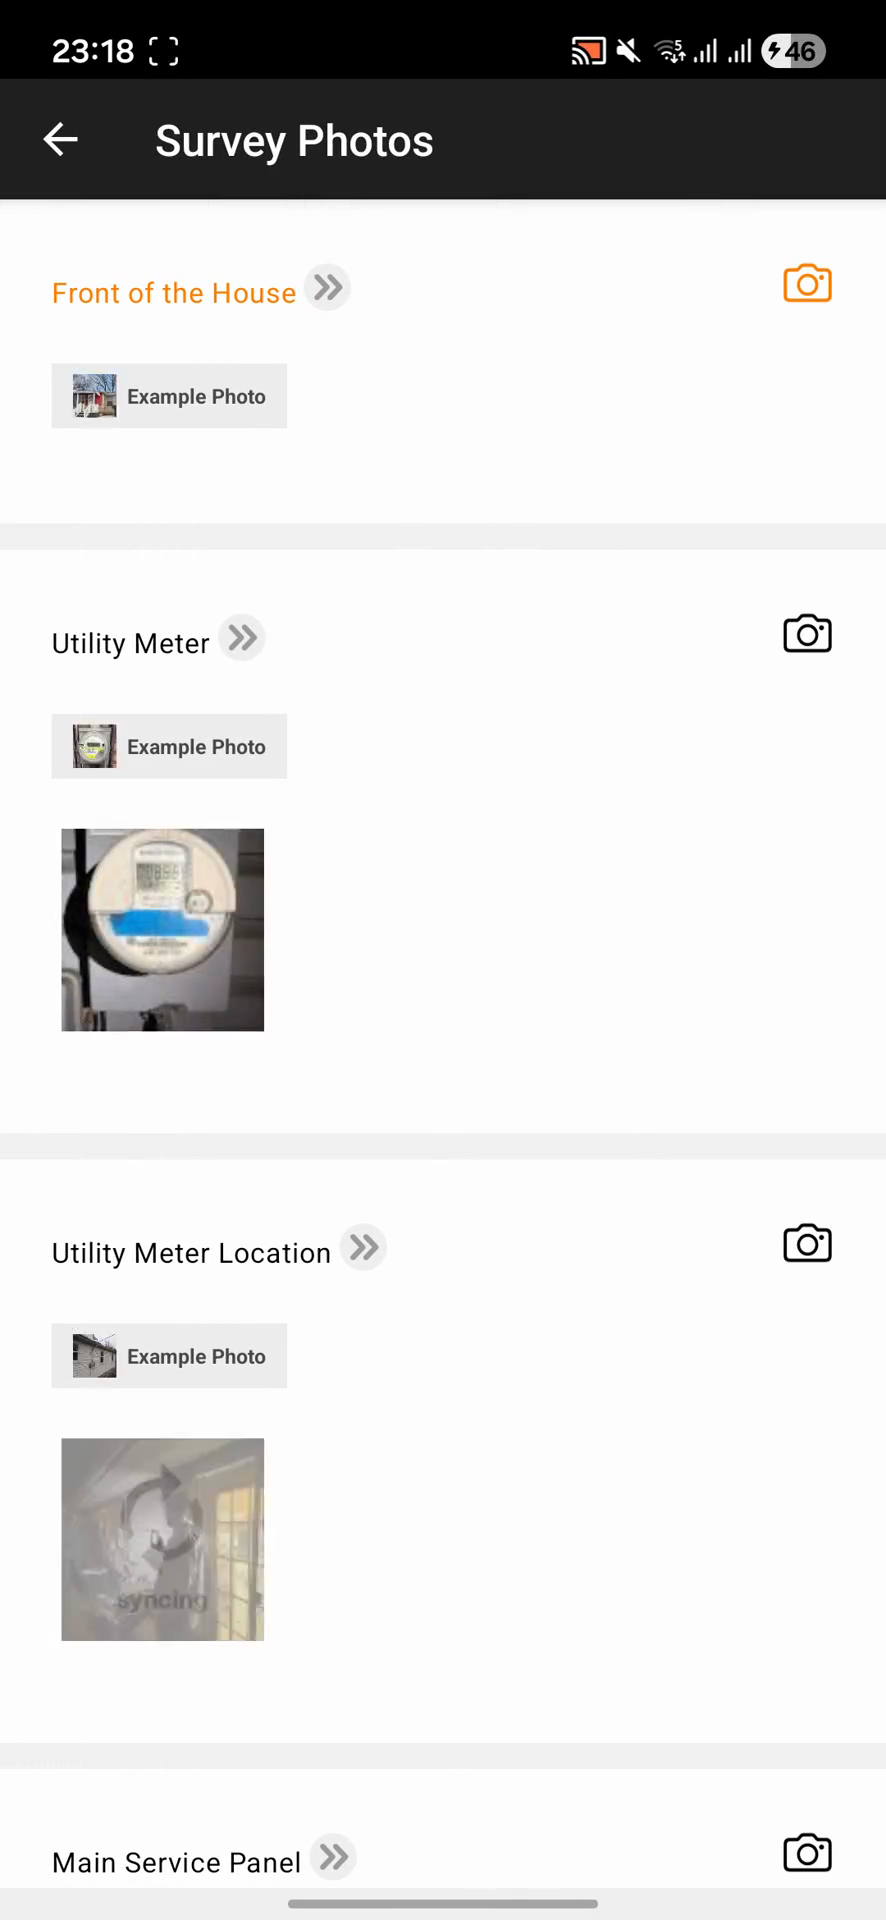
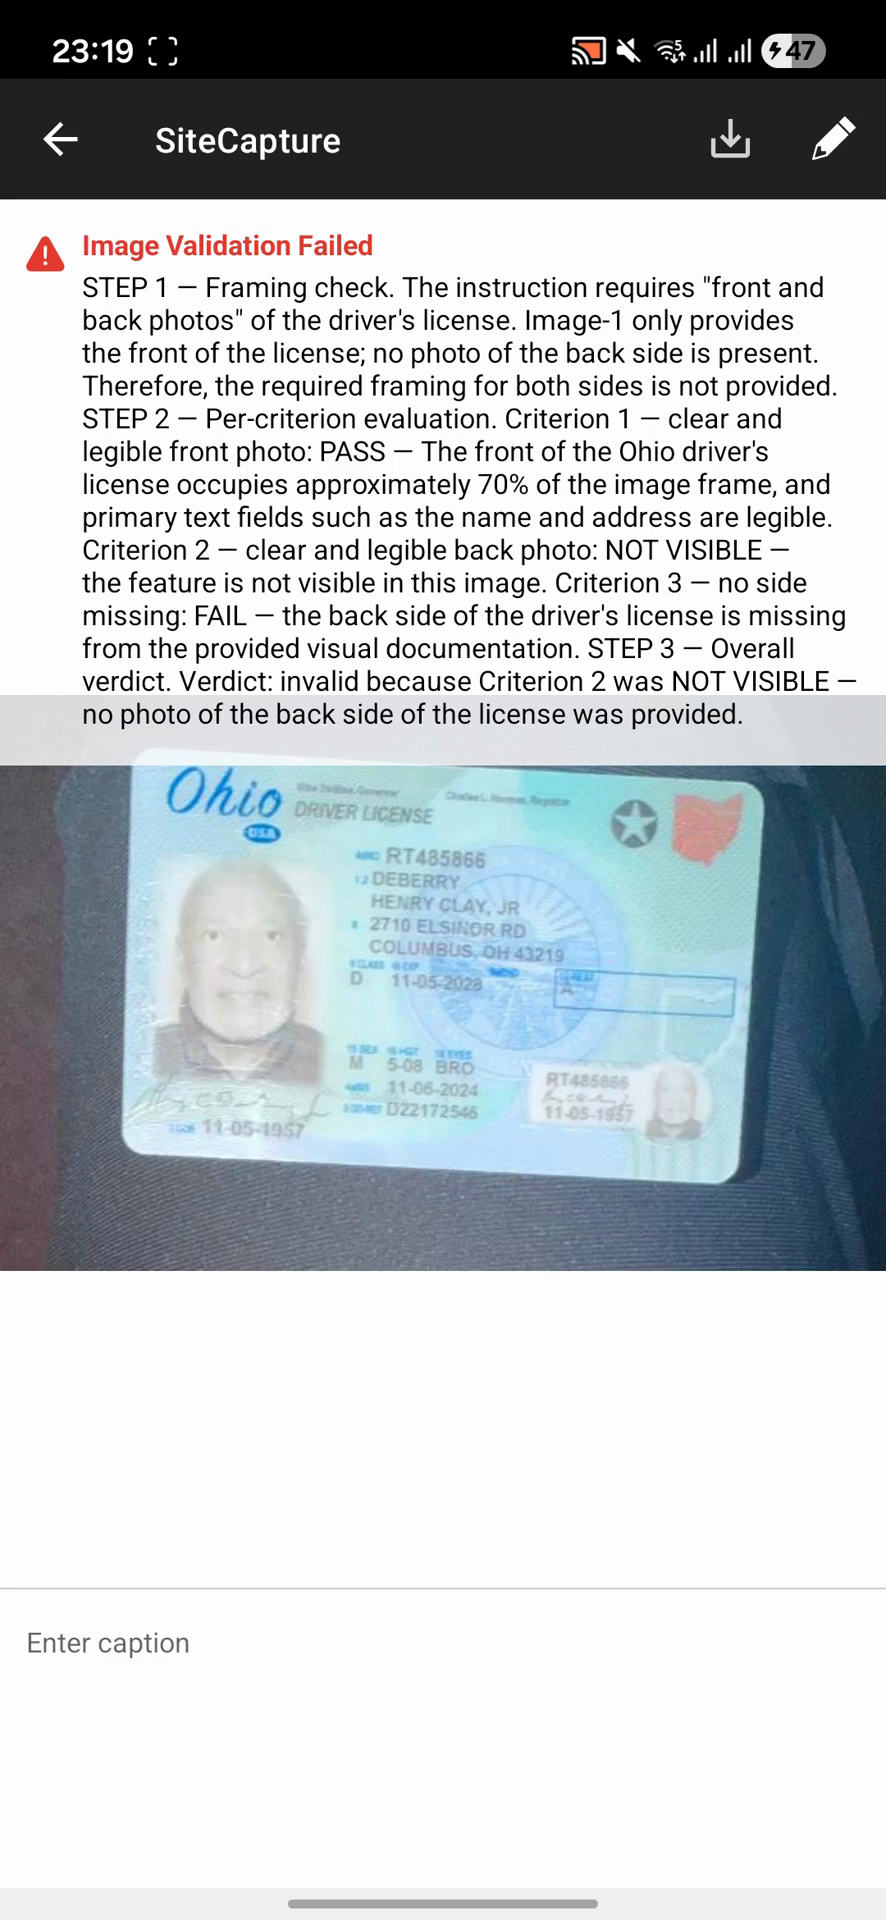
Review and Resolve AI Validations

13
After photos are uploaded into each field. Go back & Tap the Submit for AI Review button to trigger automated quality checks.
Step #13: After photos are uploaded into each field. Go back & Tap the Submit for AI Review button to trigger automated quality checks.
14
Tap the Customer Information section to view any flagged items.
Step #14: Tap the Customer Information section to view any flagged items.
15
Tap the thumbnail under "Customer Driving License" to inspect the specific warning.
Step #15: Tap the thumbnail under "Customer Driving License" to inspect the specific warning.
16
You'll be able to read the Failure notes & why AI flagged it. Retake & reupload the photos that are flagged.
Step #16: You'll be able to read the Failure notes & why AI flagged it. Retake & reupload the photos that are flagged.
17
Access the Survey Photos section by tapping on it to check for other alerts.
Step #17: Access the Survey Photos section by tapping on it to check for other alerts.
18
See the other flags photos in the sections. Read the validation failure notes.
Step #18: See the other flags photos in the sections. Read the validation failure notes.
19
Retake the flagged photos & Run AI again but submitting the project to Submit for AI Review button
20
Once all photos are approved & validated, go back click on Complete to mark the task as finished.
Step #20: Once all photos are approved & validated, go back click on Complete to mark the task as finished.

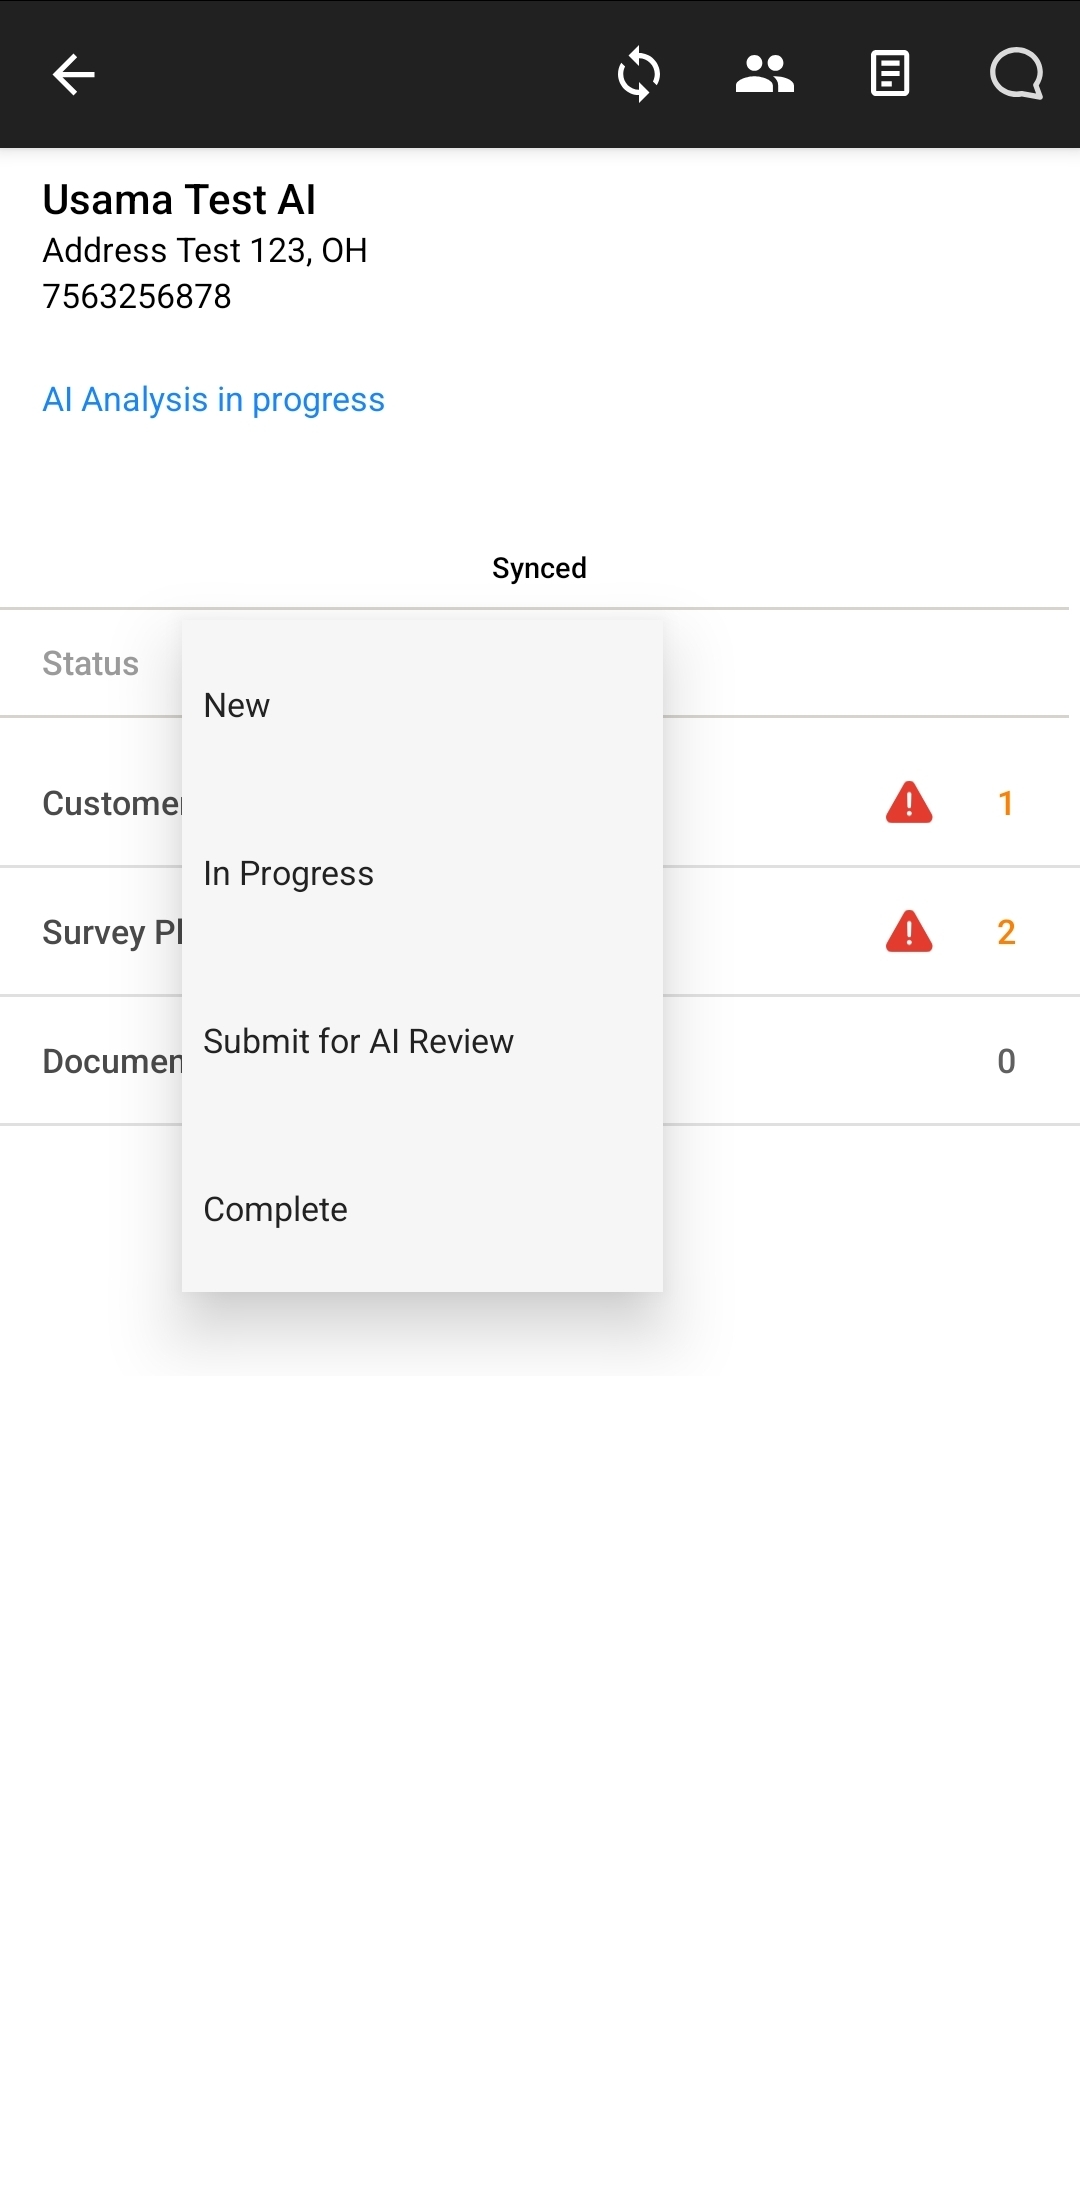
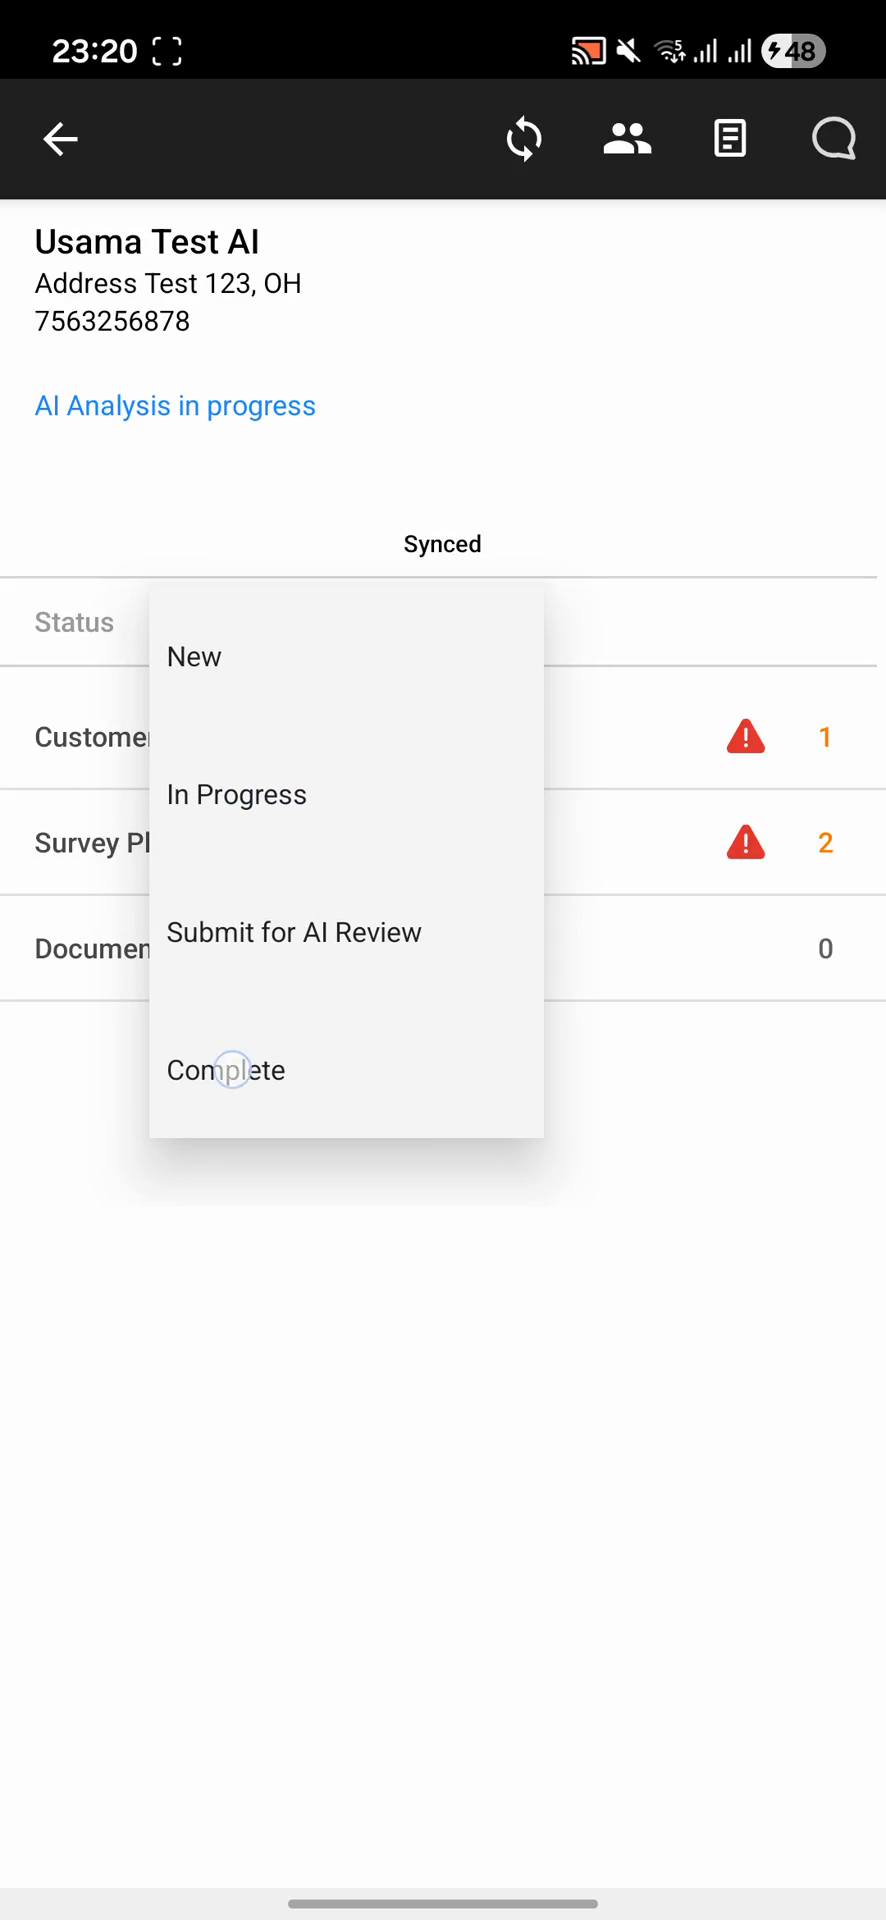
Complete the Project

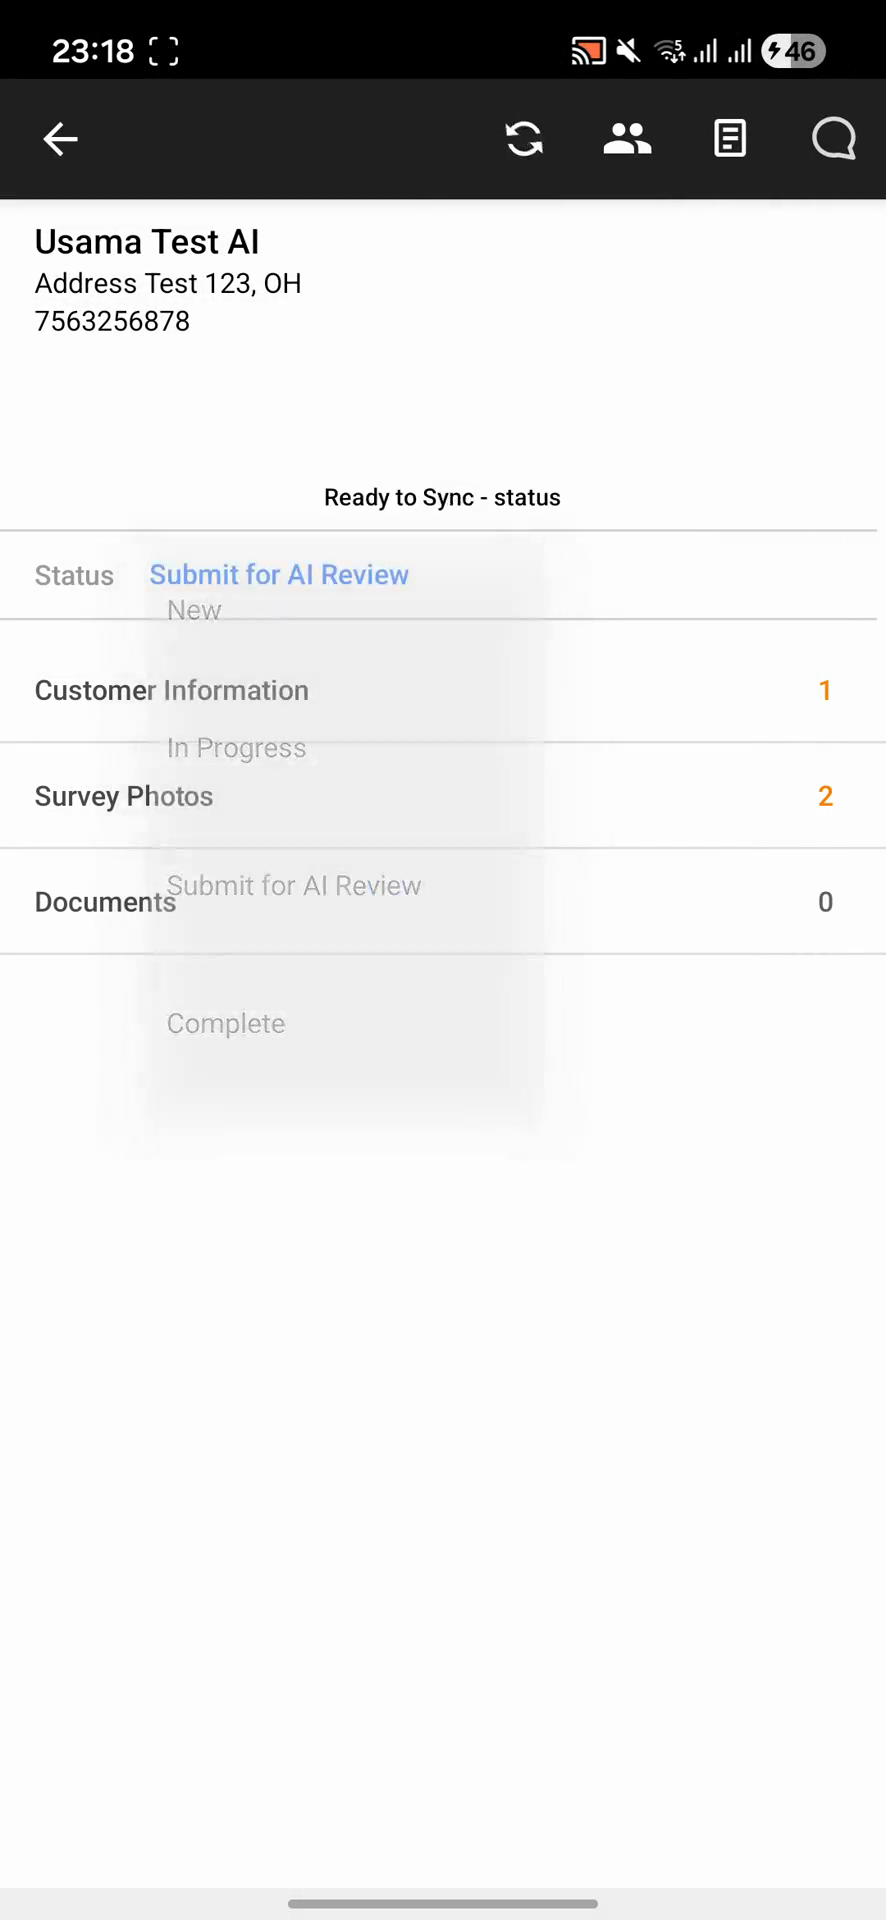
When managing a project, you can update its status through several phases in the dropdown menu:

Status

Description

New

The project is assigned but work hasn't started.

In Progress

Data collection and photo capture are actively occurring.

Submit for AI Review

All data is collected and sent for automated validation checks.

Complete

Validations are resolved and the job is finished.

21
Tap the current project status line, indicating Submit for AI Review.
Step #21: Tap the current project status line, indicating Submit for AI Review.
22
Select Complete from the dropdown menu to finalize the job.
Step #22: Select Complete from the dropdown menu to finalize the job.
23
Tap OK on the alert dialog to confirm the status change.
Step #23: Tap OK on the alert dialog to confirm the status change.

Q: Why can't I mark the project as "Complete" immediately after taking photos?

A: You must submit the photos for AI review first. Any resulting validation failures must be reviewed and resolved before the system will allow you to close out the project.

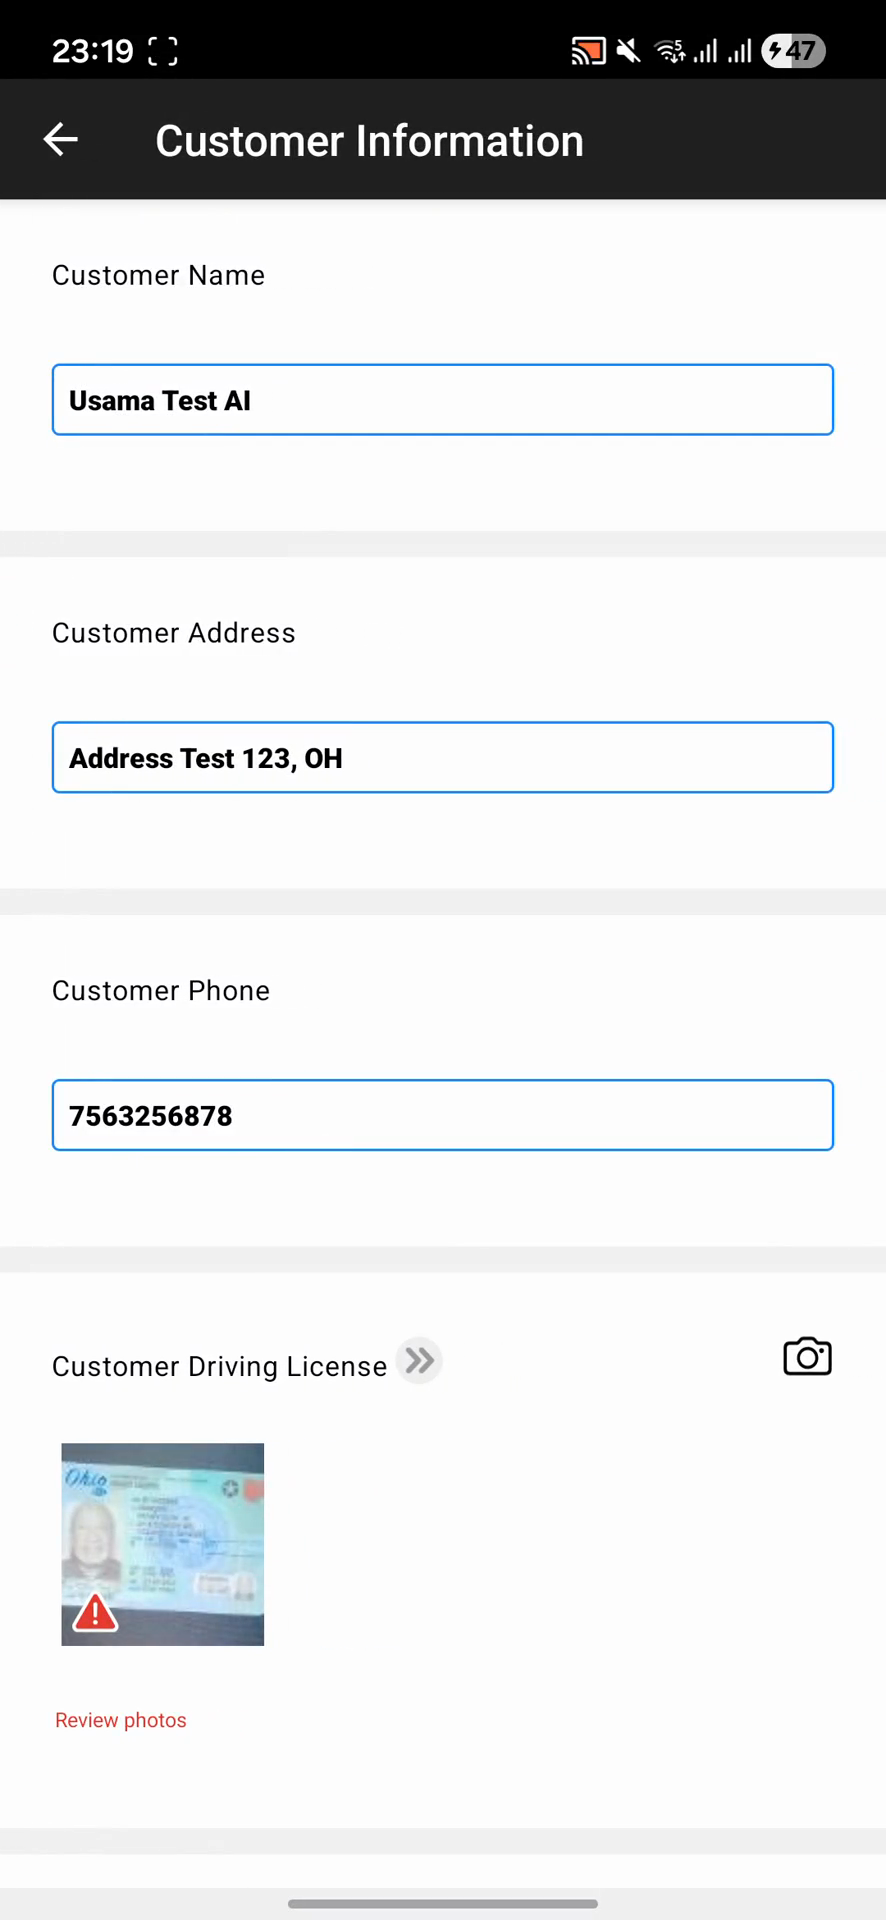
Q: How do I fix a validation failure on an image if the image is actually correct?

A: Open the flagged image to review the AI alert. You can add an explanatory caption (such as "This is approved") to justify the photo, which allows you to override the warning and proceed.

Term

Definition

AI Review

An automated system process that scans uploaded project photos to ensure they meet required quality and content standards.

Validation Failure

An alert triggered when a captured image does not pass the automated criteria, requiring manual review or retaking of the photo.

Sync

The action of uploading local device data and captured photos to the central project database.