How to Onboard a New Client in Karbon, Canva, and DocuSign
How to Onboard a New Client in Karbon, Canva, and DocuSign
Learn how to seamlessly onboard new clients by creating profiles in Karbon, customizing welcome guides in Canva, and sending authorization forms via DocuSign.
By Daniel Mladjen
This guide provides a comprehensive workflow for onboarding new clients across your tech stack. Completing these steps ensures that the client is properly set up in your management system, receives their customized welcome materials, and completes necessary tax and accounting authorizations.
This process is designed for administrative staff, account managers, and accounting professionals responsible for client setup. It should be executed immediately after a new client signs their initial contract.
Phase 1: Create the Client Profile in Karbon
Start by creating the client's core record in your Karbon database.
1
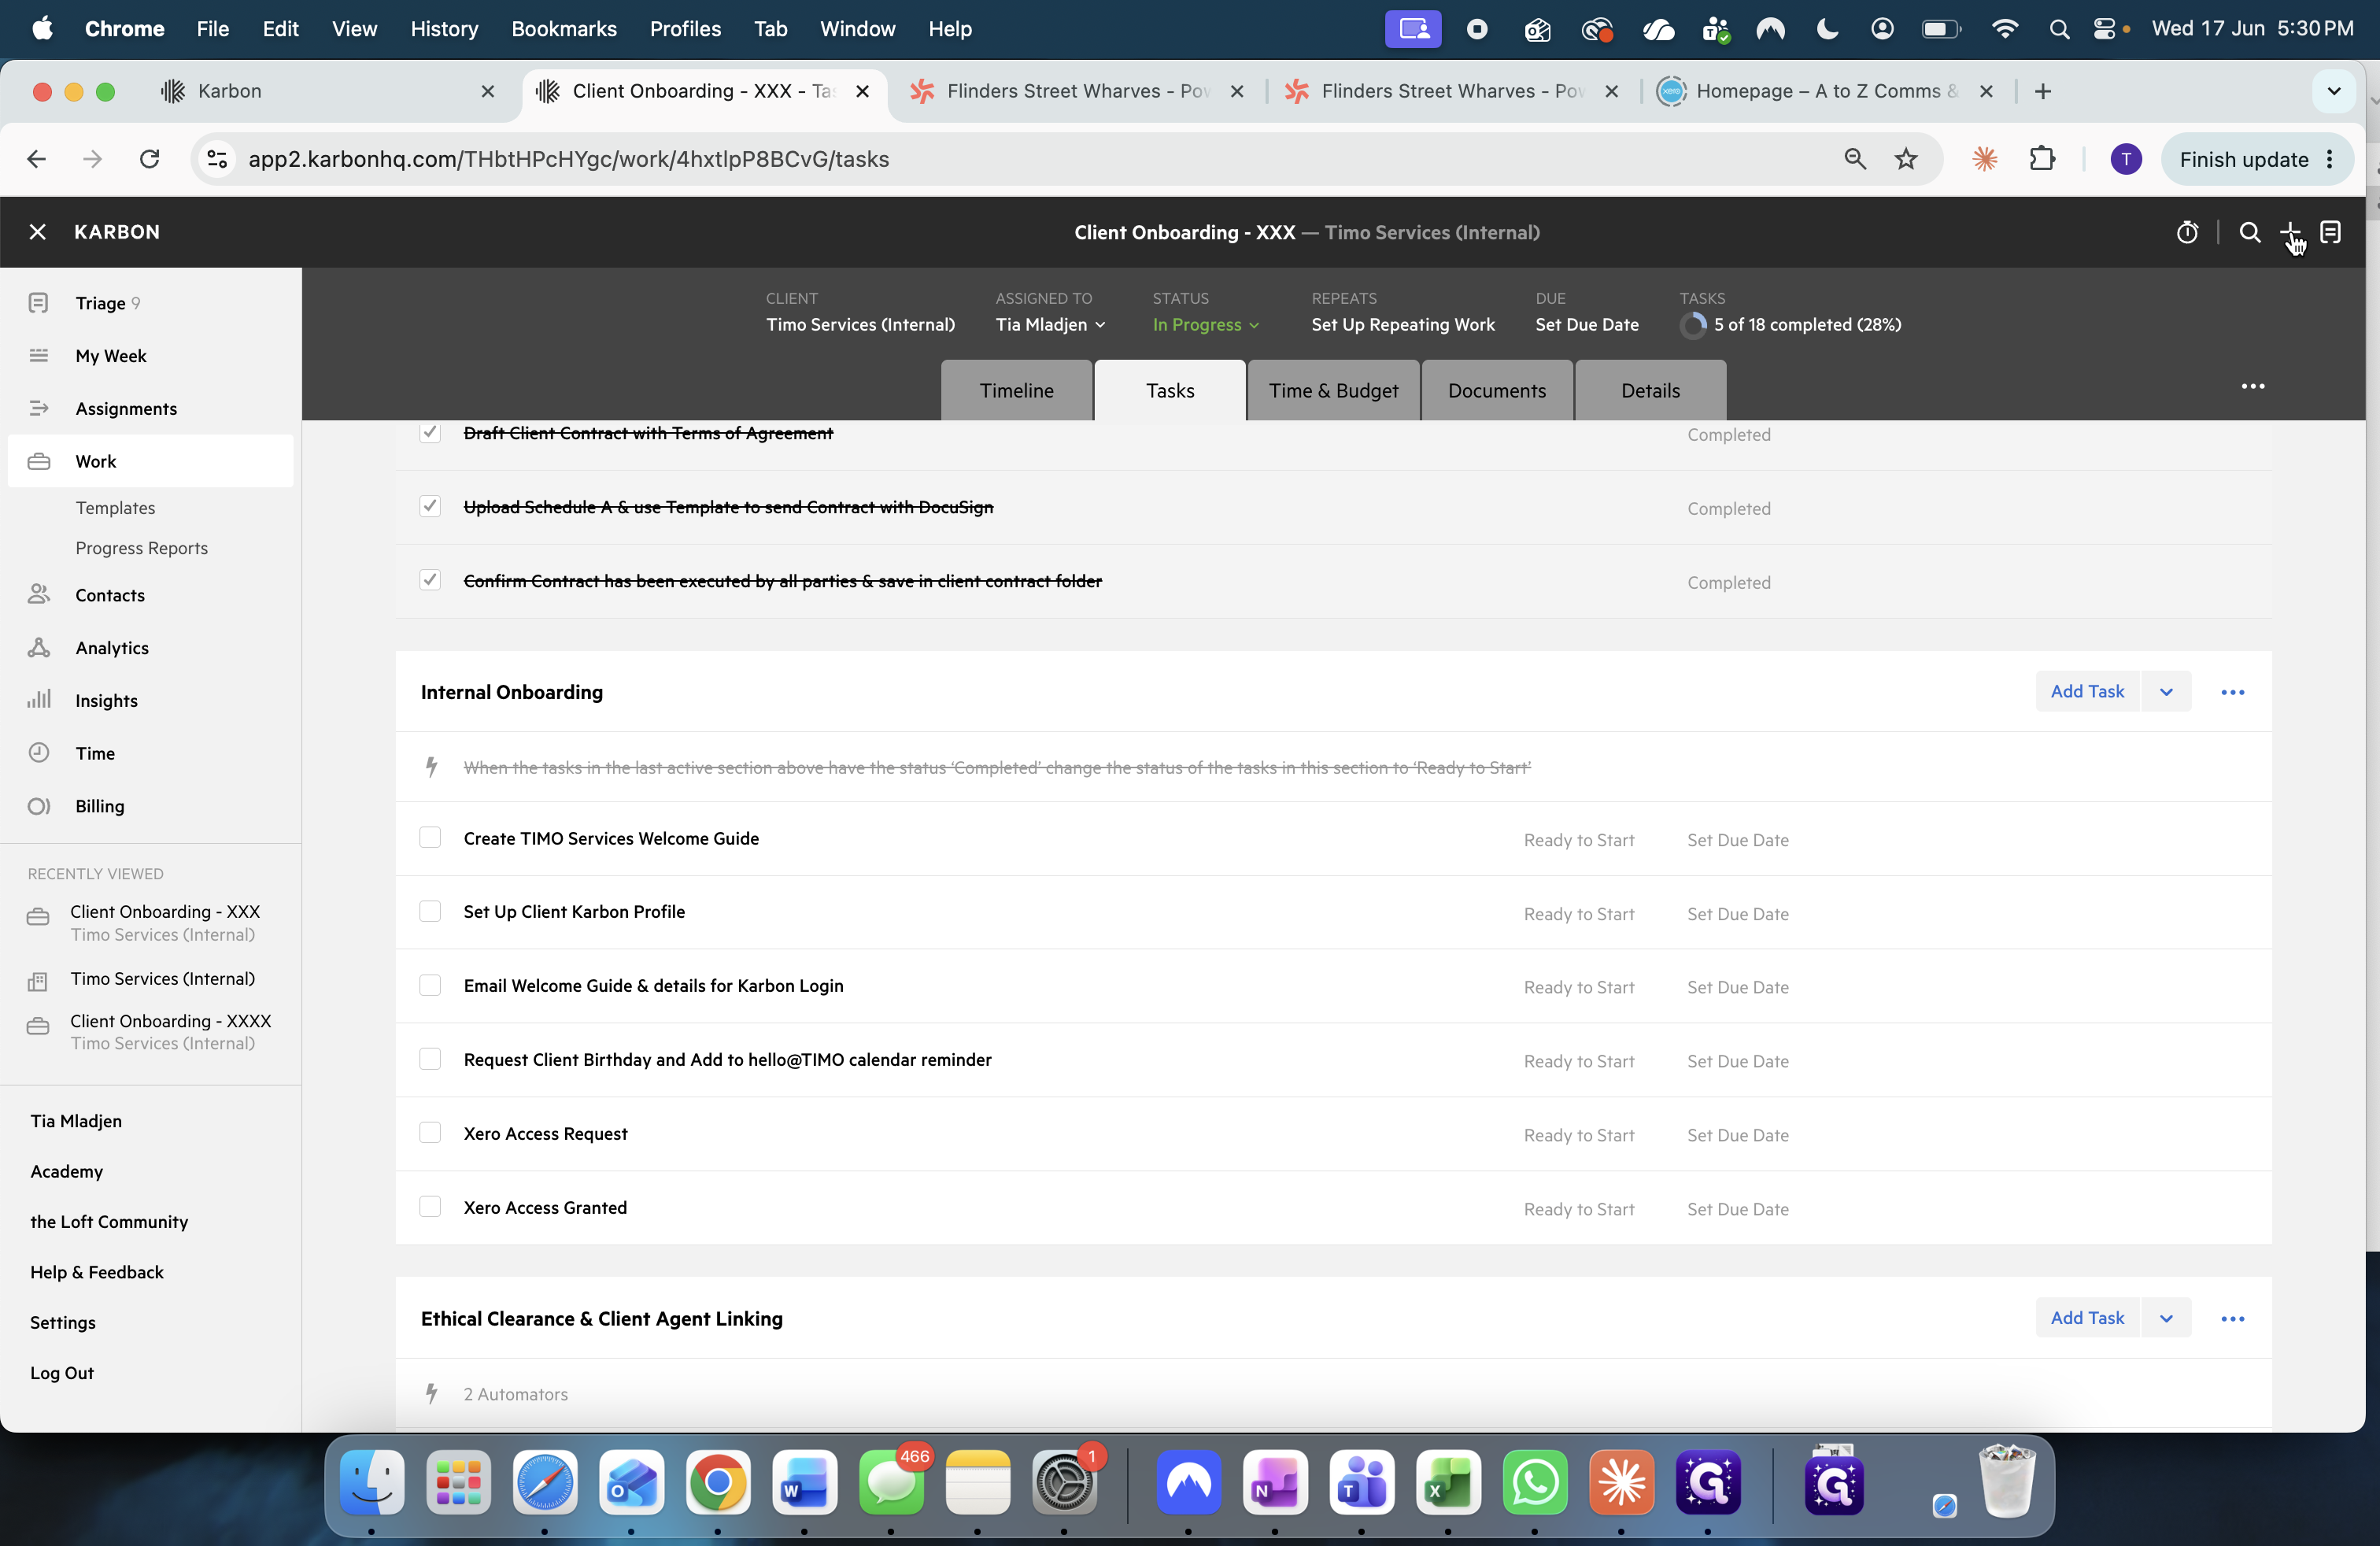
Click the + icon in the top right header to add a new item.
2
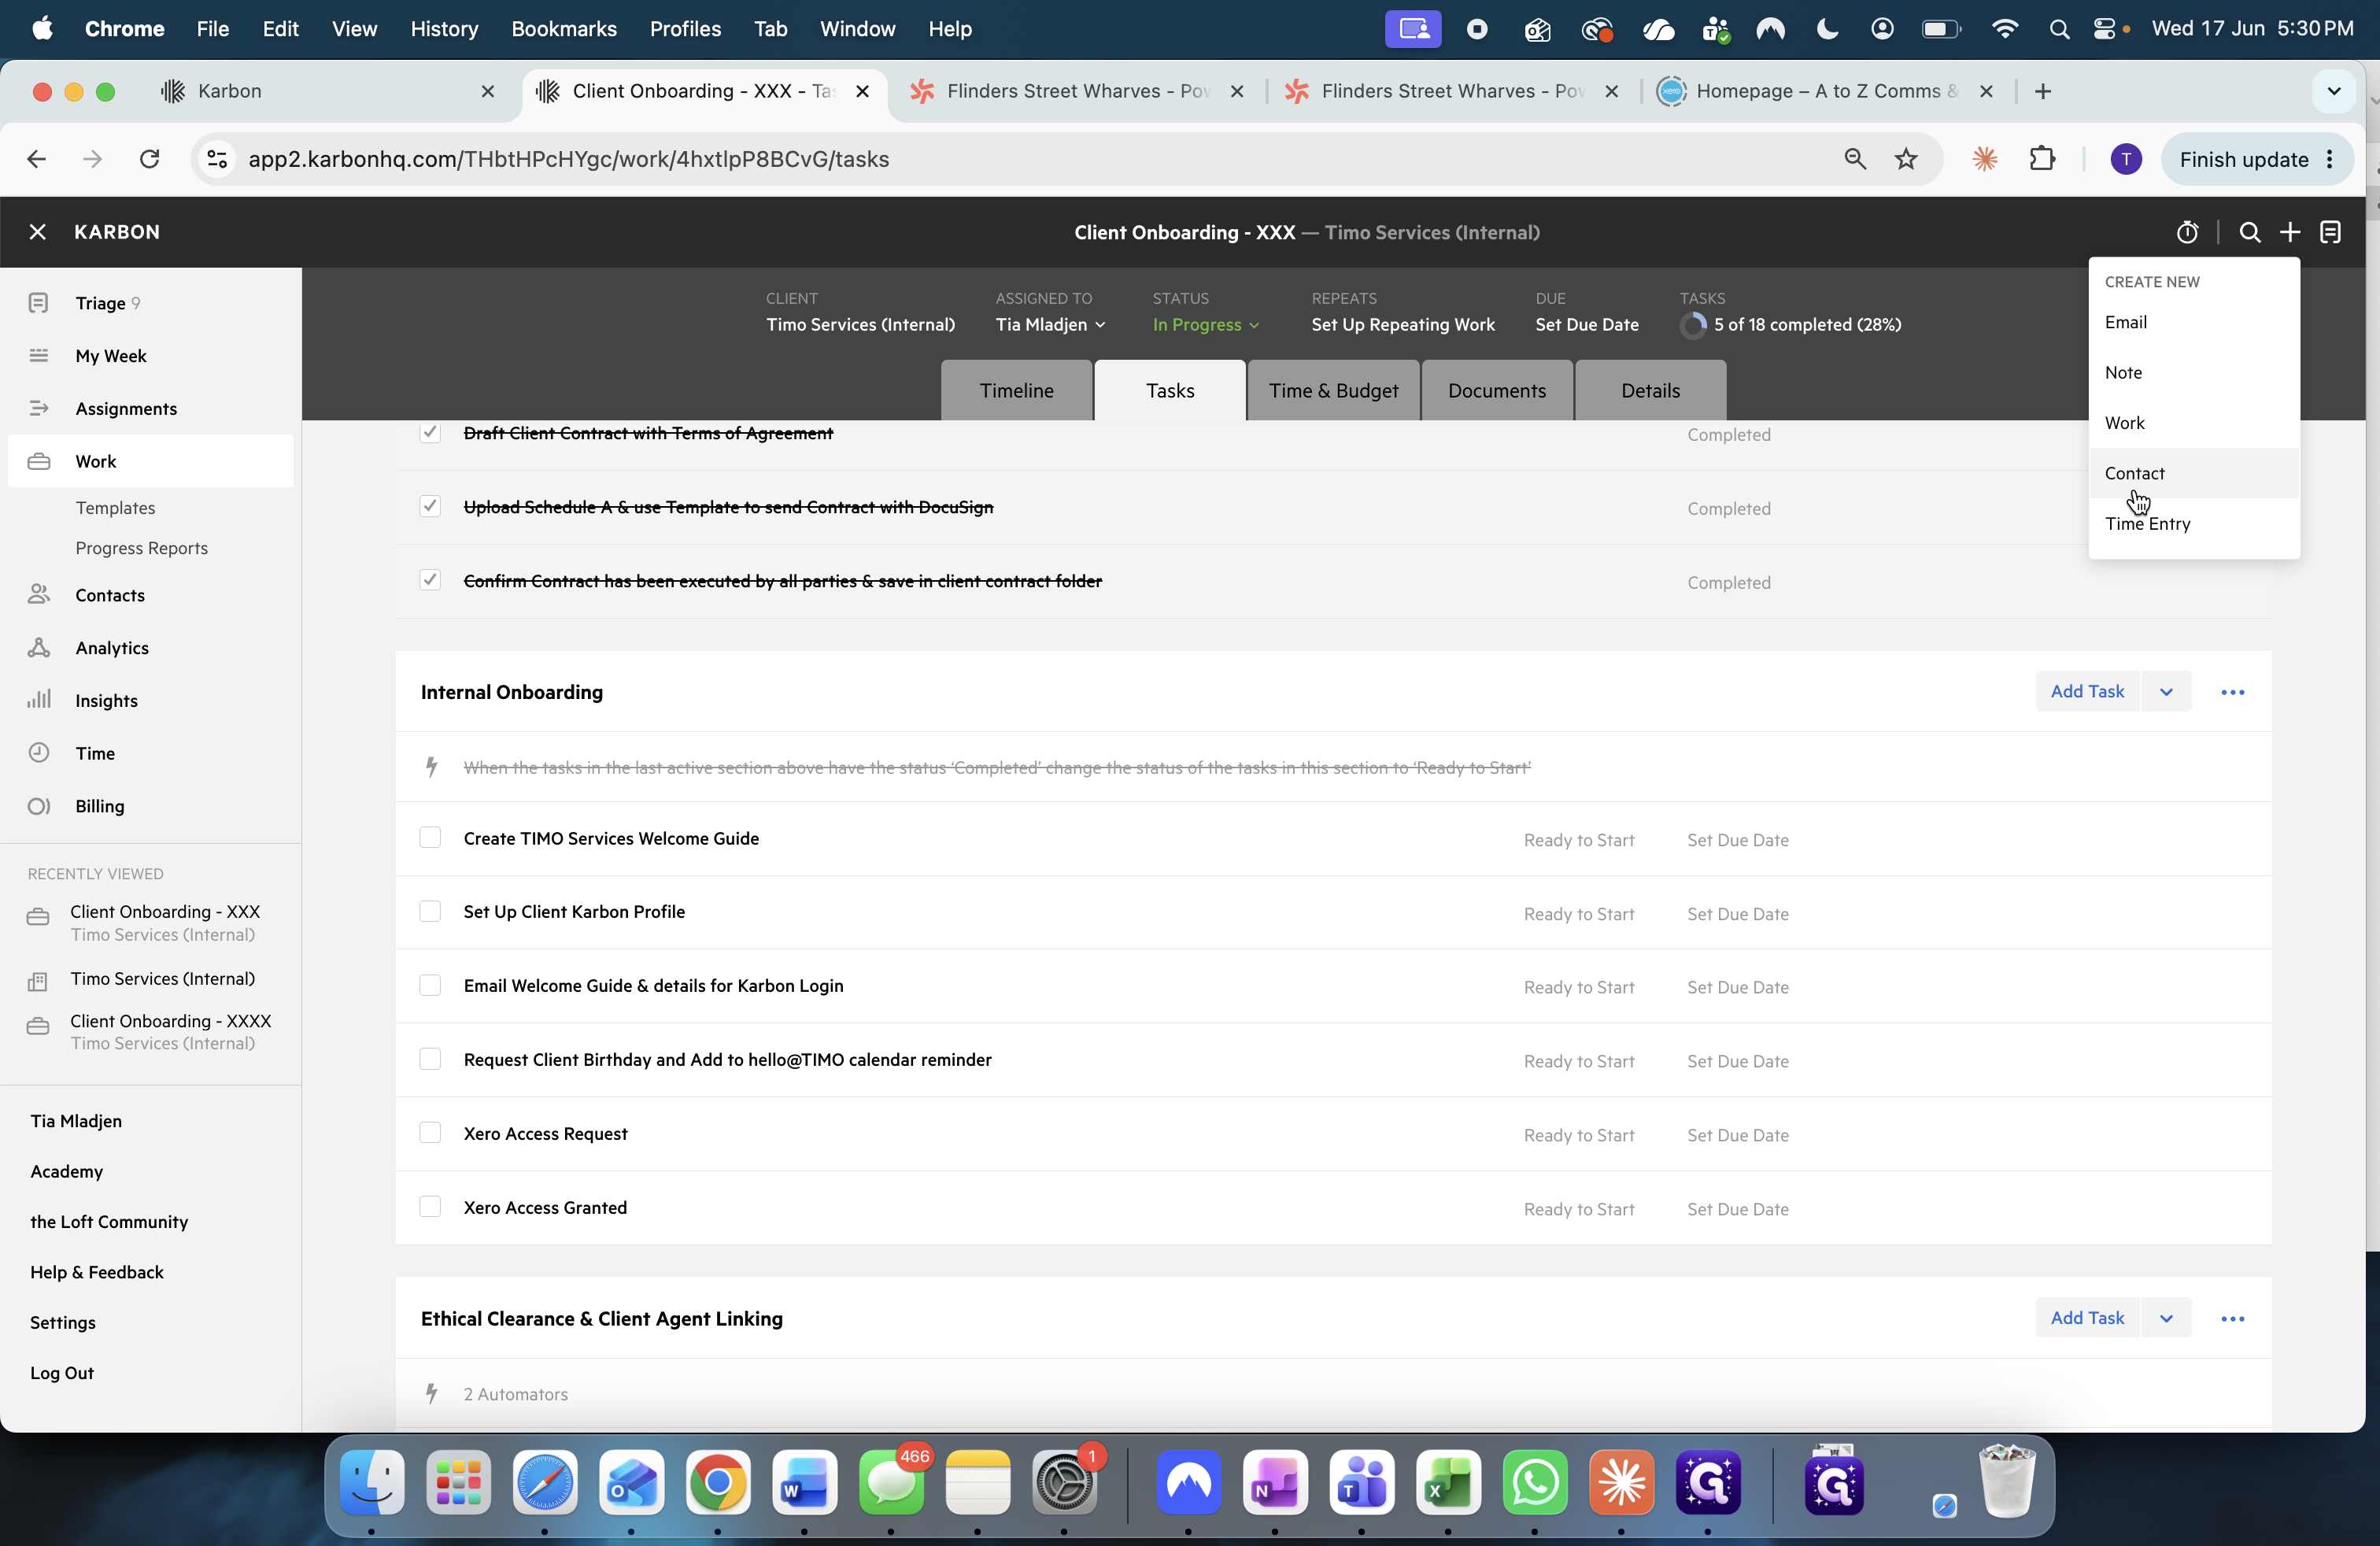
Select Contact from the dropdown menu.
3
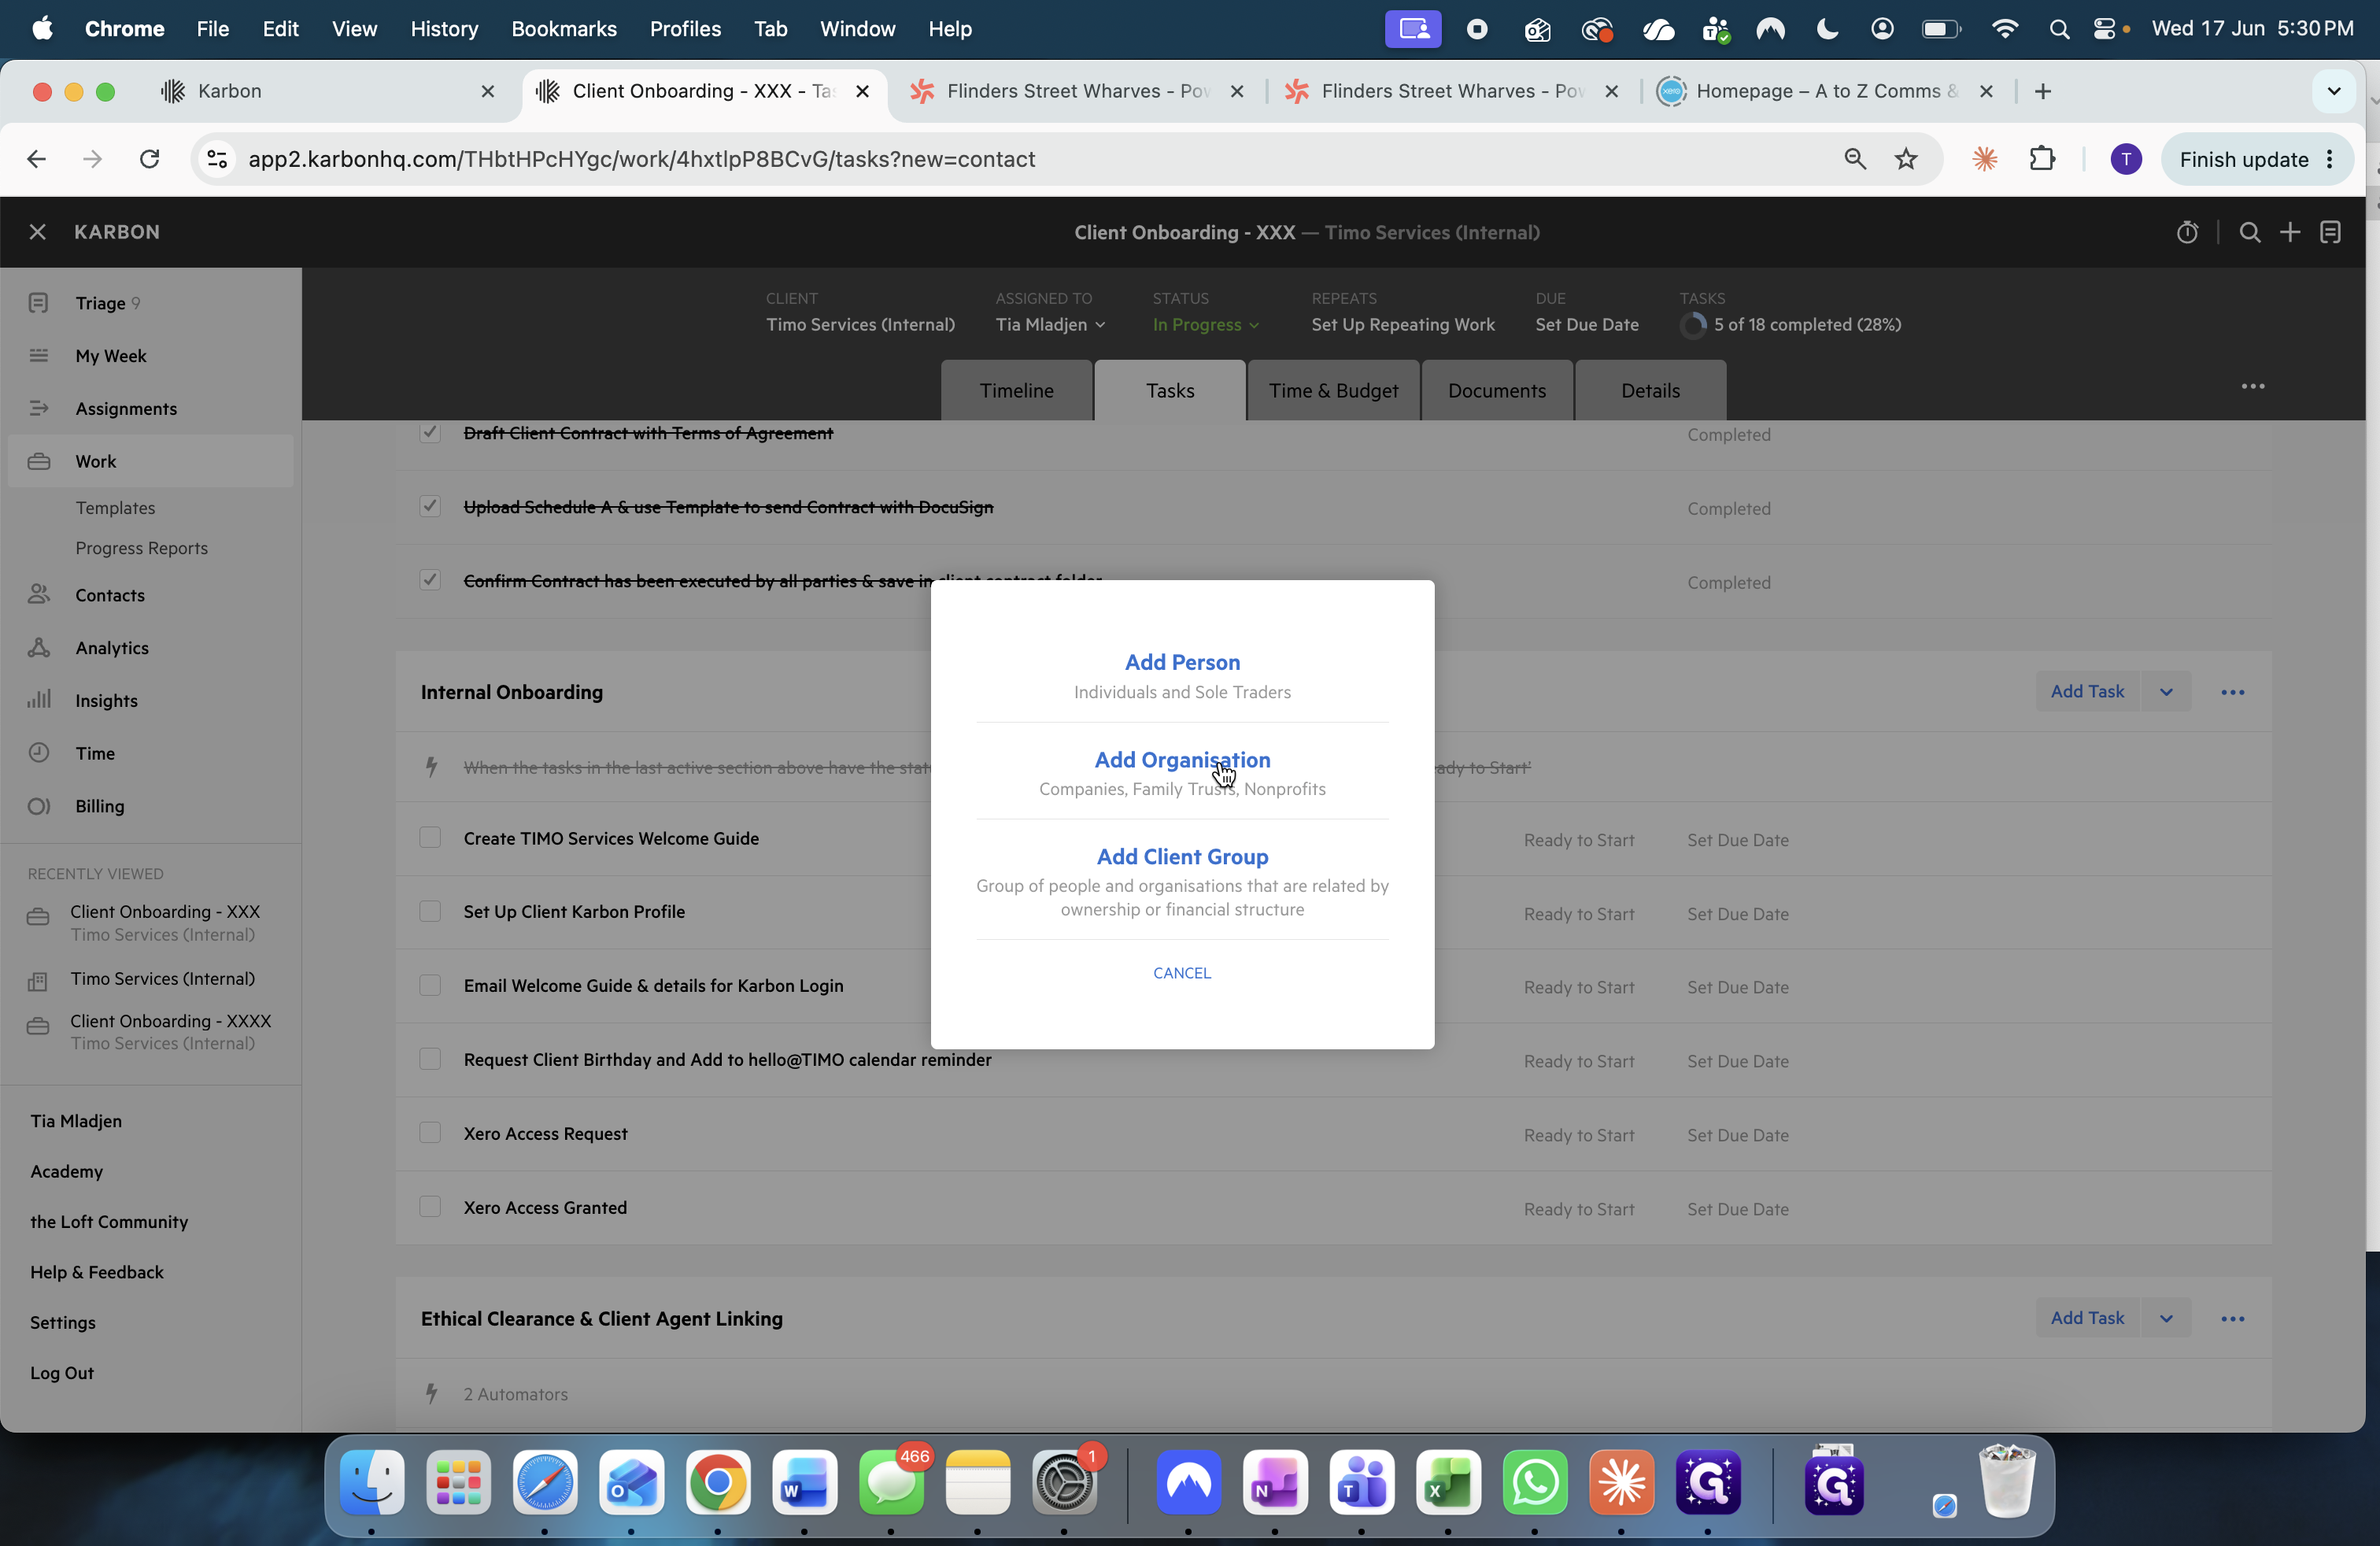
Click Add Organisation.
4
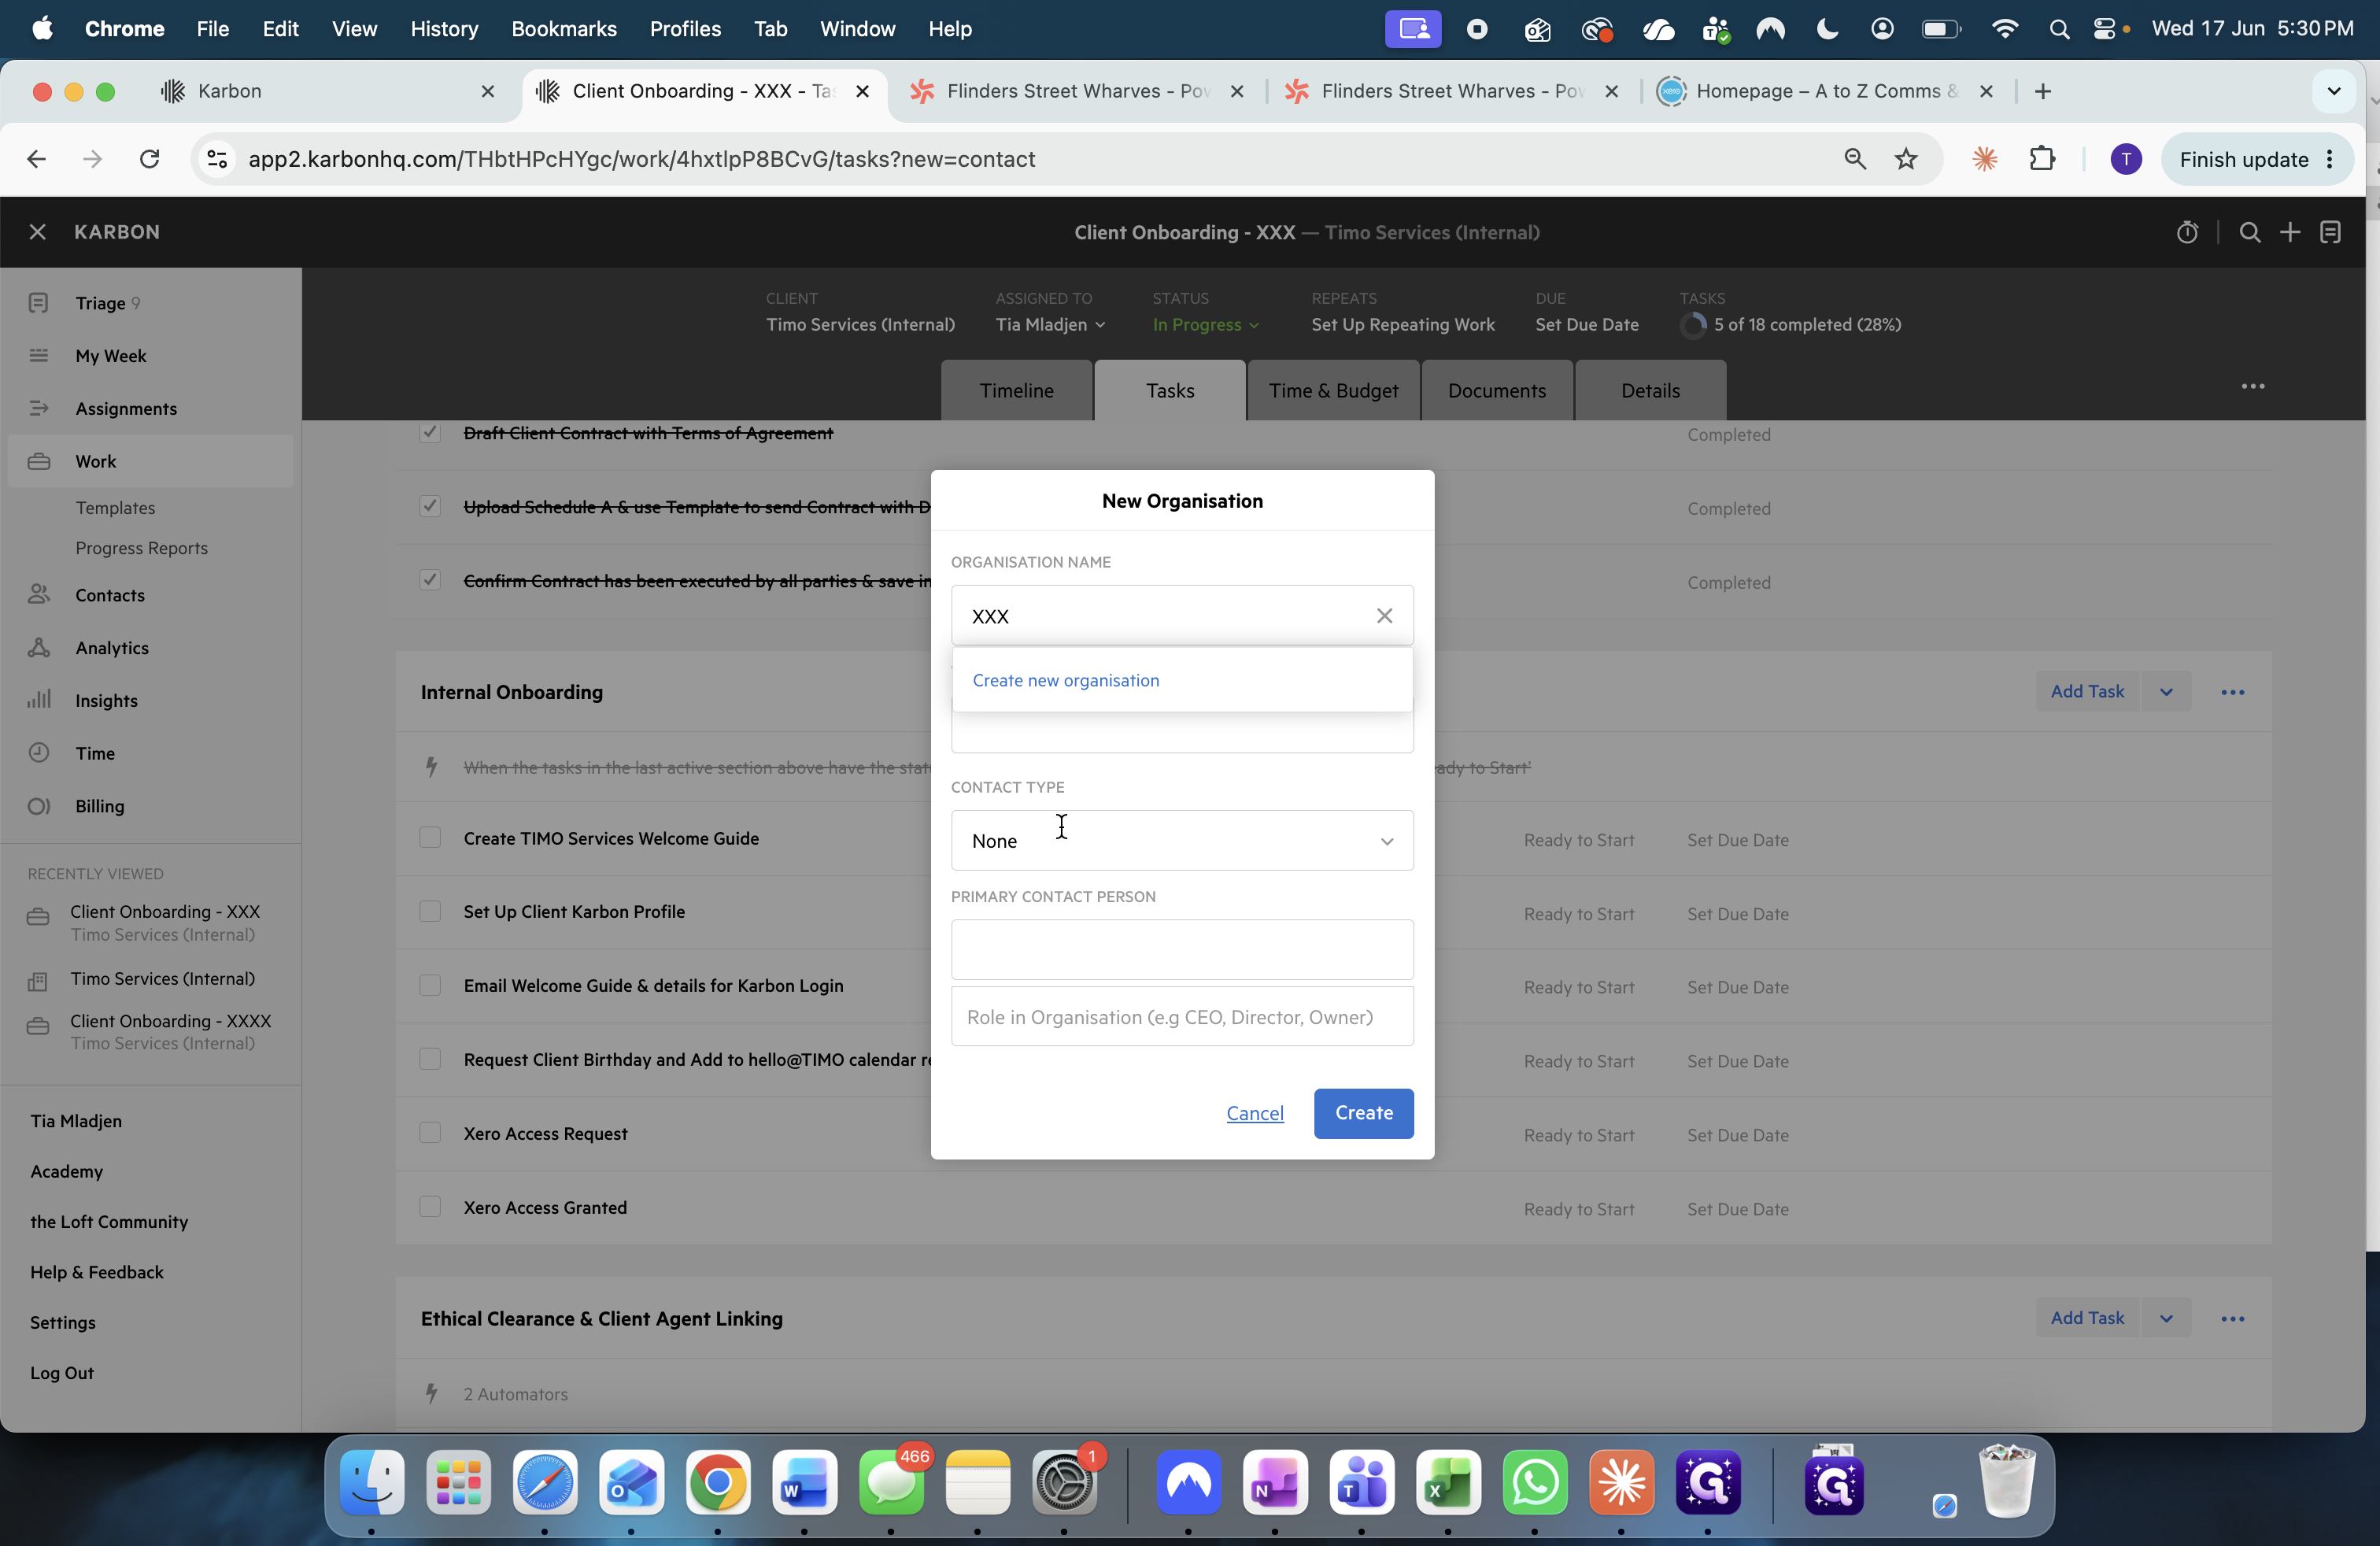
Type the client's organization name into the search bar to ensure they don't already exist.
5
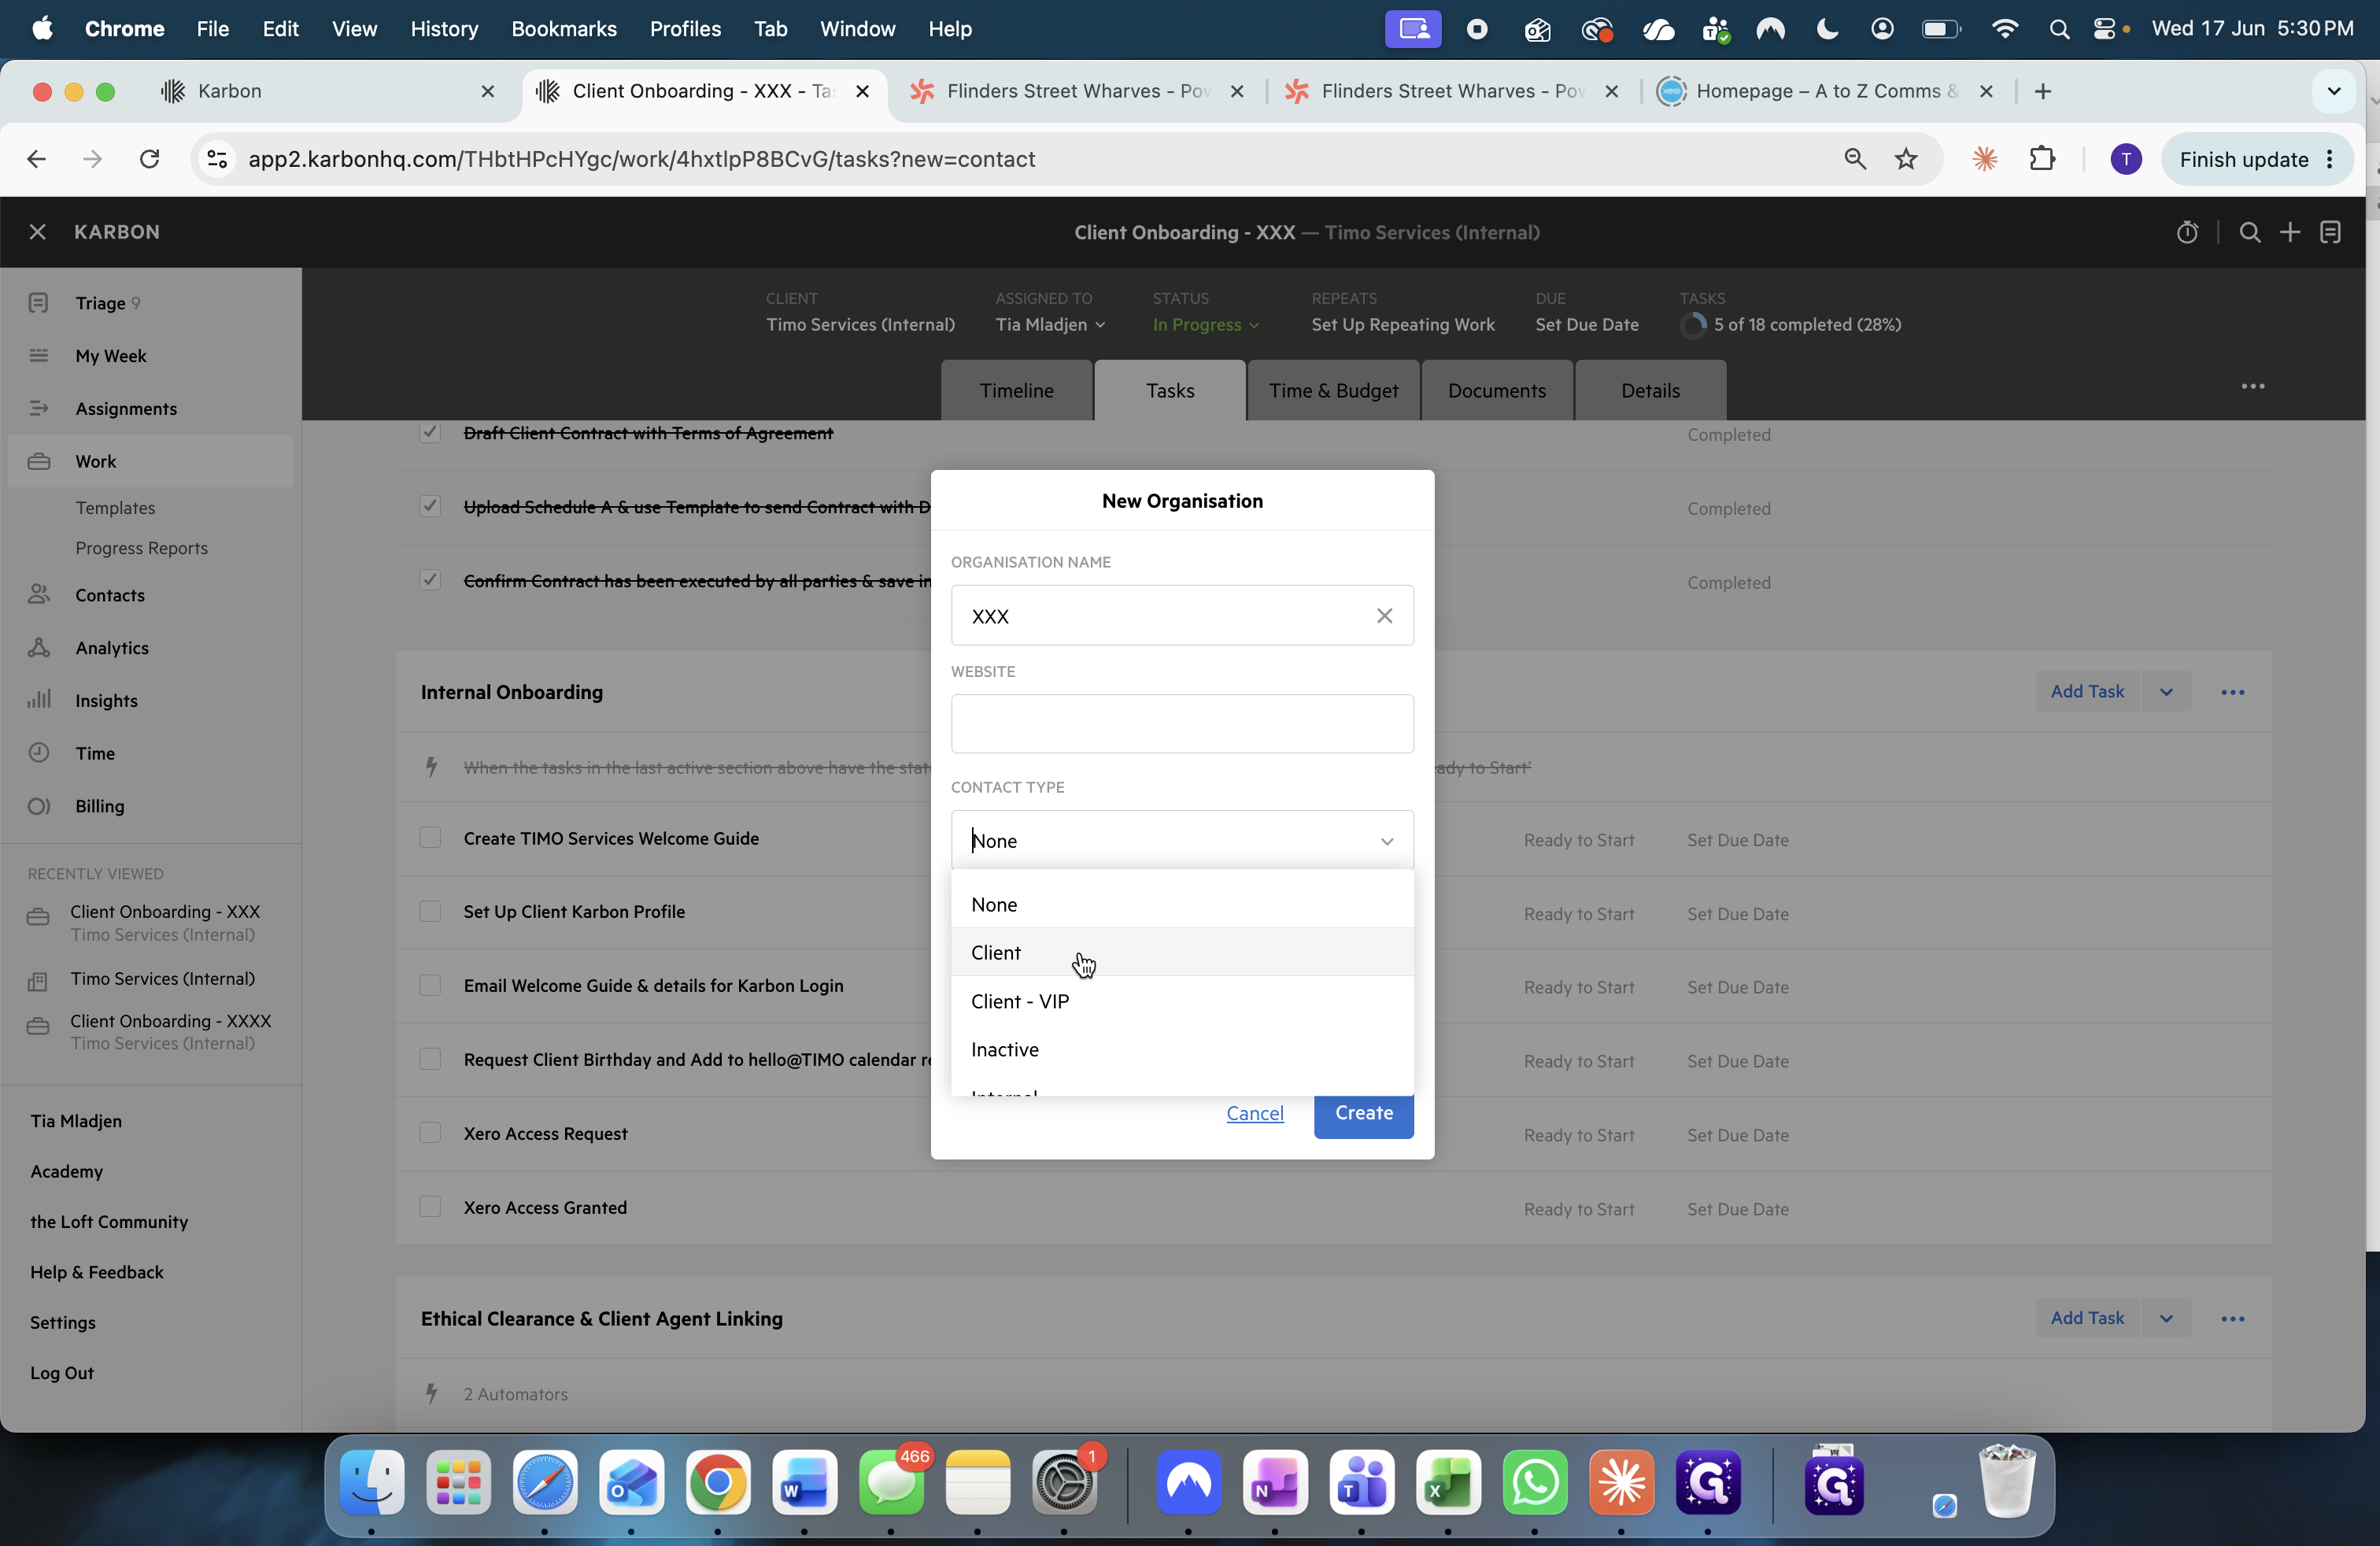
Click the Contact Type dropdown menu.
6
Select Client.
7
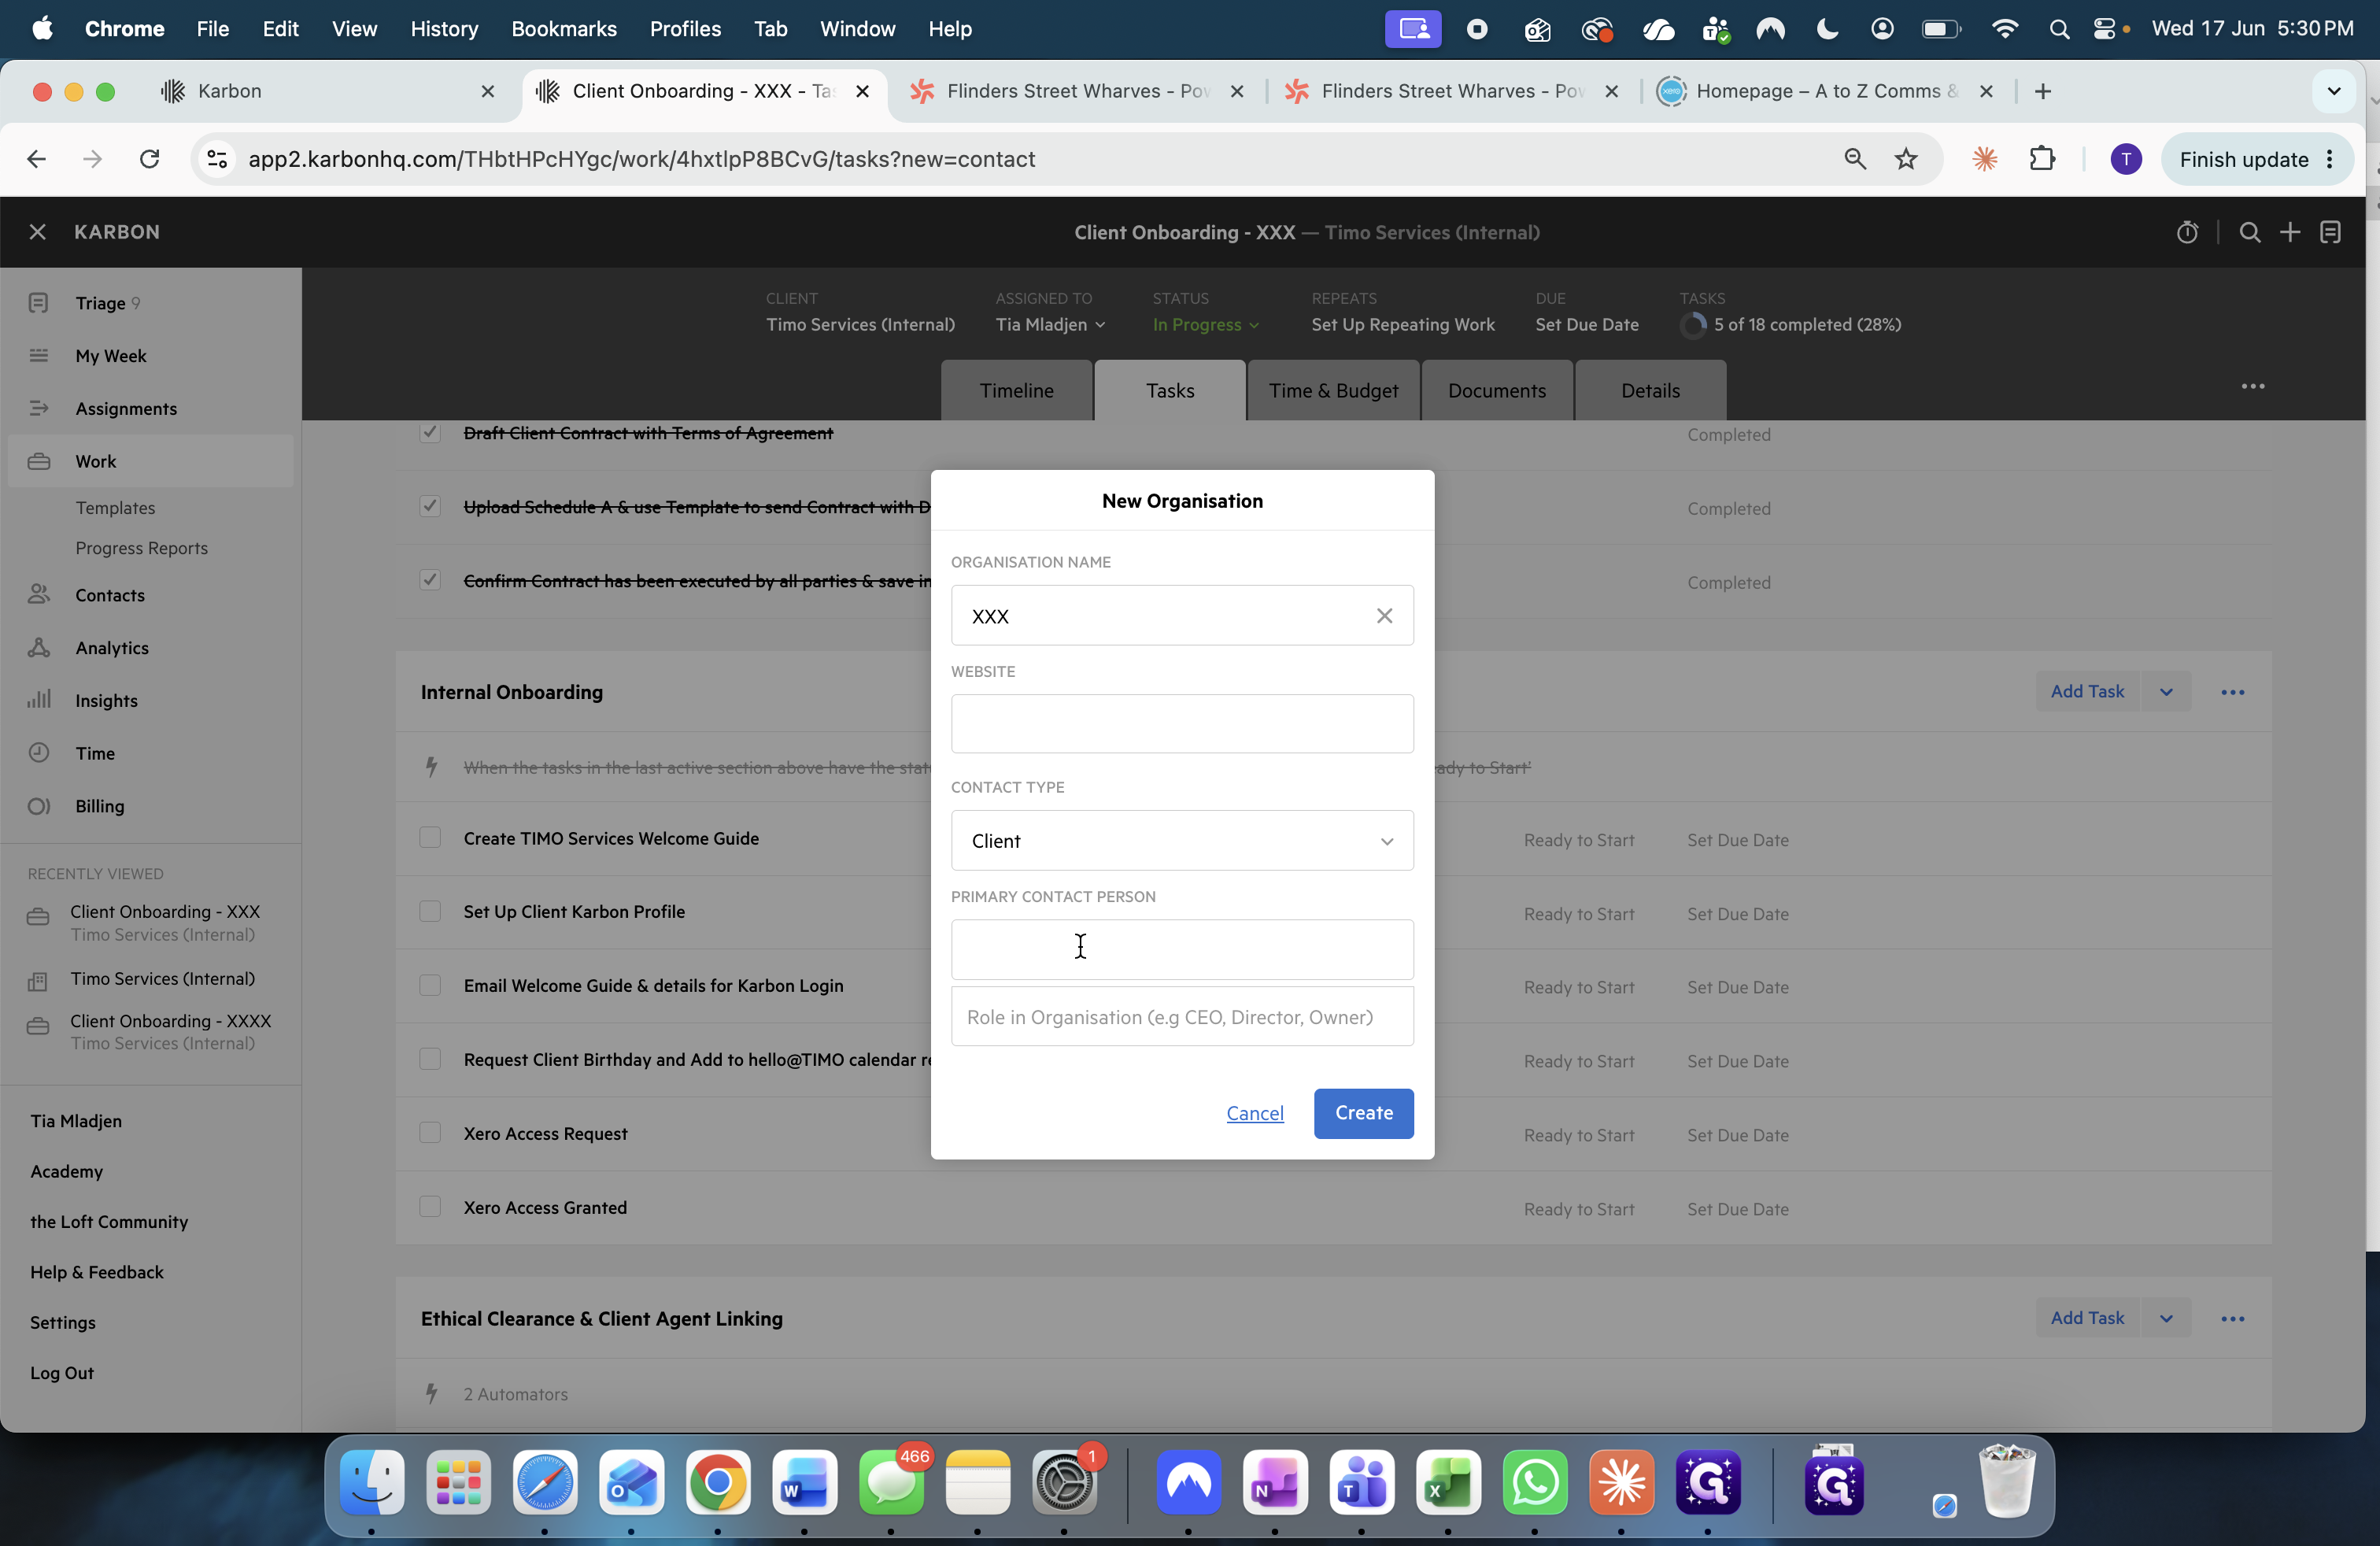
Click the Primary Contact Person input field.
8
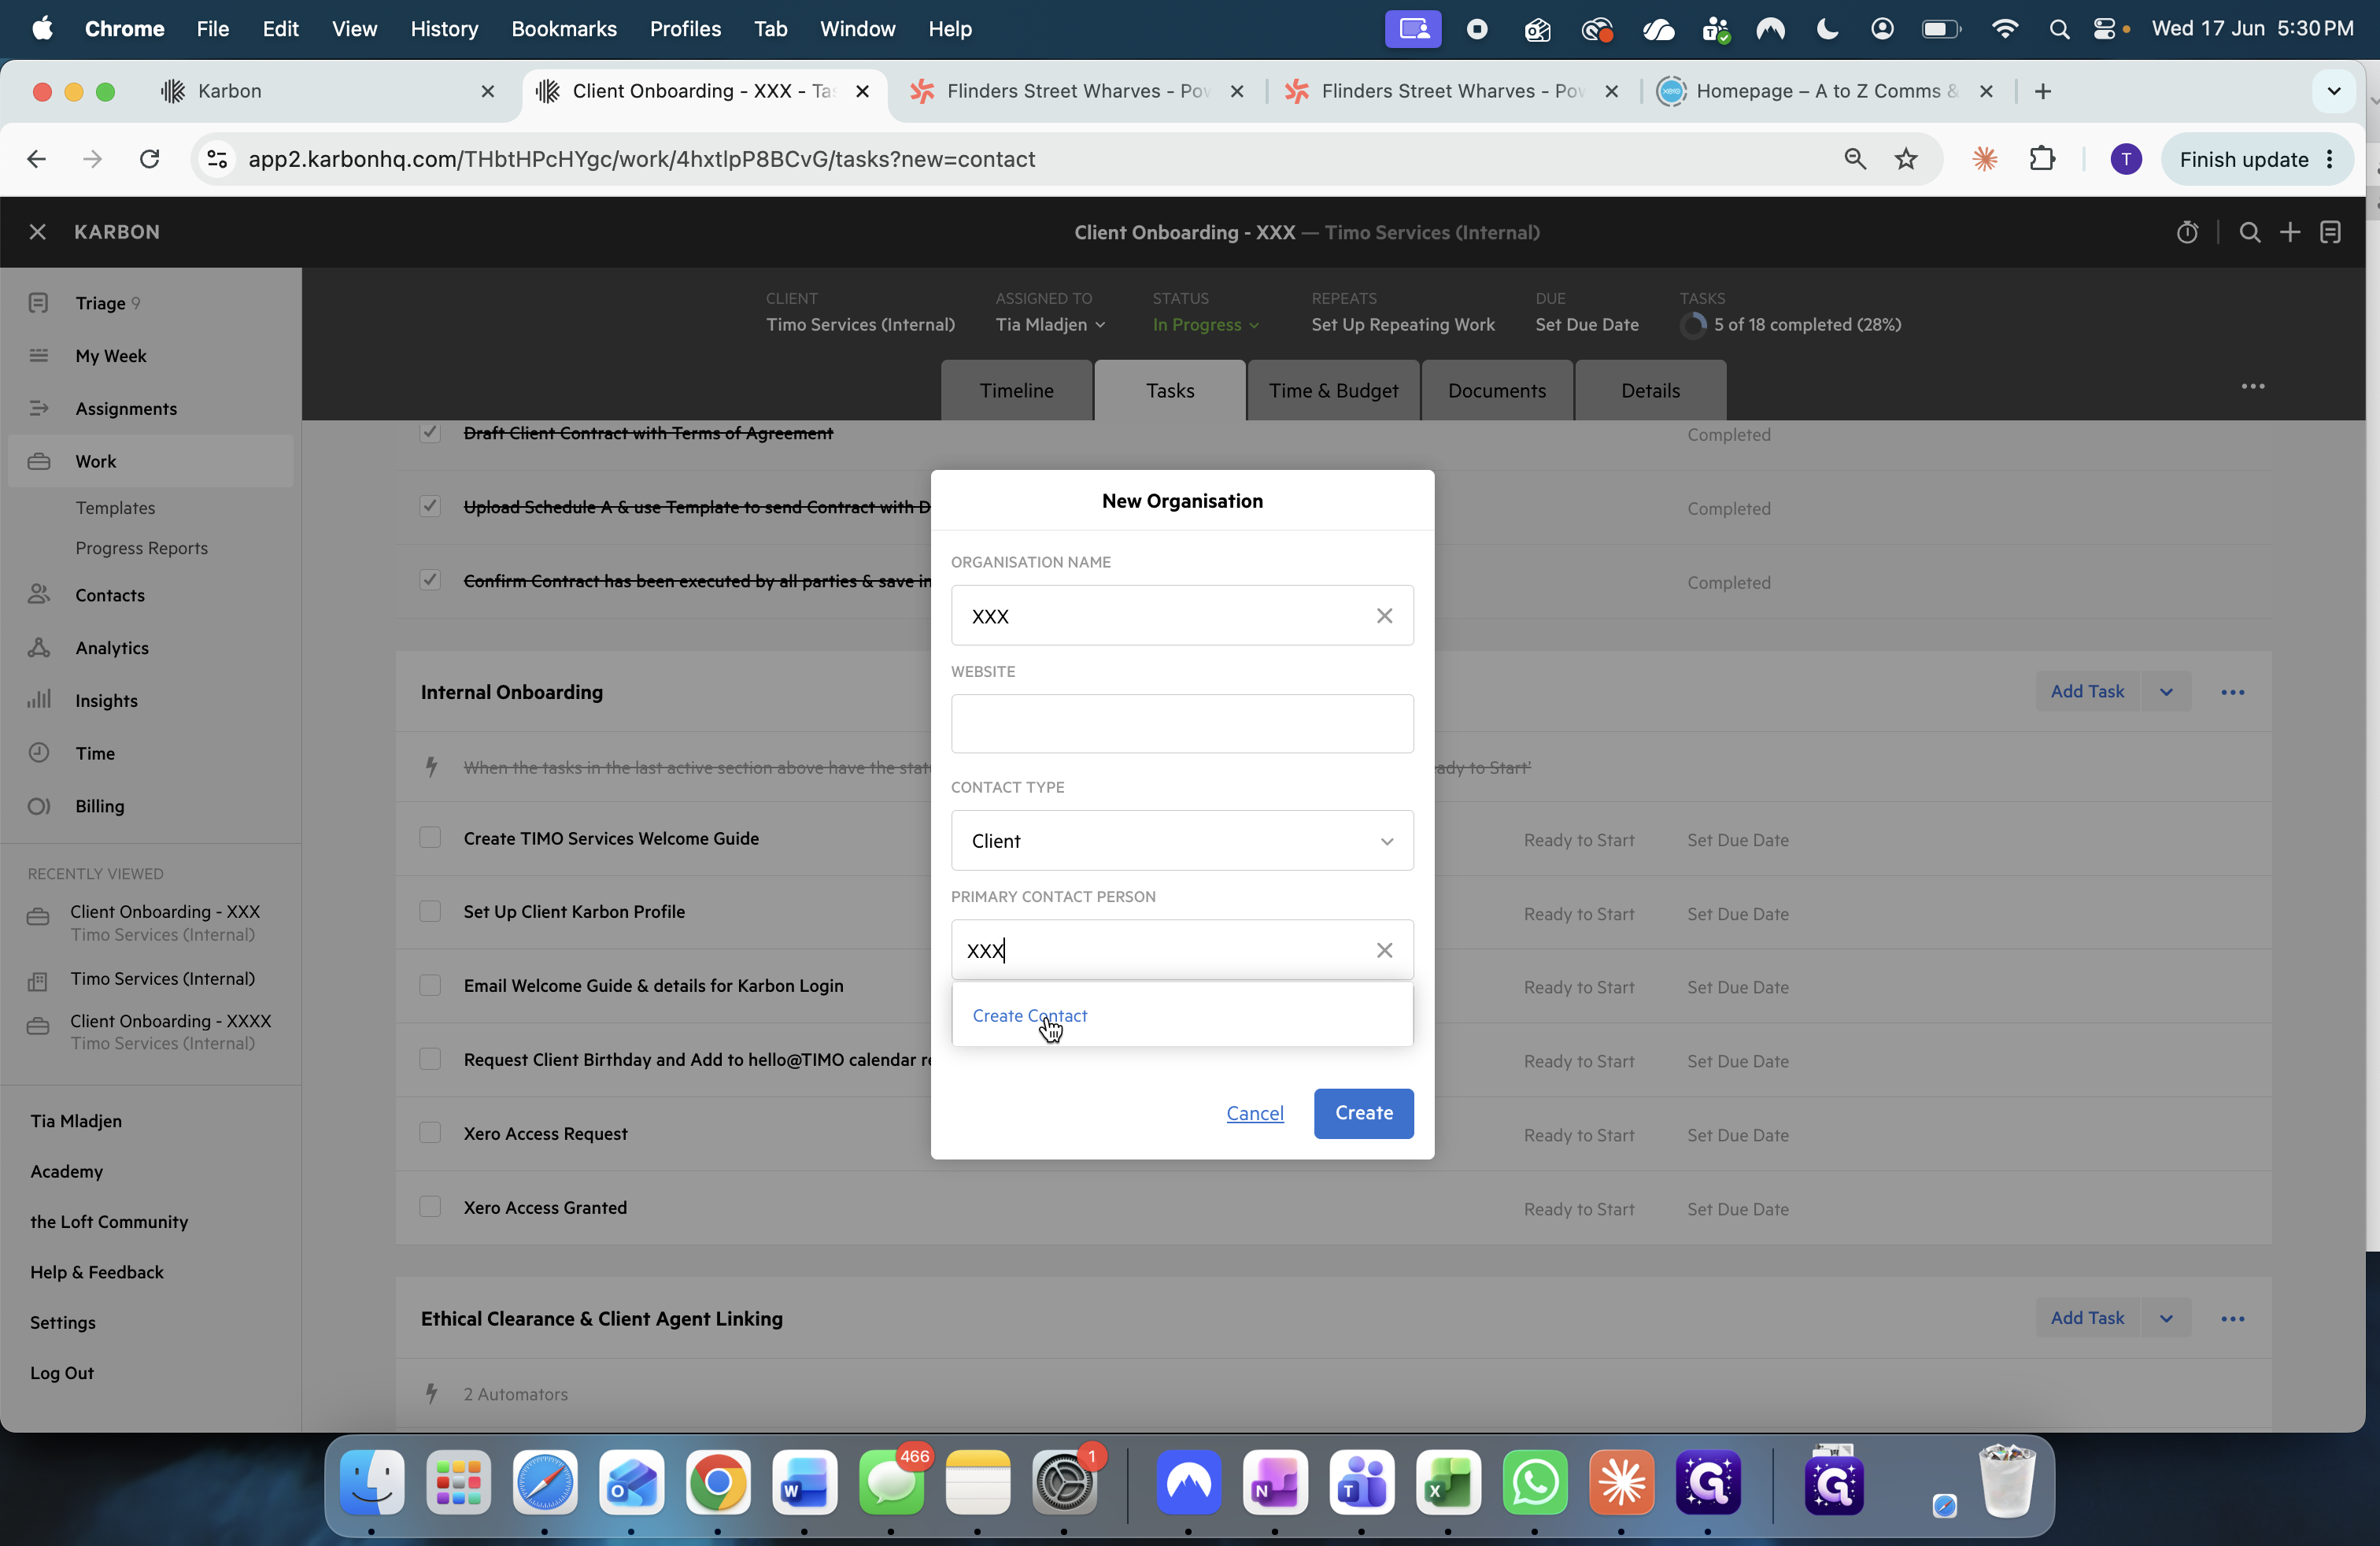
Type the primary contact's name.
9
Click Create Contact.
10
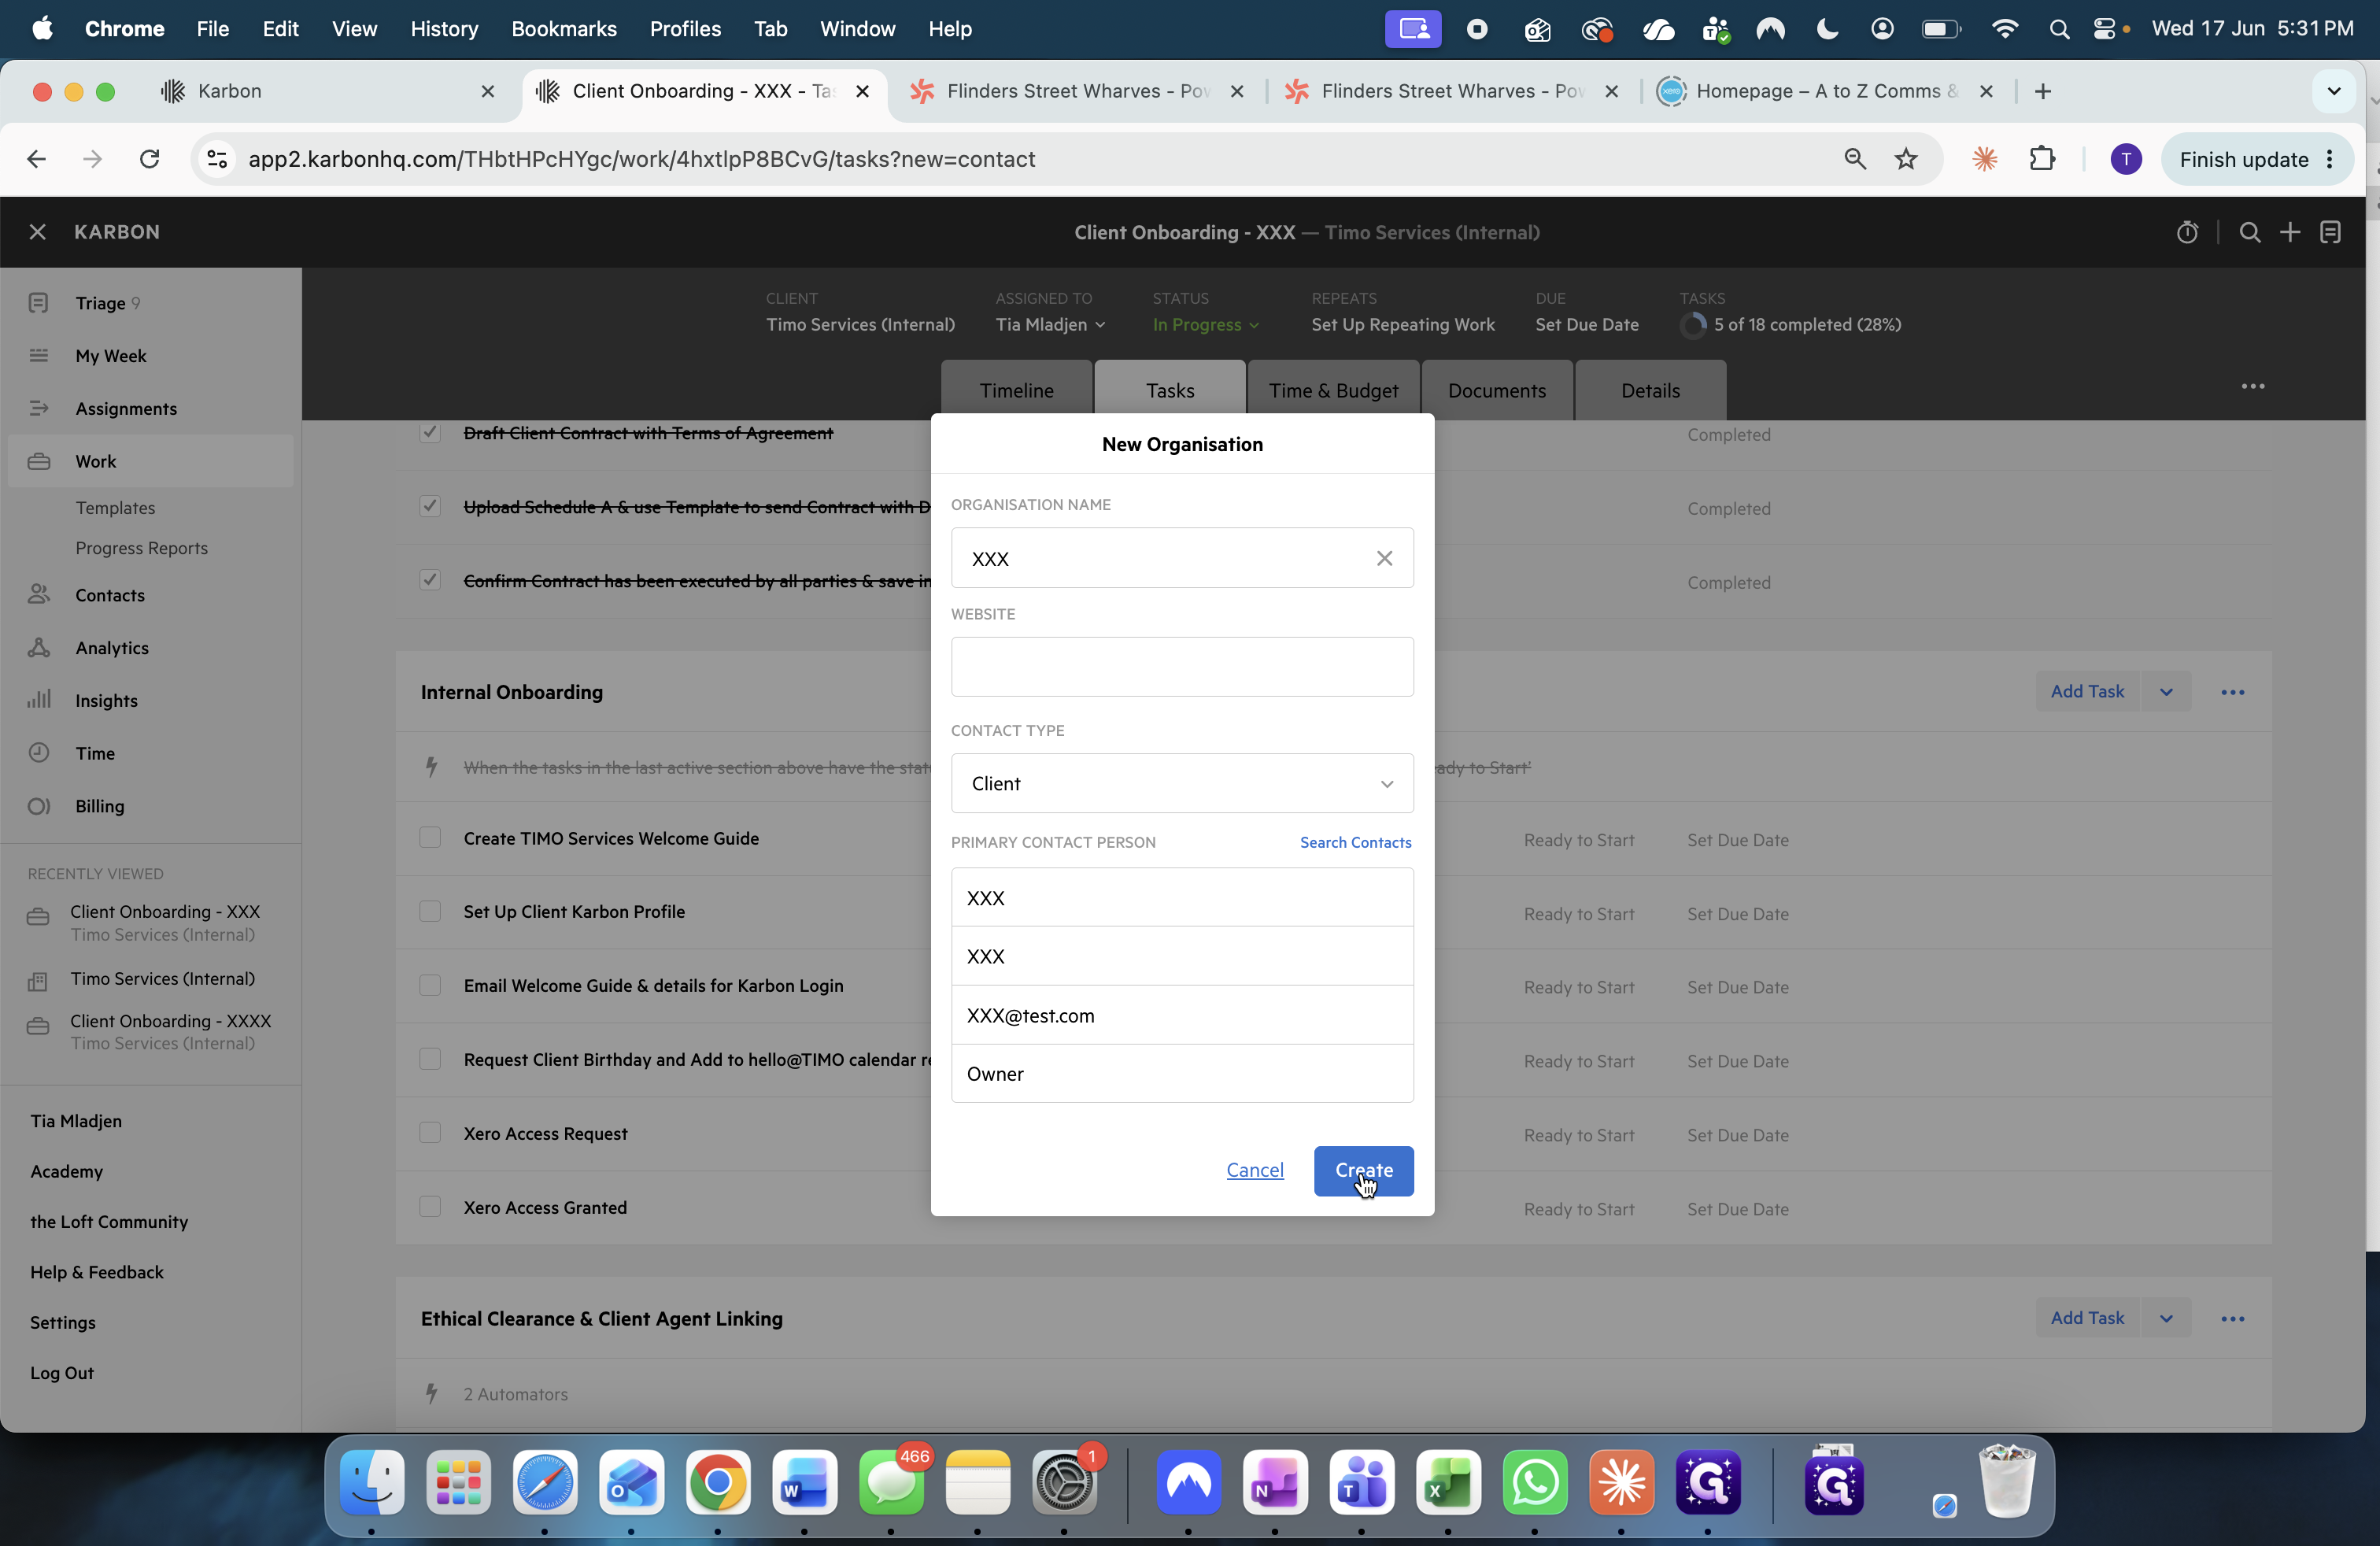
Fill in the contact's first name, last name, email address, and their role.
11
Click Create to save the new organization.
Phase 2: Assign the Client to Onboarding Work
Now, tie the newly created client record to your active onboarding task list.
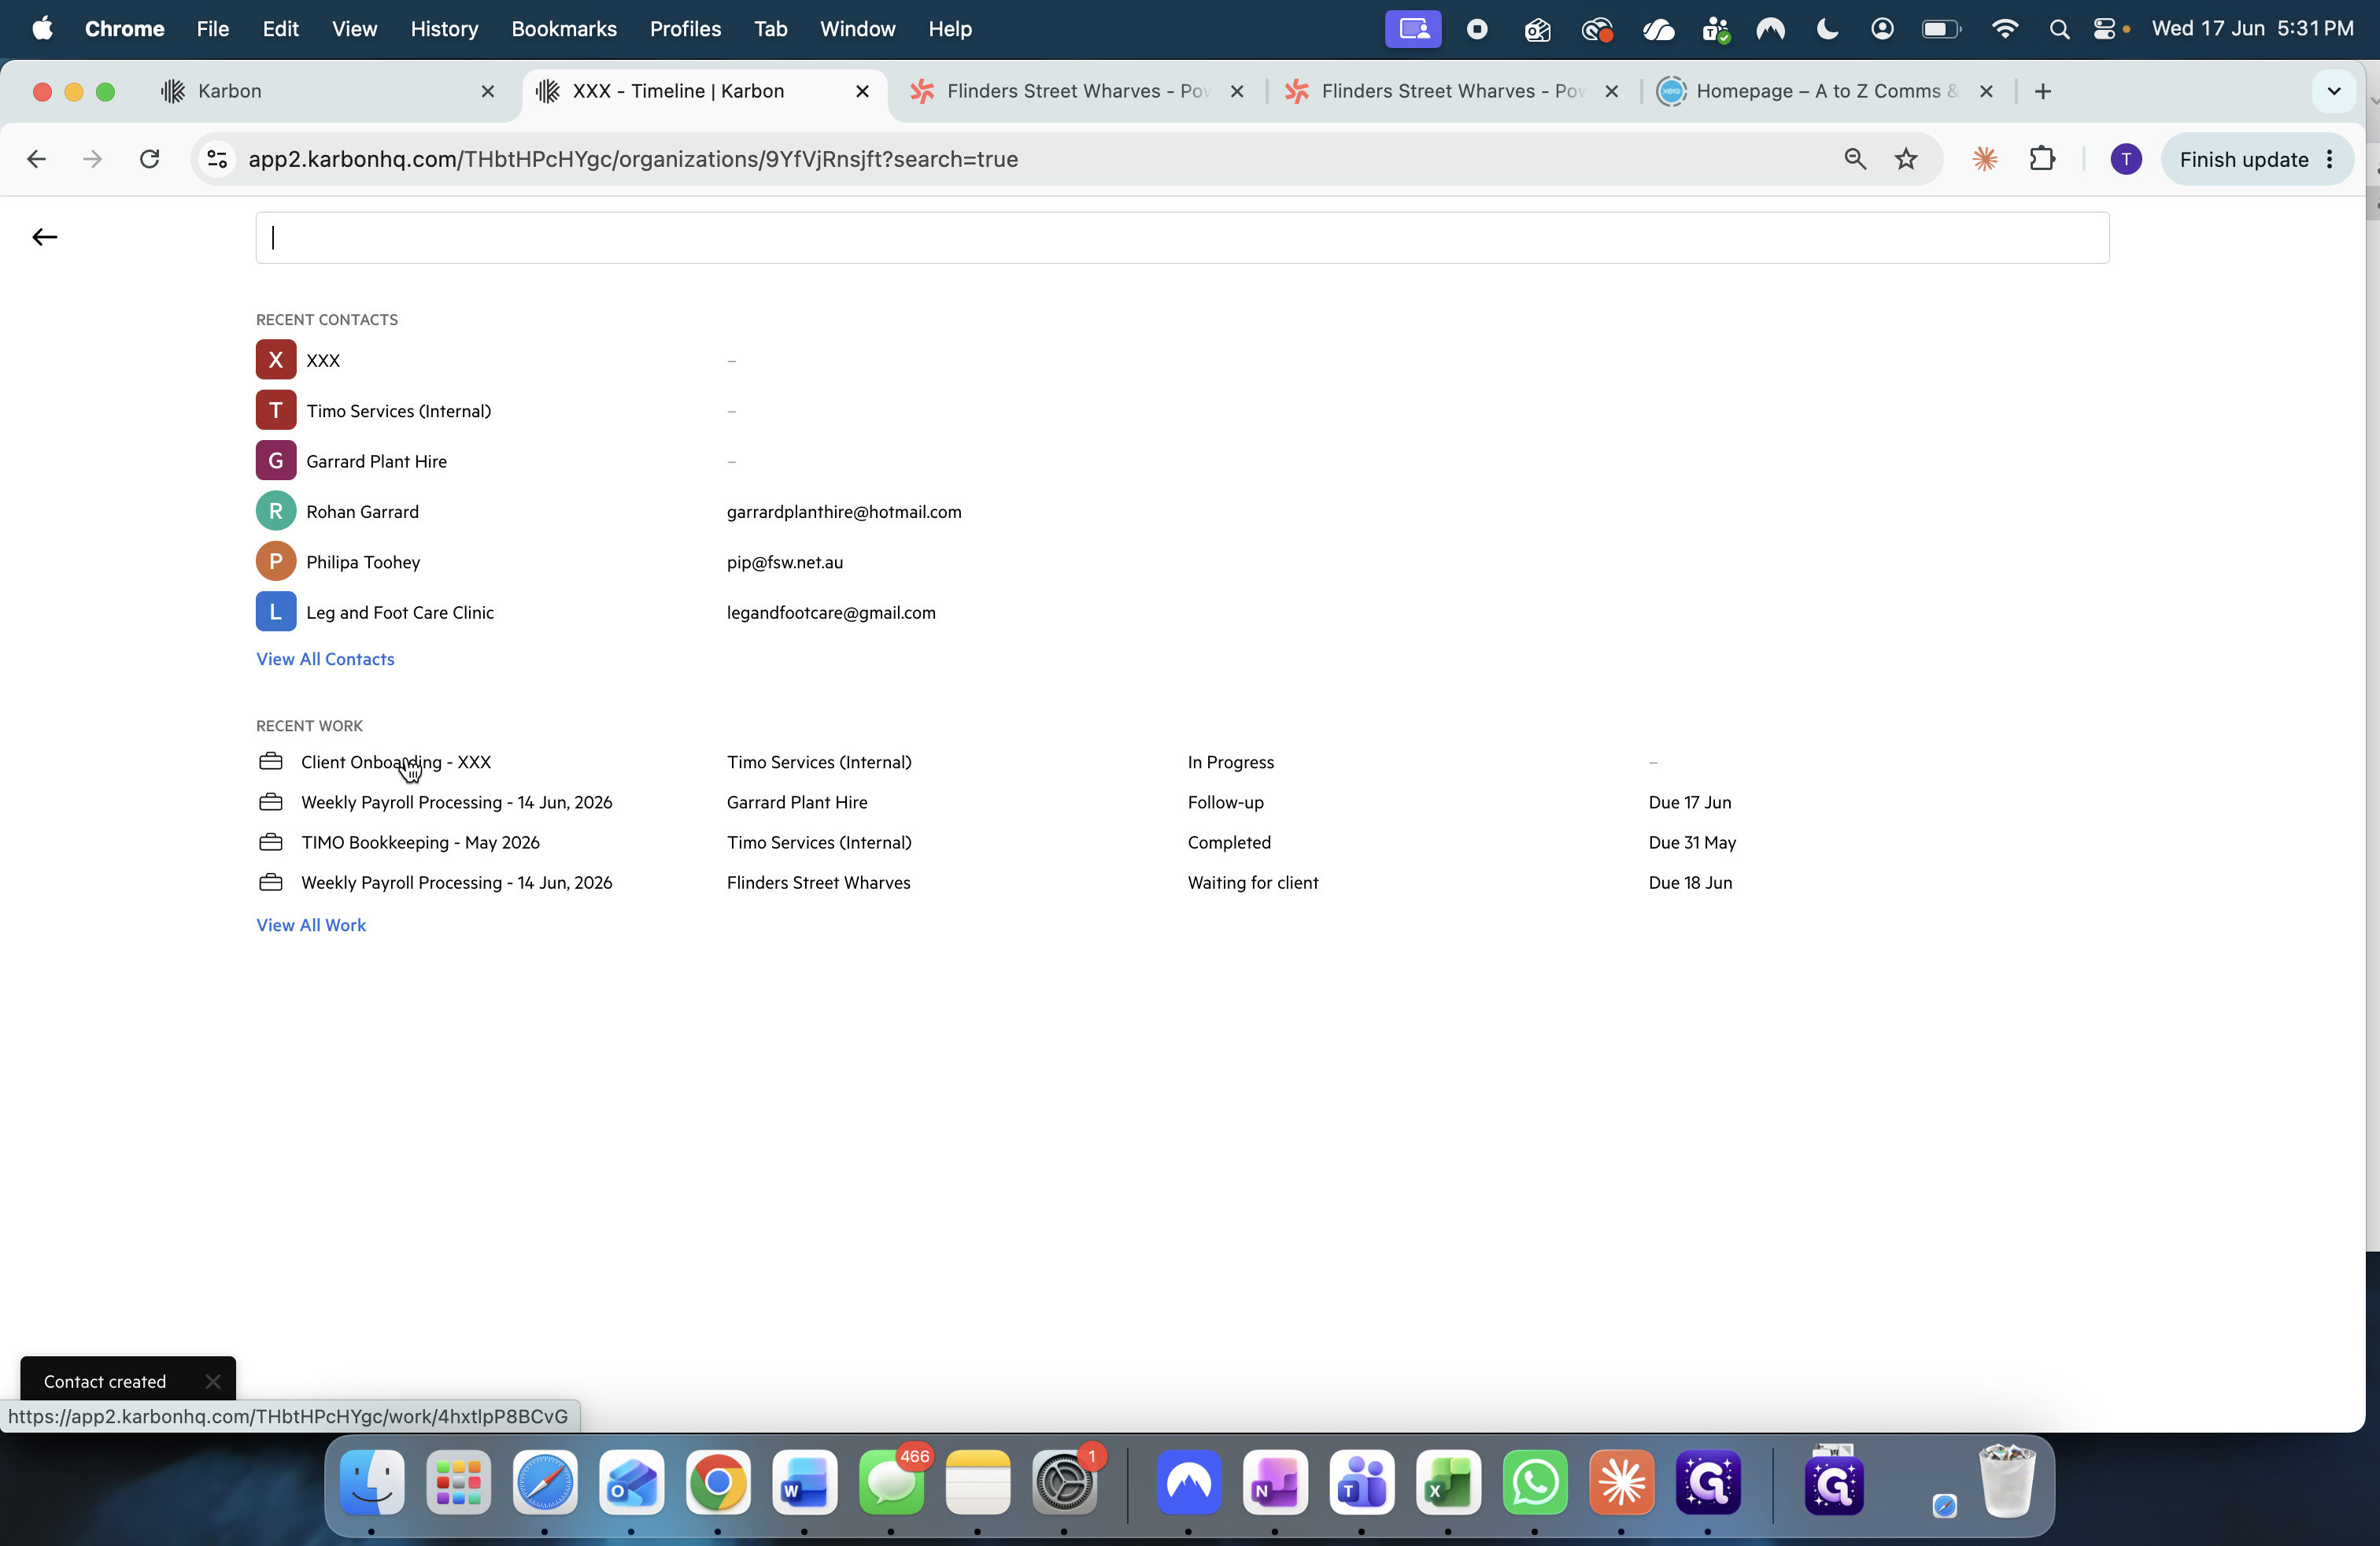
12
Click your Client Onboarding work item from the Recent Work section.
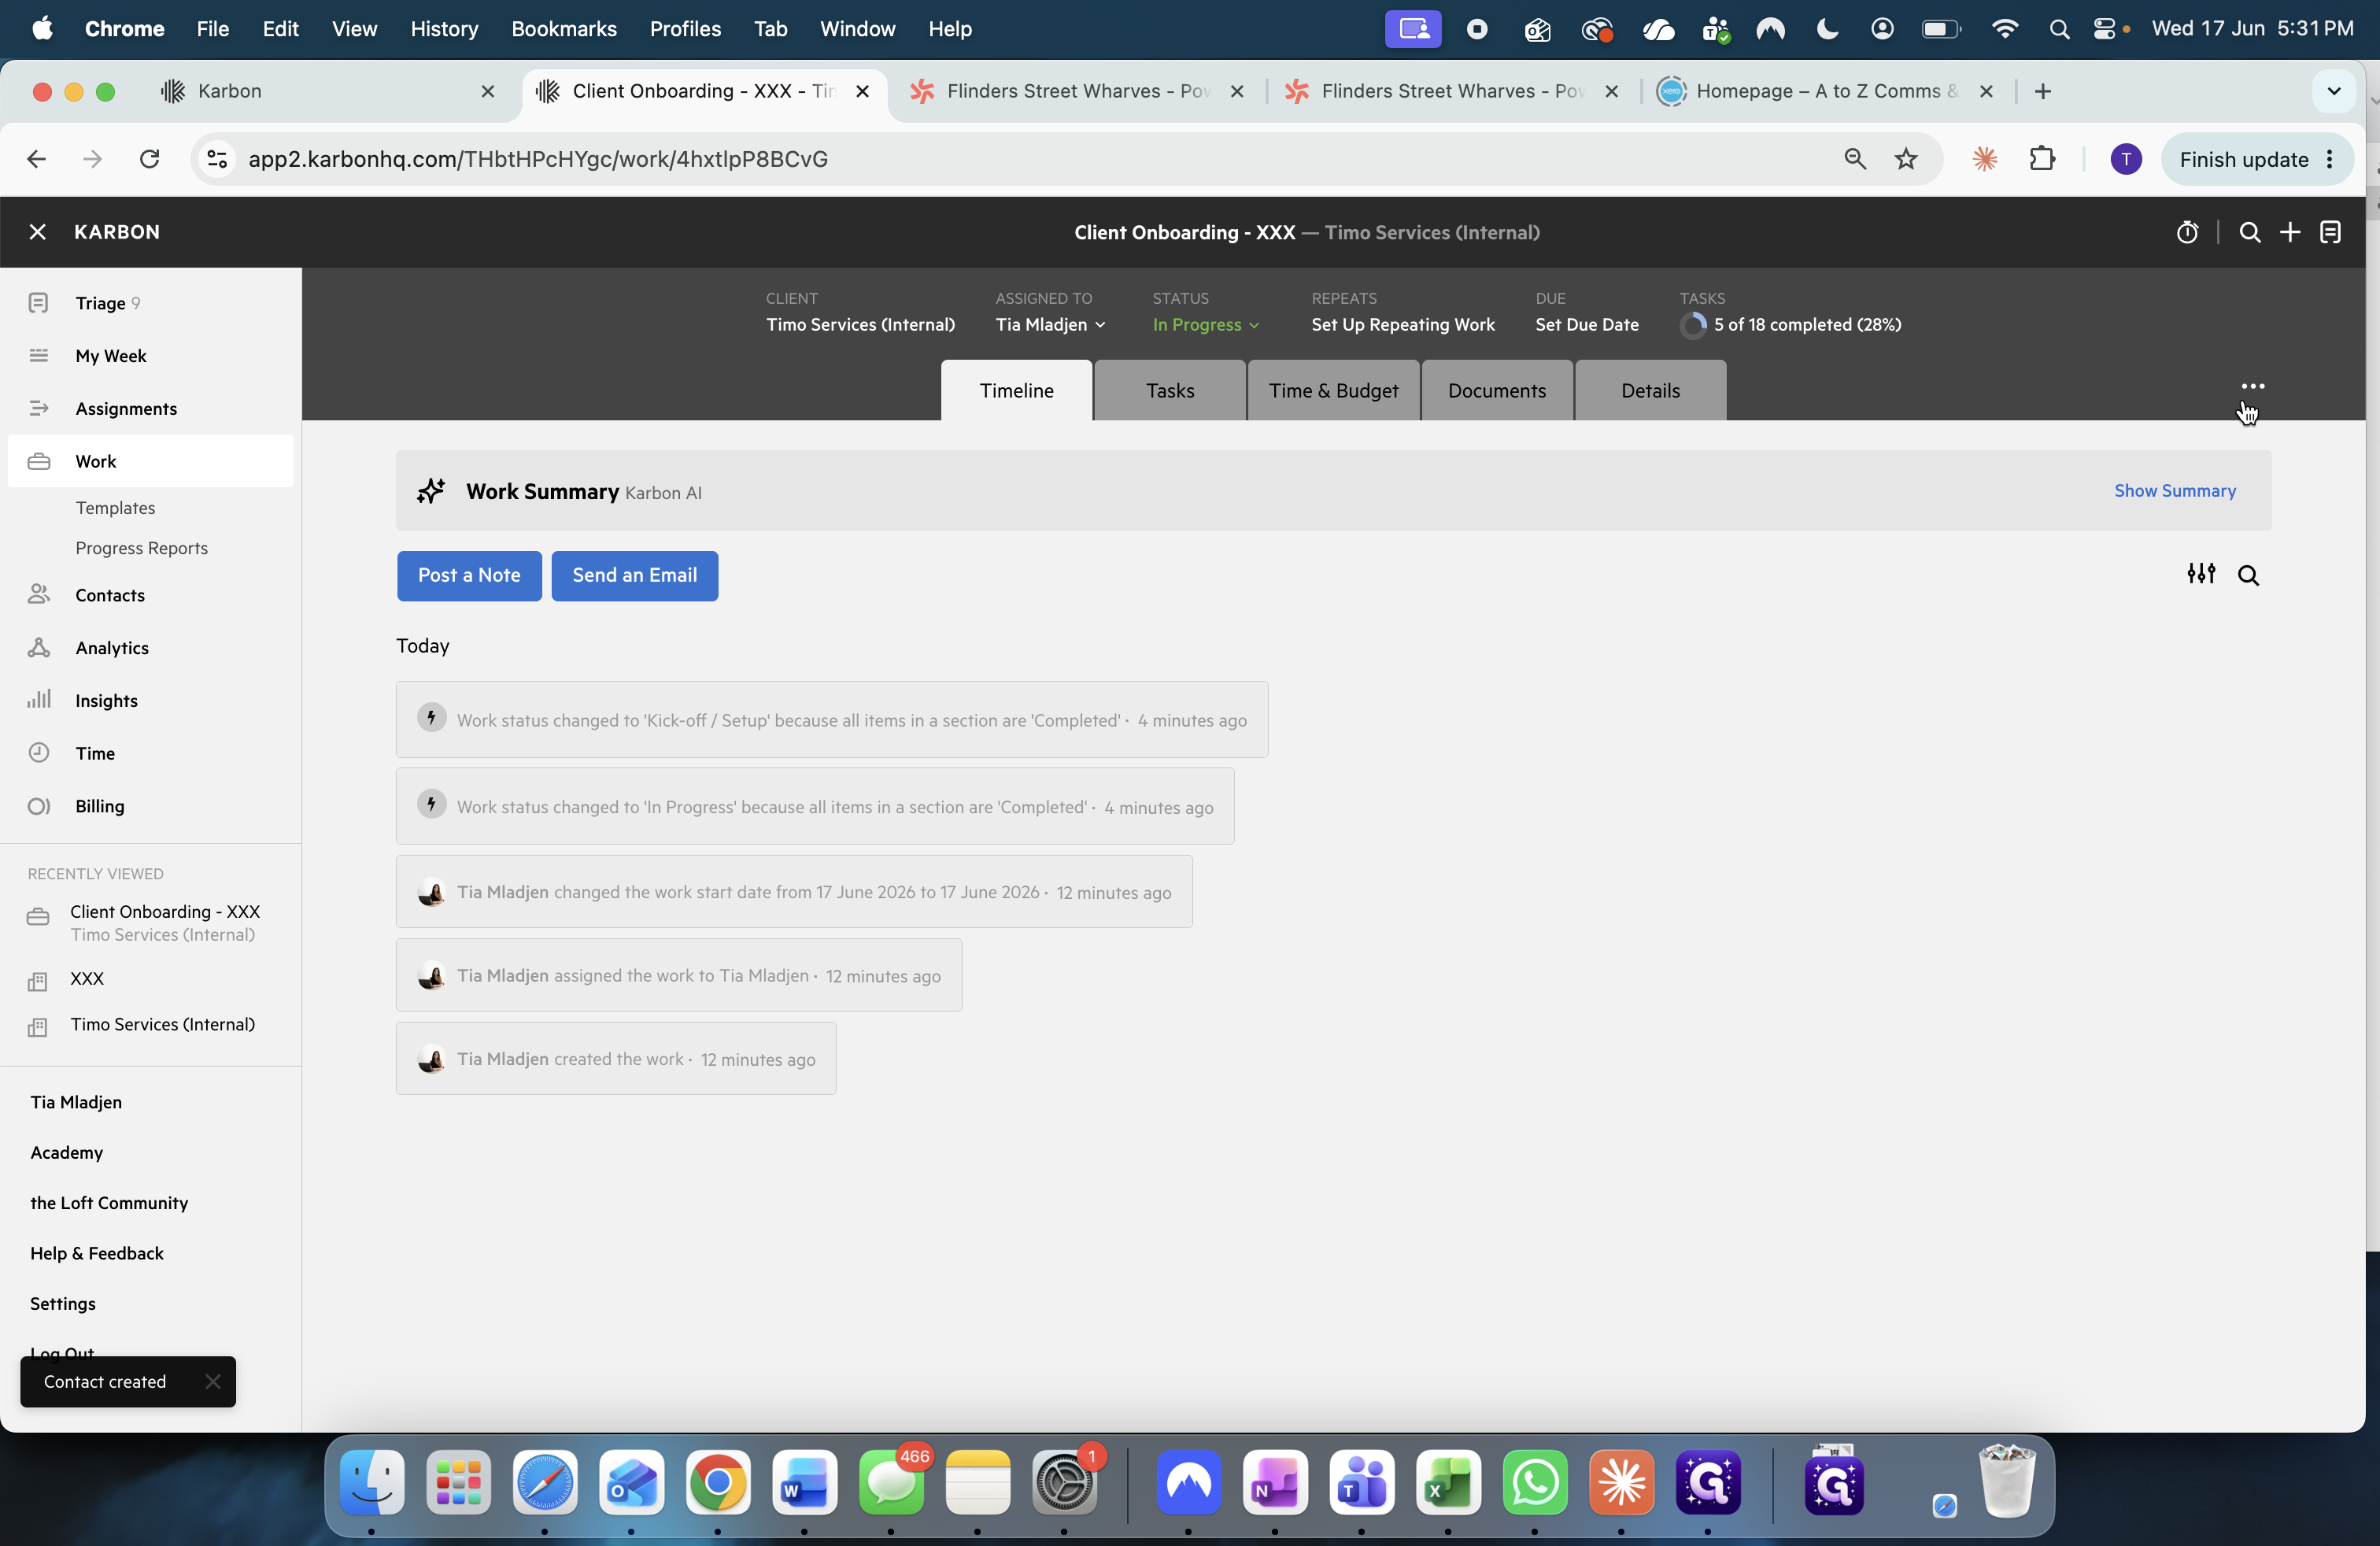
13
Click the three-dot menu icon in the upper right area of the work details panel.
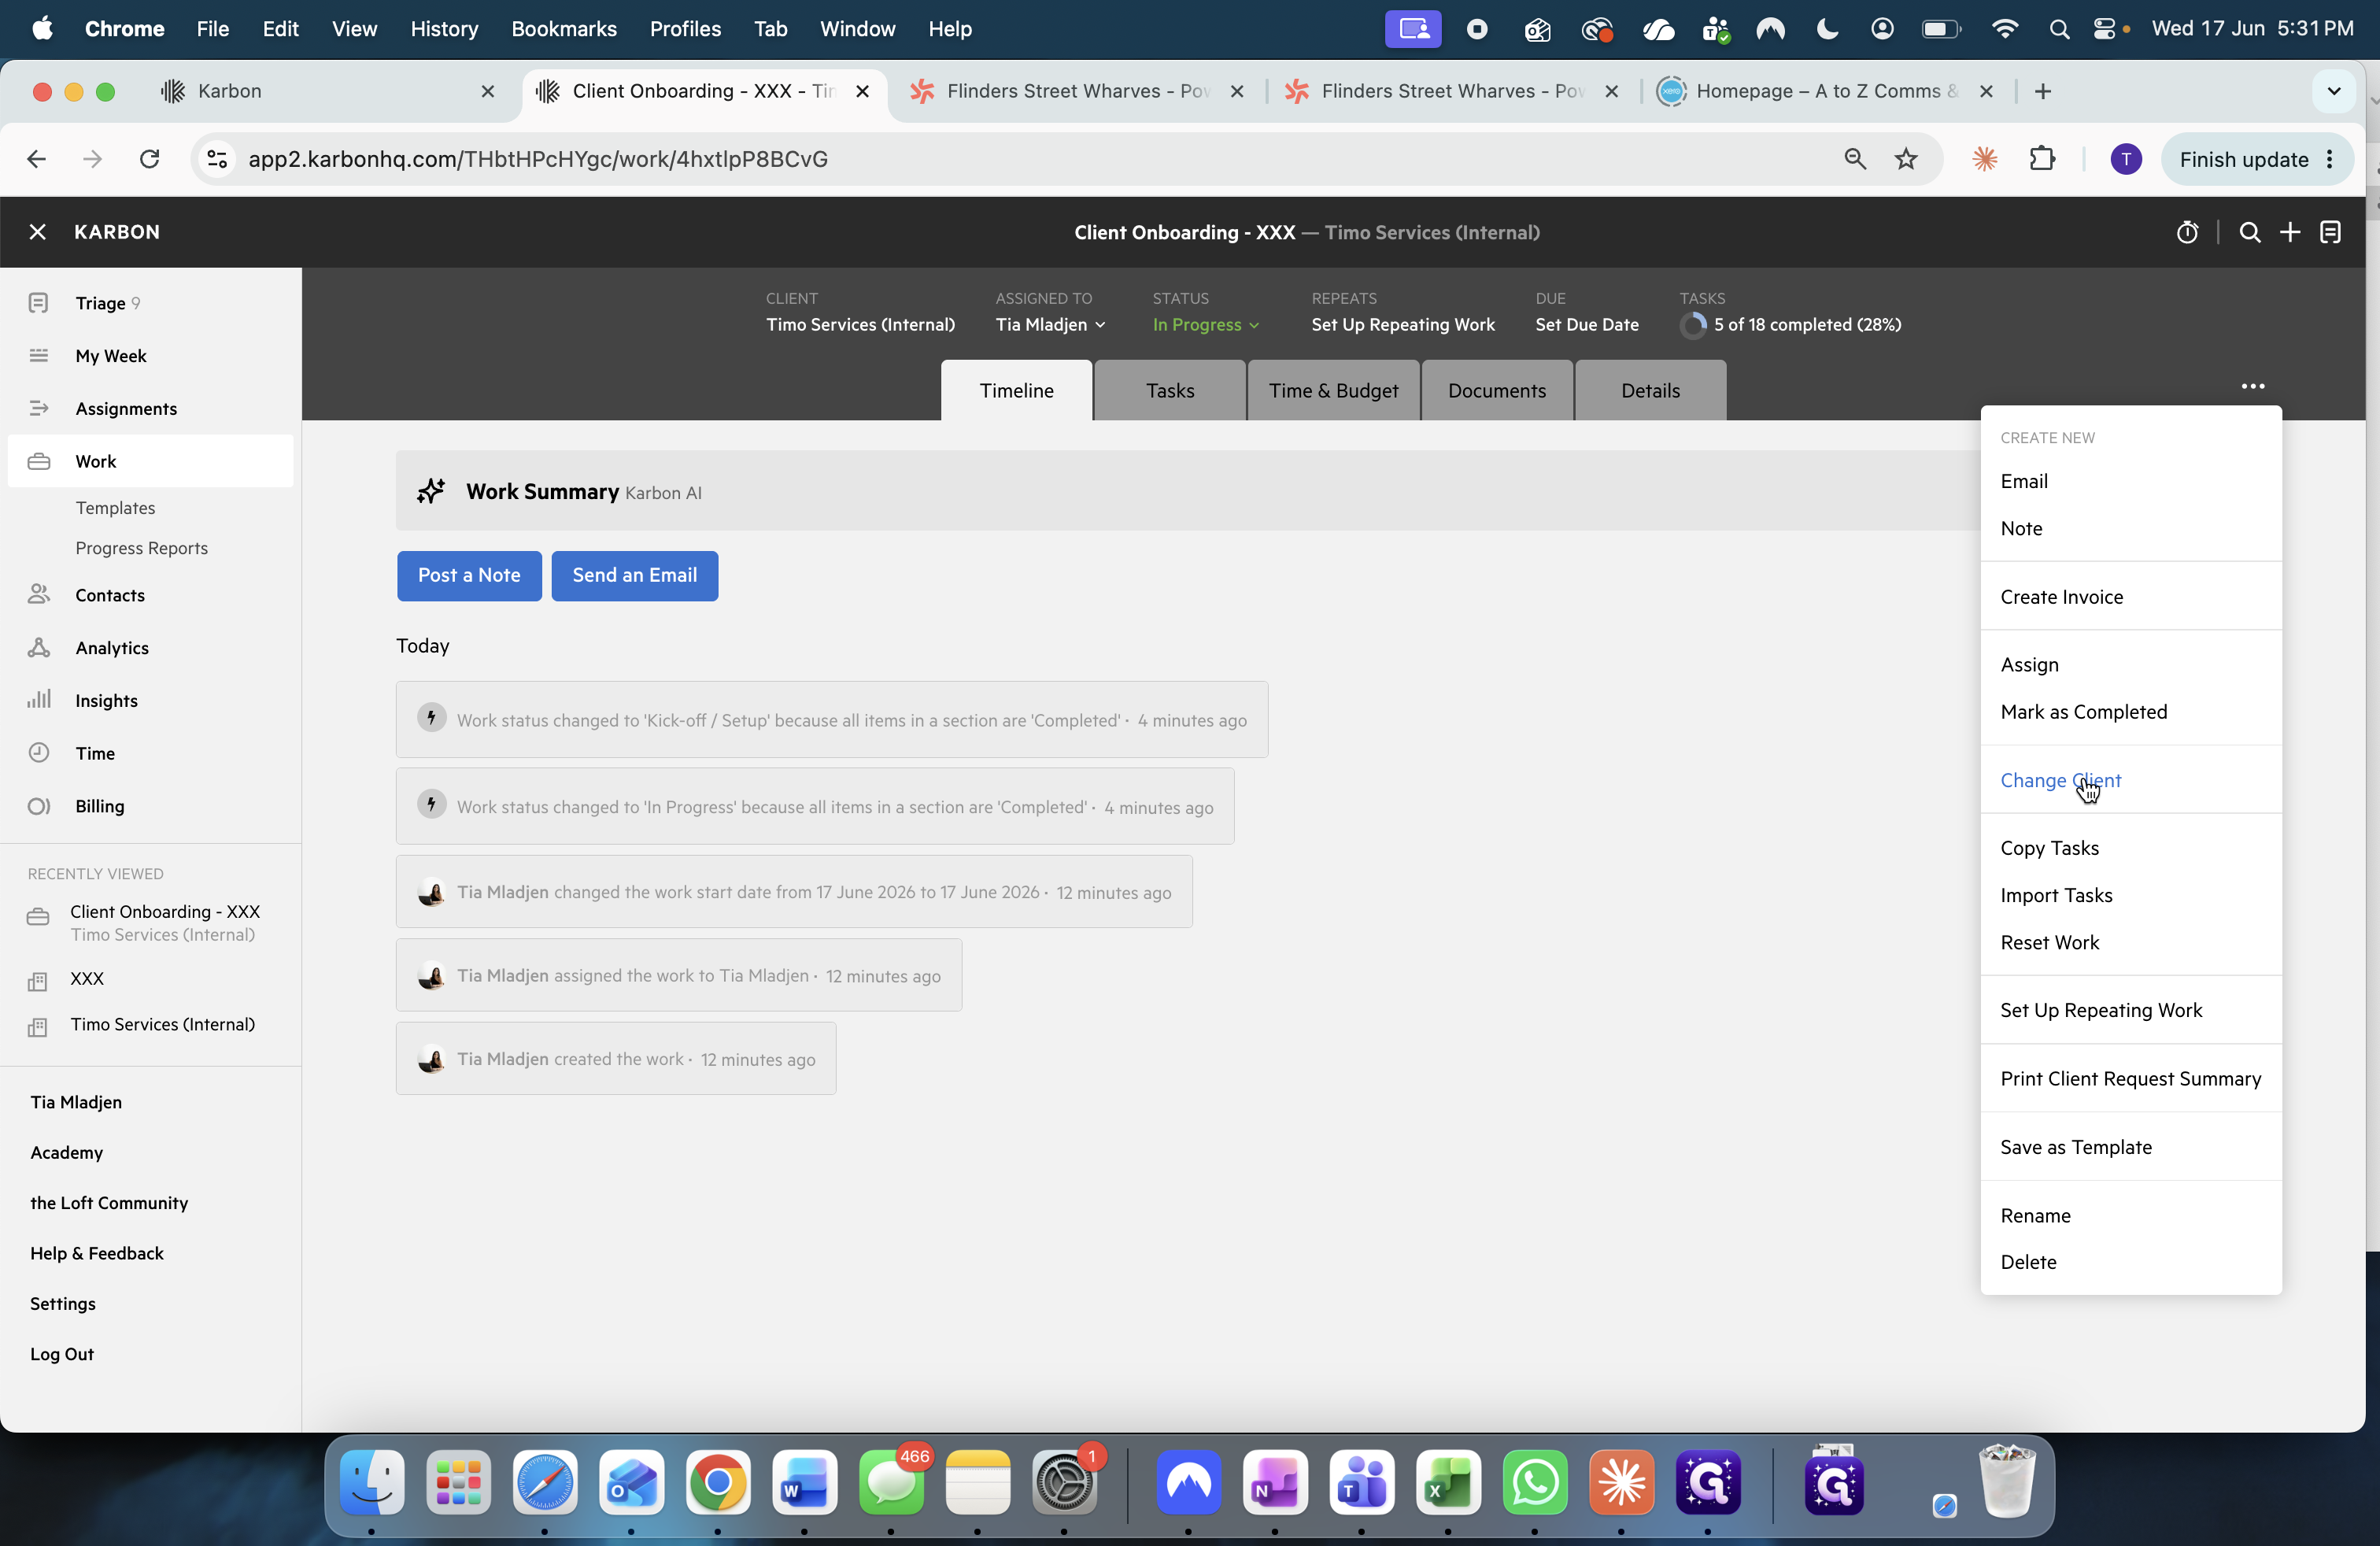
14
Click Change Client.
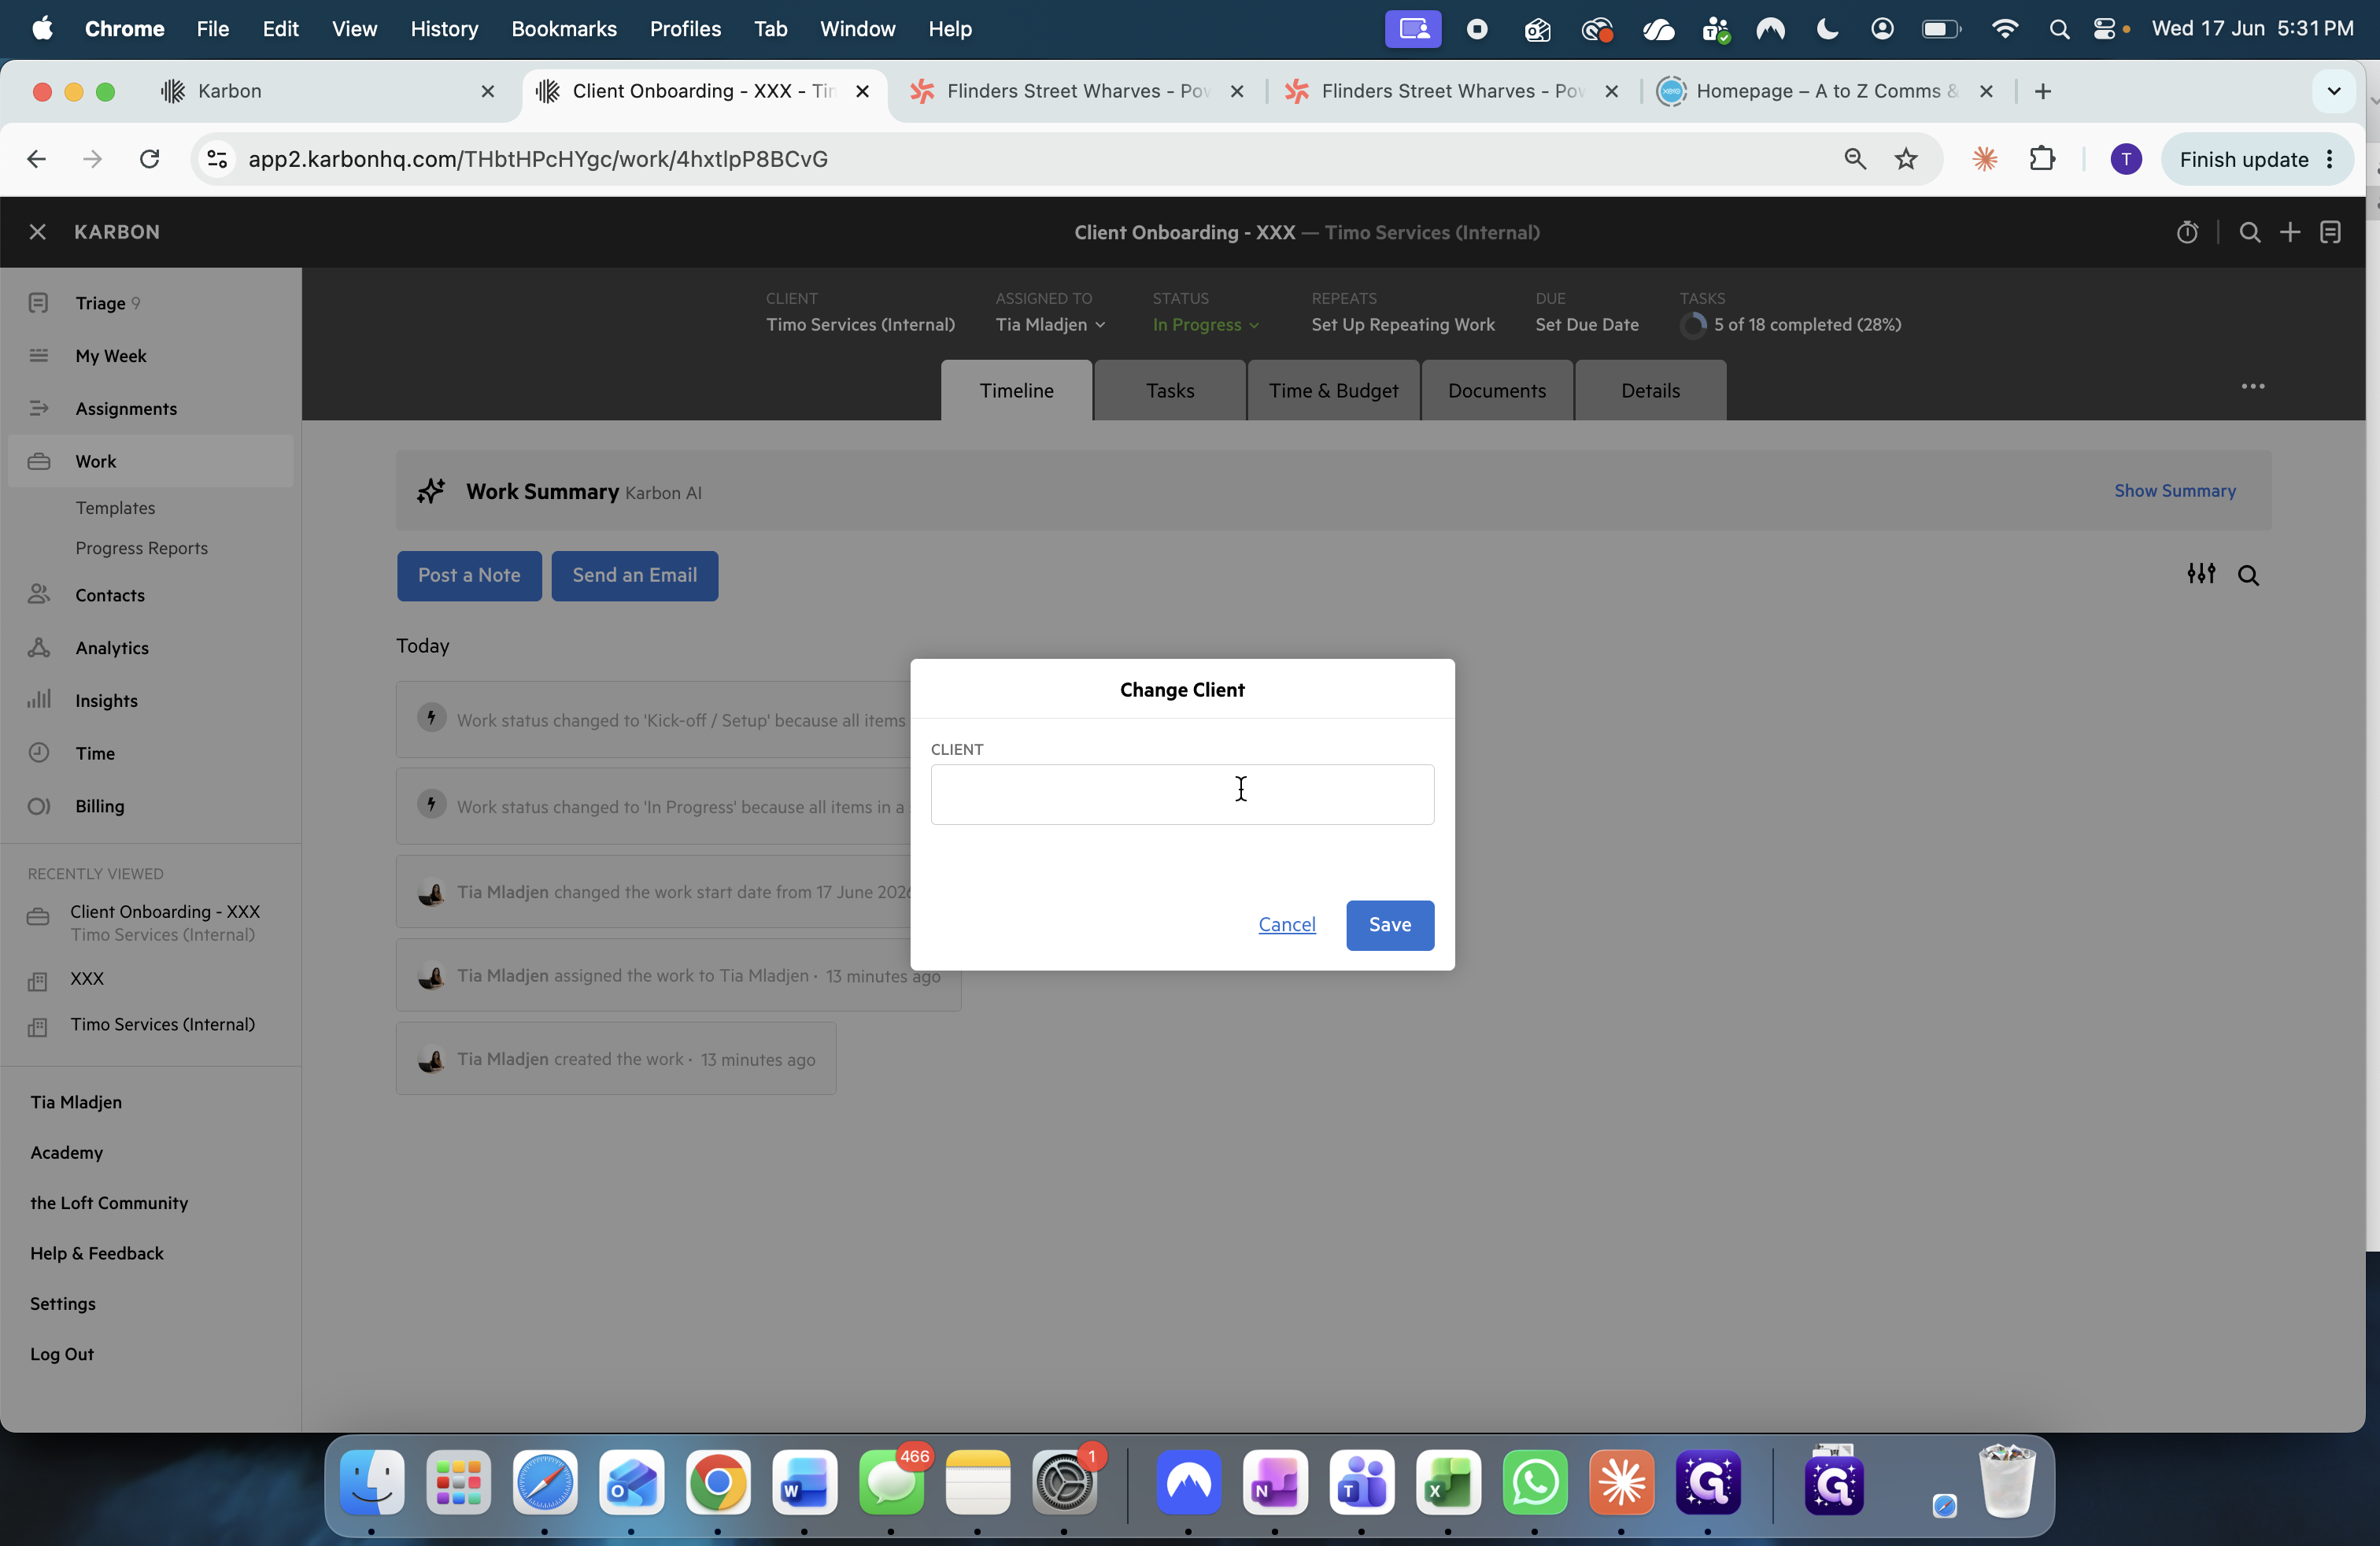
15
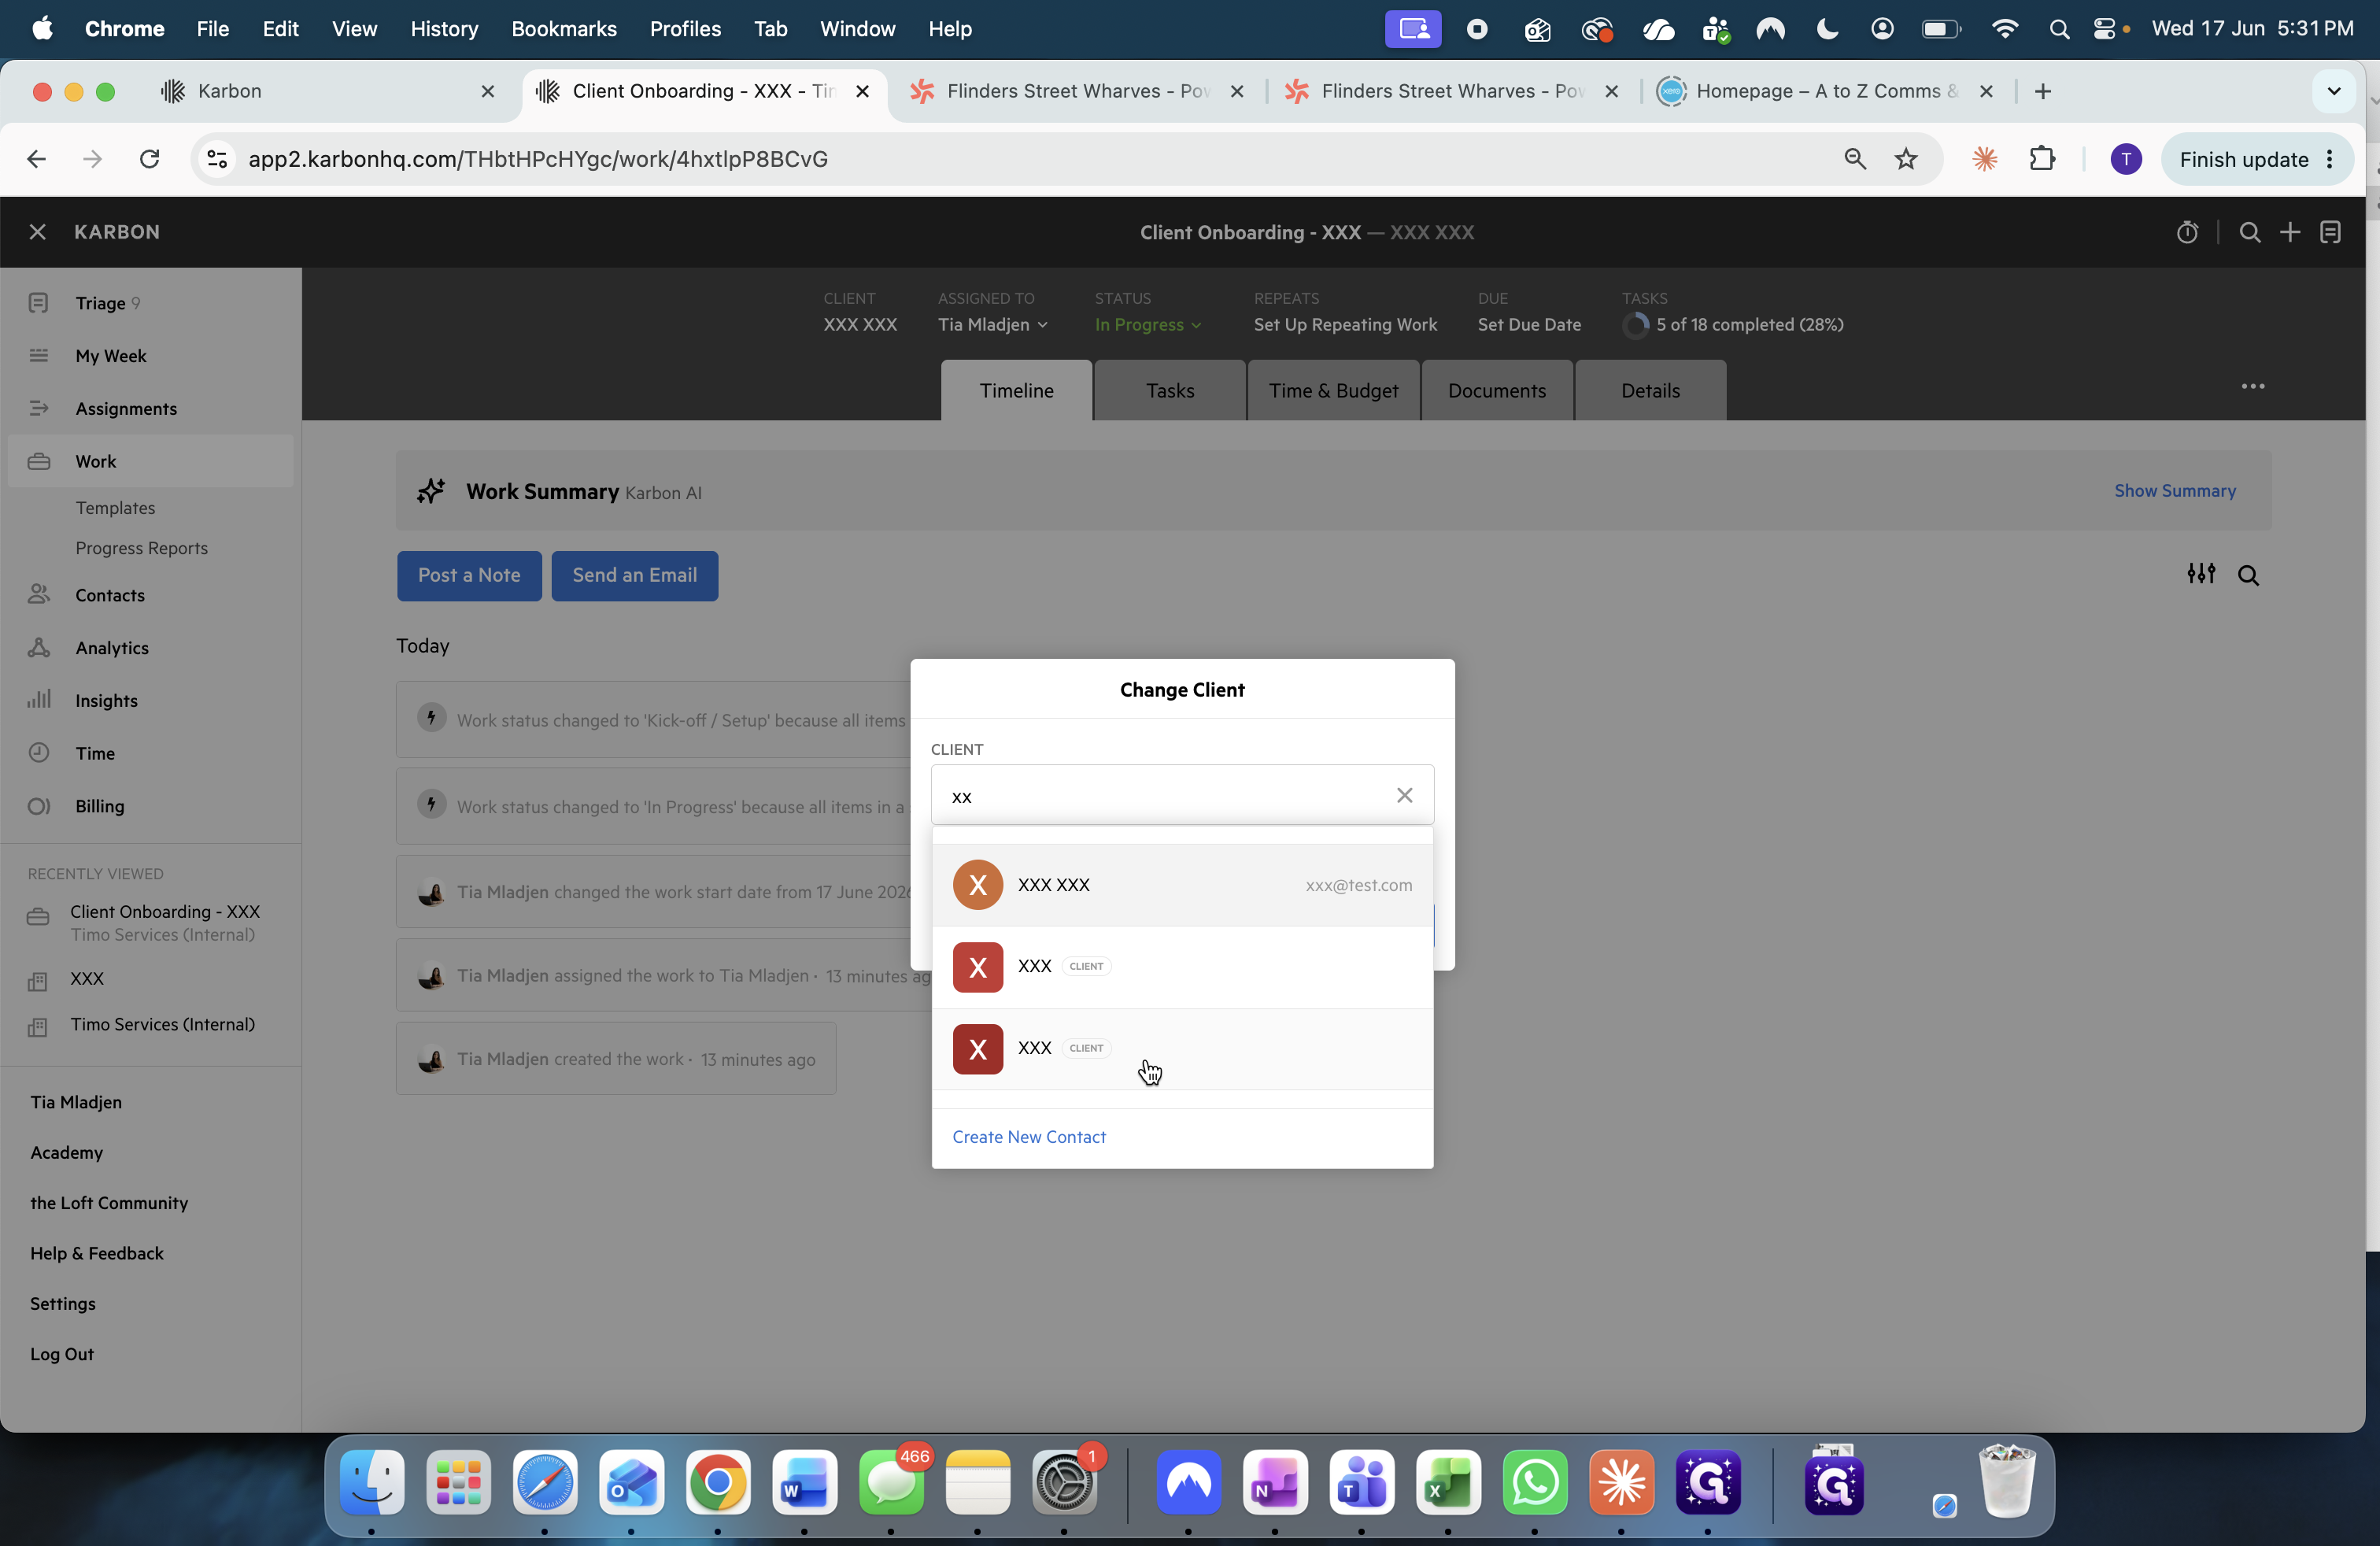
Click the input field to search for a new client.
16
Type the name of the client you just created.
17
Select the client from the search results.
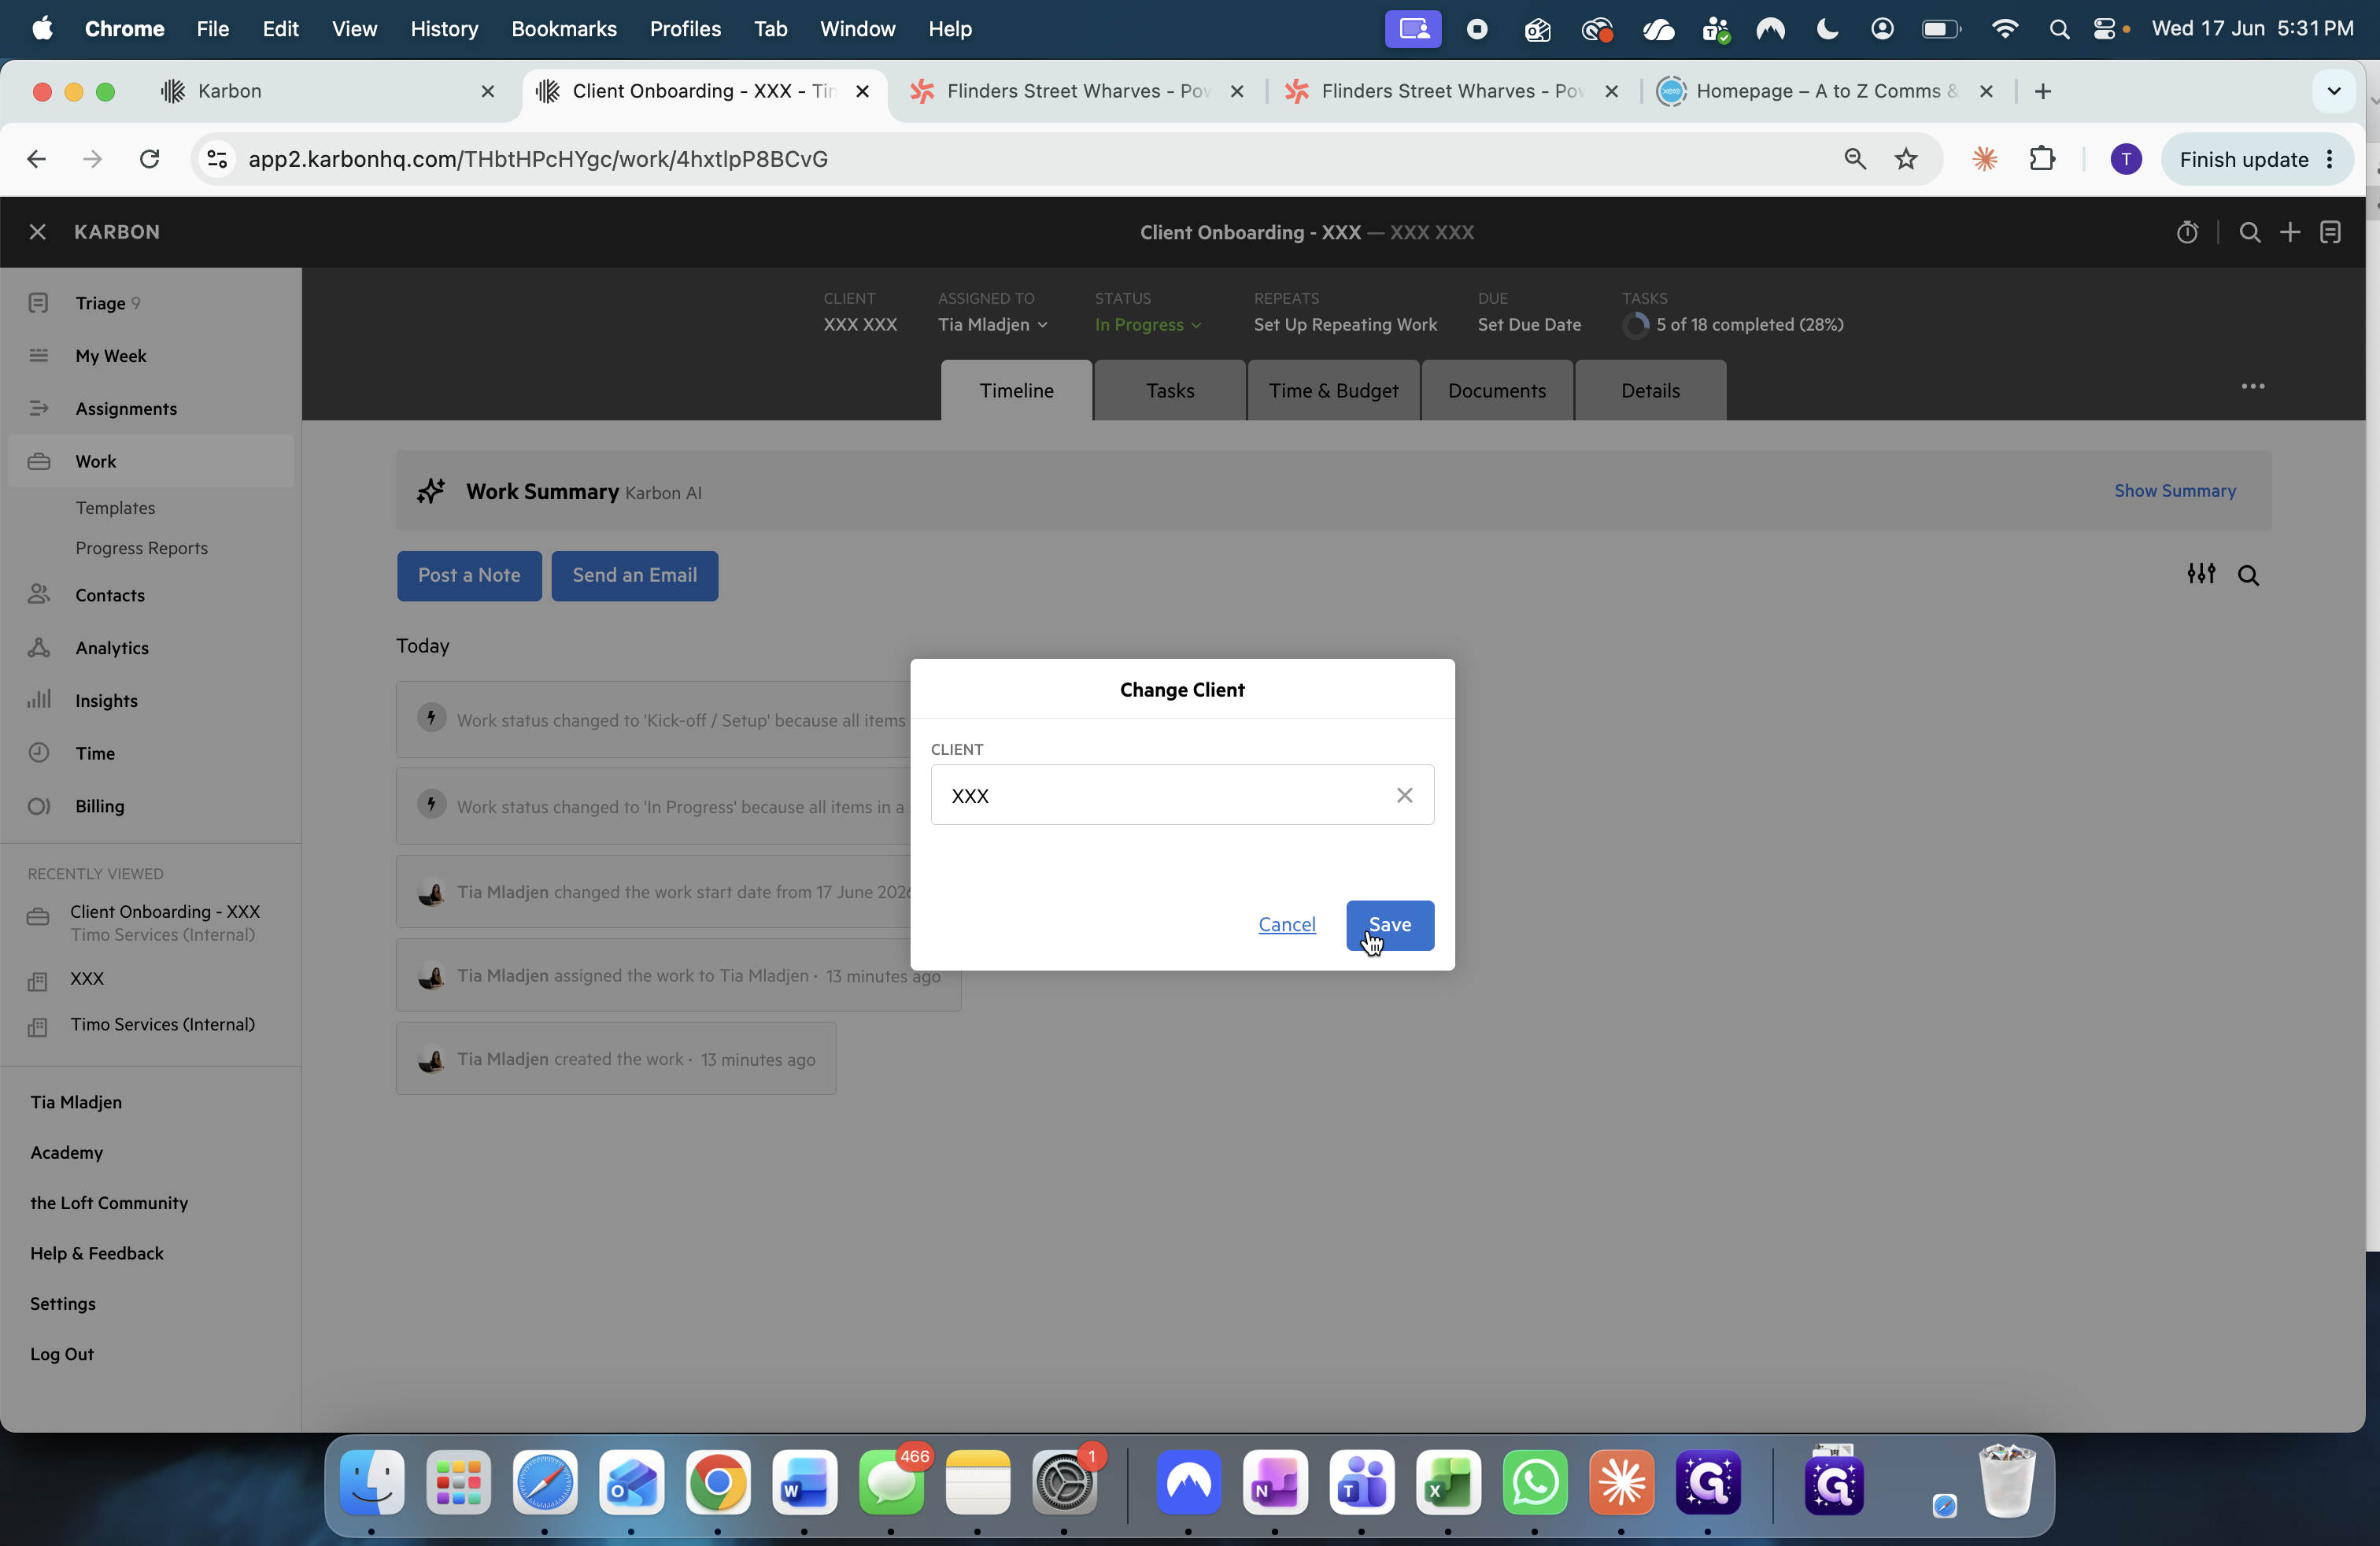
18
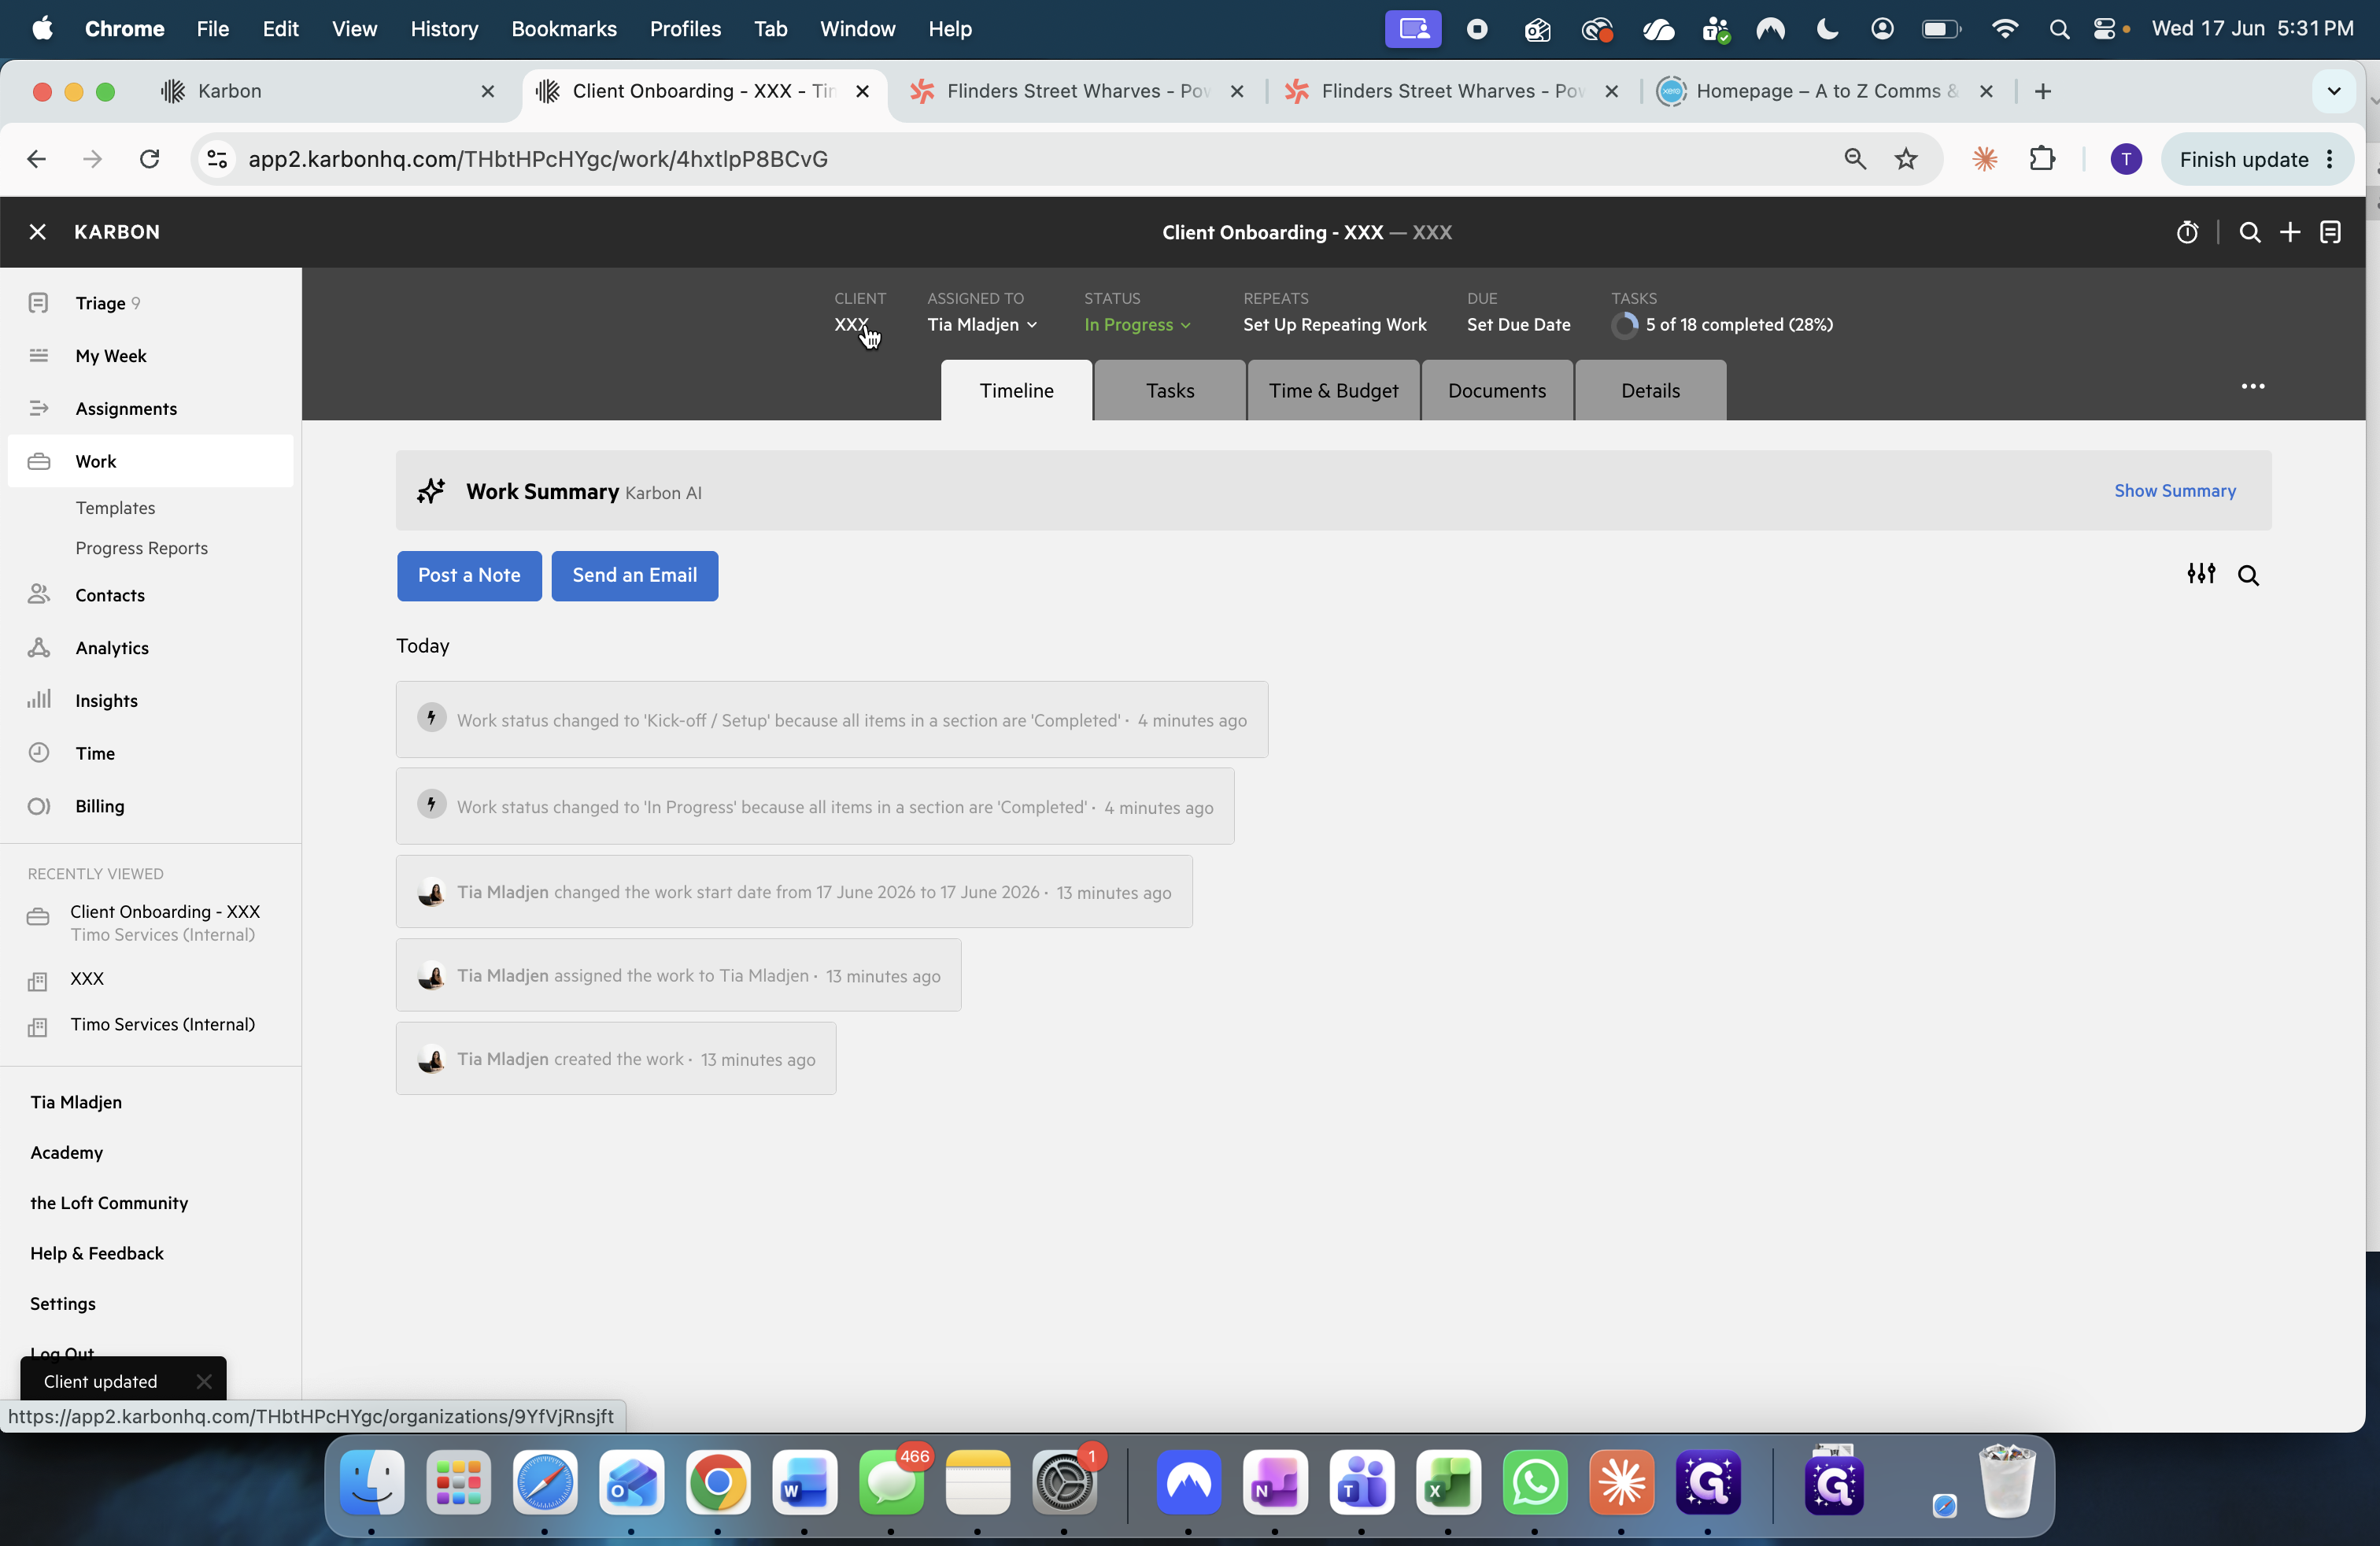
Click Save.
Phase 3: Send Karbon Portal Invite
Give your client access to the Karbon portal so they can view relevant tasks and documents.
19
Click the client's name in the top header area of the project.
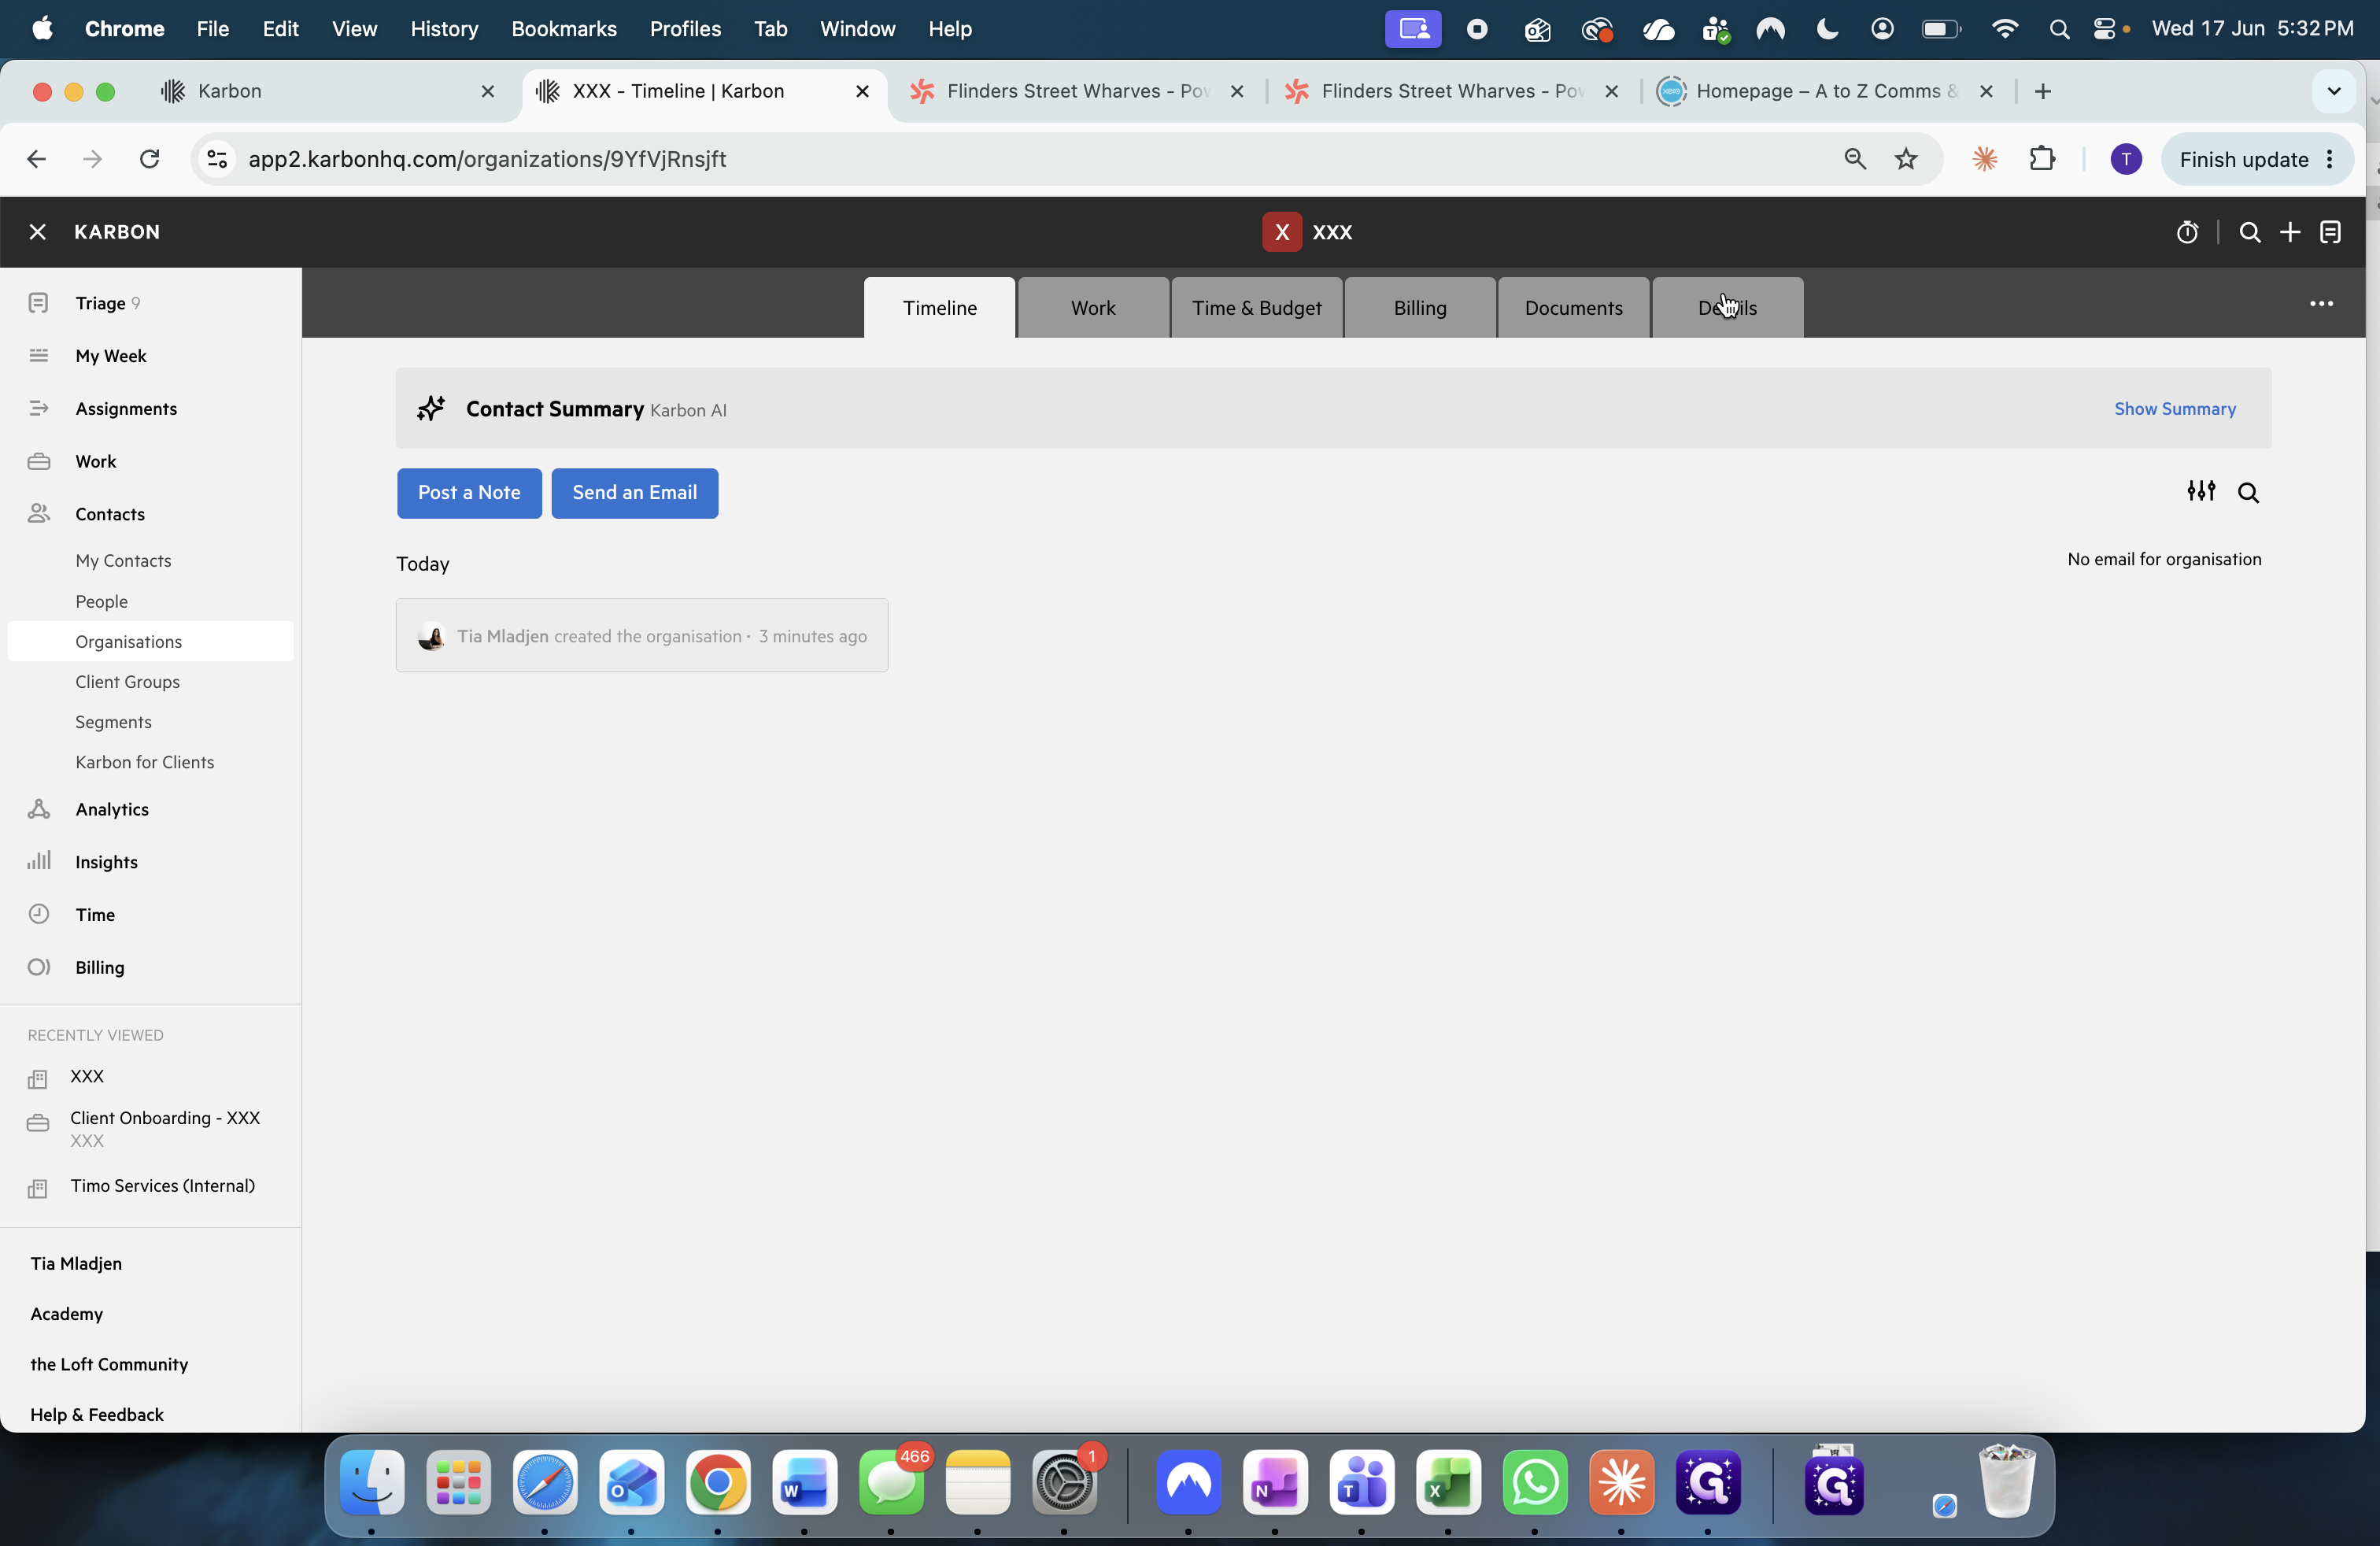
20
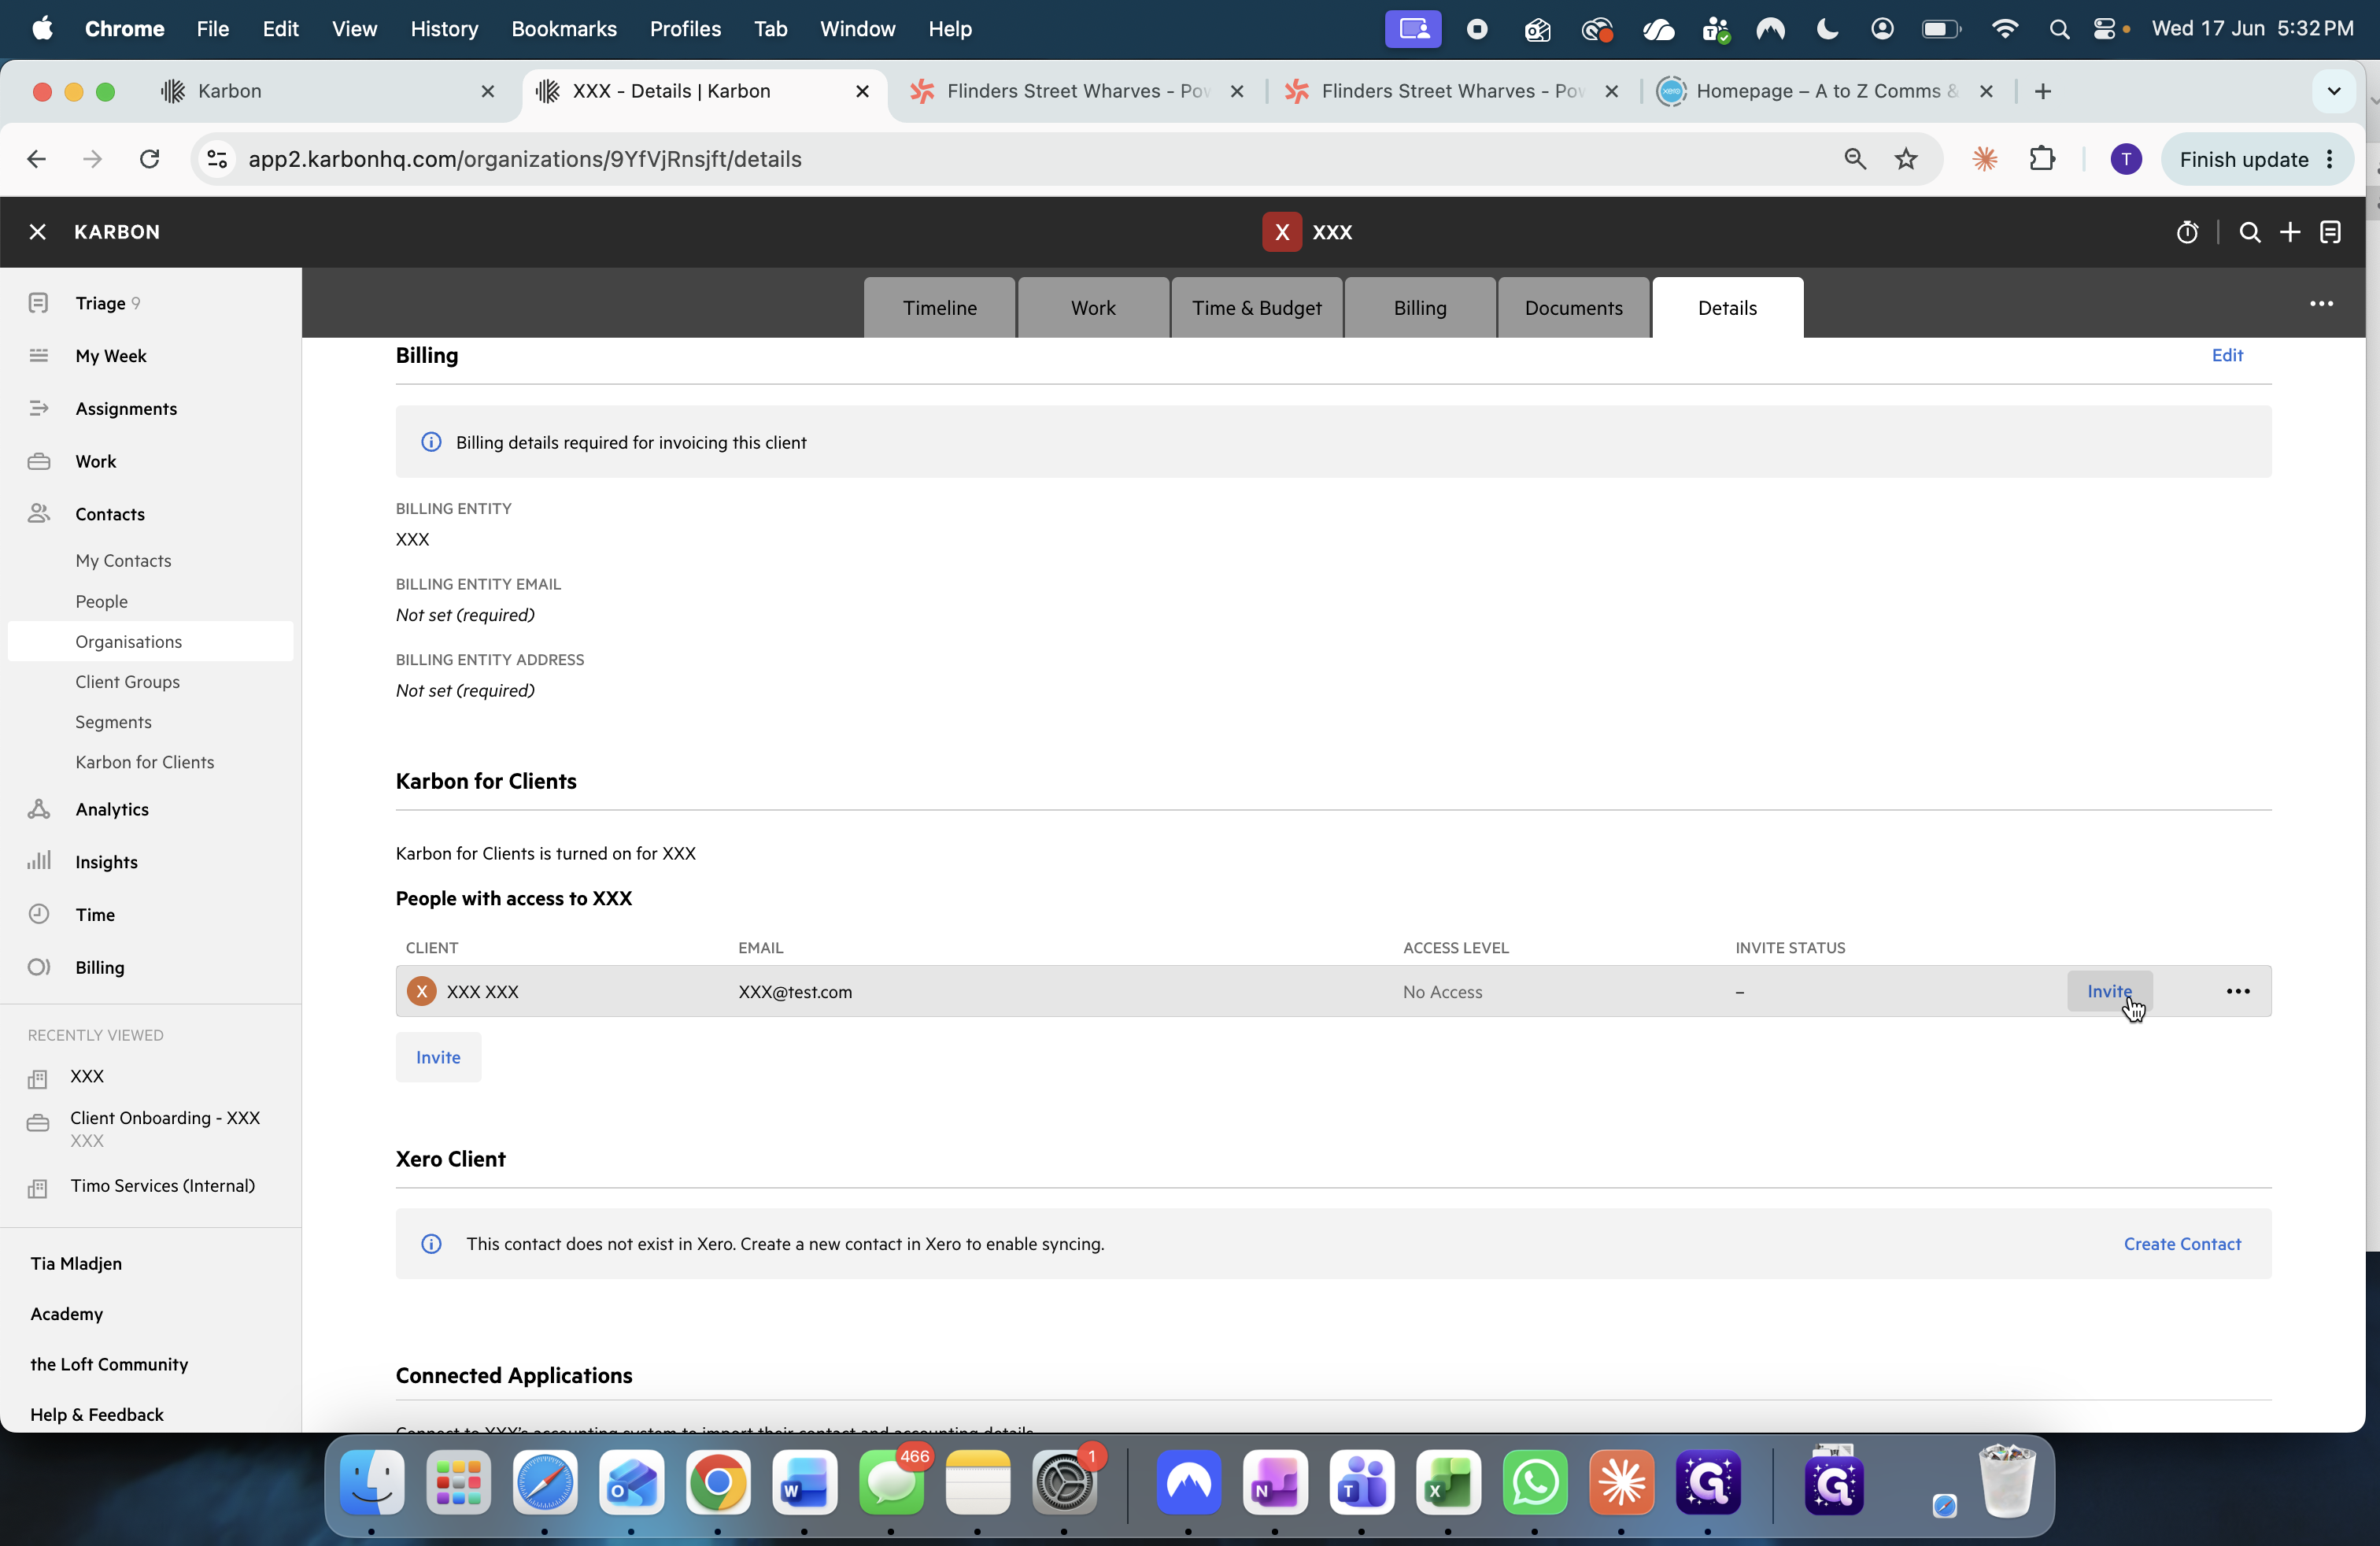
Navigate to the Details tab on their profile.
21
Scroll down to the Karbon for Clients section and click Invite next to the primary contact.
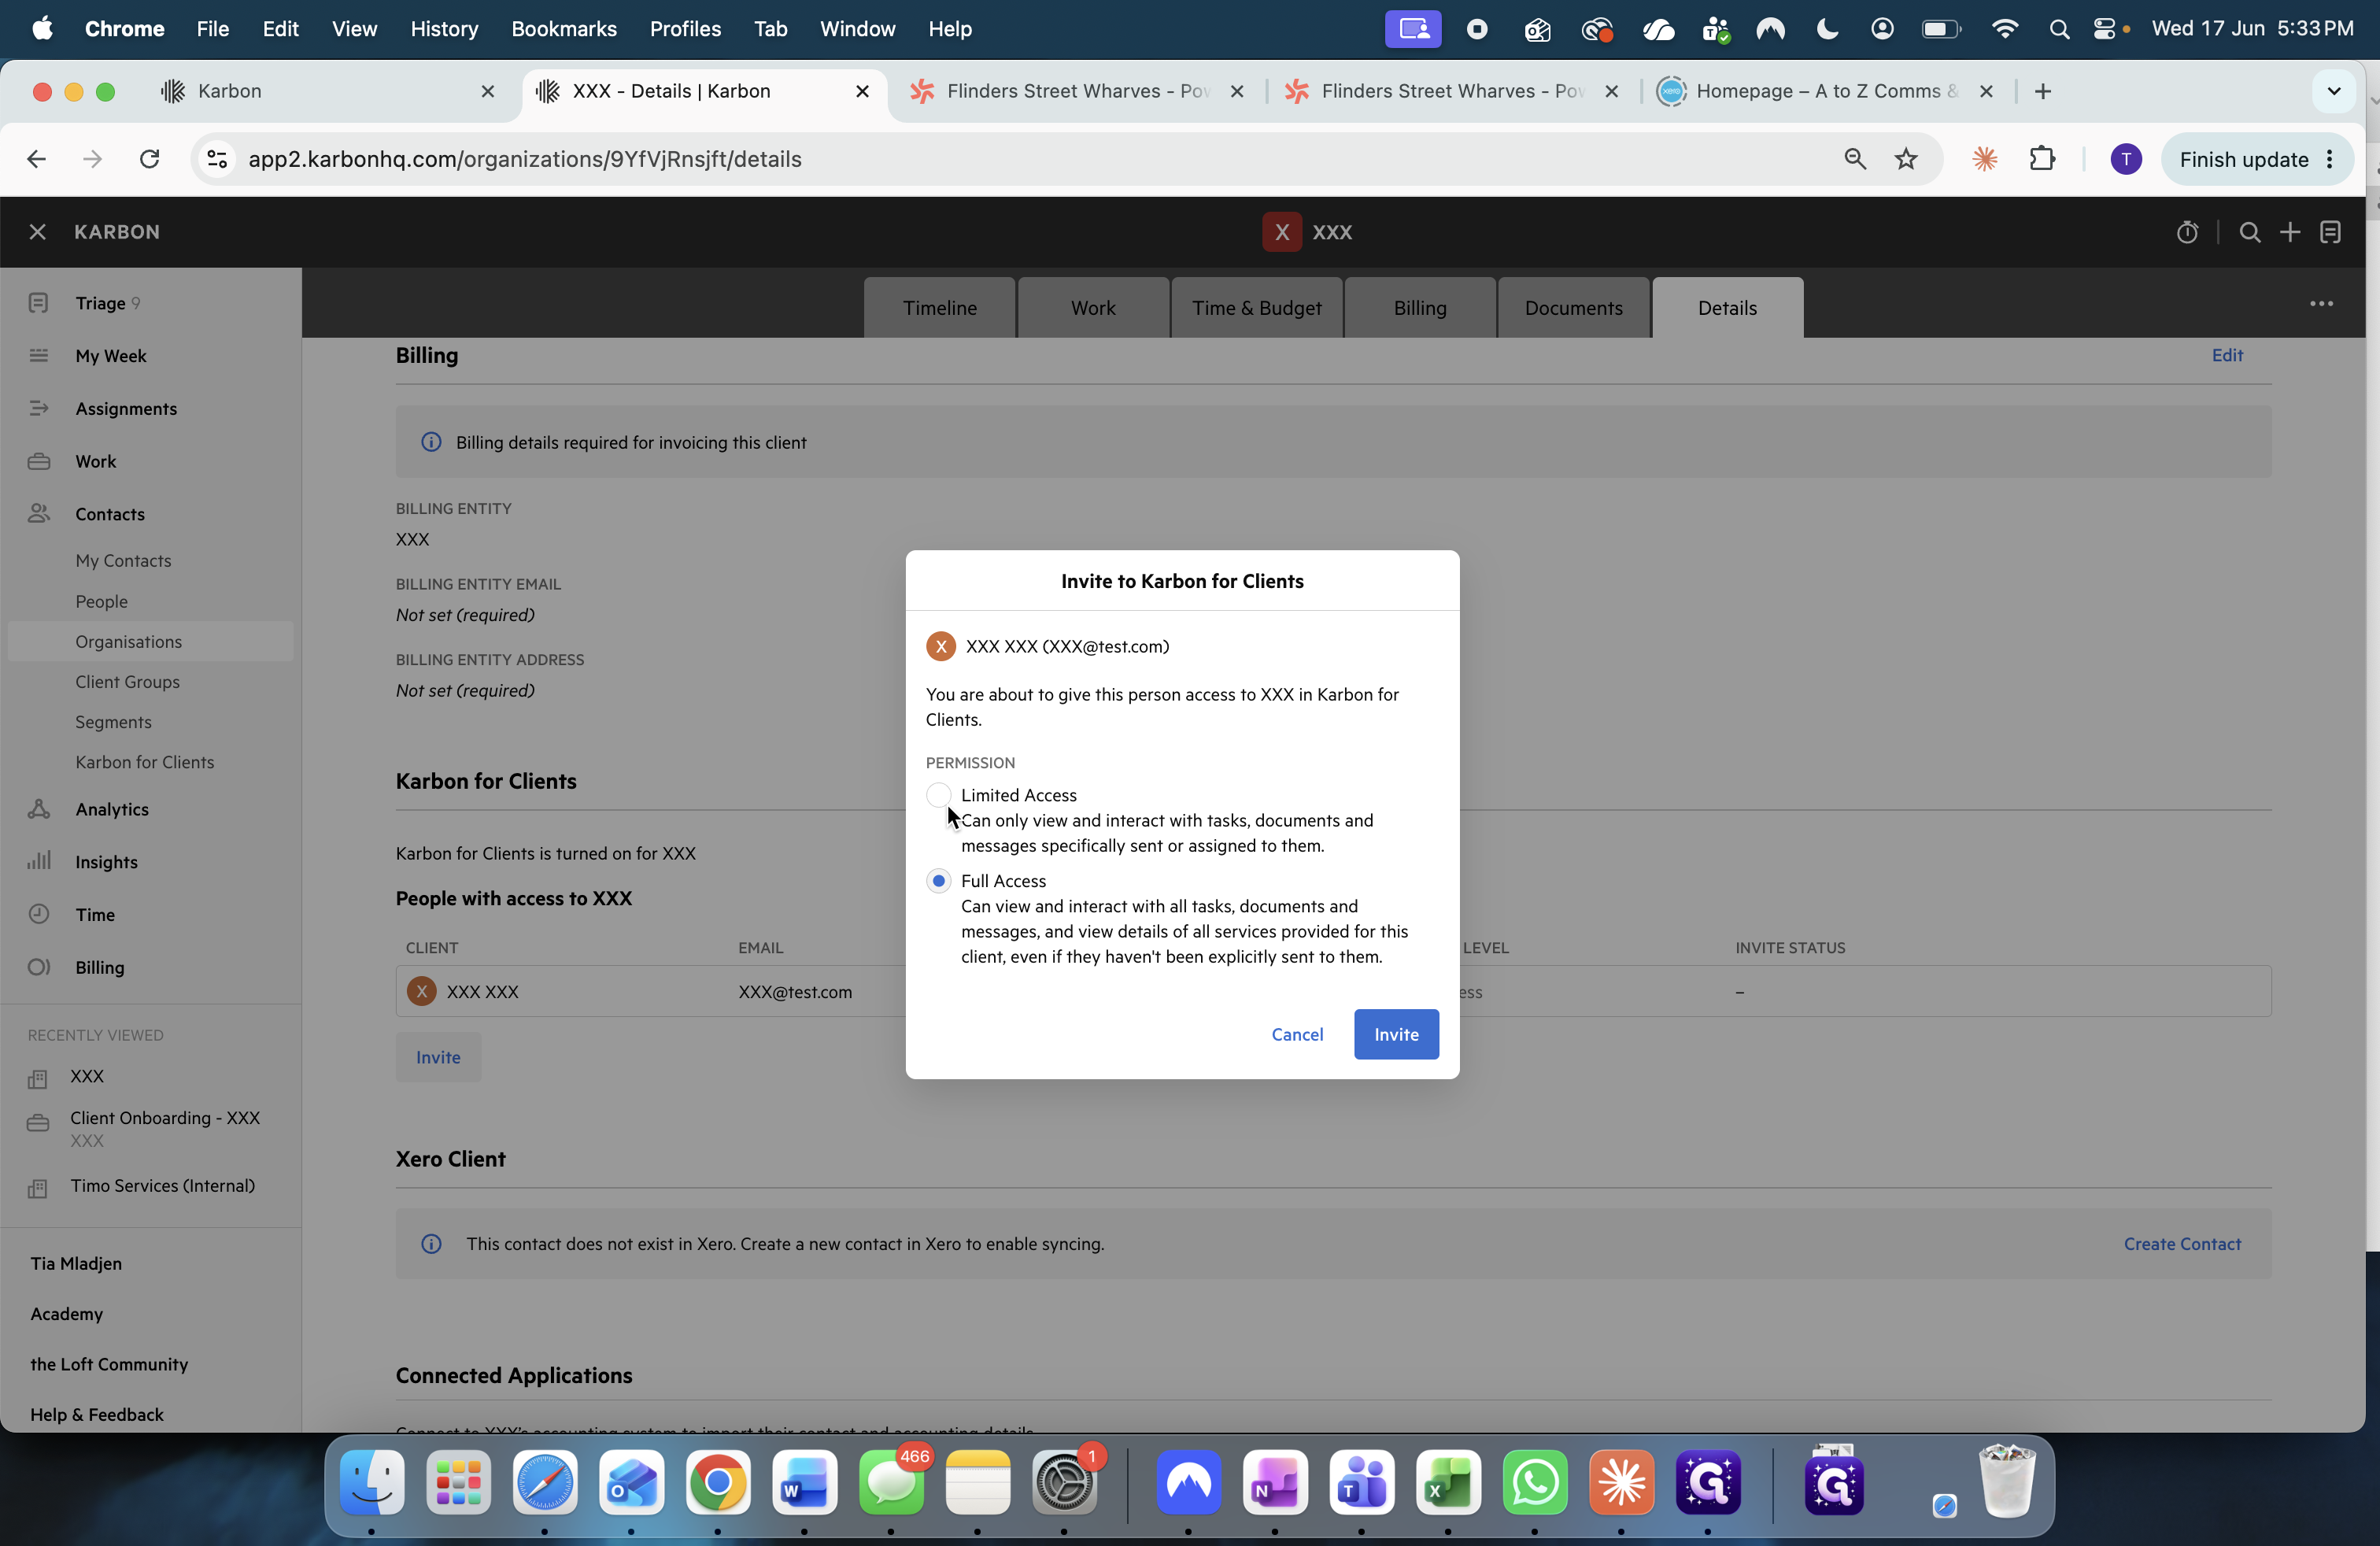
22
Select the appropriate permissions level (such as Limited Access) based on what the client needs to see.
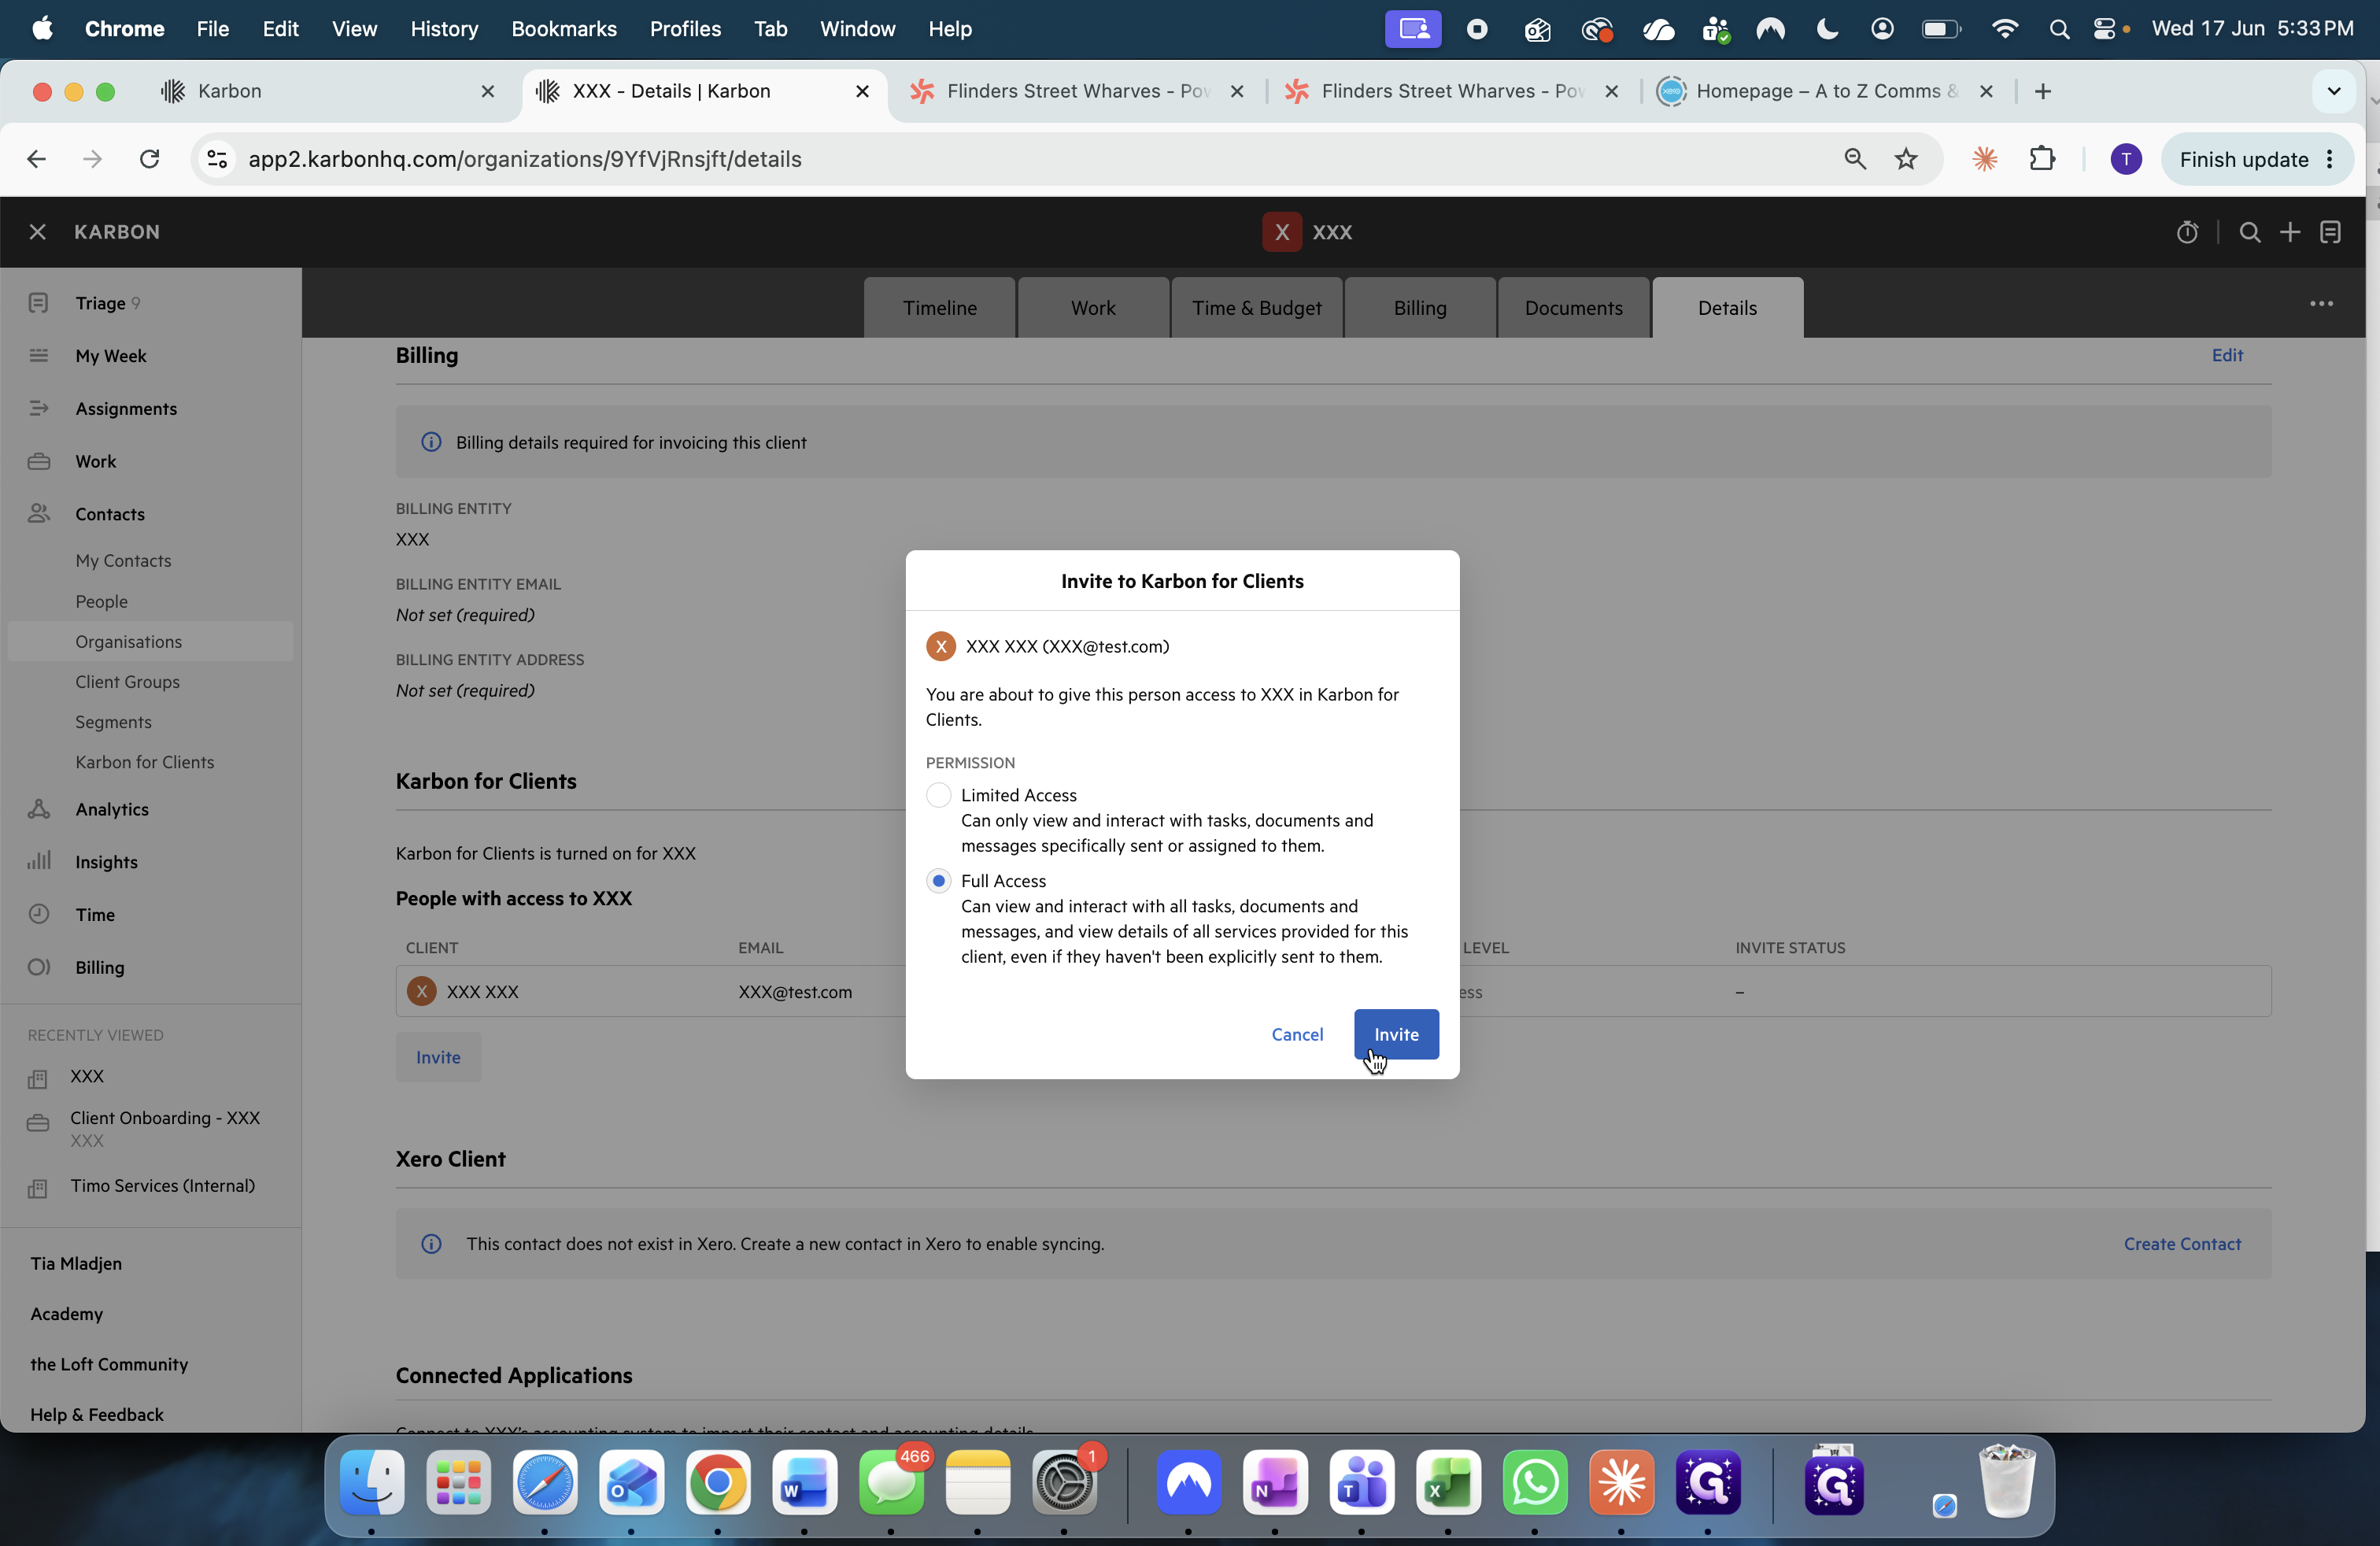
23
Click Invite to send the portal setup email.
Phase 4: Request Xero Access
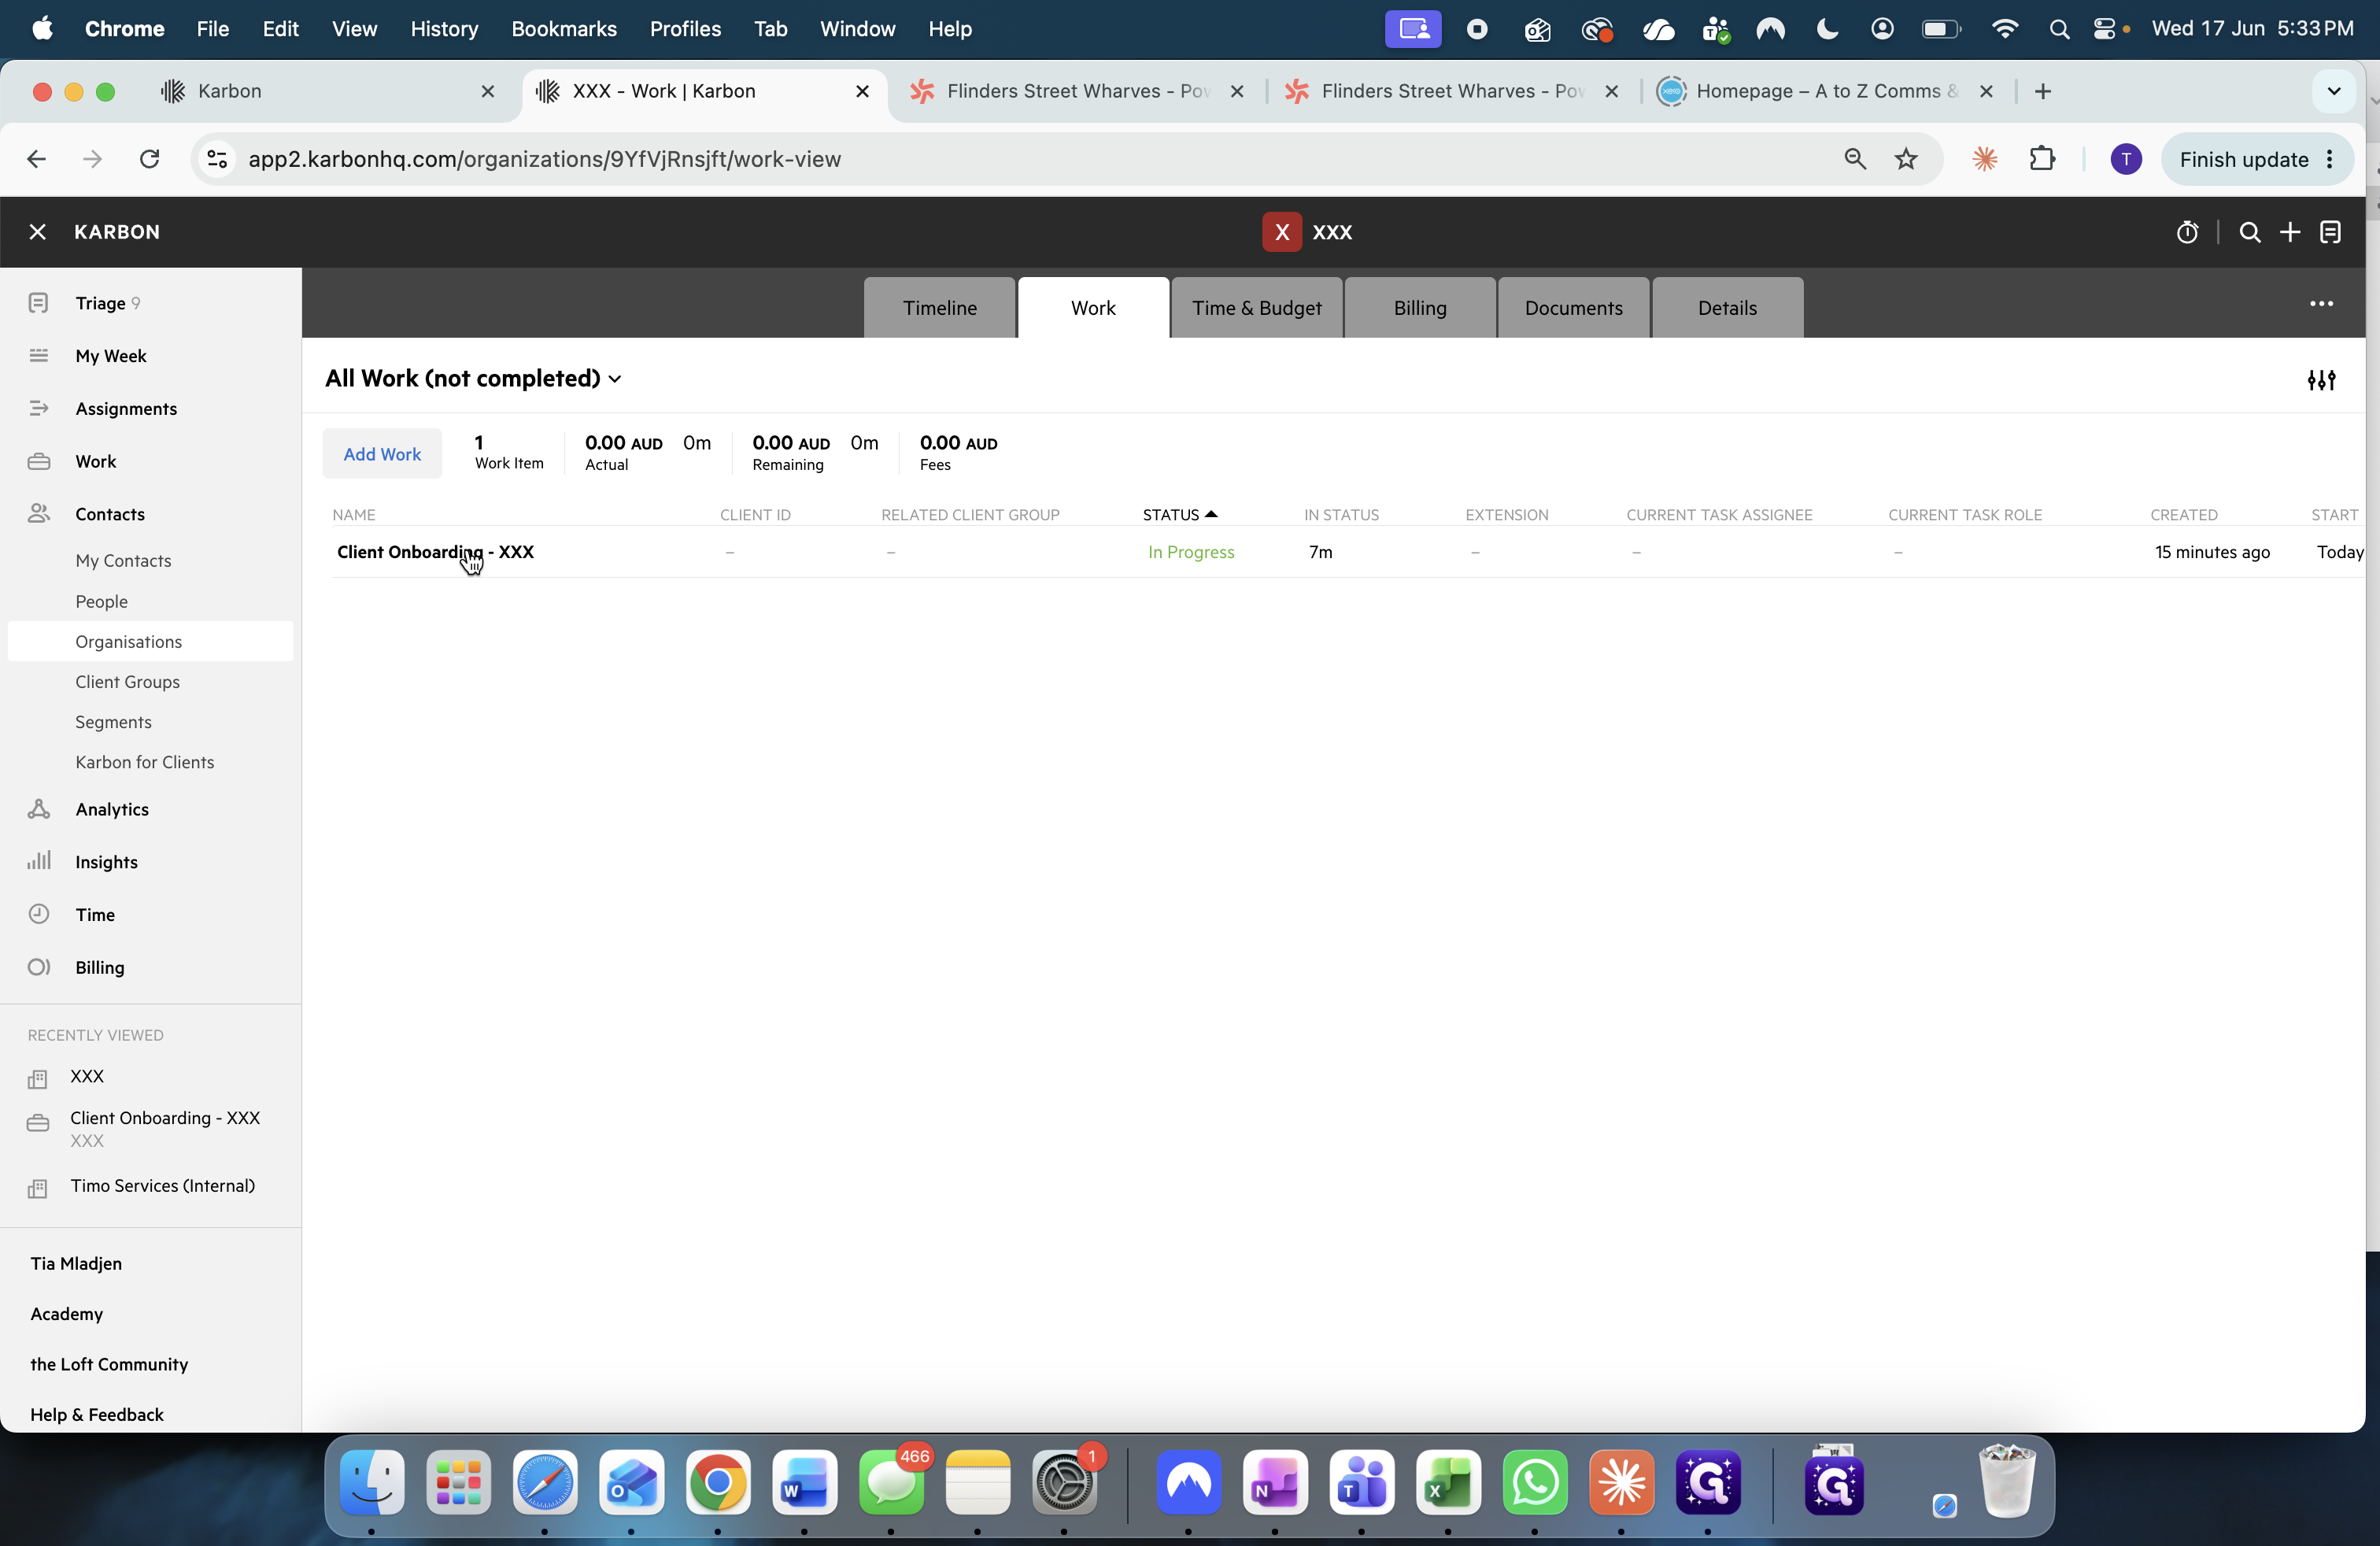
24
Return to the Work tab and click the Client Onboarding item.
25
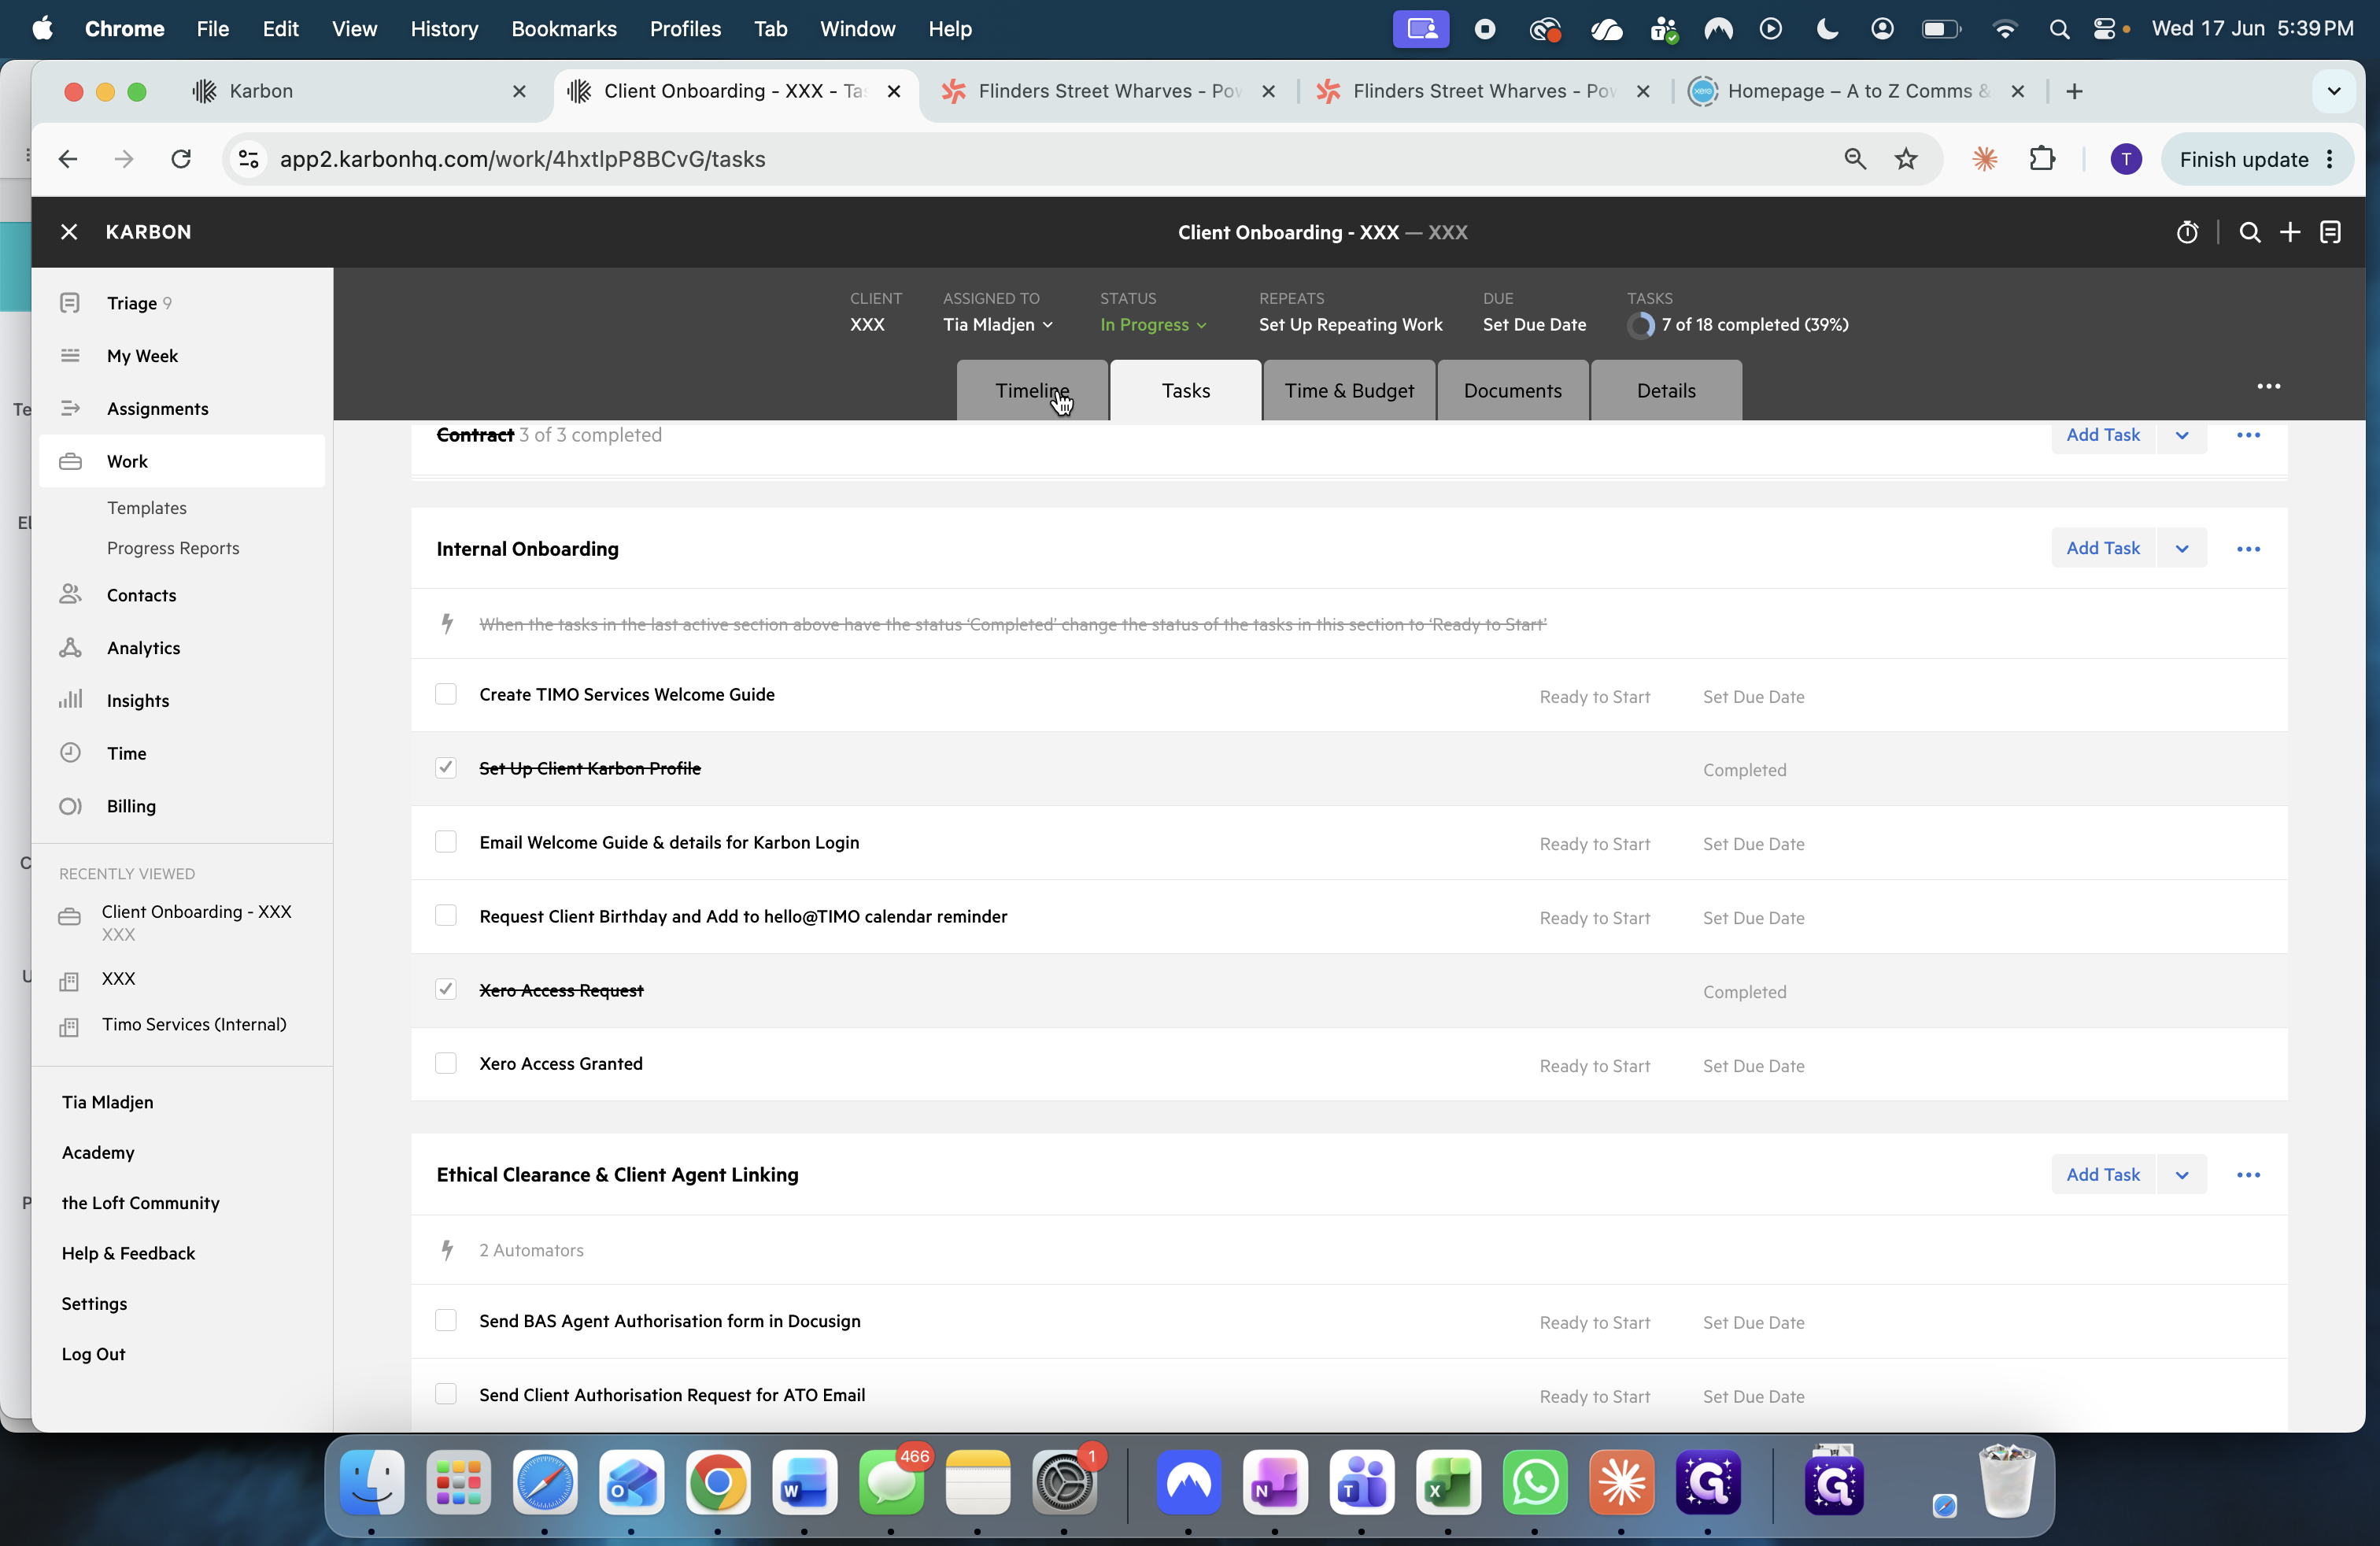
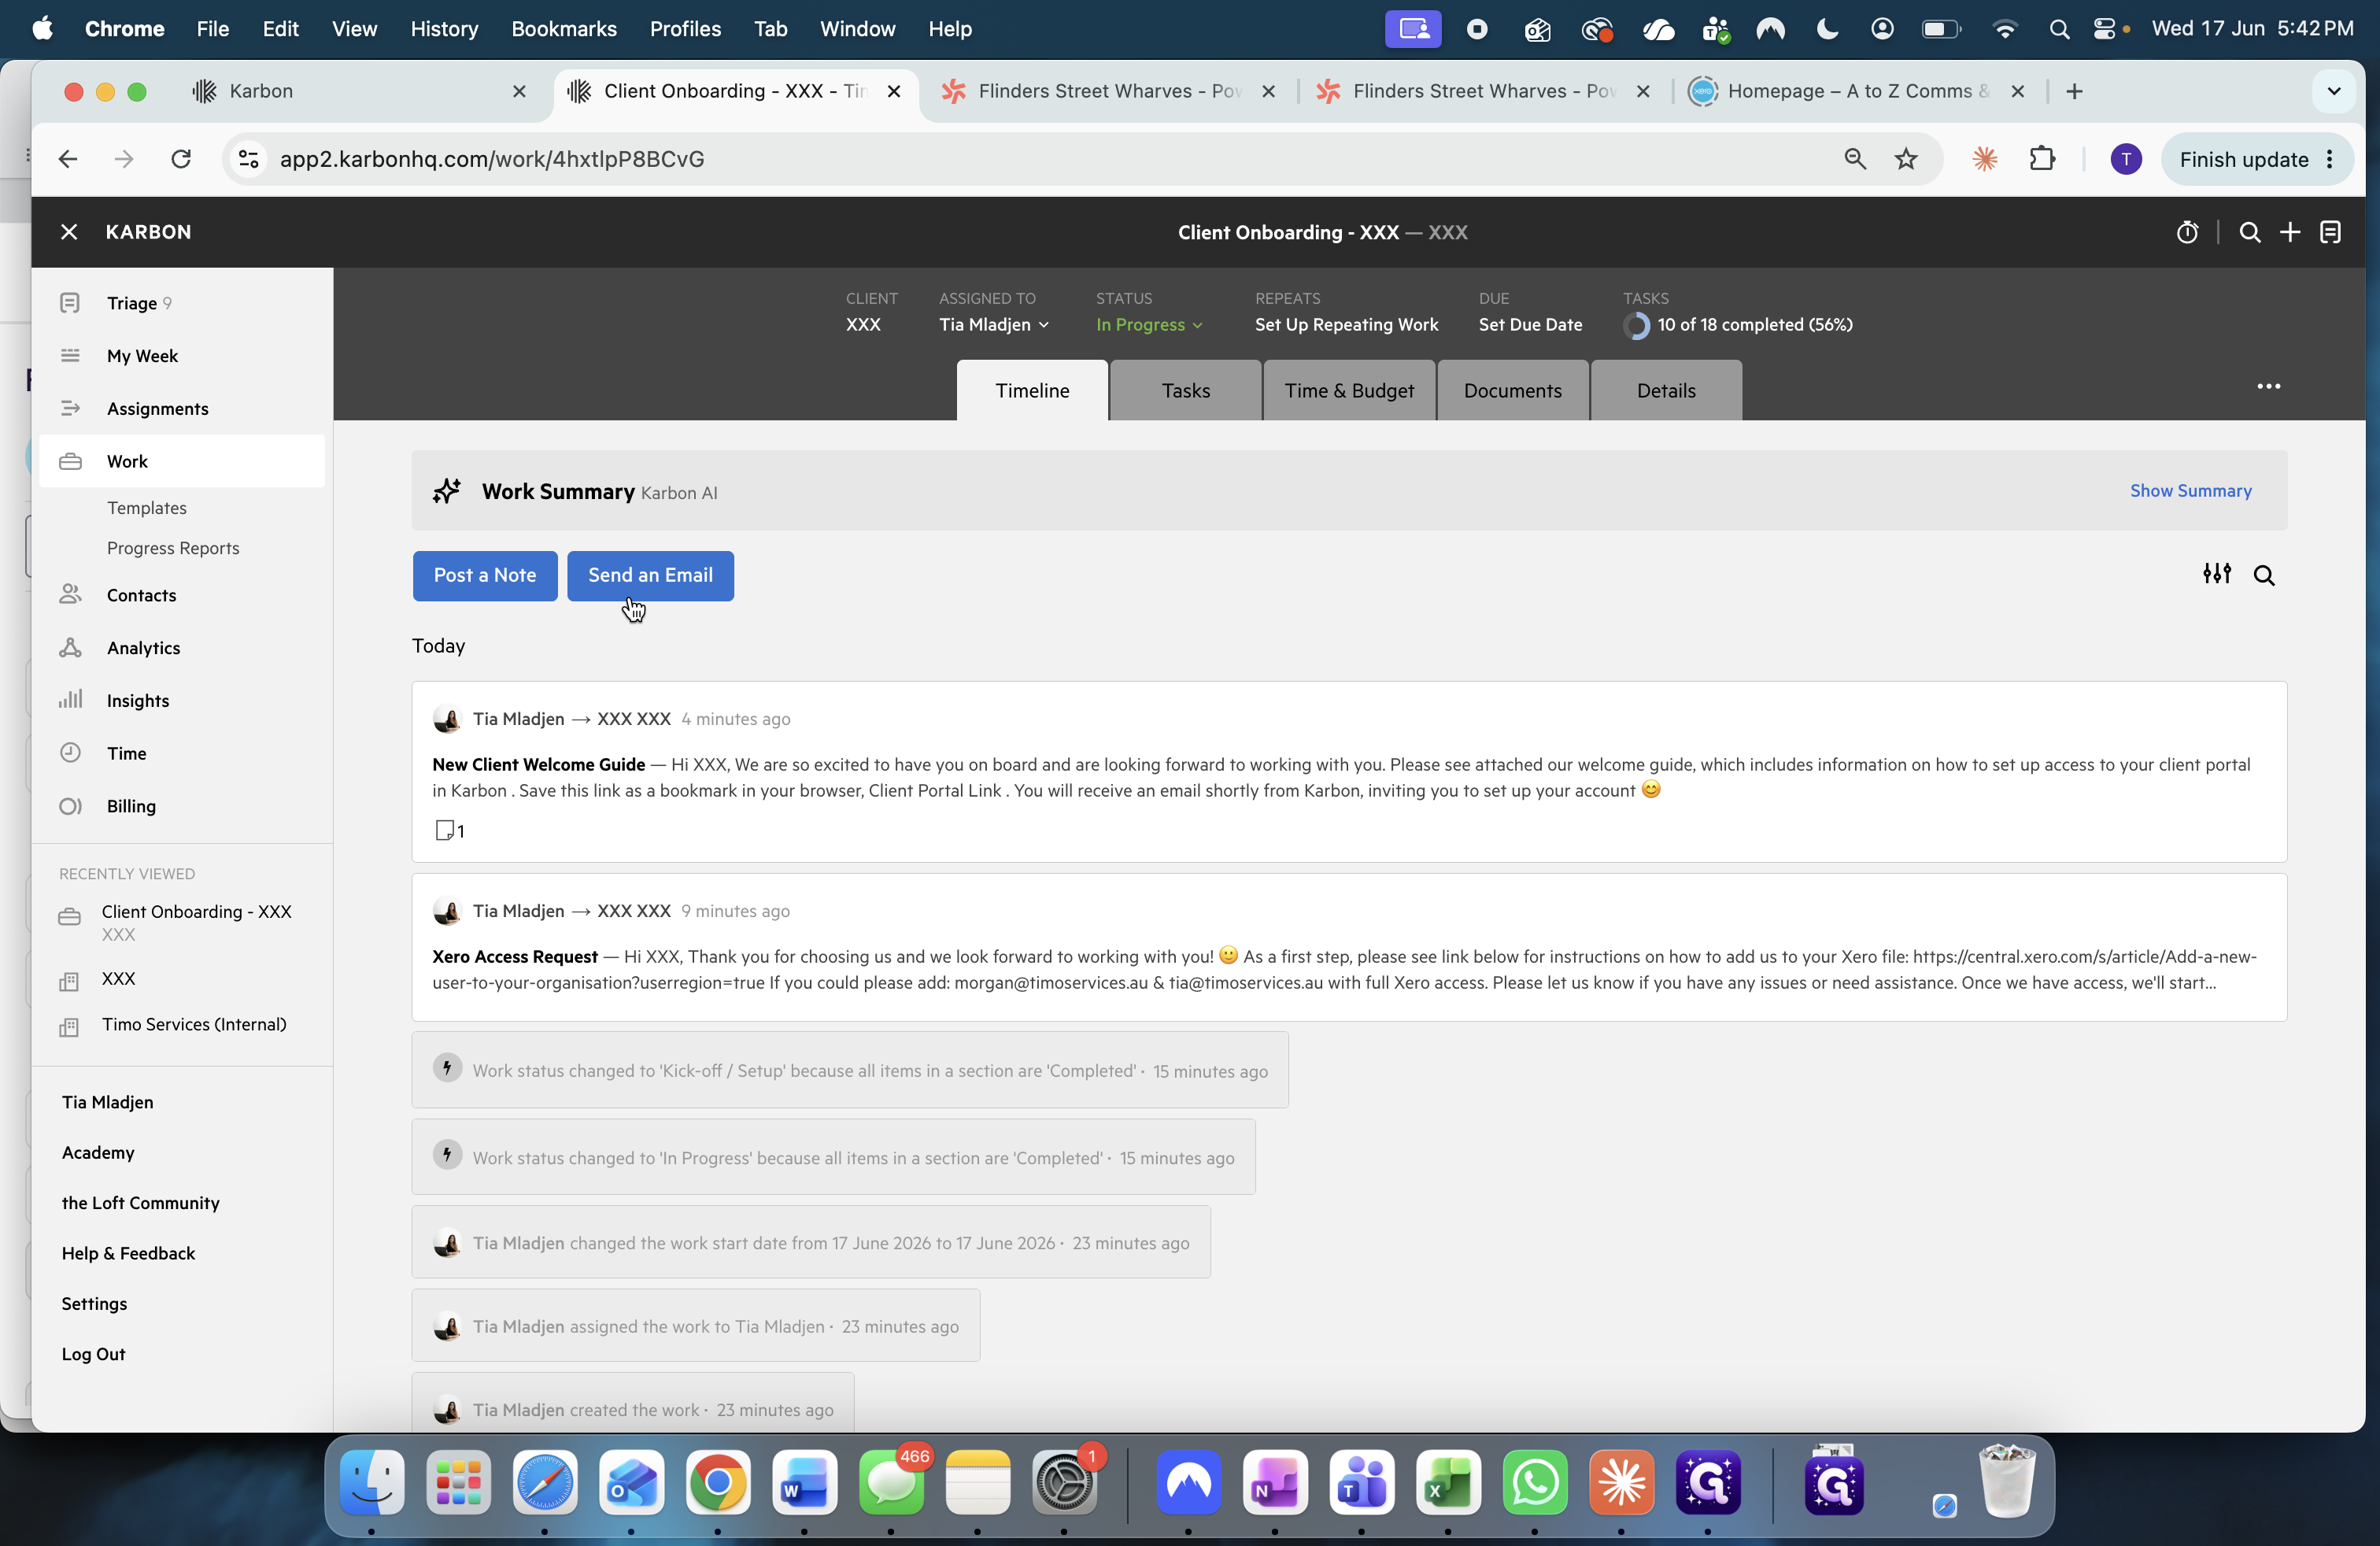
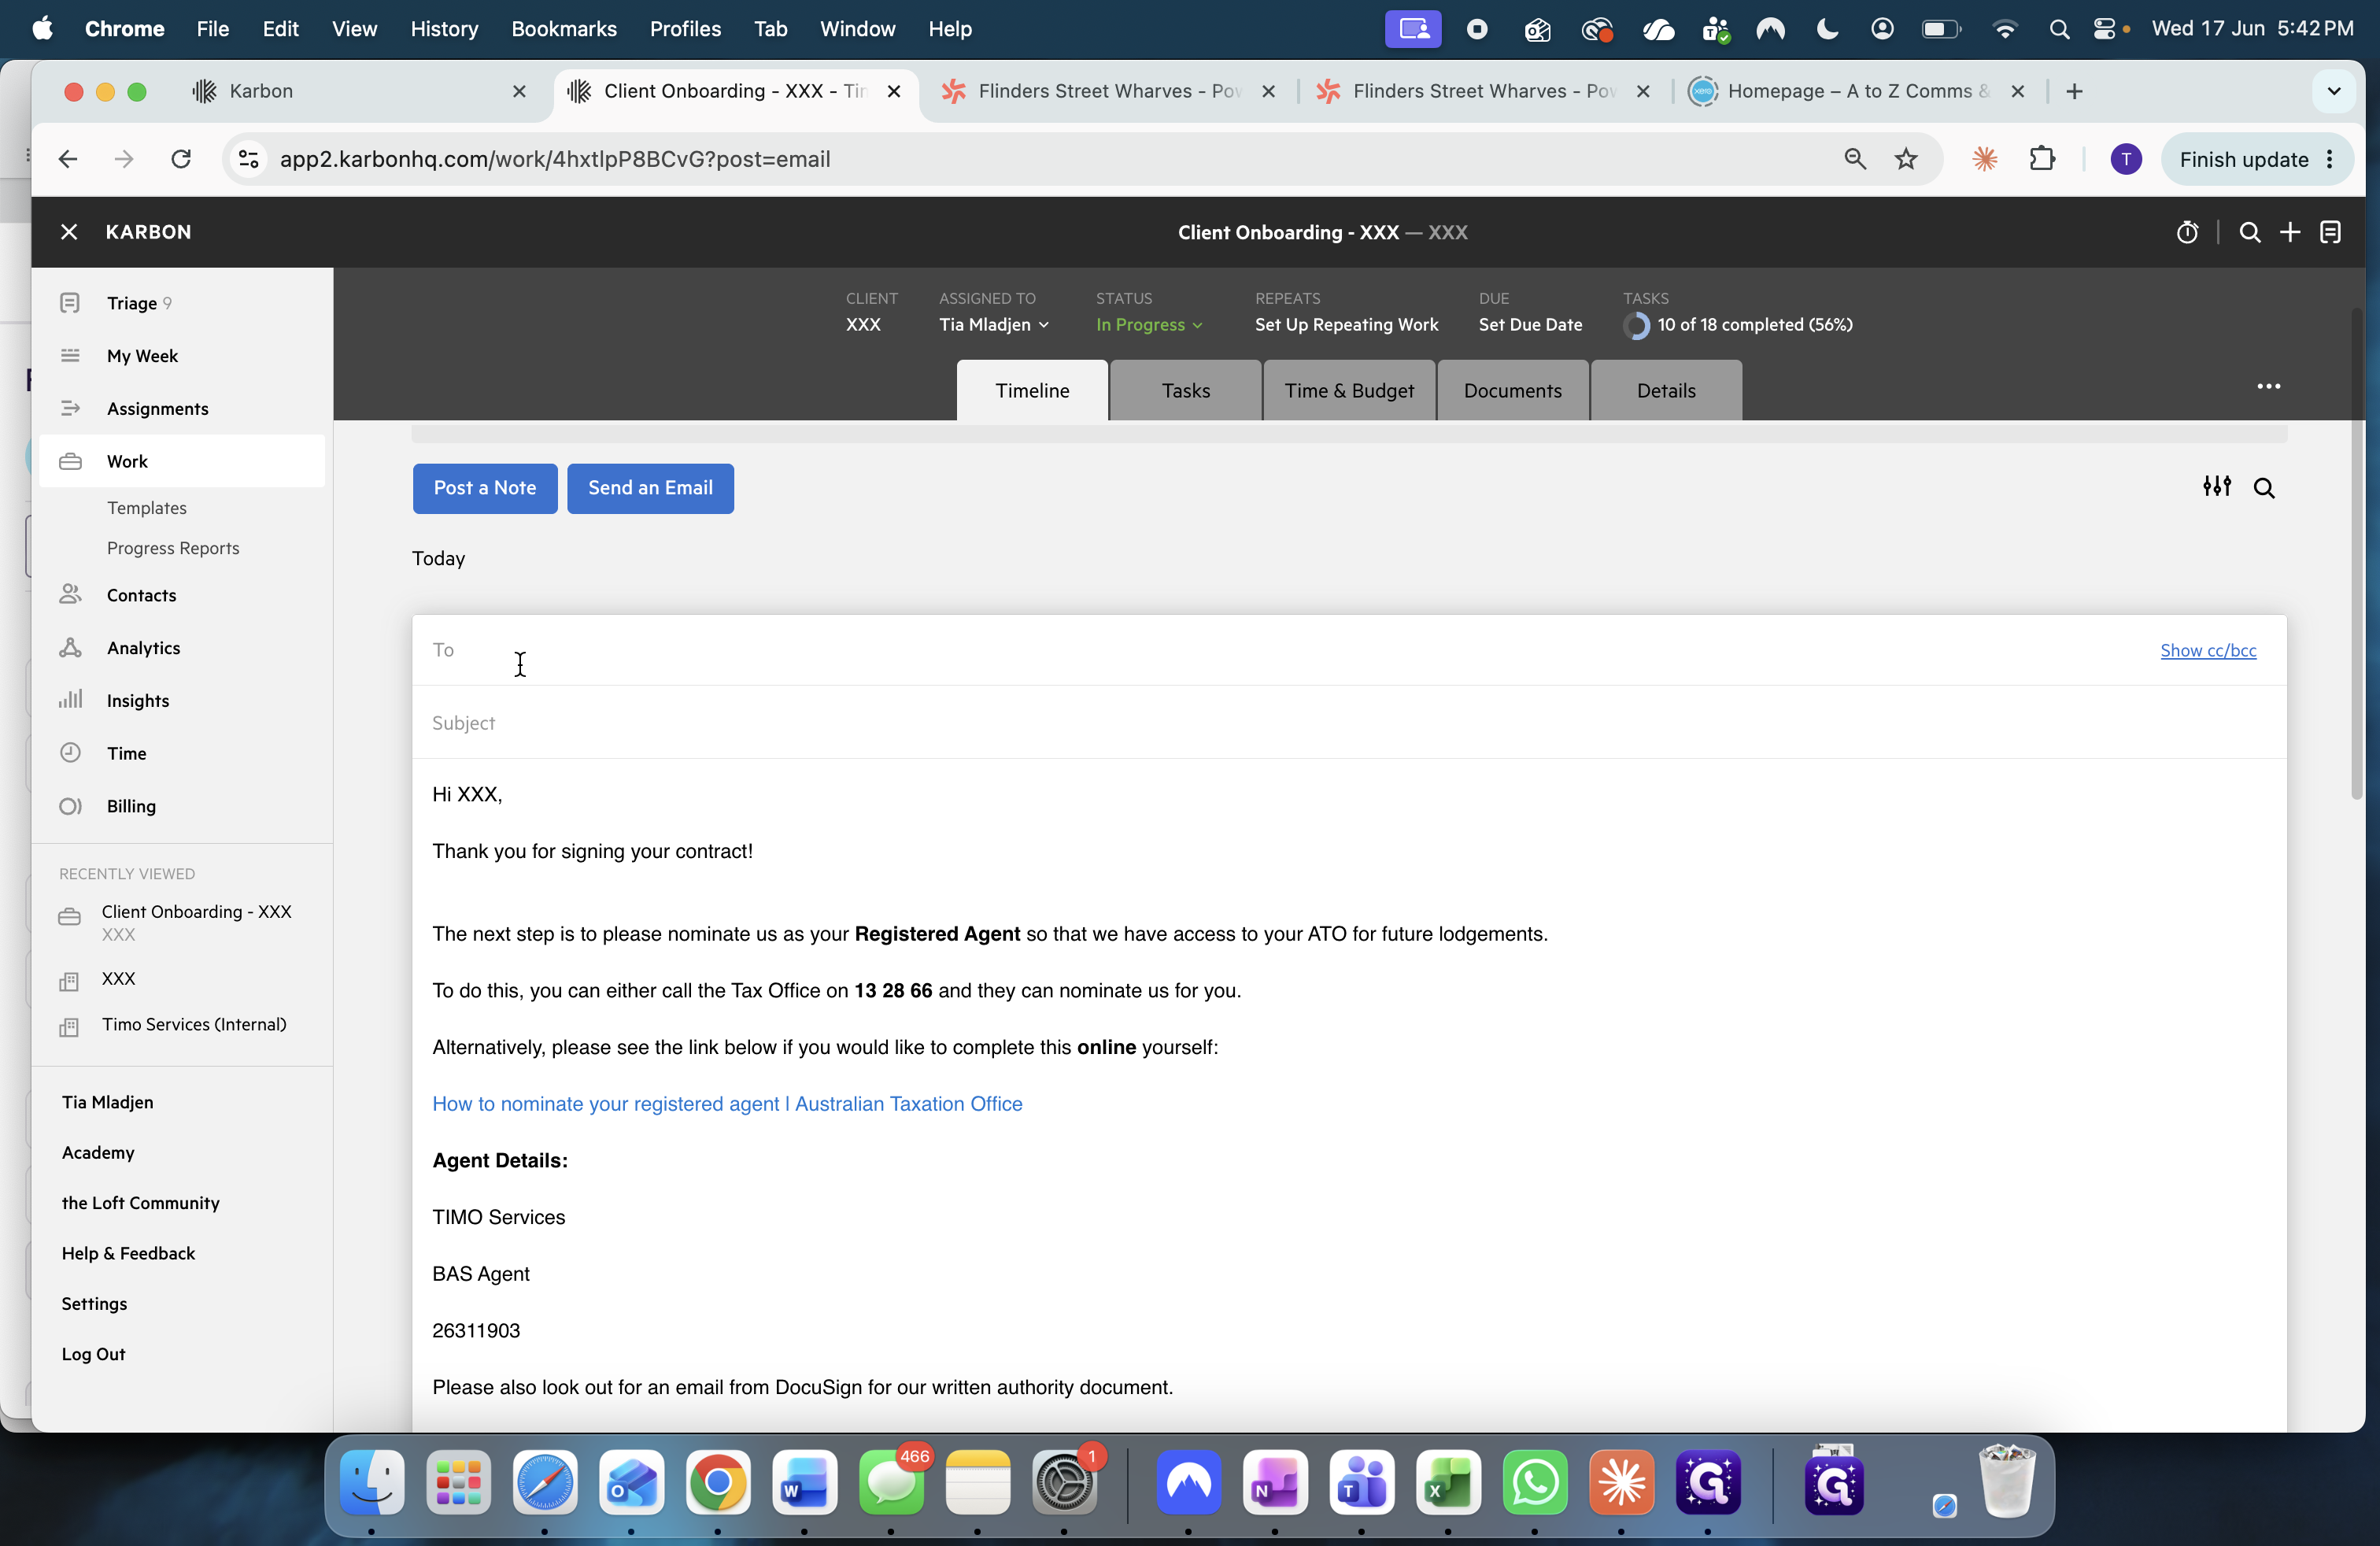
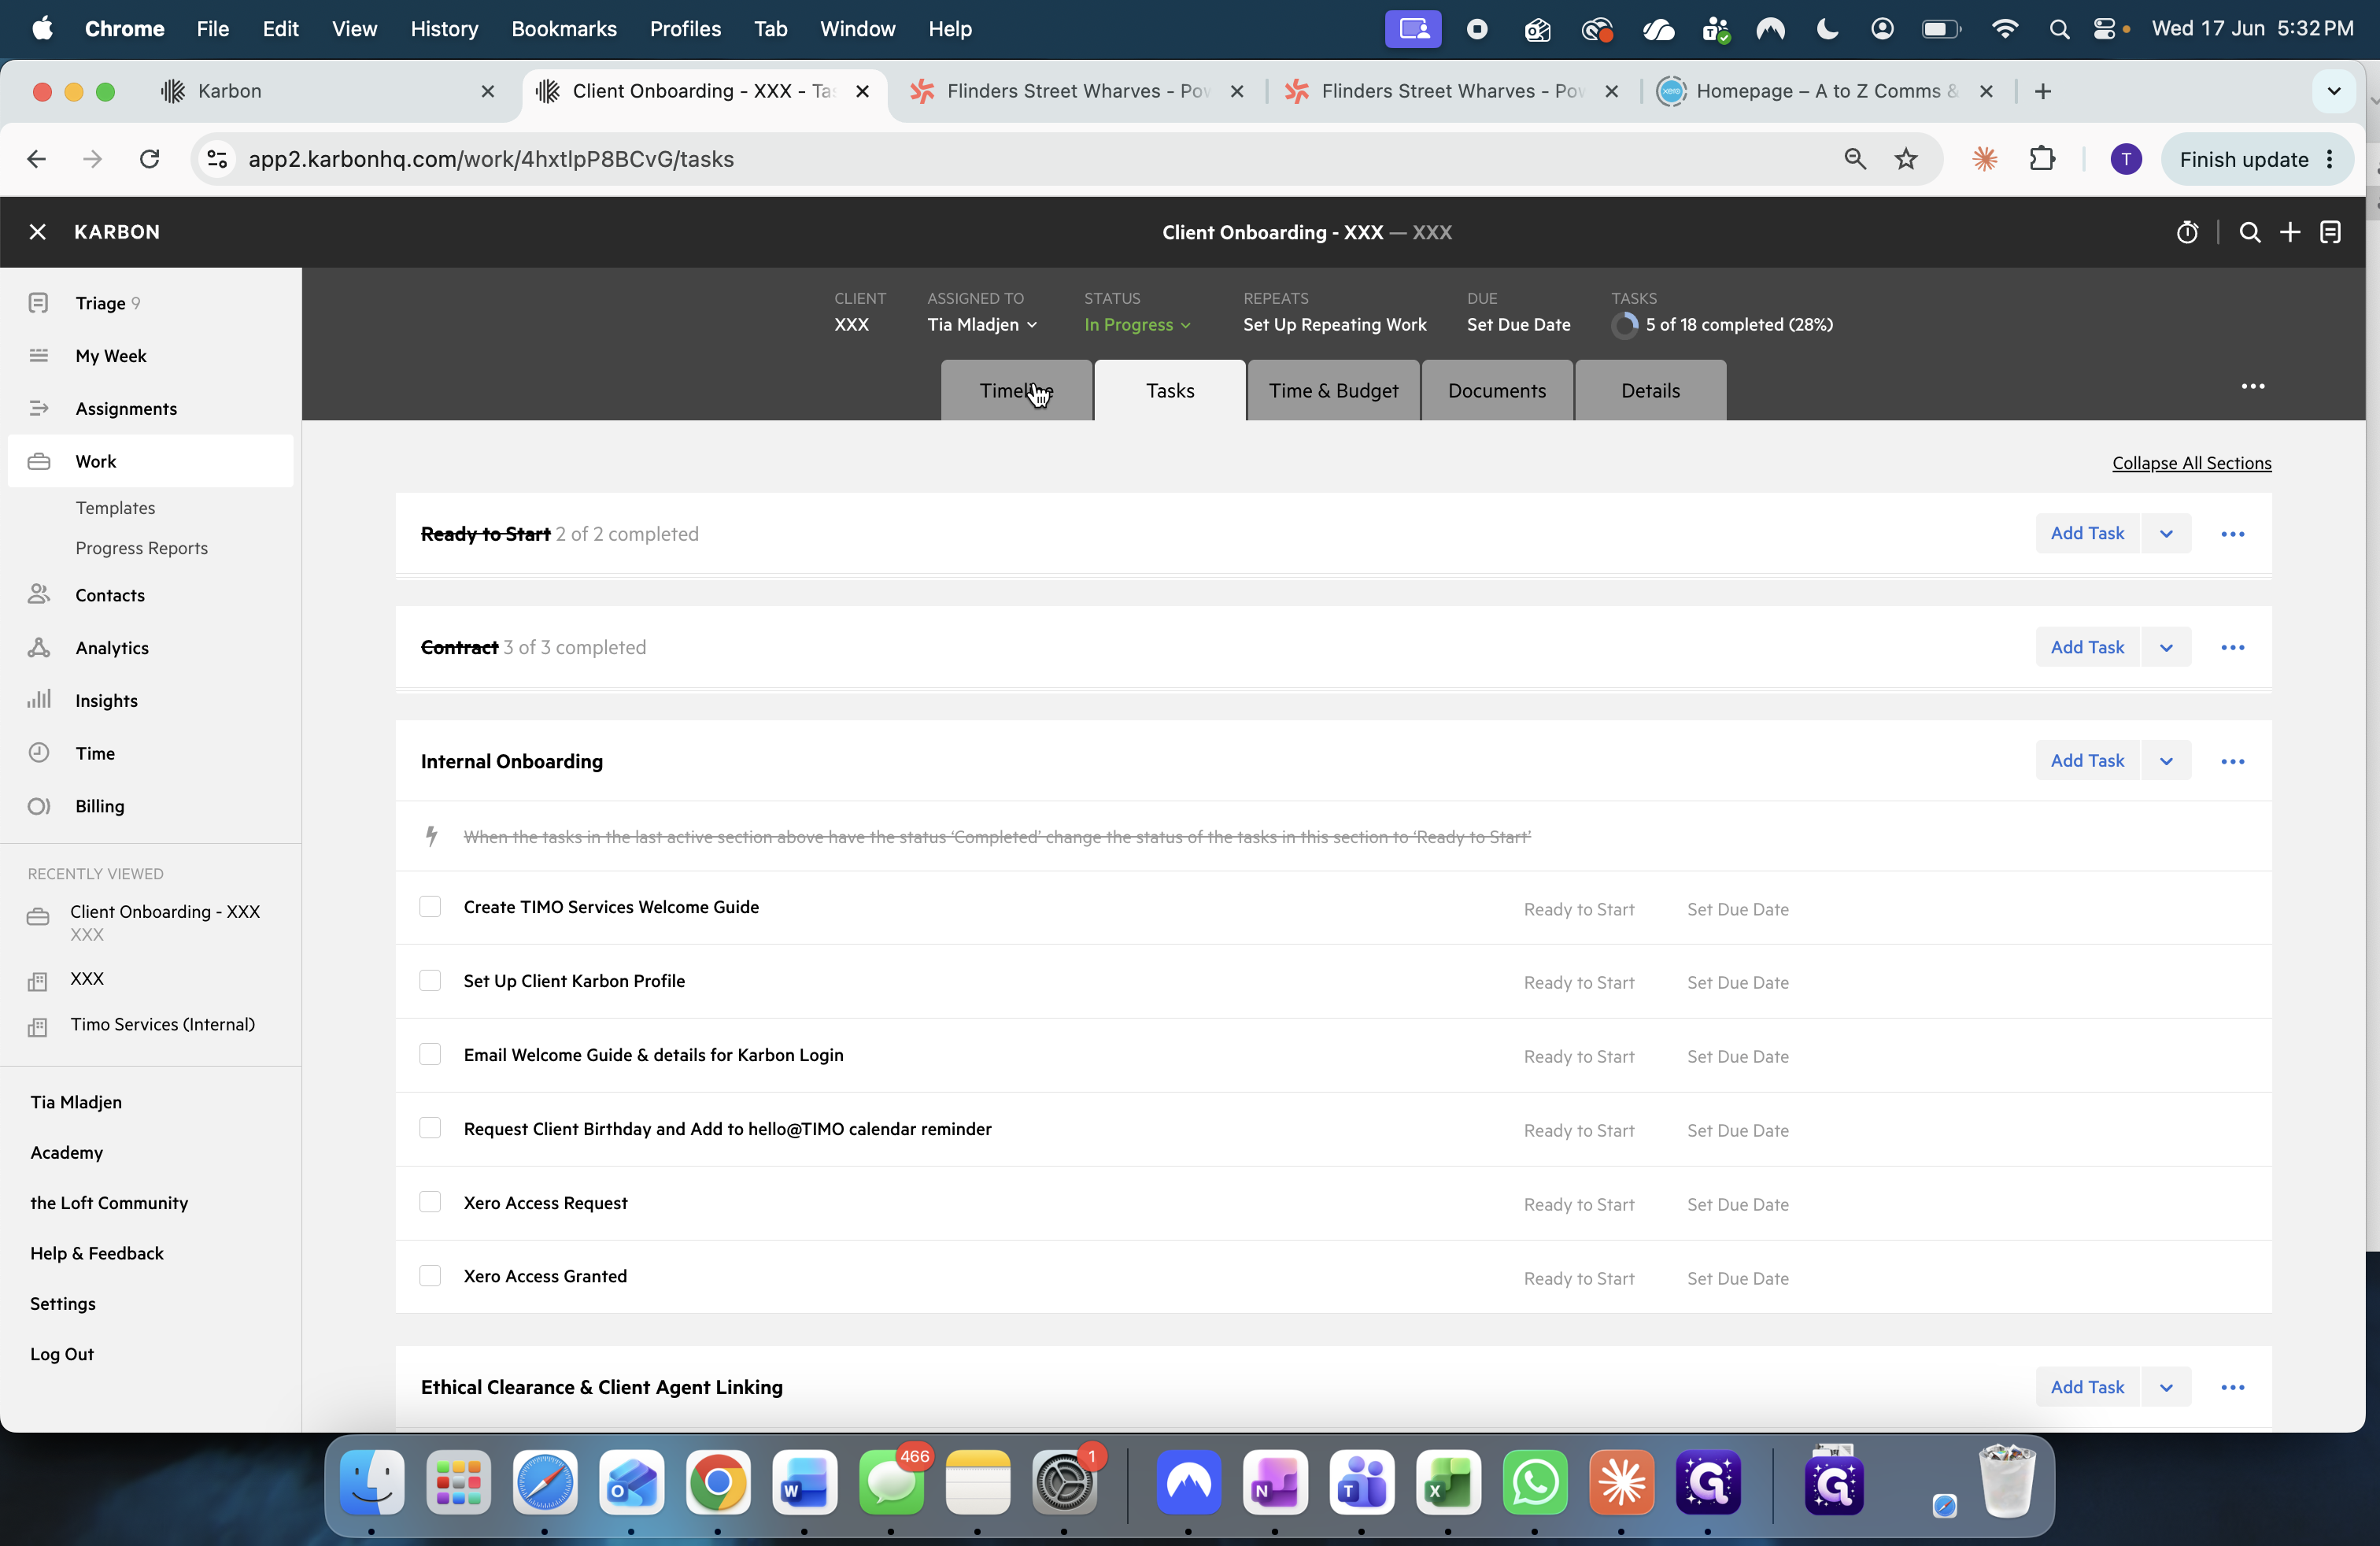
Click the Timeline tab.
26
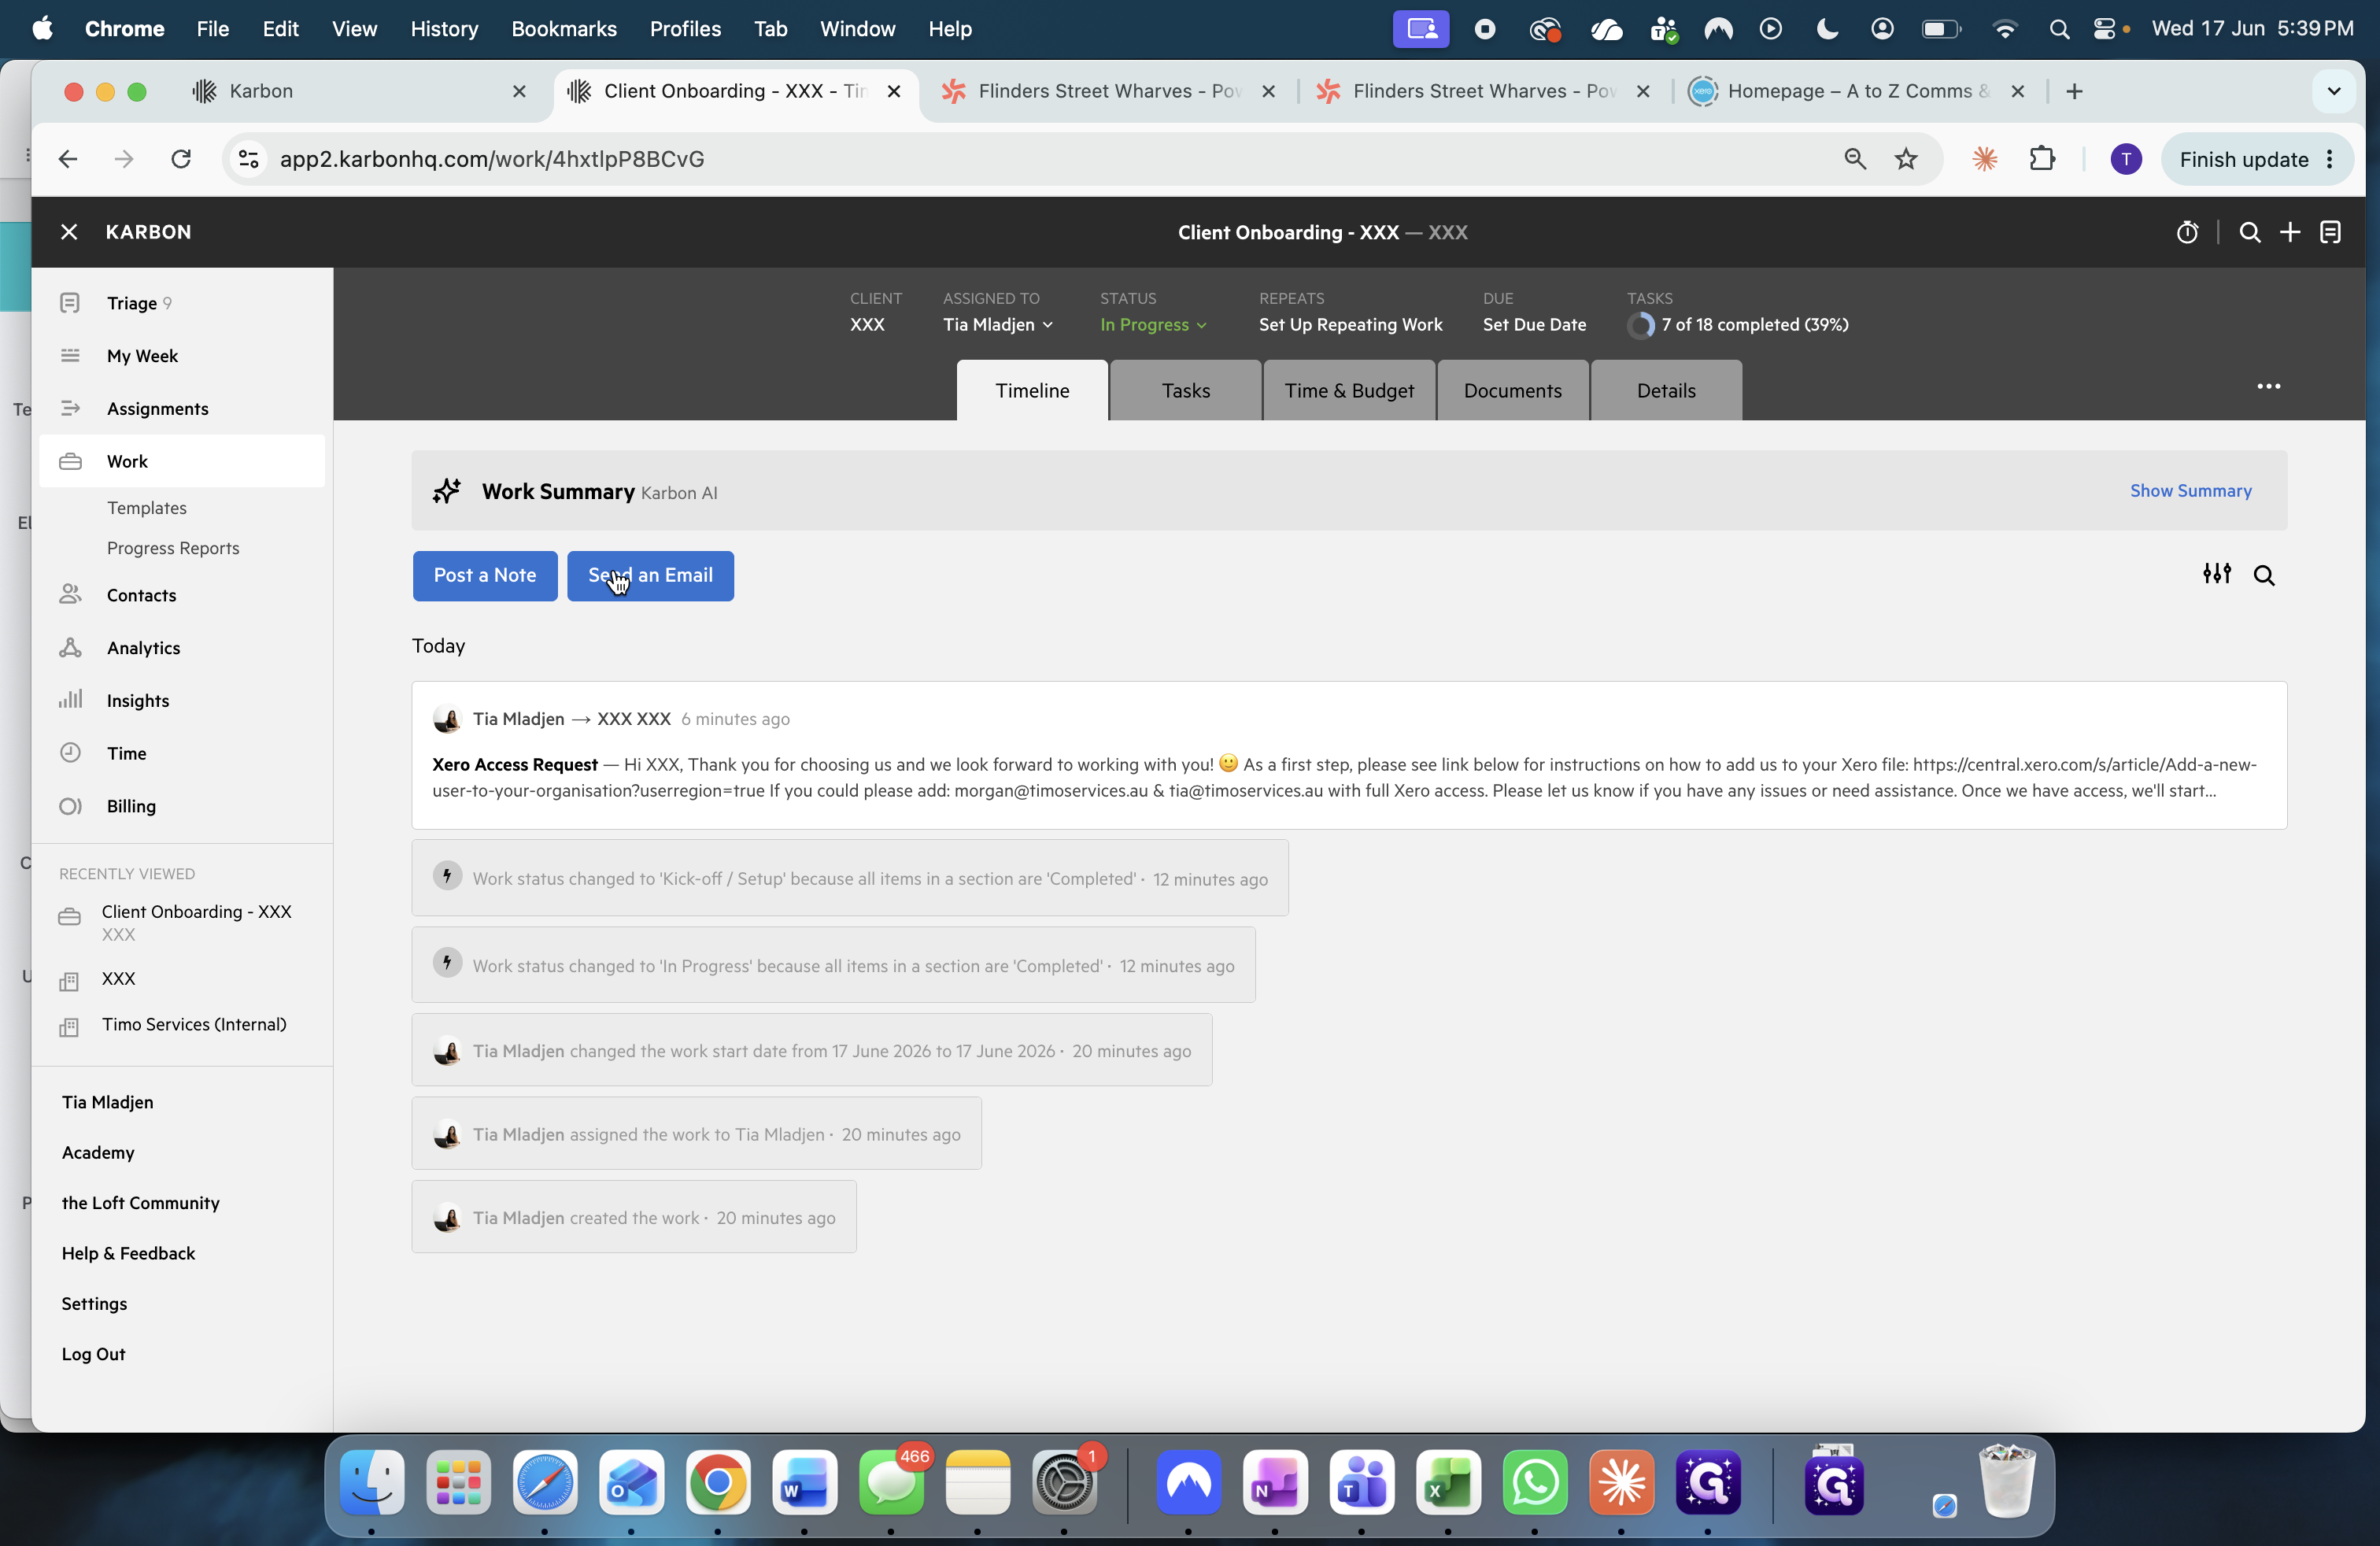
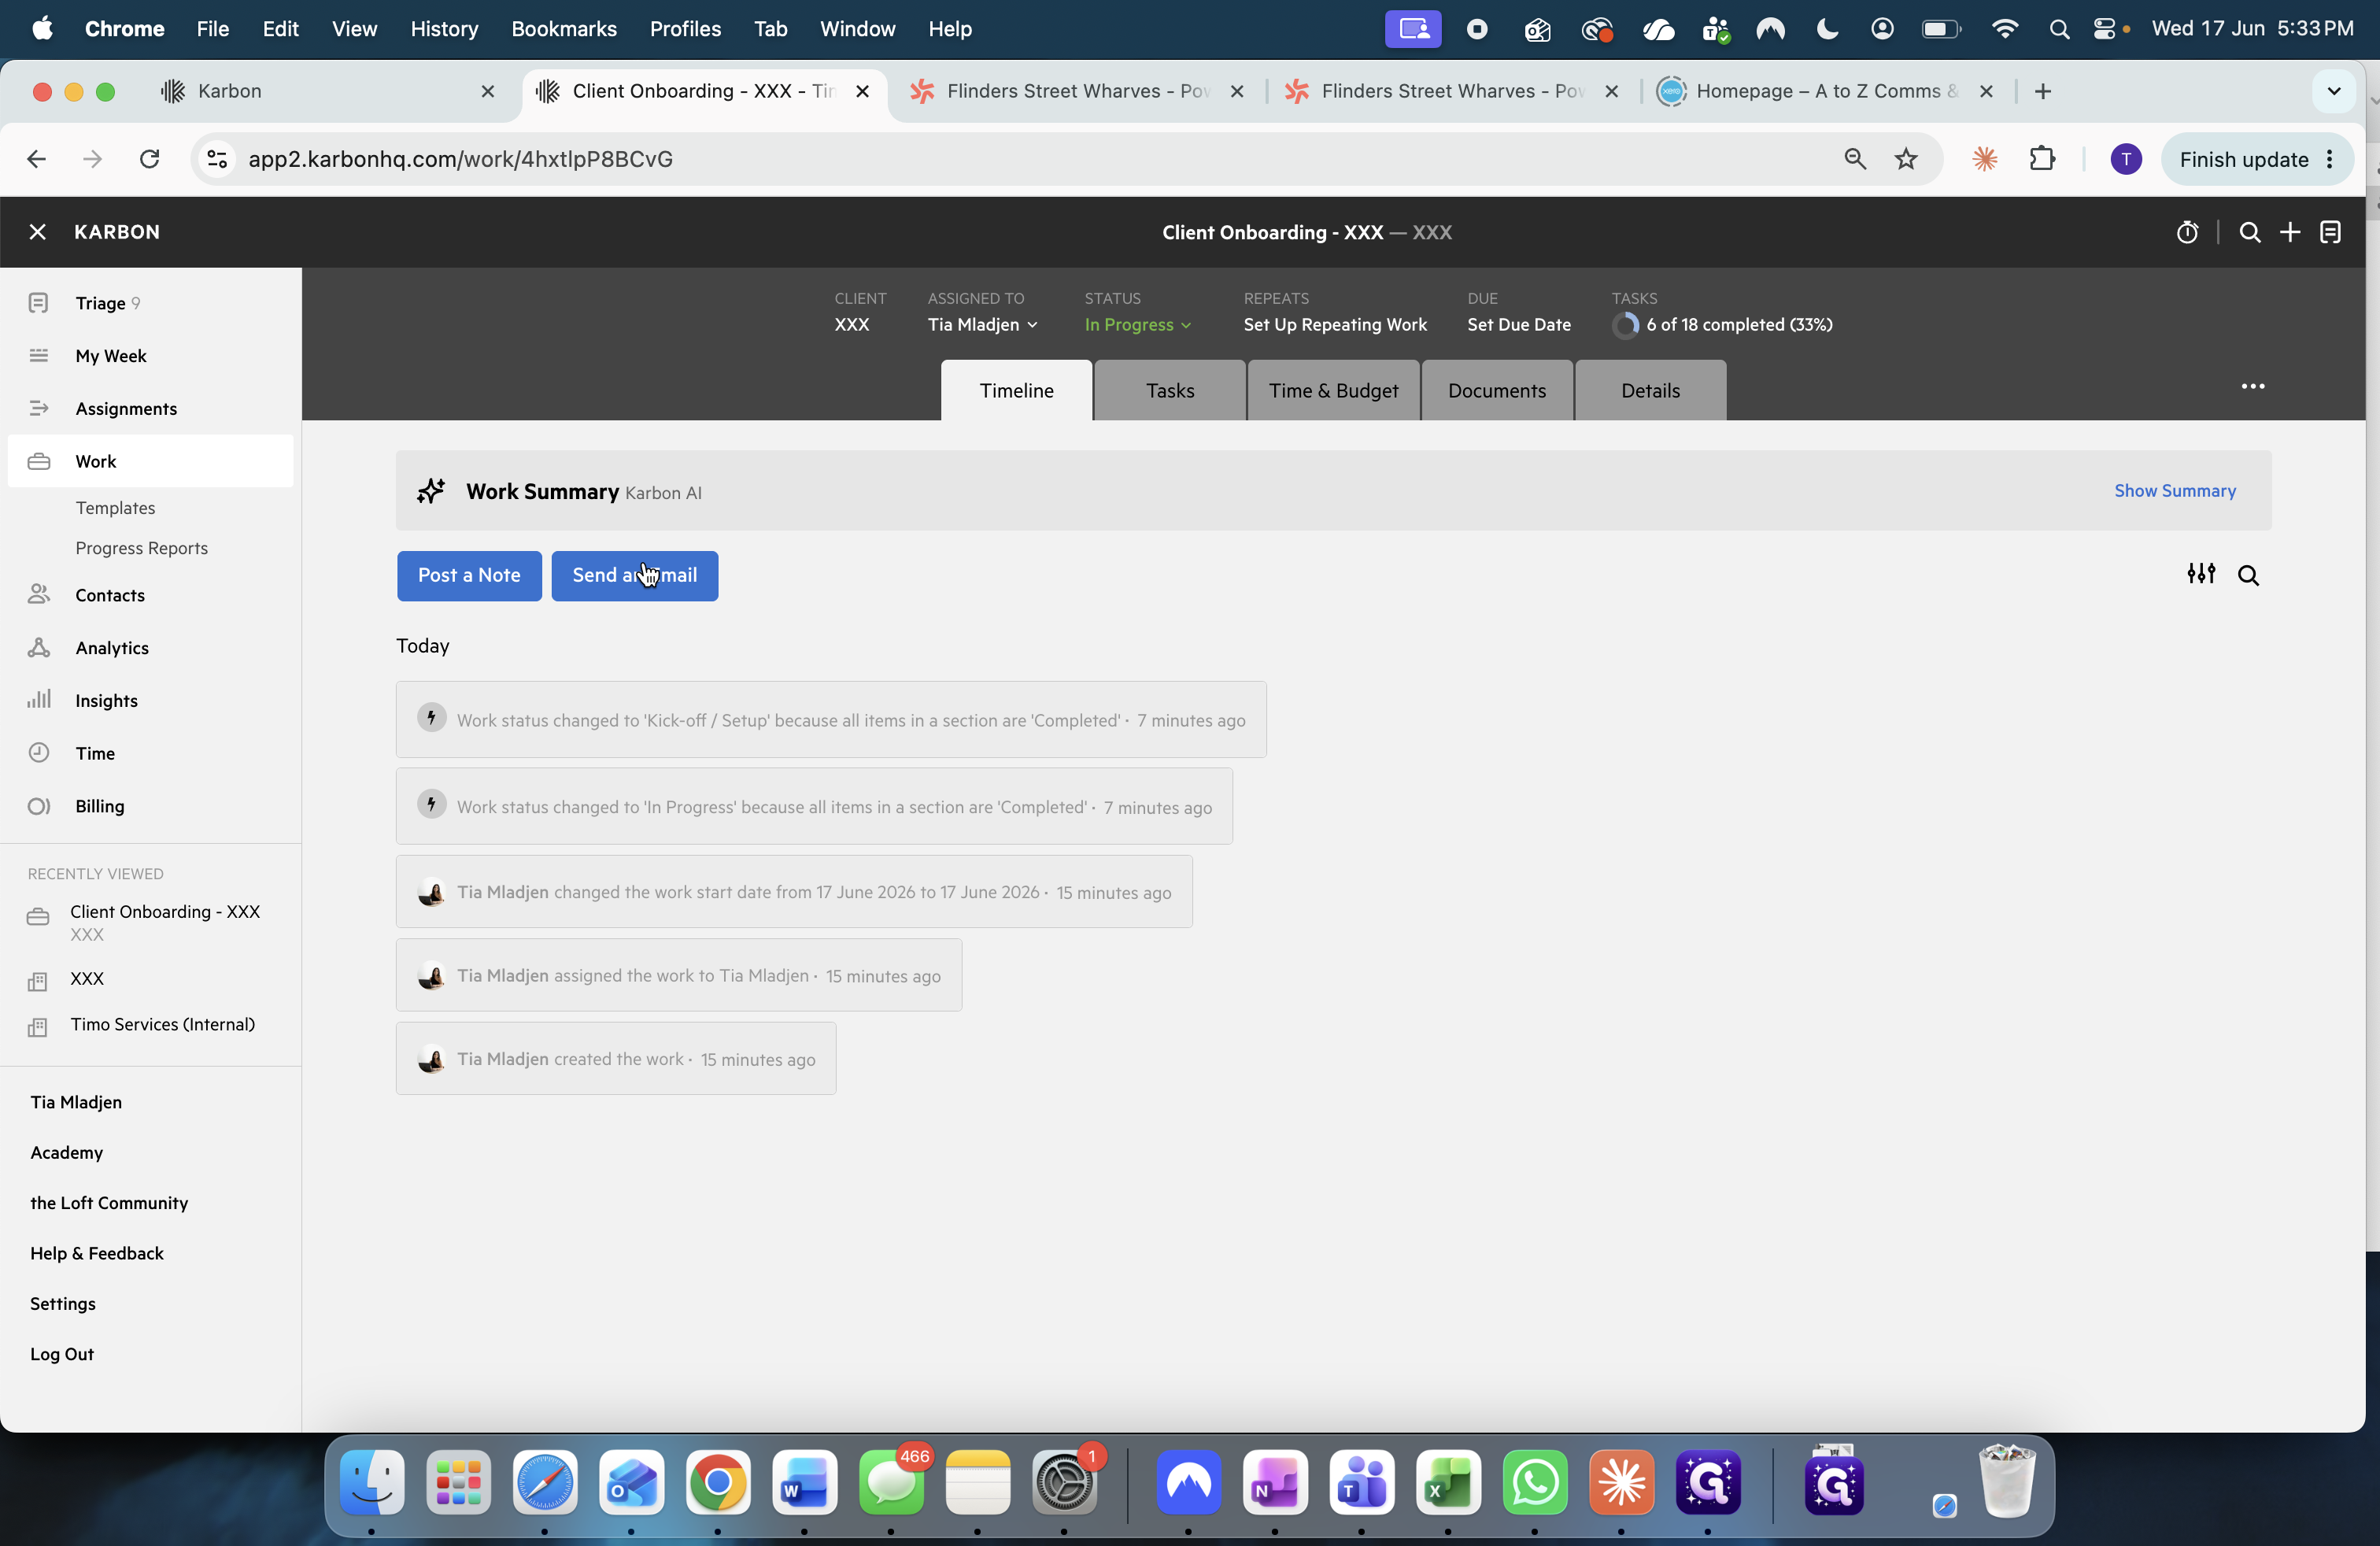
Click Send an email.
27
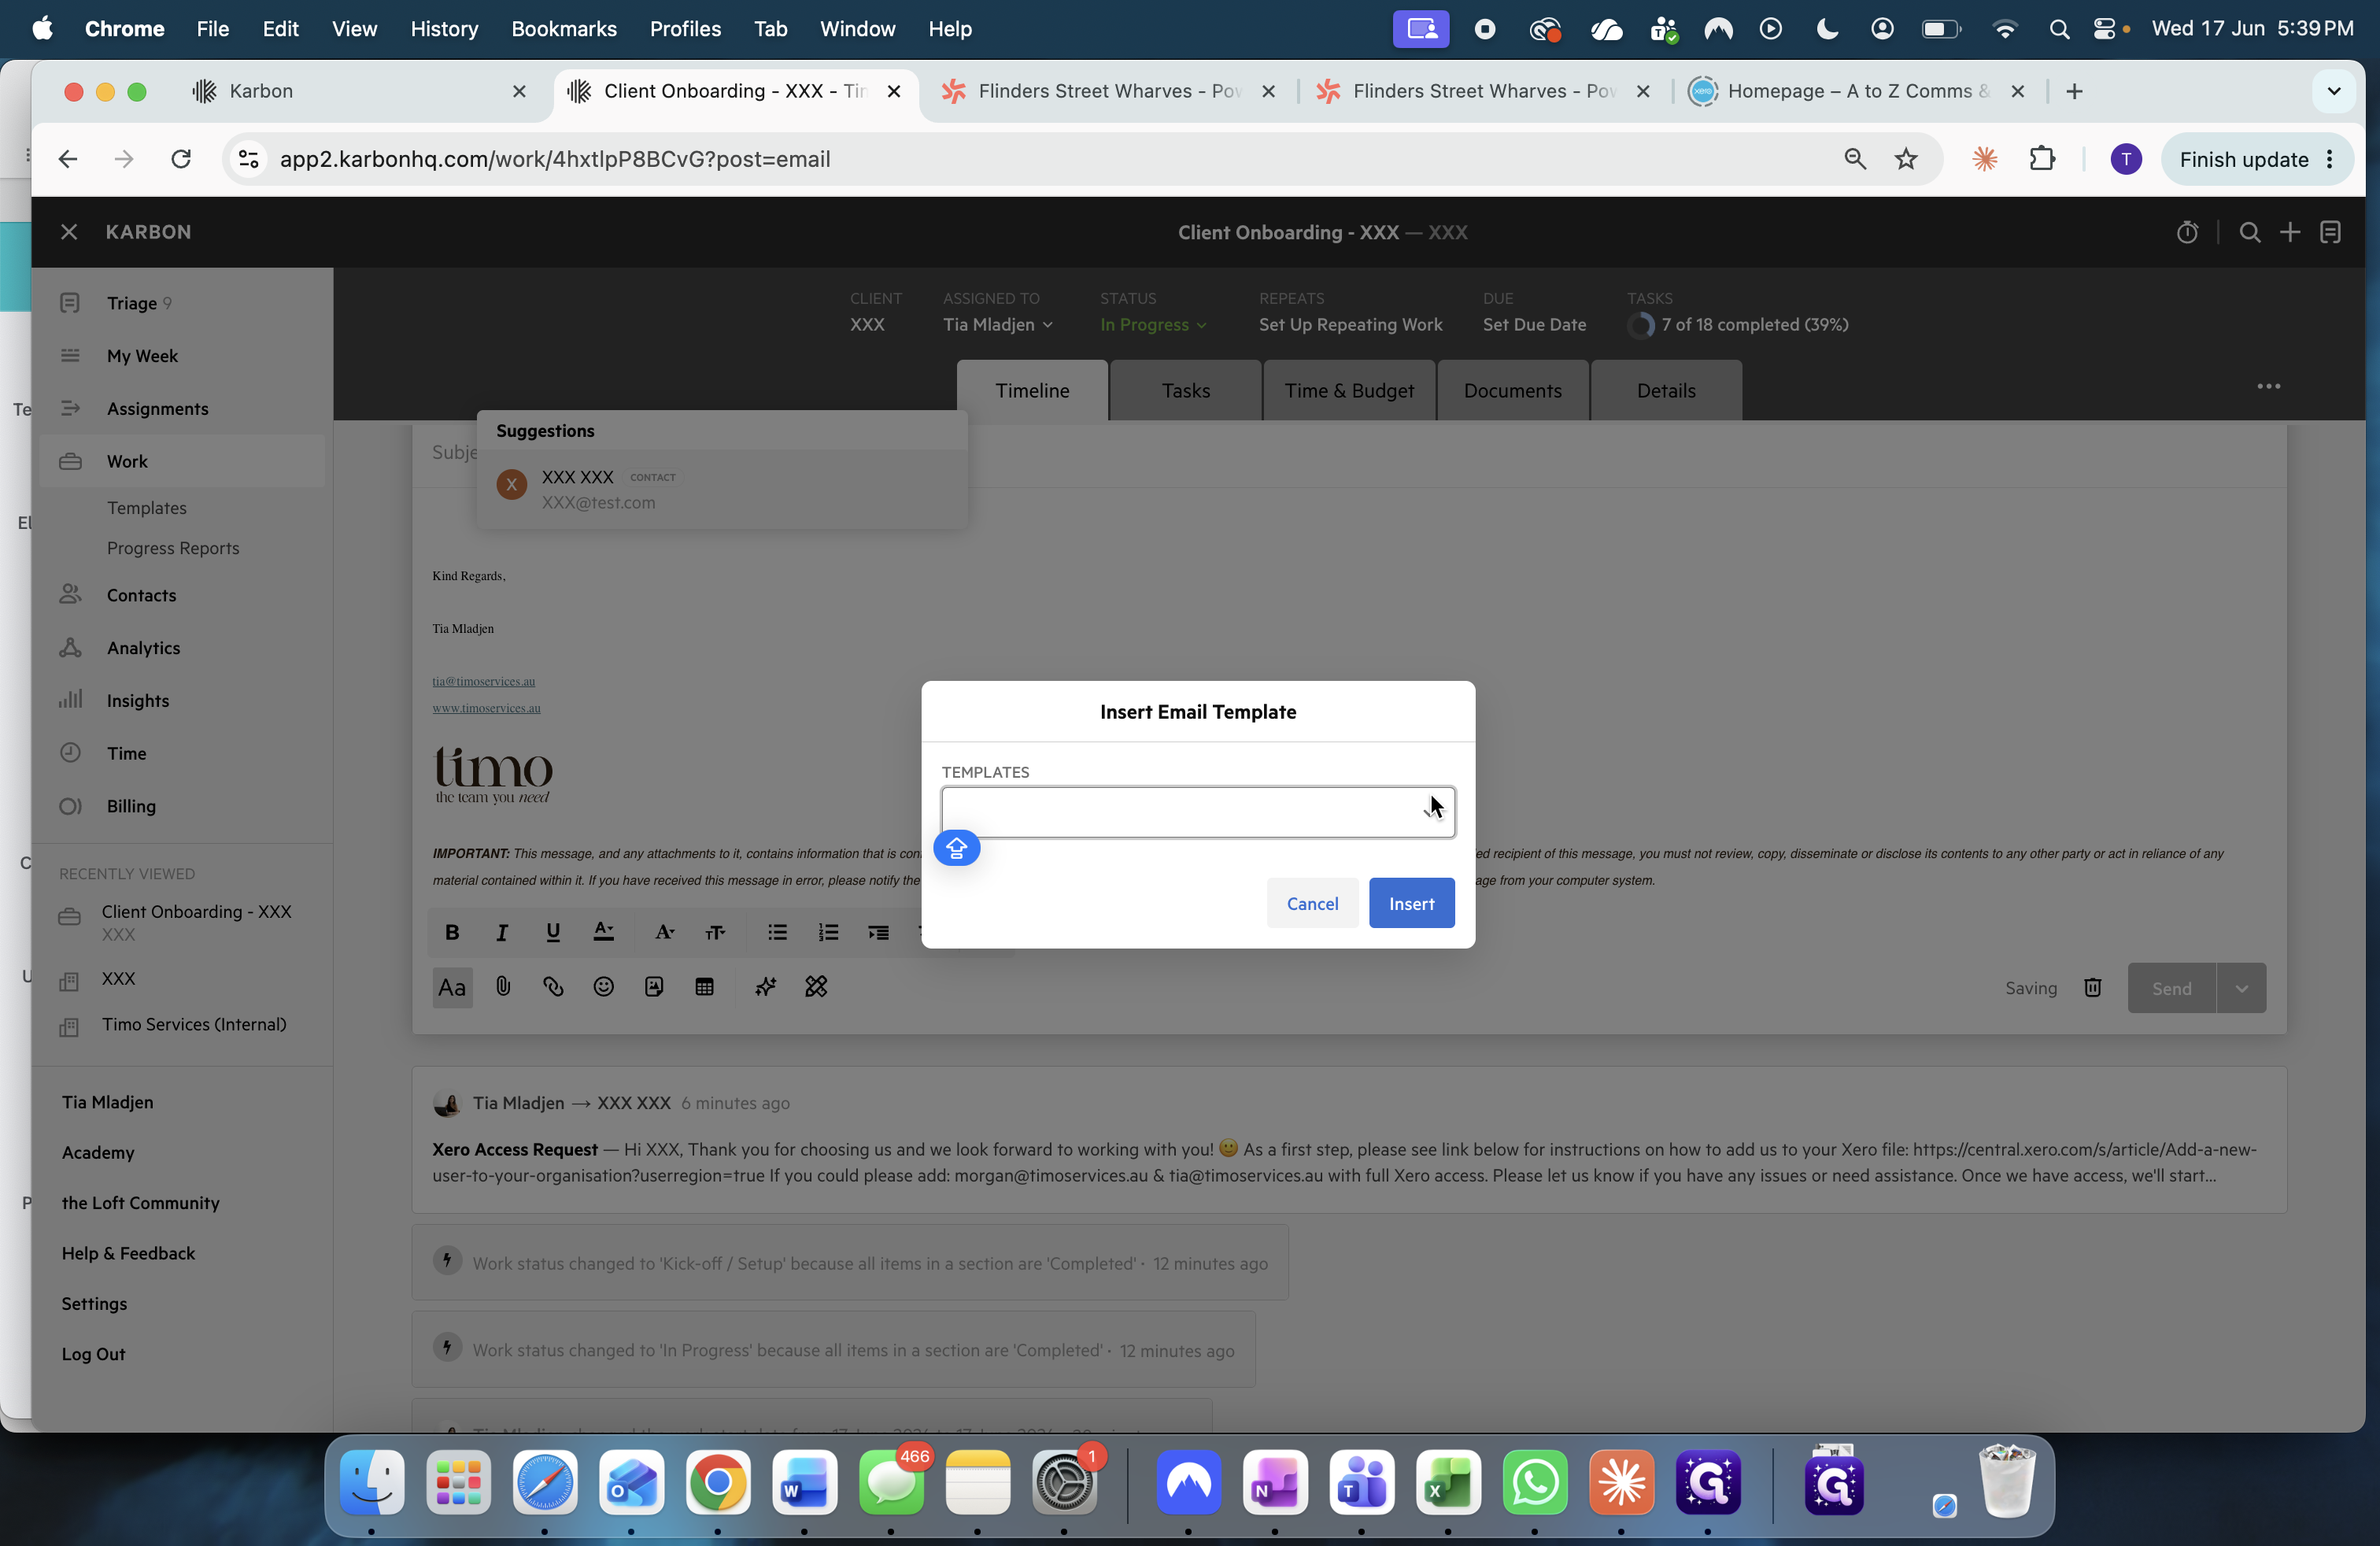
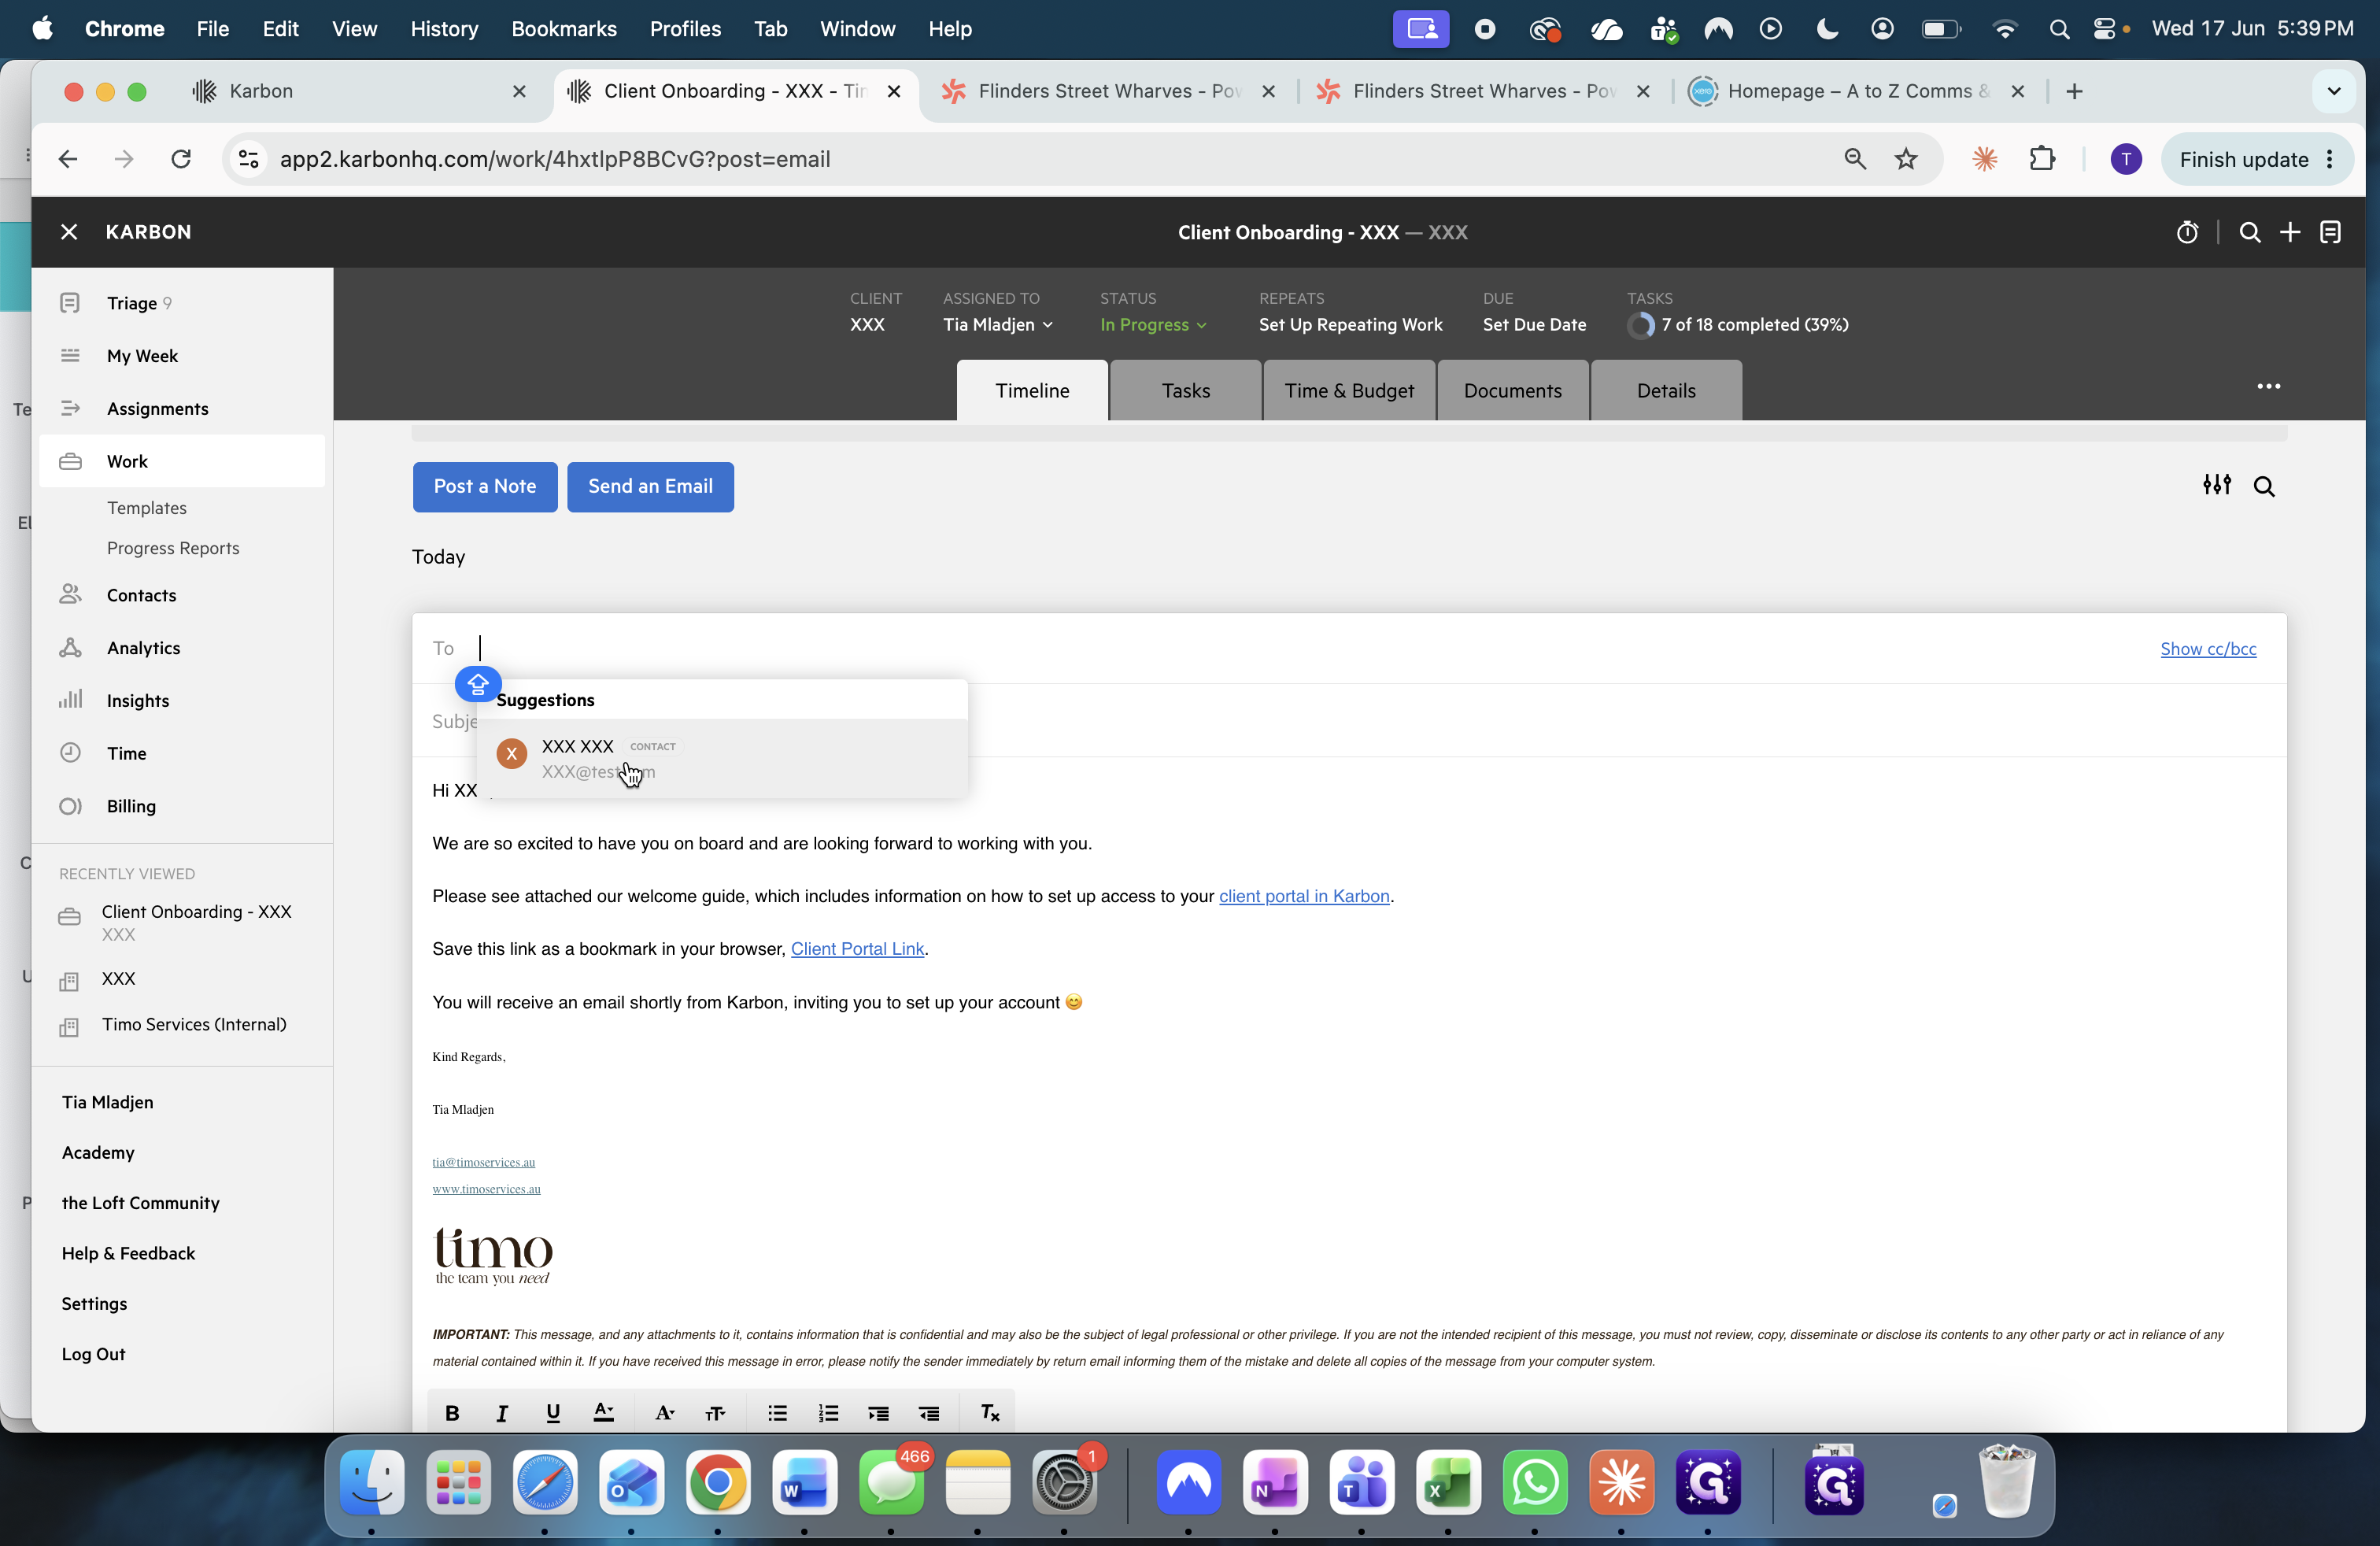
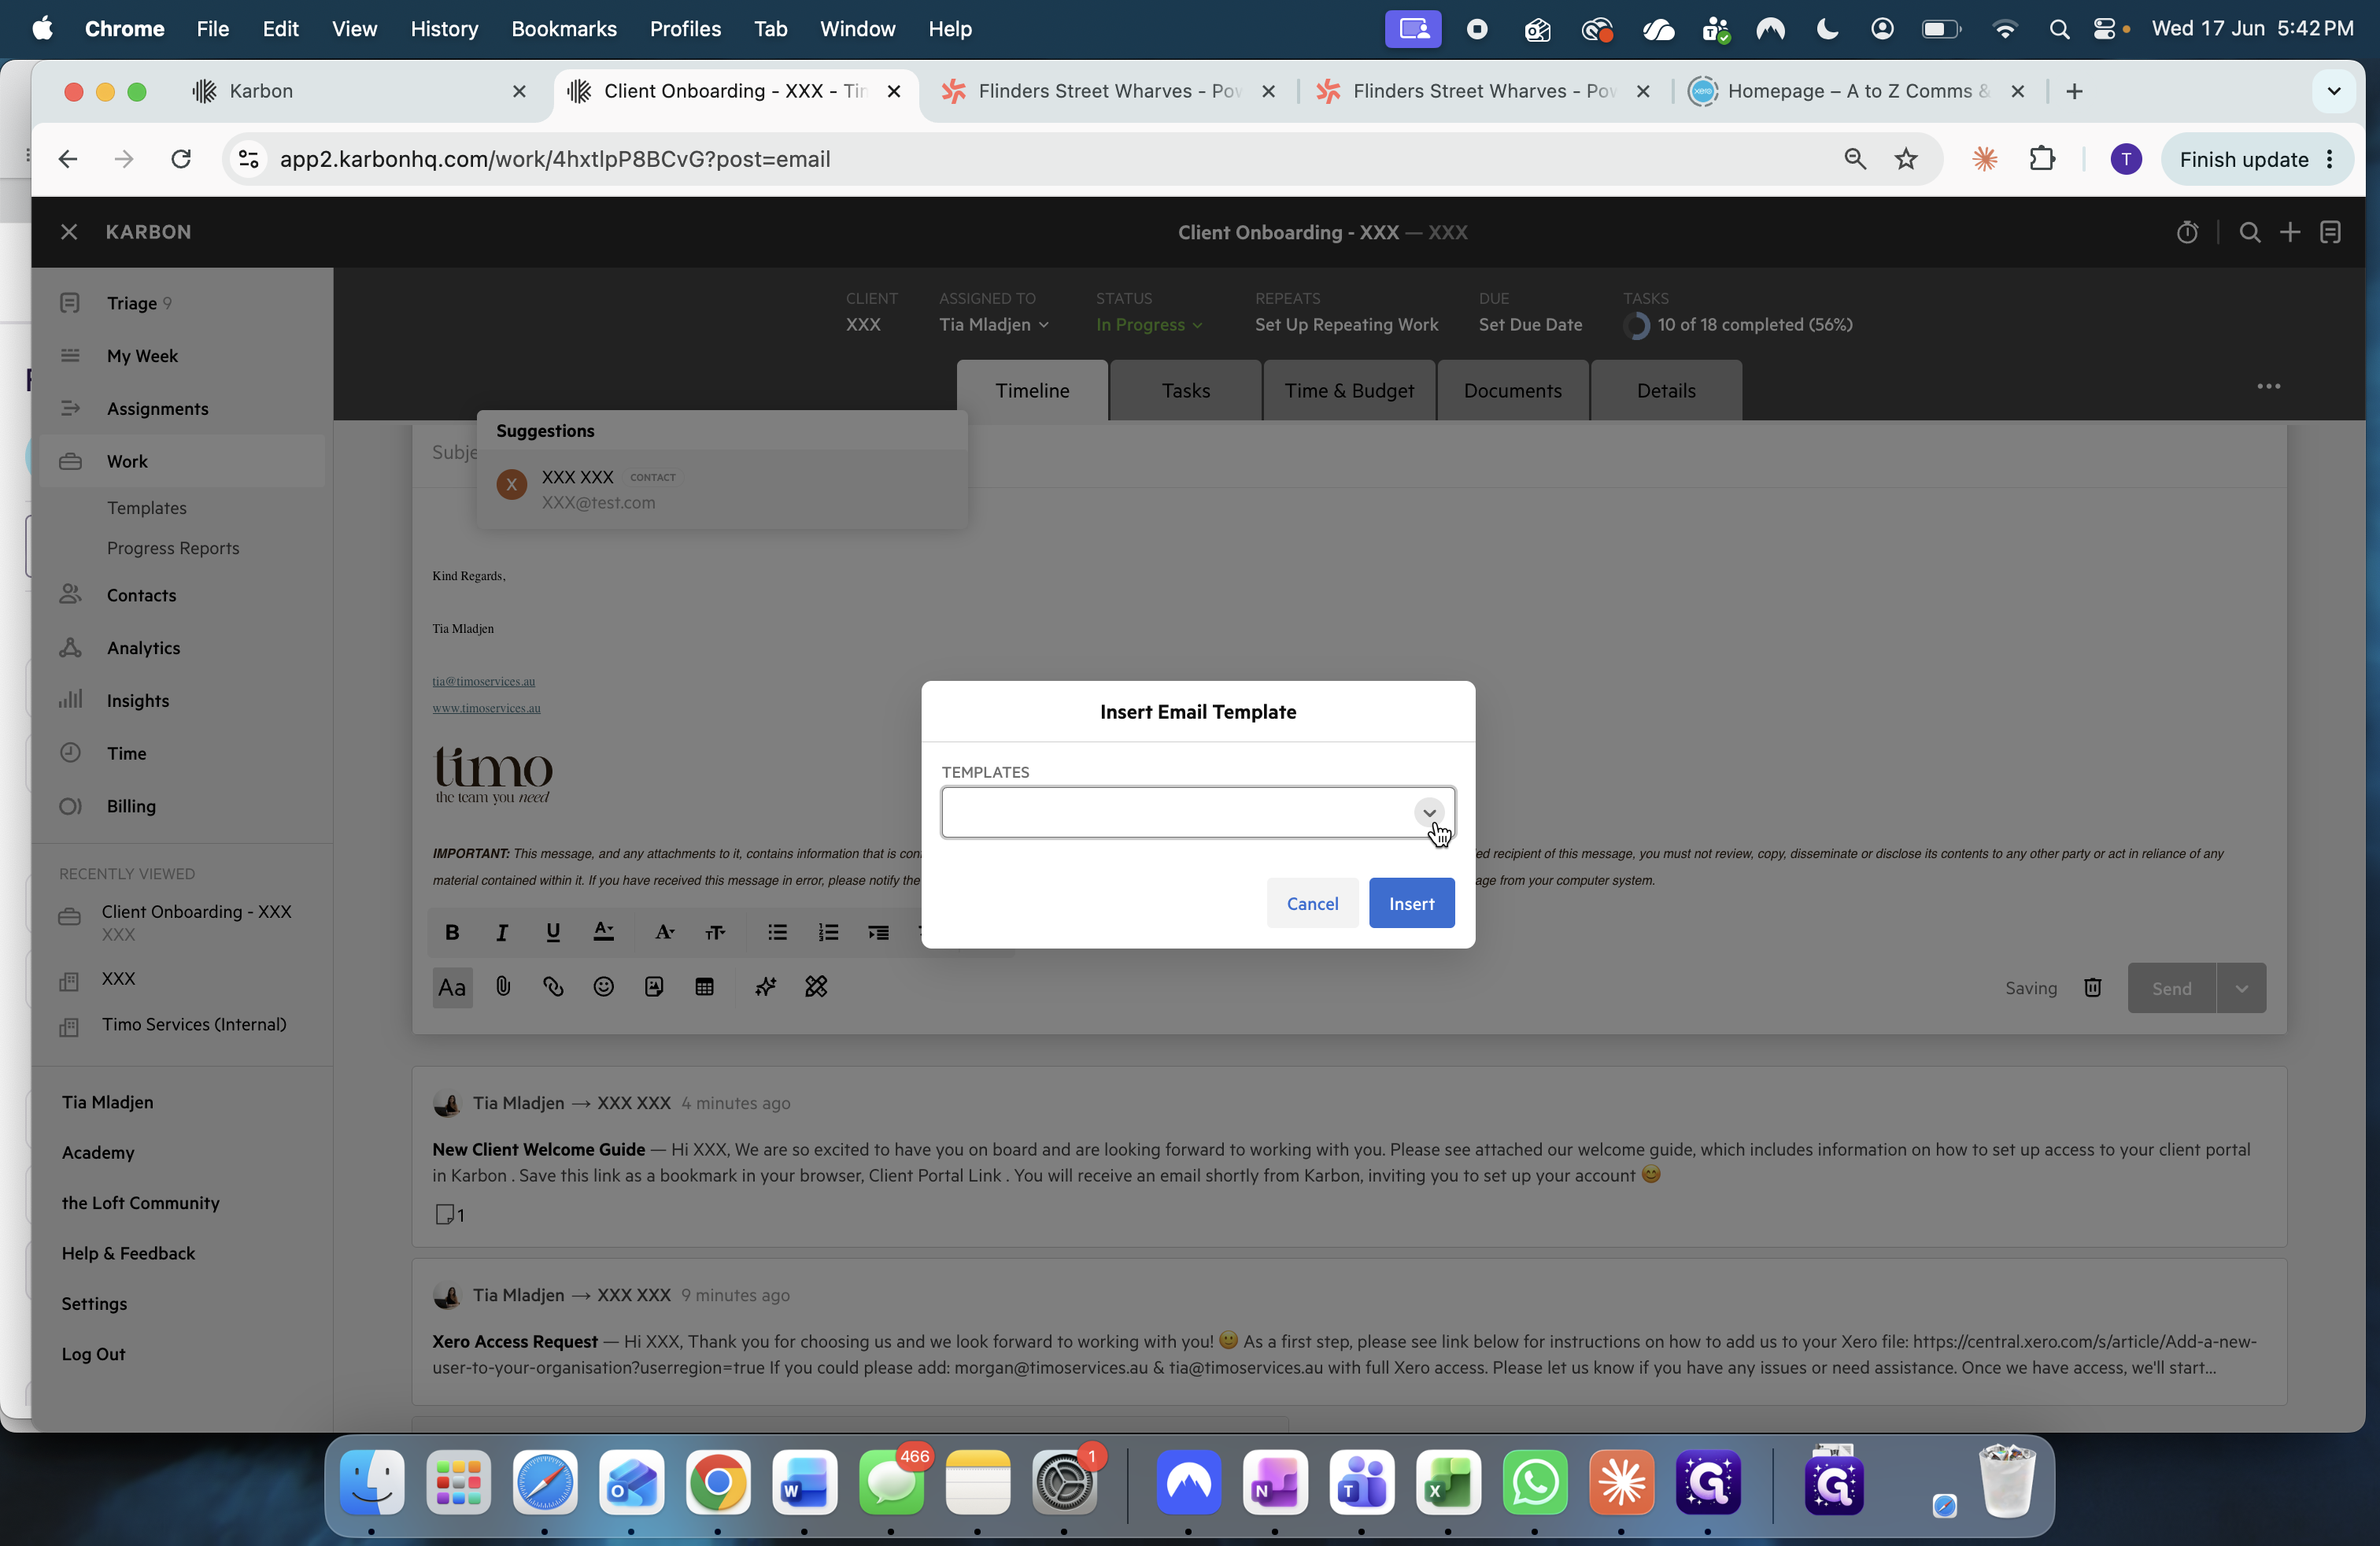
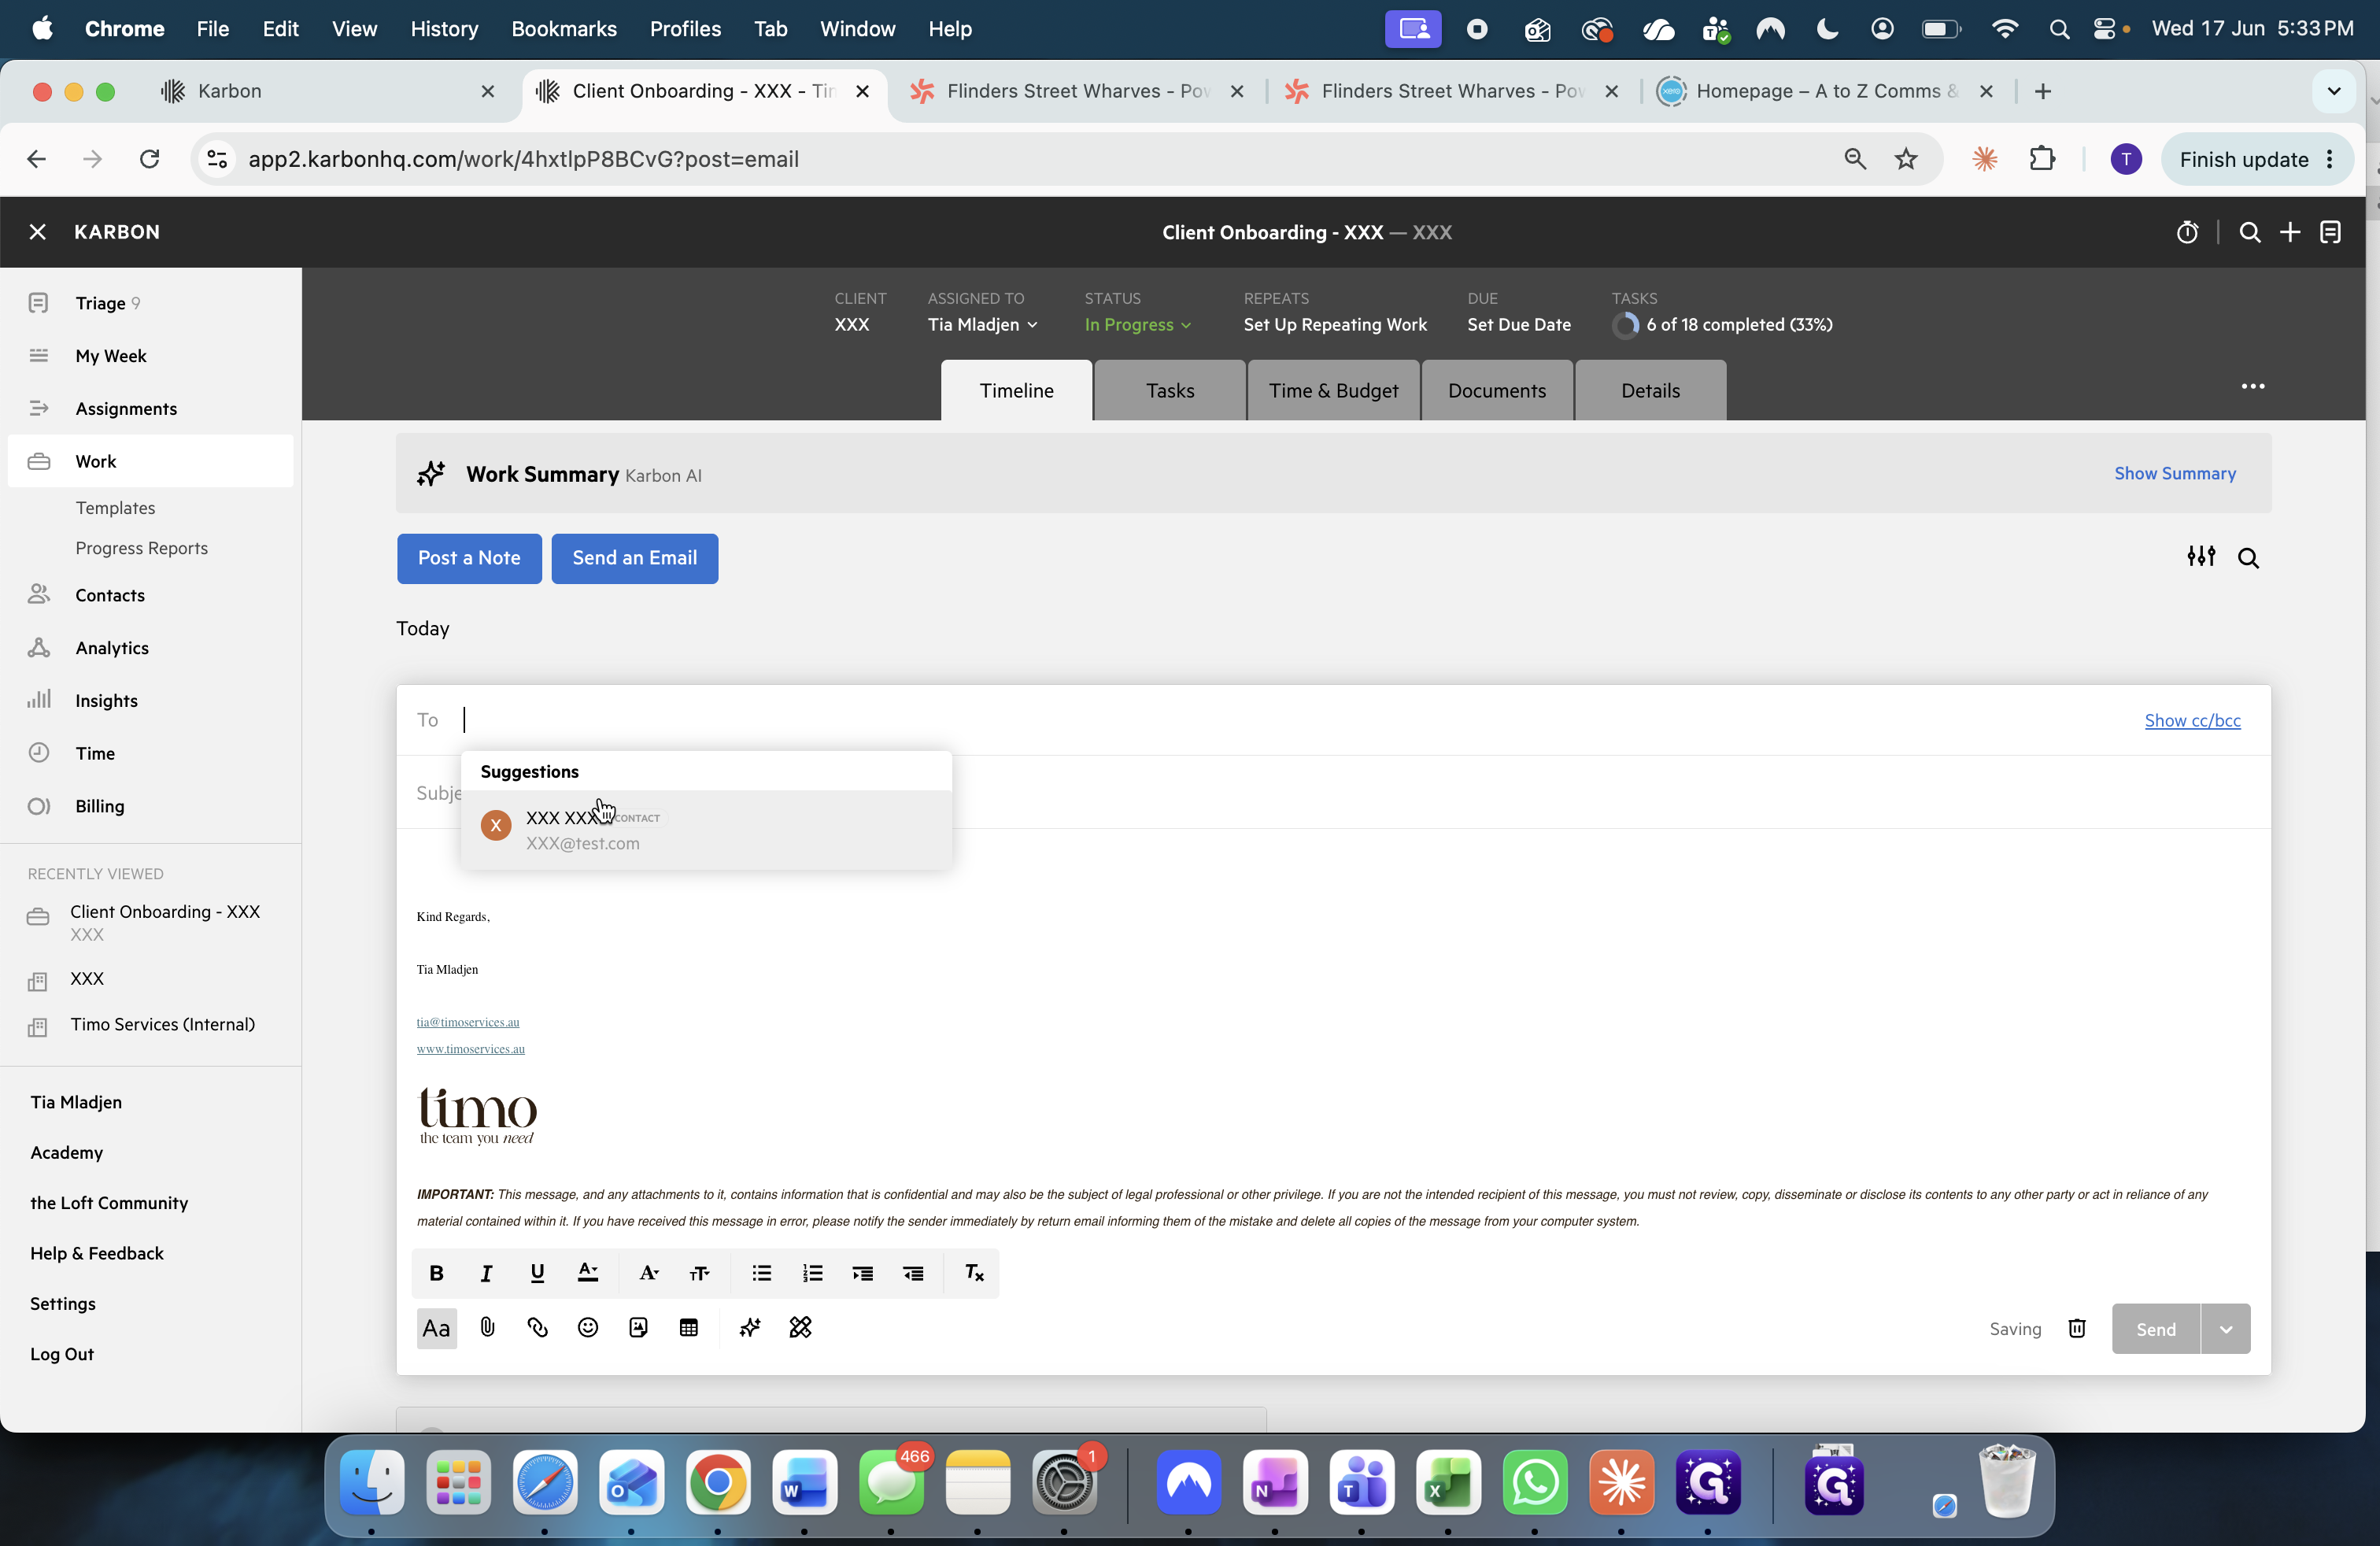
Select the client from the recipient suggestion dropdown.
28
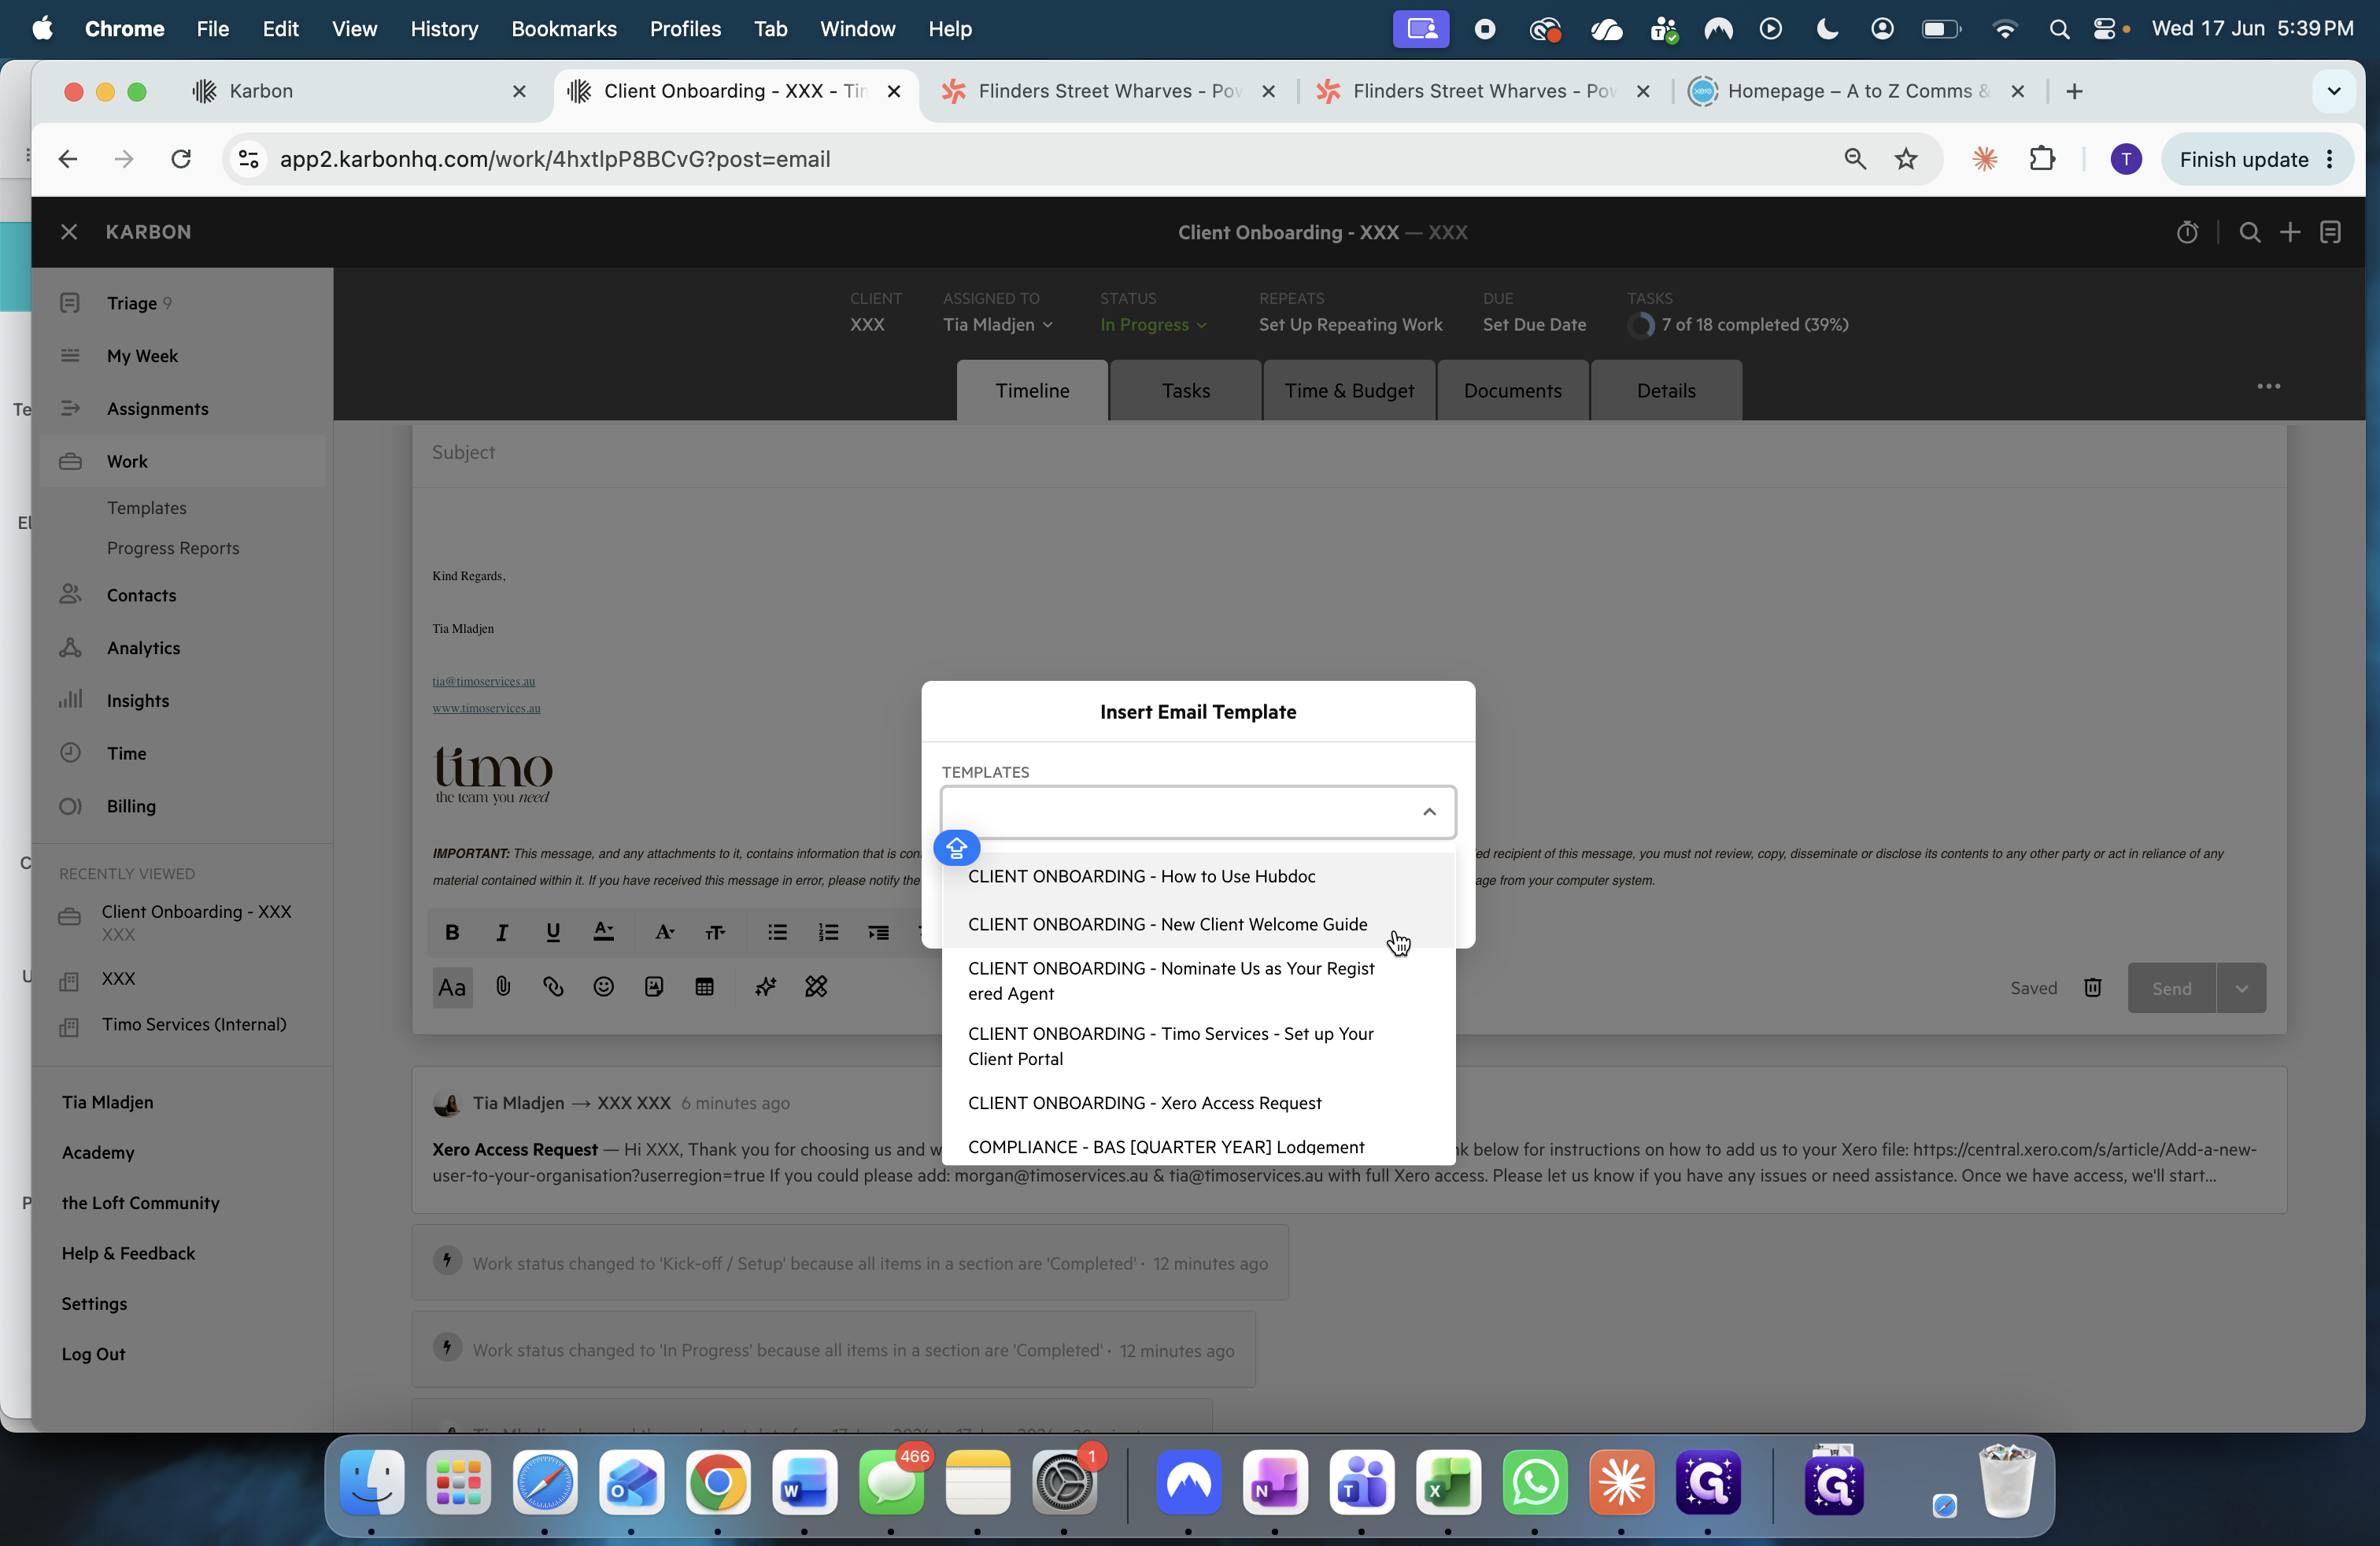
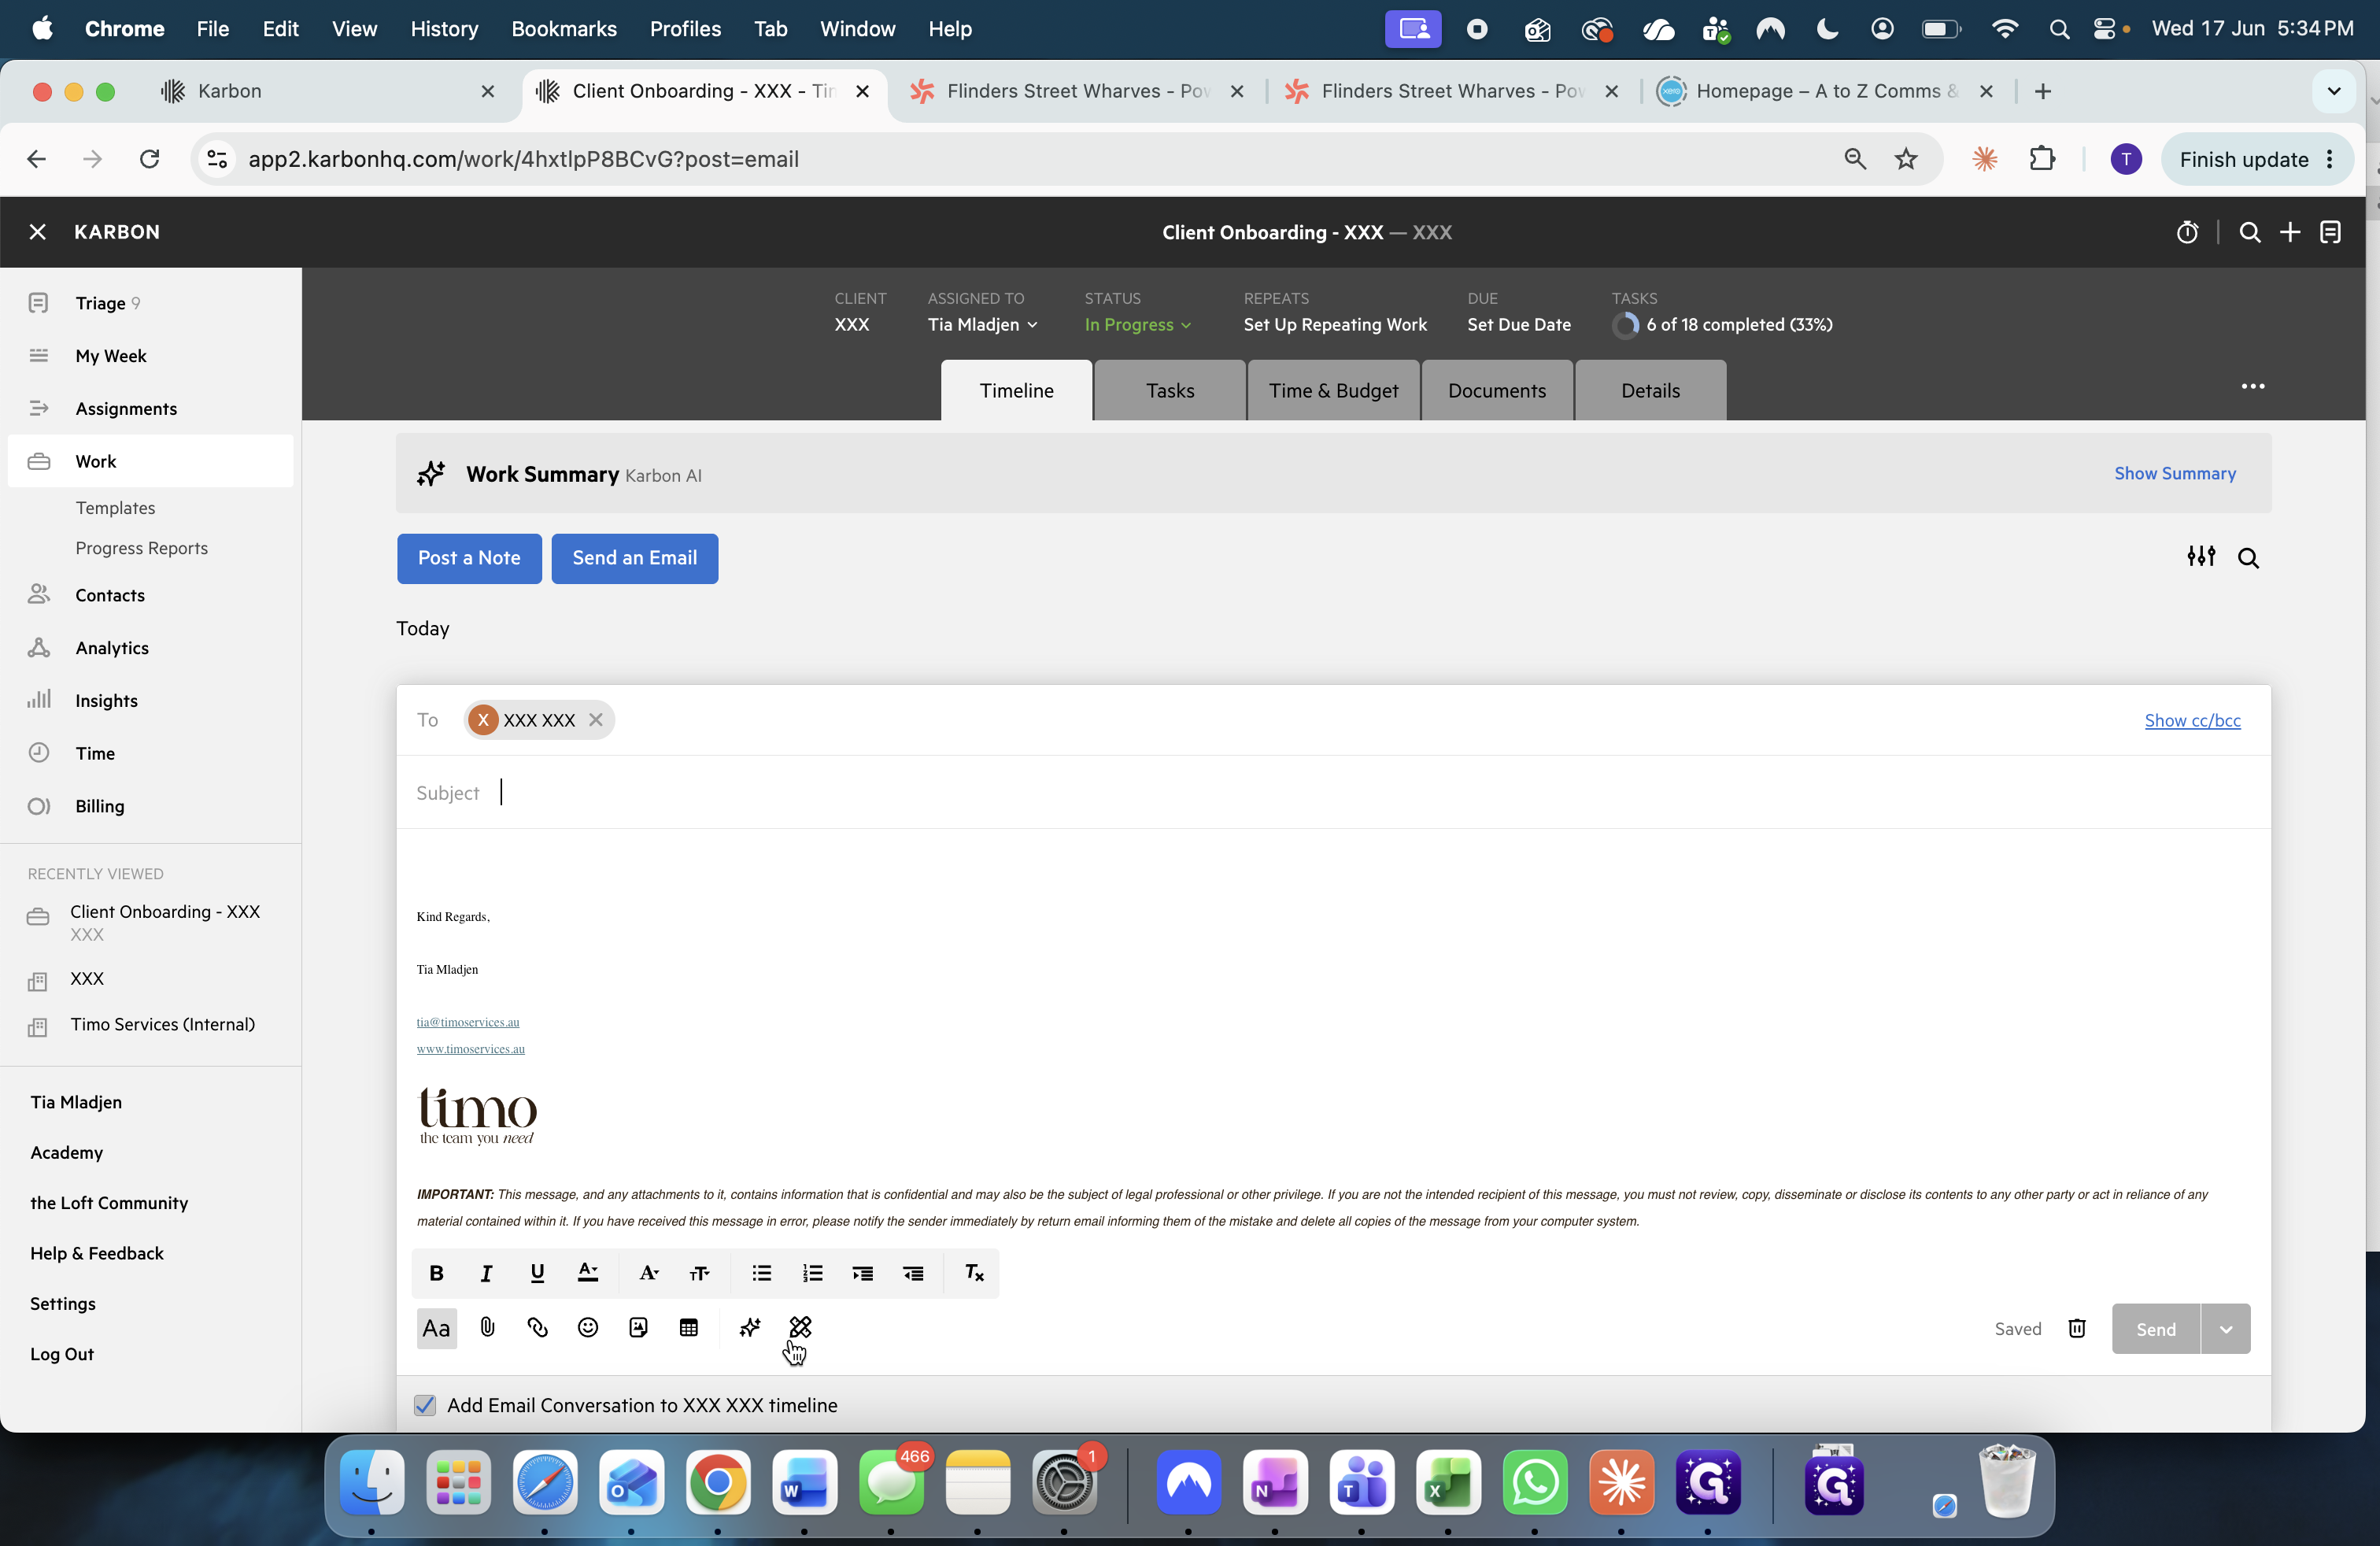
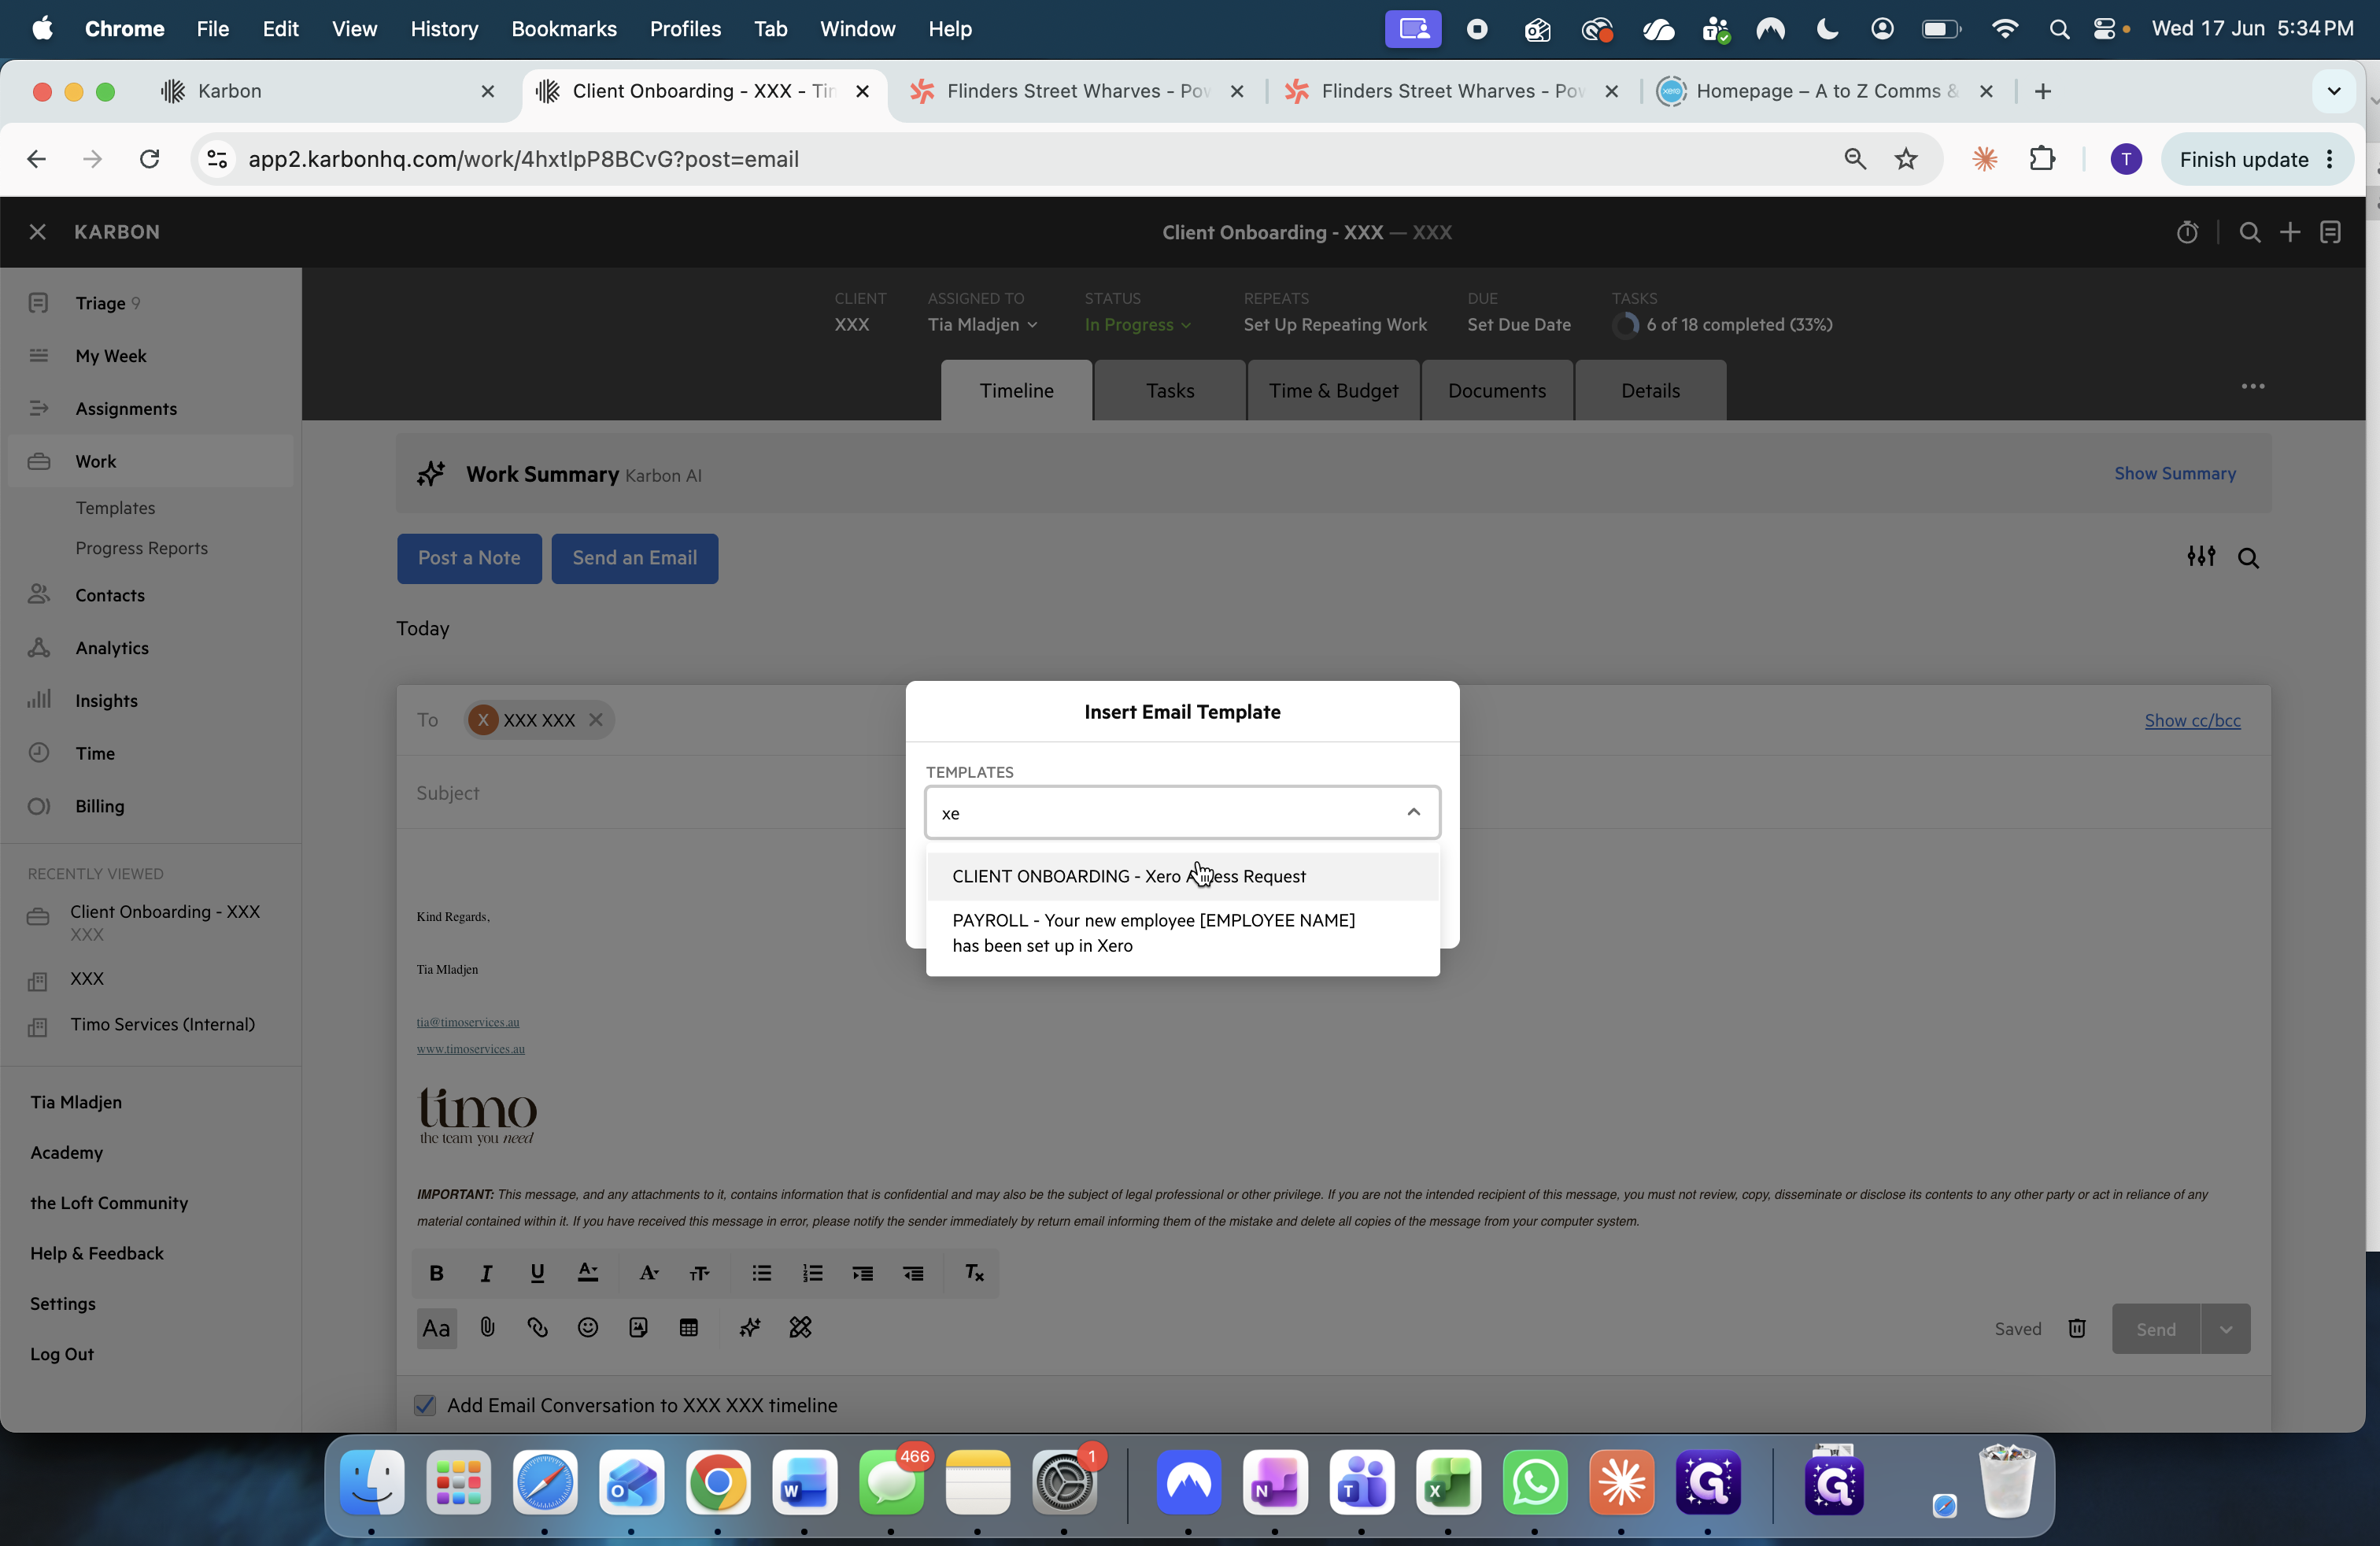
Click the email template icon in the formatting toolbar.
29
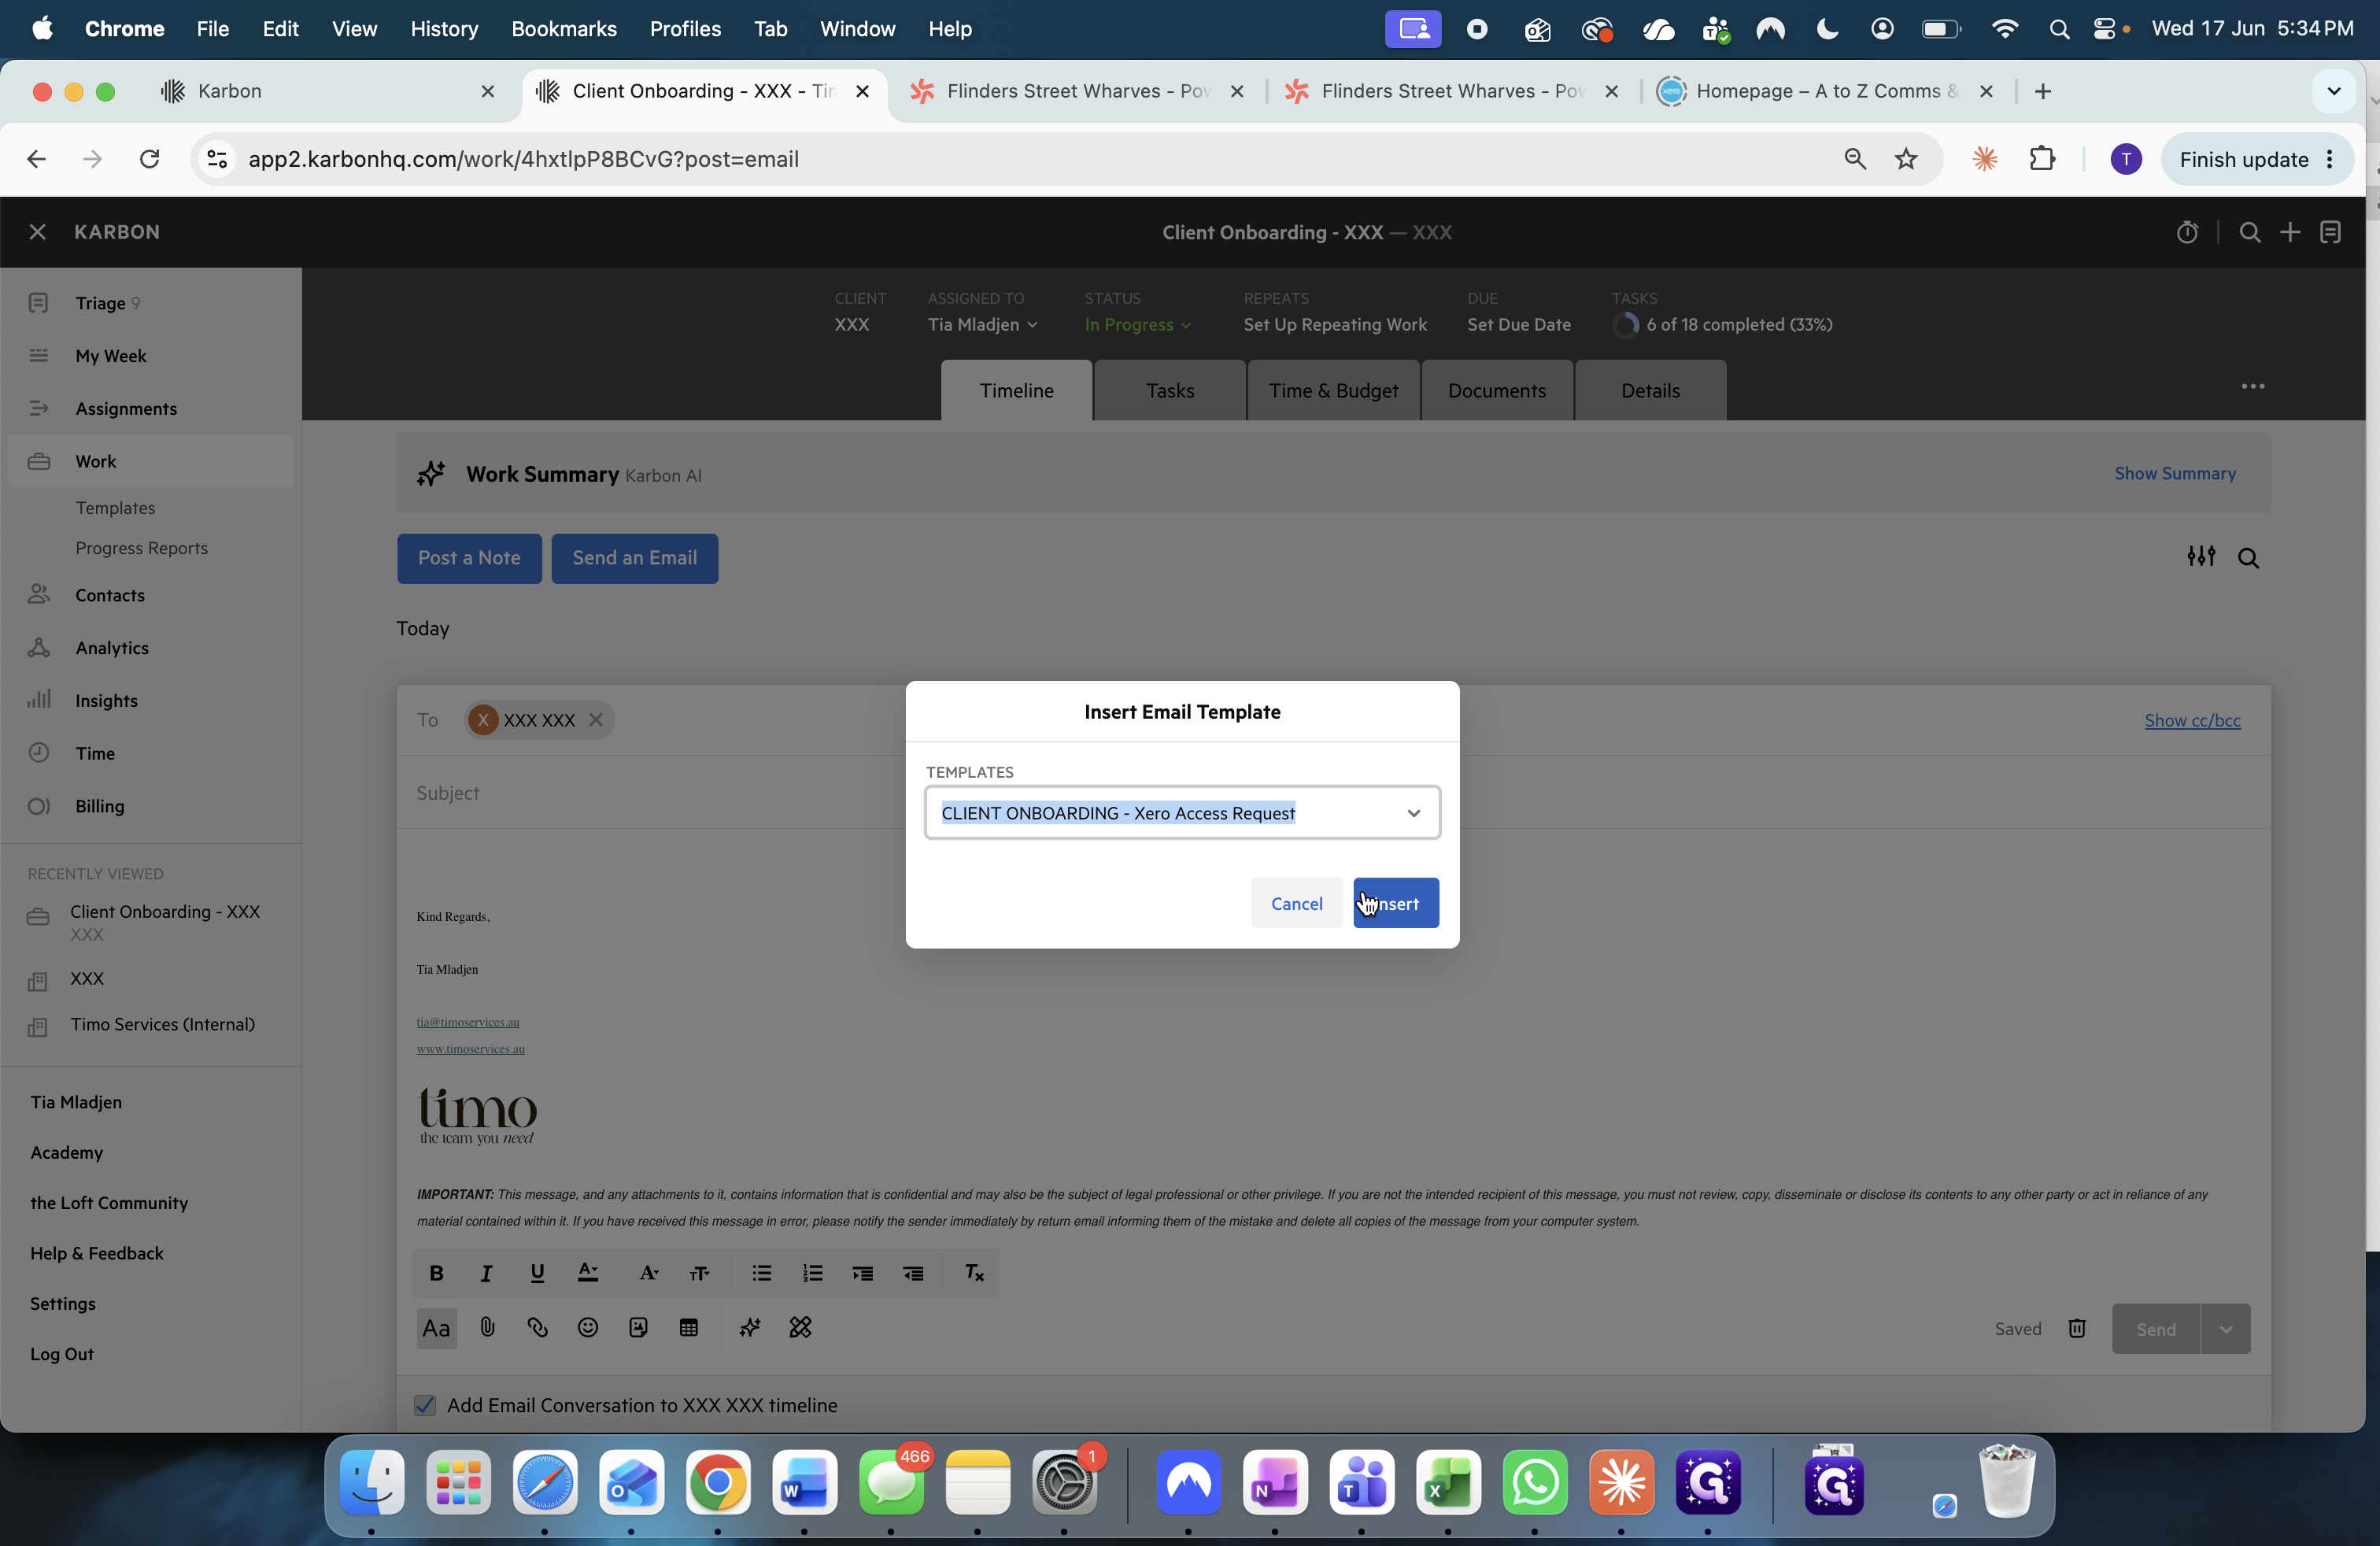
Select the CLIENT ONBOARDING - Xero Access Request template.
30
Click Insert.
31
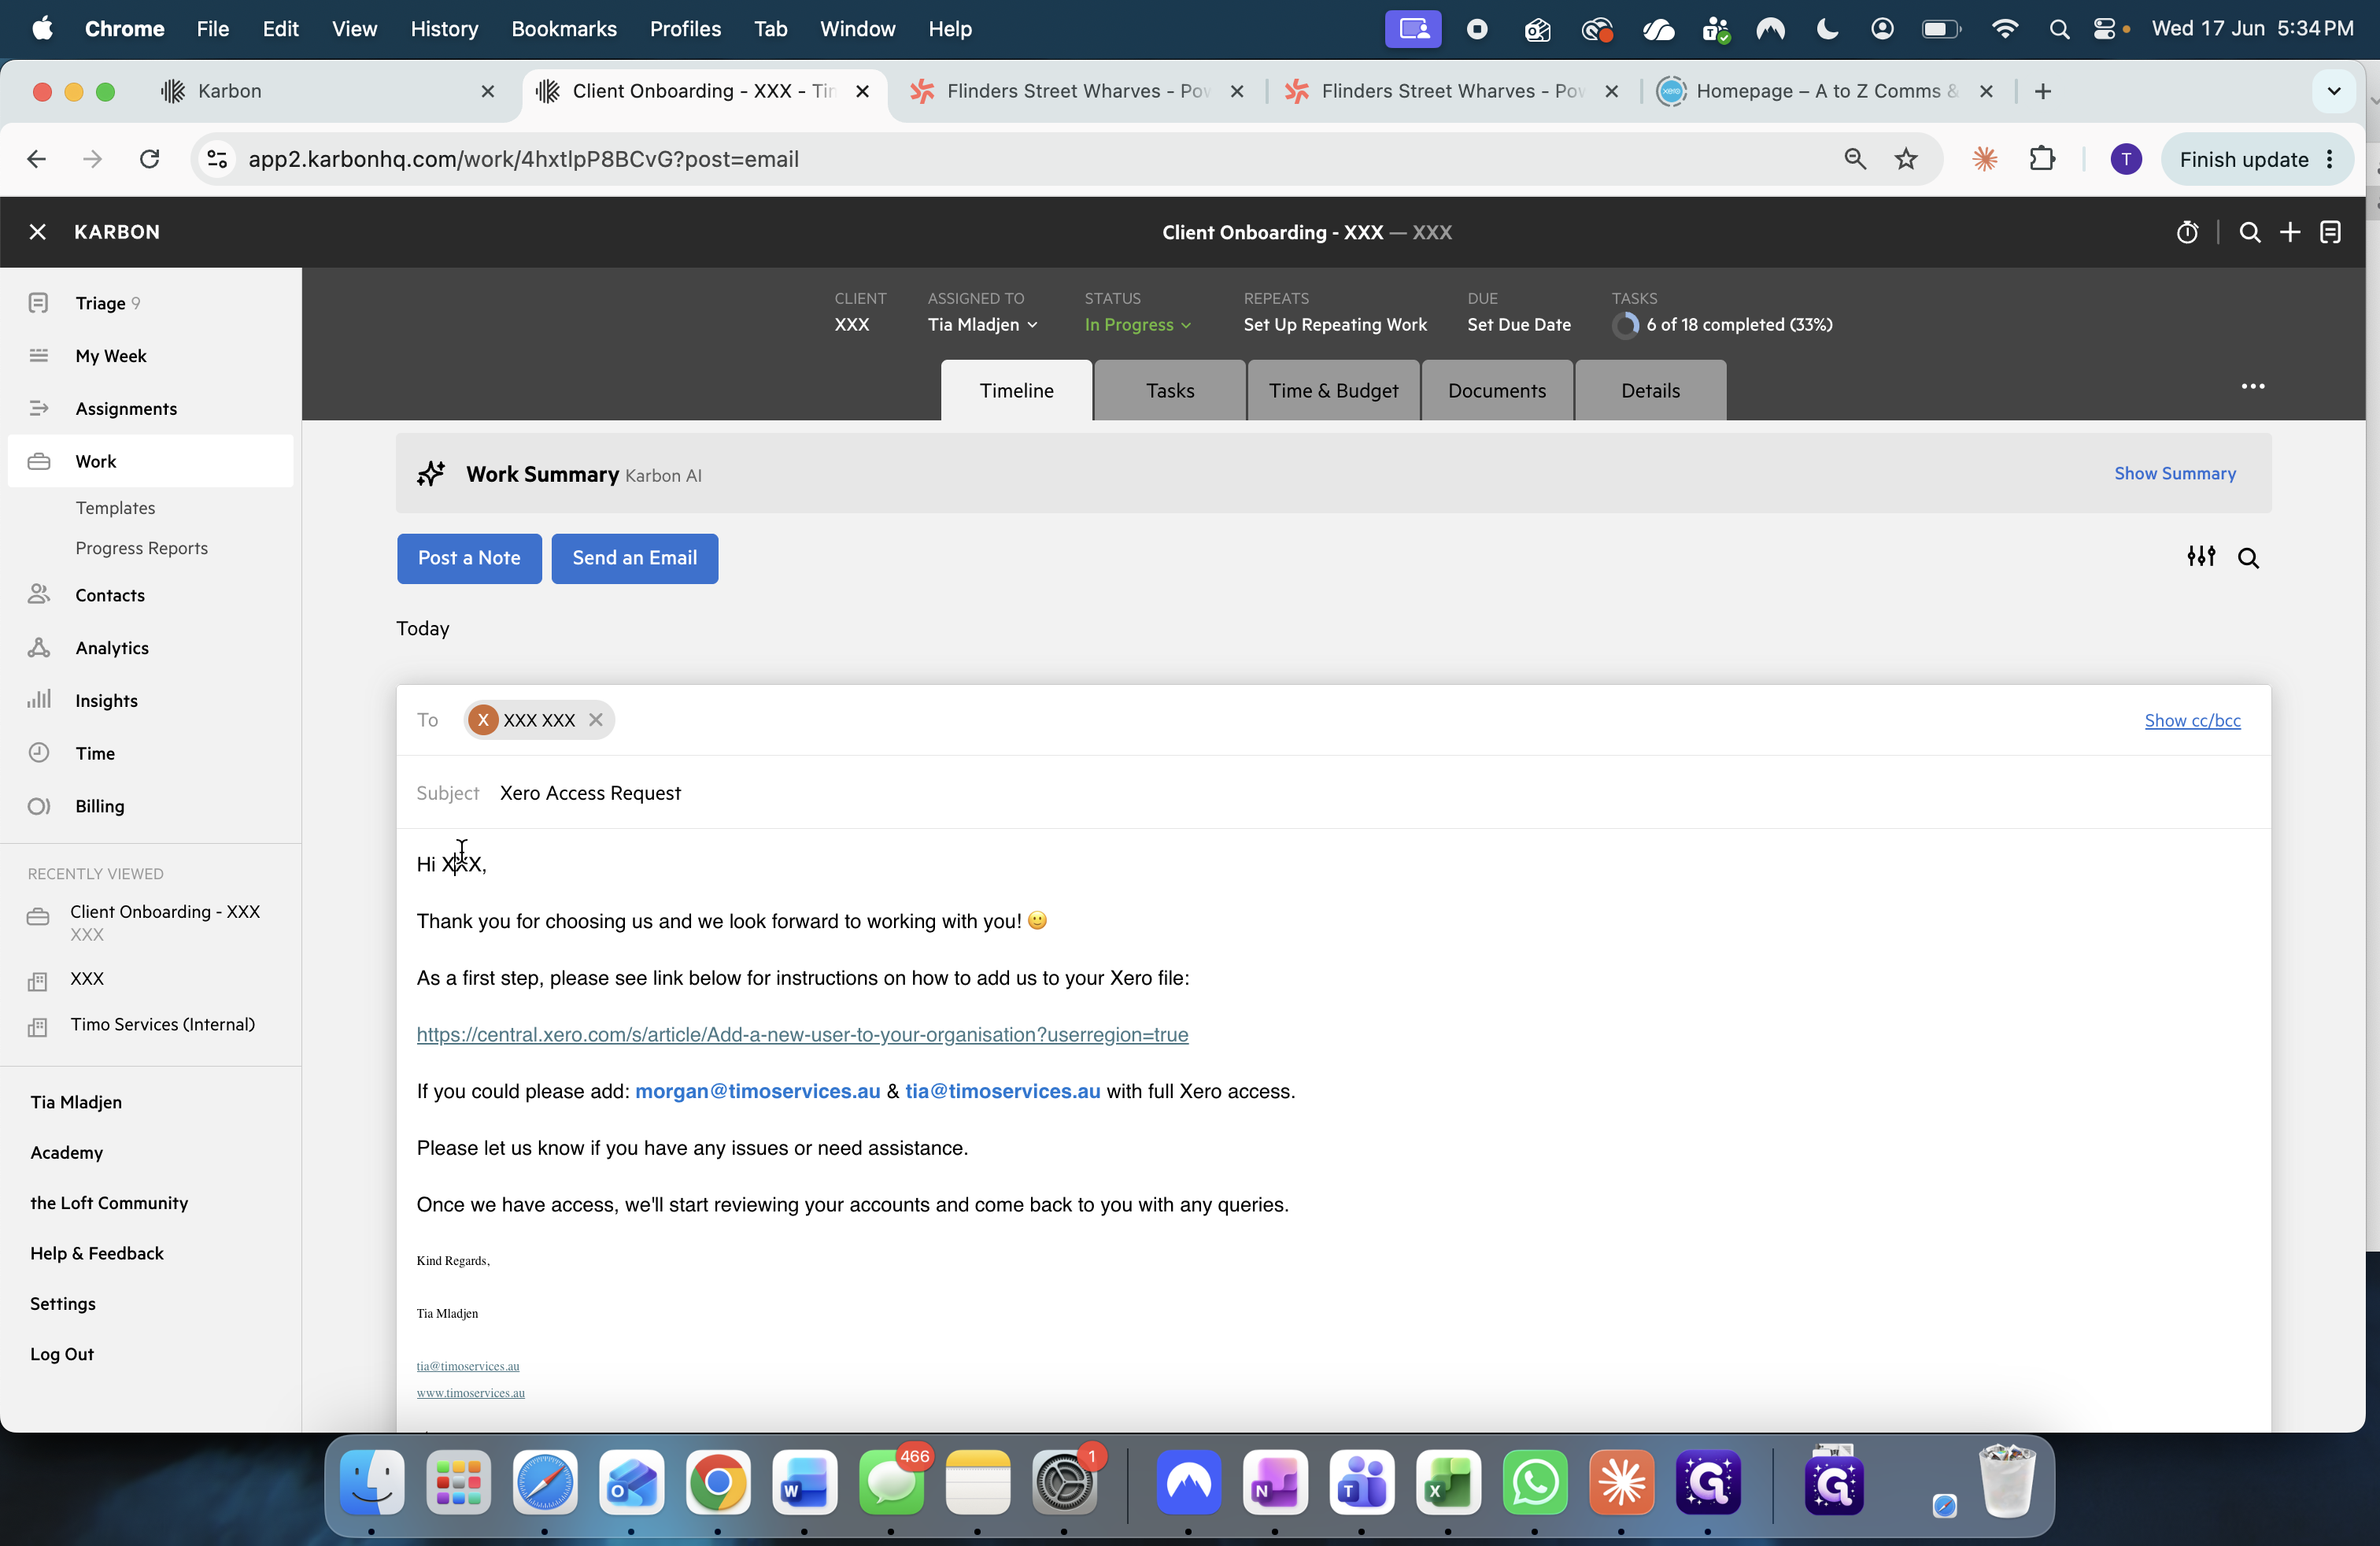
Update the placeholder greeting text with the client's actual name.
32
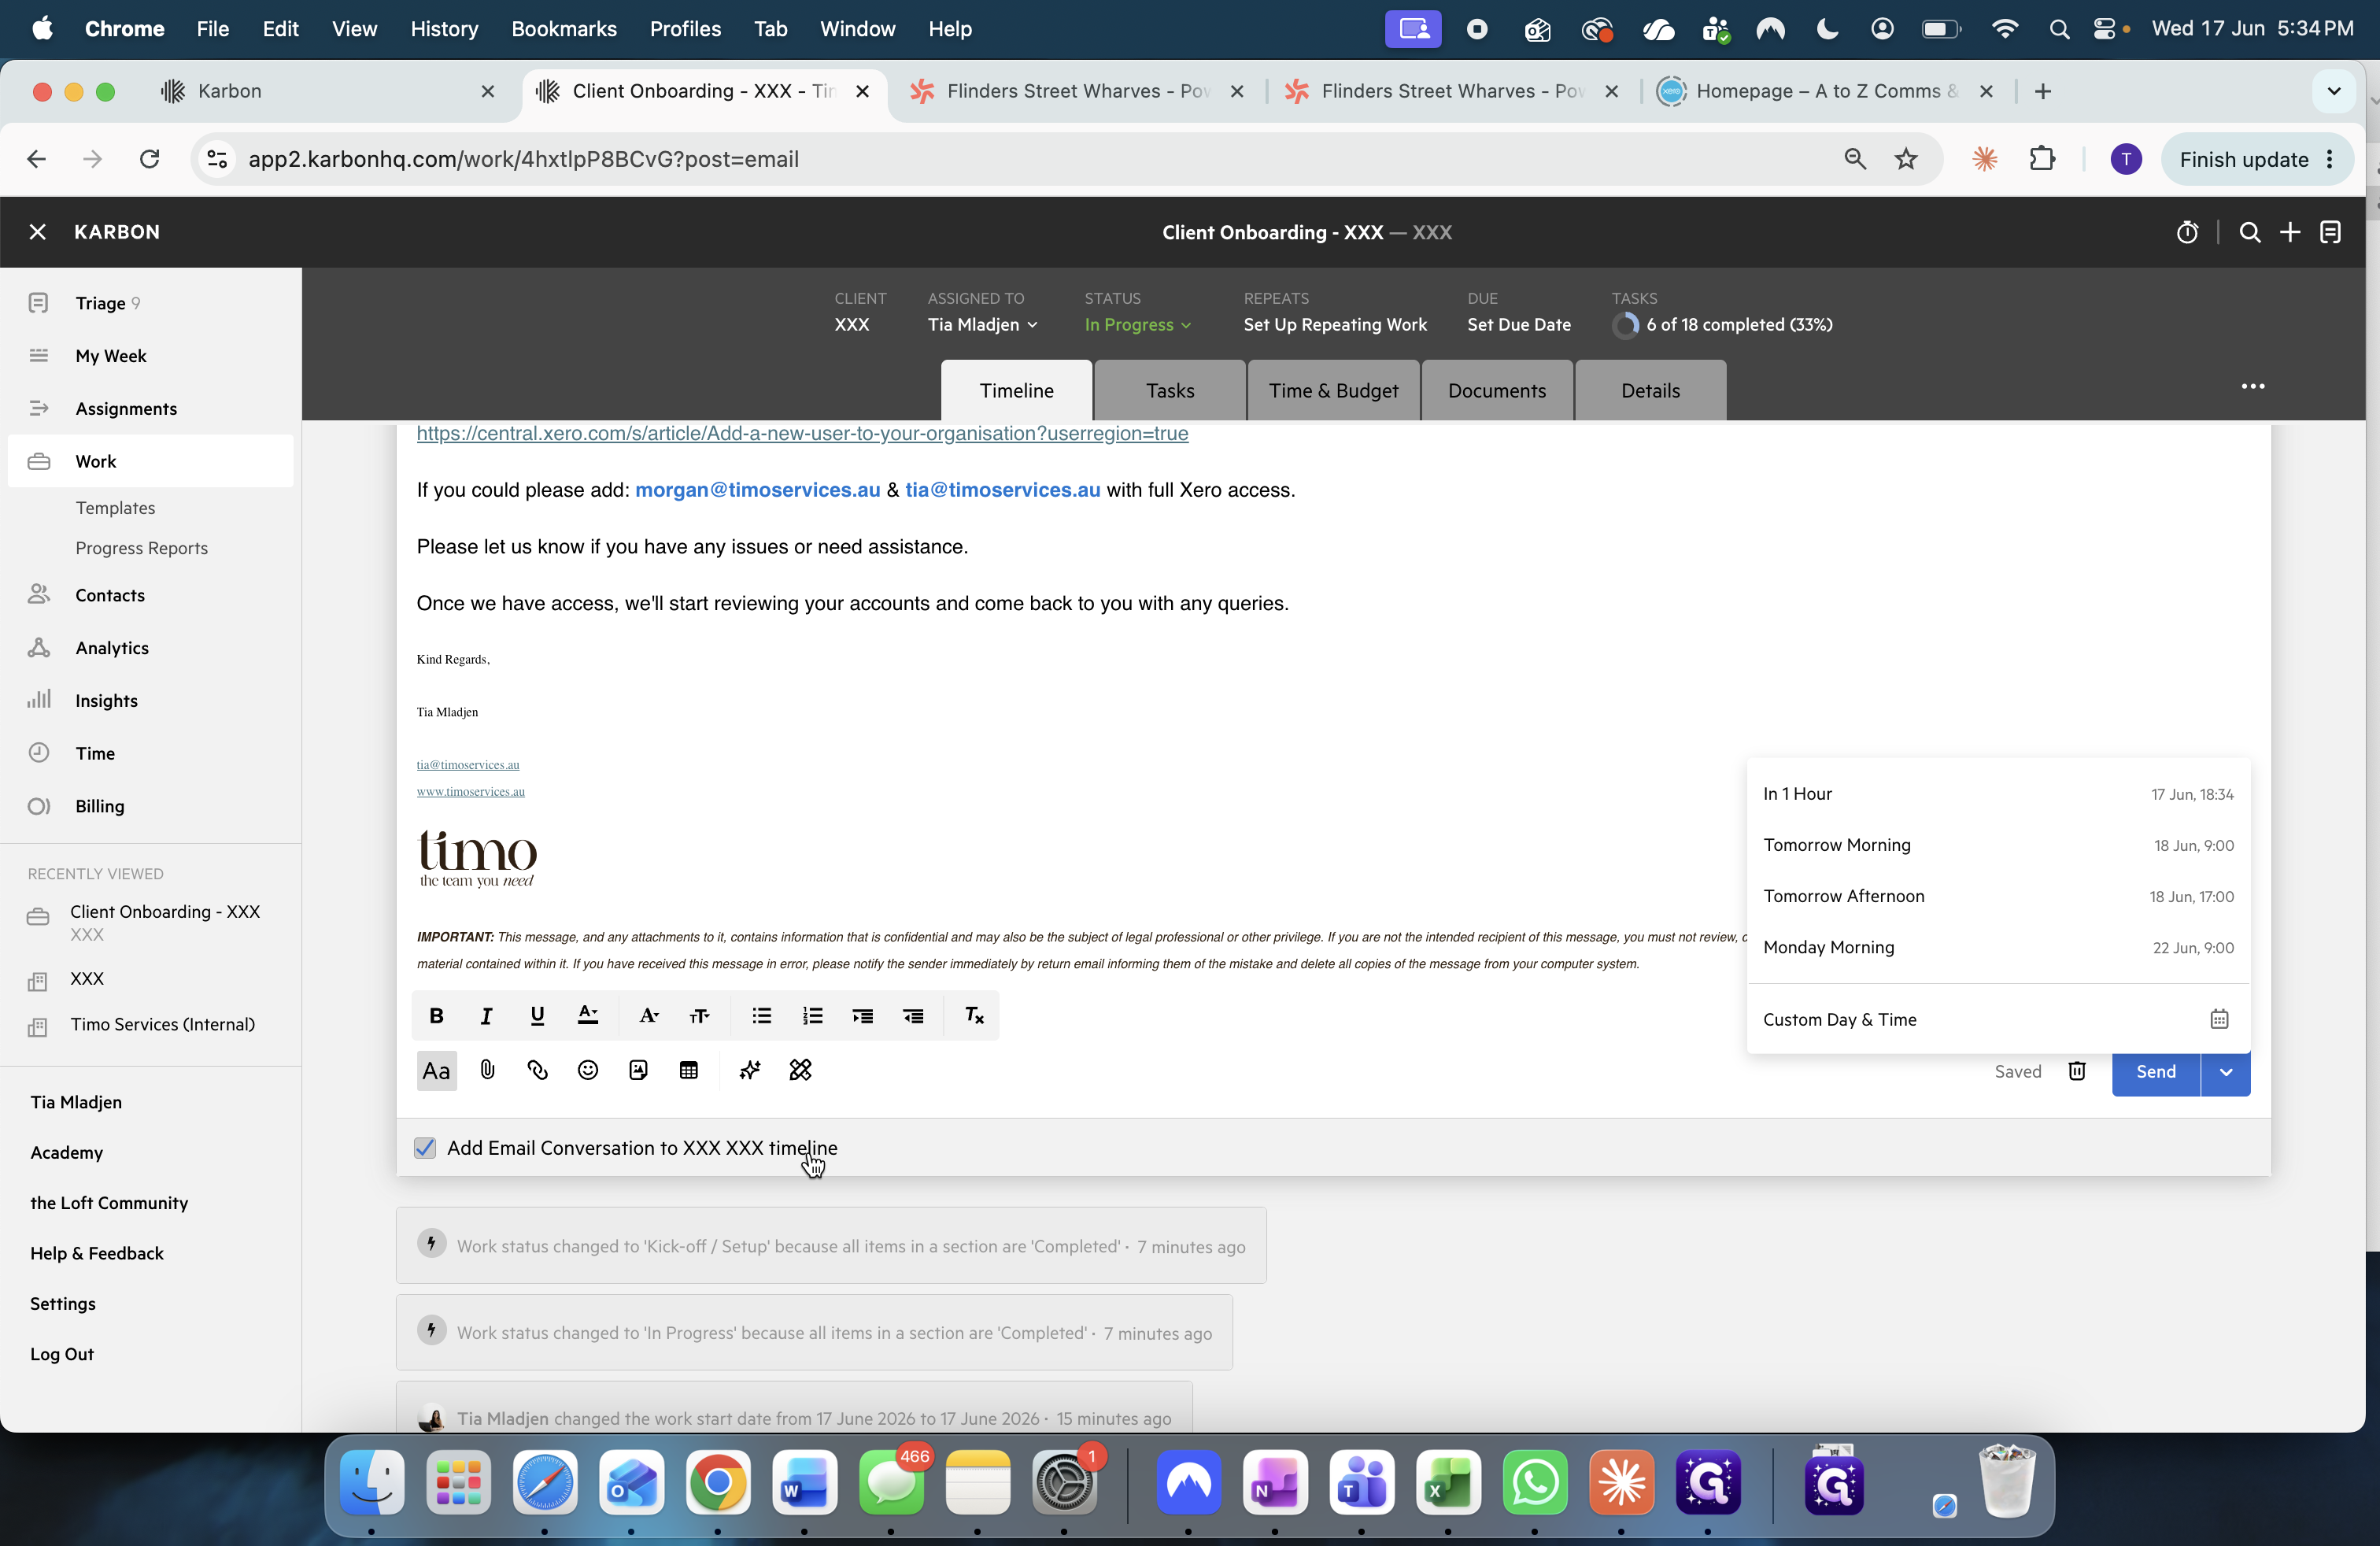
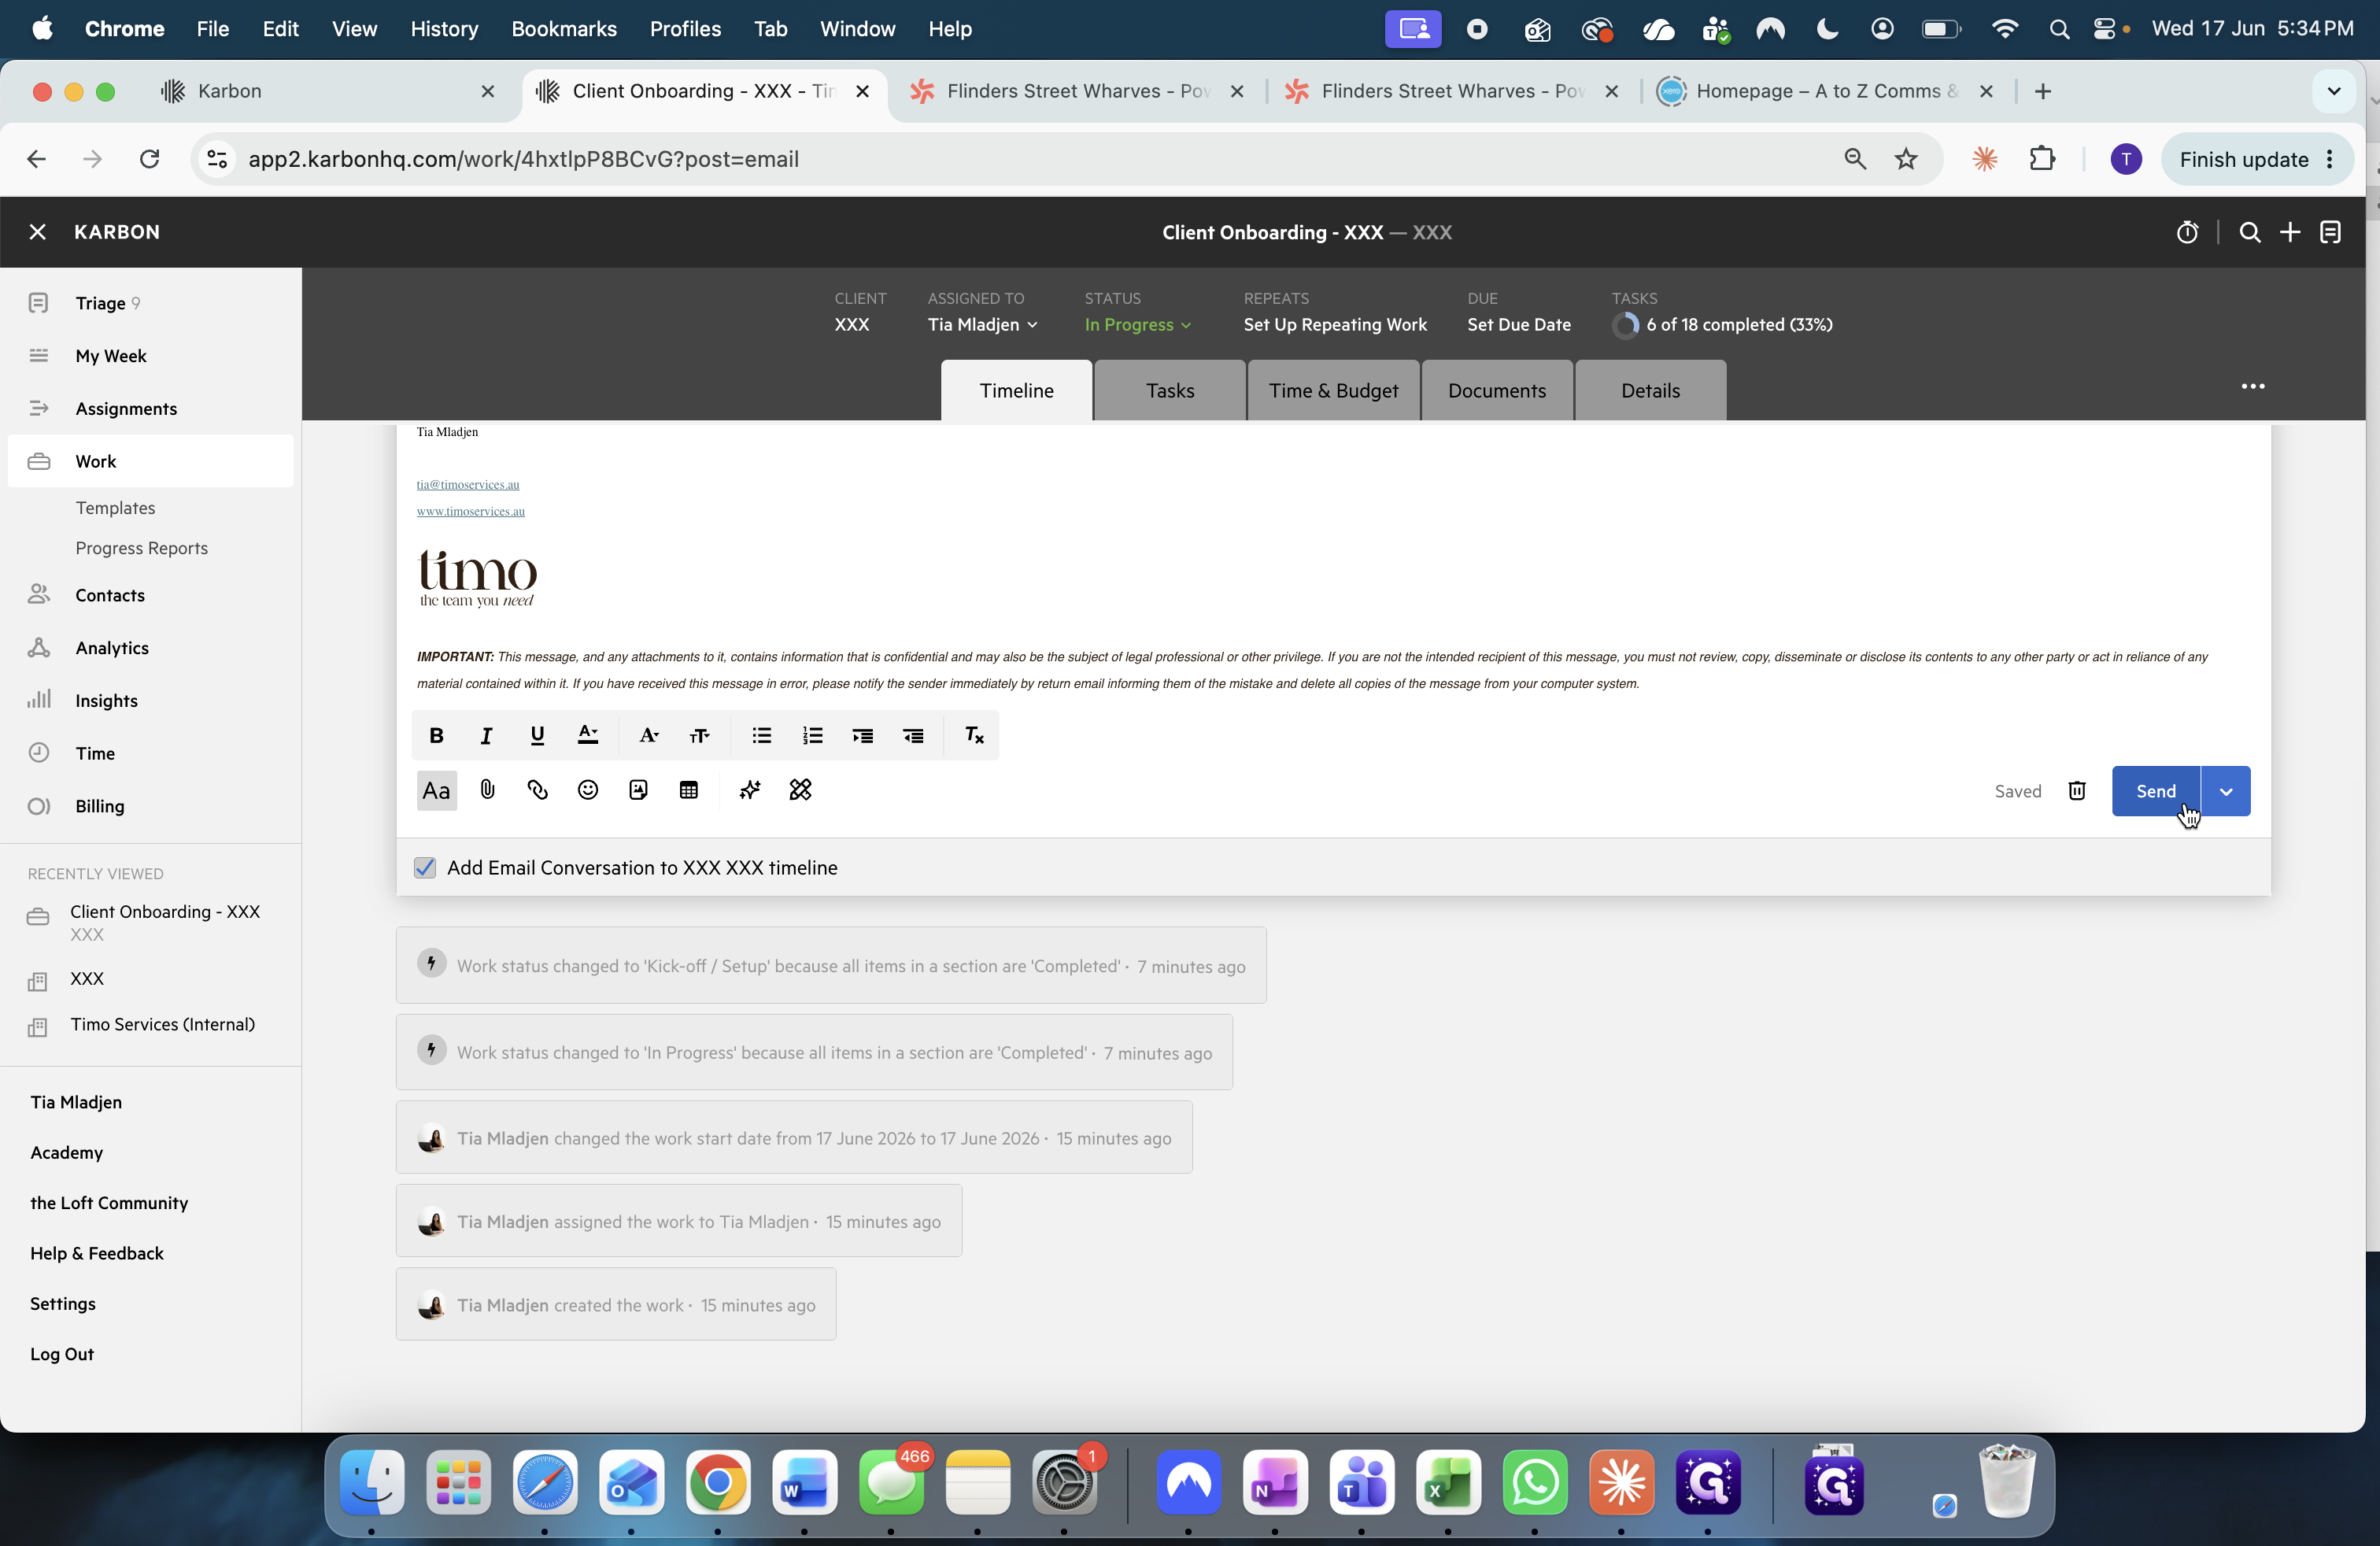
Ensure the Add Email Conversation to timeline box is checked so the communication history is saved to the project.
33
Click Send.
34
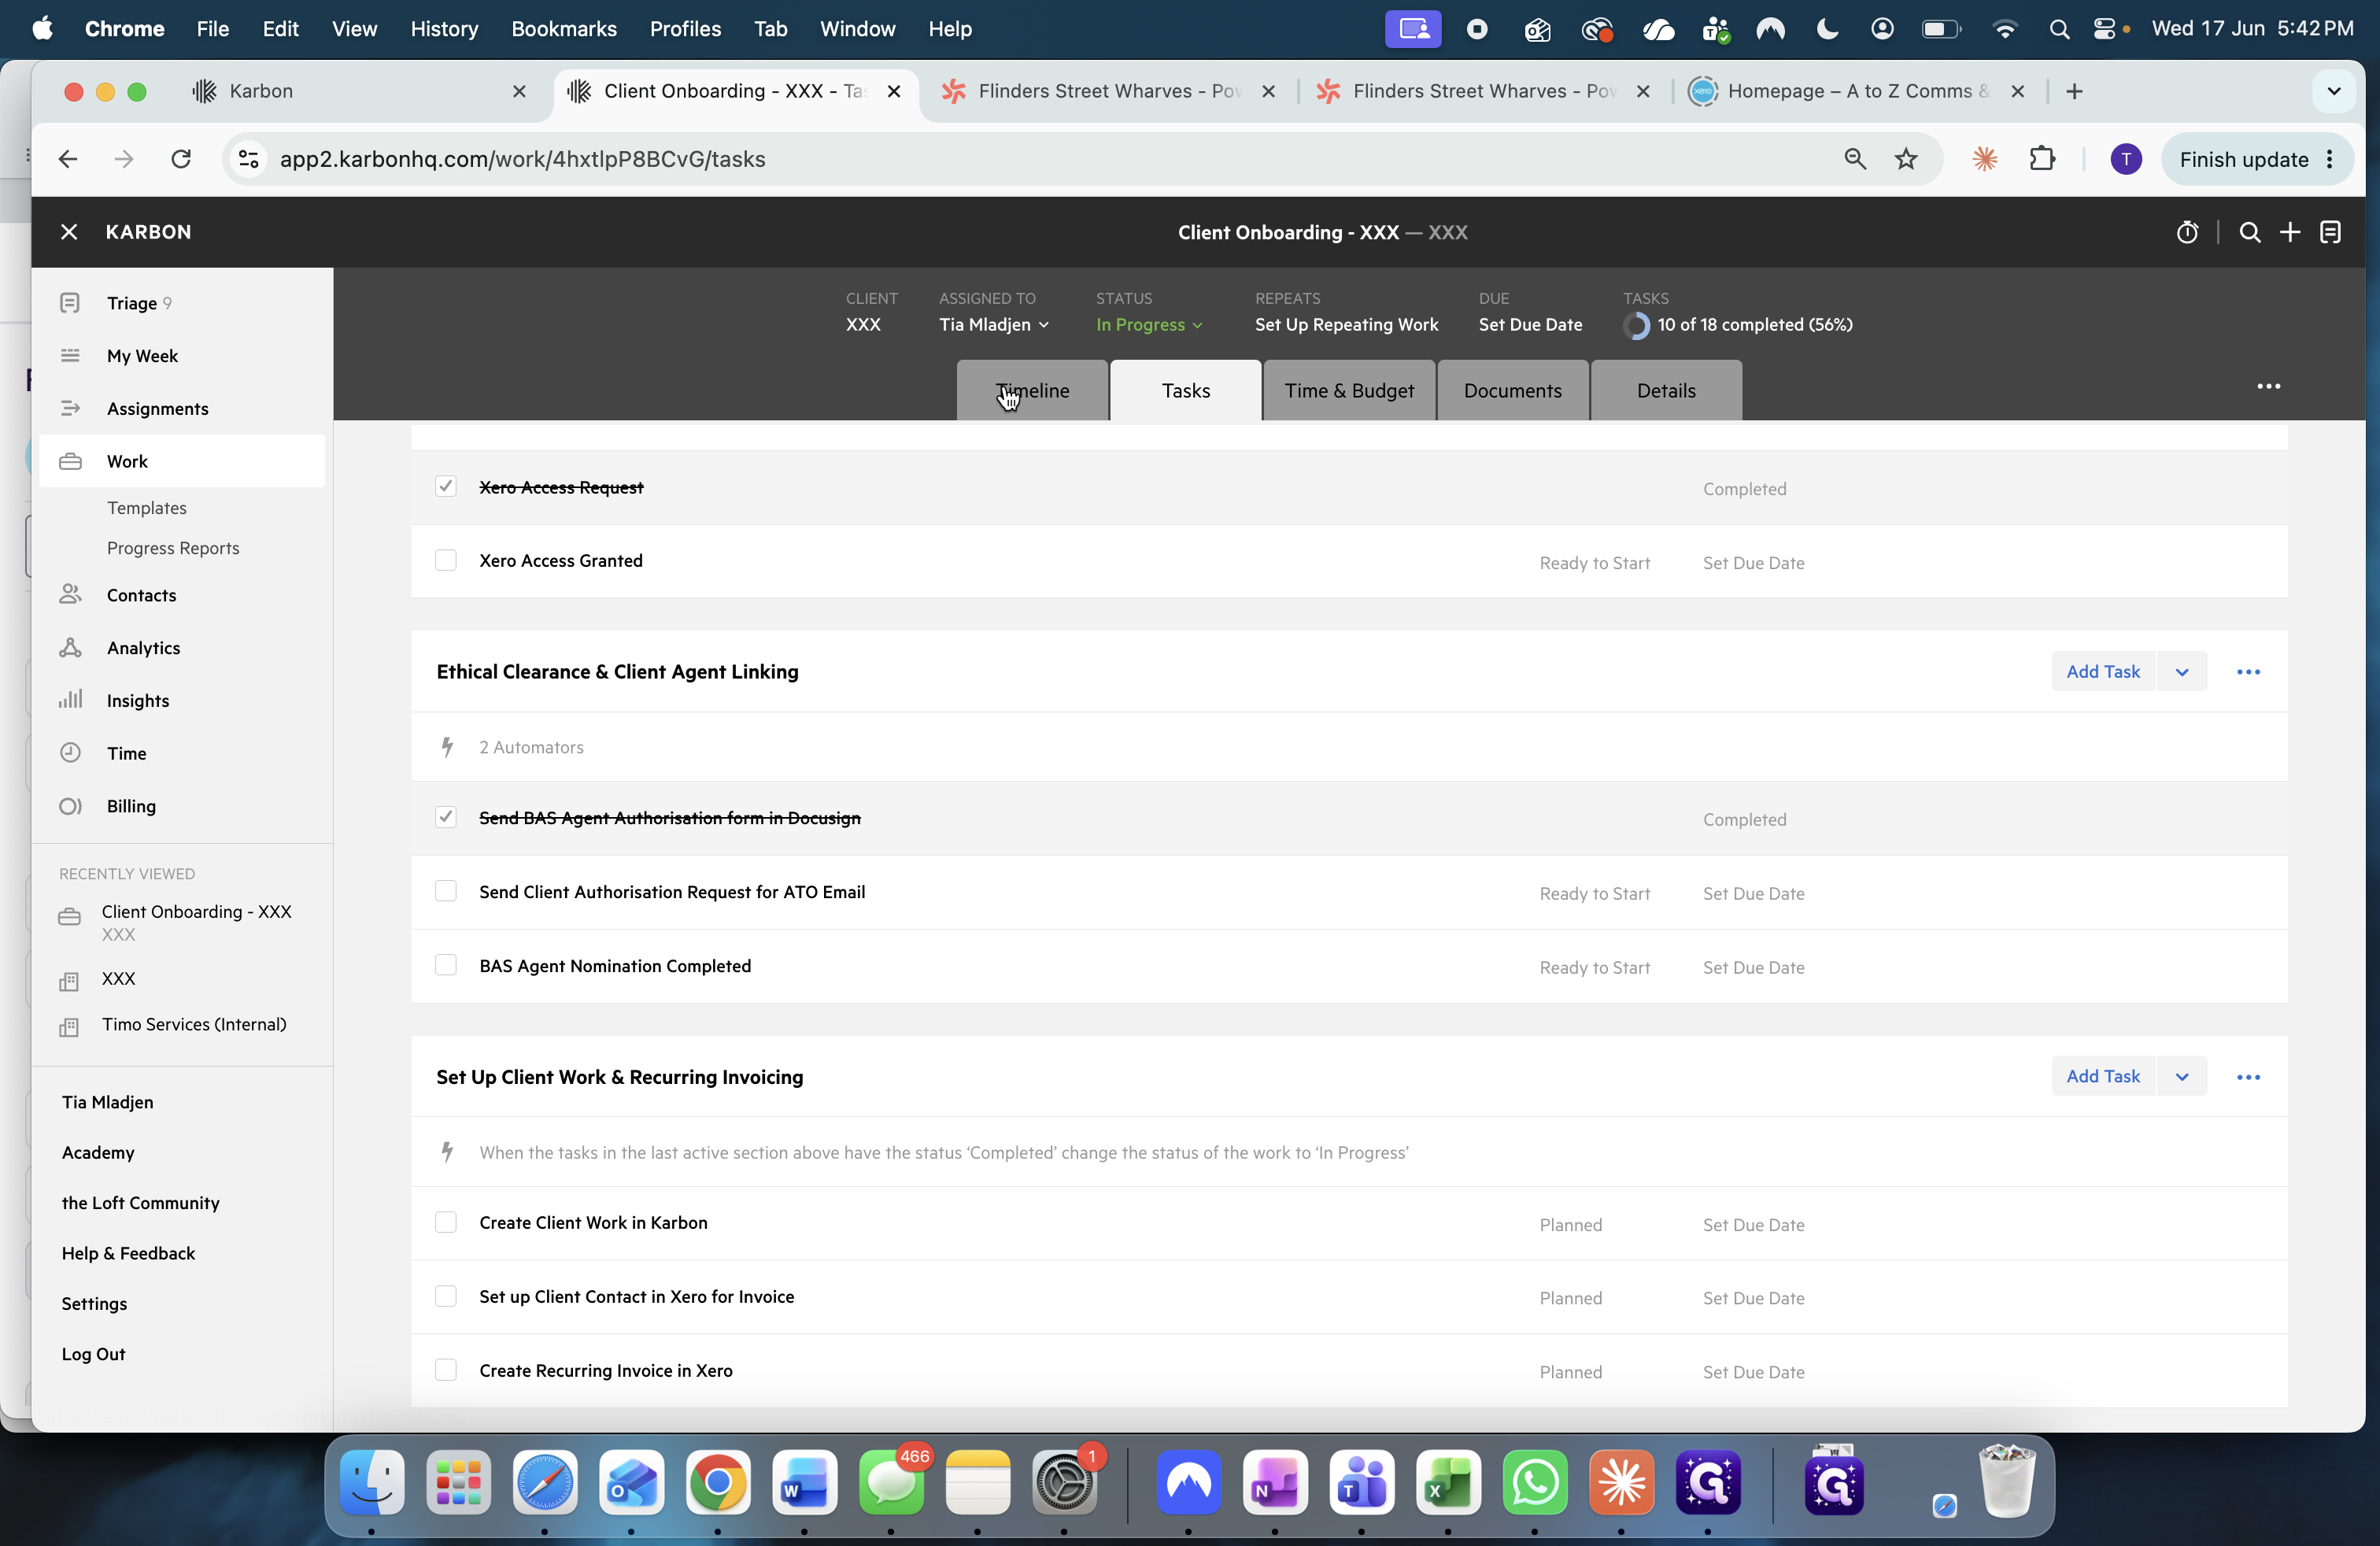
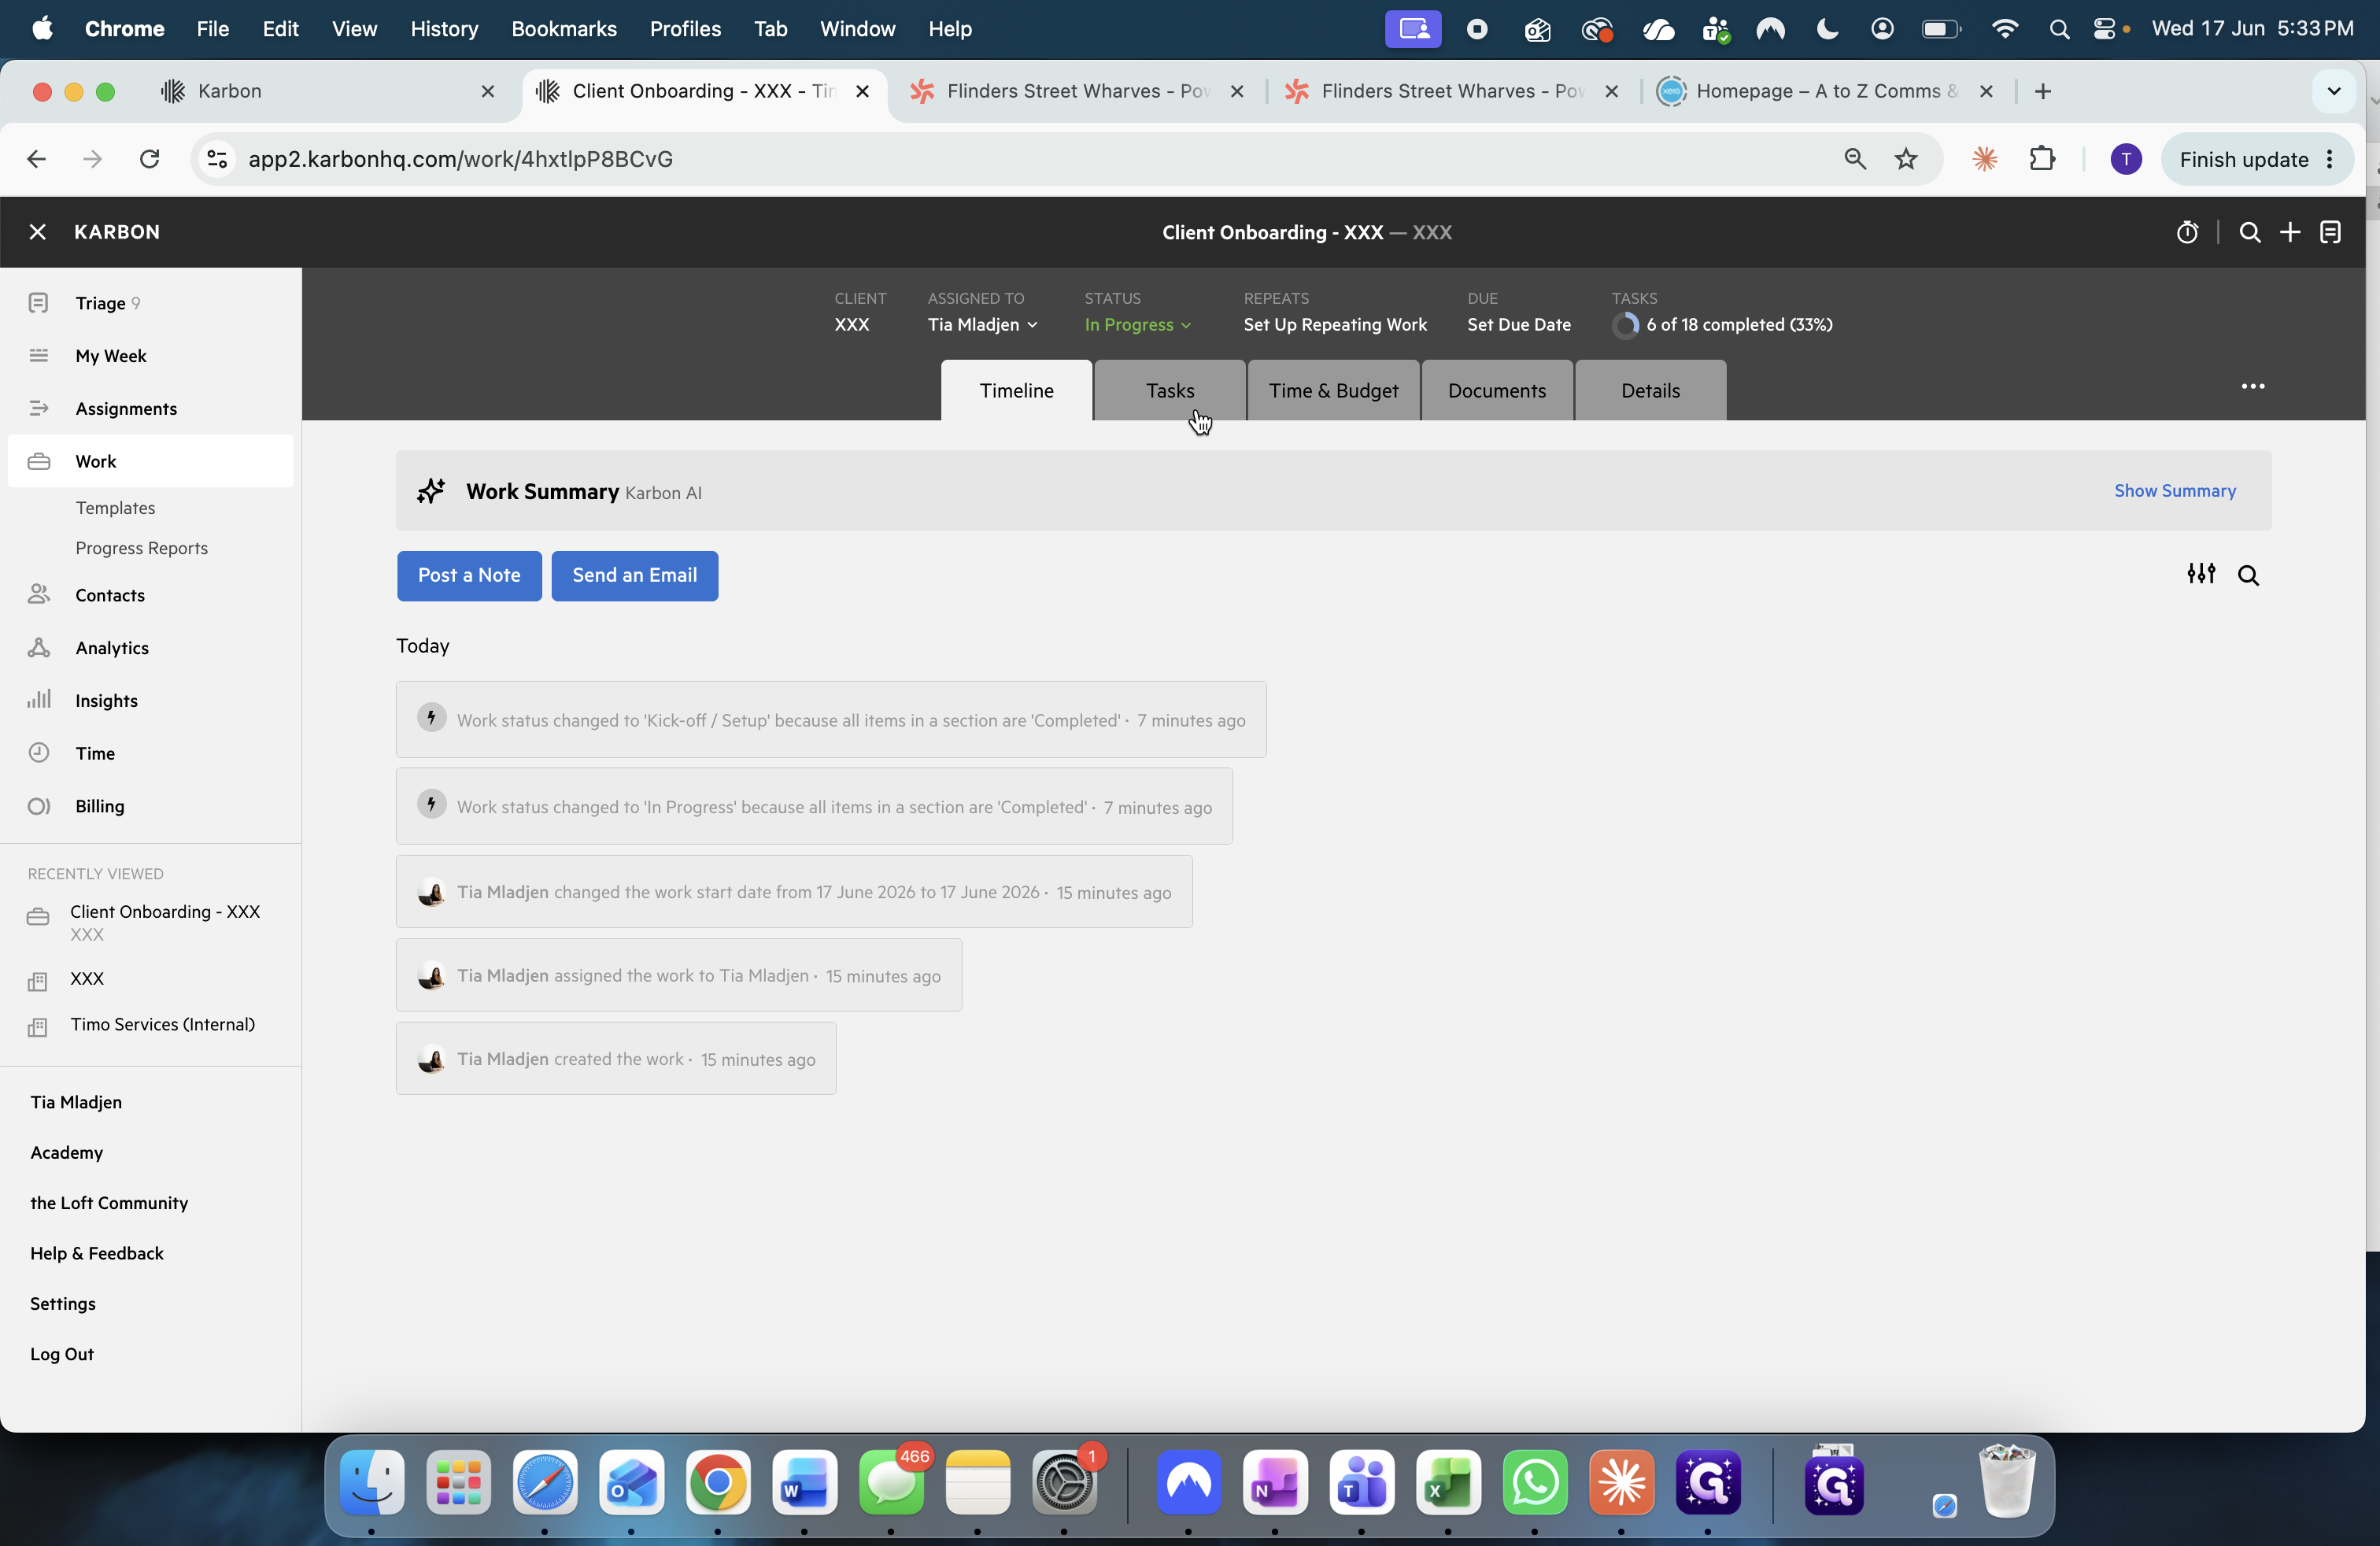
Navigate back to the Tasks tab.
35
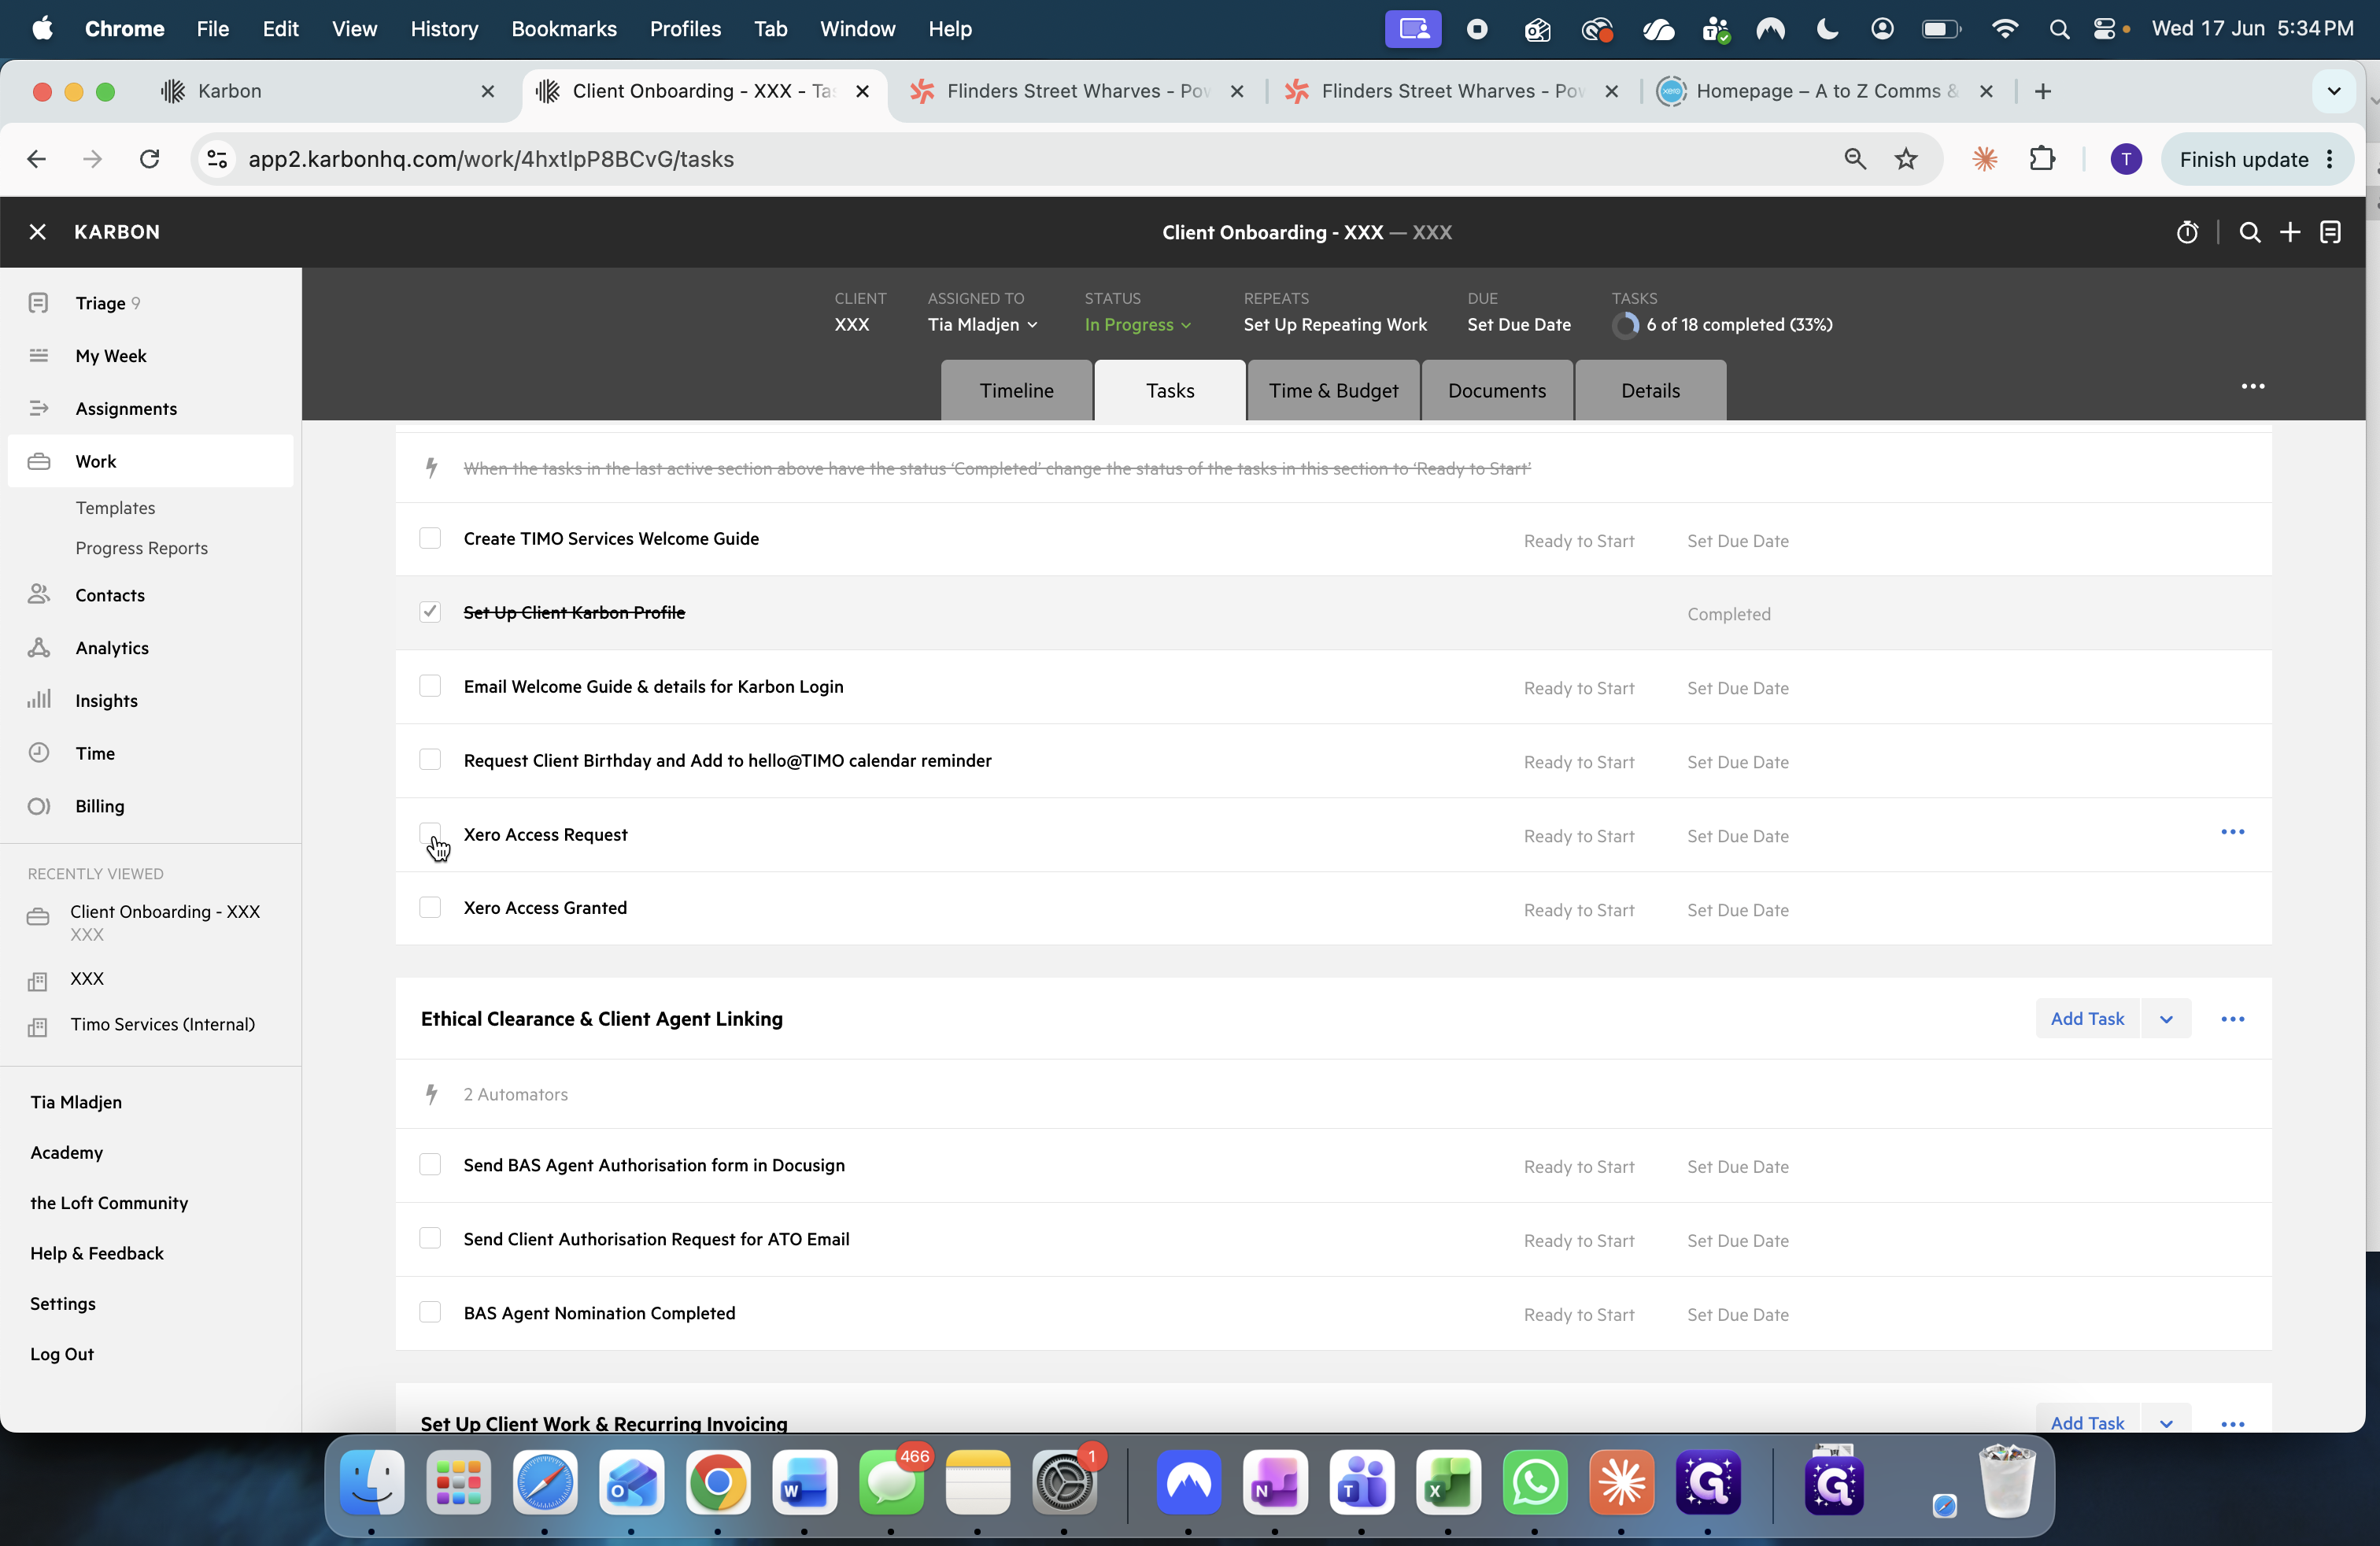
Check off the Xero Access Request task to mark it complete.
Phase 5: Create a Custom Welcome Guide in Canva
Rather than starting from scratch, duplicate an existing guide from a client with similar service requirements.
36
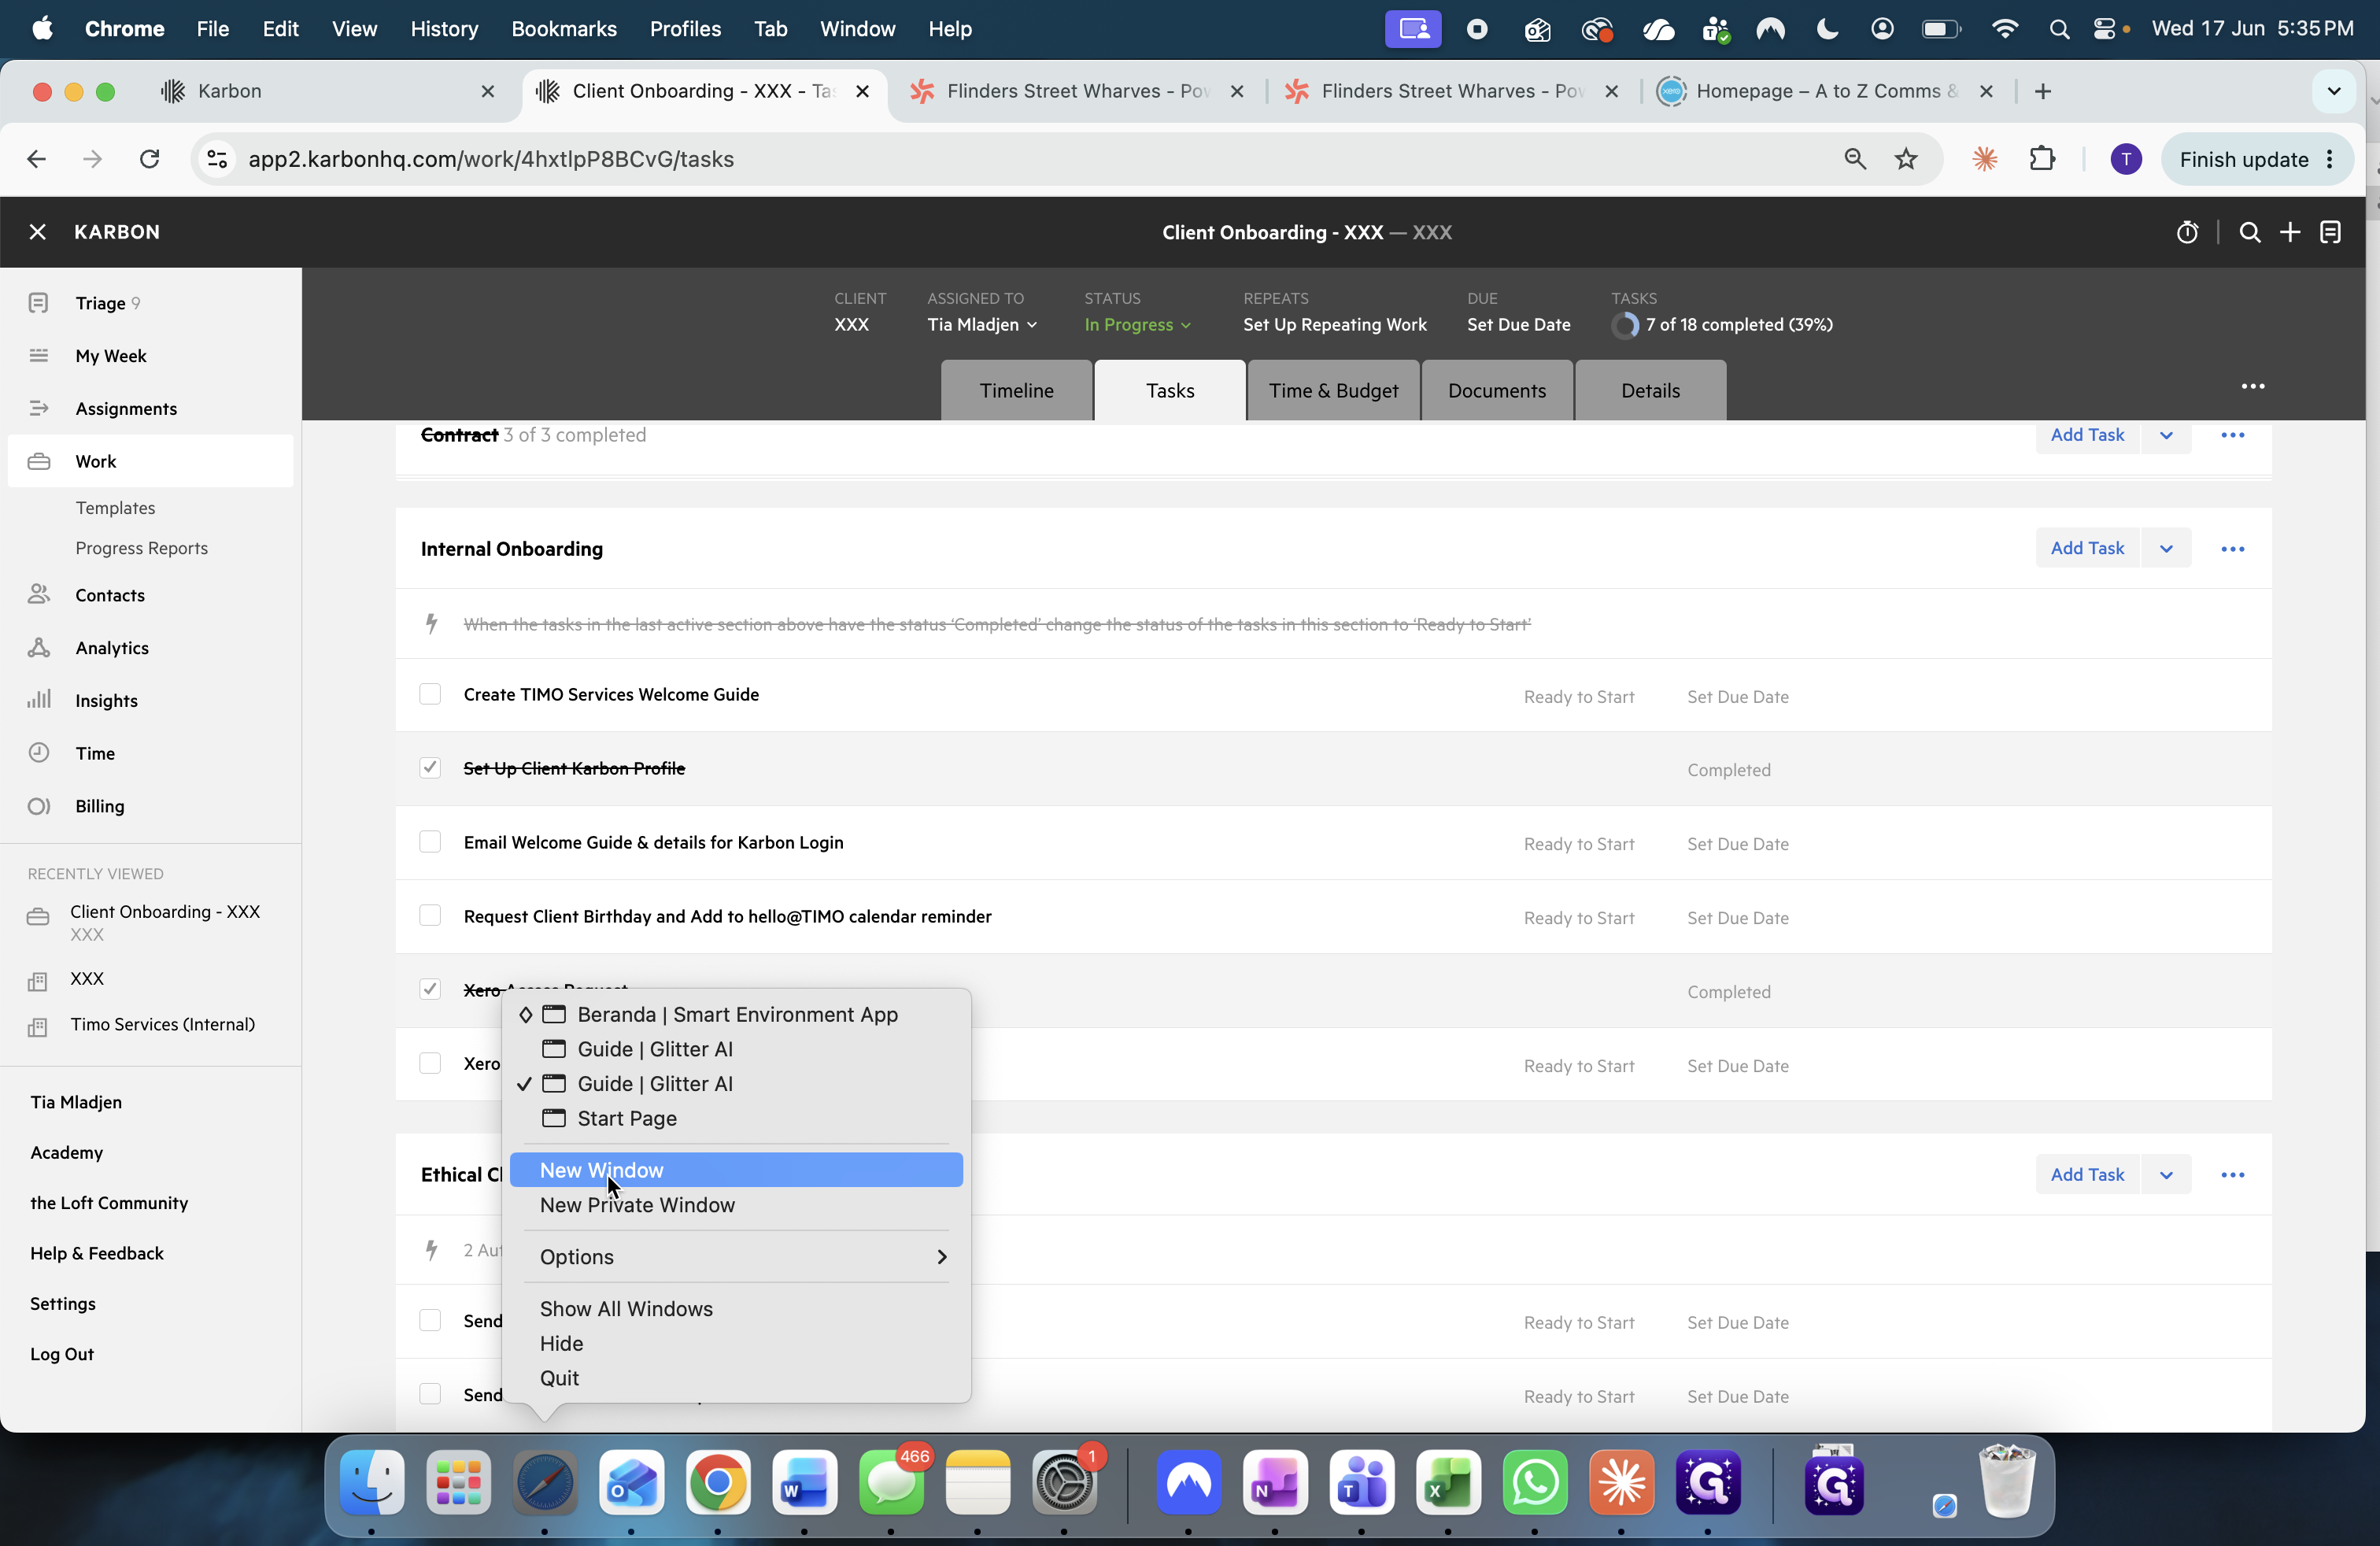
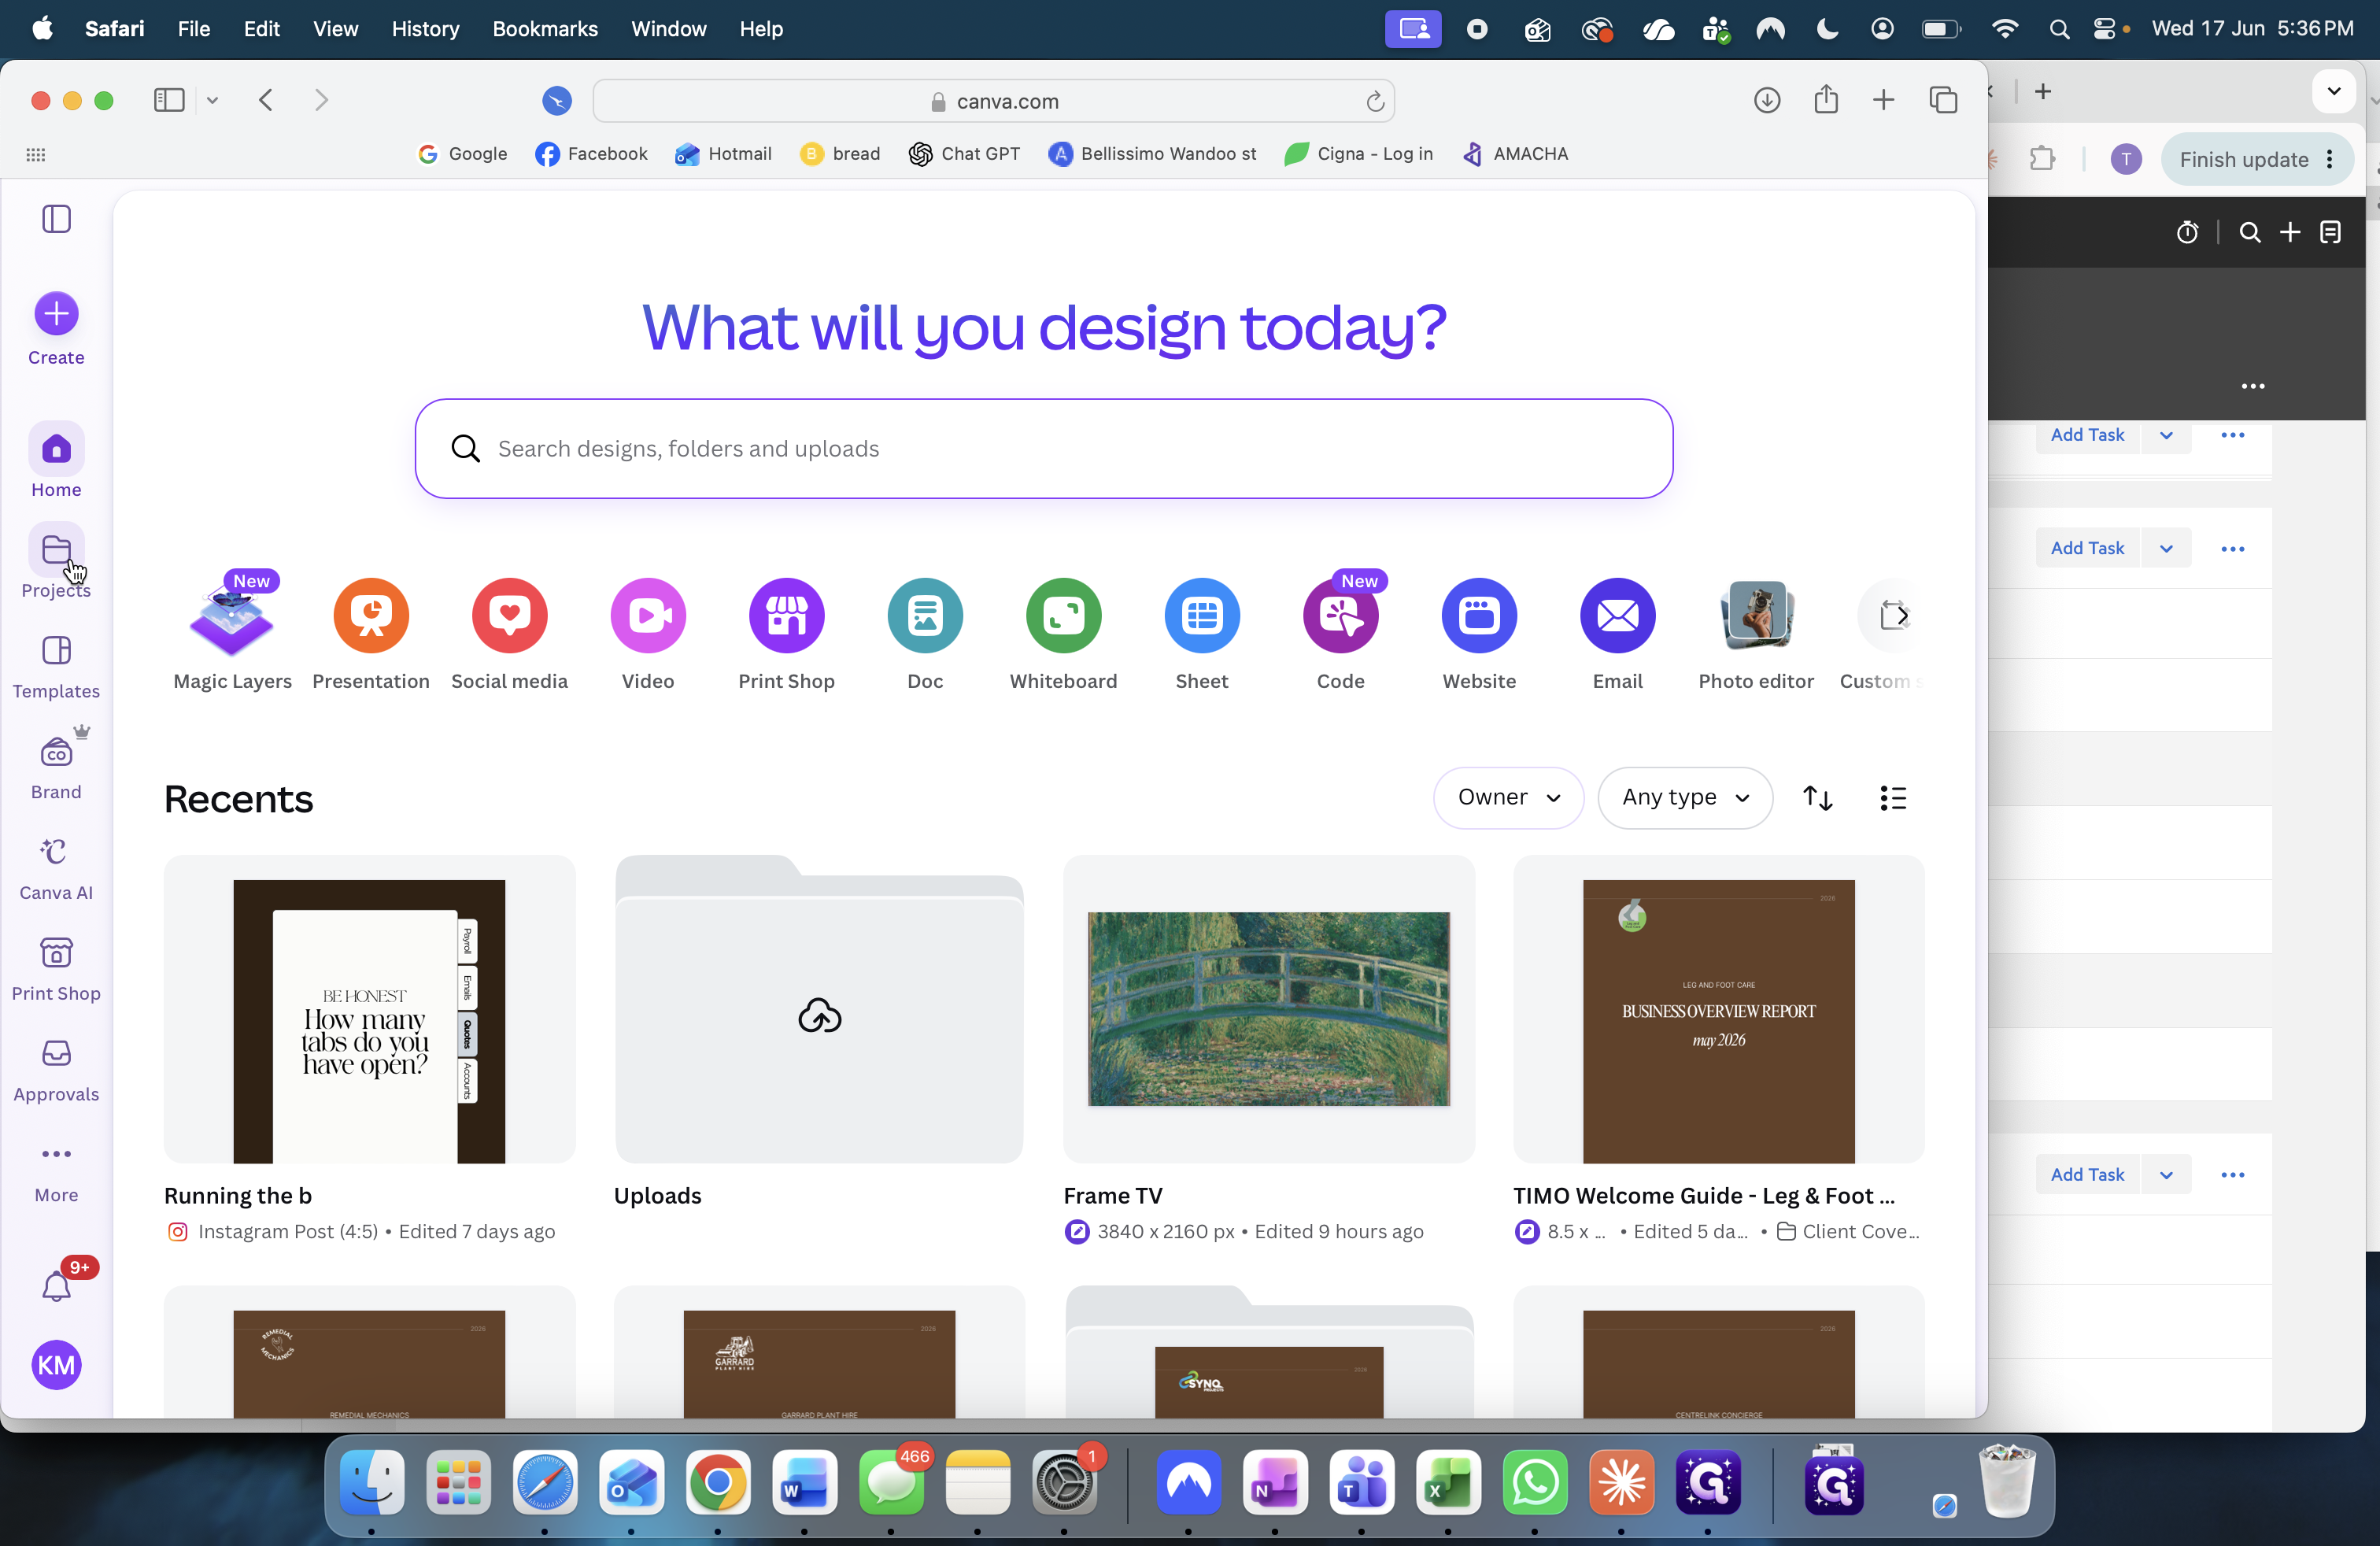
Open Canva in a new browser window.
37
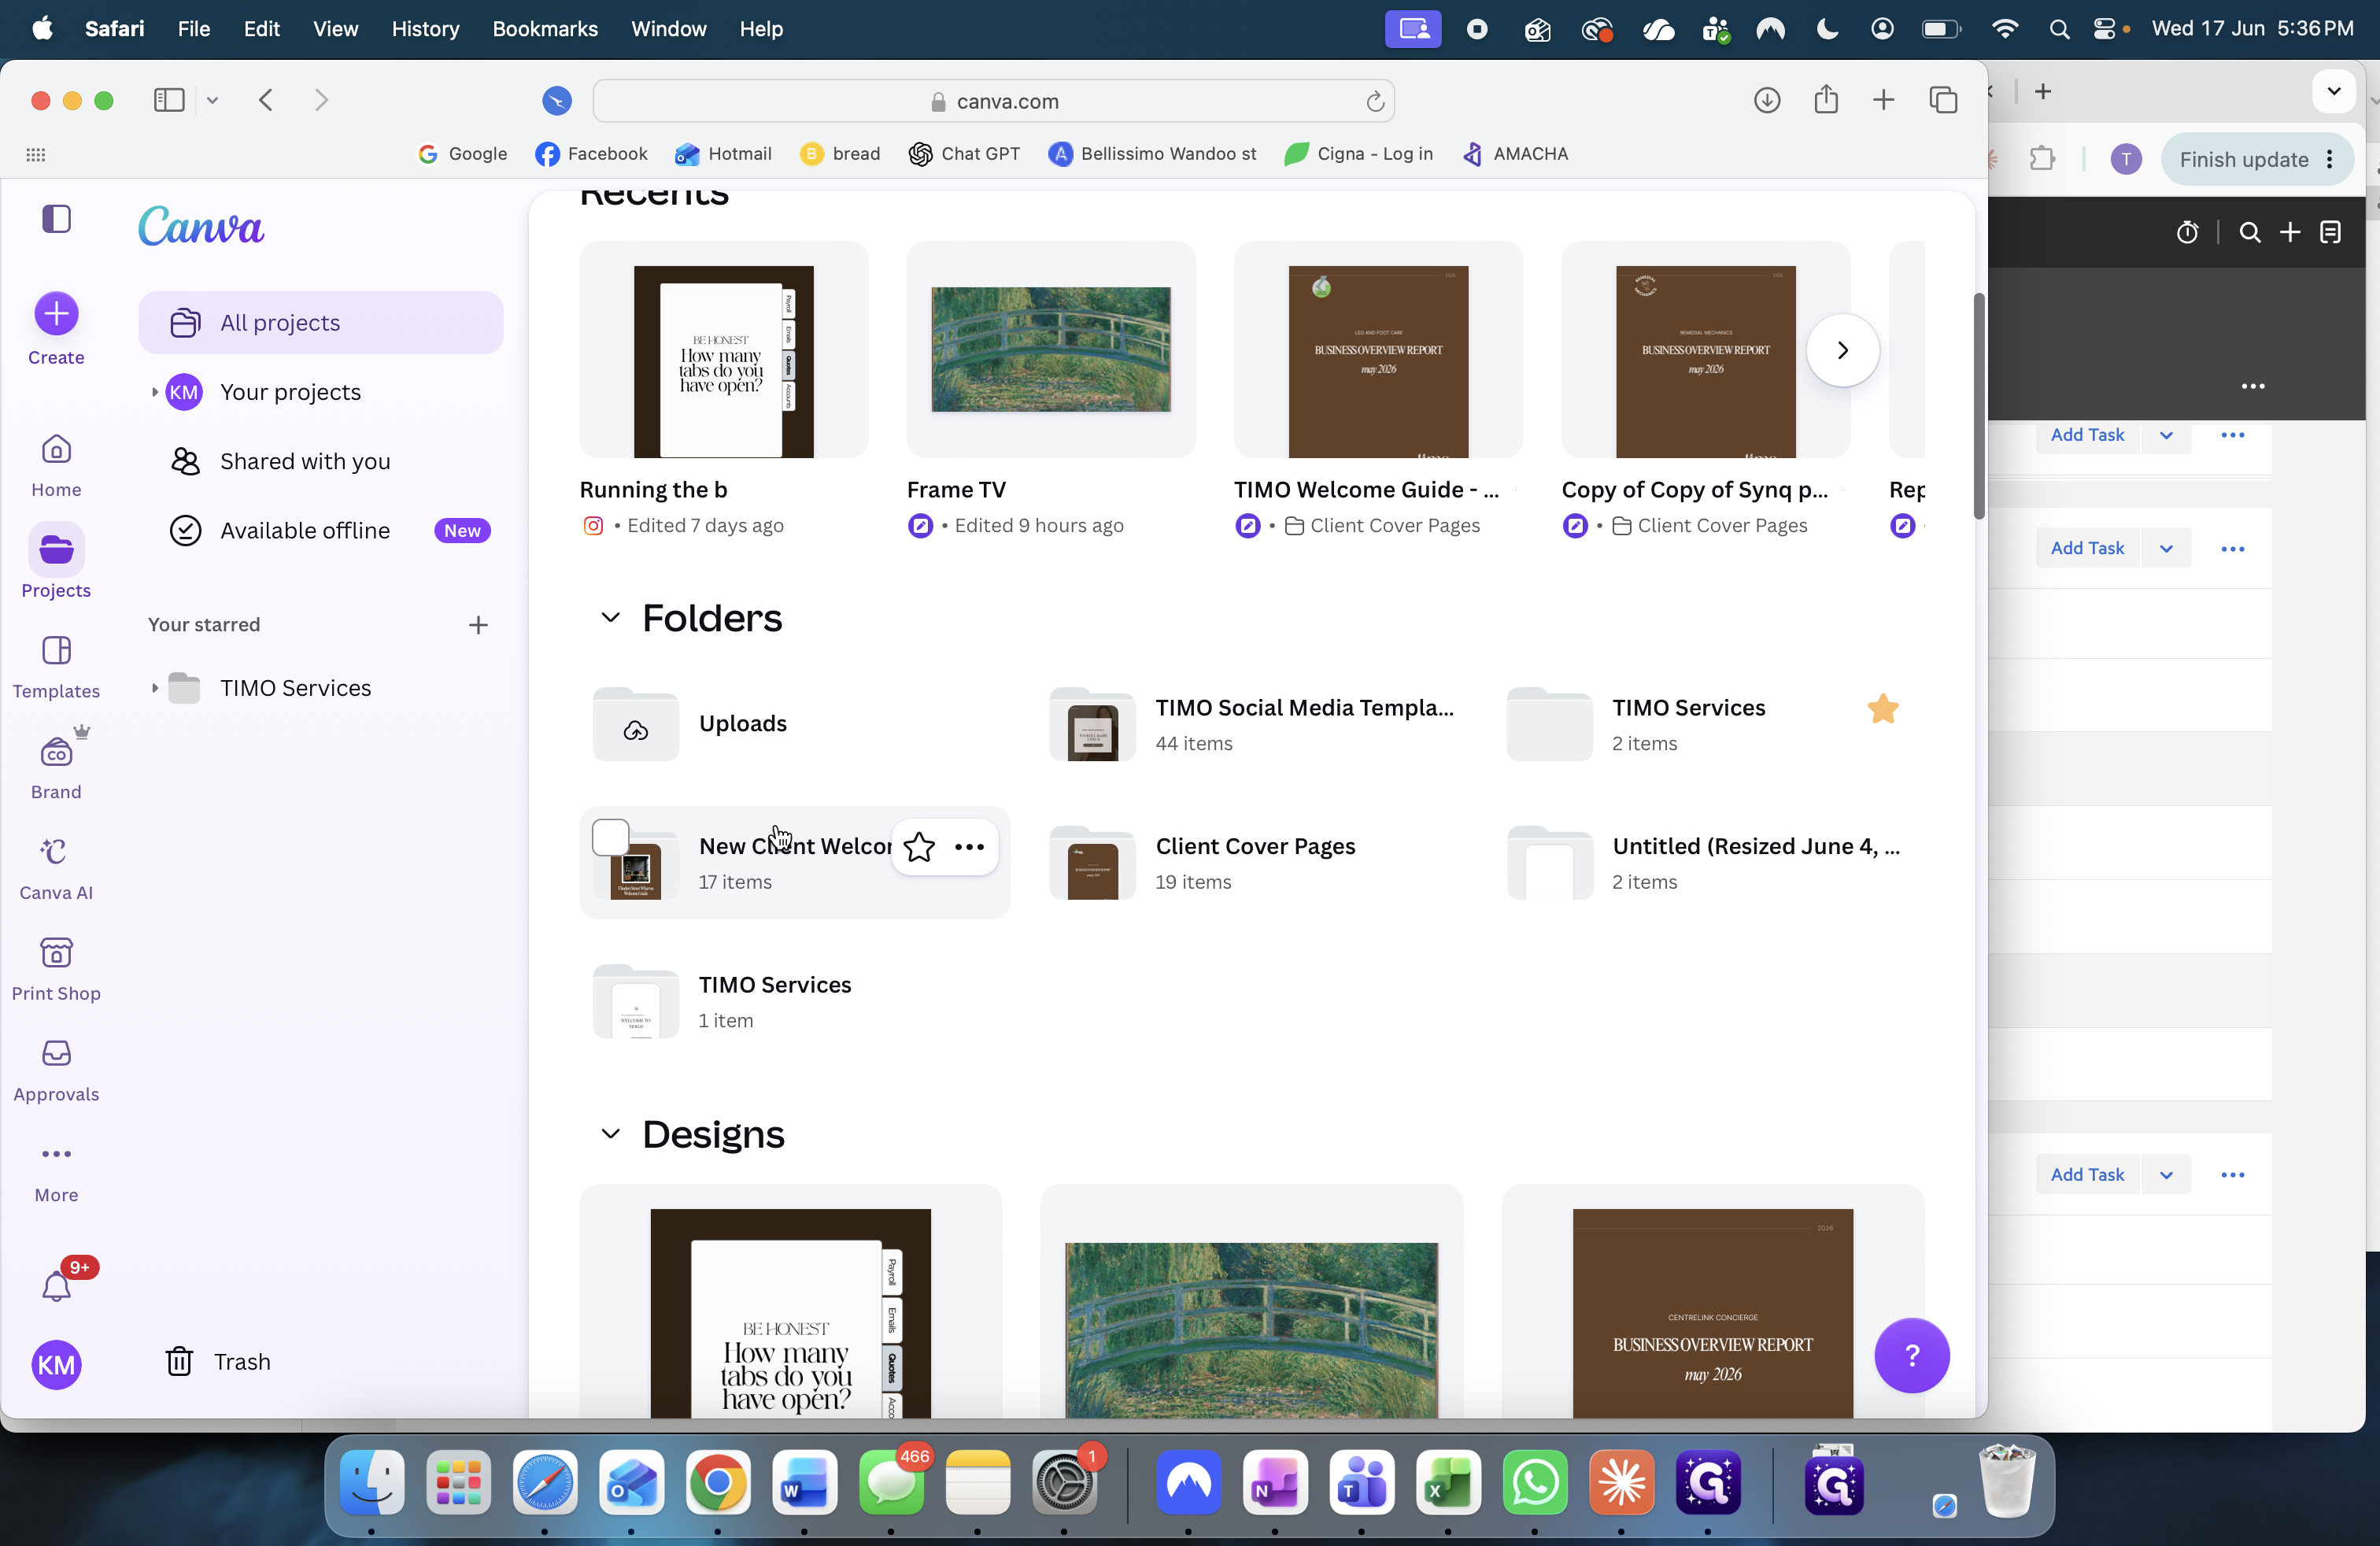
Click Projects in the left-hand navigation sidebar.
38
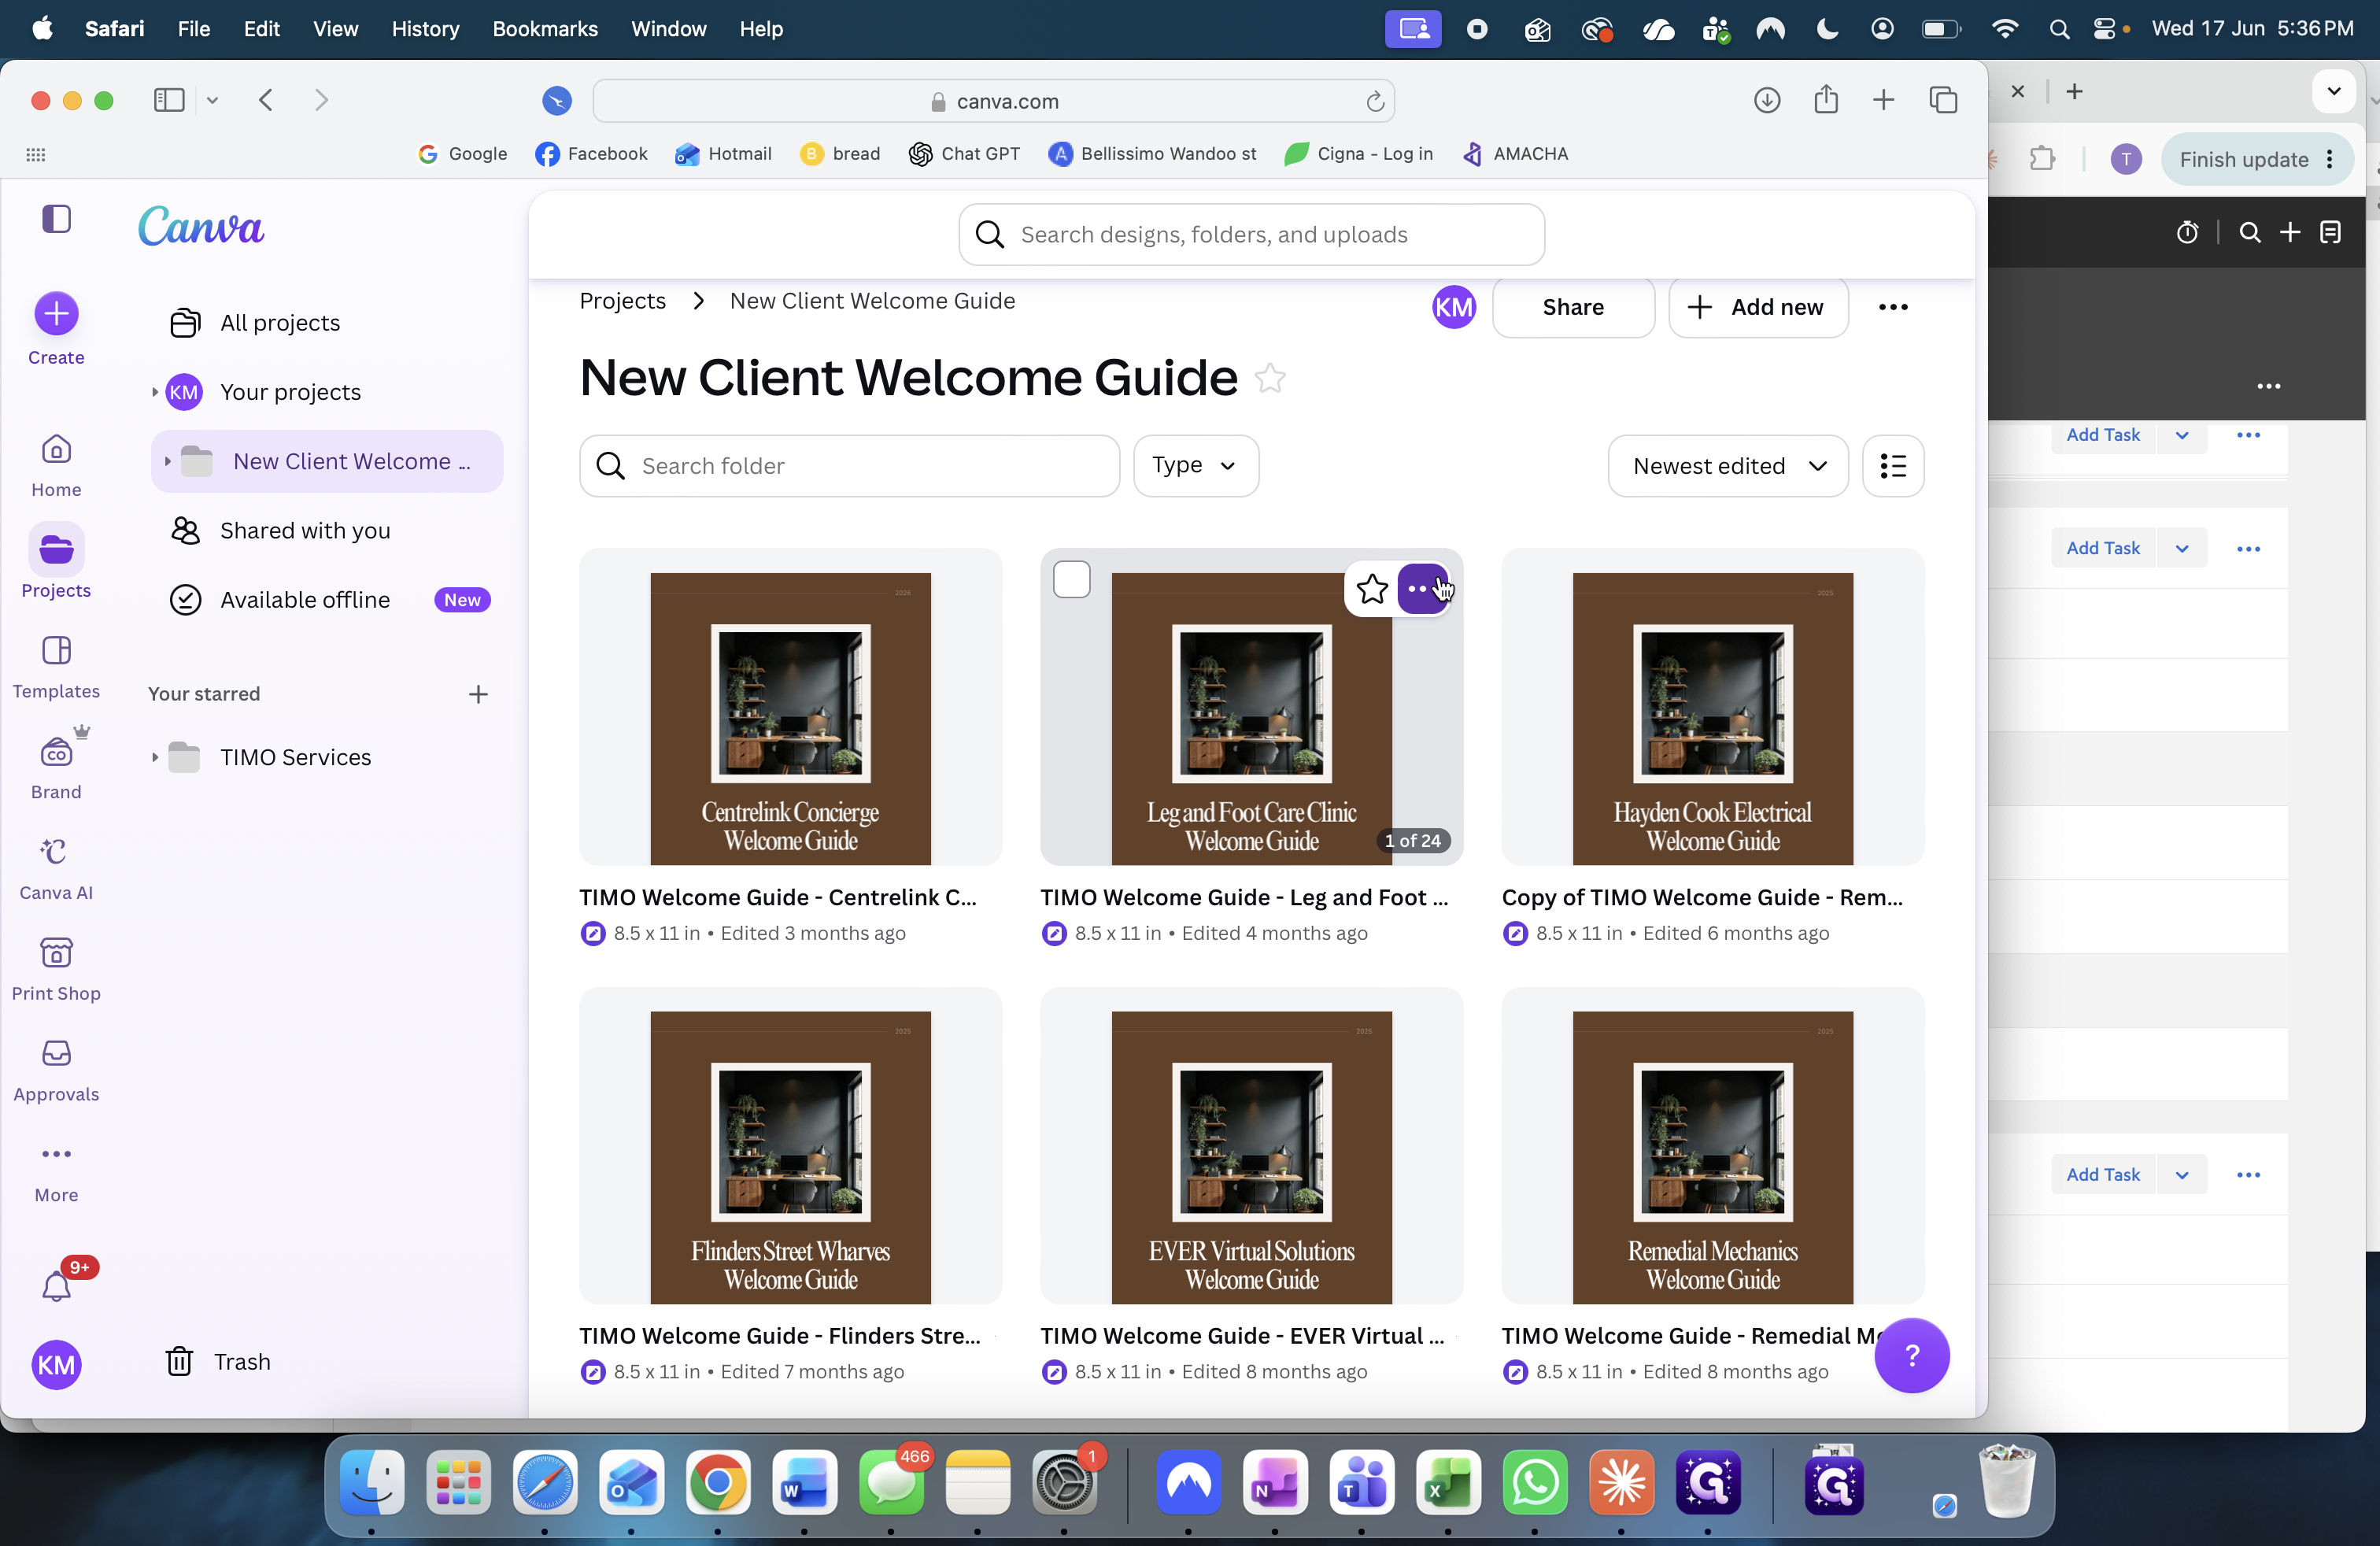
Open the New Client Welcome folder.
39
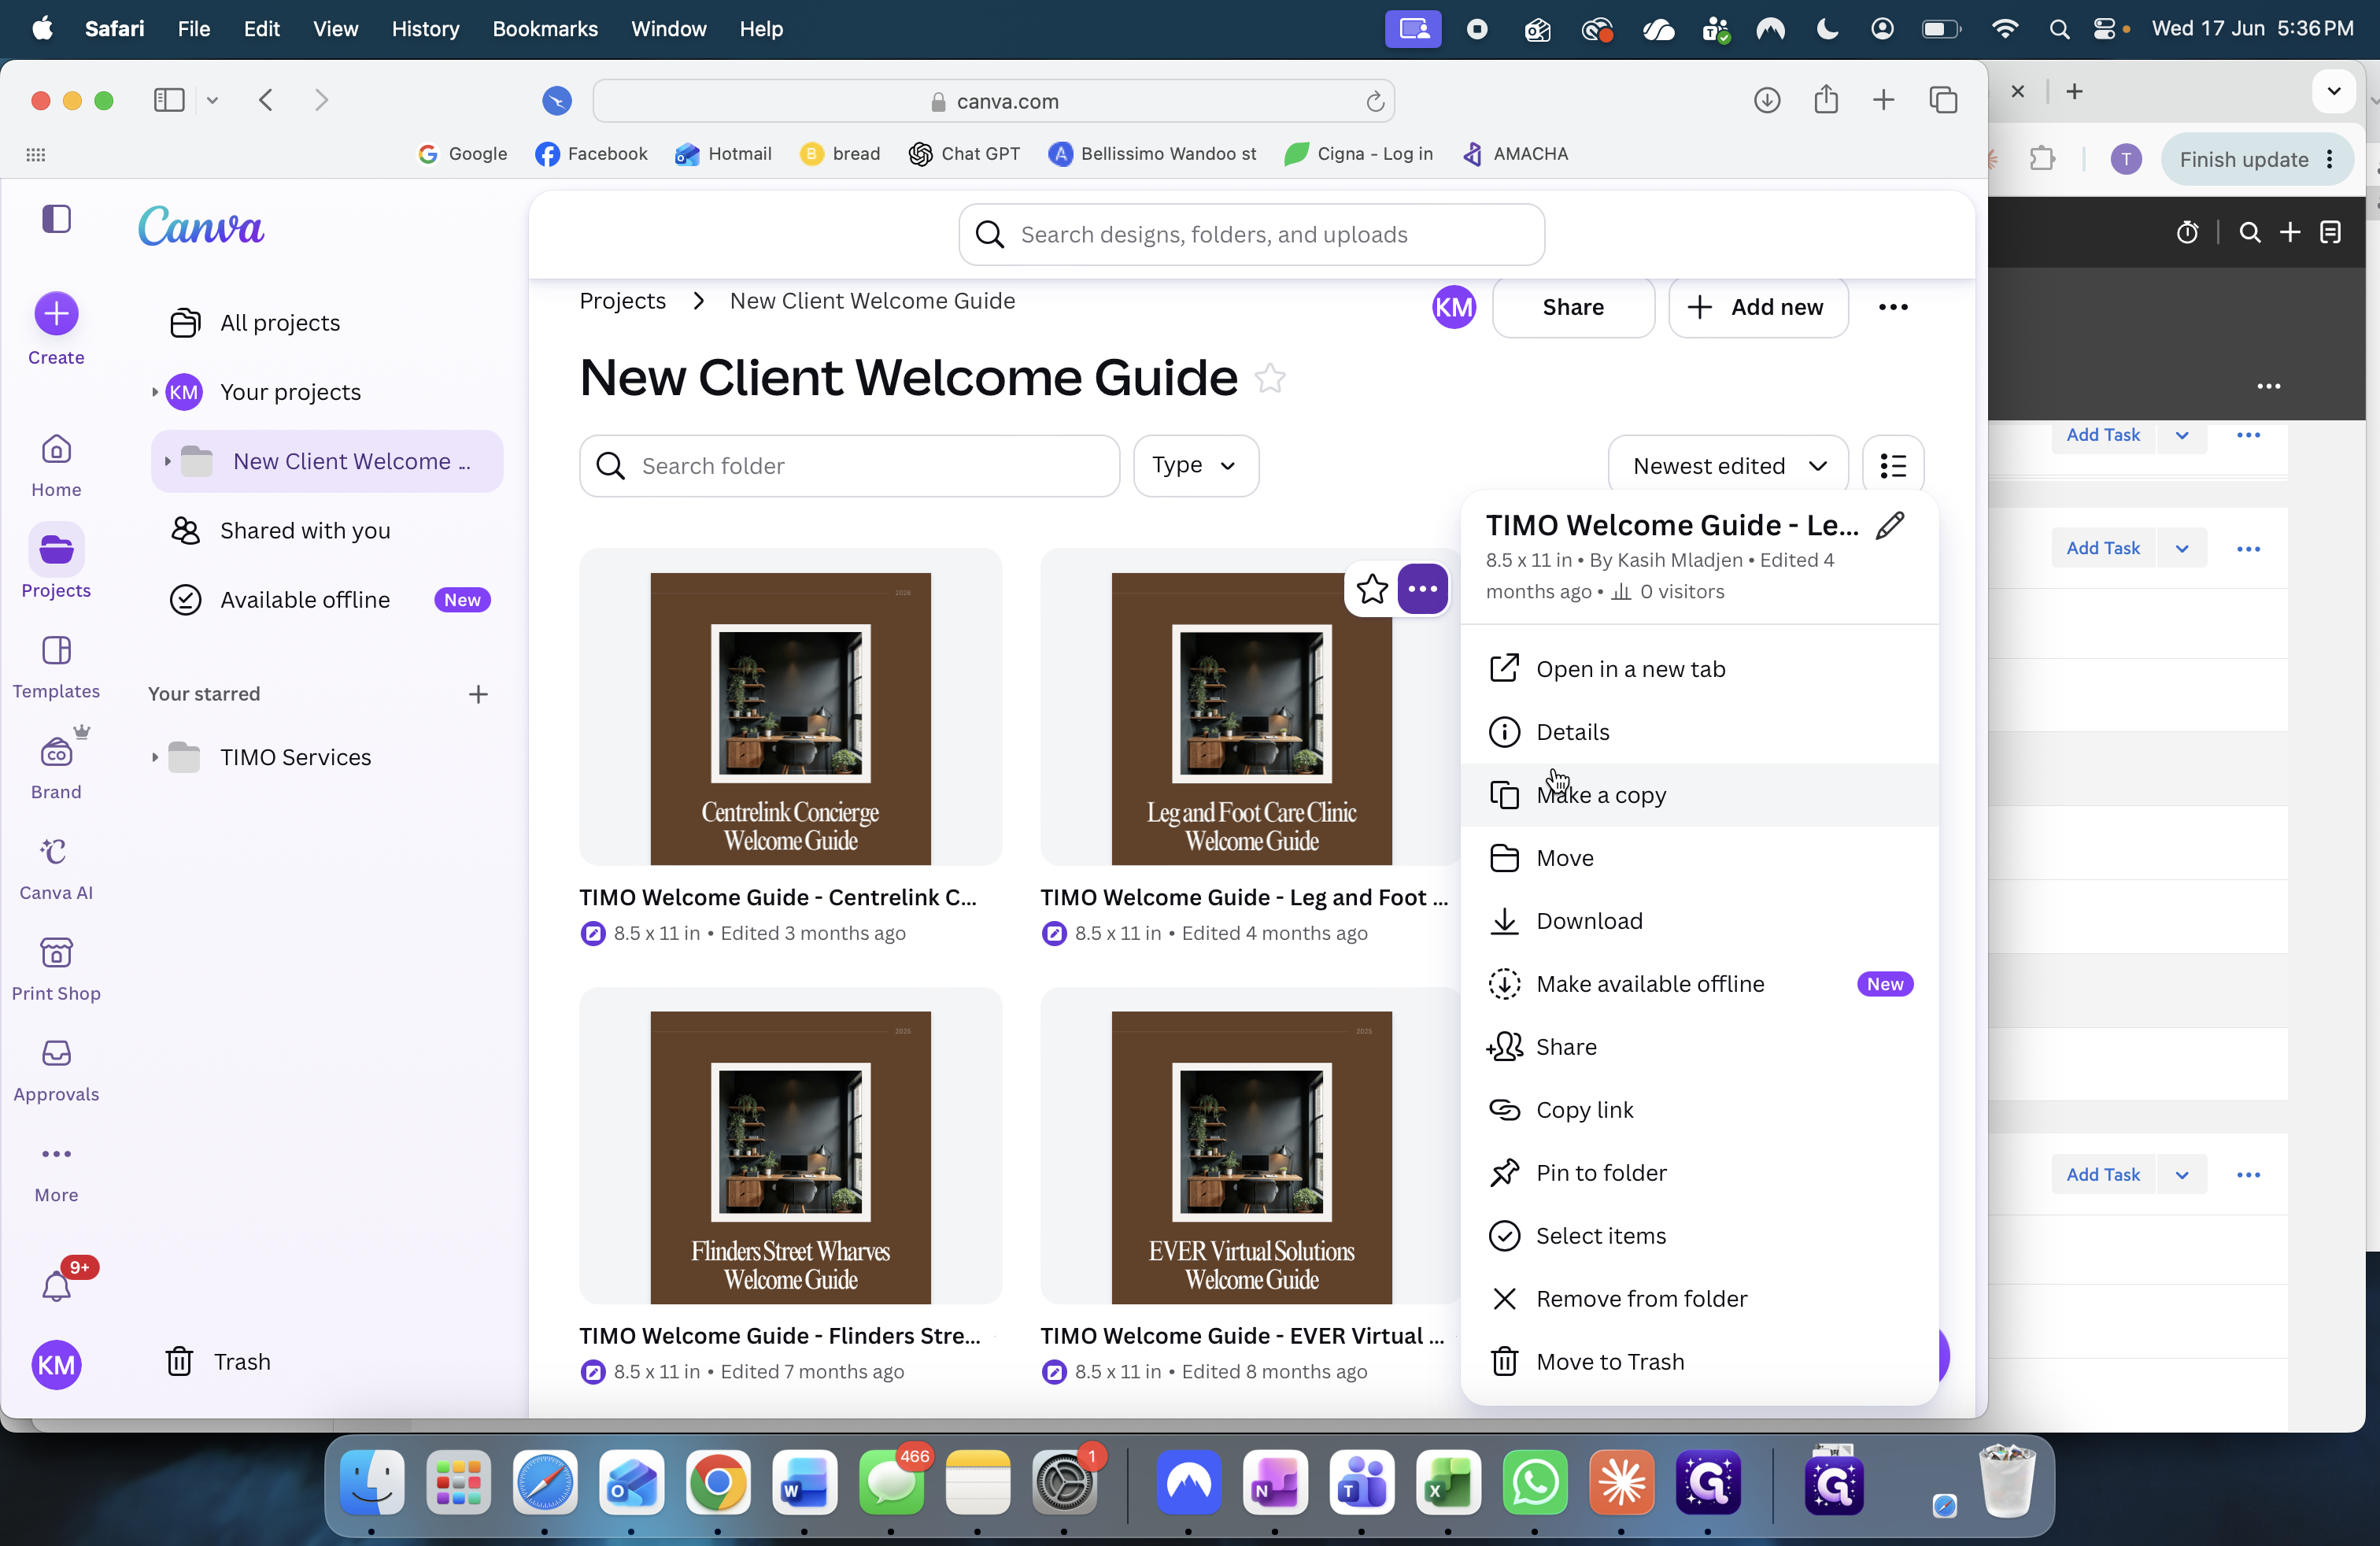
Locate a welcome guide from a client with similar services and click its three-dot menu icon.
40
Select Make a copy.
41
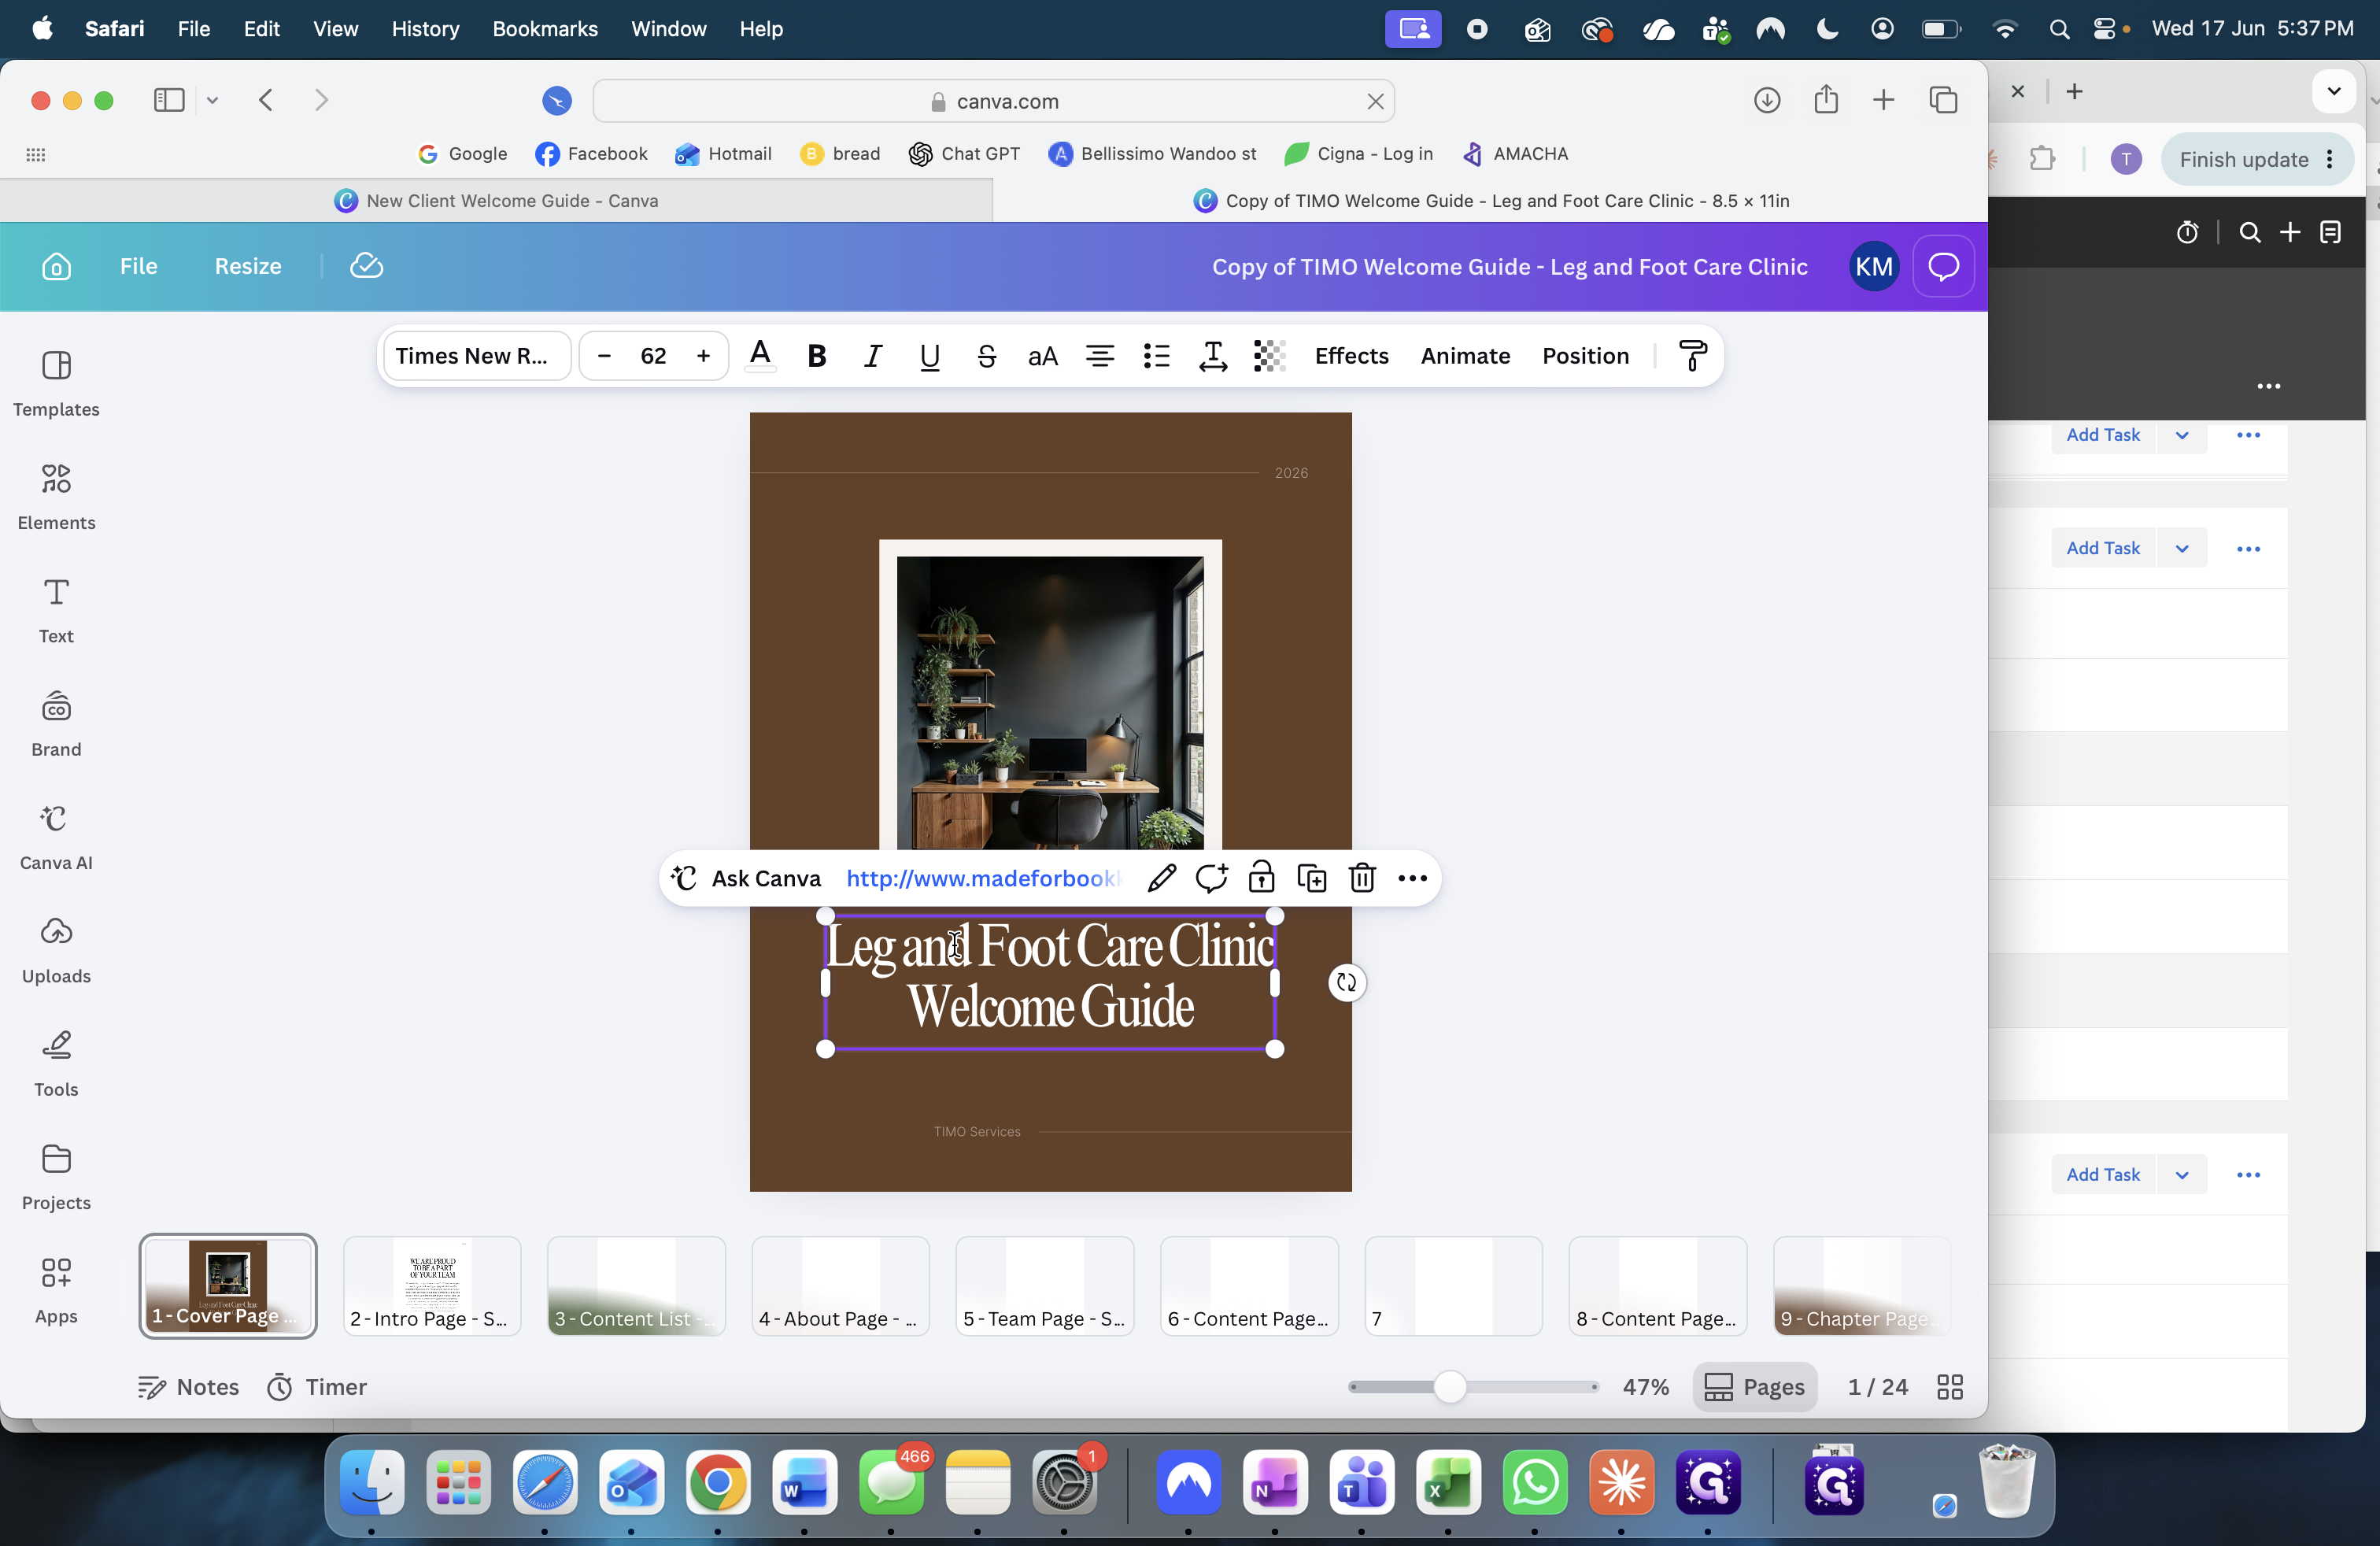
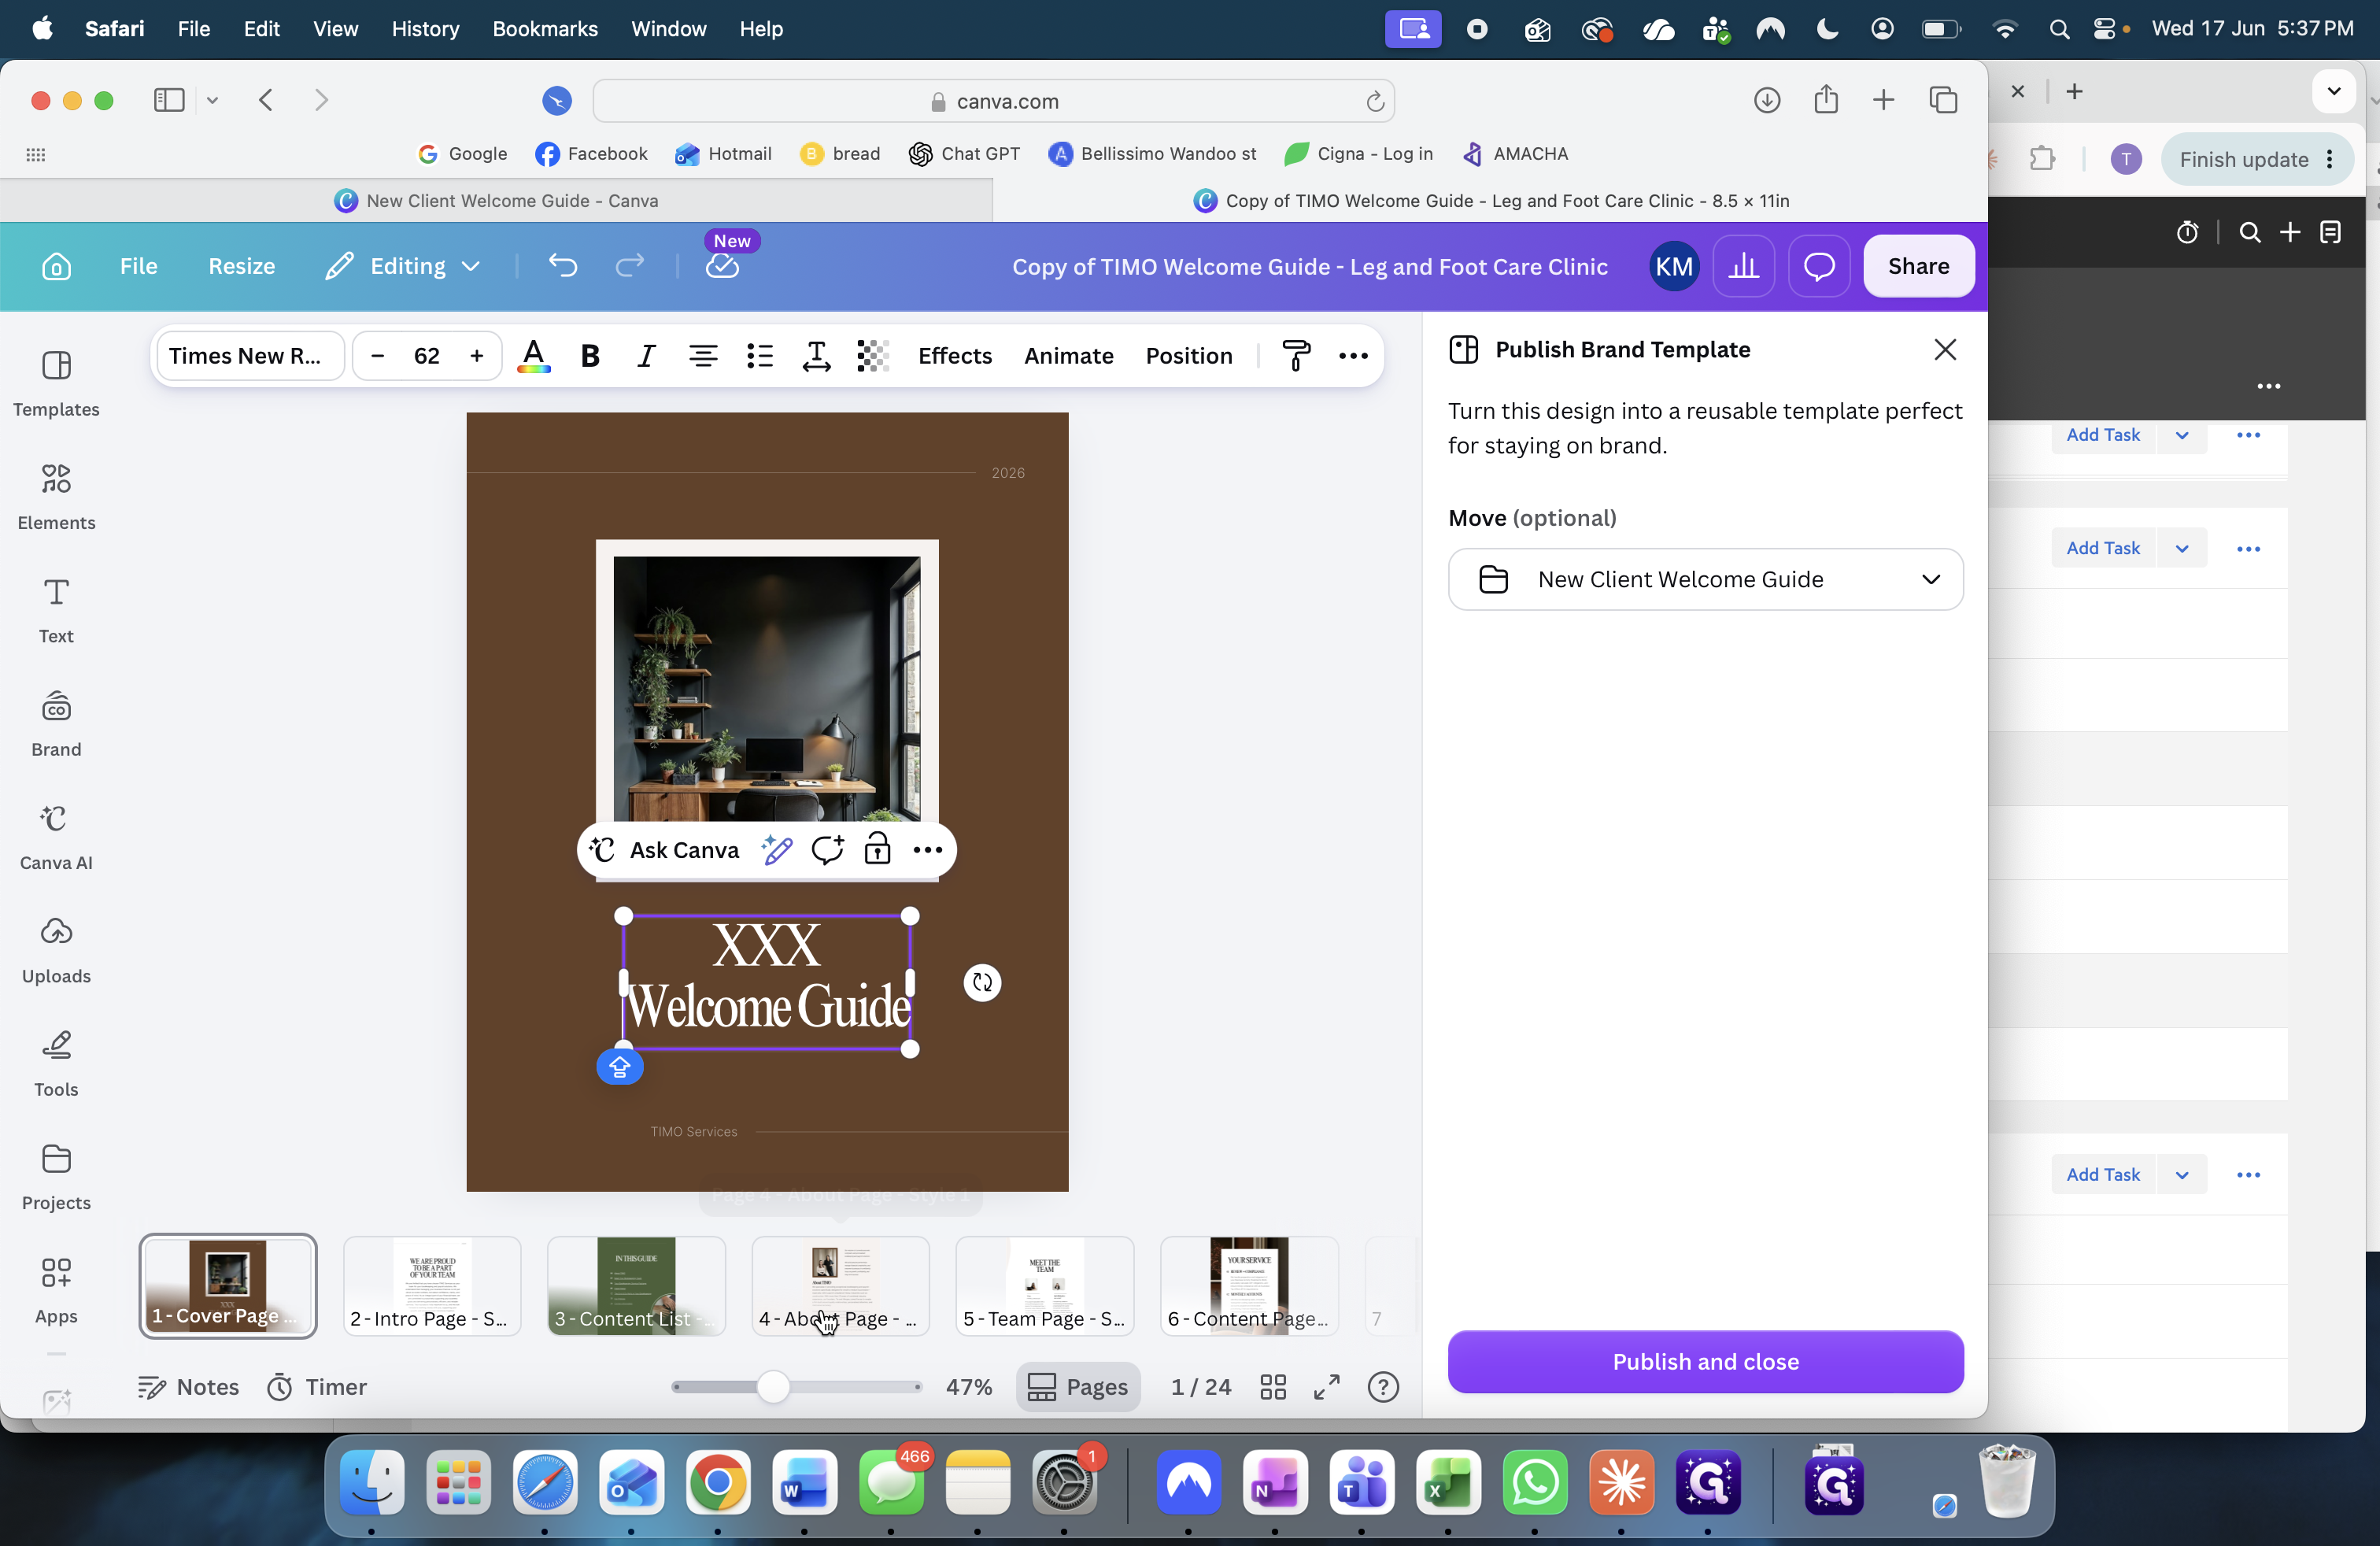
Double-click the title text box and update it to the new client's company name.
42
Review specific pages like Your Service and Add-on Services to ensure they match the new client's contract details.
43
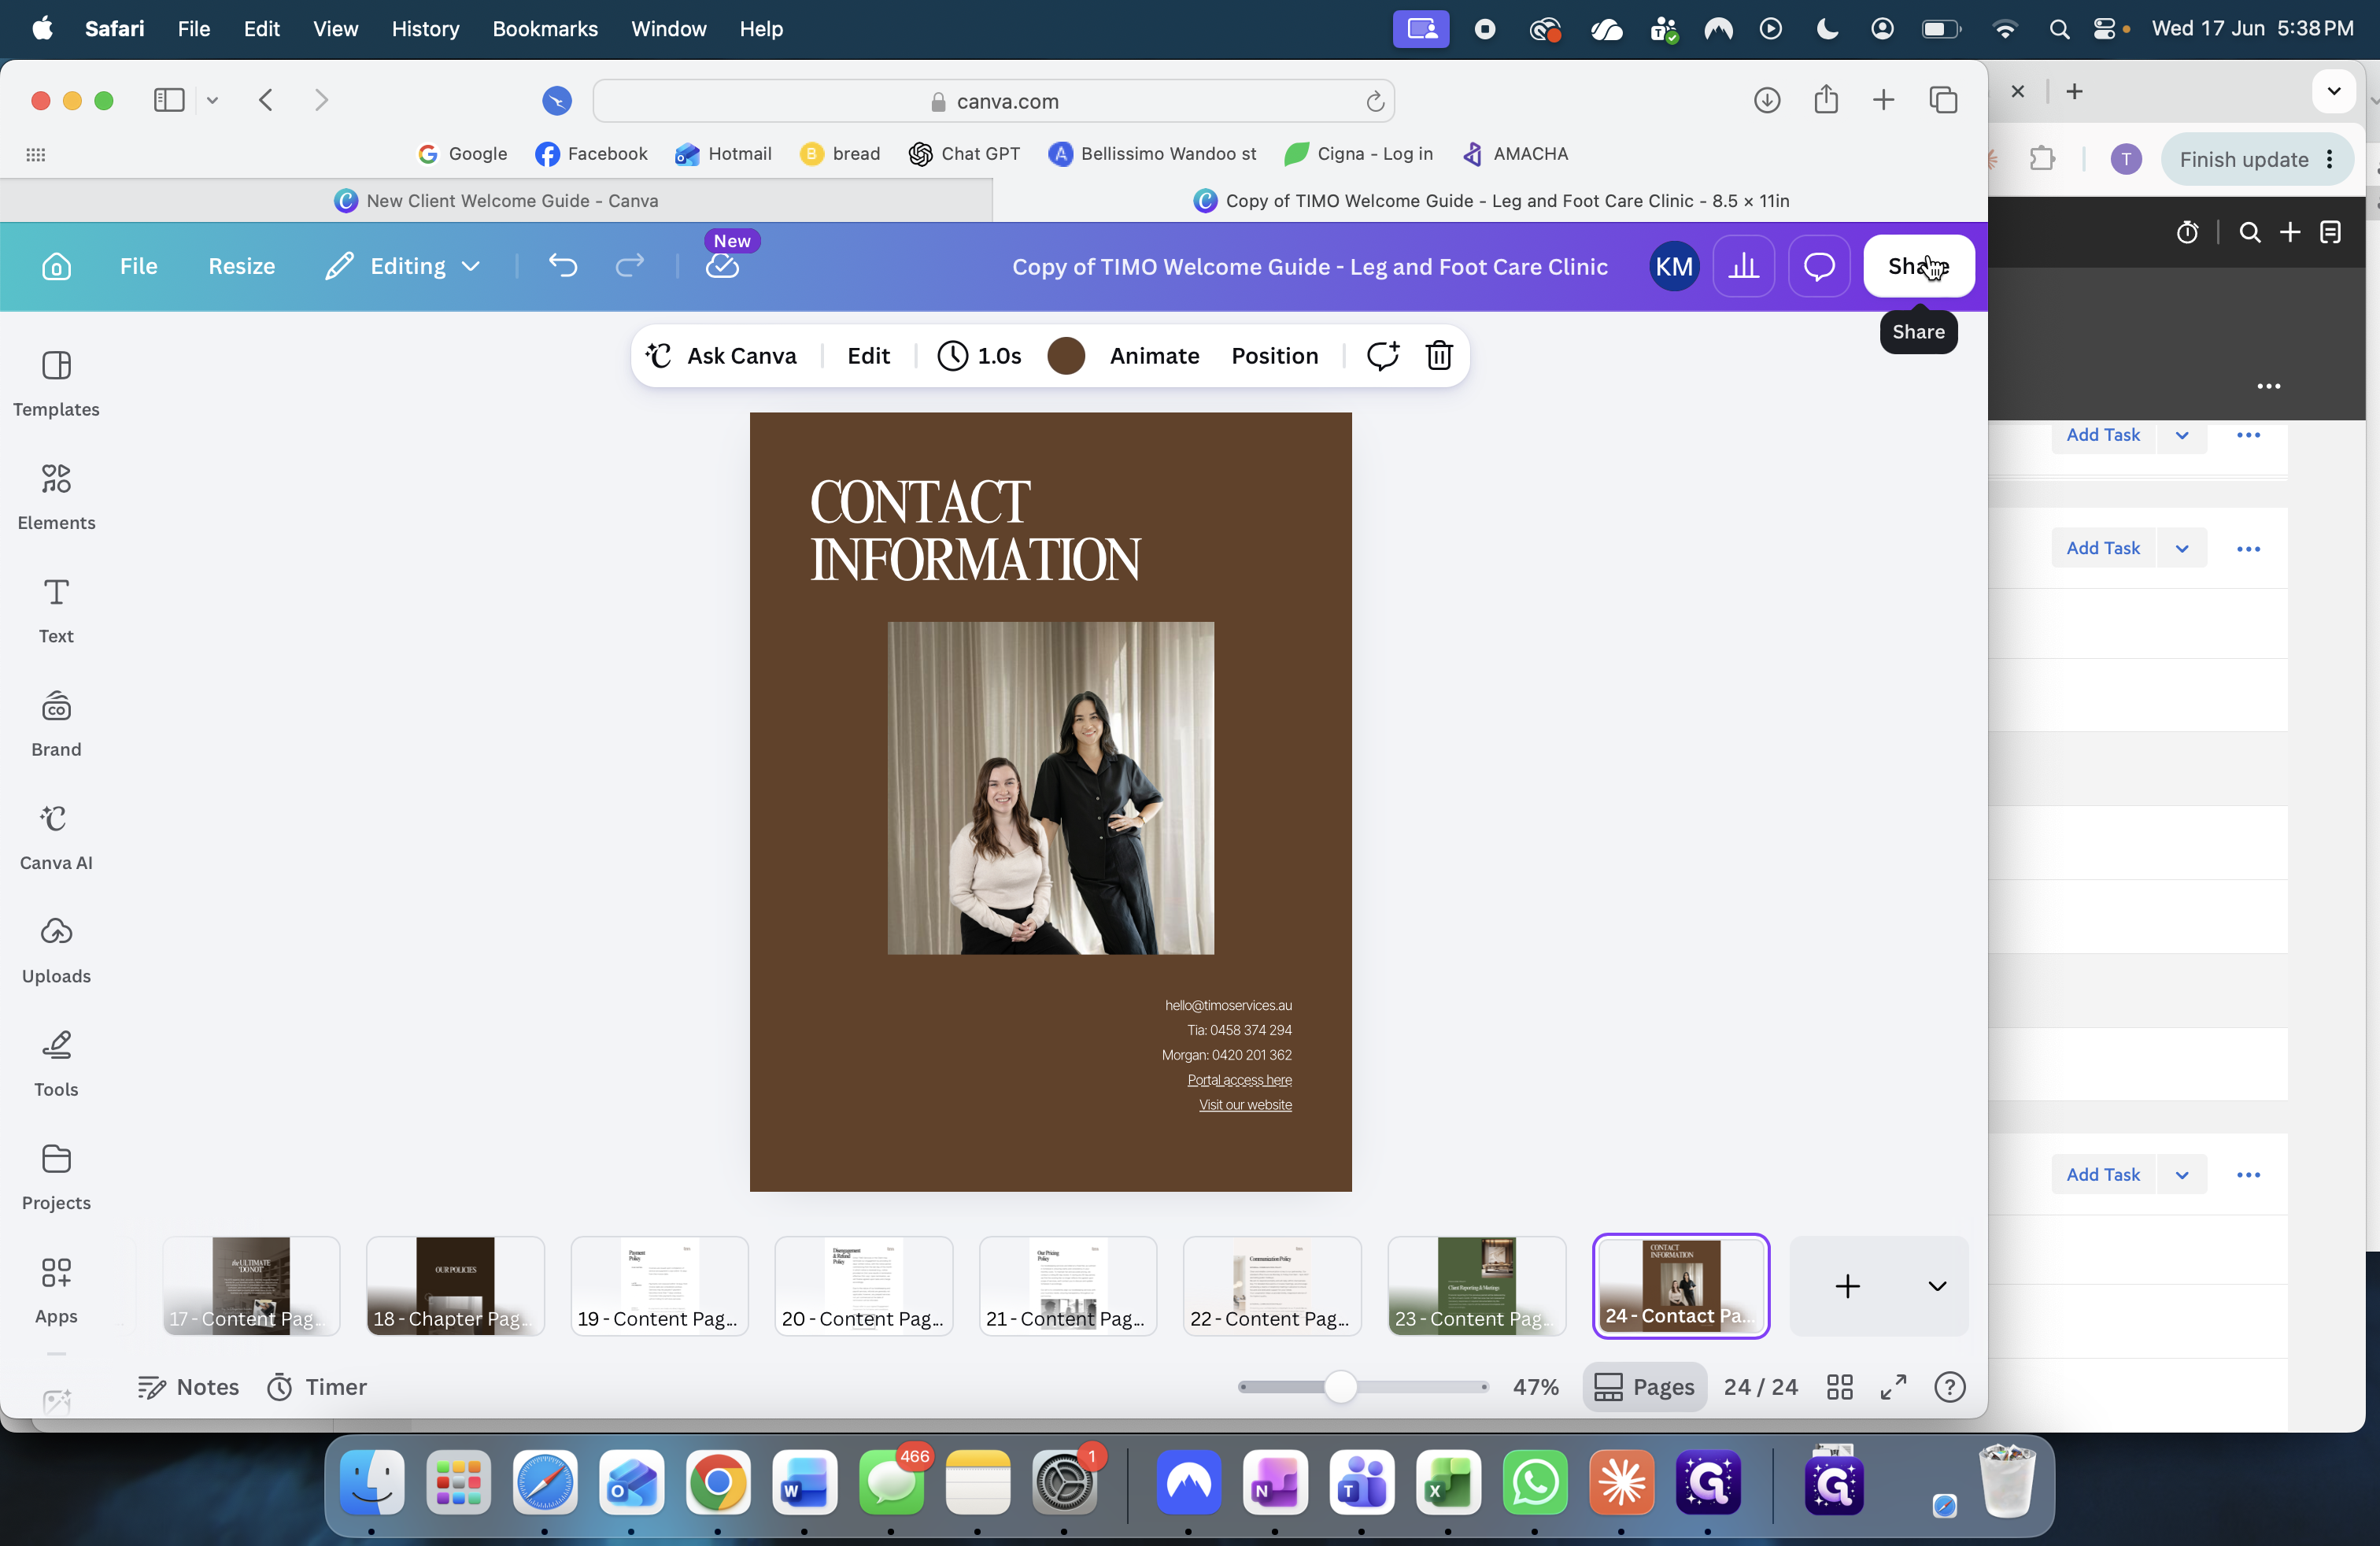
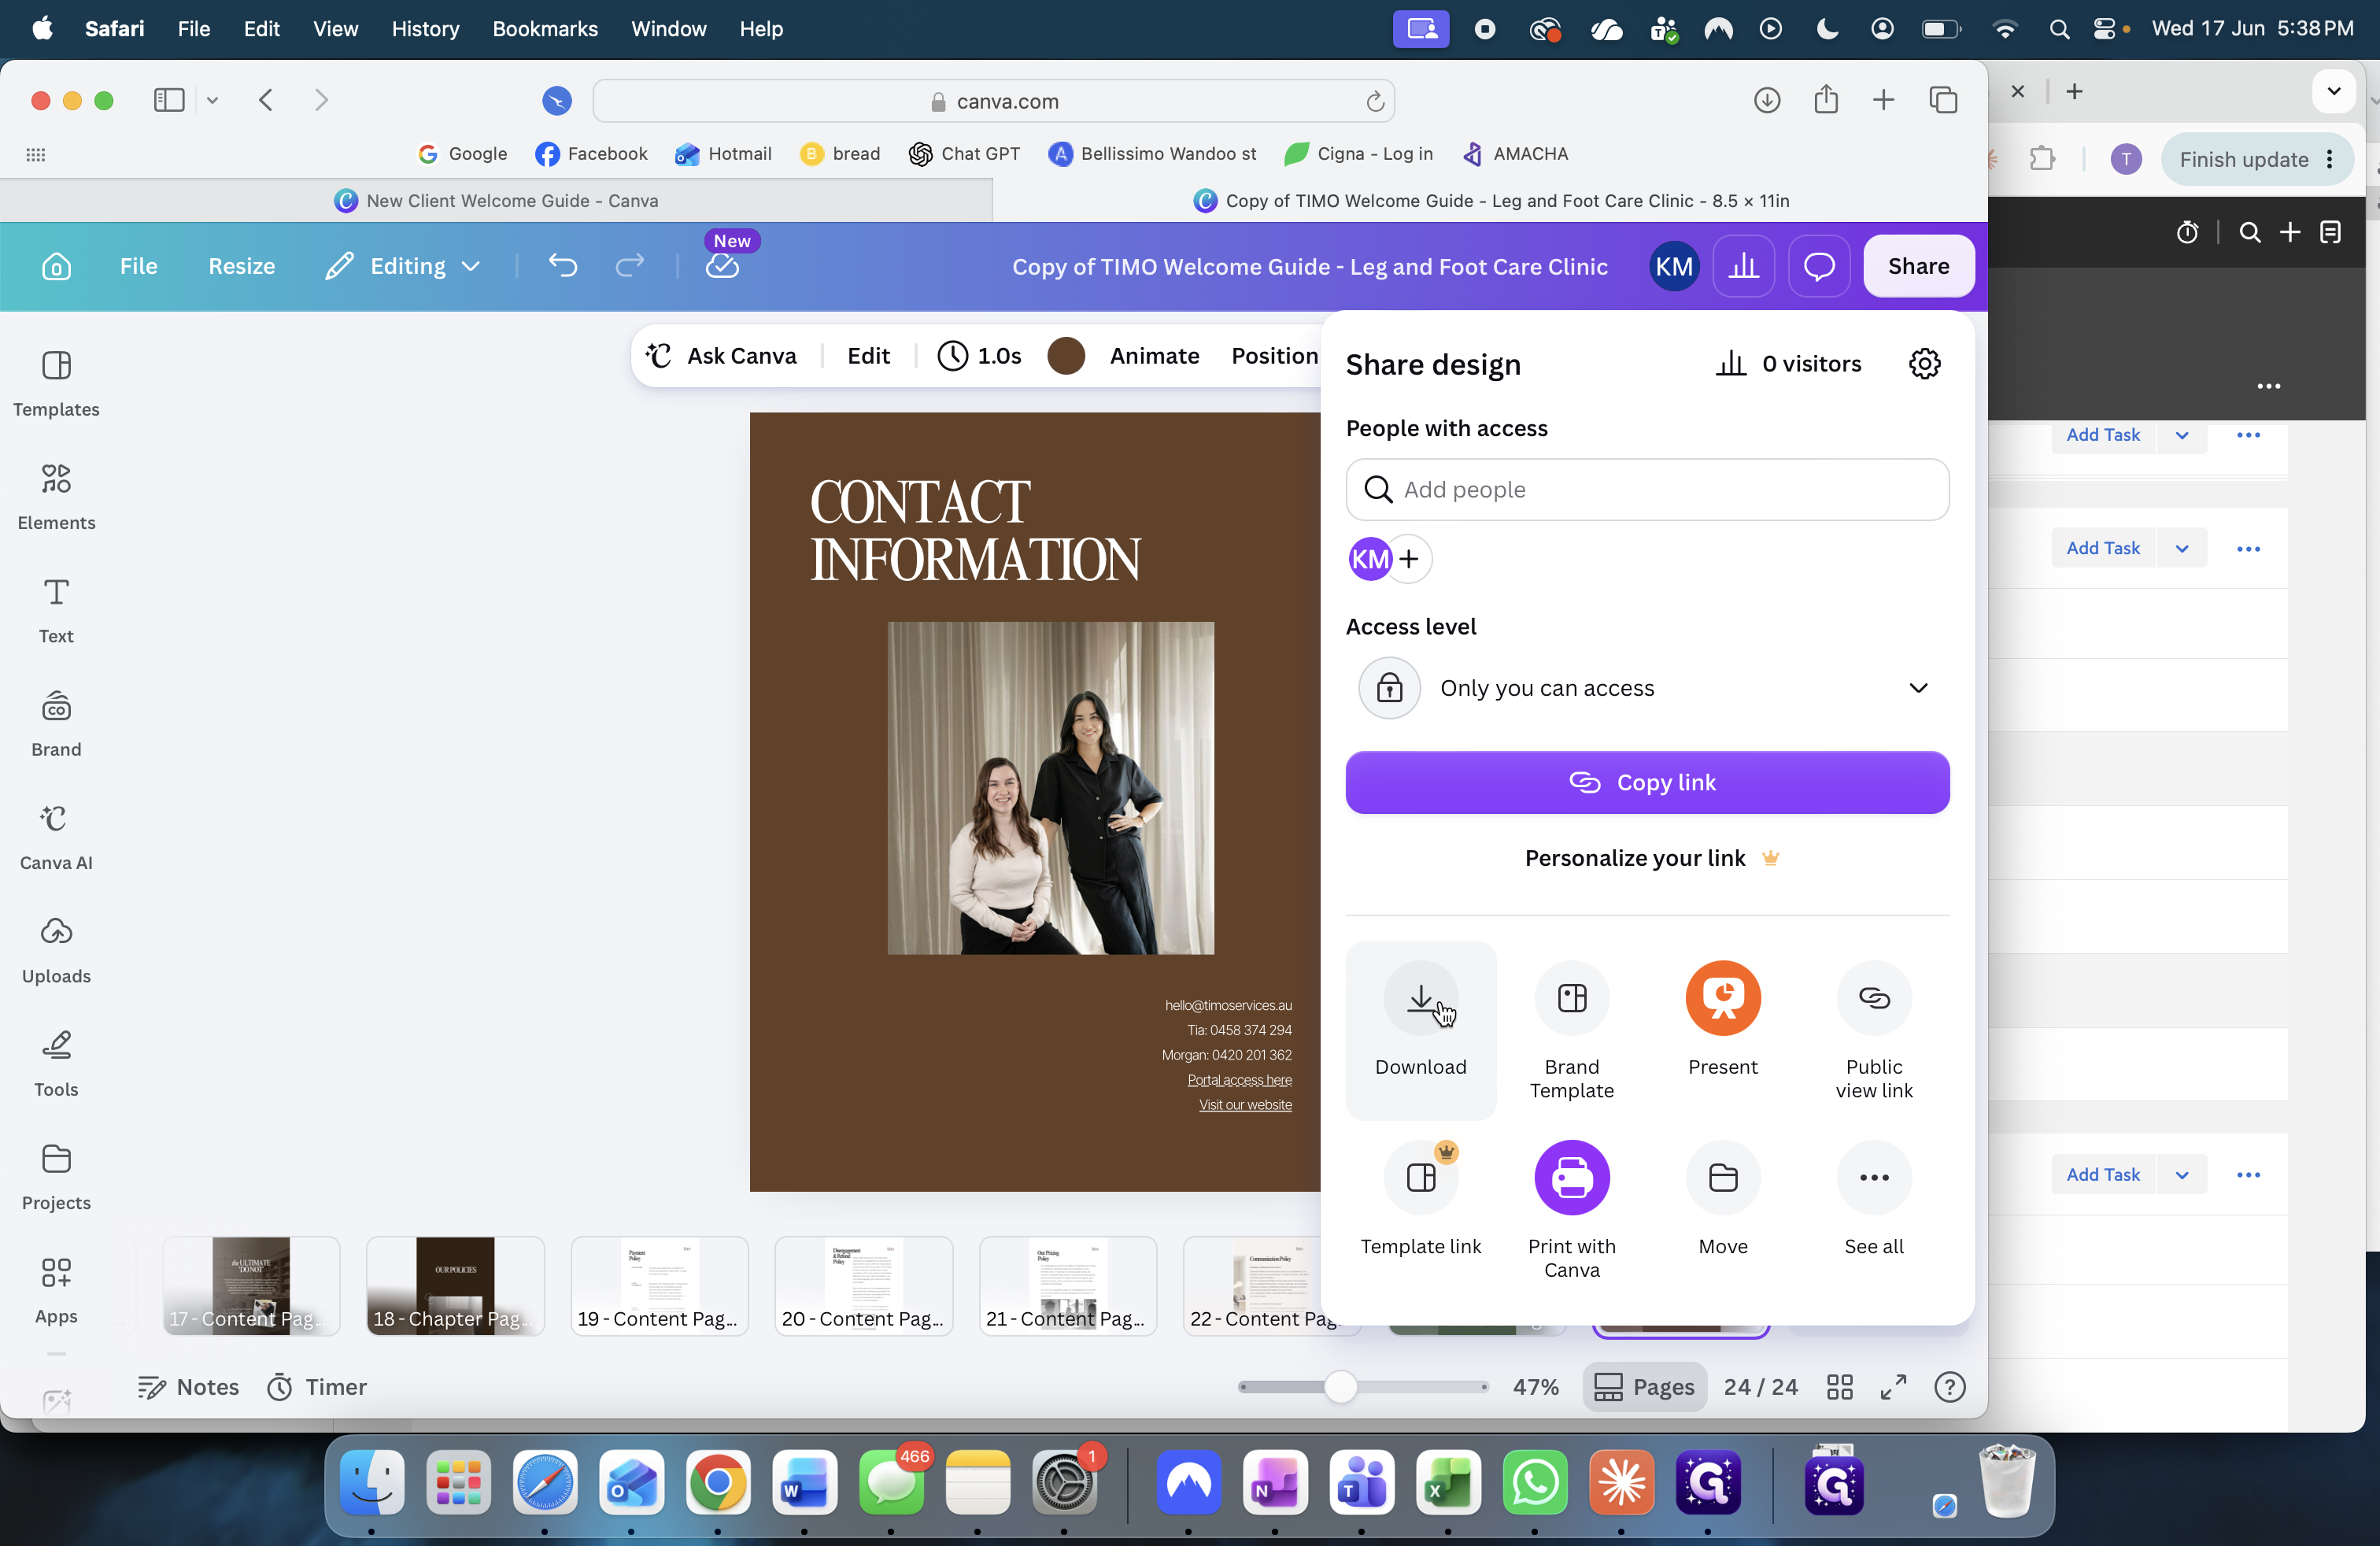
Click Share in the top right corner when you are finished editing.
44
Select Download from the dropdown menu.
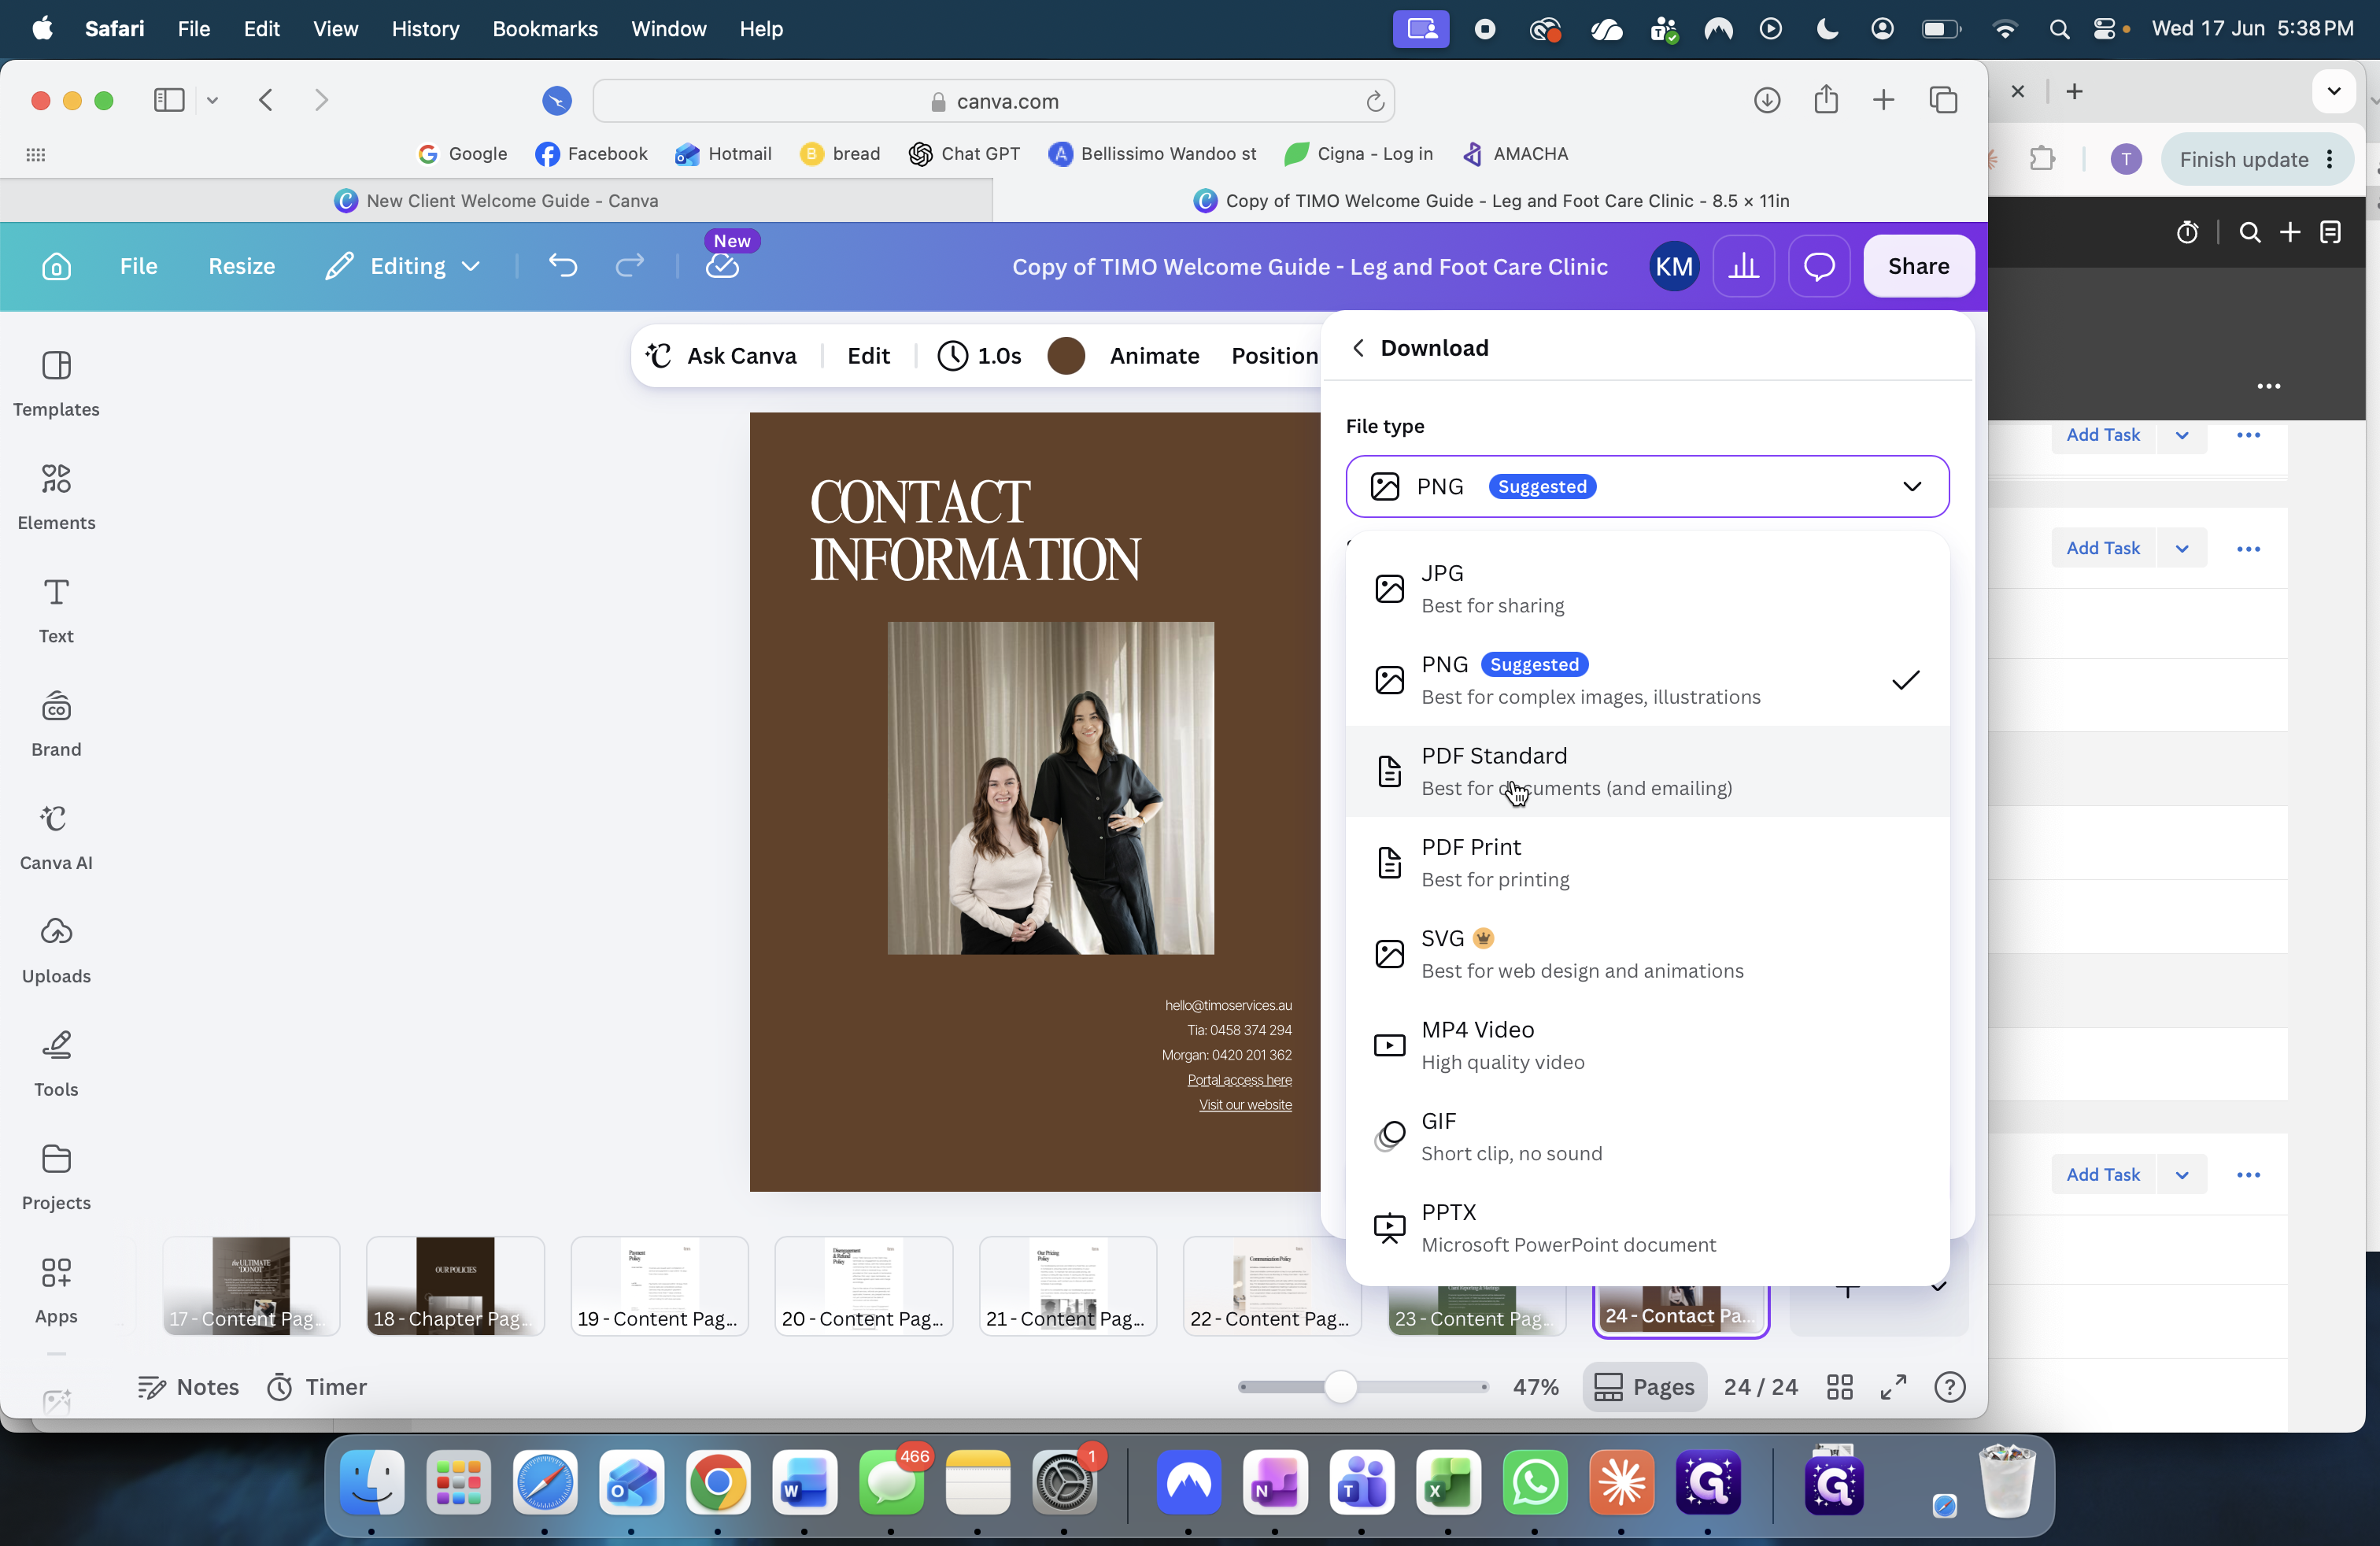
45
Select PDF Standard as the file type.
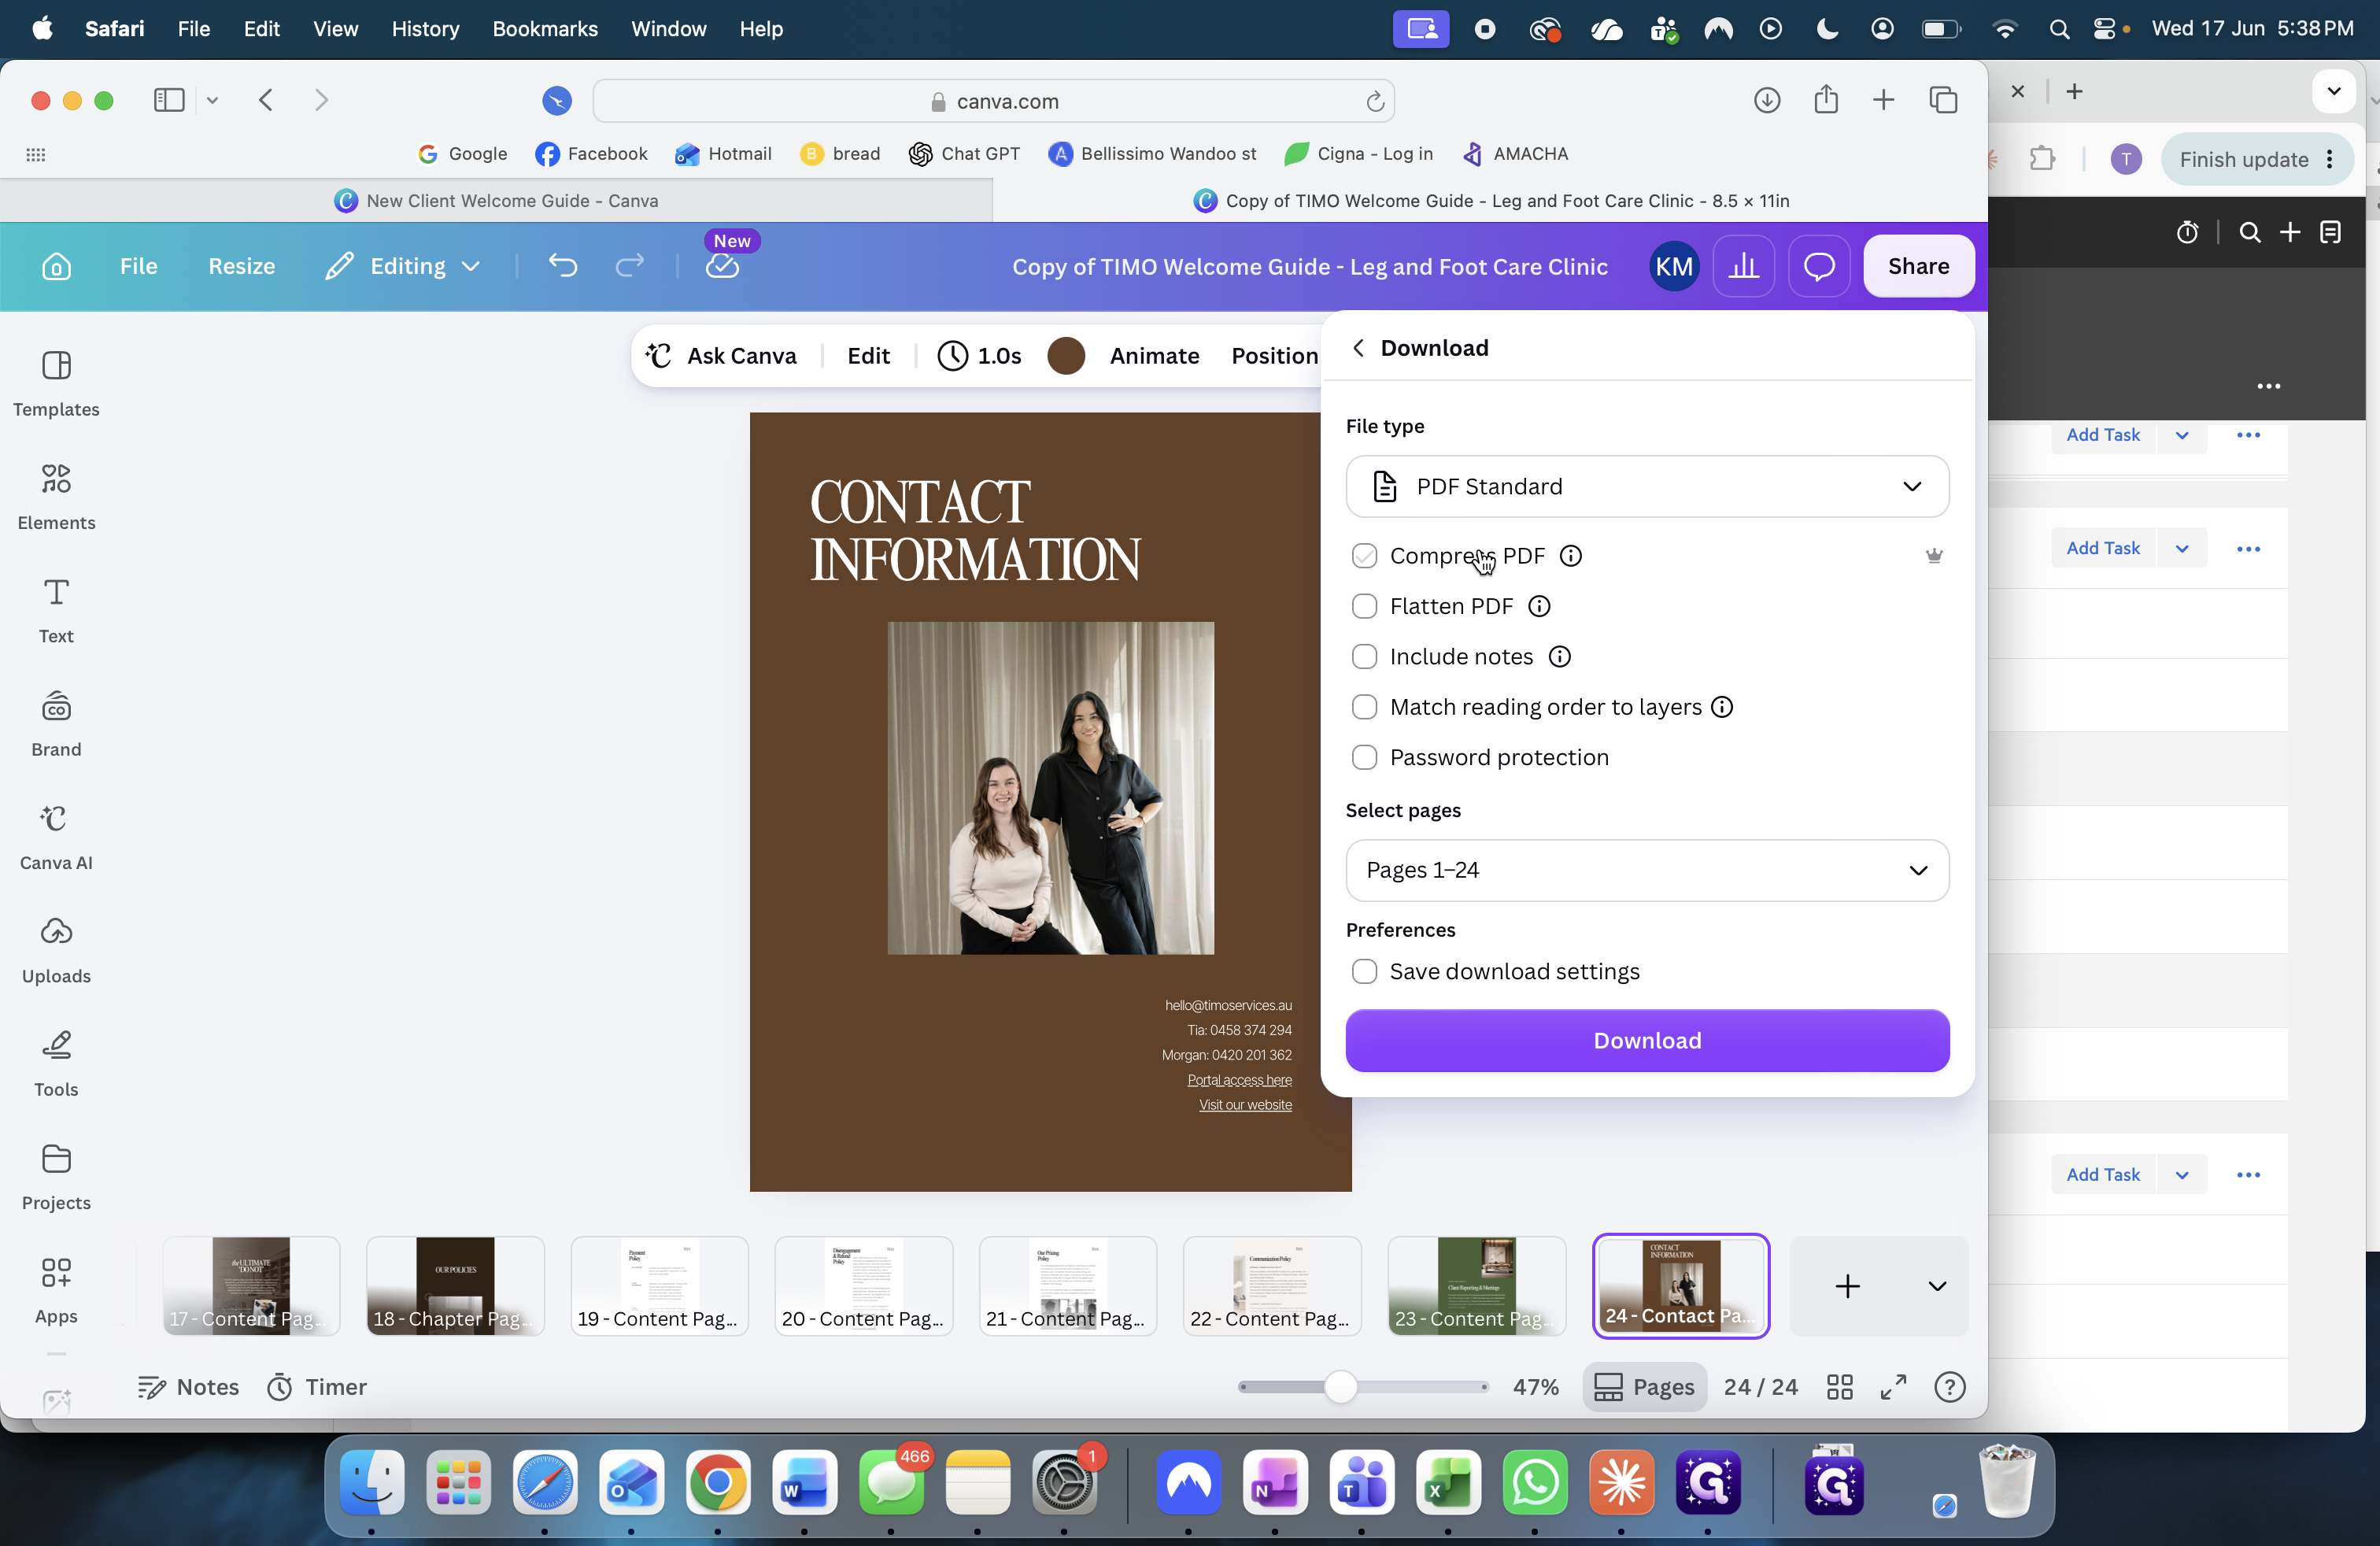
46
Check the Compress PDF box to ensure the file size is manageable for emailing.
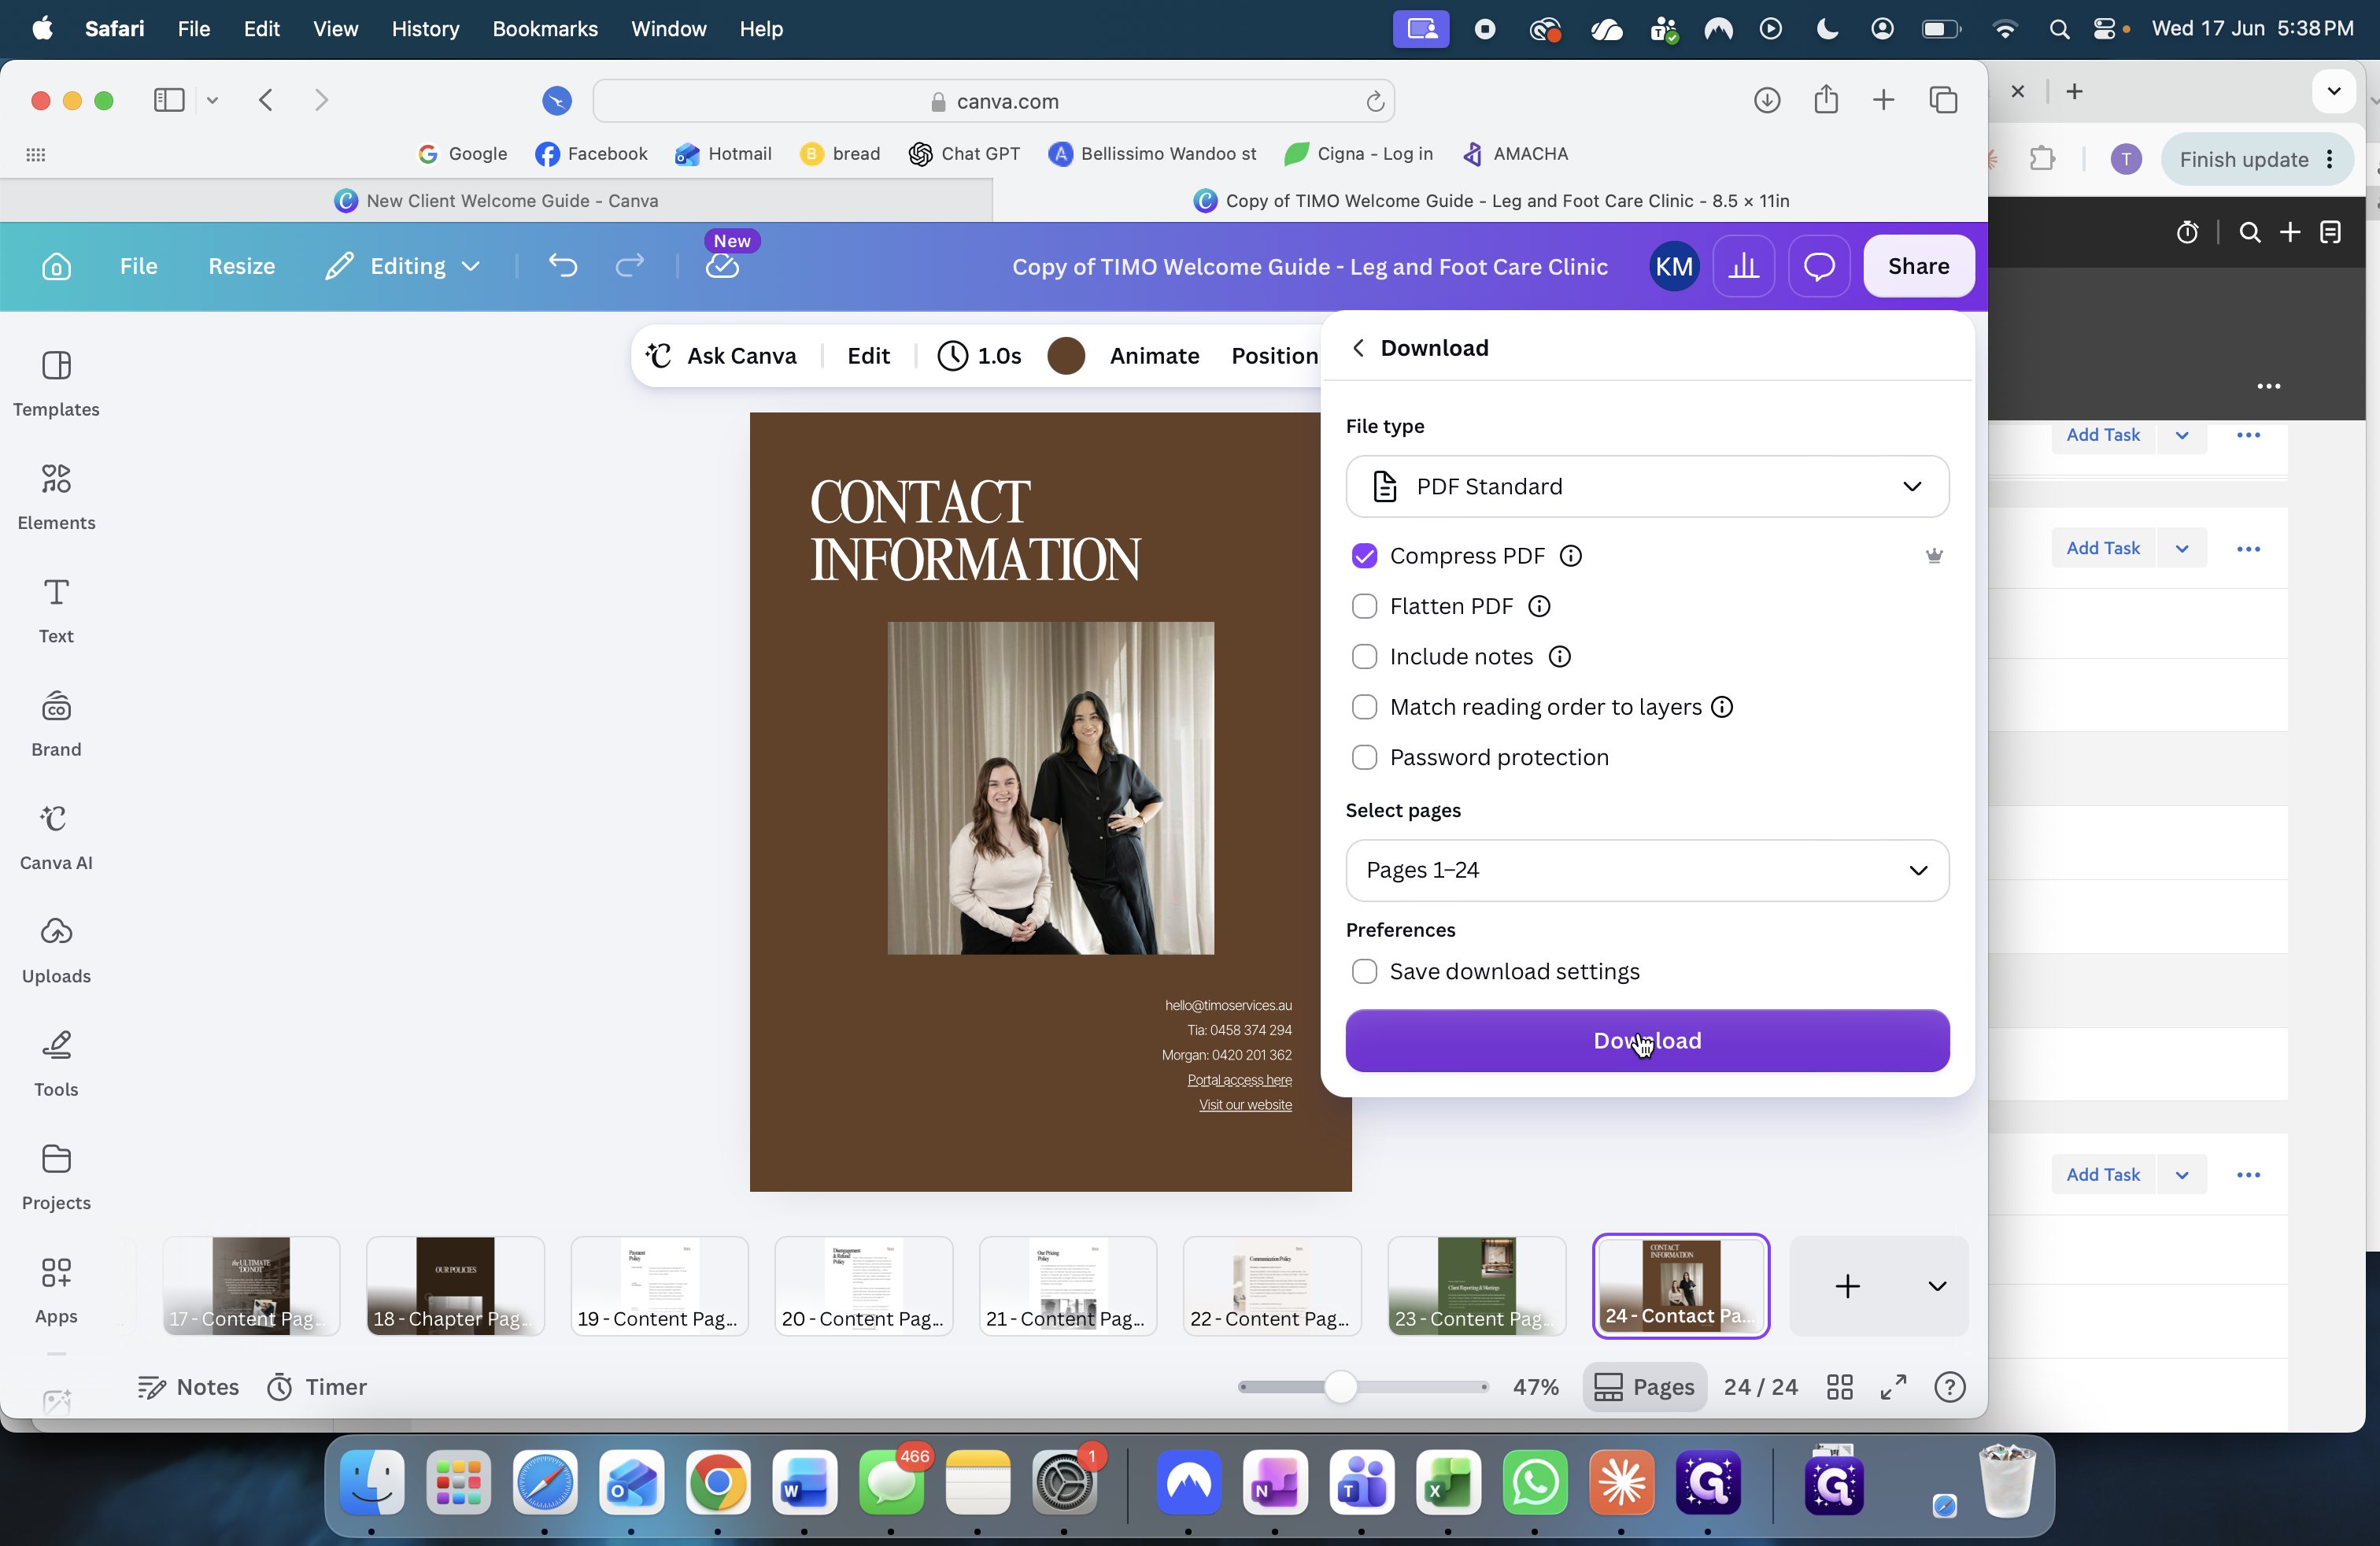
47
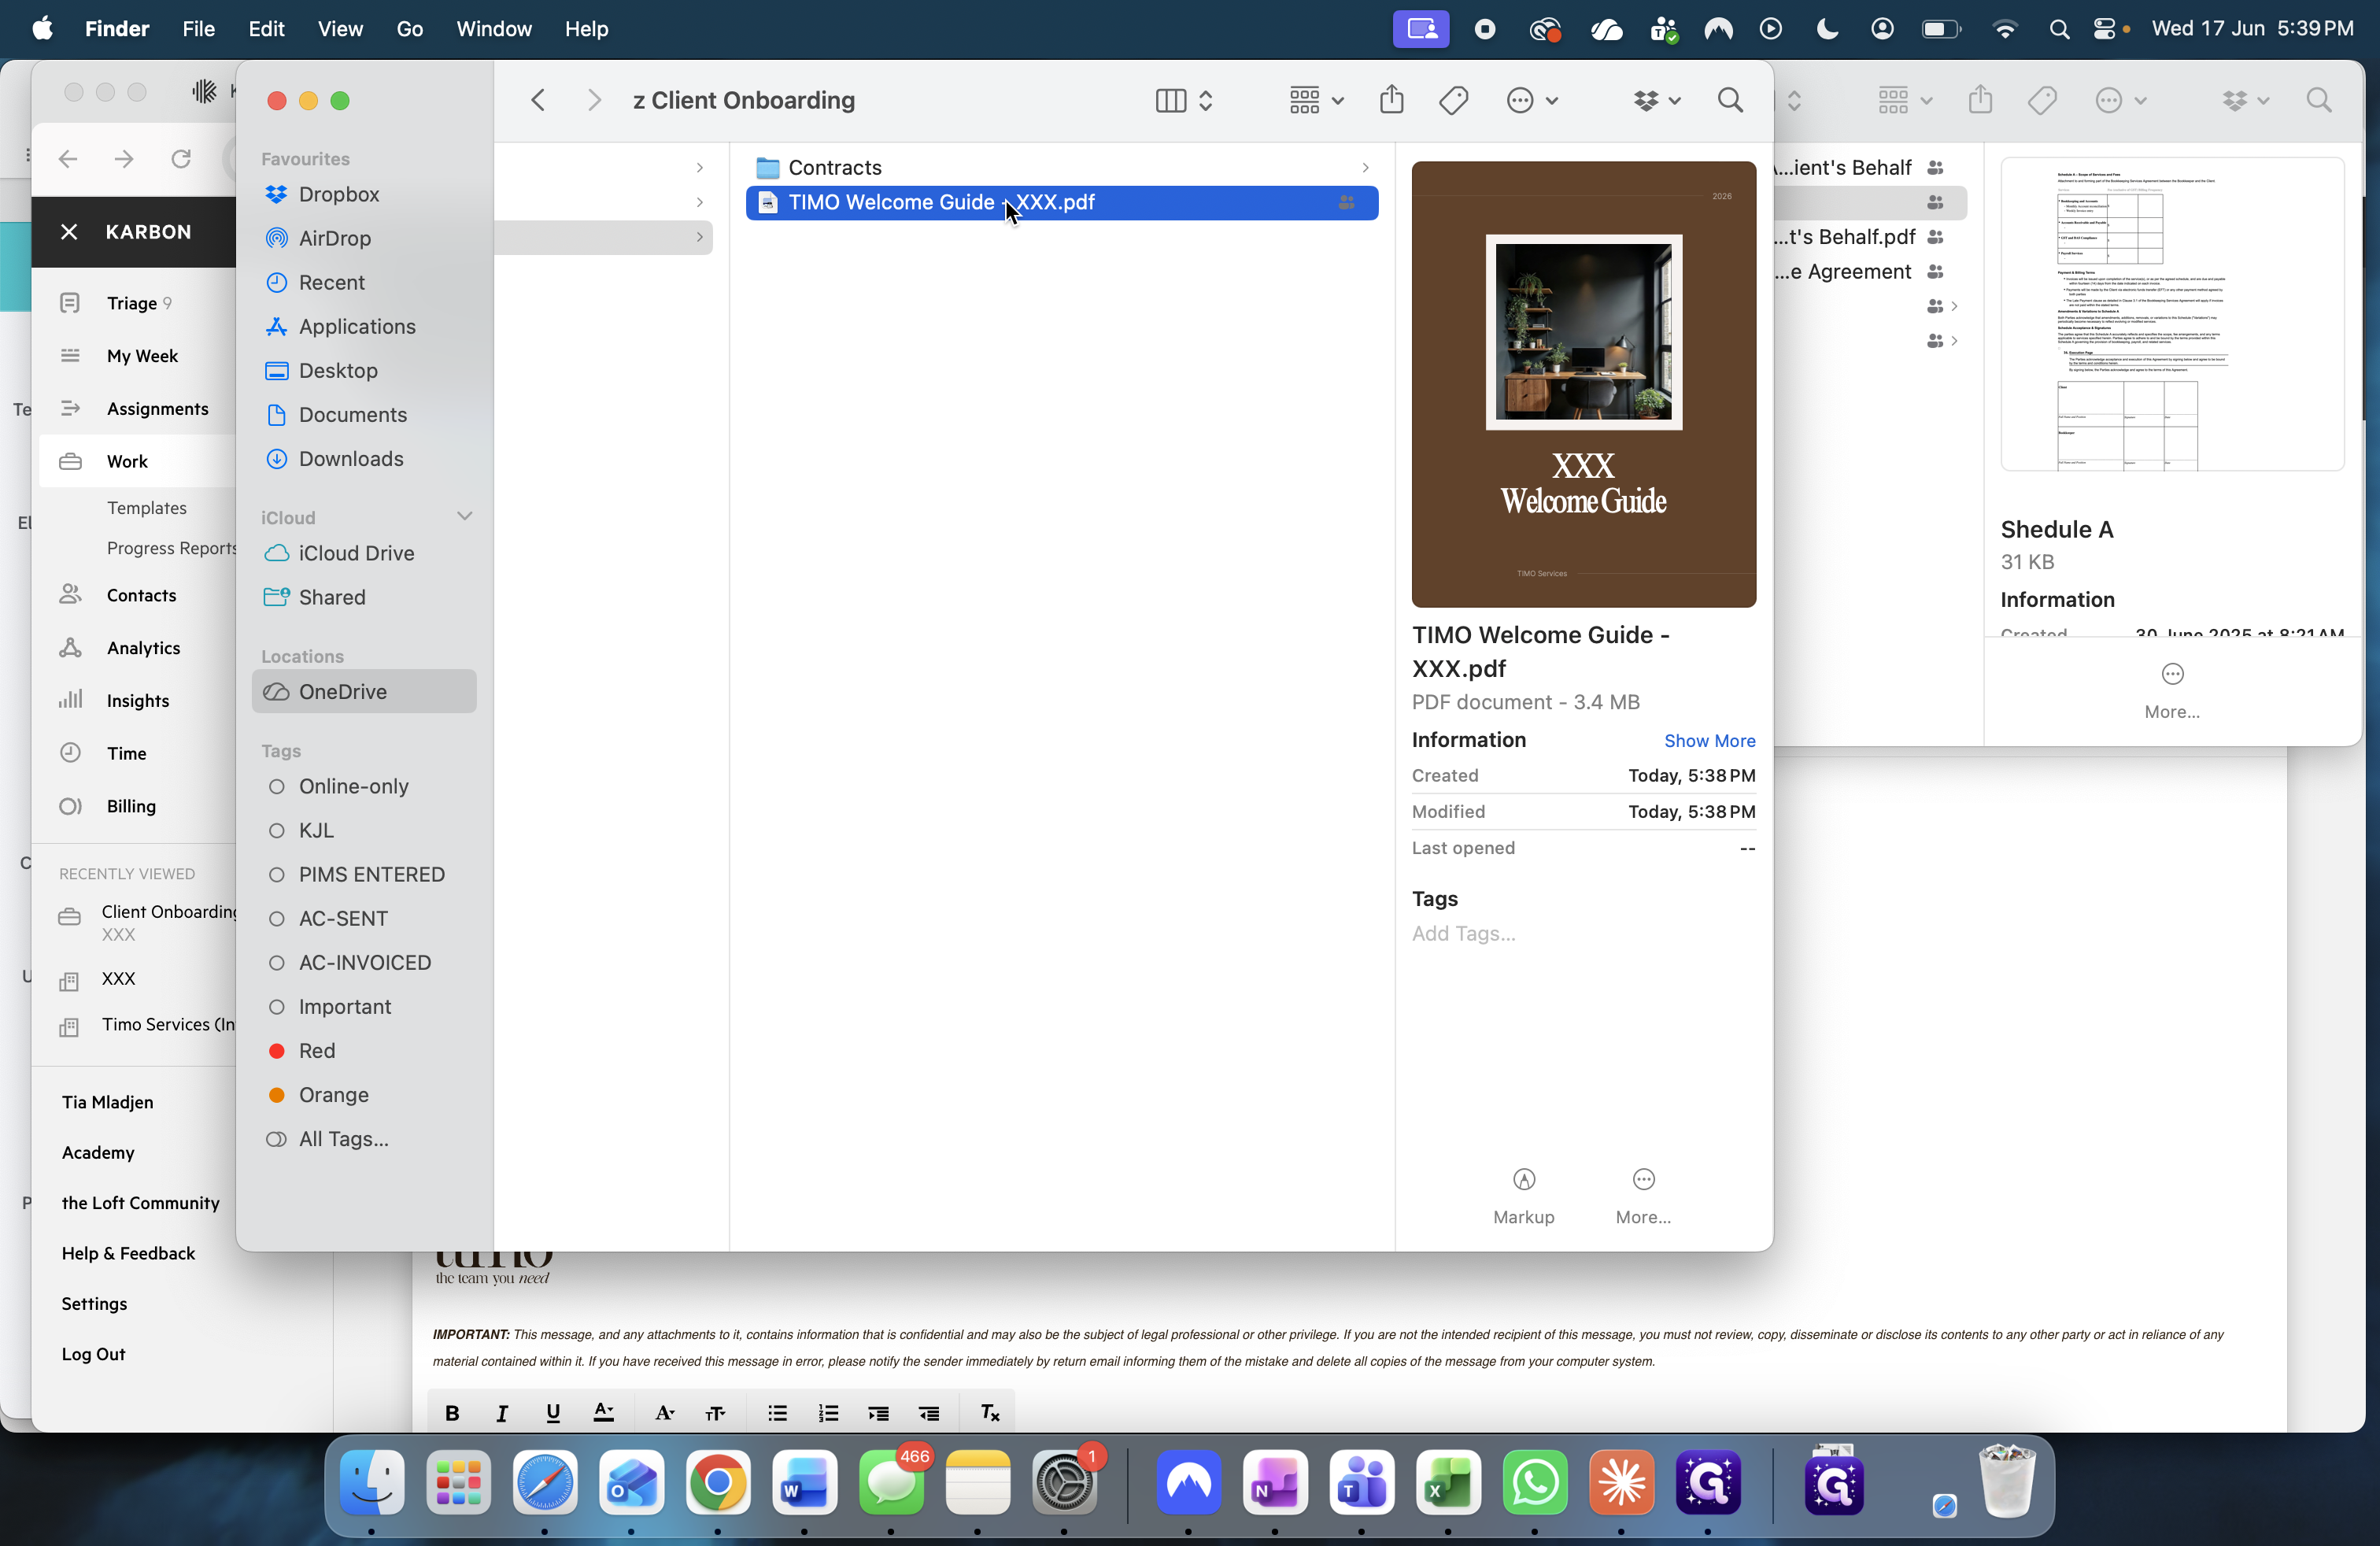
Click Download.
48
Save and rename the file locally on your computer to follow standard formatting (e.g., "Welcome Guide - [Client Name].pdf").
Phase 6: Send the Welcome Guide via Karbon
49
Return to the Timeline tab of the Client Onboarding project in Karbon.
50
Click Send an Email.
51
Click the email template icon.
52
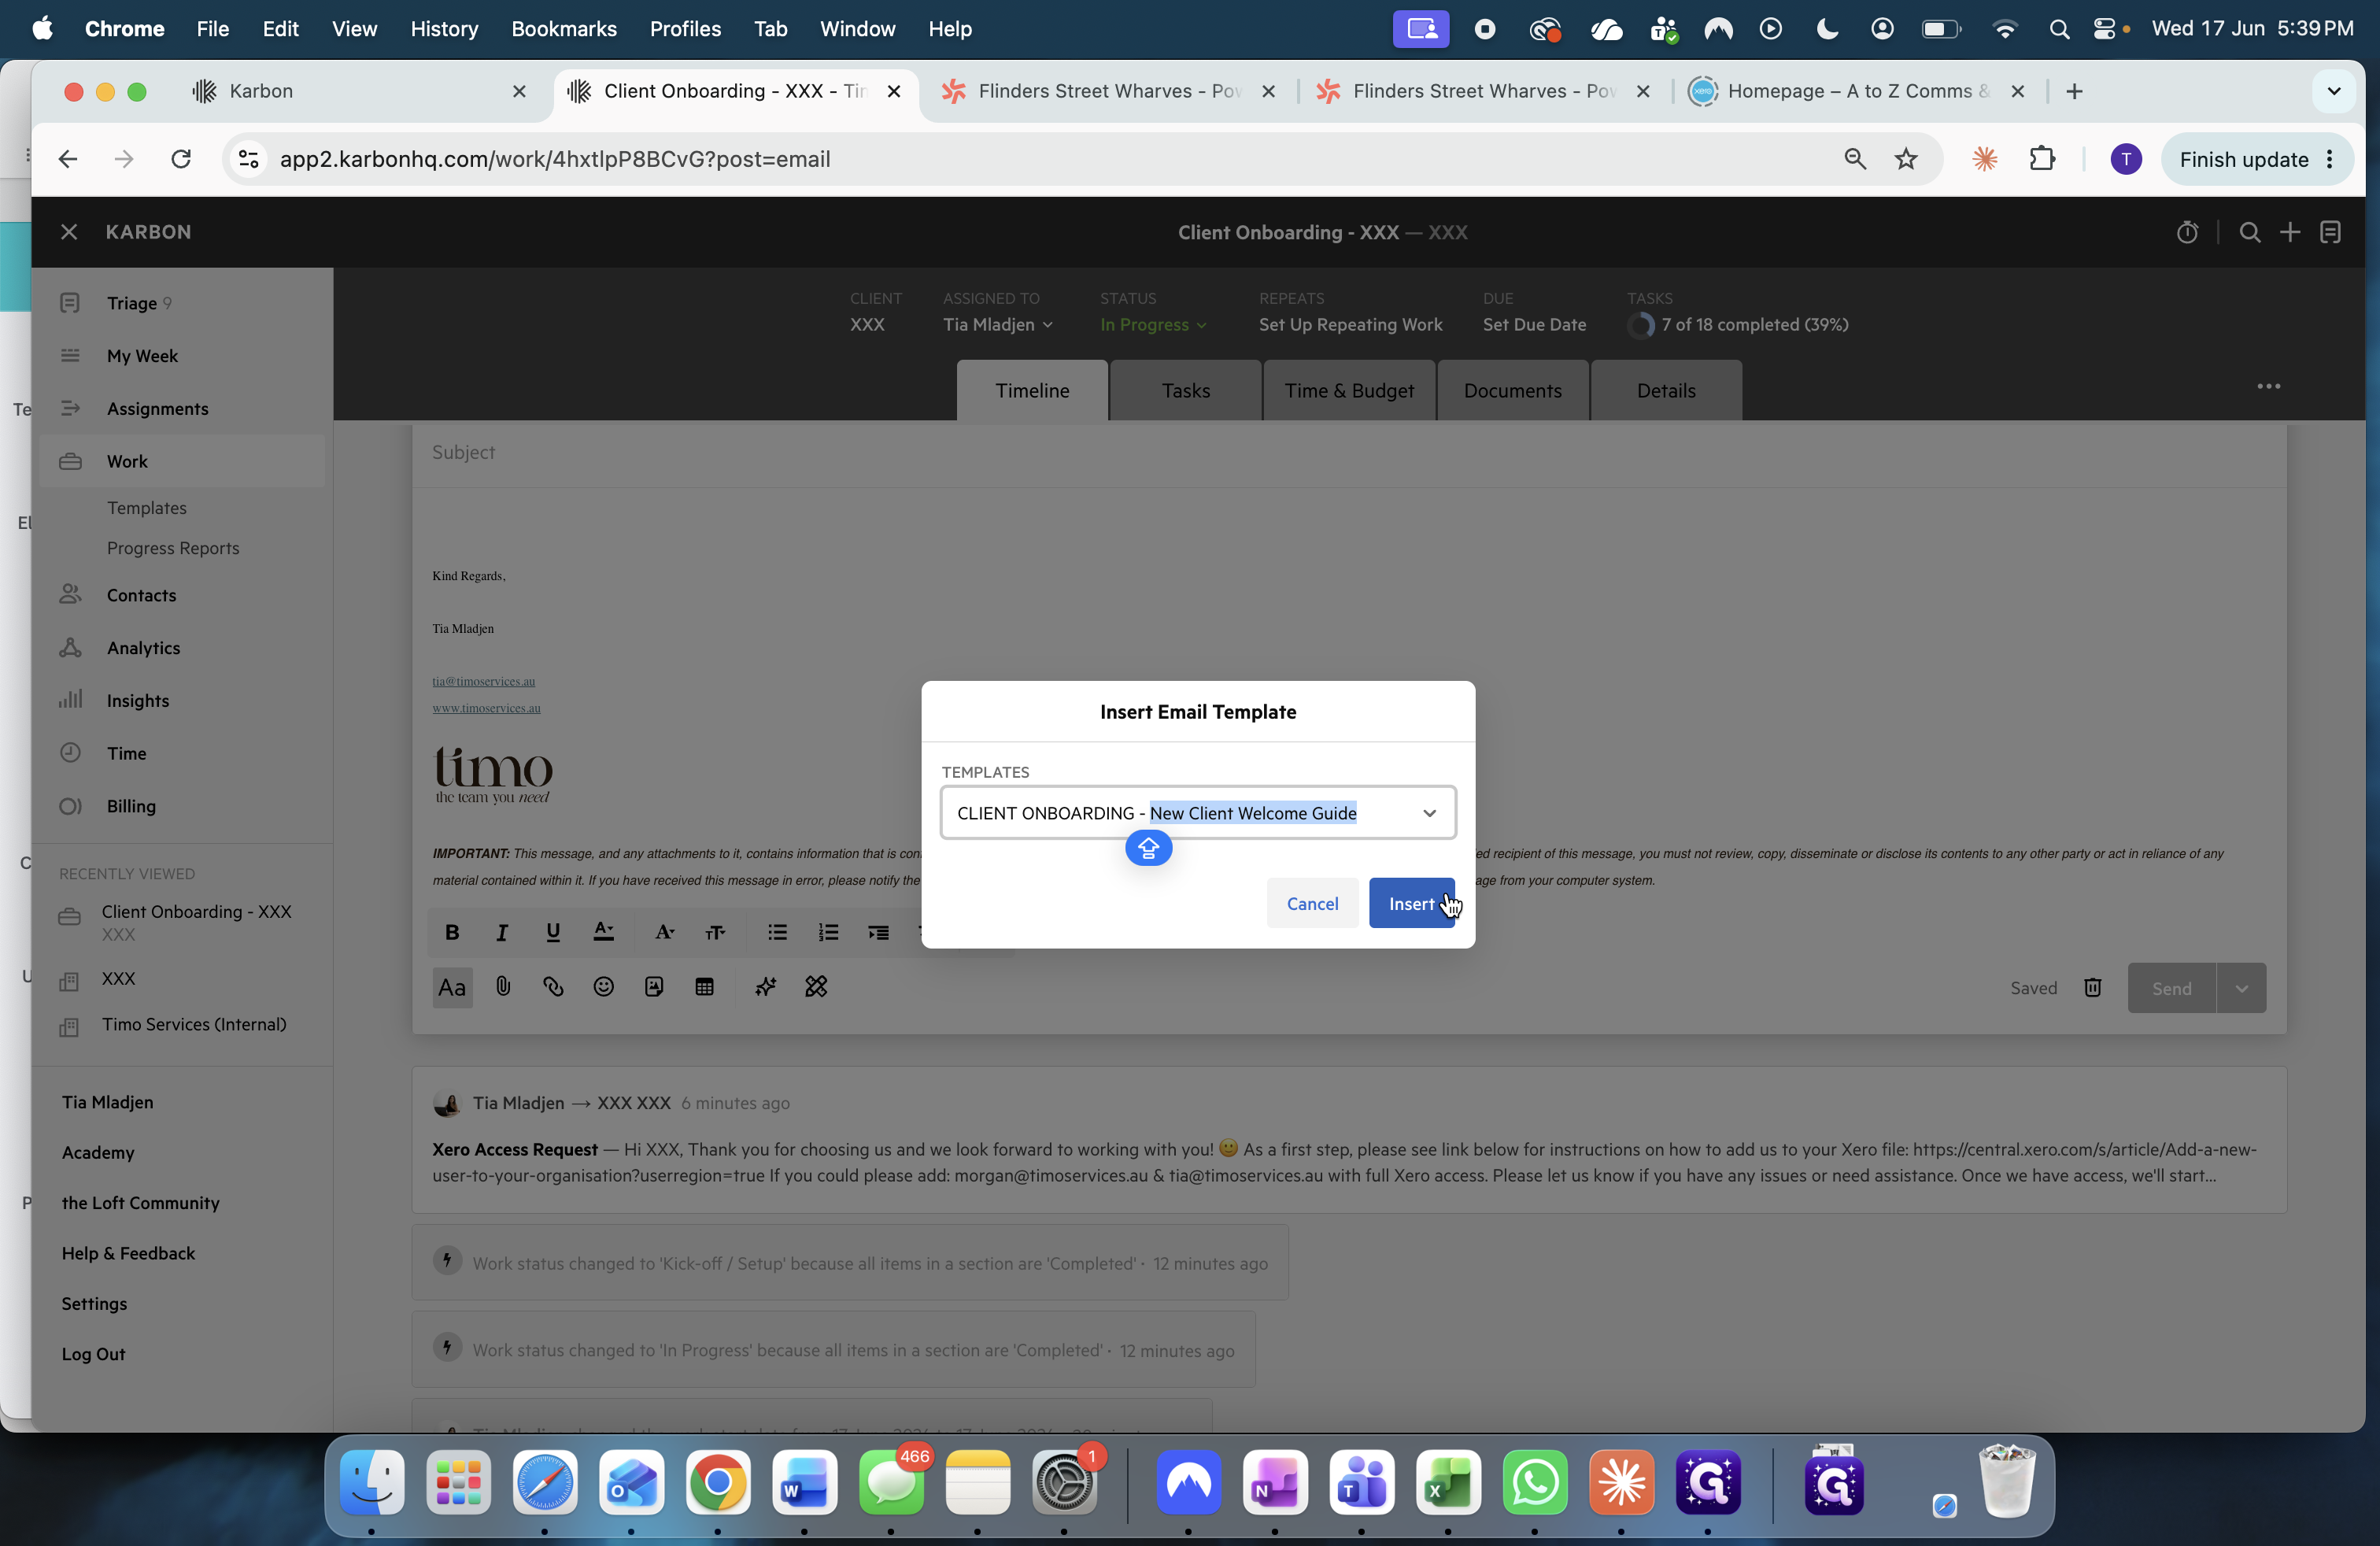
Select the CLIENT ONBOARDING - New Client Welcome Guide template.
53
Click Insert.
54
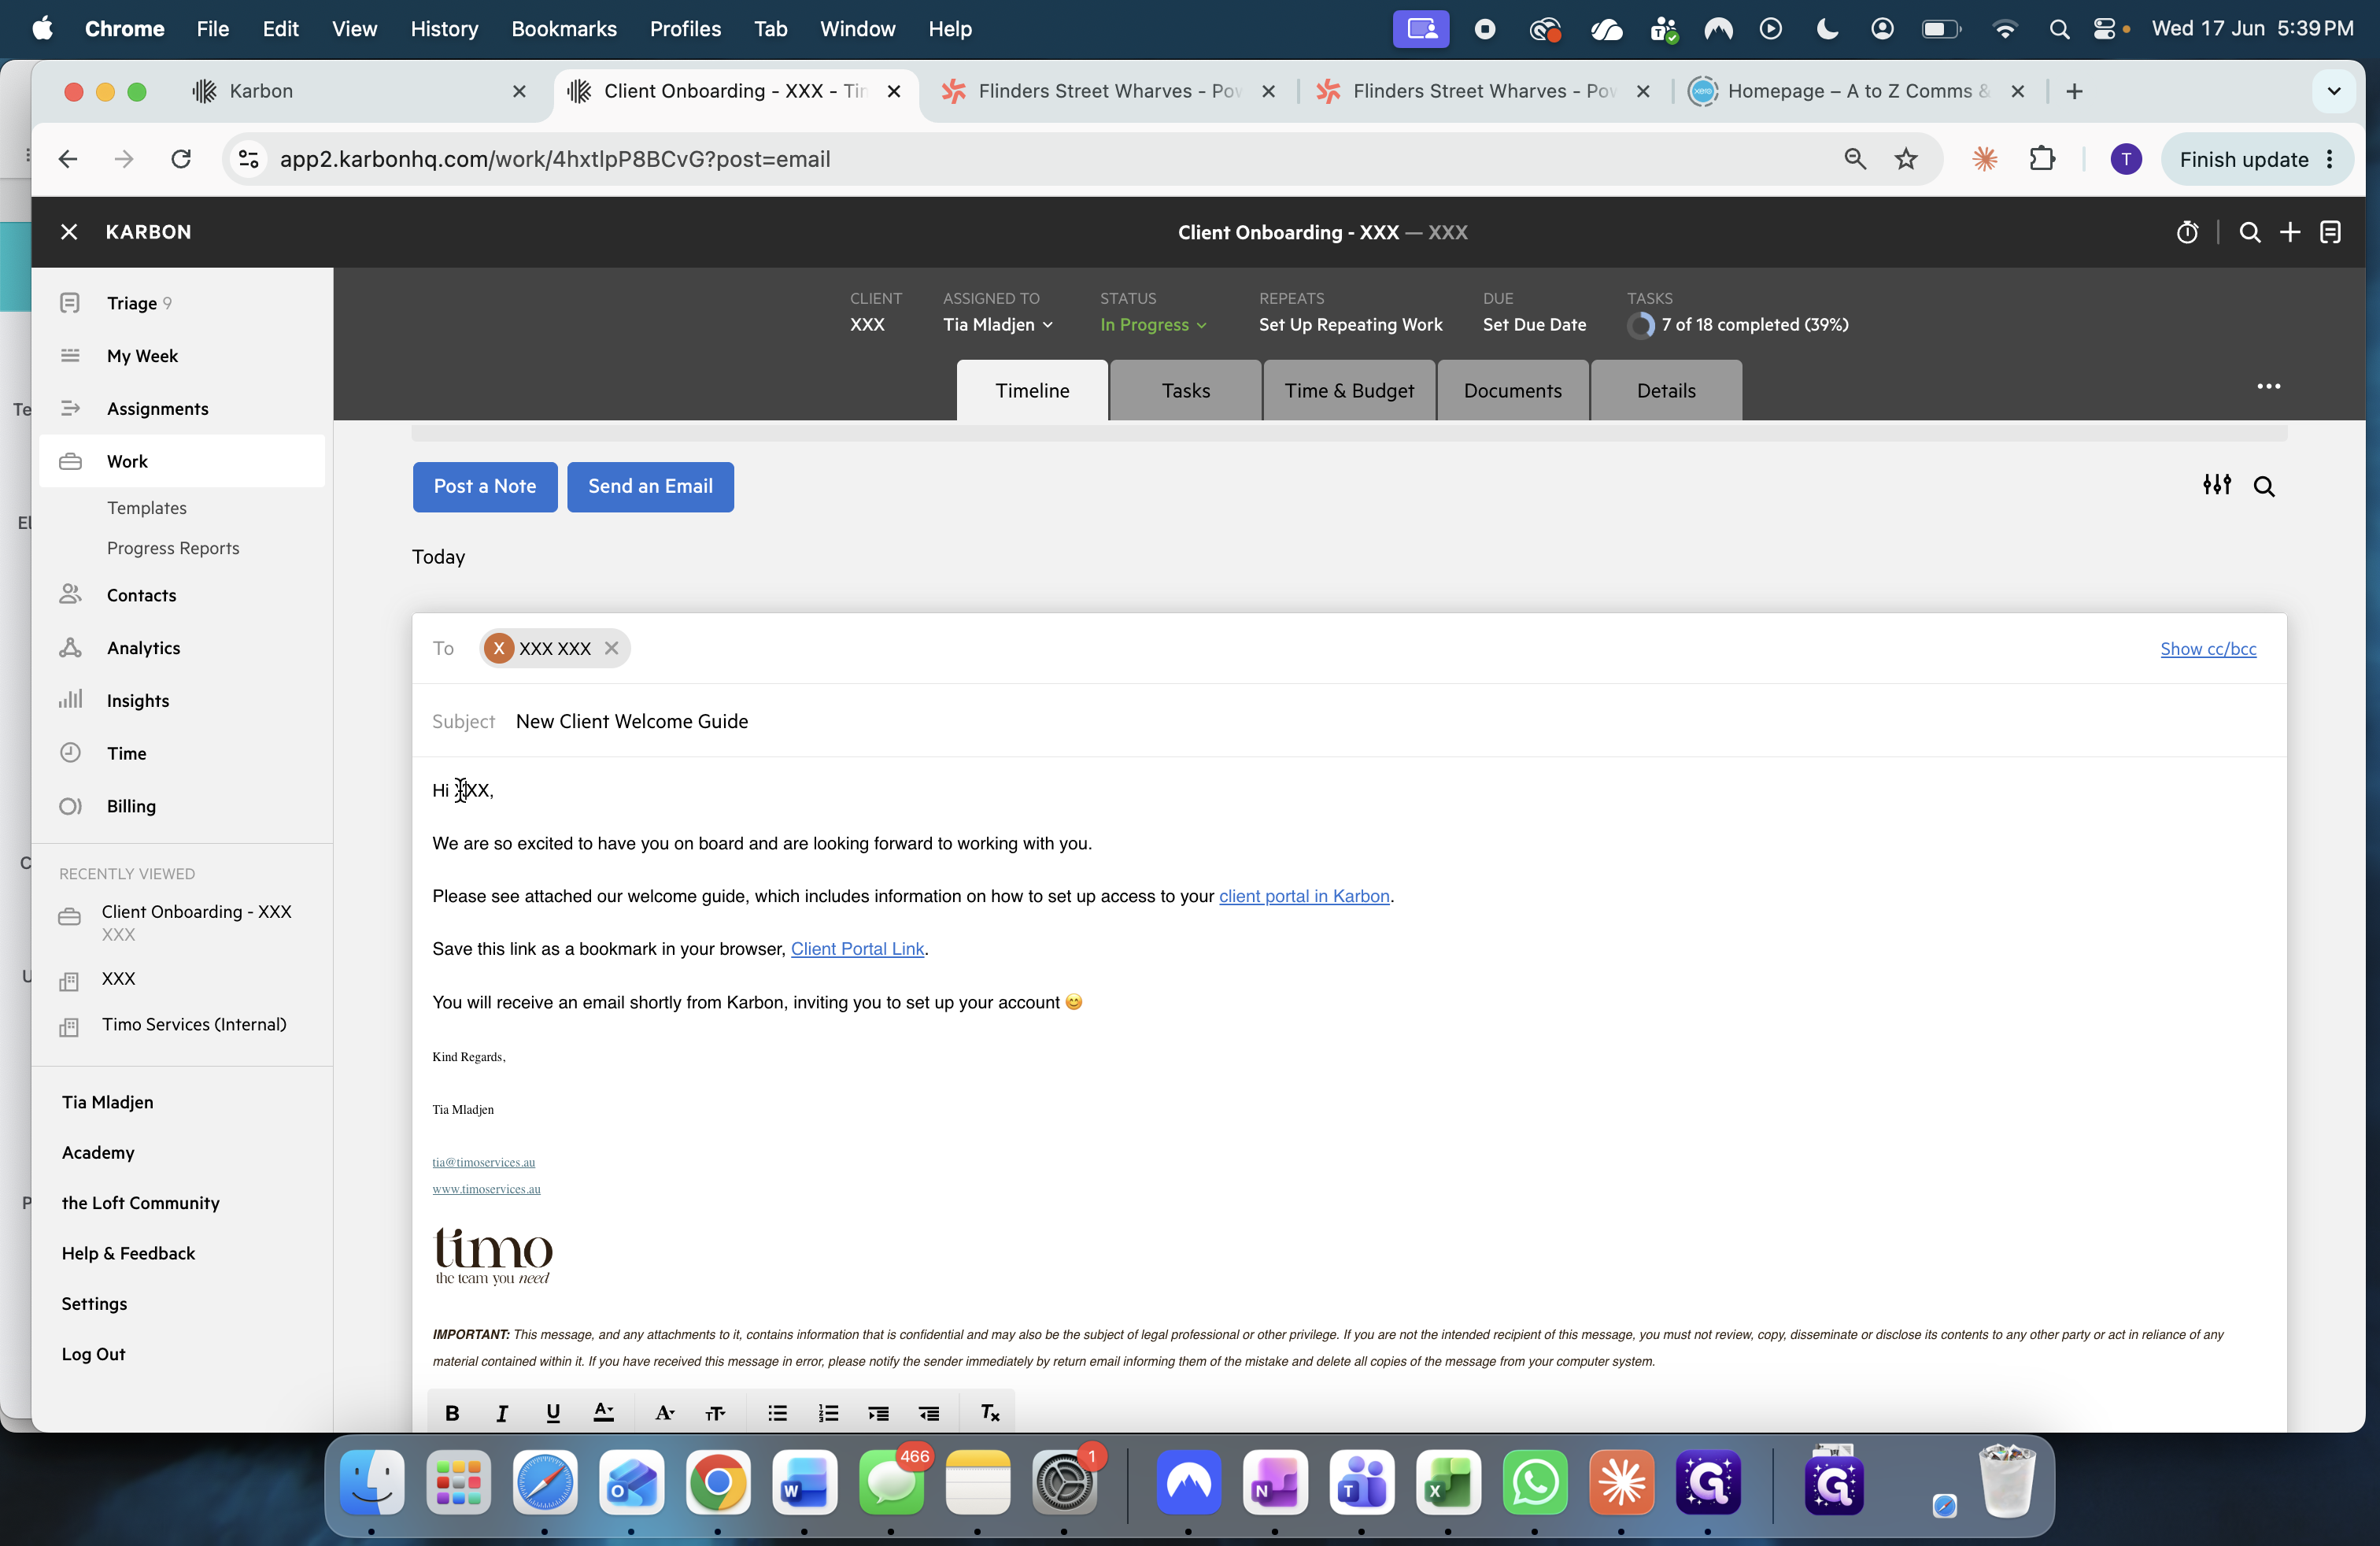
Select the client in the "To" field.
55
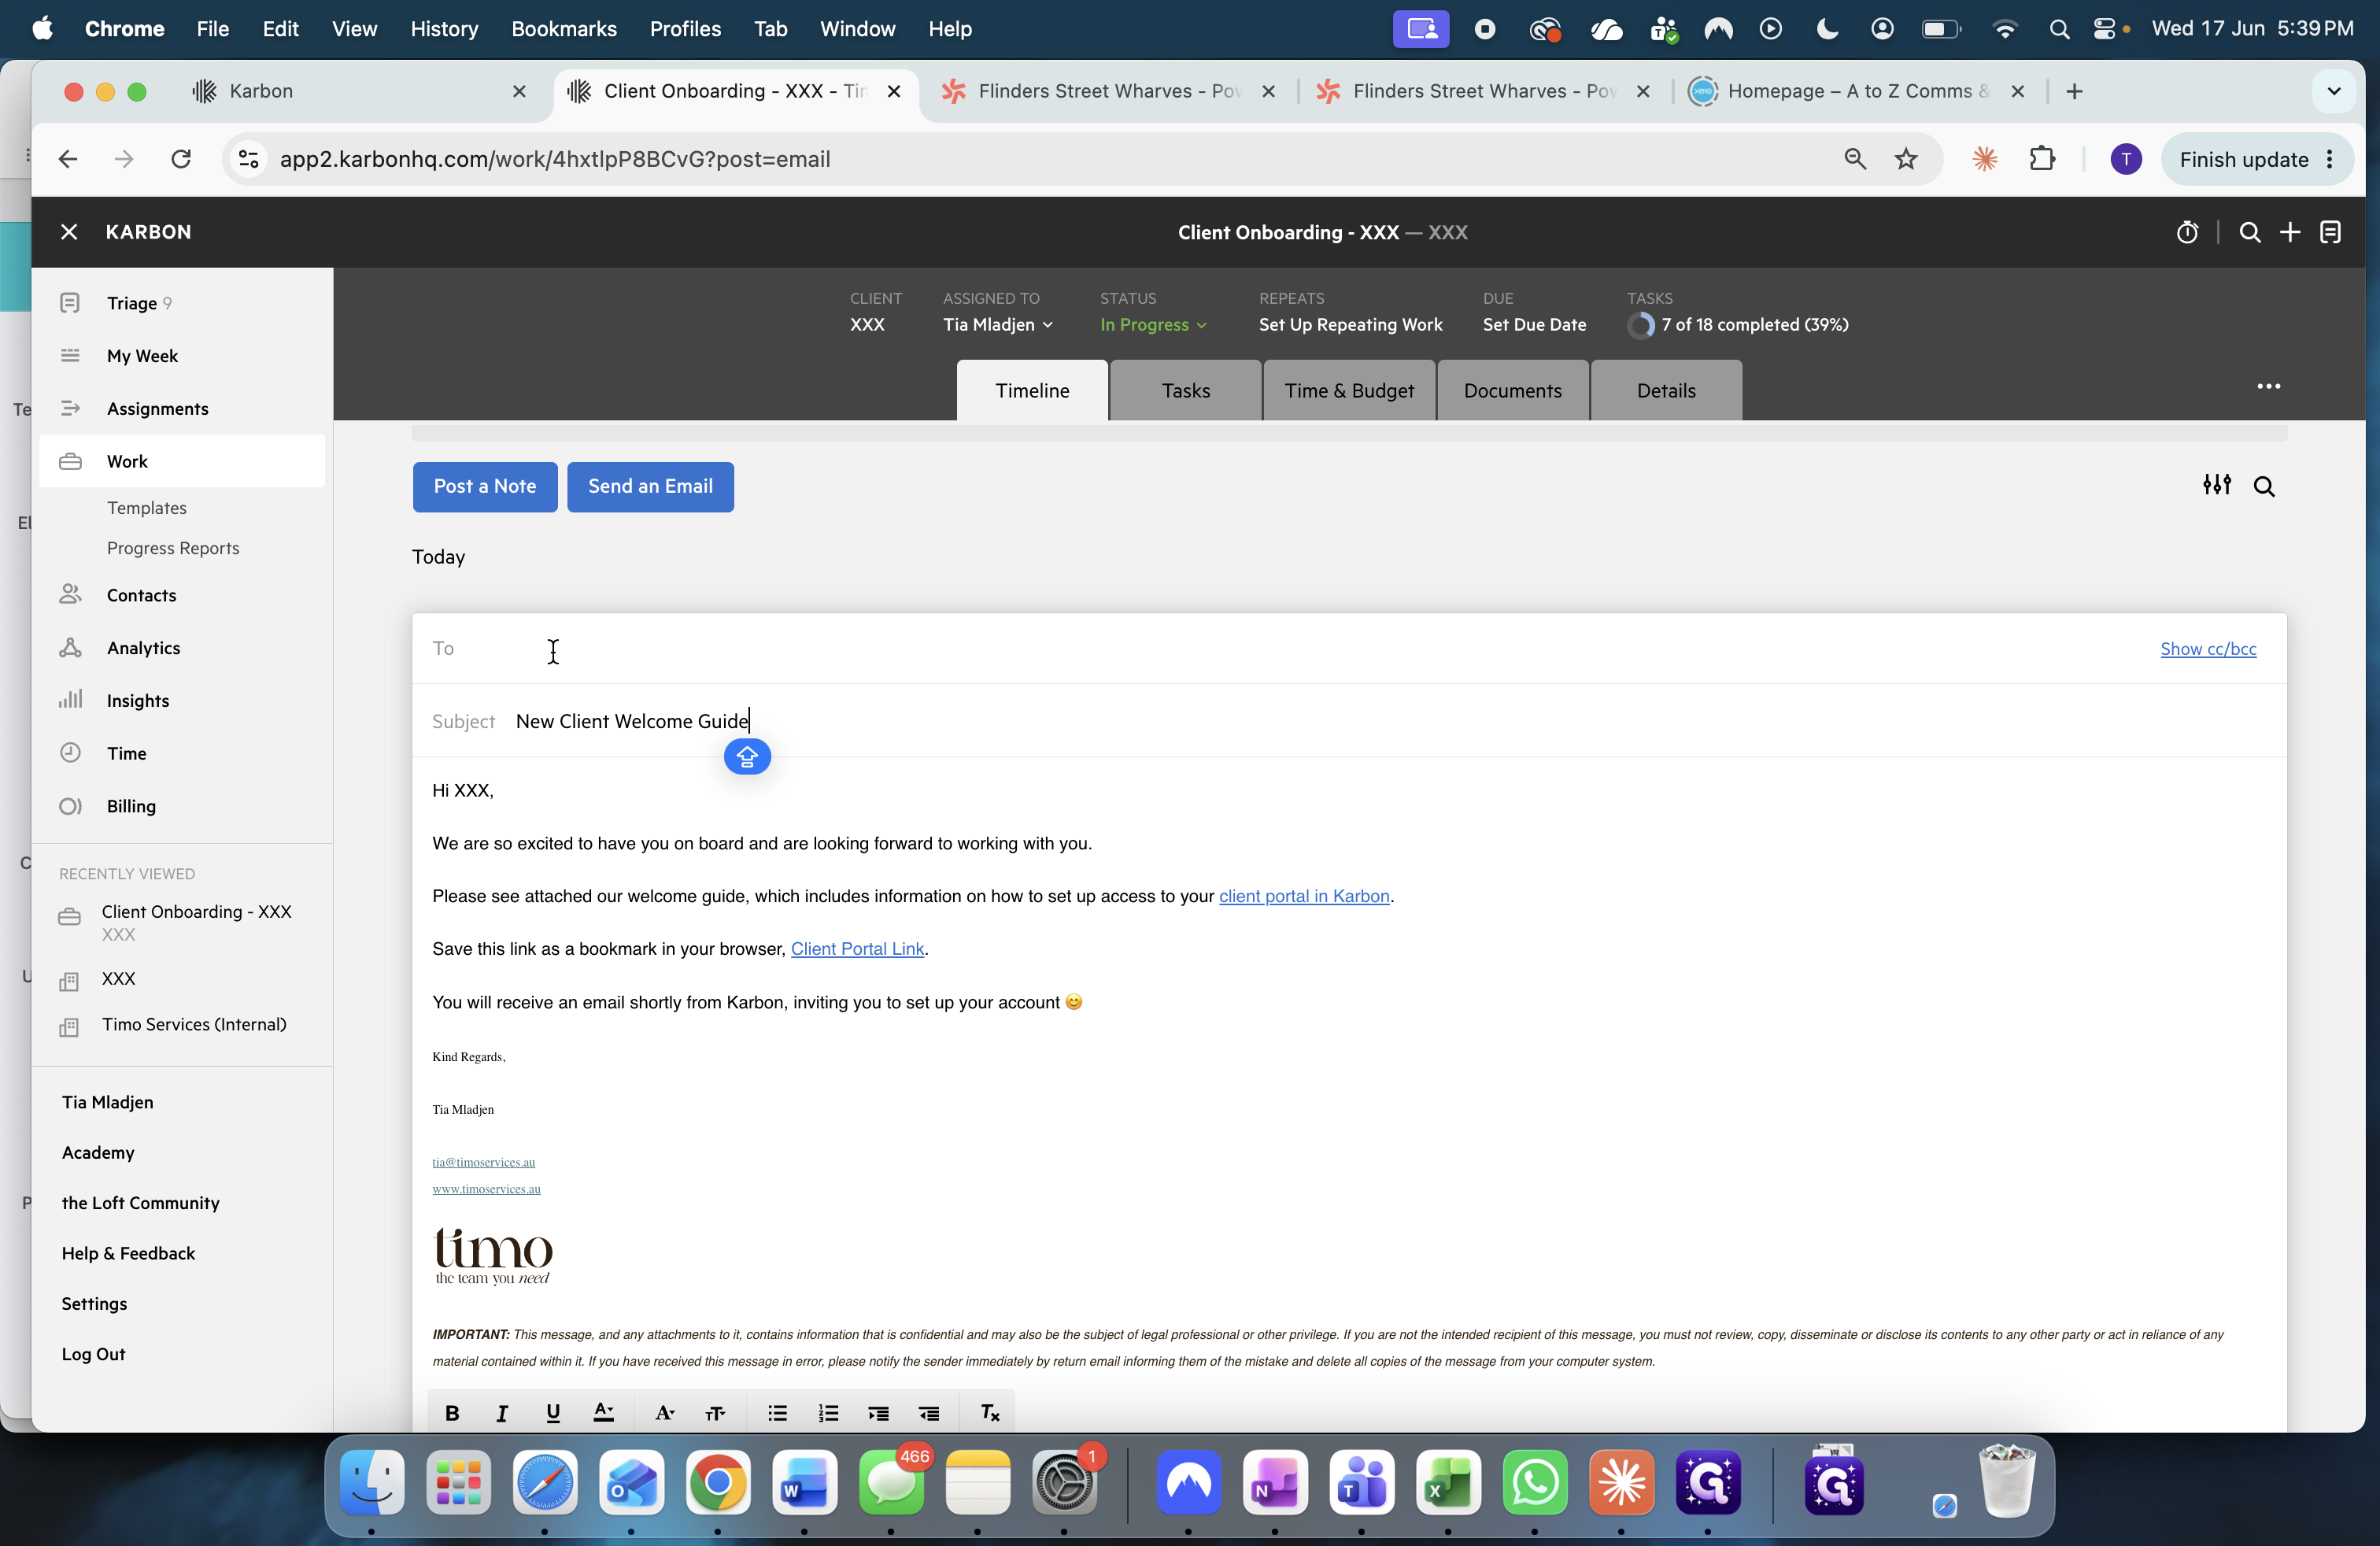
Update the placeholder greeting with the client's name.
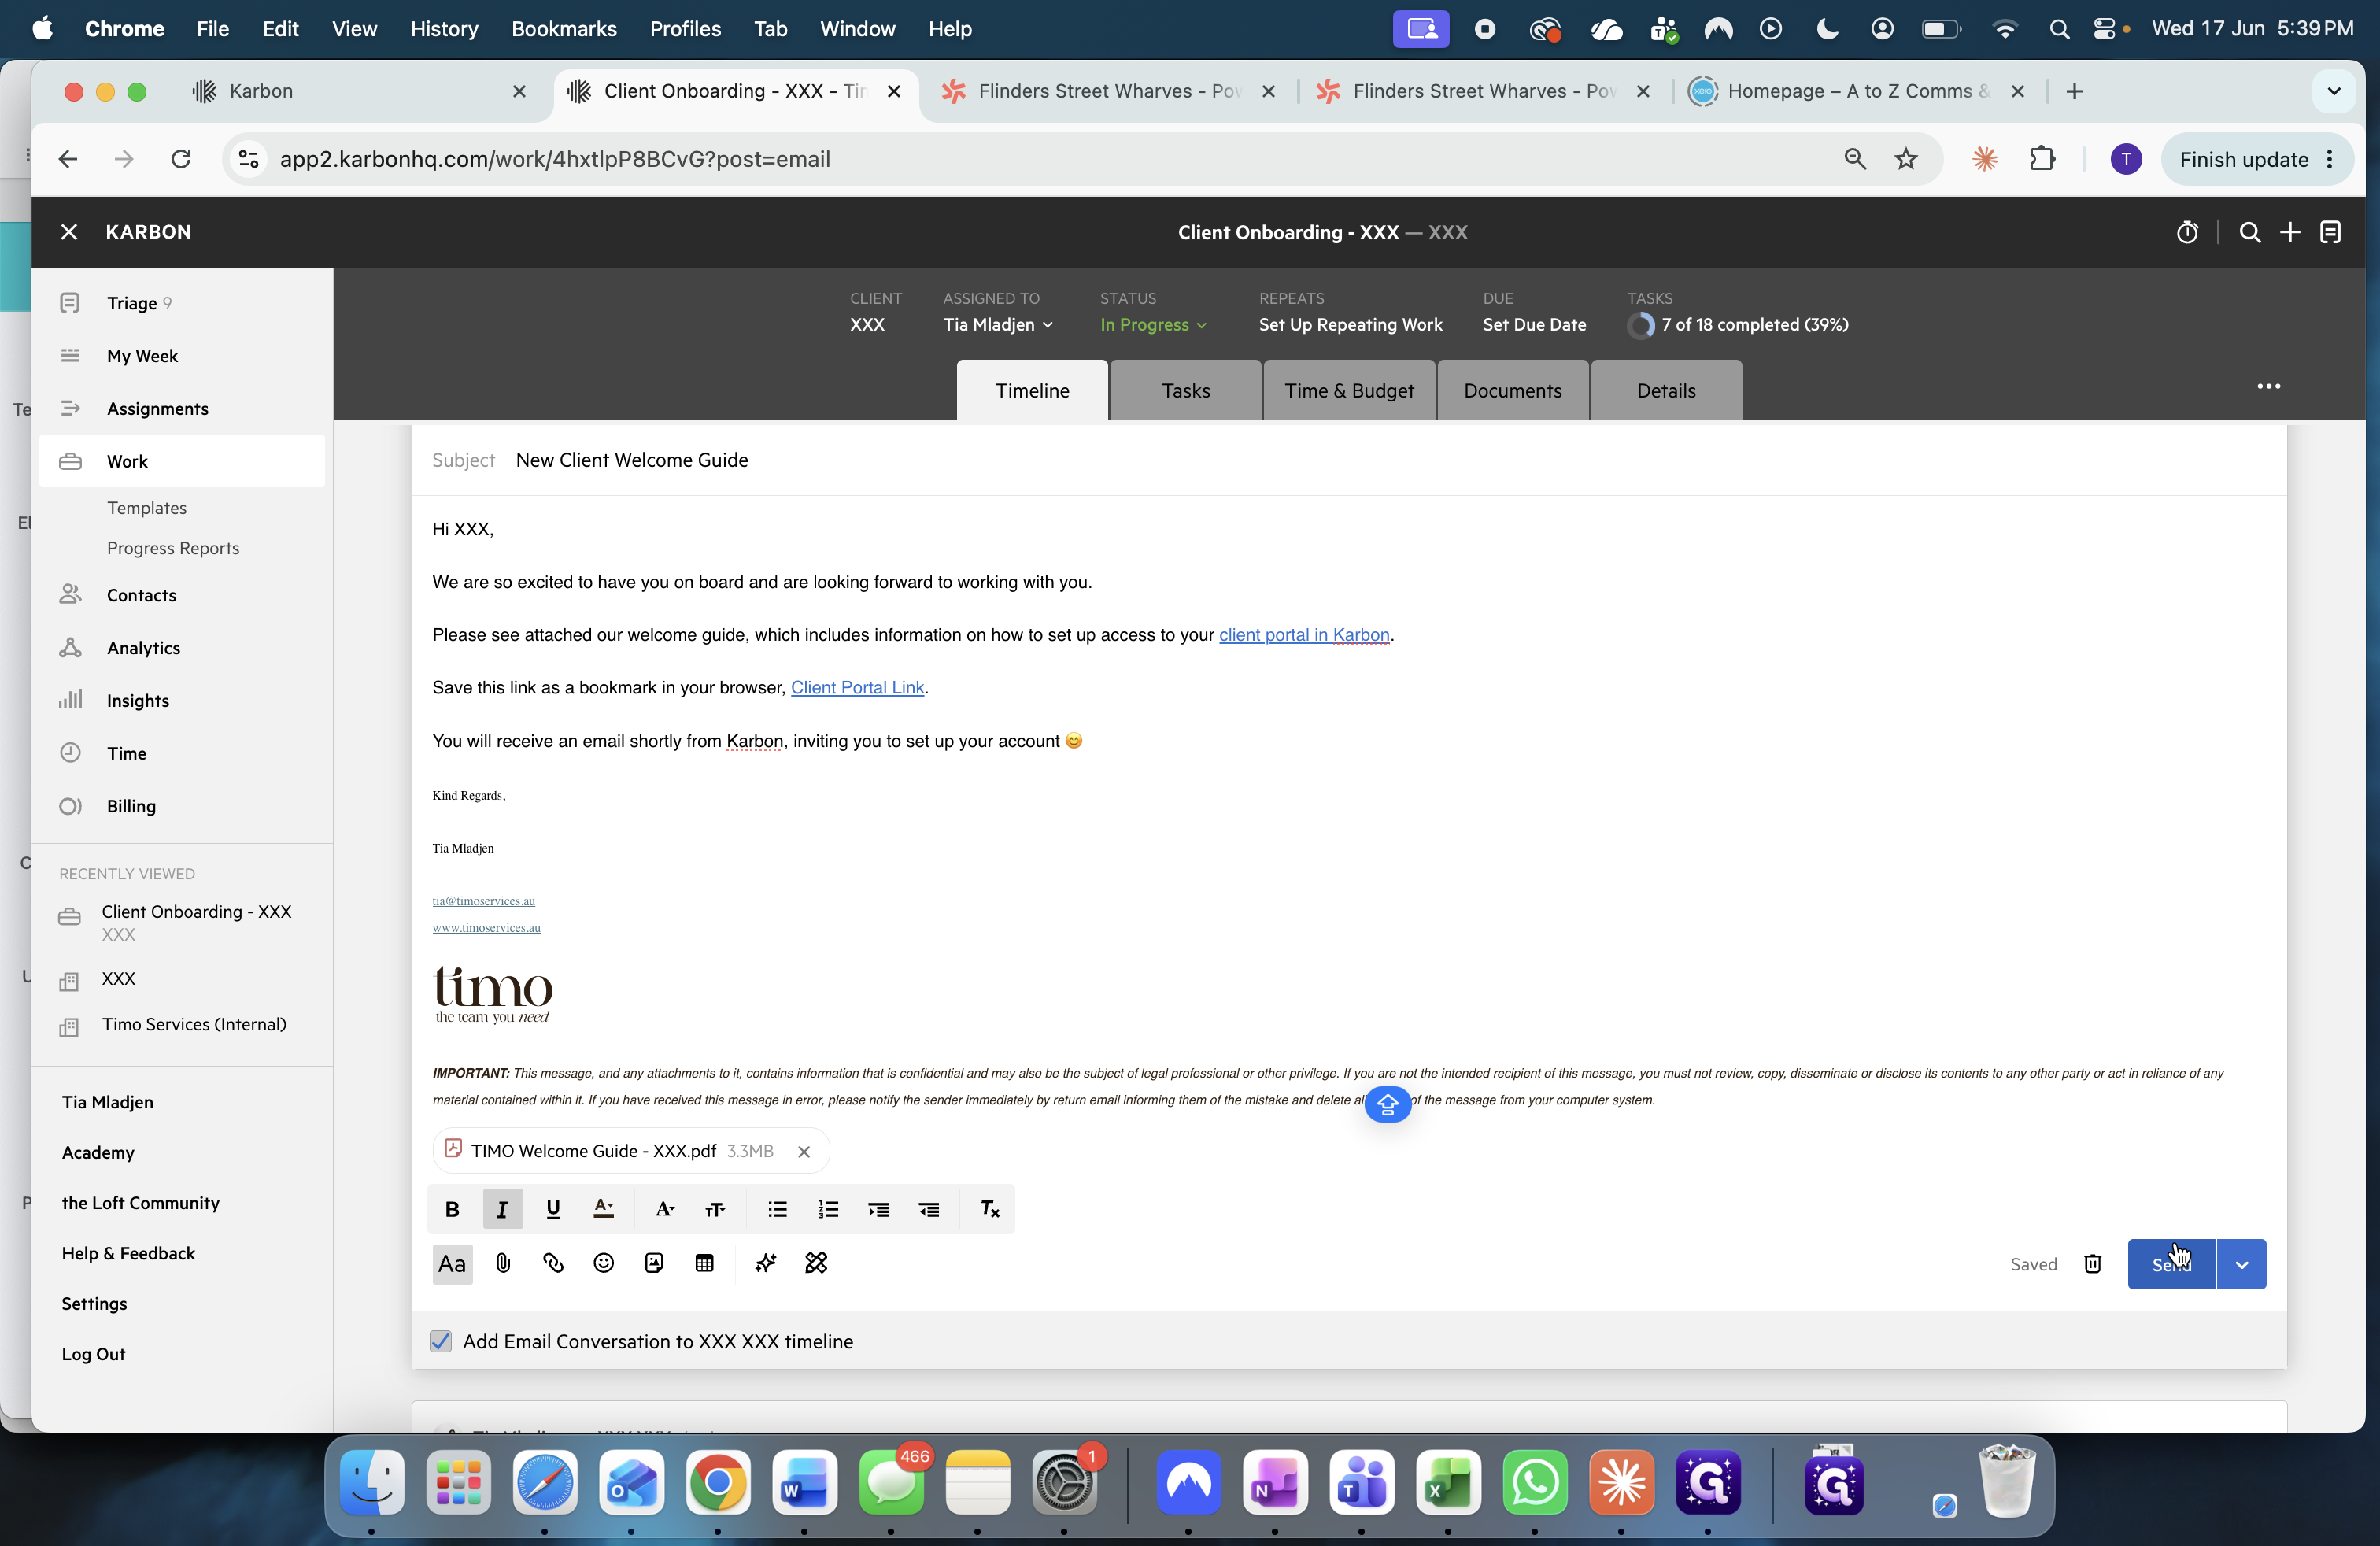
56
Click the attachment icon in the formatting toolbar.
57
Attach the PDF Welcome Guide you downloaded from Canva.
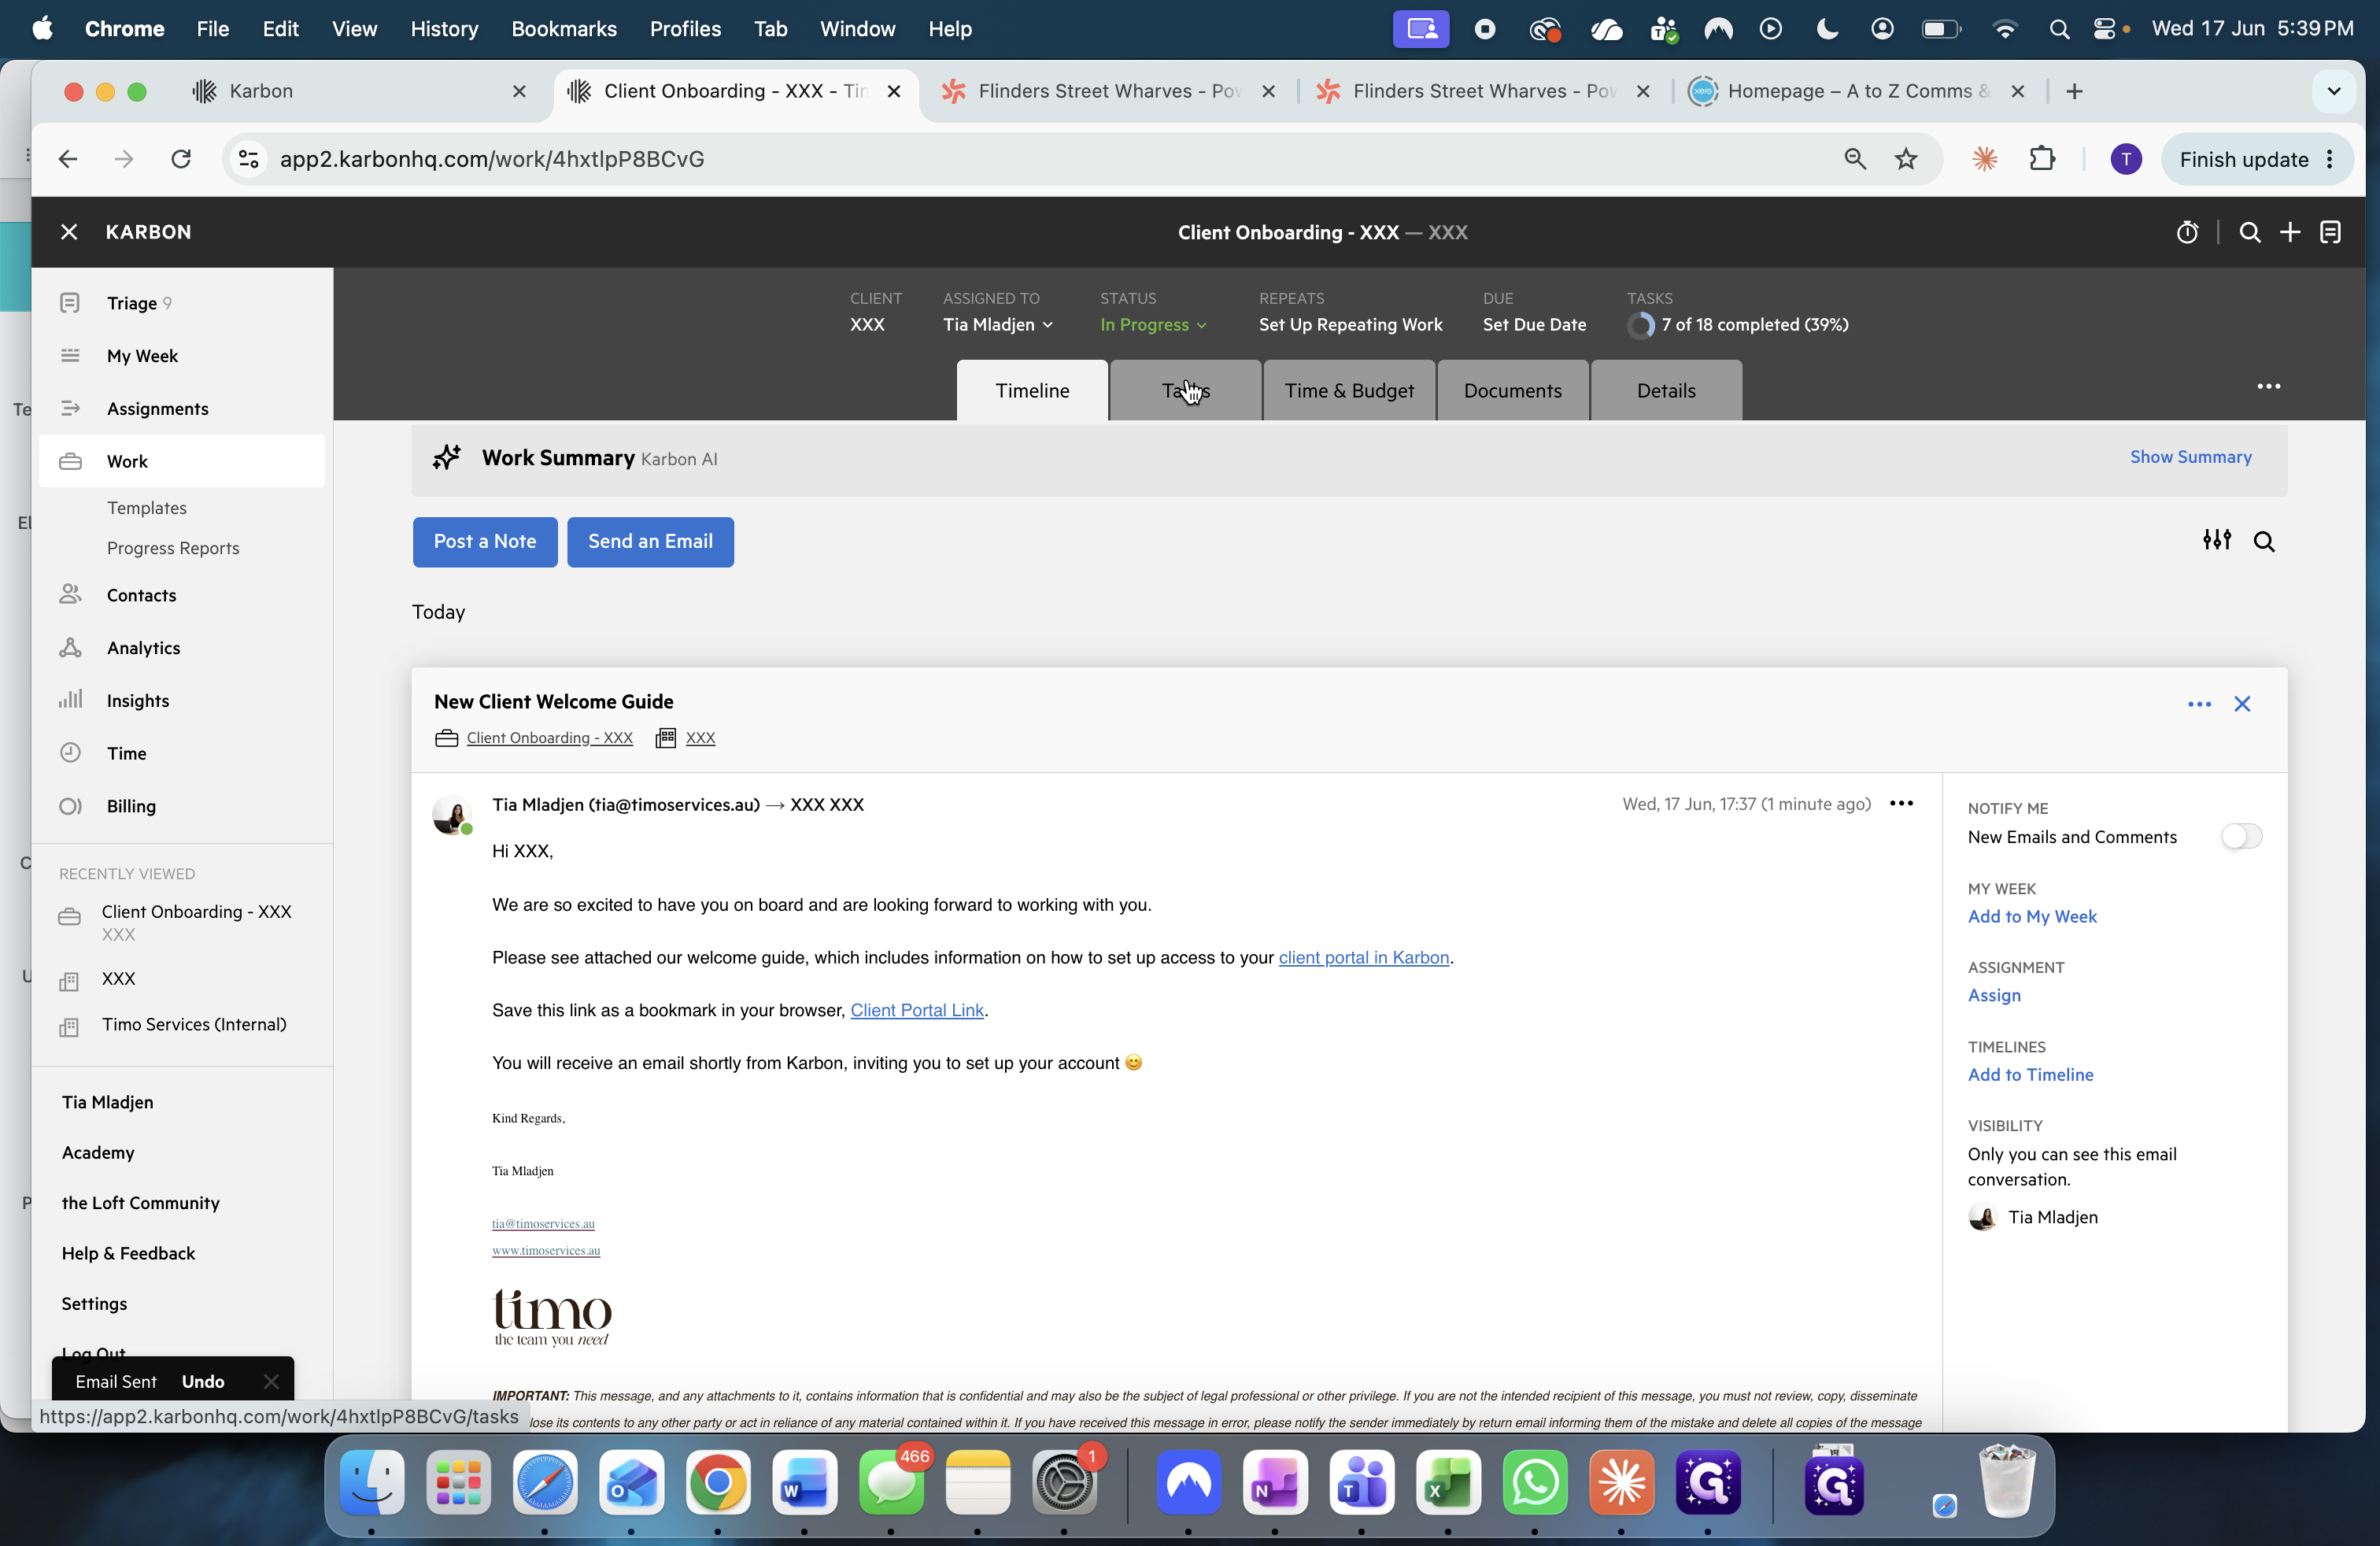
58
Click Send.
59
Navigate to the Tasks tab and check off the Welcome Guide creation and emailing tasks.
Phase 7: Prepare the DocuSign BAS Authority
60
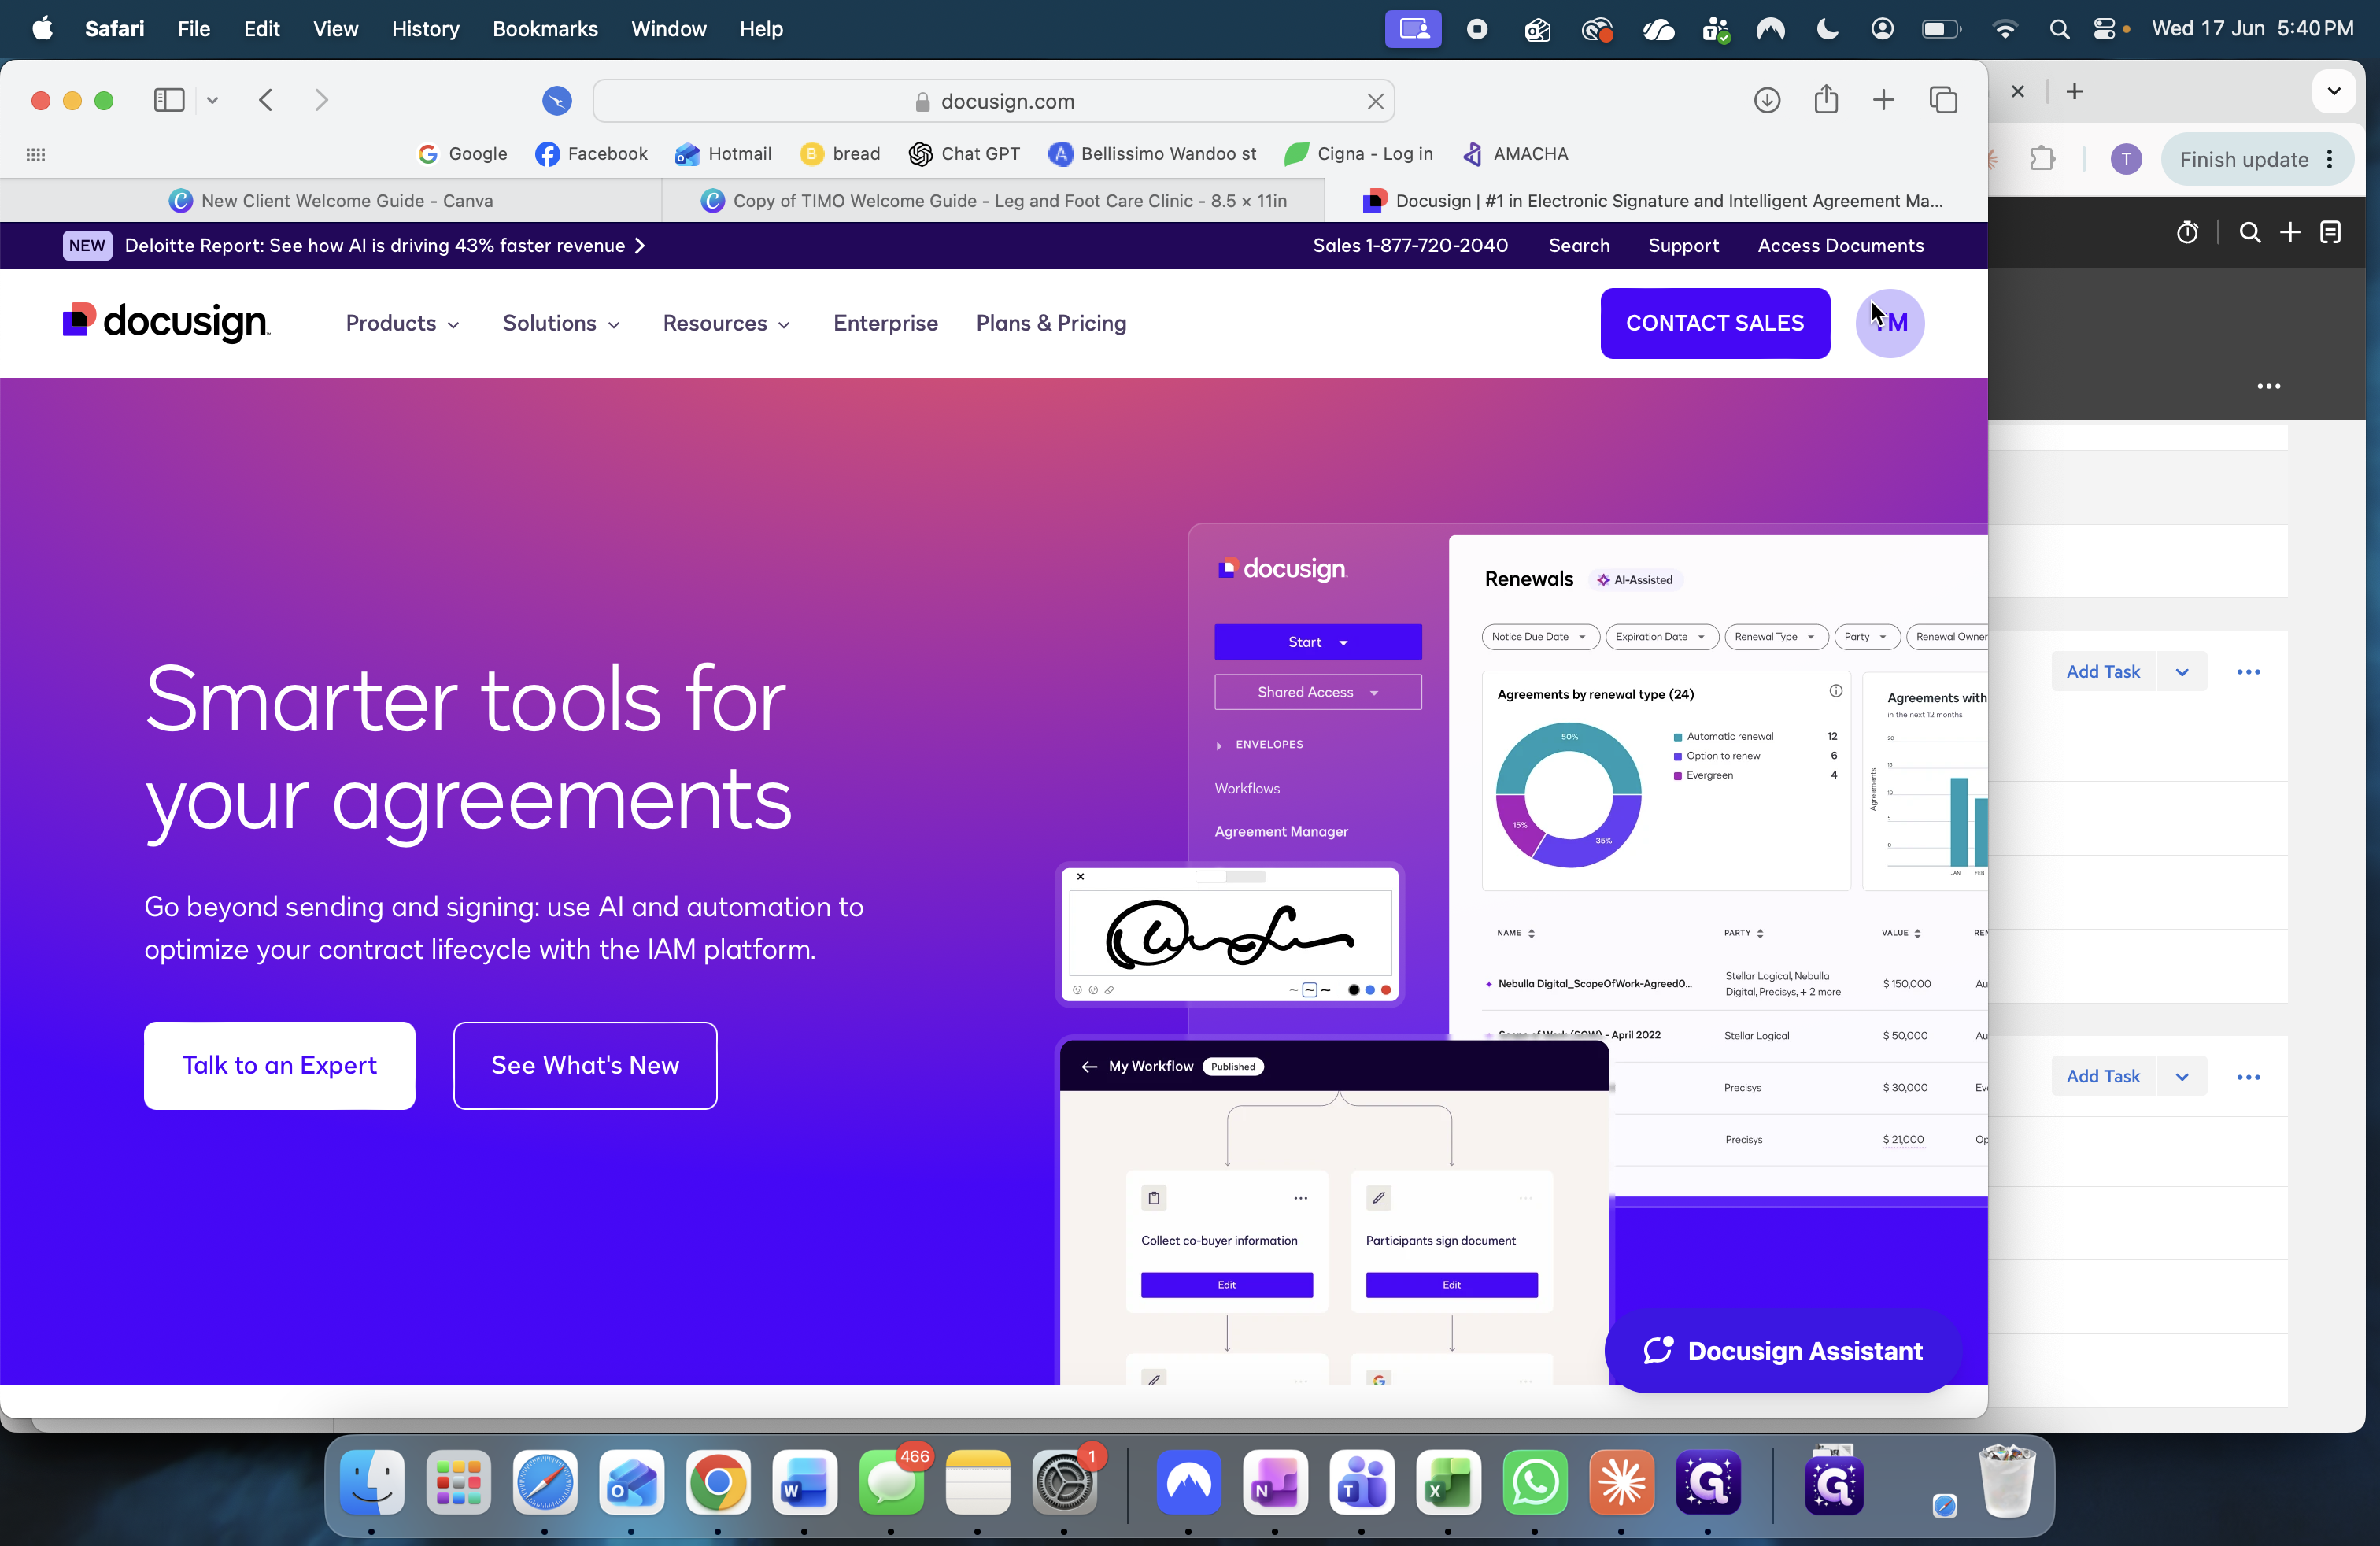
Open DocuSign and confirm you are logged into the correct workspace.
61
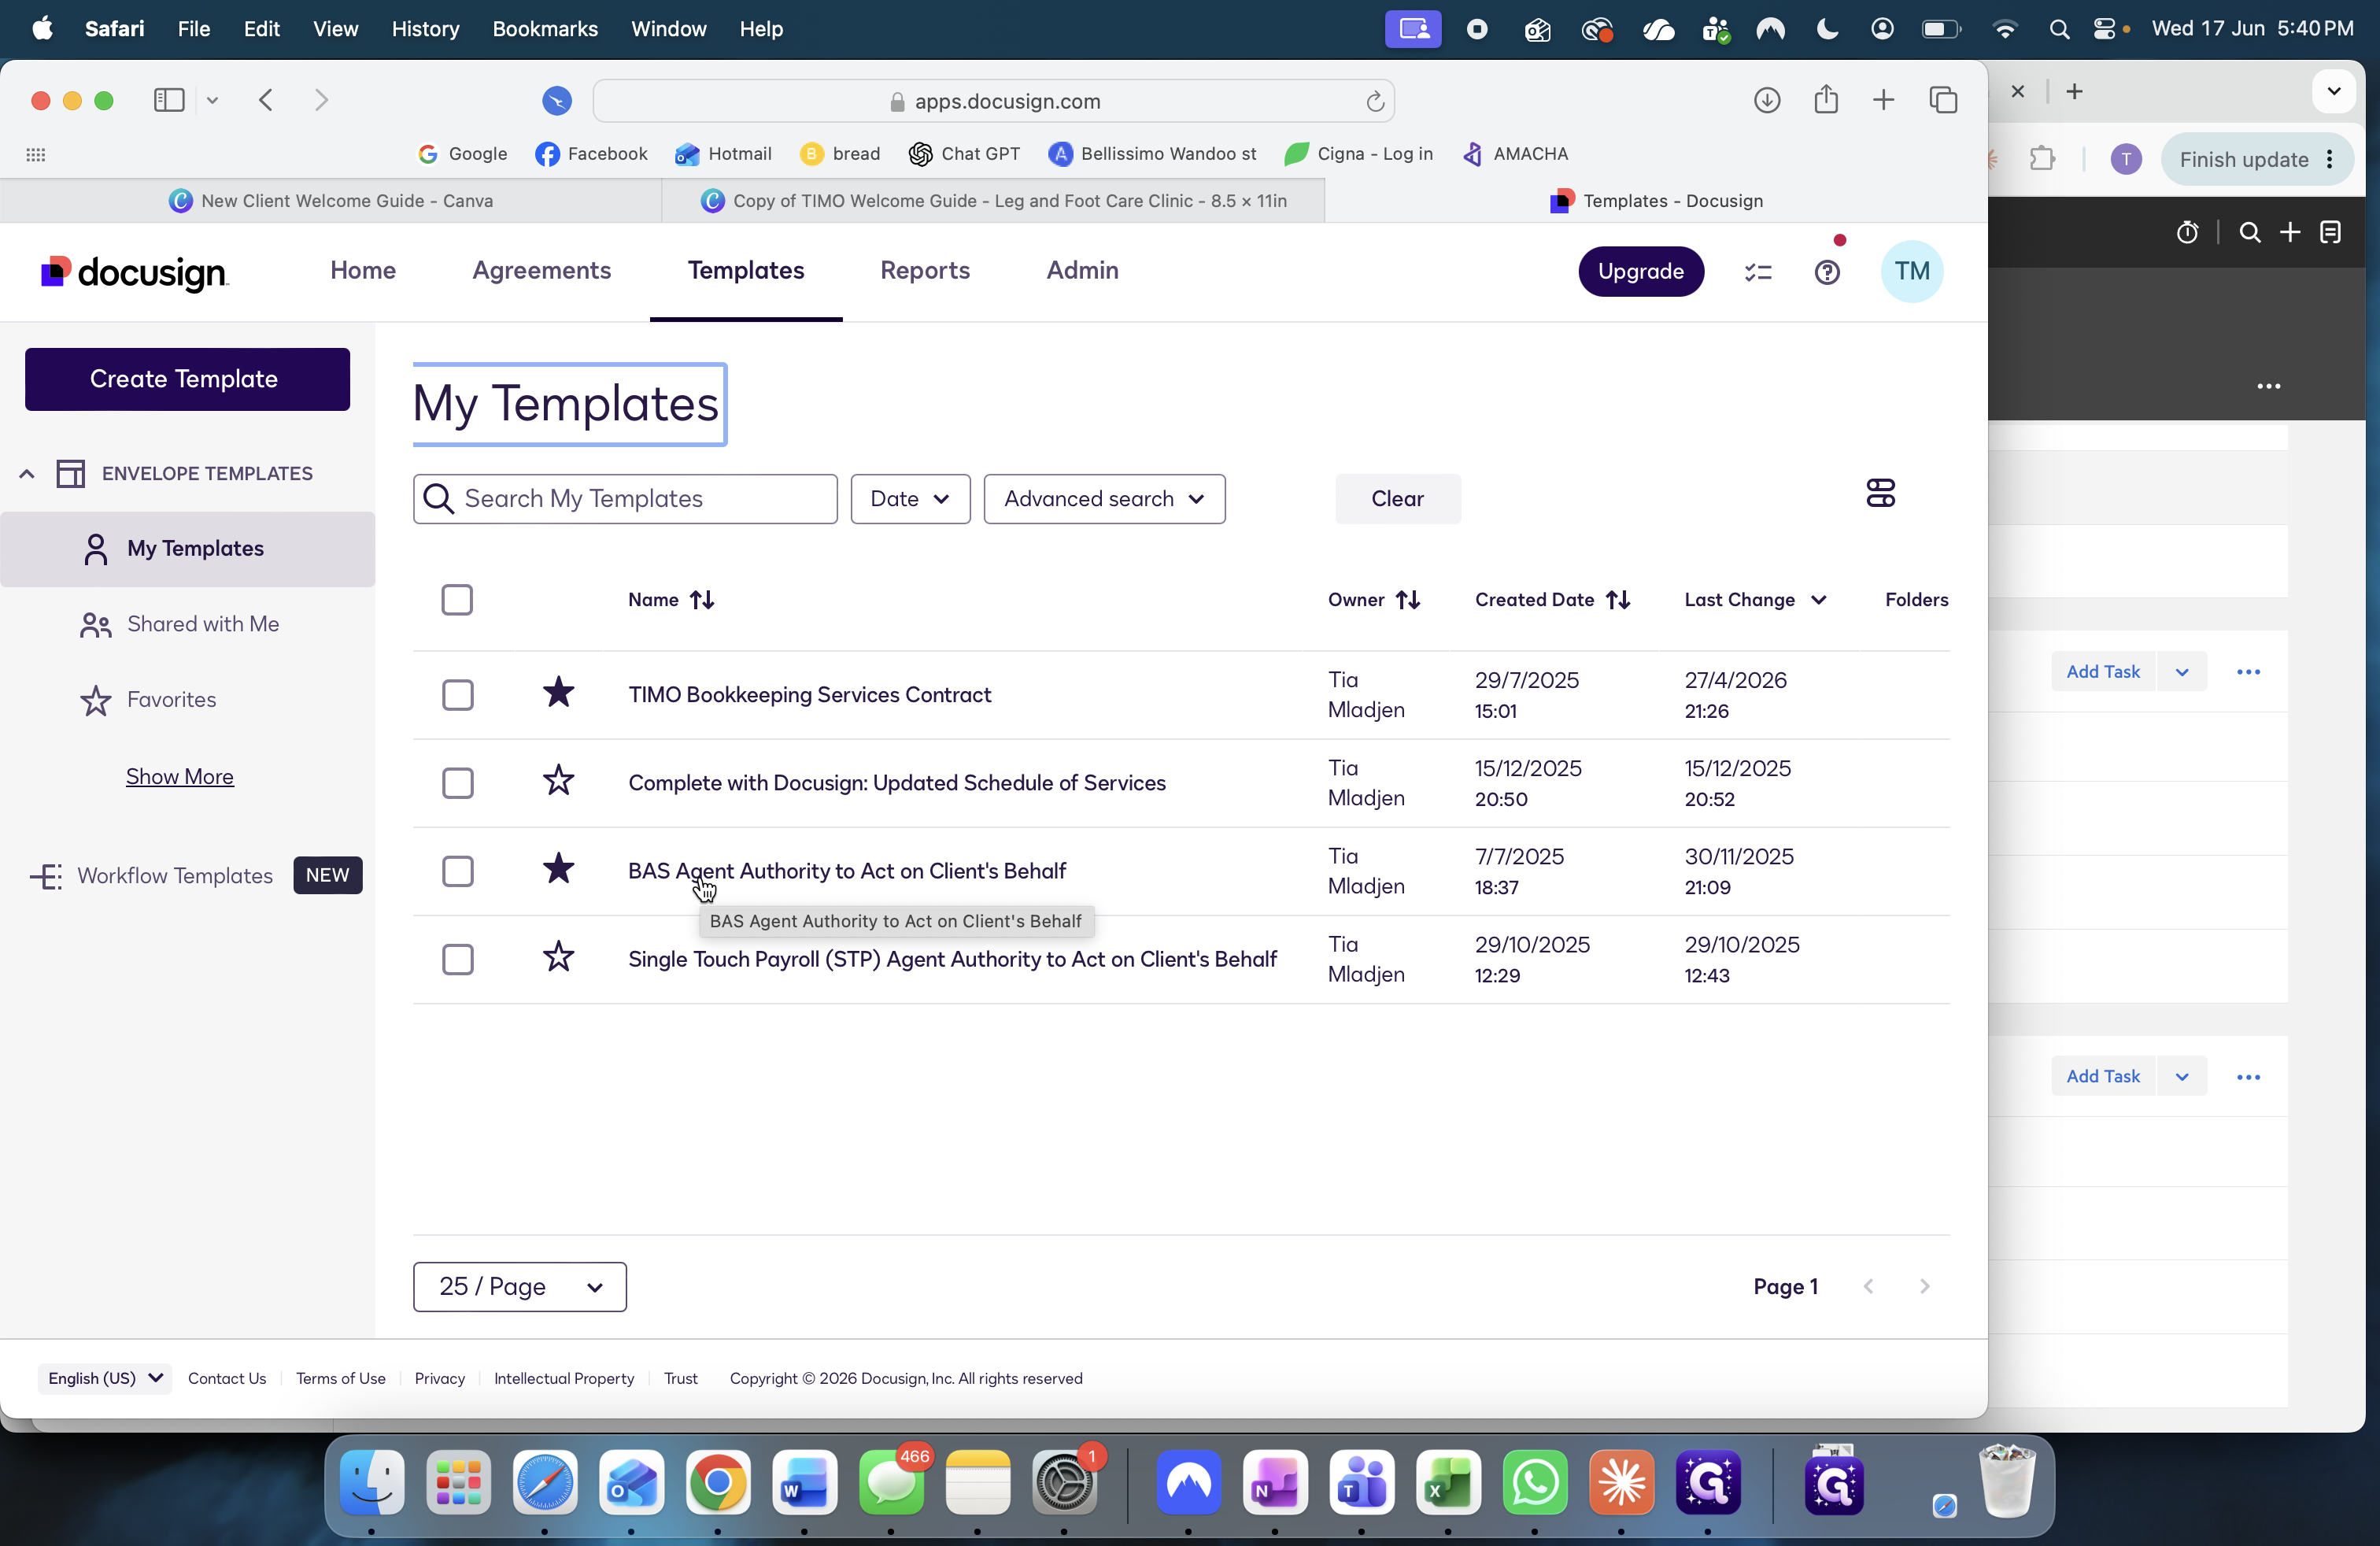
Click Templates in the main header navigation.
62
Locate the BAS Agent Authority to Act on Client's Behalf template.
63
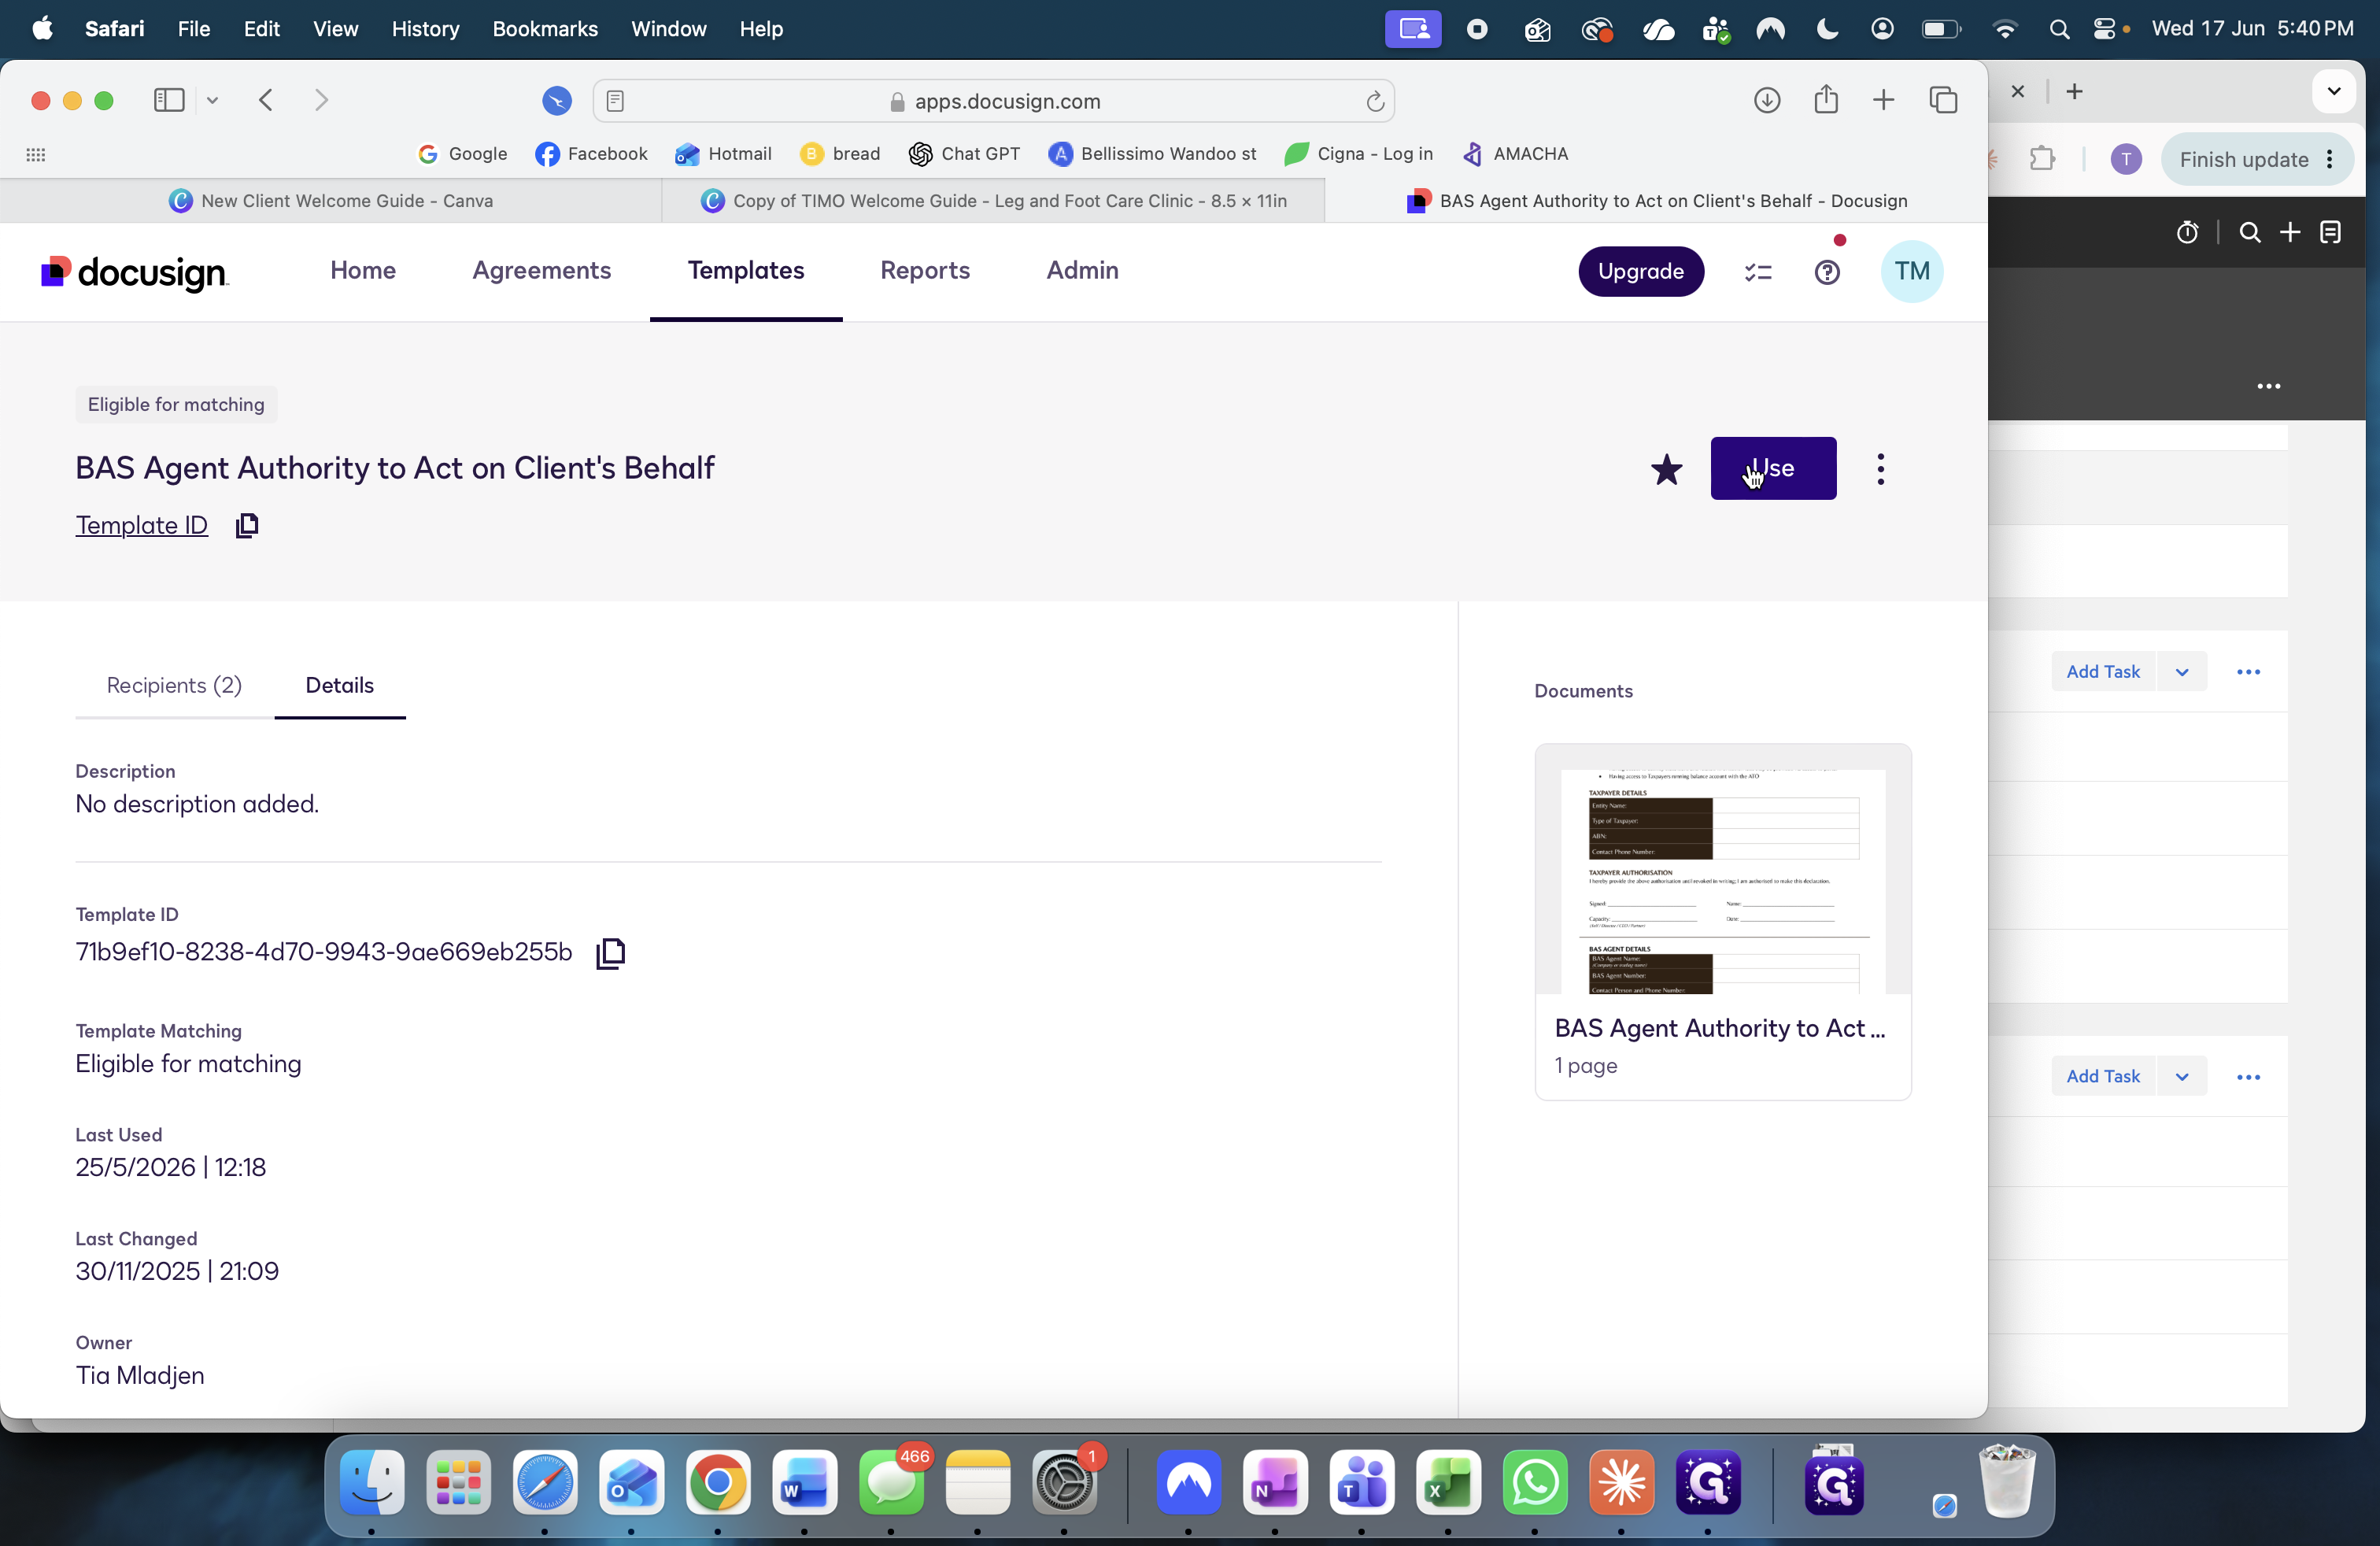
Click Use next to the template.
64
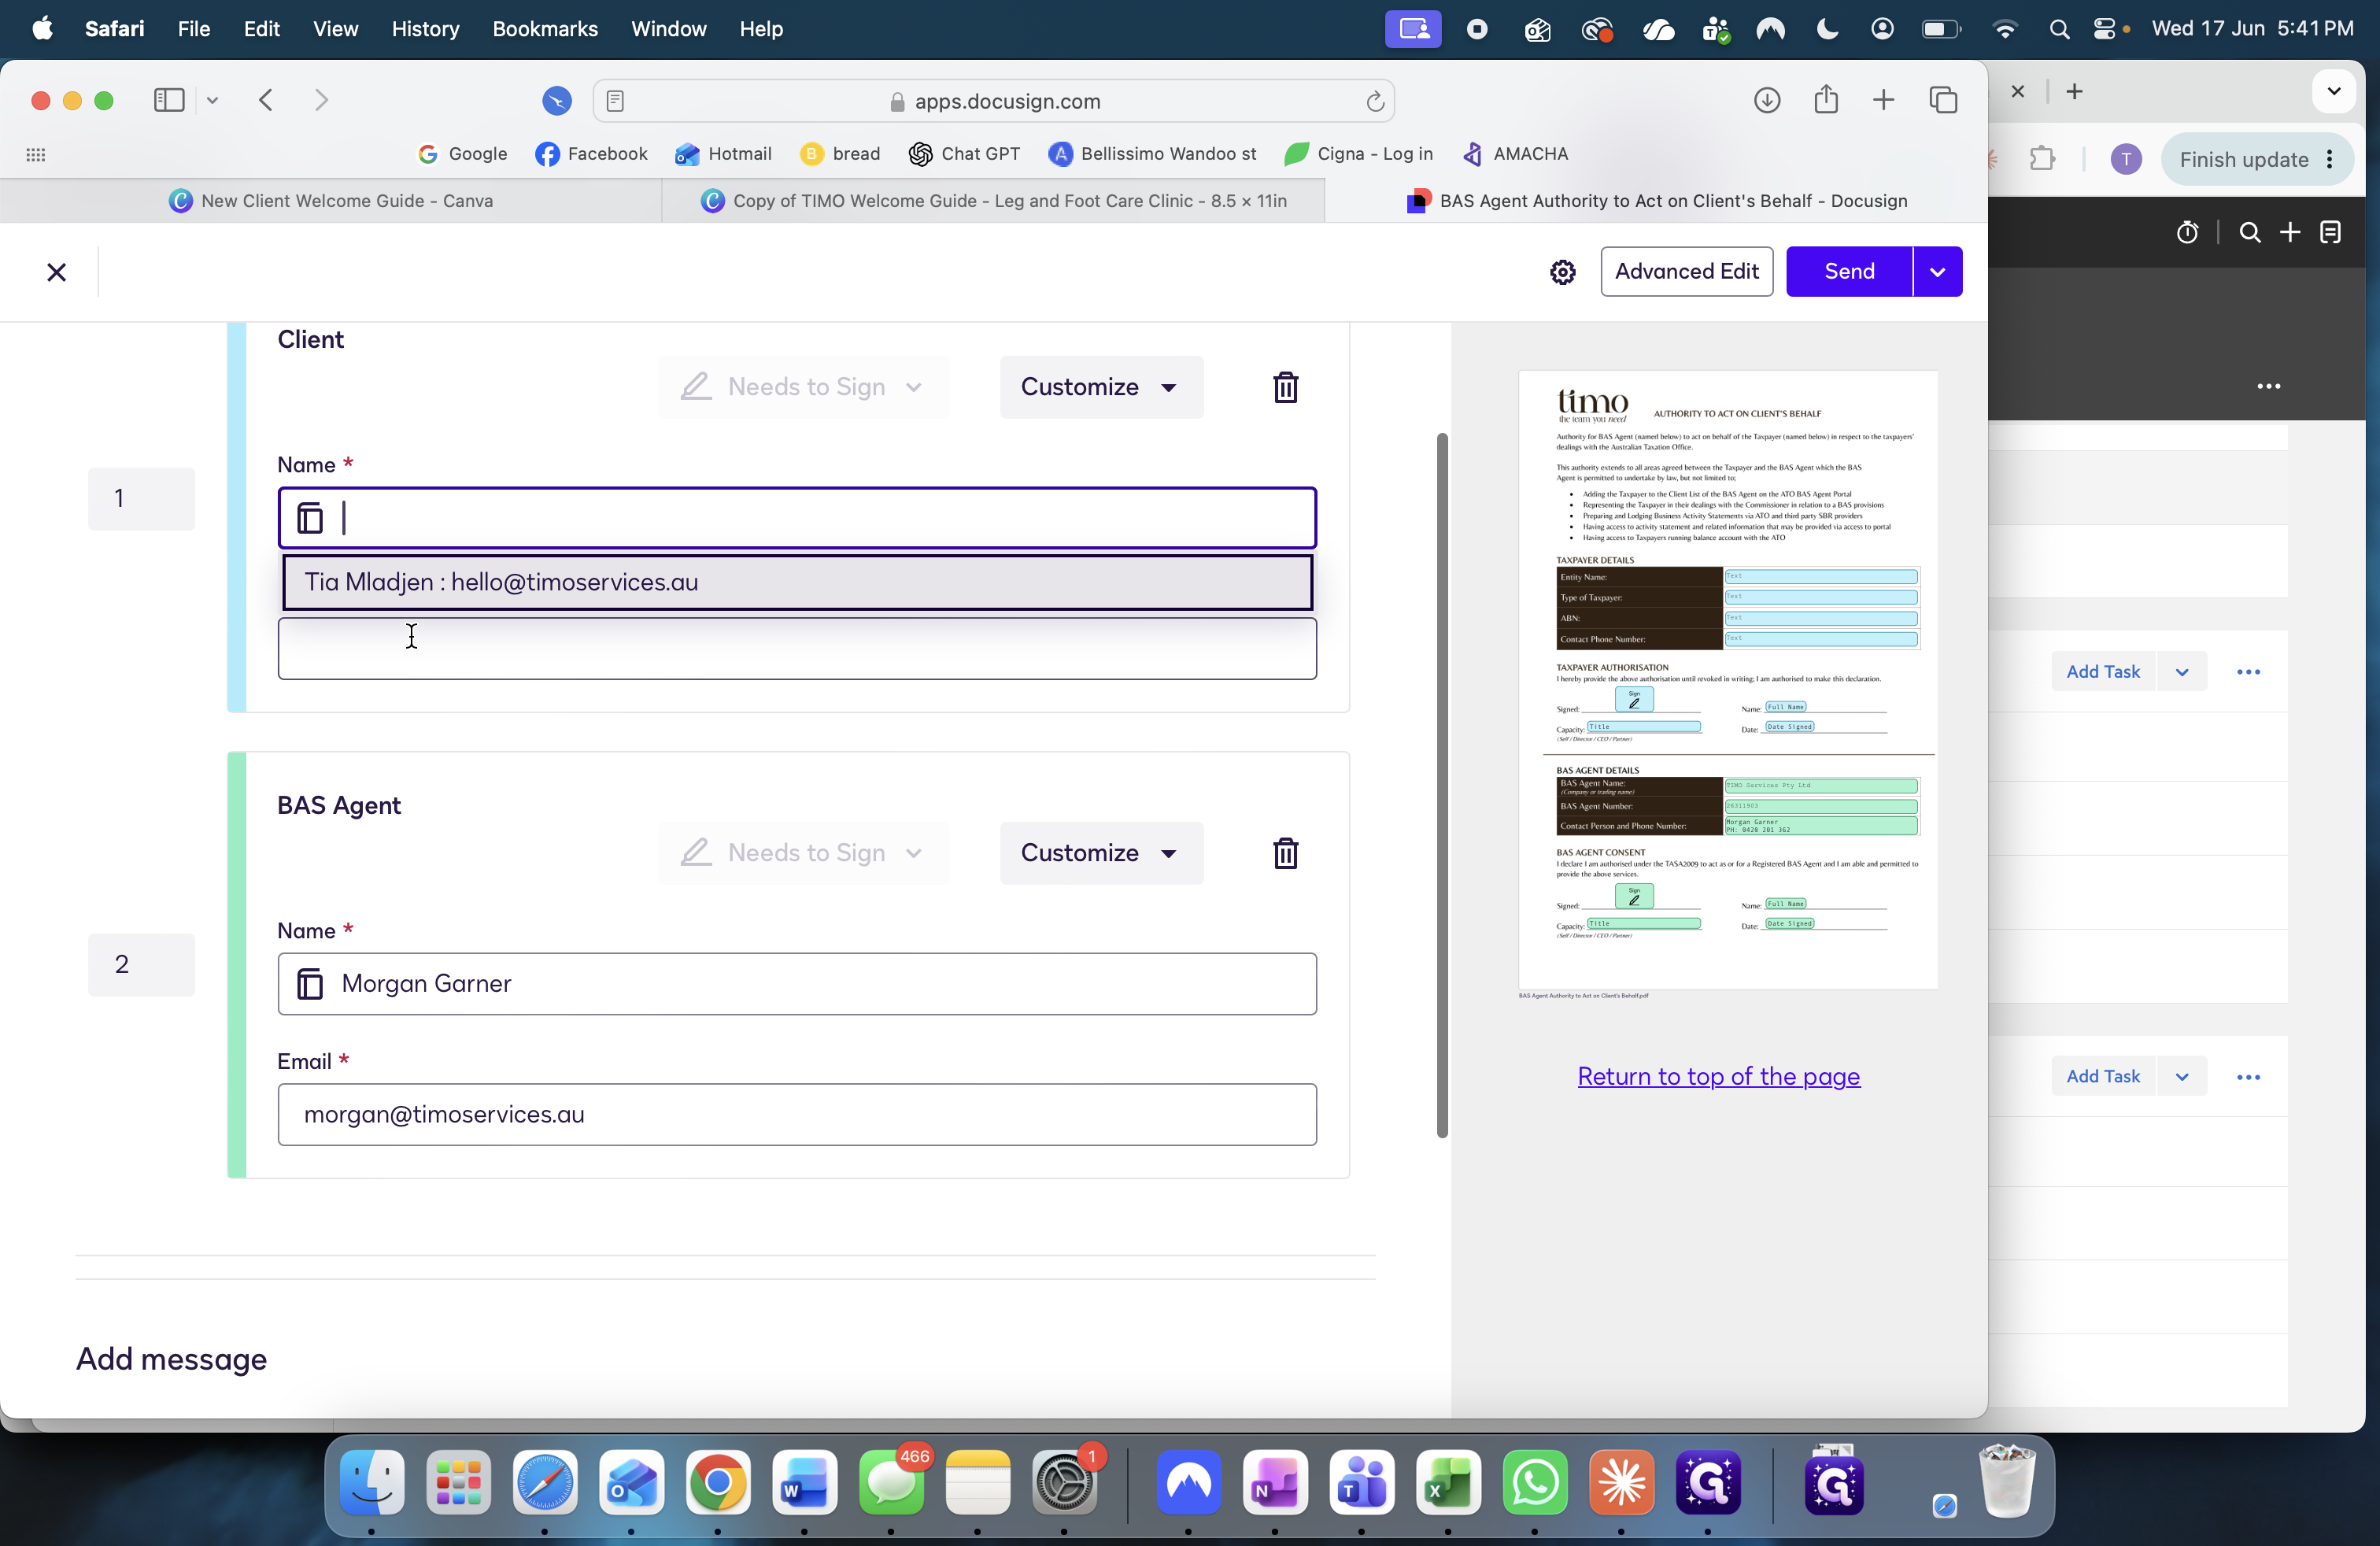
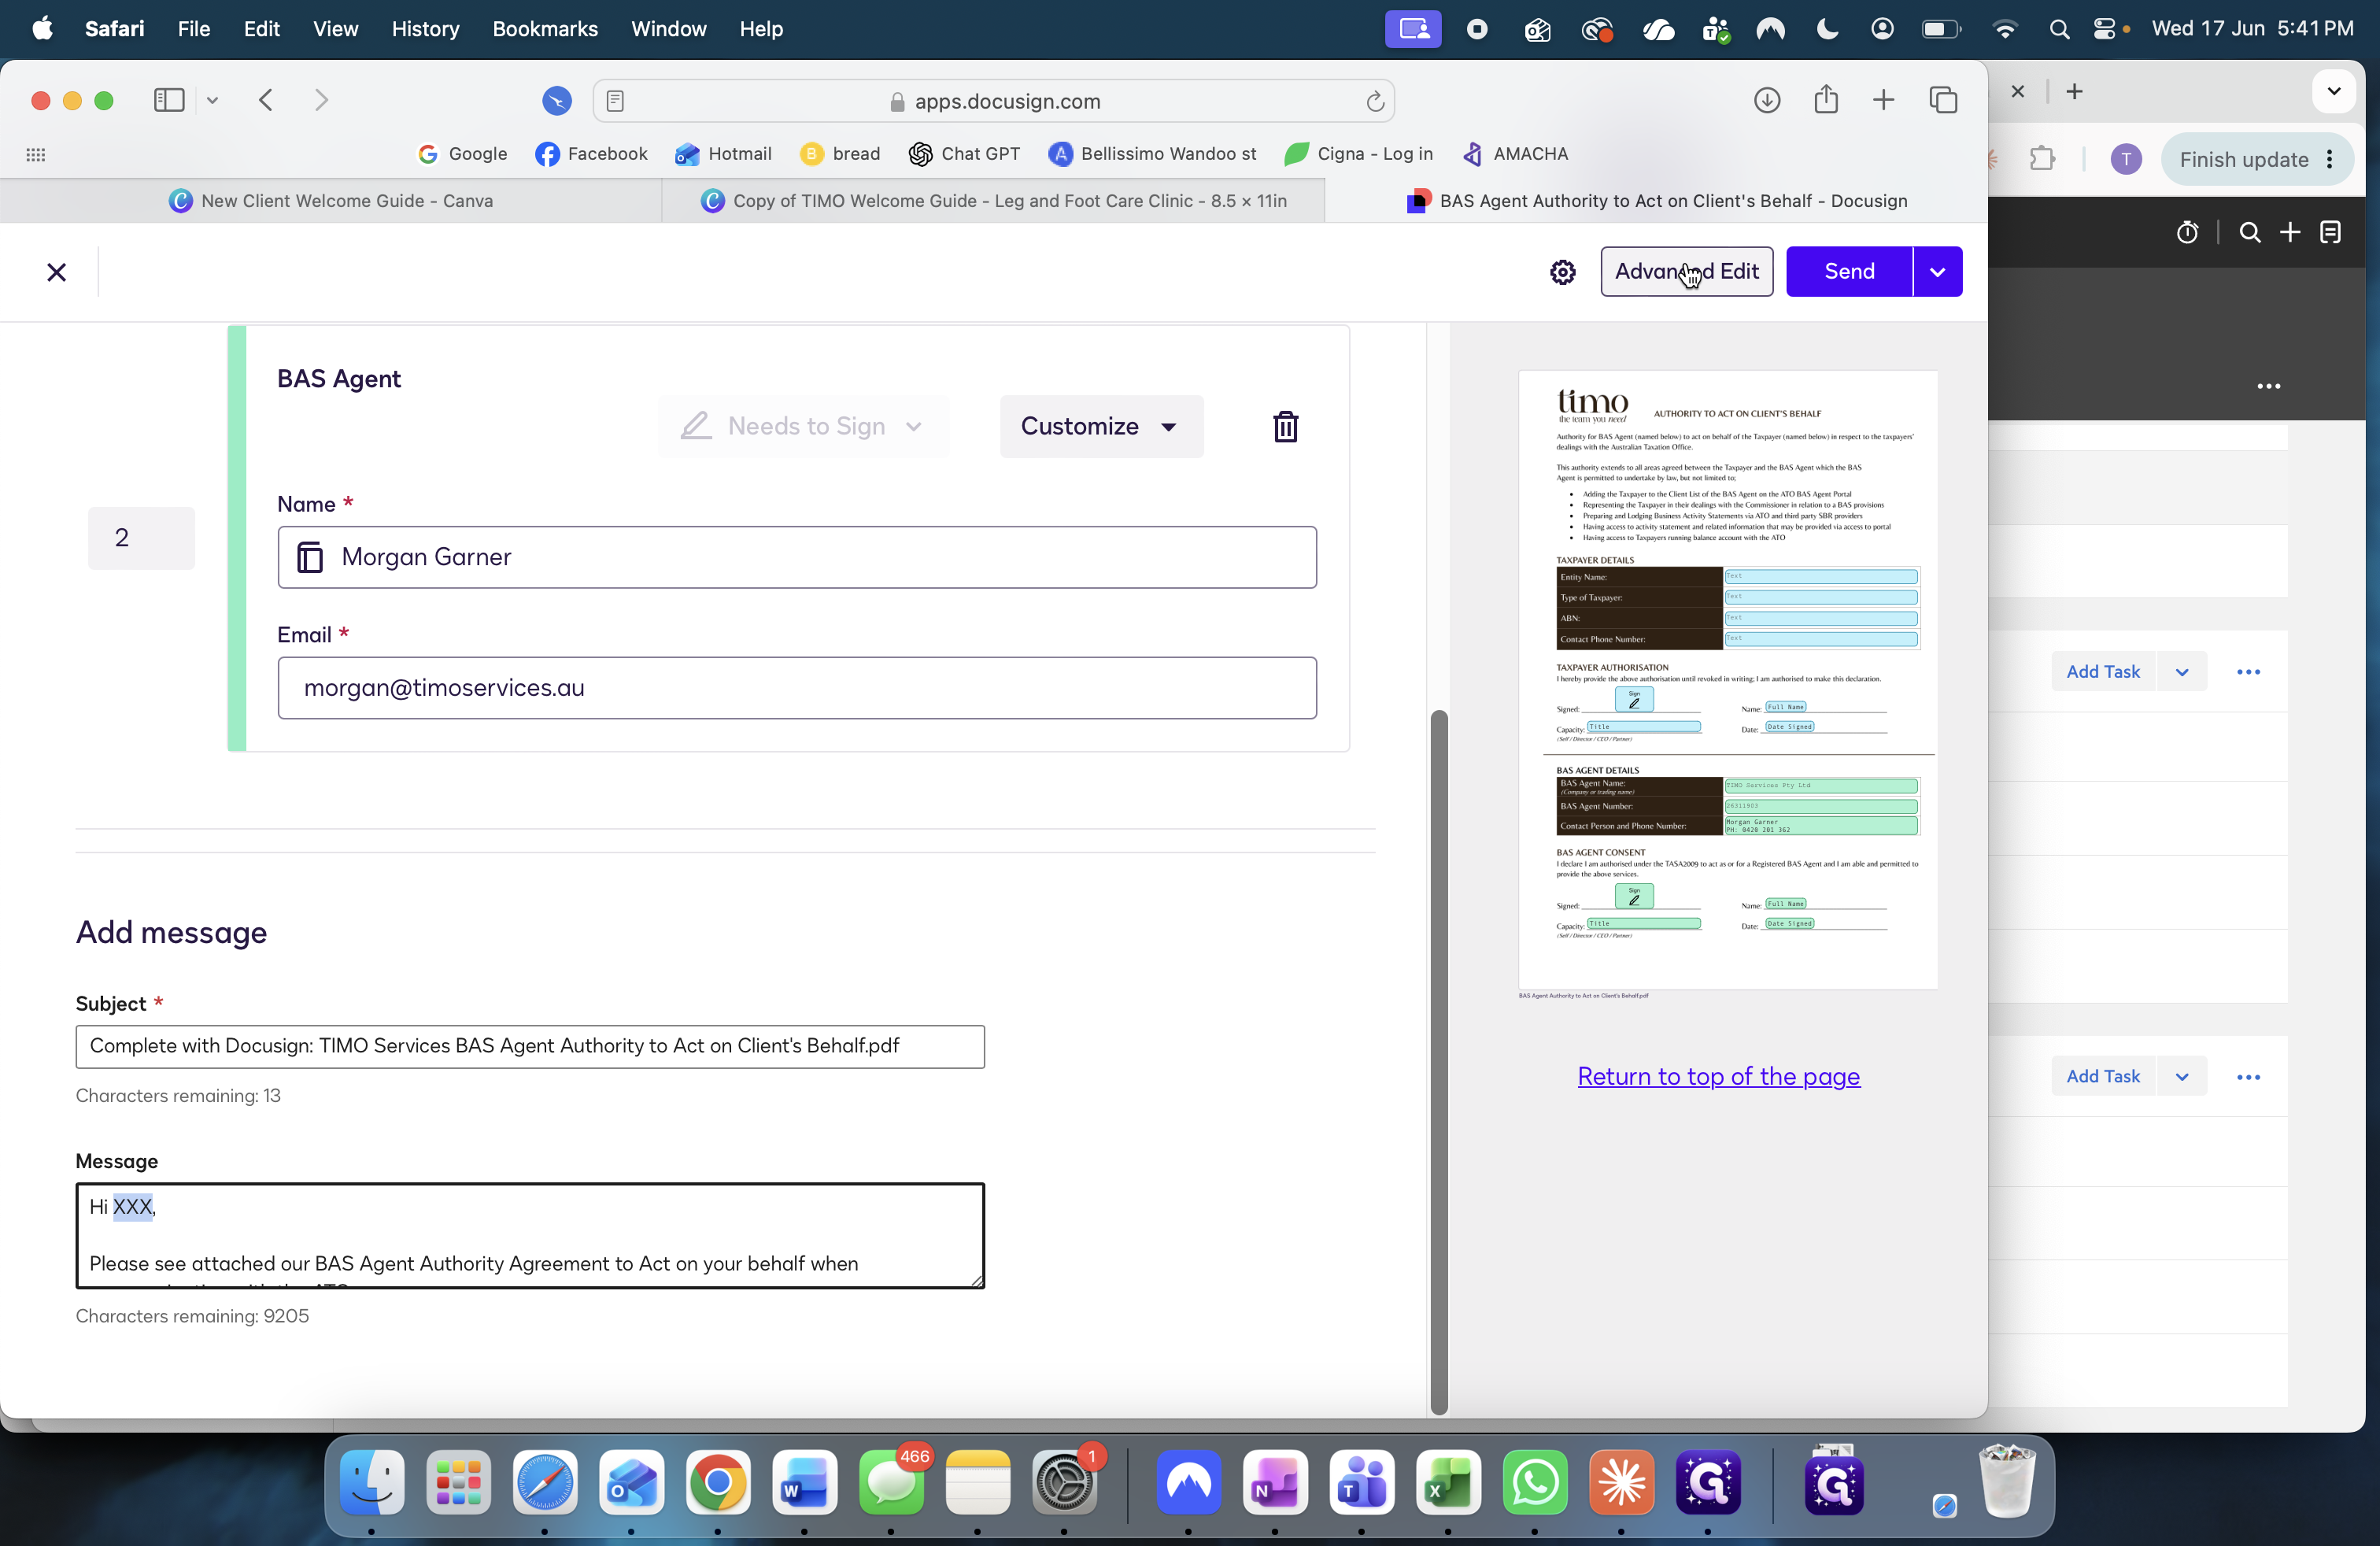
Enter the client's name and email address in the recipient fields.
65
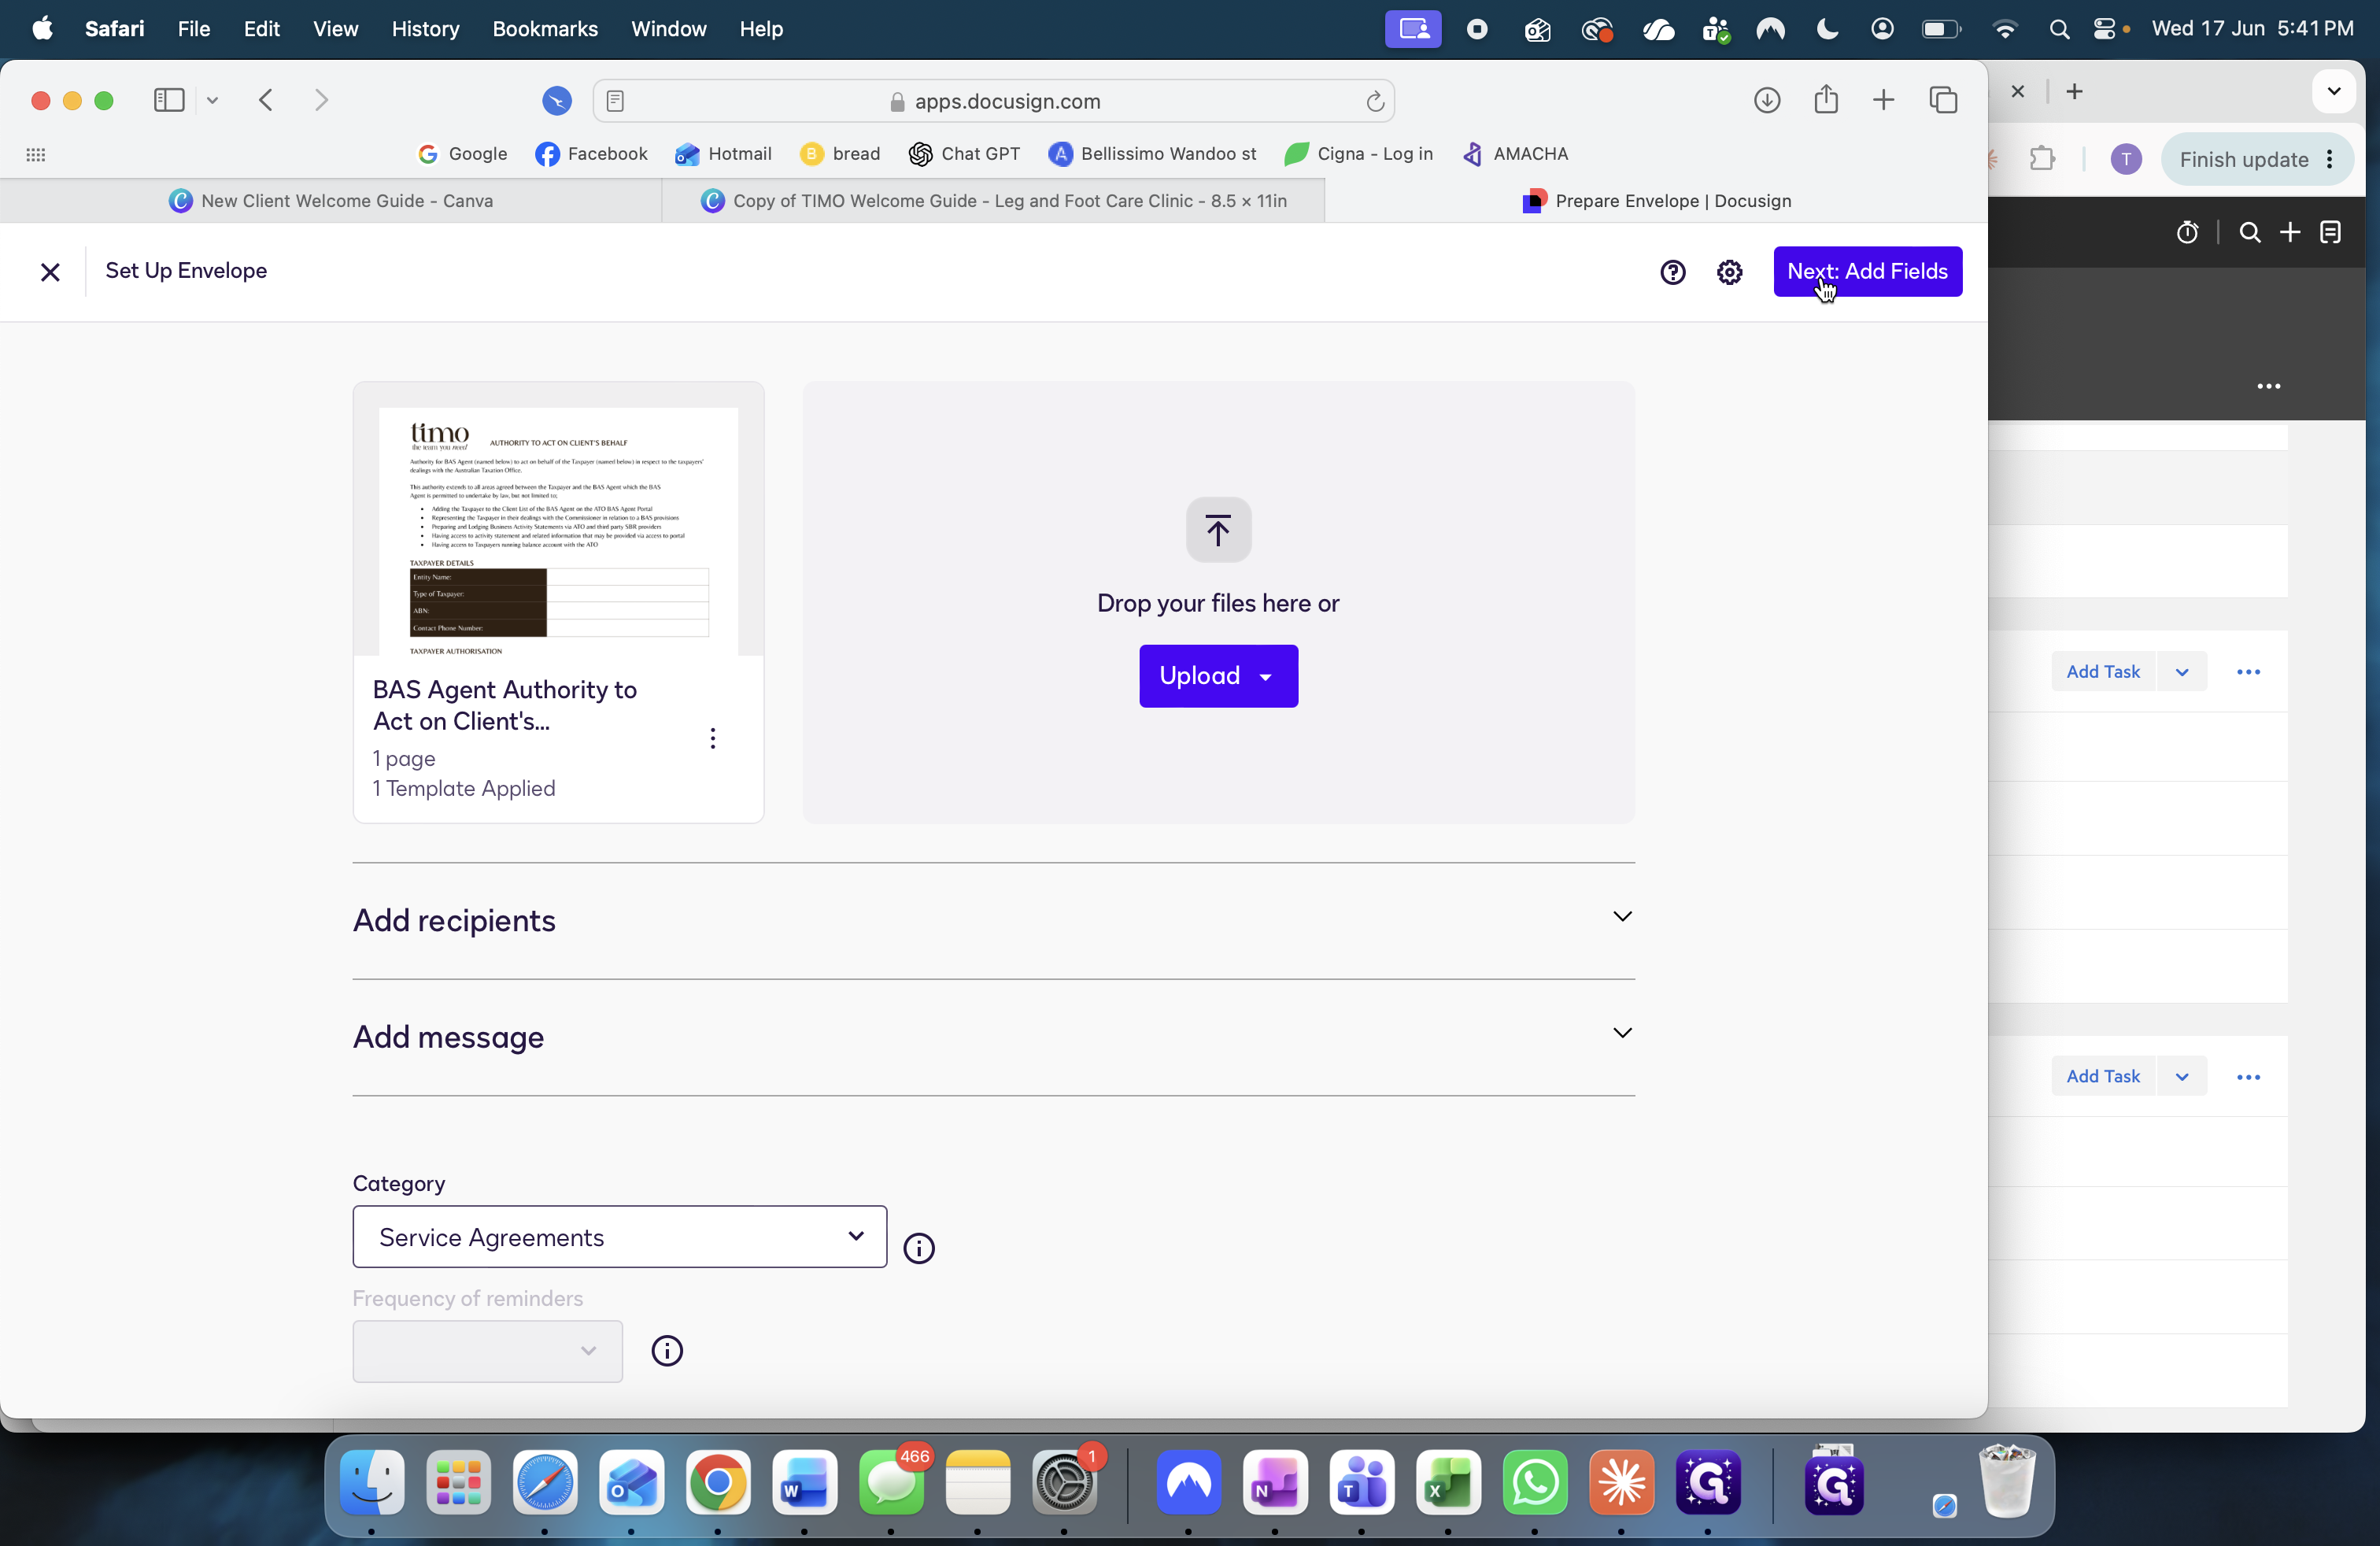
Click Advanced Edit in the top right corner.
66
Click Next to proceed to the document field editor.
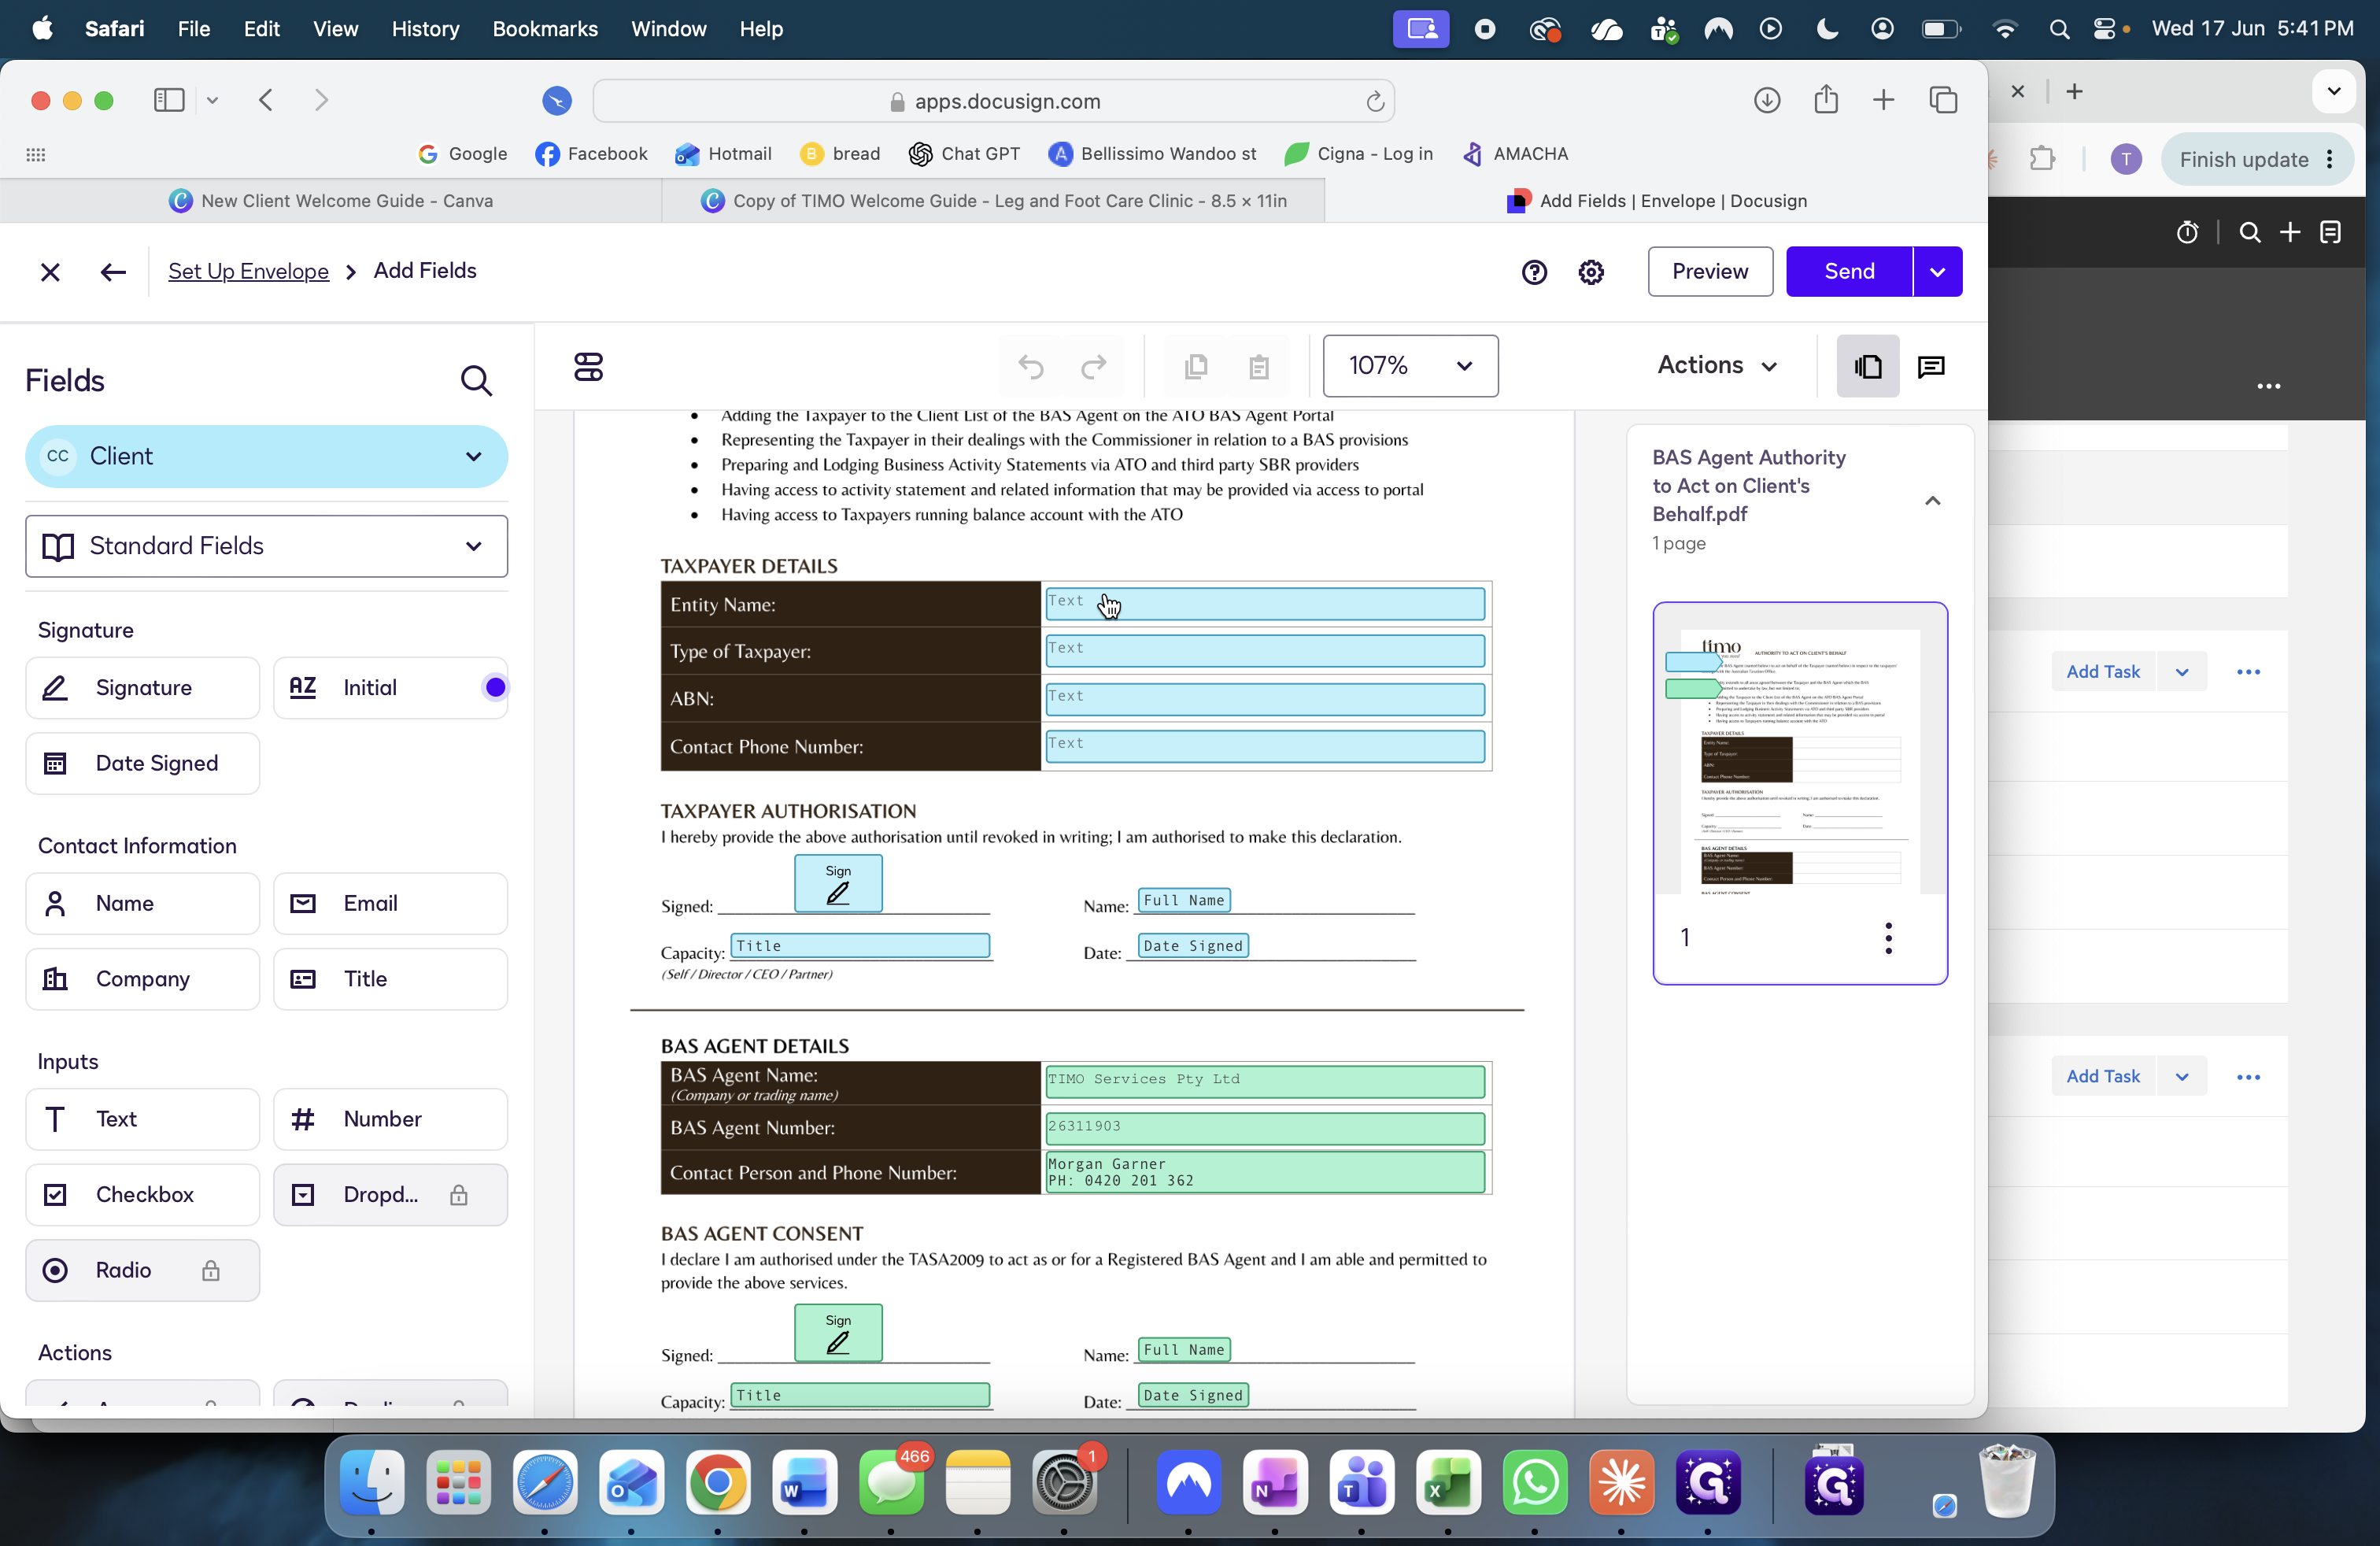
It is highly recommended to pre-fill the entity details on the client's behalf using information from their contract. This provides a smoother onboarding experience.
Form Field
Description
Entity Name
The client's official company name.
ABN
The client's Australian Business Number.
Type of Taxpayer
The entity classification (e.g., Sole Trader, Private Company).
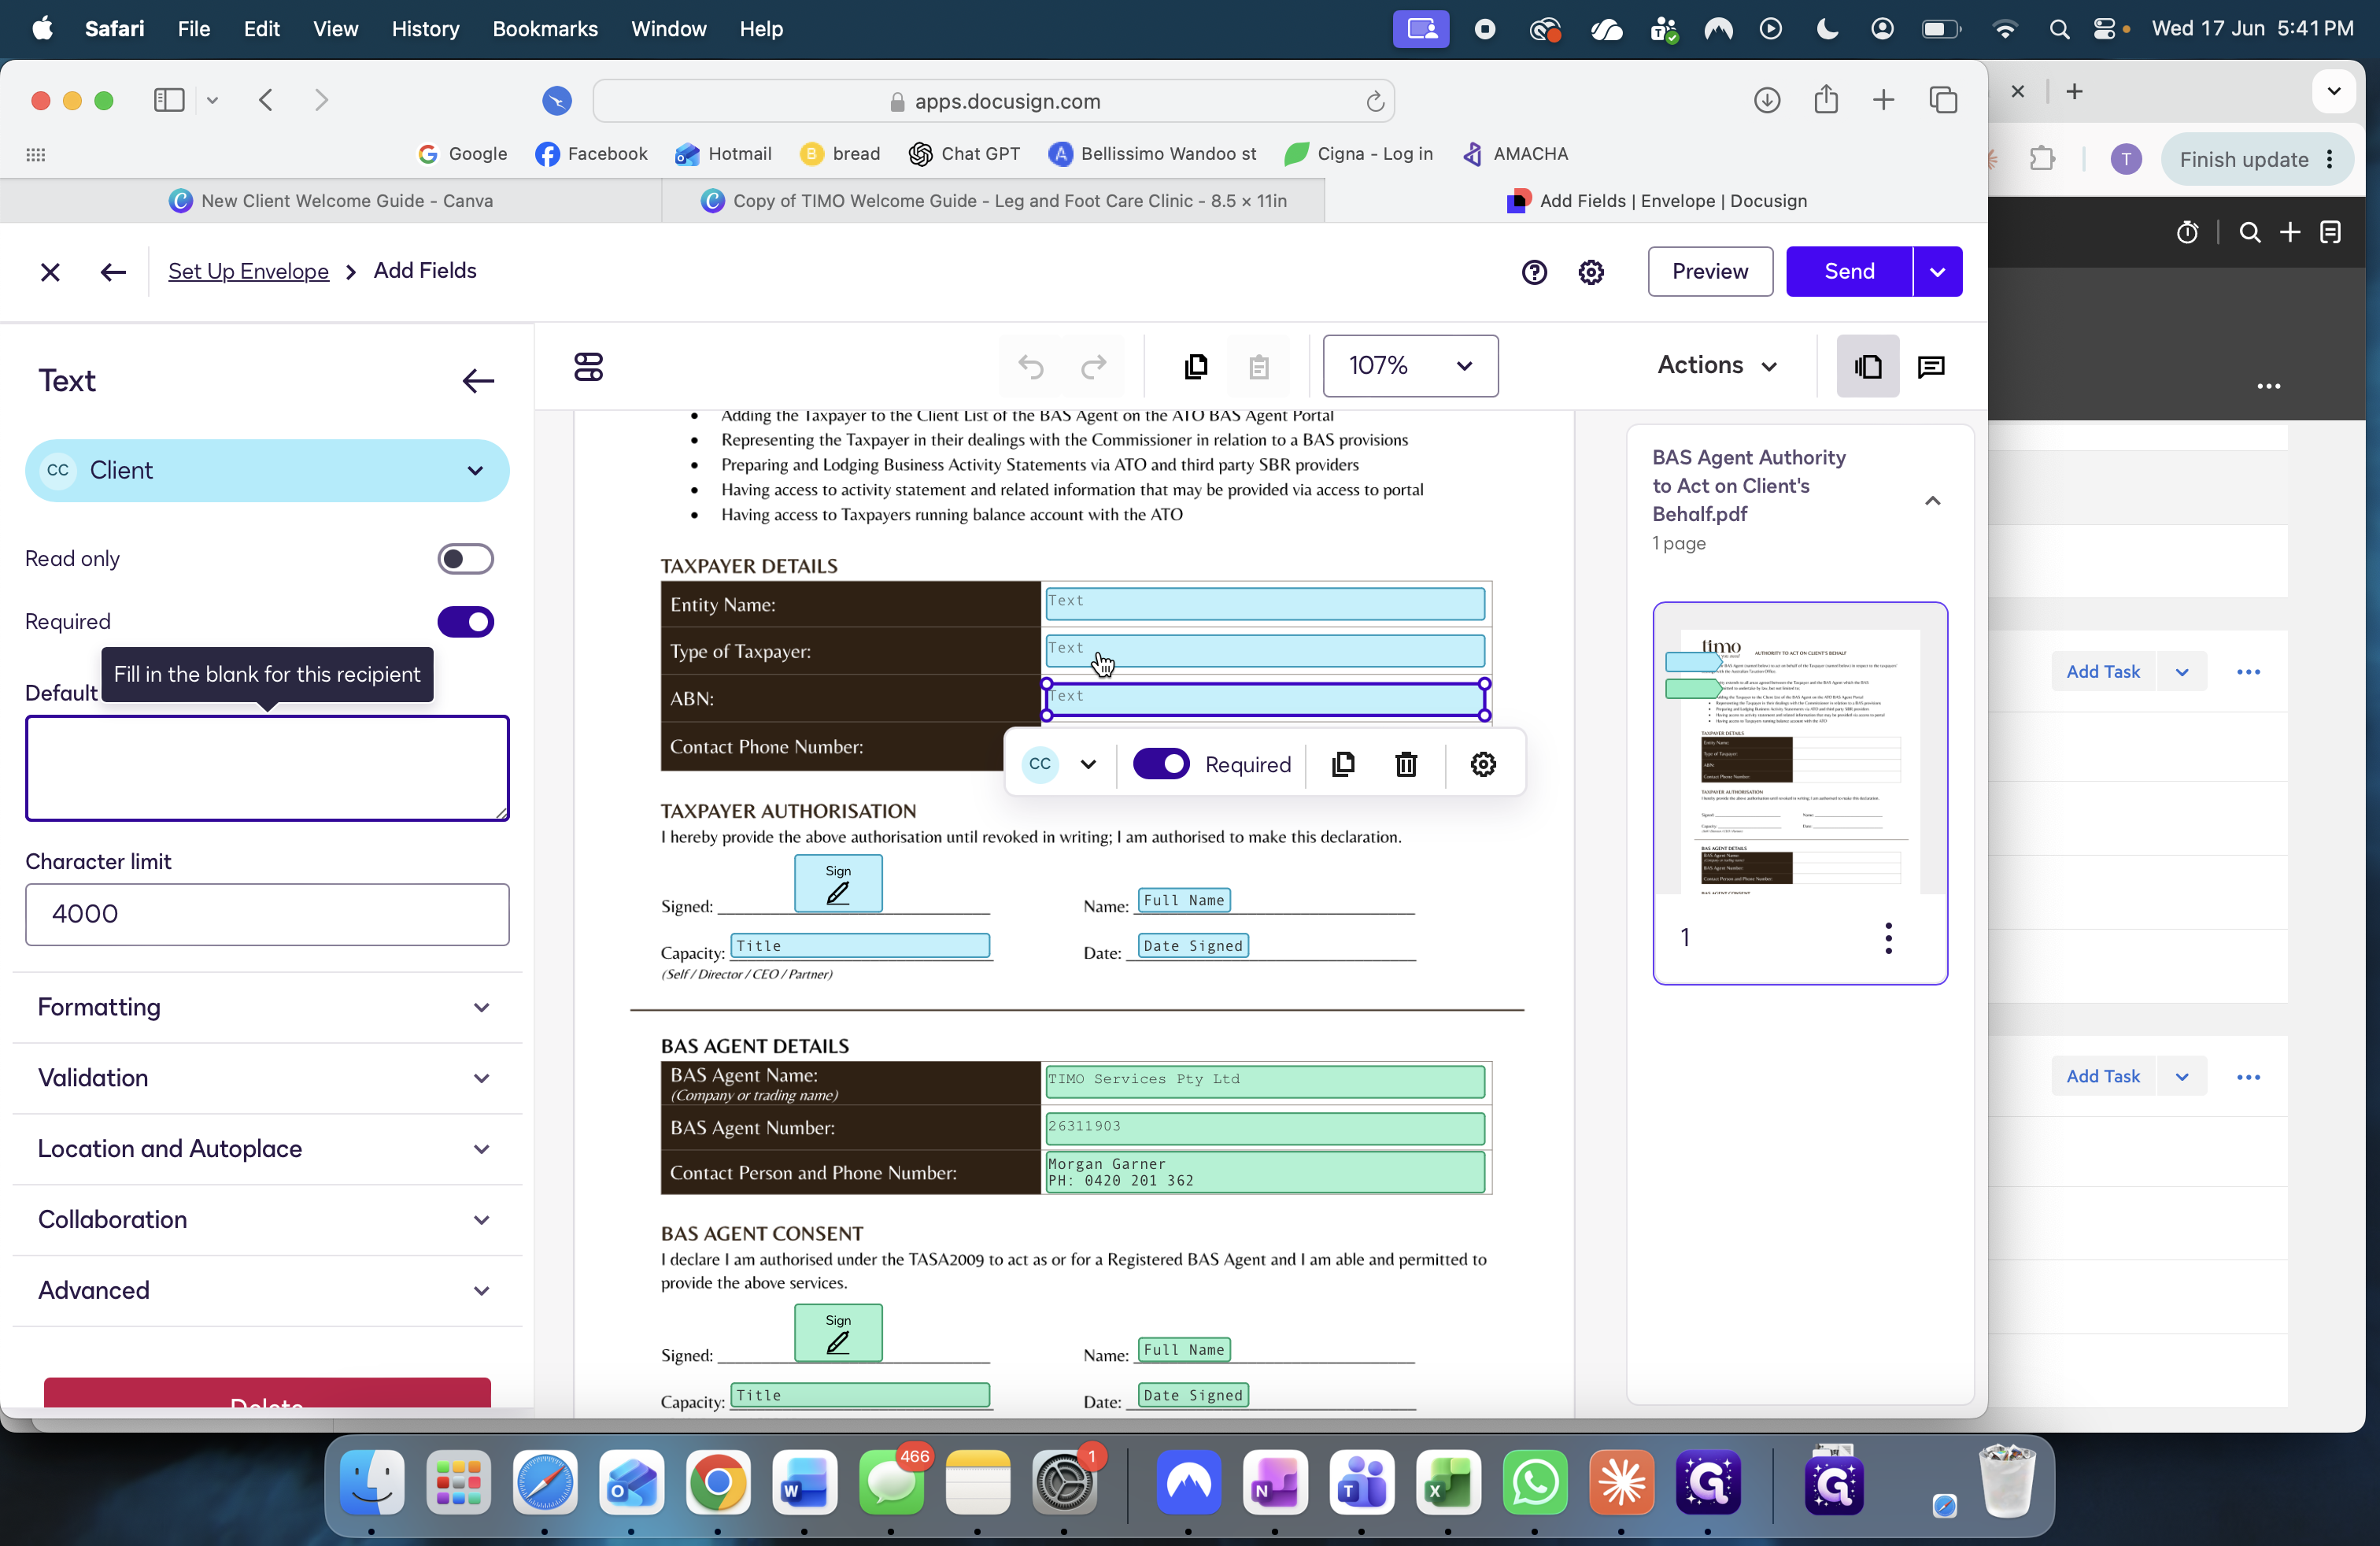
67
Click the Entity Name text field and type the client's company name.
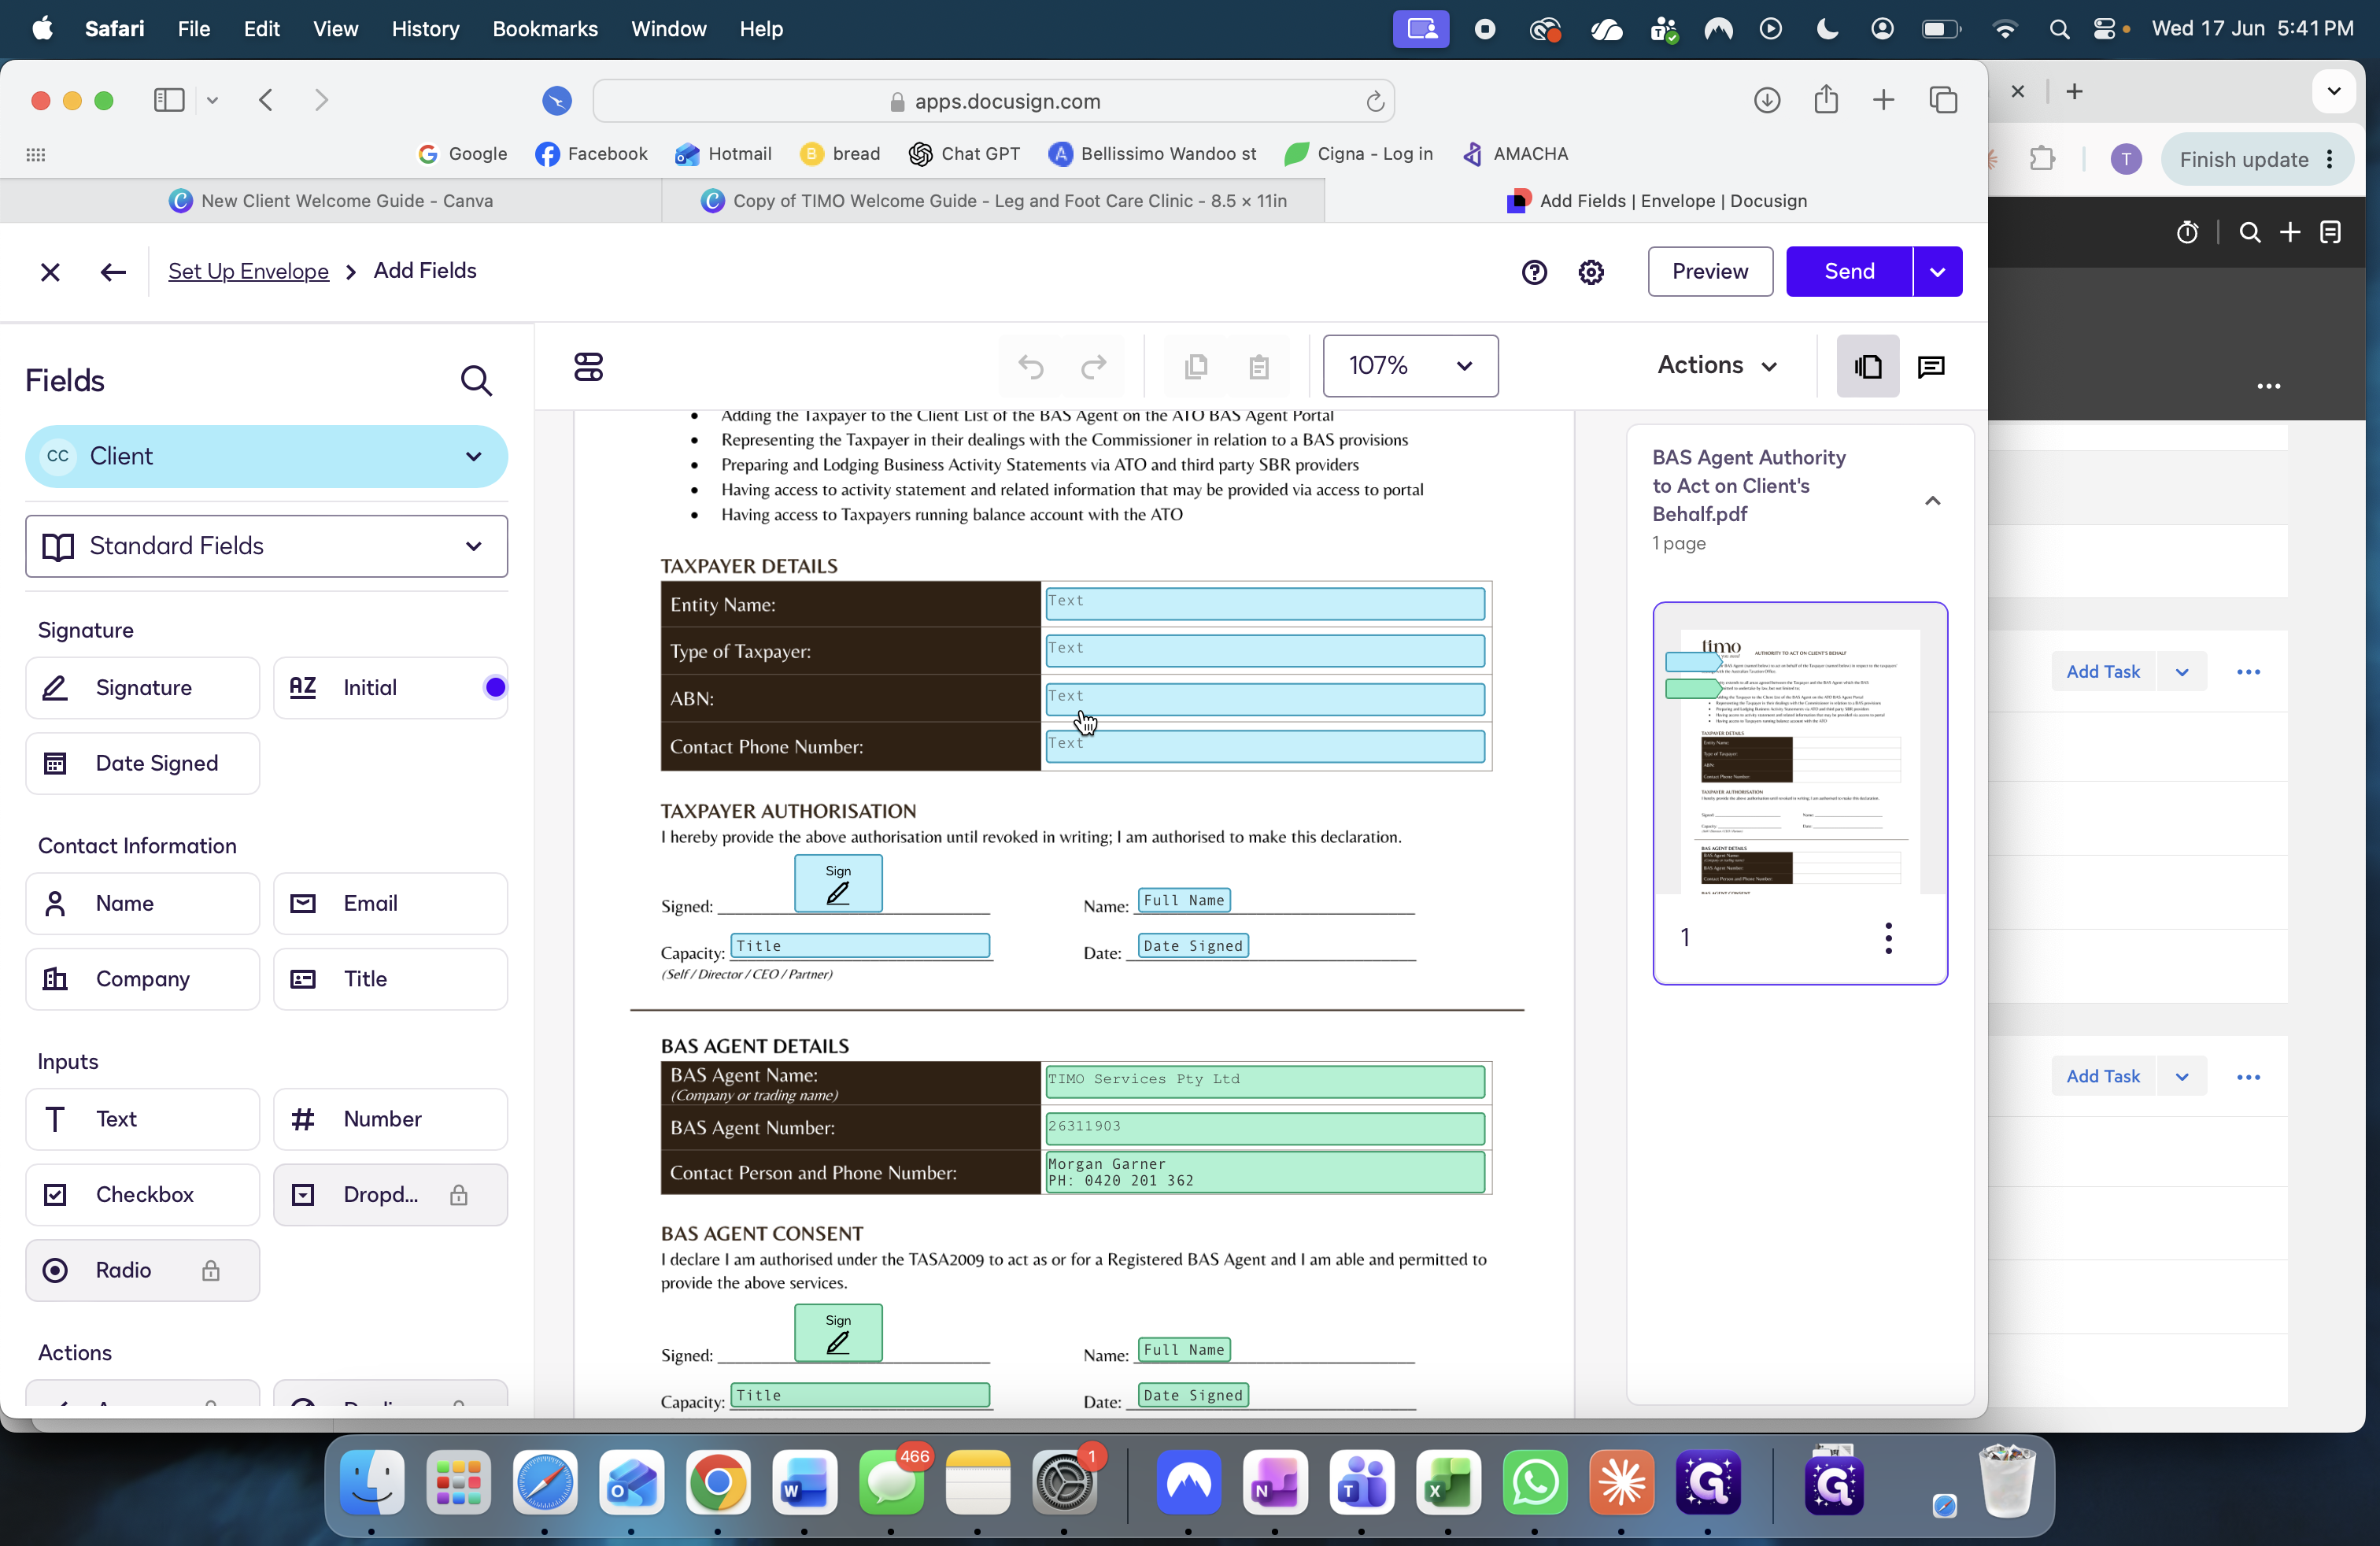
68
Click the ABN field and enter their ABN.
69
Click the Type of Taxpayer field and enter their entity classification.
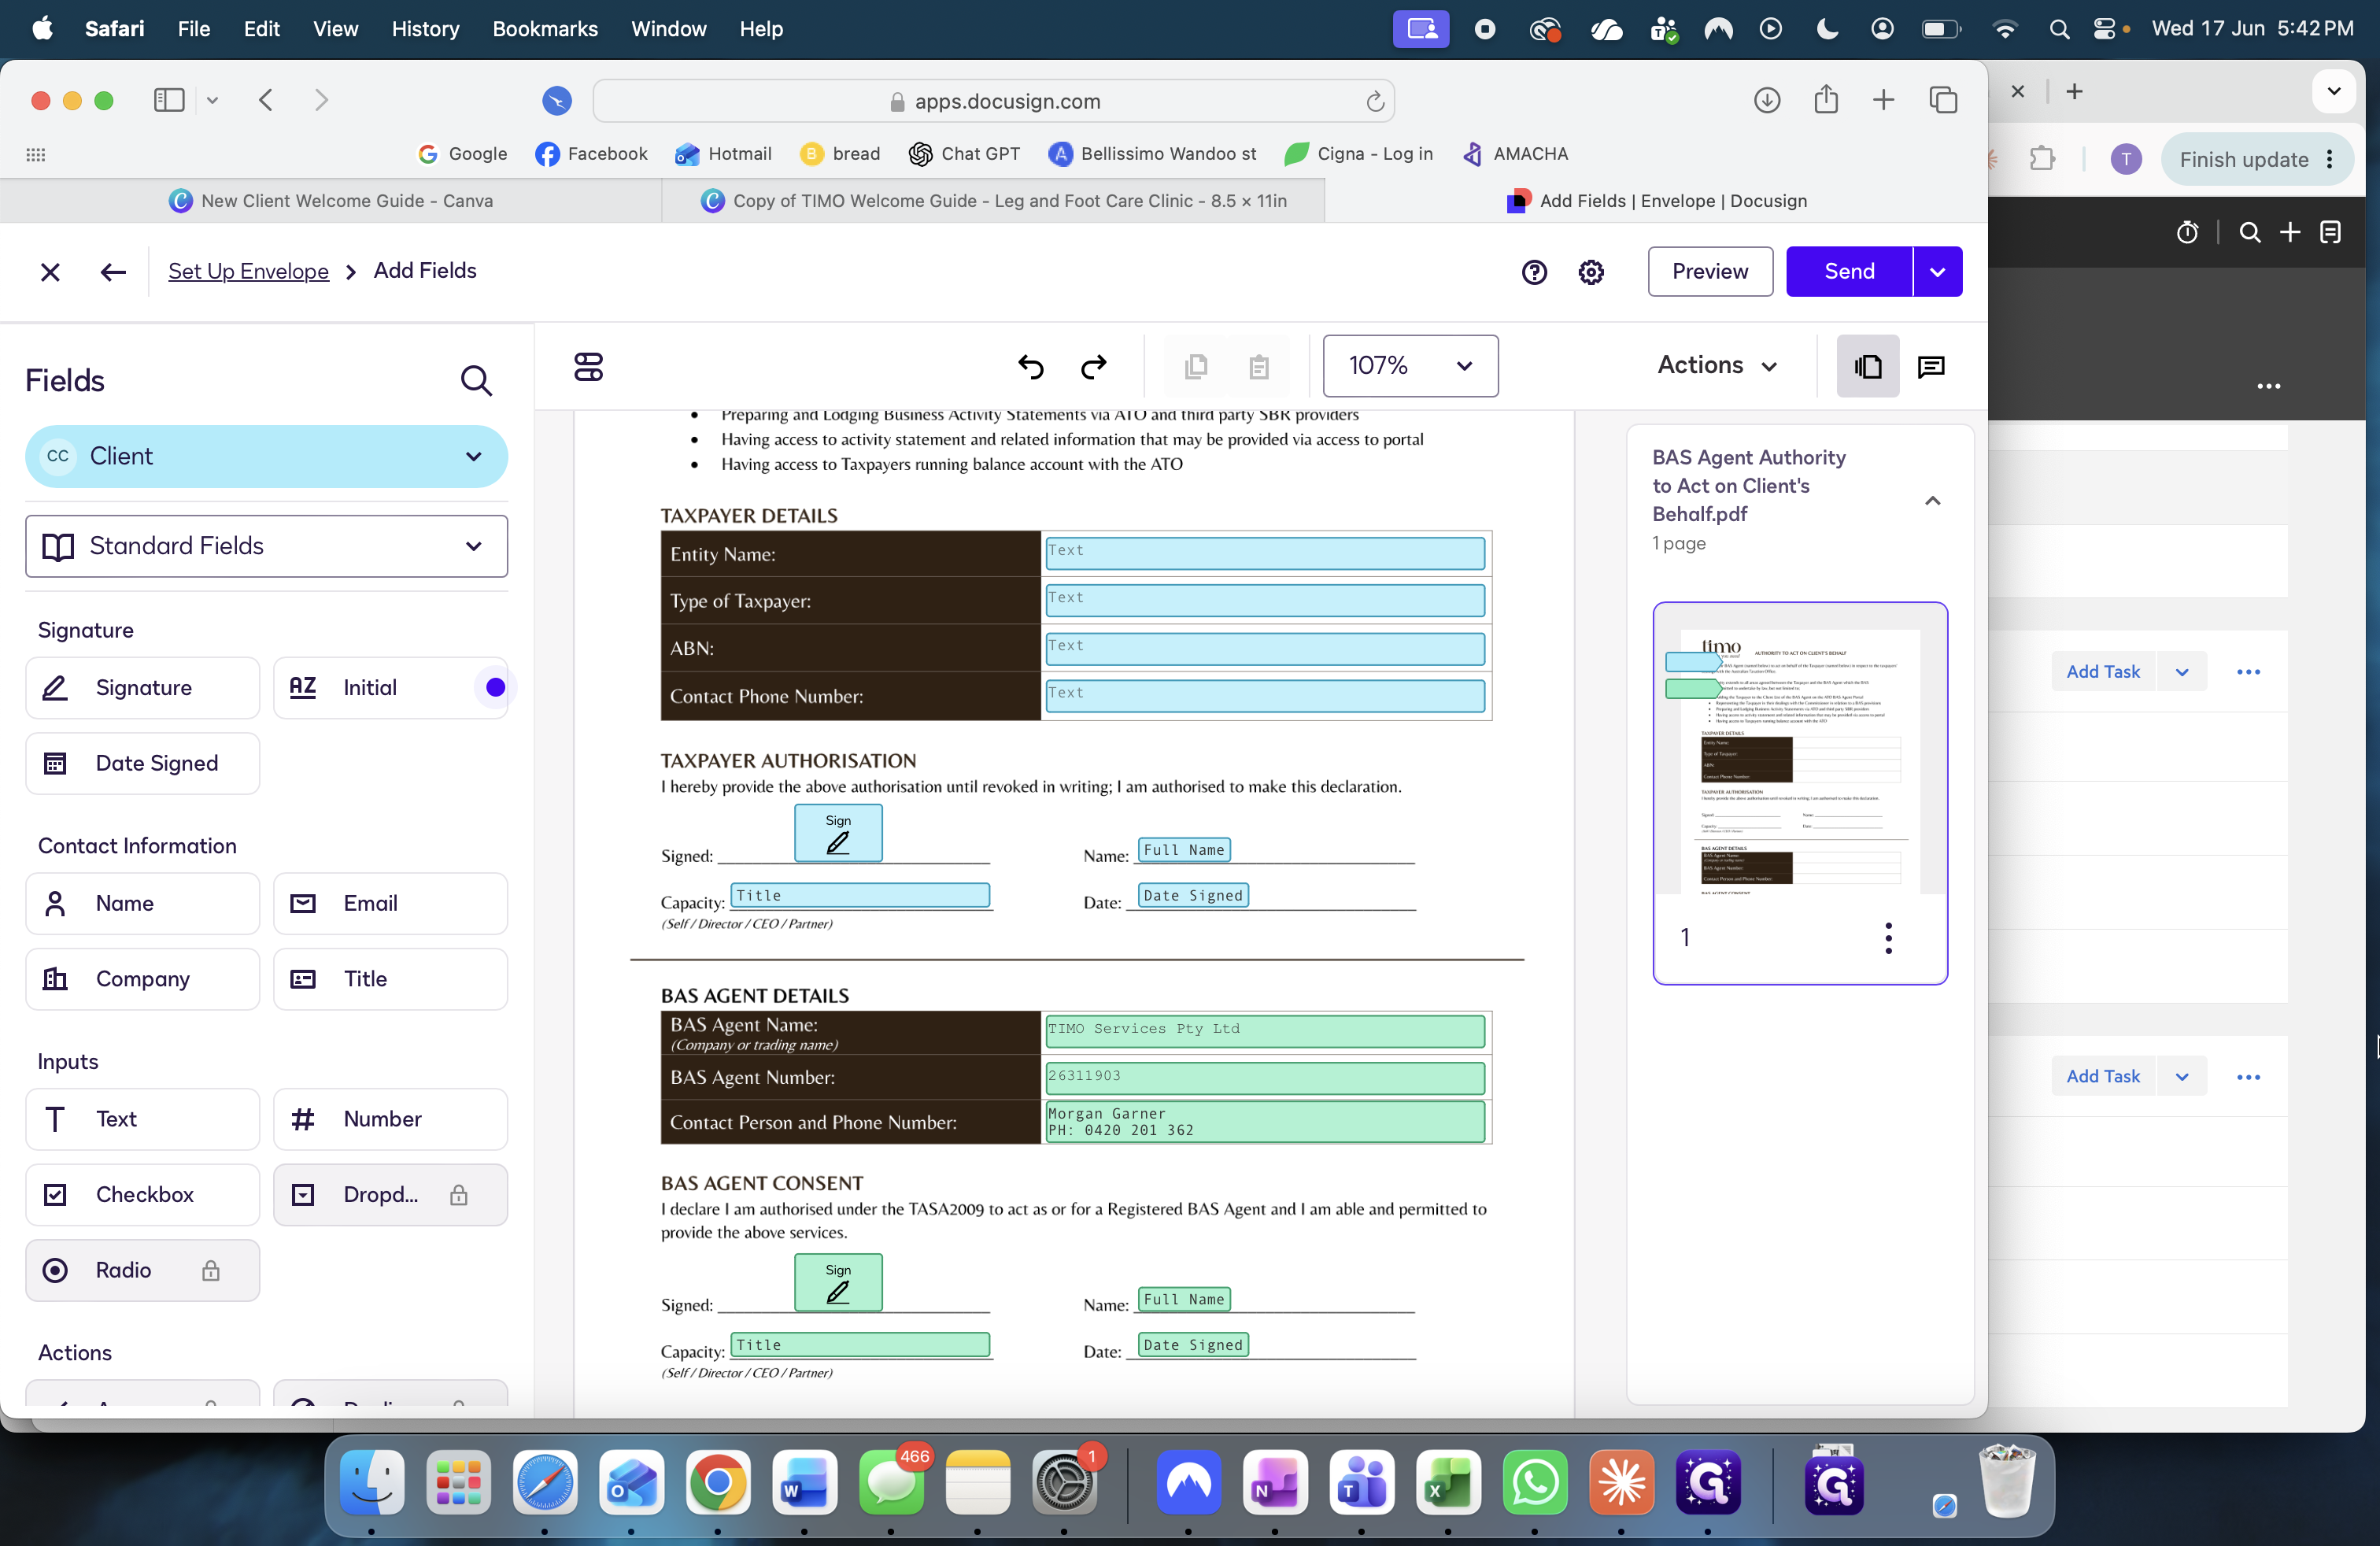
70
Verify all signature fields are properly placed and click to send the envelope.
71
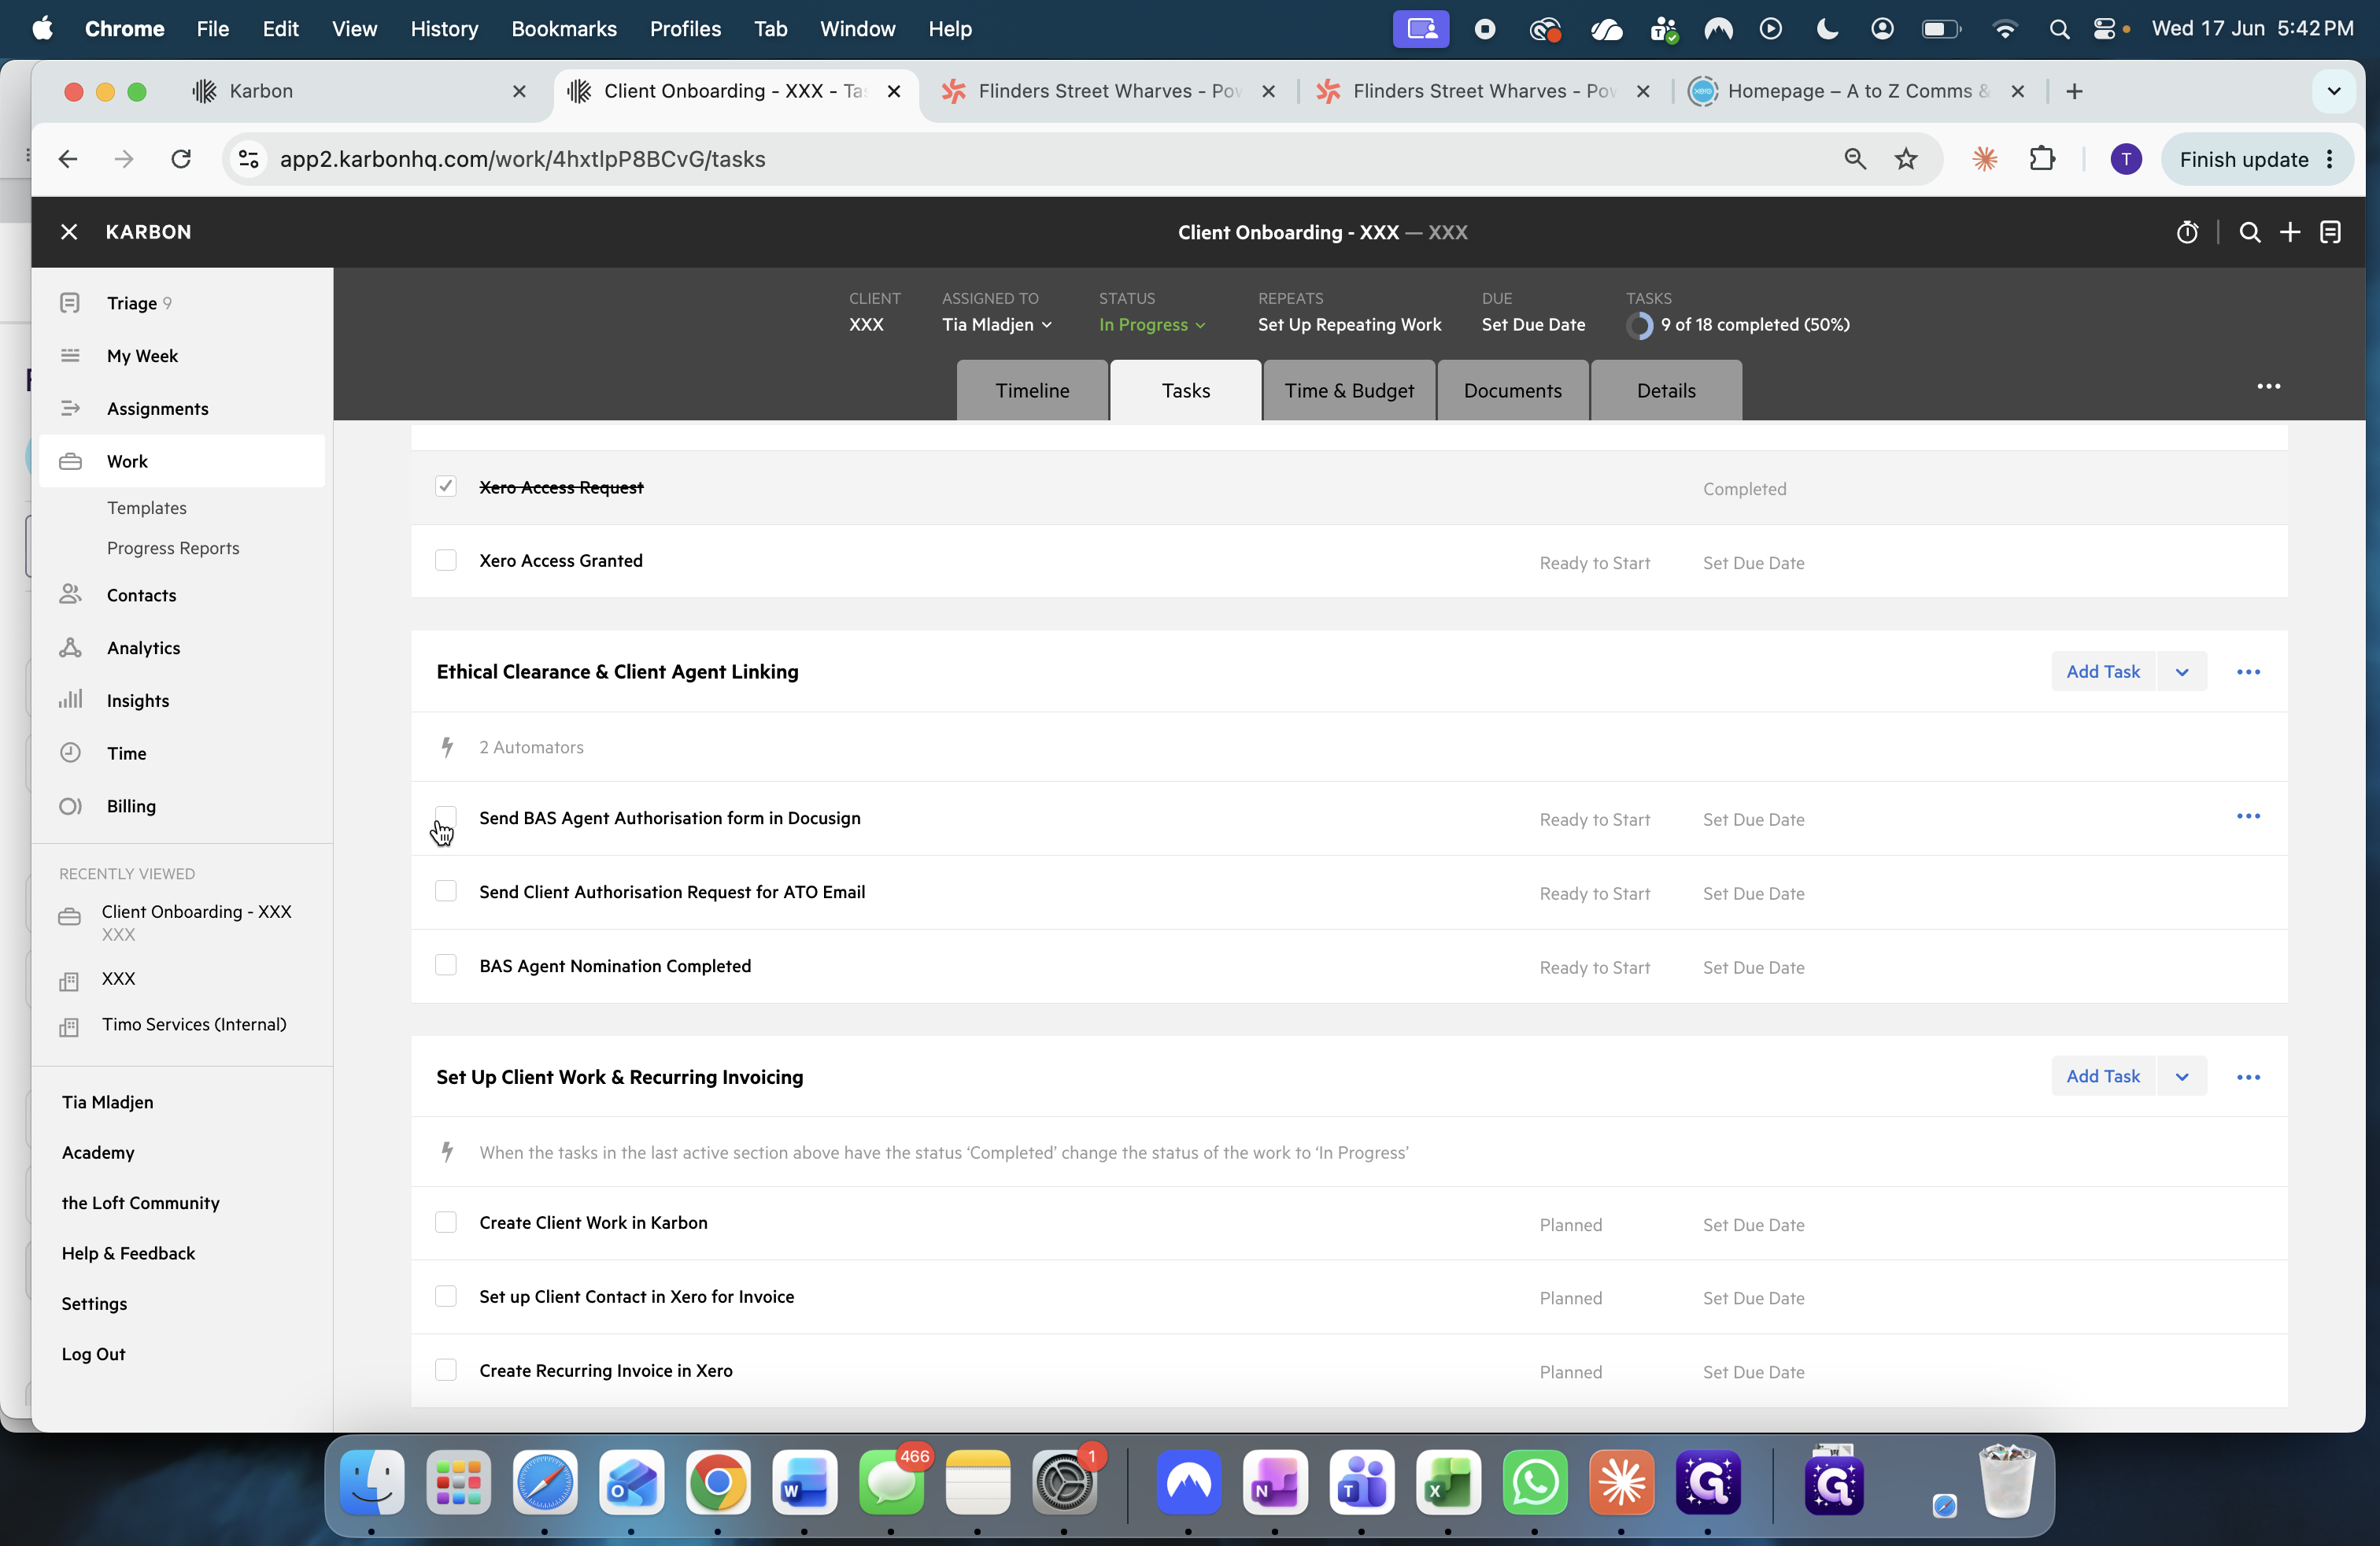
Return to the Tasks tab in Karbon and check off the Send BAS Agent Authorisation form in Docusign task.
Phase 8: Request ATO Agent Nomination via Karbon
72
Navigate back to the Timeline tab in the Client Onboarding project.
73
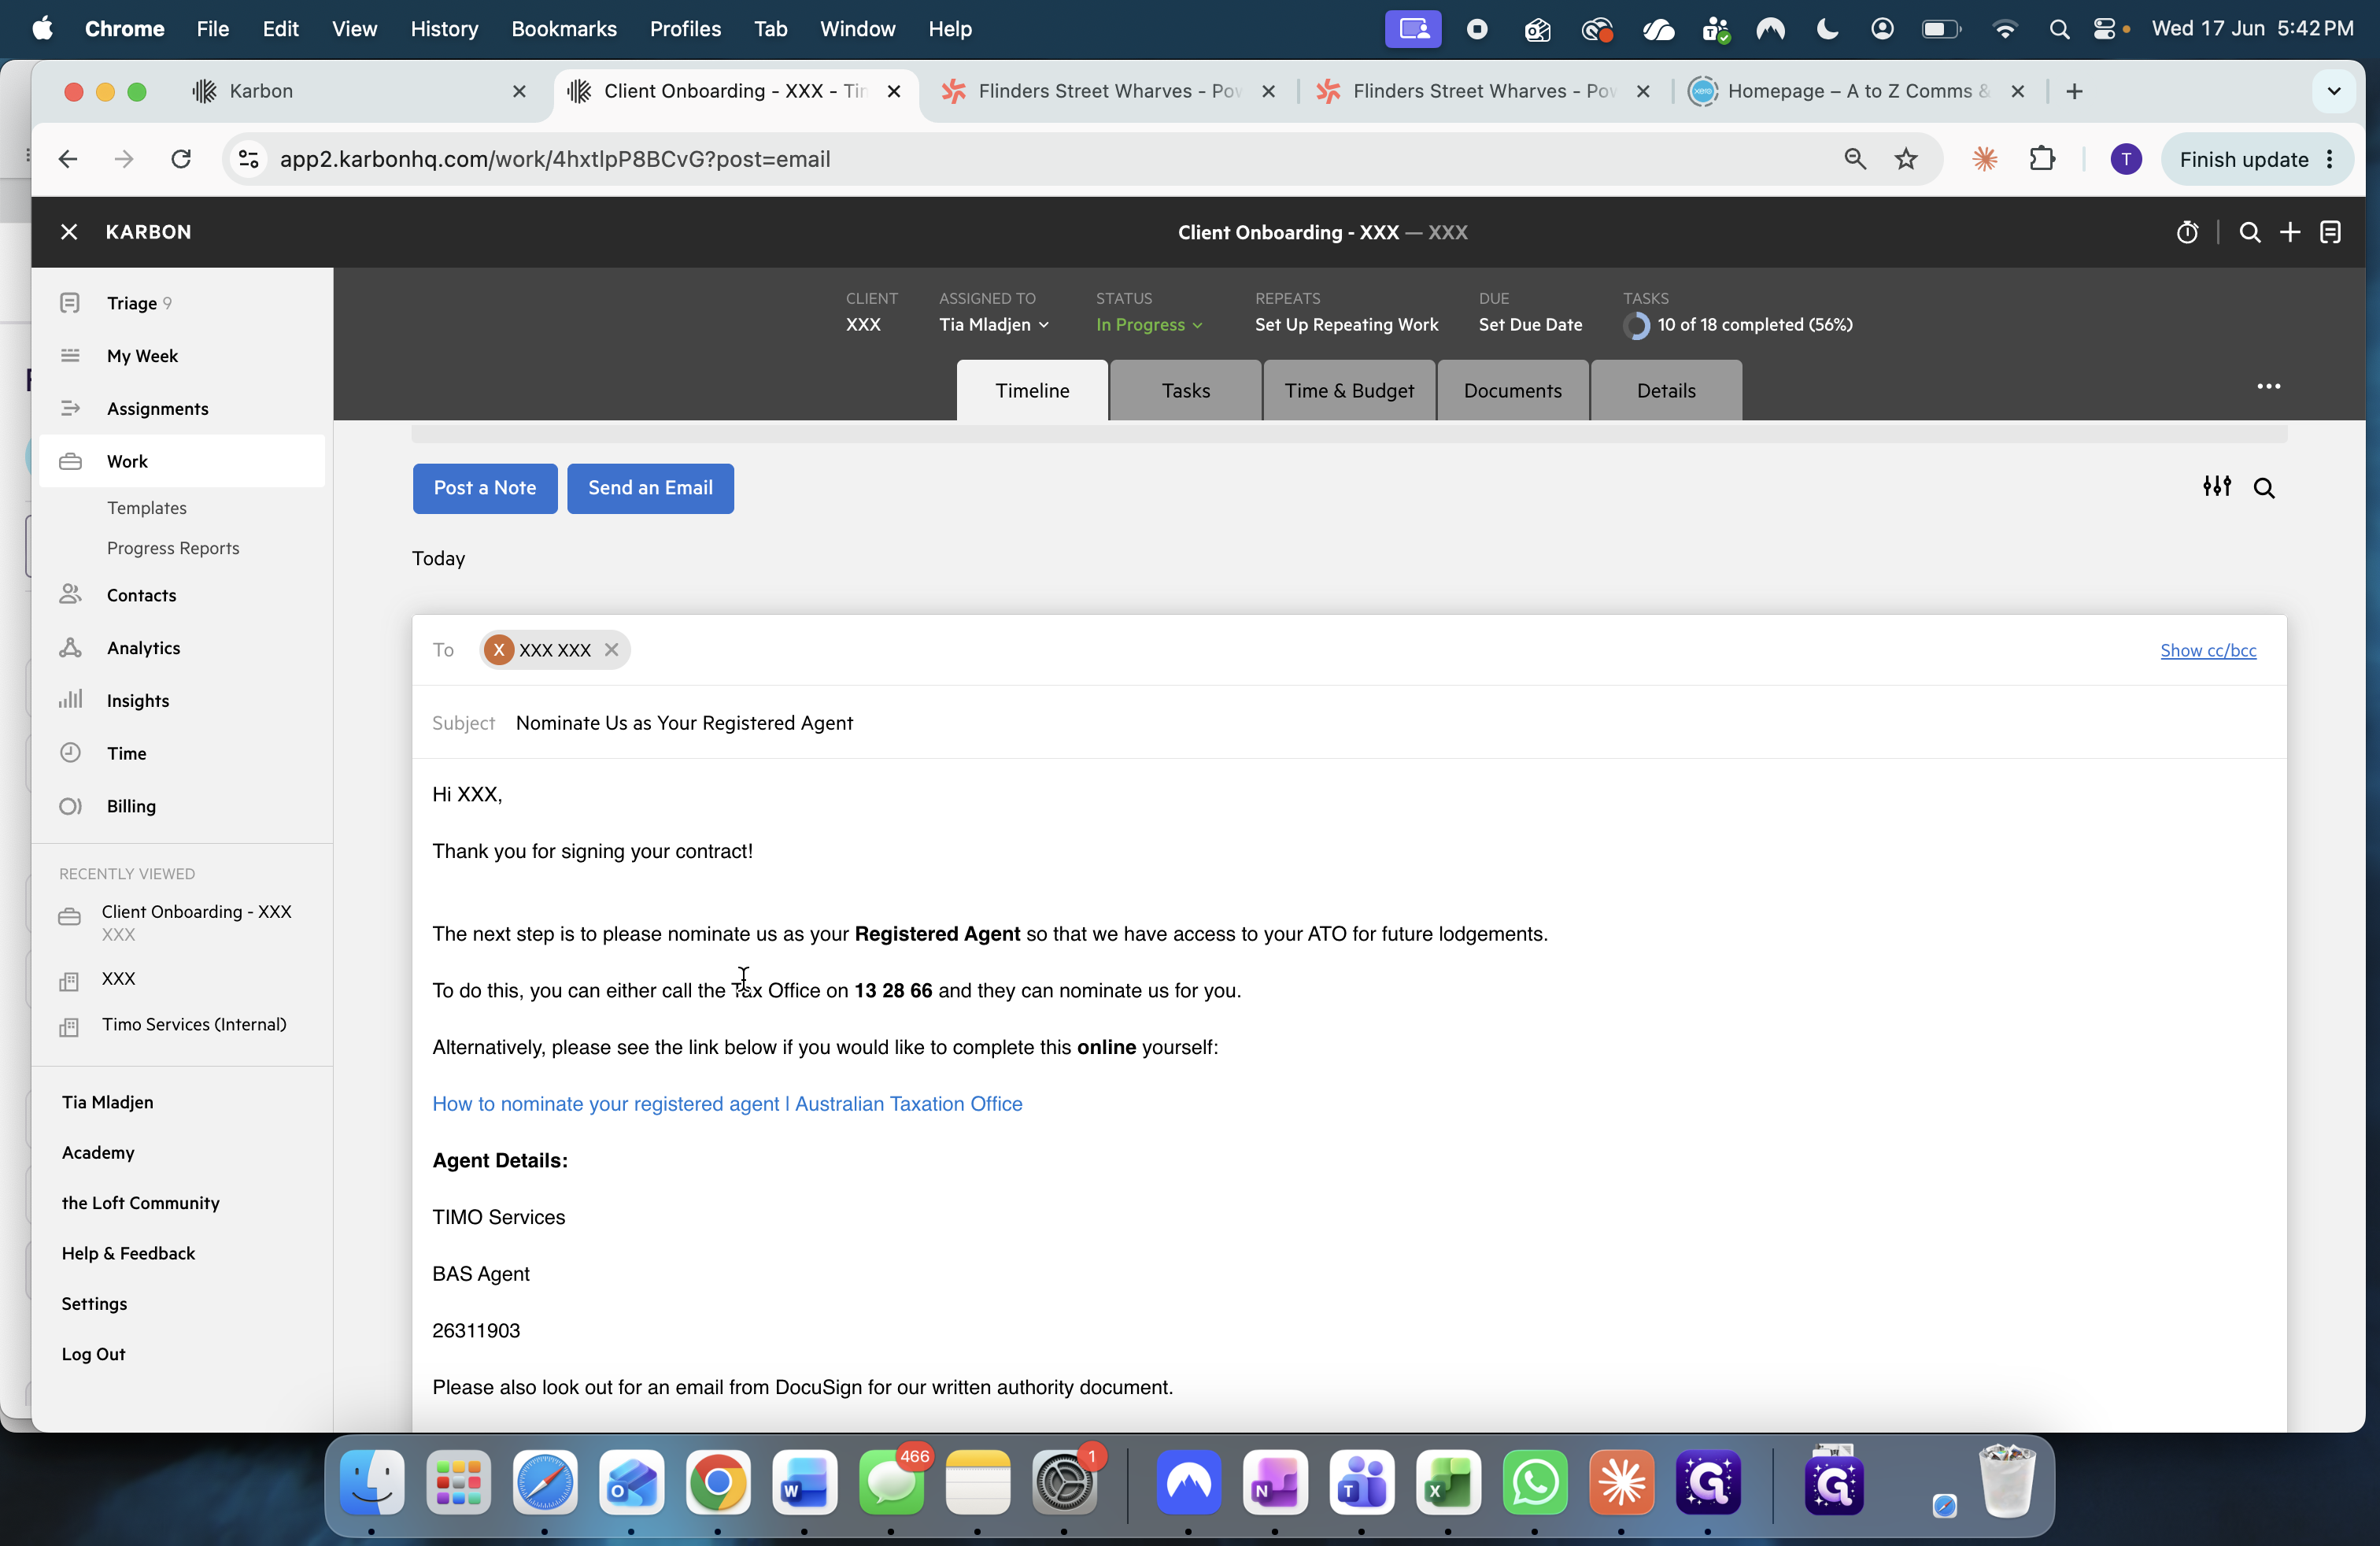
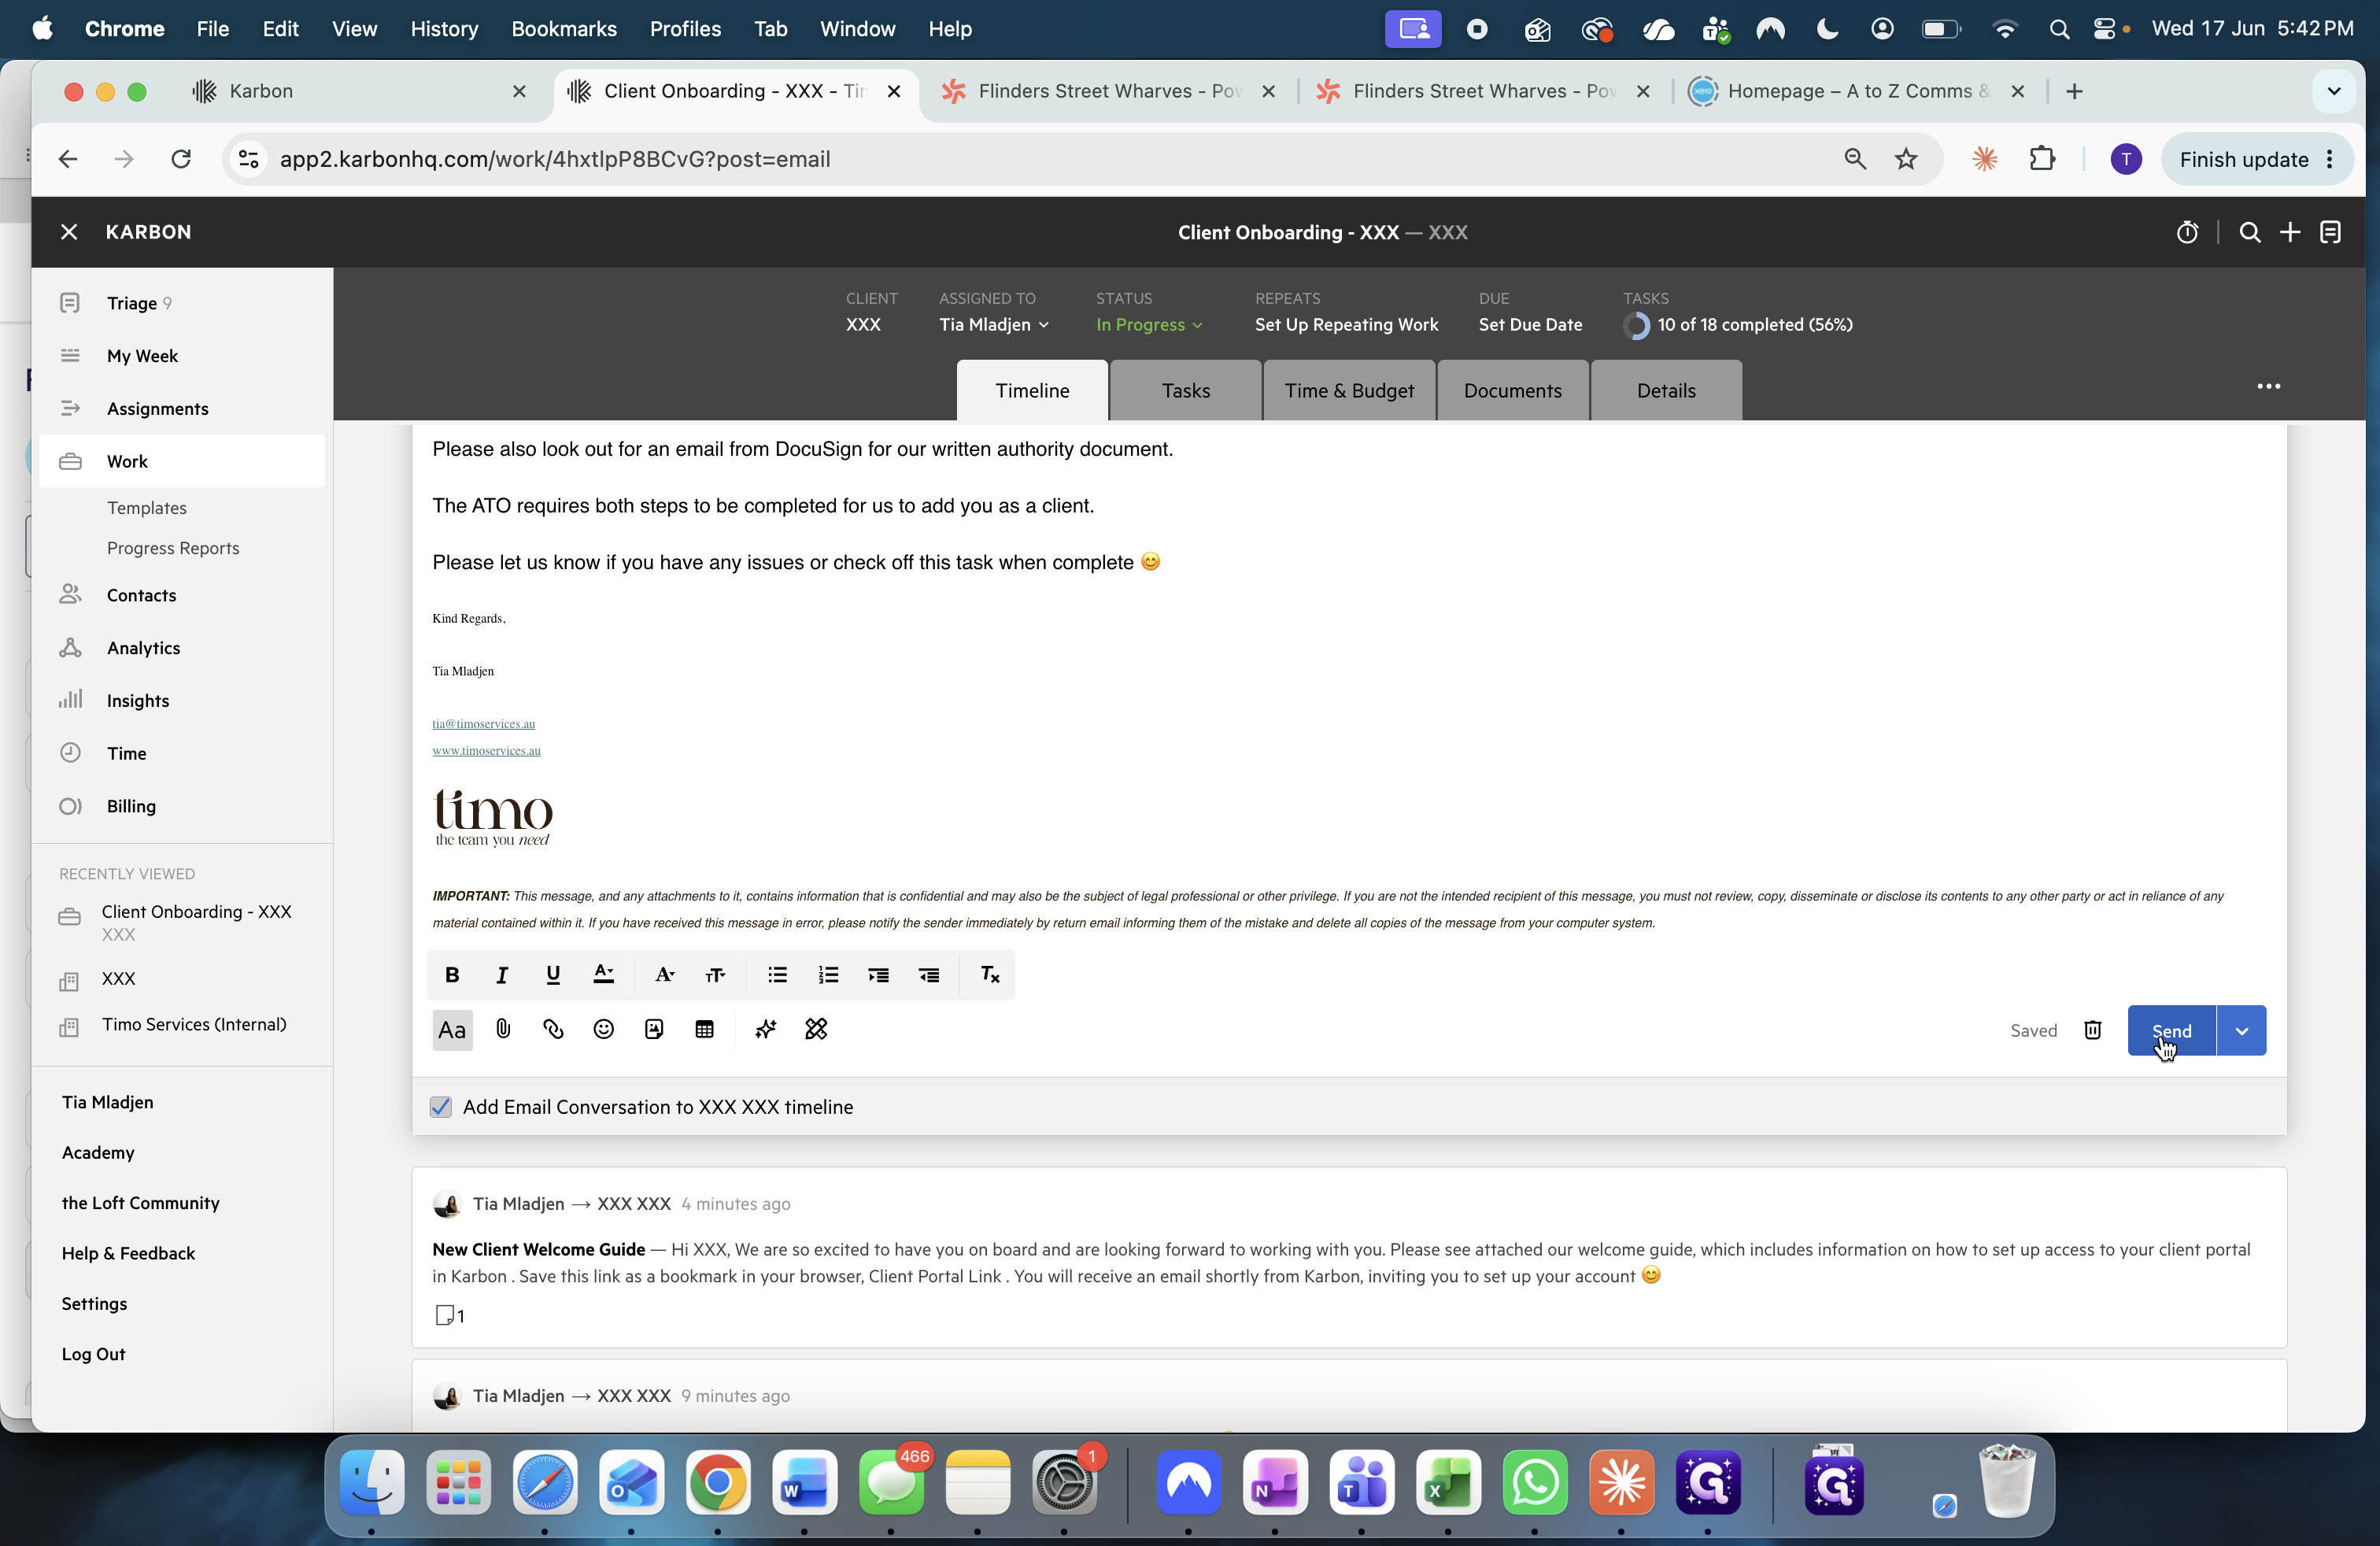
Click Send an Email.
74
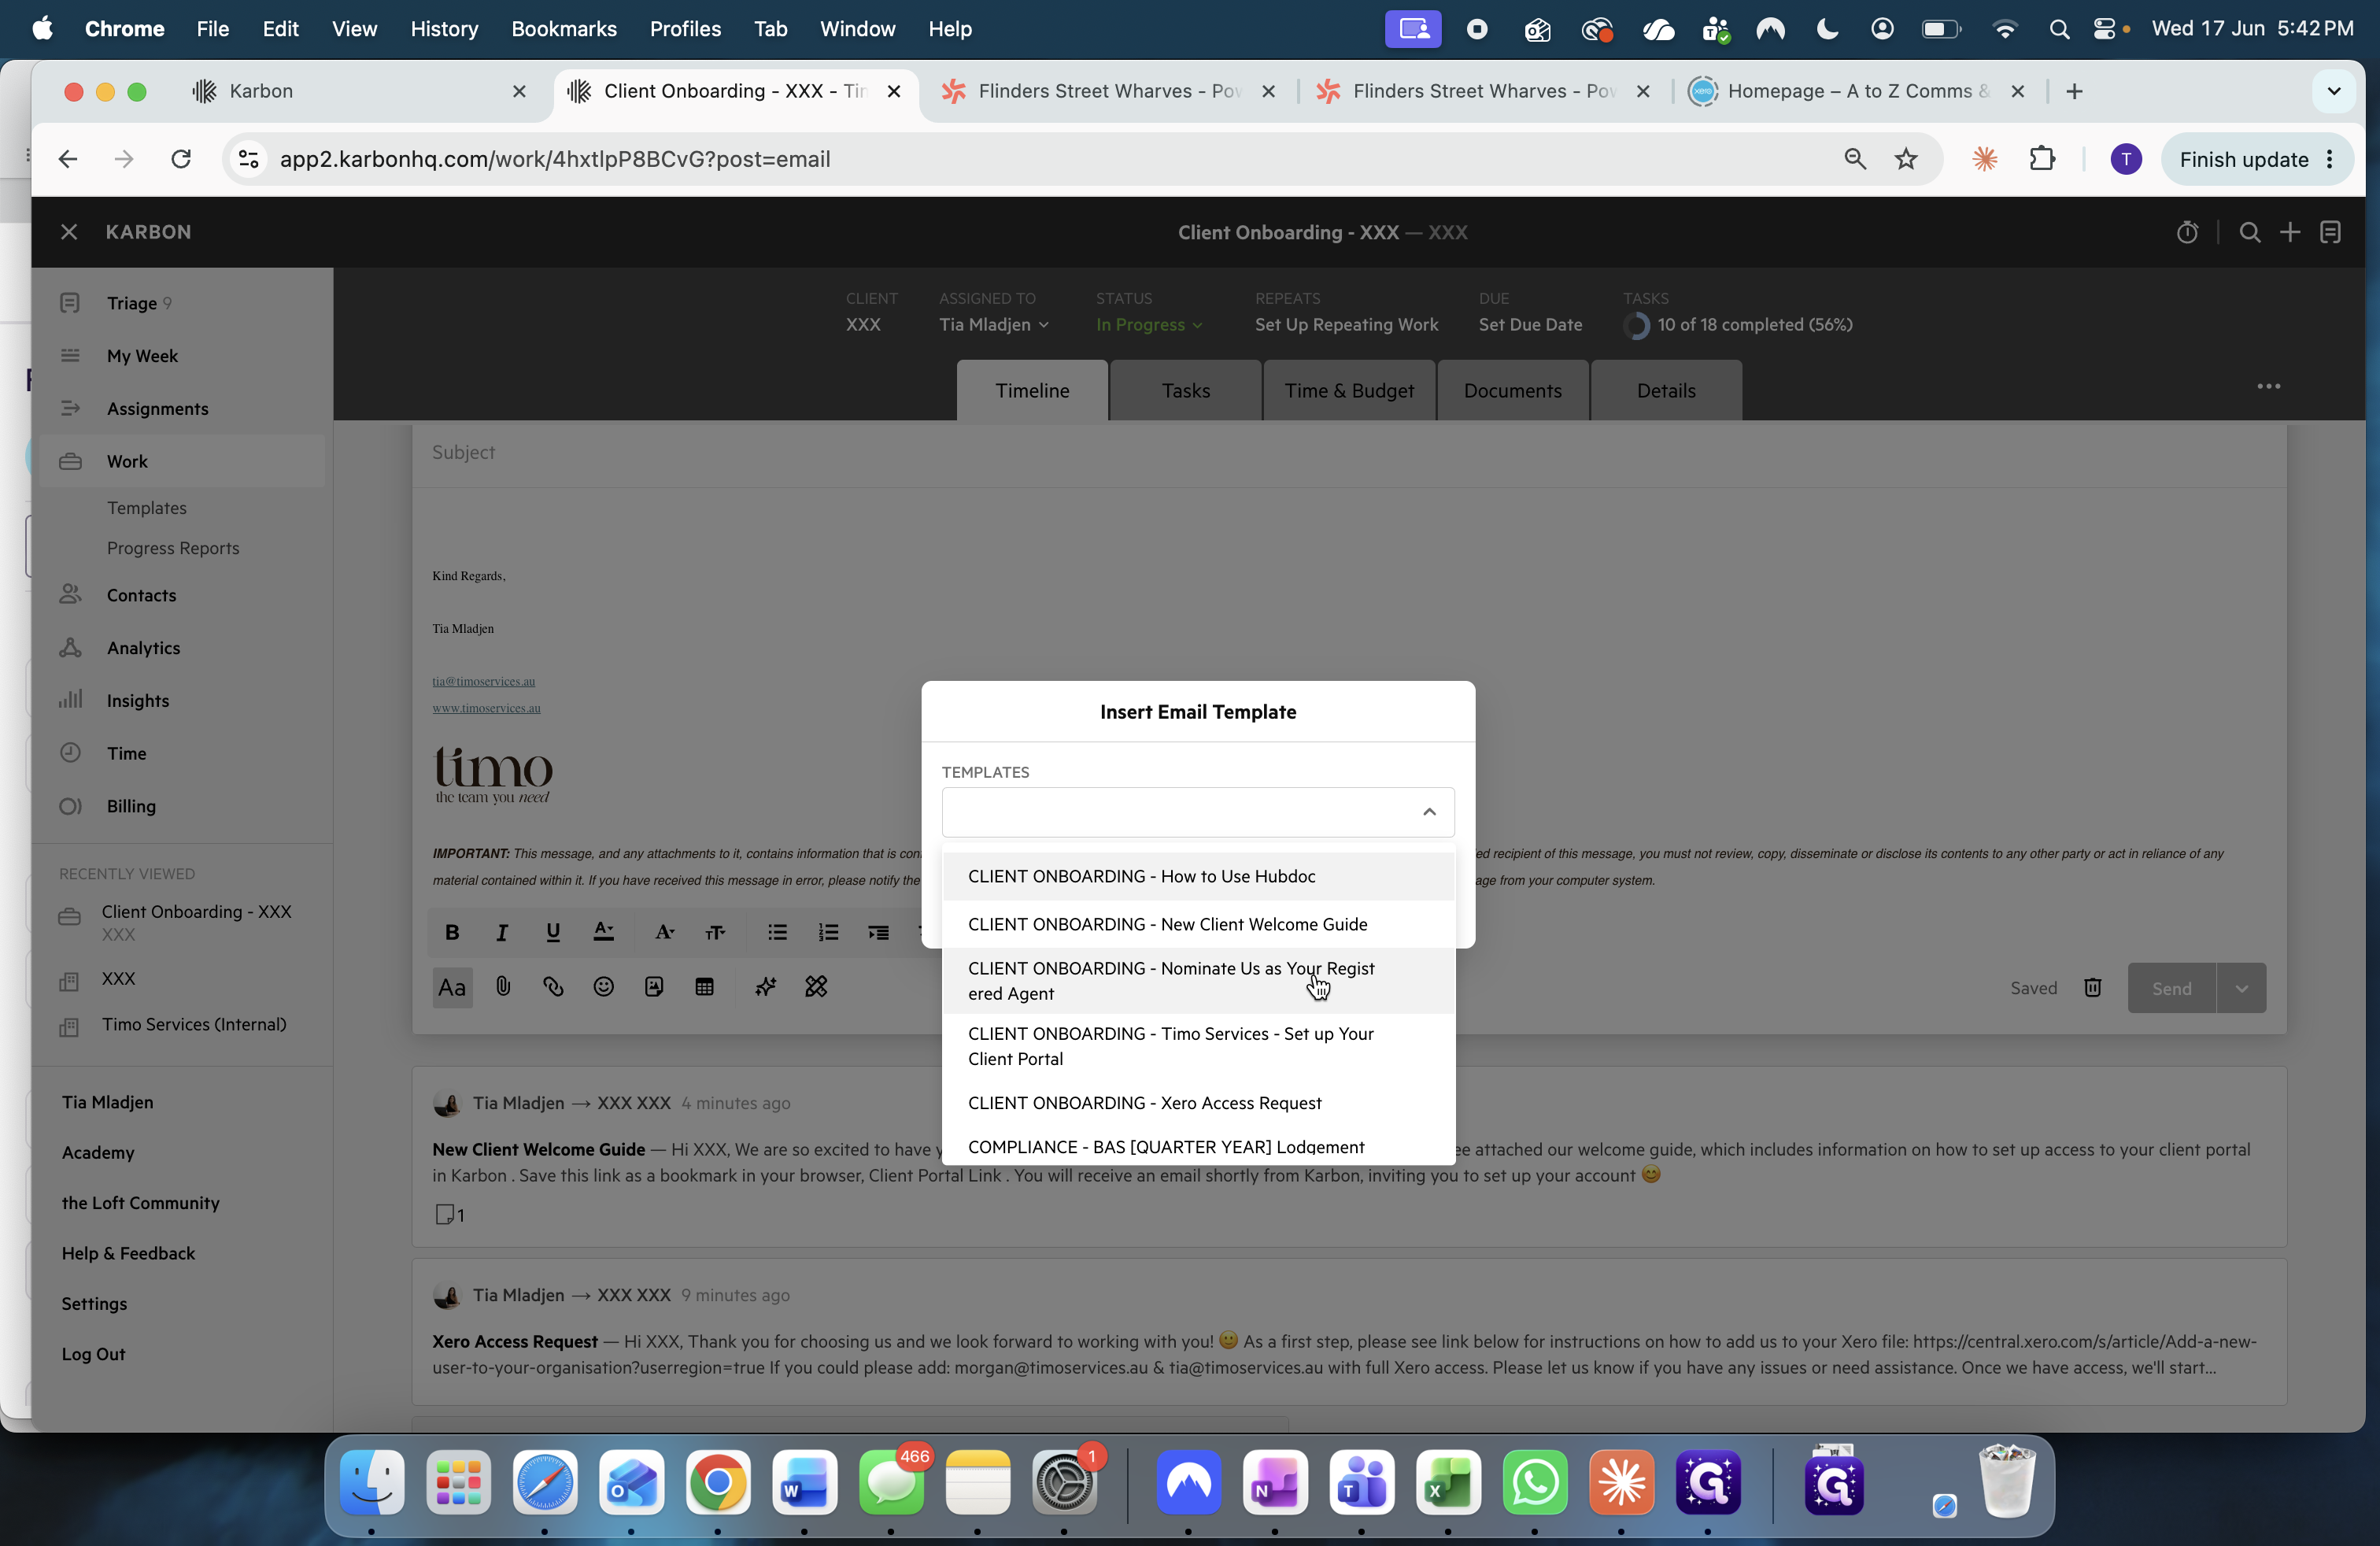
Open the email templates dropdown.
75
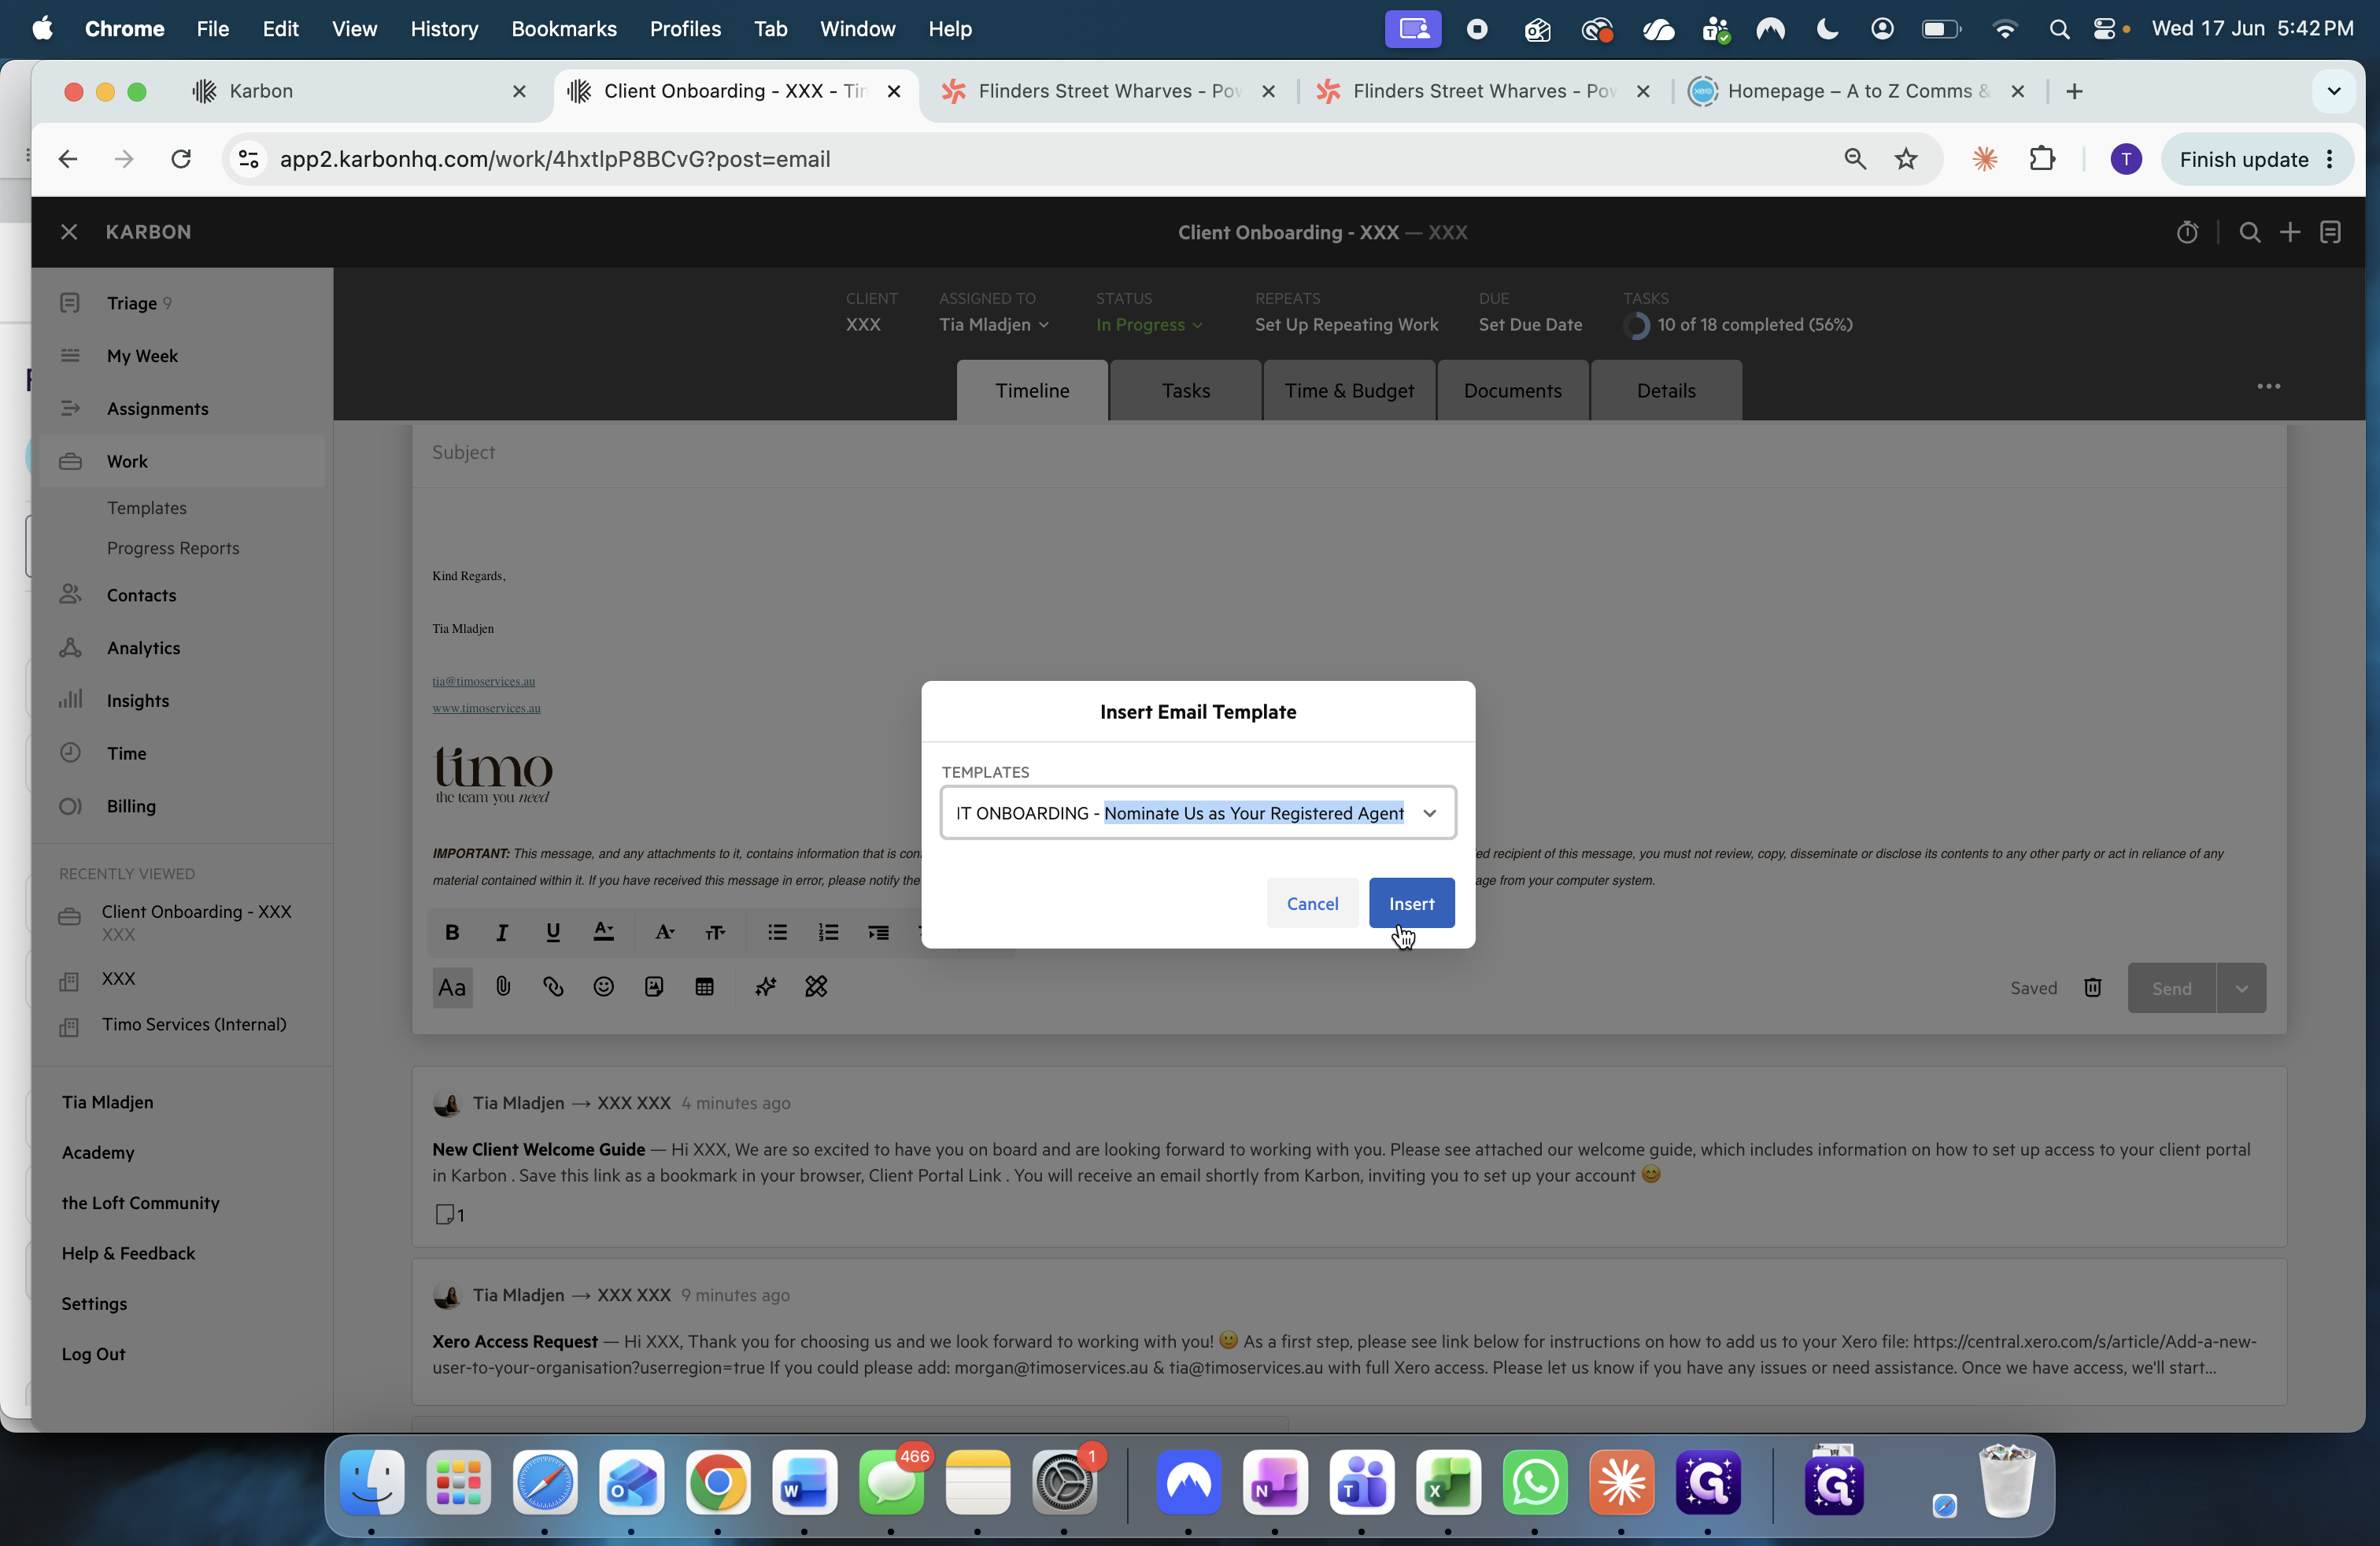
Select the CLIENT ONBOARDING - Nominate Us as Your Registered Agent template.
76
Click Insert.
77
Enter the client's email address in the "To" field.
78
Update the placeholders in the email body with the client's specific details.
79
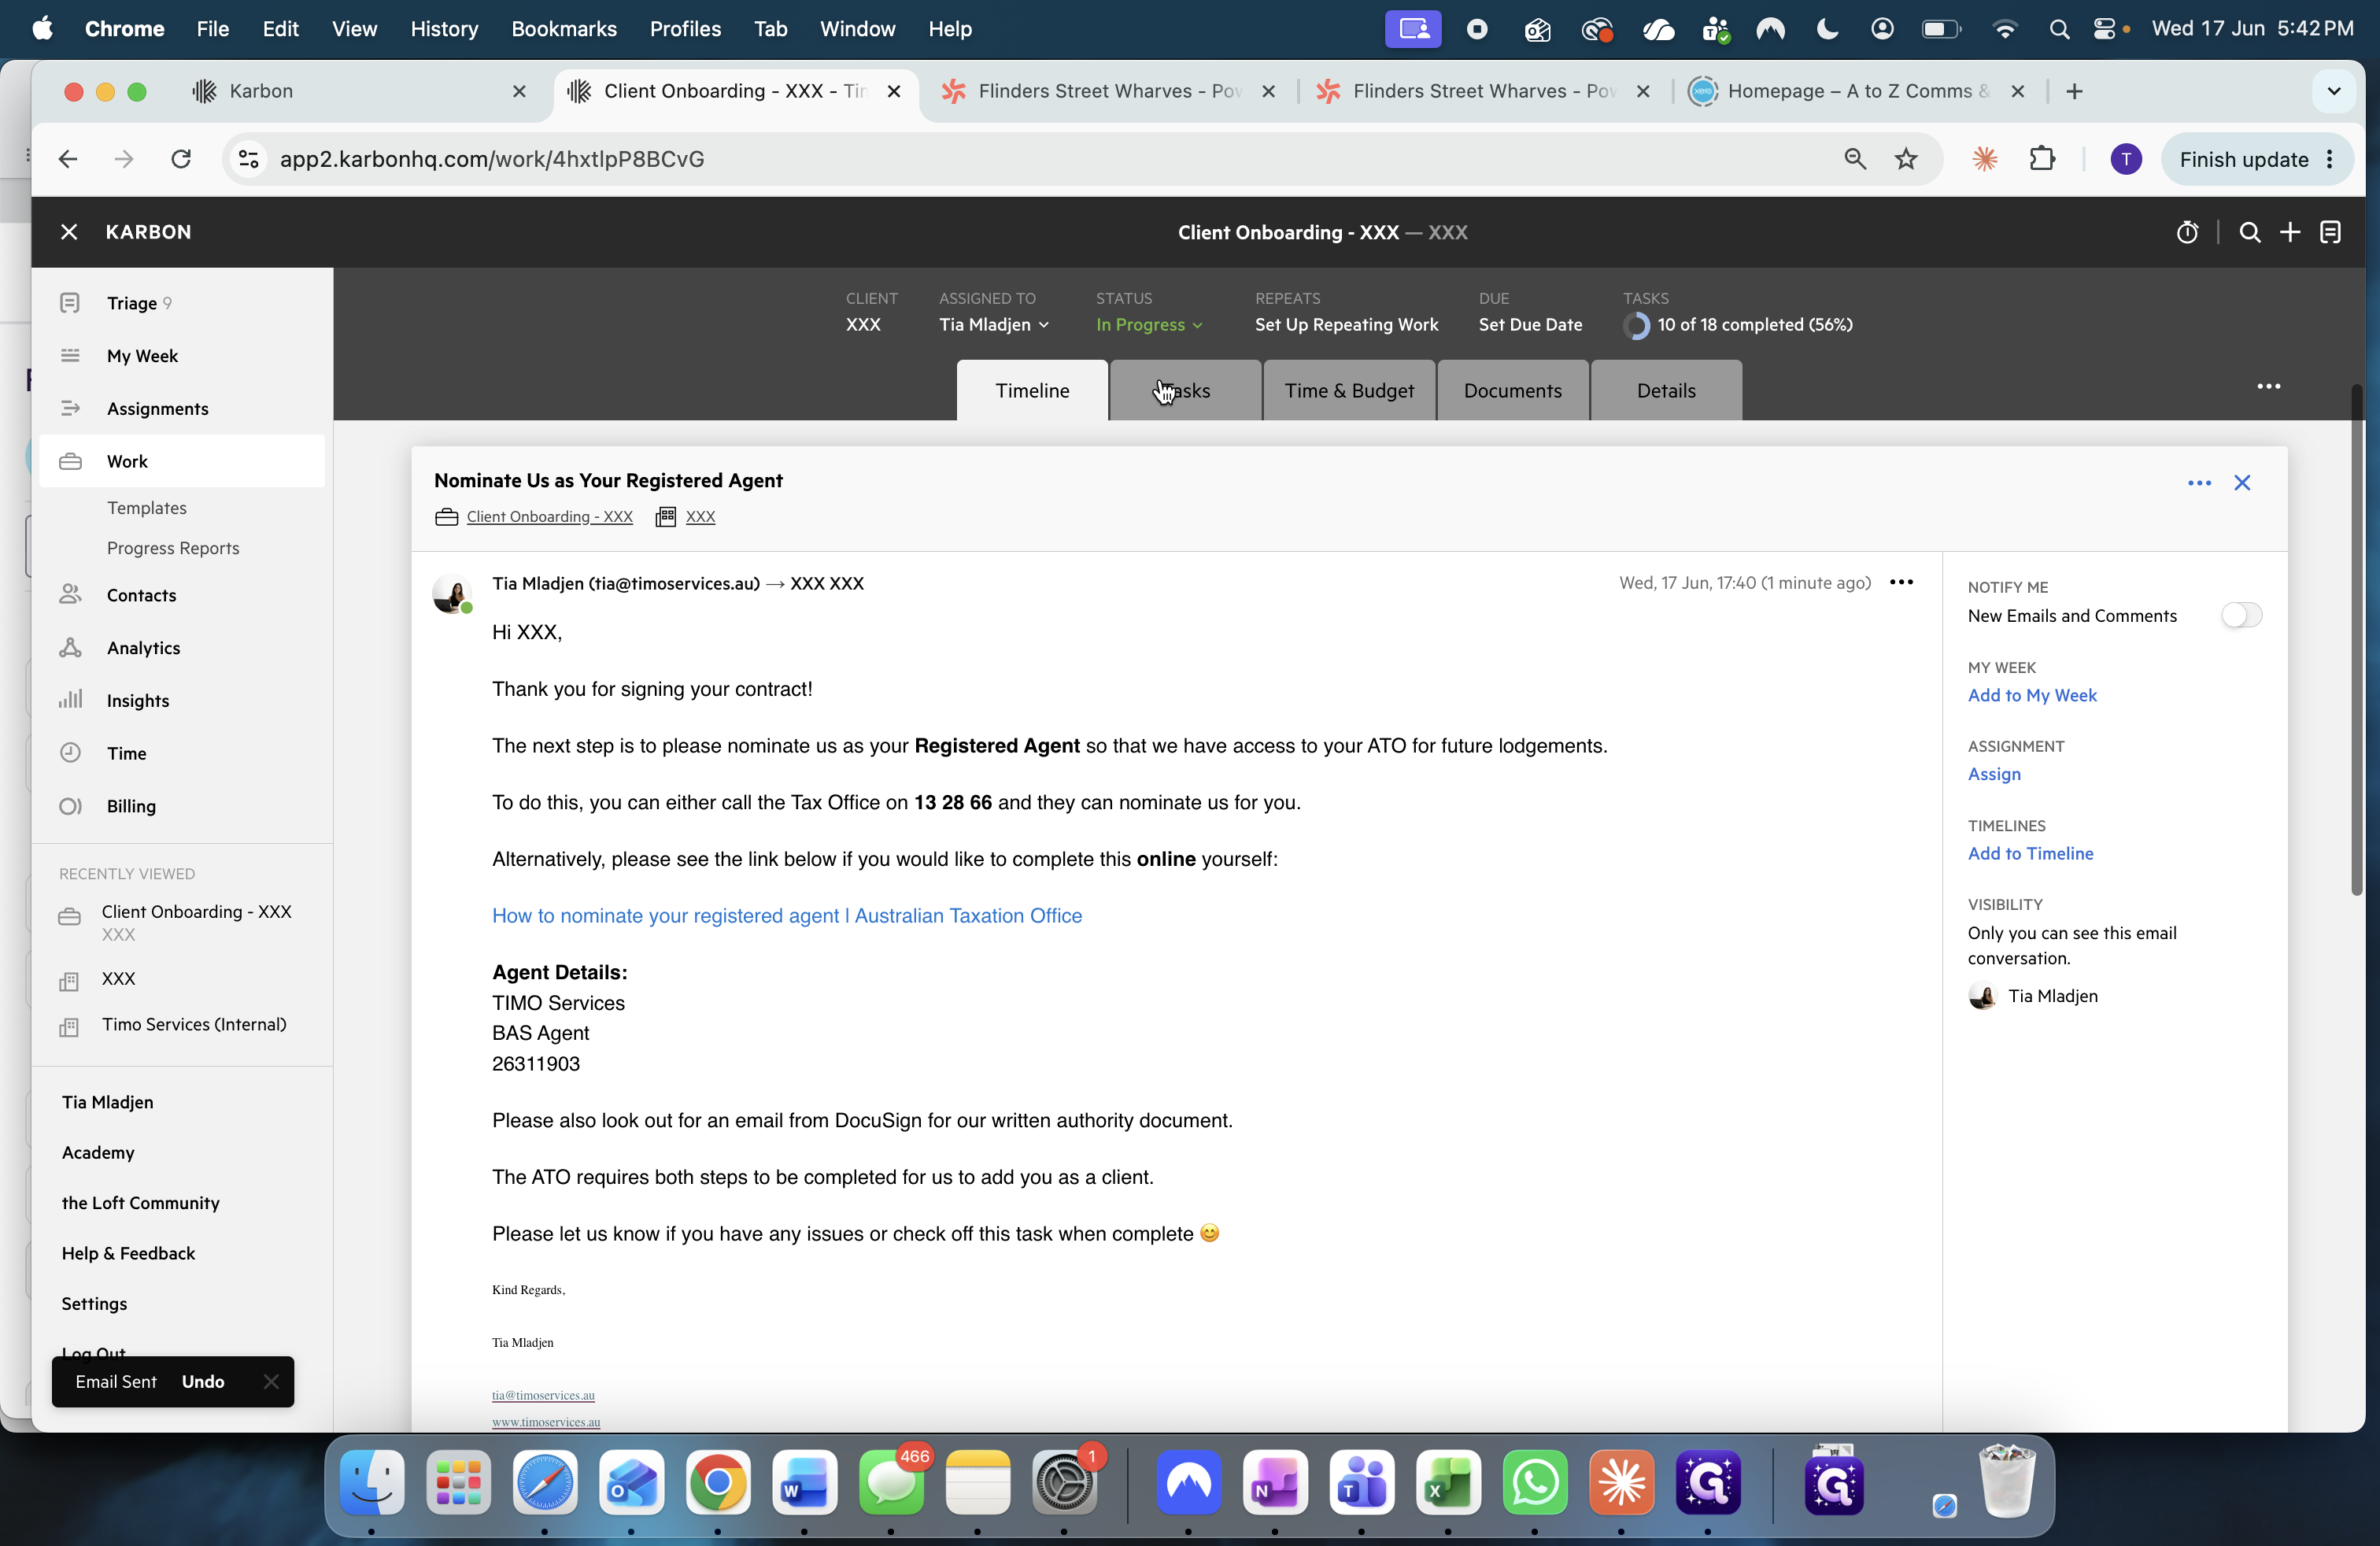
Click Send.
80
Go to the Tasks tab and check off the associated agent nomination task.
Q: What happens if the client doesn't reply to the Xero access request within a few days?
A: If the client hasn't responded, navigate to their Karbon timeline and manually send a follow-up email requesting access again.
Q: Do I need to create a new welcome guide from scratch for every client?
A: No. You can open Canva, find an existing welcome guide for a client utilizing similar services, and copy it. You only need to update the specific client names and adjust any minor service differences.
Q: Do I have to fill out the ABN and entity details on the DocuSign BAS form myself?
A: Technically, the client can fill these fields out when they receive the DocuSign. However, pre-filling the fields for them provides a much smoother onboarding experience if you already have the details from their signed contract.
Q: Do the DocuSign templates need to be audited or edited for every client?
A: No, the BAS Agent Authority template in DocuSign is a standard document, meaning you typically do not need to make edits to the core annotations or fields.
Term
Definition
Karbon
A practice management platform used by accounting firms to track workflows, clients, and communications.
Canva
A graphic design platform used to easily customize and export visual documents like welcome guides.
DocuSign
An electronic signature platform used to securely send, sign, and manage legal authorizations.
BAS Agent Authority
A formal document authorizing a registered tax agent to act on behalf of a client for Business Activity Statement (BAS) purposes.
Xero
Cloud-based accounting software used by businesses and accounting professionals to manage daily finances.
ABN
Australian Business Number, a unique 11-digit identifier that identifies a business to the government and community.

![Step #48: Save and rename the file locally on your computer to follow standard formatting (e.g., "Welcome Guide - [Client Name].pdf").](https://di8mn0rali2ic.cloudfront.net/uploads/0623d2cf-7e24-4832-8526-4f59a81d7e28/a912b42b-8f0c-4493-ad47-cd803311690d.png)