
Guide to Conducting a Thorough System Scan
Learn how to effectively conduct a thorough system scan.
In this guide, we'll learn how to perform an advanced scan on your device to detect potential threats, such as rootkits. This process involves configuring a custom scan to ensure a thorough examination of your system. While some features may be optional or available through other applications like Bitwarden, conducting a detailed scan can enhance your device's security. We'll walk through the steps to set up and initiate the scan, allowing you to identify and address any hidden threats effectively.
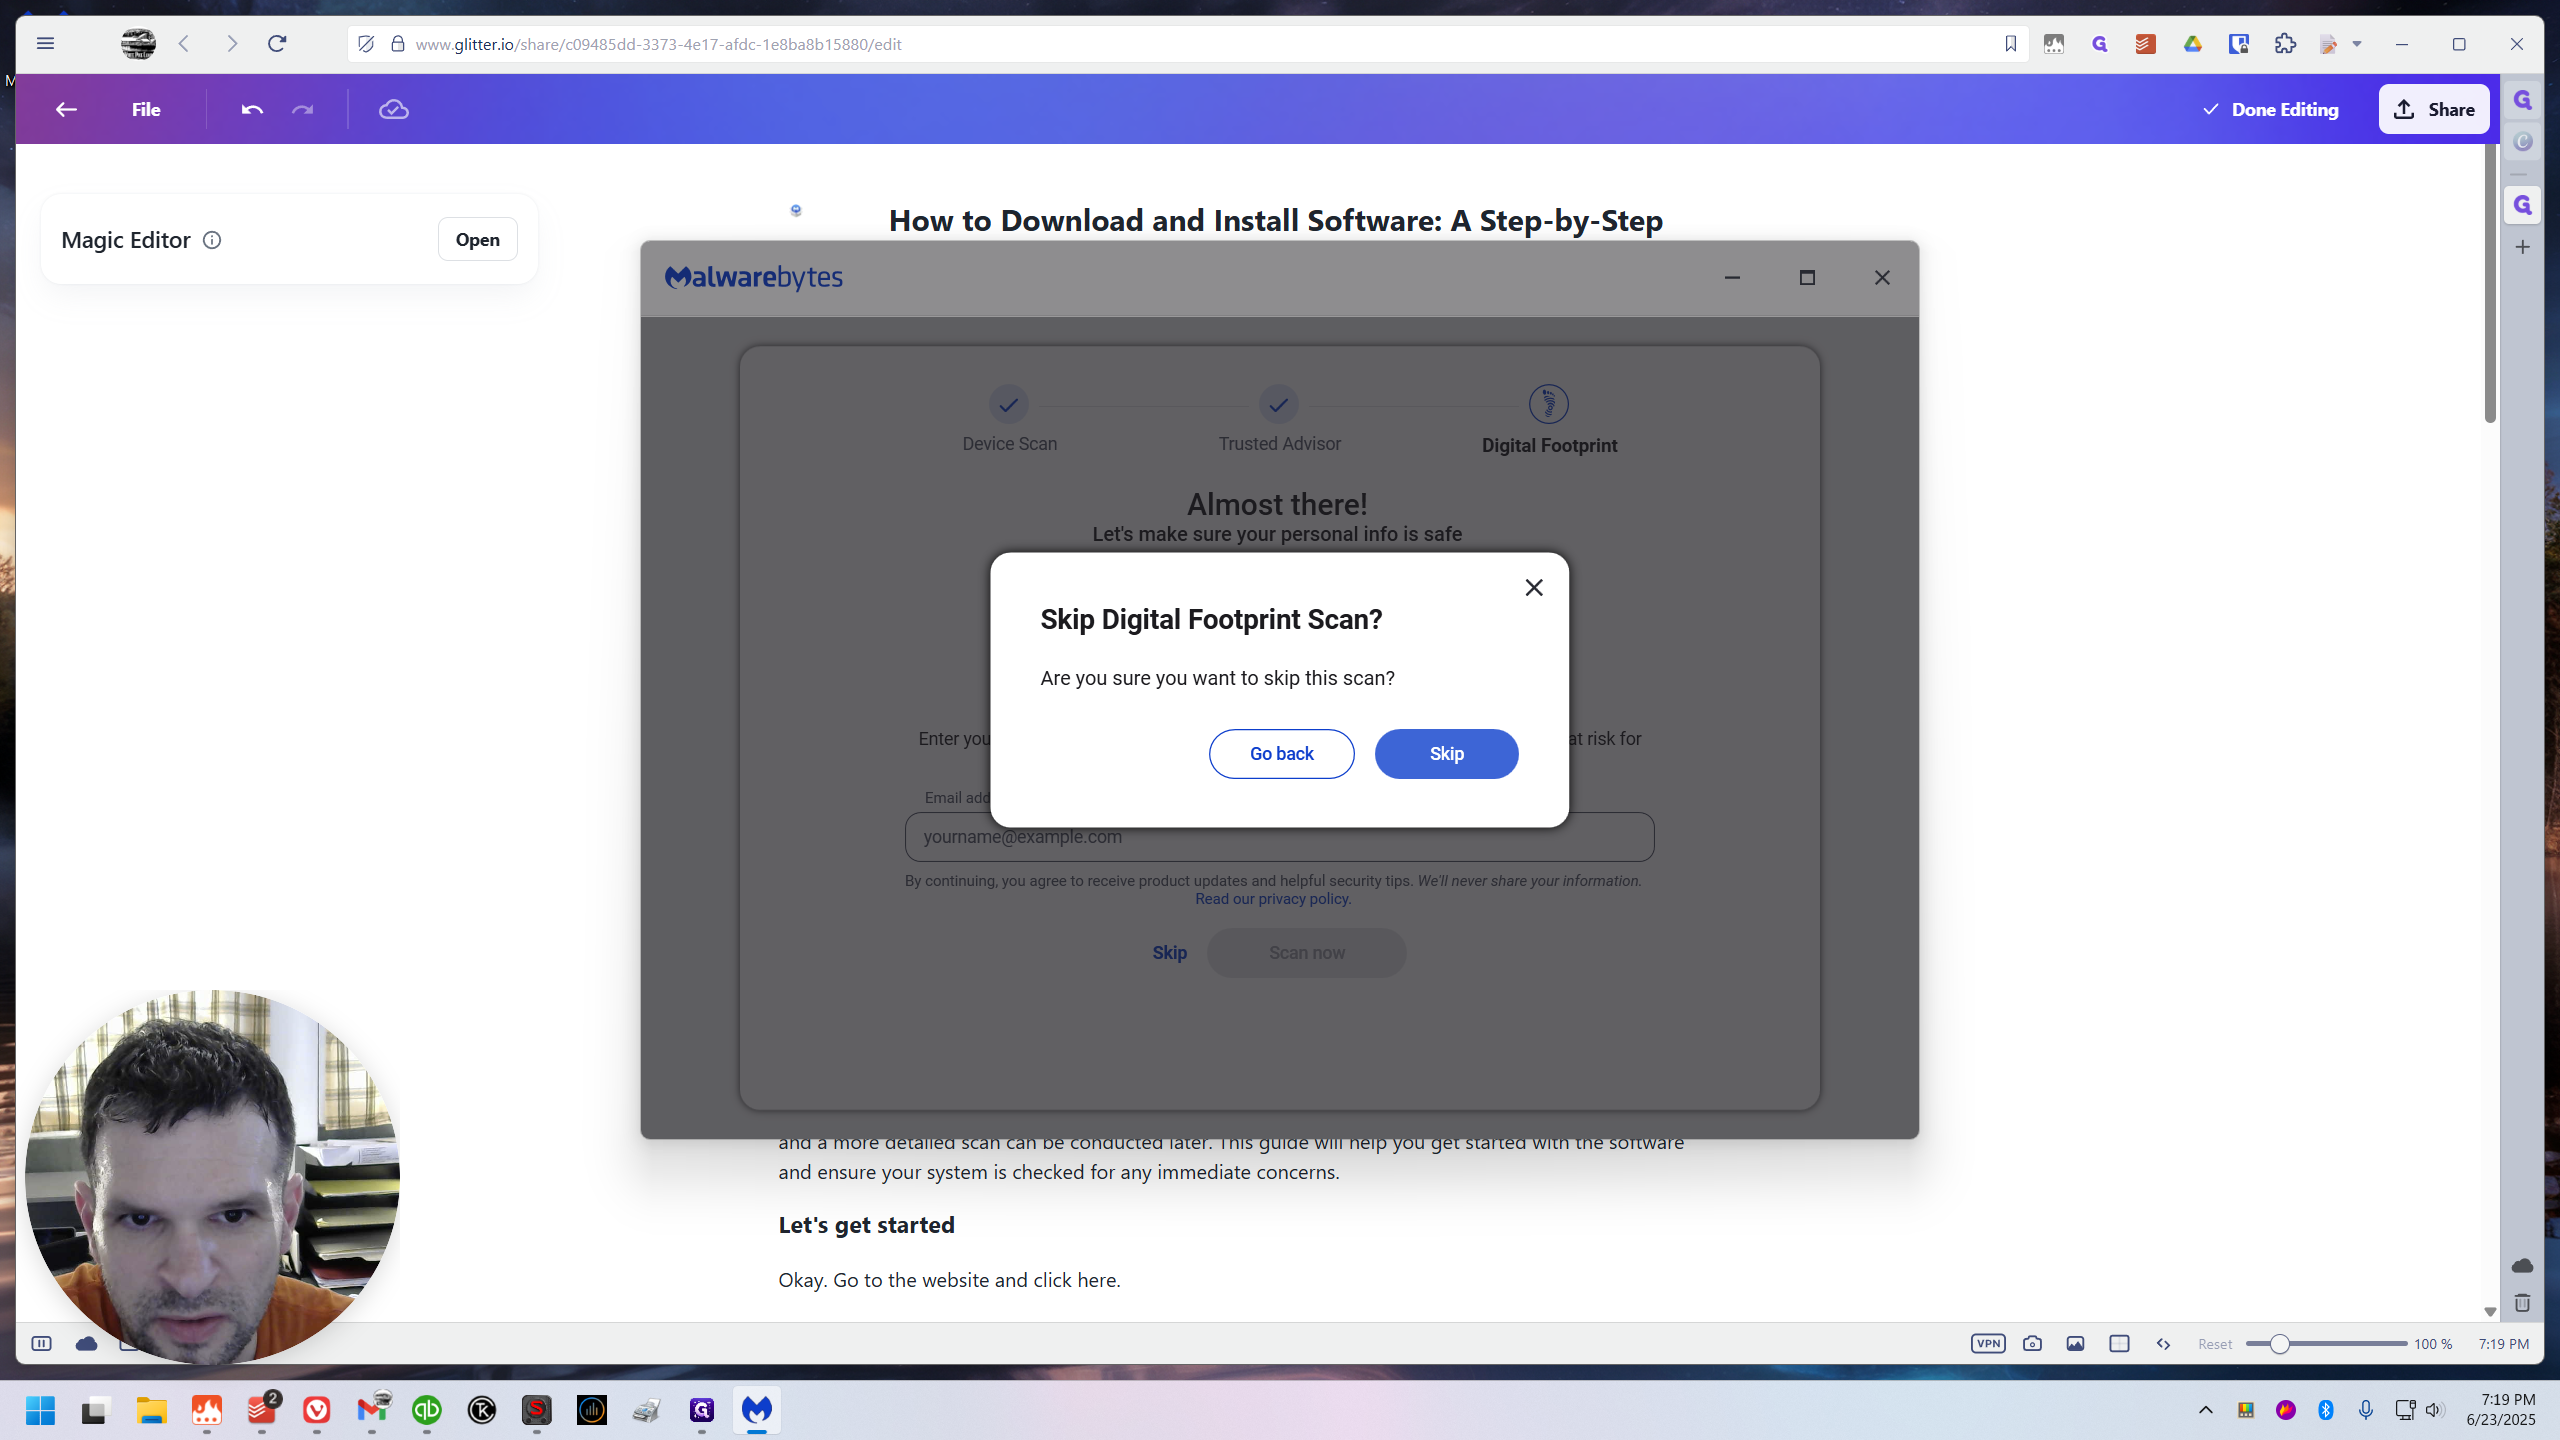
Optional: Digital Footprint Scan
After completing its initial scan, I reviewed it, clicked through a couple screens, and reached this point. You don't need to do this, but you could if you want. Bitwarden already does this, for what it's worth. I will skip it.
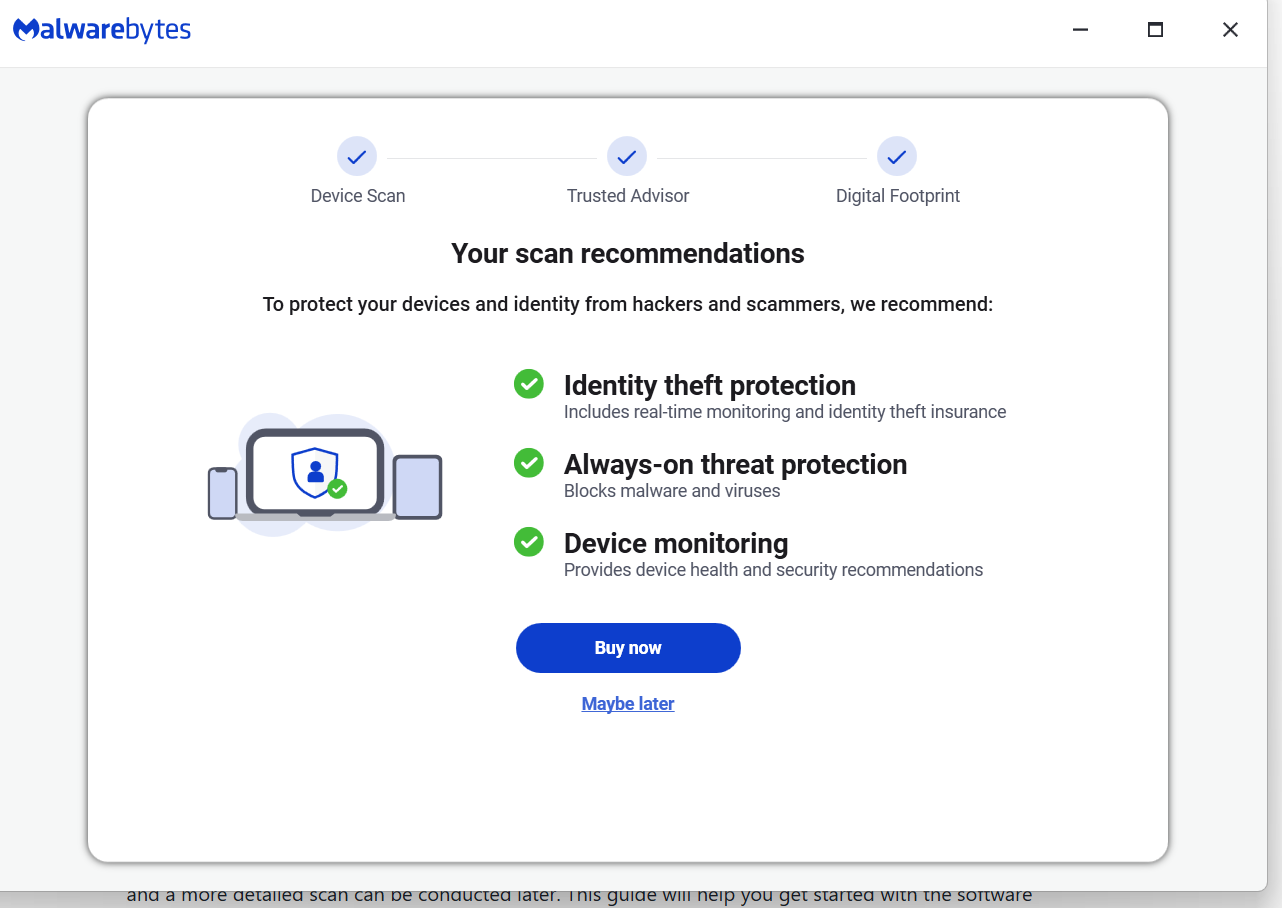
Real-time protection
I don't want to buy this but you could. It's definitely good to have. It will just cost you money. But my recommendation, and the way I do it on camp's PC, is to let Windows inherent antivirus handle real-time protection, and use Malwarebytes for manual scanning when needed.
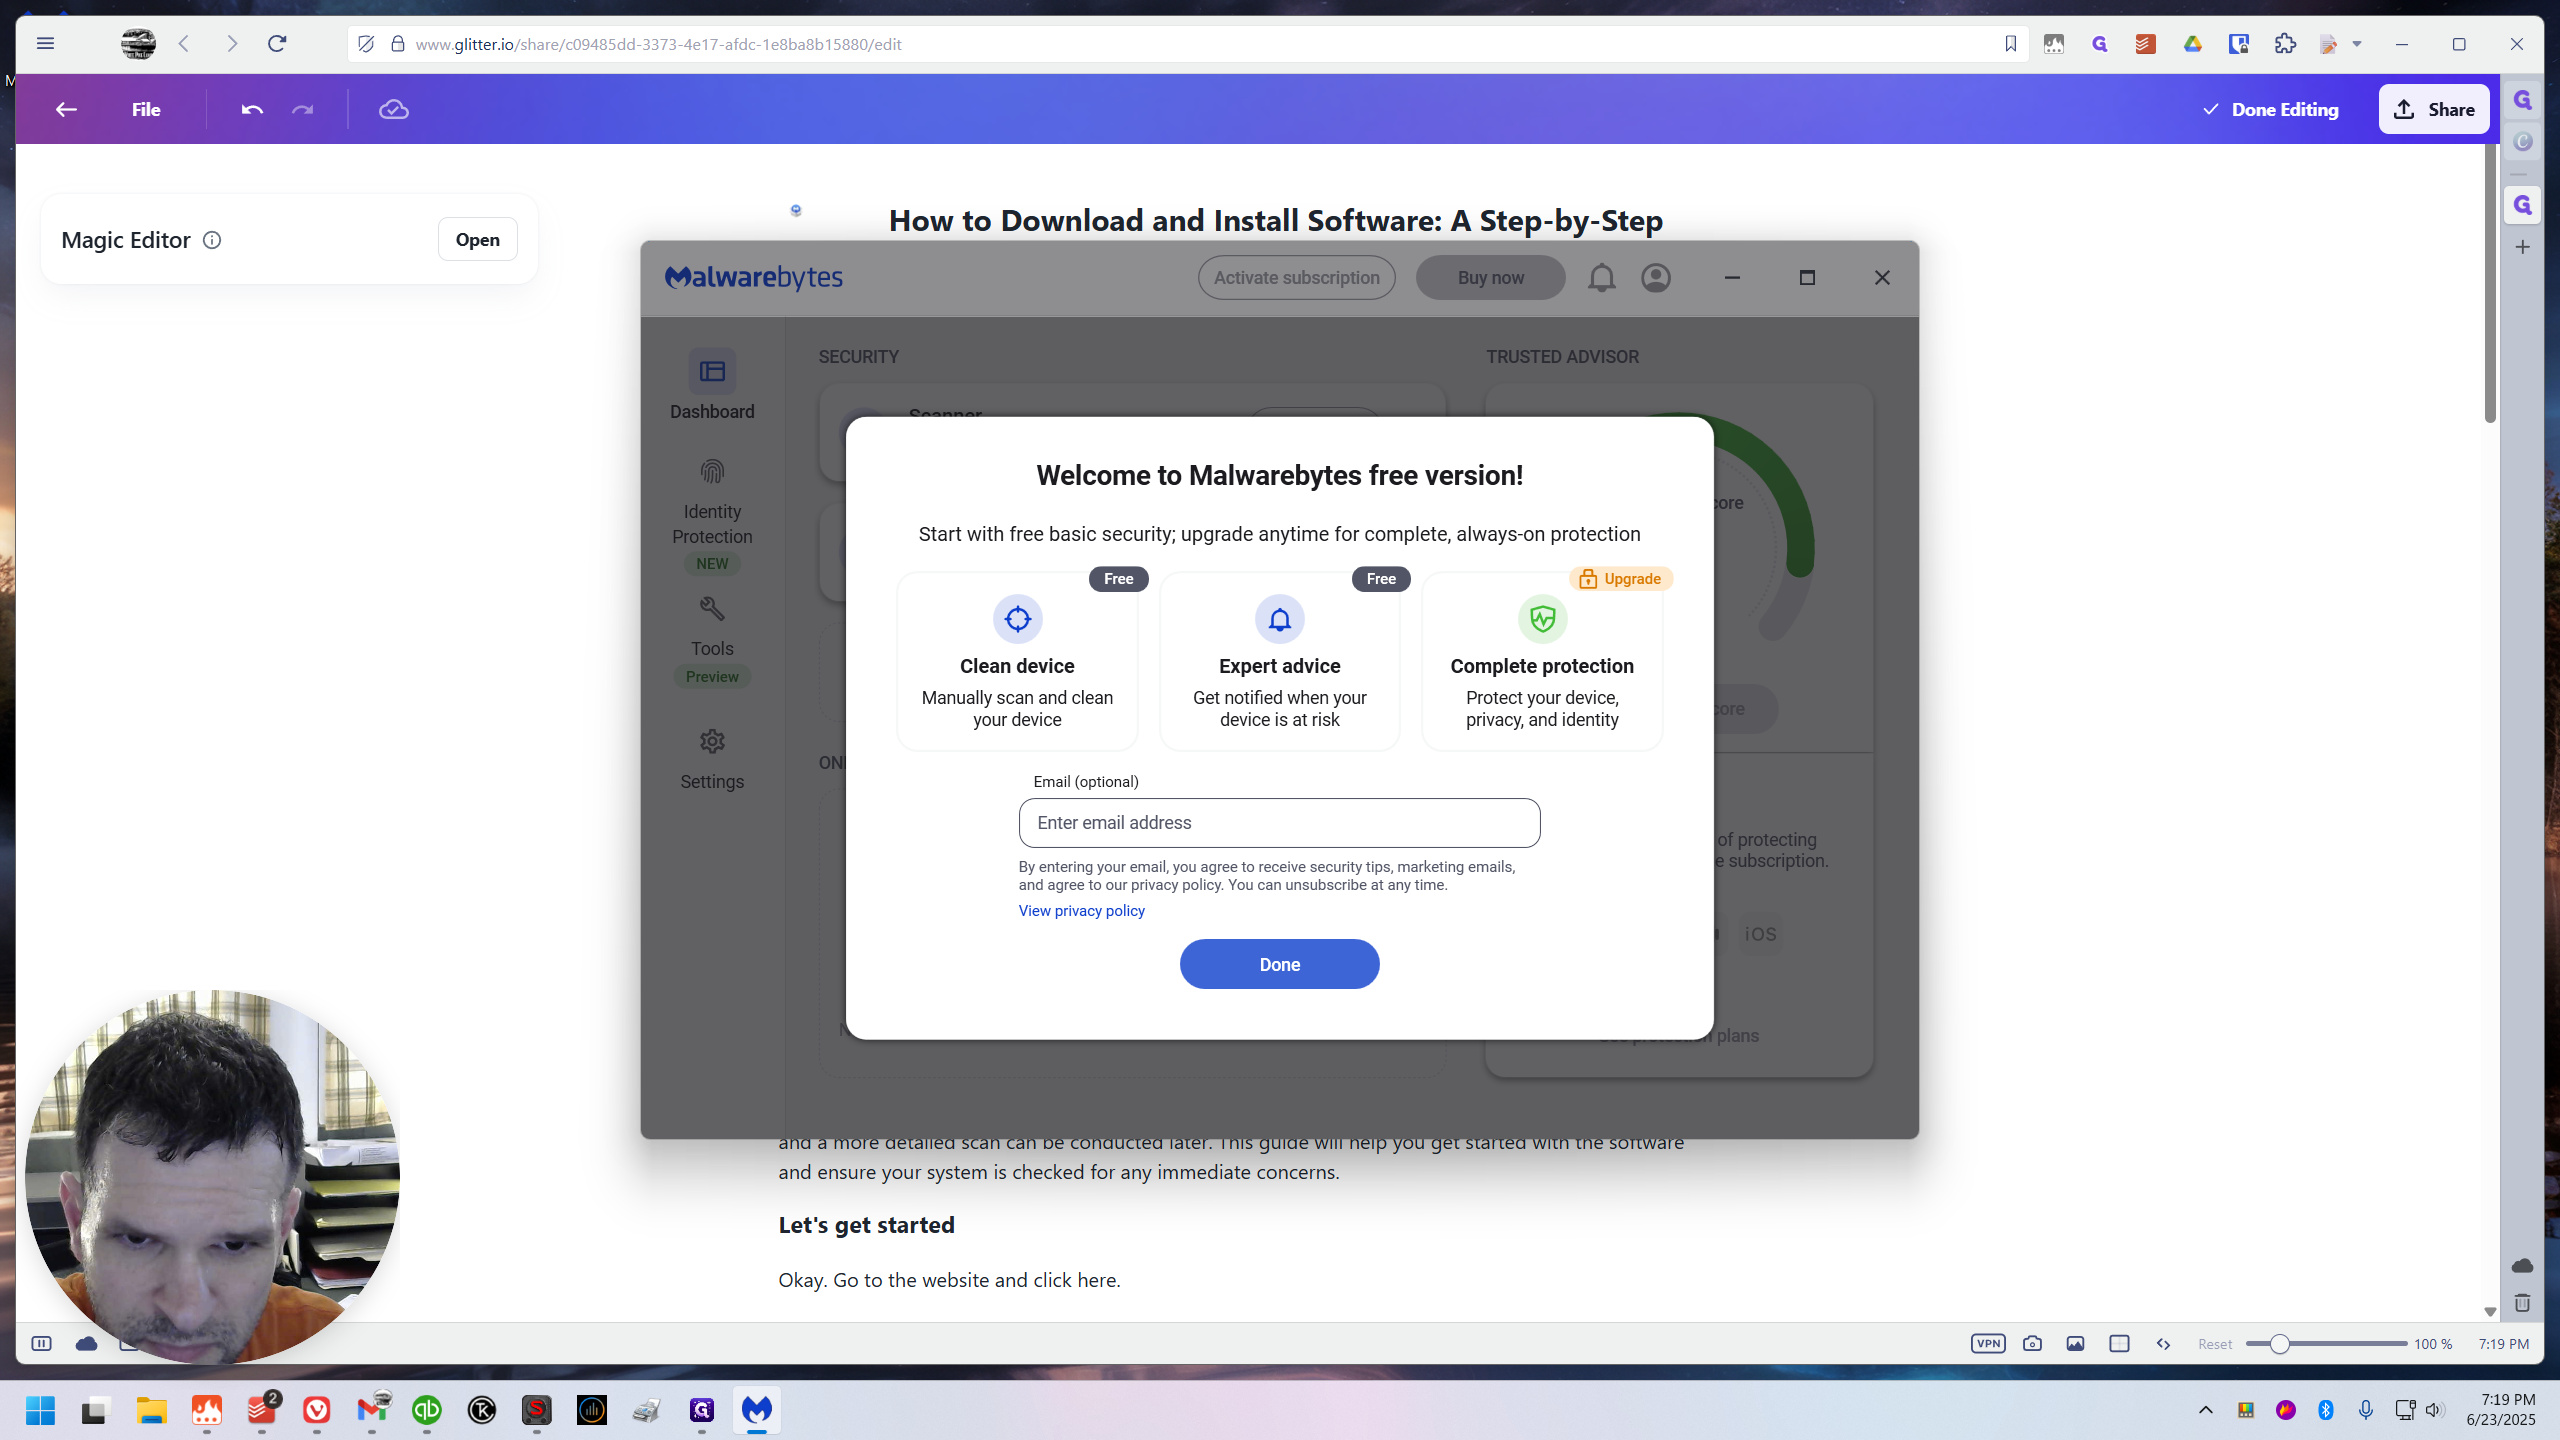
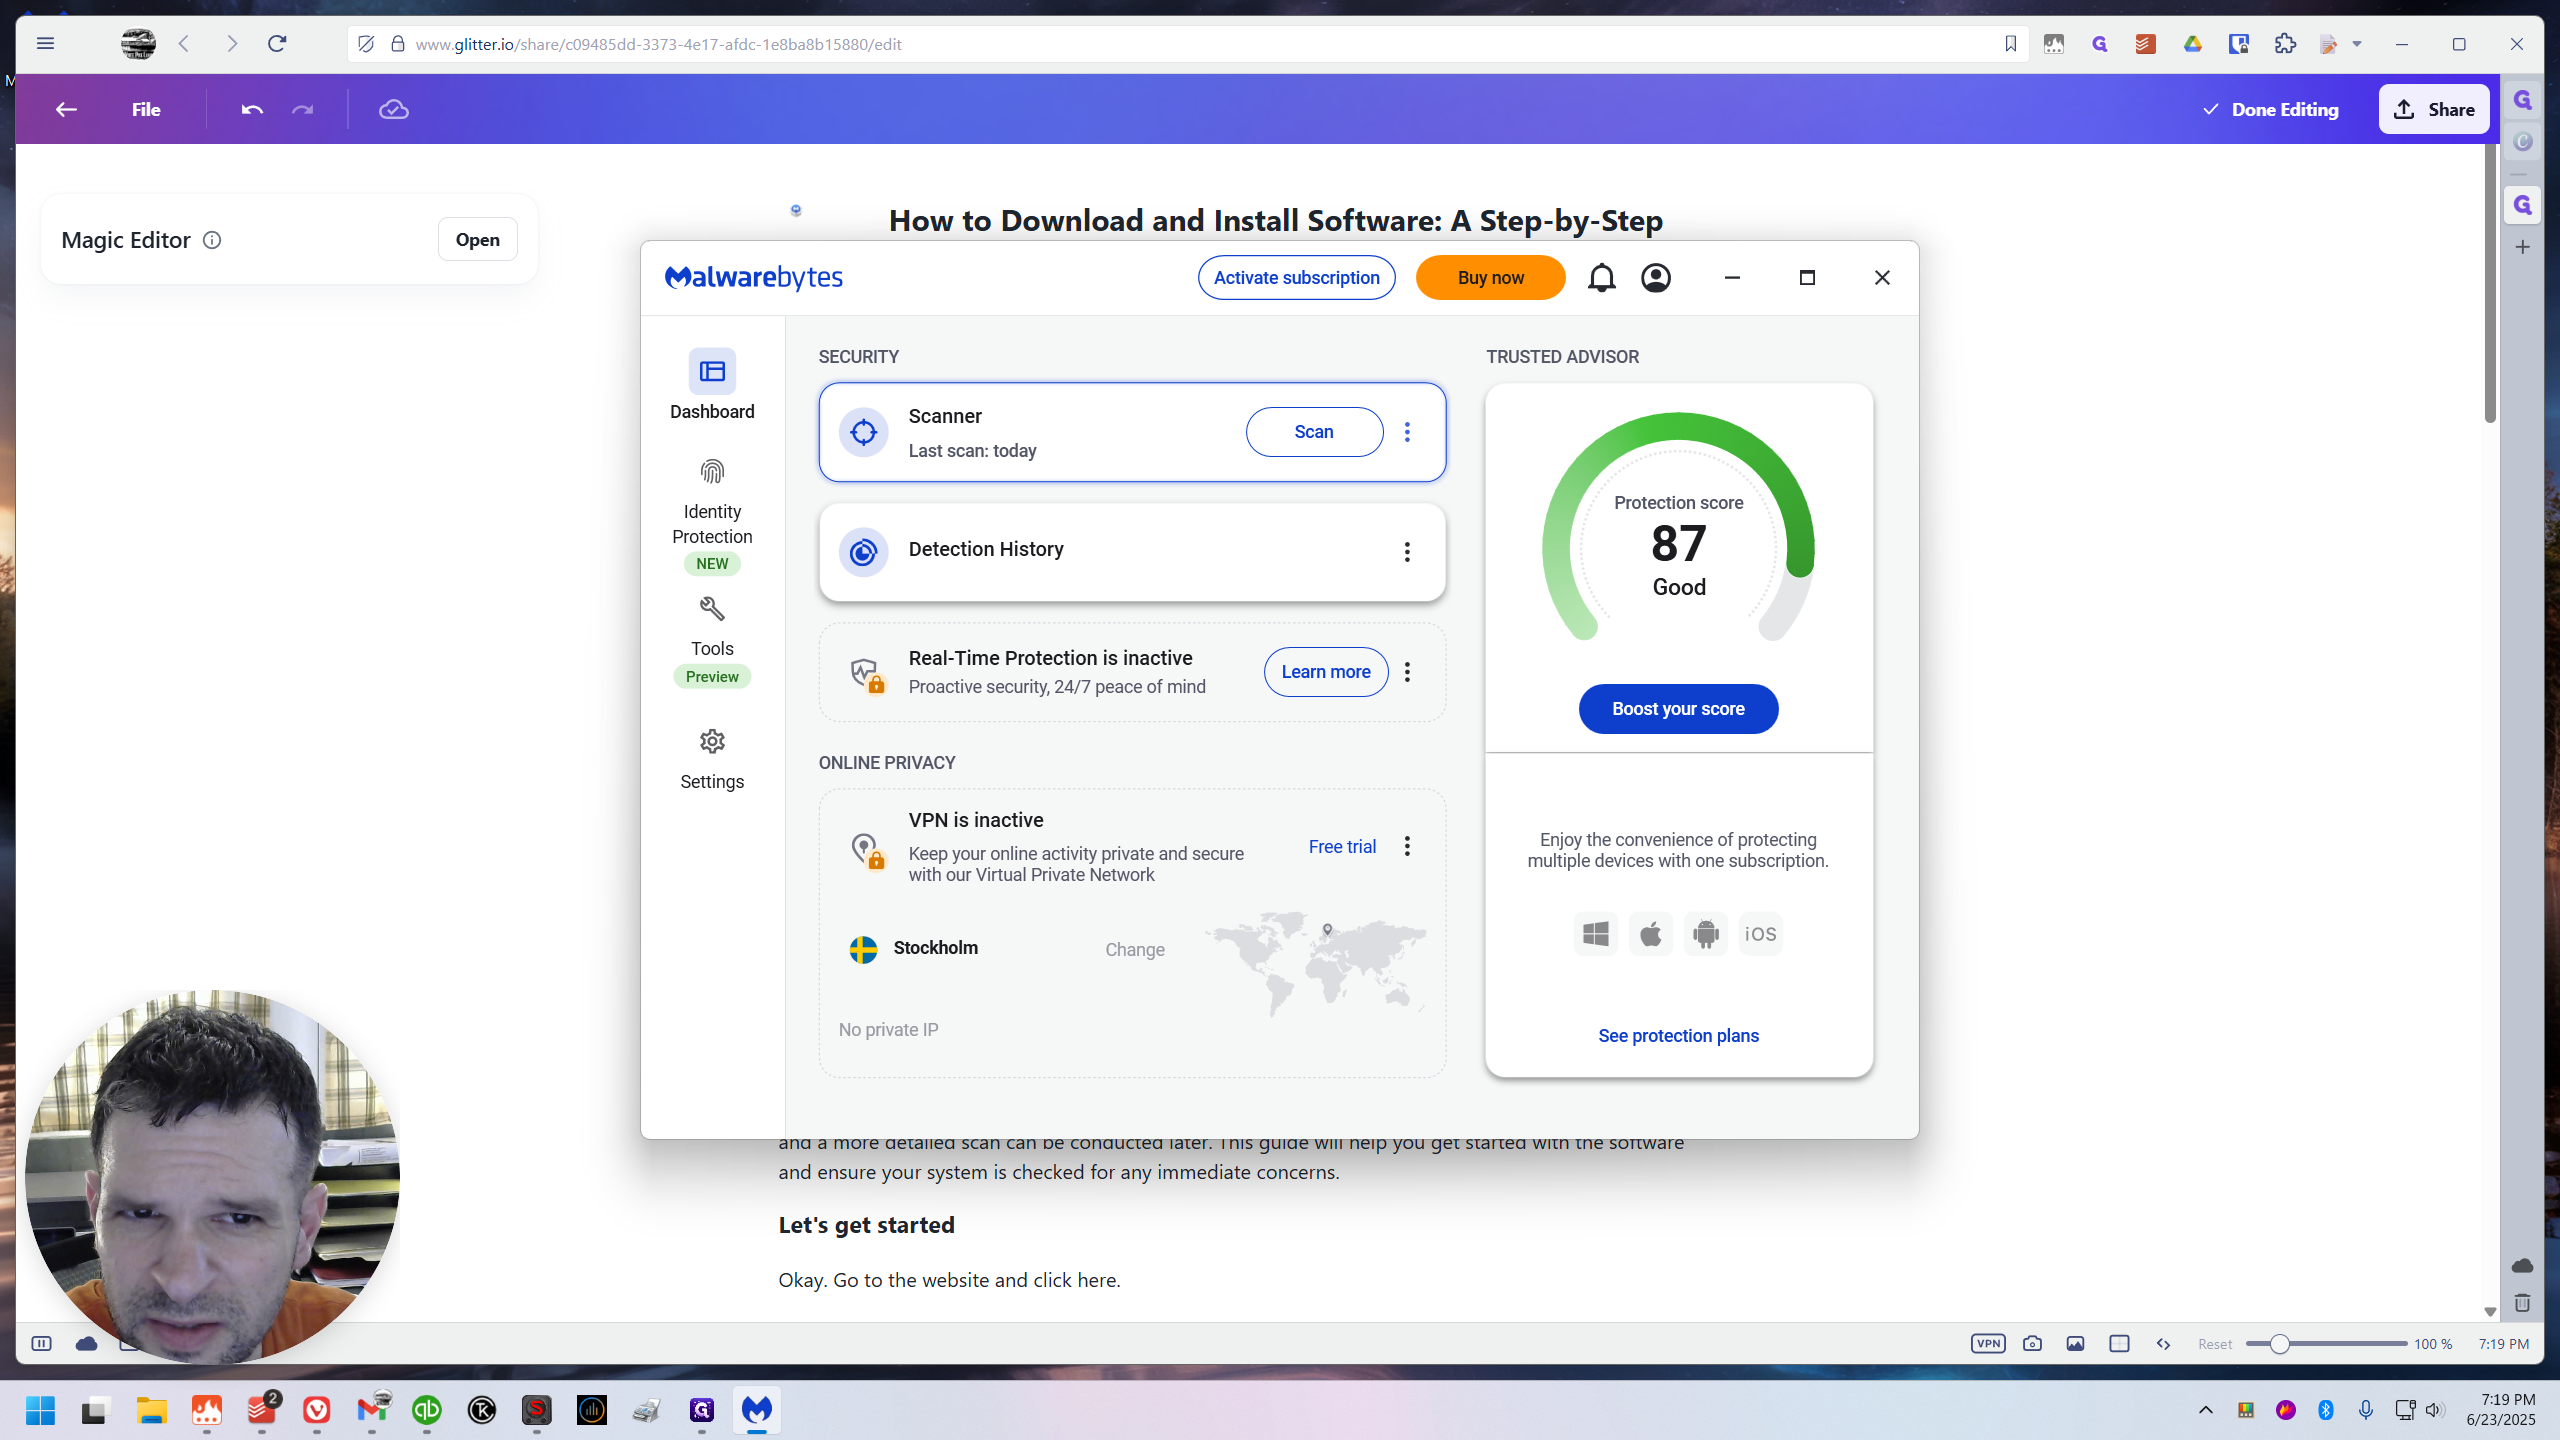
I just clicked through all the other screens. Then finally we'll be able to access the main dashboard of Malwarebytes.
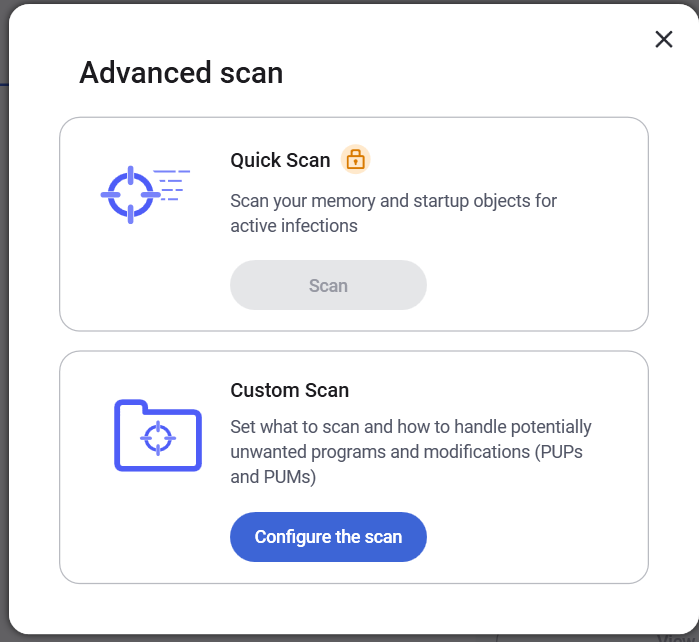
Finally! How to run an advanced scan:
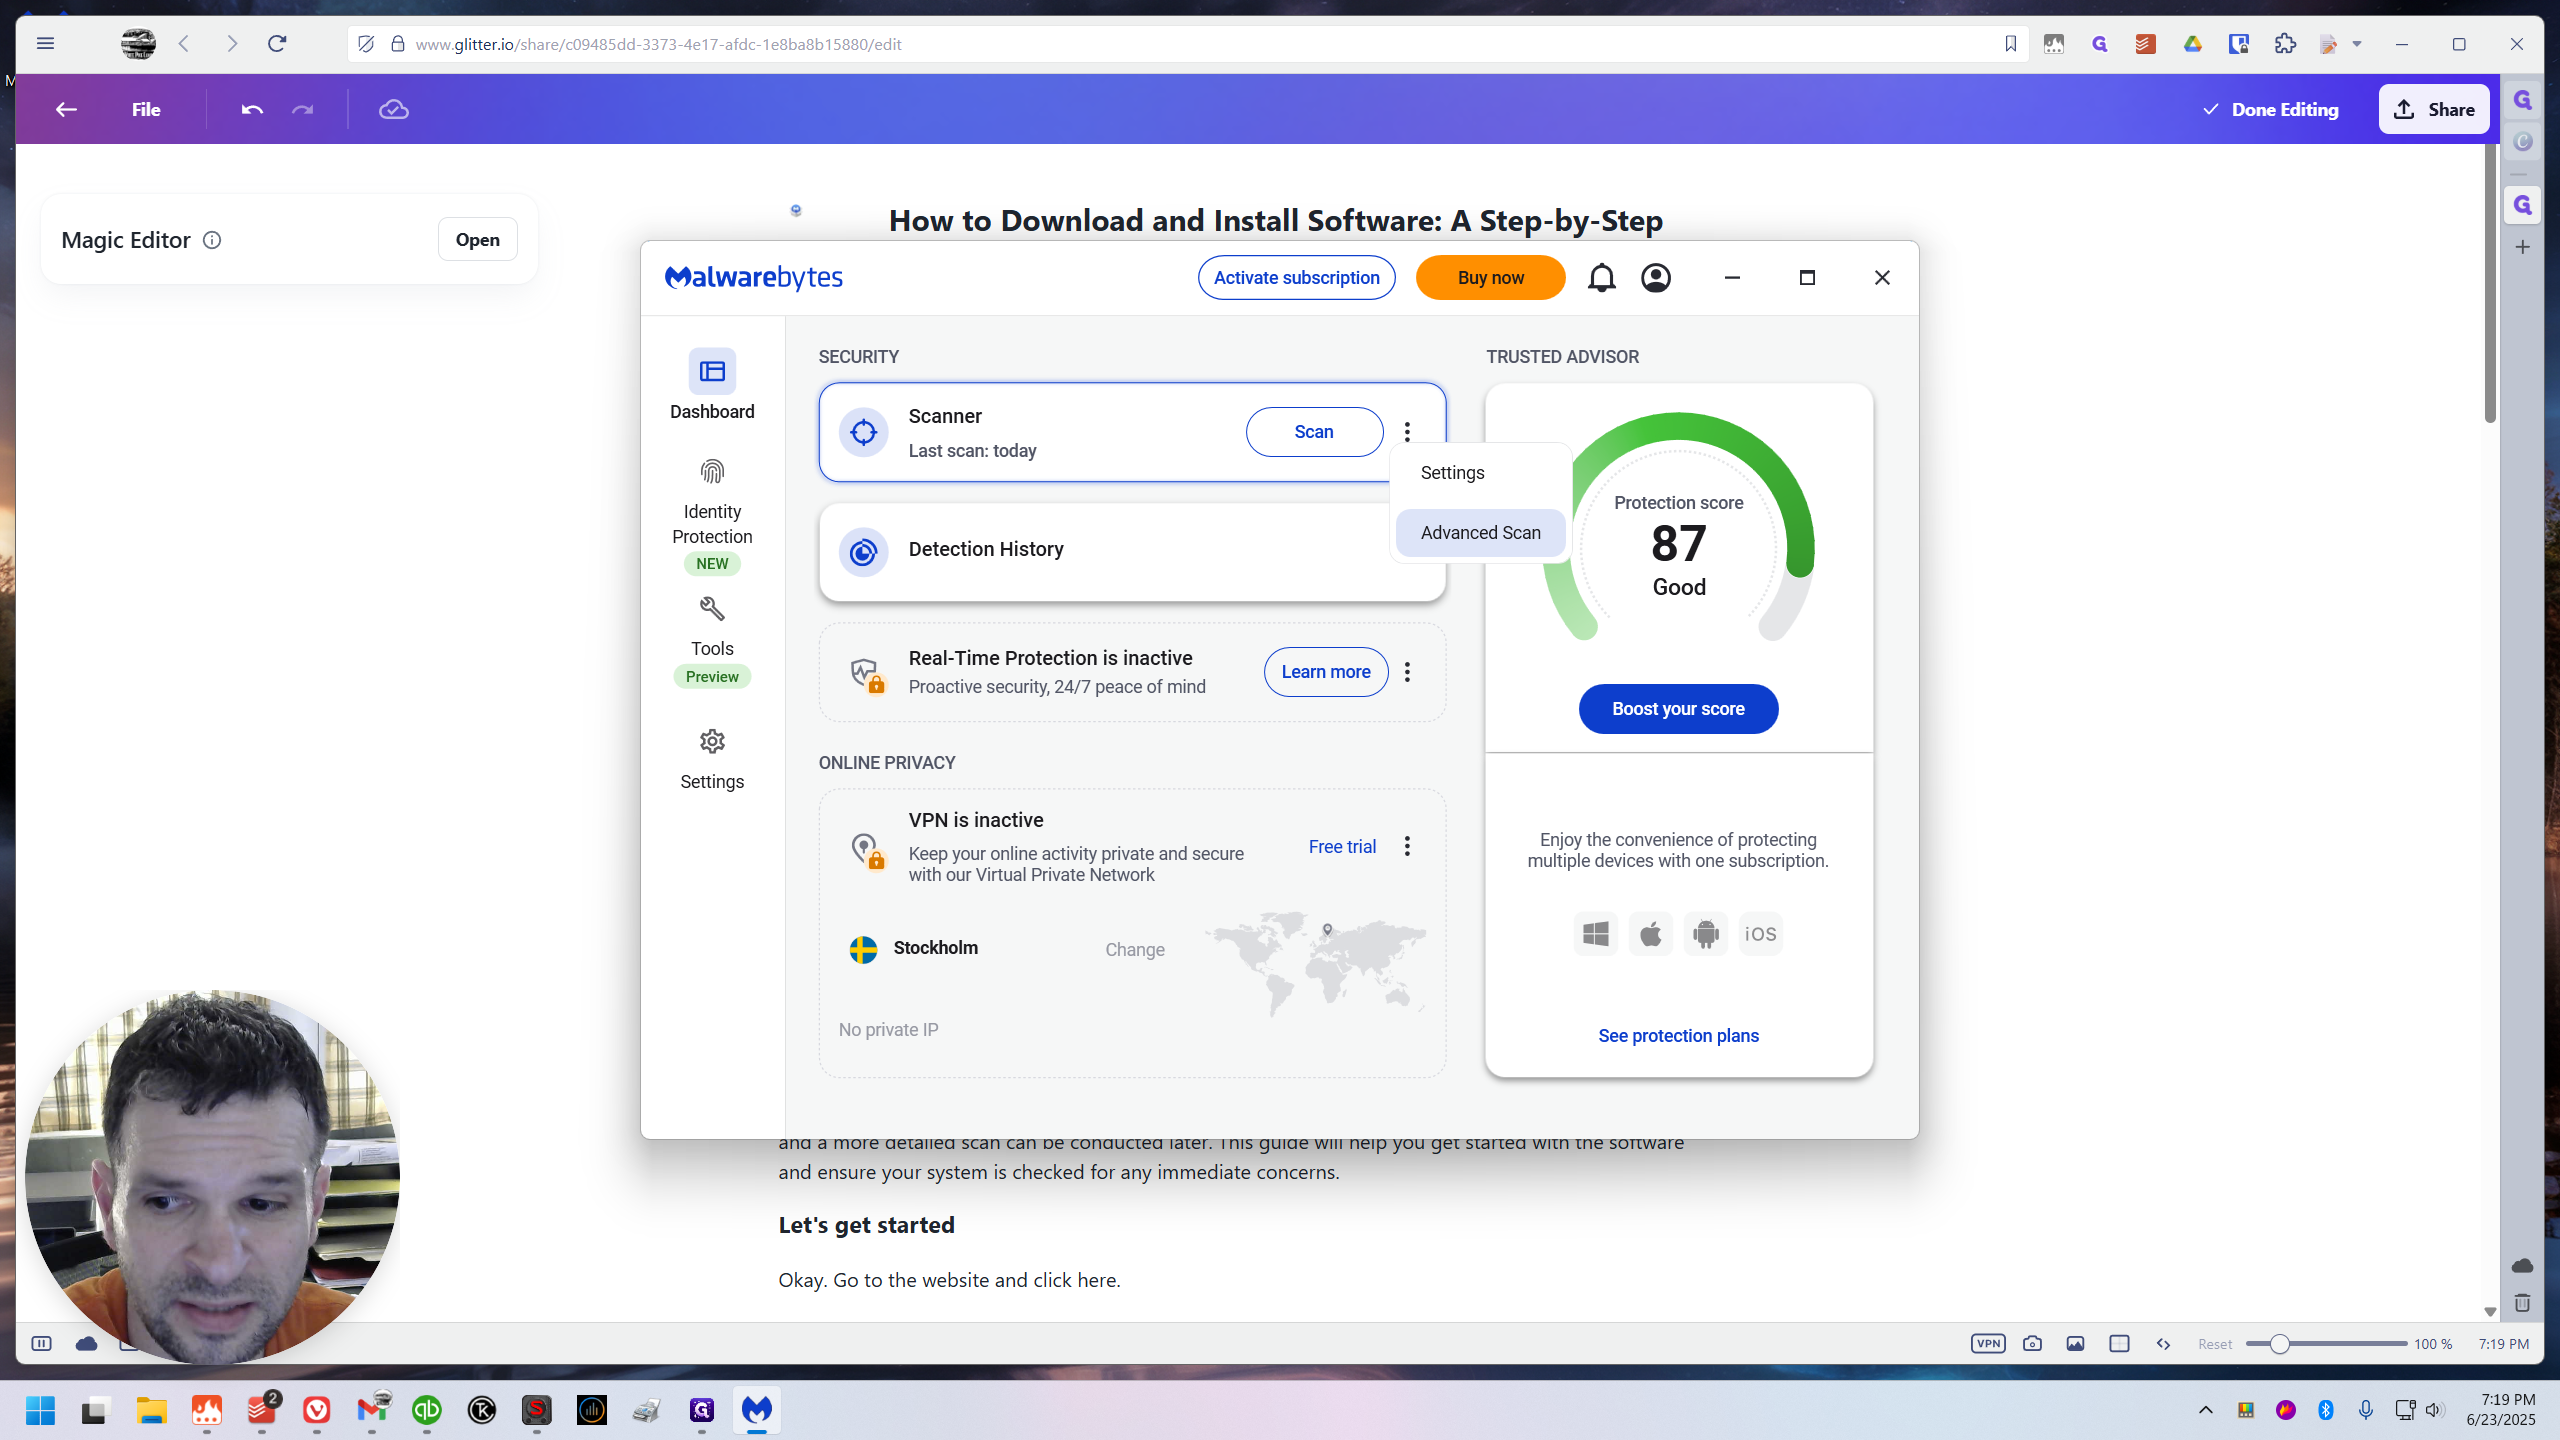
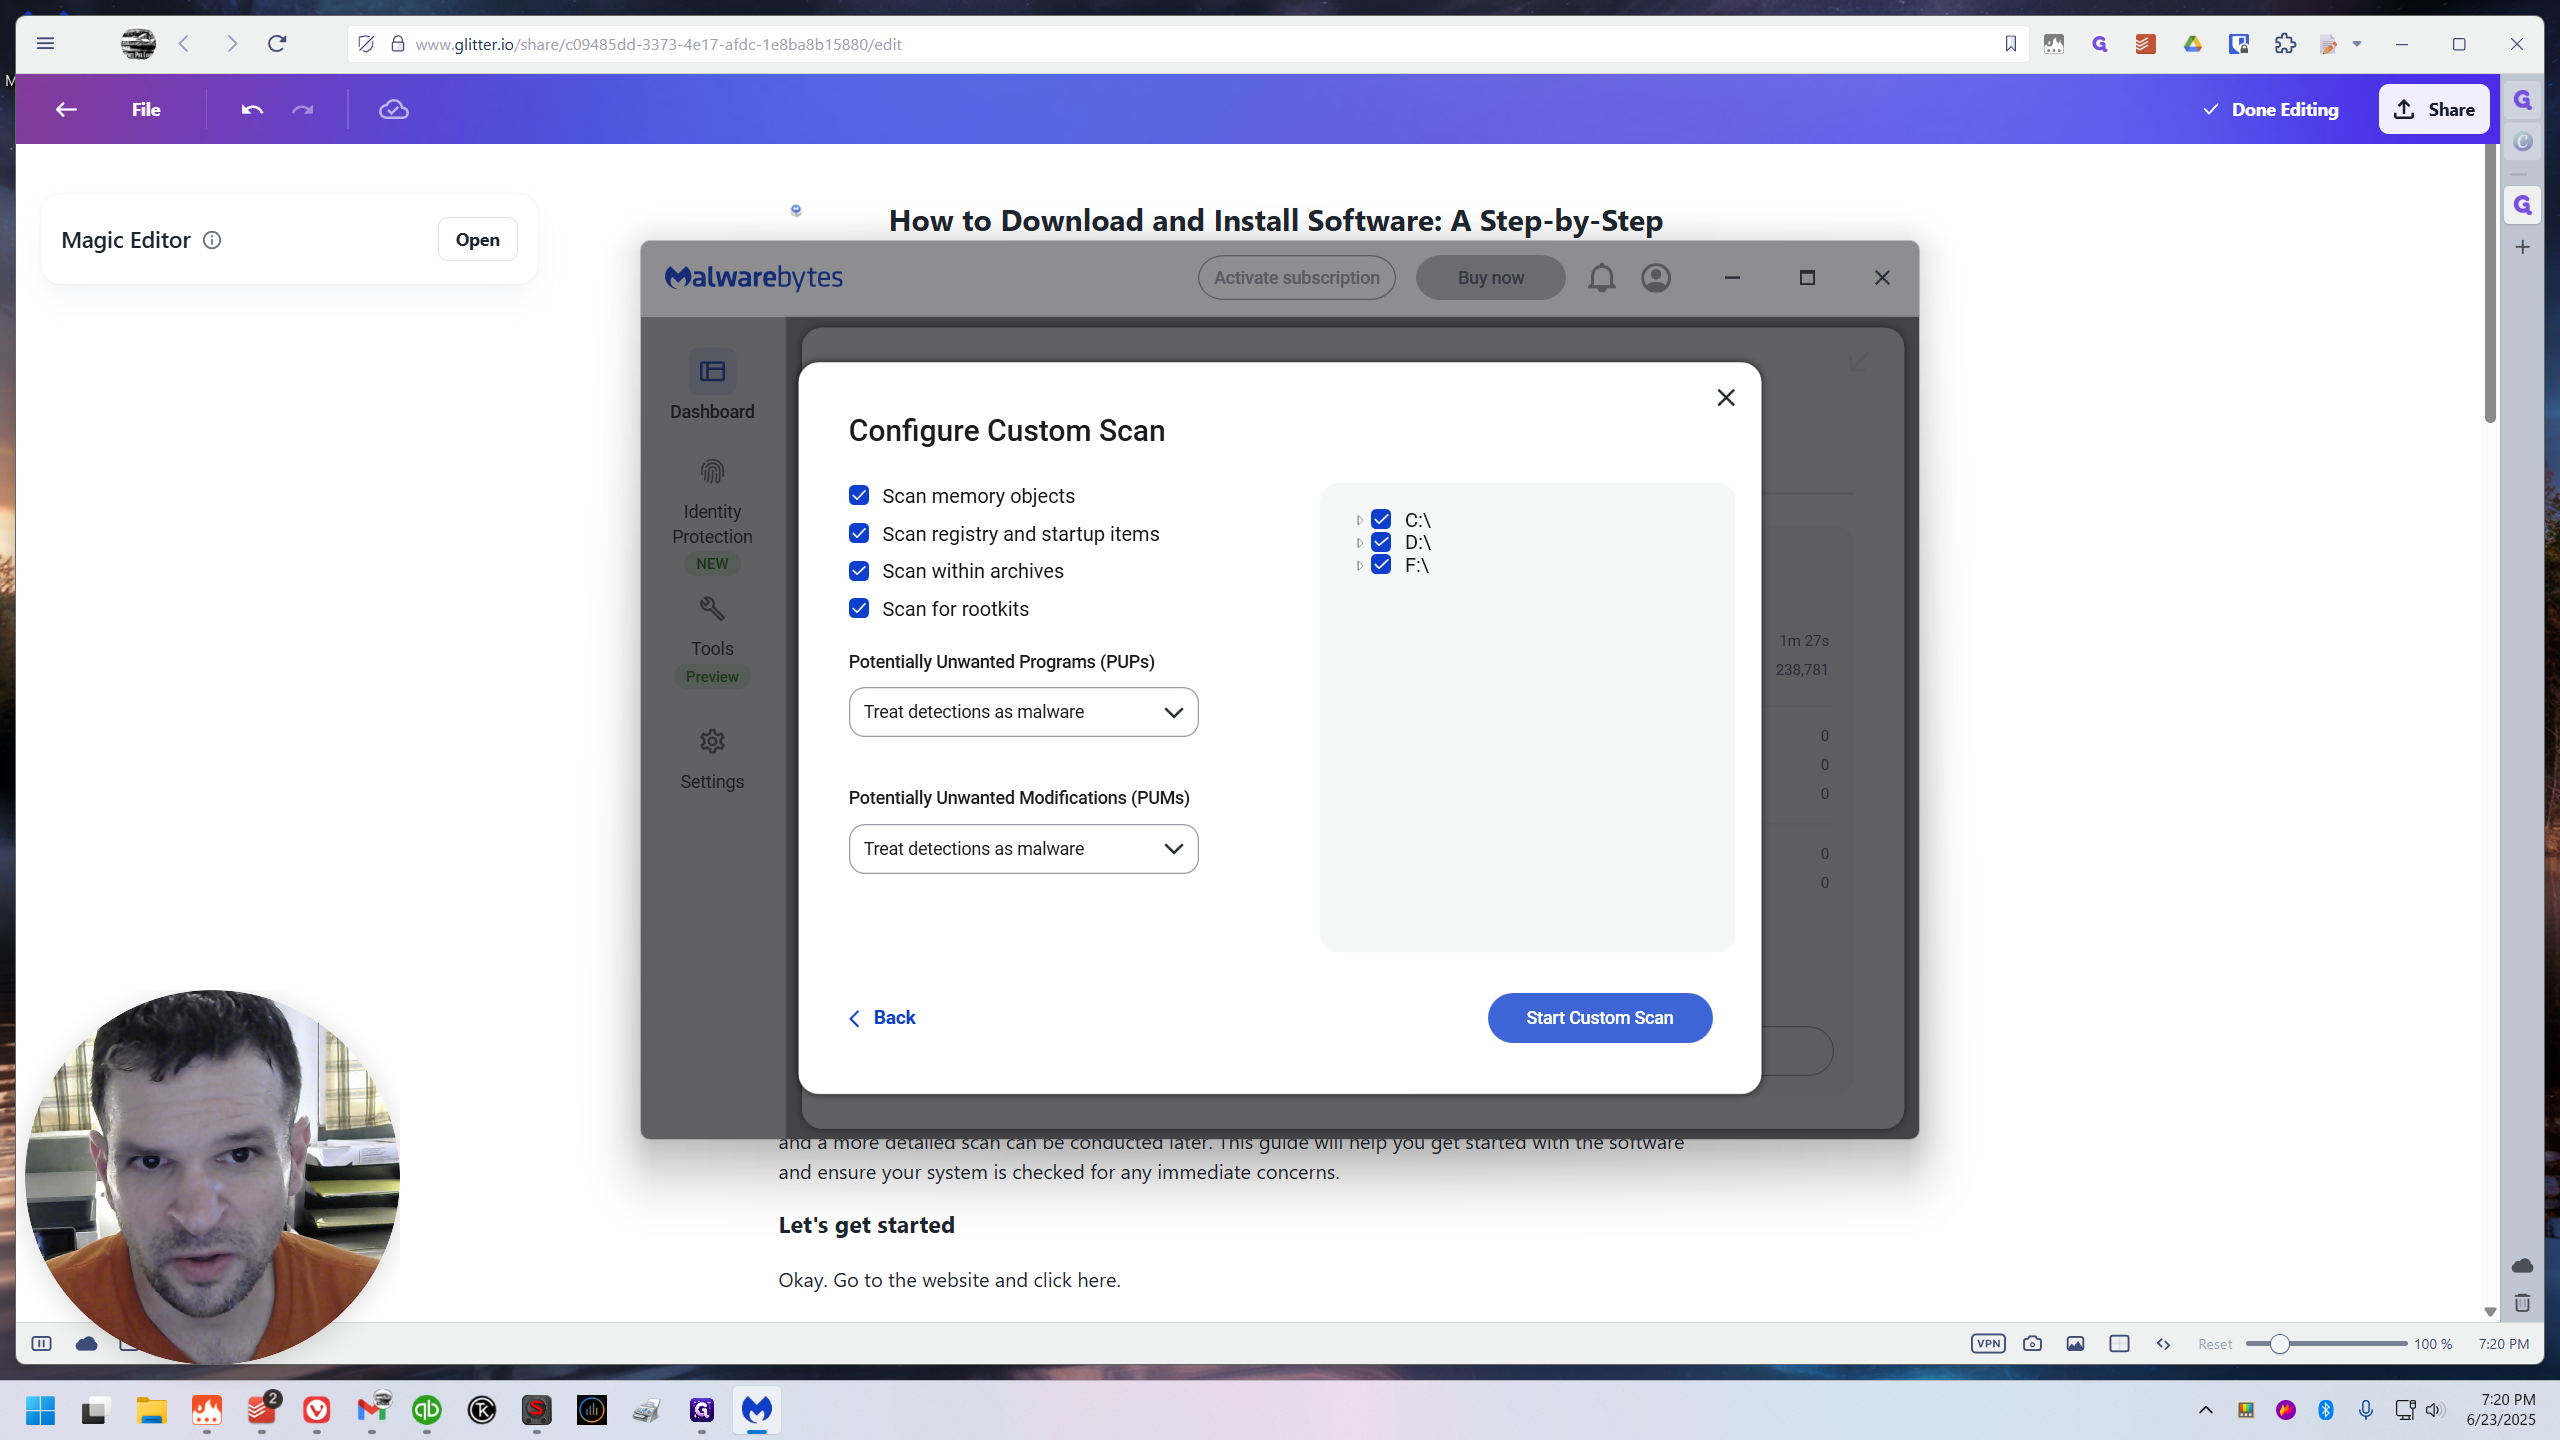
Then, under Custom Scan, I'll click "Configure the Scan." Here, I want to click "Scan for Rootkits."
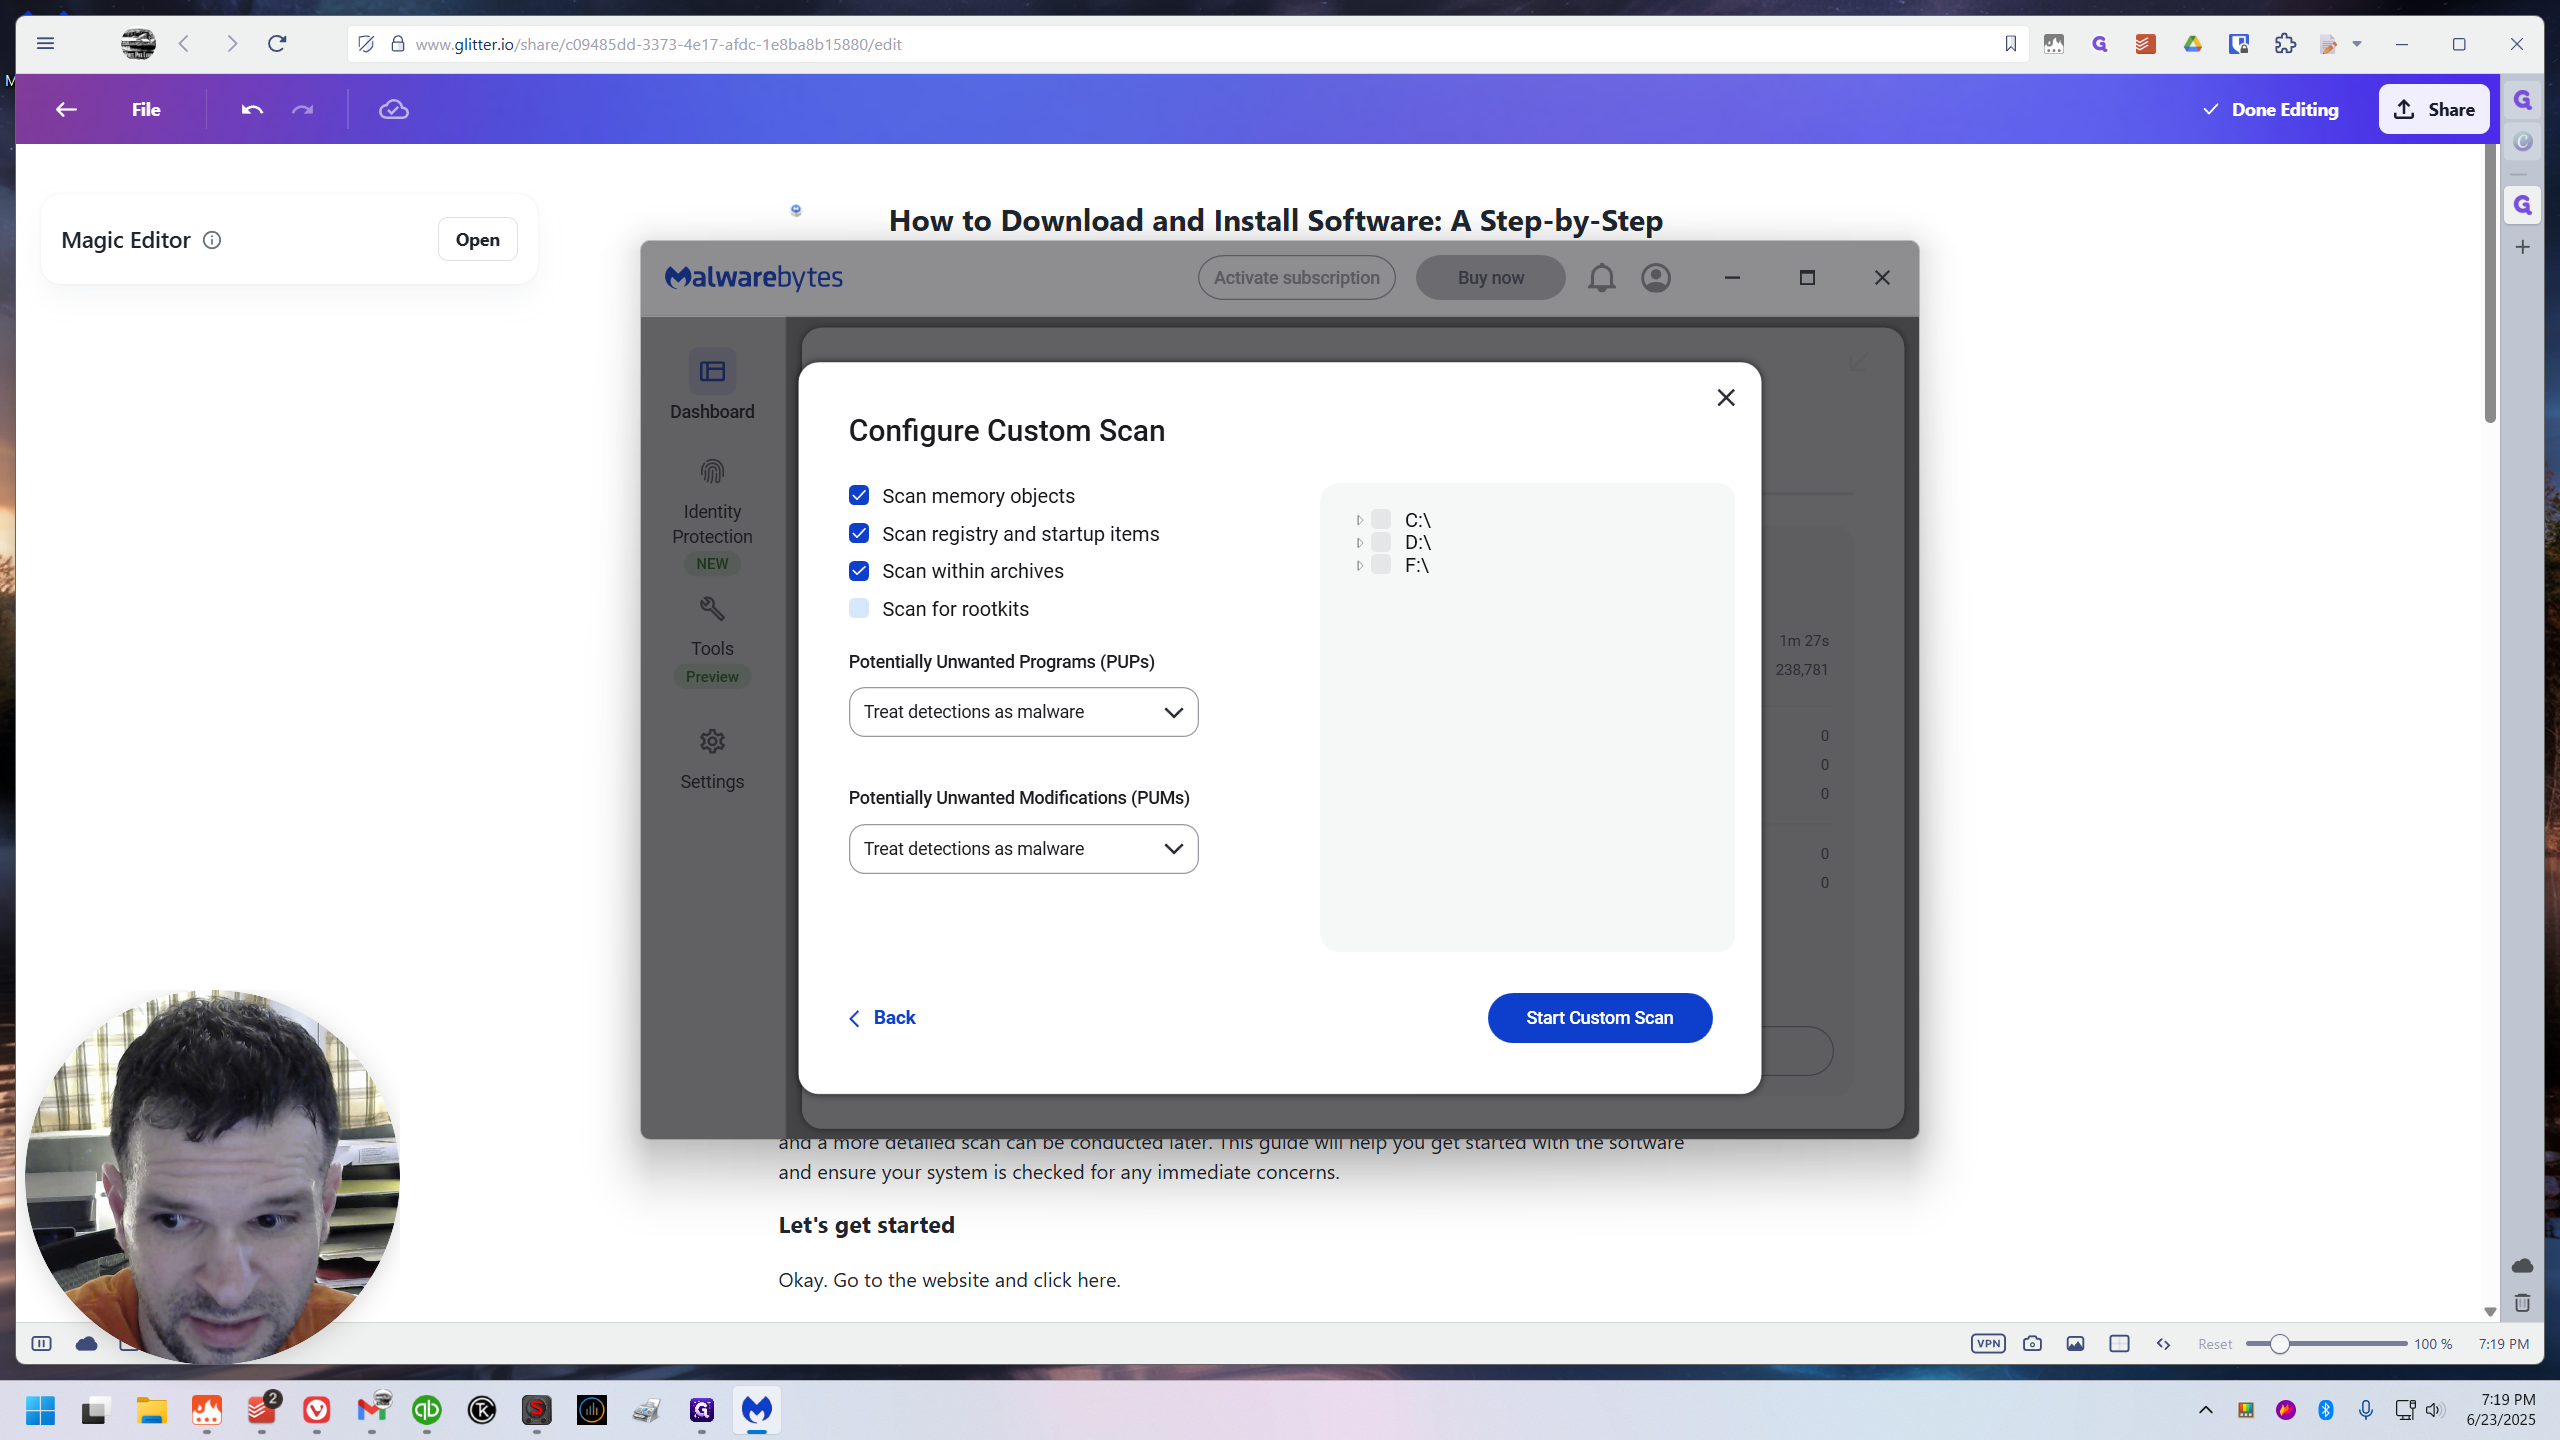
I will click everything on the right.
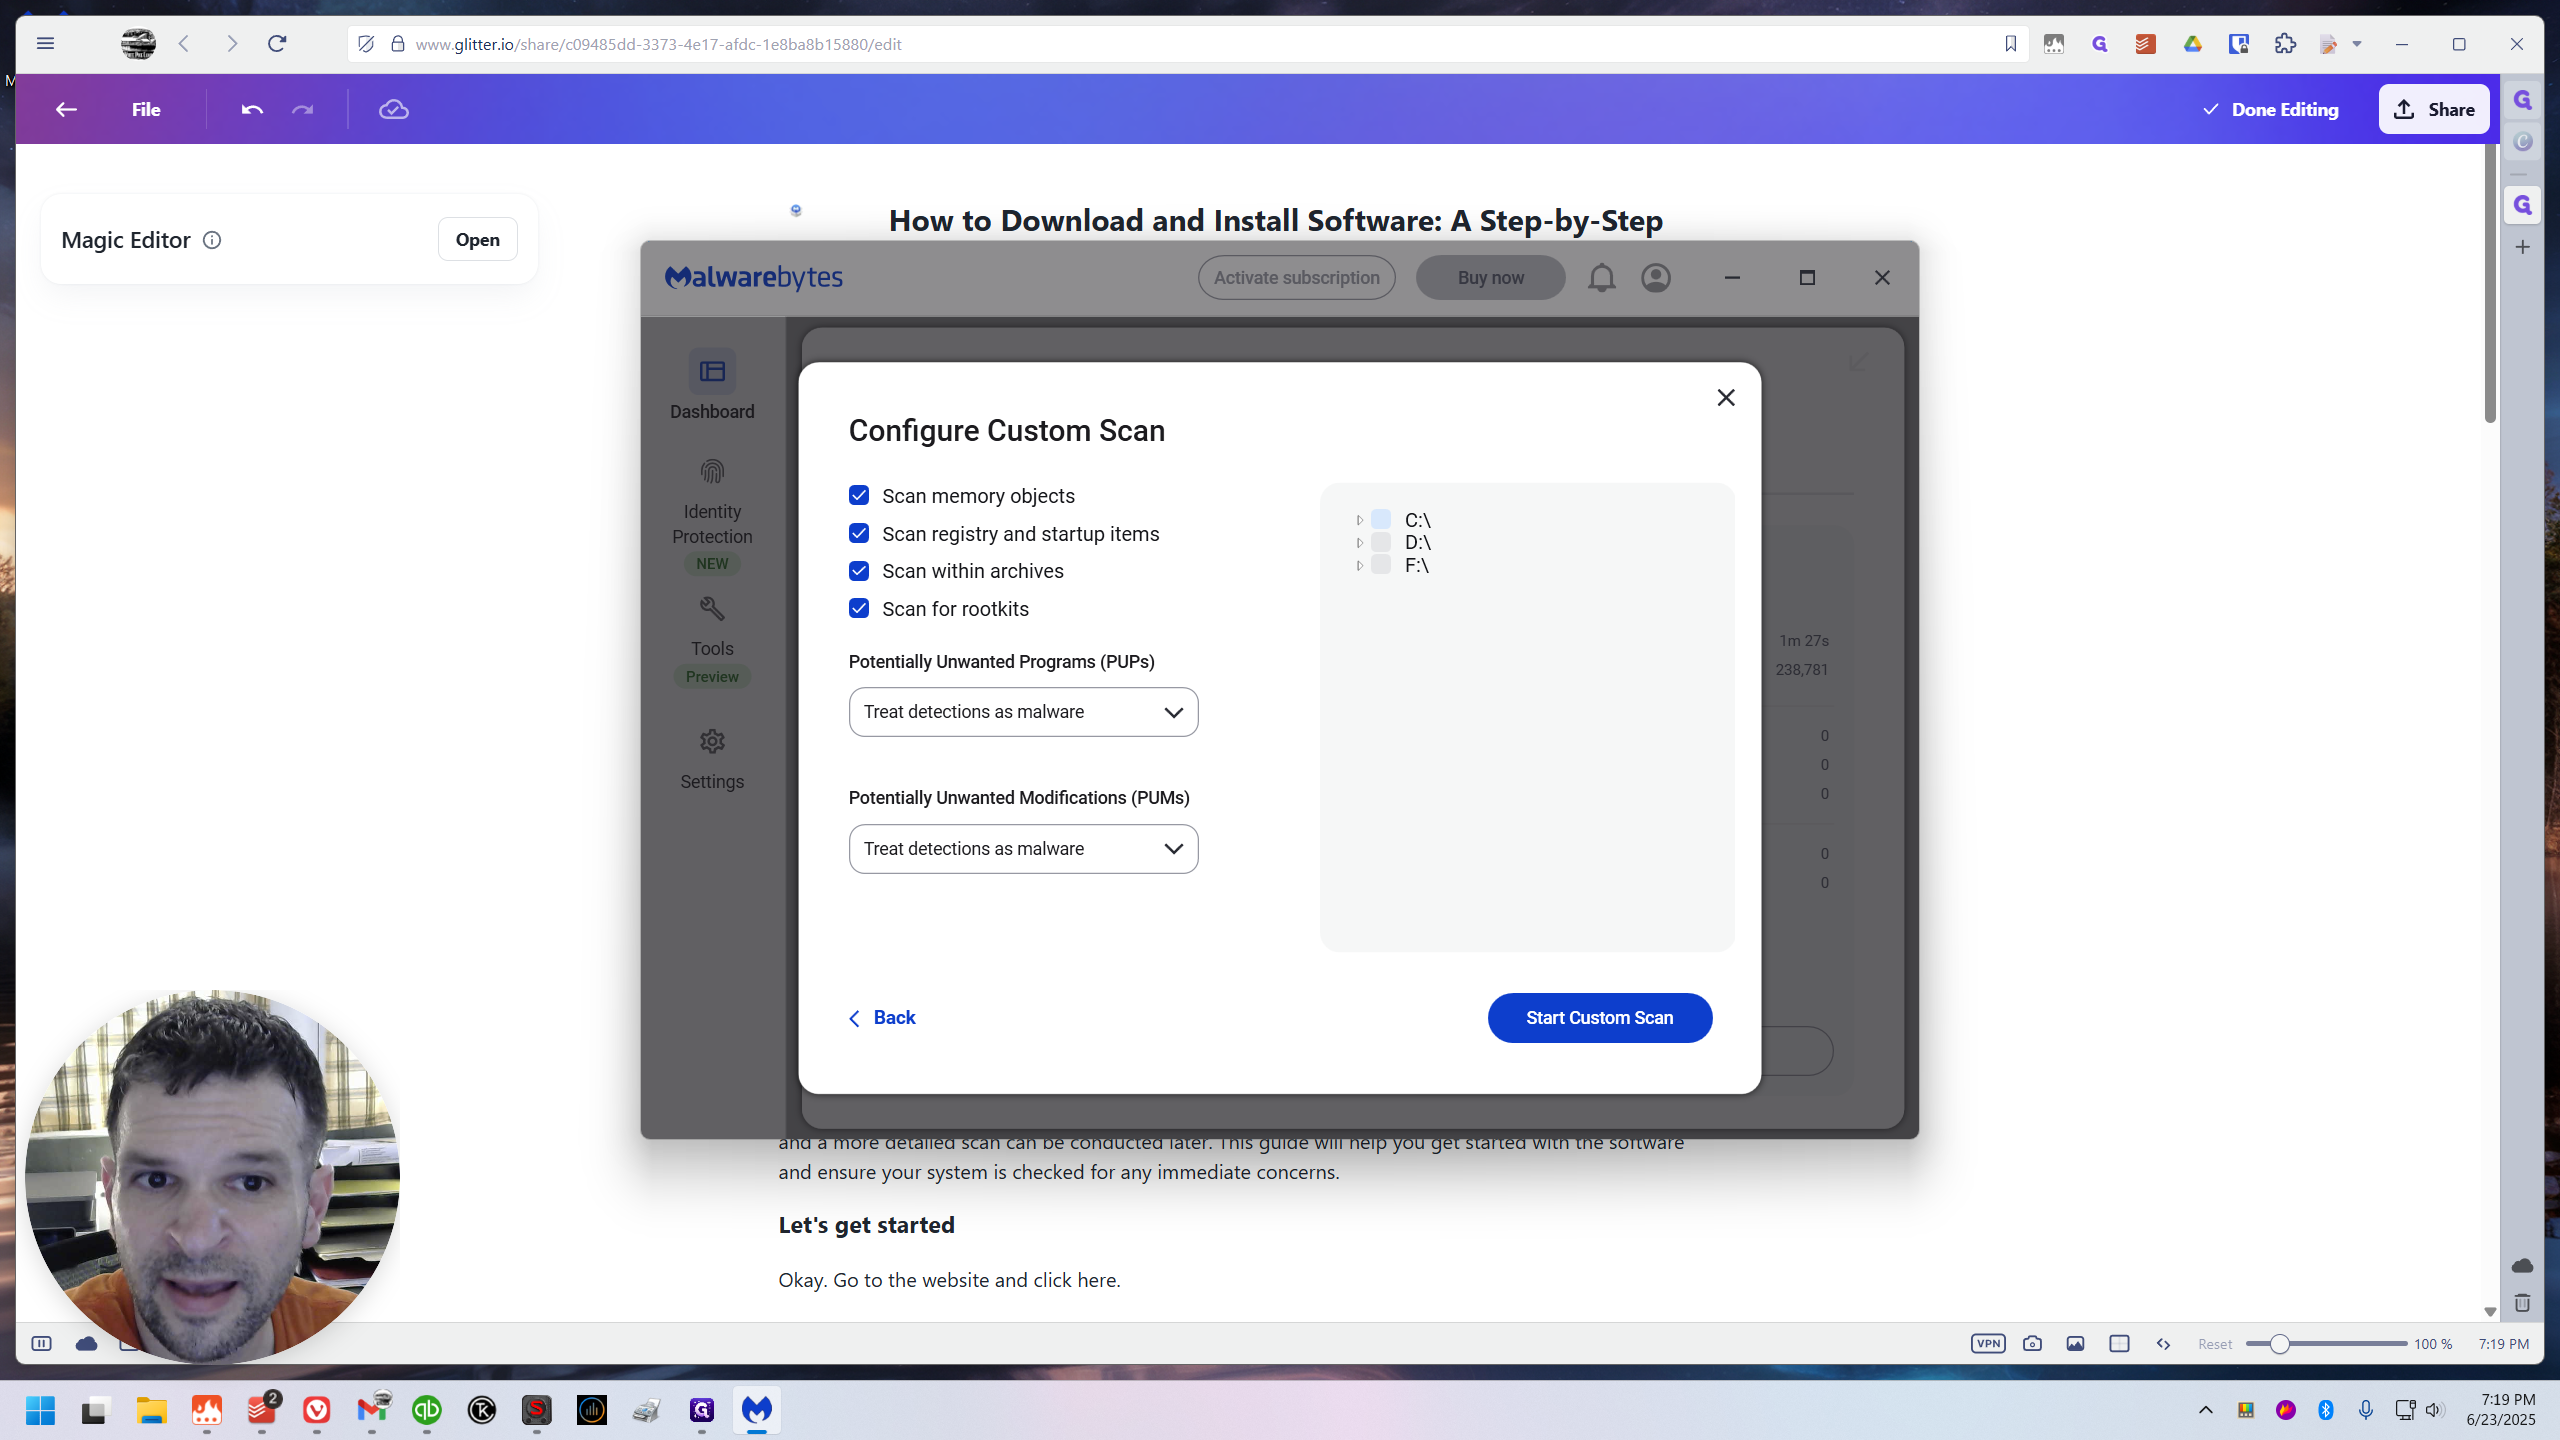


Simply place a check mark on everything. You may only have one, actually, since you're on a laptop, or maybe you'll have two. Check all the checkboxes you see there.
Keep these two settings unchanged:
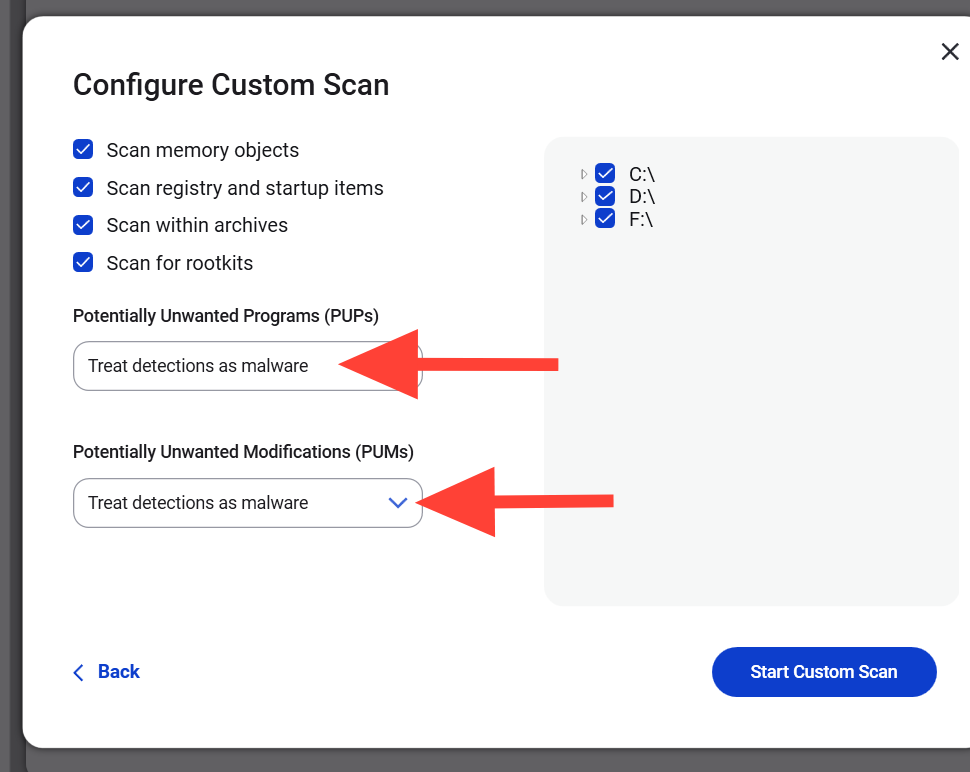
Then start a custom scan.
This might take a while. So, walk away, do something else, and then come back. You will receive your results later. This will be a more thorough scan, so it's definitely worth running.