Icon

How to Configure Glitter AI SSO with Microsoft Entra ID

Learn how to set up Microsoft Entra ID as your SAML Identity Provider to manage Single Sign-On (SSO) authentication for Glitter AI.

By Yuval Karmi

This guide demonstrates how to configure Microsoft Entra ID as a SAML Identity Provider (IdP) to enable Single Sign-On (SSO) for your Glitter AI organization. Configuring SSO streamlines application access and centralizes authentication management.

This workflow applies to IT administrators and workspace owners responsible for identity management. You will need admin privileges in both Microsoft Entra ID and Glitter AI to complete this setup.

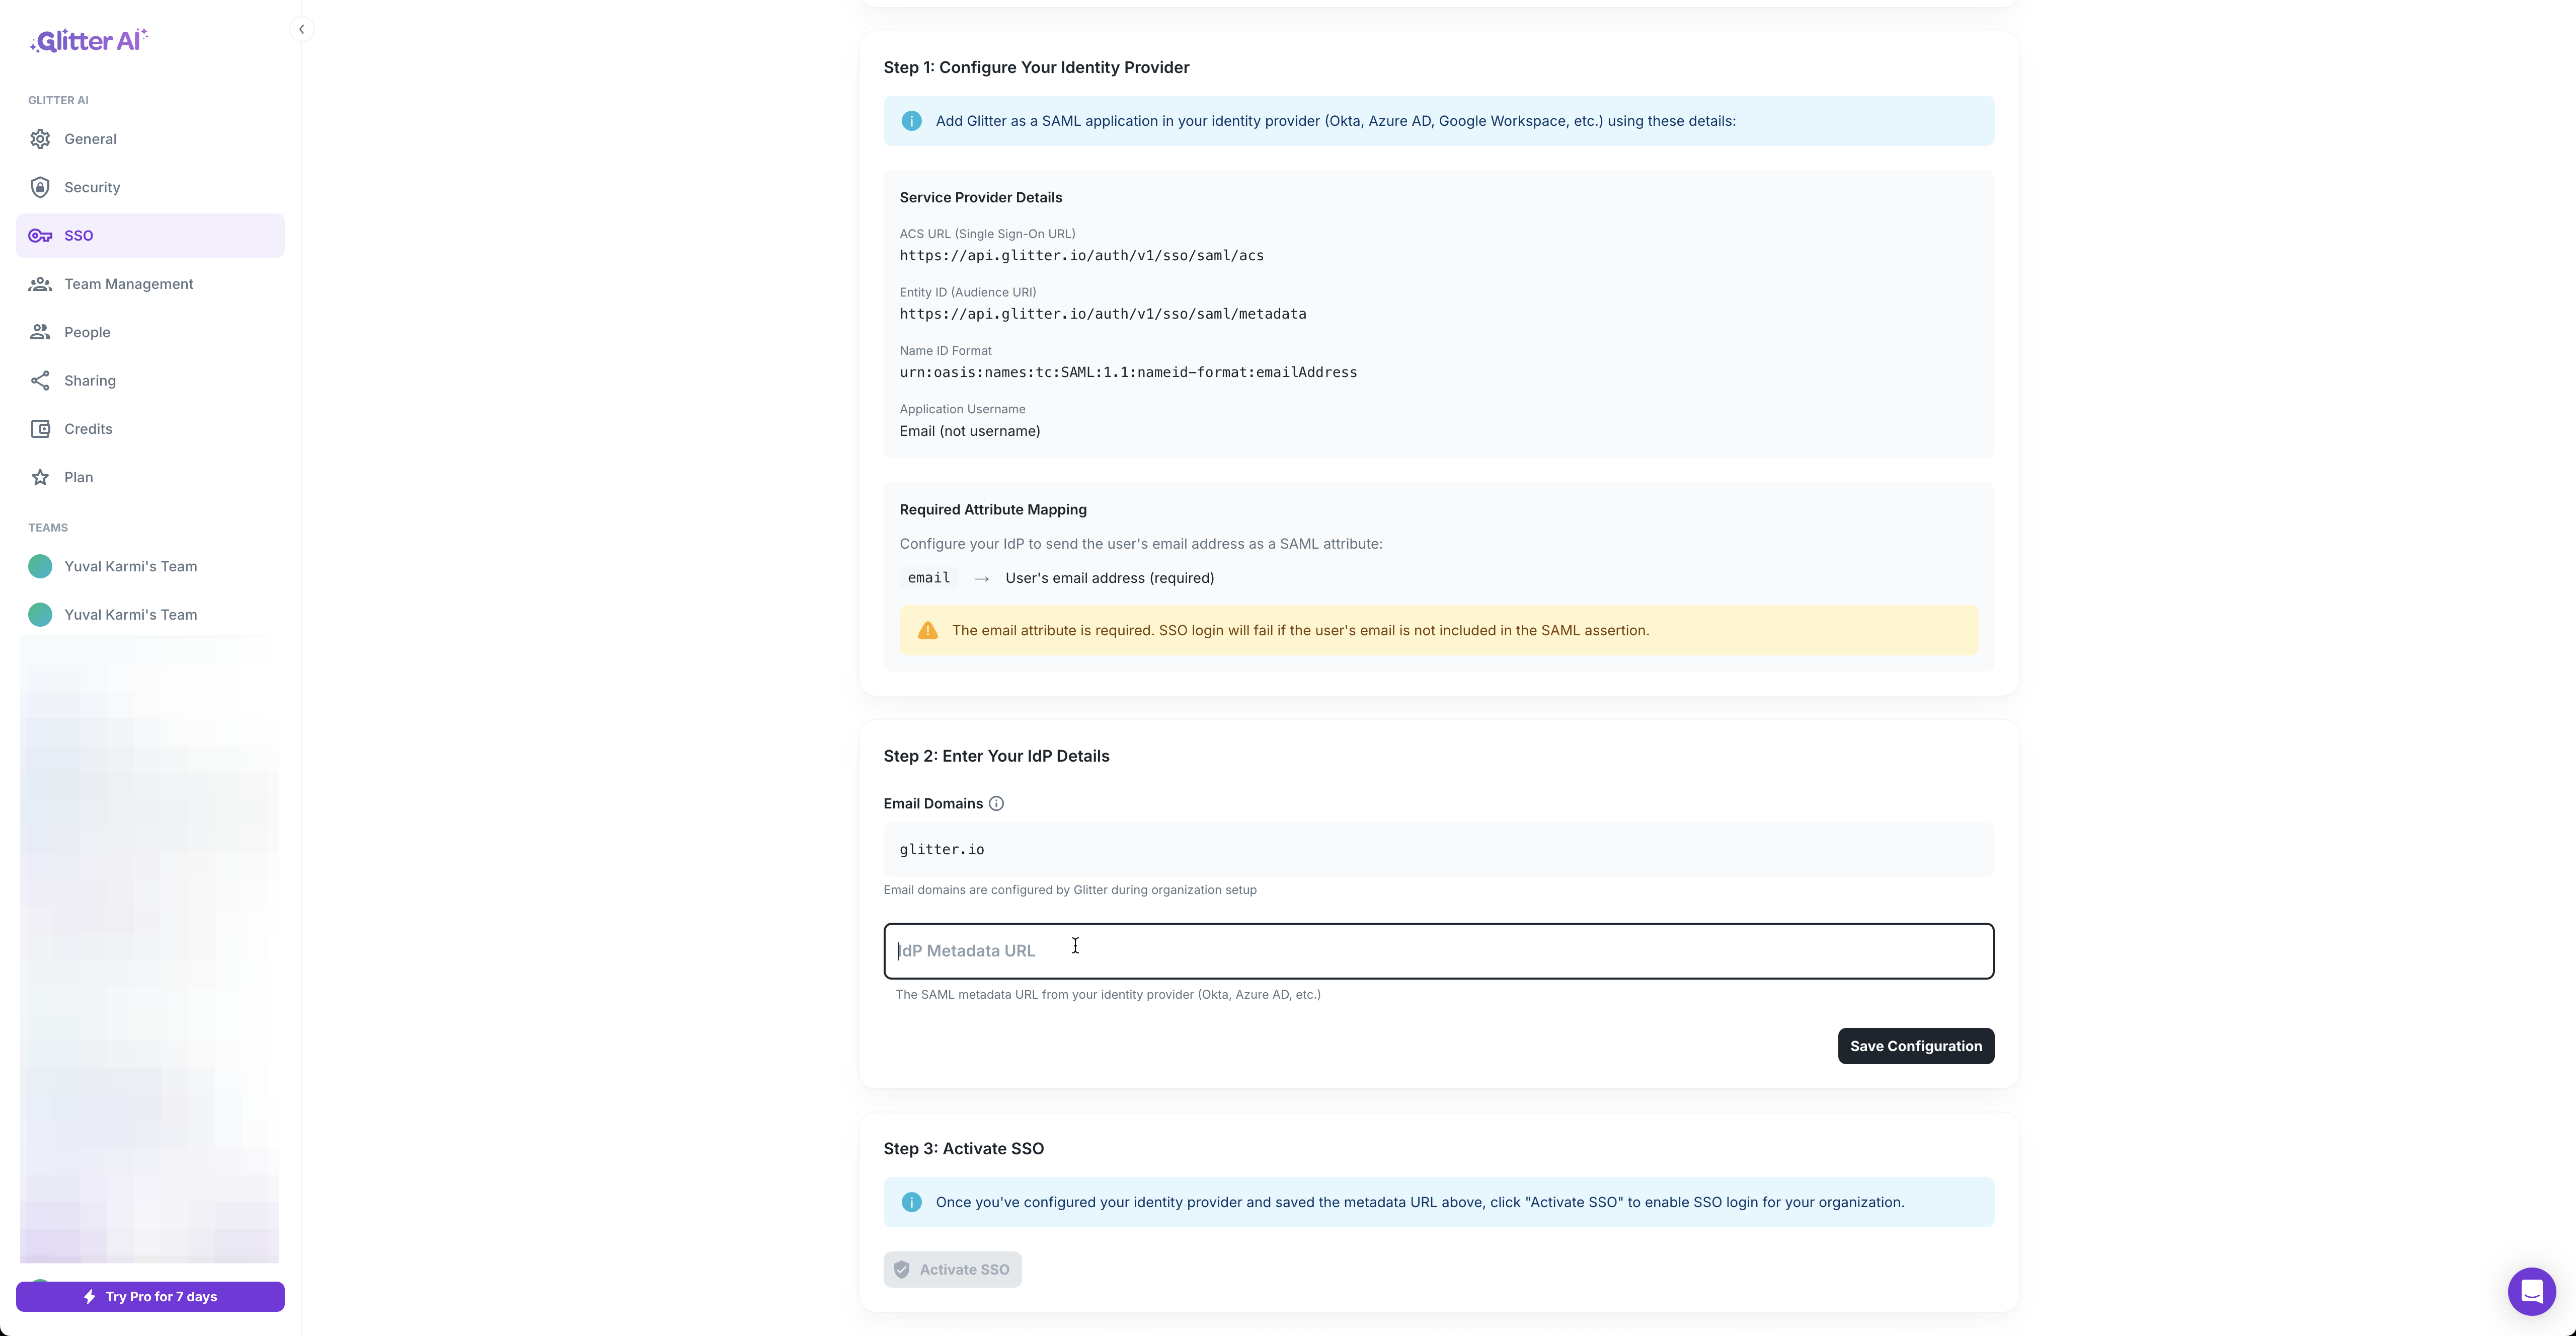
Retrieve Glitter AI SSO Details

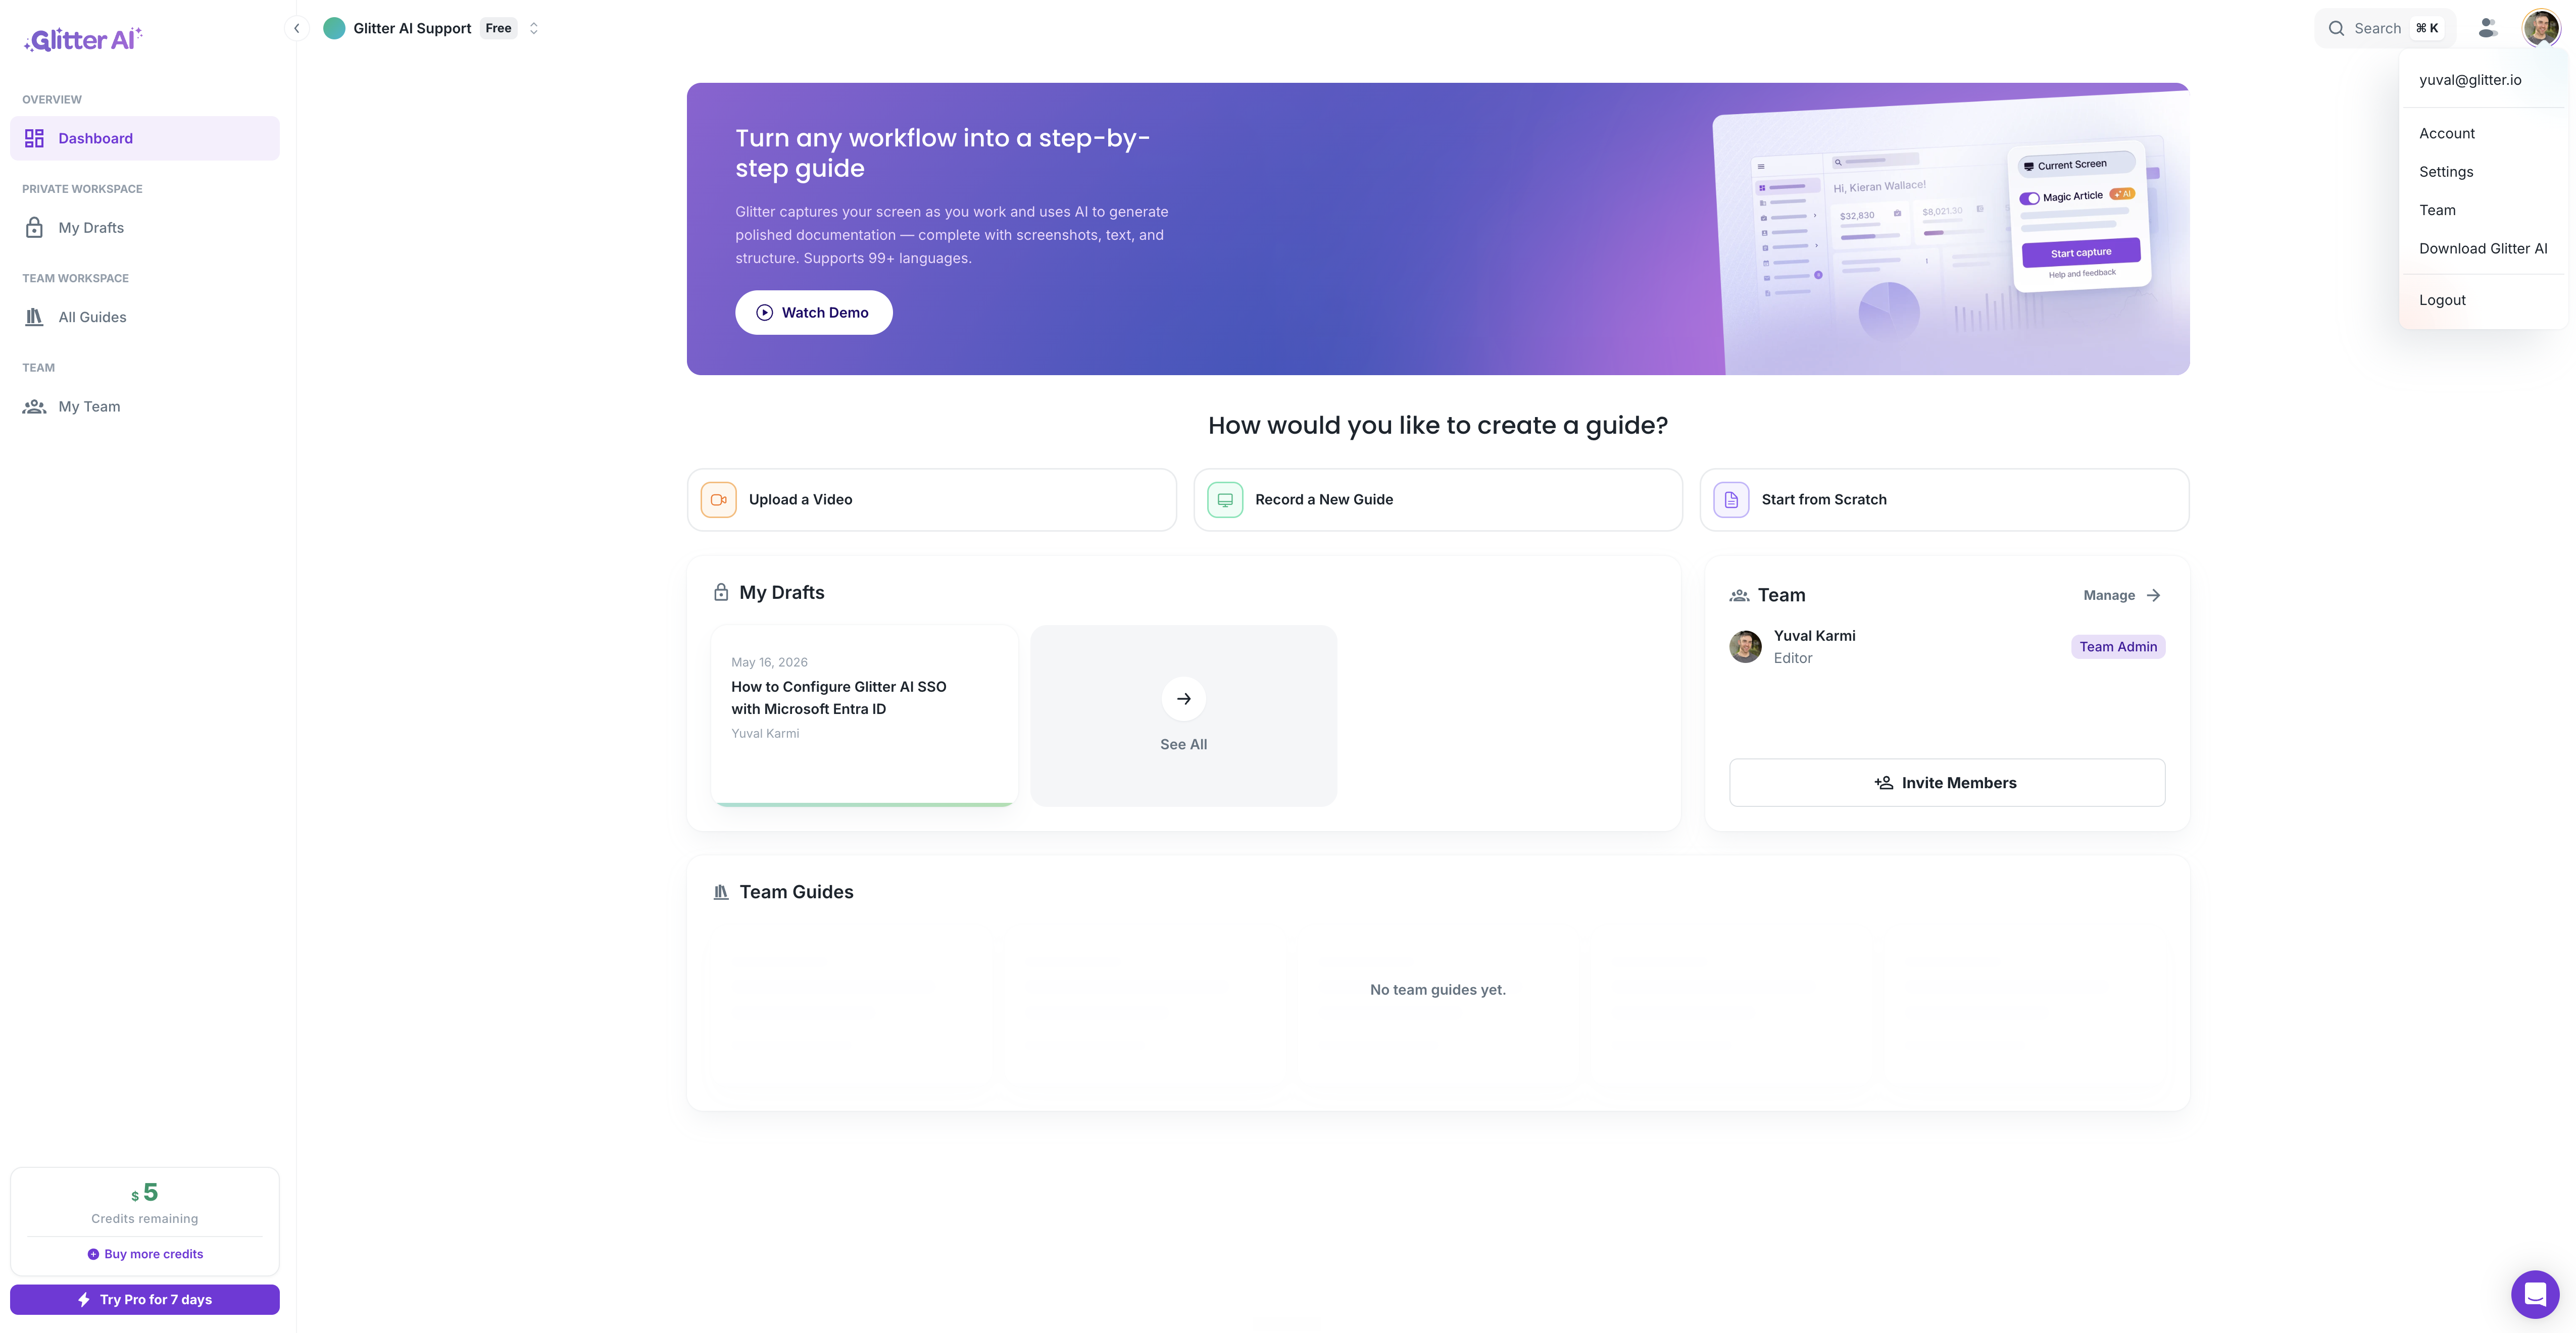
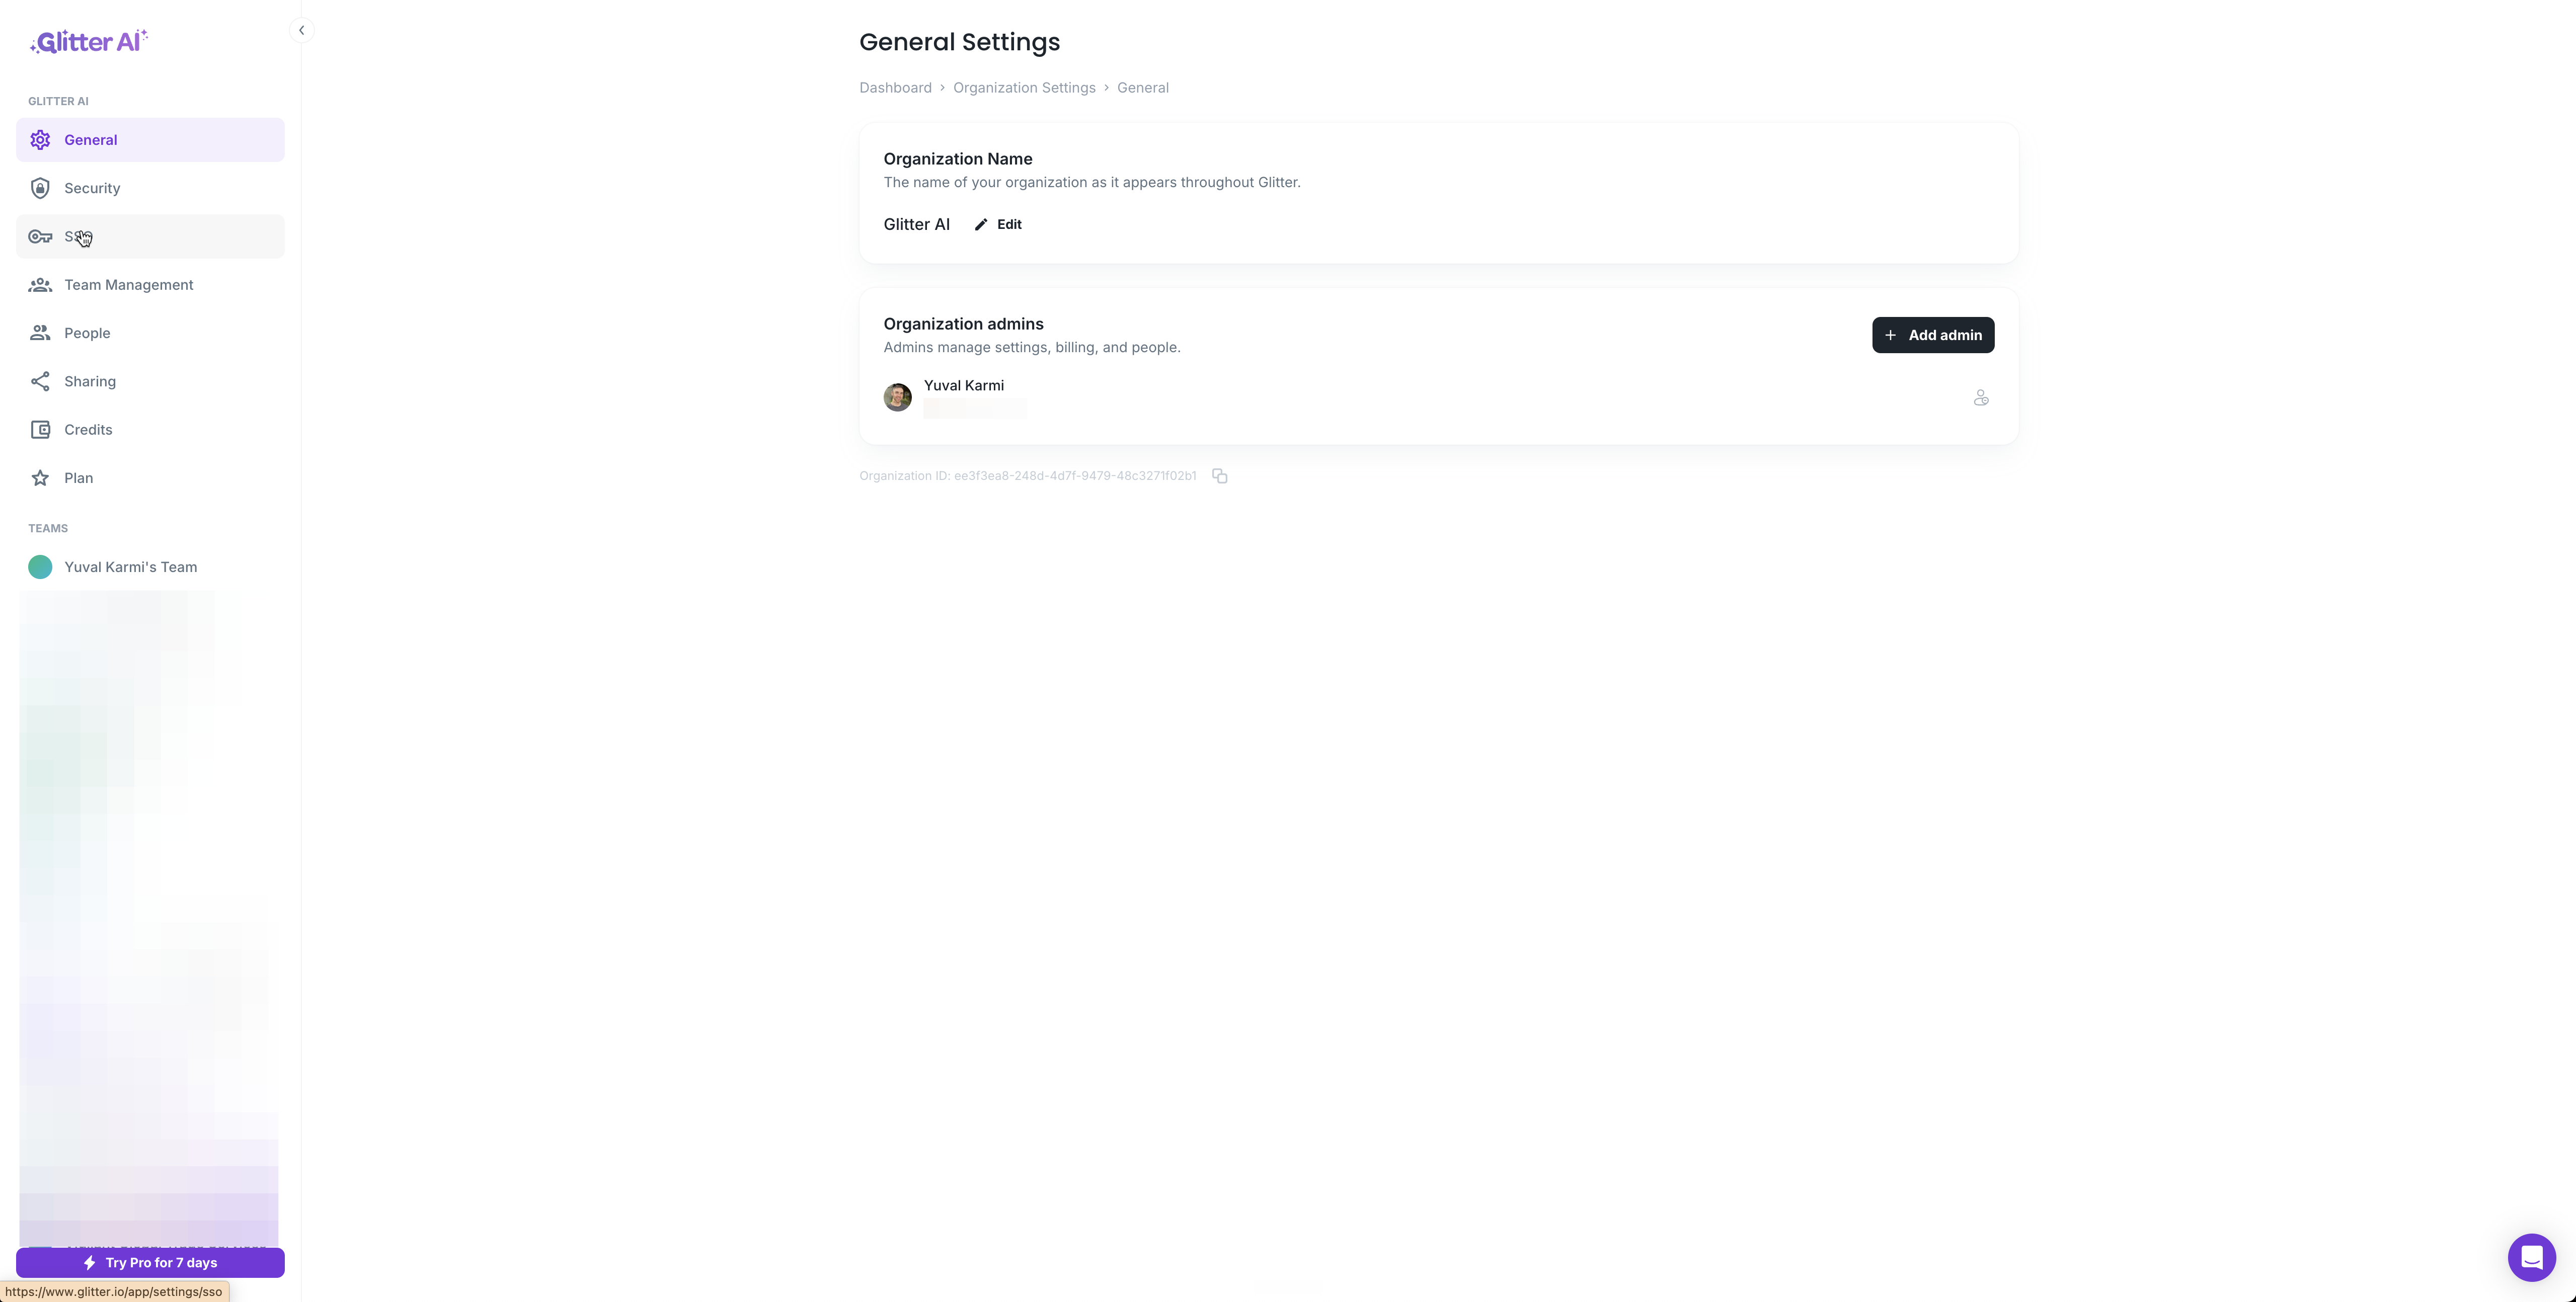
To begin, you need to collect your organization's unique SAML parameters from the Glitter AI application.

1
In your account, click on Settings
Step #1: In your account, click on Settings
2
Then click on SSO to view your Service Provider Details.
Step #2: Then click on SSO to view your Service Provider Details.

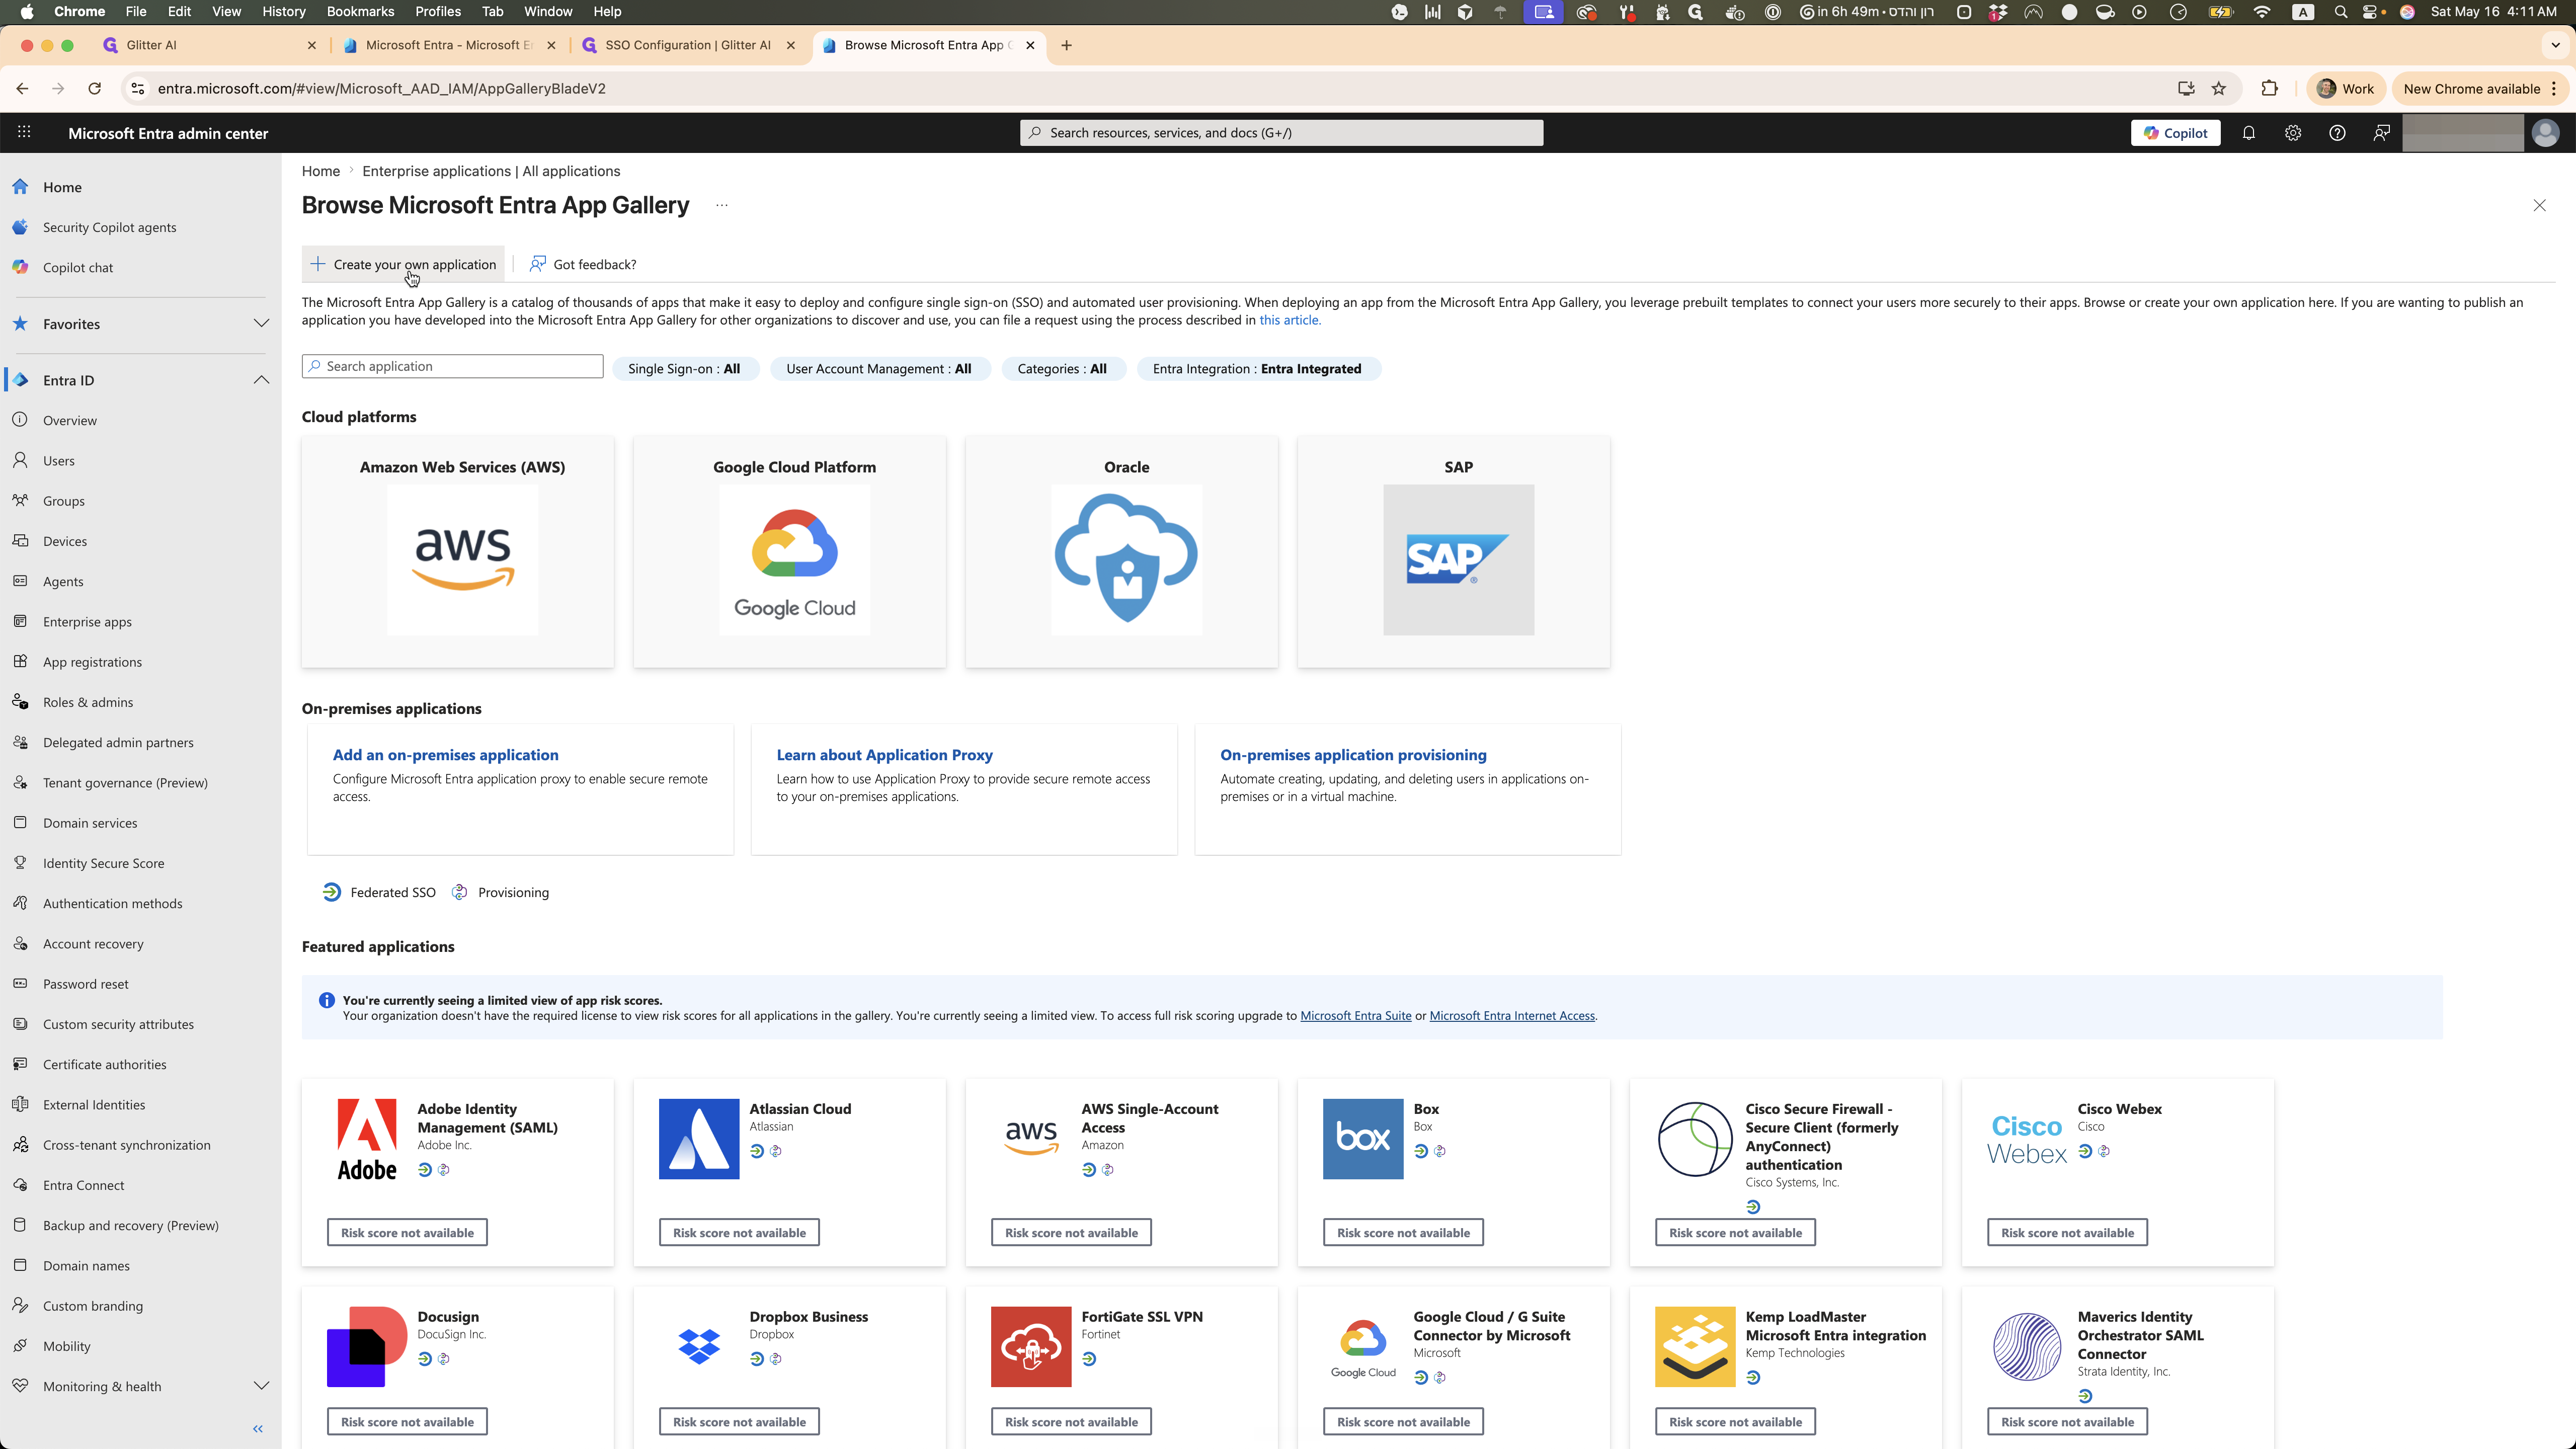
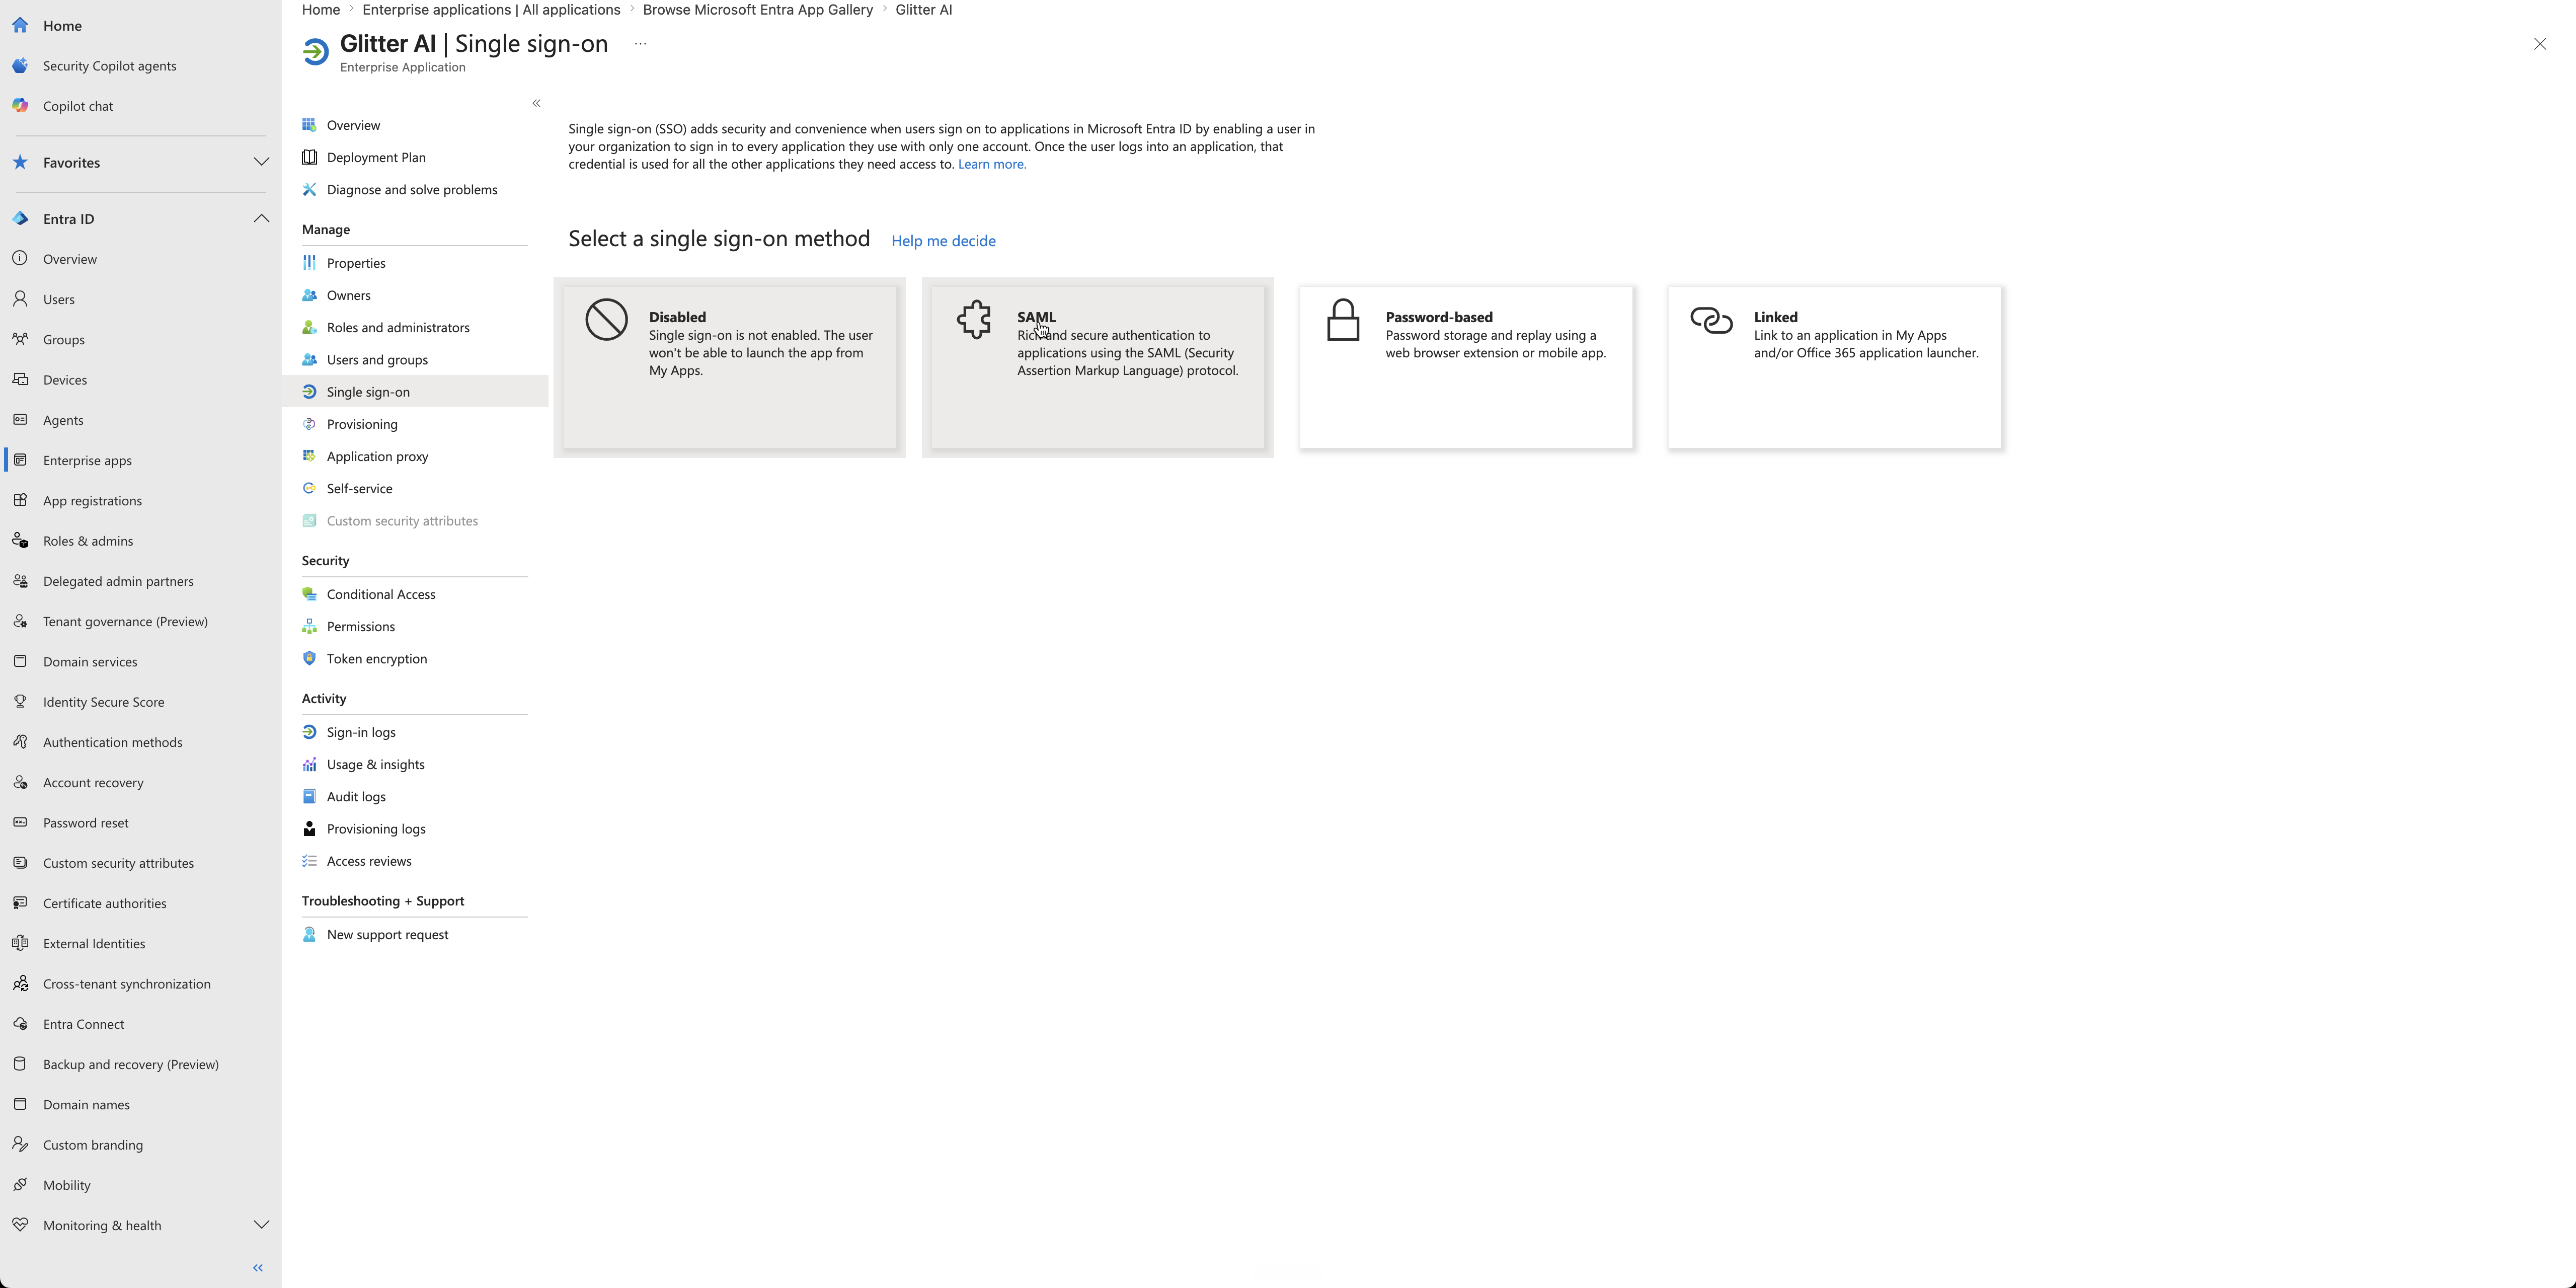
Create the Entra ID Enterprise Application

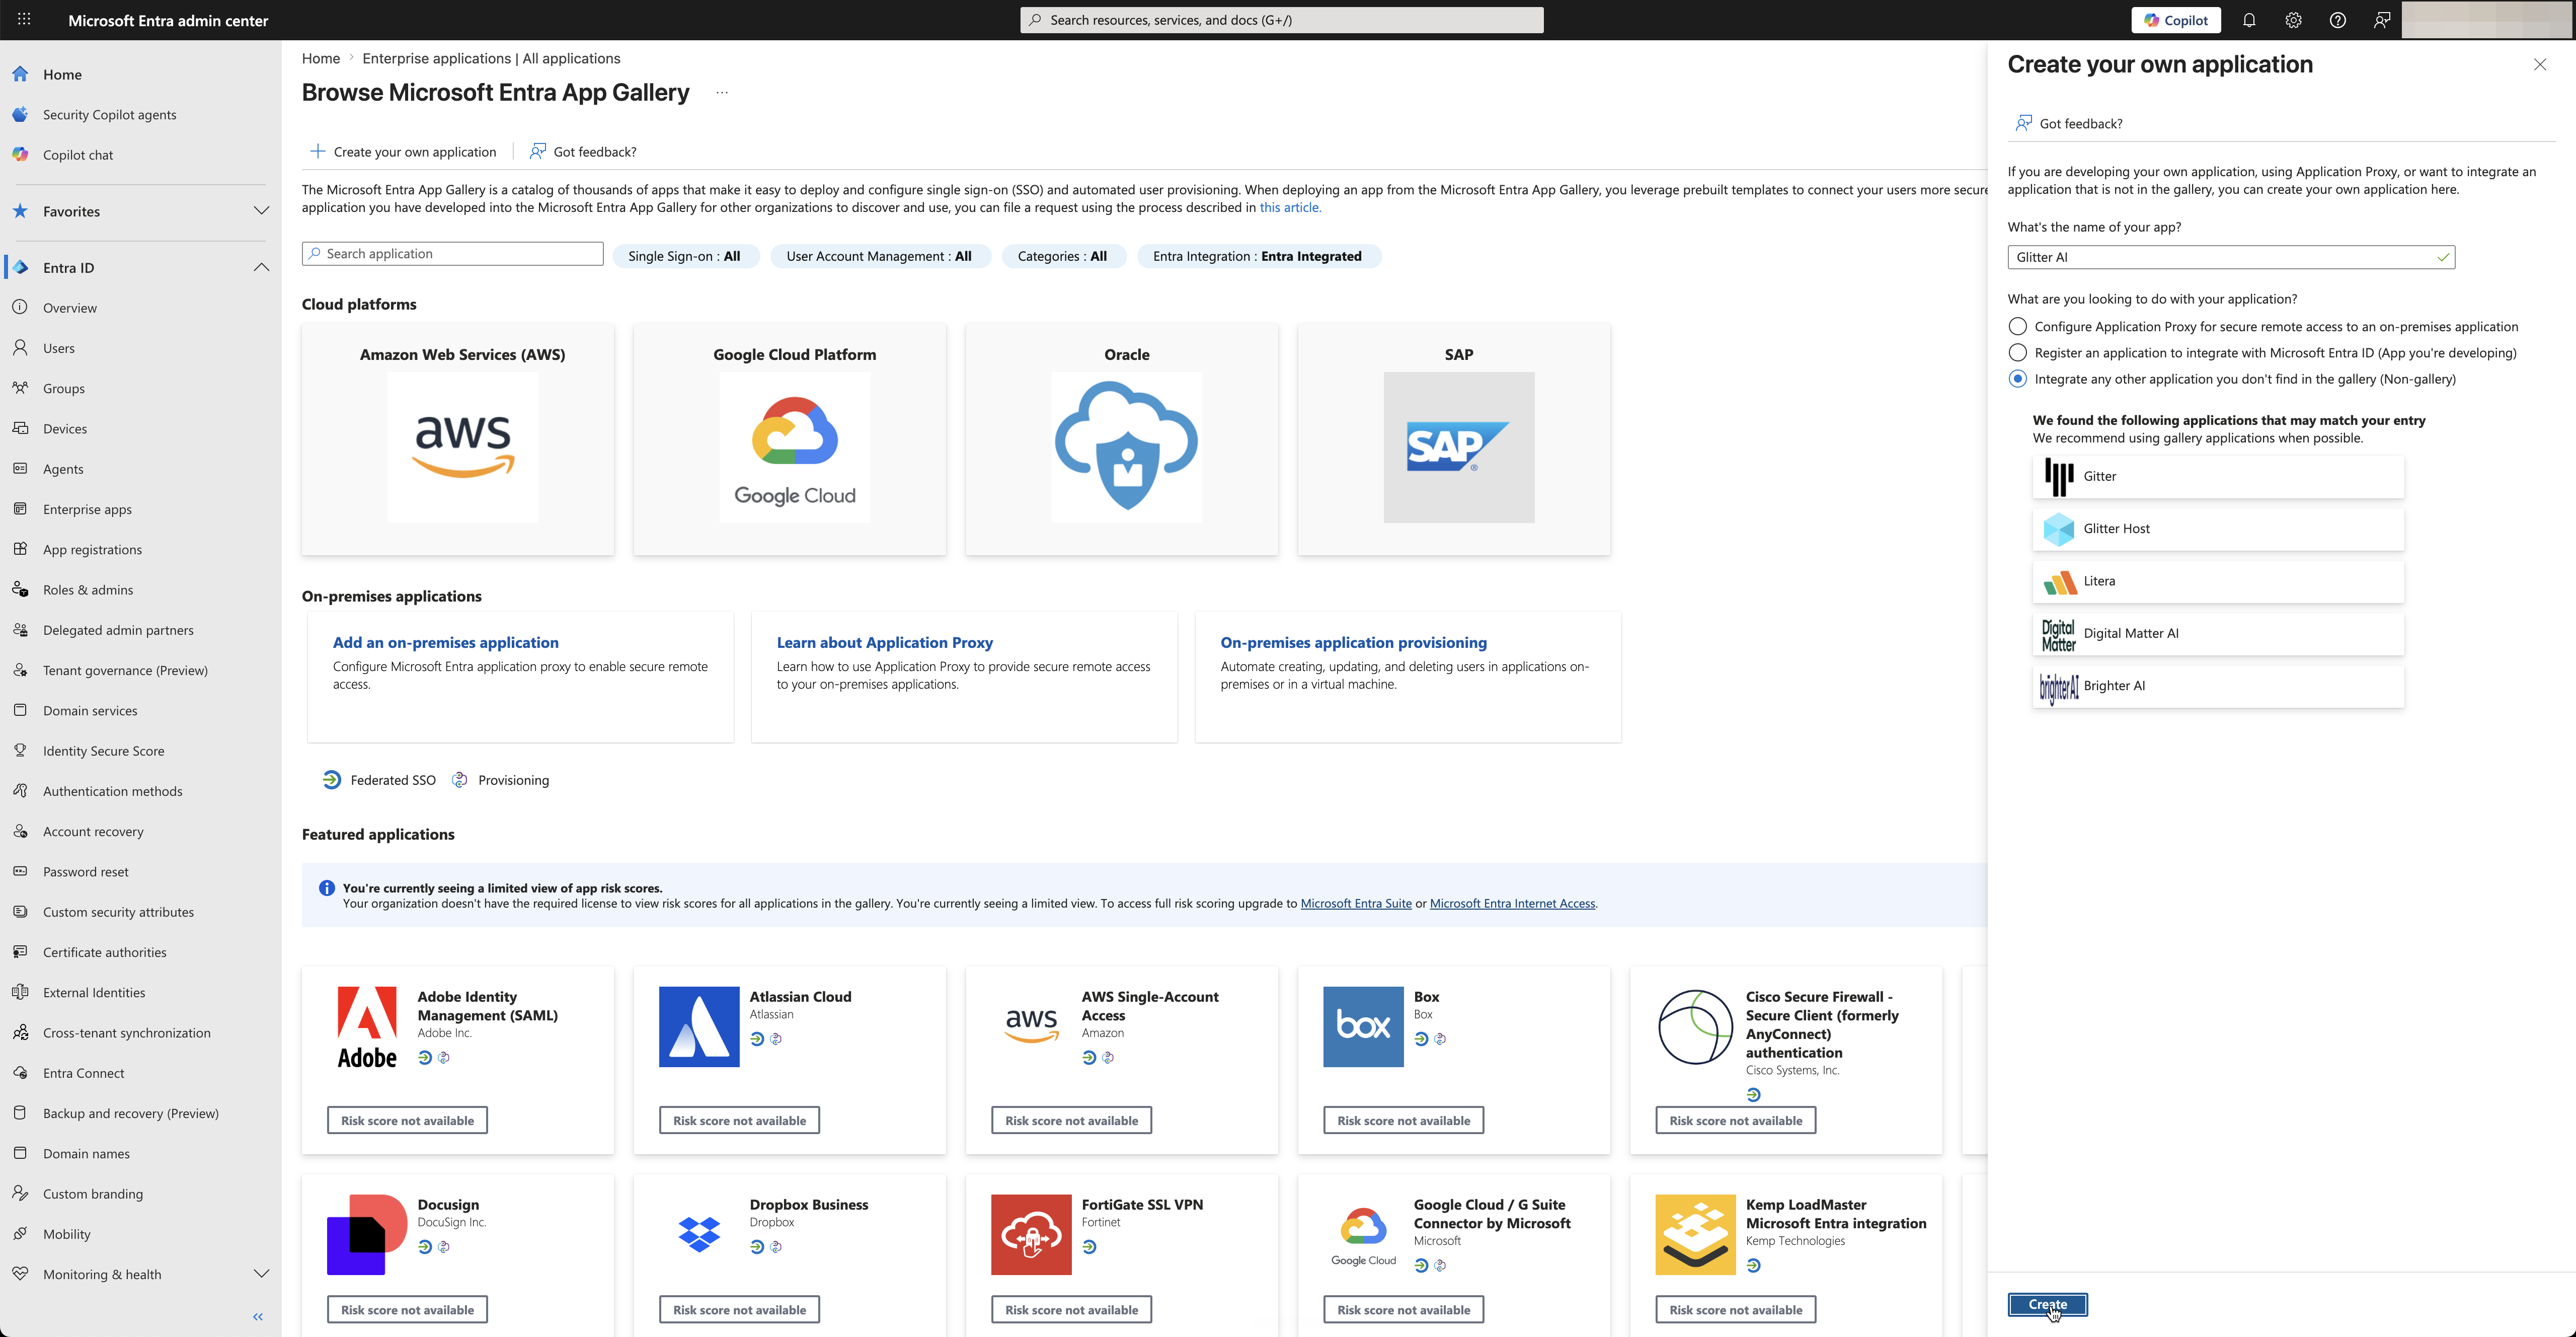
Log in to the Microsoft Entra admin center to register Glitter AI as a new application.
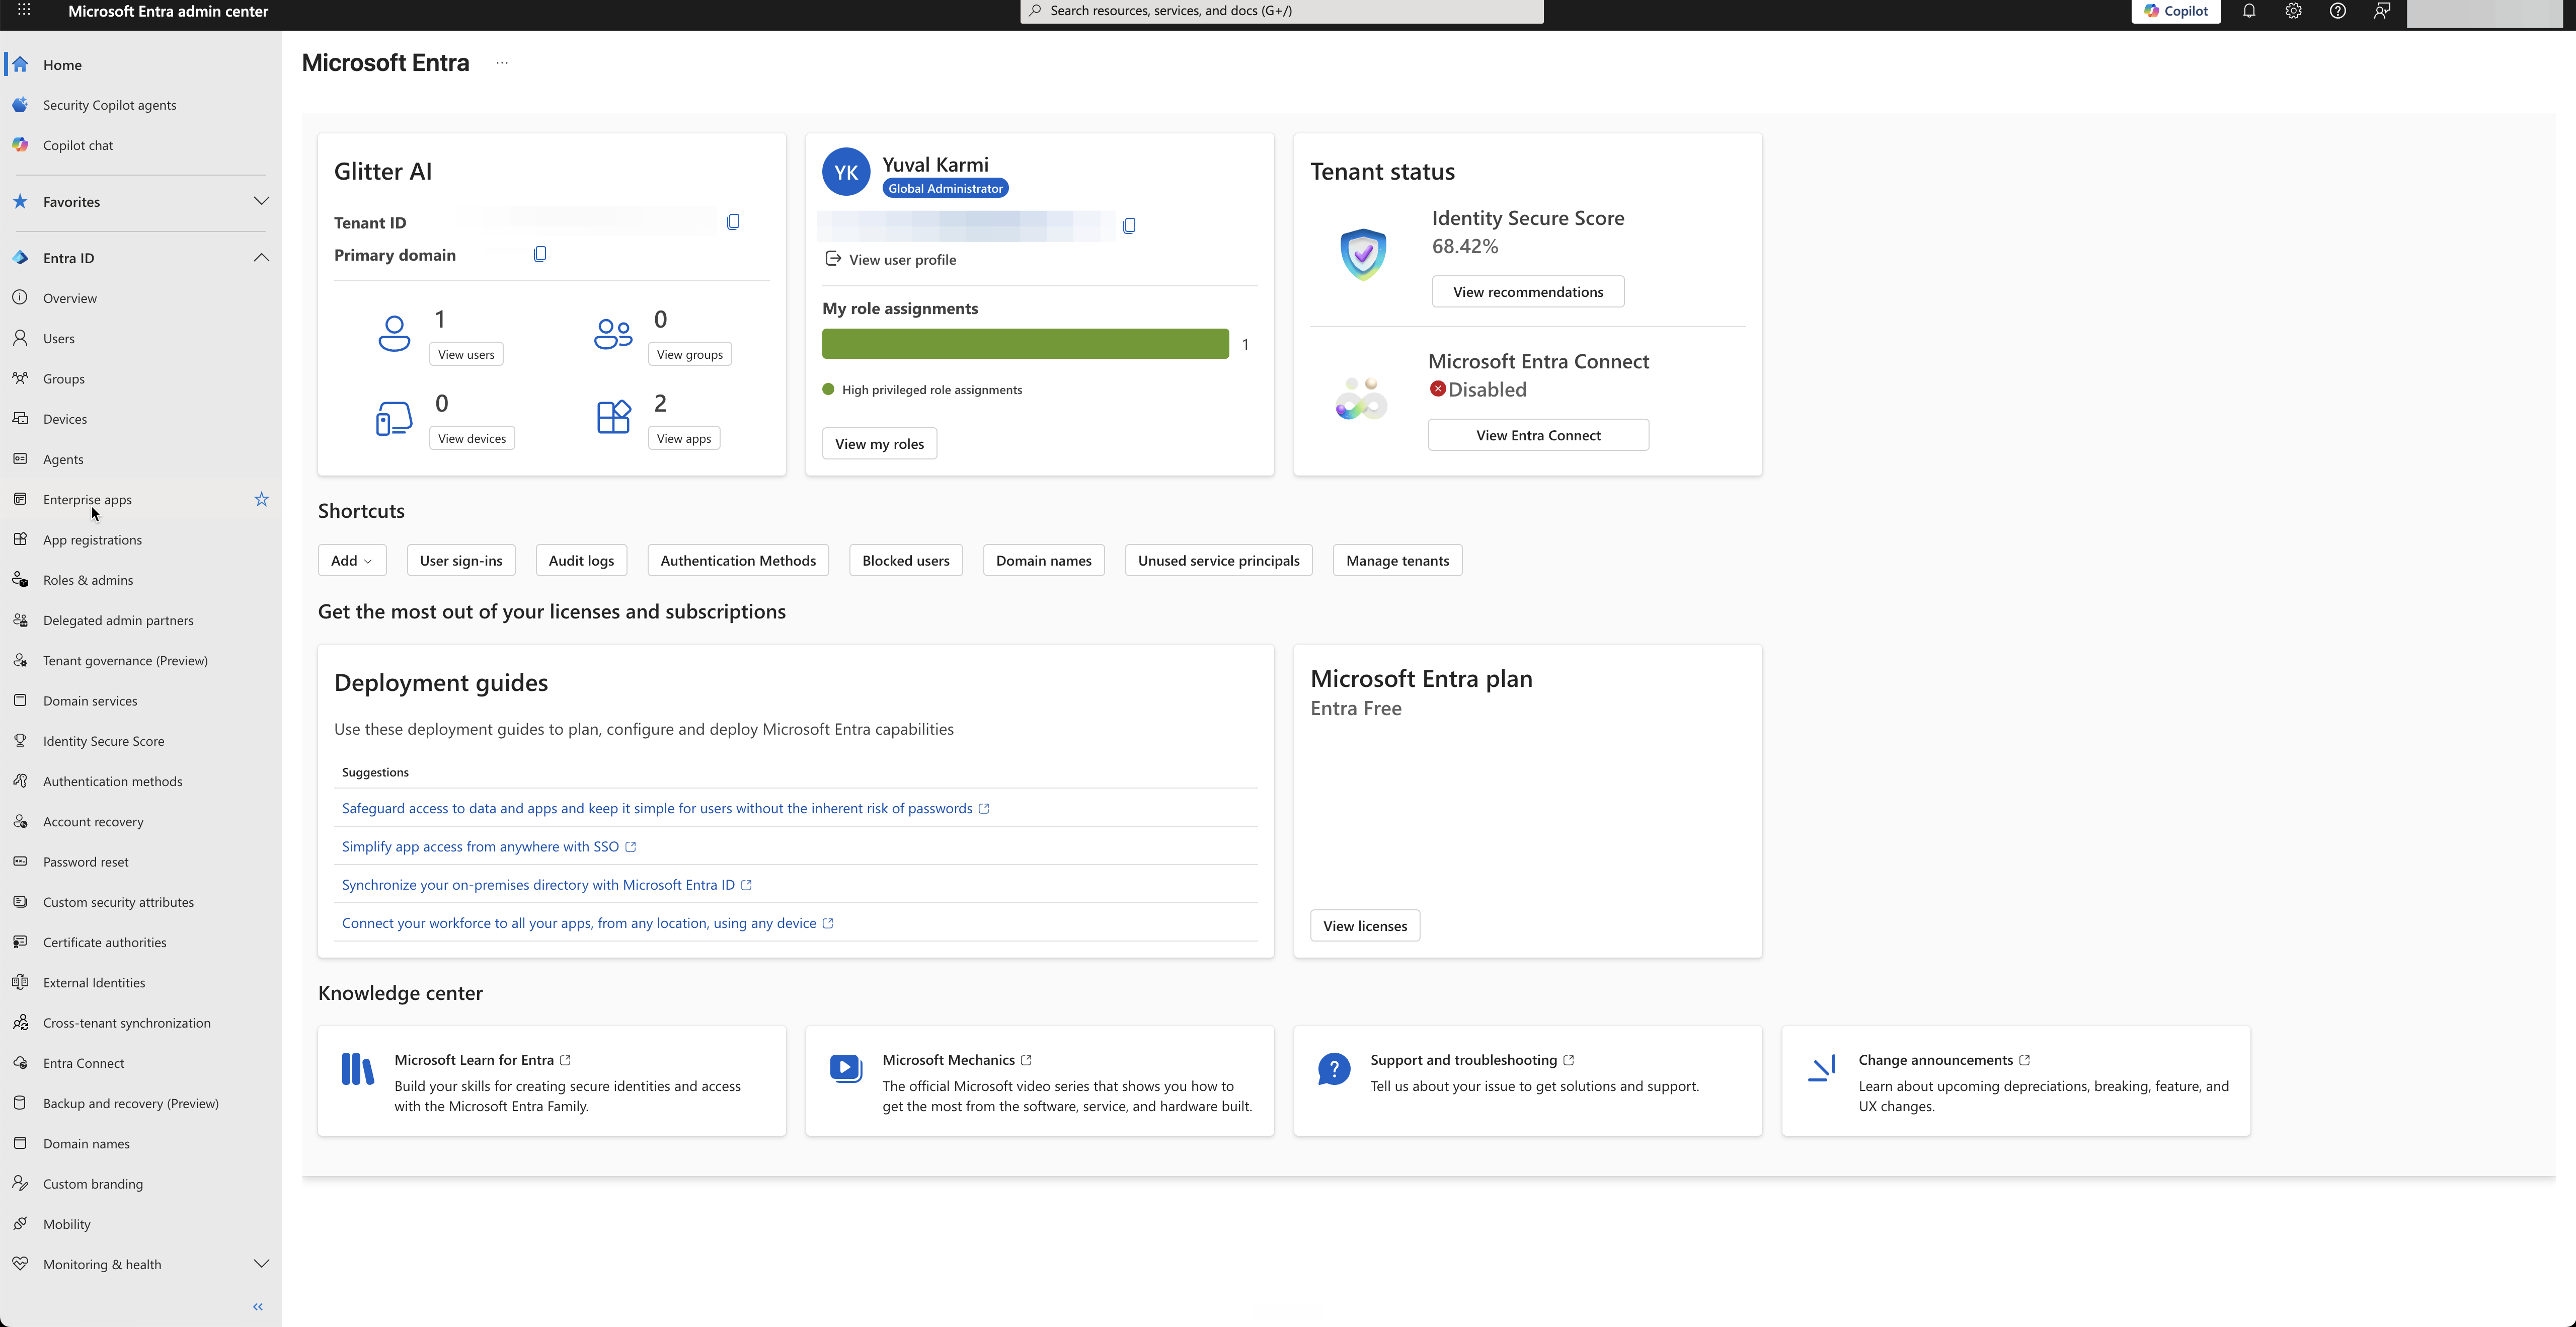
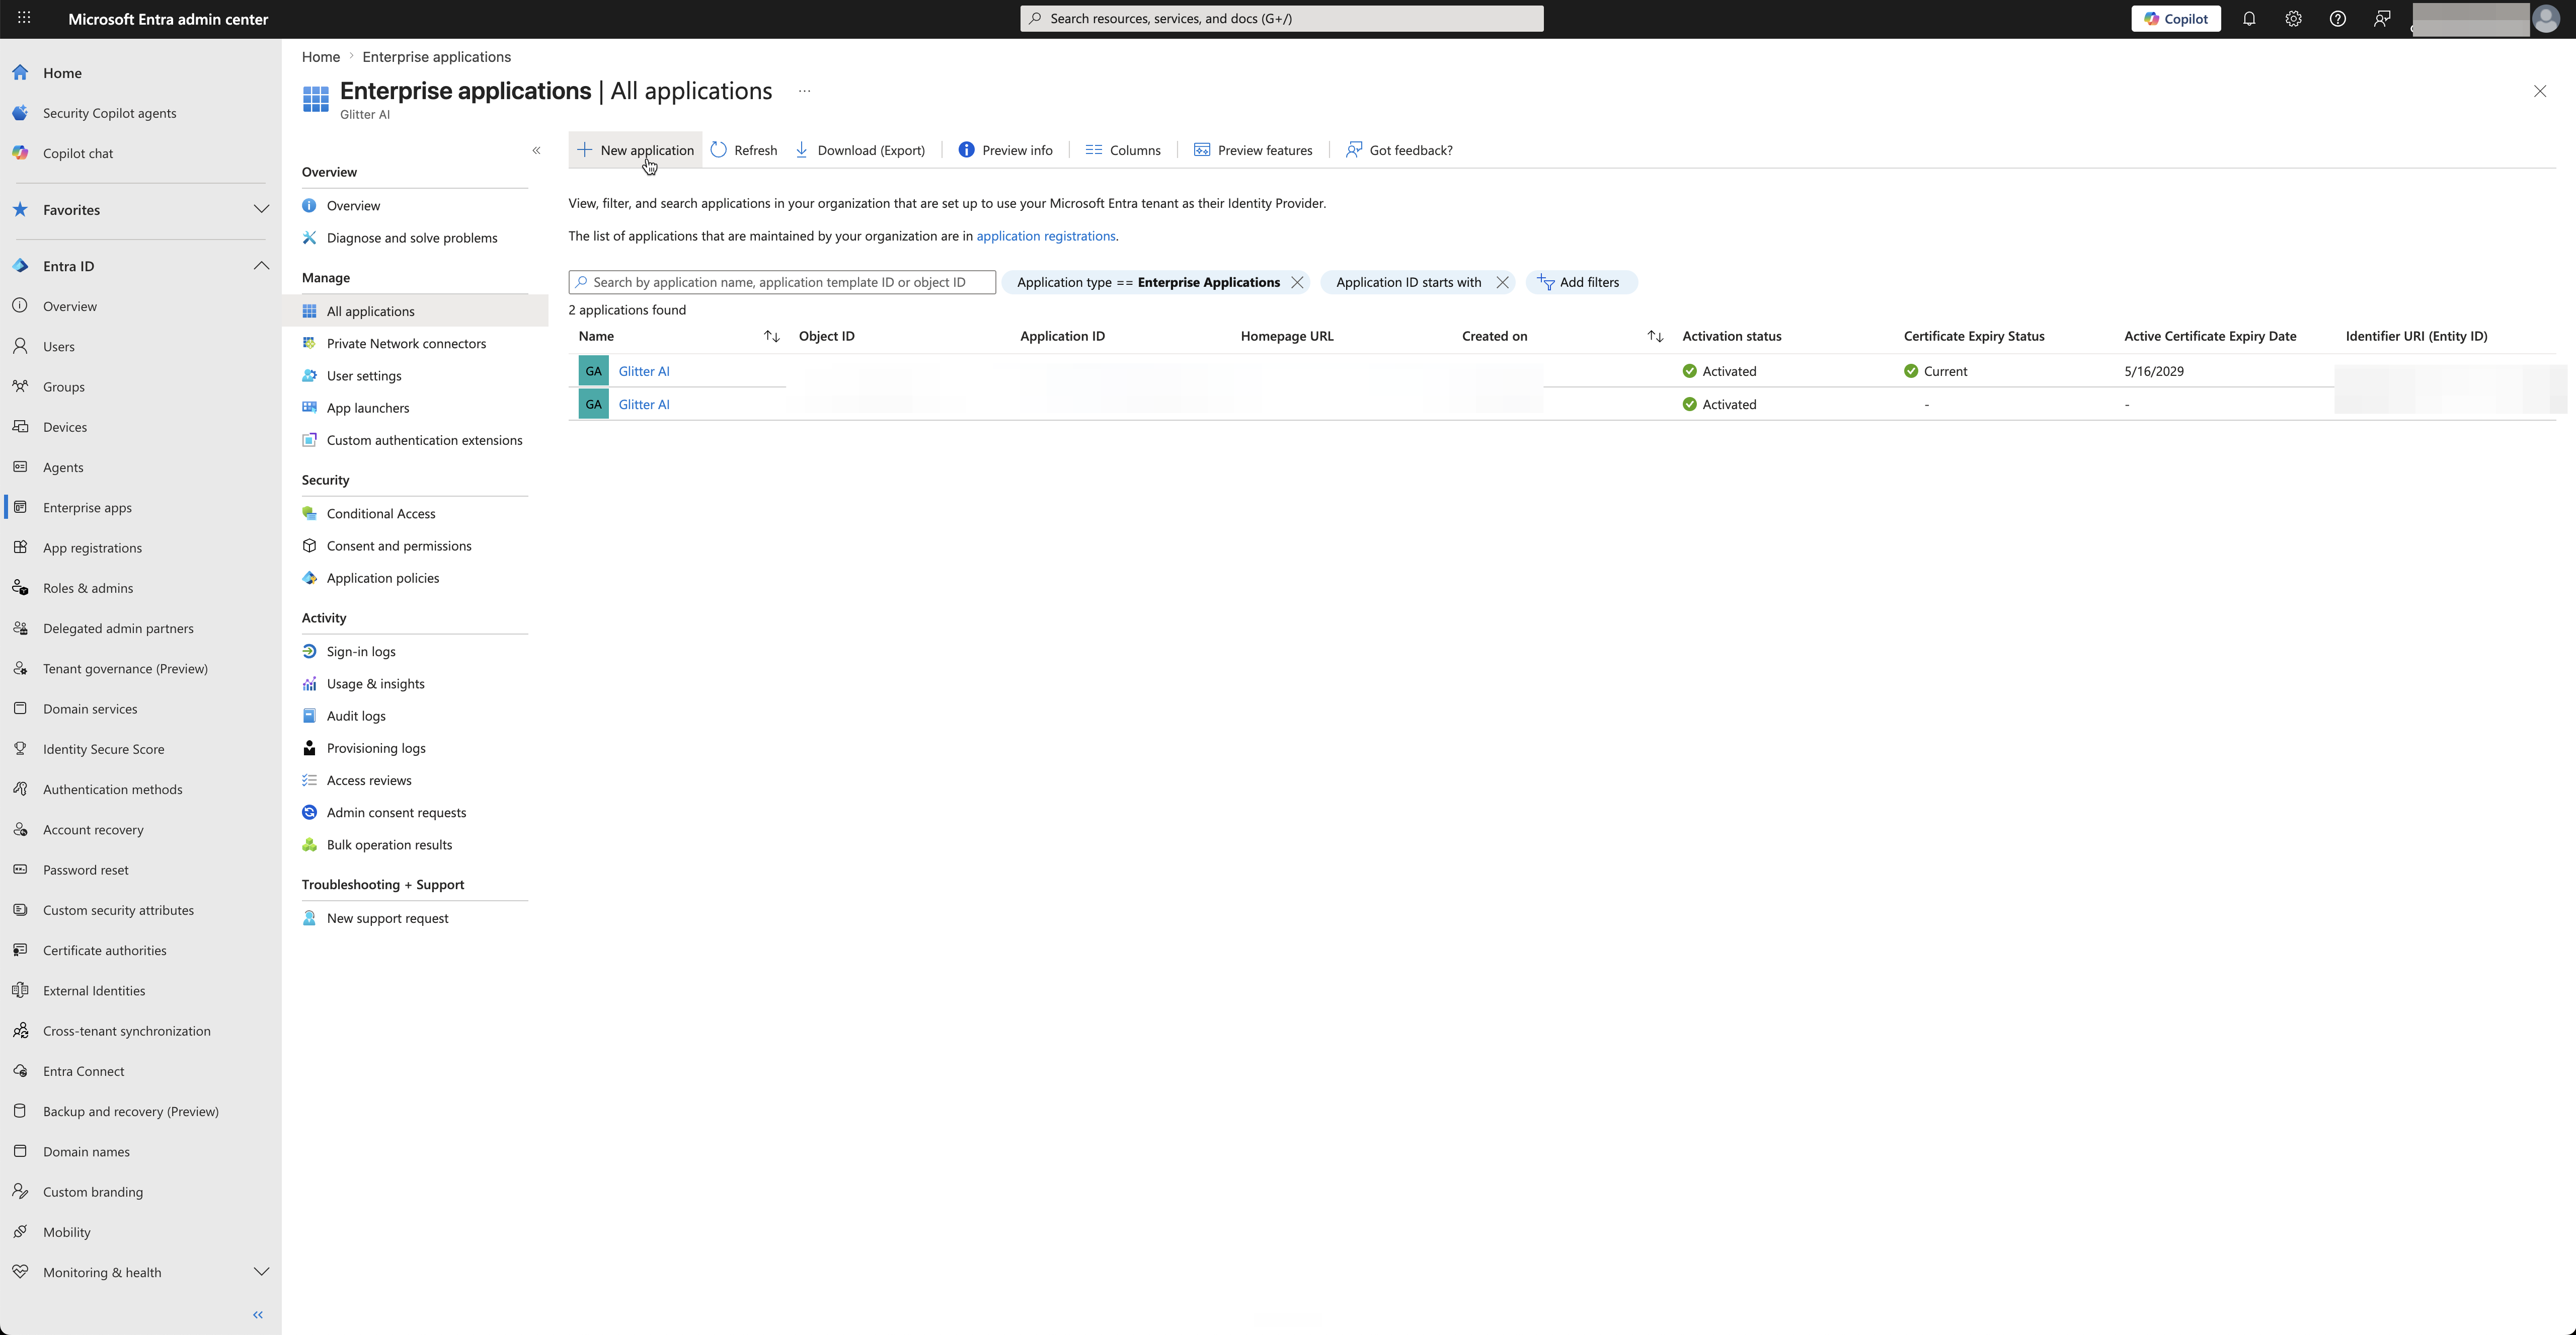
3
Under Entra ID in the left sidebar click Enterprise apps
Step #3: Under Entra ID in the left sidebar click Enterprise apps
4
Click New application.
Step #4: Click New application.
5
Click Create your own application at the top of the gallery.
Step #5: Click Create your own application at the top of the gallery.
6
Enter a descriptive name like Glitter AI.
7
Select Integrate any other application you don't find in the gallery (Non-gallery).
Step #7: Select Integrate any other application you don't find in the gallery (Non-gallery).
8
Click Create to provision the application.
Step #8: Click Create to provision the application.

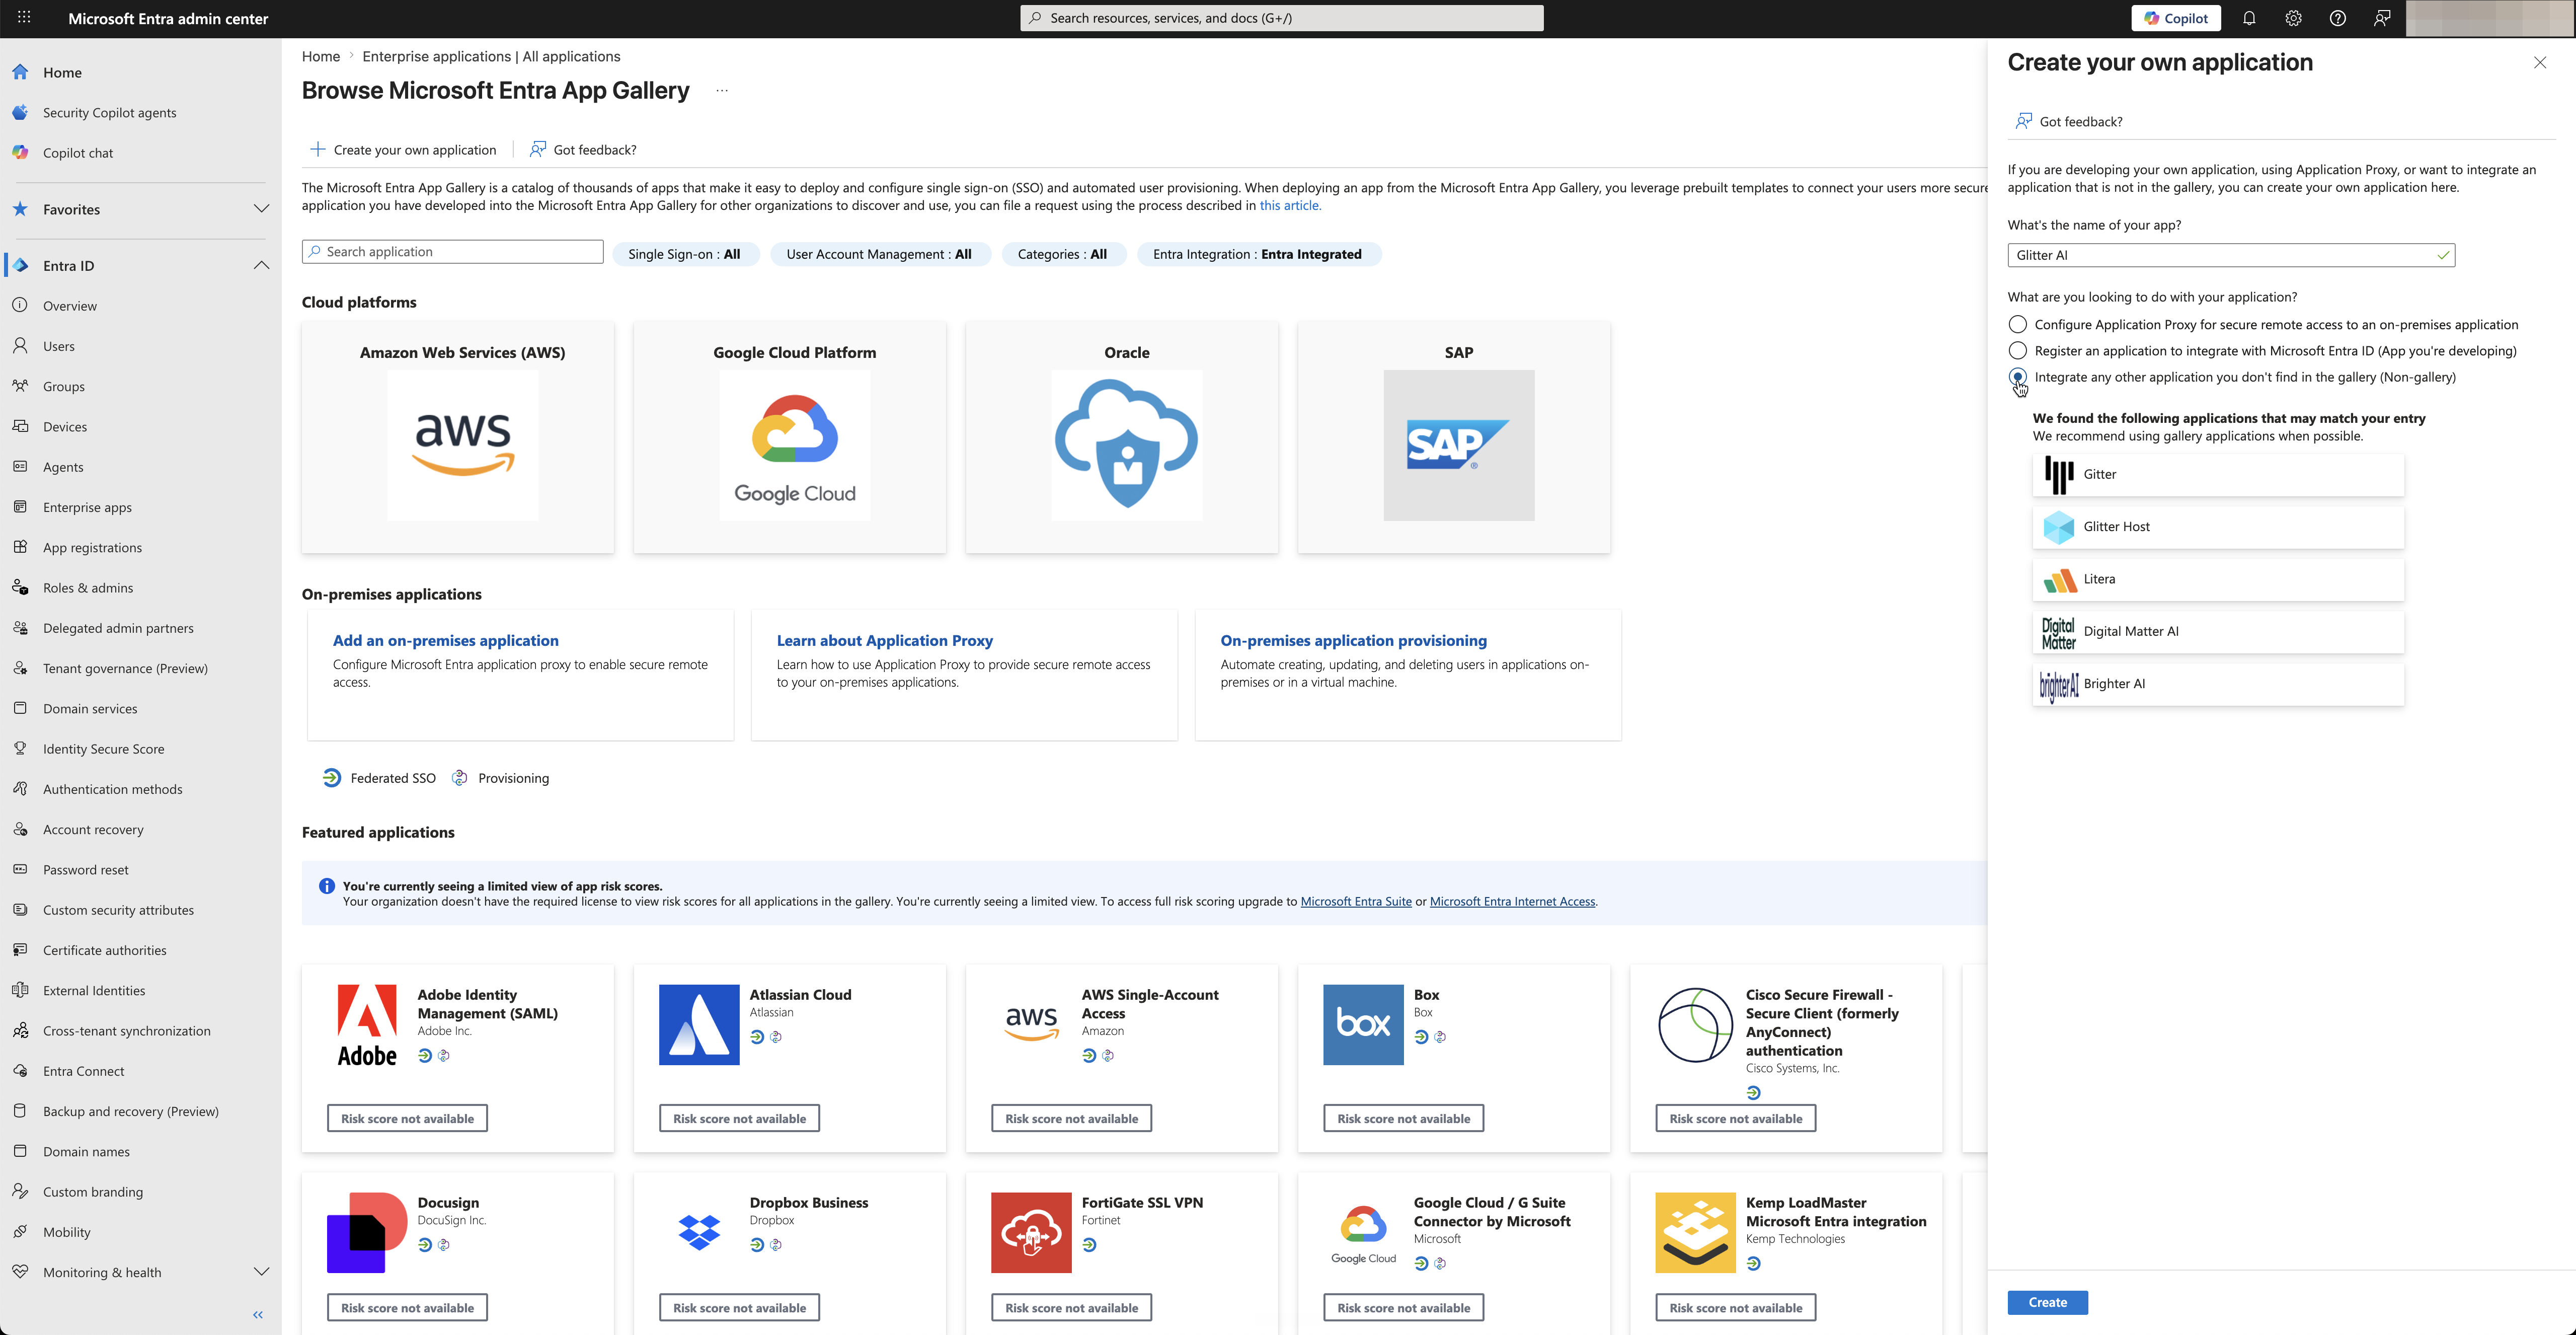
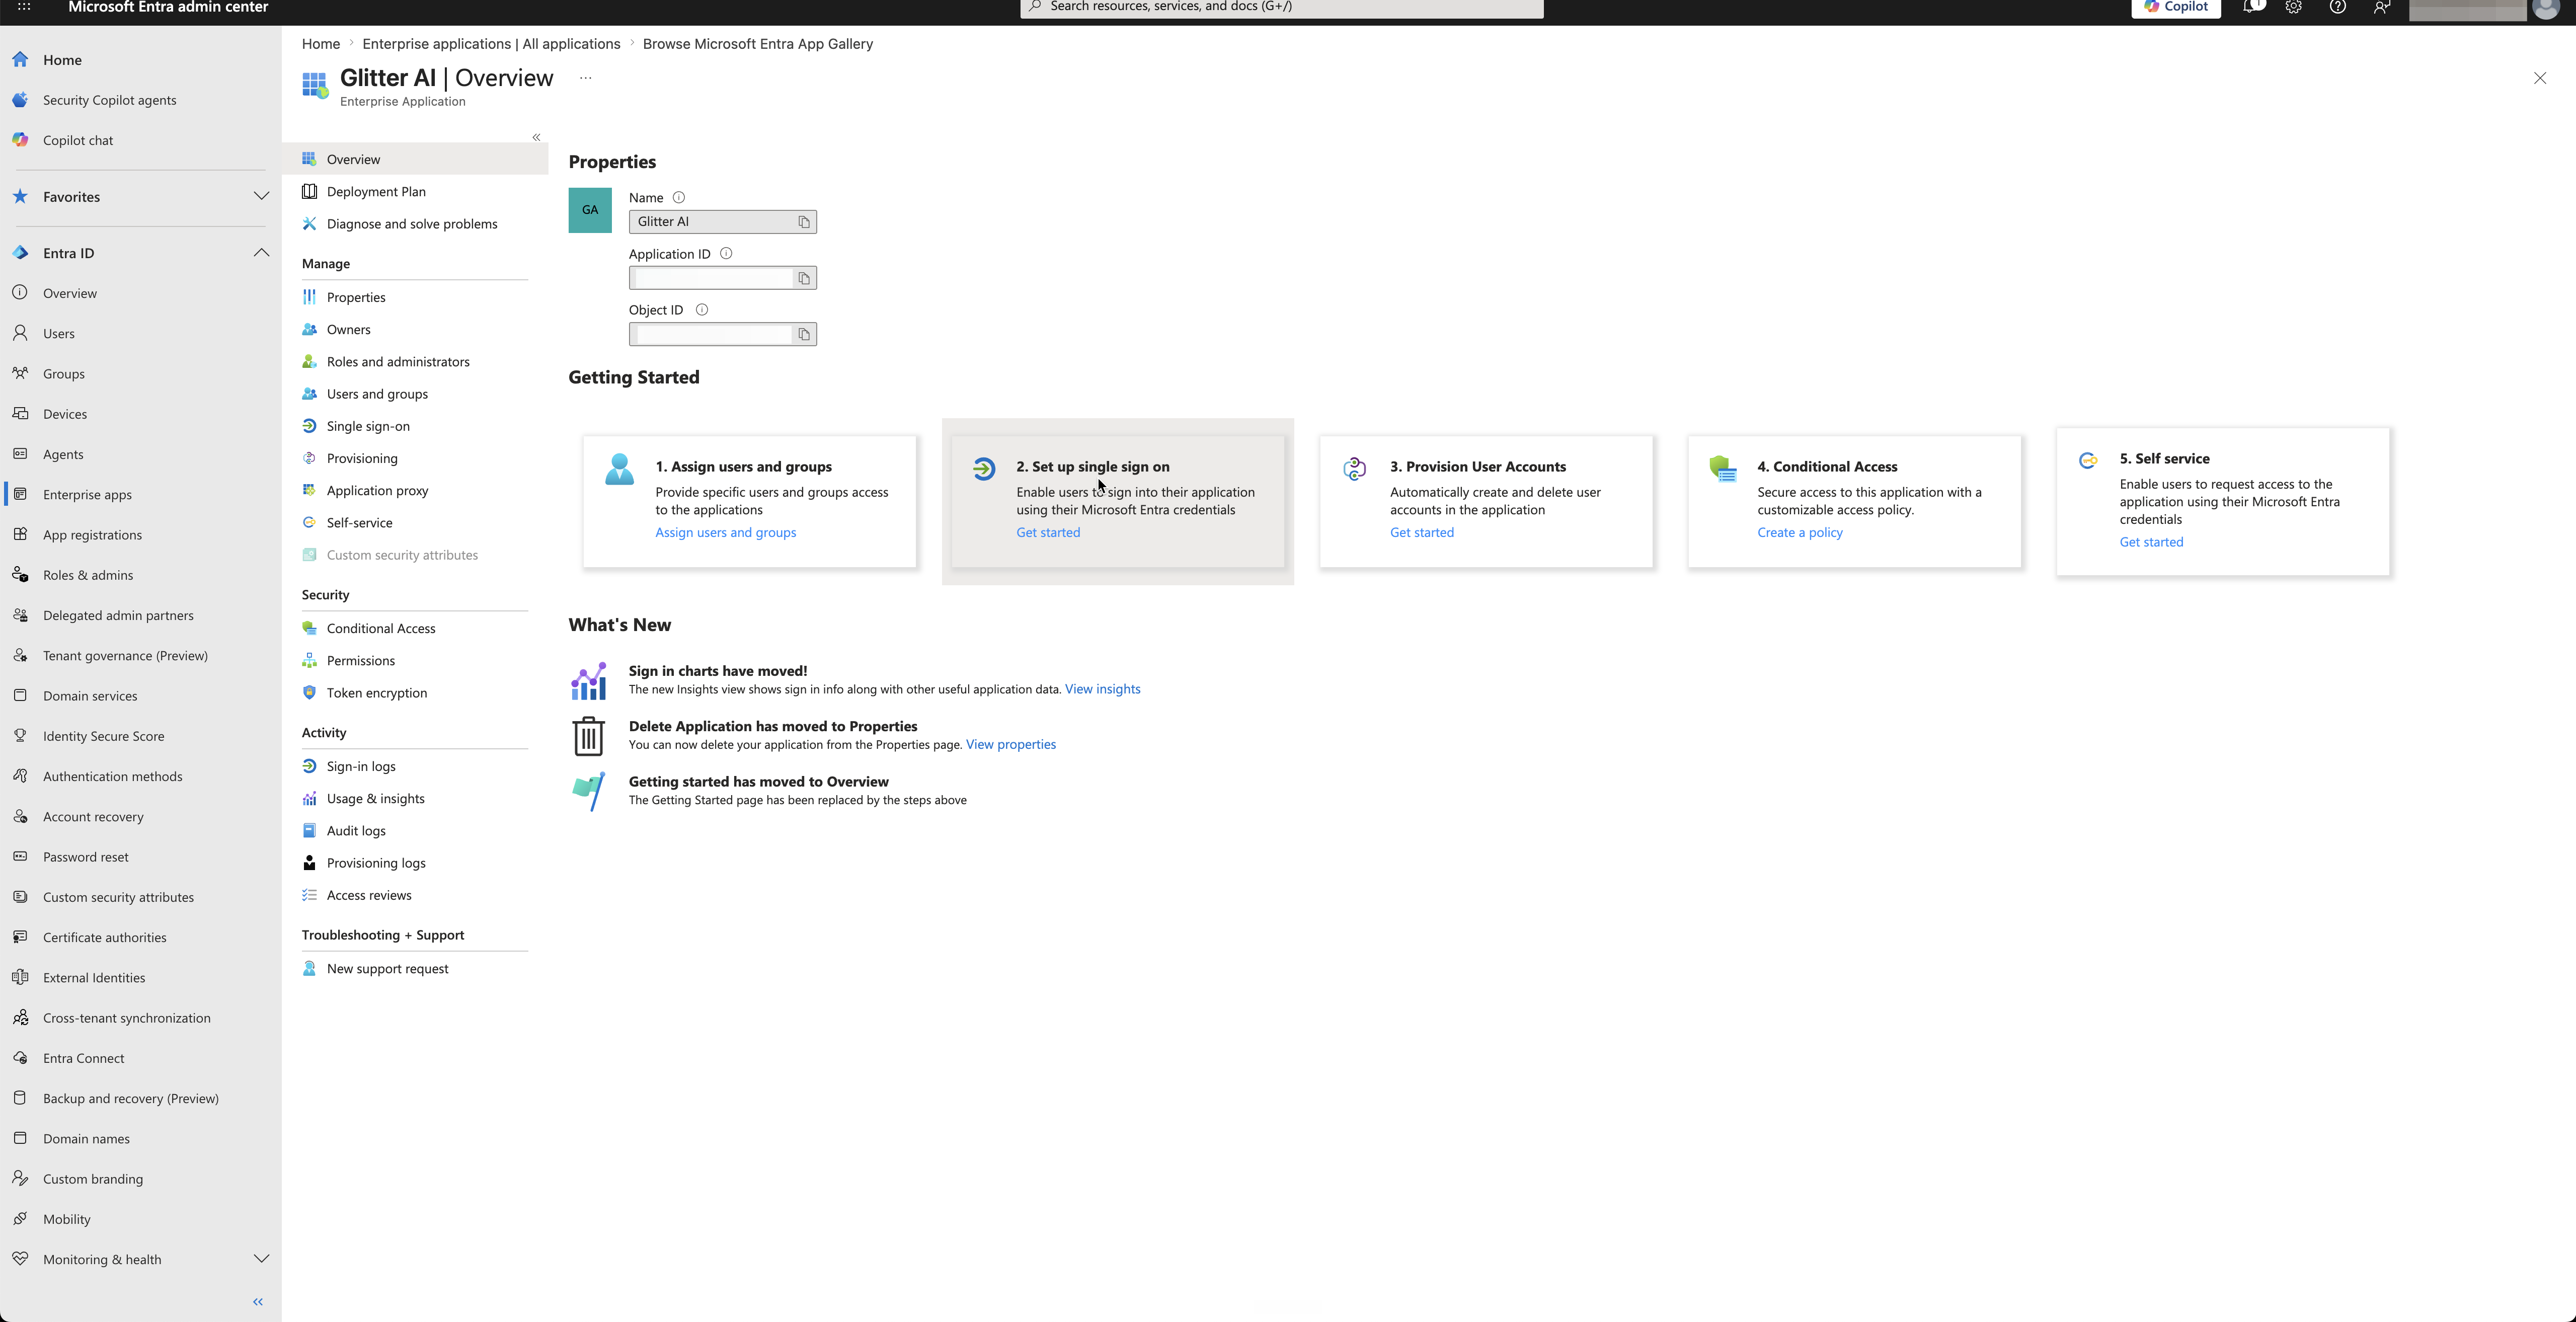
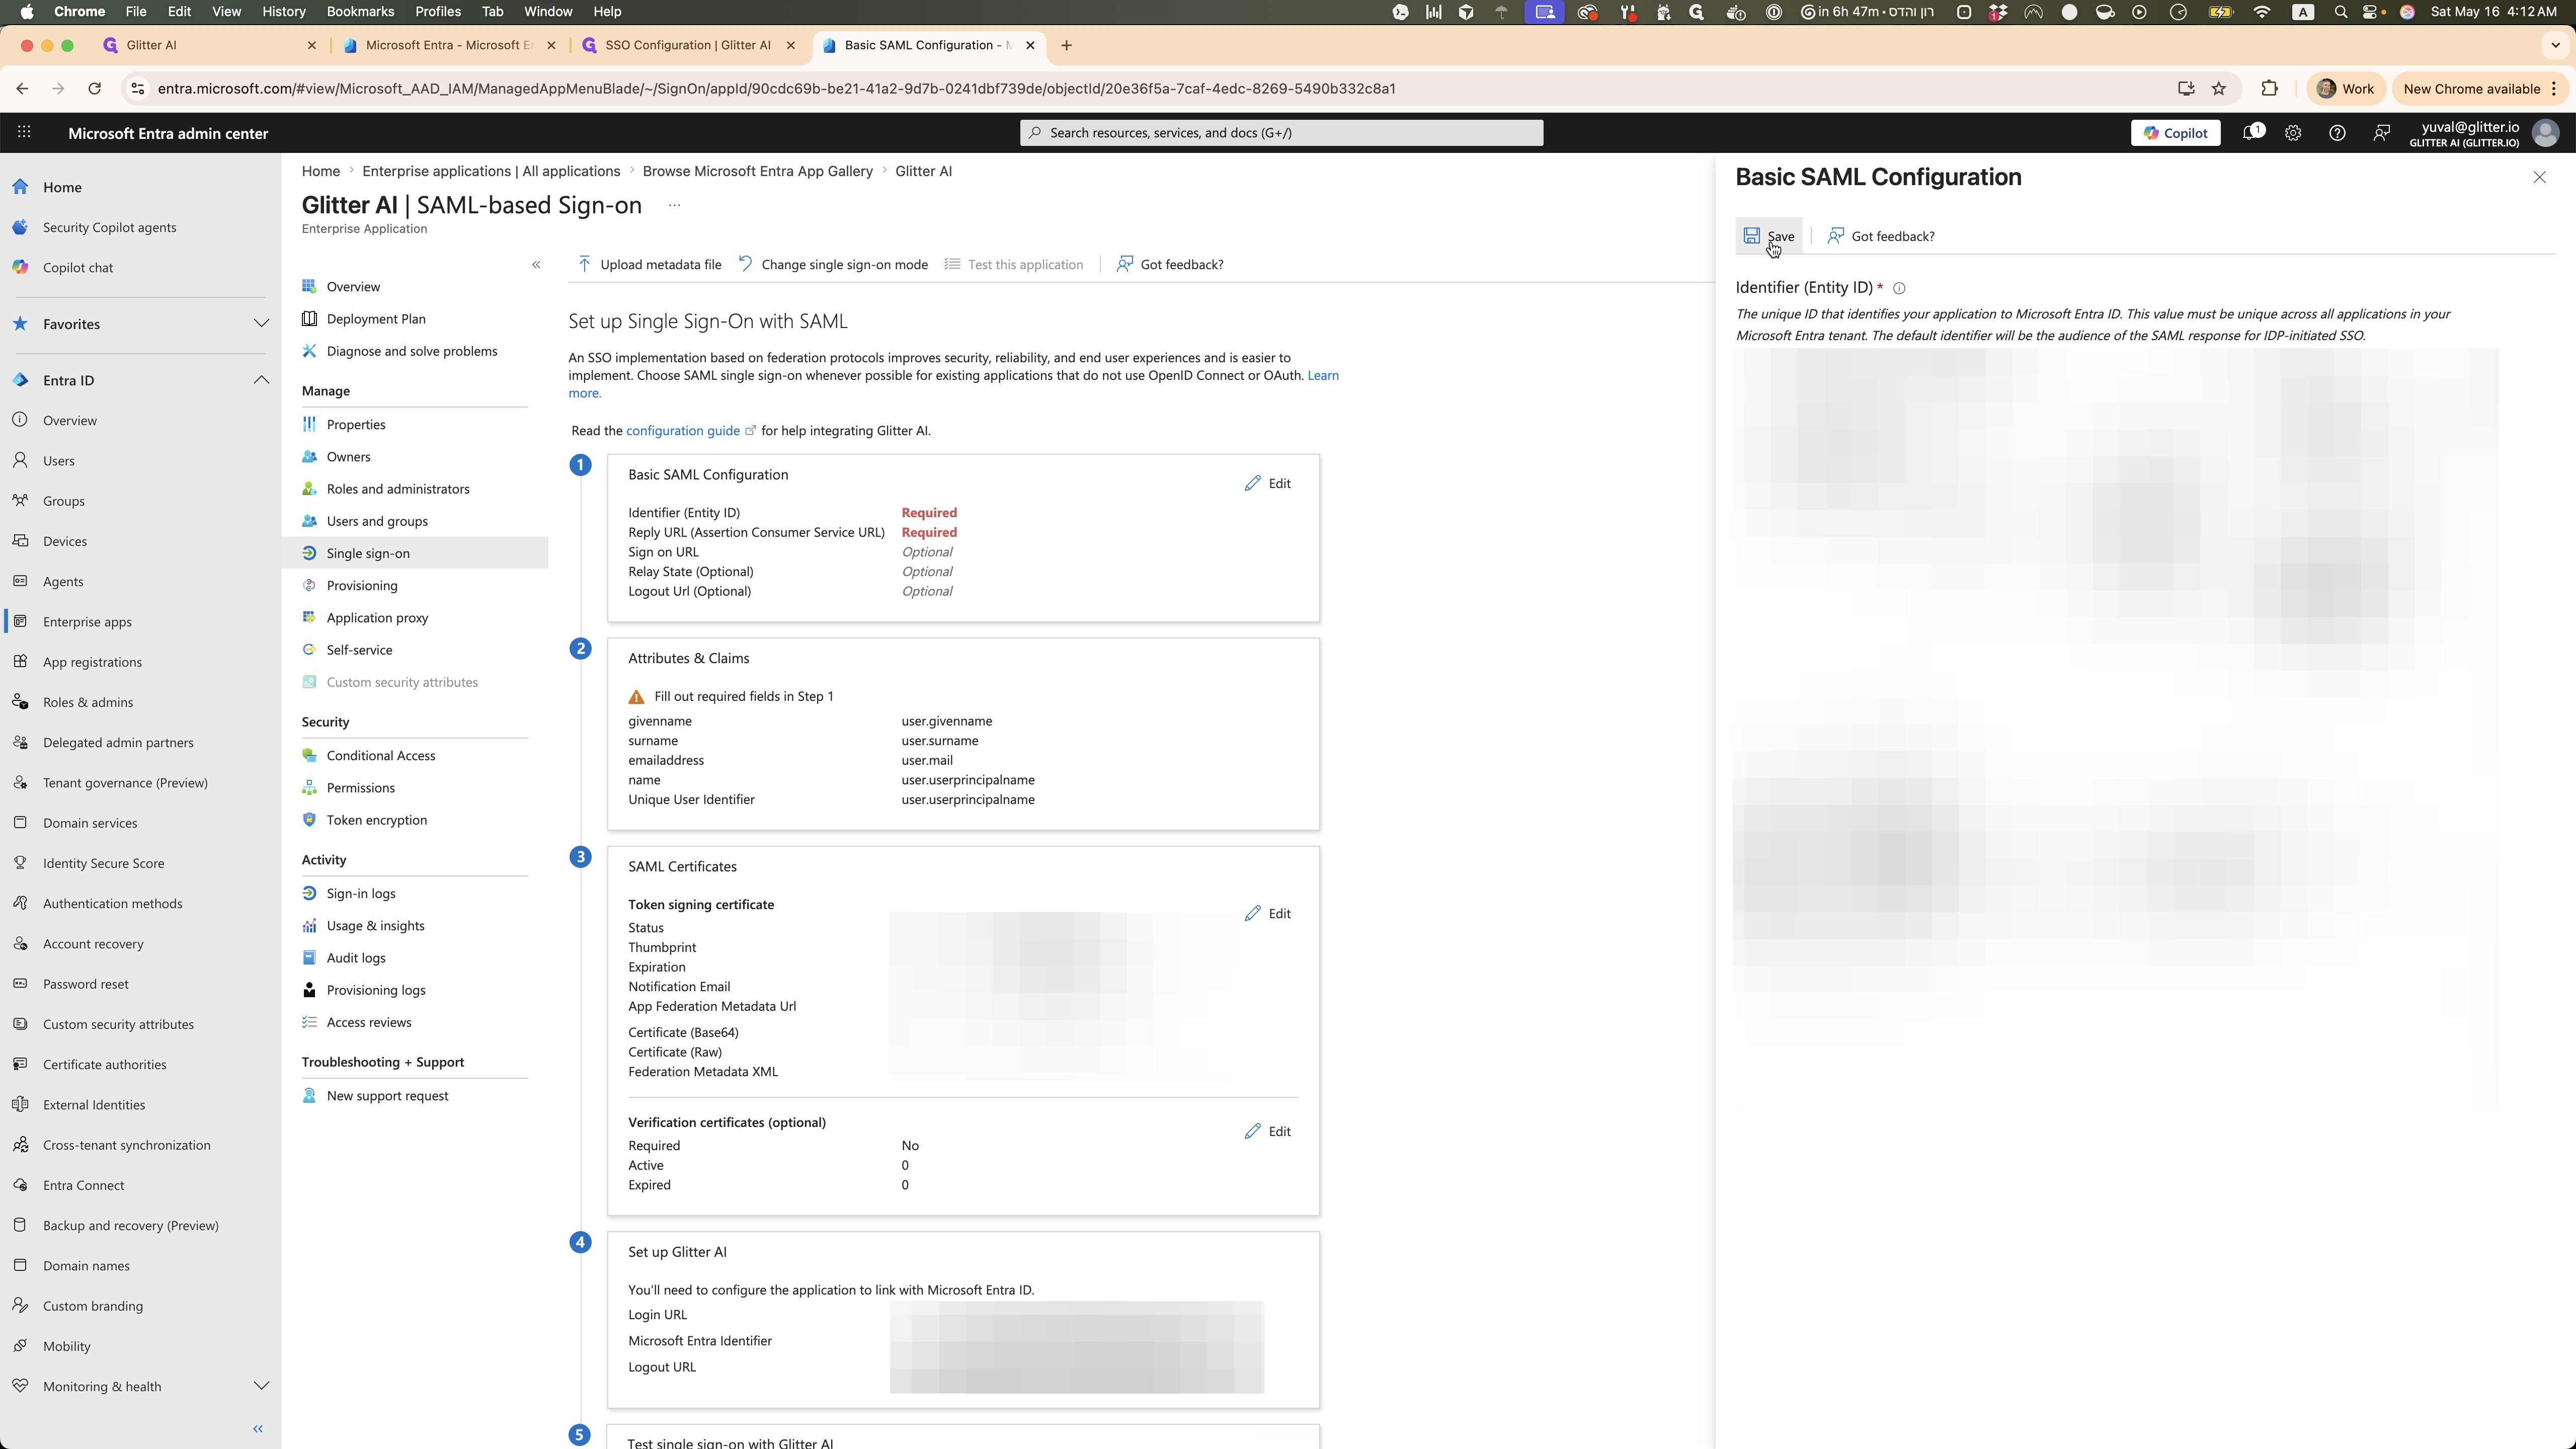
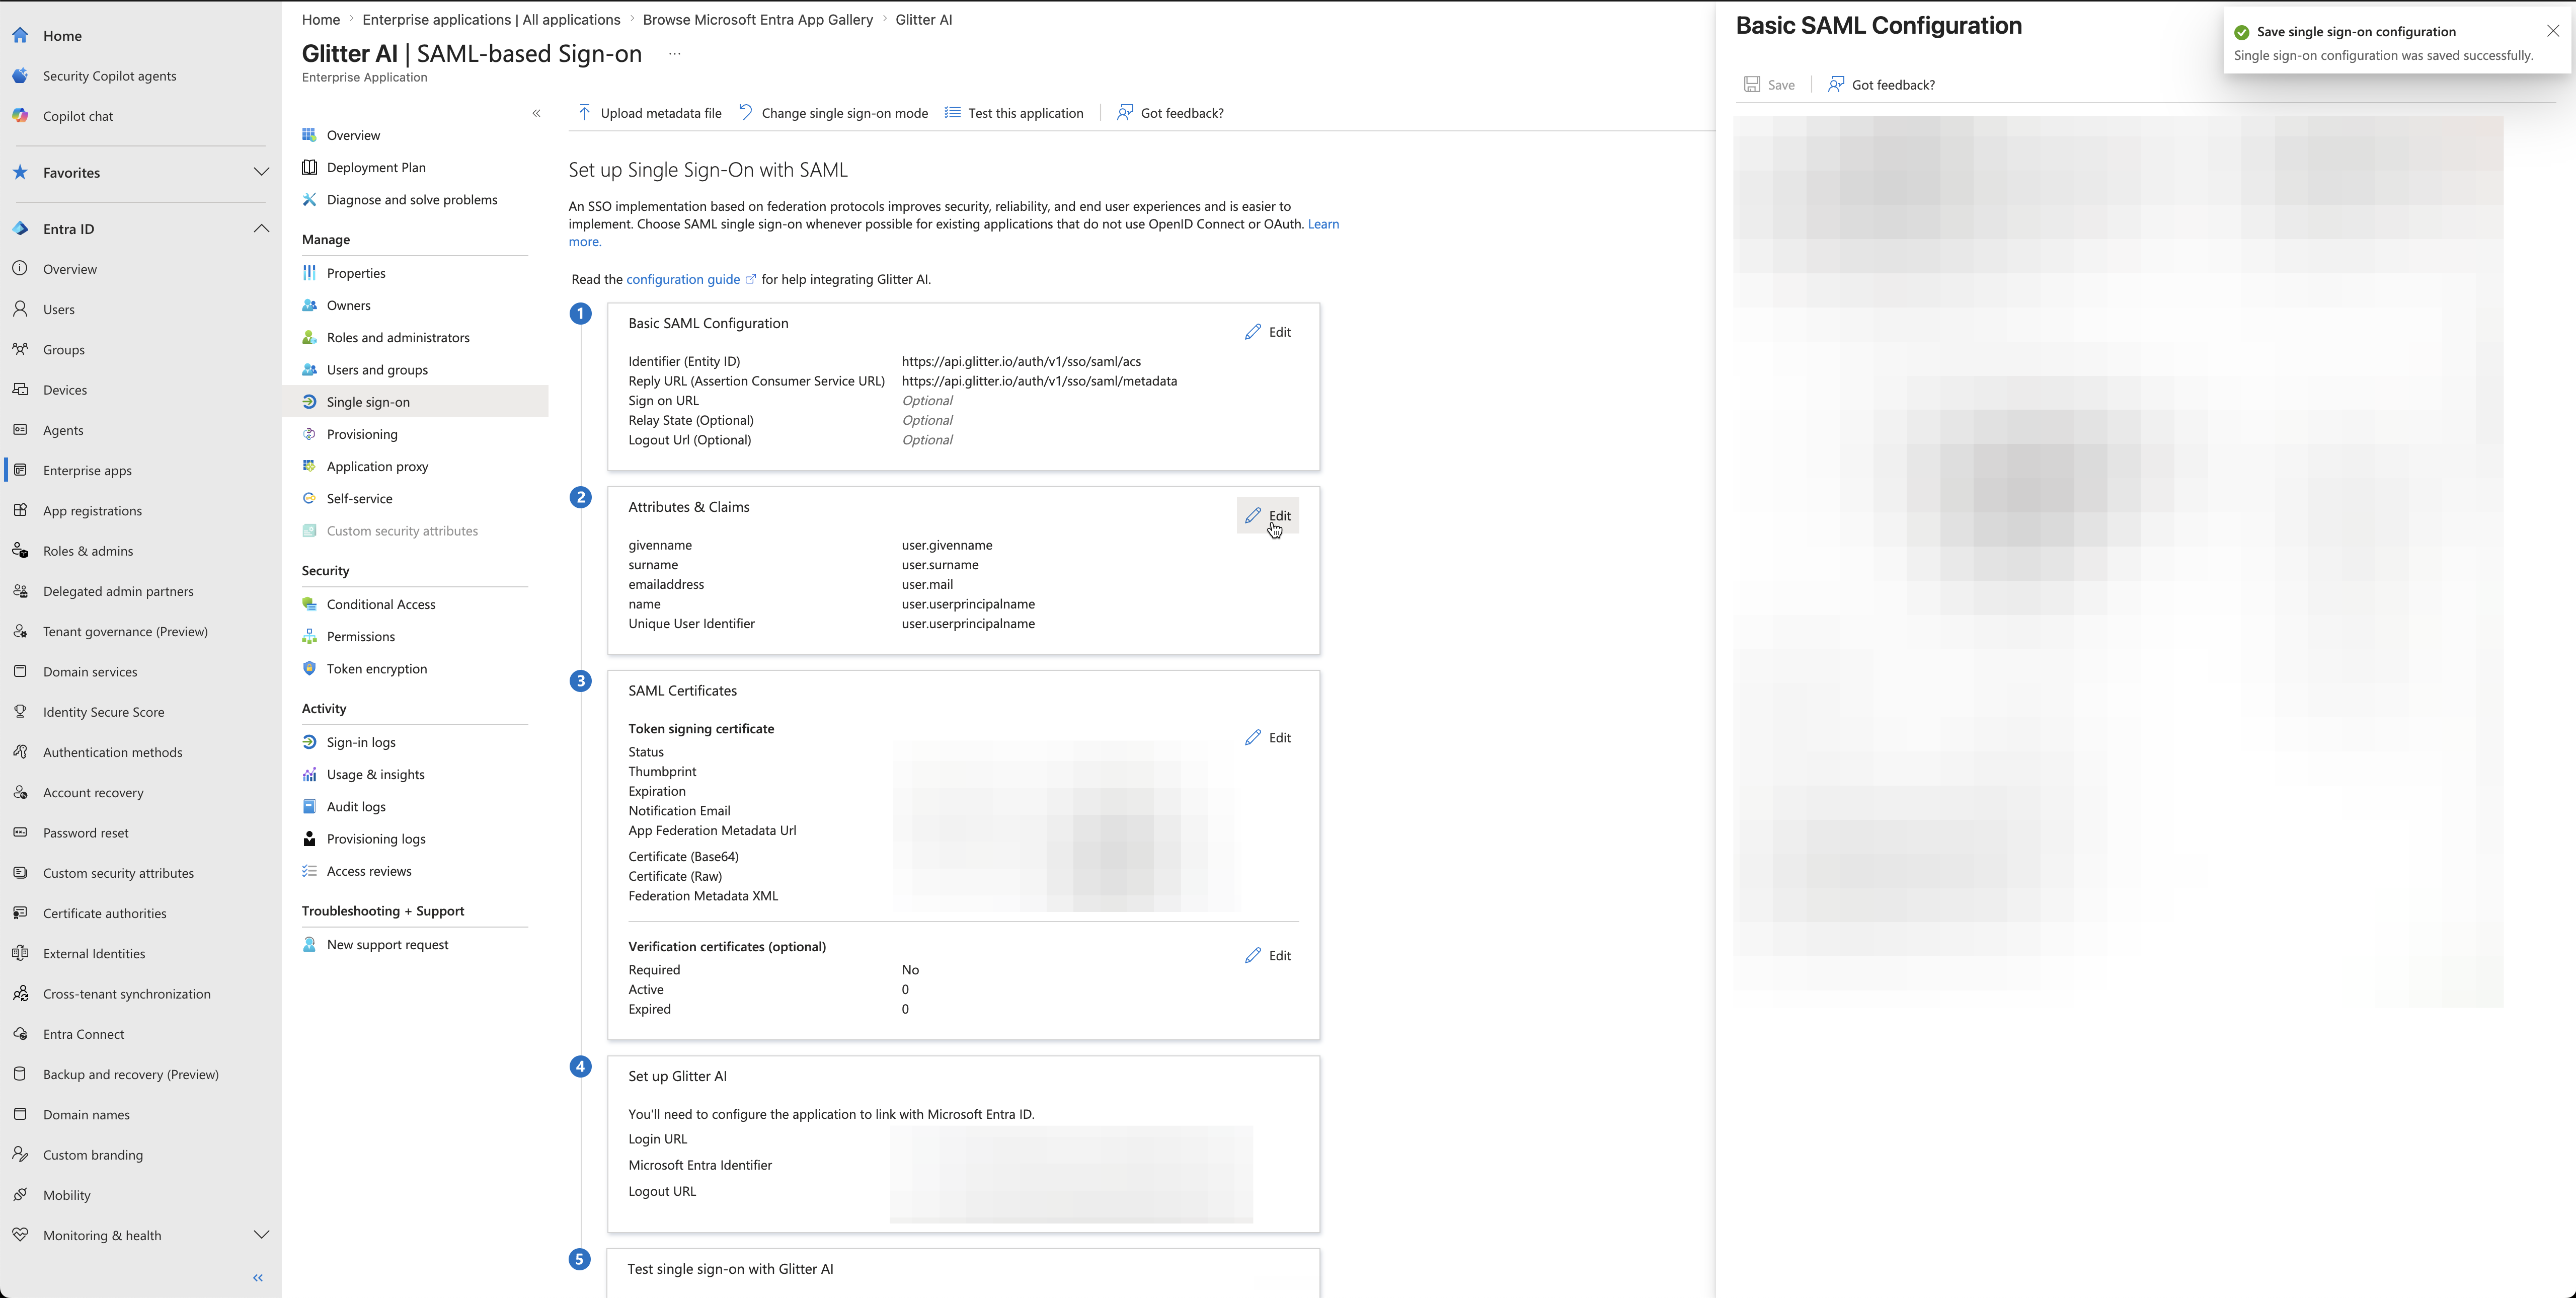
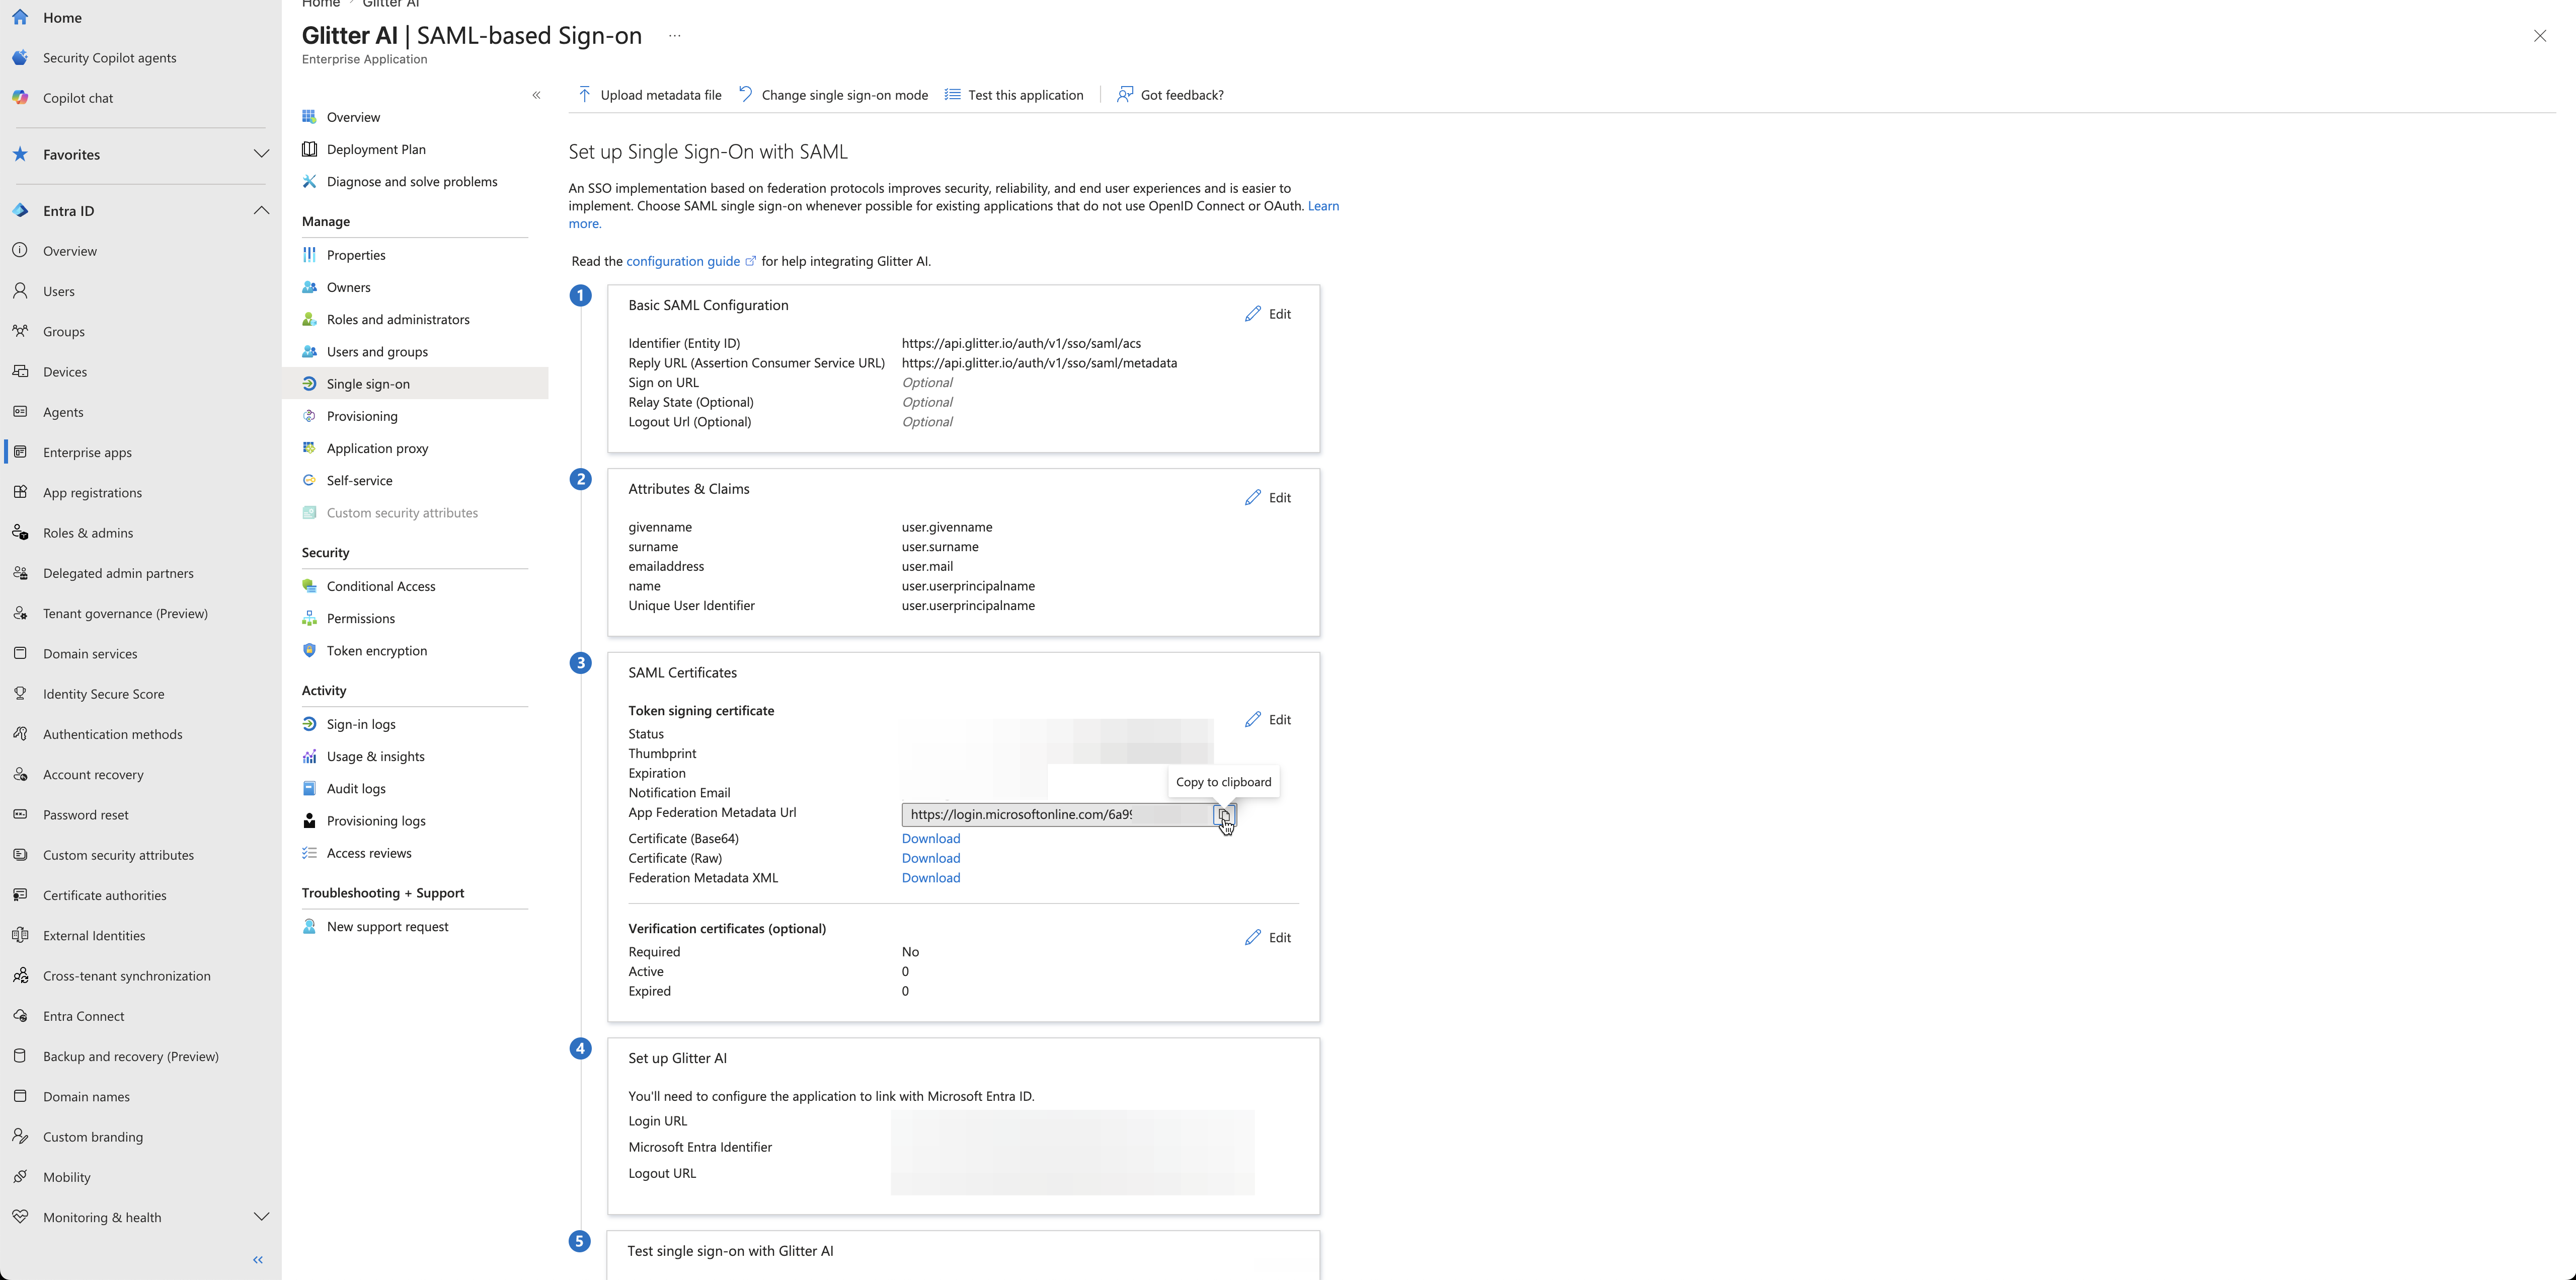
Configure SAML Settings in Entra ID

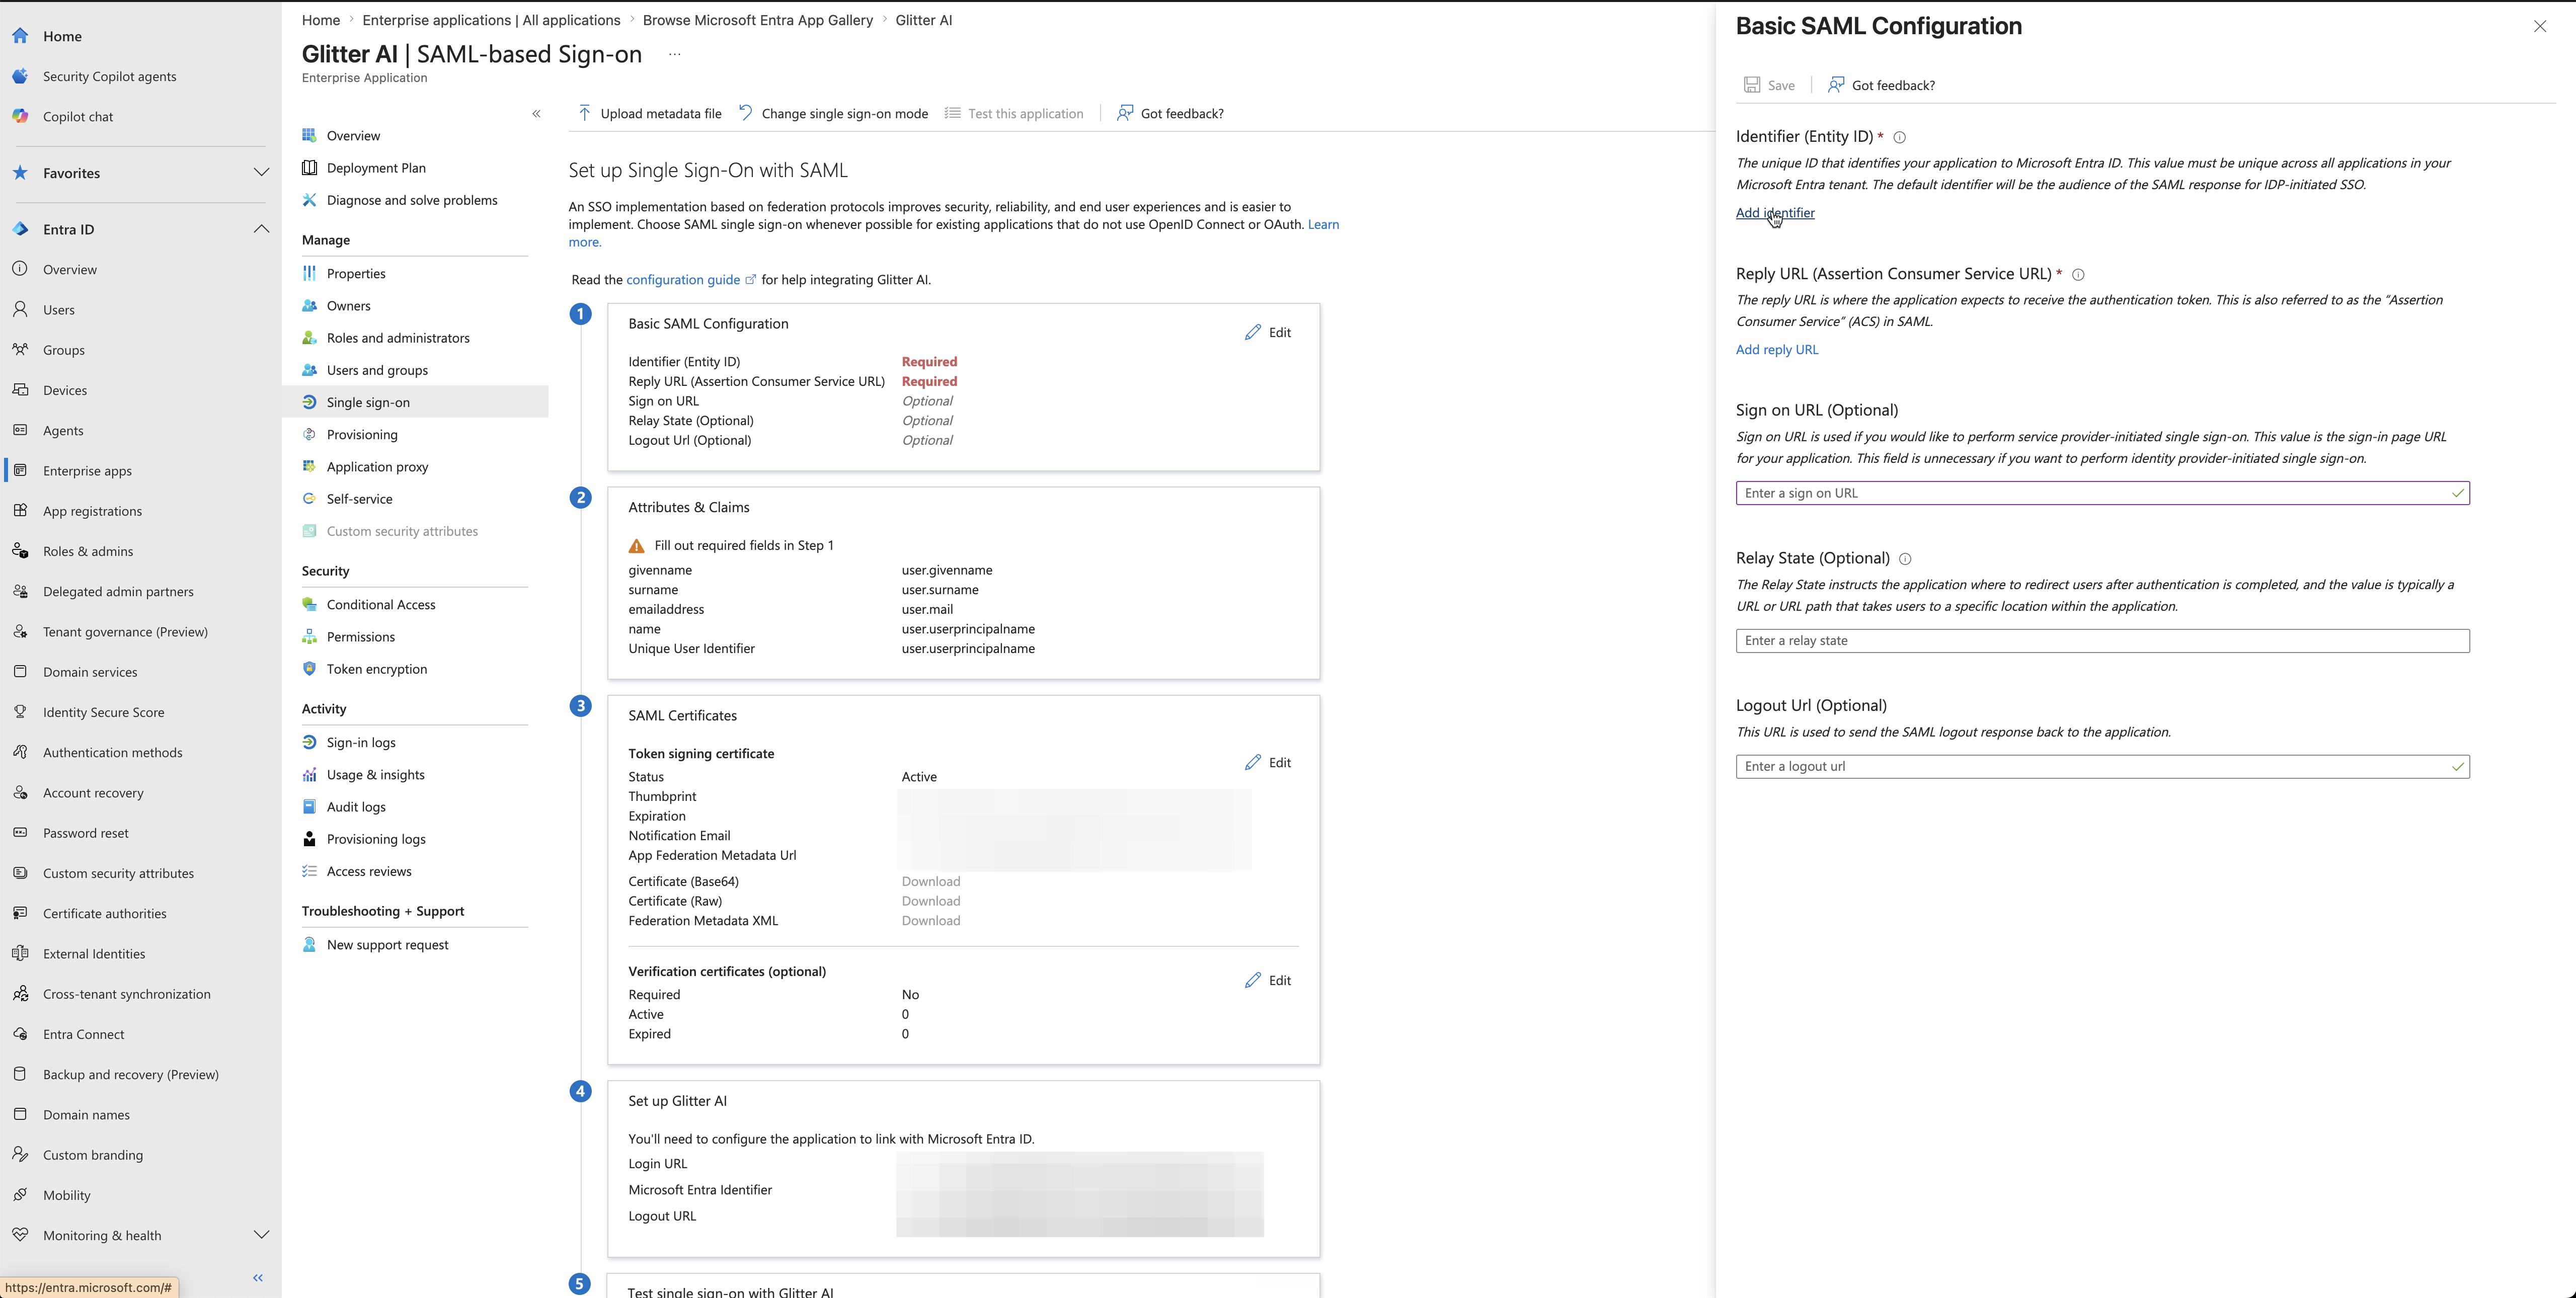
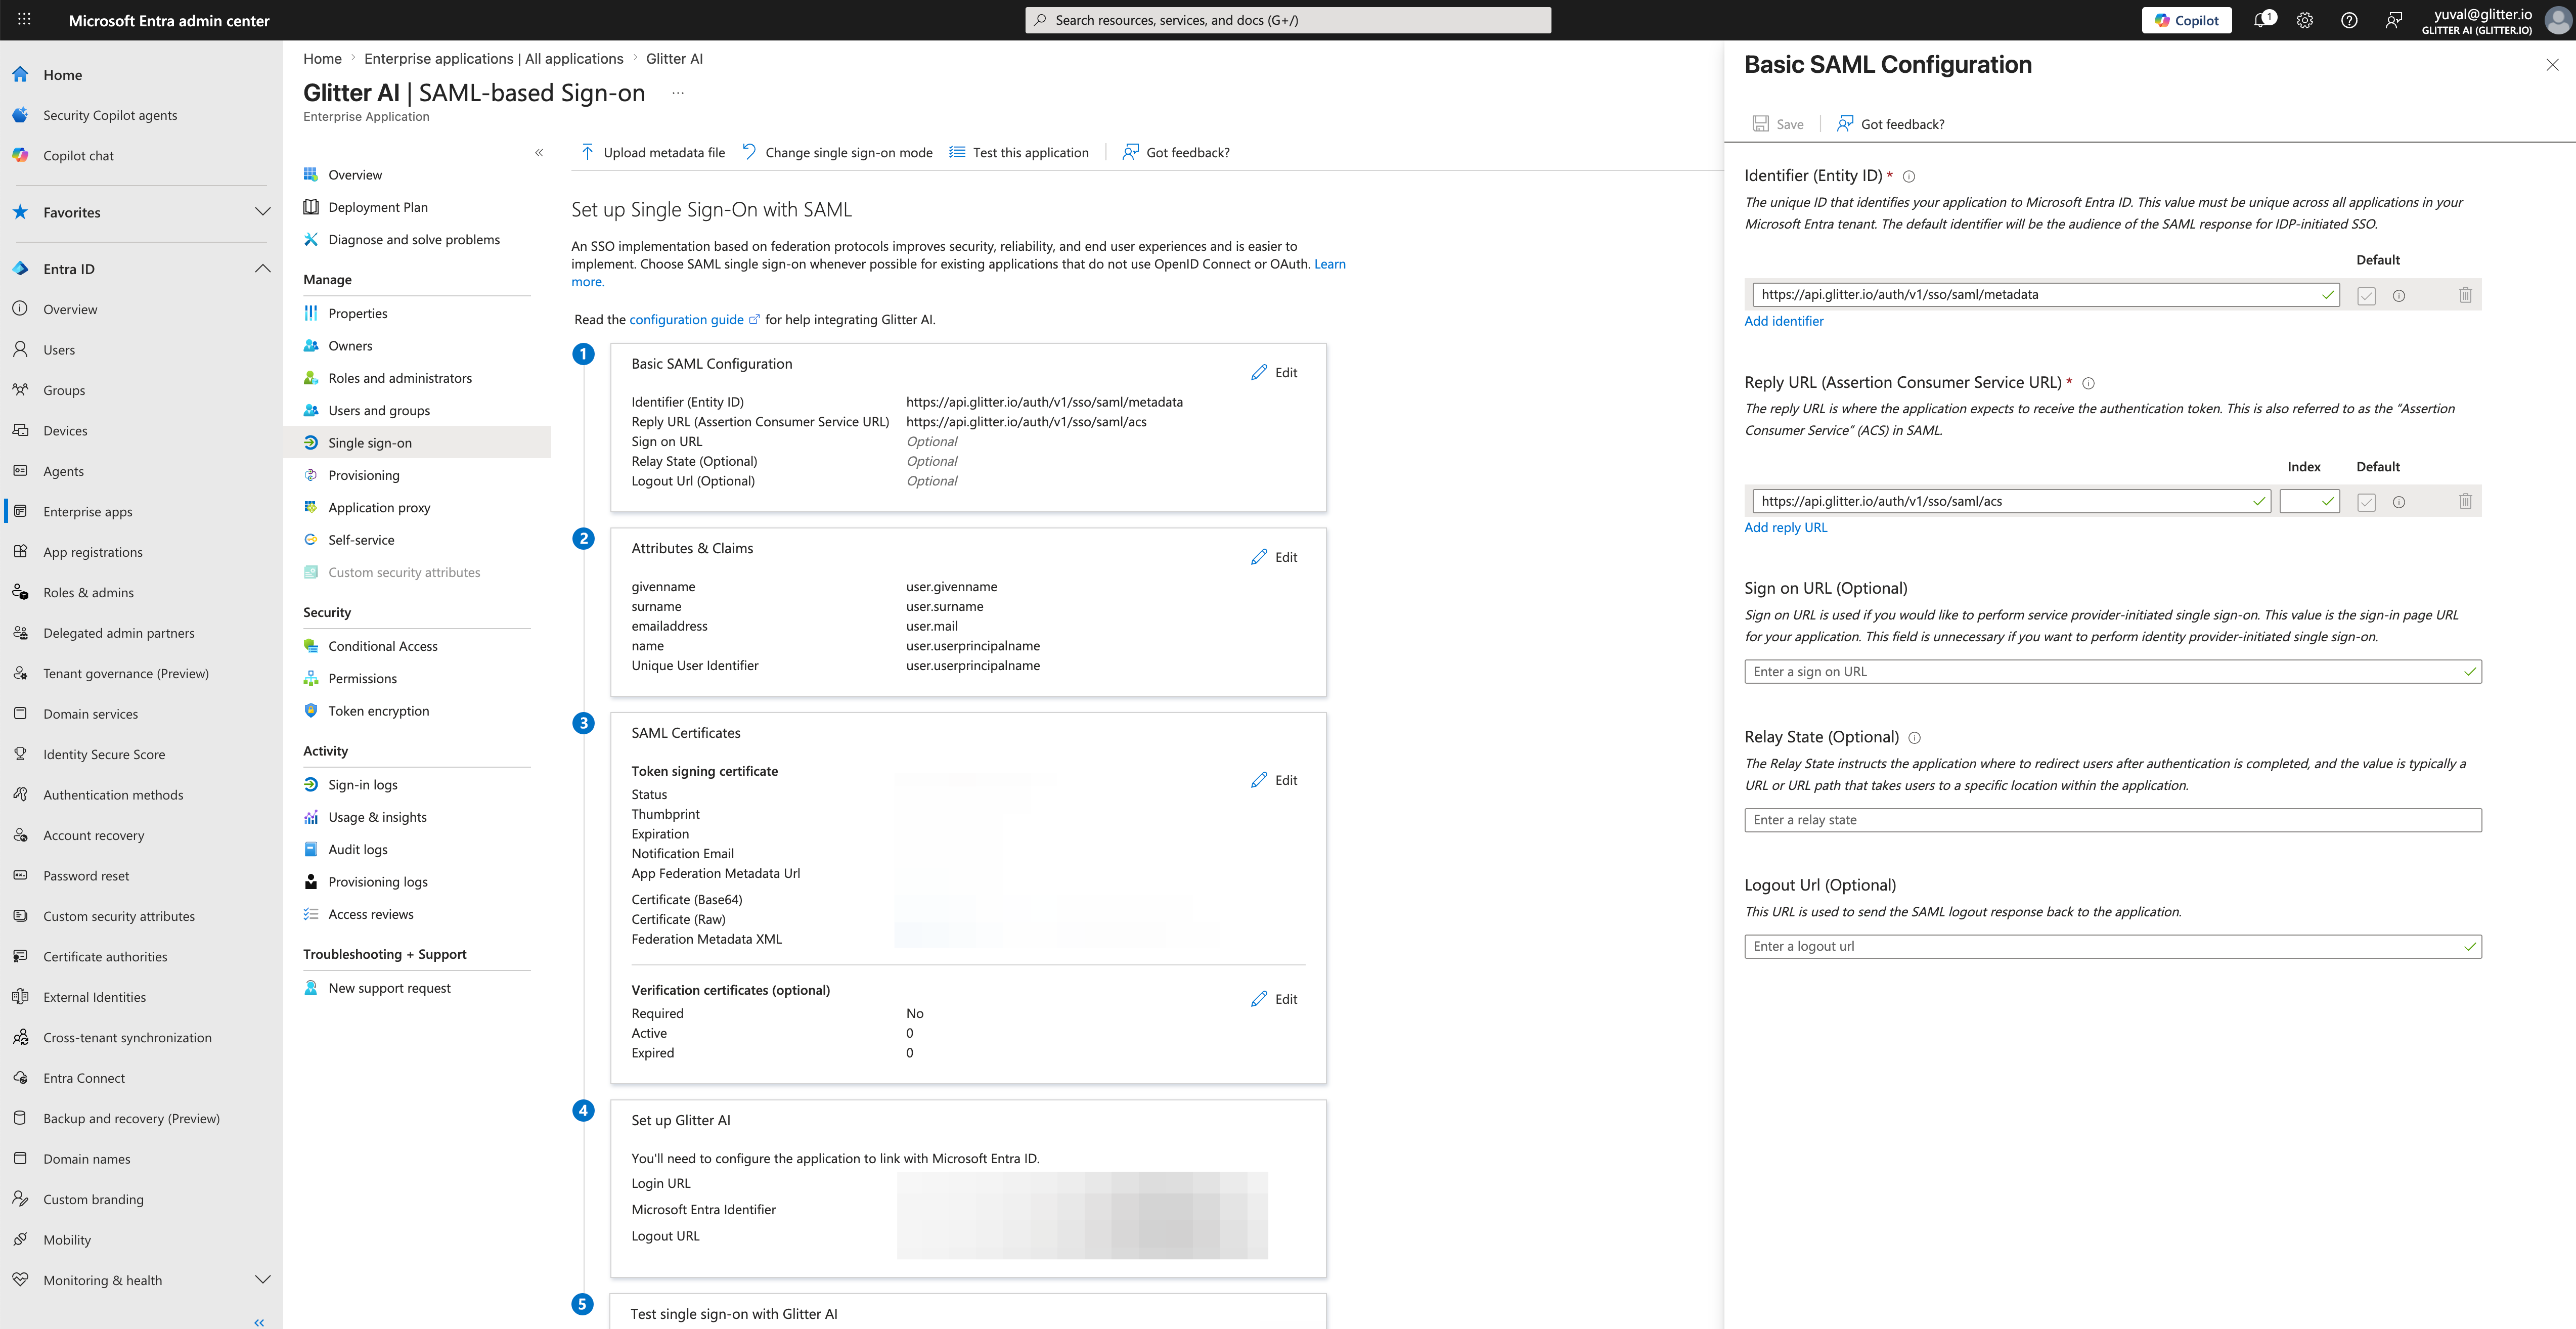
Now you will link Entra ID to Glitter AI using the Service Provider details you located earlier. Reference the mapping table below to ensure you paste the correct URLs into Entra ID.

Entra ID Field

Glitter AI Value to Paste

Identifier (Entity ID)

Entity ID (Audience URI)

Reply URL (Assertion Consumer Service URL)

ACS URL

9
Click Set up single sign on from the application overview.
Step #9: Click Set up single sign on from the application overview.
10
Select SAML as your sign-on method.
Step #10: Select SAML as your sign-on method.
11
Click Edit in the Basic SAML Configuration section.
Step #11: Click Edit in the Basic SAML Configuration section.
12
Click Add identifier and paste the Glitter AI Entity ID.
Step #12: Click Add identifier and paste the Glitter AI Entity ID.
13
Click Add reply URL and paste the Glitter AI ACS URL.
Step #13: Click Add reply URL and paste the Glitter AI ACS URL.
14
Click Save to apply the configuration.
Step #14: Click Save to apply the configuration.

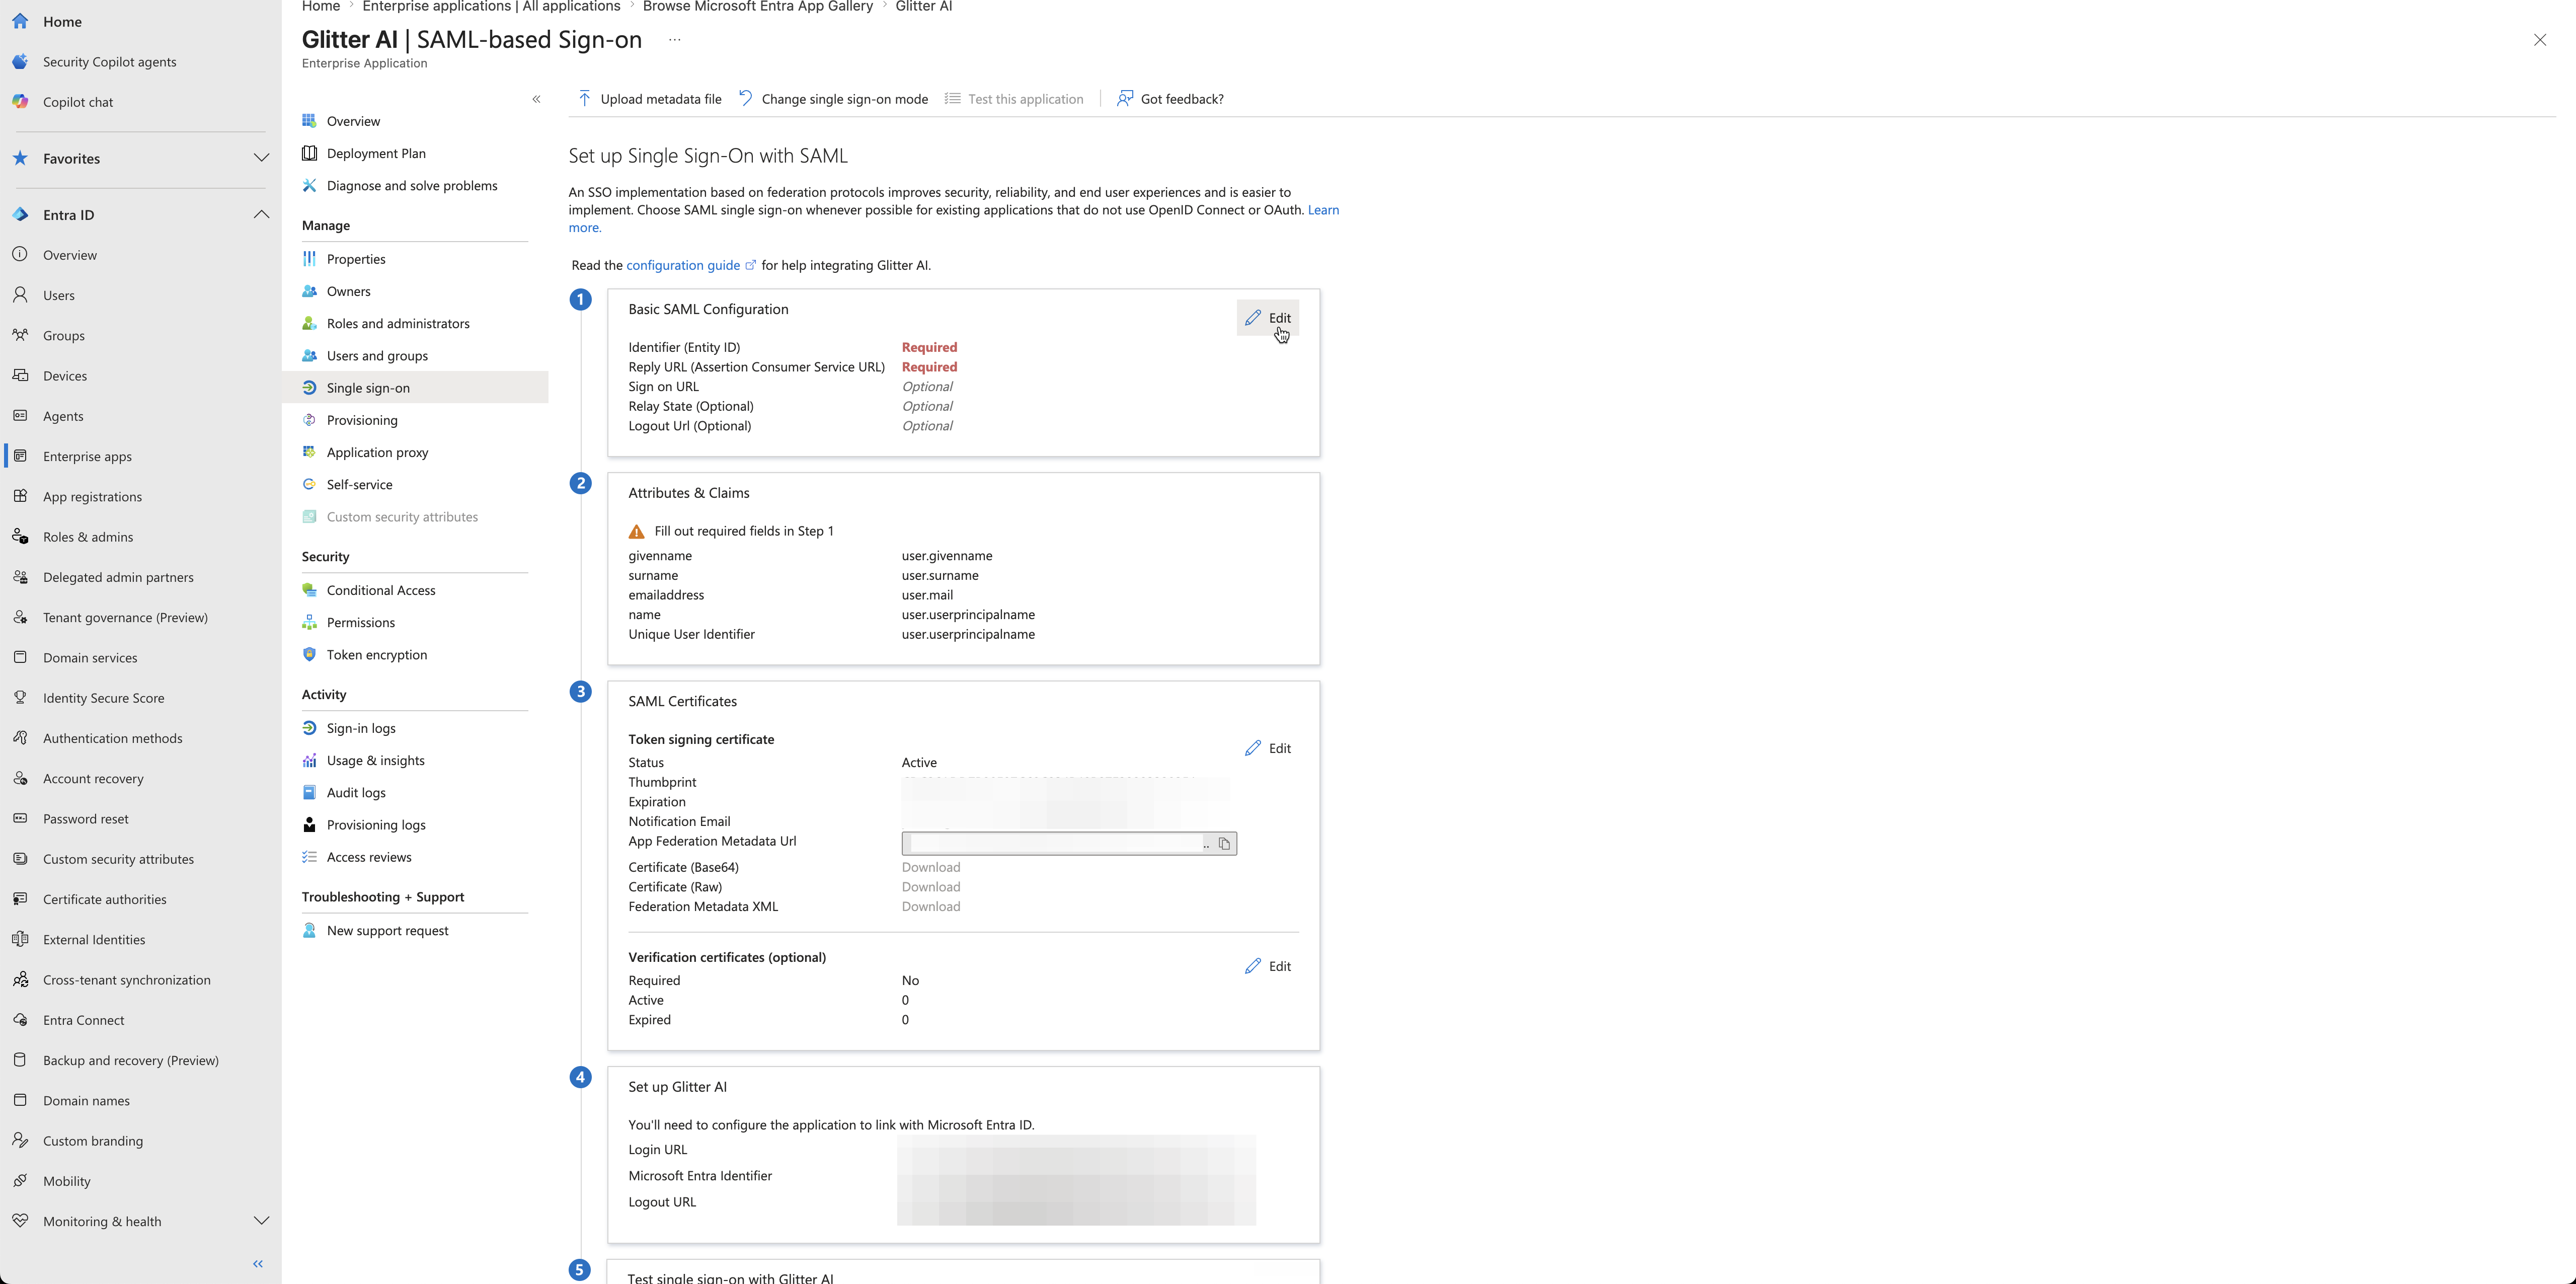
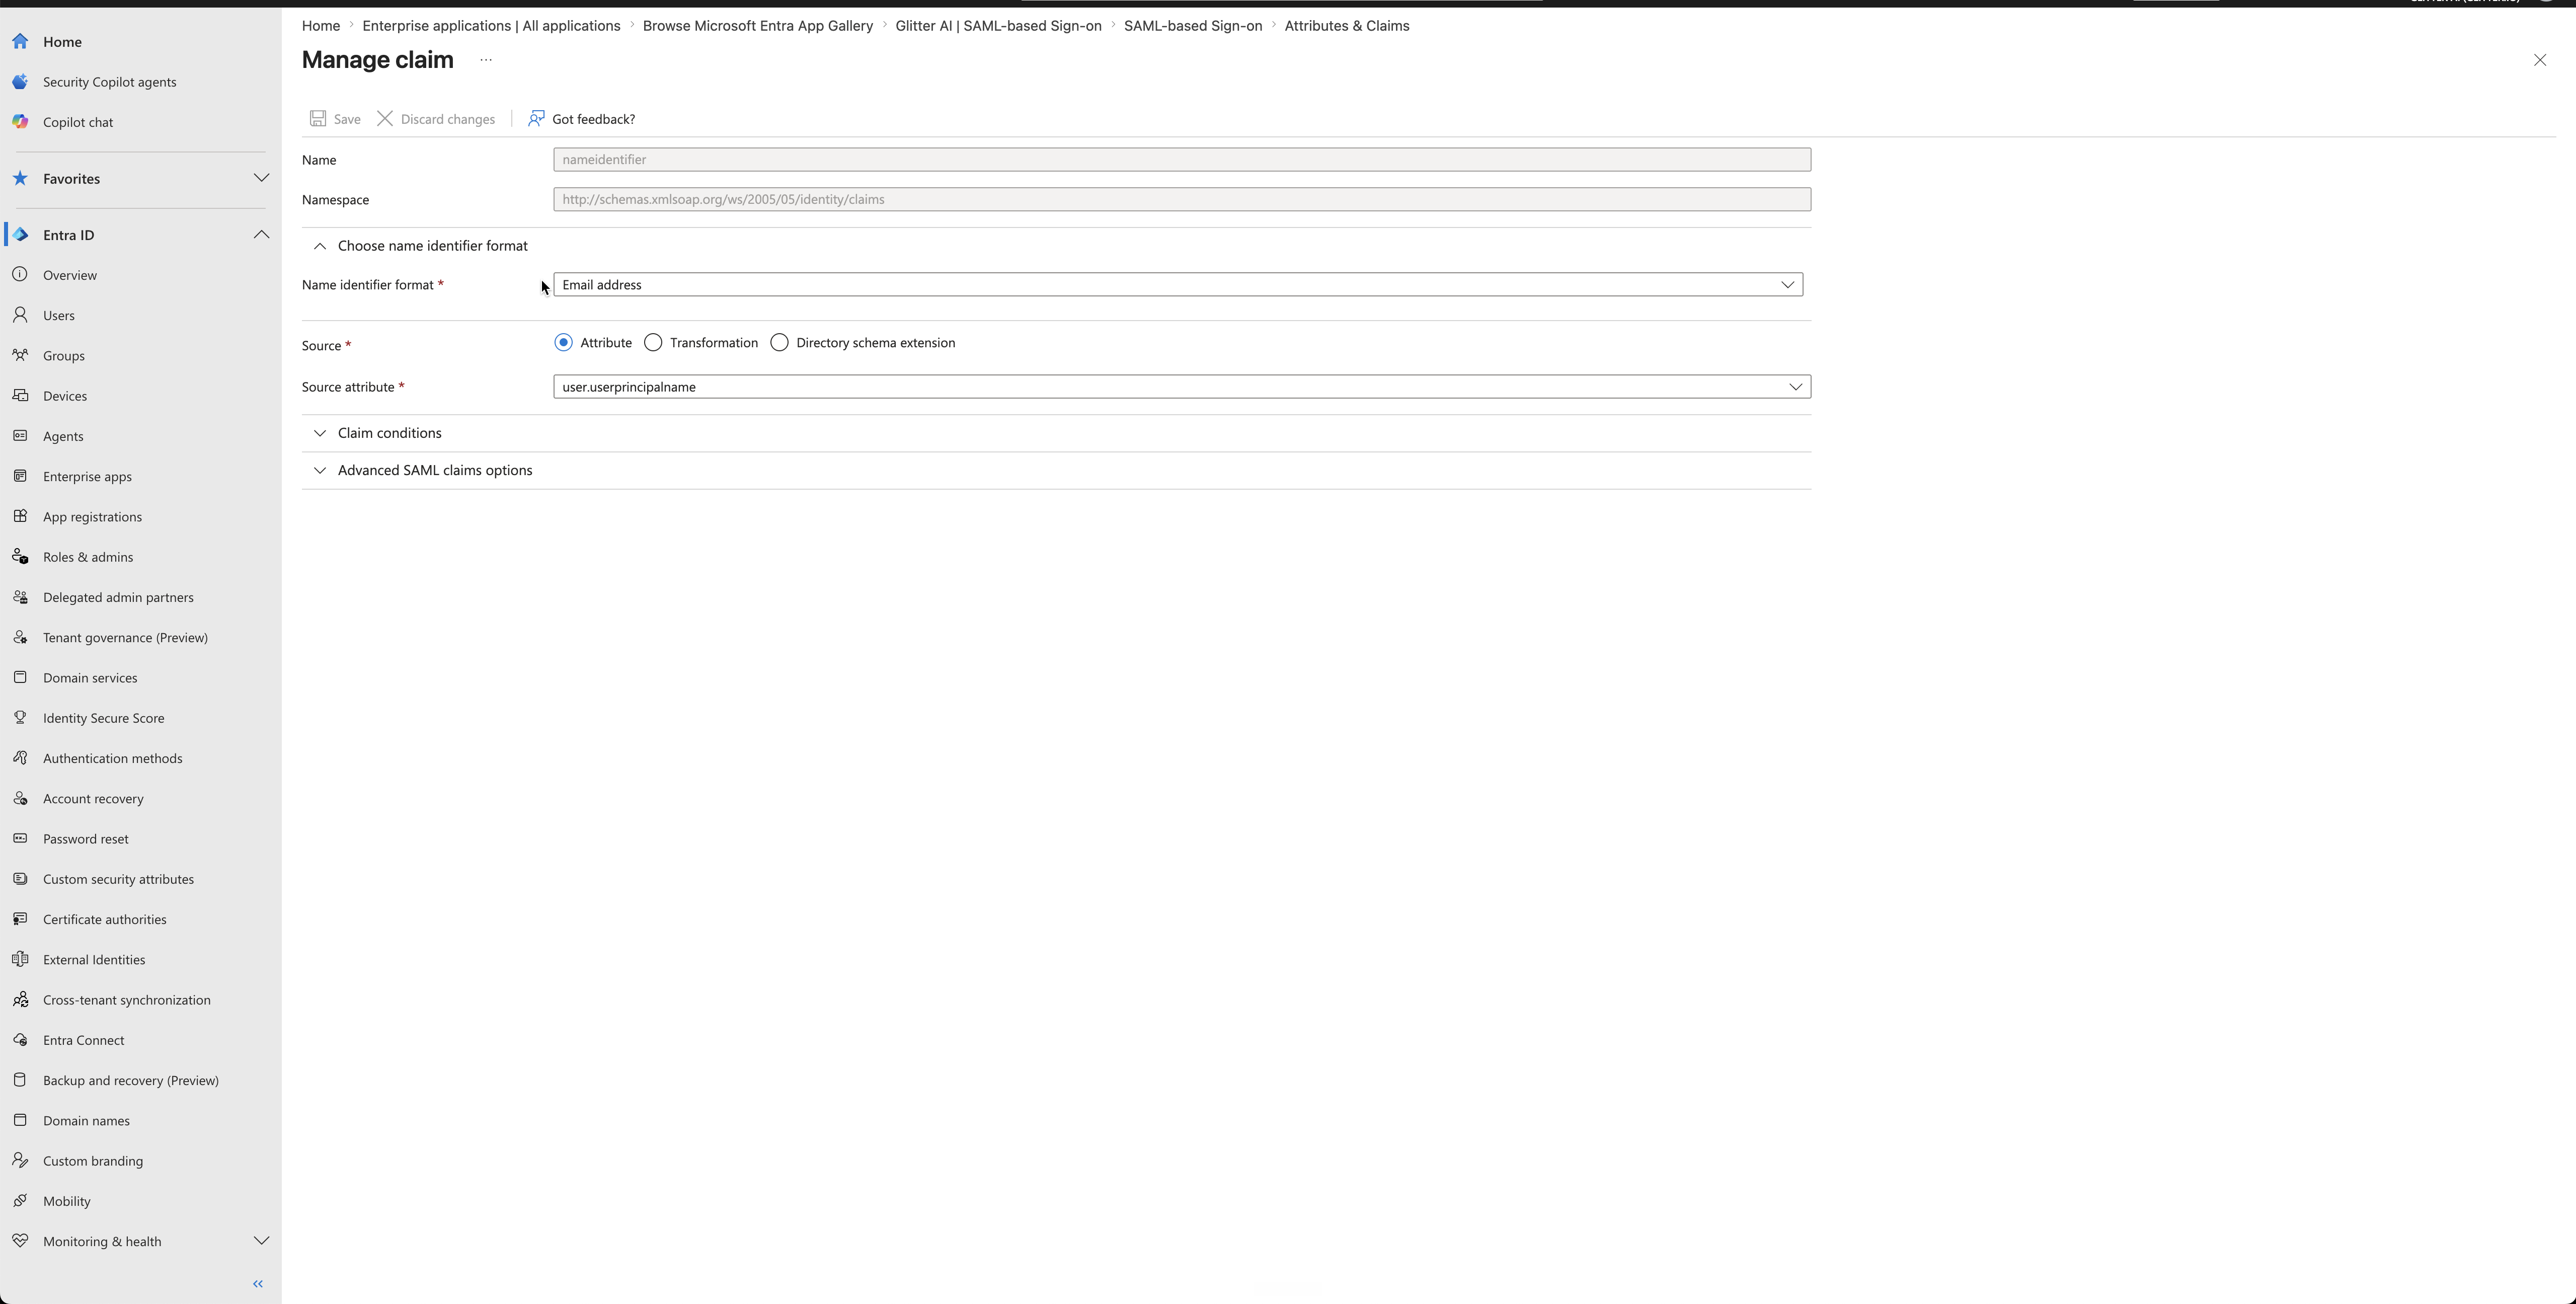
Verify Attributes and Claims

Glitter AI requires users to pass an email address format to authenticate correctly.

15
Click Edit in the Attributes & Claims section.
Step #15: Click Edit in the Attributes & Claims section.
16
Verify that the Unique User Identifier maps to user.userprincipalname.
Step #16: Verify that the Unique User Identifier maps to user.userprincipalname.
17
Ensure the Name identifier format is configured to output an email address. If the defaults are correct, you can close this pane.
Step #17: Ensure the Name identifier format is configured to output an email address. If the defaults are correct, you can close this pane.

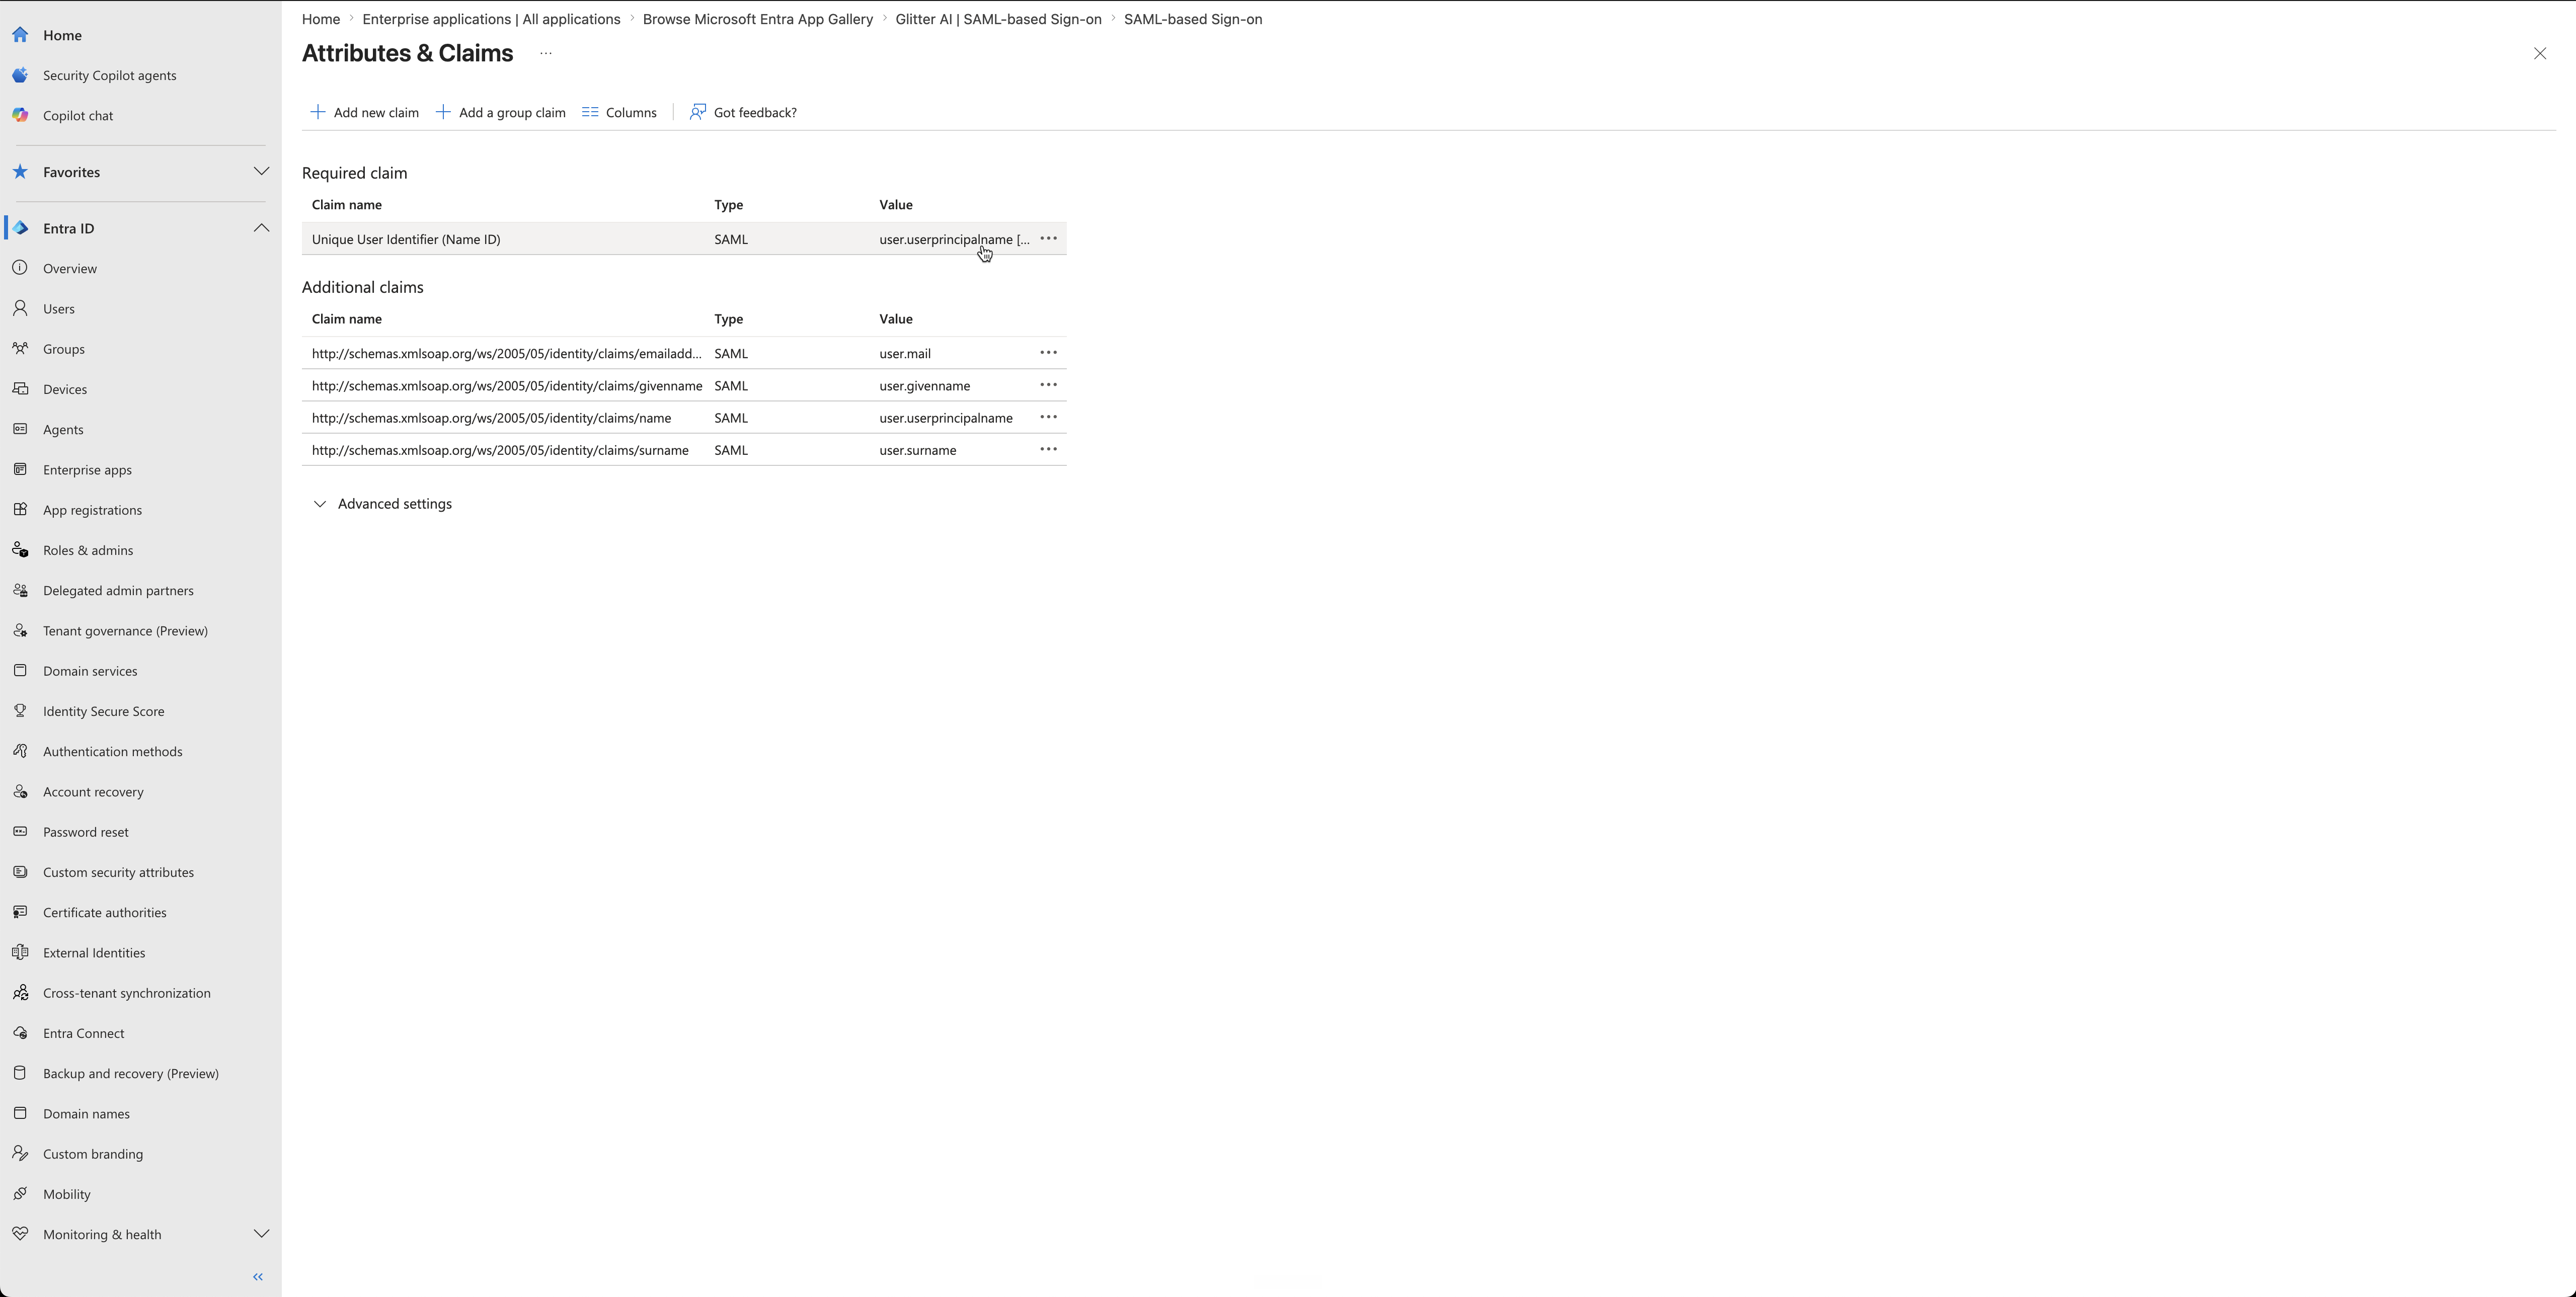
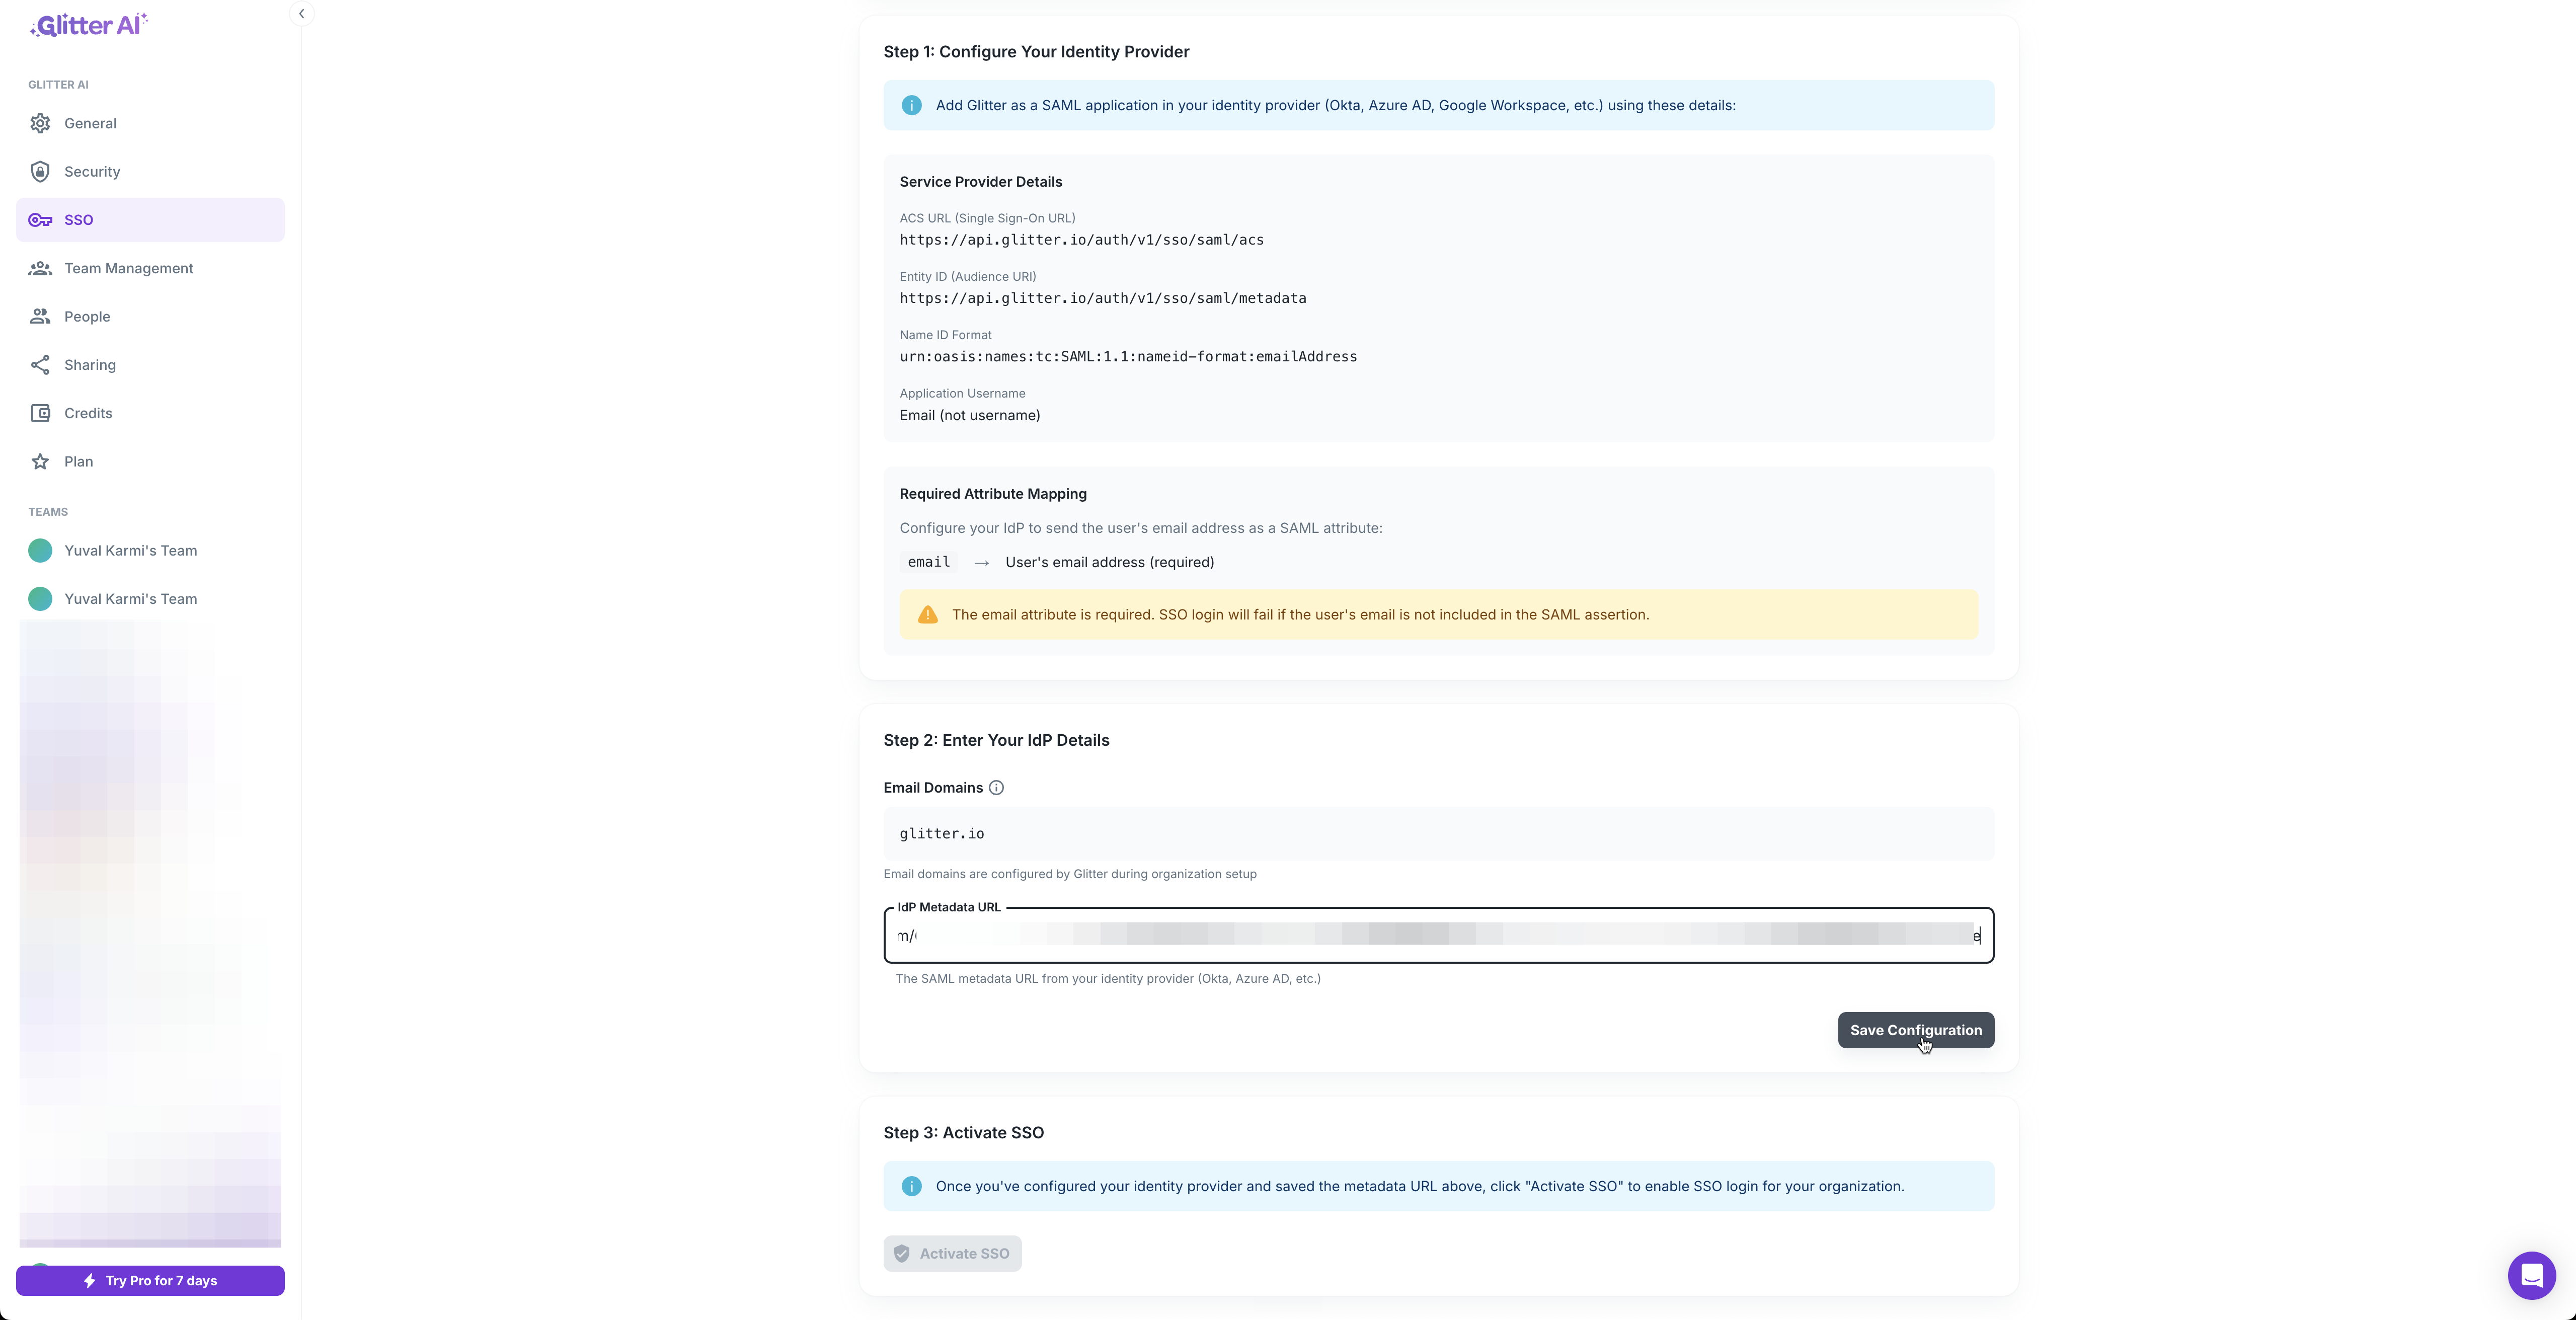
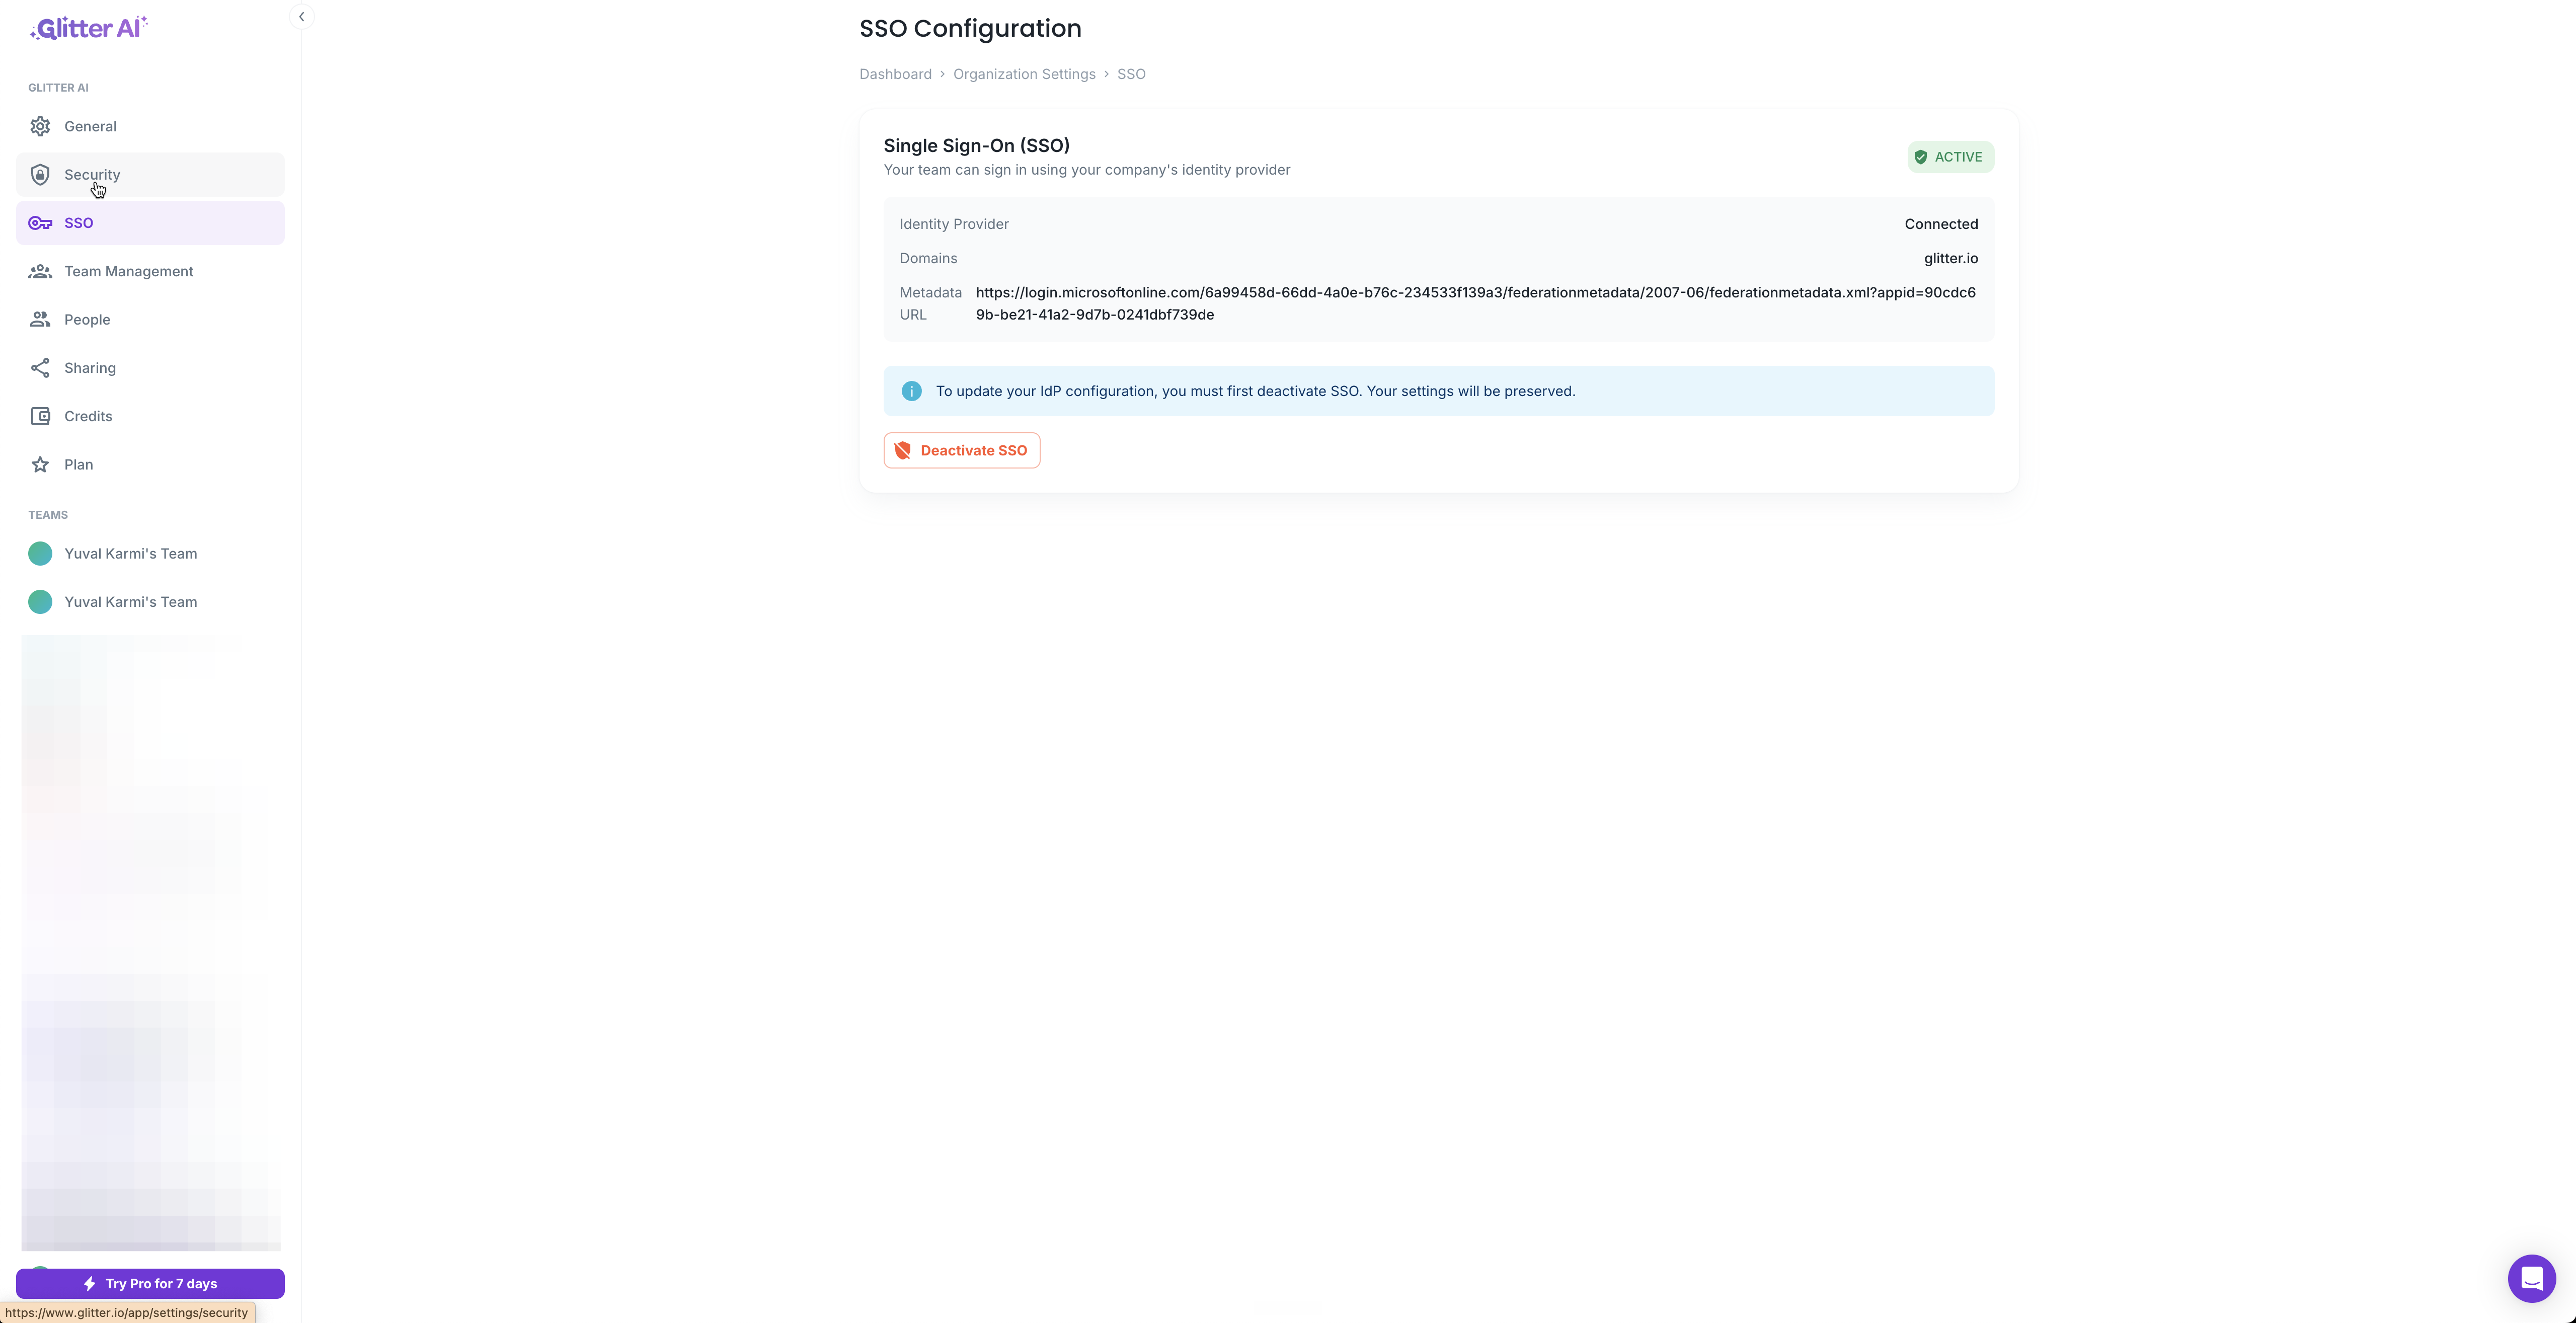
Finalize Configuration in Glitter AI

With Entra ID ready, you must provide its connection details back to Glitter AI.

18
In Entra ID under the SAML Certificates section, click the copy icon next to App Federation Metadata Url.
Step #18: In Entra ID under the SAML Certificates section, click the copy icon next to App Federation Metadata Url.
19
Return to the Glitter AI SSO Settings and paste the copied URL into the IdP Metadata URL field.
Step #19: Return to the Glitter AI SSO Settings and paste the copied URL into the IdP Metadata URL field.
20
Click Save Configuration.
Step #20: Click Save Configuration.
21
Click Activate SSO to finalize the setup.
Step #21: Click Activate SSO to finalize the setup.

(Optional) Enforce SSO Only

By default, users can sign in using SSO or email OTP. You can enforce strict SSO routing to mandate that users authenticate via Entra ID.

22
Navigate to the Security tab in the Glitter AI sidebar.
Step #22: Navigate to the Security tab in the Glitter AI sidebar.
23
Change the Login Method to SSO only.
Step #23: Change the Login Method to SSO only.

FAQ

Q: Why isn't SSO authentication working for my users?

A: The most common cause is a mismatch in attributes. Ensure the "Unique User Identifier" in Entra ID's Attributes & Claims settings properly maps to user.userprincipalname and is formatted to pass the user's email address.

Q: Can I use both SSO and Email OTP login options simultaneously?

A: Yes. Under Glitter AI's Security tab, you can set the Login Method to "Both methods" to support a mixed authentication approach.

Glossary

Term

Definition

ACS URL

Assertion Consumer Service URL. The destination where the Identity Provider (Entra ID) sends its SAML authentication response.

Identity Provider (IdP)

A system entity that creates, maintains, and manages identity information while providing authentication services (e.g., Microsoft Entra ID).

SAML

Security Assertion Markup Language. An open standard that allows identity providers to pass authorization credentials to service providers.

How to Configure Glitter AI SSO with Microsoft Entra ID