
How to Configure a Site-to-Site IPsec VPN on SonicWall
Learn how to configure a Site-to-Site IPsec VPN tunnel on a SonicWall appliance, from creating address objects to setting IKE proposals and keep alive.
Setting up a Site-to-Site IPsec VPN on a SonicWall firewall involves creating an address object for the remote network, defining the VPN policy, and configuring encryption and authentication protocols. Follow these steps to build and configure your secure VPN tunnel.
Step 1: Log in to your SonicWall
.
Step 2: Create a Remote Address Object
Before you create the VPN policy, define an Address Object representing the remote network.

. 2.

. 3.

. 4.
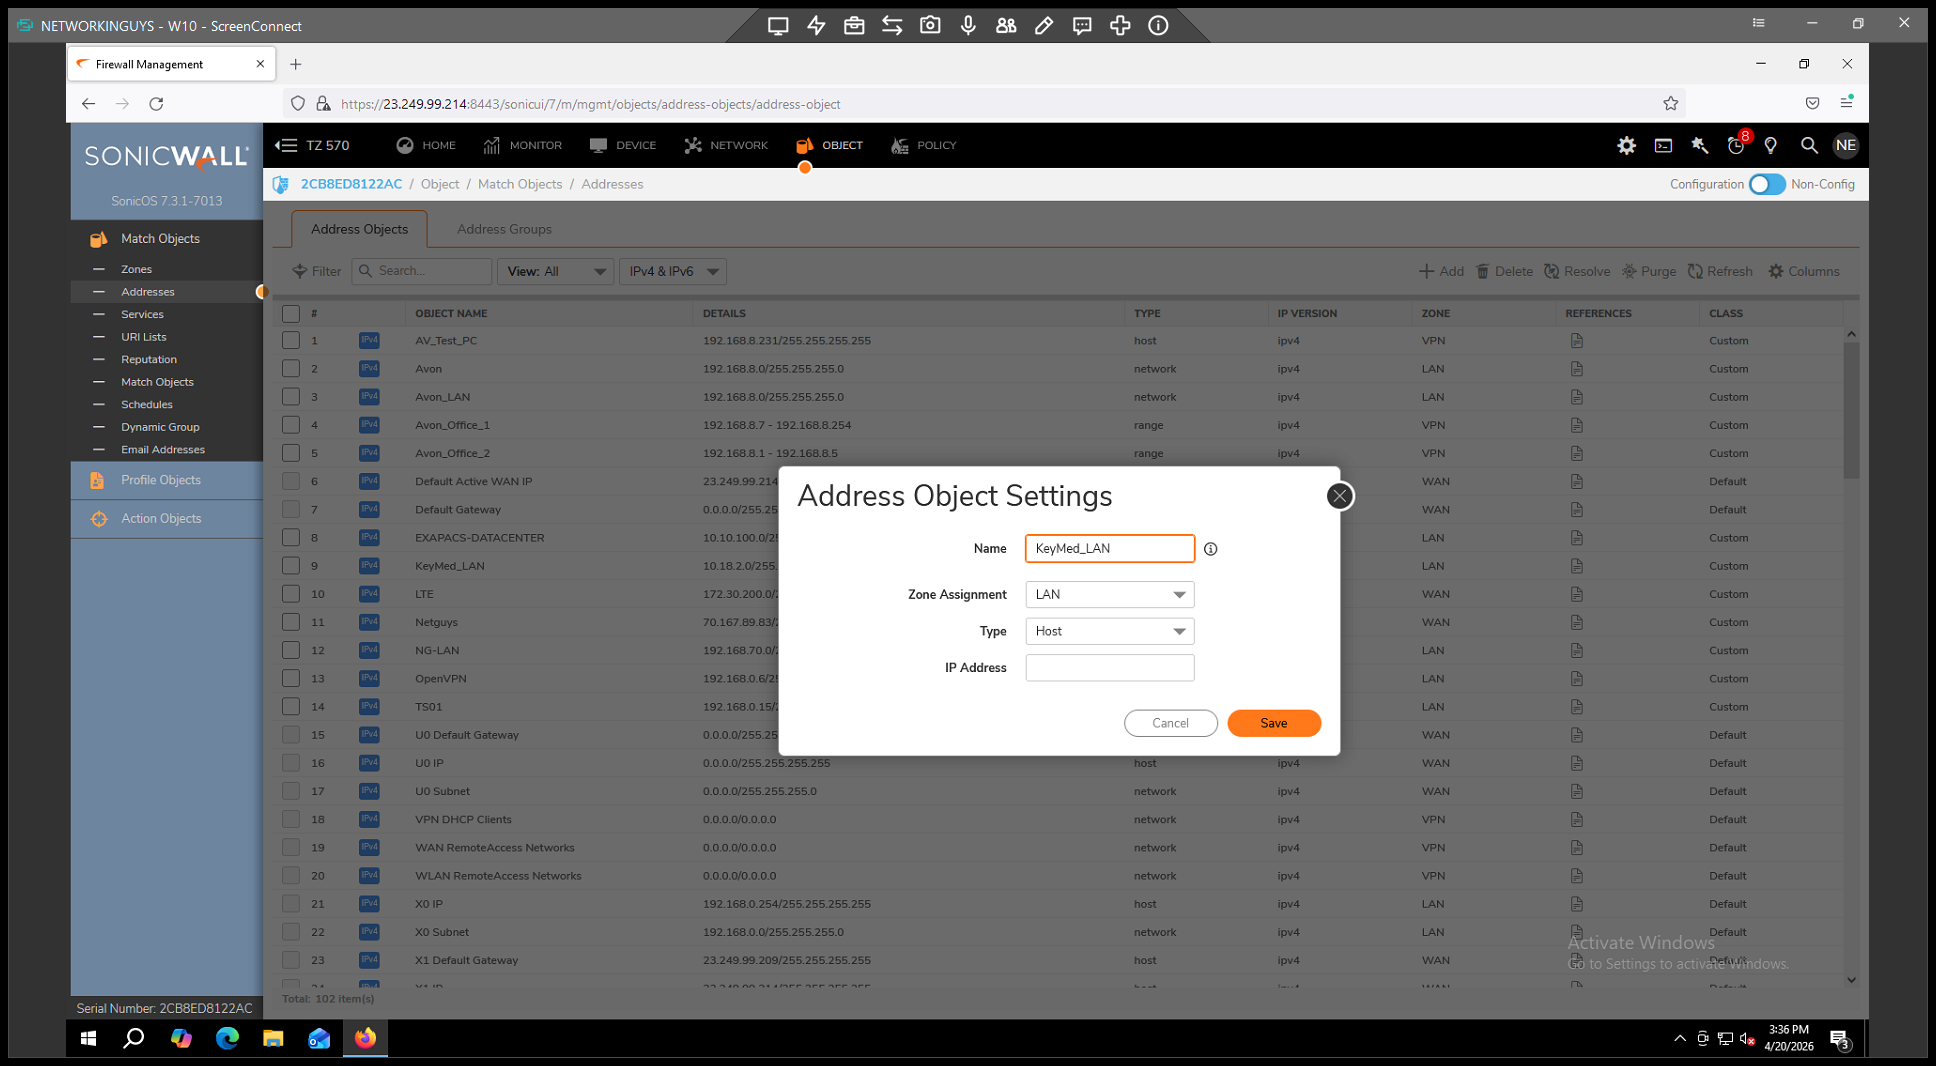
for the remote network (e.g., "Vendor_LAN"). 5.
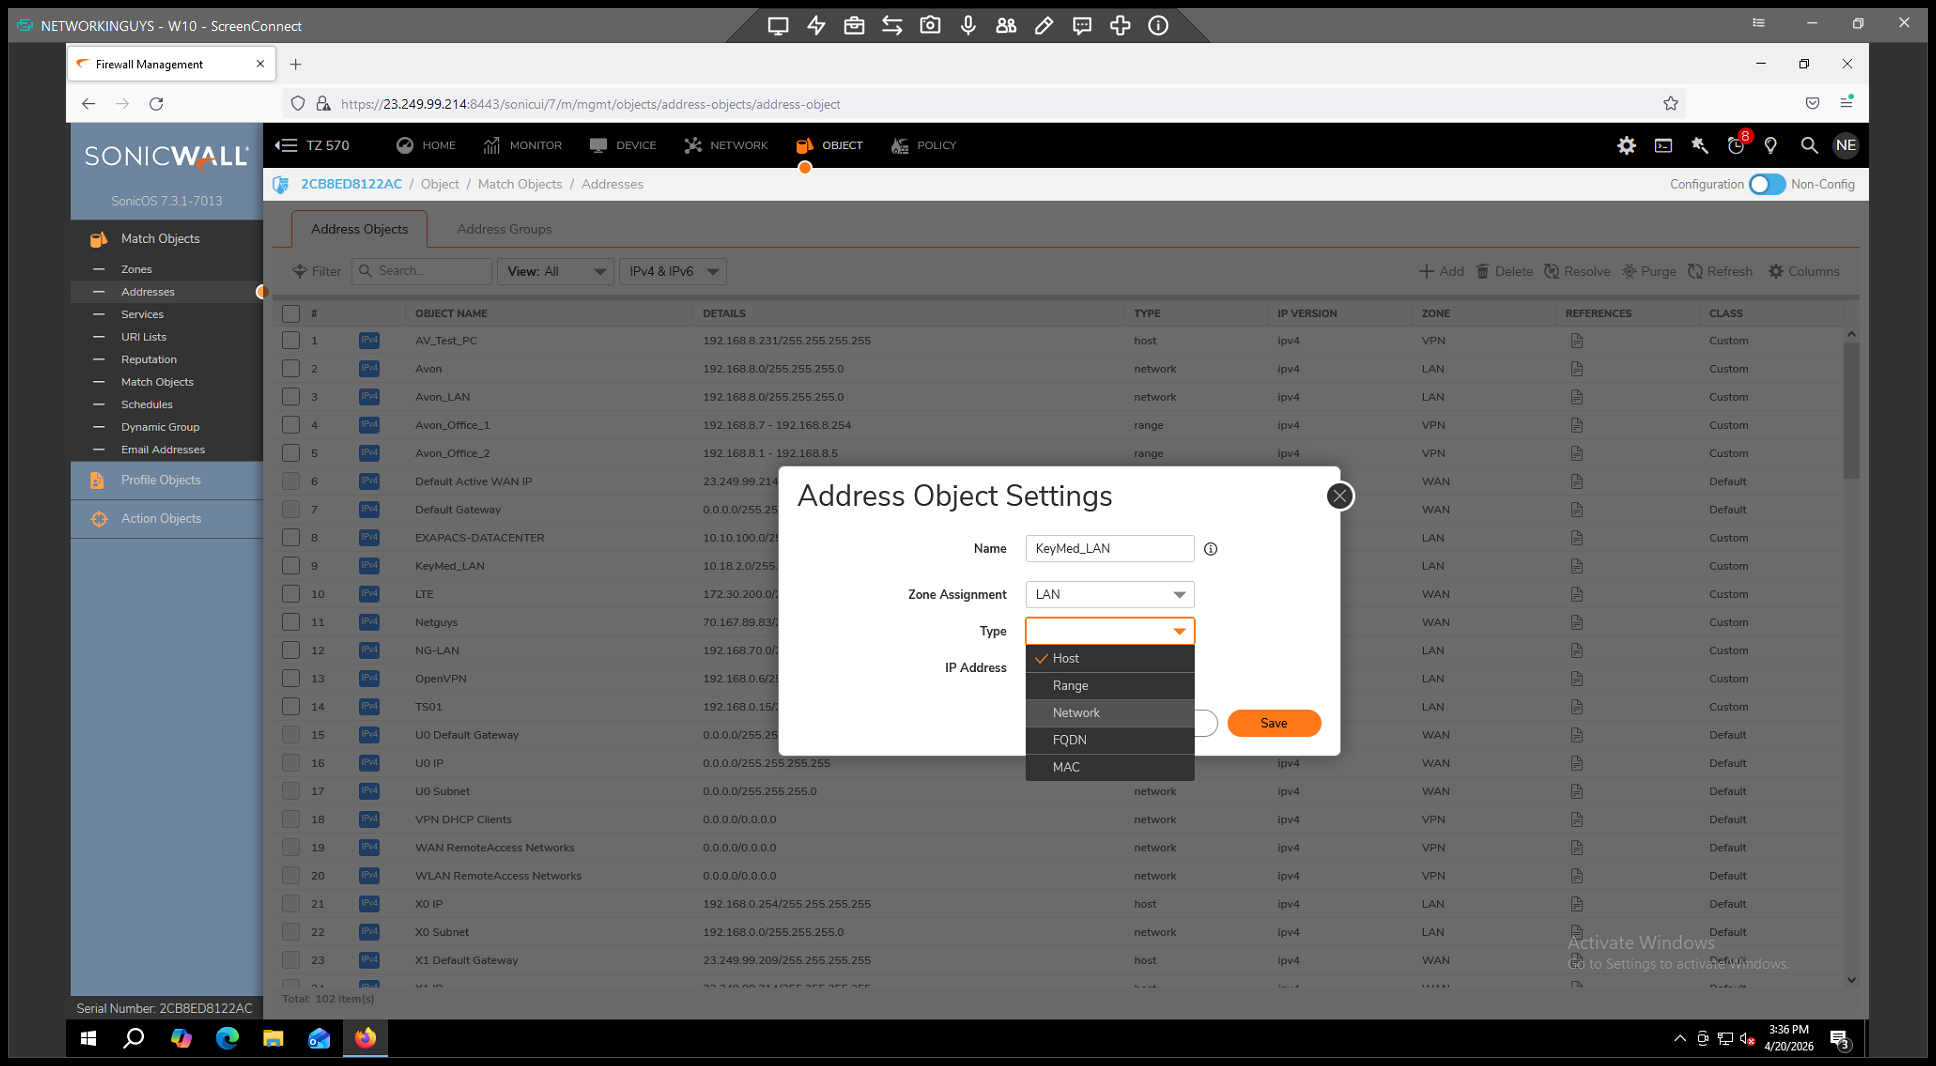
from the Type dropdown. 6.
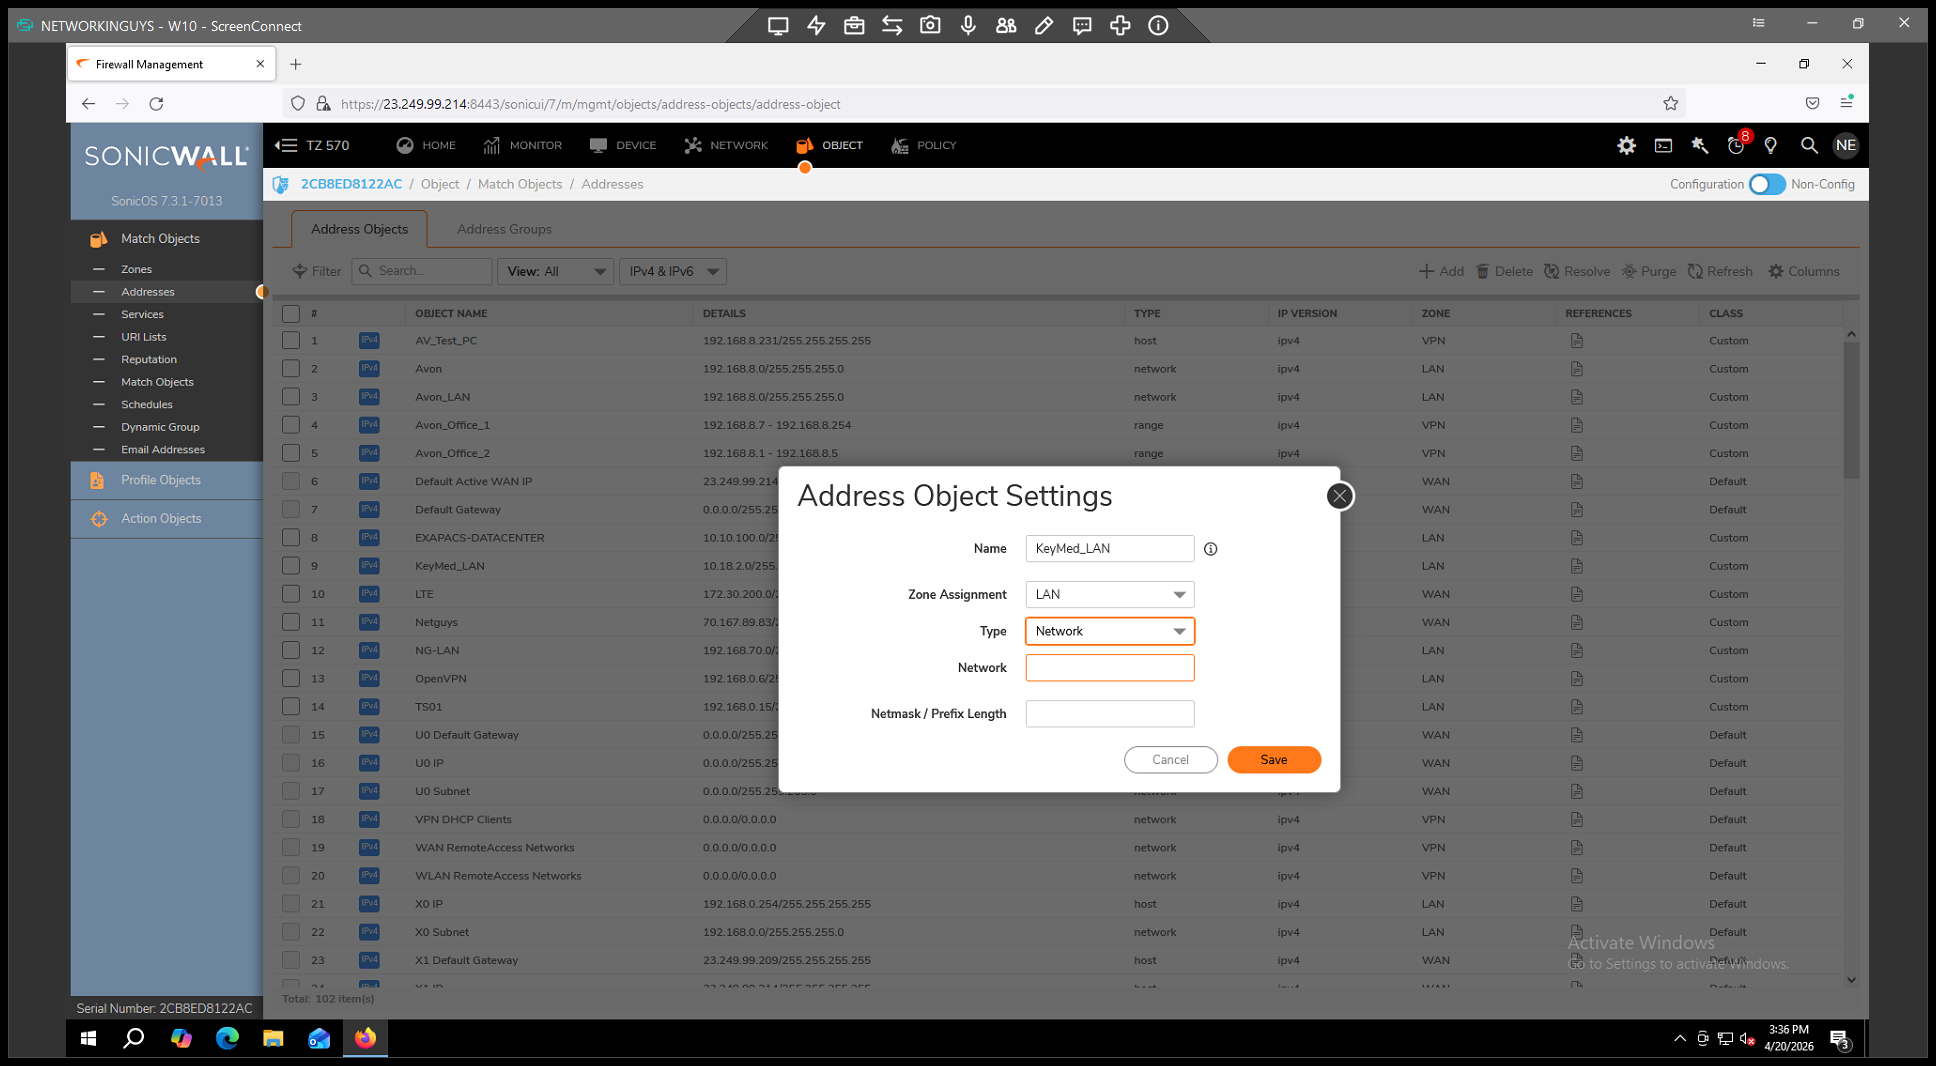
of the remote side. 7.

. 8.

to store the object.
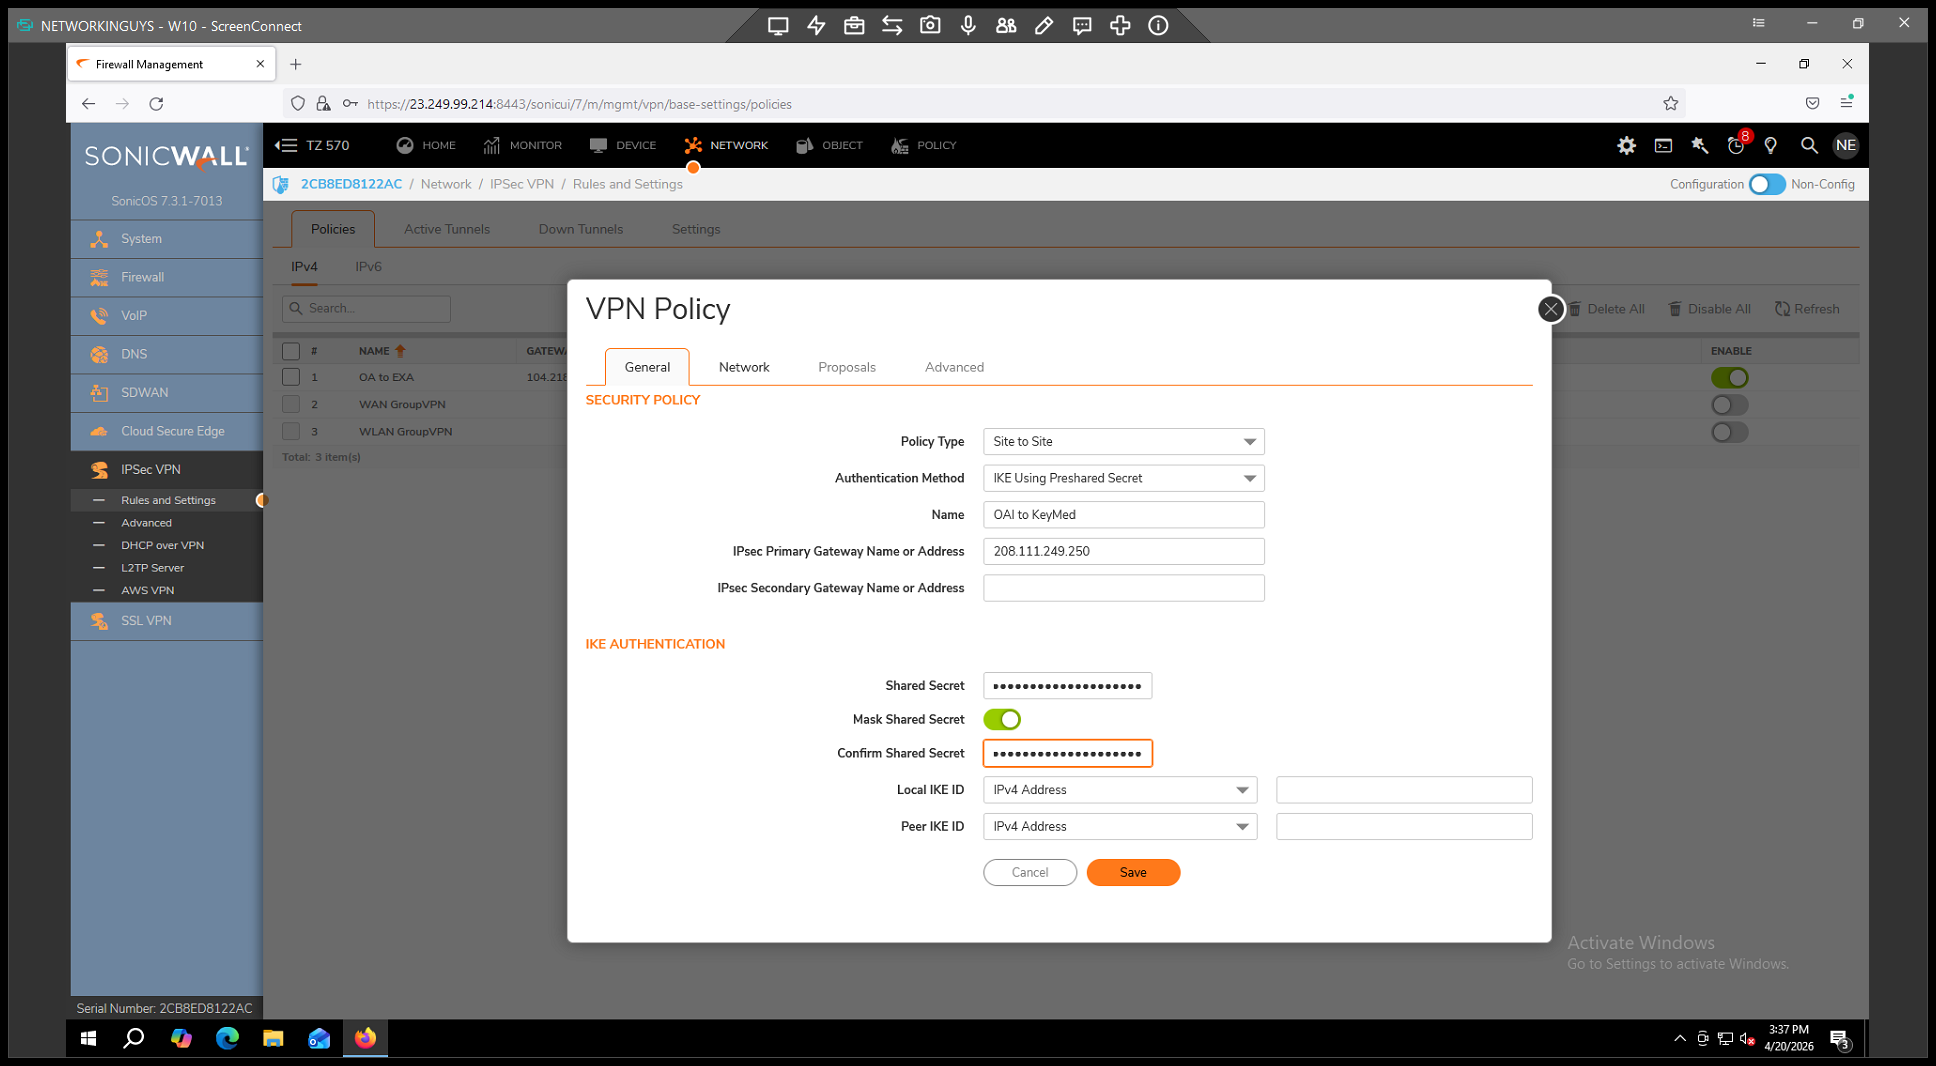
Step 3: Configure VPN General Settings

. 2.

. 3.
. 4. In the General tab,
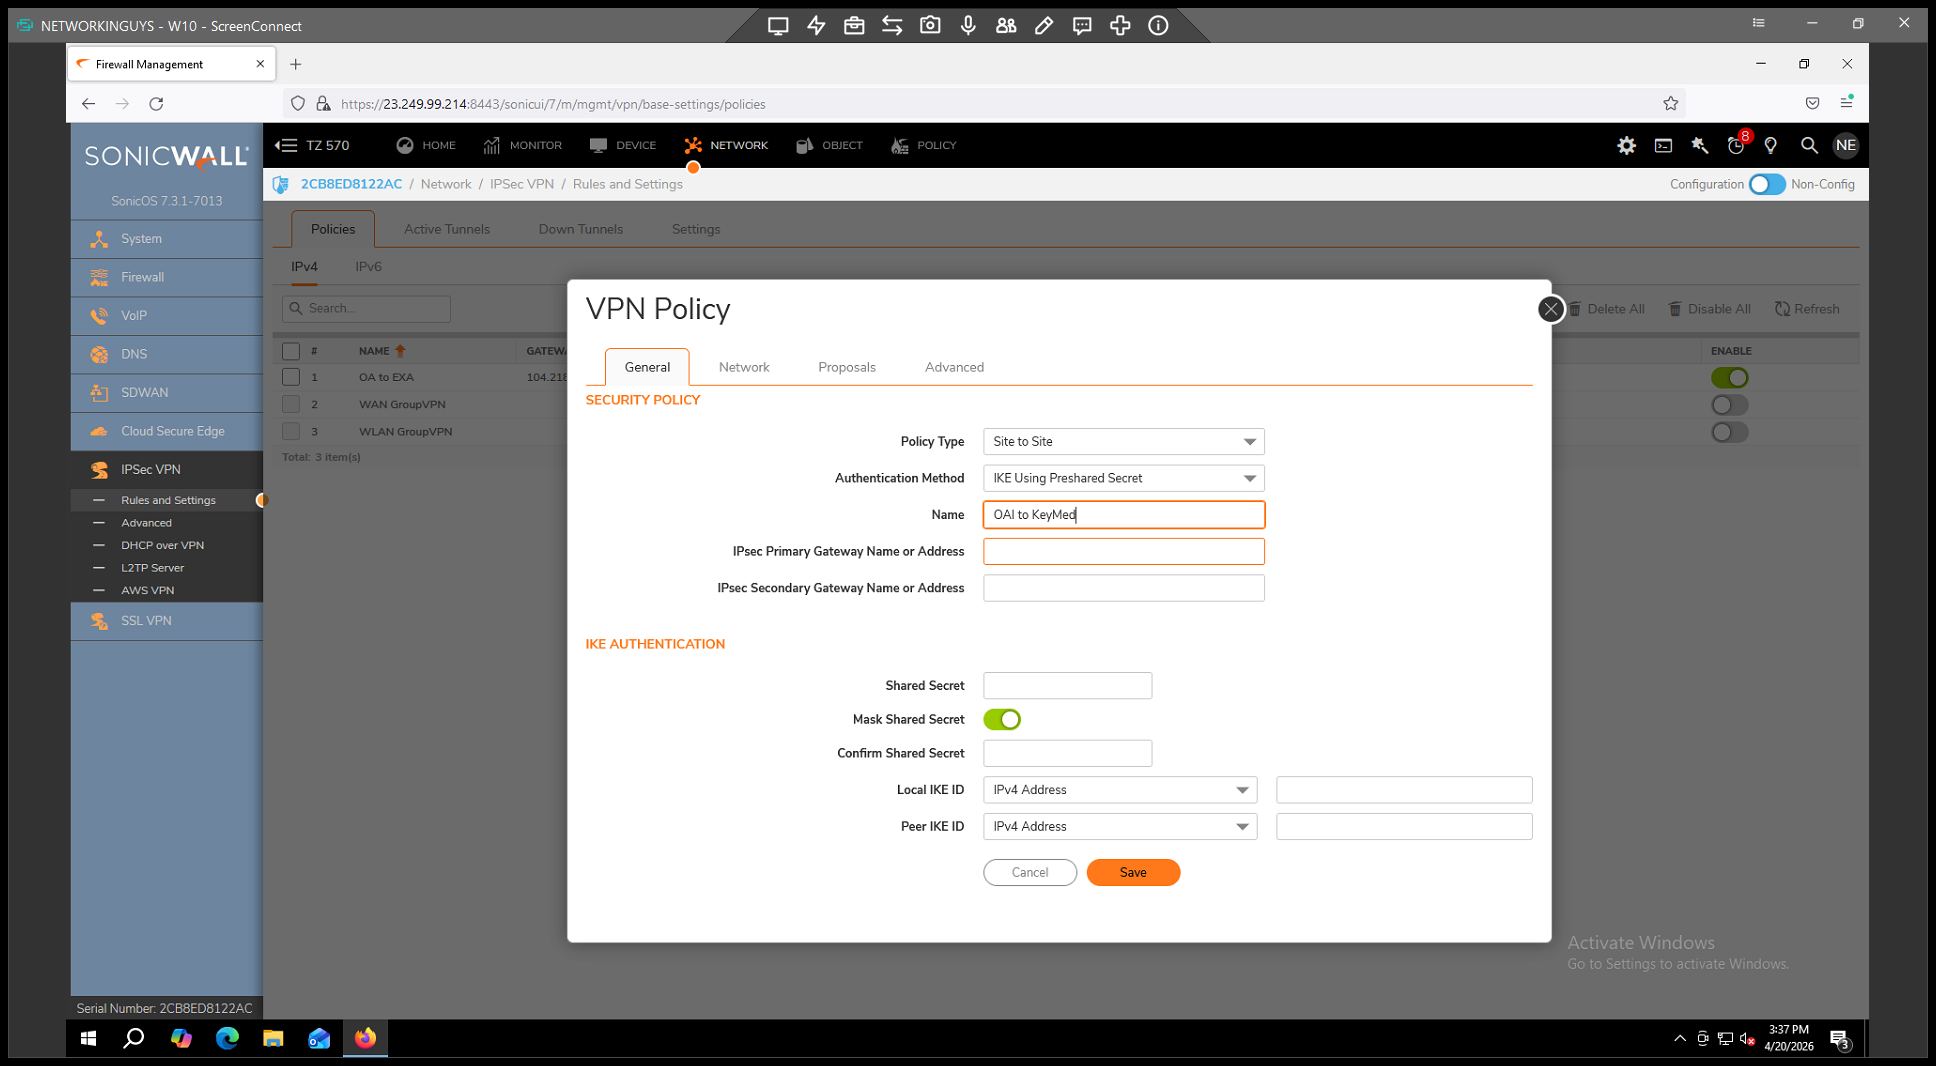
for the VPN policy. 5.
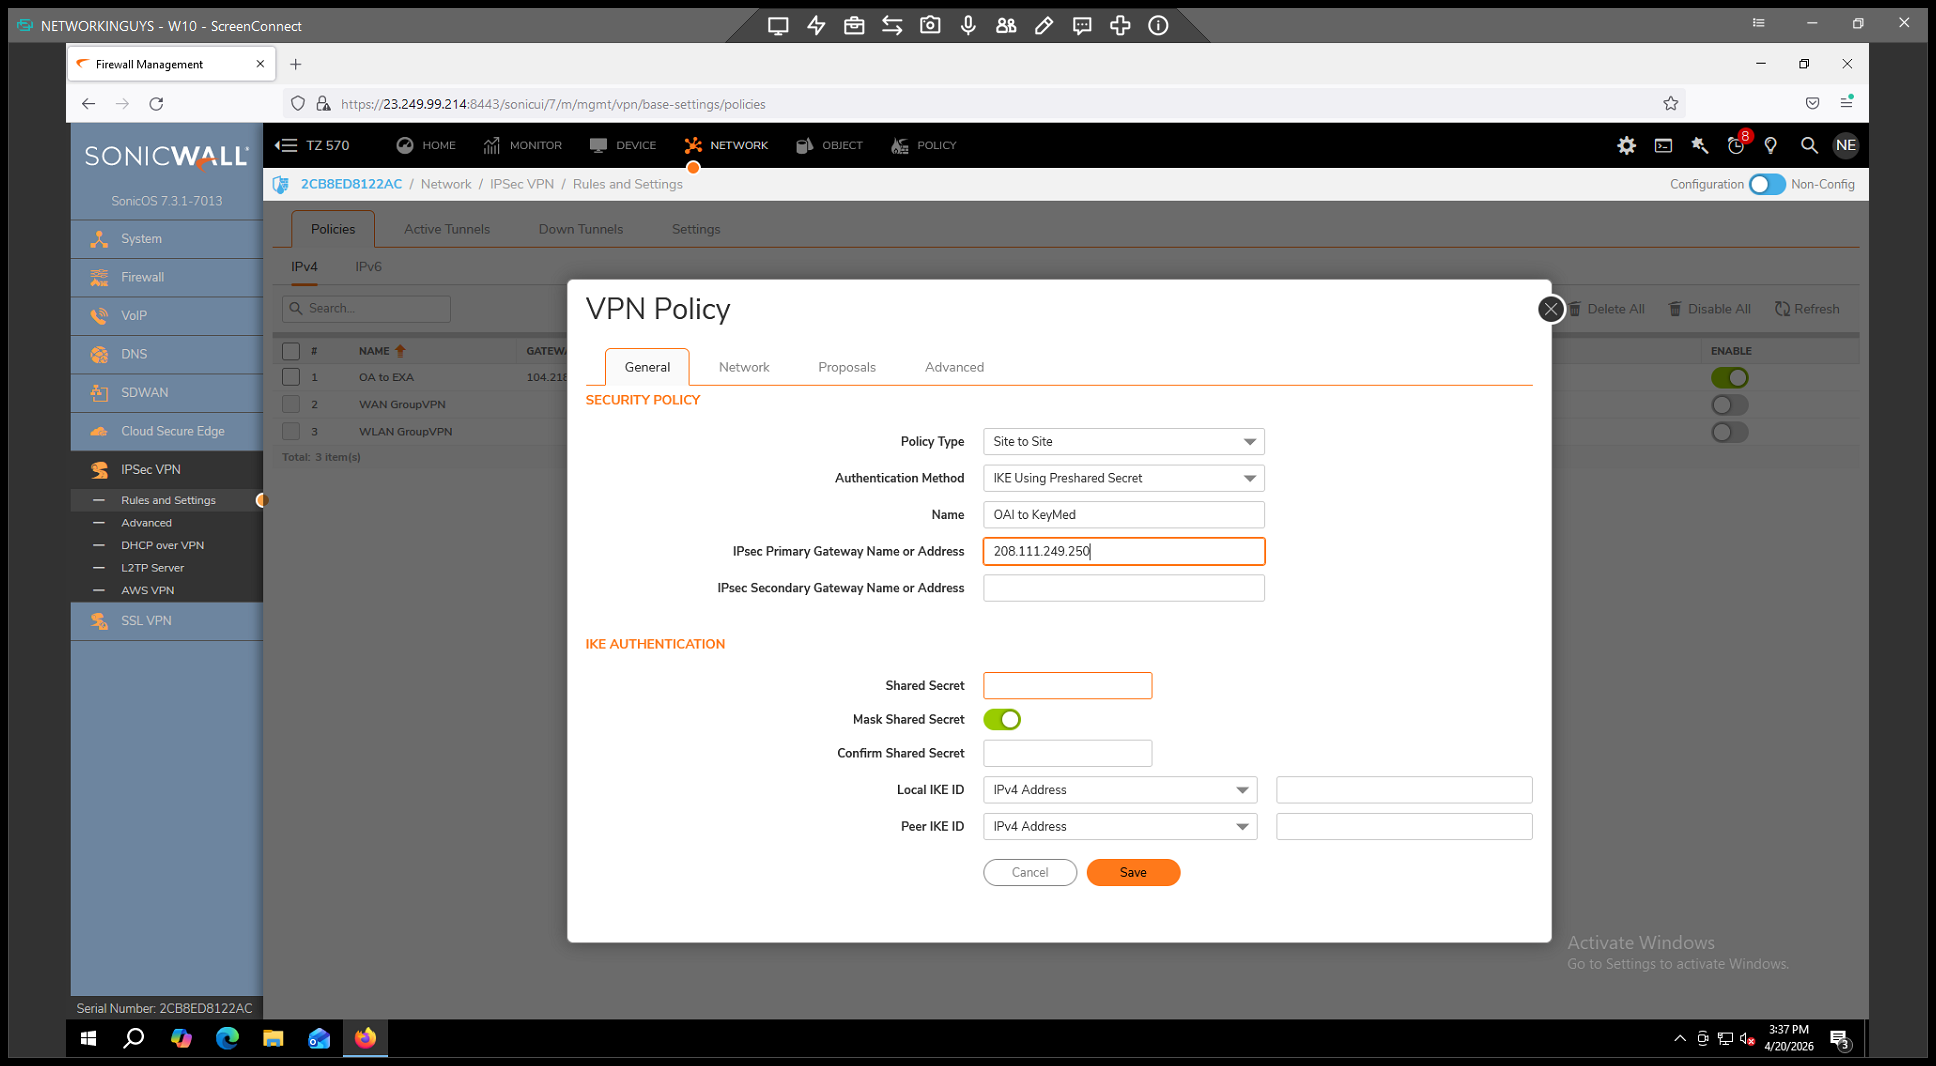
into the IPsec Primary Gateway field. 6.
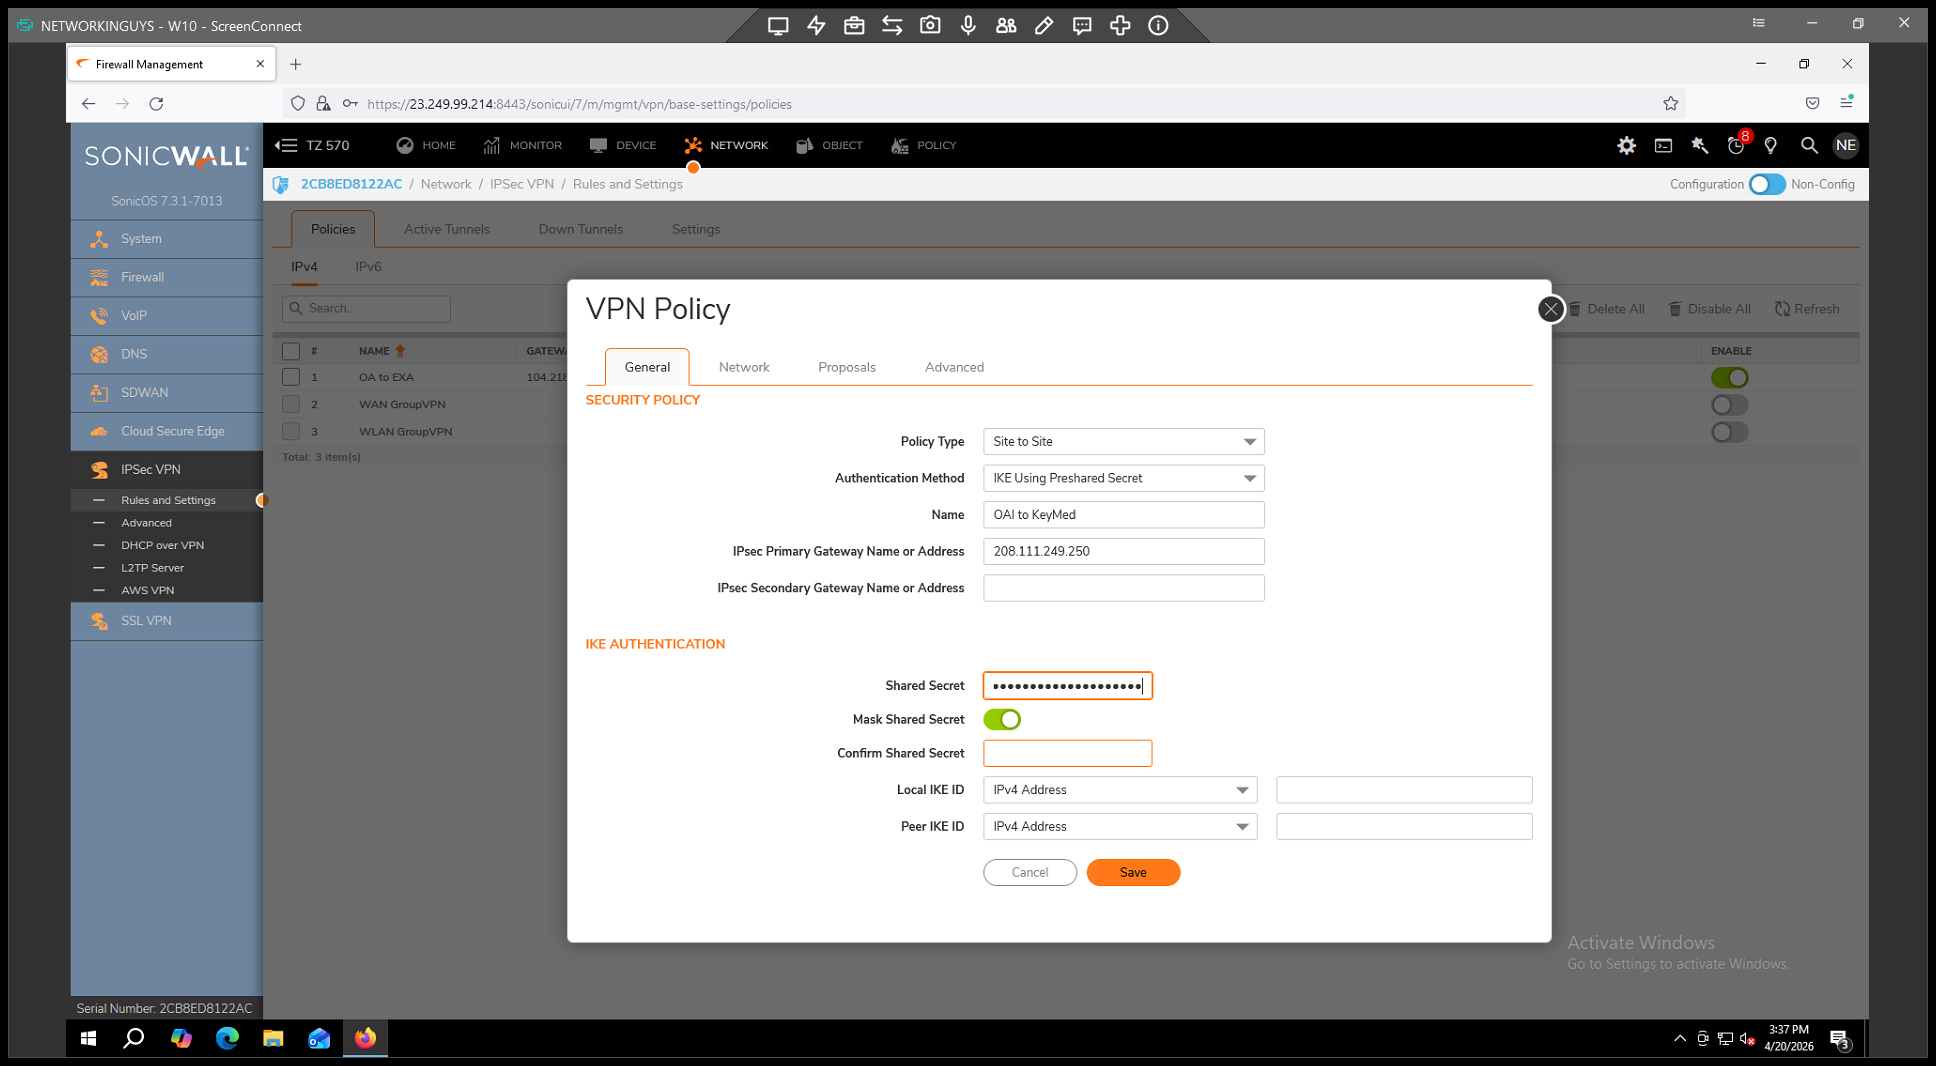
(the password used to authenticate both ends of the tunnel).
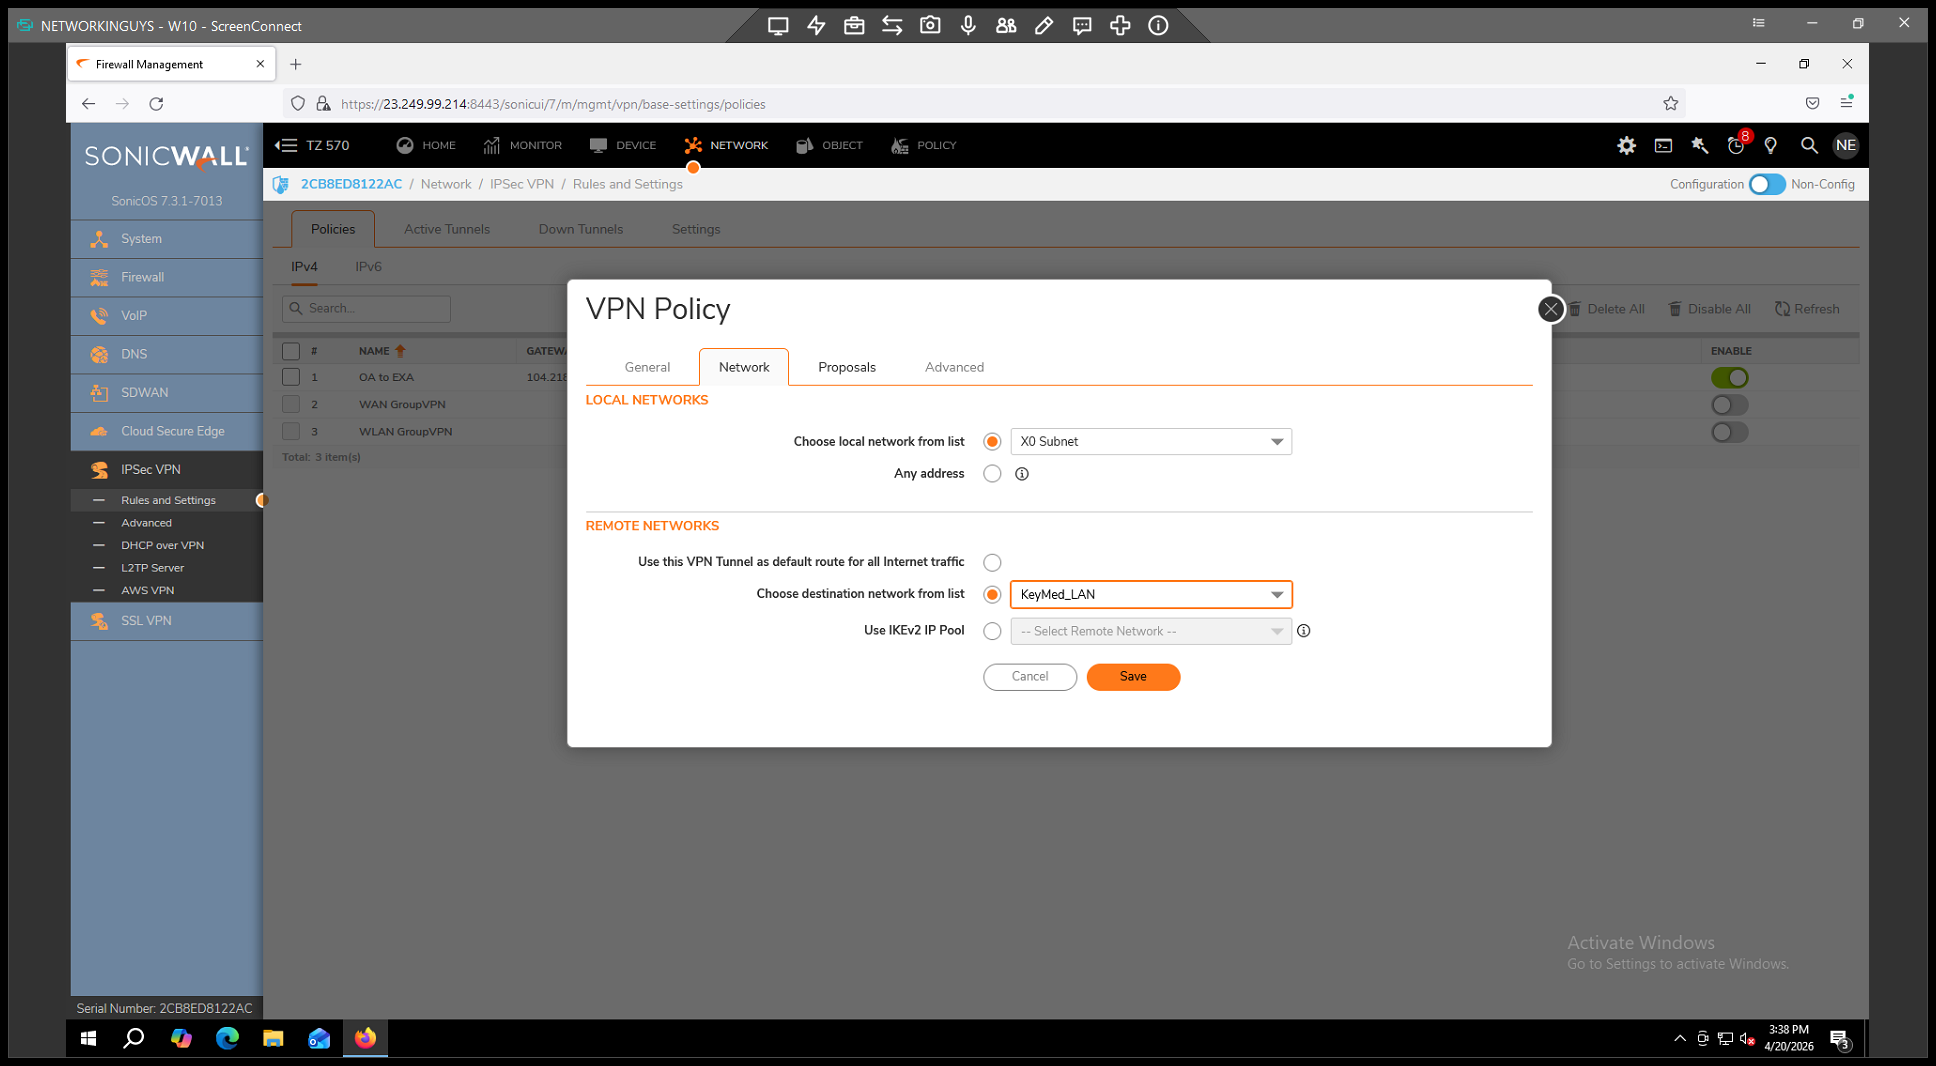
Step 4: Define Local and Remote Networks
Now, define which networks are allowed to communicate across the tunnel.
within the policy configuration. 2.
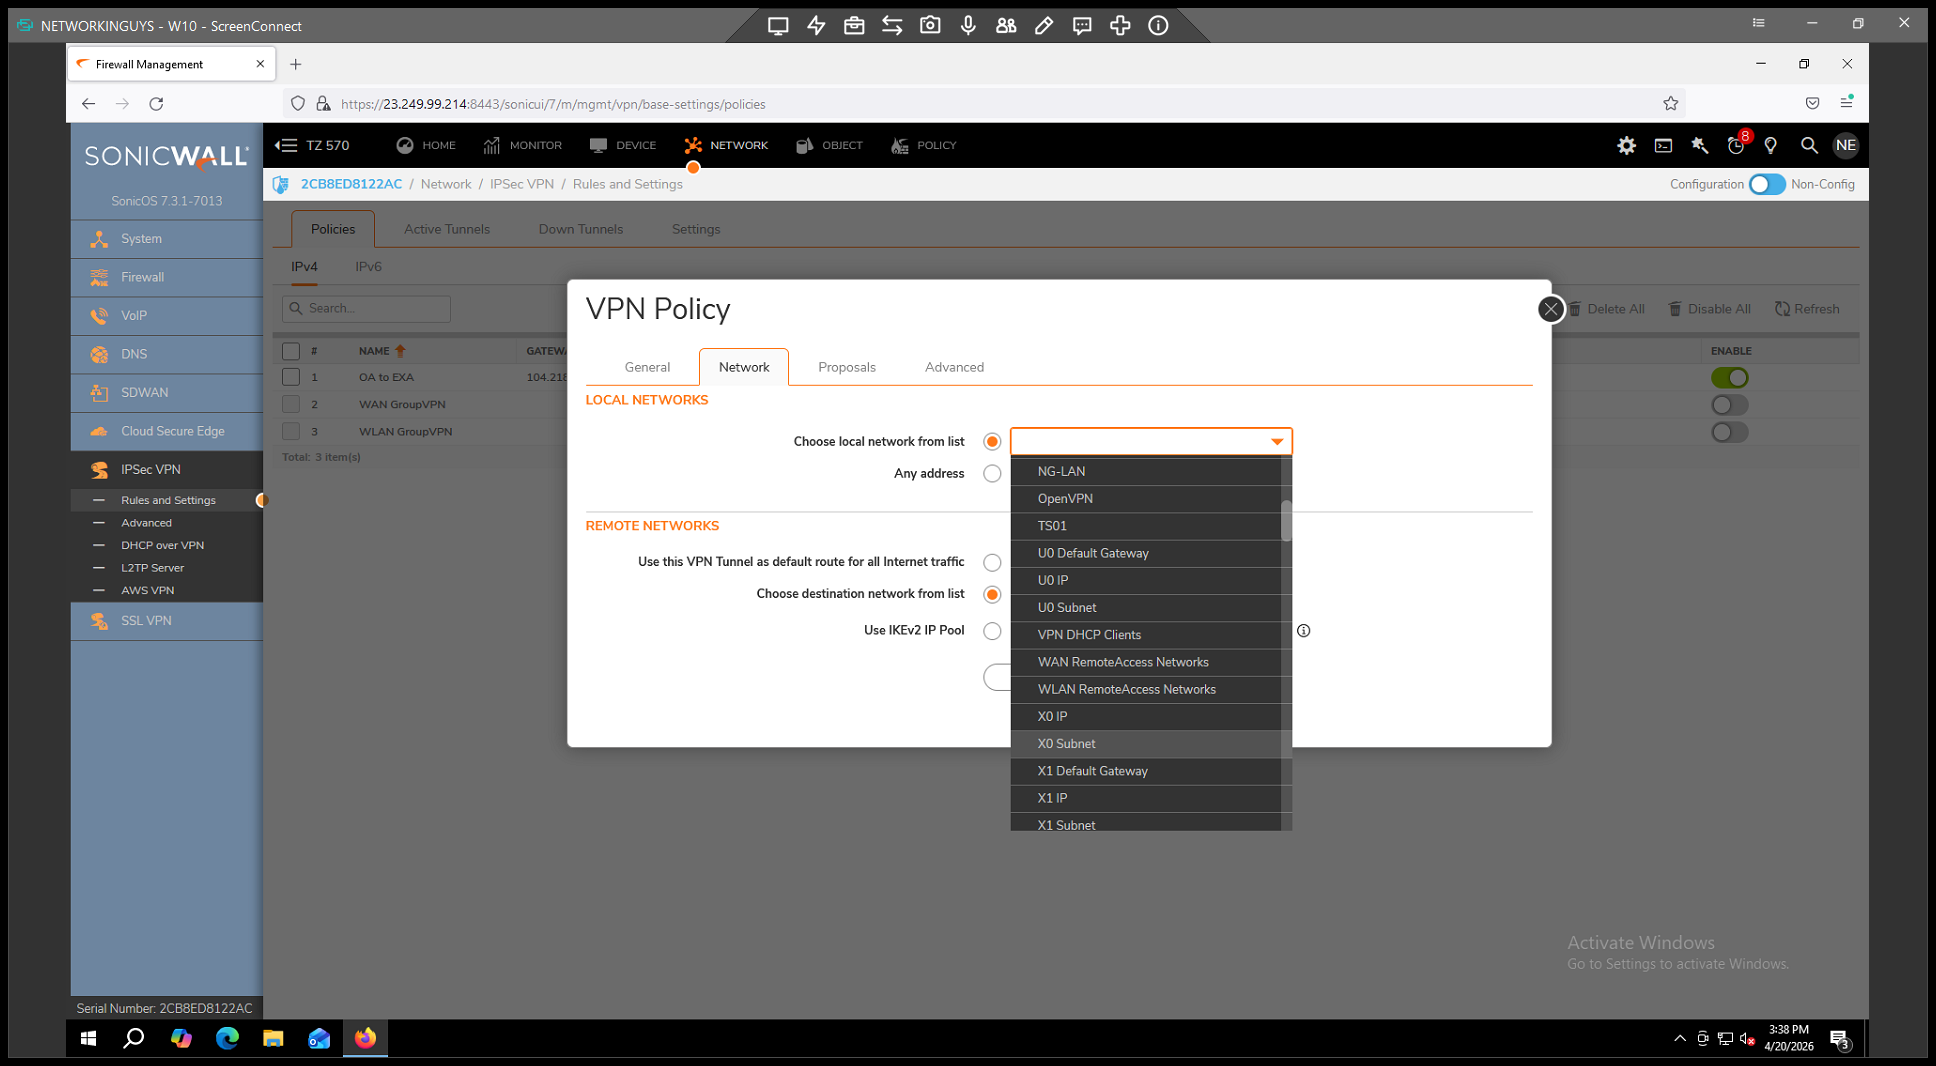
(for instance, the X0 subnet) from the local network dropdown list. 3. In the Remote Networks section,
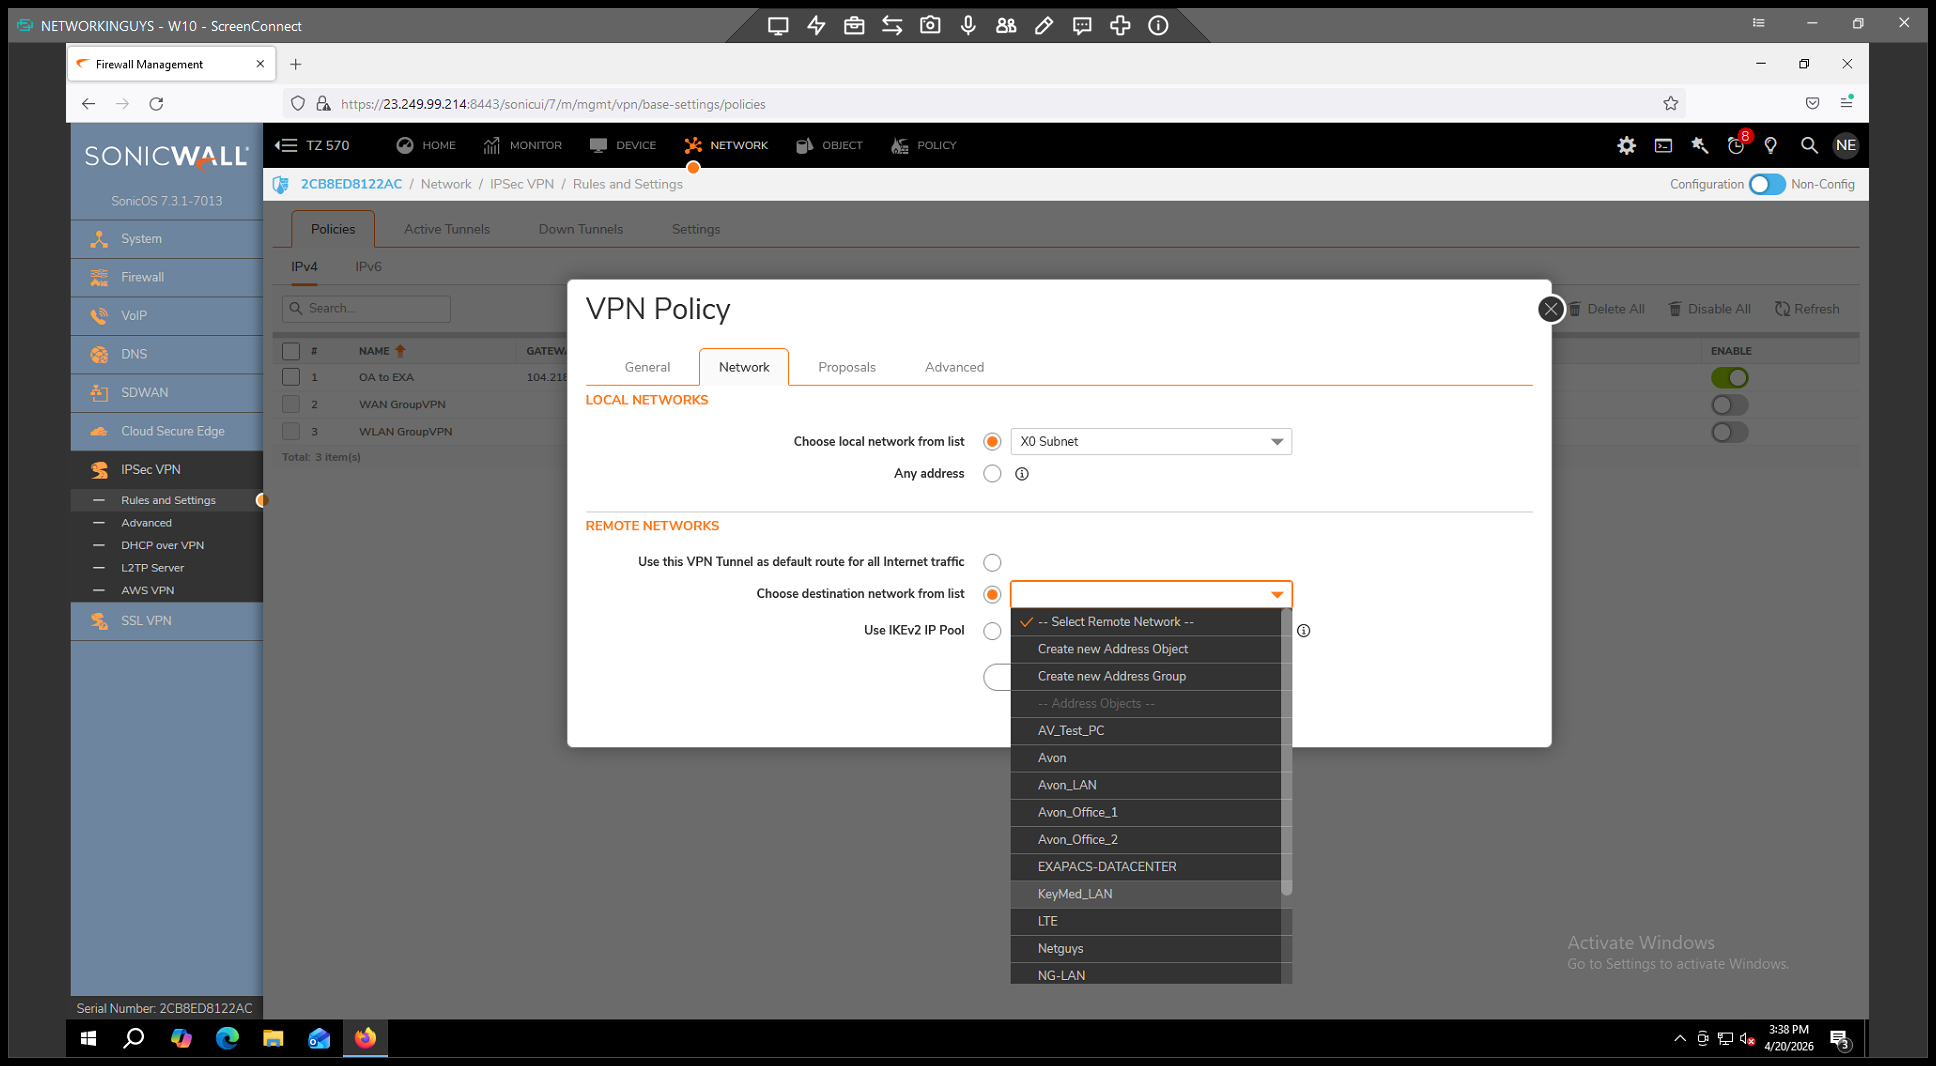
as the destination network.
Step 5: Configure IKE and IPsec Proposals
. 2. Under the IKE (Phase 1) Proposal section: *
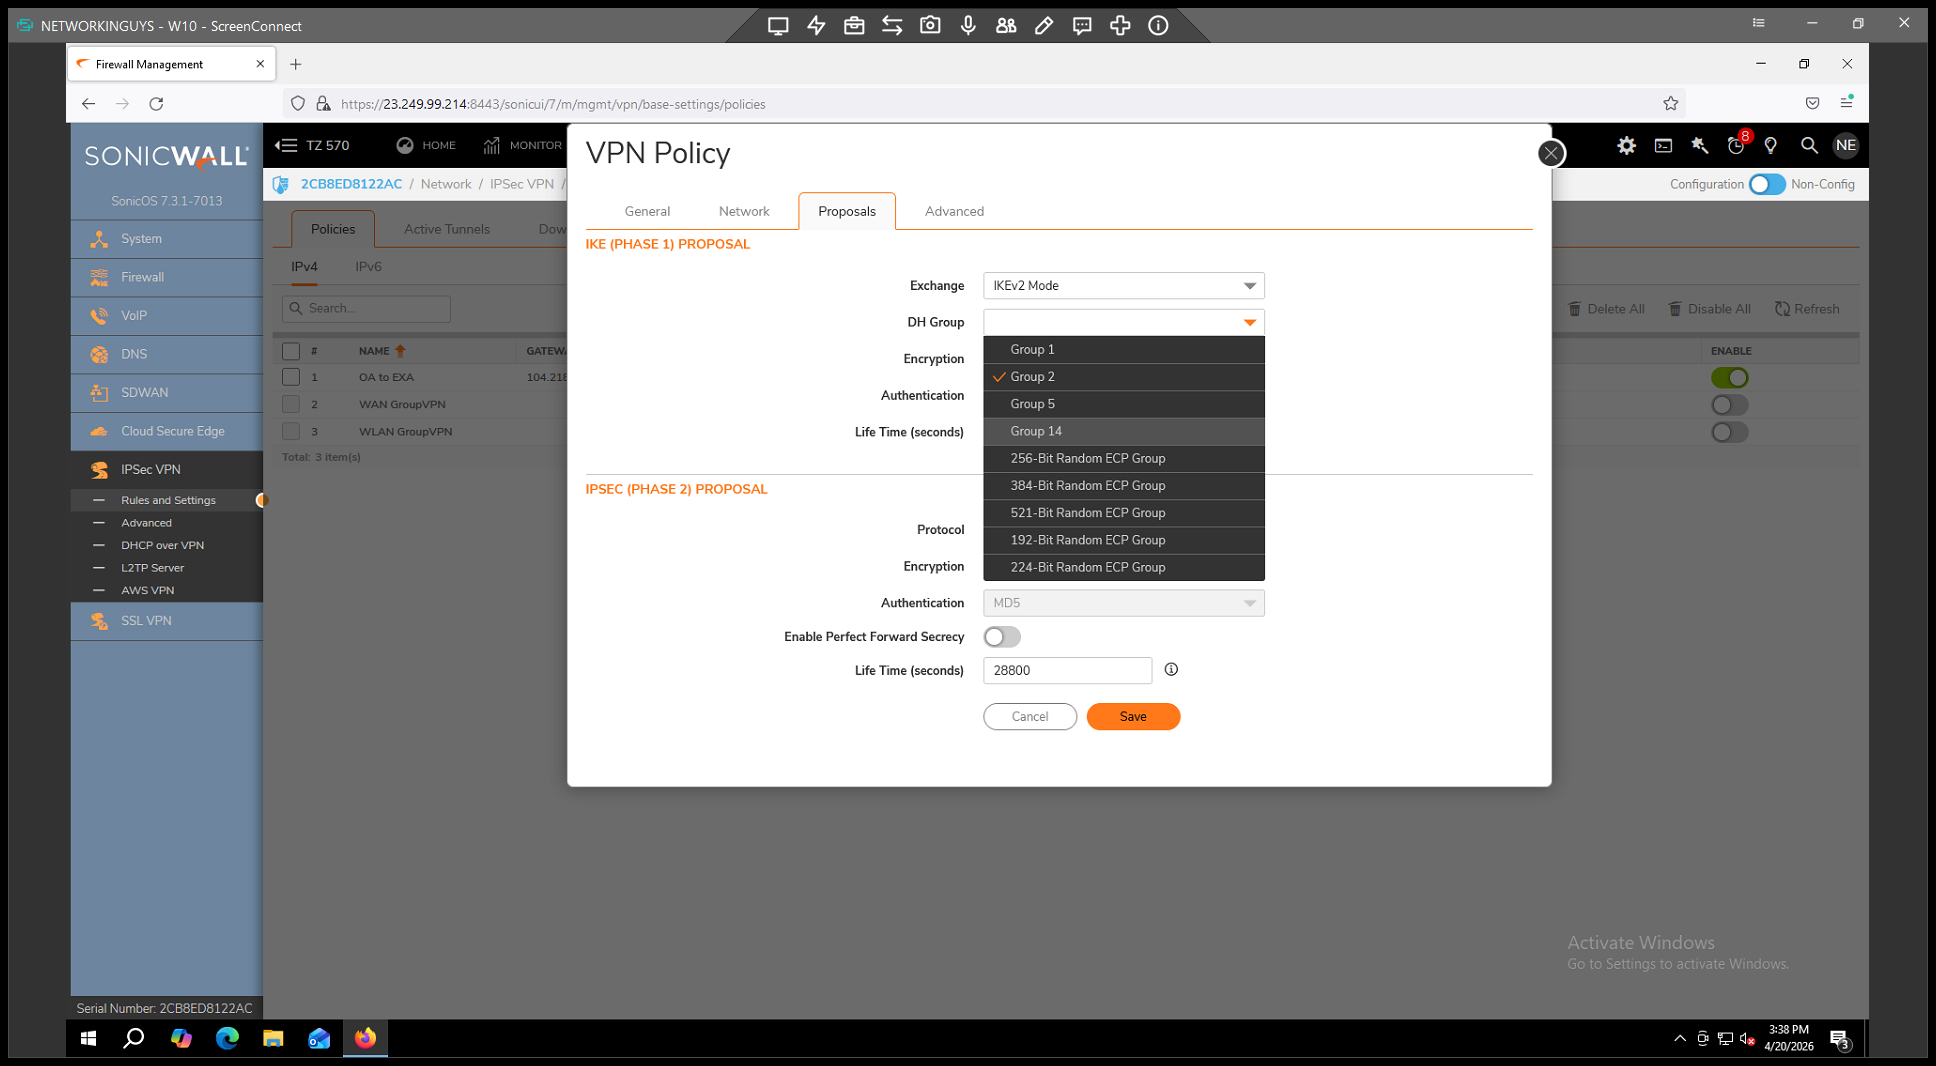
. *
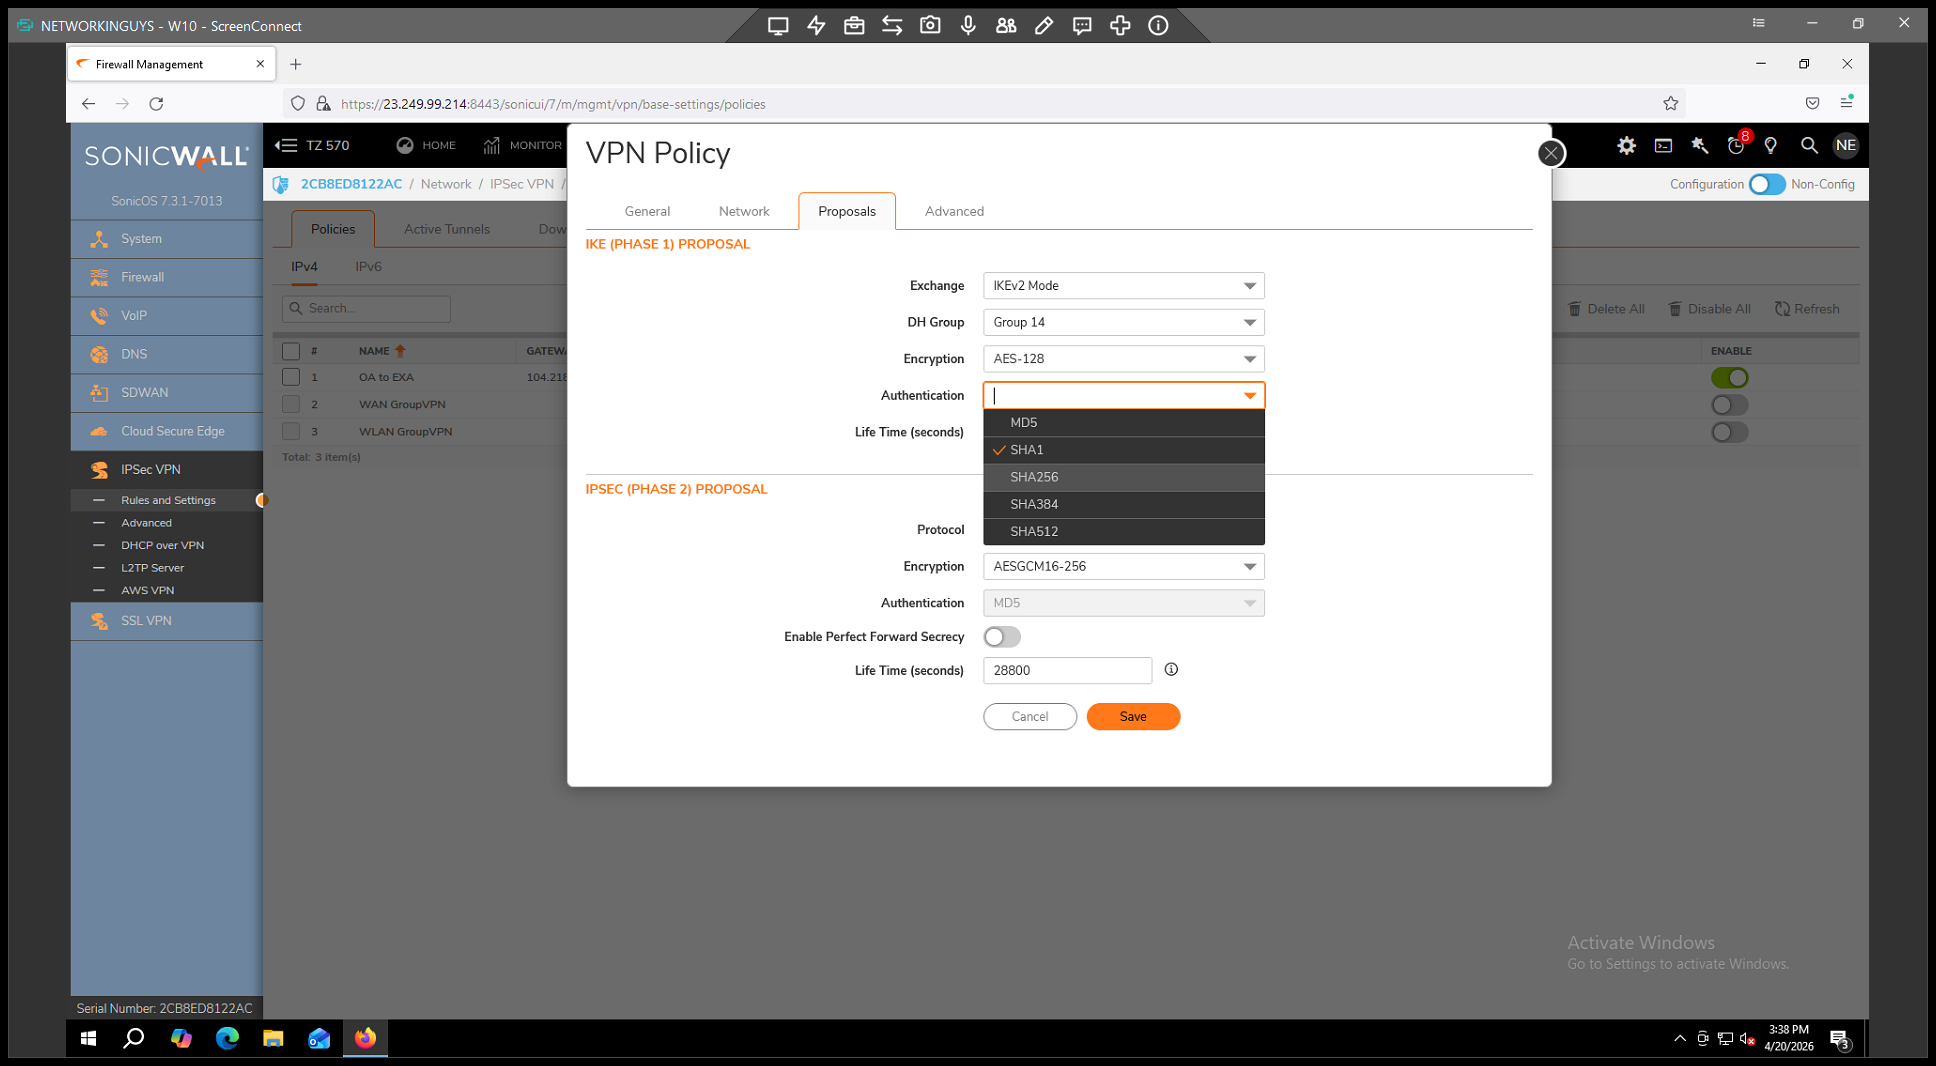
(or according to your vendor's specifications). 3. Under the IPsec (Phase 2) Proposal section: *
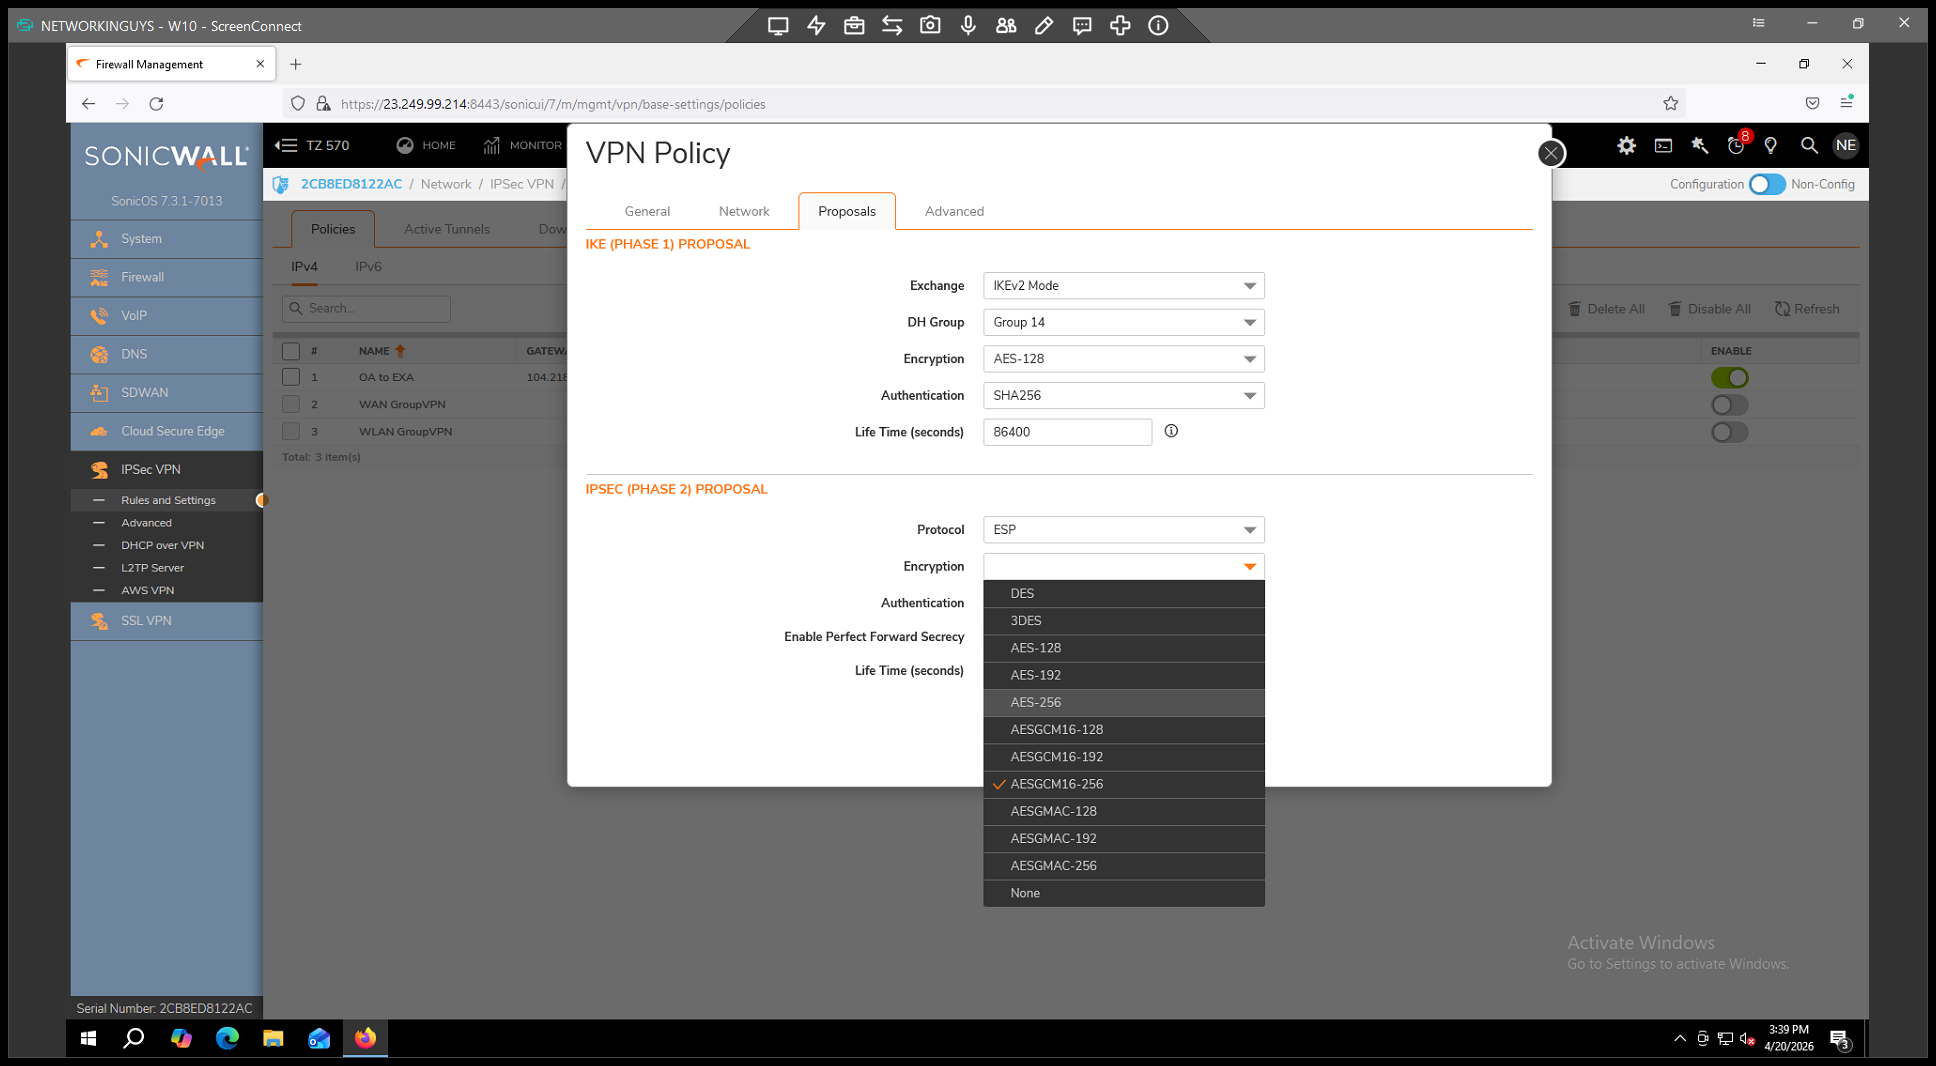
. *
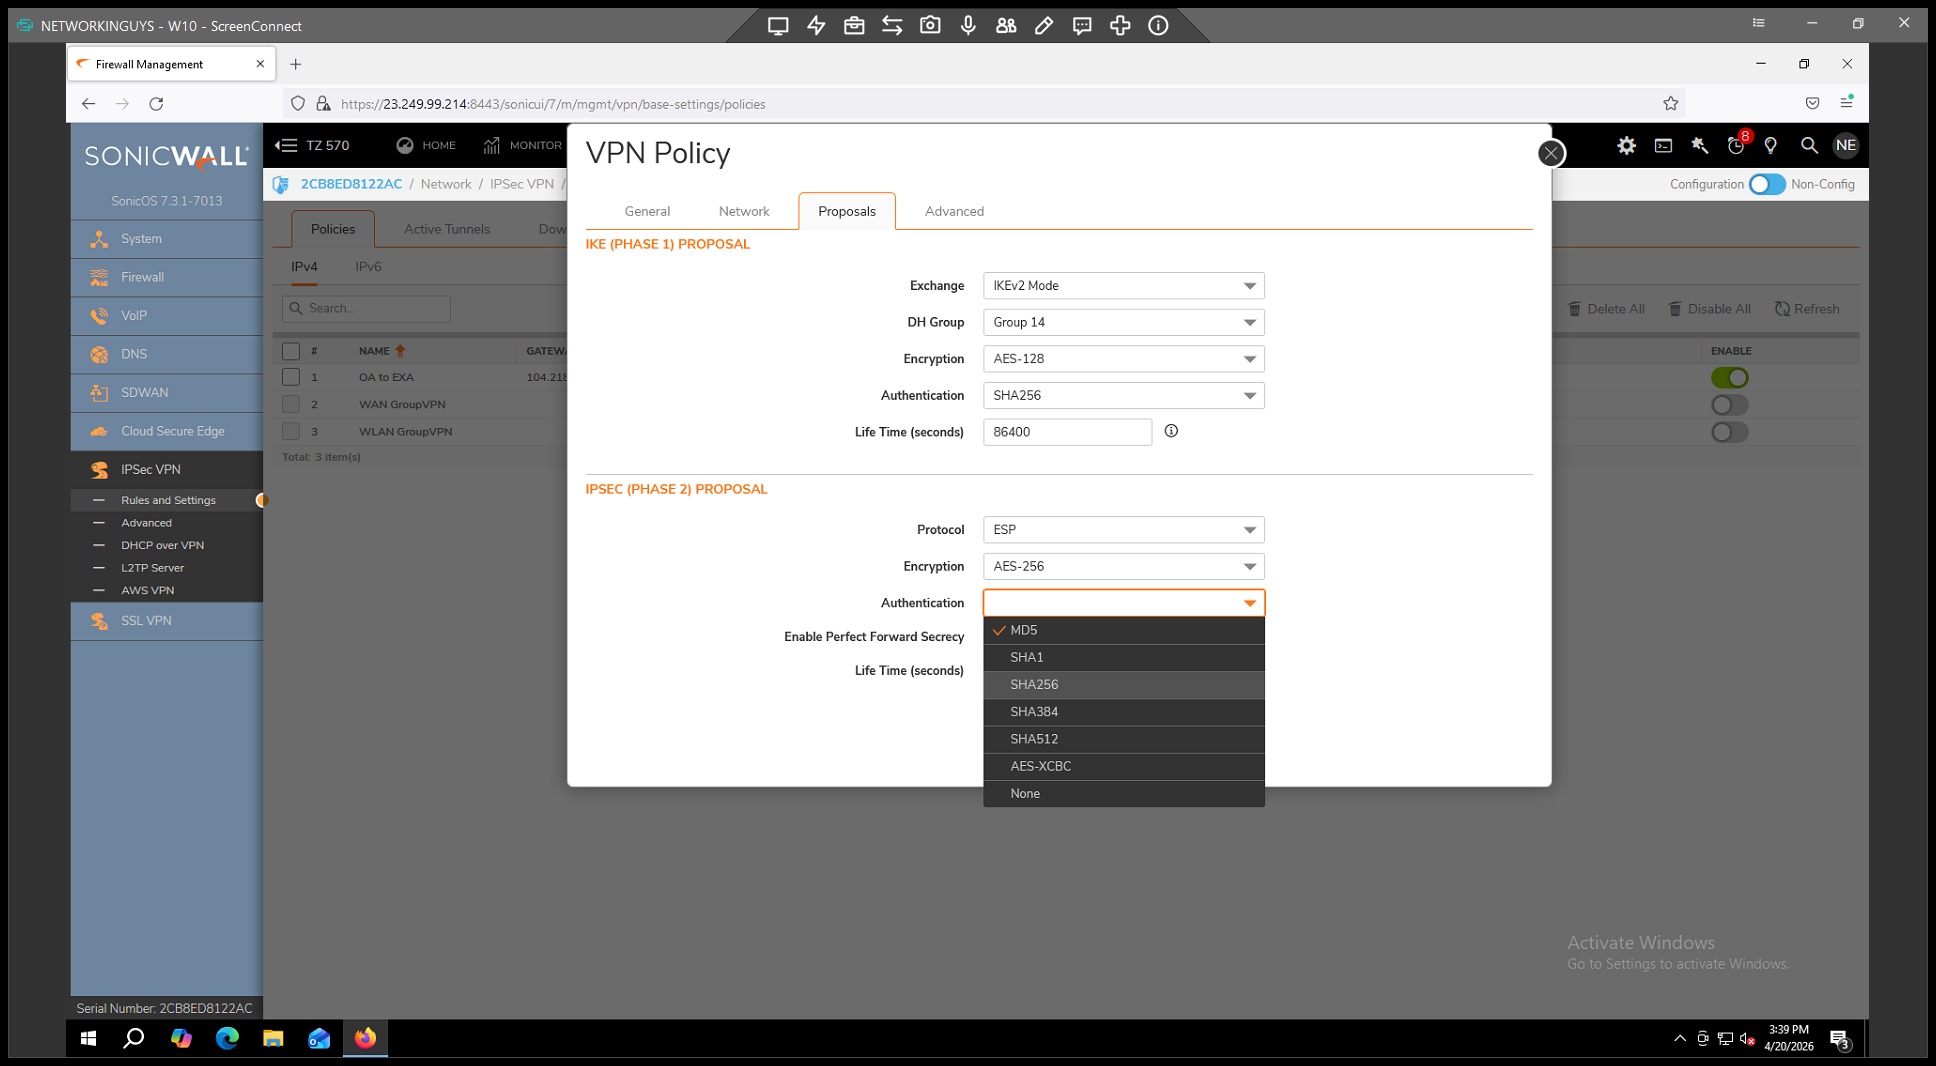
. *
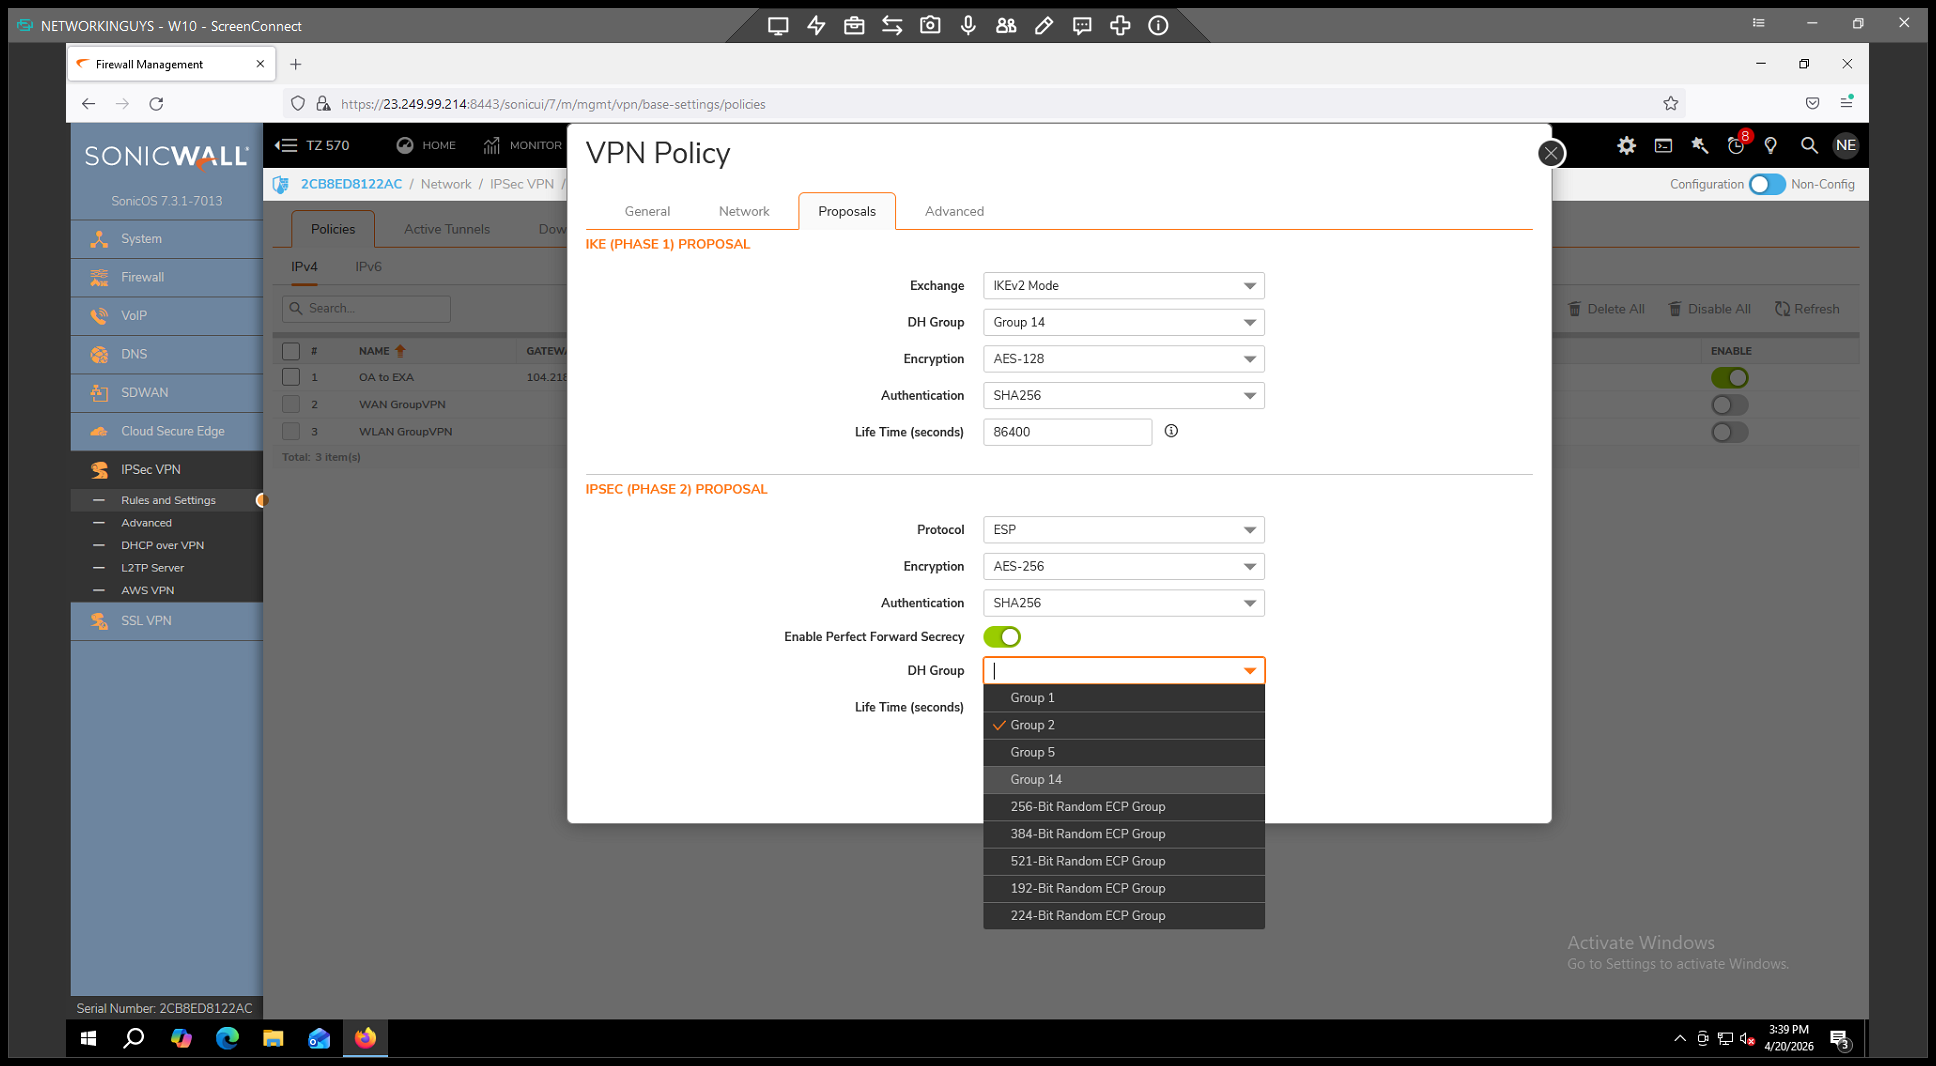
.
Step 6: Enable Keep Alive and Save
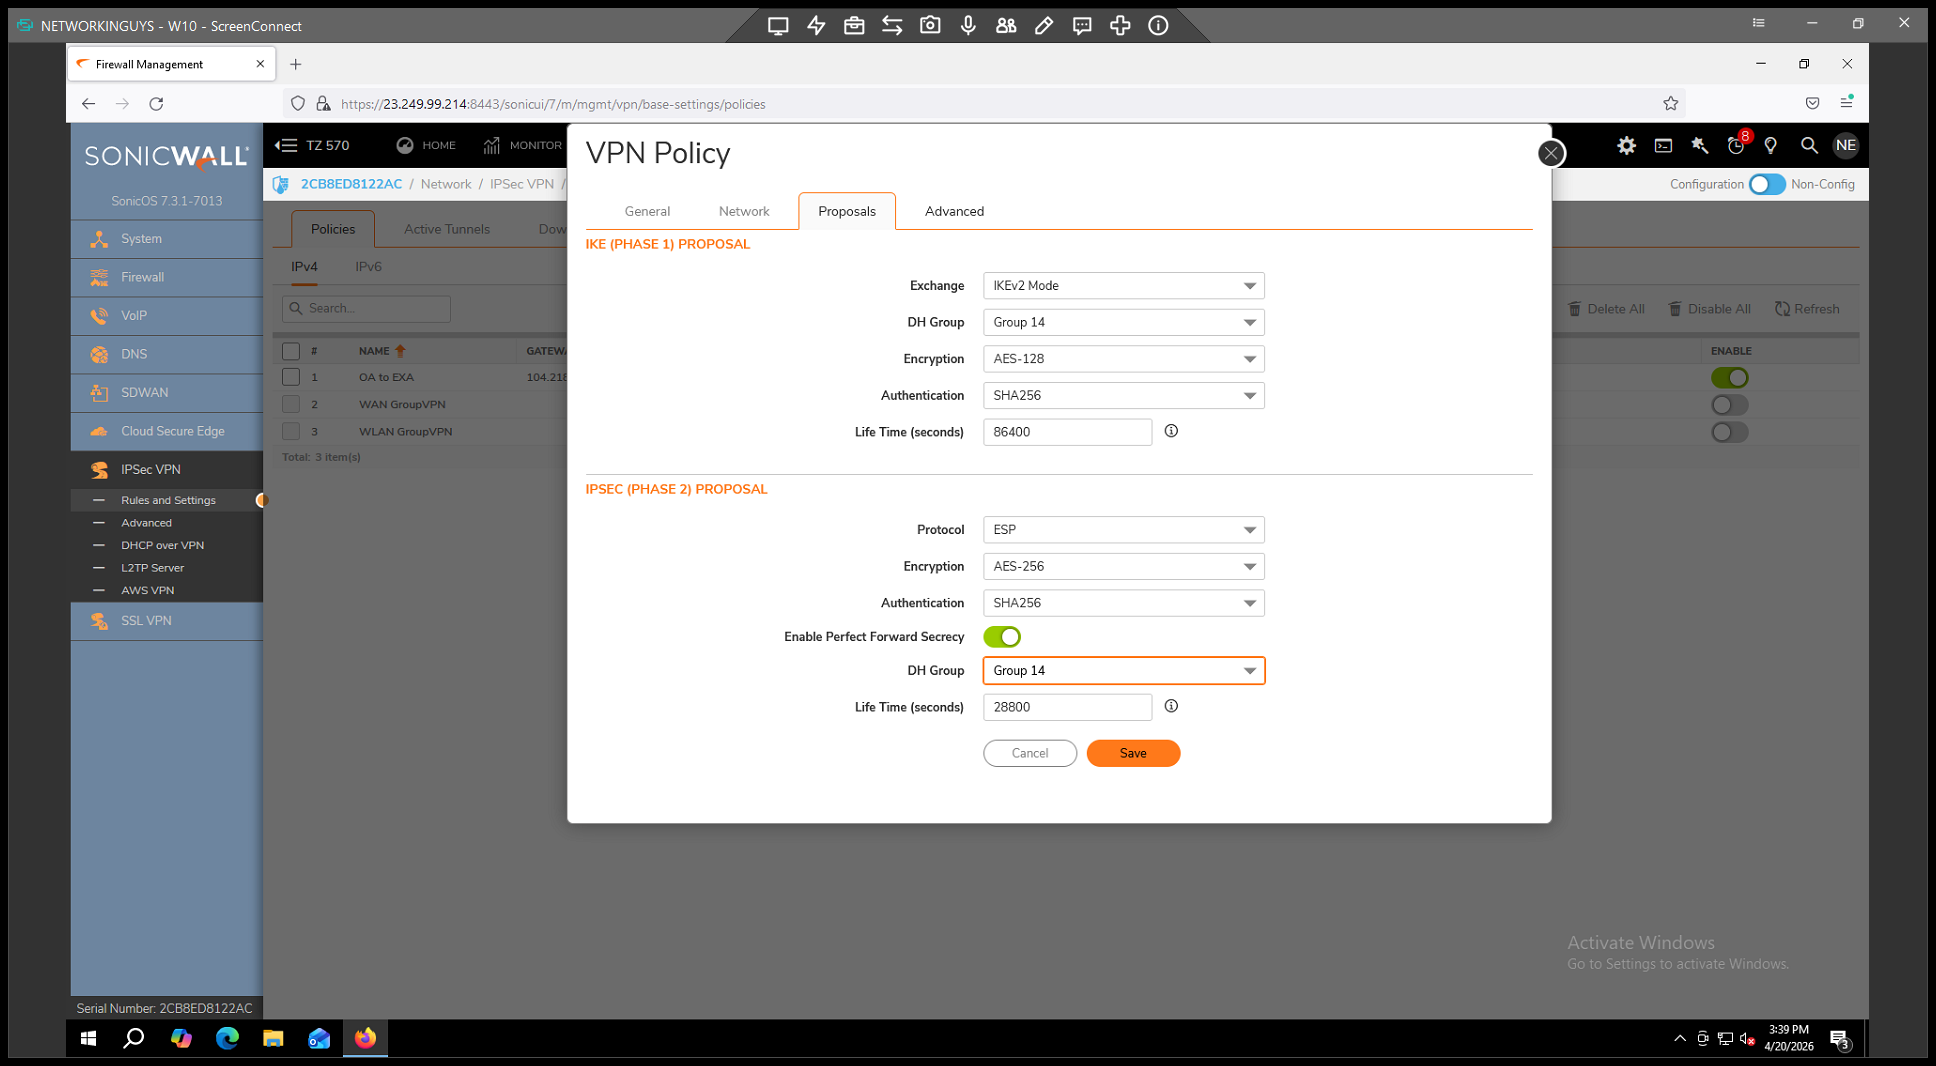
. 2.
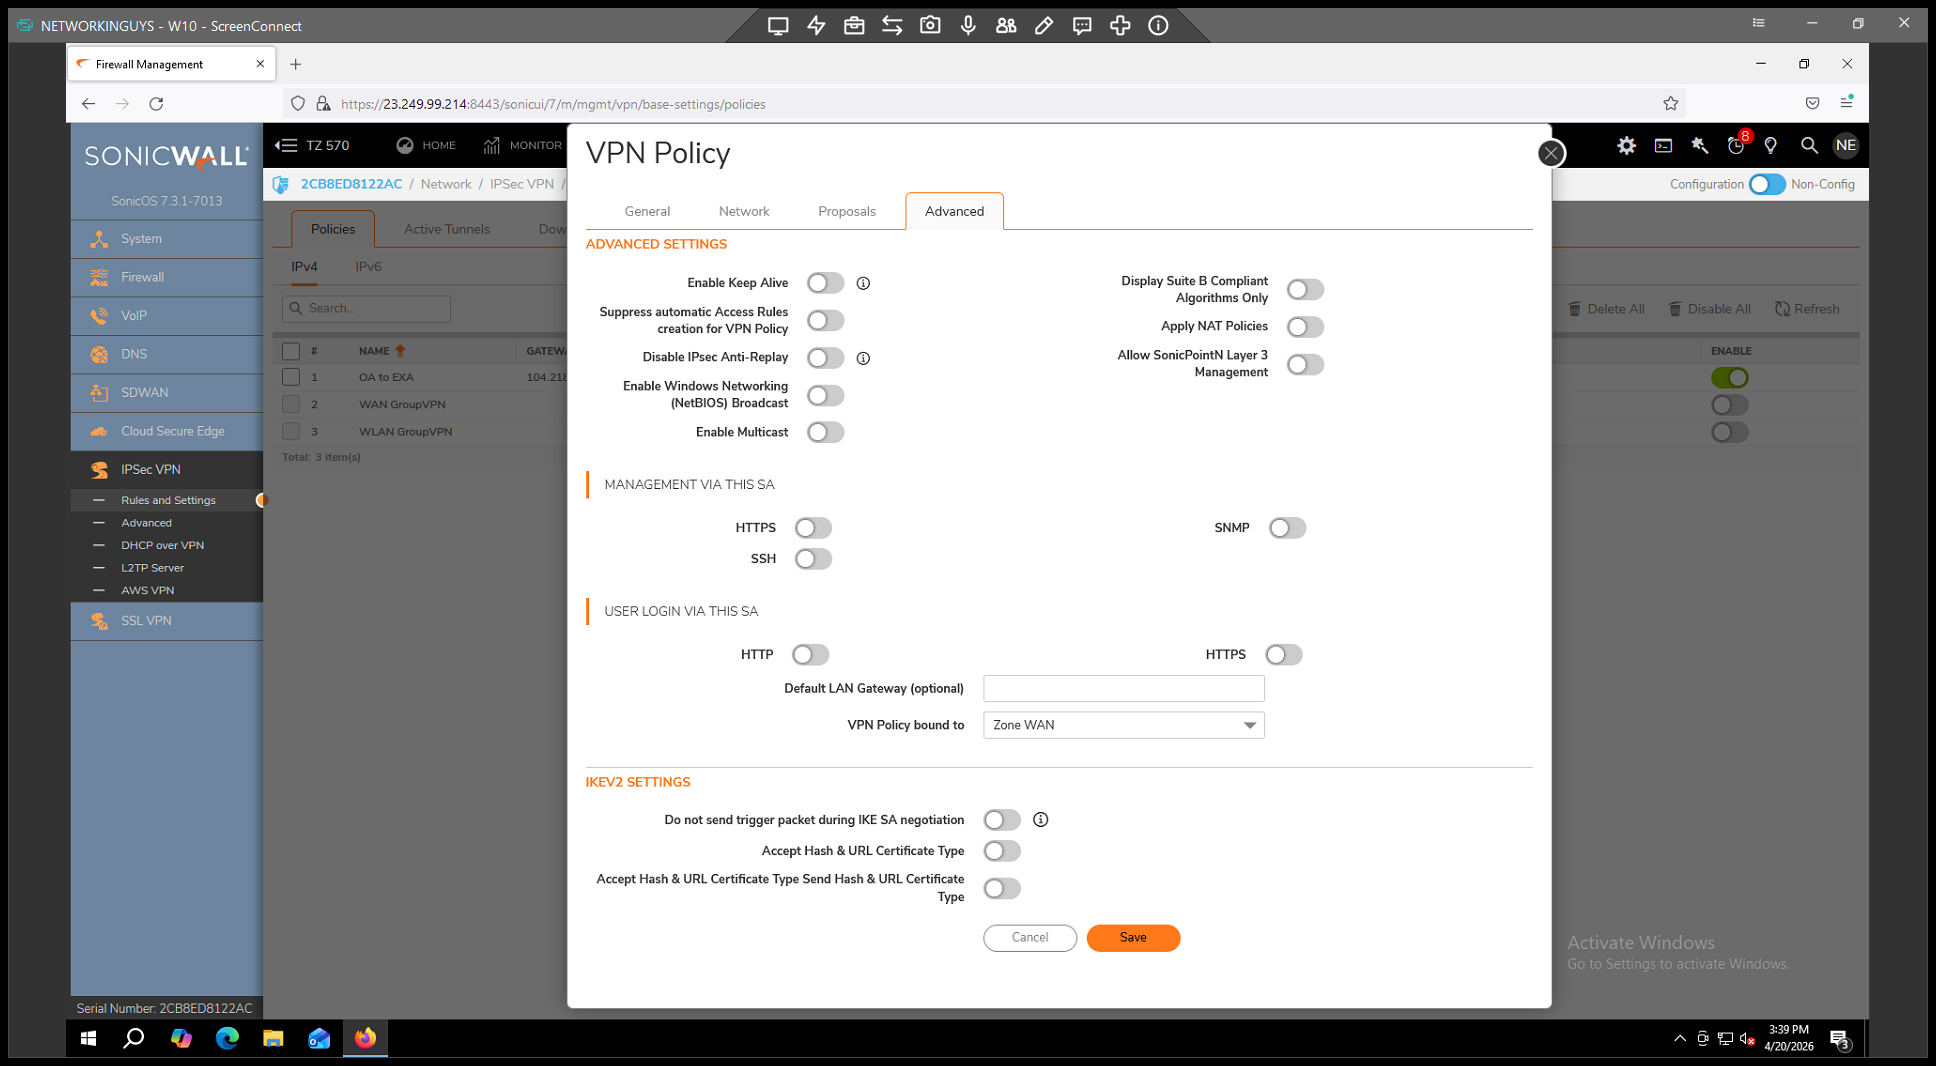
to ensure the tunnel attempts to reconnect automatically if there are network drops. 3.

to finalize your configuration.
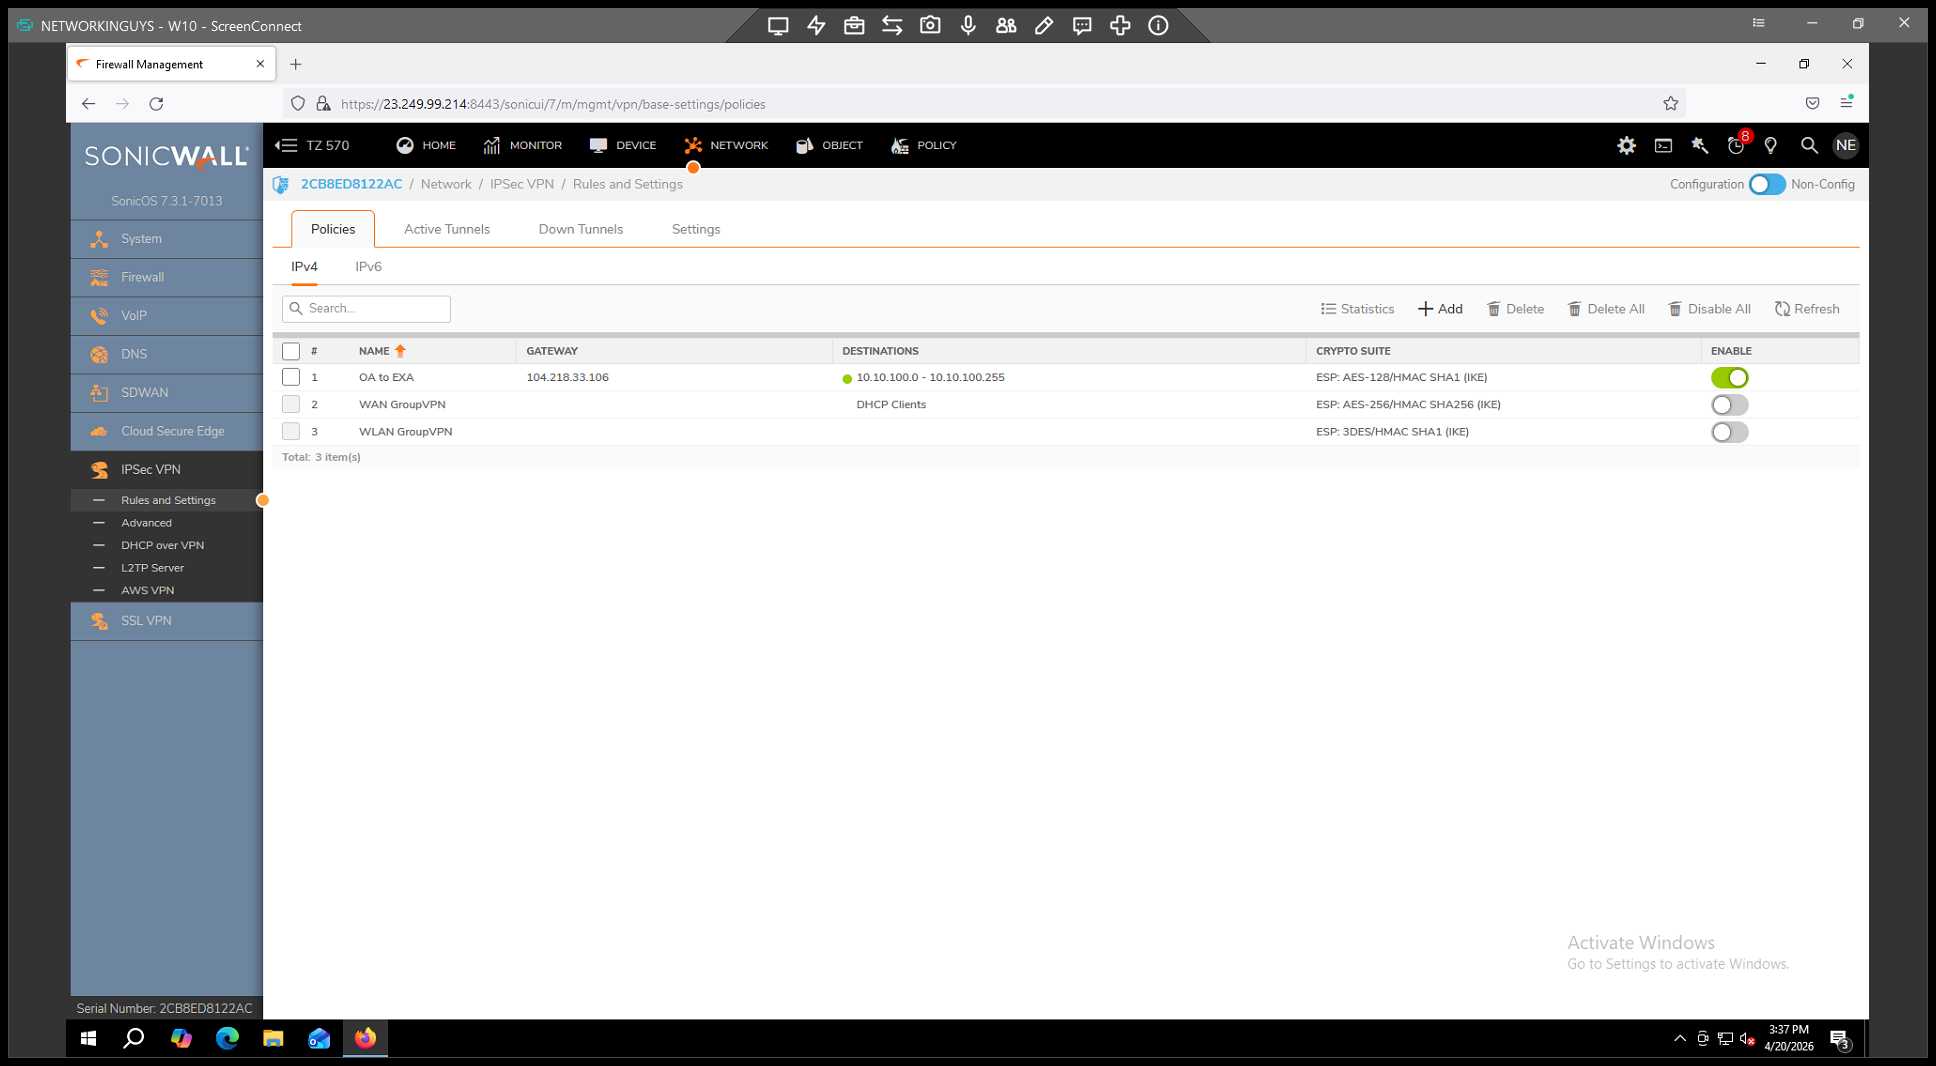
You have now created the VPN policy. Once the customer, vendor, or remote office successfully matches these settings on their end, the tunnel will connect and display a green indicator next to the policy in your IPsec VPN table.