How to Create a Job and Schedule a Visit from an Estimate

Learn how to seamlessly convert a sold estimate into a job, configure timesheet tracking, and add the job to your schedule calendar.

By Ludi Cortinas

This guide explains how to convert a sold estimate into an active job and schedule it for your crew. Following these steps ensures accurate job costing, timesheet tracking, and proper calendar management.

This process is primarily for project managers and dispatchers who need to transition approved estimates into actionable, scheduled work. Use this workflow immediately after an estimate is marked as sold or approved by management.

Ensure the estimate is marked with a "sold" status or you have received manager approval before proceeding.
1
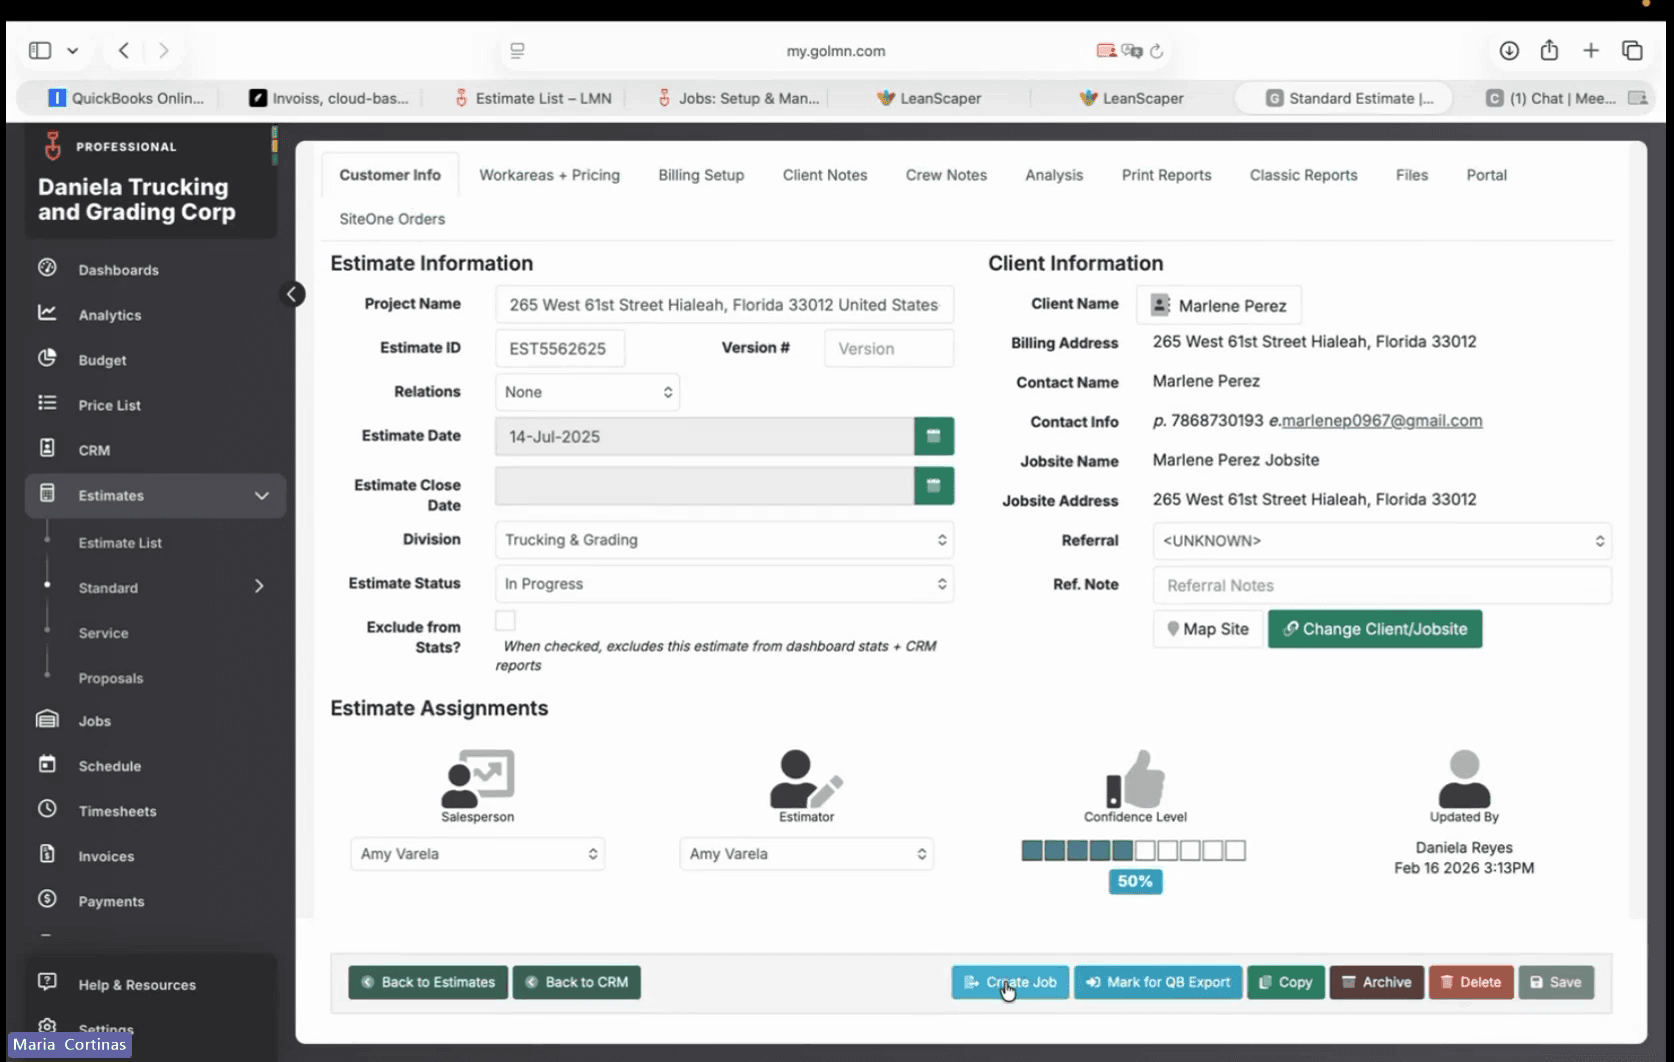
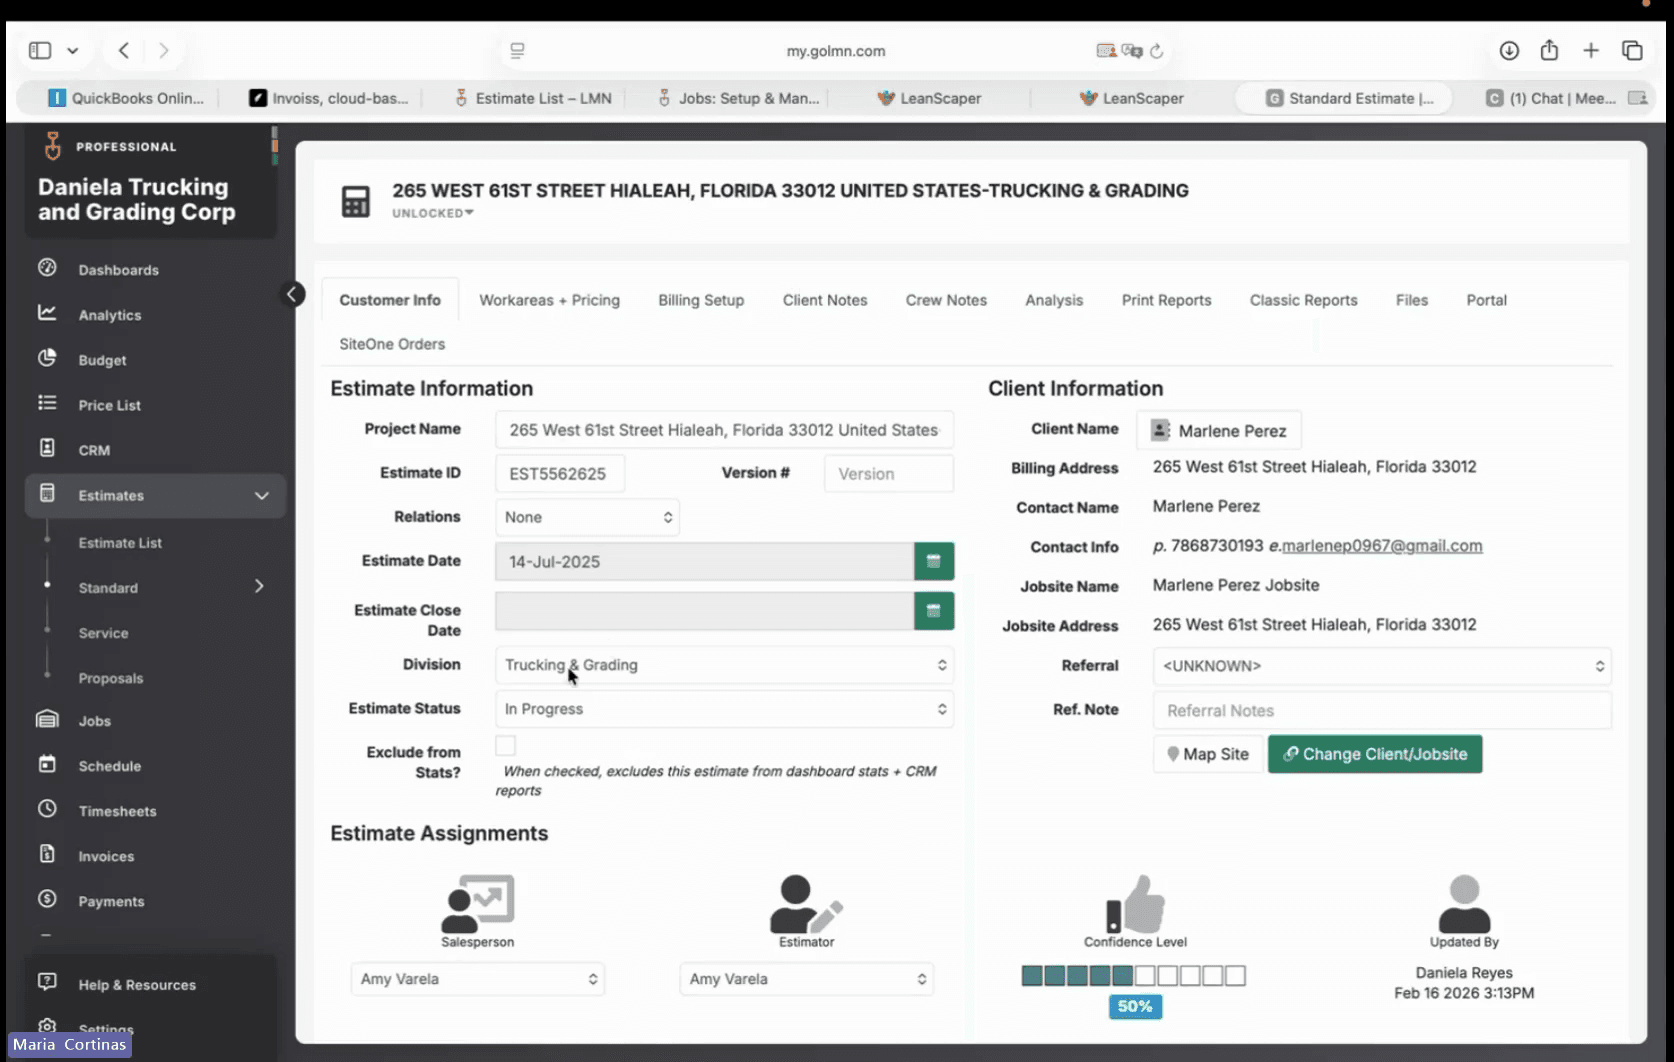
Review the estimate information and verify the Estimate Status is set to Sold.
Step #1: Review the estimate information and verify the Estimate Status is set to Sold.

Navigate to the Customer Info tab to begin creating the job.
2
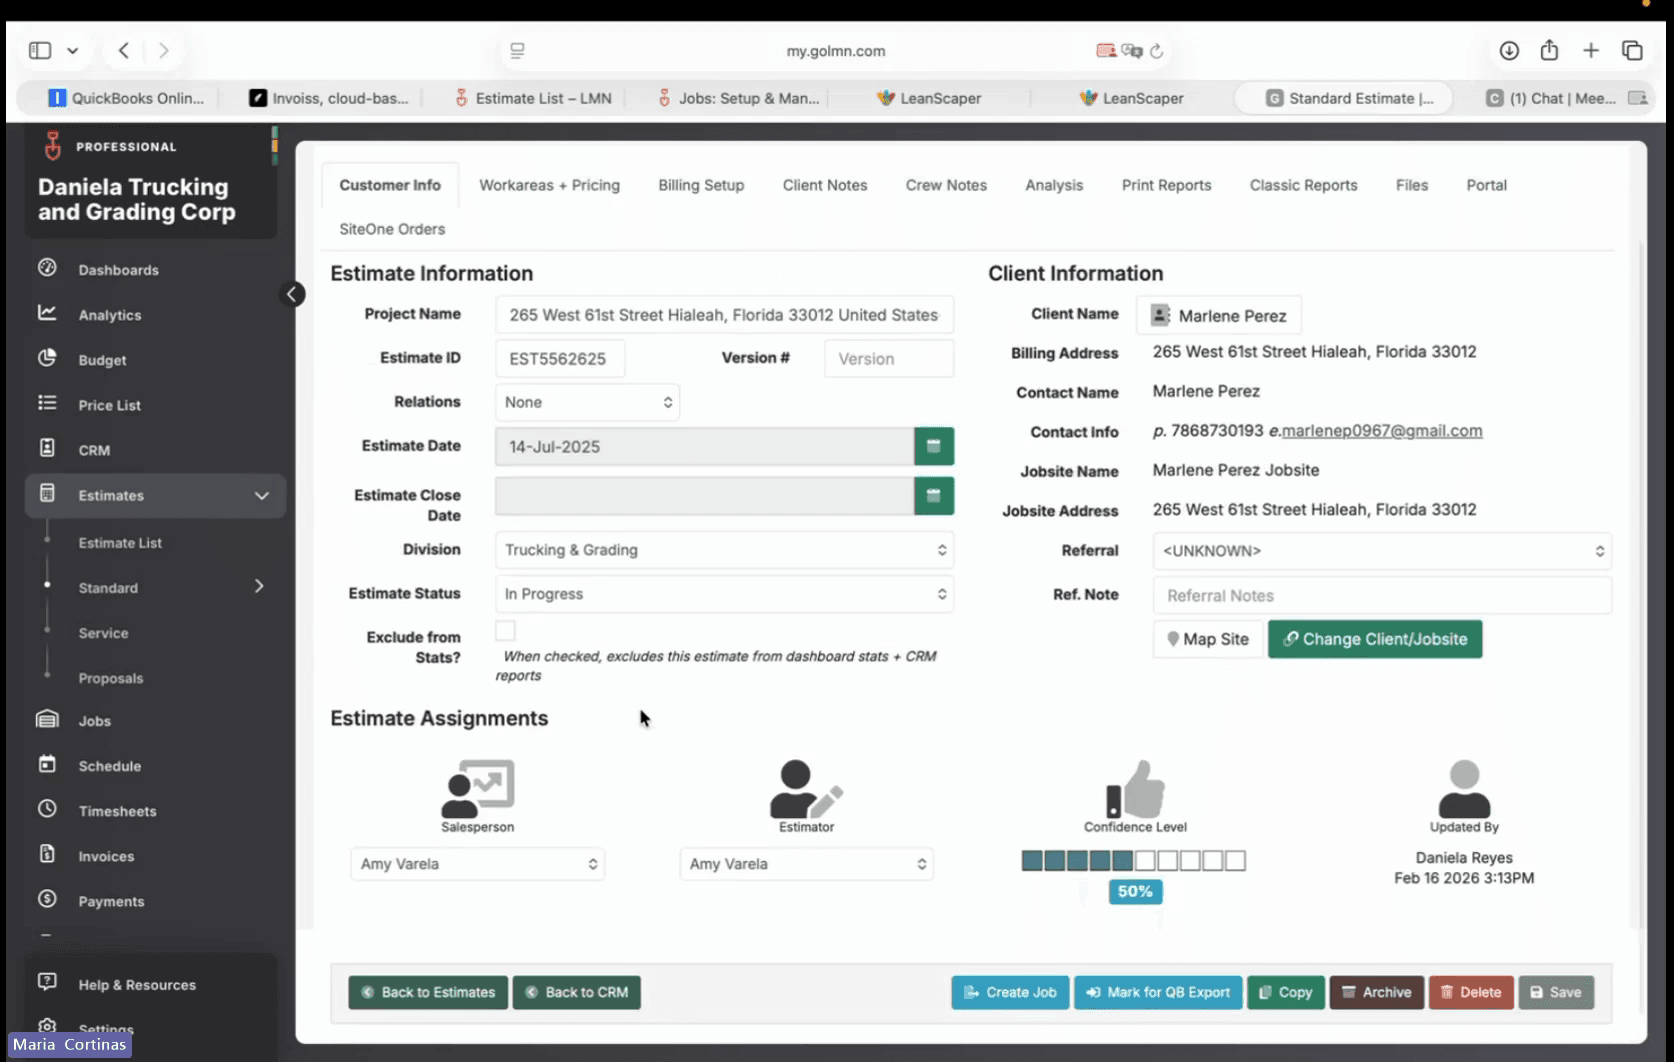
Check the Exclude from Stats? box if you wish to exclude this estimate from dashboard reporting.
Step #2: Check the Exclude from Stats? box if you wish to exclude this estimate from dashboard reporting.
3
Click Create Job to start the conversion process.
Step #3: Click Create Job to start the conversion process.
4
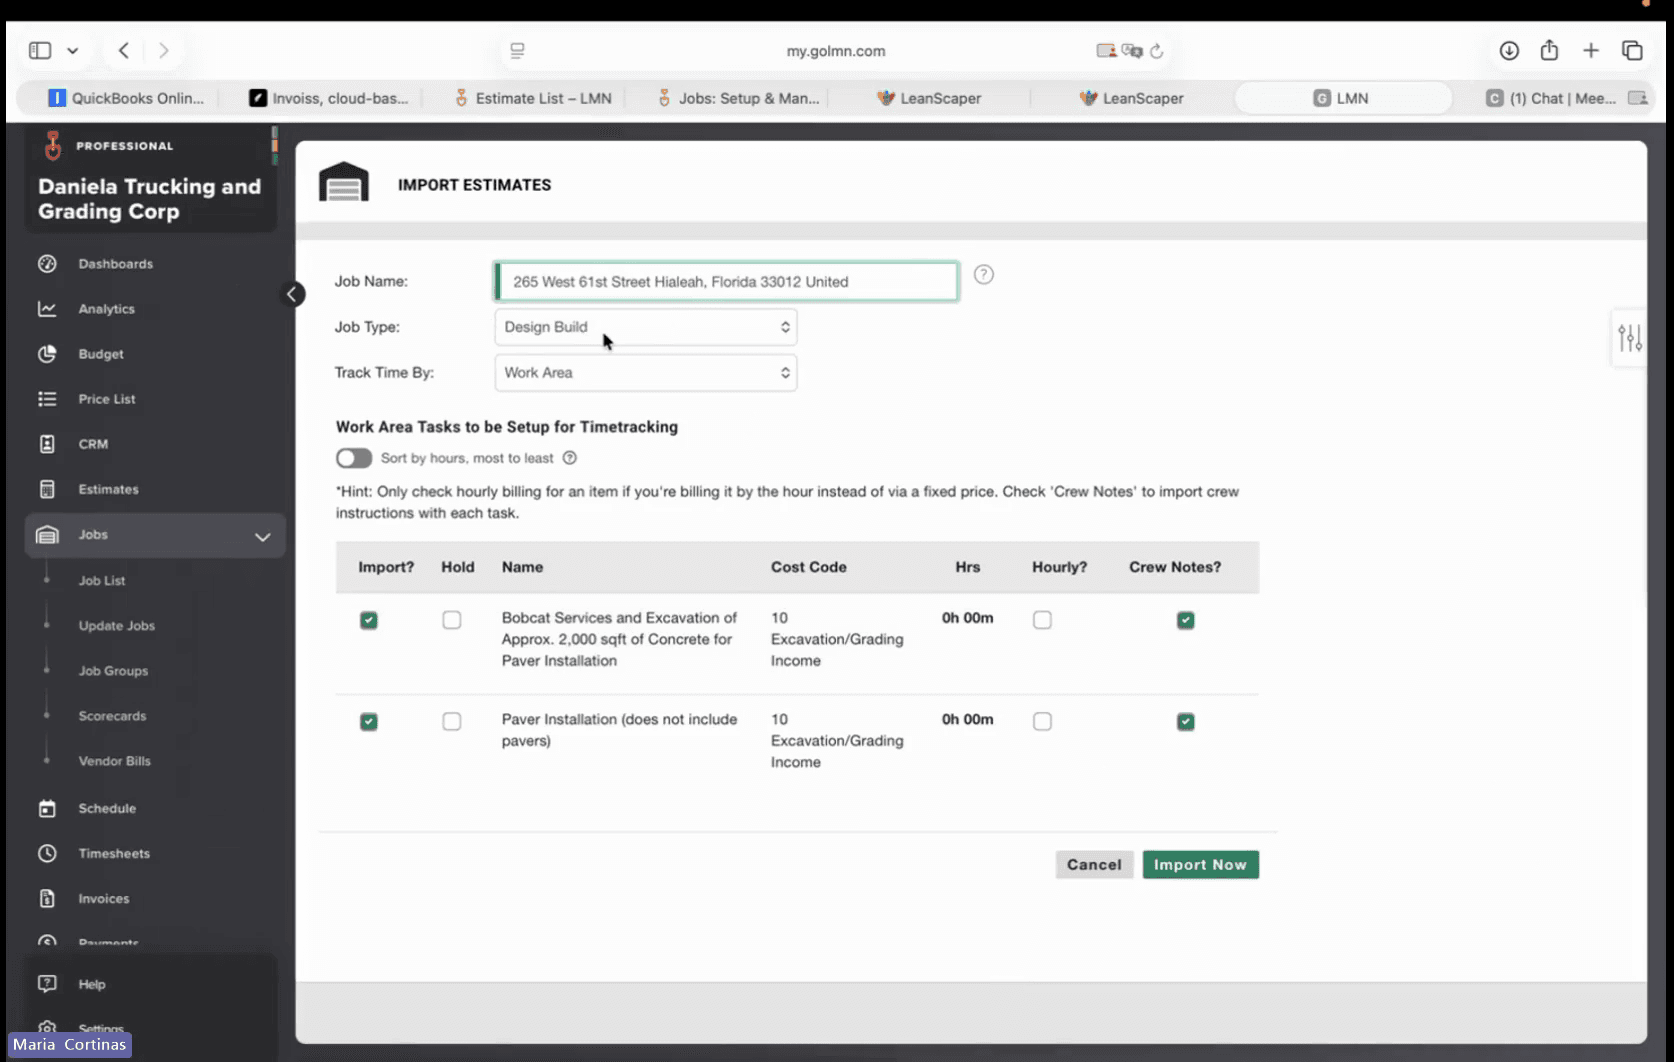
Click the Job Type dropdown and select the appropriate job type, such as Bobcat Services - Excavation & Grading.
Step #4: Click the Job Type dropdown and select the appropriate job type, such as Bobcat Services - Excavation & Grading.

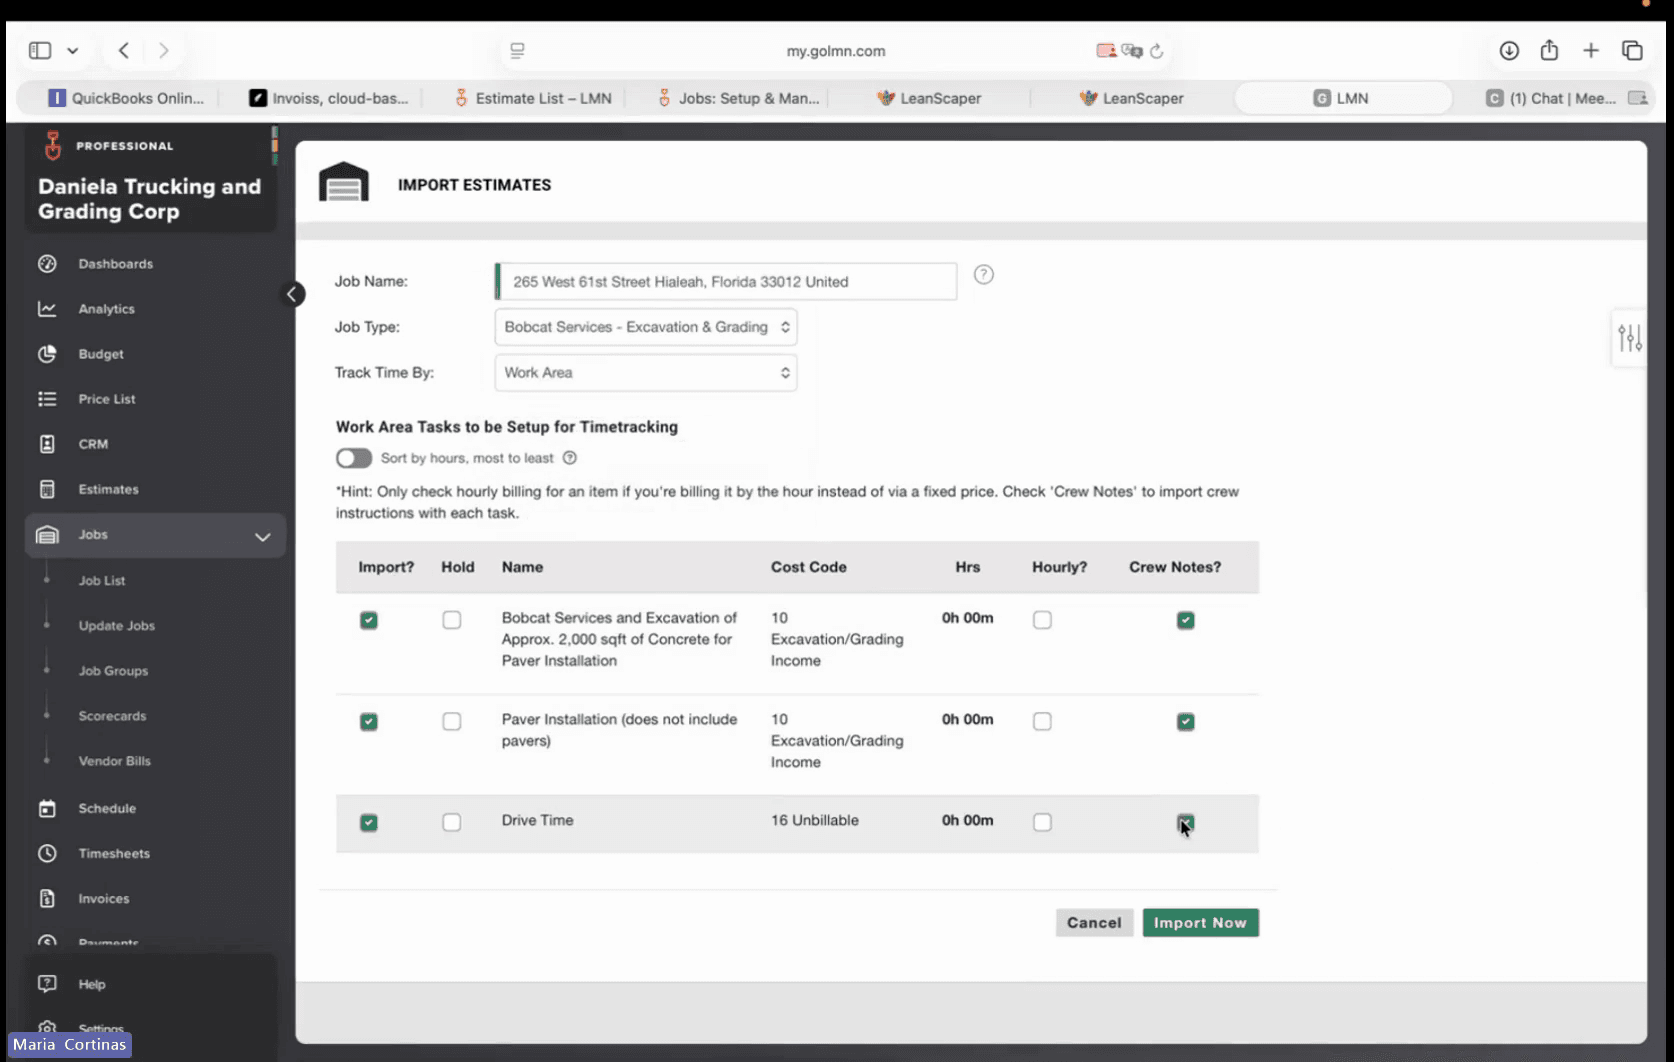
Allowing crew notes is crucial so your team can report incidents or provide context on their time.
5
Check the box under Crew Notes for the Drive Time row.
Step #5: Check the box under Crew Notes for the Drive Time row.
6
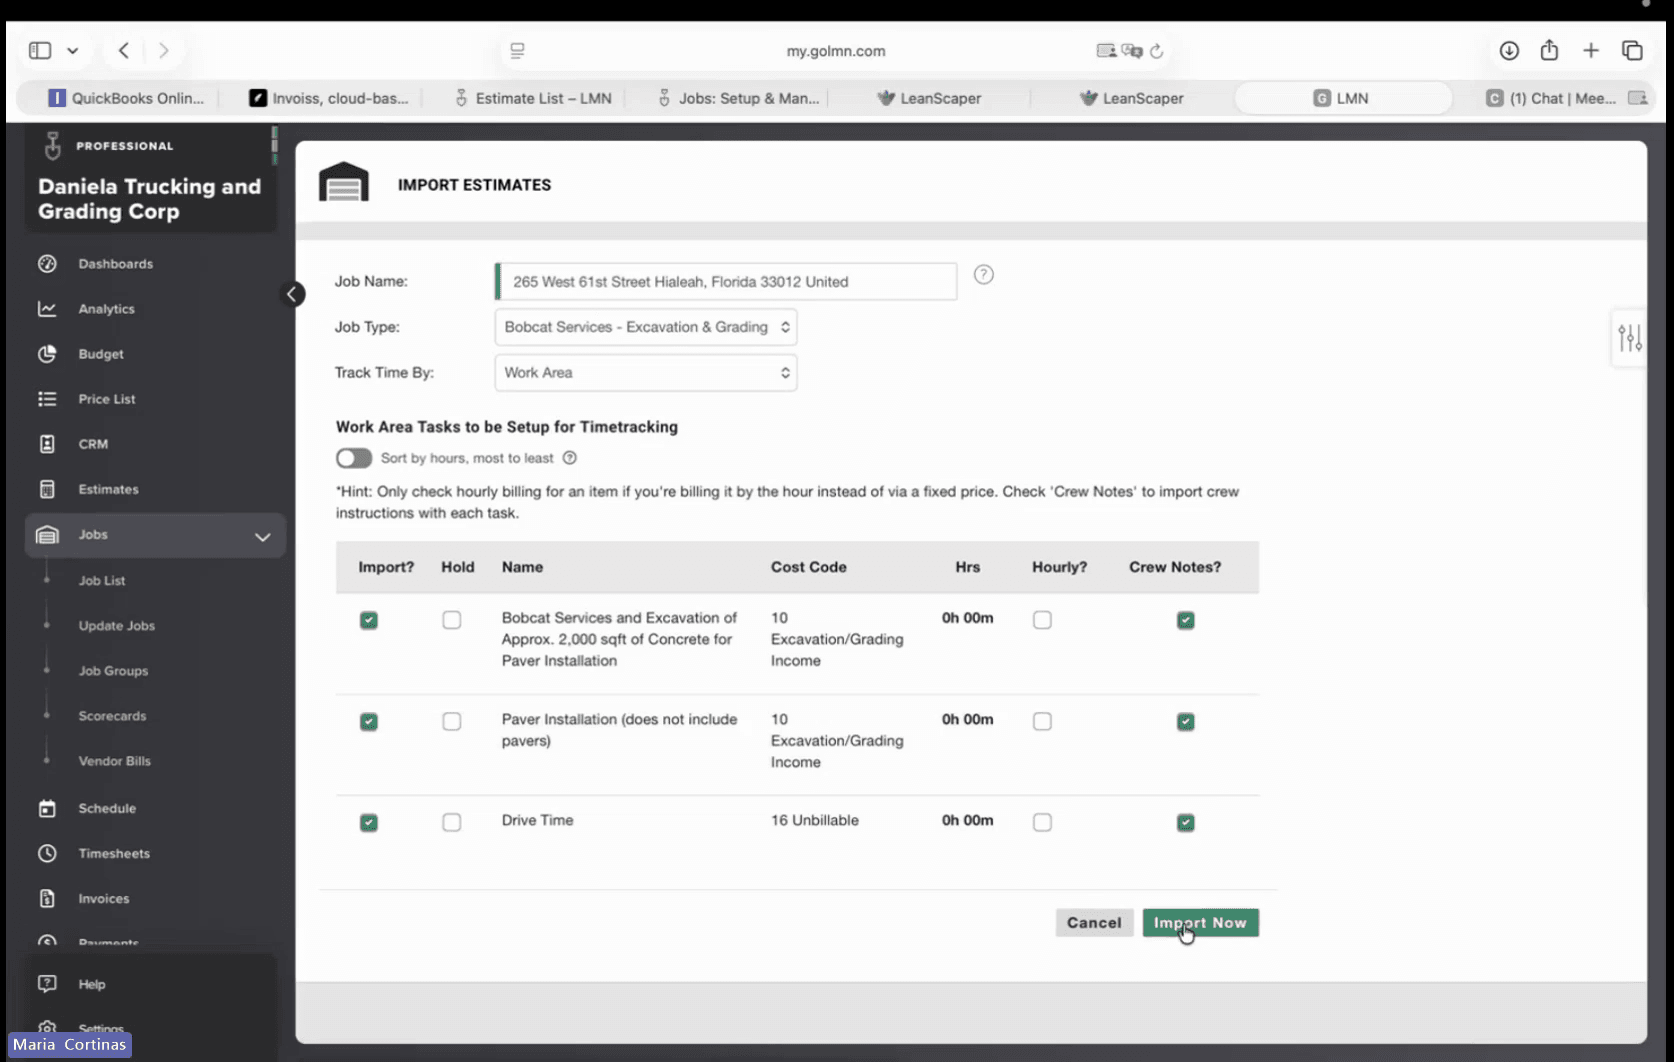
Click the Import Now button to finalize the creation of the job.
Step #6: Click the Import Now button to finalize the creation of the job.

Take a moment to review the job information from the top down to ensure everything matches your intended scope of work.

Track Materials and Labor

You must ensure all relevant materials, equipment, and tasks are enabled for timesheet tracking so your crew can log their time against them.
7
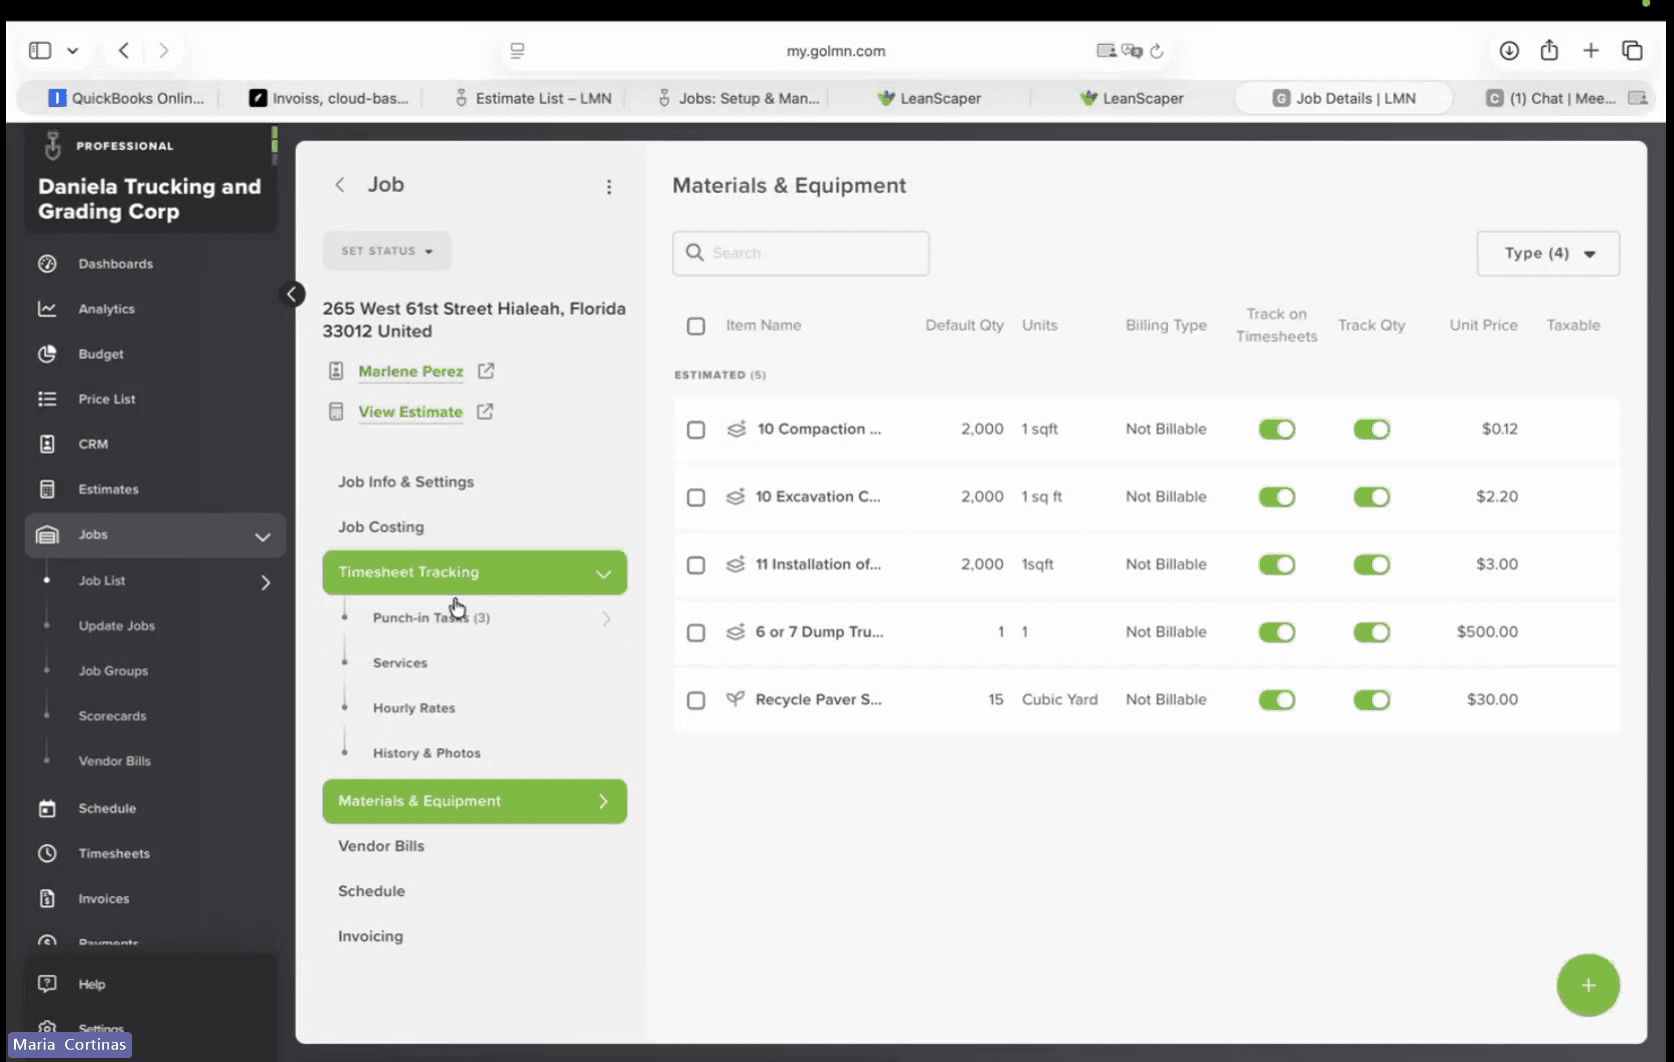
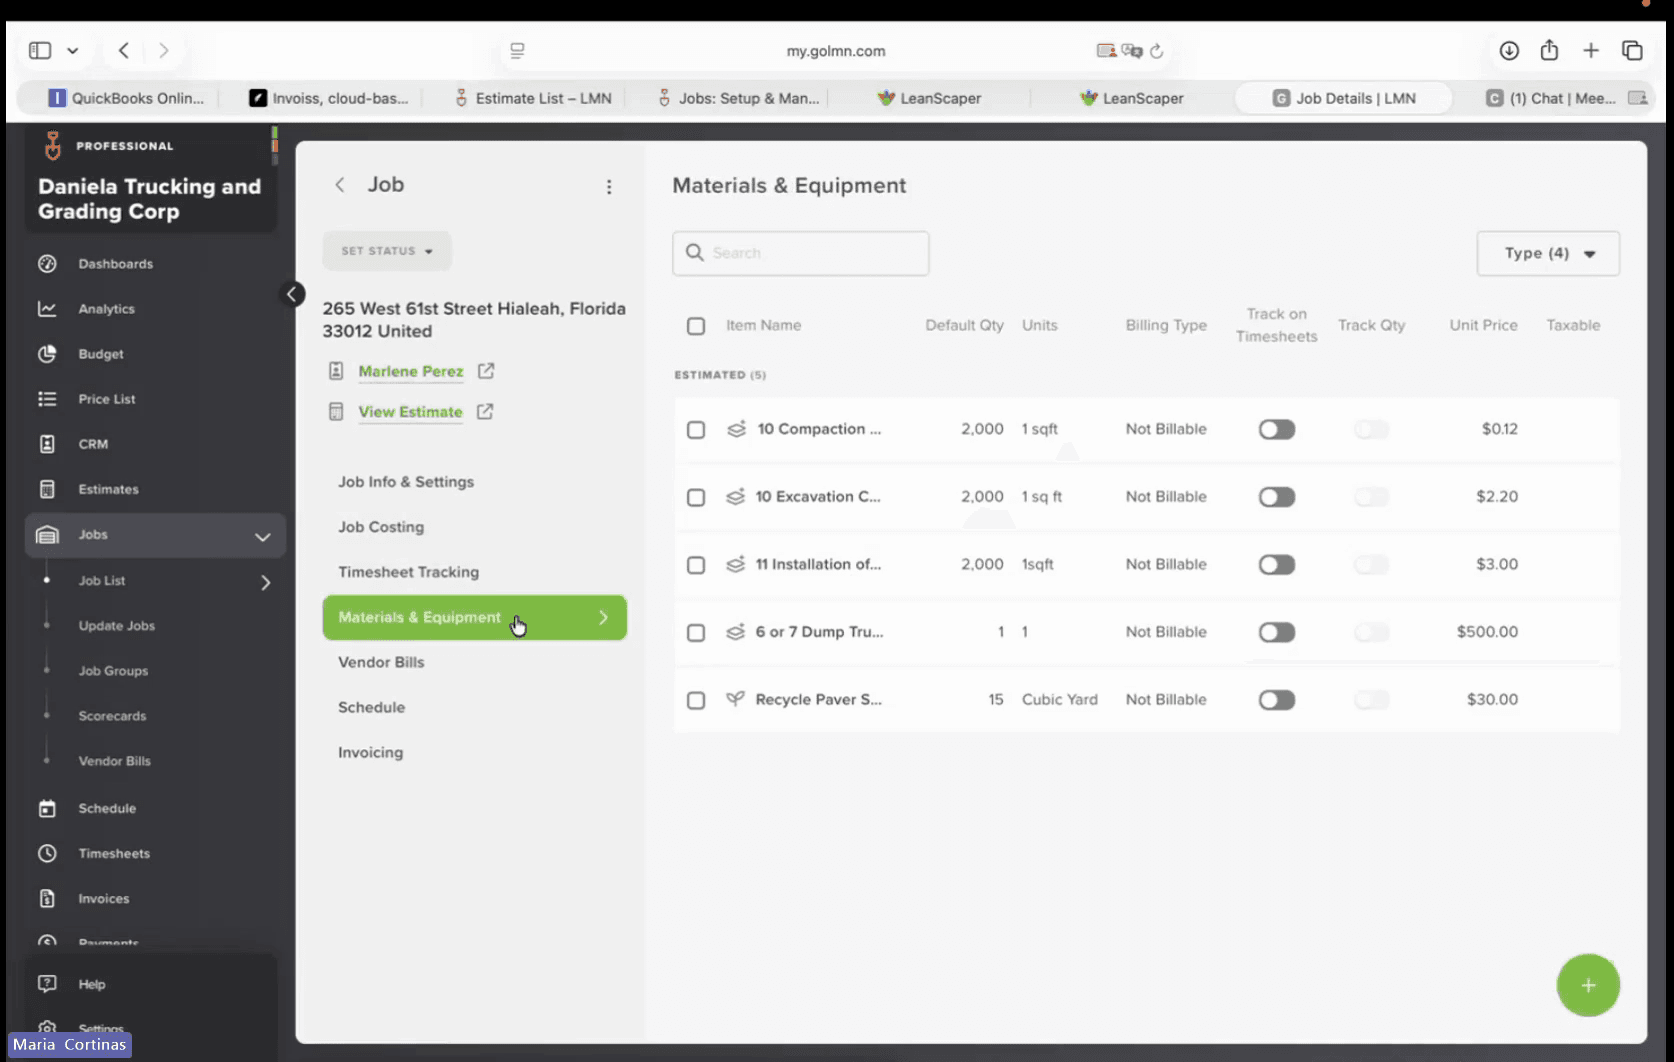
Click Materials & Equipment in the left-hand navigation menu.
Step #7: Click Materials & Equipment in the left-hand navigation menu.
8
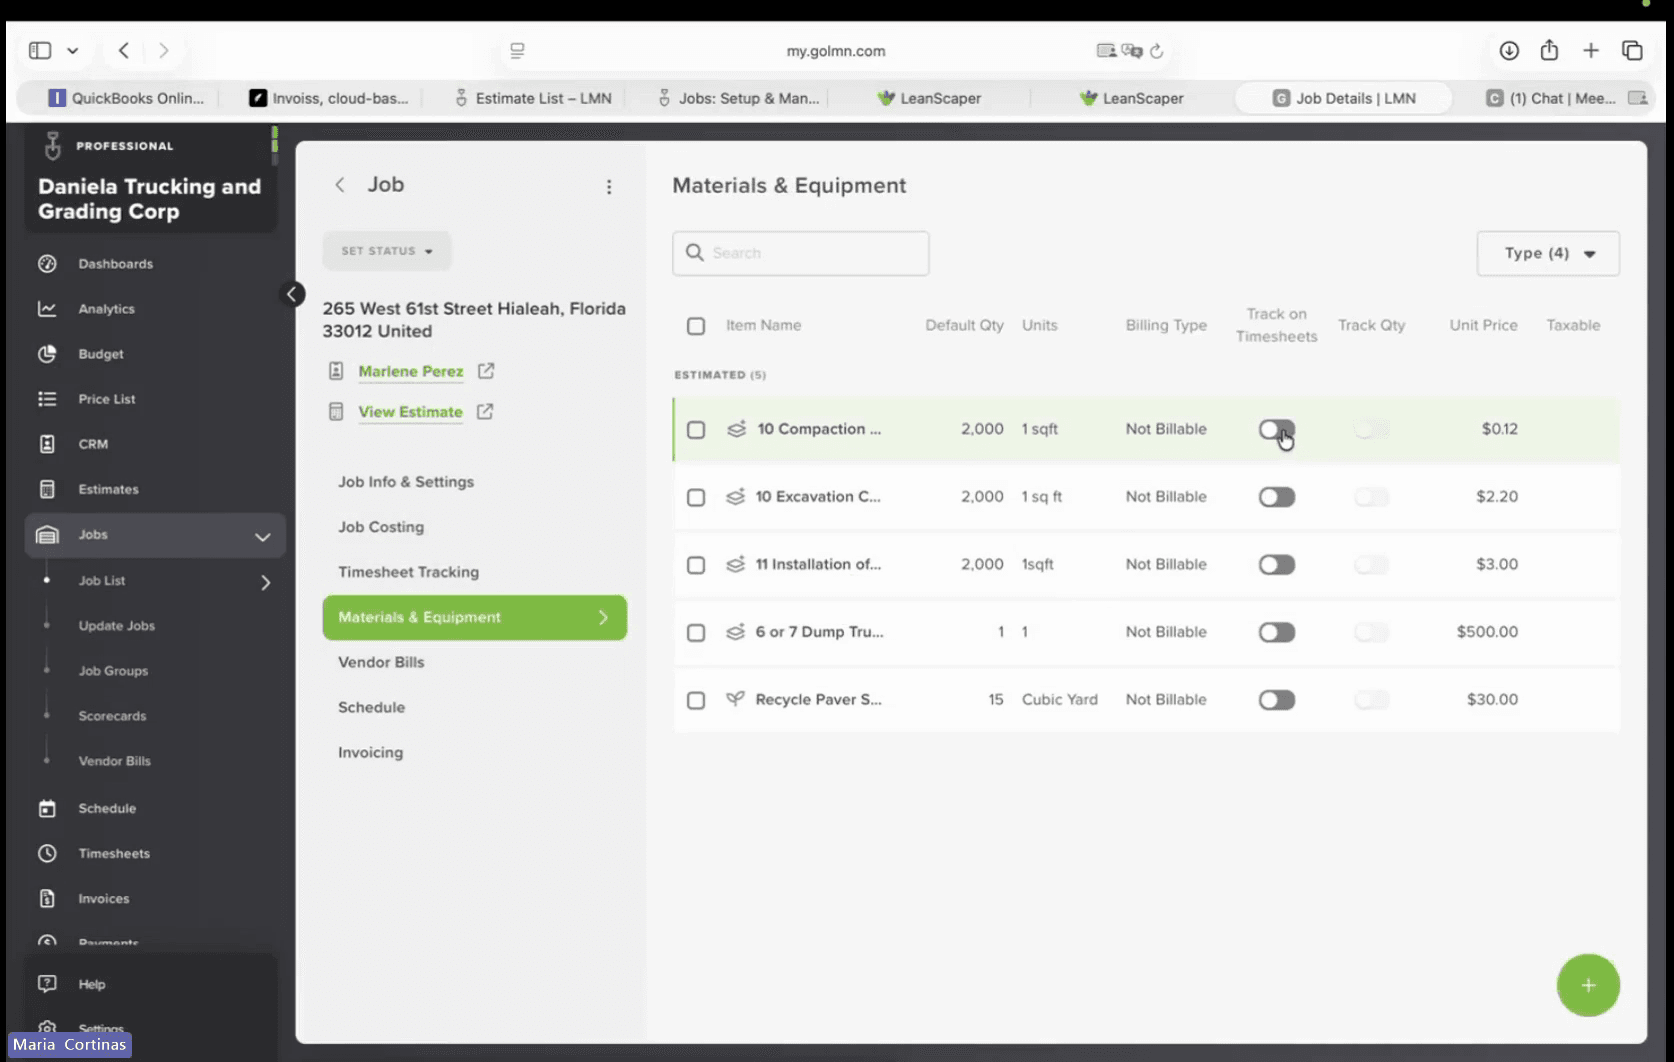
Toggle on Track on Timesheets for all necessary line items in the list.
Step #8: Toggle on Track on Timesheets for all necessary line items in the list.
9
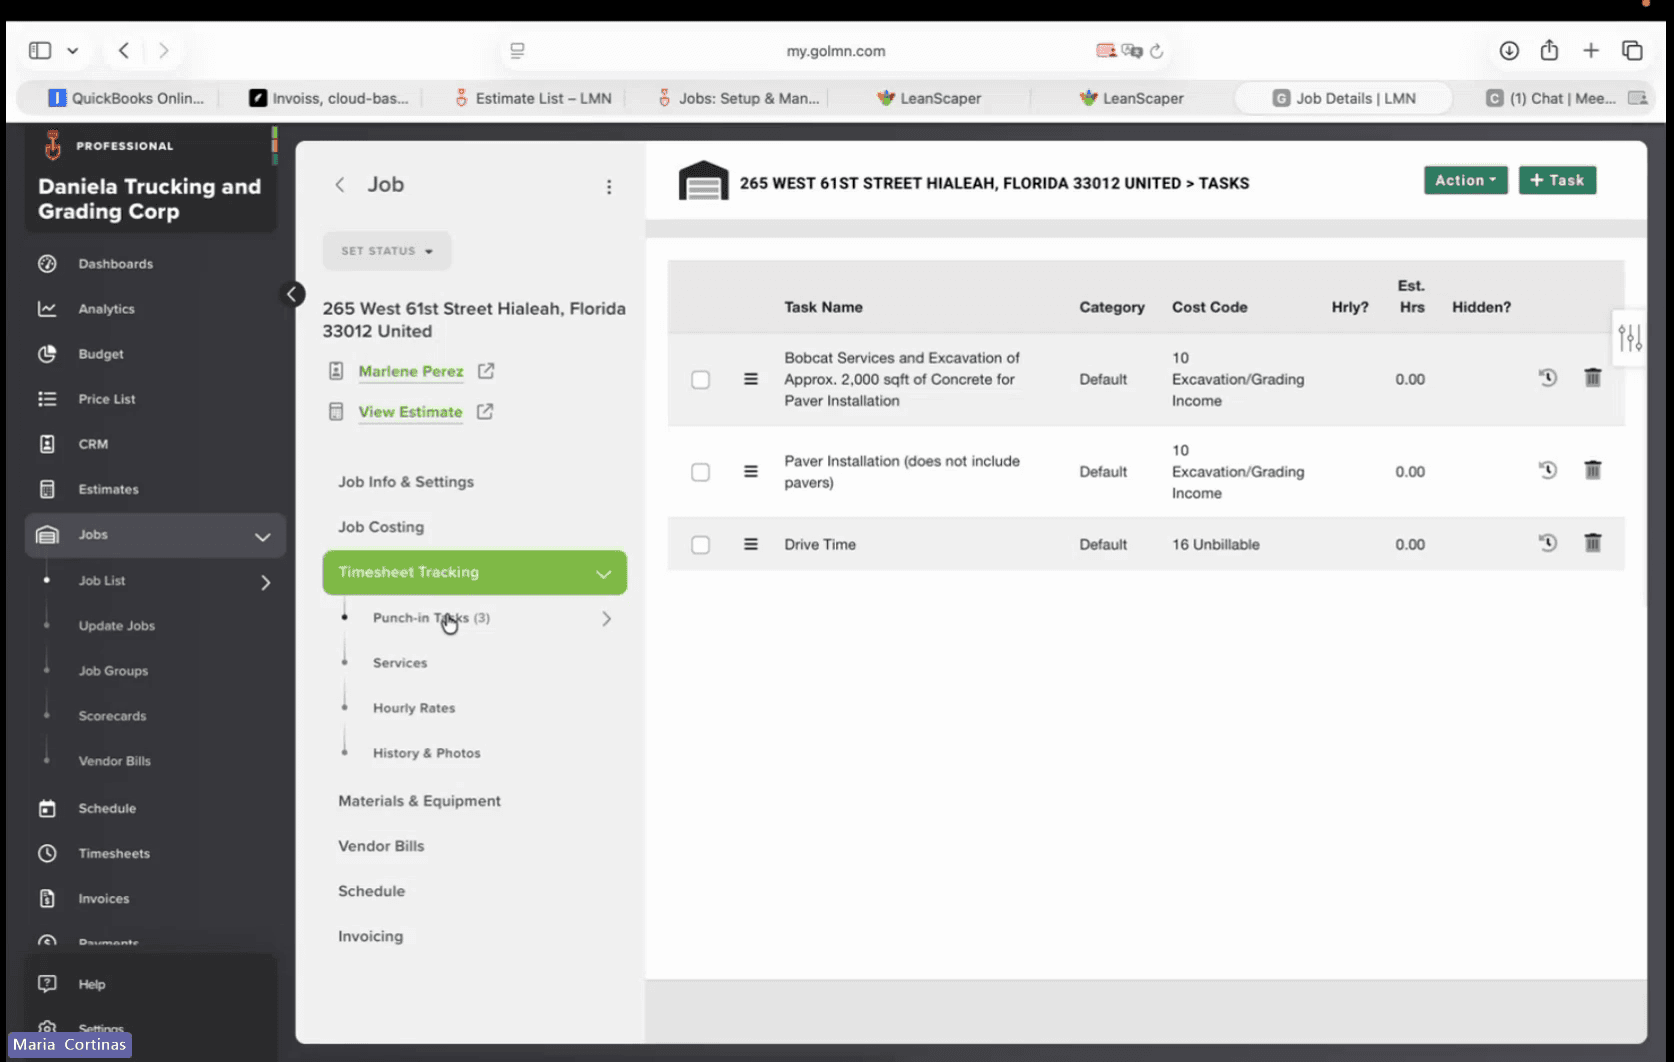
Click Timesheet Tracking in the navigation menu.
Step #9: Click Timesheet Tracking in the navigation menu.
10
Click Punch-in Tasks and verify that all tasks related to the job (including drive time and specific work areas) are visible.
Step #10: Click Punch-in Tasks and verify that all tasks related to the job (including drive time and specific work areas) are visible.

Schedule the Job

Once materials and equipment are configured, you can assign a crew and schedule the job on the calendar.
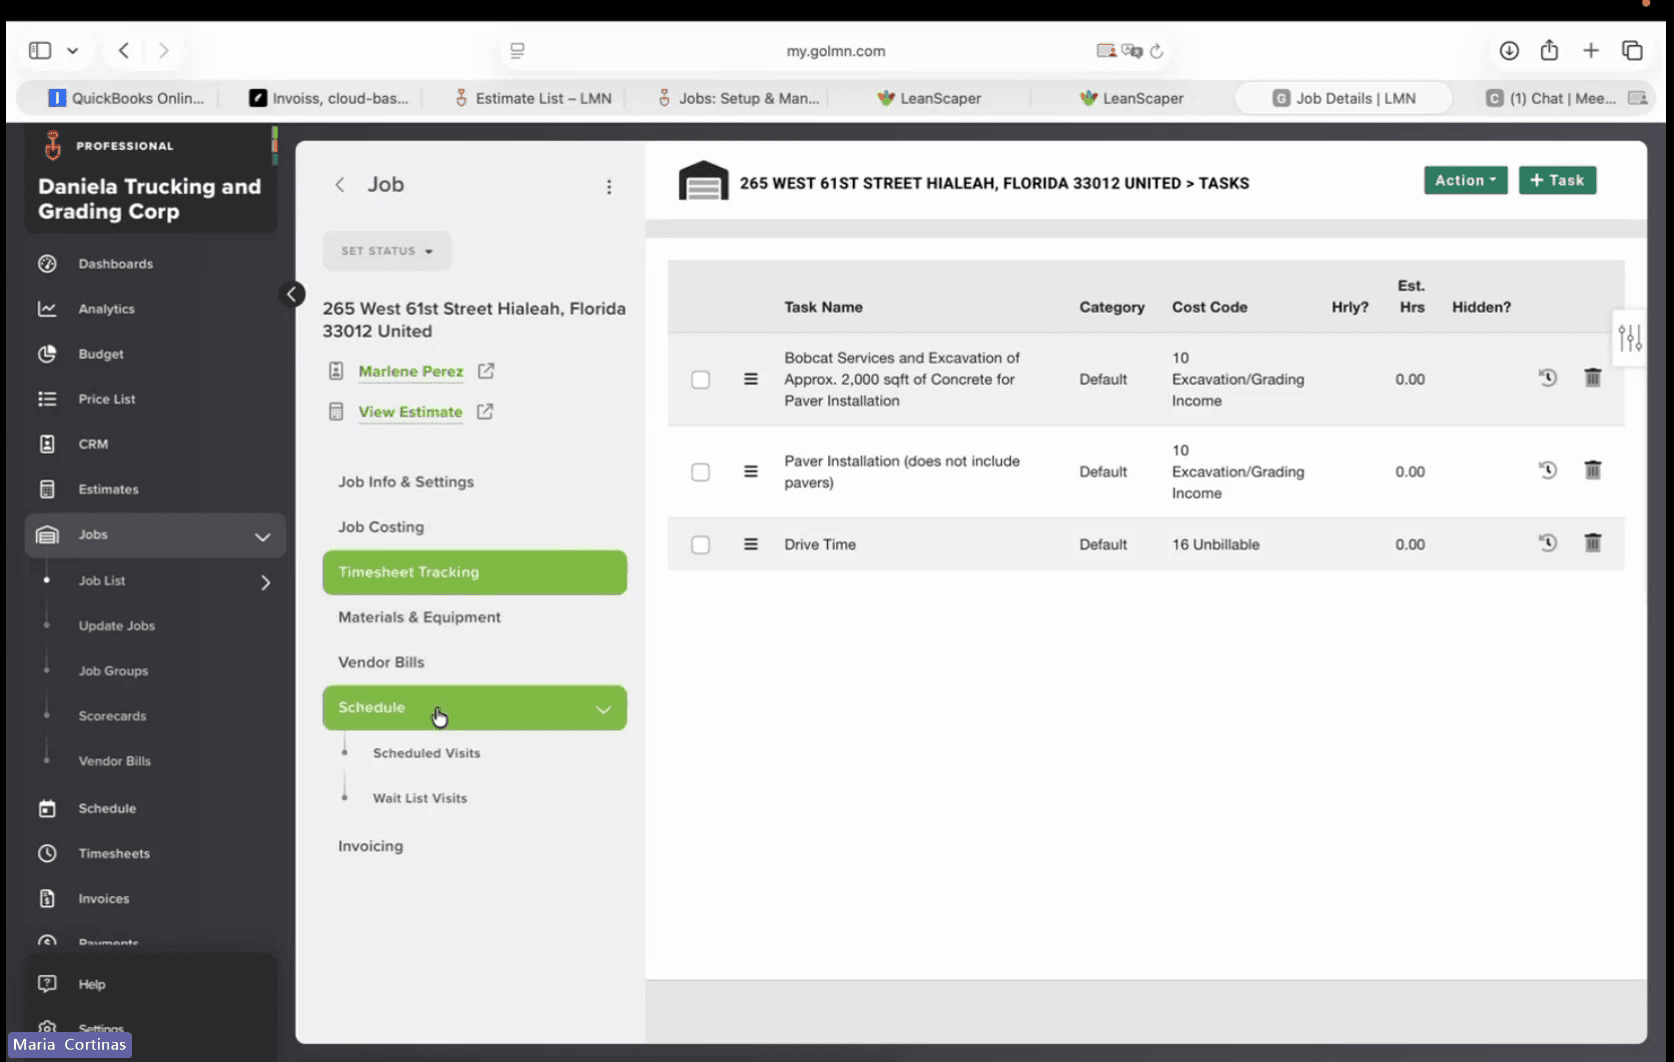
11
Click Schedule in the left-hand navigation pane.
Step #11: Click Schedule in the left-hand navigation pane.
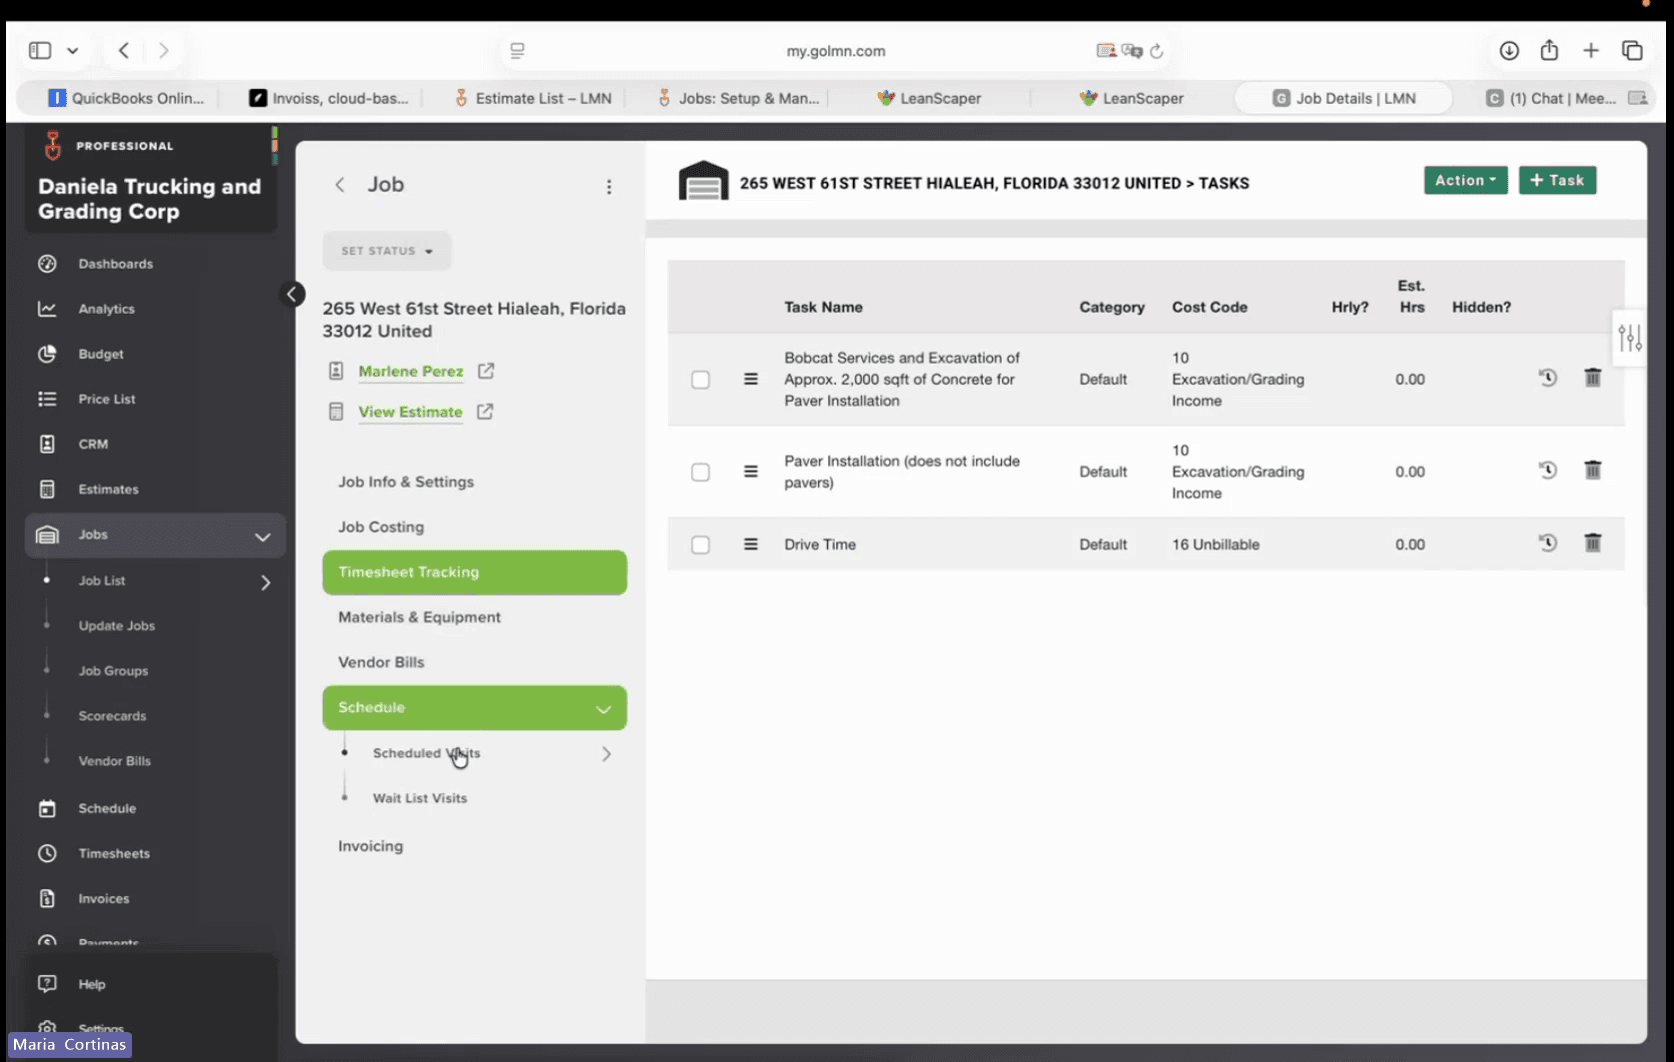
12
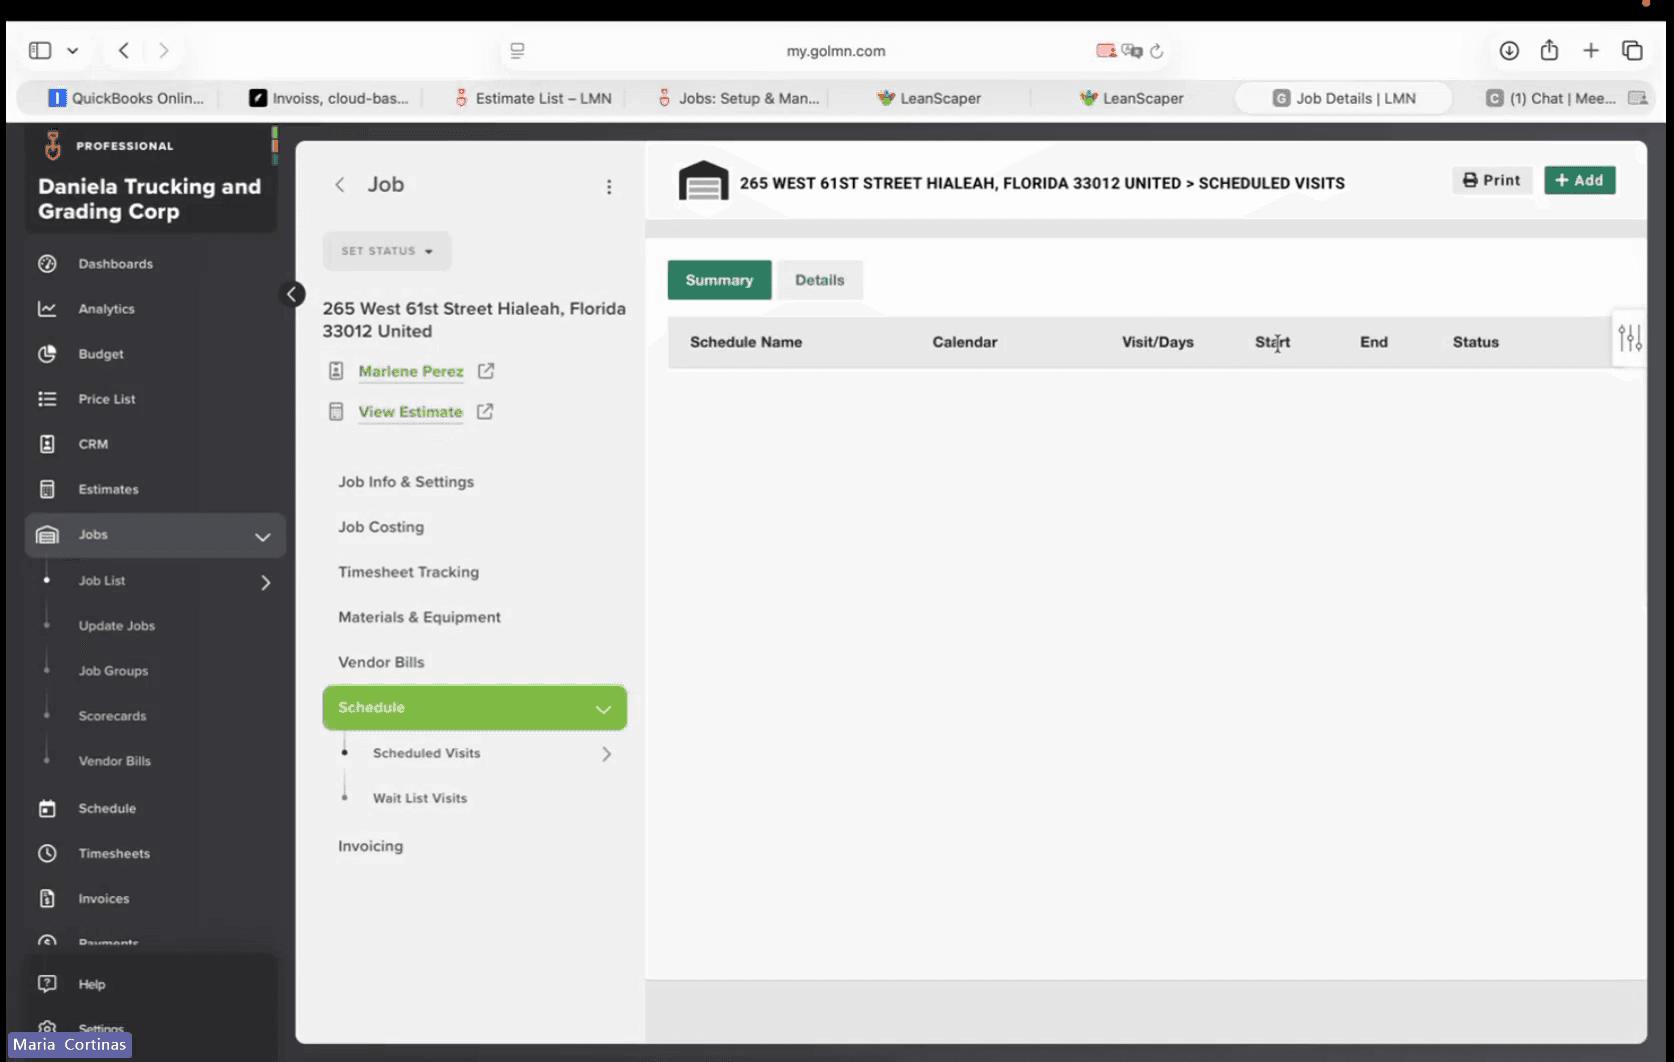
Select Scheduled Visits from the expanded menu.
Step #12: Select Scheduled Visits from the expanded menu.
13
Click the Add button in the top right corner.
Step #13: Click the Add button in the top right corner.
14
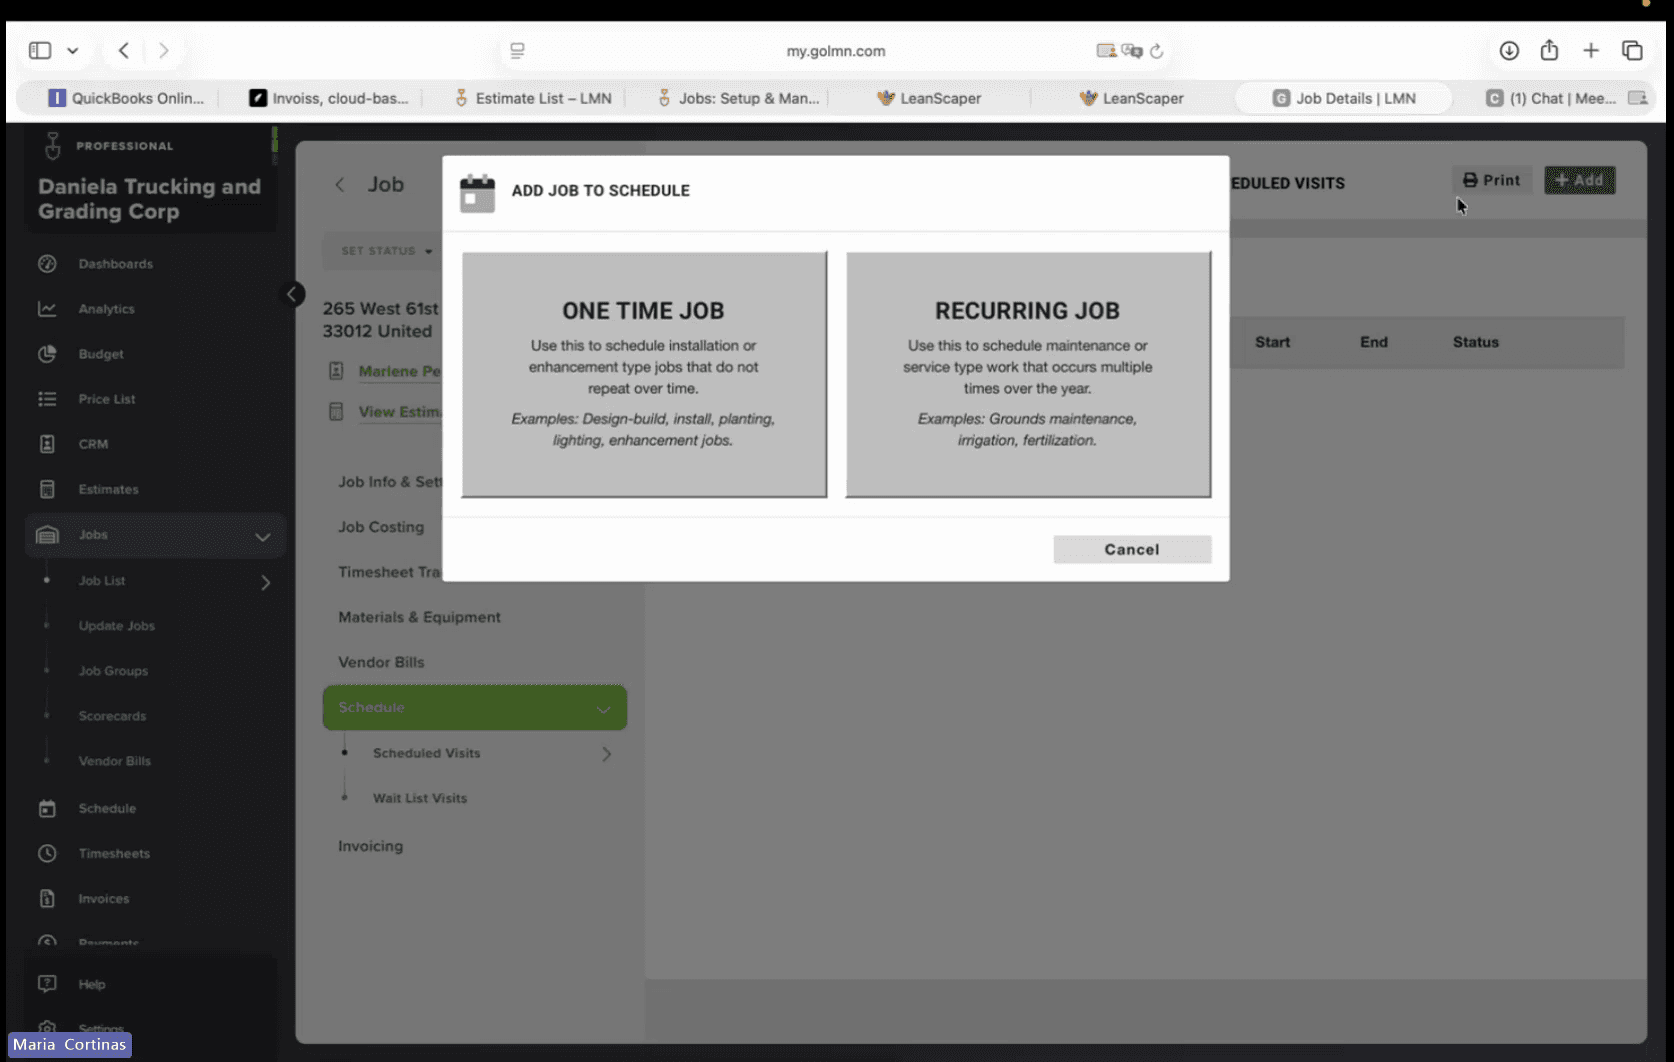
Select One Time Job from the scheduling options.
Step #14: Select One Time Job from the scheduling options.
15
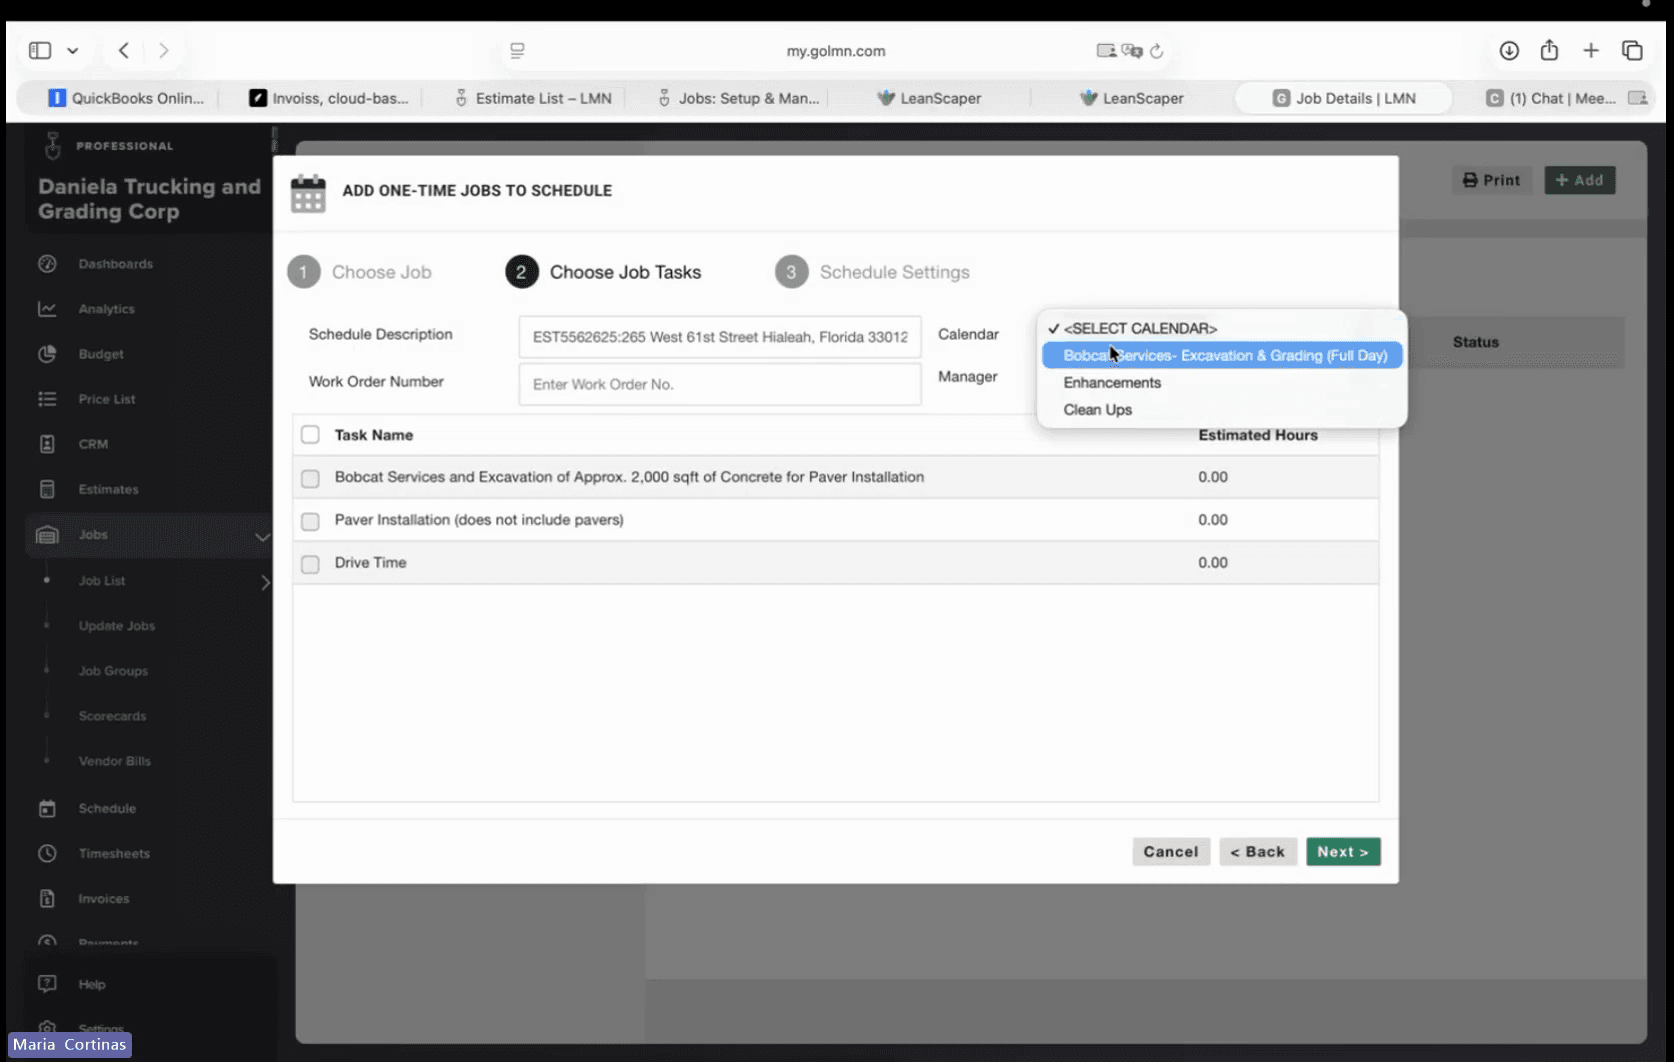
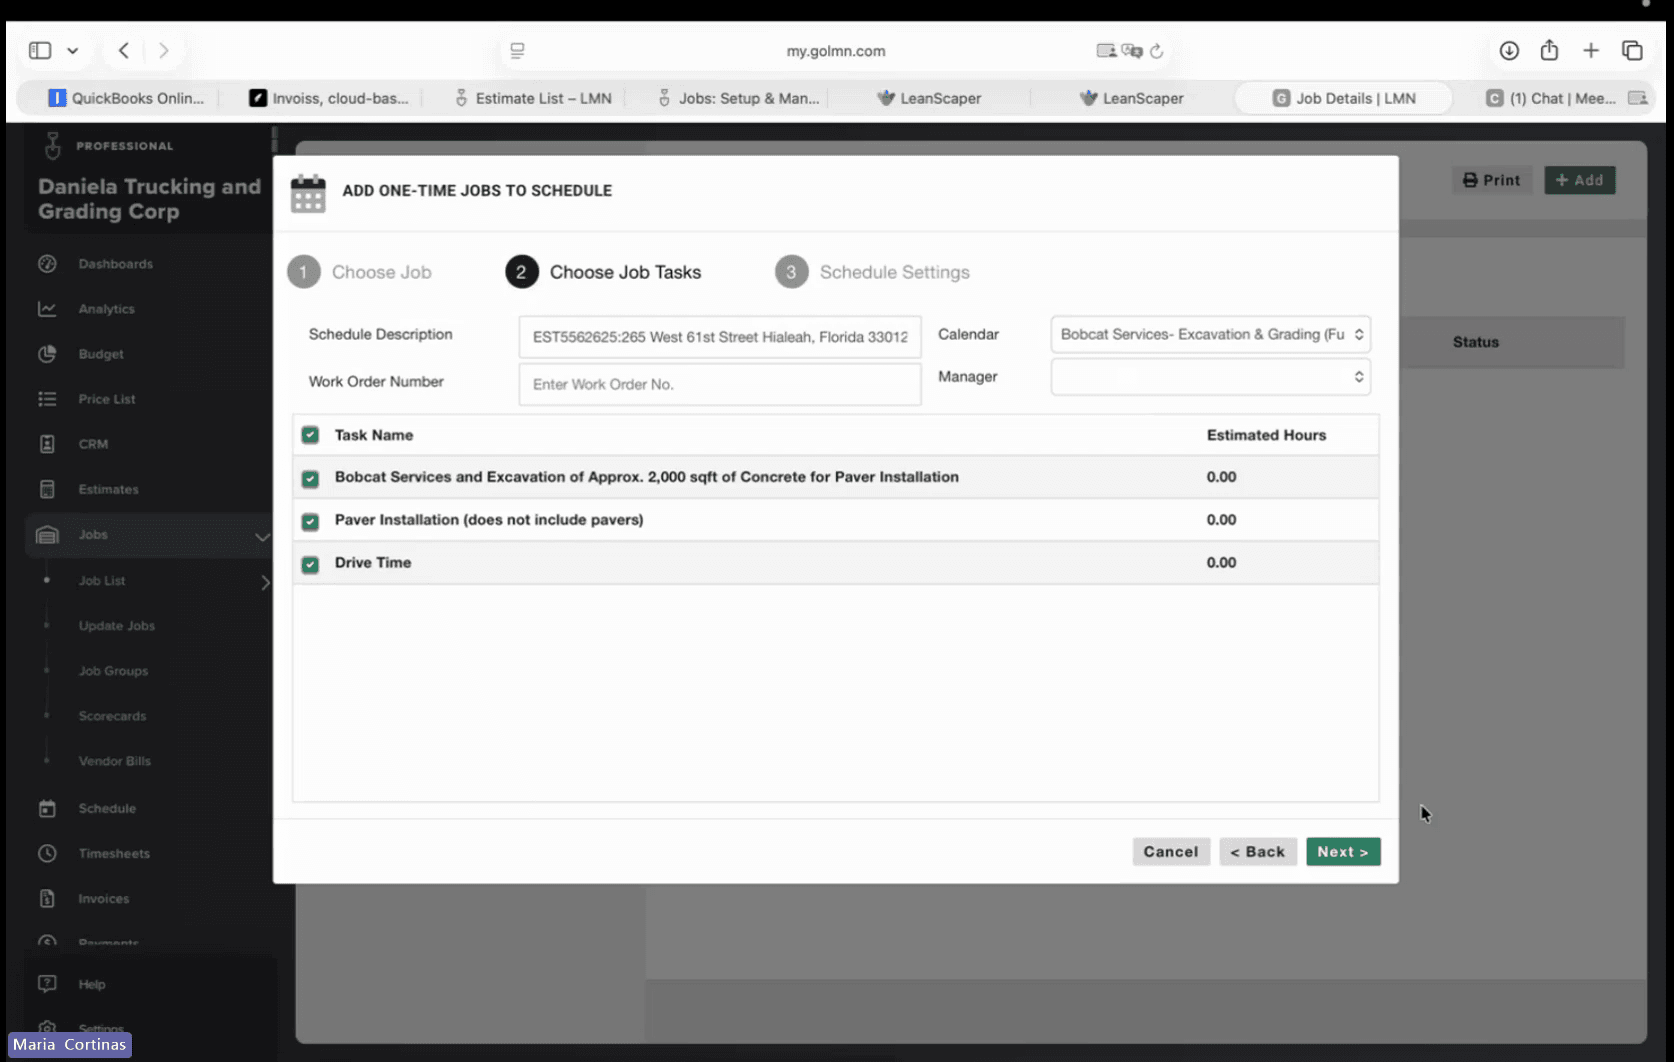
Open the Calendar selection dropdown and select the relevant calendar, such as Bobcat Services.
Step #15: Open the Calendar selection dropdown and select the relevant calendar, such as Bobcat Services.
16
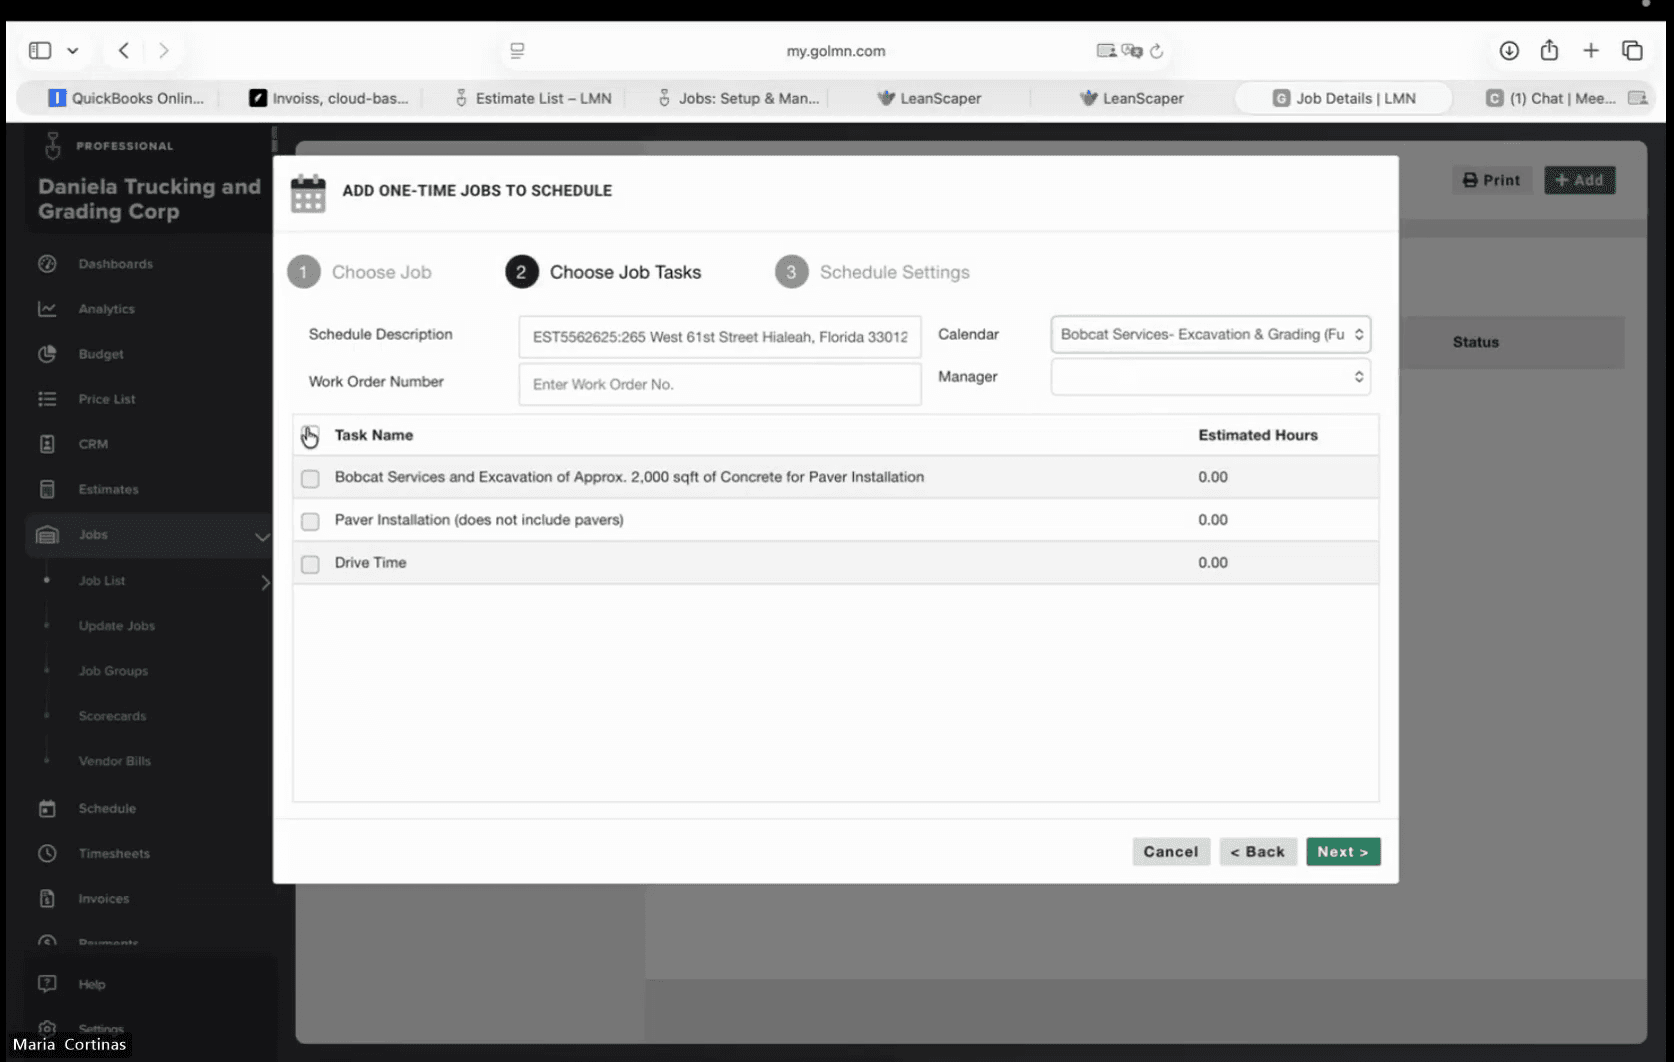
Select the master checkbox in the table header to choose all job tasks, ensuring drive time is included.
Step #16: Select the master checkbox in the table header to choose all job tasks, ensuring drive time is included.
17
Click Next to proceed to Schedule Settings.
Step #17: Click Next to proceed to Schedule Settings.
18
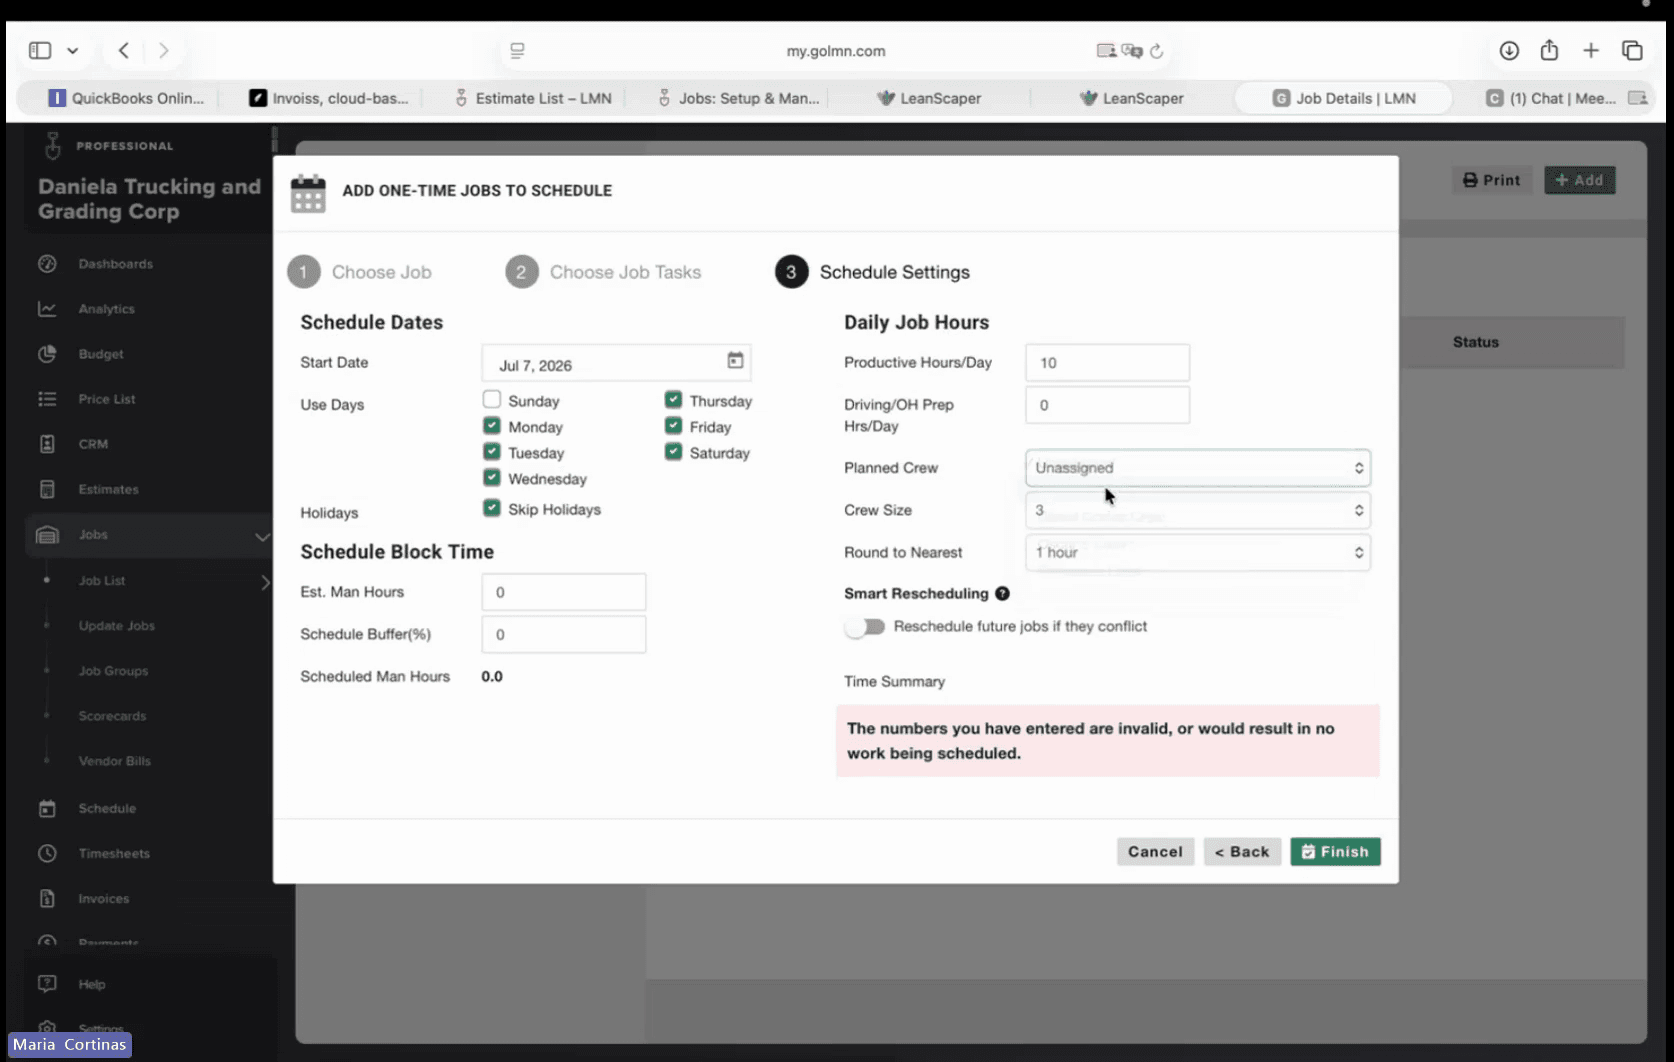
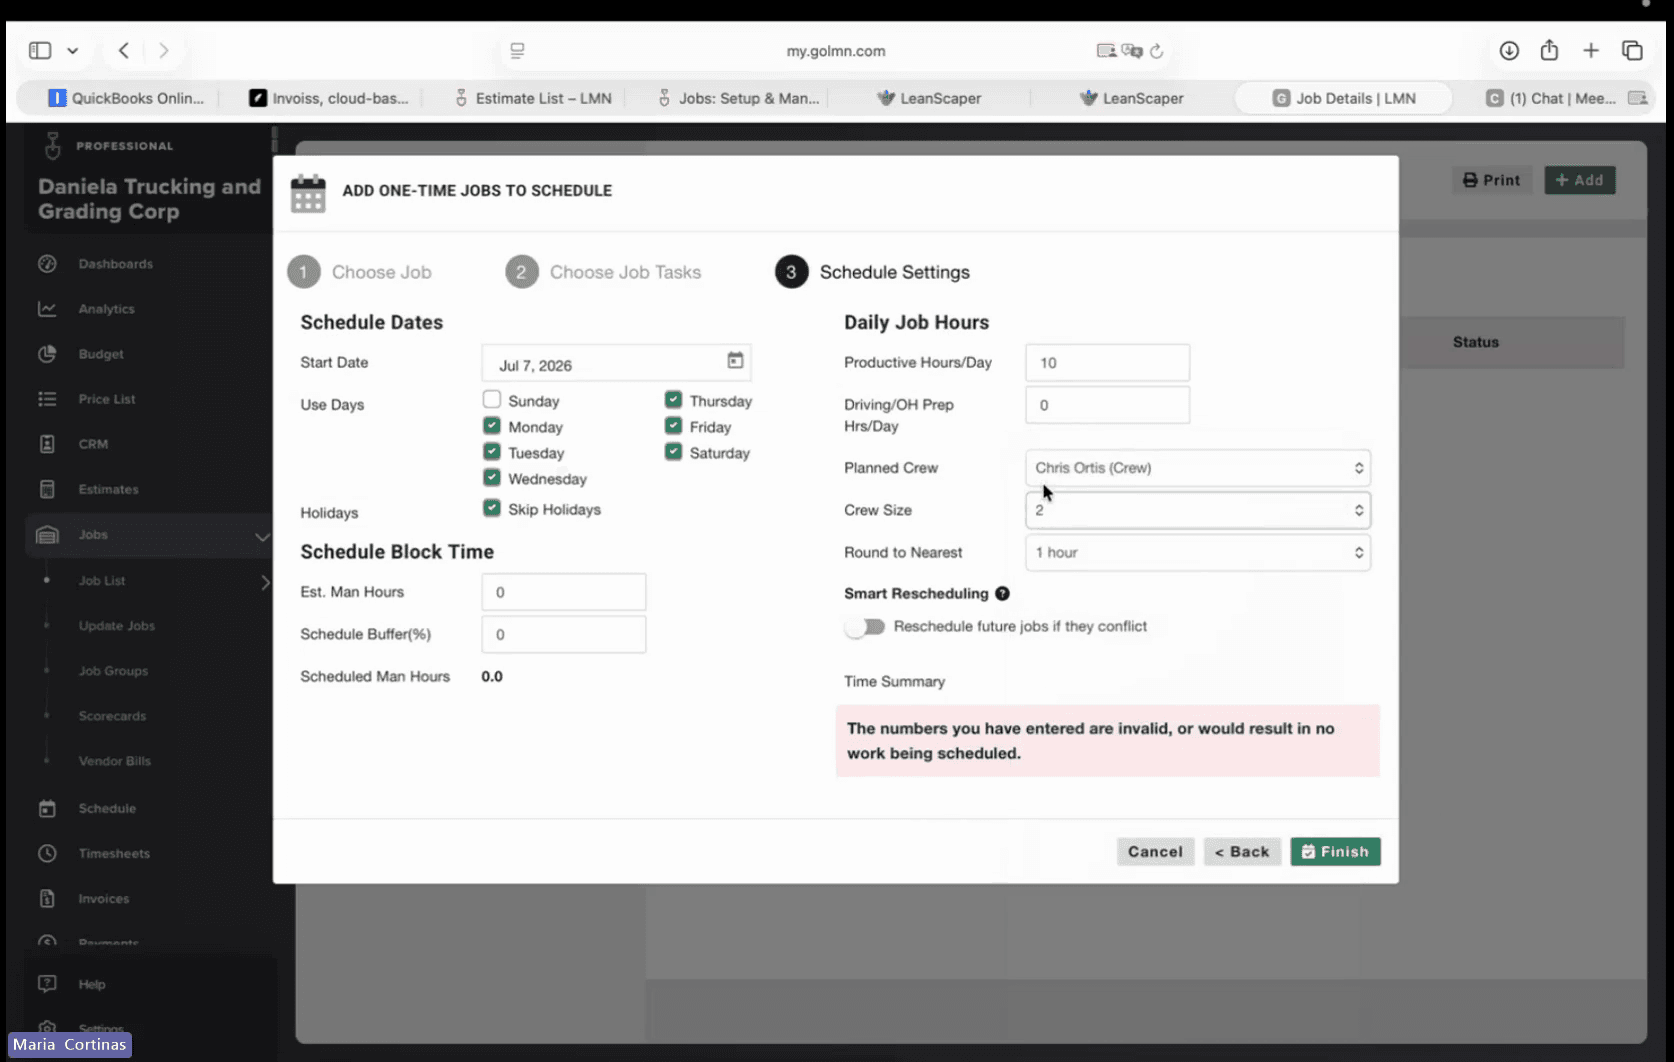
Open the Planned Crew dropdown menu and select the assigned crew lead.
Step #18: Open the Planned Crew dropdown menu and select the assigned crew lead.
19
Open the Crew Size dropdown and select the number of crew members needed.
Step #19: Open the Crew Size dropdown and select the number of crew members needed.
20
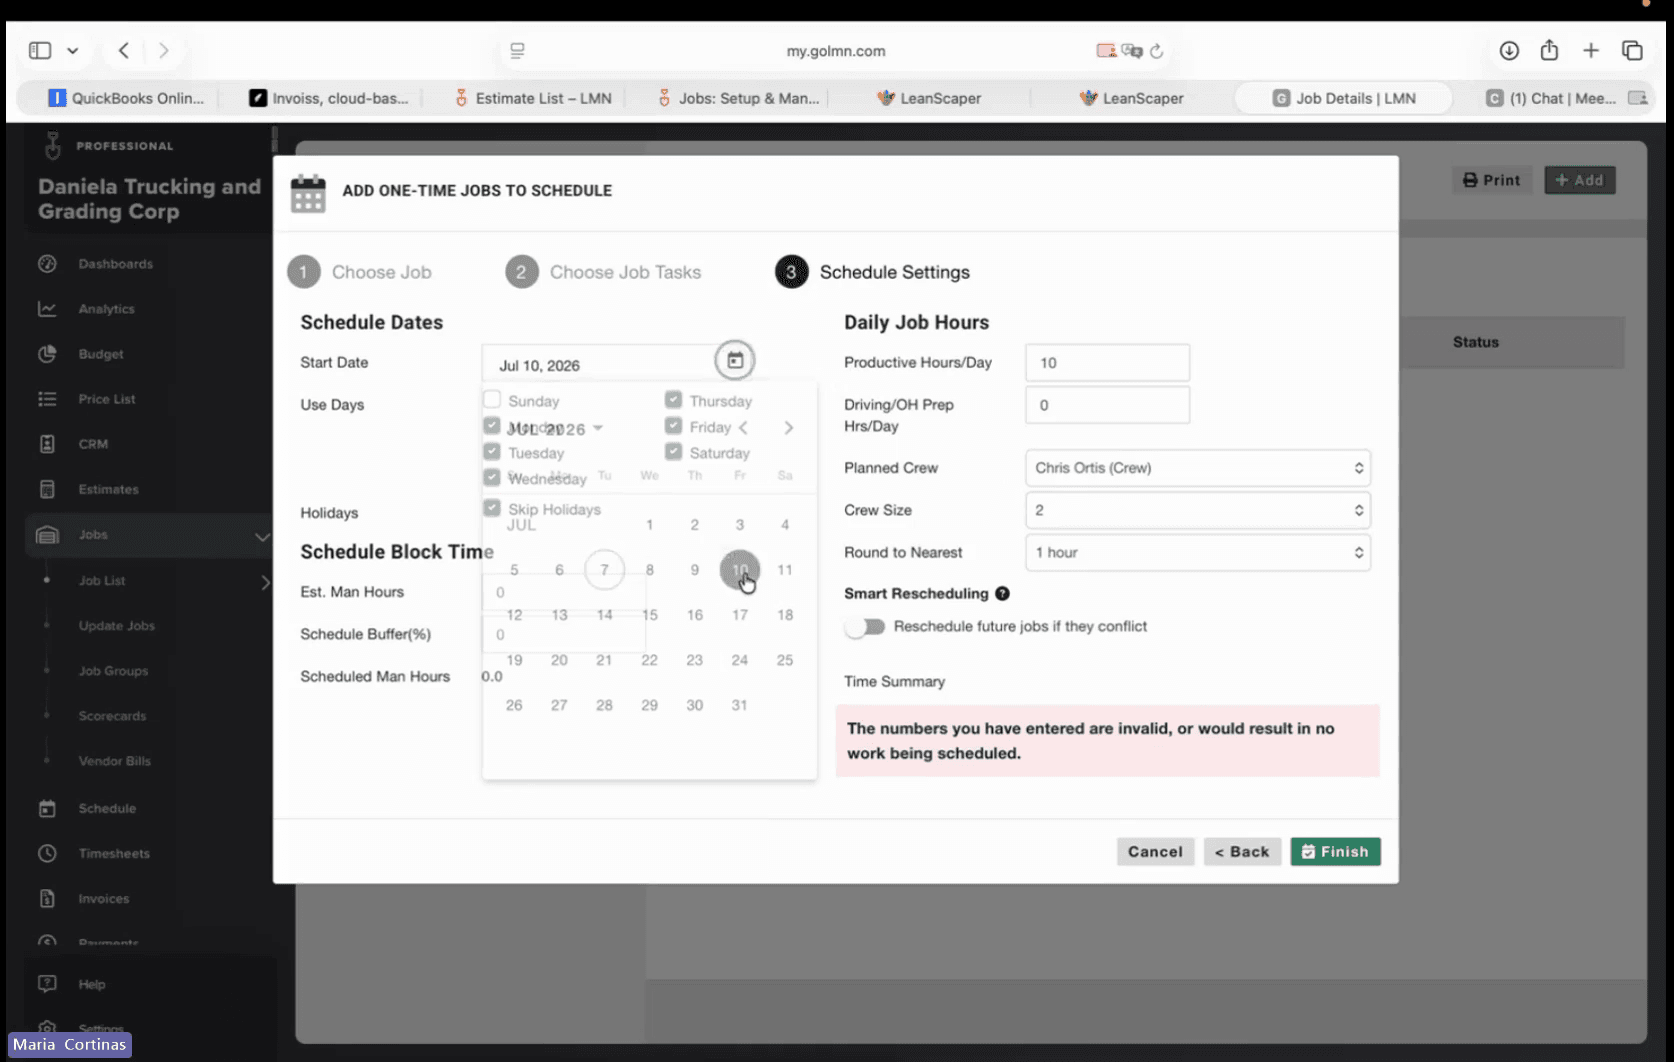
Click the Start Date field and select the scheduled date from the calendar.
Step #20: Click the Start Date field and select the scheduled date from the calendar.
21
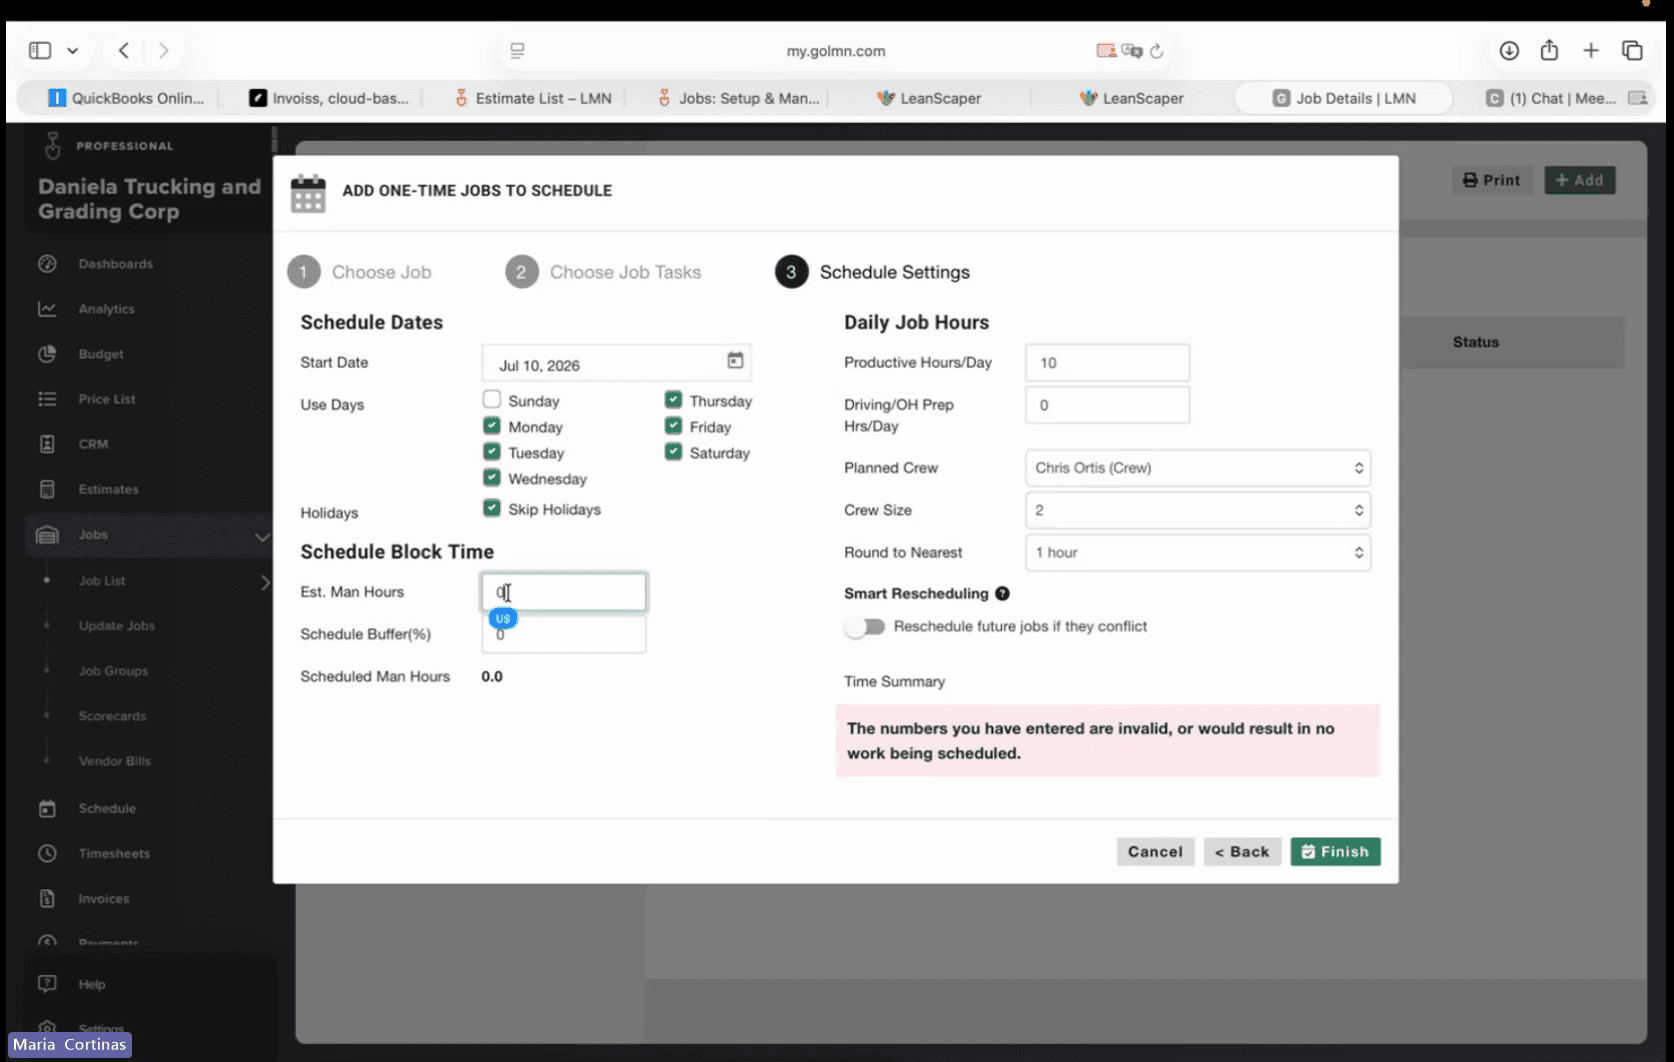
Click the Est. Man Hours field and manually enter the estimated hours if they do not automatically populate.
Step #21: Click the Est. Man Hours field and manually enter the estimated hours if they do not automatically populate.
22
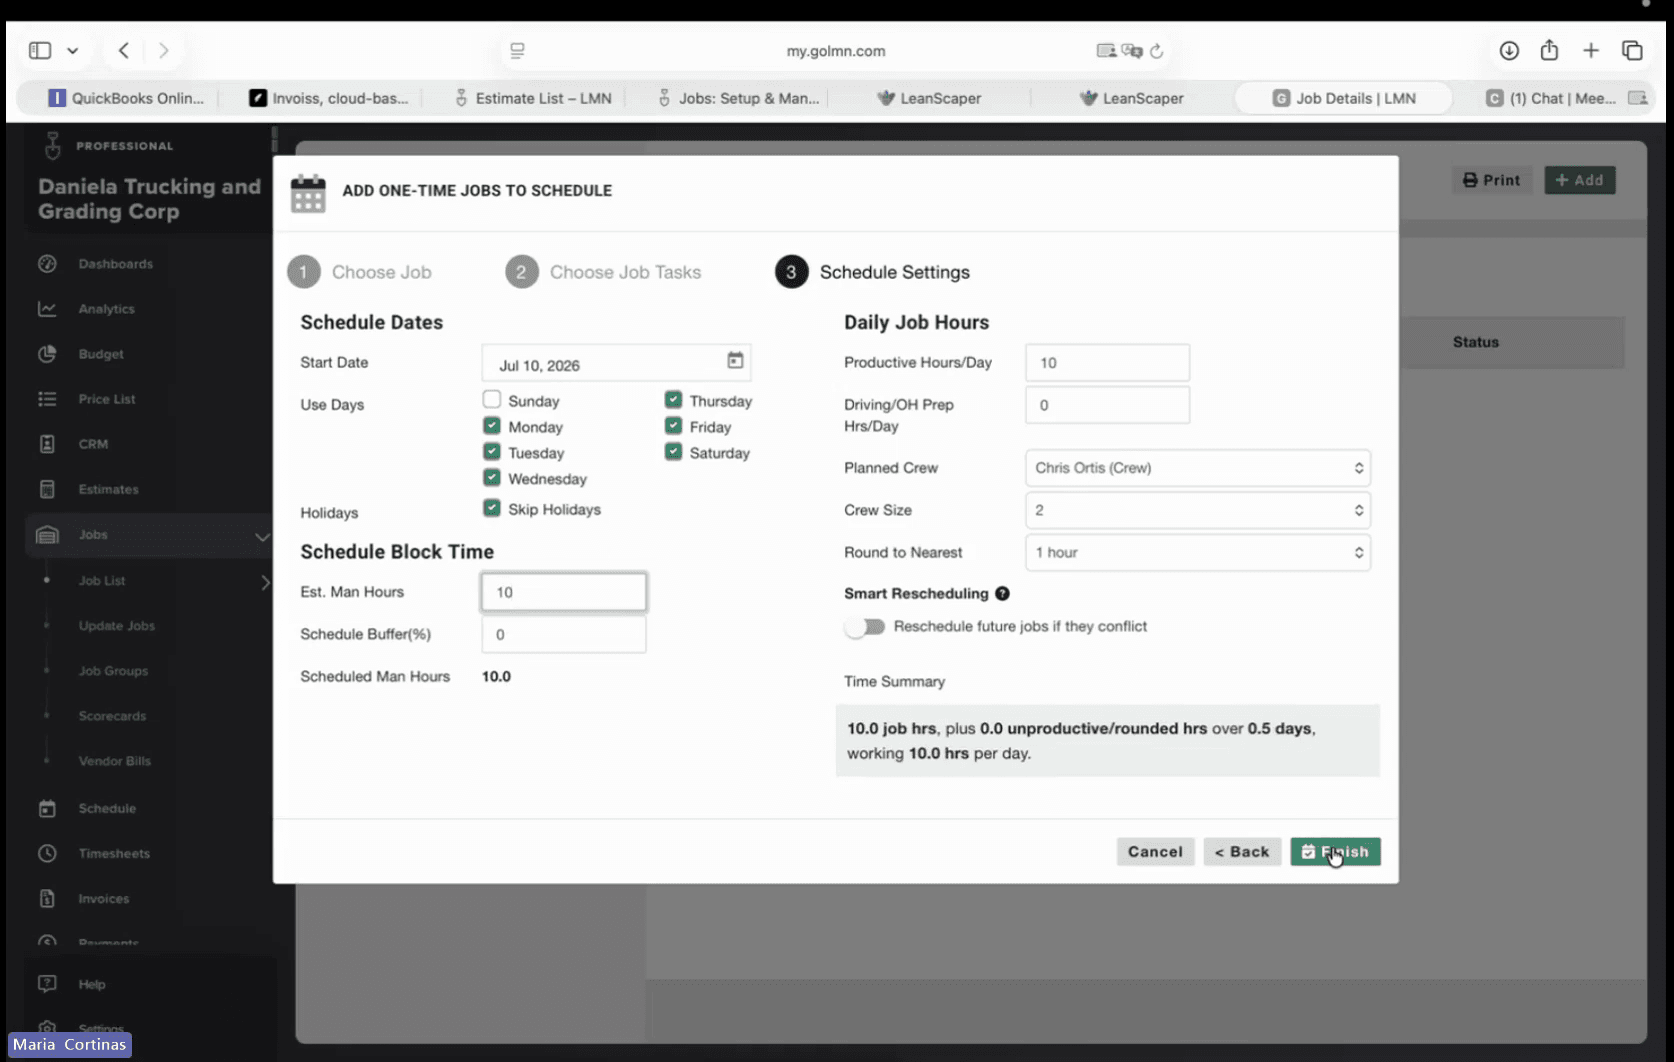
Click Finish to add the job to the schedule calendar.
Step #22: Click Finish to add the job to the schedule calendar.

Q: Why are the estimated man-hours not showing up automatically in the schedule settings?

A: Estimated man-hours typically populate automatically once an estimate is completely finalized. If you are creating a test job or the estimate is missing specific labor data, the field may remain blank and requires manual entry.

Q: Why do I need to check the "Crew Notes" box for Drive Time?

A: Enabling crew notes for drive time allows your team to directly log and report any incidents, delays, or context that occur during transit, keeping all documentation organized within the job's history.

Term

Definition

Estimate

A preliminary quotation or proposal for a job that must be marked as sold or approved before converting it into active work.

Job Costing

The process of tracking the financial performance, labor, and material expenses associated with a specific project.

Timesheet Tracking

A feature used to log the specific time and work tasks completed by a crew for accurate payroll and project management tracking.

Punch-in Tasks

Individual line items or activities that a crew member selects to clock their time against when beginning work.

Estimated Man-Hours

The projected total amount of labor time required to complete the scheduled job based on the initial quote.