Learn how to generate a new project quote in Chuteflow from a Monday.com lead, configure building chute details, adjust pricing, and export claim documents.
By Michael Seif
This guide outlines the process of generating a customized quote for building chute systems. Completing this workflow ensures accurate material configurations, pricing generation, and polished final project documentation.
This process is designed for estimators and sales representatives who need to convert a raw lead in Monday.com into a fully configured structural quote using the Chuteflow platform.
Create a New Lead in Monday.com
Start by entering the raw project details into your primary CRM tracking board.
1
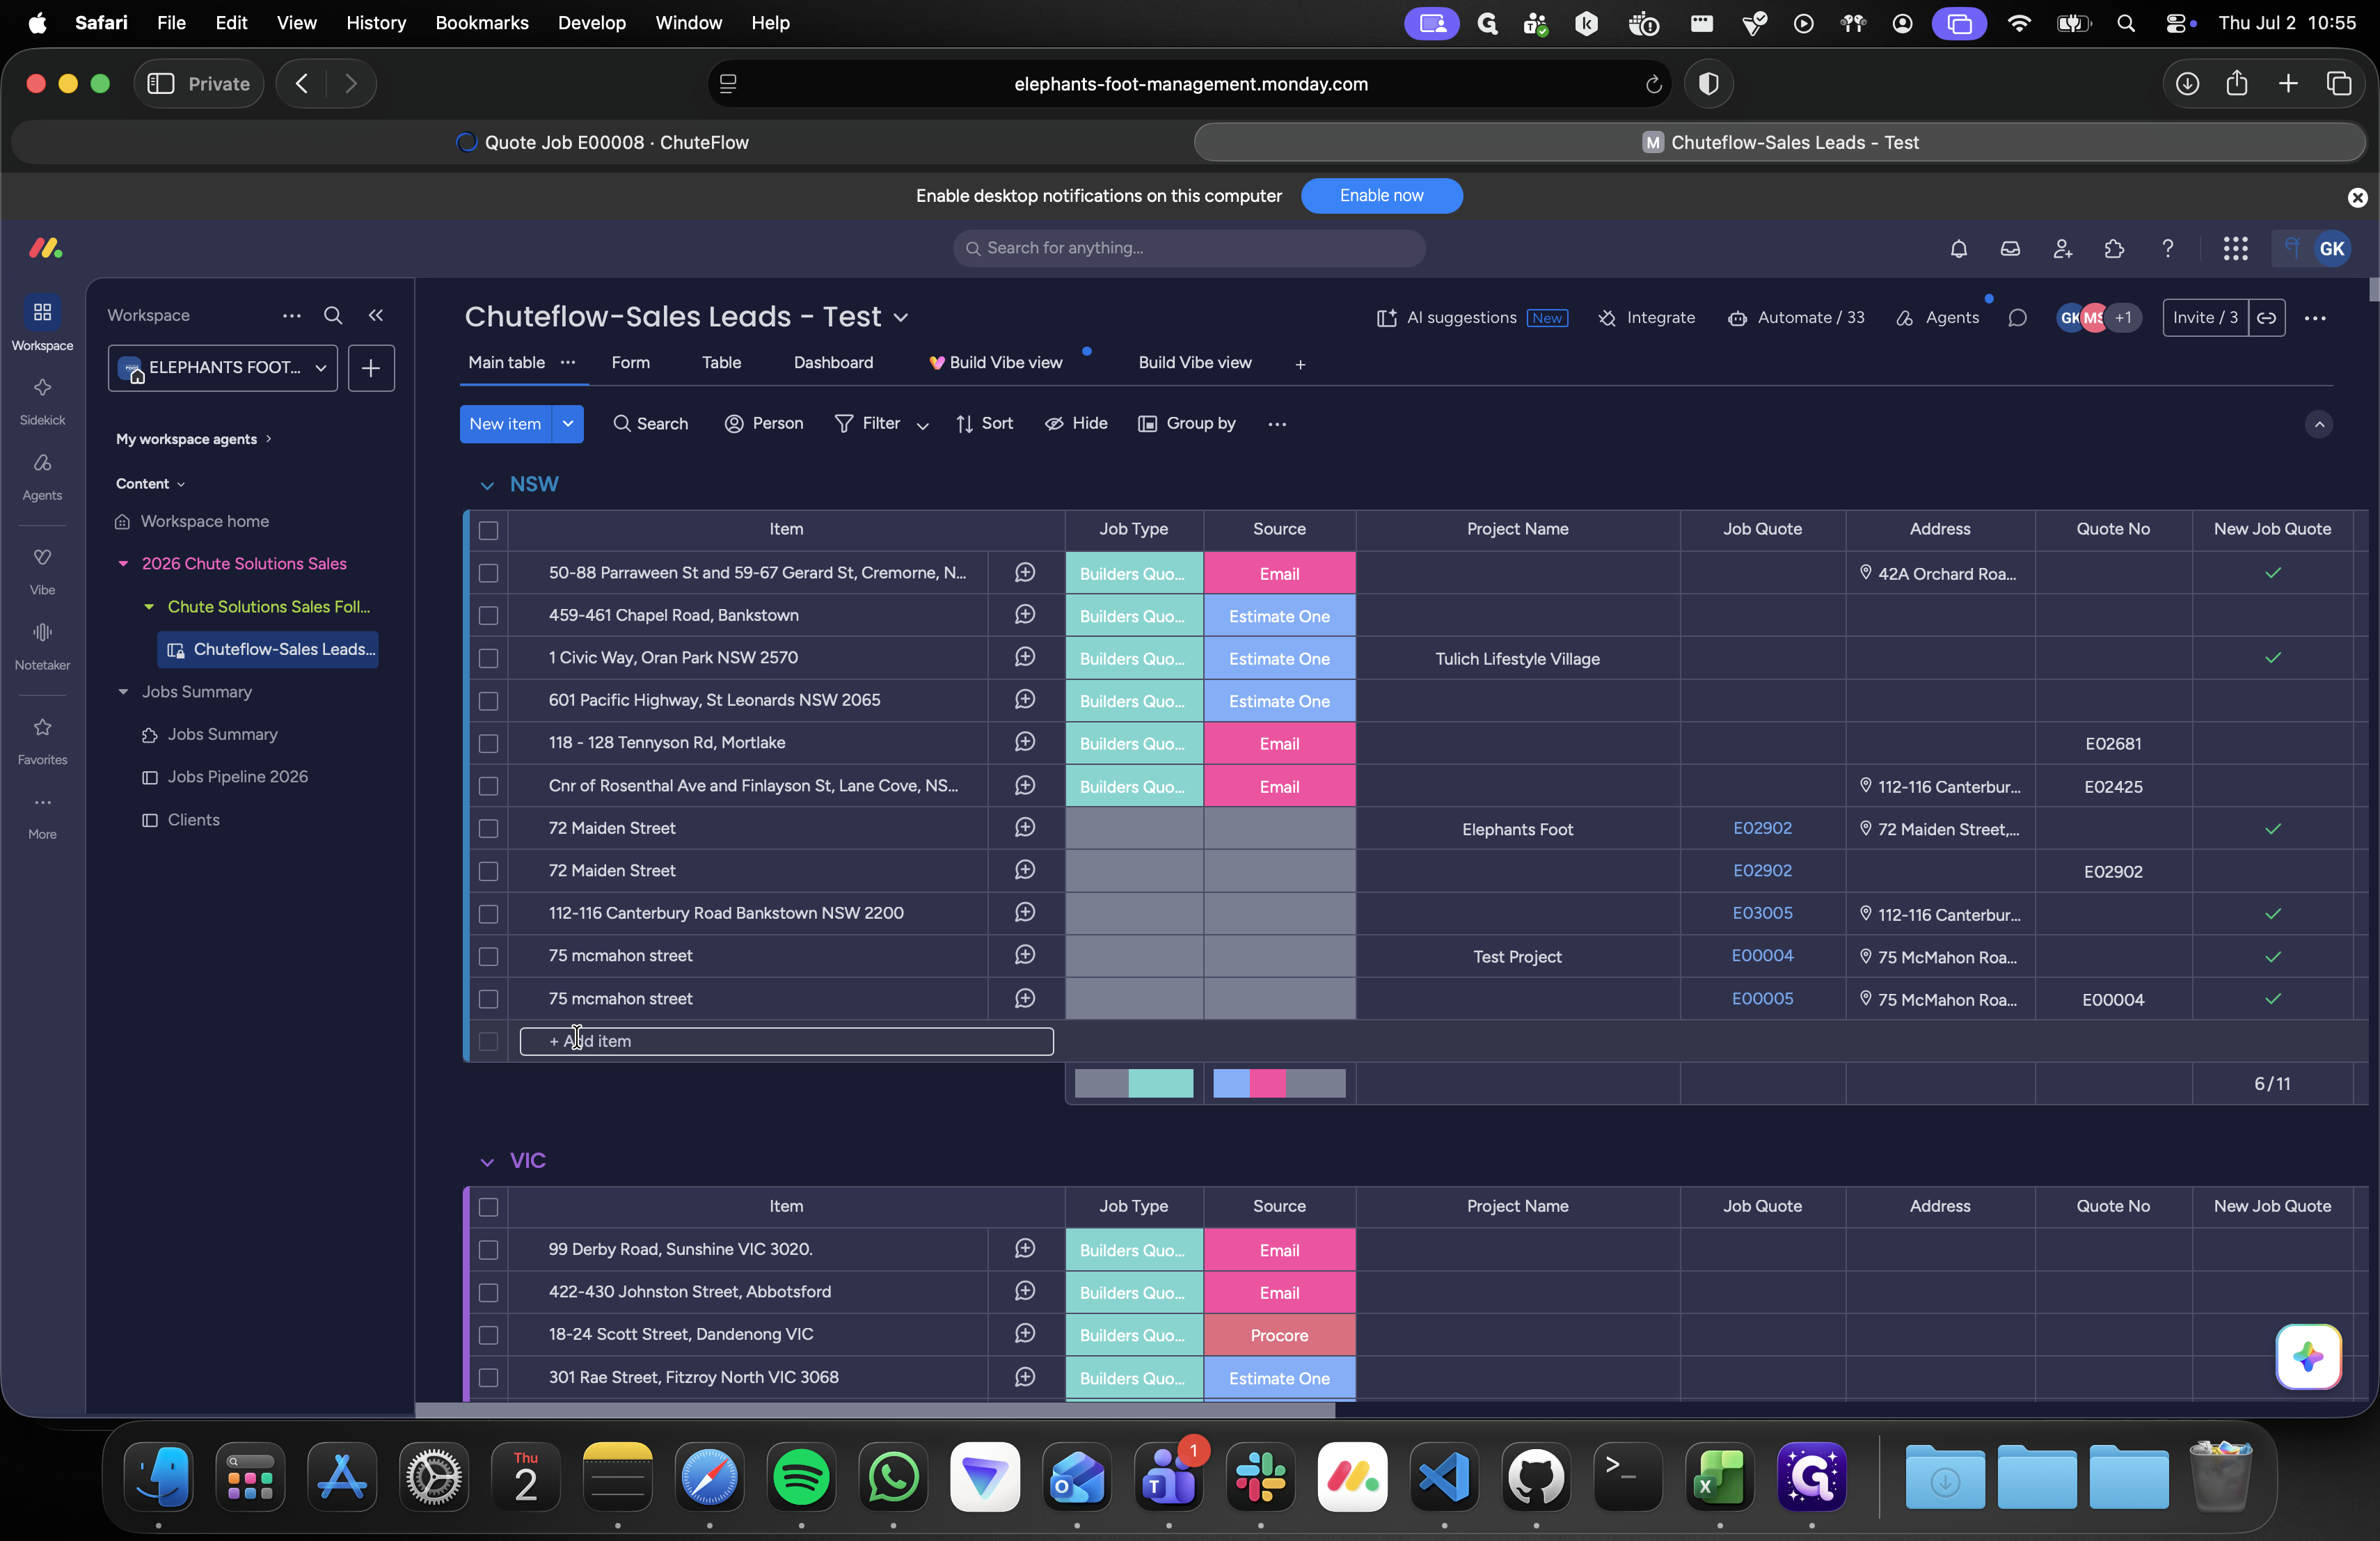
Click on + Add item to create a new entry in your regional section.
2
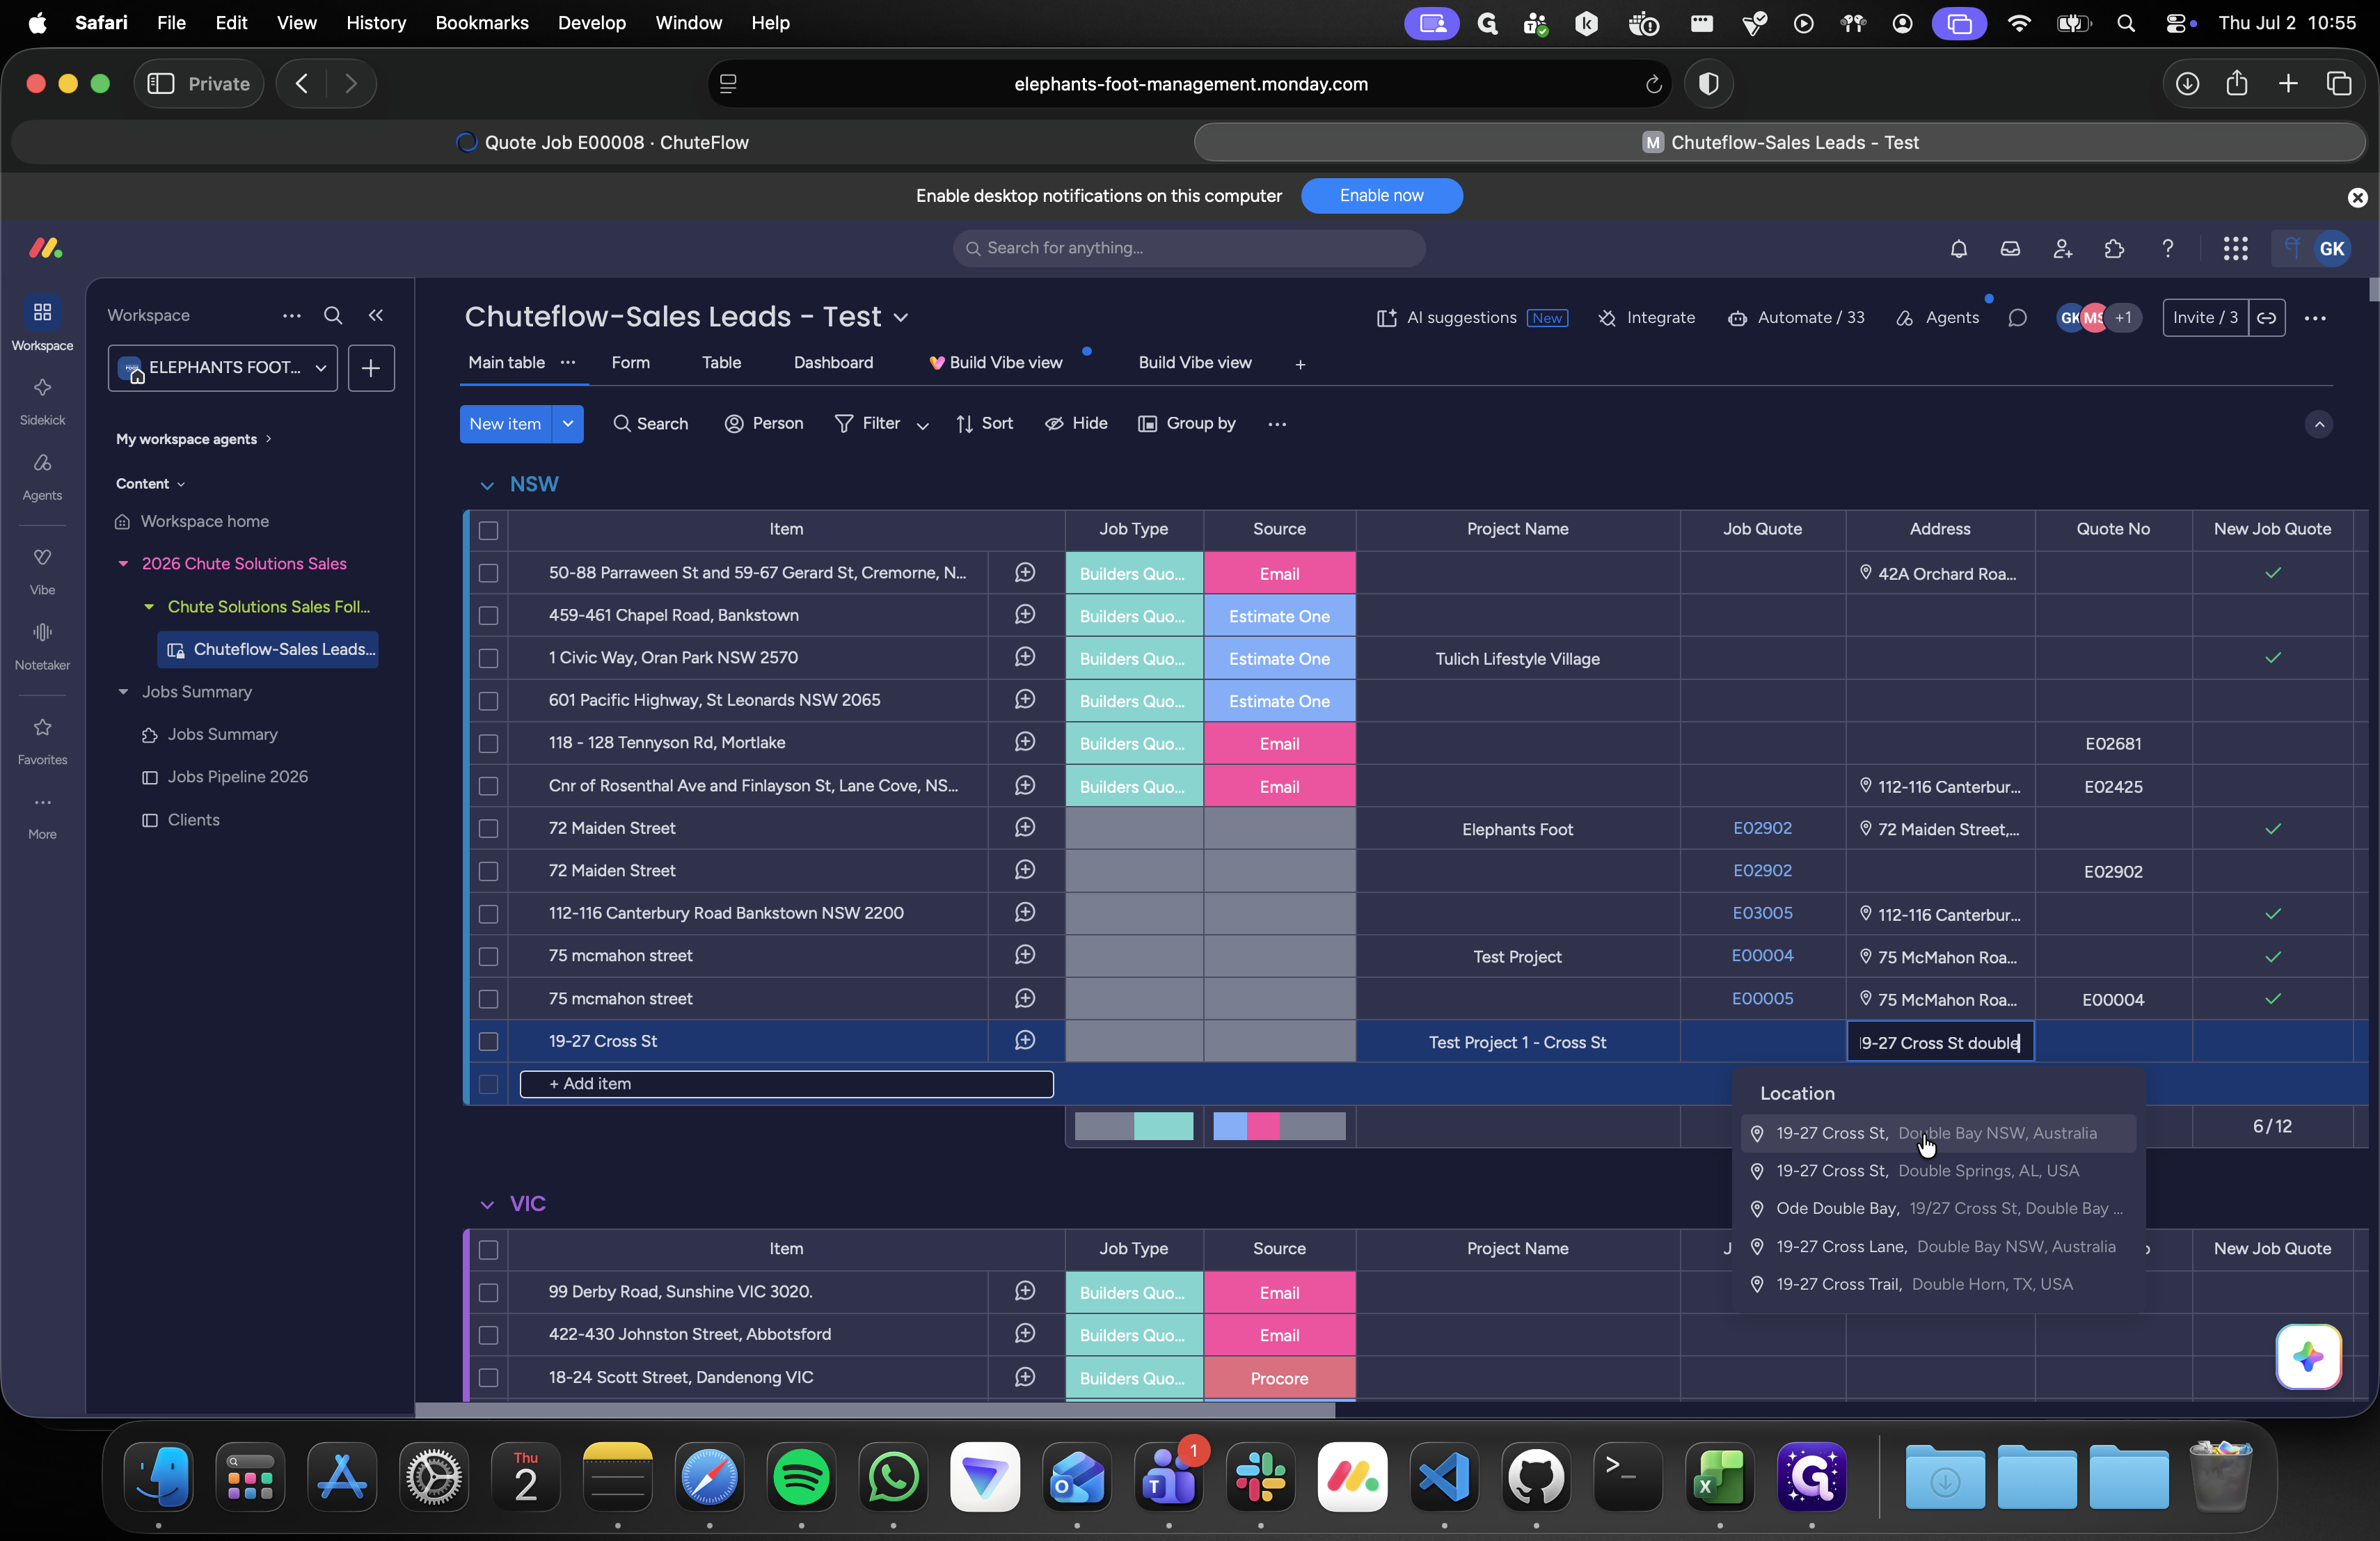
Type in the name of the new project.
3
Click on the location dropdown and select the relevant regional address, such as "19-27 Cross St Double Bay NSW".
4
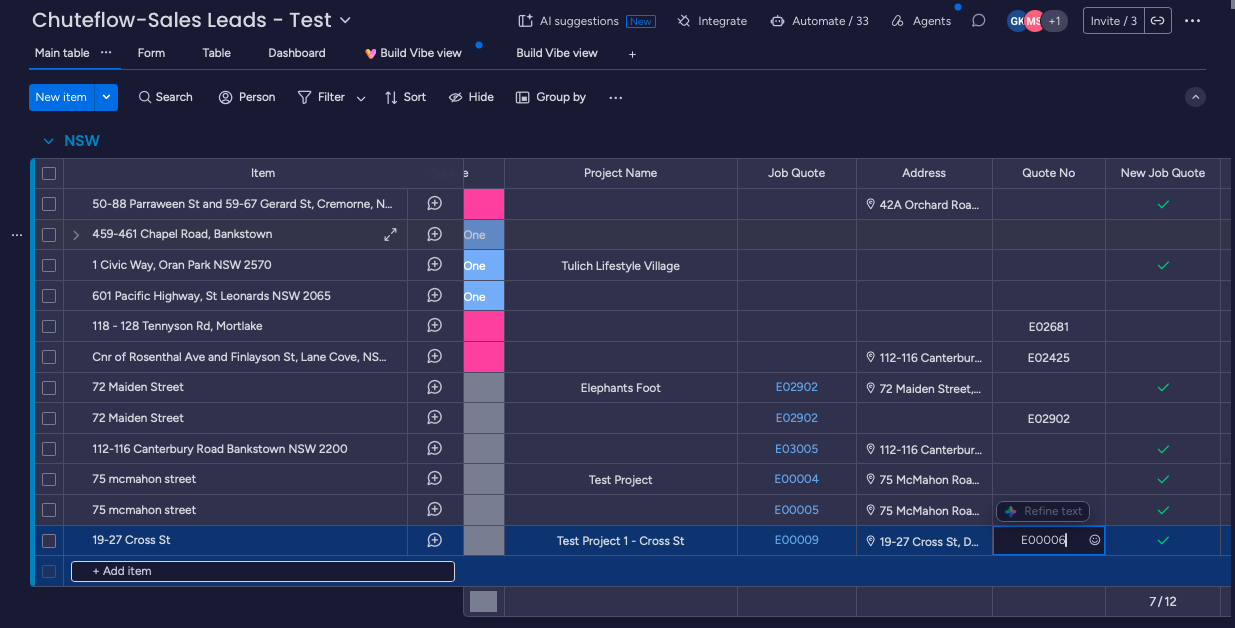
Enter the Quote No and tick the New Job Quote checkmark to run an automation.
5
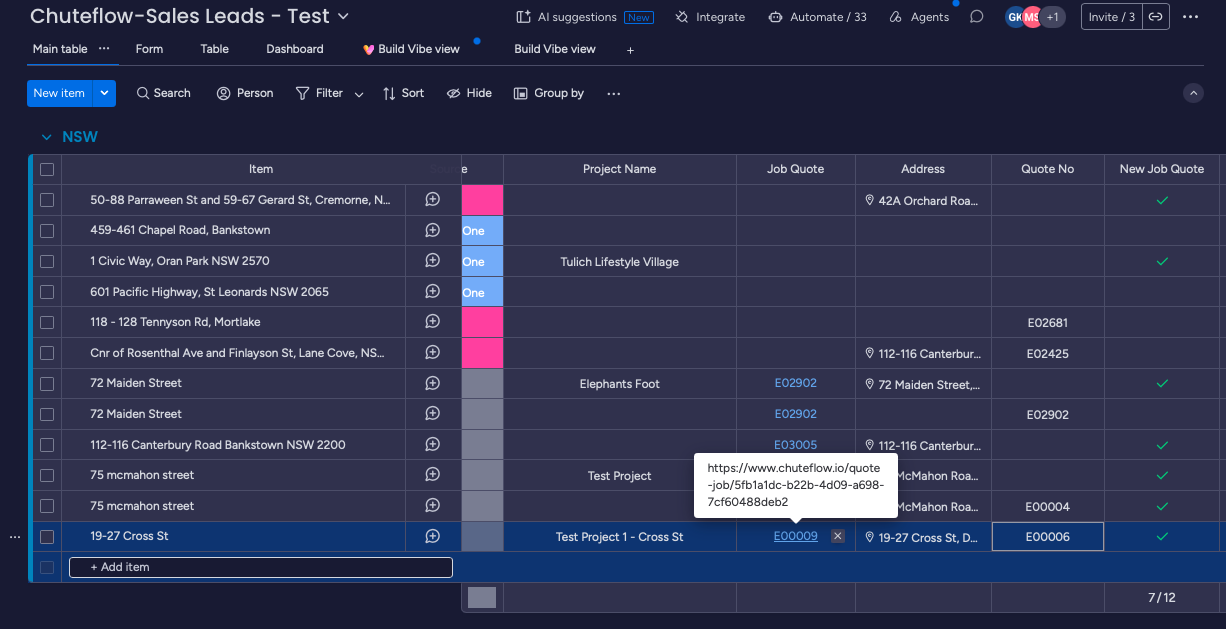
A link will be generated in Job Quote. Click the link to redirect to Chuteflow.
Generate a Quote in Chuteflow
Once the lead is logged, navigate to the specific project integration tabs to generate a formal quote.
6
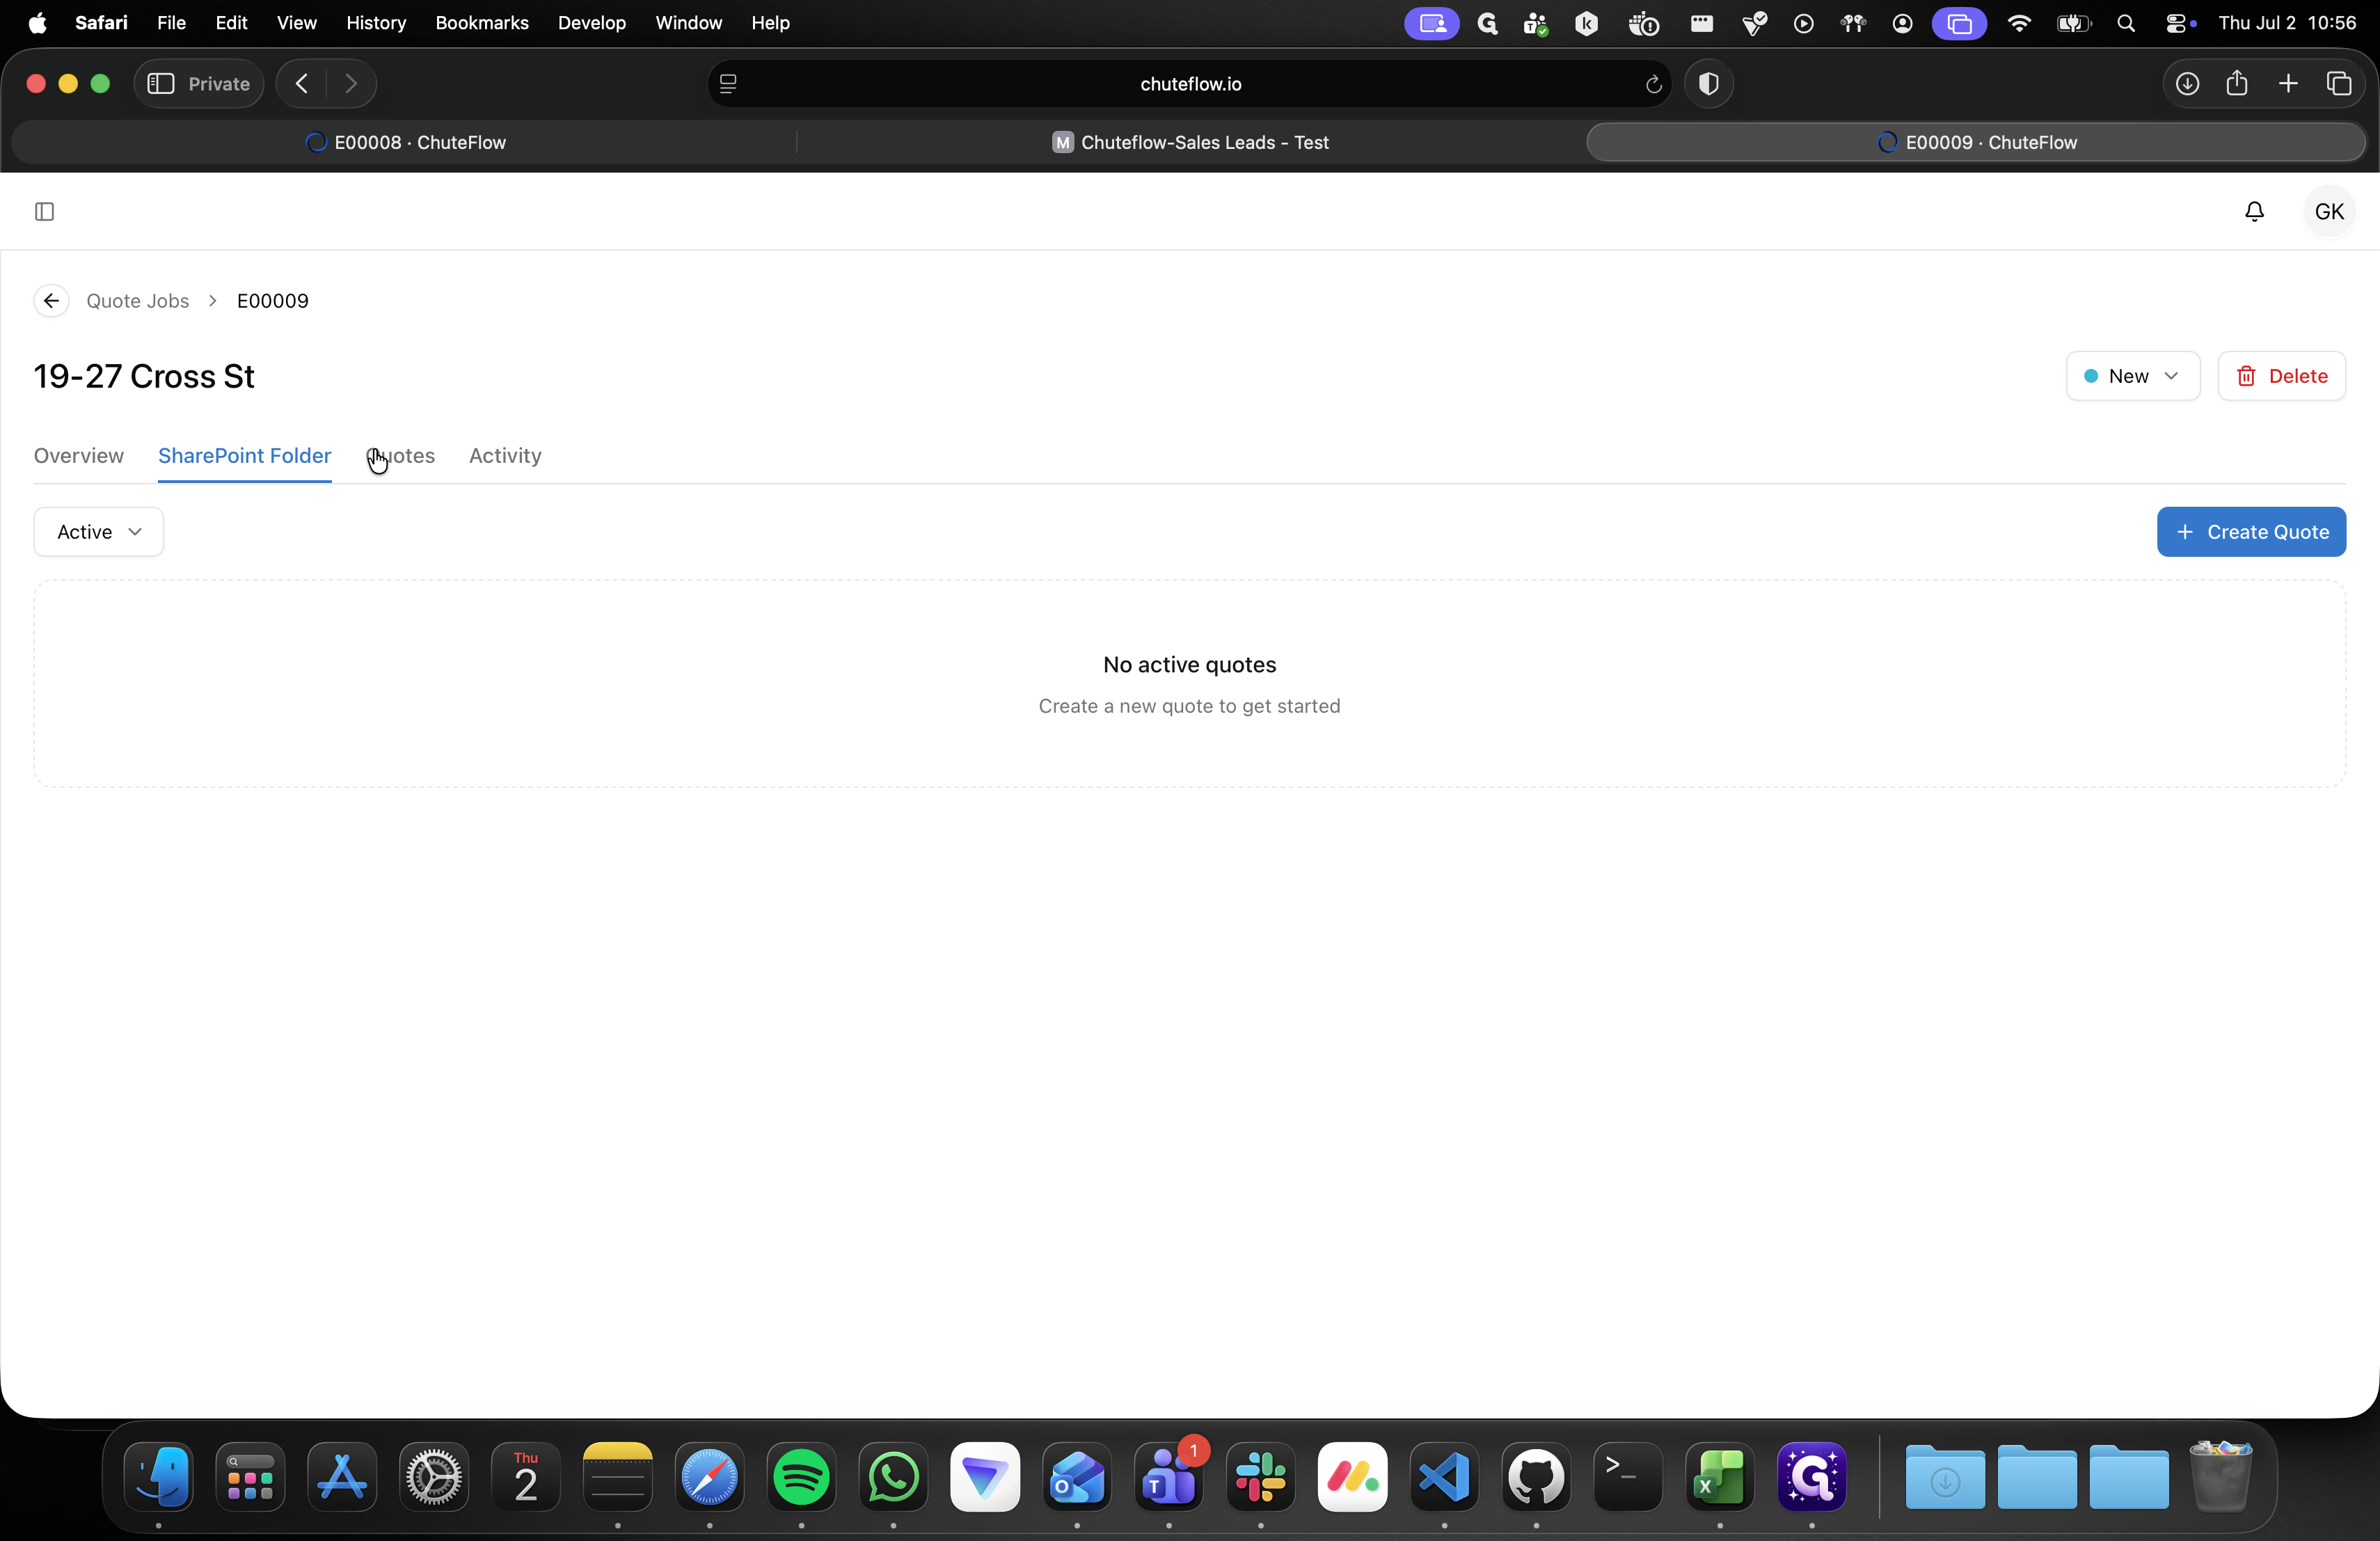
Navigate to the Quotes tab in the project details panel.
7
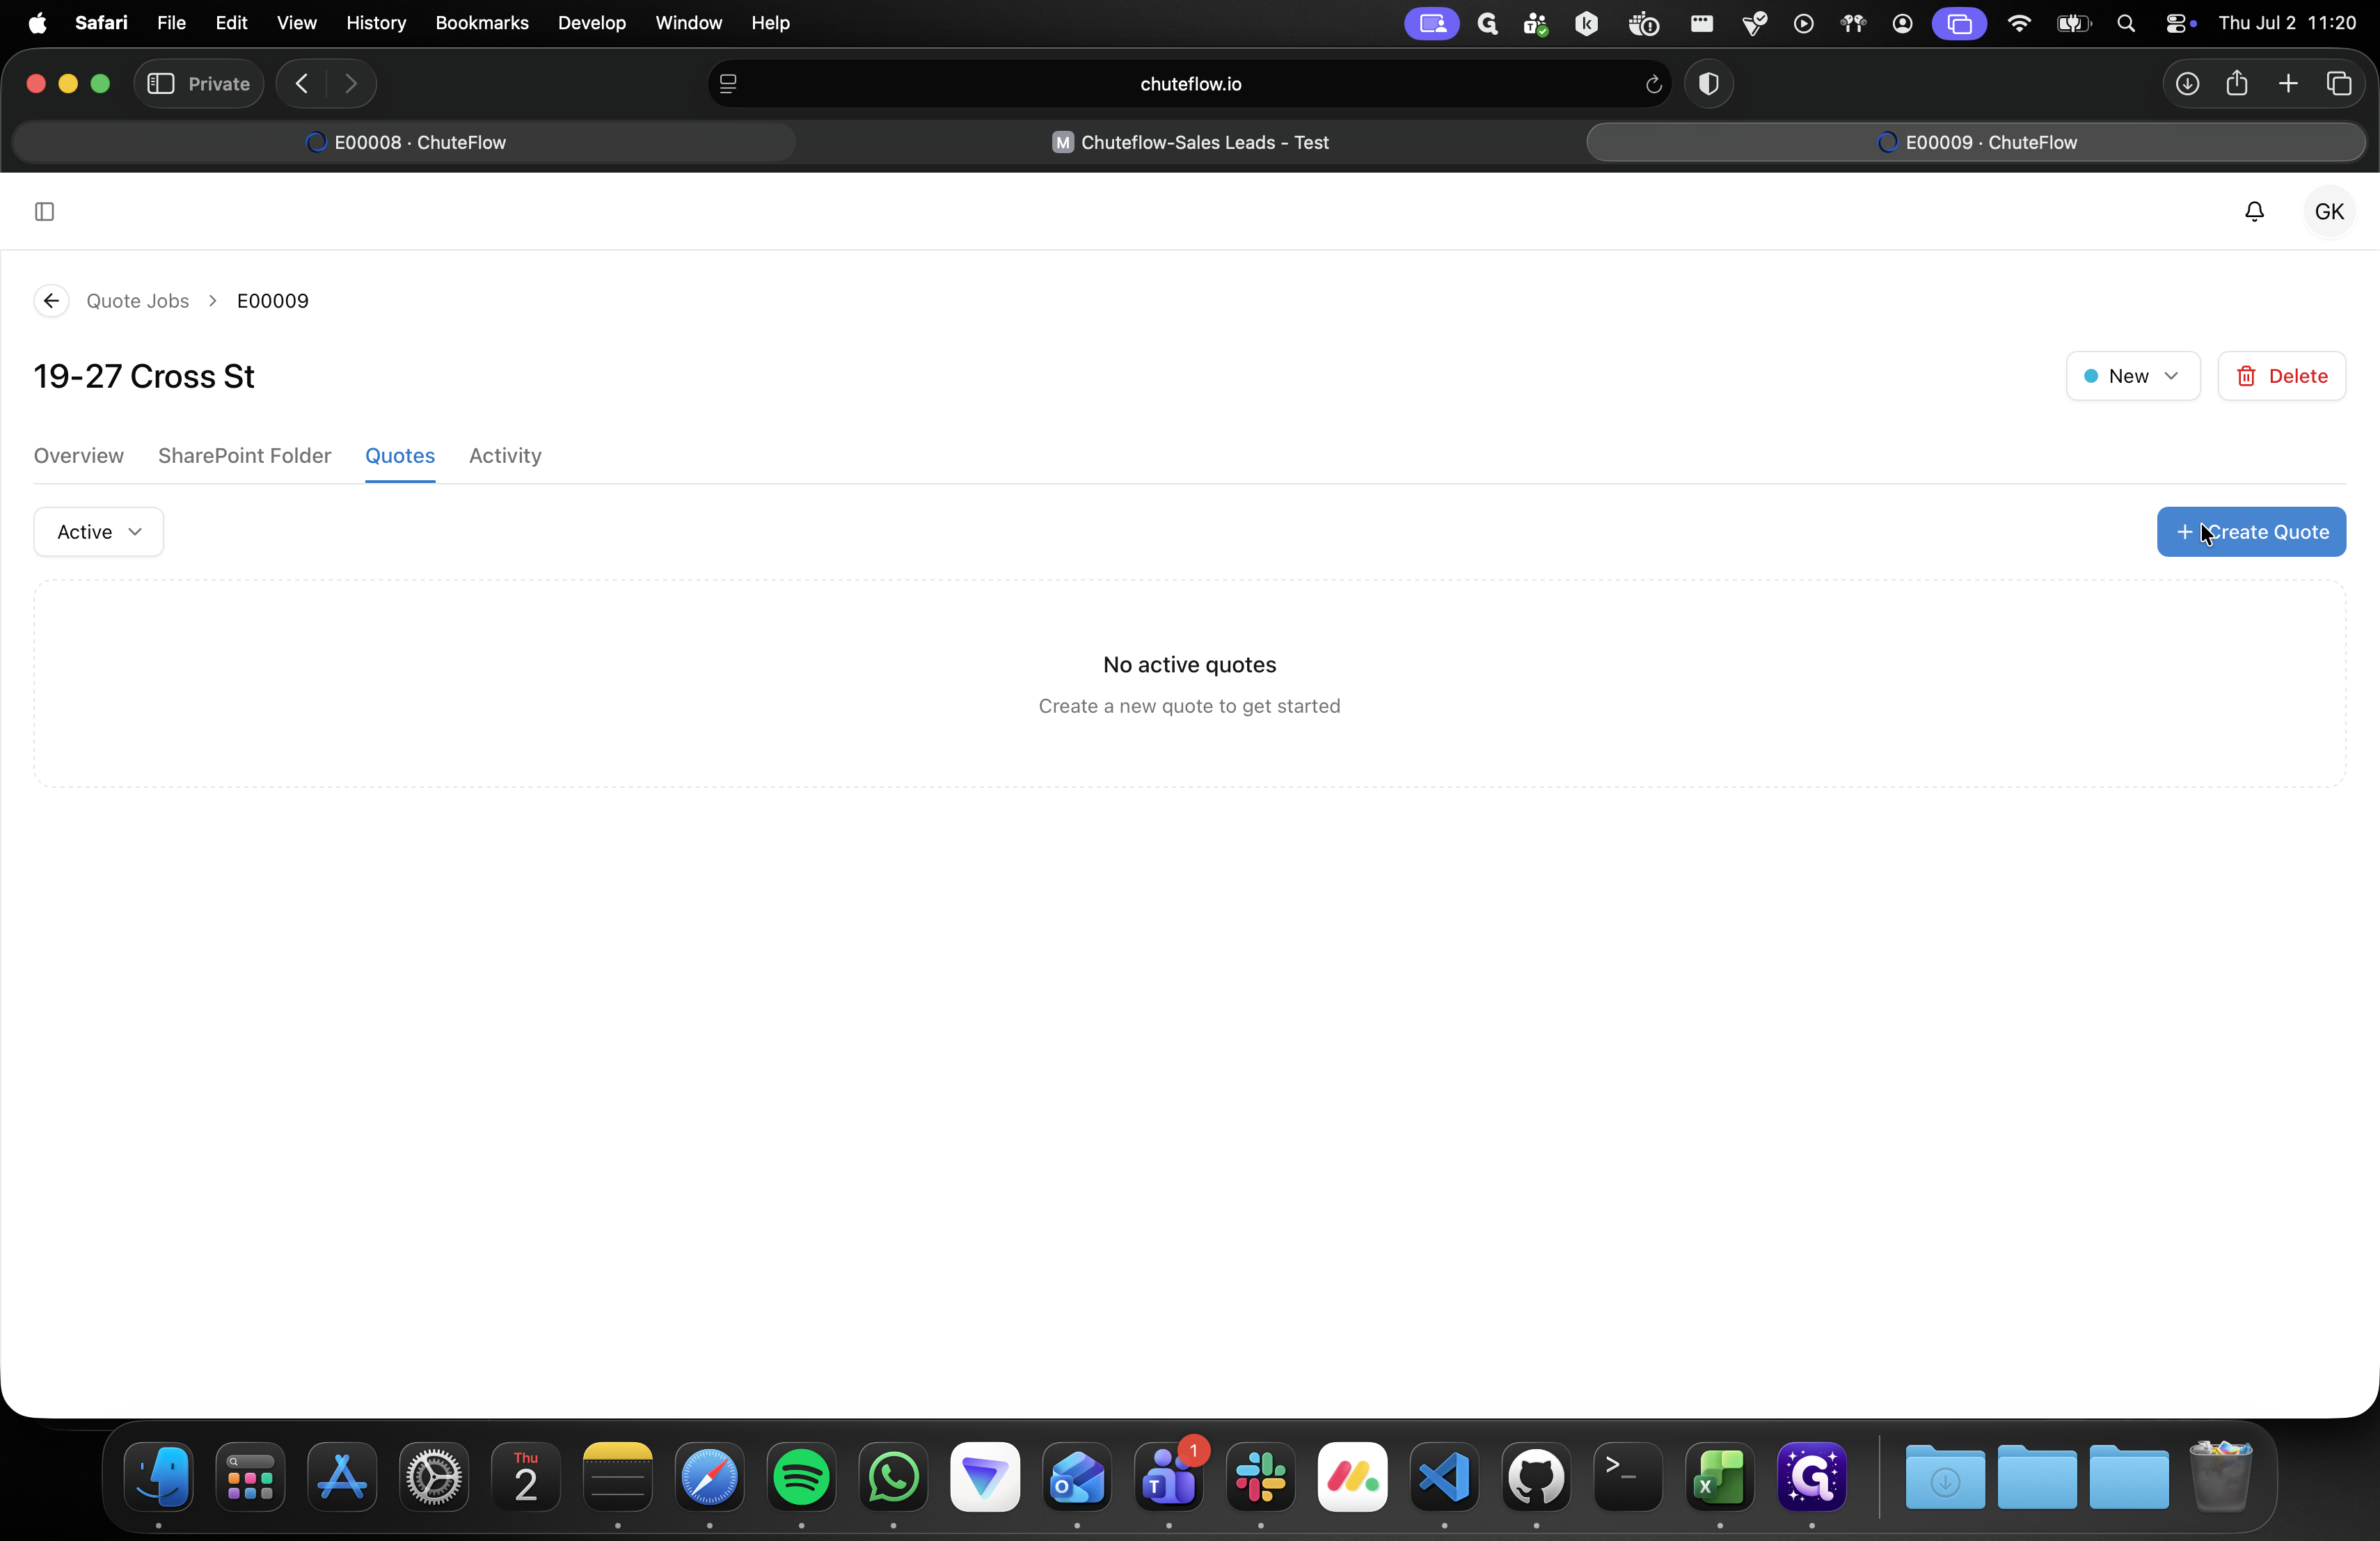
Click on + Create Quote to open the Chuteflow interface.
8
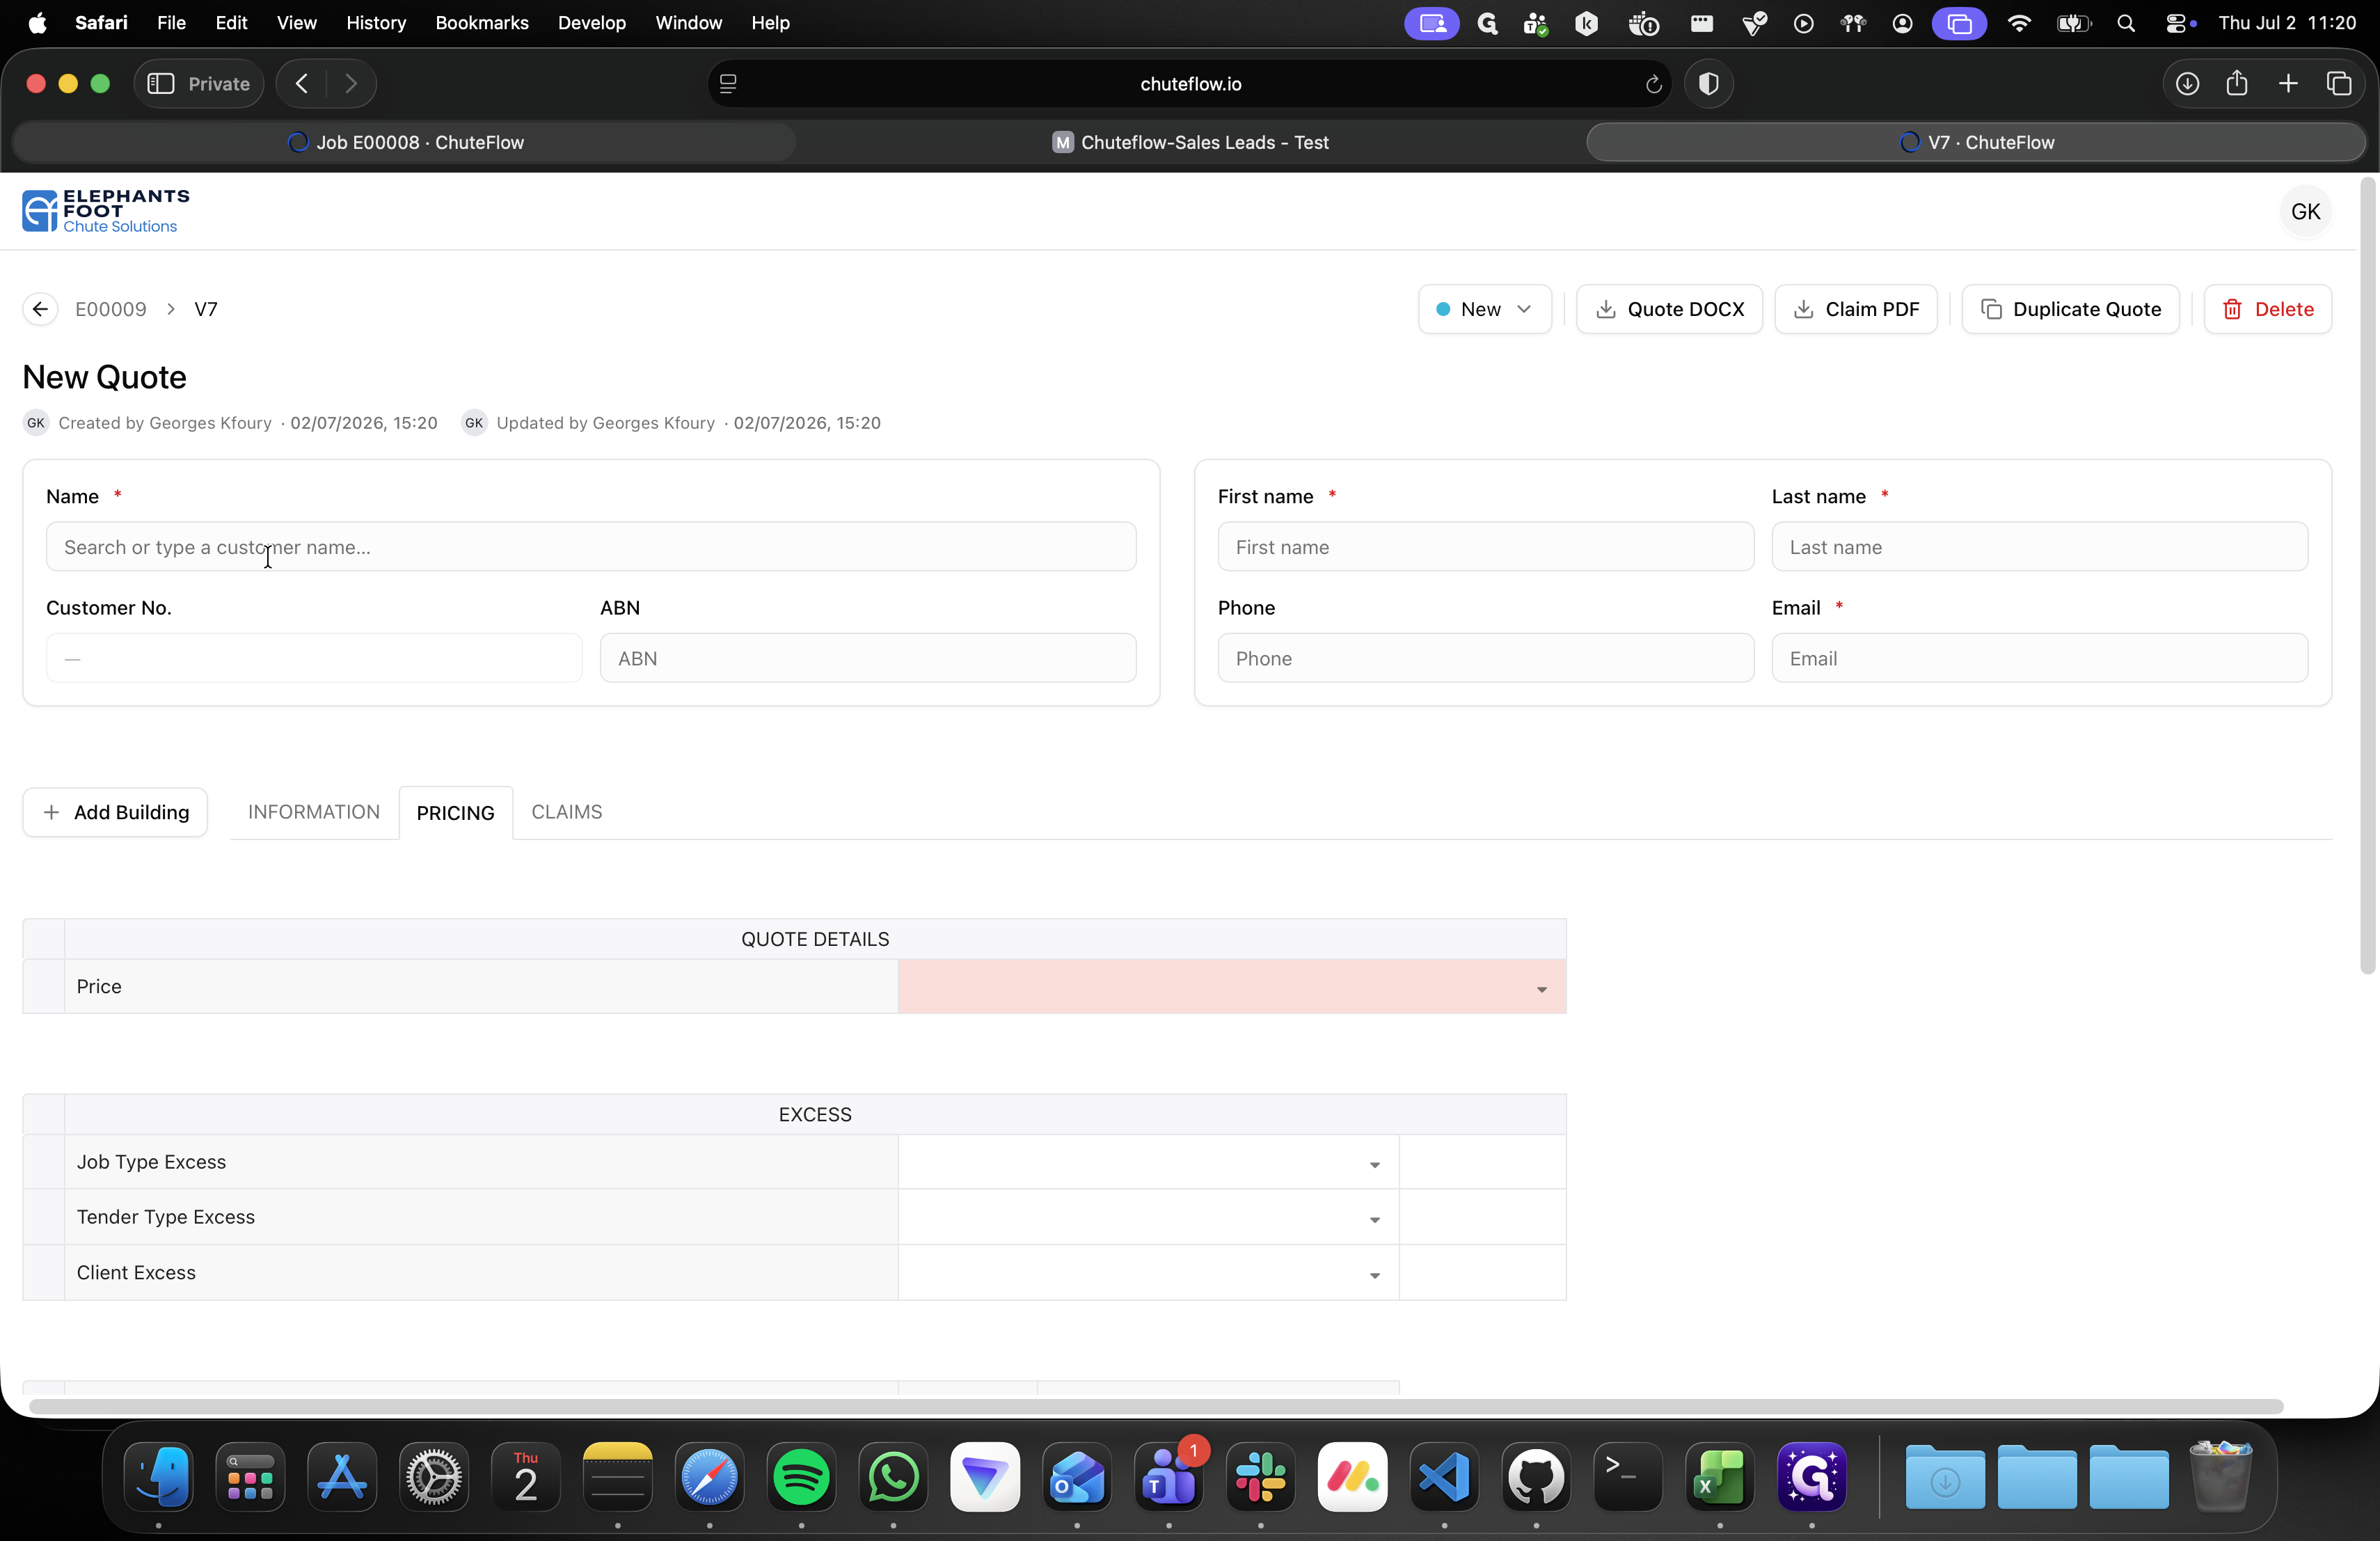
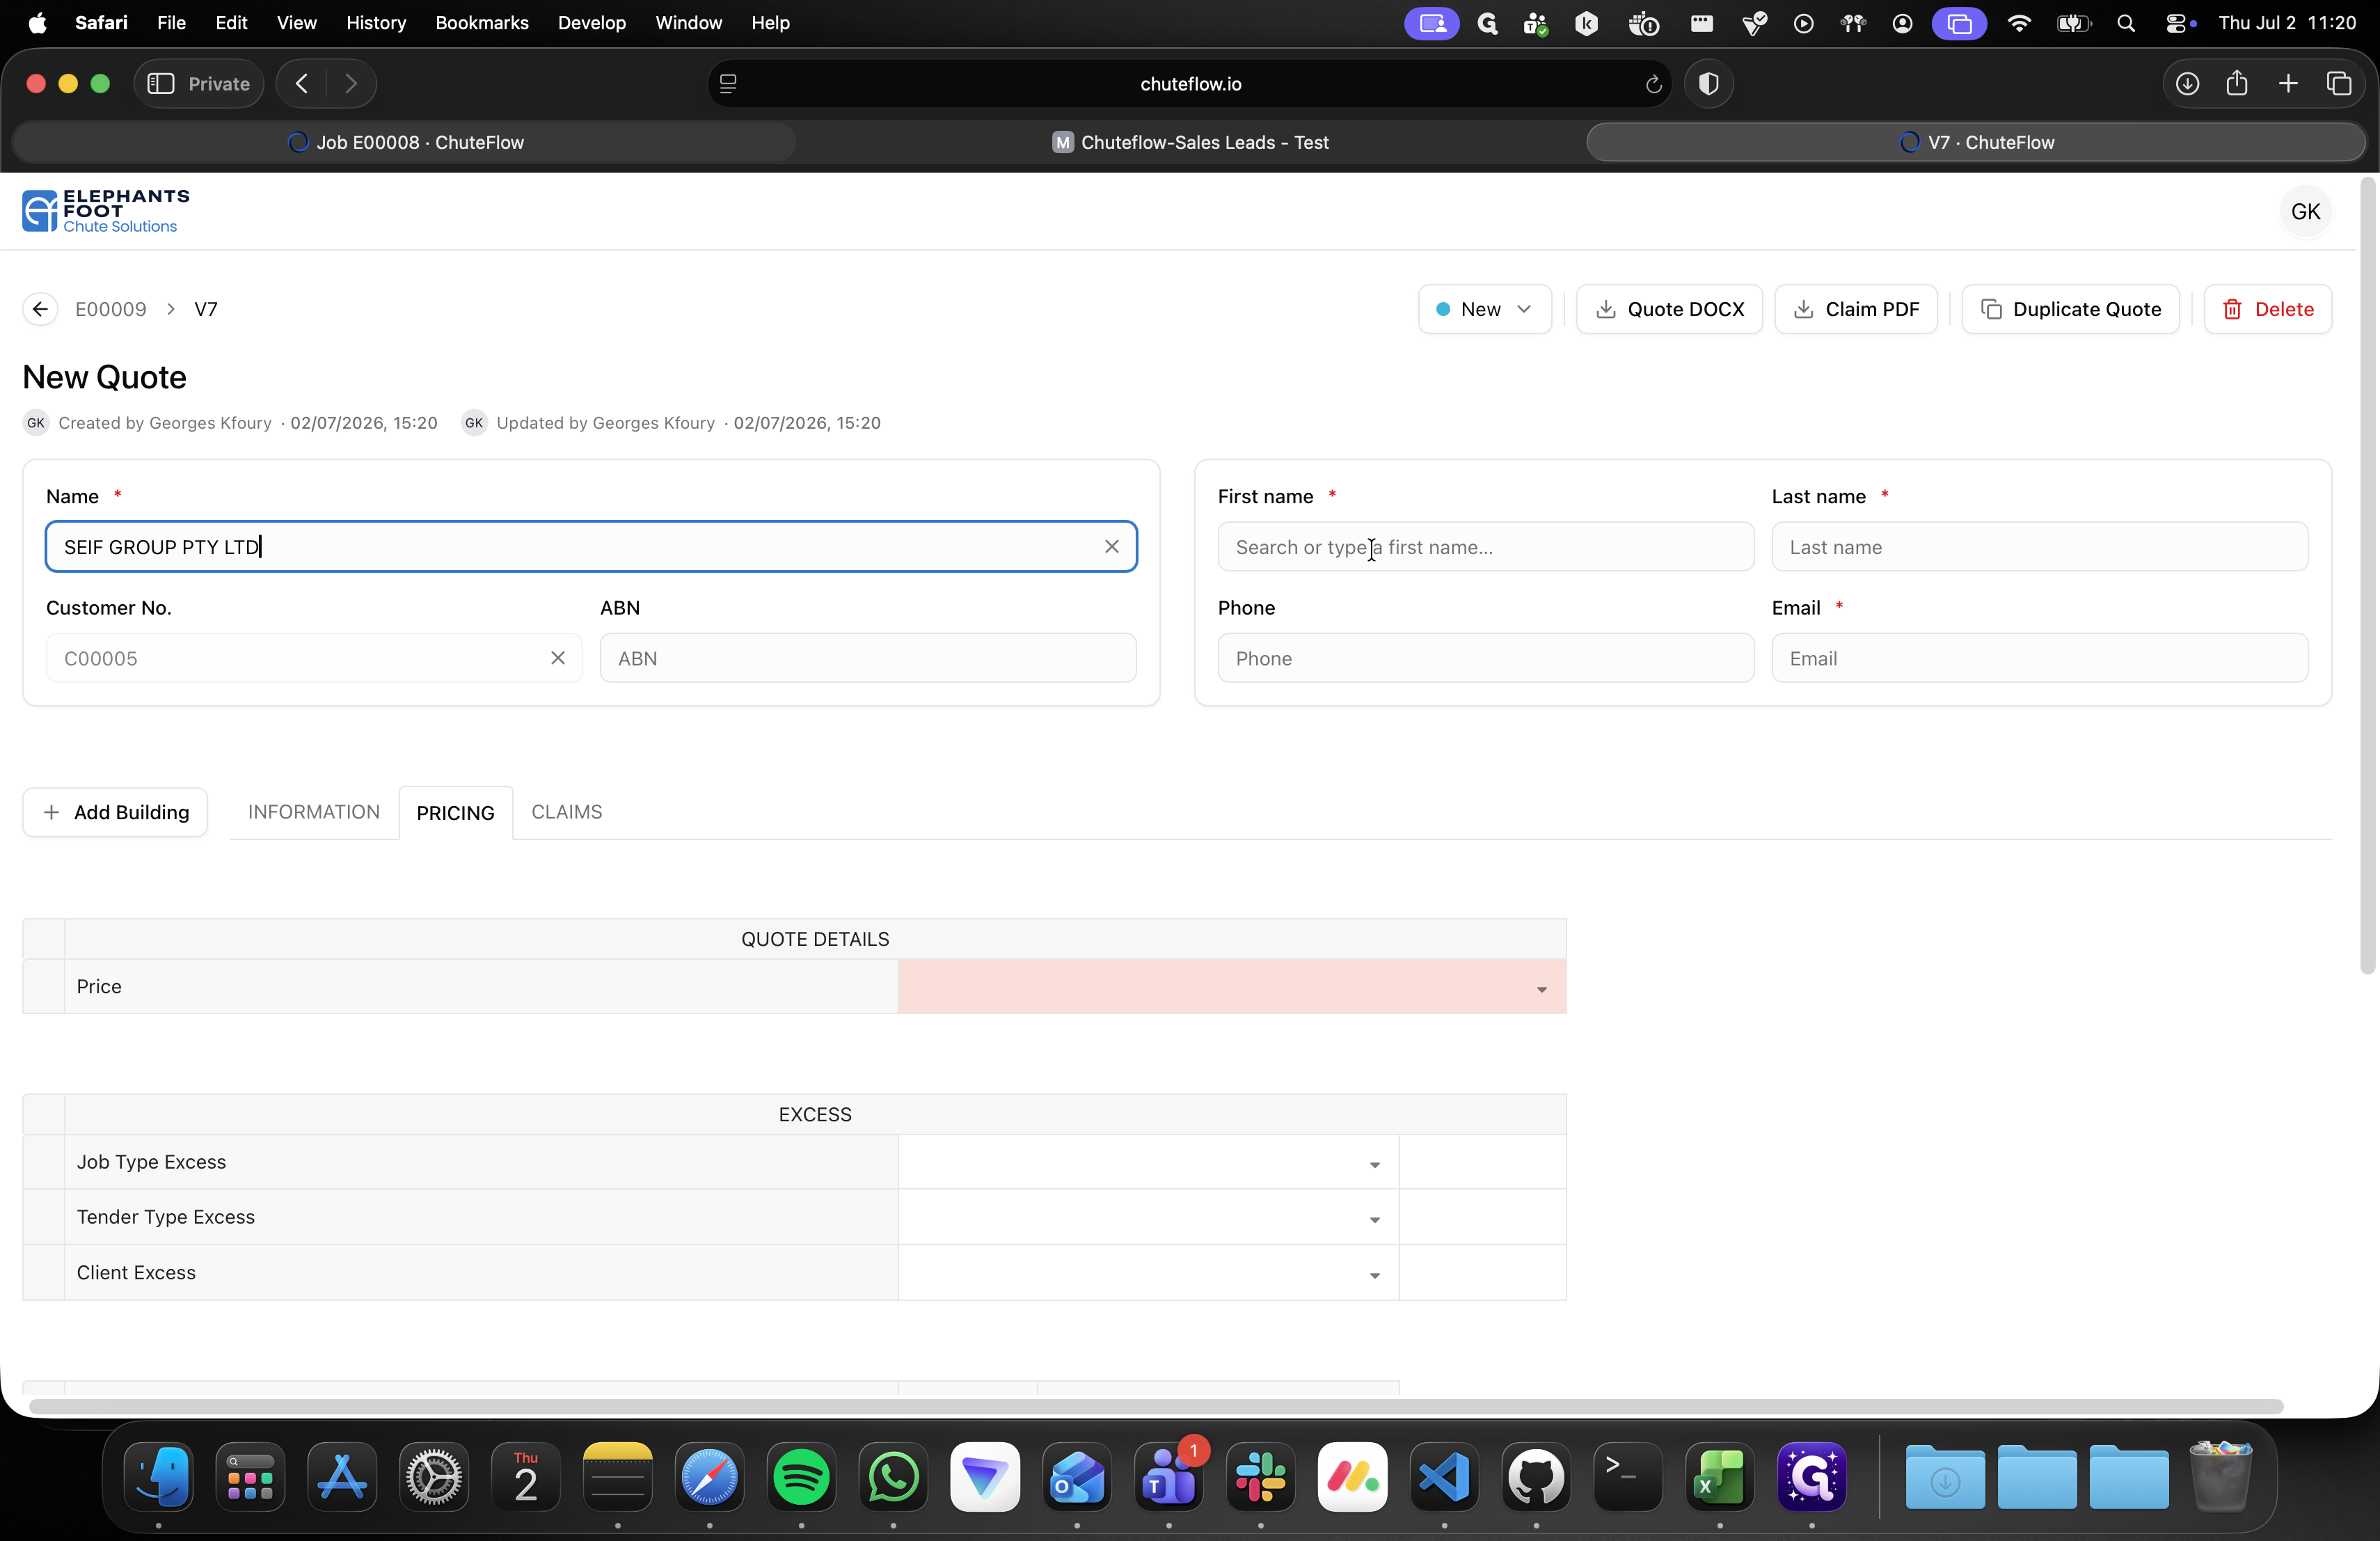
Click on the Search or type a customer name... field.
9
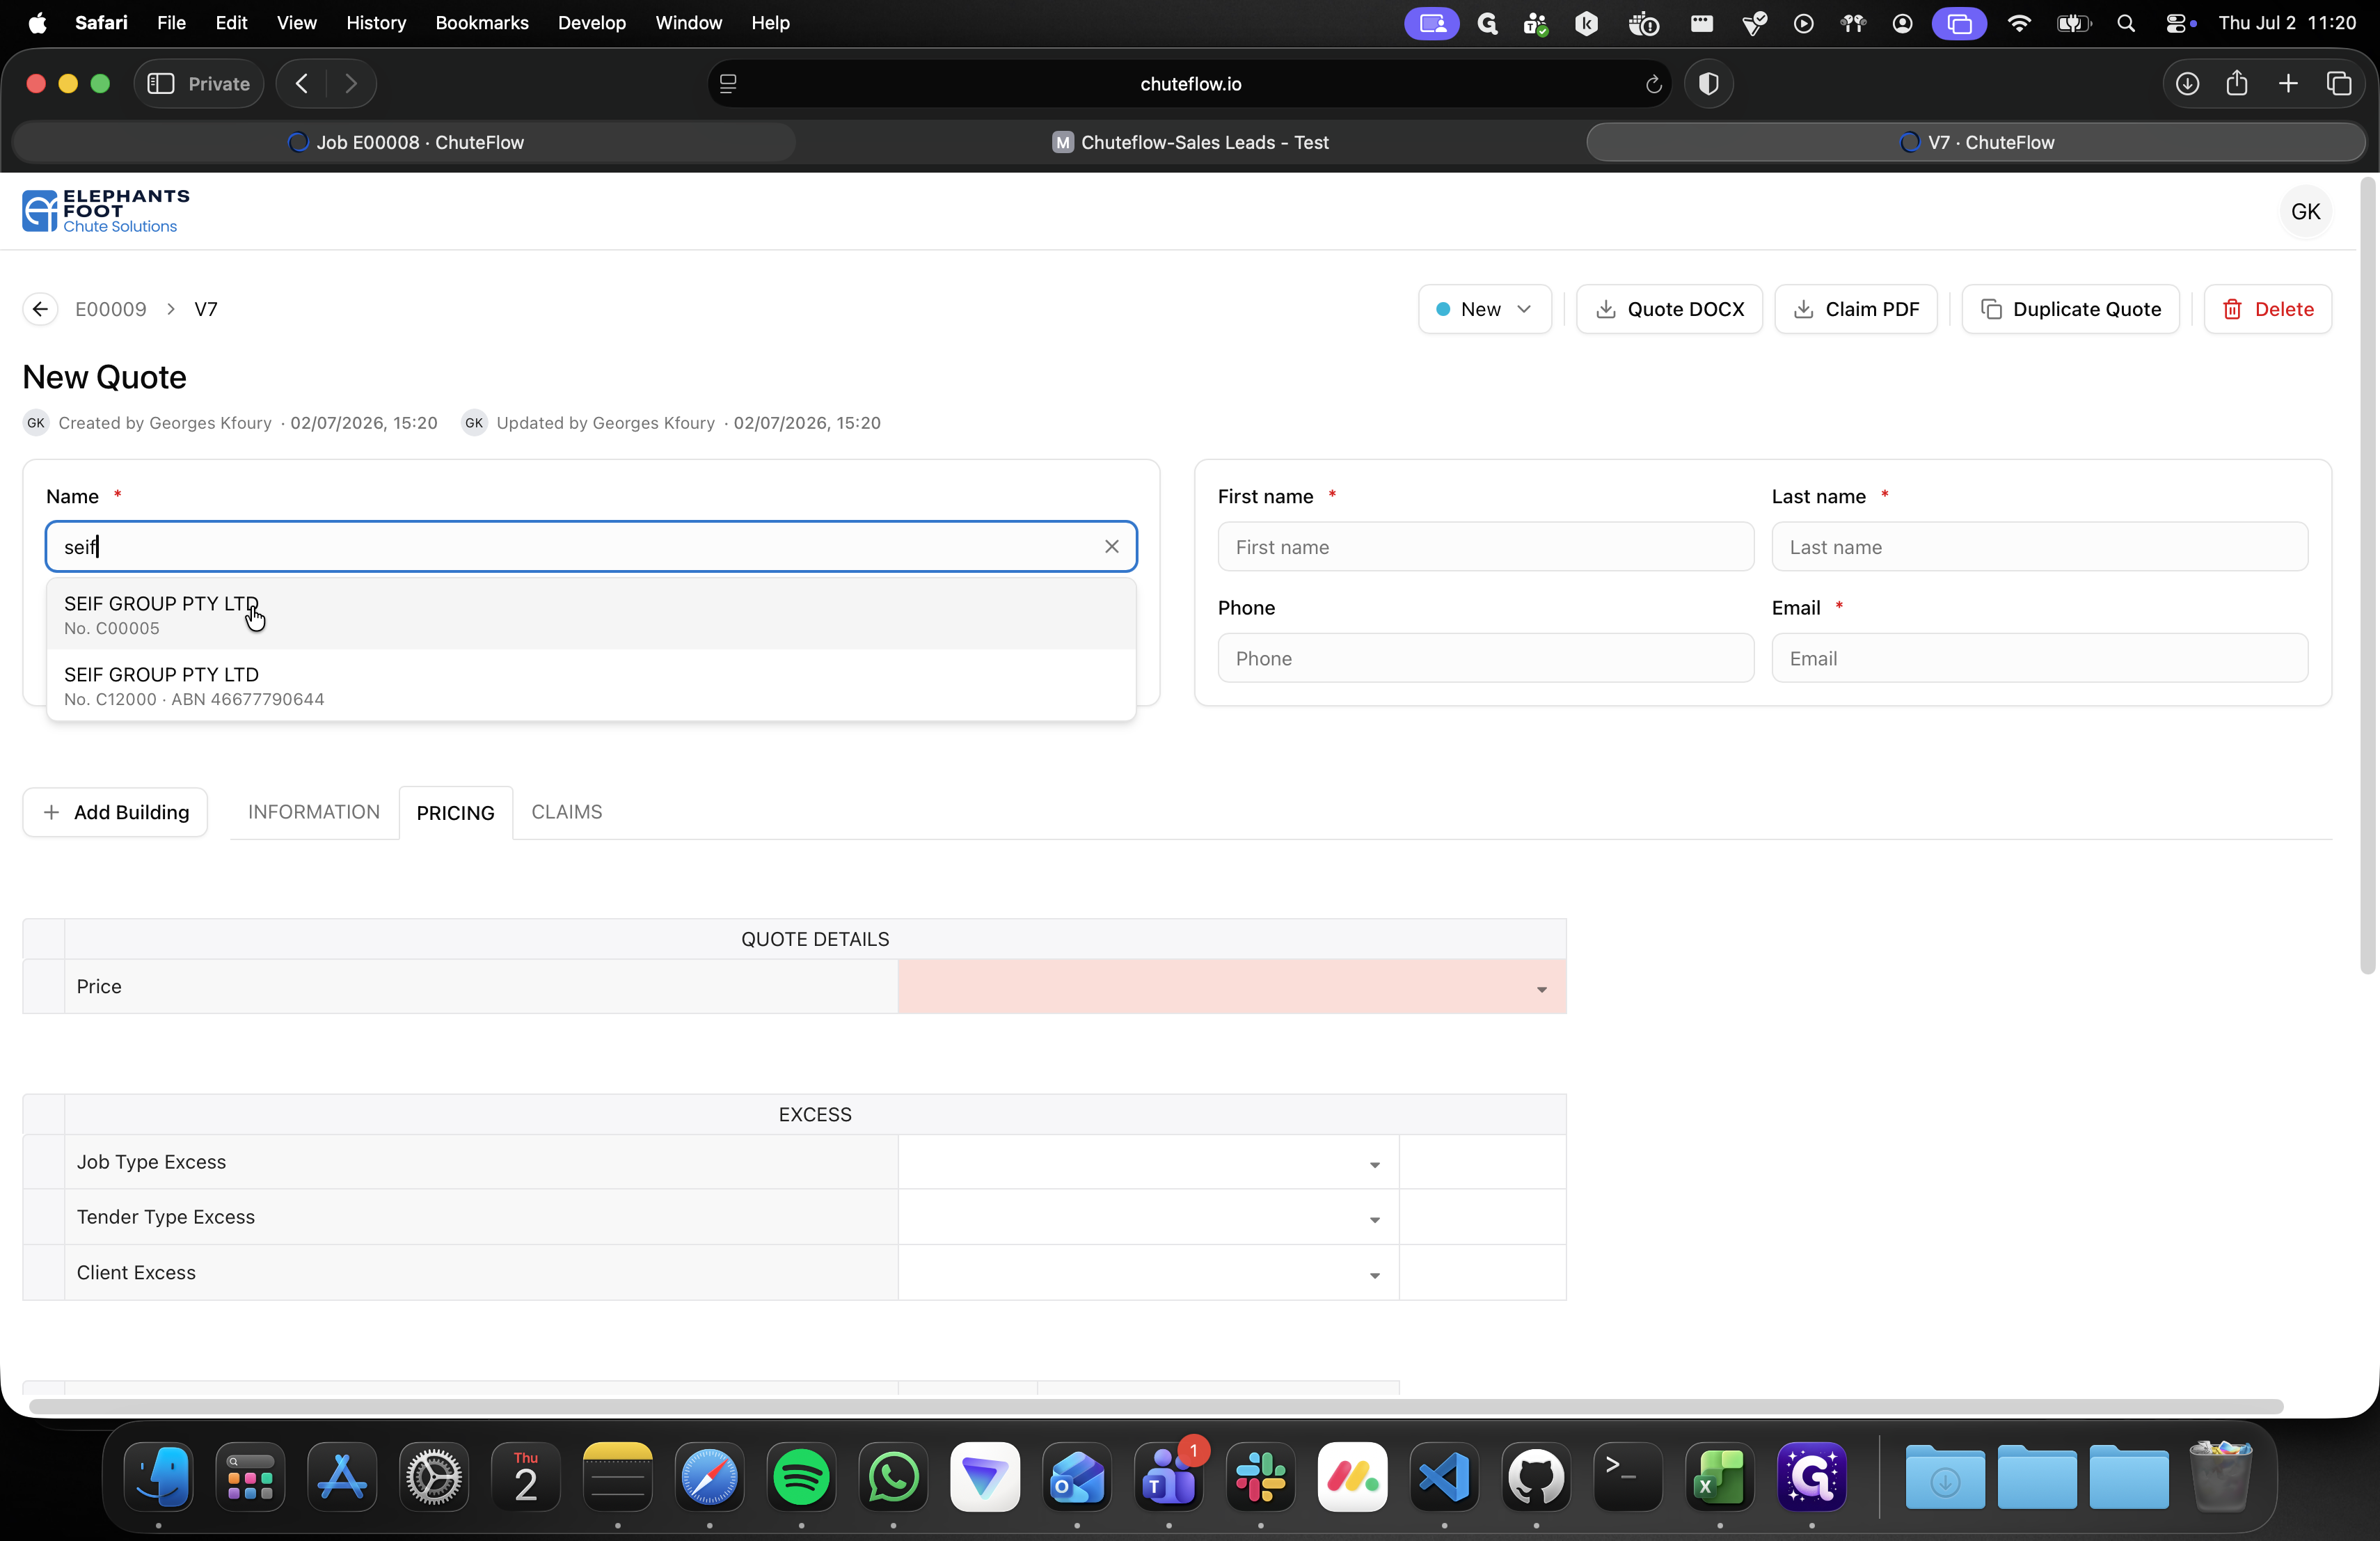
Select the matching customer account from the predictive search list.
10
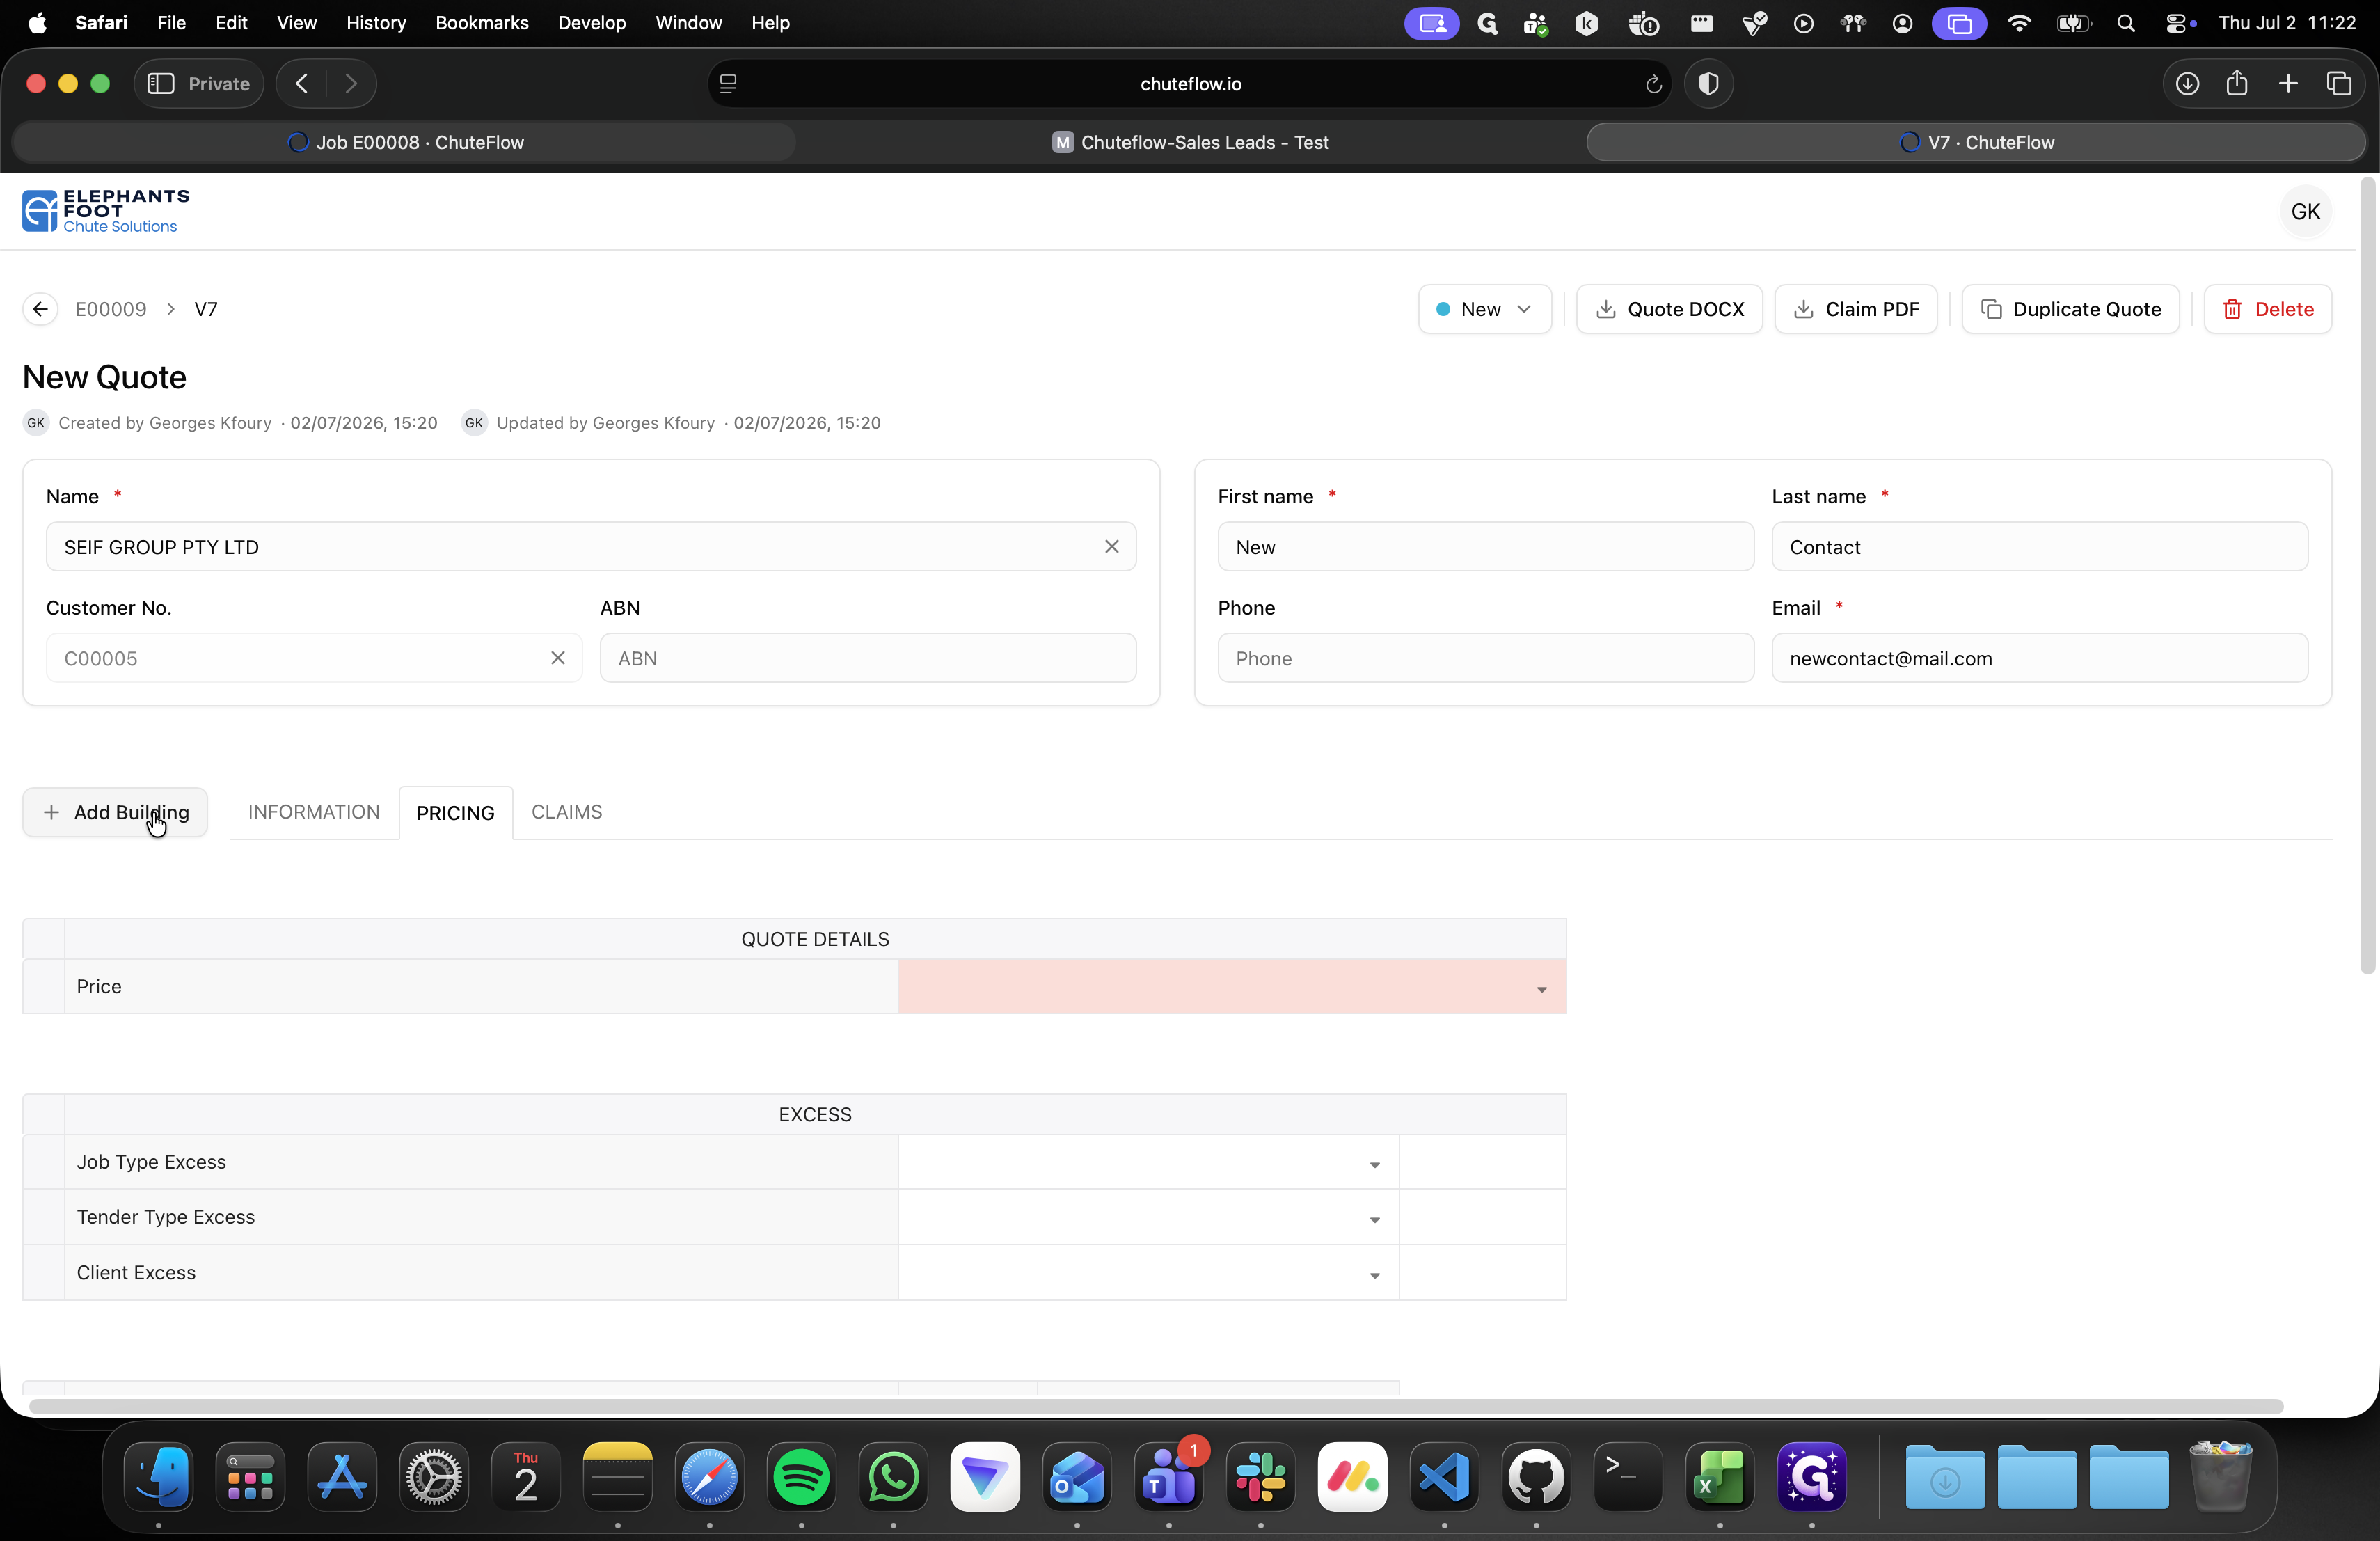
Enter the contact's First Name, Last Name, Phone, and Email.
Configure Building and Chute Details
Set up the physical dimensions and component requirements for the building.
11
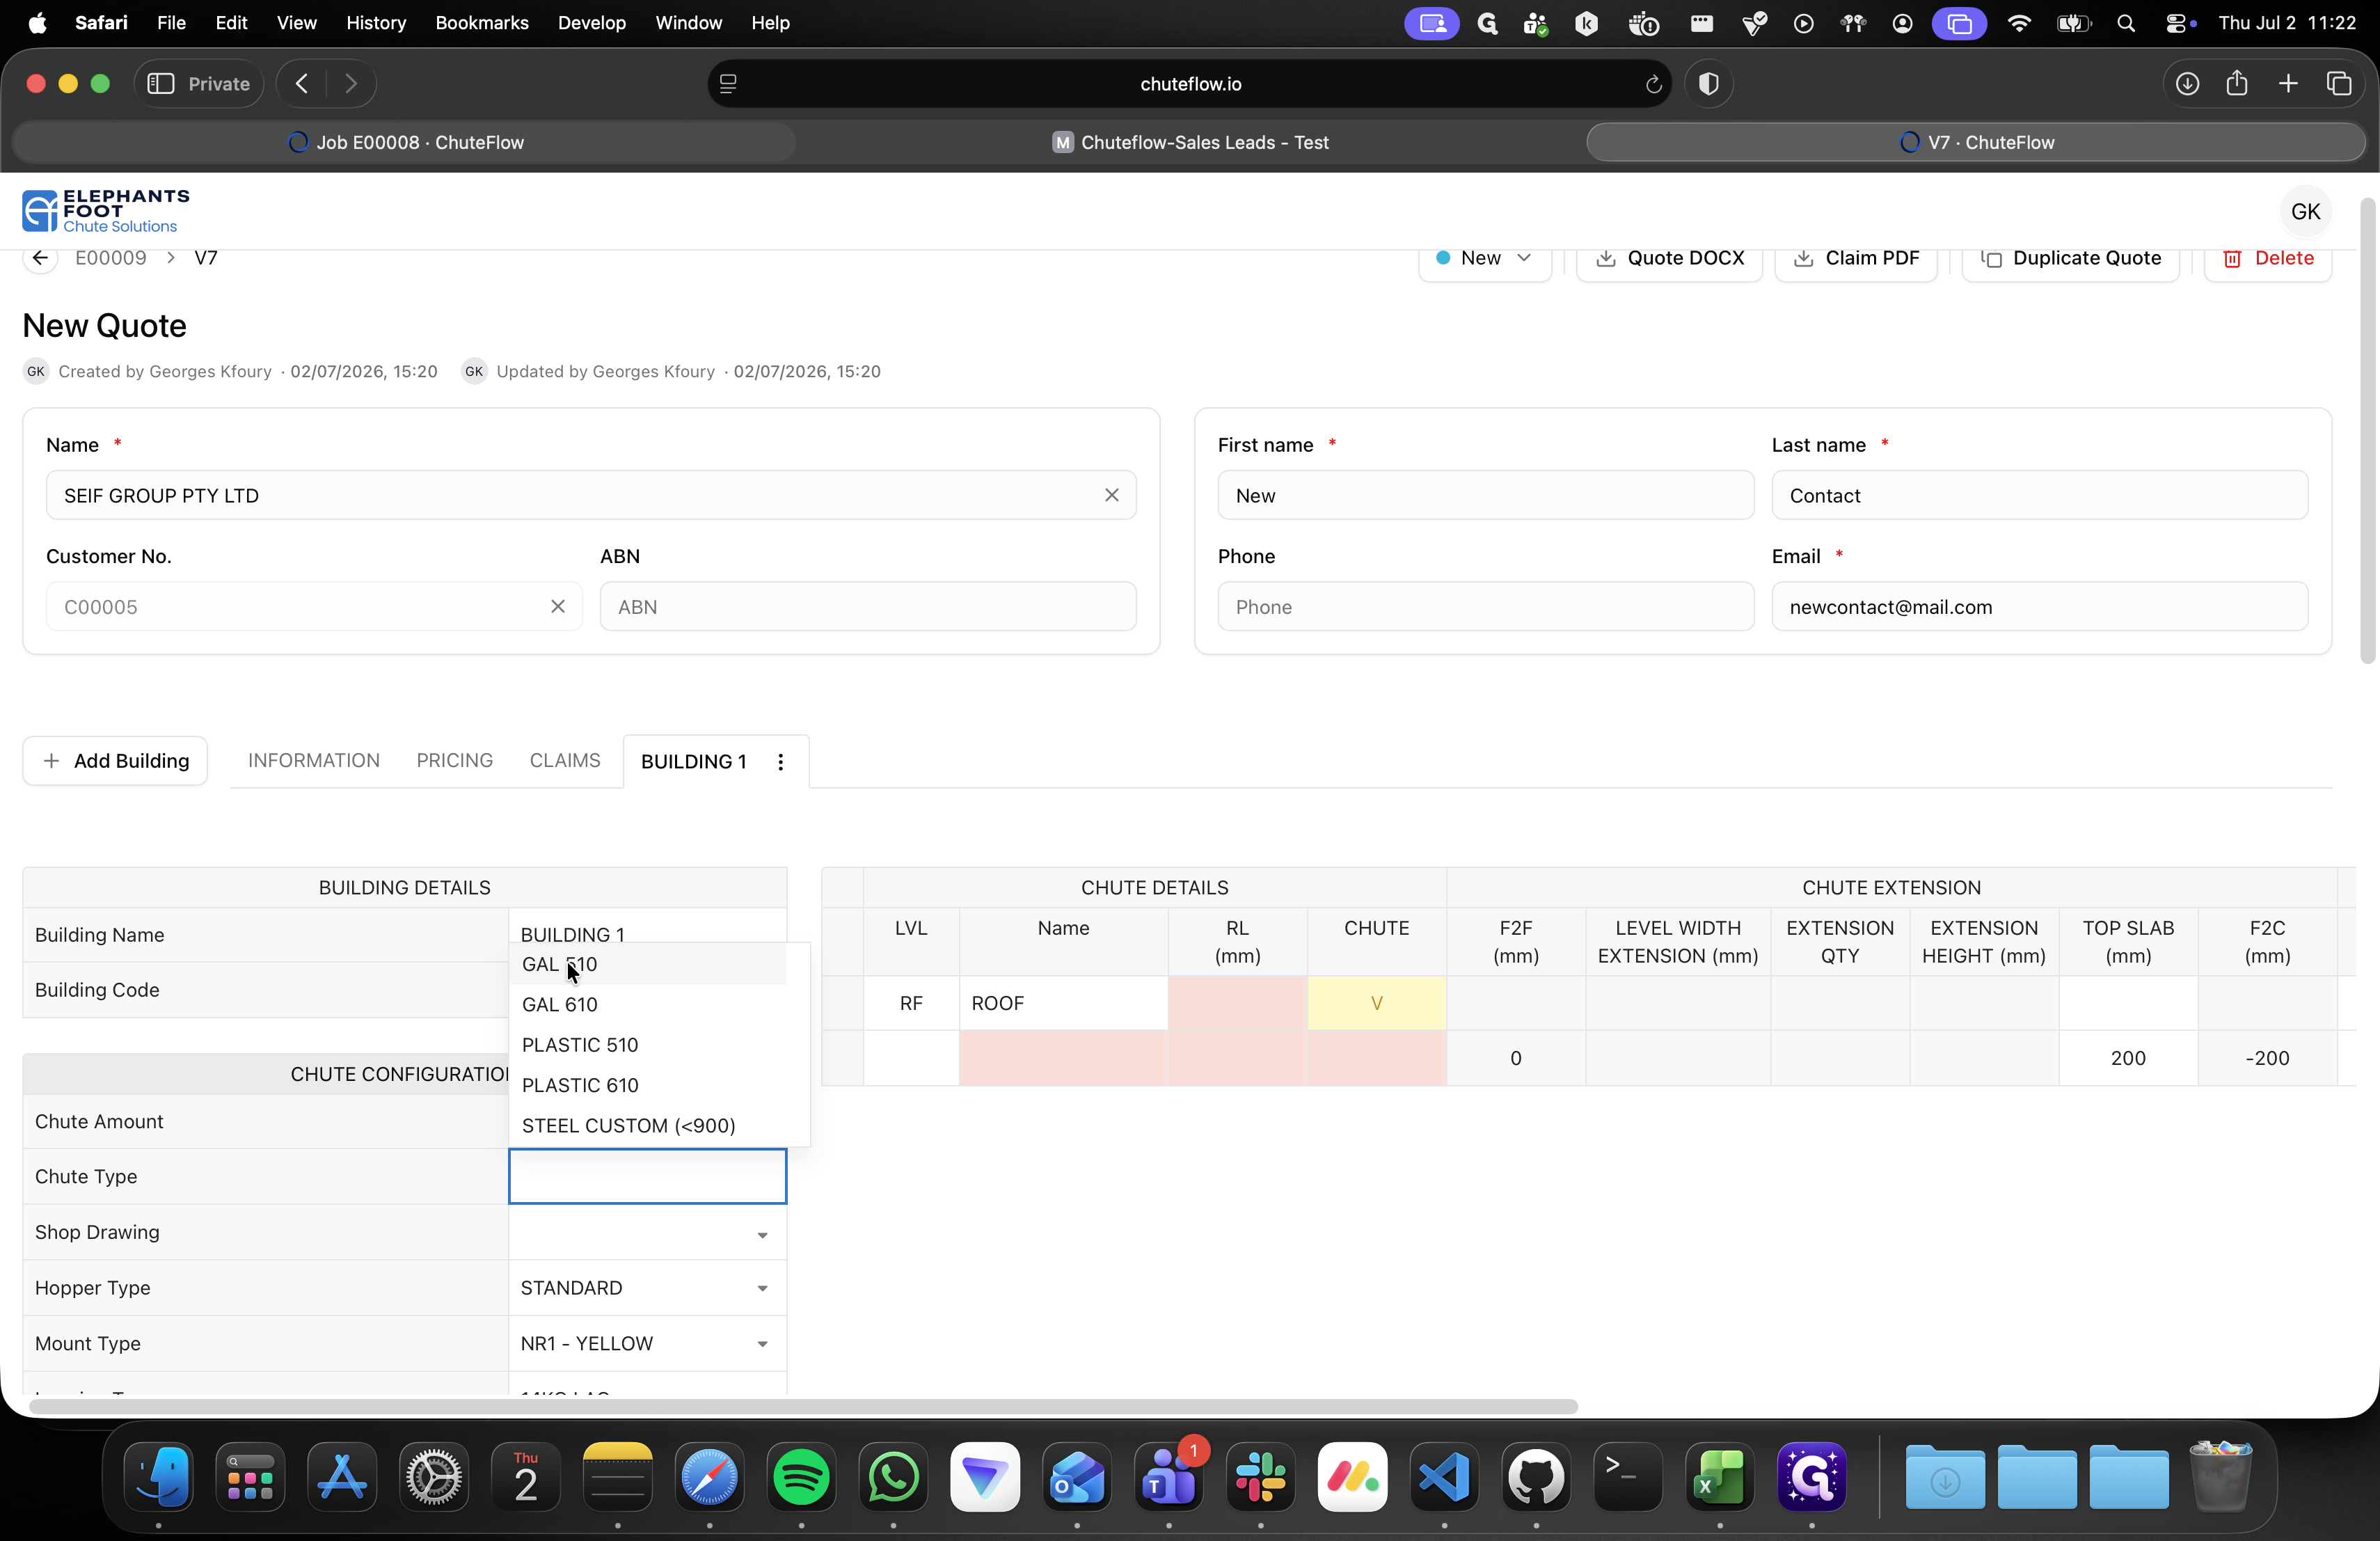
Click on + Add Building to add a new Building.
12
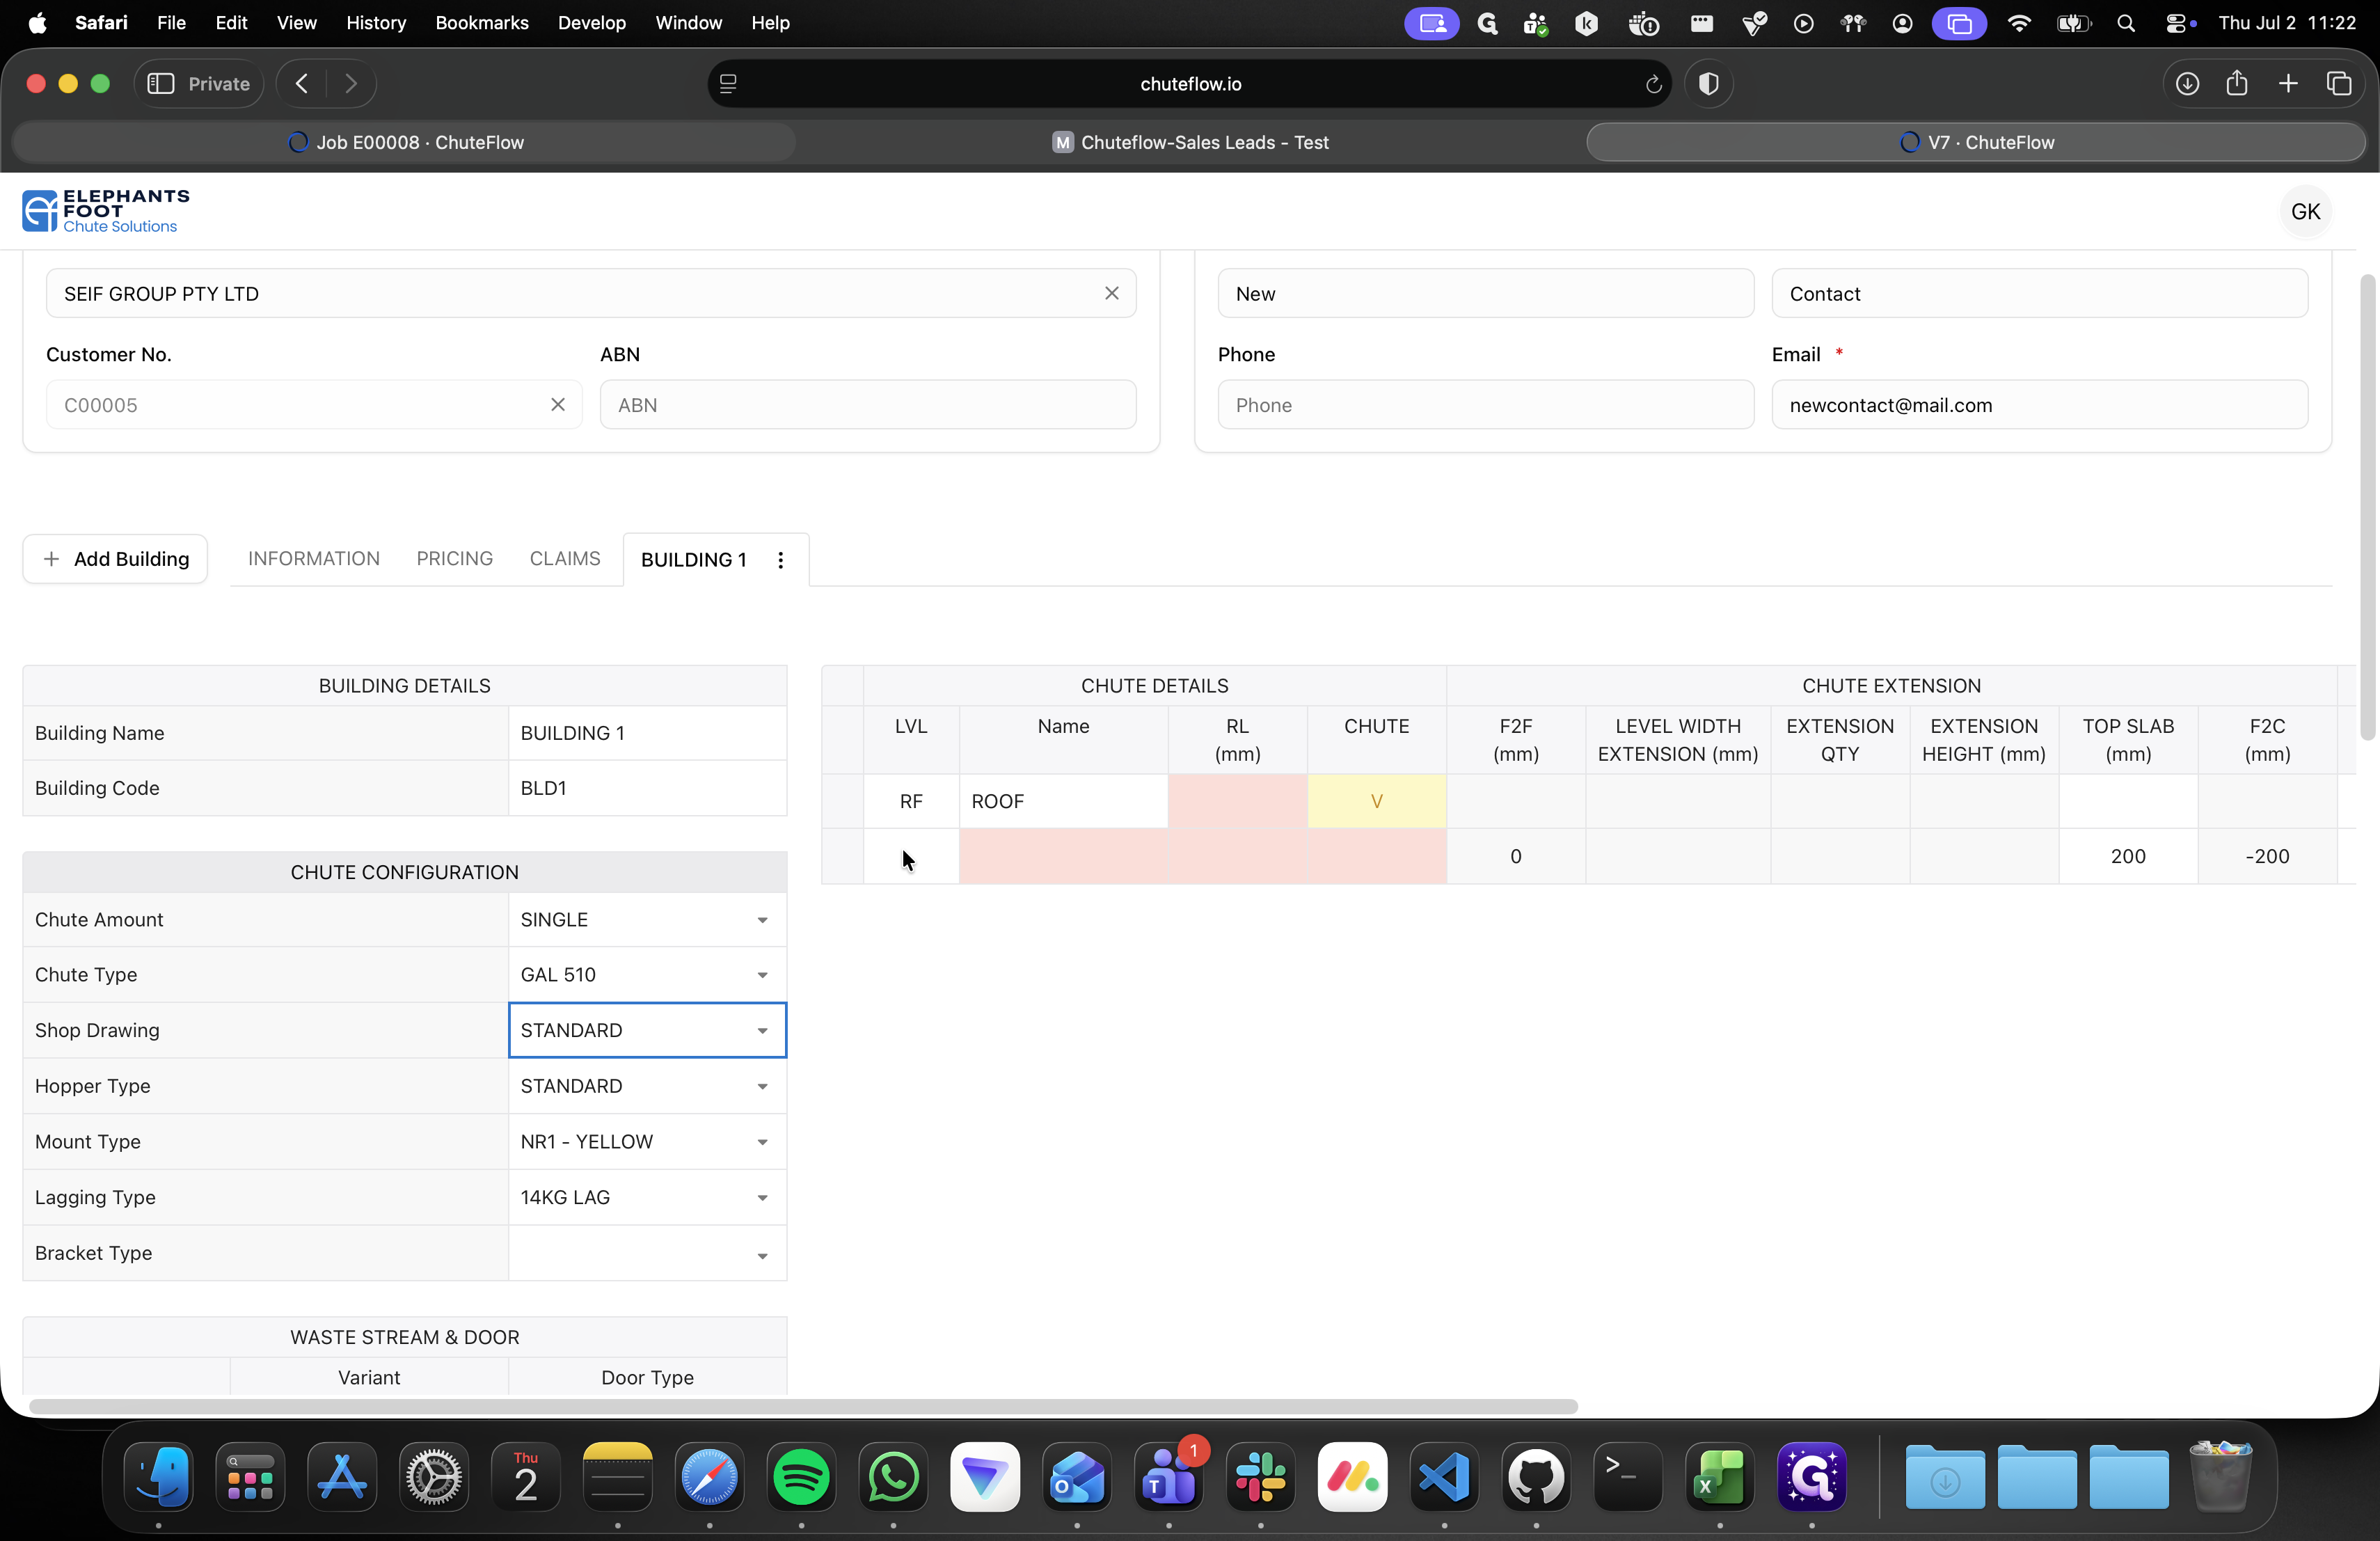
Open the Chute Type dropdown and select the material specification, such as GAL 10.
13
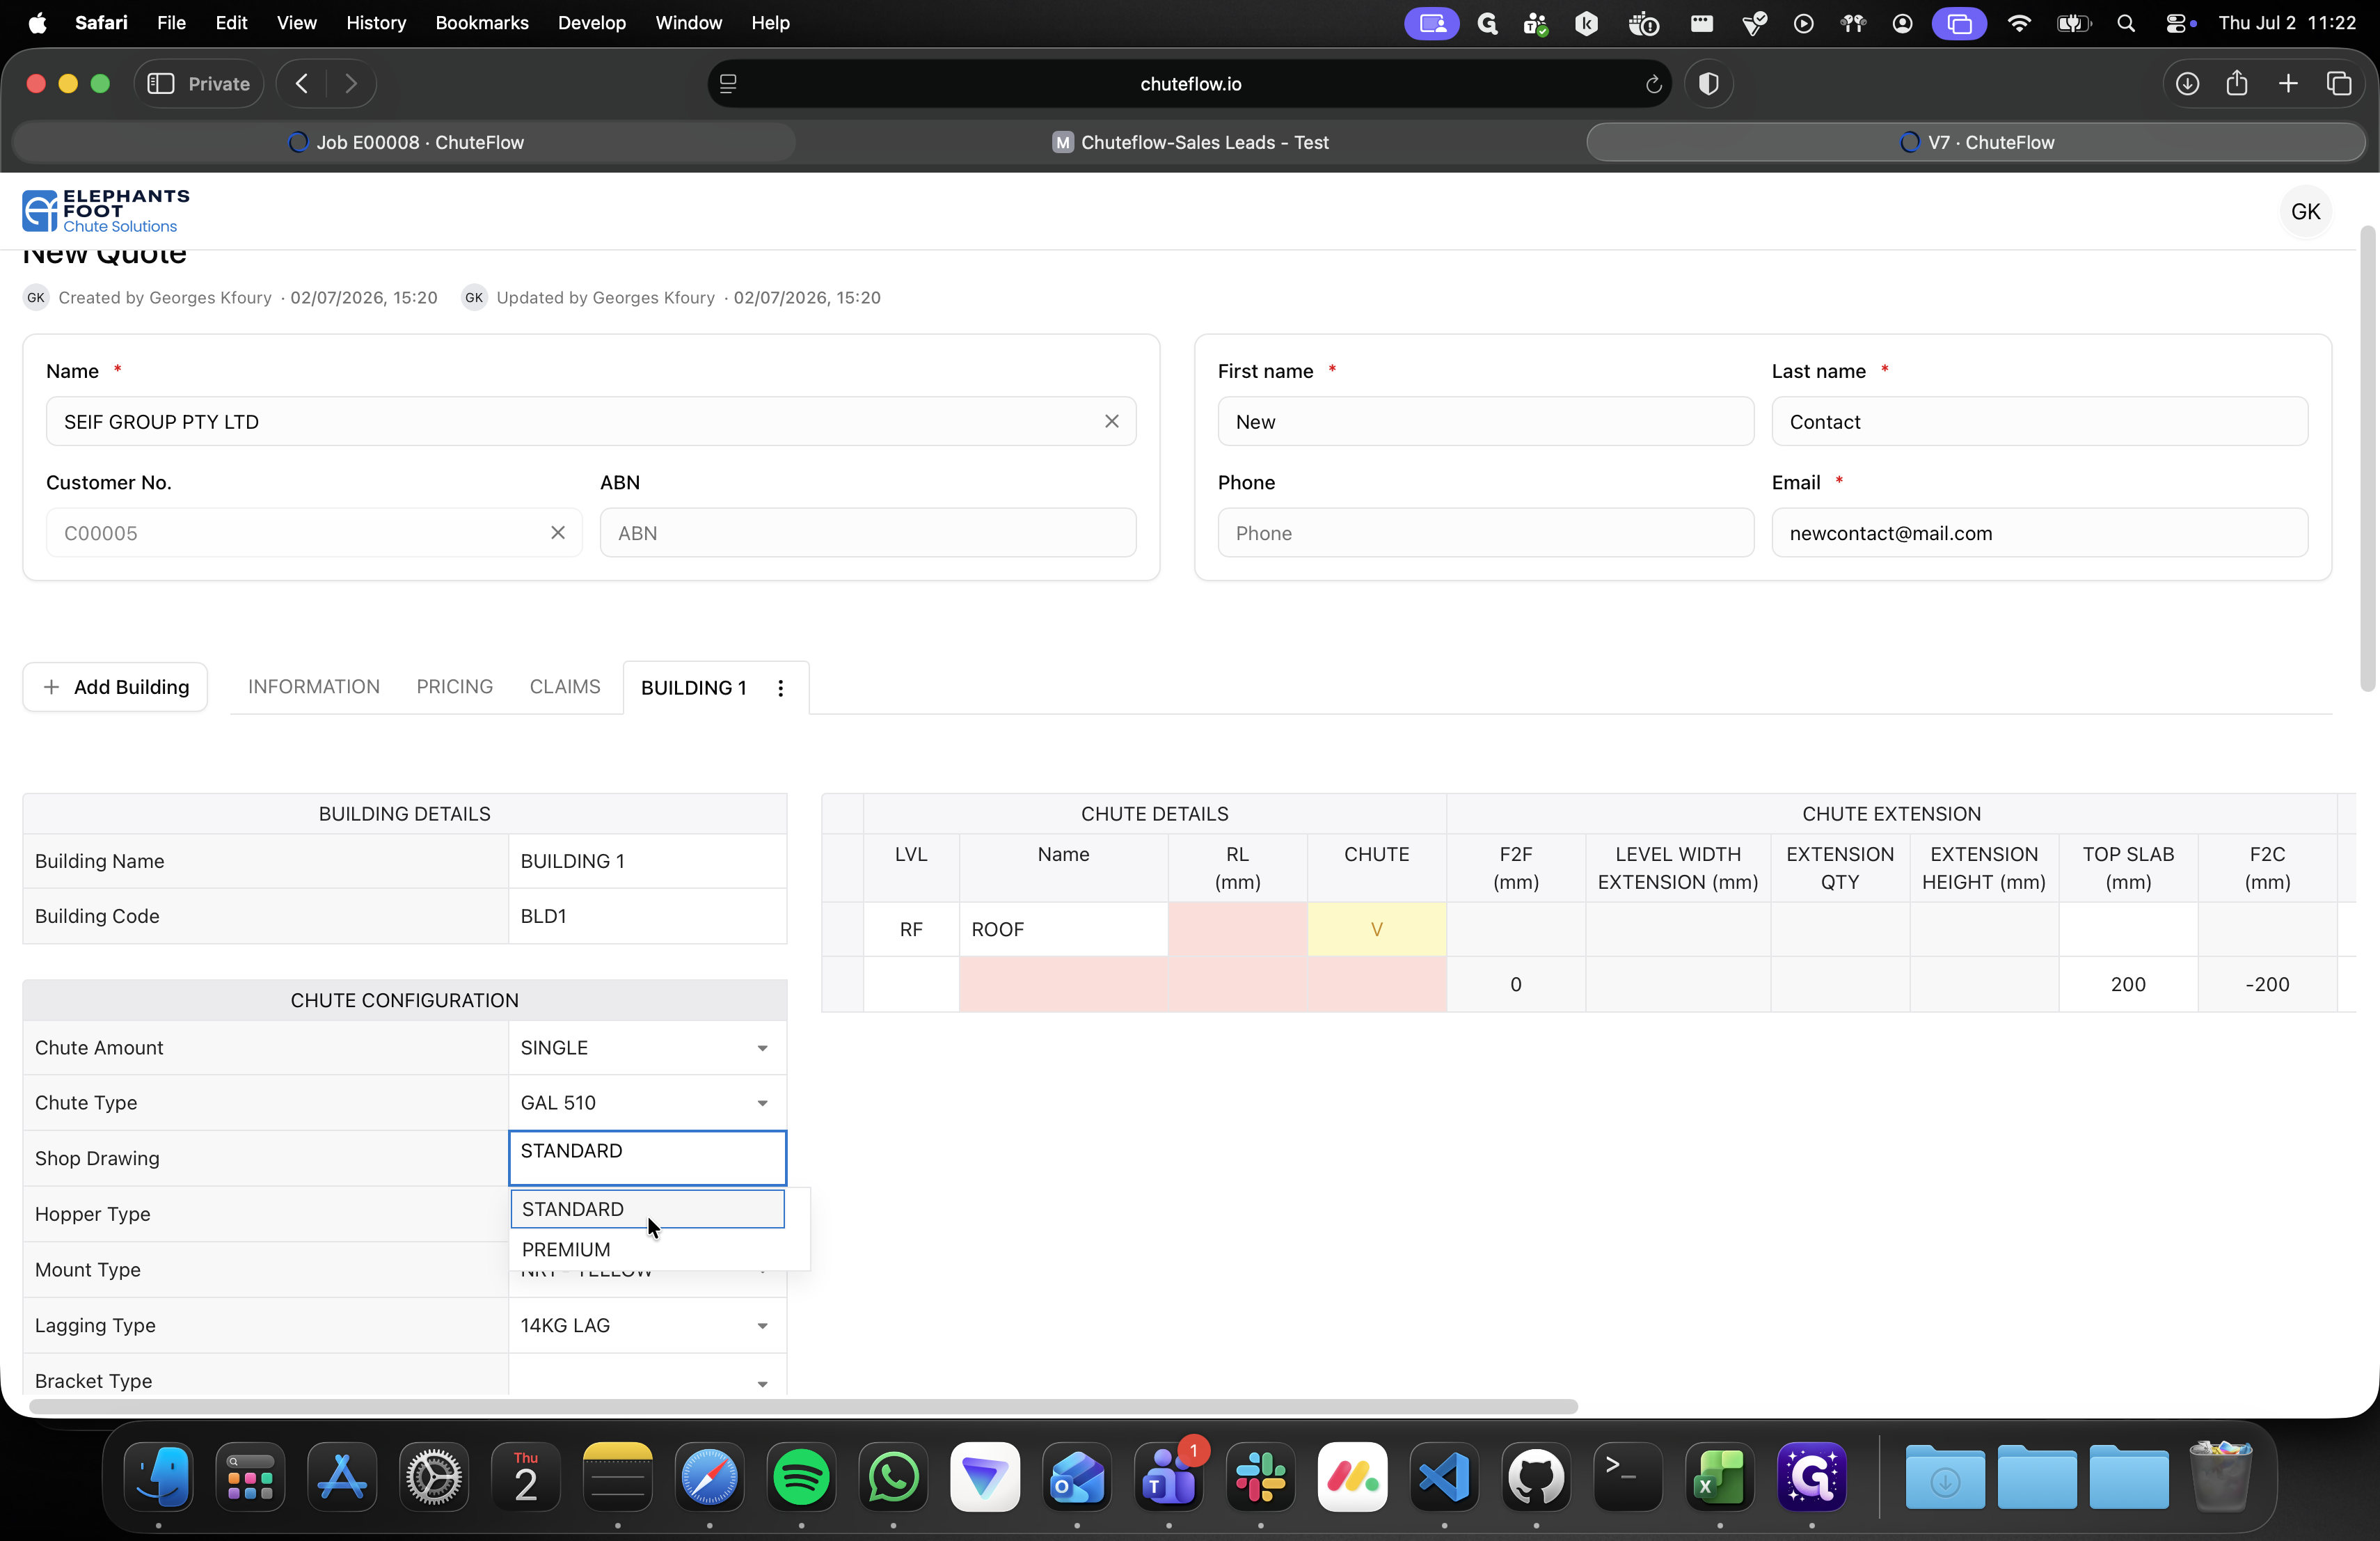
Click the Shop Drawing dropdown and choose the required drawing tier (e.g., STANDARD or PREMIUM).
14
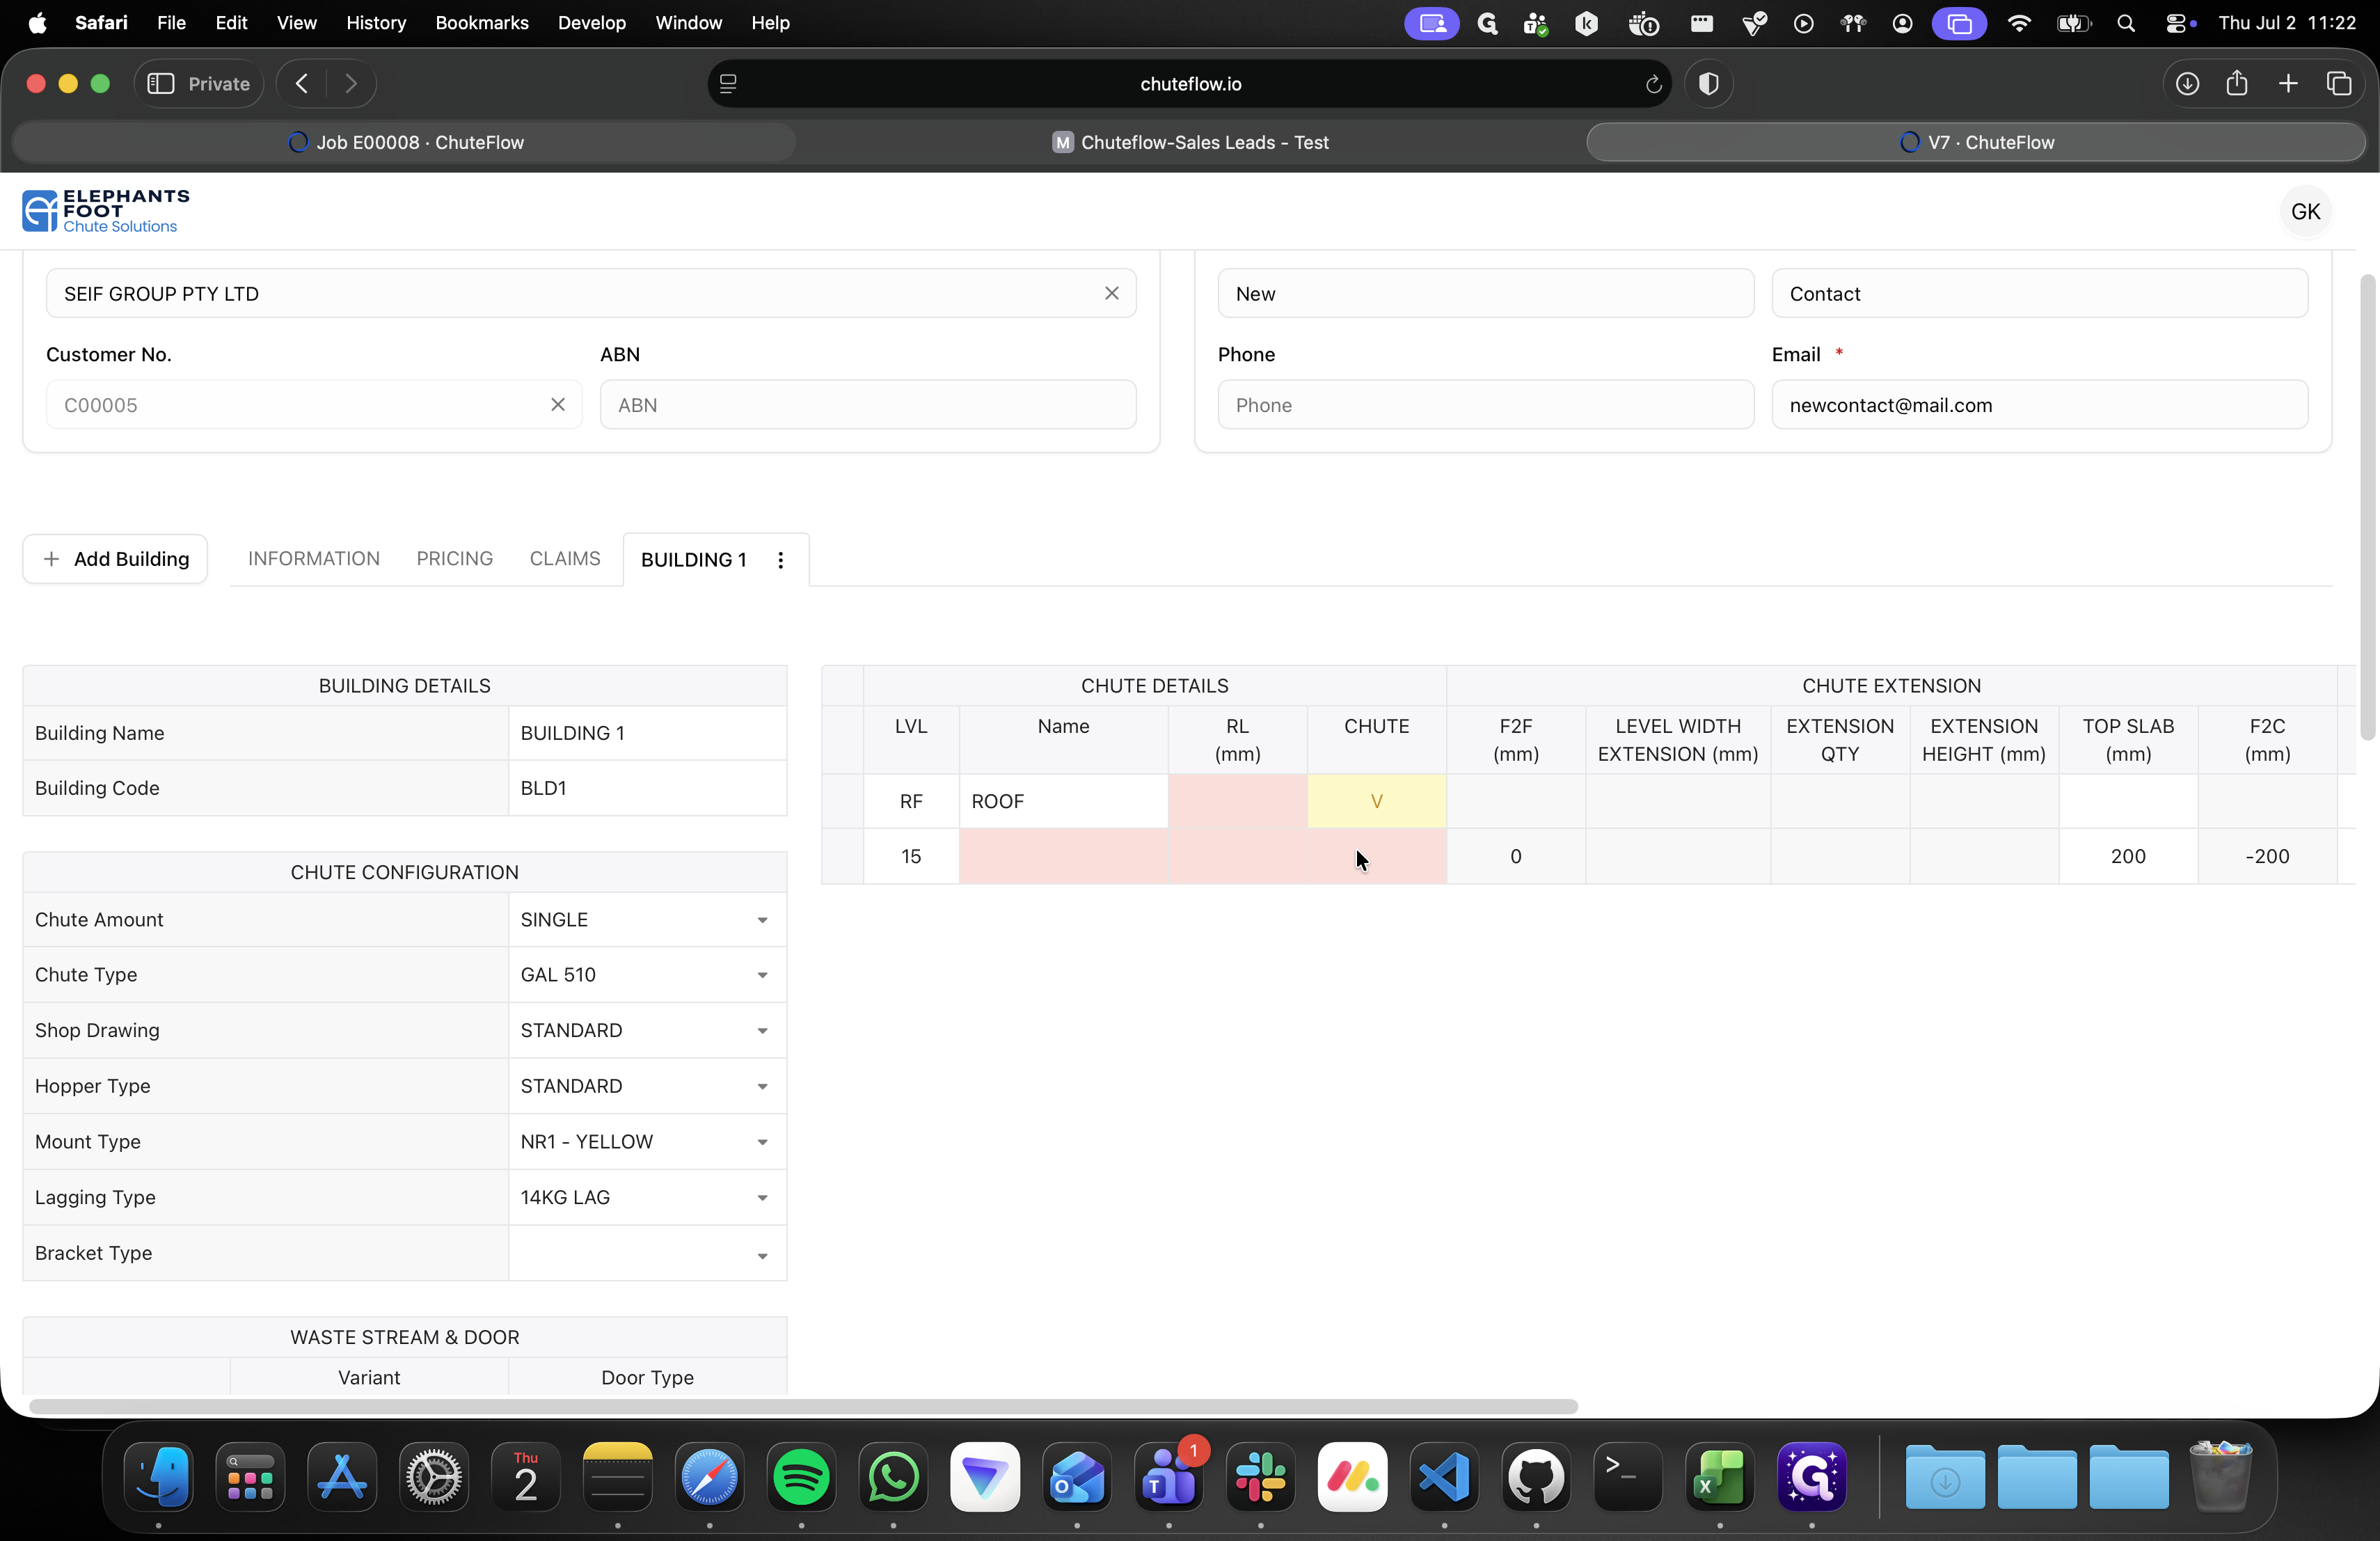
In the Chute Details table, click the highest level cell.
15
Type the total number of floors for the project (e.g., 15).
16
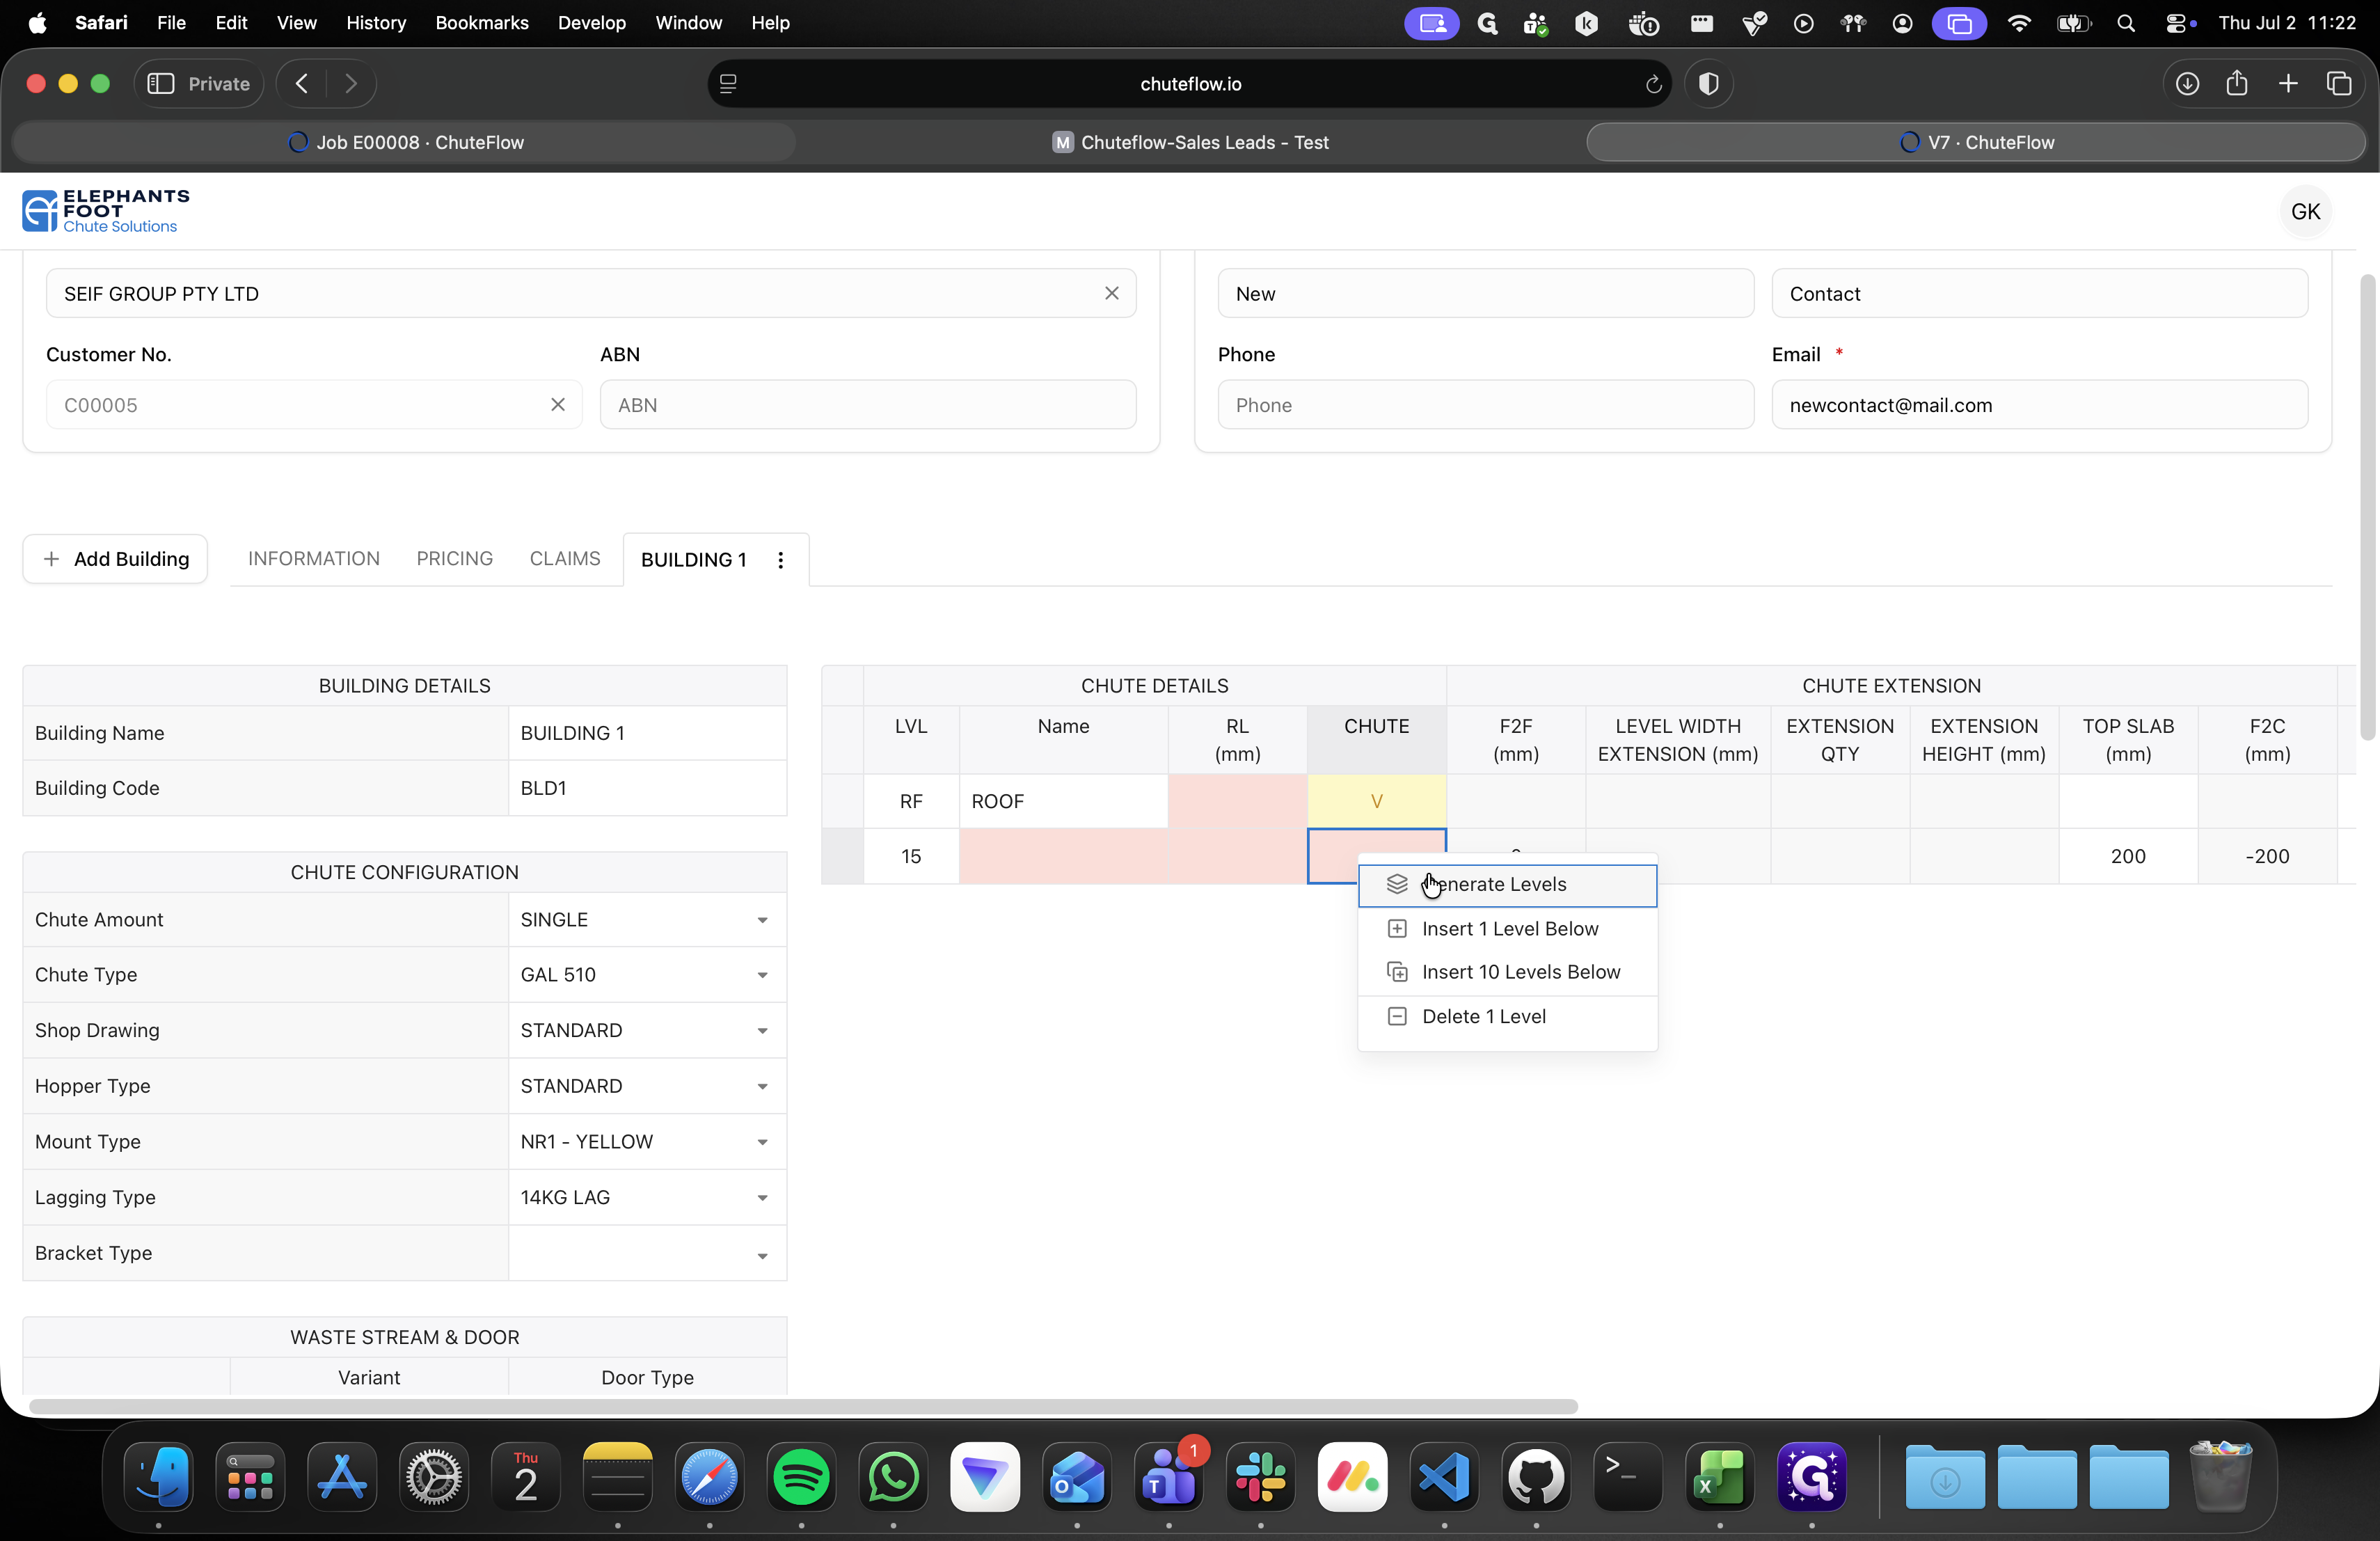
Right-click the row for your top level.
17
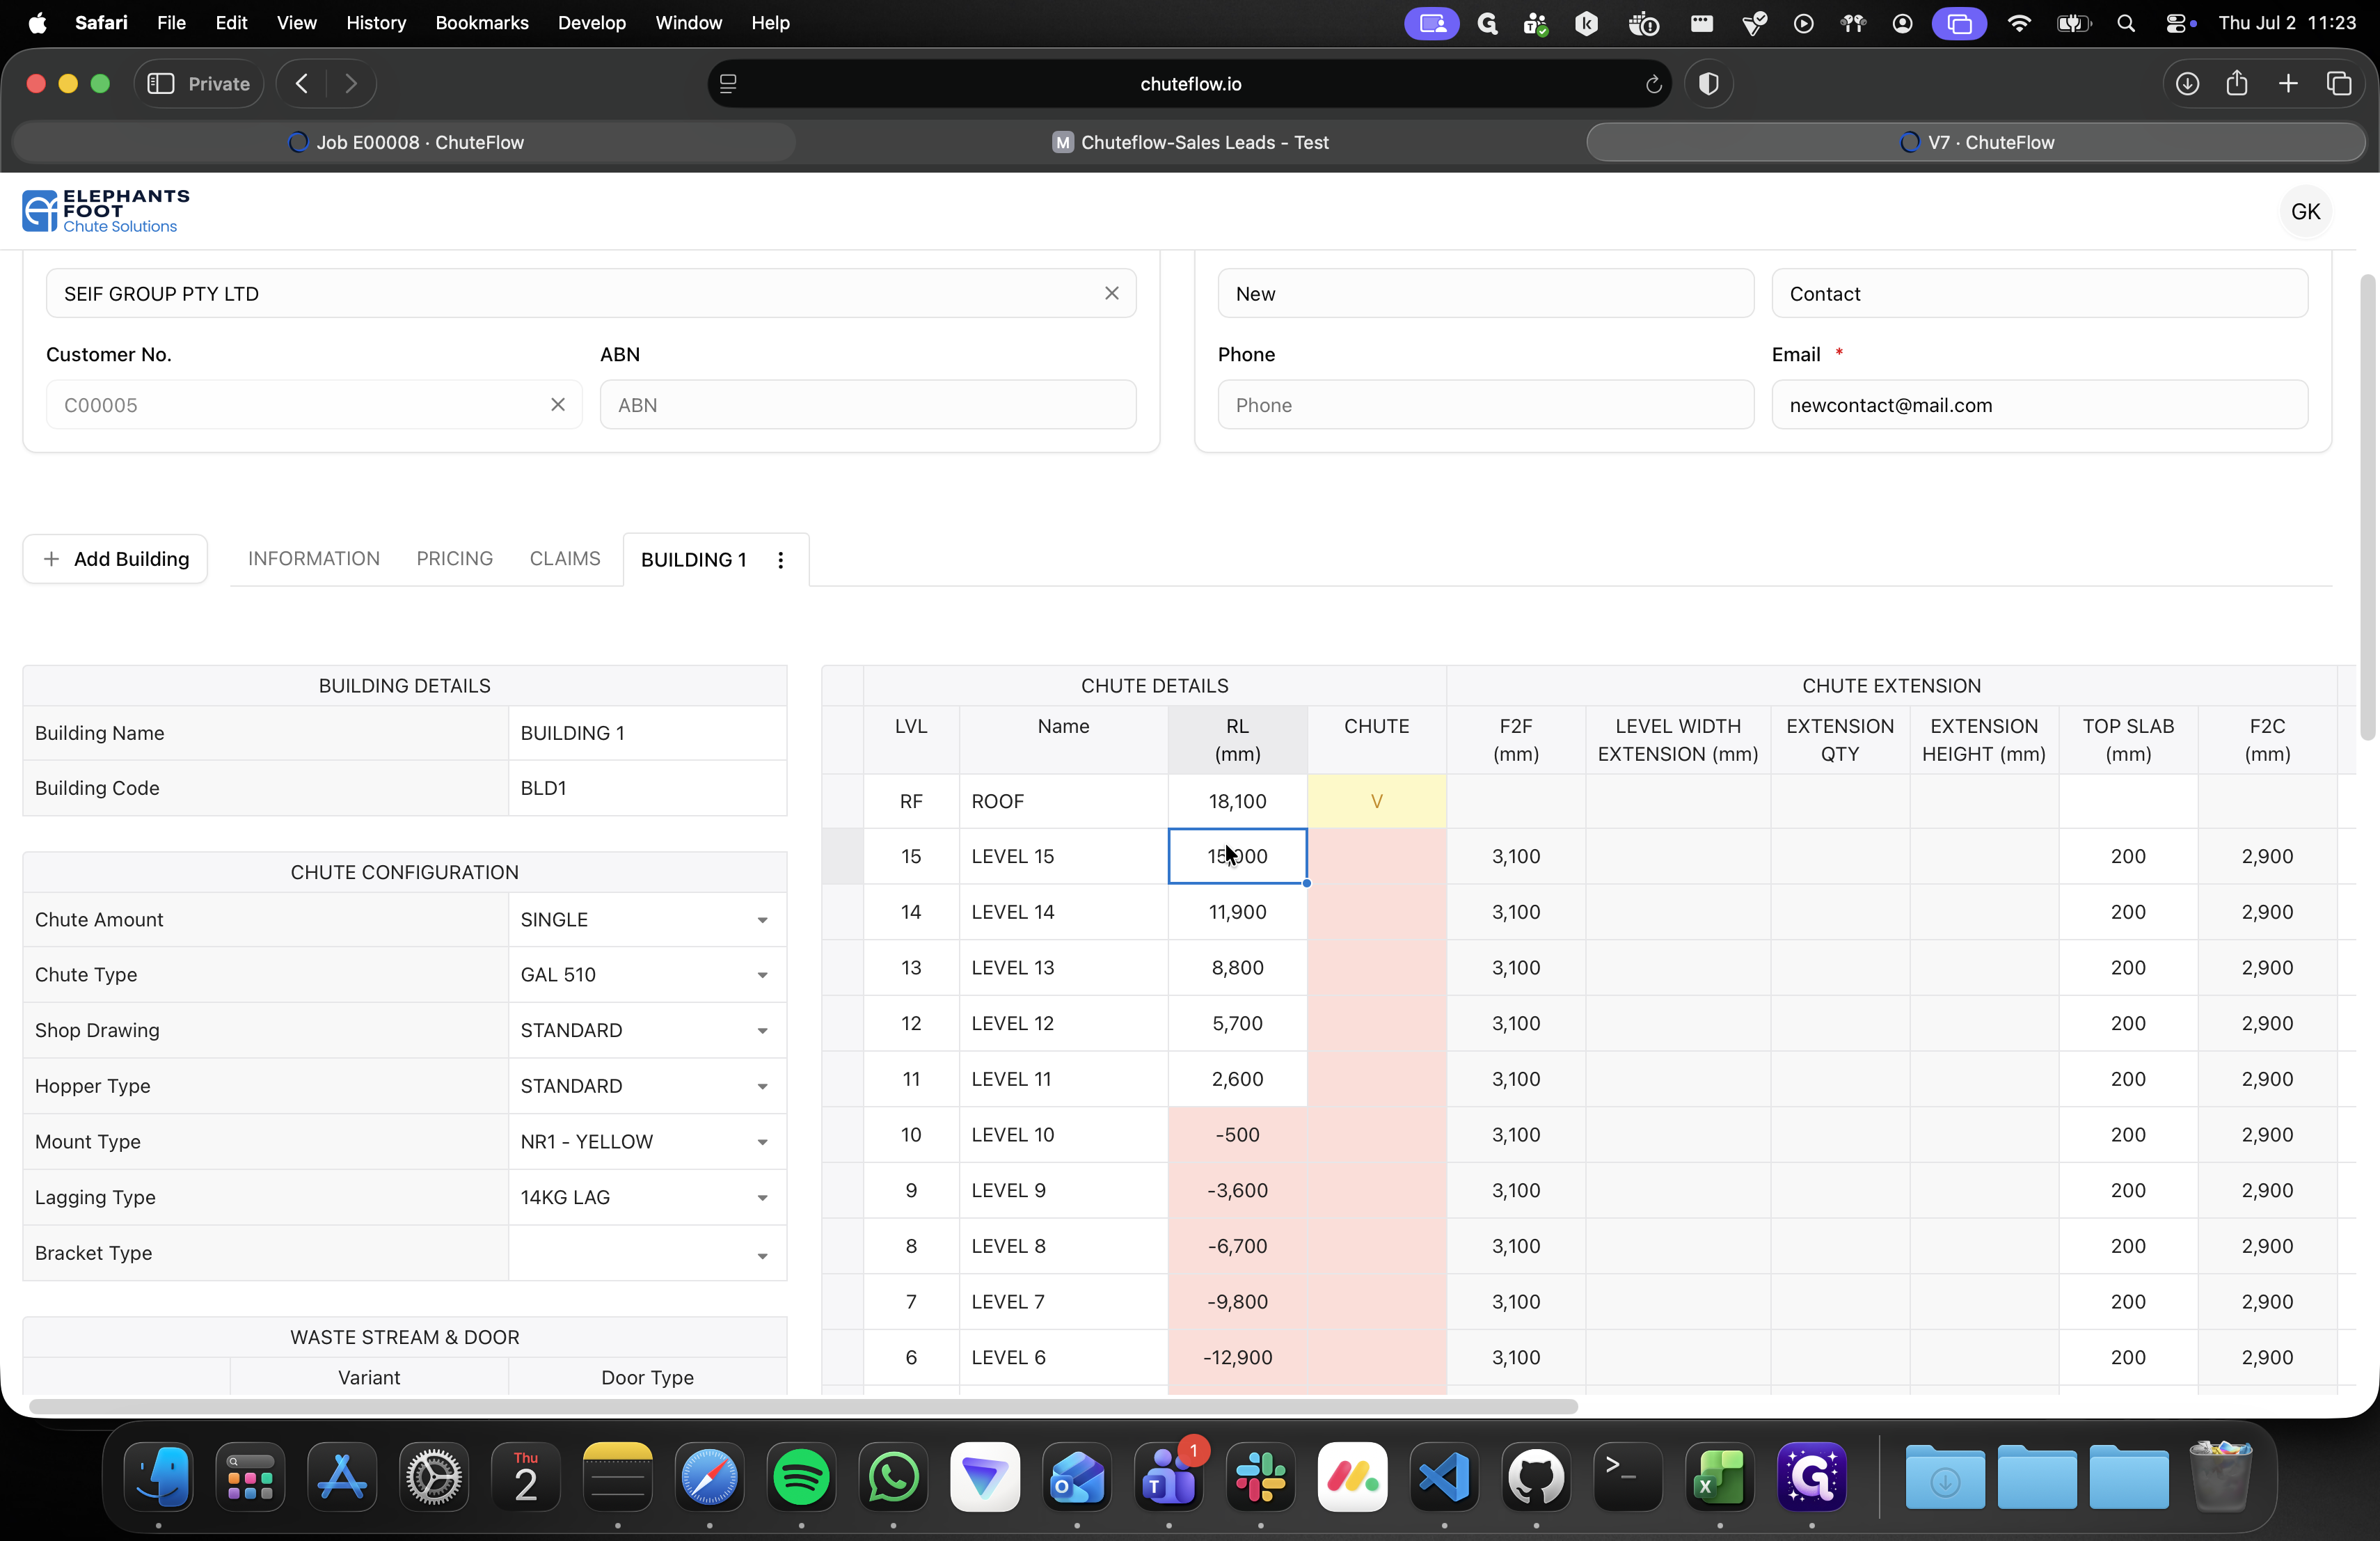
Select Generate Levels to automatically populate all intermediate floors down to the ground level.
18
Double-click the RL (mm) value for any level to adjust its specific height.
19
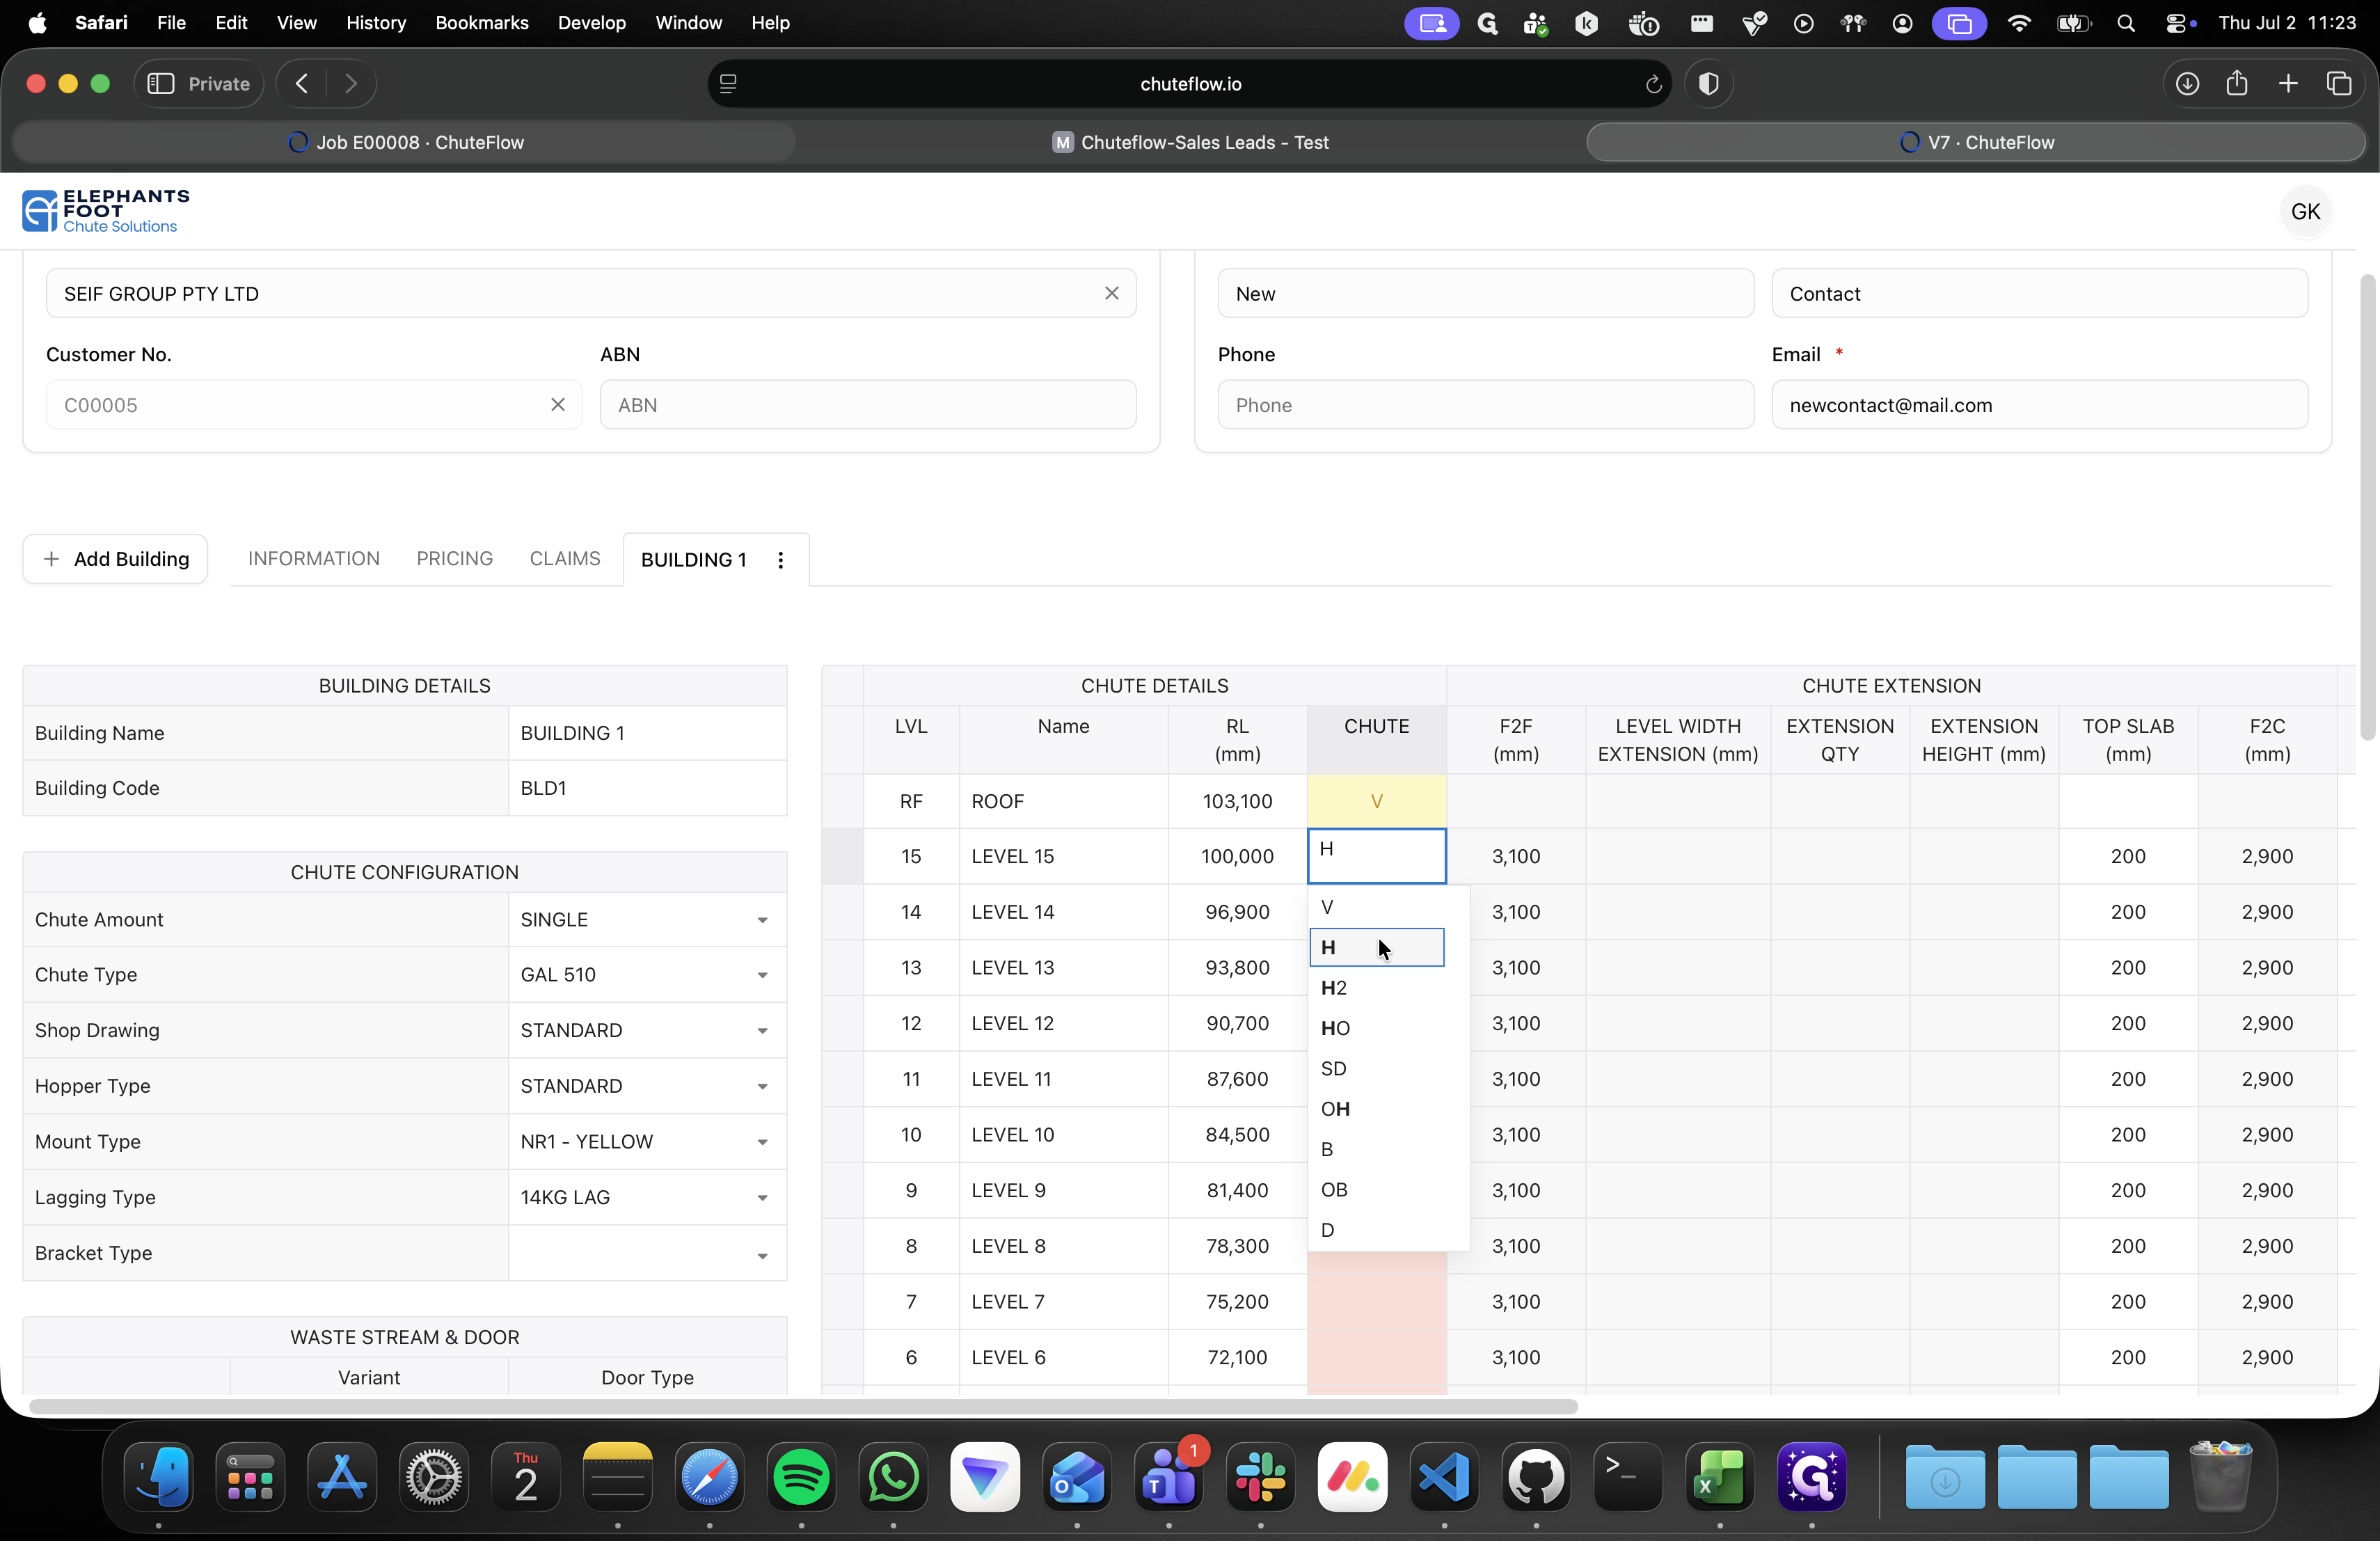
Click the dropdown in the Chute column for a specific level to assign its component type.
When assigning chute component types to specific levels, you can choose from several configurations. Example codes:
Chute Code
Description
V
Standard Vertical Chute
H / H2
Horizontal Offset Sections
B / OB
Bends and Offset Bends
D / SD
Standard Discharge Components
G
Ground Floor Level Denotation
20
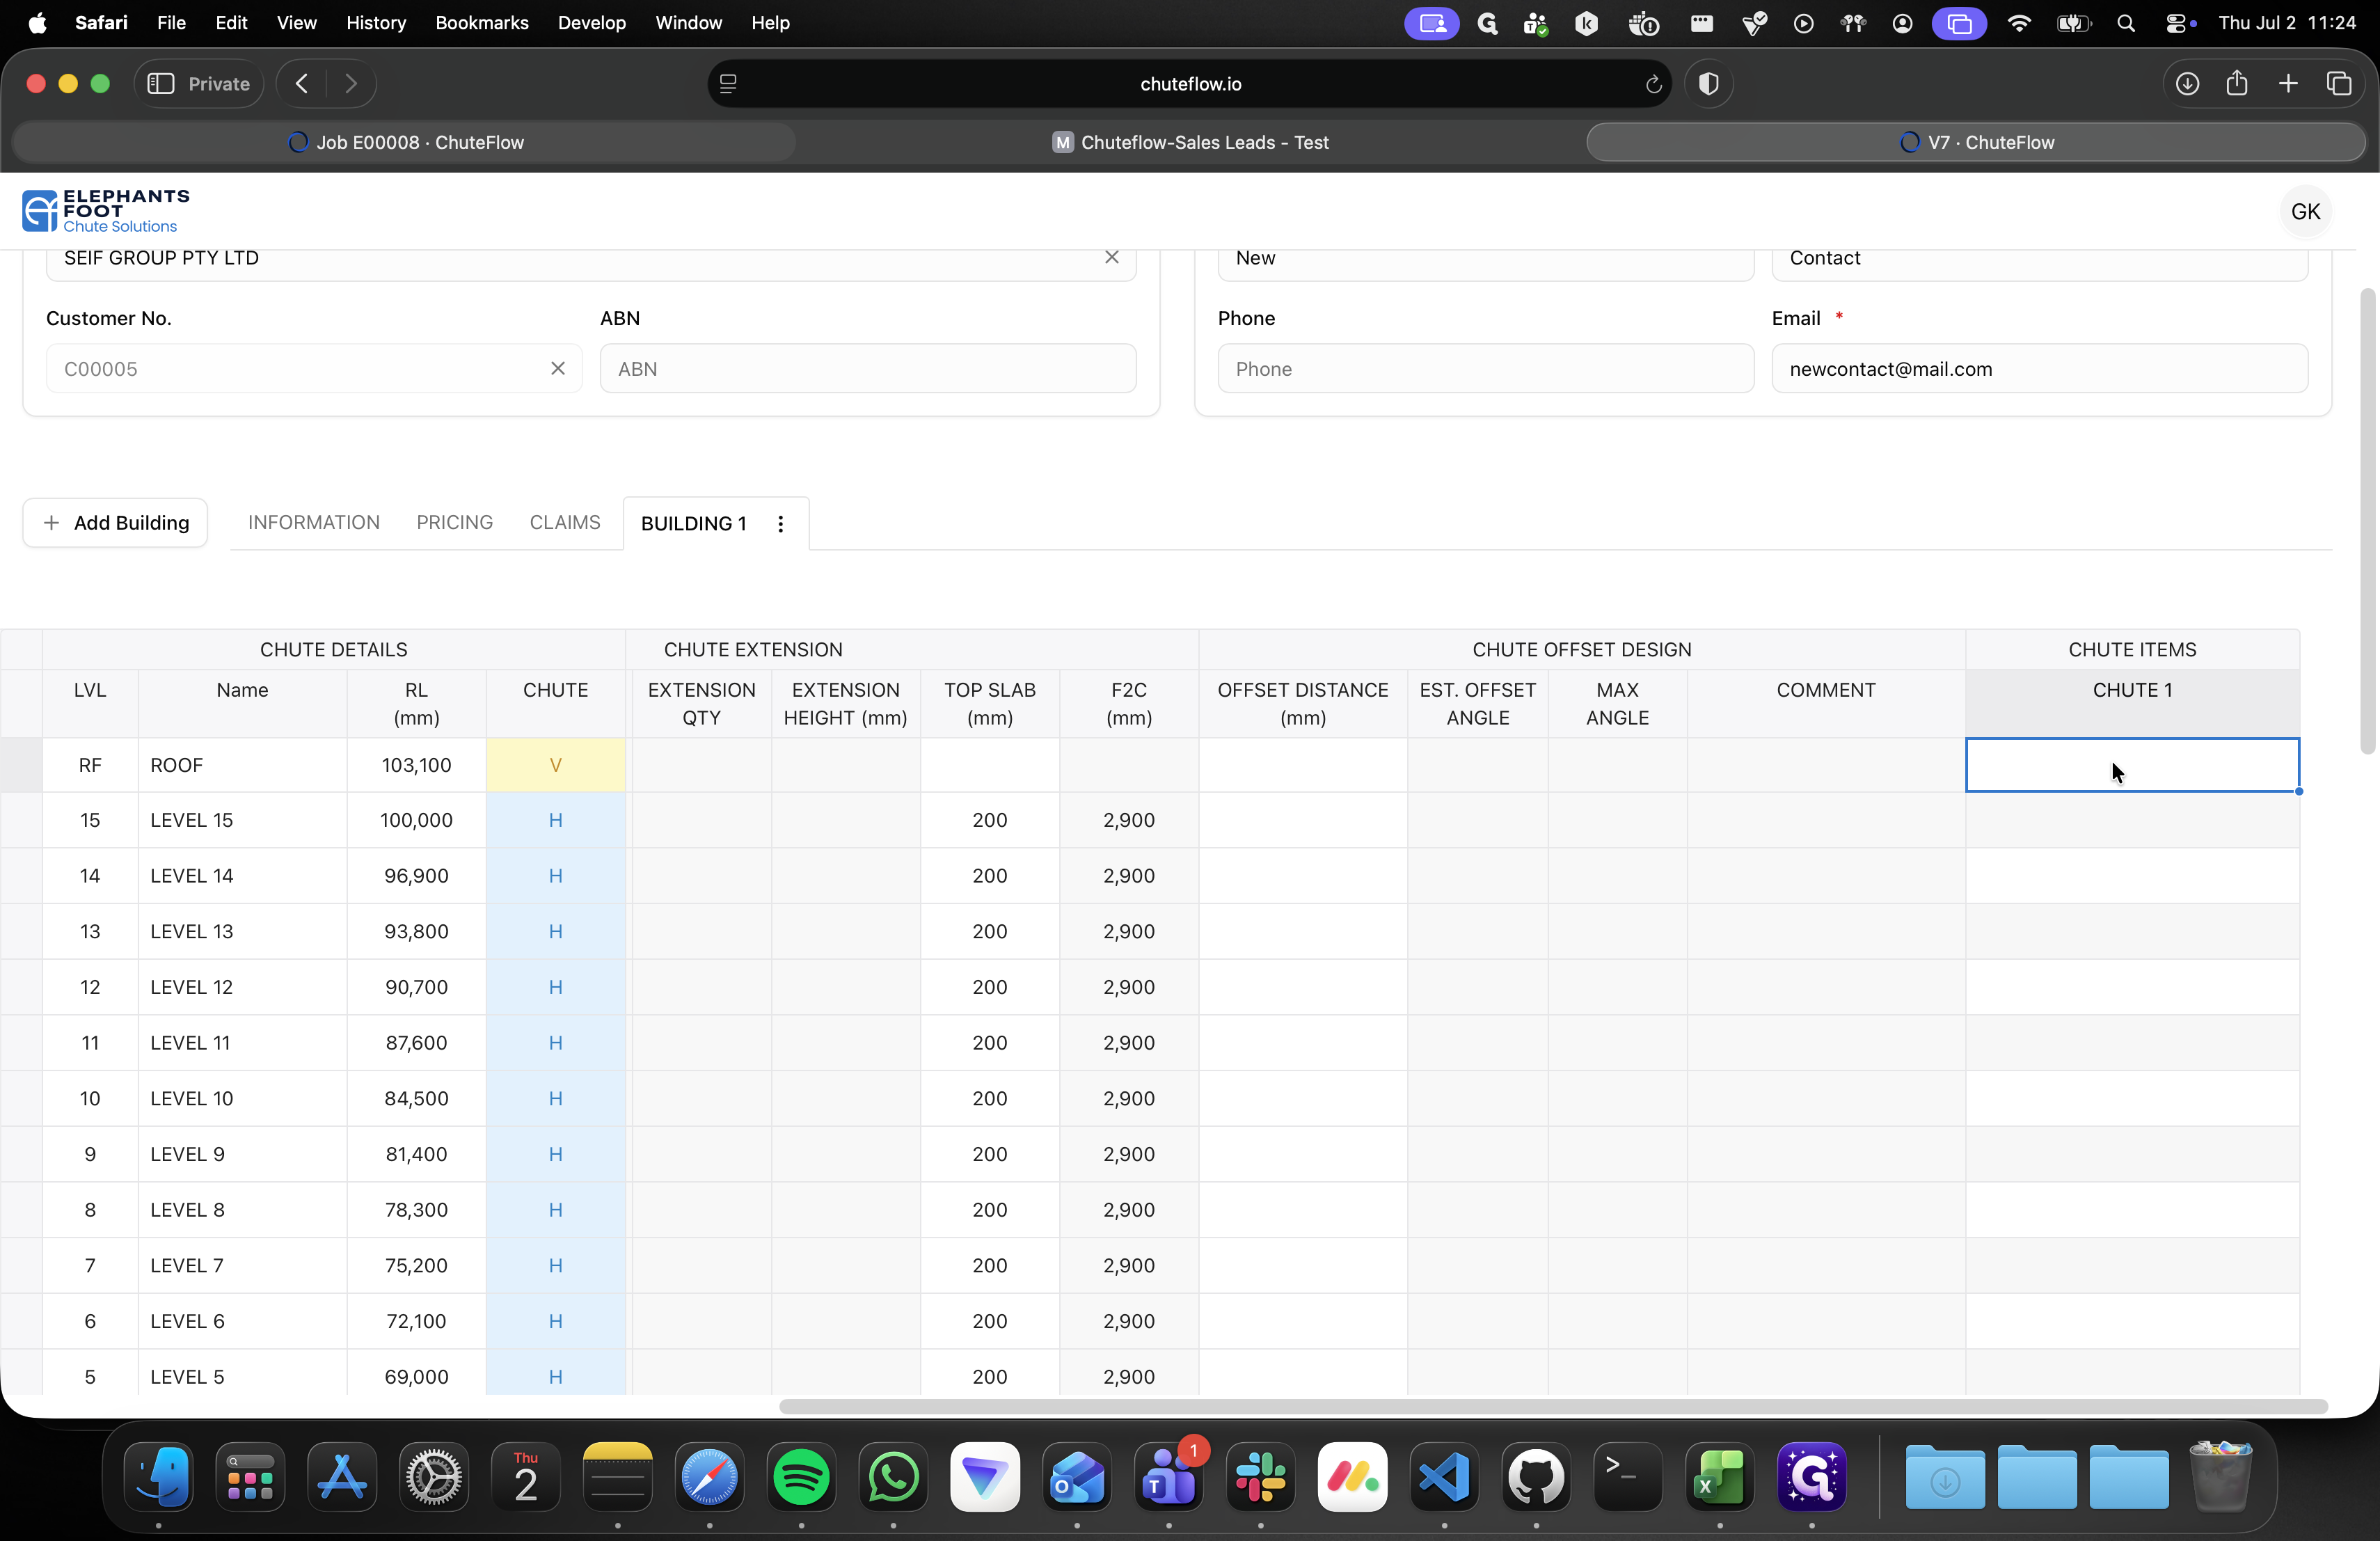
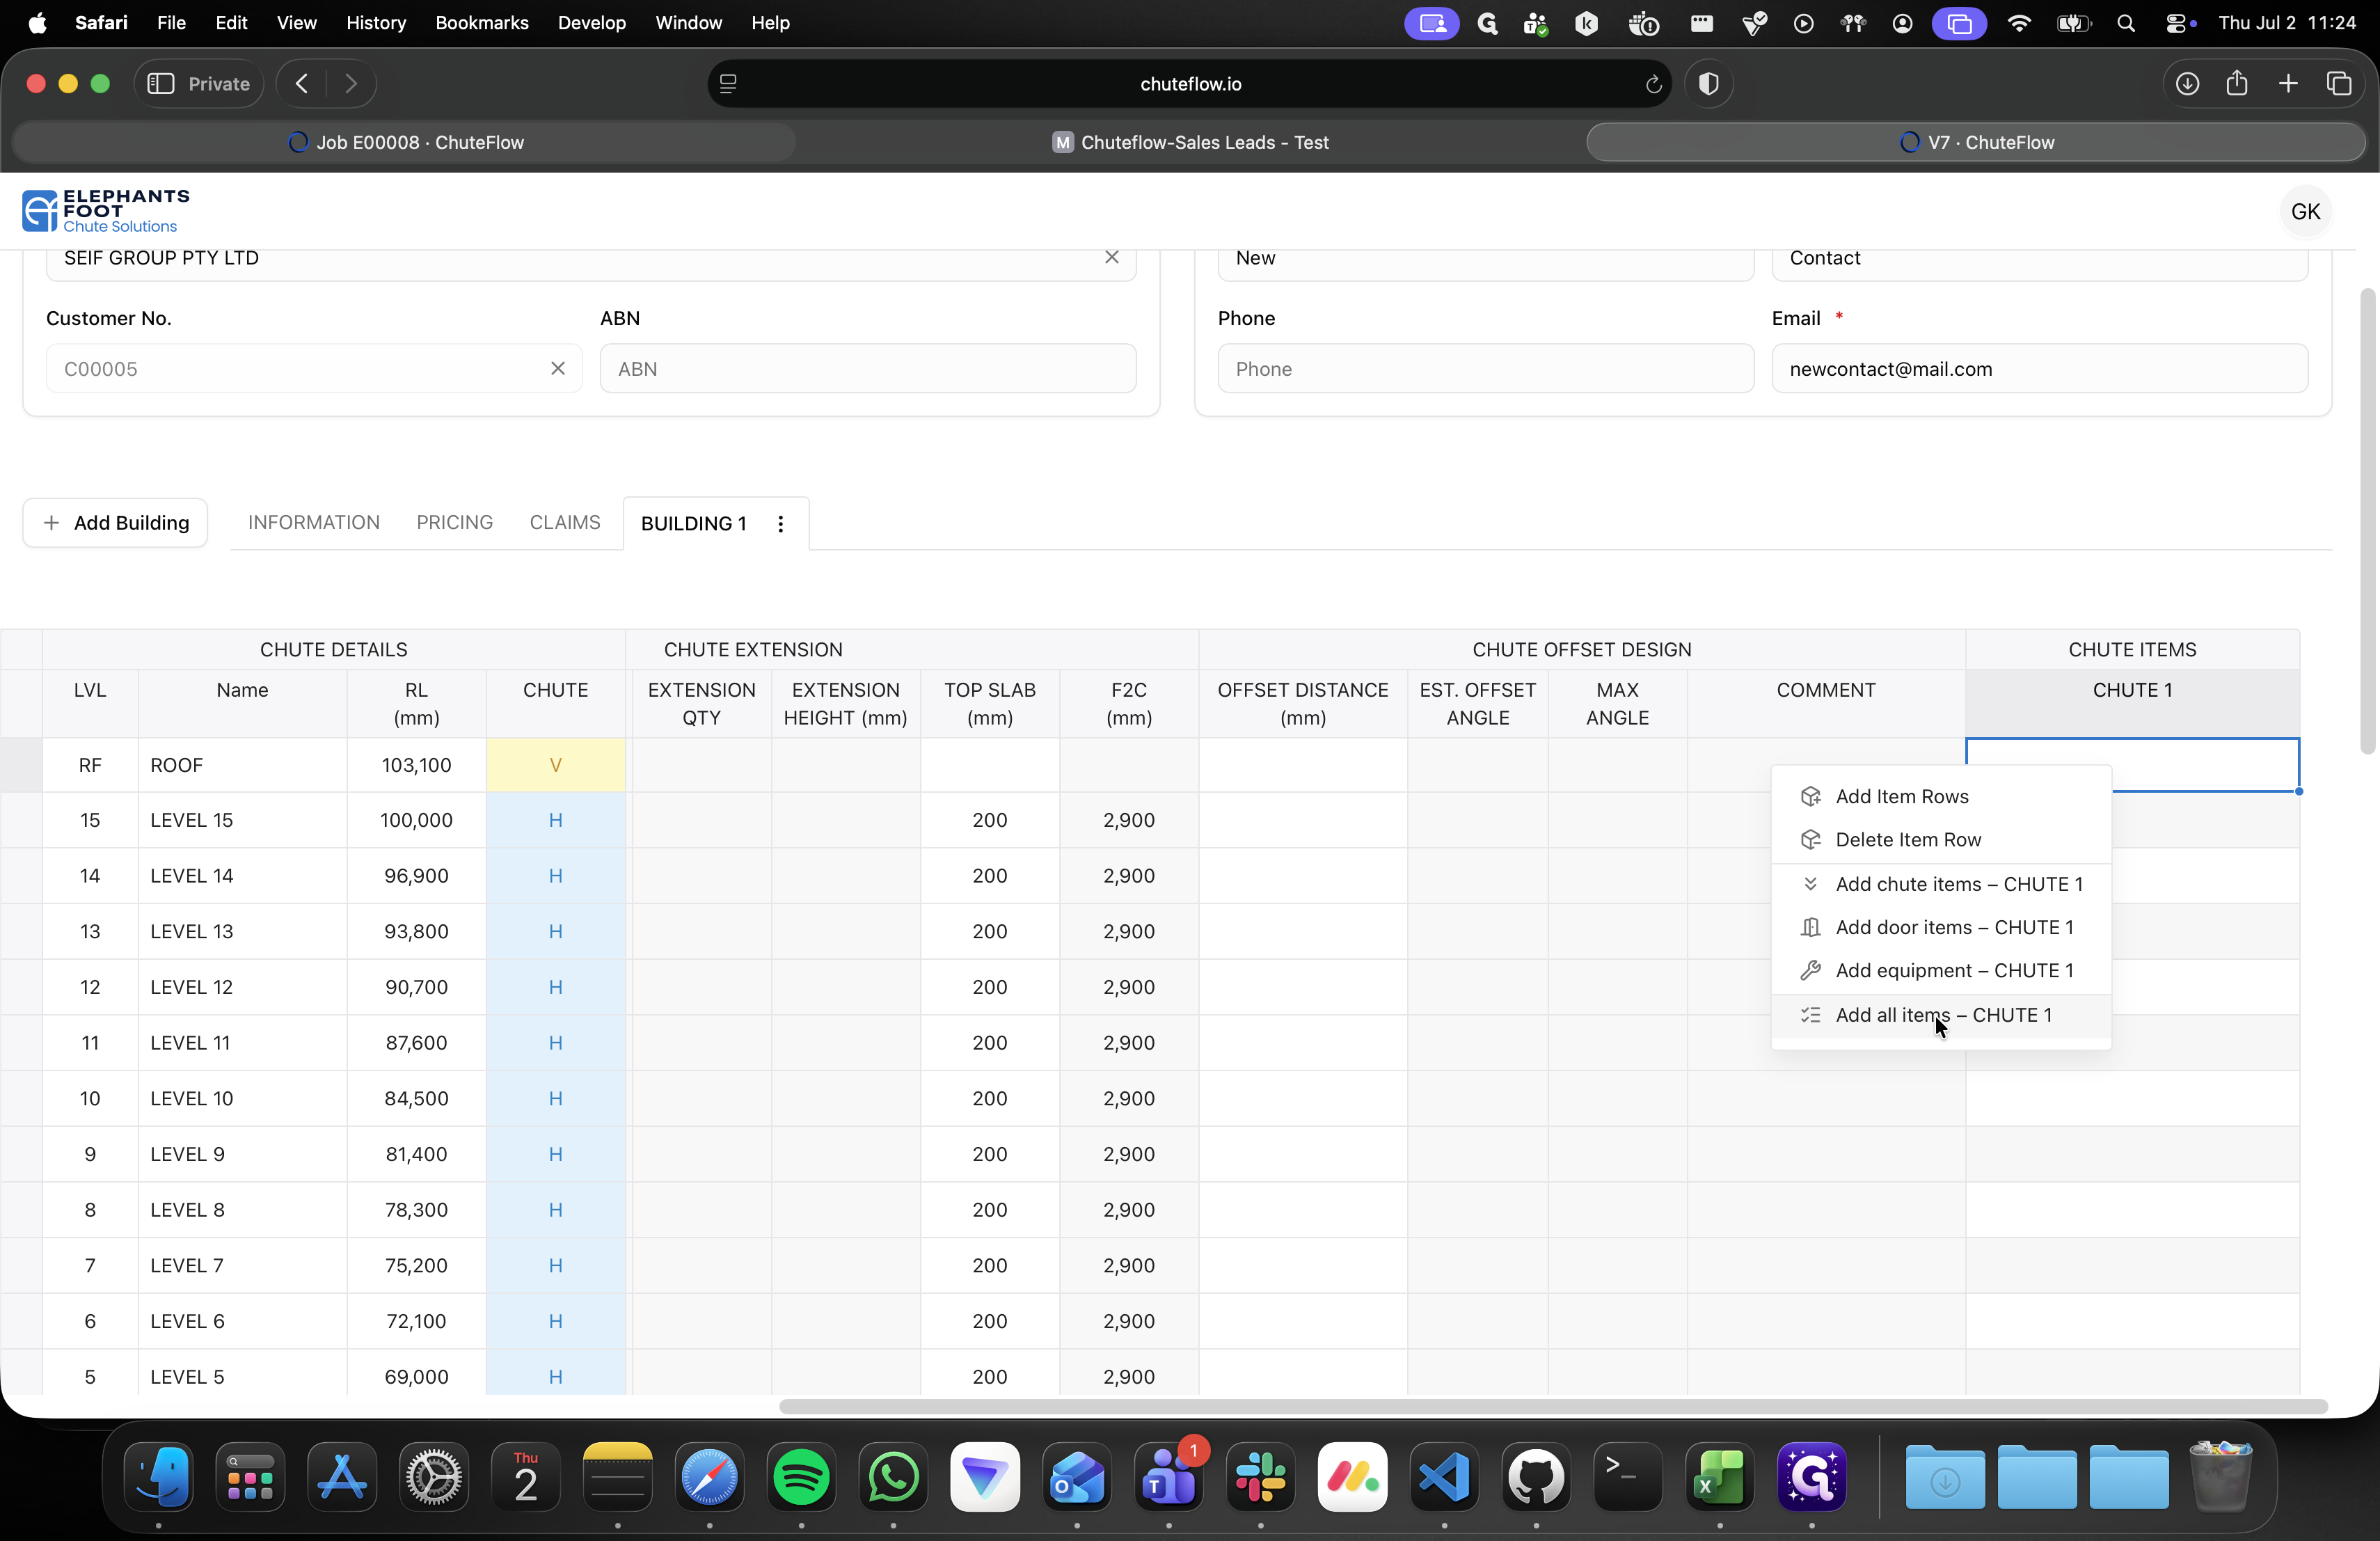
Right-click inside the Chute Items column.
21
Select Add all items to calculate and auto-populate the necessary materials based on your configured floor types.
22
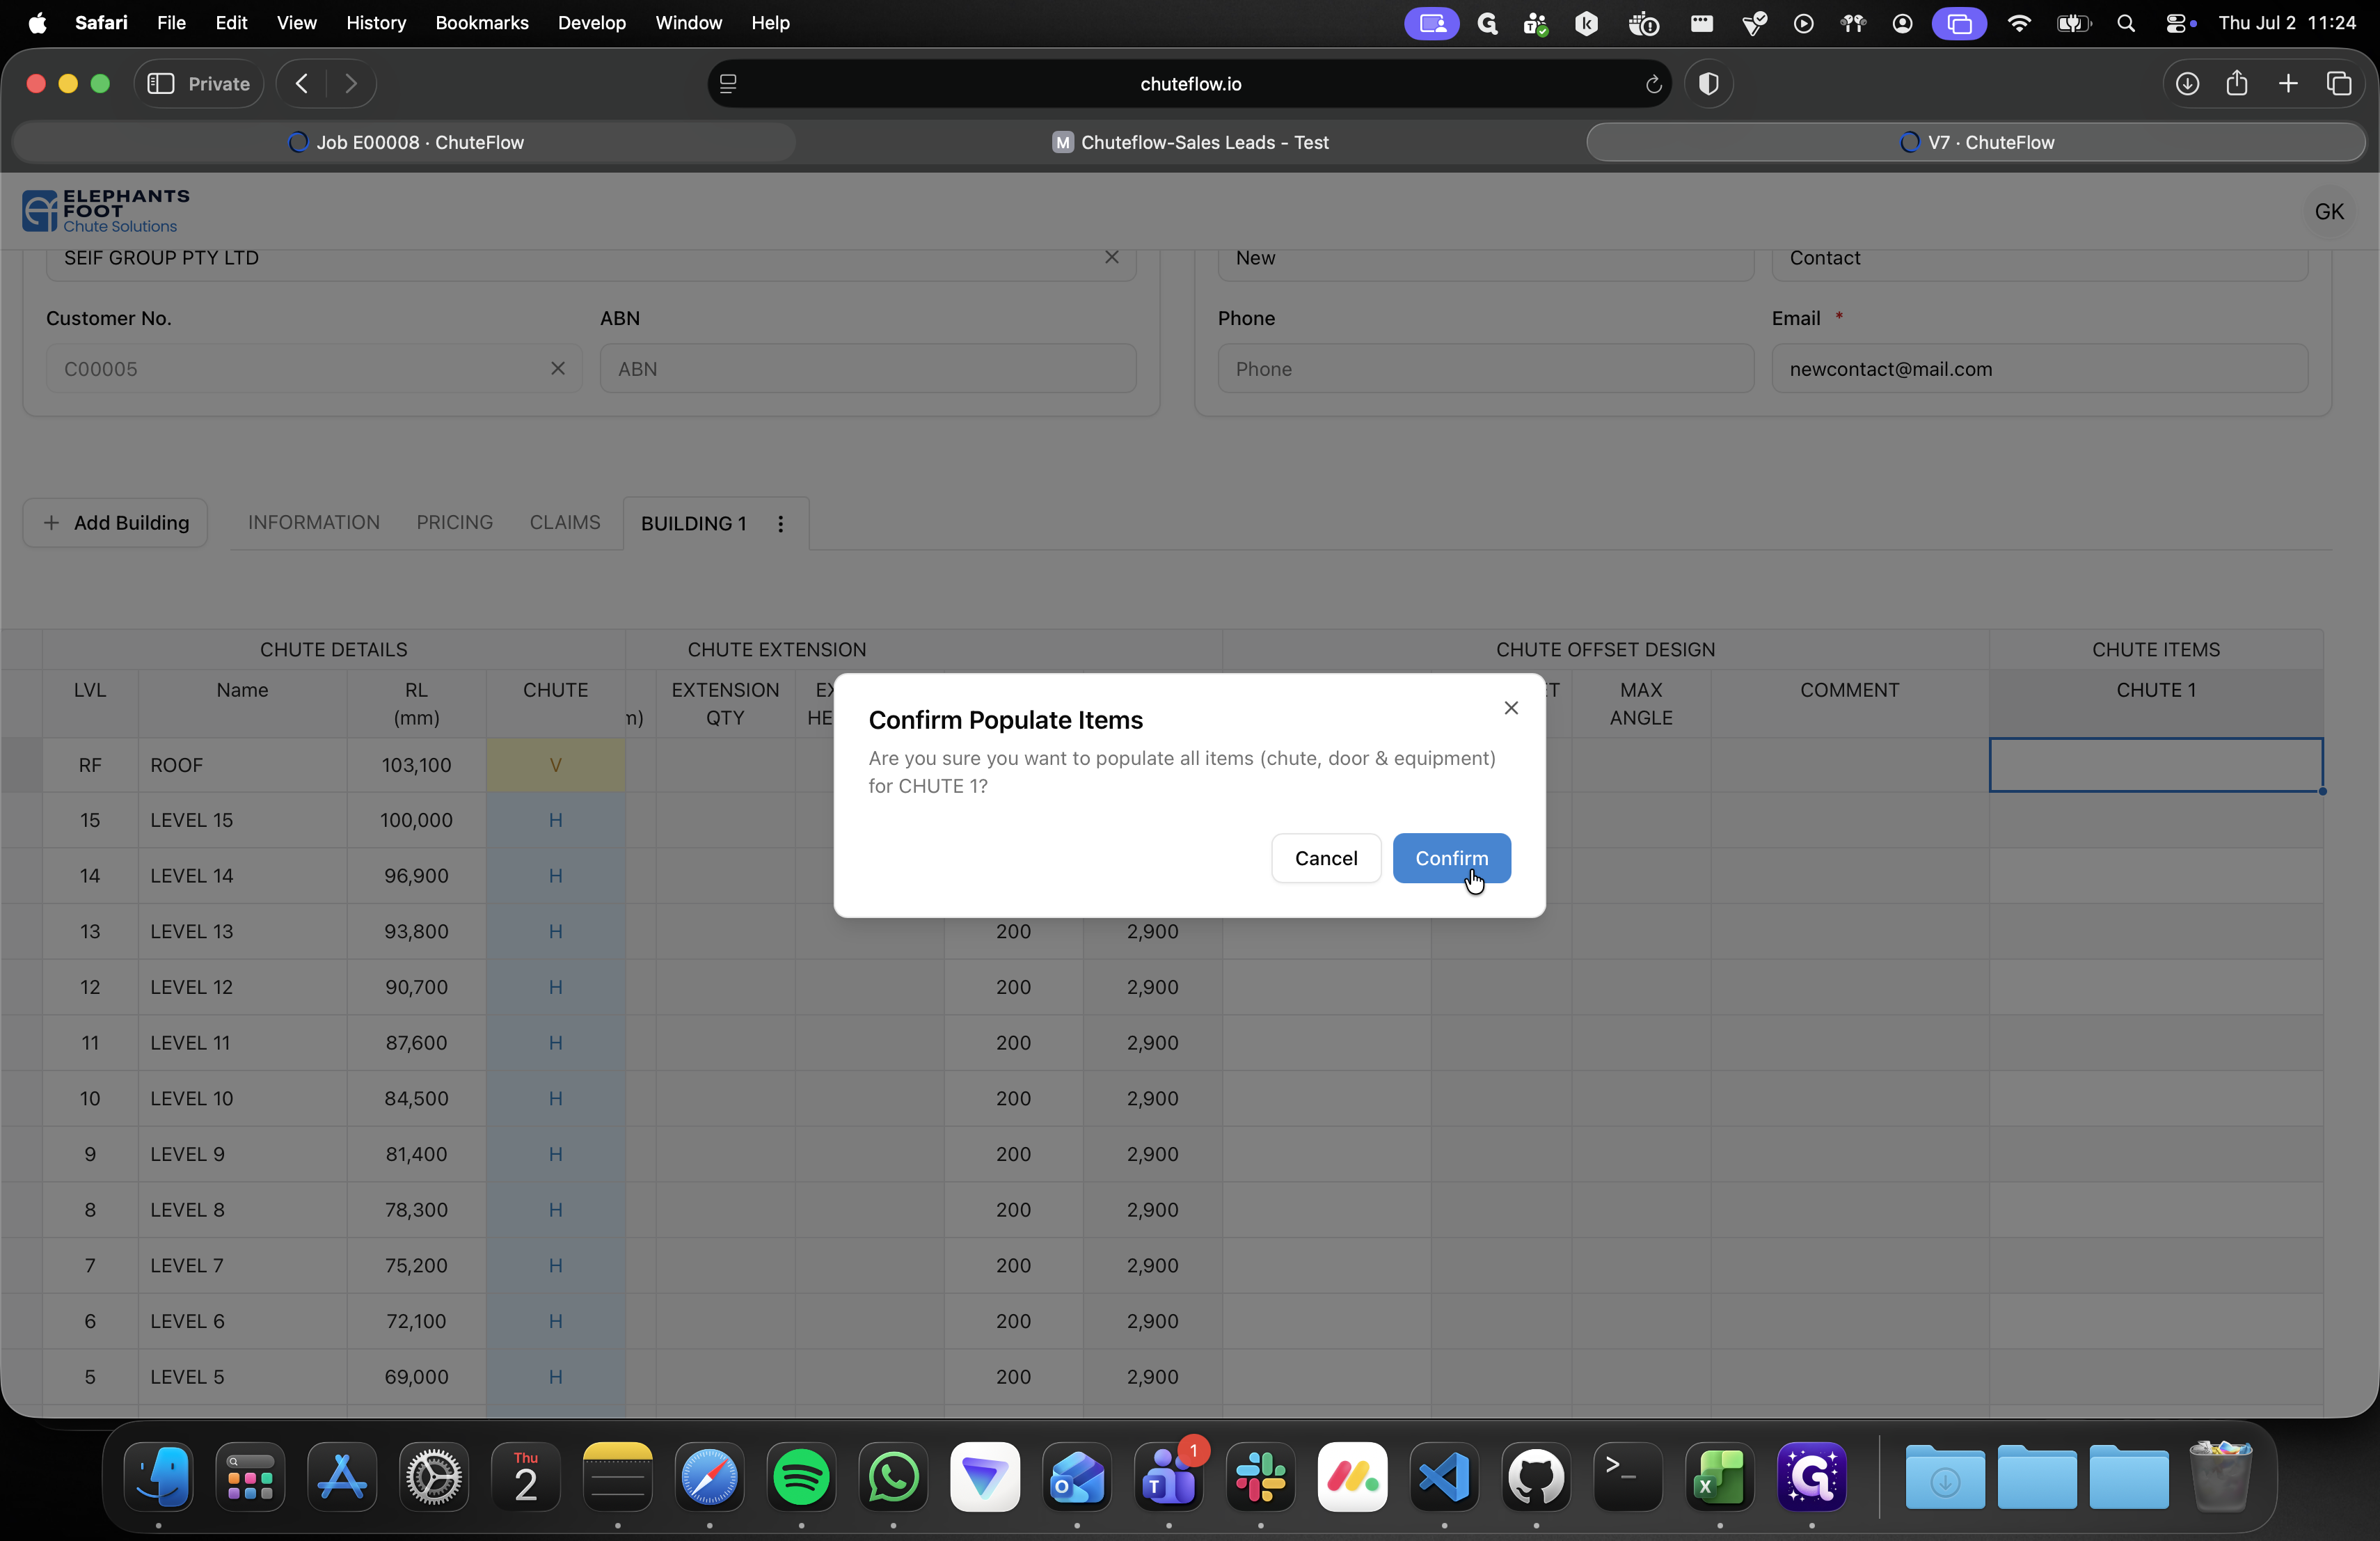
Click Confirm on the verification modal.
23
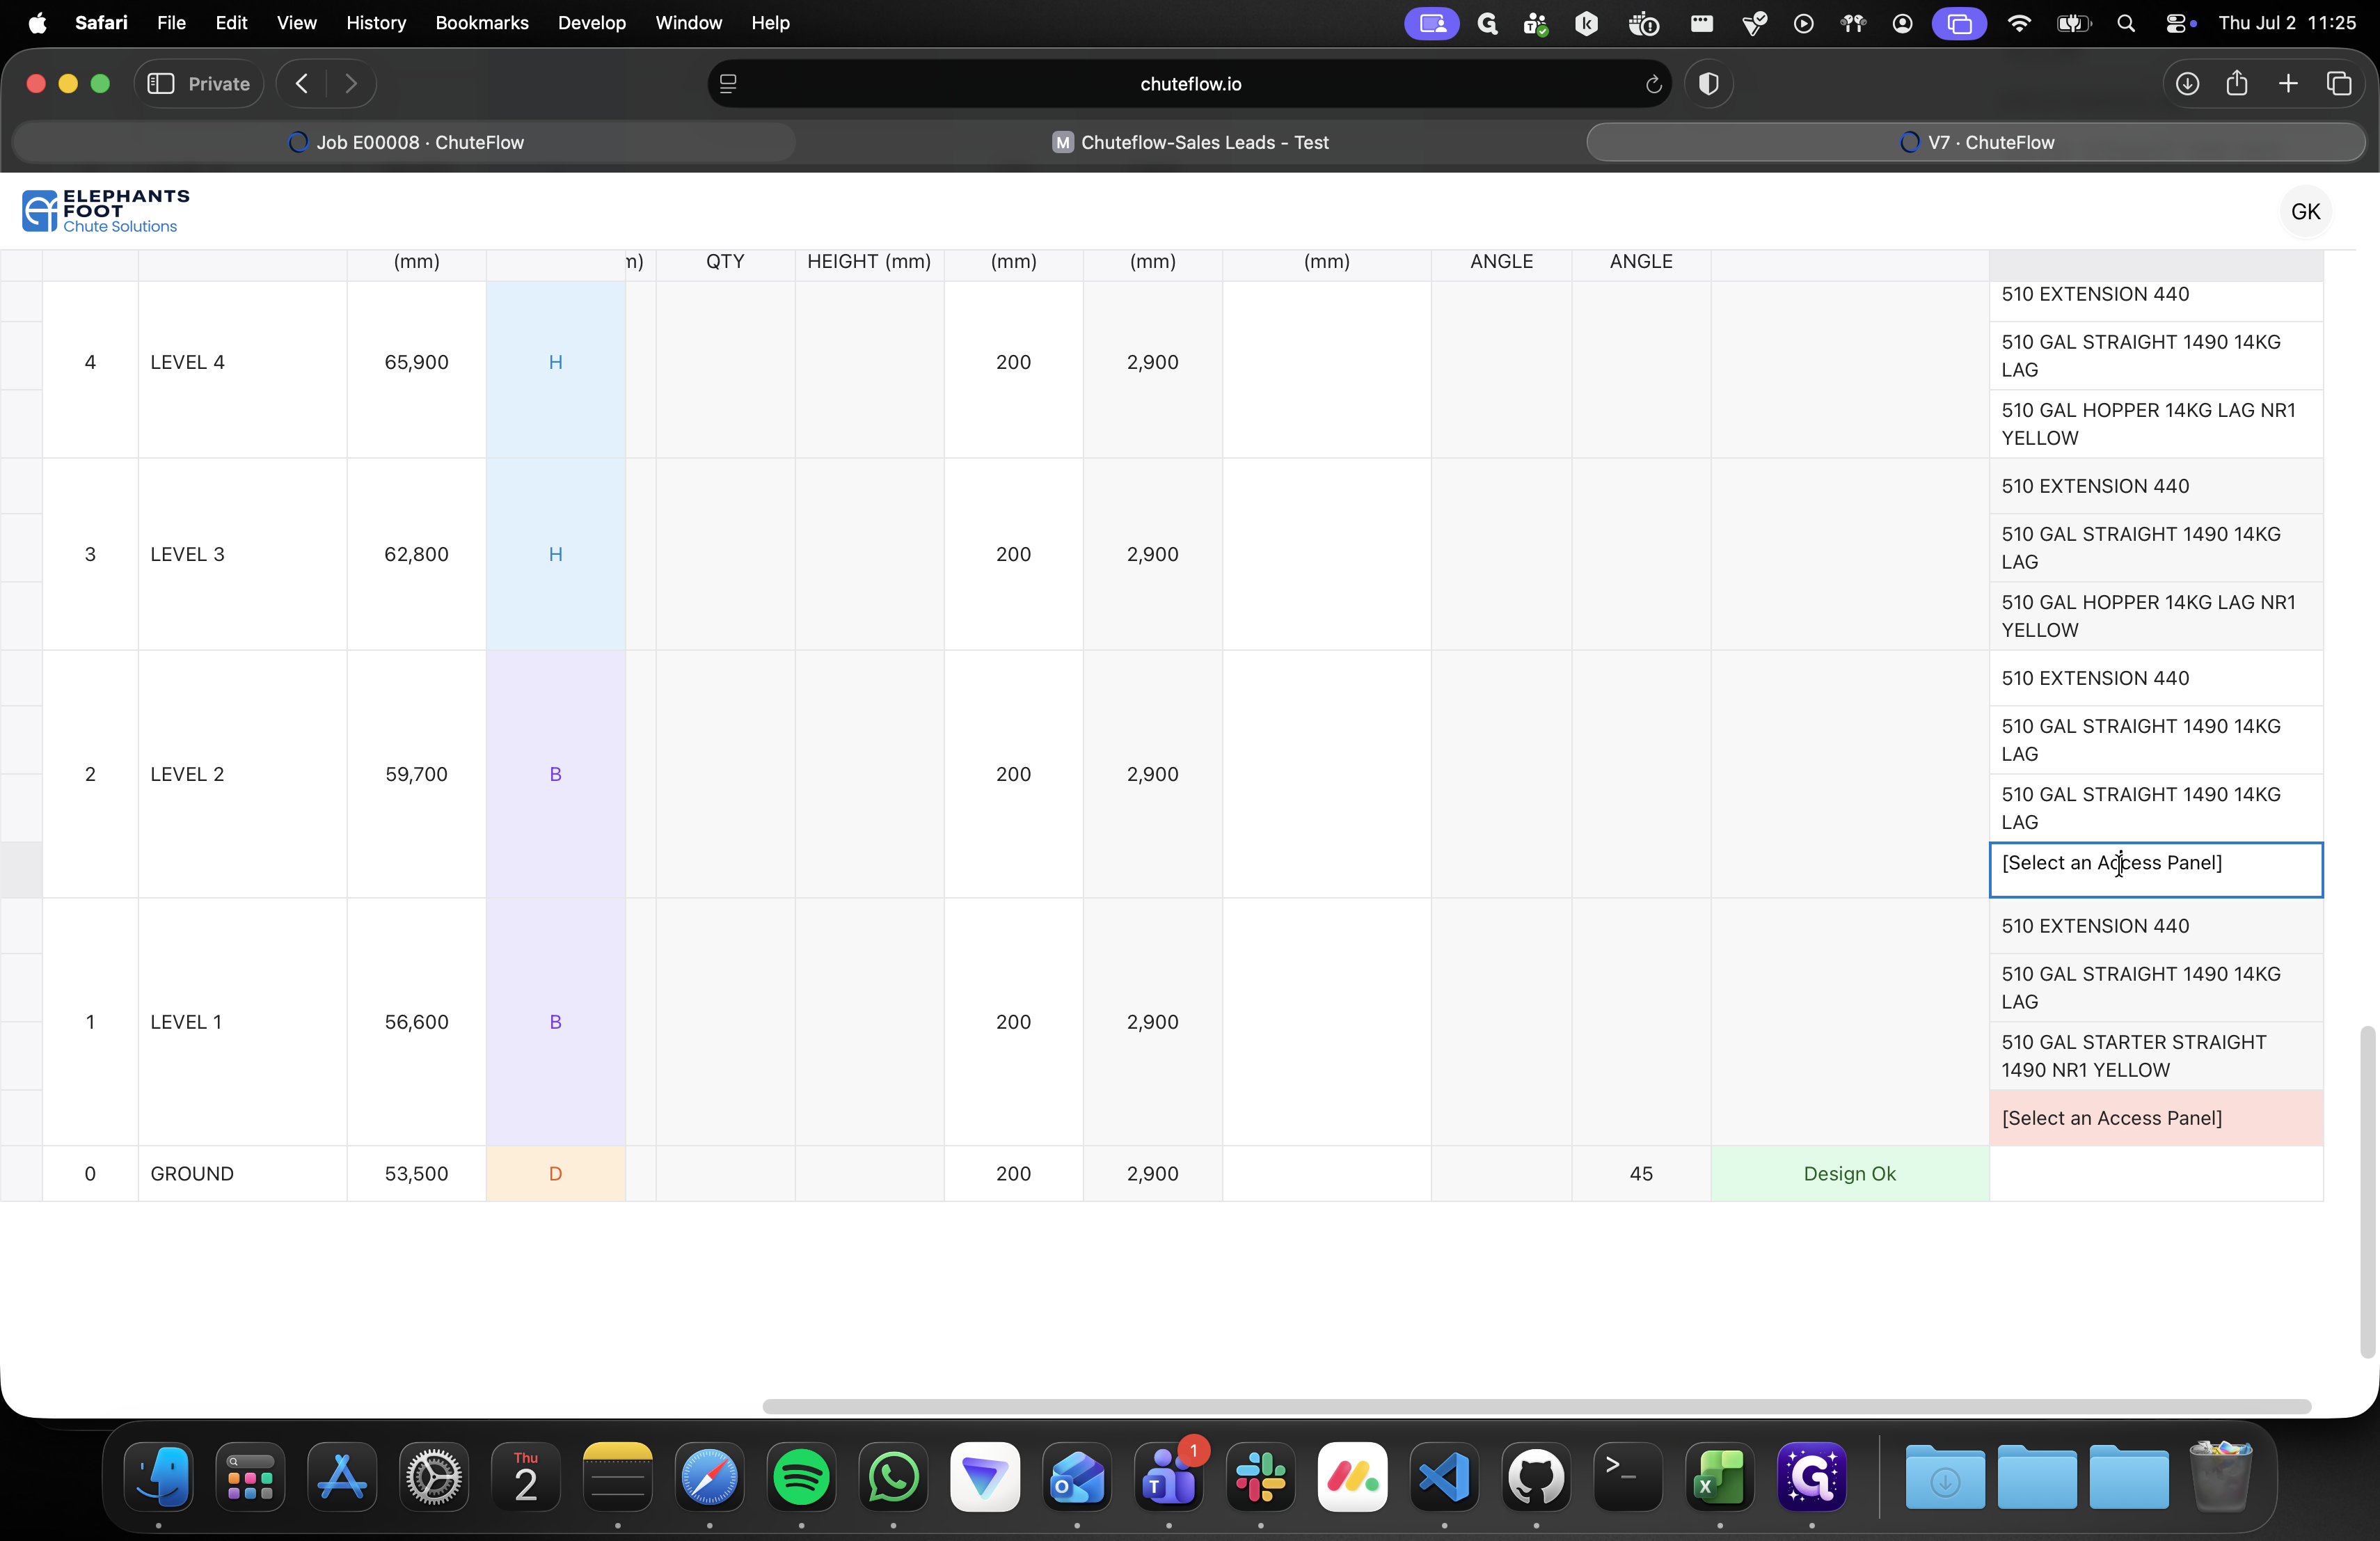
Double-click the final column to assign specific Access Panels to the required floors.
24
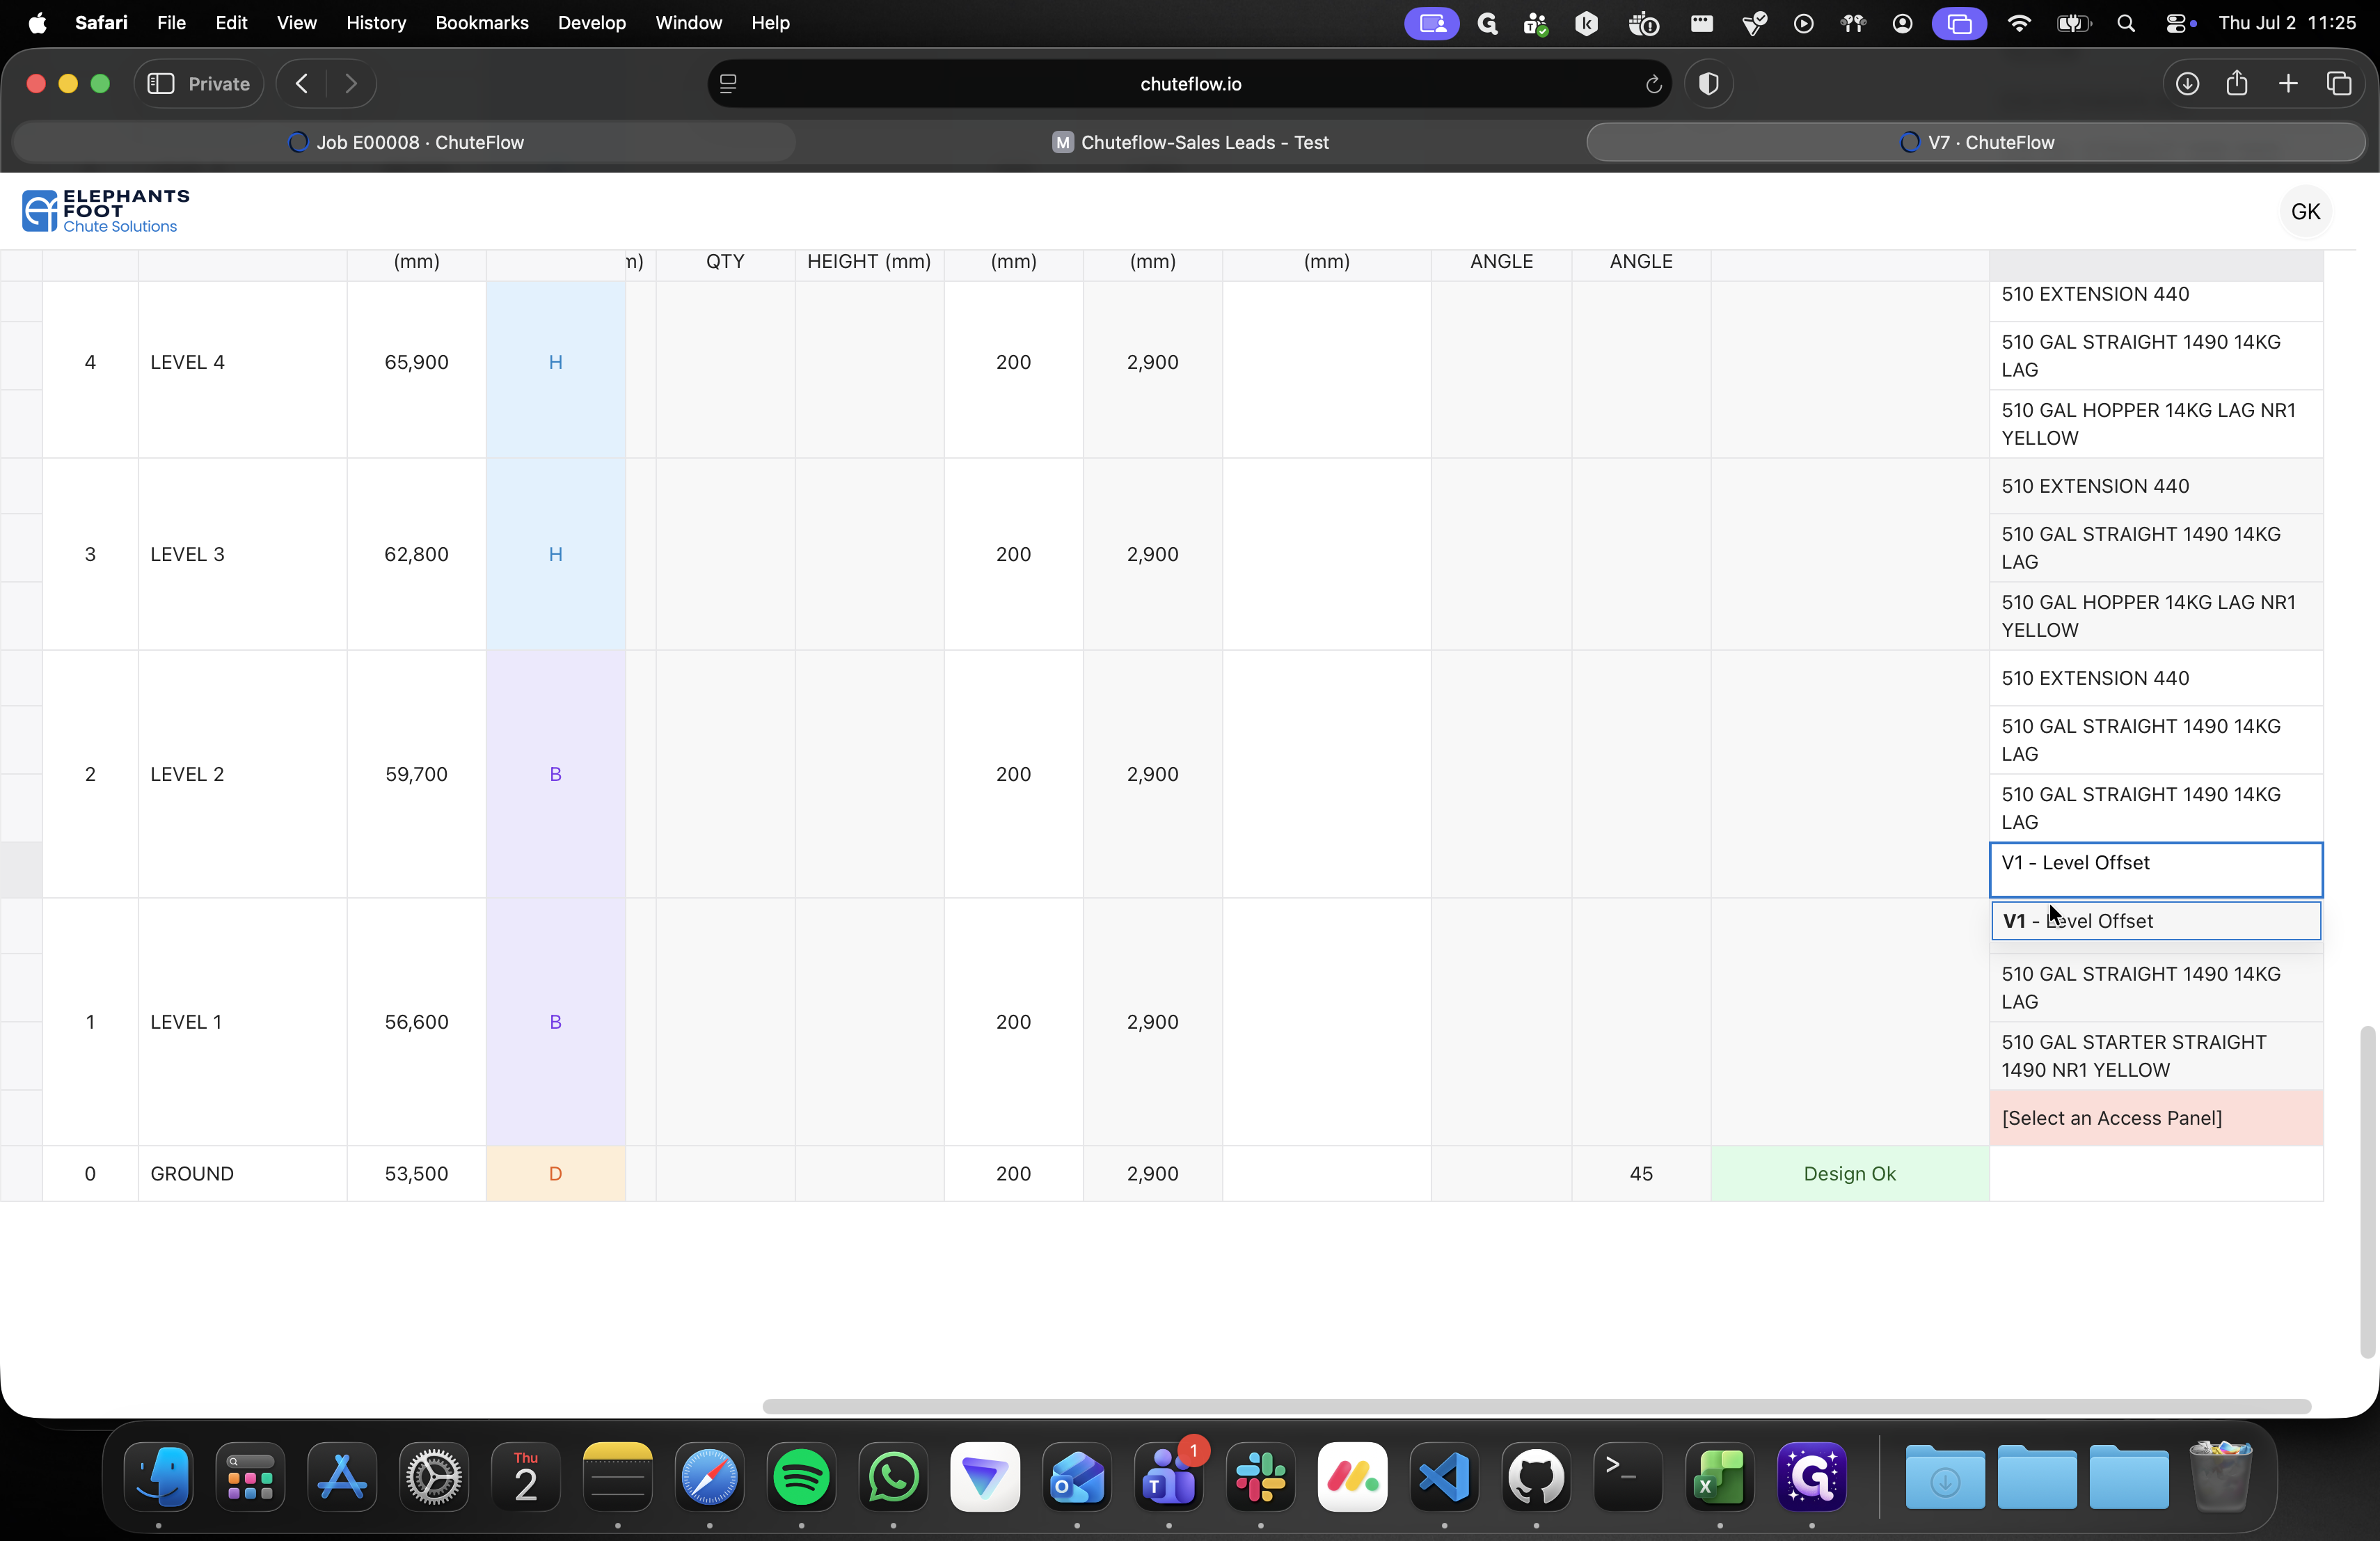
Select specialized components from the dropdowns if necessary, such as V1 - Level Offset.
25
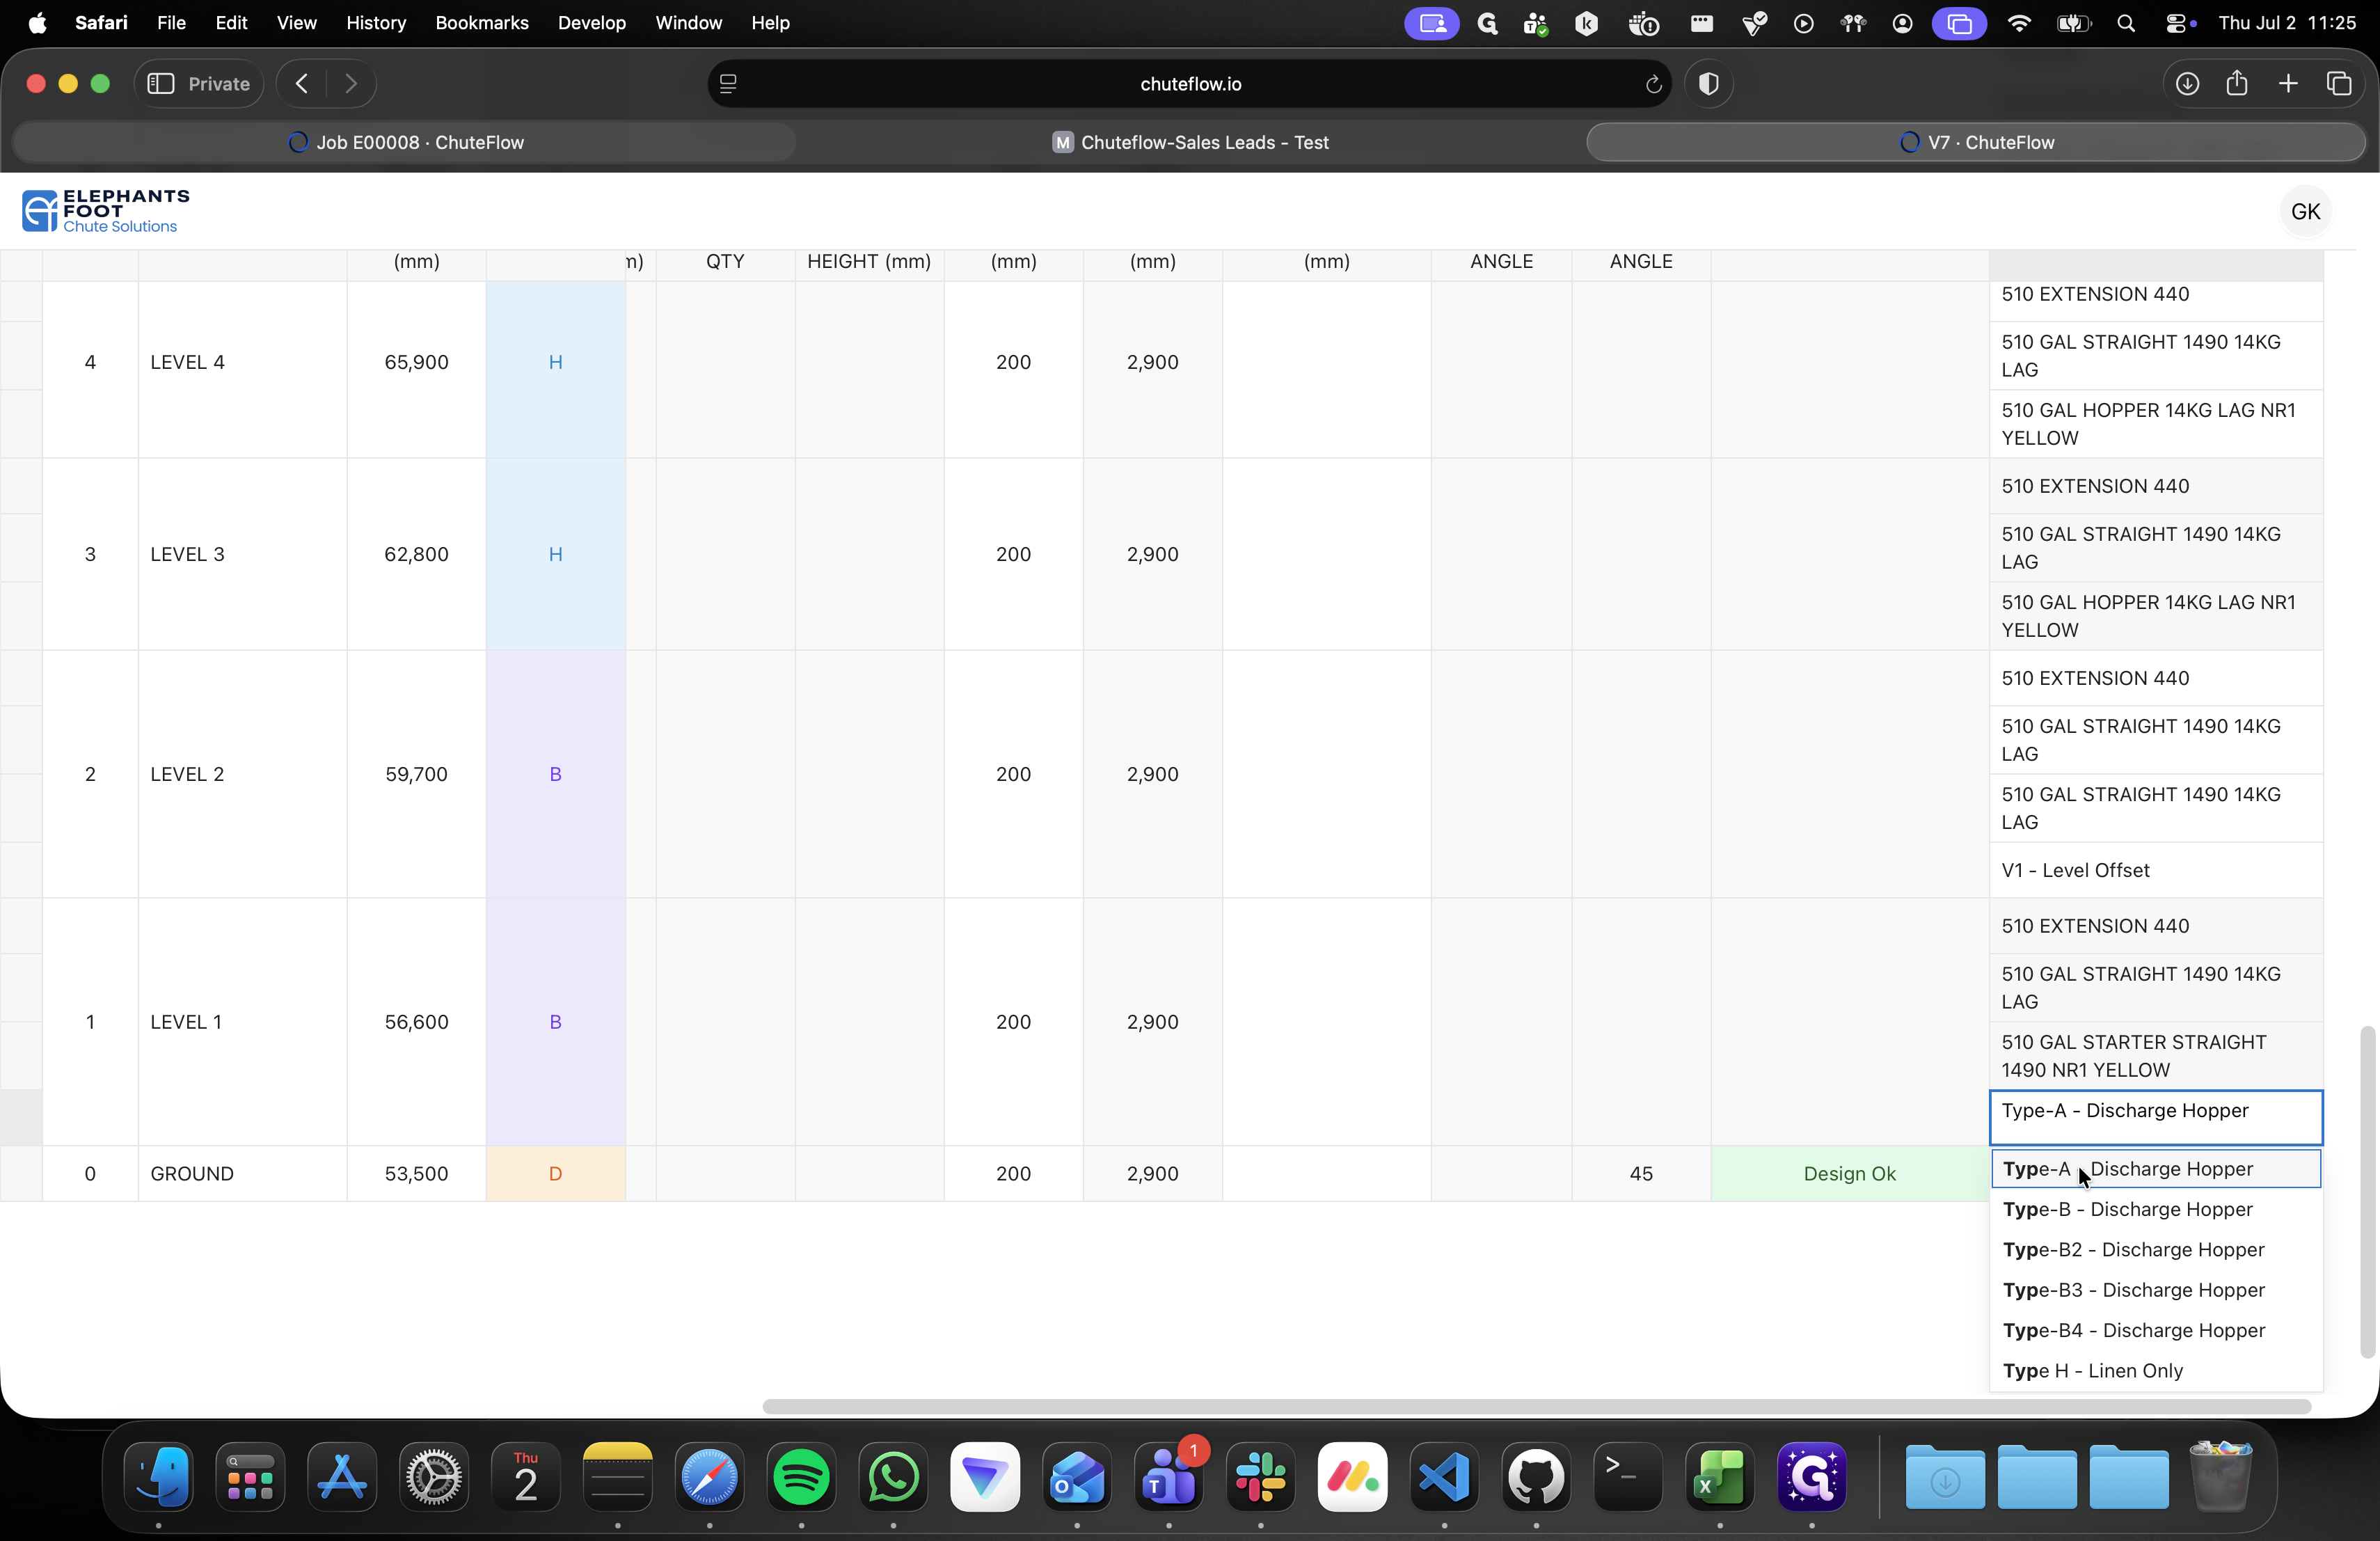
Assign the hopper type for the discharge level, such as Type - A Discharge Hopper.
Review Pricing and Export Documents
26
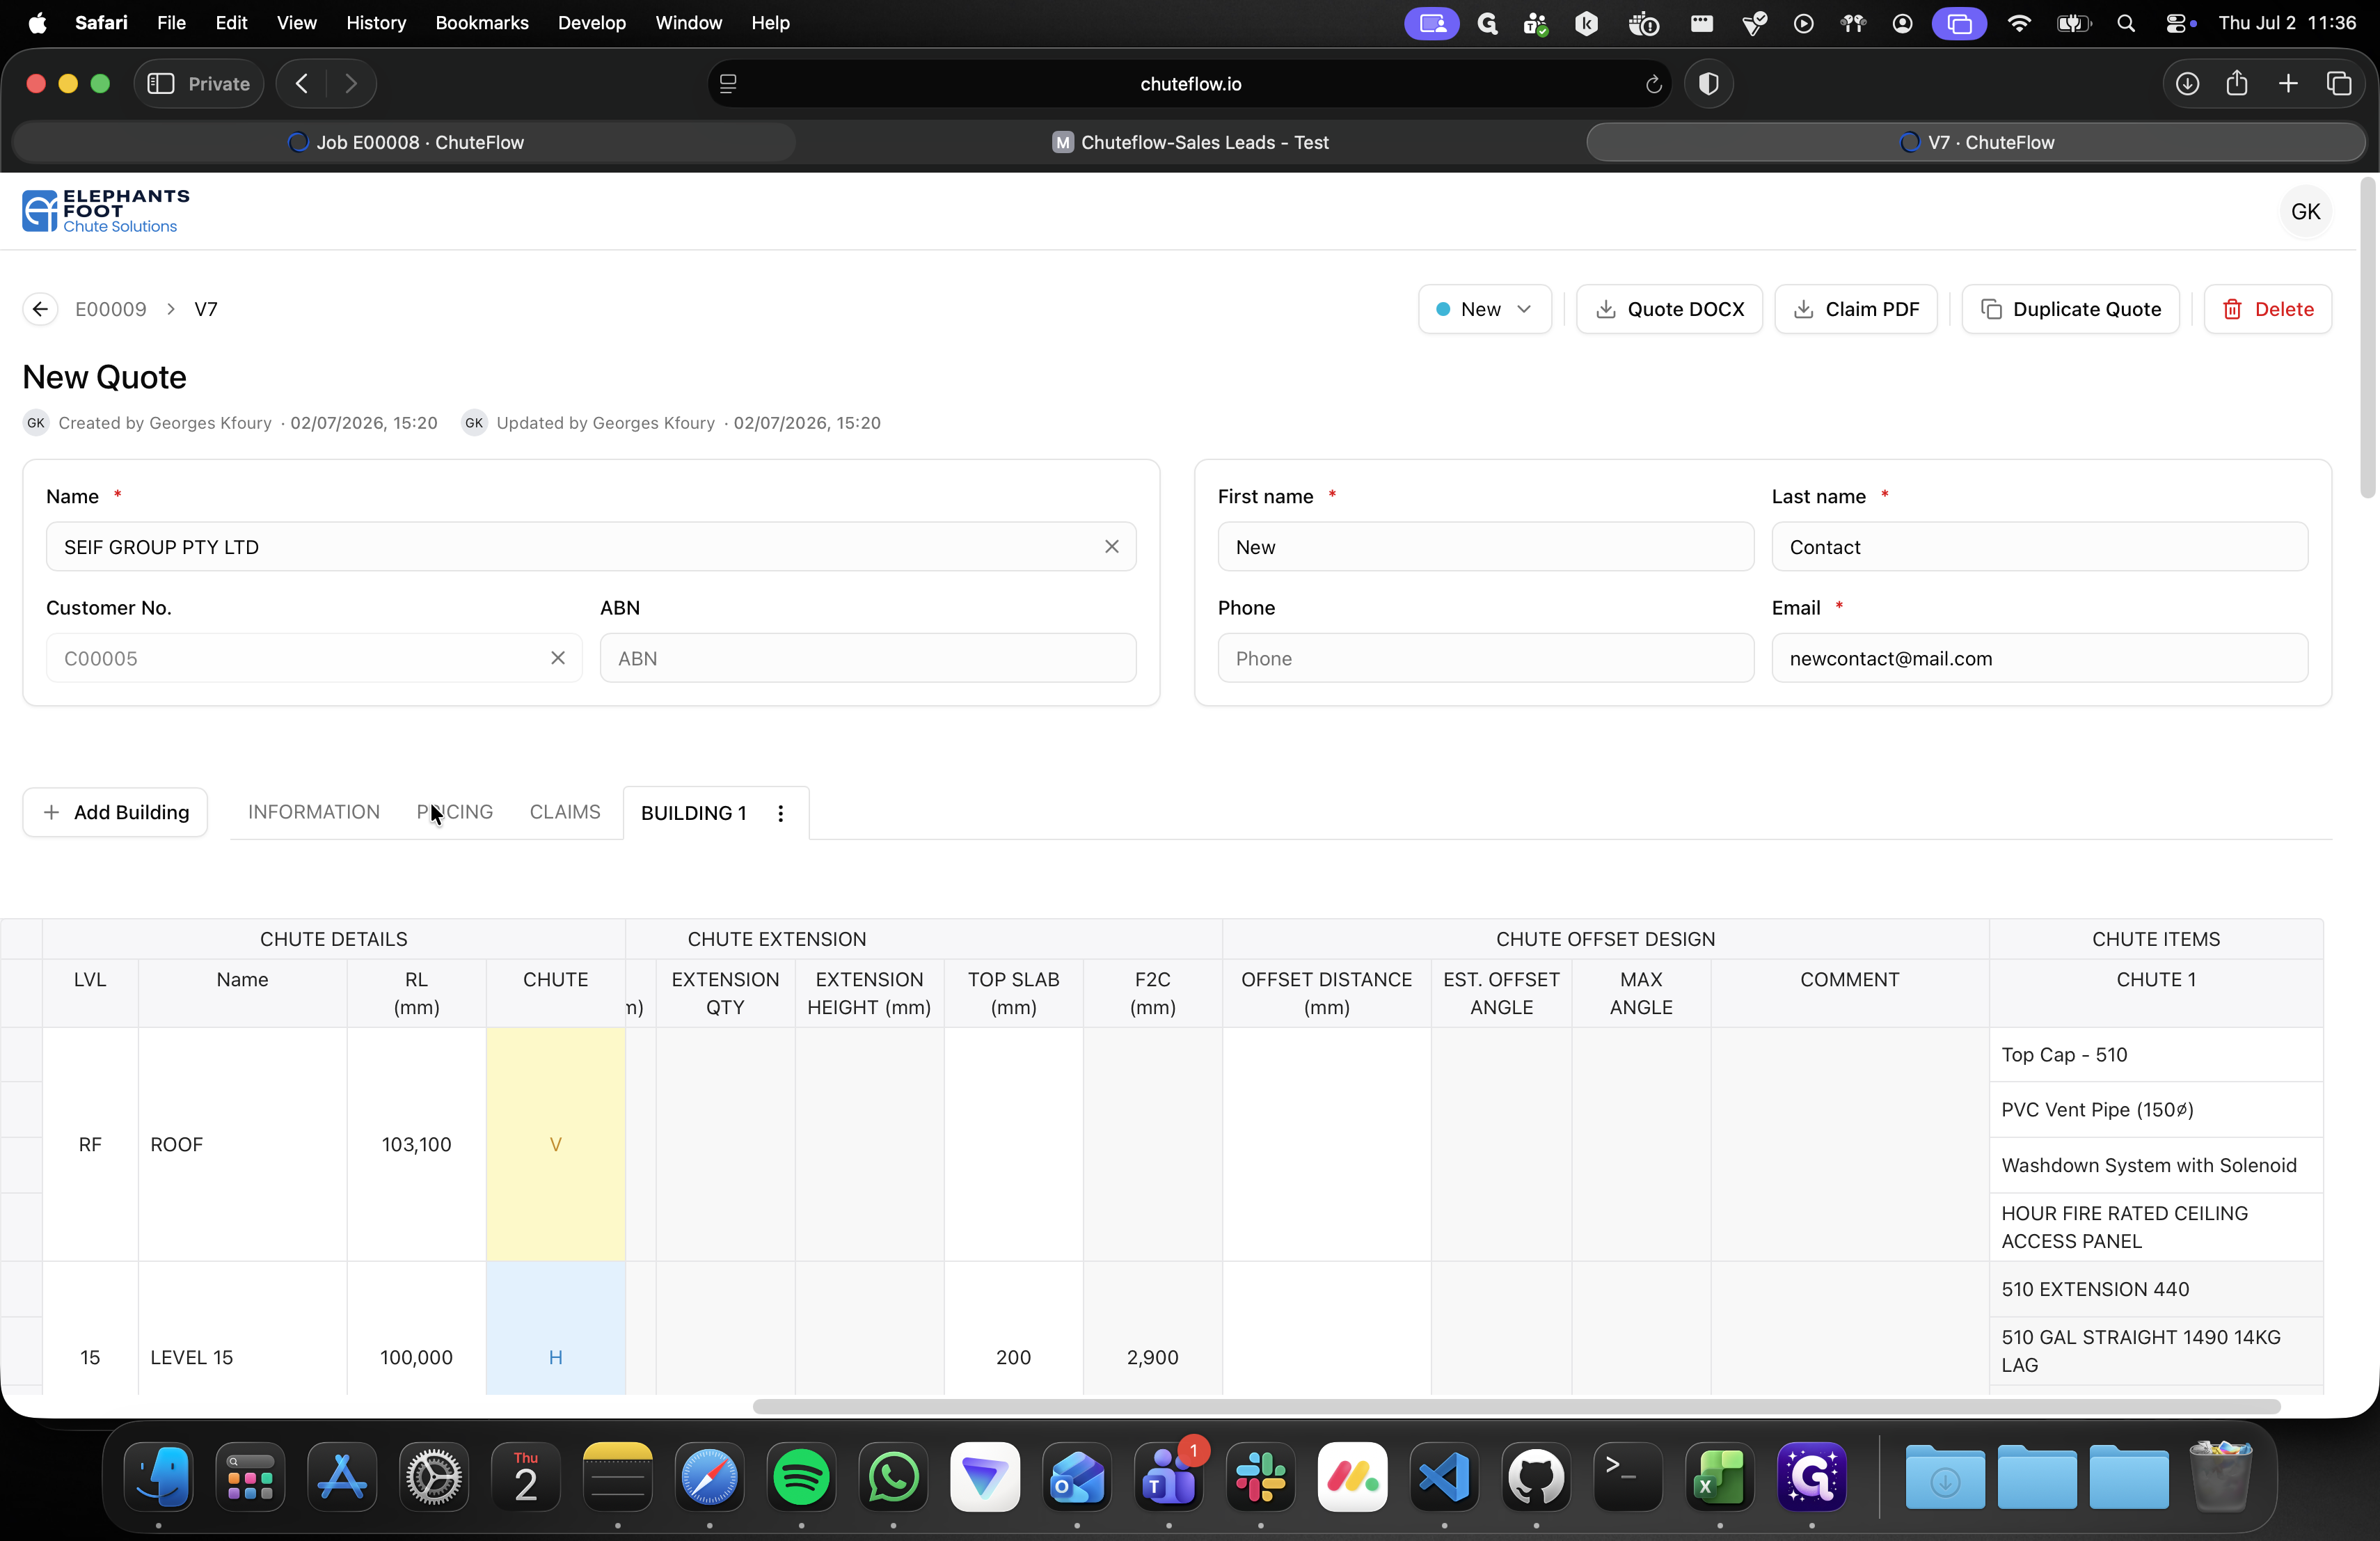
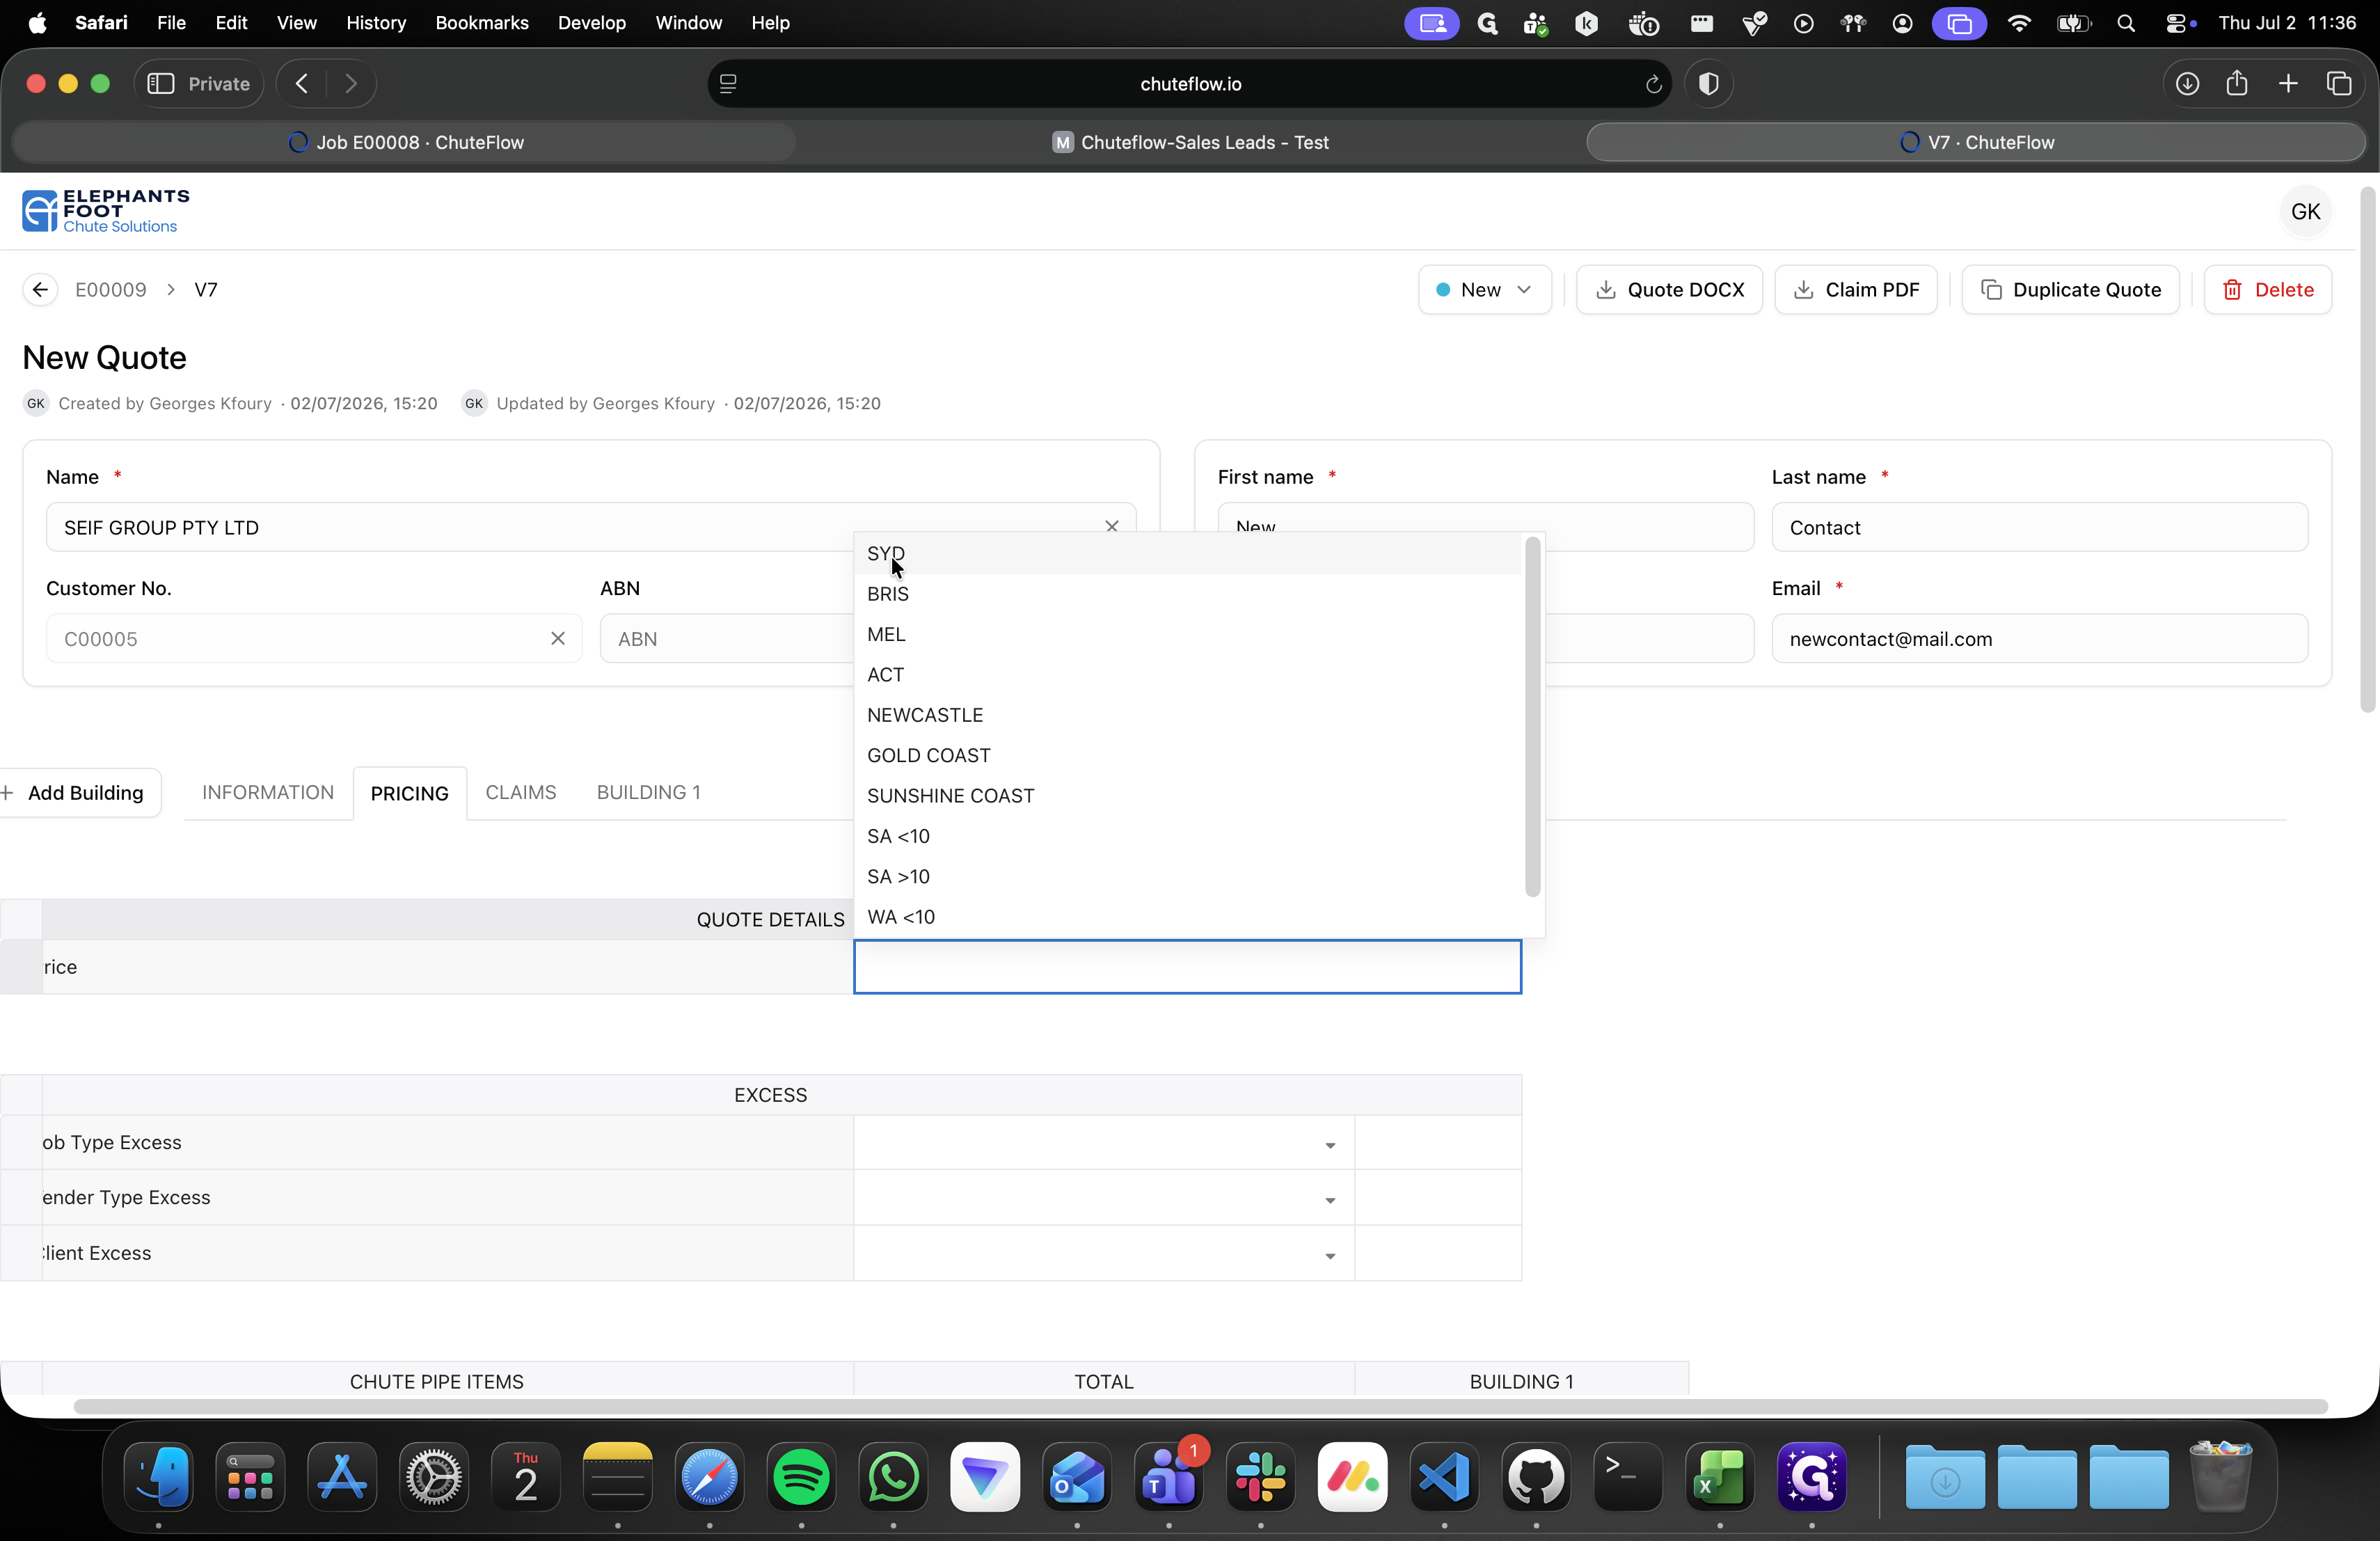
Navigate to the PRICING tab.
27
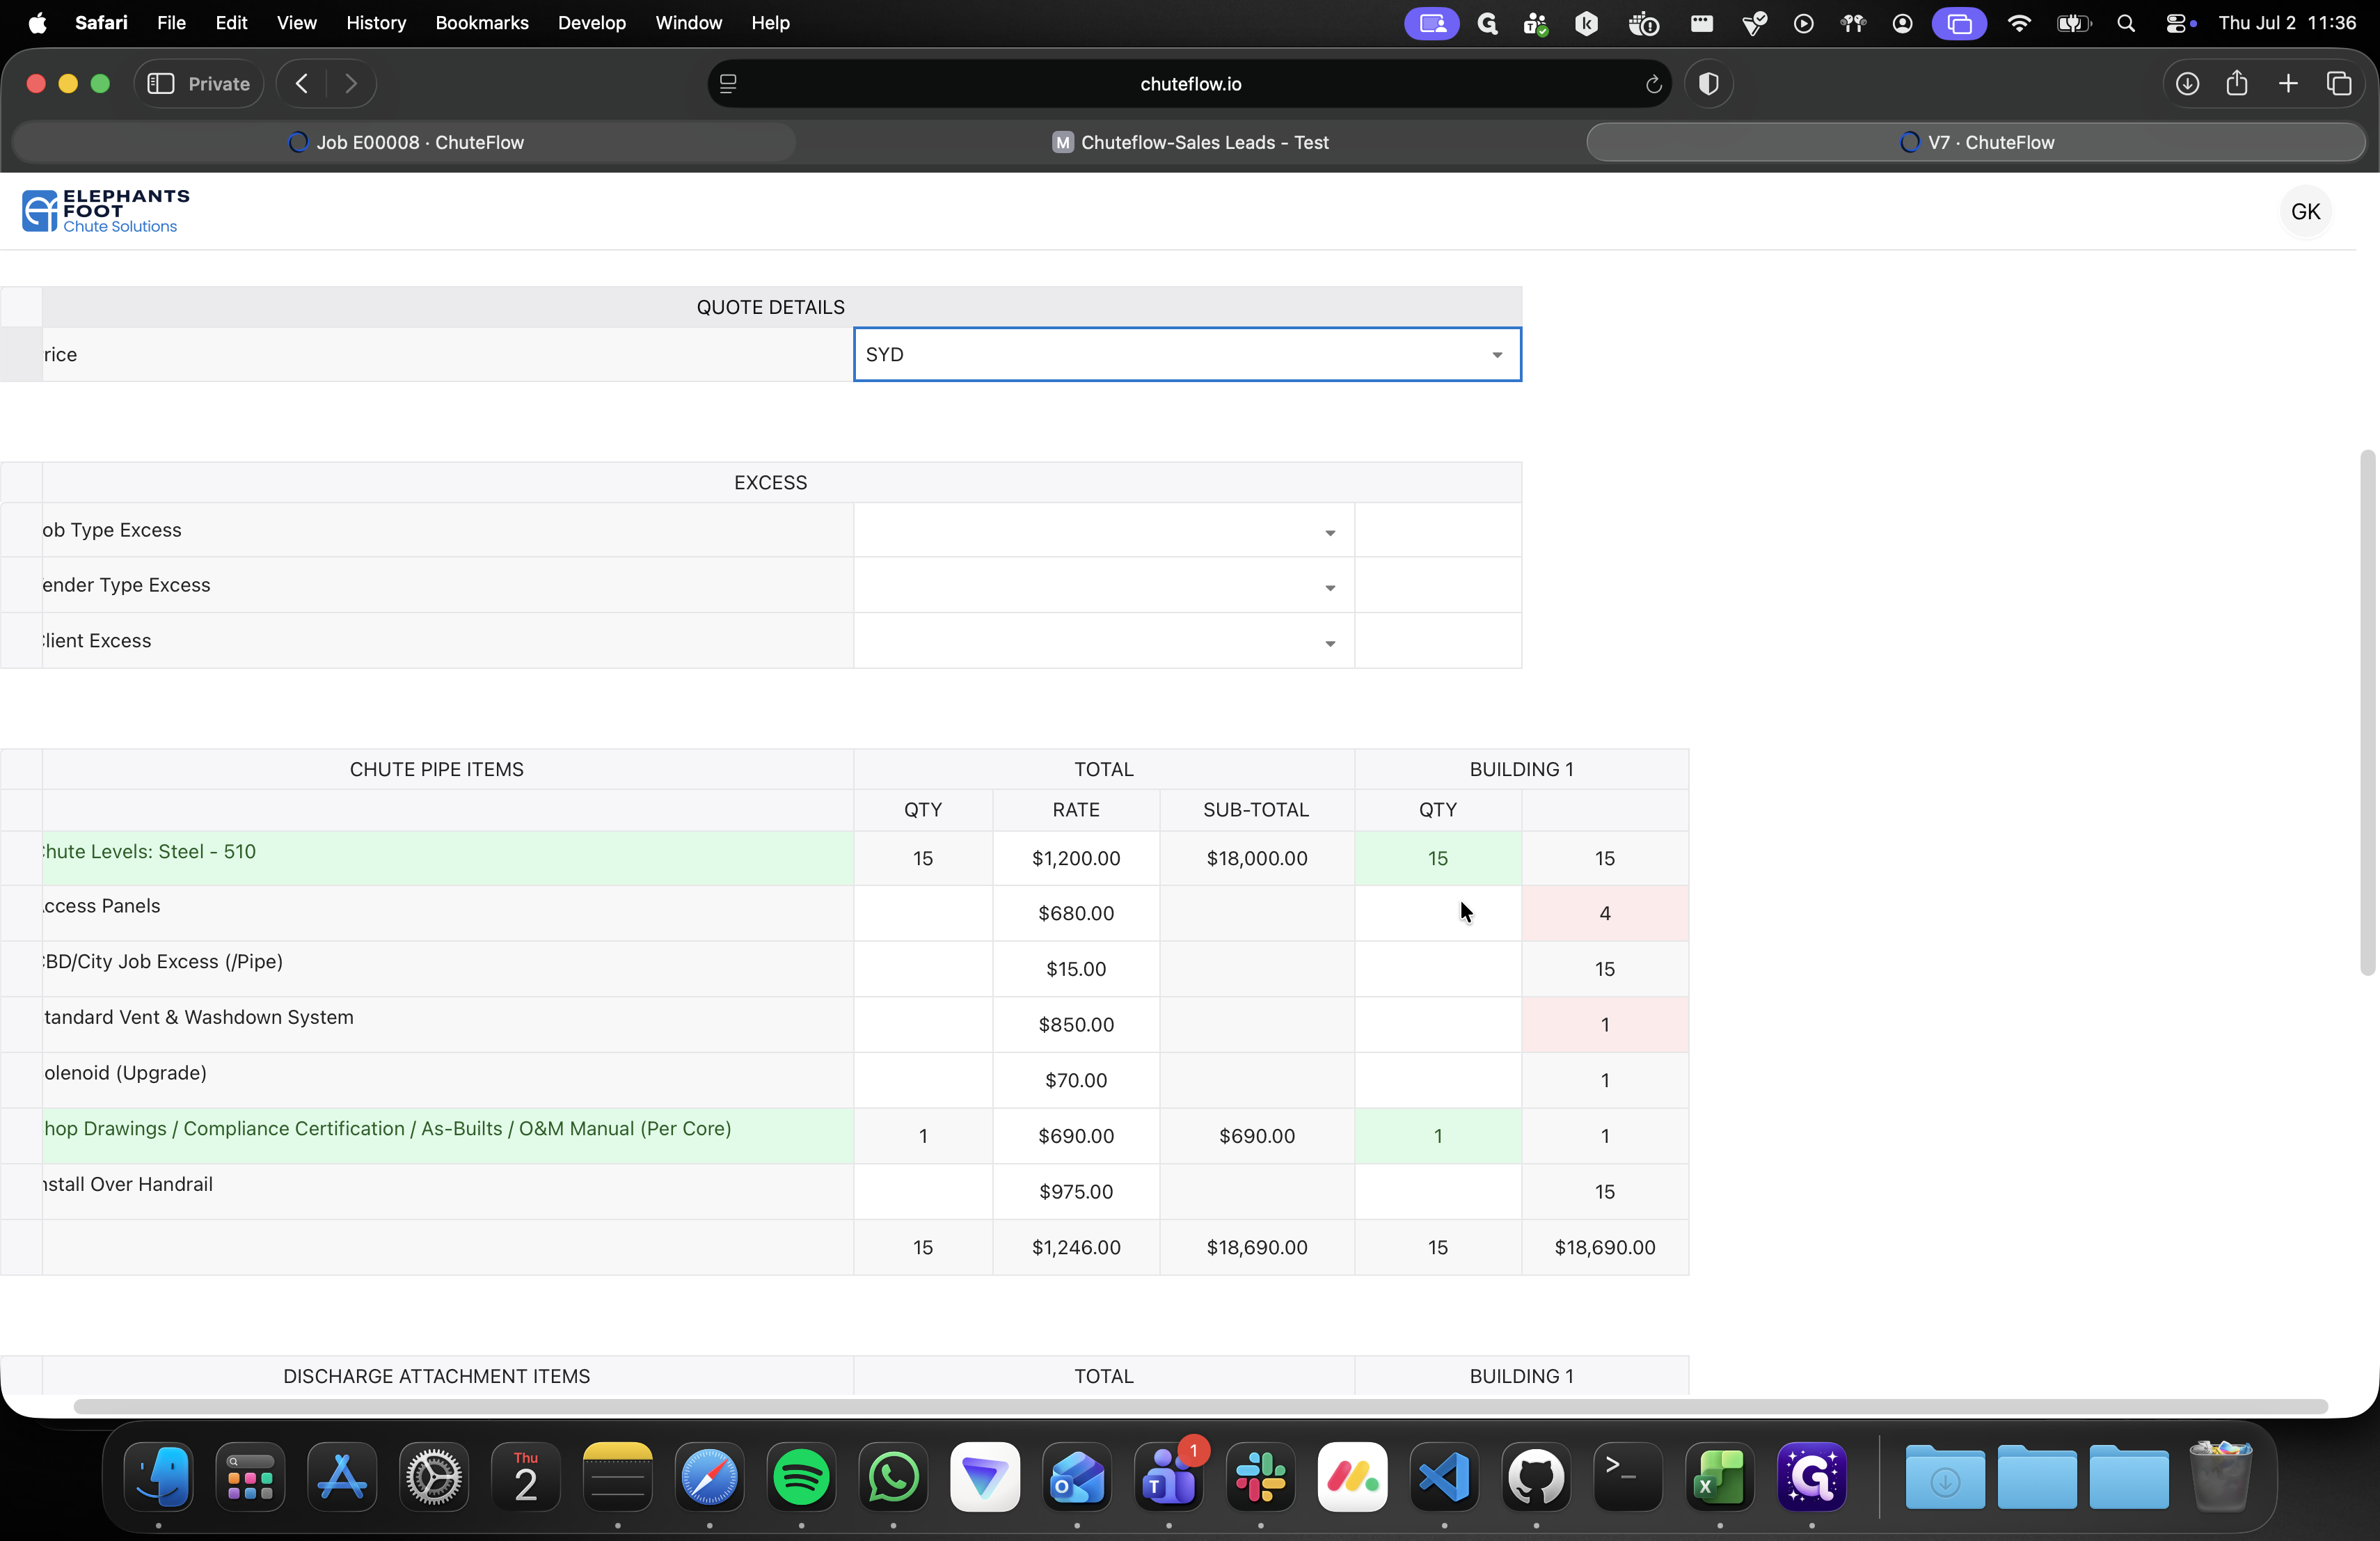
Under Quote Details, select your regional location code (e.g., SYD).
28
Double-click any quantity field in the items table to manually adjust the count.
29
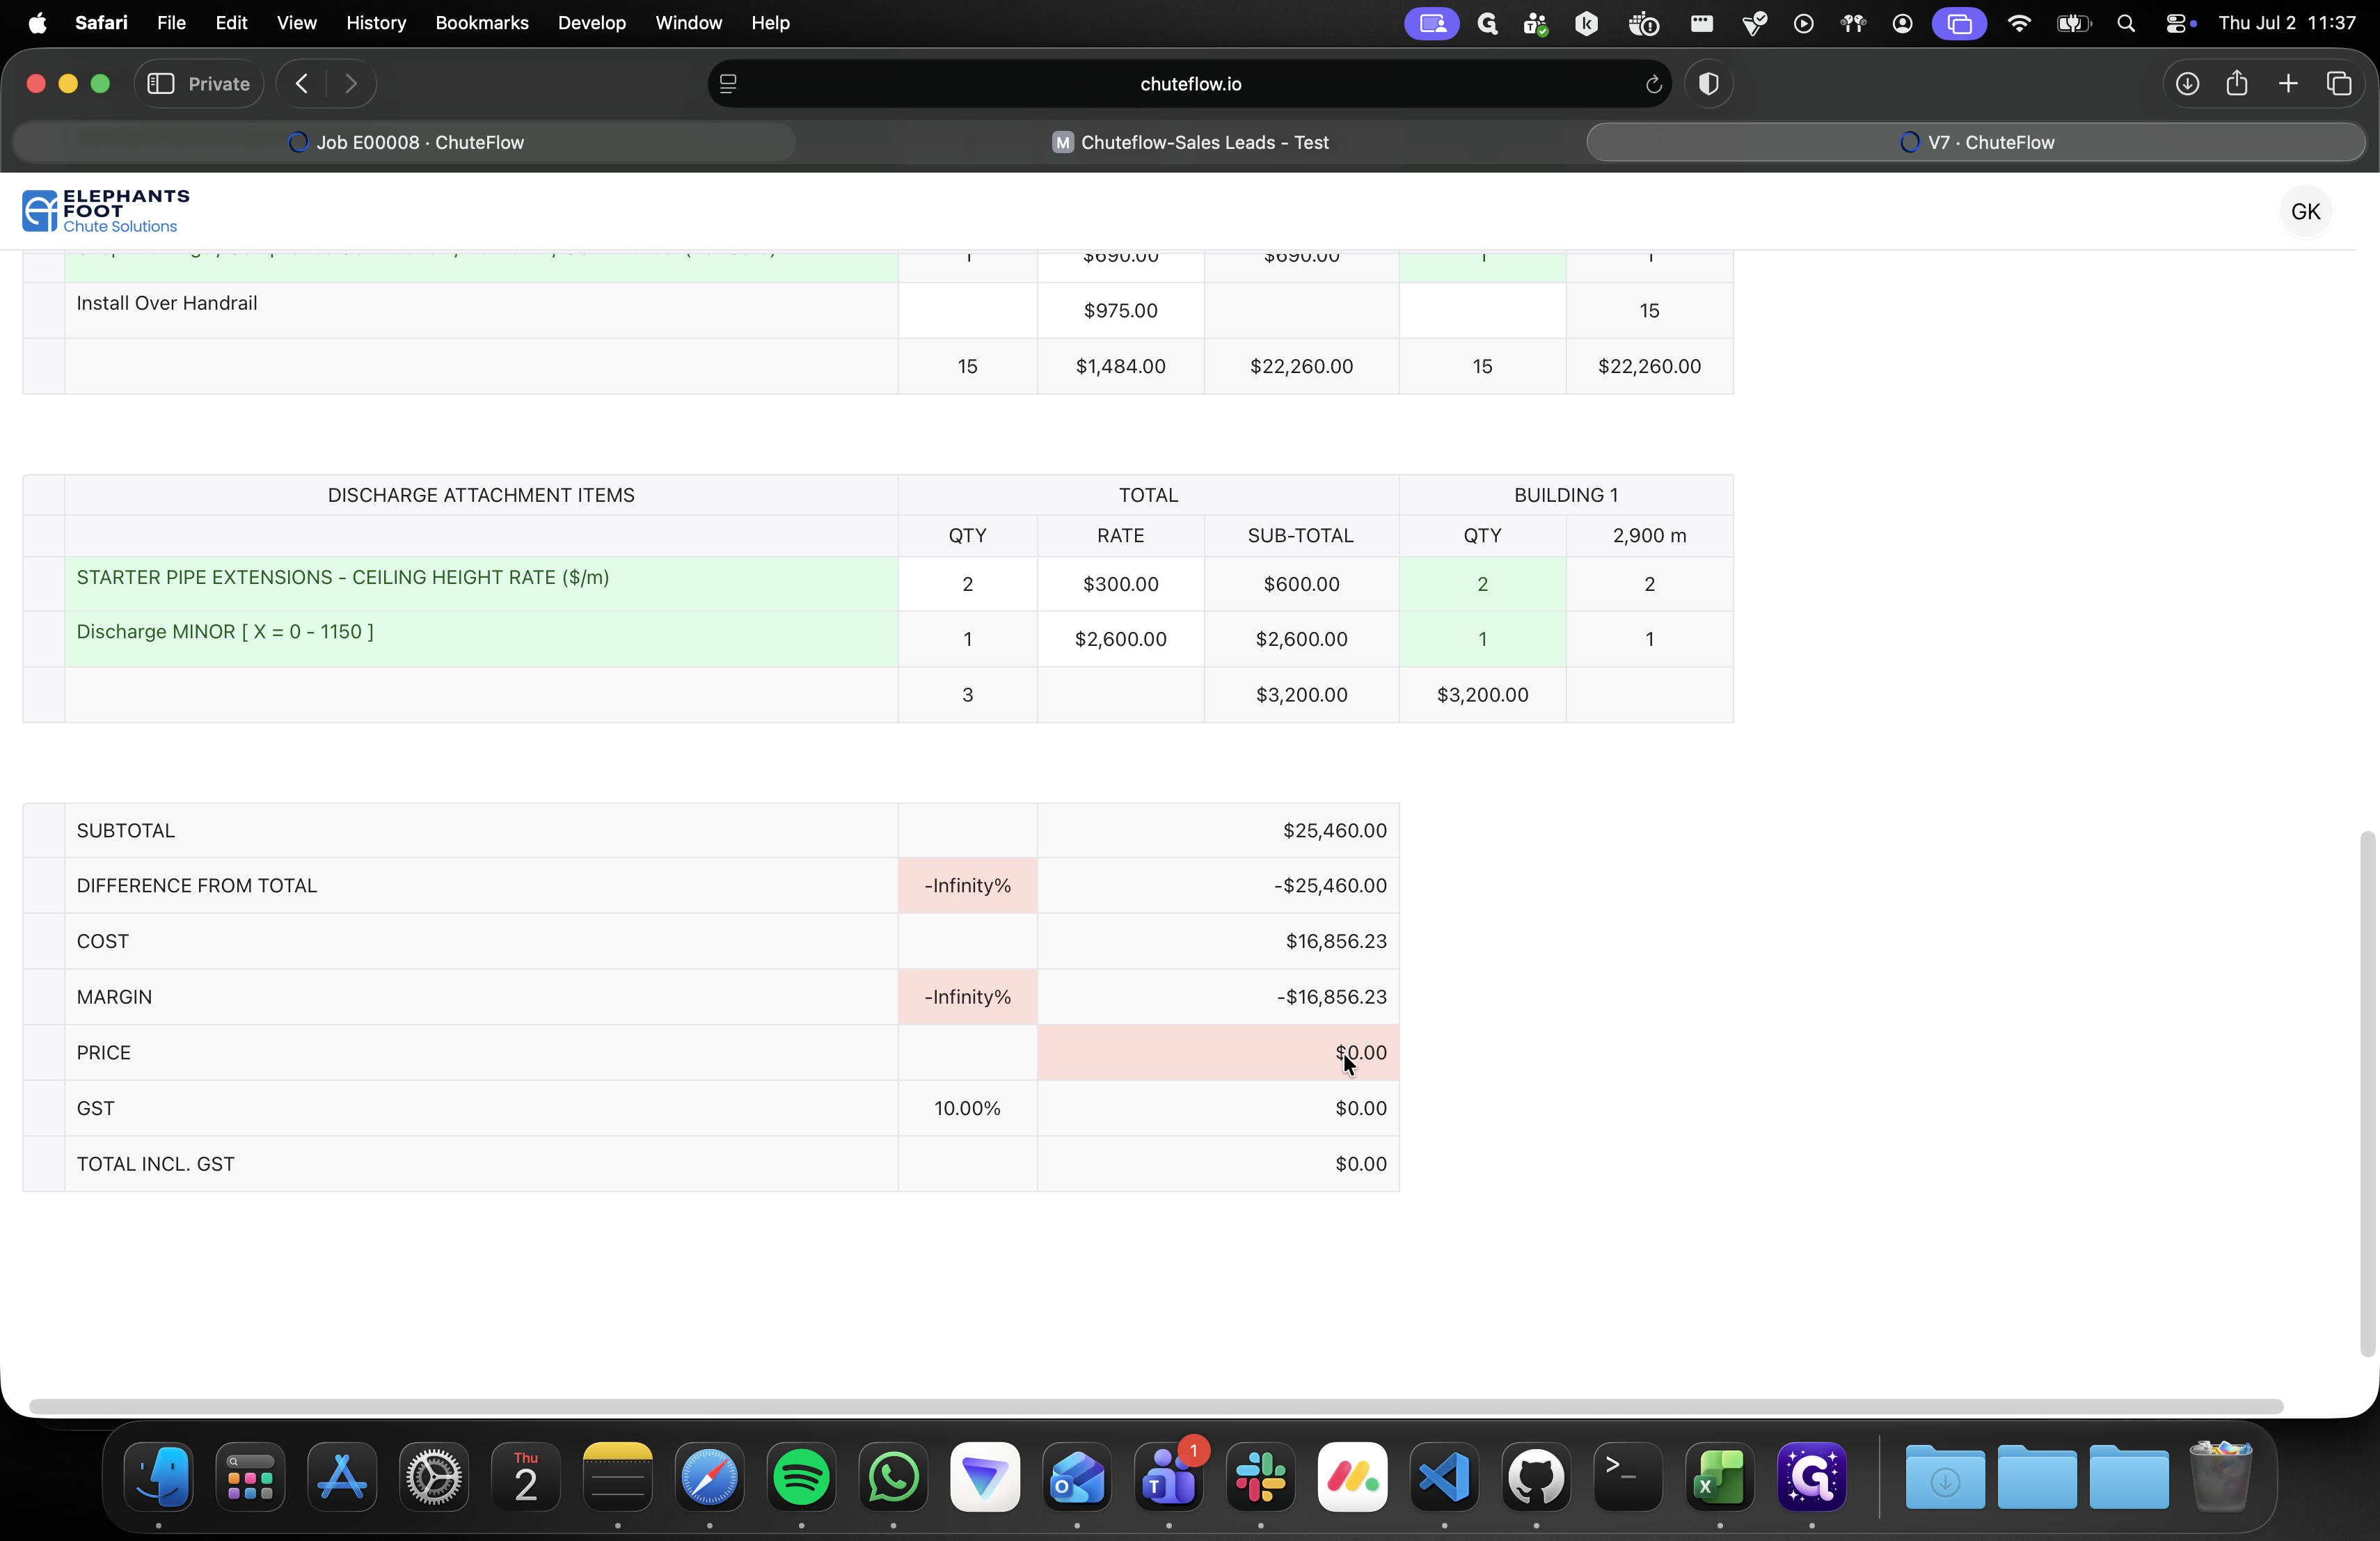
Double-click the final price field to apply manual overrides or discounts if required.
30
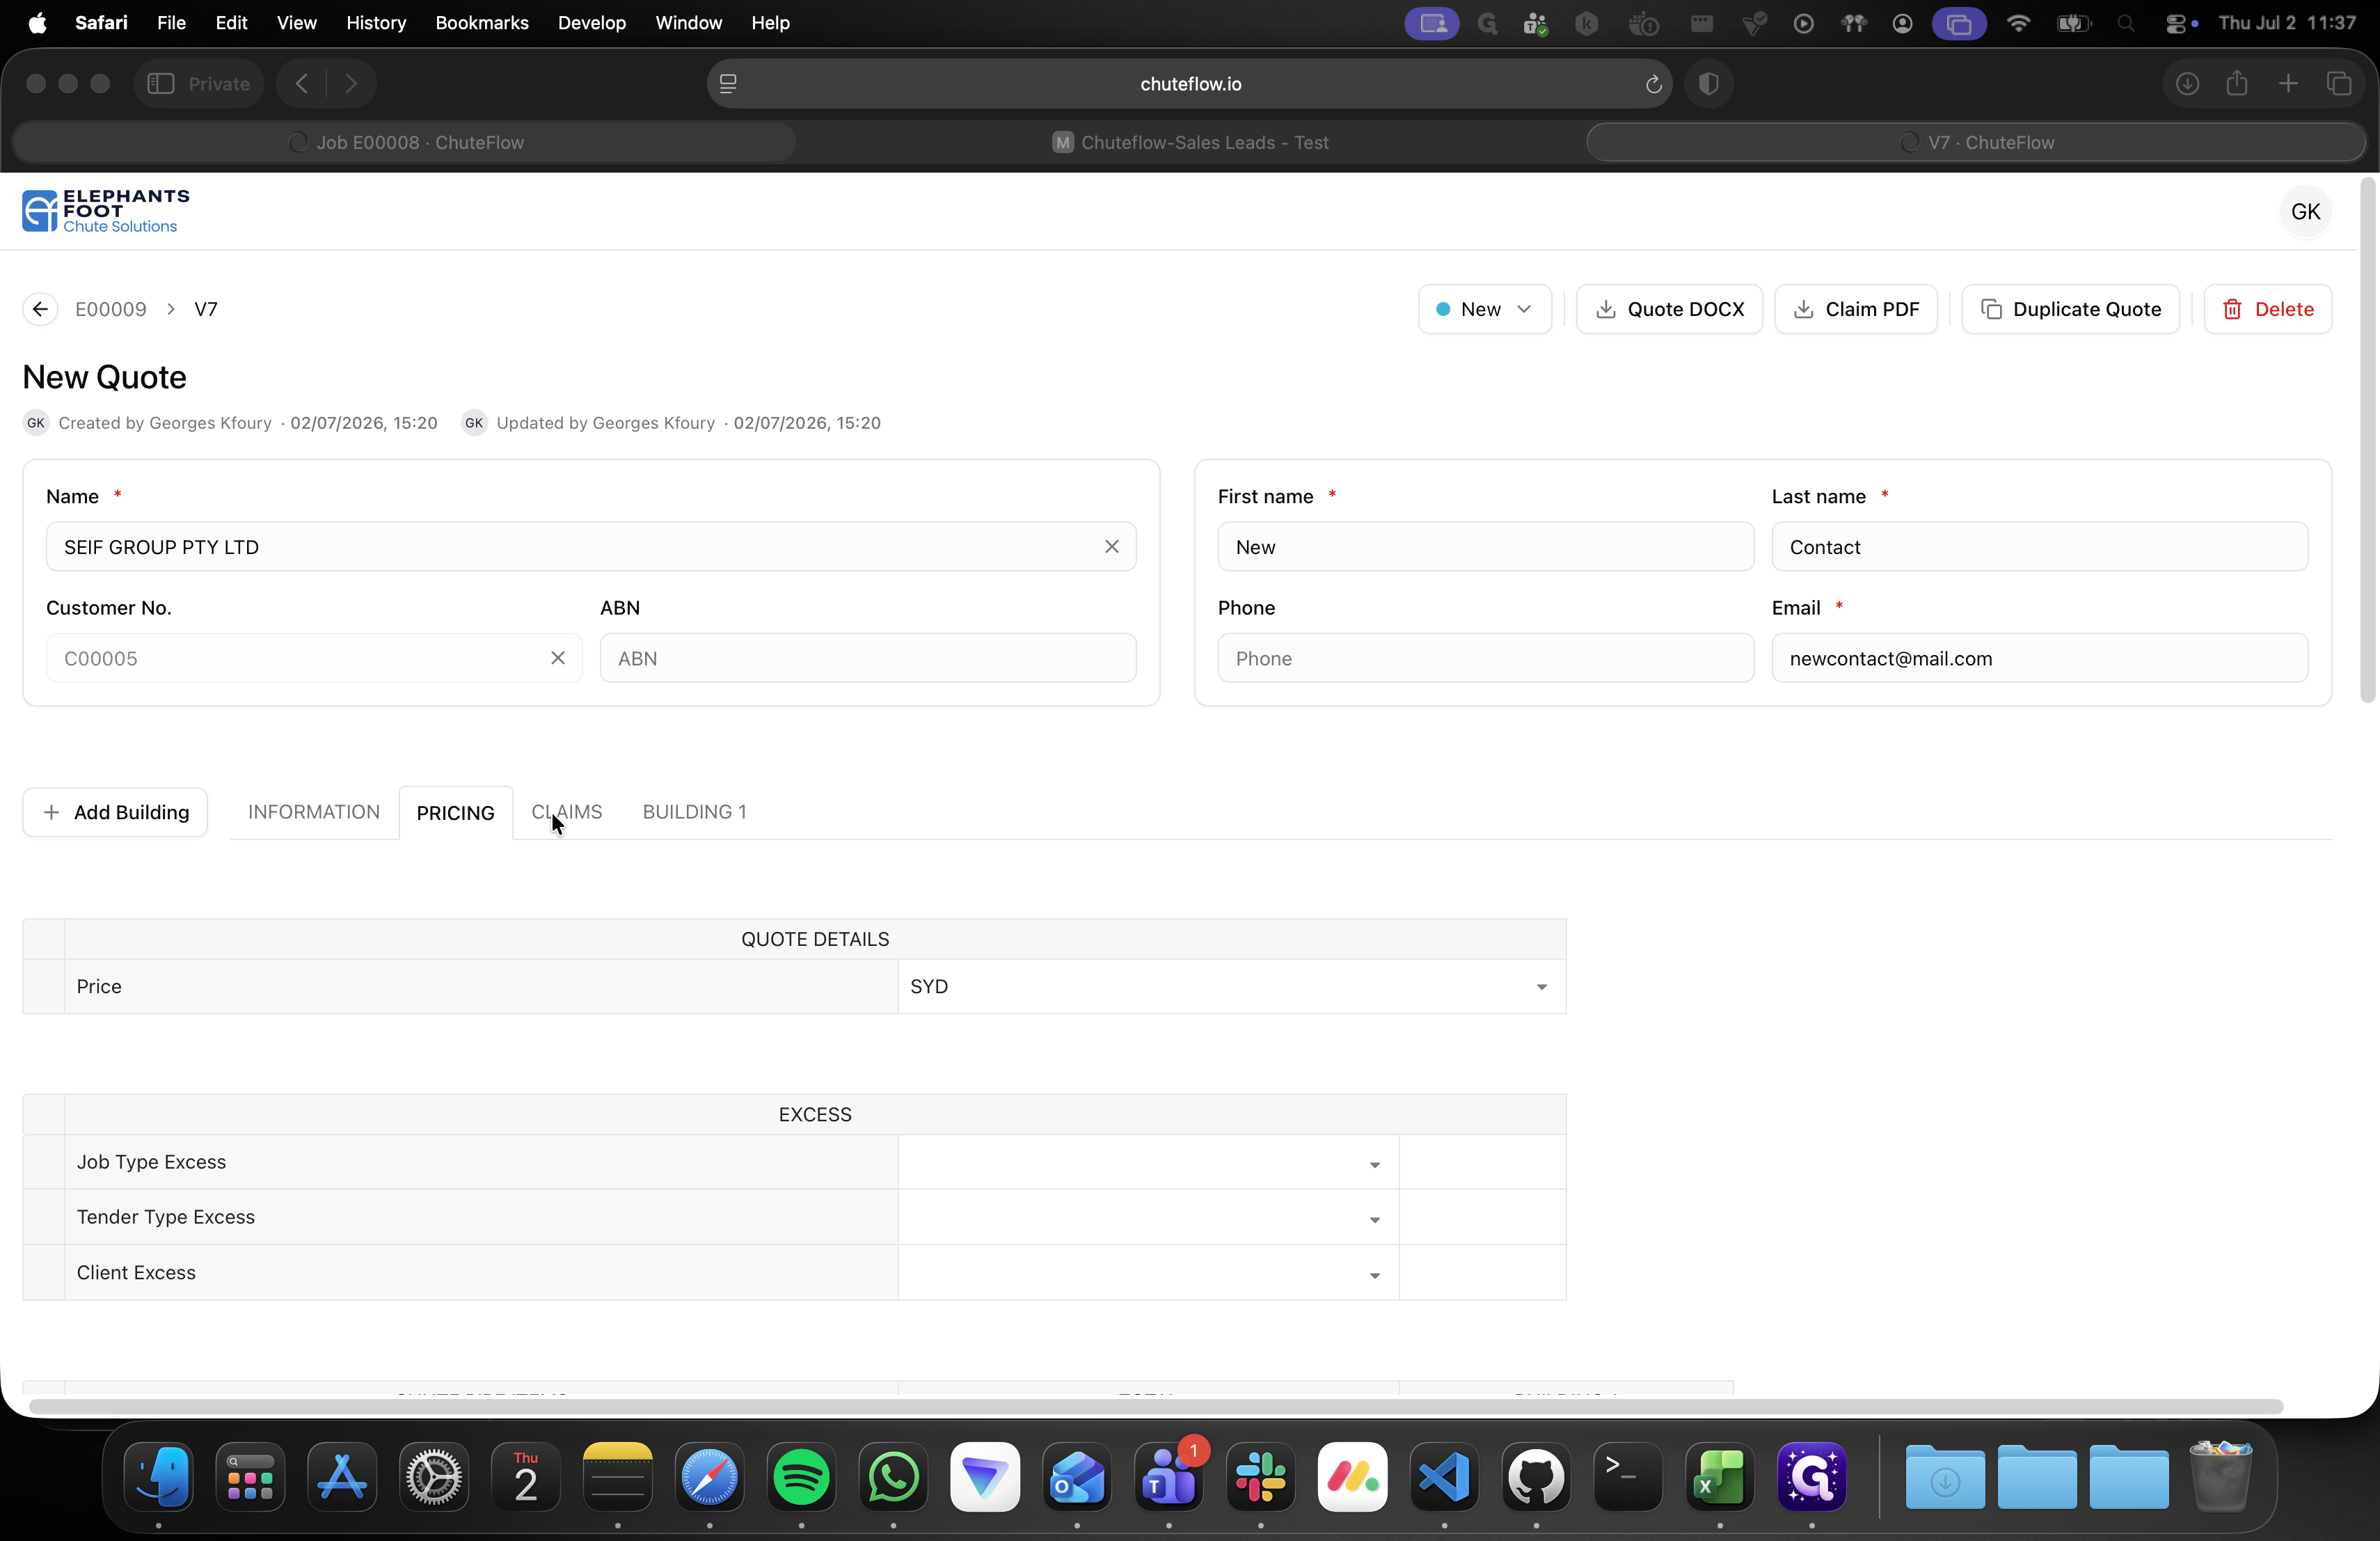
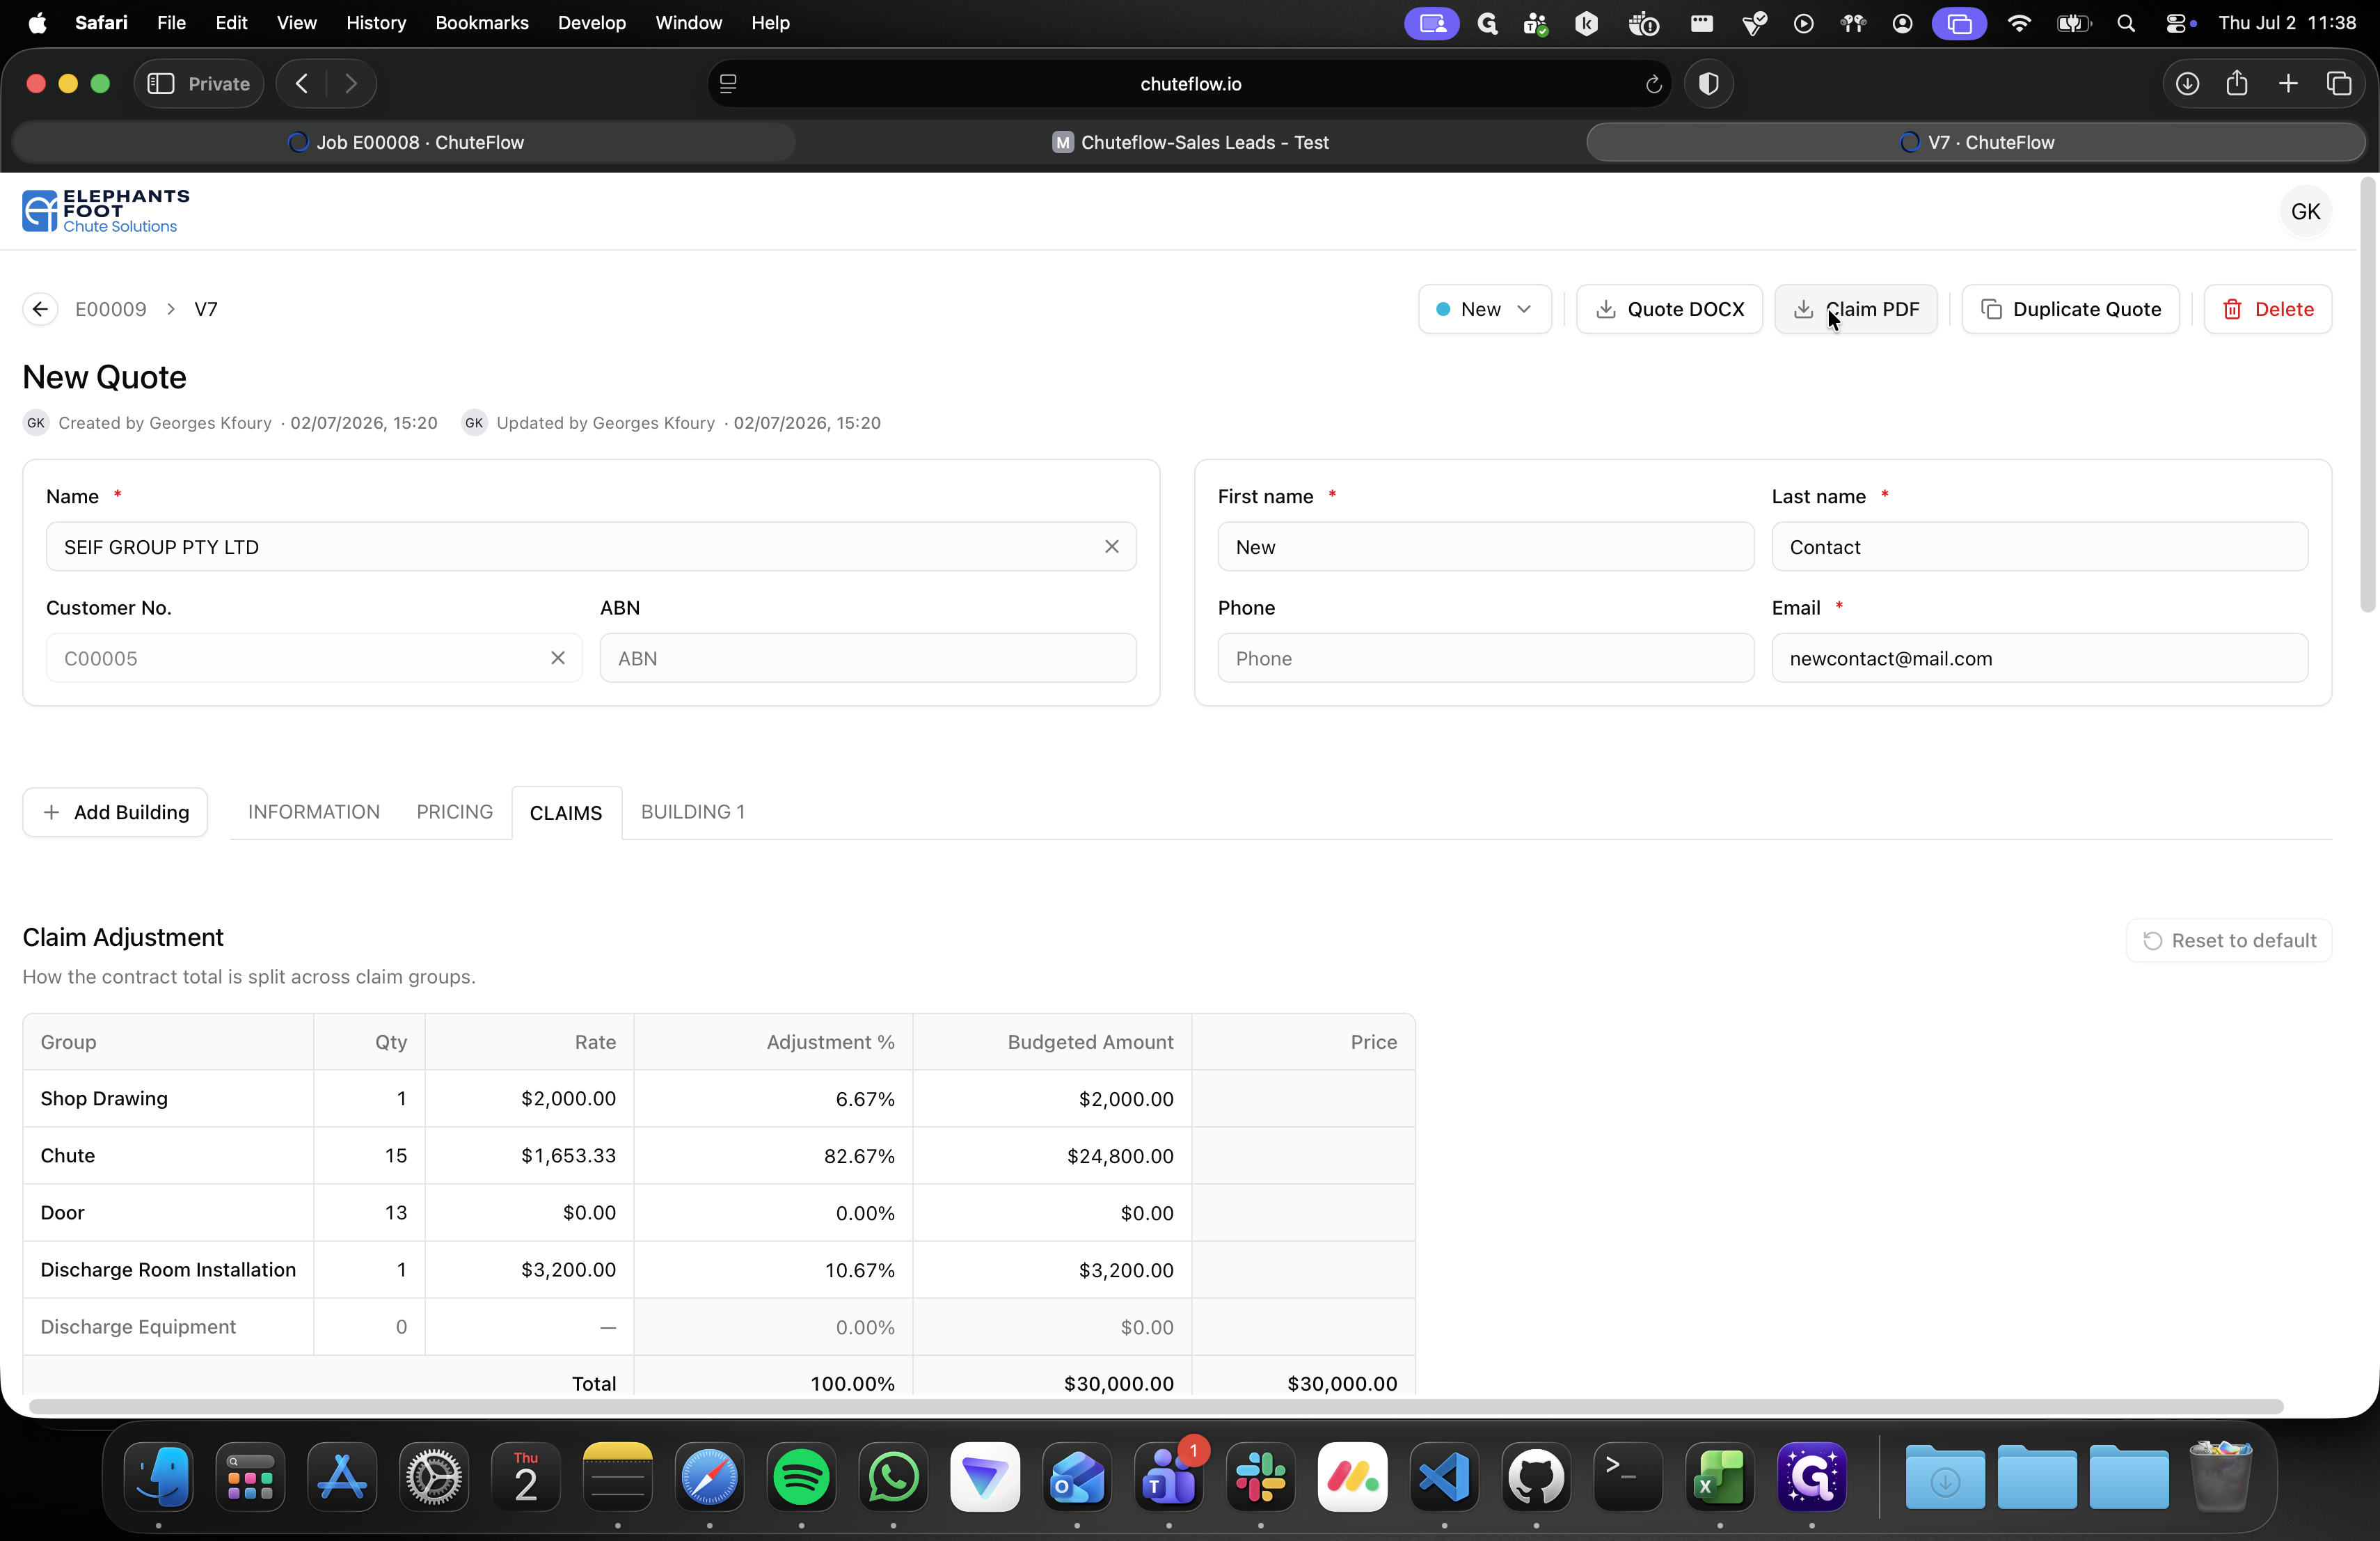
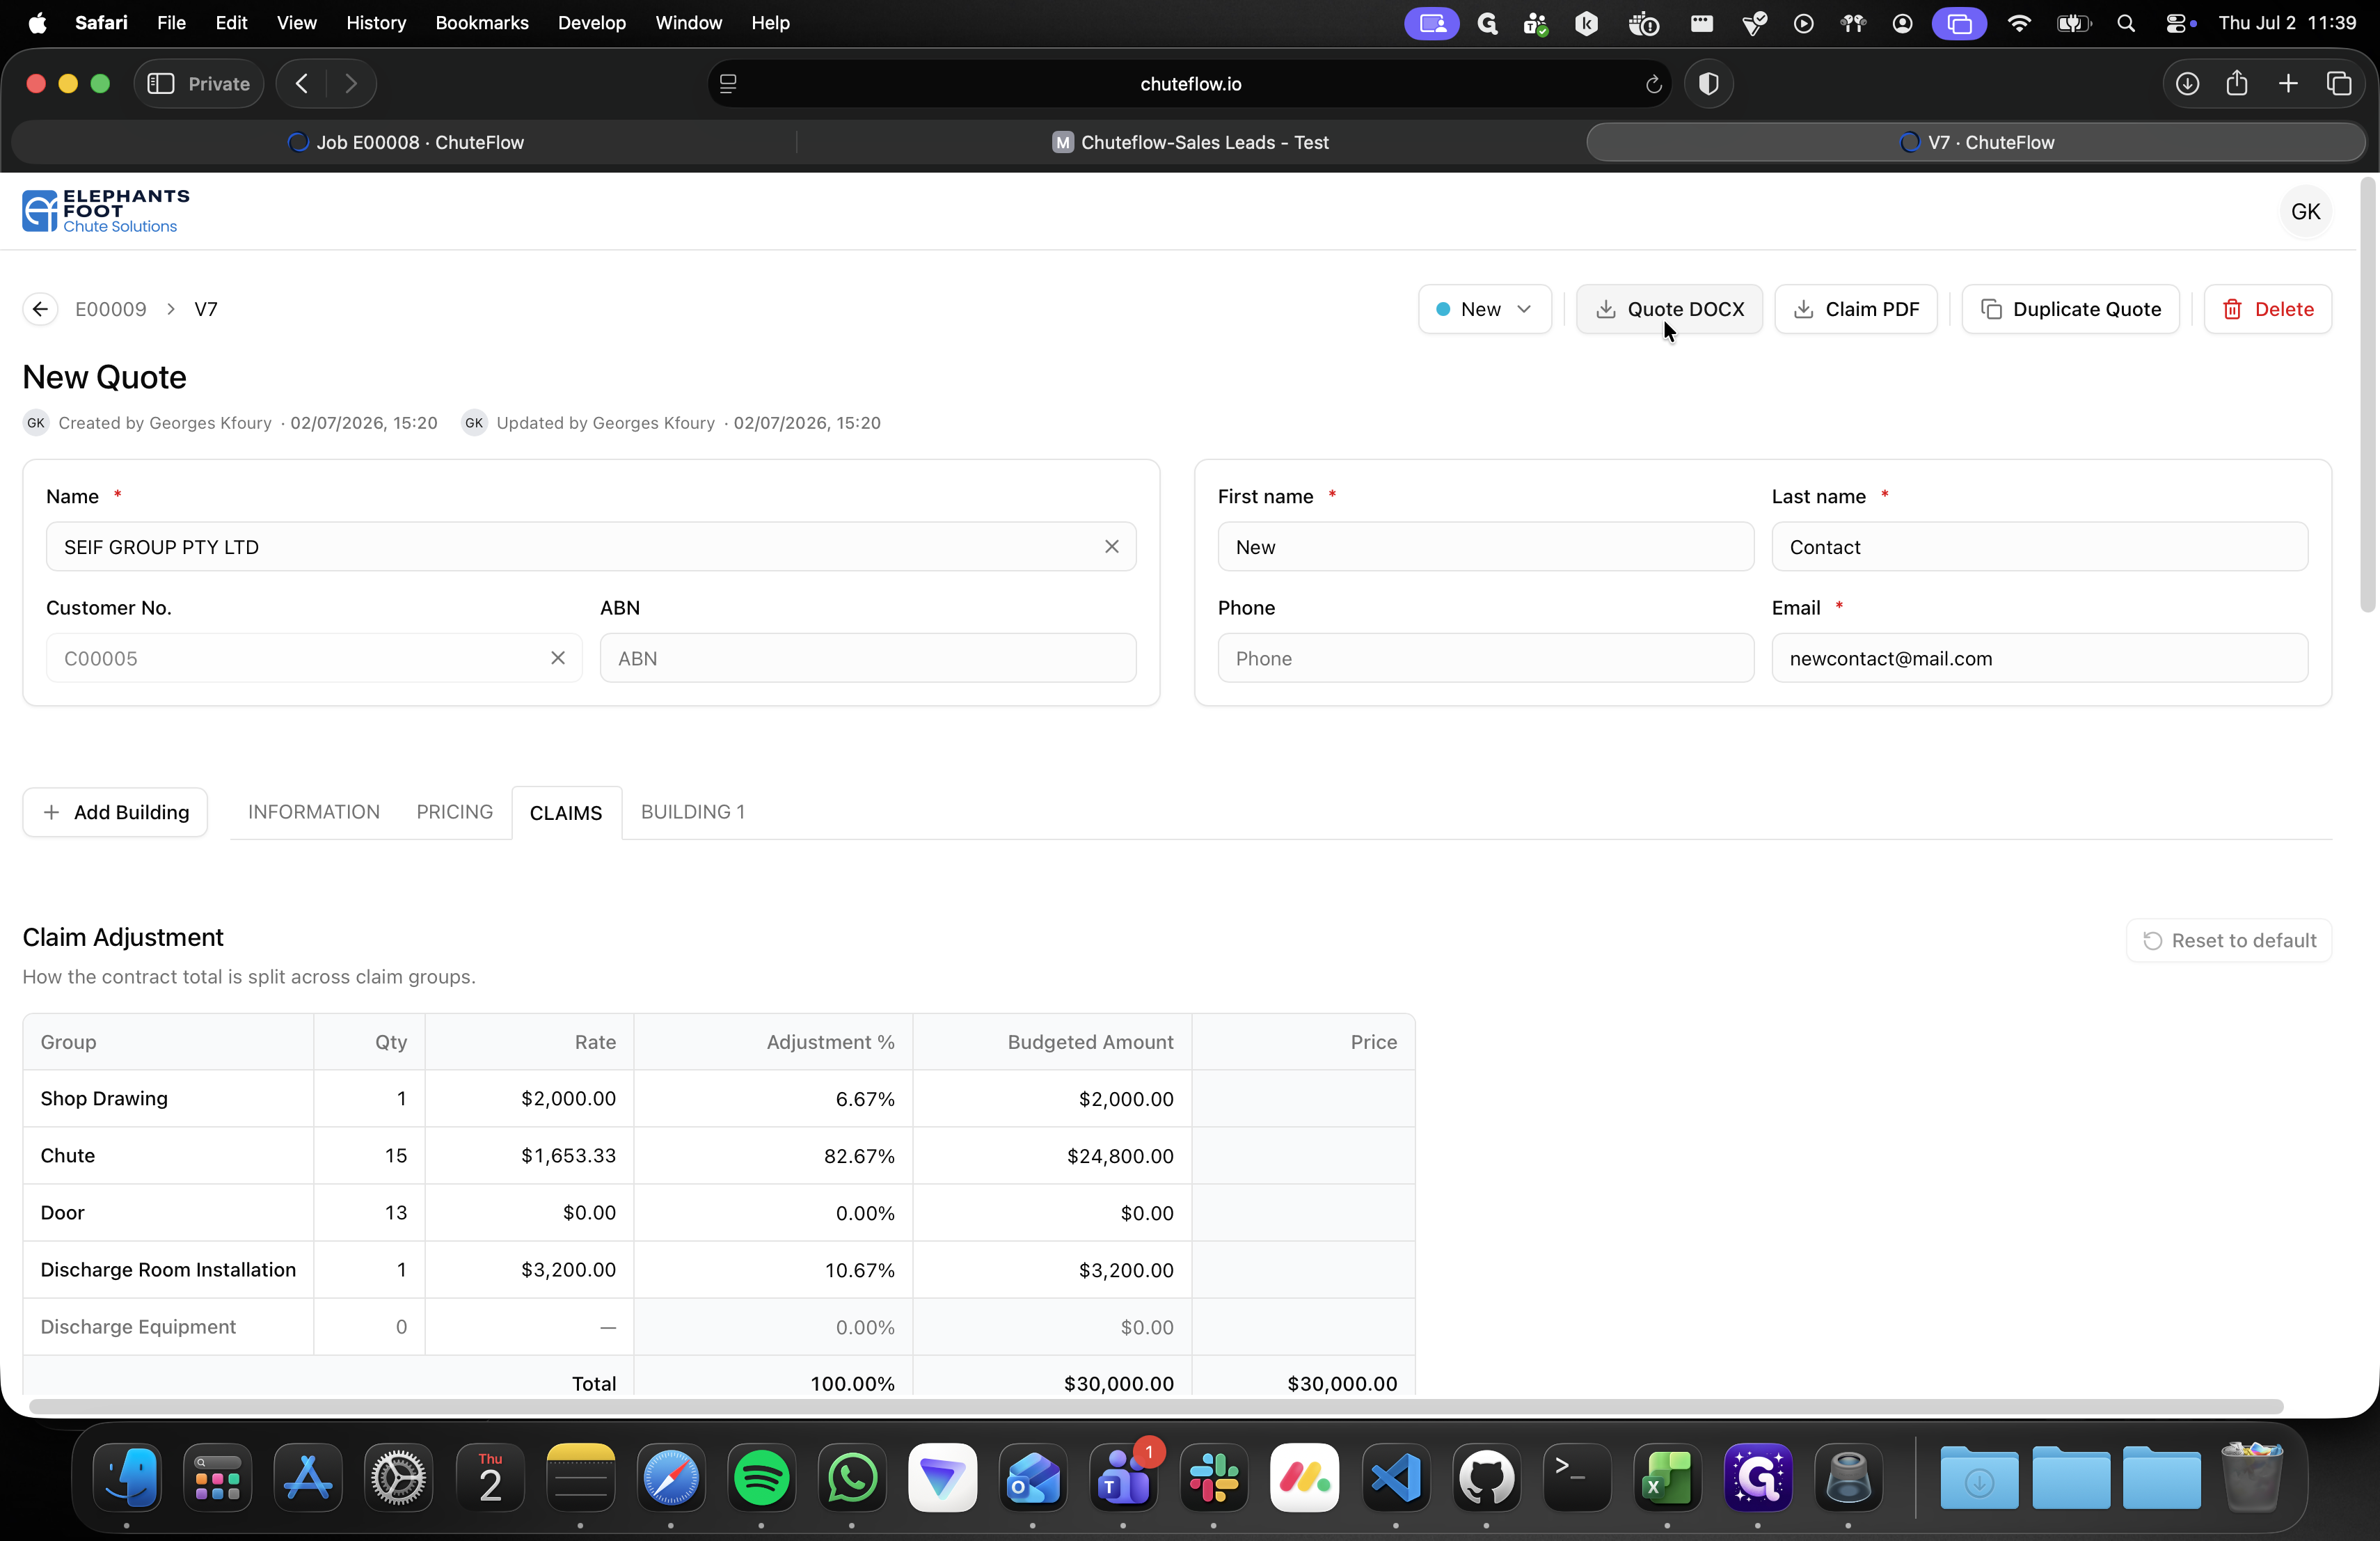
Navigate to the CLAIMS tab to view cost distribution.
31
Click on ✓ Claim PDF in the top navigation to export the adjustment claim.
32
Click on ✓ Quote DOCX in the top-right toolbar to download the finalized project quote.