Icon

How to Create and Manage Users in Qumulex

Learn how to add new users, assign access groups, attach credentials, and deactivate profiles in the Qumulex access control system.

By Tanner Nack

This guide explains how to add and manage users in the Qumulex access control system. Completing these steps ensures personnel have the correct building access levels and associated credentials.

This process applies to system administrators and facility managers responsible for maintaining access control records and issuing security badges.

Log In and Set Scope

1
Navigate to app.qumulex.io in your web browser.
2
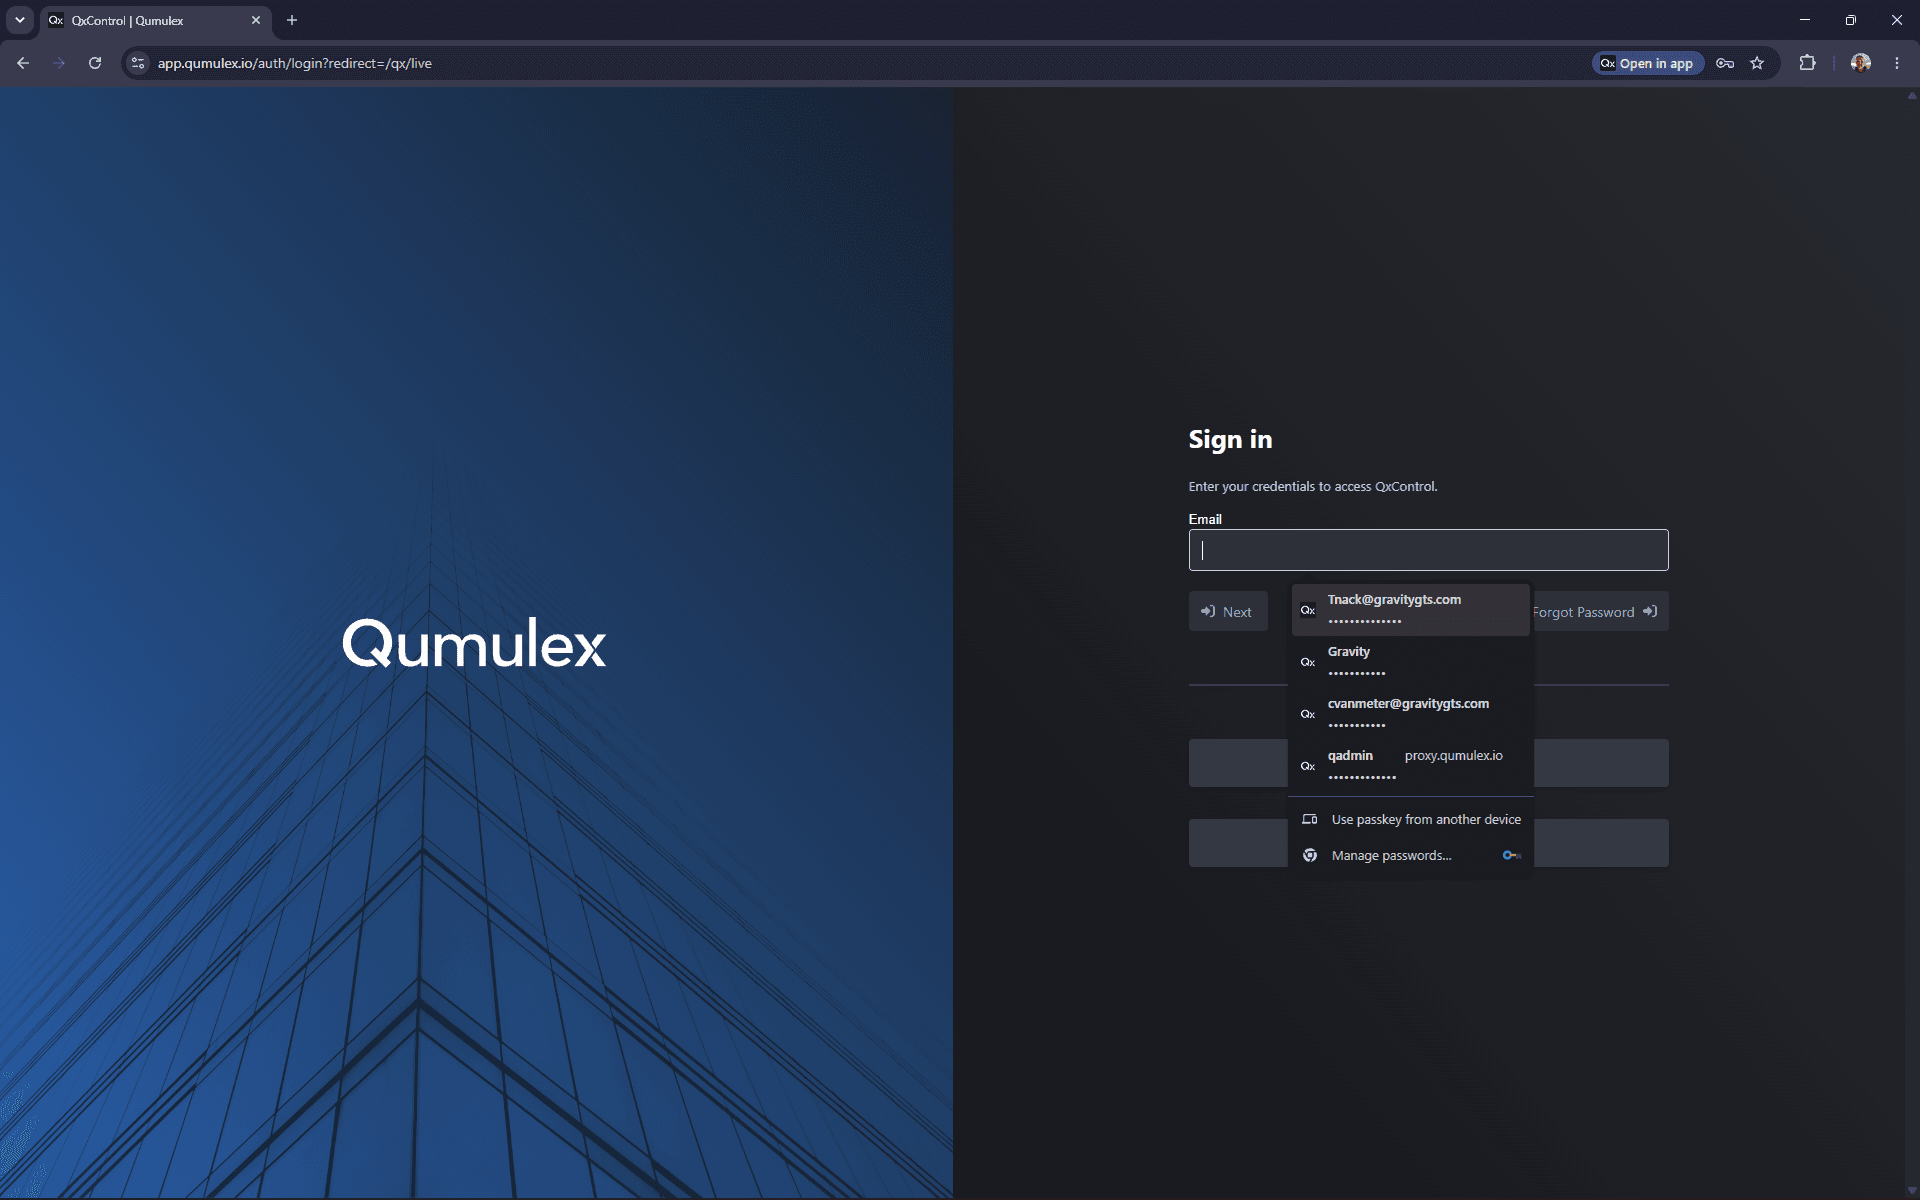
Select your account or enter your email address.
Step #2: Select your account or enter your email address.
3
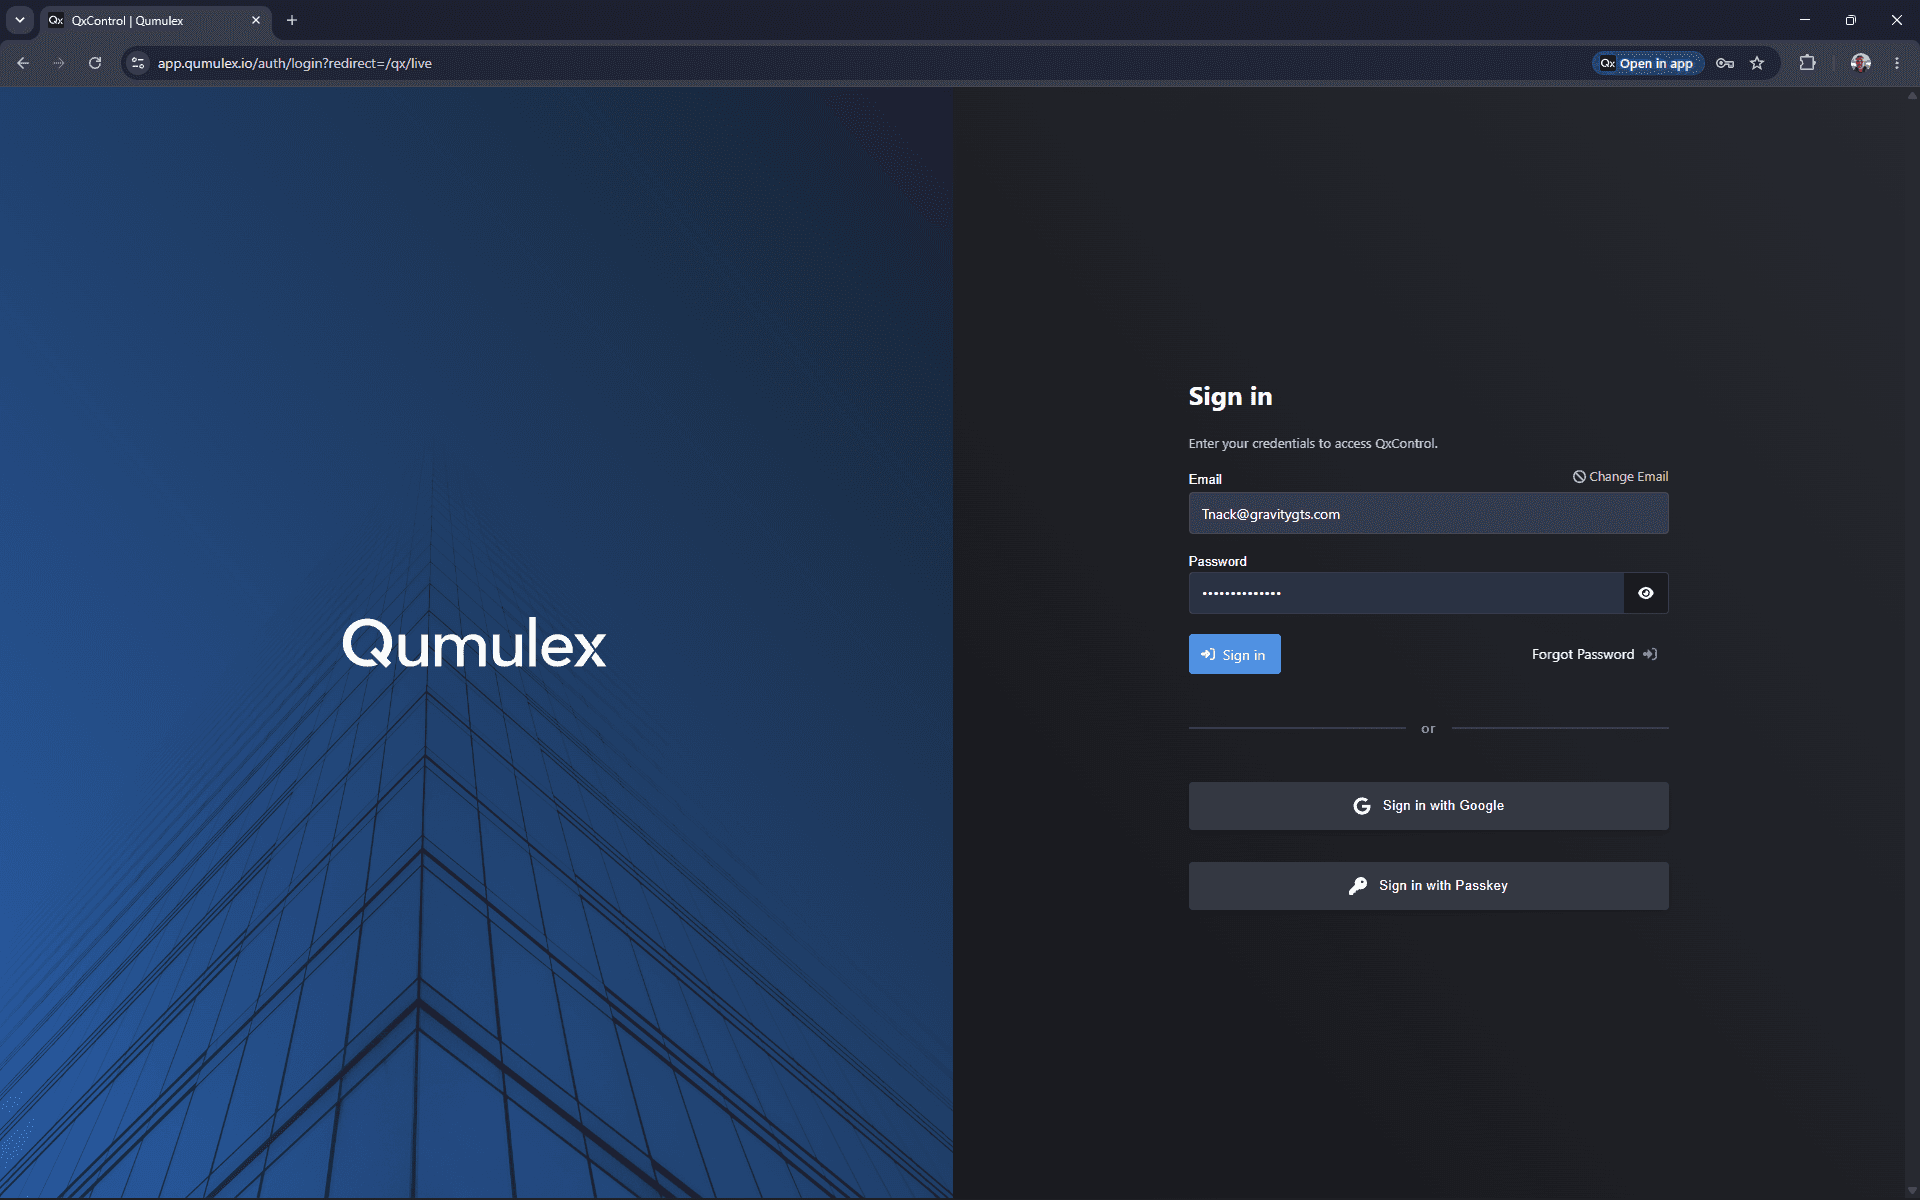
Enter your password and click Sign in.
Step #3: Enter your password and click Sign in.
4
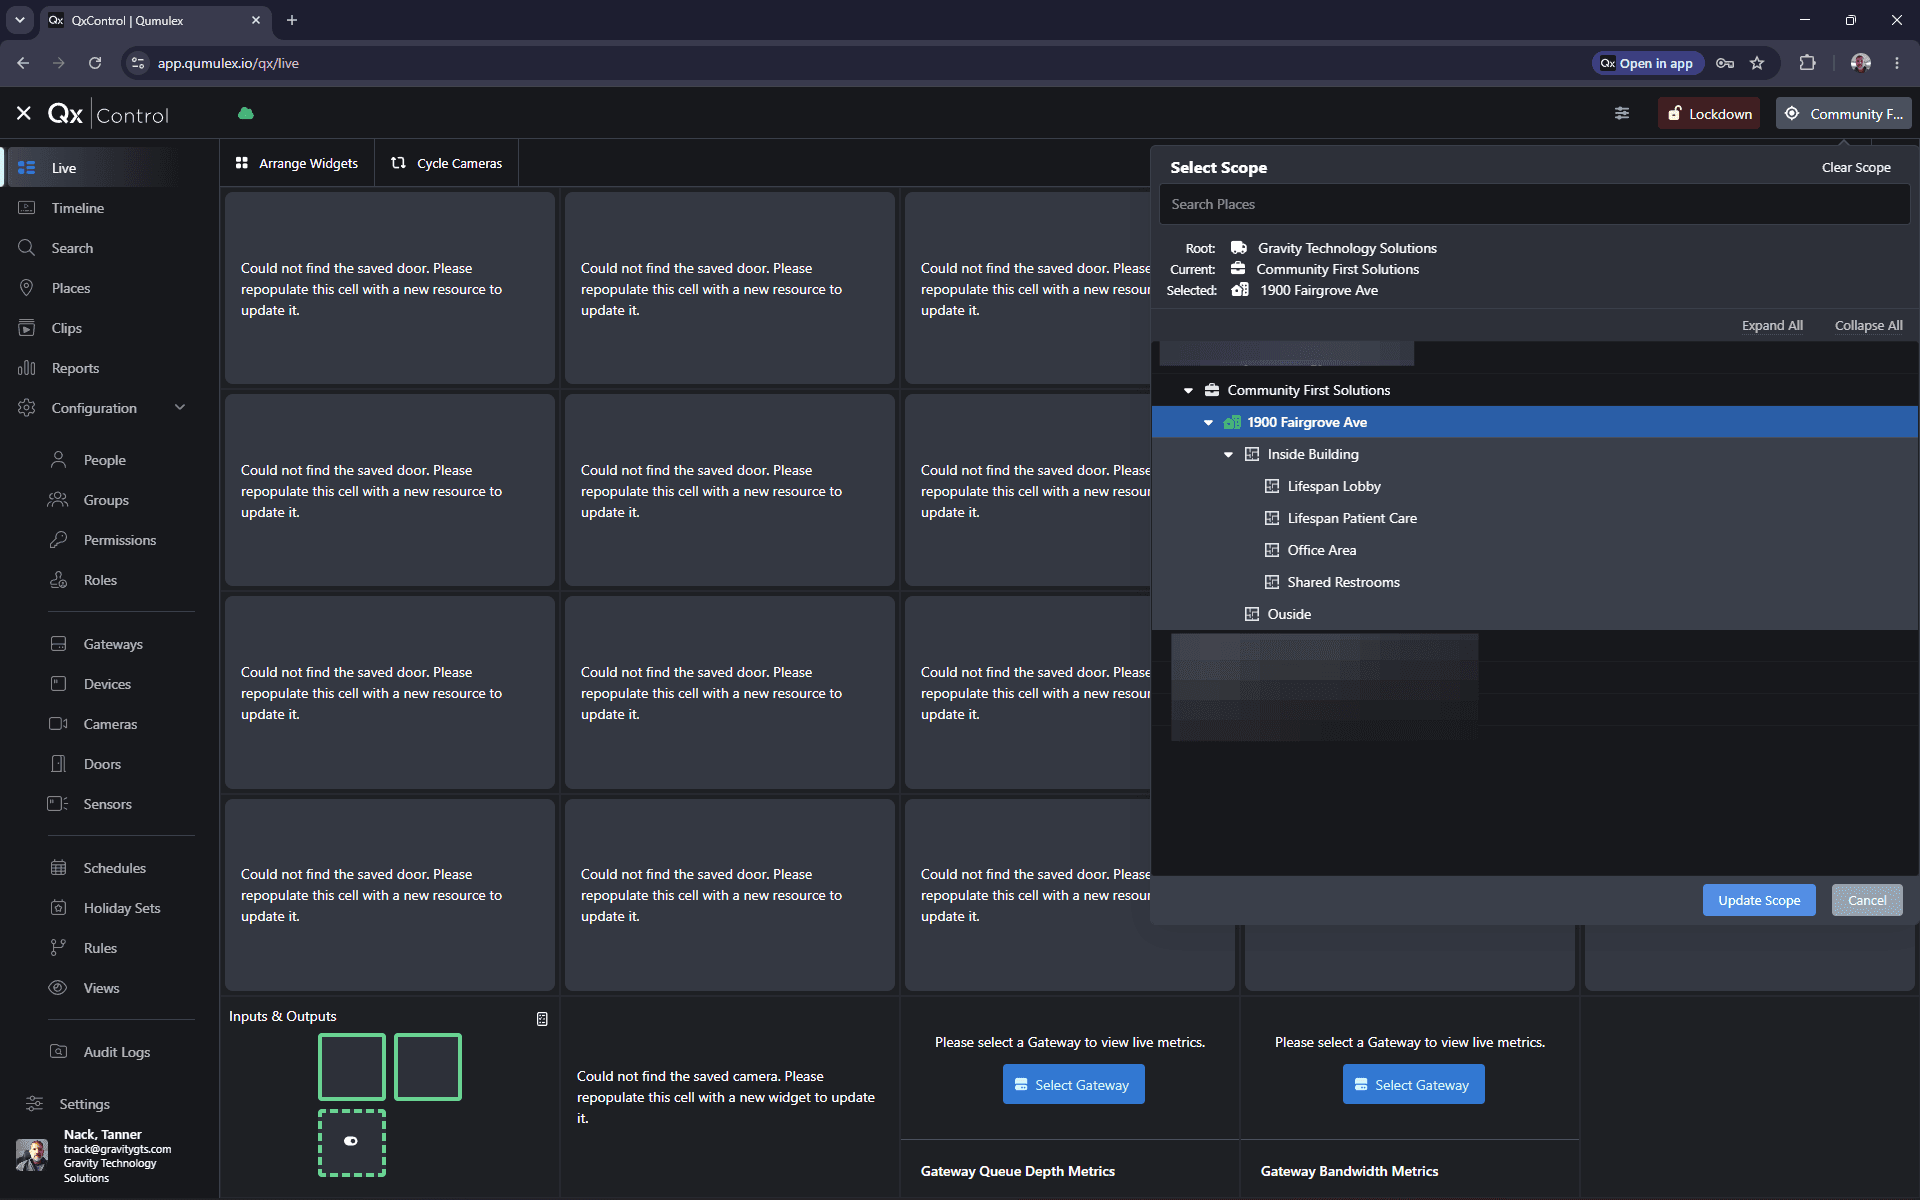
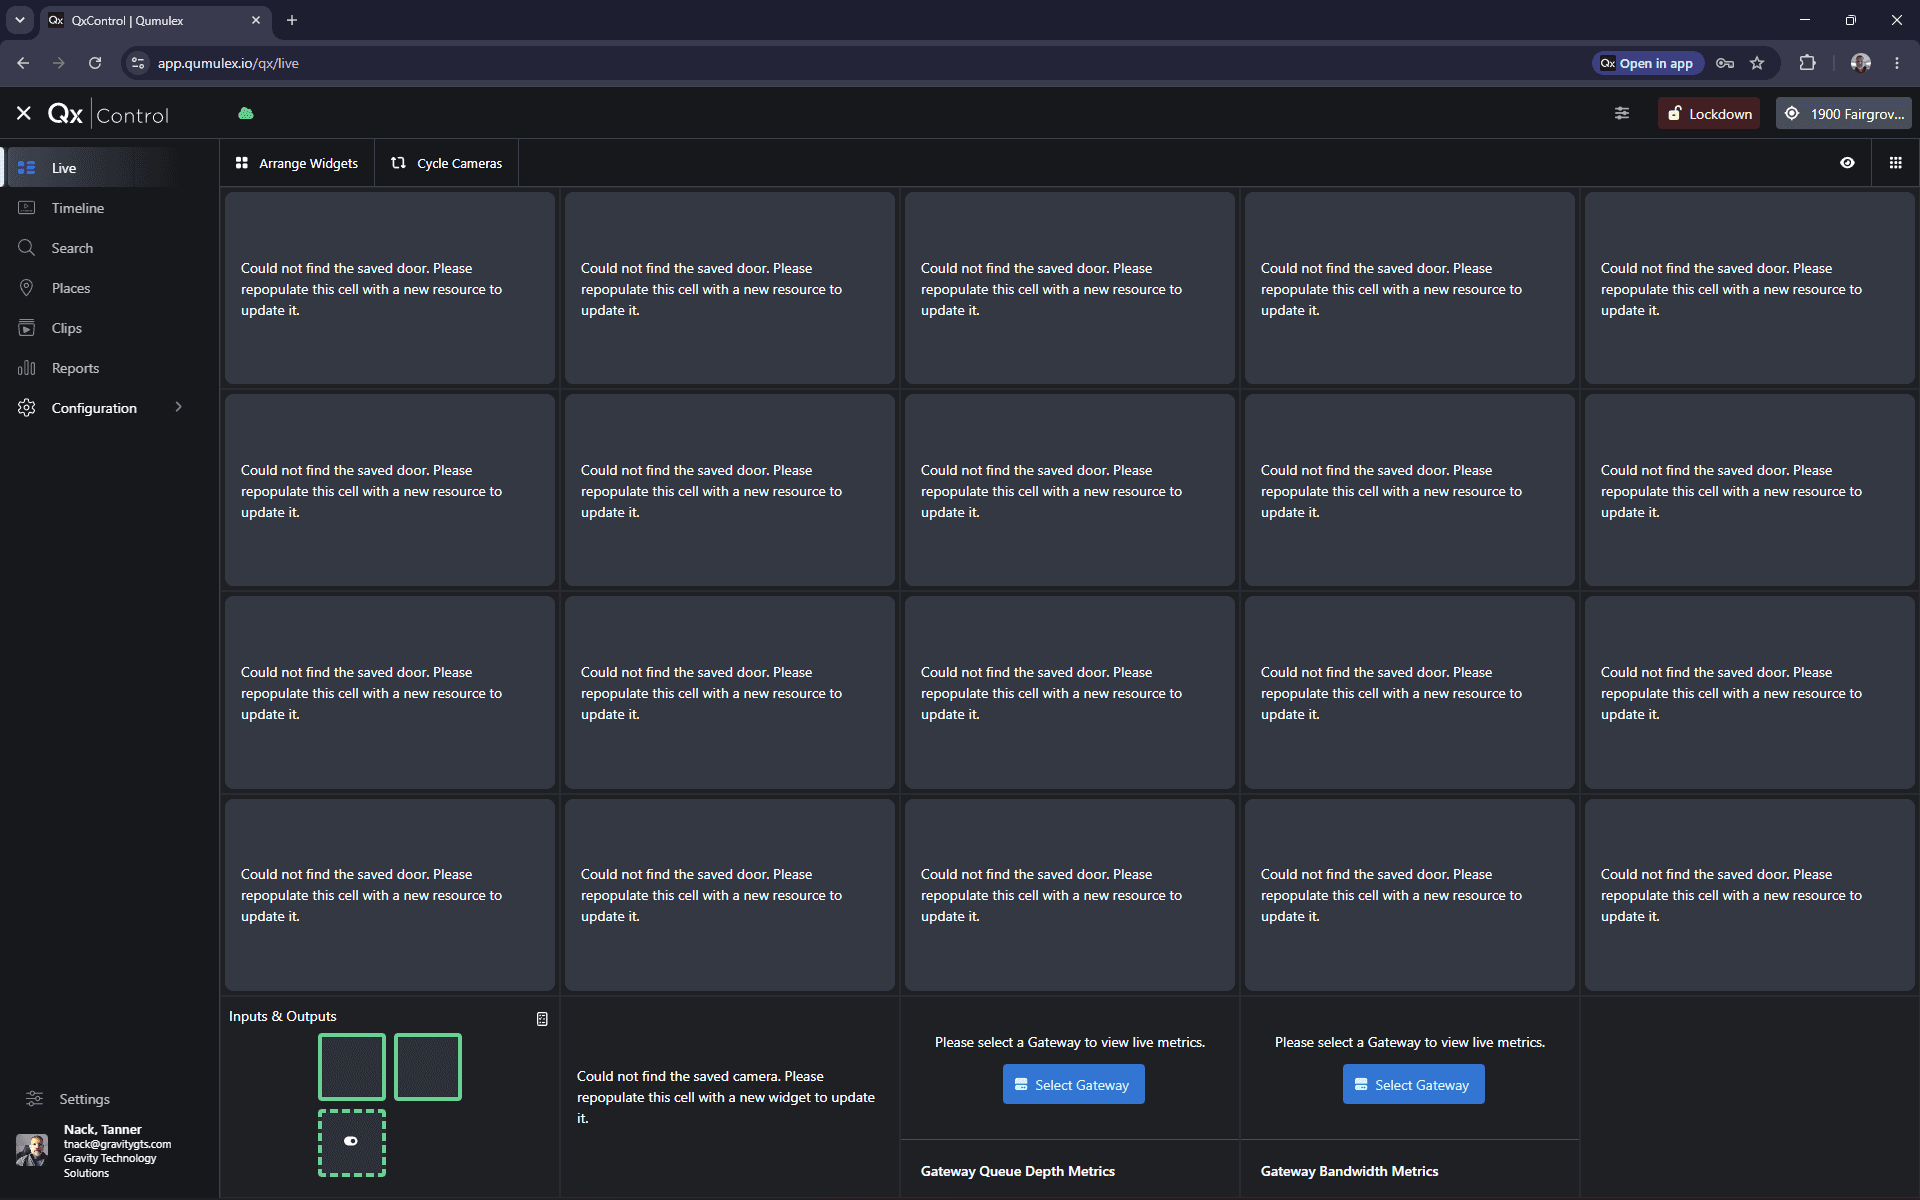
Select your specific location scope from the top-right menu (e.g., 1900 Fairgrove Ave) and click Update Scope.
Step #4: Select your specific location scope from the top-right menu (e.g., 1900 Fairgrove Ave) and click Update Scope.

Create a New User

5
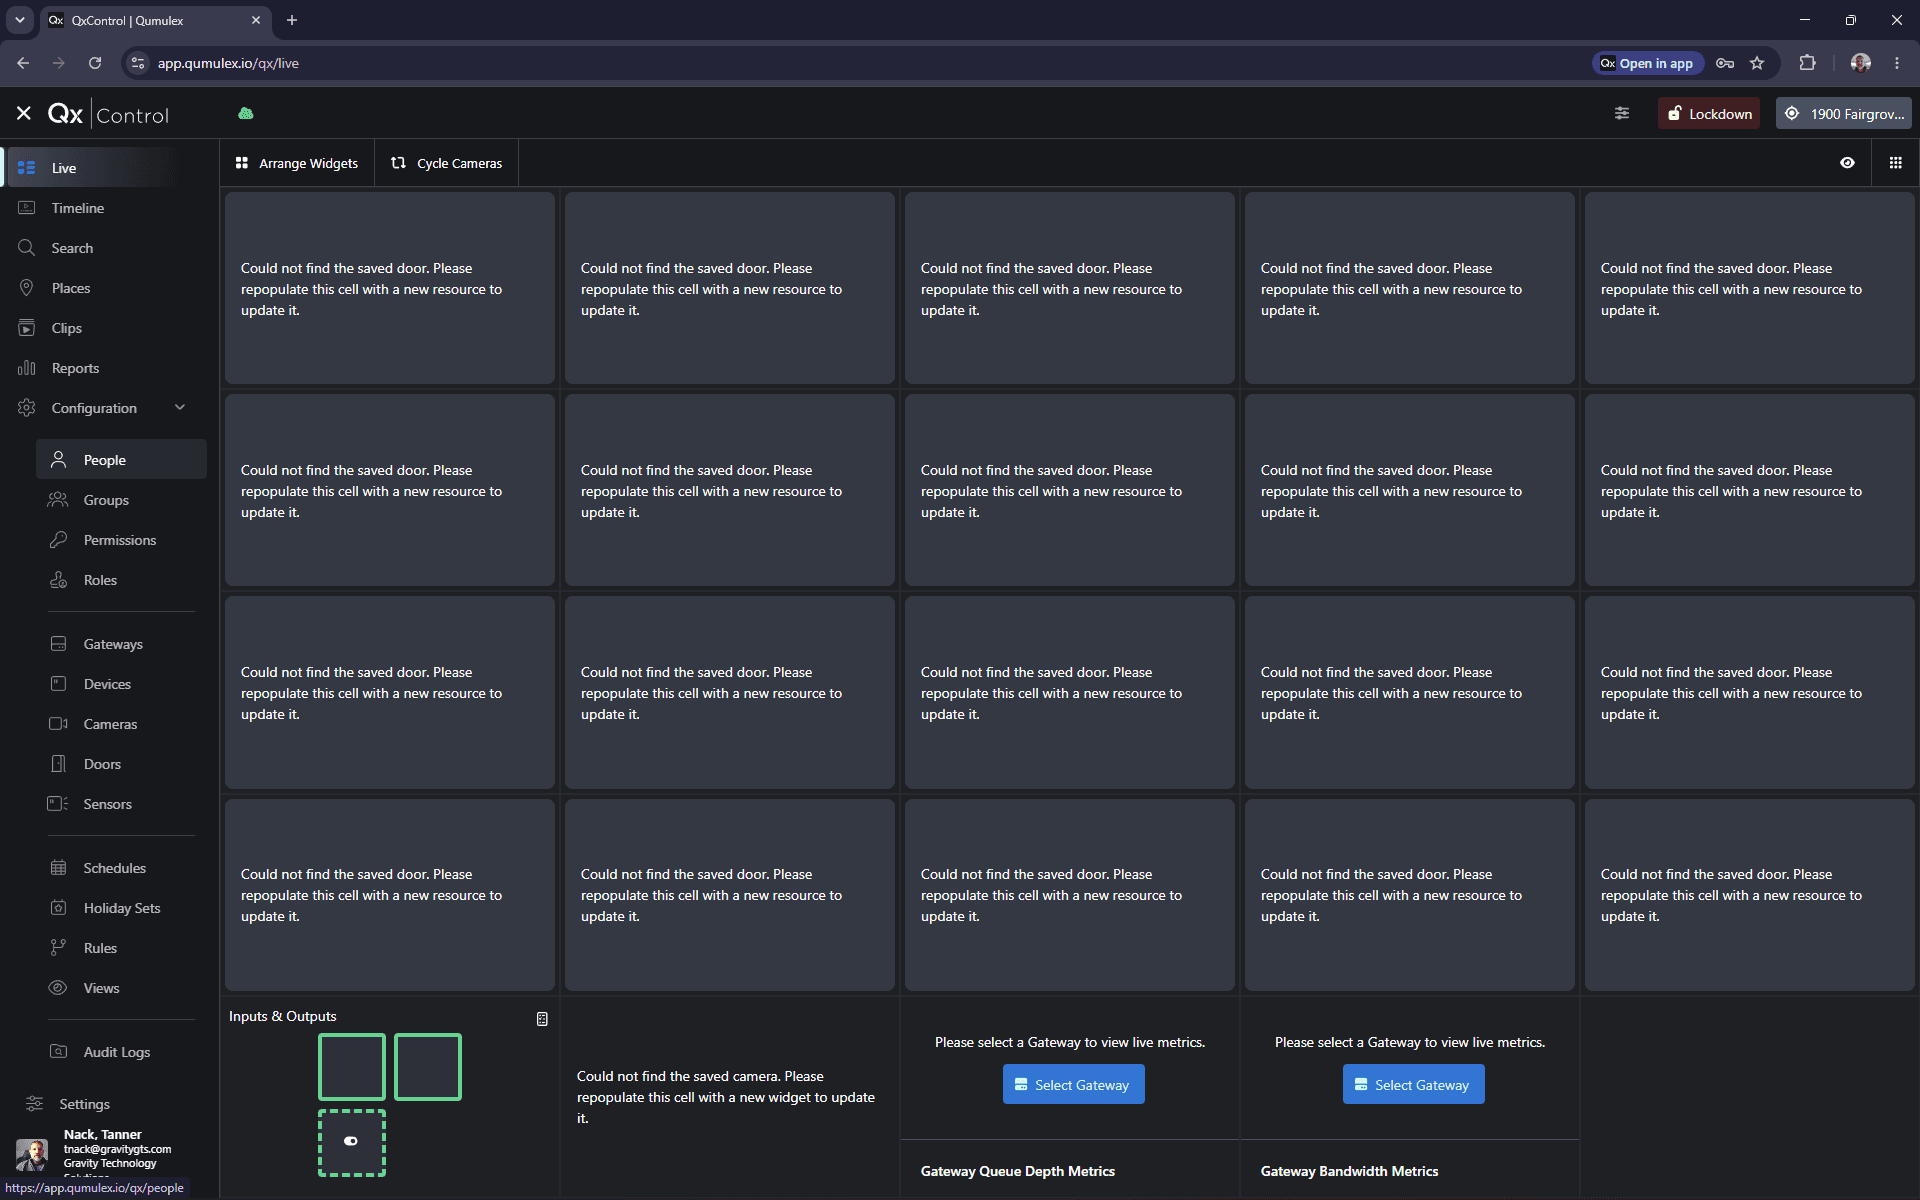
Click on Configuration in the left sidebar.
Step #5: Click on Configuration in the left sidebar.
6
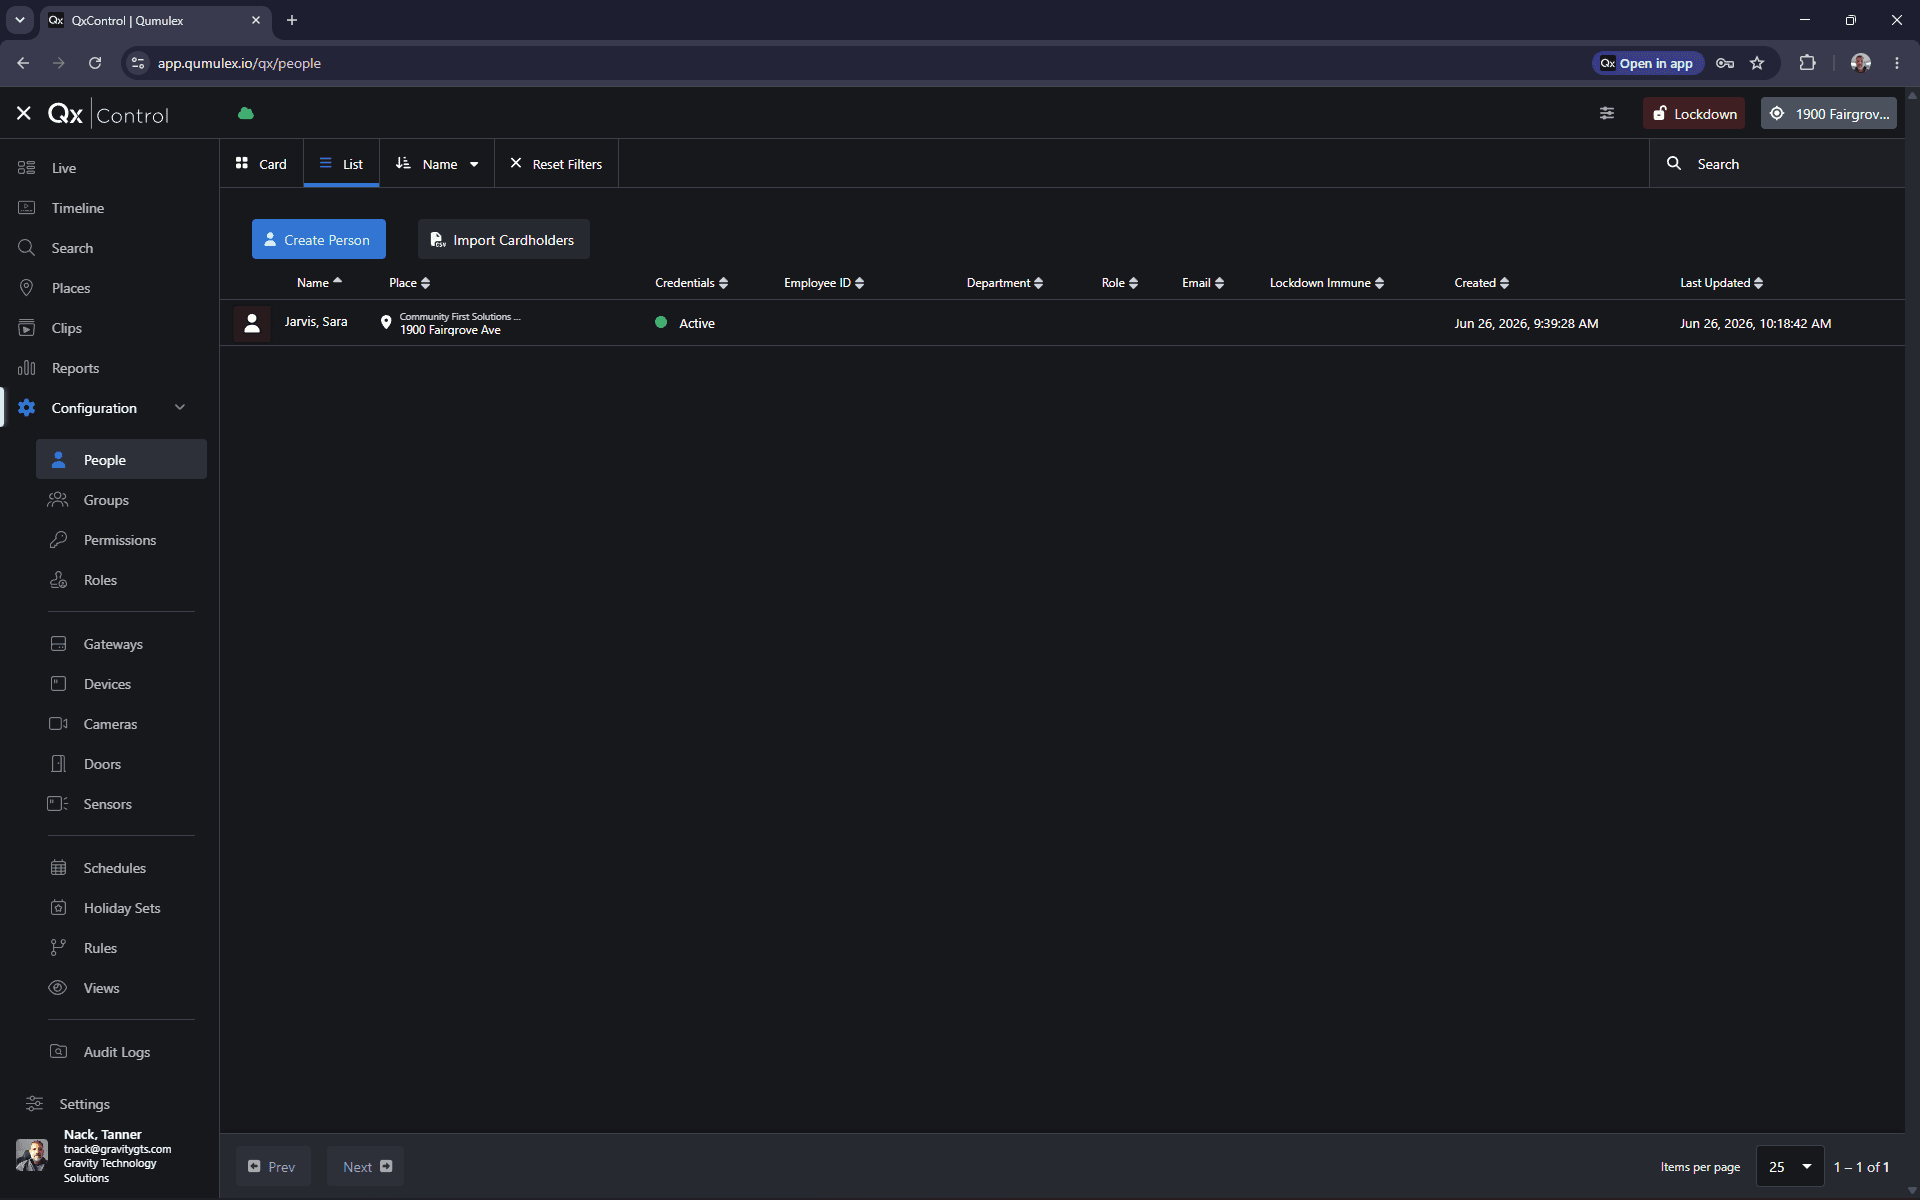
Click on People to view the user directory for your selected scope.
Step #6: Click on People to view the user directory for your selected scope.
7
Click Create Person.
Step #7: Click Create Person.
8
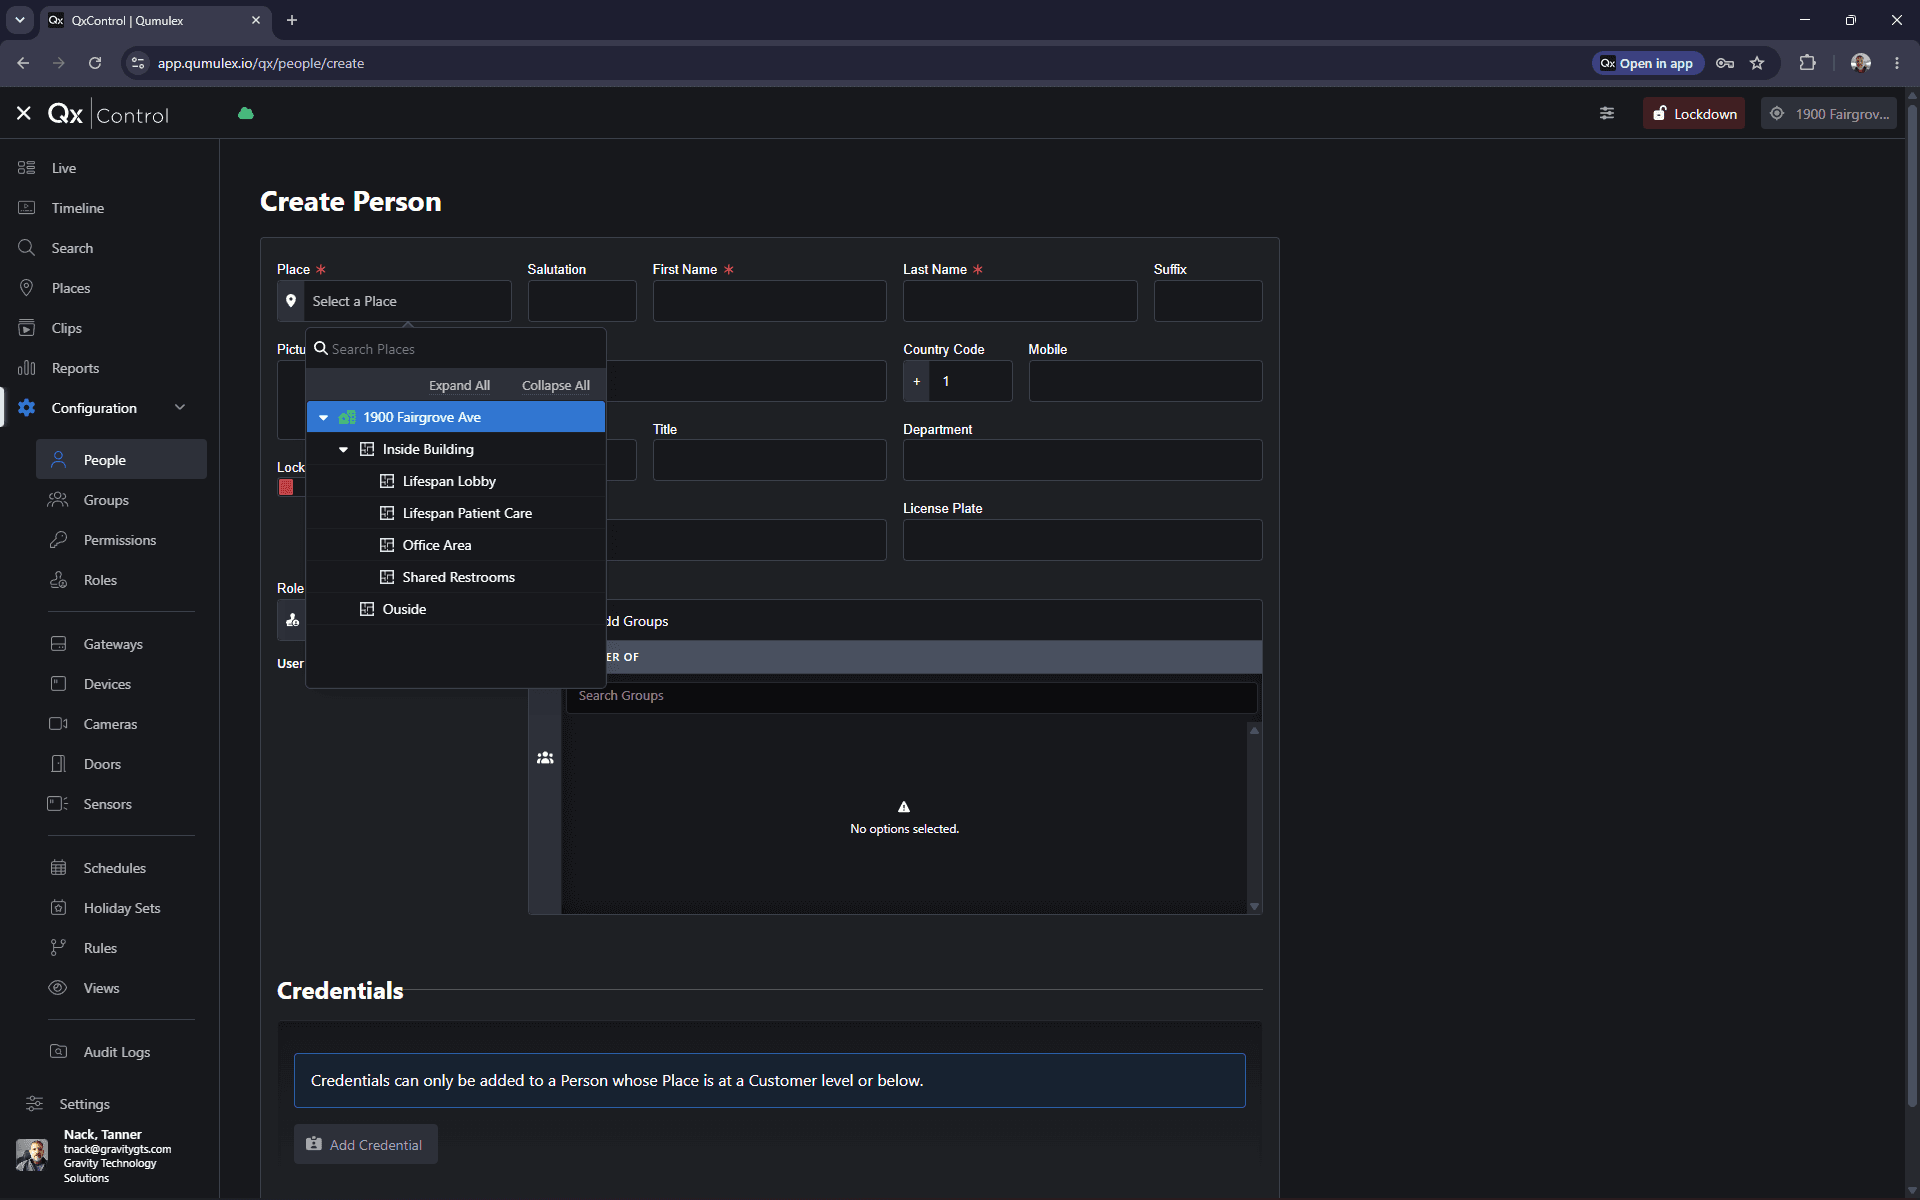
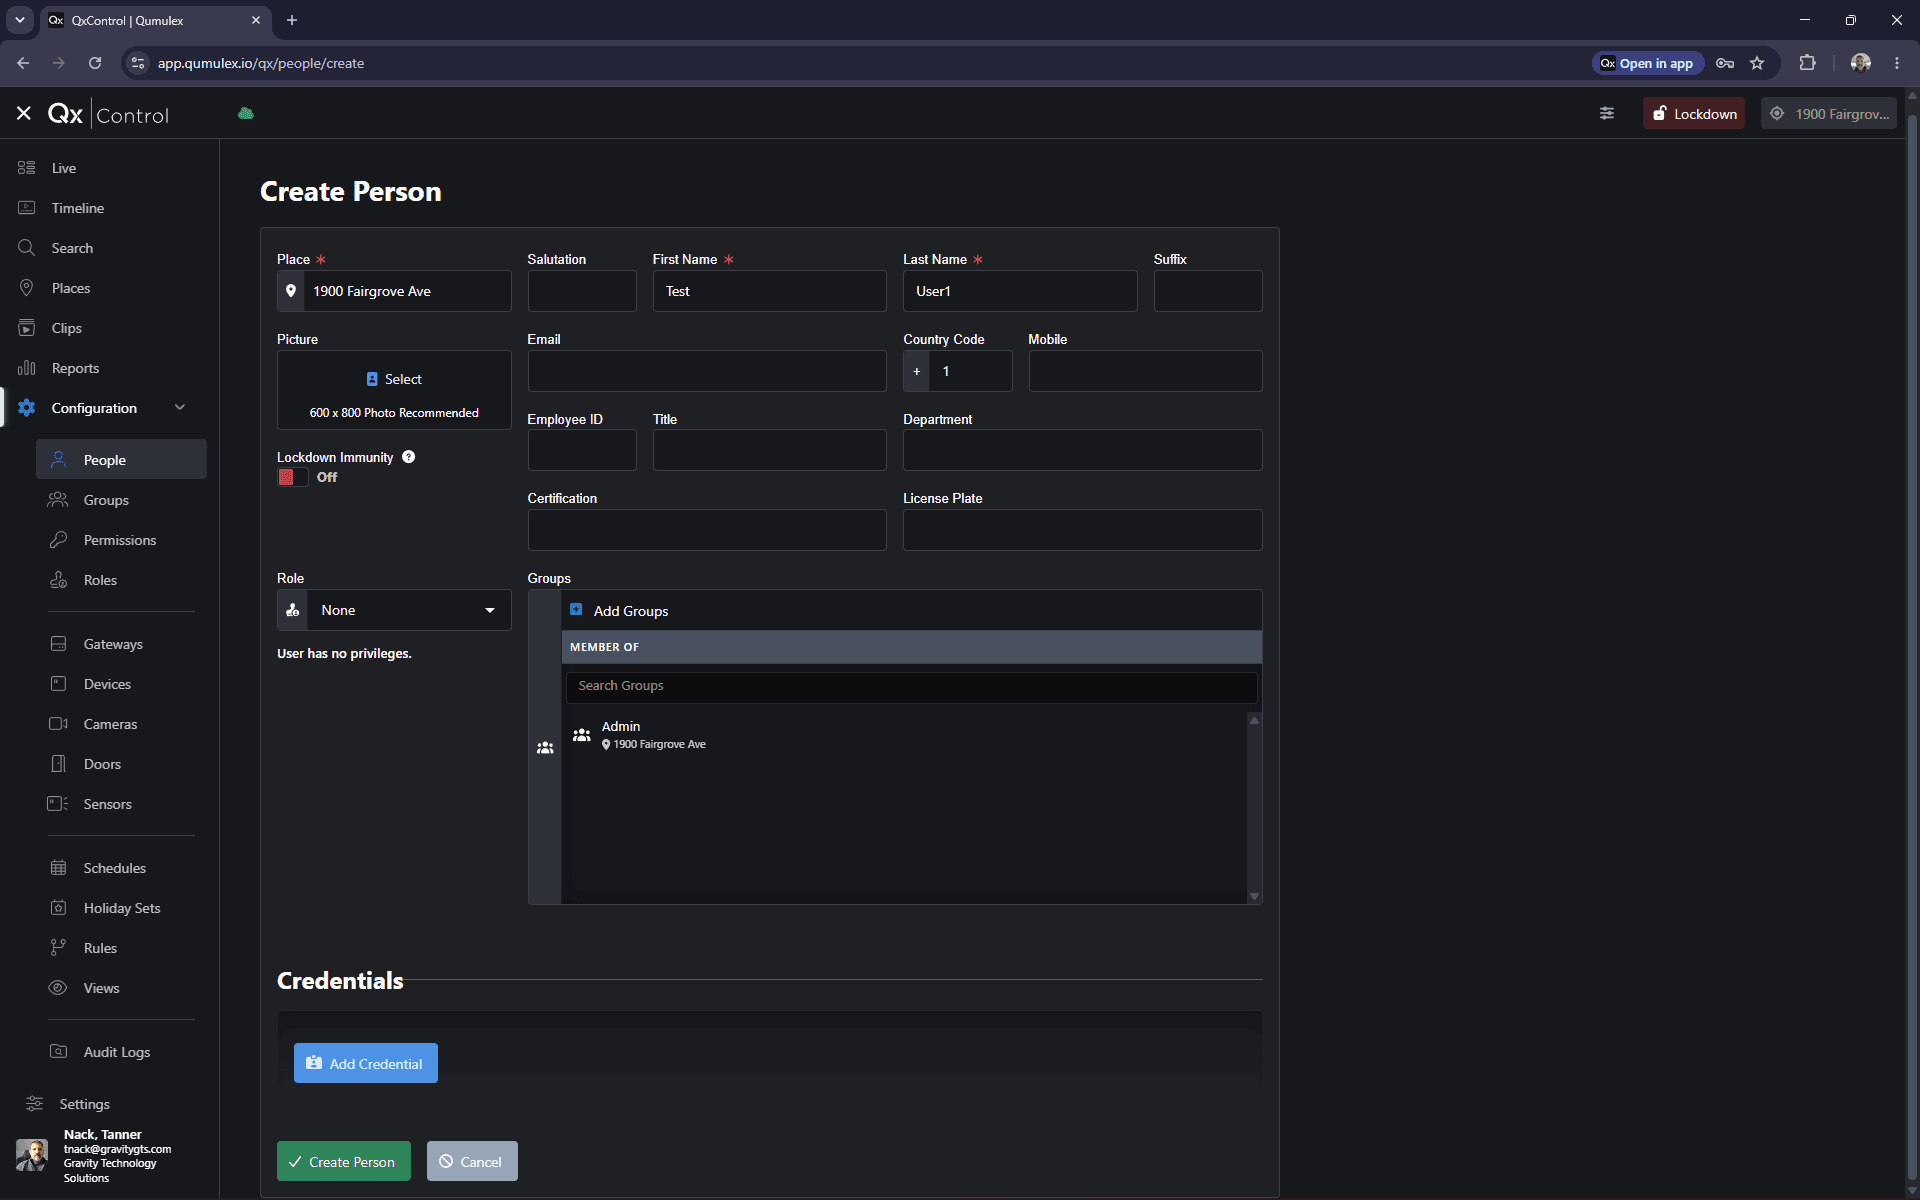
Select the specific place or area the user needs access to from the dropdown menu.
Step #8: Select the specific place or area the user needs access to from the dropdown menu.
9
Enter the user's first and last name, along with any optional details like email, mobile phone, or department.
10
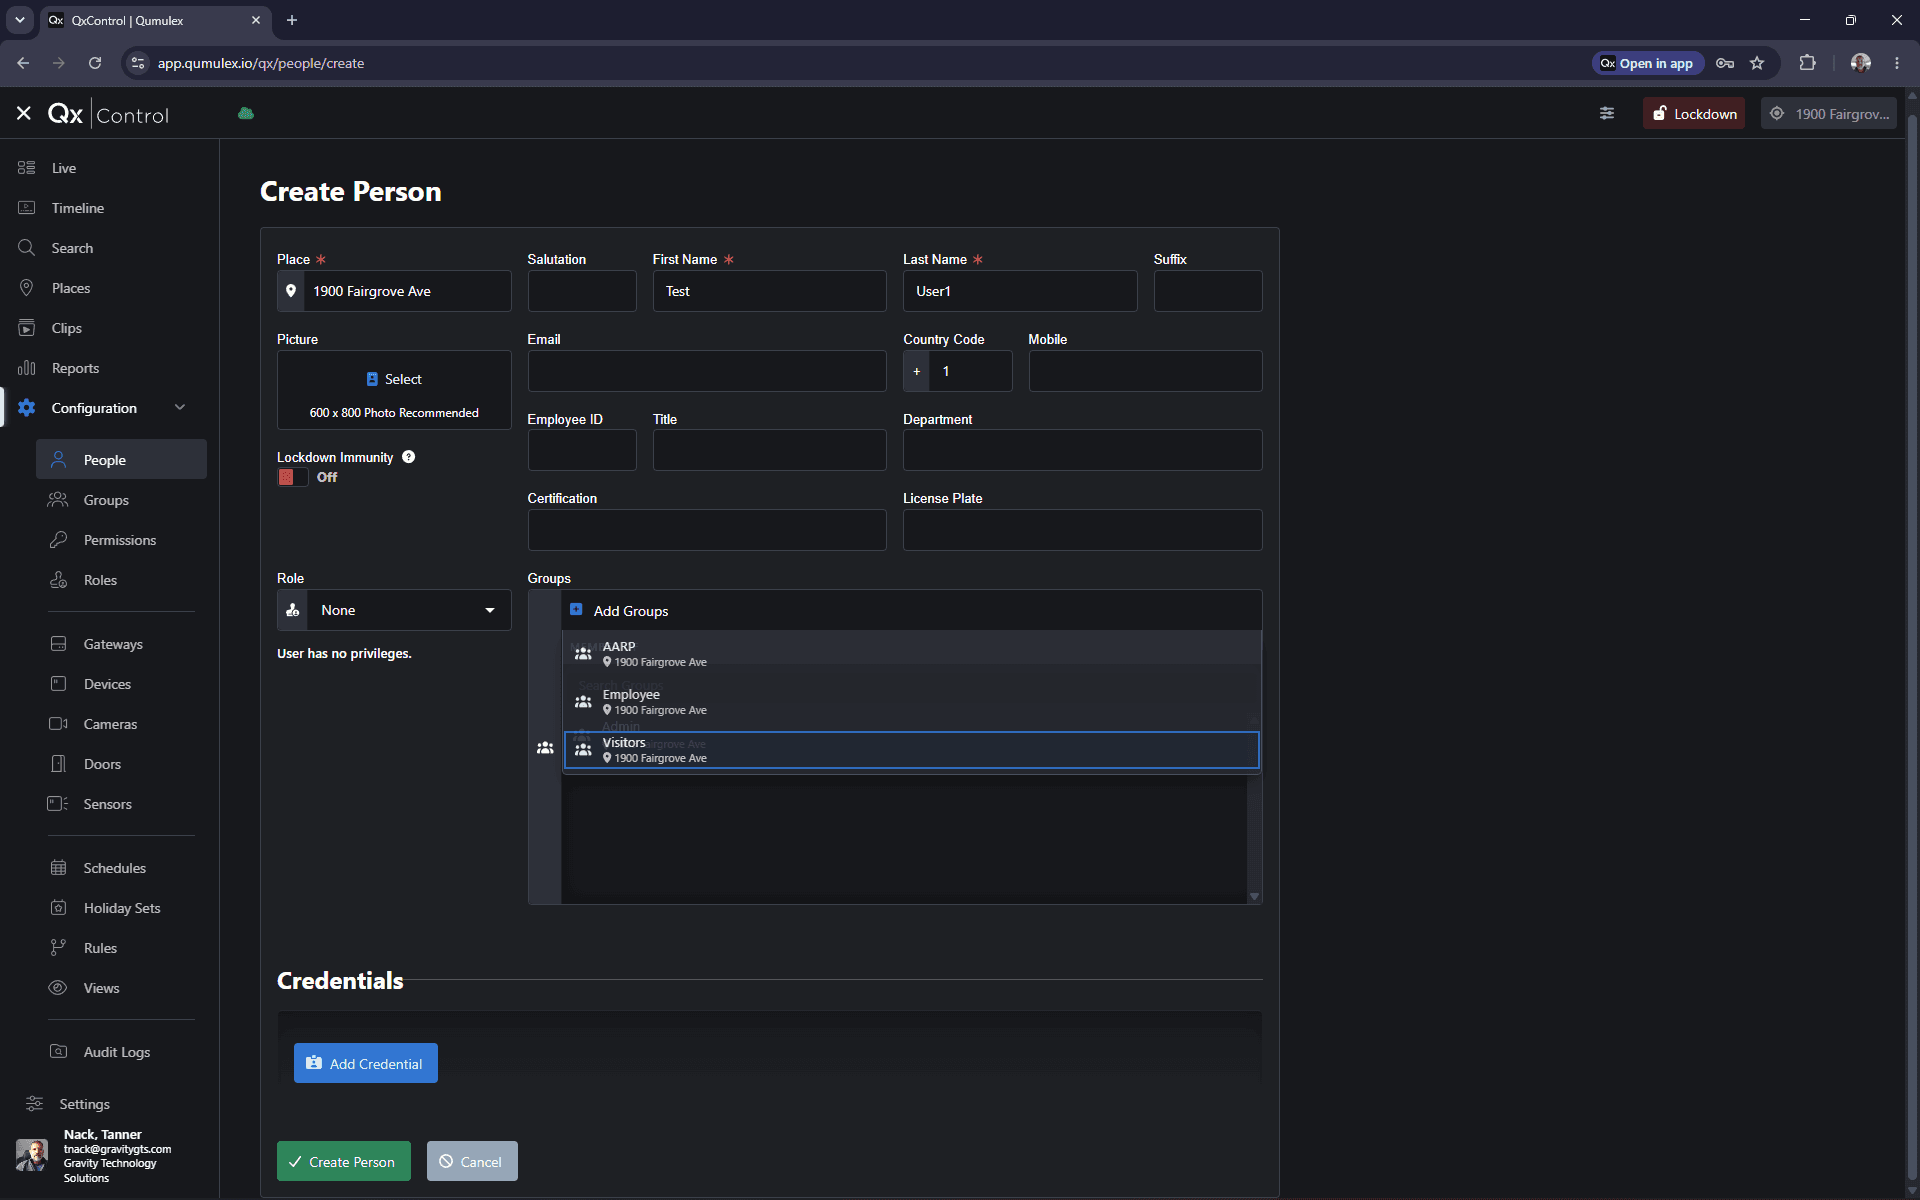
Select the appropriate access group for the user.
Step #10: Select the appropriate access group for the user.

When assigning groups, keep the following access levels in mind:

Group

Access Level

Admin

24/7 access to all doors.

Employee

Access restricted to Monday through Friday.

Visitors

Access restricted to limited, specific timeframes.

Add Credentials

11
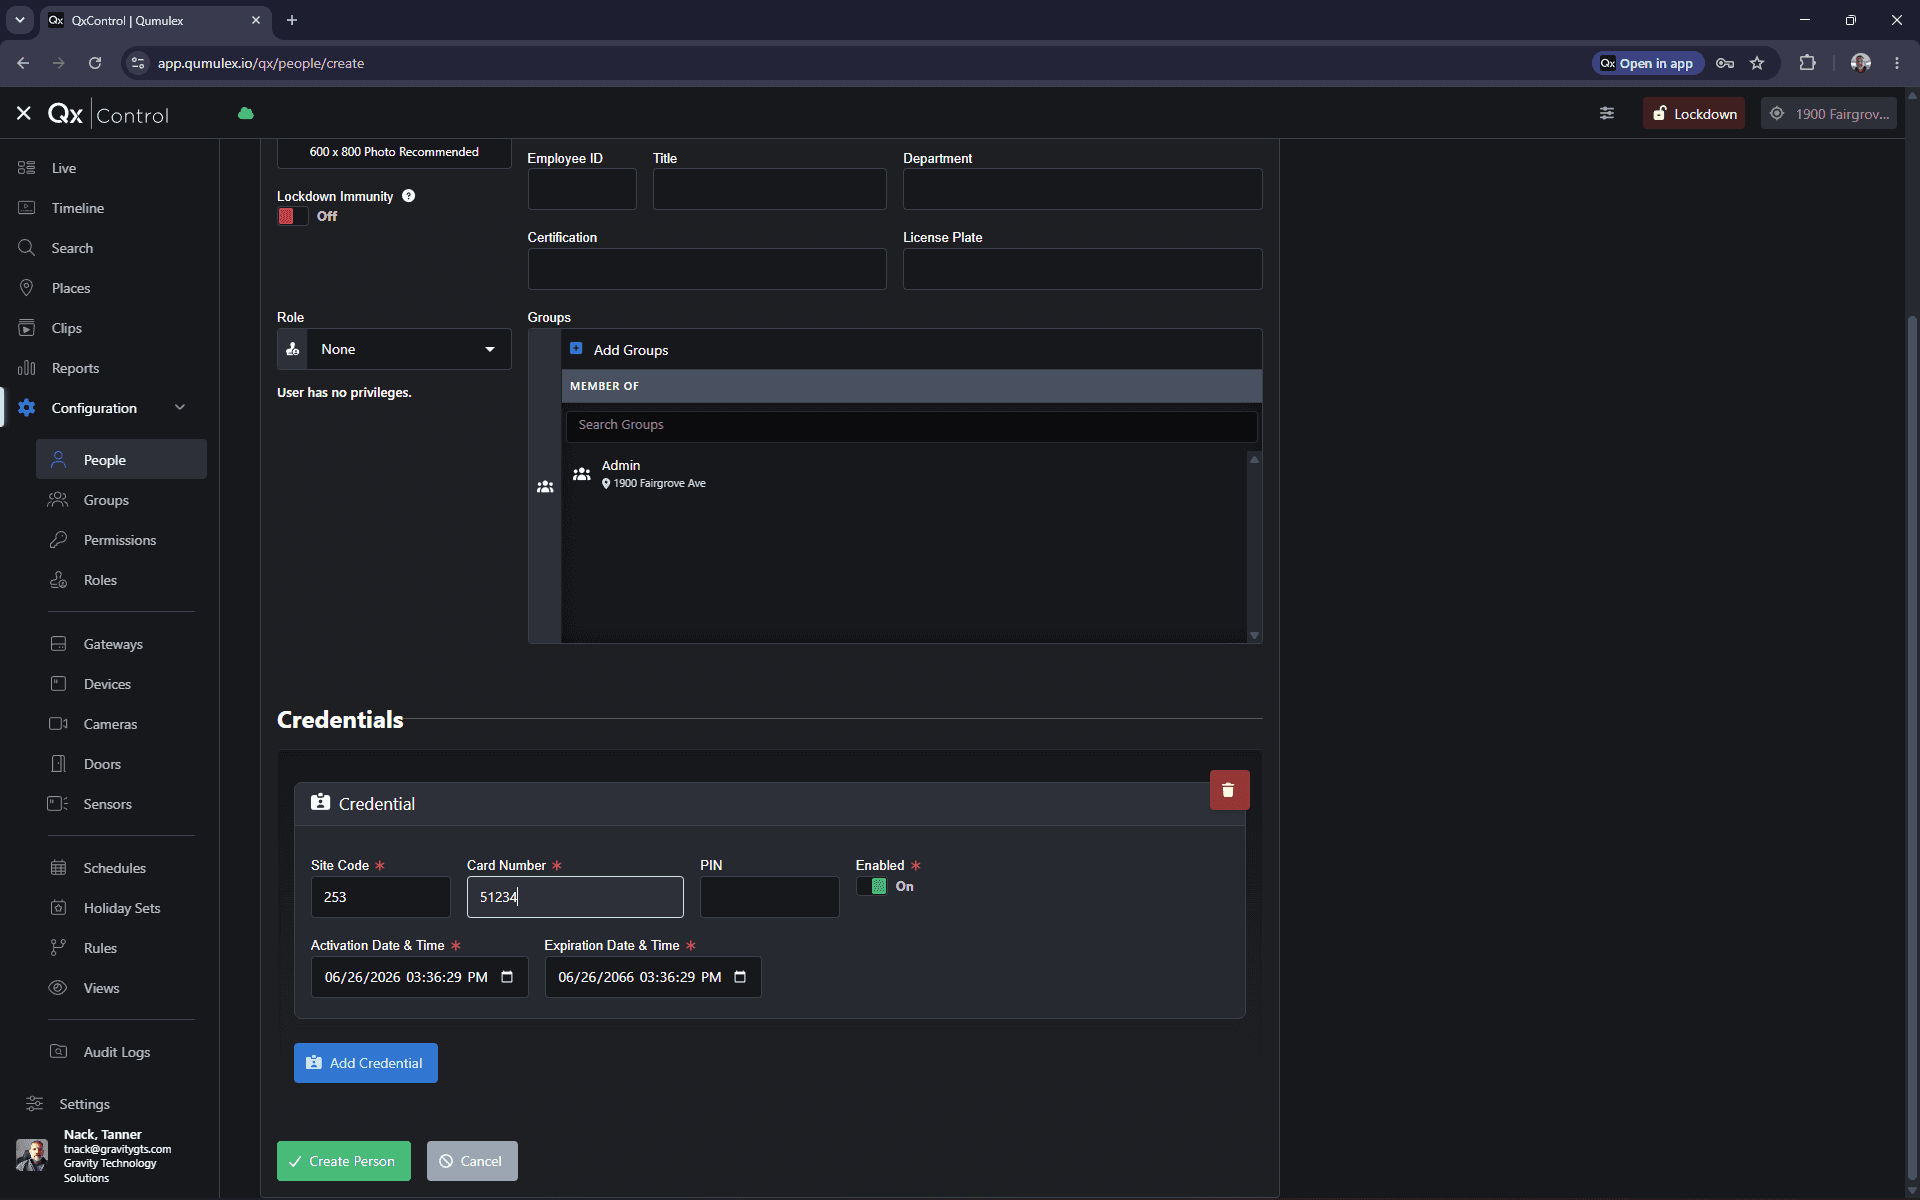
Click Add Credential.
Step #11: Click Add Credential.
12
Enter the Site Code and Card Number. If access is temporary, select an expiration date; otherwise, leave it set to a future date.
13
Click Create Person to save the new user and grant them access.
Step #13: Click Create Person to save the new user and grant them access.

(Optional) Add a Profile Picture

When a user scans their badge, their profile picture will appear alongside the scan event in usage reports.
14
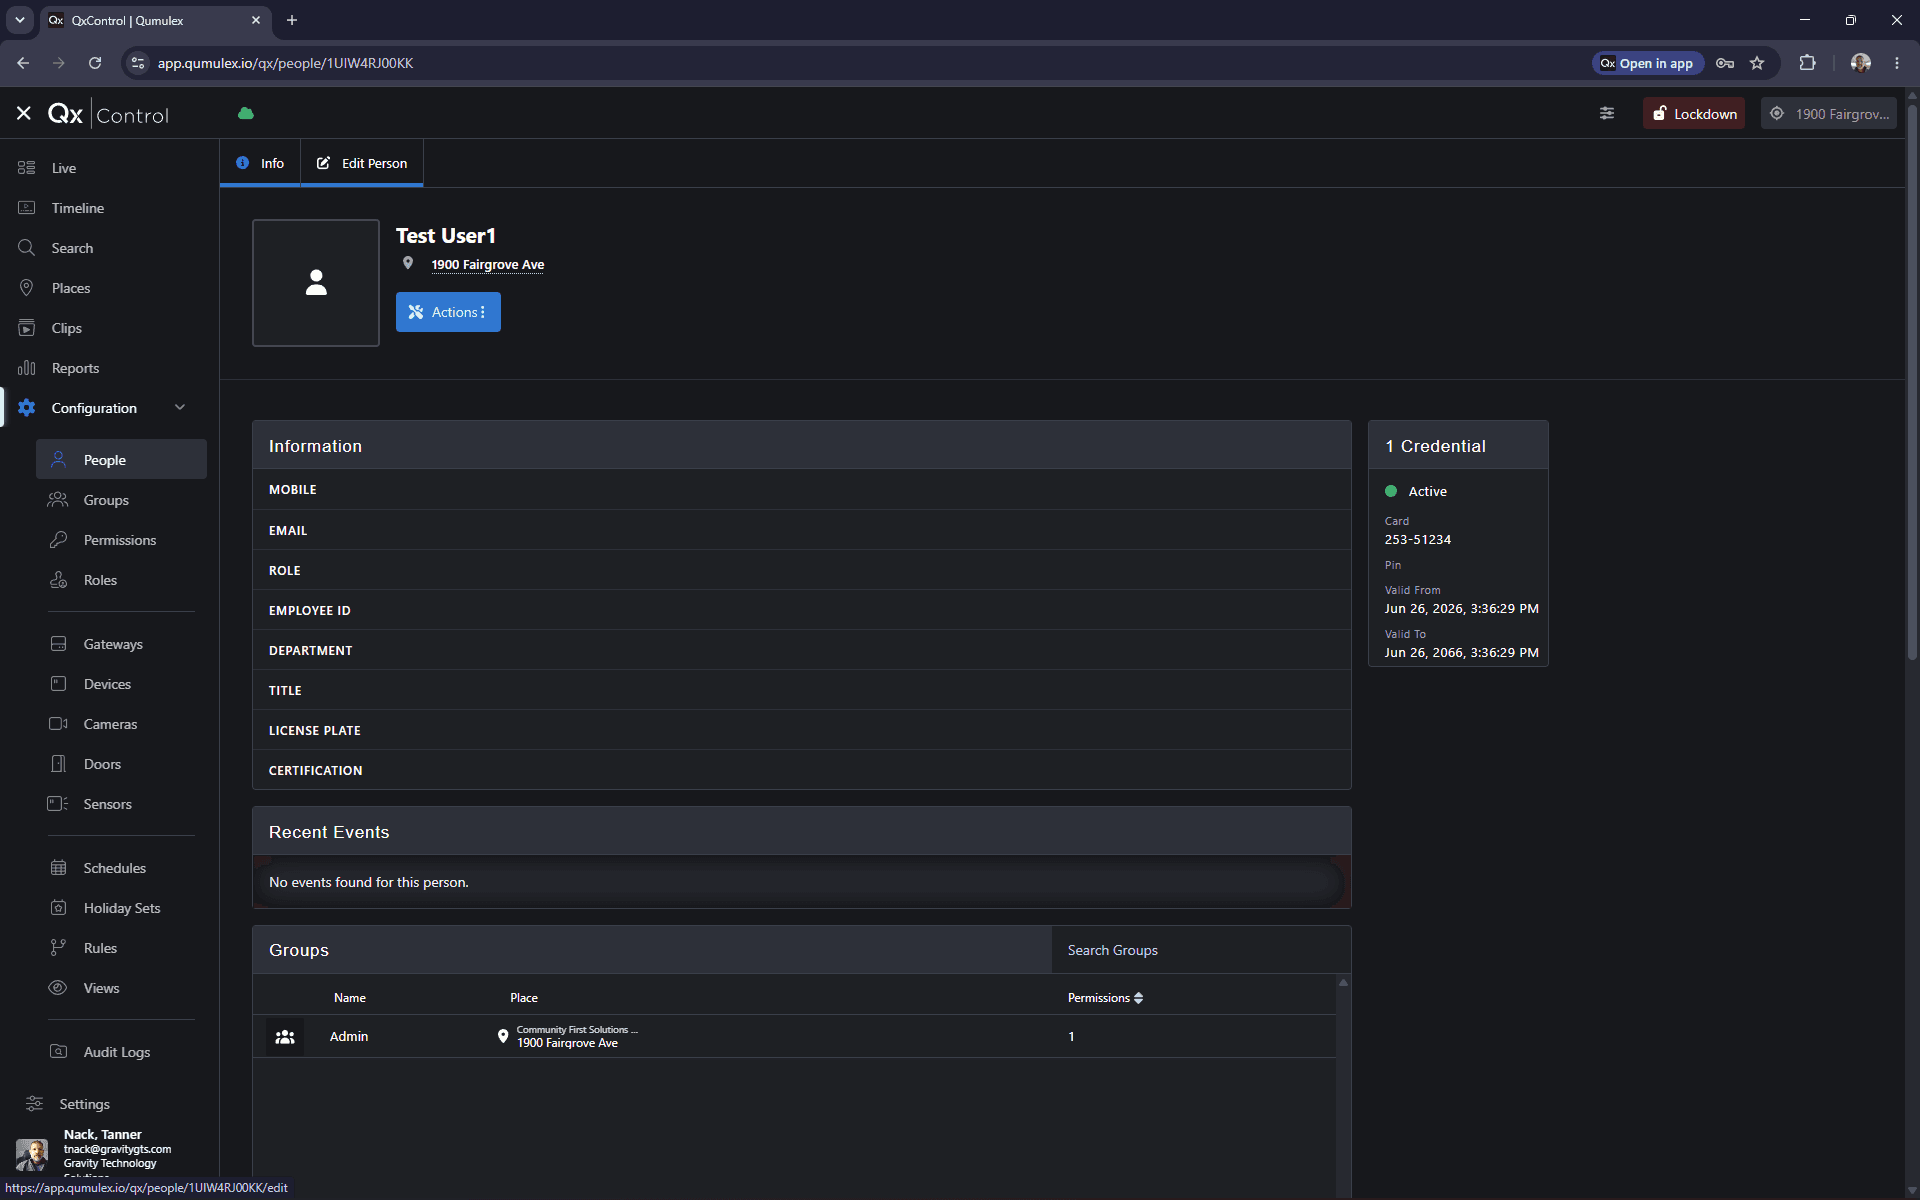
From the user's profile, click Edit Person.
Step #14: From the user's profile, click Edit Person.
15
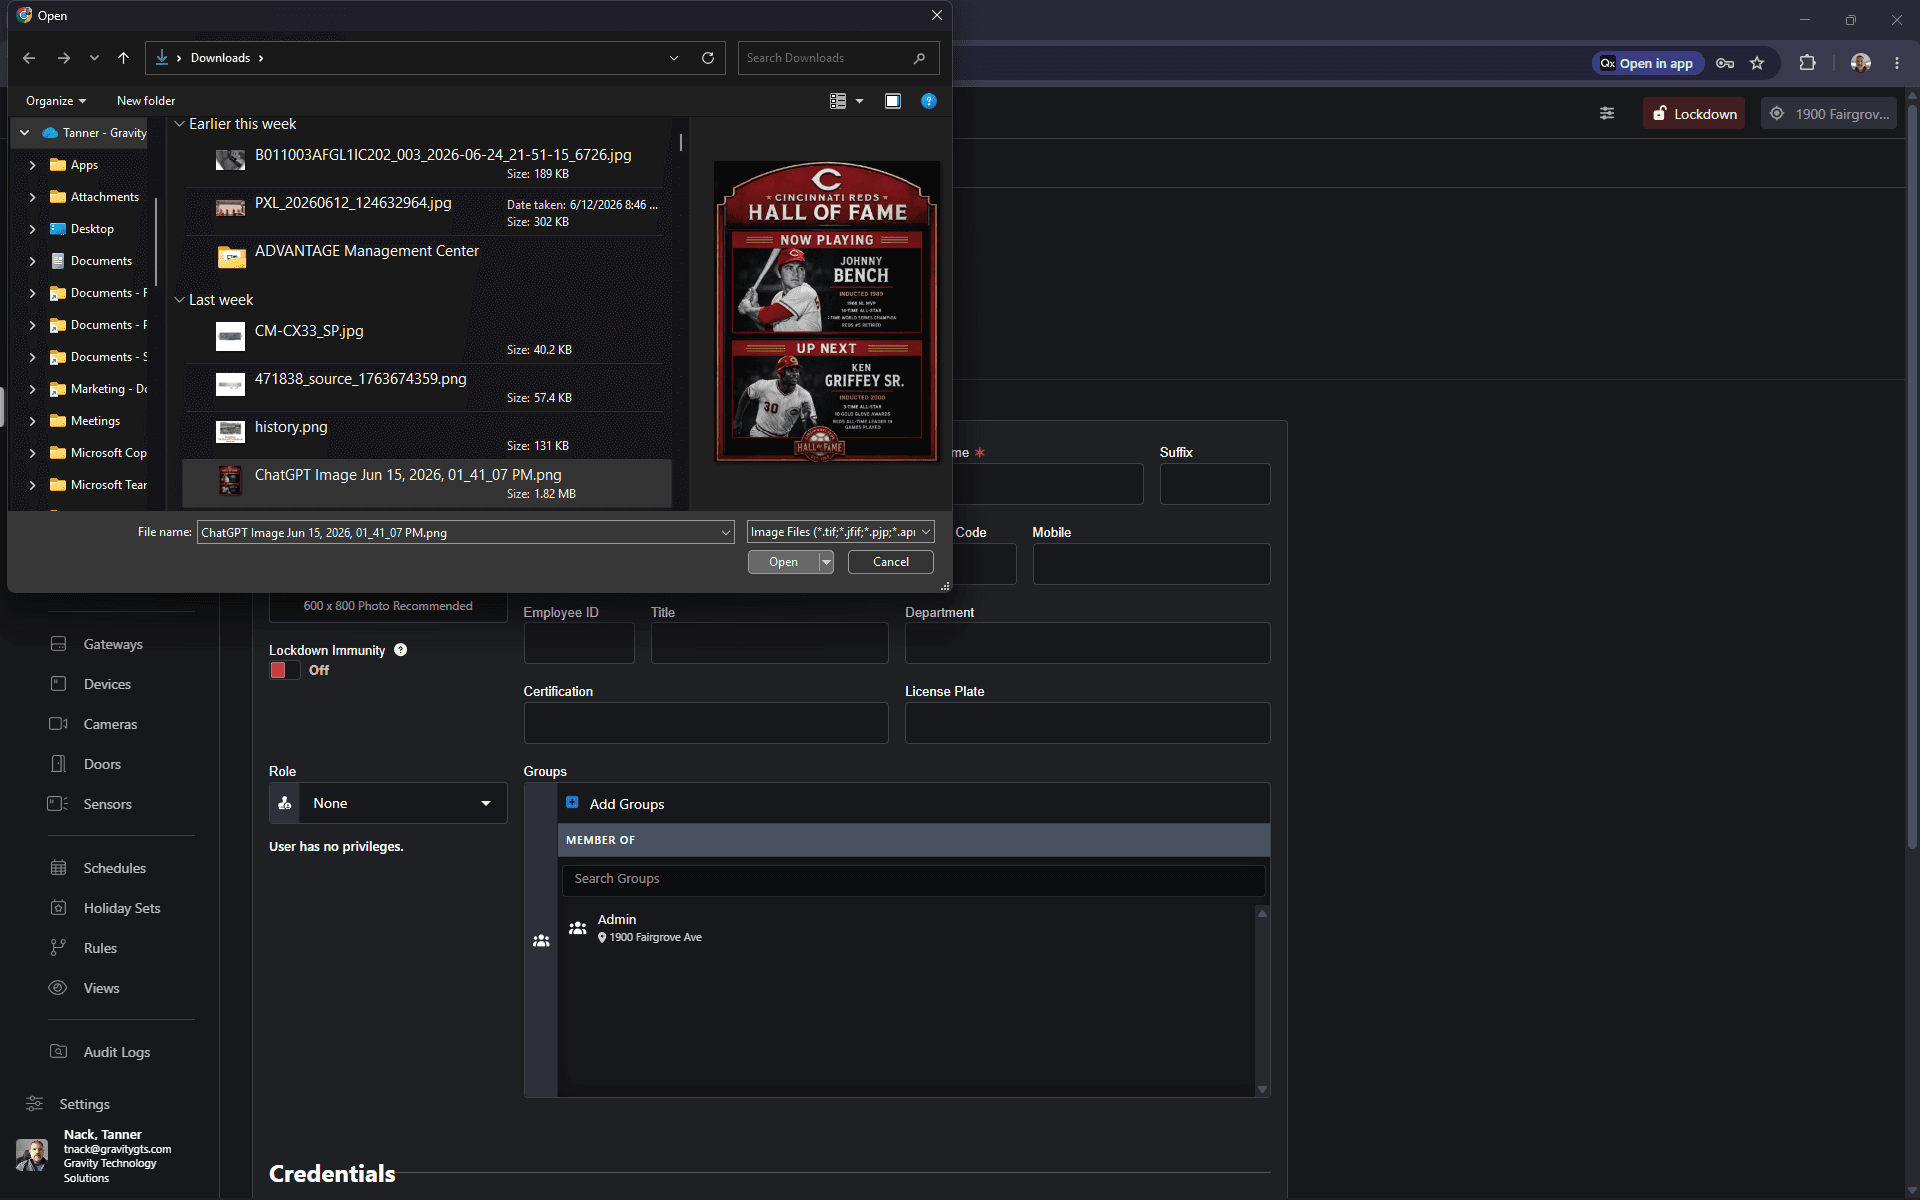
Click the picture placeholder, select an image file from your computer, and click Open.
Step #15: Click the picture placeholder, select an image file from your computer, and click Open.
16
Click Save Person.
Step #16: Click Save Person.

Find an Unknown Badge Number

If you need to assign a badge but do not know the card number, you can capture it through a live door scan.
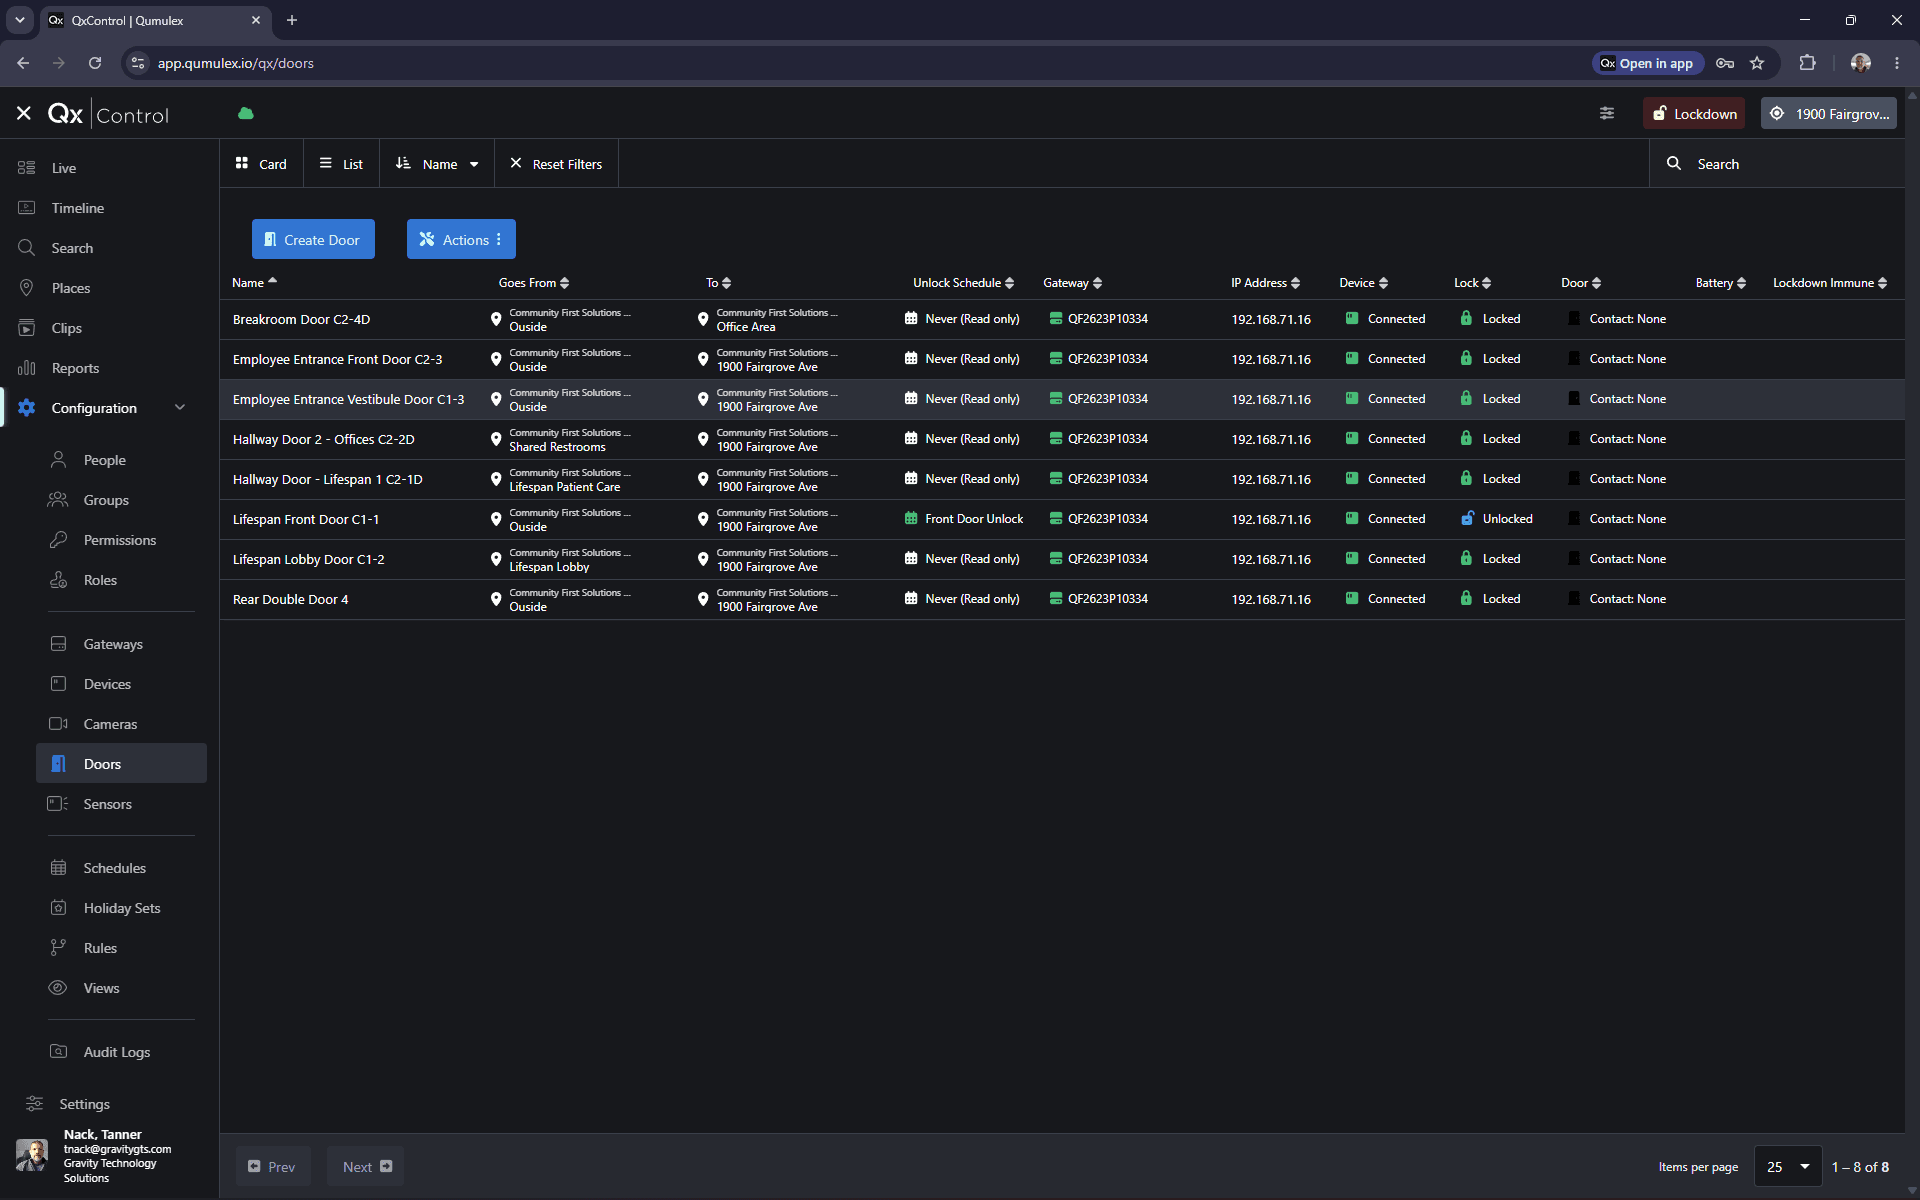
17
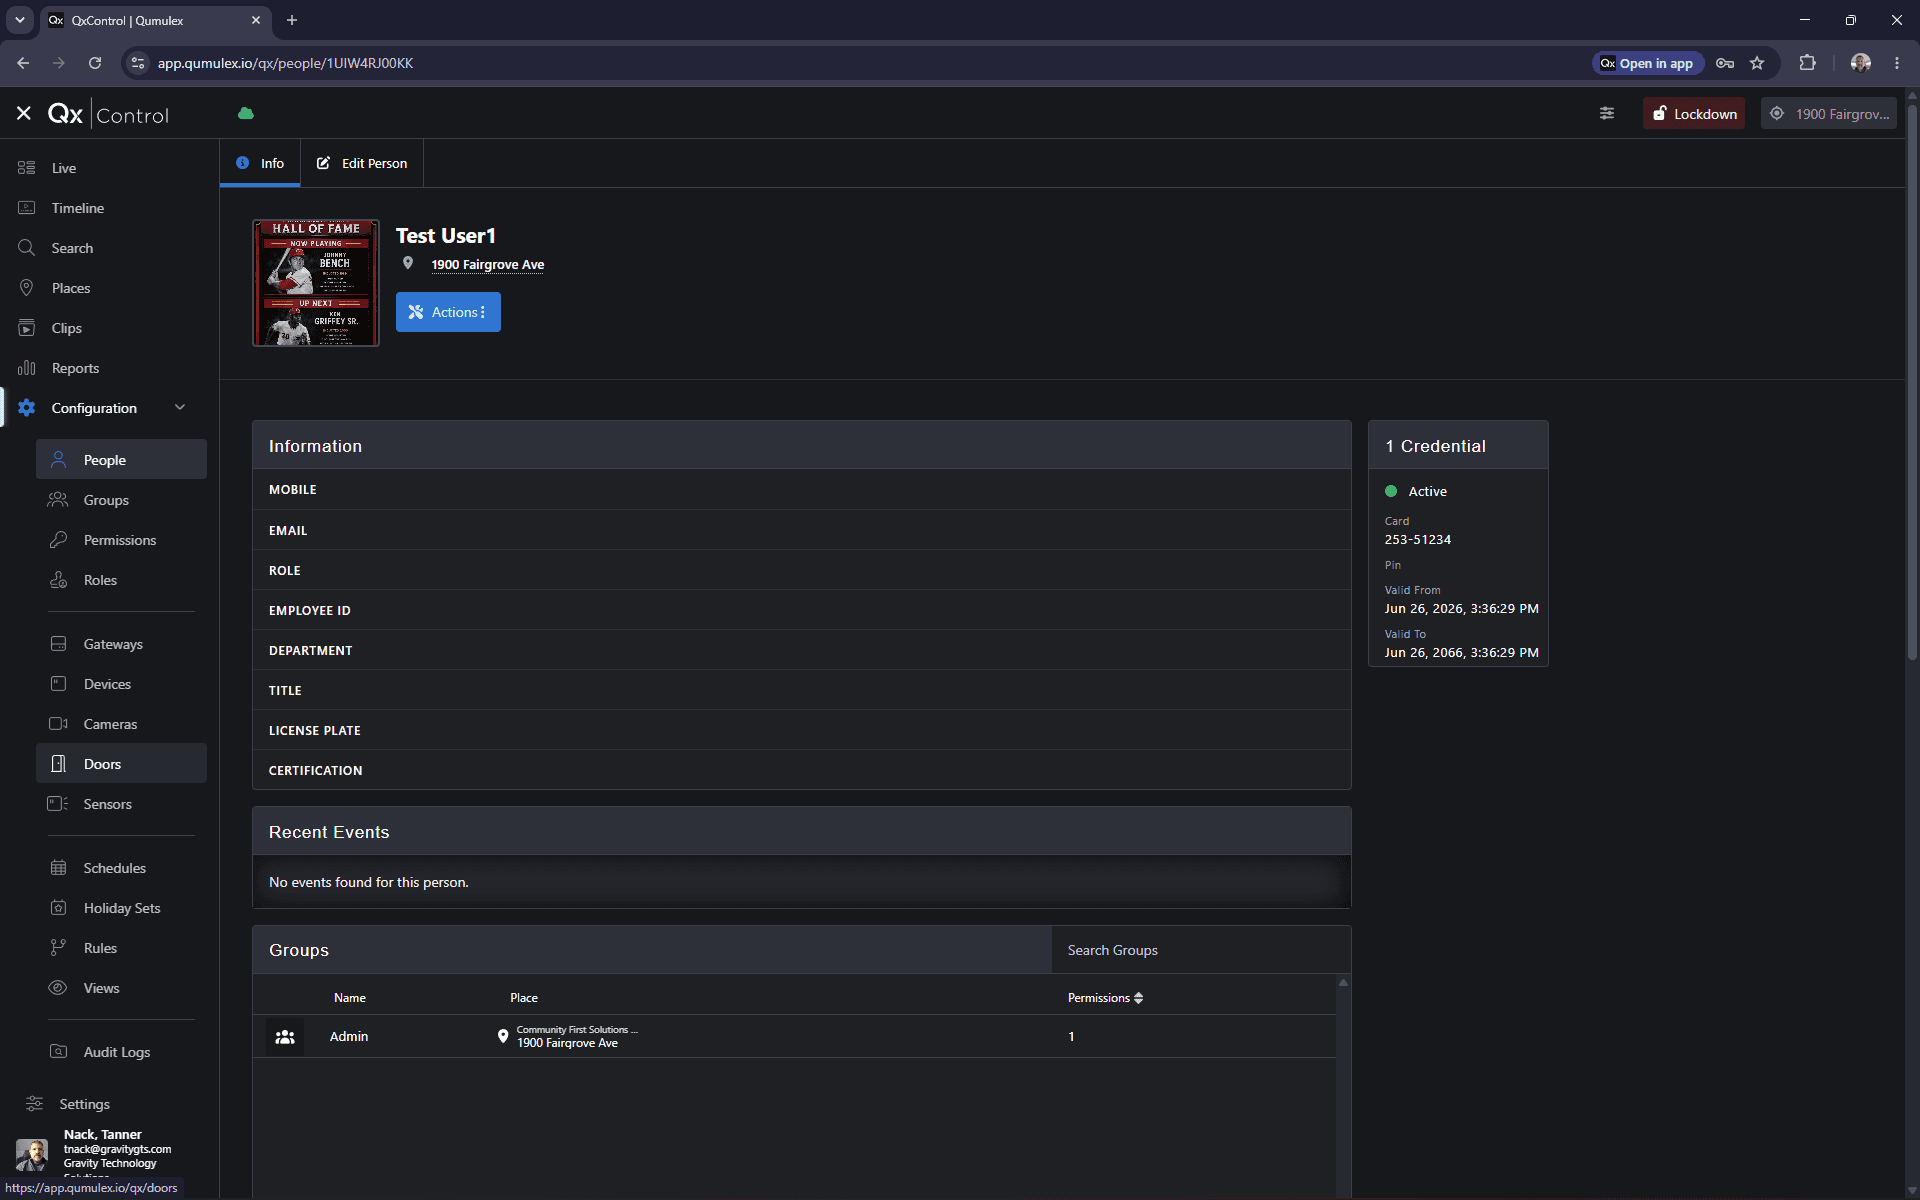
Click on Doors under the Configuration menu.
Step #17: Click on Doors under the Configuration menu.
18
Select the specific door where the user will scan their badge.
Step #18: Select the specific door where the user will scan their badge.
19
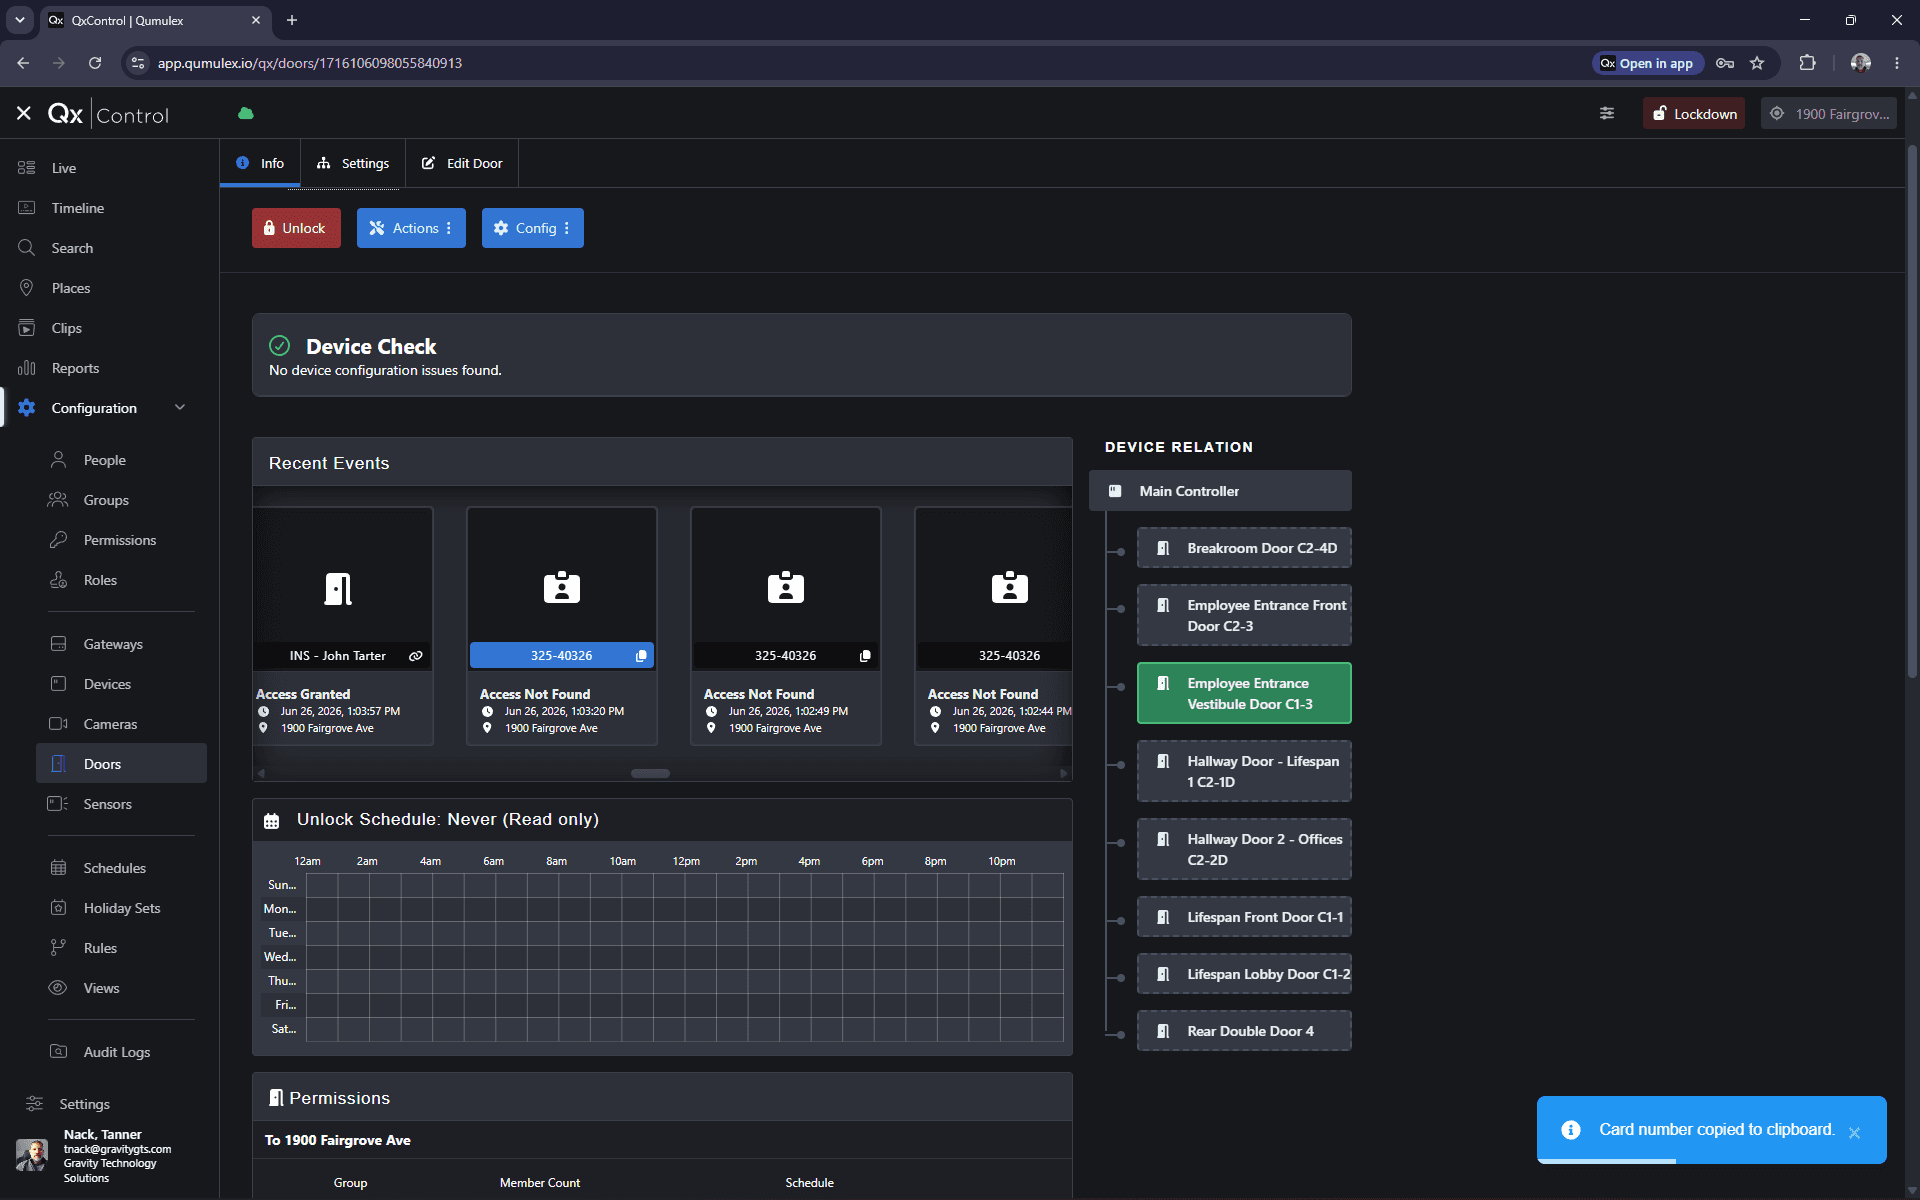
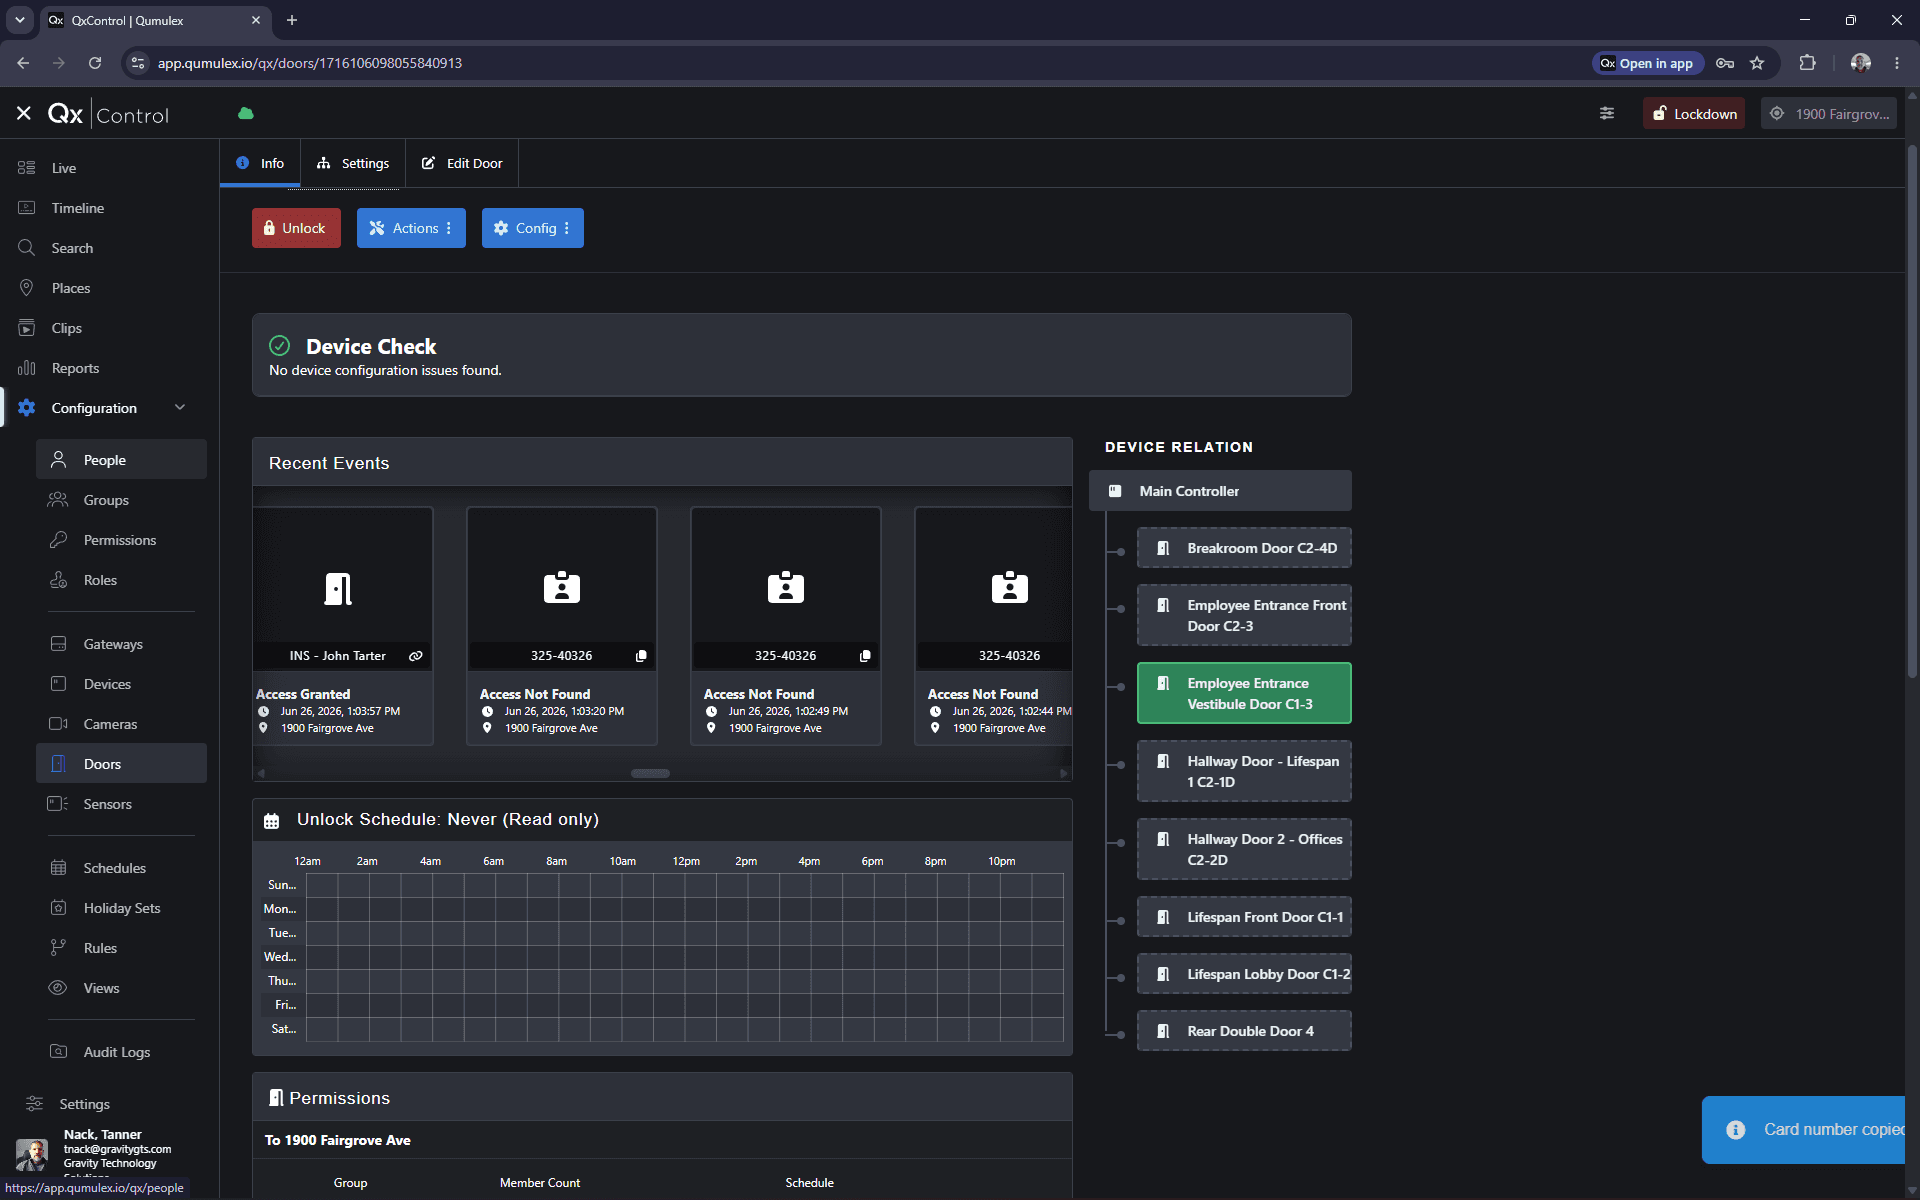
Have the user scan their badge at the door. Locate the "access not found" entry under Recent Events and click the copy icon to copy the card number.
Step #19: Have the user scan their badge at the door. Locate the "access not found" entry under Recent Events and click the copy icon to copy the card number.
20
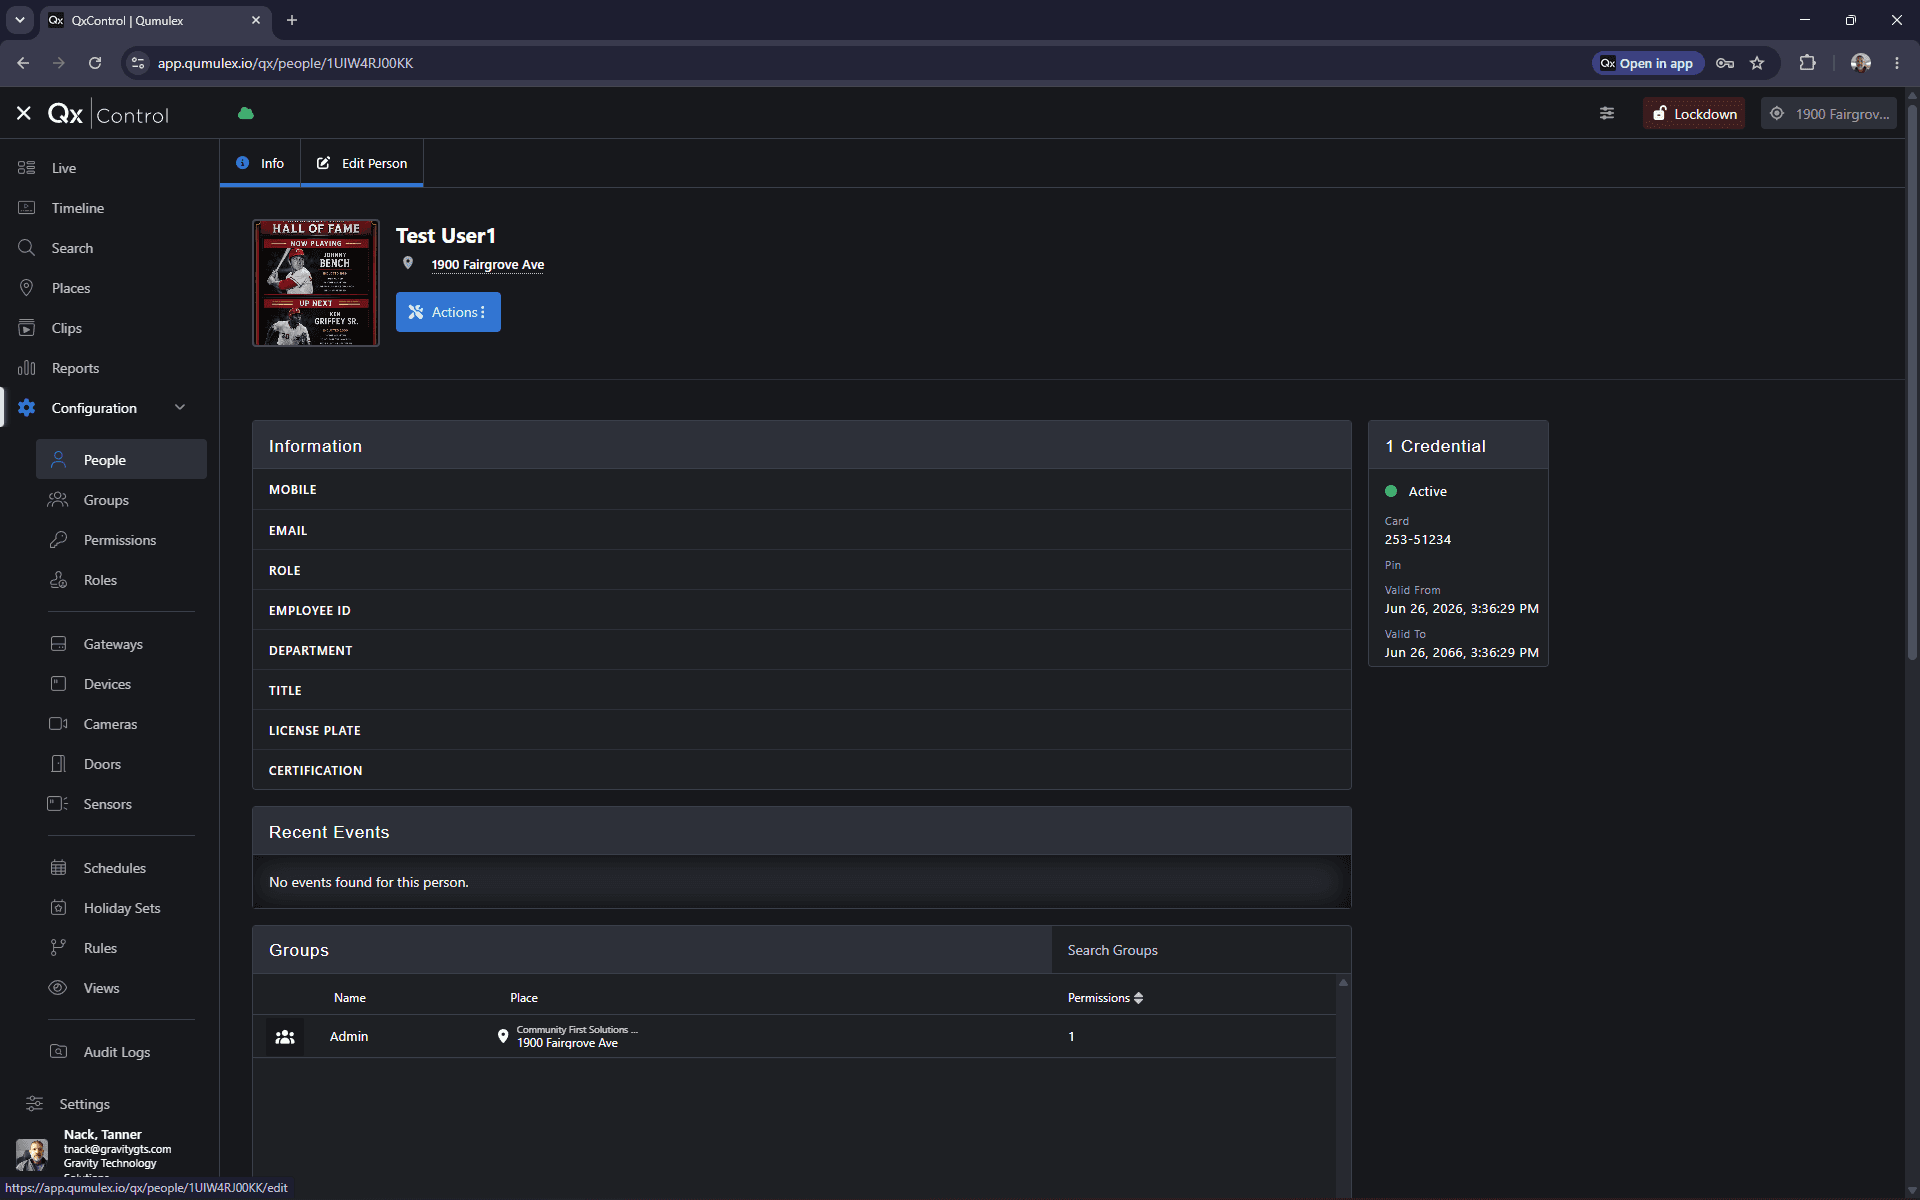
Navigate back to People and select the user you wish to assign the badge to.
Step #20: Navigate back to People and select the user you wish to assign the badge to.
21
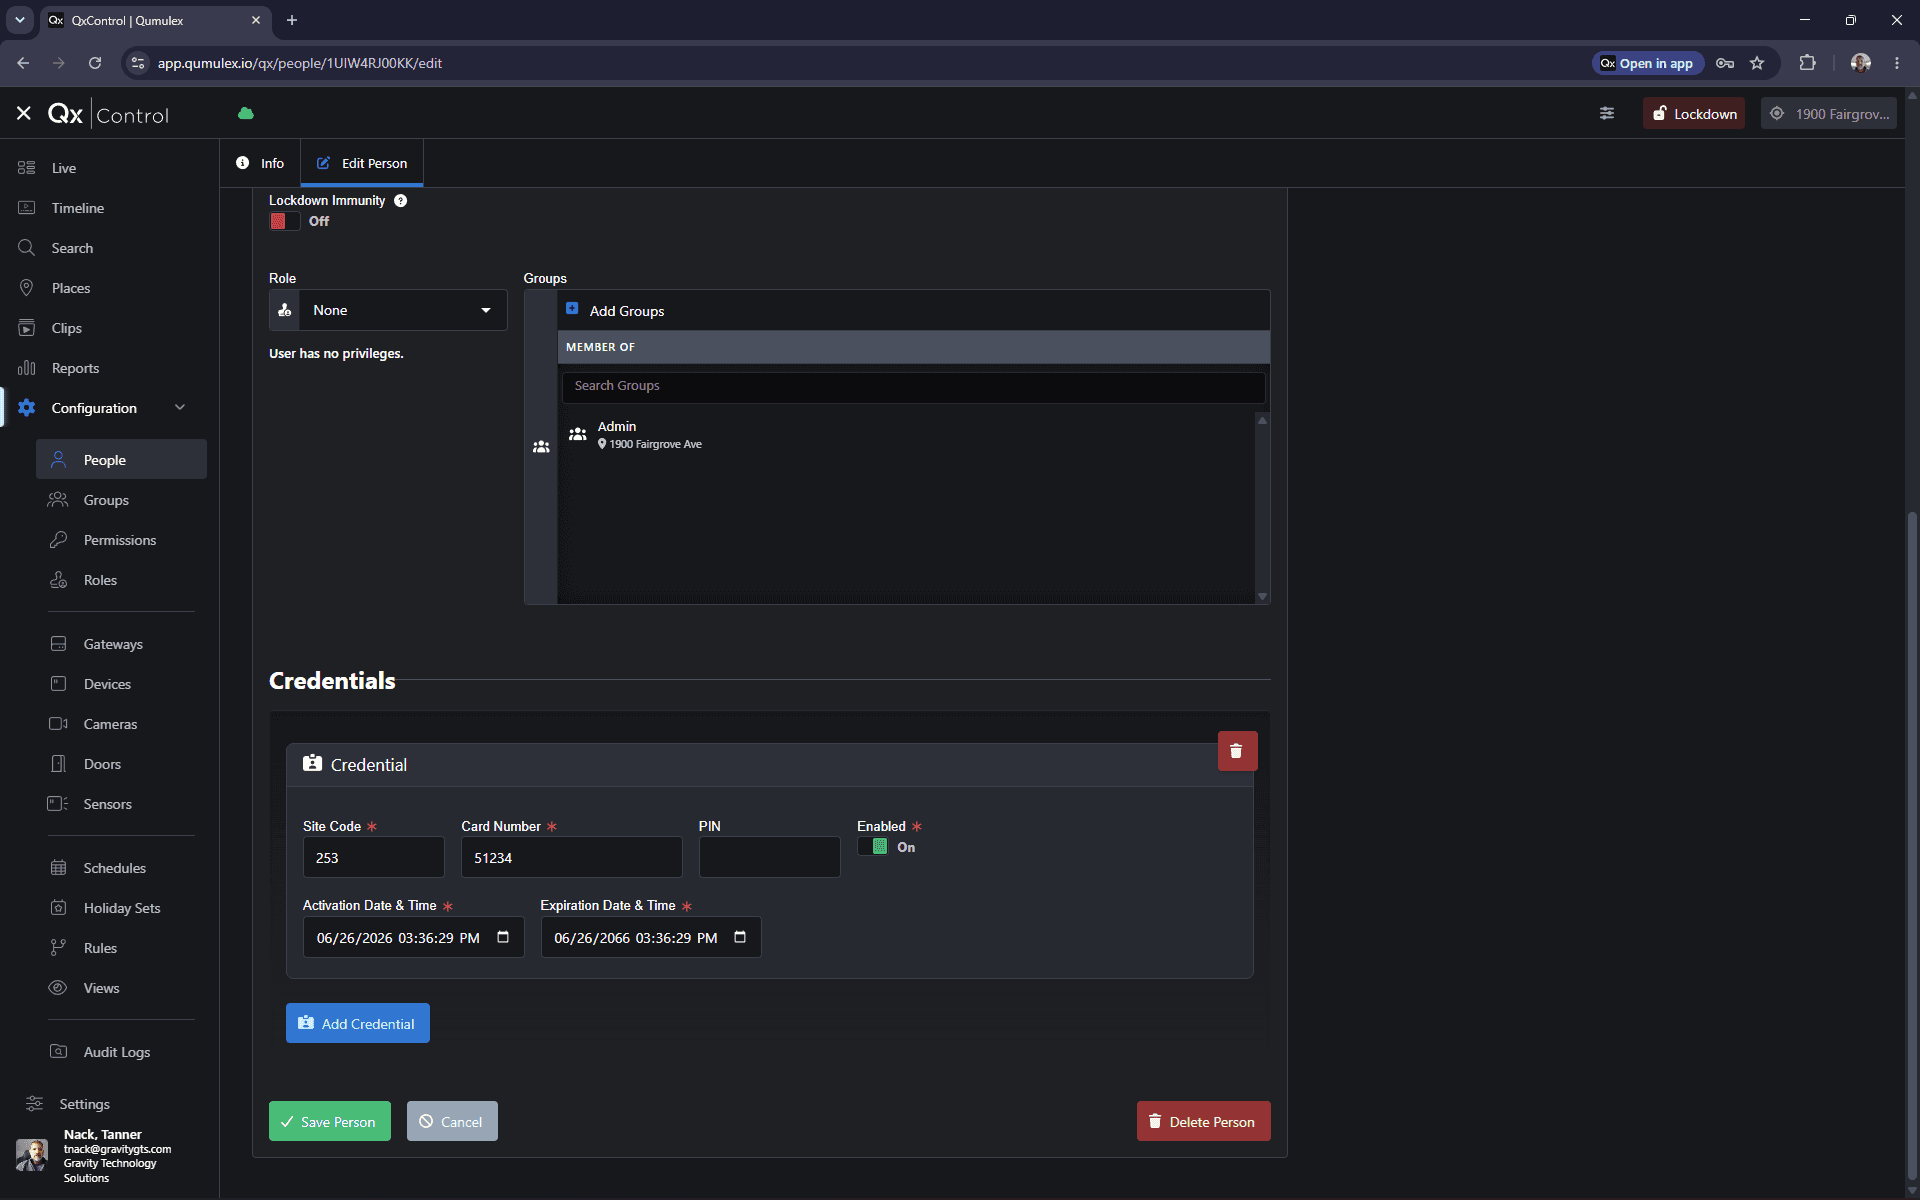
Click Edit Person.
Step #21: Click Edit Person.
22
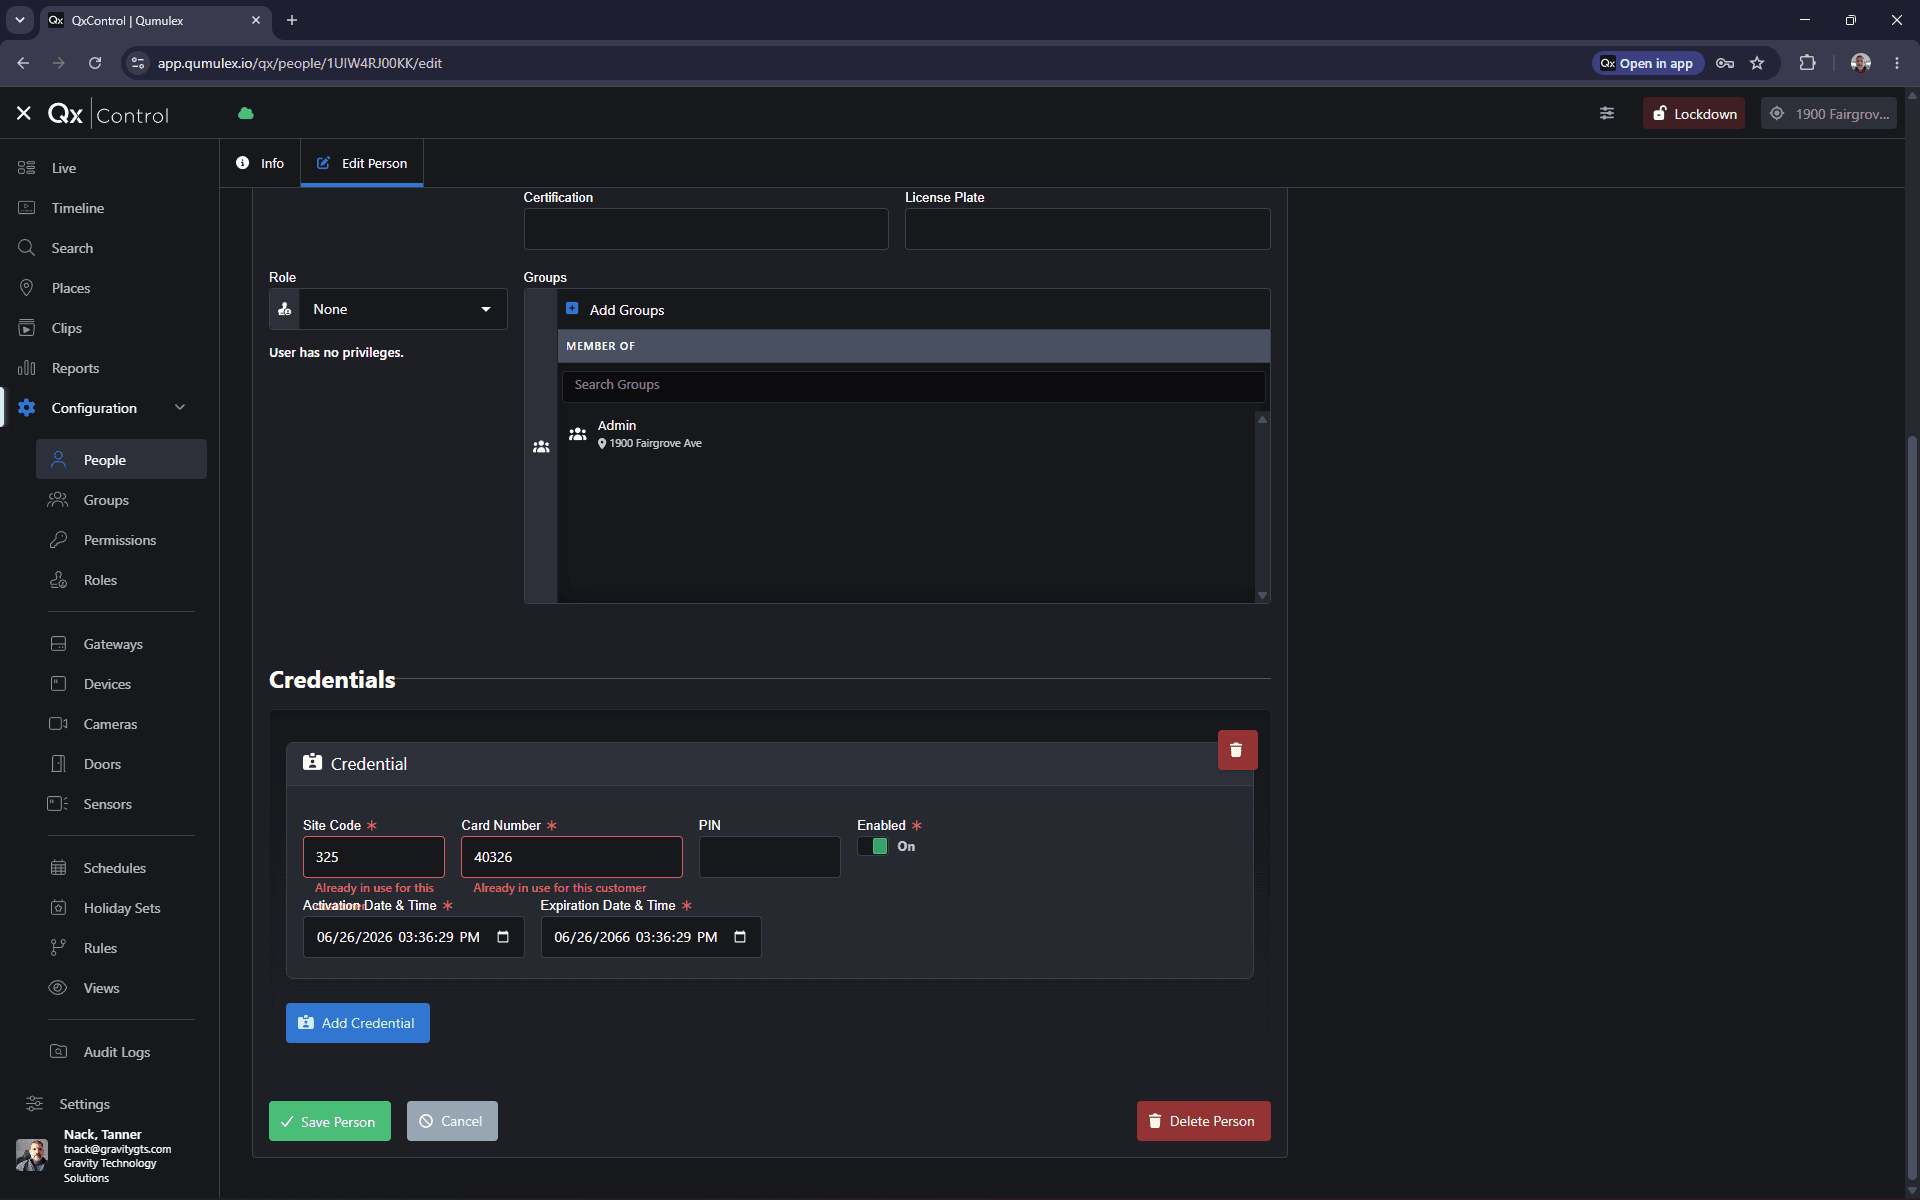
Scroll down to the credentials section and paste the copied card number.
23
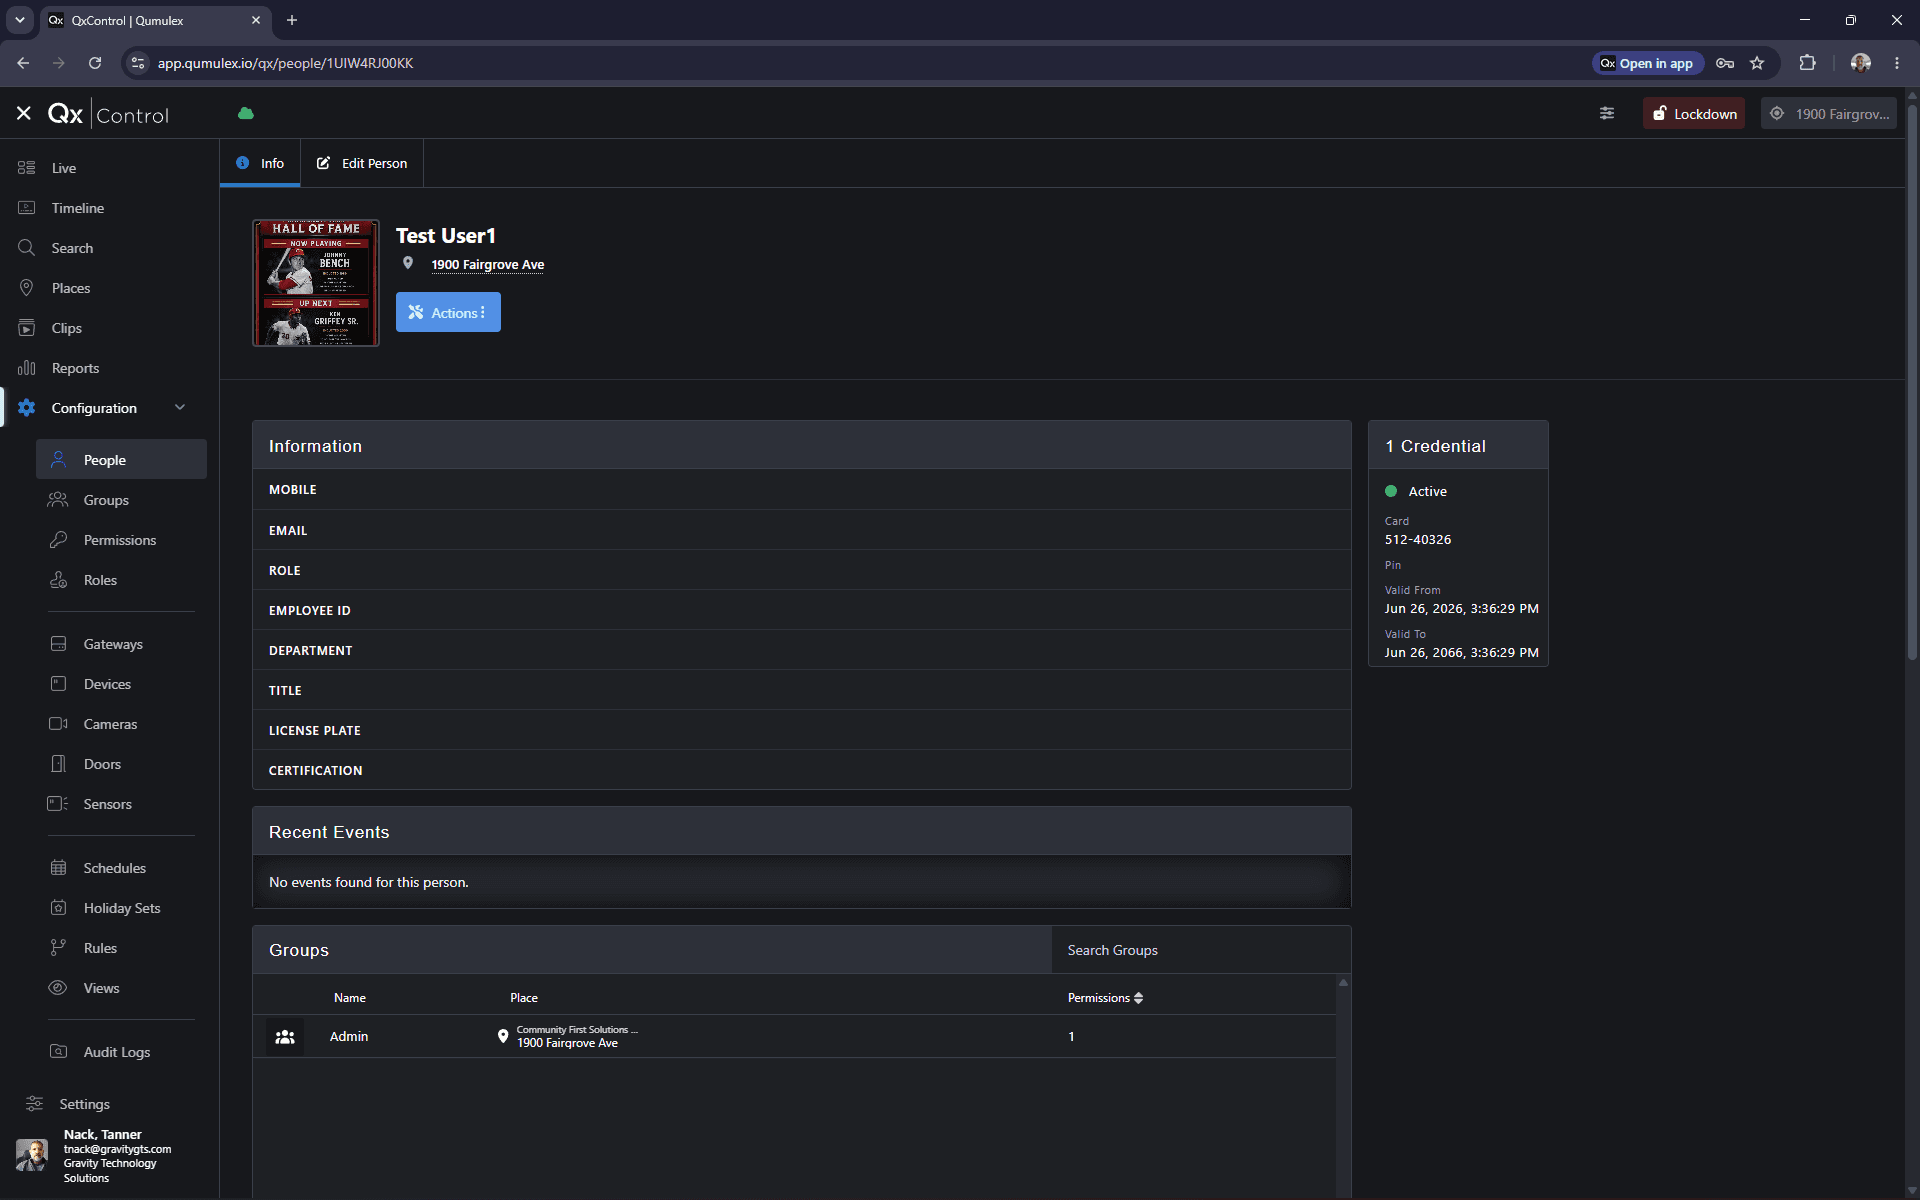
Click Save Person.
Step #23: Click Save Person.

Deactivate a User

24
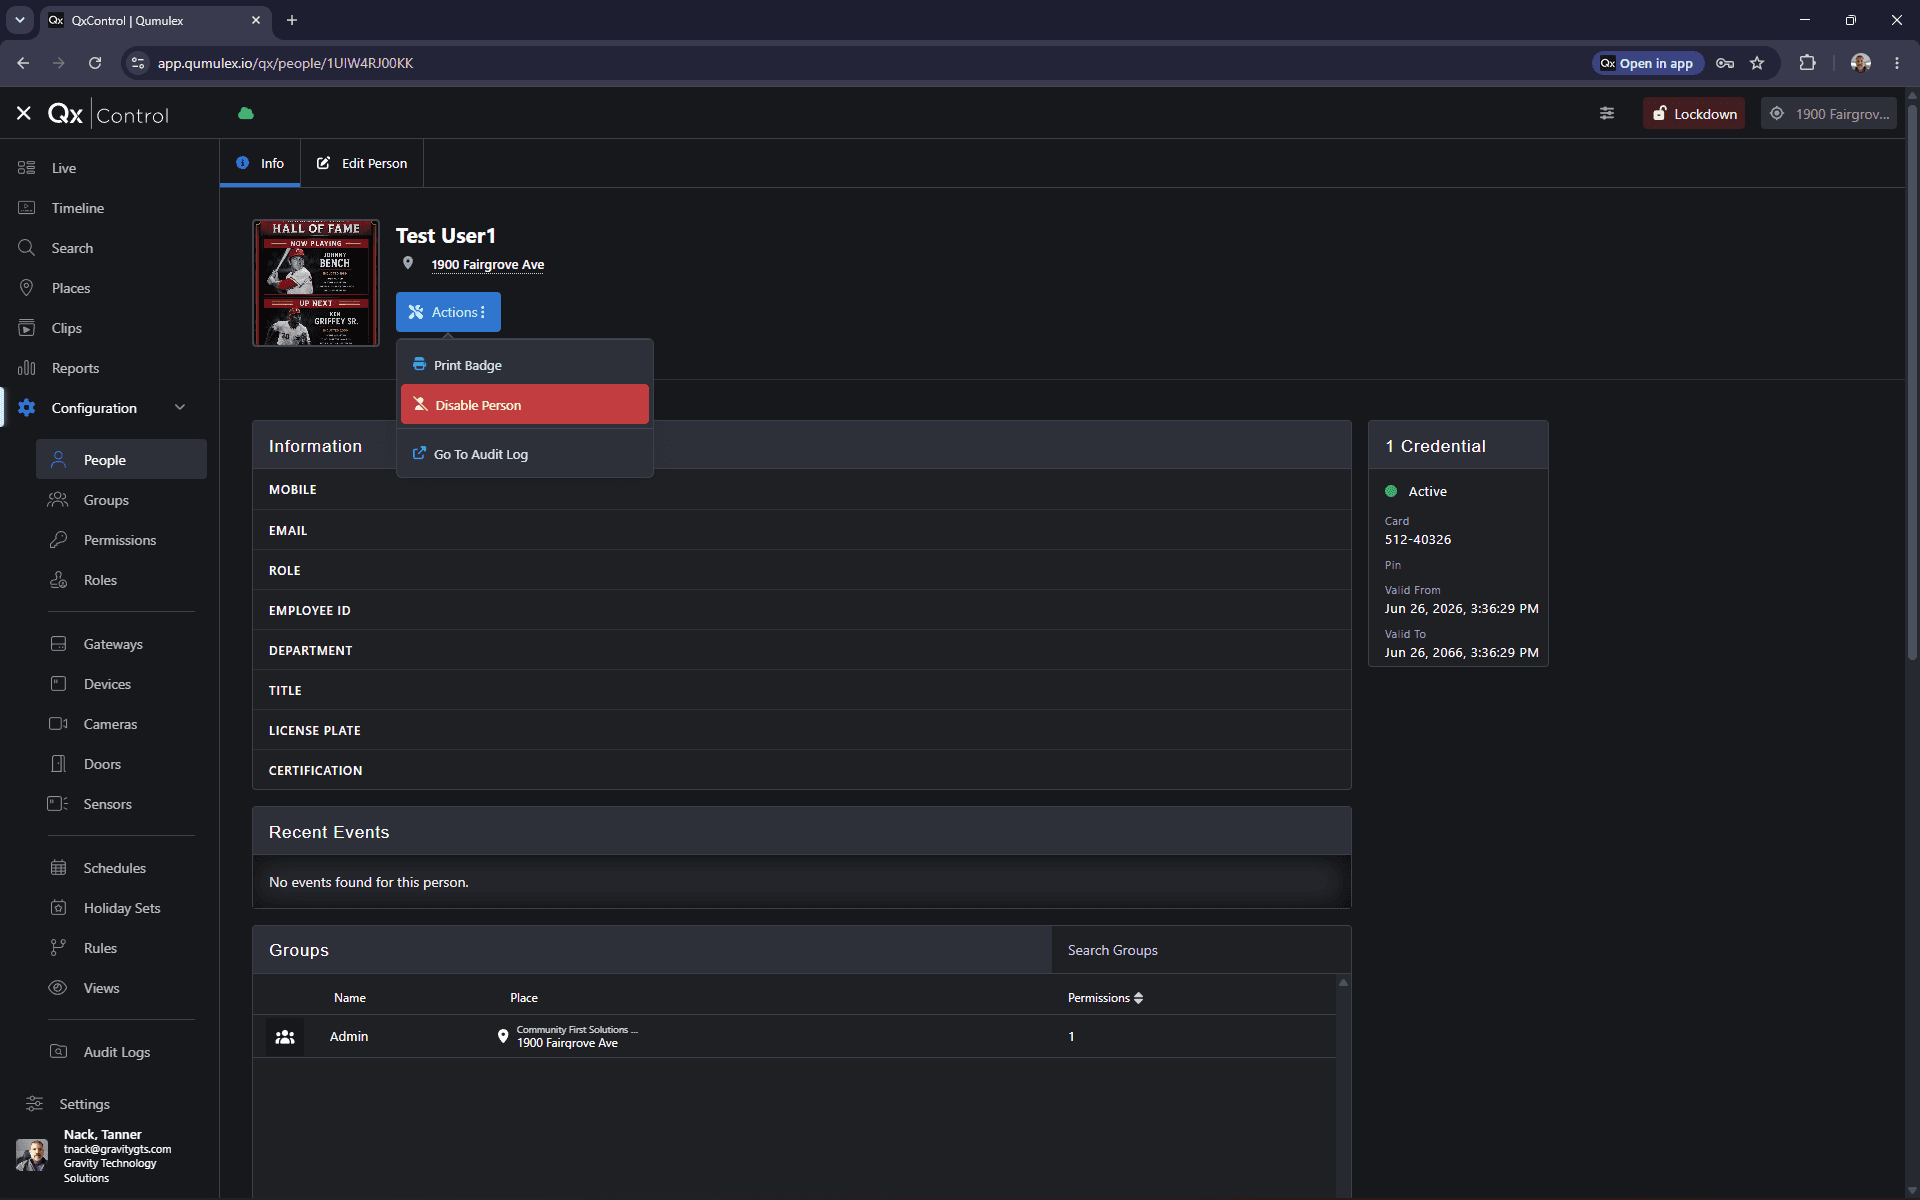
Navigate to the user's profile and click Actions.
Step #24: Navigate to the user's profile and click Actions.
25
Click Disable Person to immediately invalidate their credentials.
Step #25: Click Disable Person to immediately invalidate their credentials.

Q: What should I do if I don't know the person's badge number?

A: Have the person scan their badge at a specific door, then view that door's recent events in QxControl. The scan will show as "access not found," and you can copy the card number from there to paste into the user's profile.

Q: Why shouldn't I delete a user when they leave the organization?

A: It is recommended to deactivate a user instead of deleting them. This preserves their access history and allows the system to log unauthorized access attempts and send alerts if their deactivated badge is used.

Q: Will the system allow duplicate badge numbers?

A: No, if you attempt to assign a site code and card number that is already in use by another person, the system will warn you and prevent you from saving the duplicate credential.

Term

Definition

Scope

The location or organizational level currently selected in the system, which dictates what data and settings are visible.

Site Code

A facility-specific identifier number programmed into access control credentials.

Card Number

The unique identification number assigned to an individual physical access badge or keycard.