Create and Process a Customer Order in IFS Applications
Learn how to create a new customer order, add lines, attach documents, and process initial shipment phases in IFS Applications.
By Jerad Matkus
This guide walks you through the end-to-end process of creating a new customer order, entering necessary details, and managing the initial shipment phases in IFS Applications. Following these steps ensures accurate data entry, proper document generation, and a smooth transition into the warehouse picking process.
This guide is intended for sales and order processing teams who handle customer requests. It should be referenced whenever a new purchase order is received and needs to be logged, verified, and released for fulfillment.
Initialize the Customer Order
Navigate to the Customer Order screen to begin the order entry process.
1
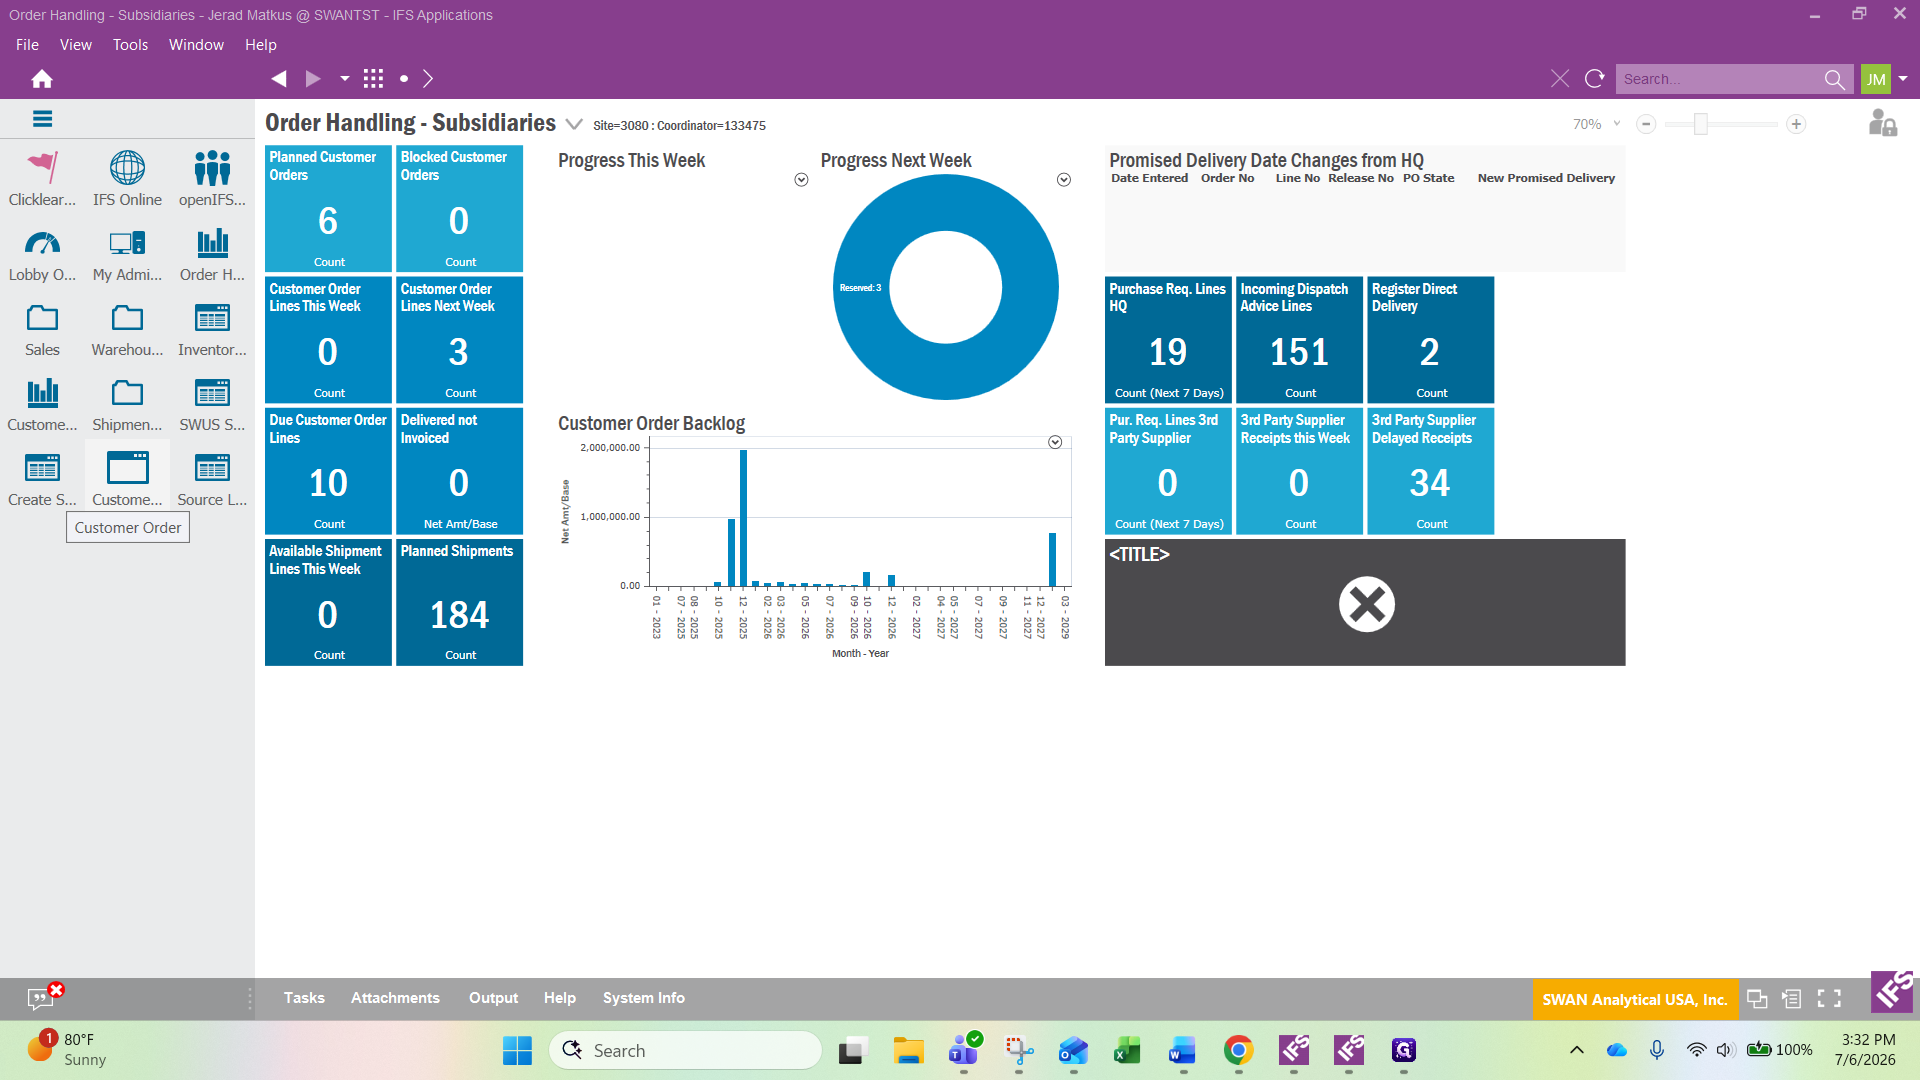
Click the Order Handling tile from your dashboard.
2
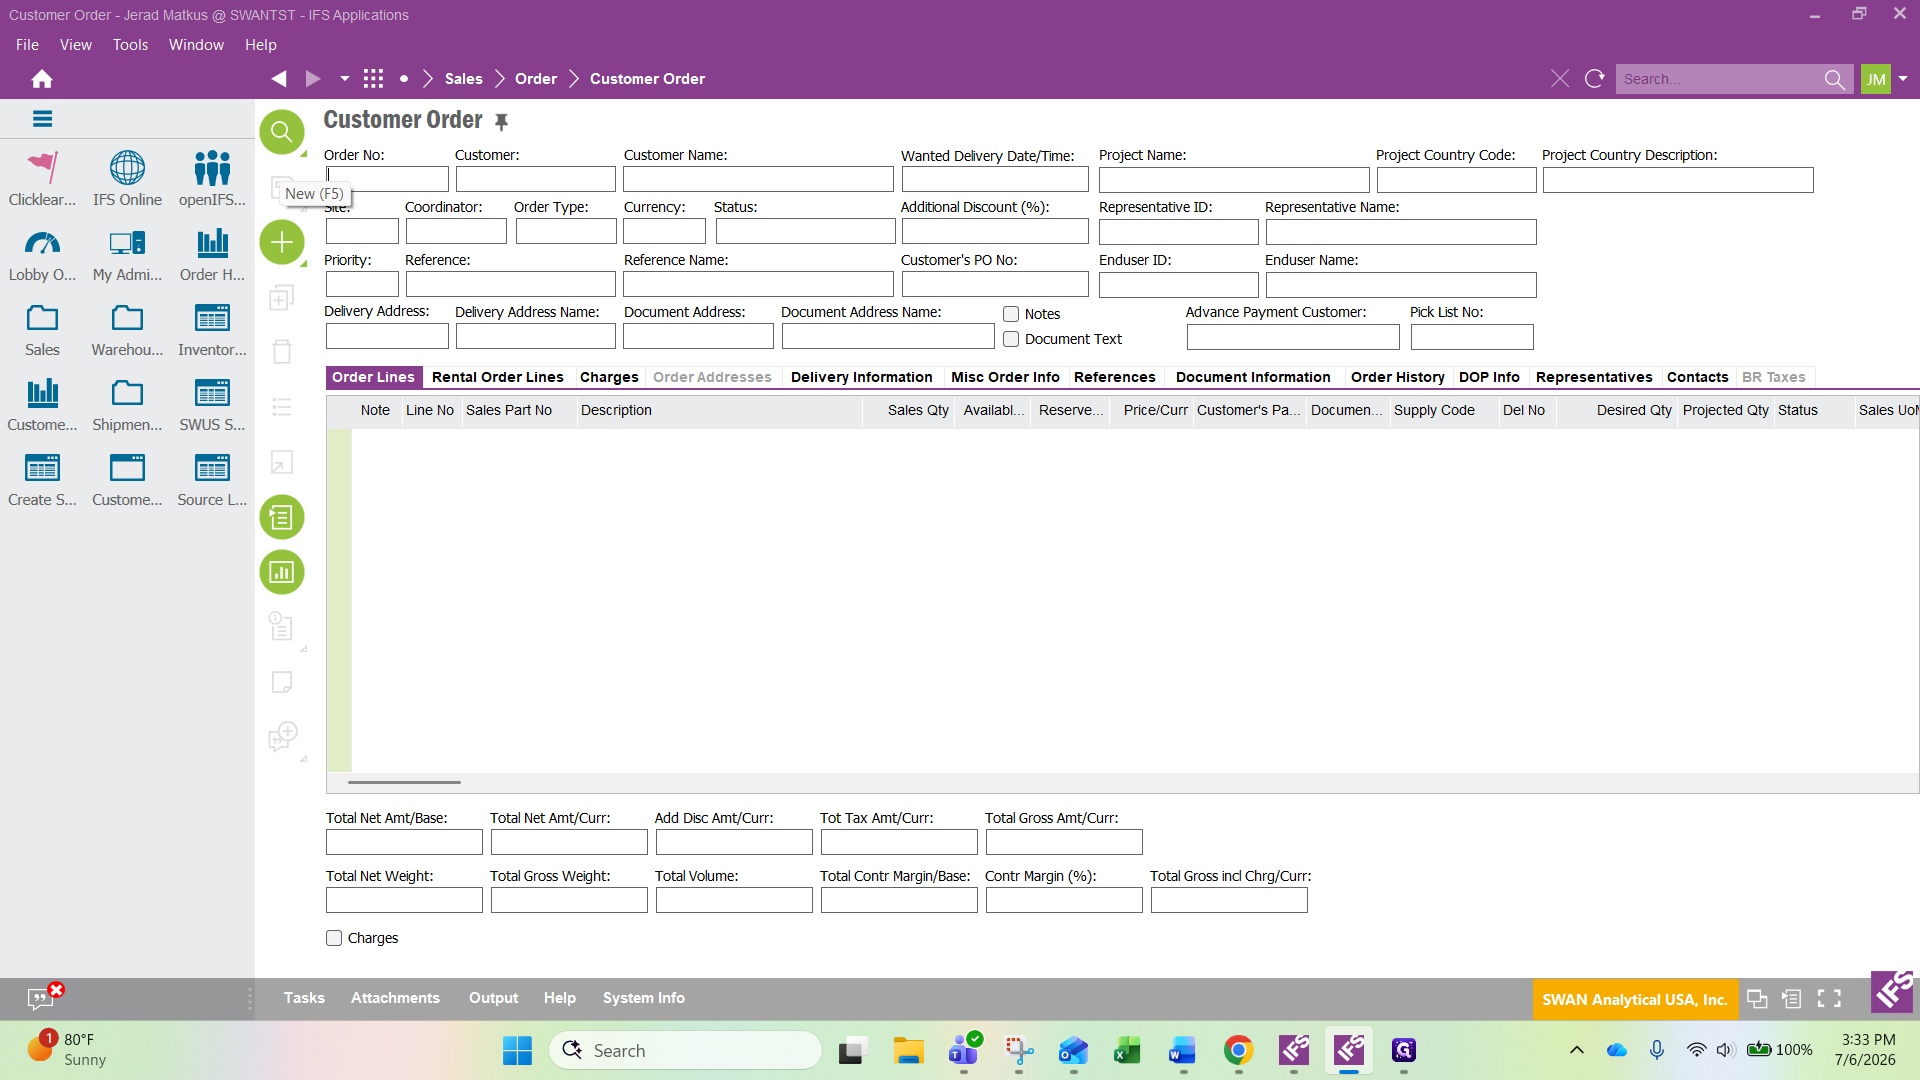
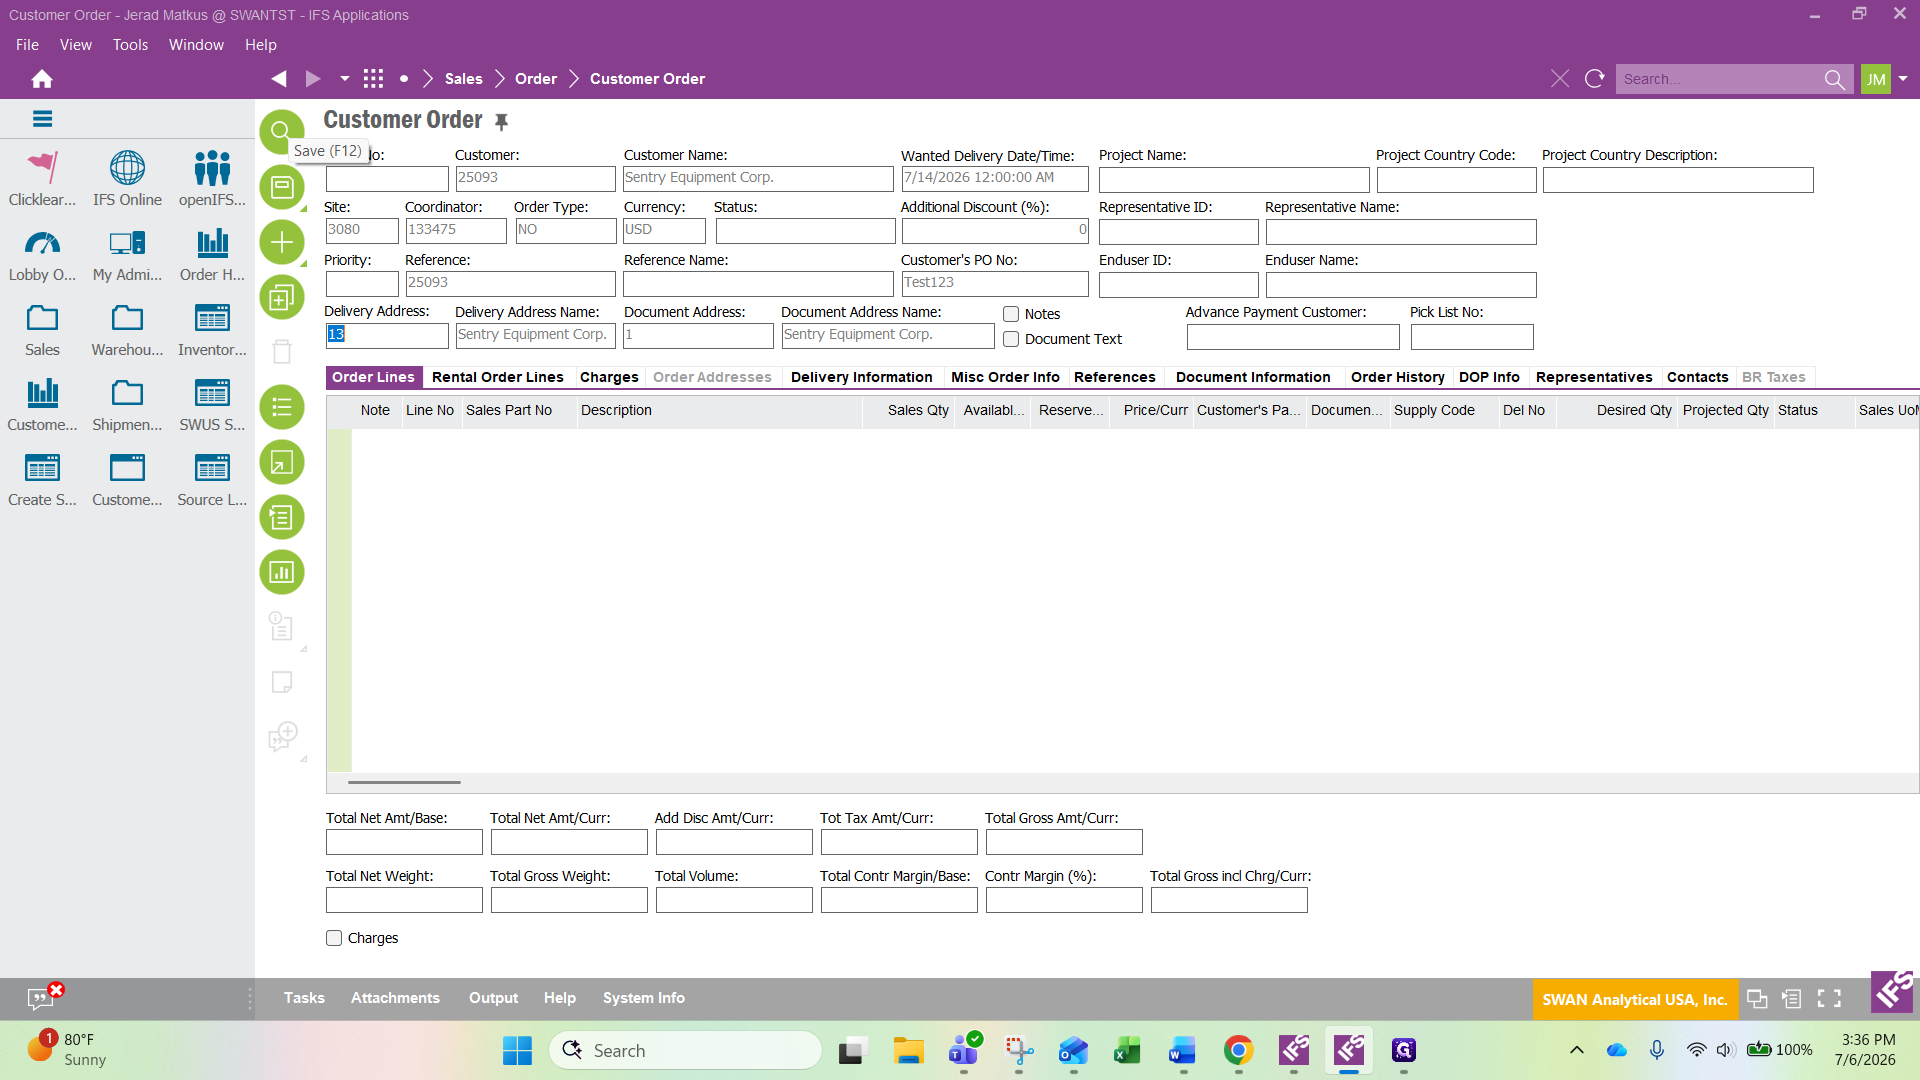
Click + (or press F5) in the left navigation to create a new order.
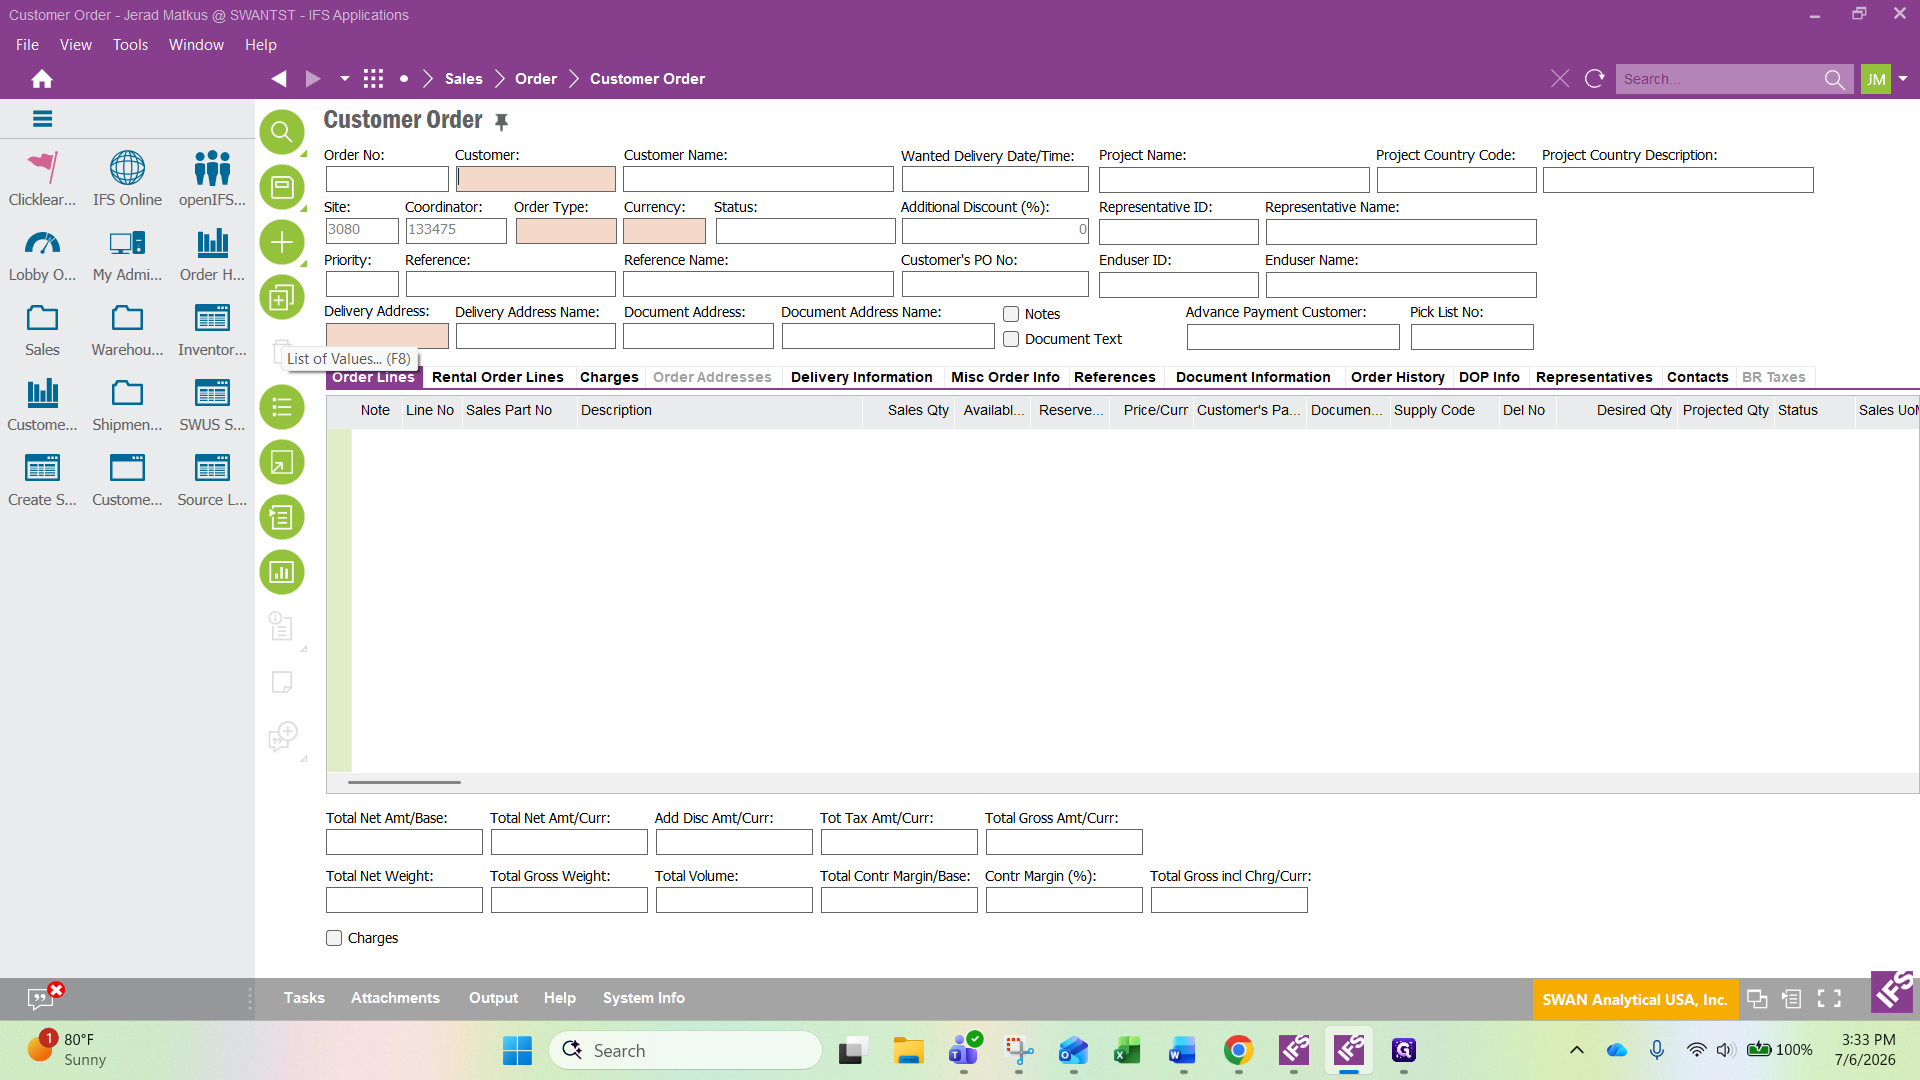
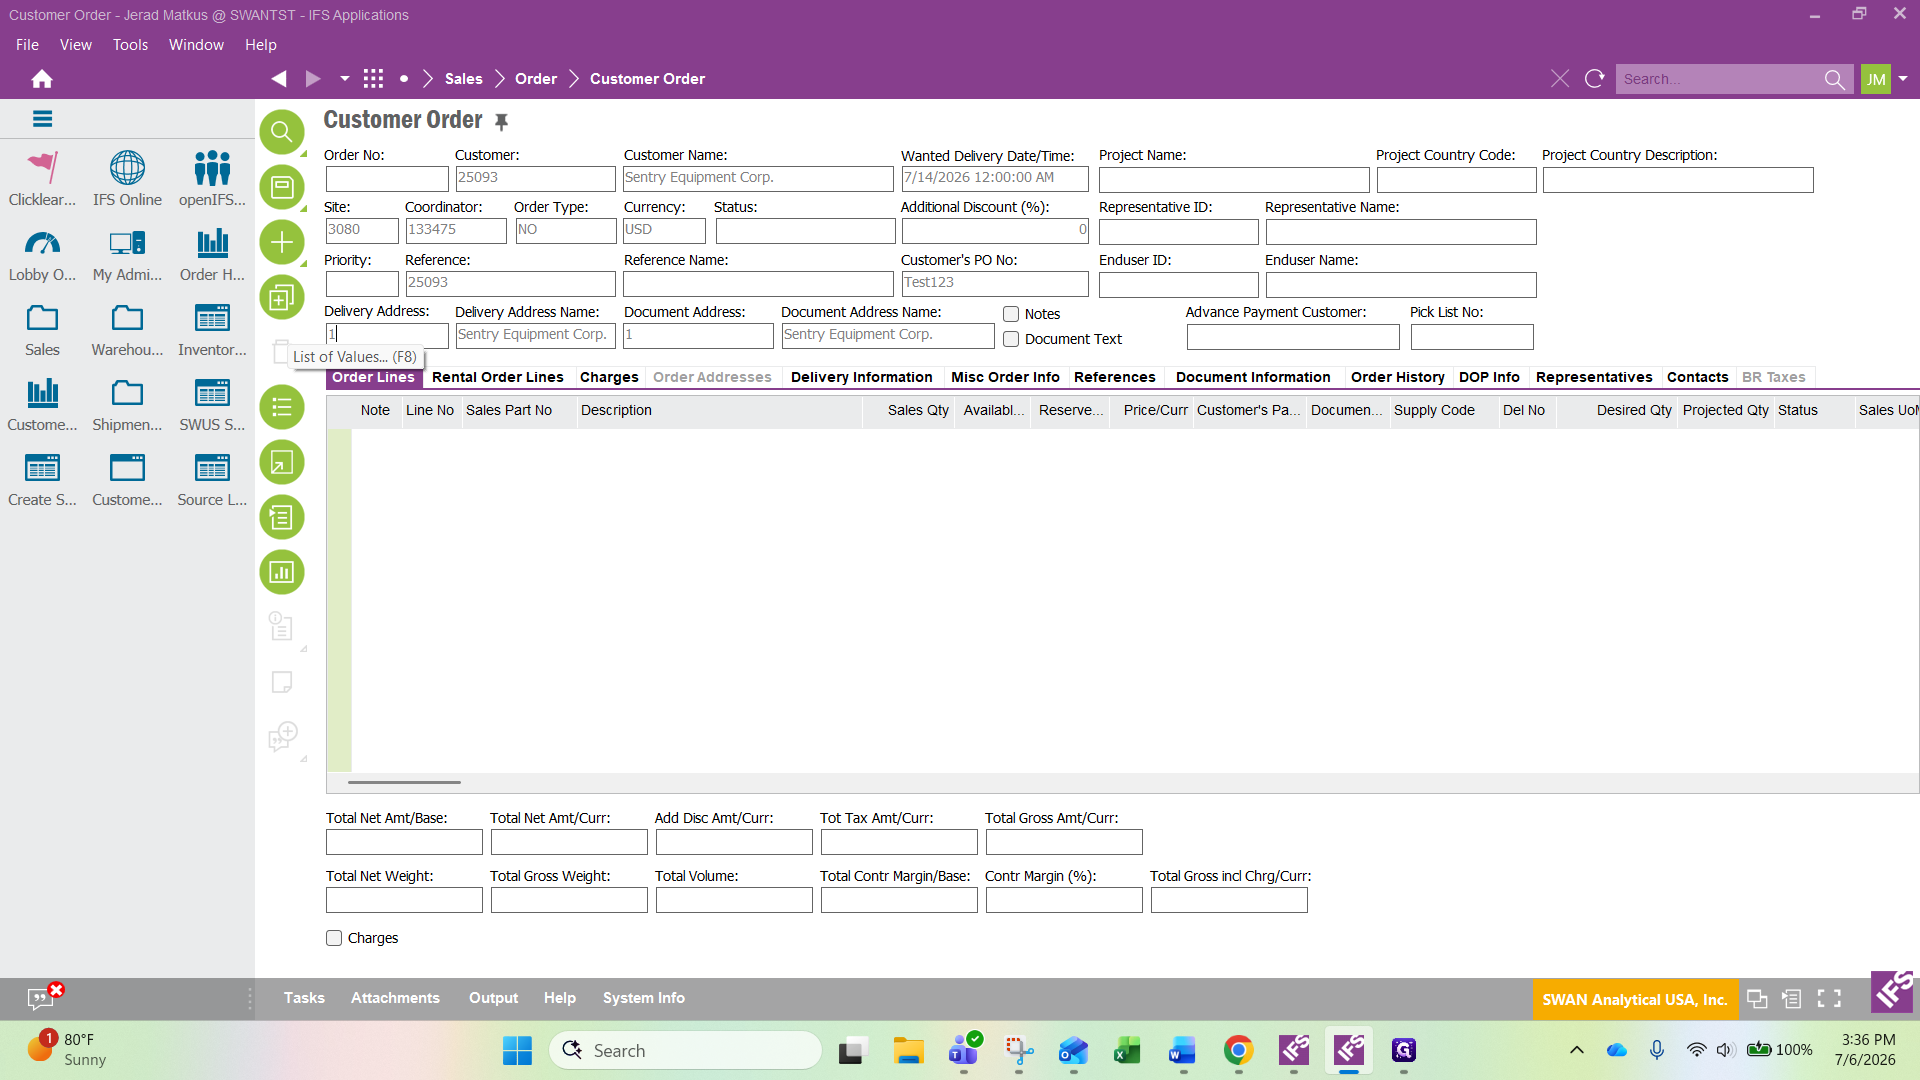
There are multiple ways to open the List of Values when selecting data for fields throughout the application.
Method
Action
Toolbar
Click the three lines icon on the side toolbar.
Menu
Click List of Values.
Keyboard
Press F8 on your keyboard.
Enter Header Information
3
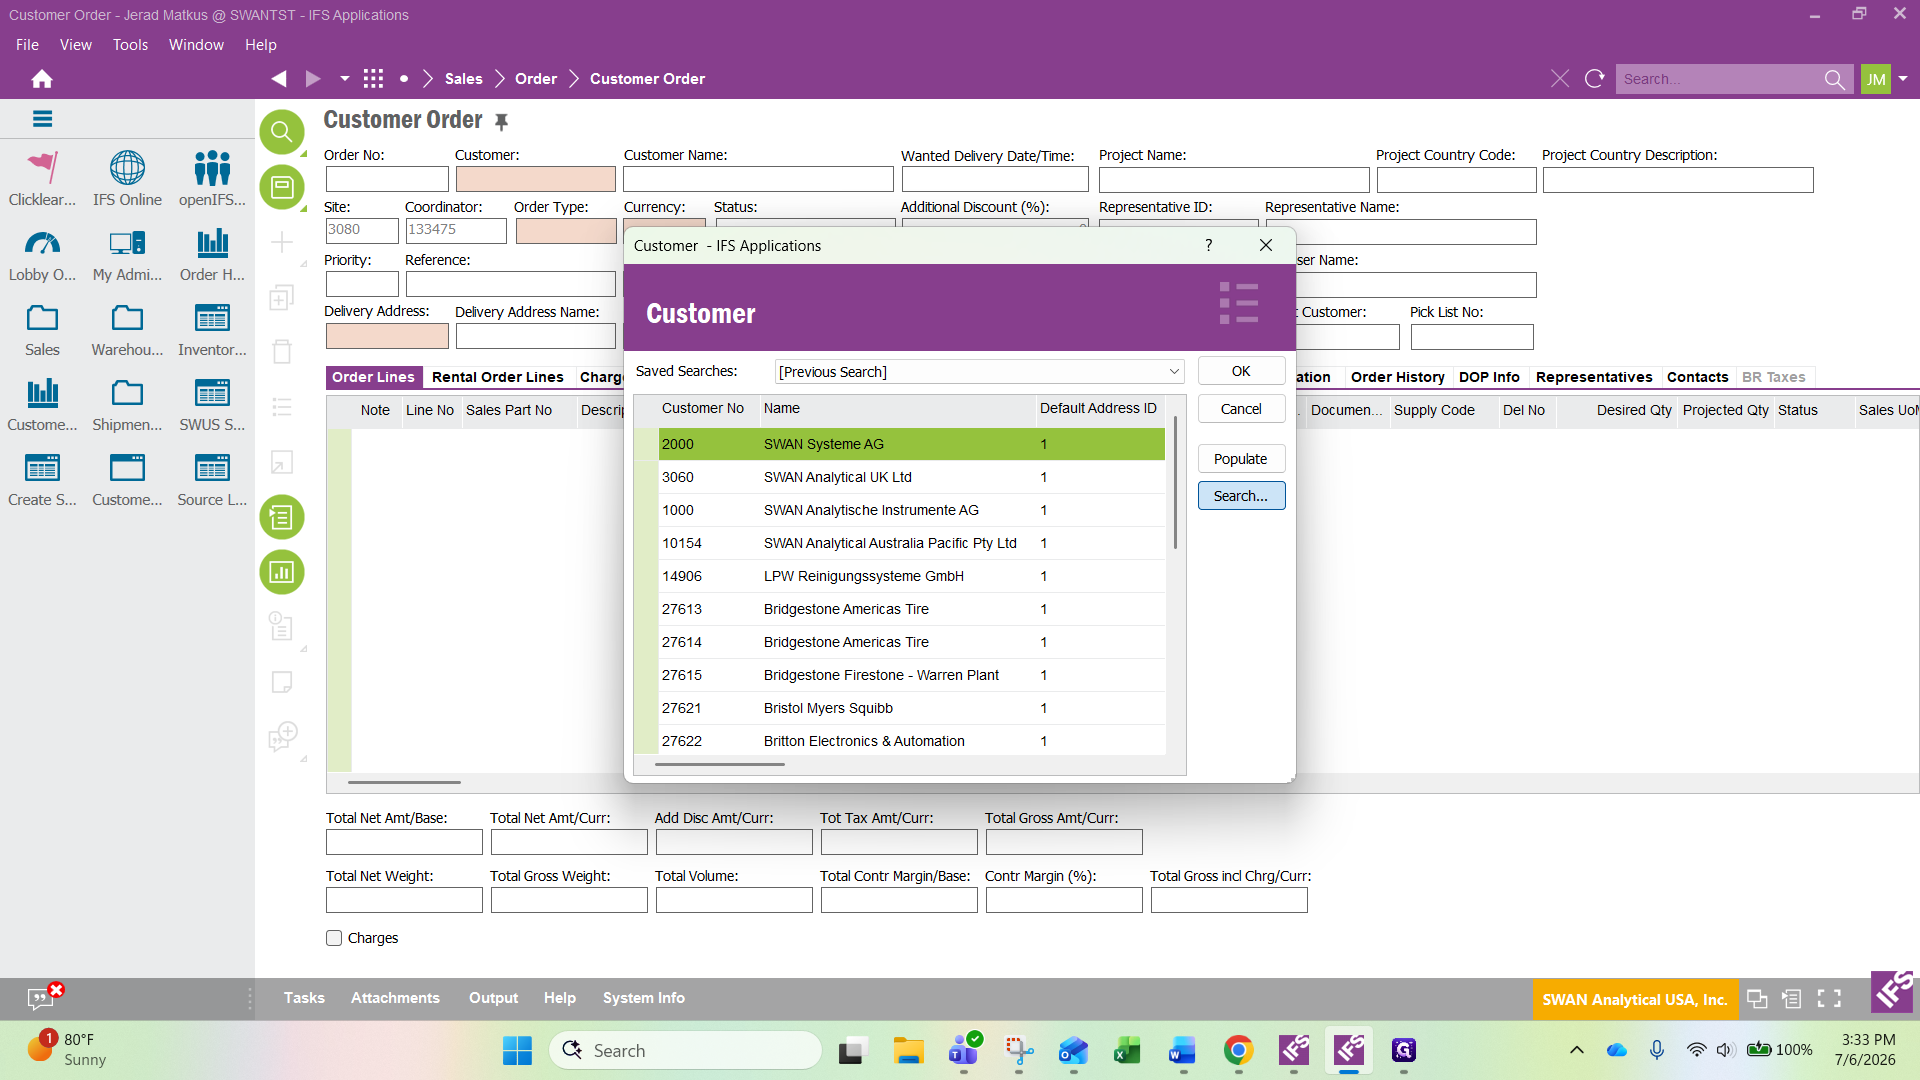
Click in the Customer Data field then click the List of Values icon or hit F8 on your keyboard.
4
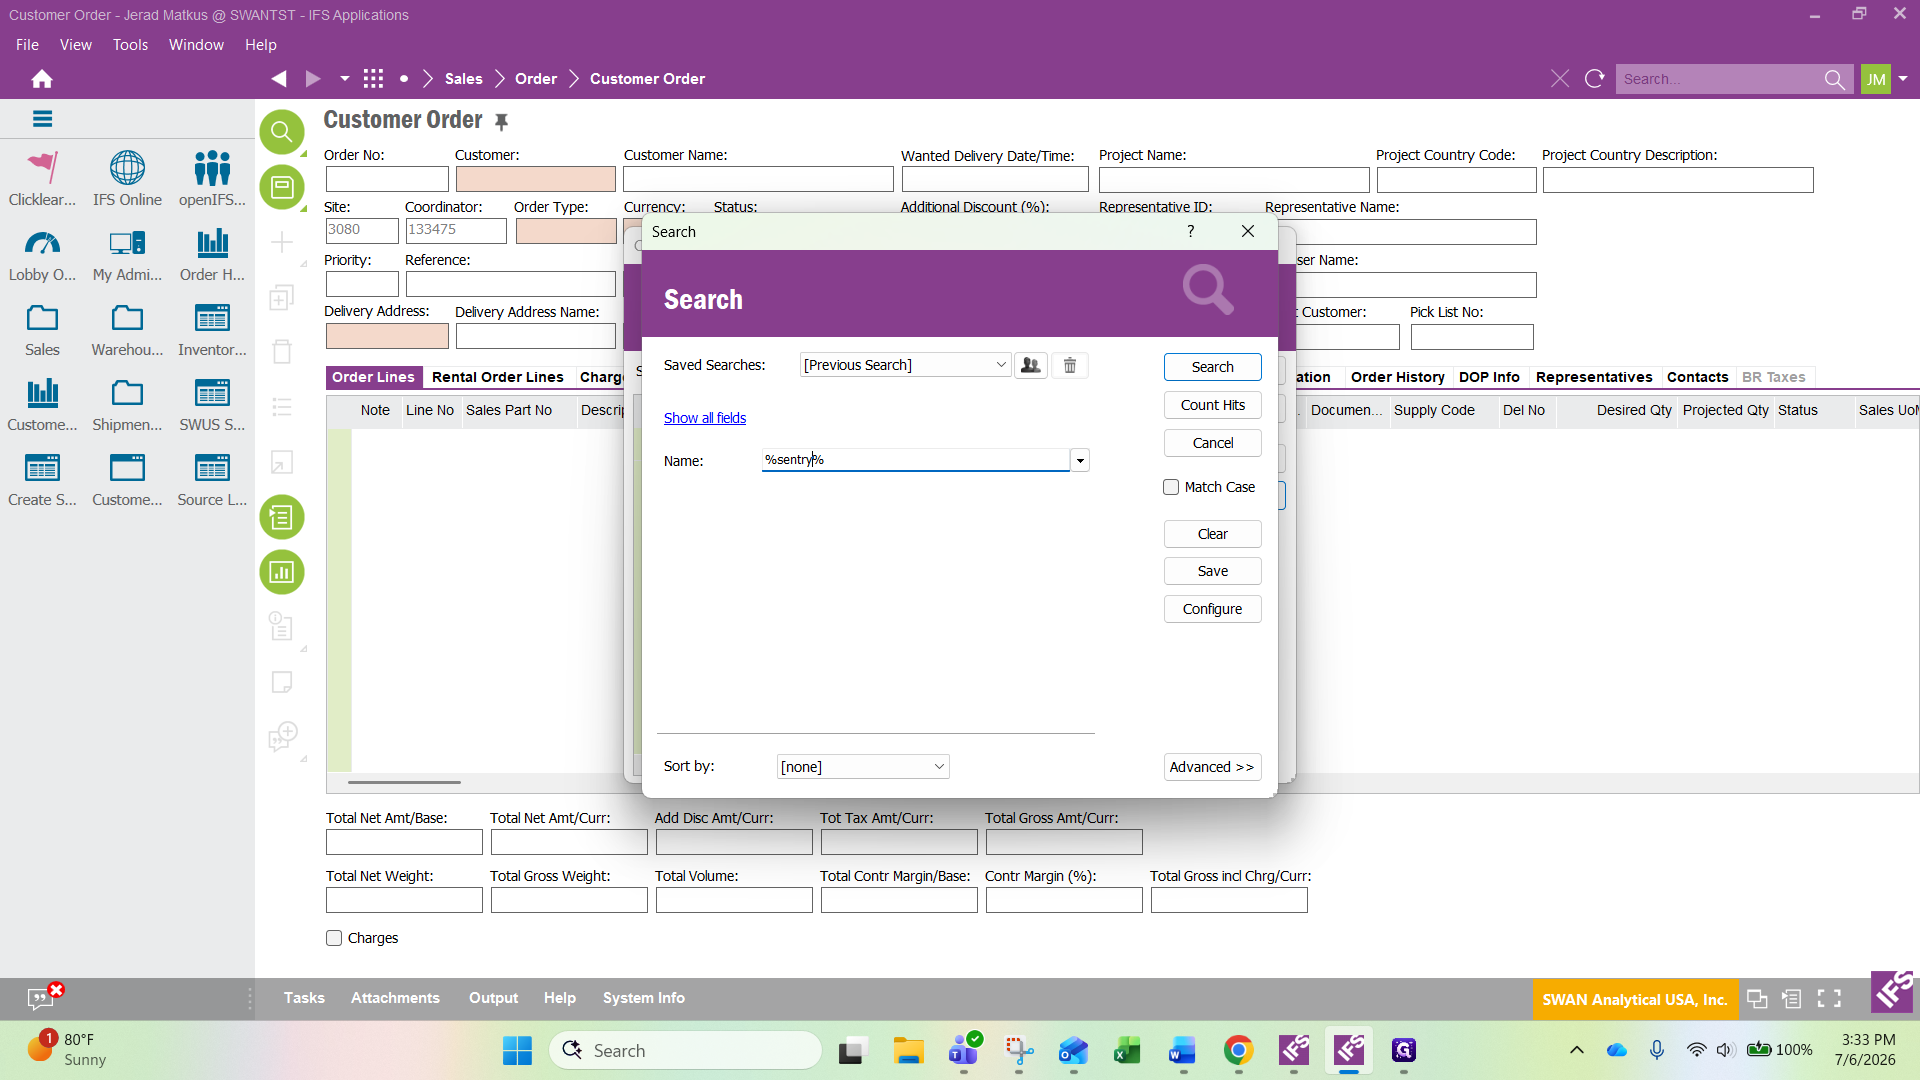
Click Search... in the dialog box.
5
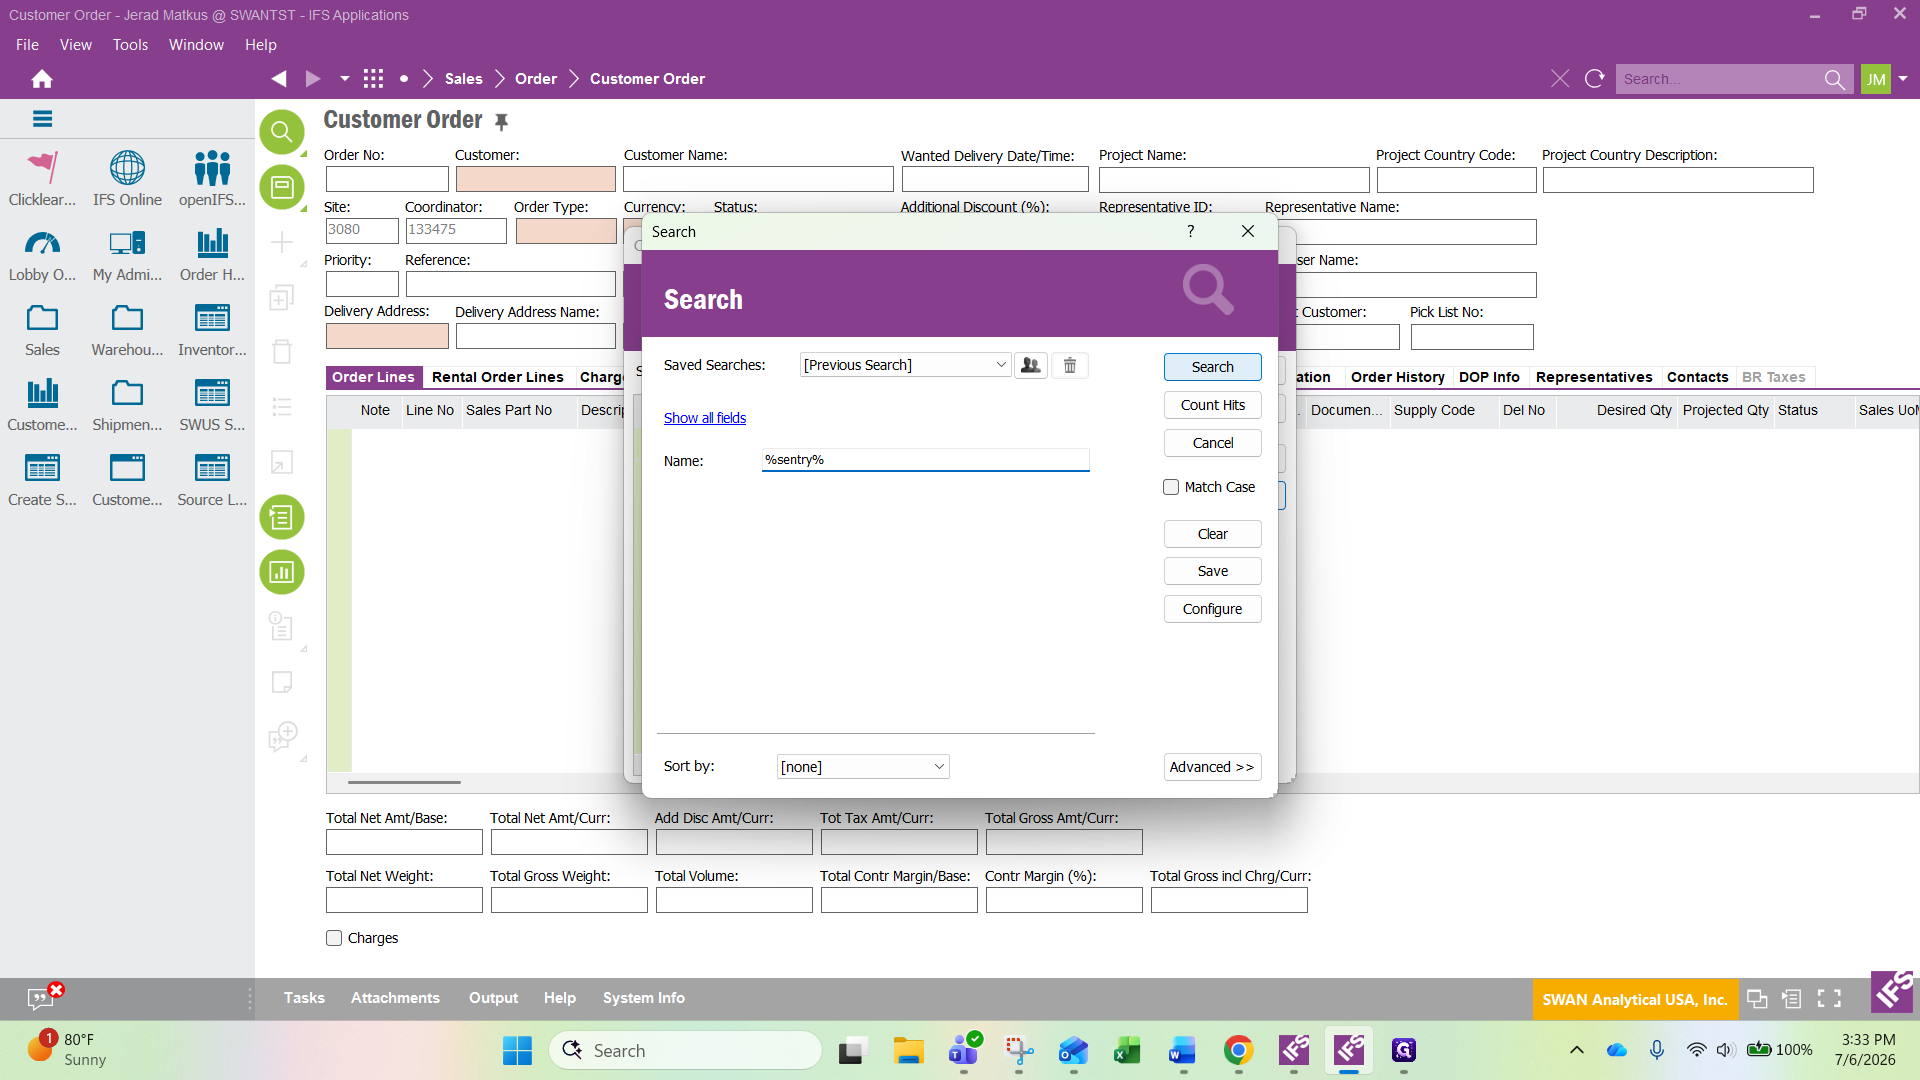
Enter the customer name using percentage signs for wildcards (e.g., %sentry%).
6
Click Search to filter the results.
7
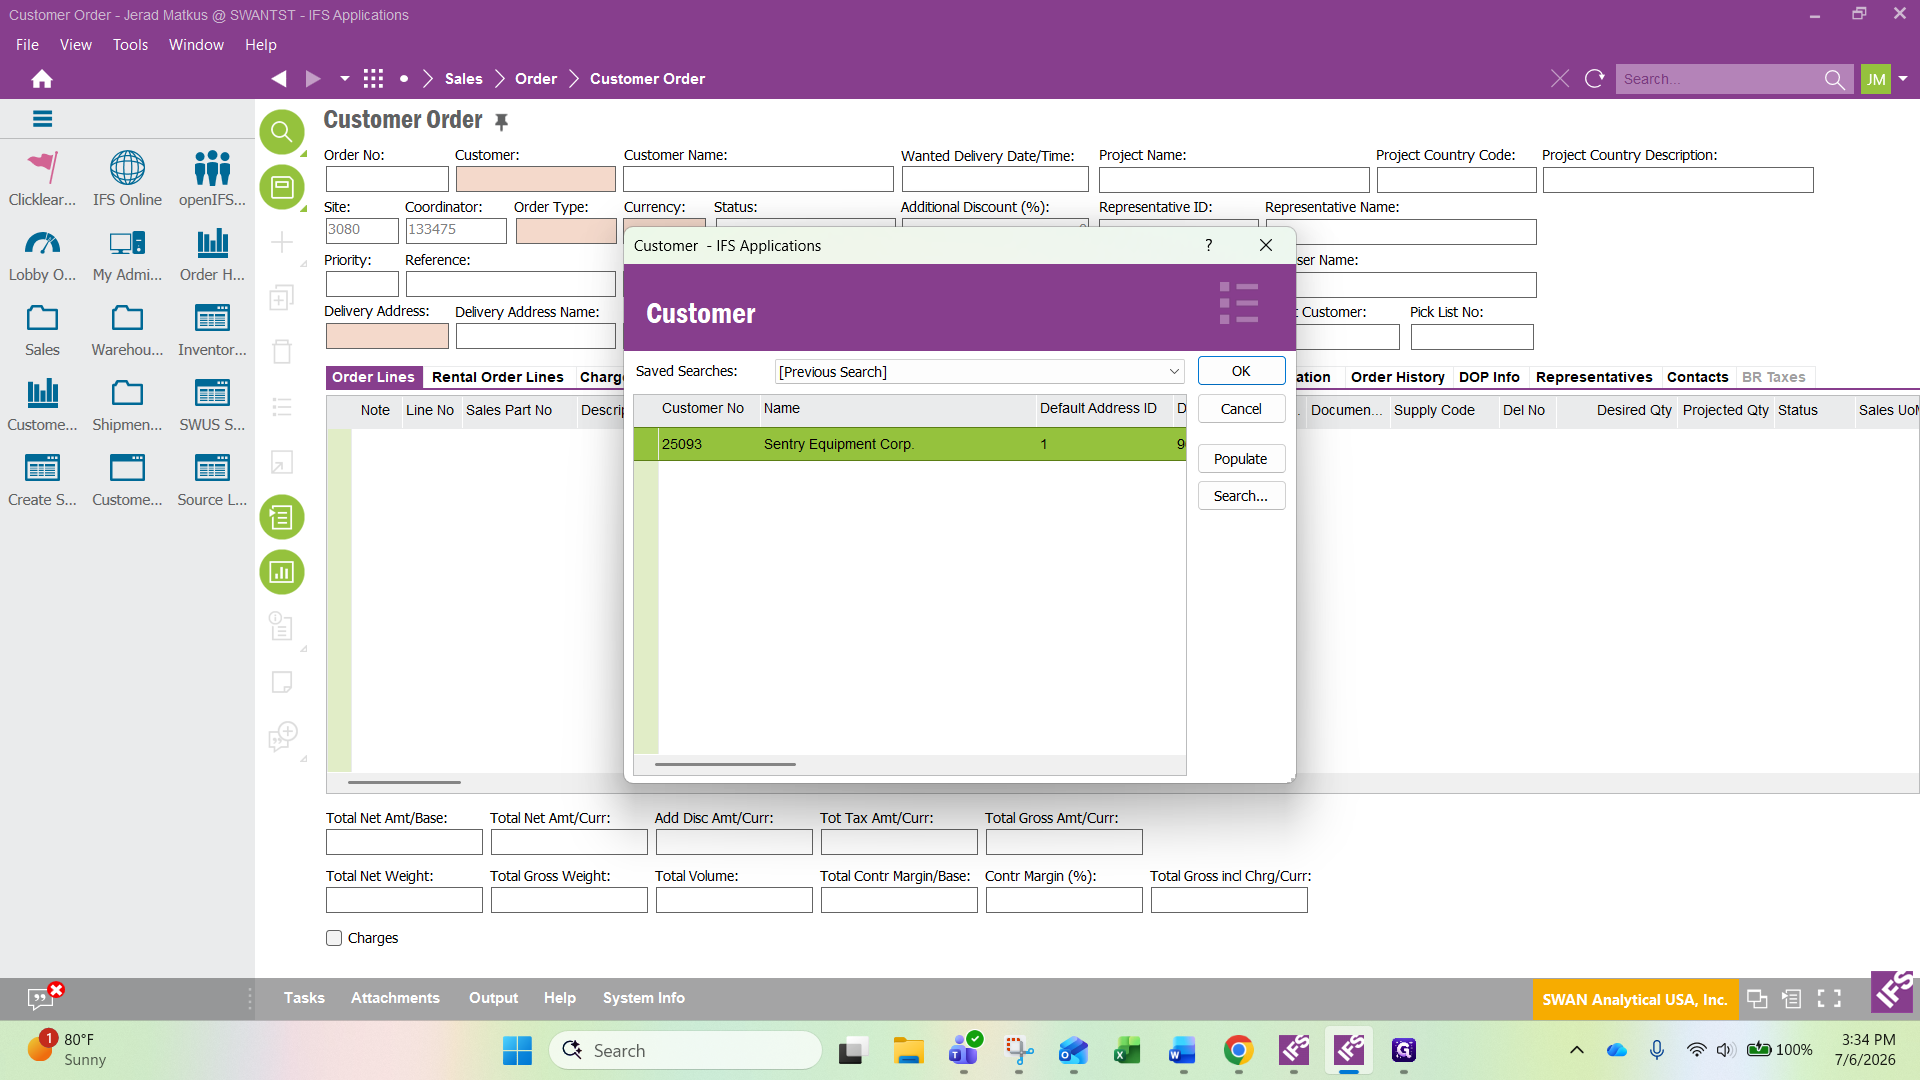
Select the correct customer from the list.
8
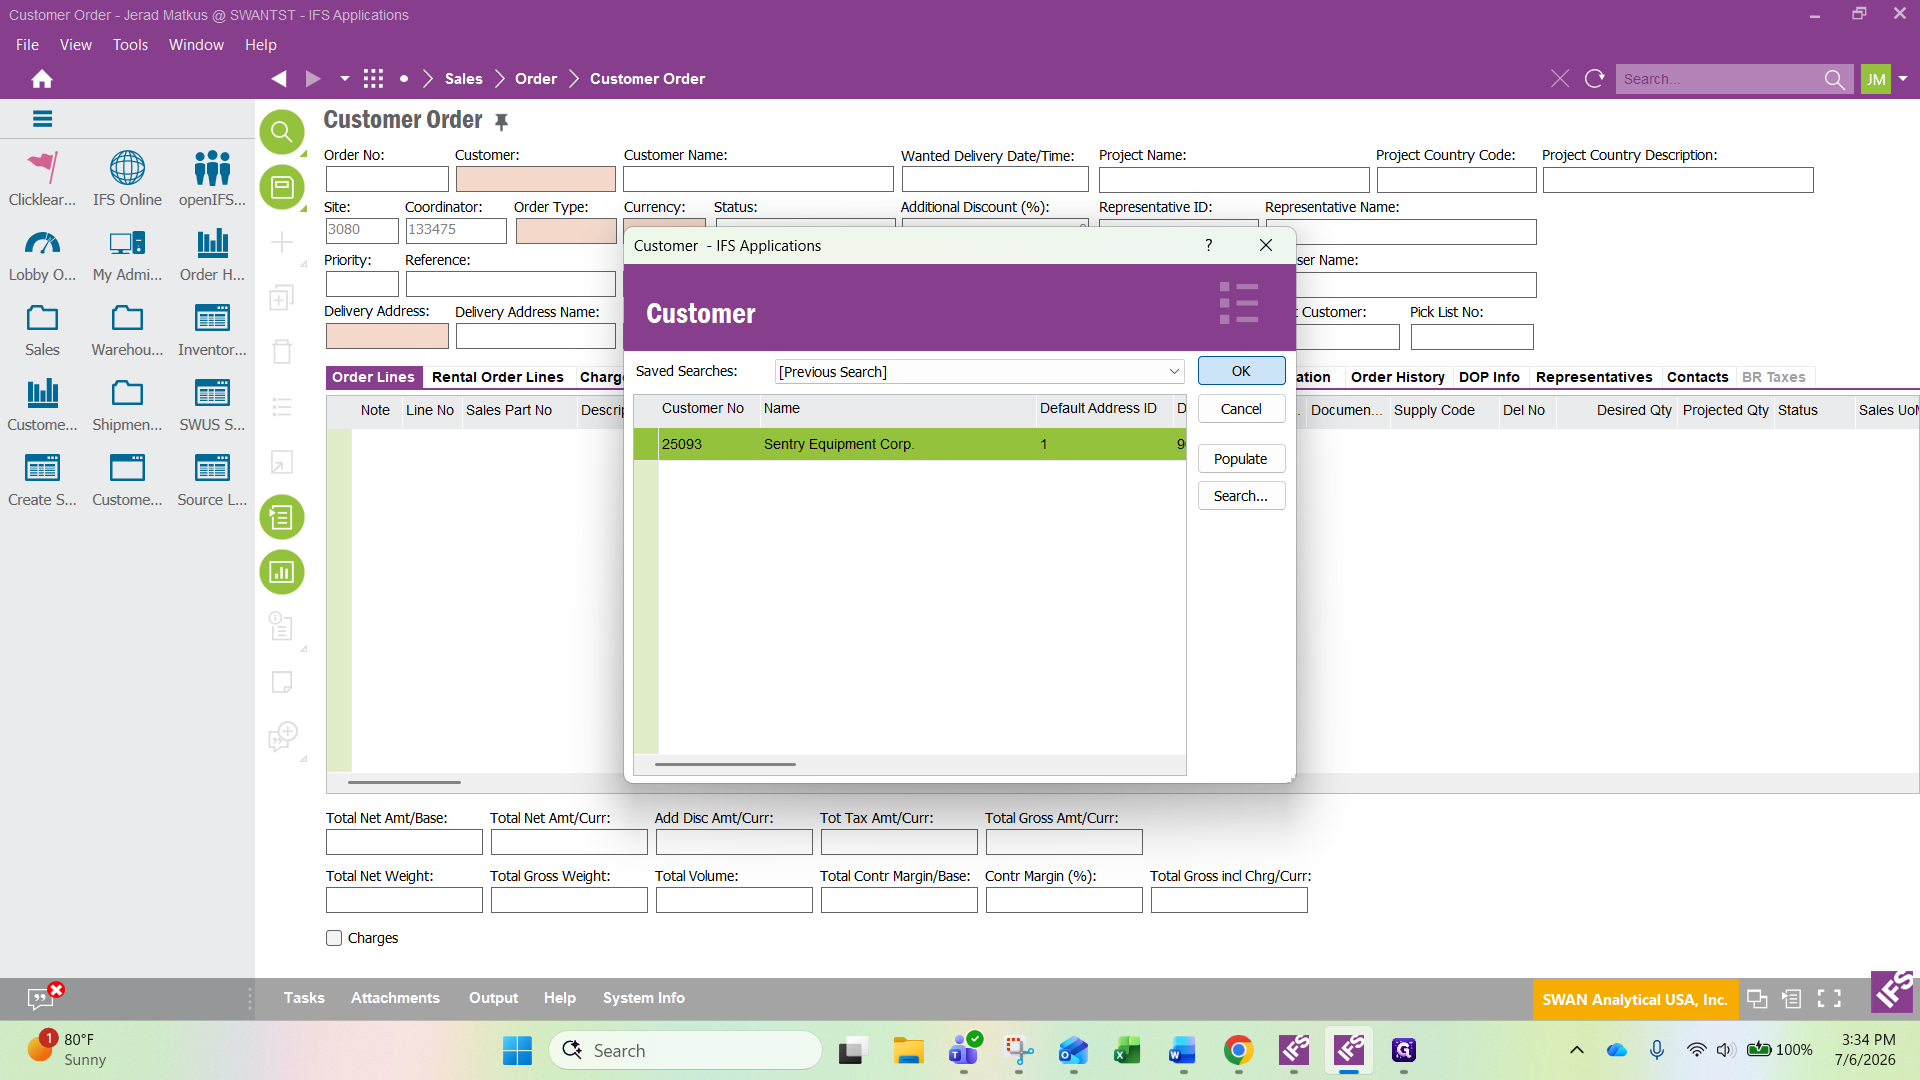
Click OK.
9
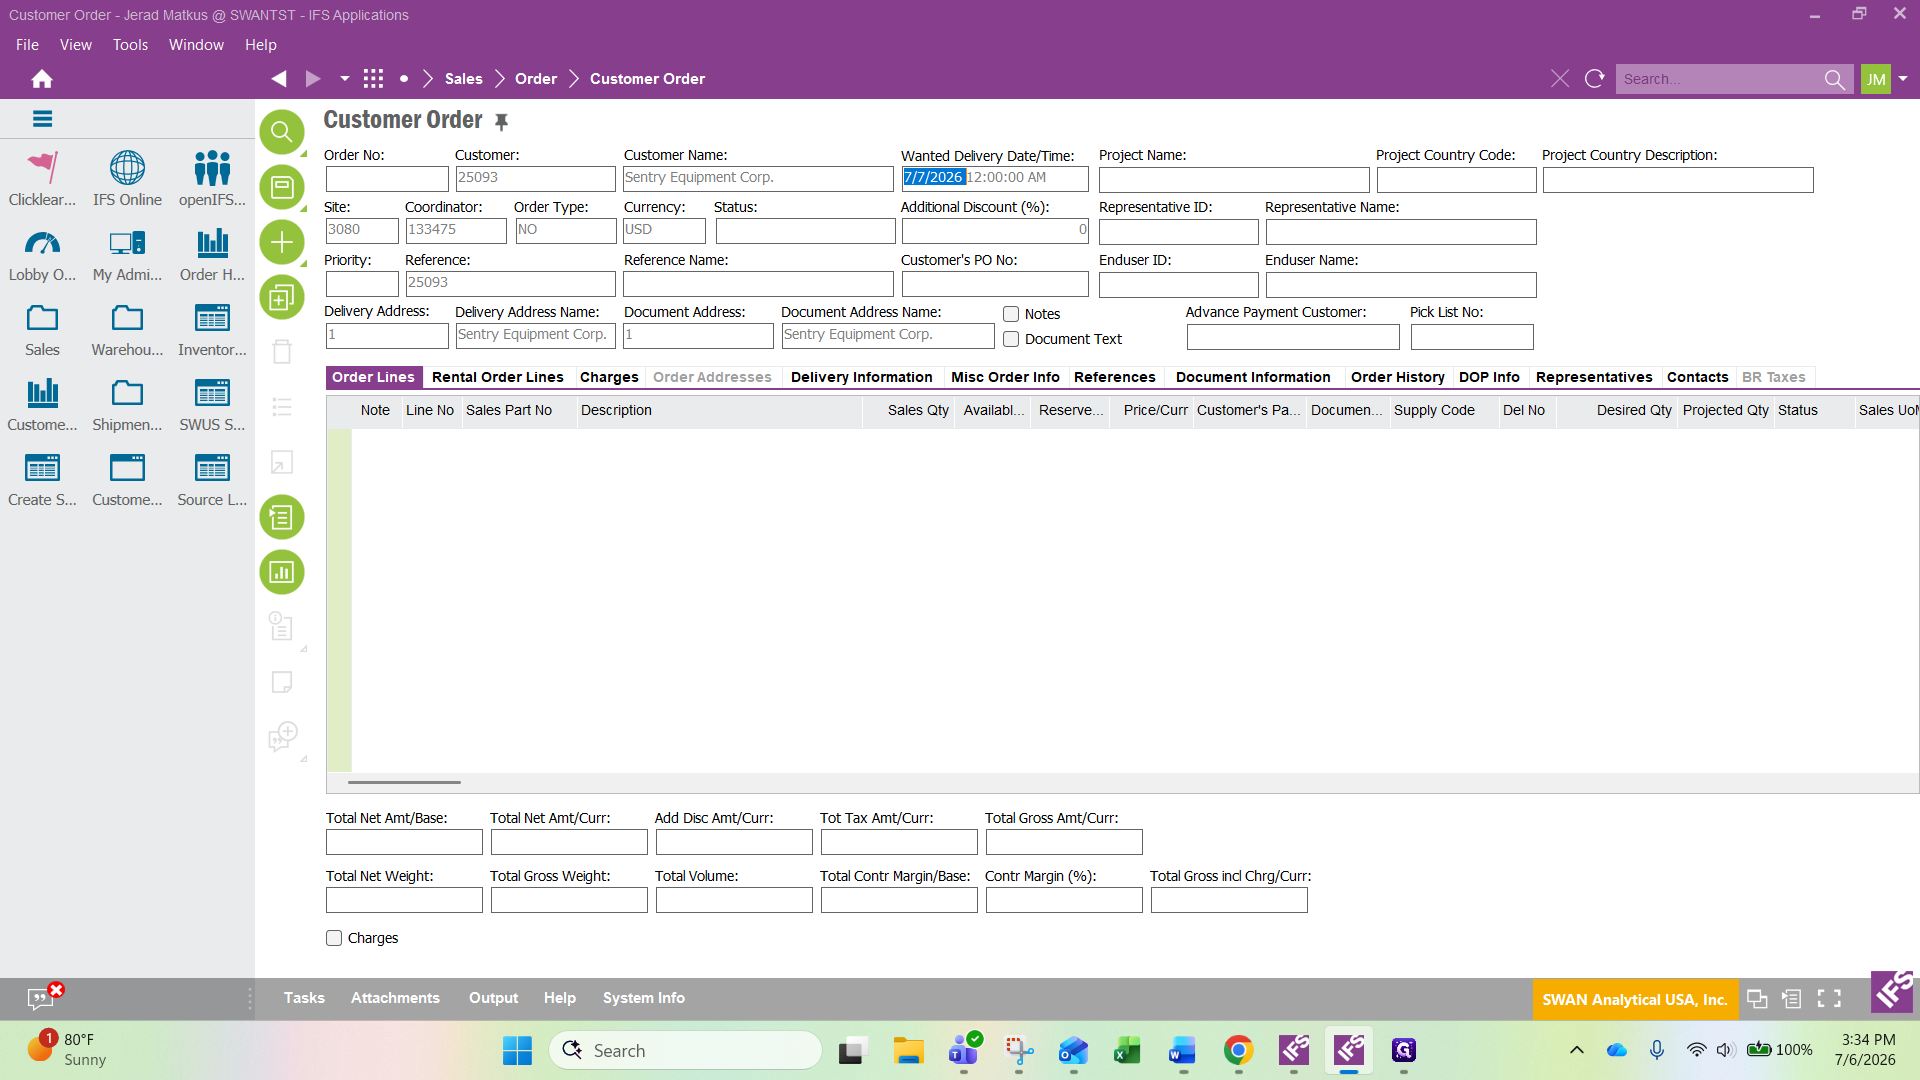
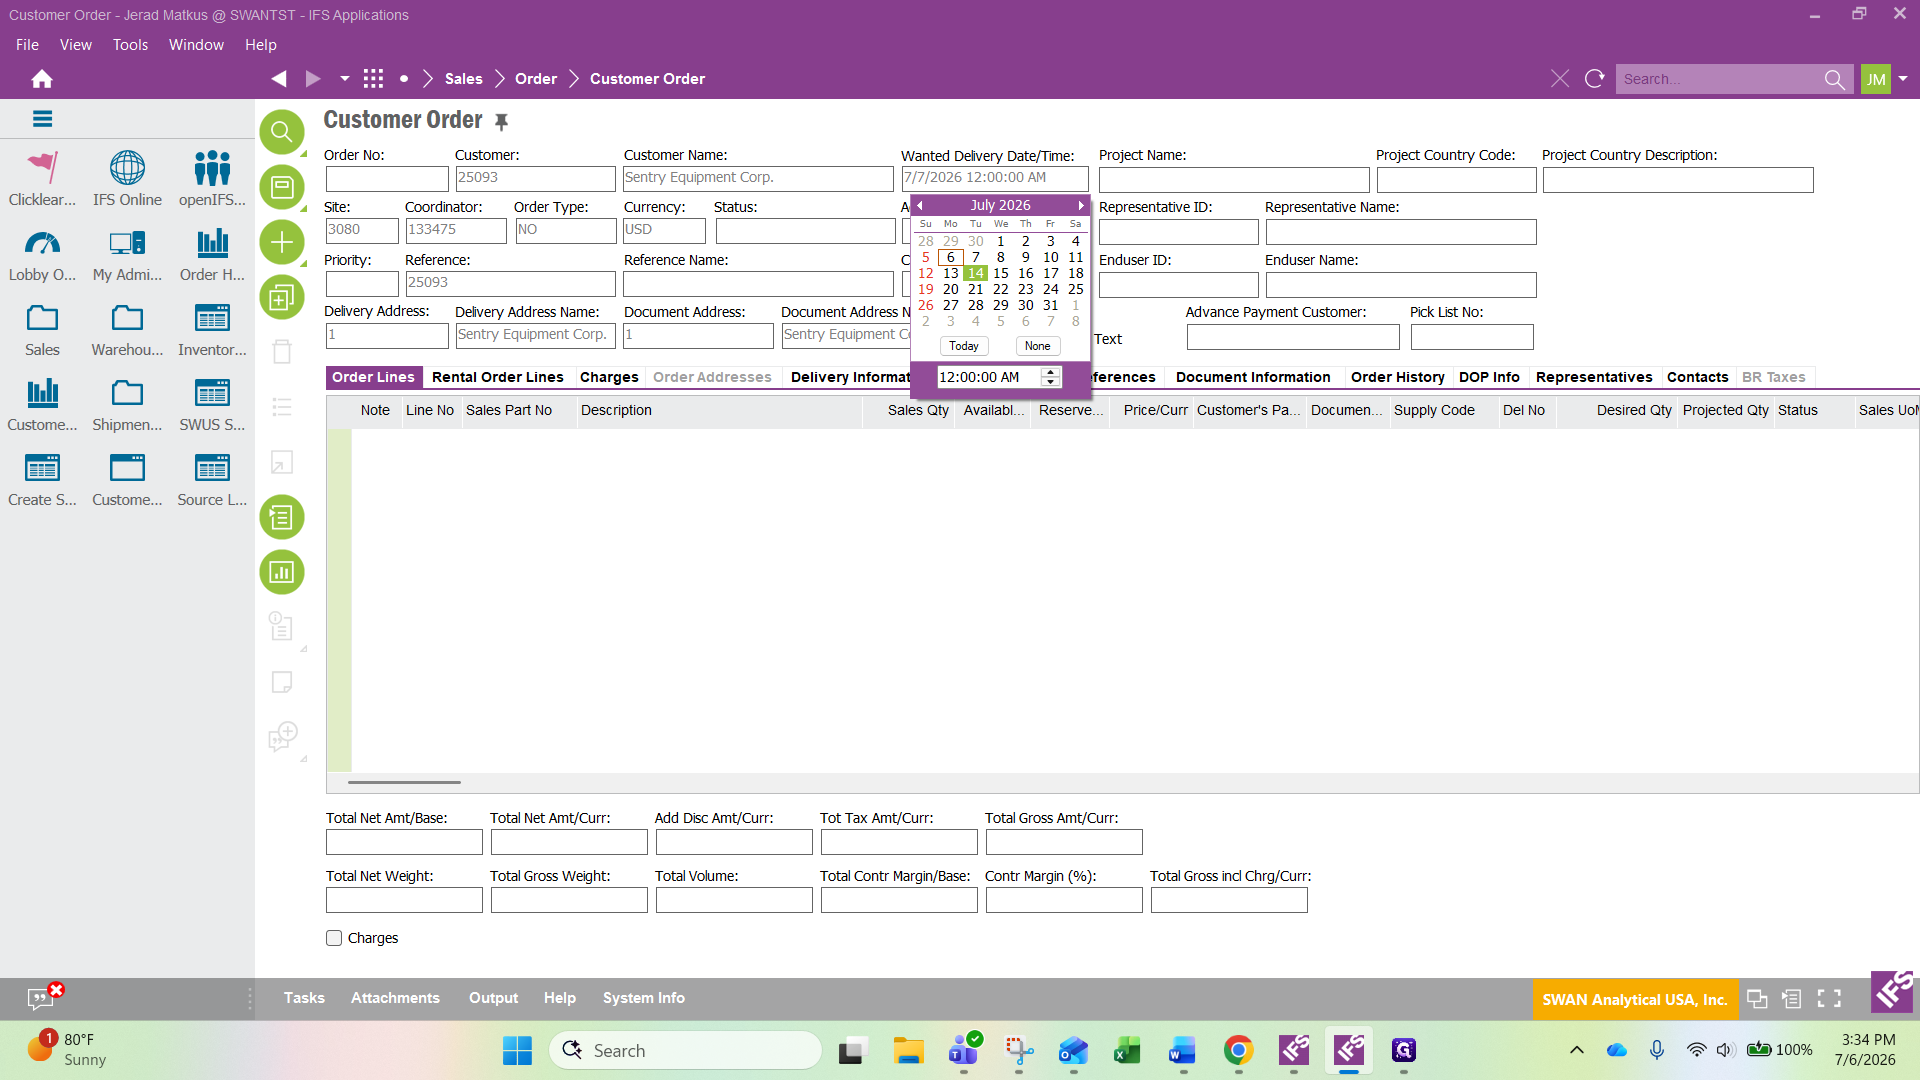
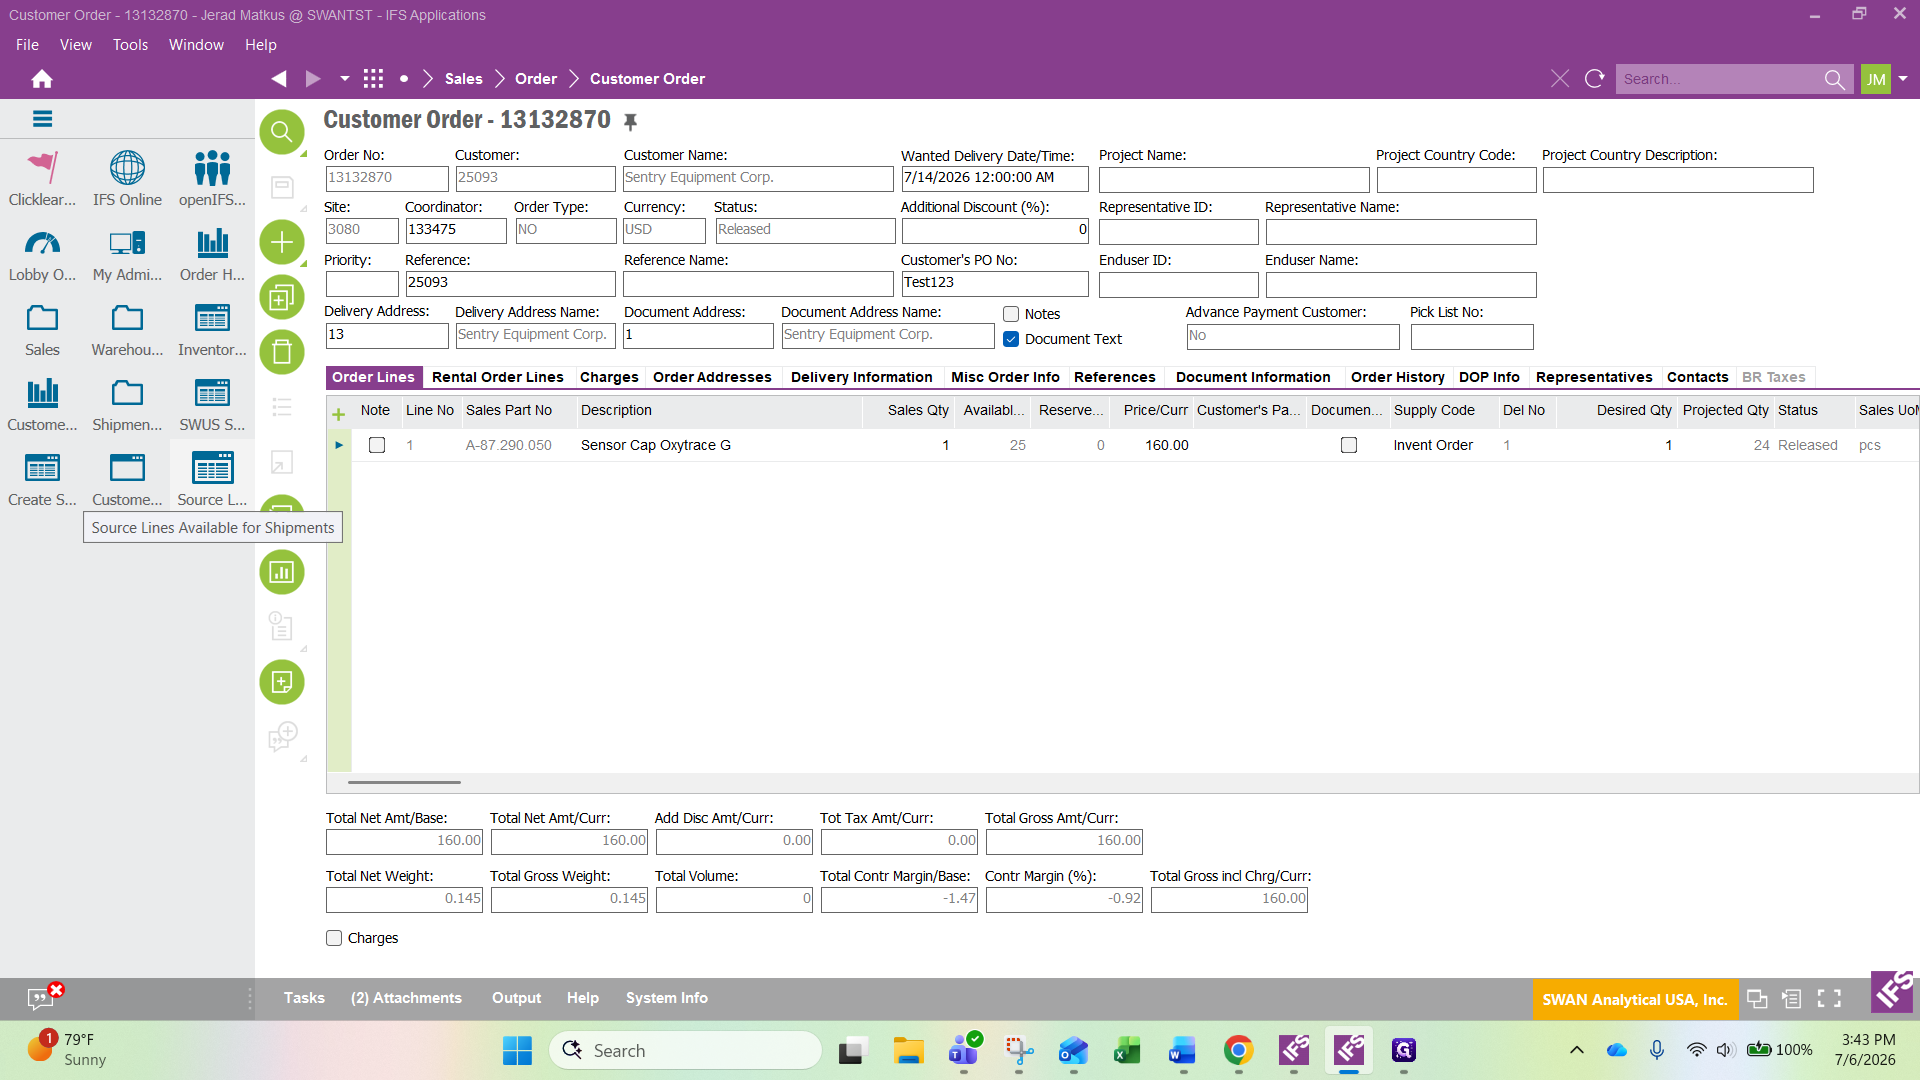
Double-click the Wanted Delivery Date/Time field to open the calendar.
10
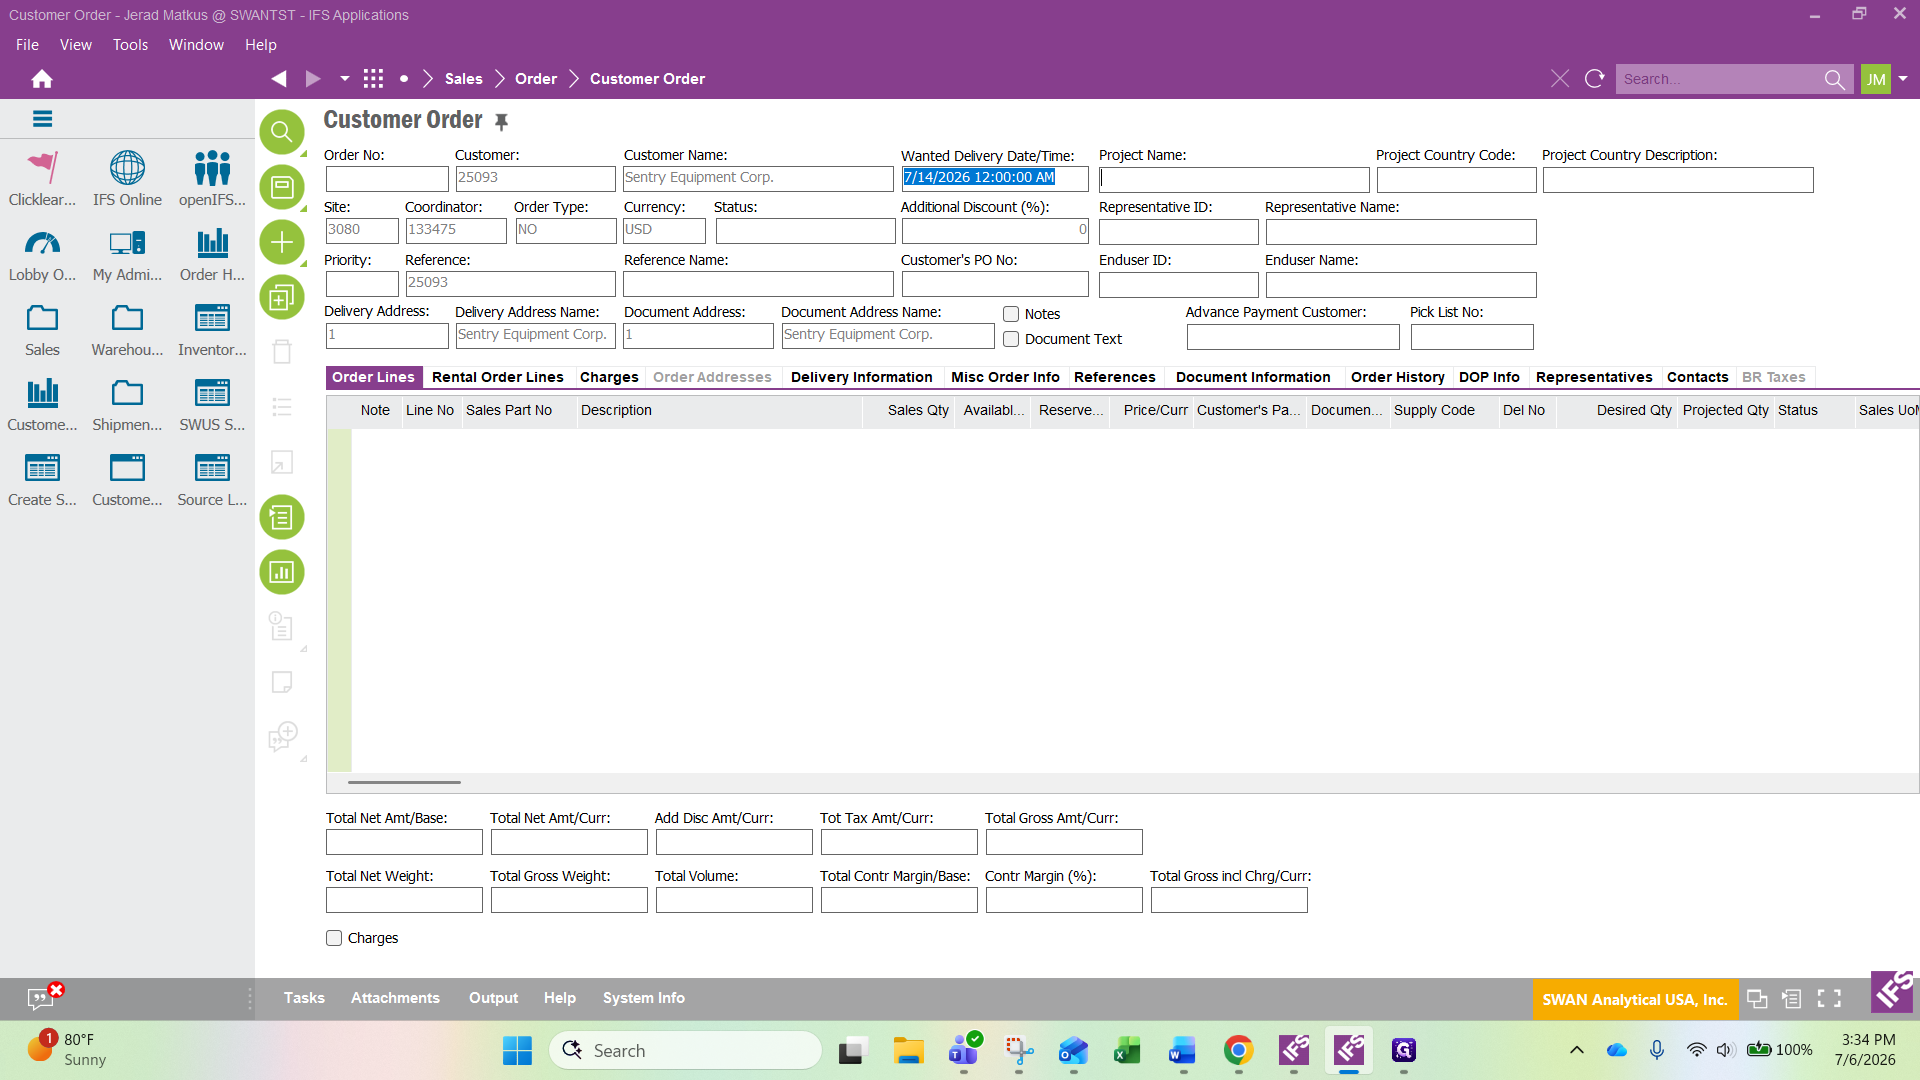
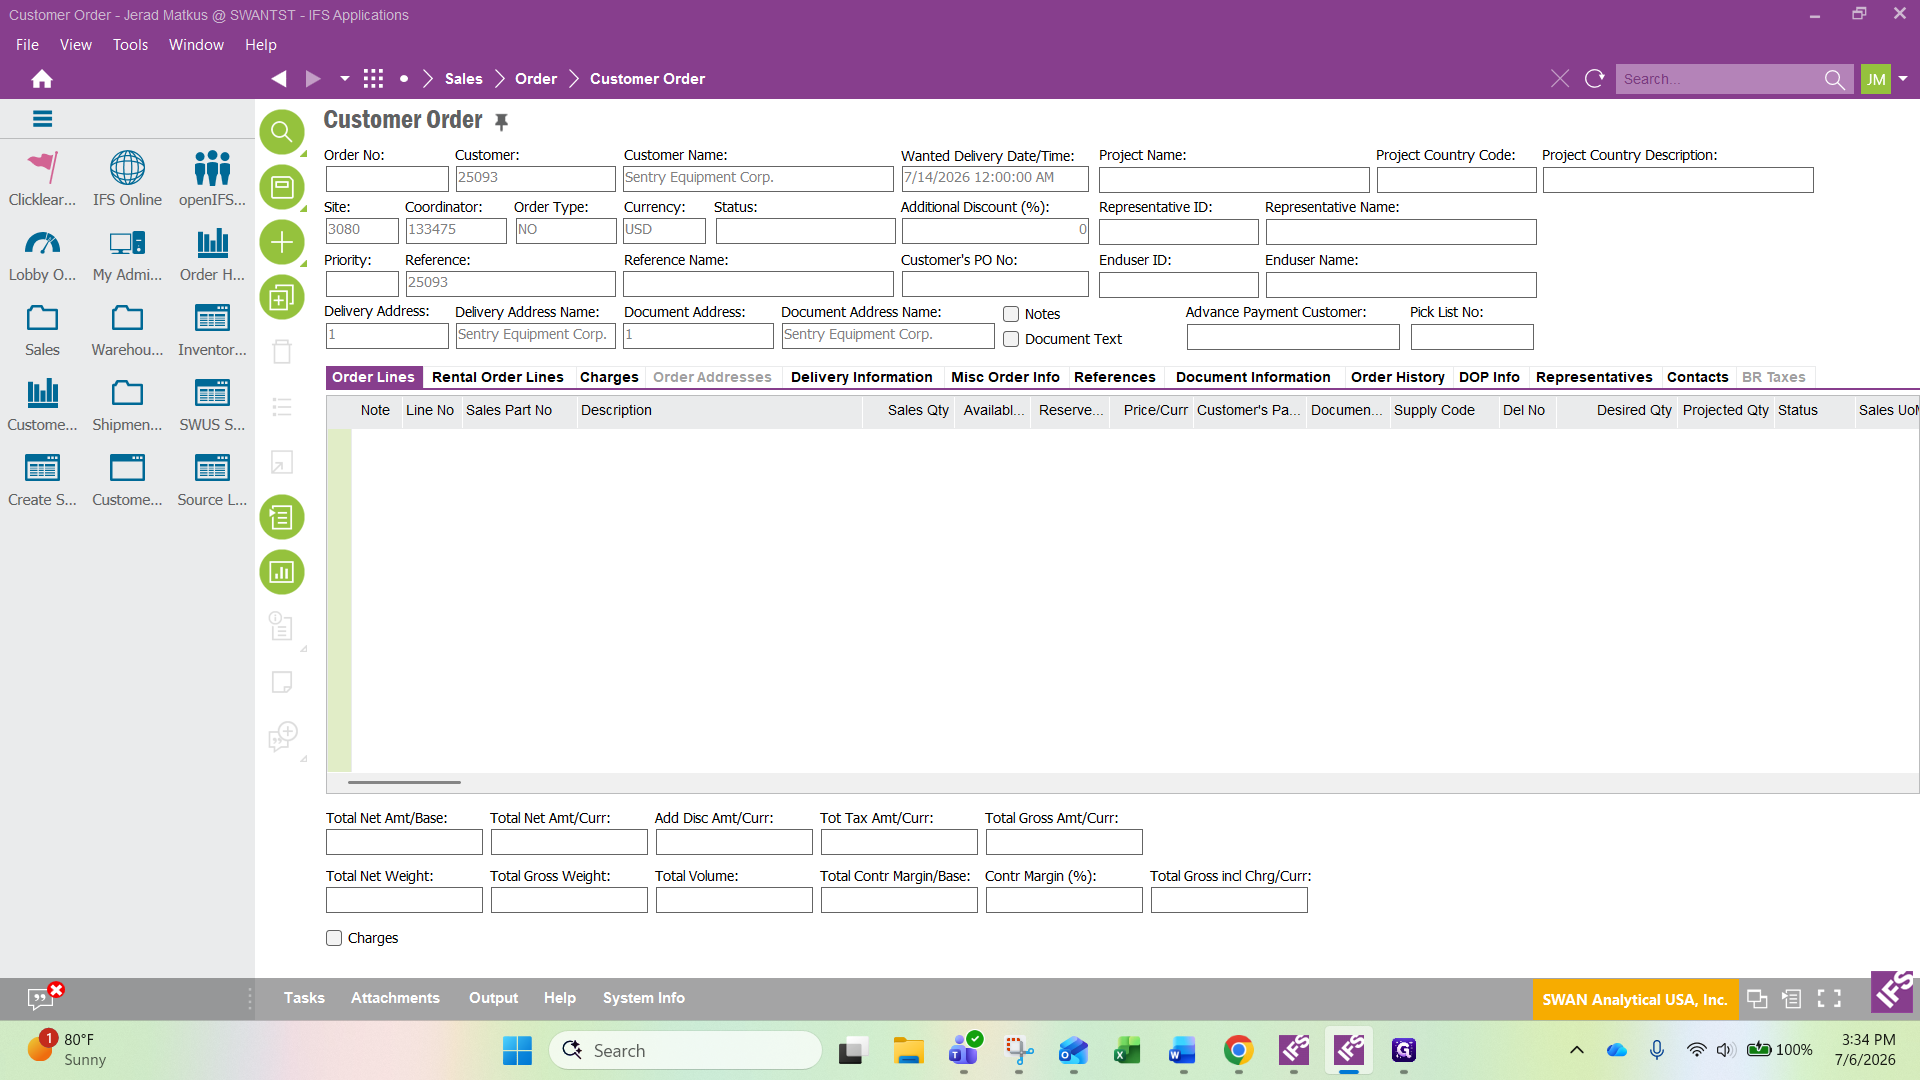
Select the appropriate delivery date. This will be determined by the parts being ordered. In stock, order from Switzerland, or from another vendor.
11
If there is a Project name for the order, enter that here.
12
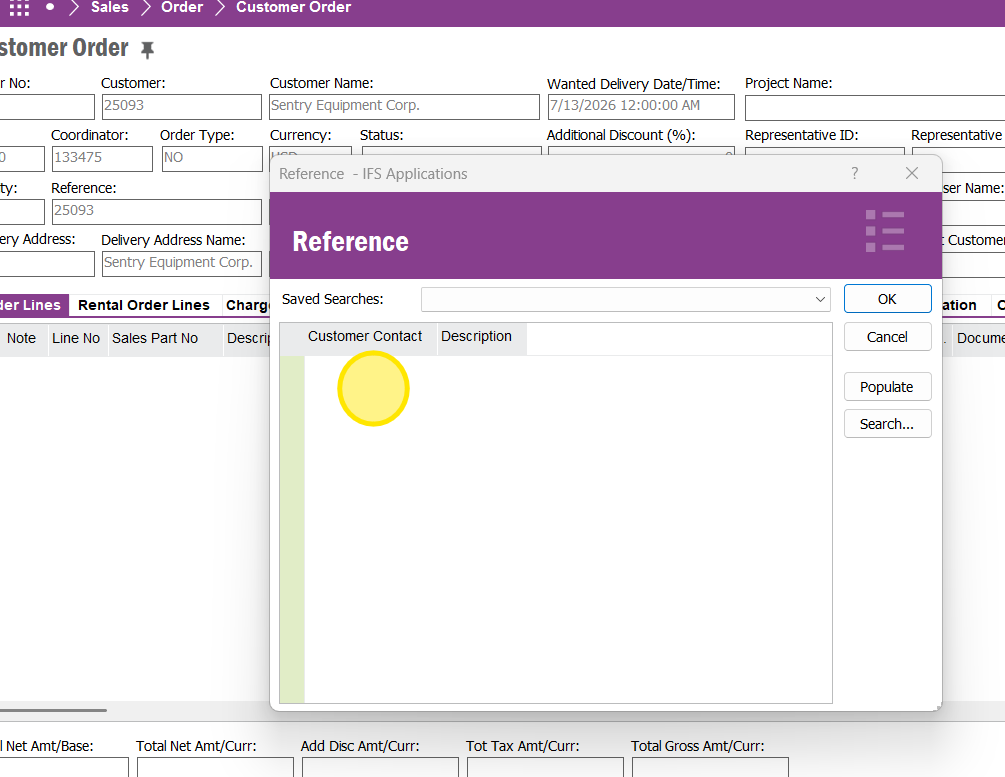
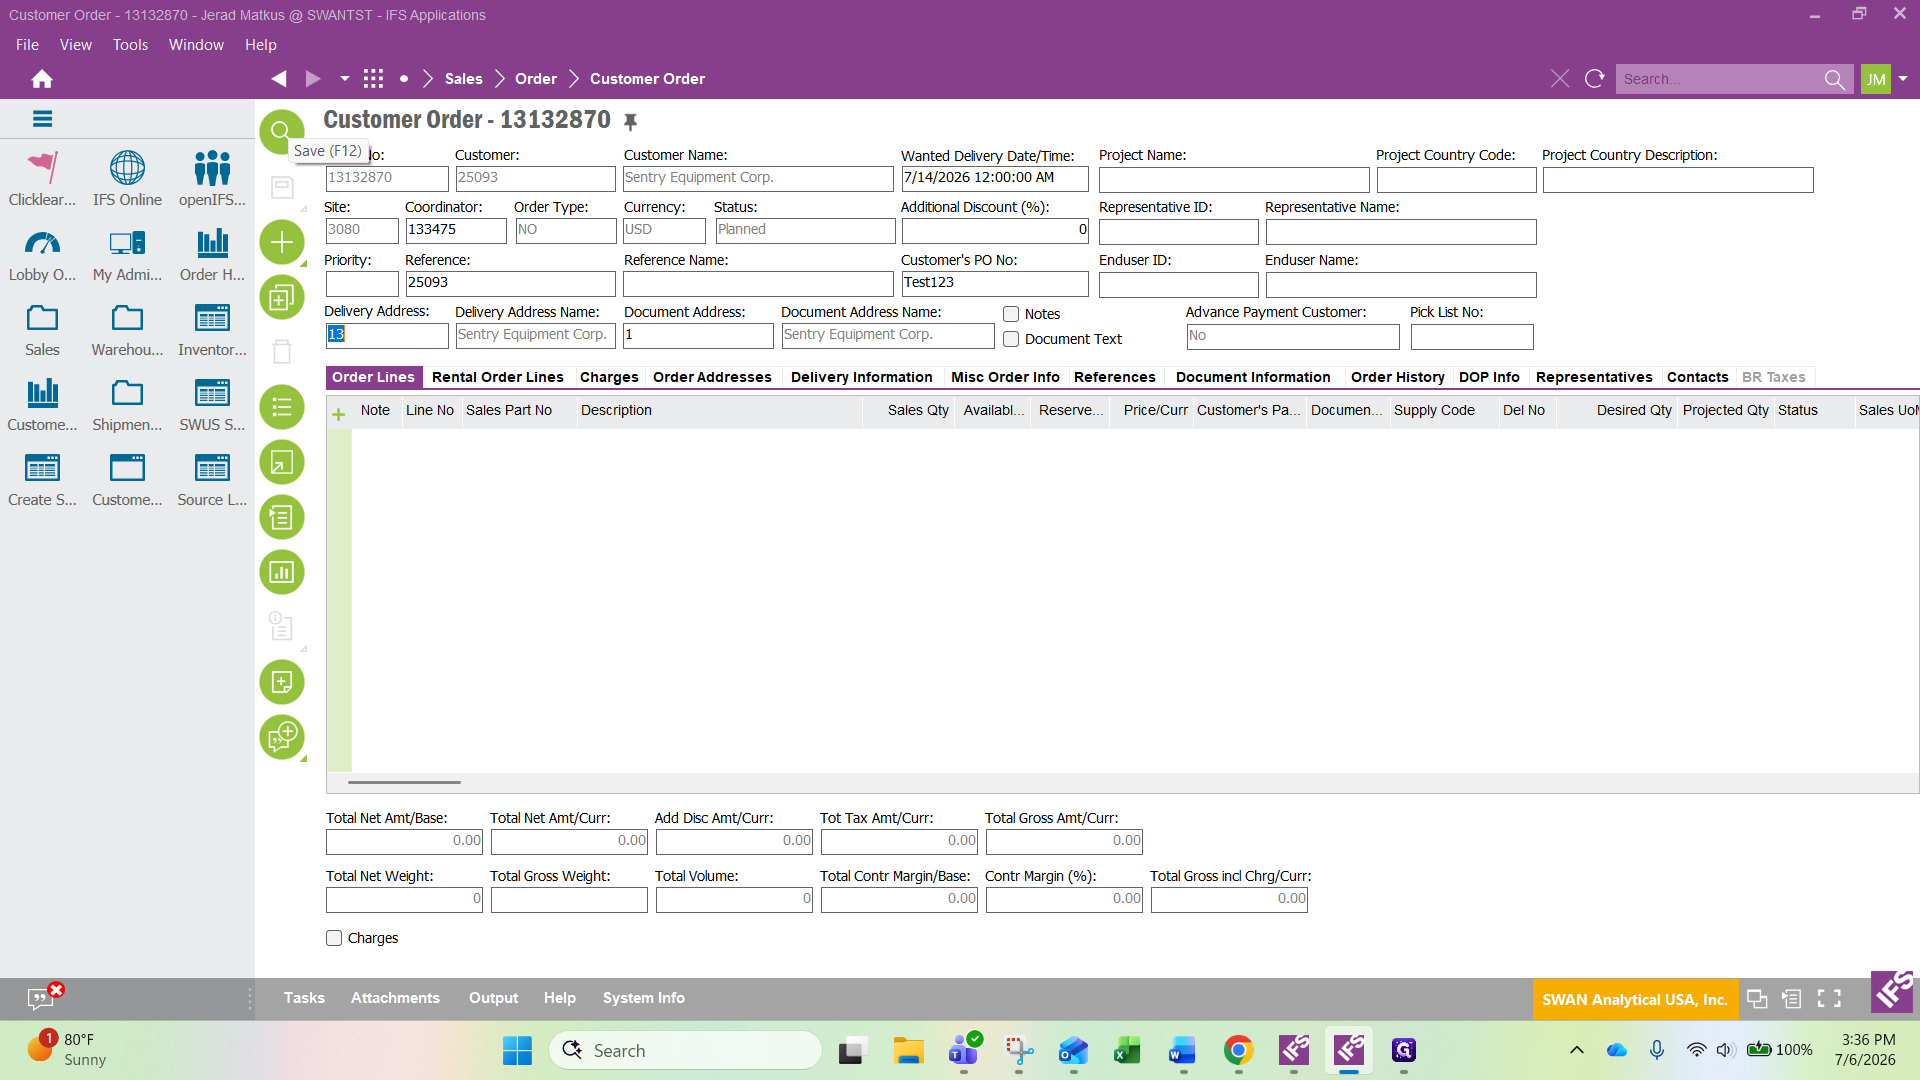
Click in the "Reference" field.
13
Click on the 3 line "List of Values" to pull up the customer contact box. Click on the person that placed the PO, and click OK. If the person you received the PO from is not listed, leave the field with what was defaulted.
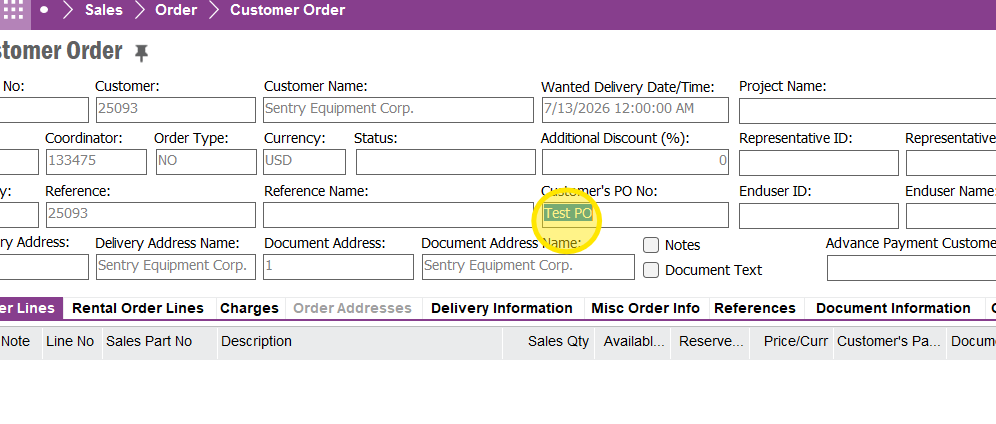
14
Click in the "Customer's PO No:" field and enter the customer PO. If they do not give a PO, enter the persons name requesting the order and the date. Ex: "Verbal Jerad 070726"
If the customer is selling to an end user, click into the End User ID field and use the List of Values to search for and add their identifier.
15
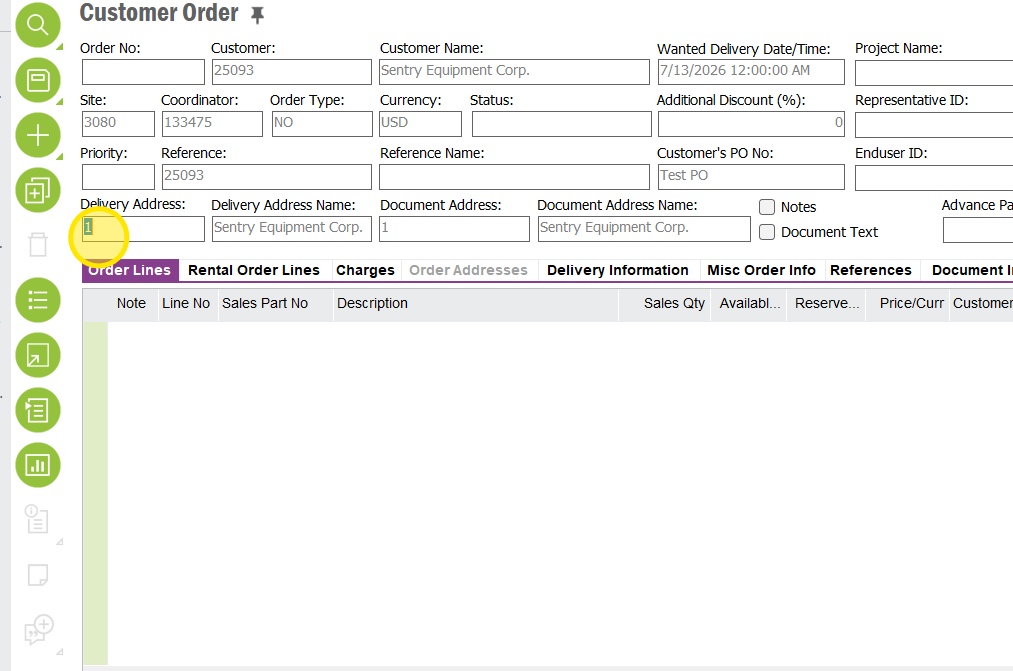
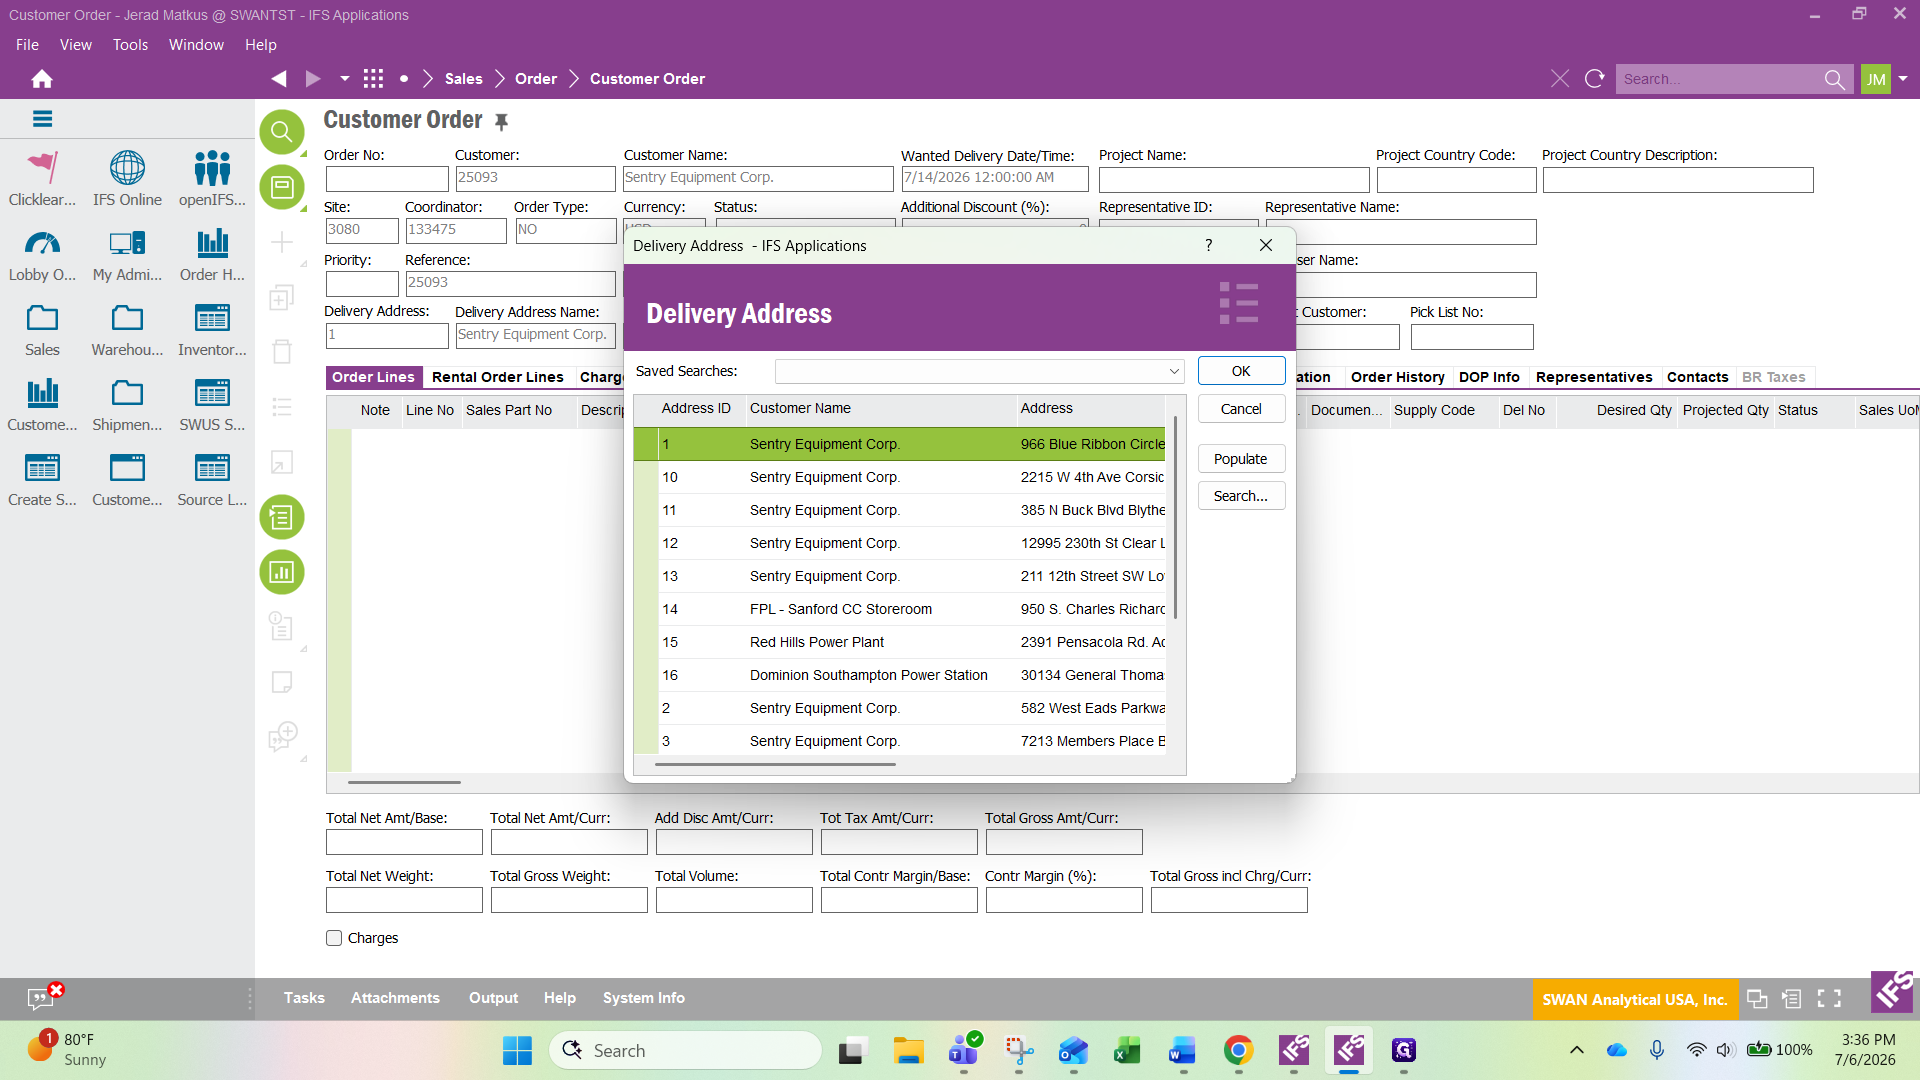
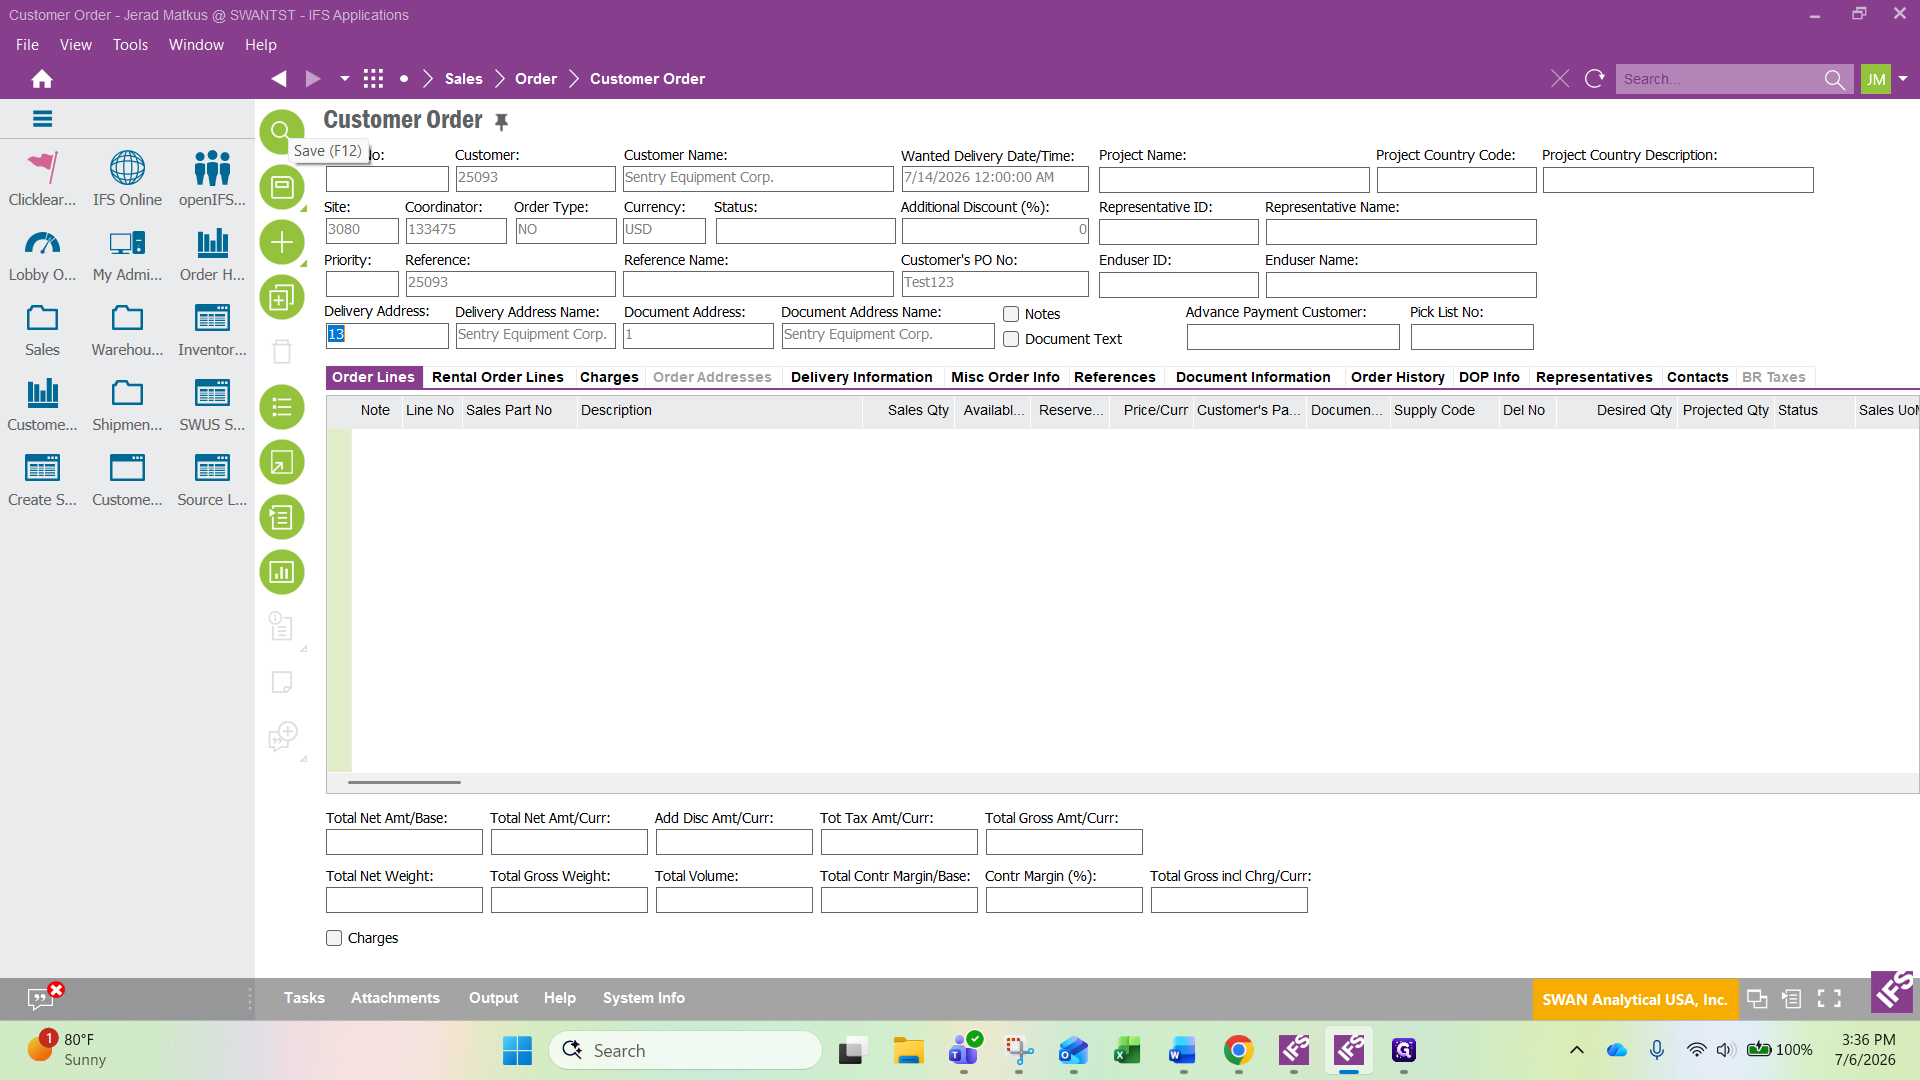
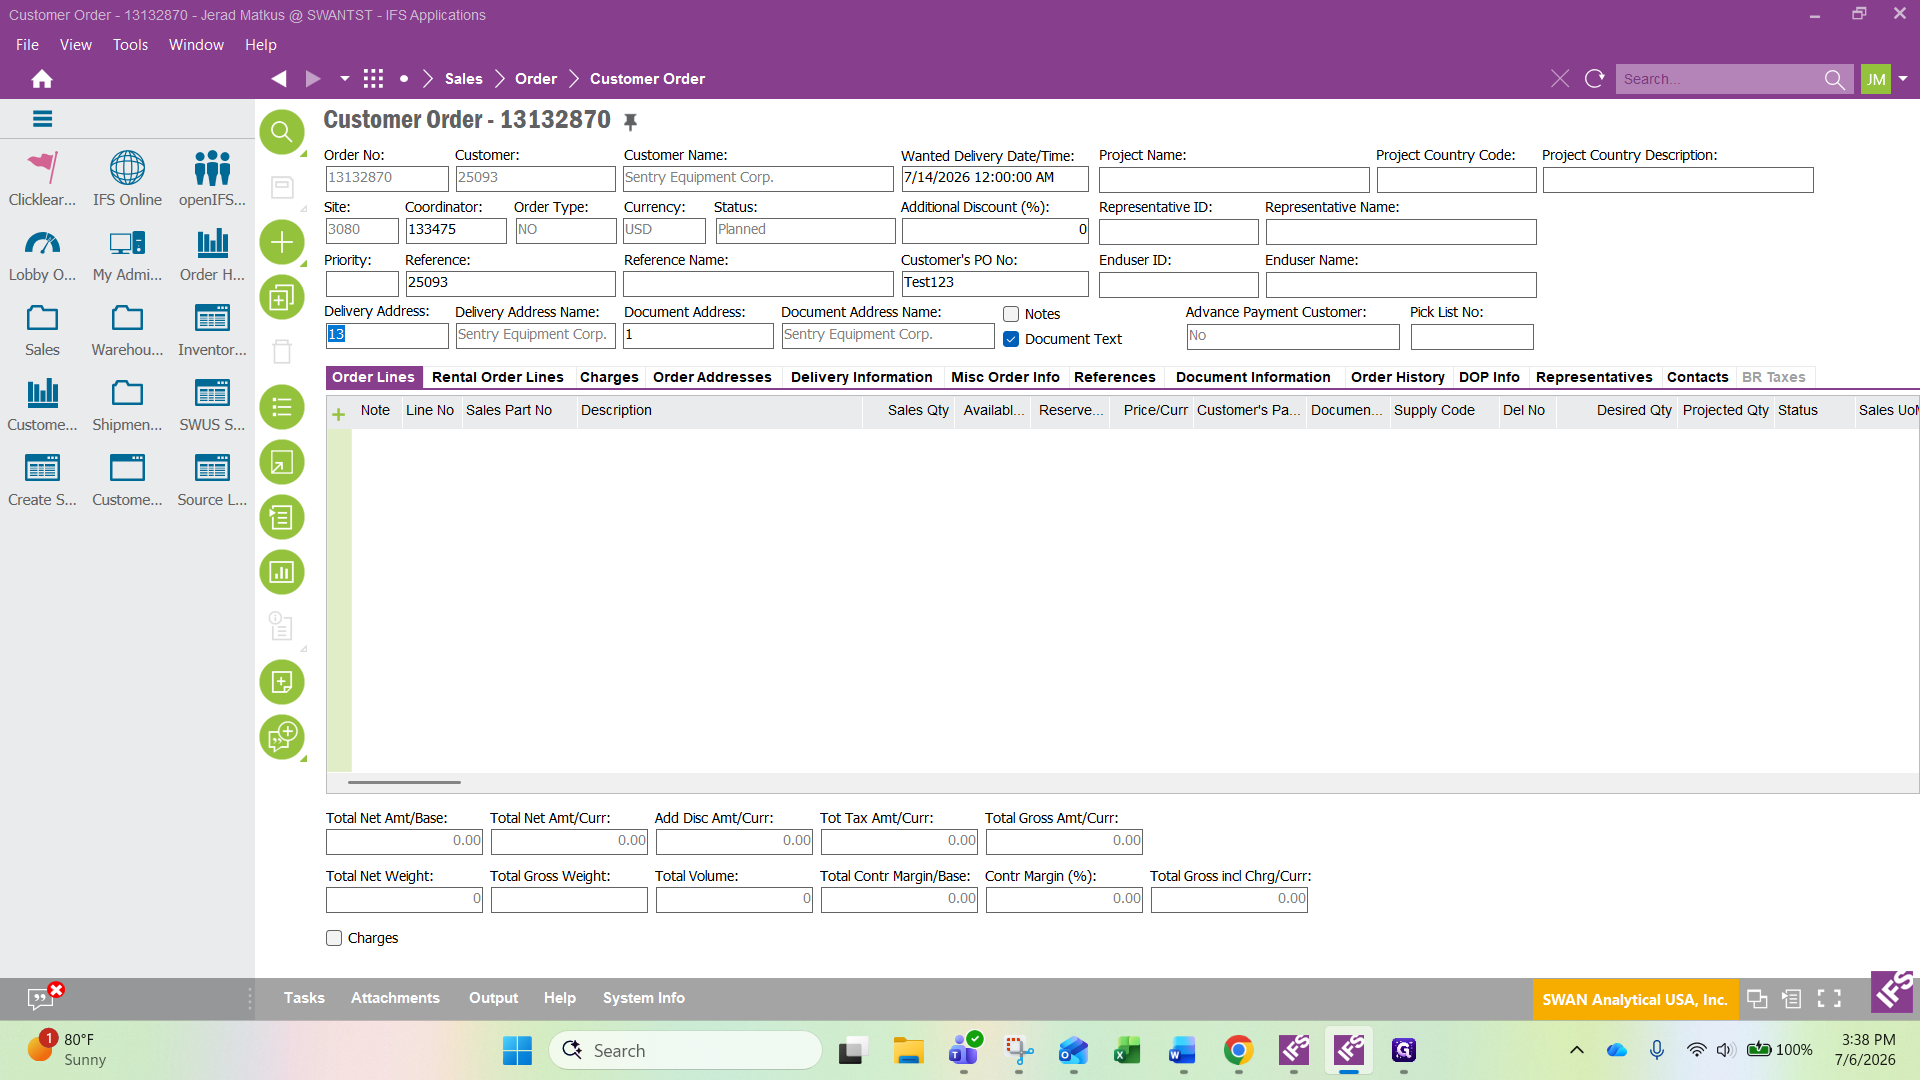
Next, click in the "Delivery Address" field.
16
Click the List of Values icon in the side toolbar.
17
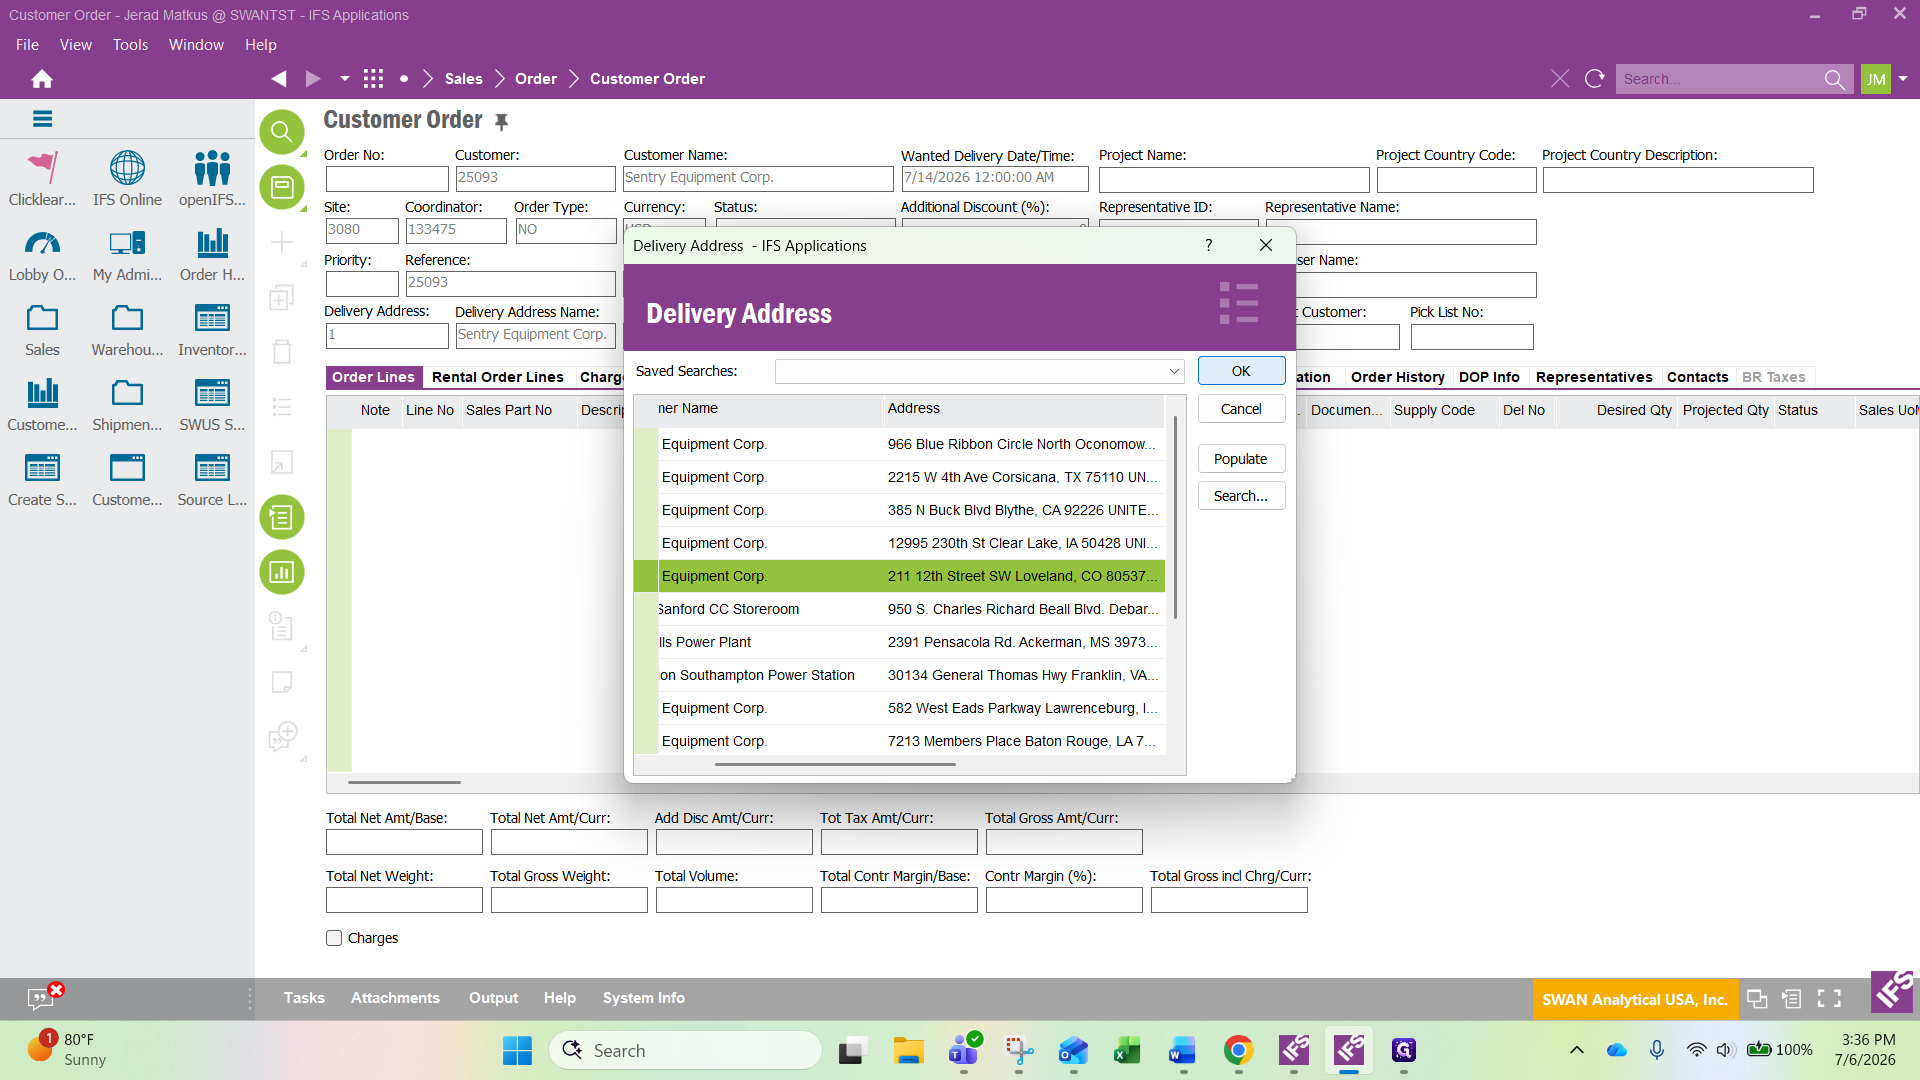
Select the correct delivery location from the available addresses.
18
Click OK.
19
Click Save (or press F12) to save the order header.
If the delivery address is not listed in the list of values, leave the default delivery address on the order. We will add a new delivery address as a "Single Occurrence" in the next few steps.
How to add a "Single Occurrence" delivery address to an order.
20
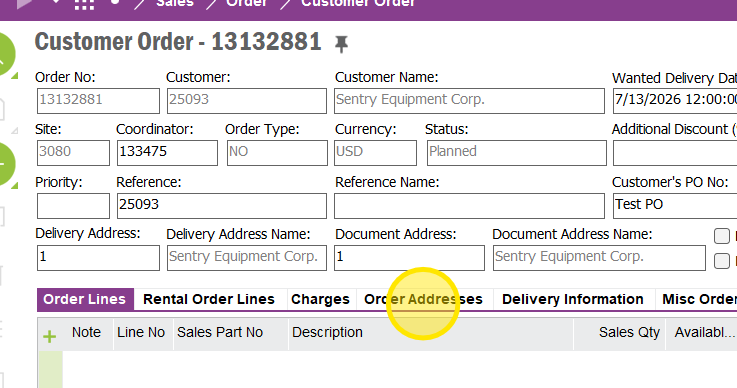
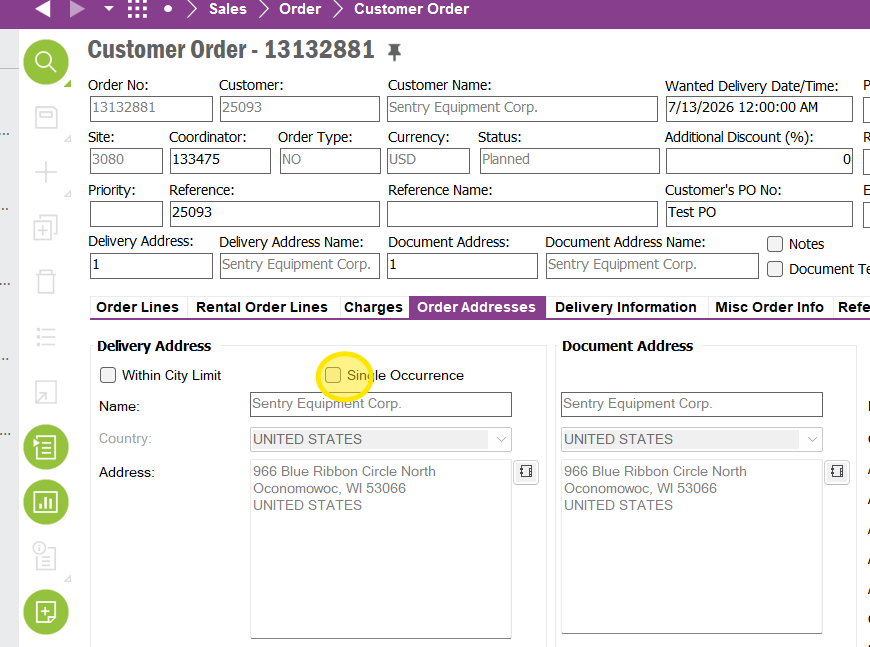
Click on the "Order Addresses" tab.
21
Check the box for "Single Occurrence" and enter the wanted delivery address in the address box
22
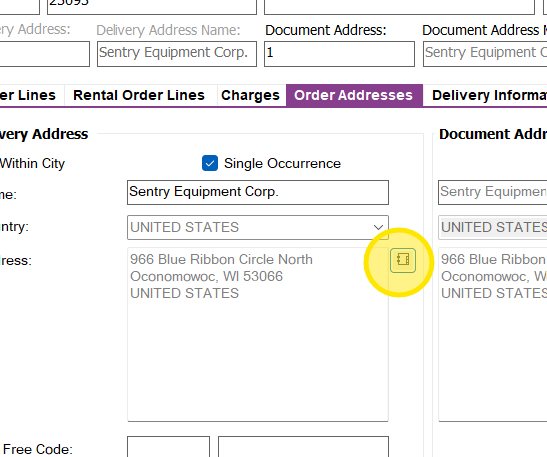
Next click on the address book icon next to the delivery address box.
23
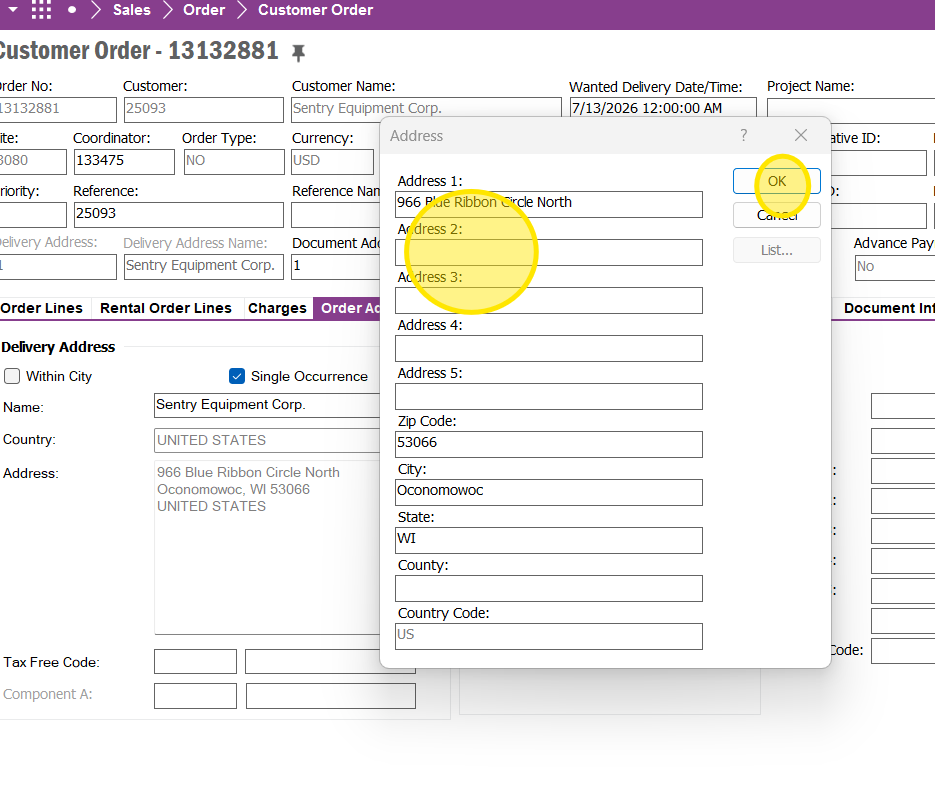
Enter the wanted delivery address and then click OK.
24
Click Save (or press F12) to save the order header.
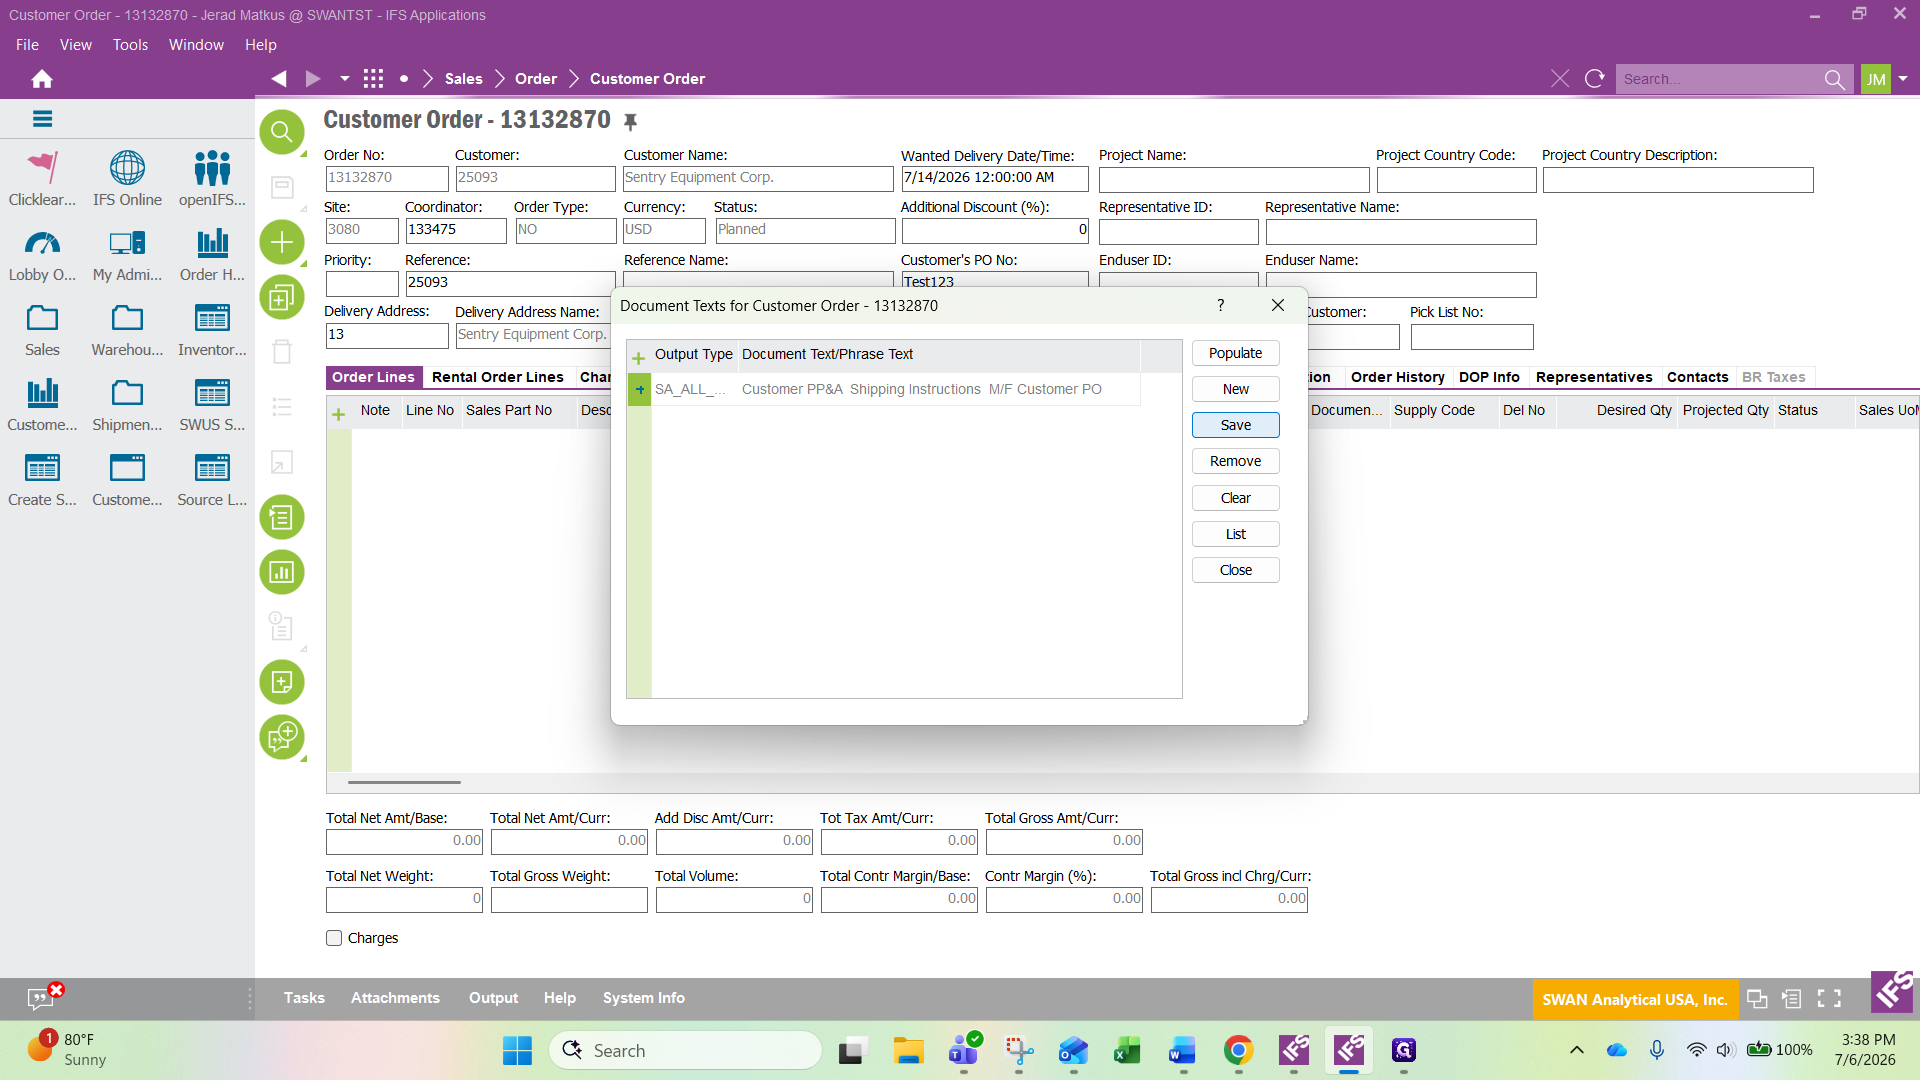
Adding Document text to the order for special instructions.
25
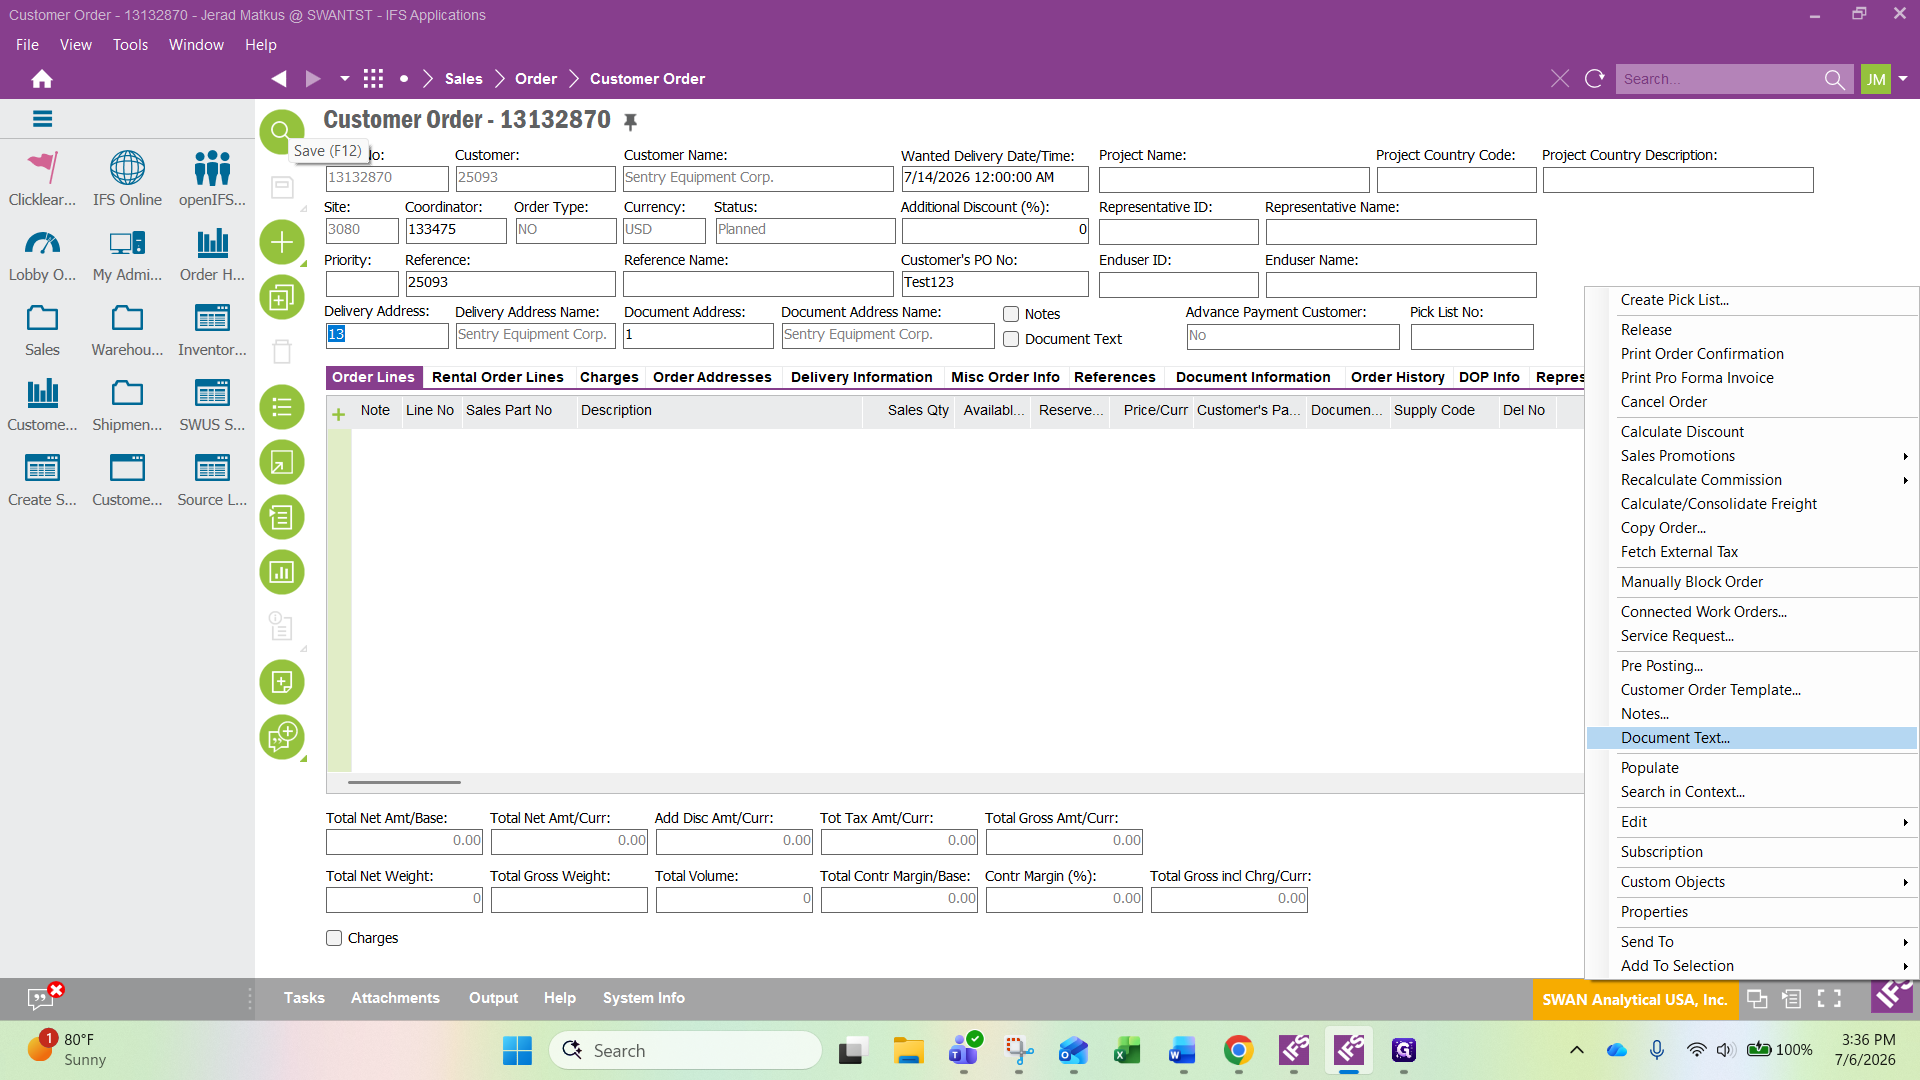
Right-click in the header space.
26
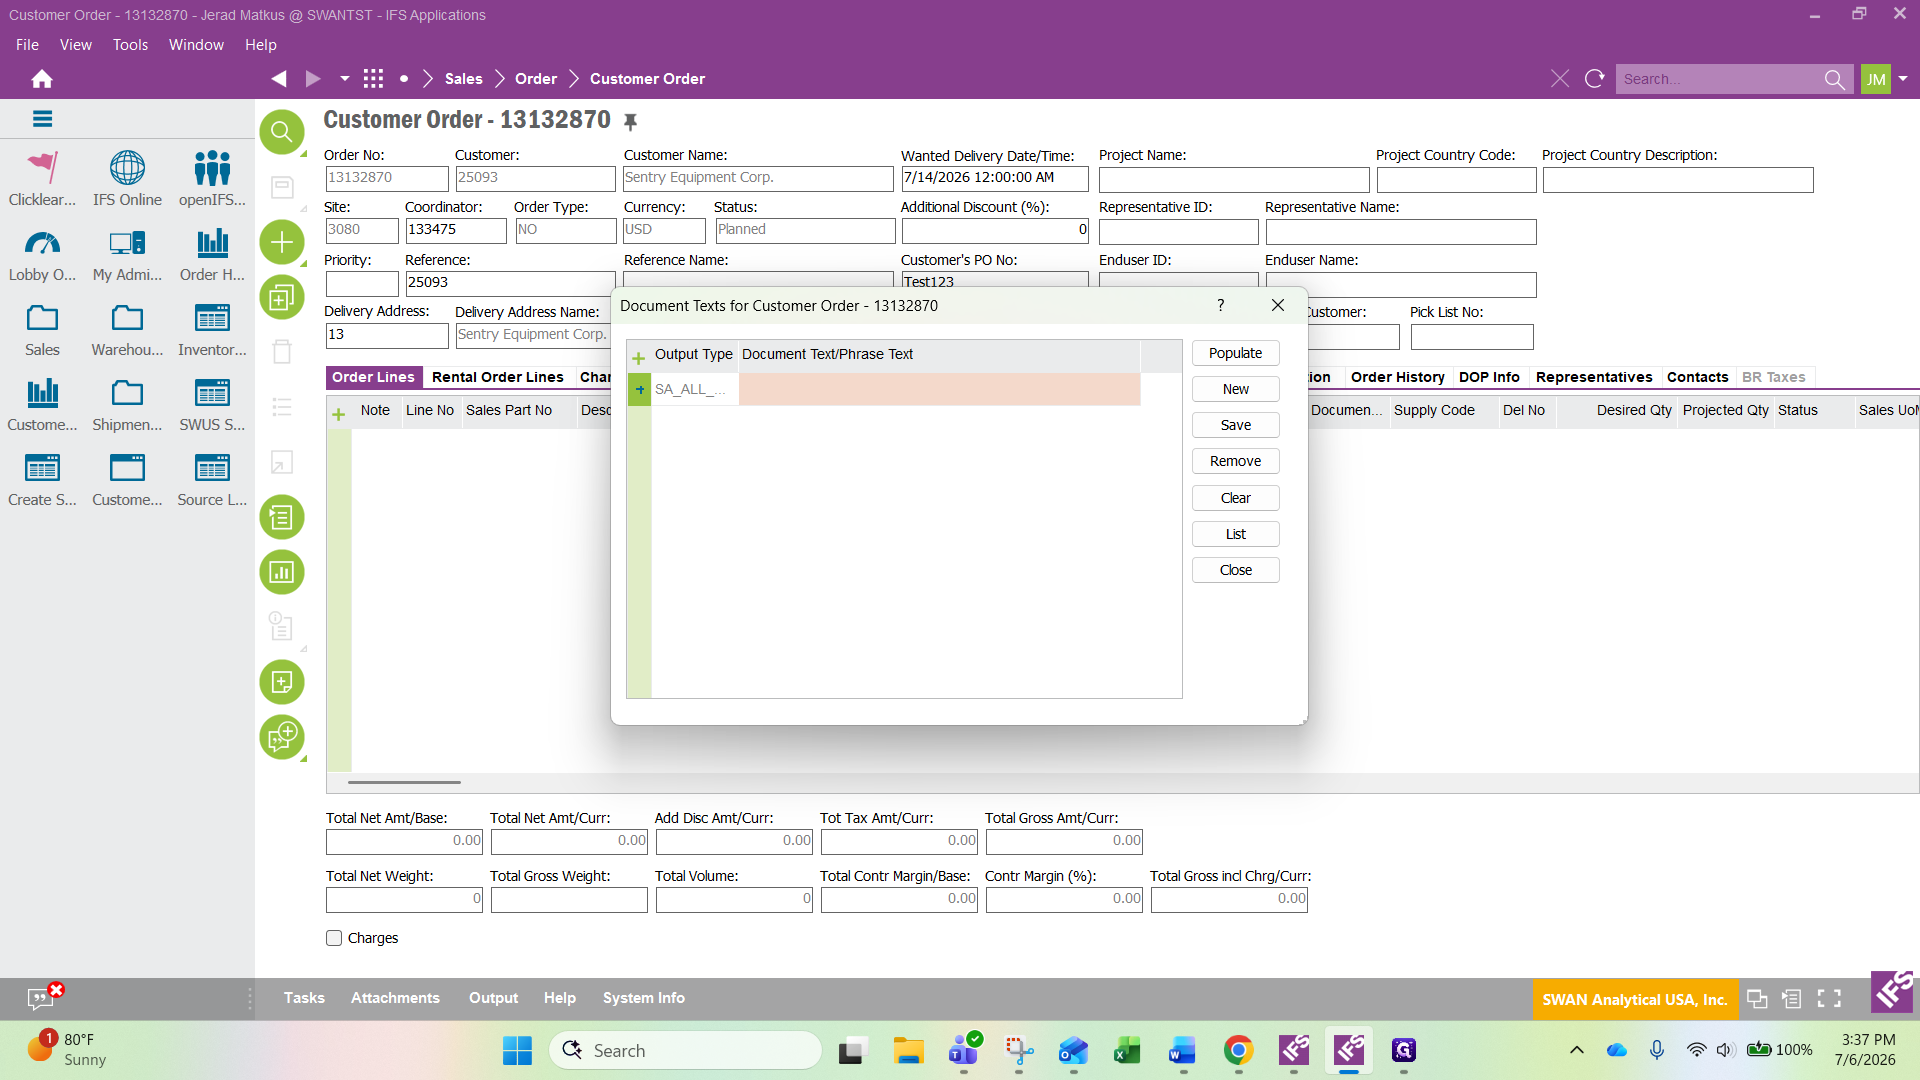
Click Document Text.
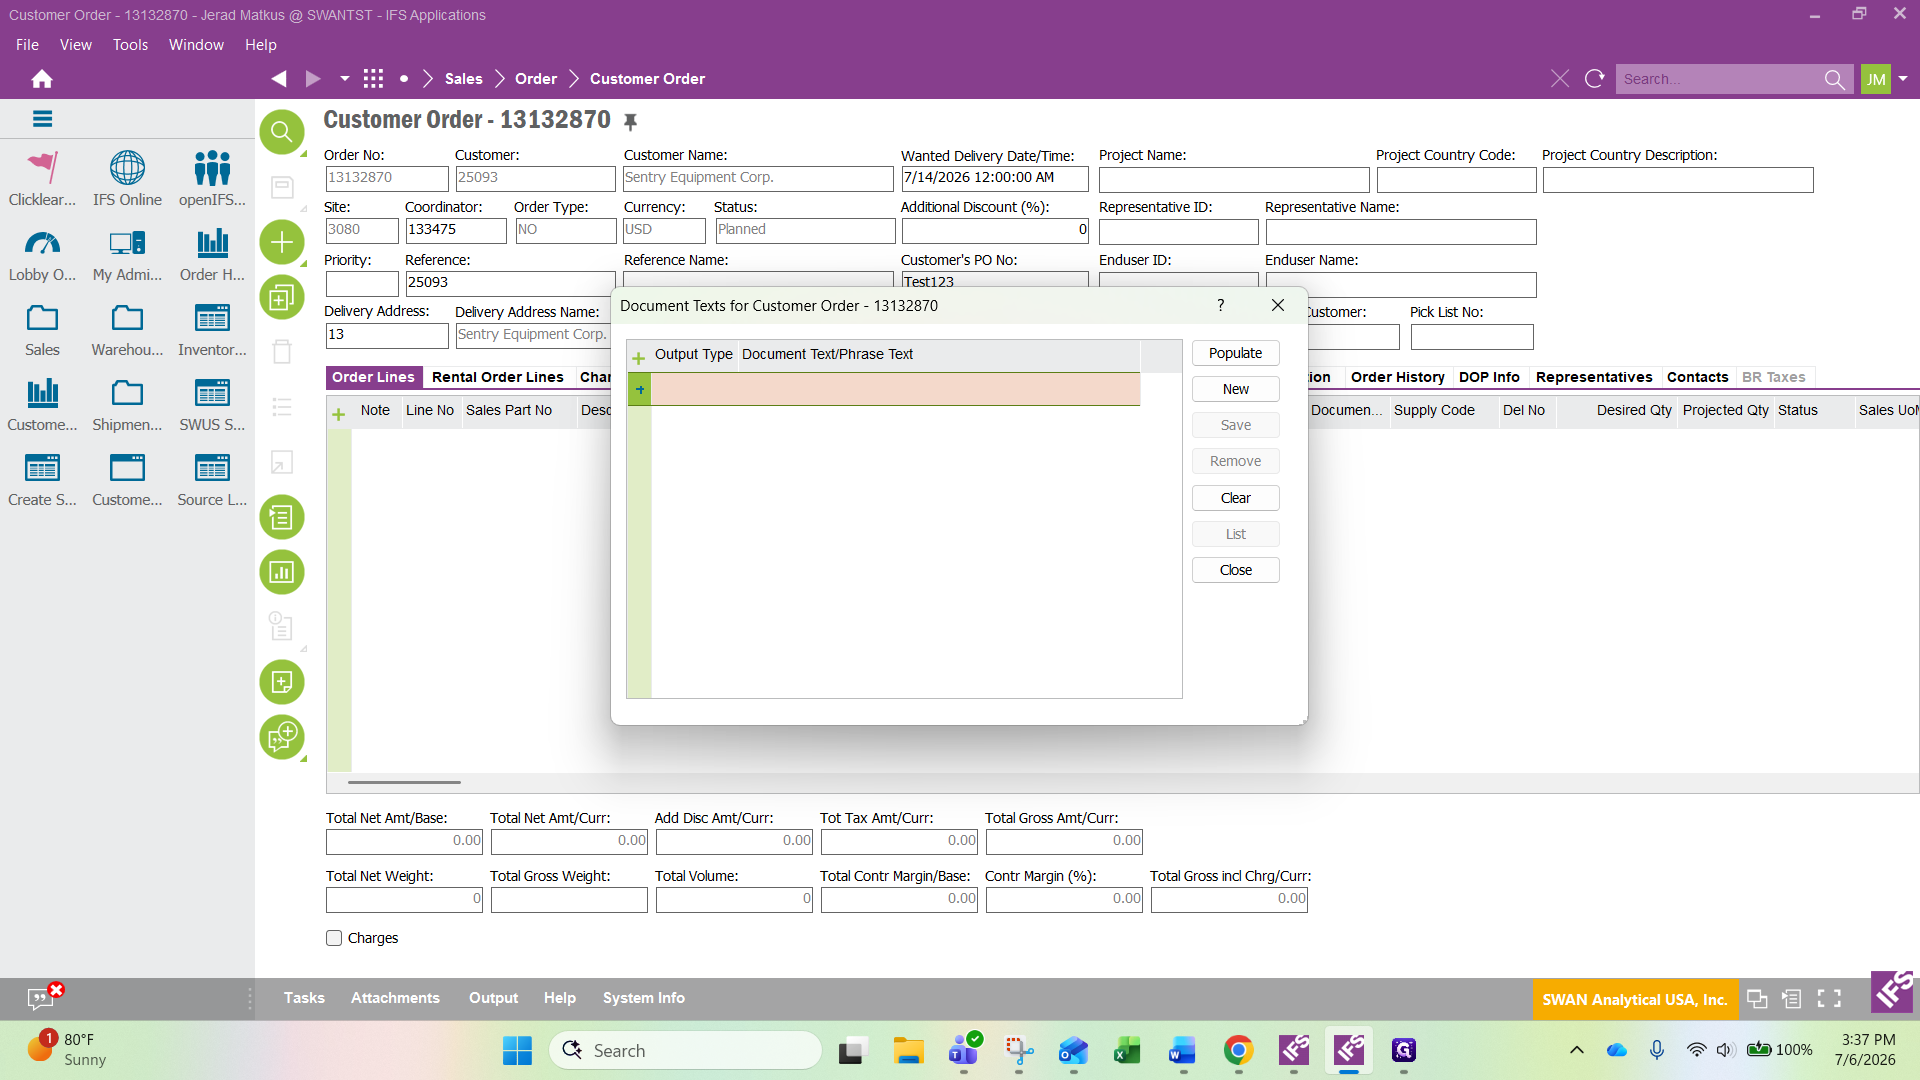
27
Click the + icon to add a new document text entry.
28
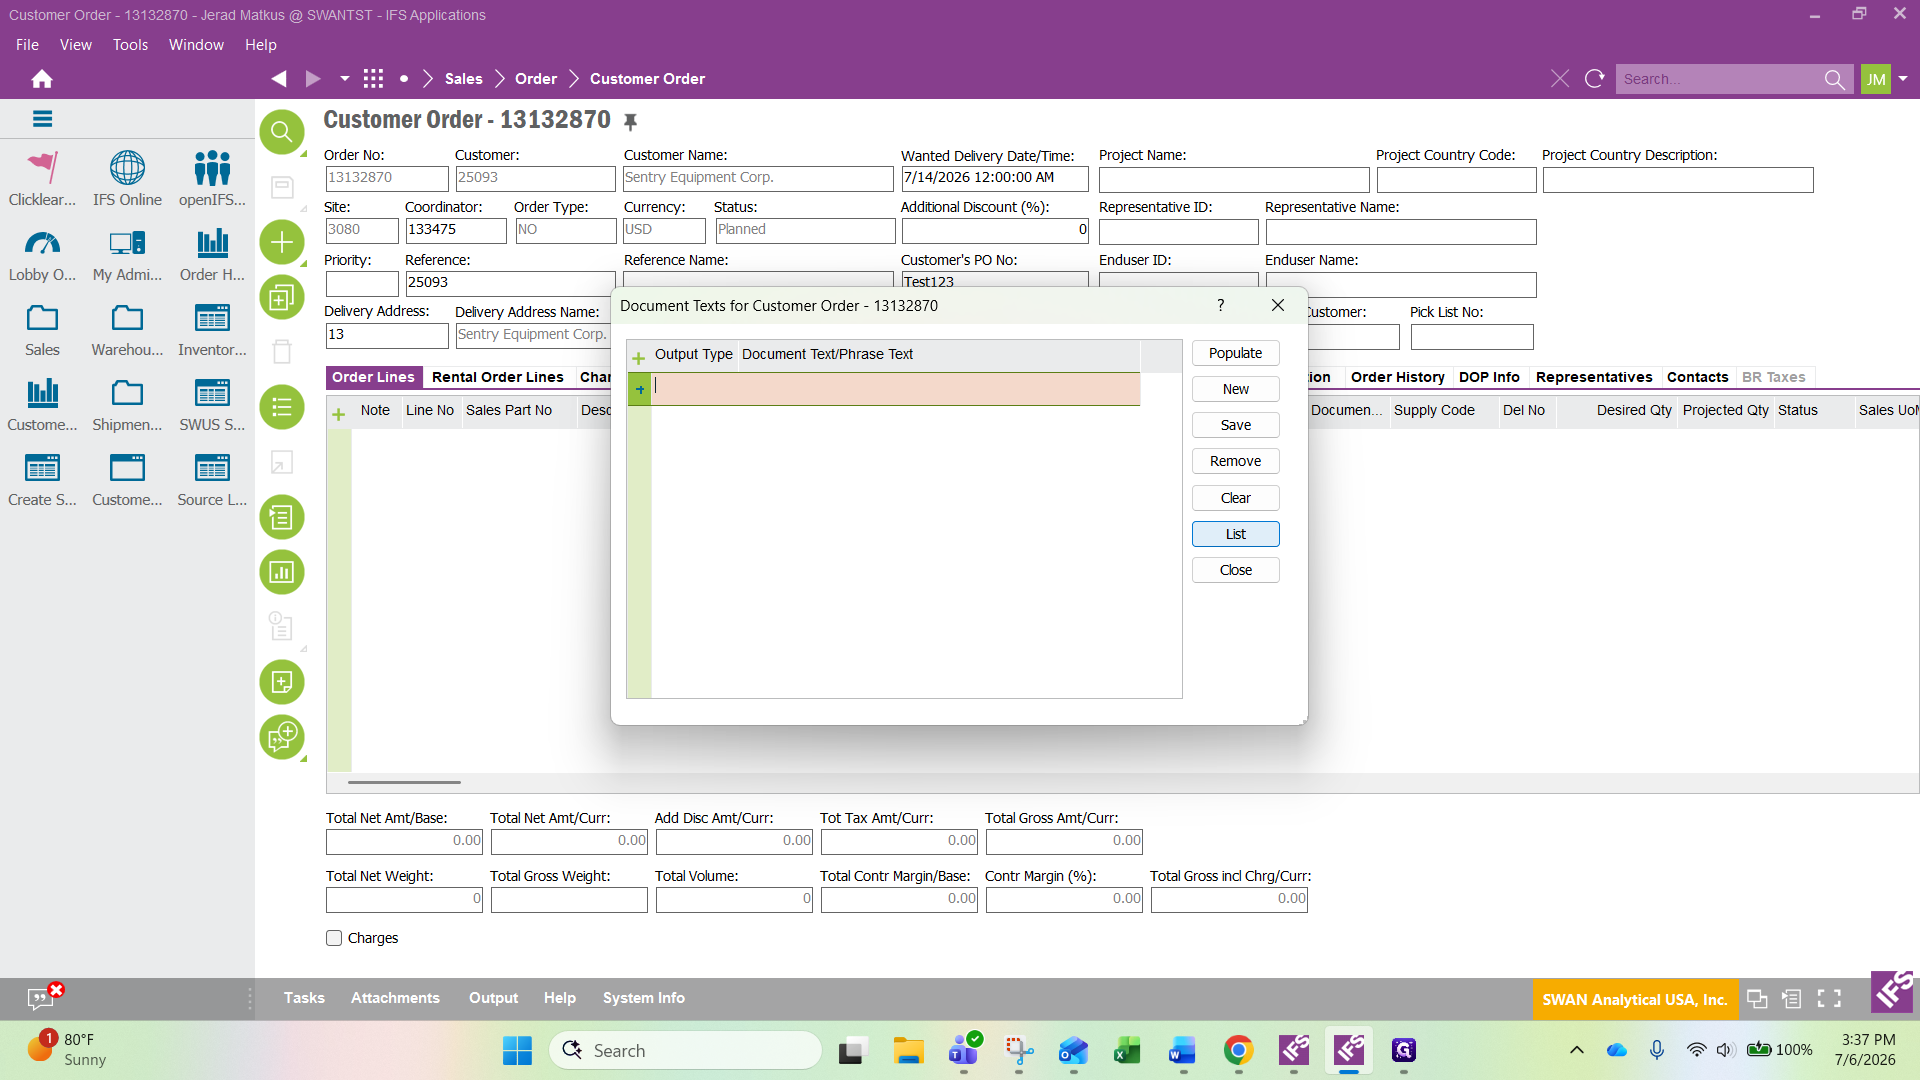
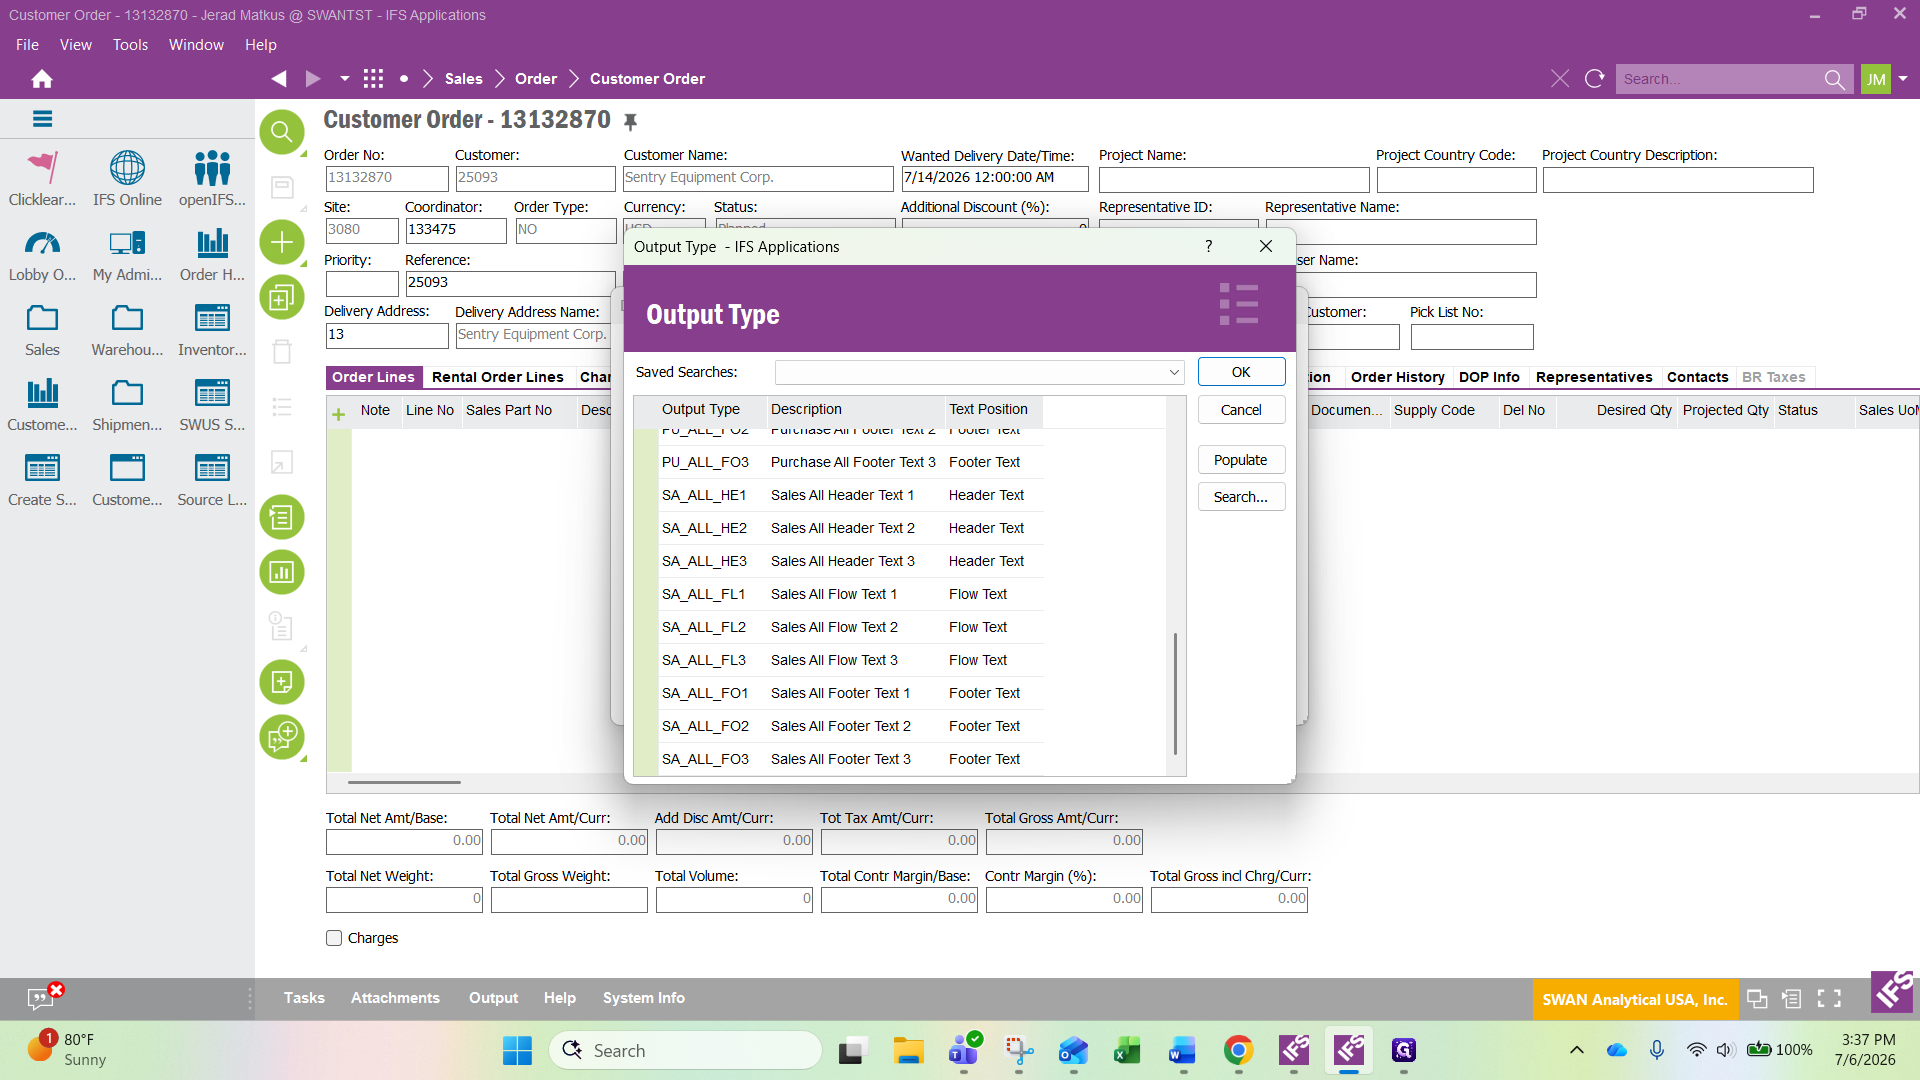
Click List next to the Output Type field.
29
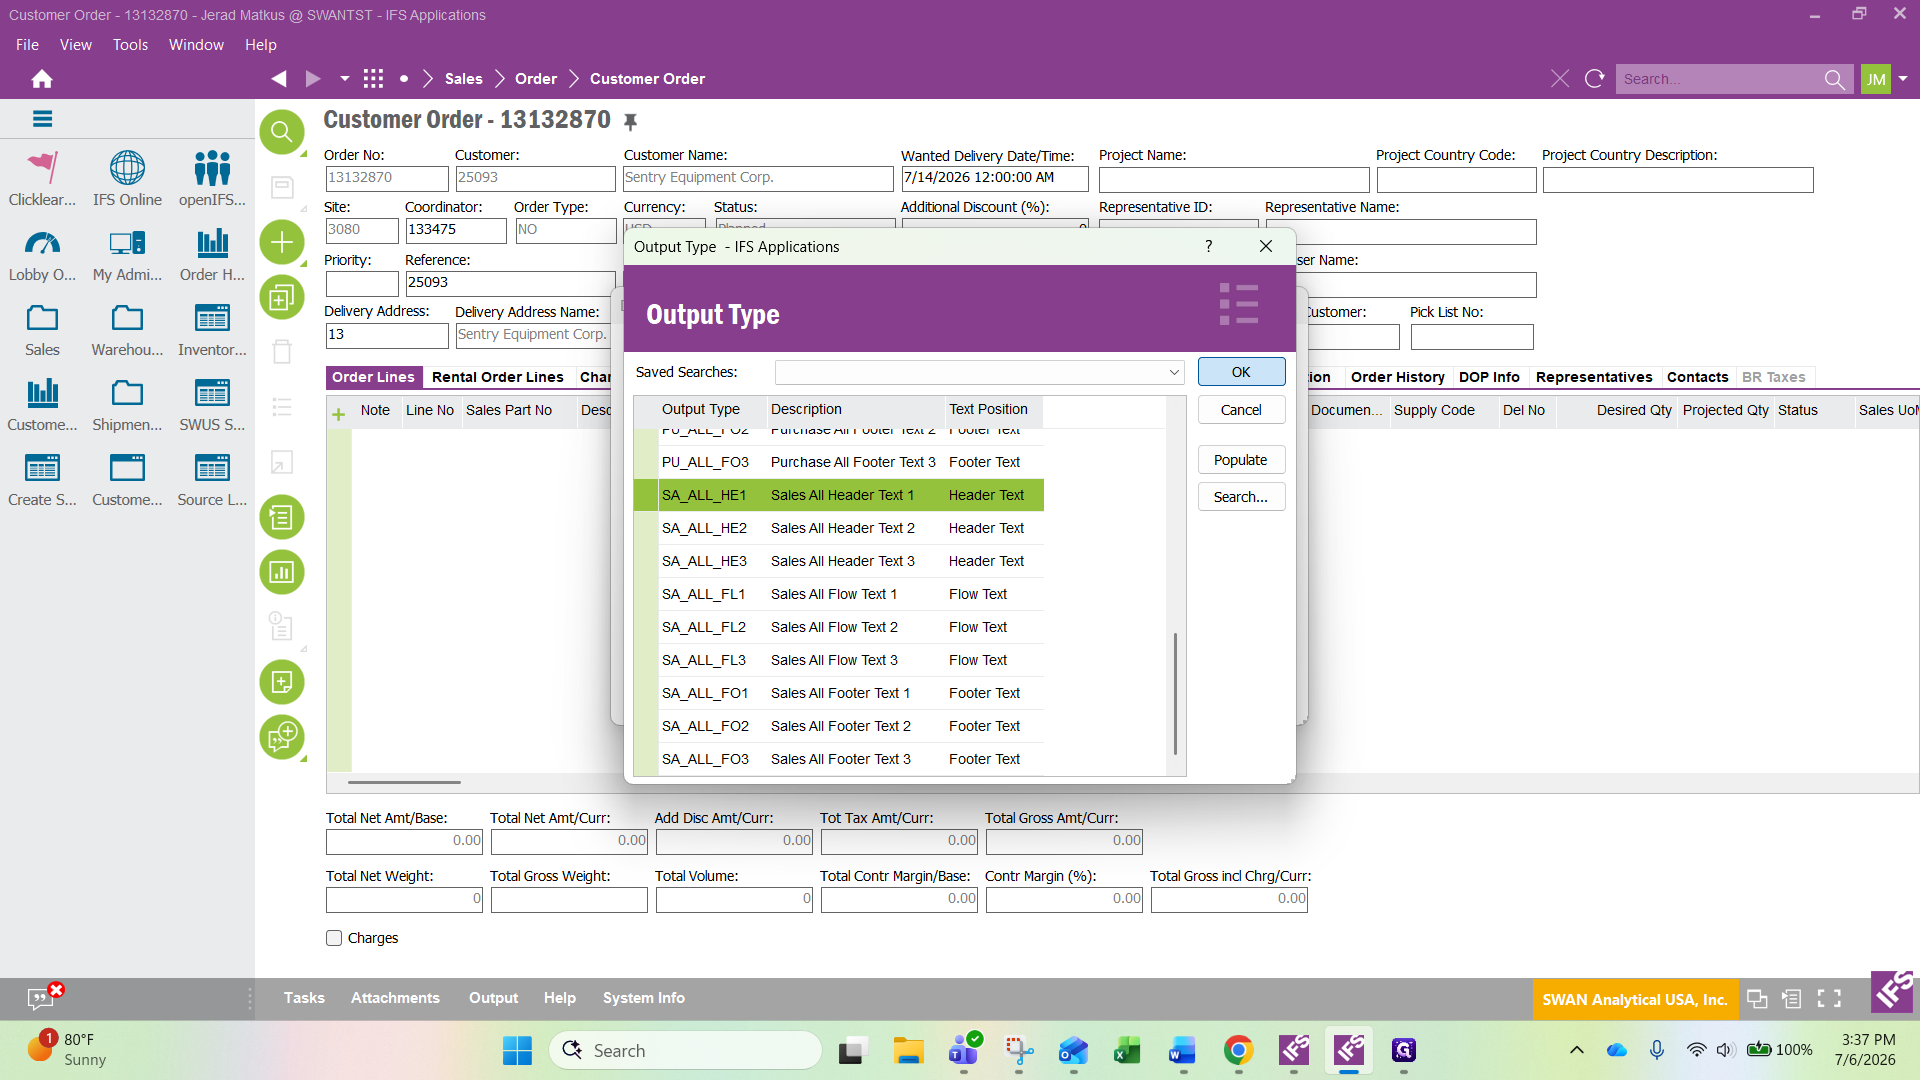
Select Sales All Header Text 1 from the list.
30
Click OK.
31
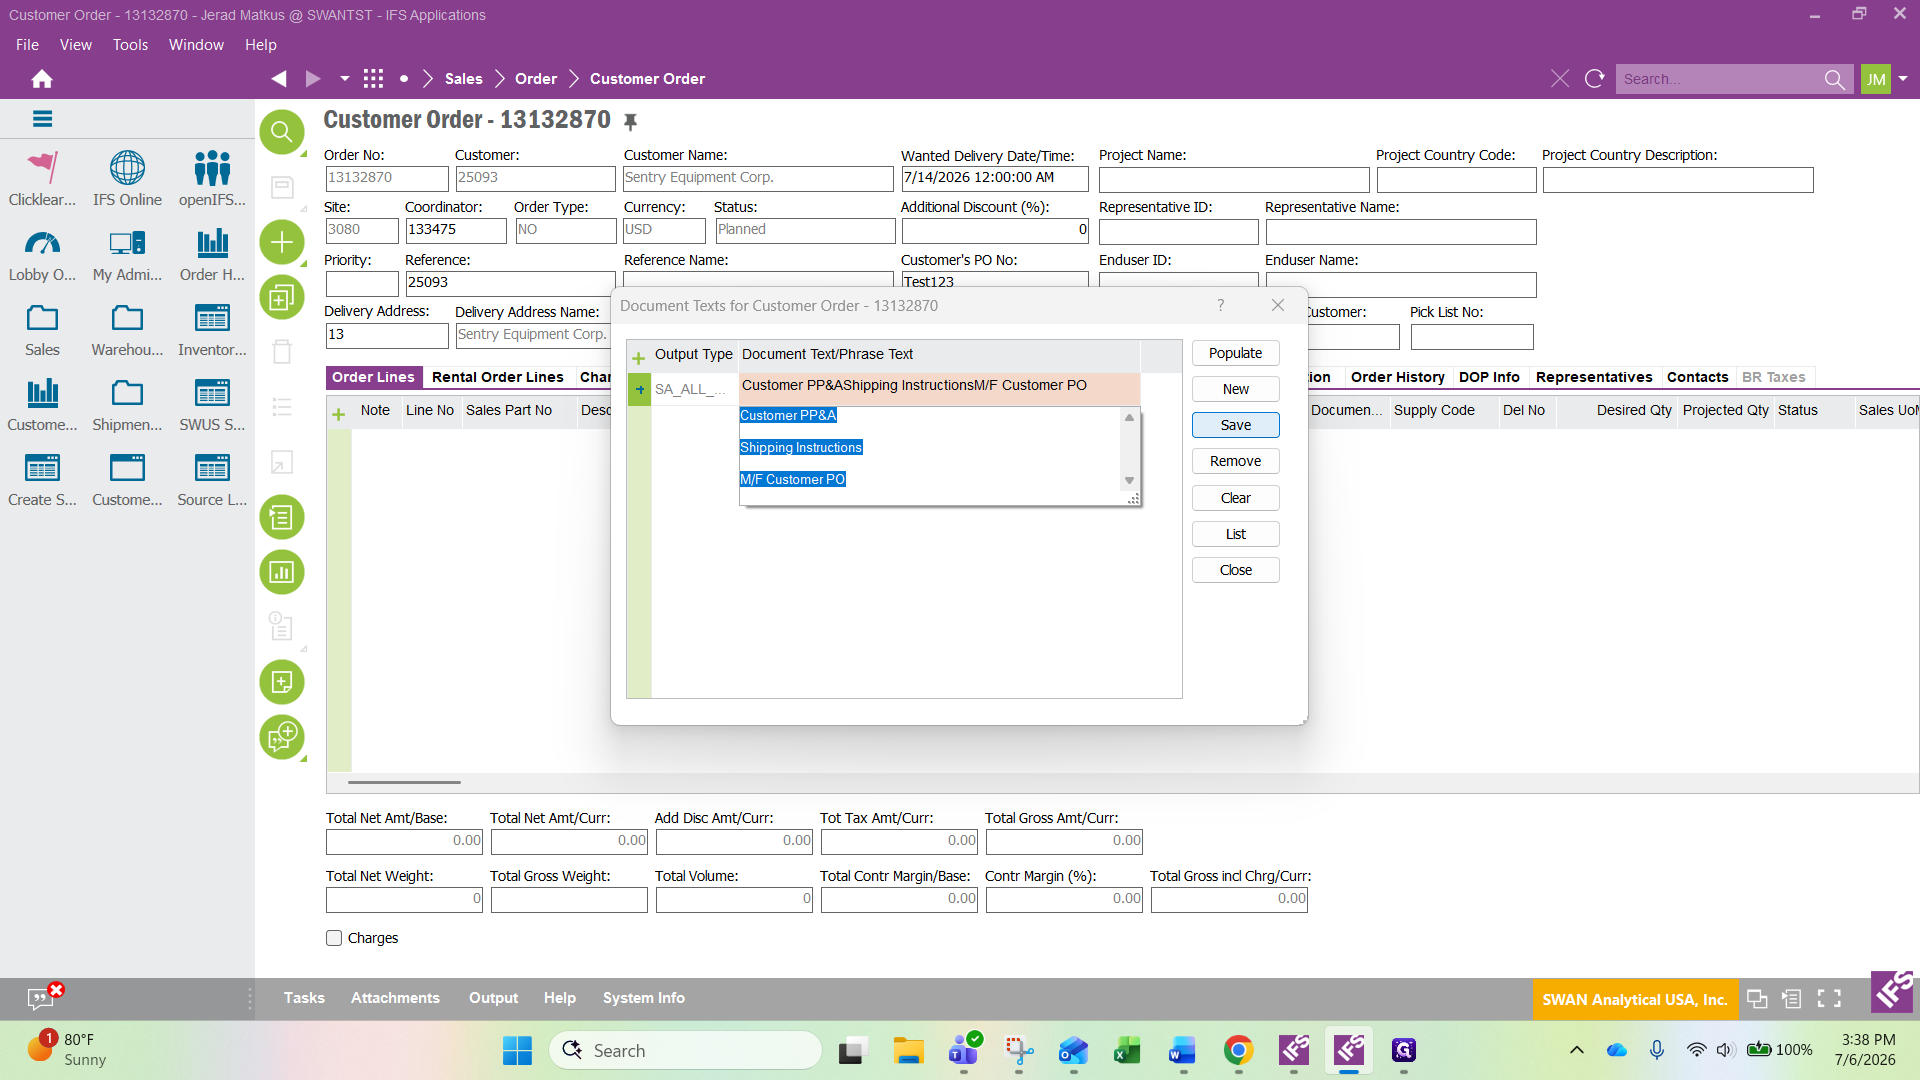
Double-click or triple click the phrase text box to expand it.
32
Enter necessary information such as credit card payment, special shipping instructions, or mark for (Attn:) information and click save.
33
Click Save again.
34
Click Close to return to the order.
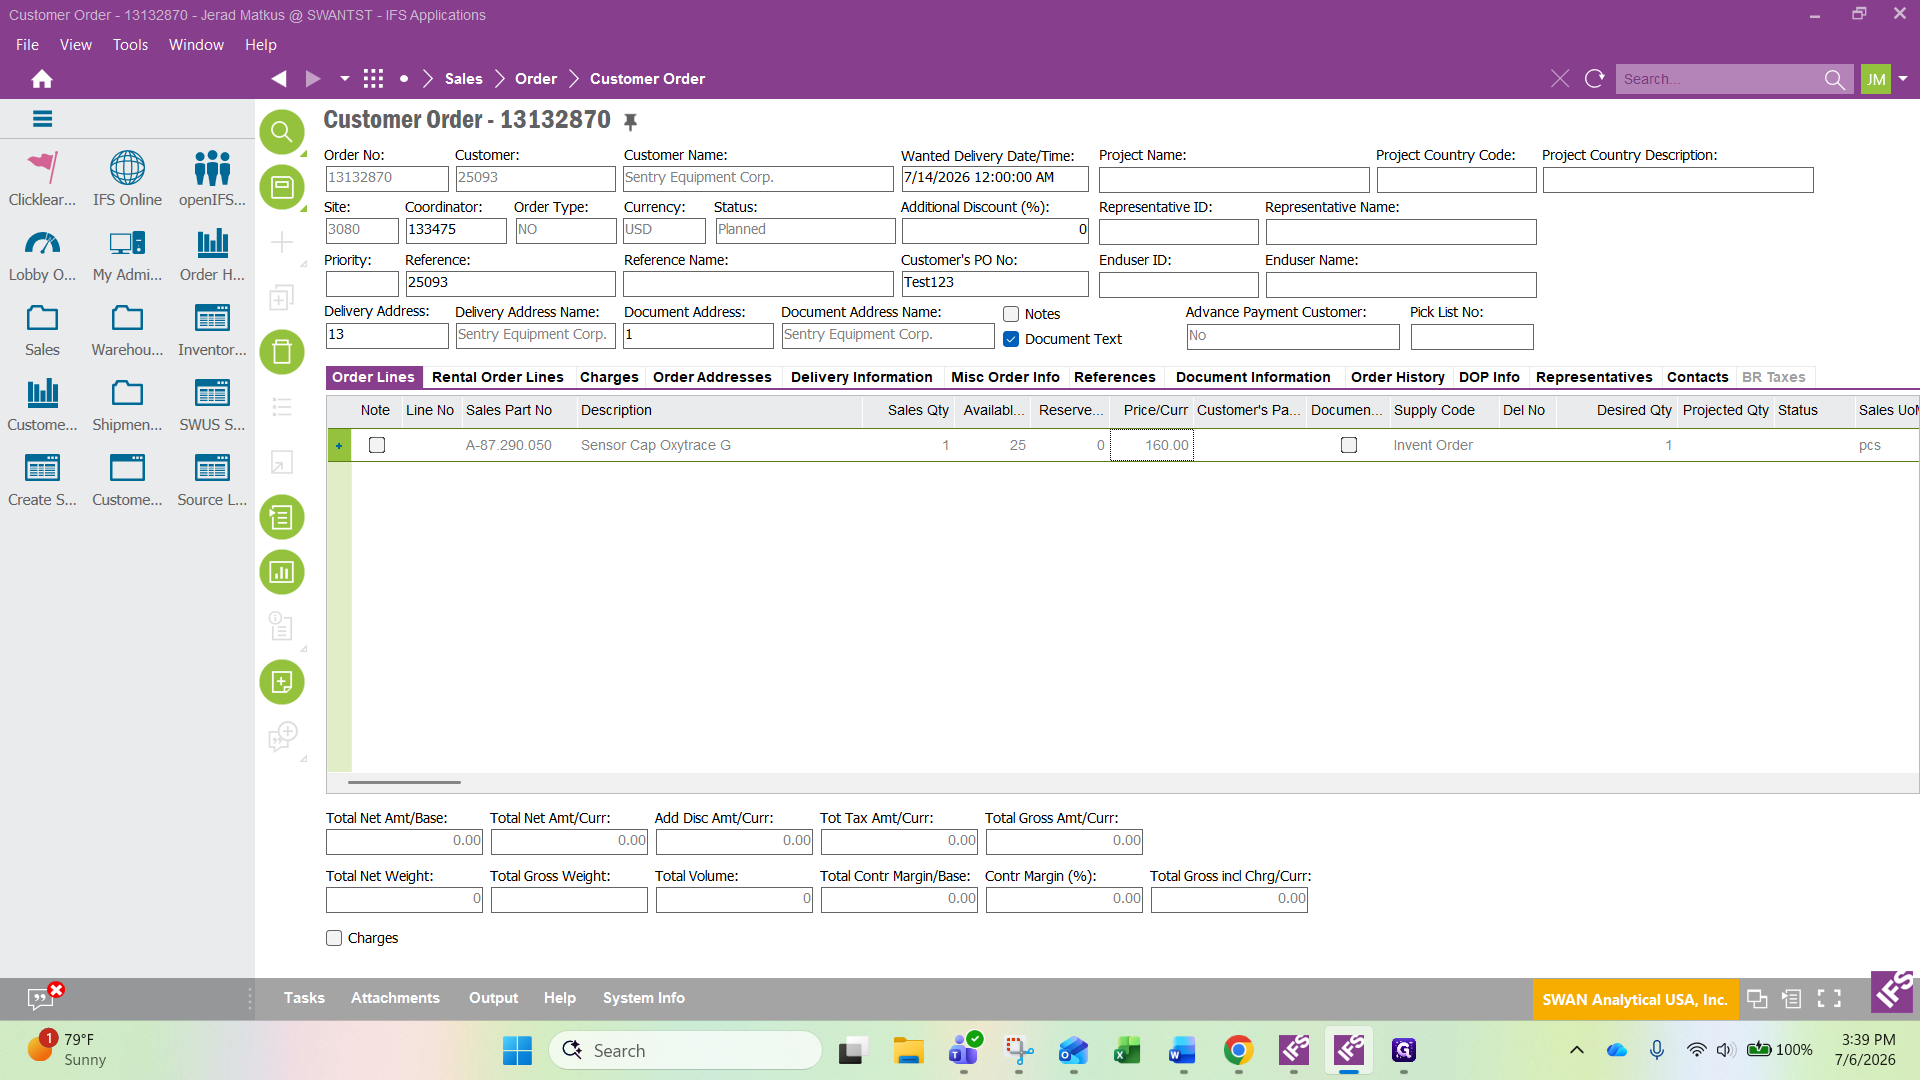
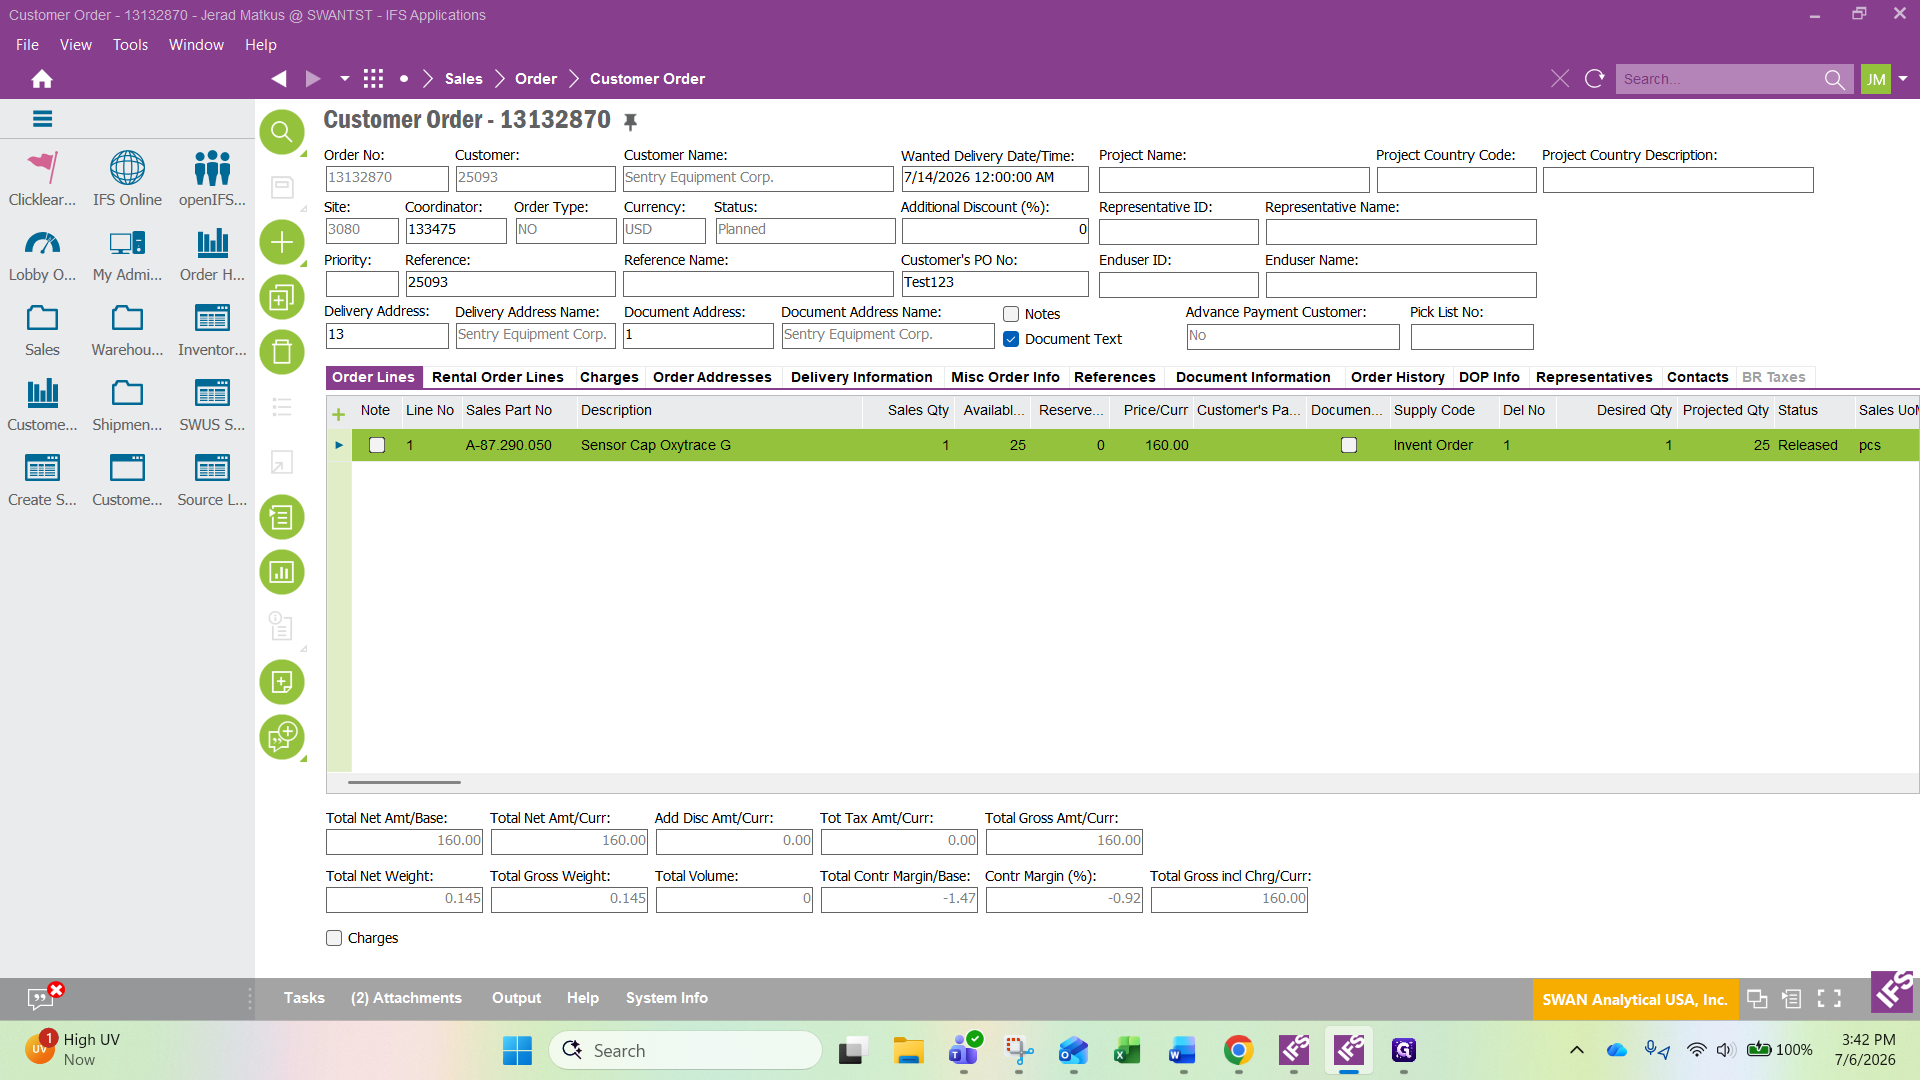
Enter Order Lines
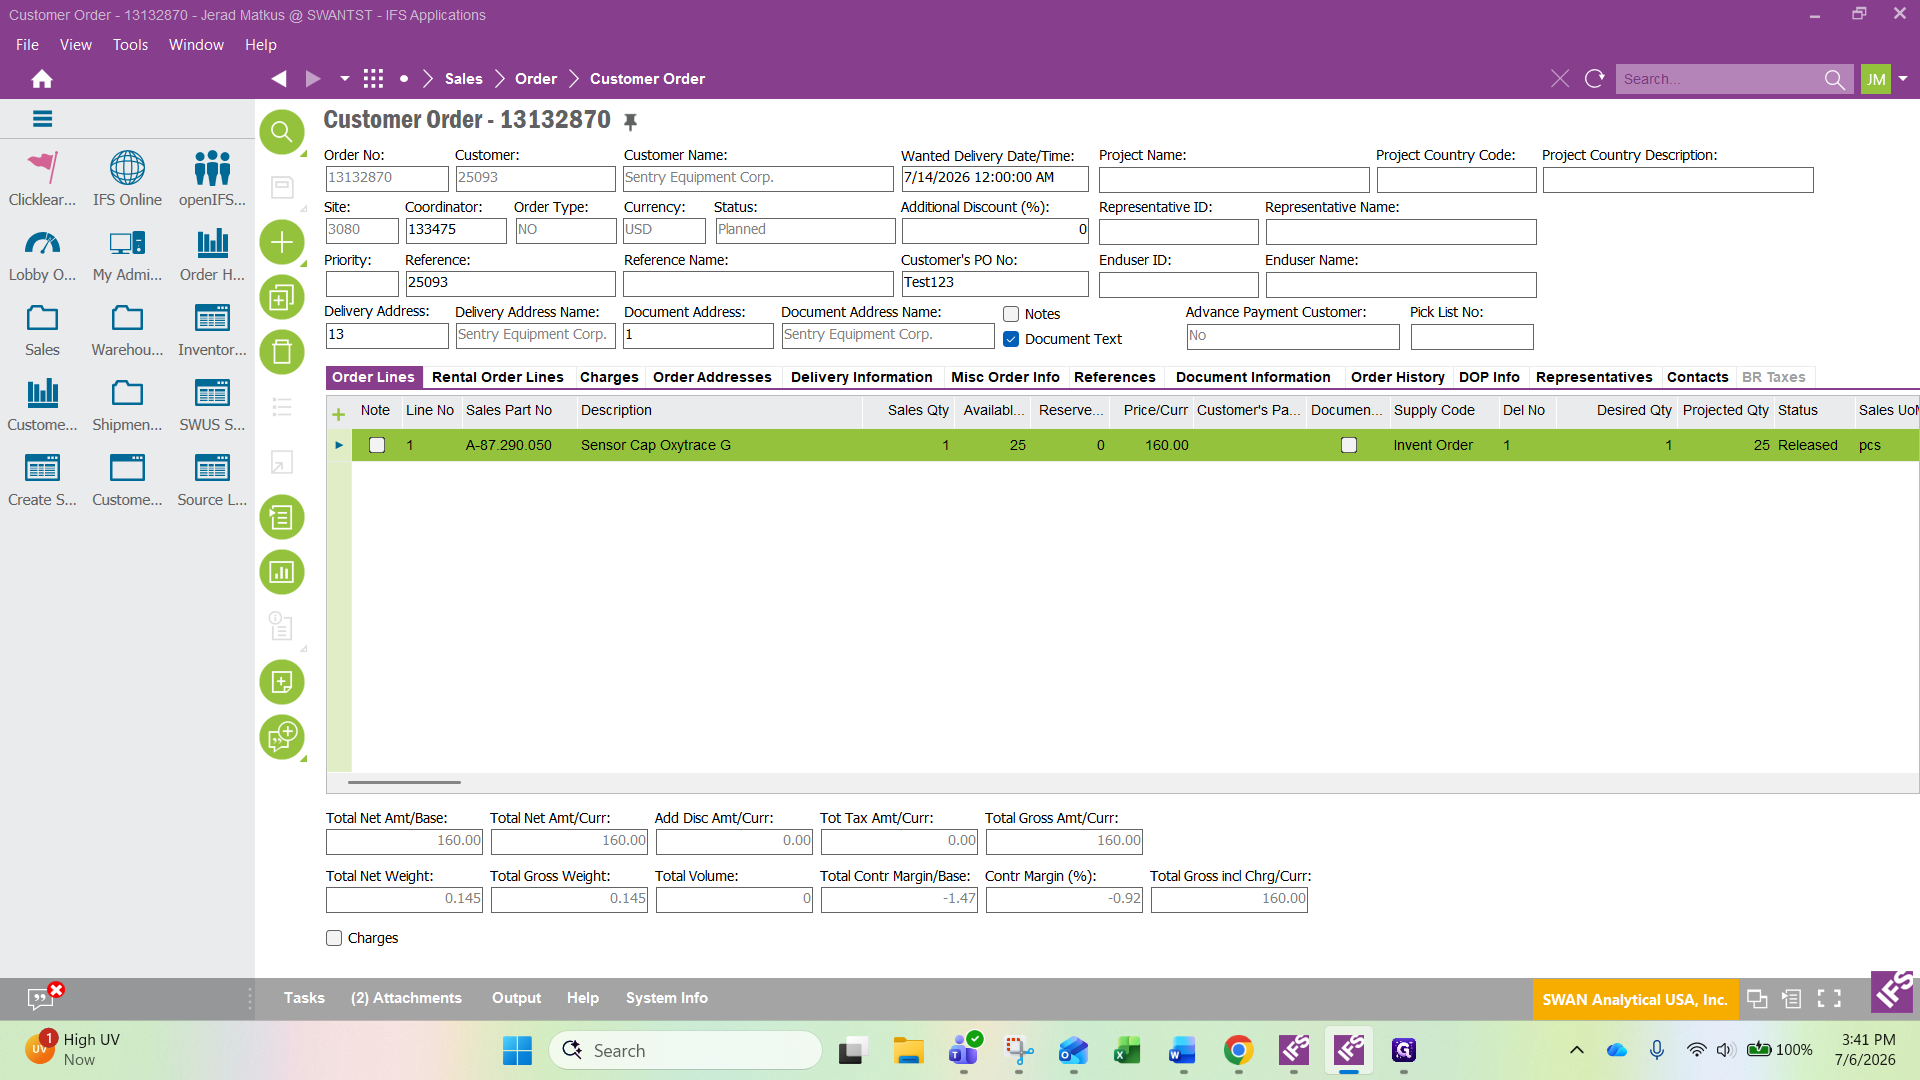
35
Click the + icon in the Order Lines section.
36
Enter the part number in the Sales Part Number field.
37
Enter the requested quantity in the Sales Quantity field.
38
Verify or enter the price in the Price Current field, then press Enter.
39
Click Save to complete the line entry.
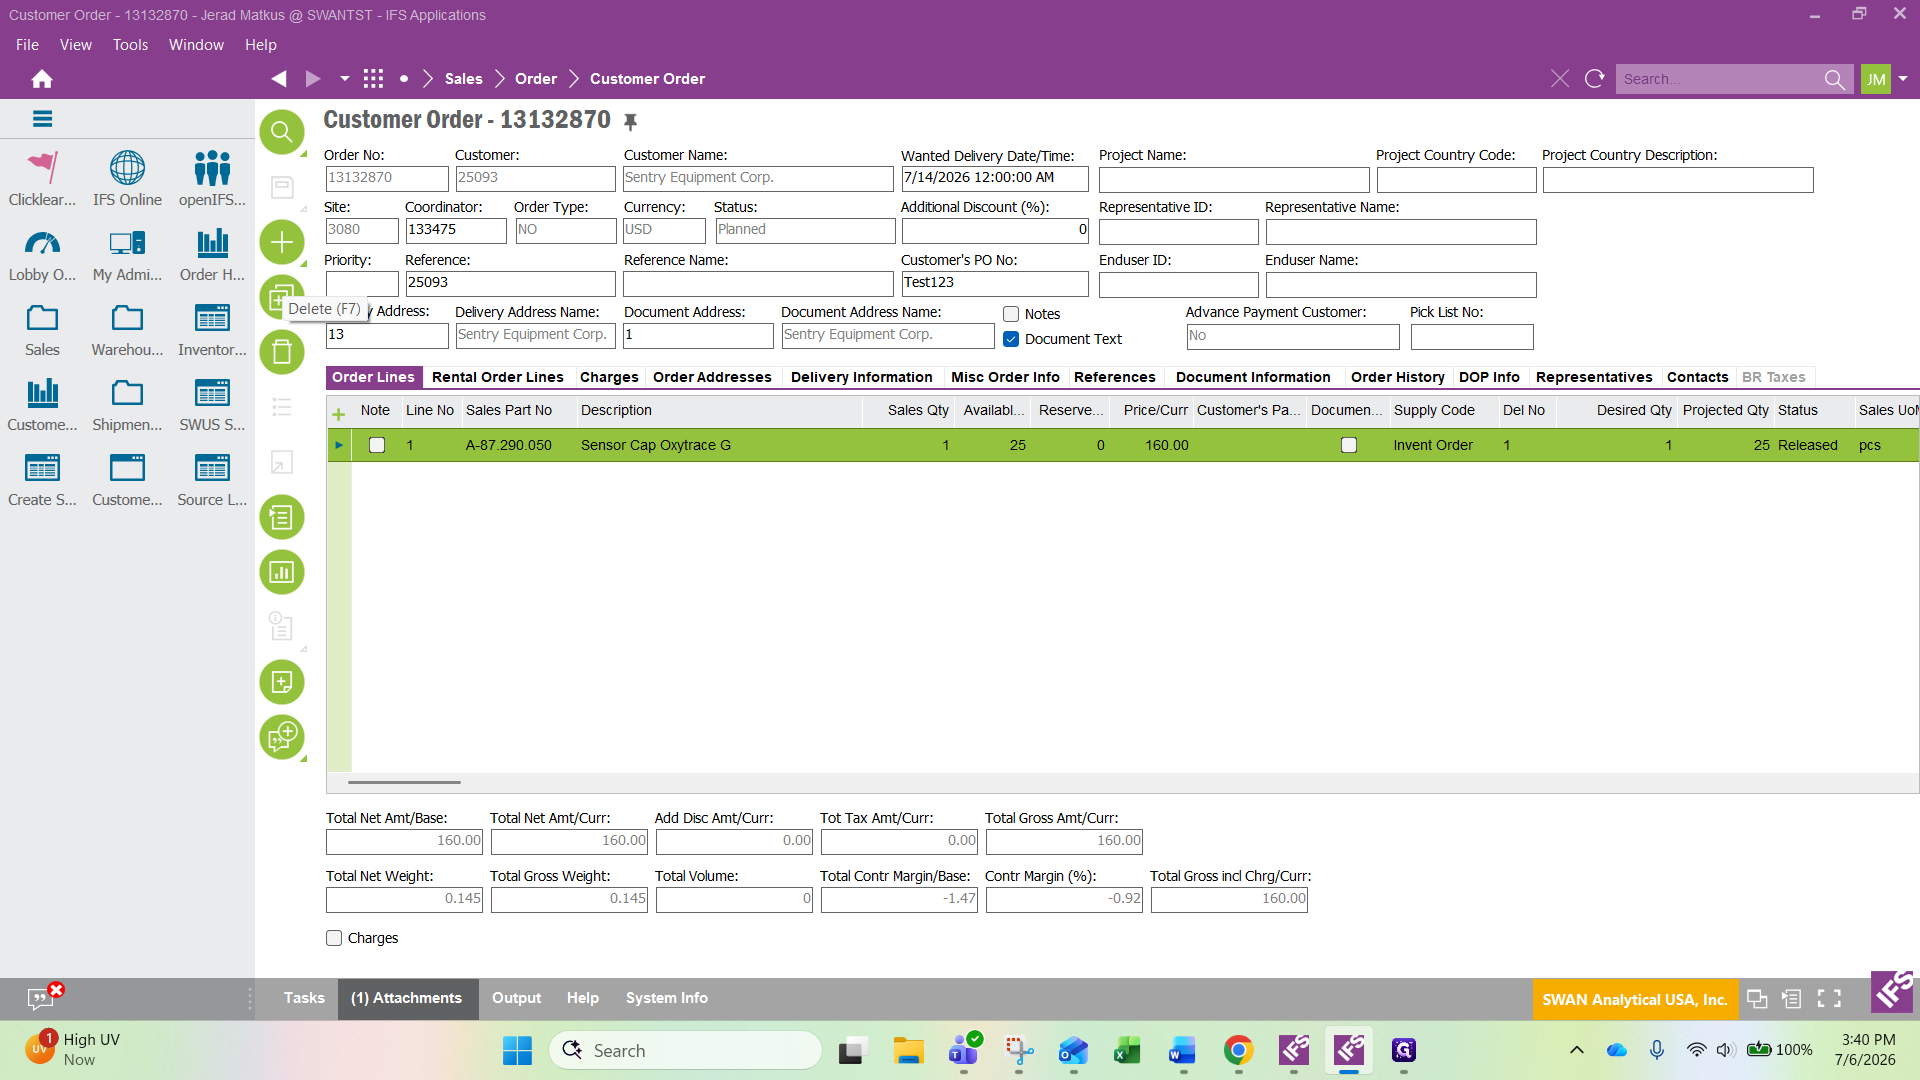
If you need to delete an extra order line, select the line and click the Delete button on the side toolbar, or press F7.
Add Attachments
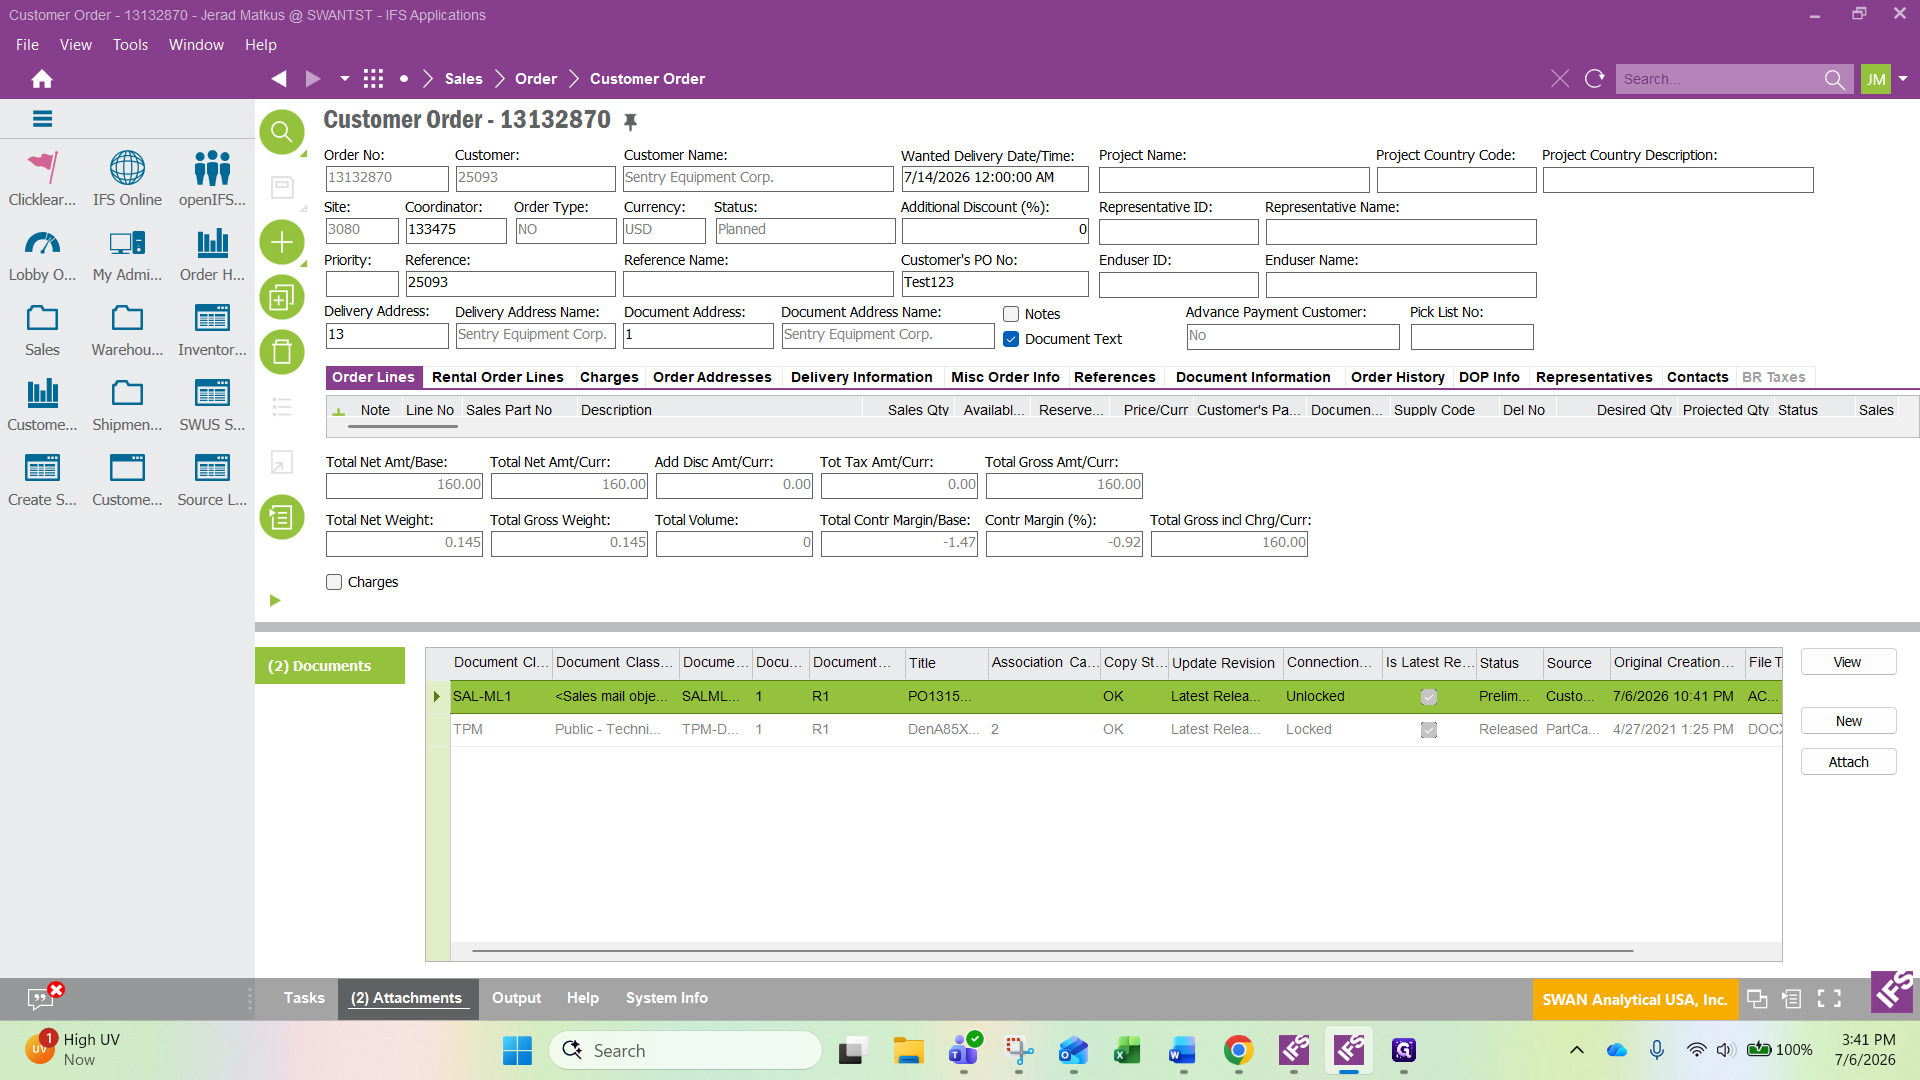
40
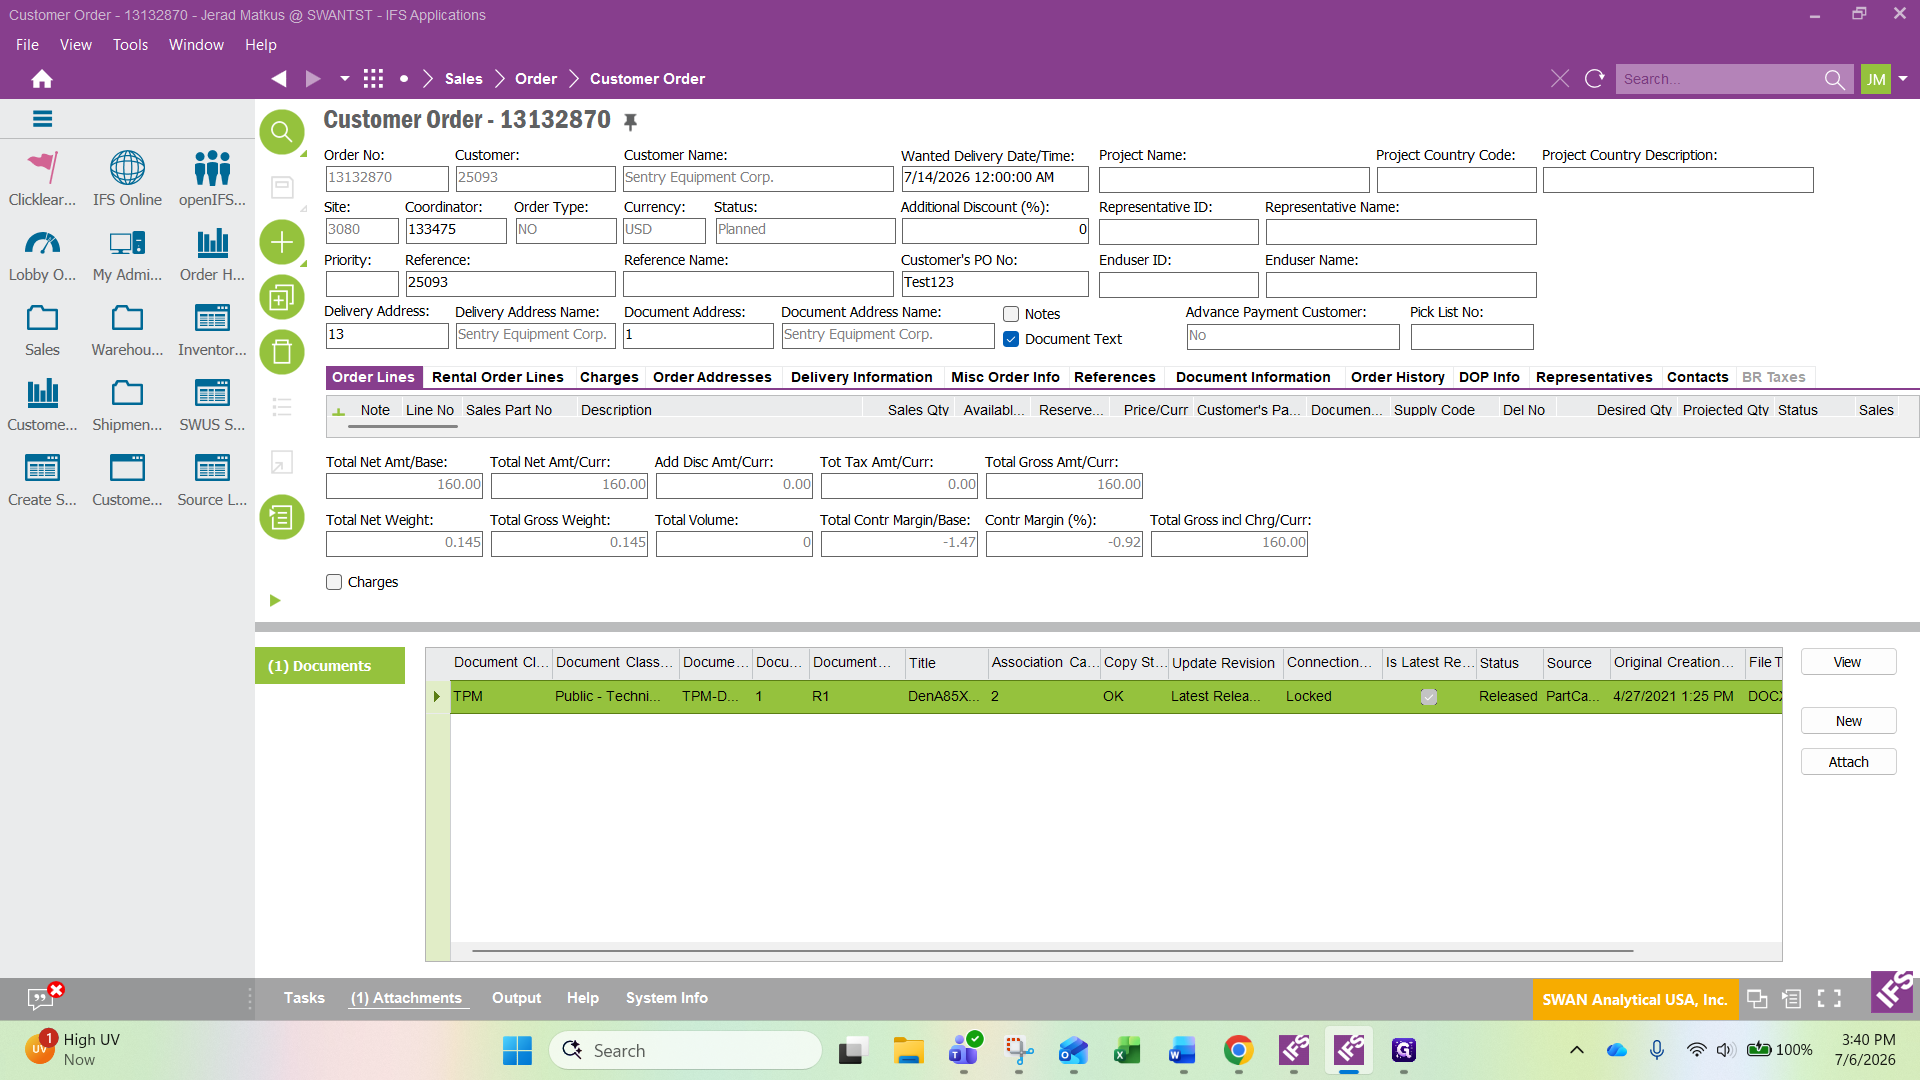
Click Attachments at the bottom of the screen.
41
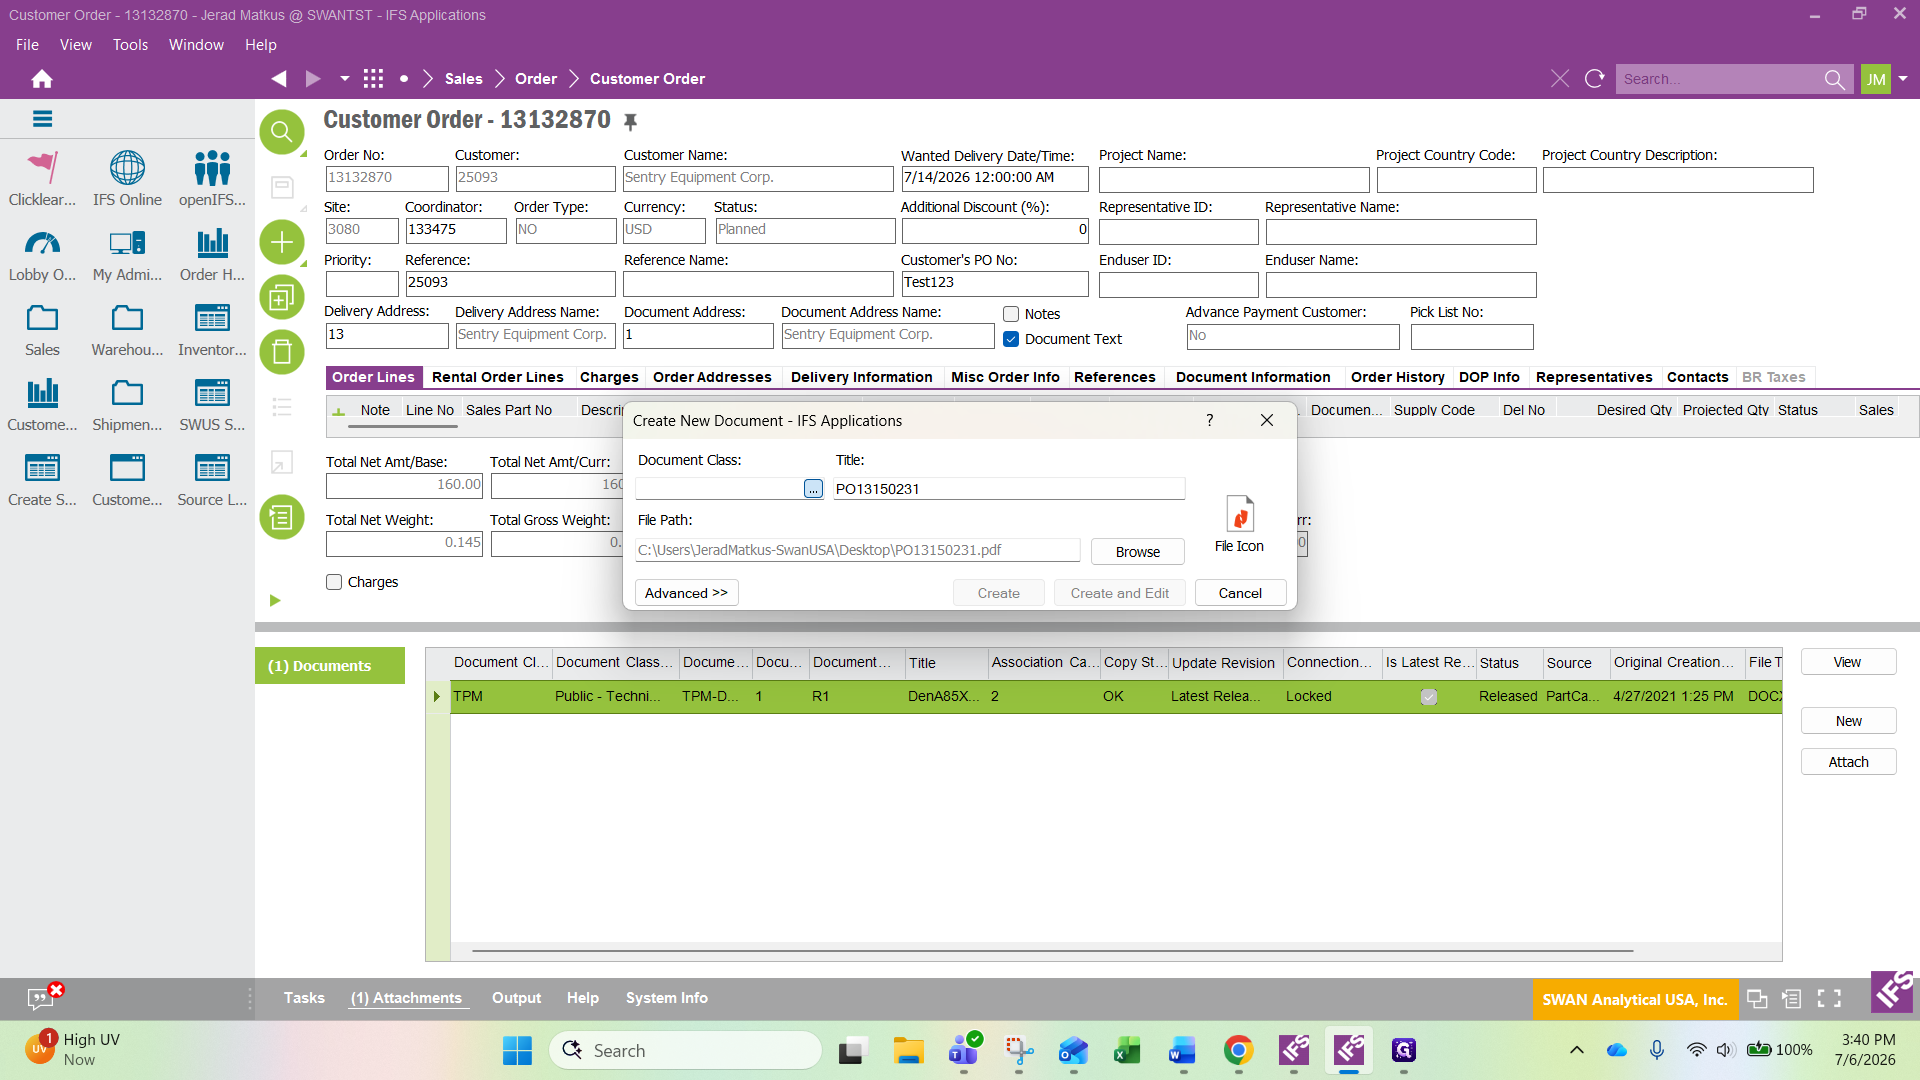
Drag and drop the customer's PDF purchase order into the attachments box from your desktop.
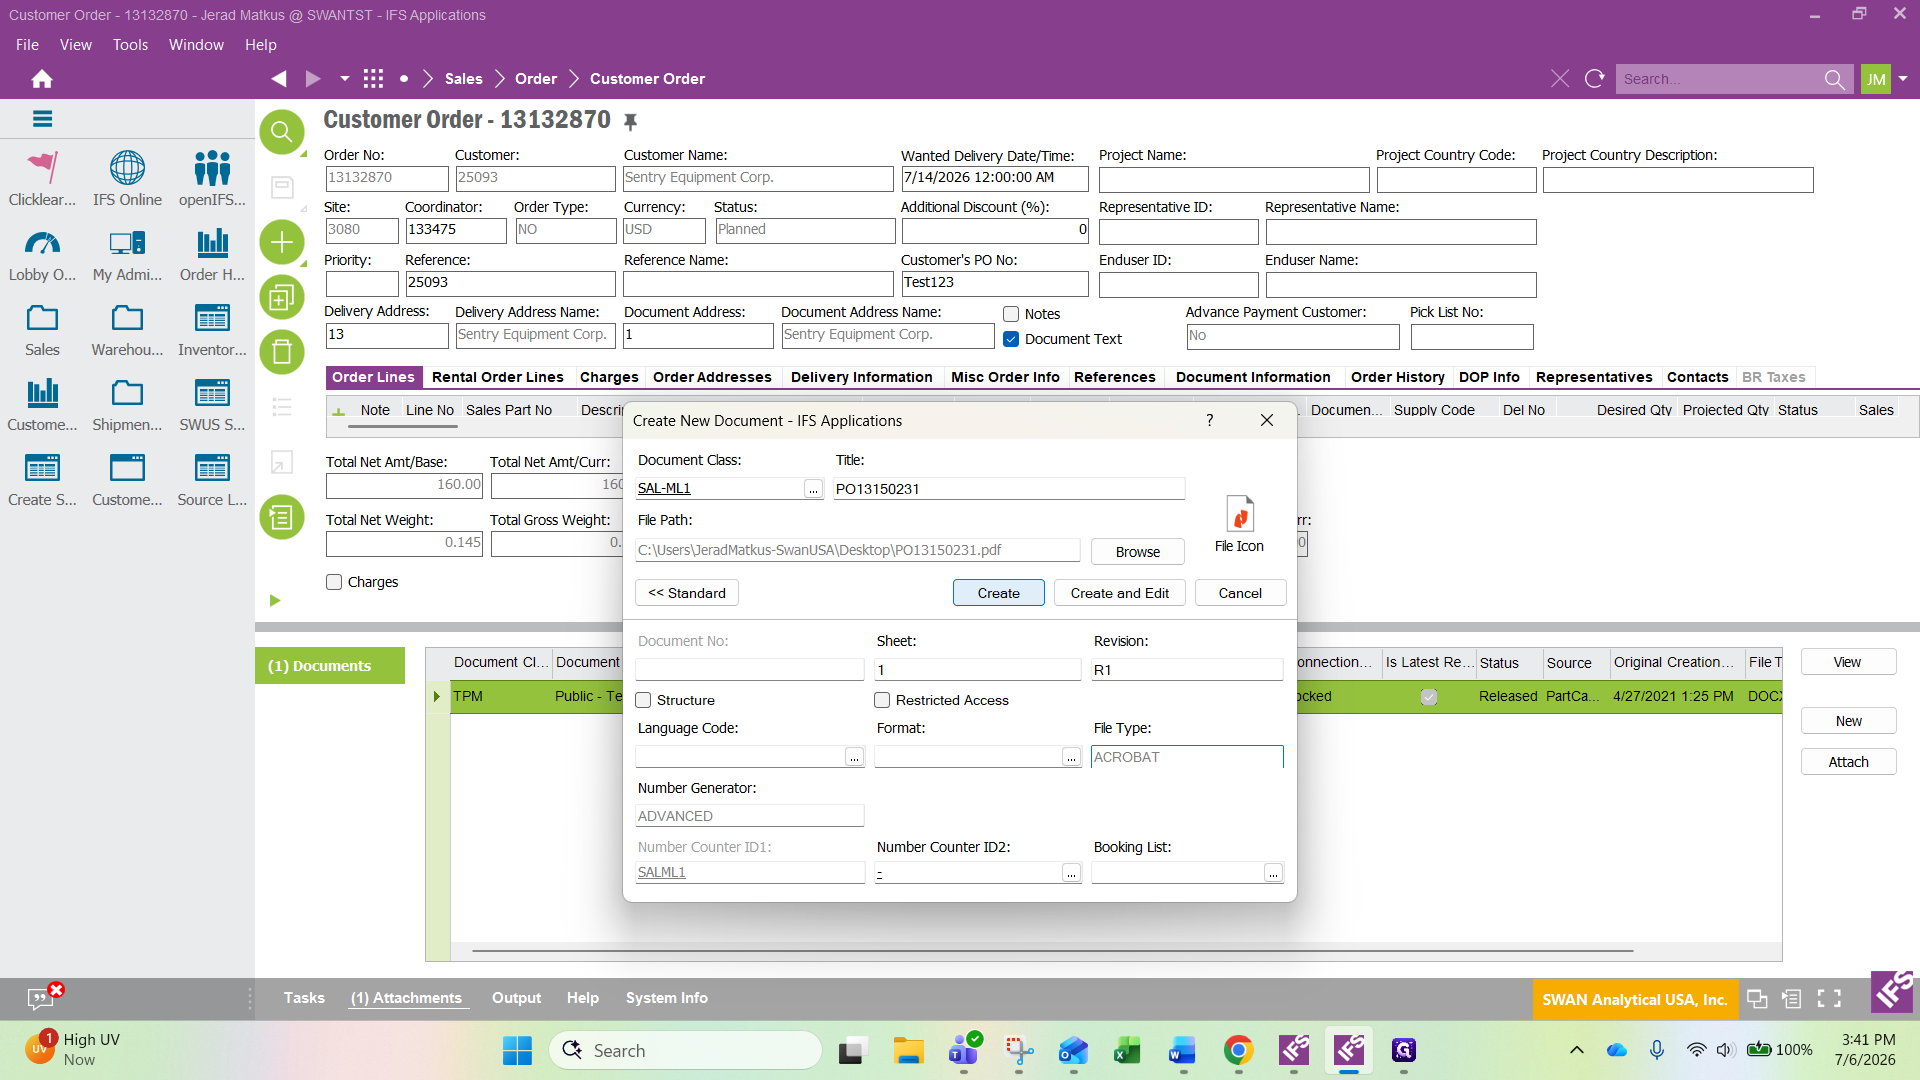
42
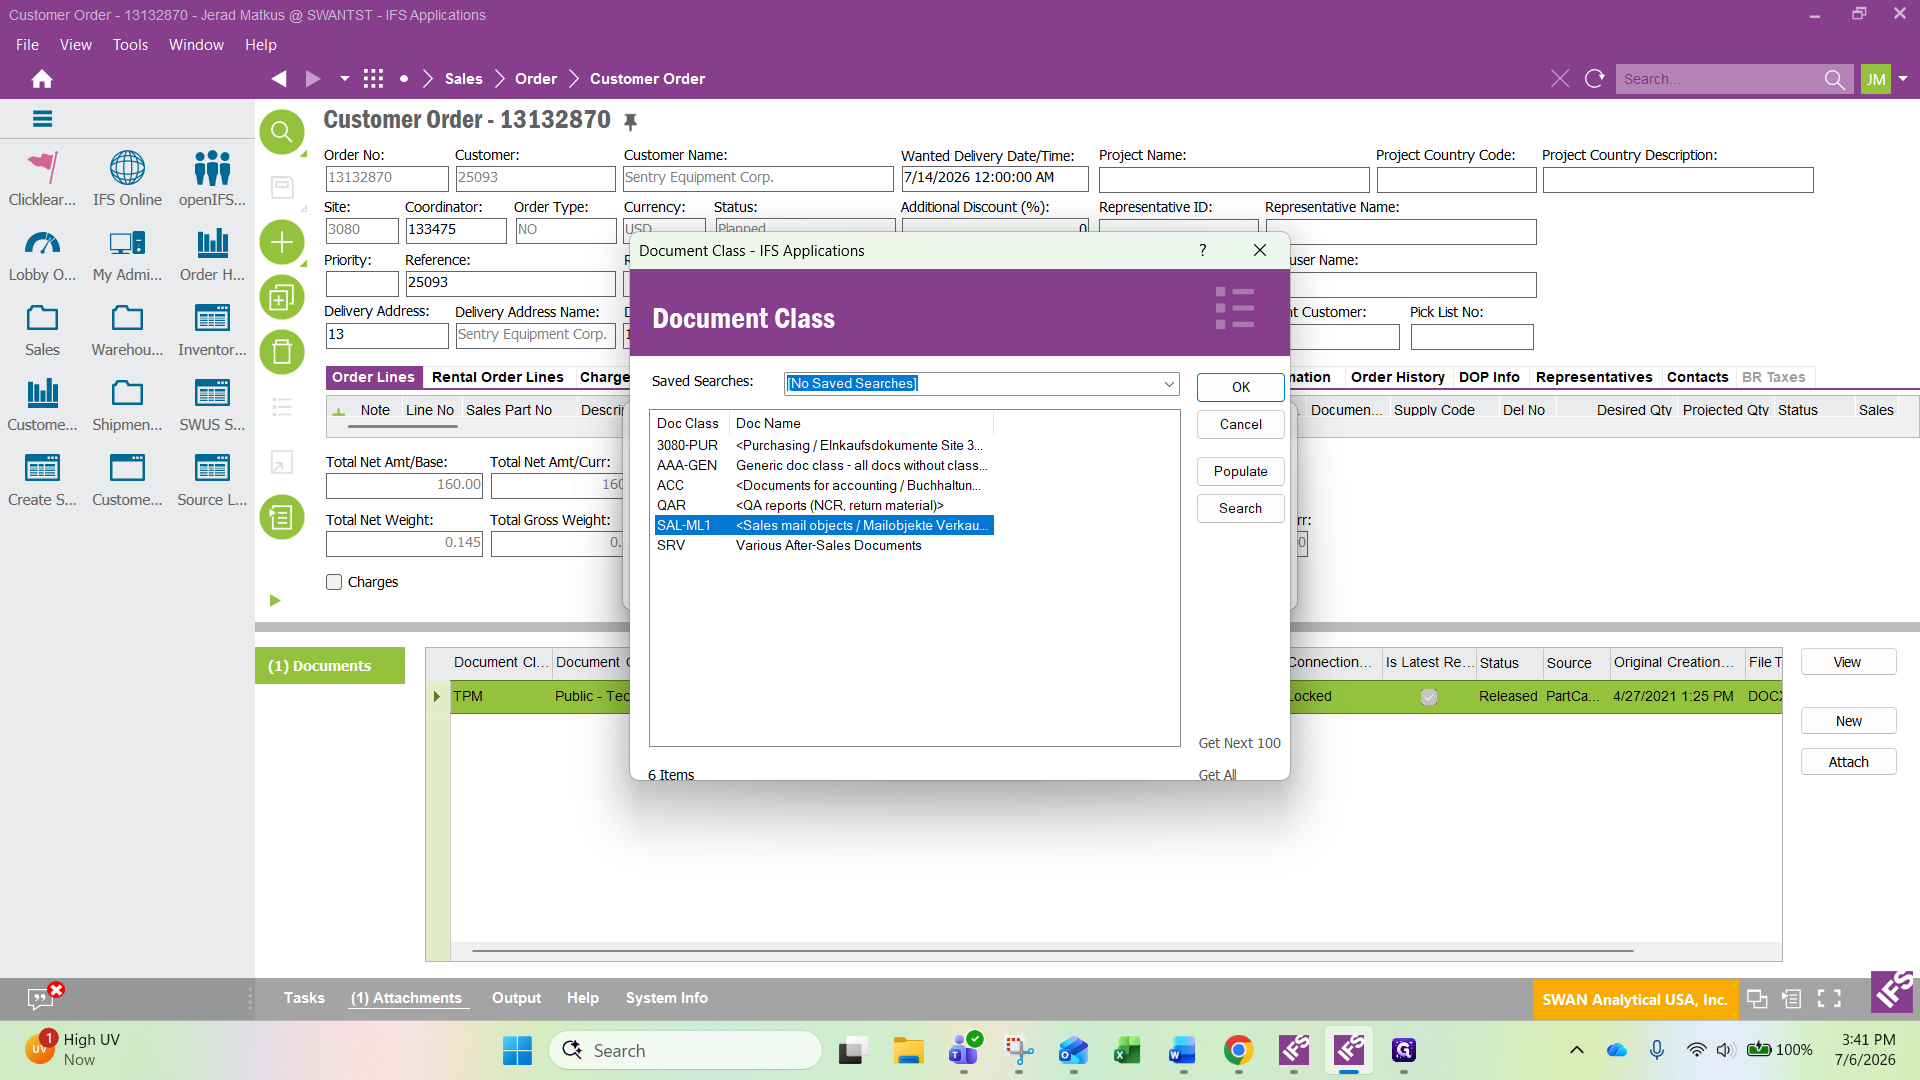
Click the ellipsis (...) next to the Document Class field.
43
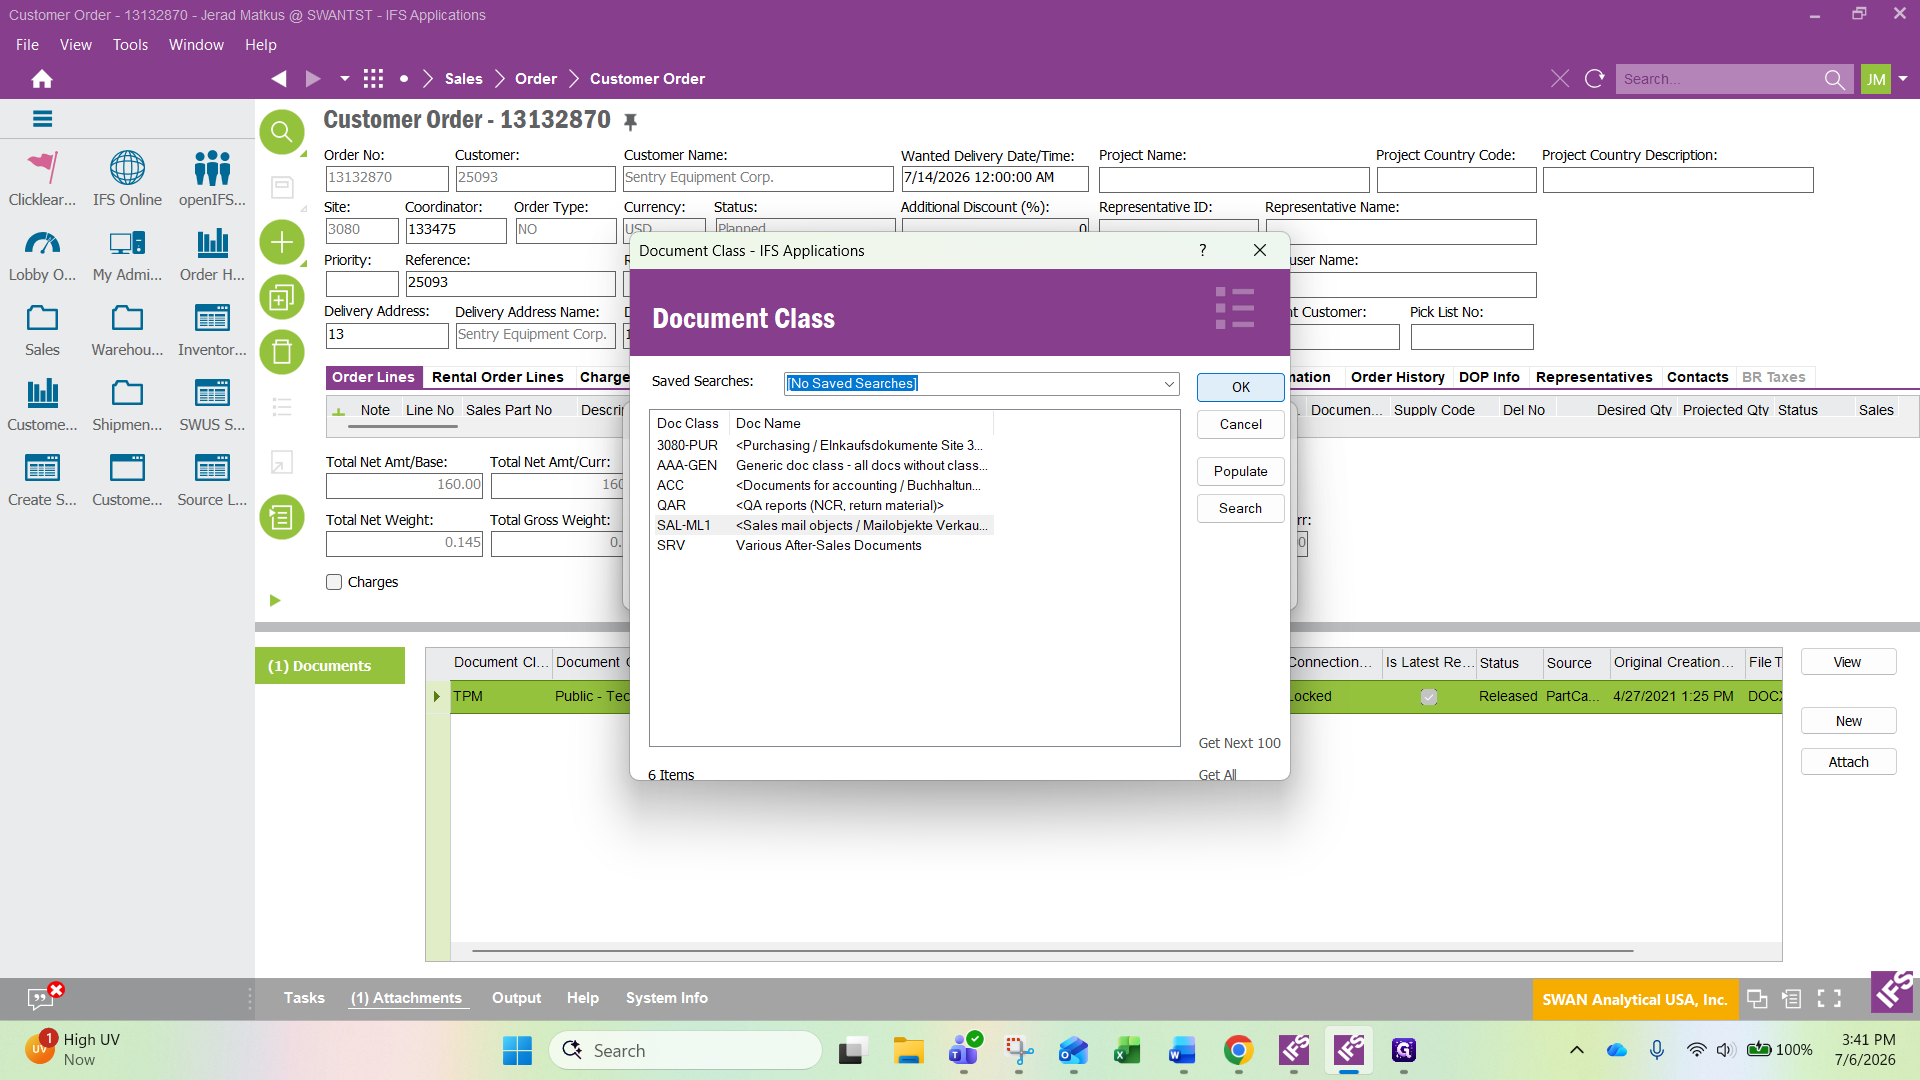
Select SAL-ML1 (Sales Mail Objects).
44
Click OK.
45
Click Create.
46
Click Attachments again to collapse the panel.
Print Order Confirmation
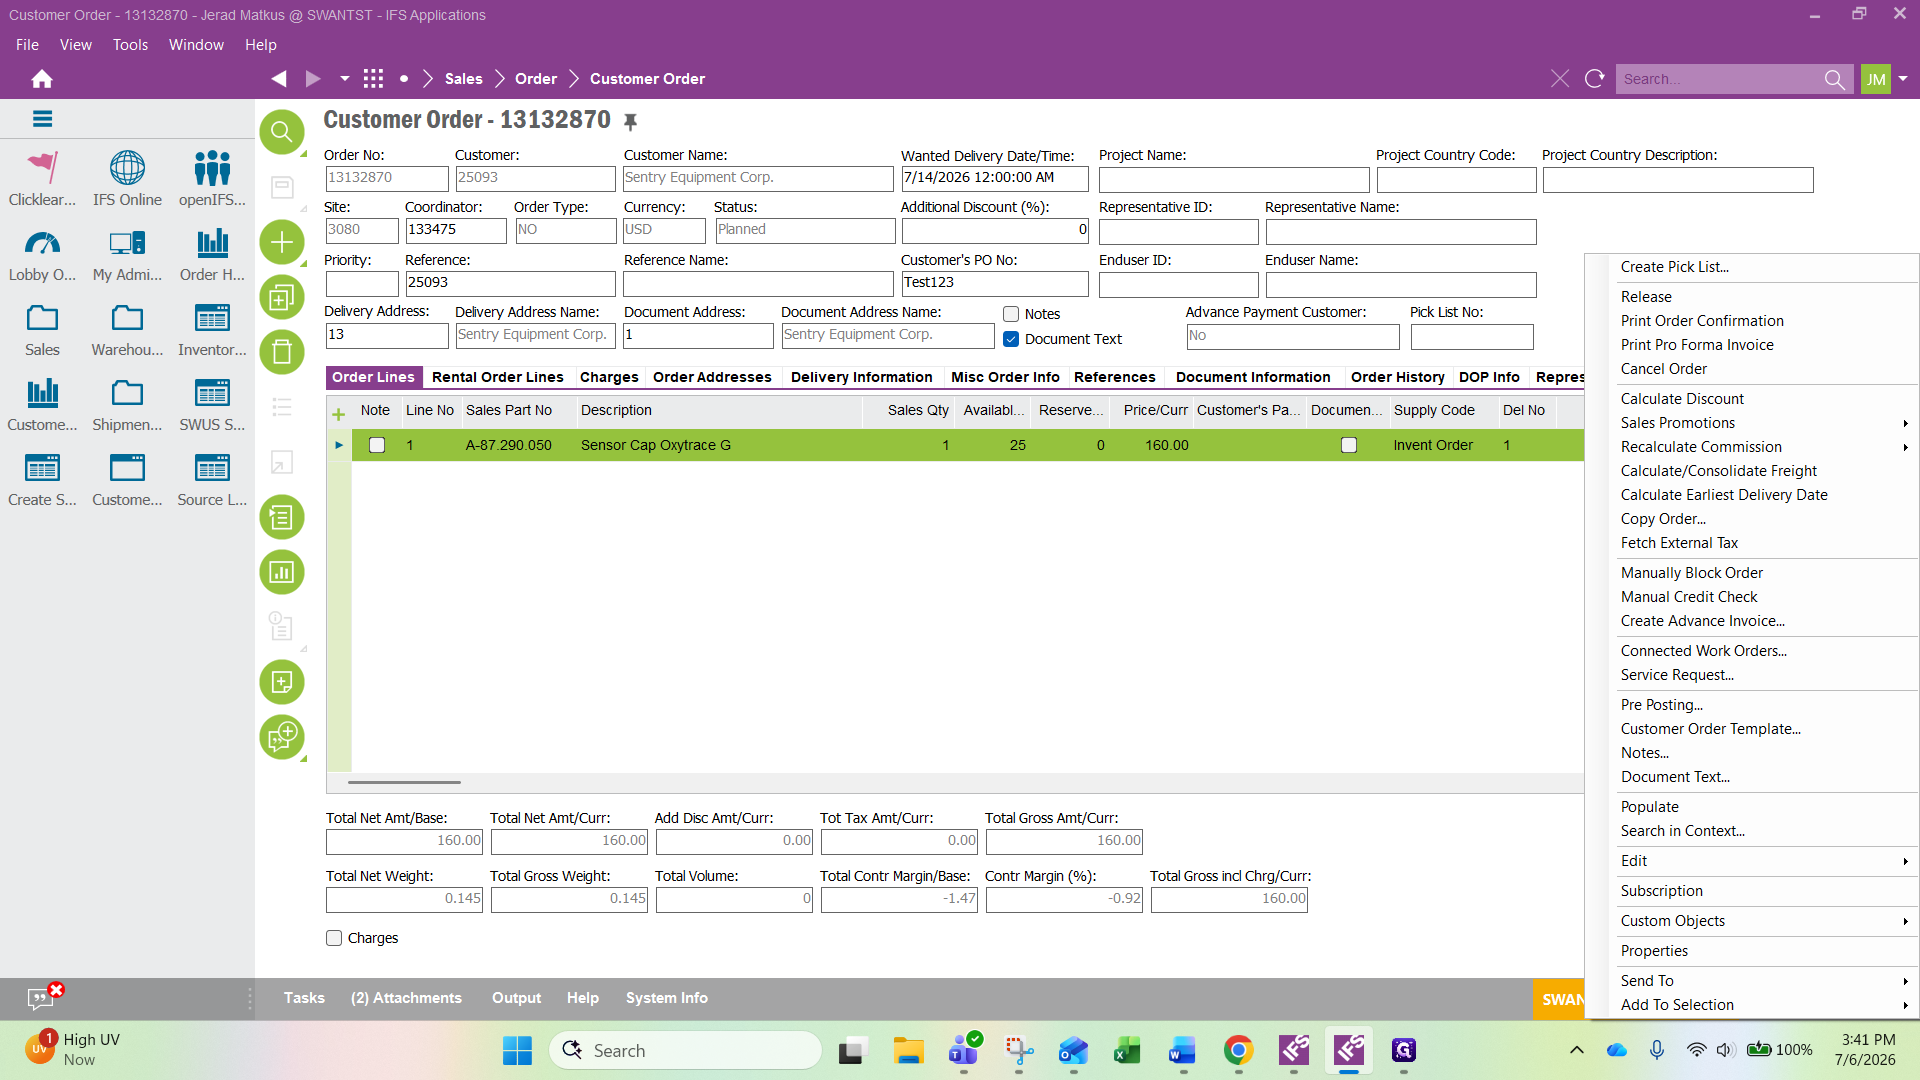
47
Right-click in the header section.
48
Click Print Order Confirmation.
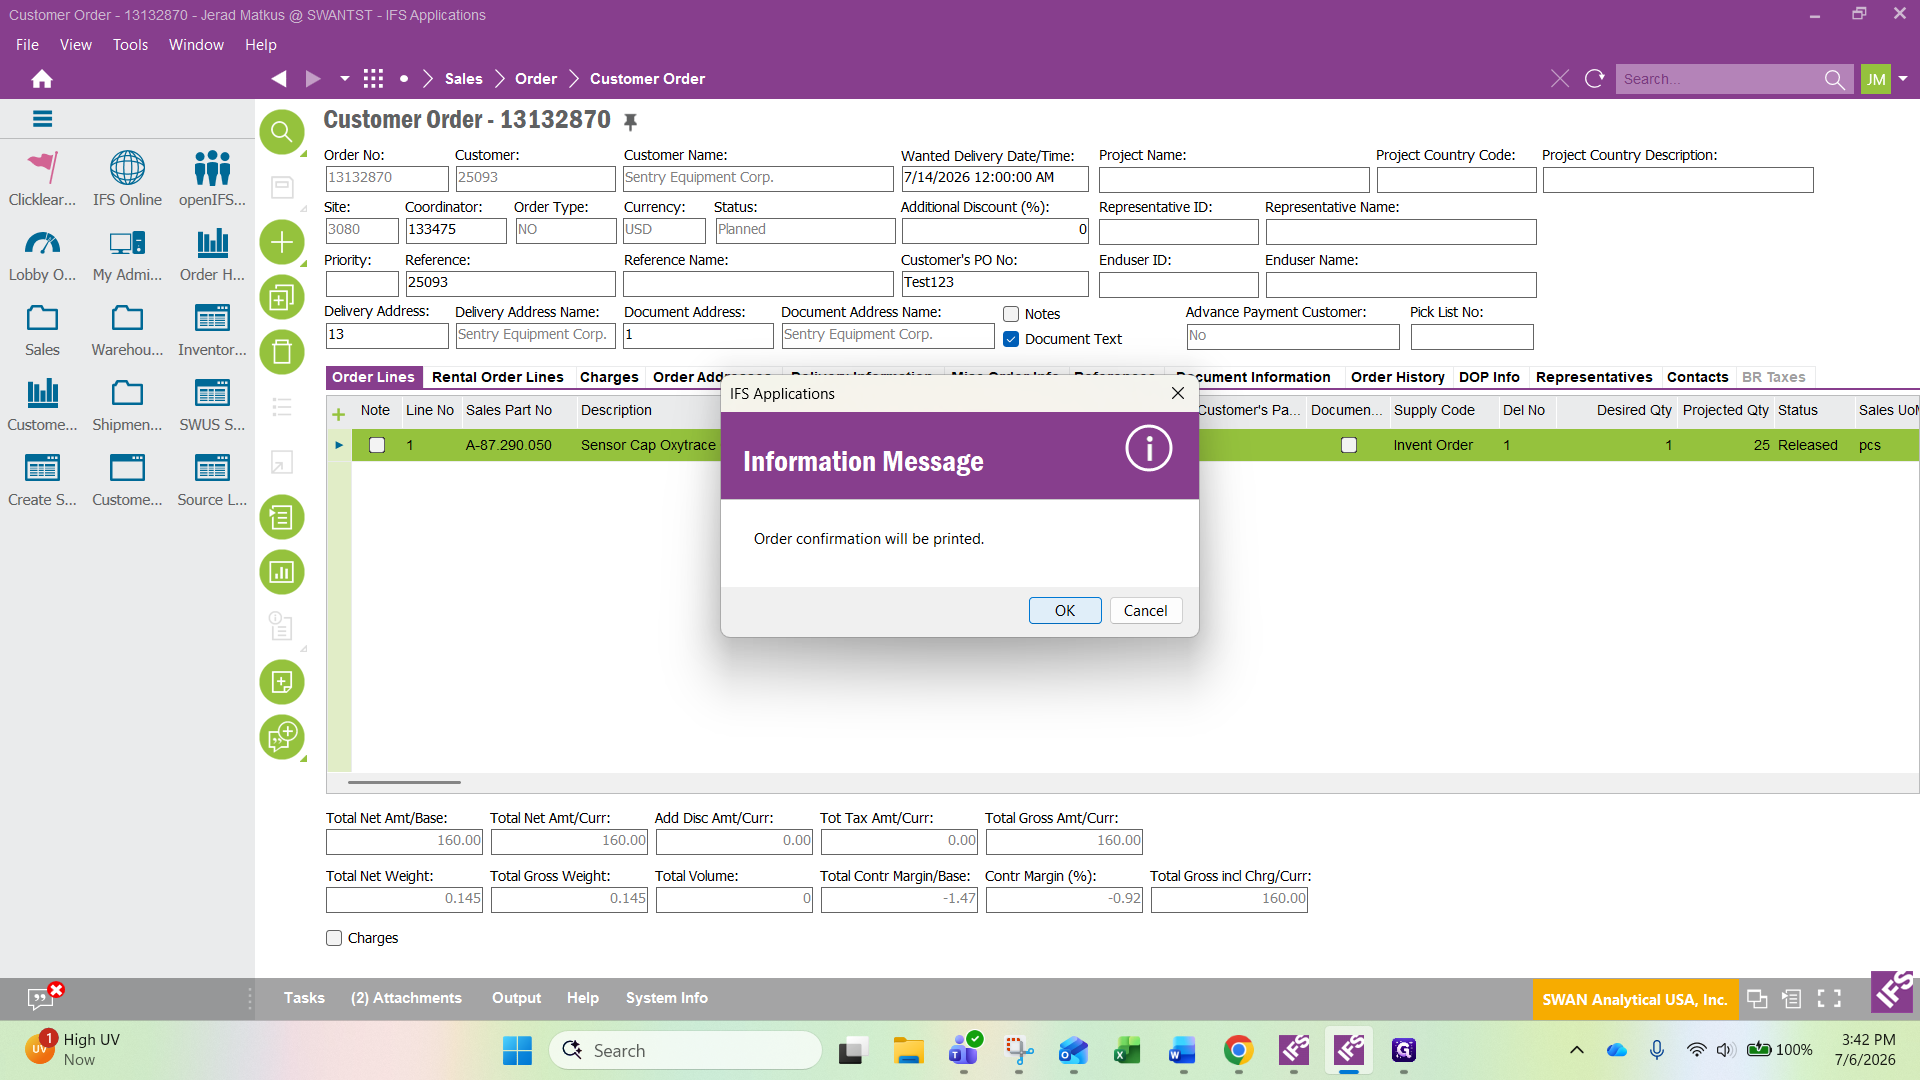
49
Click OK on the information prompt.
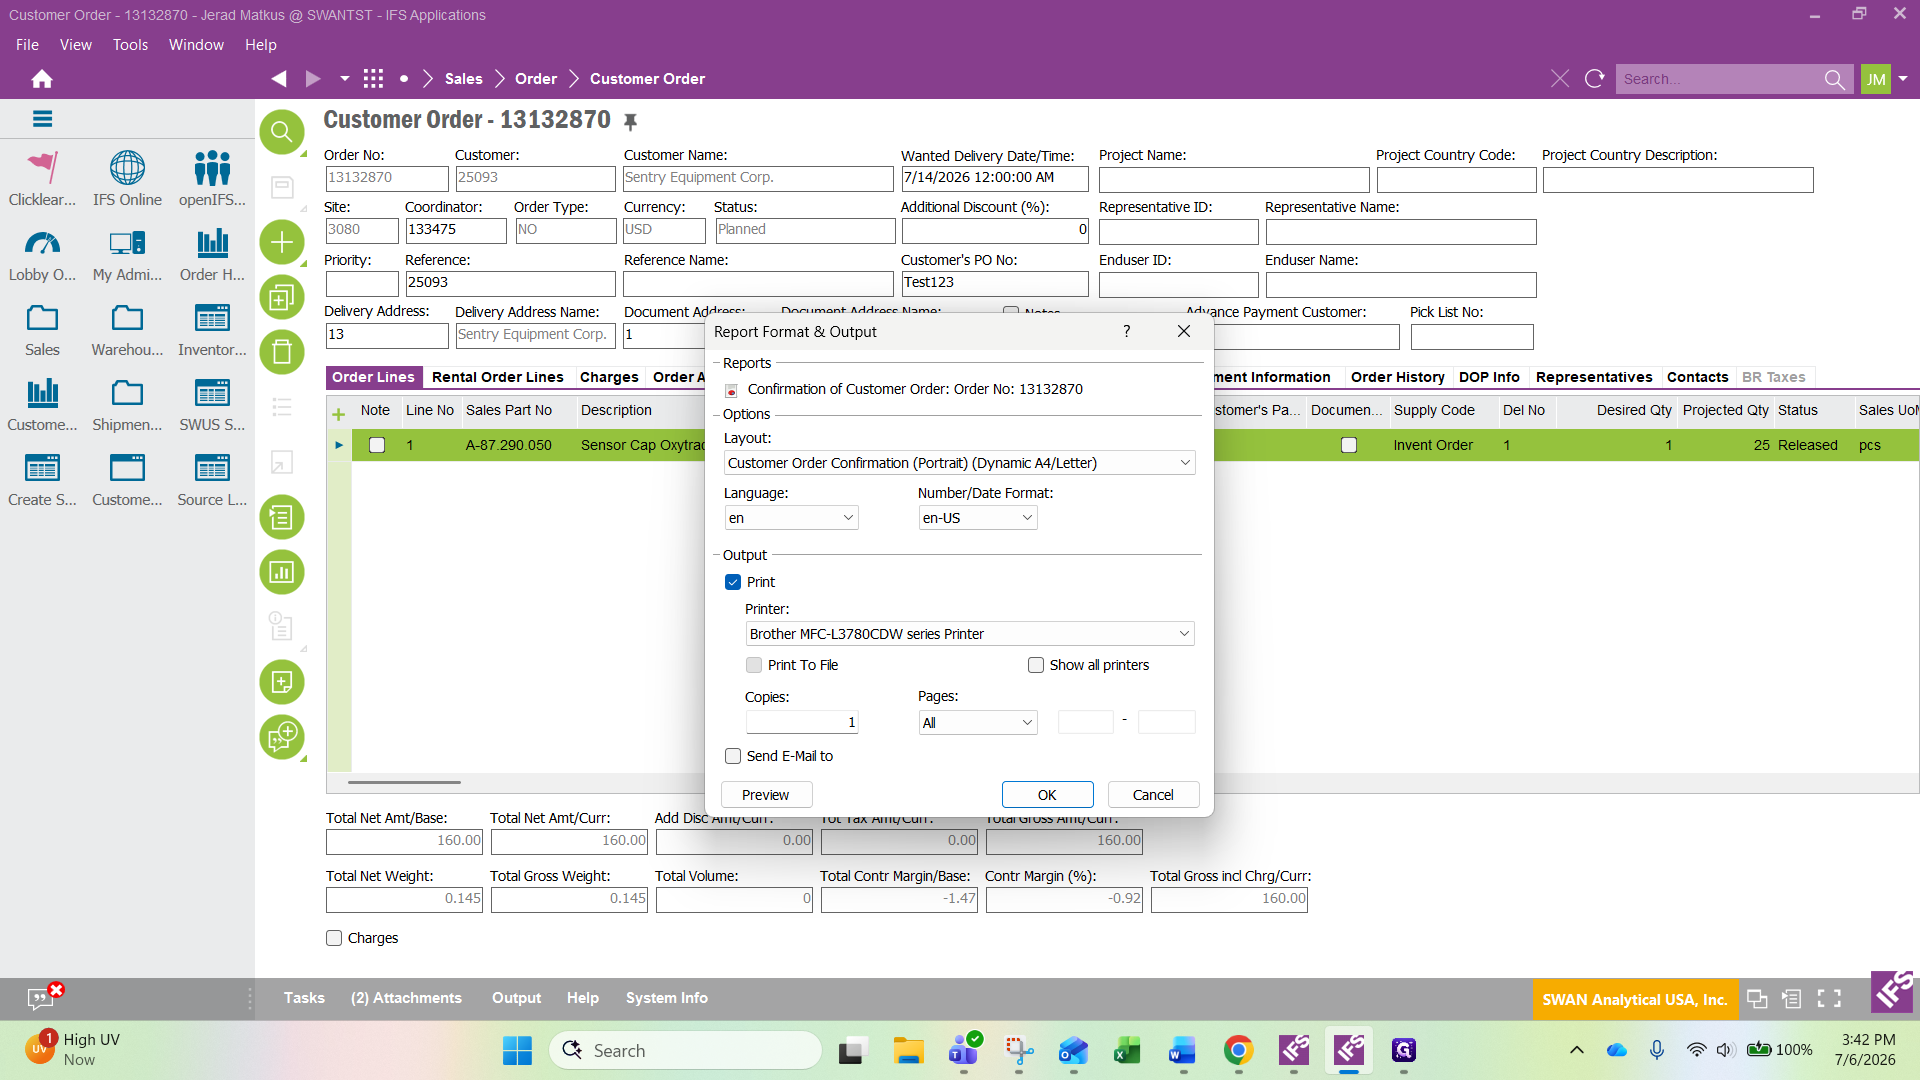
50
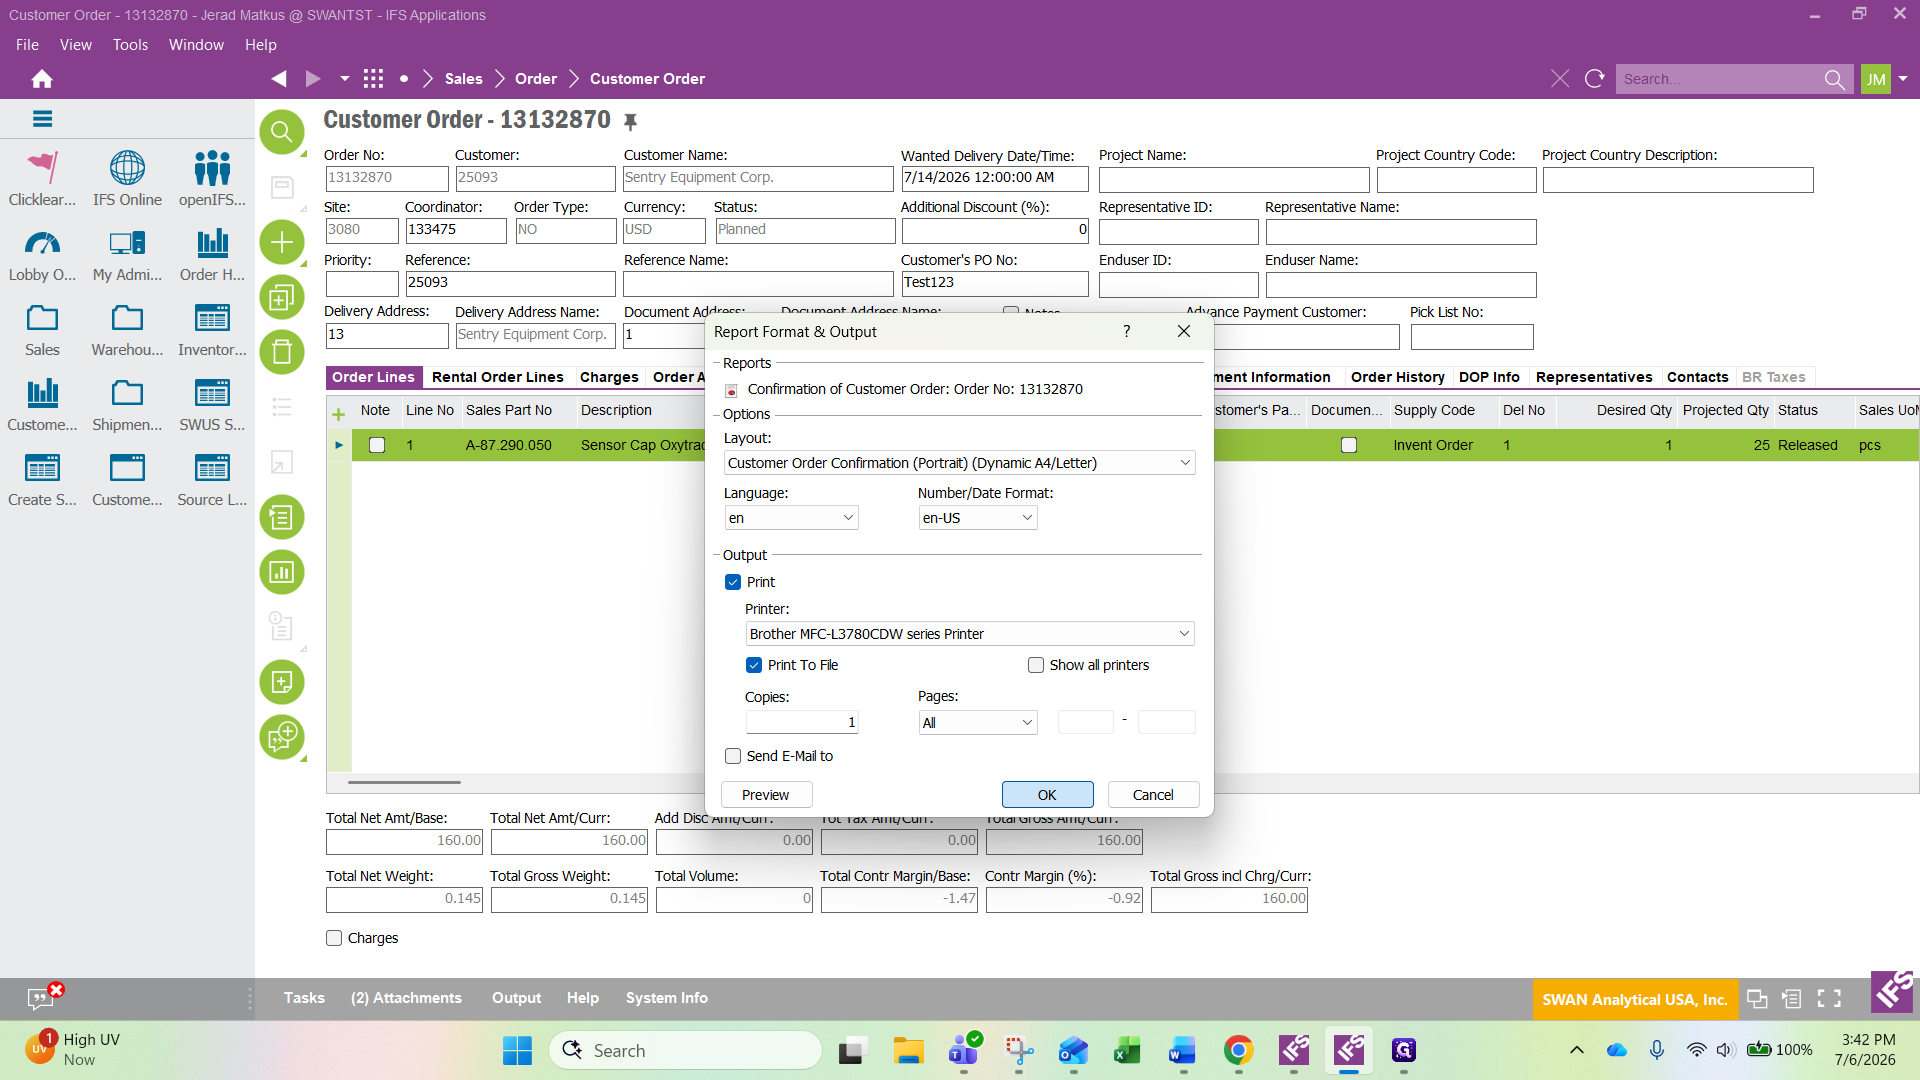
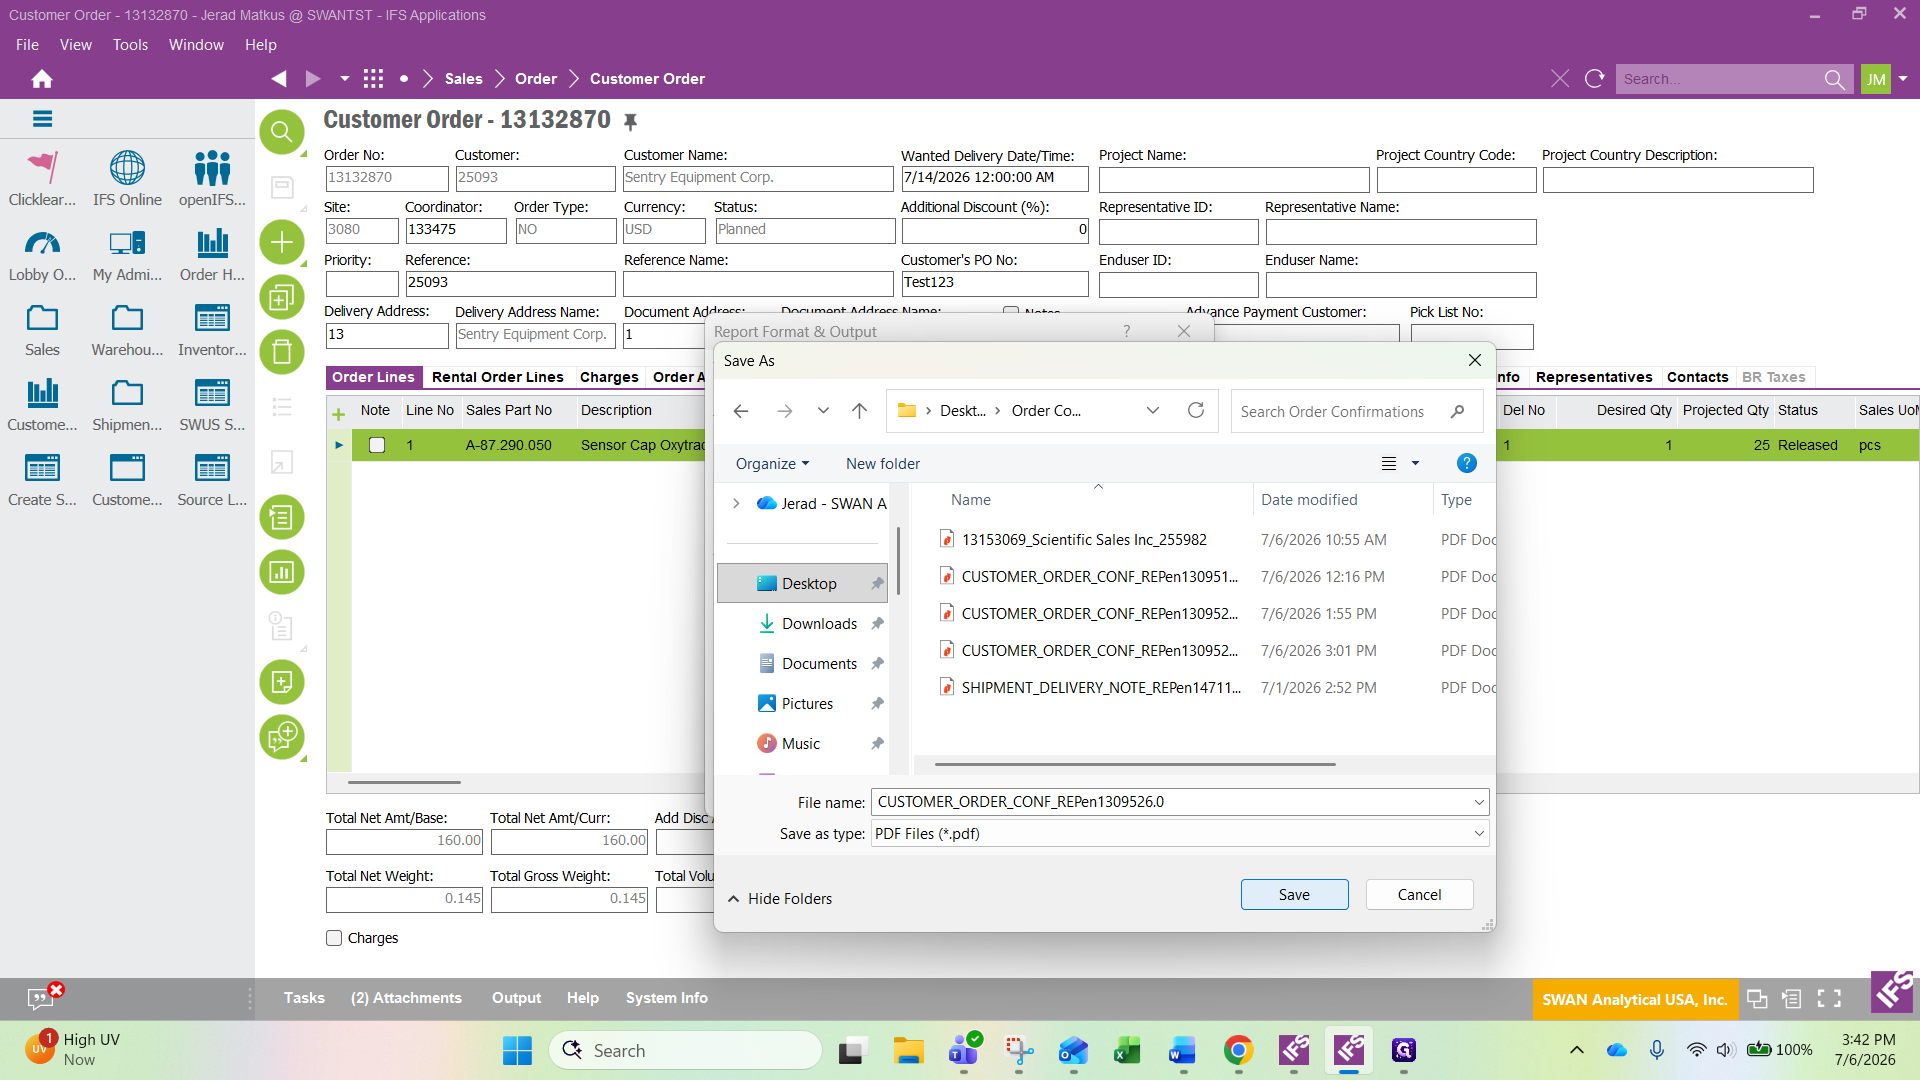
Select Print To File.
51
Click OK.
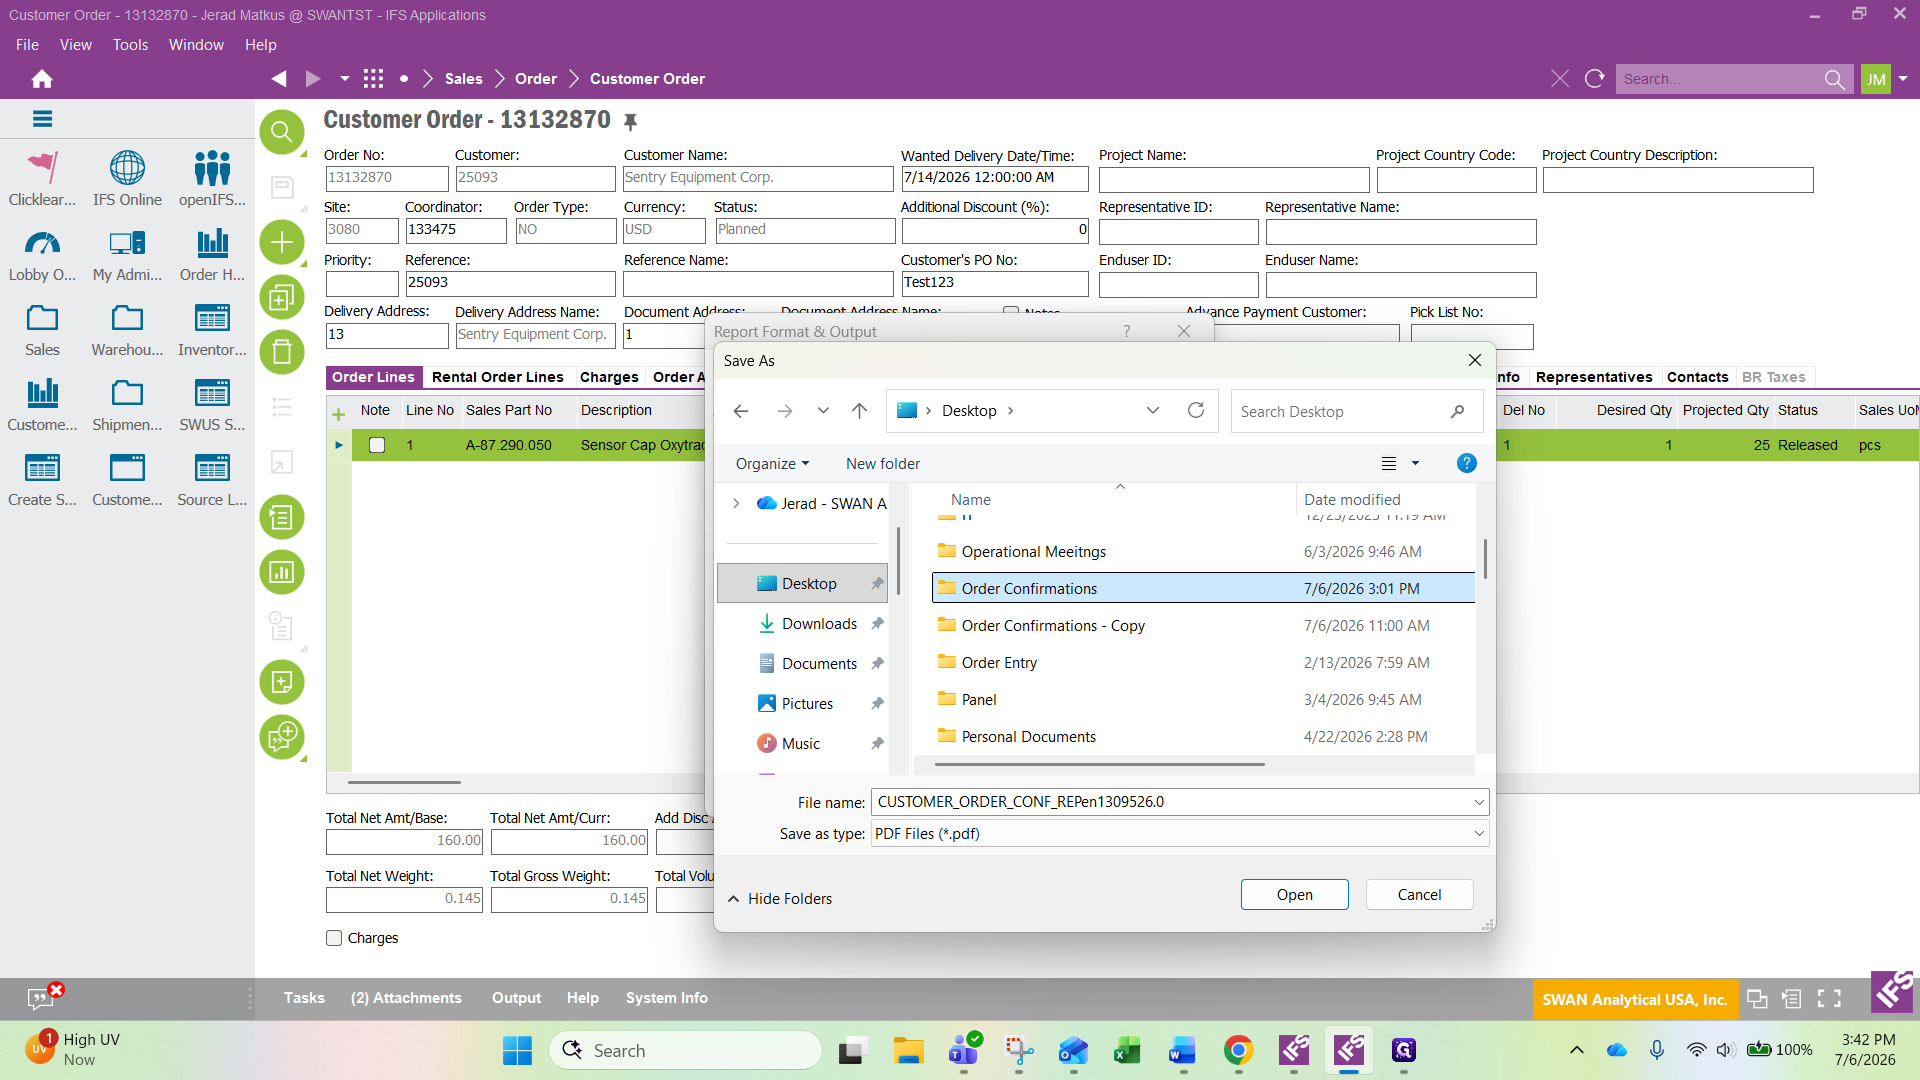
52
Navigate to your desired folder (e.g., Order Confirmations on the Desktop).
53
Click Save.
Remember to attach this saved PDF file to an email and send it back to the customer to confirm their order has been received.
Release the Order and Process Shipment
54
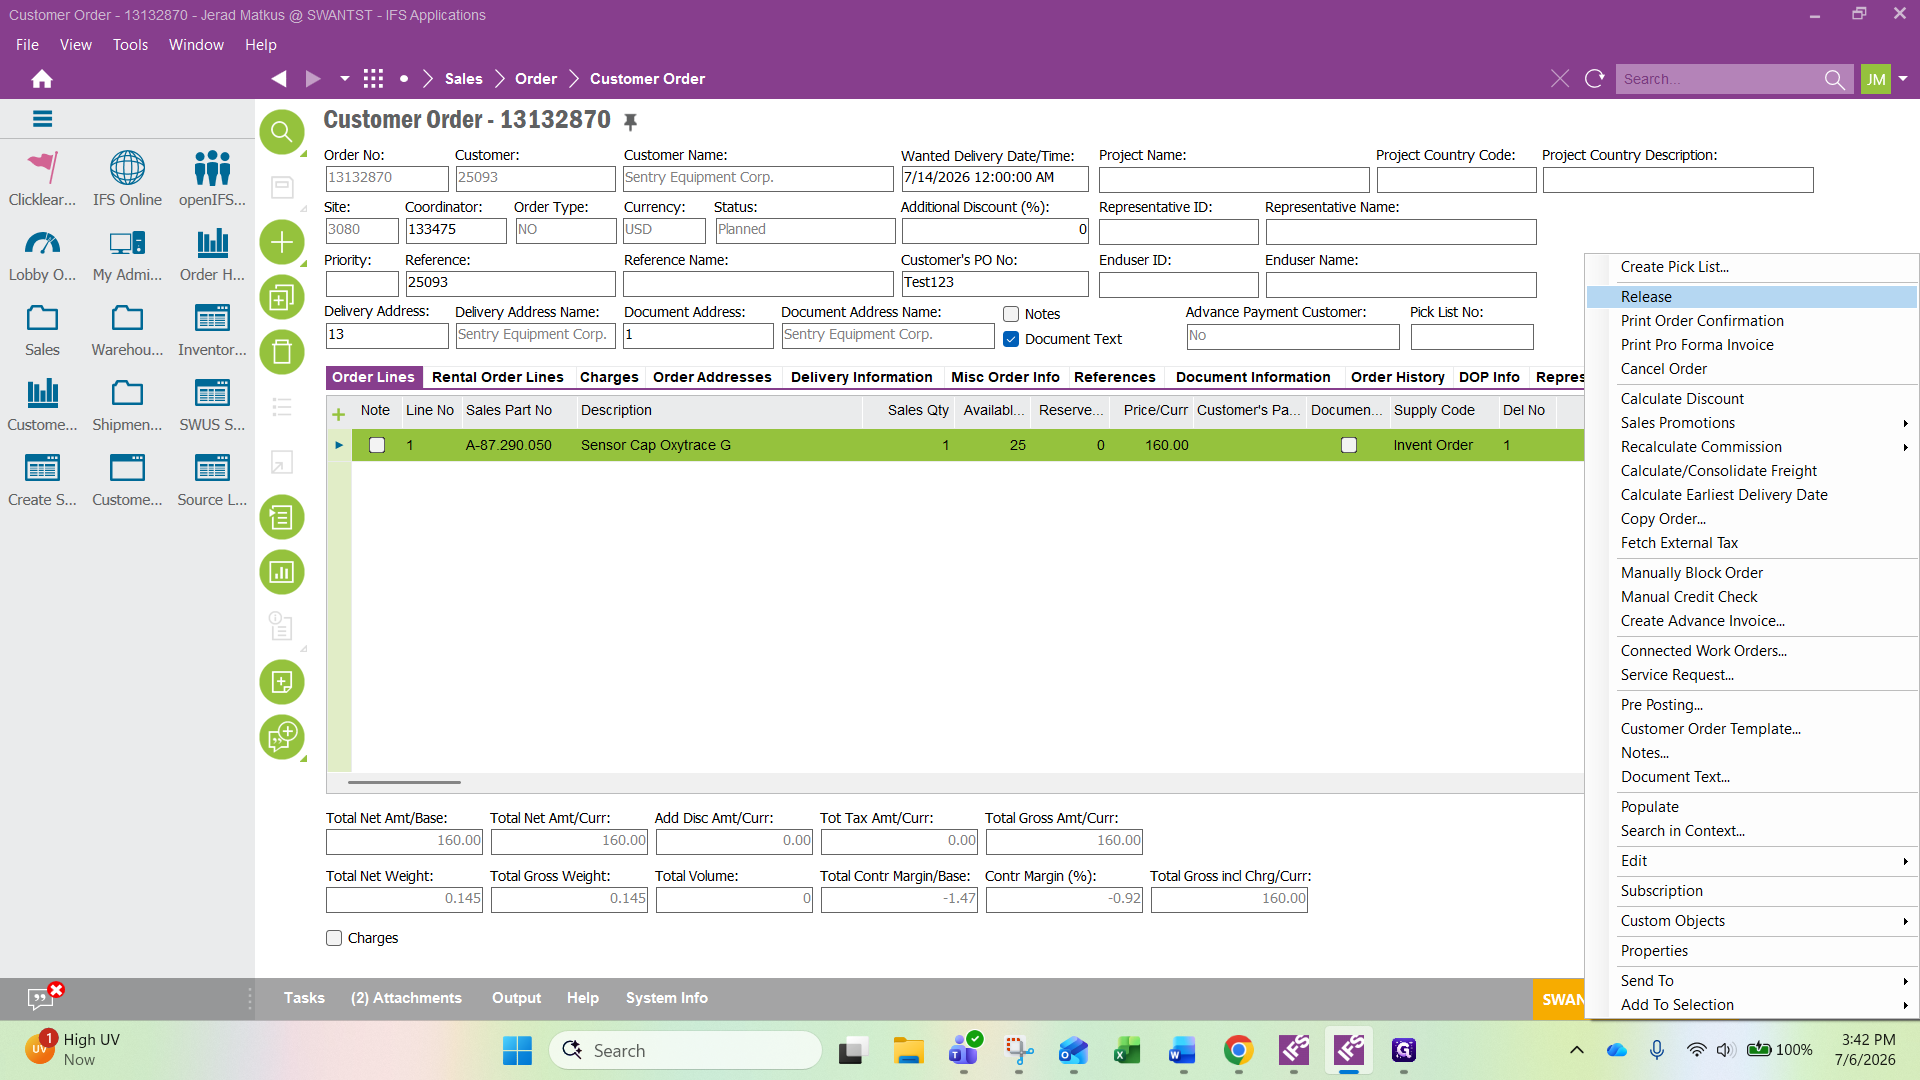
Right-click the order header.
55
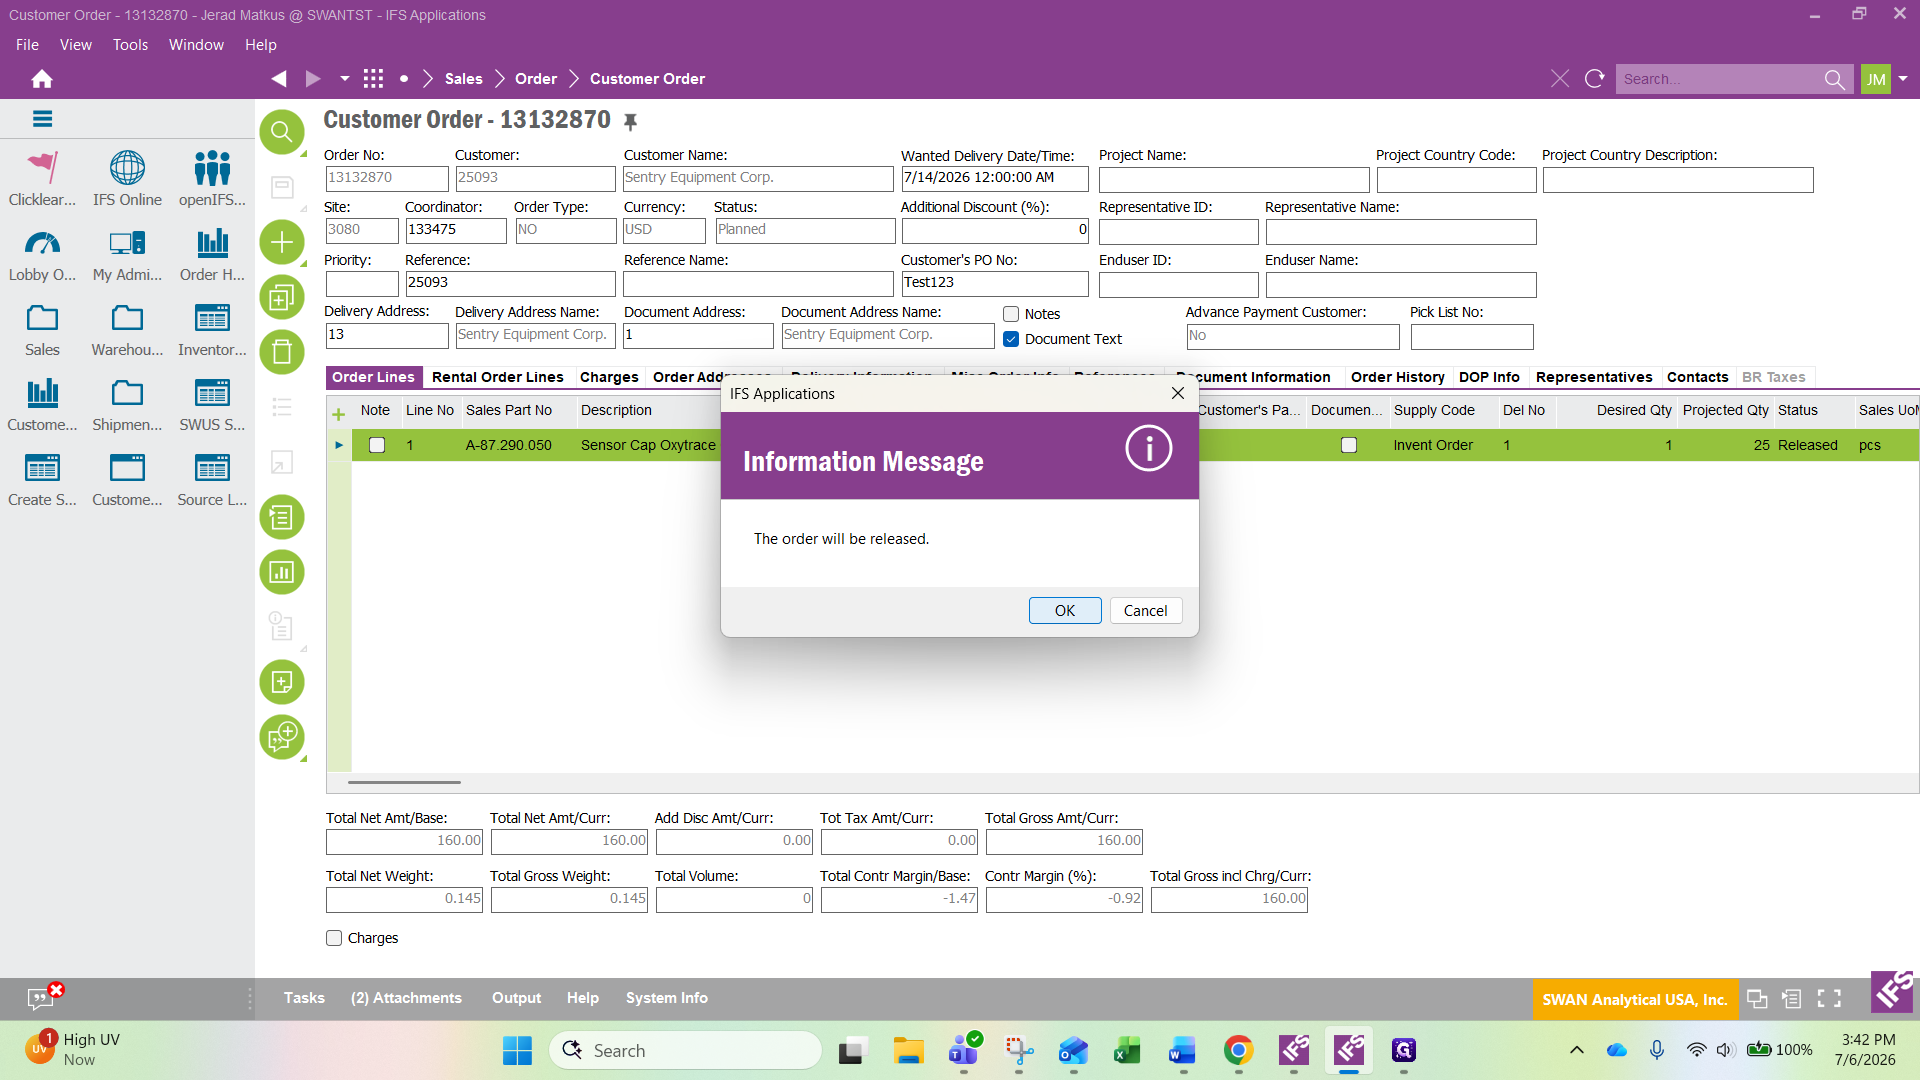
Click Release.
56
Click OK to confirm.
57
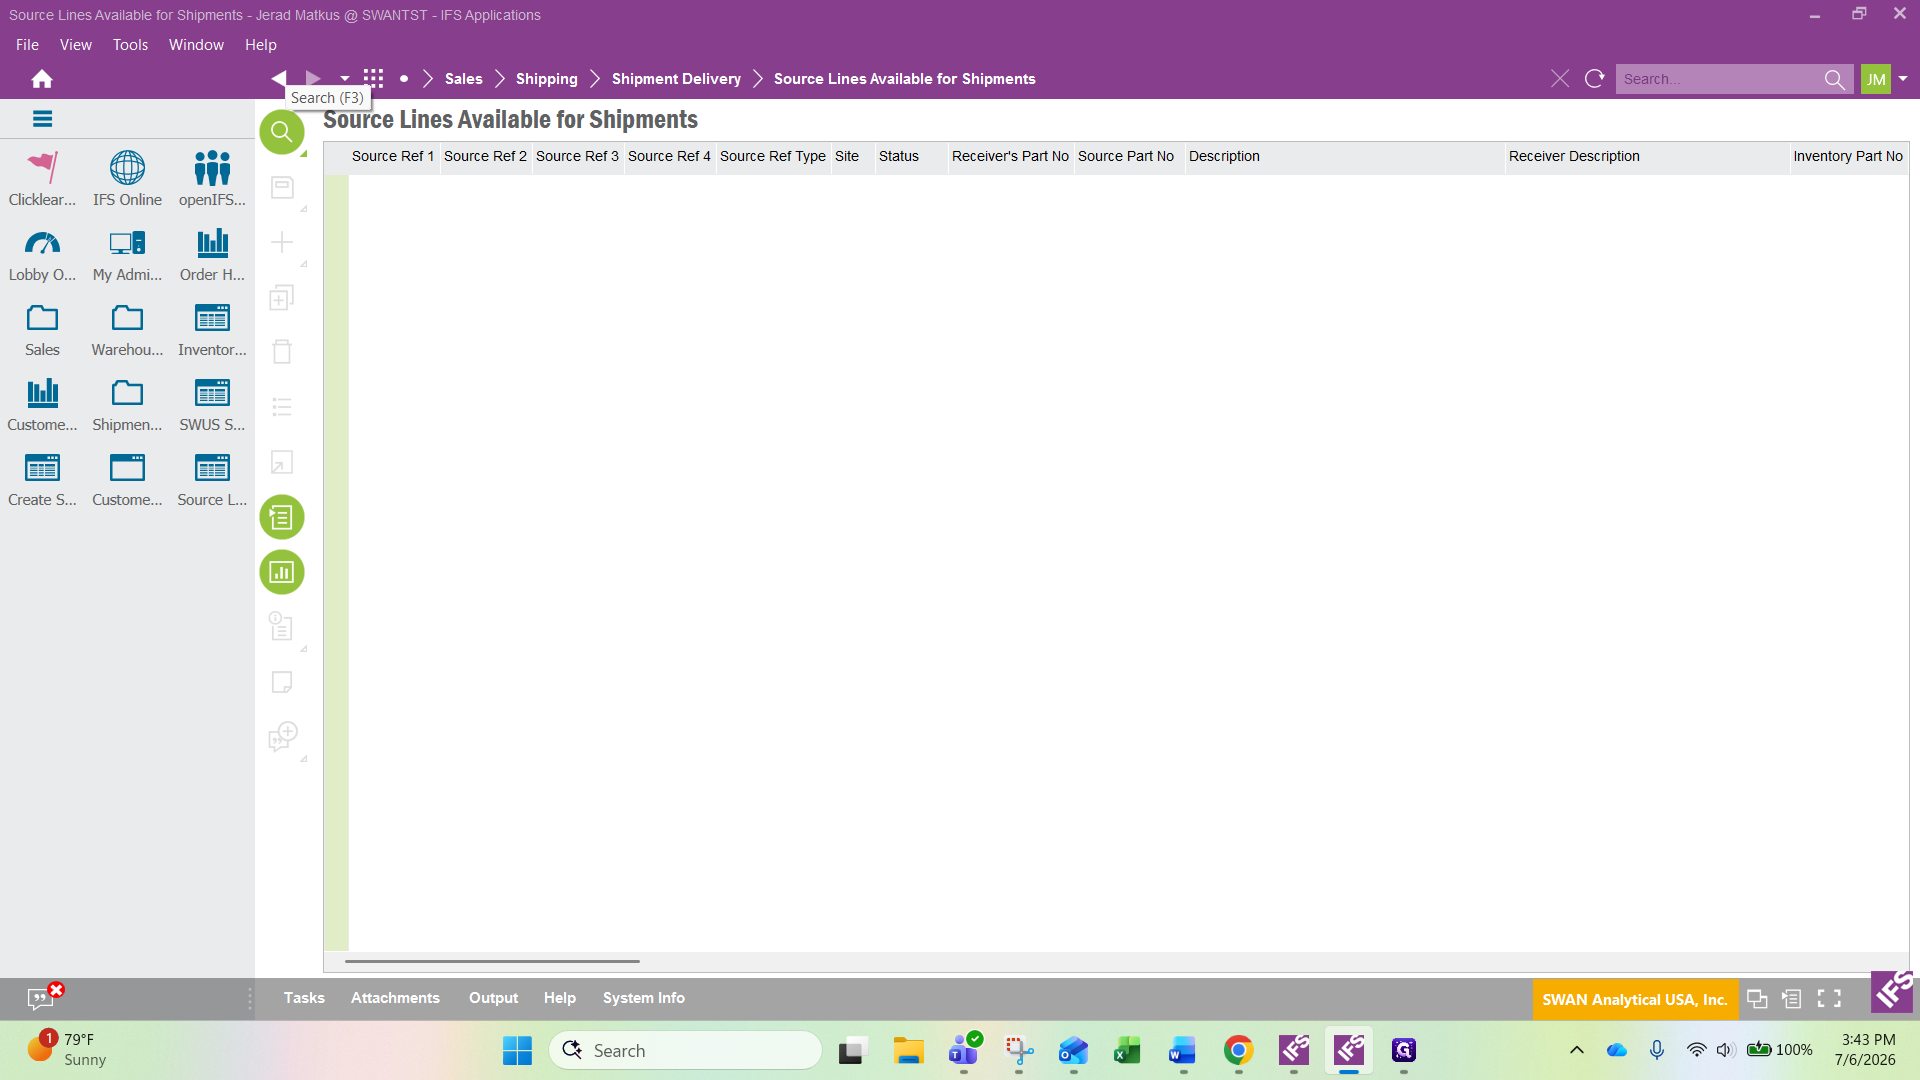
Navigate to the Source Lines Available for Shipments module.
58
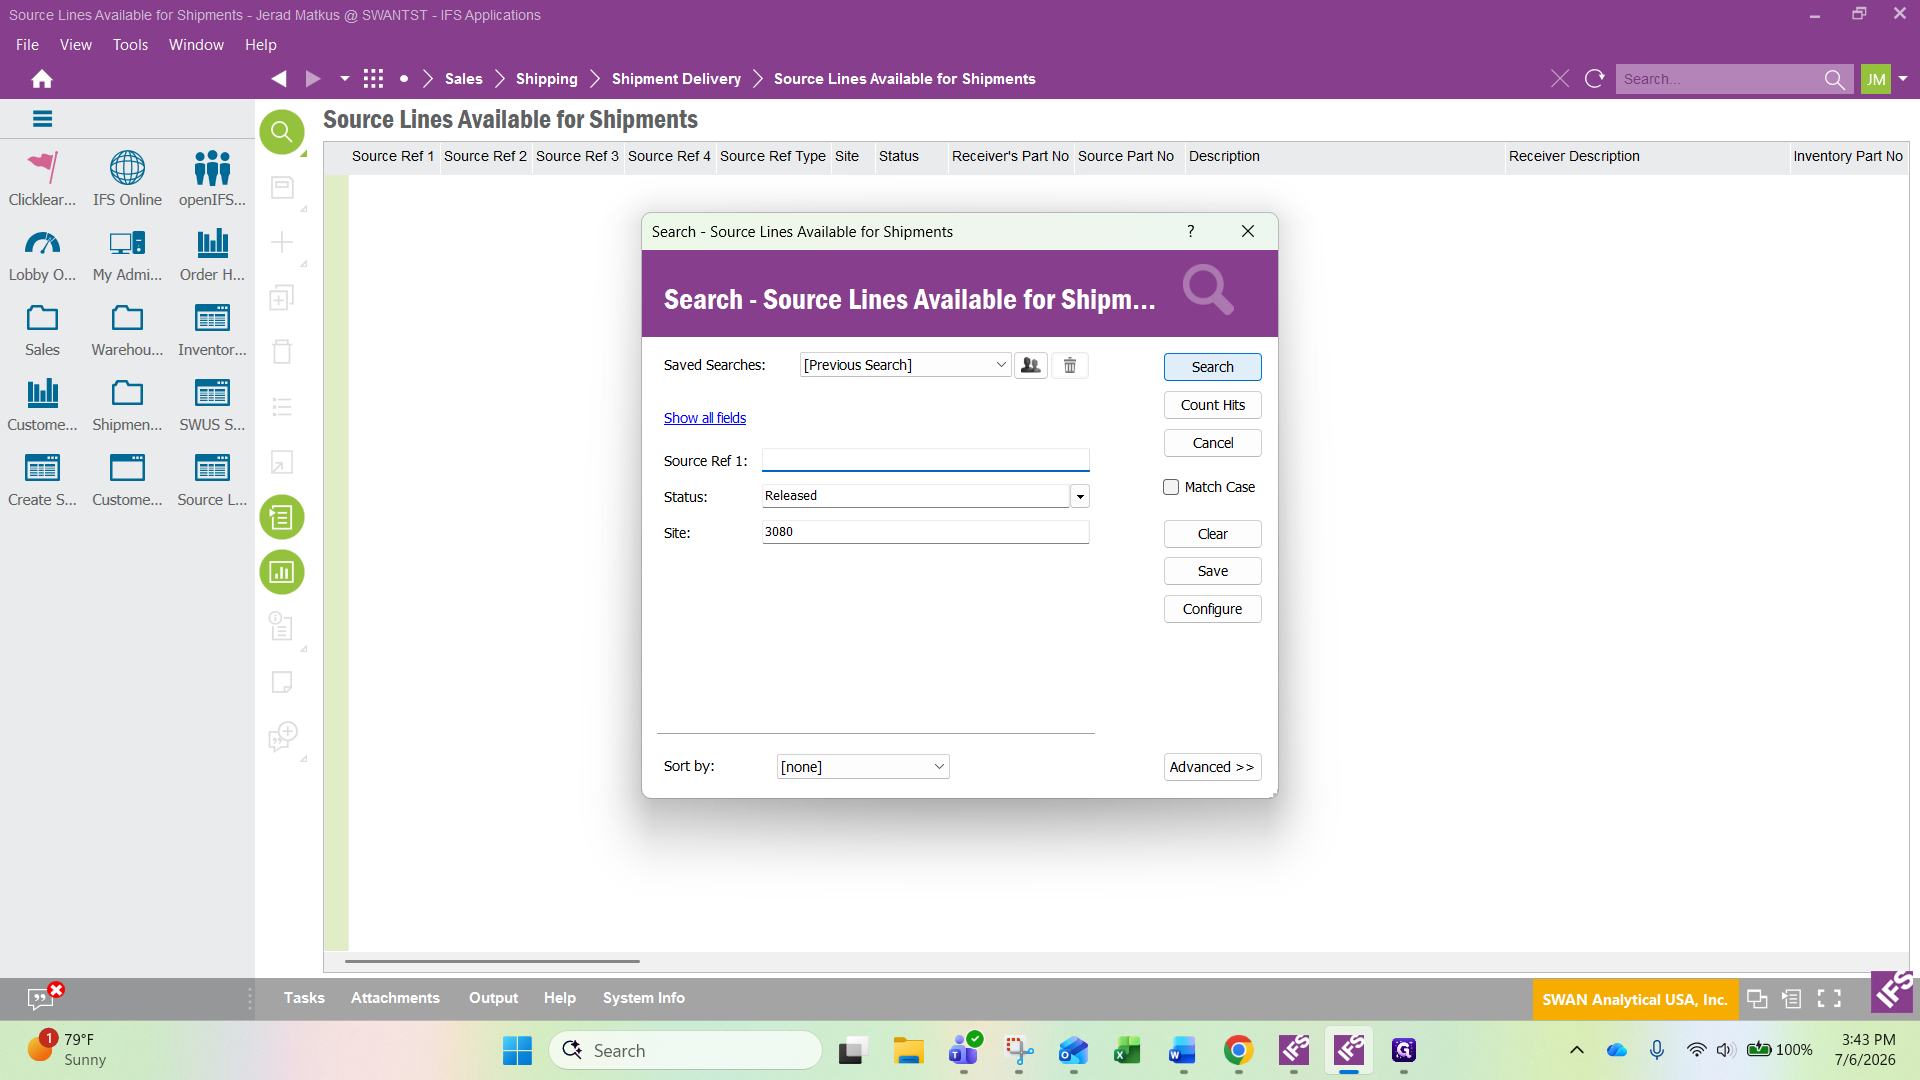
Click the Search icon (or press F3).
59
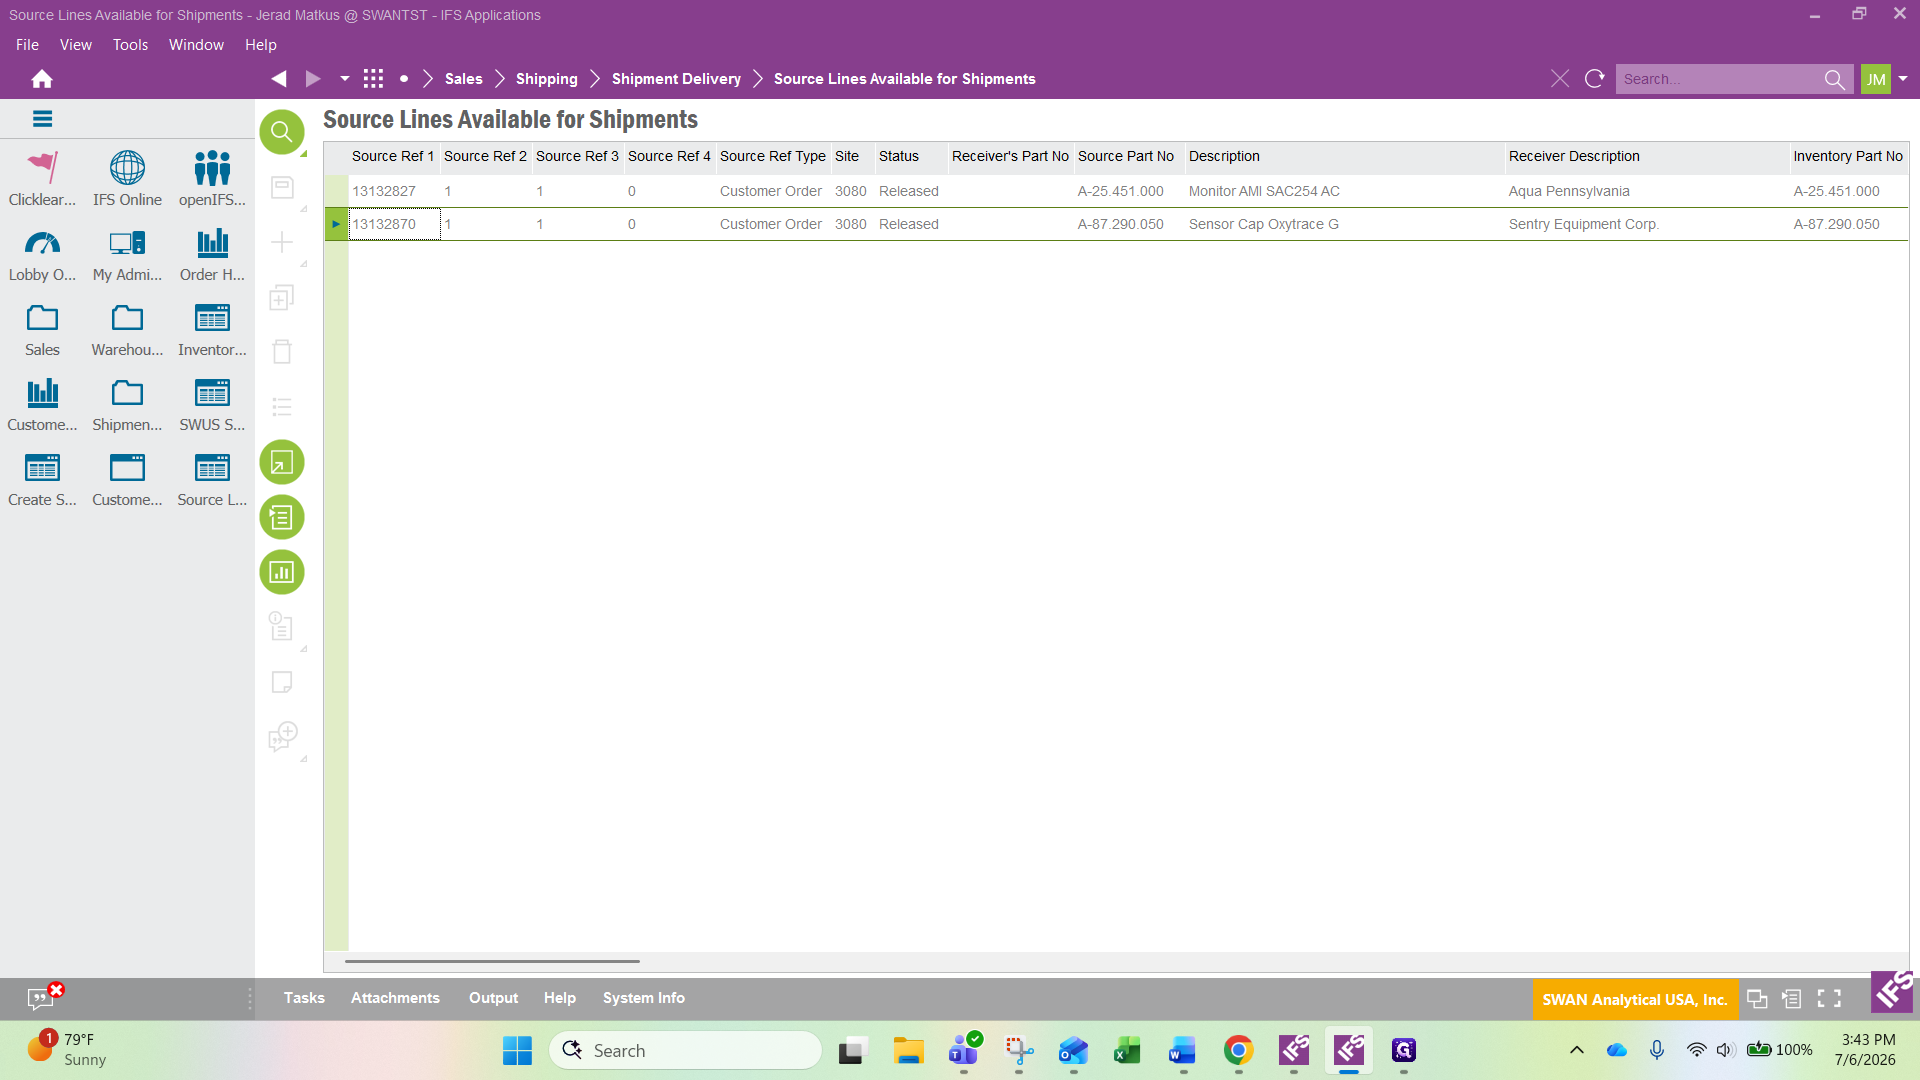
Click Search to view released orders.
60
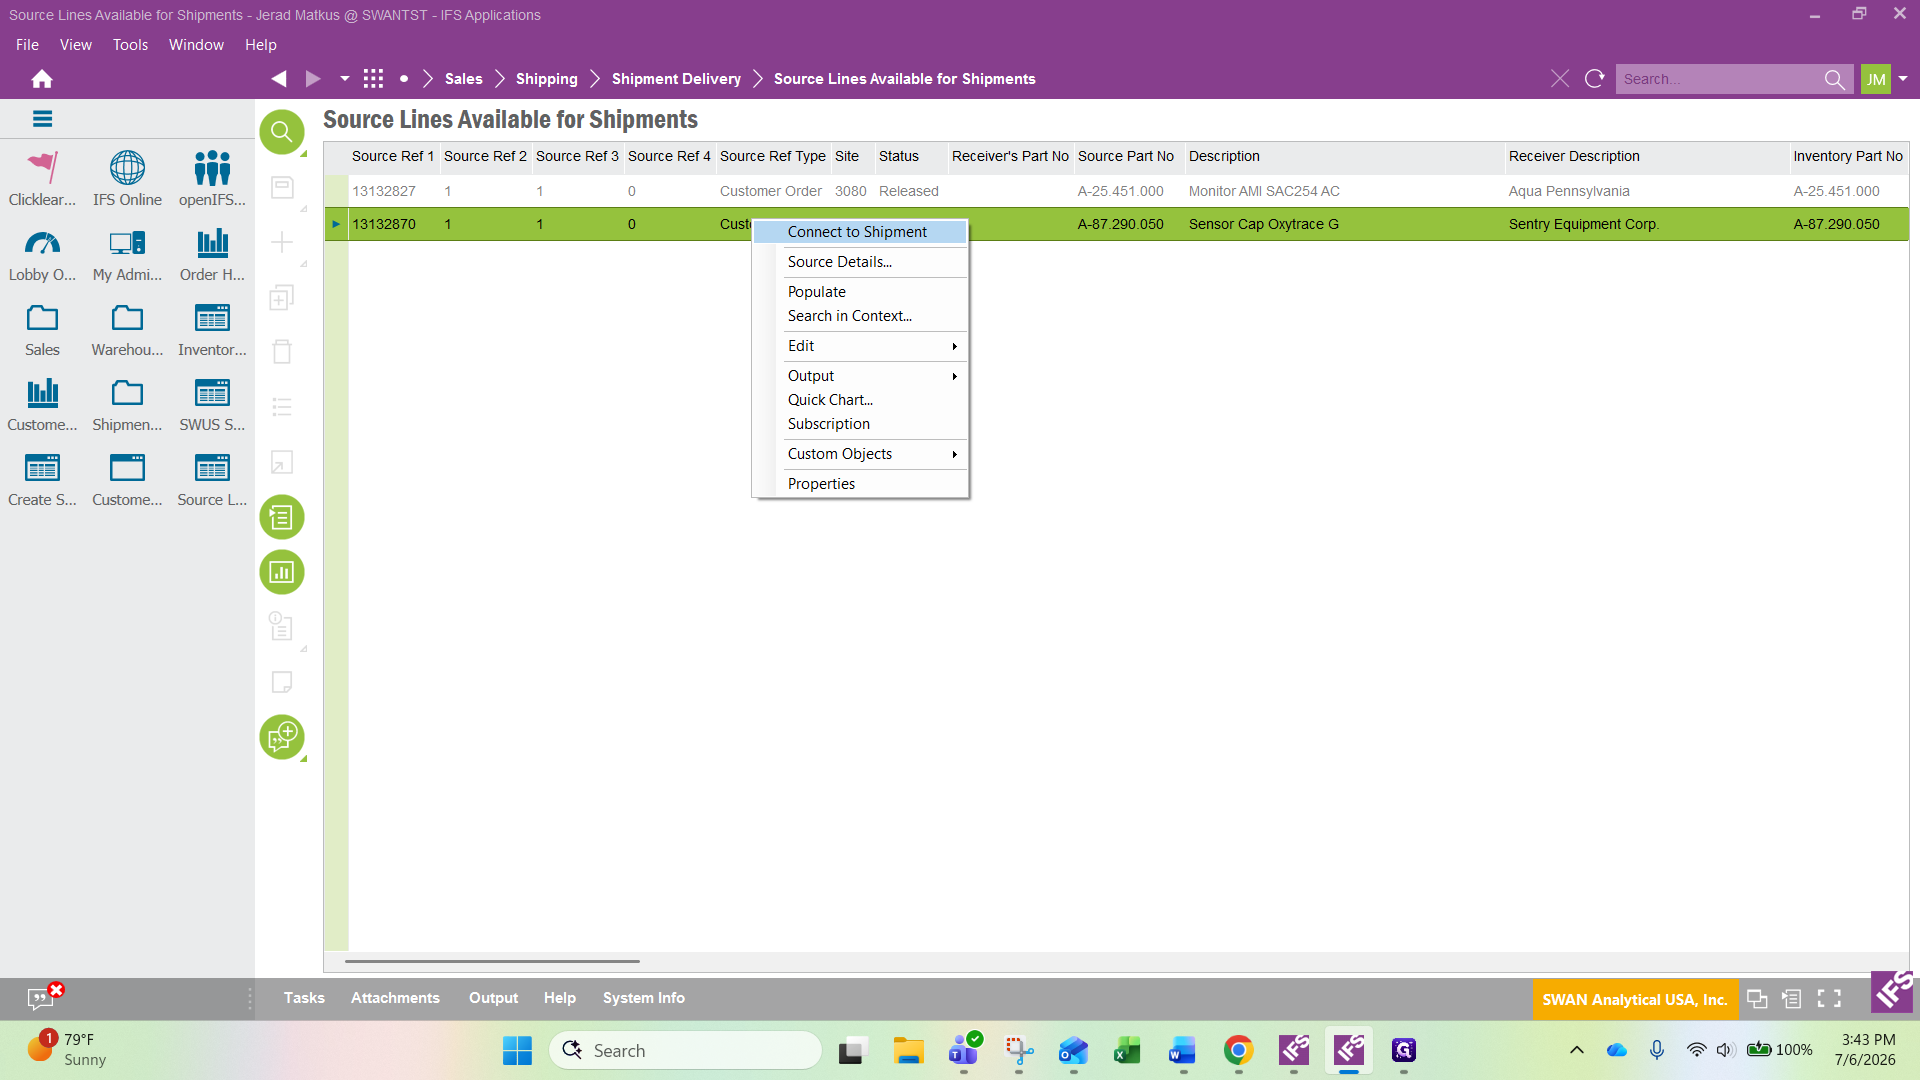
Right-click your specific order in the list.
61
Click Connect to Shipment.
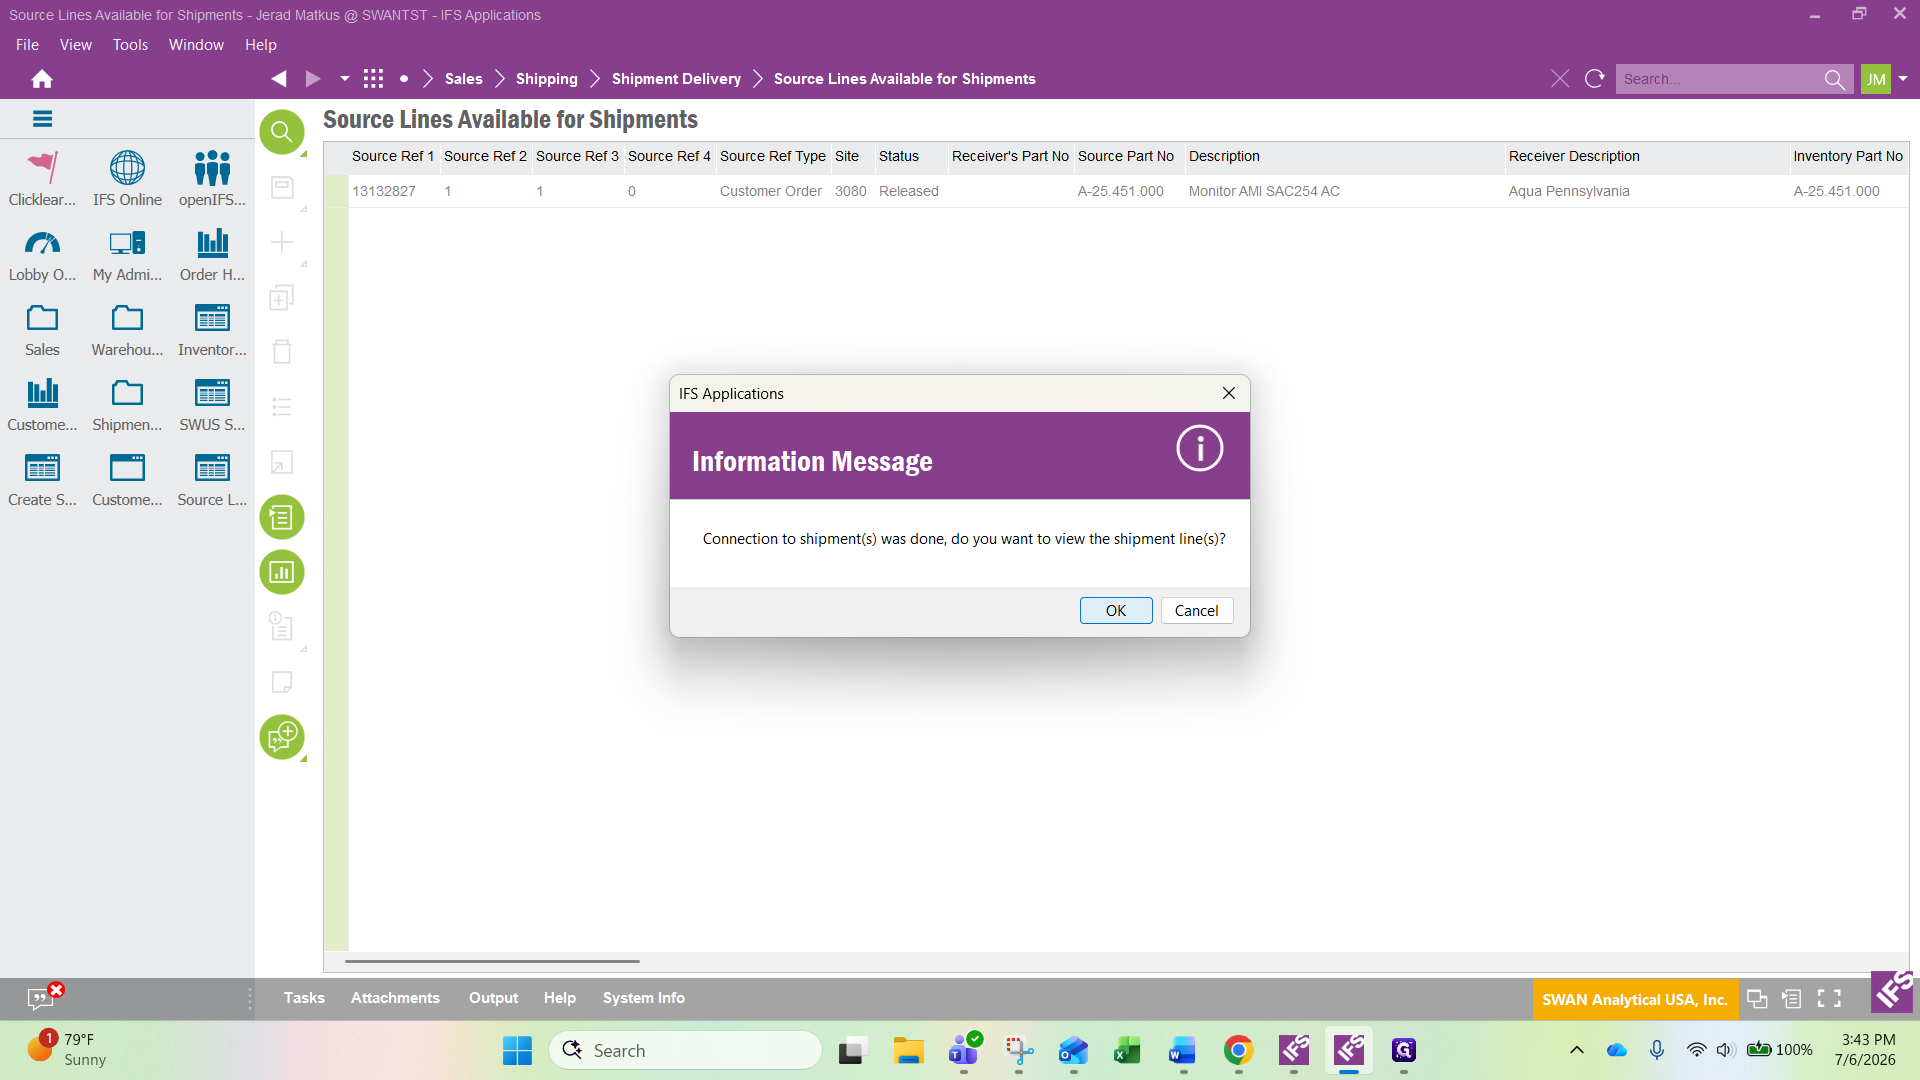
62
Click OK to view the created shipment lines.
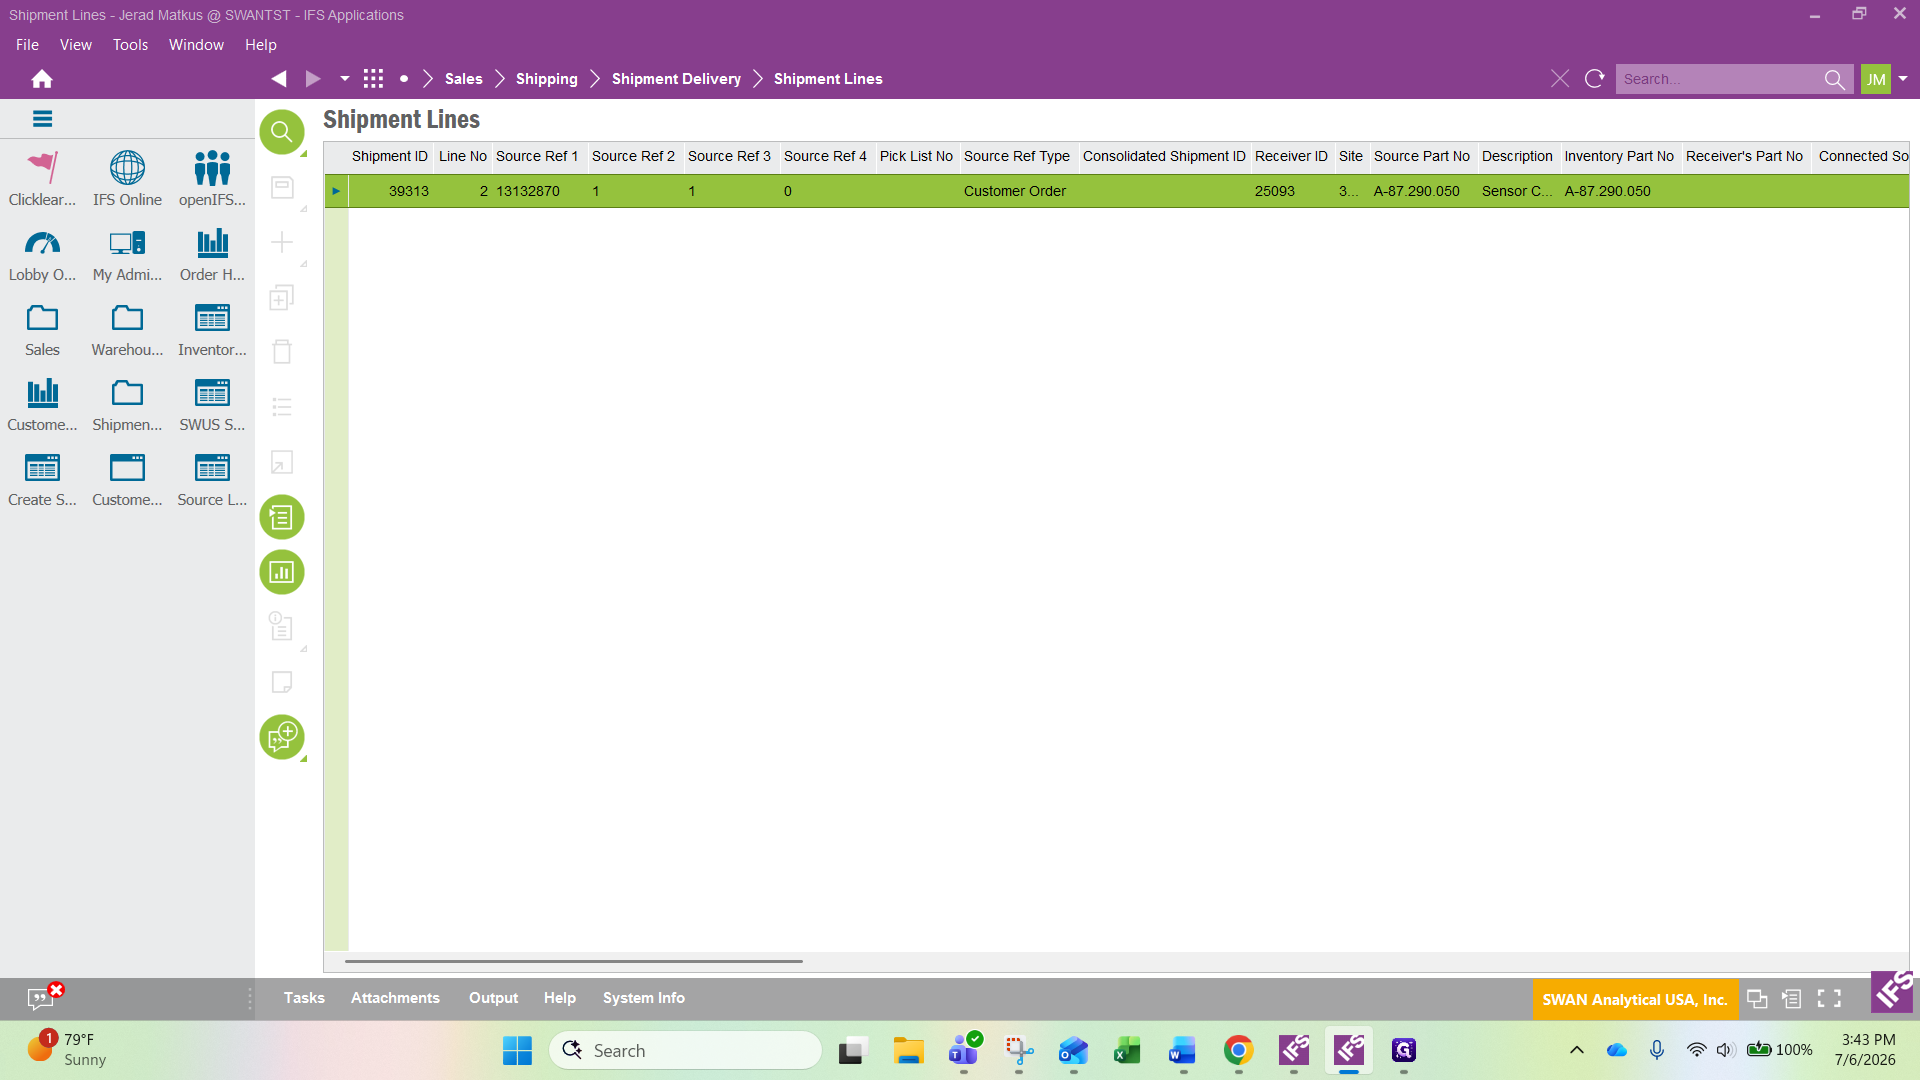
63
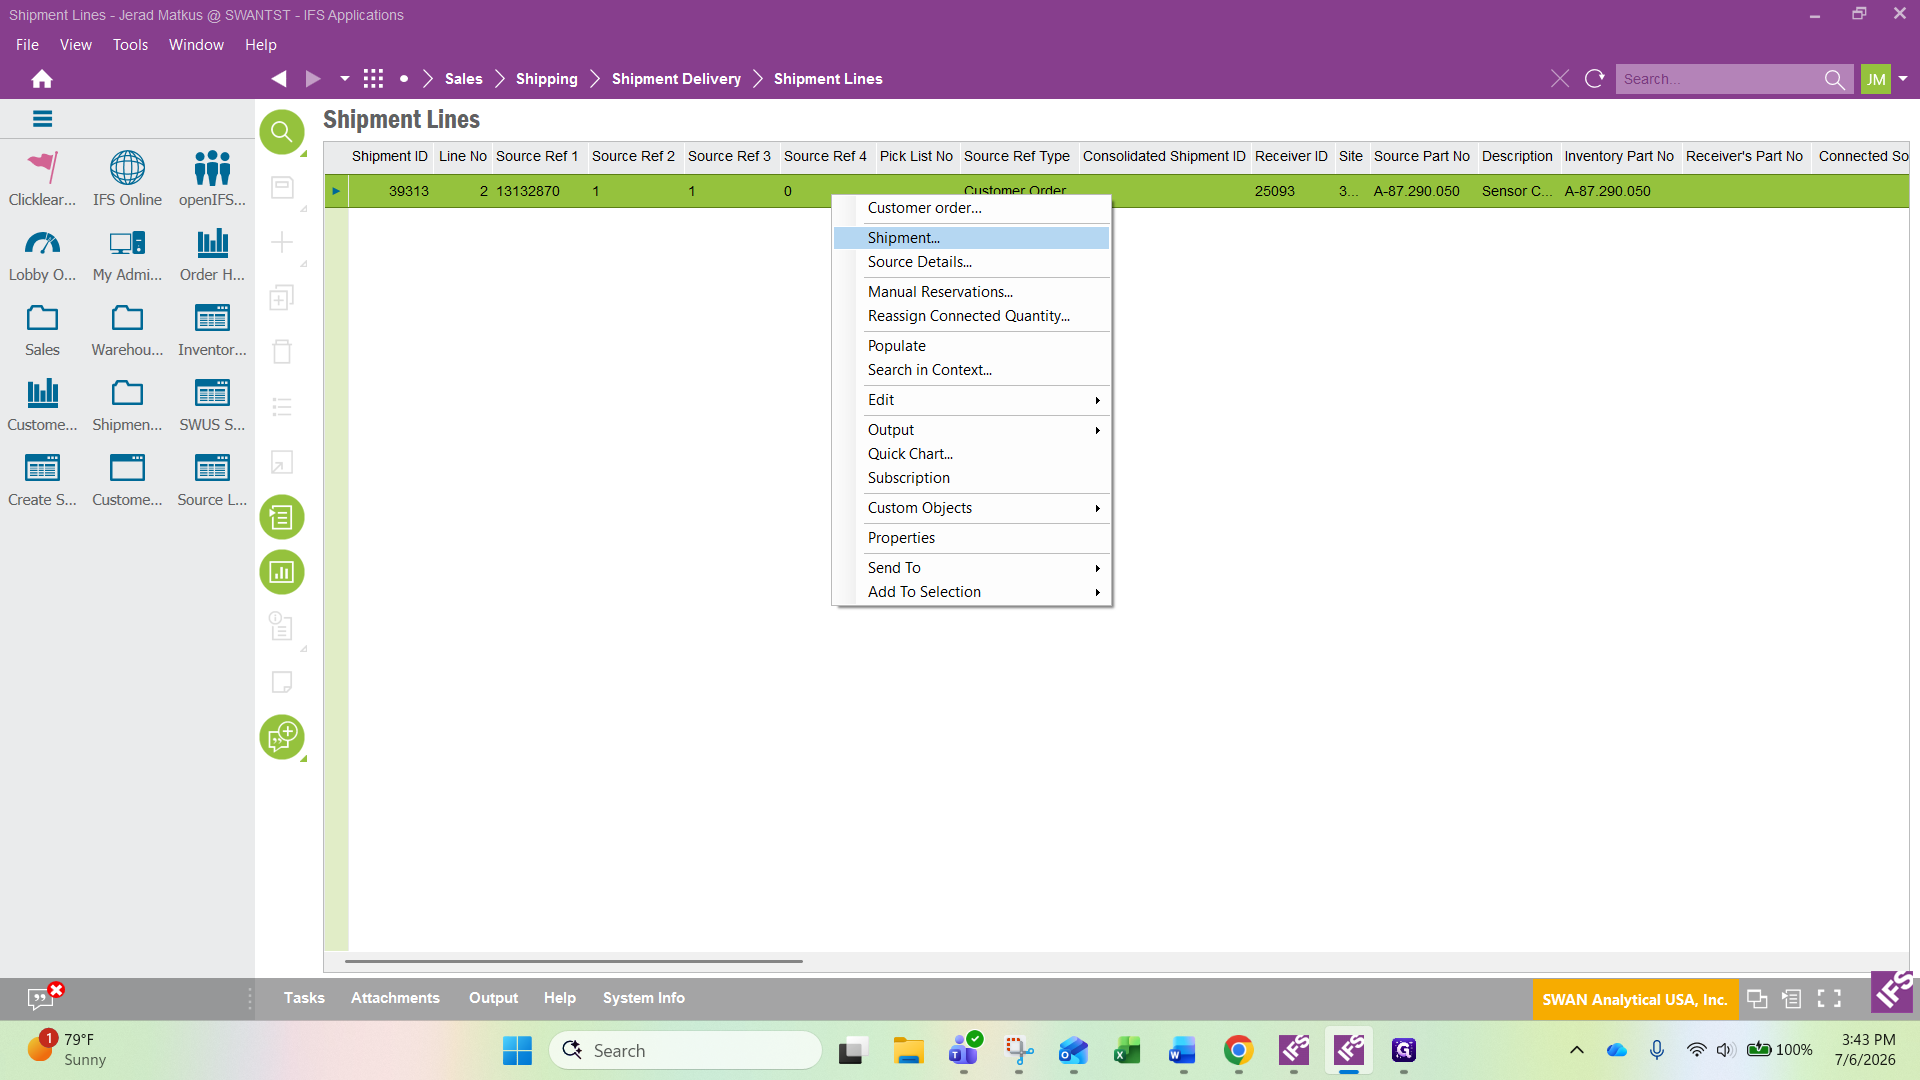
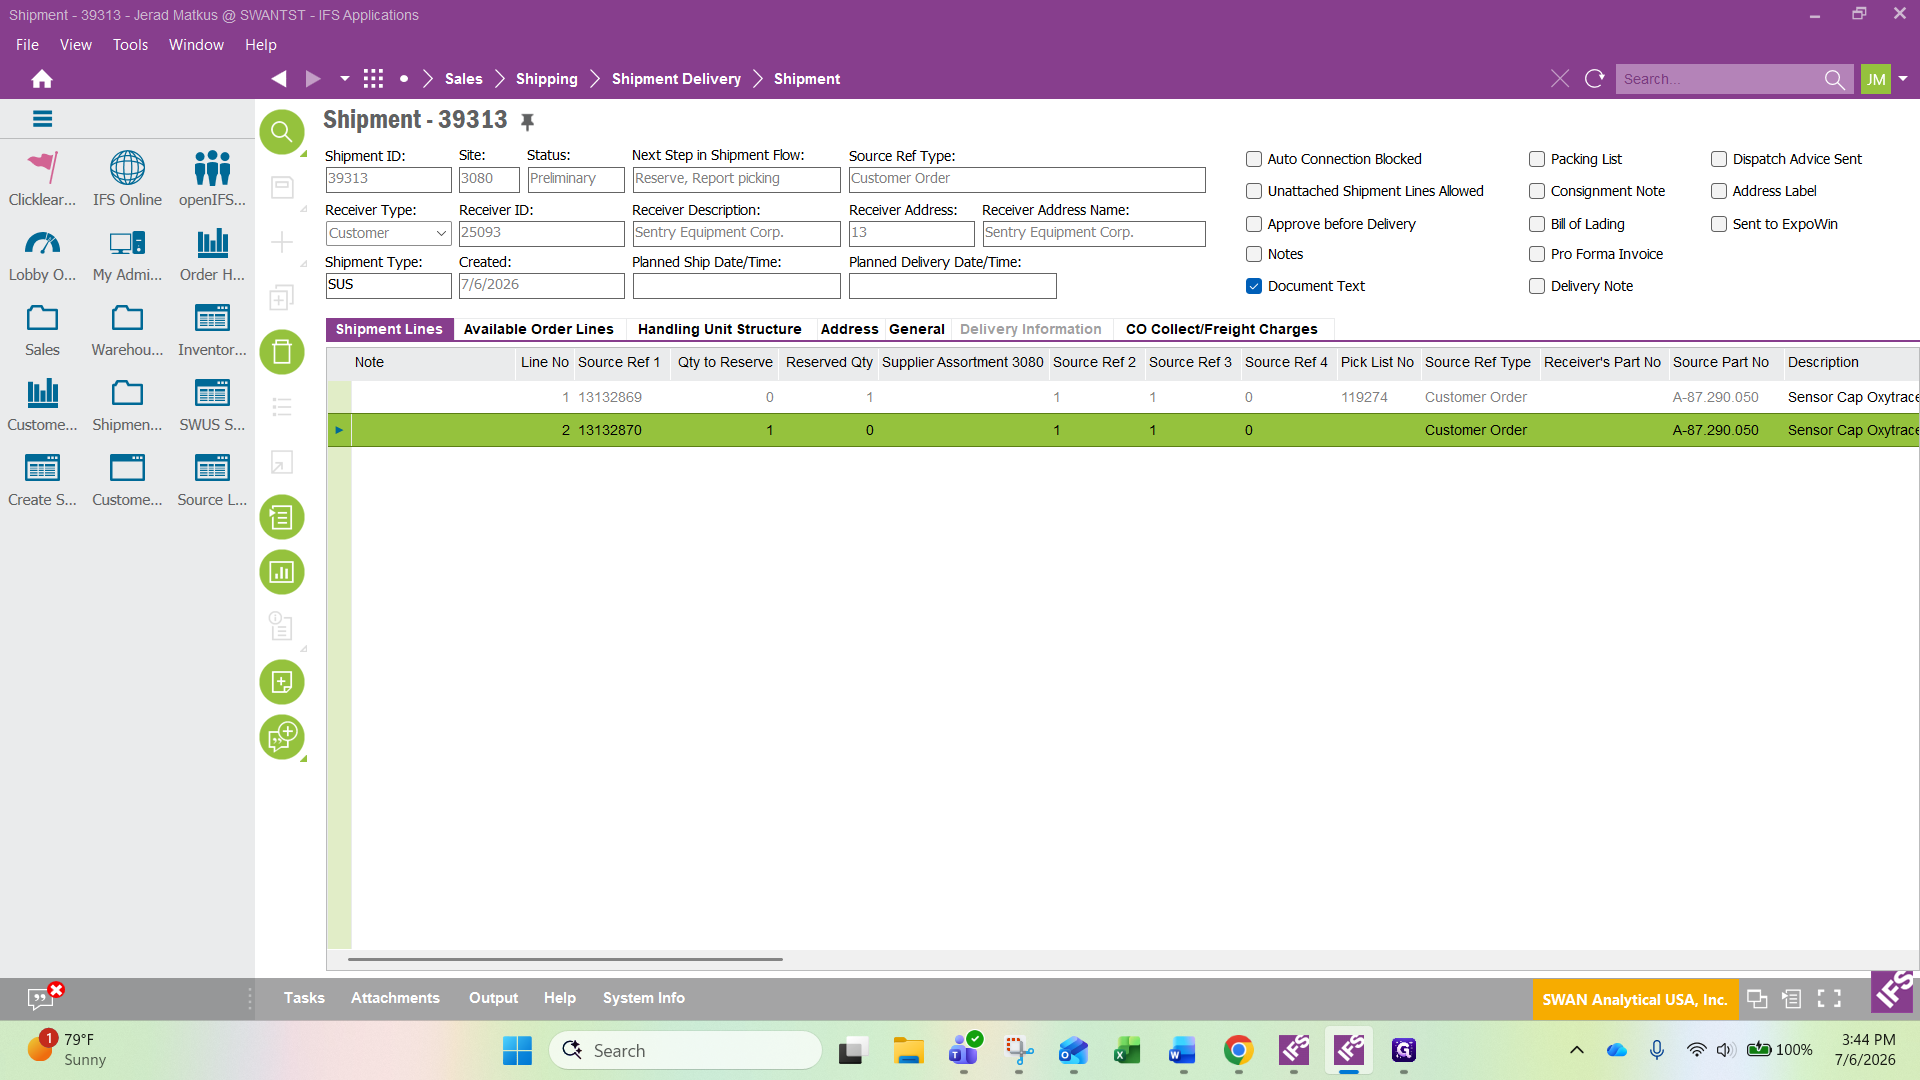
Right-click the newly created record.
64
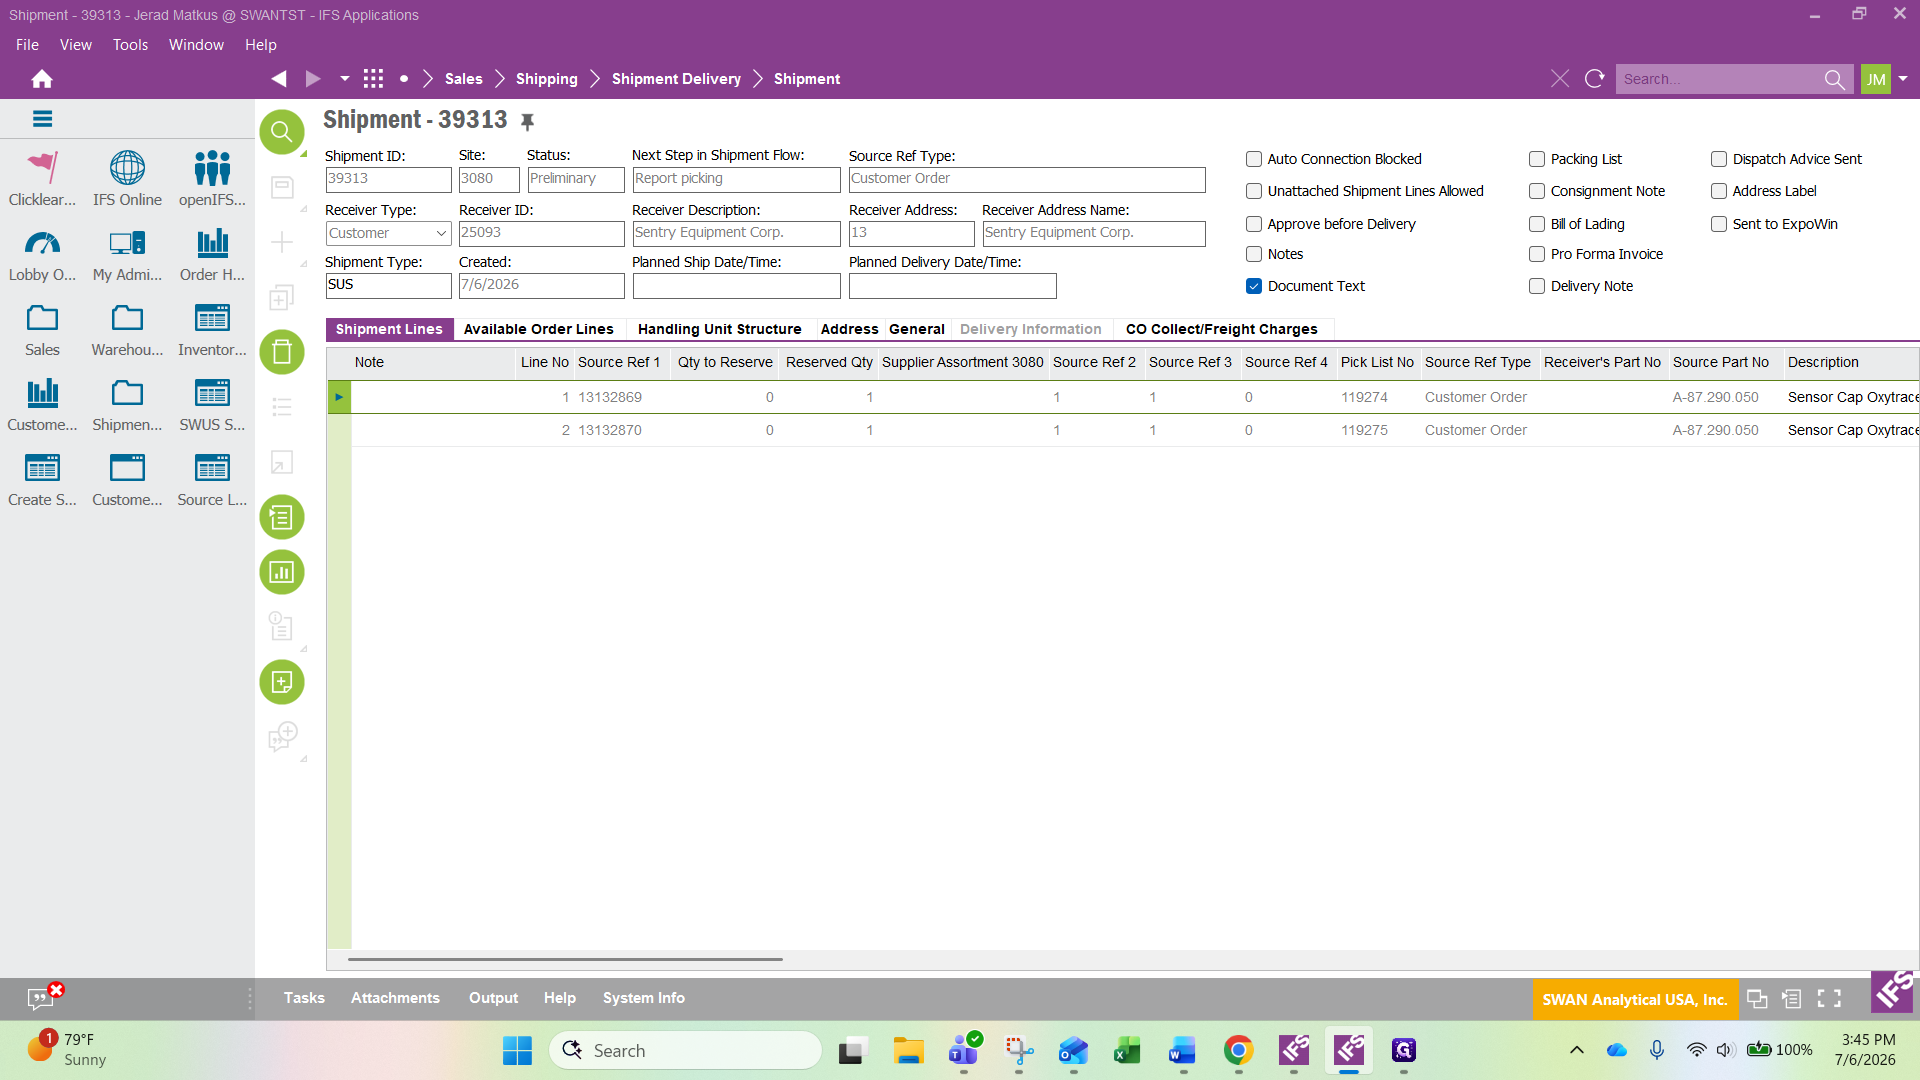
Click Shipment to open the shipment details screen.
65
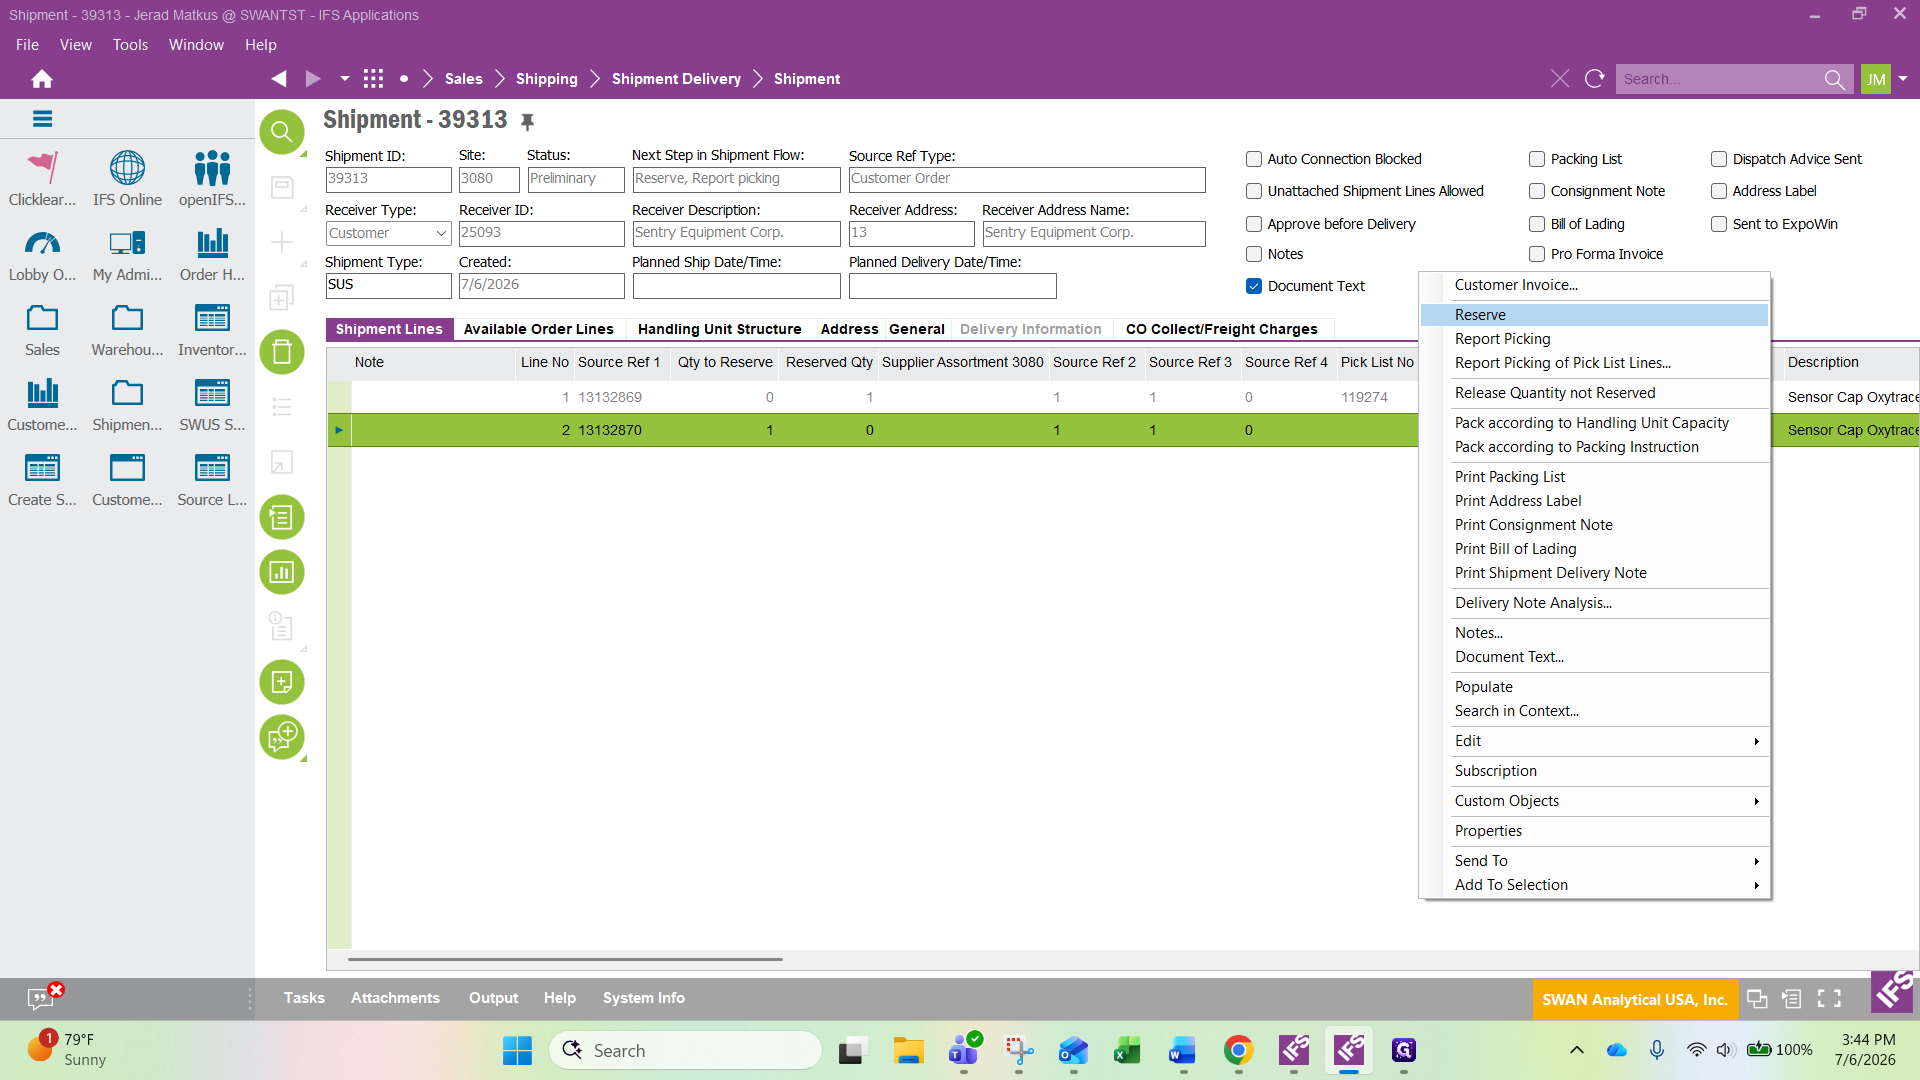
Select the correct shipment line, then right-click.
66
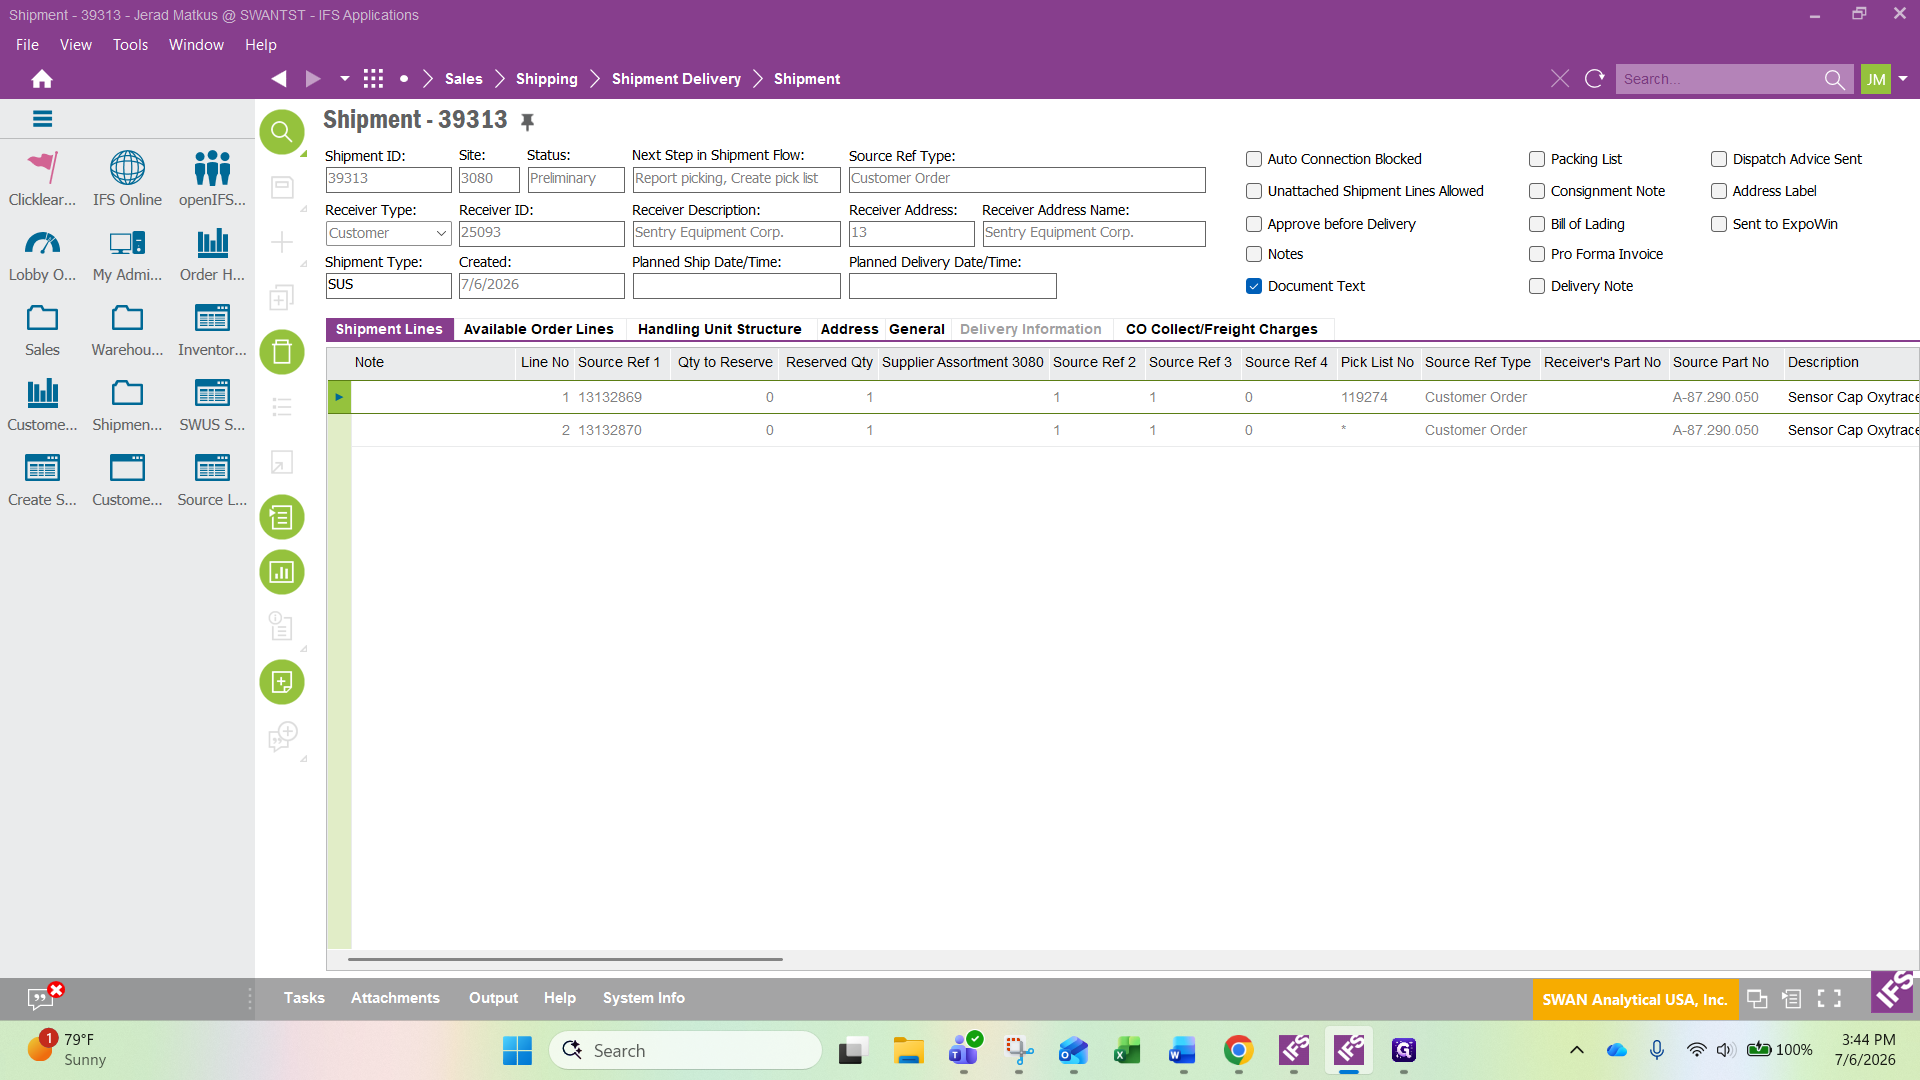
Click Reserve to allocate inventory for picking.
67
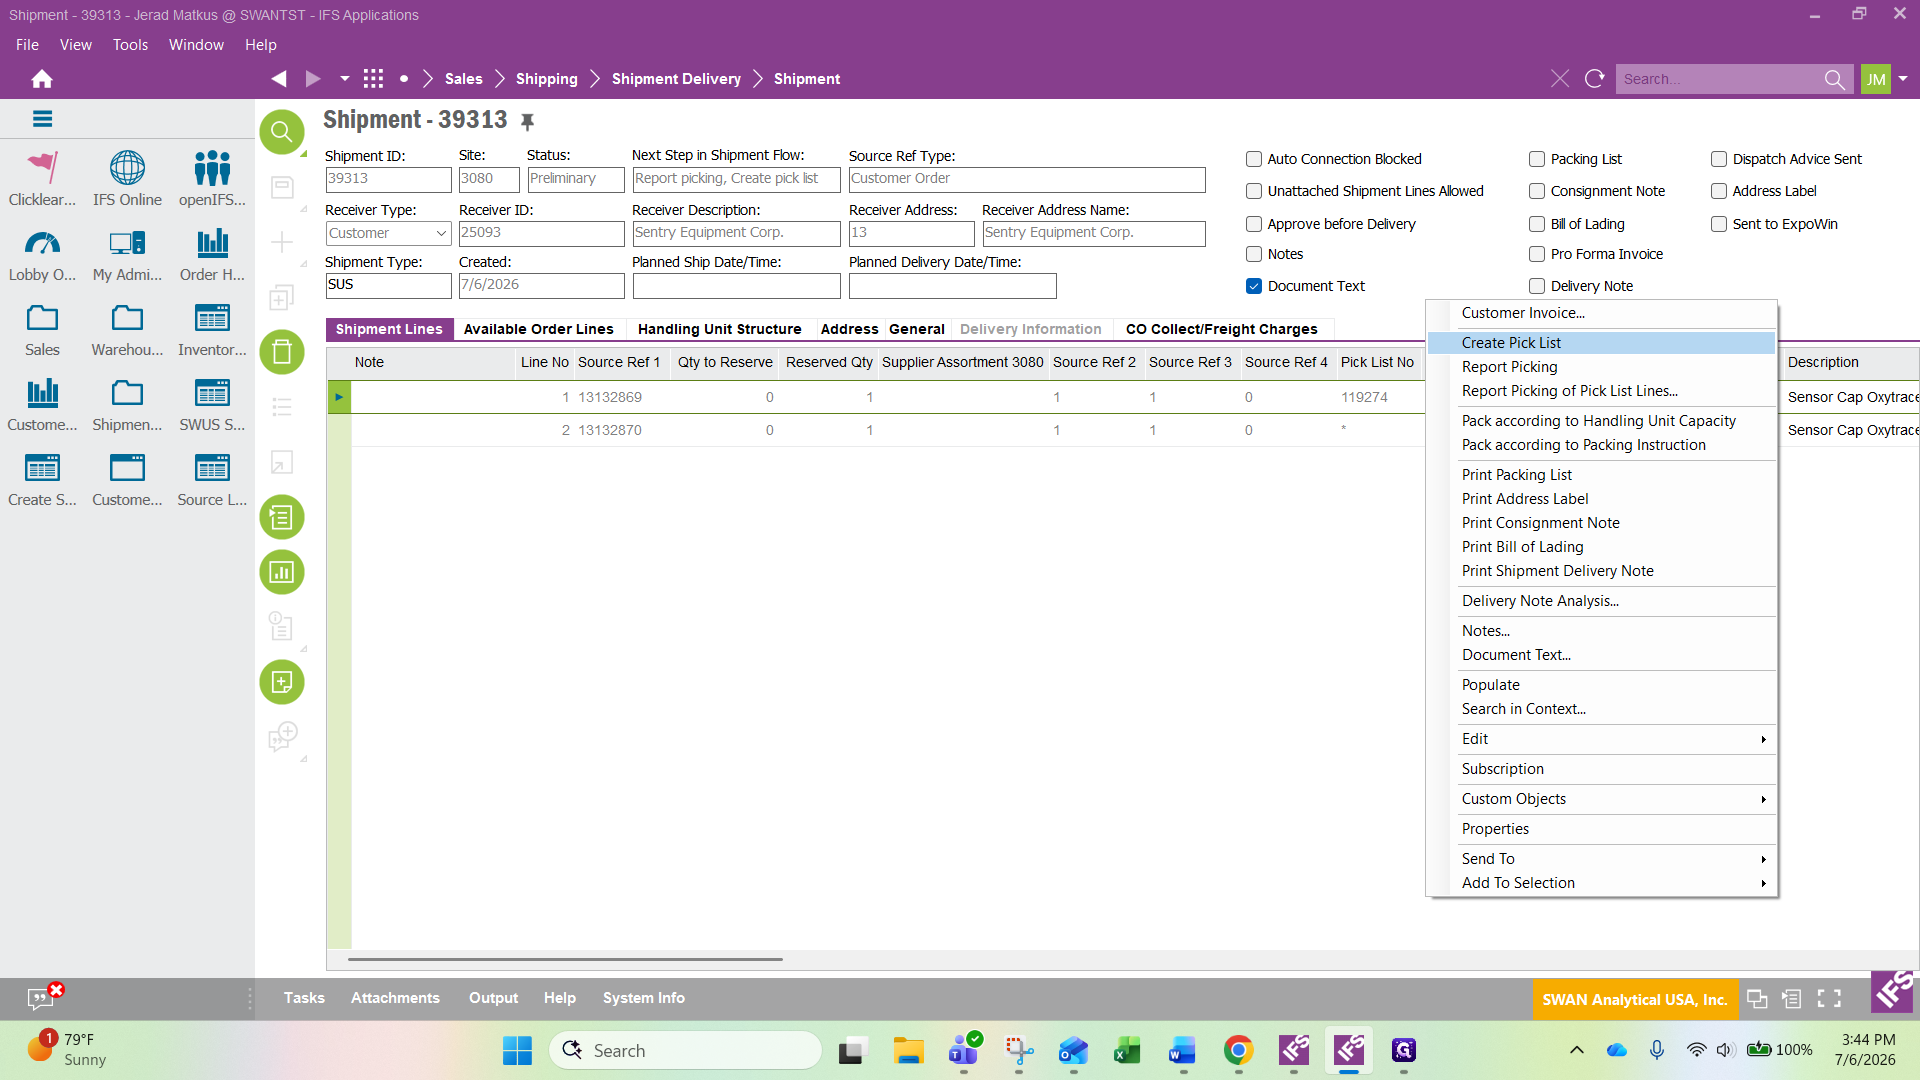
Right-click the reserved line.
68
Click Create Pick List.
69
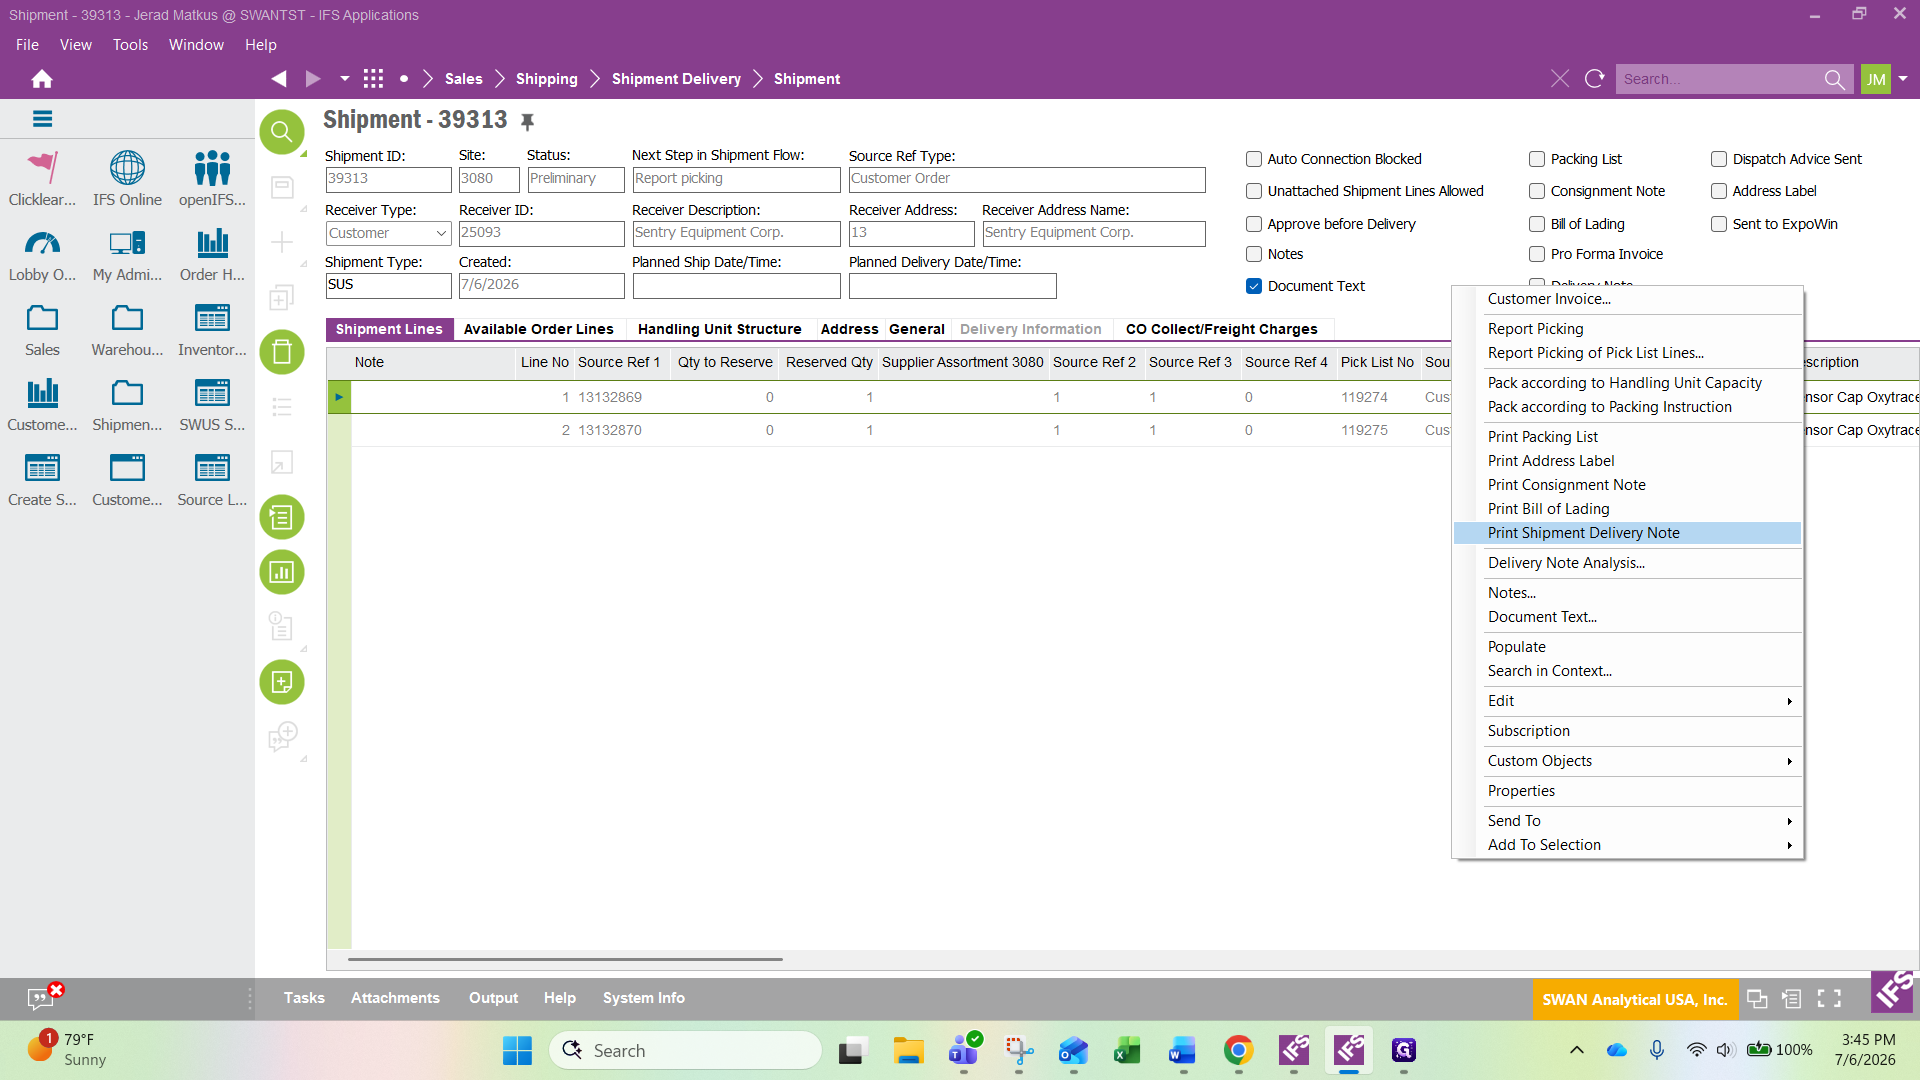
Right-click the header again.
70
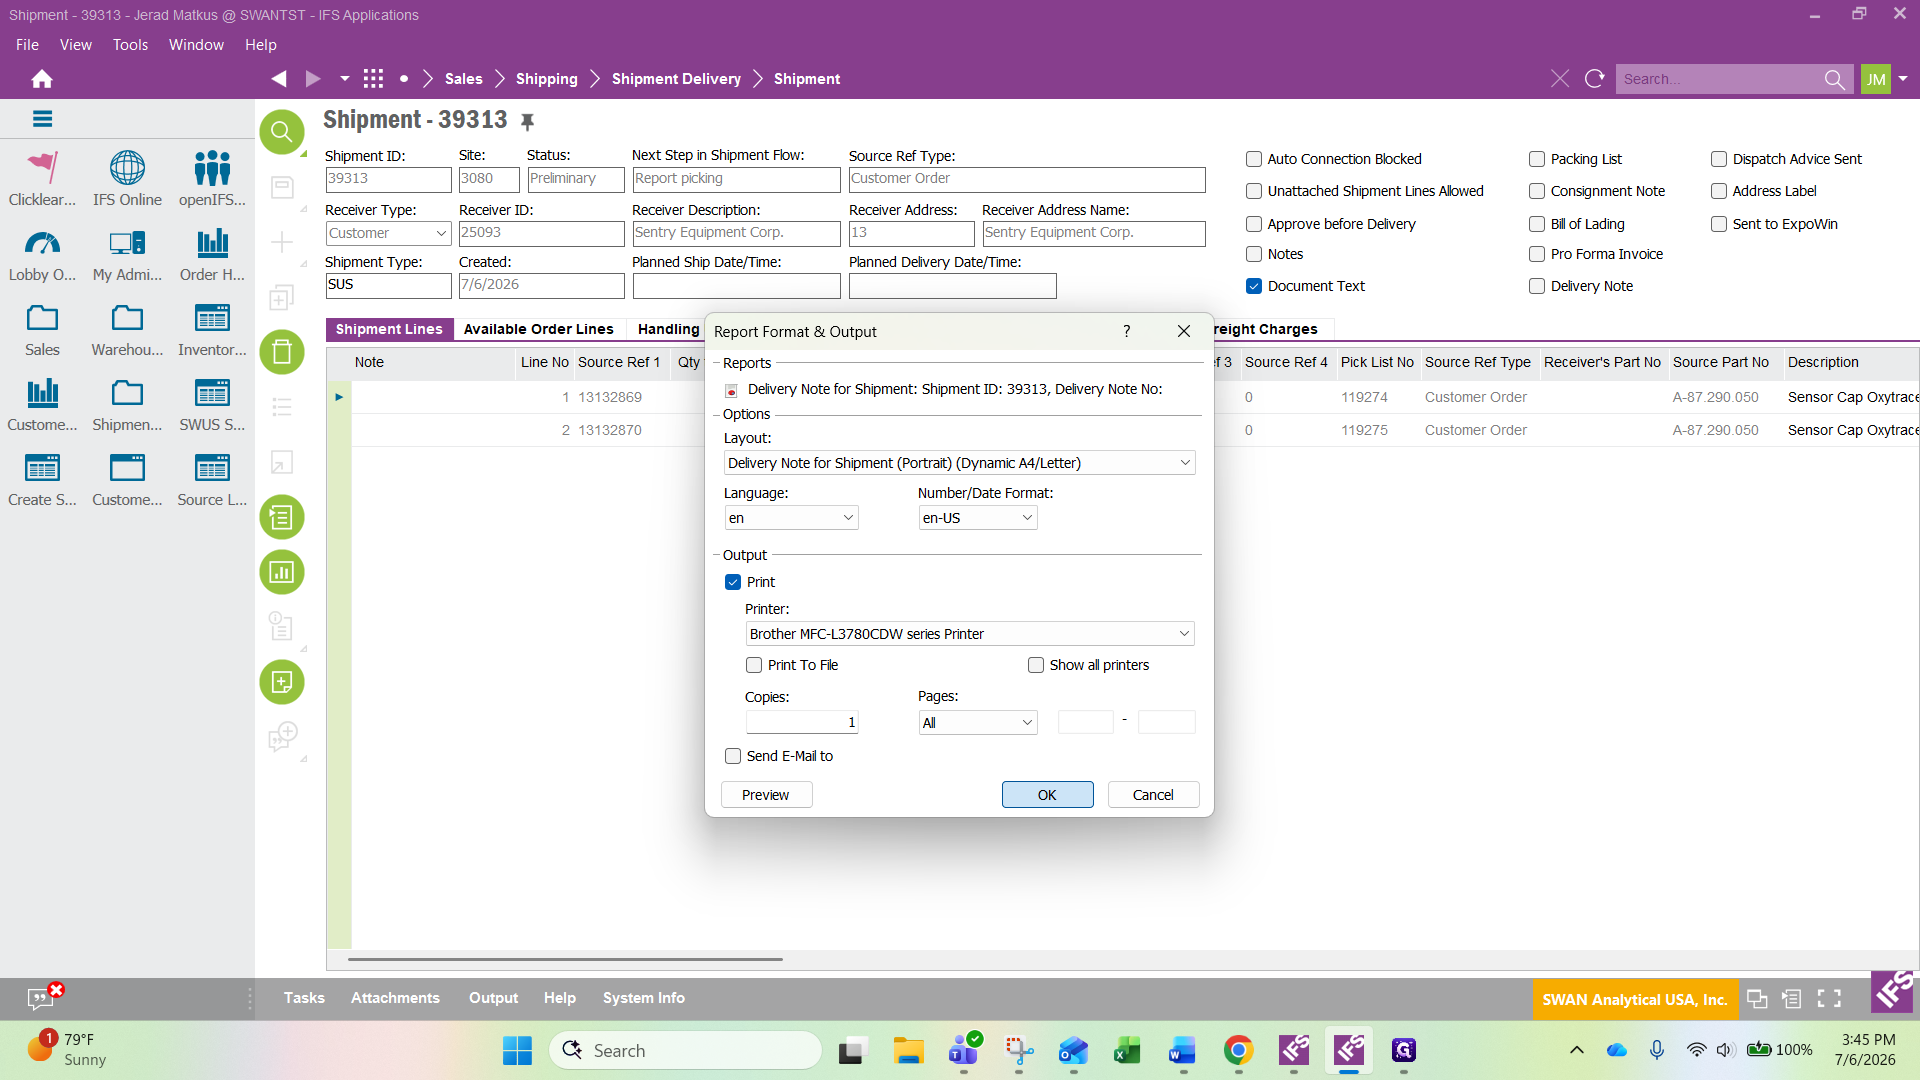
Click Print Shipment Delivery Note.
71
Print the document to a physical printer for the warehouse team.
Q: How do I search for a customer name if I don't know the exact string?
A: Use percentage signs as wildcards around the text (e.g., %Sentry%) to capture any matching records.
Q: What do I enter if my customer is selling to an end user?
A: Enter the ultimate recipient's identifier in the End User ID field. You can use the List of Values to search for and select the correct entity.
Q: How do I attach the customer's original PDF purchase order?
A: Drag and drop the PDF into the Attachments section at the bottom of the screen. Use the Document Class SAL-ML1 (Sales Mail Objects) when saving it.
Q: How do I delete an order line I accidentally added?
A: Select the line and either click the Delete icon on the side toolbar or press F7 on your keyboard.
Q: What should I do after printing the order confirmation?
A: Save it to a local folder, such as your Desktop, and then email it to the customer who requested the order as proof of processing.
Term
Definition
List of Values
A searchable menu within IFS Applications that displays valid data entries for a specific field.
End User ID
The identifier for the final recipient of the goods when the direct customer is a reseller.
Document Class
A categorization tag used in the system to define the type and handling of an attached file, such as a sales mail object.
Pick List
A document generated for warehouse staff that details the inventory to be collected for an order.
Shipment Delivery Note
A final printed document that accompanies the physical shipment, outlining the contents of the delivery.