Icon

How to Create Users and Print Badges in Brivo Access

Learn how to provision a new user, assign access groups and physical credentials, and print an ID badge in the Brivo Access platform.

By Julie Phung

This guide explains how to fully provision a new user in Brivo Access, from entering their profile details to assigning access credentials and groups. By completing this process, you will grant the user appropriate facility access and issue a printed identification badge.

This workflow is designed for security administrators, HR personnel, or office managers responsible for onboarding new employees or contractors. It should be performed whenever a new individual needs physical access to the building and a printed ID card.

Create a New User Profile
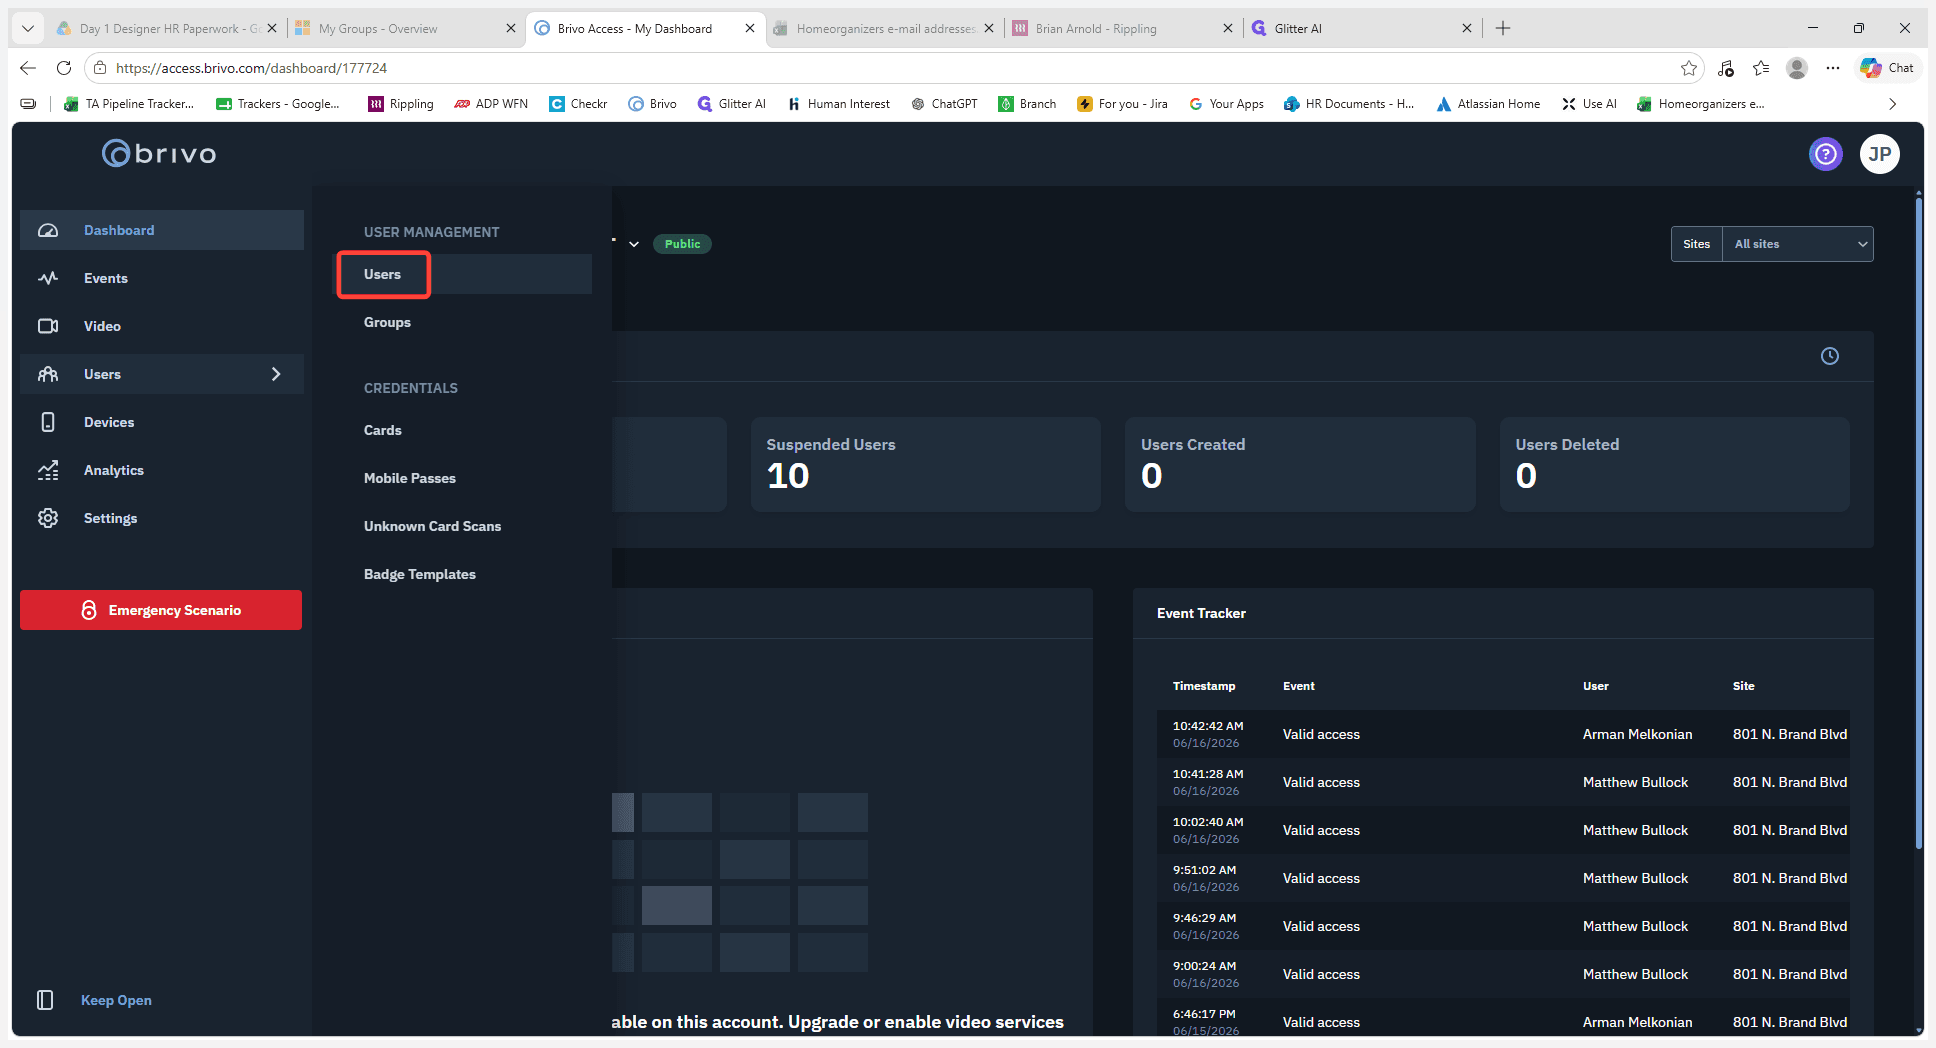
1
Click Users in the left-hand navigation panel under User Management.
Step #1: Click Users in the left-hand navigation panel under User Management.
2
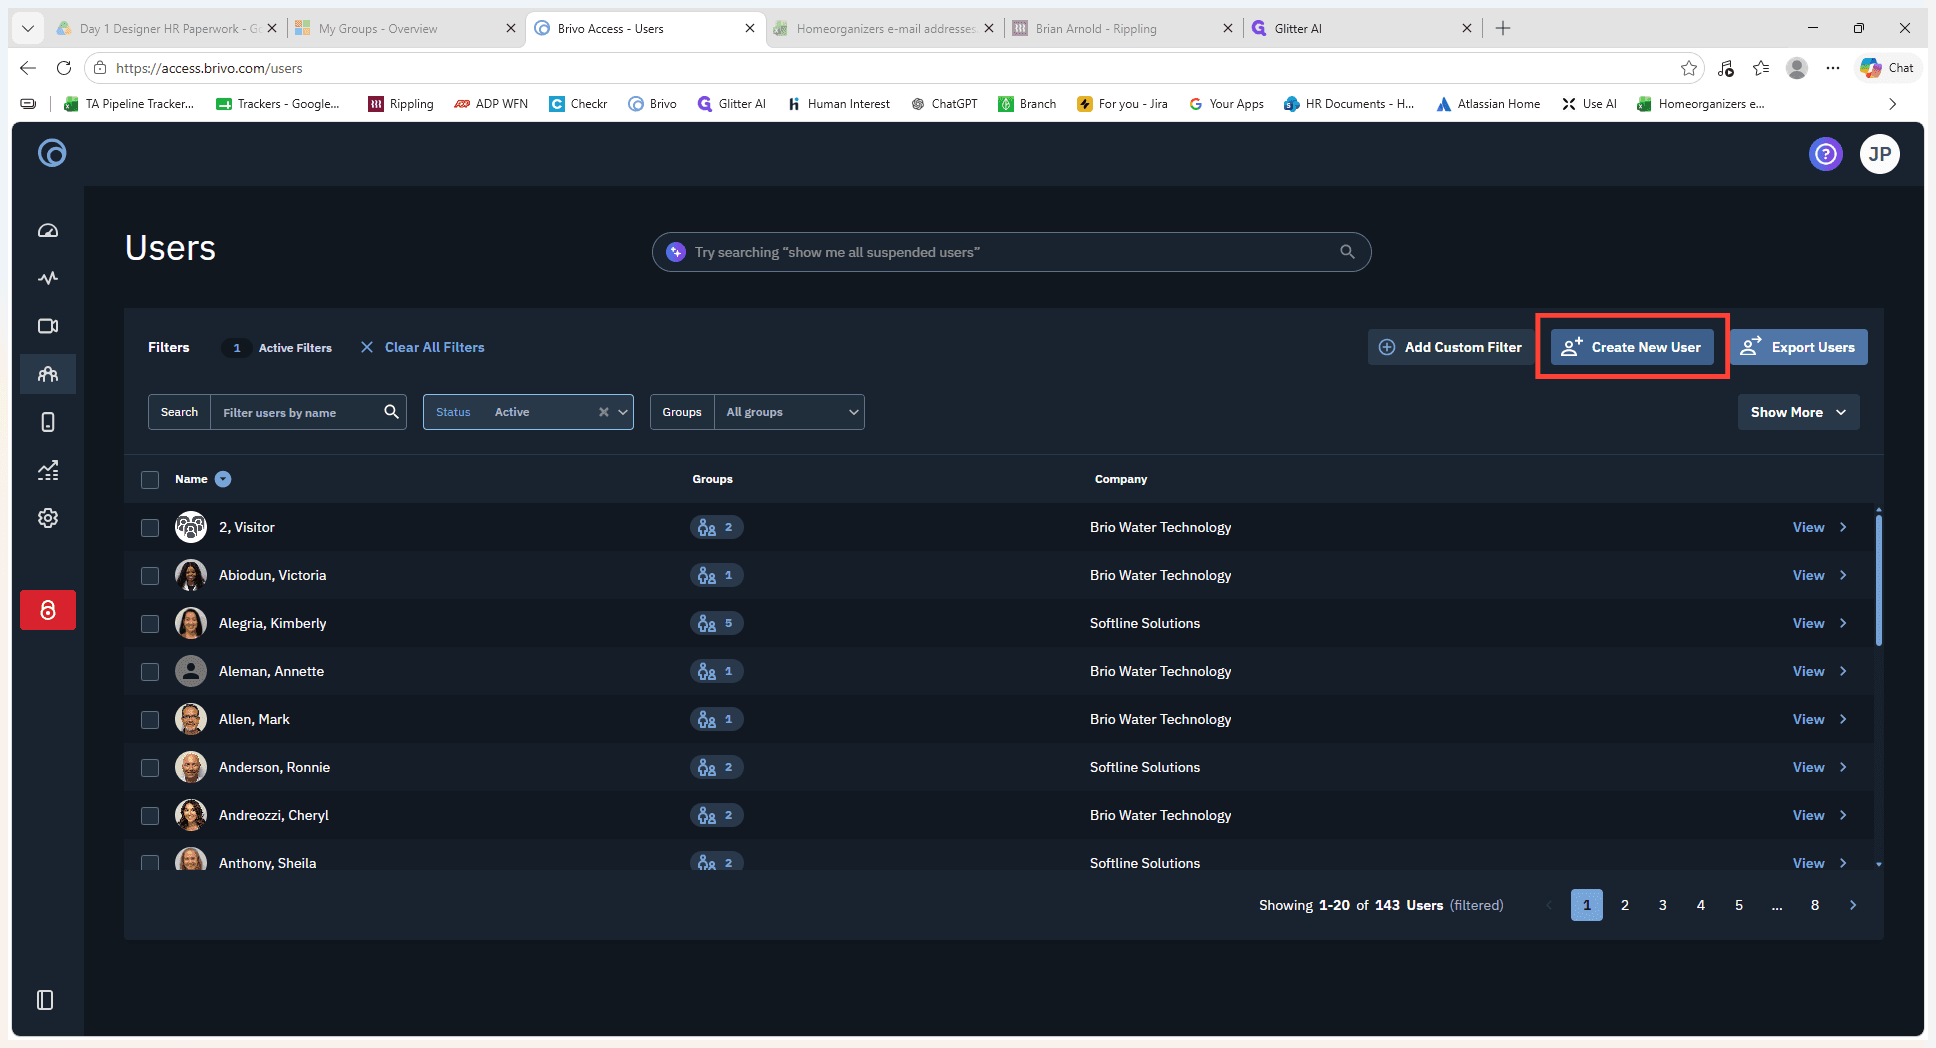
Click the + Create New User button located in the top right corner.
Step #2: Click the + Create New User button located in the top right corner.
3
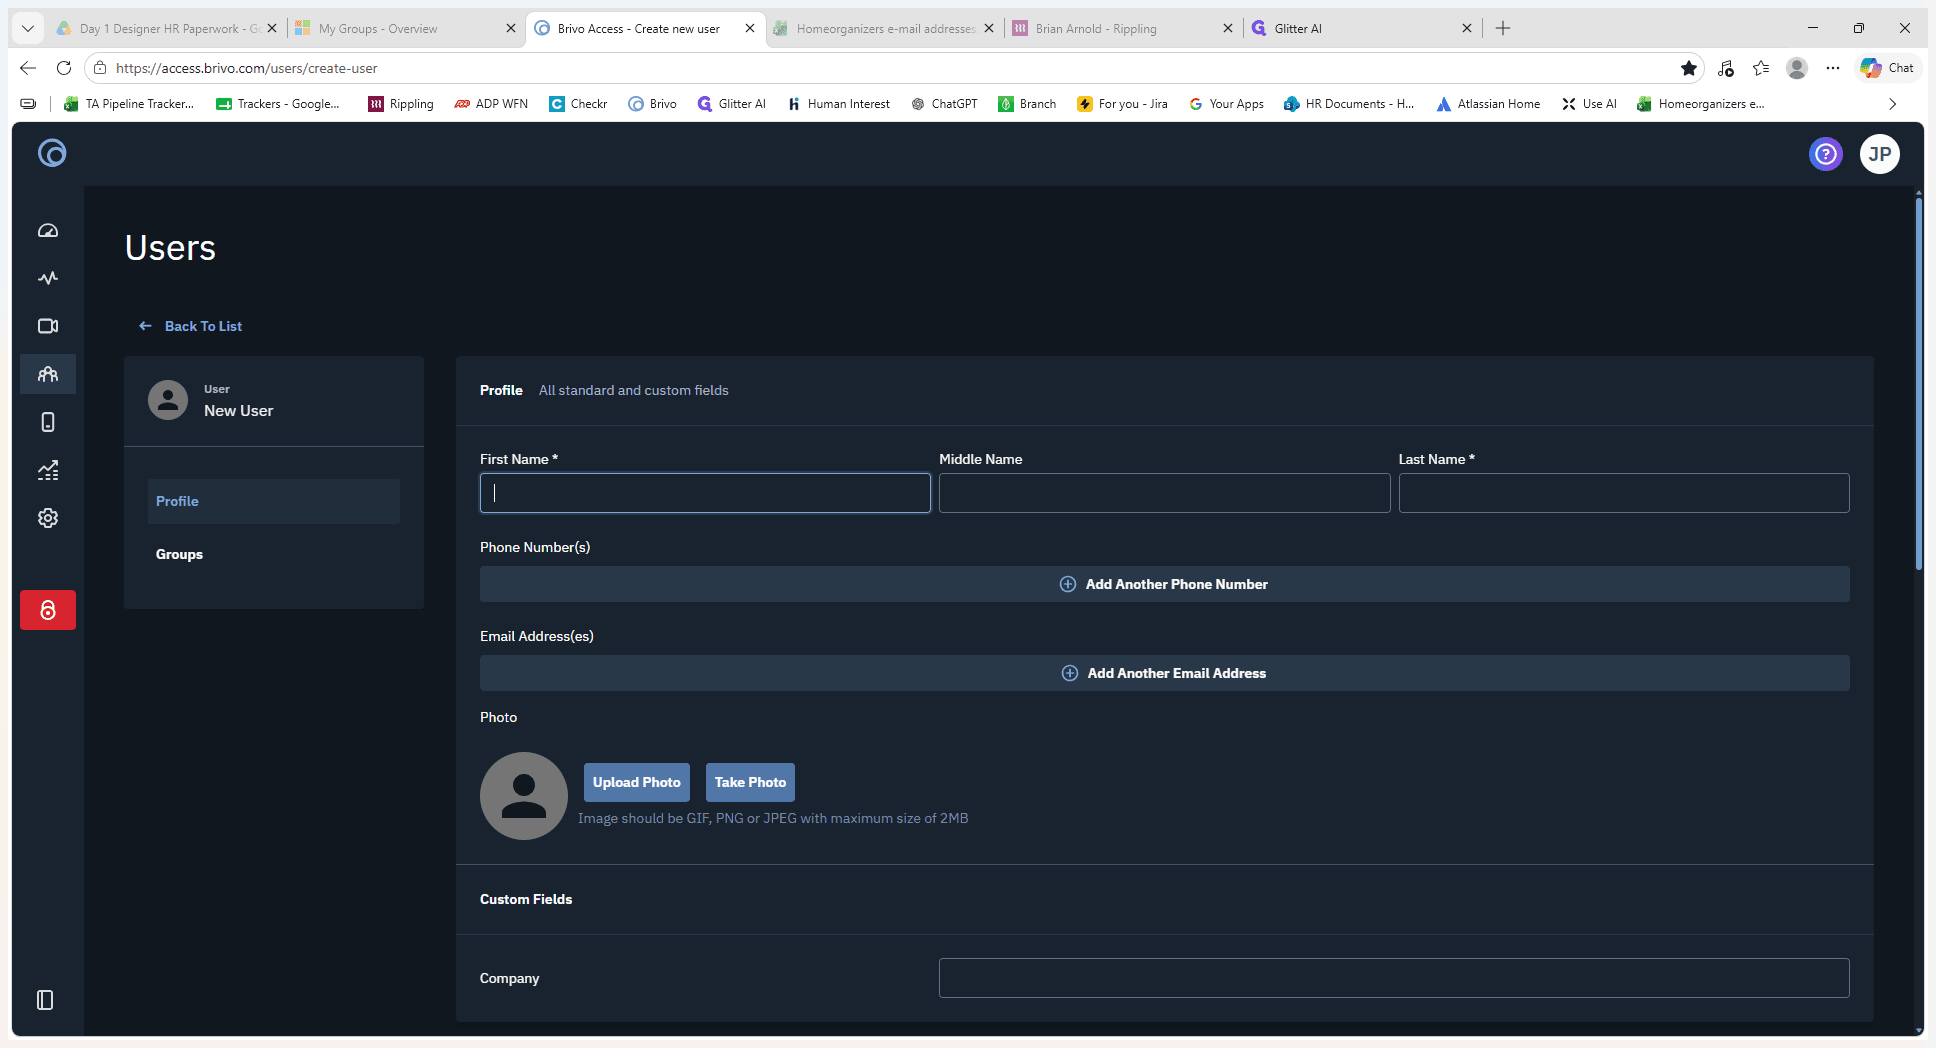
Type the user's first name in the required First Name field.
Step #3: Type the user's first name in the required First Name field.
4
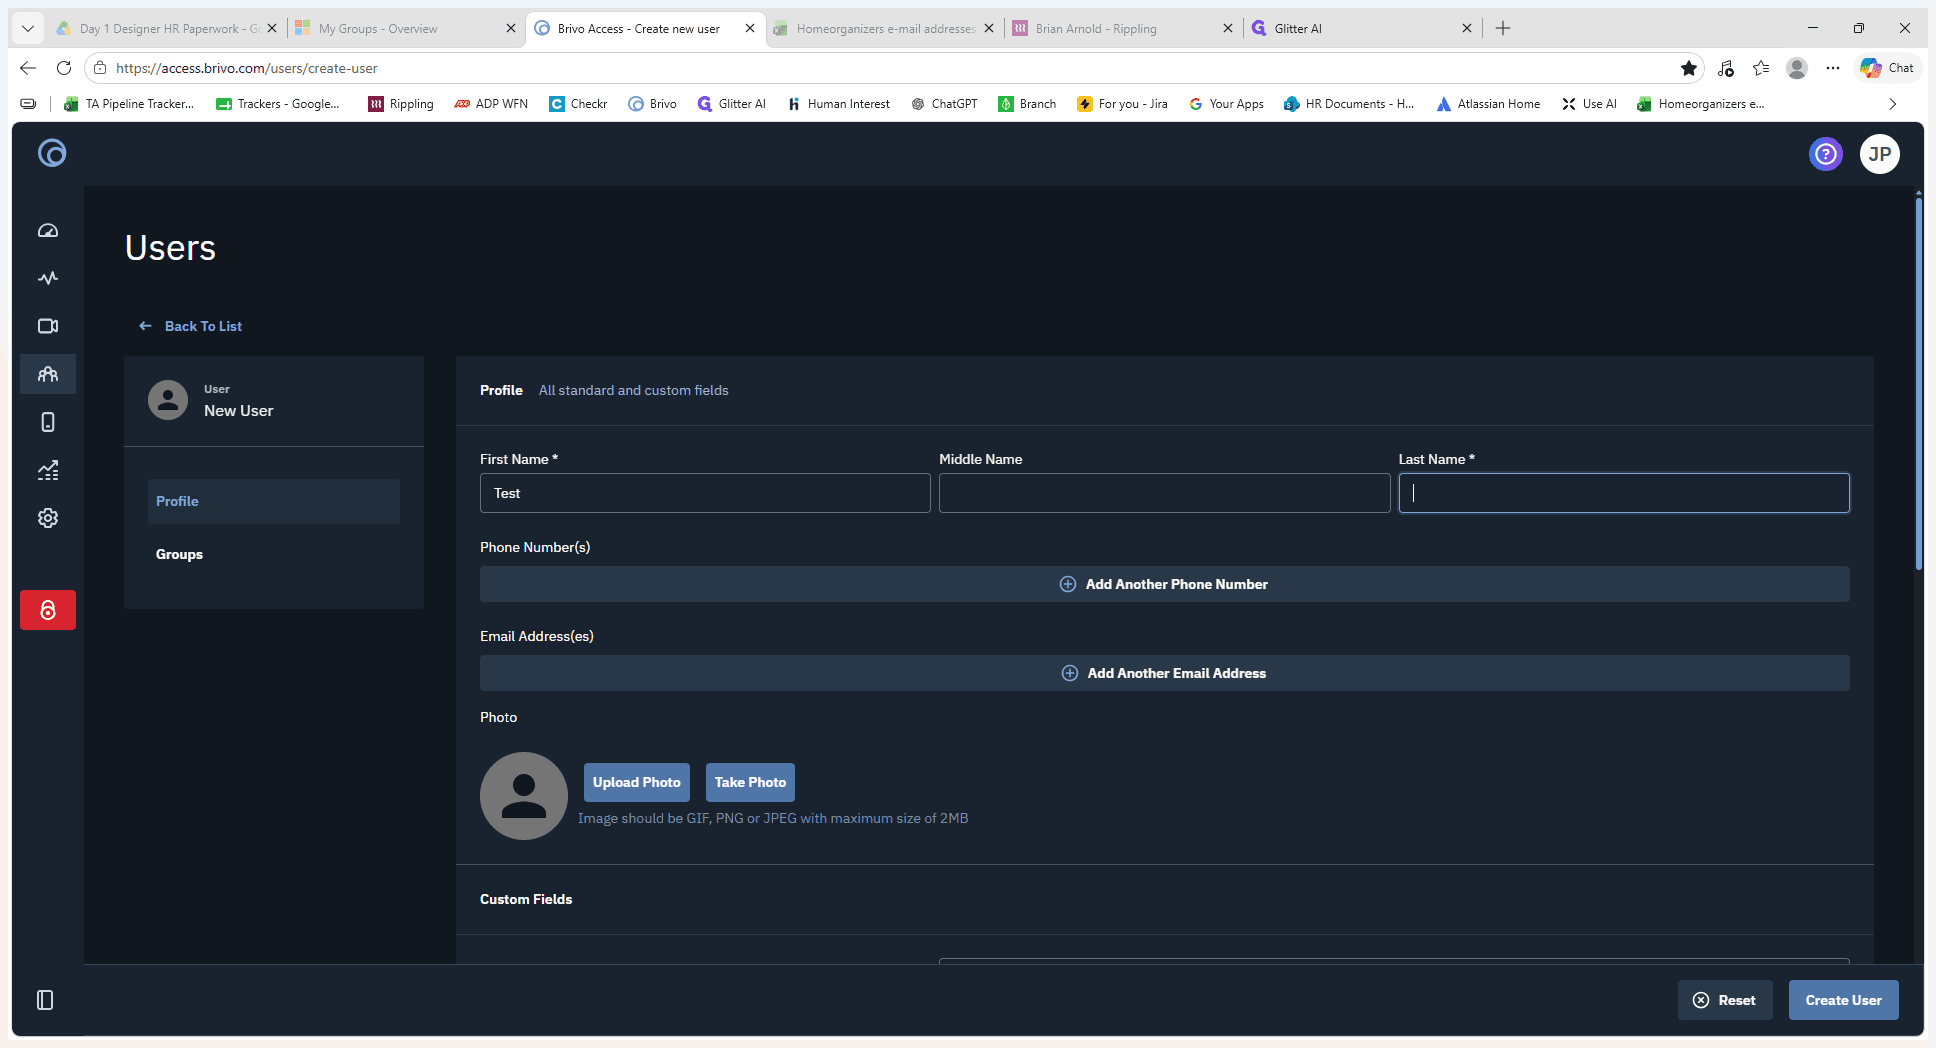
Type the user's last name in the Last Name field.
Step #4: Type the user's last name in the Last Name field.
5
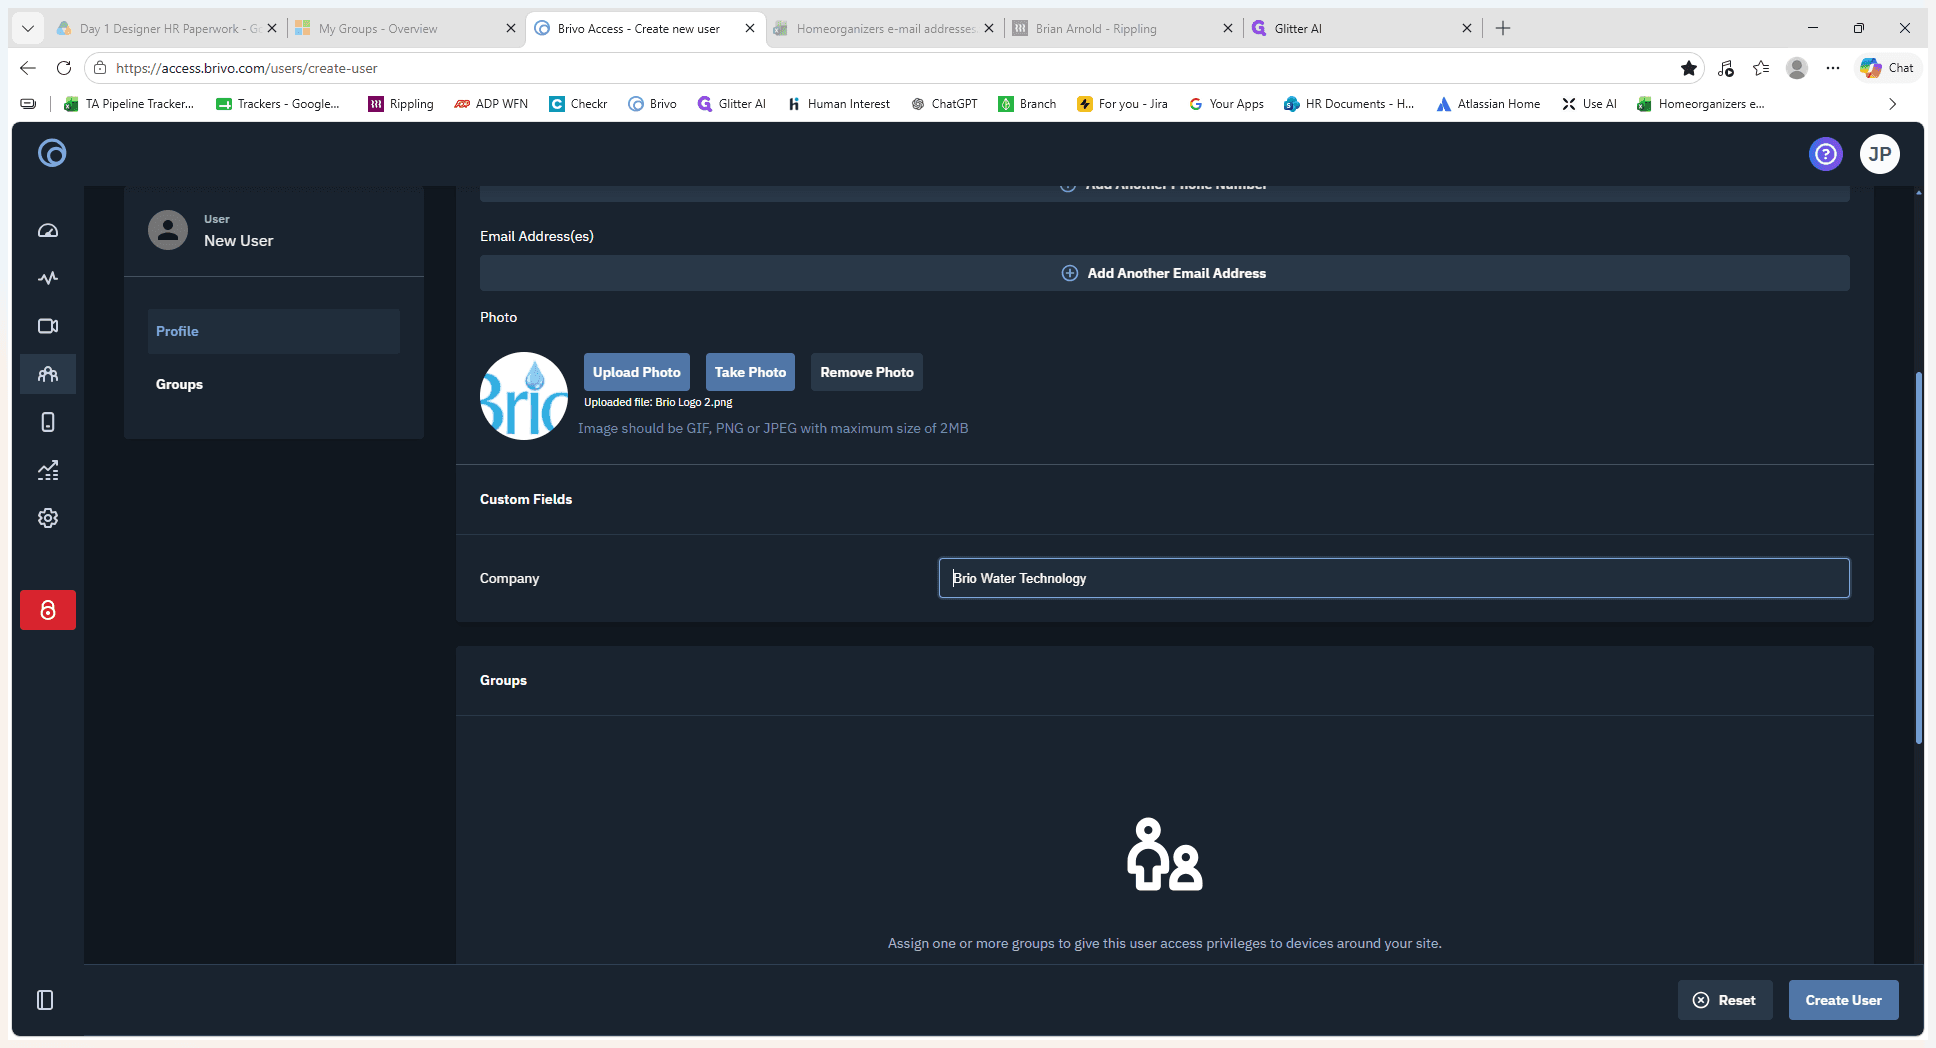
Scroll to the Custom Fields section and enter the user's employer in the Company input field.
Step #5: Scroll to the Custom Fields section and enter the user's employer in the Company input field.
6
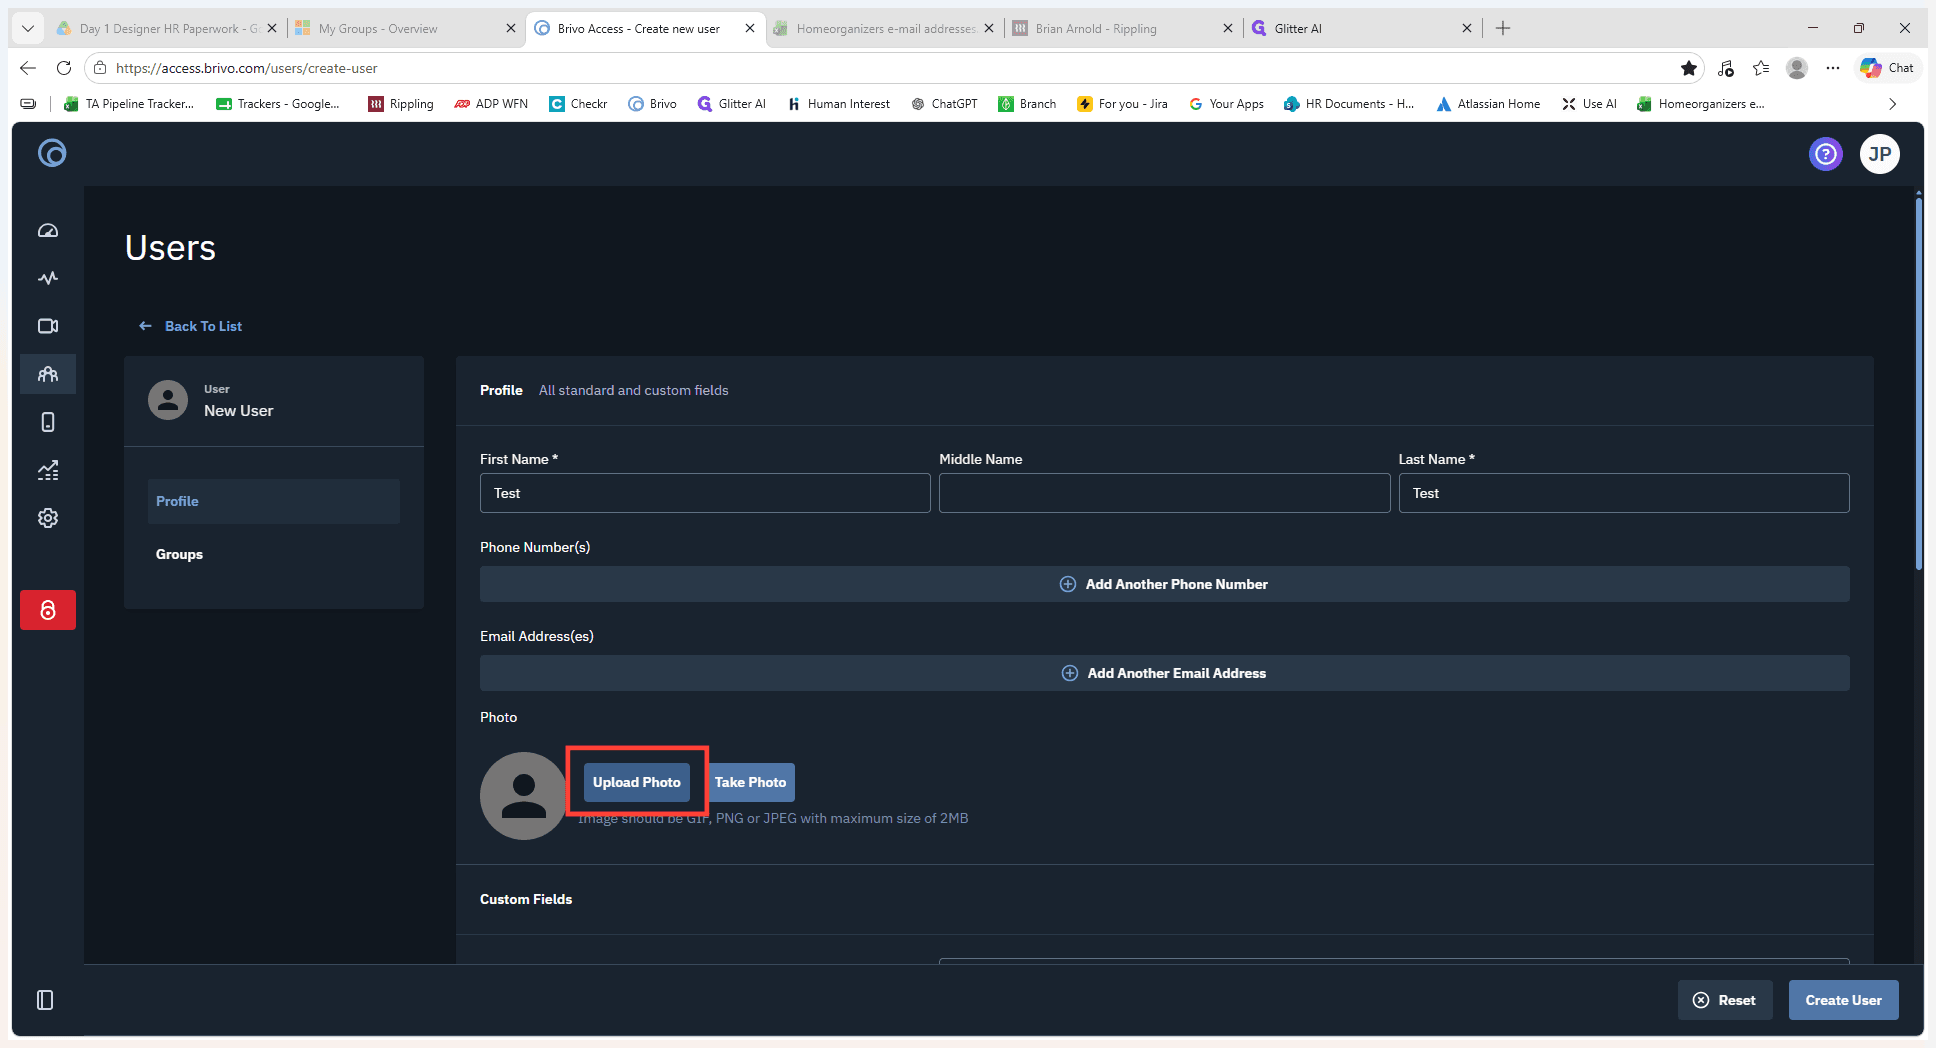
Click Upload Photo to attach a profile picture for the user.
Step #6: Click Upload Photo to attach a profile picture for the user.

Assign Groups and Credentials

Assigning groups dictates which doors the user can unlock, while assigning credentials gives them the physical or digital keys to do so.
7
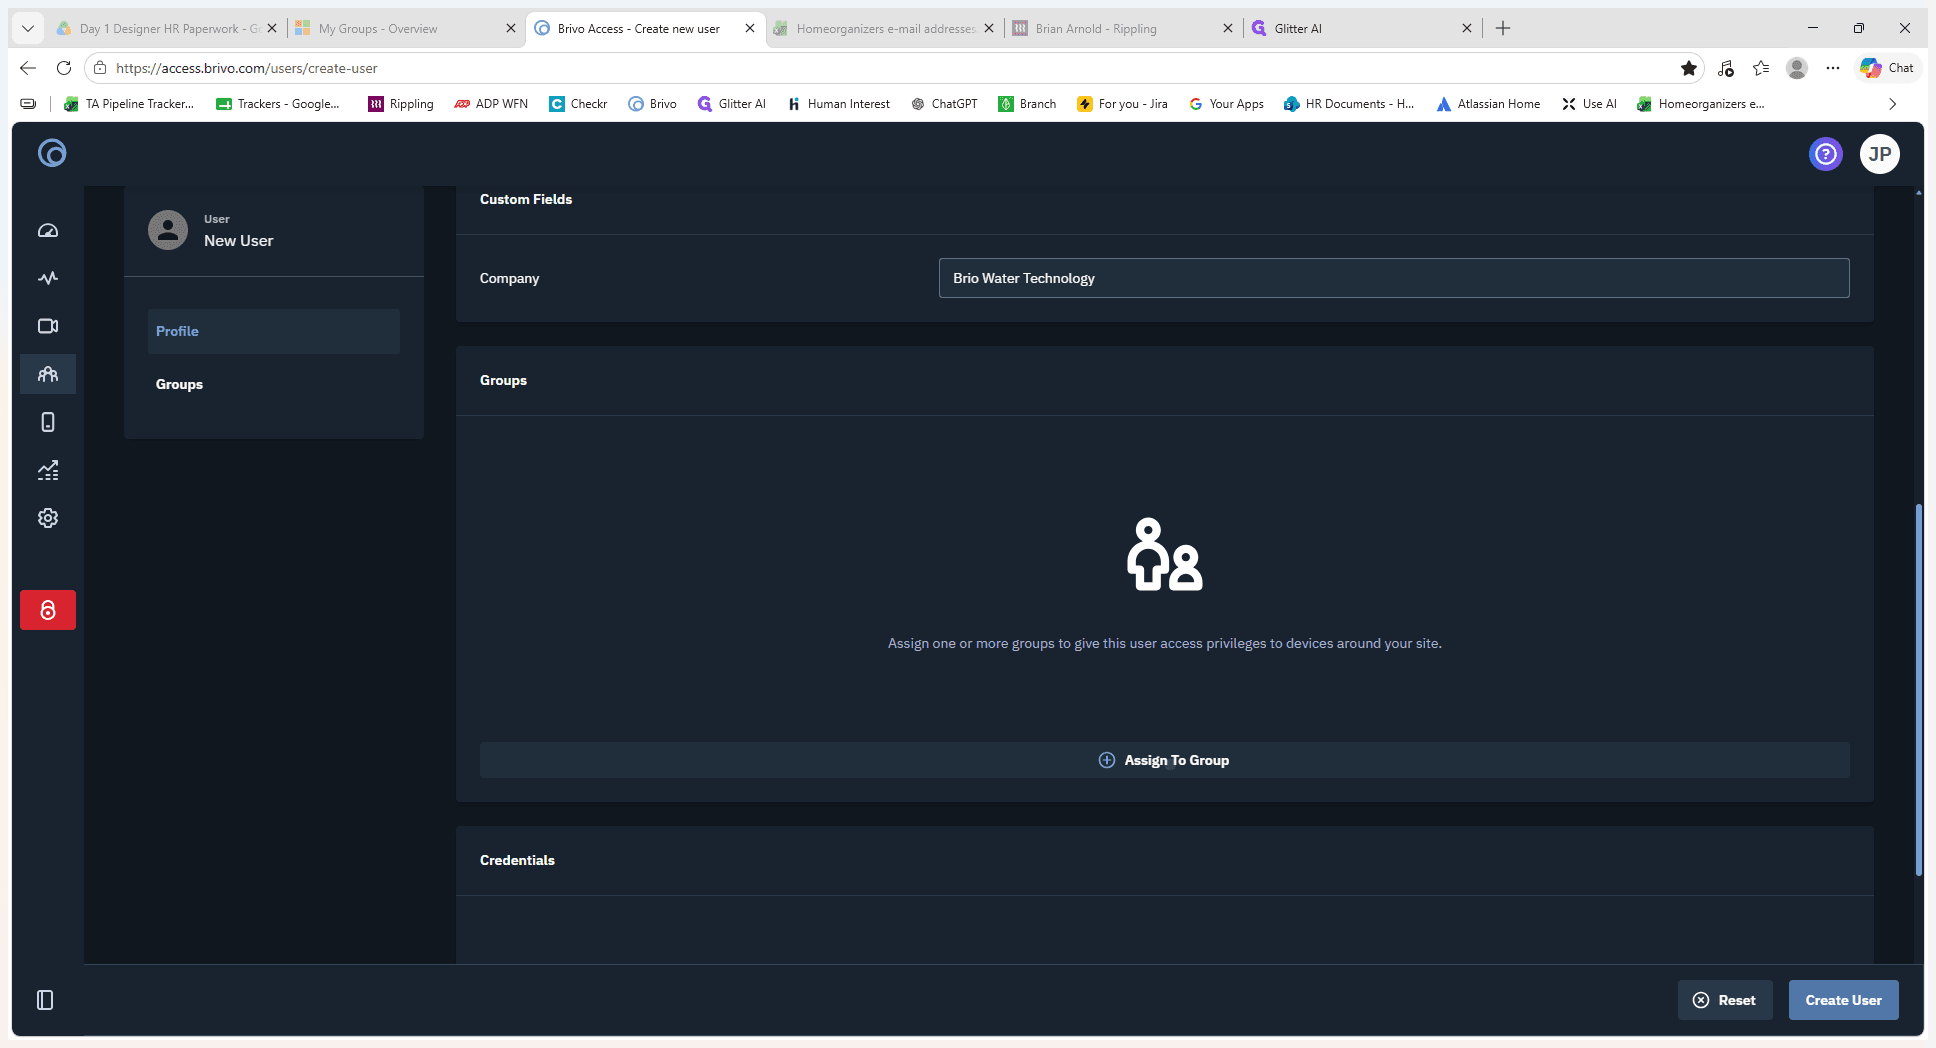
Scroll down to the Groups section and click Assign To Group.
Step #7: Scroll down to the Groups section and click Assign To Group.
8
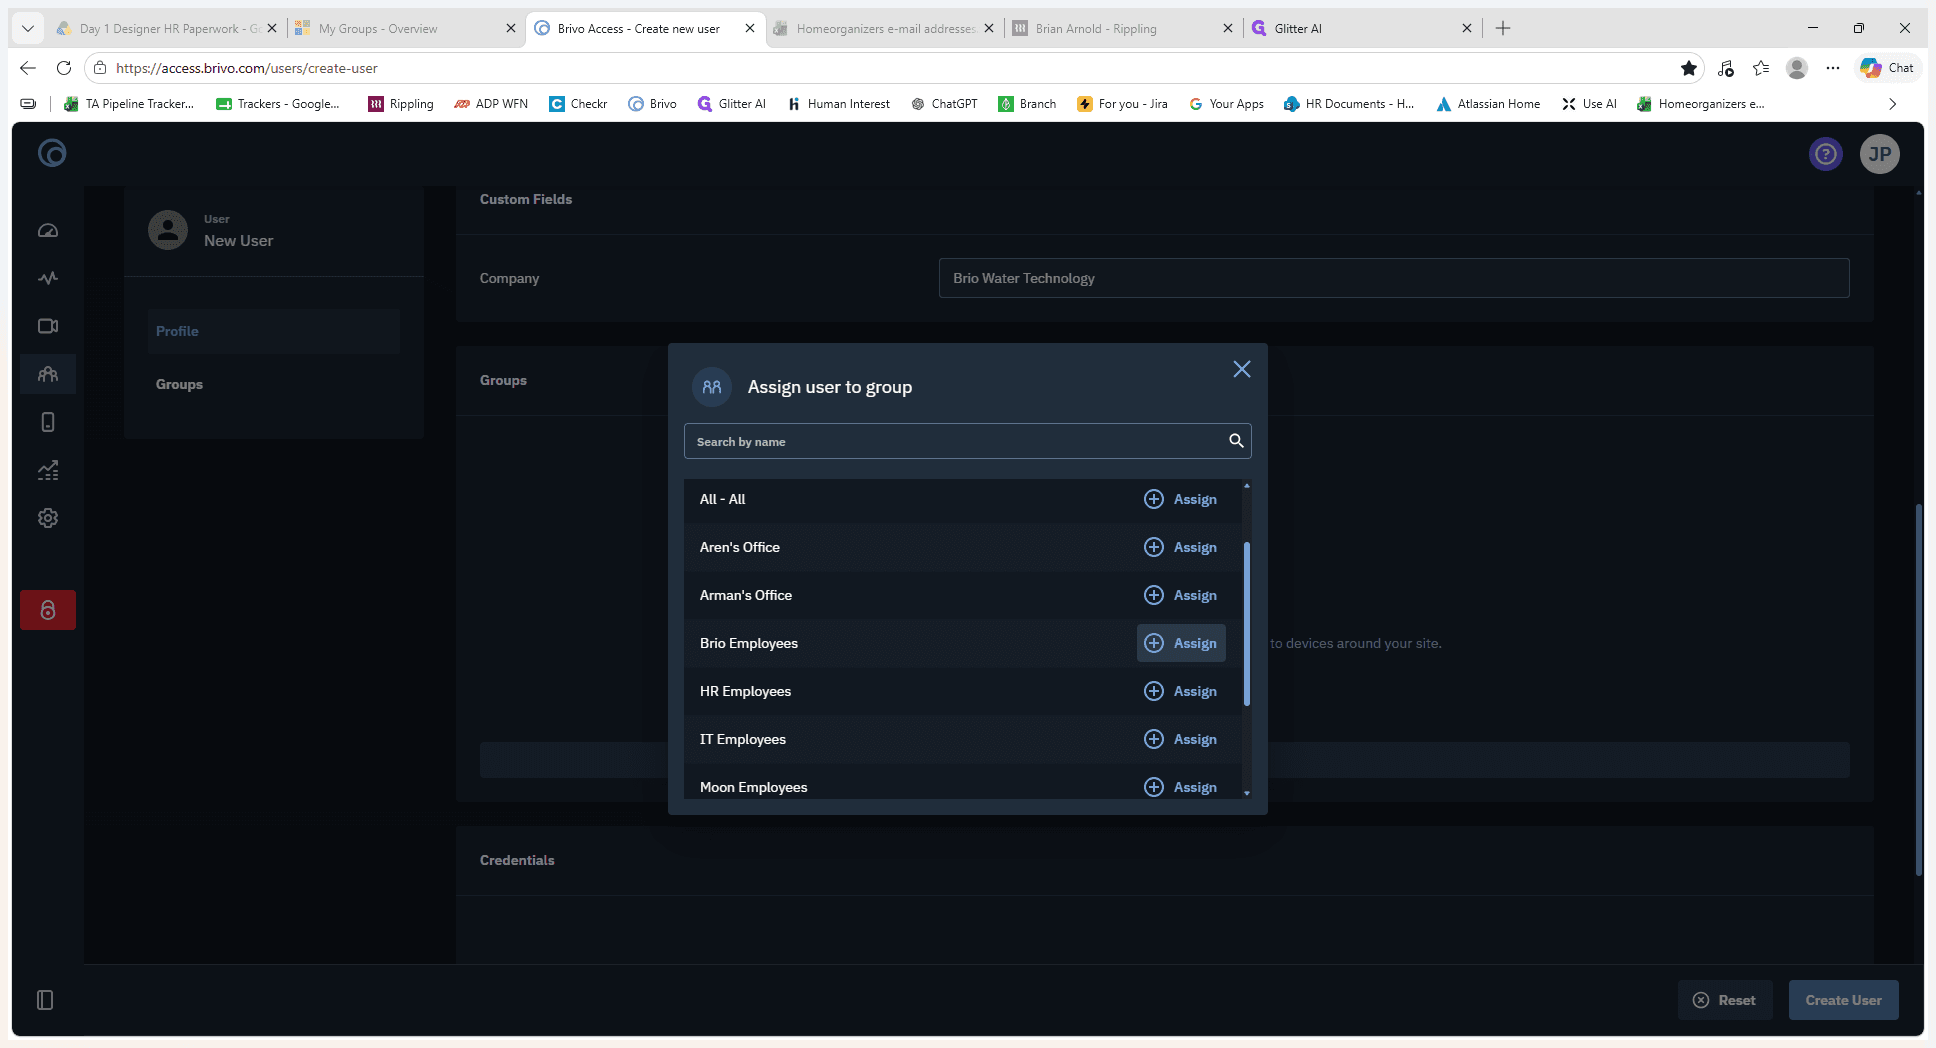
Click Assign (the + icon) next to the desired group, such as "Brio Employees", to link the user to those access permissions.
Step #8: Click Assign (the + icon) next to the desired group, such as "Brio Employees", to link the user to those access permissions.
9
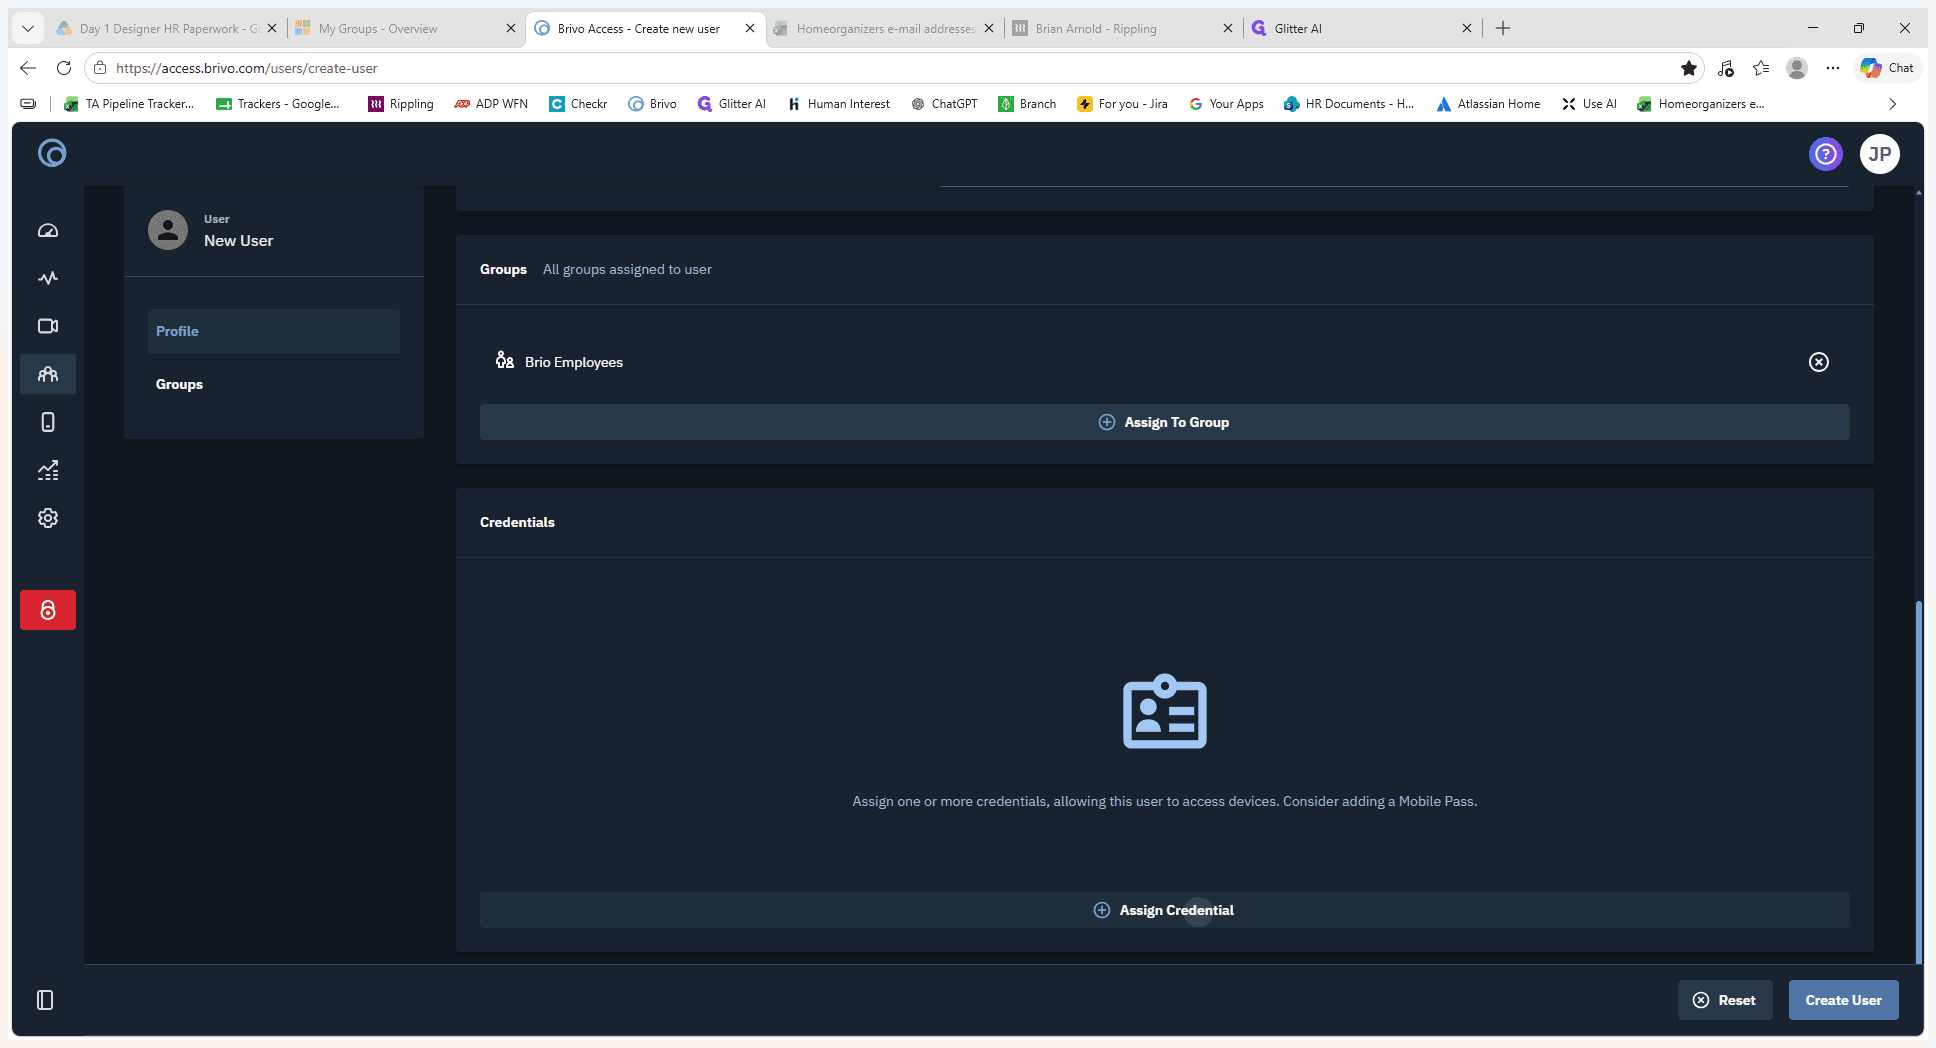
Click Assign Credential in the center of the page.
Step #9: Click Assign Credential in the center of the page.

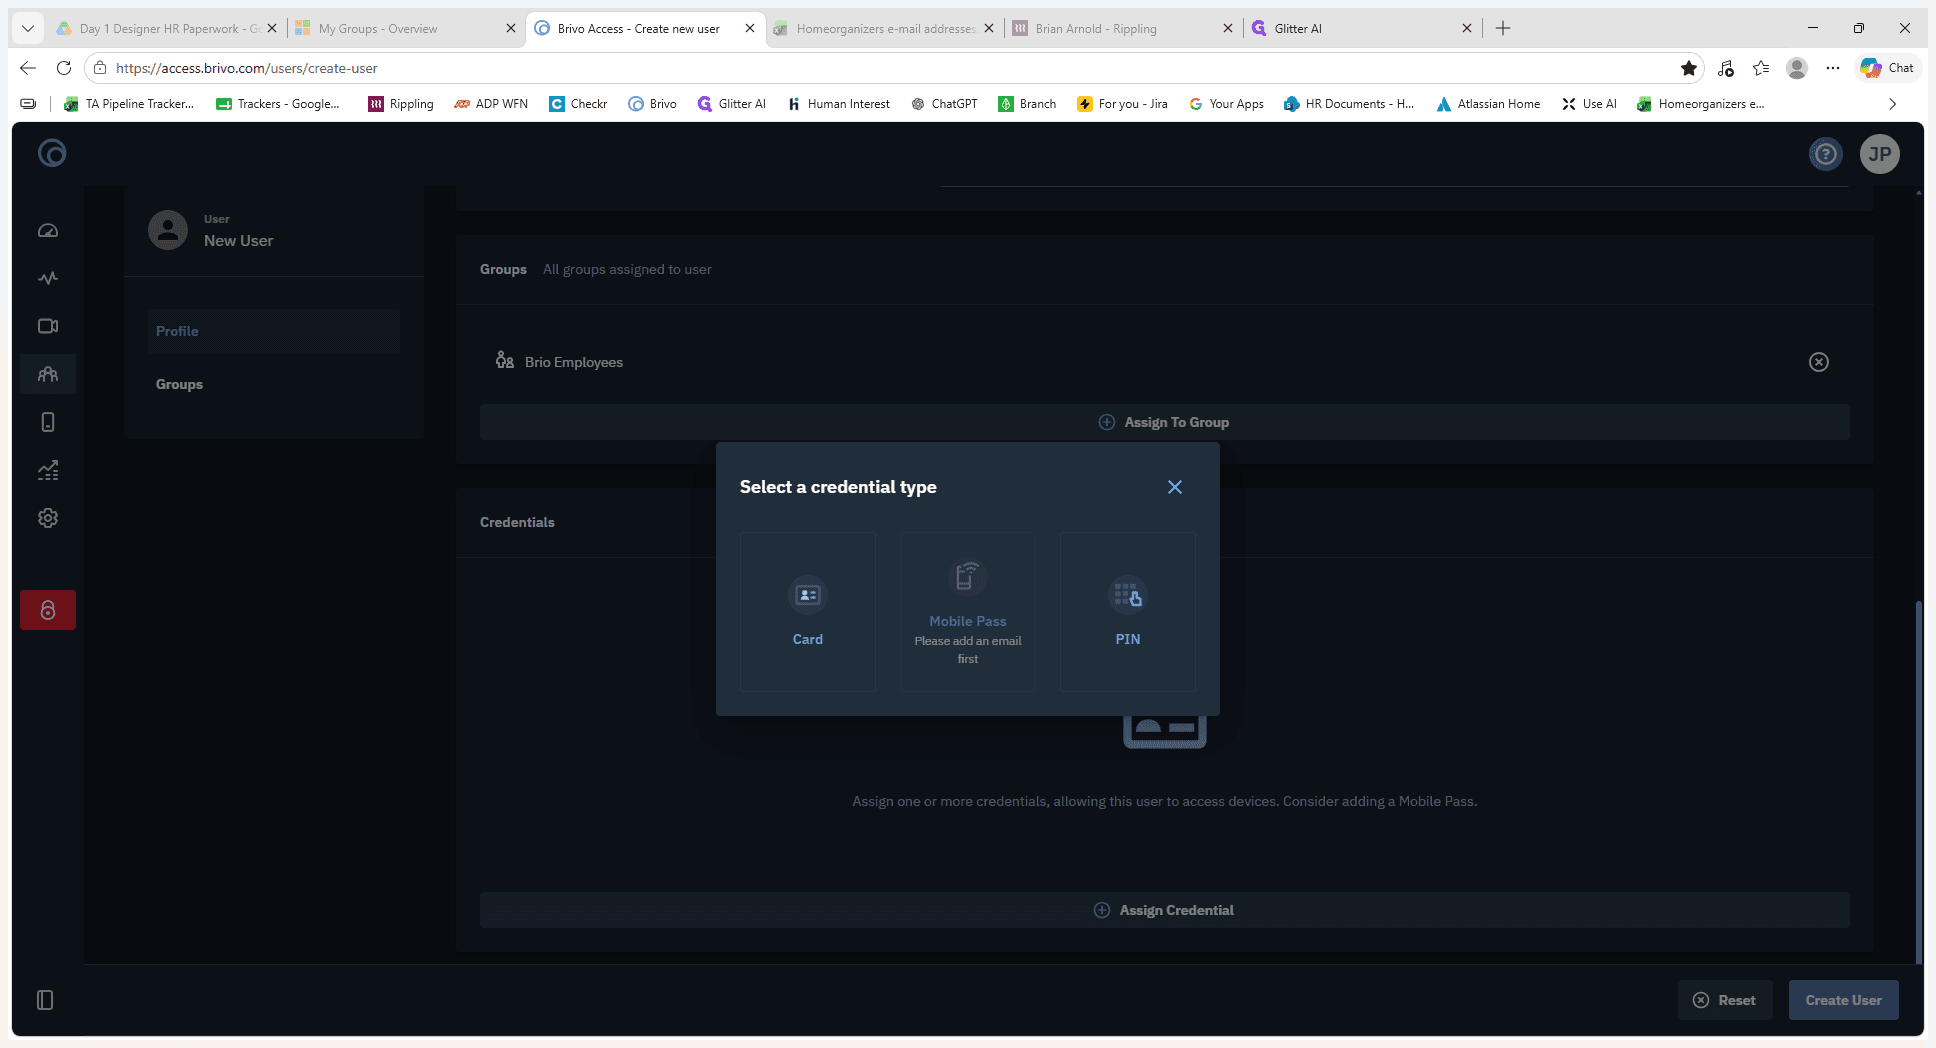
When assigning credentials, Brivo Access provides multiple methods depending on your organization's hardware and security policies:

Credential Type

Description

Card

A physical RFID or proximity card assigned via a reference ID printed on the card.

Mobile Pass

A digital credential sent to the user's smartphone via the Brivo app.

PIN

A numeric keypad code for panel entry, usually a secondary or backup method.

10
Select the credential type you want to assign from the modal. For this example, choose the Card option.
Step #10: Select the credential type you want to assign from the modal. For this example, choose the Card option.
11
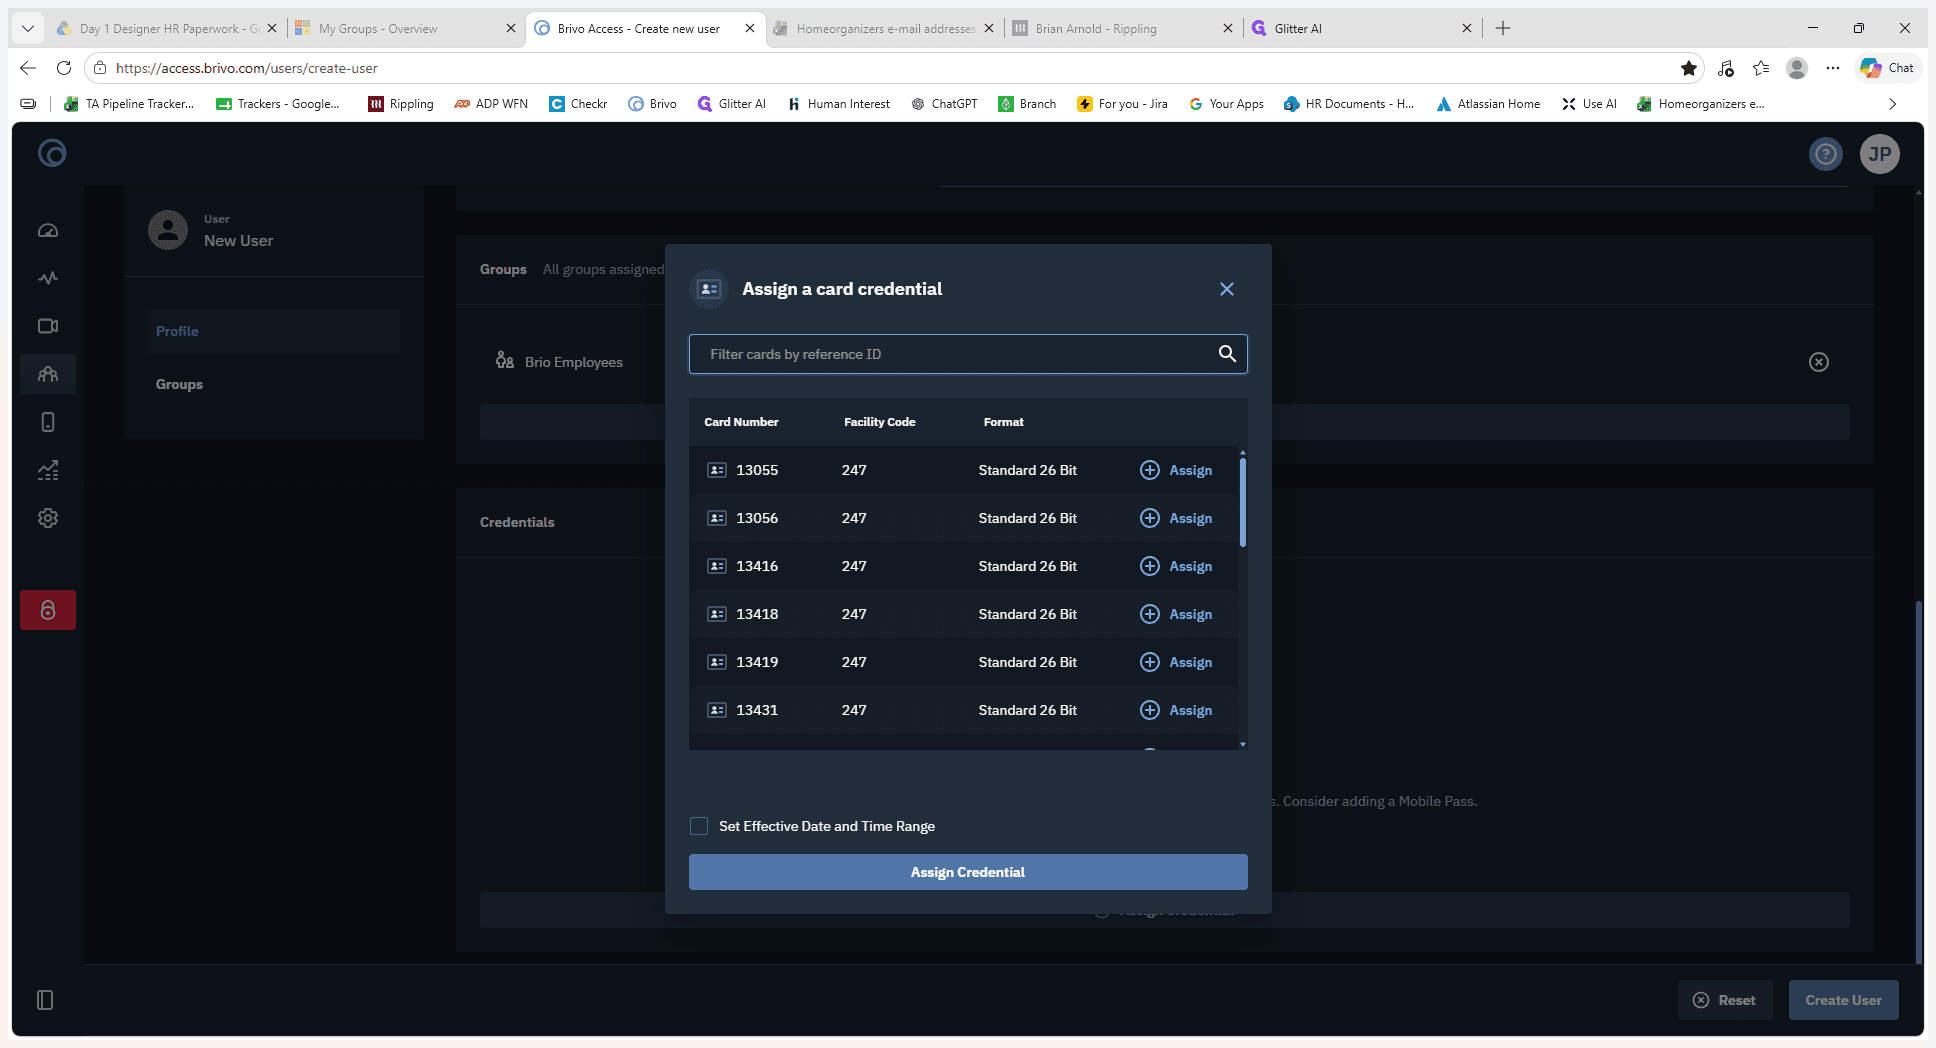
Click Filter cards by reference ID to search for a specific unassigned card number.
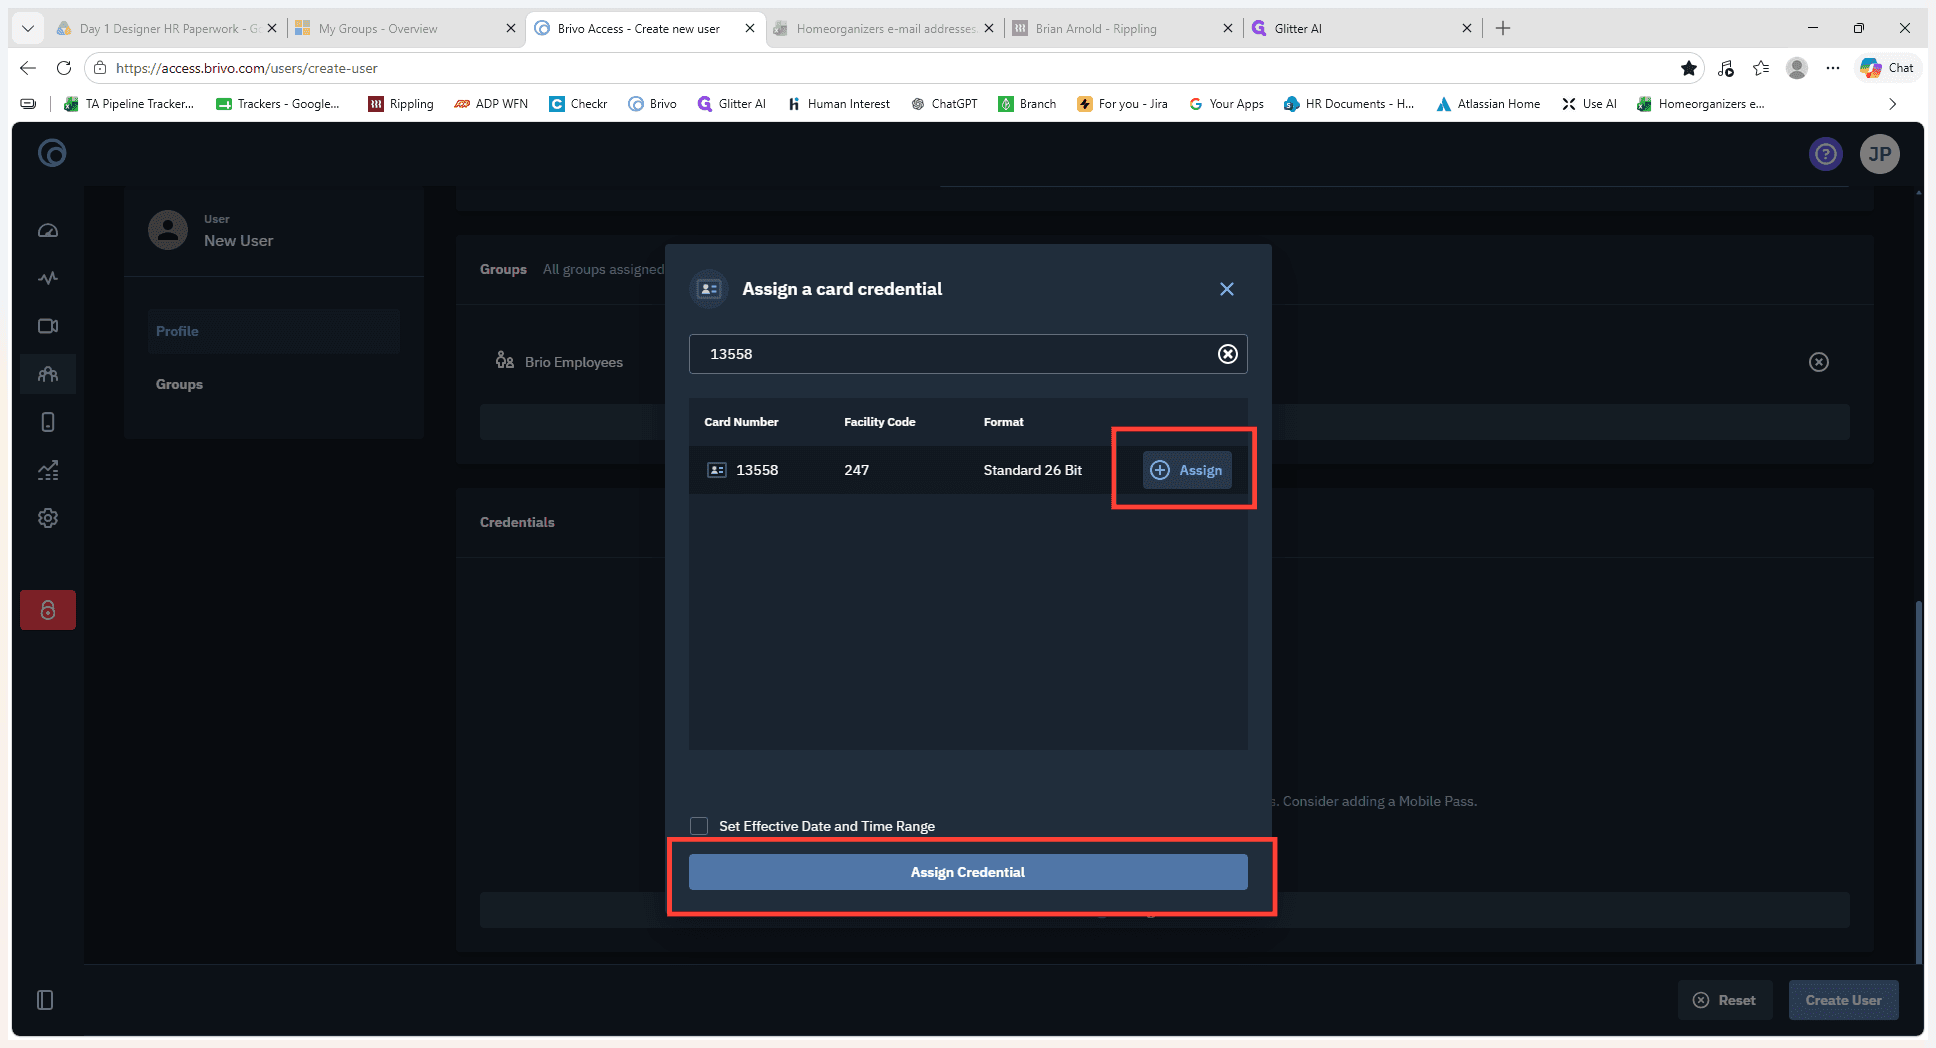
Step #11: Click Filter cards by reference ID to search for a specific unassigned card number.
12
Click Assign next to the correct card credential in the list.
Step #12: Click Assign next to the correct card credential in the list.
13
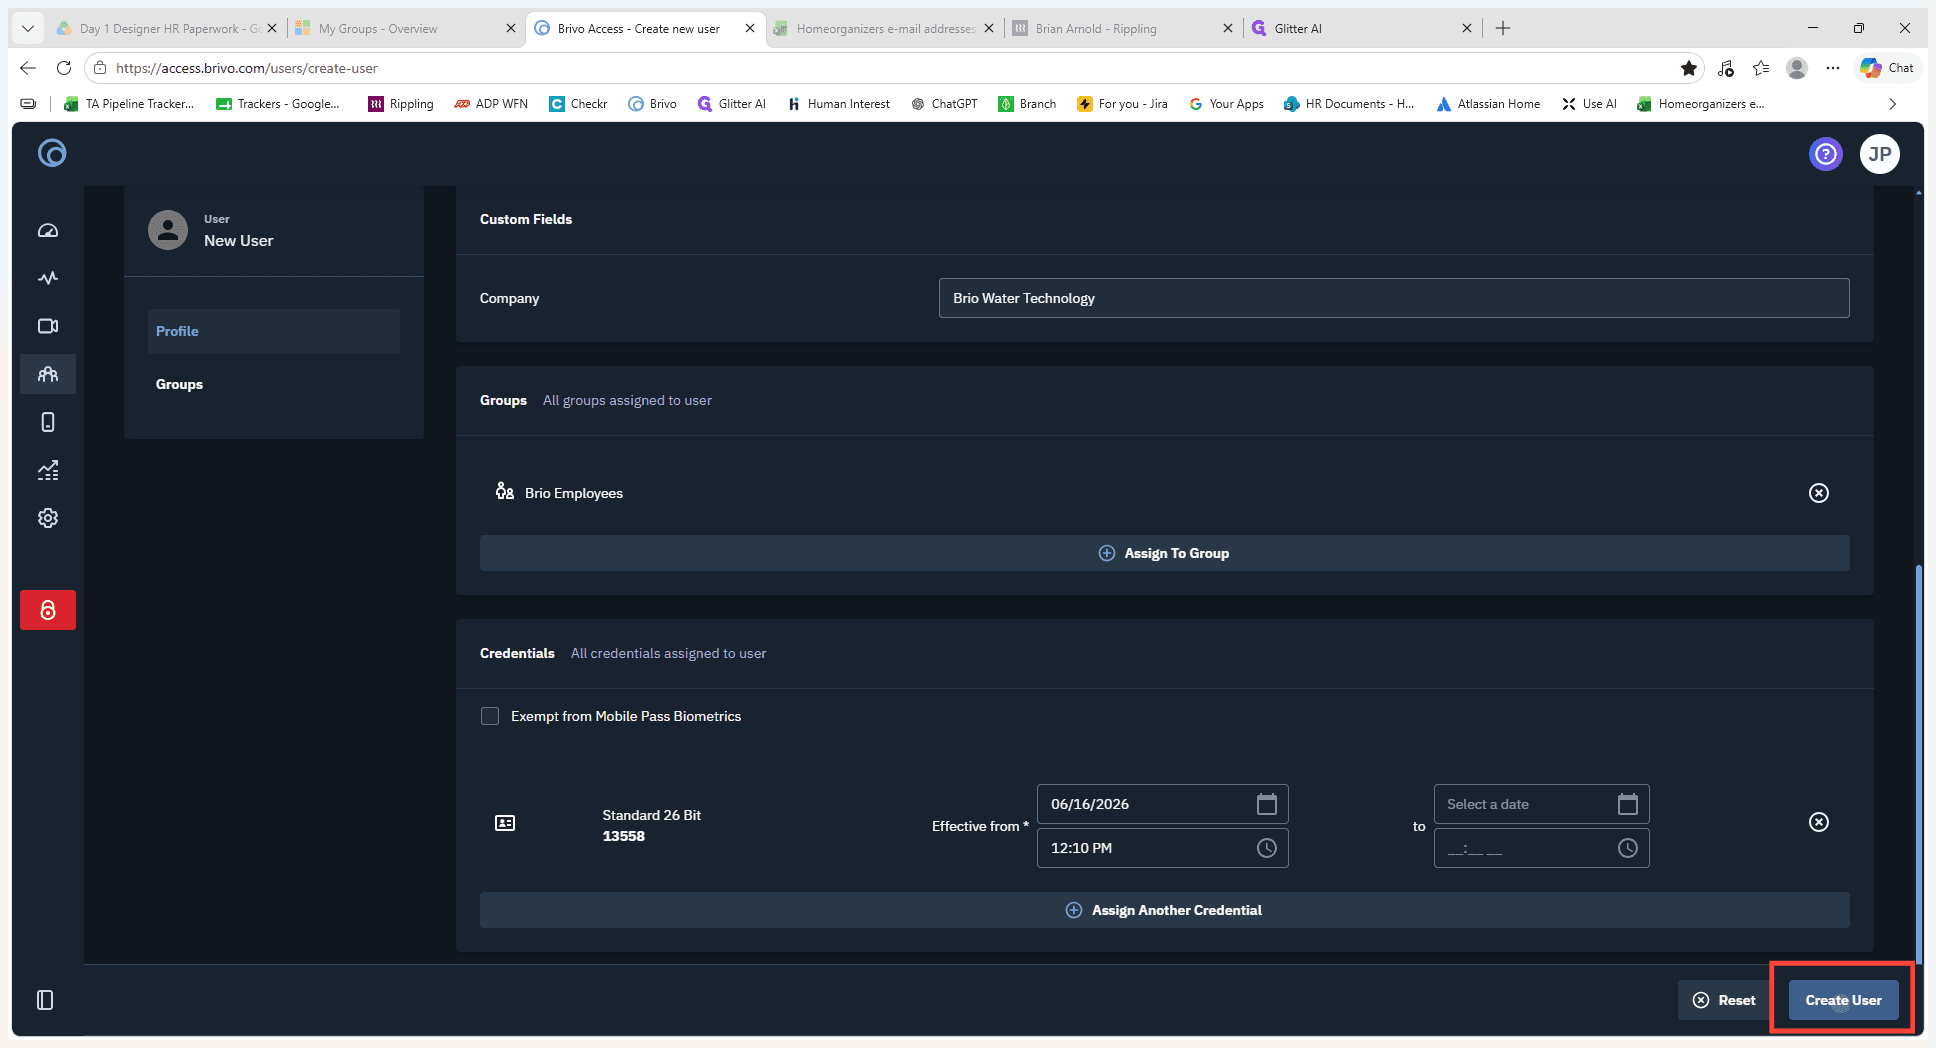
Click Create User at the bottom right of the screen to save the completed user profile.
Step #13: Click Create User at the bottom right of the screen to save the completed user profile.

Print the ID Badge

14
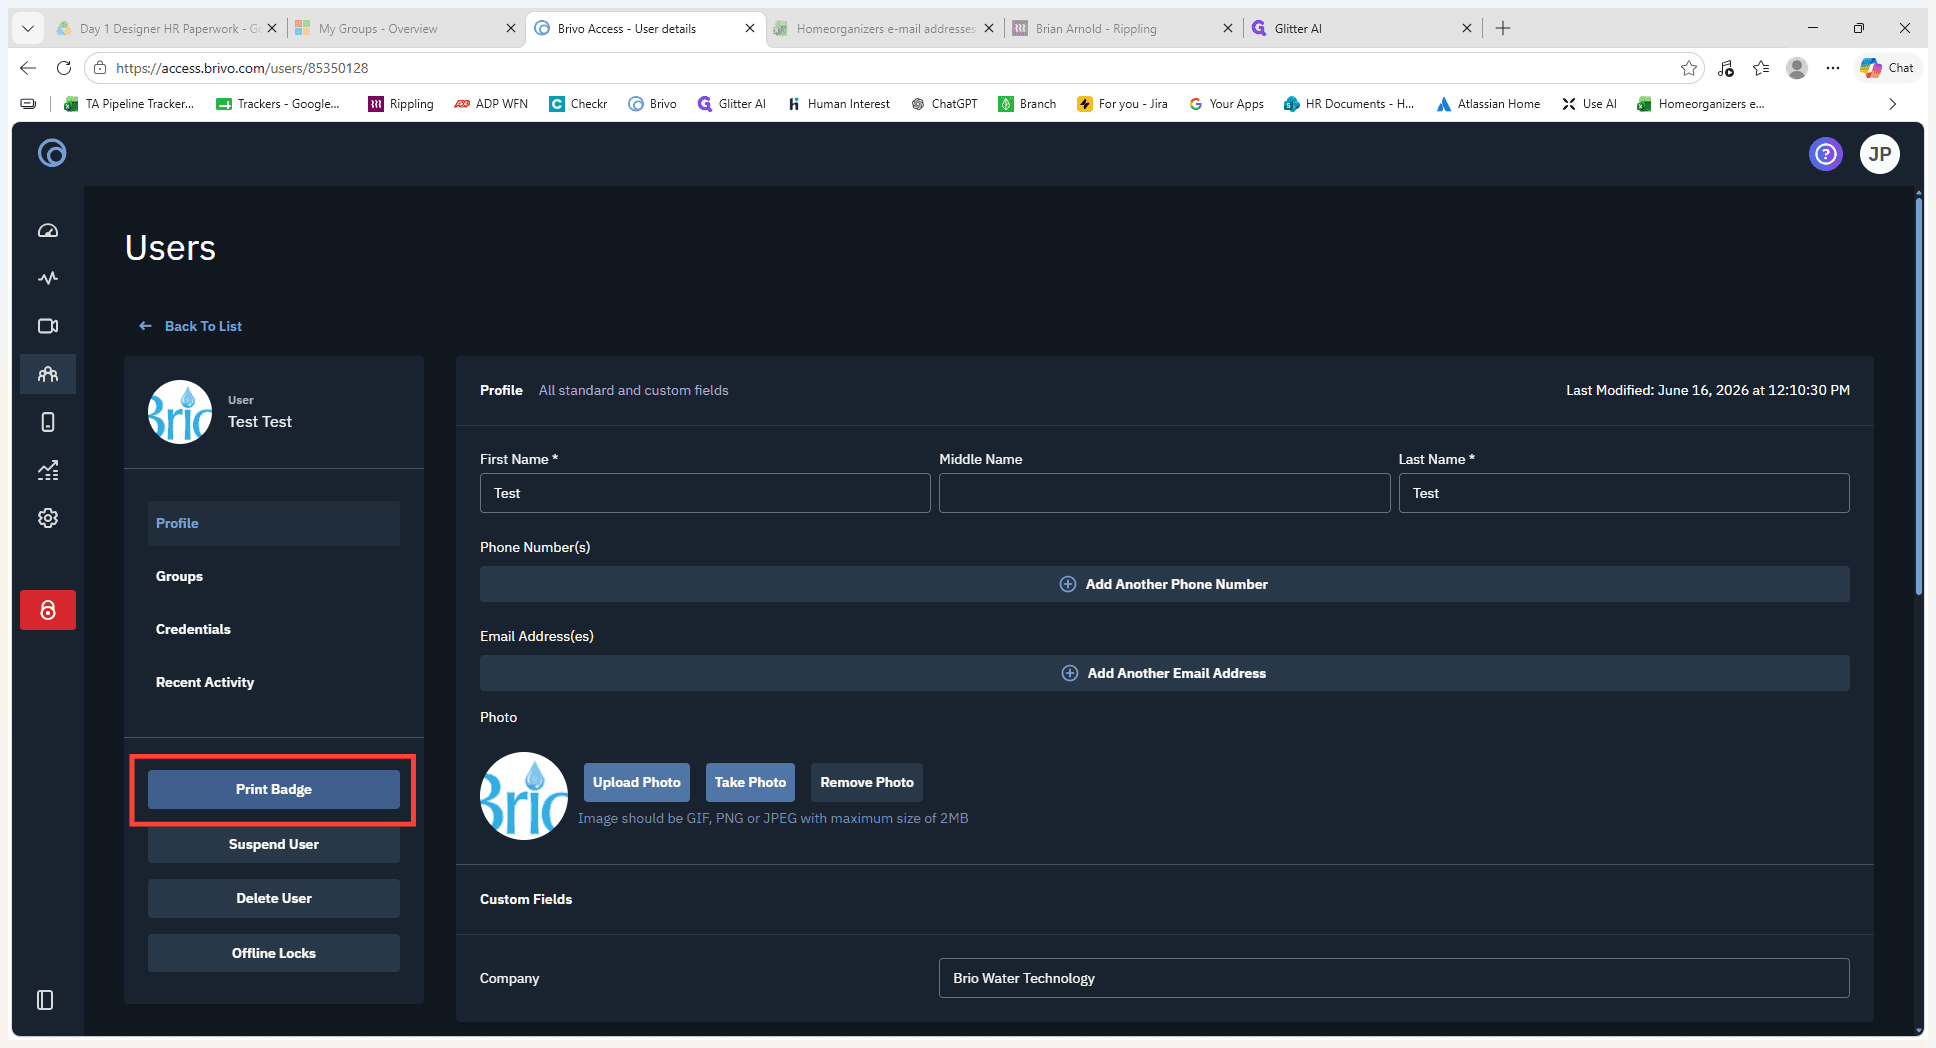
On the new user's profile page, click Print Badge in the contact information section.
Step #14: On the new user's profile page, click Print Badge in the contact information section.
15
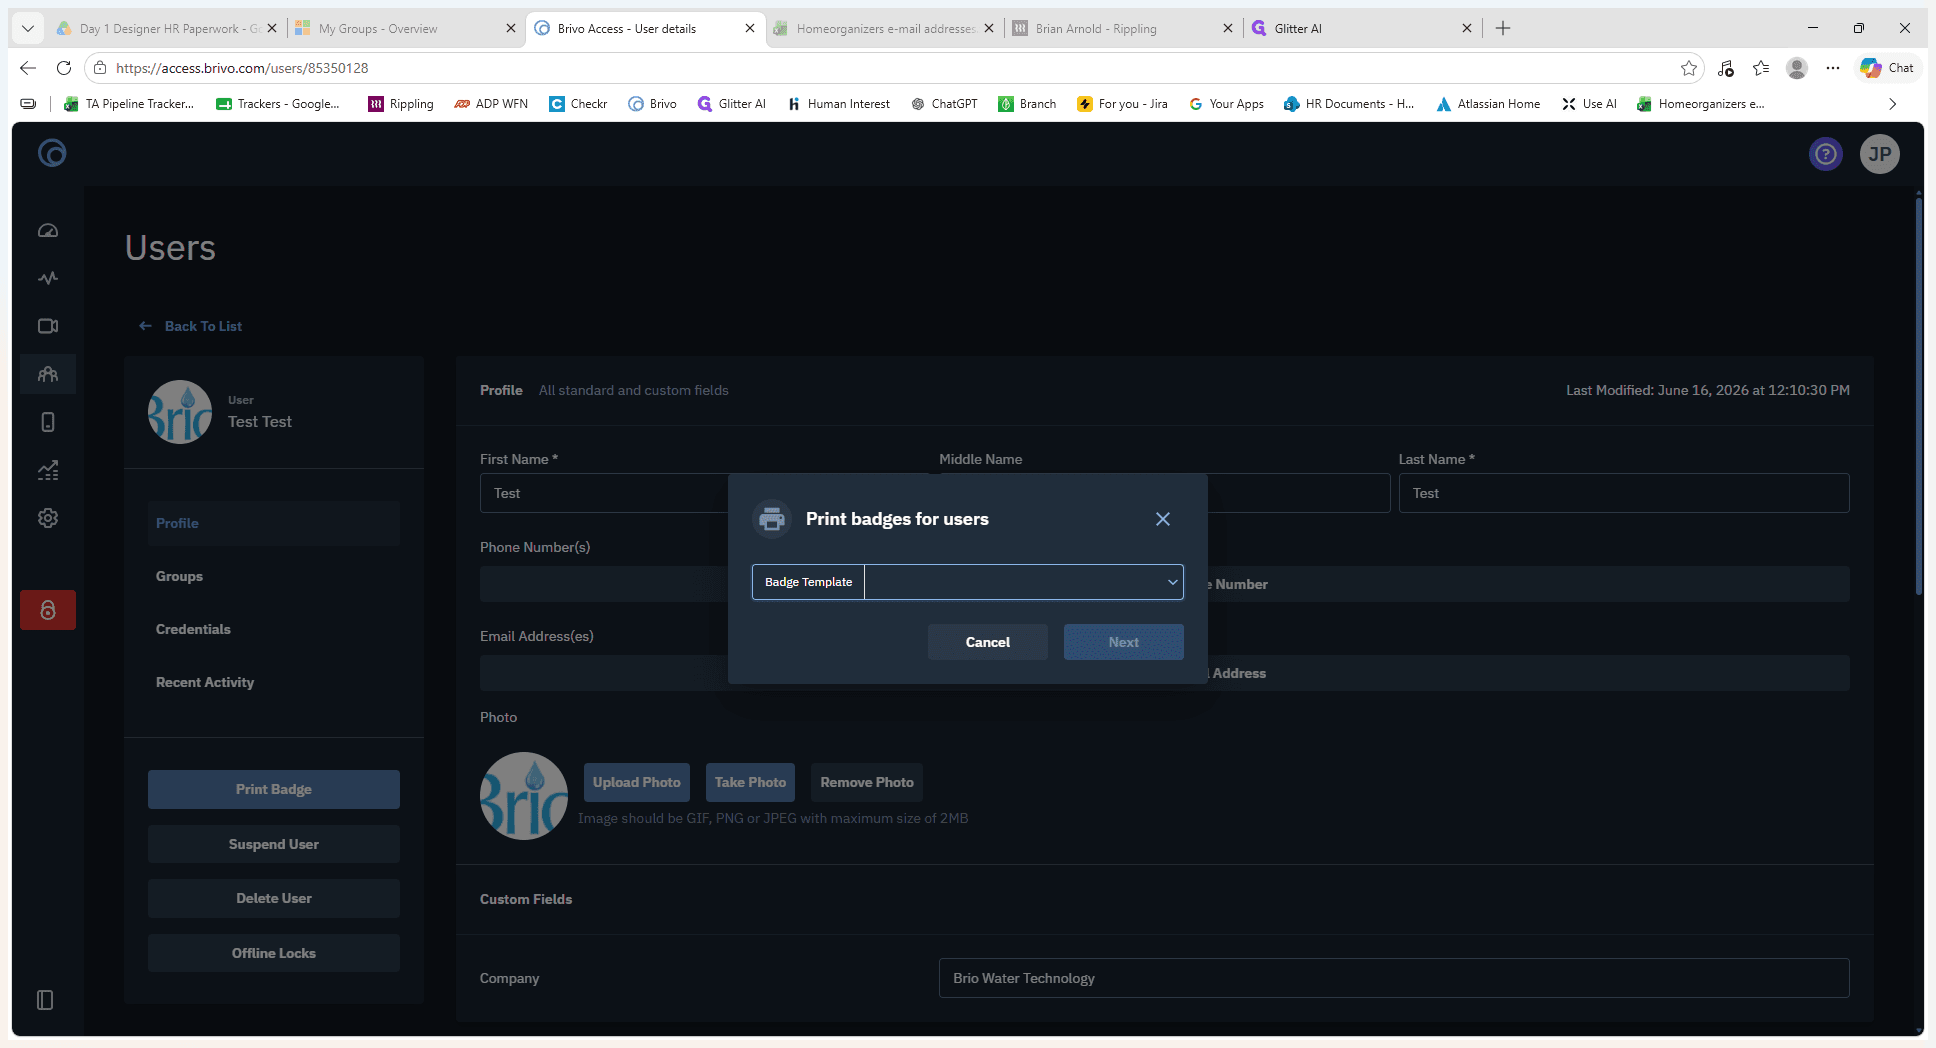
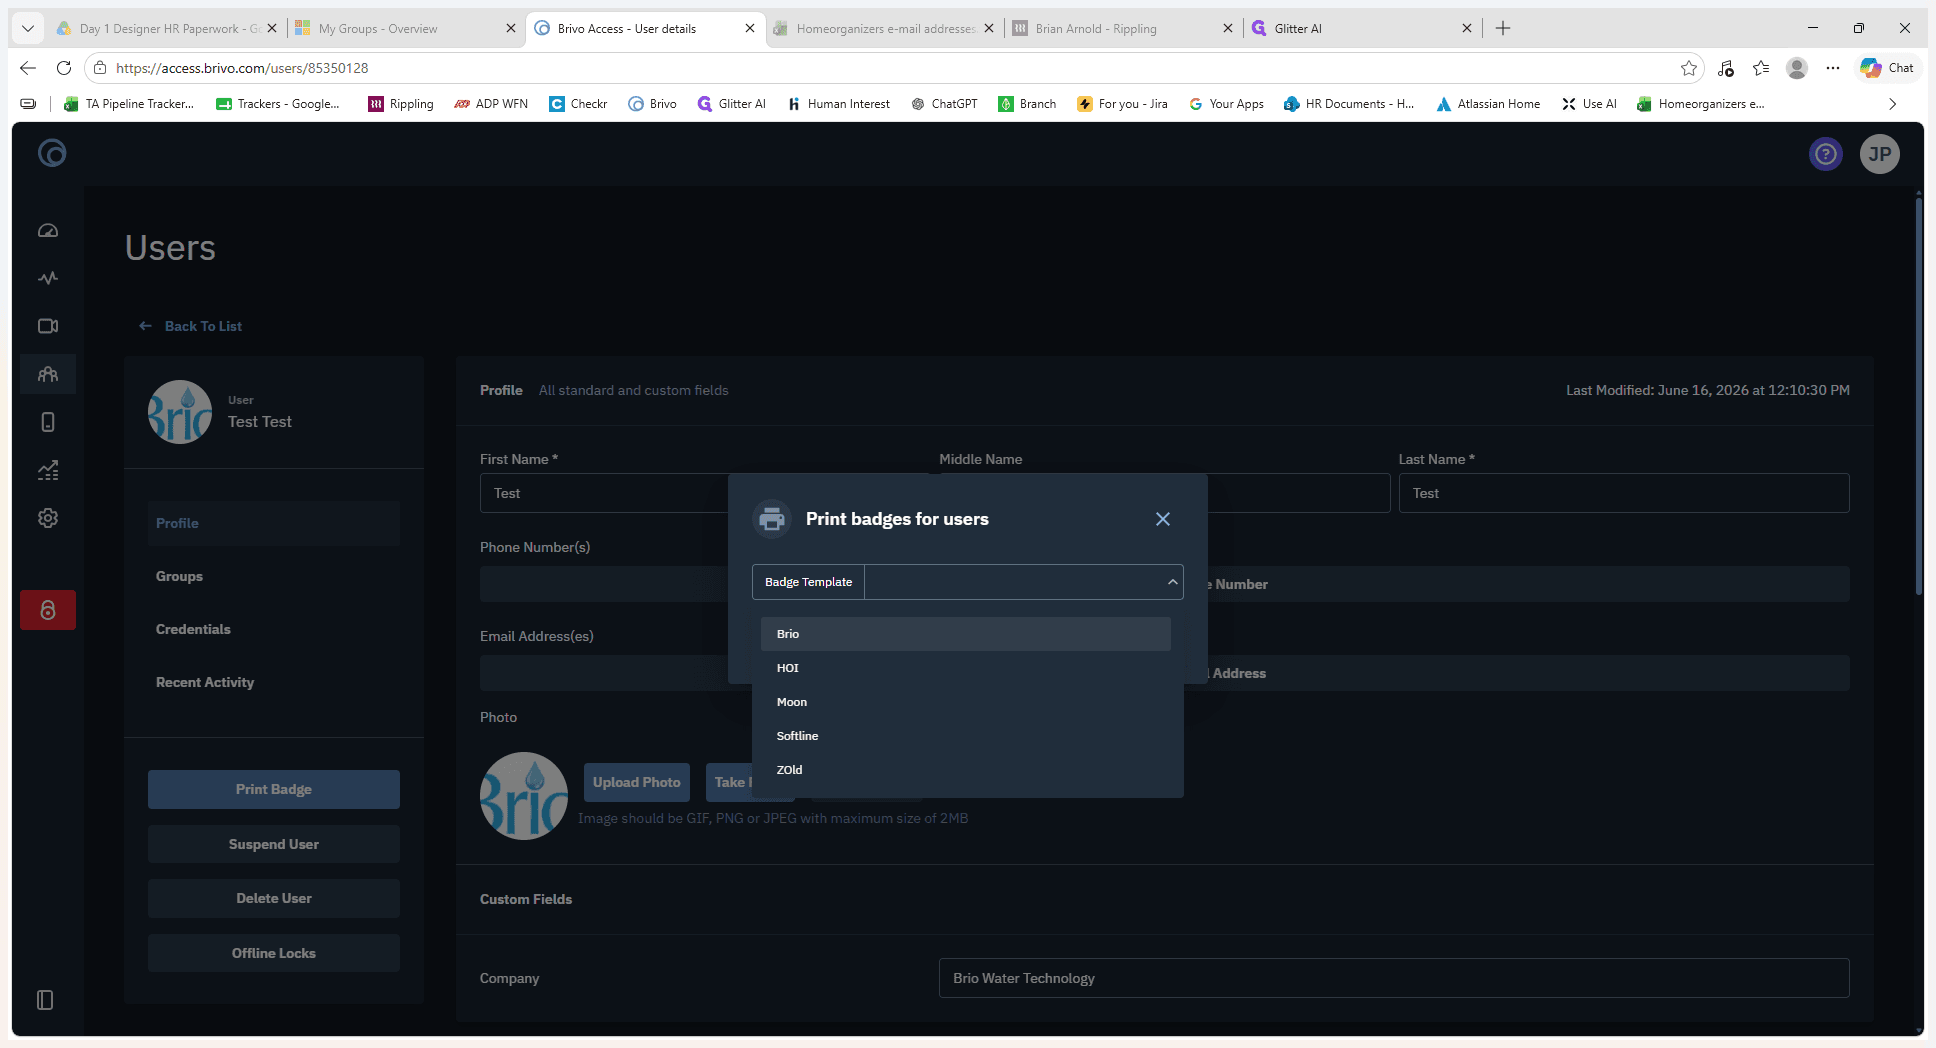
Click the Badge Template dropdown menu.
Step #15: Click the Badge Template dropdown menu.
16
Select your desired badge design (e.g., Brio, HOI, or Moon) from the list of available templates.
Step #16: Select your desired badge design (e.g., Brio, HOI, or Moon) from the list of available templates.
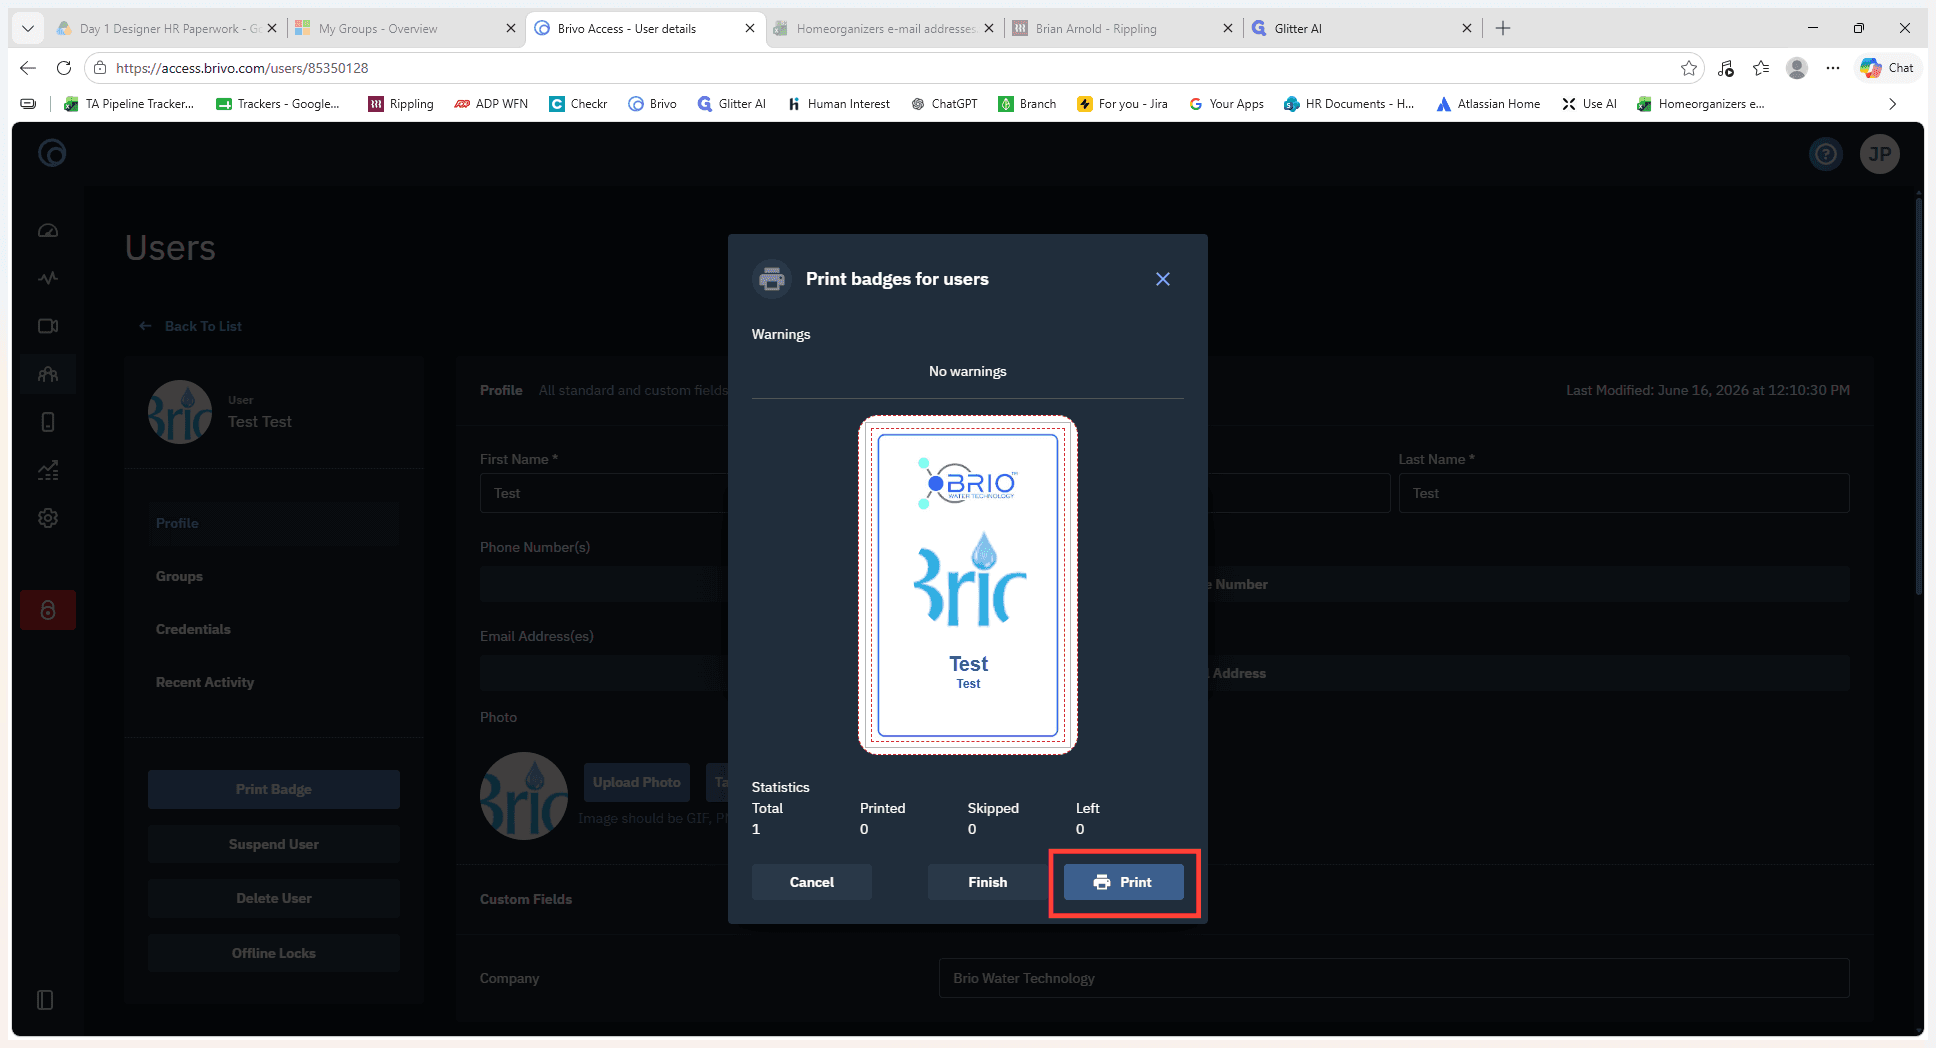
17
Review the badge preview, then click Print at the bottom right of the modal to open the browser print dialog.
Step #17: Review the badge preview, then click Print at the bottom right of the modal to open the browser print dialog.
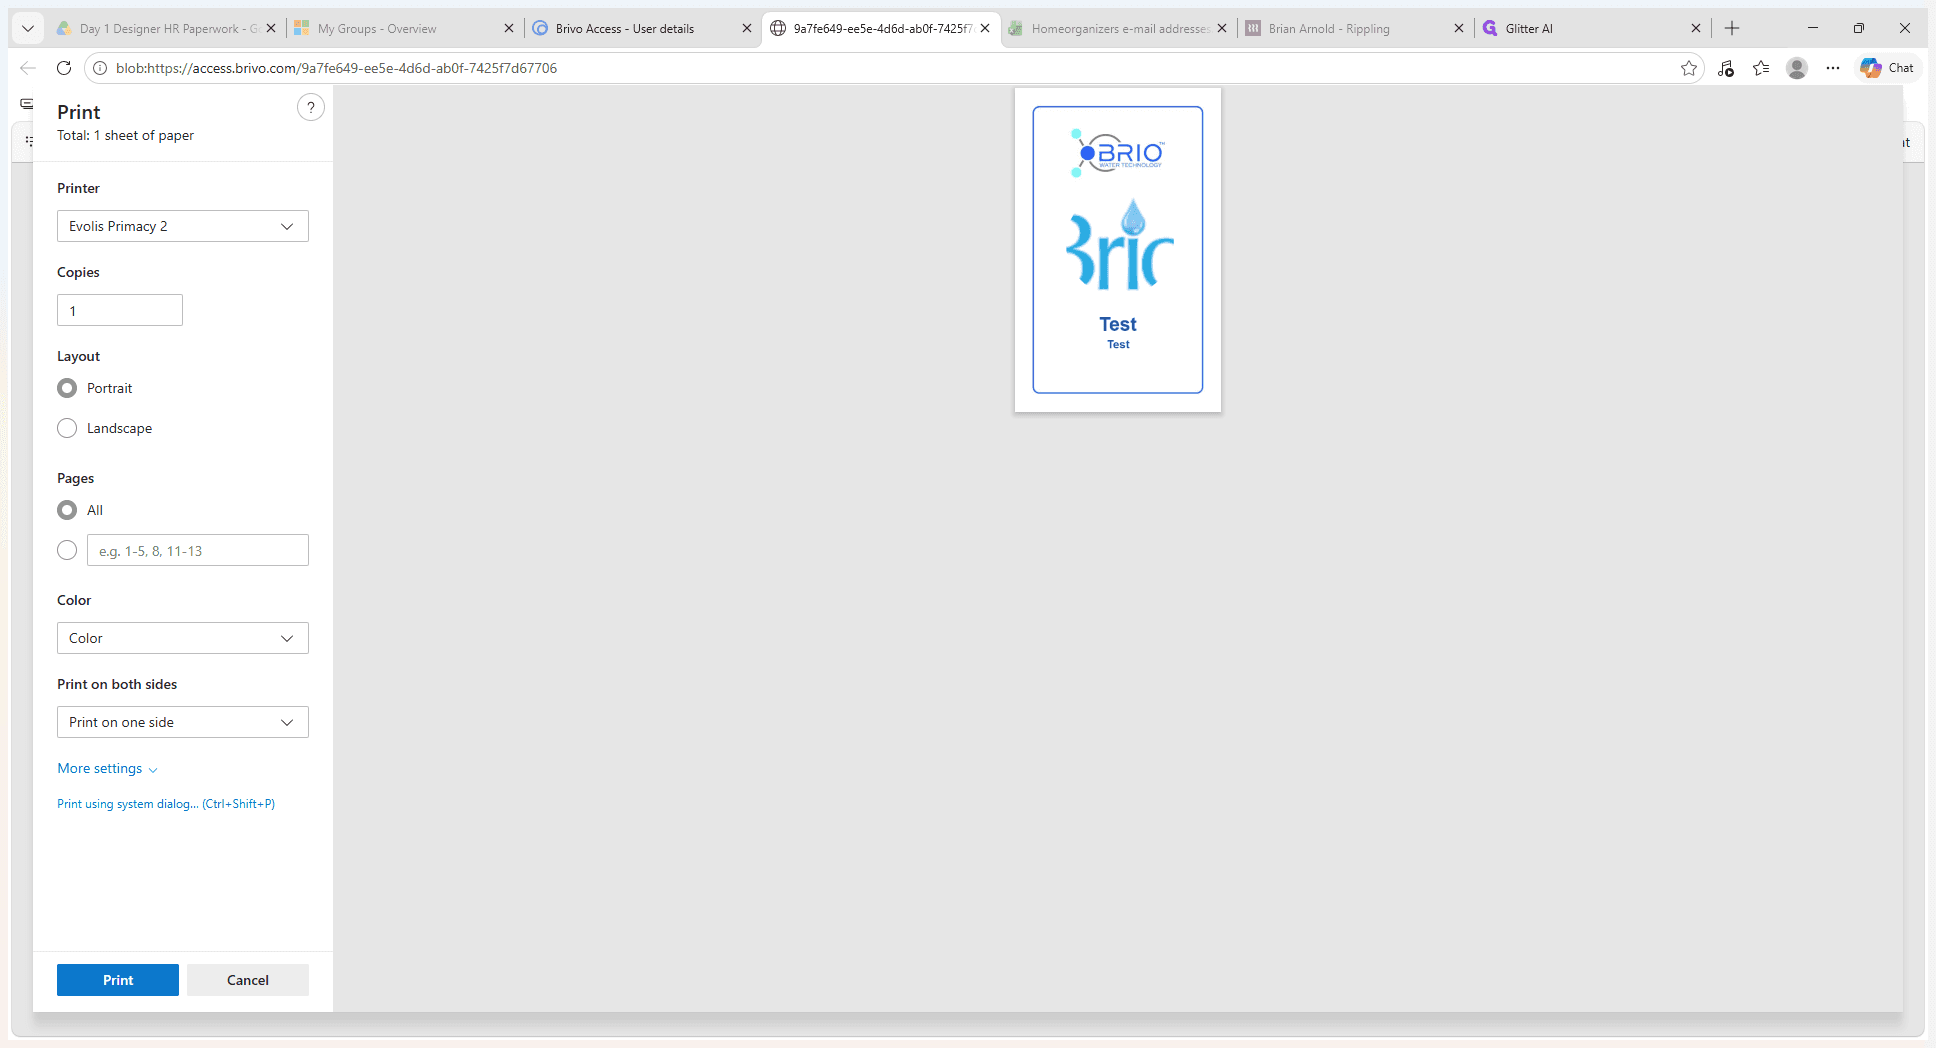
18
Select your dedicated ID card printer (such as the Evolis Primacy 2) in your browser's print dialog, then click Print to send the job to the printer.
Step #18: Select your dedicated ID card printer (such as the Evolis Primacy 2) in your browser's print dialog, then click Print to send the job to the printer.

Q: Can I assign multiple credential types to a single user?

A: Yes, you can assign a mix of physical cards, mobile passes, and PINs based on the user's needs. Simply click "Assign Credential" again to add additional methods to their profile.

Q: What if I don't know the exact card number to assign?

A: When assigning a card credential, you can use the "Filter cards by reference ID" feature to search your inventory, ensuring you select the correct physical card before issuing it.

Q: Do I need a specific printer to print the ID badges?

A: Yes. While Brivo Access generates a printable PDF of the badge, you will need a dedicated ID card printer (such as an Evolis Primacy) correctly configured on your computer to physically print onto PVC cards.

Term

Definition

Brivo Access

A cloud-based physical access control system used to manage facility entry, users, and credentials.

Credential

An authentication method—such as an RFID card, mobile pass, or PIN—used to unlock doors.

Reference ID

A unique numerical identifier printed on or associated with a physical access card.

Facility Code

A site-specific numeric code programmed into a batch of RFID access cards to ensure they match a specific organization's readers.

Mobile Pass

A digital credential stored on a user's smartphone that communicates with Bluetooth or NFC readers.