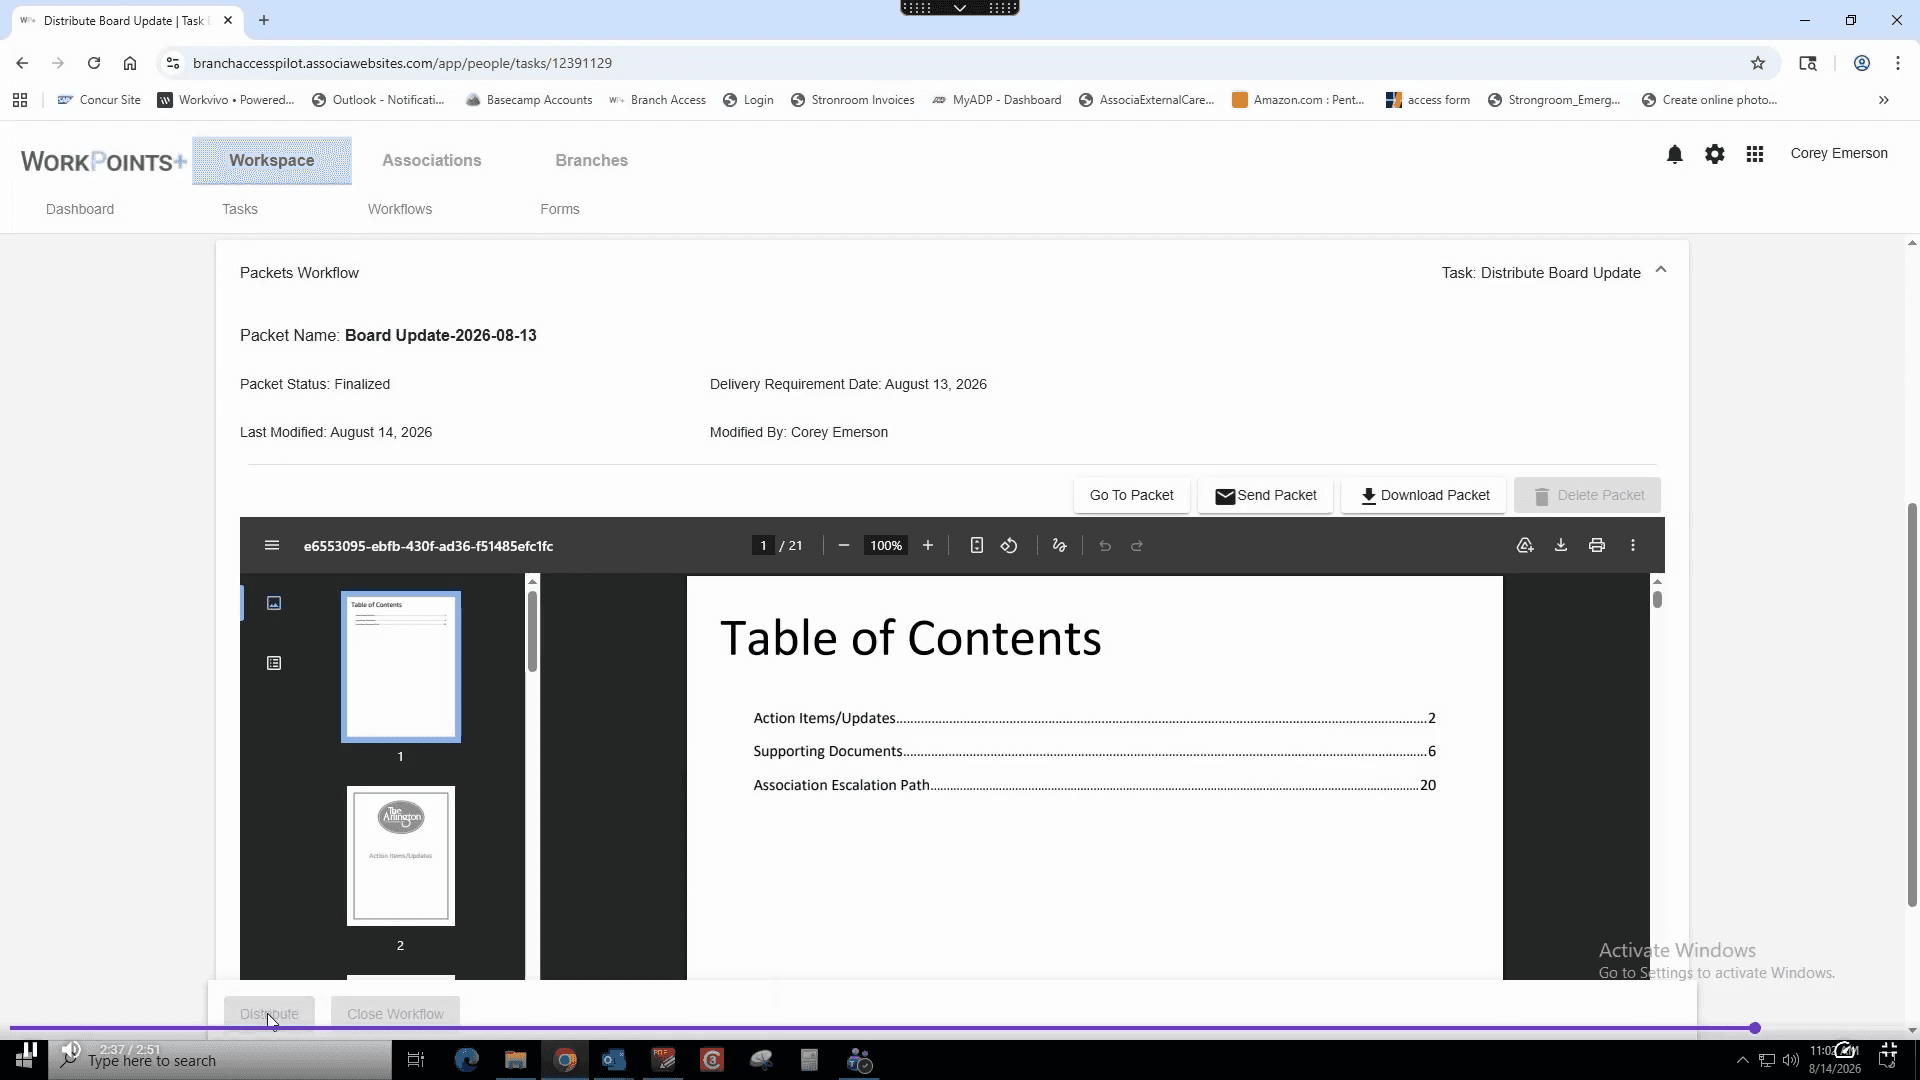
Learn how to assemble, customize, and distribute weekly board update packets using WorkPoints Plus, including adding documents and configuring recipients.
By Corey Emerson
This guide explains how to build, format, and distribute a weekly board update packet in WorkPoints Plus. By completing this process, you ensure that board members and supervisors receive well-organized updates, reports, and supporting documents in a timely manner.
This process applies to community managers and association management staff. It should be used weekly when preparing standard communications, action items, and management reports for the association's board of directors.
Create a New Packet
1
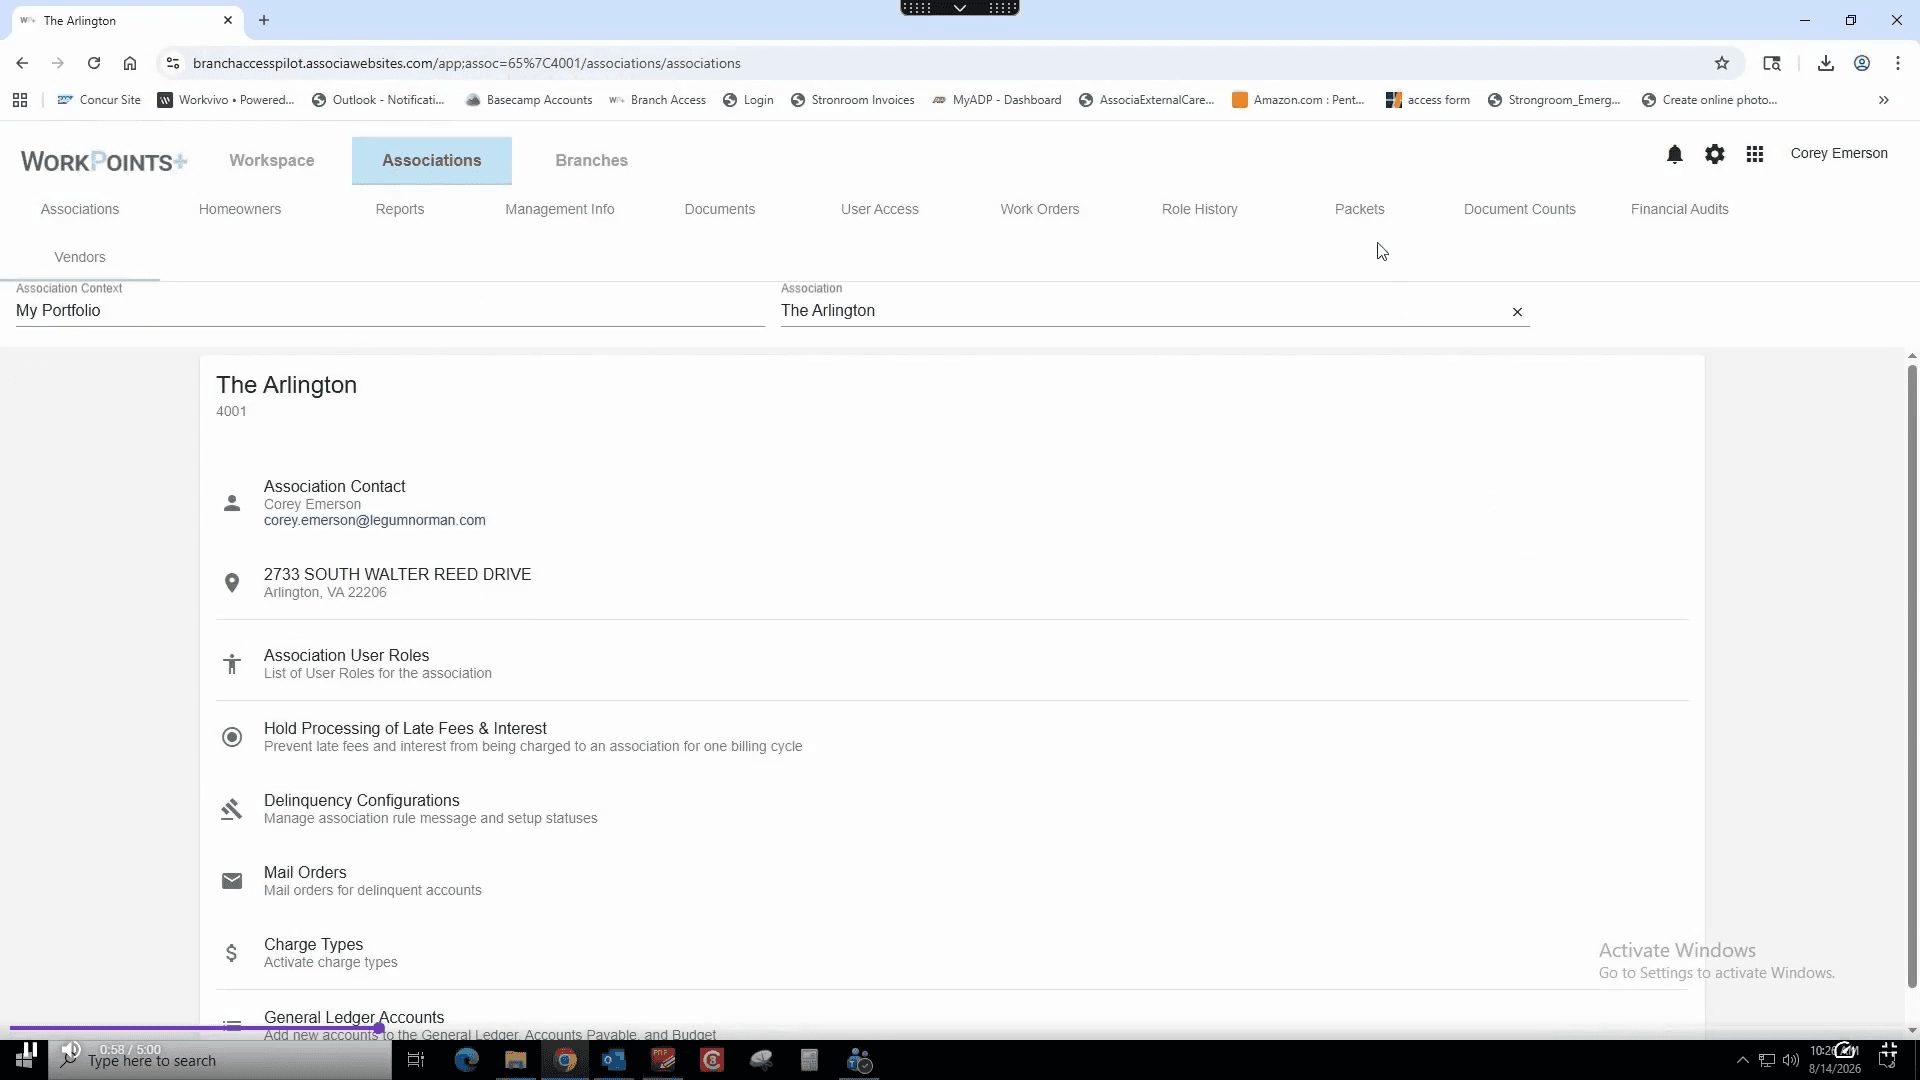
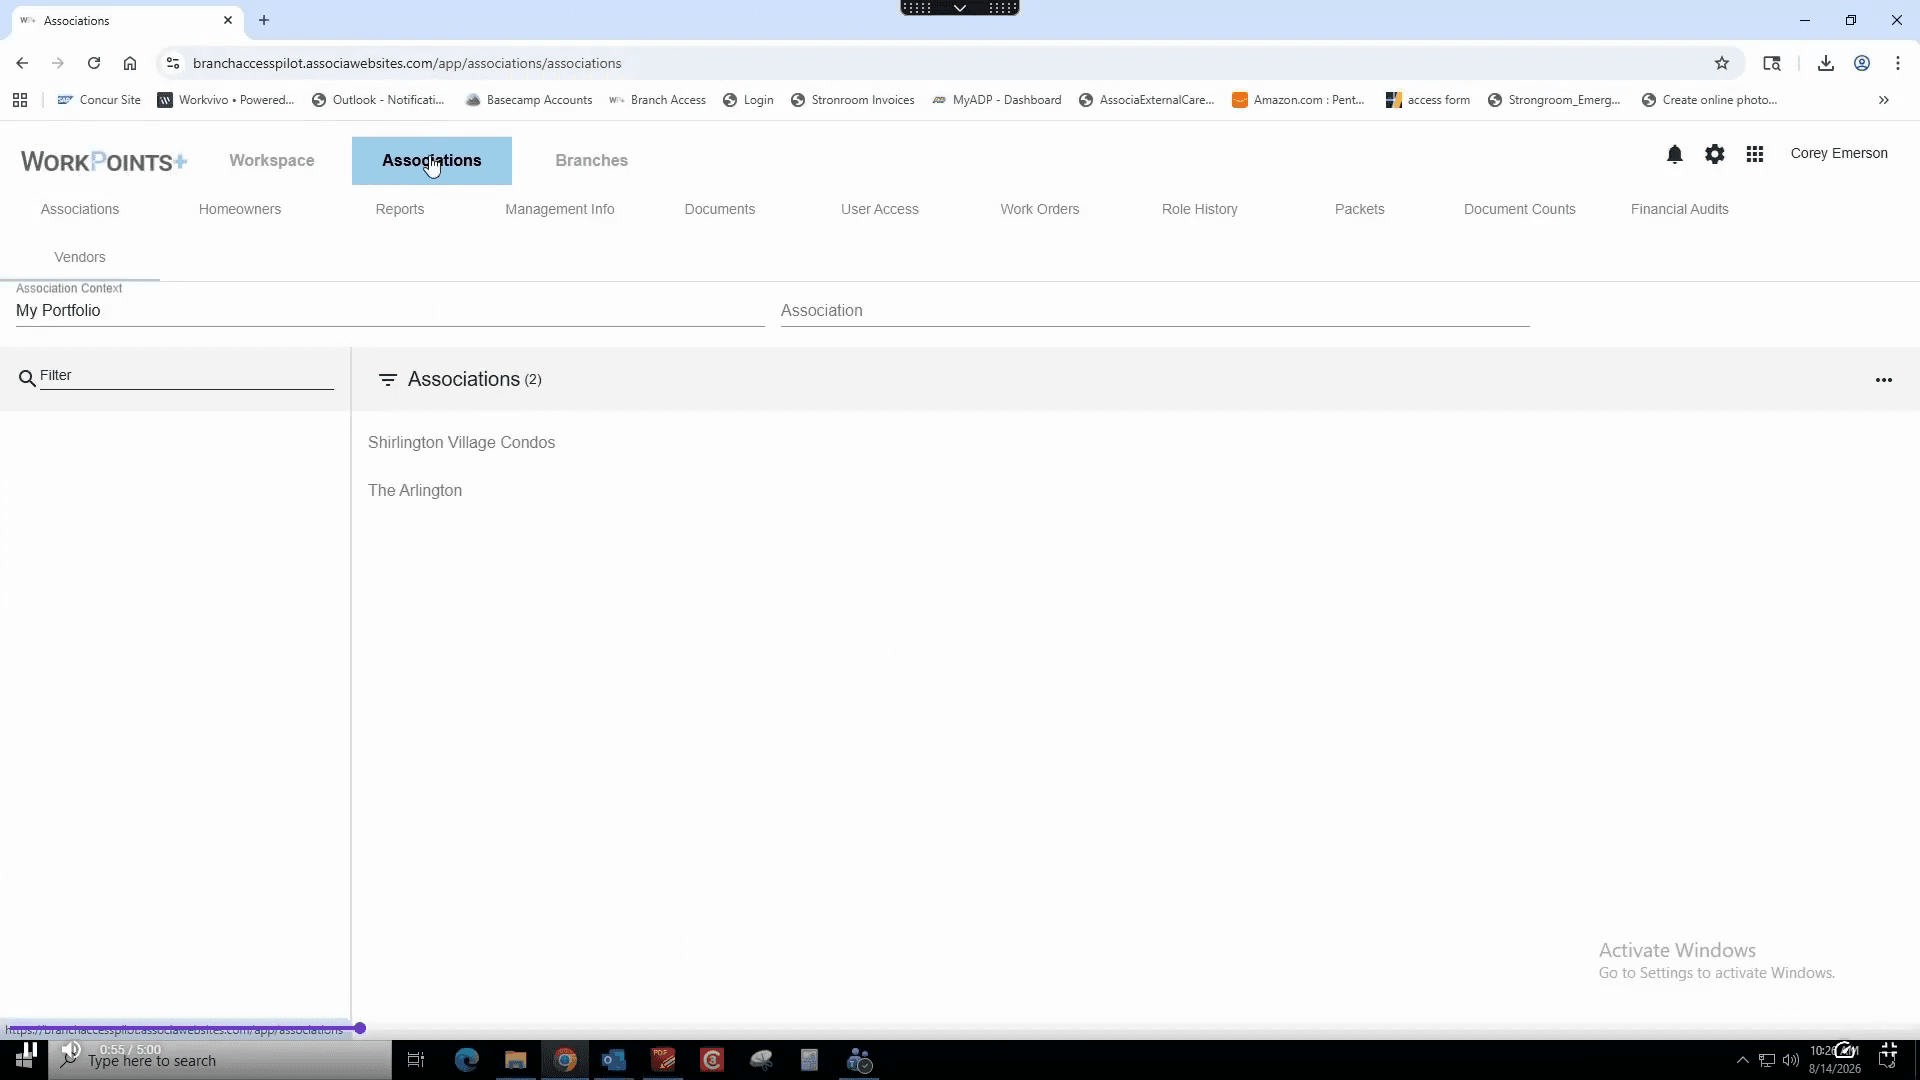
Click your property, such as The Arlington, from the Associations list.
2
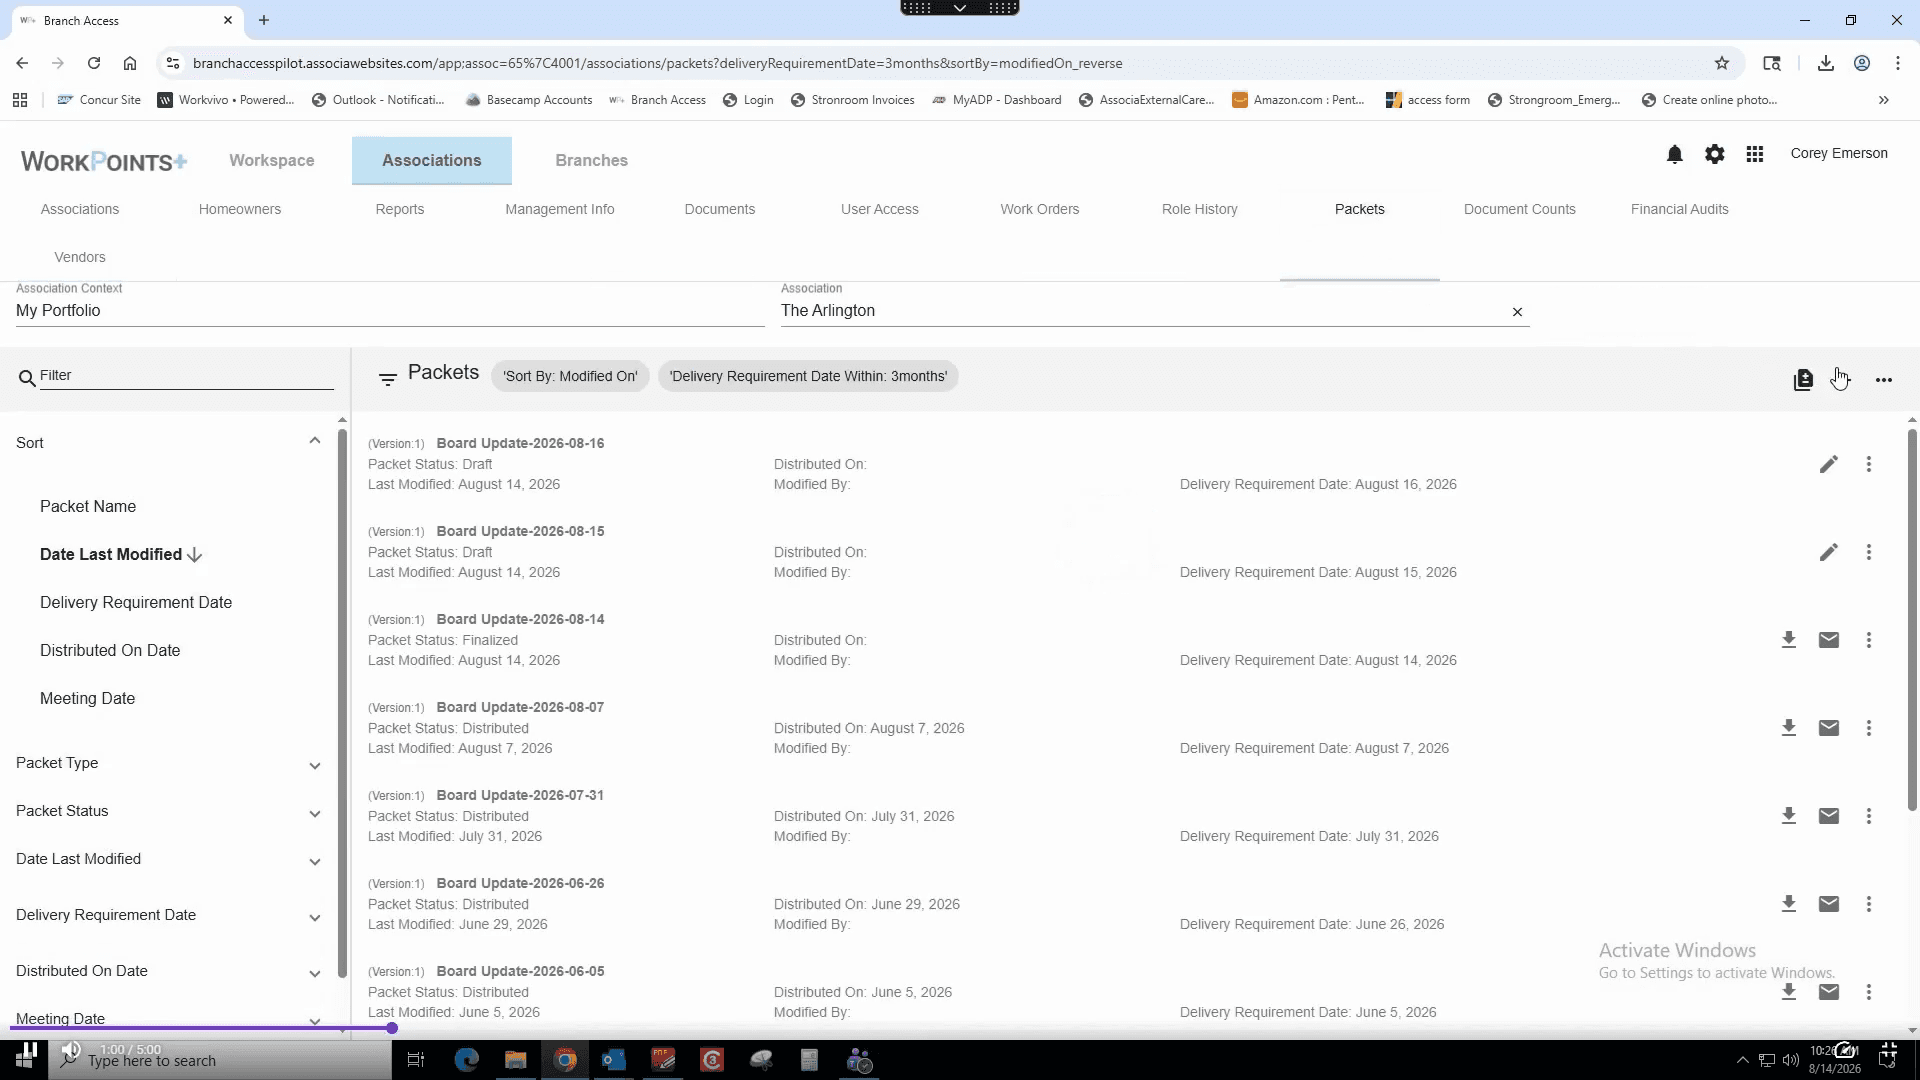
Click Packets in the navigation menu.
3
Click the Create Packet icon (the plus sign).
4
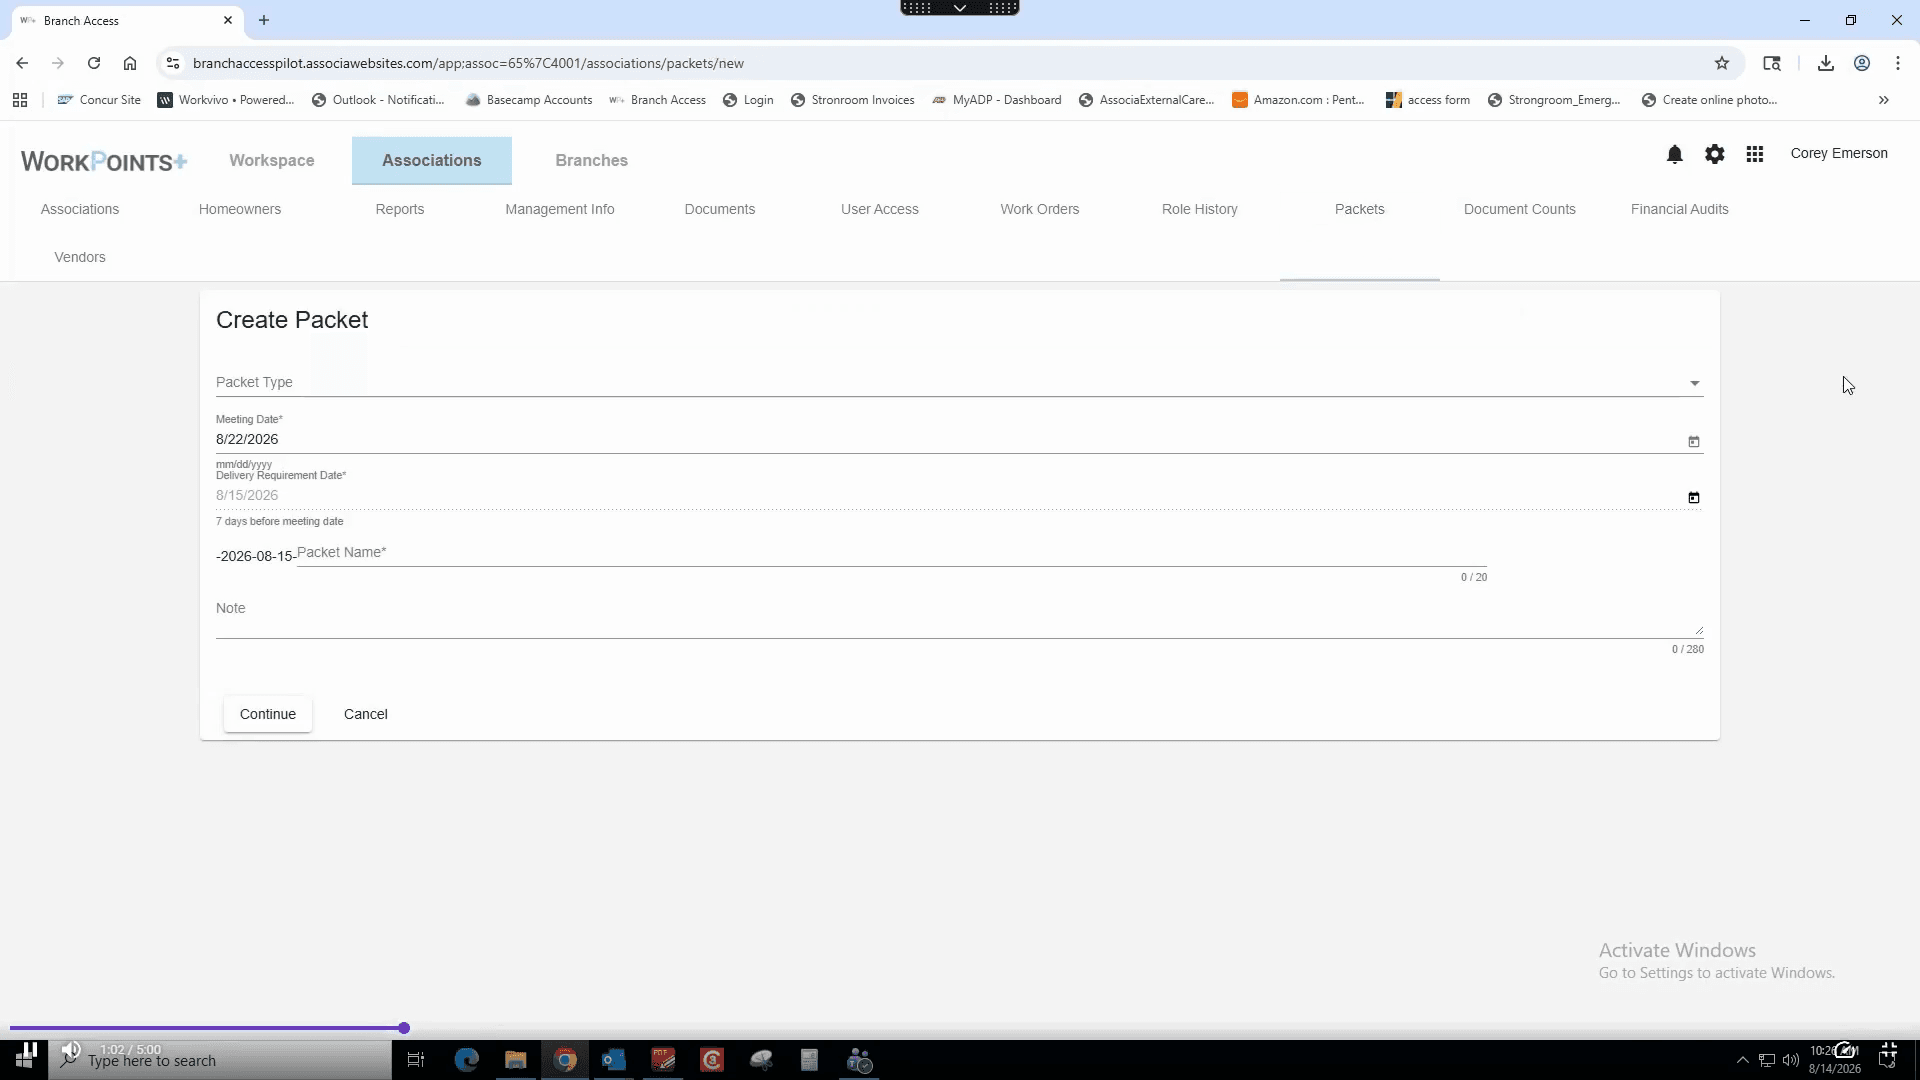
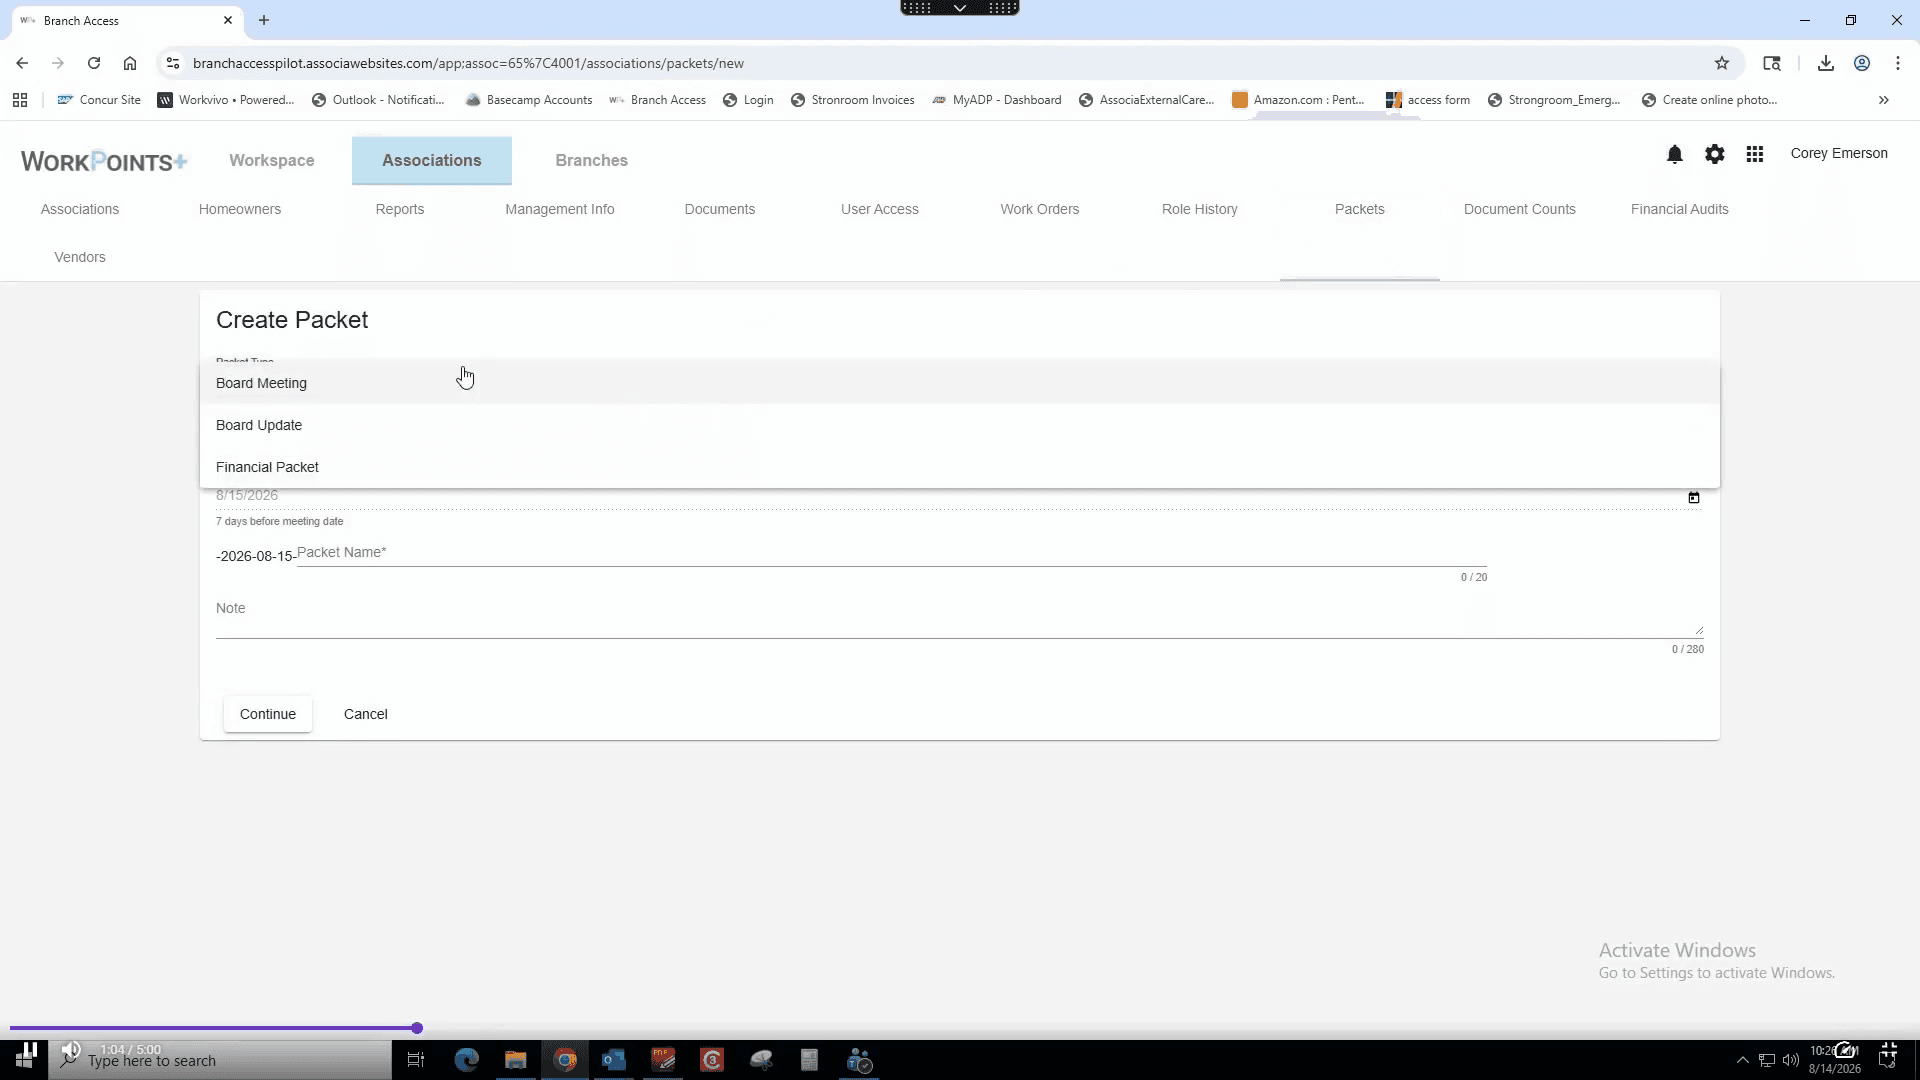
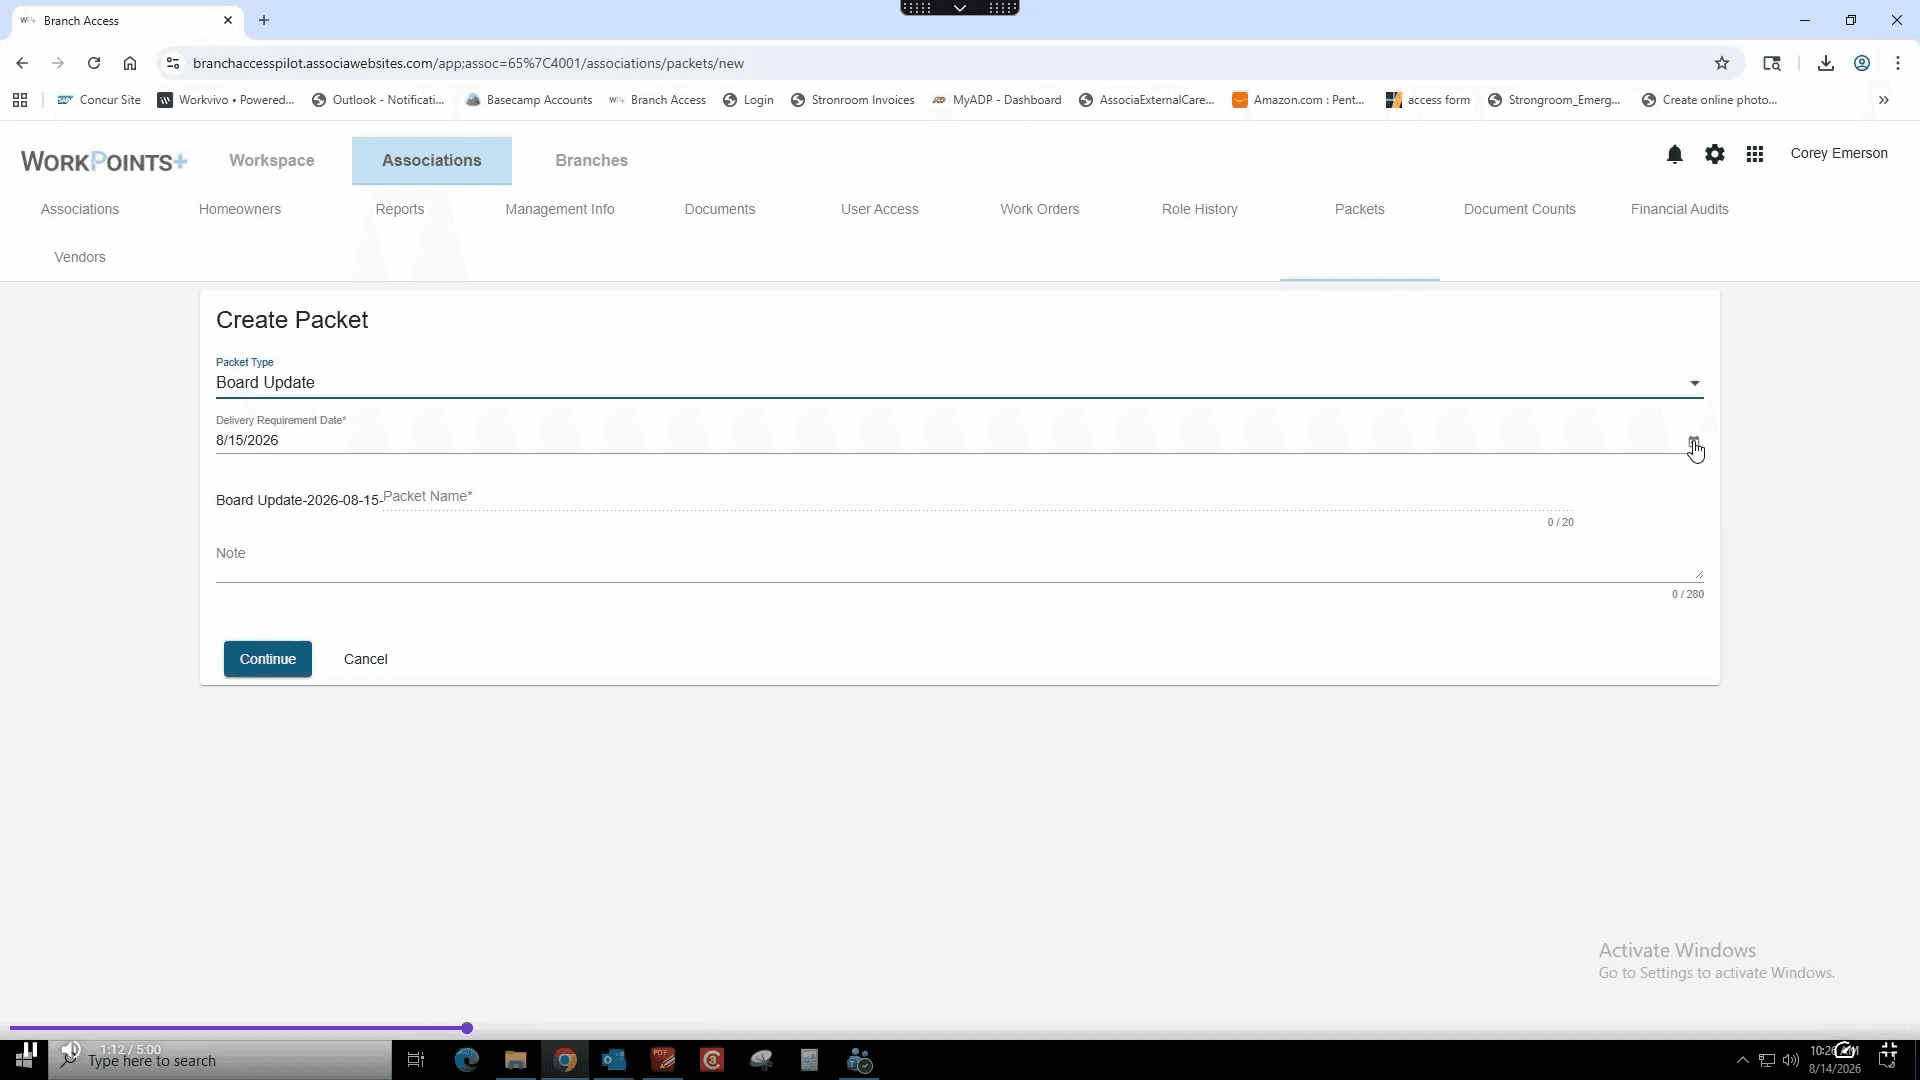
Click the Packet Type field.
5
Click Board Update from the dropdown menu.
6
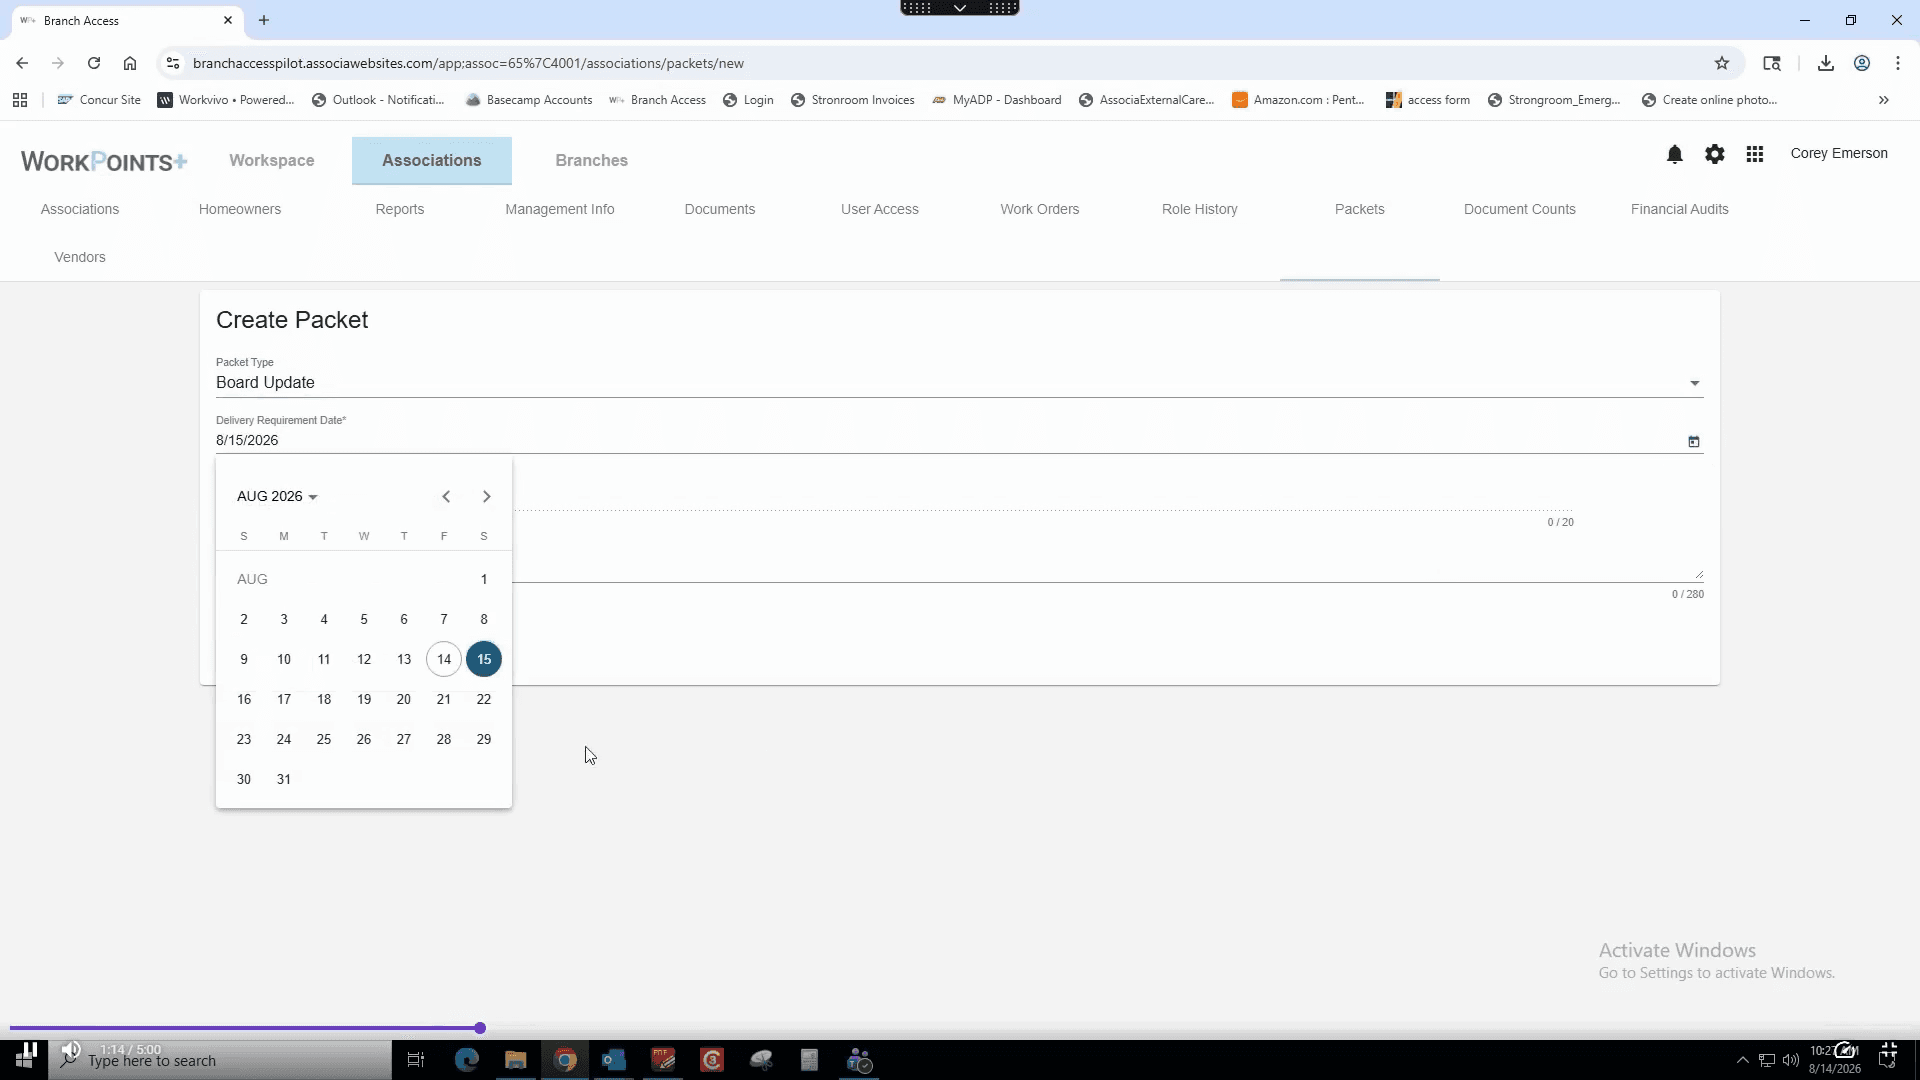
Click the Delivery Requirement Date field.
7
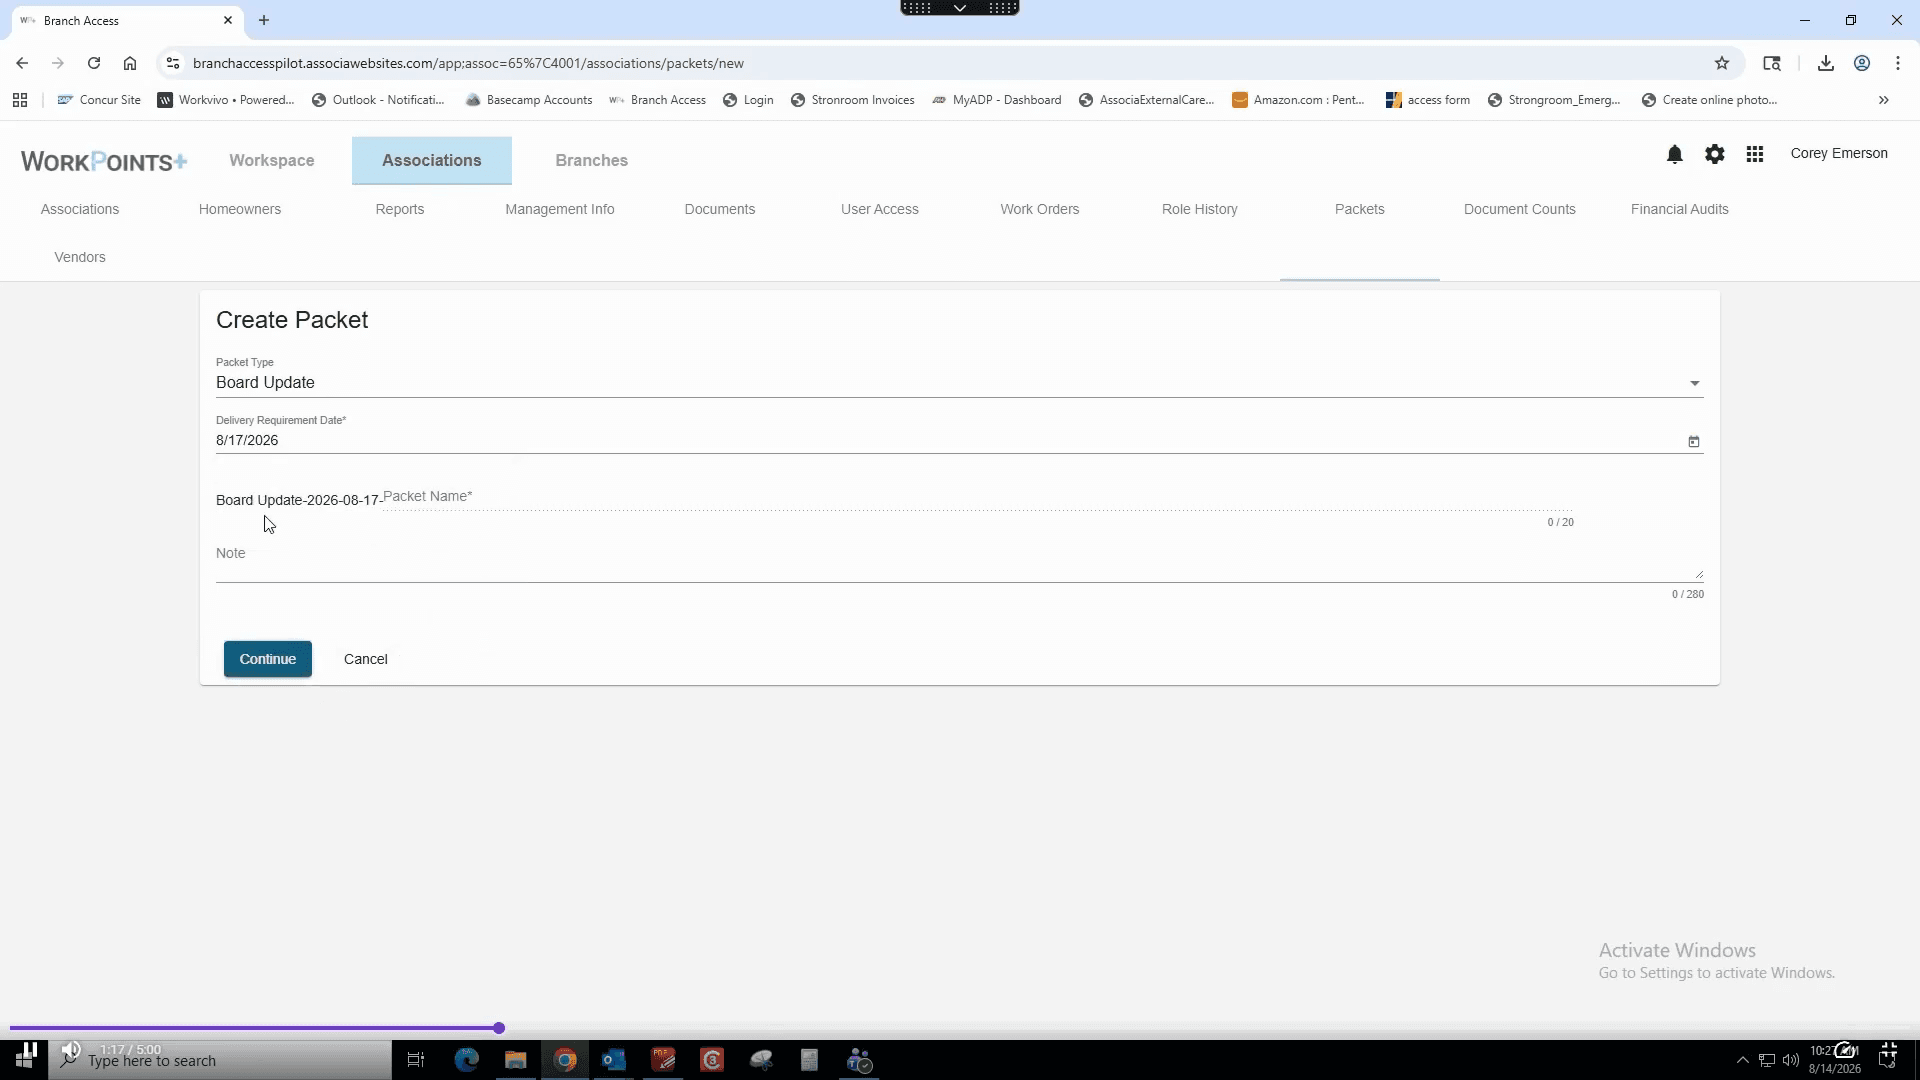
Select your desired delivery date on the calendar.
8
Click Continue.
9
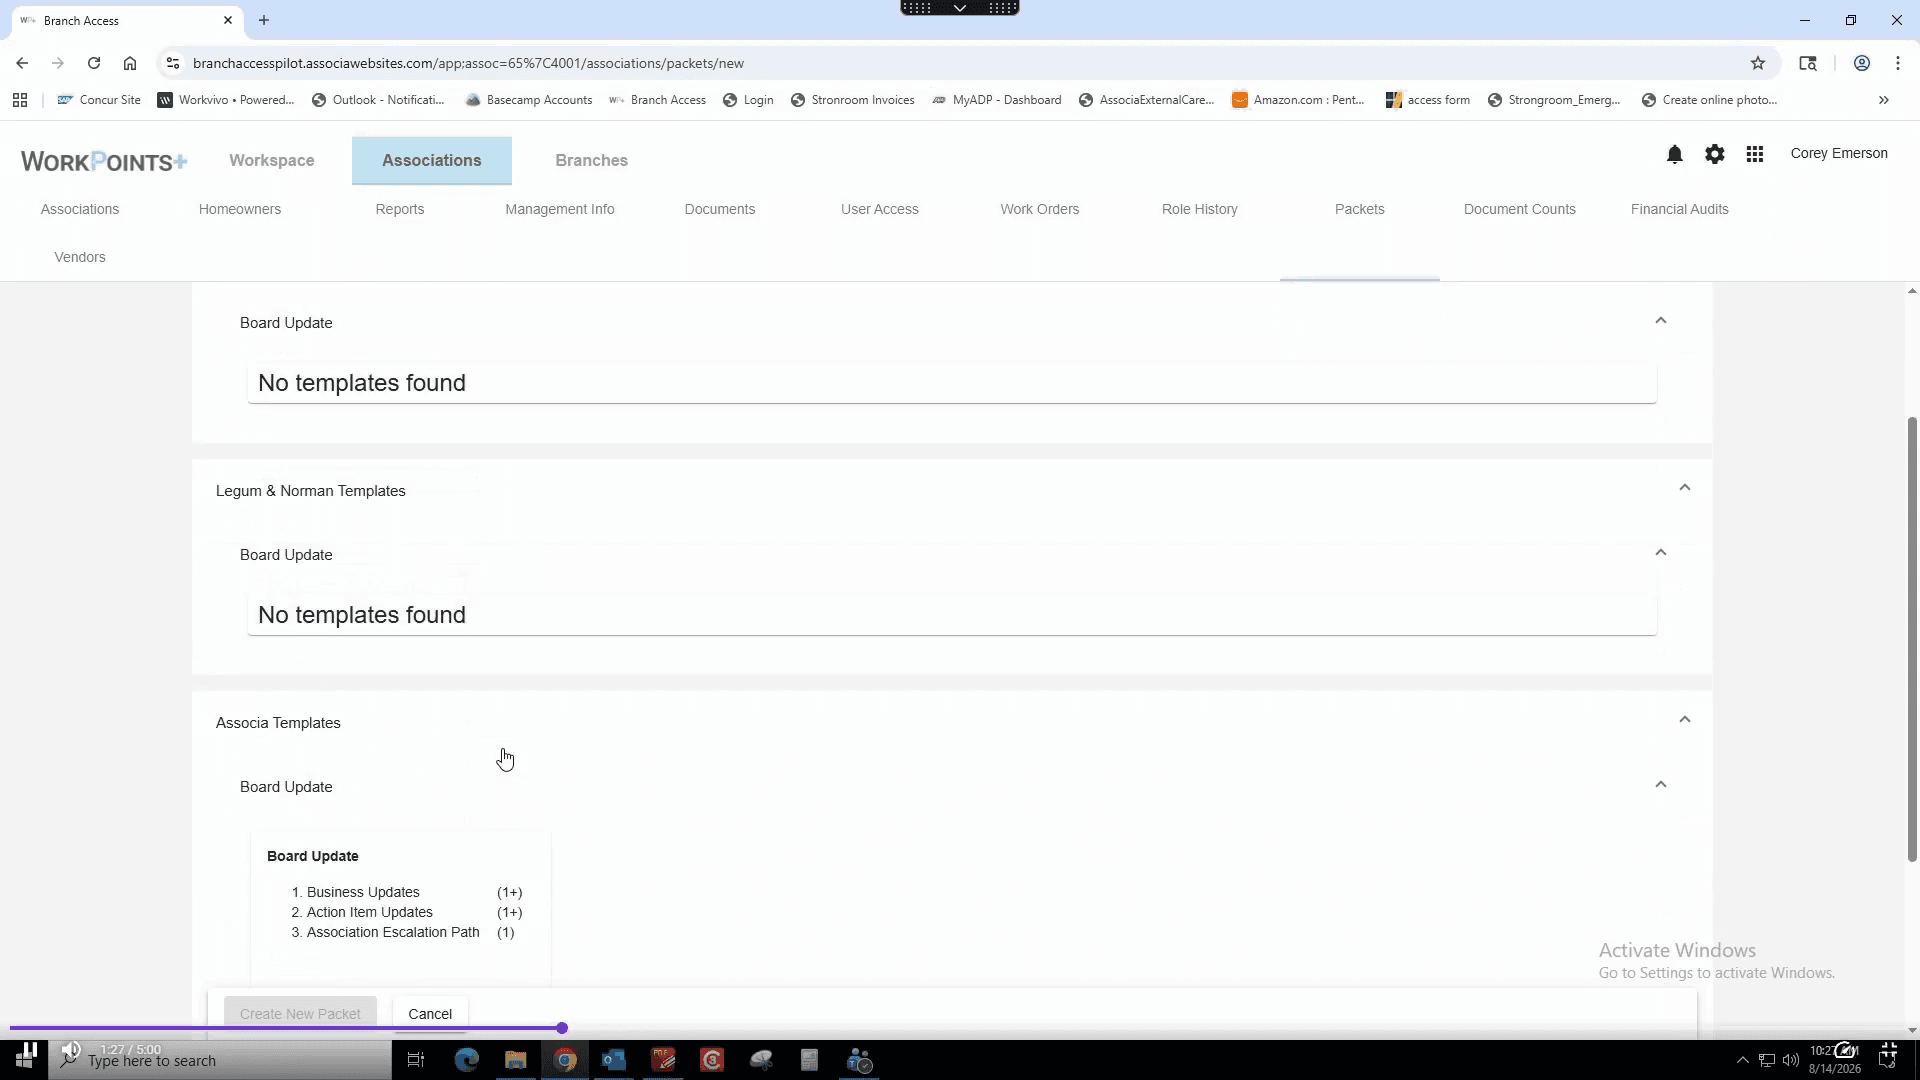
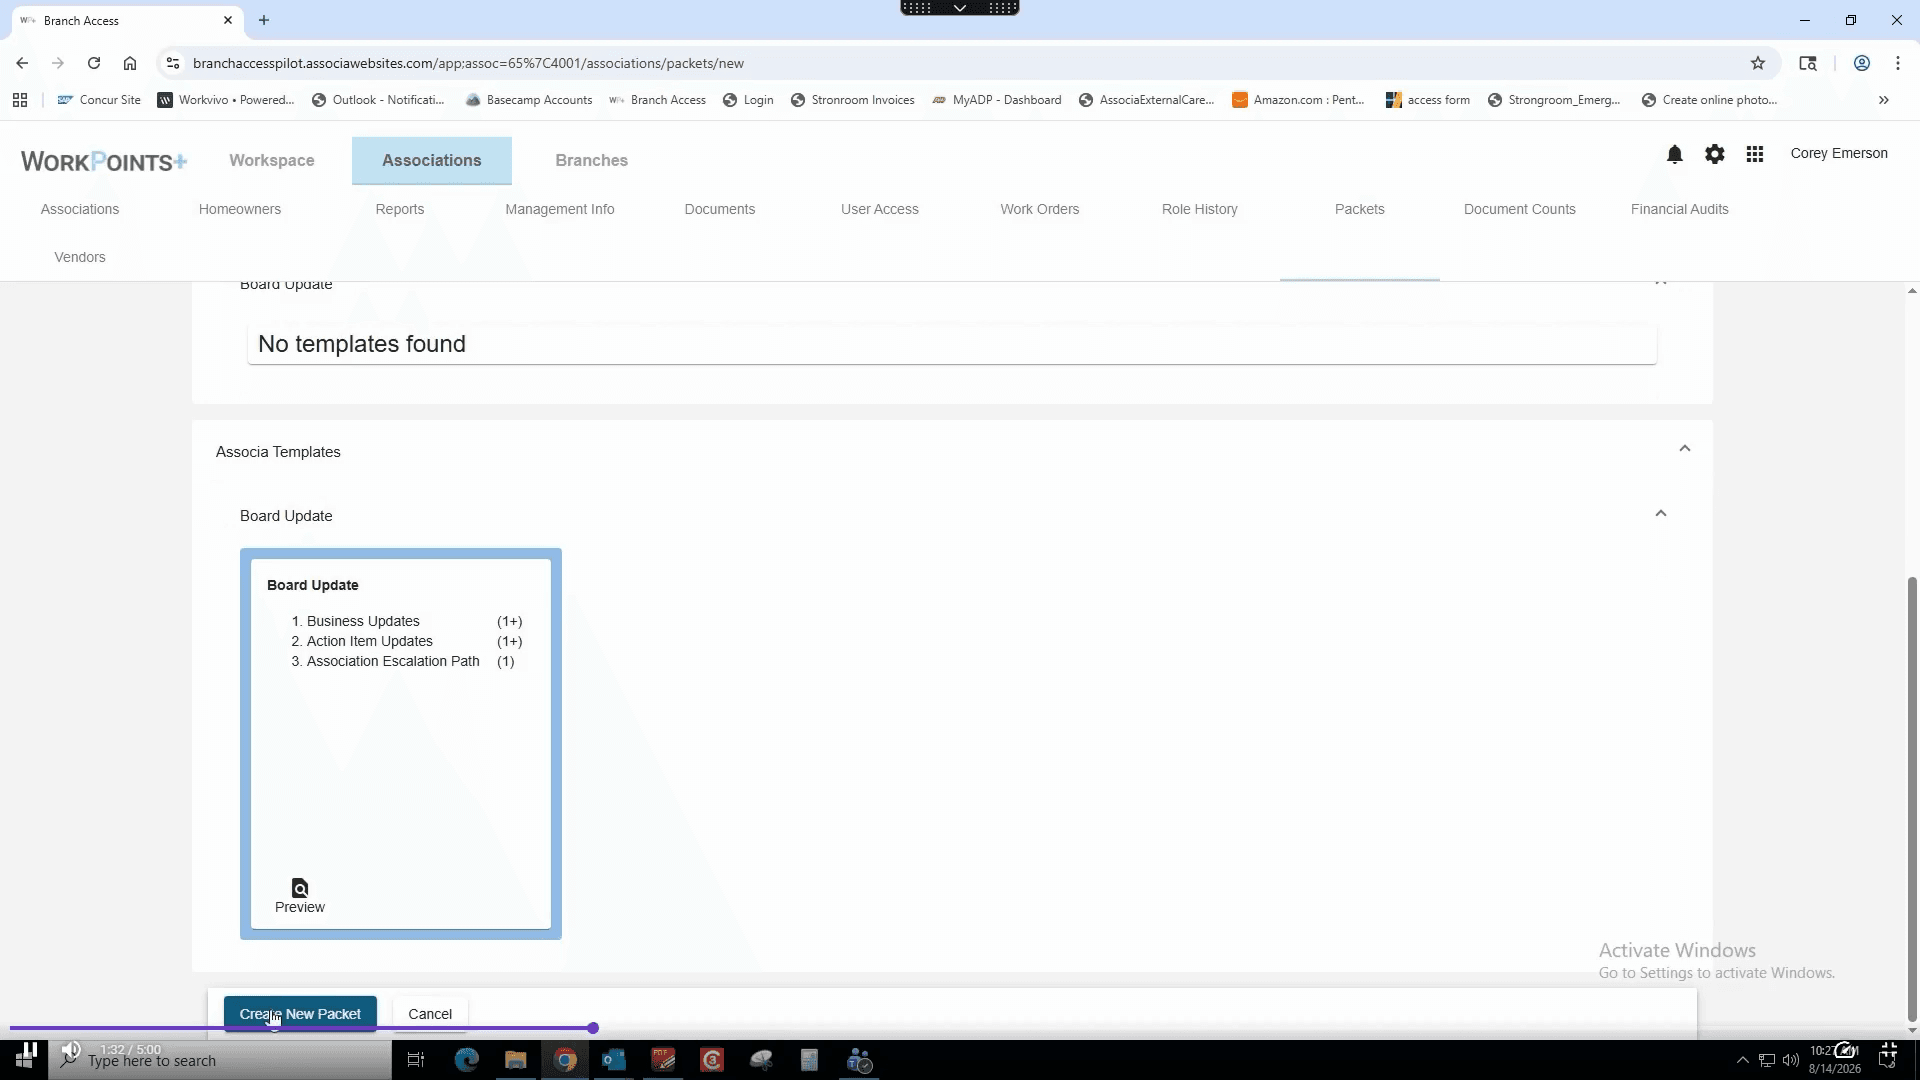
Scroll down to the Associa Templates and click Business Updates.
10
Click Create New Packet.
Upload the Escalation Path Document
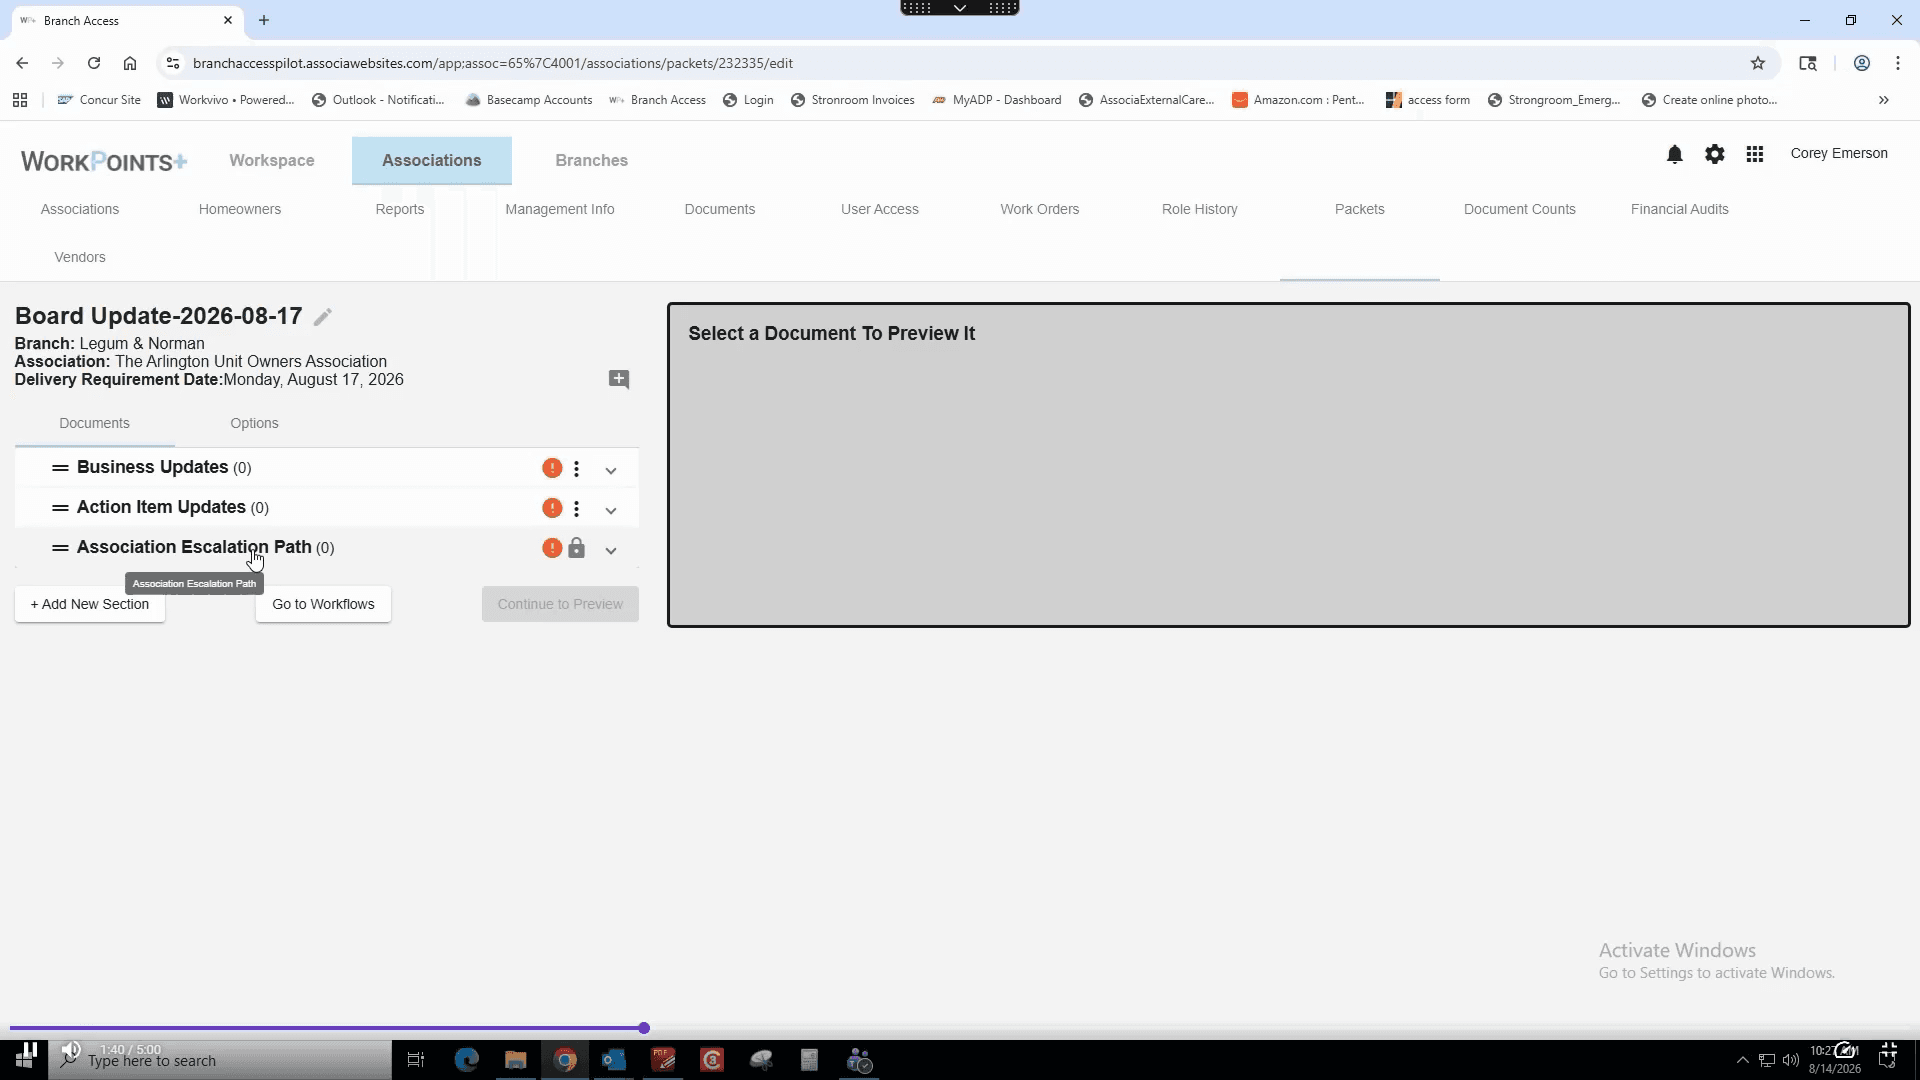
Ensure you have the latest association escalation path document ready. If you do not have it, contact your supervisor or an executive team member.
11
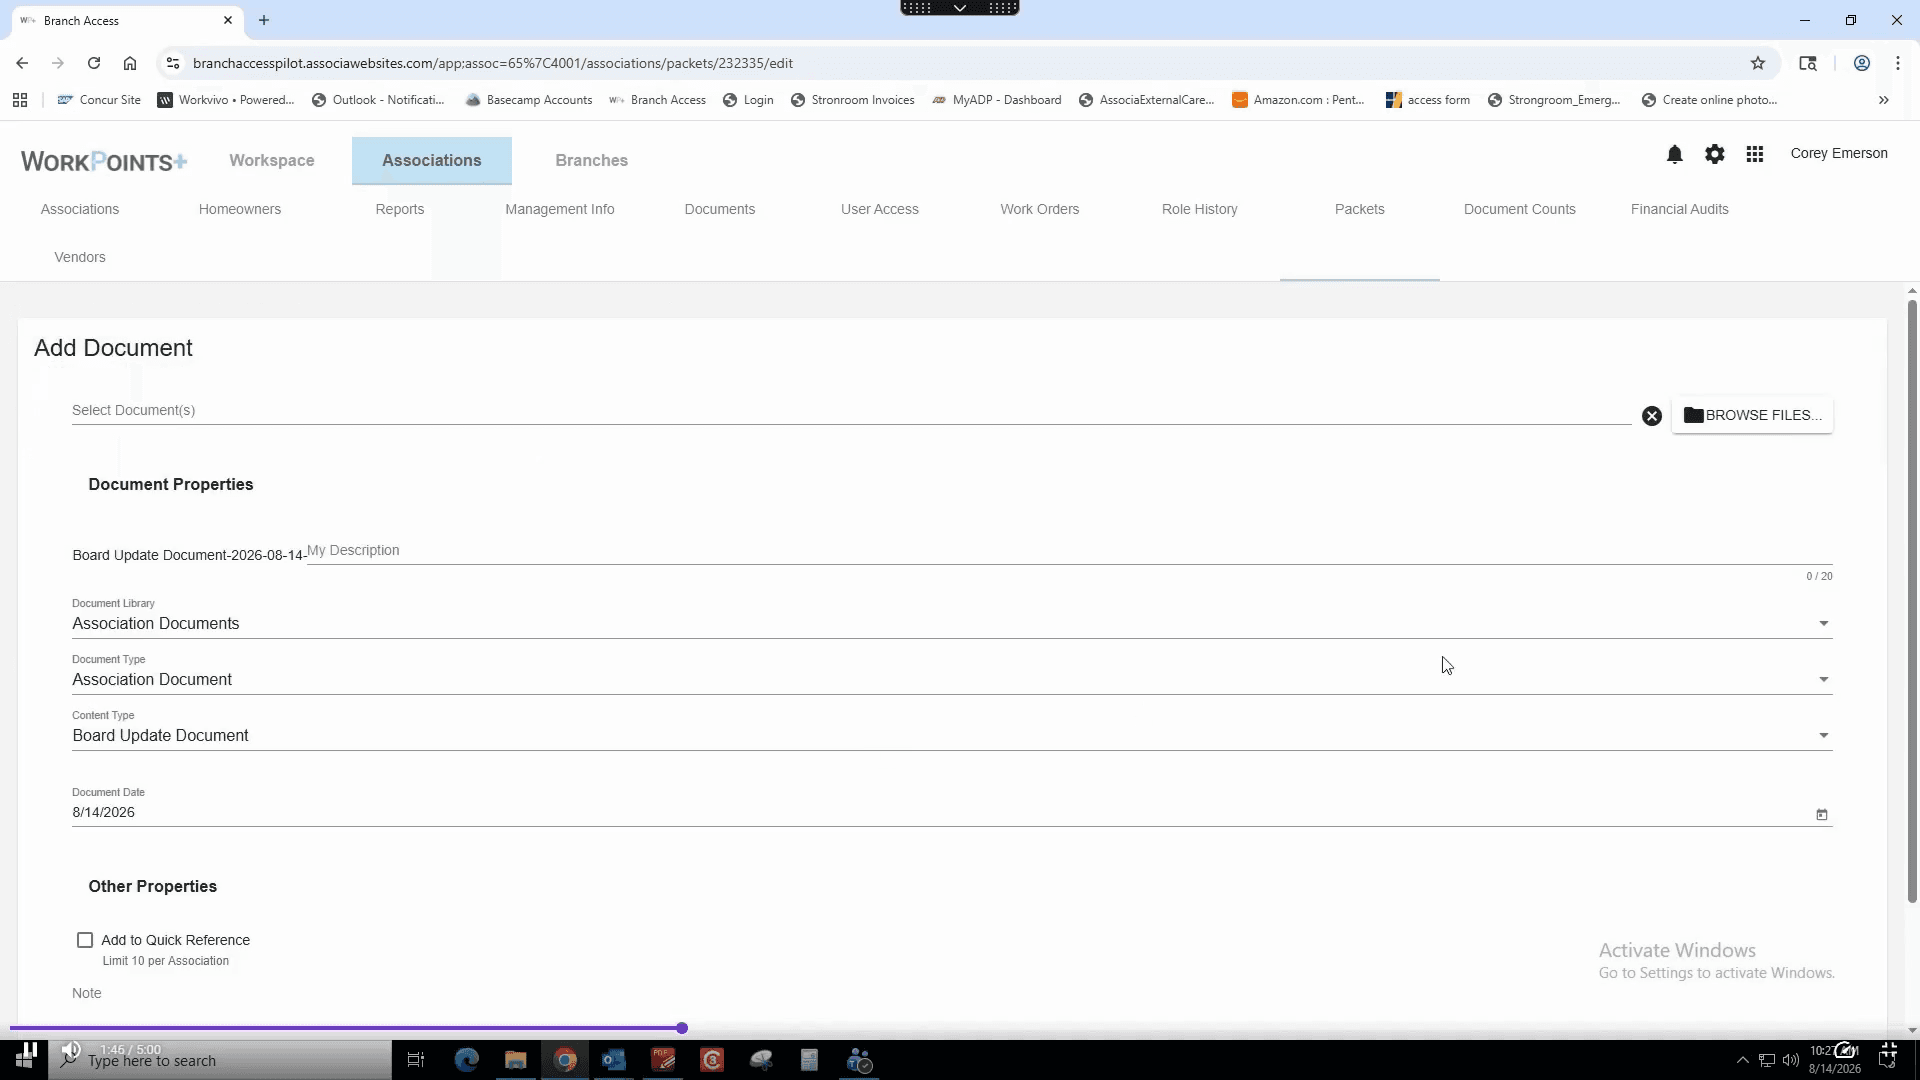
Click Association Escalation Path (0) to open the document upload section.
12
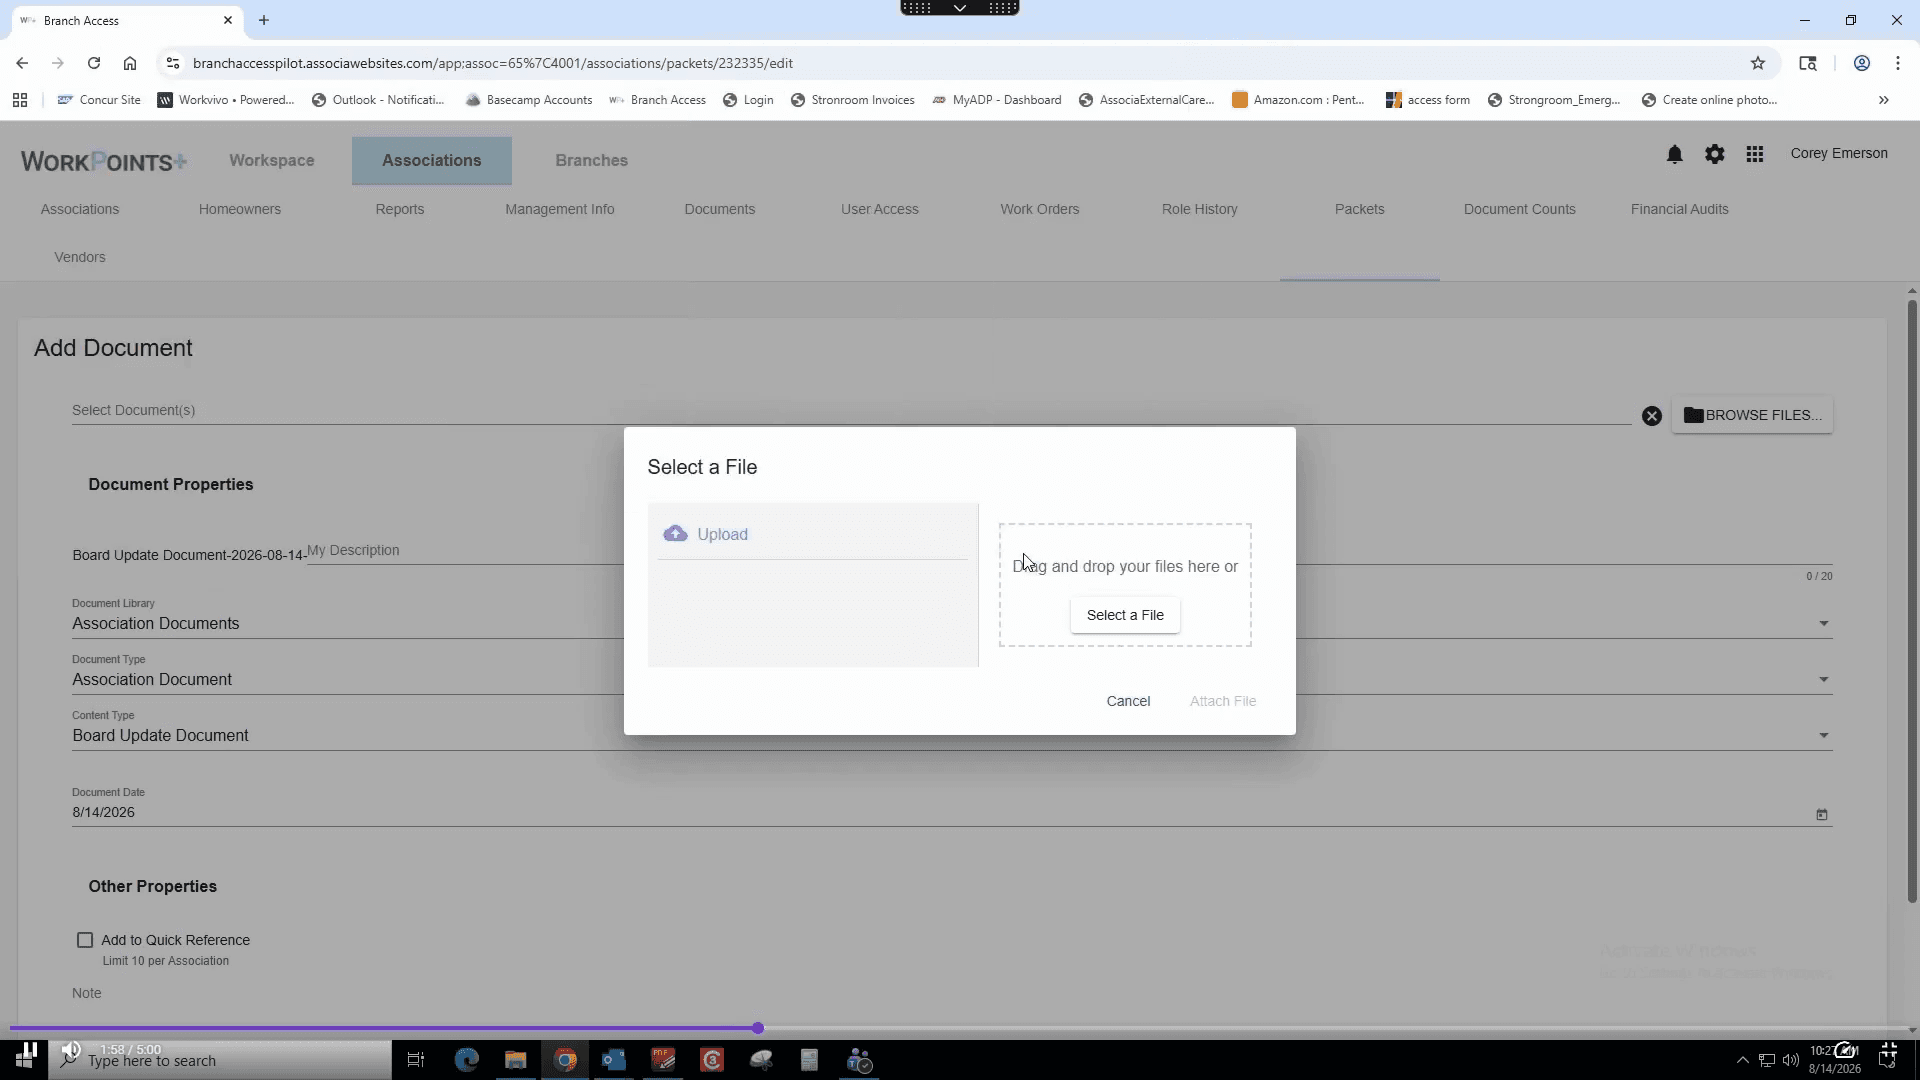
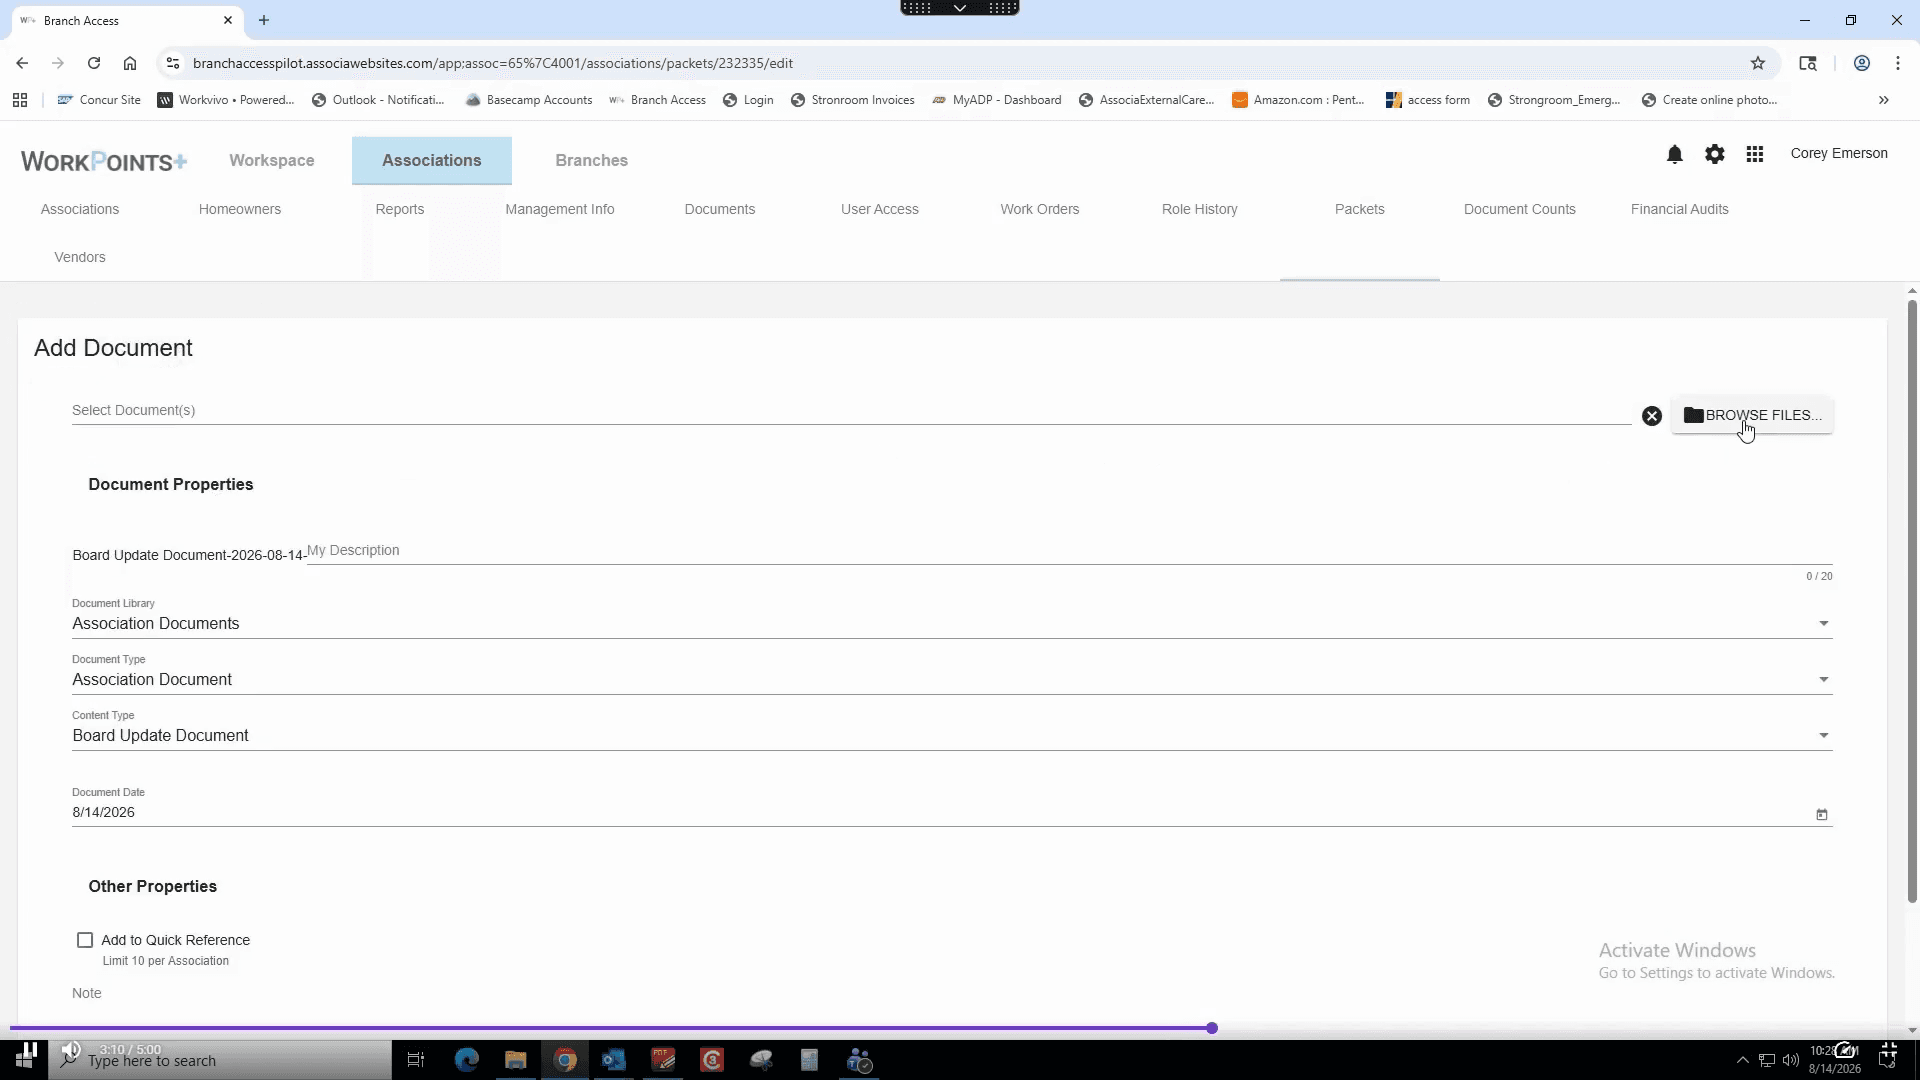
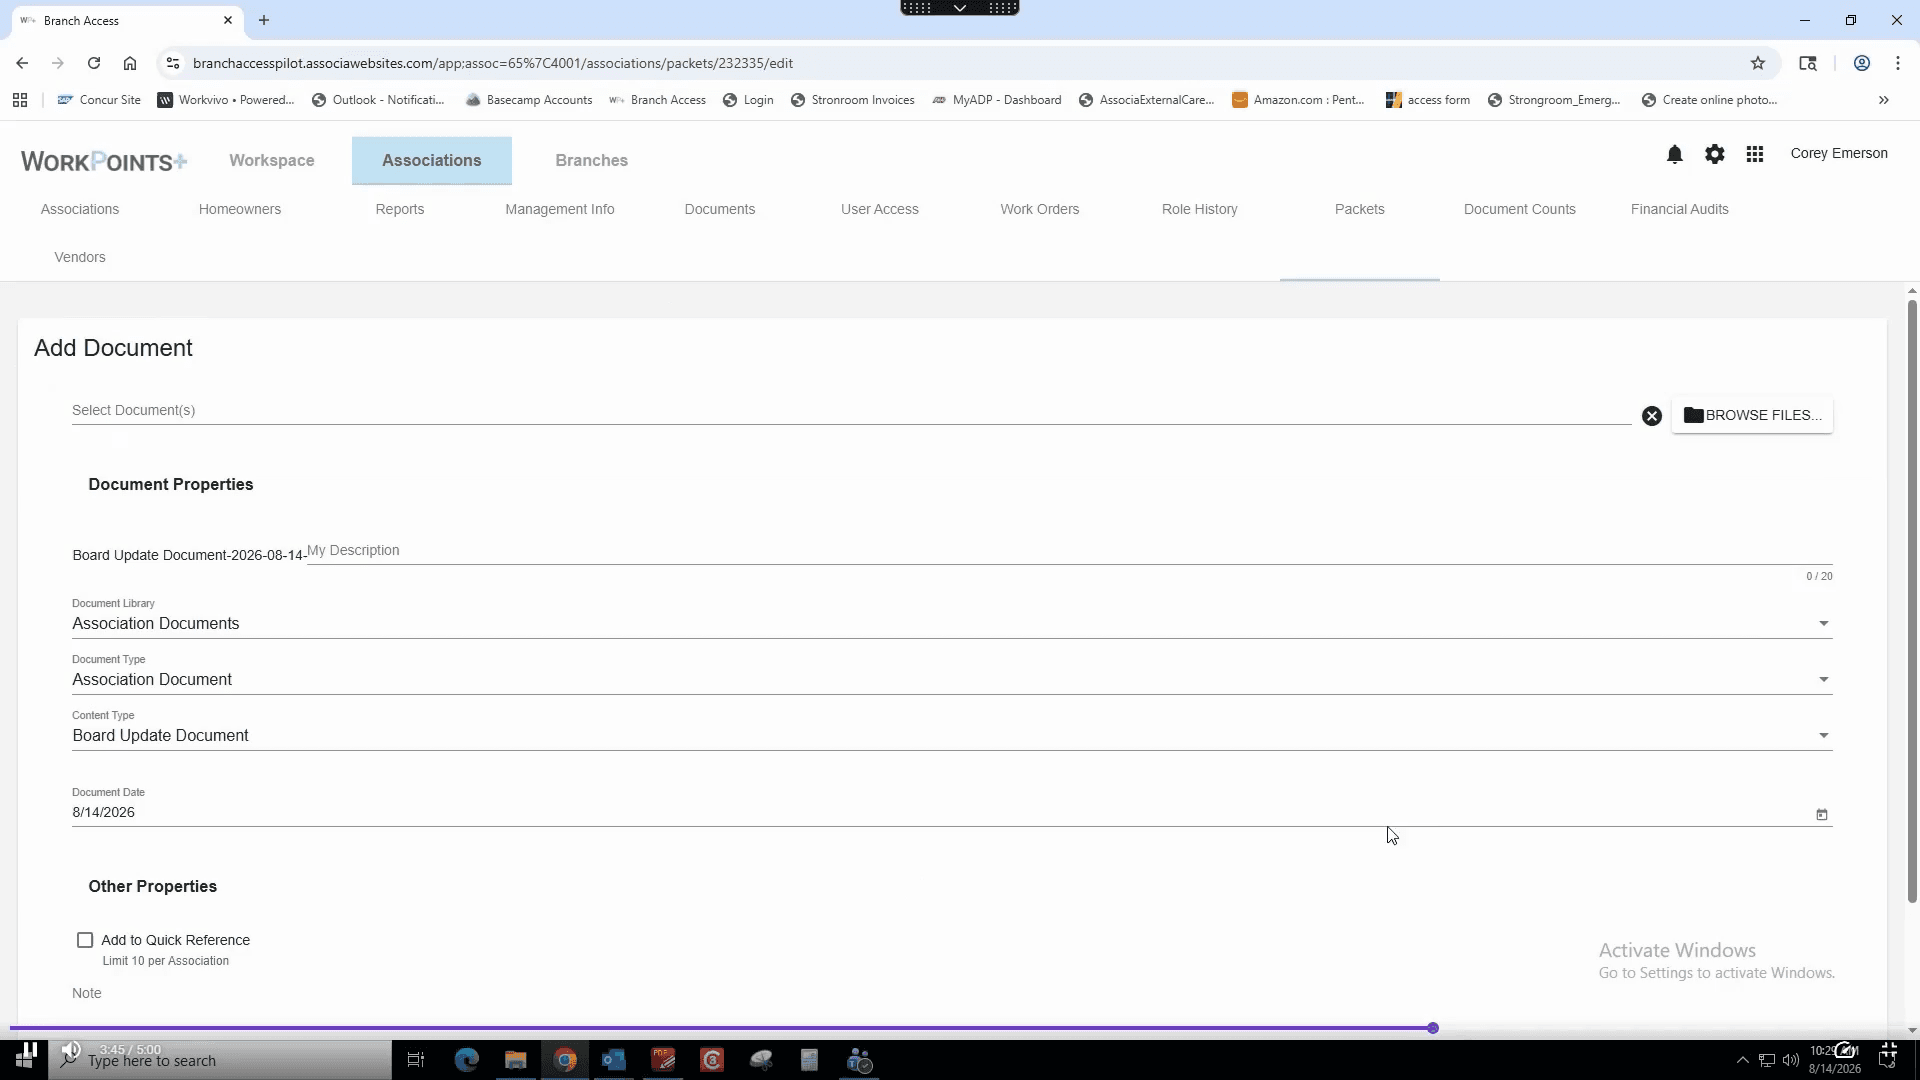
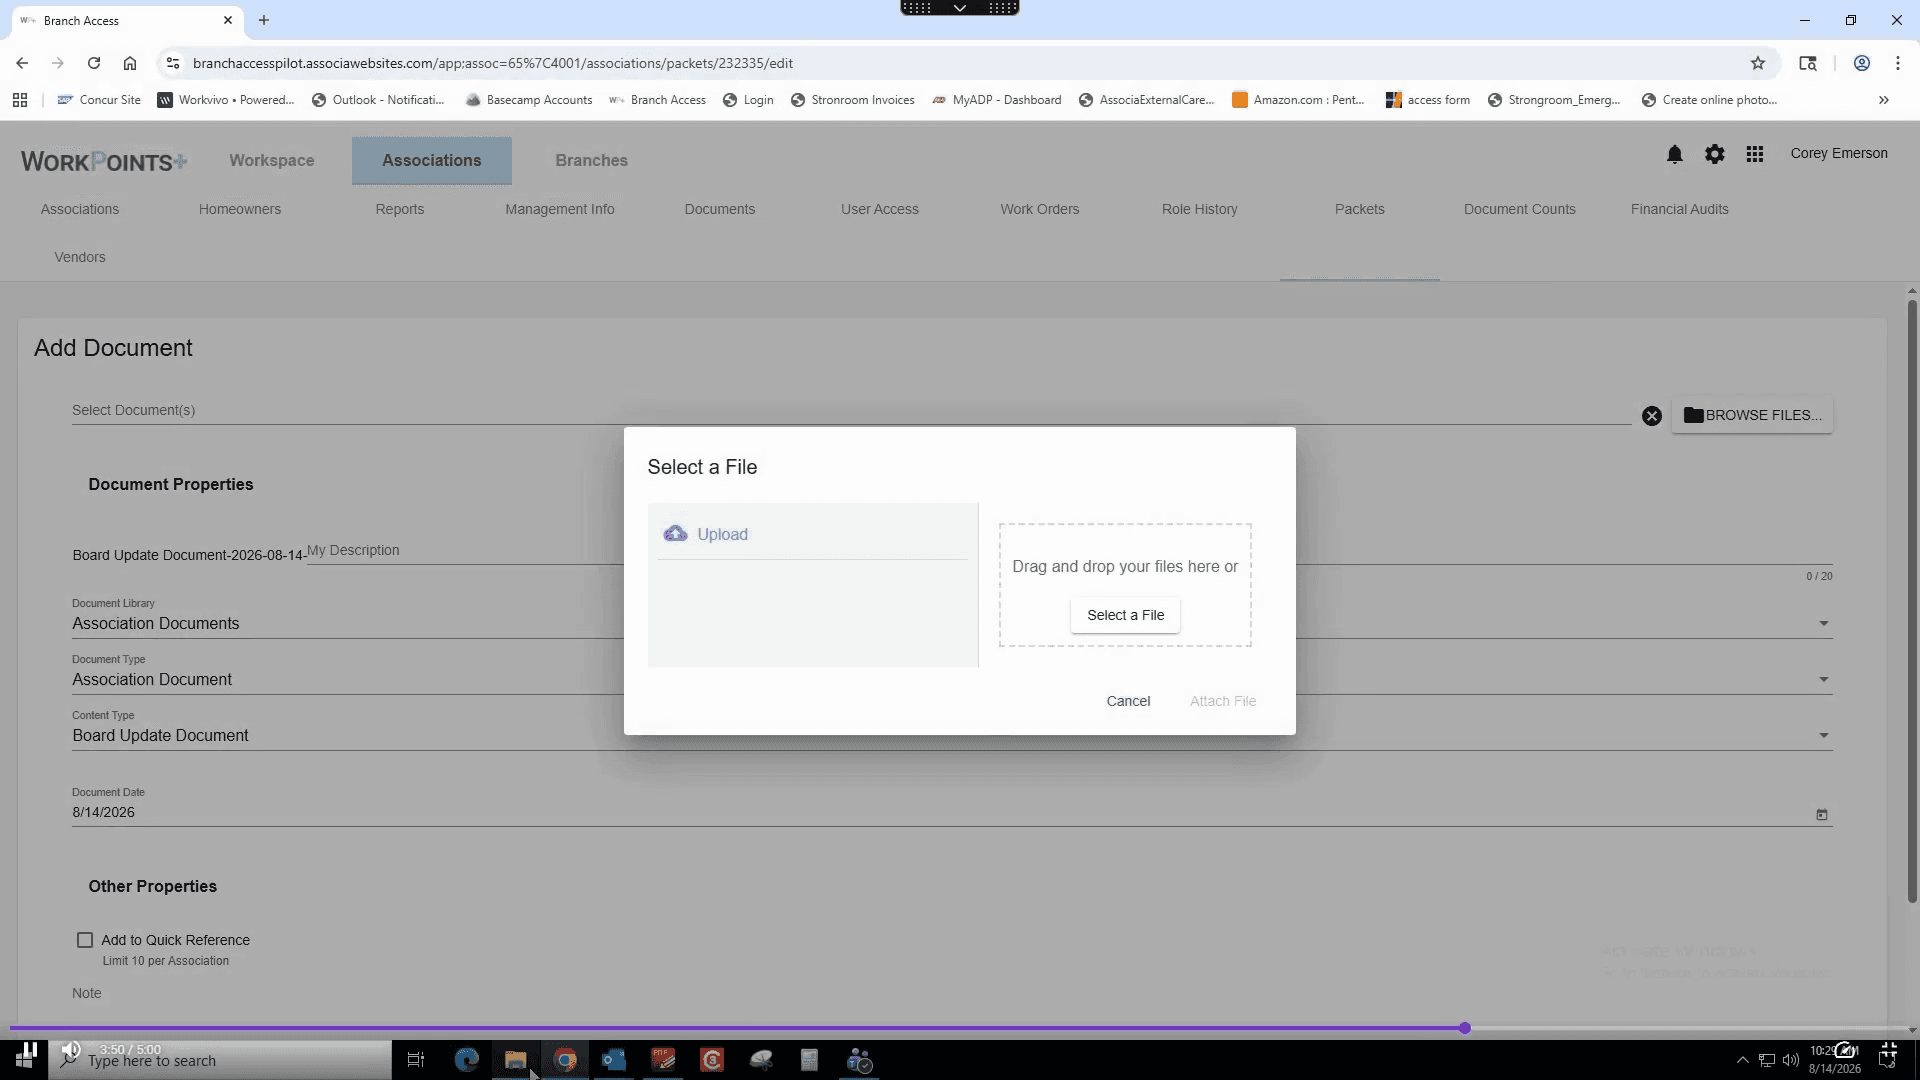
Click BROWSE FILES... and then click Select a File to locate your document.
13
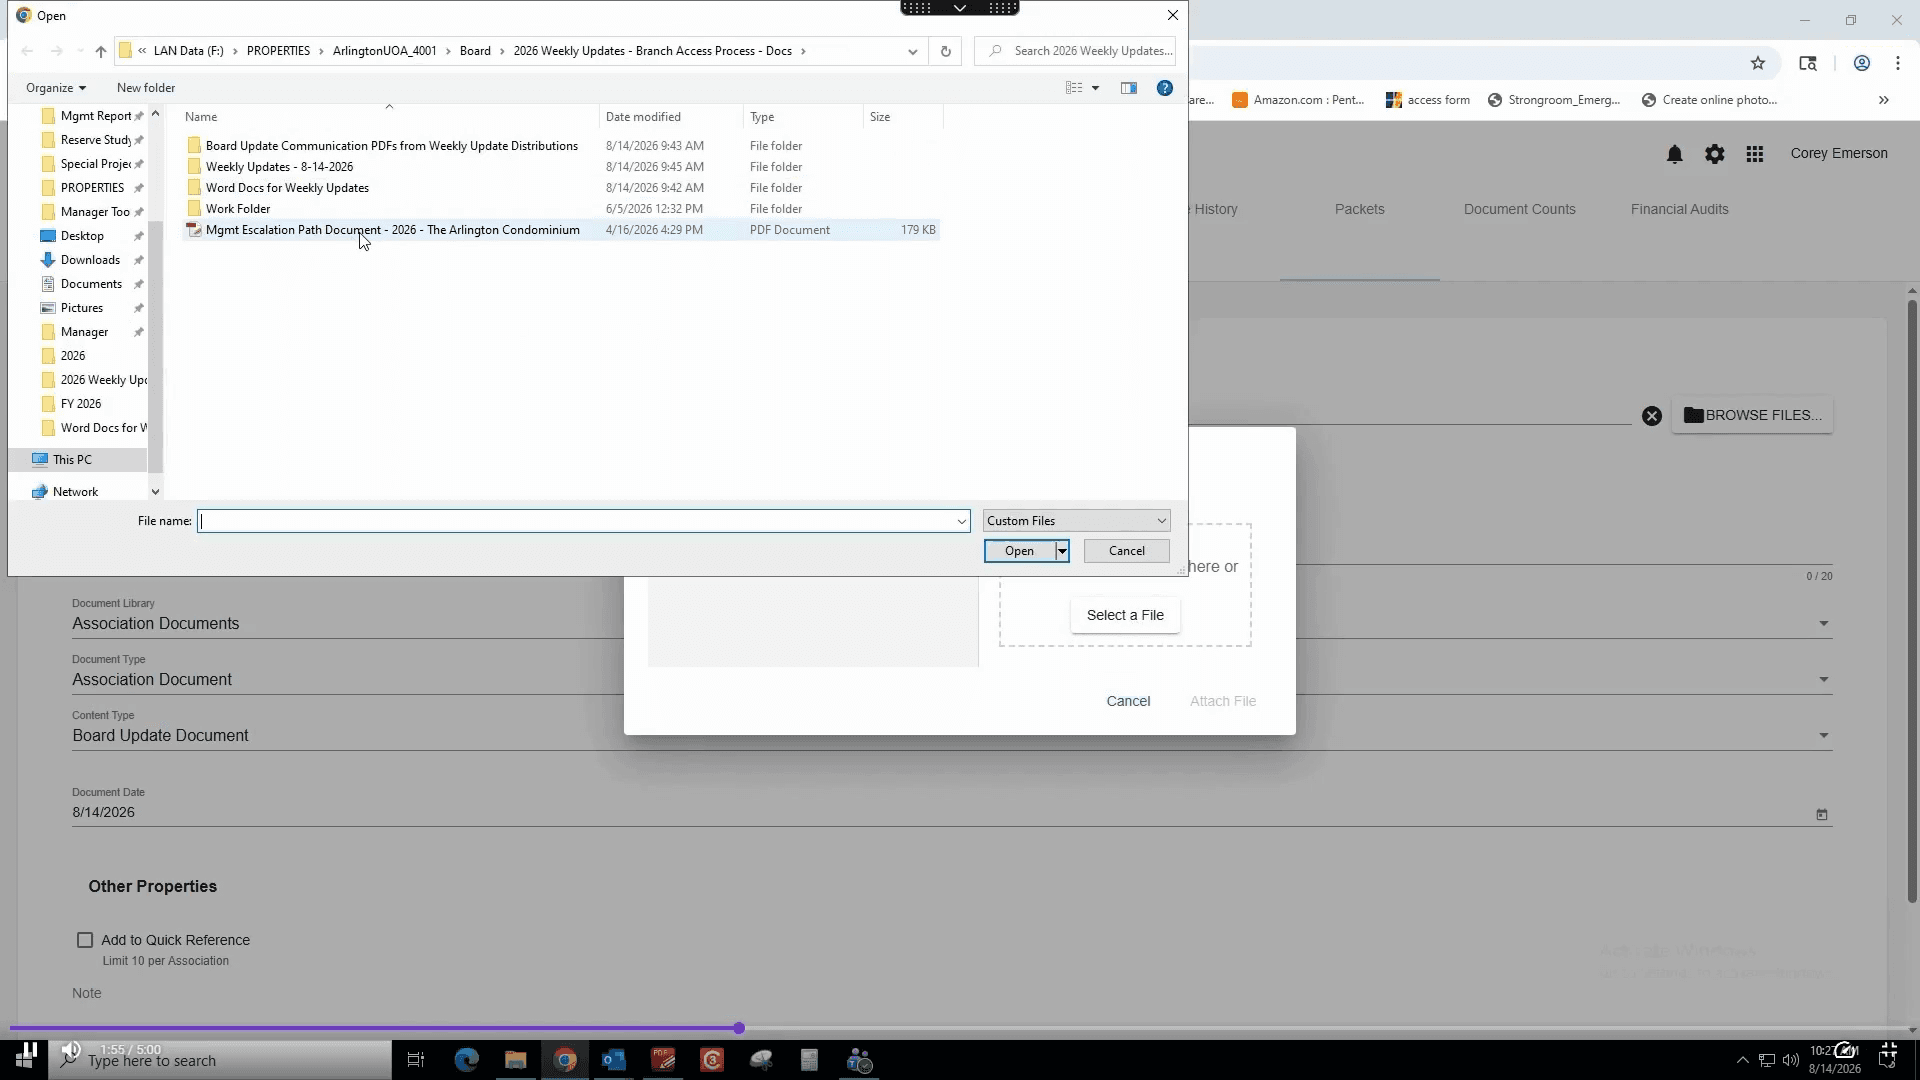
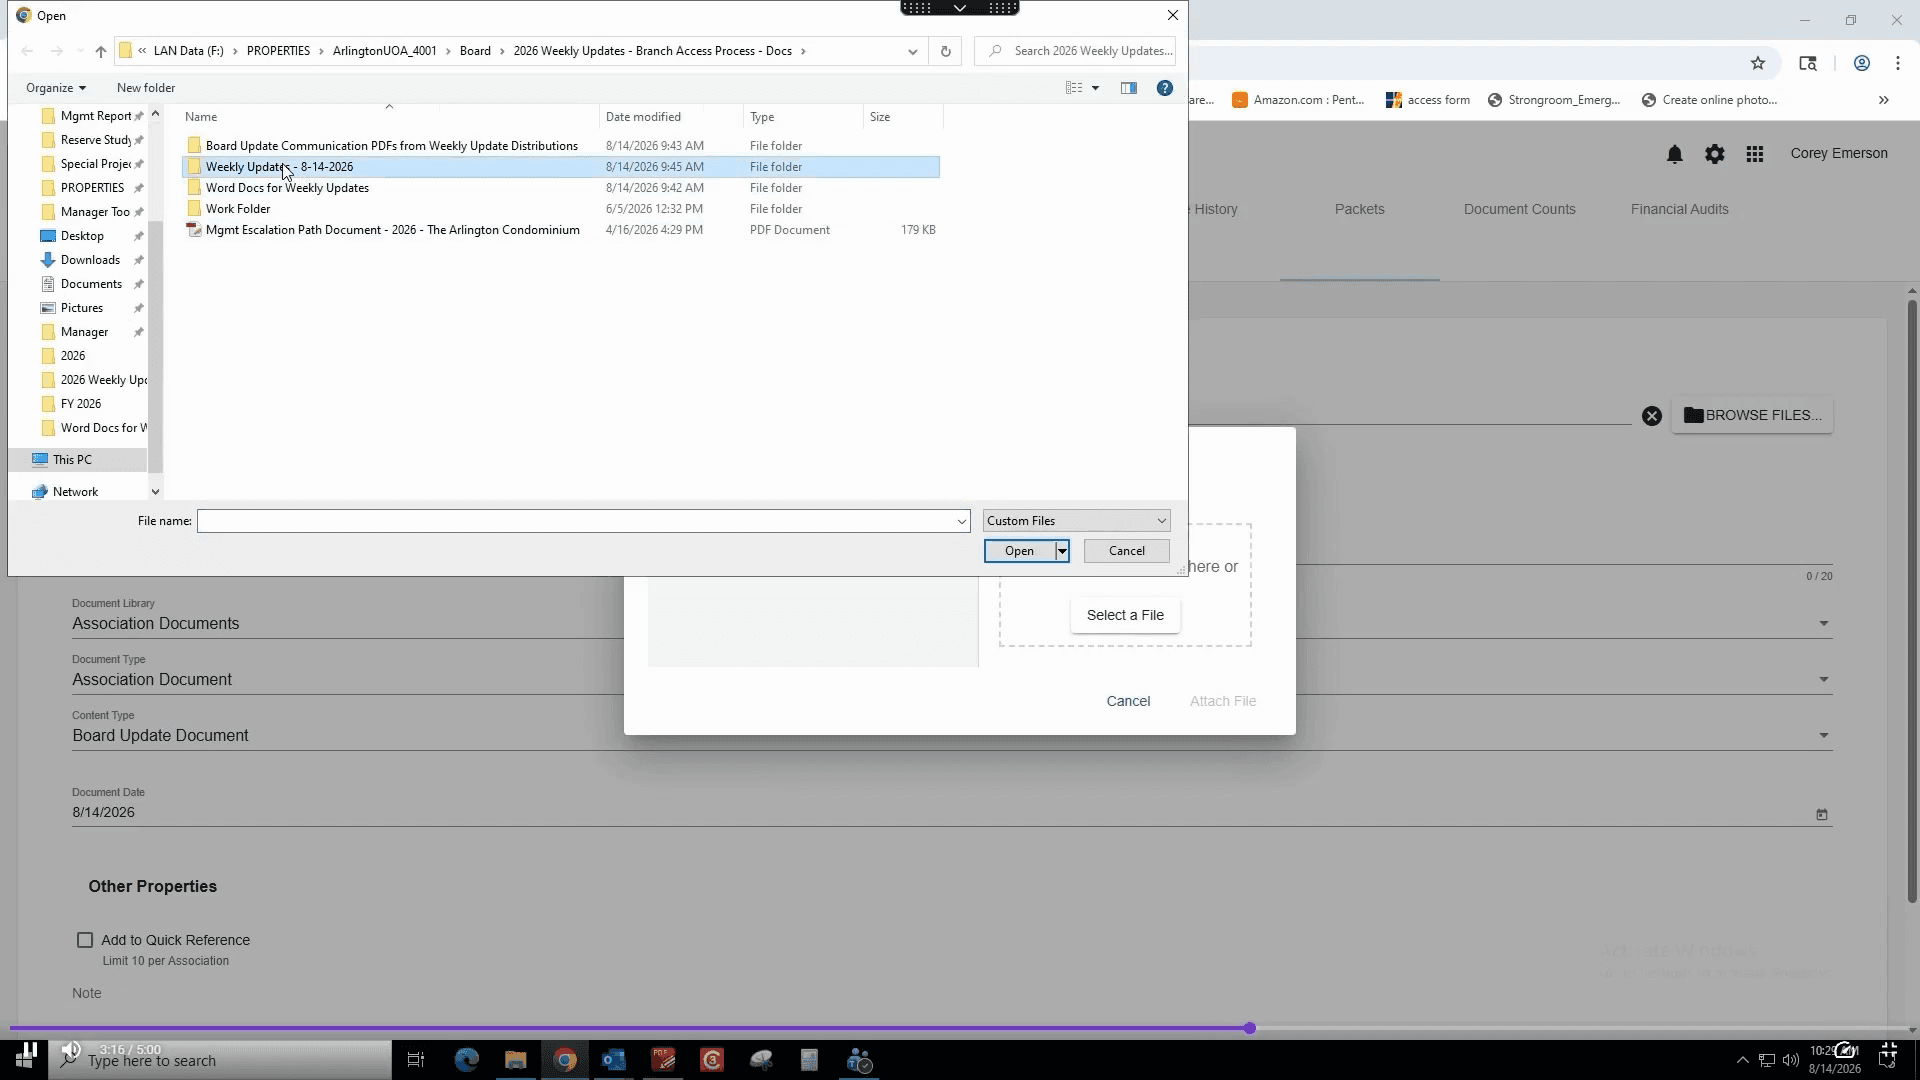
Select your Management Escalation Path document from your computer and click Open.
14
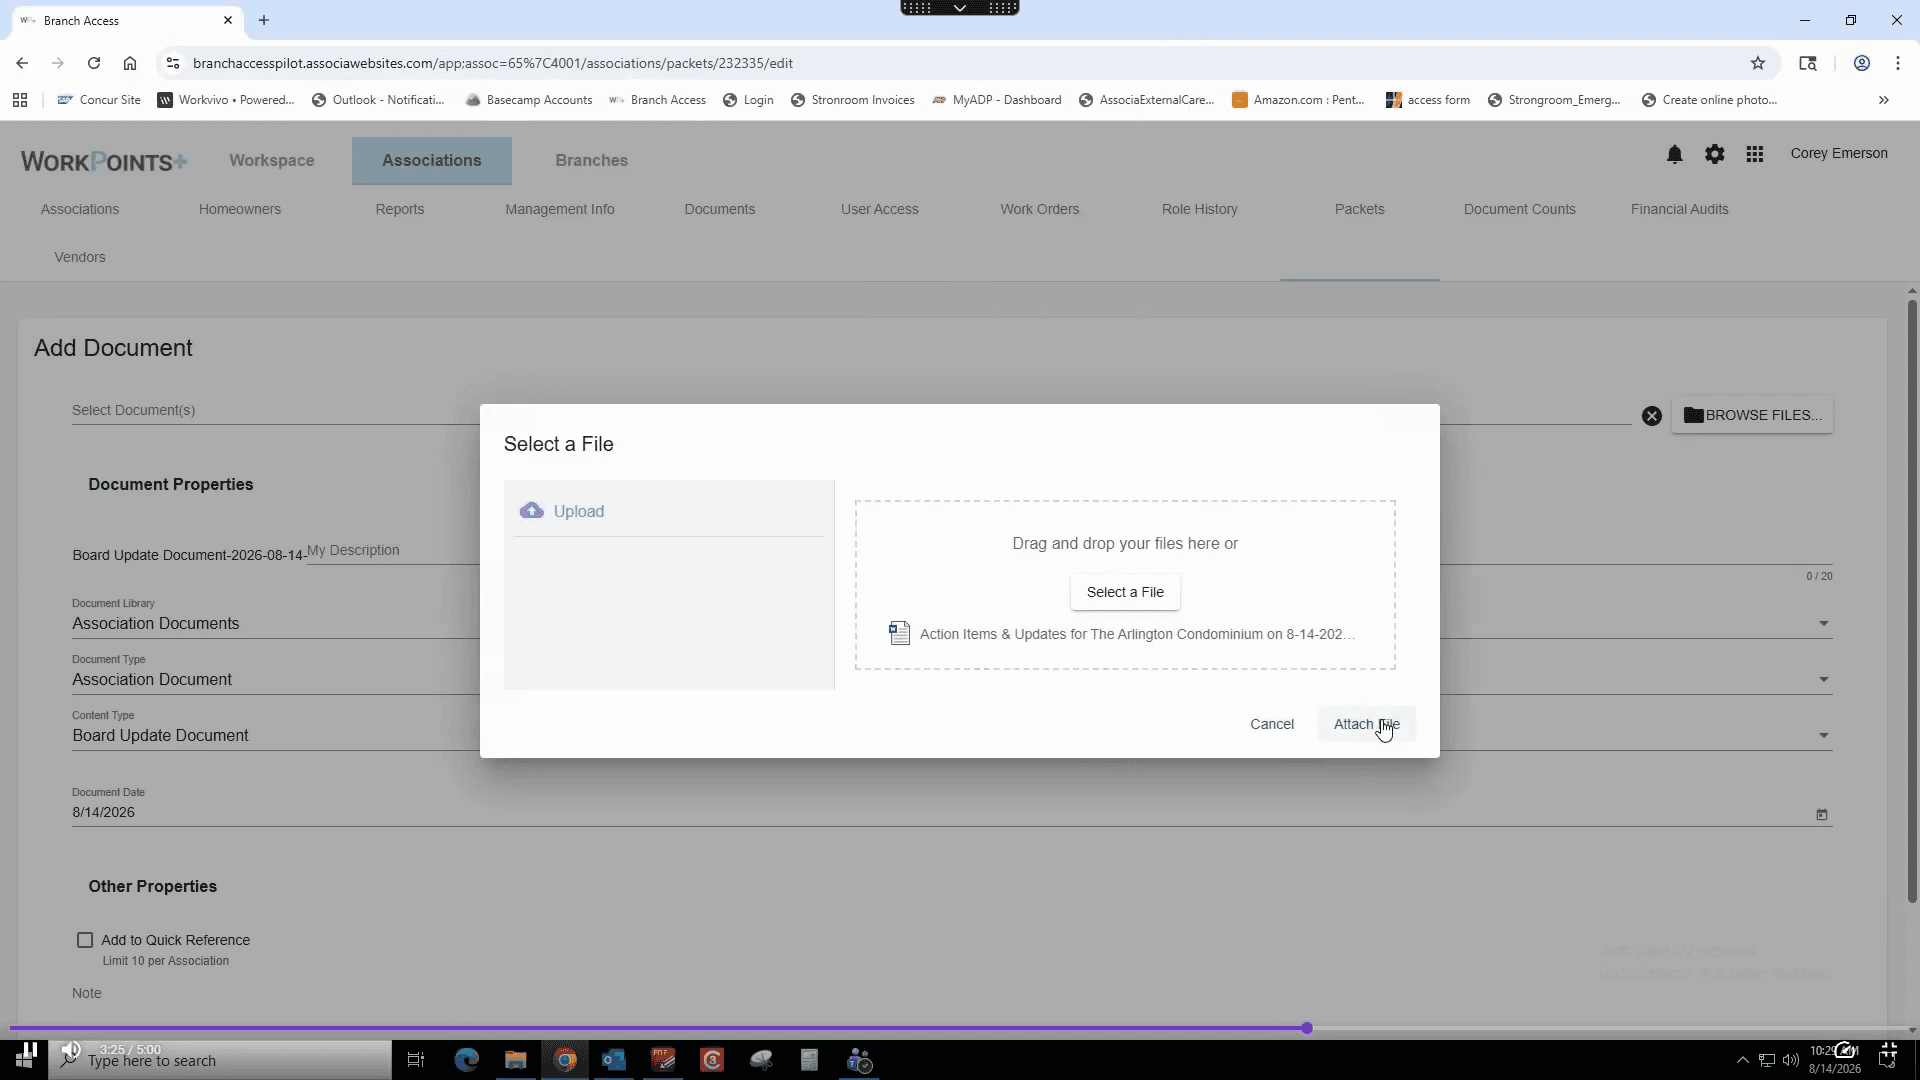
Click Attach File.
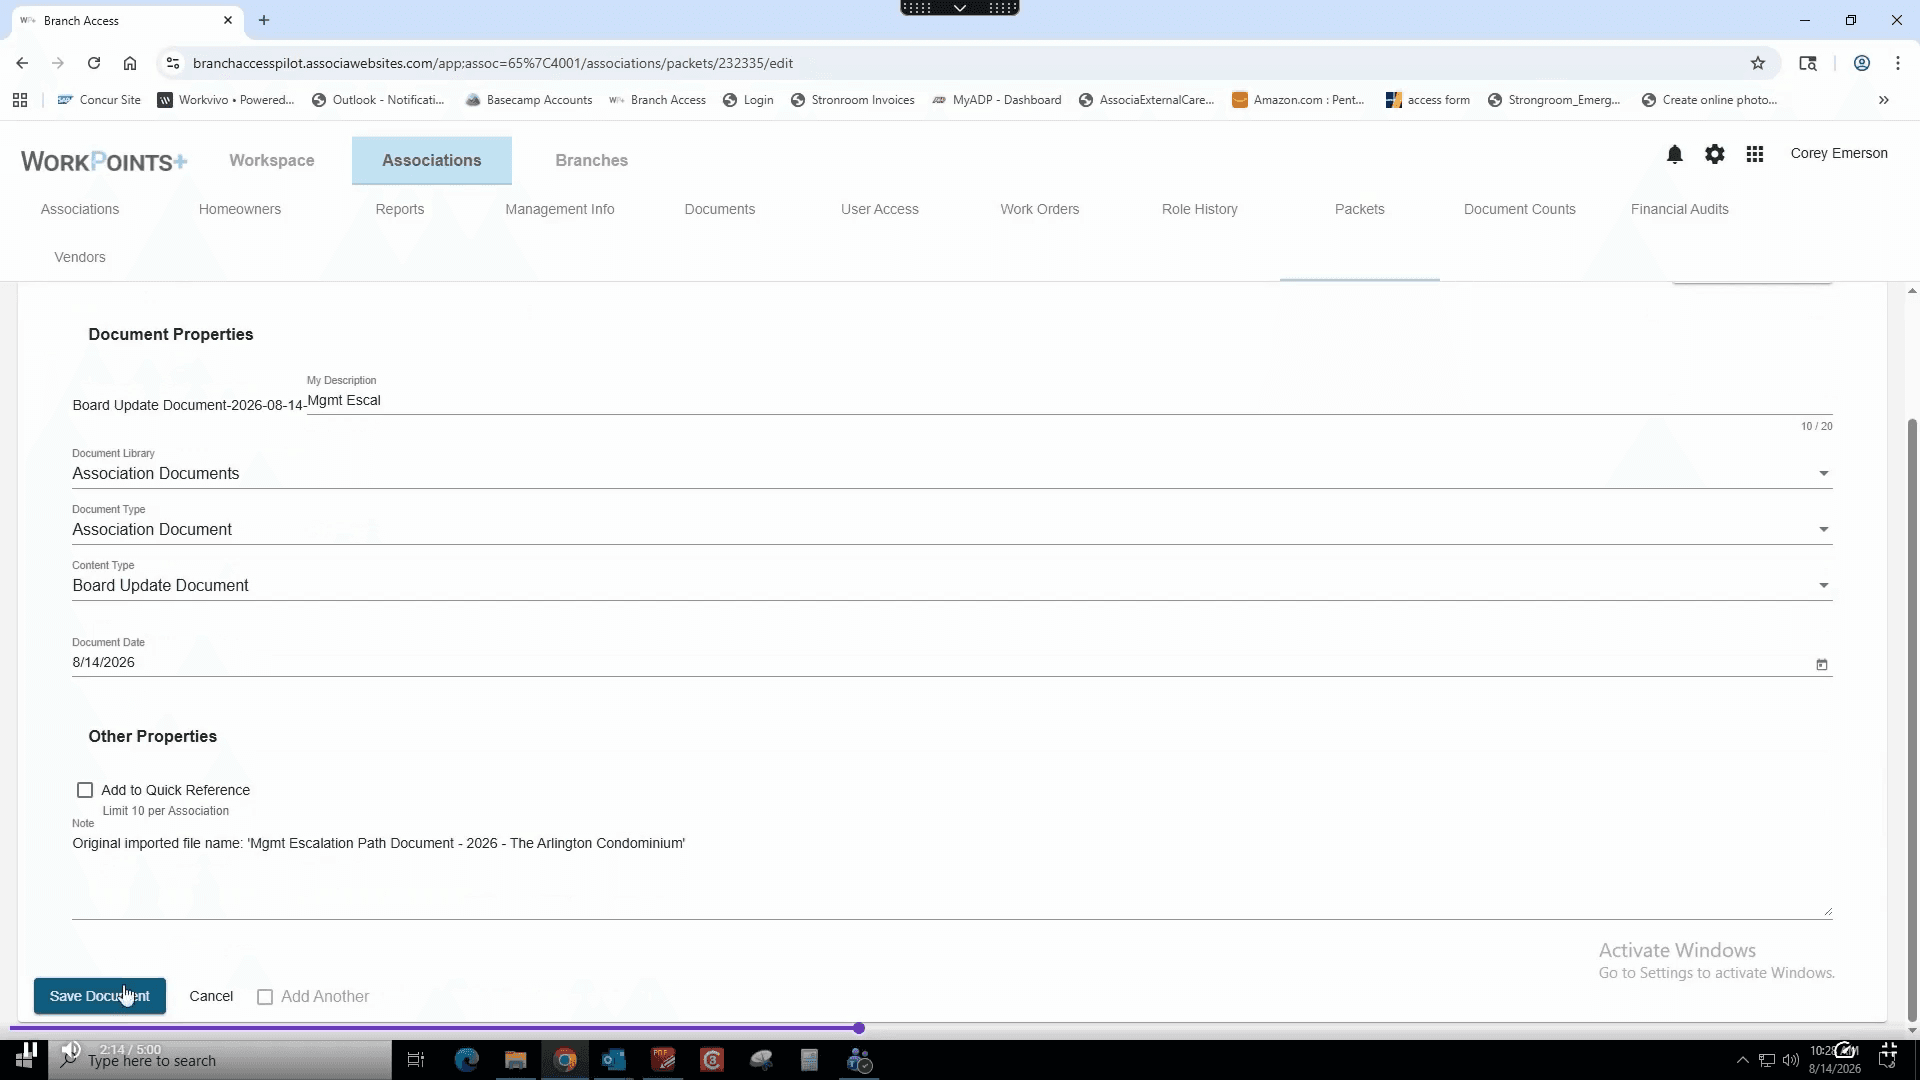
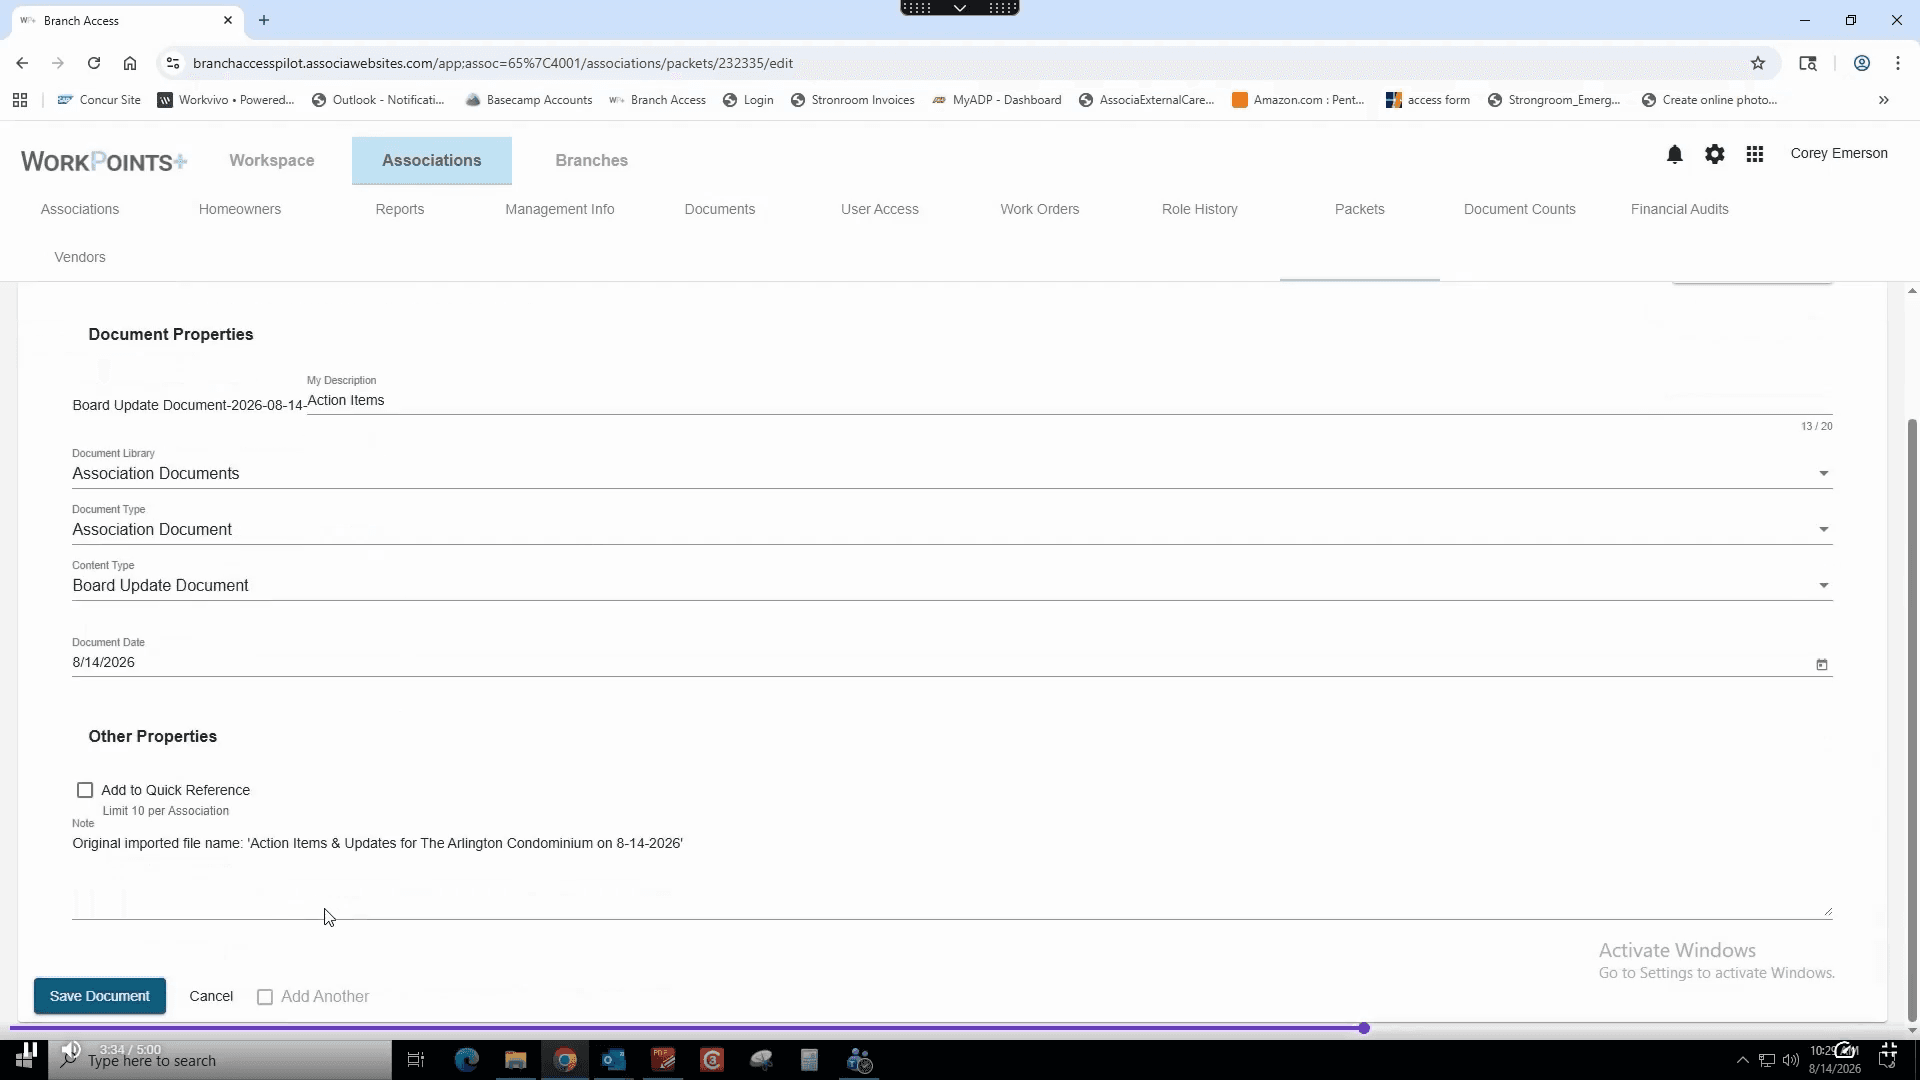
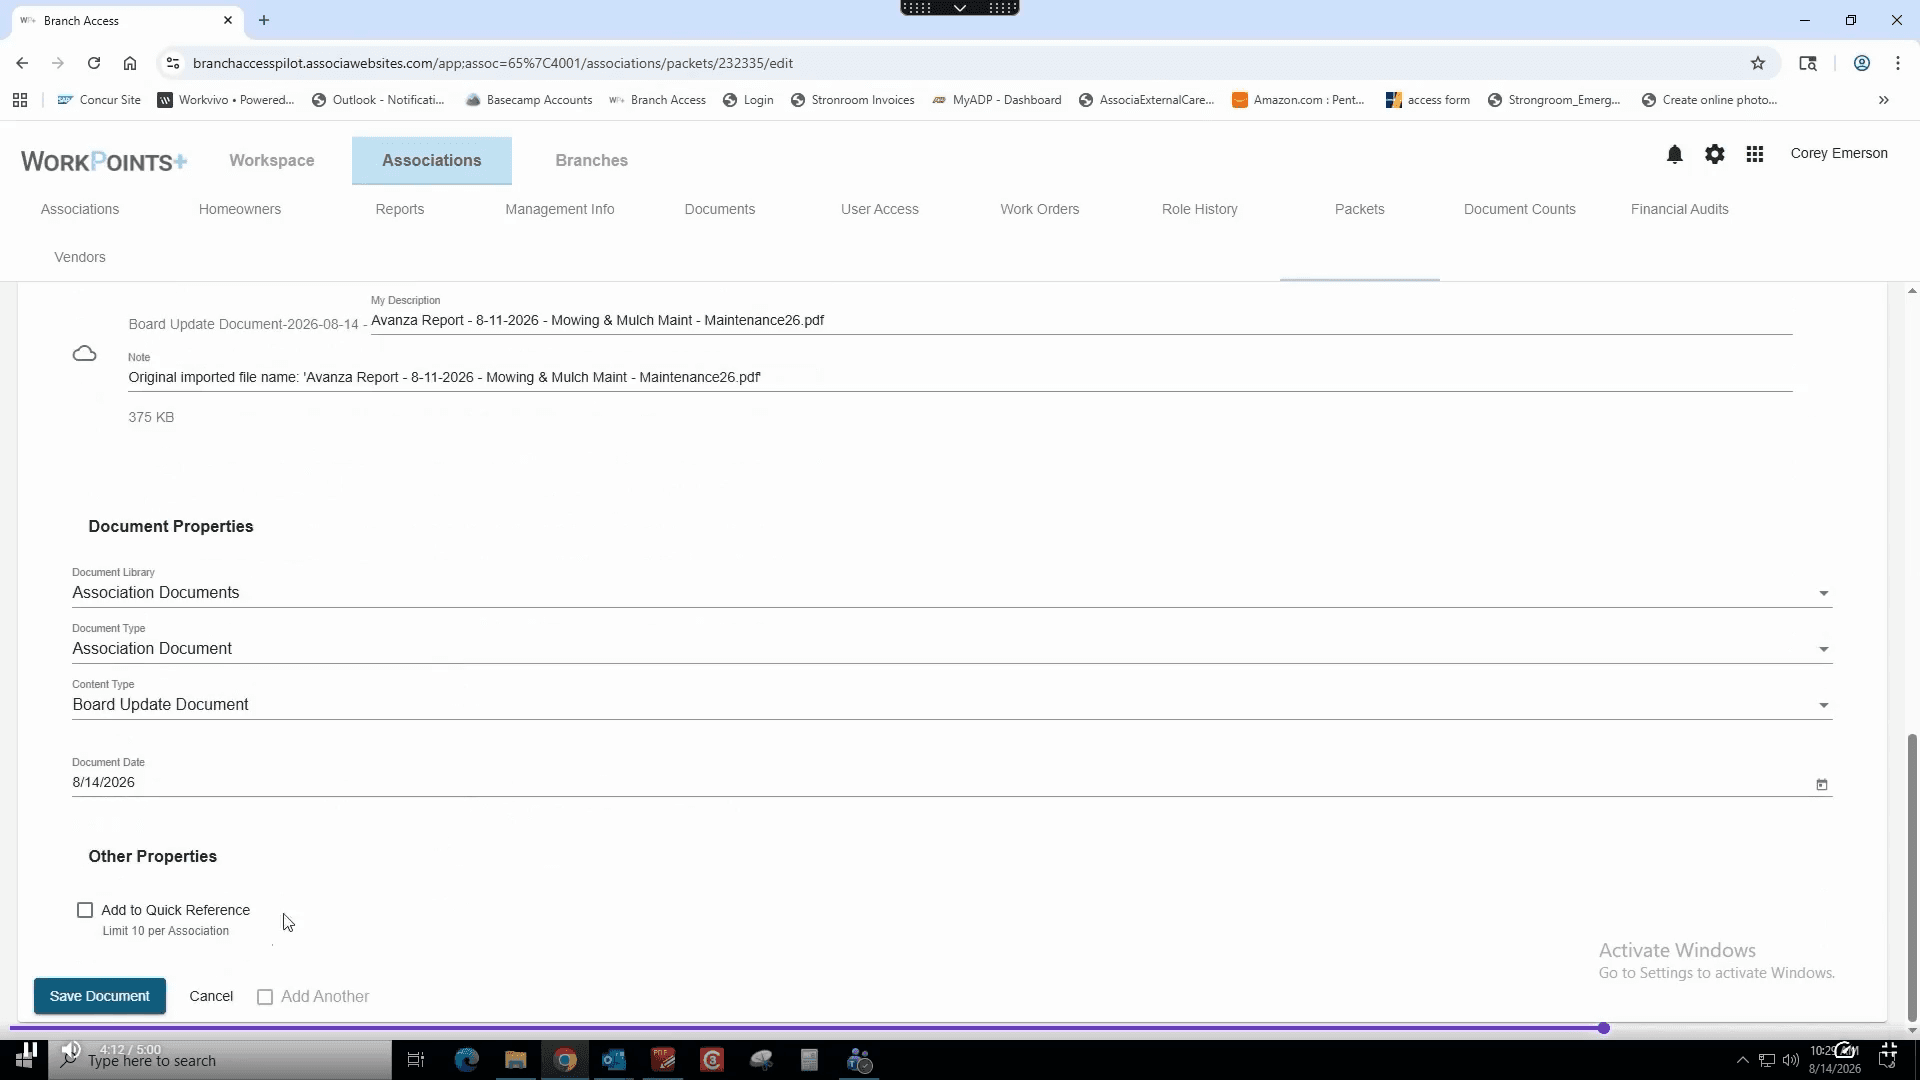
WorkPoints Plus enforces a character limit for file names. Shorten the file name before saving if necessary; the board will only see the organized packet, not this internal file name.
15
Click Save Document.
Customize Sections and Upload Supporting Documents
16
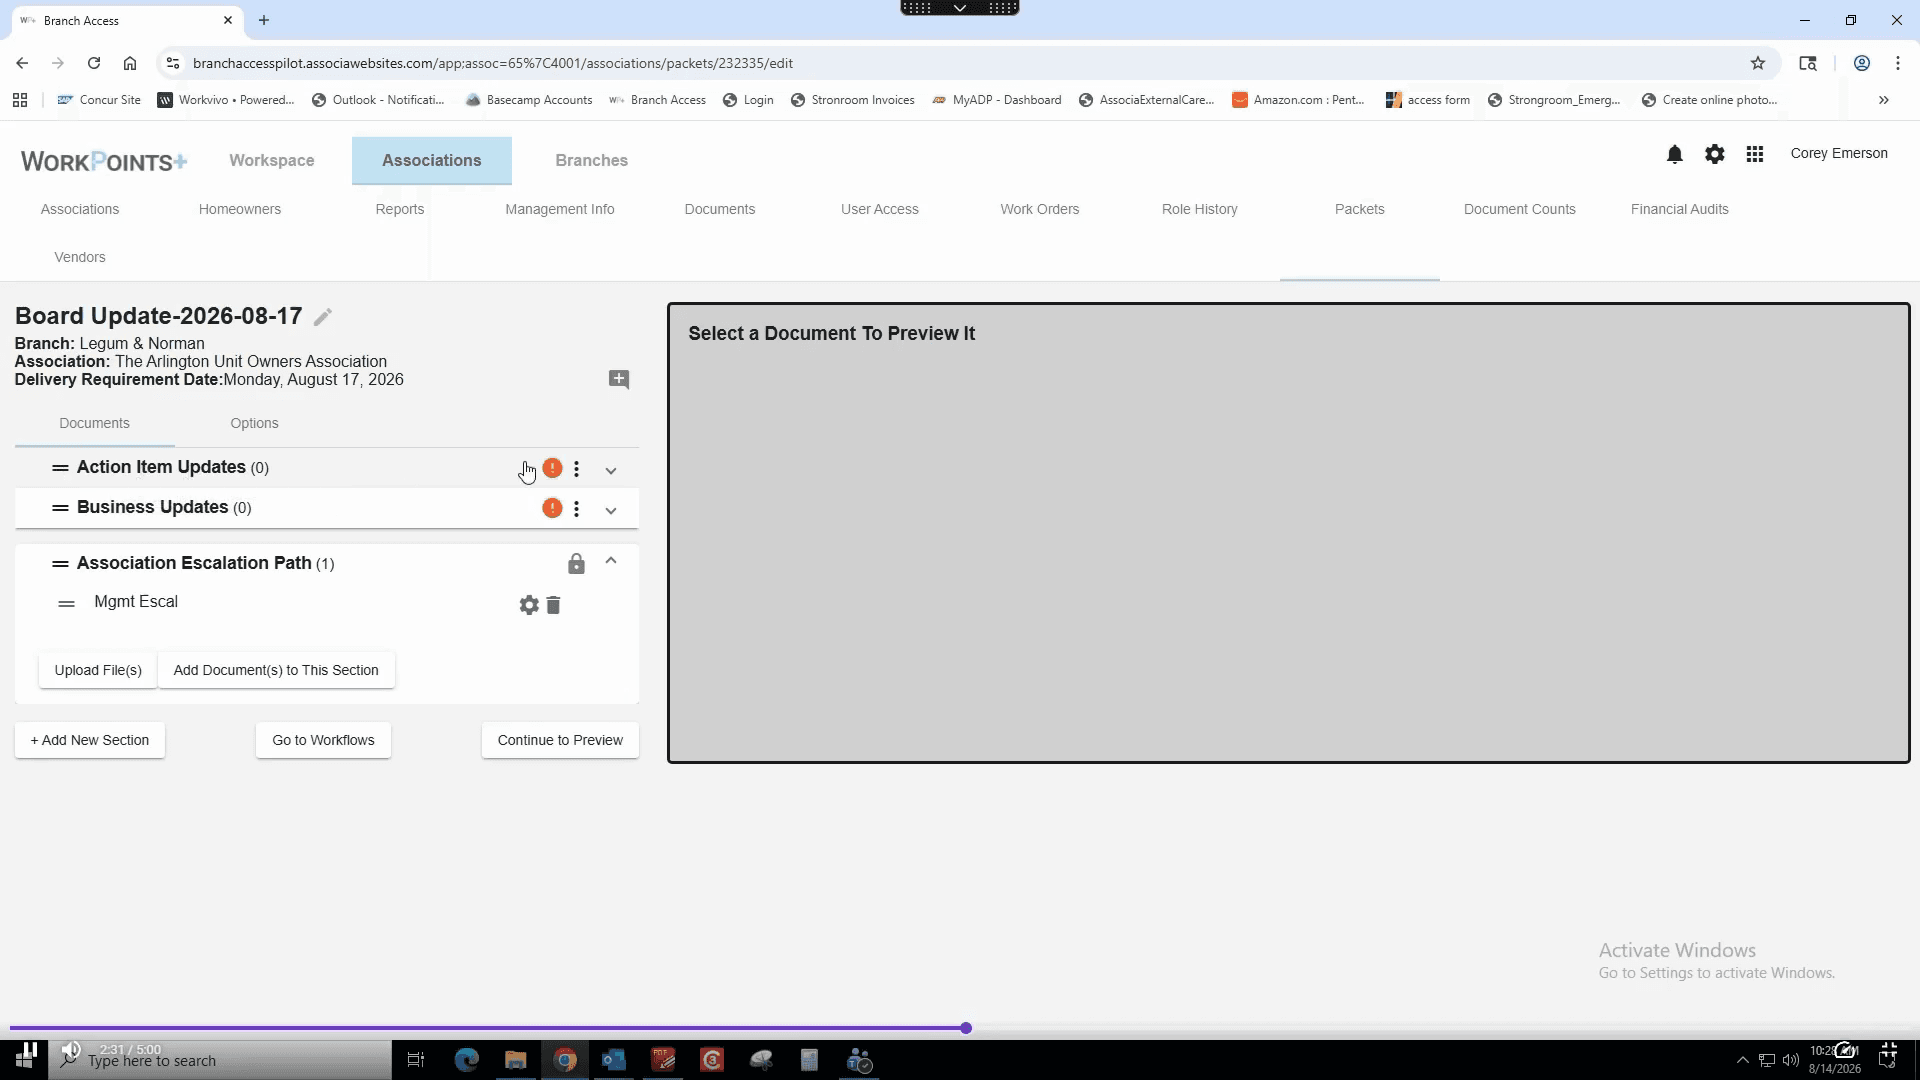
Drag the Action Item Updates line up using the handle on the left to reorder the section.
17
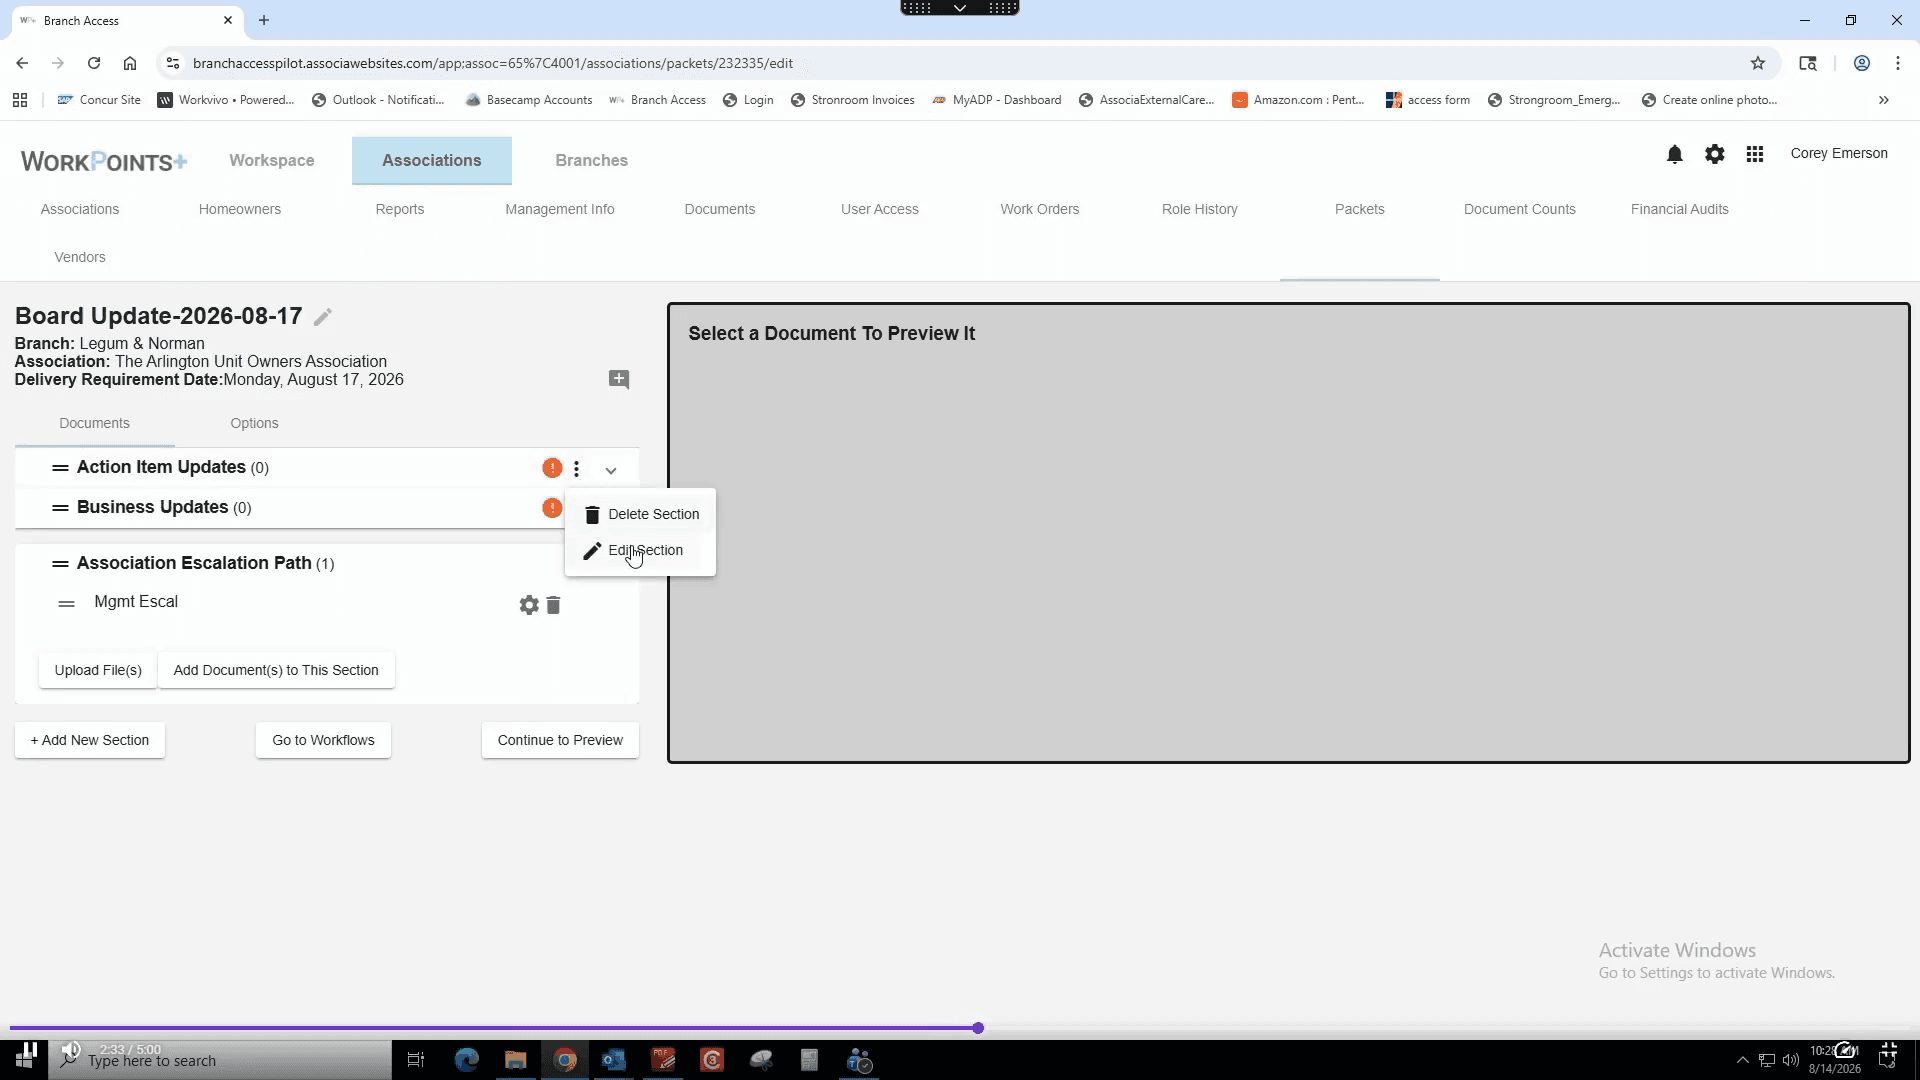
Click the Edit Section button (the three dots) for the Action Item Updates line.
18
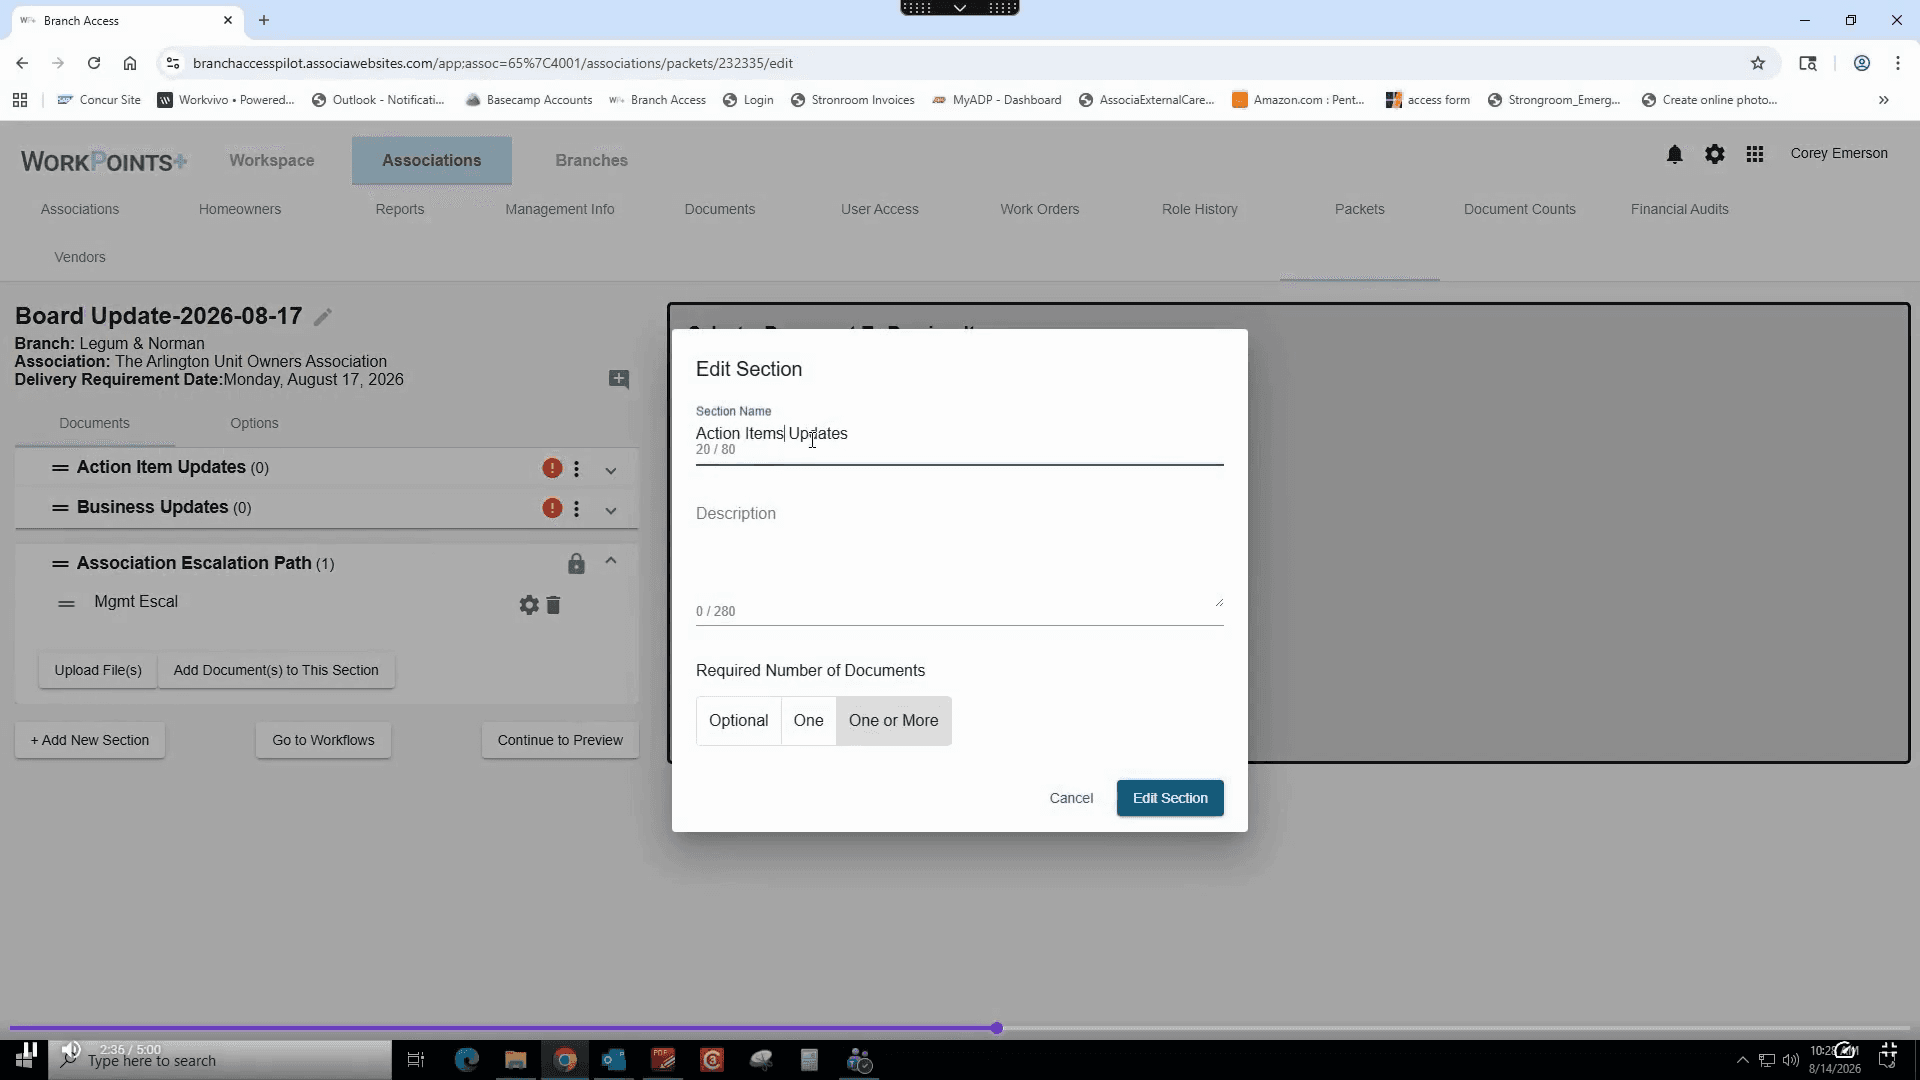
Click the Section Name field and edit the section name to match your preference.
19
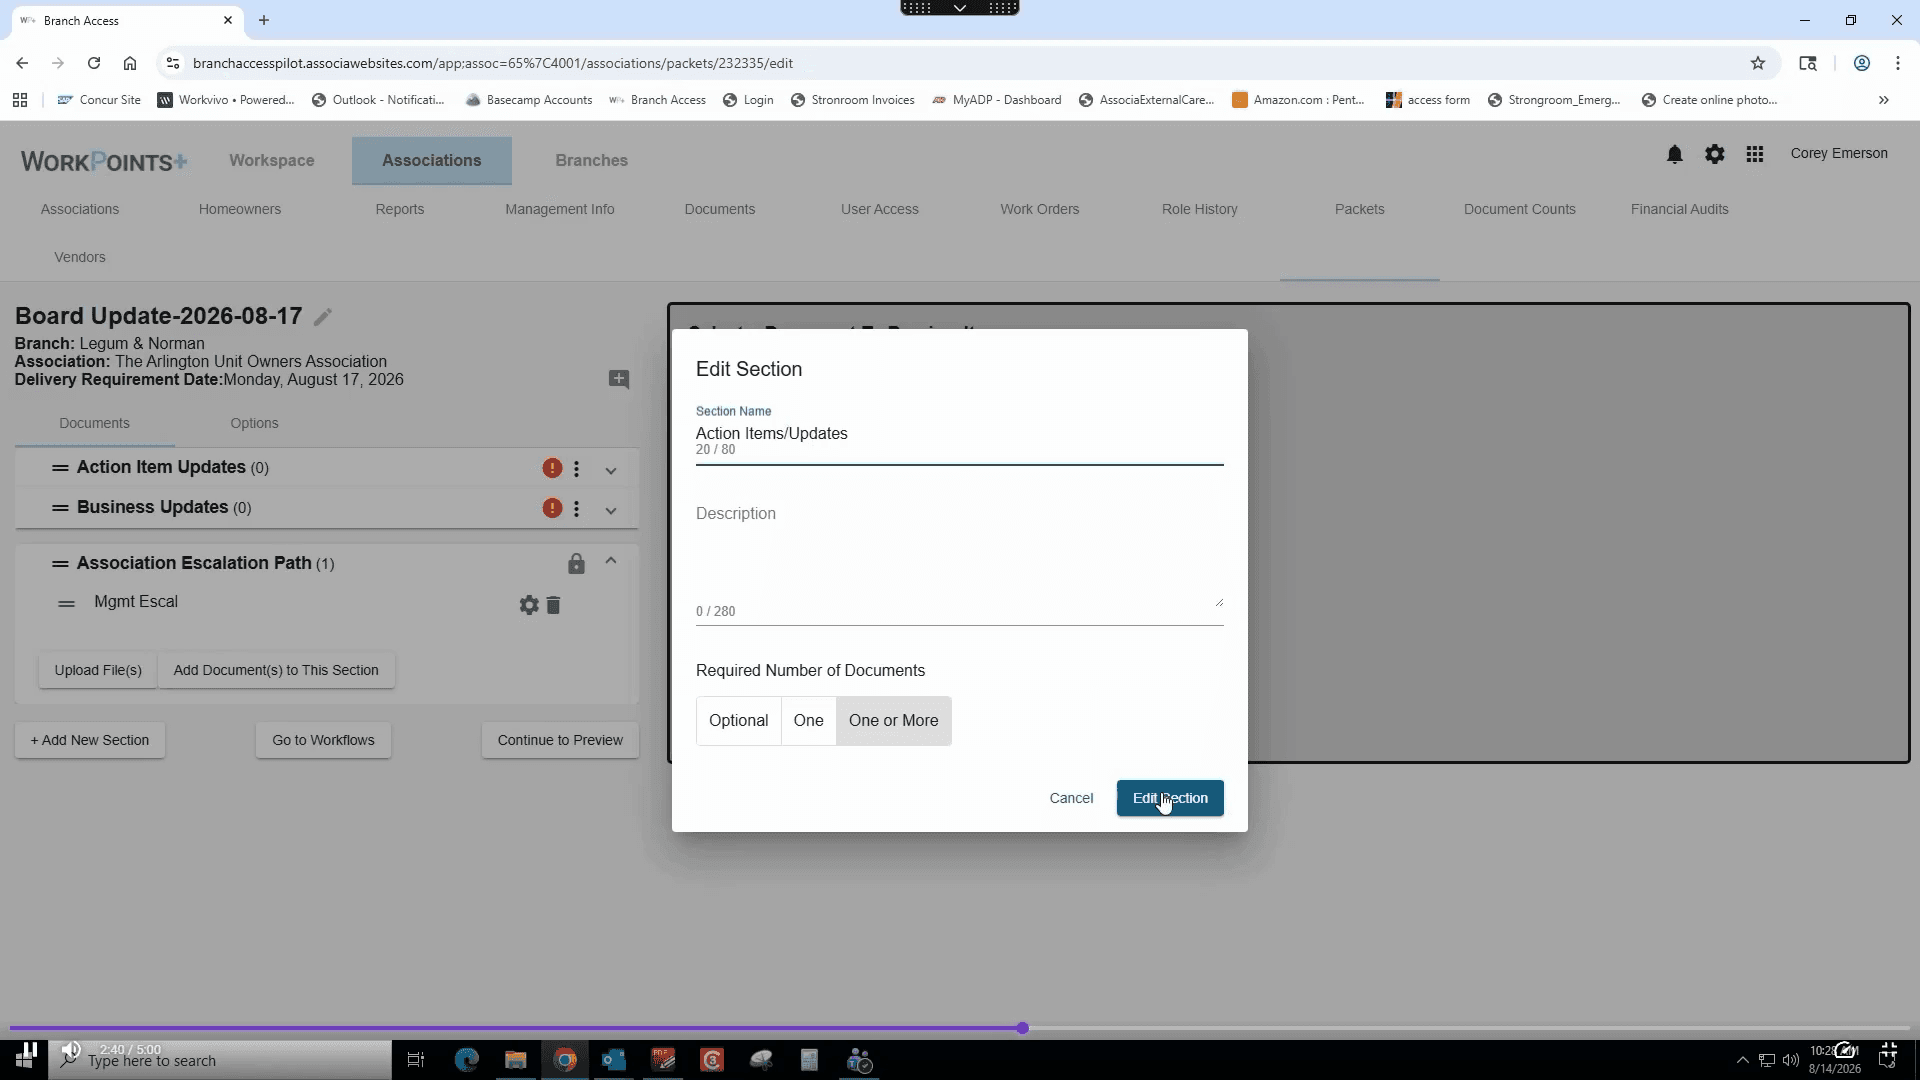
Click the Edit Section button to save.
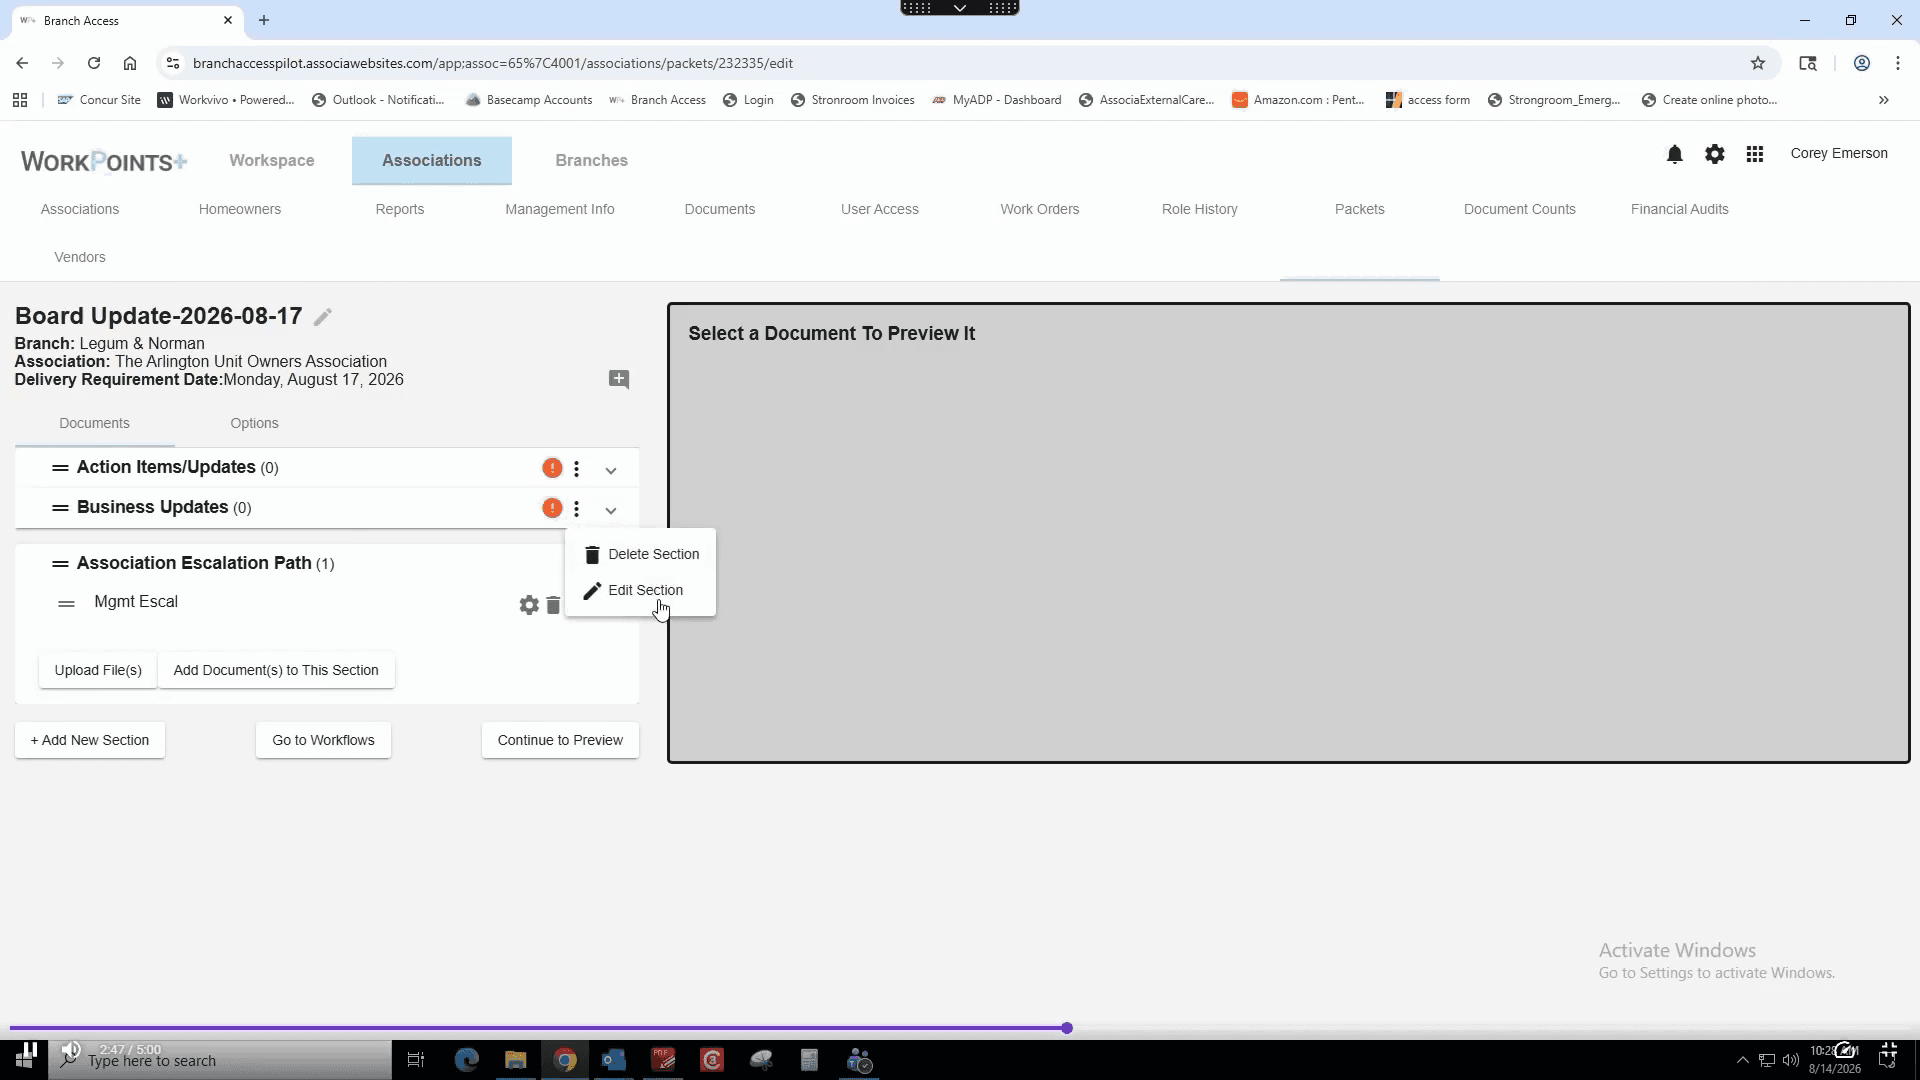
20
Click the Edit Section button for the Business Updates line.
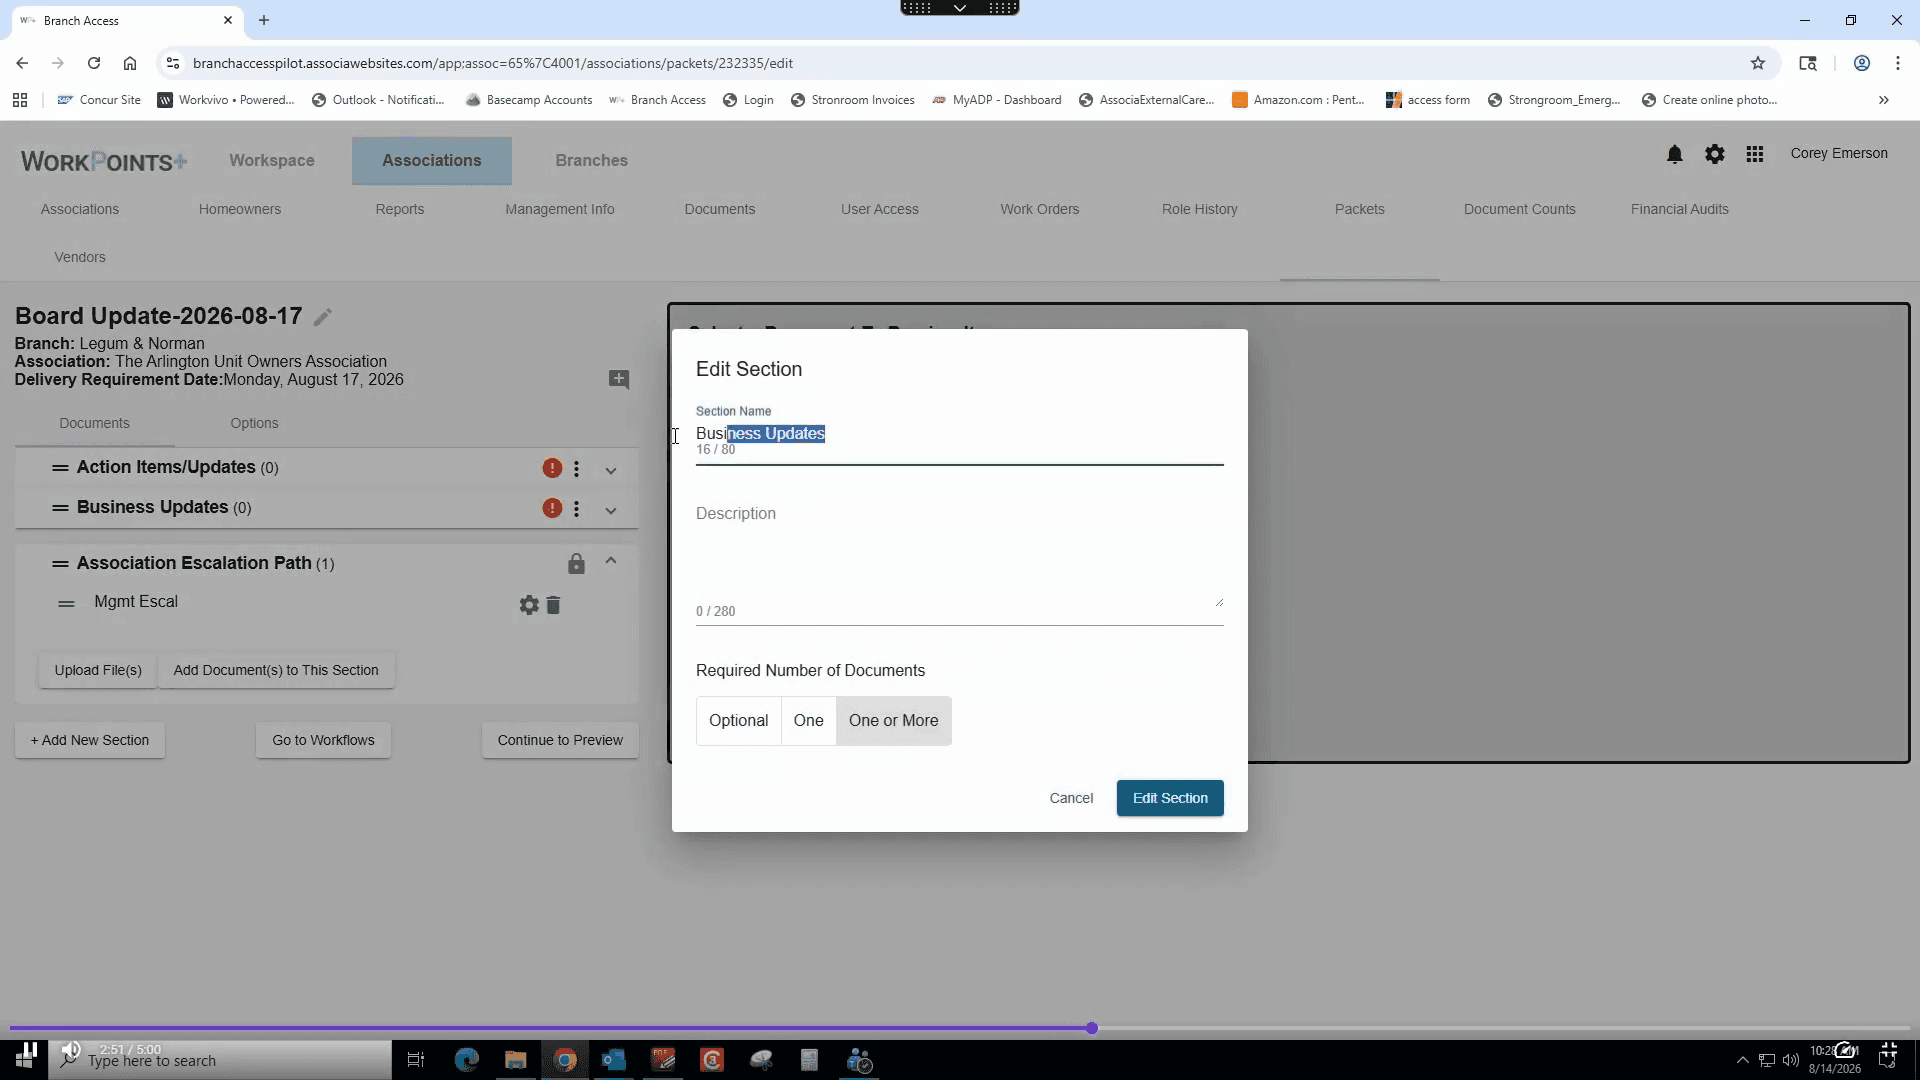
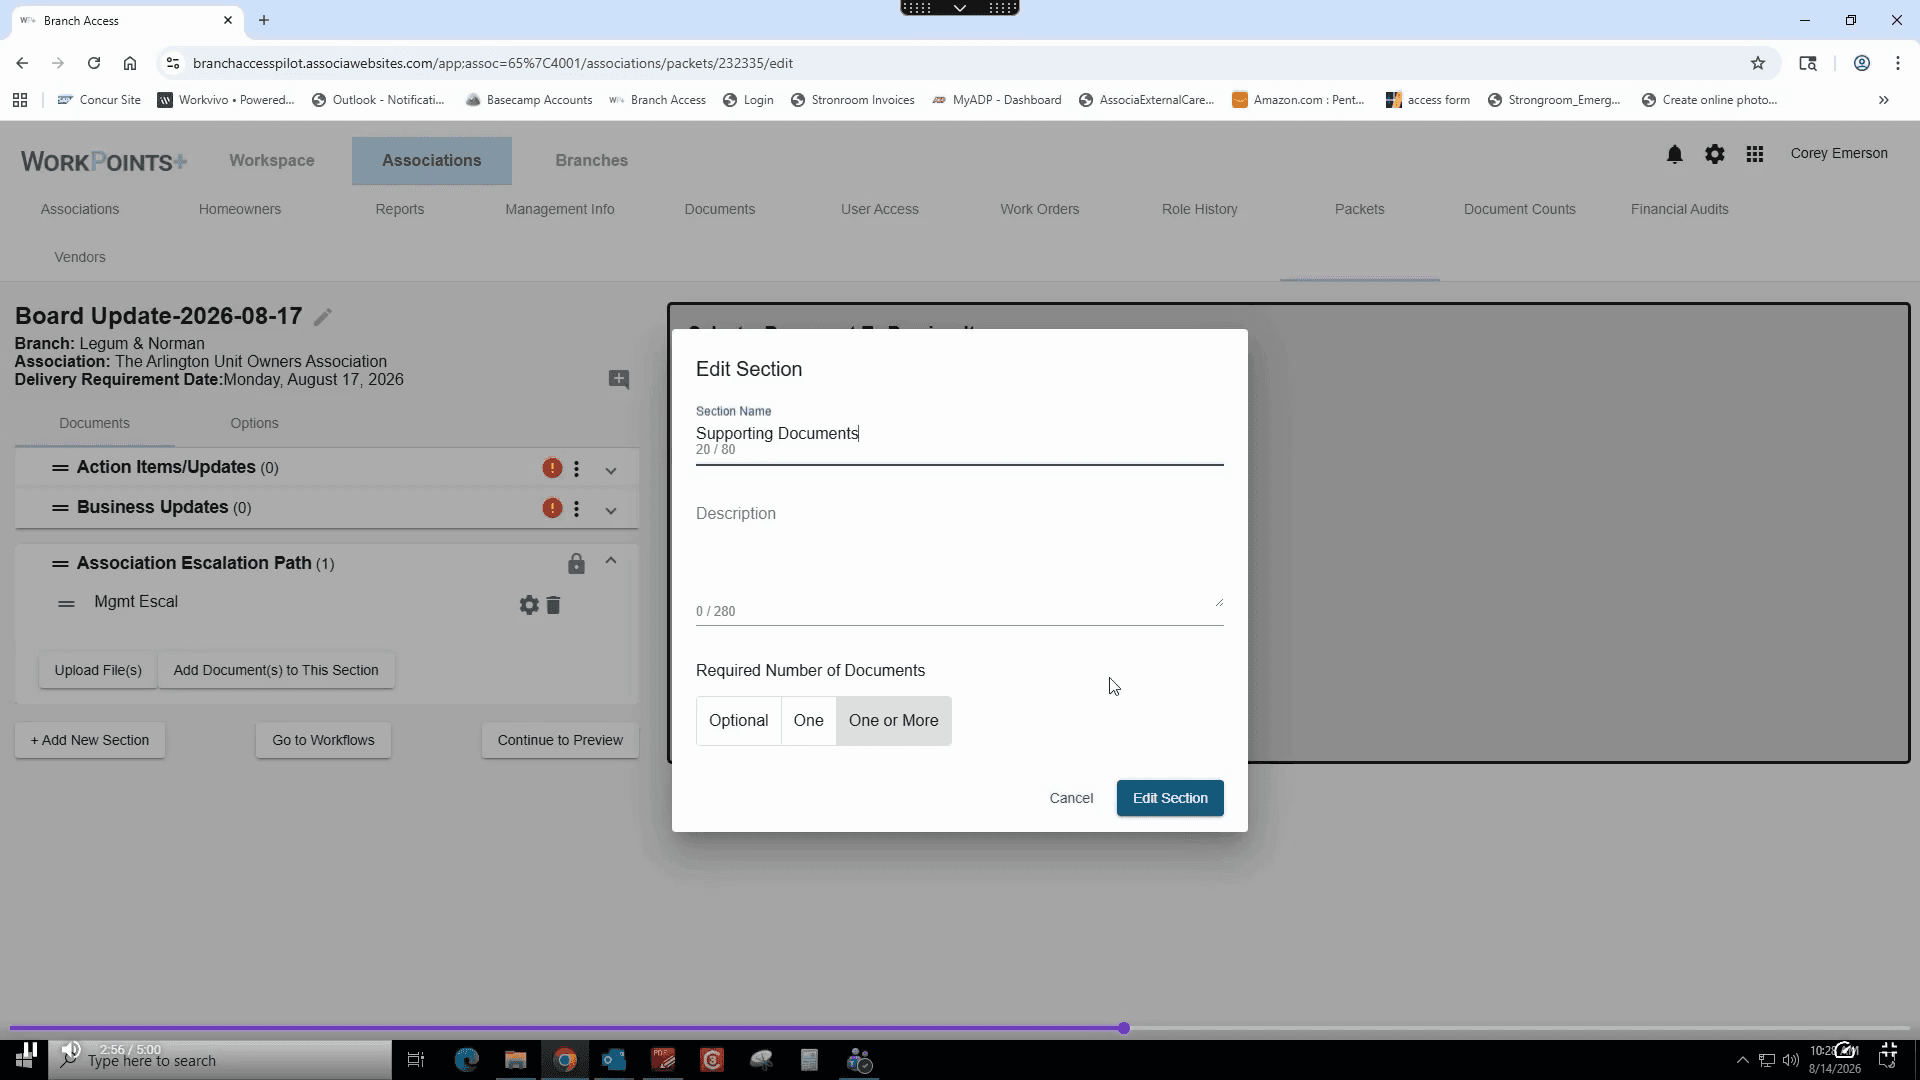
21
Select the existing text and type Supporting Documents into the Section Name field.
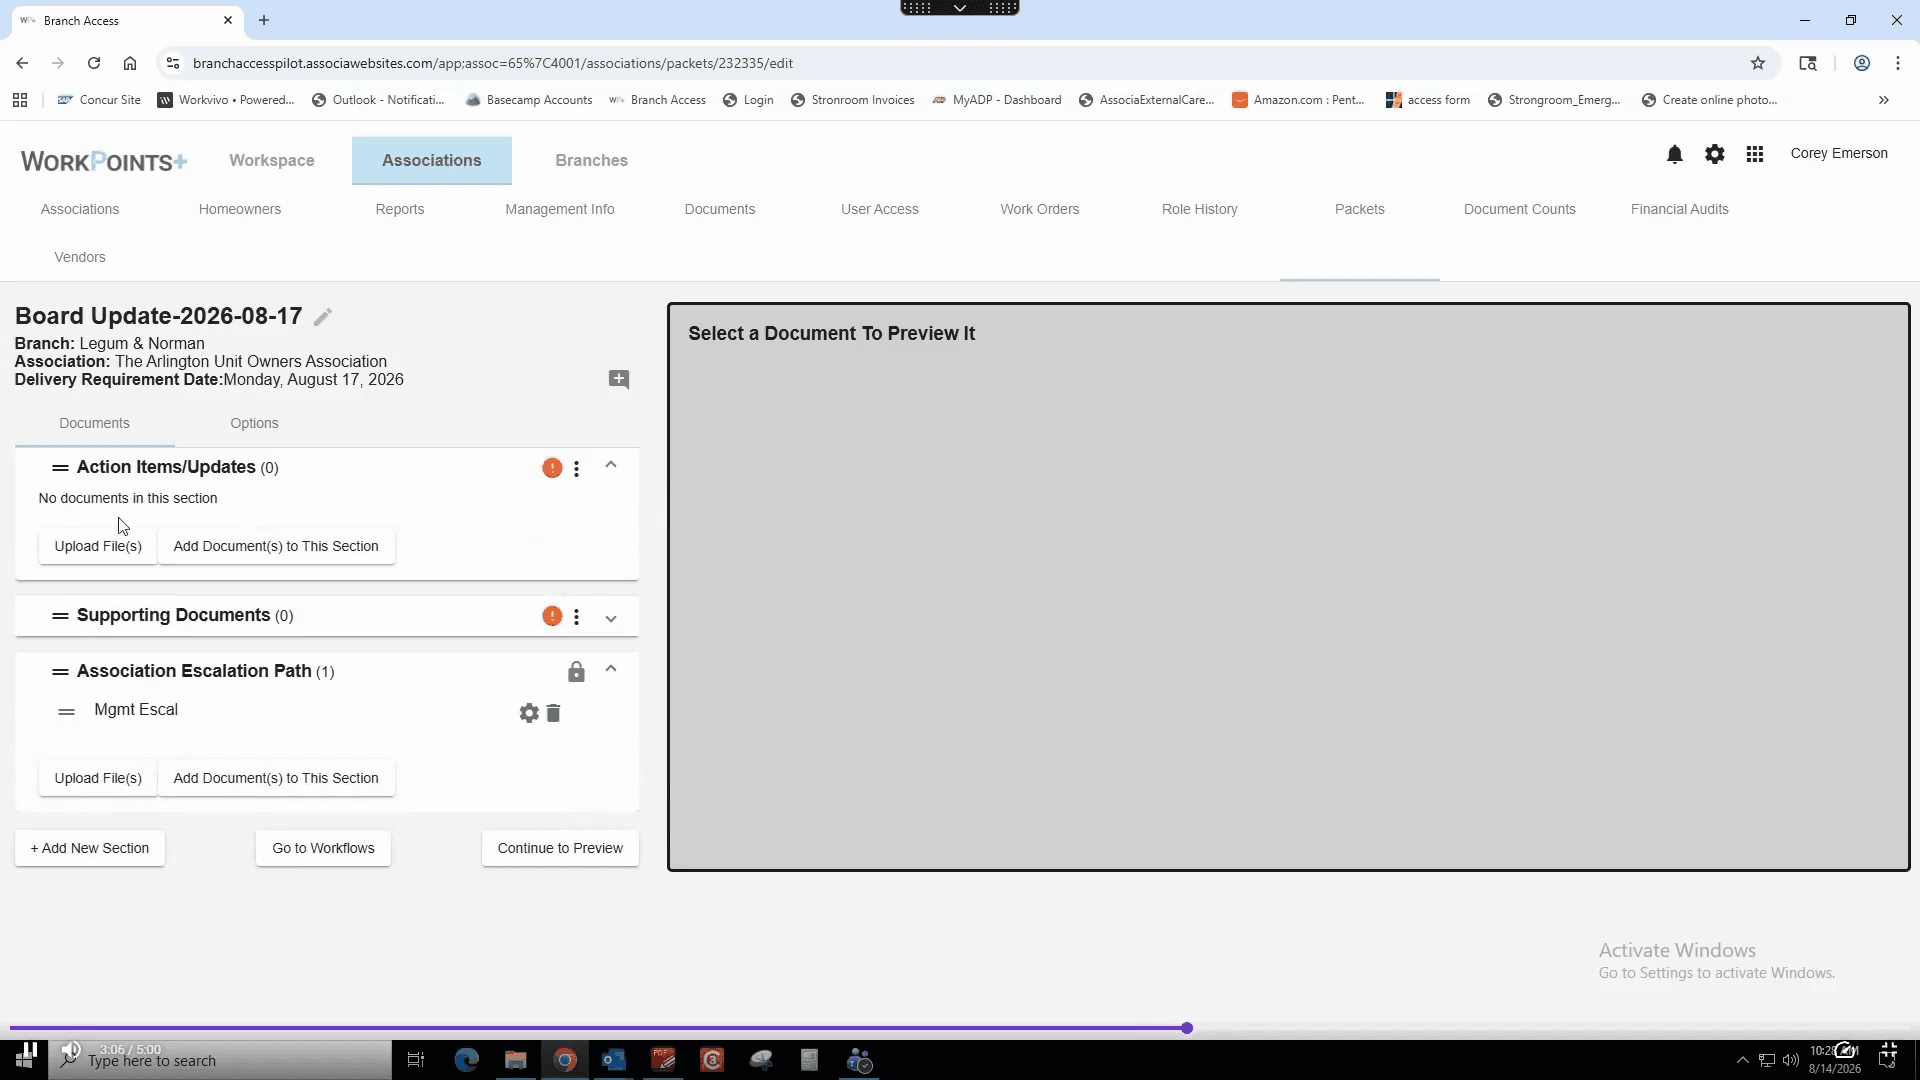
22
Click the Edit Section button to apply the change.
23
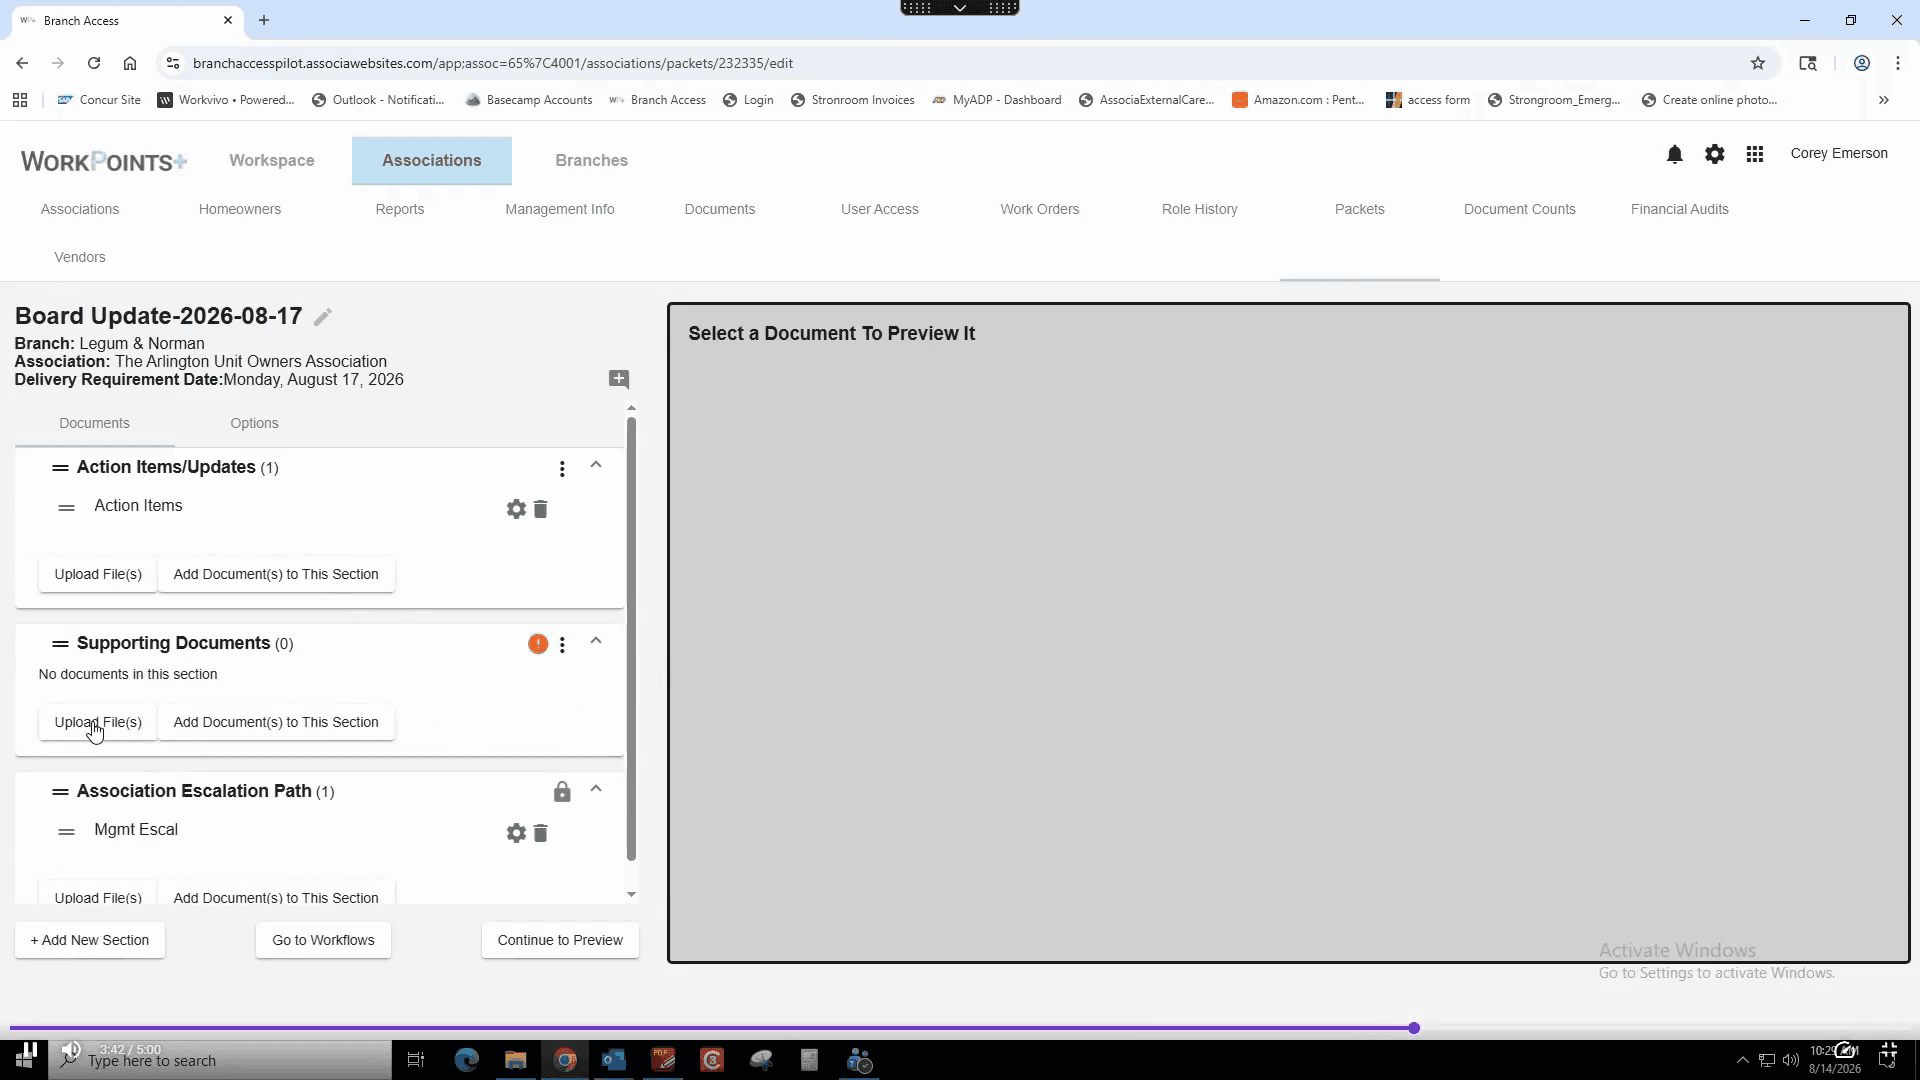
Click Upload File(s) within the Action Items section.
24
Click BROWSE FILES... and then click Select a File.
25
Select your Action Items & Updates file and click Open.
26
Click Attach File.
27
Shorten the file name if necessary, then click Save Document.
28
Click Upload File(s) under the Supporting Documents section.
29
Click BROWSE FILES....
30
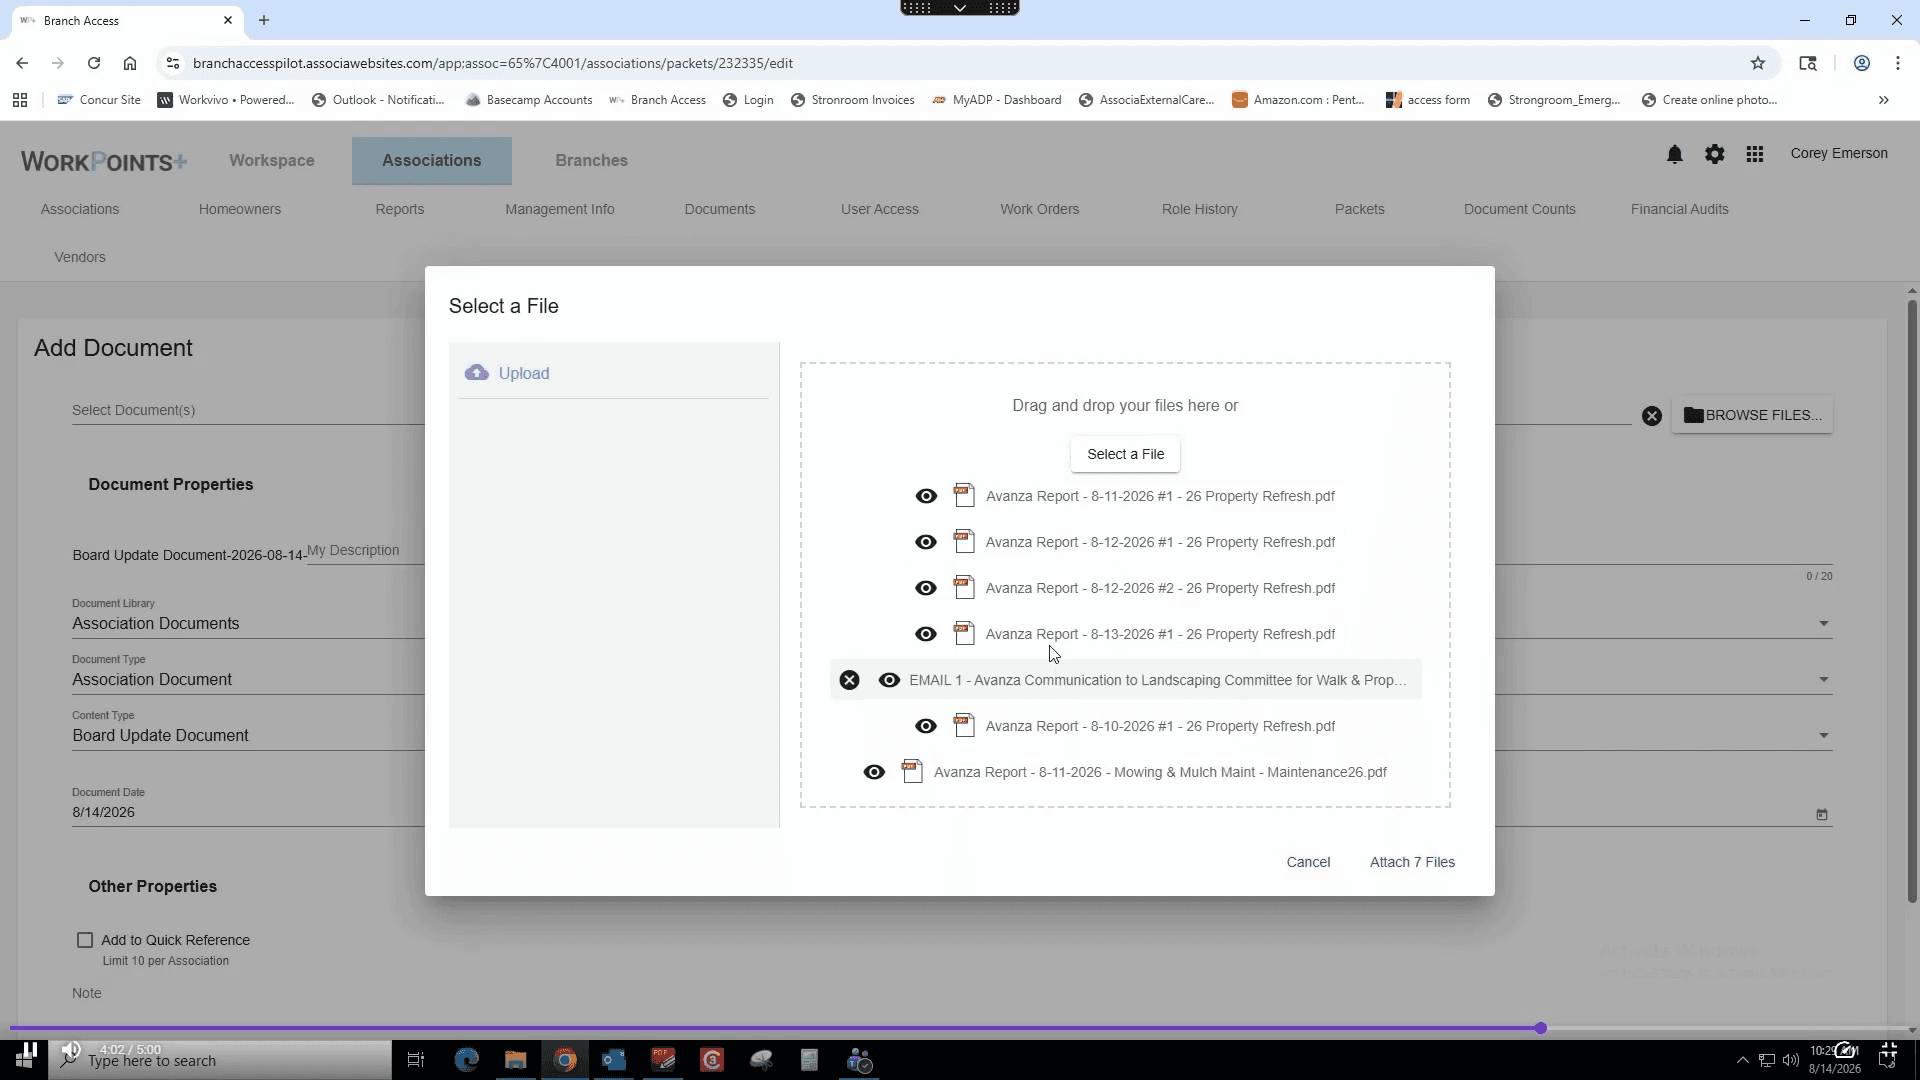
Click Select a File or drag and drop multiple files (such as emails and reports) directly into the upload area.
31
Click Attach Files.
32
Click Save Document to upload them all at once.
33
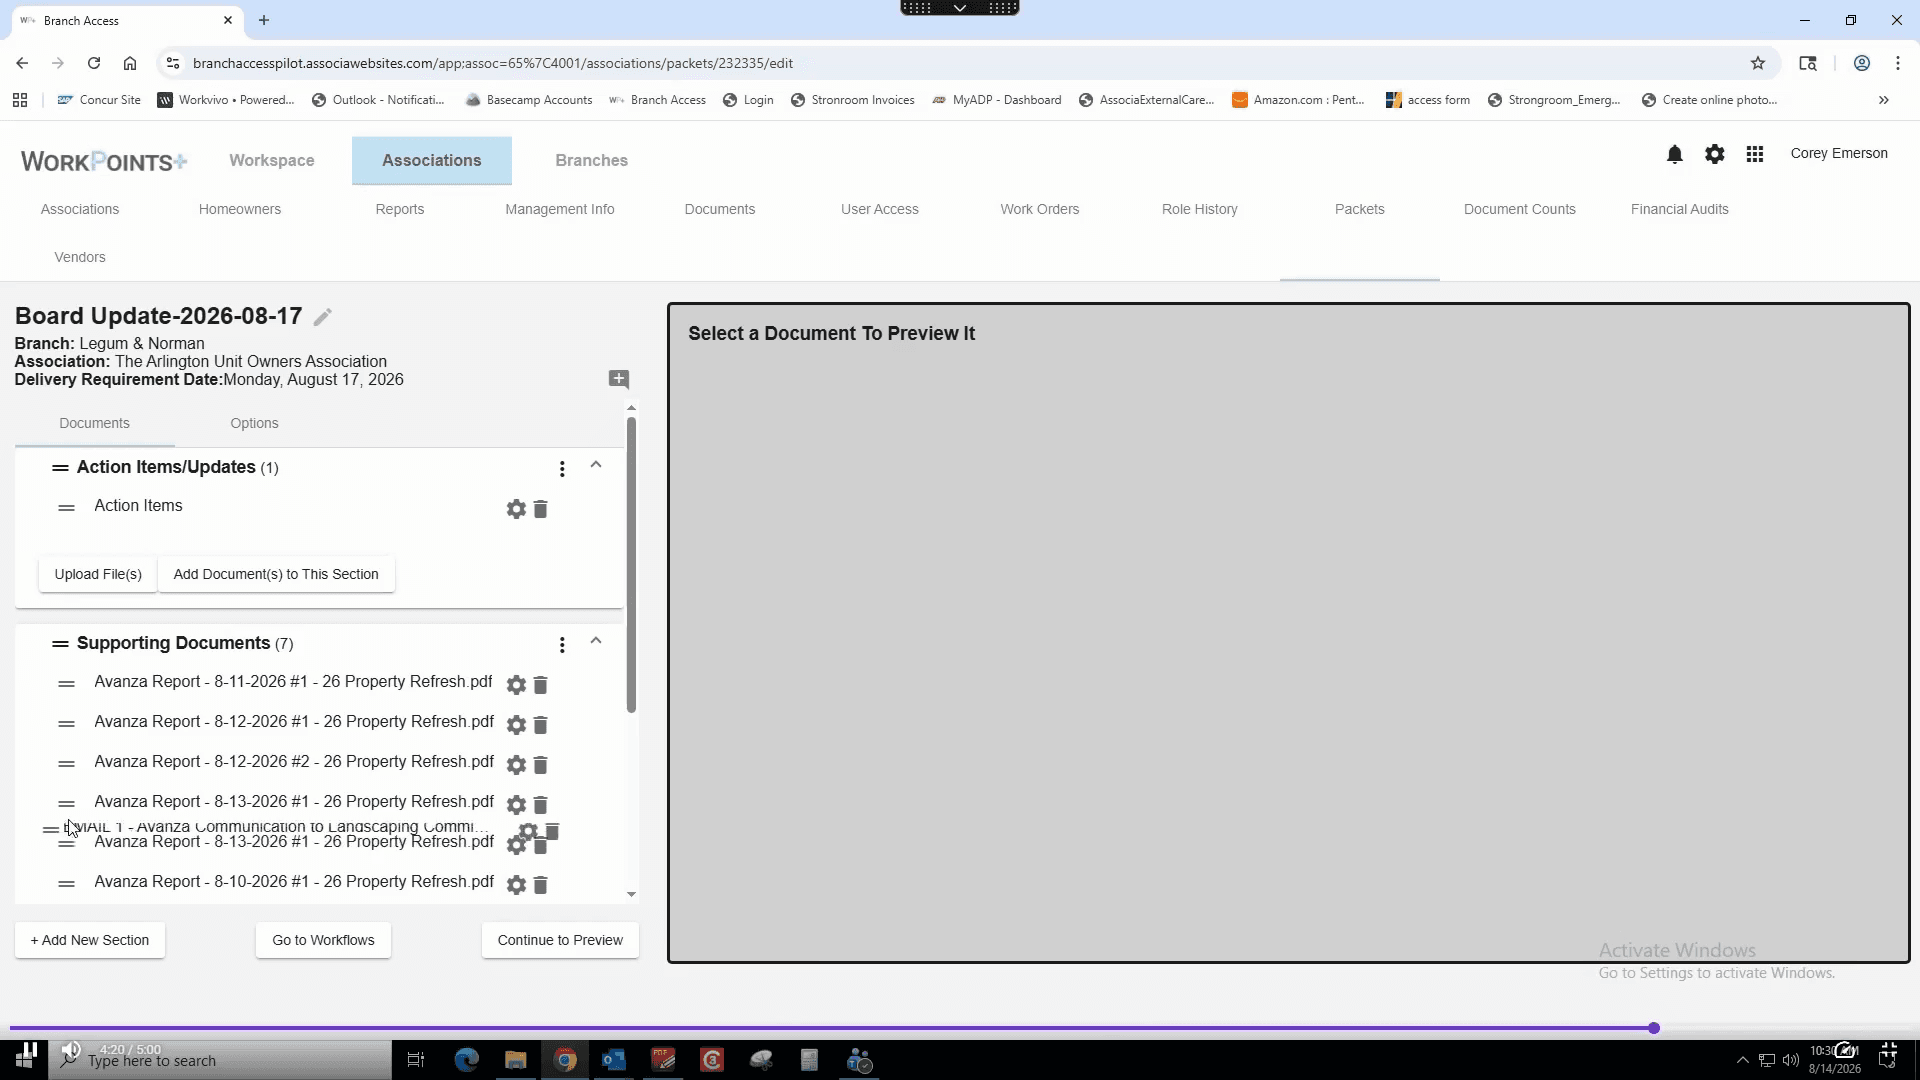
Reorder your supporting documents into a logical sequence by clicking and dragging the dotted handle to the left of each file.
Add Section Dividers and Preview
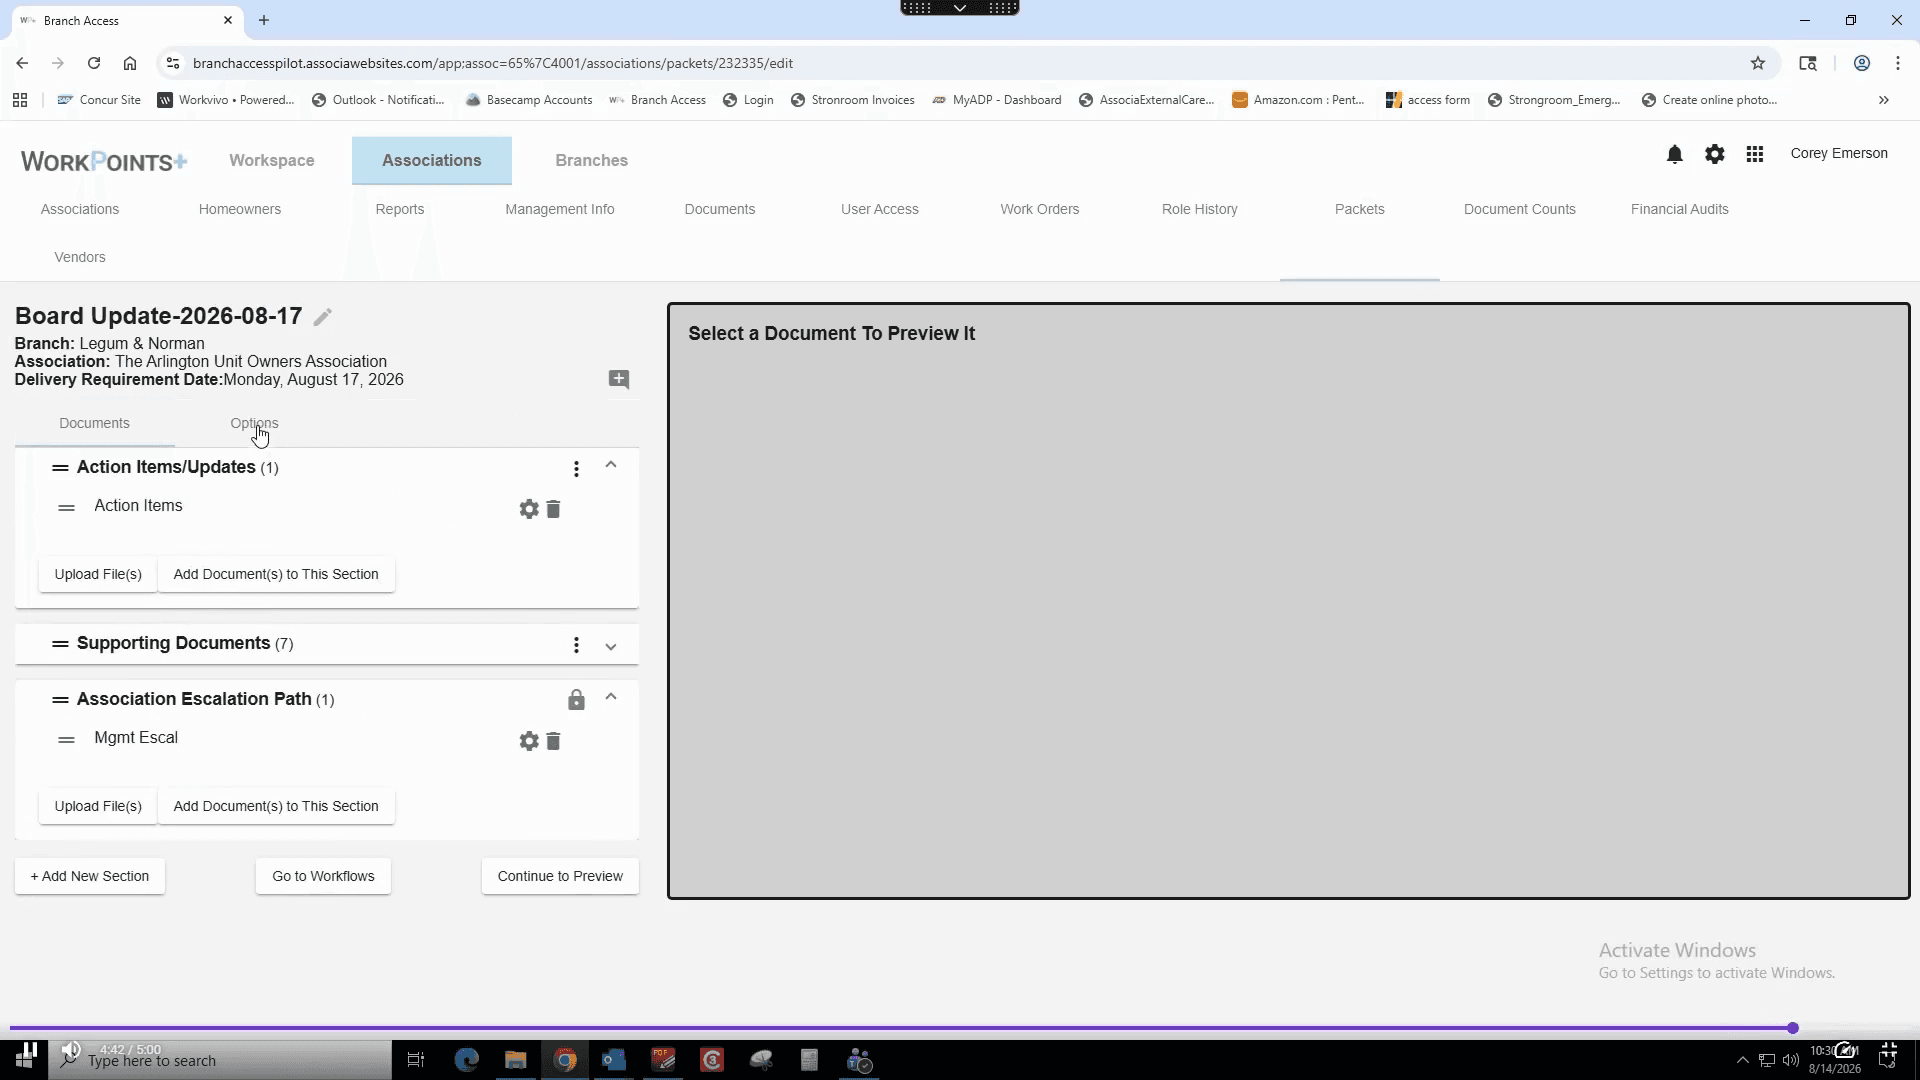
34
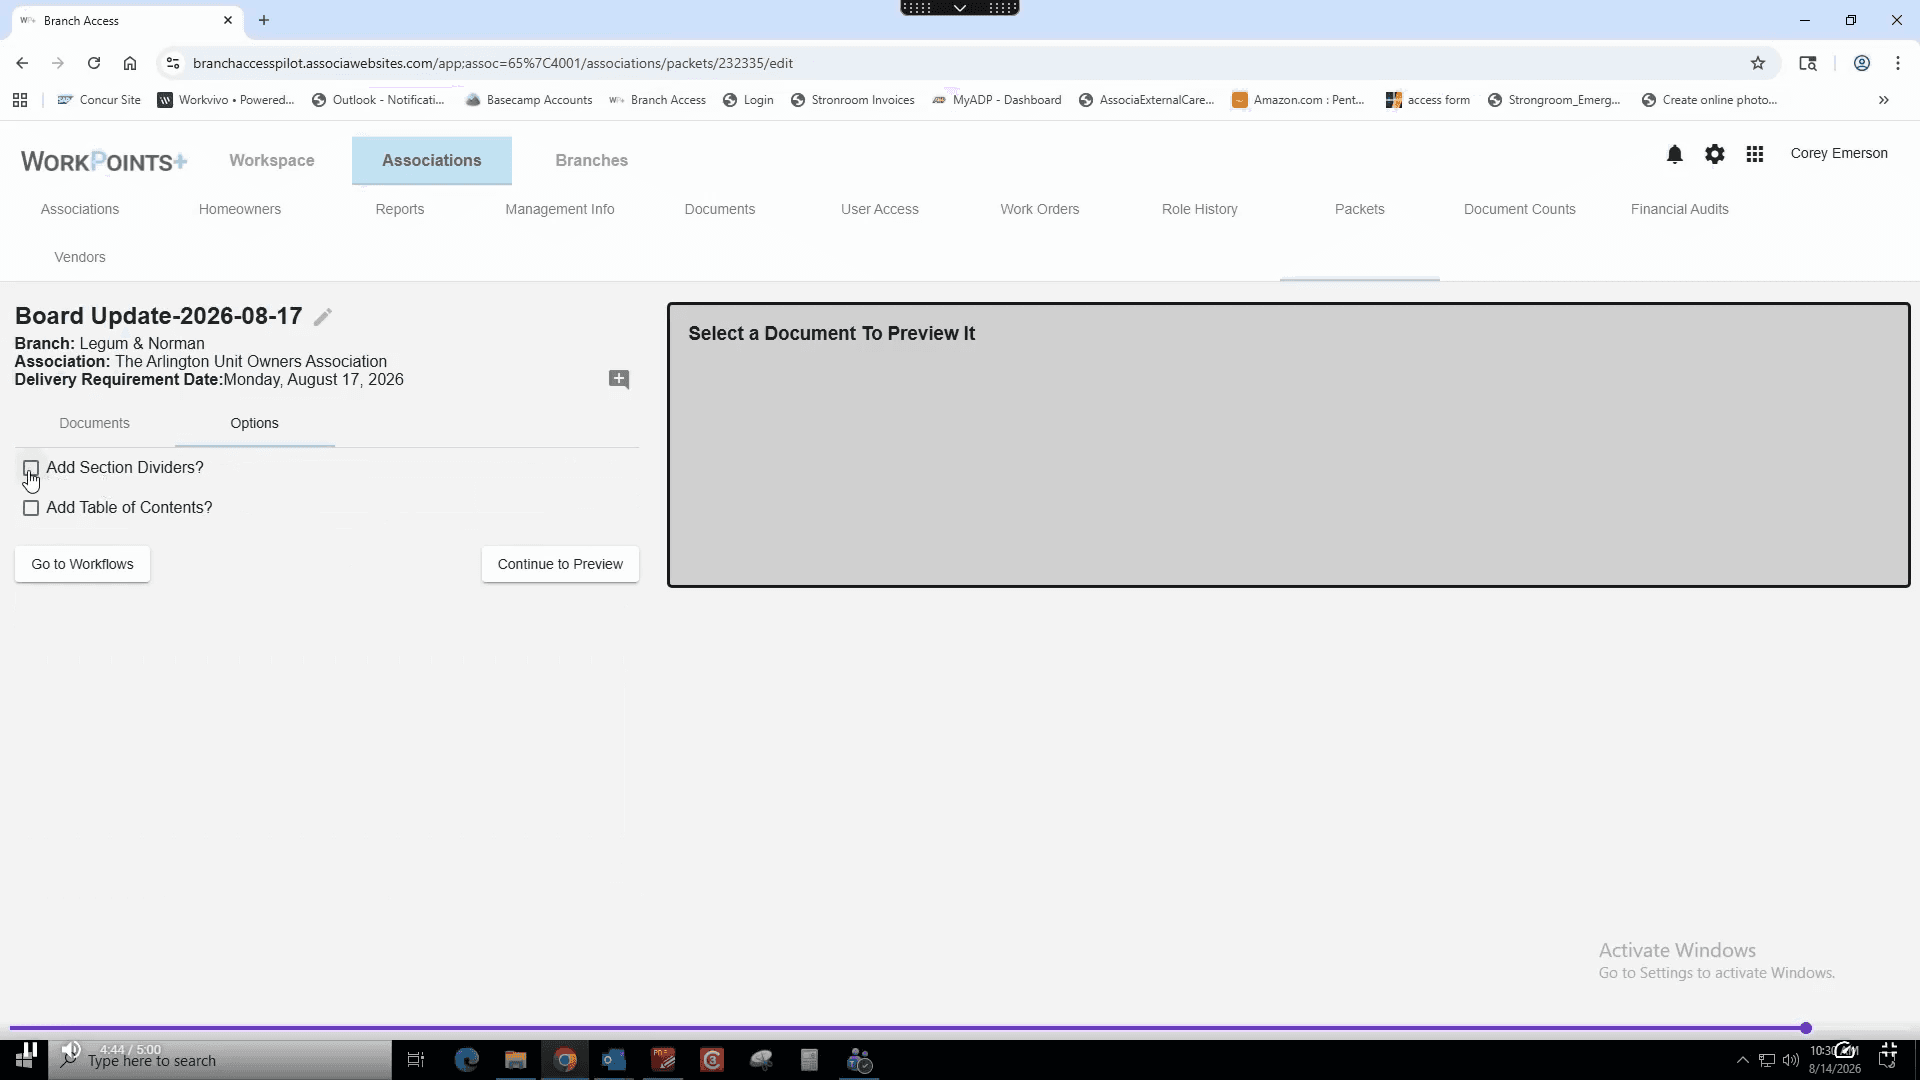
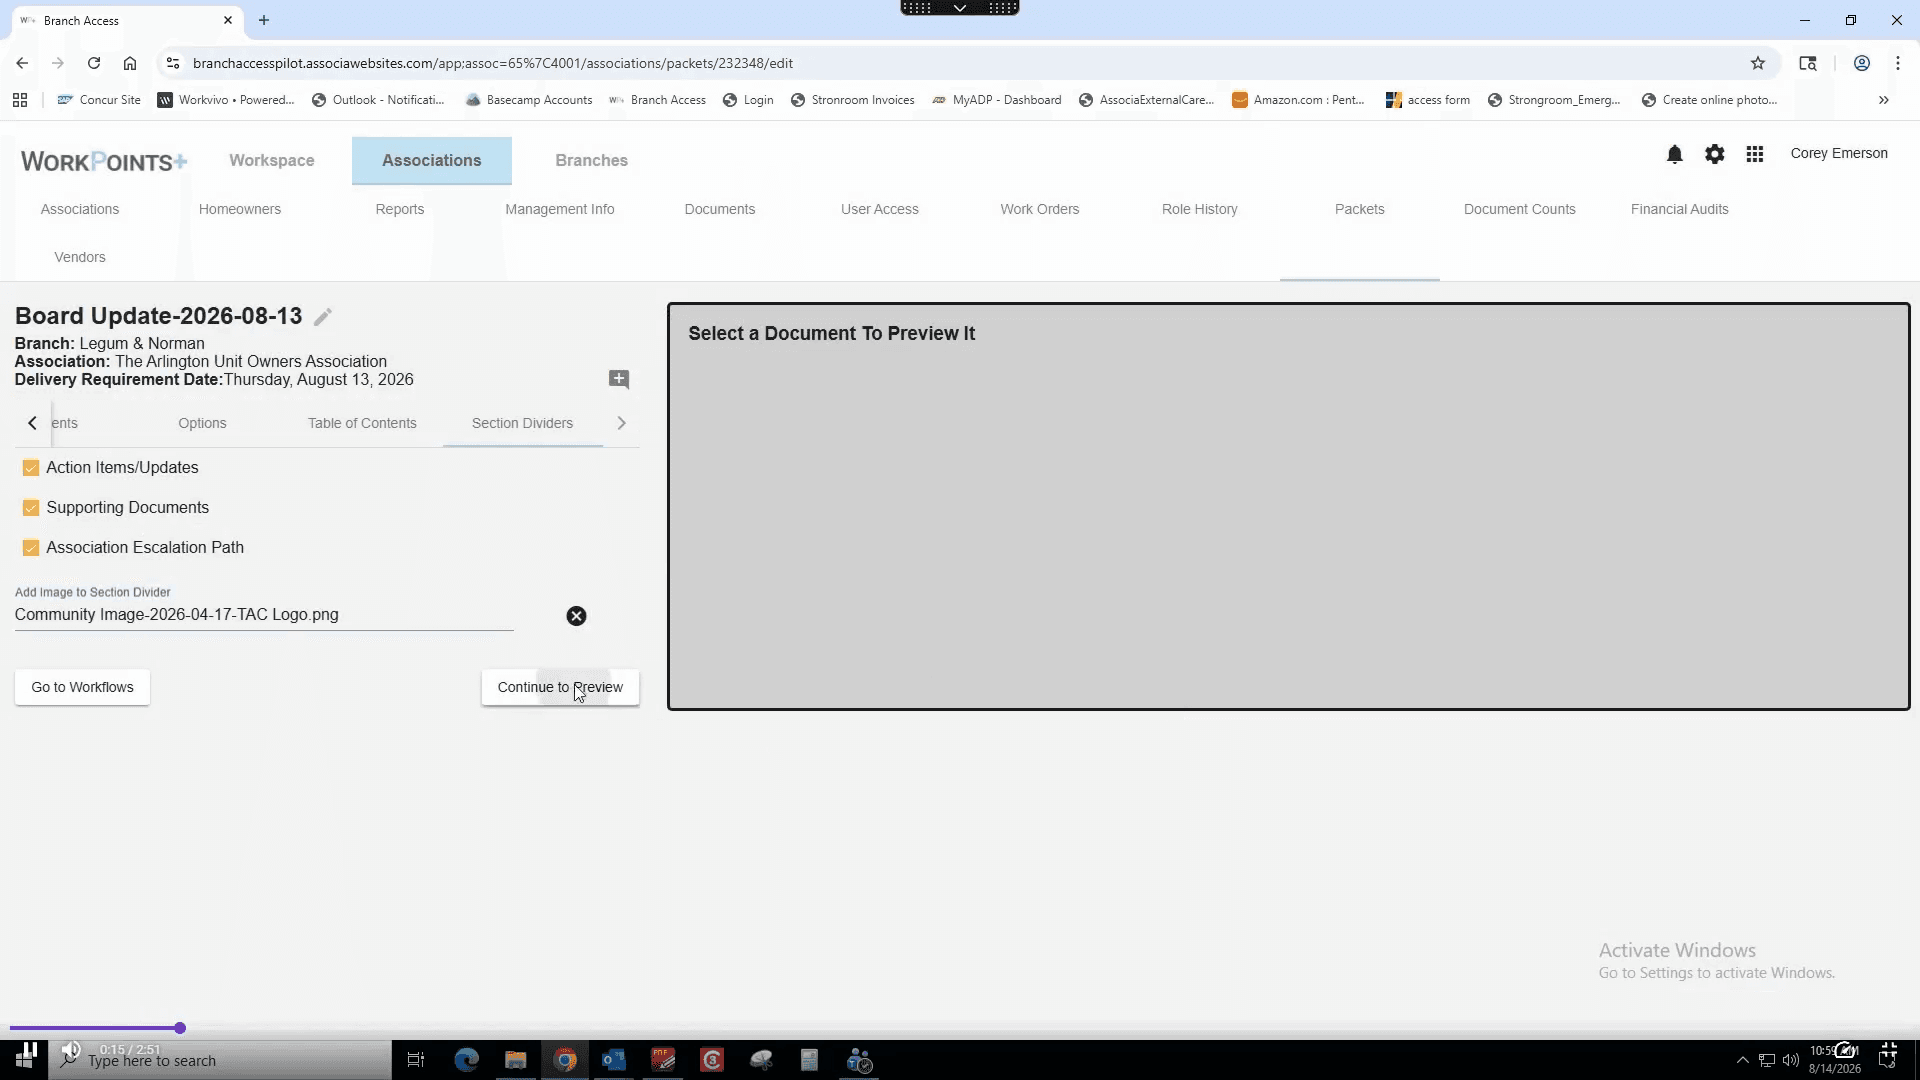
Click the Options tab in the left-hand panel.
35
Check the Add Section Dividers? box.
36
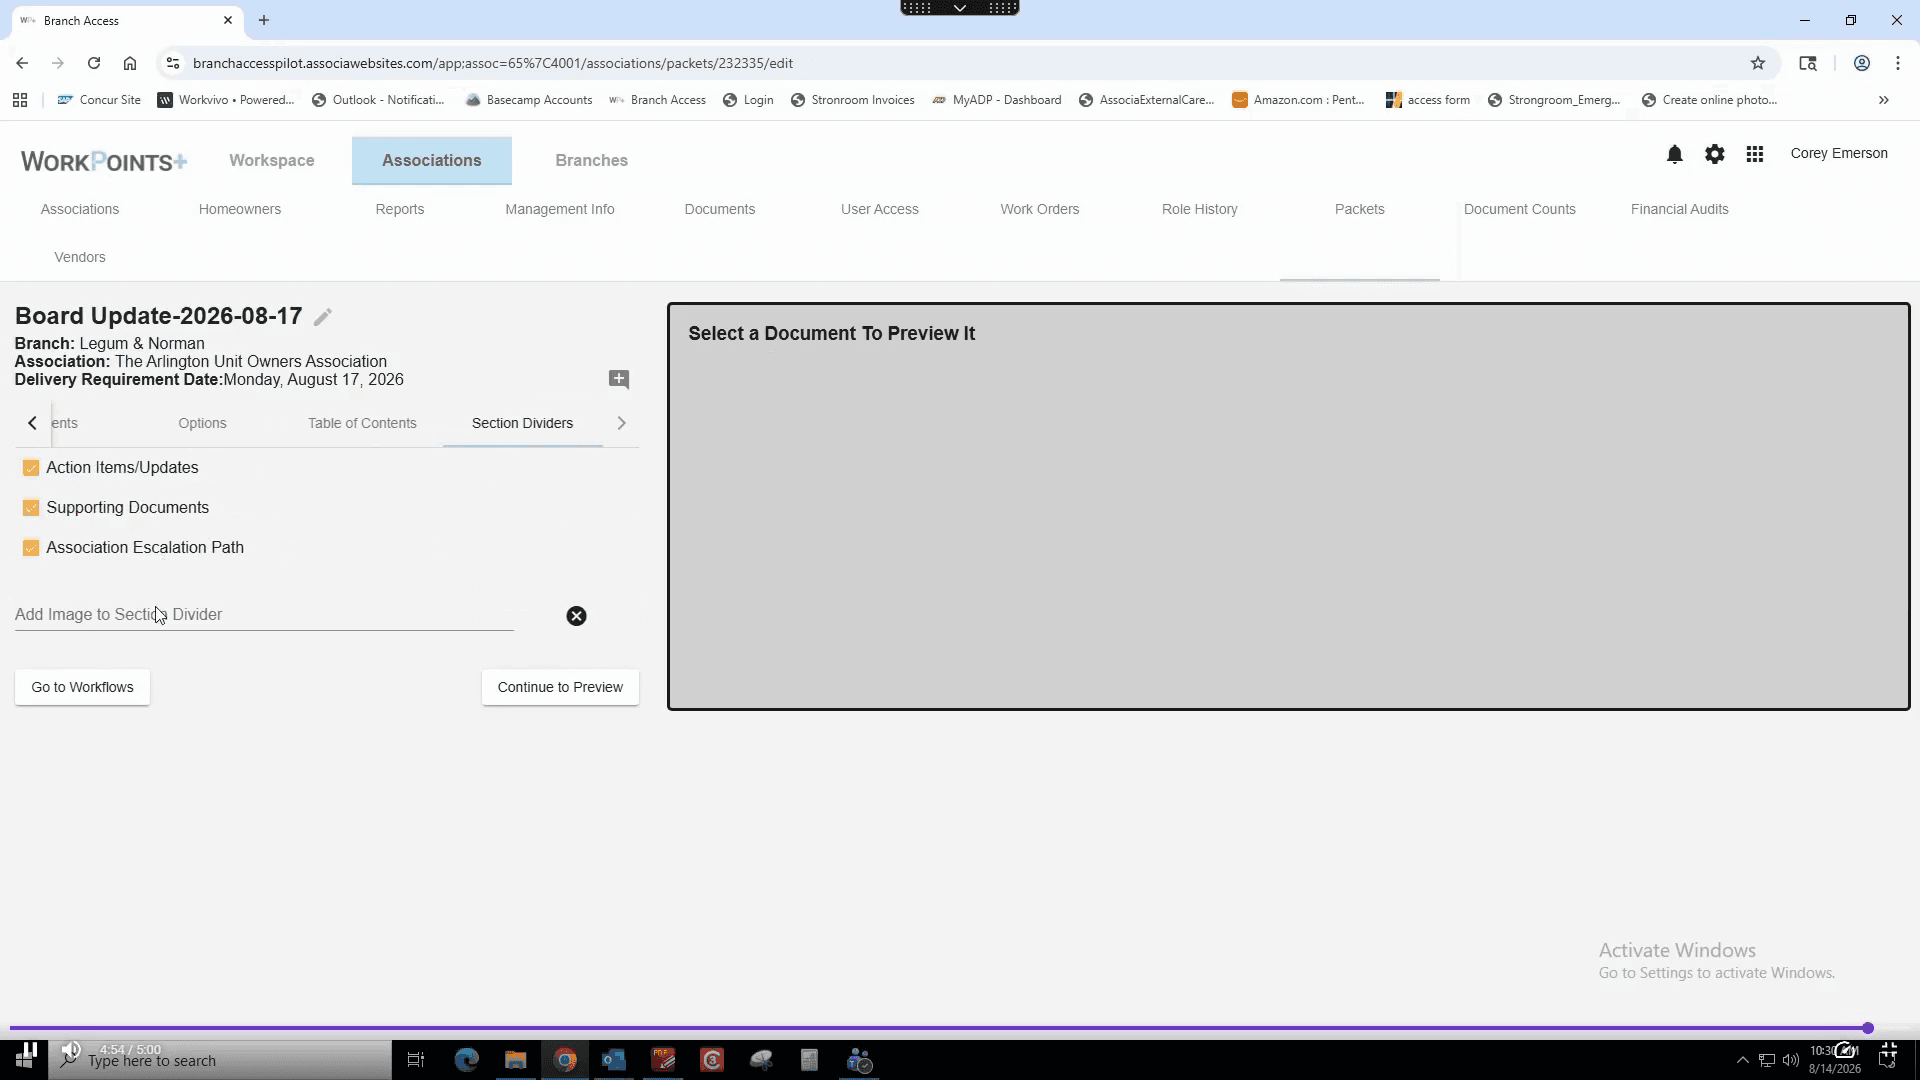
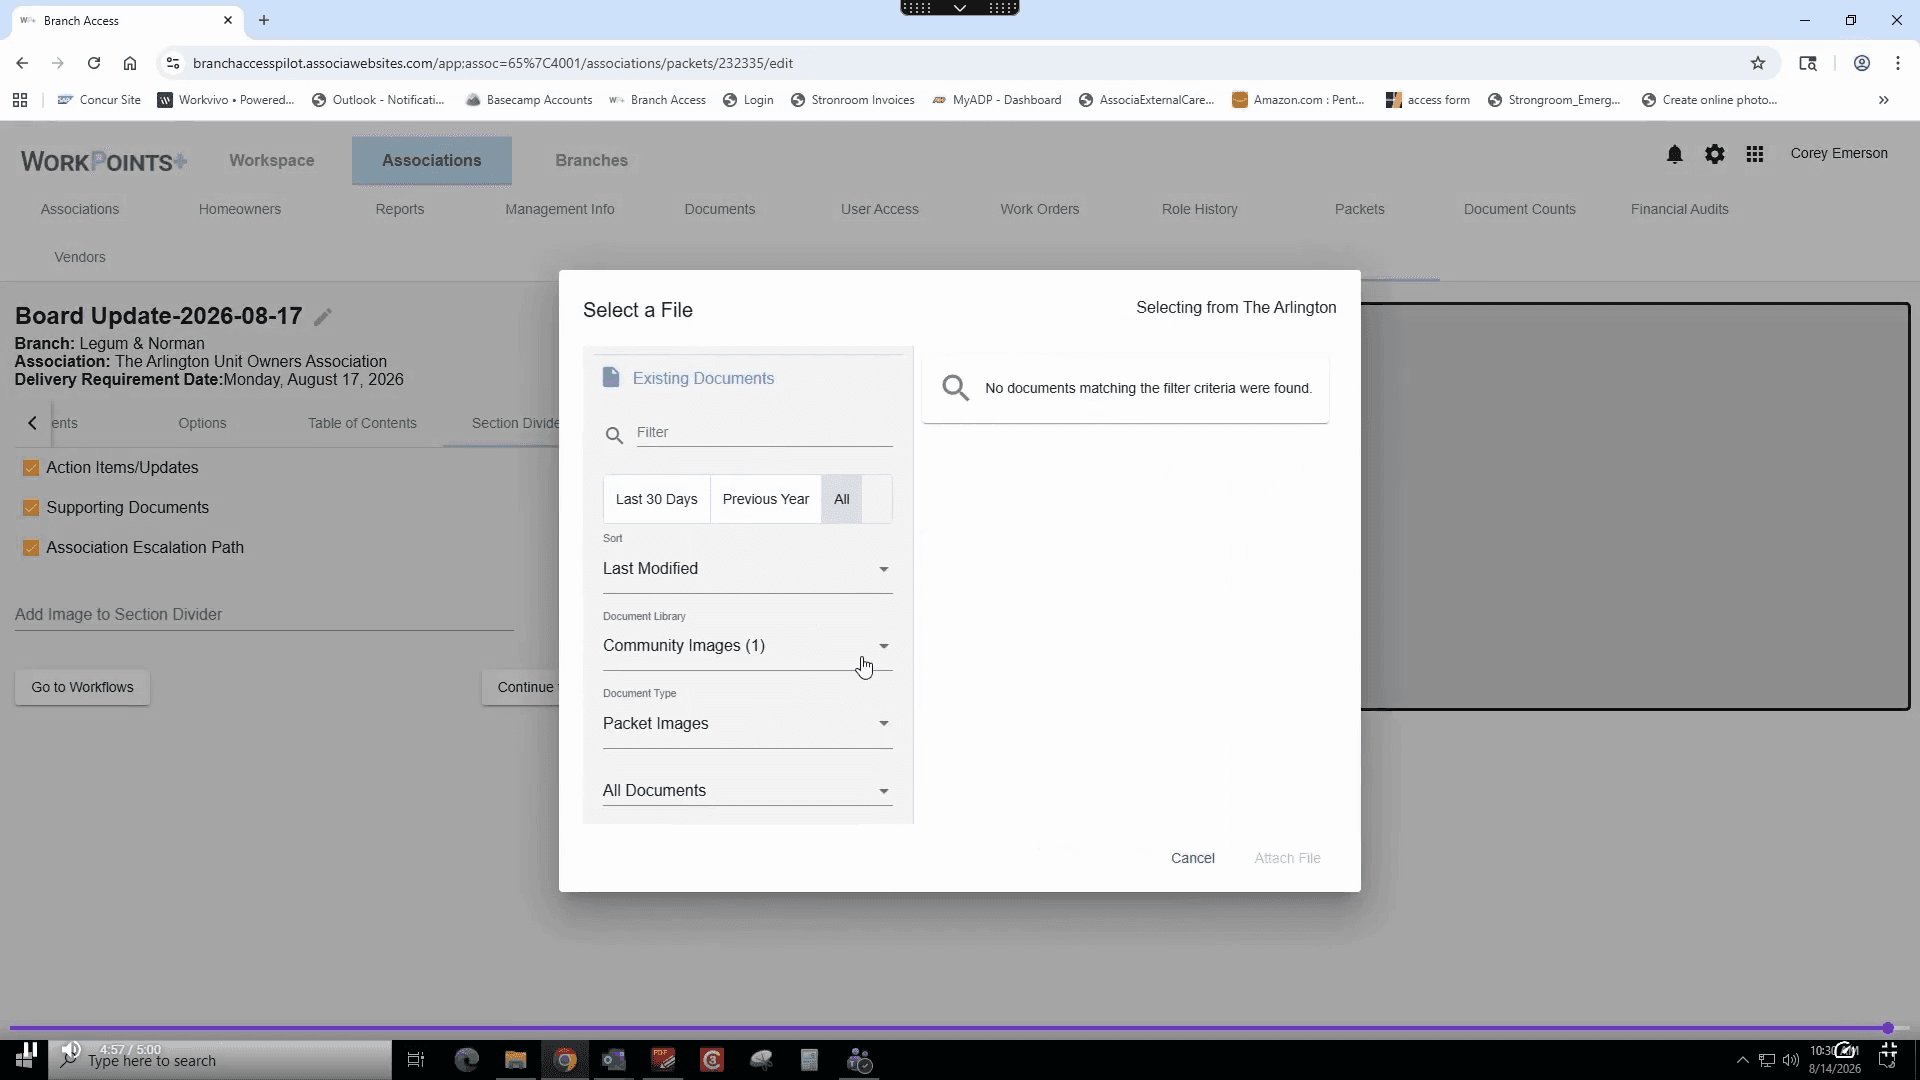
Click Add Image to Section Divider.
37
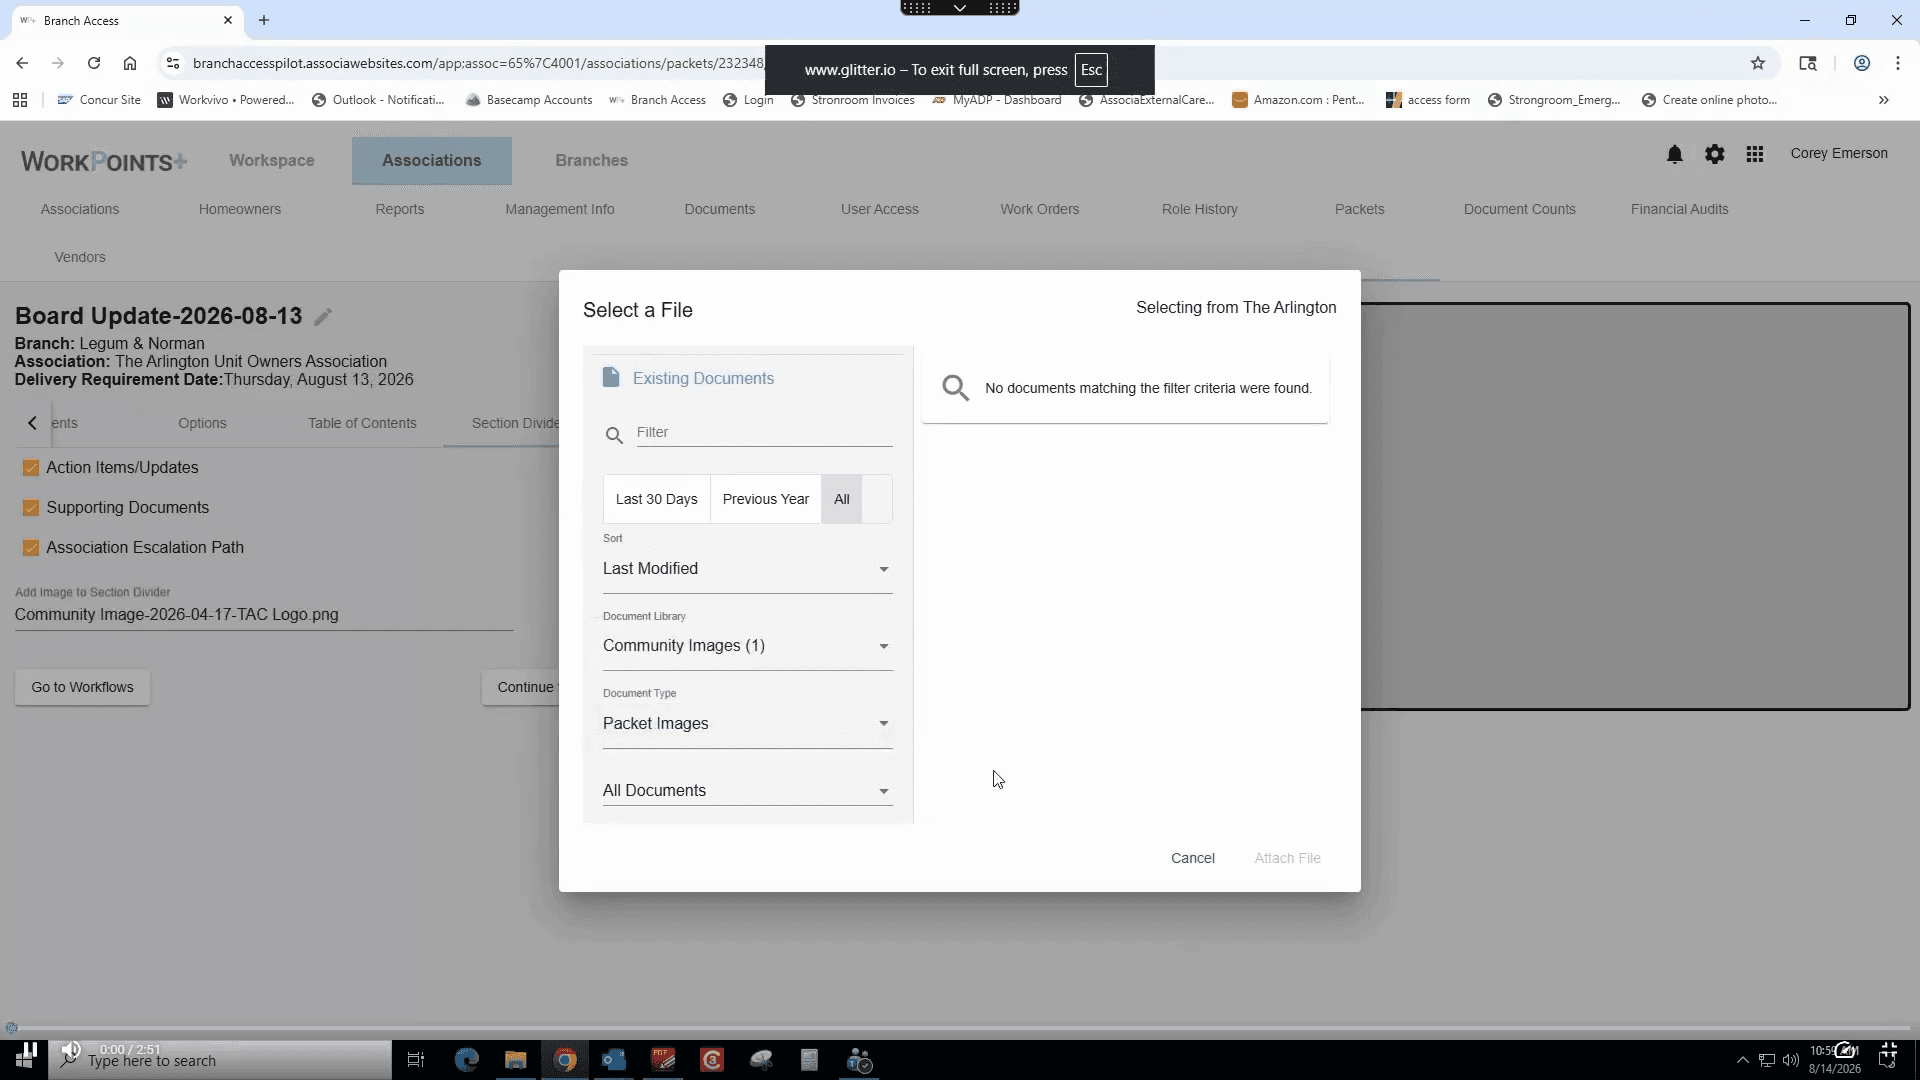
Click Community Images in the document library filter.
38
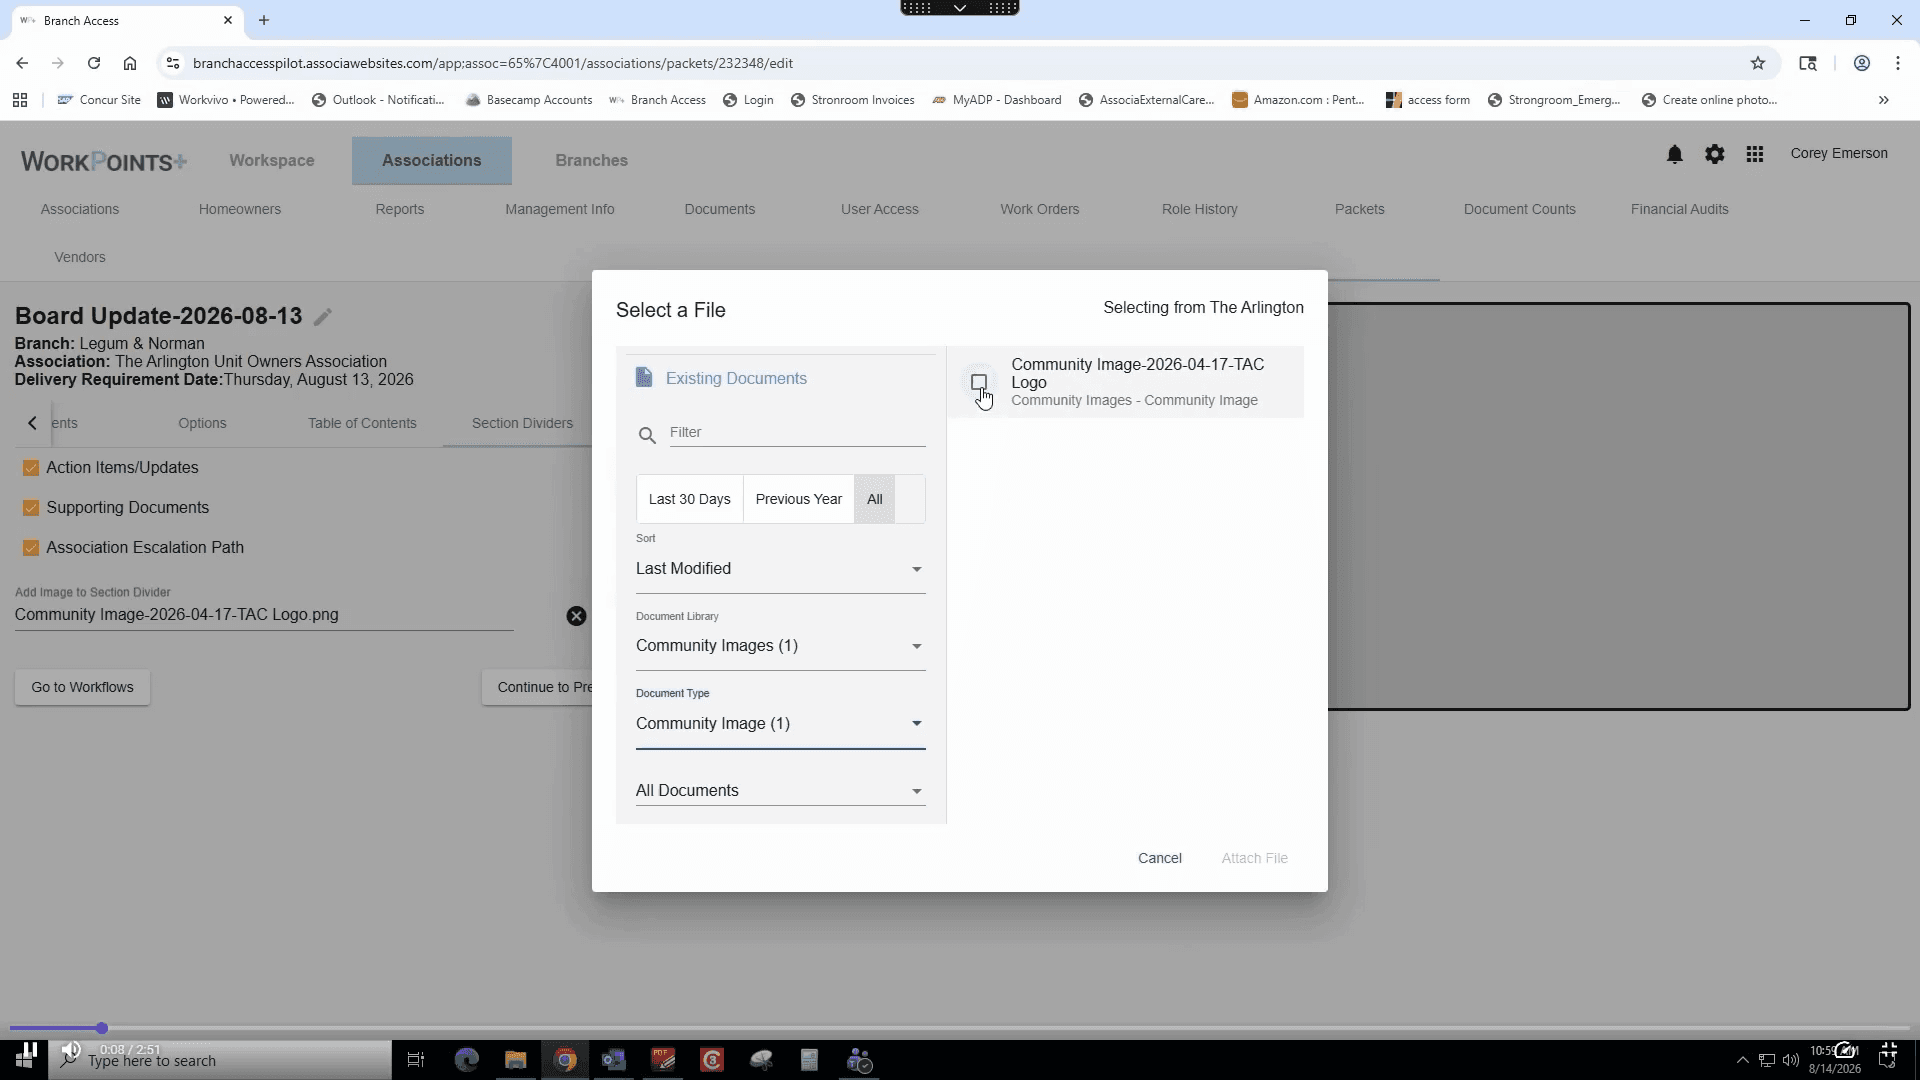
Click the Document Type dropdown menu and select Community Image.
39
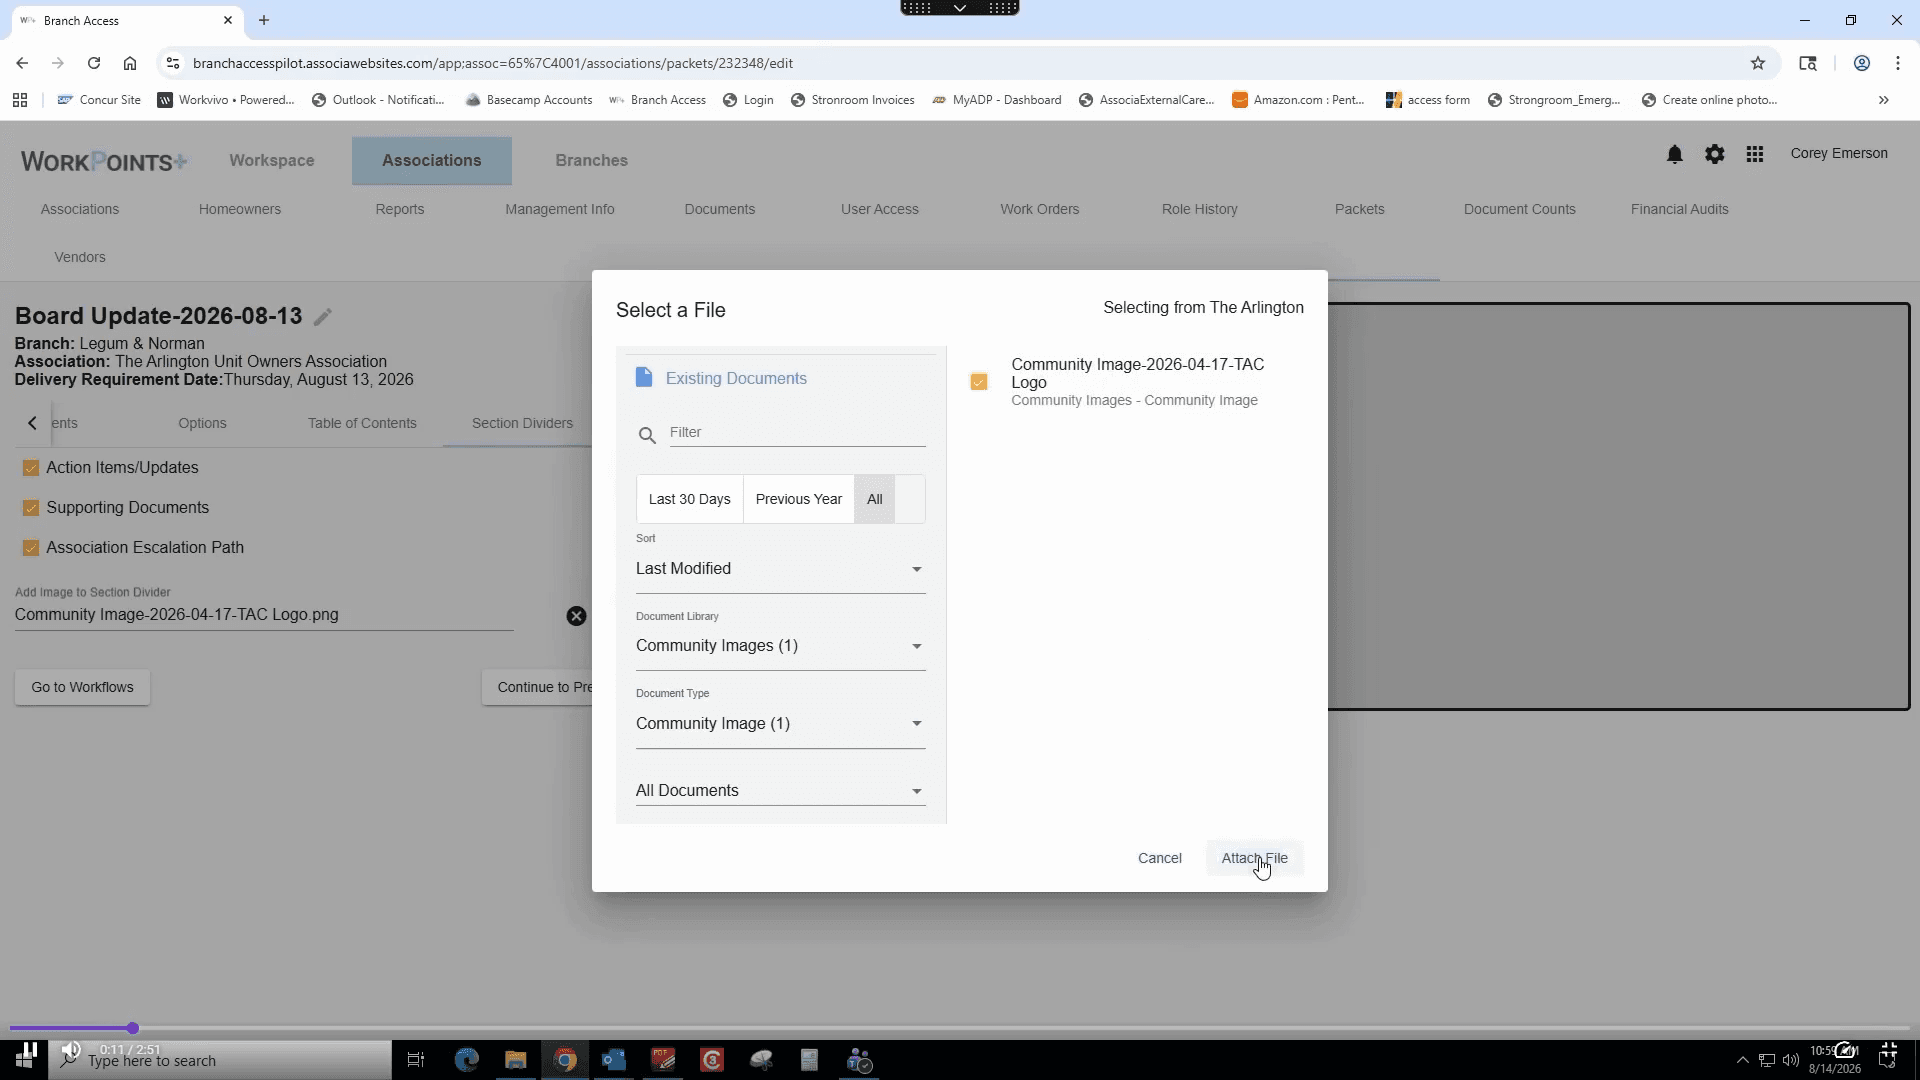
Check the box next to your community logo image.
40
Click the Attach File button.
41
Click the Continue to Preview button at the bottom of the left panel.
42
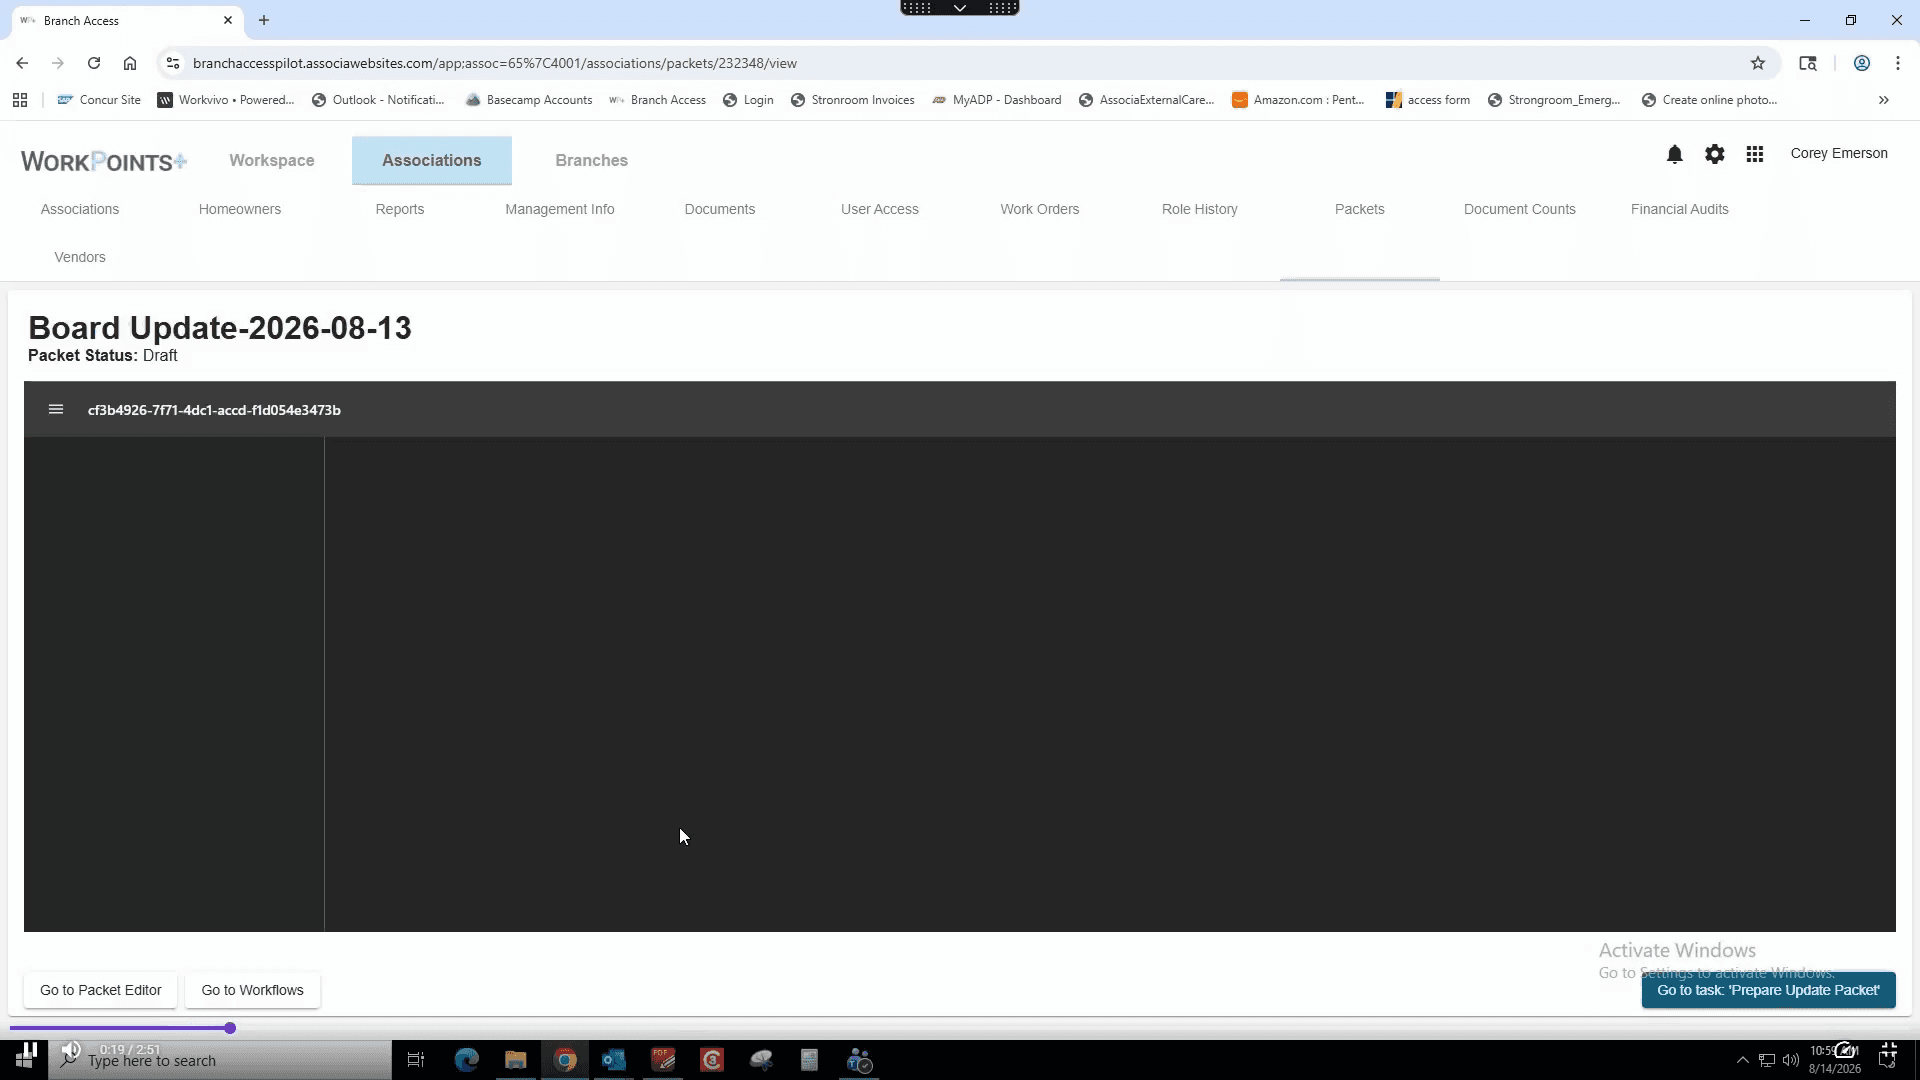
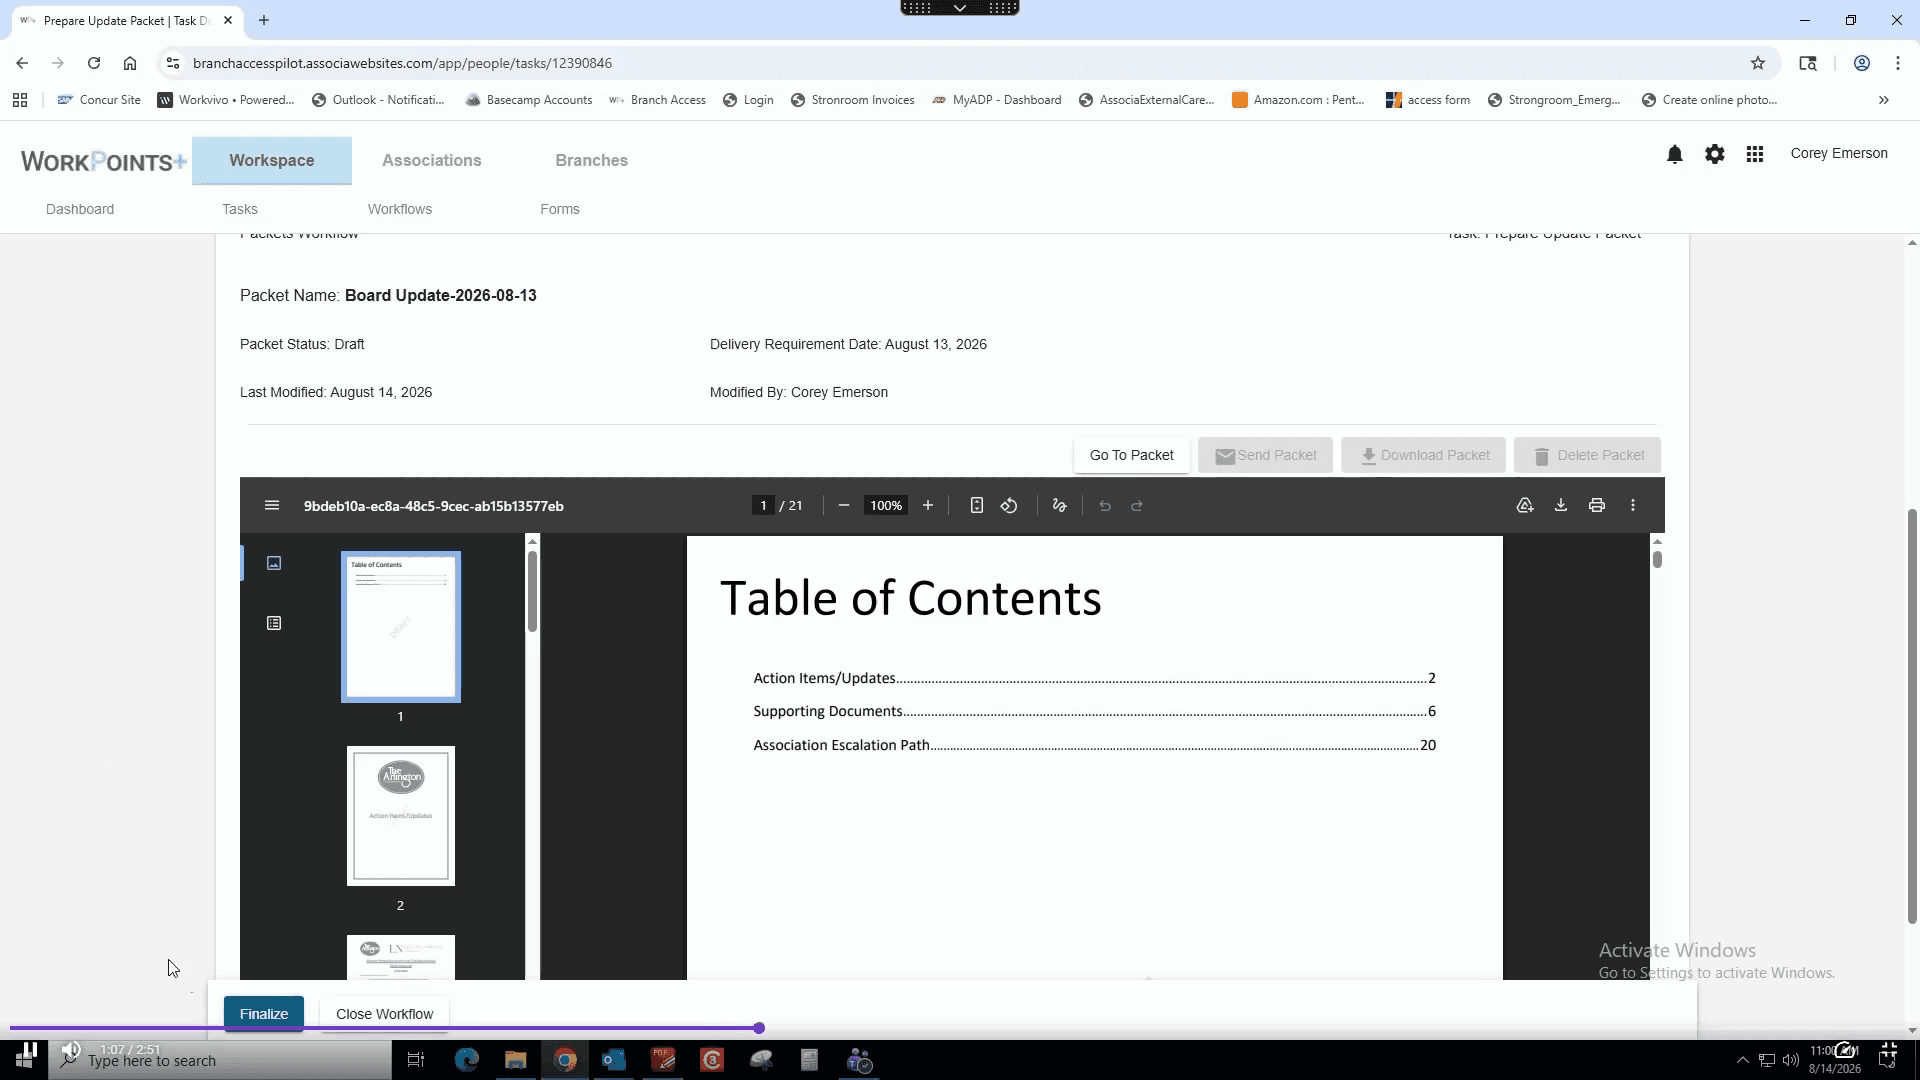
Review the generated Table of Contents and ensure all pages and section dividers look correct.
Finalize and Distribute the Packet
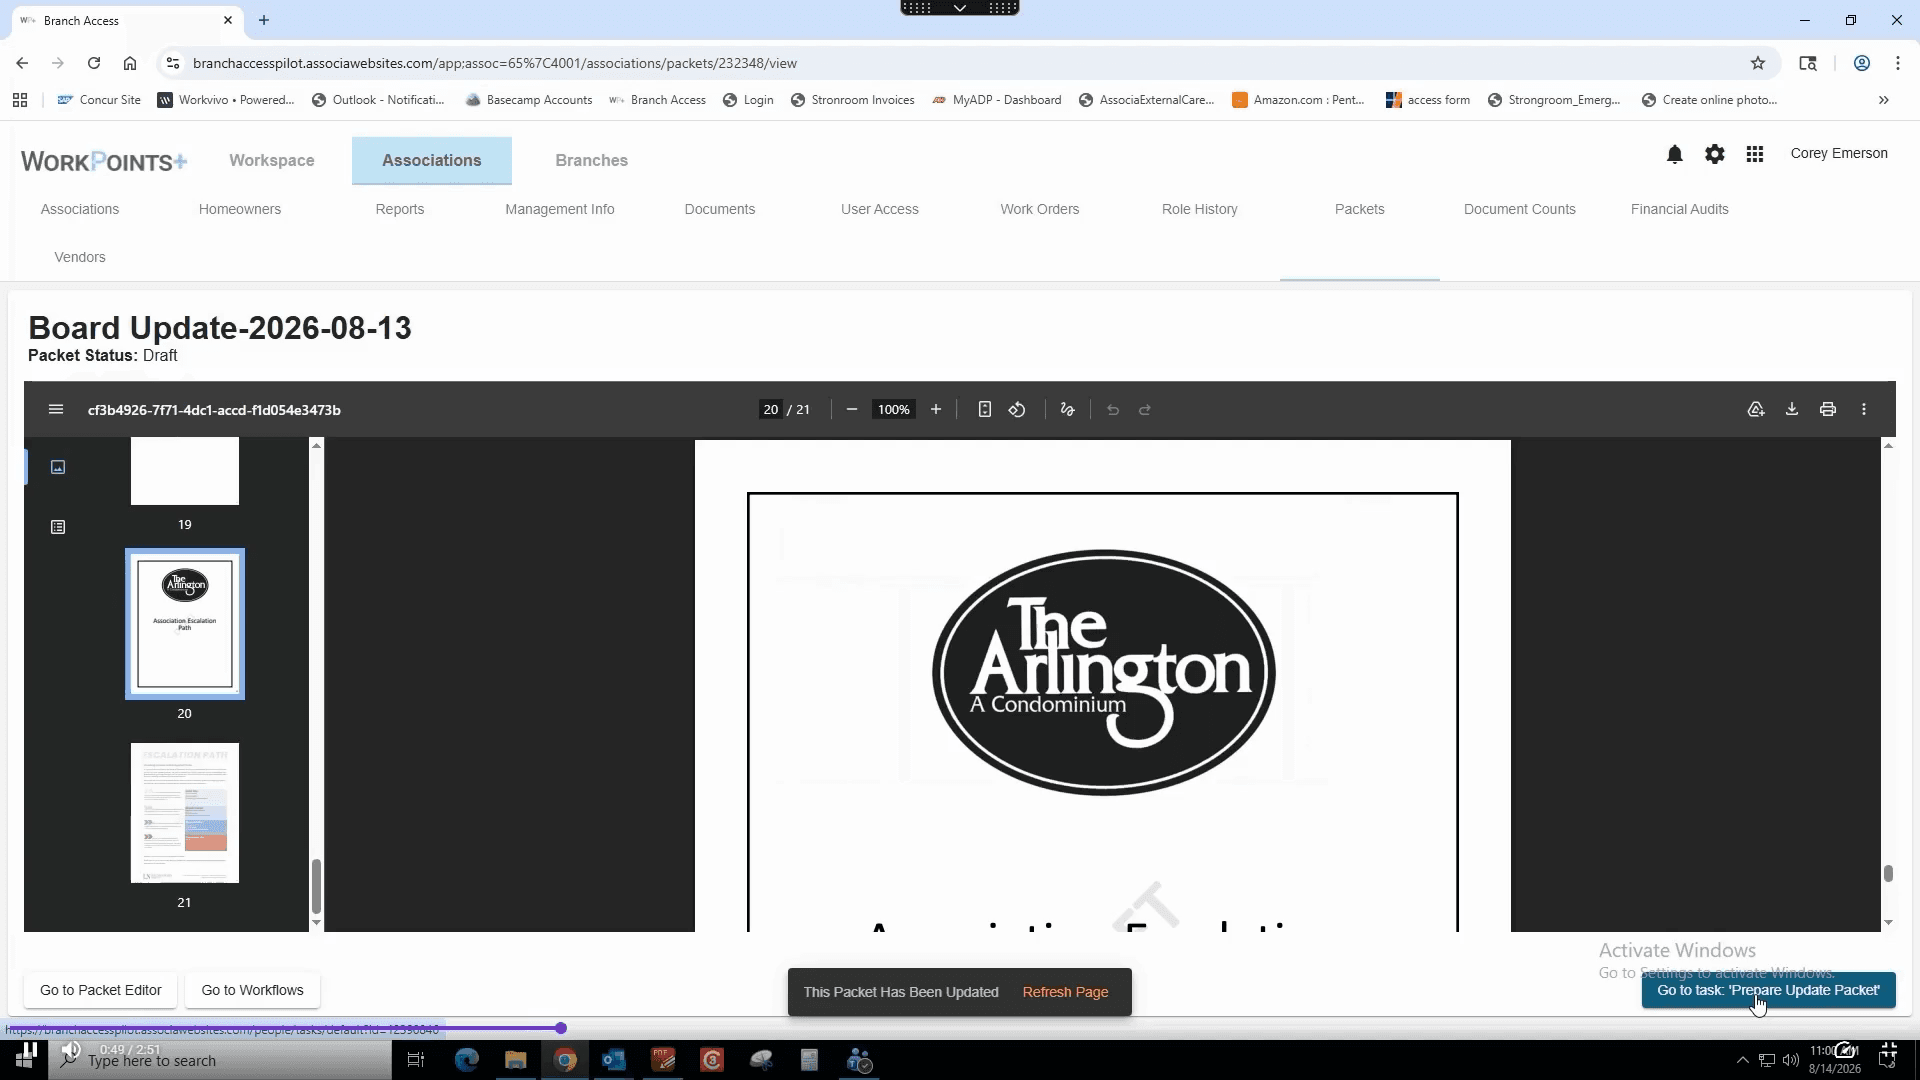
43
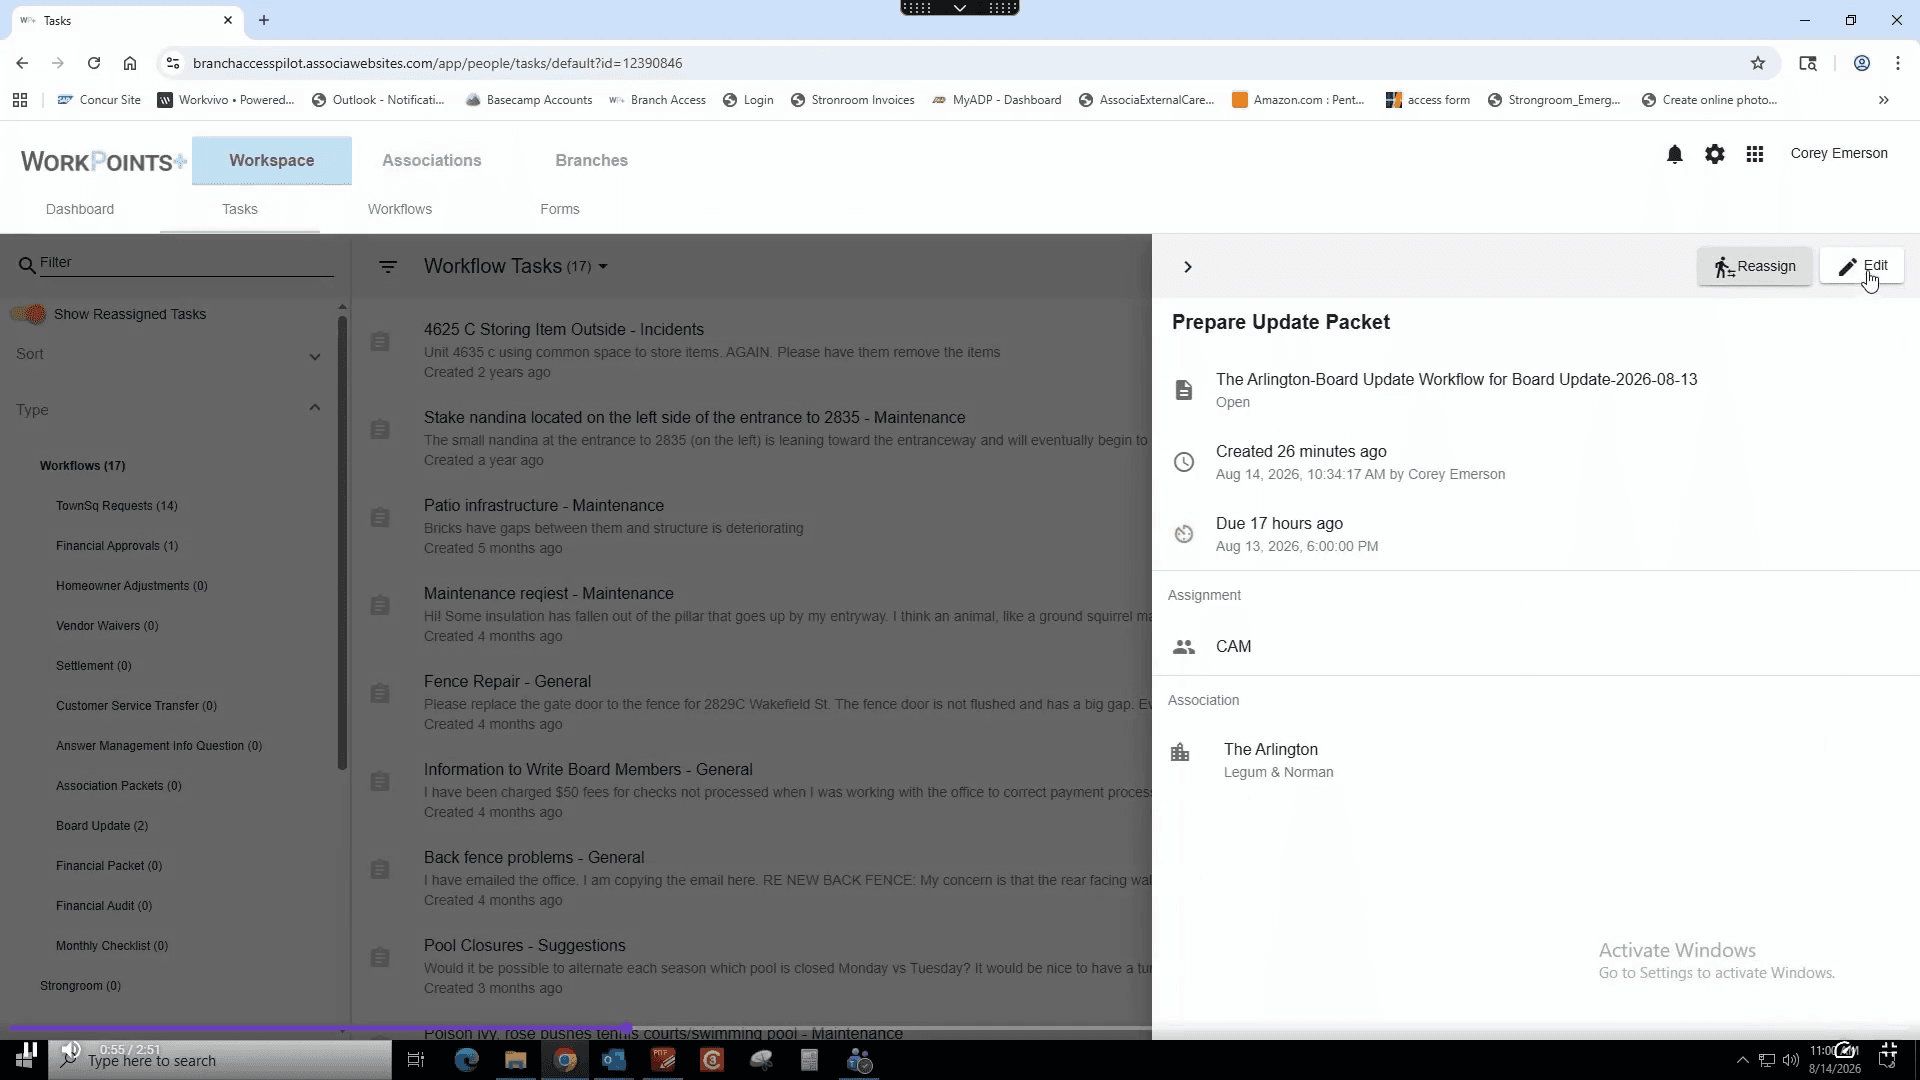
Click Go to task: 'Prepare Update Packet' at the bottom of the screen.
44
Click Edit in the top right corner.
45
Click Finalize in the bottom left corner.
46
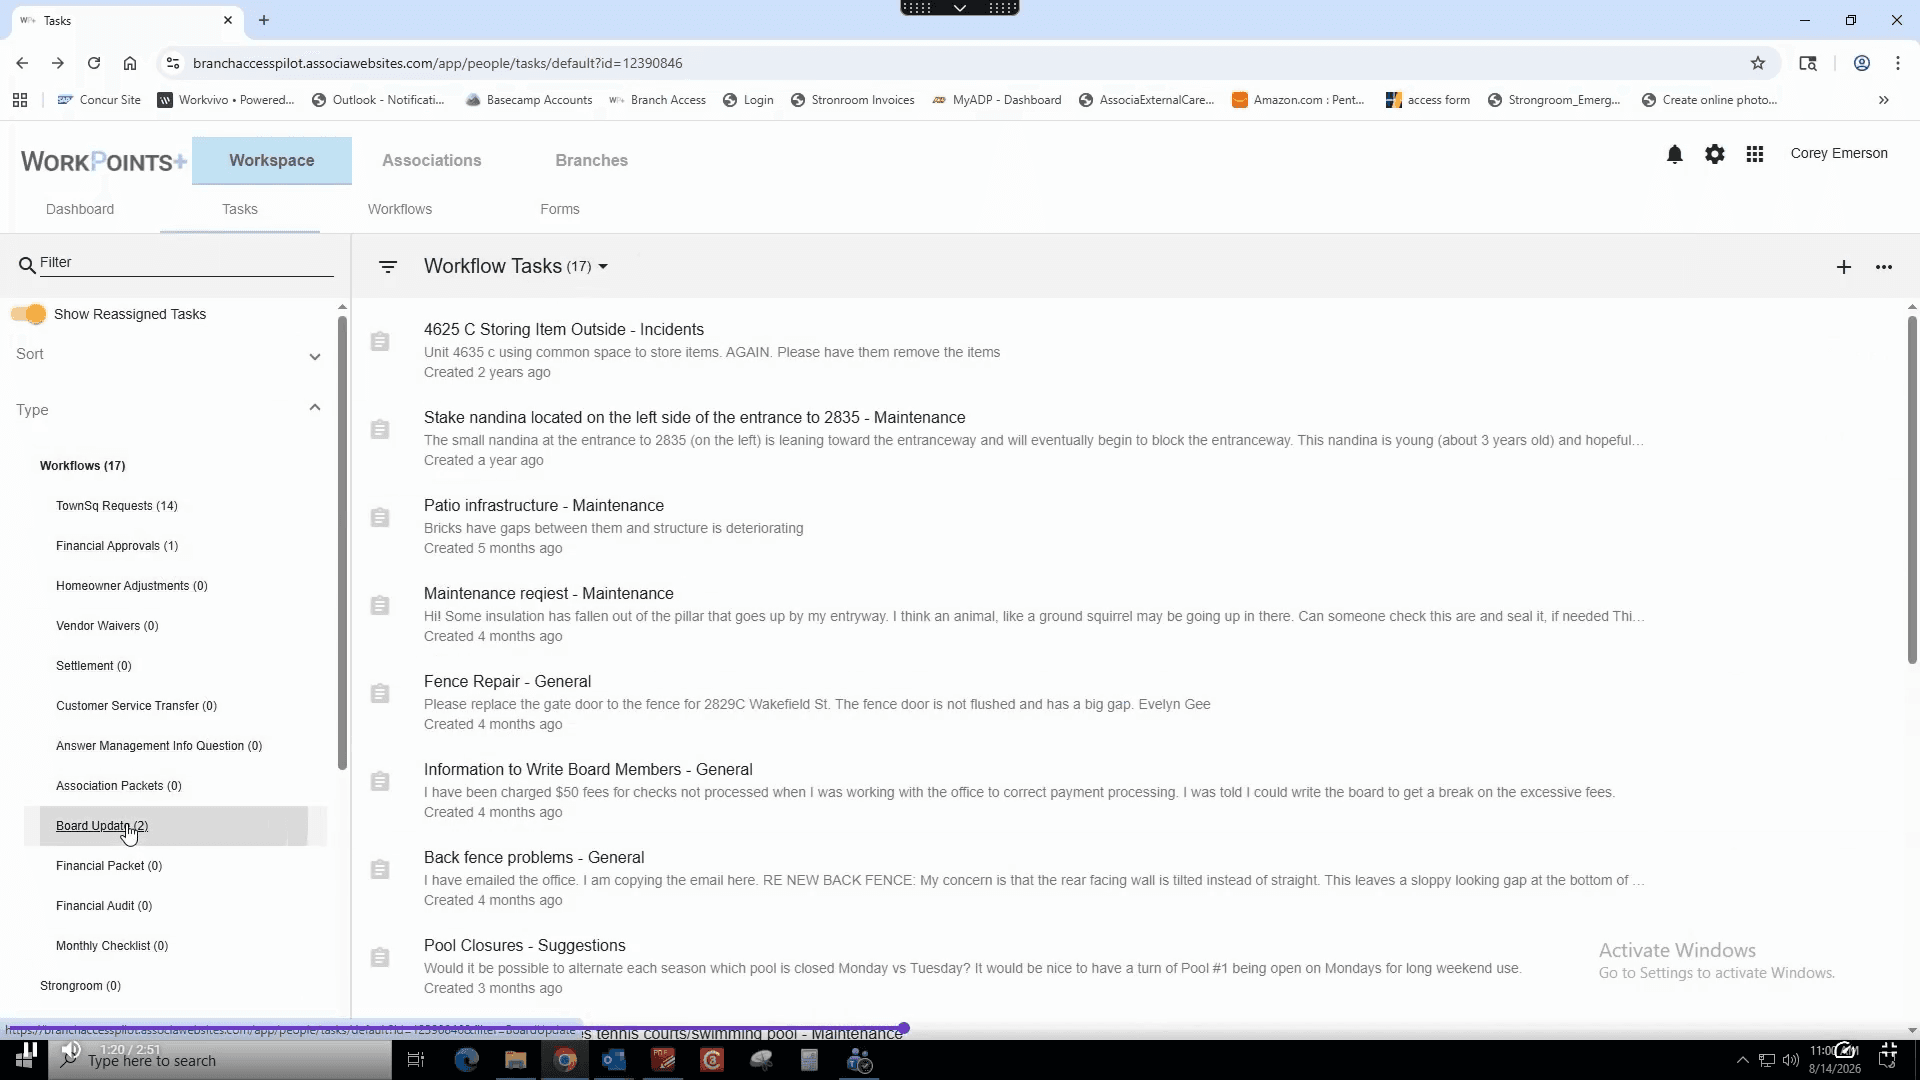
Under Workflow Tasks in the left-hand sidebar, click Board Update.
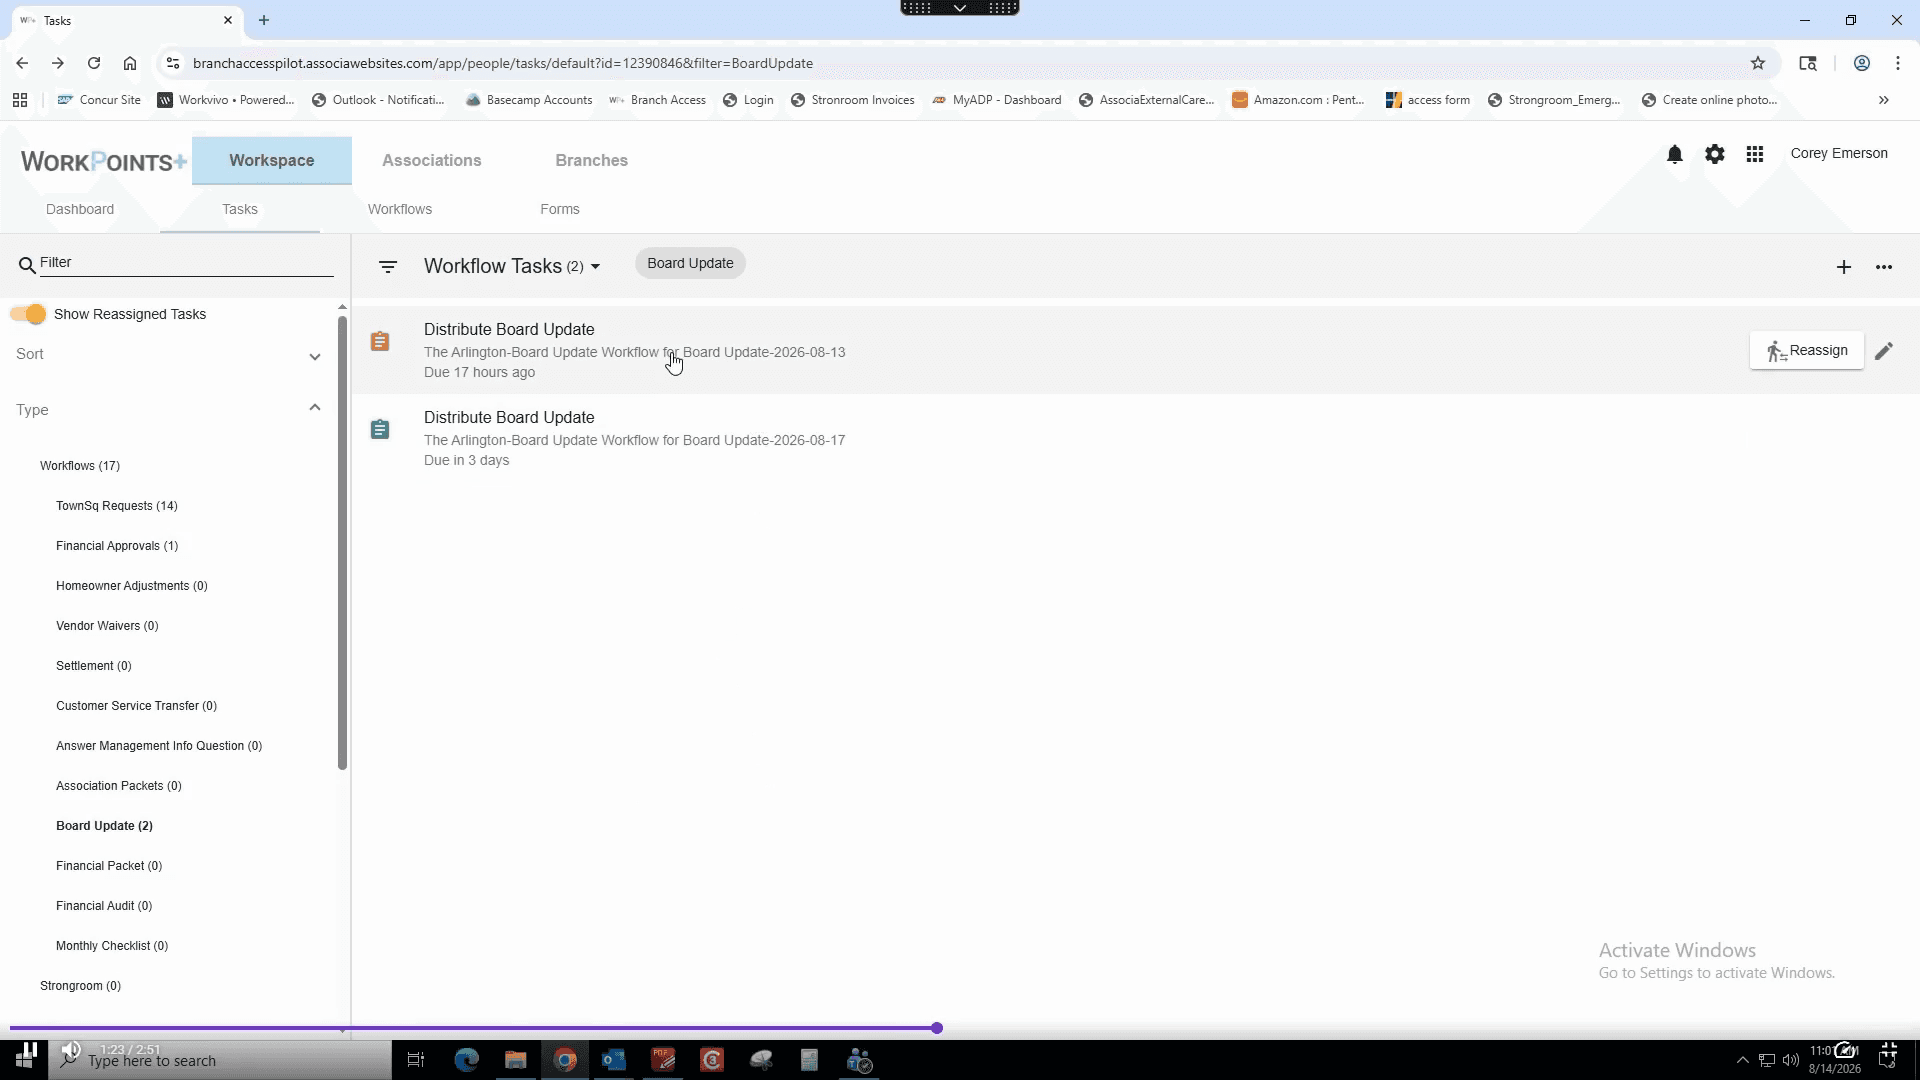
47
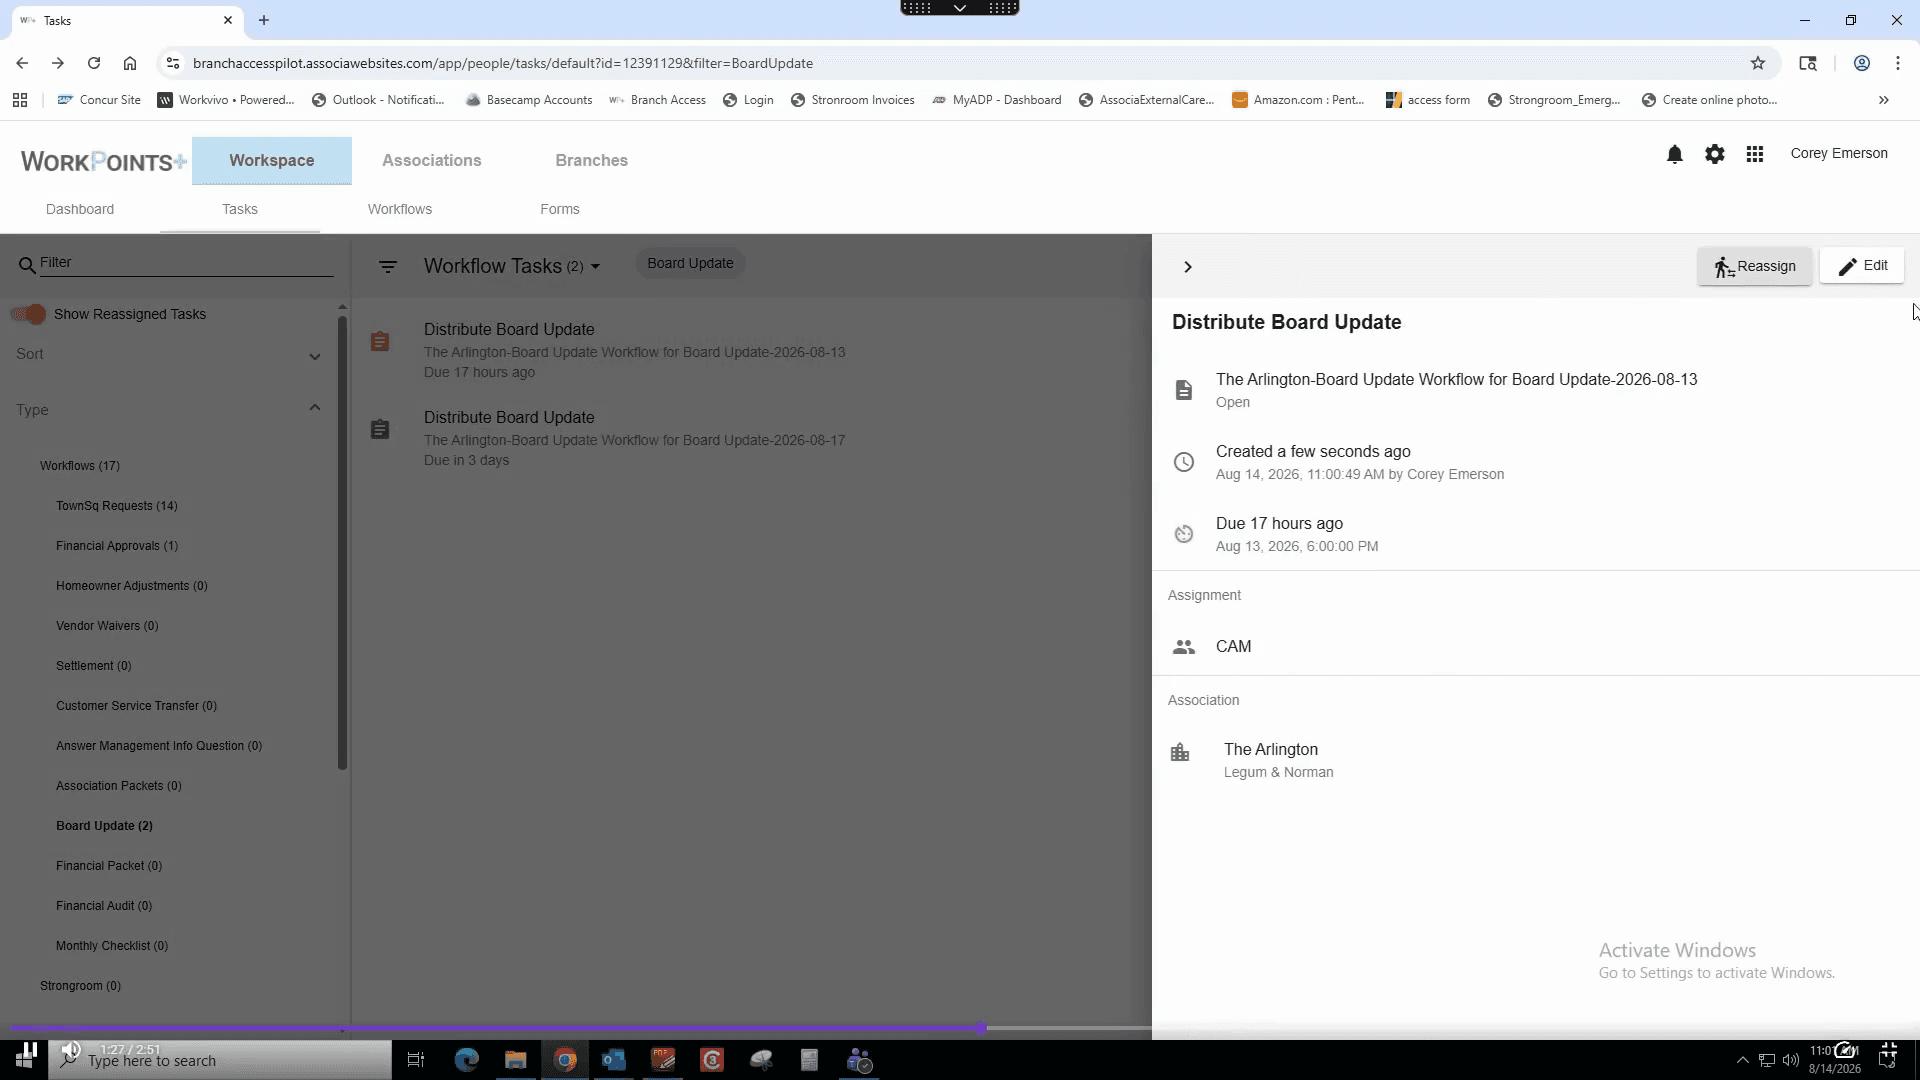
Click the Distribute Board Update task to open it.
48
Click Edit.
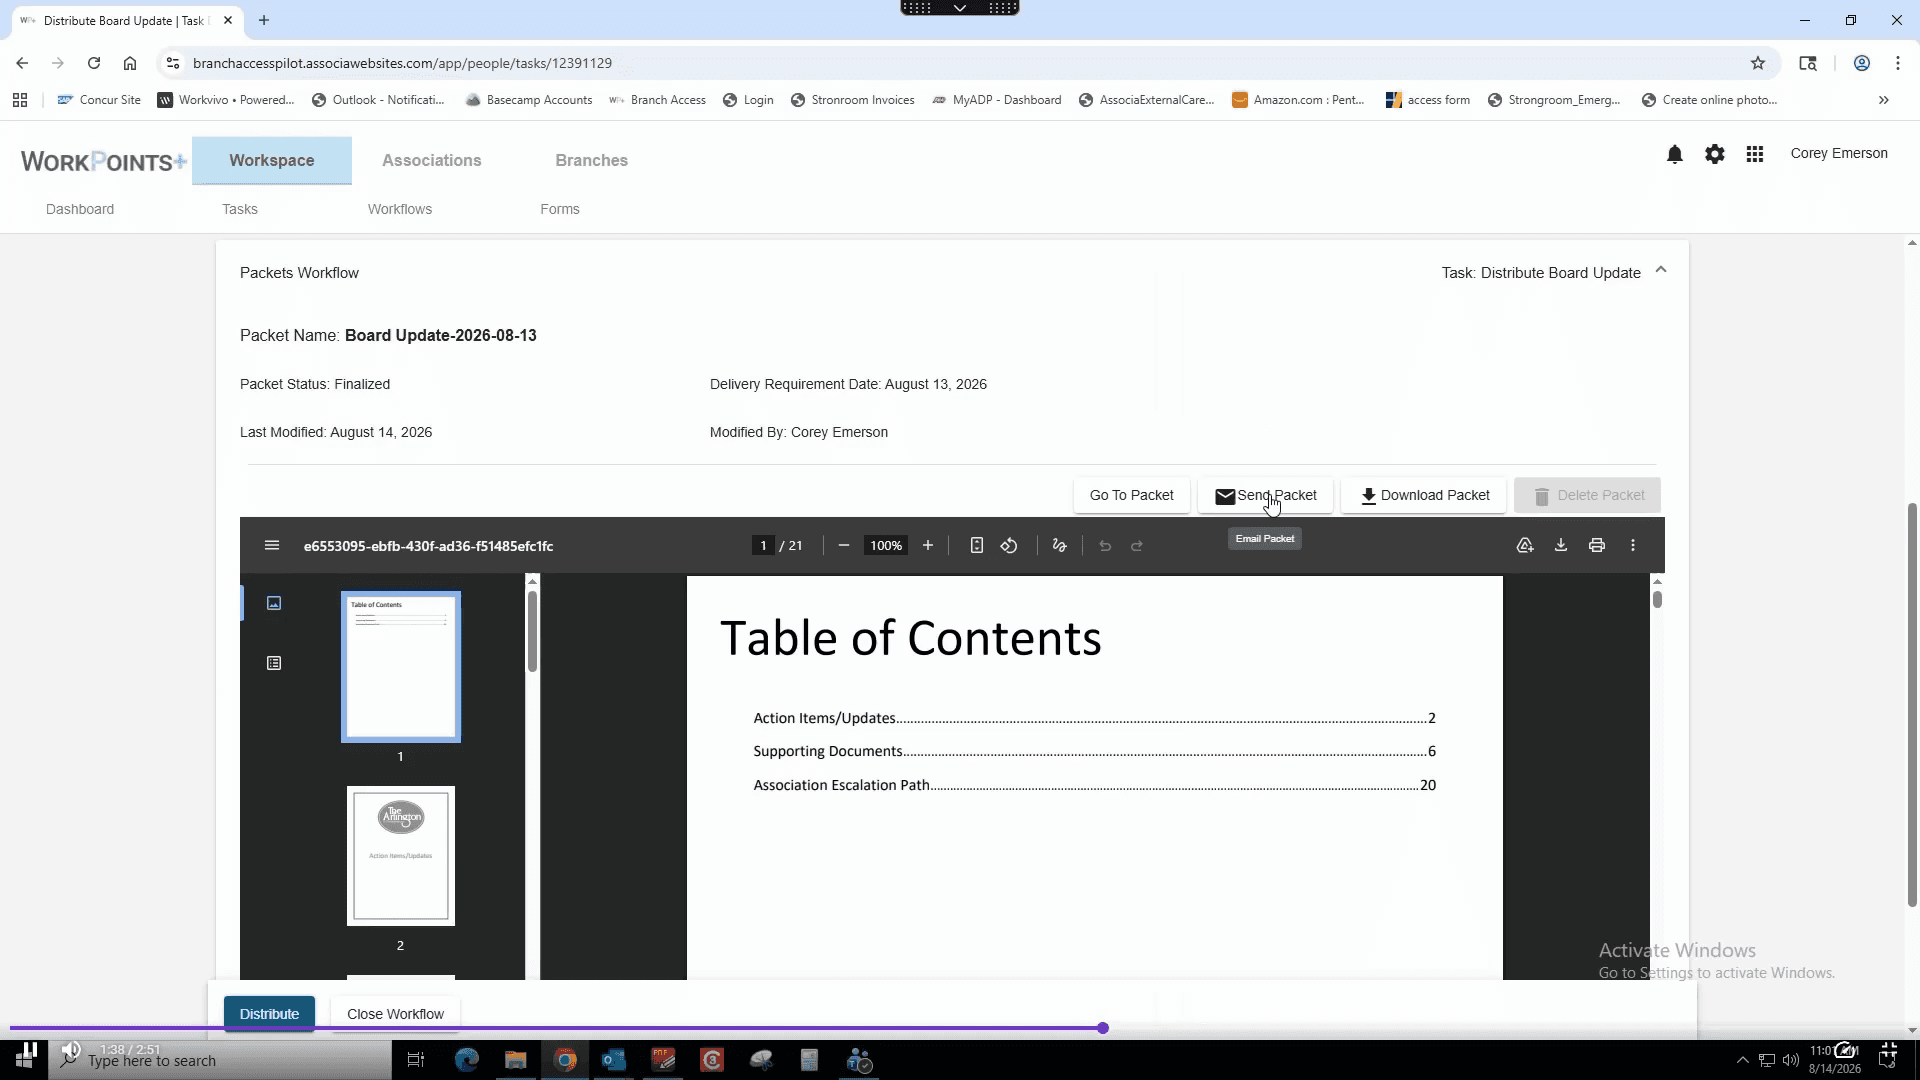
49
Click the Send Packet button to prepare the email distribution.
50
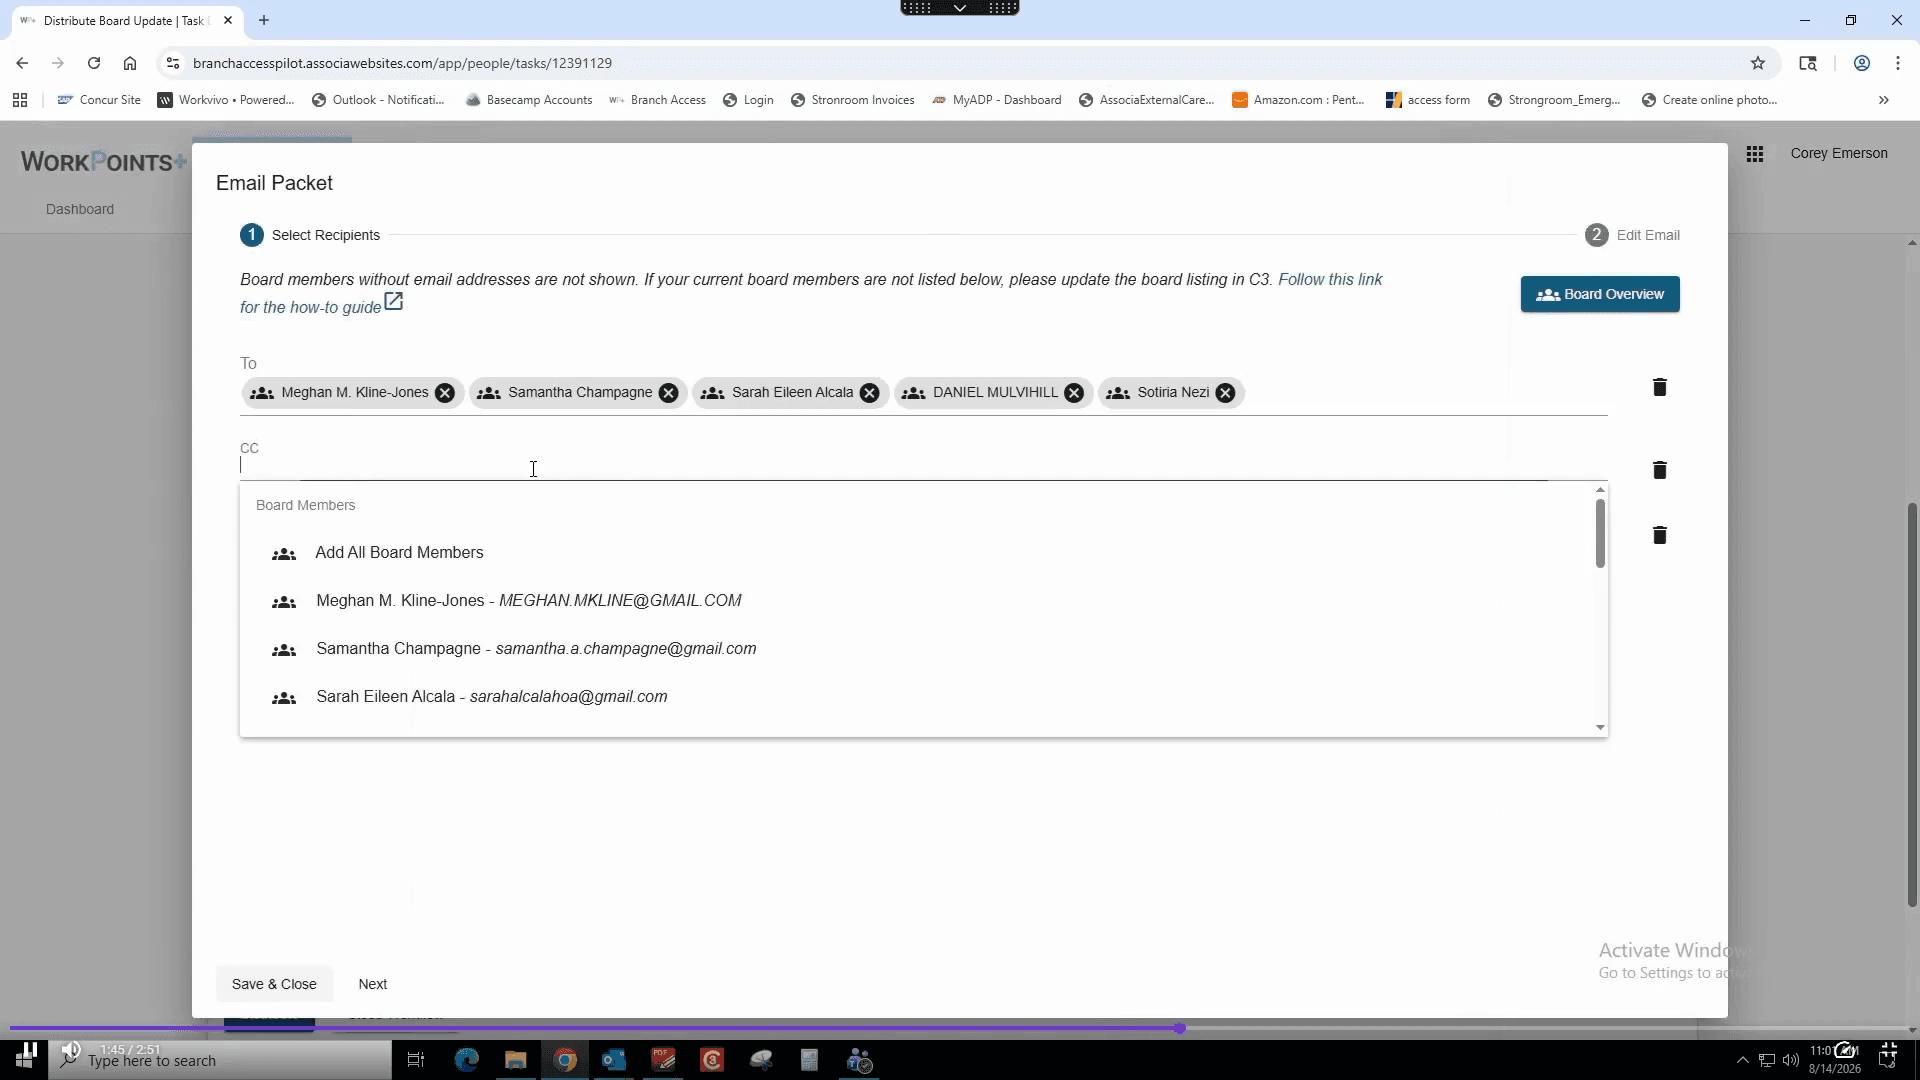
Click inside the CC input field.
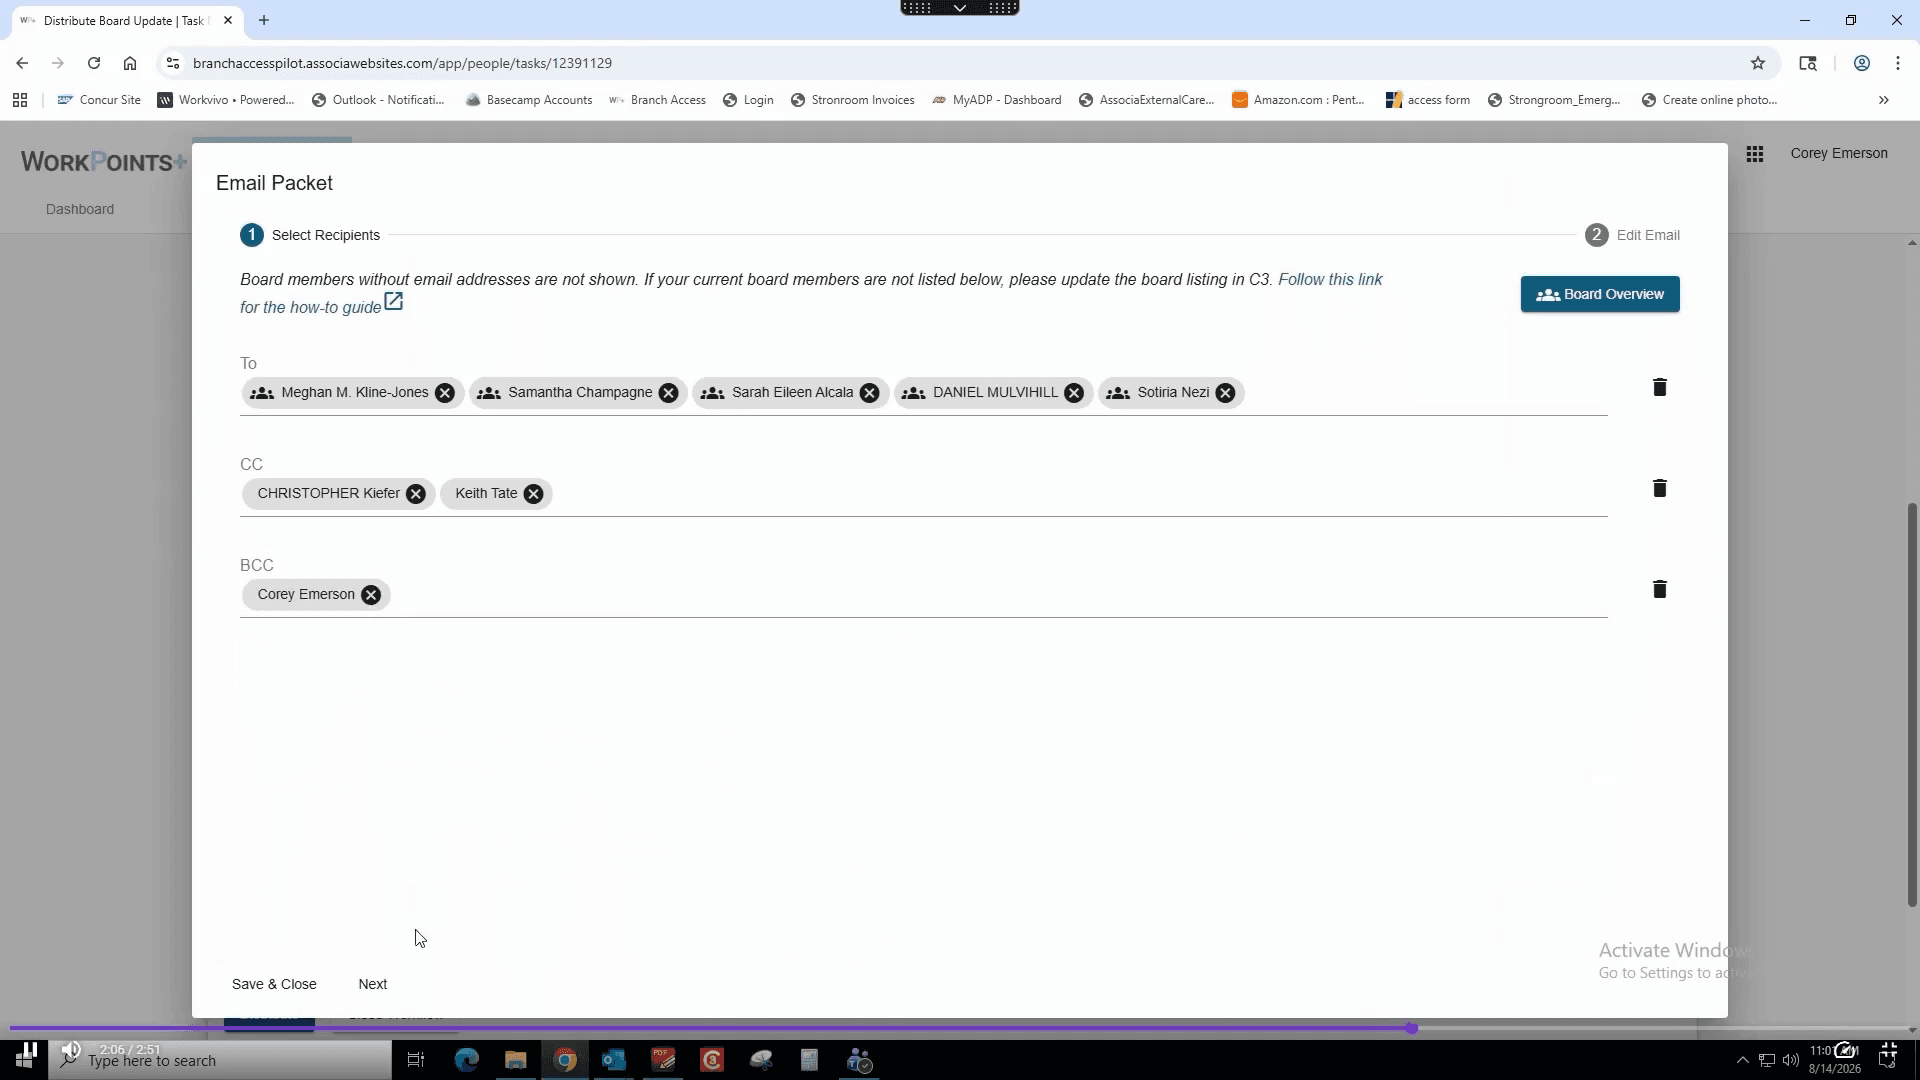
51
Type the names of your additional recipients (e.g., chris) into the CC field and select them from the dropdown list.
52
Type your own email address into the BCC field and select it from the dropdown list to ensure you receive a copy of the distribution.
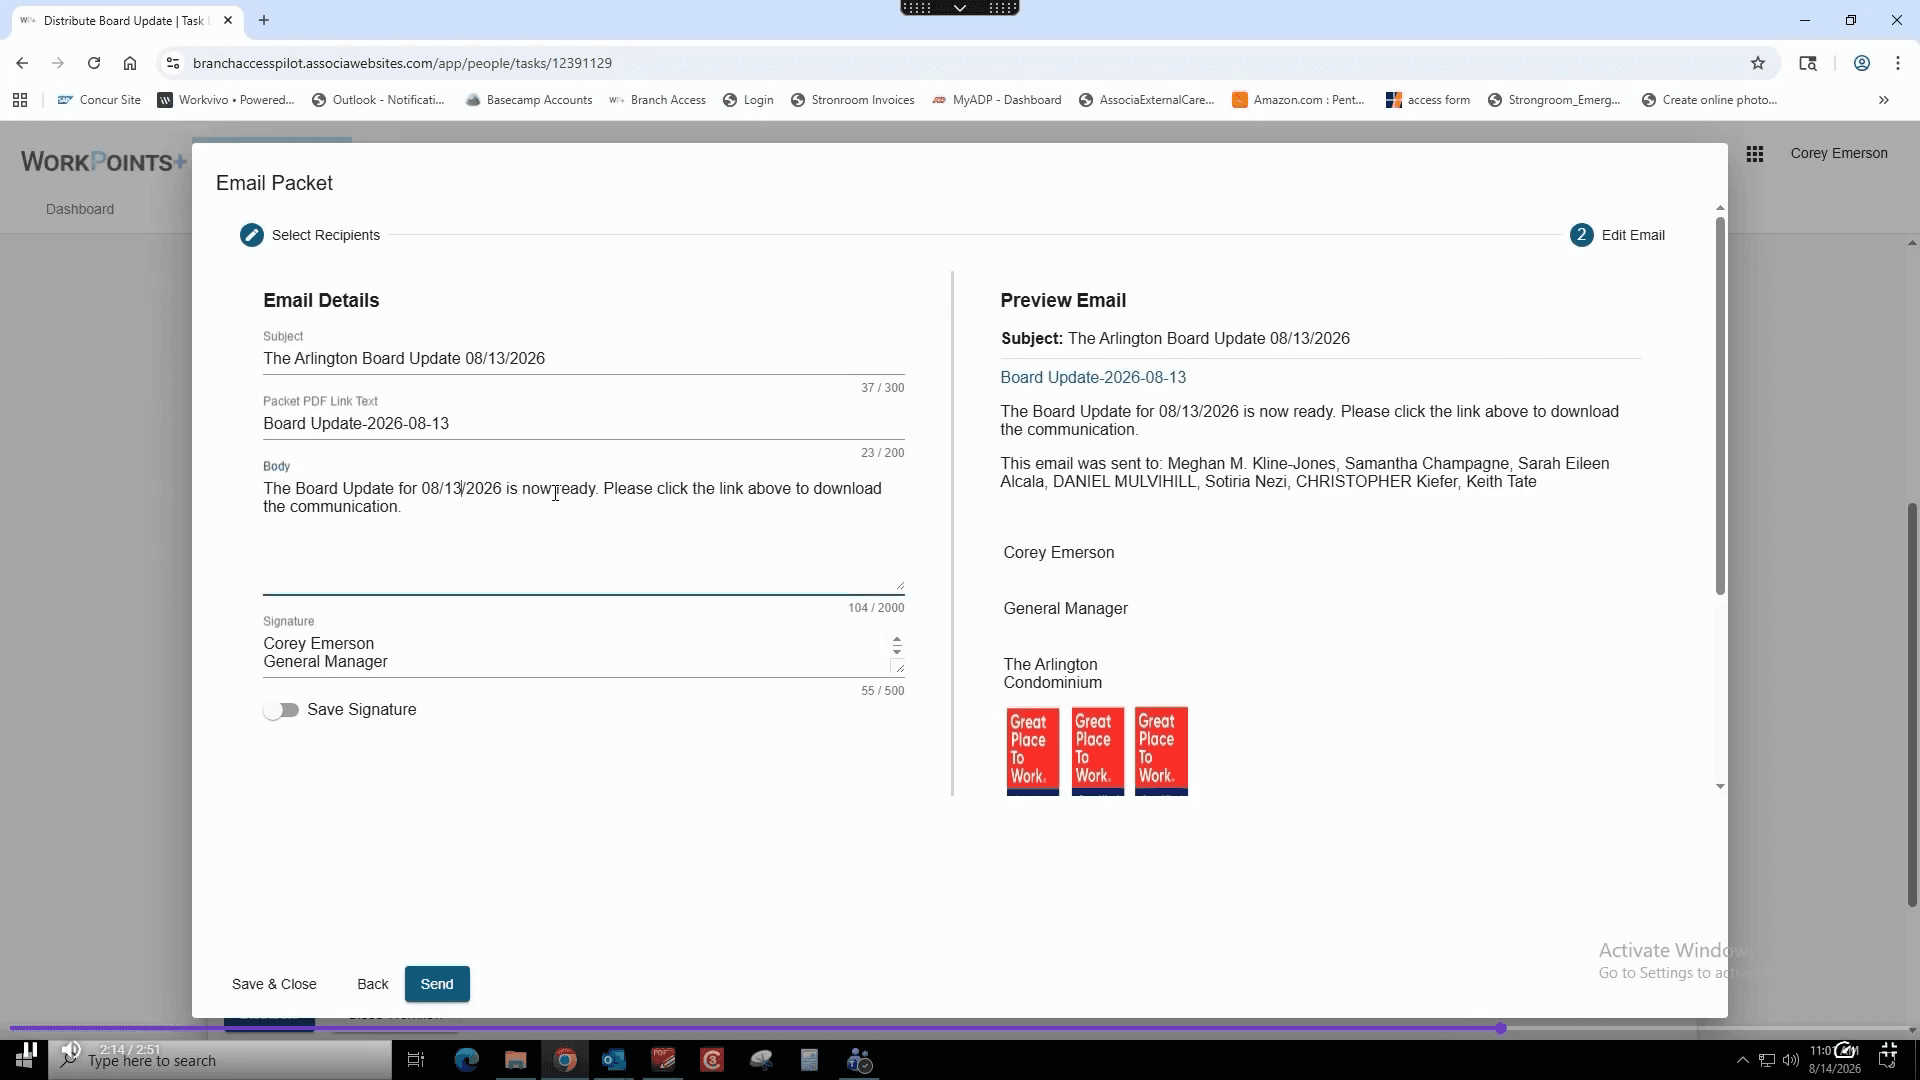
53
Click Next.
54
Click in the Body field to edit the text and add any updated contextual information for the board.
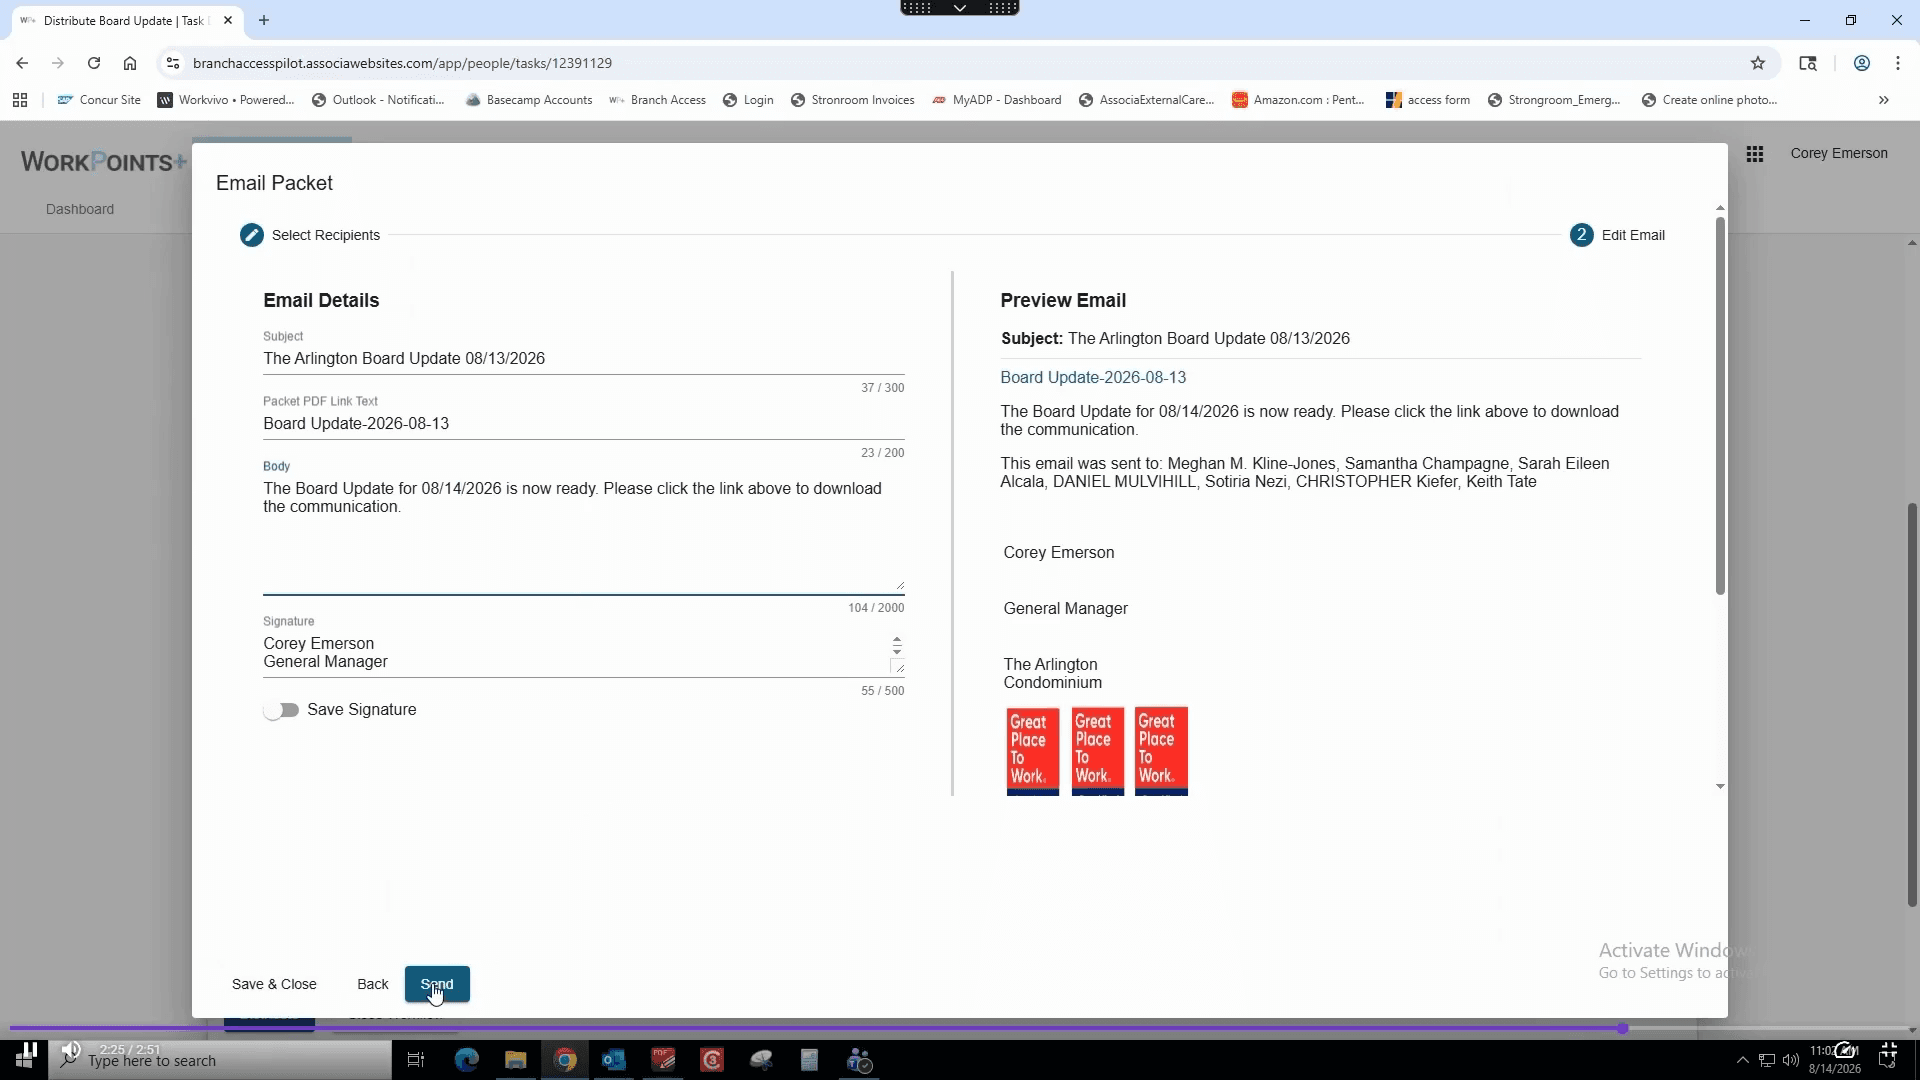
55
Click Send.
56
Click Distribute to finish processing the workflow task. The board update is now complete.
Q: Why is the "Create New Packet" button disabled?
A: The button will remain inactive until you select a specific packet template, such as the "Business Updates" or "Board Update" template.
Q: Do I need to shorten document file names before saving?
A: Yes, WorkPoints Plus has a character limit for file names. It is recommended to shorten long file names before saving; your board will not see the internal file name.
Q: How do I reorder supporting documents in the packet?
A: You can easily drag and drop documents into the correct sequence by clicking and holding the dotted vertical handle located to the left of the file names.
Q: Do I need to rename files if I attach multiple at once?
A: No. When you drag and drop or attach multiple files simultaneously, WorkPoints Plus automatically uploads them together, typically bypassing the need to individually rename each one.
Q: Why can't I click "Send Packet" right away after previewing?
A: You must finalize the draft packet first. Go to the "Prepare Update Packet" task and click "Finalize" to unlock the "Distribute" and "Send Packet" features.
Term
Definition
Association Escalation Path
A document outlining the procedural chain of command for escalating and resolving issues within an association.
Board Update Packet
A compiled set of management reports, action items, and communications distributed periodically to an association's board of directors.
WorkPoints Plus
The software platform used to manage association tasks, compile documents, and dispatch board communications.