
STEP 3: Design Donor Screens, STEP 4: Validate and STEP 7: Publish
This is a step-by-step guide for Women's Golf - Cal State East Bay - Cal State East Bay Educational Foundation
By Nyiema Bayfield
1
EDIT THE CONTENT ON THE DONATION FORM
2
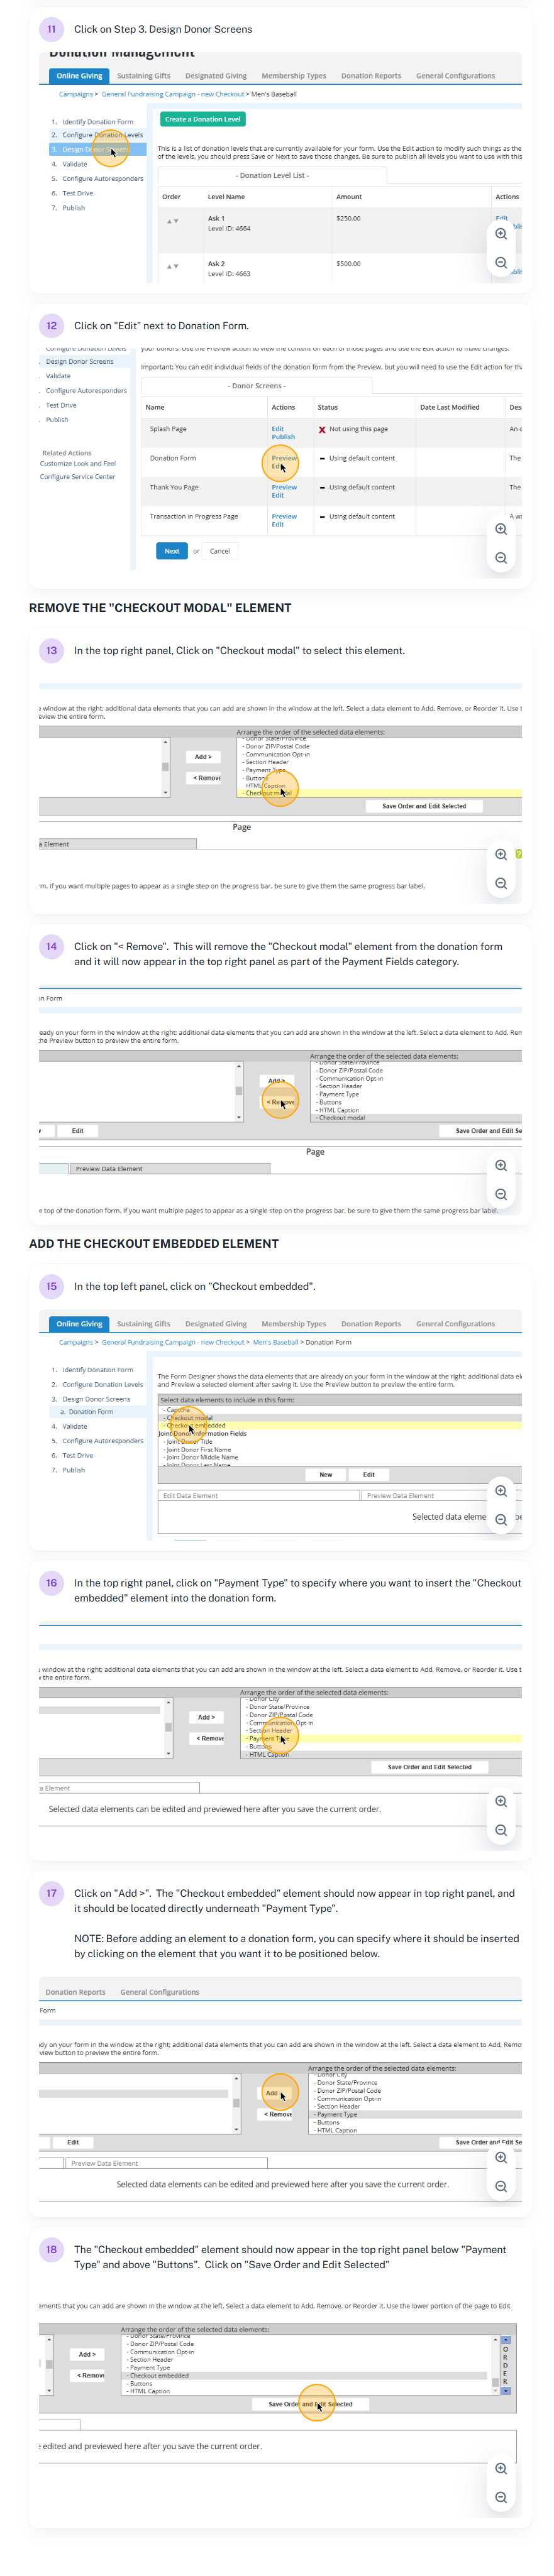
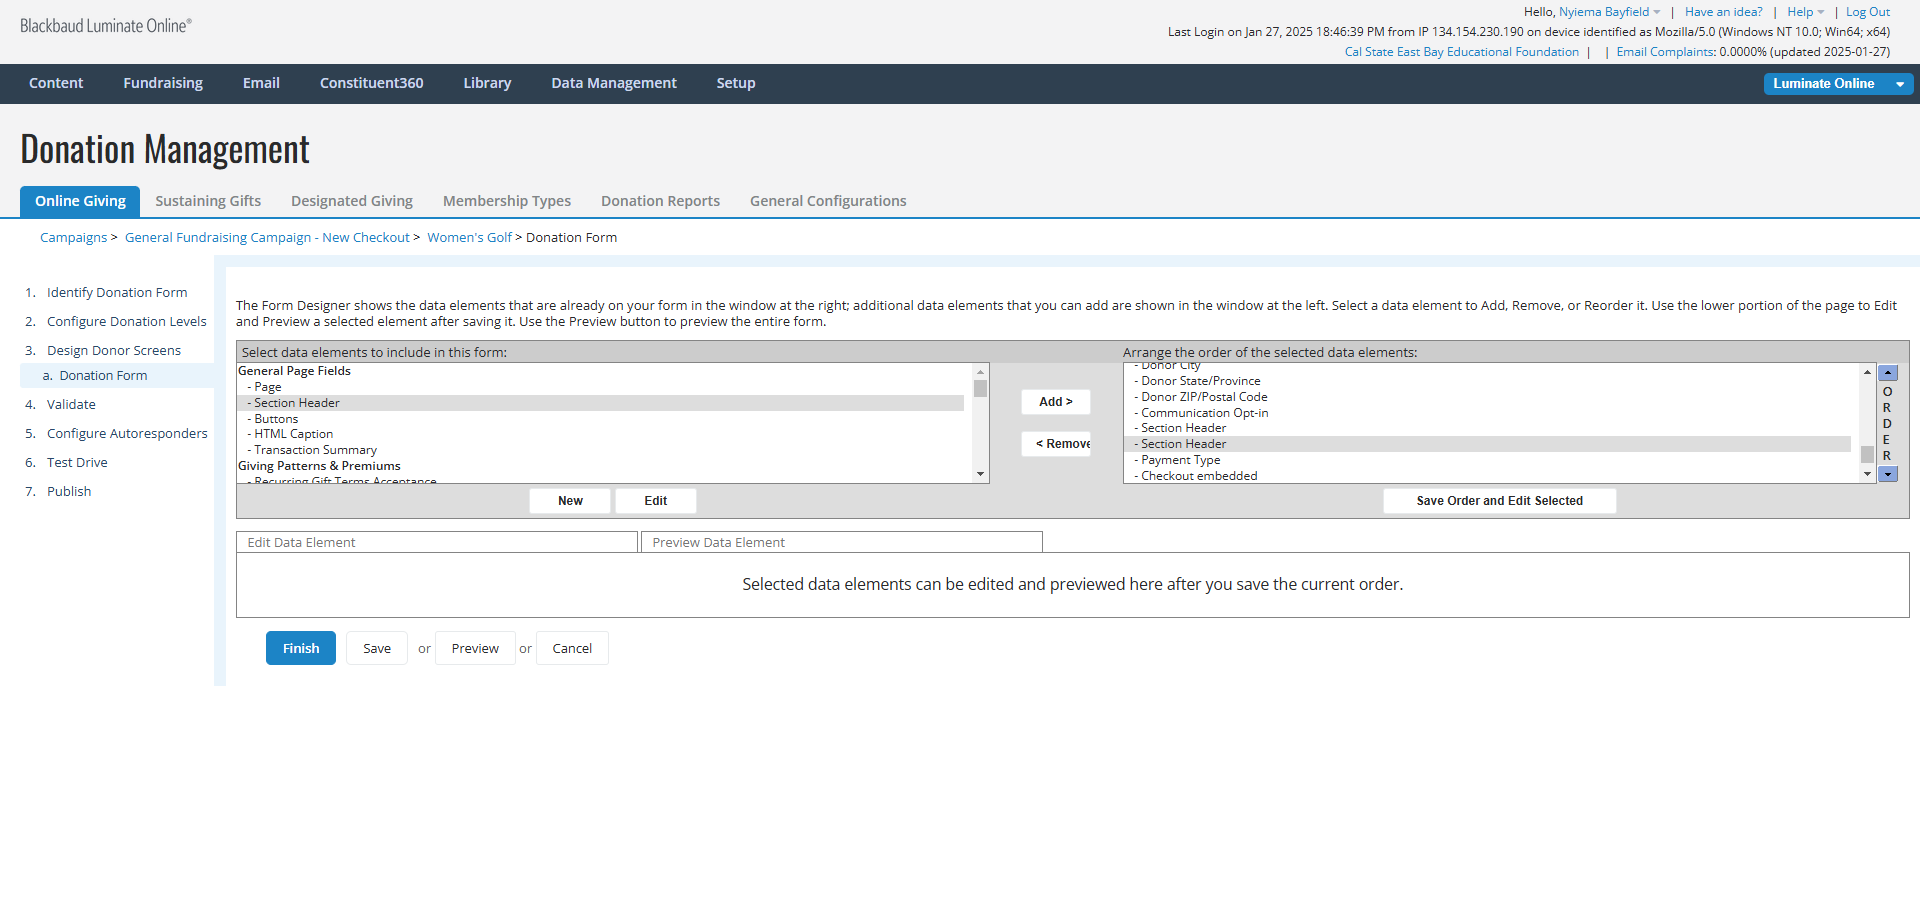
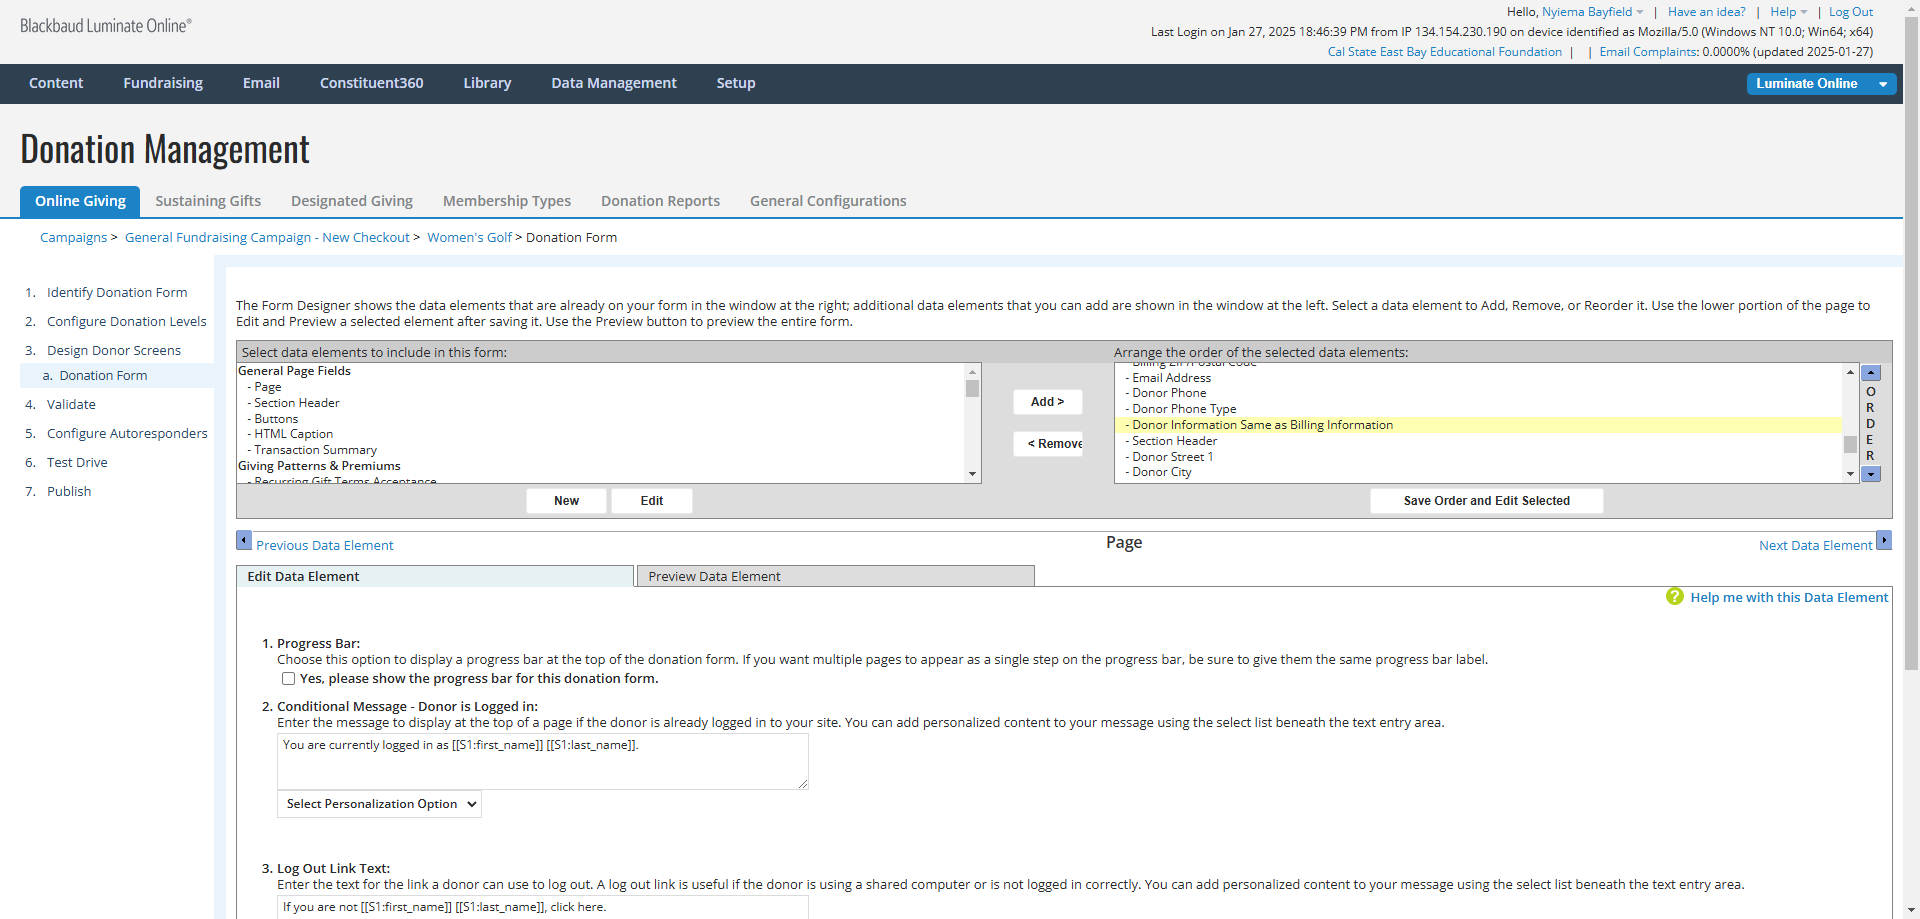
In the top right panel, Click on the first "HTML Caption" element.

3
Click on "Save Order and Edit Selected"

4
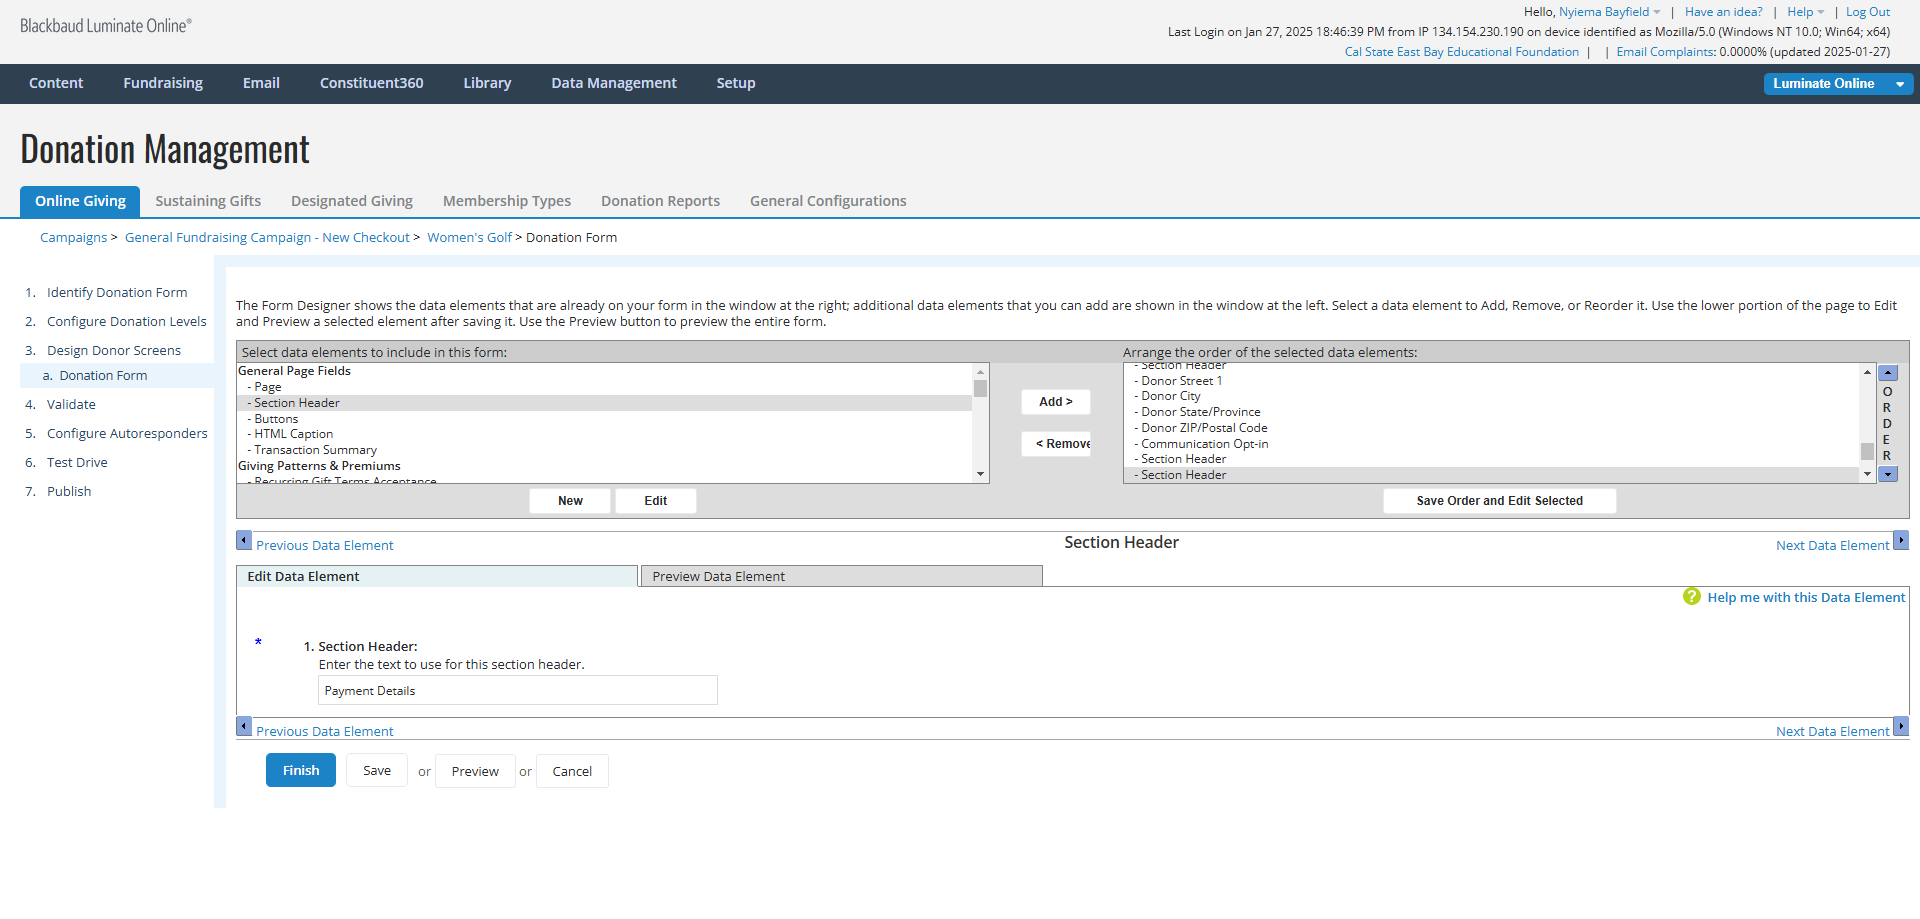
This will open the HTML Content editor where you can modify the text and images that appear at the top of each donation form, and that explain who or what donations made through the form will support, why support is needed, and provides additional context or background information.
In the HTML Content editor, update the content and images.
NOTE: Remember to remove any references to Giving Tuesday or information that is no longer valid or relevant.
In the HTML Content editor, update the content and images.
NOTE: Remember to remove any references to Giving Tuesday or information that is no longer valid or relevant.
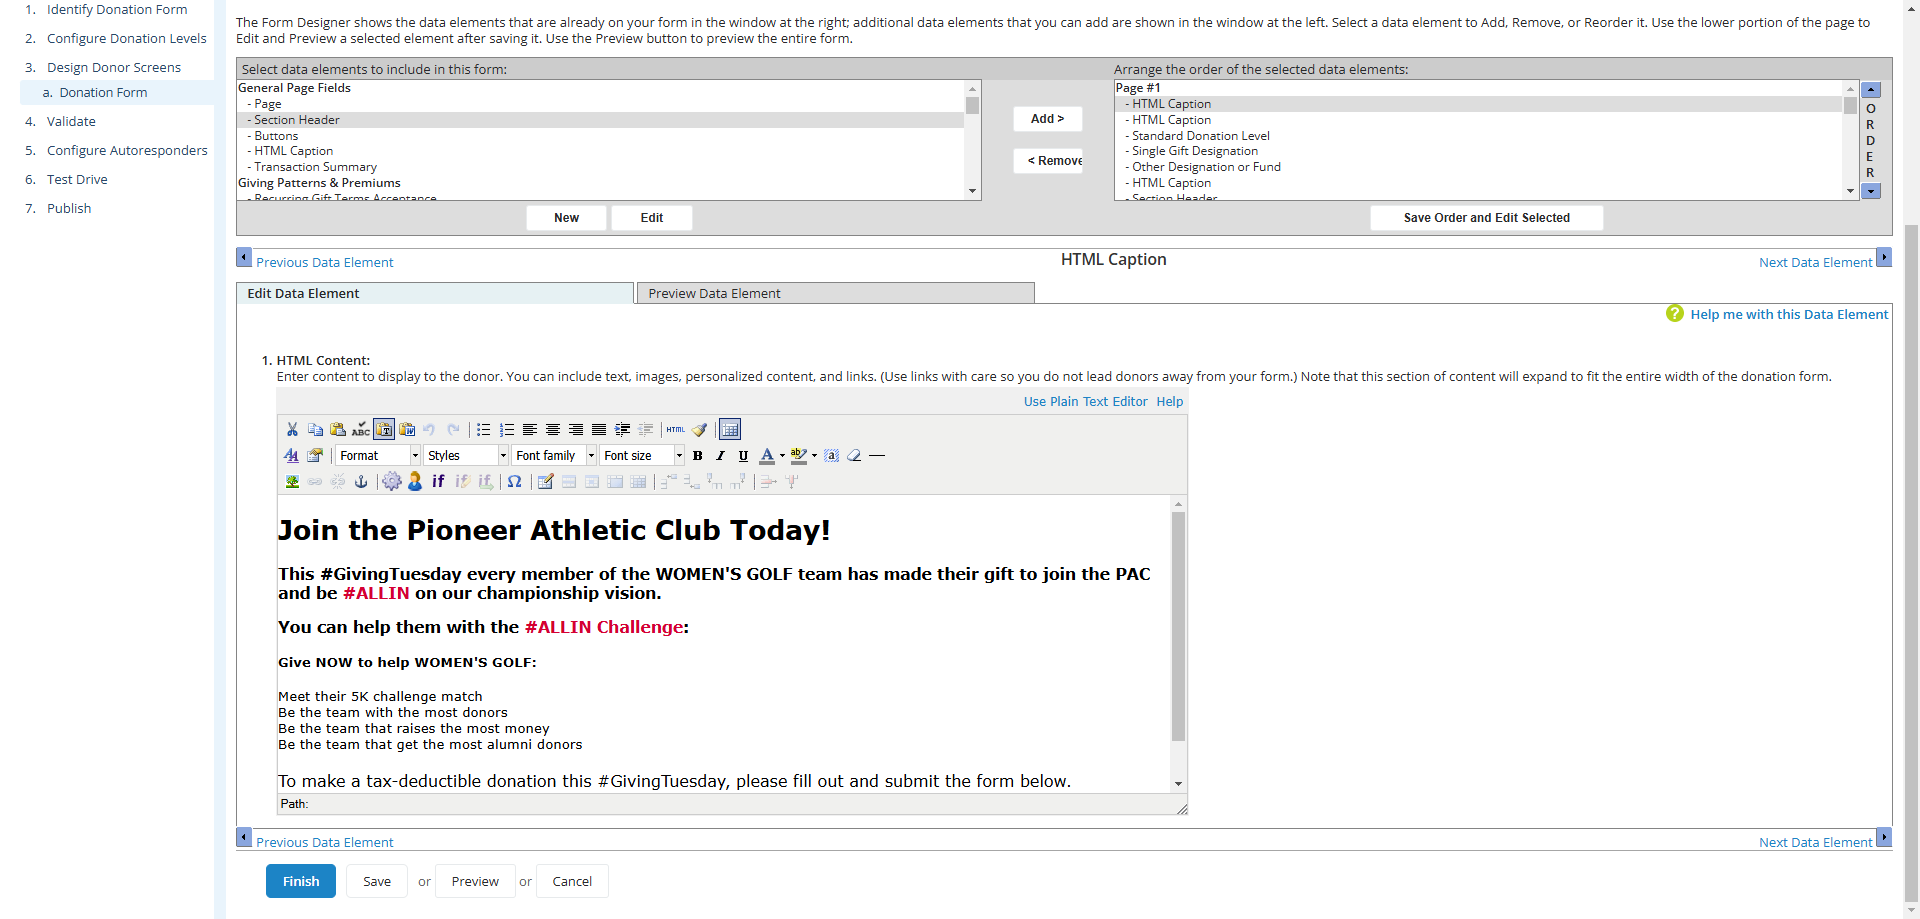
5
Once you've finished revising the content, Click on the "Save" button.
ADD SECTION HEADER TITLED "PAYMENT DETAILS"
6
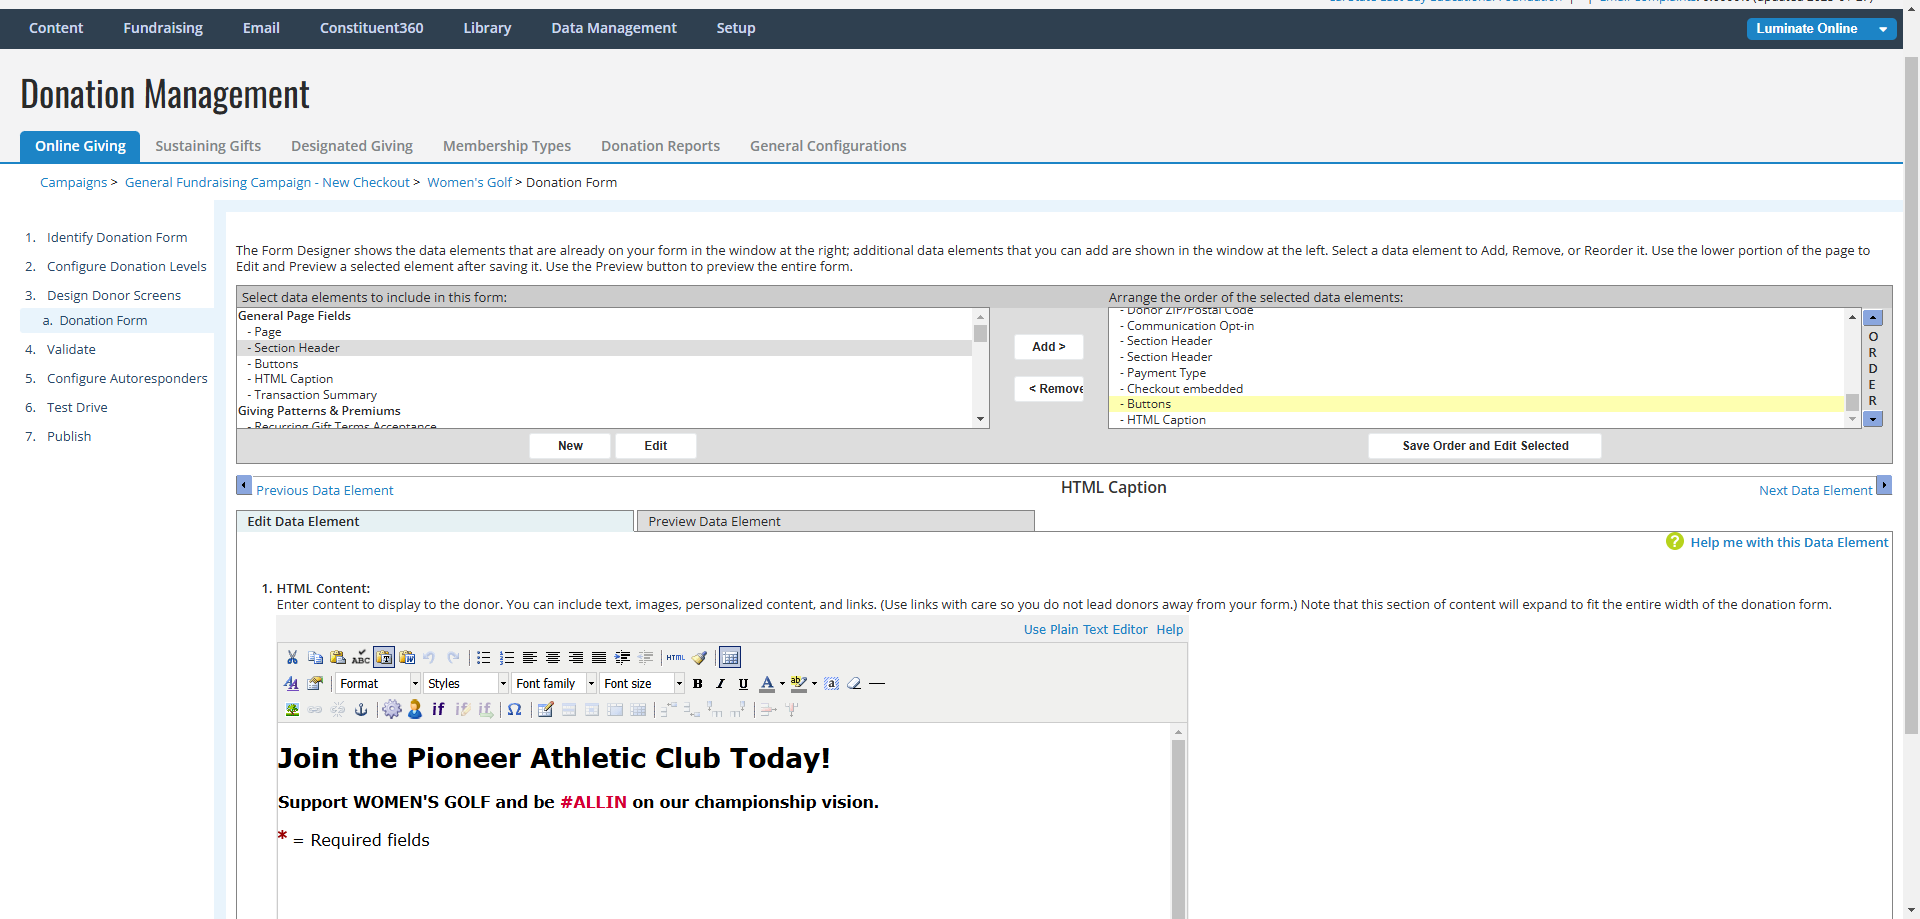
In the top left panel, Click on "Section Header". In the top right panel, Click on "Payment Type". Click on "Add>".
7
A new "Section Header" element should now appear above the "Payment Type" element. Click on "Save Order and Edit Selected"
8
Change the text displayed from "Section Header" to "Payment Details".

9
Click on "Save"
CHANGE "PROCESS" BUTTON TO "SUBMIT"
10
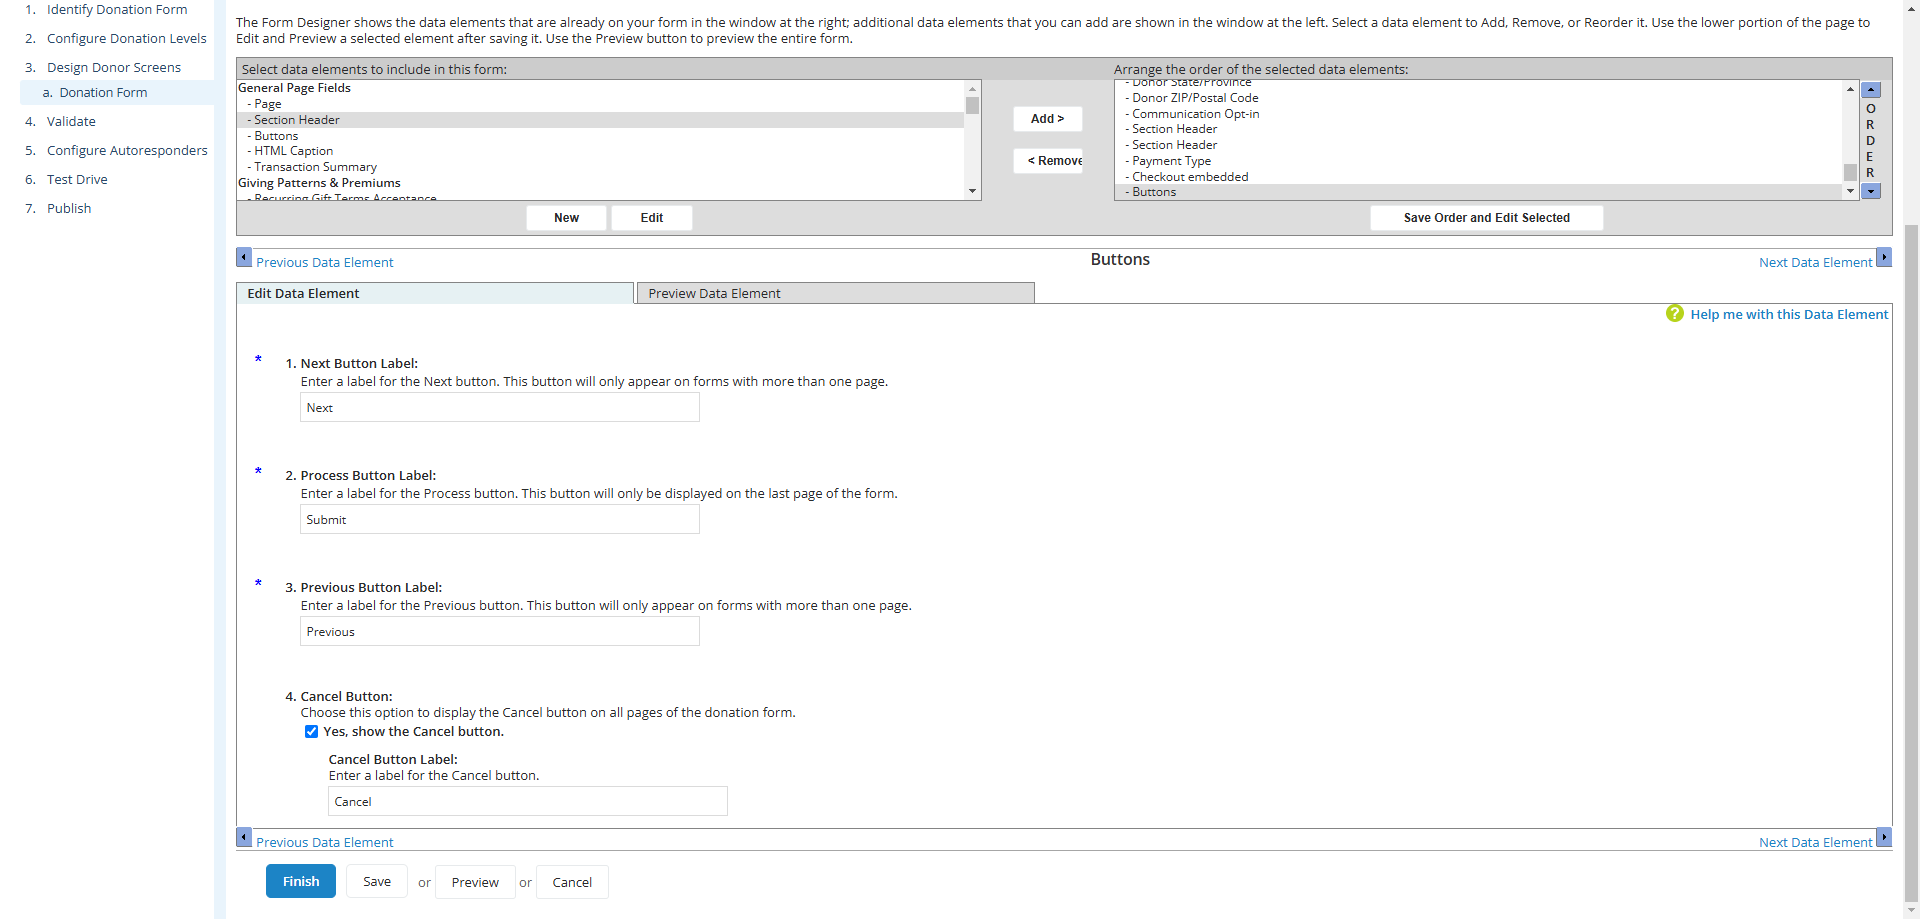
Click on "Buttons"
11
Click on "Save Order and Edit Selected"

12
Under Process Button Label, change the text from "Process" to "Submit".

13
Click on "Save"
REMOVE "DONOR INFORMATION SAME AS BILLING INFORMATION"
14
In the top right panel, Click on "Donor Information Same as Billing Information"
15
Click on "< Remove"
16
