Deploy Applications Using Microsoft Configuration Manager
Learn how to create, distribute, and deploy a Windows Installer (.msi) application to a target device collection using Microsoft Configuration Manager (MECM).
By Michael Limberg
This guide demonstrates how to create, distribute, and deploy a Windows Installer (.msi) application using Microsoft Configuration Manager (MECM). Completing this task ensures your software packages are properly formatted, cached on distribution points, and targeted securely to your managed devices.
This guide is intended for IT administrators and system engineers who manage software lifecycles for organizational endpoints. Use these steps when onboarding a new application into your MECM environment for broad or targeted deployment.
Create the Application
1
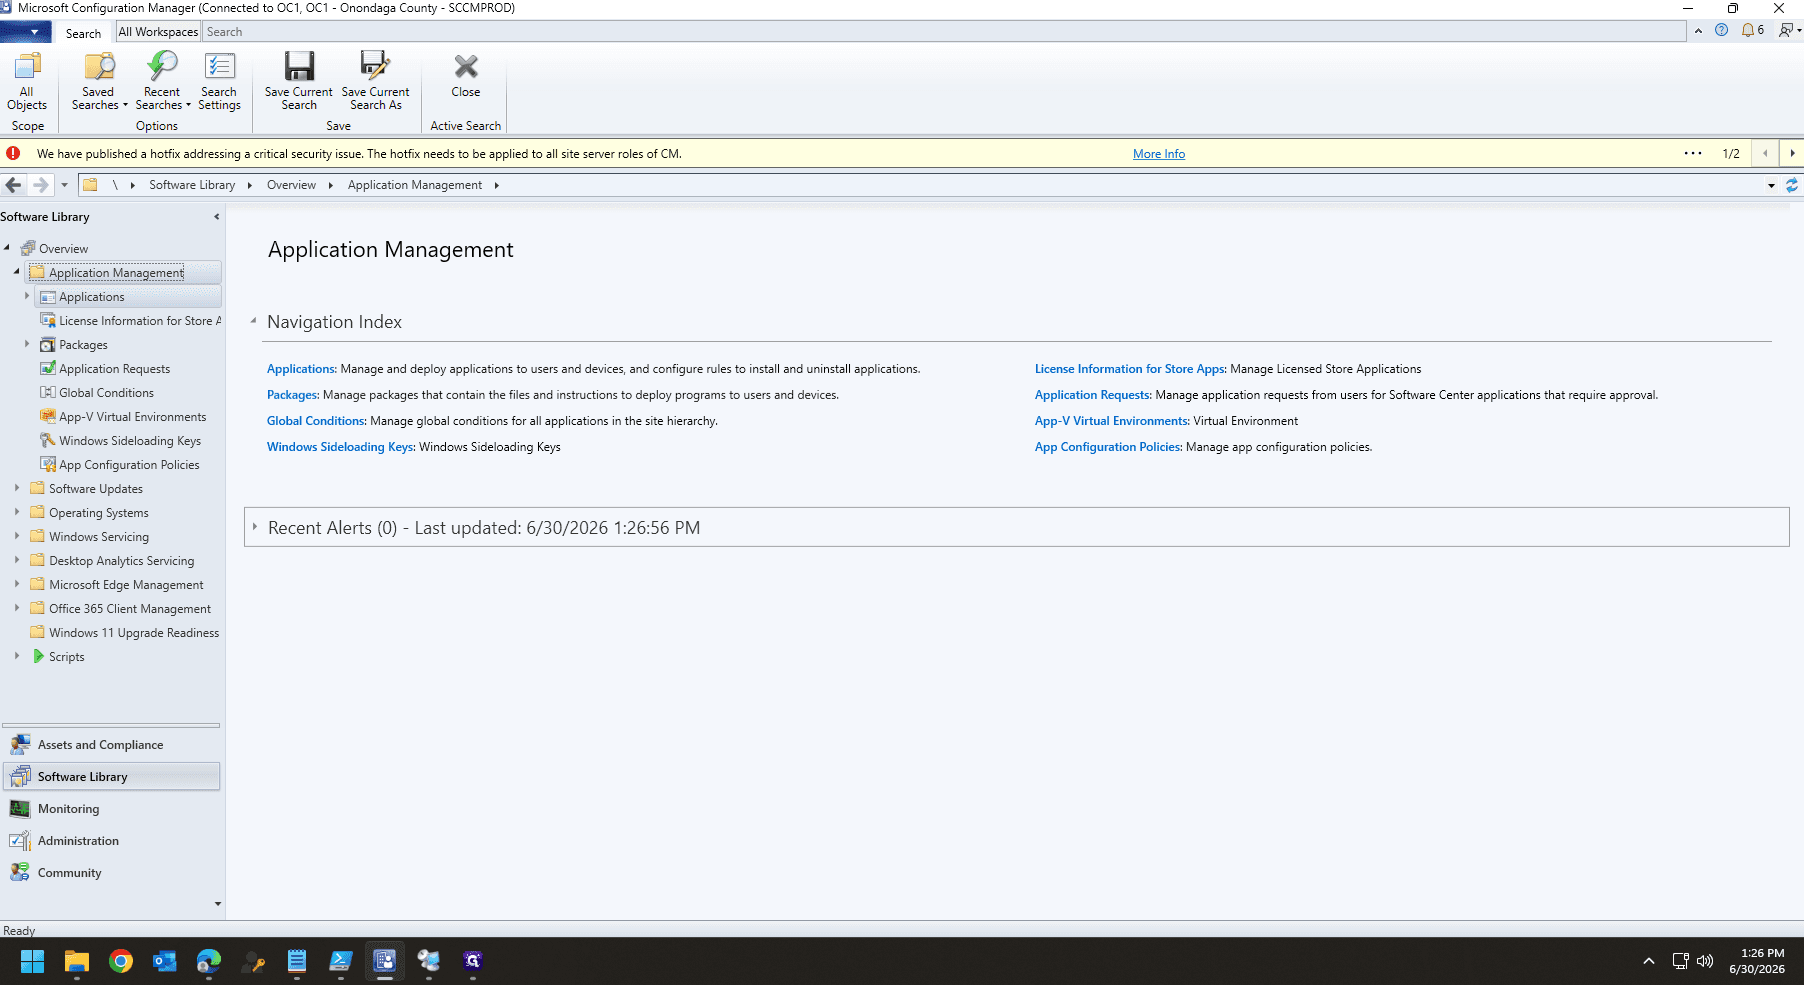
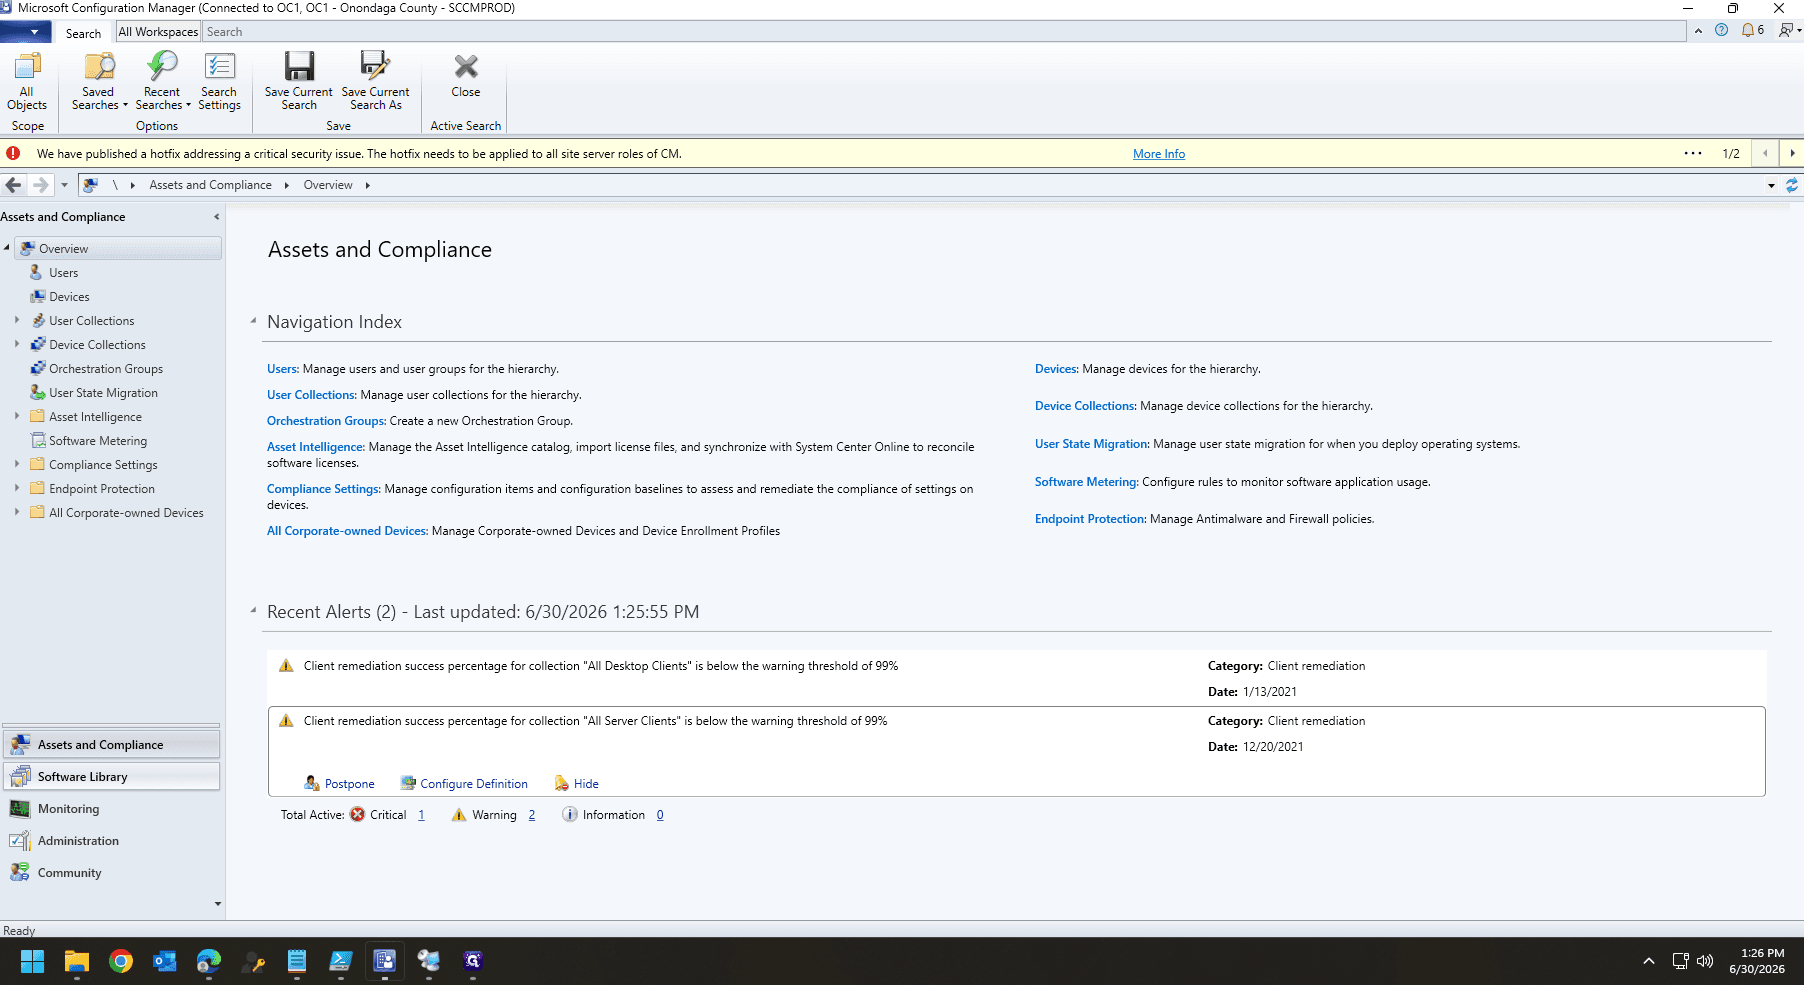
In the Microsoft Configuration Manager console, navigate to the Software Library workspace.
2
Expand Application Management and click on Applications.
3
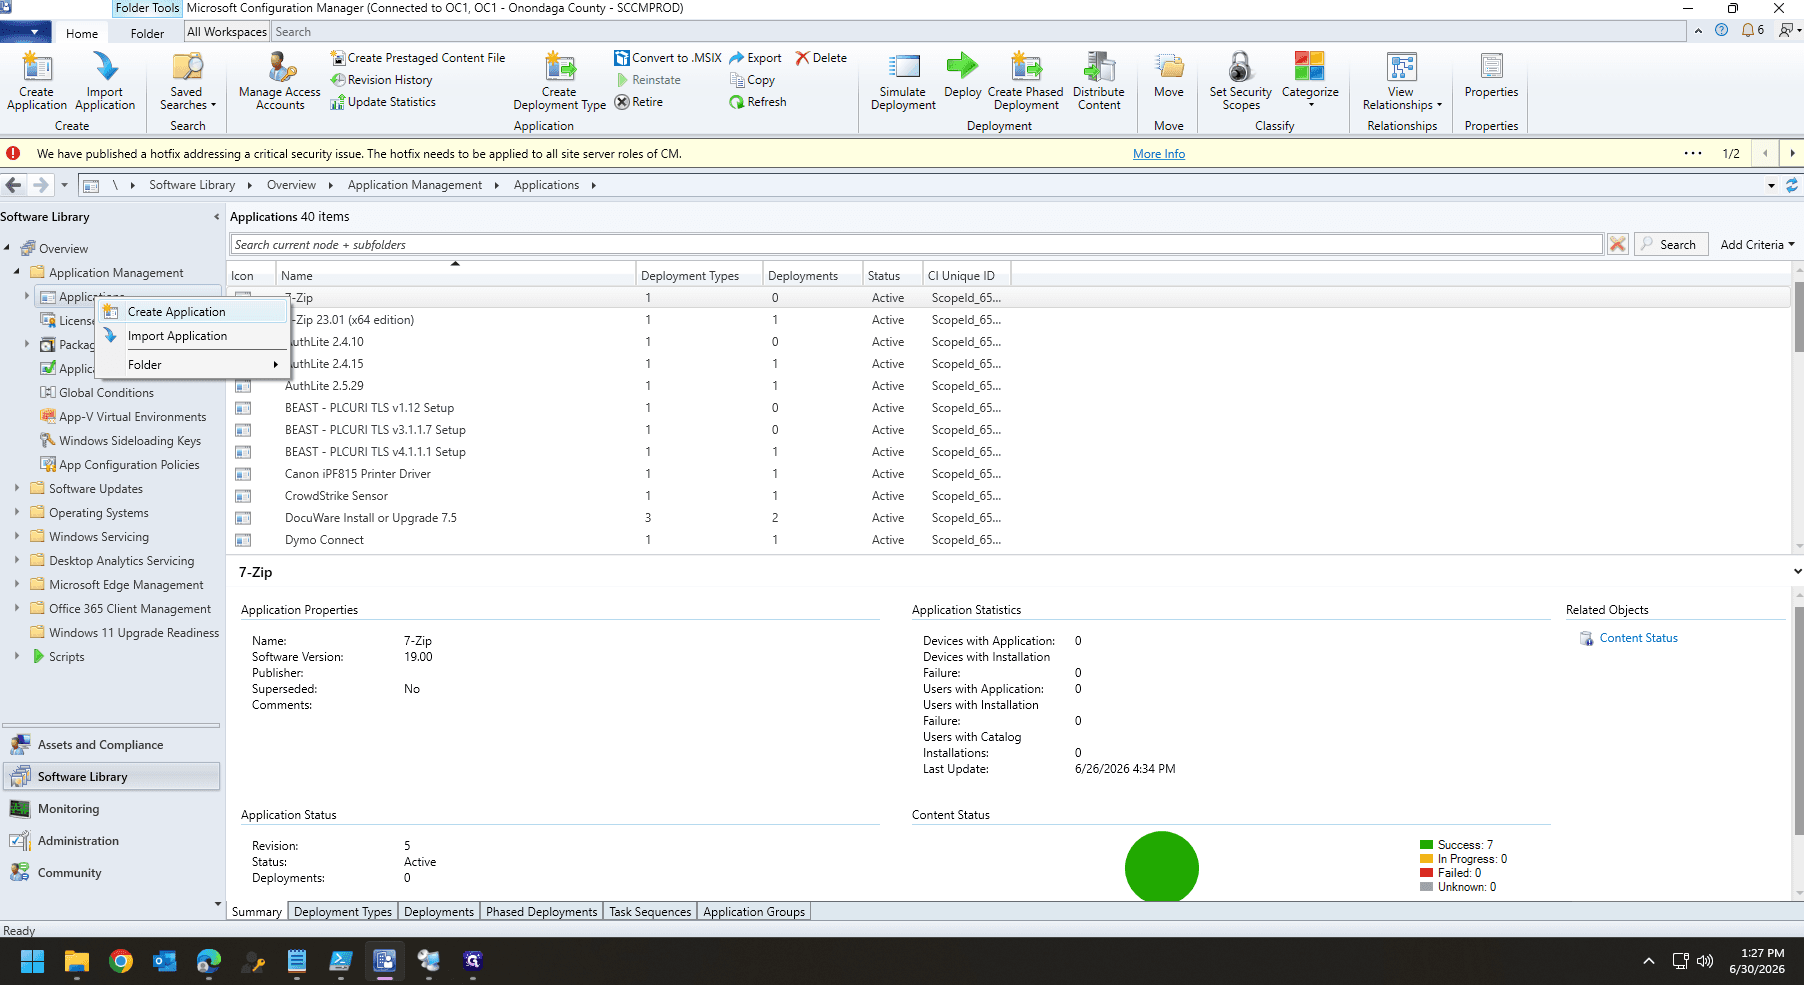
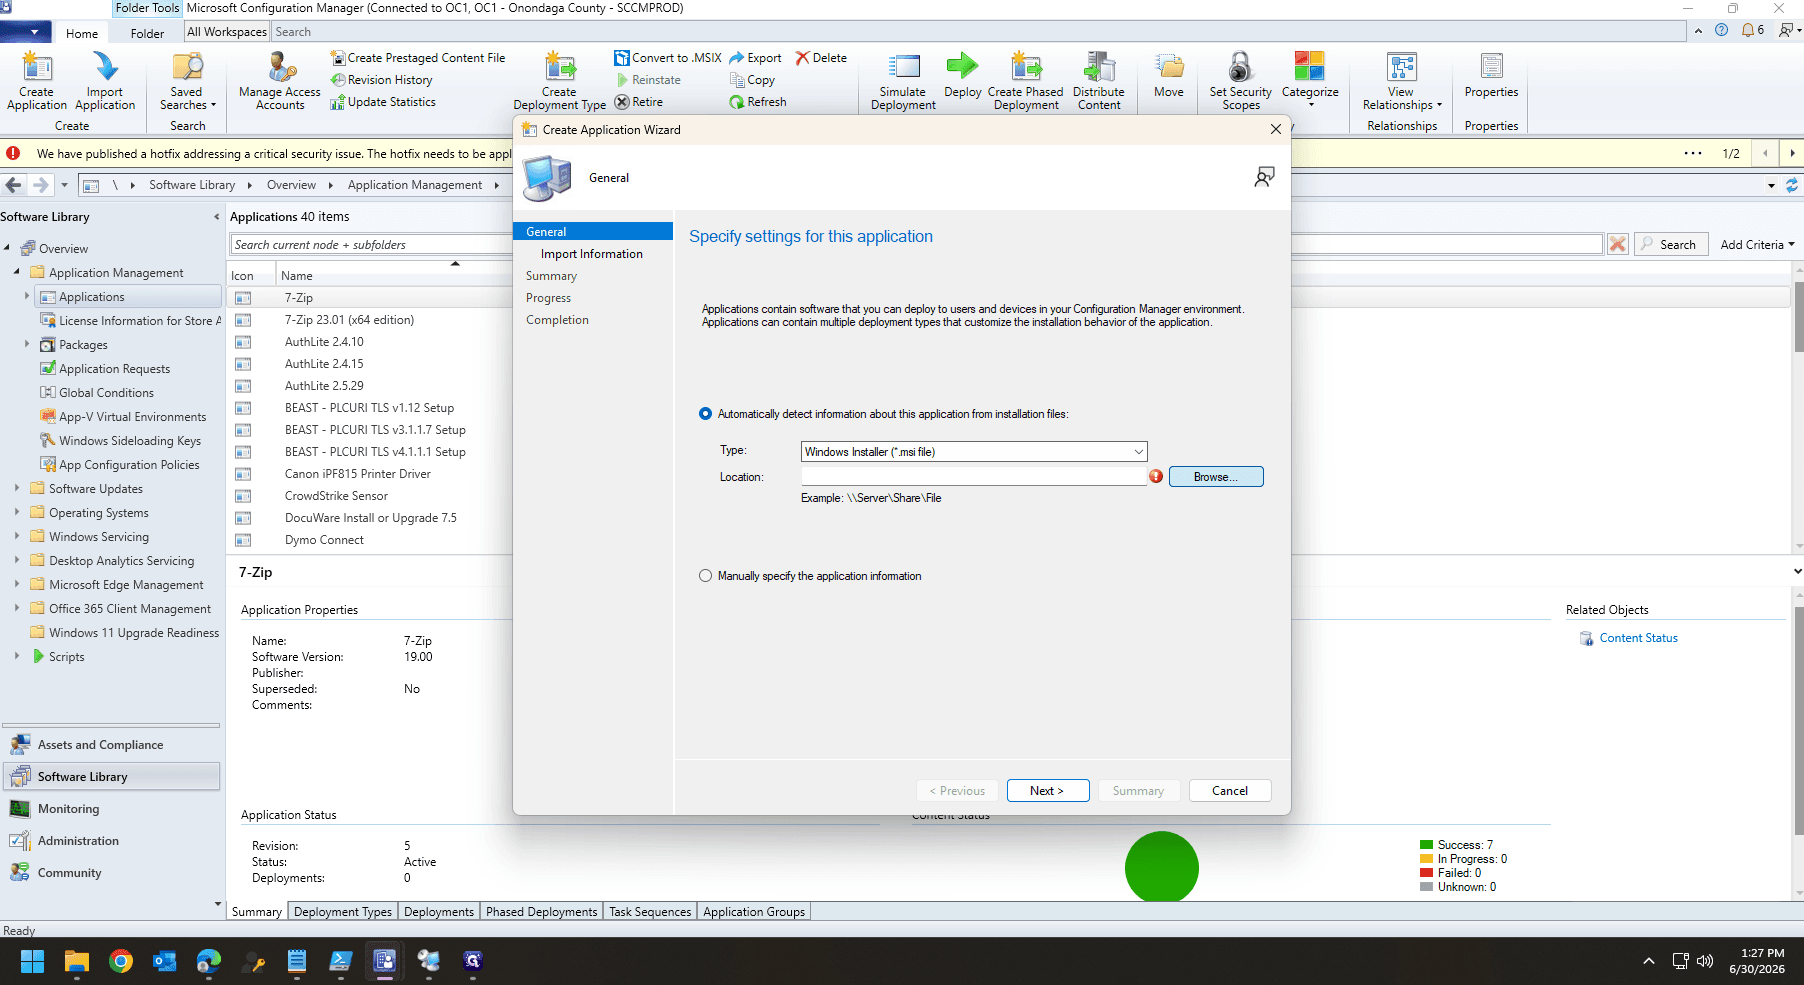
Right-click on Applications and select Create Application to open the wizard.
4
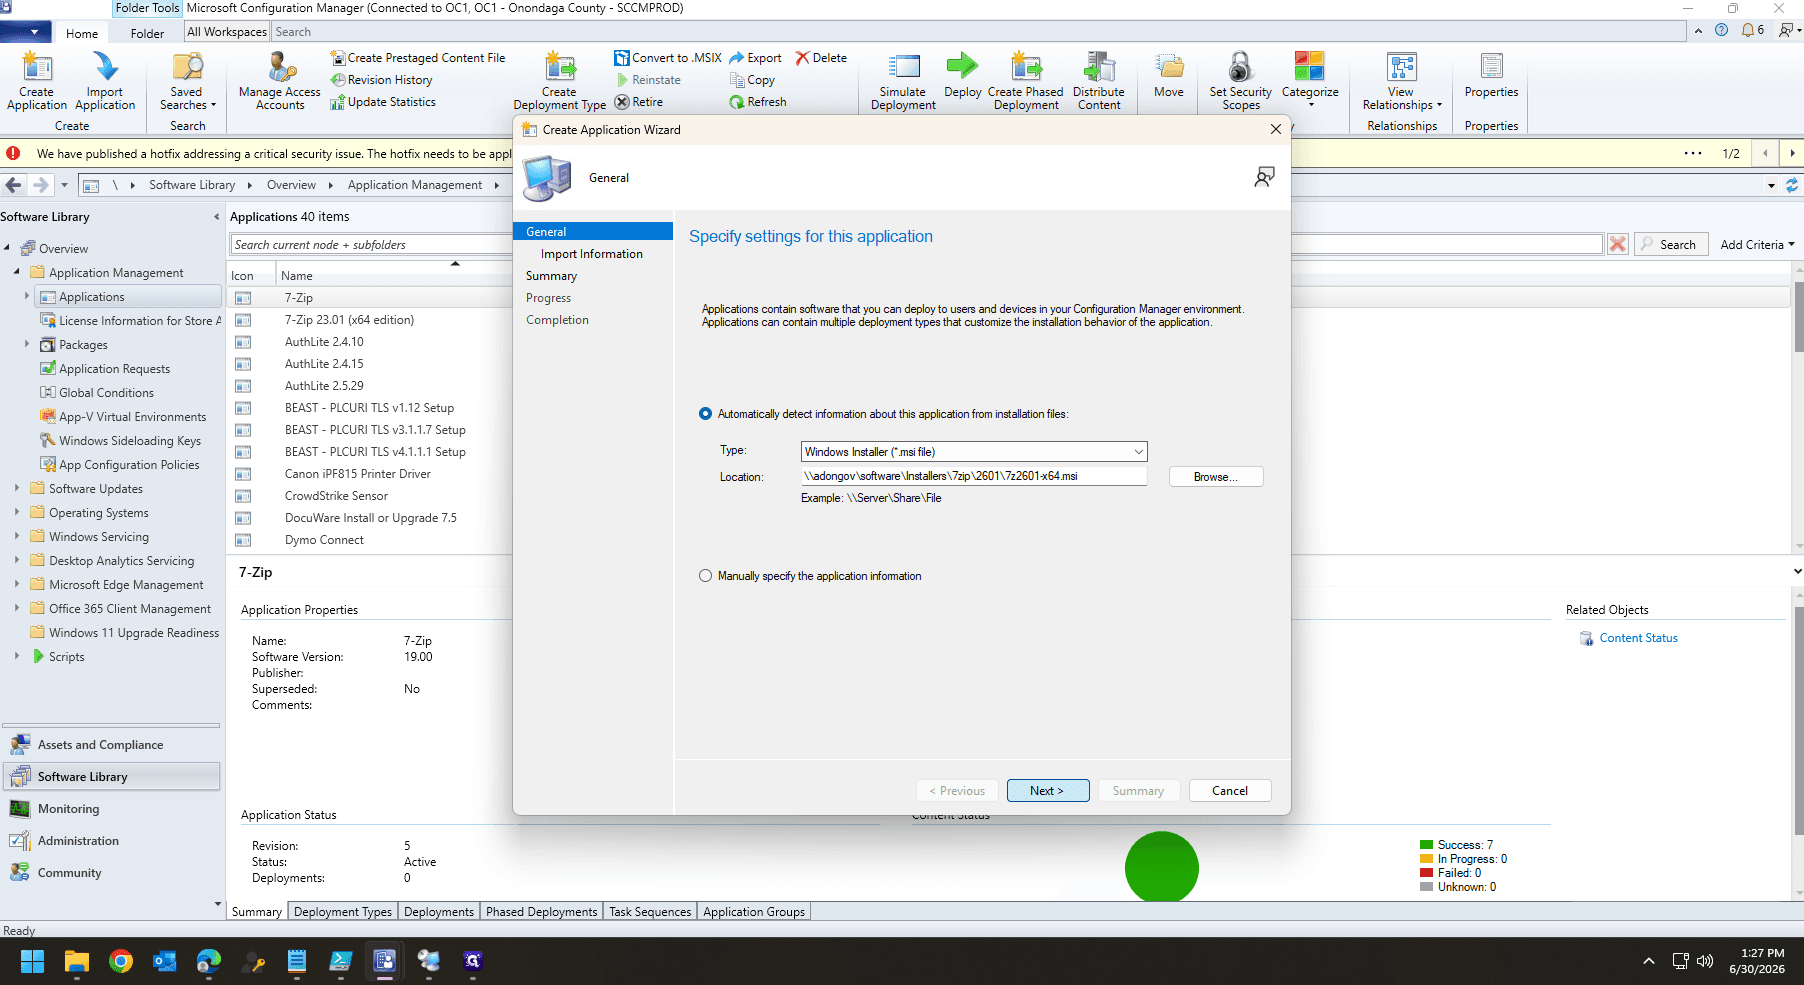
Click Browse... to locate your Windows Installer (.msi) file.
5
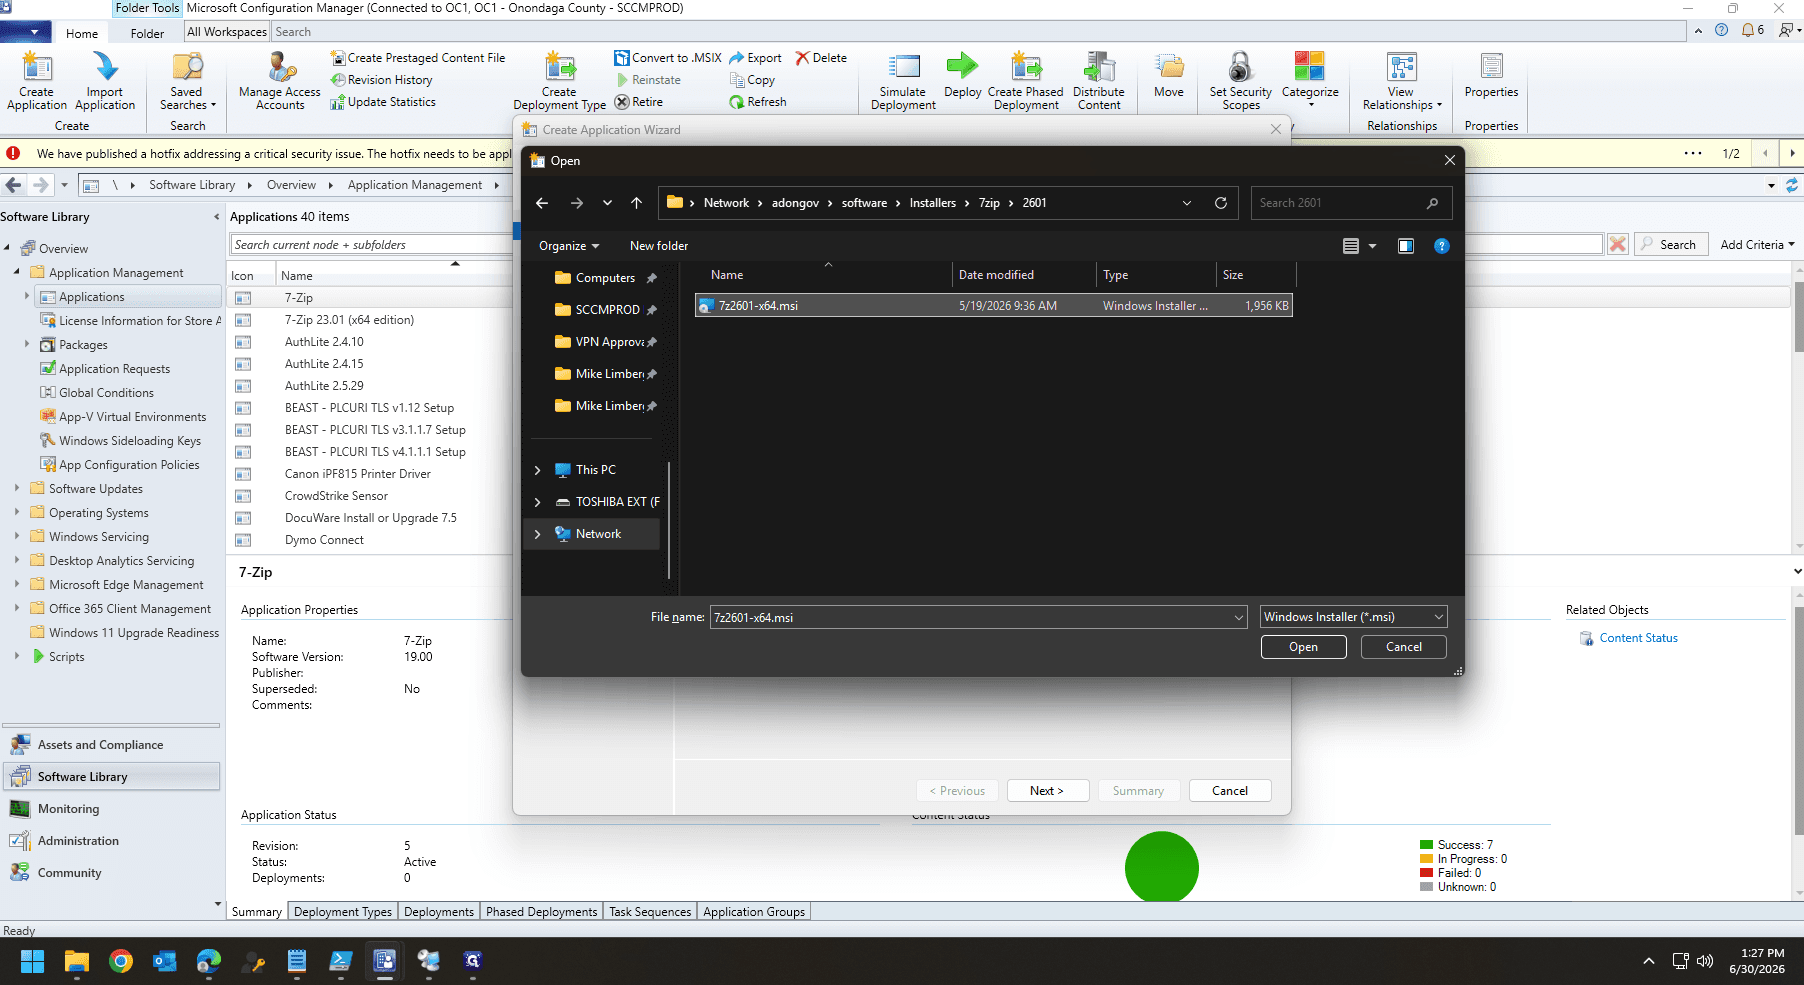
Navigate to your network software share (e.g., \\adongov\software) and access your installer directory.
6
Double-click on the target MSI file (e.g., 7z2601-x64.msi) to load it.
7
Click Next to confirm the automatically detected application information.
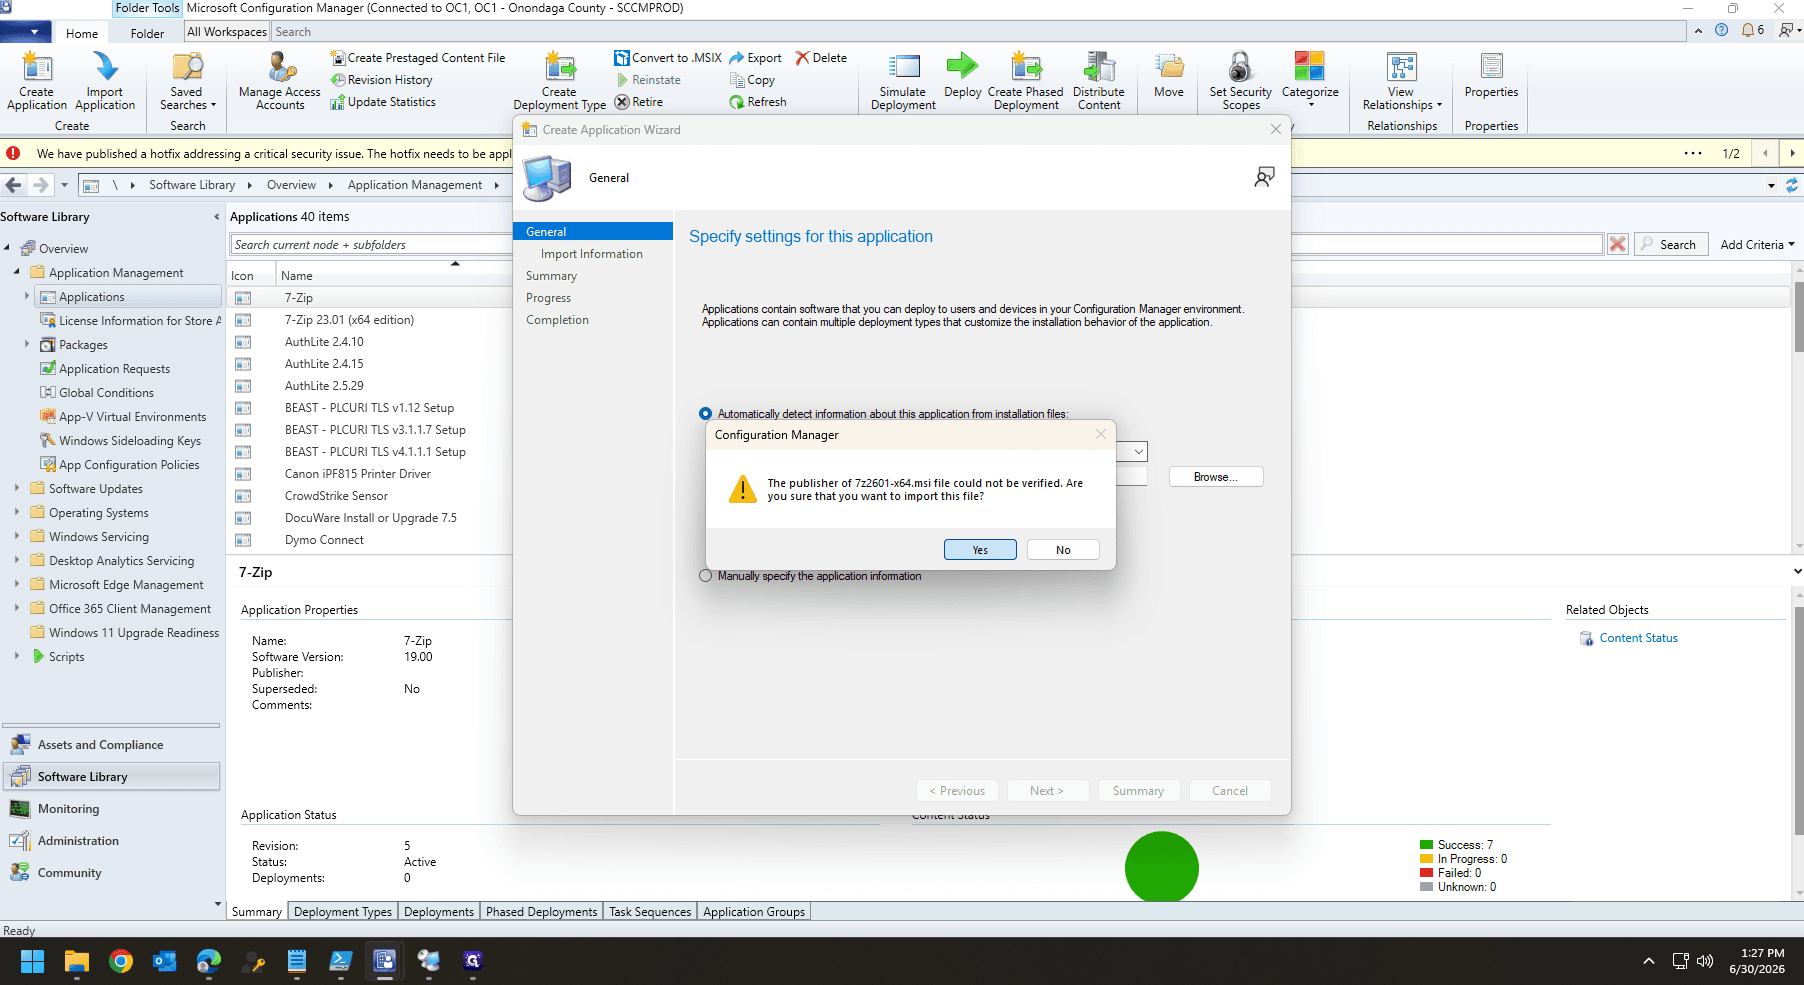
If your MSI file originates from an unverified publisher, Configuration Manager will prompt you with a security warning before proceeding.
8
Click Yes to acknowledge the unverified publisher warning and proceed.
9
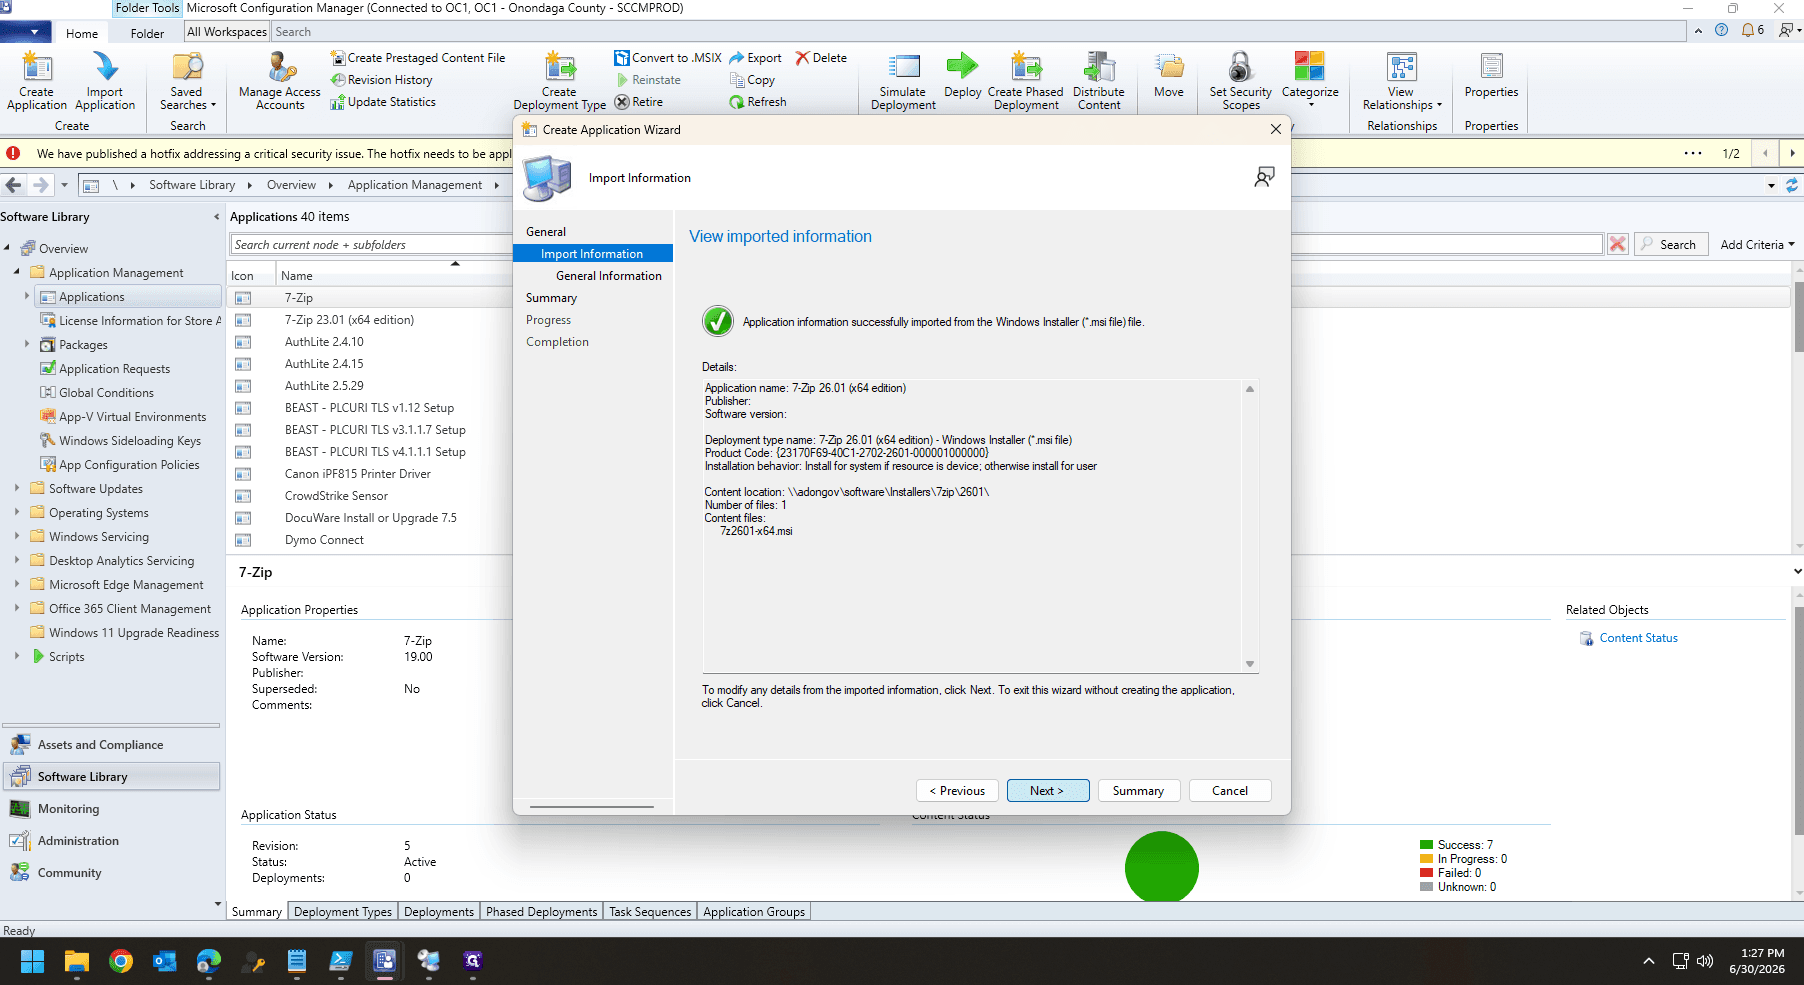
Review the import success message and click Next.
10
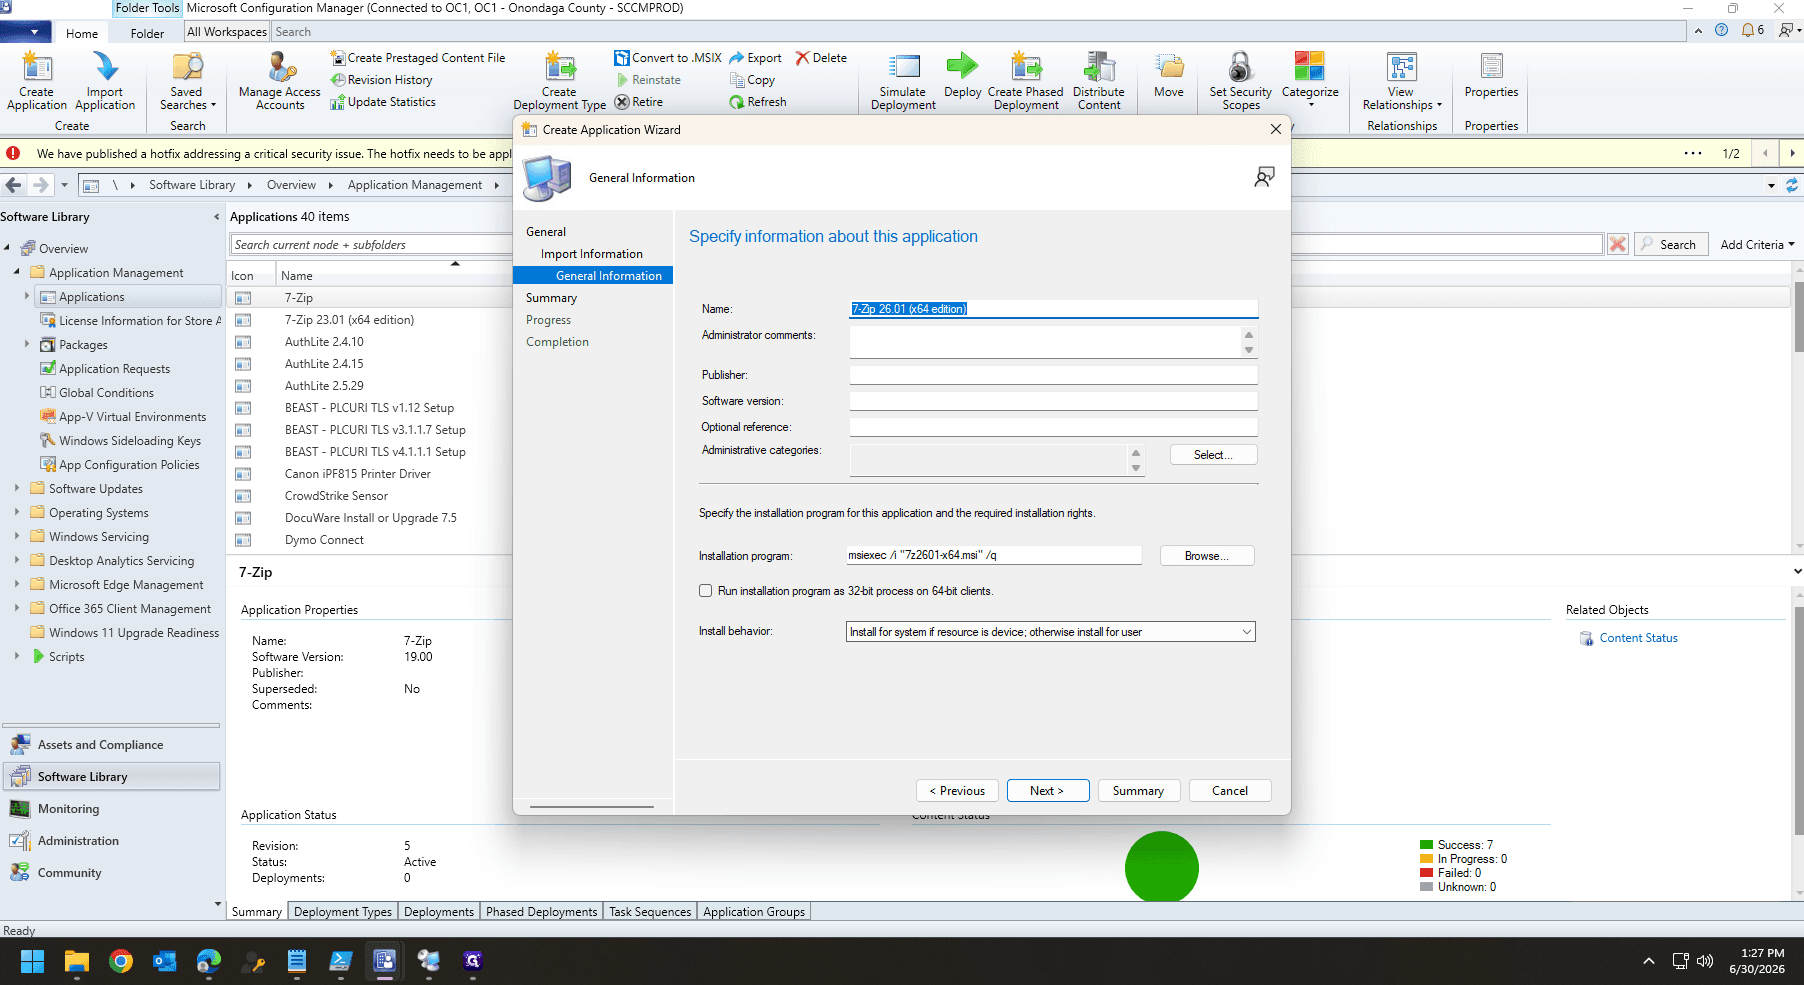
On the General Information page, verify the application metadata and click Next.
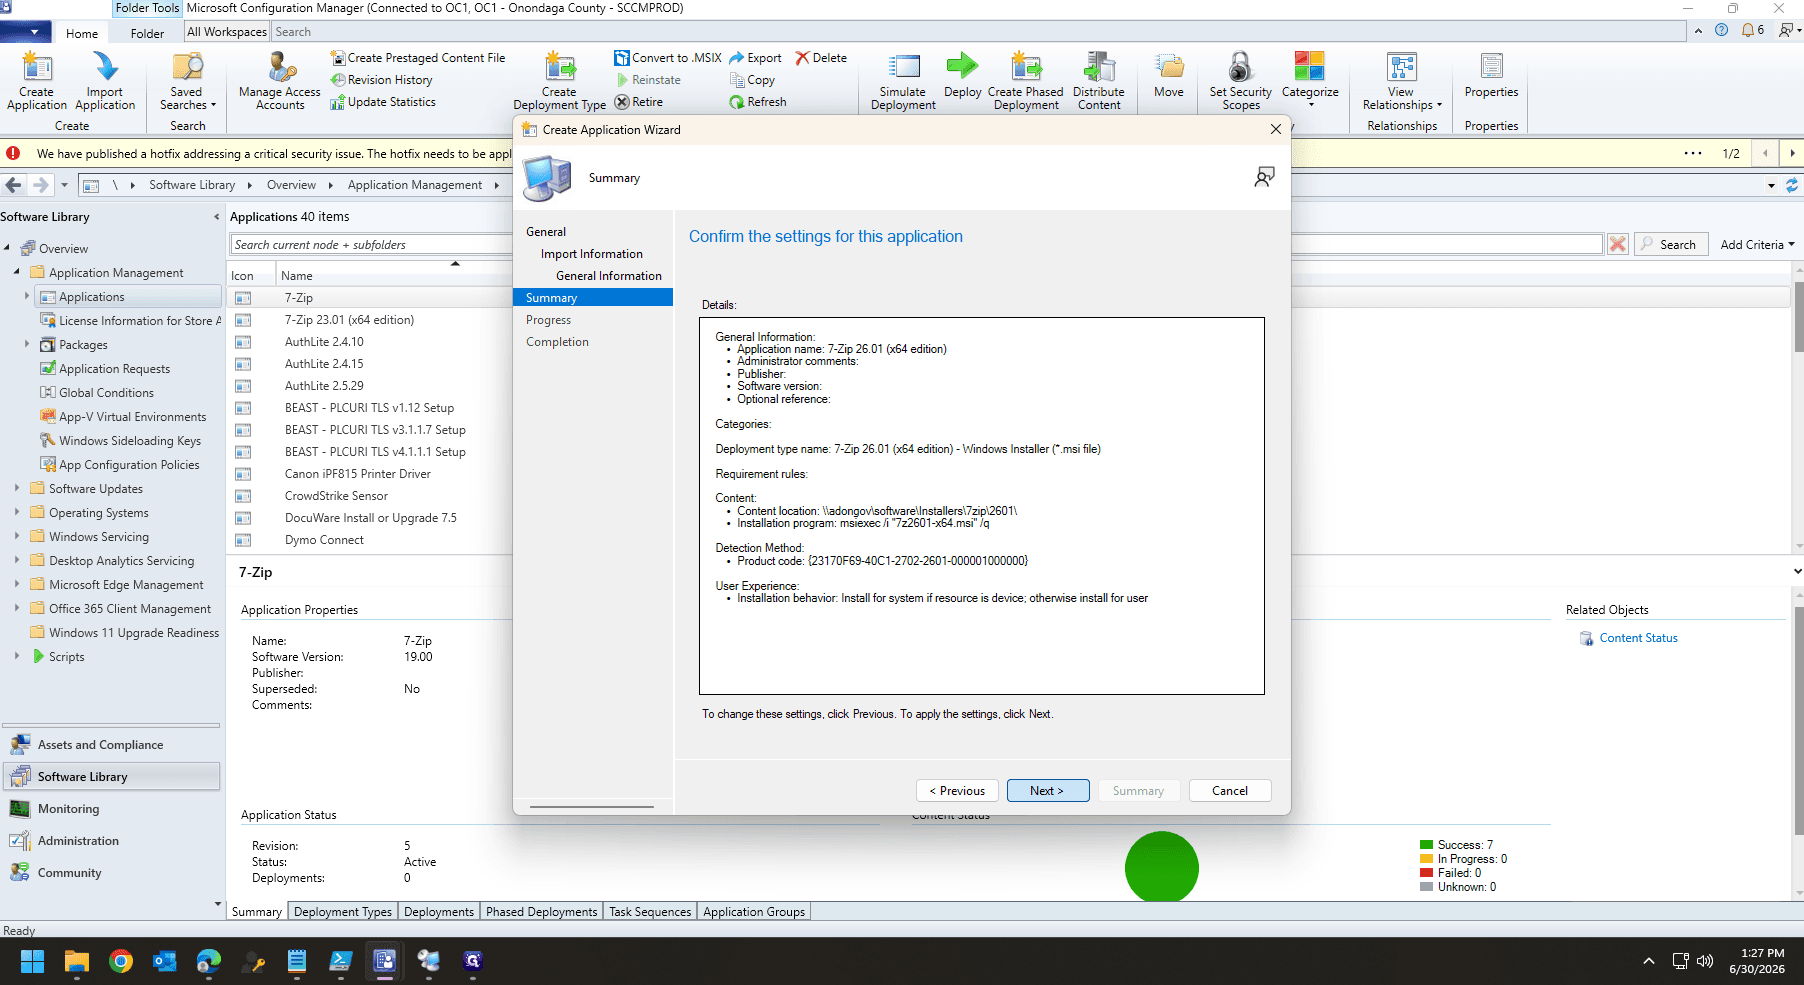
11
Review the deployment Summary and click Next to create the application.
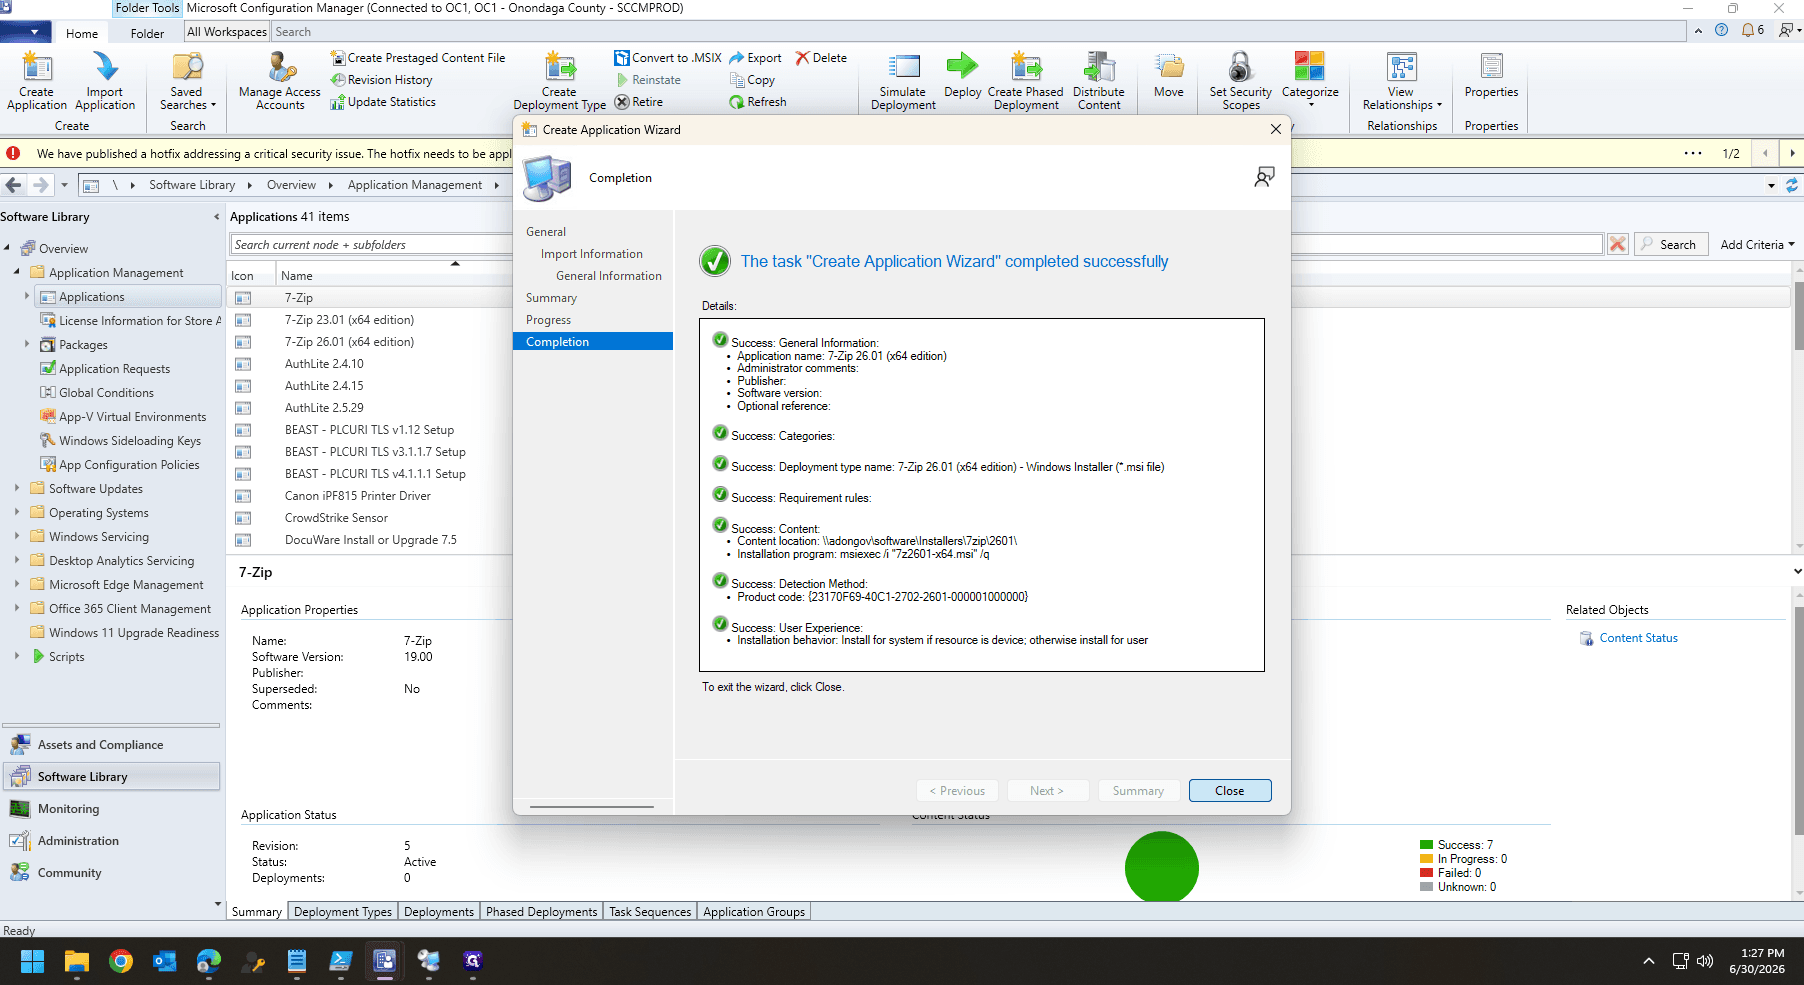
12
Once the process completes successfully, click Close.
Configure Deployment Type Properties
13
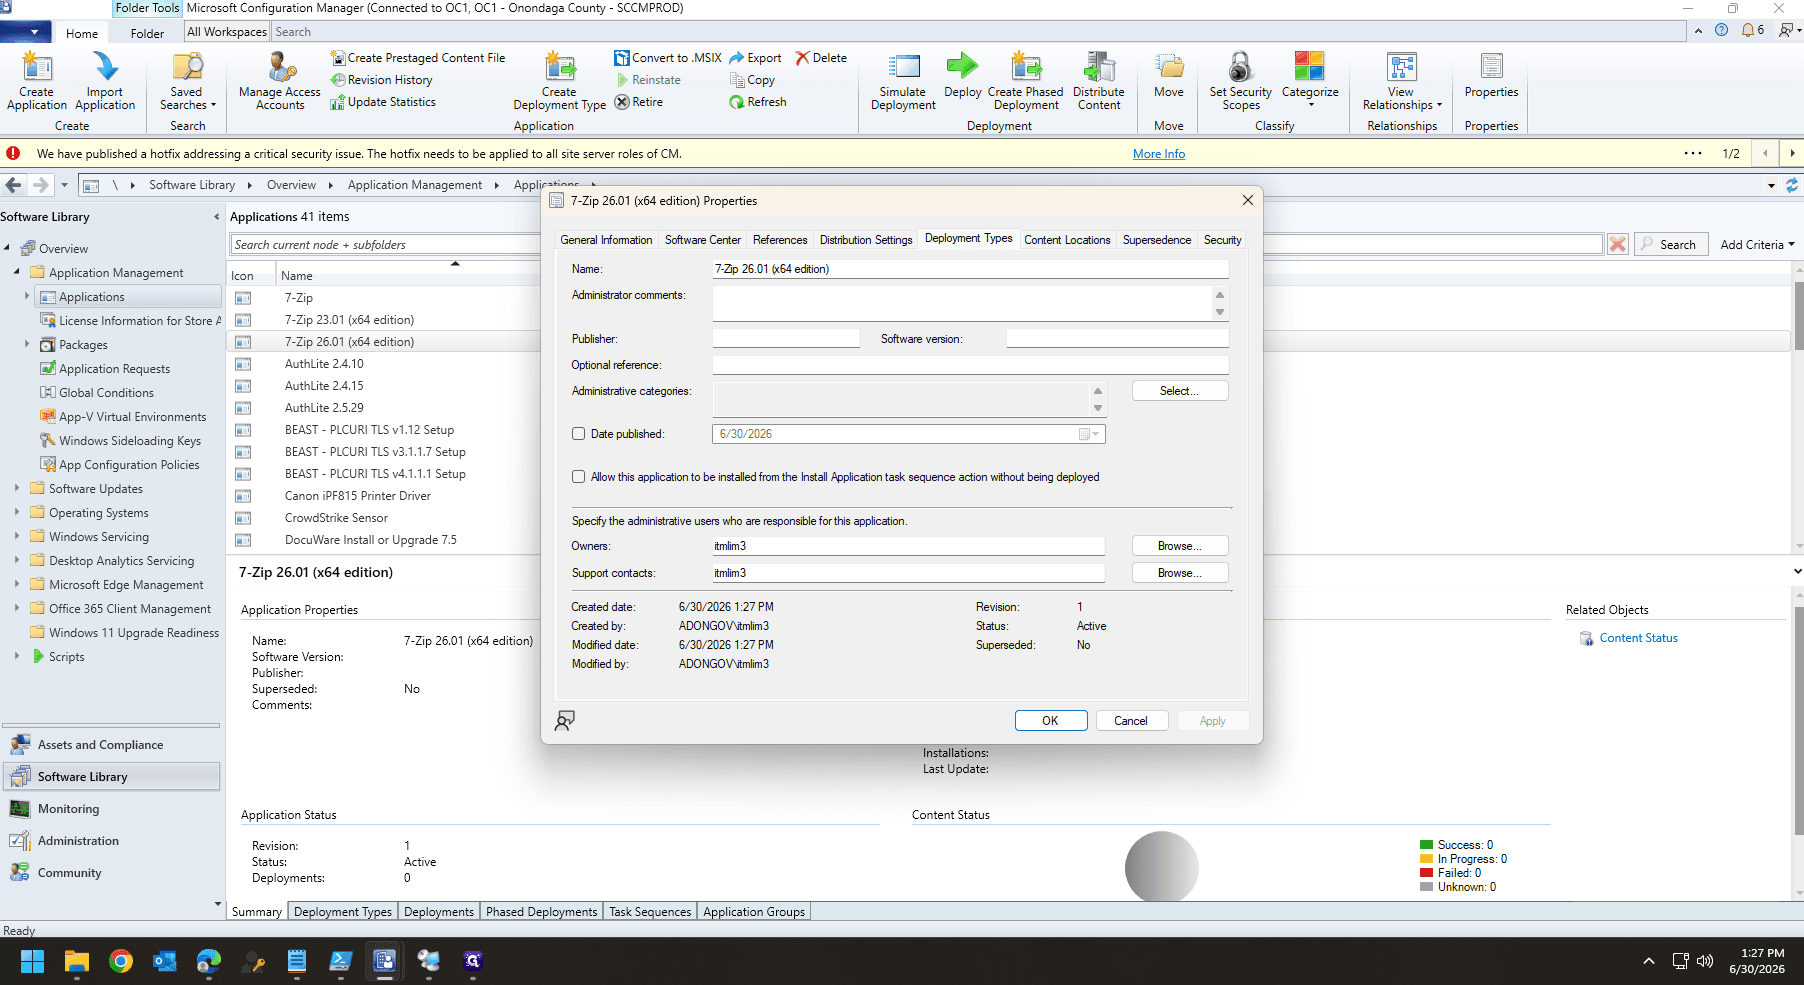
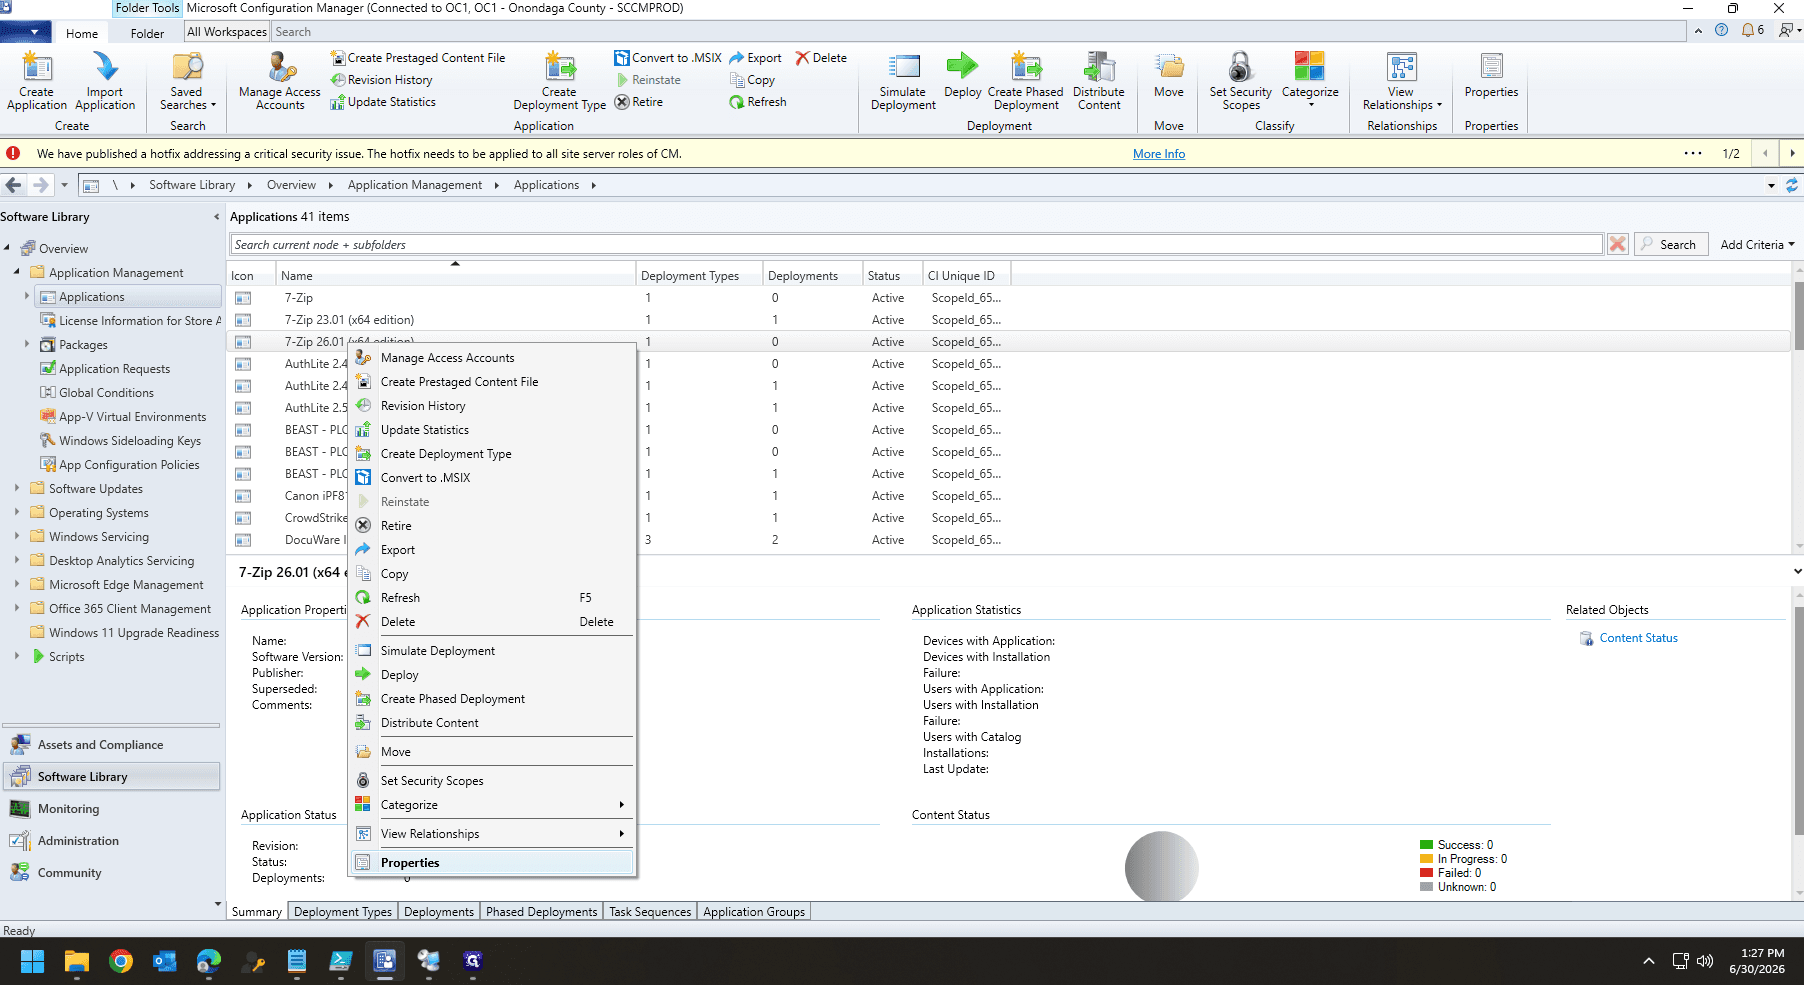
Right-click the newly created application from the center list and select Properties.
14
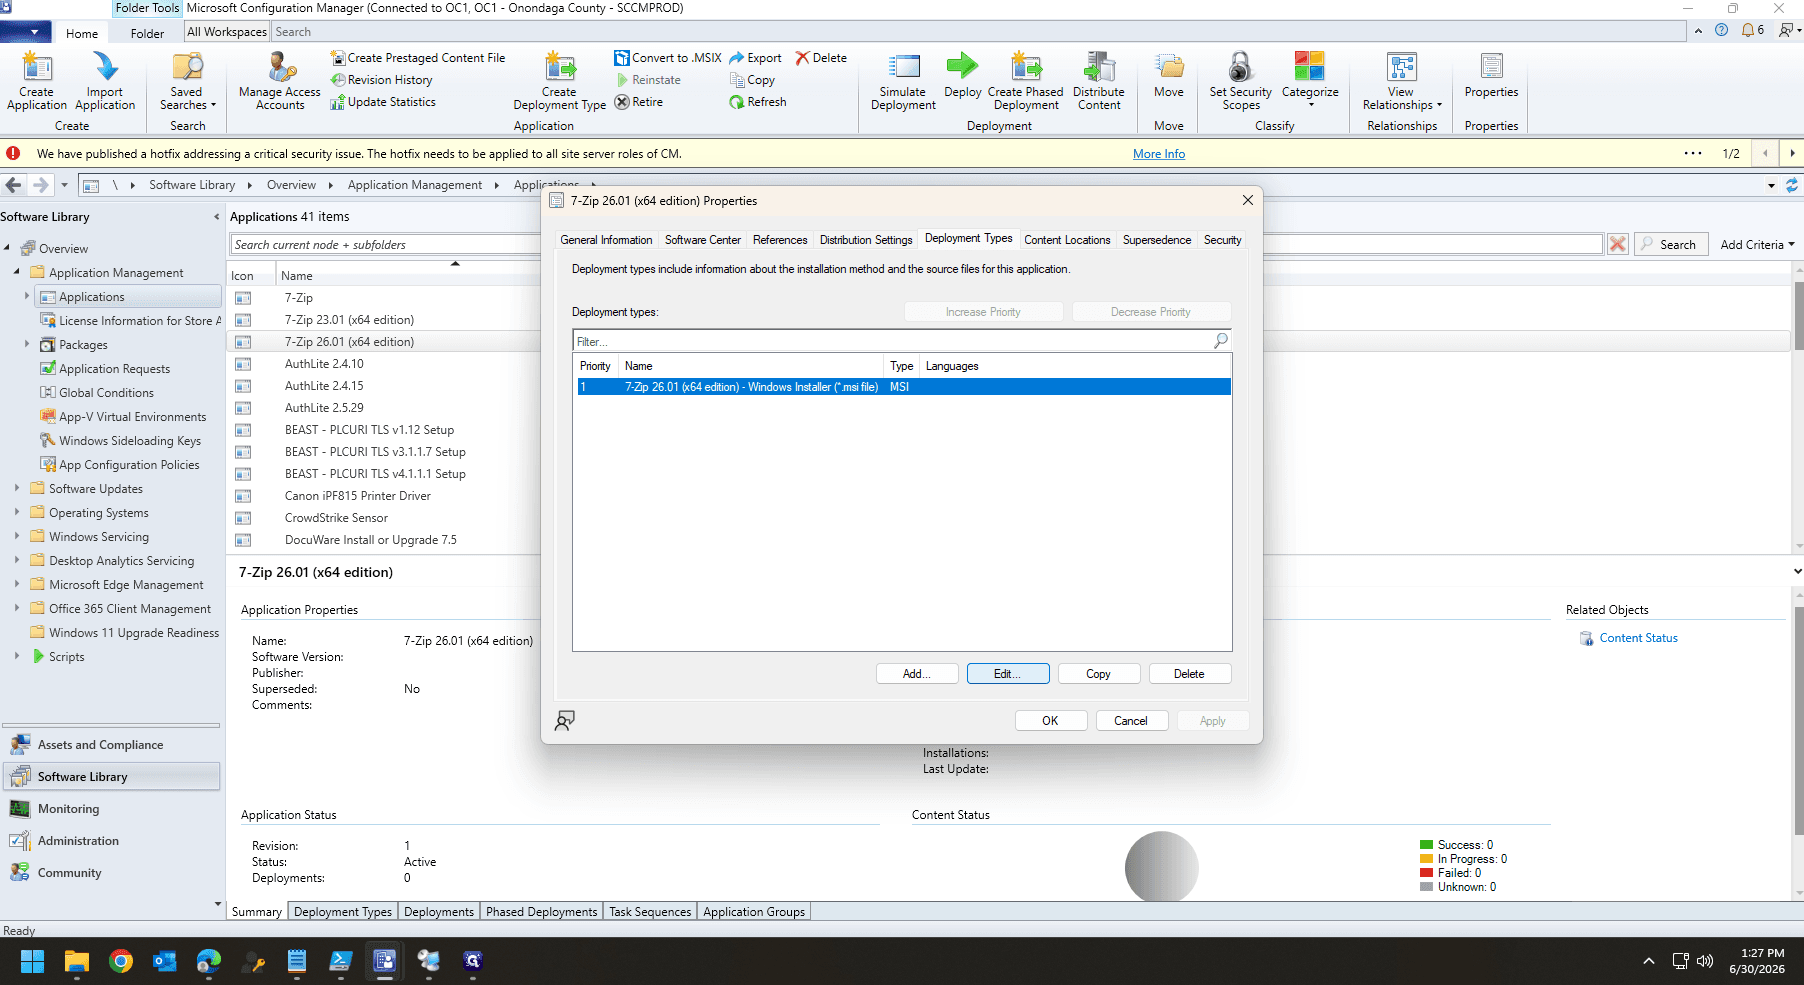
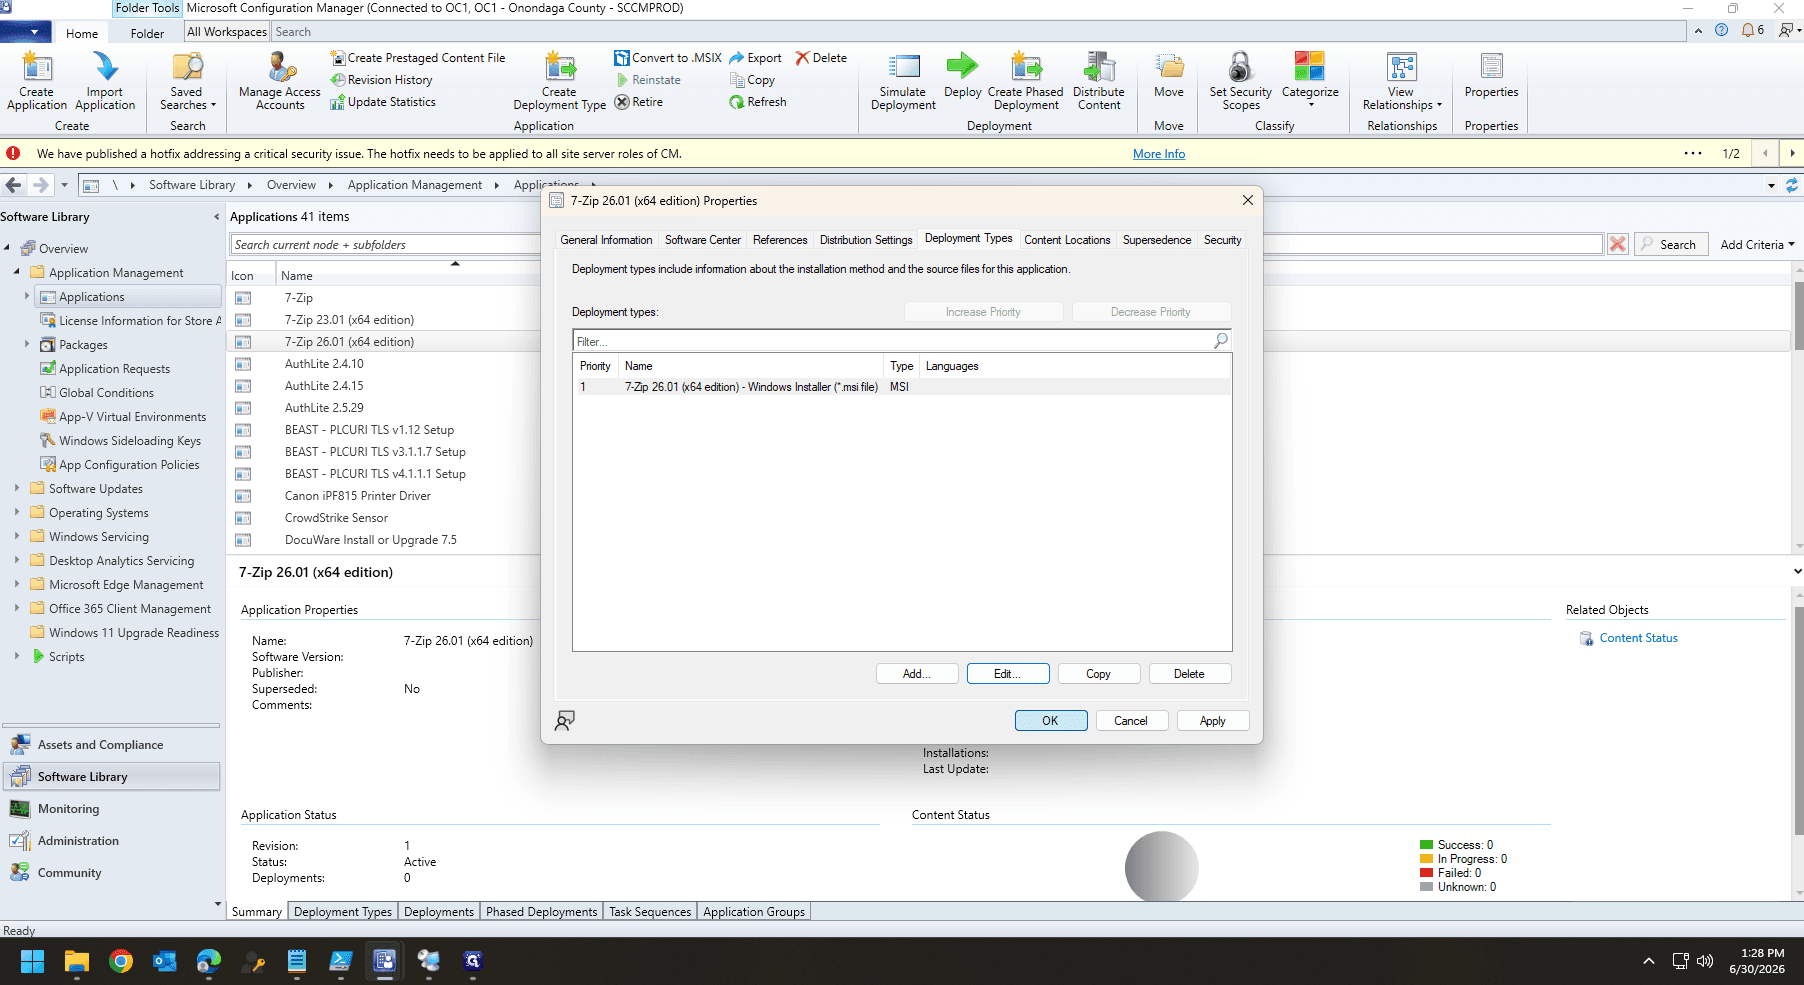
Navigate to the Deployment Types tab.
15
Select the architecture deployment type (e.g., x64 edition) and click Edit.
16
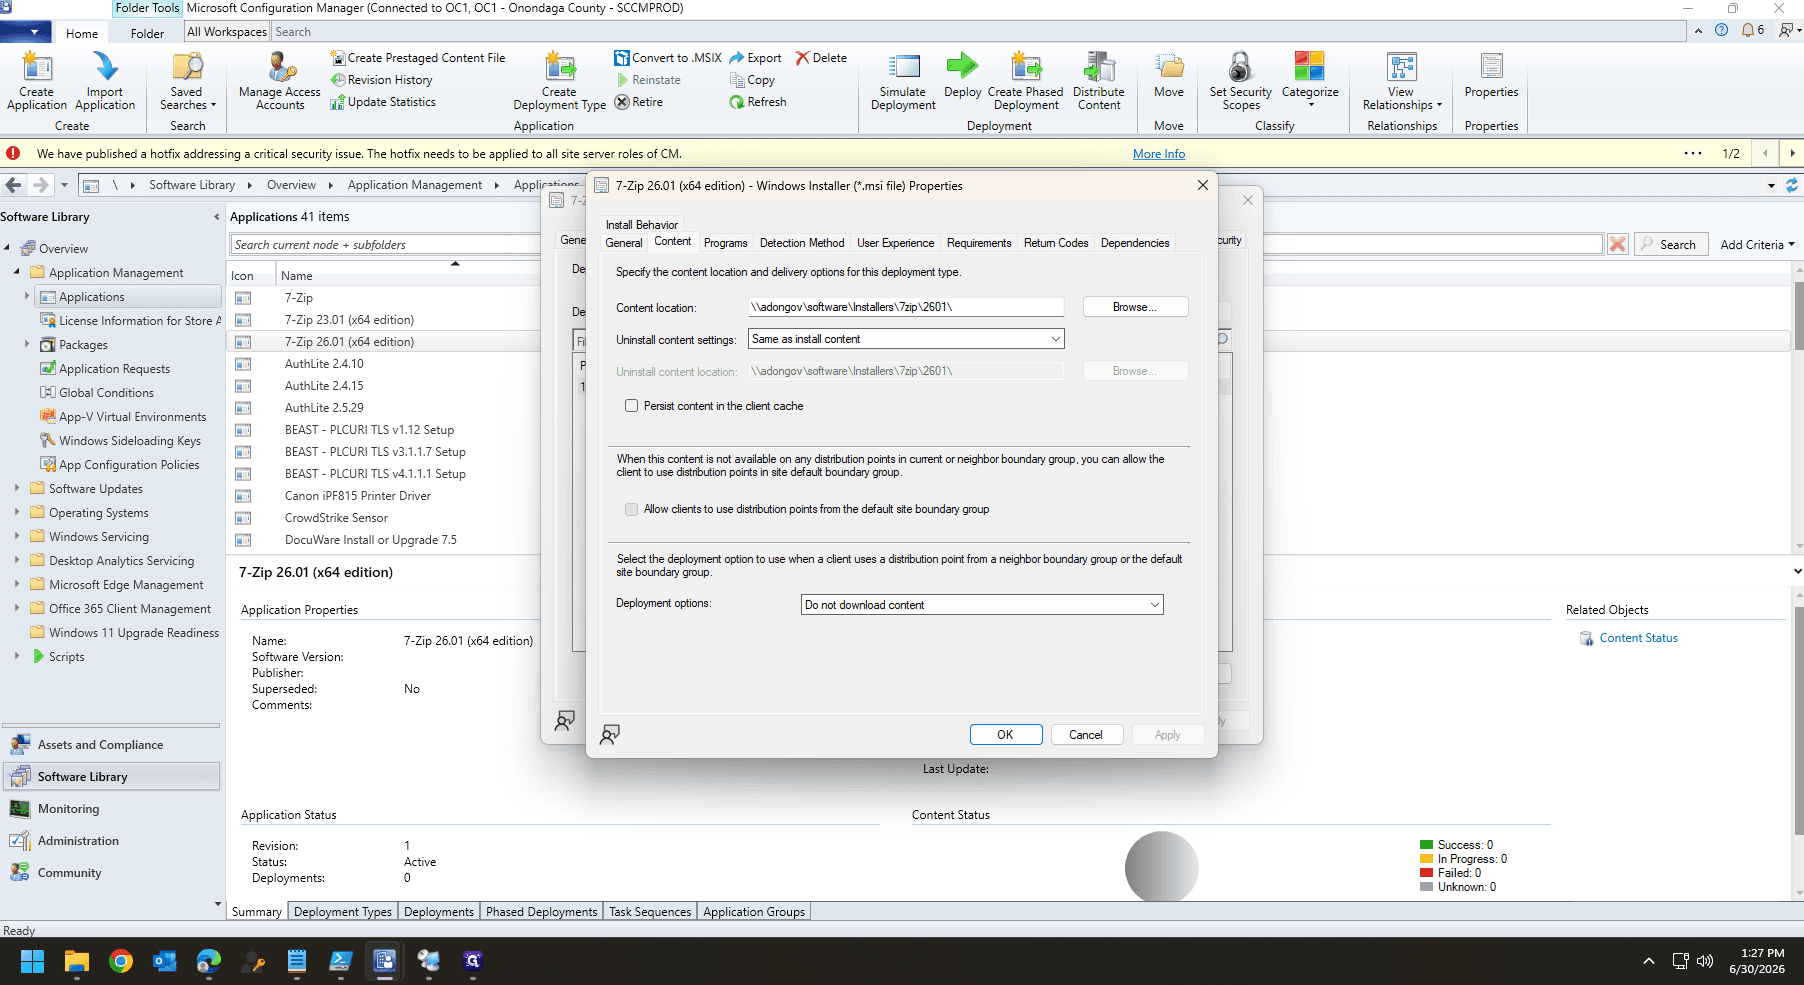
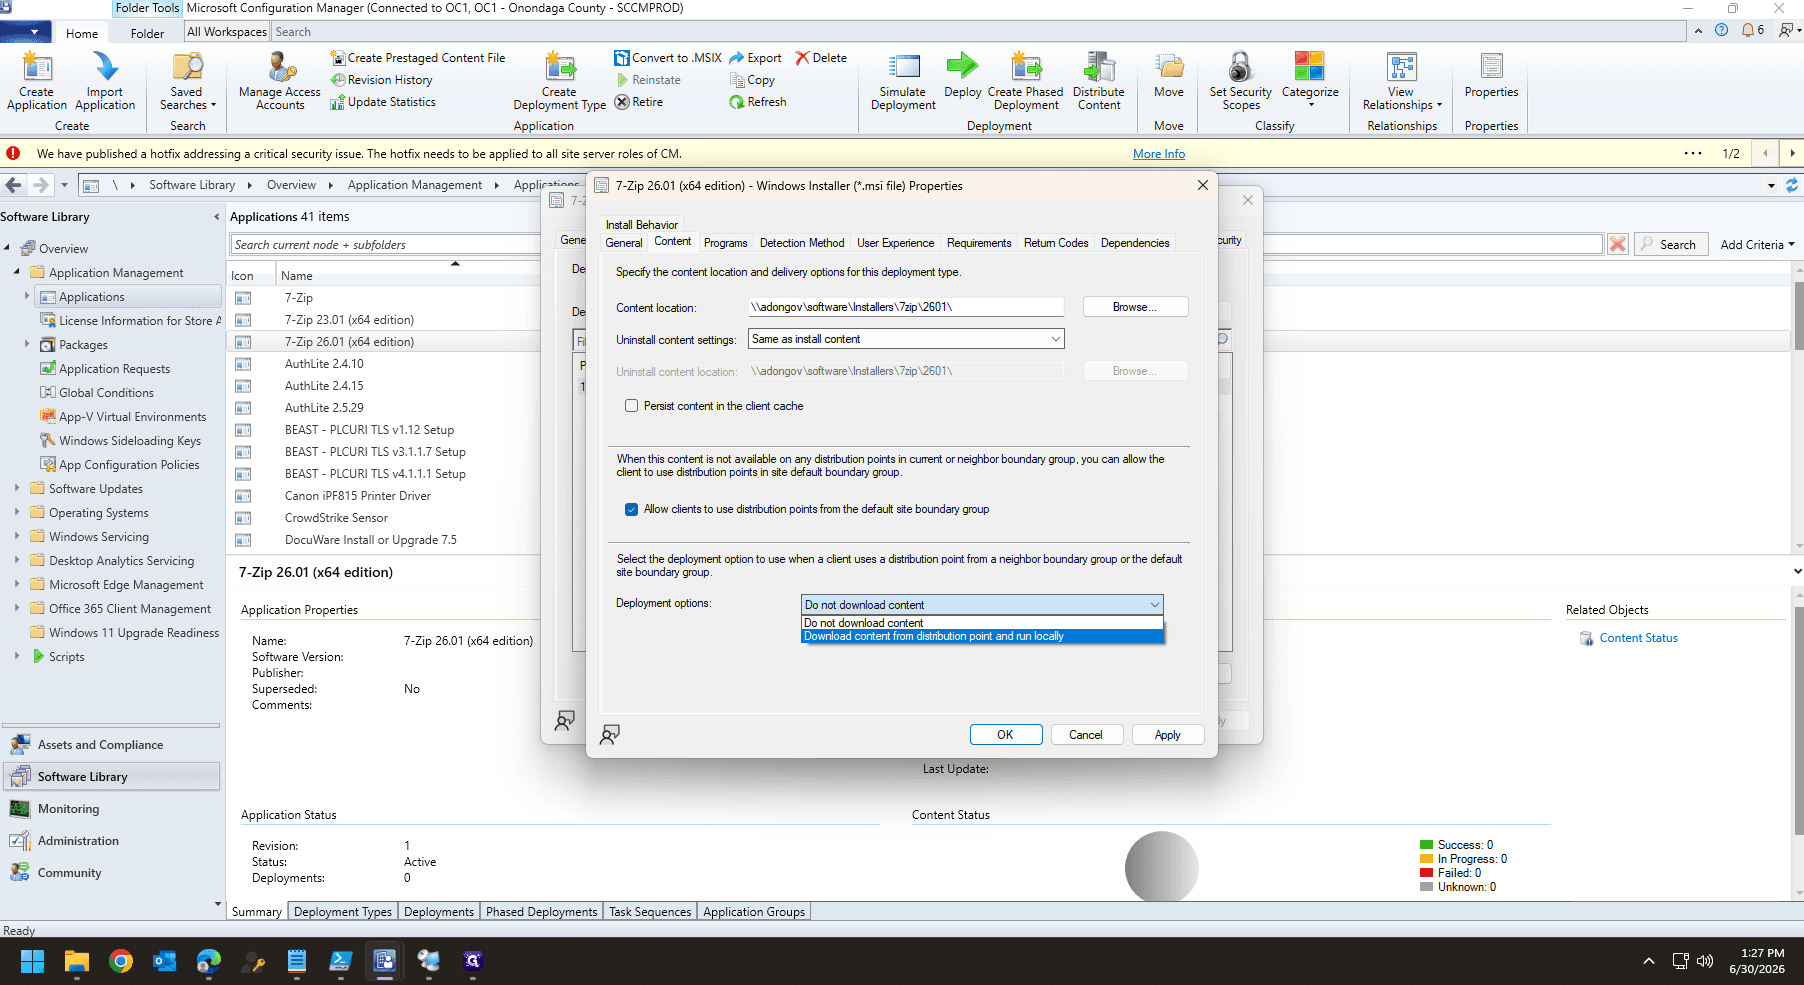
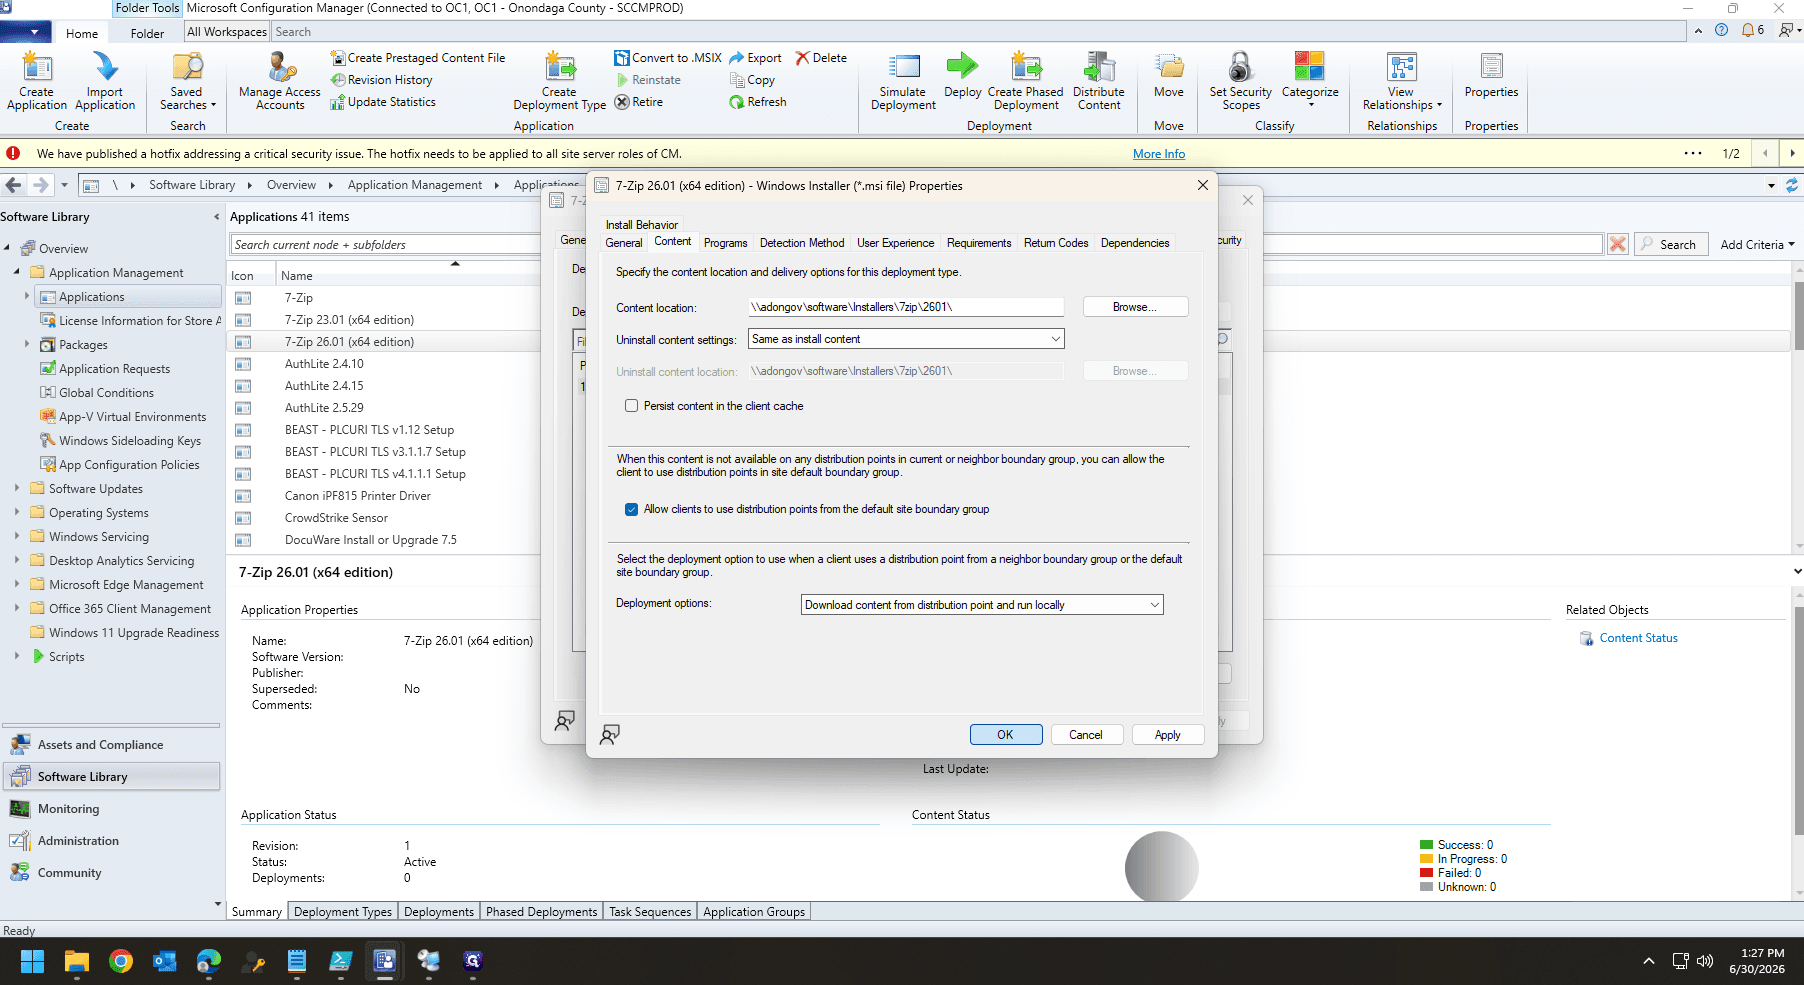
In the deployment type properties window, click on the Content tab. Check the box for Allow clients to use distribution points from the default site boundary group.
17
Open the Deployment options dropdown menu and select Download content from distribution point and run locally.
18
Click OK to save the deployment type properties.
19
Click OK again to close the main application properties window.
Distribute Content
20
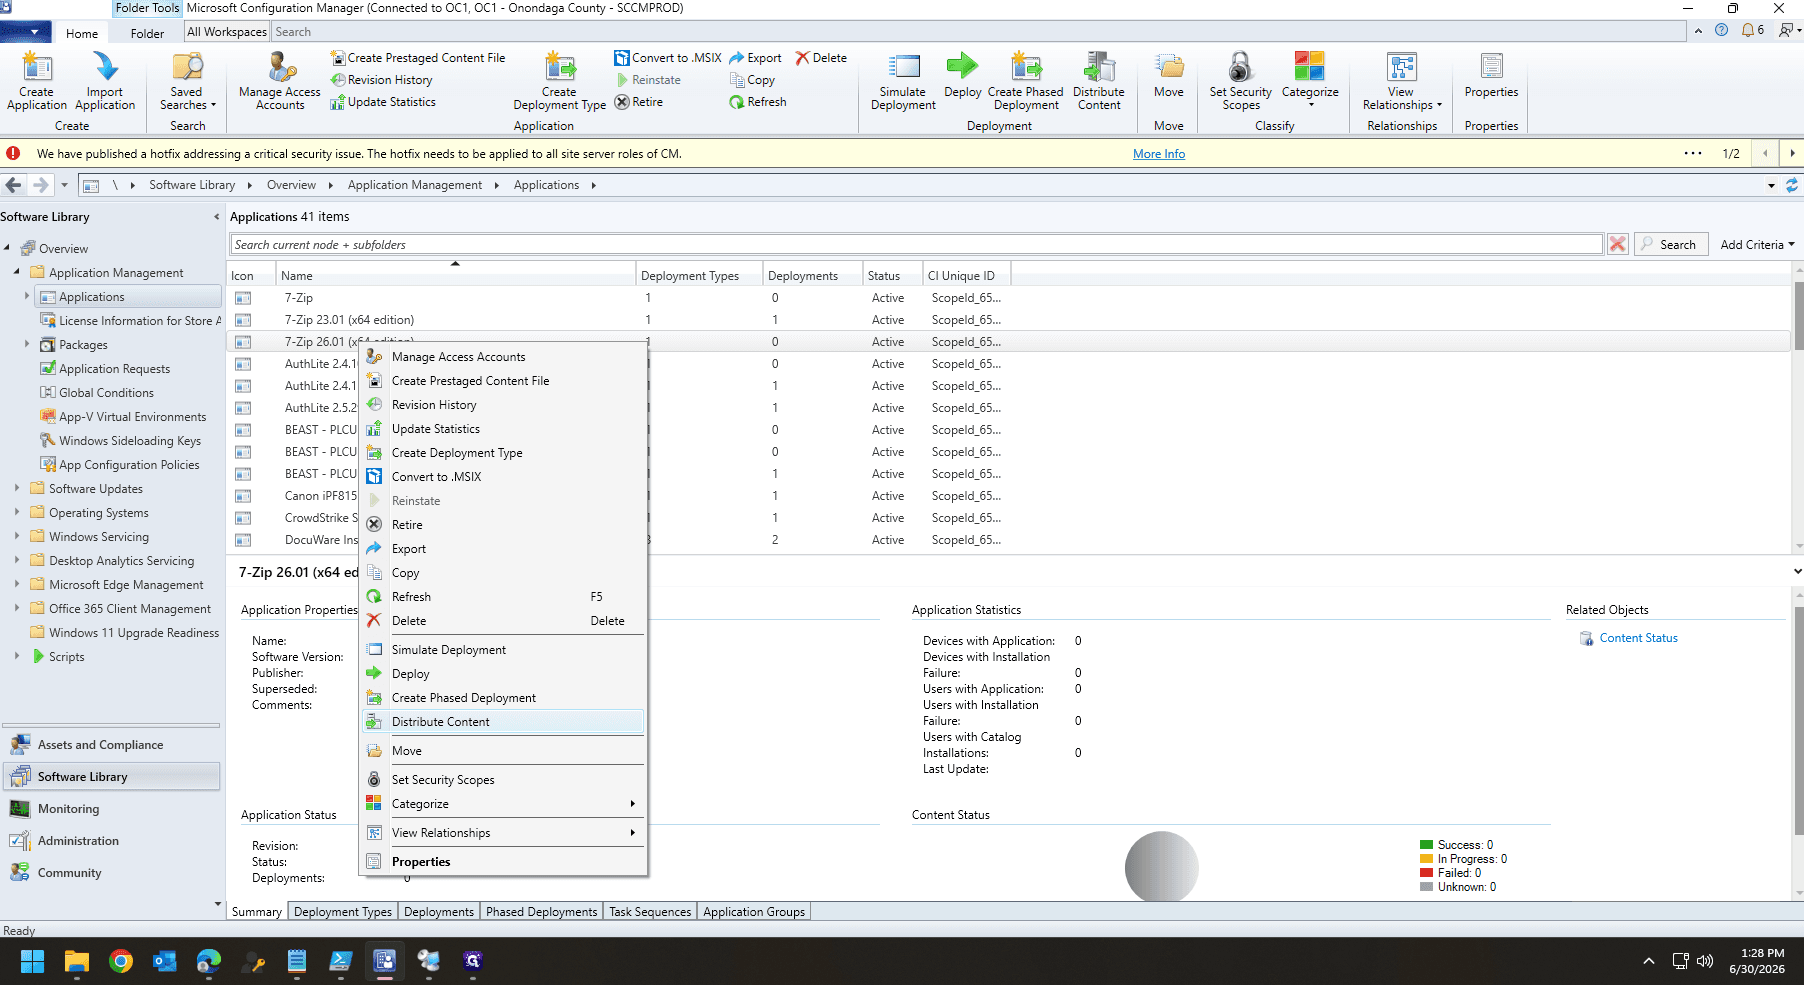
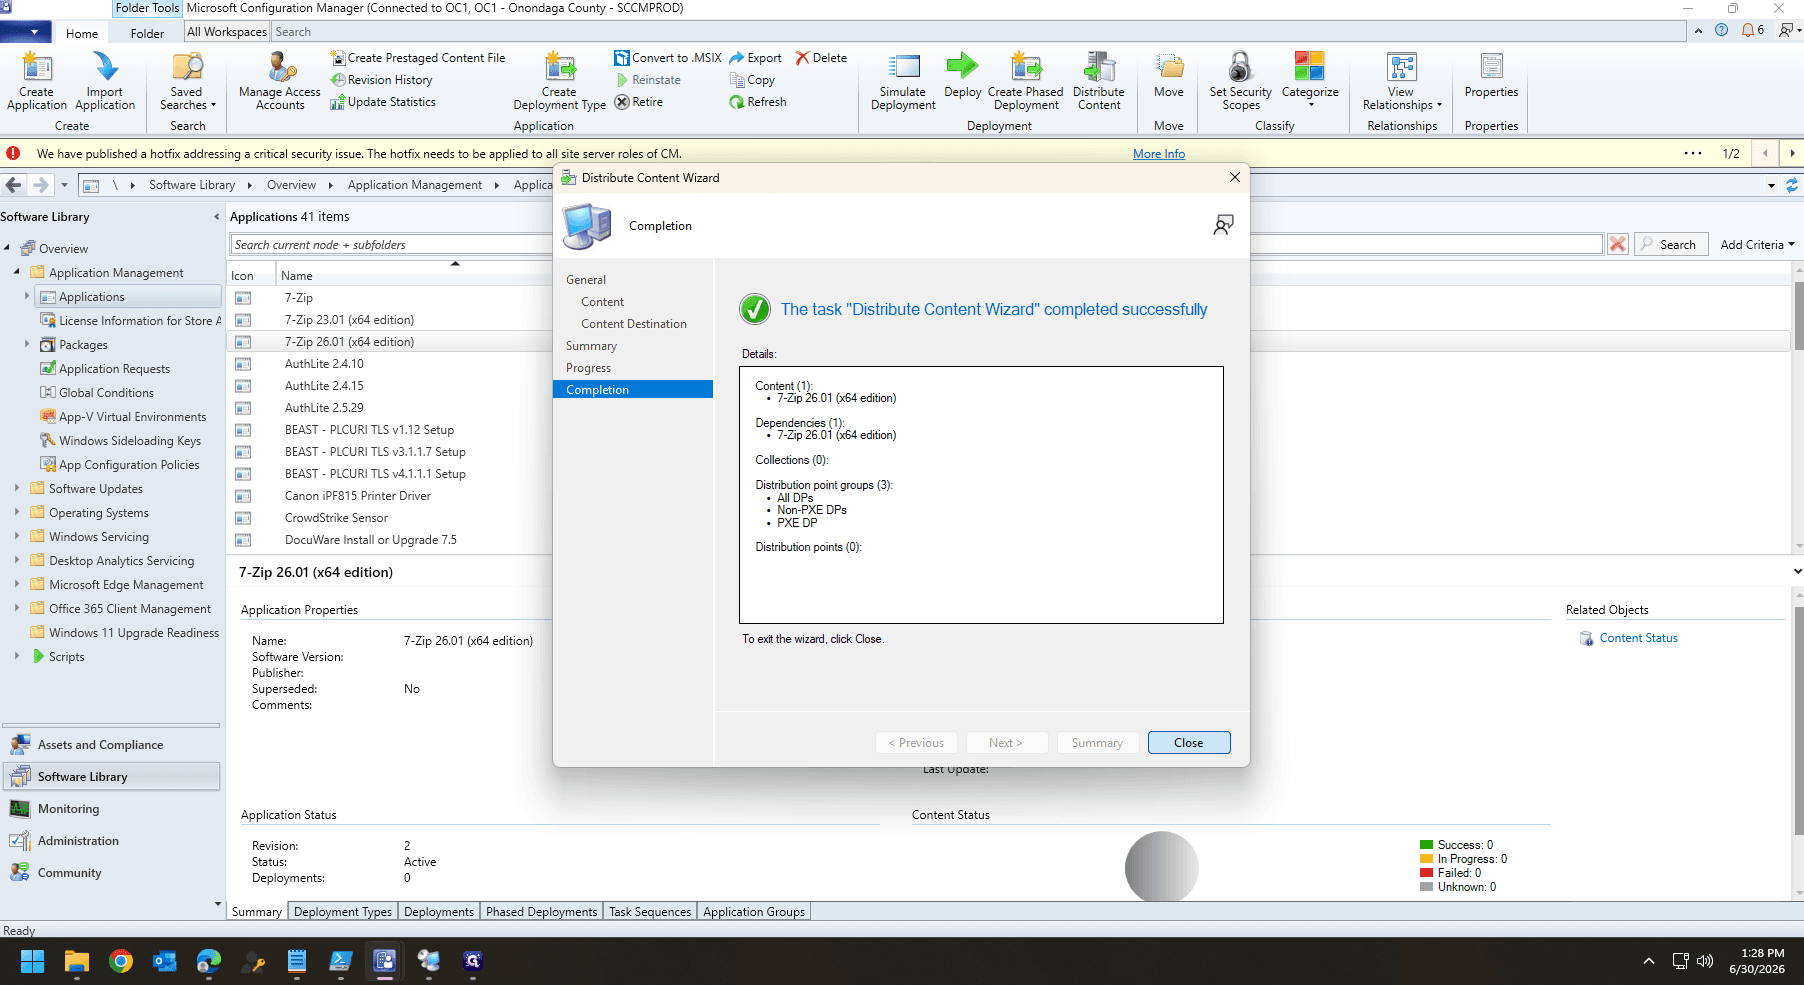
Right-click the application again and select Distribute Content.
21
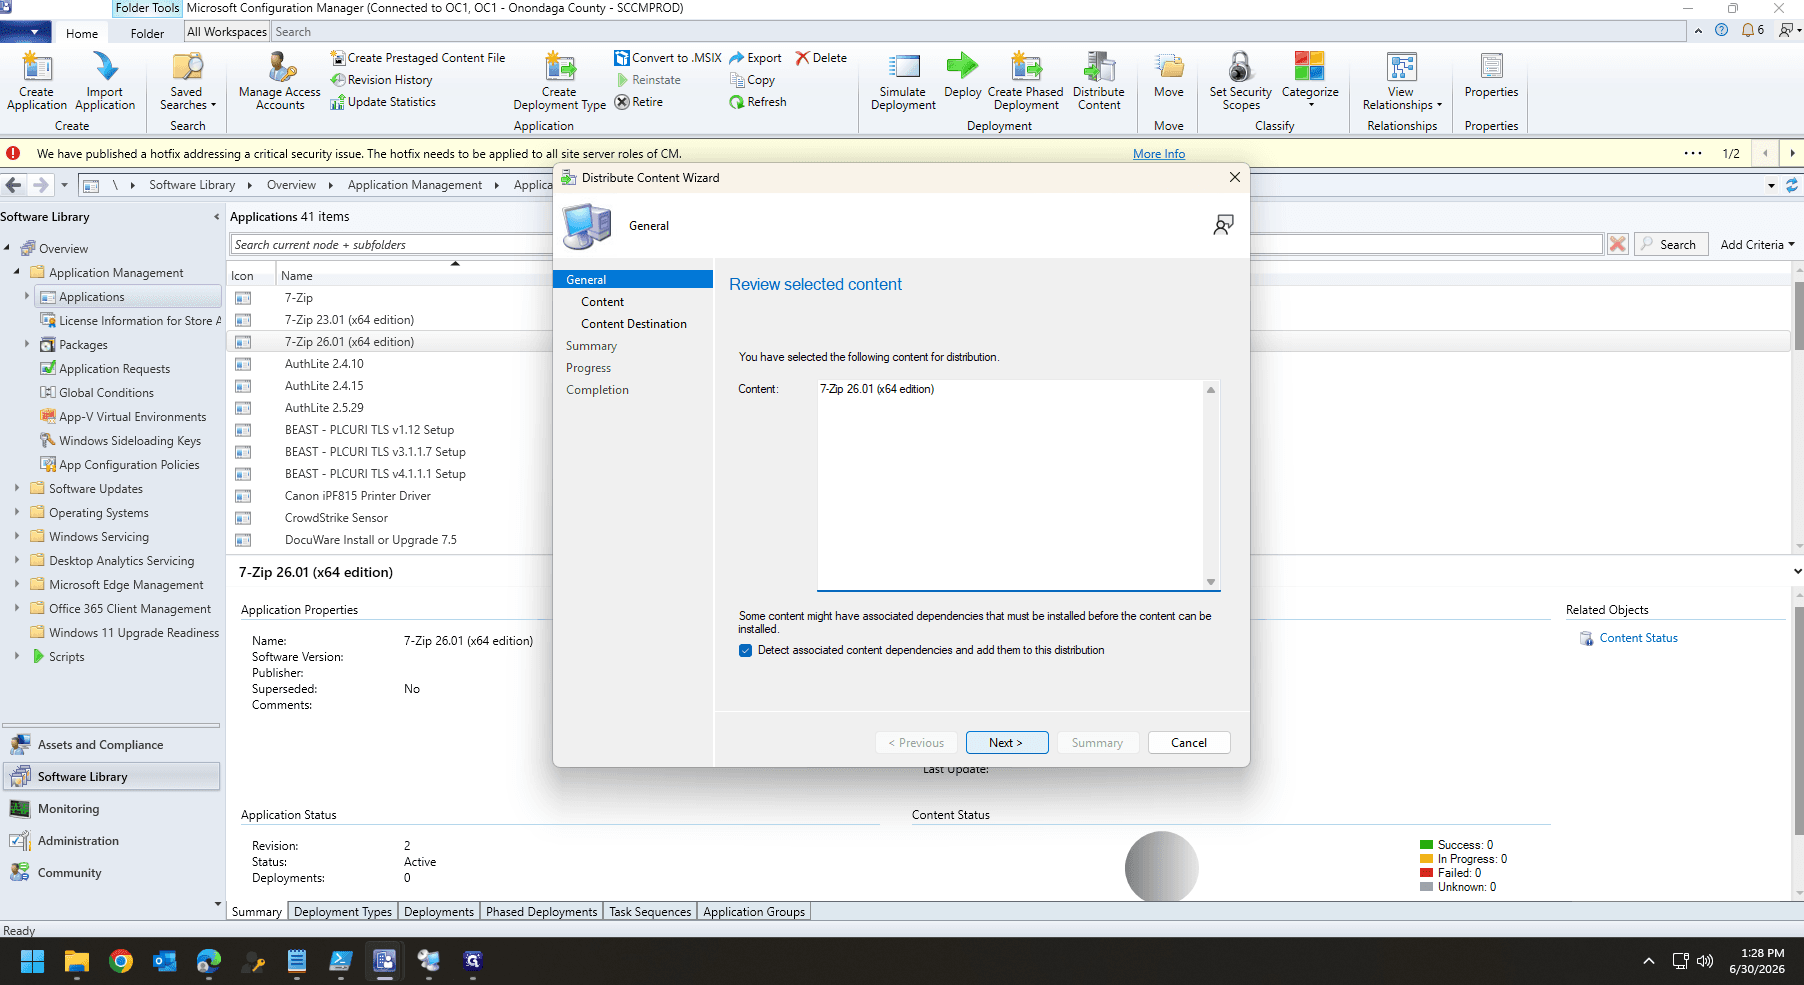
In the Distribute Content Wizard, click Next.
22
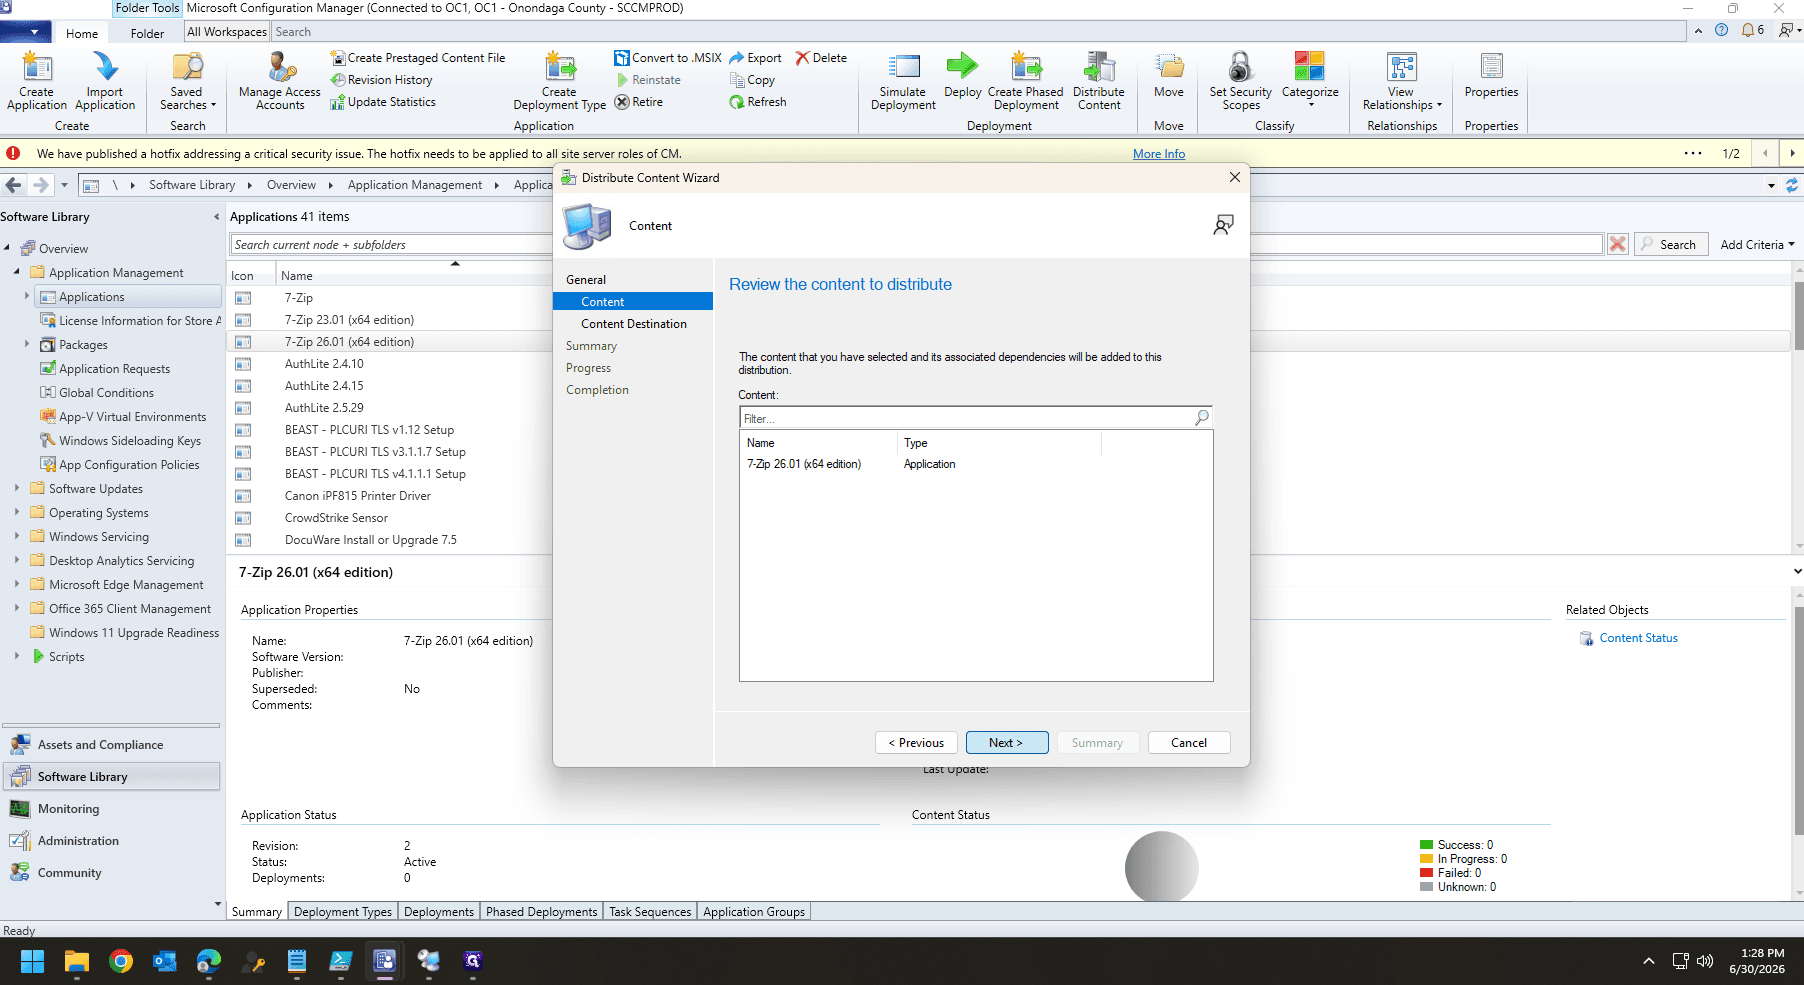
Review the application shown in the Content page and click Next.
23
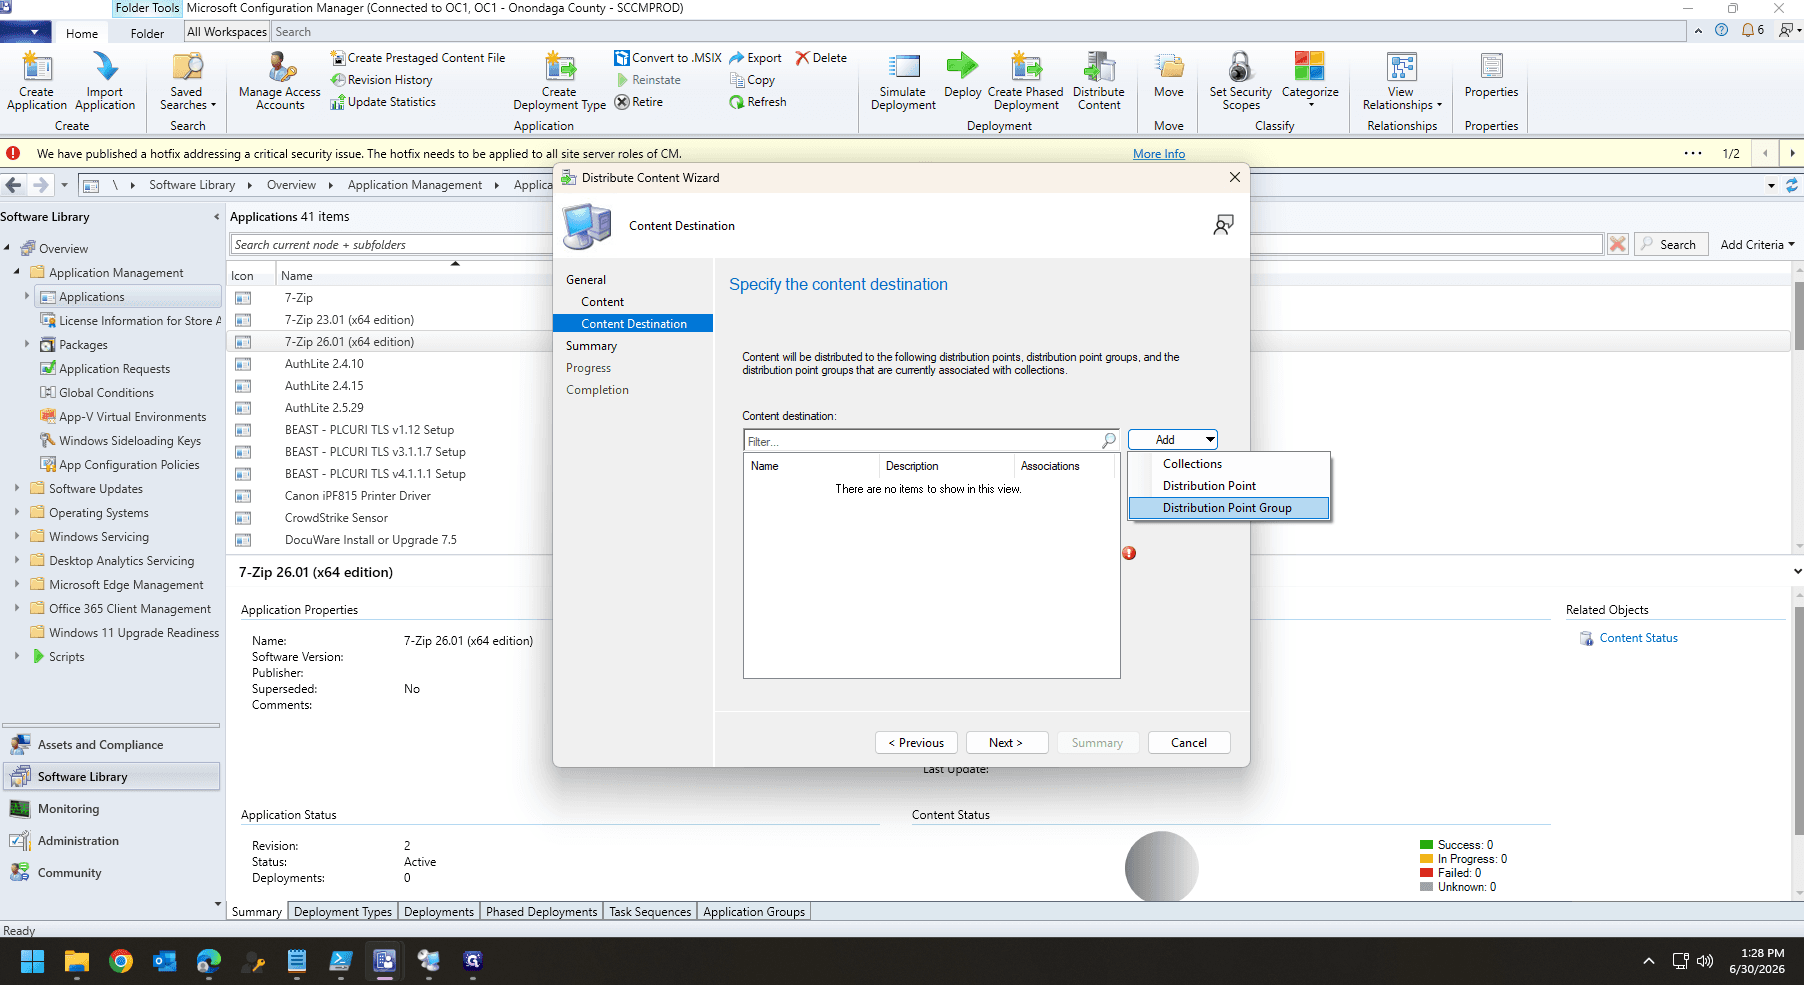
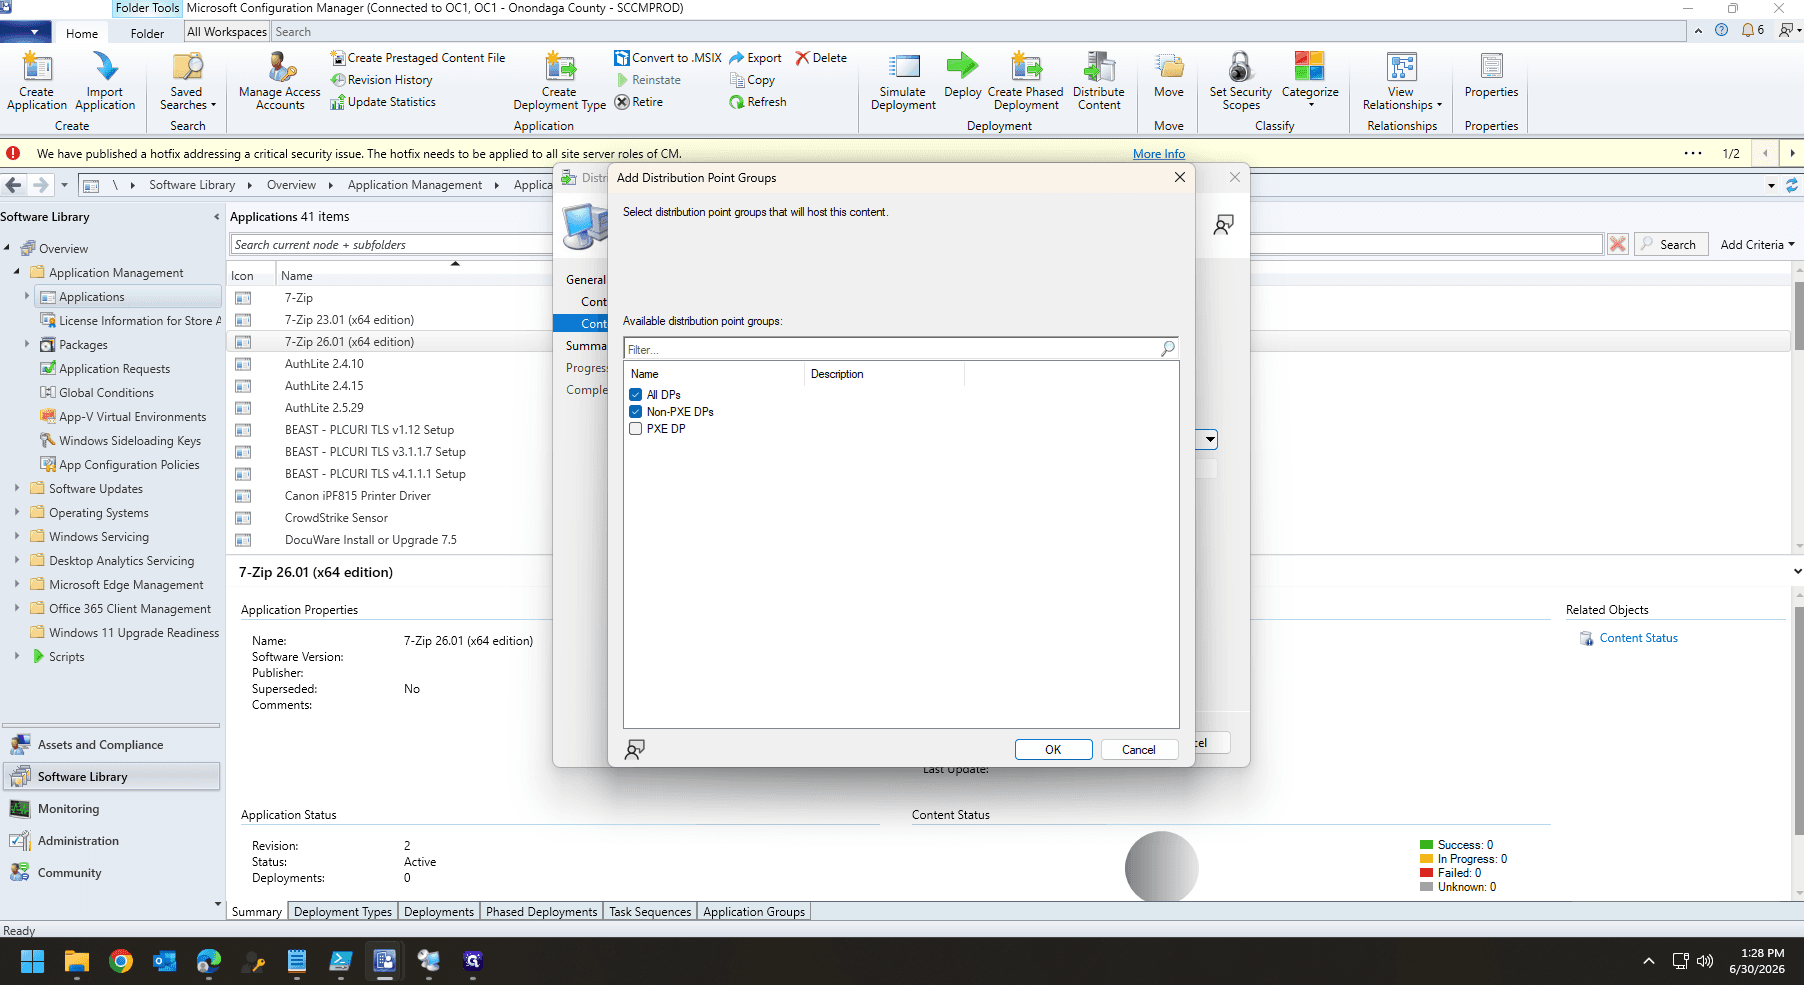
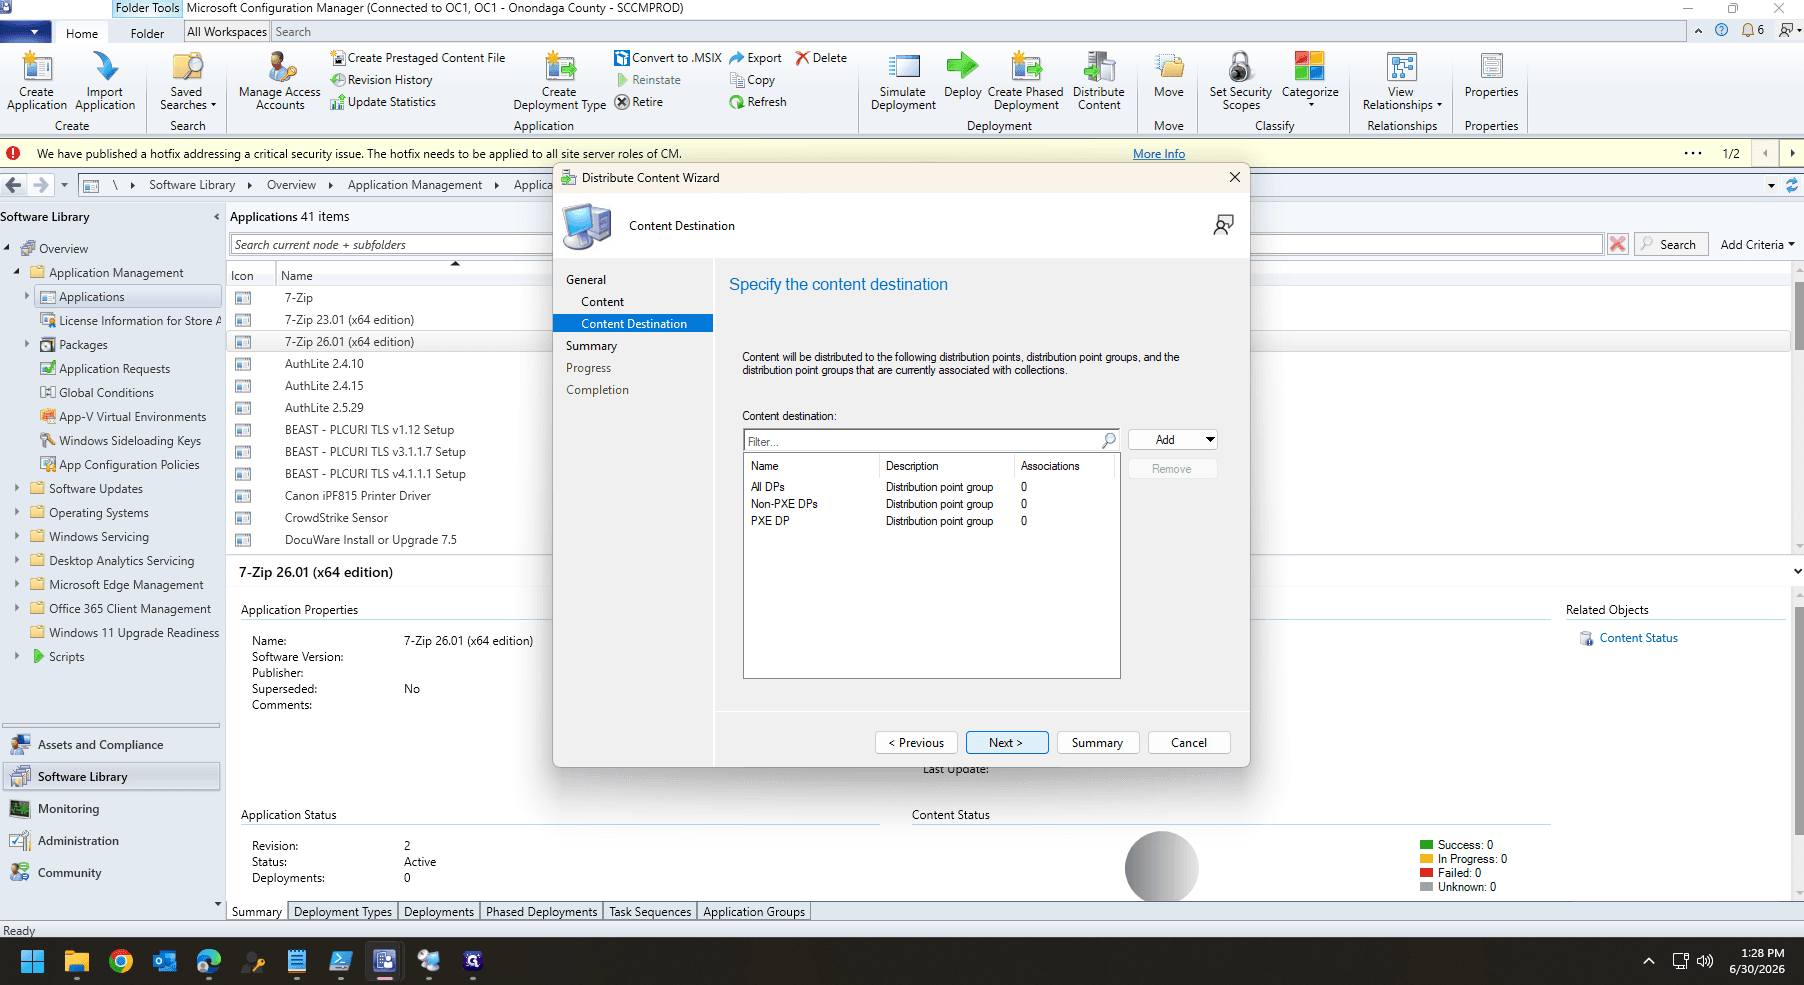
On the Content Destination page, click Add and choose Distribution Point.
24
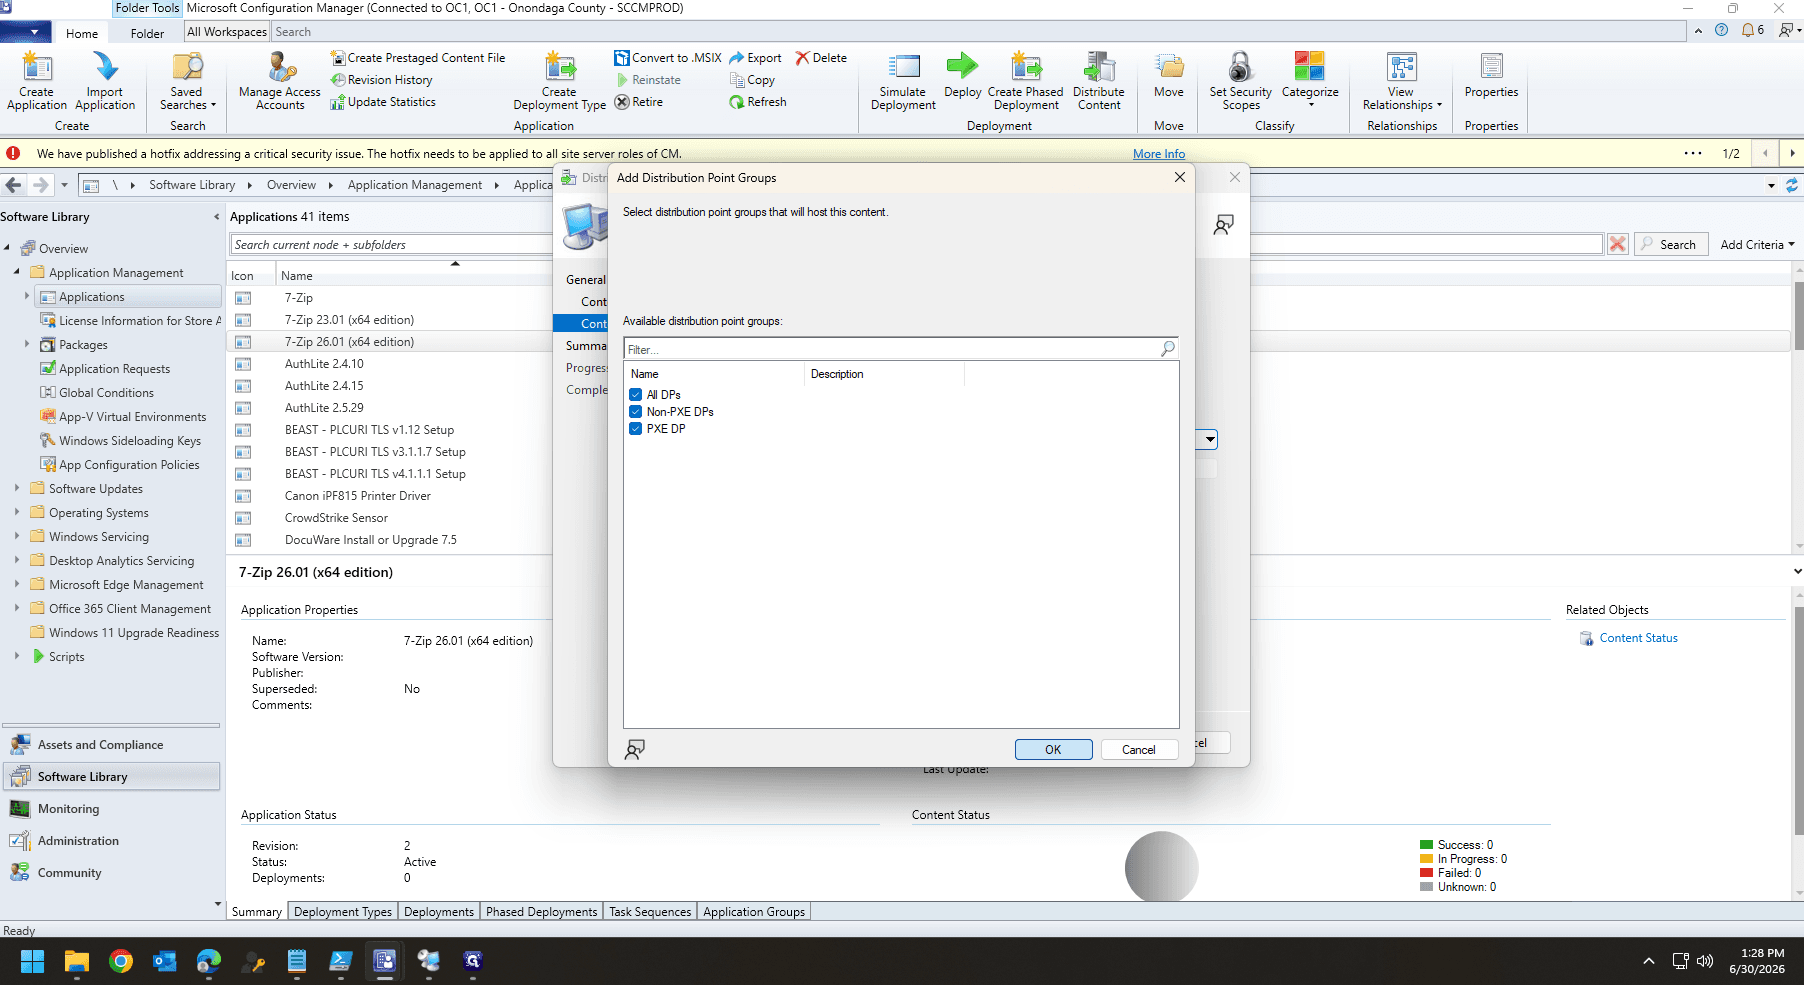
Select the necessary distribution points from the list (such as All DPs or PXE DP). For most applications you will select all of the available distribution points.
25
Click OK to confirm your selection.
26
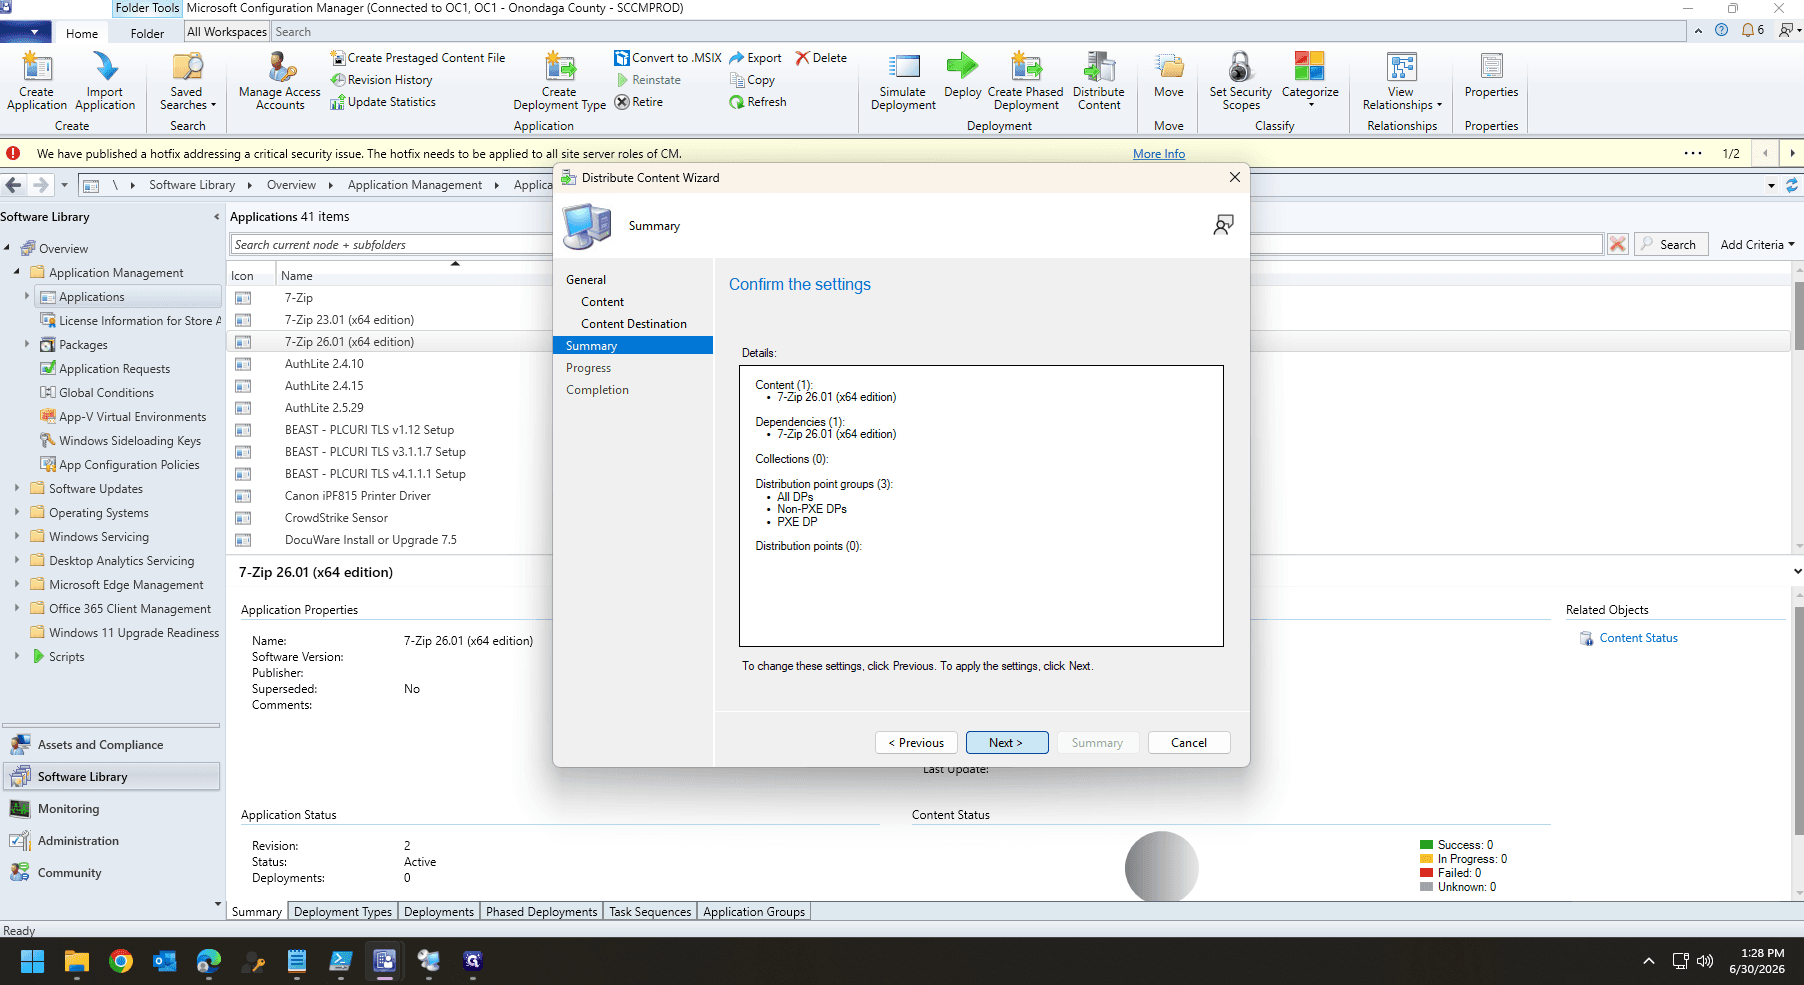
Click Next to proceed to the Summary.
27
Review the provided details and click Next.
28
Once the distribution finishes successfully, click Close.
Create a Target Device Collection
29
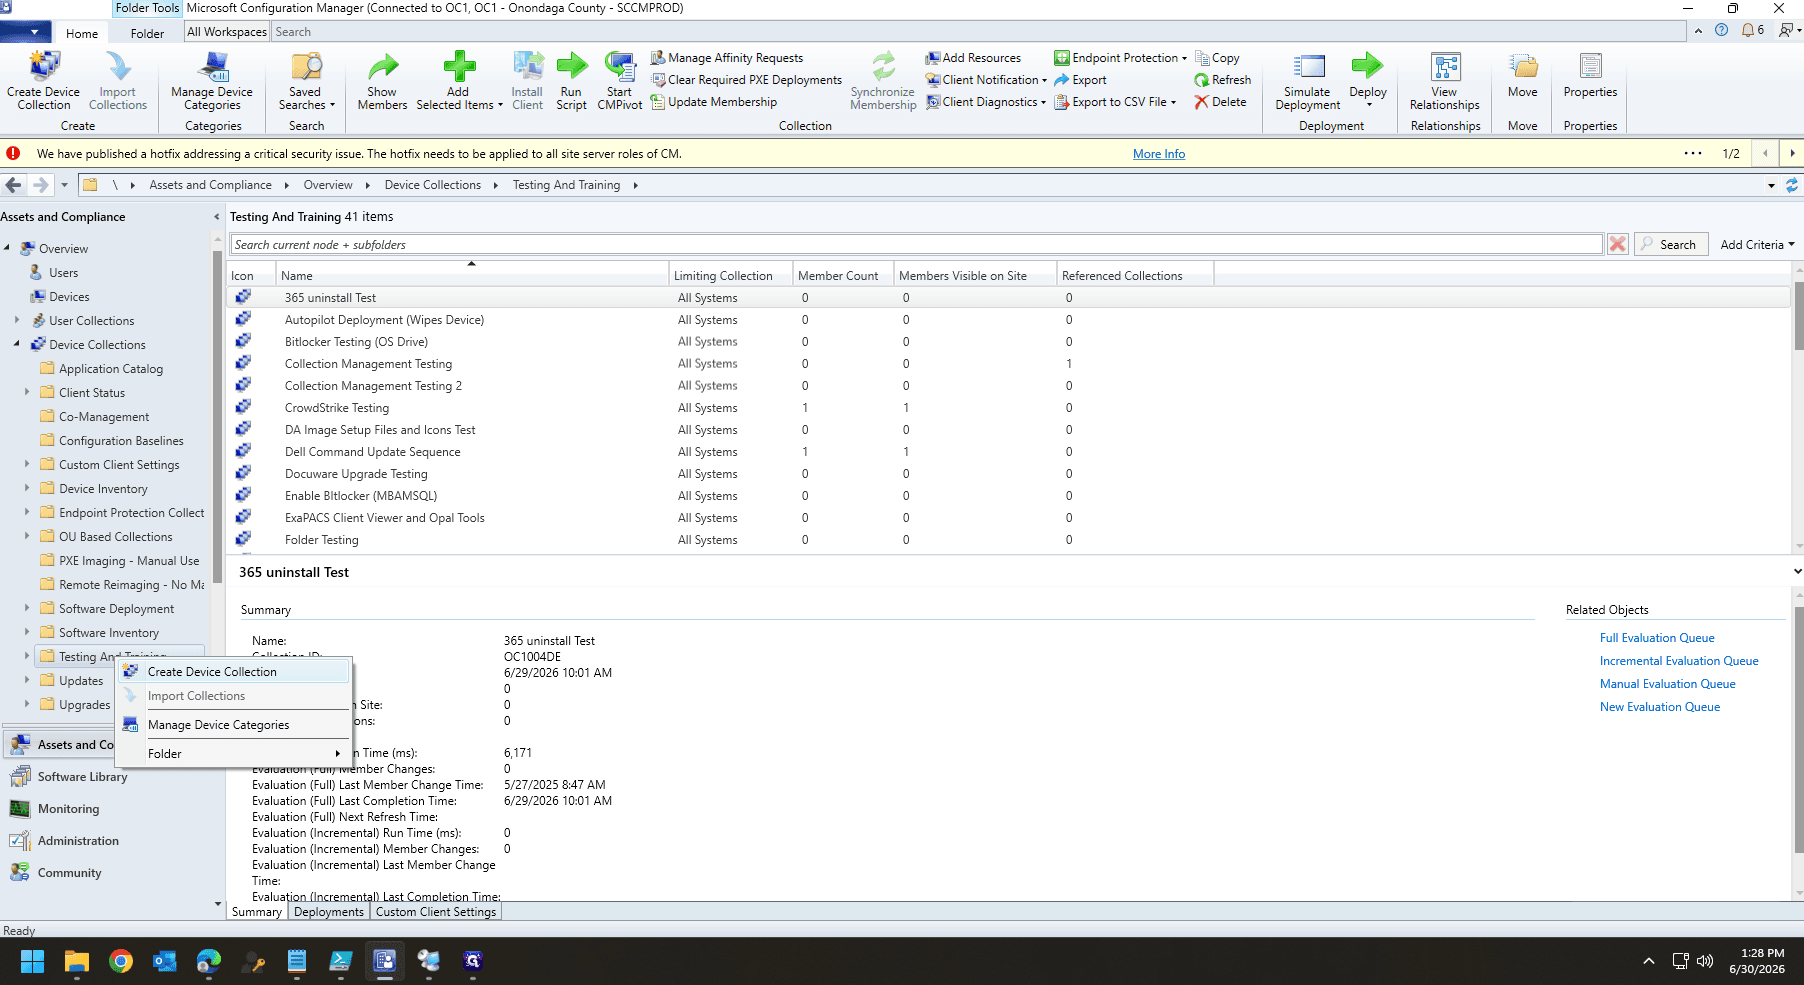
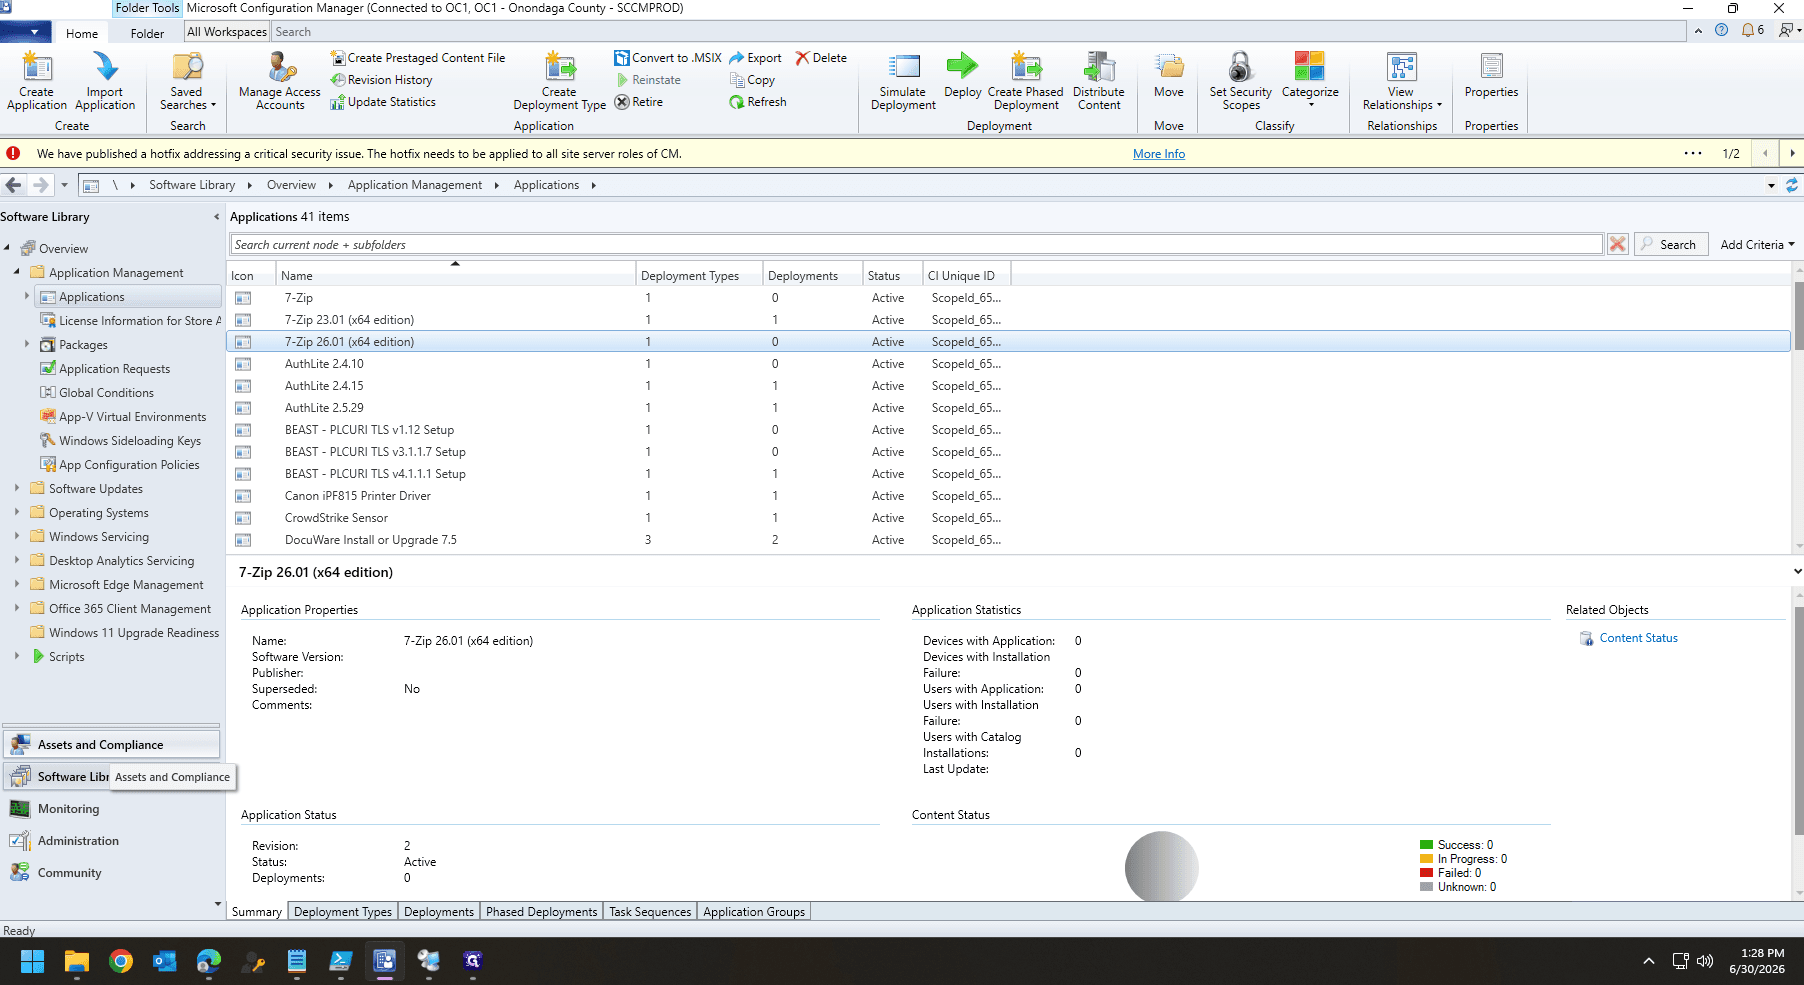
Navigate to the Assets and Compliance workspace in the left navigation pane.
30
Expand Device Collections, right-click your desired organizational folder, and select Create Device Collection. When creating a new application it's best to begin in the Testing and Training folder, so avoid confusion over tested applications. This will be moved later.
31
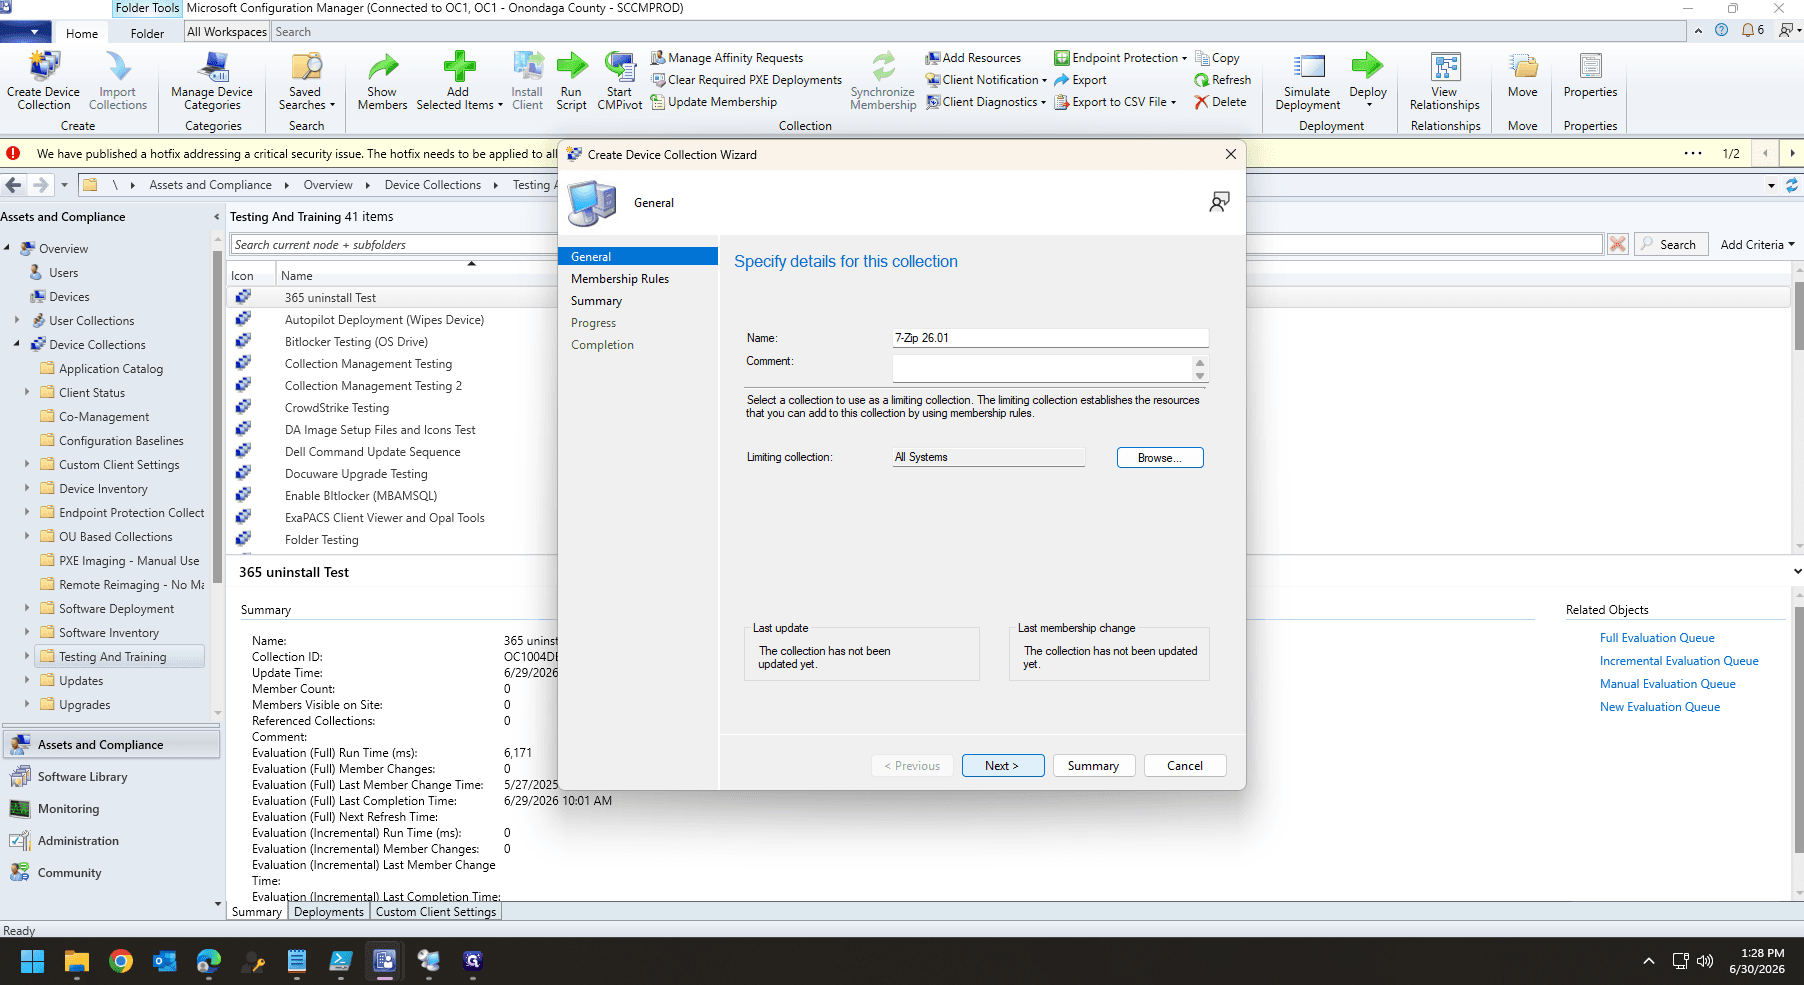
Enter a recognizable name for the collection (e.g., "7-Zip 26.01"). It's usually best to closely match the application name.
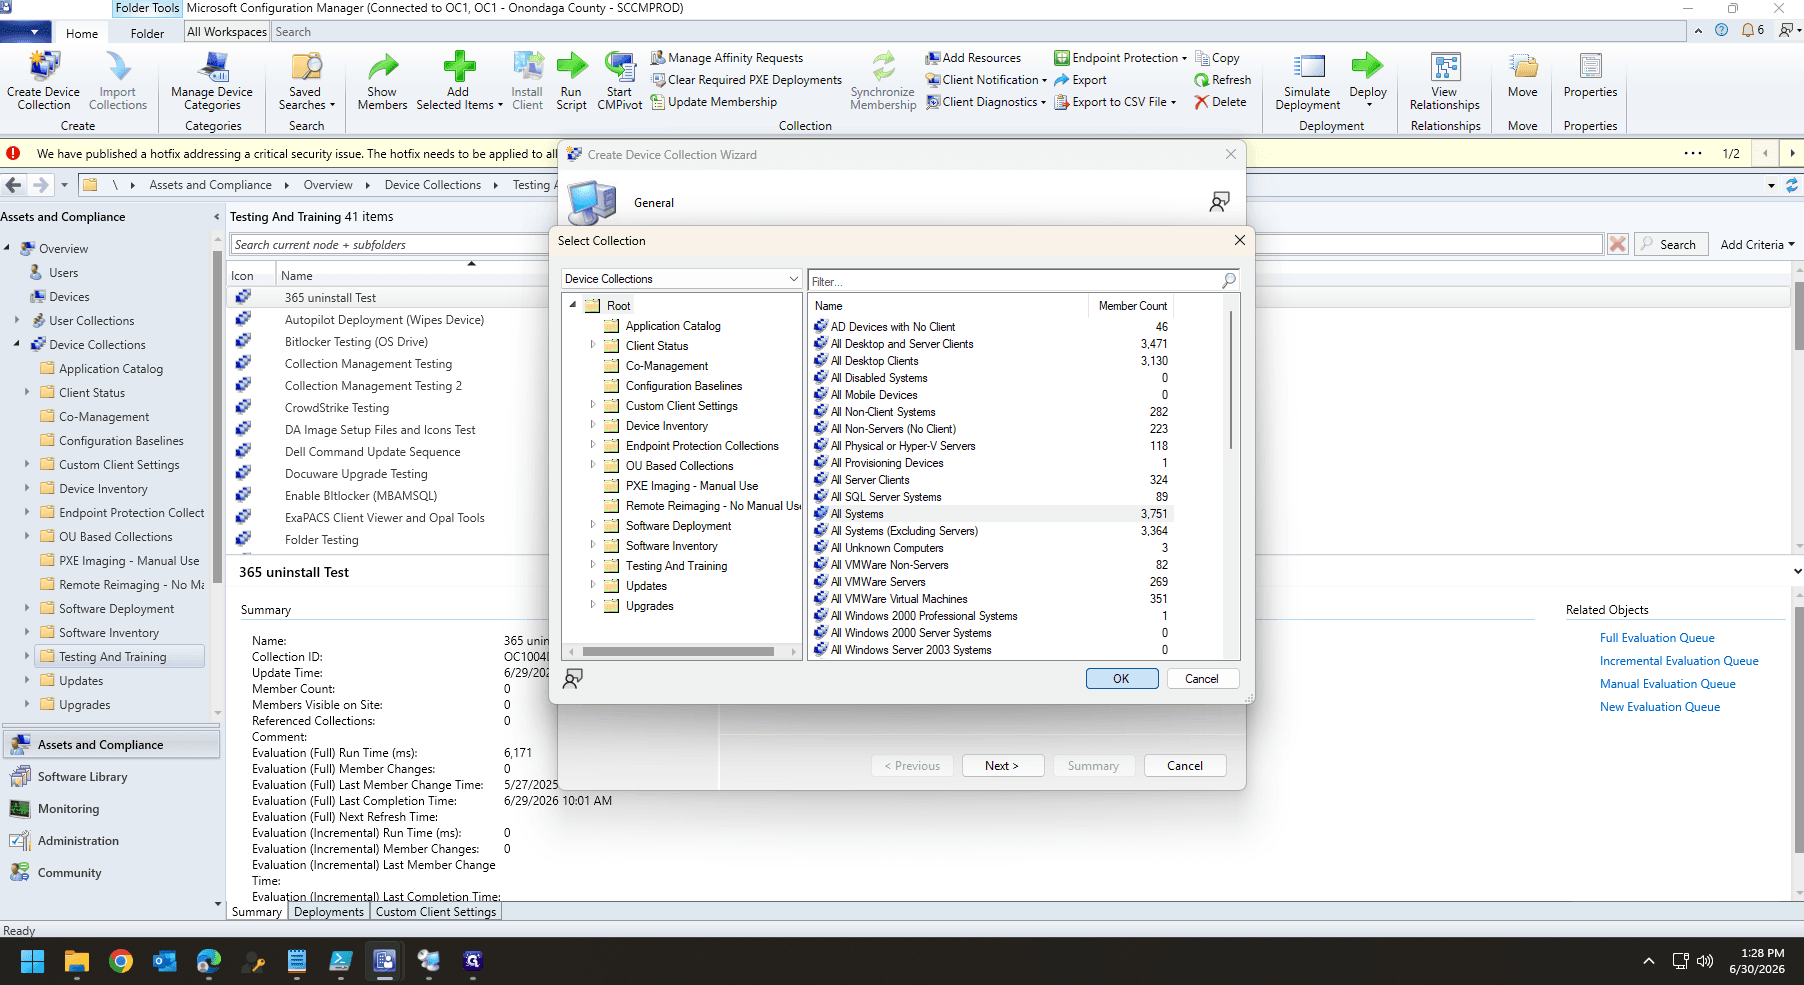
32
Click Browse..., select All Systems as your limiting collection, and click OK.
33
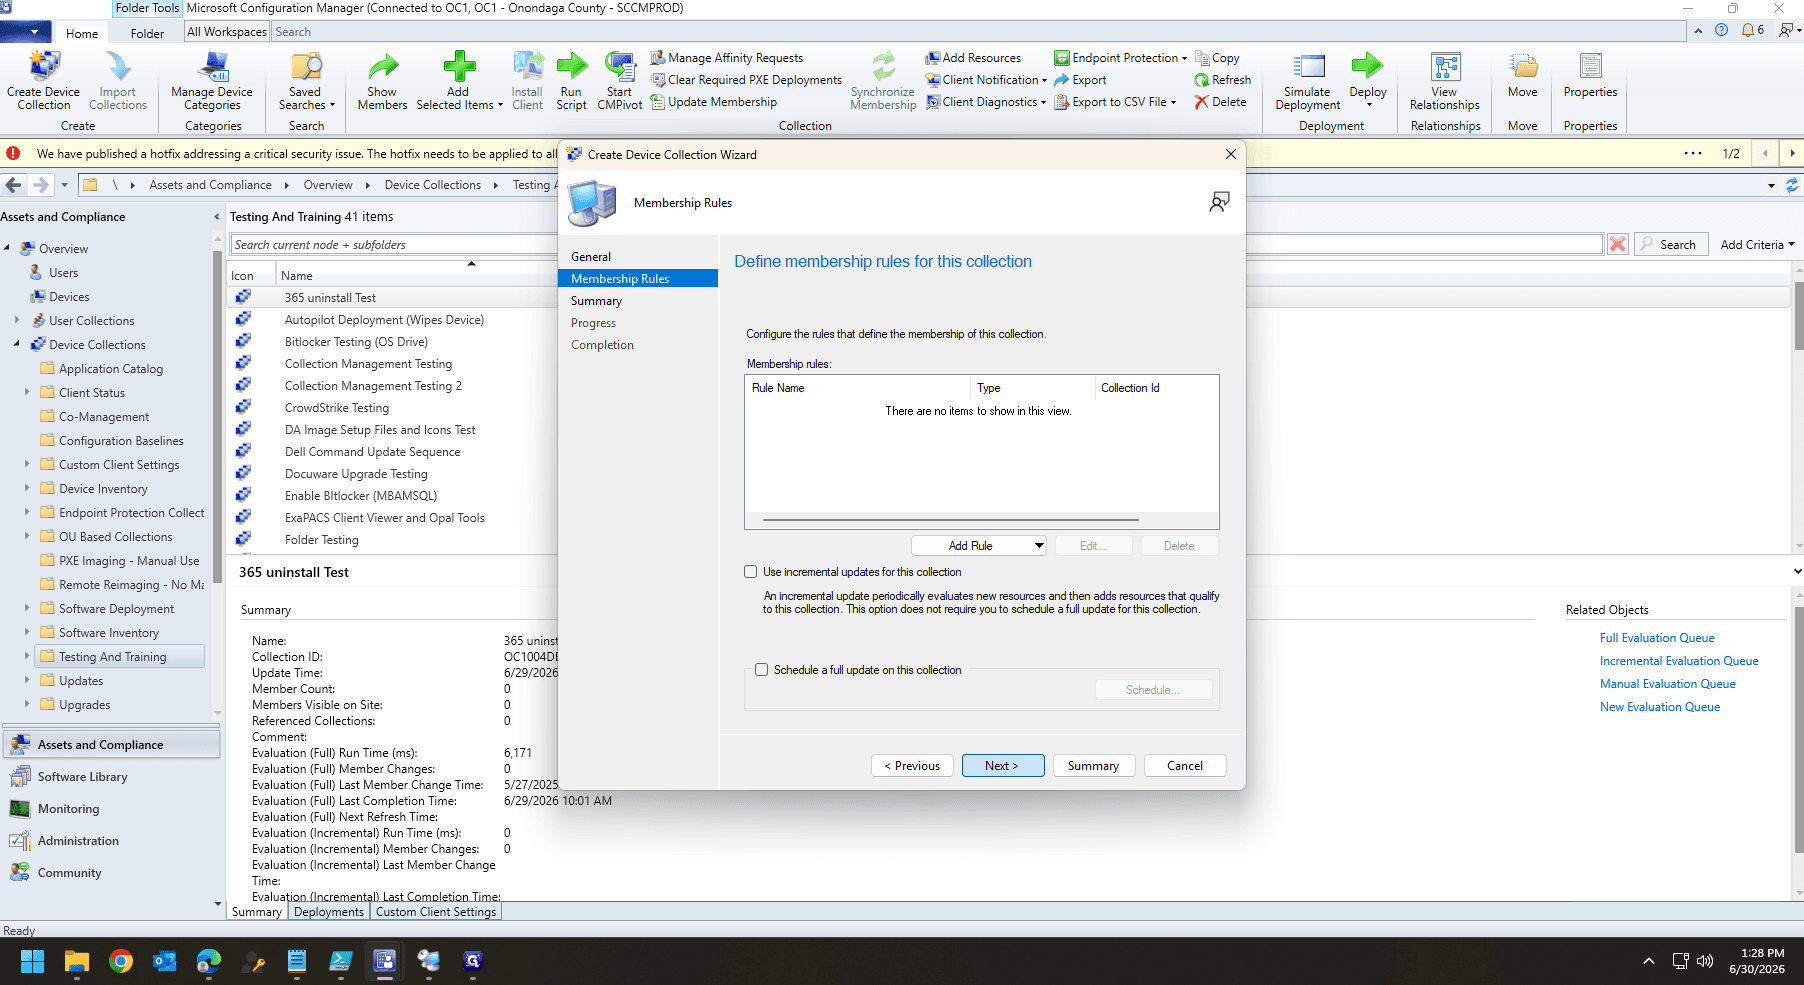
Click Next to move to the Membership Rules tab.
34
If you plan to populate this collection manually or at a later time, click Next without adding any rules.
If you choose not to define membership rules during setup, the collection will be completely empty when created.
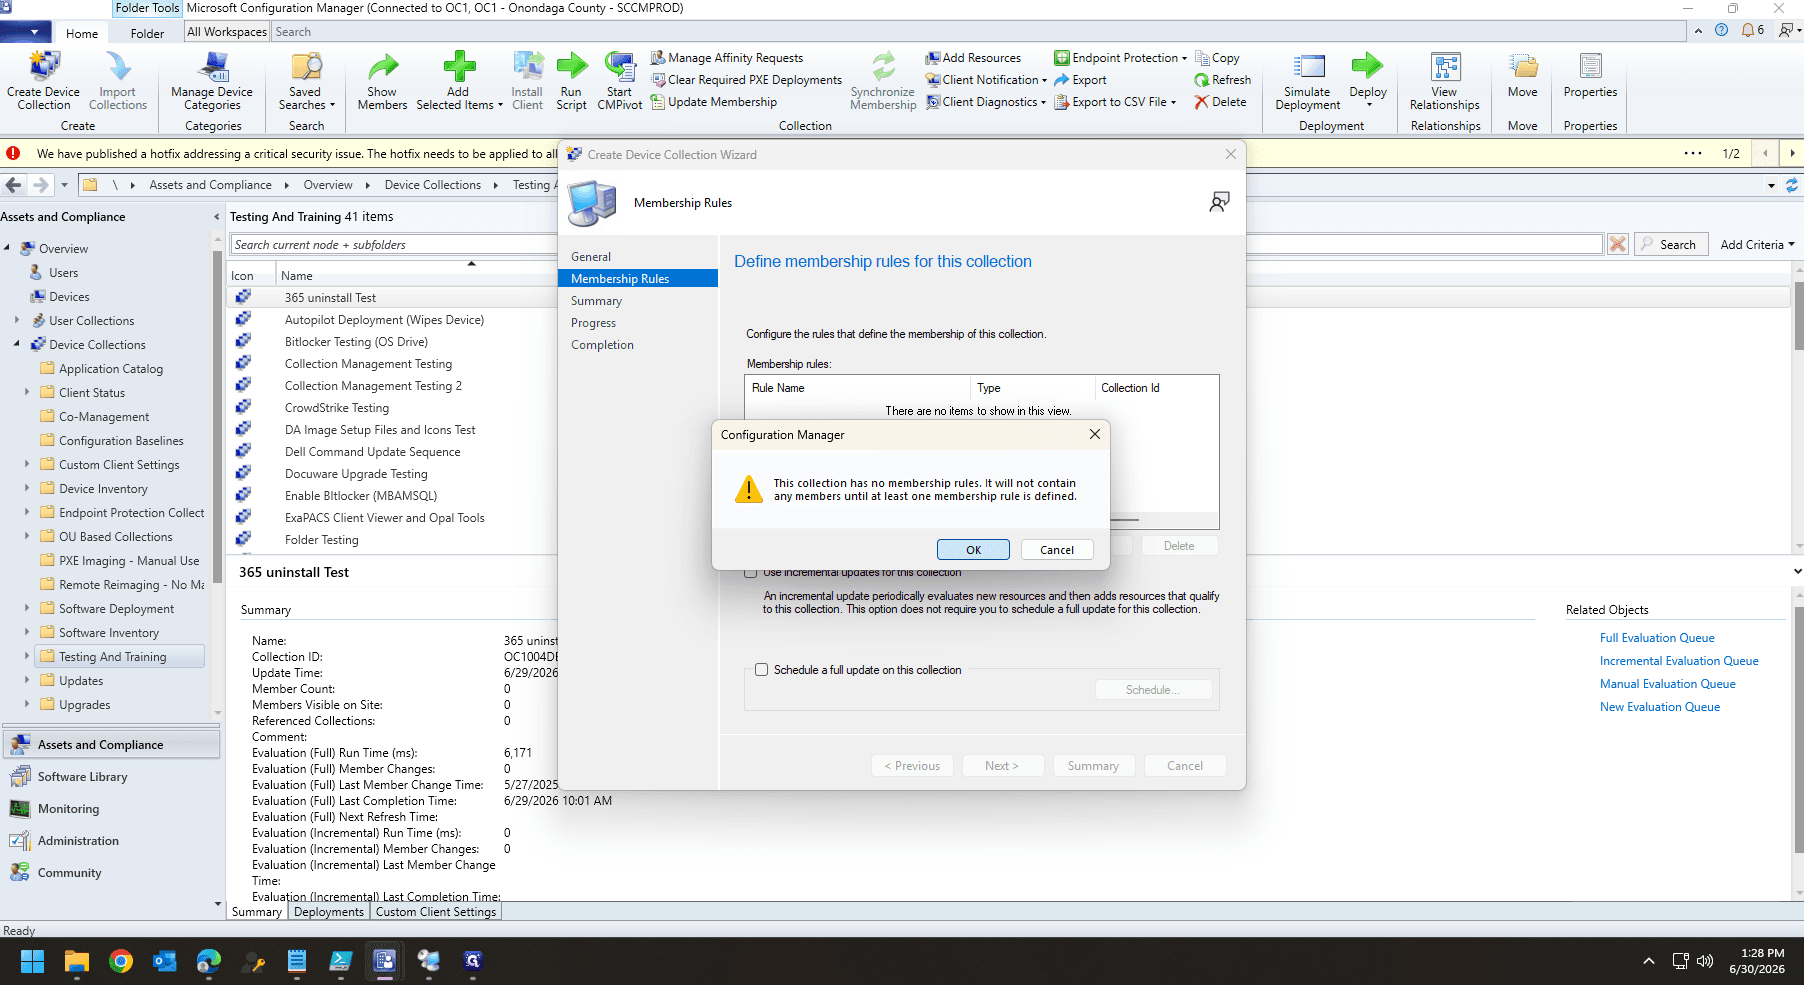
35
A warning dialog will appear stating the collection has no rules. Click OK to acknowledge.
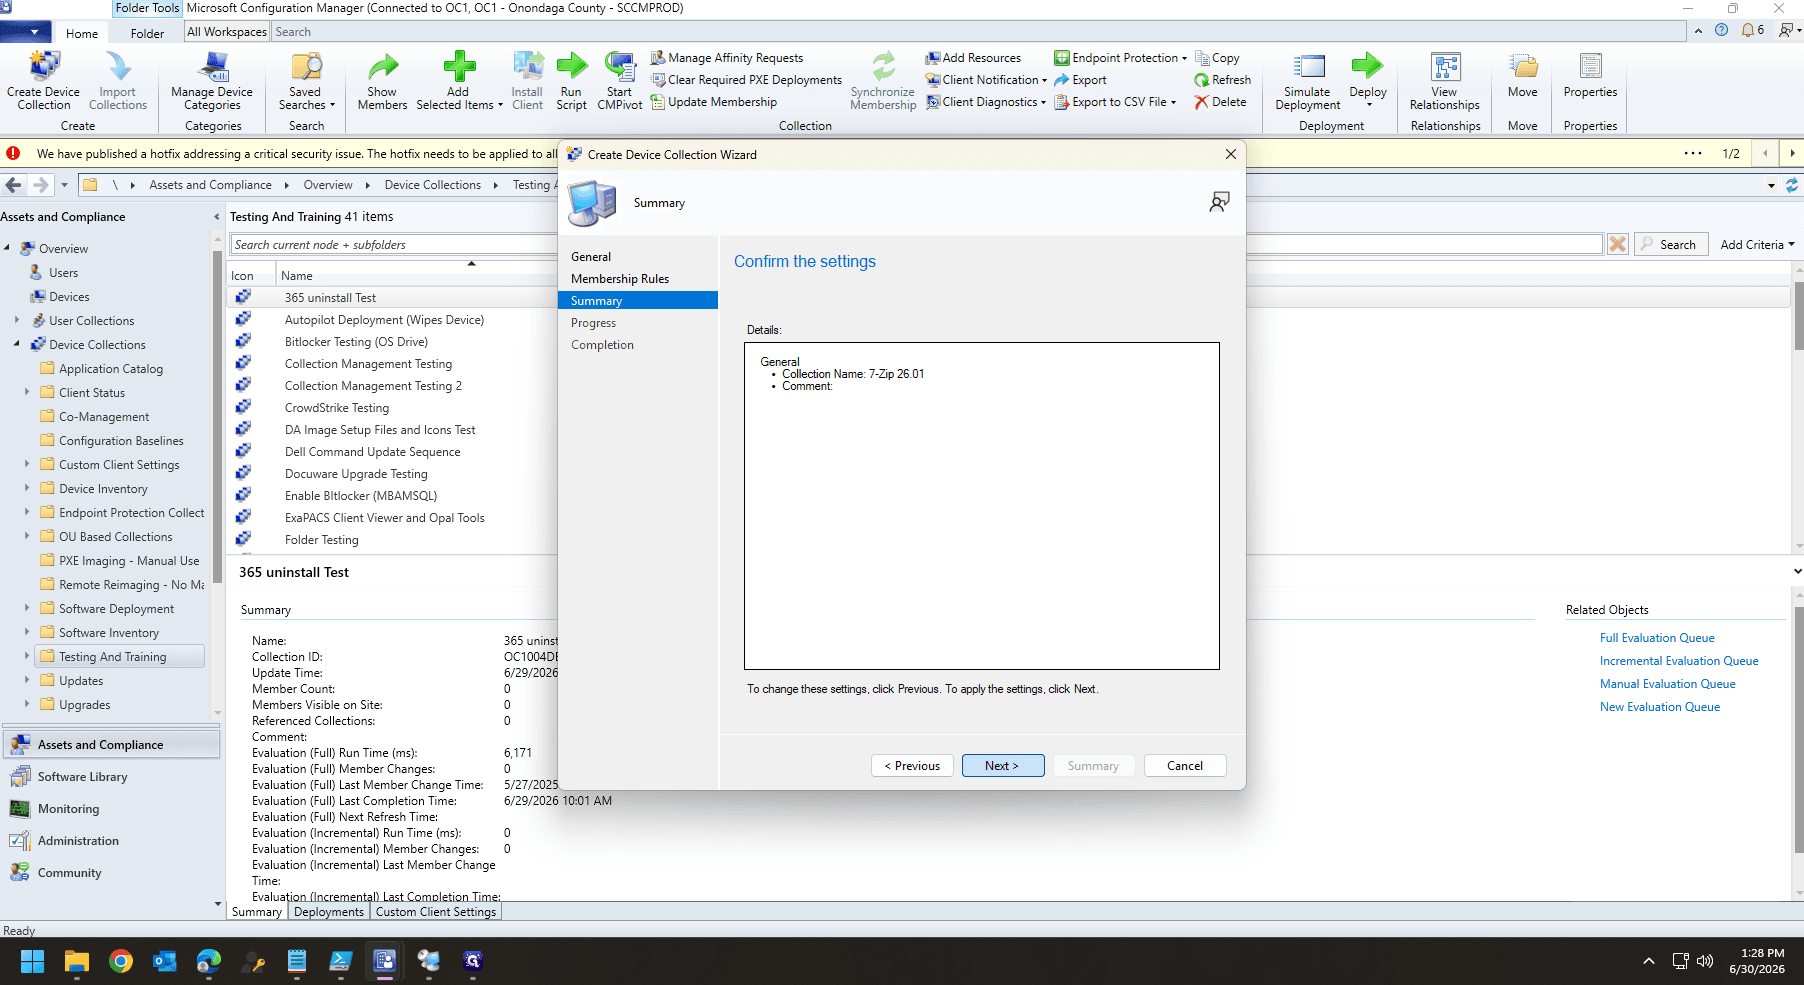
36
Review the Summary and click Next.
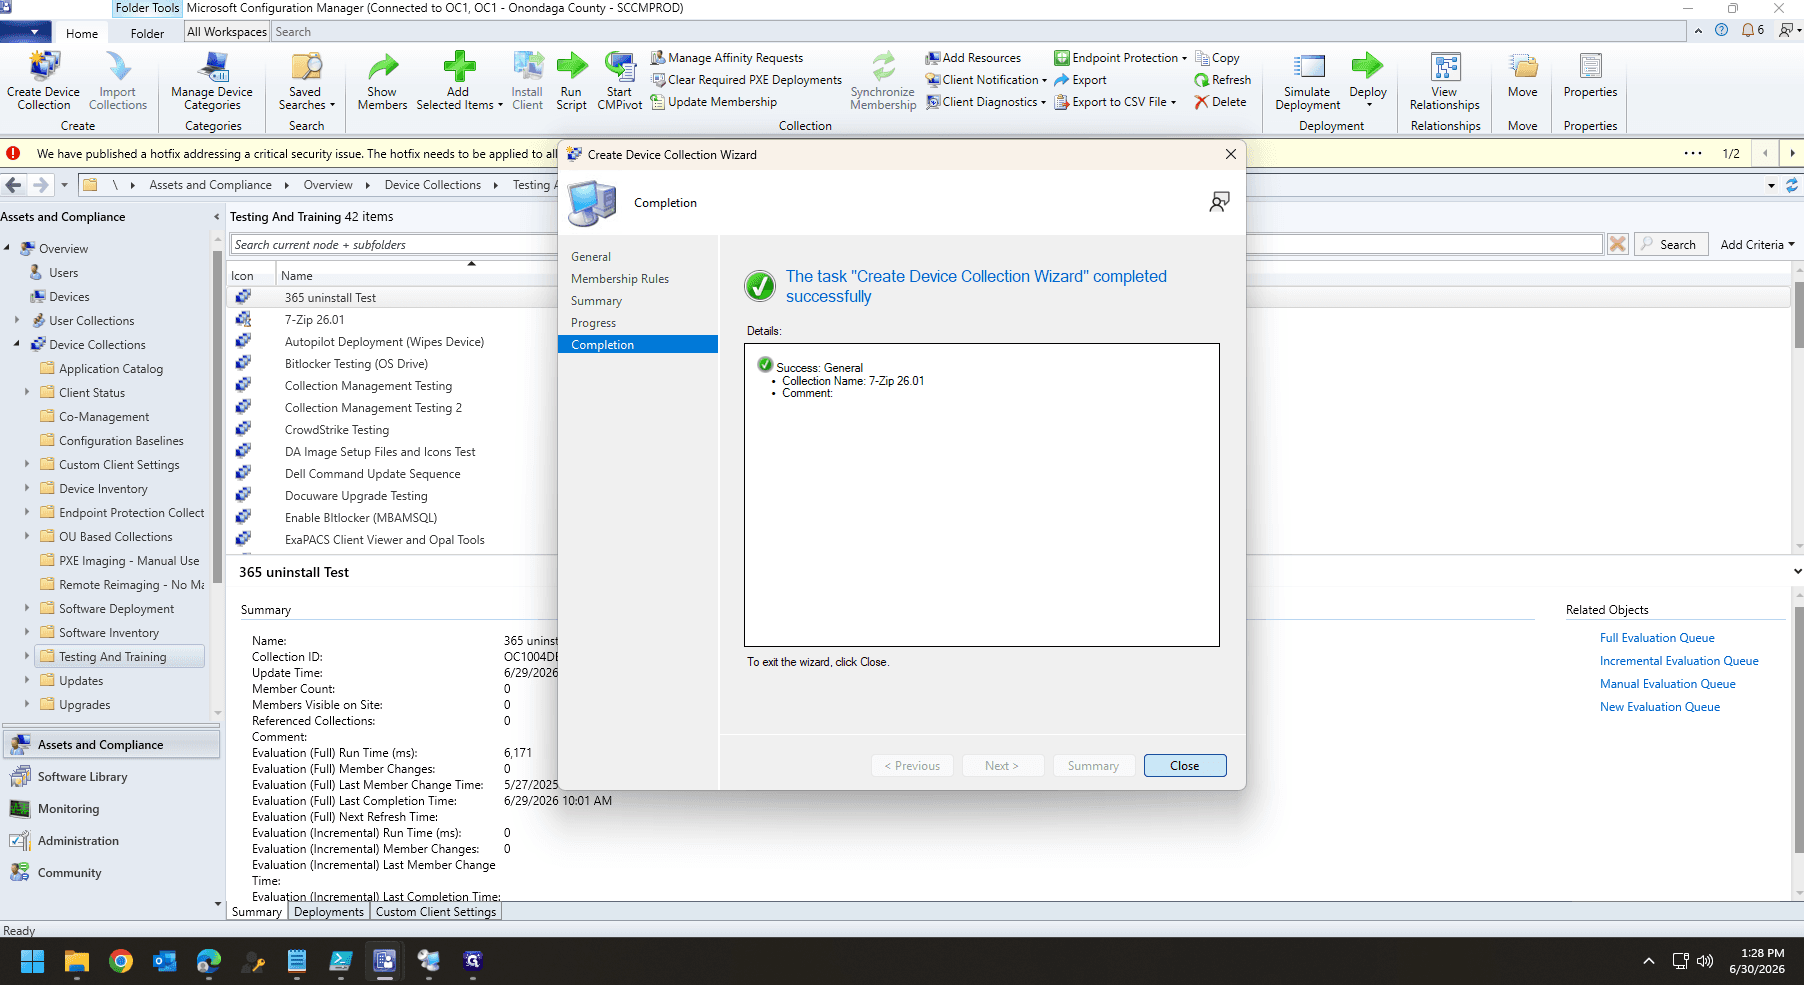
37
Click Close to finalize the creation of the empty device collection.
Deploy the Application
38
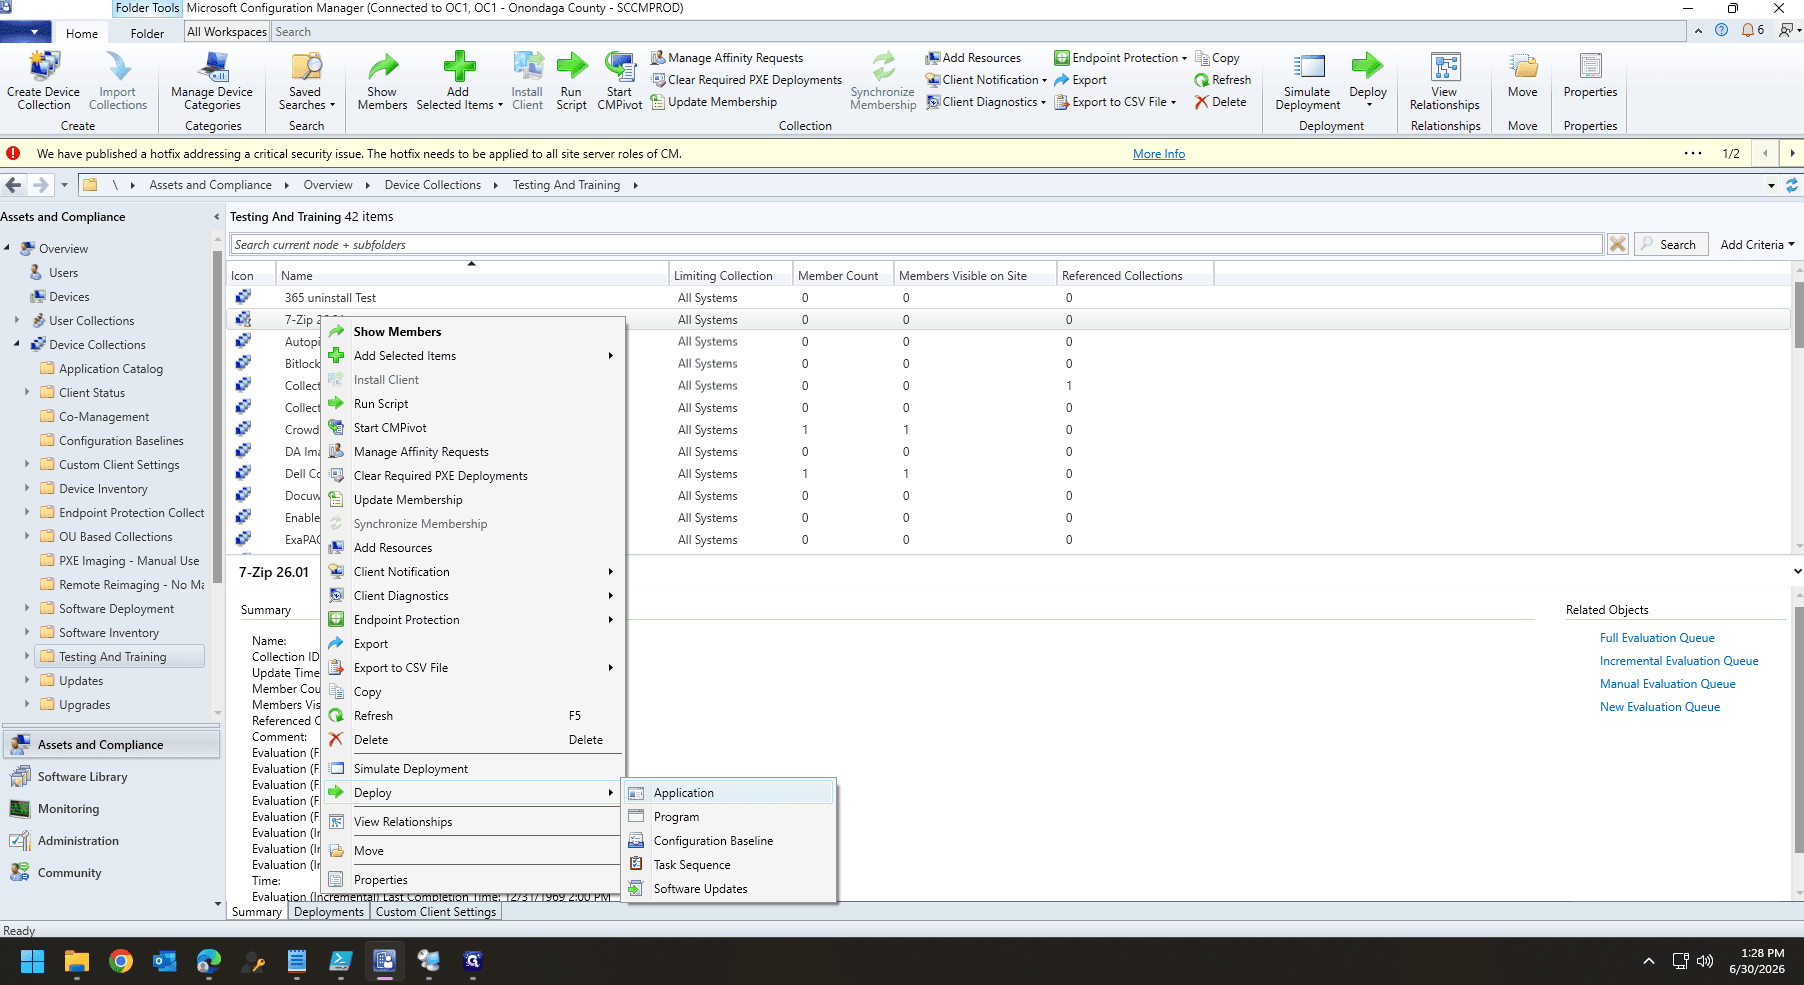
Right-click your newly created device collection, hover over Deploy, and select Application.
39
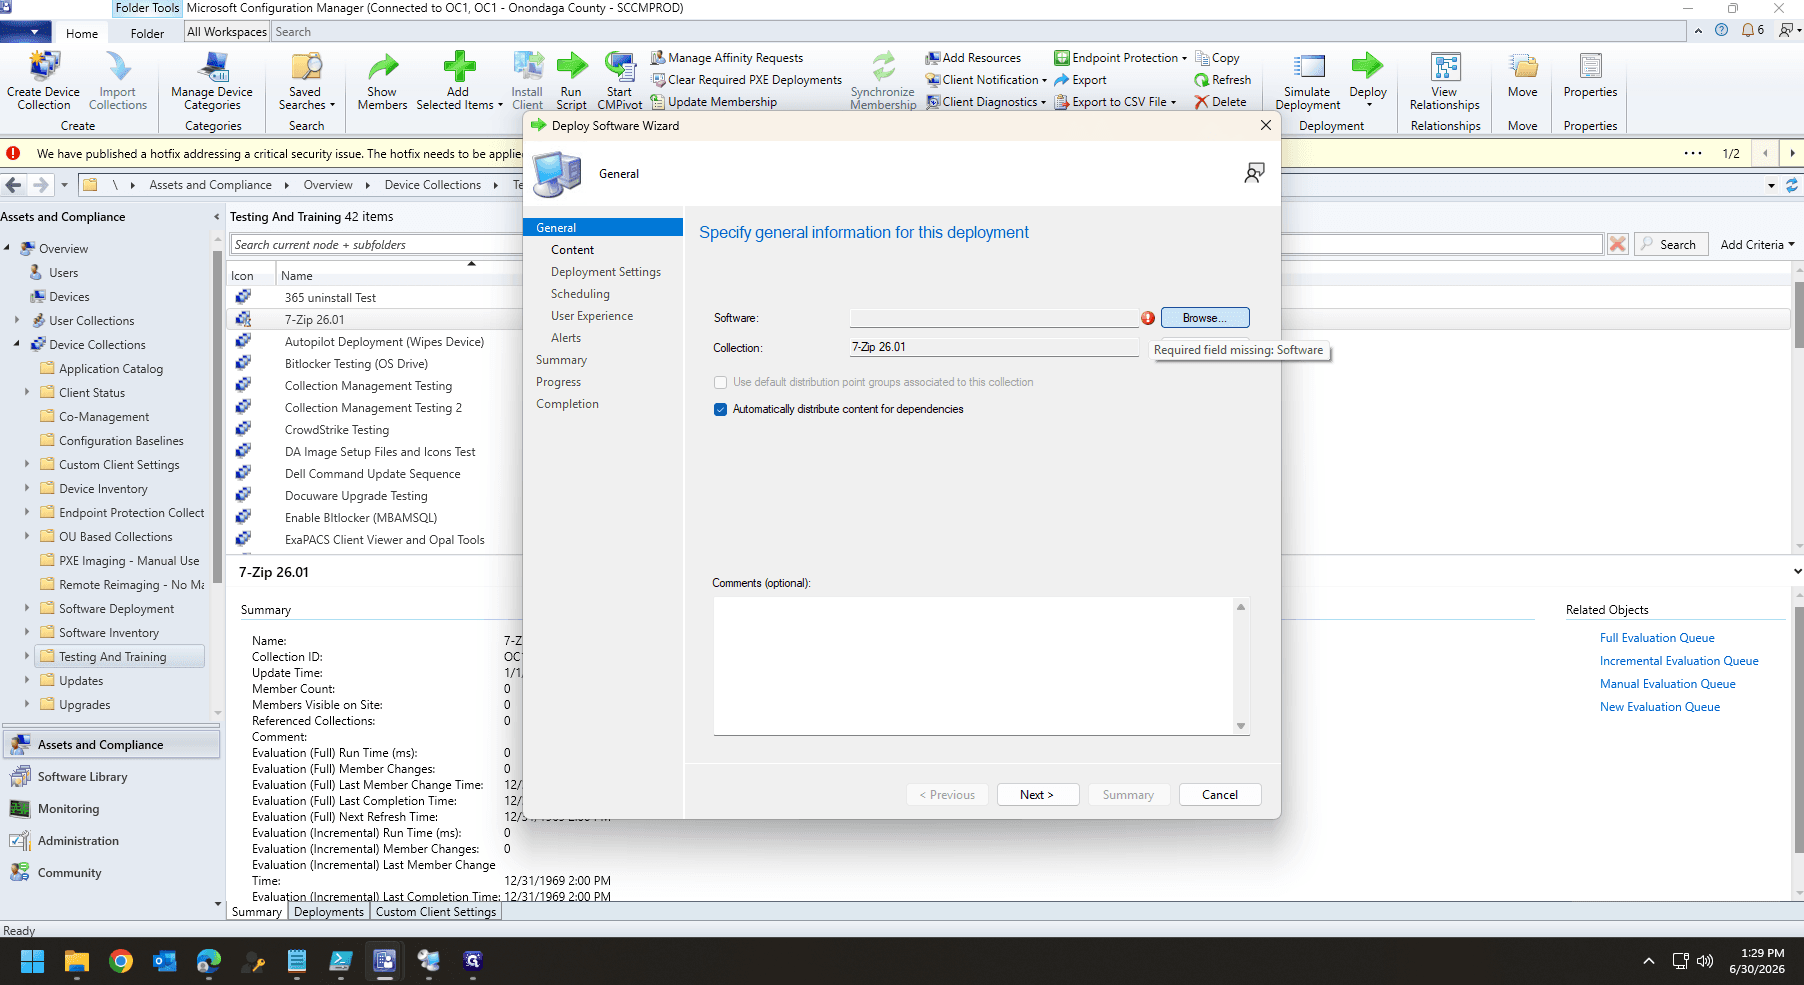
In the Deploy Software Wizard, click the empty software field to browse for your application.
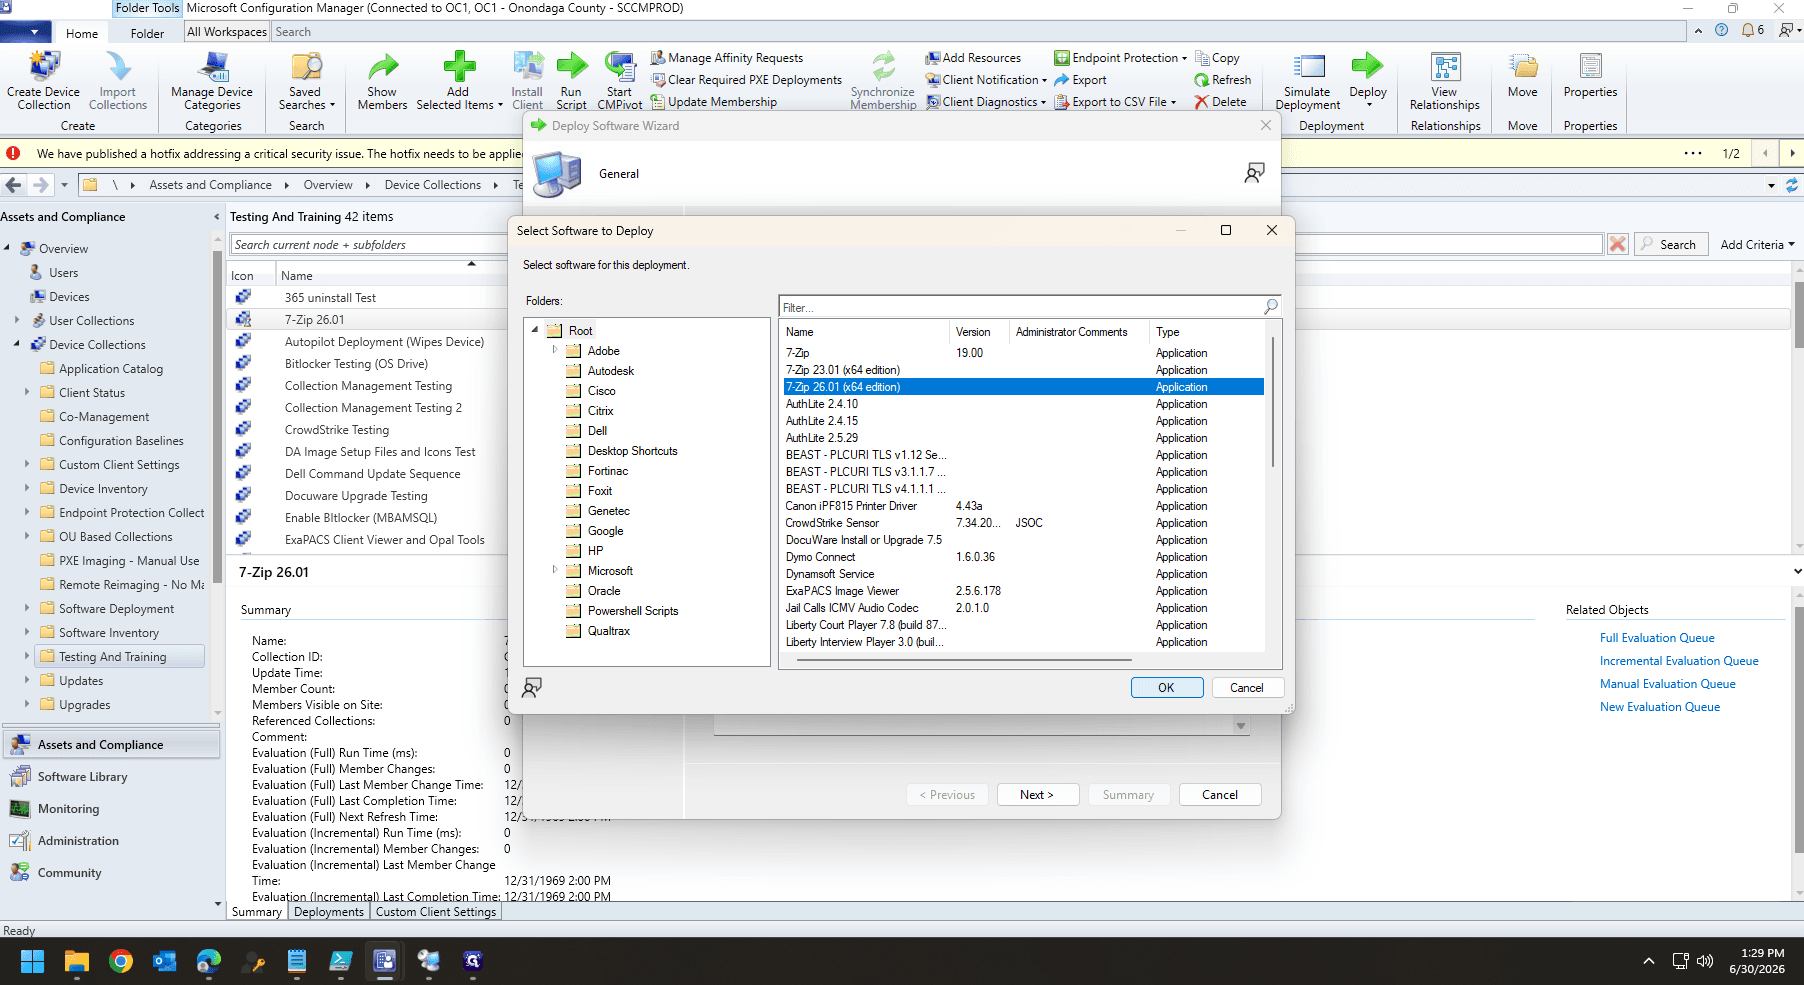
40
Select the application you created earlier and click OK.
41
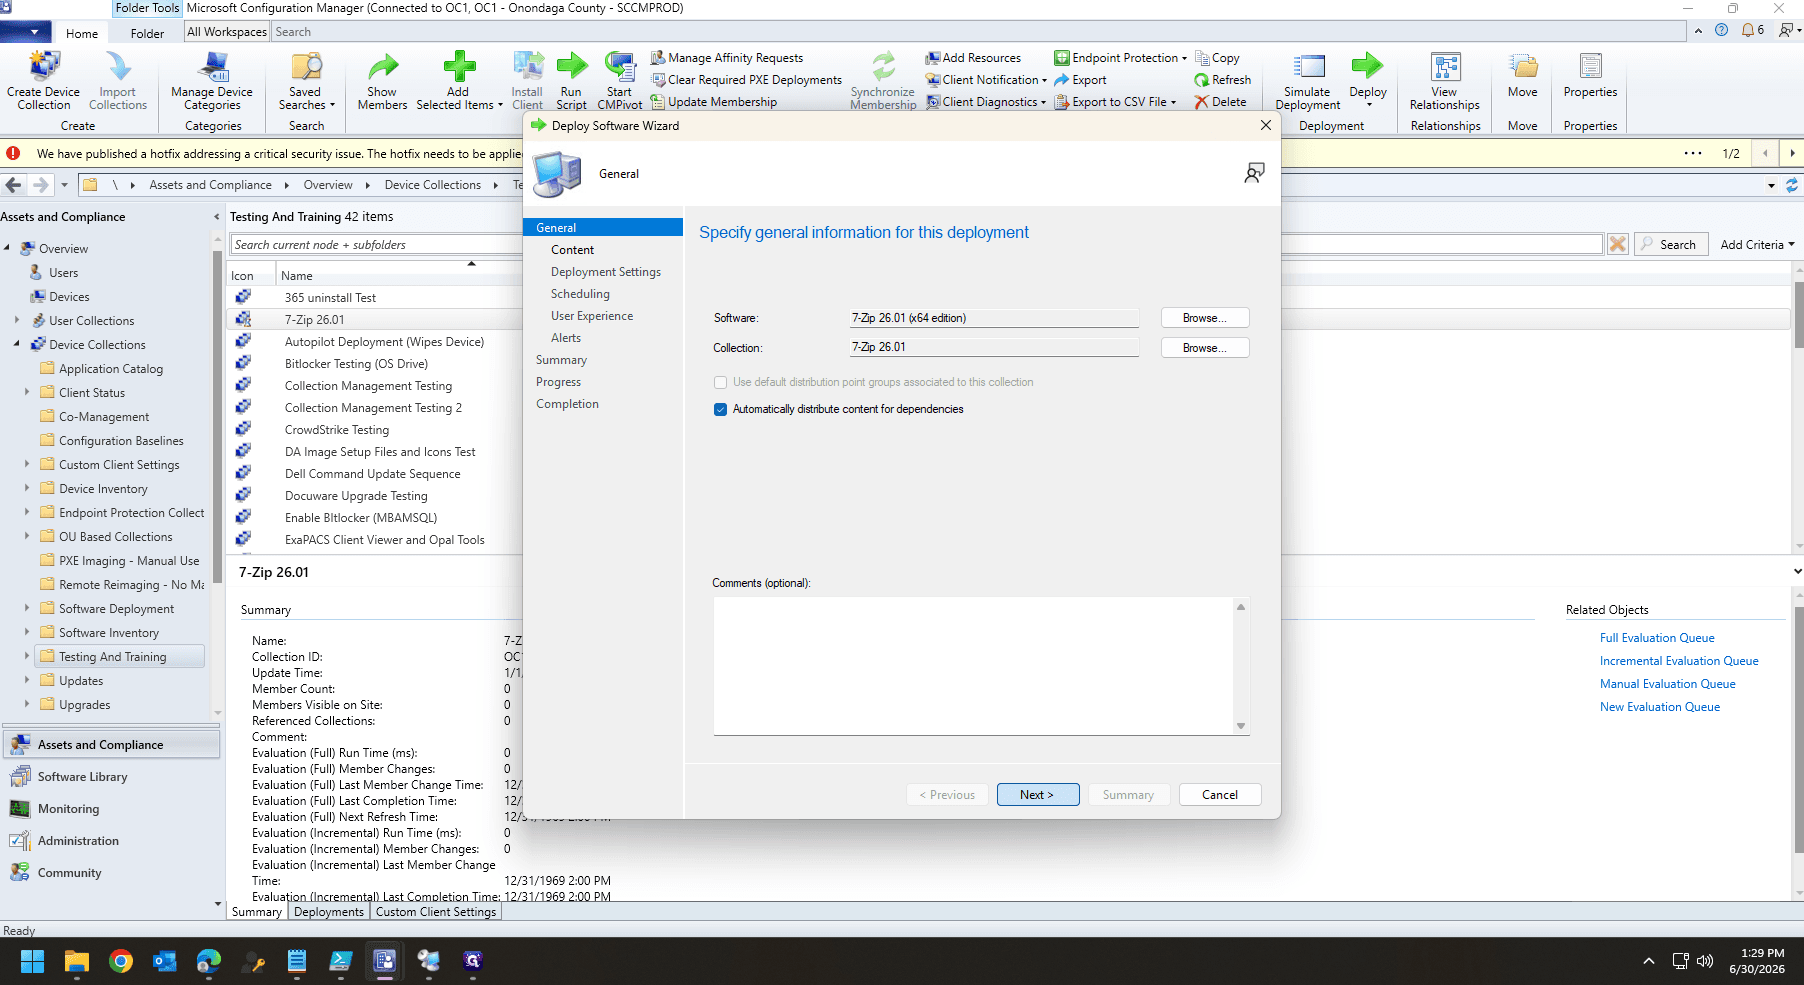
Click Next to advance past the General settings page.
42
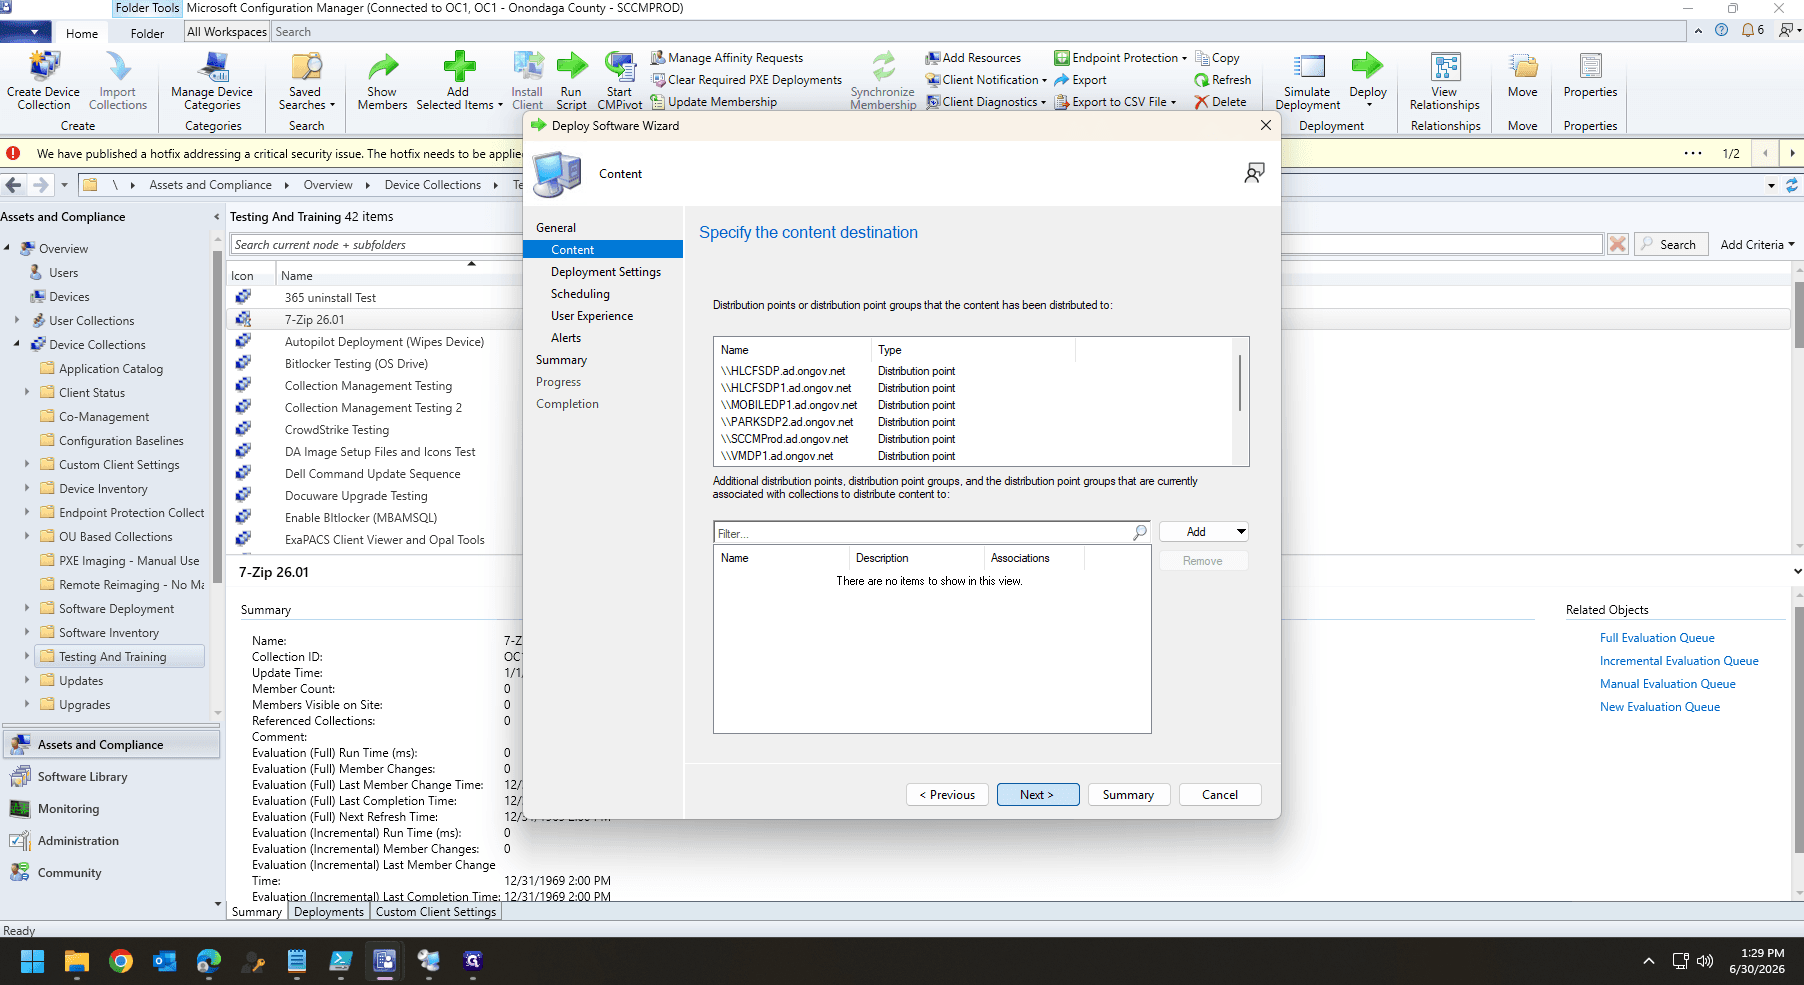
Confirm the Content page settings and click Next.
Recommended Deployment Configuration
Ensure you configure the deployment properly based on user expectations and restart behaviors. Use the following table as a reference for common options:
Configuration Page
Field
Recommended Setting
Deployment Settings
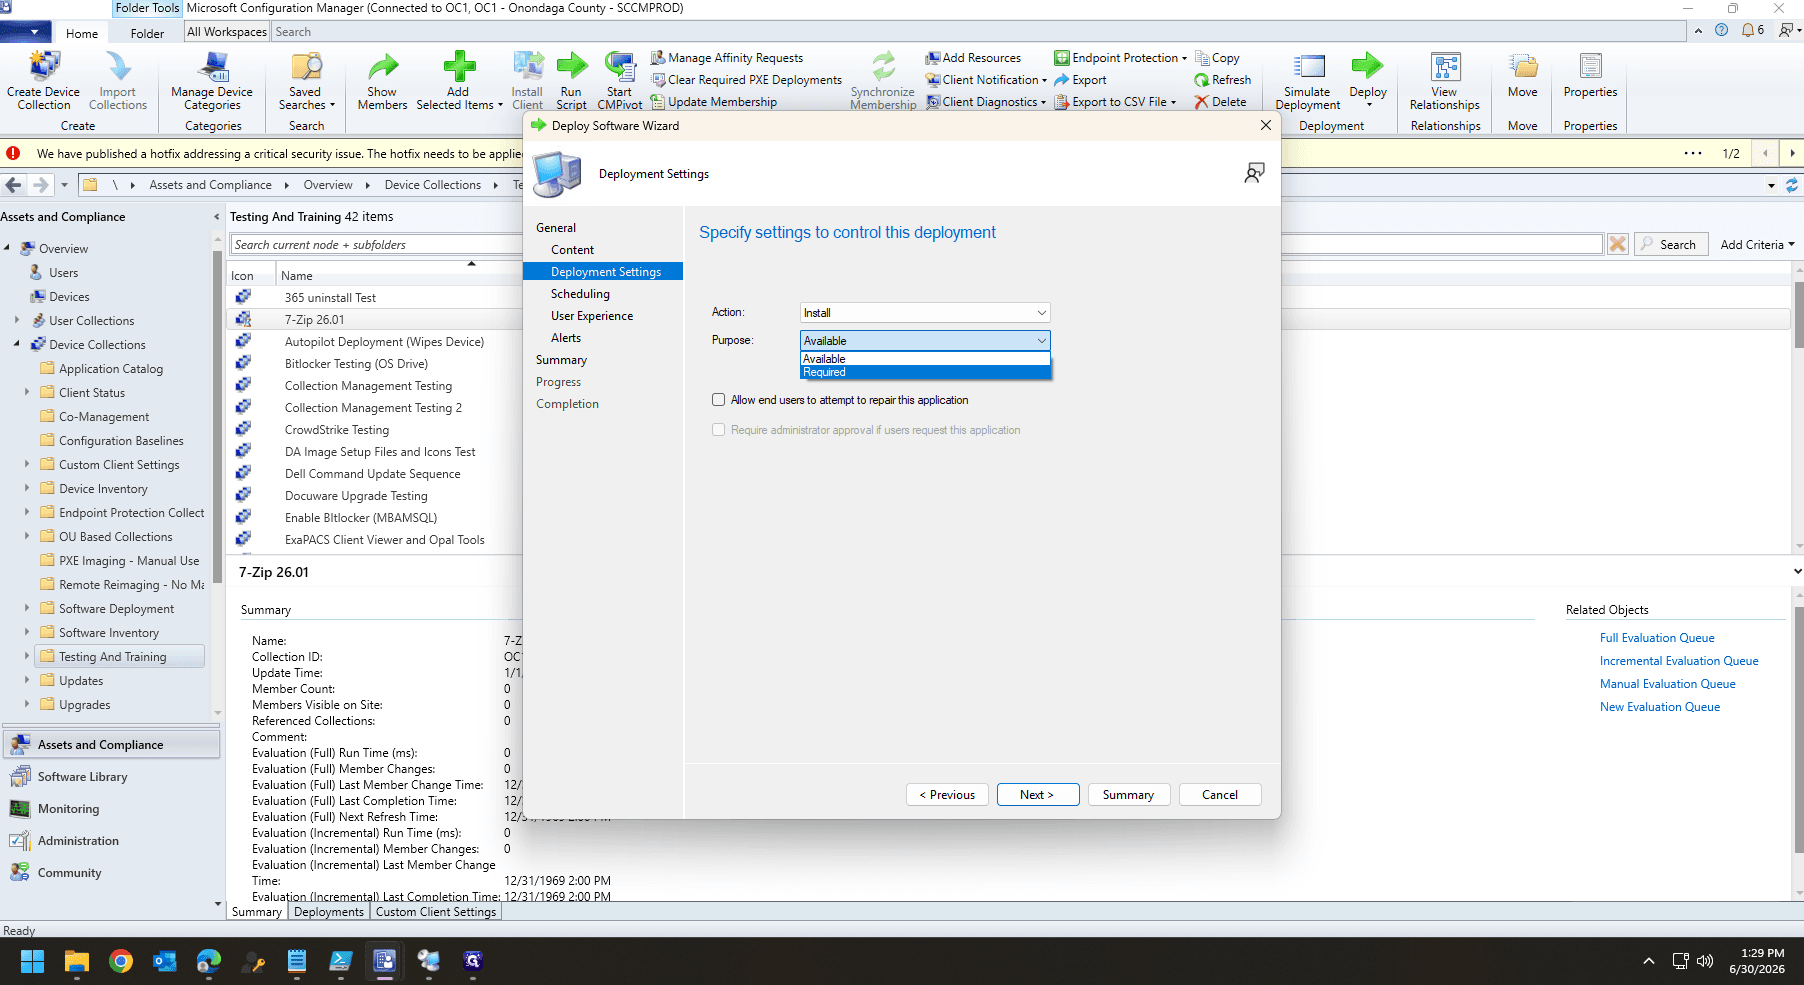
Purpose
Available (Optional) or Required (Mandatory)
User Experience
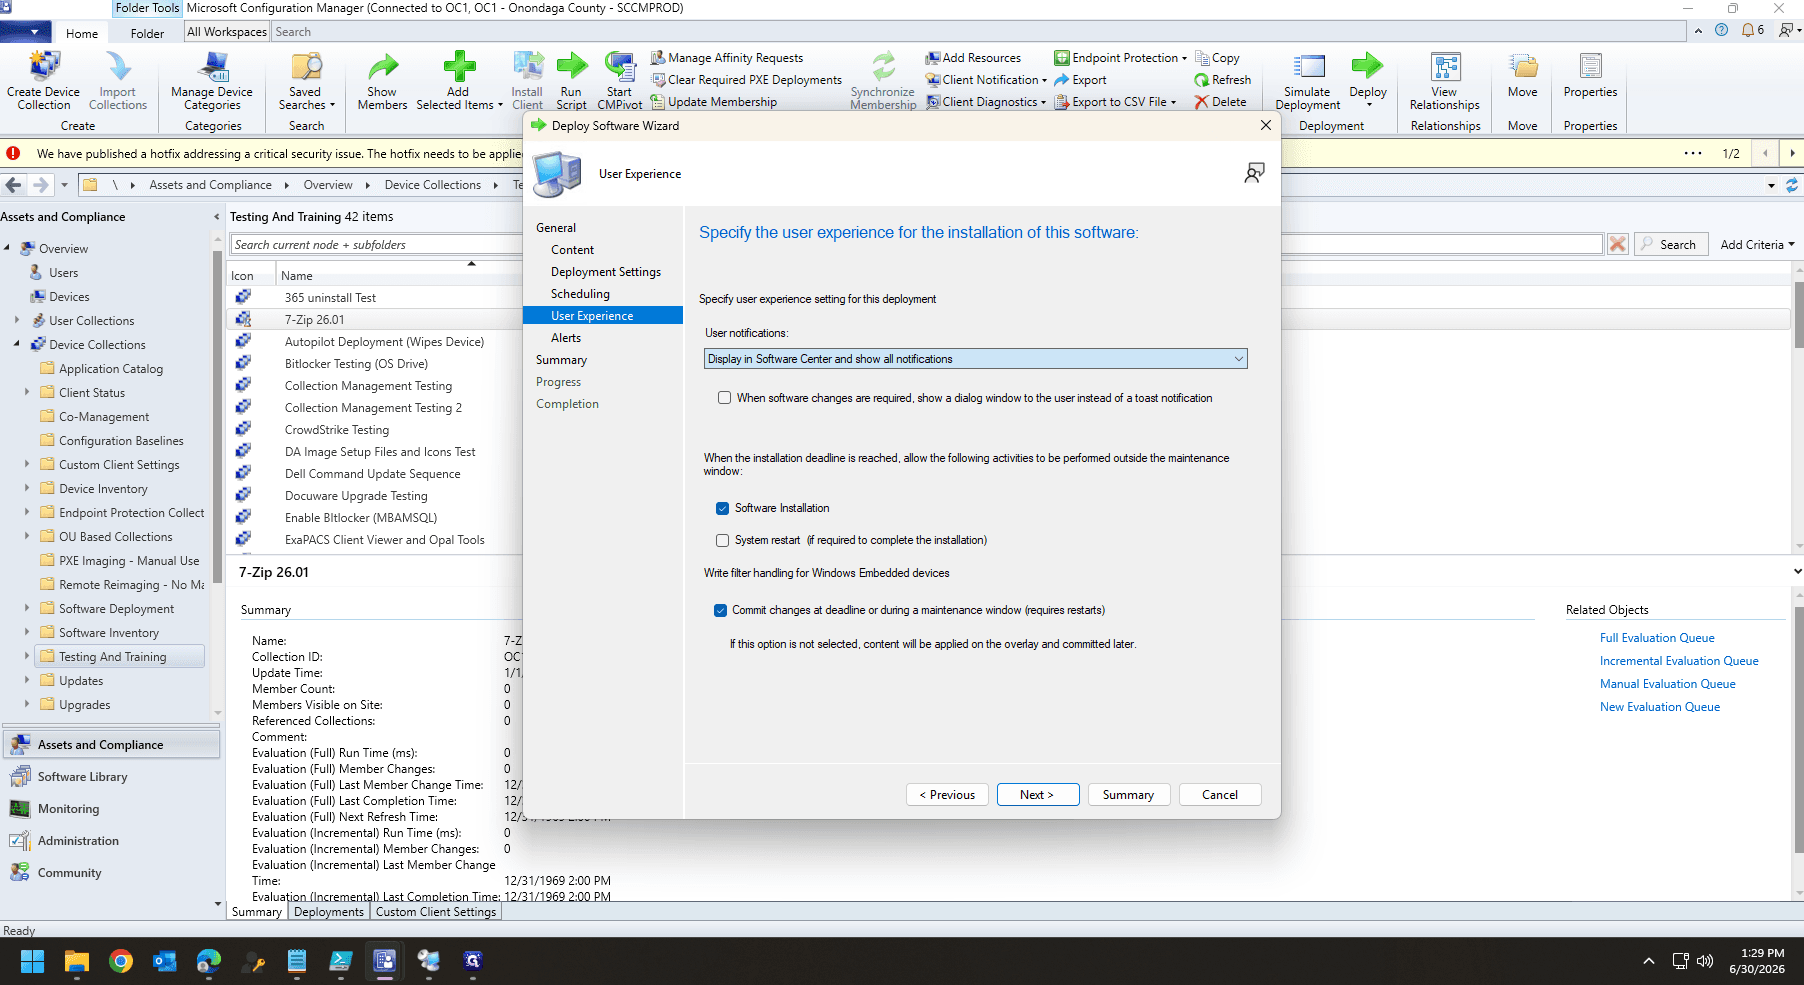
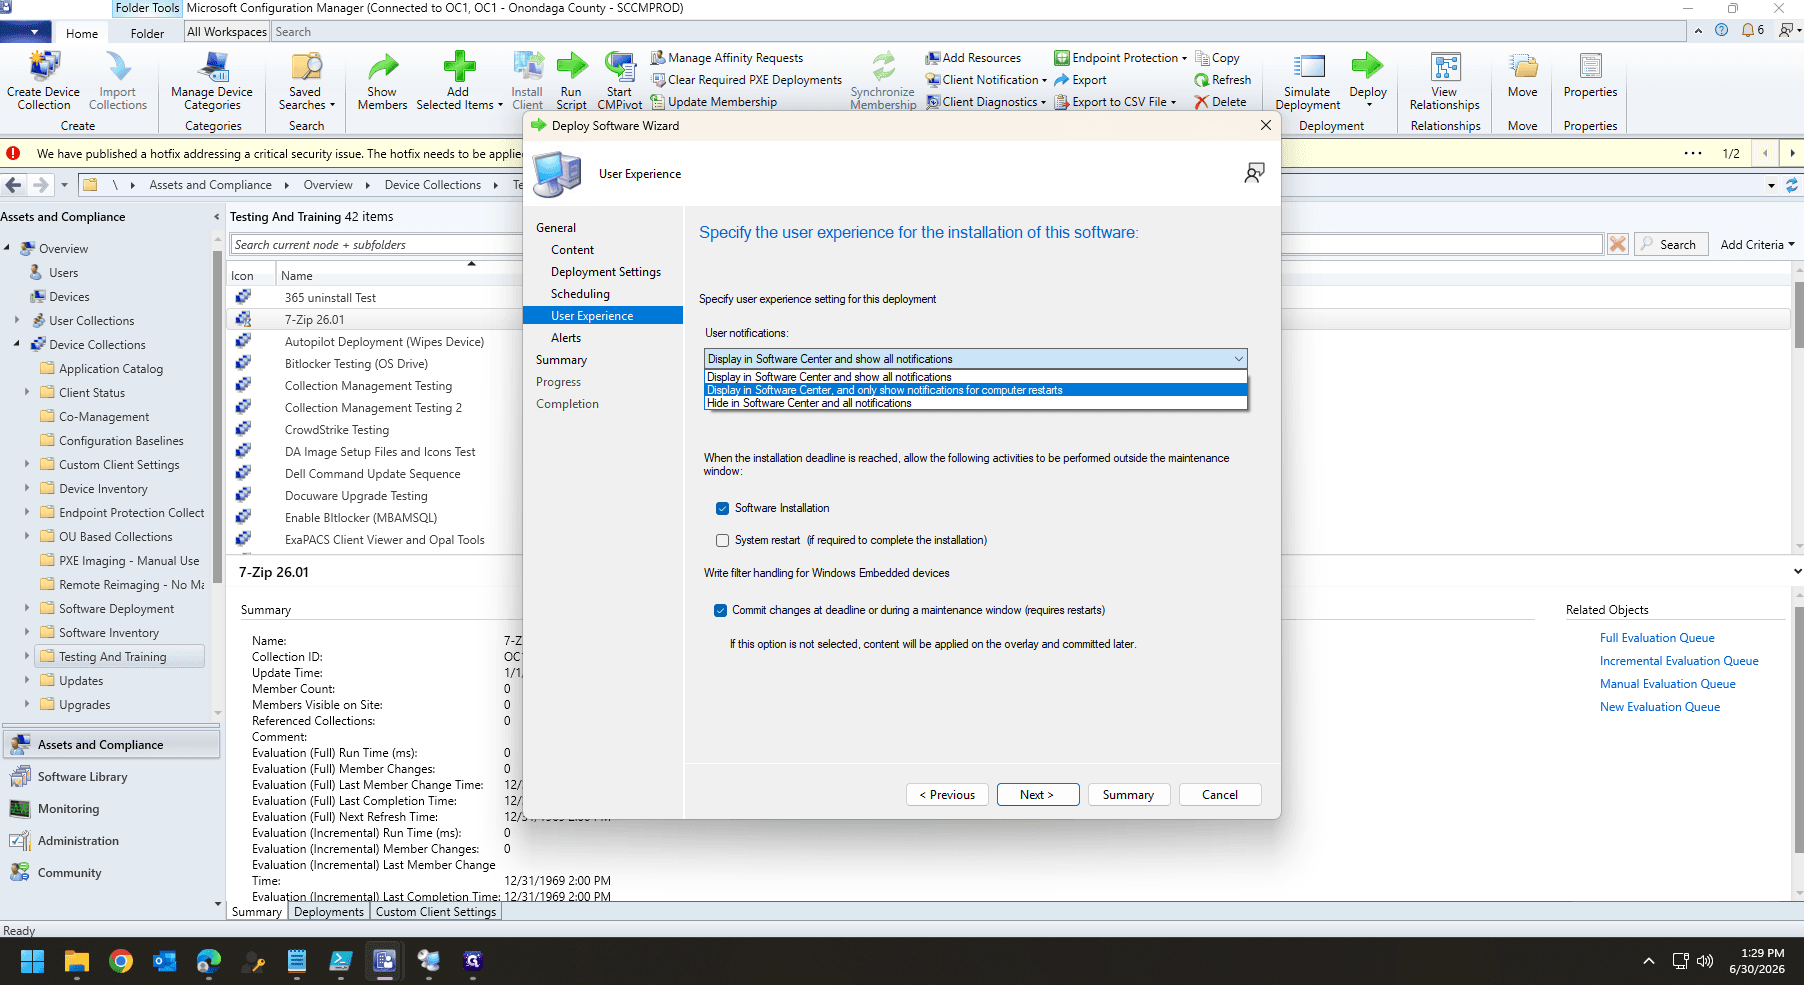
User notifications
Only show notifications for computer restarts
User Experience
Maintenance windows
Commit changes at deadline or during a maintenance window (requires restarts)
43
Choose your preferred deployment Purpose (e.g., Available) and click Next.
44
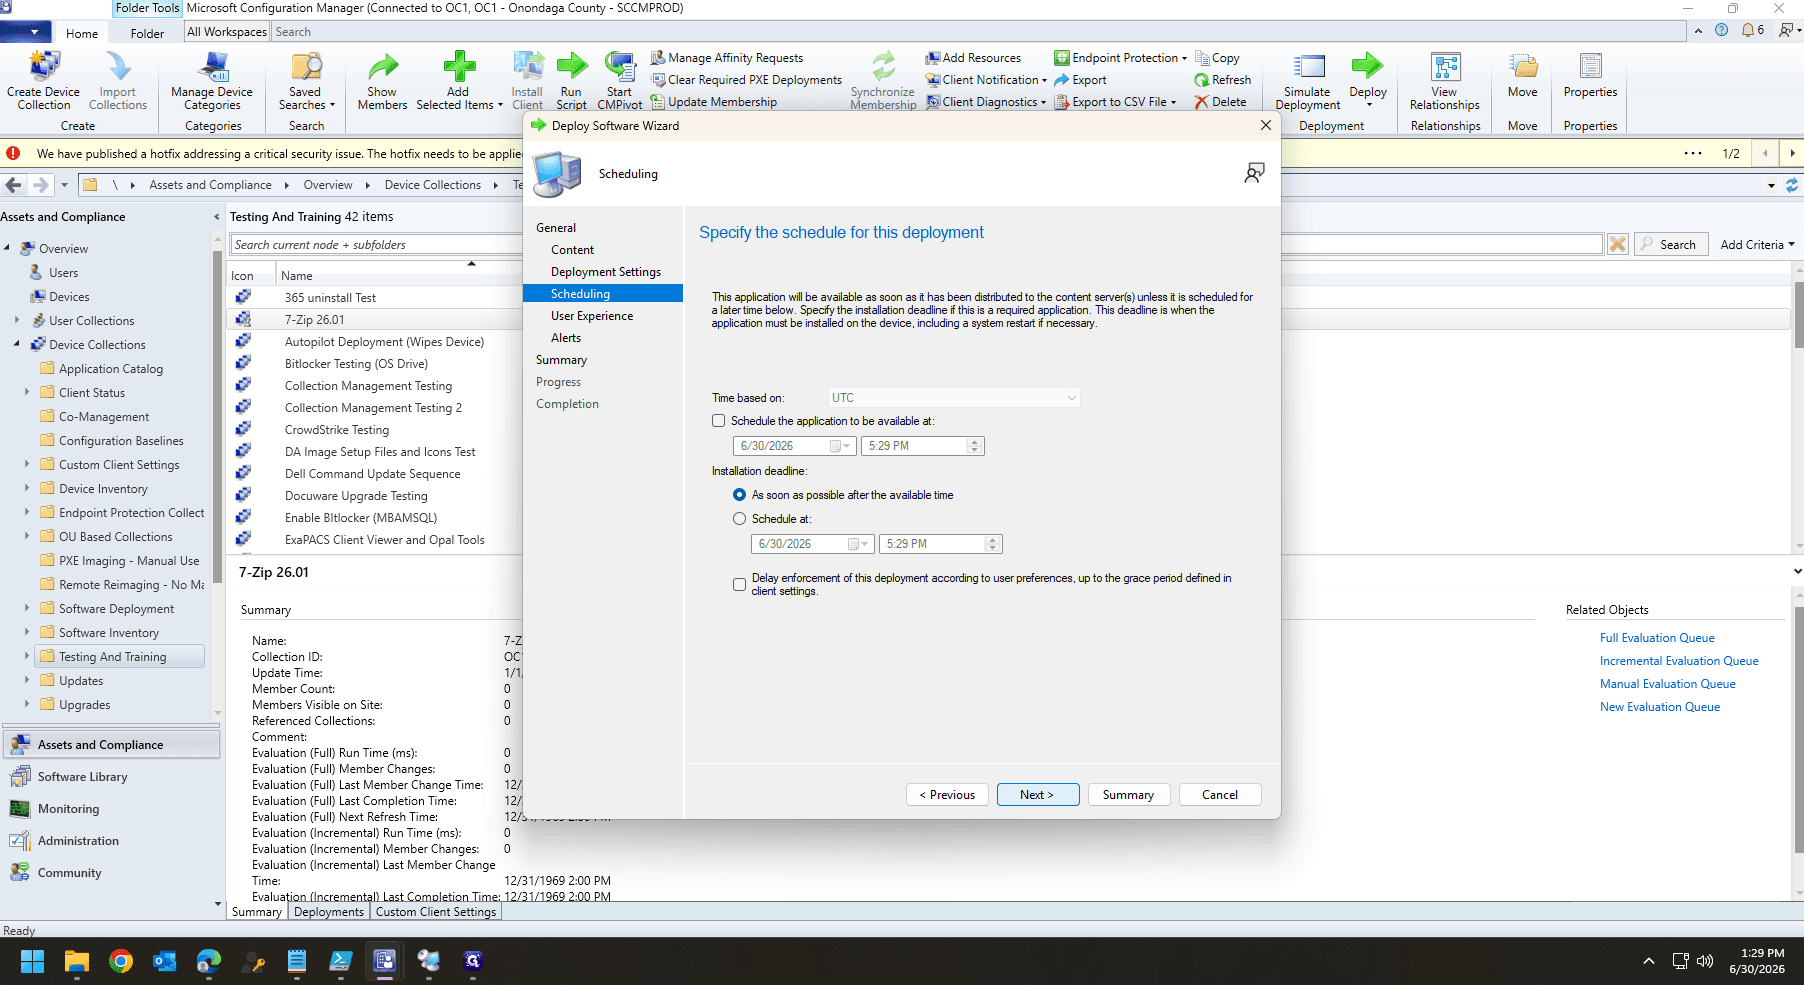
Configure your scheduling preferences, then click Next.
45
On the User Experience tab, check the box for Software Installation.
46
Adjust the user notifications dropdown to your preference and click Next.
47
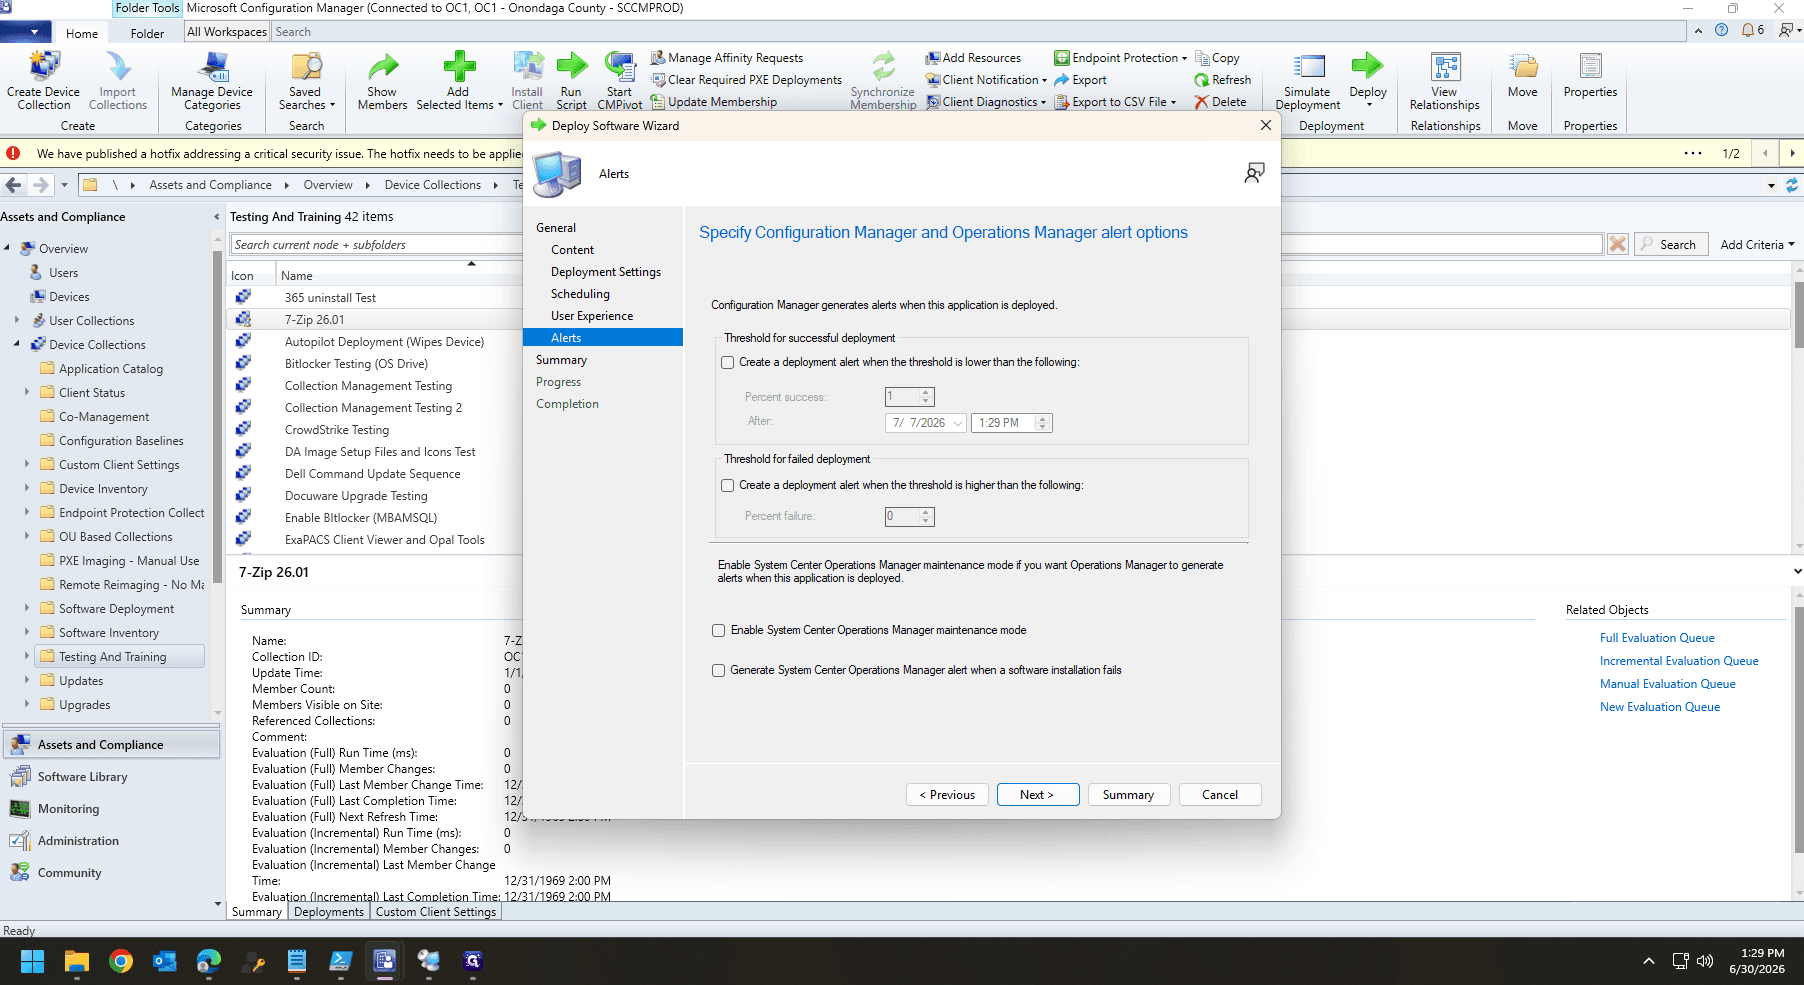
Review any Alerts configurations, then click Next.
48
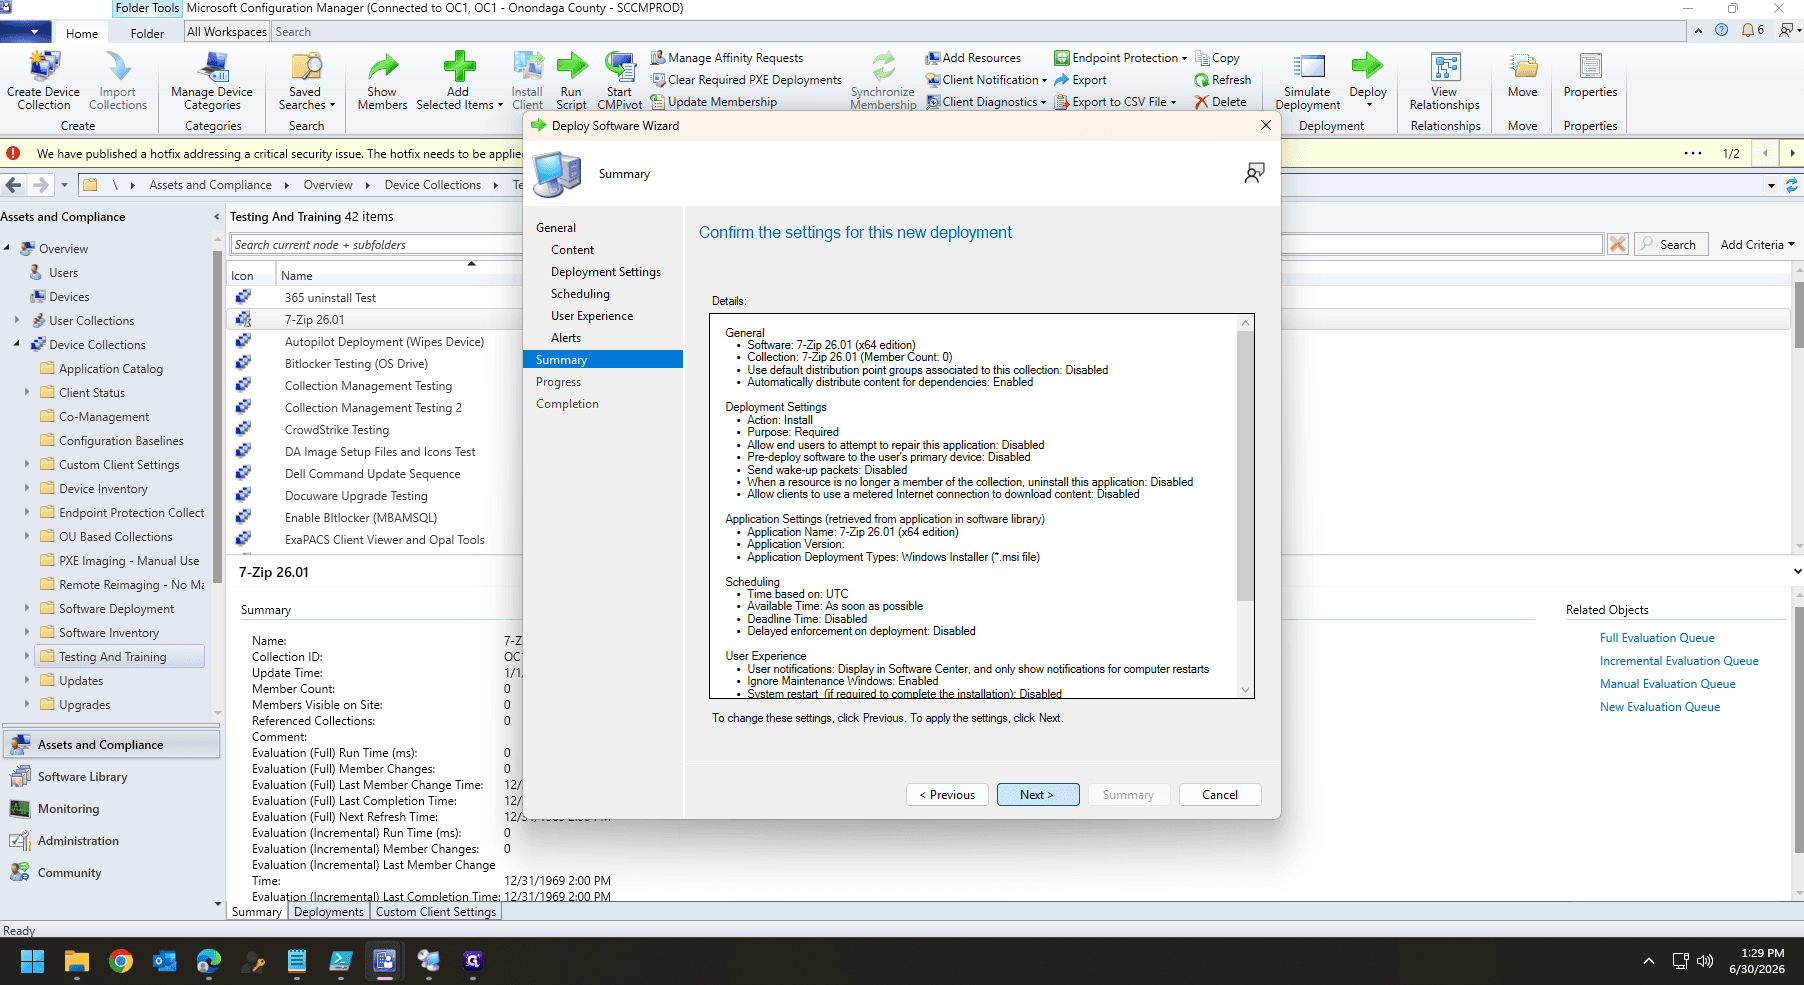
Confirm your choices on the Summary screen and click Next.
49
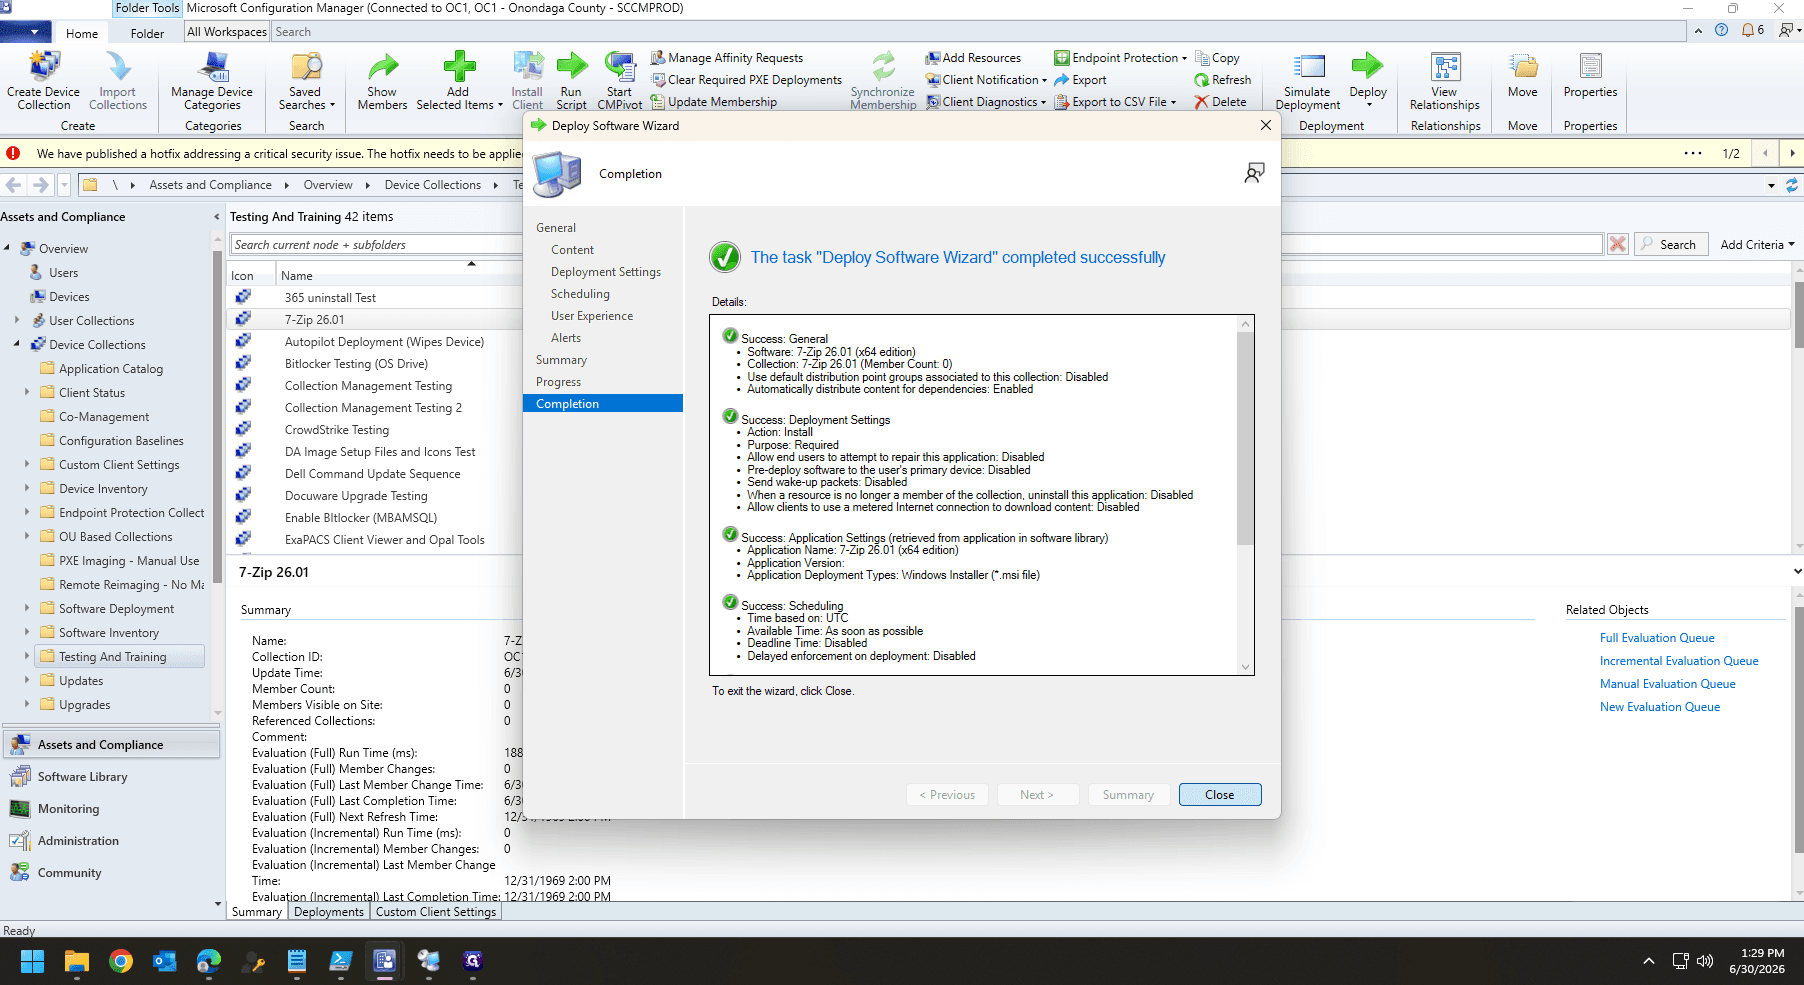
Click Close to finalize the application deployment.
50
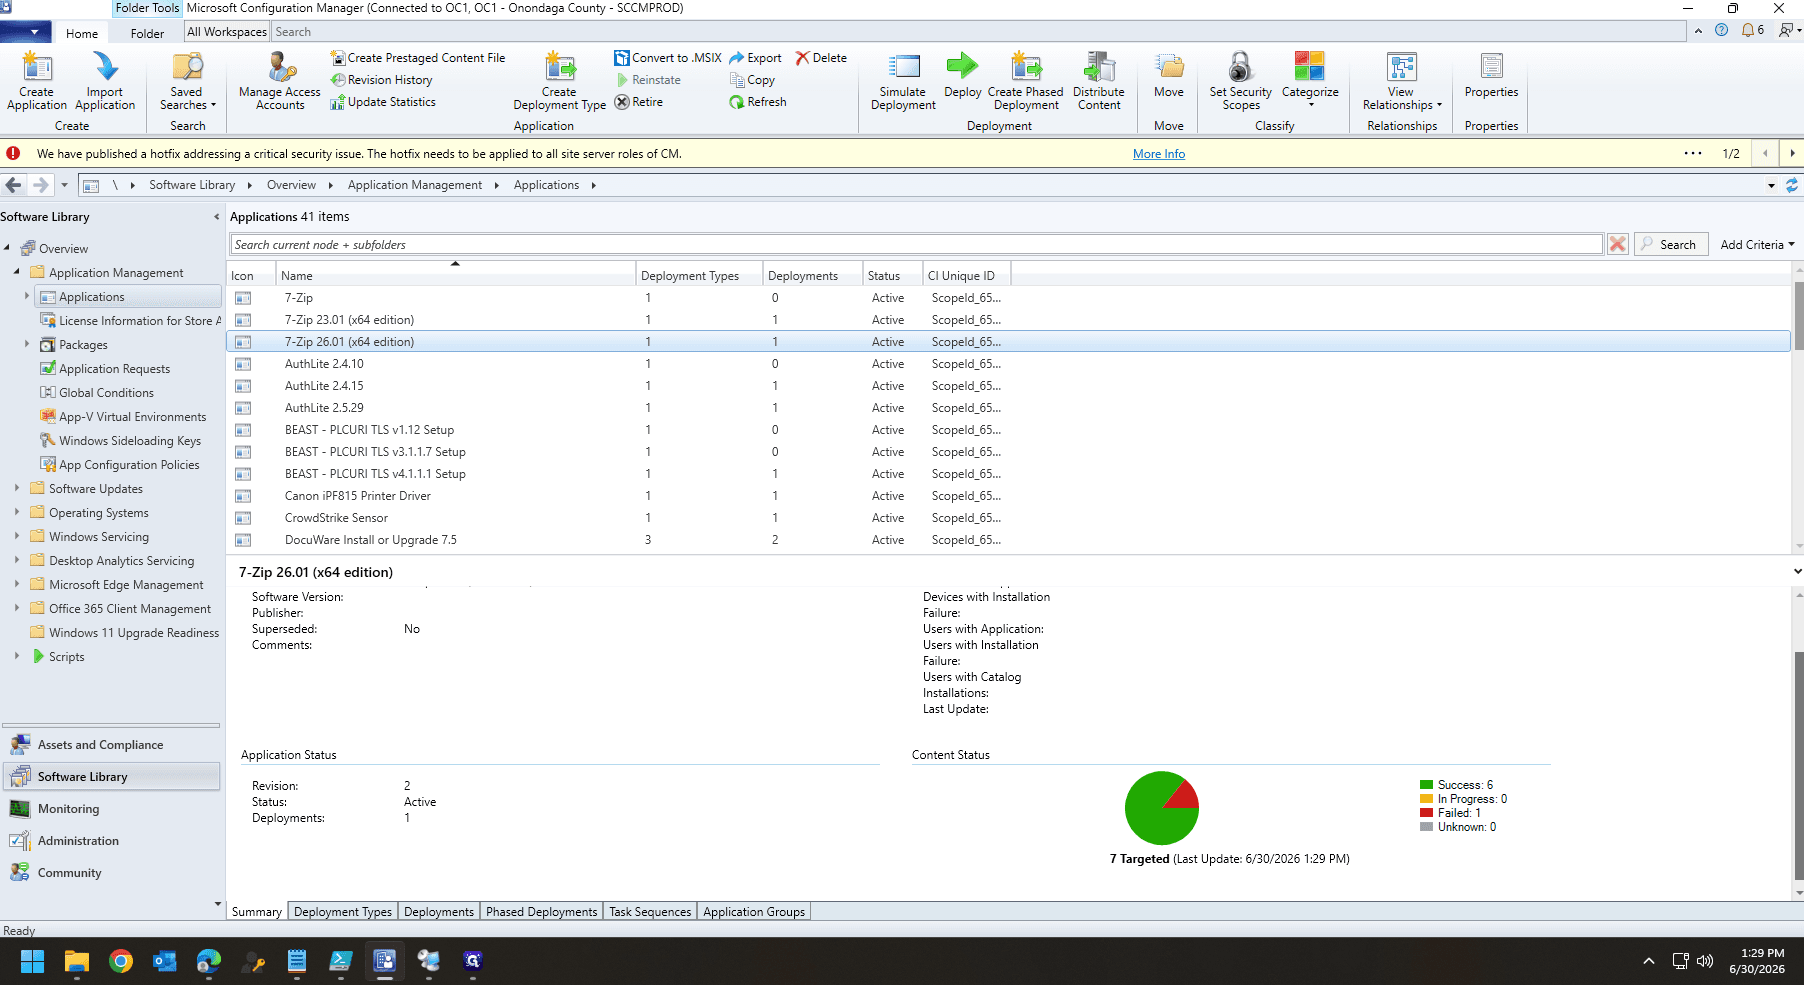
Return to the Software Library to view the application and monitor its deployment statistics in the bottom summary pane. In most cases you can begin testing after you see success for 2, which will always include the primary site.
Q: Why do I get a warning prompt when selecting the MSI file during setup?
A: Configuration Manager detects if the installer originates from an unverified publisher. You can safely click "Yes" to bypass this warning if you trust the source file.
Q: Can I proceed without adding membership rules to my Device Collection?
A: Yes. Configuration Manager will display a warning that the collection will contain no members. You can accept this and manually populate the collection later.
Q: What does the "Do not download content" option achieve?
A: This setting stops the client from unnecessarily downloading or caching the application payload before initiating the installation, executing it directly as configured.
Term
Definition
Device Collection
A grouping mechanism in Configuration Manager used to organize users or devices for targeted tasks, such as application deployment.
Distribution Point
A server role within Configuration Manager that hosts package source files for clients to download.
Deployment Type
The specific installation parameters and content (like an MSI package or script) assigned to an application in Configuration Manager.
MSI File
The standard Windows Installer package format used to install, modify, and uninstall software on Windows systems.