Icon

TIRA : Order Type Configuration Master

Β© LLAMA LOGISOL PVT LTD 2025. All rights reserved. This document and the WMS software described herein are proprietary products of Β© LLAMA LOGISOL PVT LTD and are protected by copyright law. No part of this document or software may be reproduced, transmitted, or used in any form or by any means without prior written permission from Β© LLAMA LOGISOL PVT LTD 2025.

By Shipsy

Prerequisites for Order Type Configuration

A. Extras > Configurations:

  1. Add Order Types in Outbound Configurations.

  2. Enable required Pick Types.

  3. Define Cluster Types (Single, Multi).

B. Masters > Location Master:
1. Add Zones and locations – SORTING, PRE_INVOICE.


πŸ“¦ Order Type Configuration Guide

1. Access the Configuration

  Go to Masters β†’ Order Type Configuration
  Click New Order Type and select the required type from the dropdown.

2. Select Pick Type

  2.1 Cluster Picking
    a. Single Cluster
      i. Used for single-item orders
      ii. Directly routed to PRE_INVOICE (no sorting required)

    b. Multi Cluster
      i. Used for multi-item batched orders
      ii. Orders flow through SORTING zones before invoicing

      Sorting Zone Setup for Multi Cluster:
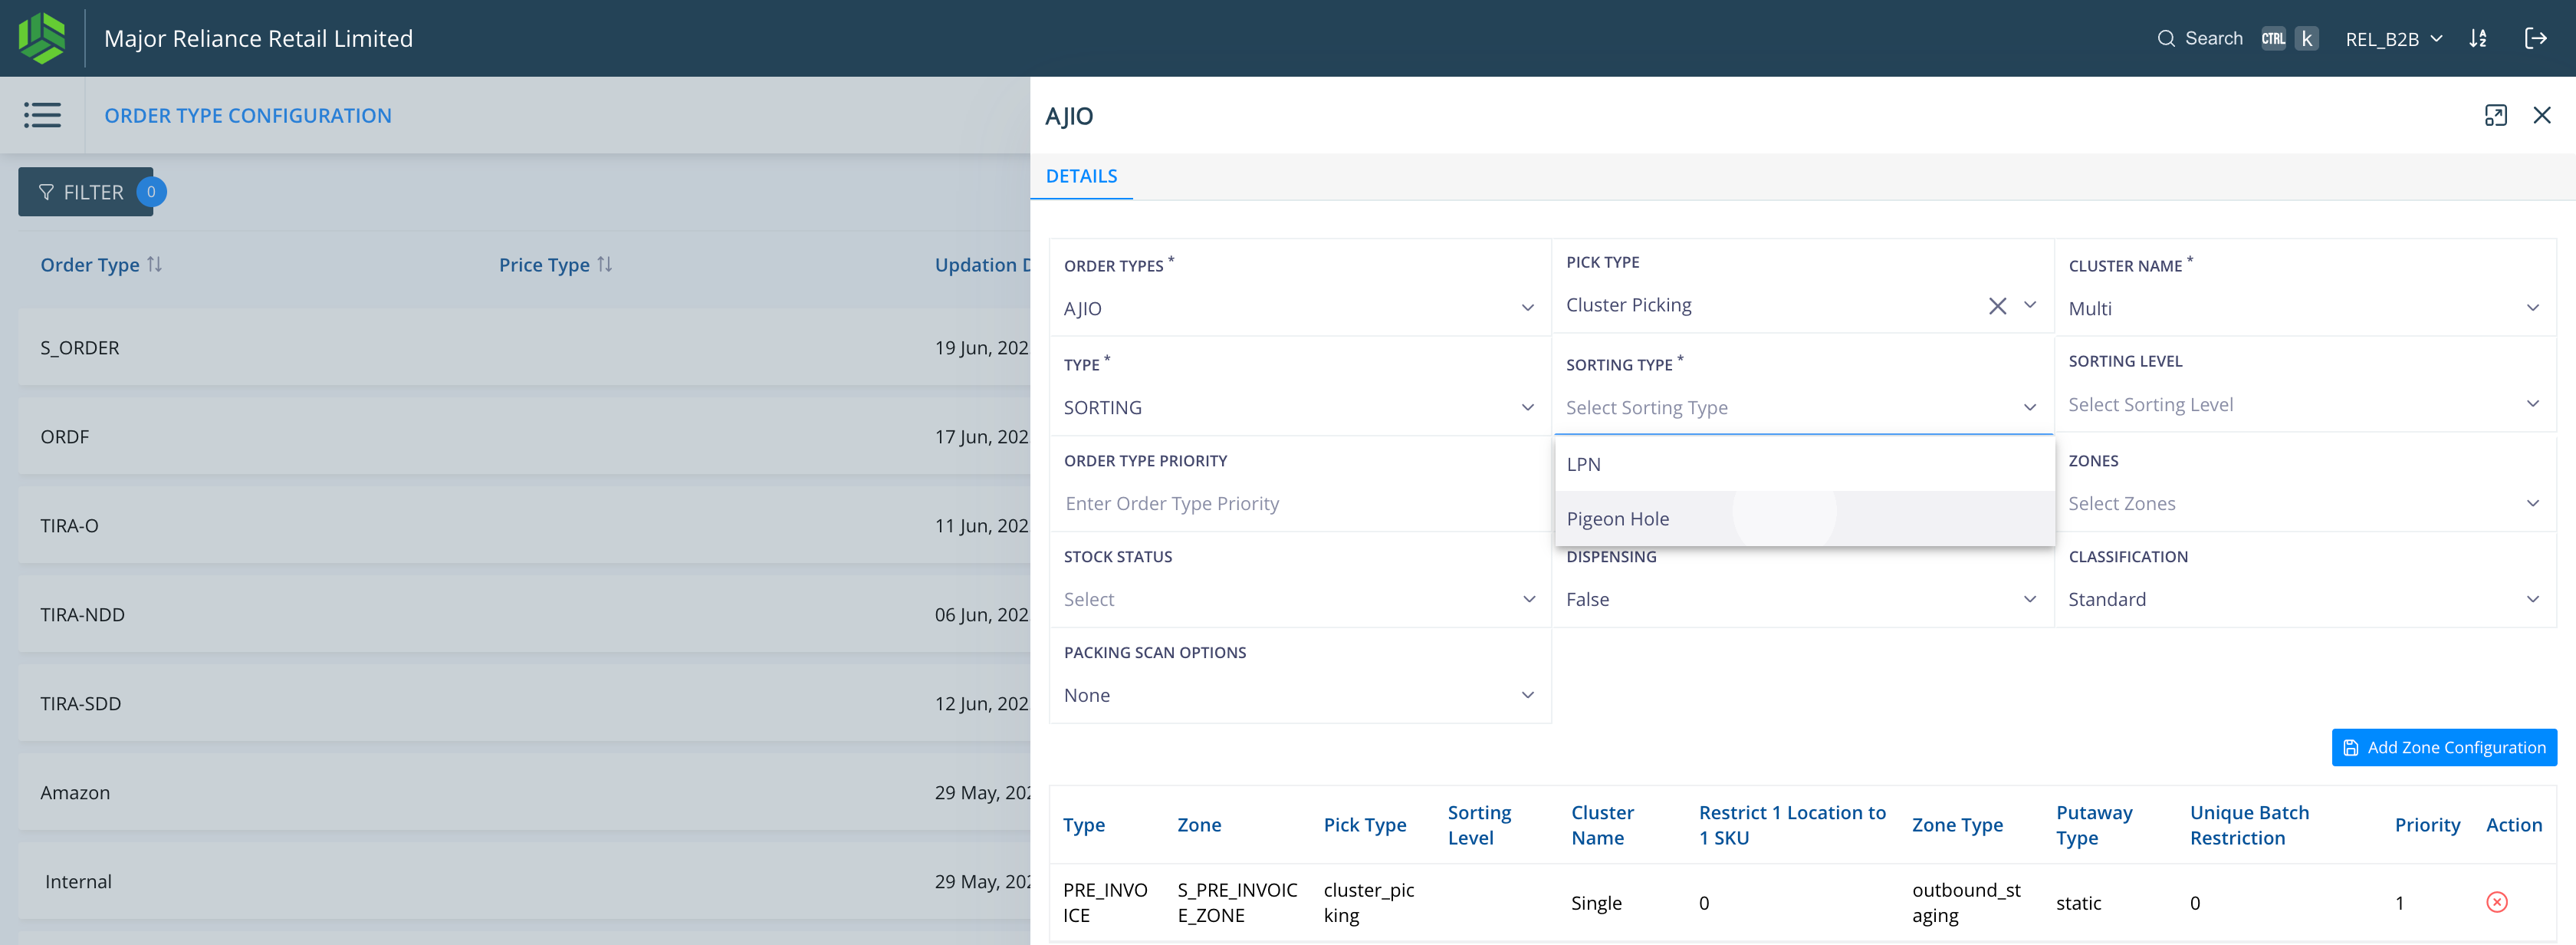
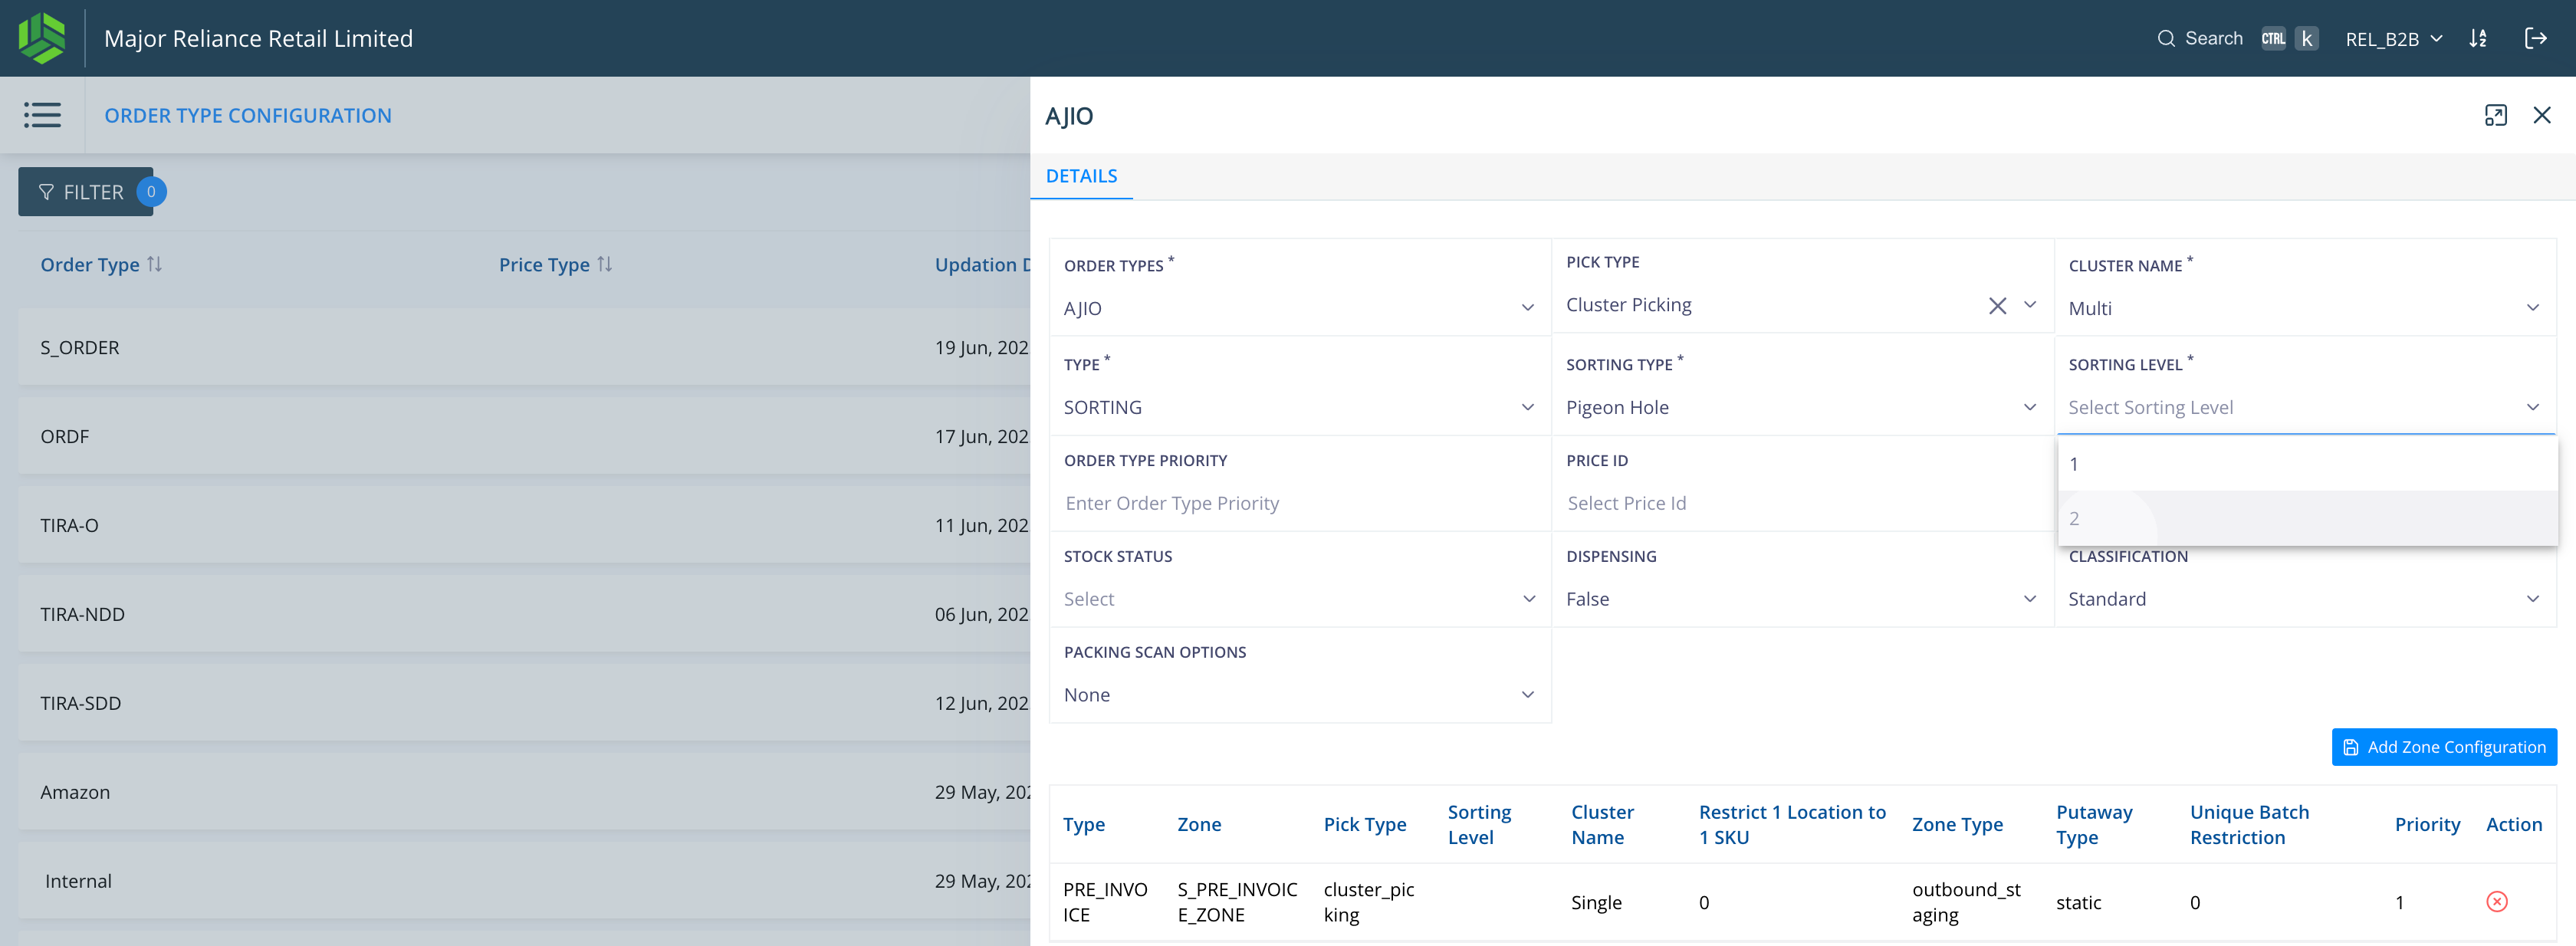
        ‒ Sorting Type: Pigeon Hole
        ‒ Sorting Level: 2

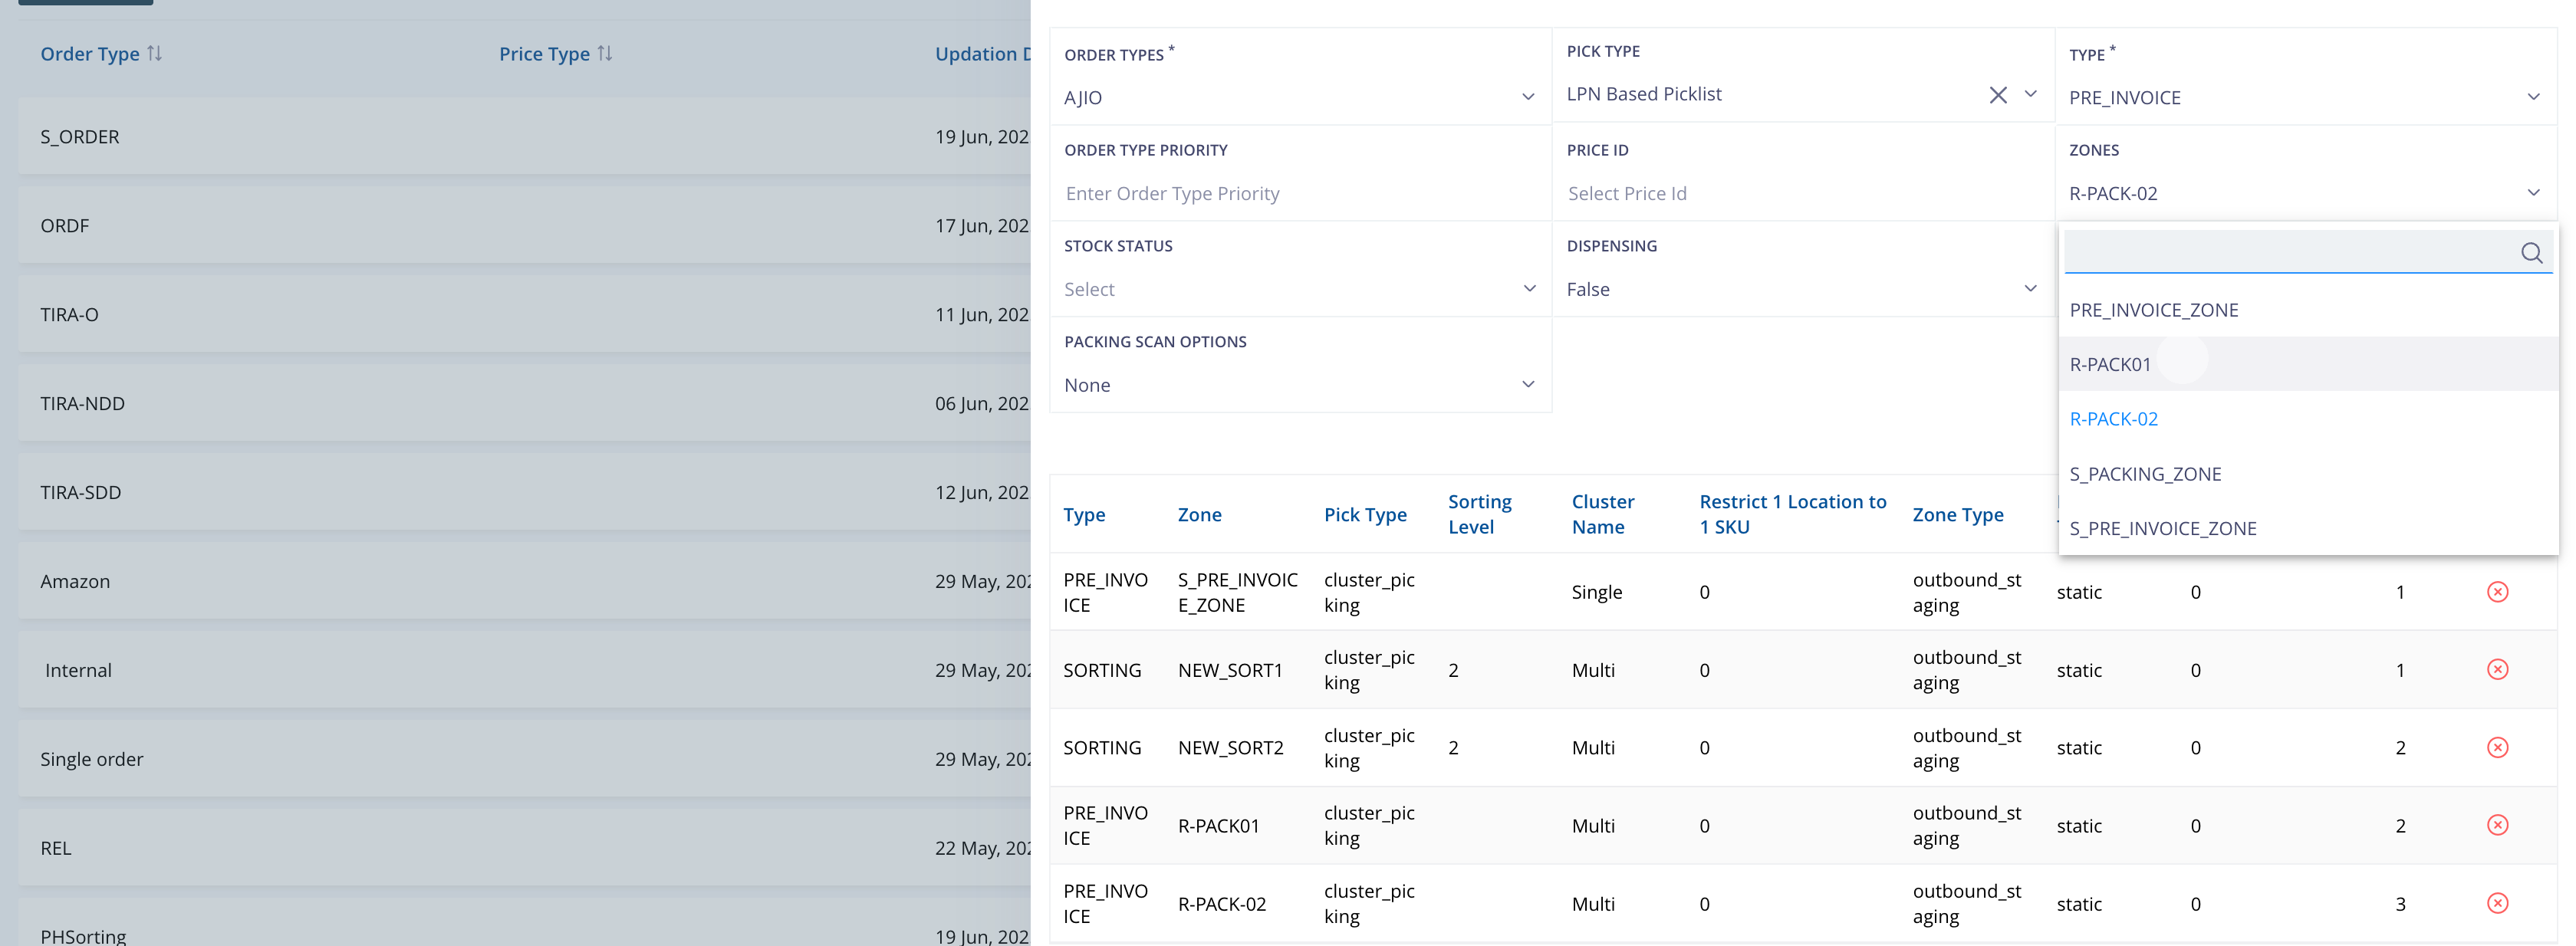
  2.2 LPN Based Picklist
    a. Used for:
      i. High-priority orders
      ii. Cancelled picklists
      iii. Line-item cancellations at QC

    b. Routed directly to PRE_INVOICE zones (sorting skipped)

3. Zone Mapping

  3.1 Transaction to Zone Mapping
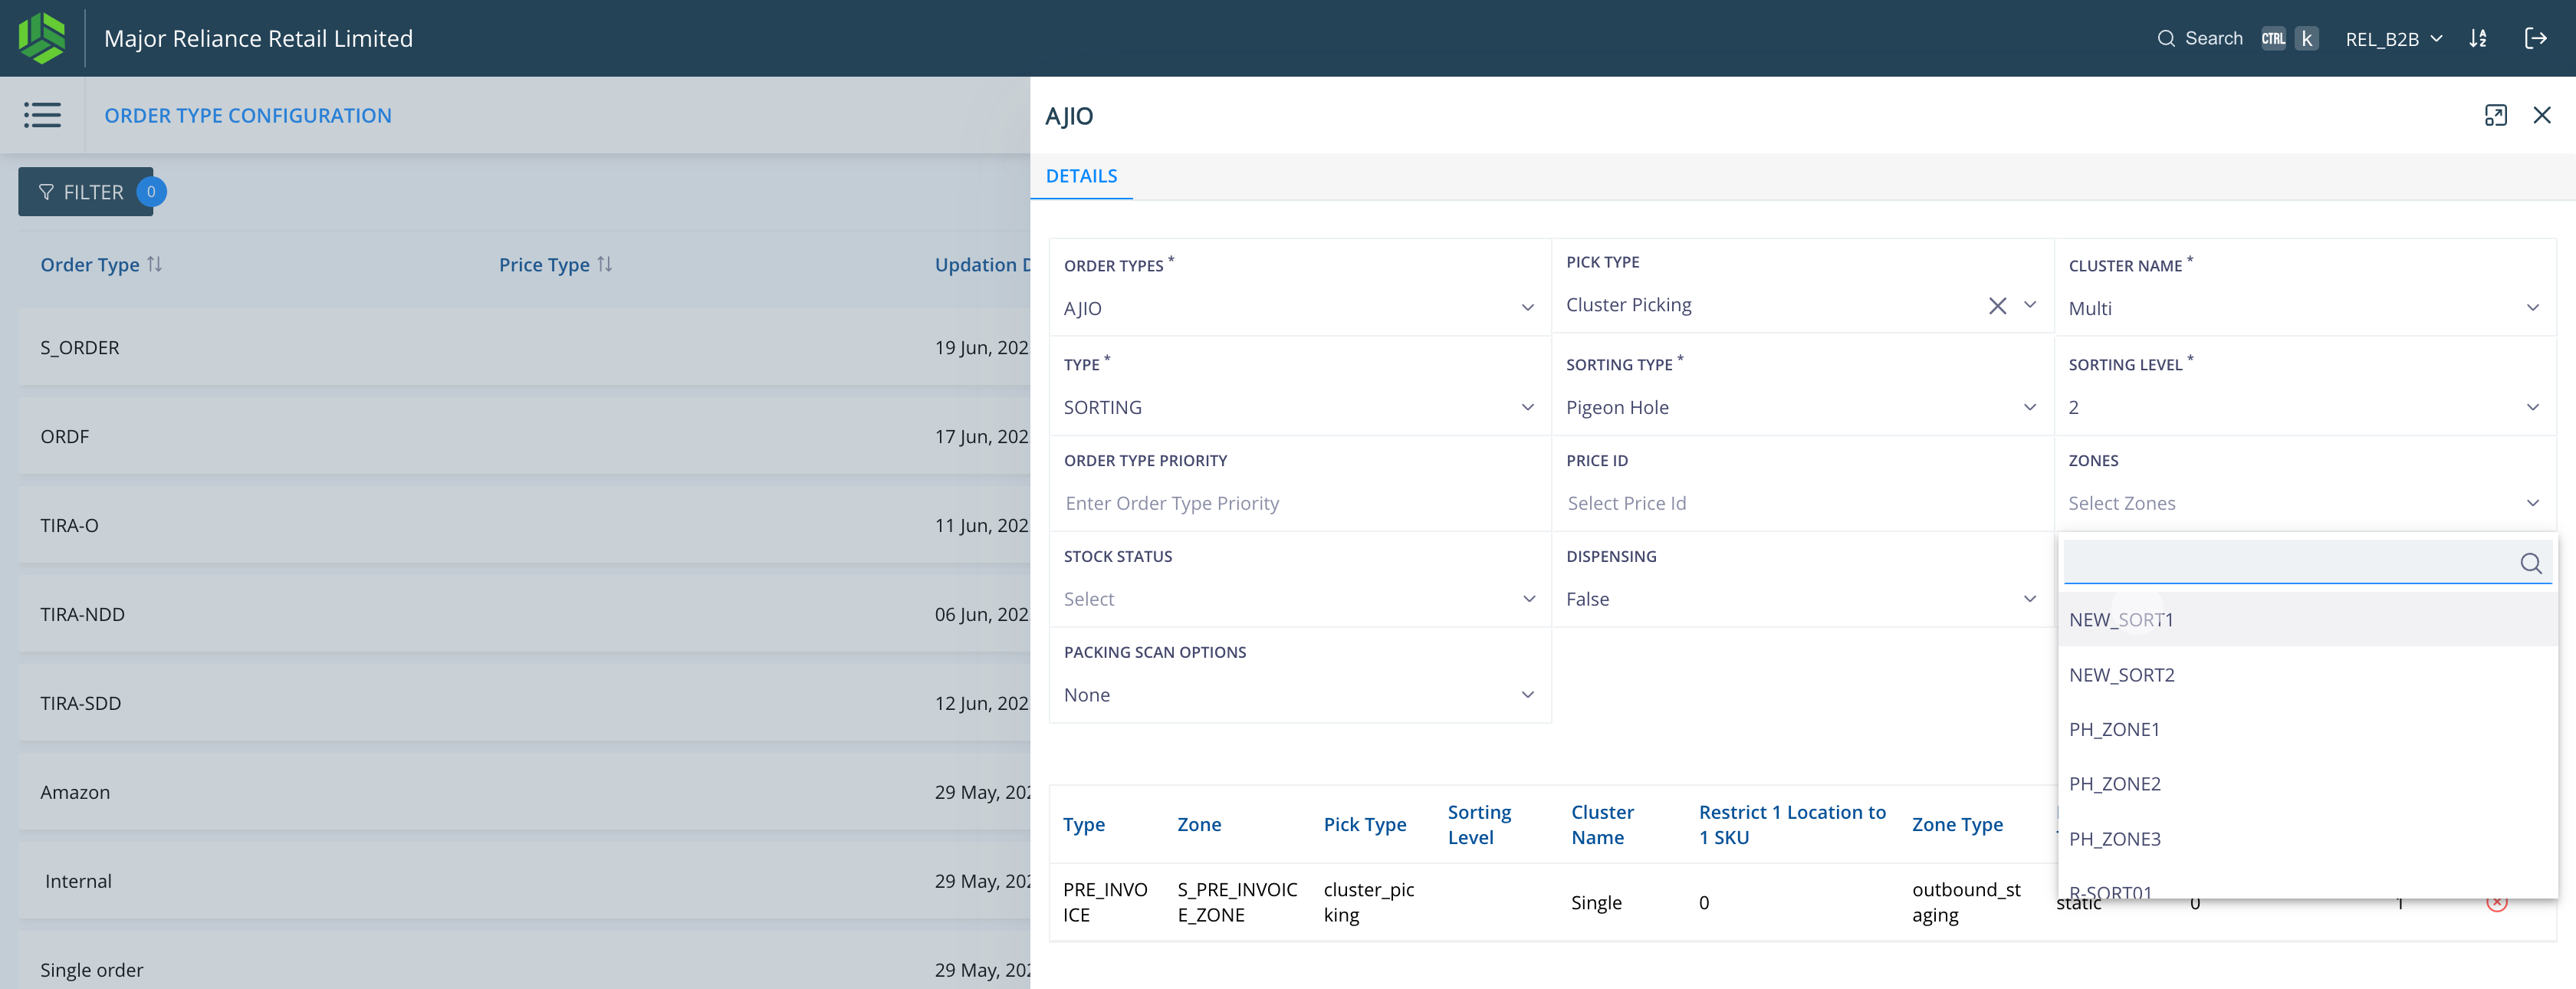
    a. SORTING β†’ Sorting Zones (for Multi Cluster only)
    b. PRE_INVOICE β†’ Invoicing Zones (used across all pick types)

  3.2 Zone Priority
    a. Add zones one at a time
    b. The first zone added gets higher priority by default, or can add zone priority while adding Zone Configuration

  3.3 Save Configuration
    a. Click Save after all zone mappings are added
    b. ⚠️ Mappings are not applied unless saved
    c. Zones can be updated or added later and saved again


1
Navigate to Masters
Step #1: Navigate to Masters
2
Choose Order Type Configuration
Step #2: Choose Order Type Configuration
3
Click on "New Order Type"
Step #3: Click on "New Order Type"
4
Click on ORDER TYPES drop down and select the order type to be configured.
Step #4: Click on ORDER TYPES drop down and select the order type to be configured.
5
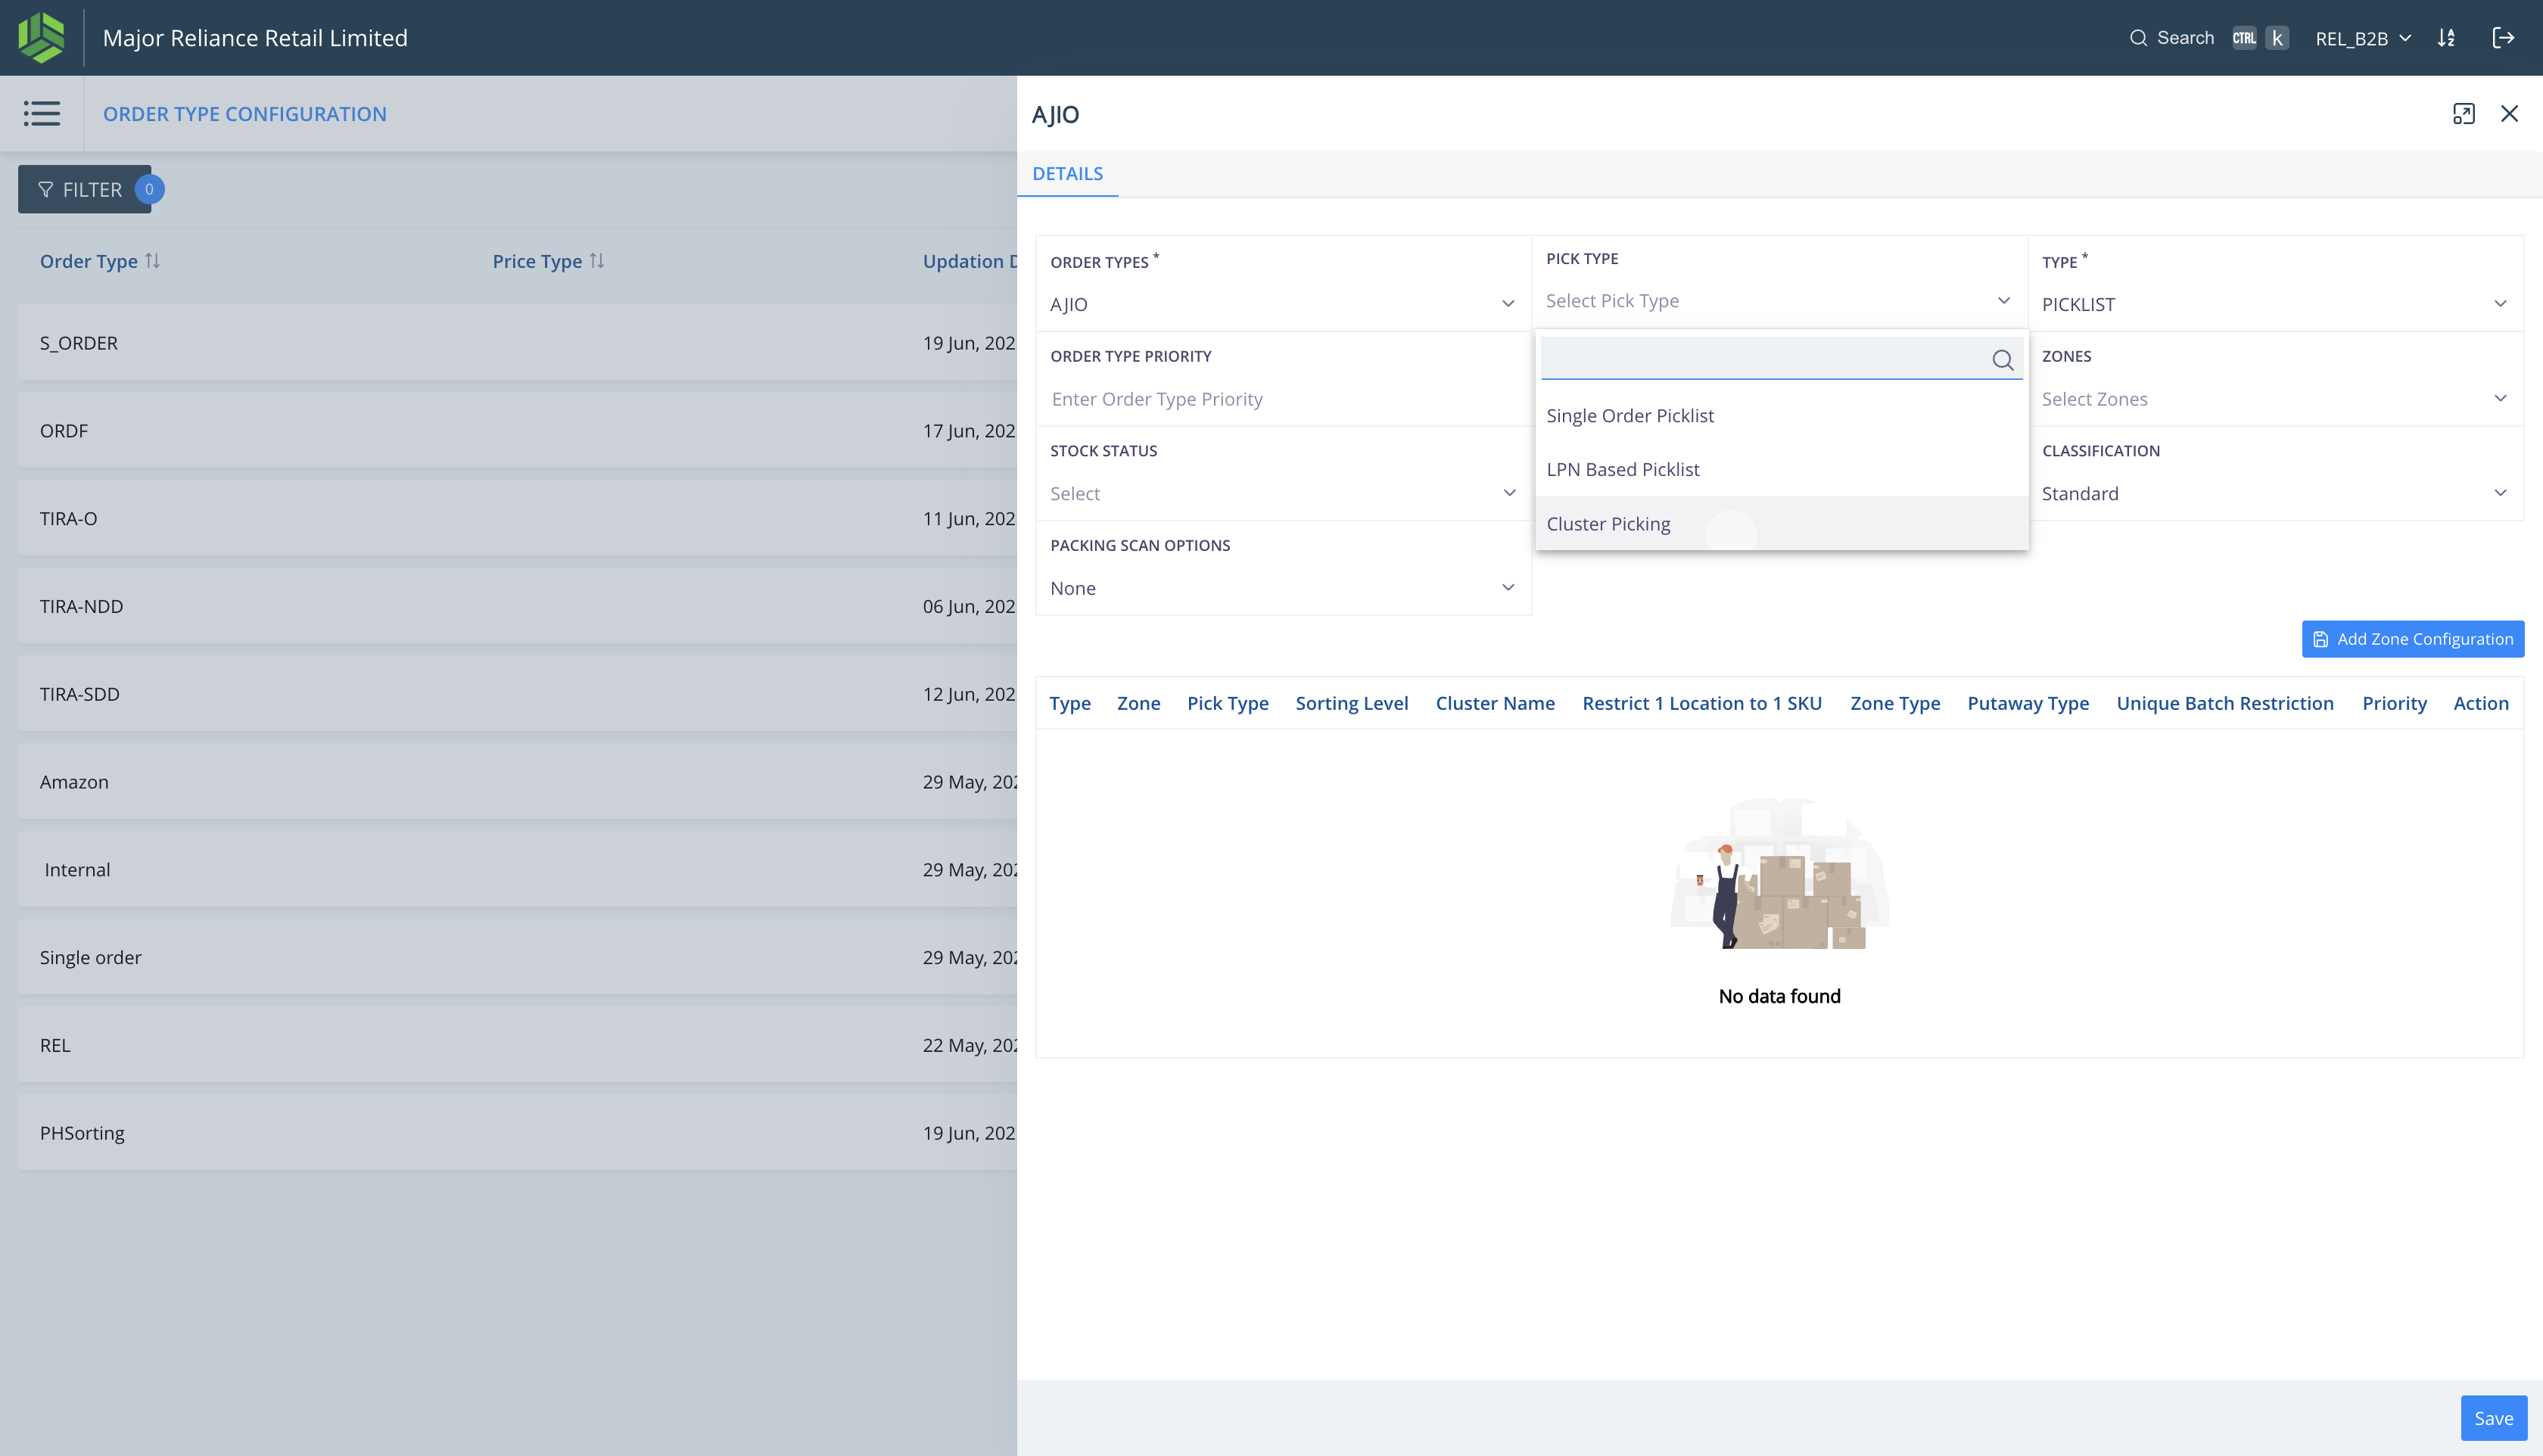
Click on PICK TYPE. Select the pick type as Cluster Picking.
Step #5: Click on PICK TYPE. Select the pick type as Cluster Picking.
6
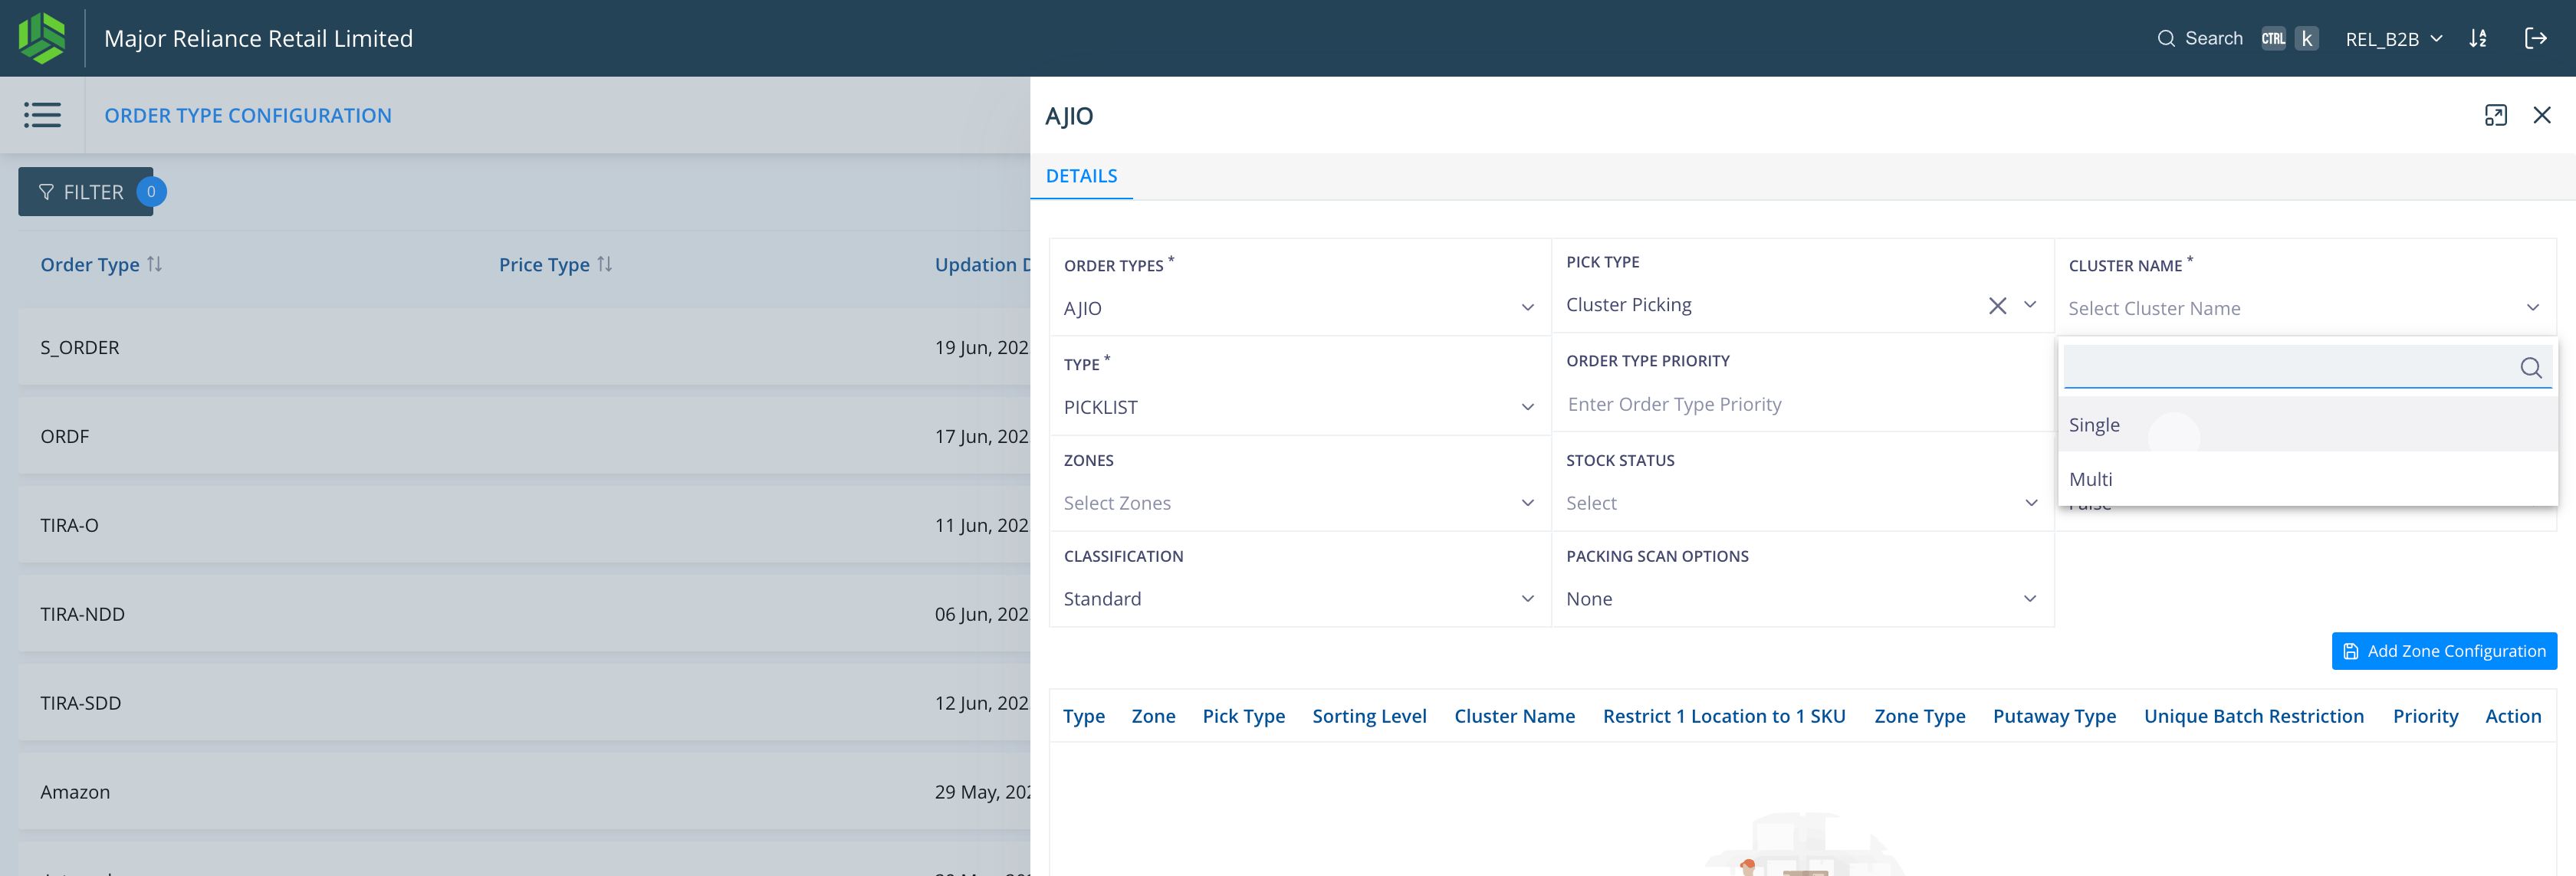
Click on CLUSTER NAME. These are the clusters defined at cluster configs.Select Single cluster ( Defined for single order quantity).
Step #6: Click on CLUSTER NAME. These are the clusters defined at cluster configs.Select Single cluster ( Defined for single order quantity).

Since Single cluster picklists will directly be dropped to PRE_INVOICE stage, we configure only PRE_INVOICE for this cluster type.
7
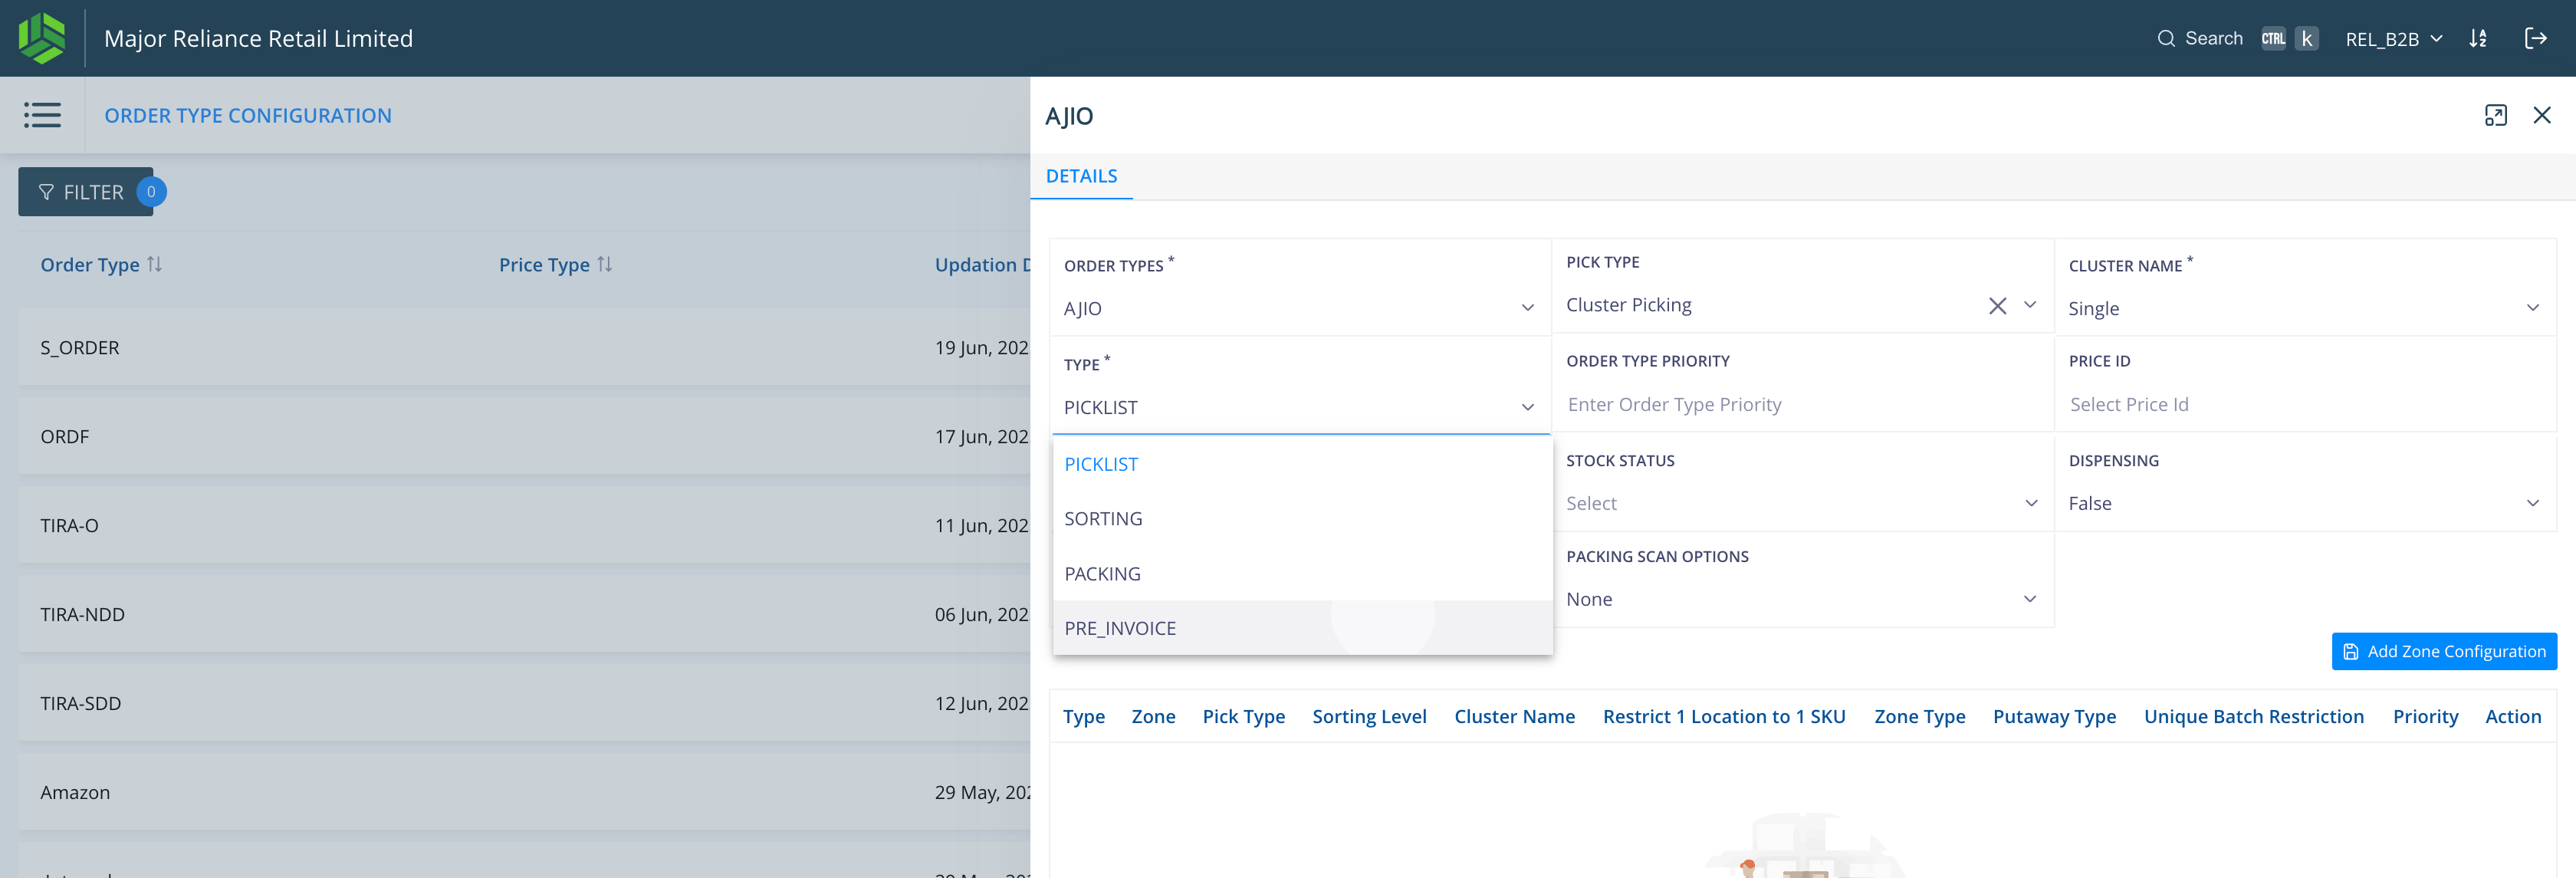
Click on TYPE which refers to transaction type - PICKLIST, SORTING, PACKING, PRE_INVOICE for which we can map Zones.
Step #7: Click on TYPE which refers to transaction type - PICKLIST, SORTING, PACKING, PRE_INVOICE for which we can map Zones.
8
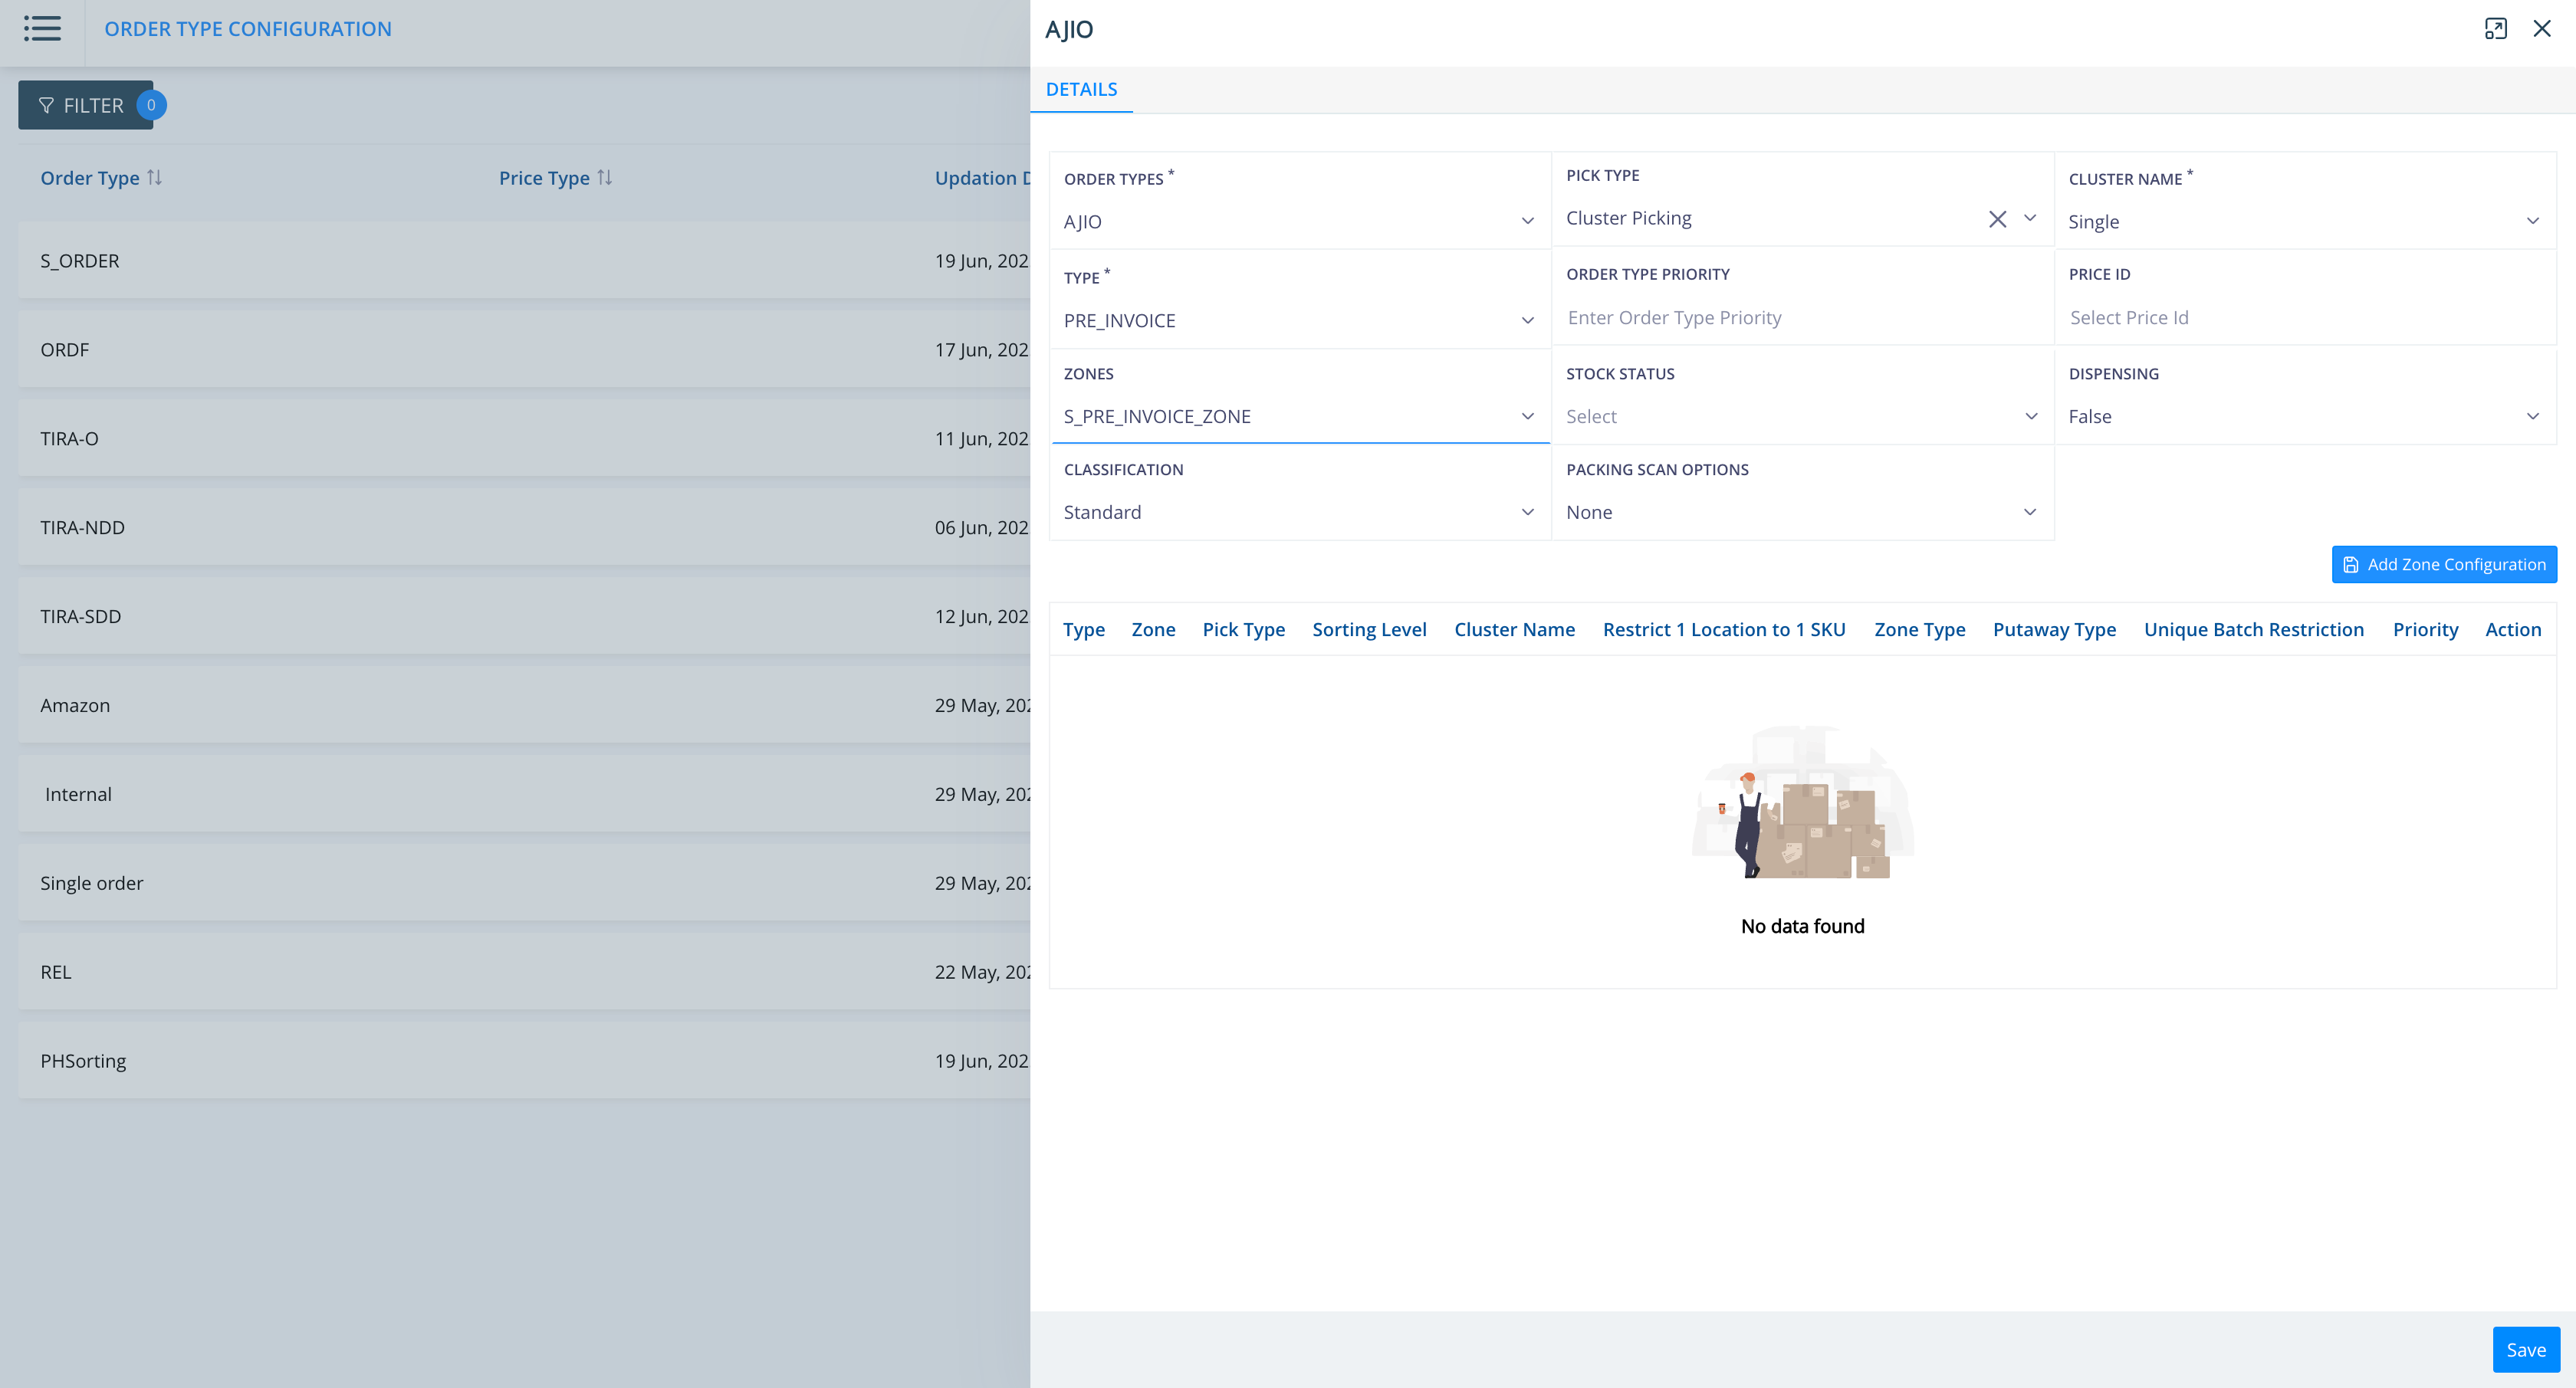
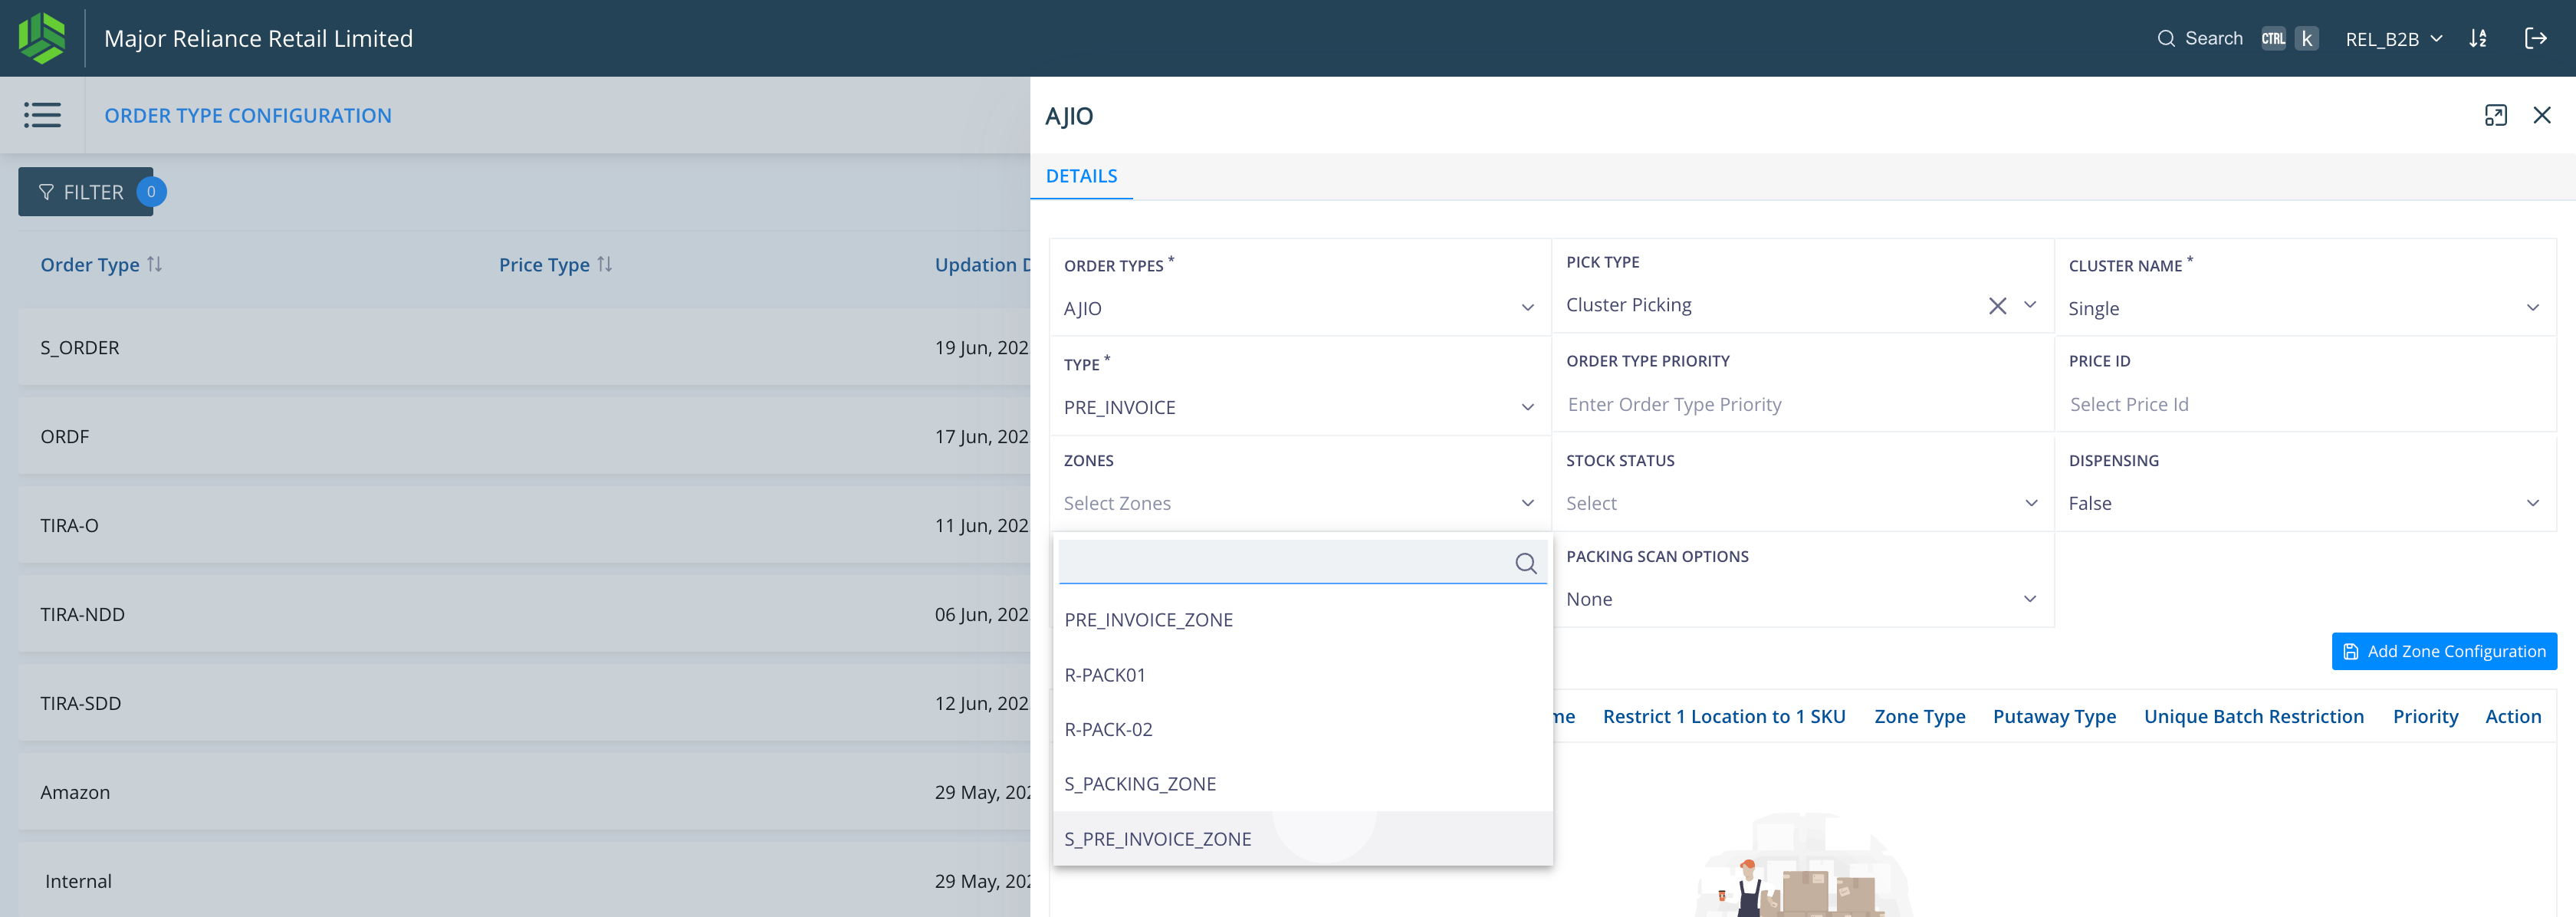
Click on ZONES to see a dropdown of all the zones available selected TYPES.
Step #8: Click on ZONES to see a dropdown of all the zones available selected TYPES.
9
Click on "Add Zone Configuration" to add this mapping to the list under this Order type.
Step #9: Click on "Add Zone Configuration" to add this mapping to the list under this Order type.

Note: The information is only saved after adding all the required mappings and clicking on Save button at the bottom.
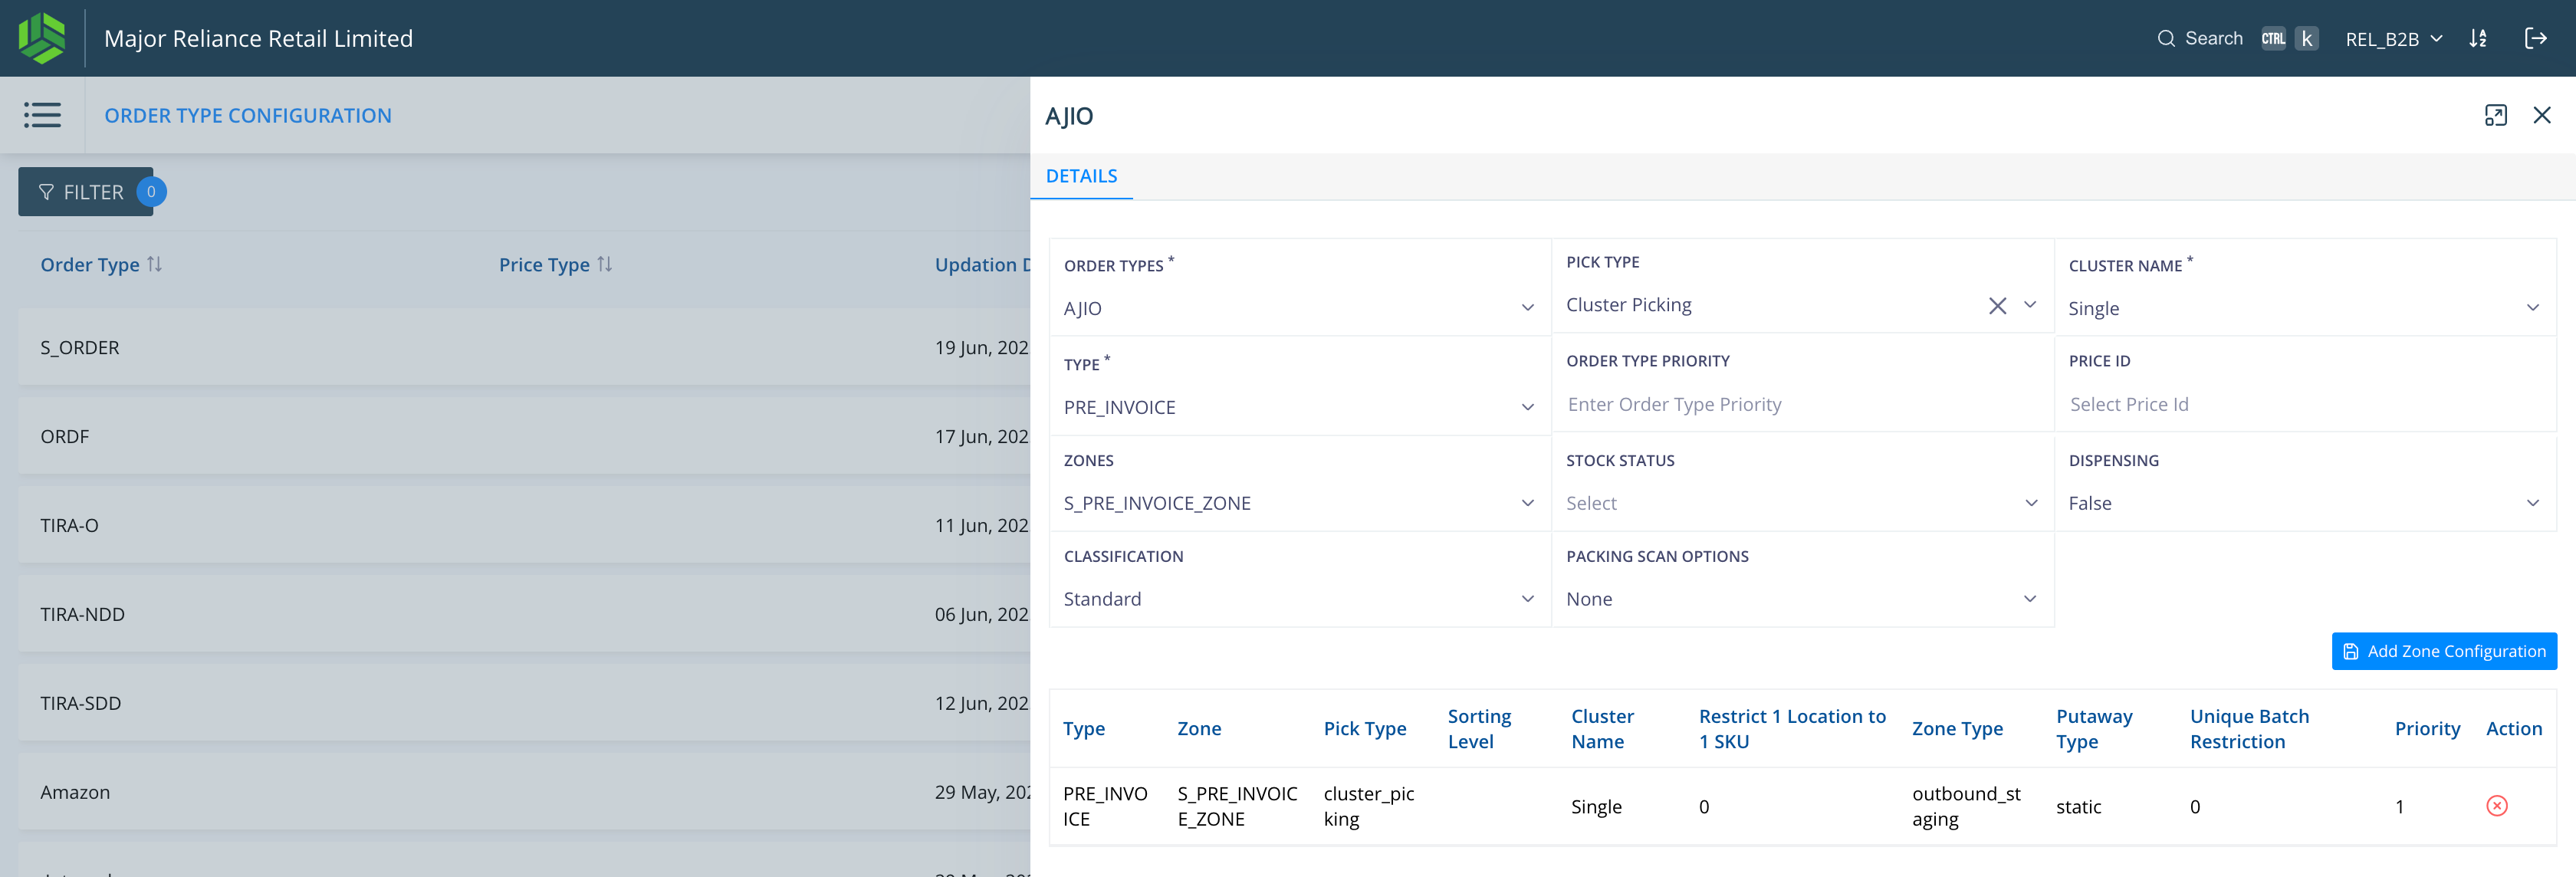
10
Change the cluster name to Multi and configure zones for SORTING and PRE_INVOICE.
Step #10: Change the cluster name to Multi and configure zones for SORTING and PRE_INVOICE.
11
Choose Multi cluster.
Step #11: Choose Multi cluster.
12
Choose SORTING from TYPE. Since Multi cluster orders go through SORTING stages, we configure SORTING zones for Multi cluster.
Step #12: Choose SORTING from TYPE. Since Multi cluster orders go through SORTING stages, we configure SORTING zones for Multi cluster.
13
Click on SORTING TYPE. Choose Pigeon Hole.
Step #13: Click on SORTING TYPE. Choose Pigeon Hole.
14
Choose SORTING LEVEL 2.
Step #14: Choose SORTING LEVEL 2.
15
The ZONES dropdown will showing sorting zones.
Step #15: The ZONES dropdown will showing sorting zones.
16
Click on "Add Zone Configuration".
Step #16: Click on "Add Zone Configuration".
17
Add more sorting ZONES by selecting each ZONE and clicking on "Add Zone Configuration".
Step #17: Add more sorting ZONES by selecting each ZONE and clicking on "Add Zone Configuration".
18
Click on "Add Zone Configuration"
Step #18: Click on "Add Zone Configuration"

Now we configure PRE_INVOICE (Invoice zones) Zones for Multi cluster.
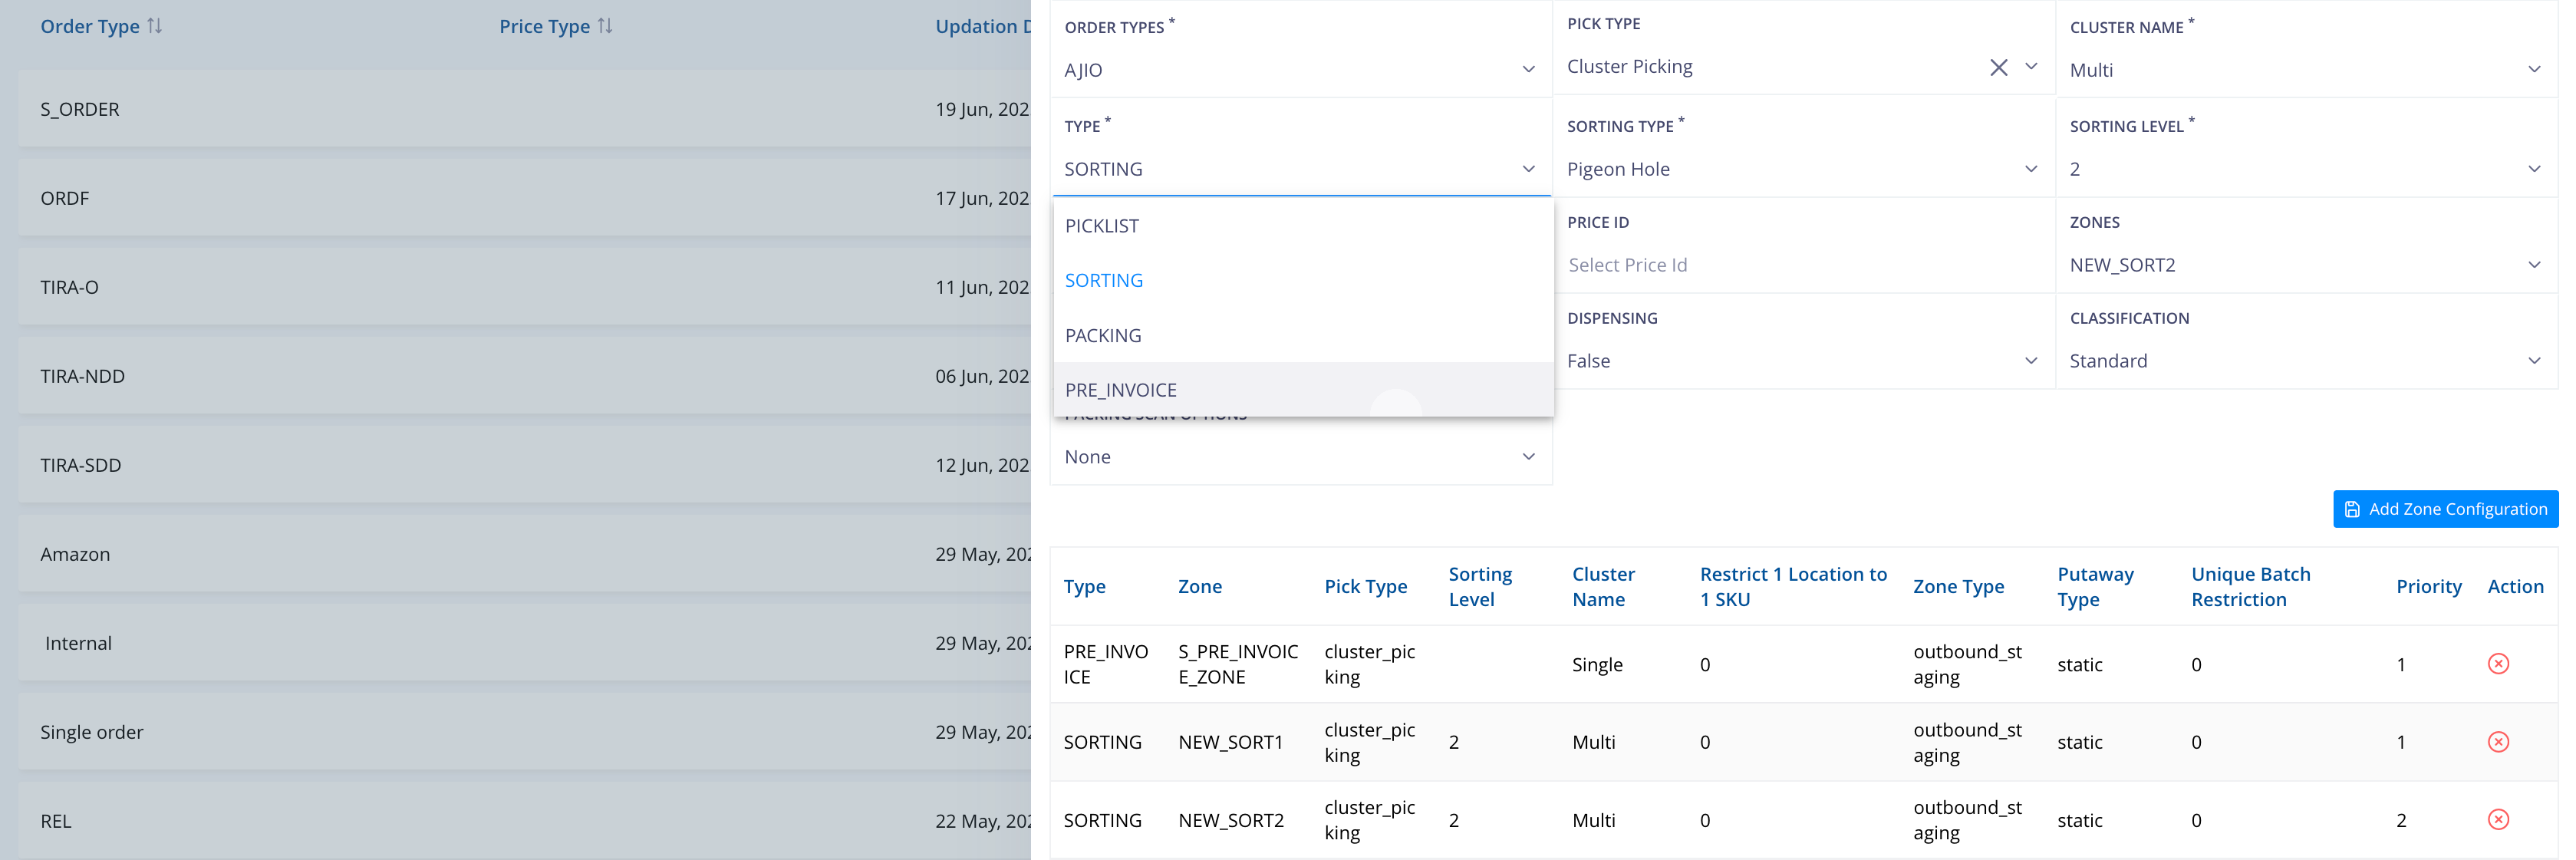
19
Choose PRE_INVOICE from TYPE.
Step #19: Choose PRE_INVOICE from TYPE.

All Zones configured as PRE_INVOICE will be listed in the dropdown.
Select each Zone in priority order for this Type, then click "Add Zone Configuration" to save.

20
Click on "Add Zone Configuration"
Step #20: Click on "Add Zone Configuration"
21
Similarly choose each Invoicing zone to be mapped for this Order Type and Picktype. Add them to the list.
Step #21: Similarly choose each Invoicing zone to be mapped for this Order Type and Picktype.  Add them to the list.
22
Click on "Add Zone Configuration"
Step #22: Click on "Add Zone Configuration"
23
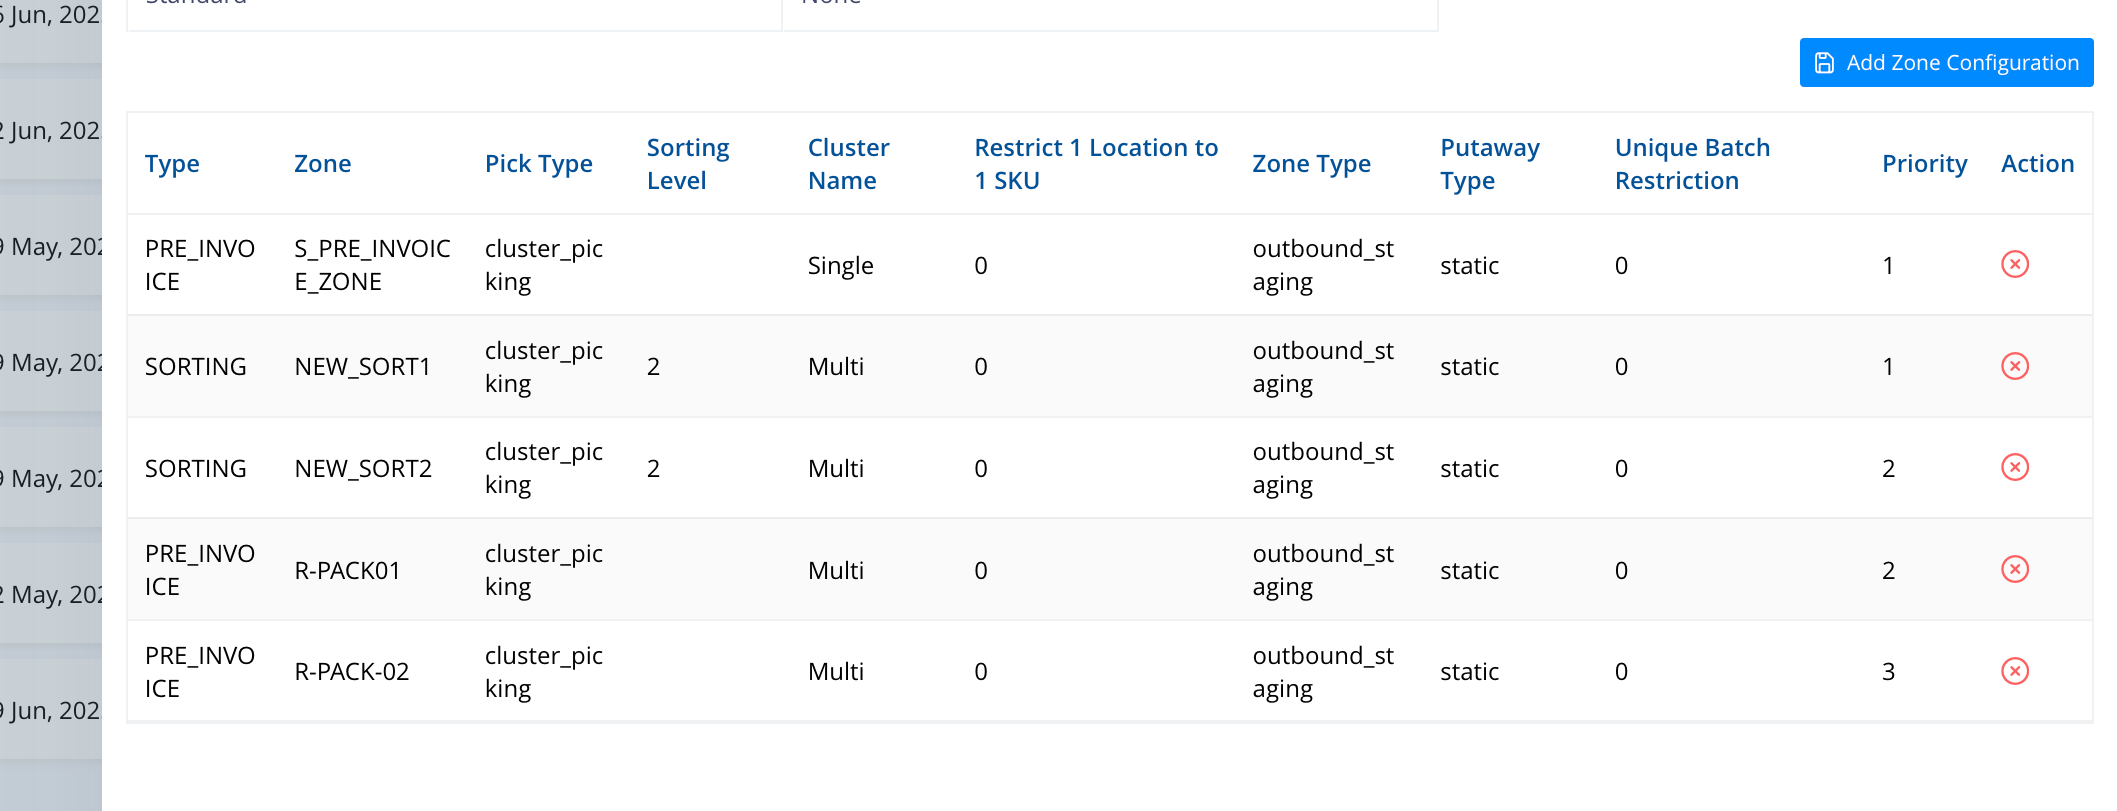
These are the Zone configurations added for Cluster Picking Pick Type.
Step #23: These are the Zone configurations added for Cluster Picking Pick Type.

For the same Order type but different Pick type, we can define the TYPEs and ZONES. For the prioritized or important orders, open order lines from QC LPN based picking can be defined without SORTING ZONES.

24
Choose PICK TYPE as LPN Based Picklist.
Step #24: Choose PICK TYPE as LPN Based Picklist.
25
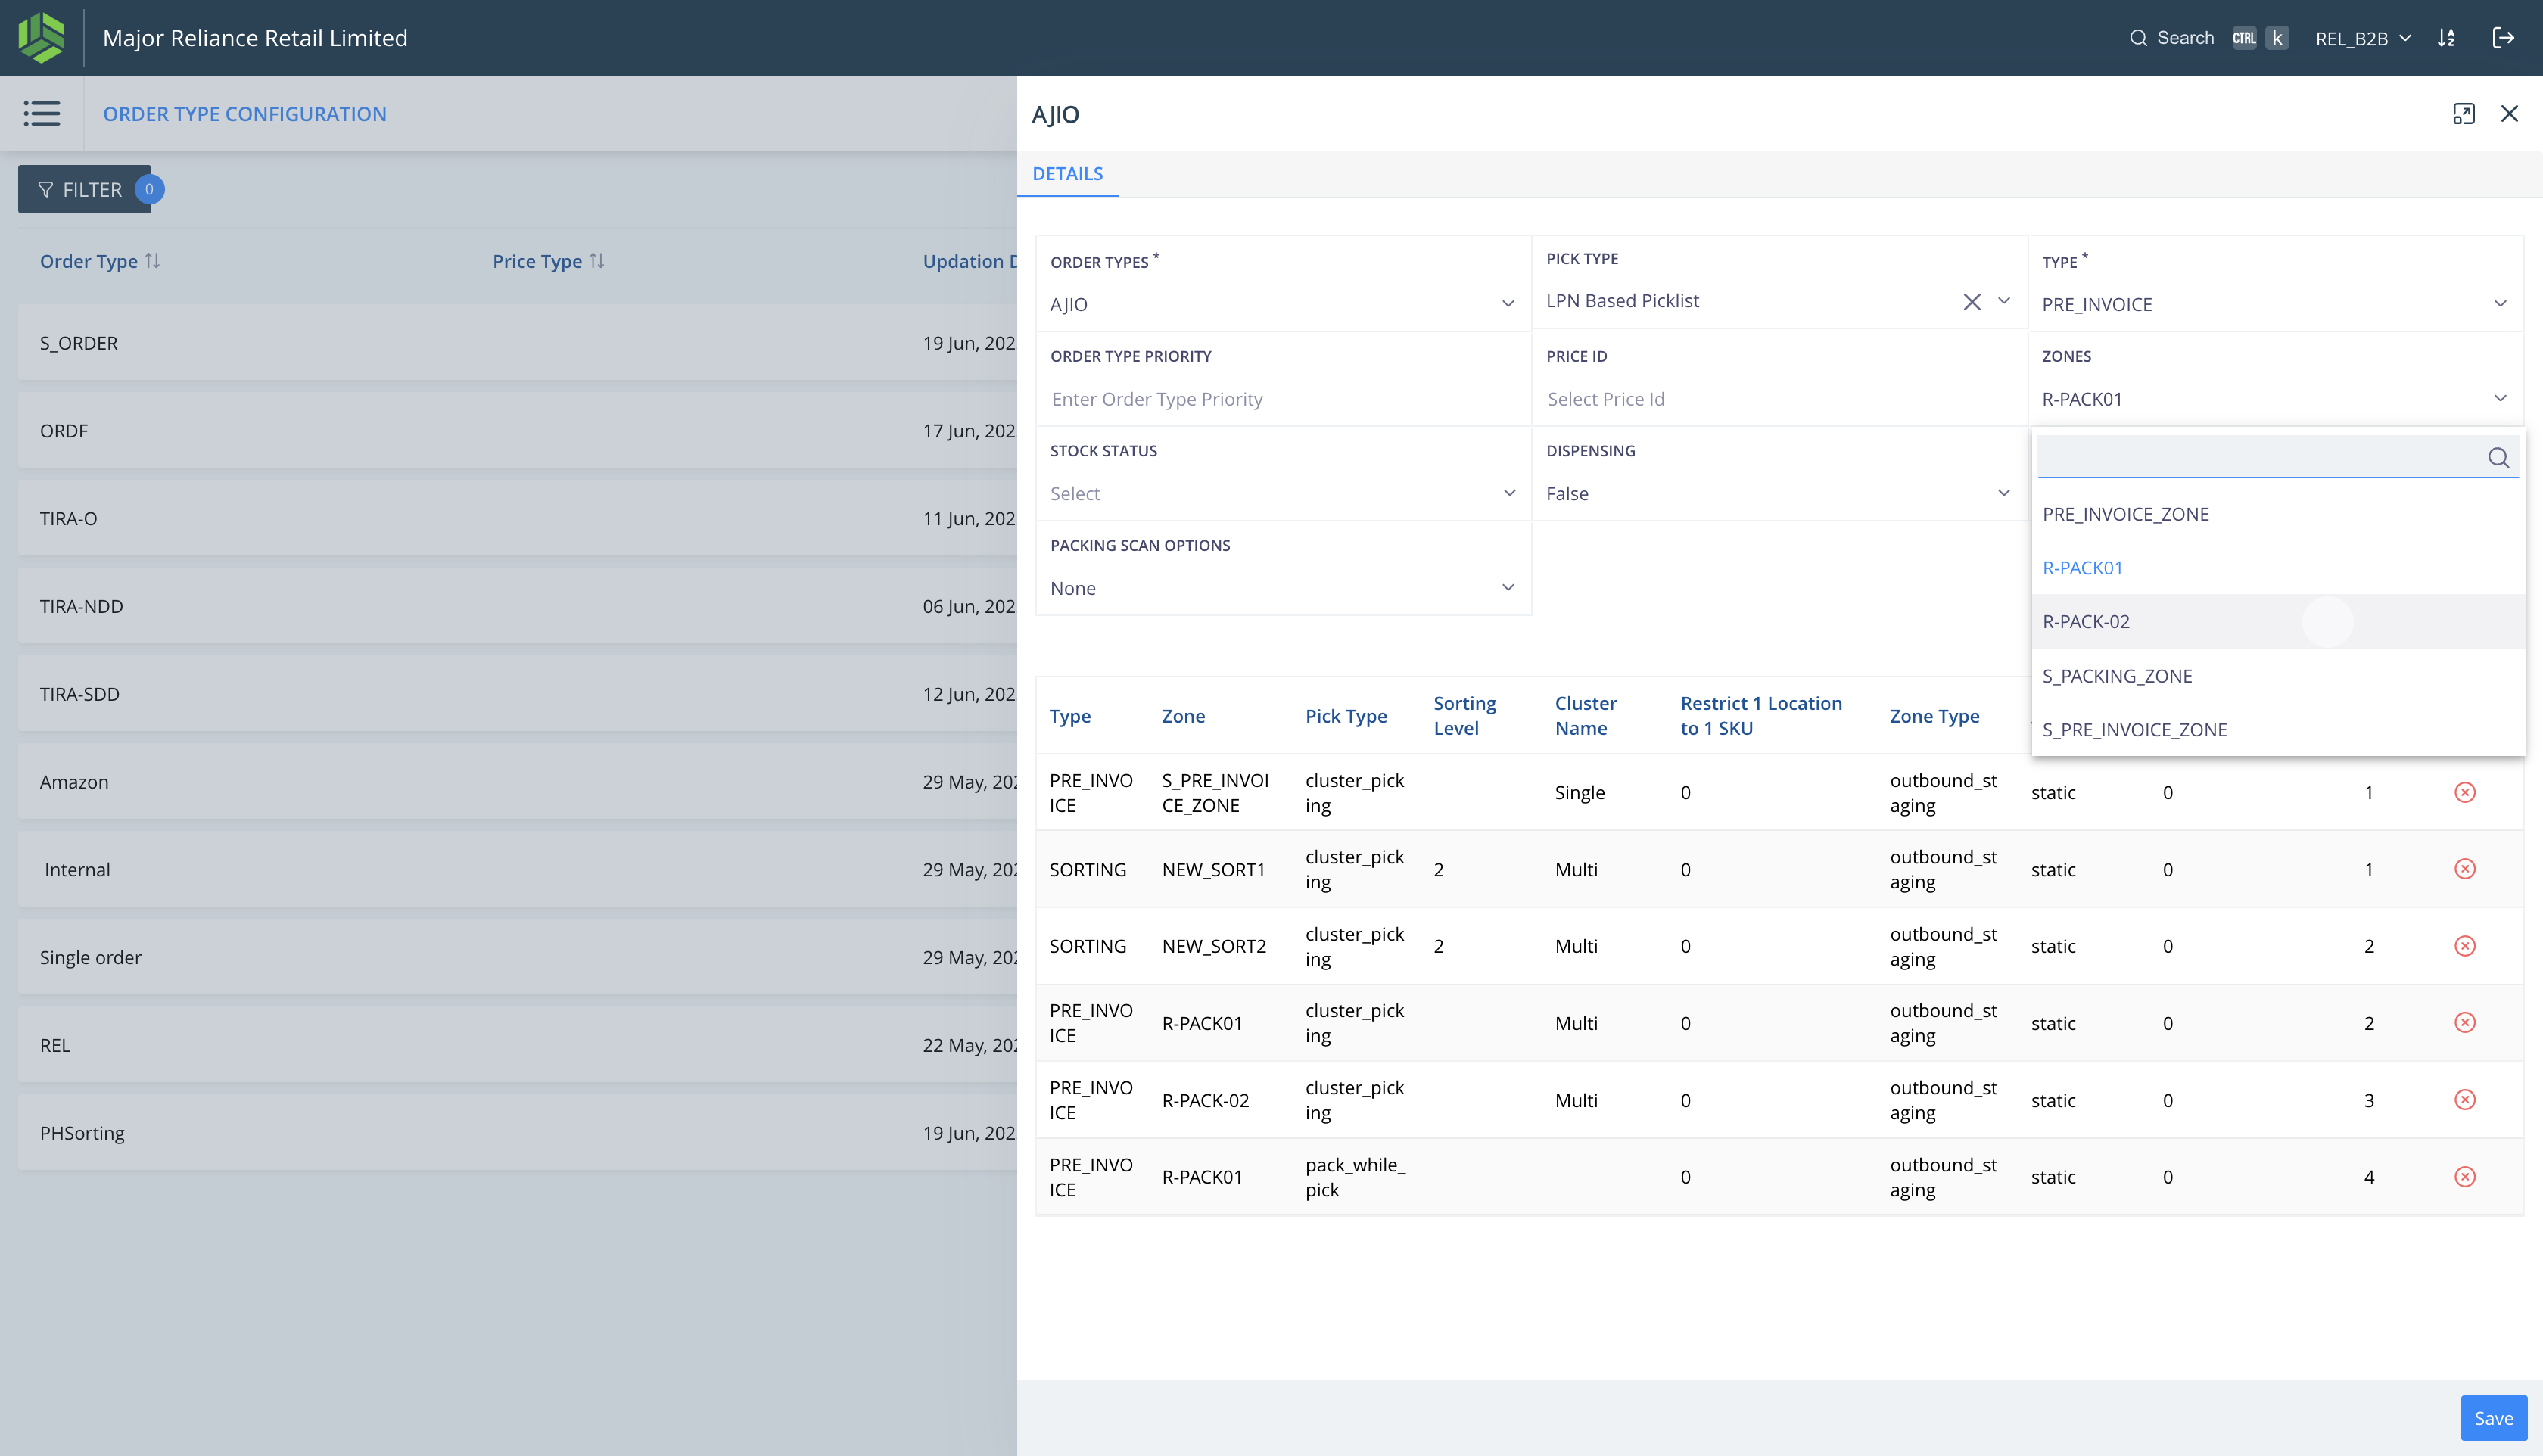
Choose the TYPE as "PRE_INVOICE".
Step #25: Choose the TYPE as "PRE_INVOICE".
26
Choose each zone priority wise and click on Add Zone Configuration.
Step #26: Choose each zone priority wise and click on Add Zone Configuration.
27
Click on "Add Zone Configuration"
Step #27: Click on "Add Zone Configuration"
28
Click here
Step #28: Click here
29
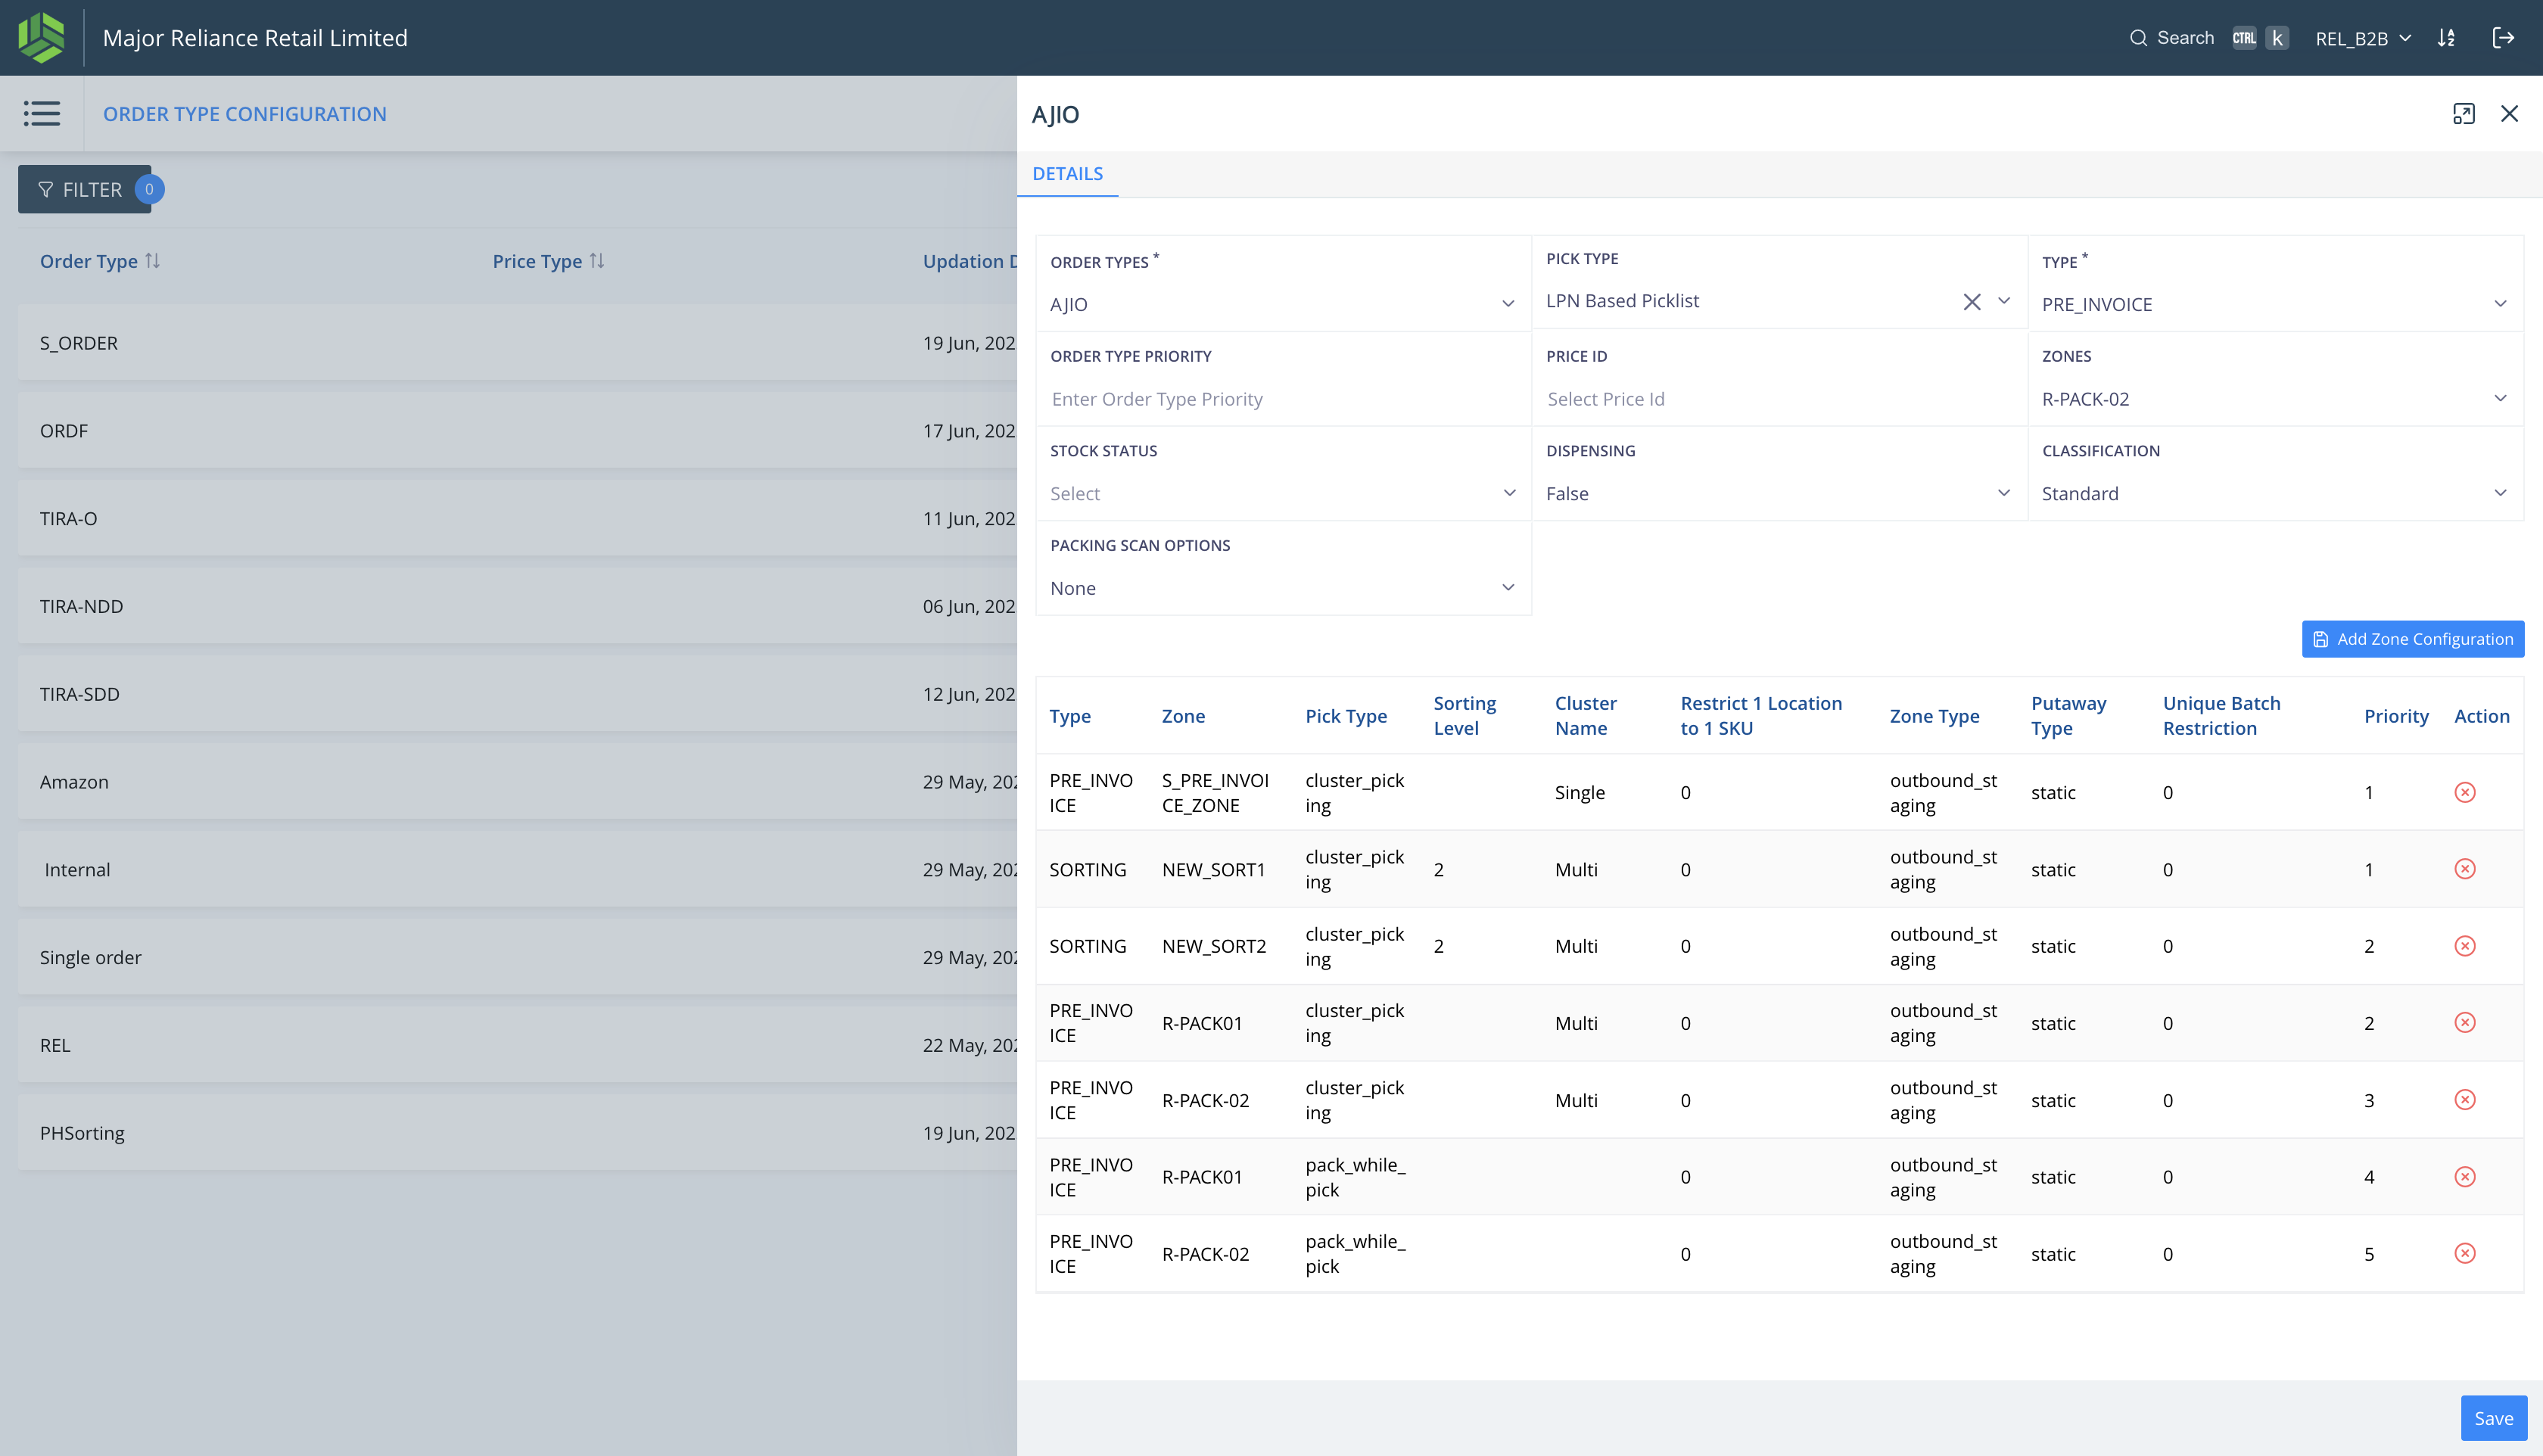
Click on "Add Zone Configuration"
Step #29: Click on "Add Zone Configuration"
30
Click on "Save" to save all the Zone configurations added to this Order type.
Step #30: Click on "Save" to save all the Zone configurations added to this Order type.
Β© LLAMA LOGISOL PVT LTD 2025. All rights reserved. This document and the WMS software described herein are proprietary products of Β© LLAMA LOGISOL PVT LTD and are protected by copyright law. No part of this document or software may be reproduced, transmitted, or used in any form or by any means without prior written permission from Β© LLAMA LOGISOL PVT LTD 2025.

TIRA : Order Type Configuration Master