Blackbaud + Google Assignments
This is a step-by-step guide to create a Blackbaud assignment that is linked to Google Assignments for near-seamless intake and grading of students' digital submissions.
By Ami Steelman
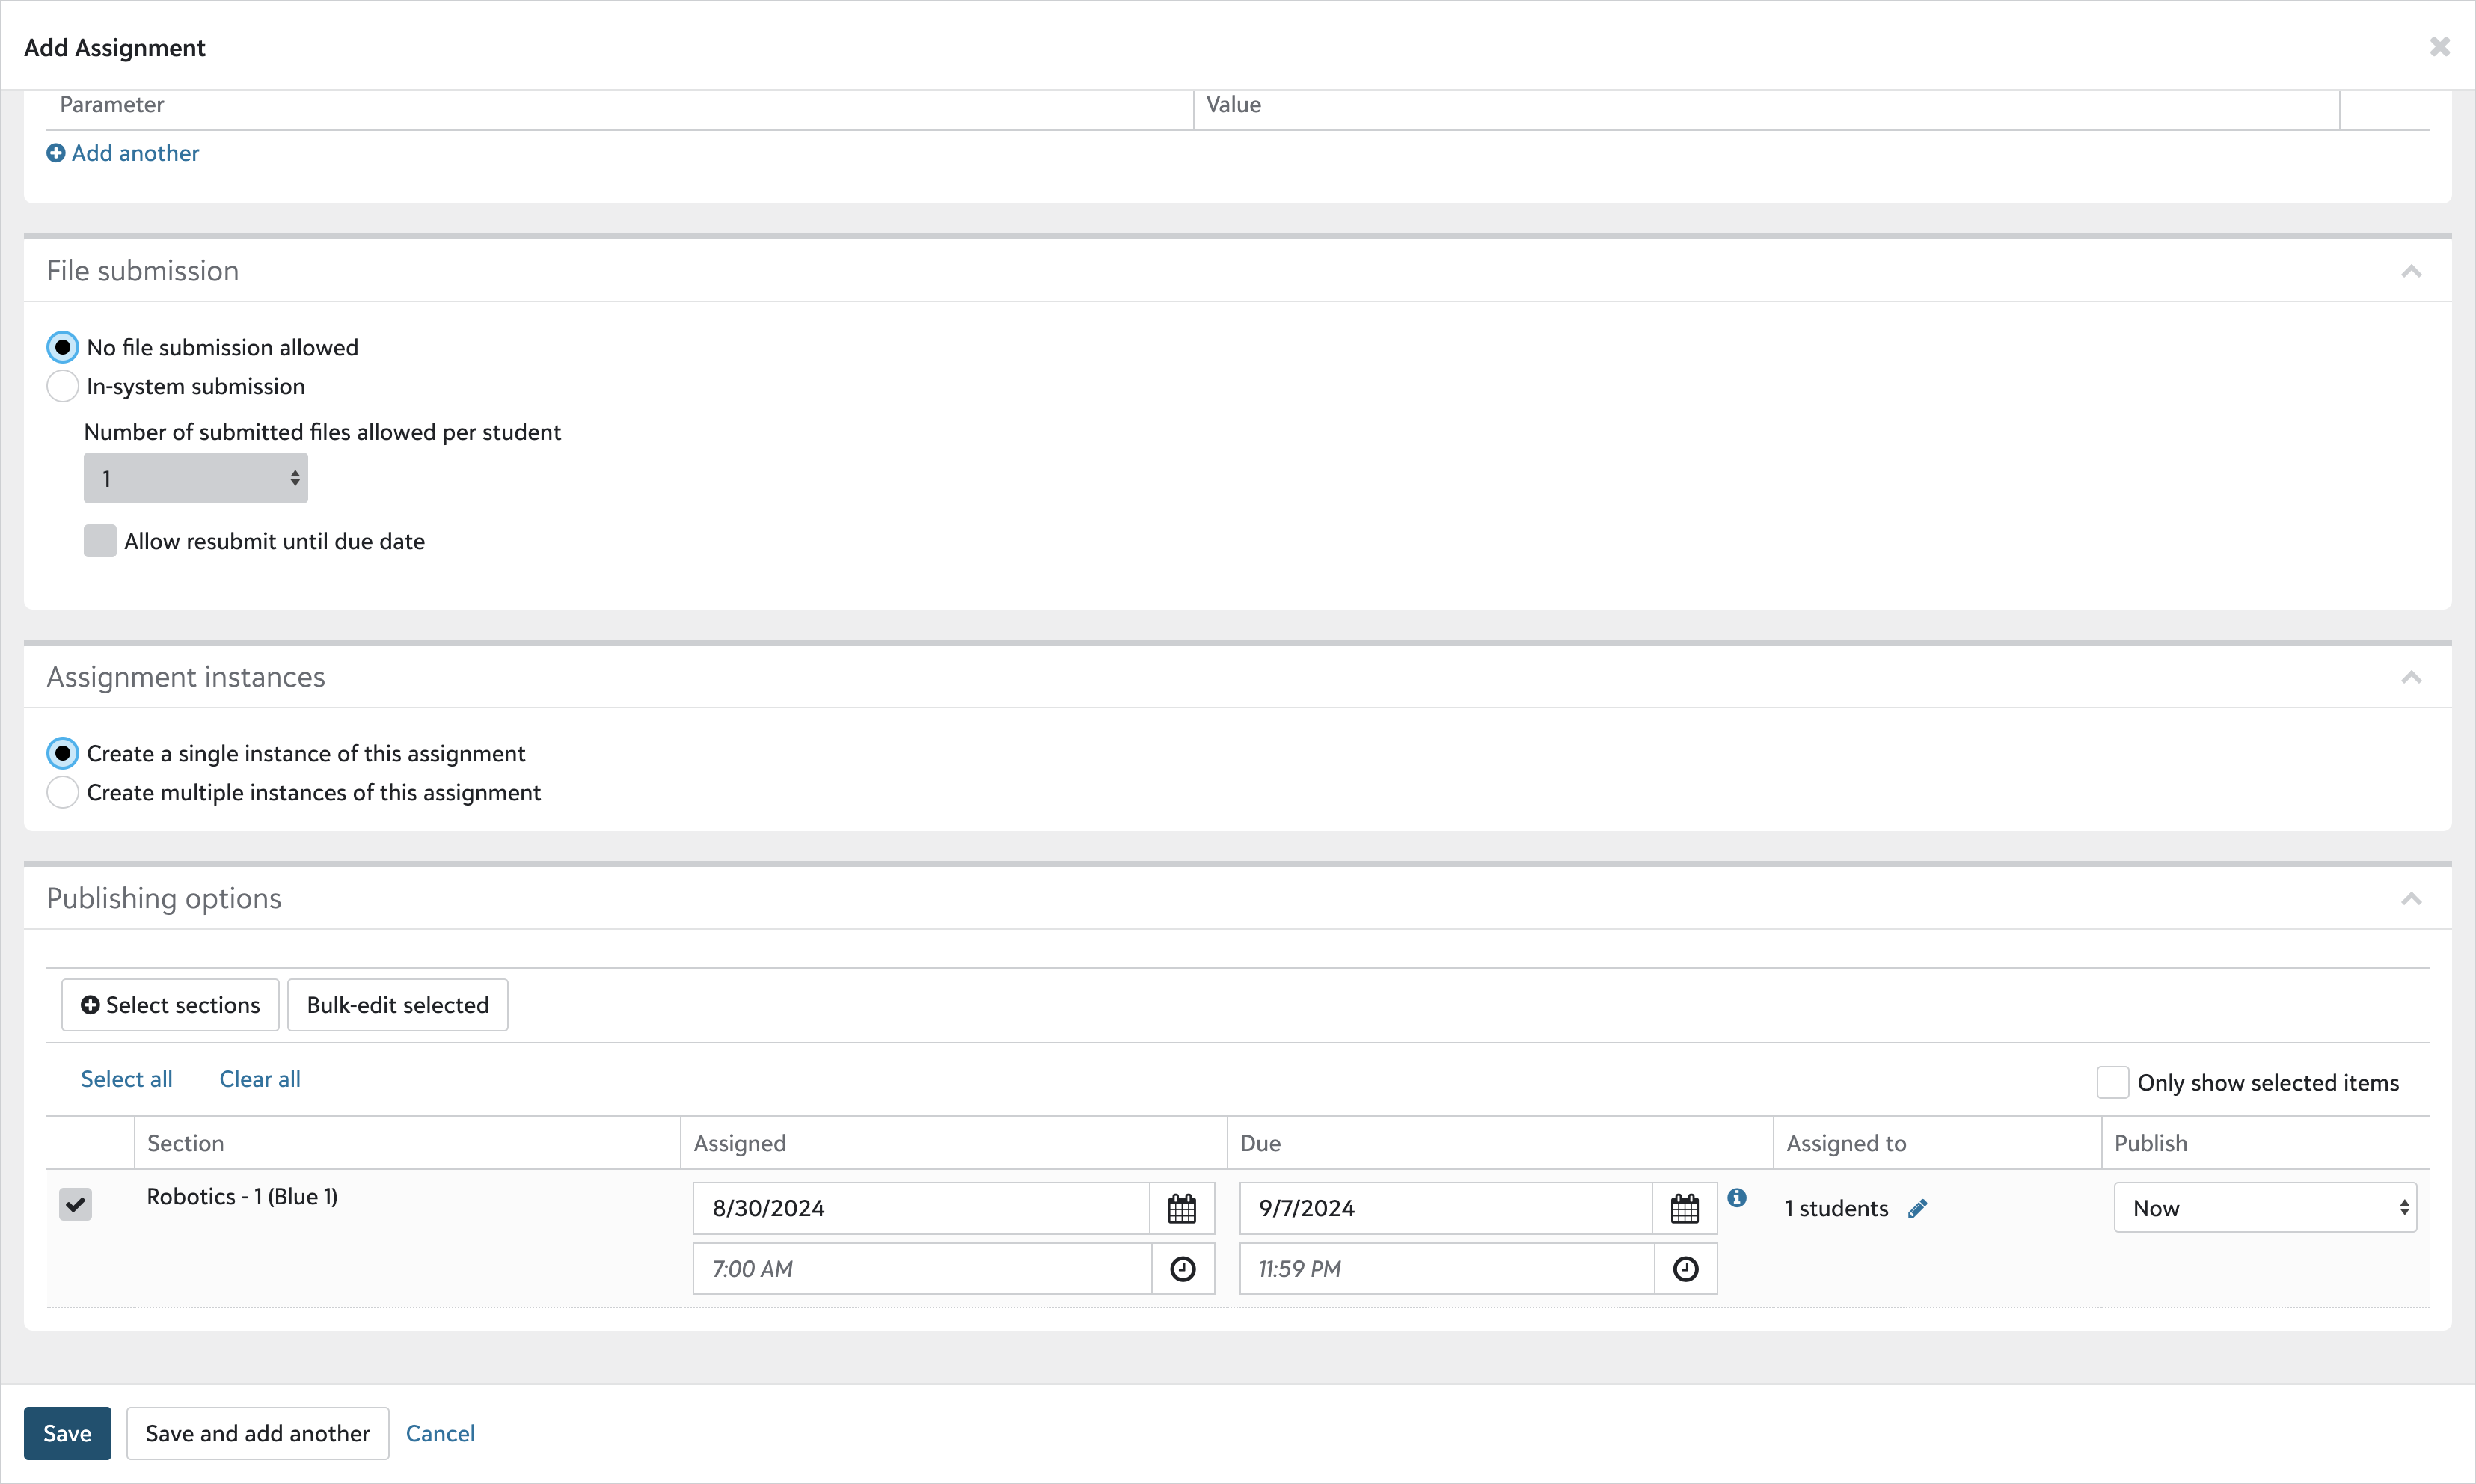
1
Create a new assignment in Blackbaud.
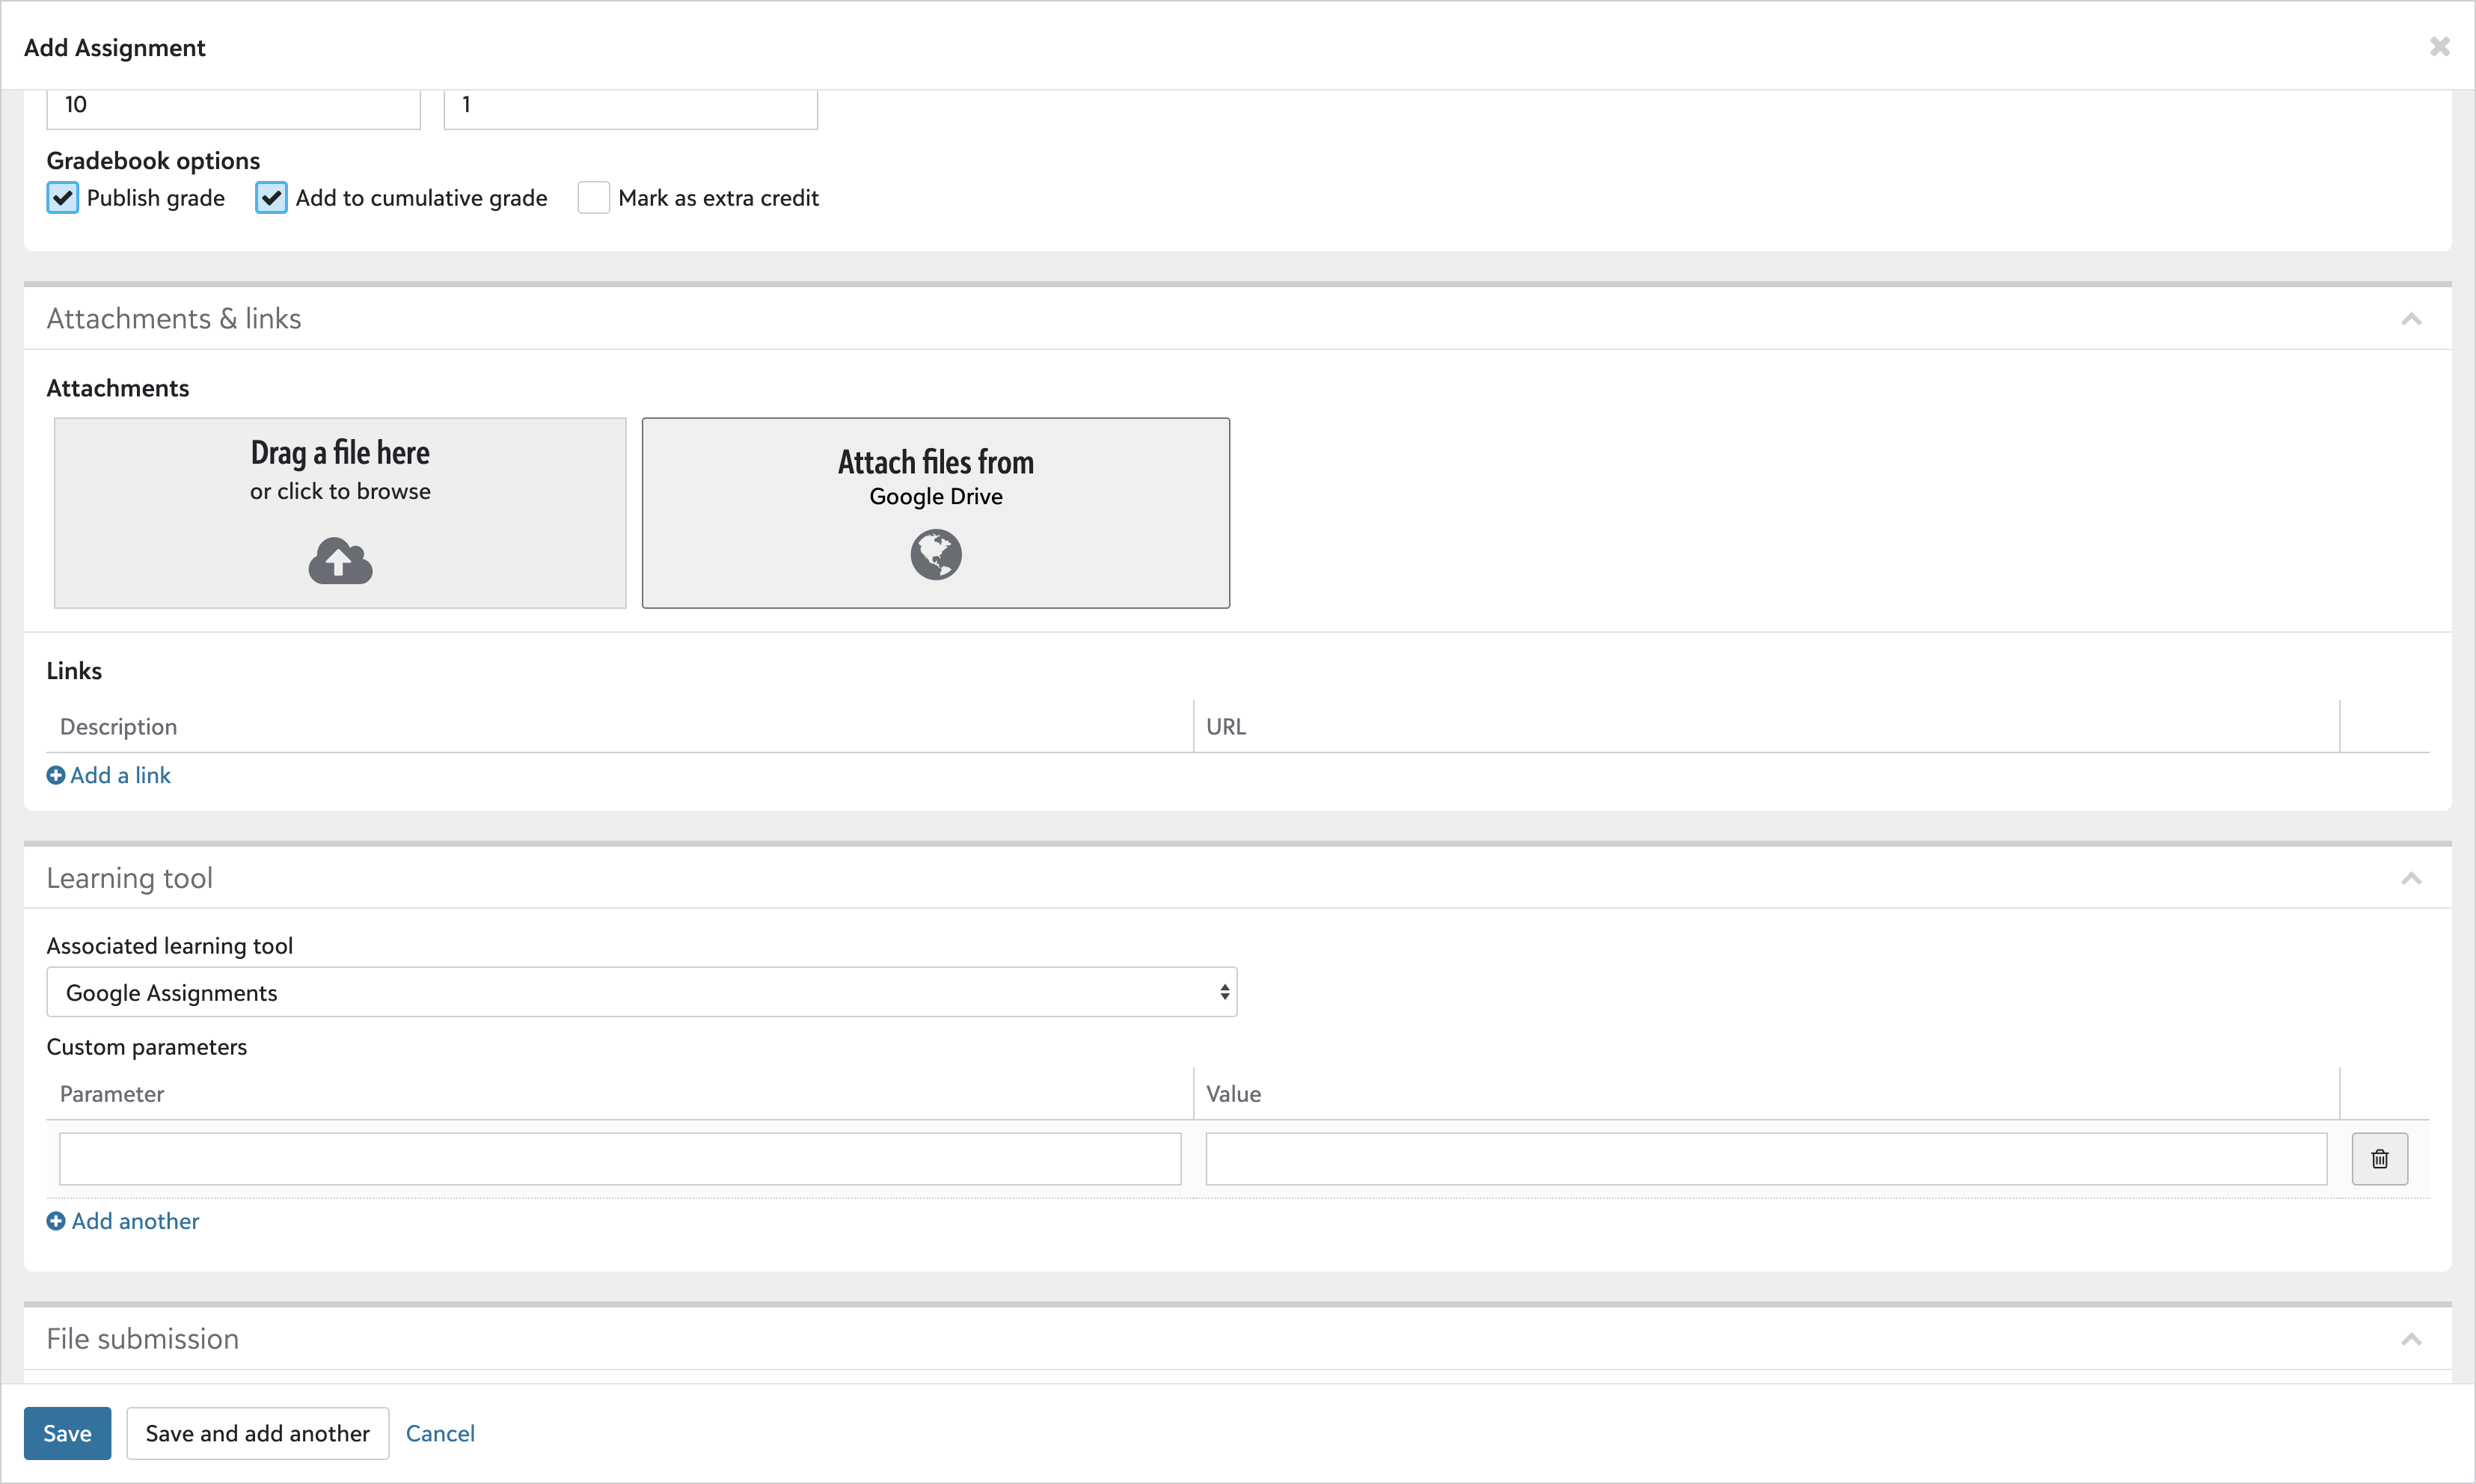
2
Under Learning Tool, select Google Assignments.
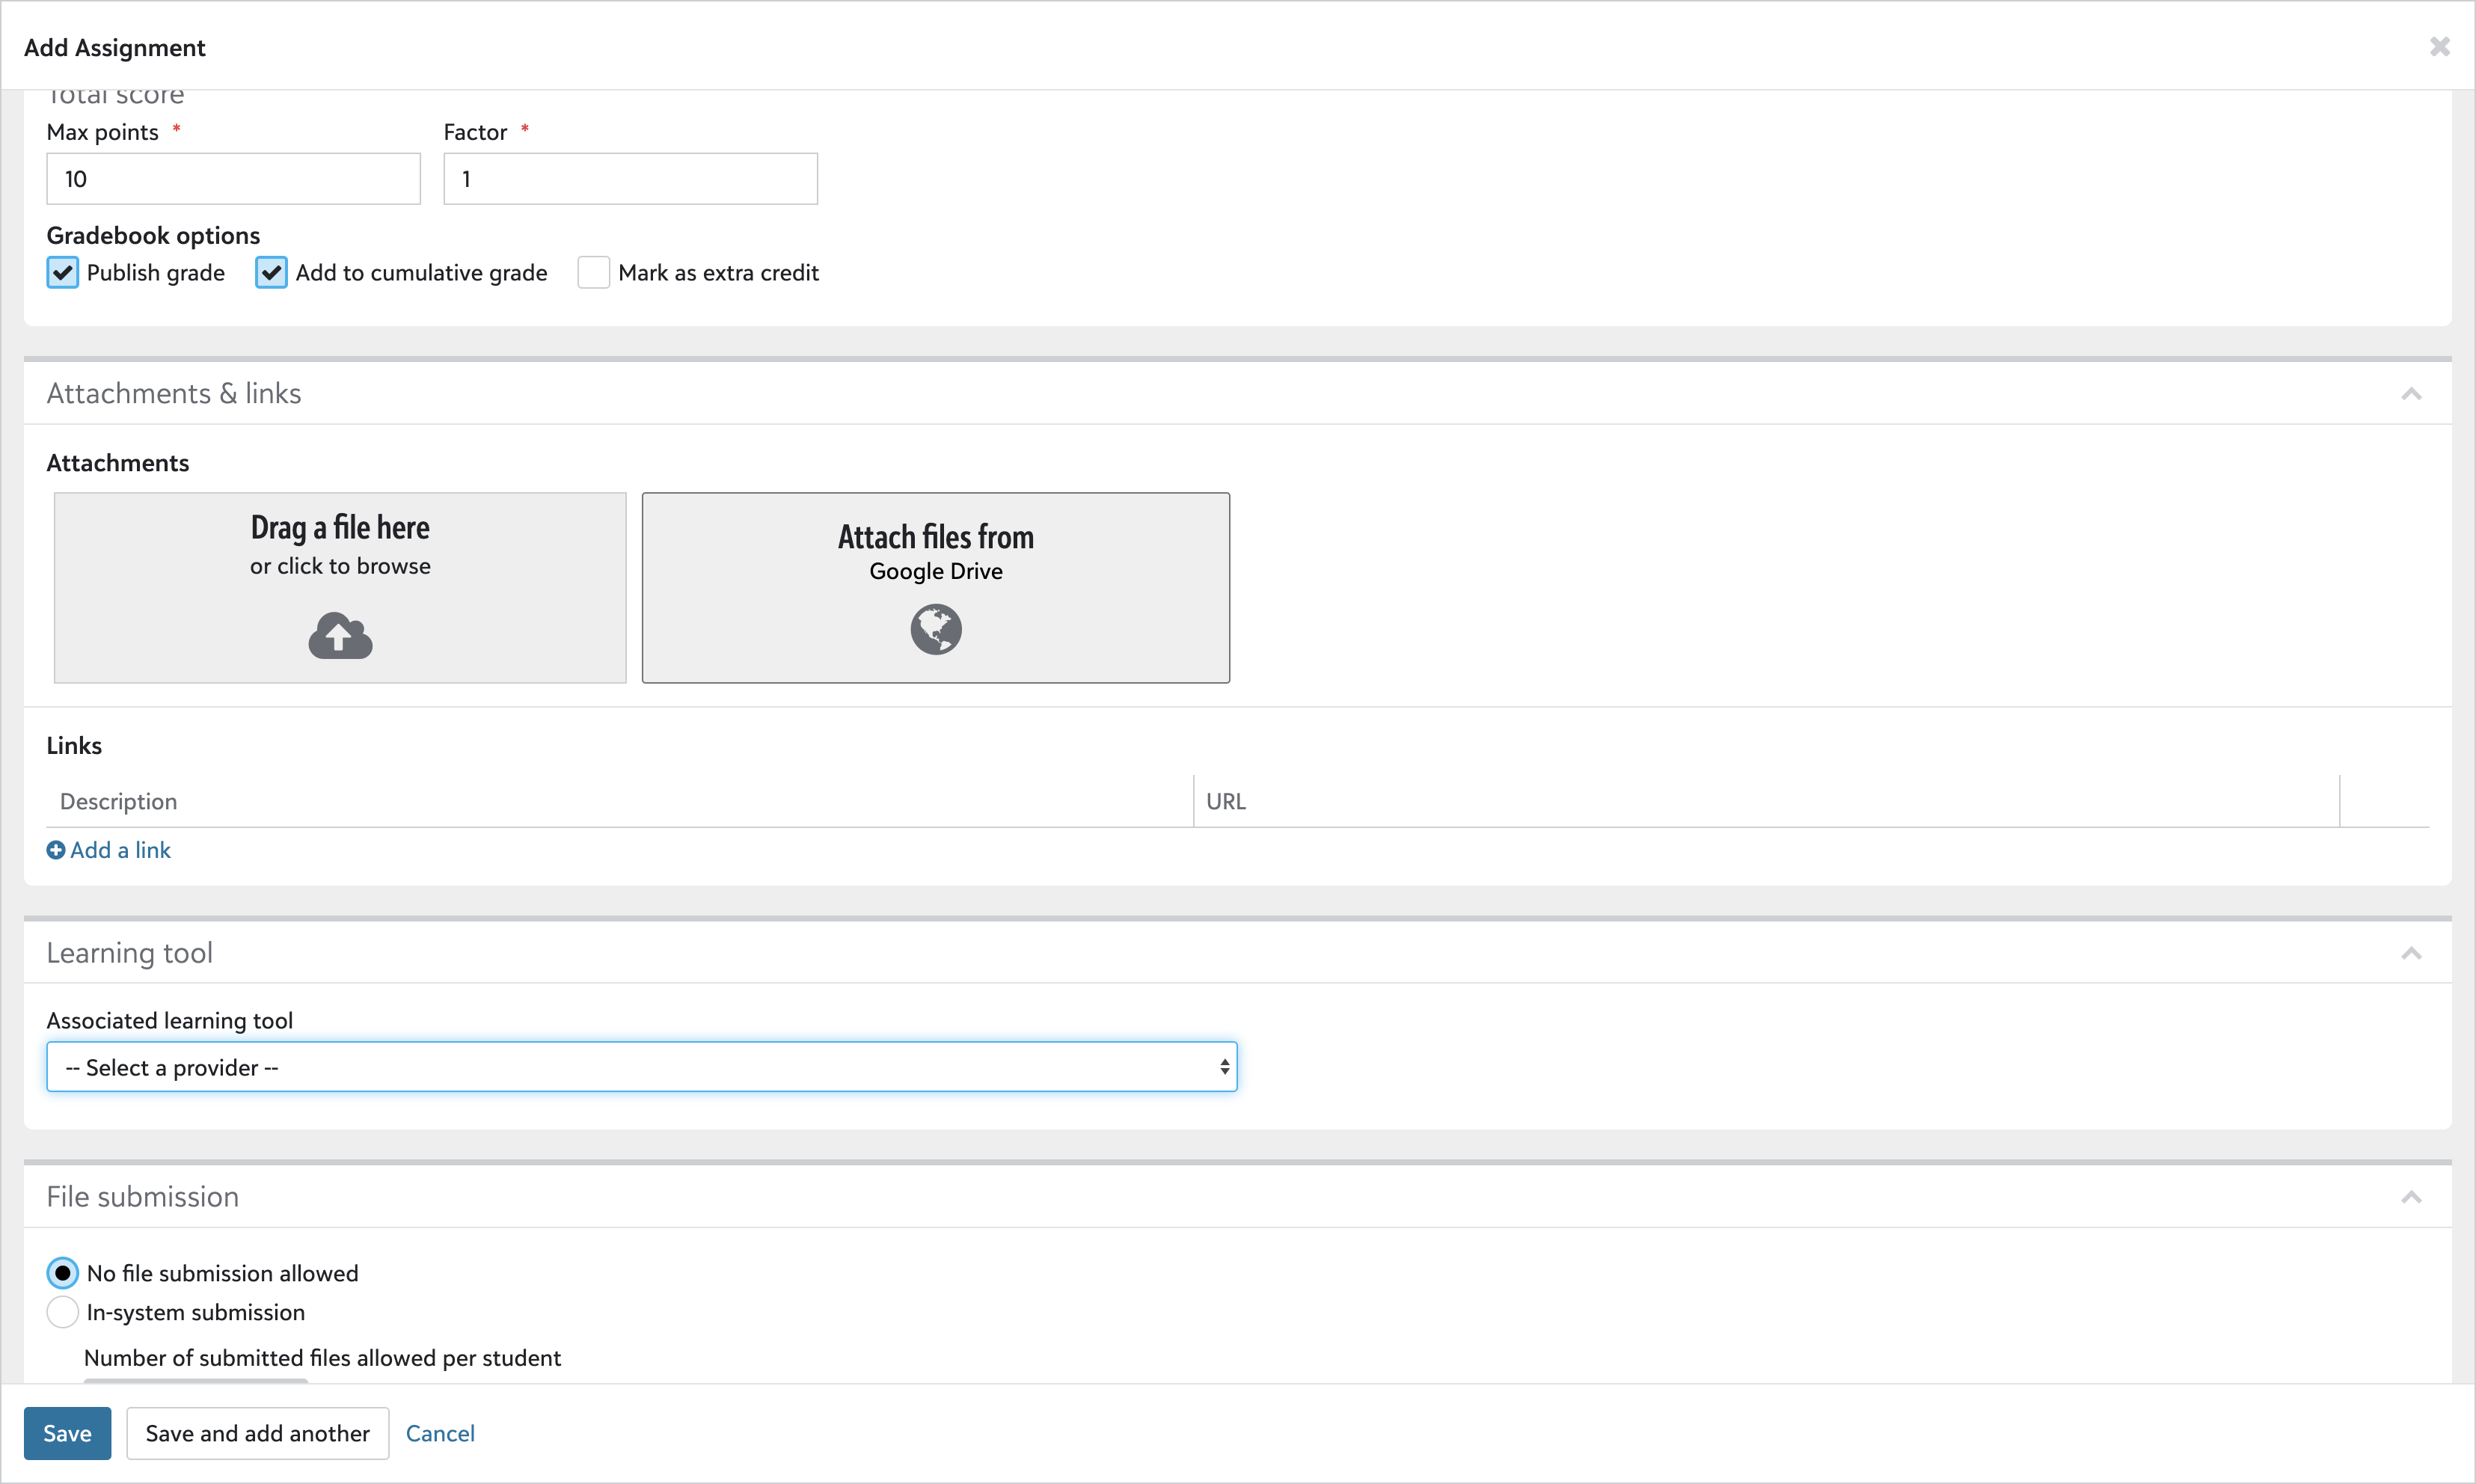
3
Delete the Custom Parameters line by clicking on the trash-can icon on the right.
4
Complete the rest of the assignment as usual.
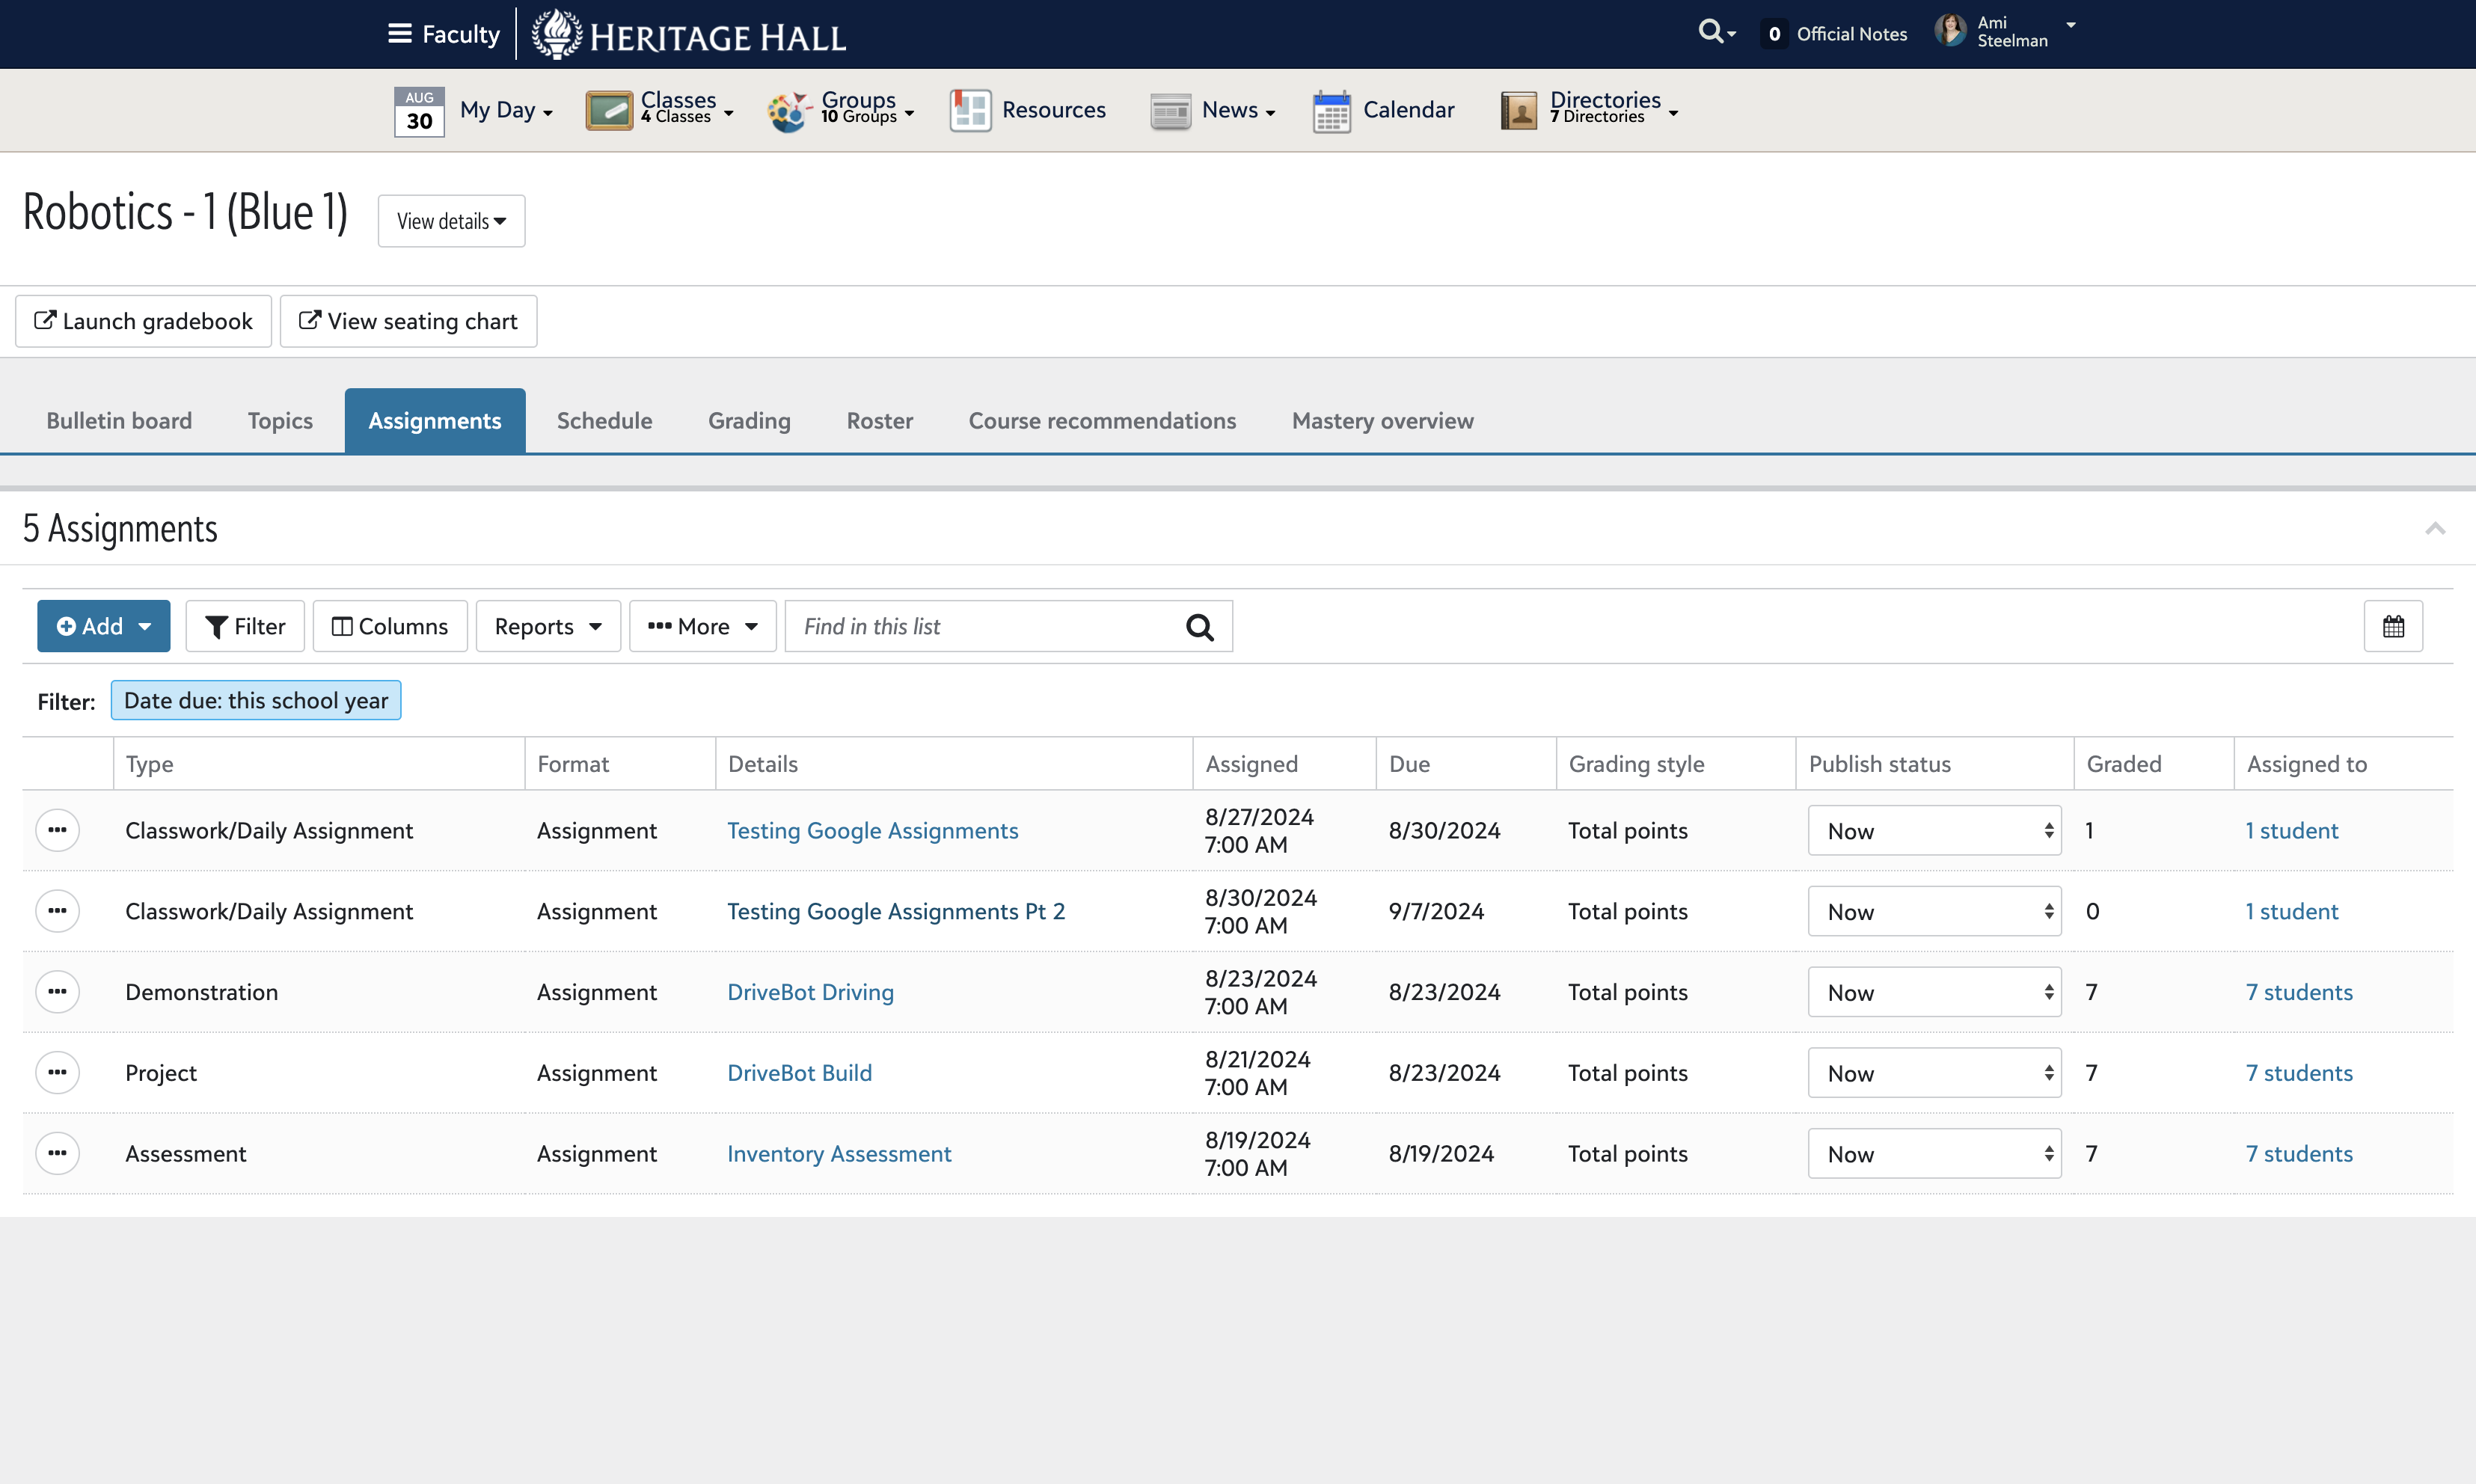
5
Click on the blue linked title of the new assignment.
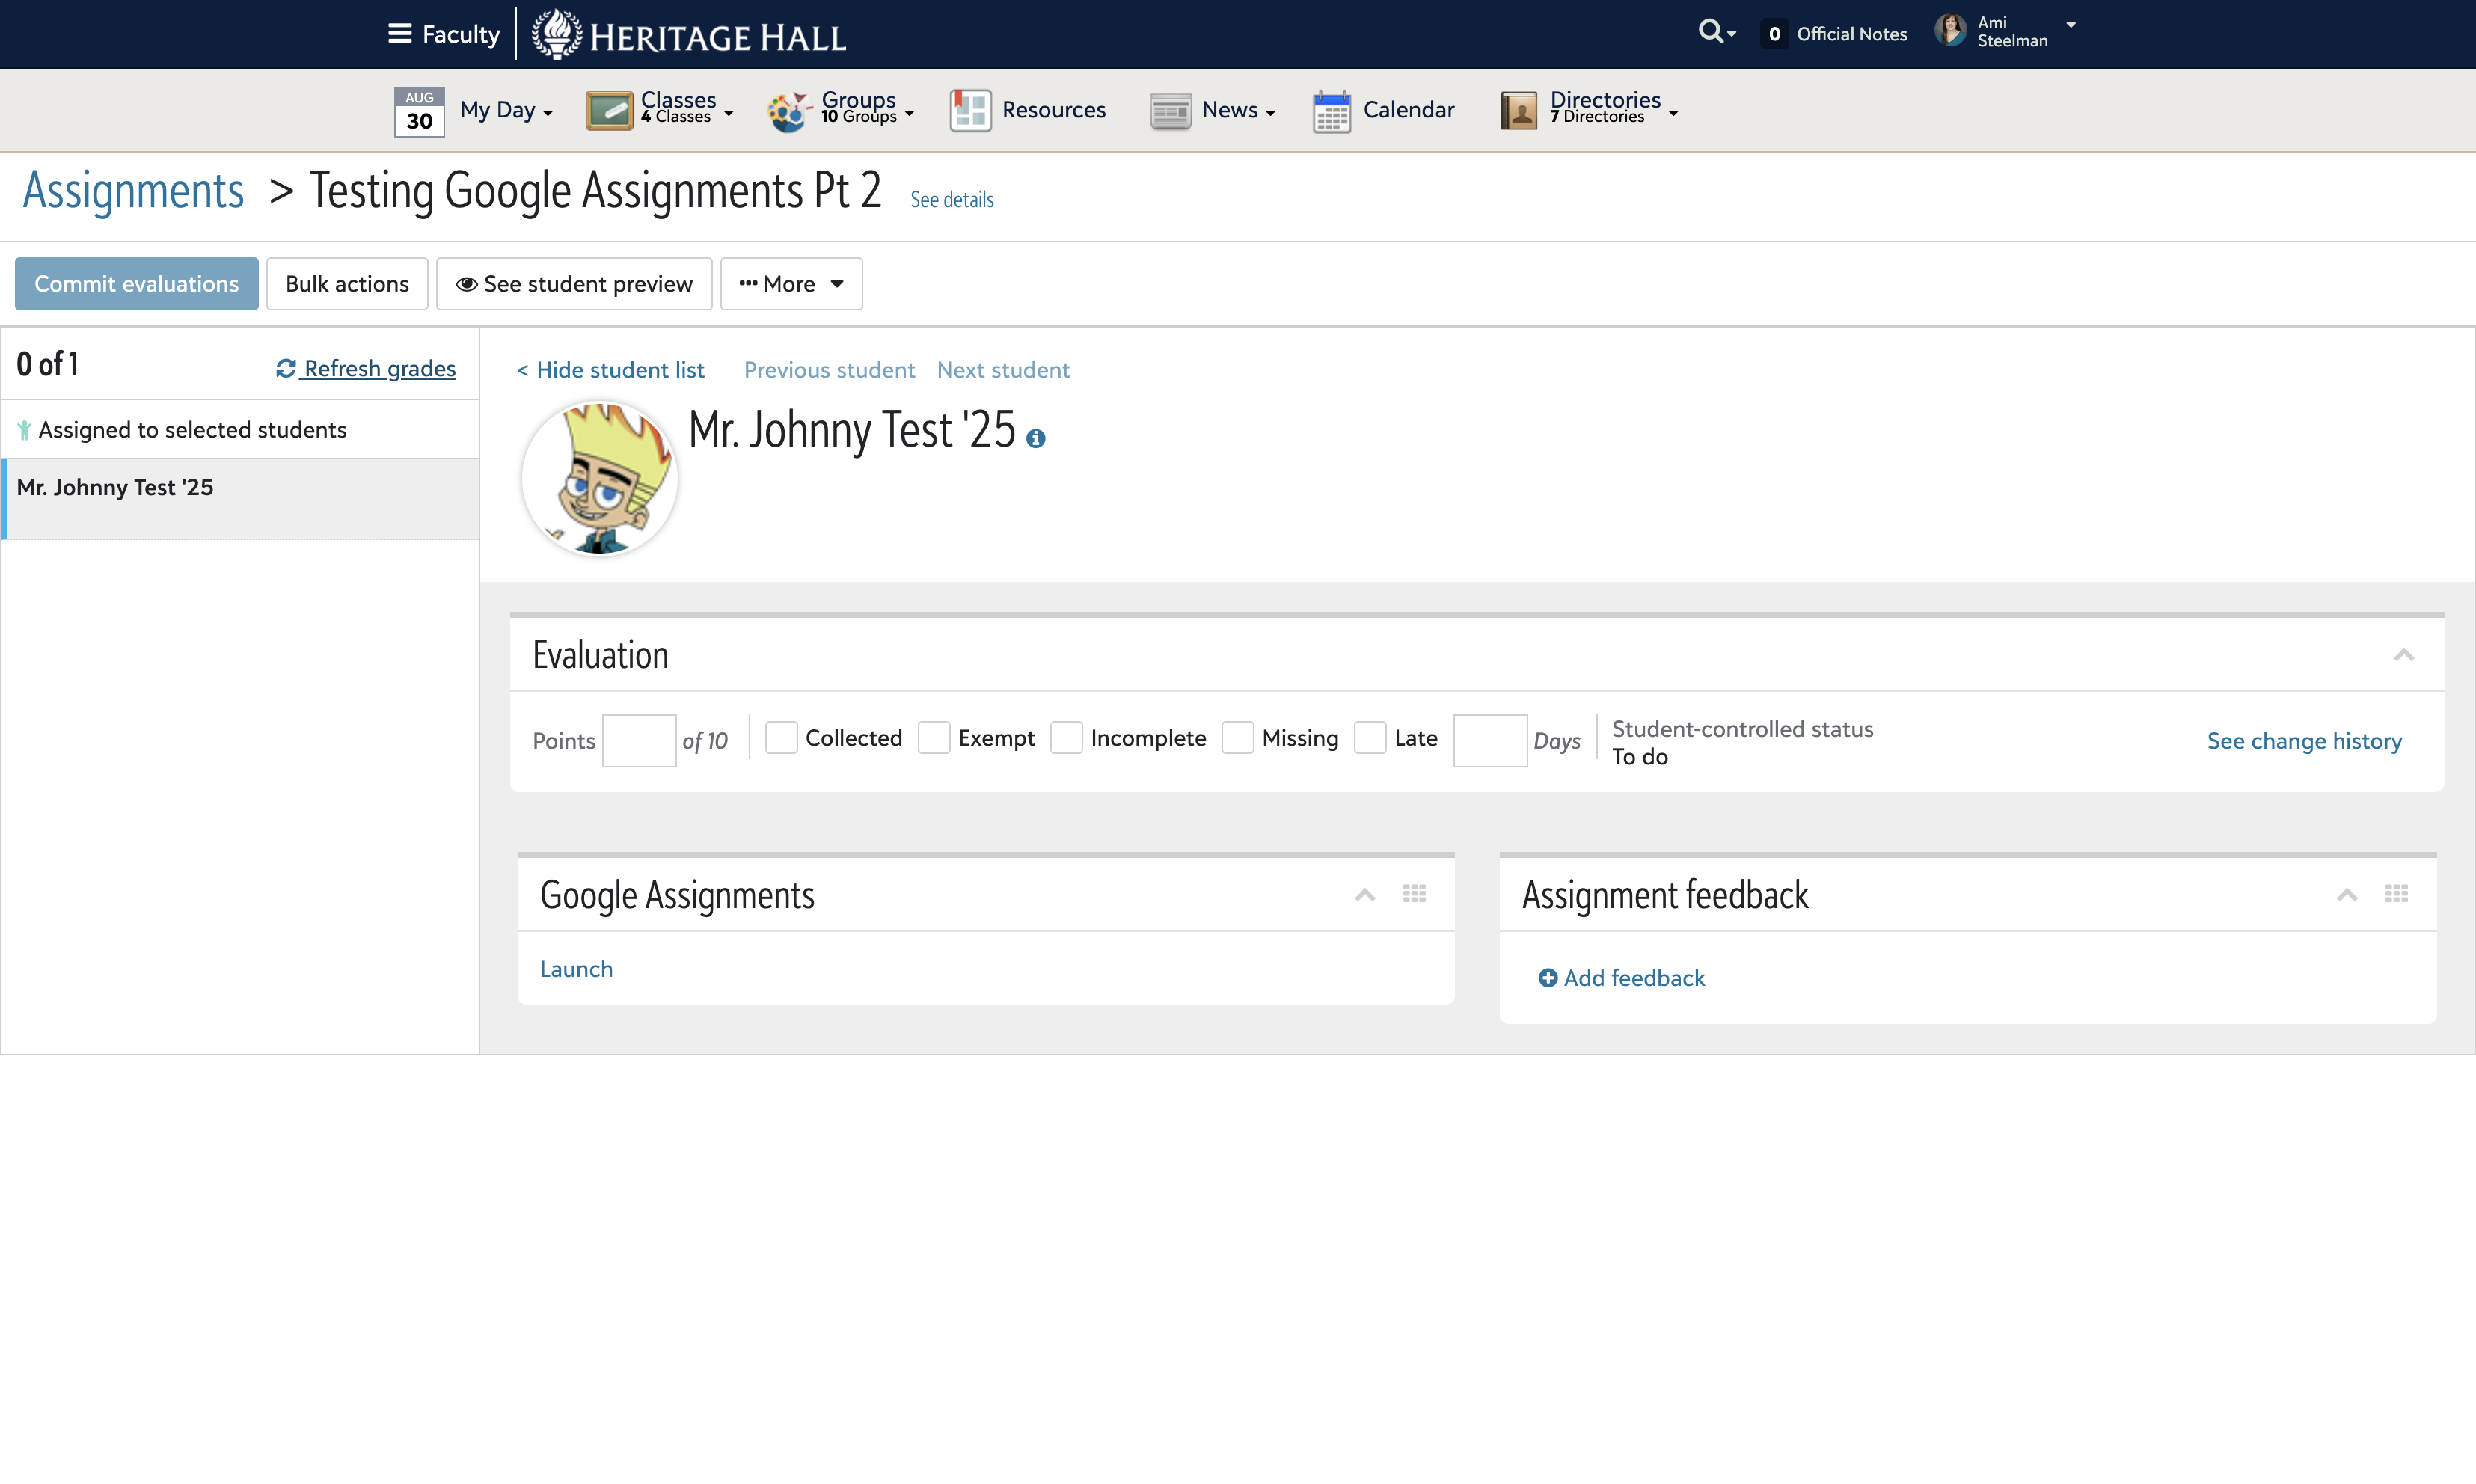
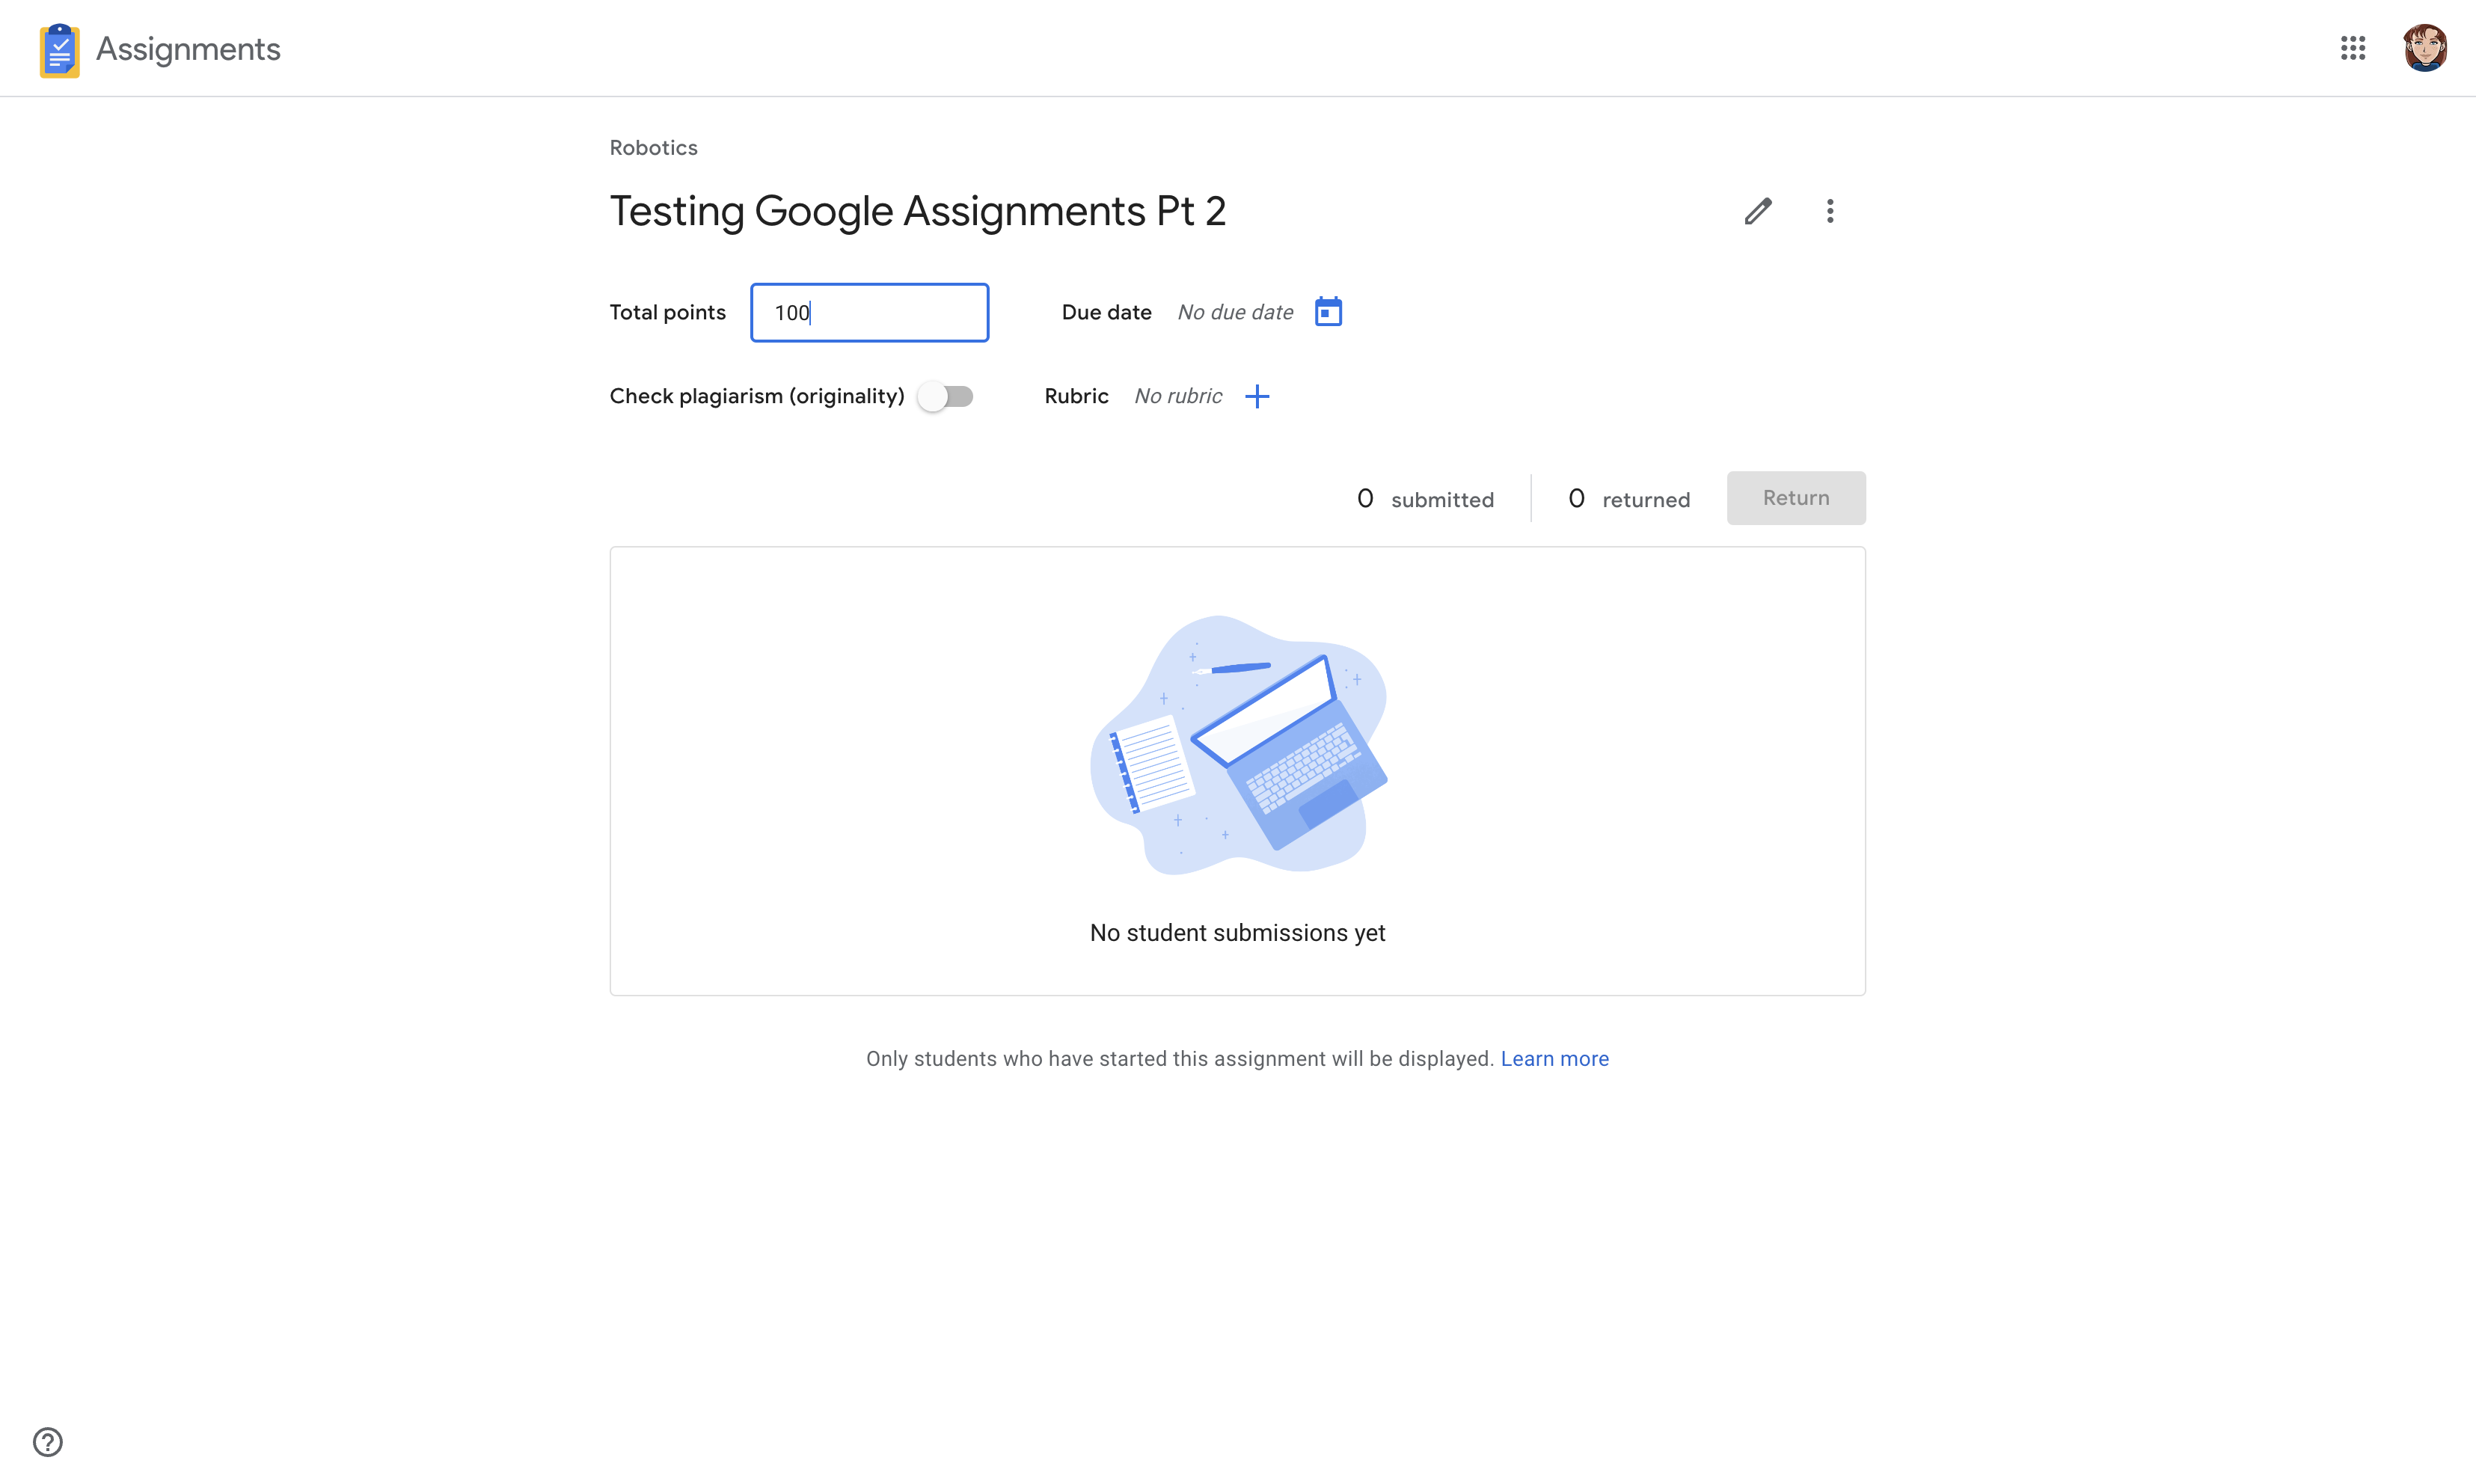
6
Click on "Launch" under Google Assignments.

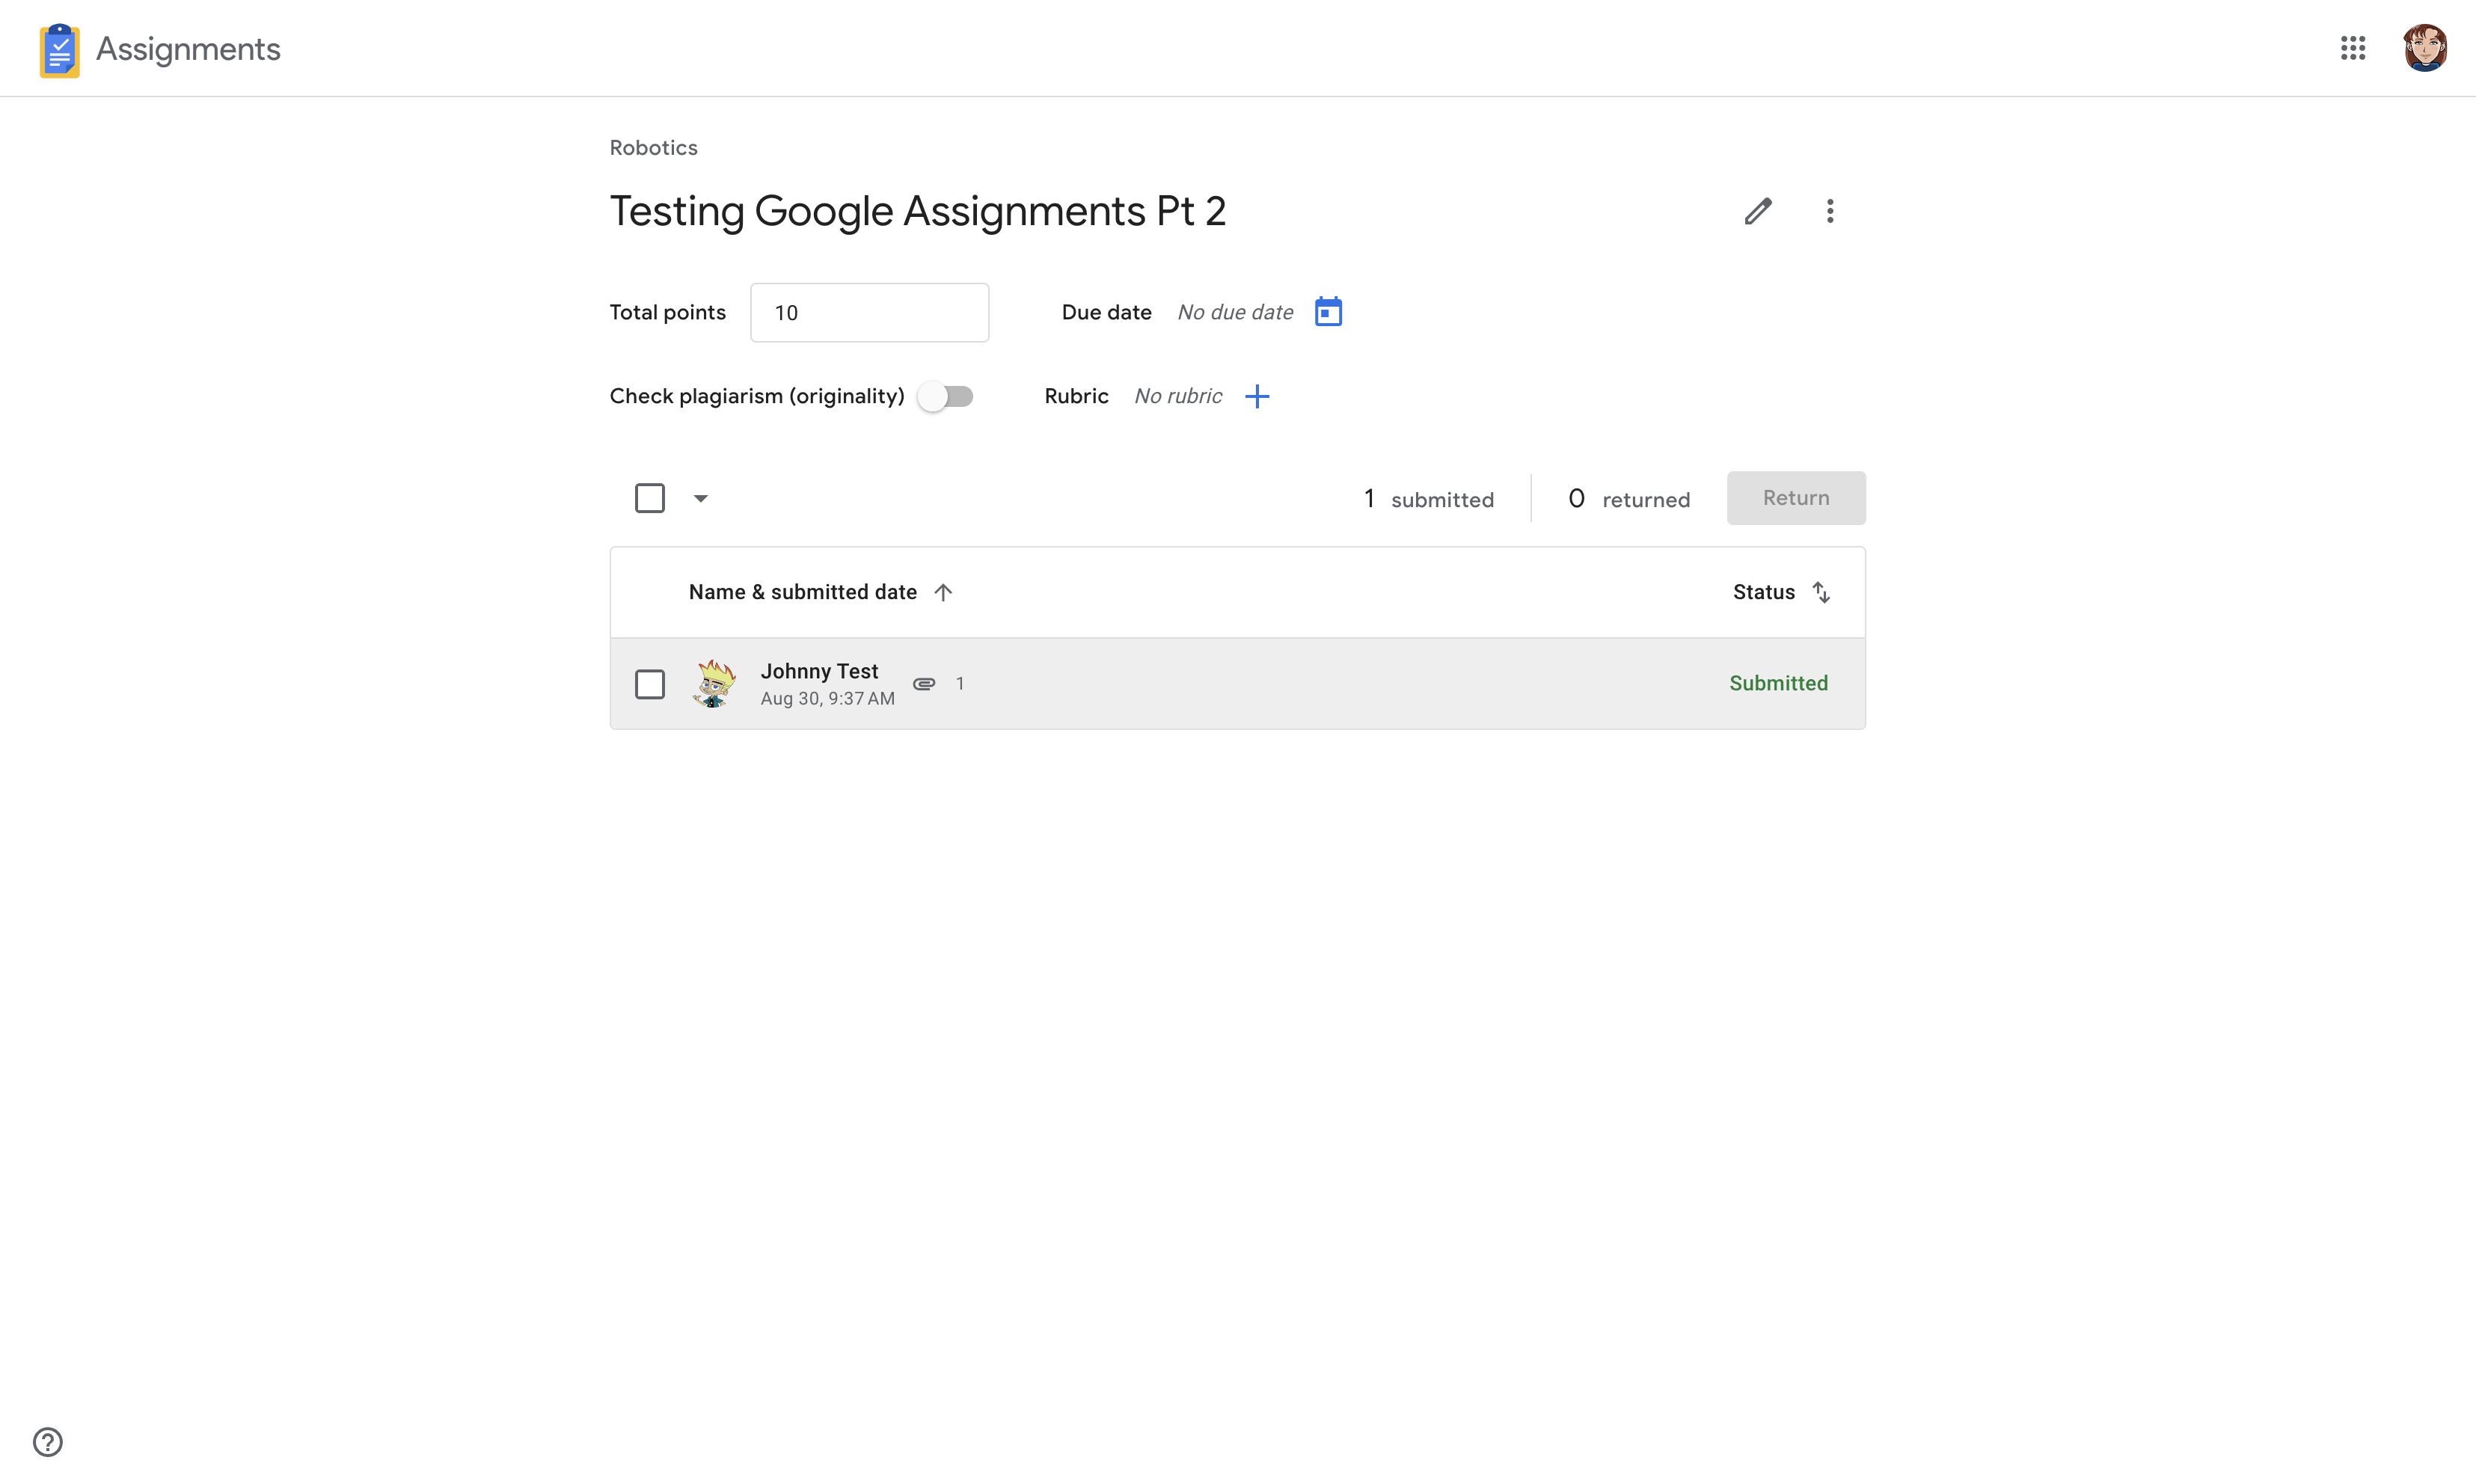
7
Unfortunately, we must edit the point value to match what we stored in Blackbaud. It will also show as 'no due date' in the Google Assignments portion so you may choose to modify this to avoid confusion. But students will see the correct due dates in Blackbaud regardless. You may also optionally link a rubric and enable plagiarism.
8
The assignment is now stored in Blackbaud, linked to Google Assignments, and visible to the students. They can attach their digital work (stored in Google Drive, created new, or uploaded from laptop) directly to the Blackbaud assignment.
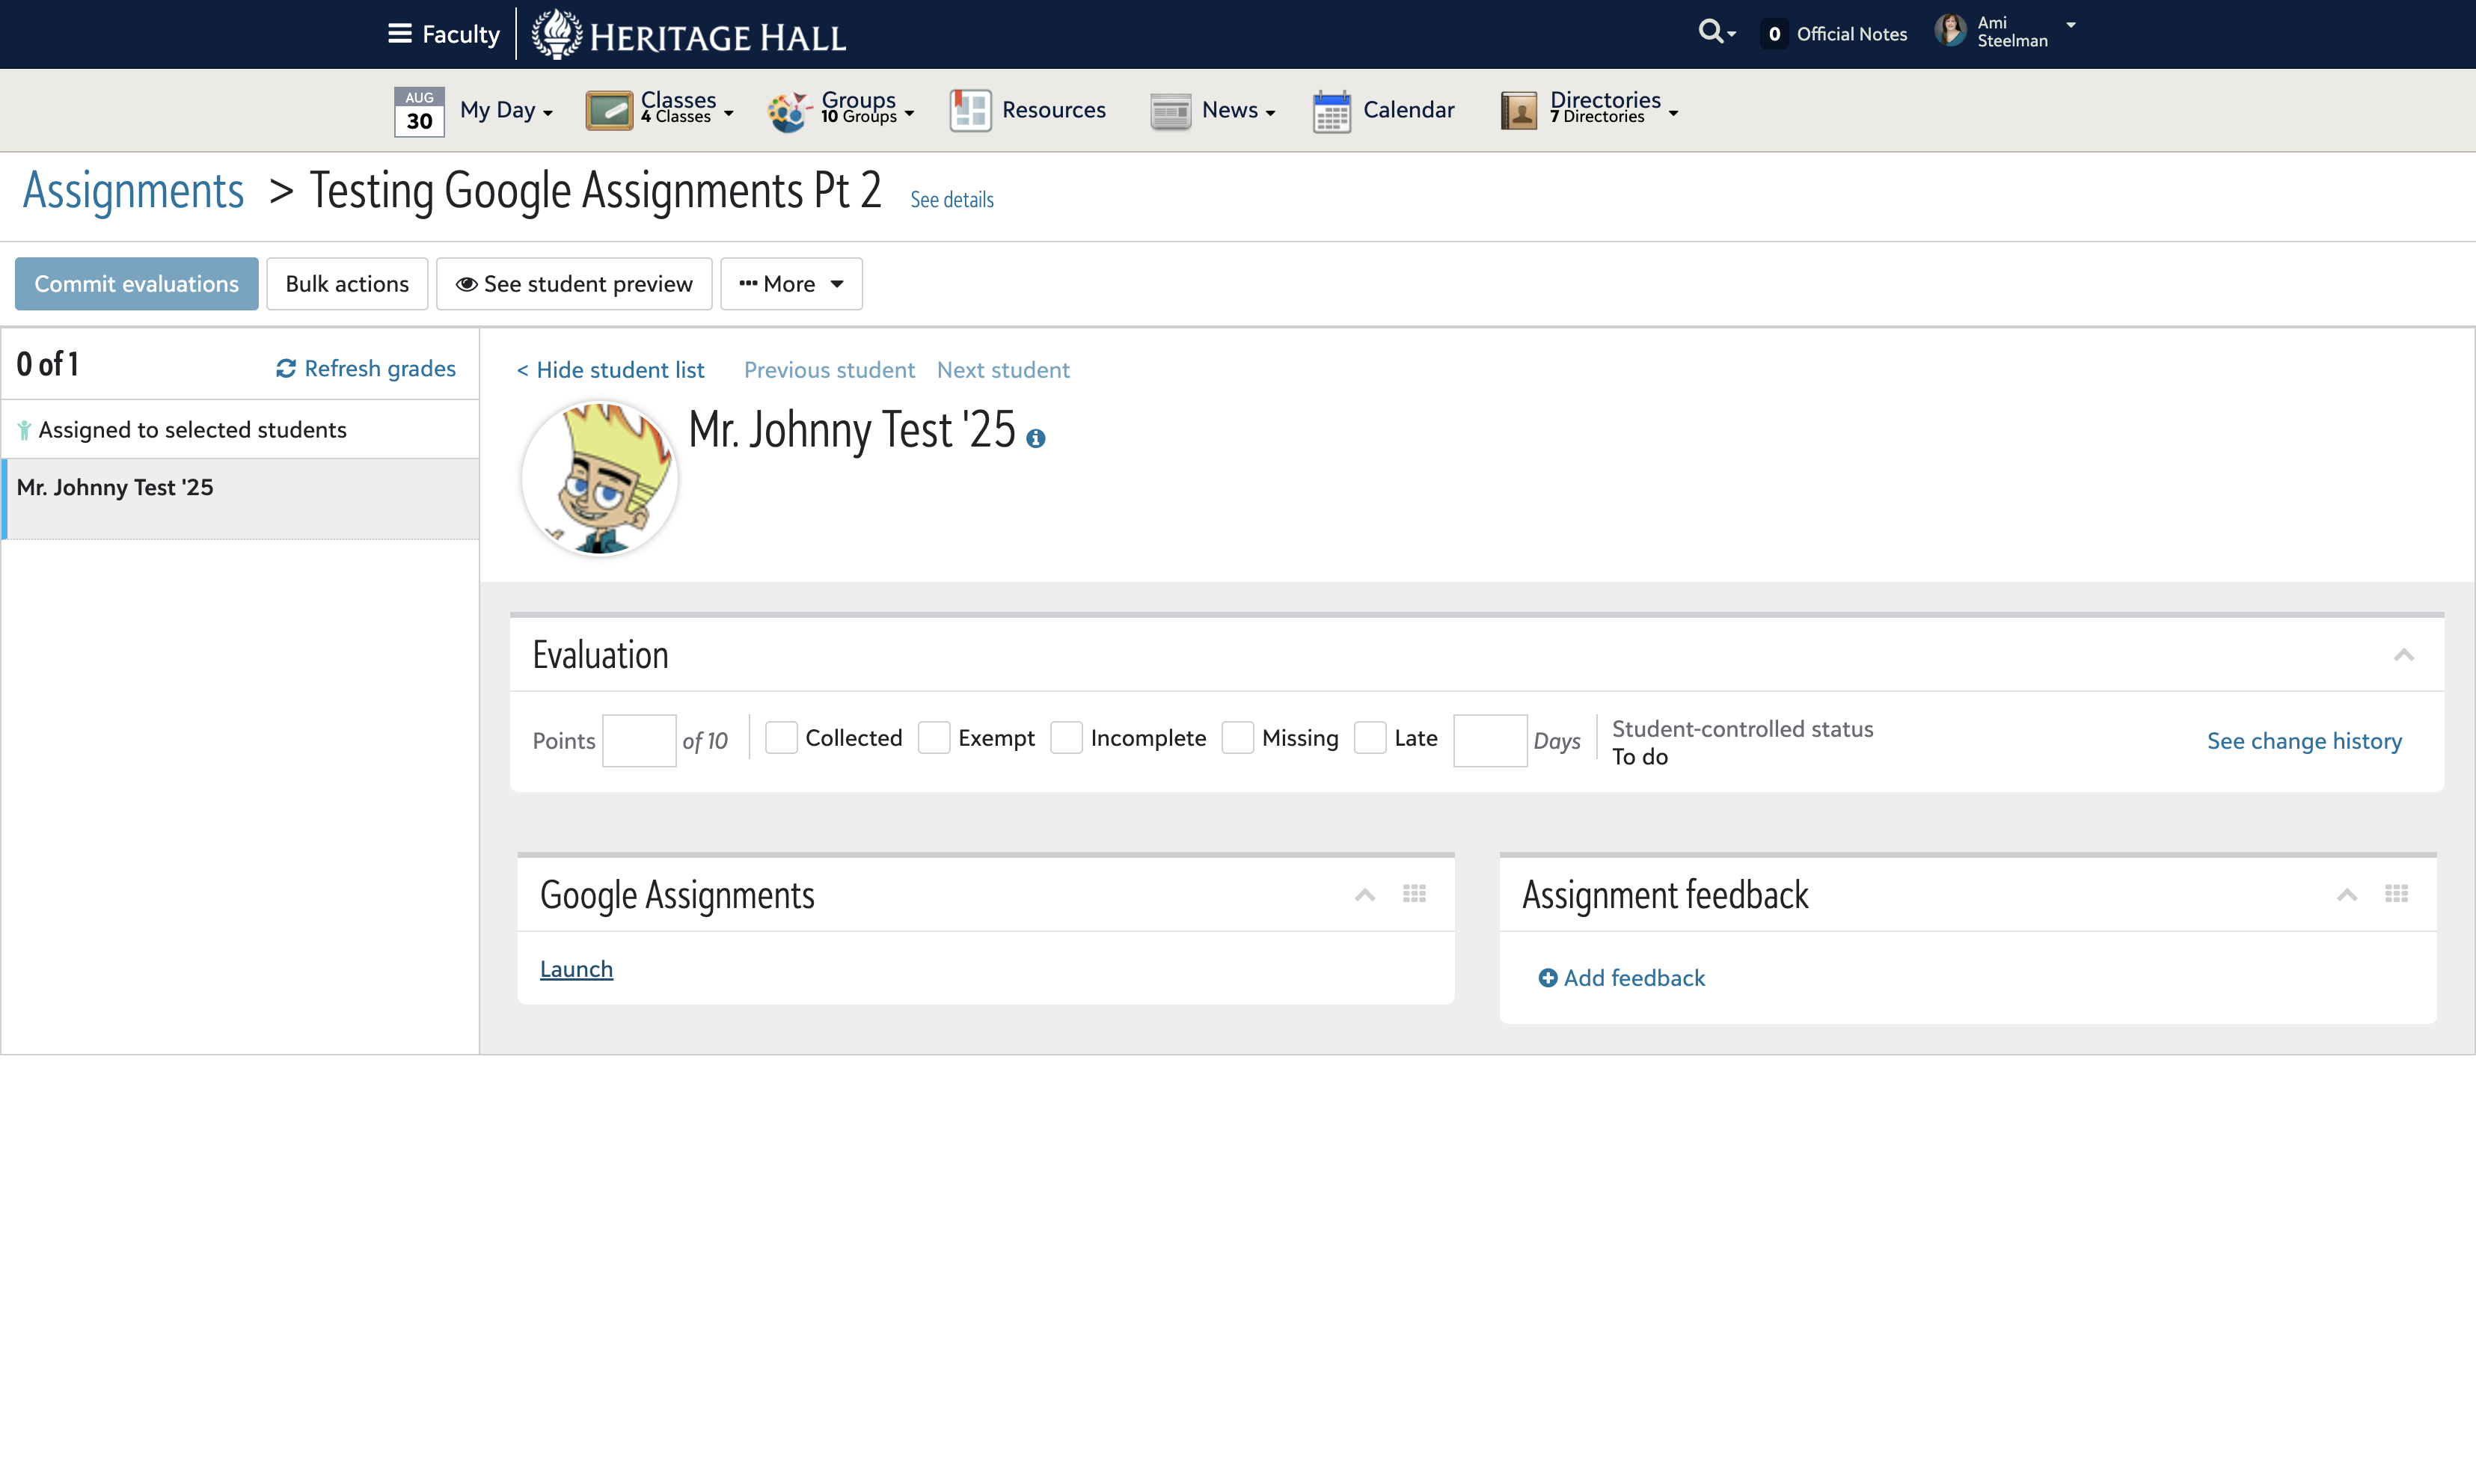
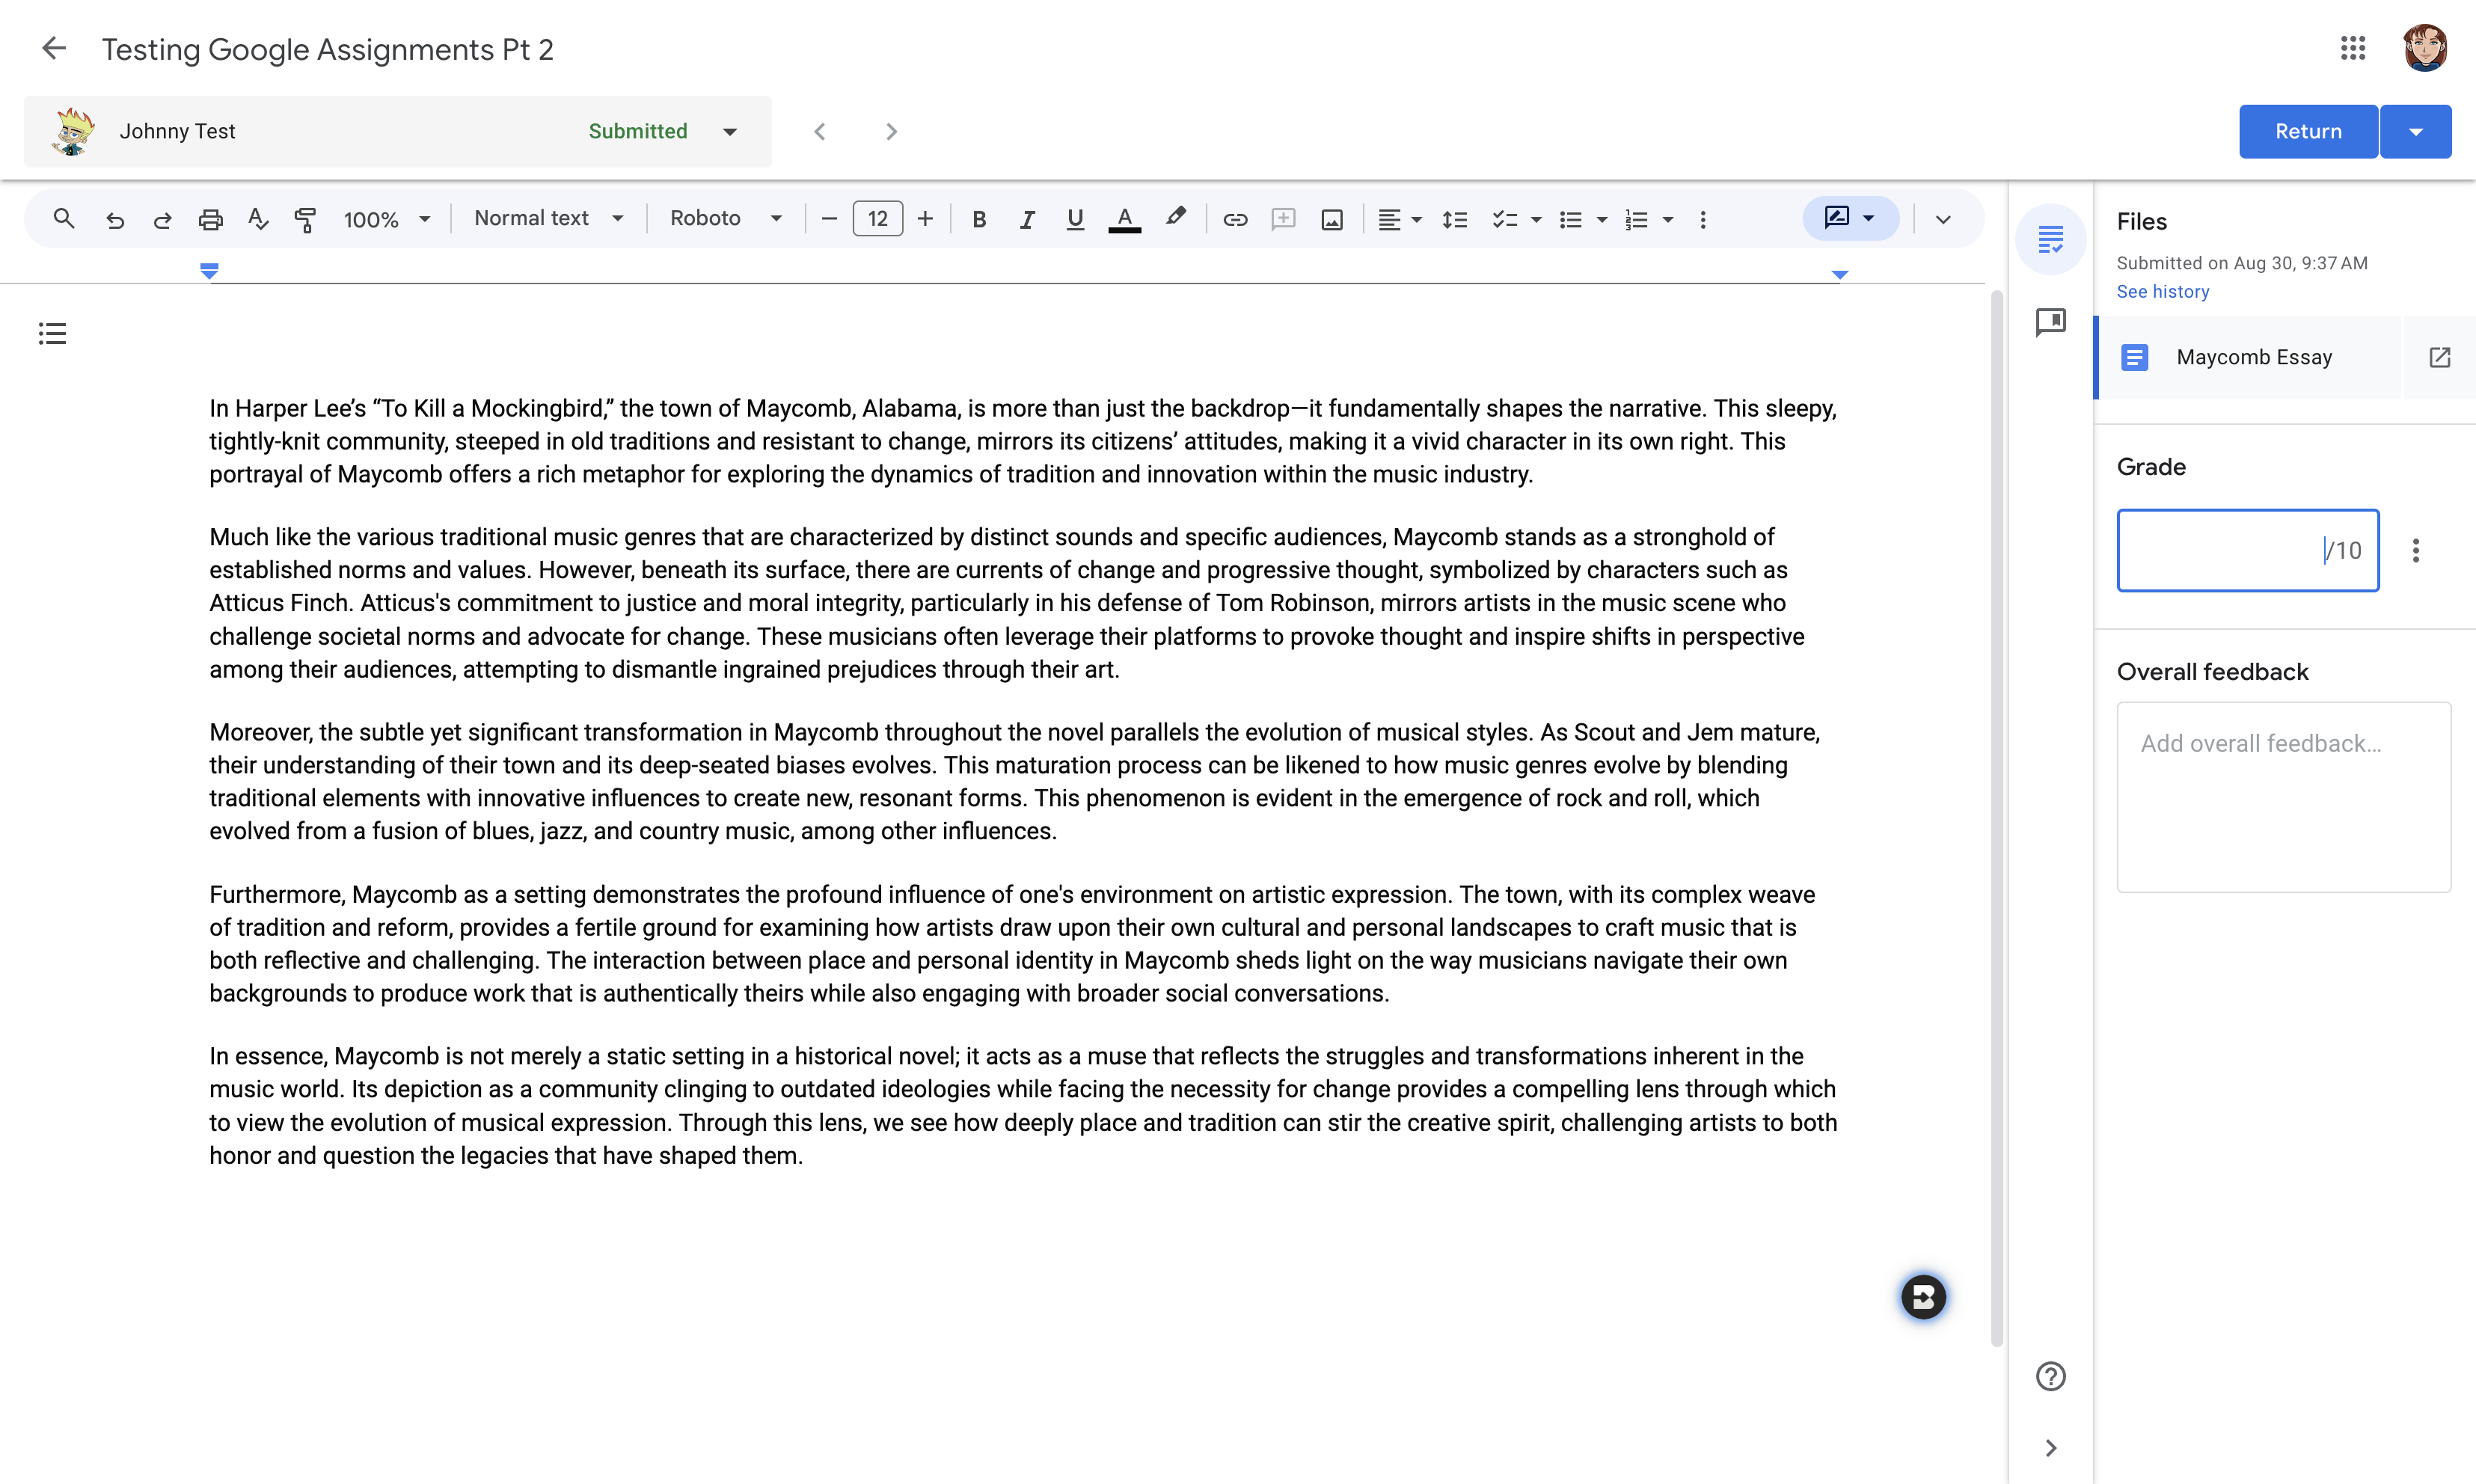
9
When ready to grade, click the blue Launch button under Google Assignments in the Blackbaud assignment.
10
Click on the assignment title.
11
Click on a student's submission.
12
Review, edit, suggest, comment, etc. the student submission. Enter a grade.
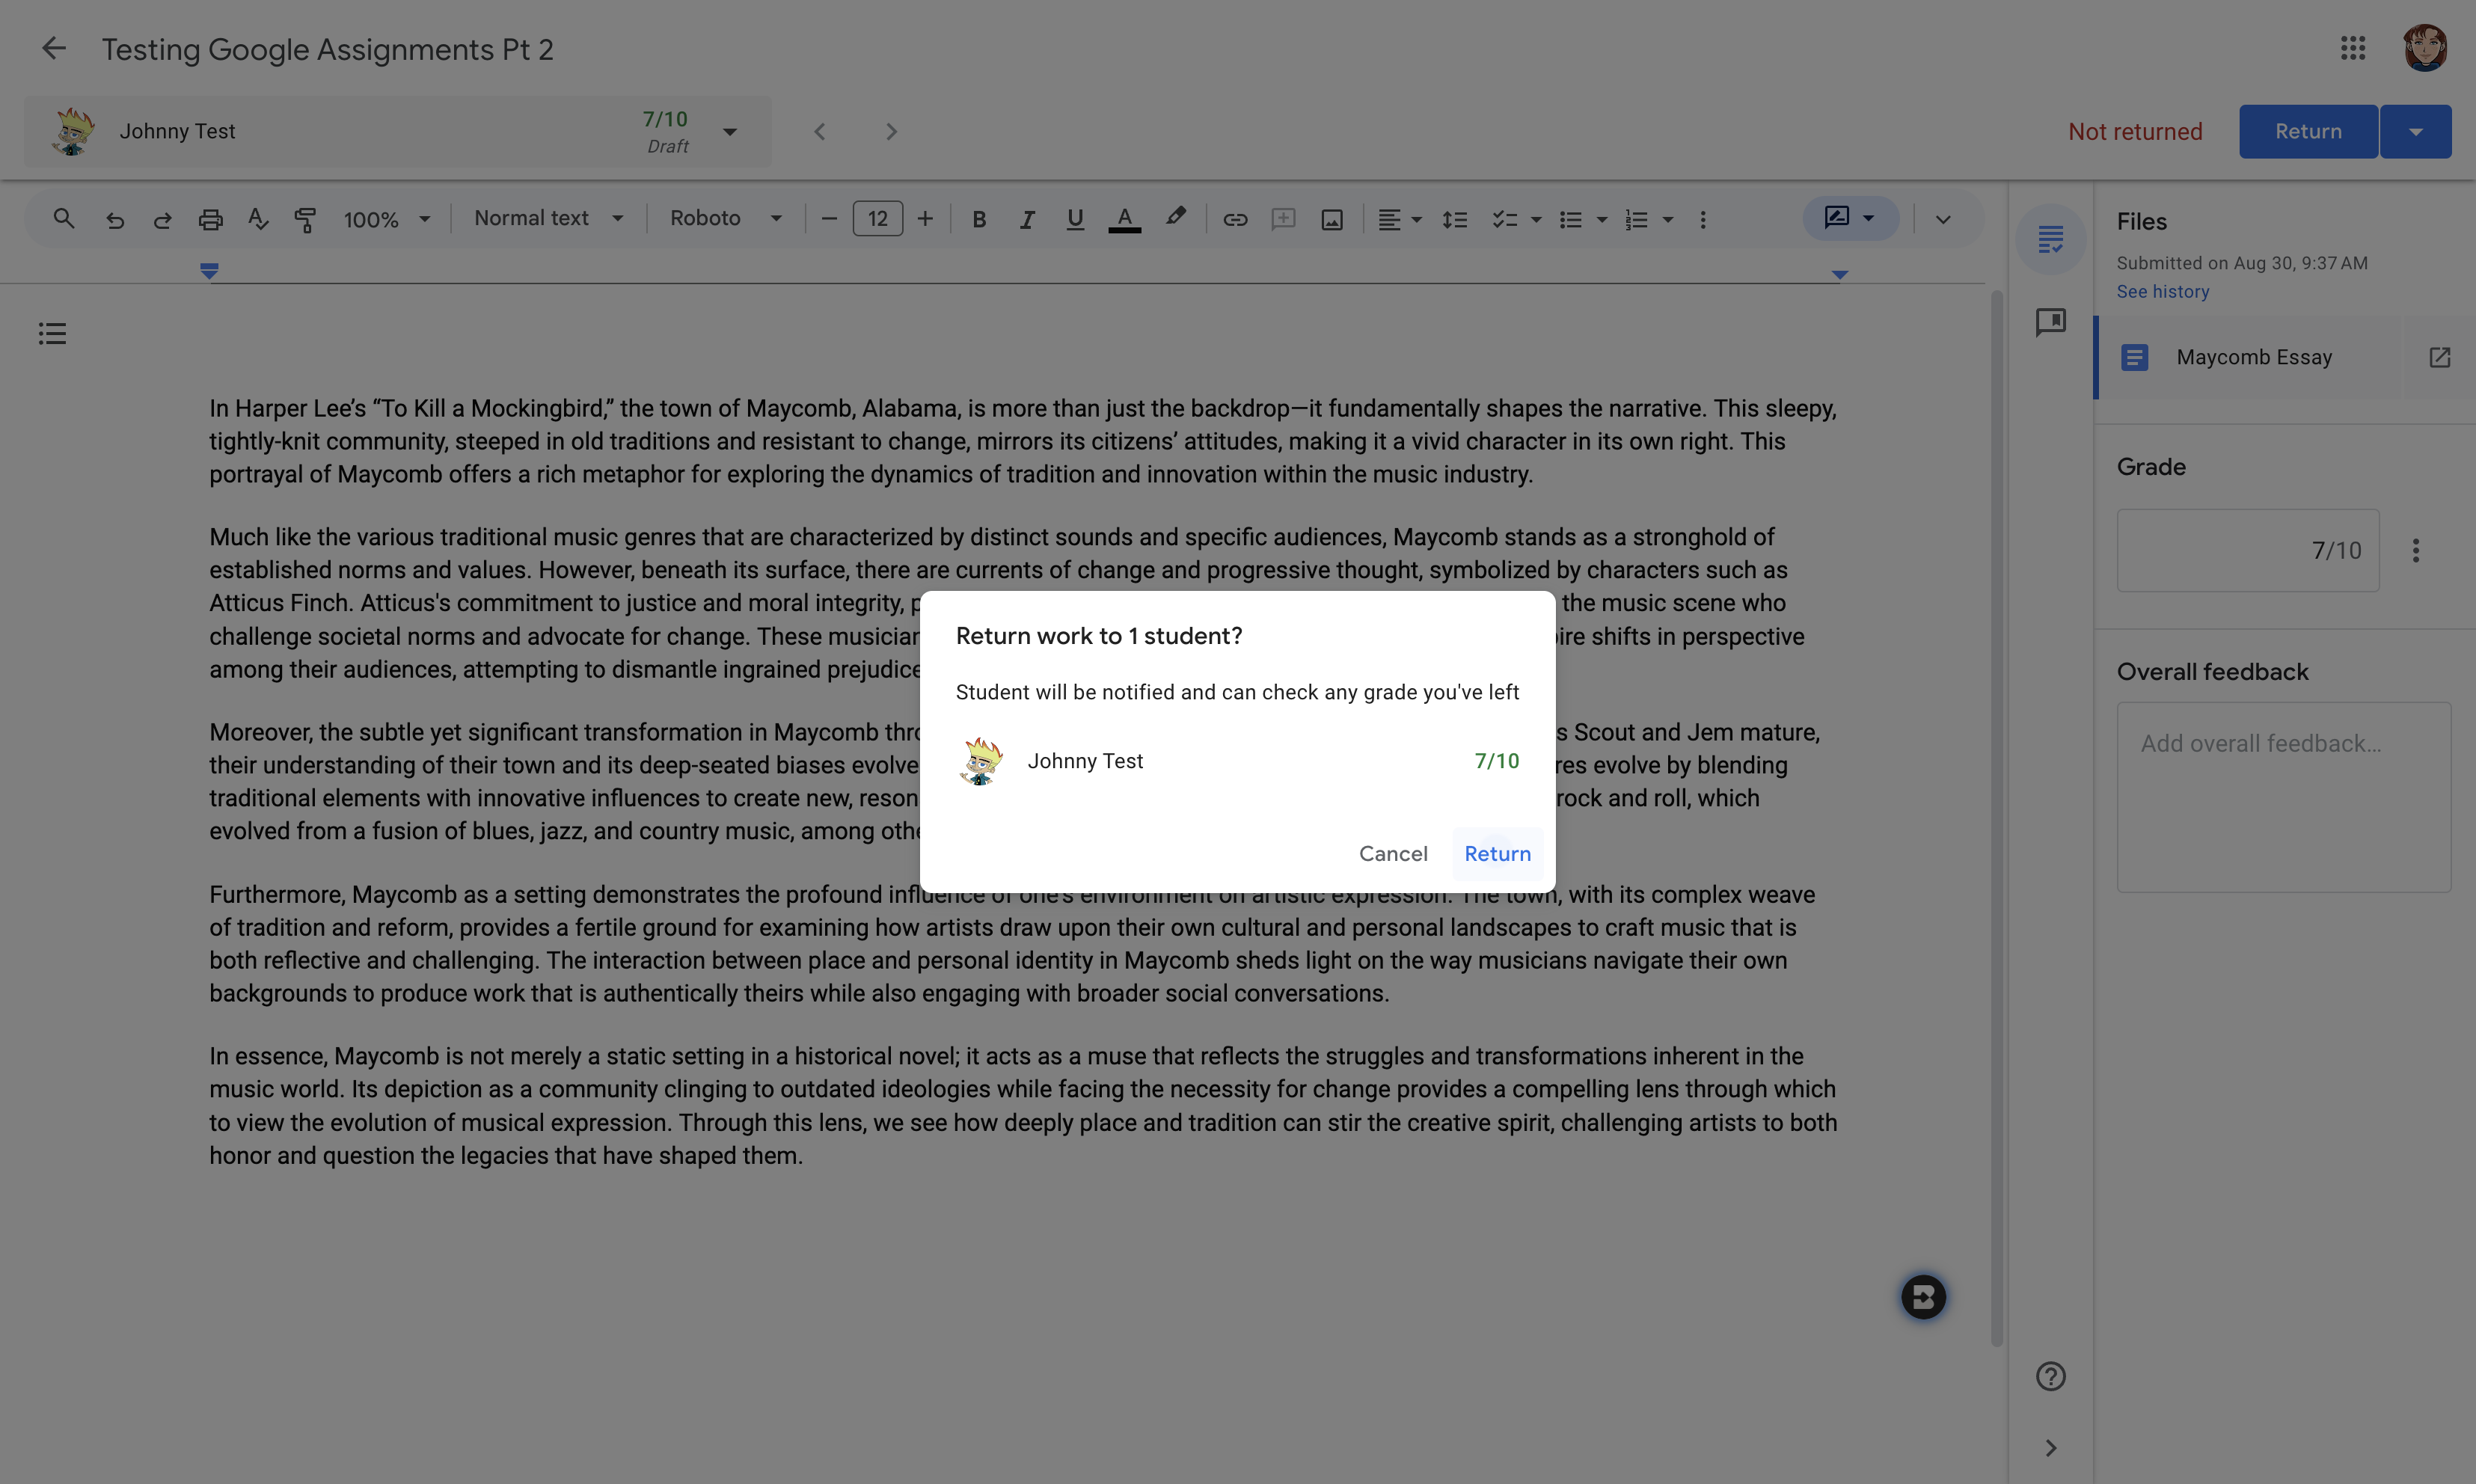
13
Click the blue "Return" button. This will not only store the grade in the Blackbaud gradebook, it will also notify the student of the grade submission.

14
Confirm the return.
15
Click on "Refresh grades" in the Blackbaud assignment to see the stored grades.