
Getting Started with the New Hub on the Unified Console Interface
Learn how to set up and navigate the new hub on the unified console interface, including setting up agent accounts, embedding chat codes, and utilizing the new features.
In this guide, we'll learn how to get started with the new hub on the unified console interface. The process begins with setting up an agent account in SnapEngage's admin dashboard. Once your account is ready, you'll need to embed the chat code on your website to initiate chats. Afterward, you'll log into the support product and navigate to the unified console hub by clicking on Onboarding. Here, you'll explore features like the mini dashboard, chat management, and agent tools. This guide will help you understand how to effectively use the new hub for managing chats and utilizing its various functionalities.
Let's get started
Hello, everyone. In this tutorial, we will learn how to get started with the new hub on the unified console interface. First, set up an agent account to access the hub. This is essentially the same as it is today within the current hub.
Log into the SnapEngage admin dashboard. Go to Settings. You likely already have your own agent account. If not, click on "Add Chat Agent" and create an account.
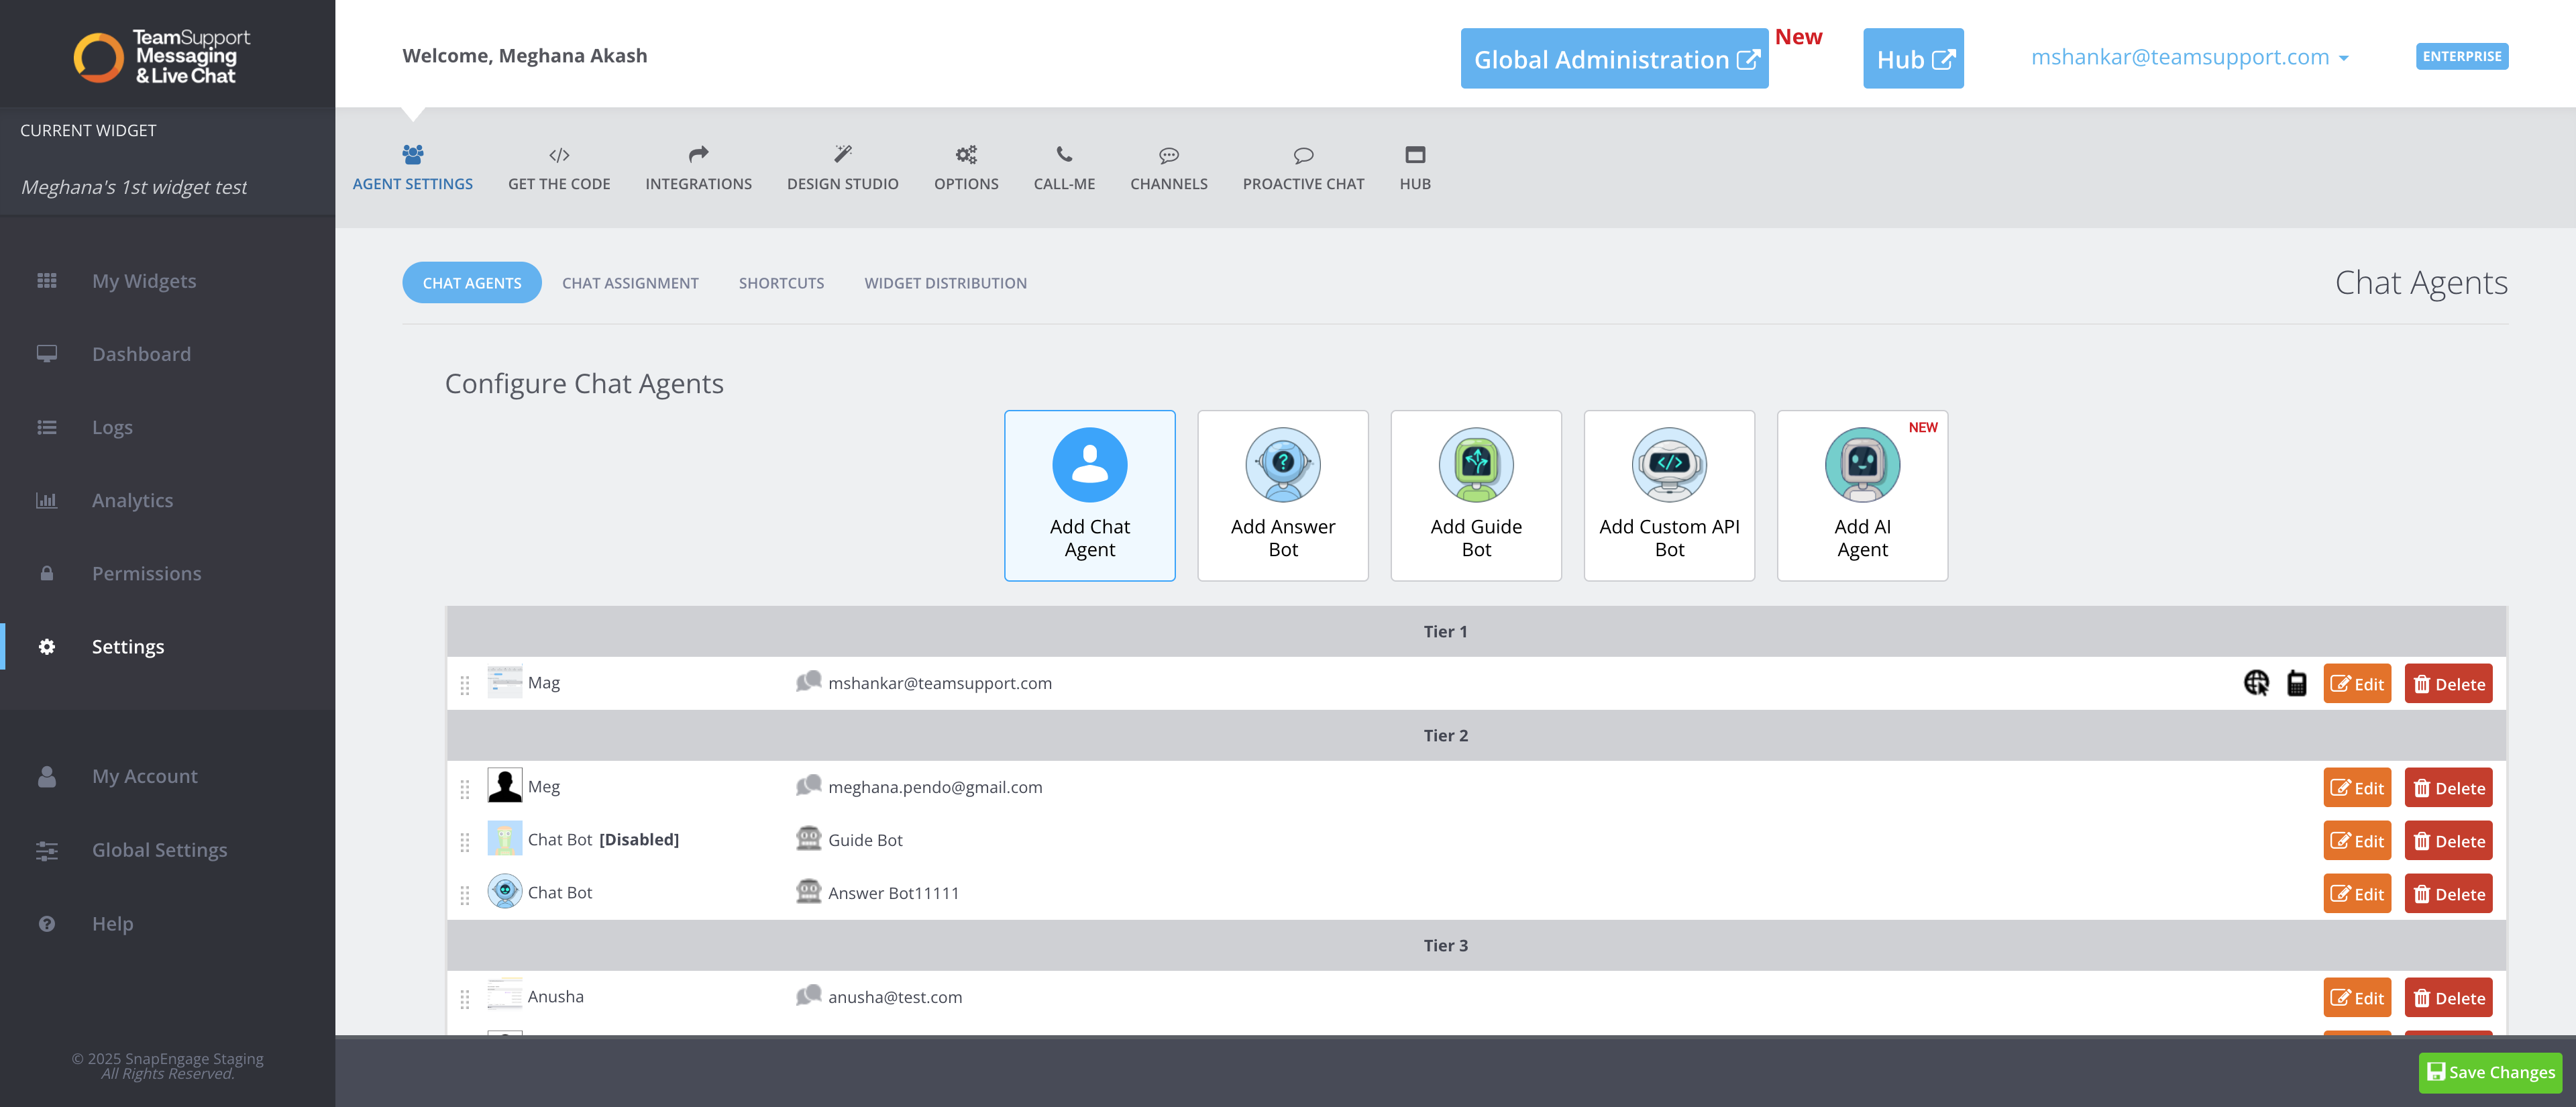
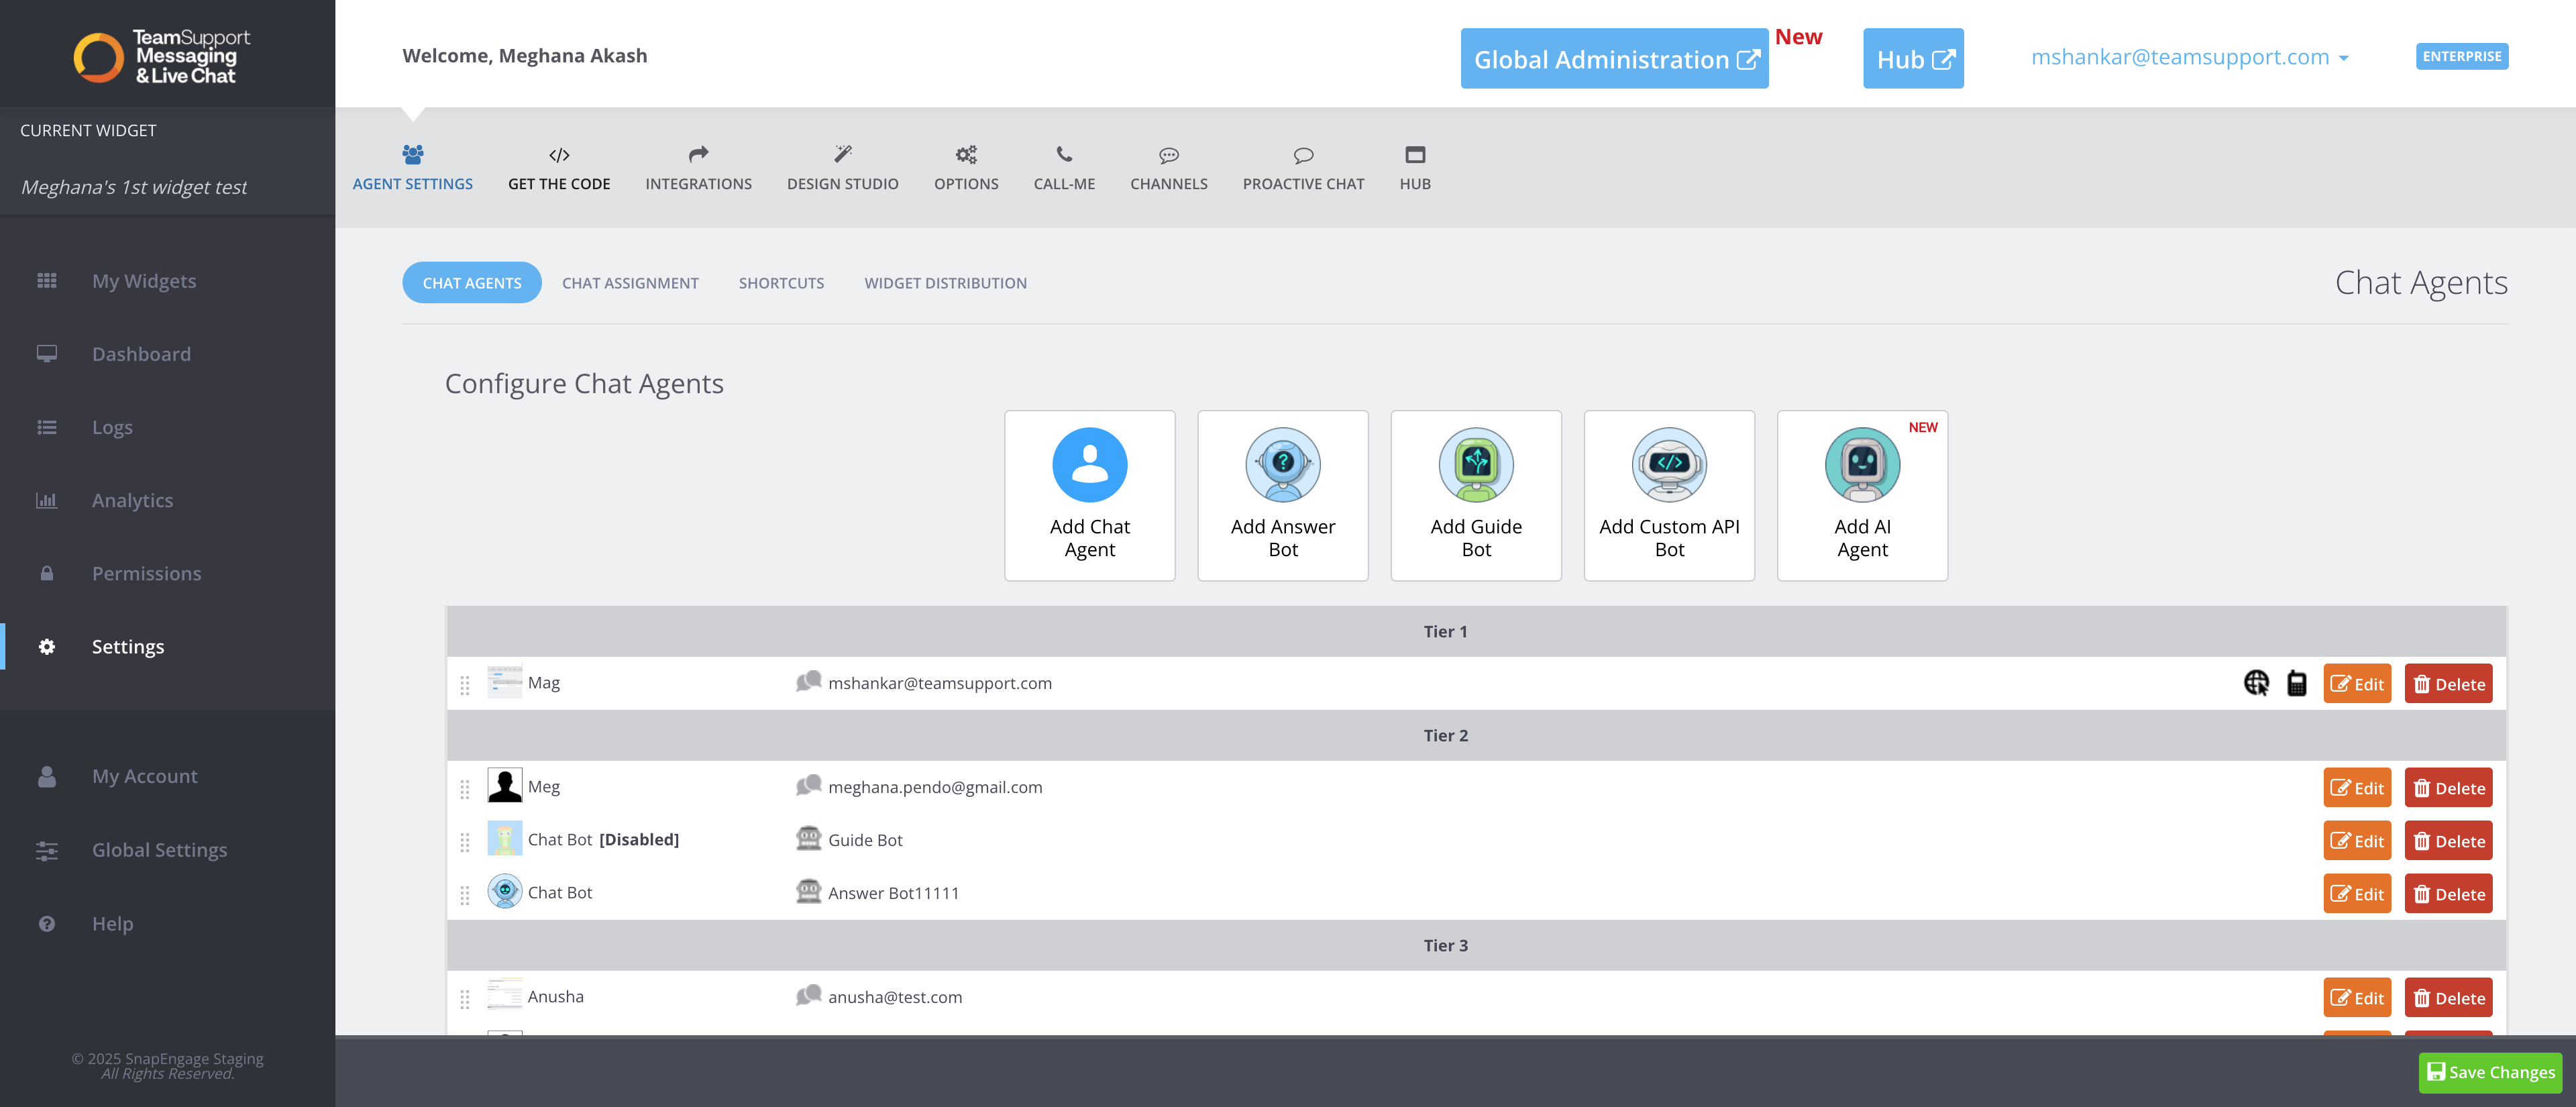
Go to the website where you have setup the chat by using the code provided in the "Get The Code" section of the settings. Copy this code and embed this into your website
Next, log into your support product and find the onboarding option. Click on it to navigate to the unified console product.
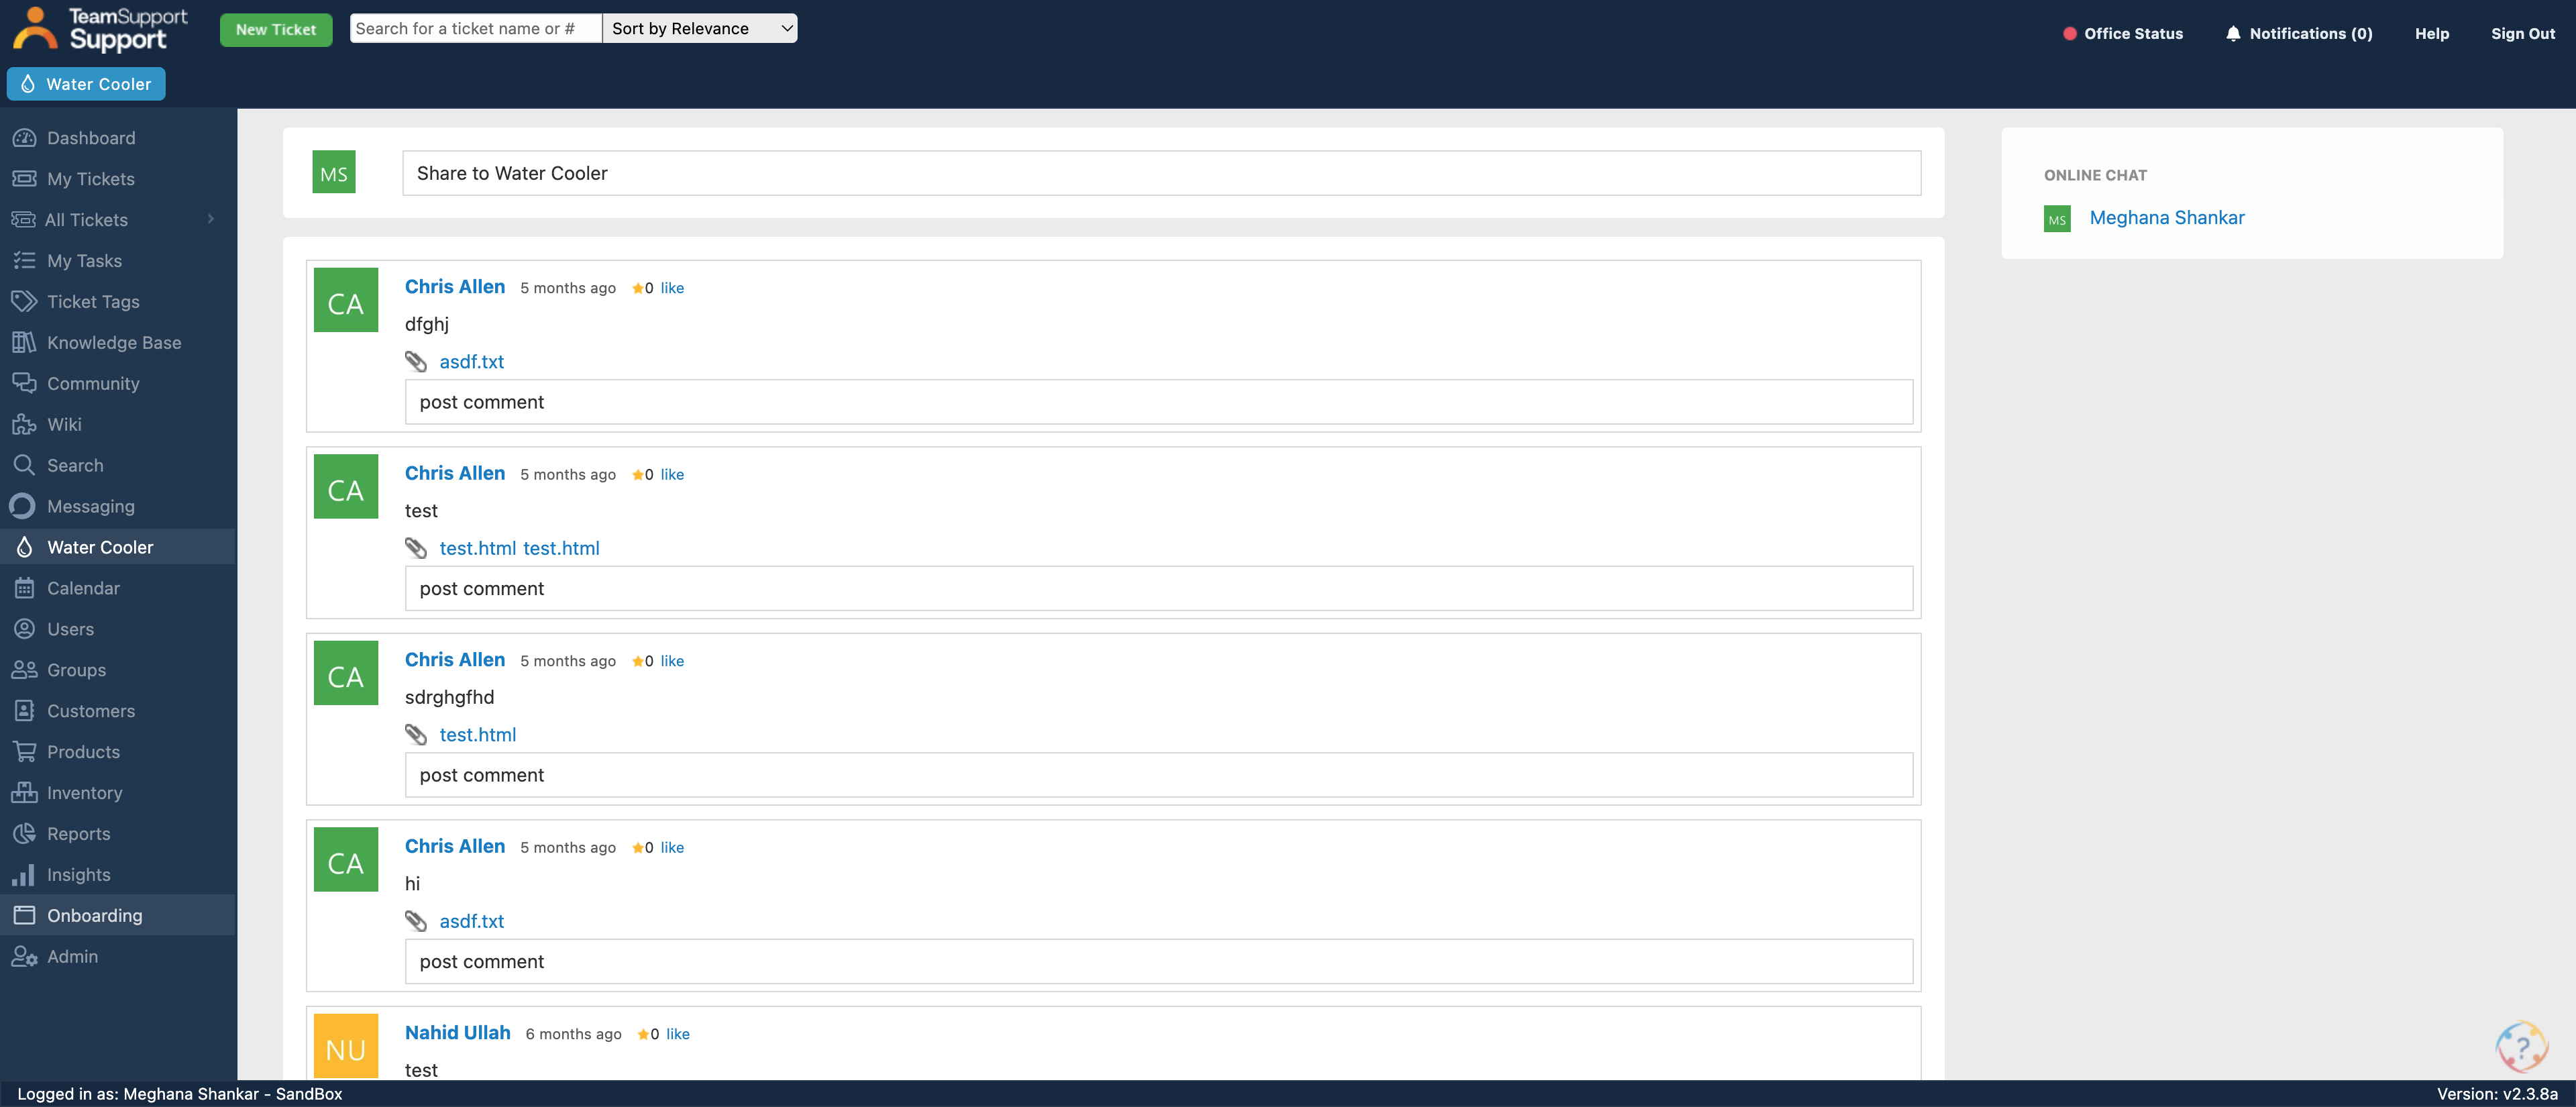
Please note that all administrative tasks will remain on the classic UI for now. Any admin setups or configurations for your widget will still be within the admin dashboard. After logging into the unified console hub, click on "Support." You will then see an option called "Chat."
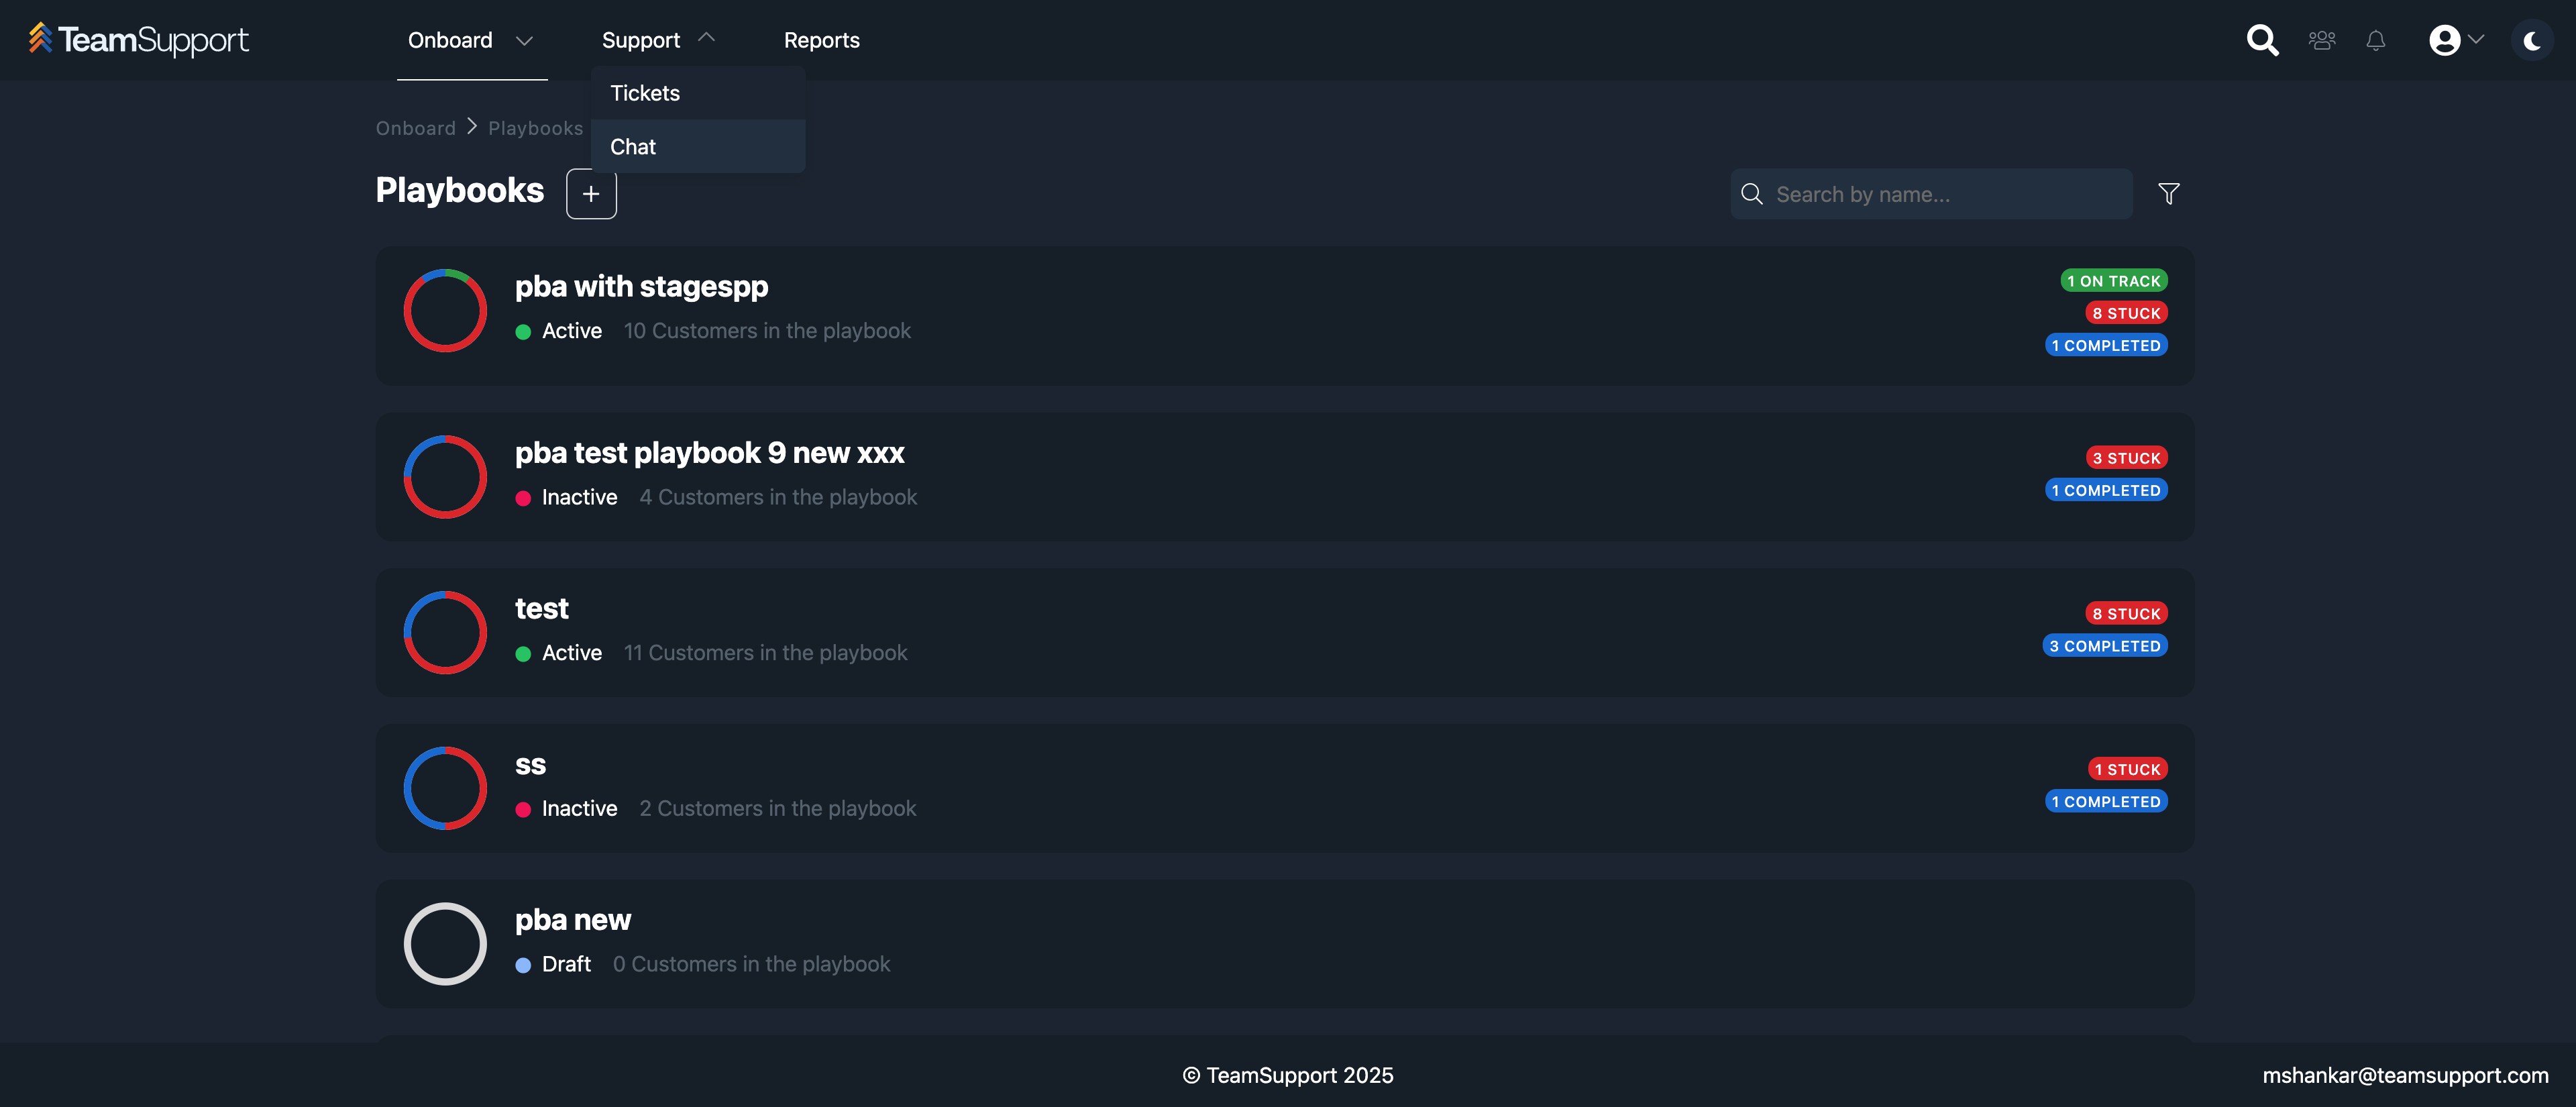
This is your new hub, designed to include nearly all the features of the existing one, enabling agents to handle chats and assist customers with ease. However, certain features—such as supervisor view, one-on-one chats, and group chats—are yet to be added.
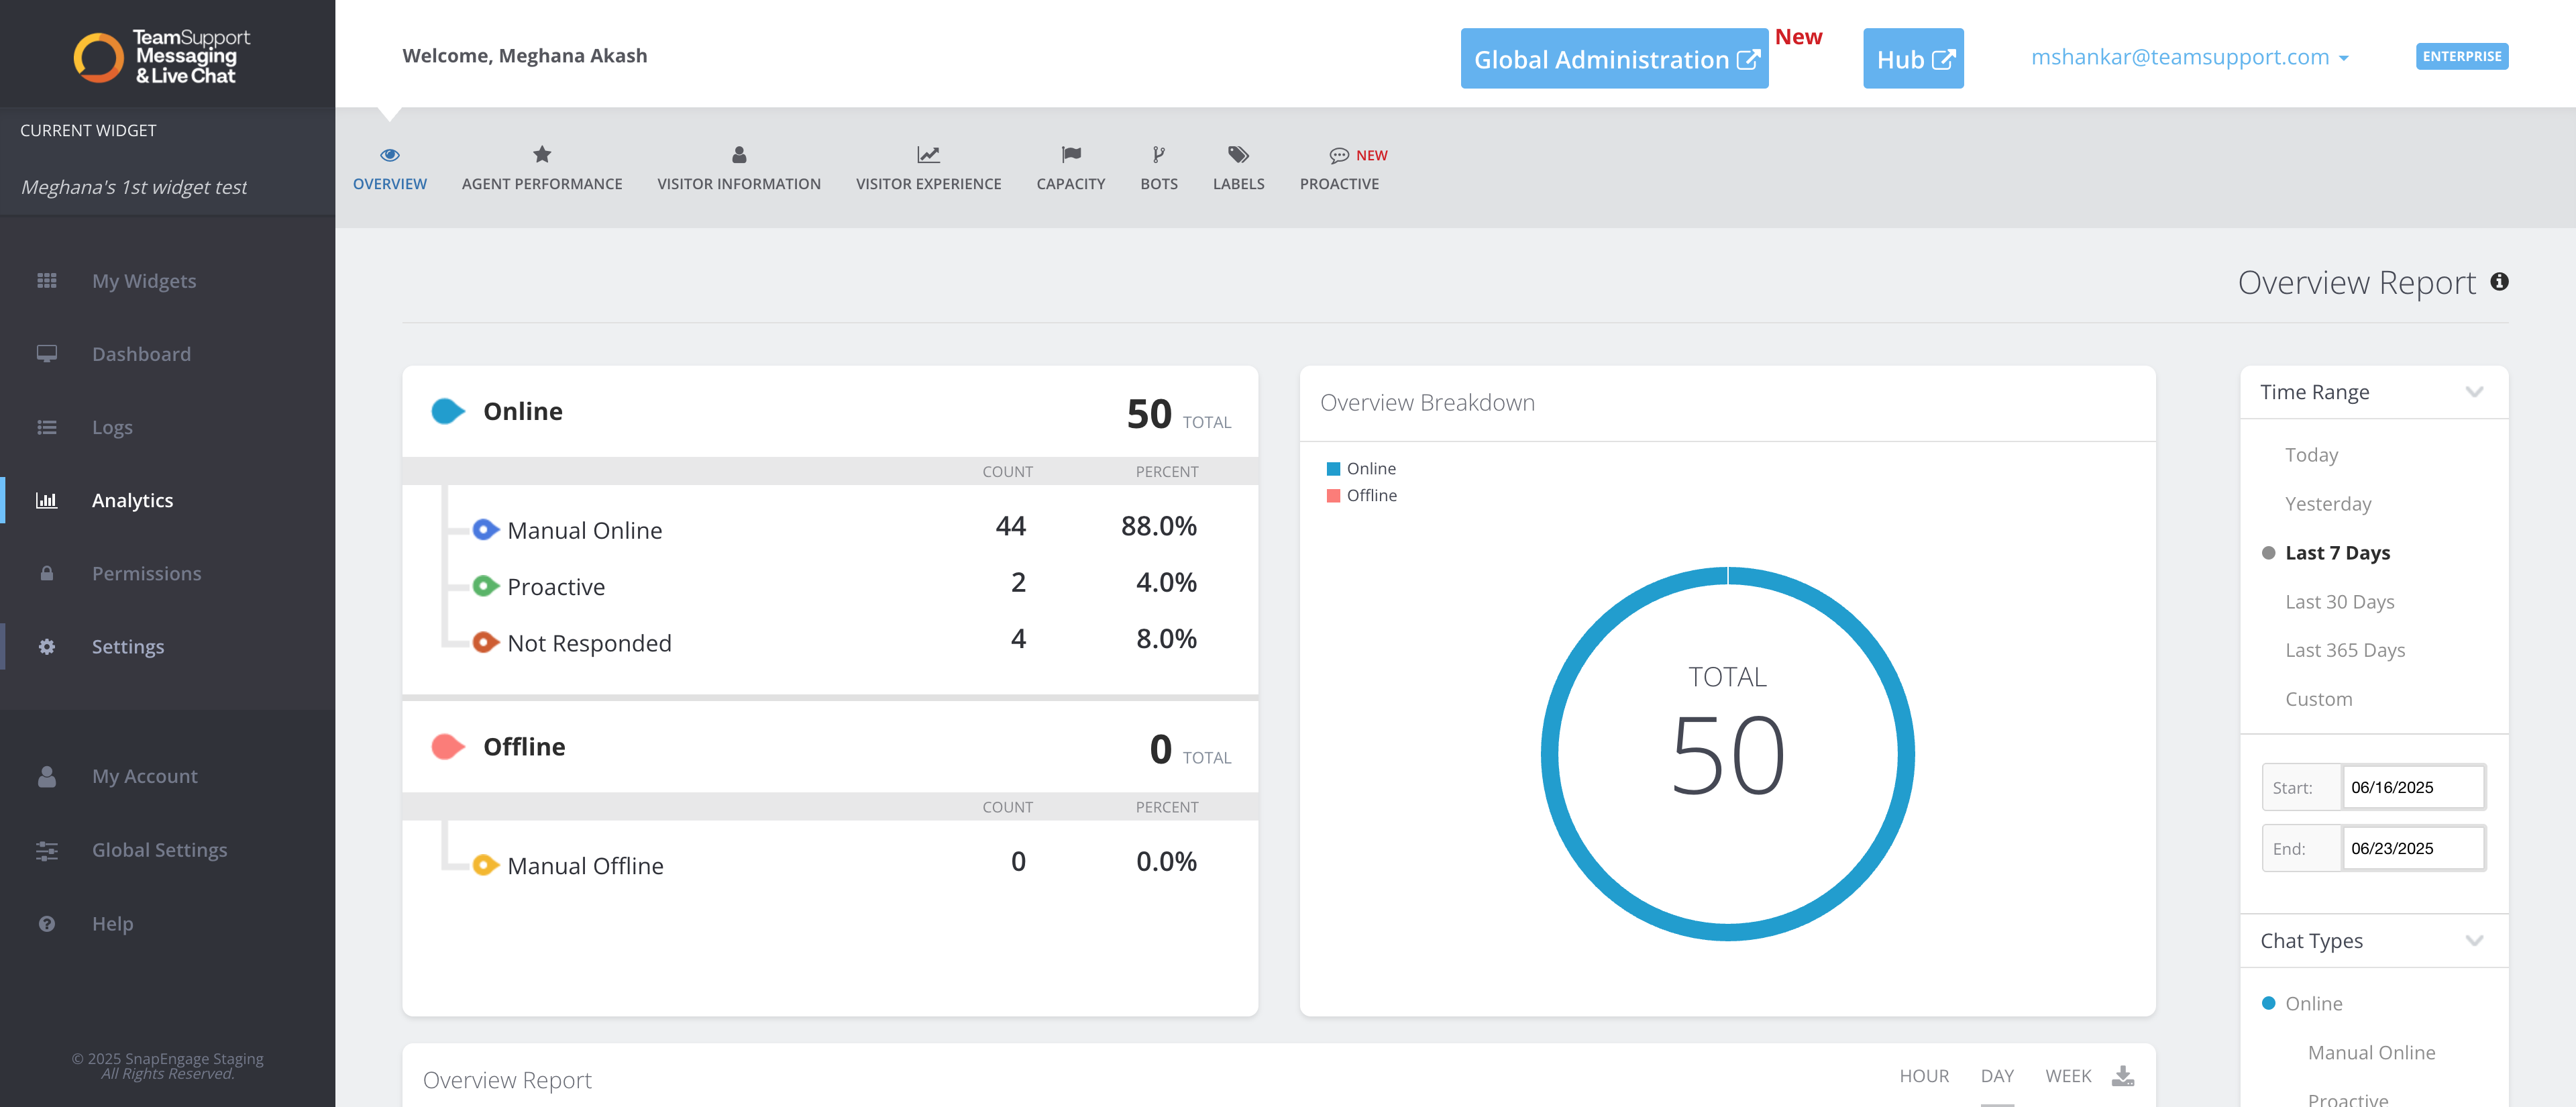
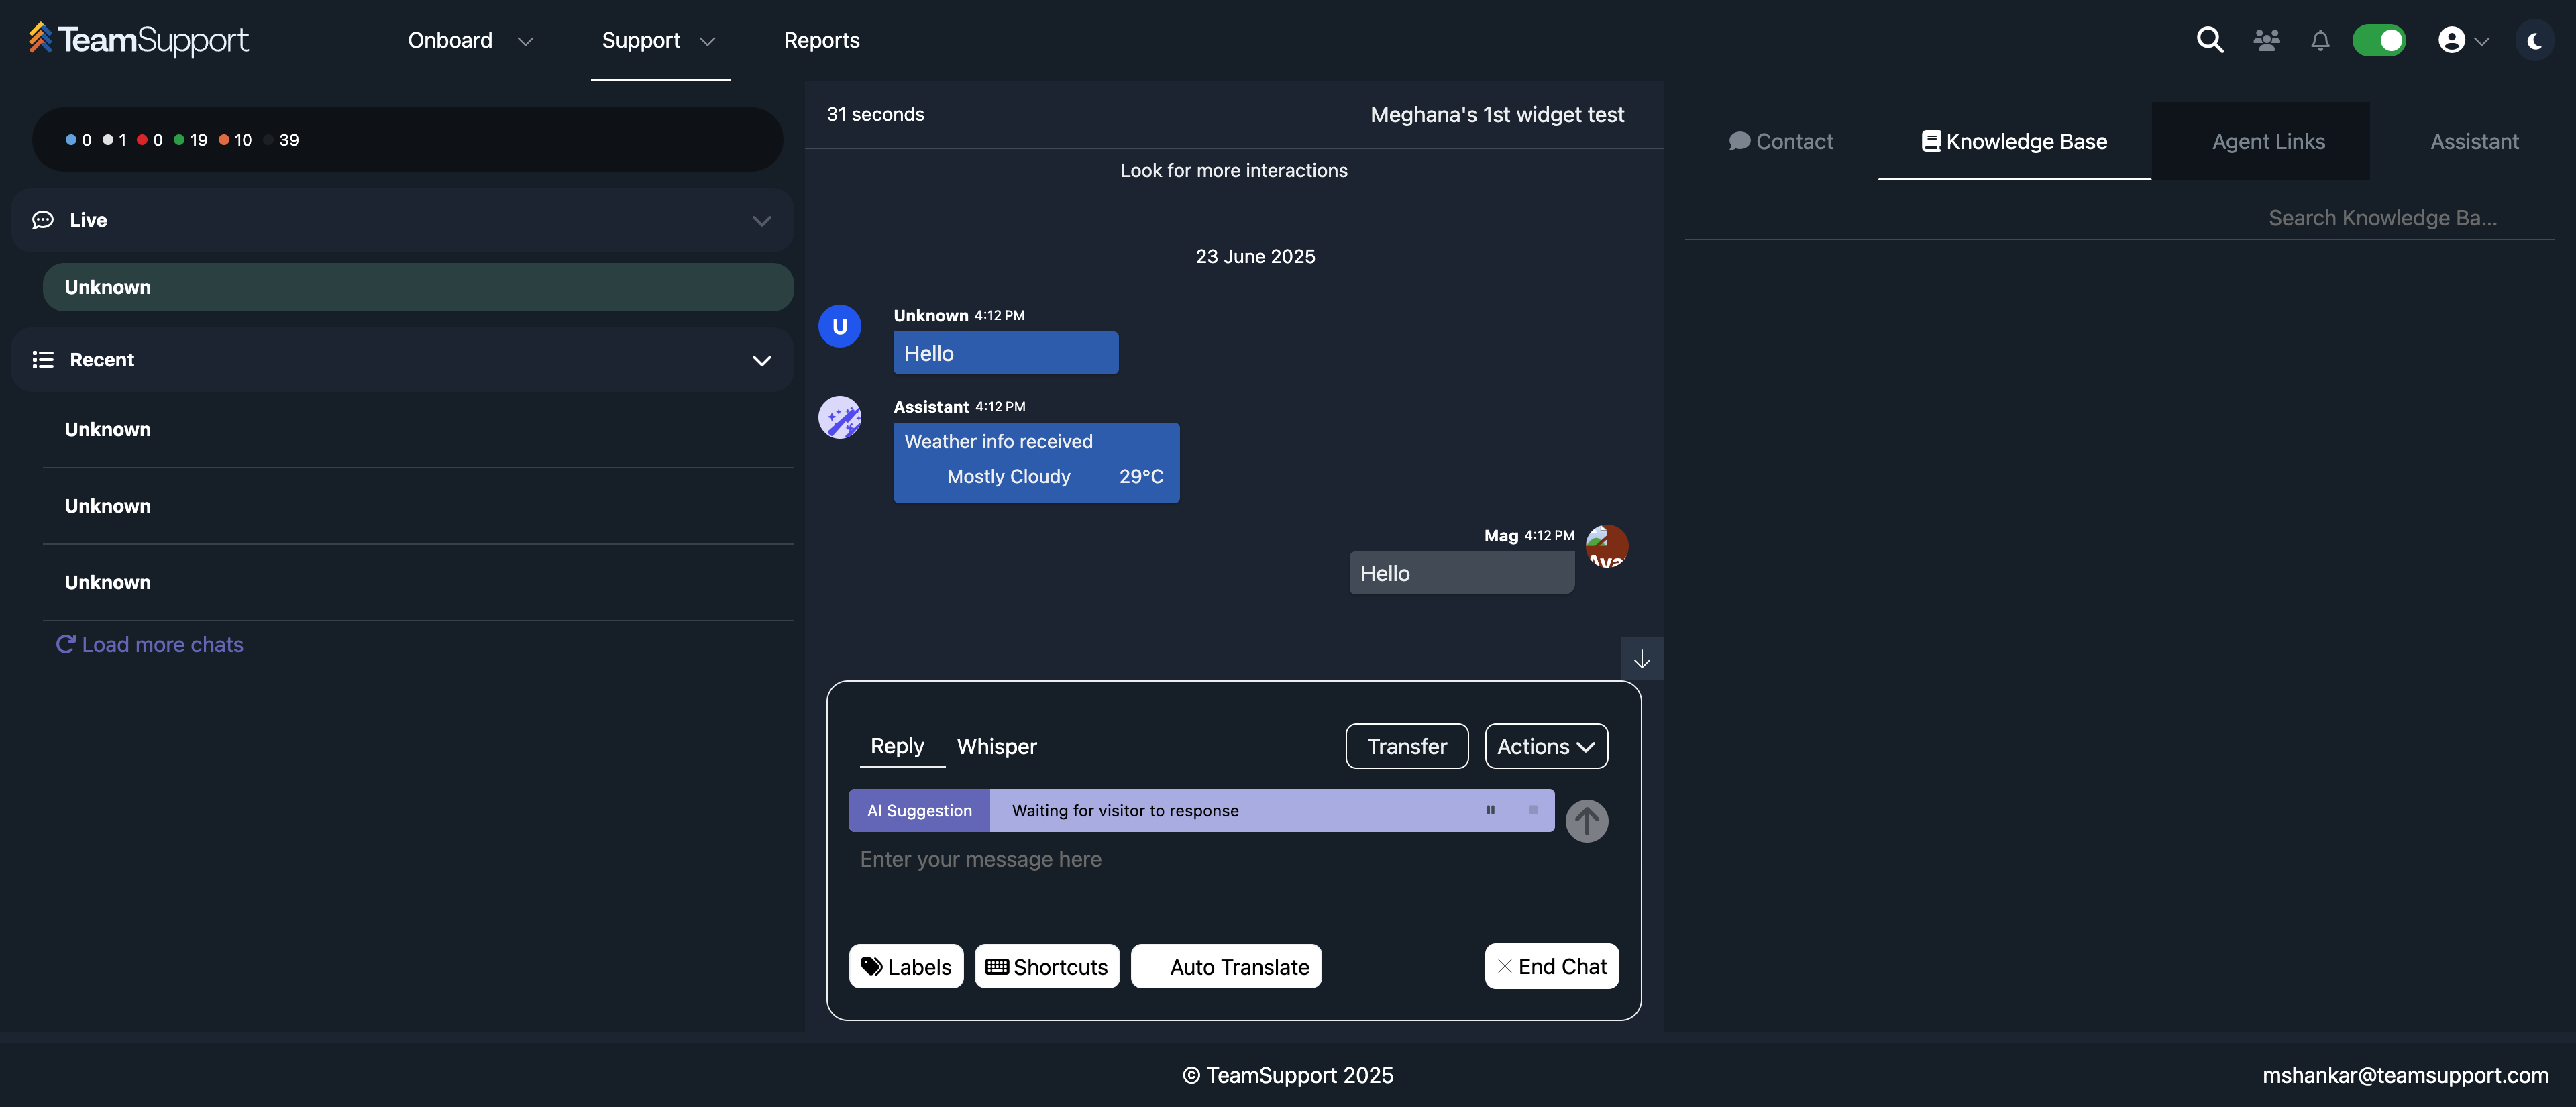
When you log into the hub, first check if you are in an active or paused state.
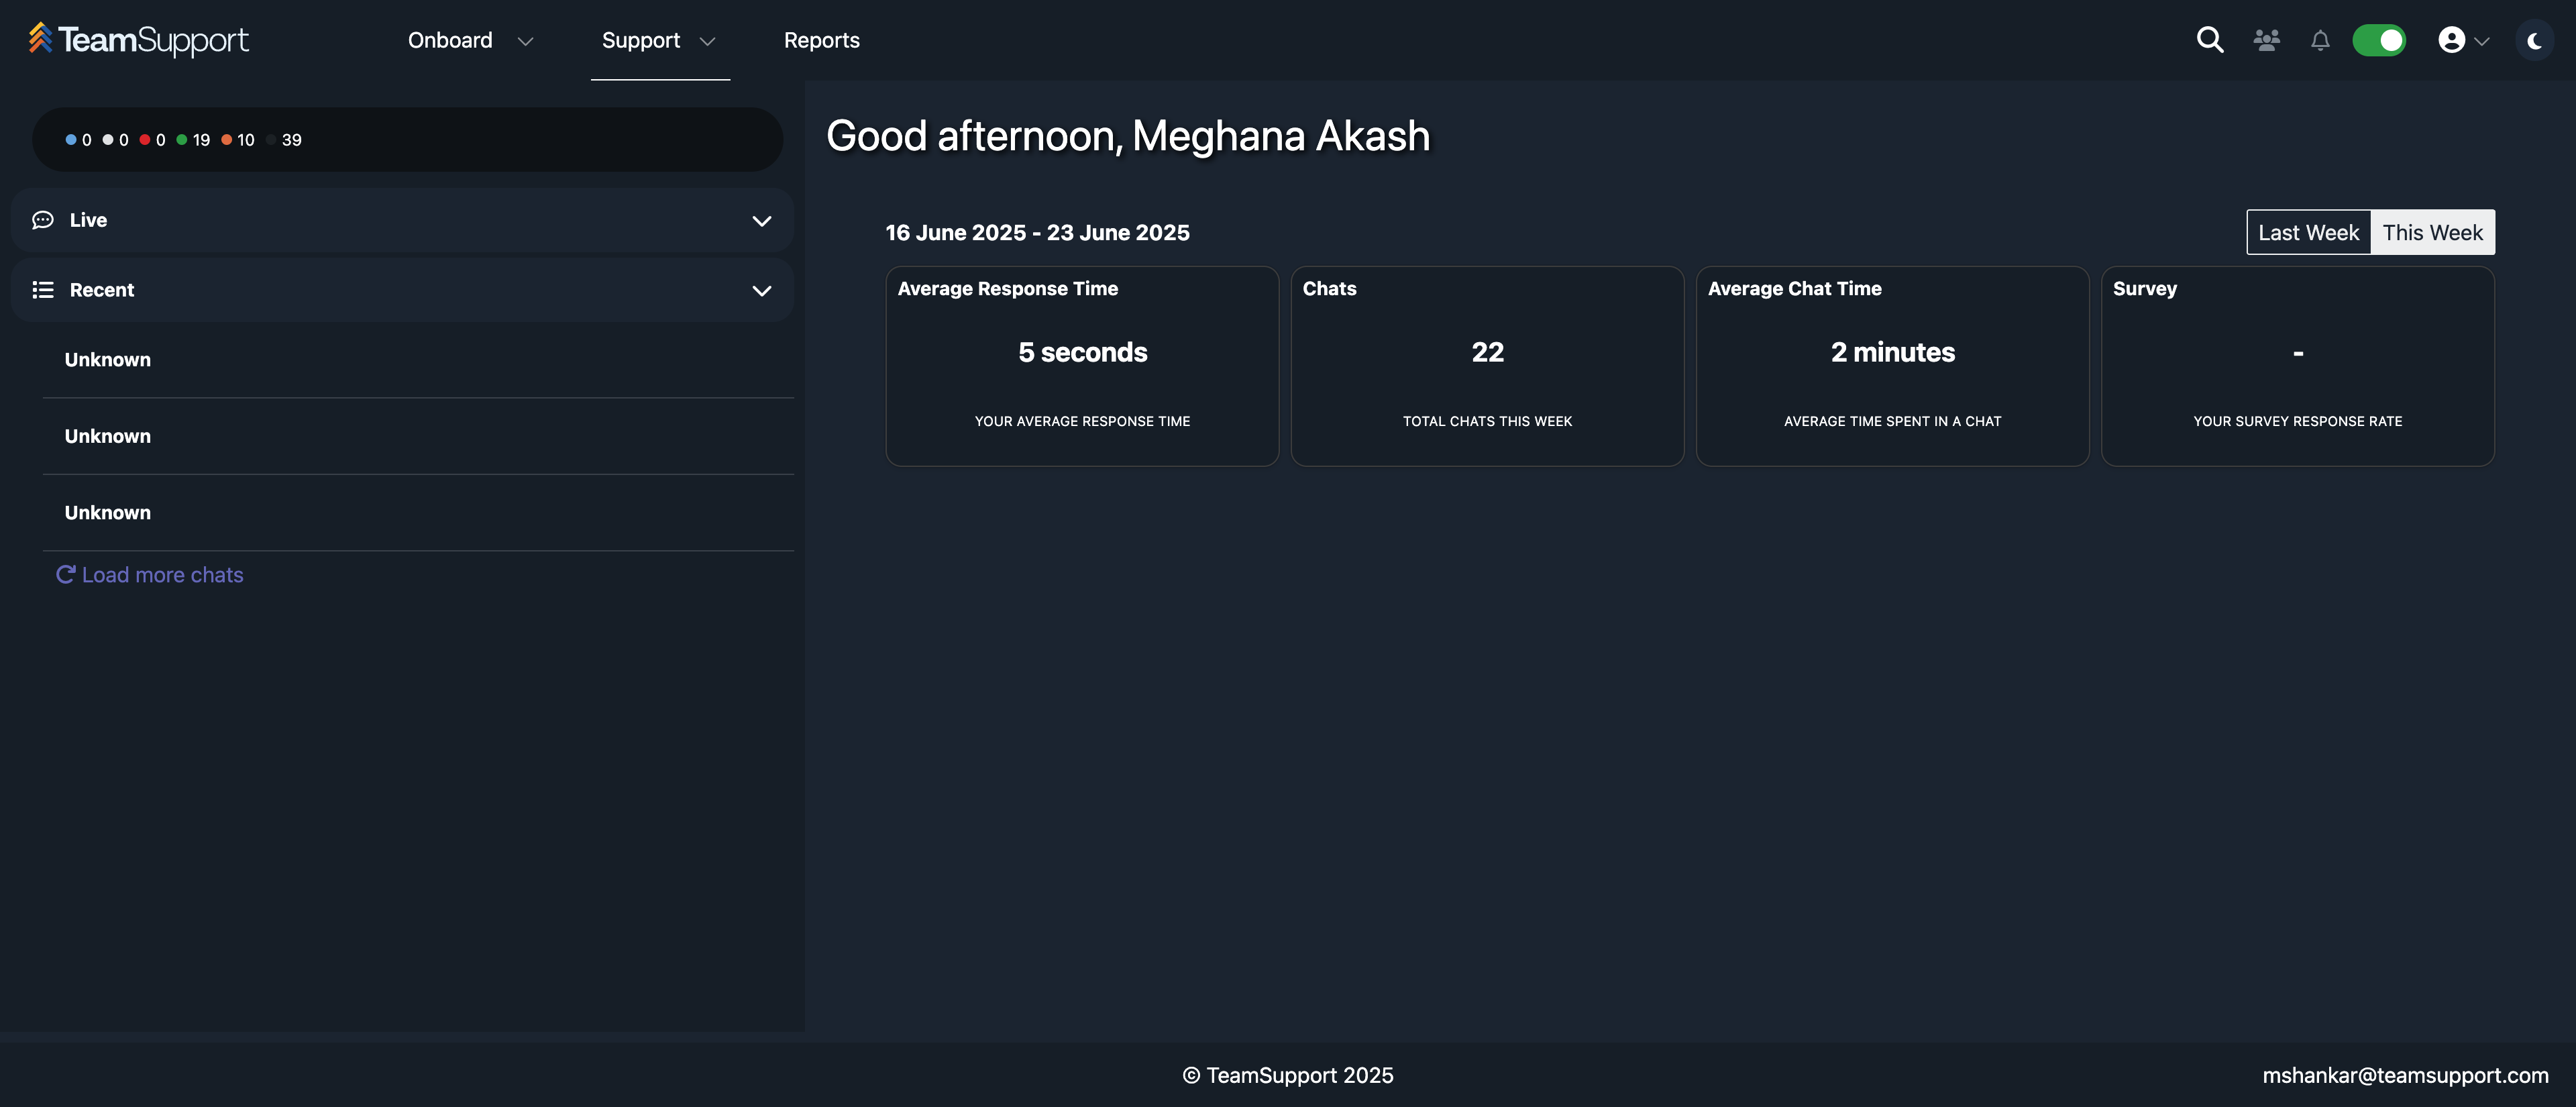
In your hub, you have all the sections from the previous hub. The mini dashboard provides information on existing widgets, active agents, online status, paused agents, incoming chat numbers, and any visitors waiting in the queue. You will see live chats once a new chat arrives. You can also look at the recent chat section. Here, you will see everything that has happened so far, including the history and all relevant information on the right-hand side.
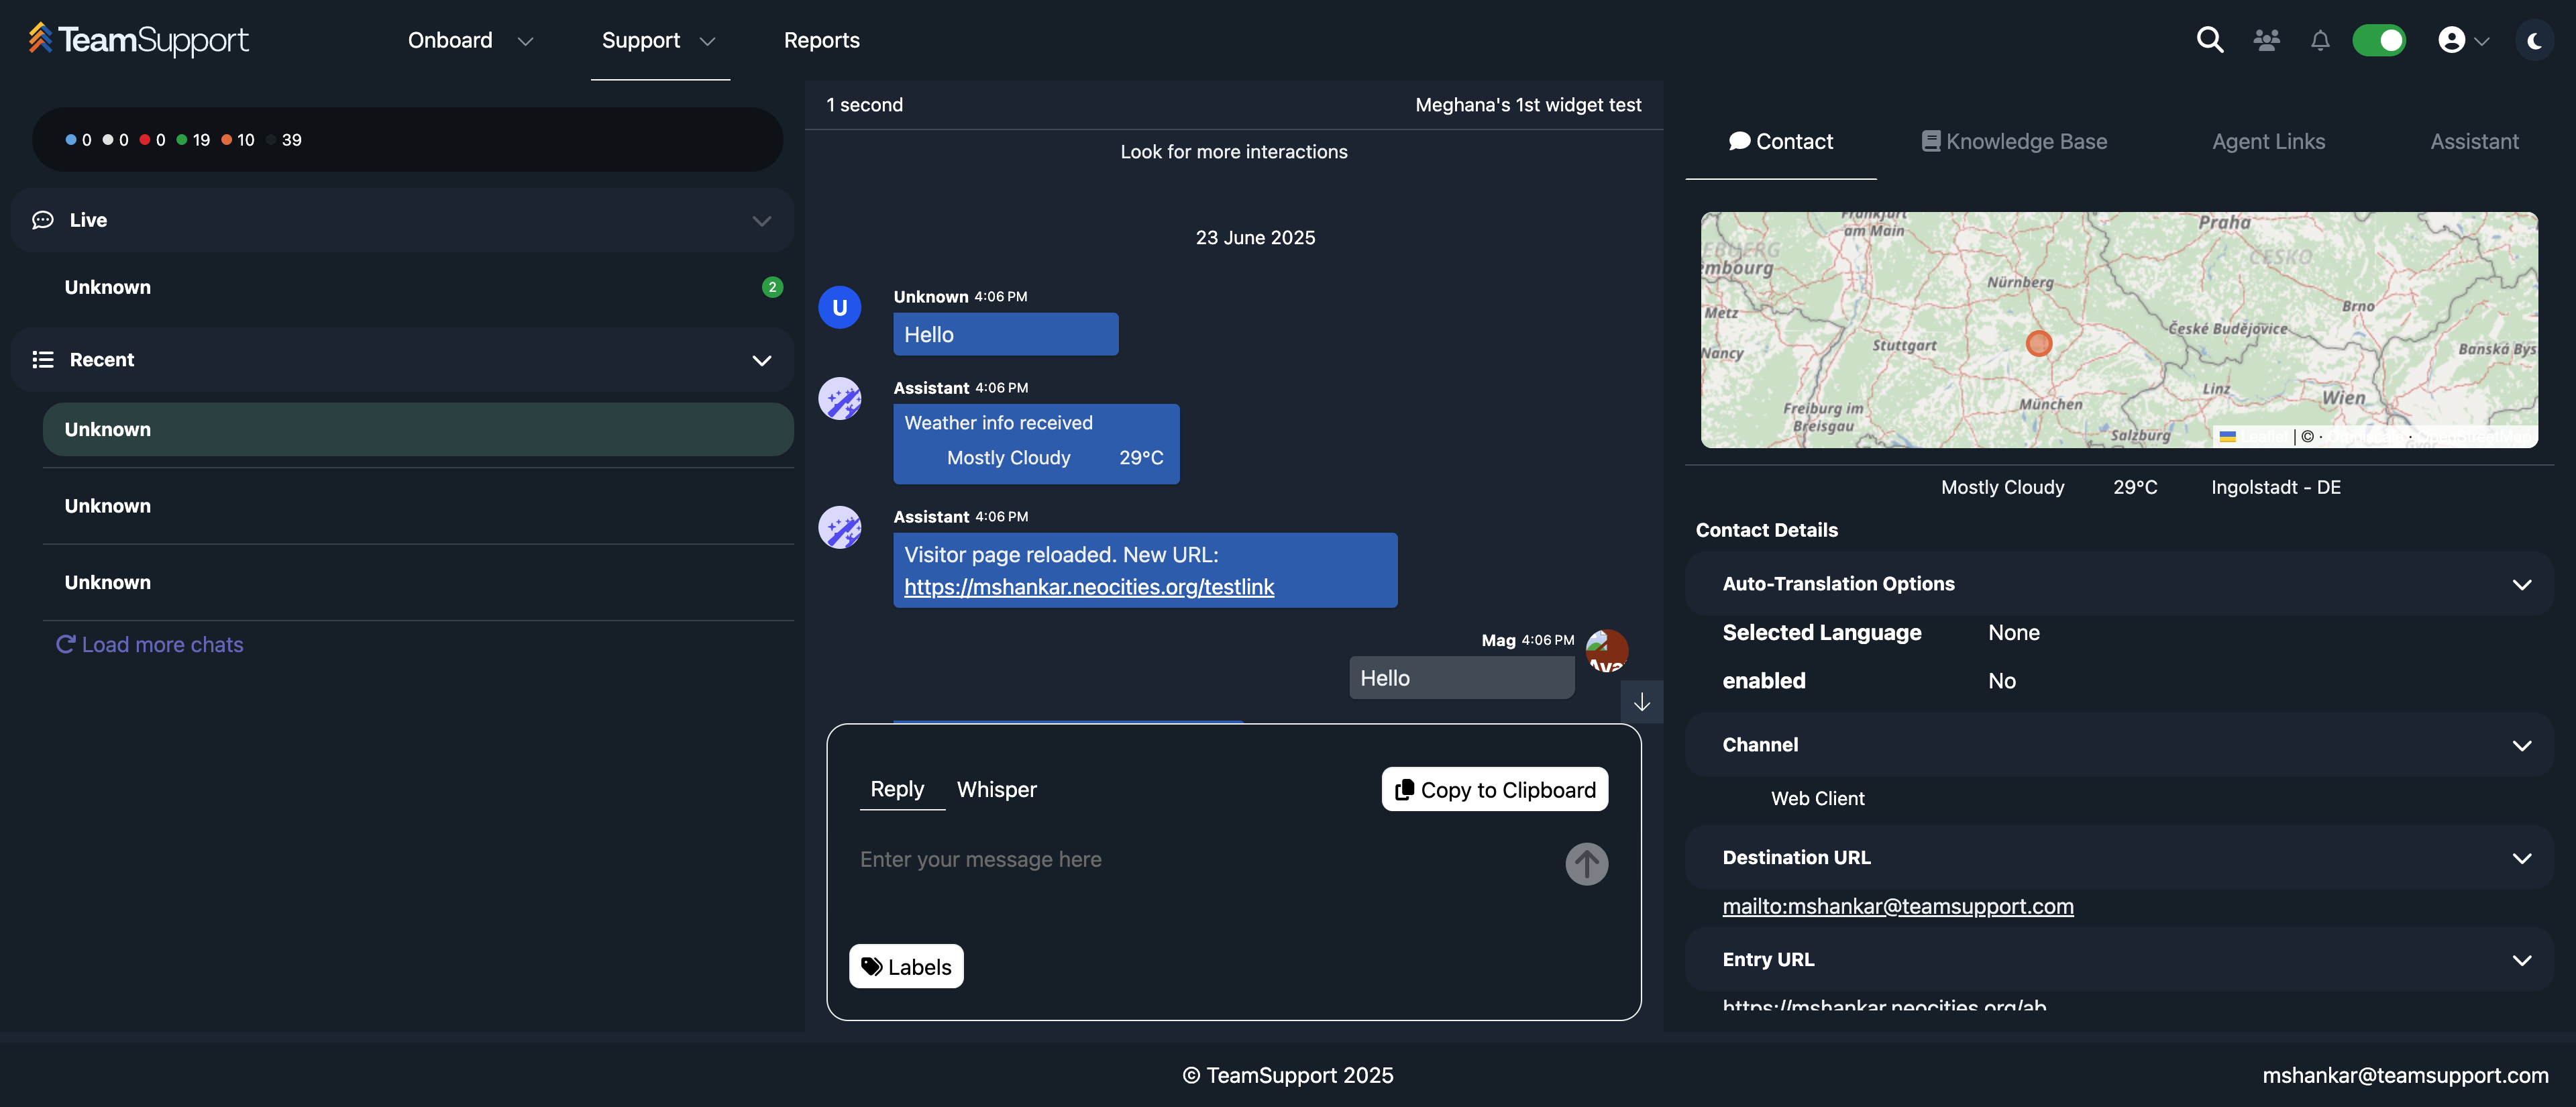
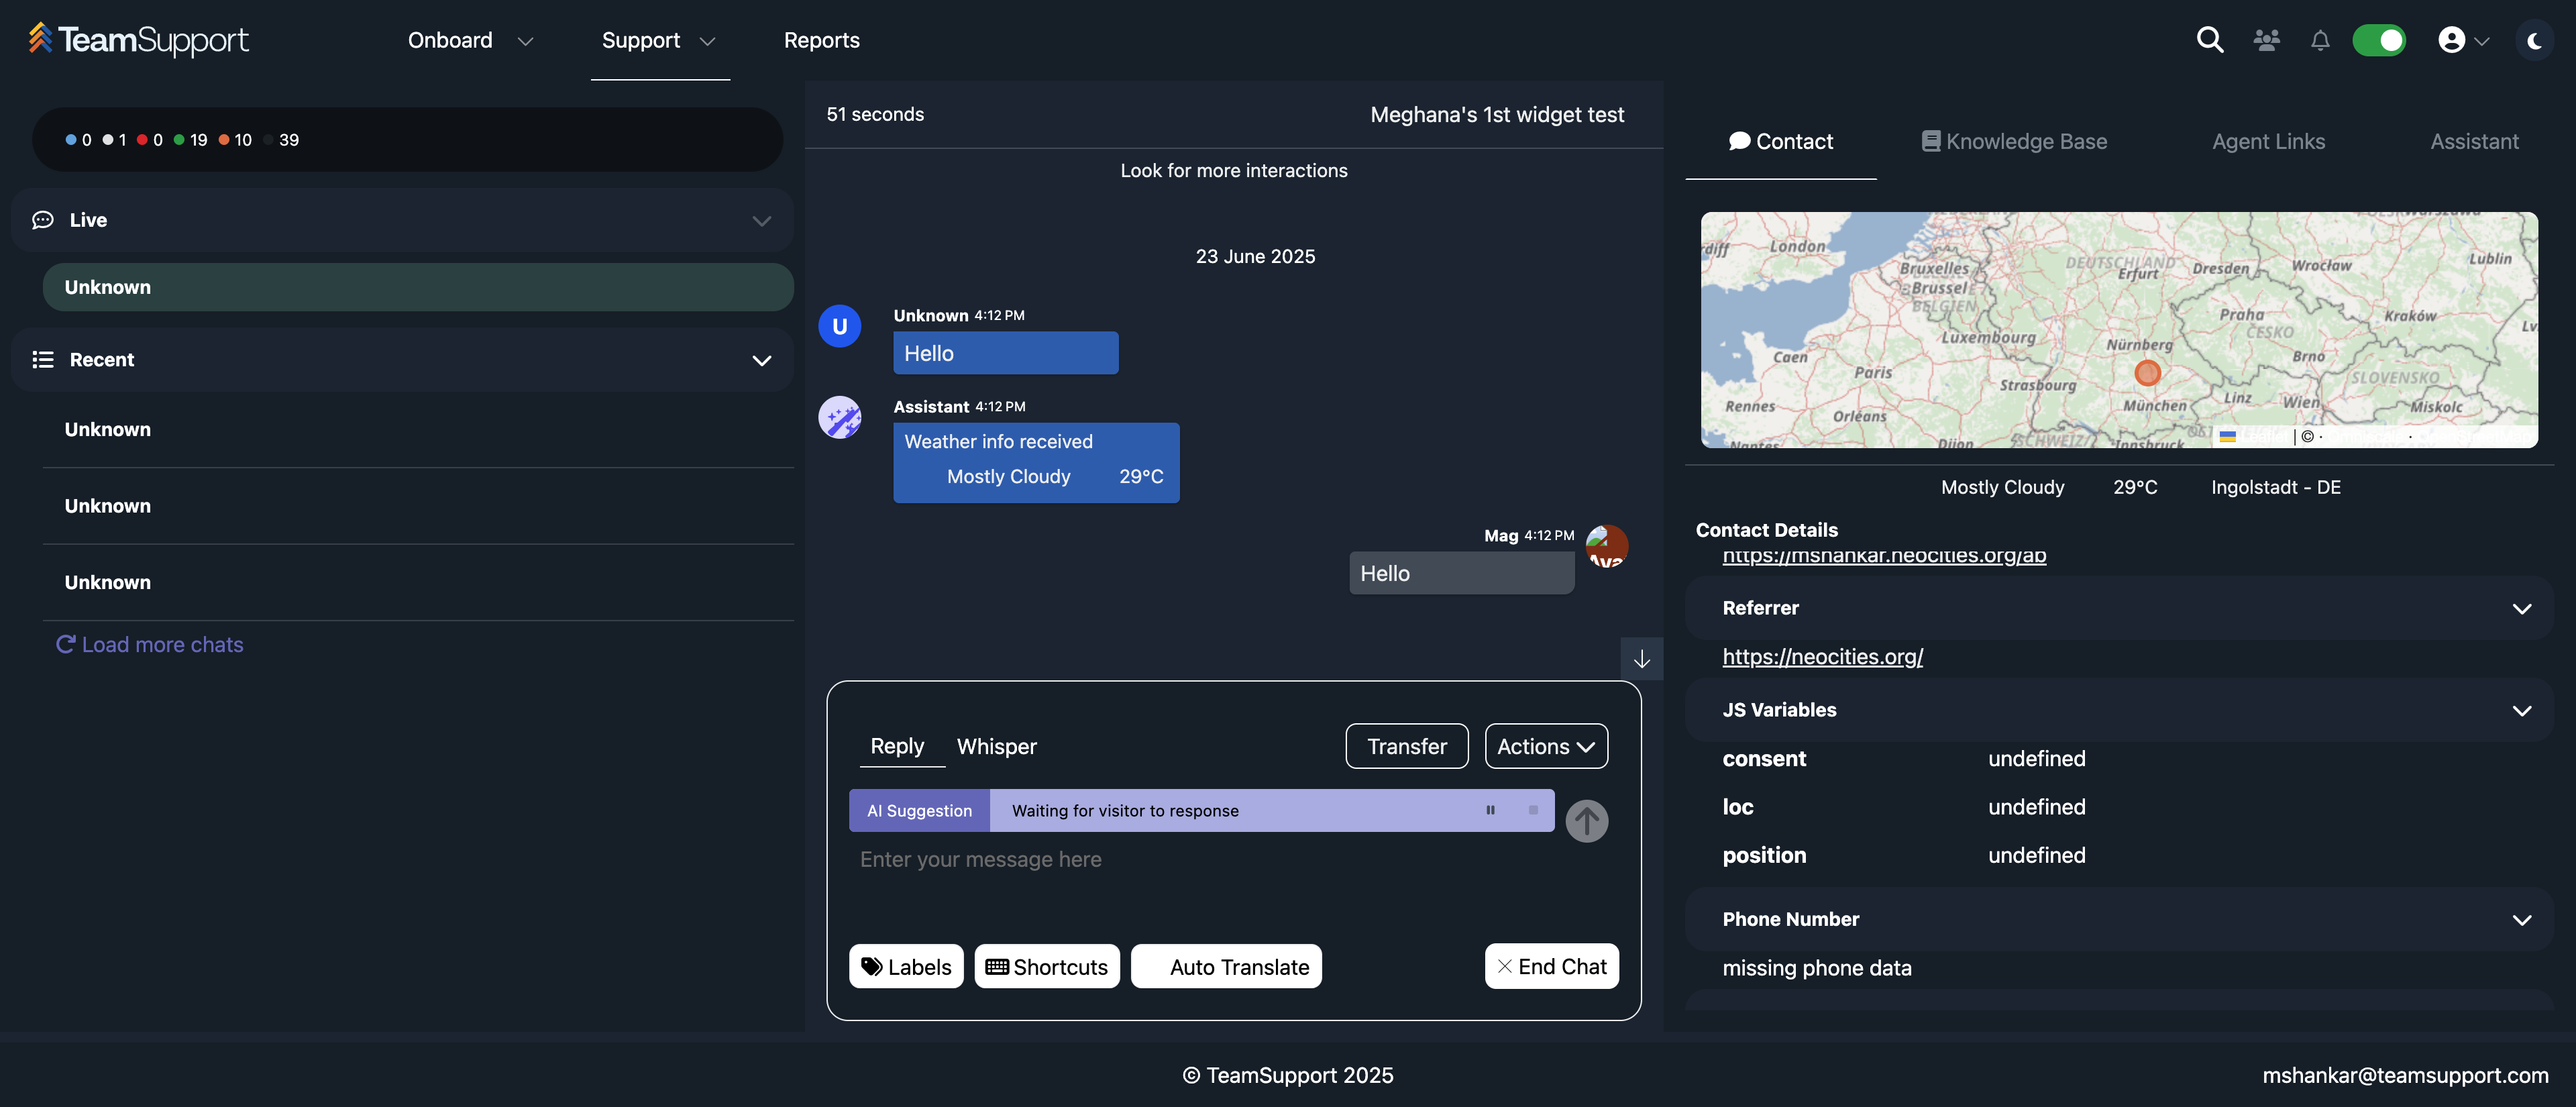
This is your central screen, containing all the information, including your contact tab. It holds details about your entry URL, geolocation, any JavaScript variables, previous interactions, language, and page title. If you have a knowledge base set up through your admin dashboard, you can view it here. You can also search for any articles that might be helpful during your chat.

The agent links allow you to use the hub SDK to set up any website of your choice, even multiple sites. This way, you can have assistance readily available while chatting.
We also have the reply and whisper features available here.
The supervisor will monitor the chat from the old hub. We plan to implement this in the future.
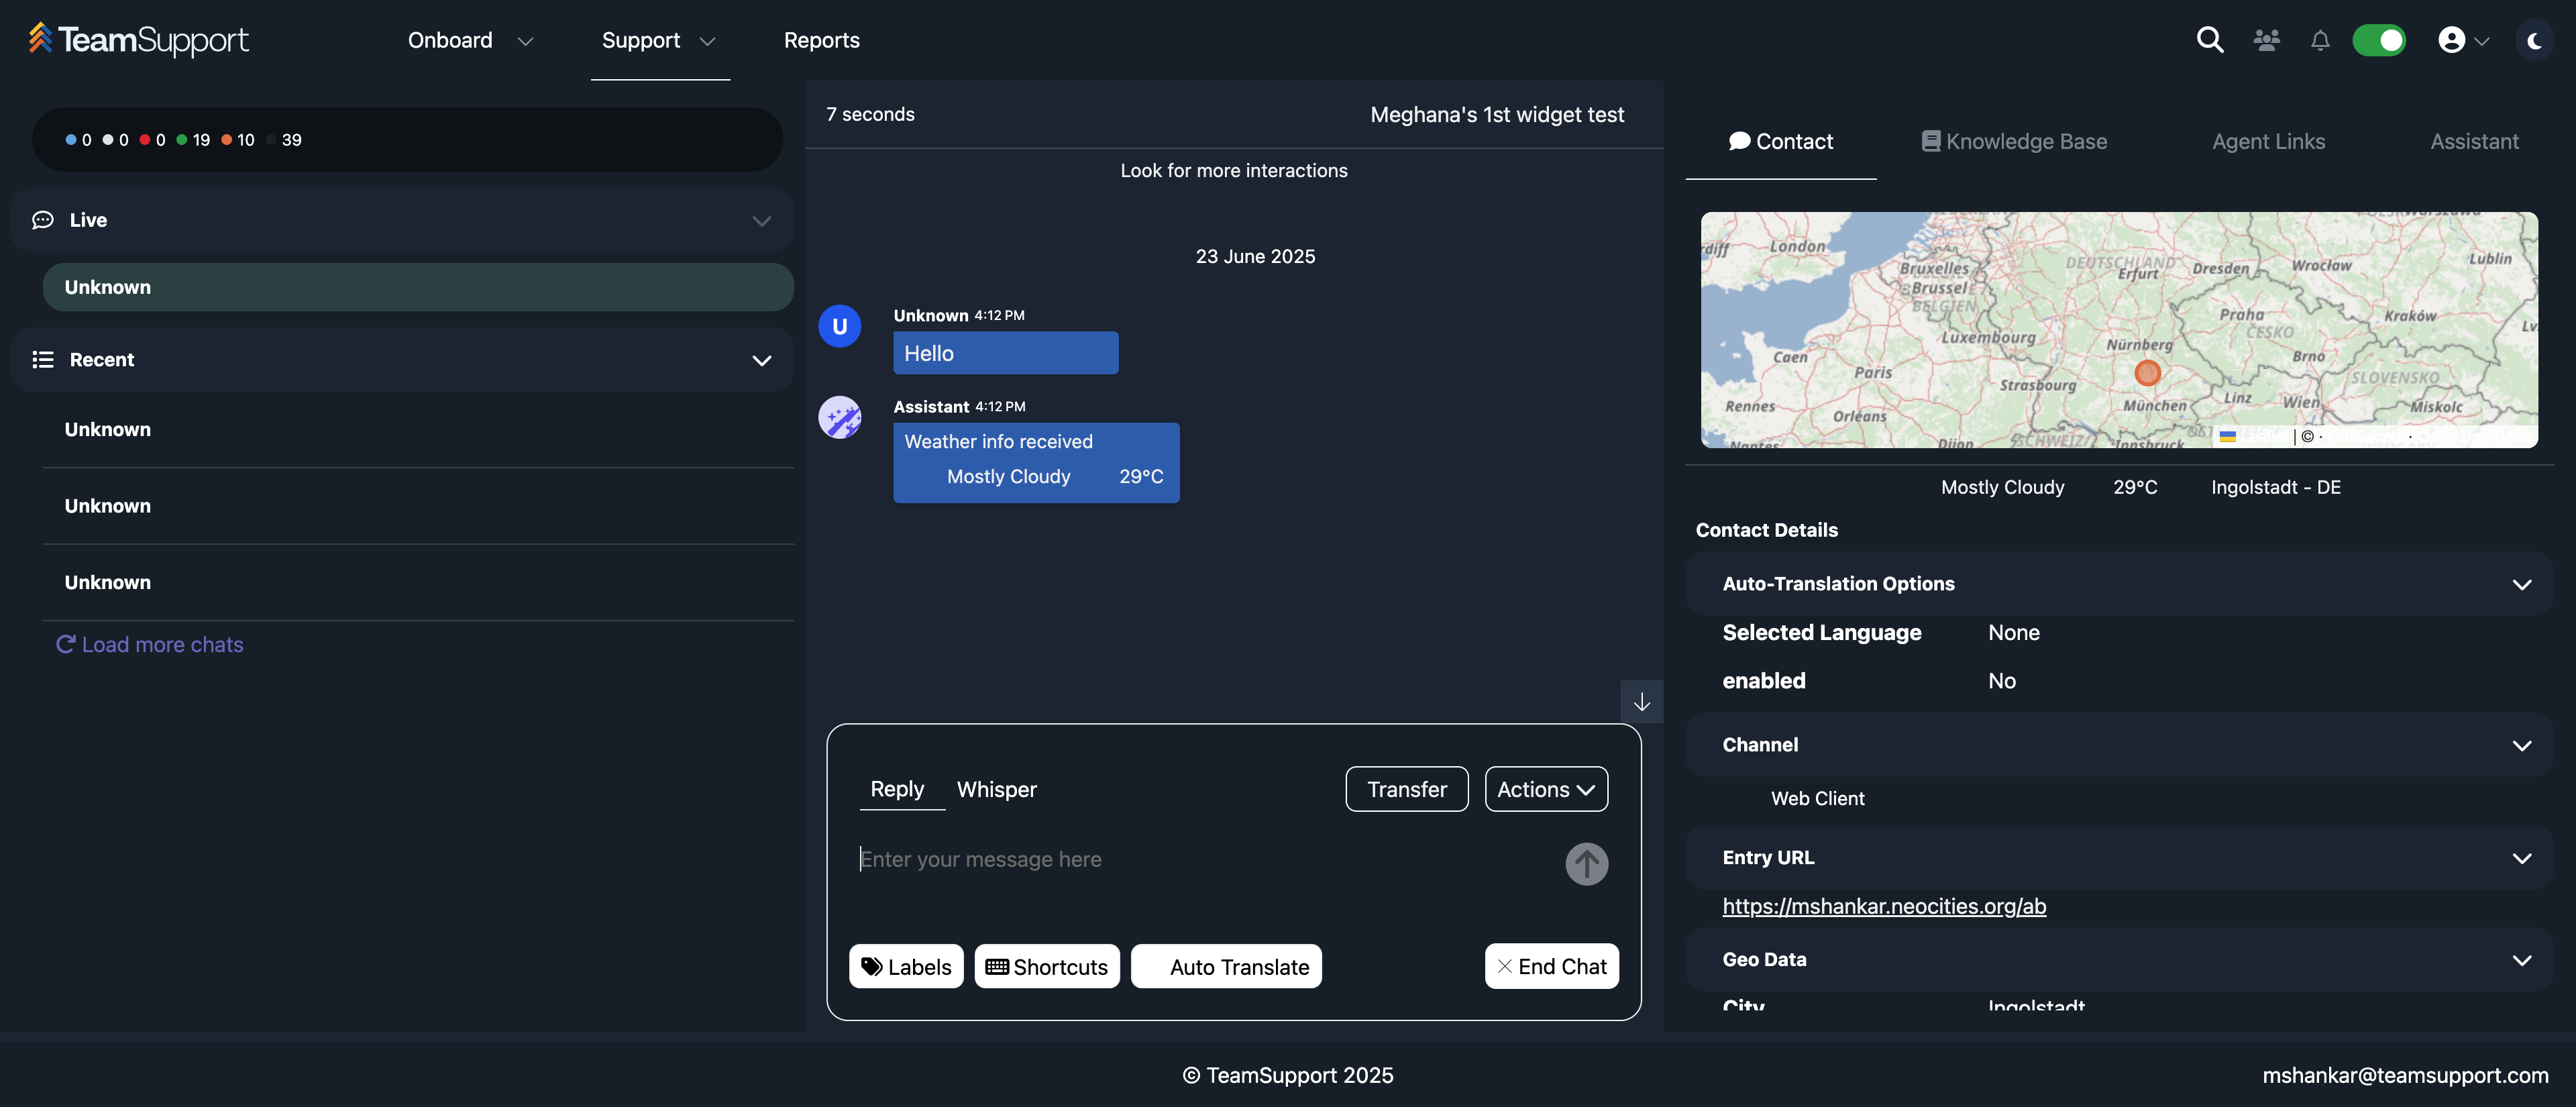
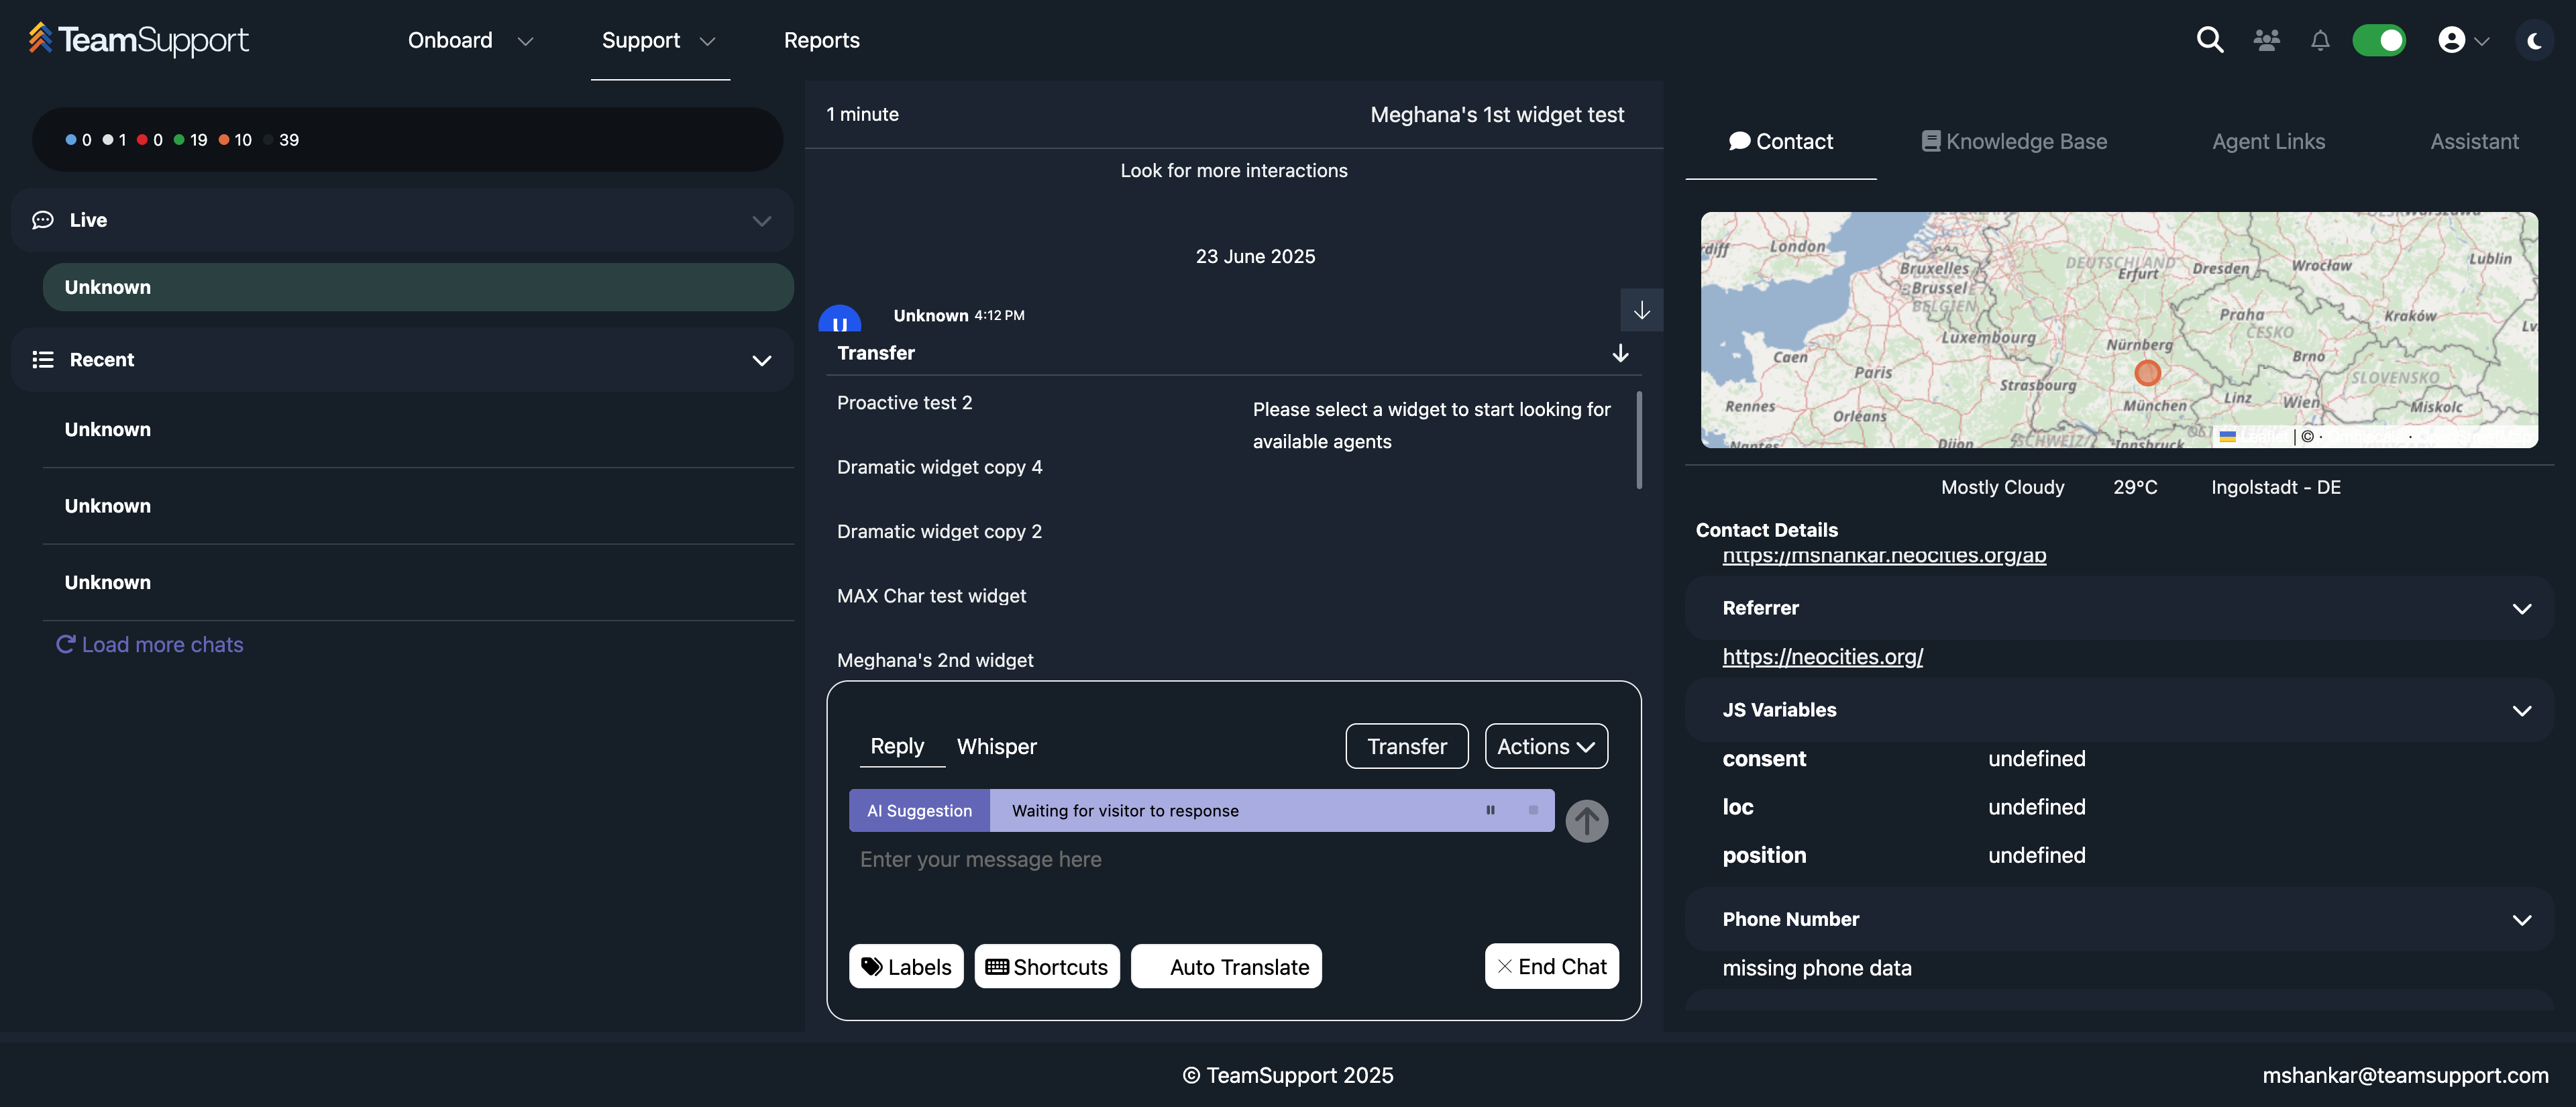
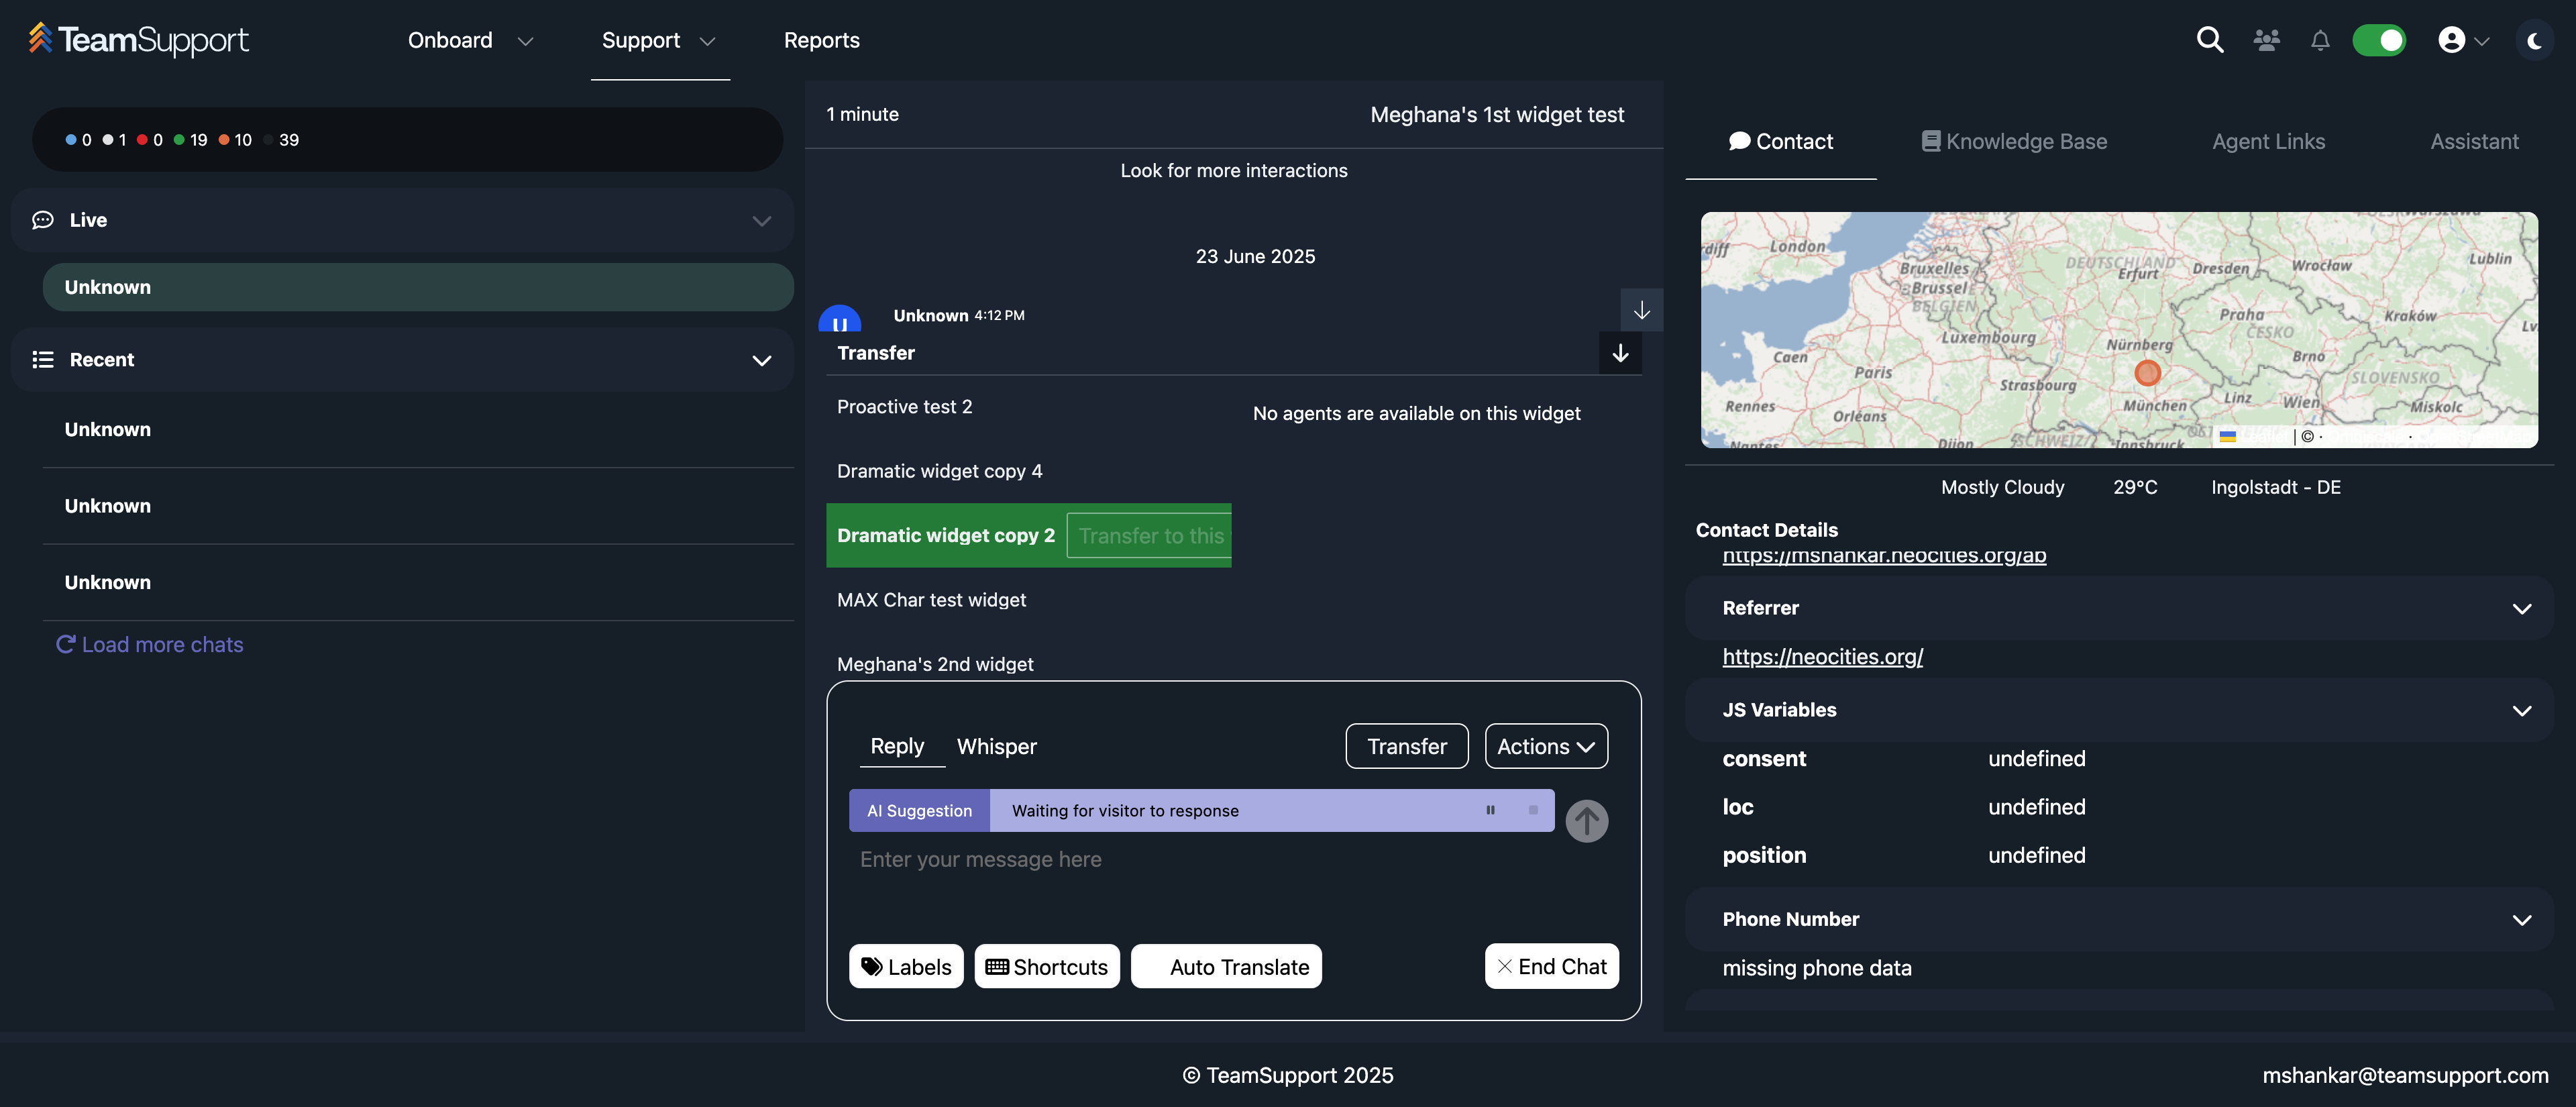
You can look for an AI suggestion if you have enabled it, or you can send a message of your choice to the visitor. There are transfer capabilities just like before.

You can transfer directly to a widget or find someone within a specific part of the widget to transfer to.
The actions contain similar information, such as transfers, shortcuts, file exchange, sentiment analysis, labels, and copying the content itself.

That's how you start using the hub. The experience would be quite similar to the existing hub.