
Guide on Adding People to Your Team and Sharing Guides
Learn how to add people to your team and share guides with them. This guide includes steps on how to move a guide to the team library and ensure it's accessible only to added individuals.
In this guide, we'll learn how to add team members and share guides with them. The primary objective is to ensure seamless communication and access to shared resources among team members.
Adding People to Your Team
To begin, navigate to the "My Team" section and select "Add People." Enter the email addresses of the individuals you wish to invite to join the team. Once done, you'll receive confirmation that the invitations have been successfully sent.
Sharing Guides in the Team Library
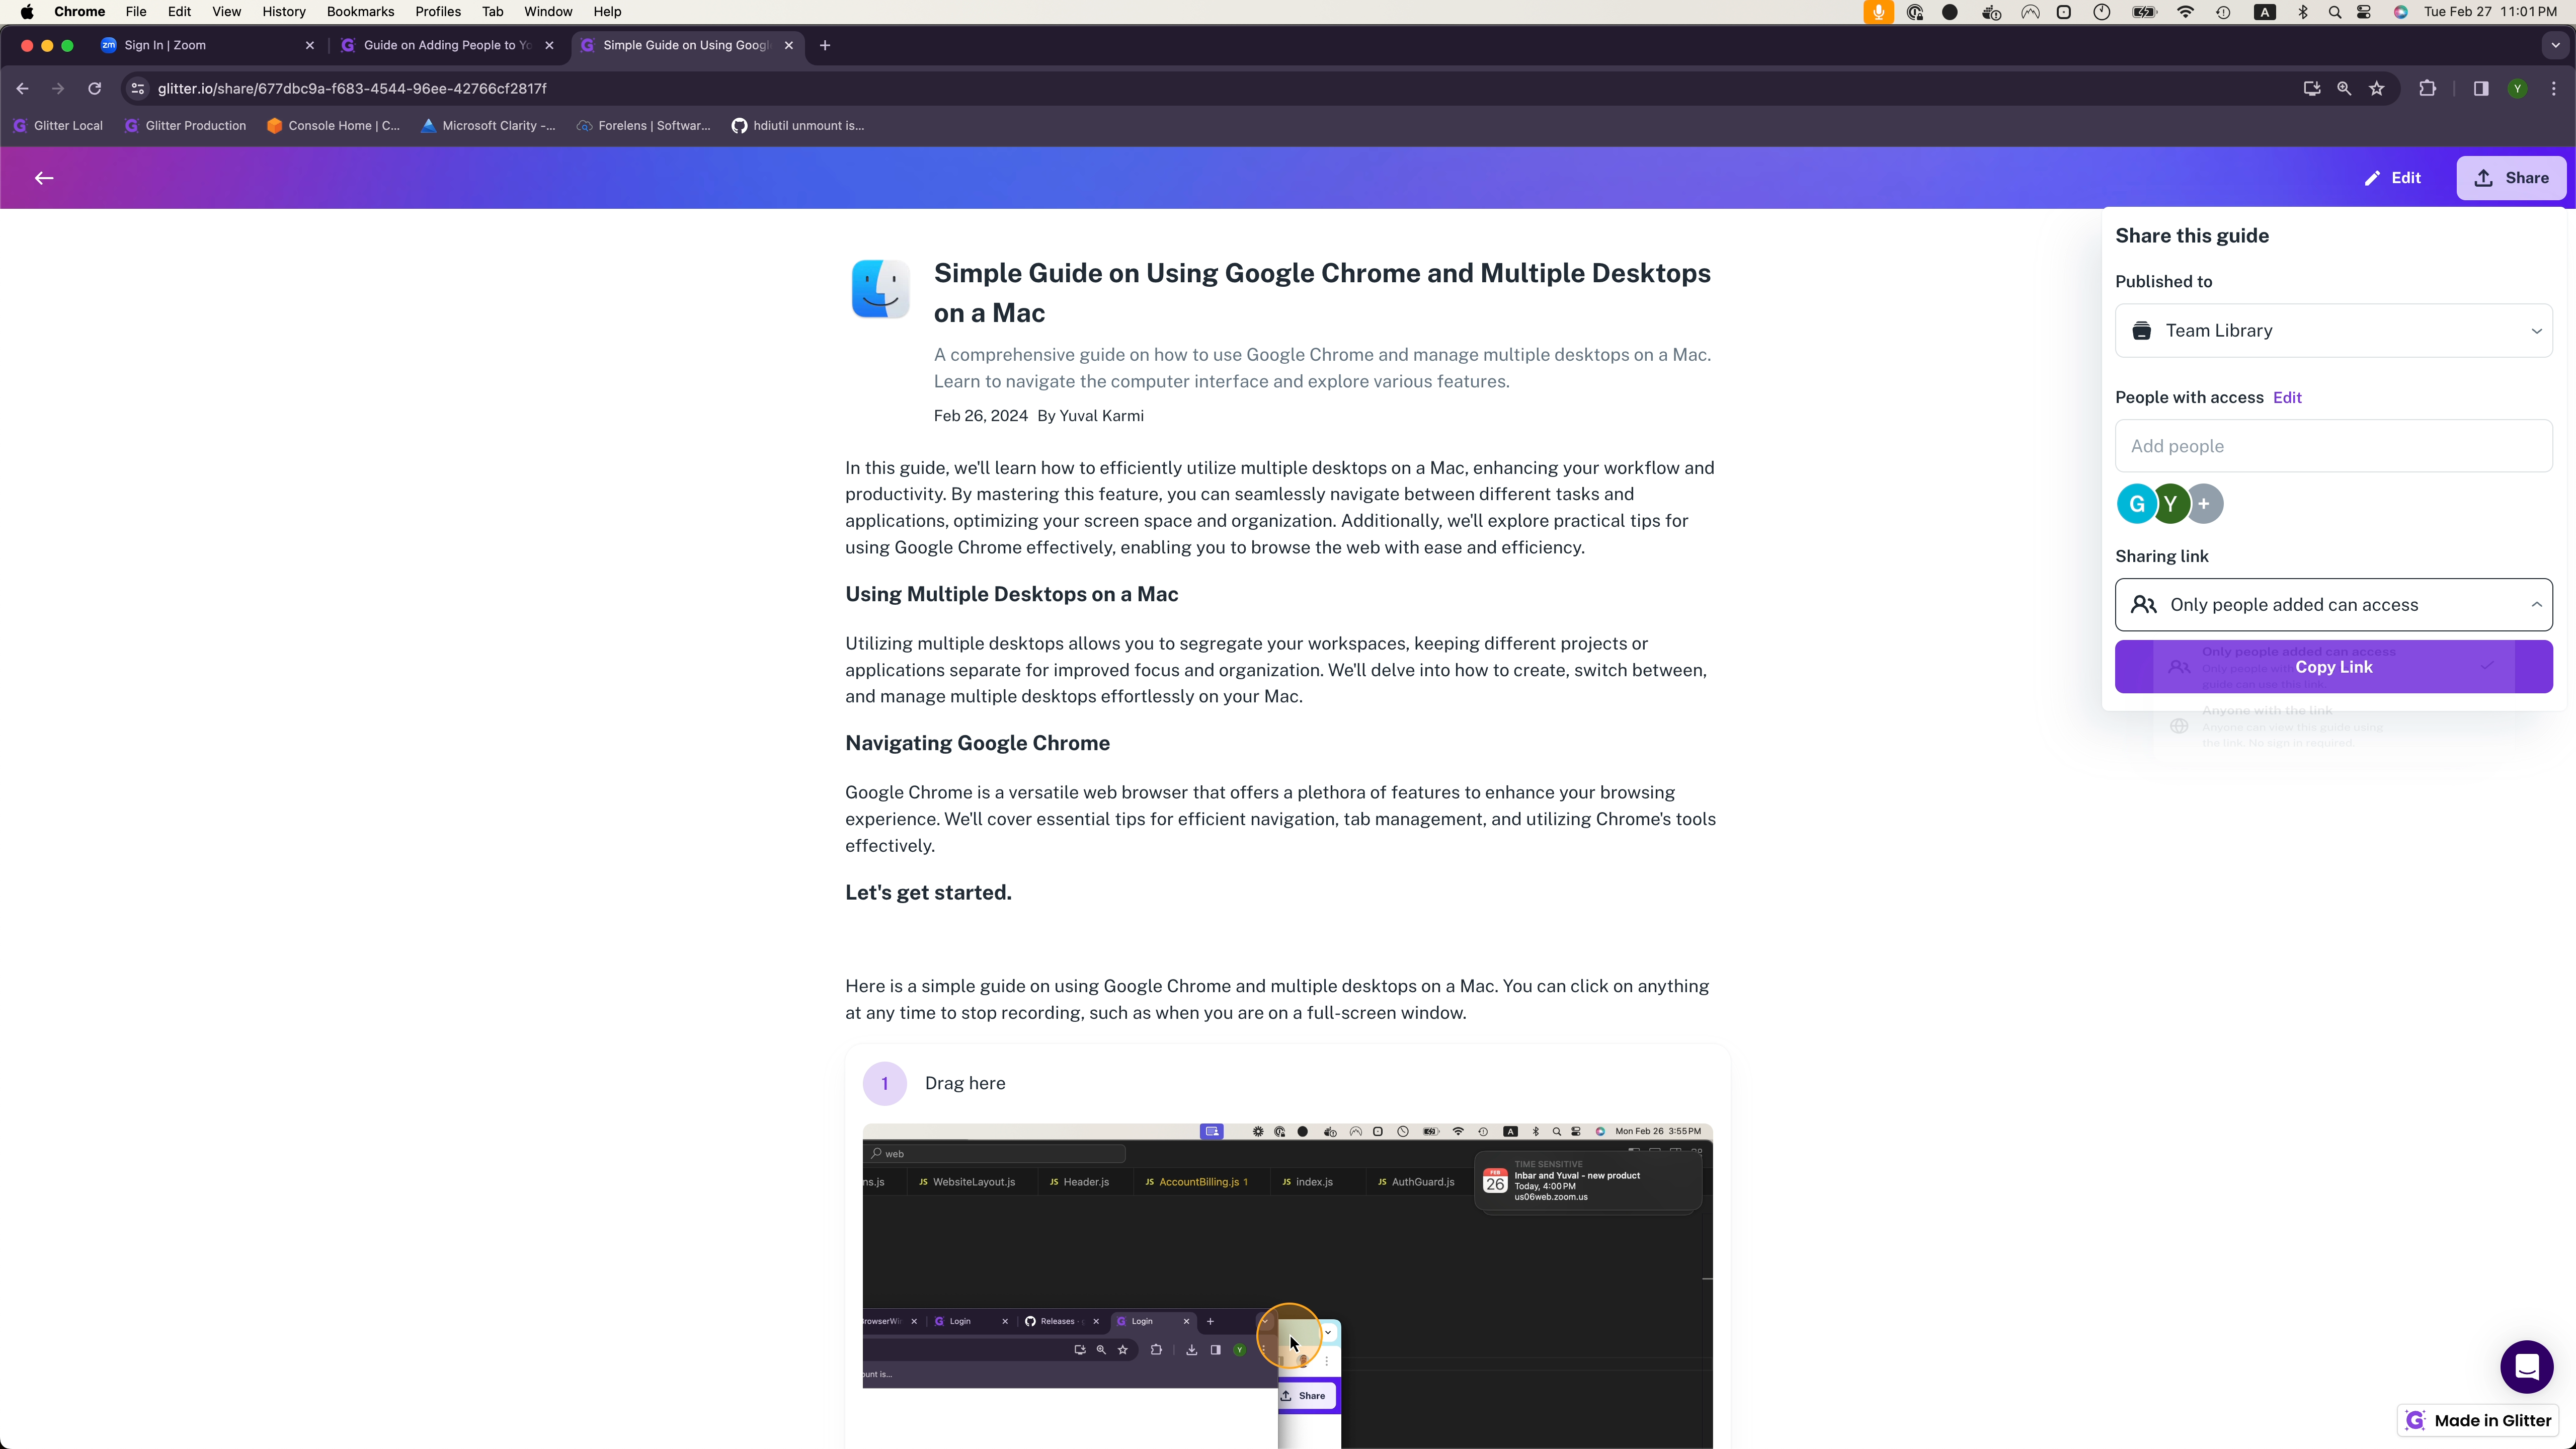
To share a guide with the team, choose the specific guide, click on "Share" at the top right corner, and select the team library under "Published To." Ensure that the sharing link is restricted to team members only for controlled access.
Setting Access Permissions
To manage access levels, edit the permissions for the guide. By default, team members can view the guide. If needed, grant editing privileges by selecting "Can Edit." This ensures that team members can collaborate effectively on shared guides.
Let's get started.
Here's a guide on adding people to our team and sharing guides with them. First, ensure that the individuals are part of your team by selecting "My Team" and then clicking on "Add People."


You can then enter the email addresses of the individuals you wish to add.


After completing the task, you will notice that the invitations have been sent successfully. Next, we need to ensure that the guide we created is in our team's library.

When you create guides, they are initially stored in the private library.
Let's select the guide we want to share with our team. Pick the guide from your private library by clicking on it.

Next, click on "Share" at the top right-hand side.


To make sure your guide is not public, pay attention that Sharing link is set to "Only people added can access"

Confirming your guide is shared with the team
Now, when you click on "edit" next to people with access, it indicates that our team is present. By default, the team can view the guide.


This is also where we can give the team the ability to Edit a guide (not just view it).
Select the eye and change it to can edit:


Now, this guide is not only accessible, but editable by all team members. You can find the guide in the team library.

