How to Add an Attachment to a Recurring Journal Entry

Learn how to upload and remove attachments for recurring journal entries to keep your accounting documentation organized.

By Aasma Technology Solutions

This guide explains how to add and remove file attachments for recurring journal entries. Adding attachments ensures that supporting documentation is always linked to your scheduled accounting tasks.

This process is designed for accountants and financial controllers who manage recurring entries in the general ledger. Use this workflow when you need to provide backup documentation, such as spreadsheets or receipts, for specific journal entries.
1
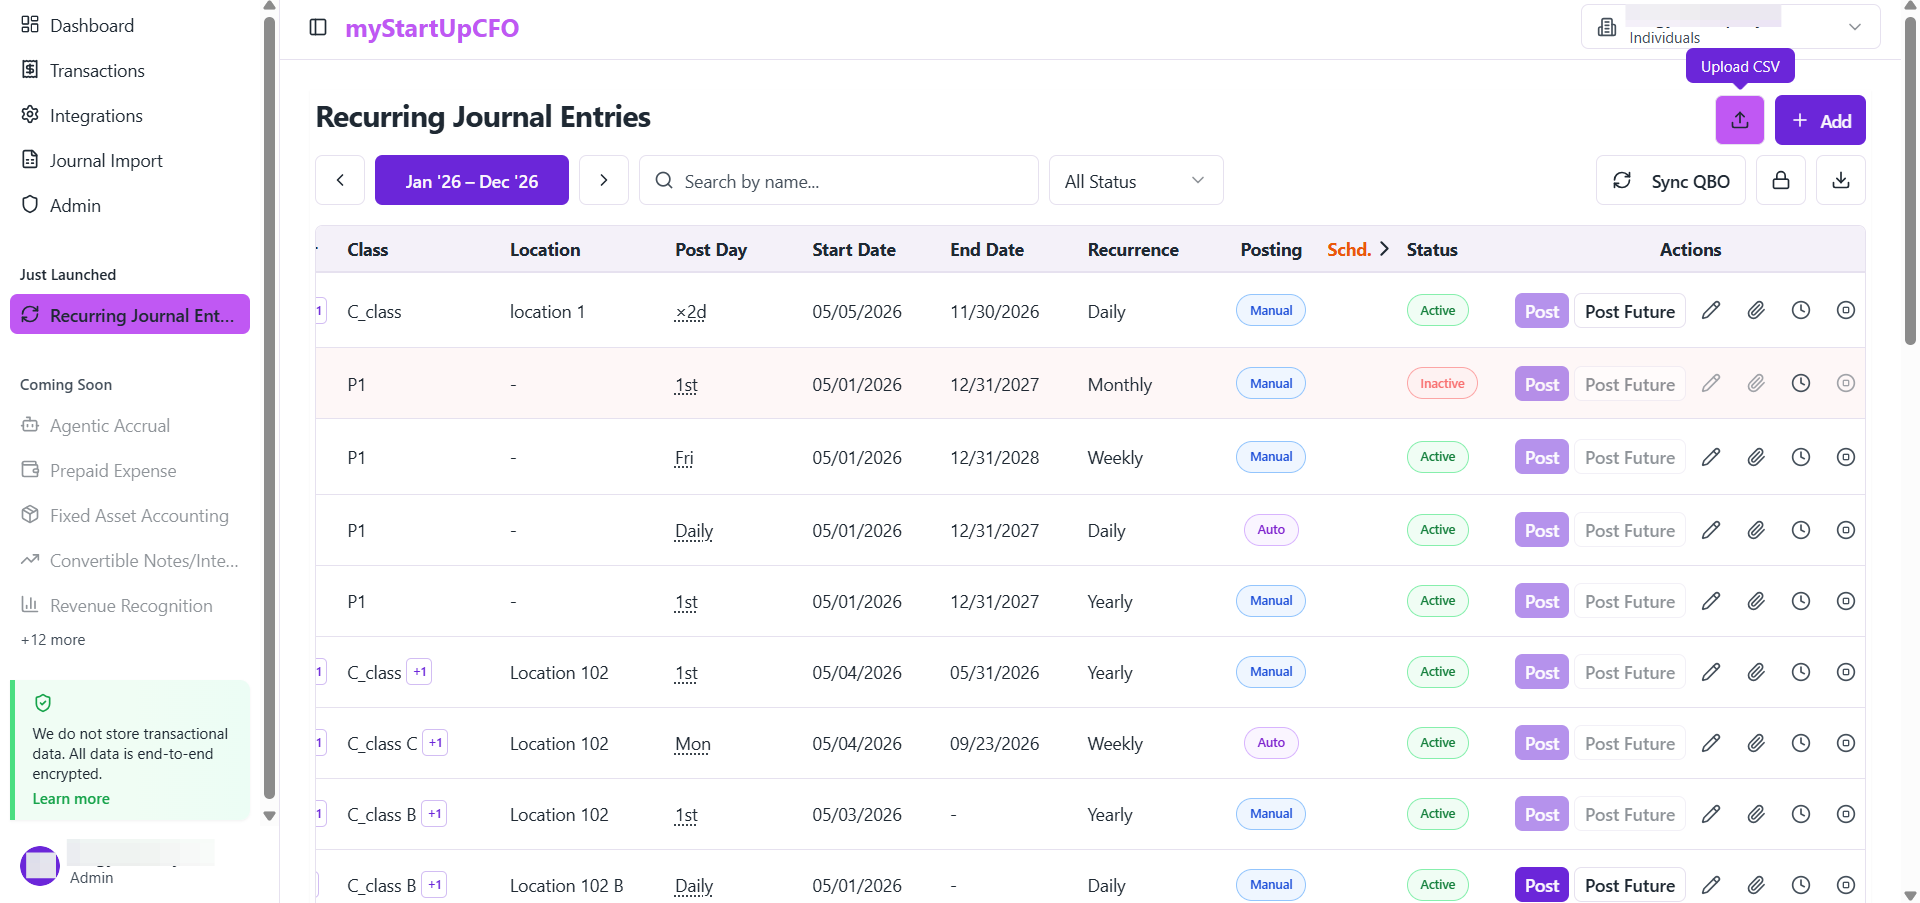
Go to the Recurring Journal Entries section from the sidebar menu.
Step #1: Go to the Recurring Journal Entries section from the sidebar menu.
2
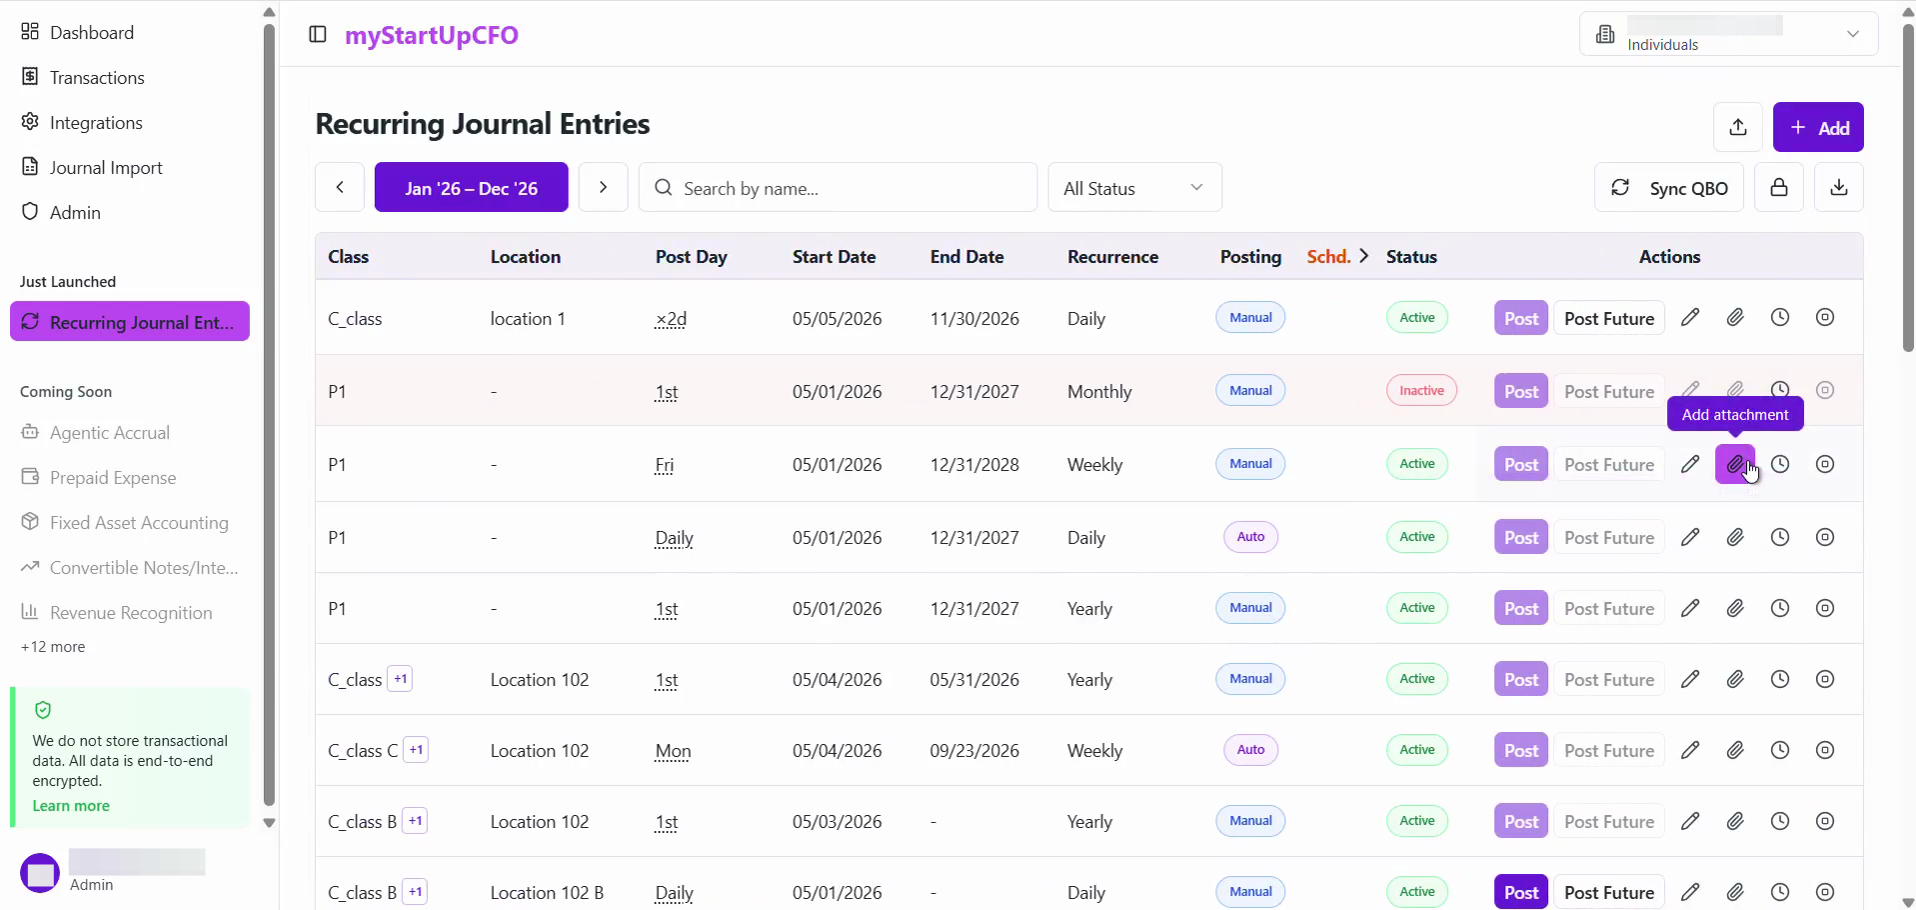
Click the Add attachment (paperclip) icon on the specific recurring journal entry to add a supporting document to the recurring journal entry.
Step #2: Click the Add attachment (paperclip) icon on the specific recurring journal entry to add a supporting document to the recurring journal entry.
3
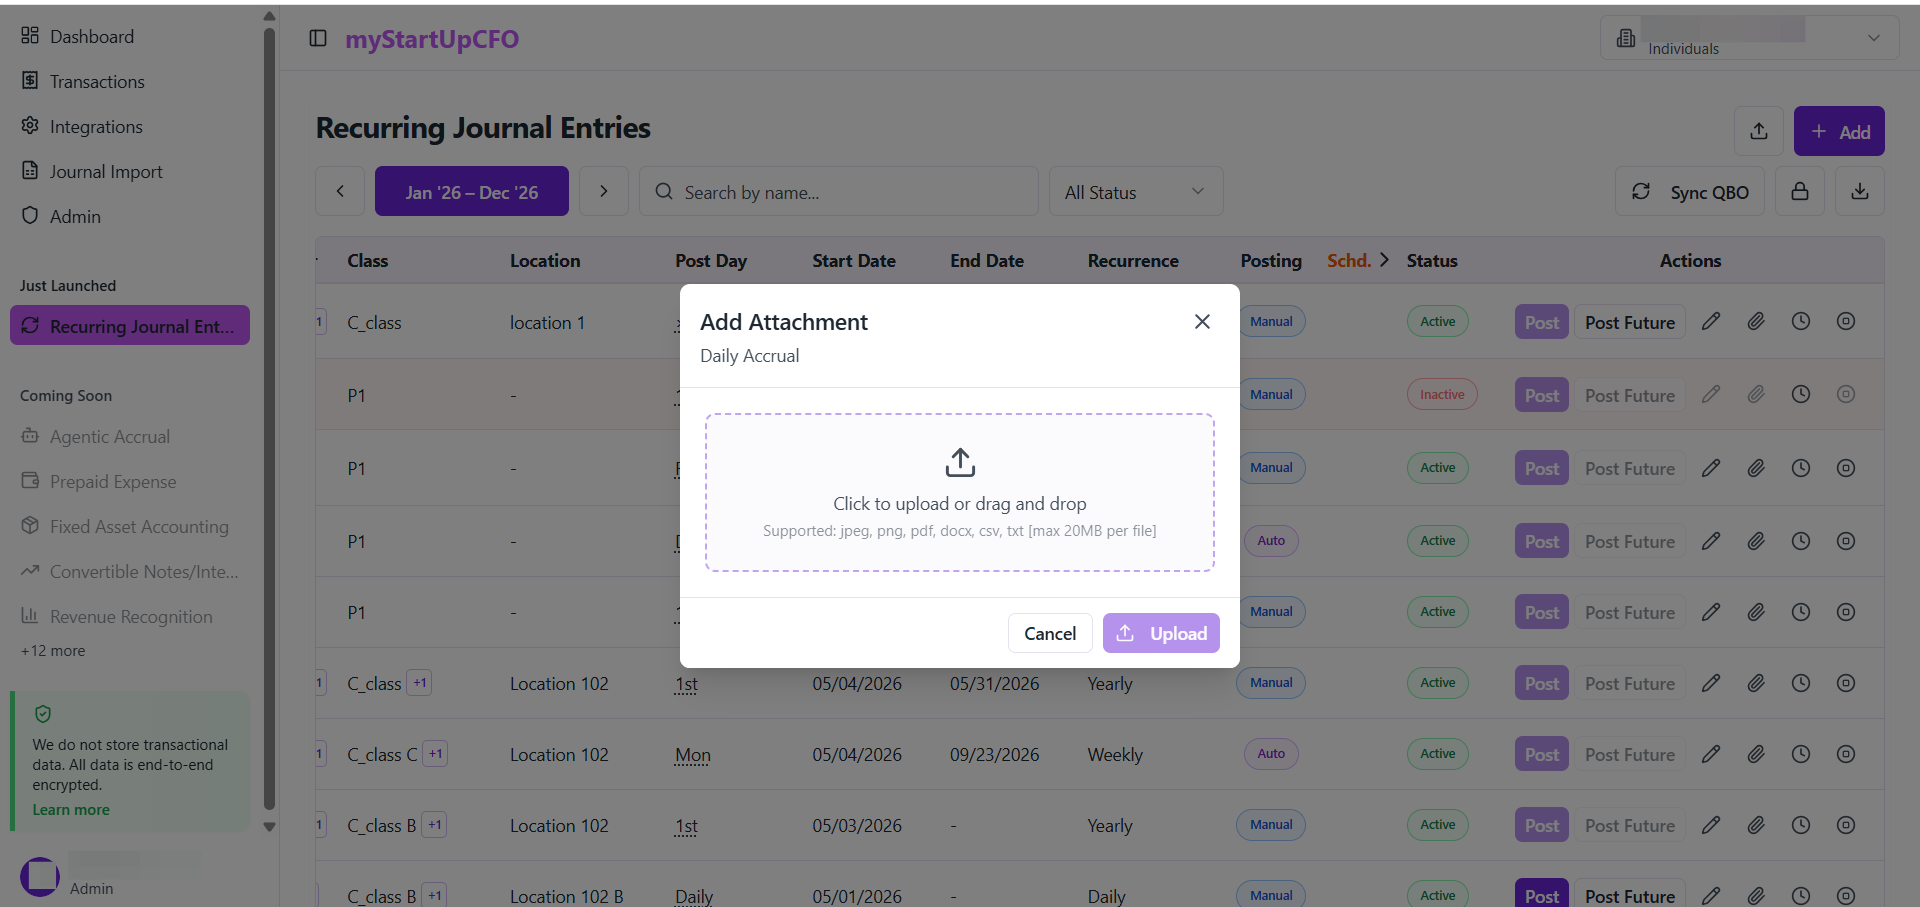
Click the upload area within the modal window.
Step #3: Click the upload area within the modal window.
4
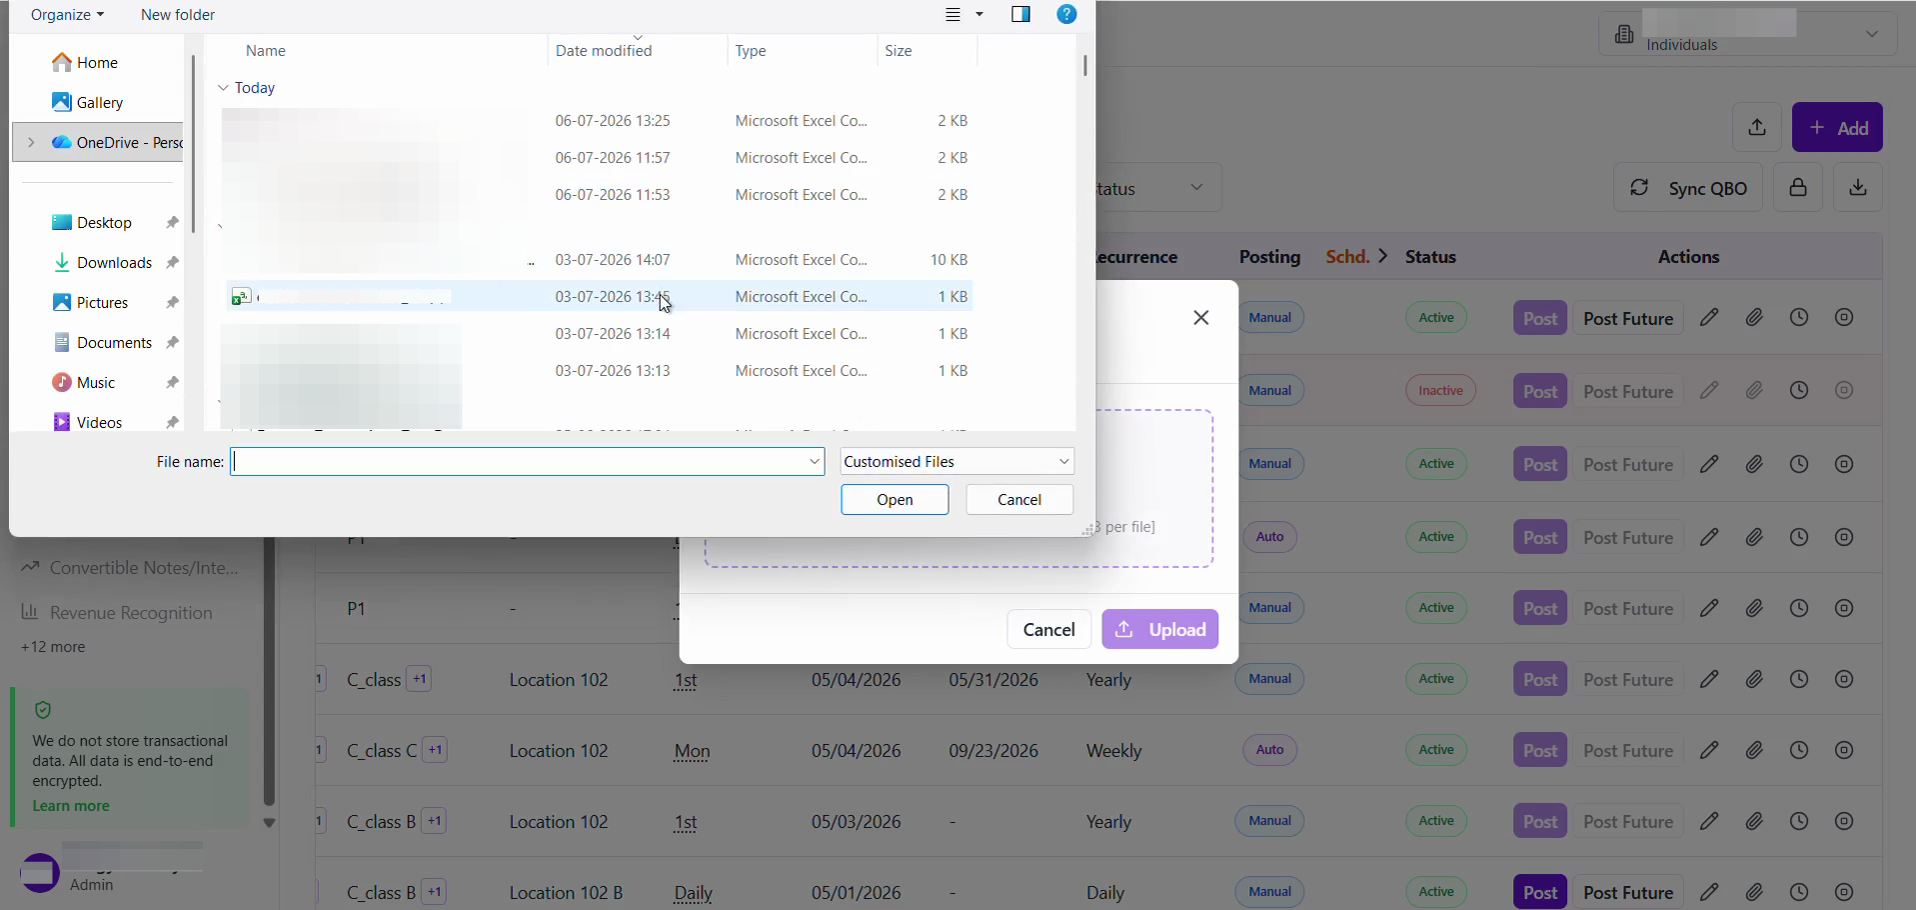
Select the desired file from your computer.
Step #4: Select the desired file from your computer.
5
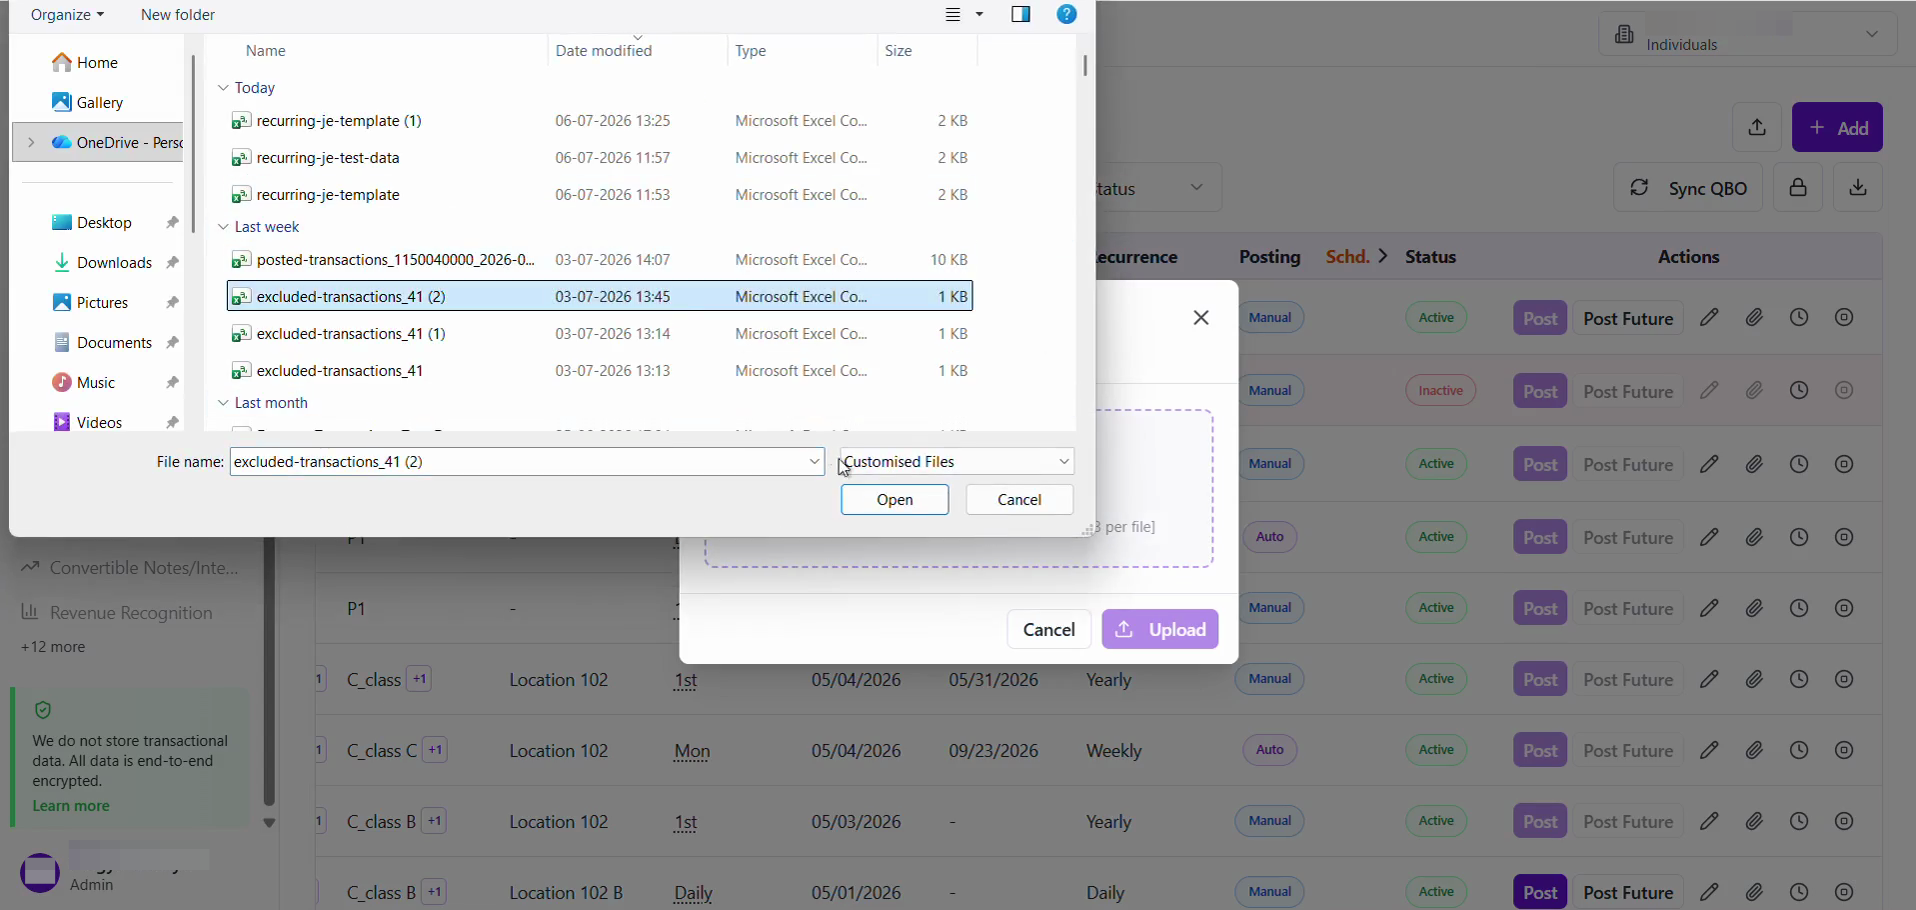
Click Open to confirm the selection.
Step #5: Click Open to confirm the selection.
6
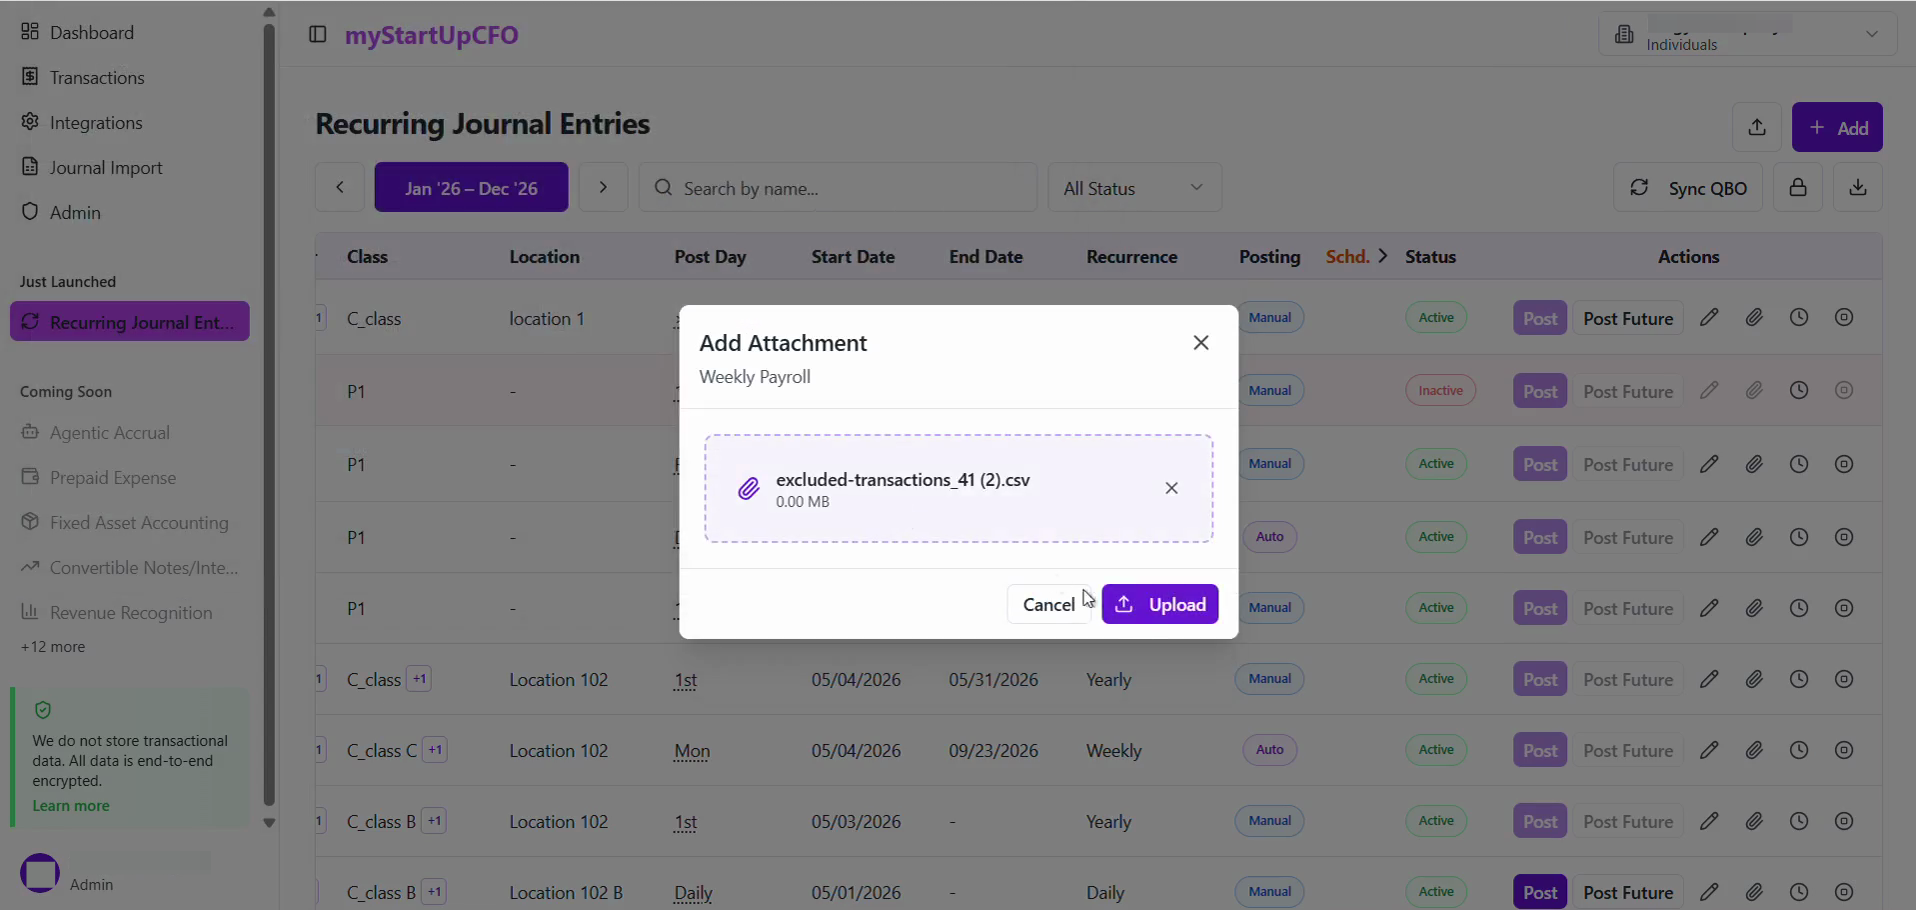
Click Upload to finalize adding the file to your entry.
Step #6: Click Upload to finalize adding the file to your entry.

Uploaded file will be added to that particular transaction

If you need to replace or remove a previously uploaded file, you can delete it directly from the entry.
7
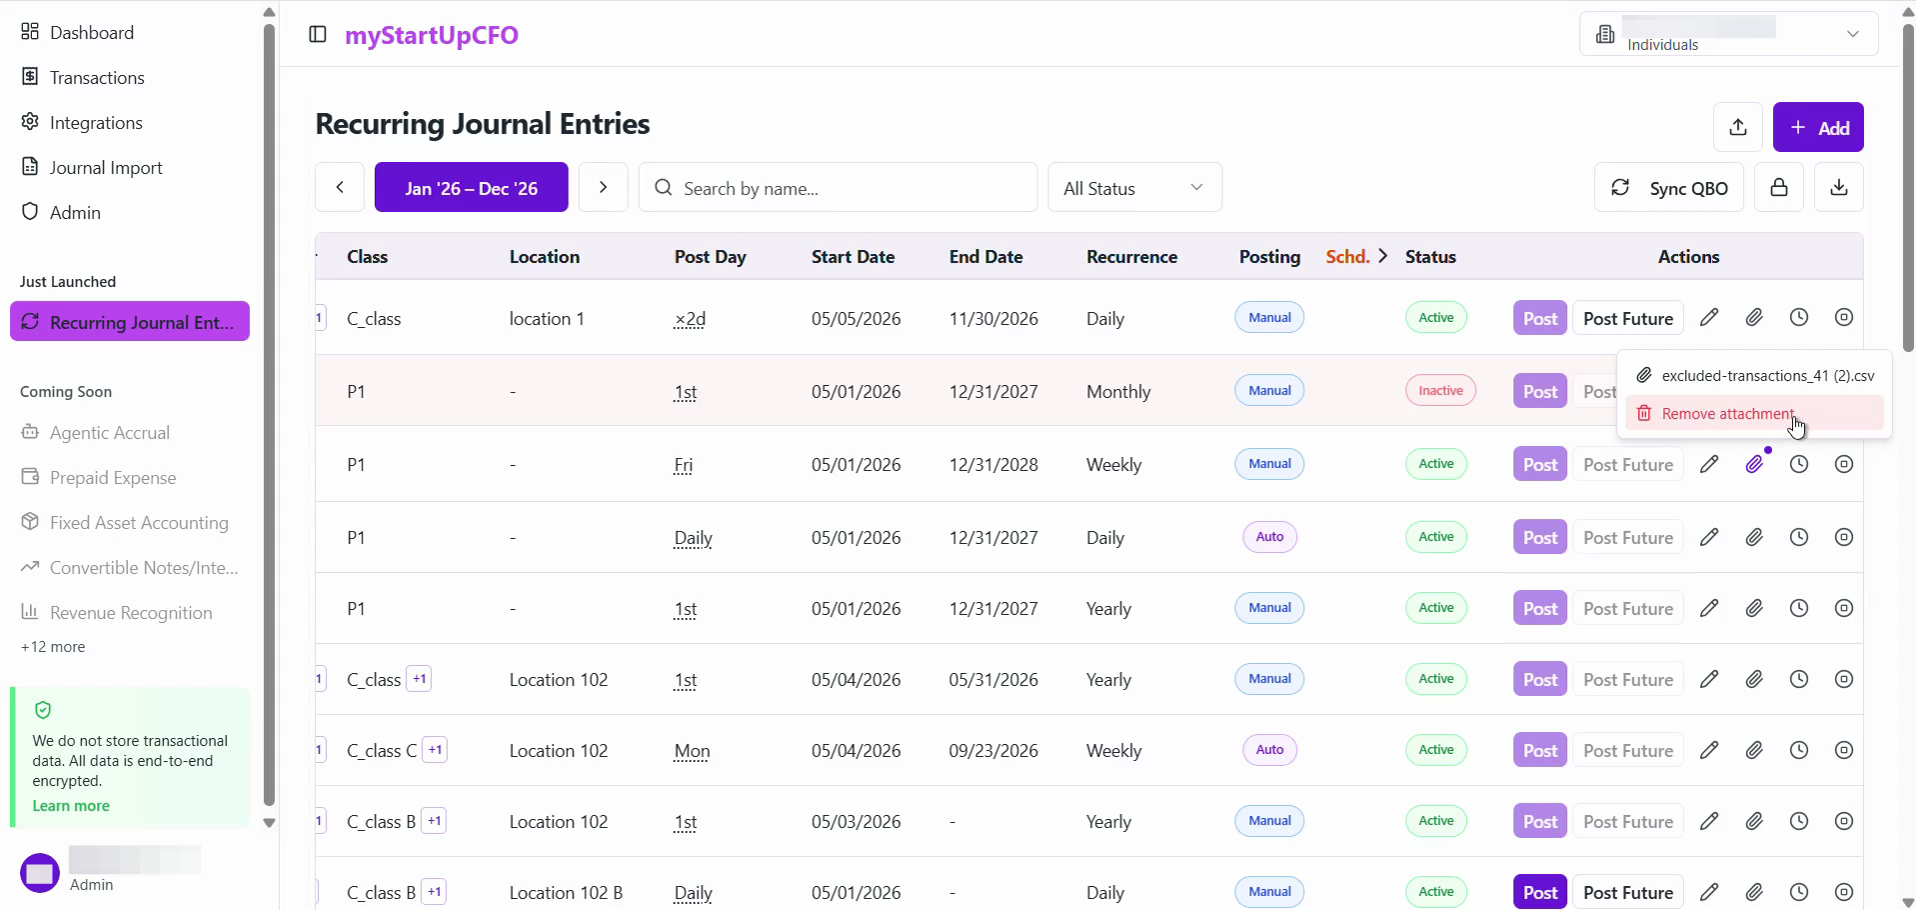
Open the pop-up menu for the existing file attachment and click Remove attachment.
Step #7: Open the pop-up menu for the existing file attachment and click Remove attachment.

The Attachment feature allows users to maintain supporting documents with Recurring Journal Entries, improving record-keeping and providing easy access to relevant files.