
How to Add Attachments to Your Transactions: Step-by-Step Guide
Learn how to easily add, view, and delete attachments in your transactions. Follow this step-by-step guide to upload up to three files and manage your transaction attachments efficiently.
By Aasma Technology Solutions
This guide provides instructions for managing transaction attachments within the system. Users can upload supporting documents, view existing attachments, and remove files as required. This functionality ensures comprehensive transaction documentation and facilitates audit trail maintenance.
Let's get started
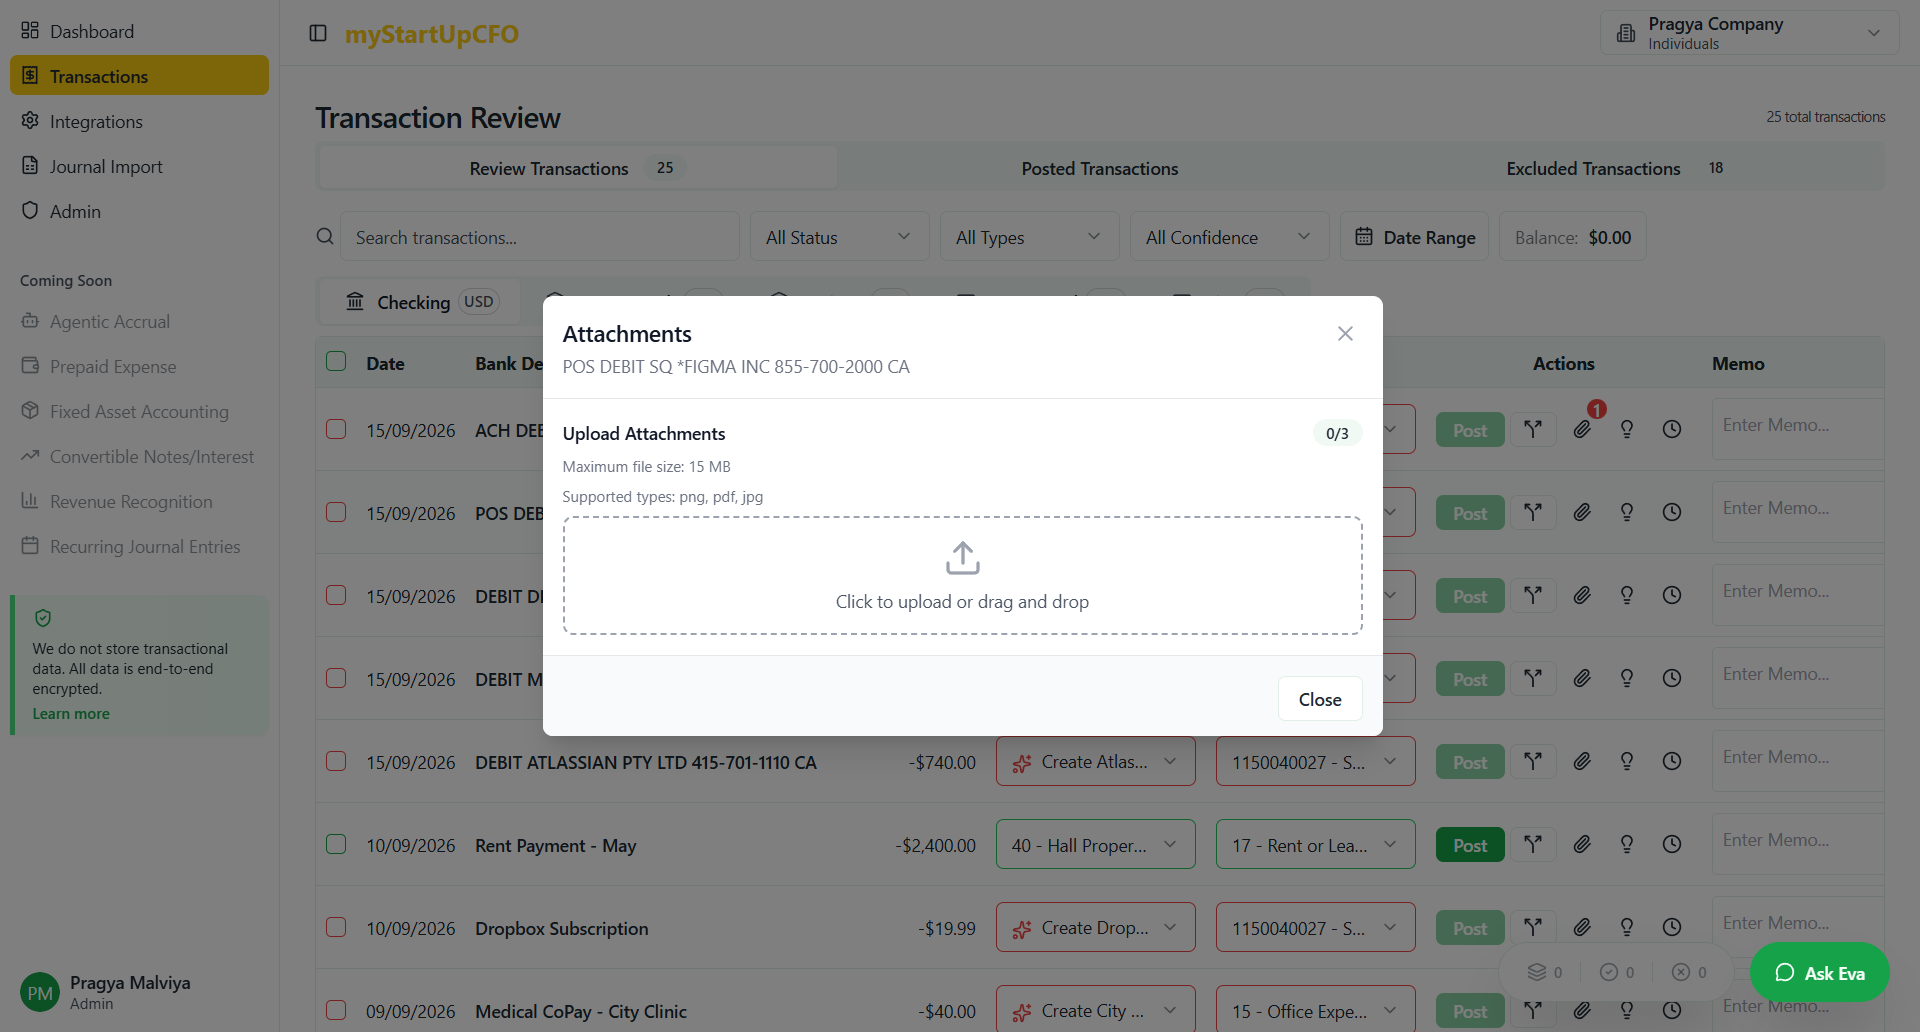
In this guide, we will learn how to add an attachment to your transactions. To do that, we need to click on this.
2
Click on "Attachment Icon"

Upload your file.
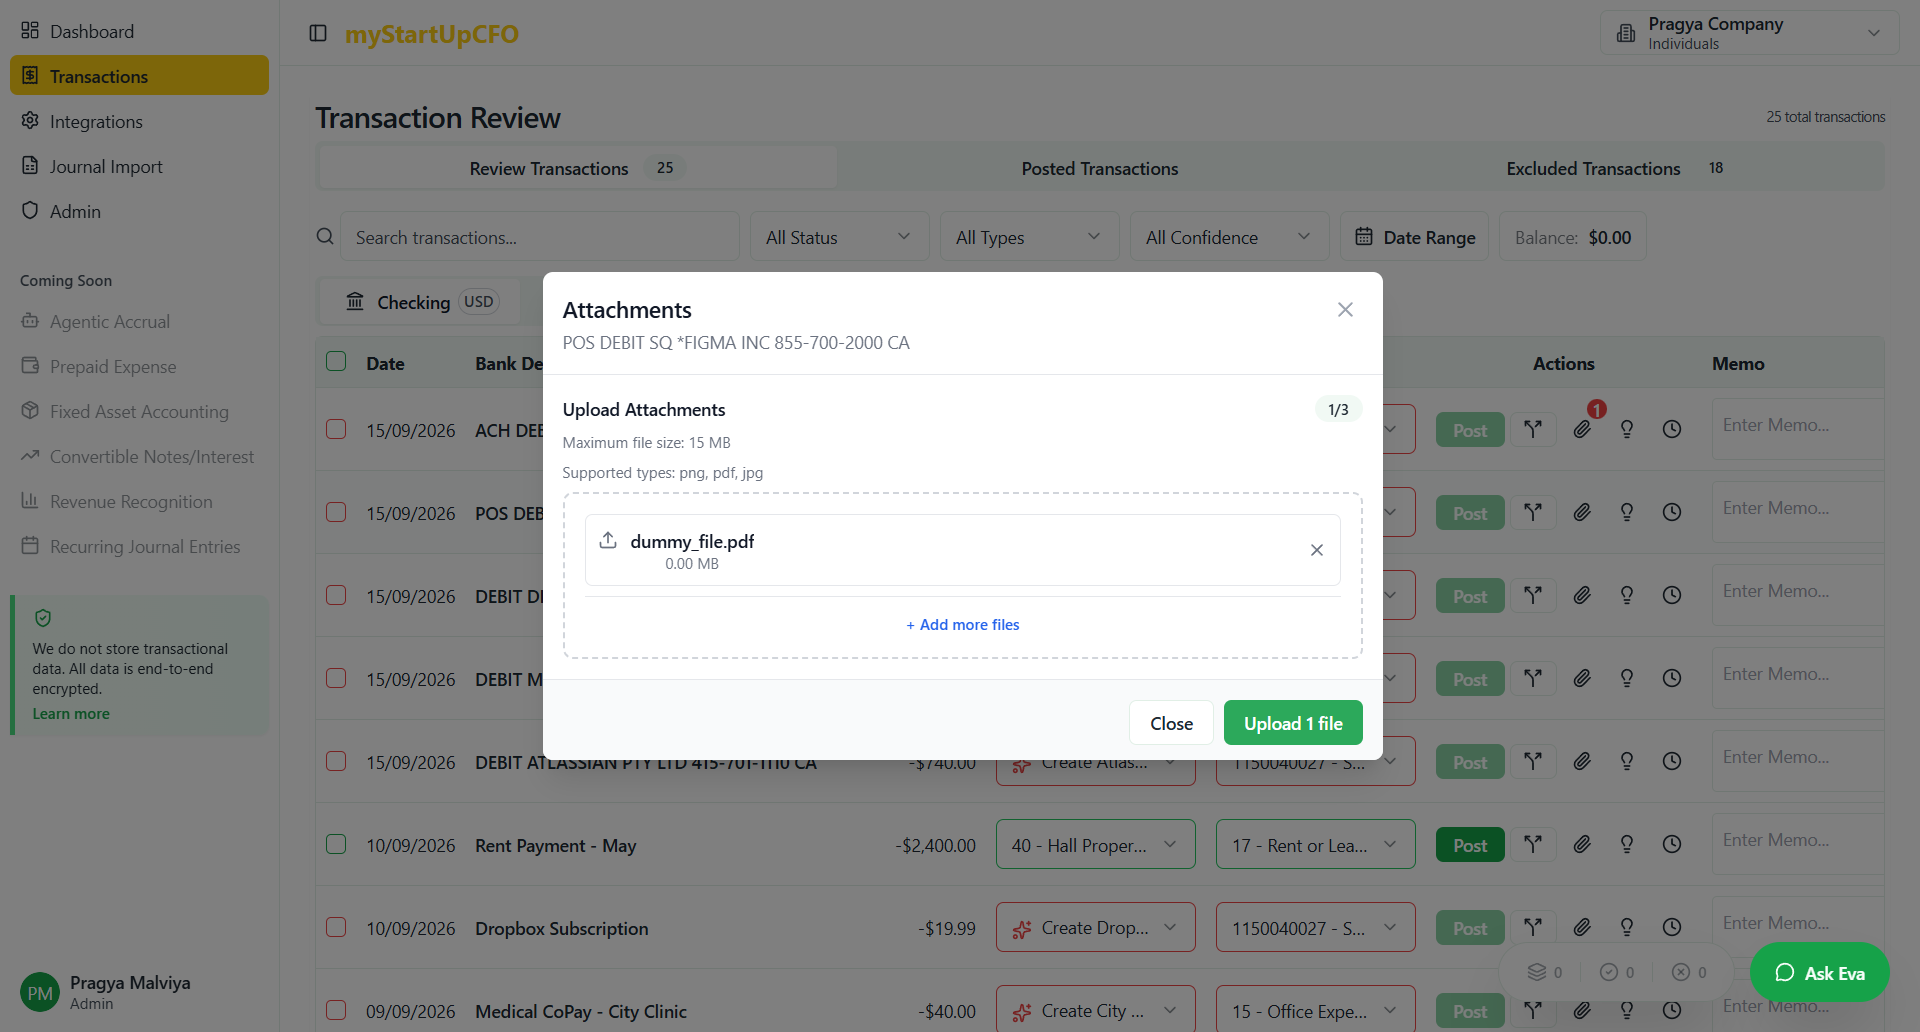
3
Click here
The file limit is three attachments per transaction. You can upload up to three files. Click "Upload One File" to begin the upload process.
4
Click Upload button
5
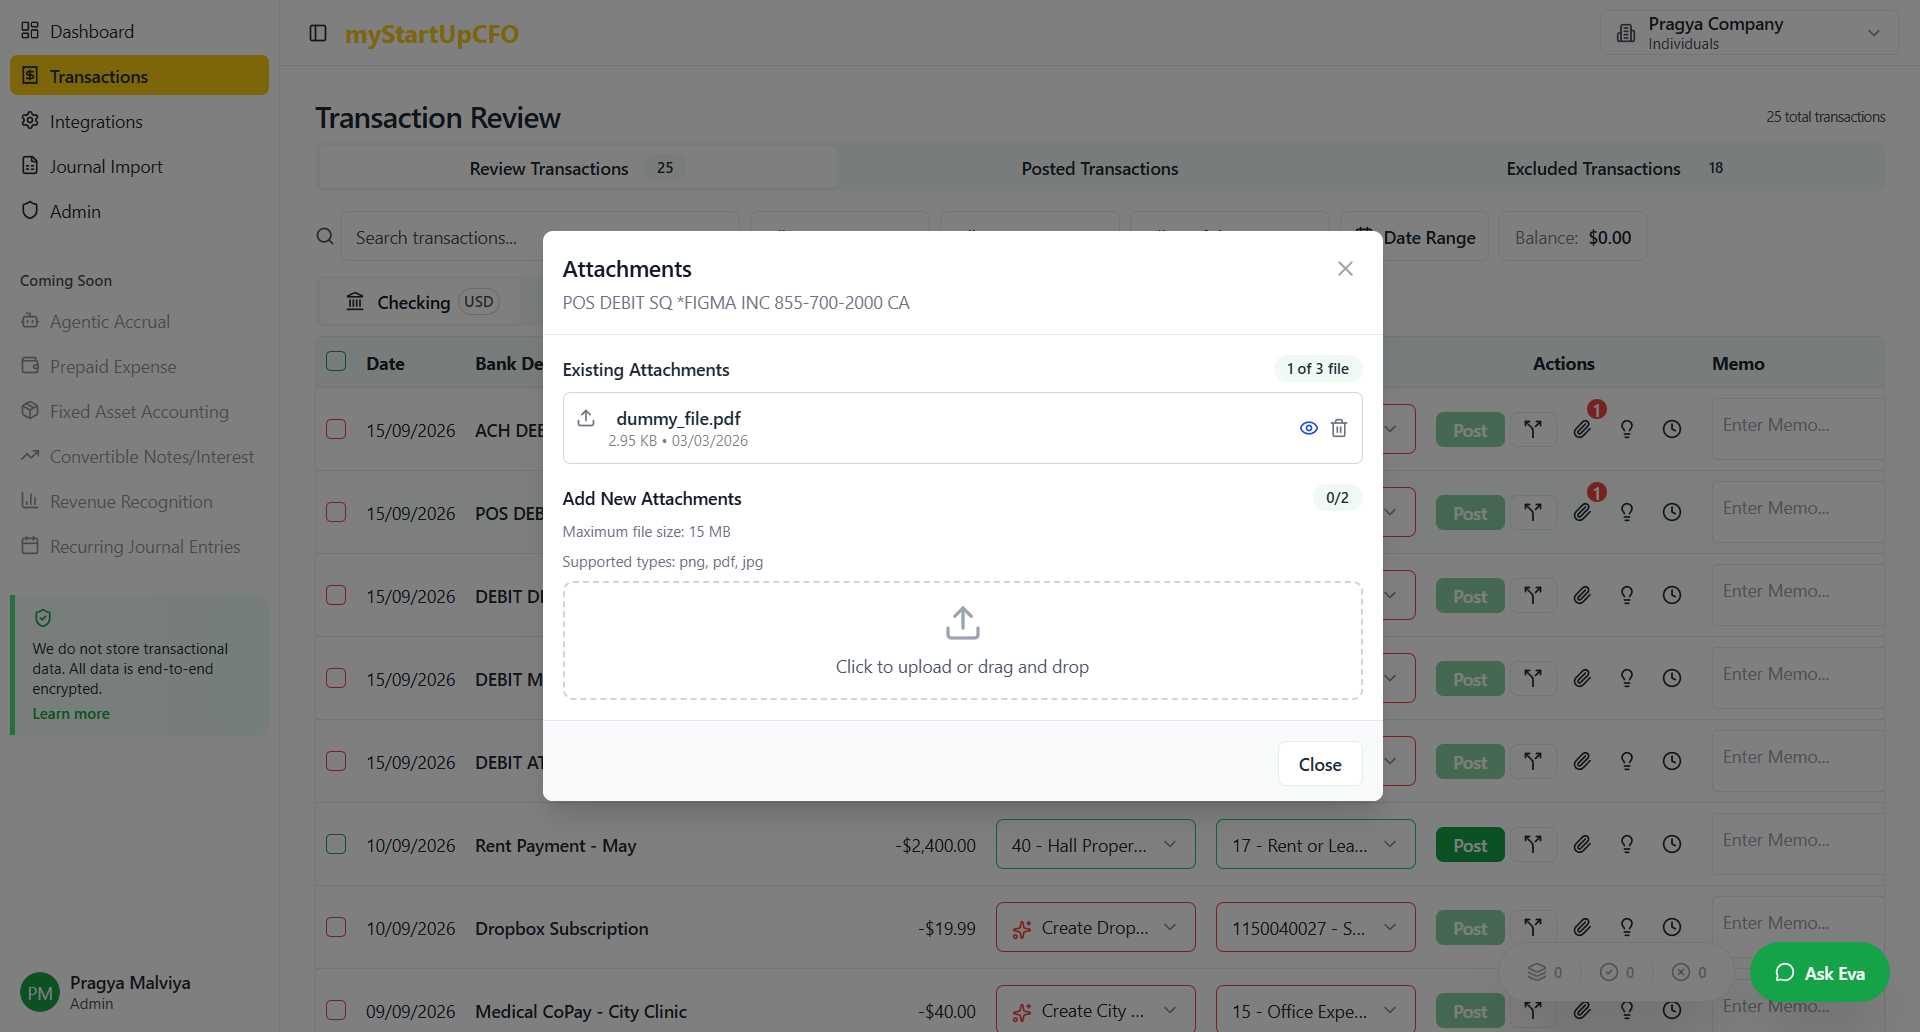
To access your transaction attachments, click the "eye" icon. This opens the attachment viewer where you can see all uploaded files.
6
Each file includes a delete option, allowing you to remove attachments when necessary.

This is how you can upload, view and delete an attachment in your transactions.
Thank you.