R - How to Add Looks to Your Collections Using the Look Gallery
Learn step-by-step how to add looks to your collections using the Look Gallery. Discover how to search by product name, item code, or color, and efficiently organize your fashion collections and pitch decks.
By Brent del rosario
In this guide, we'll learn how to:
Add looks to your collections using the Browse Looks Button and the Look Gallery.
Search for garments by name, item code, or color.
How to add selected images to your Collections.
How to view and manage your Collections
Use filters to organize your pitch decks.
Let's get started!
Add looks to Collections
1
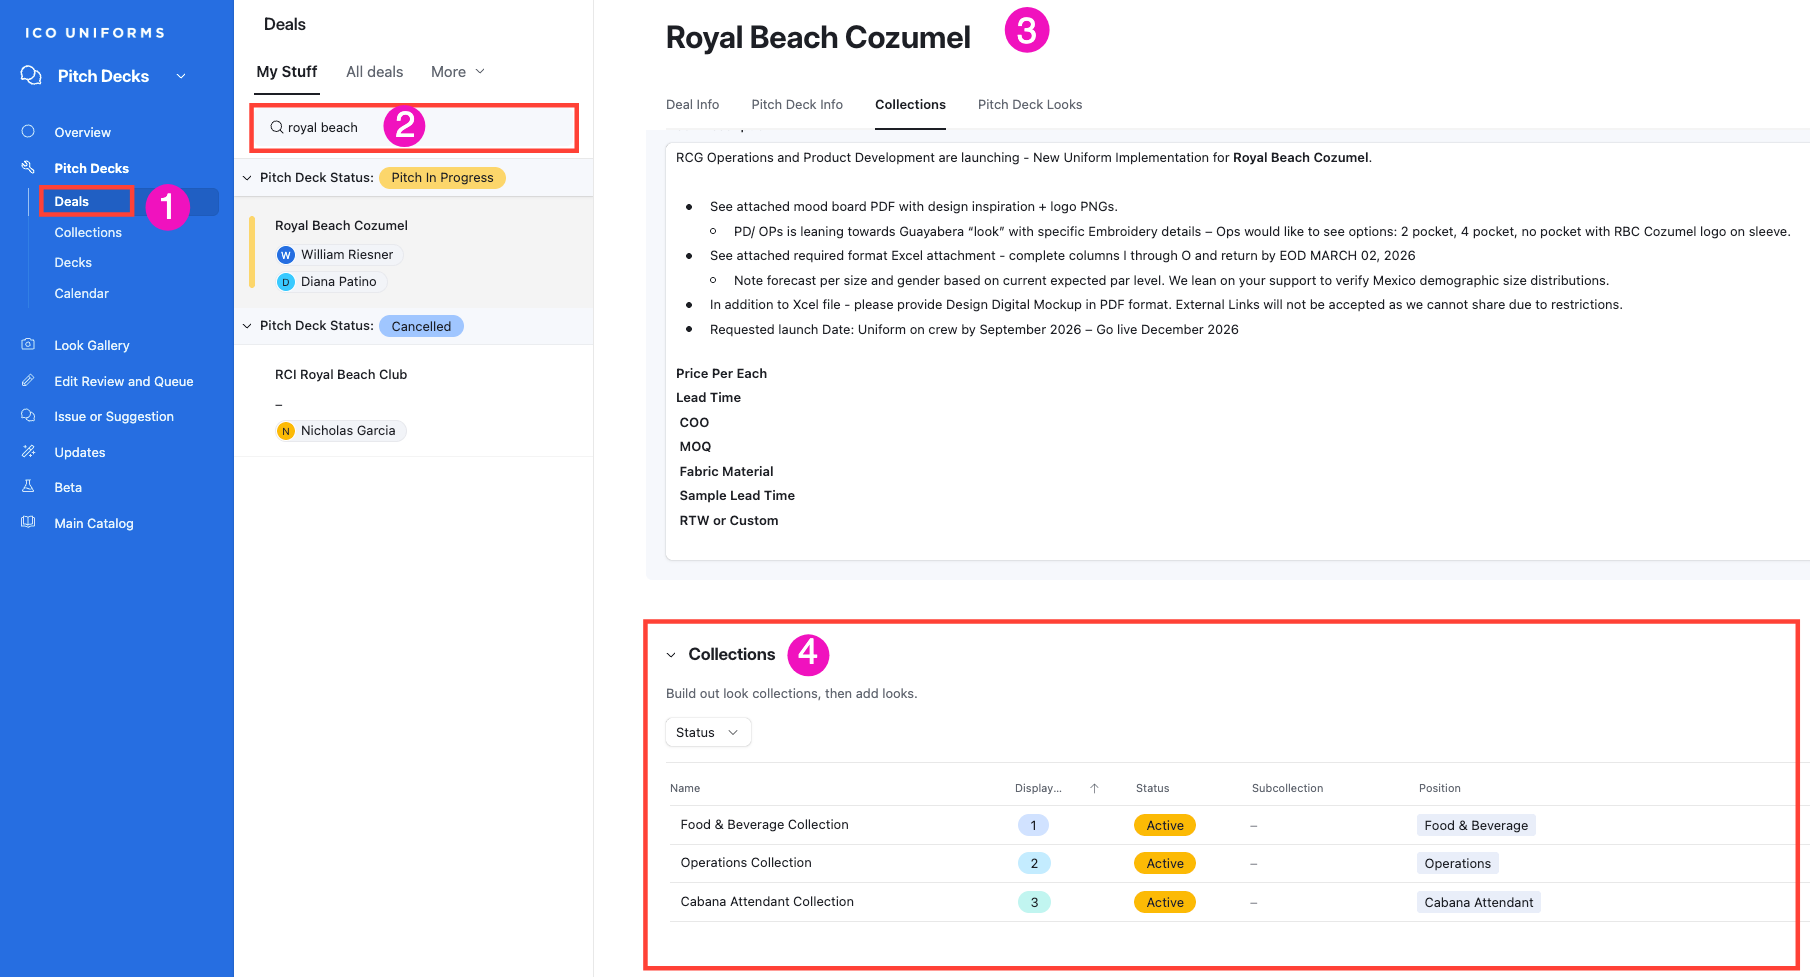
Click on Deals on the left-hand blue panel.
2
Type the name of your Deal/ Project on the search
3
Click on "Collections" at the top of the deal.
4
When you land on the Collections section you can select the specific group you want to add looks to.
5
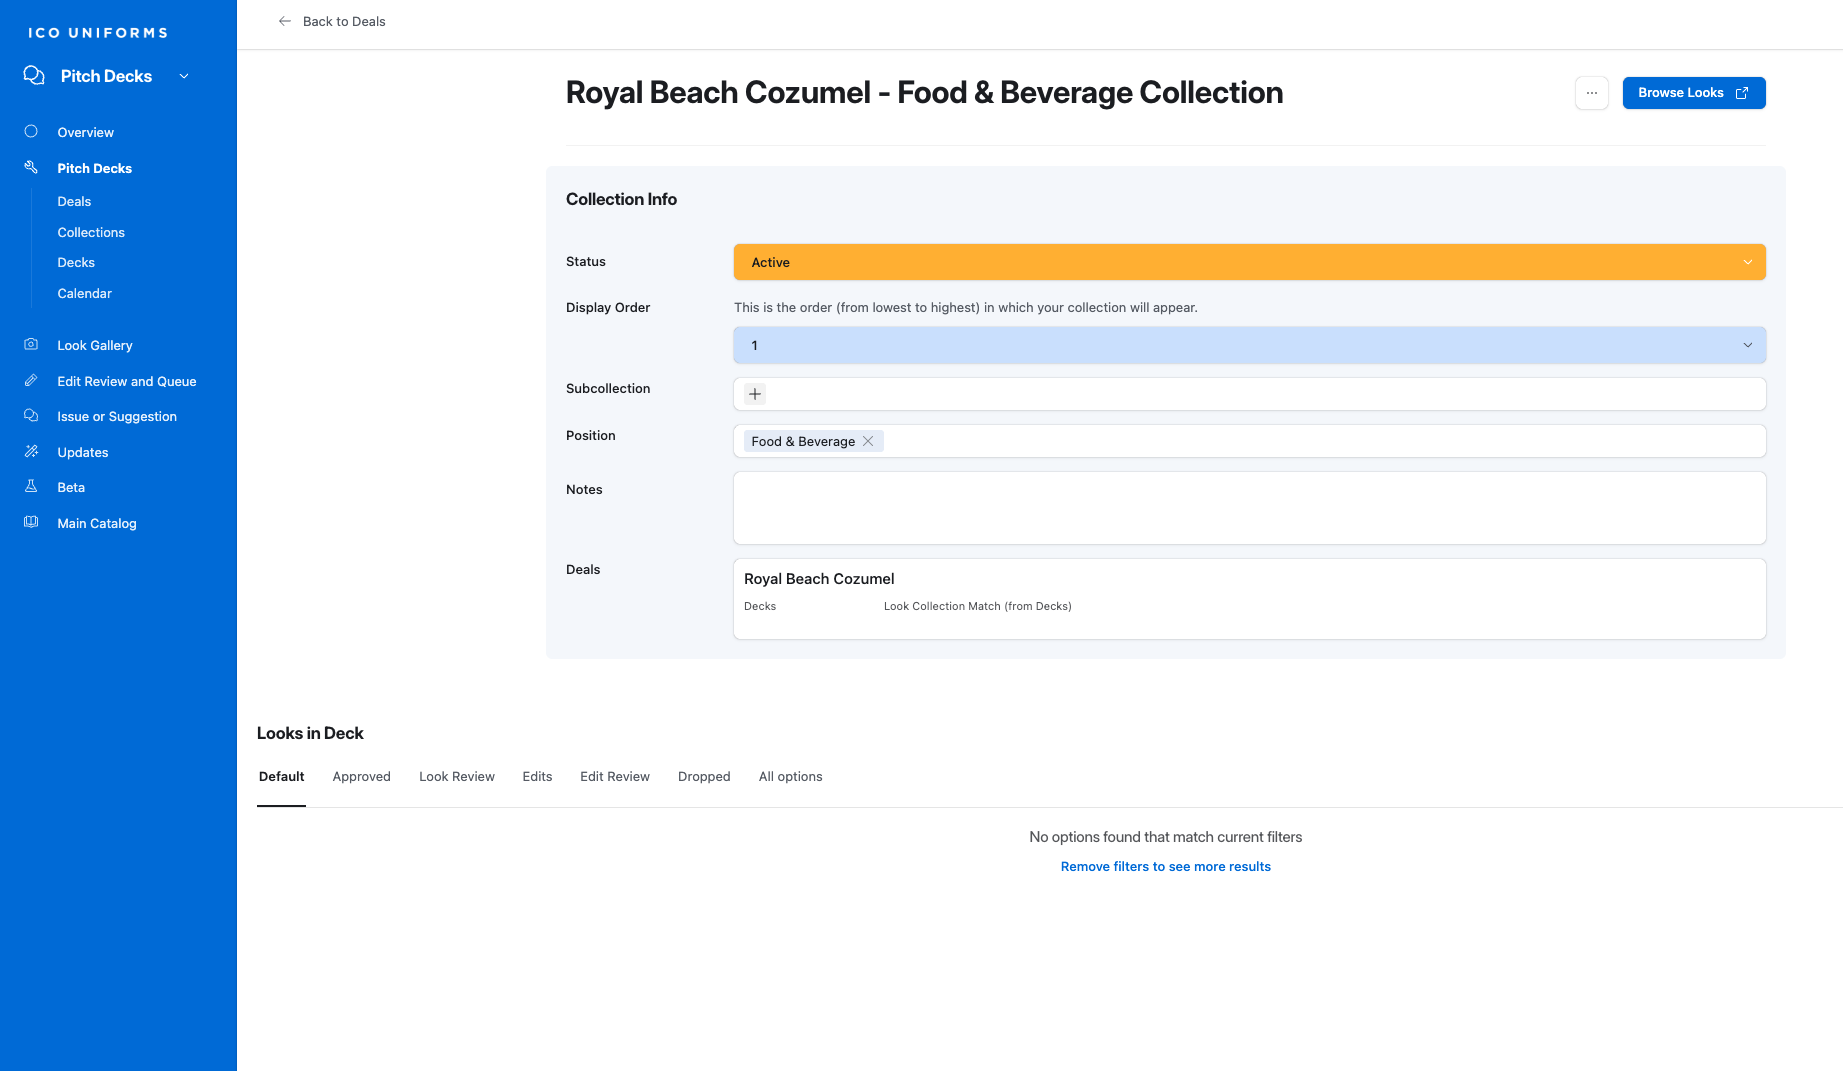
You will be directed to a new page. Here you can click on the Browse Looks button.
6
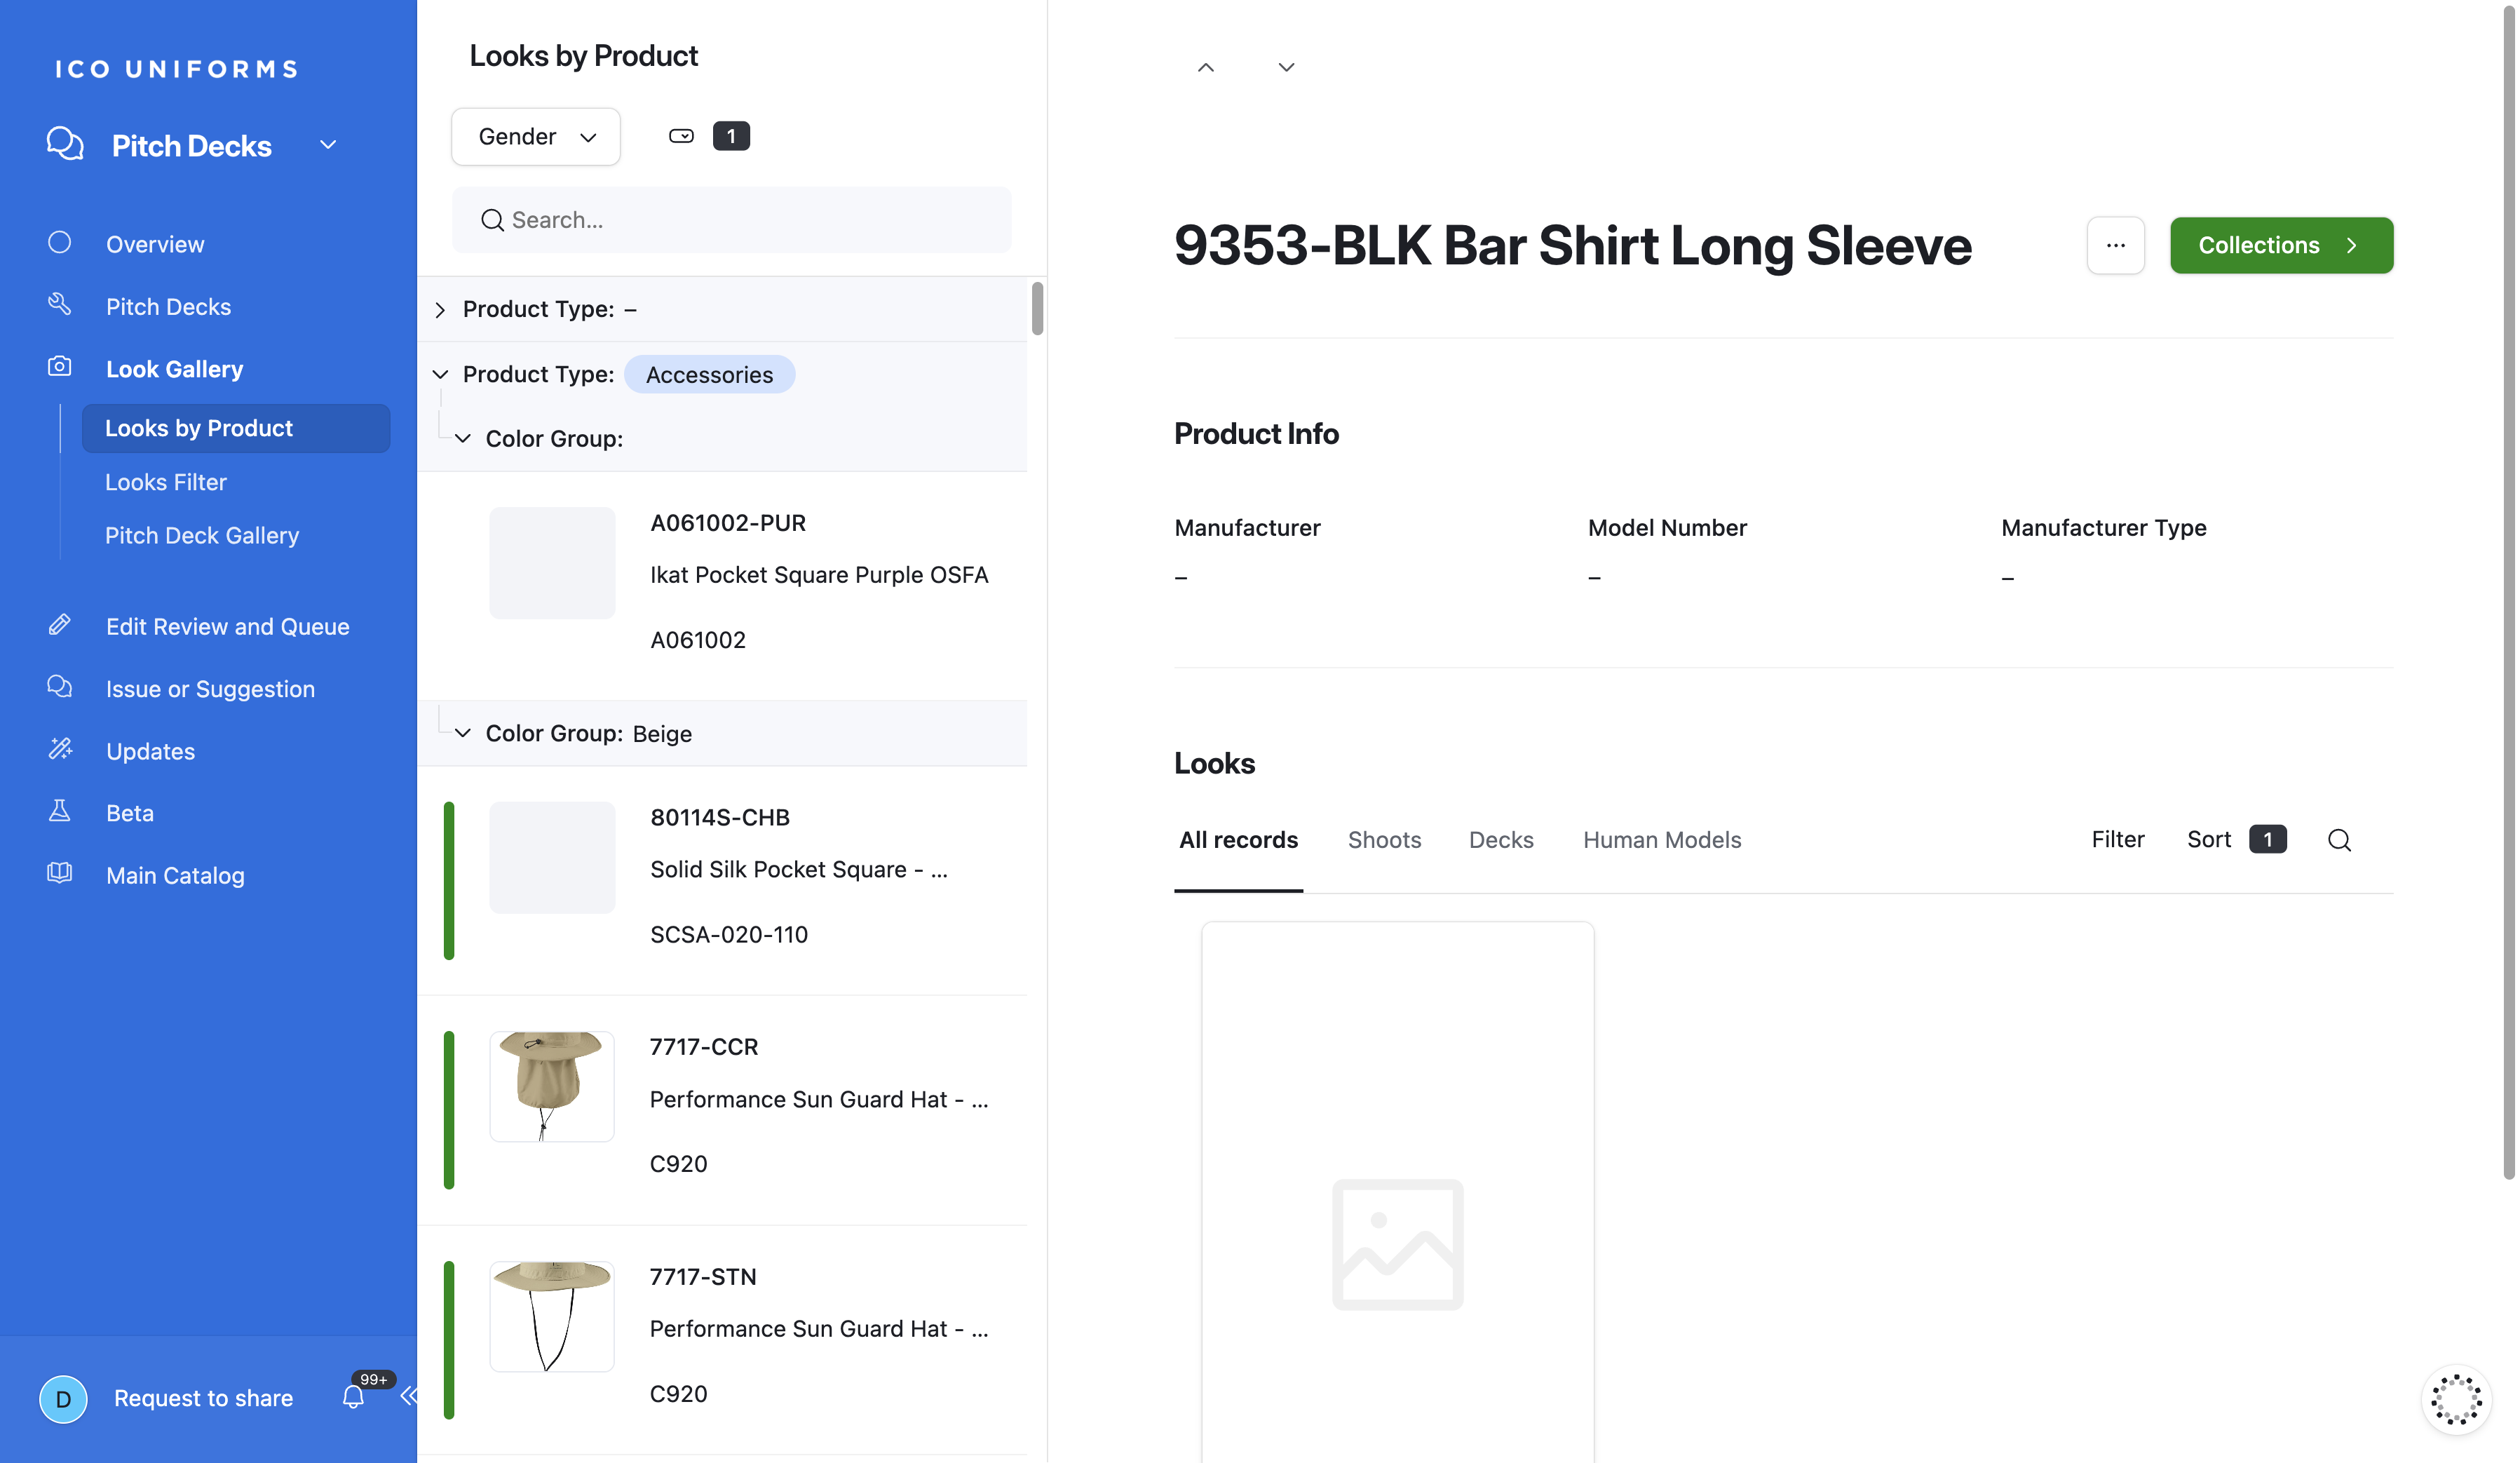
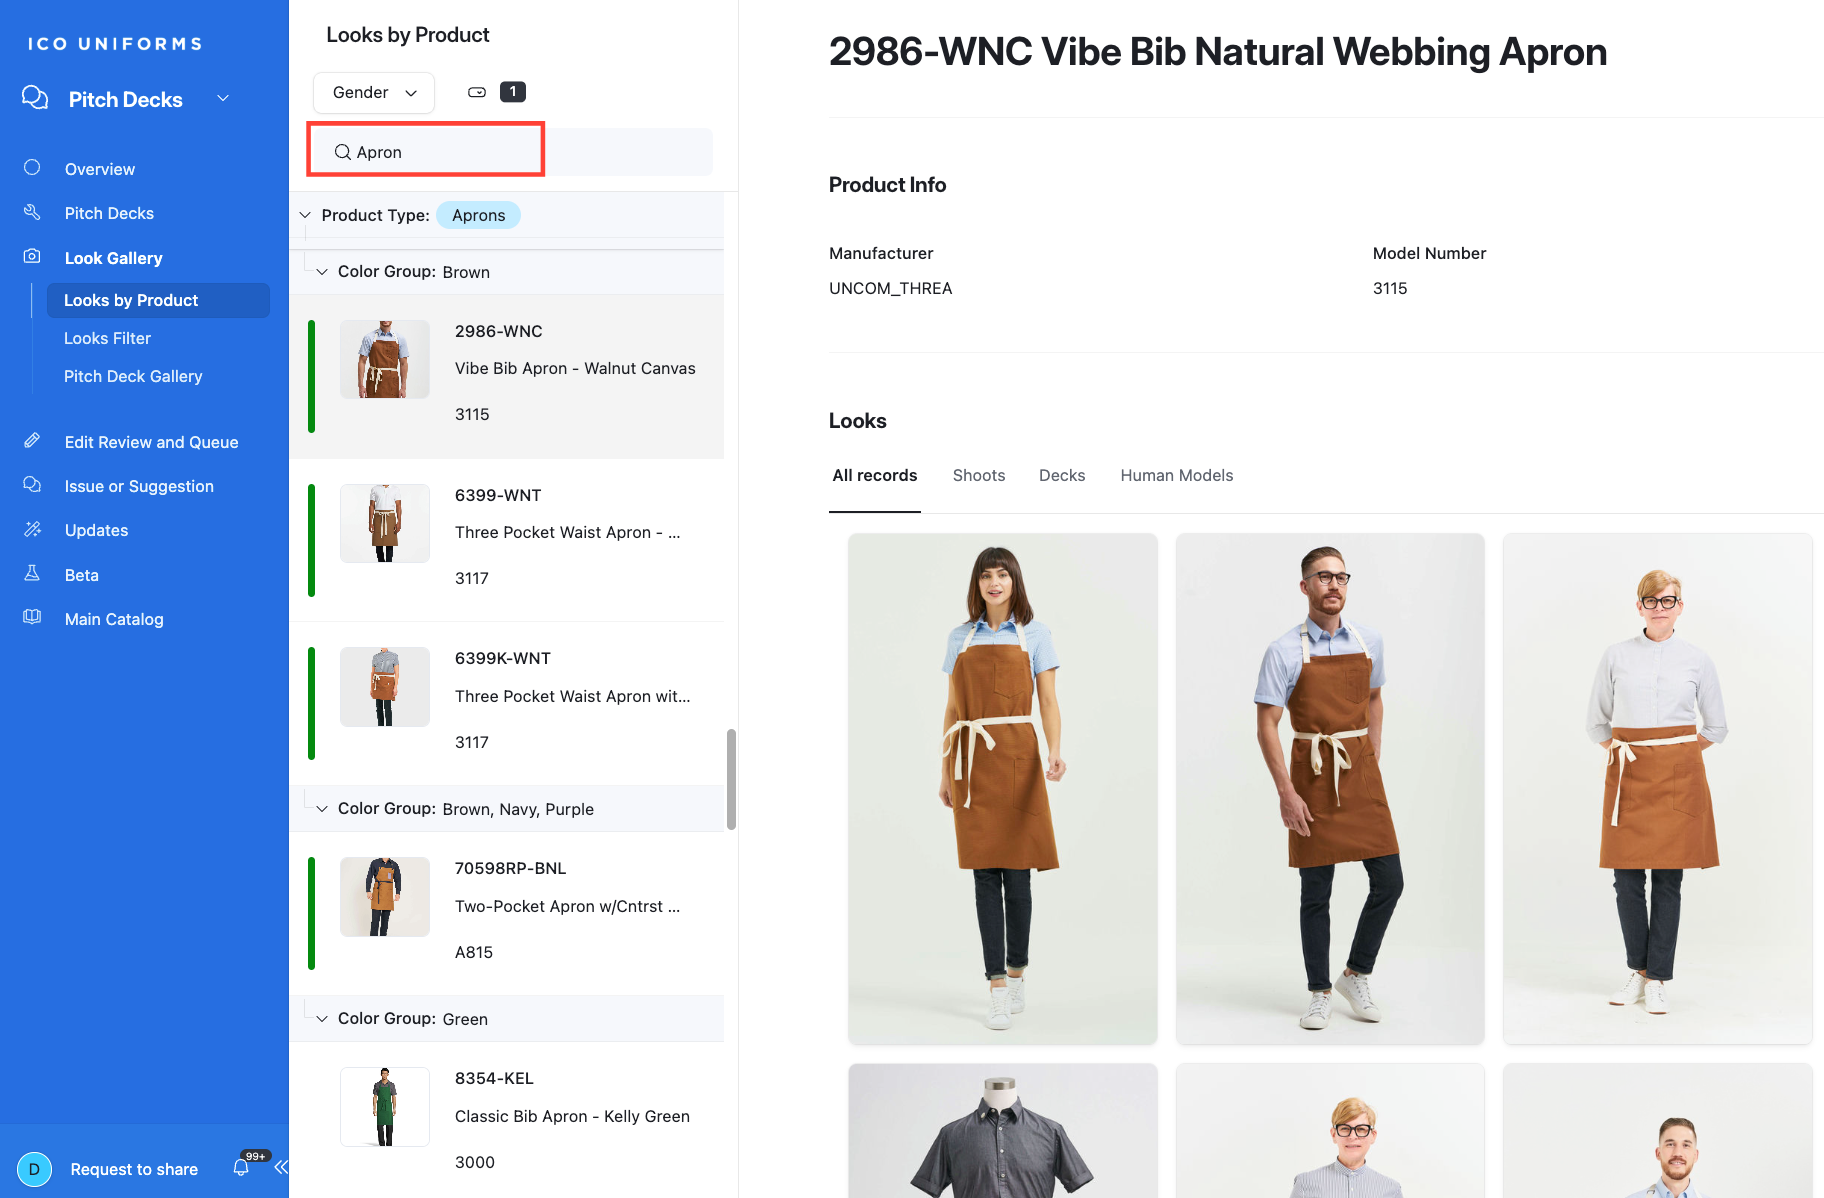
You have now entered the Look Gallery - Looks by Product page.
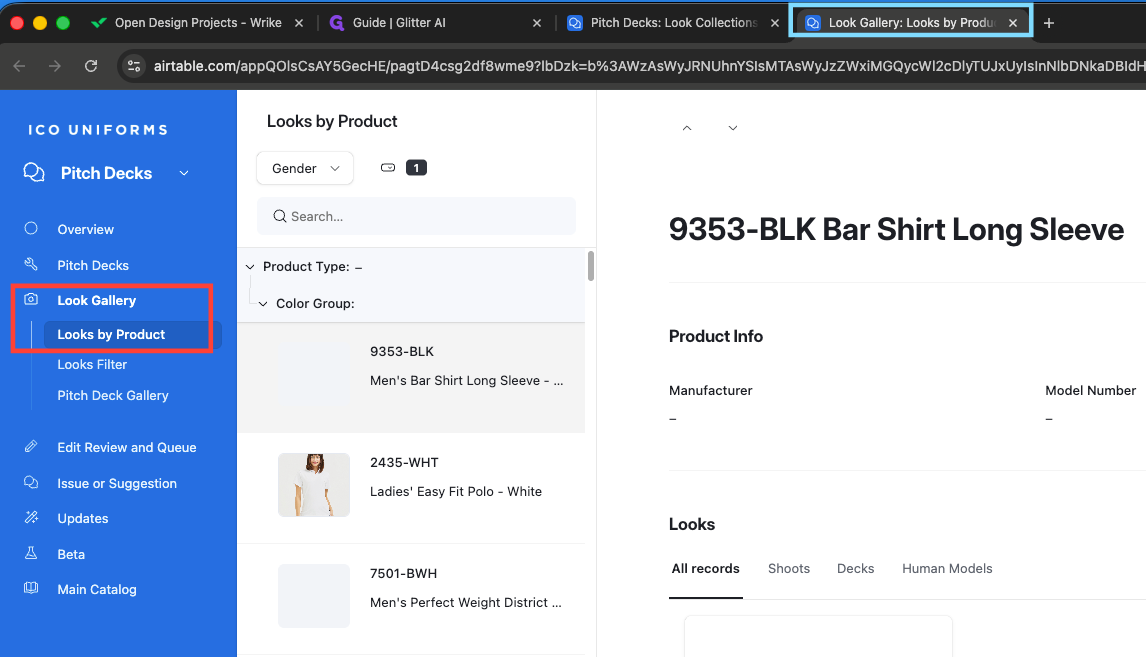
Within the Look Gallery, there are three tabs:
7
Next: Stay within Looks by Product
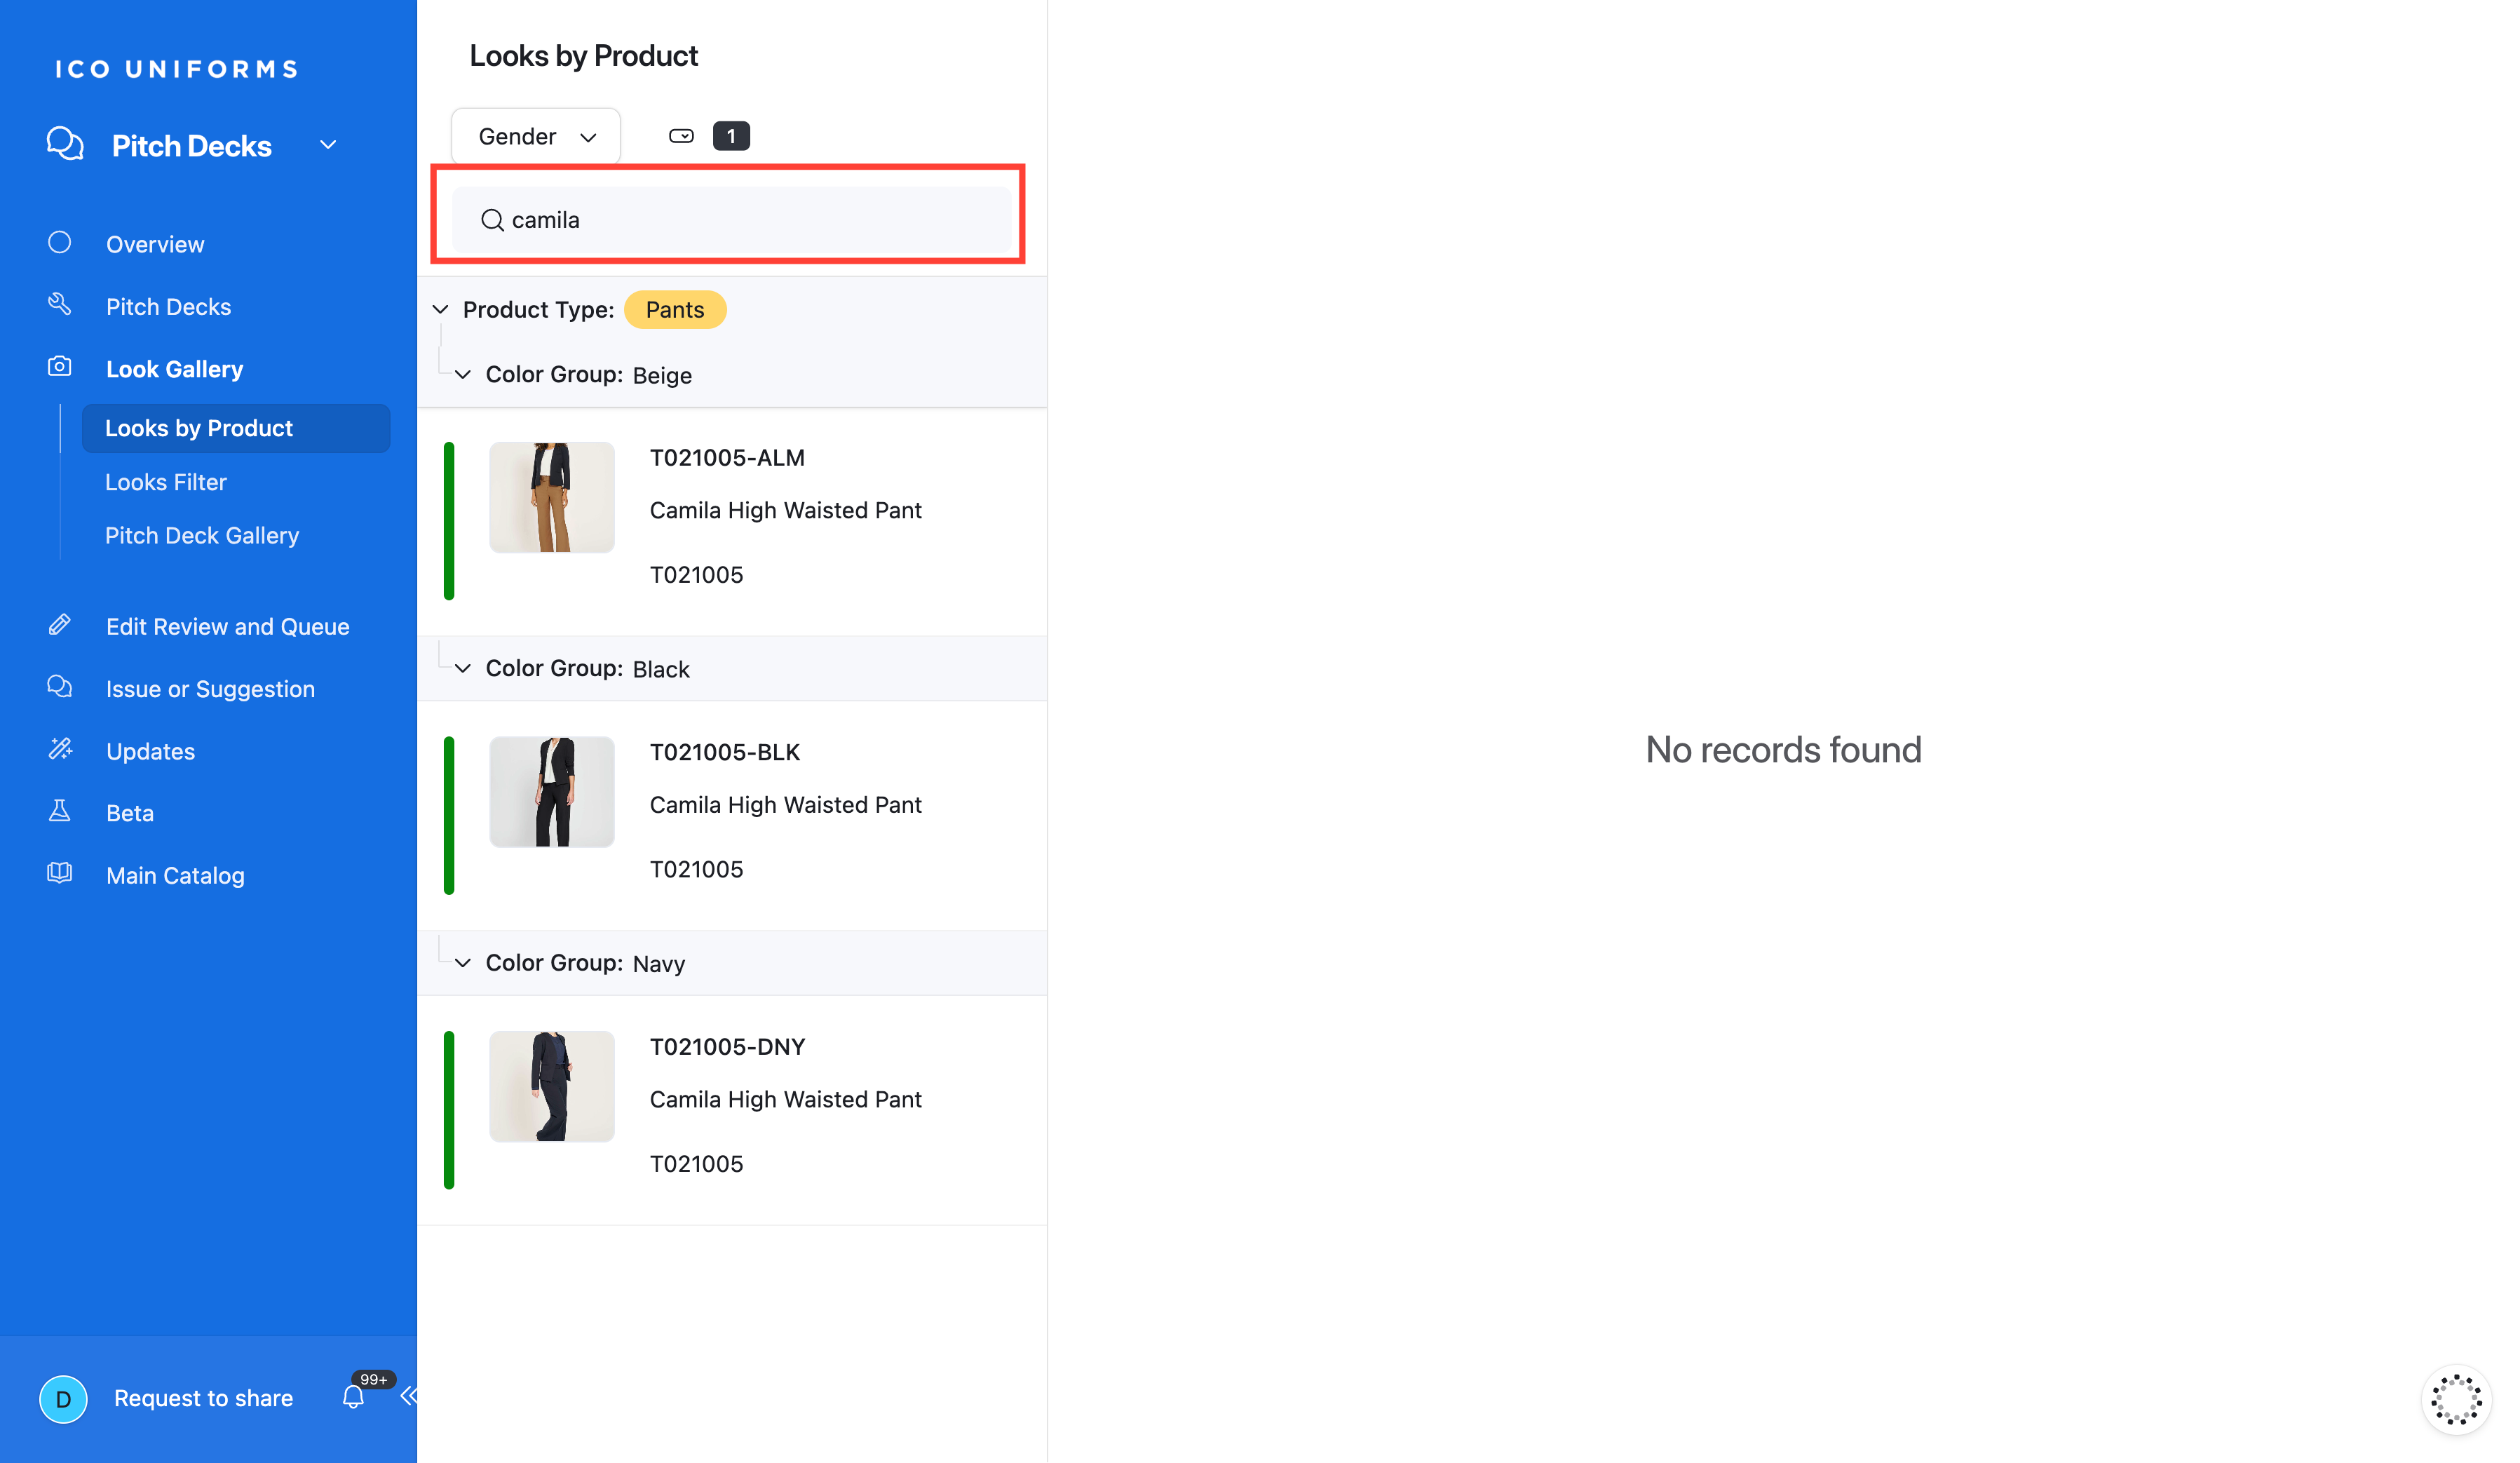
Search by Product Name
8
Type a Product Name in the Search Box and Click
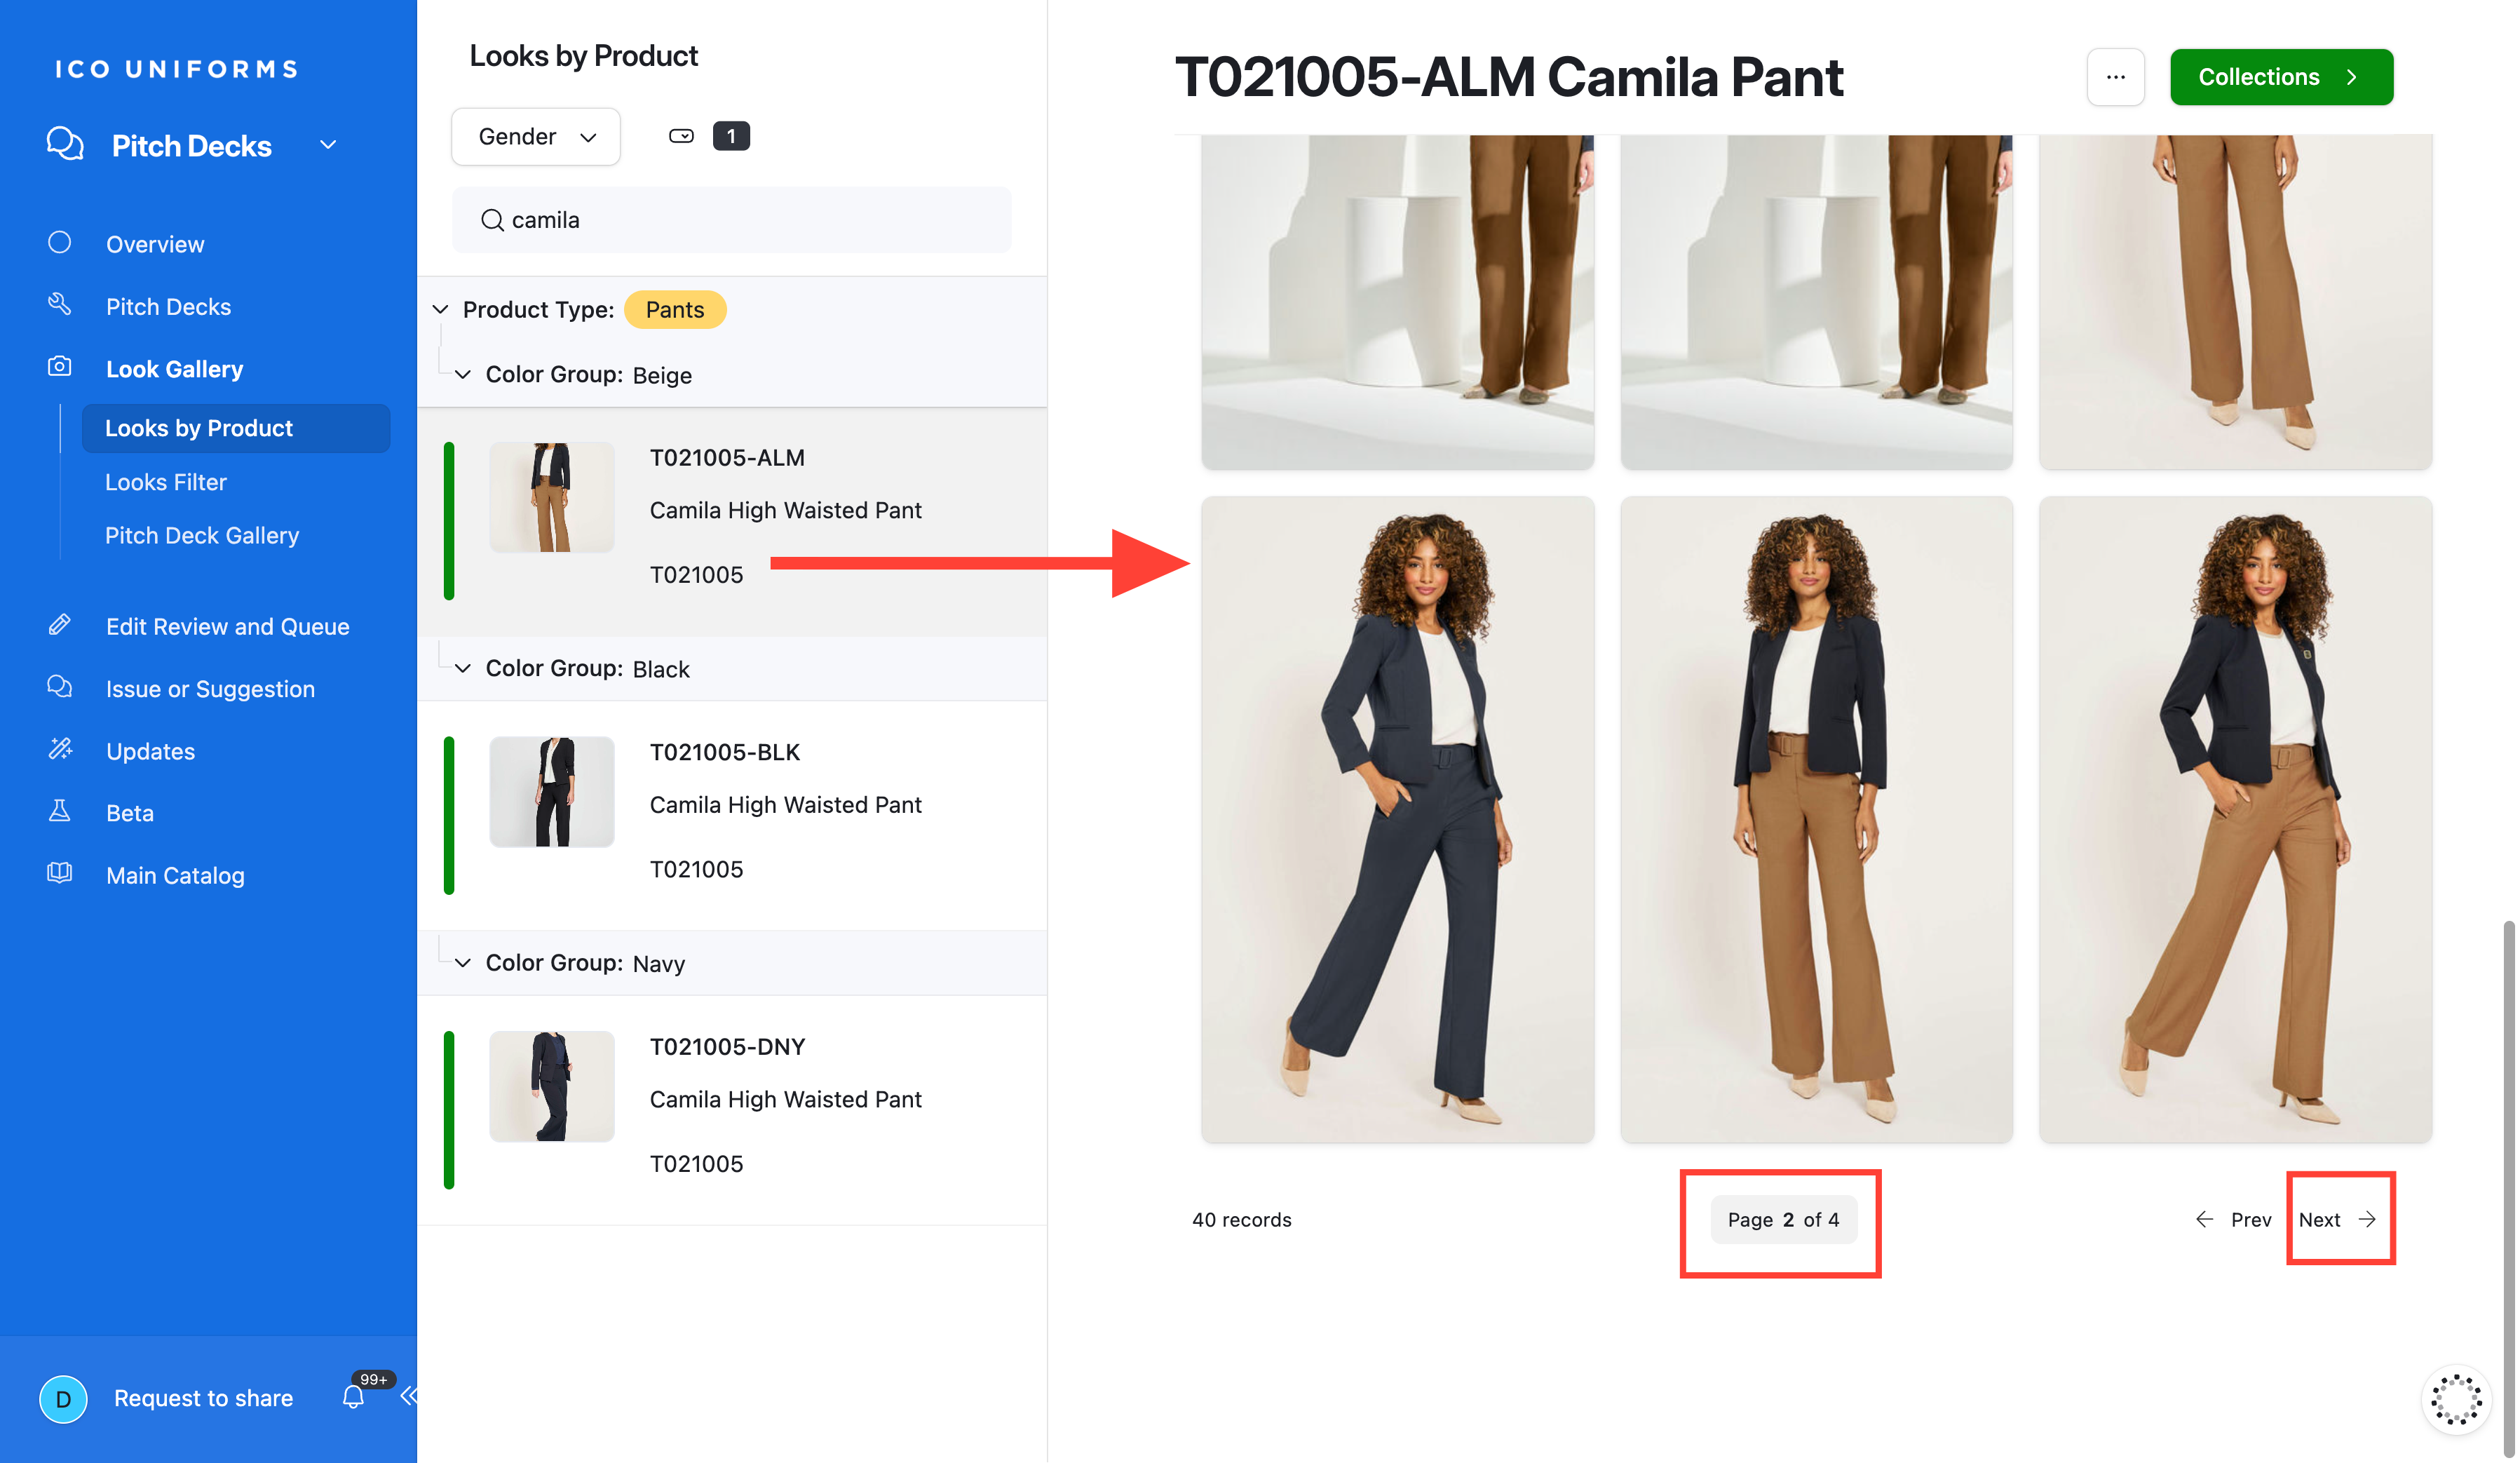
9
Click on the Look you want.
10
Click "Add to Collection"
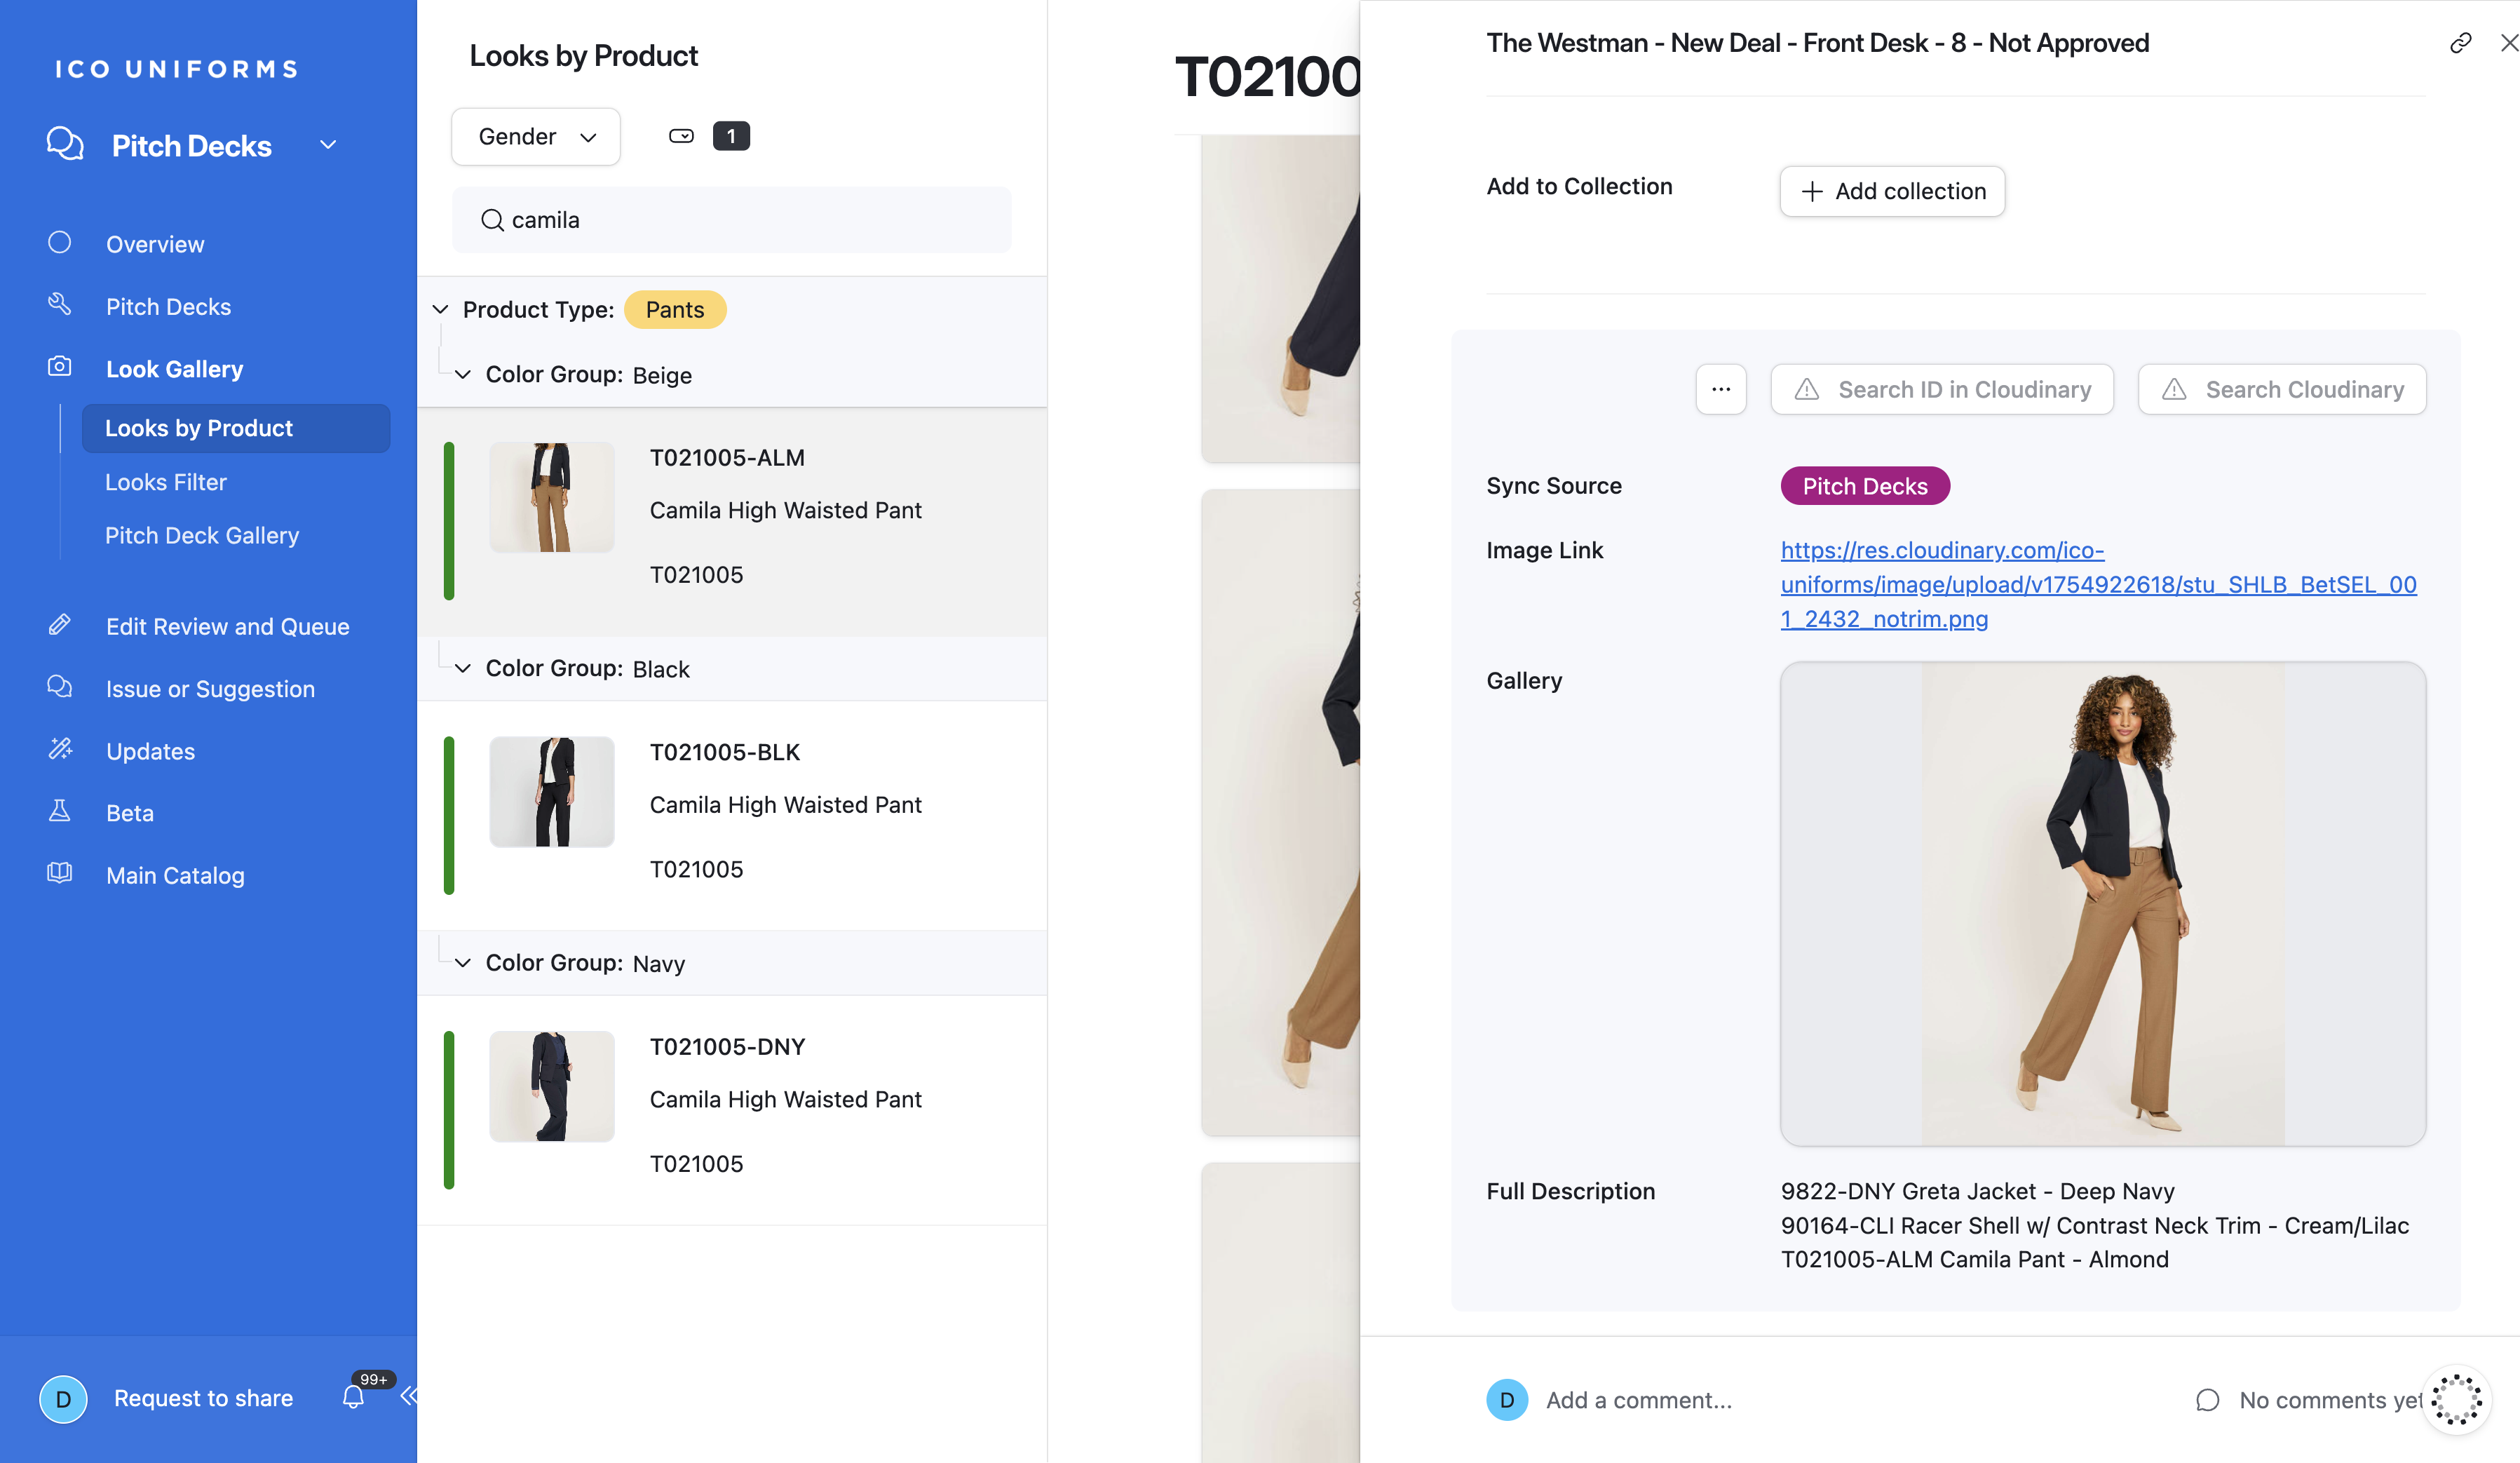
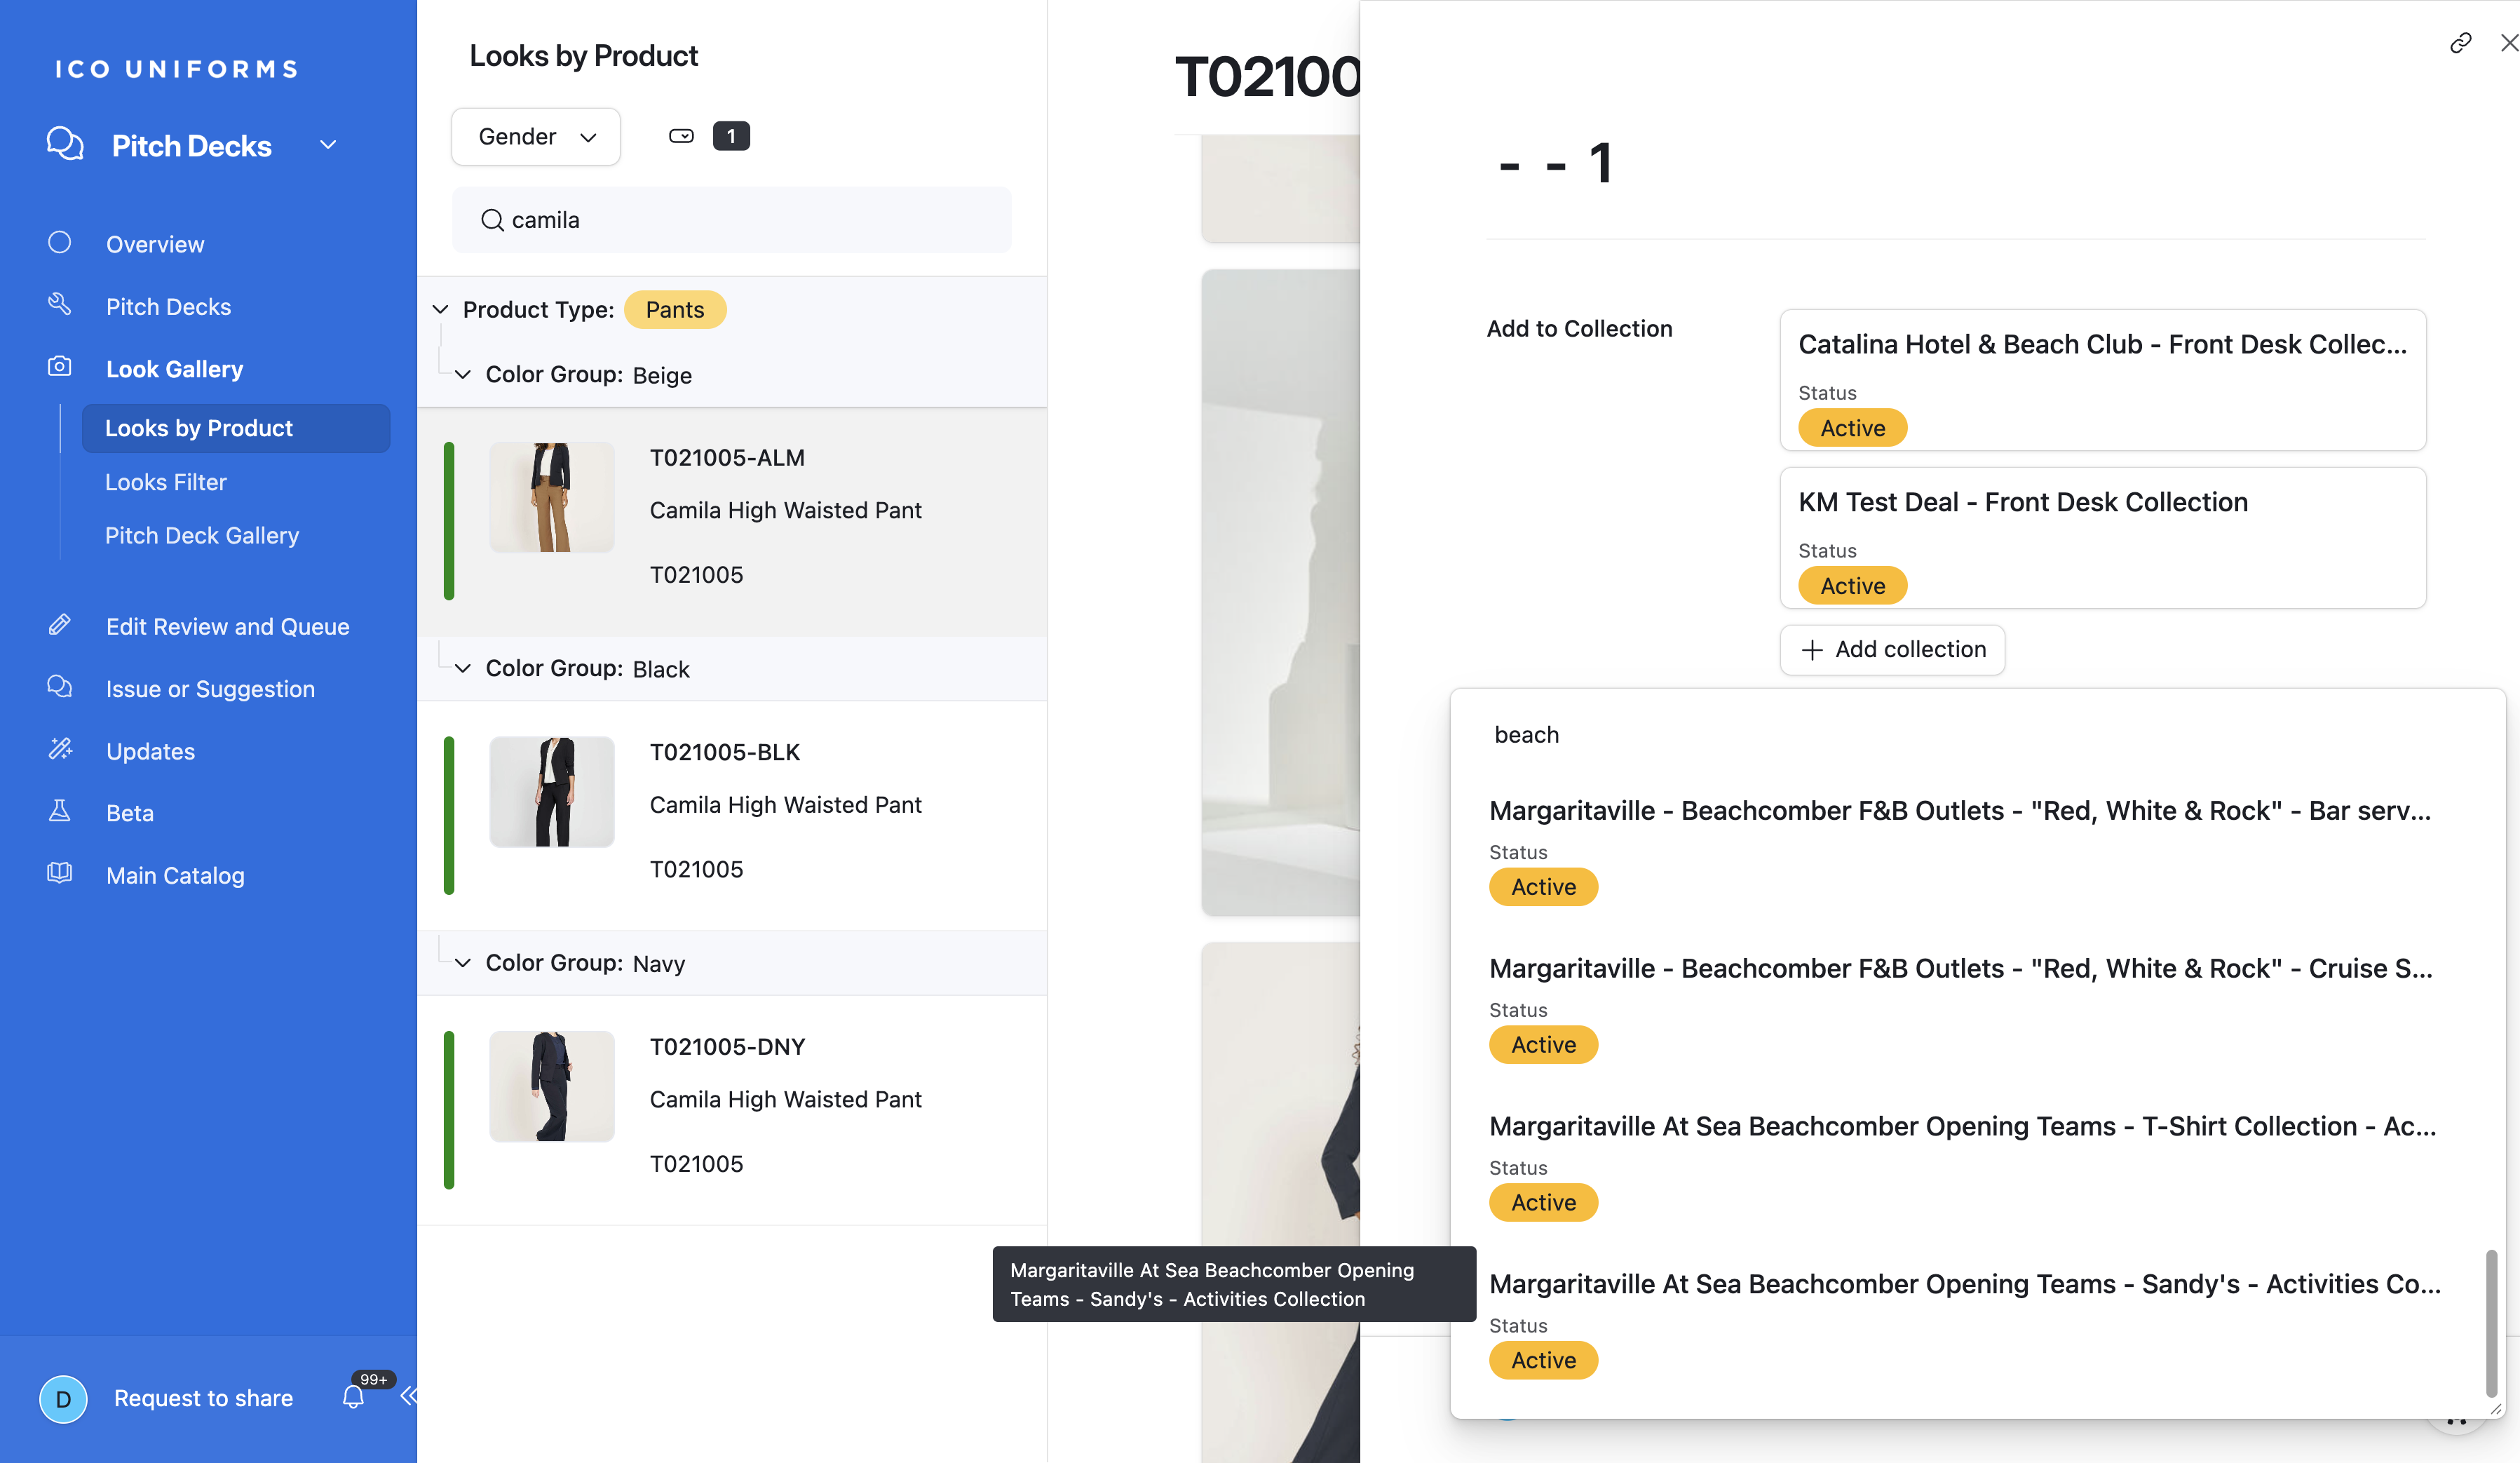
11
Start typing the name of the Collection you created for your project.
12
Type the Project name or Collection name, whichever is easier, and Click to add.
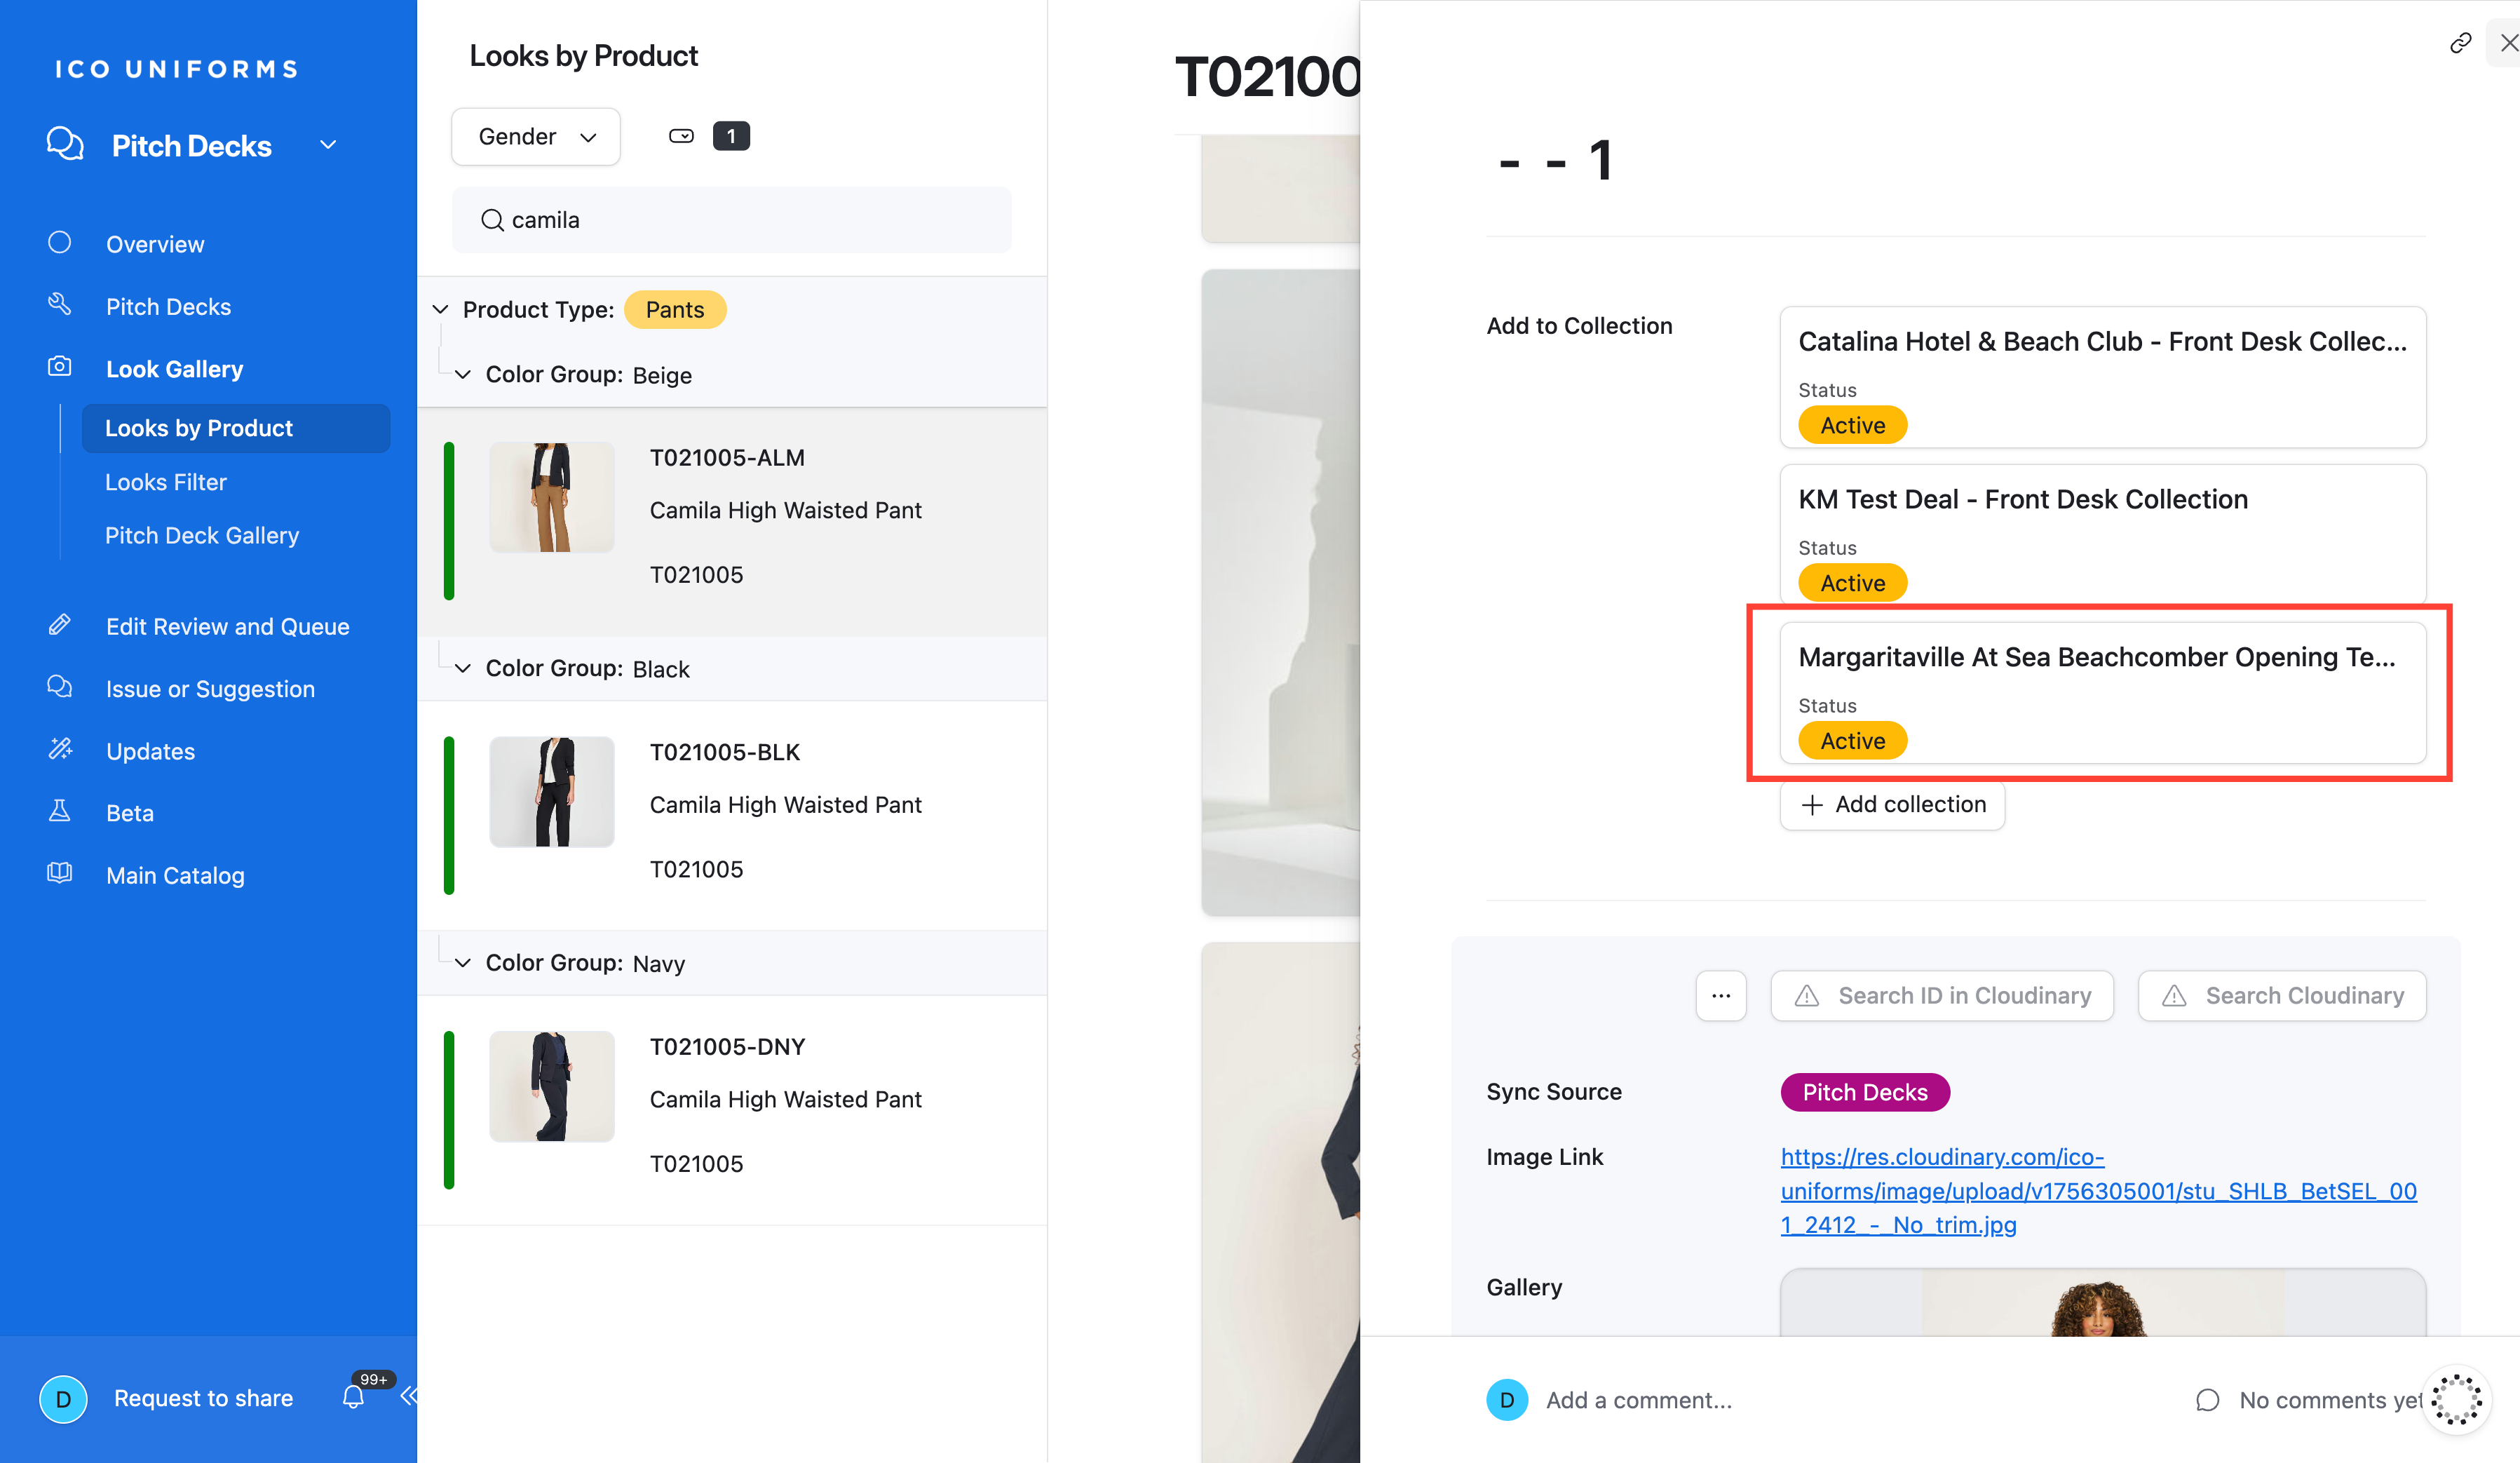
13
Look added to Collection
Search by Item Code
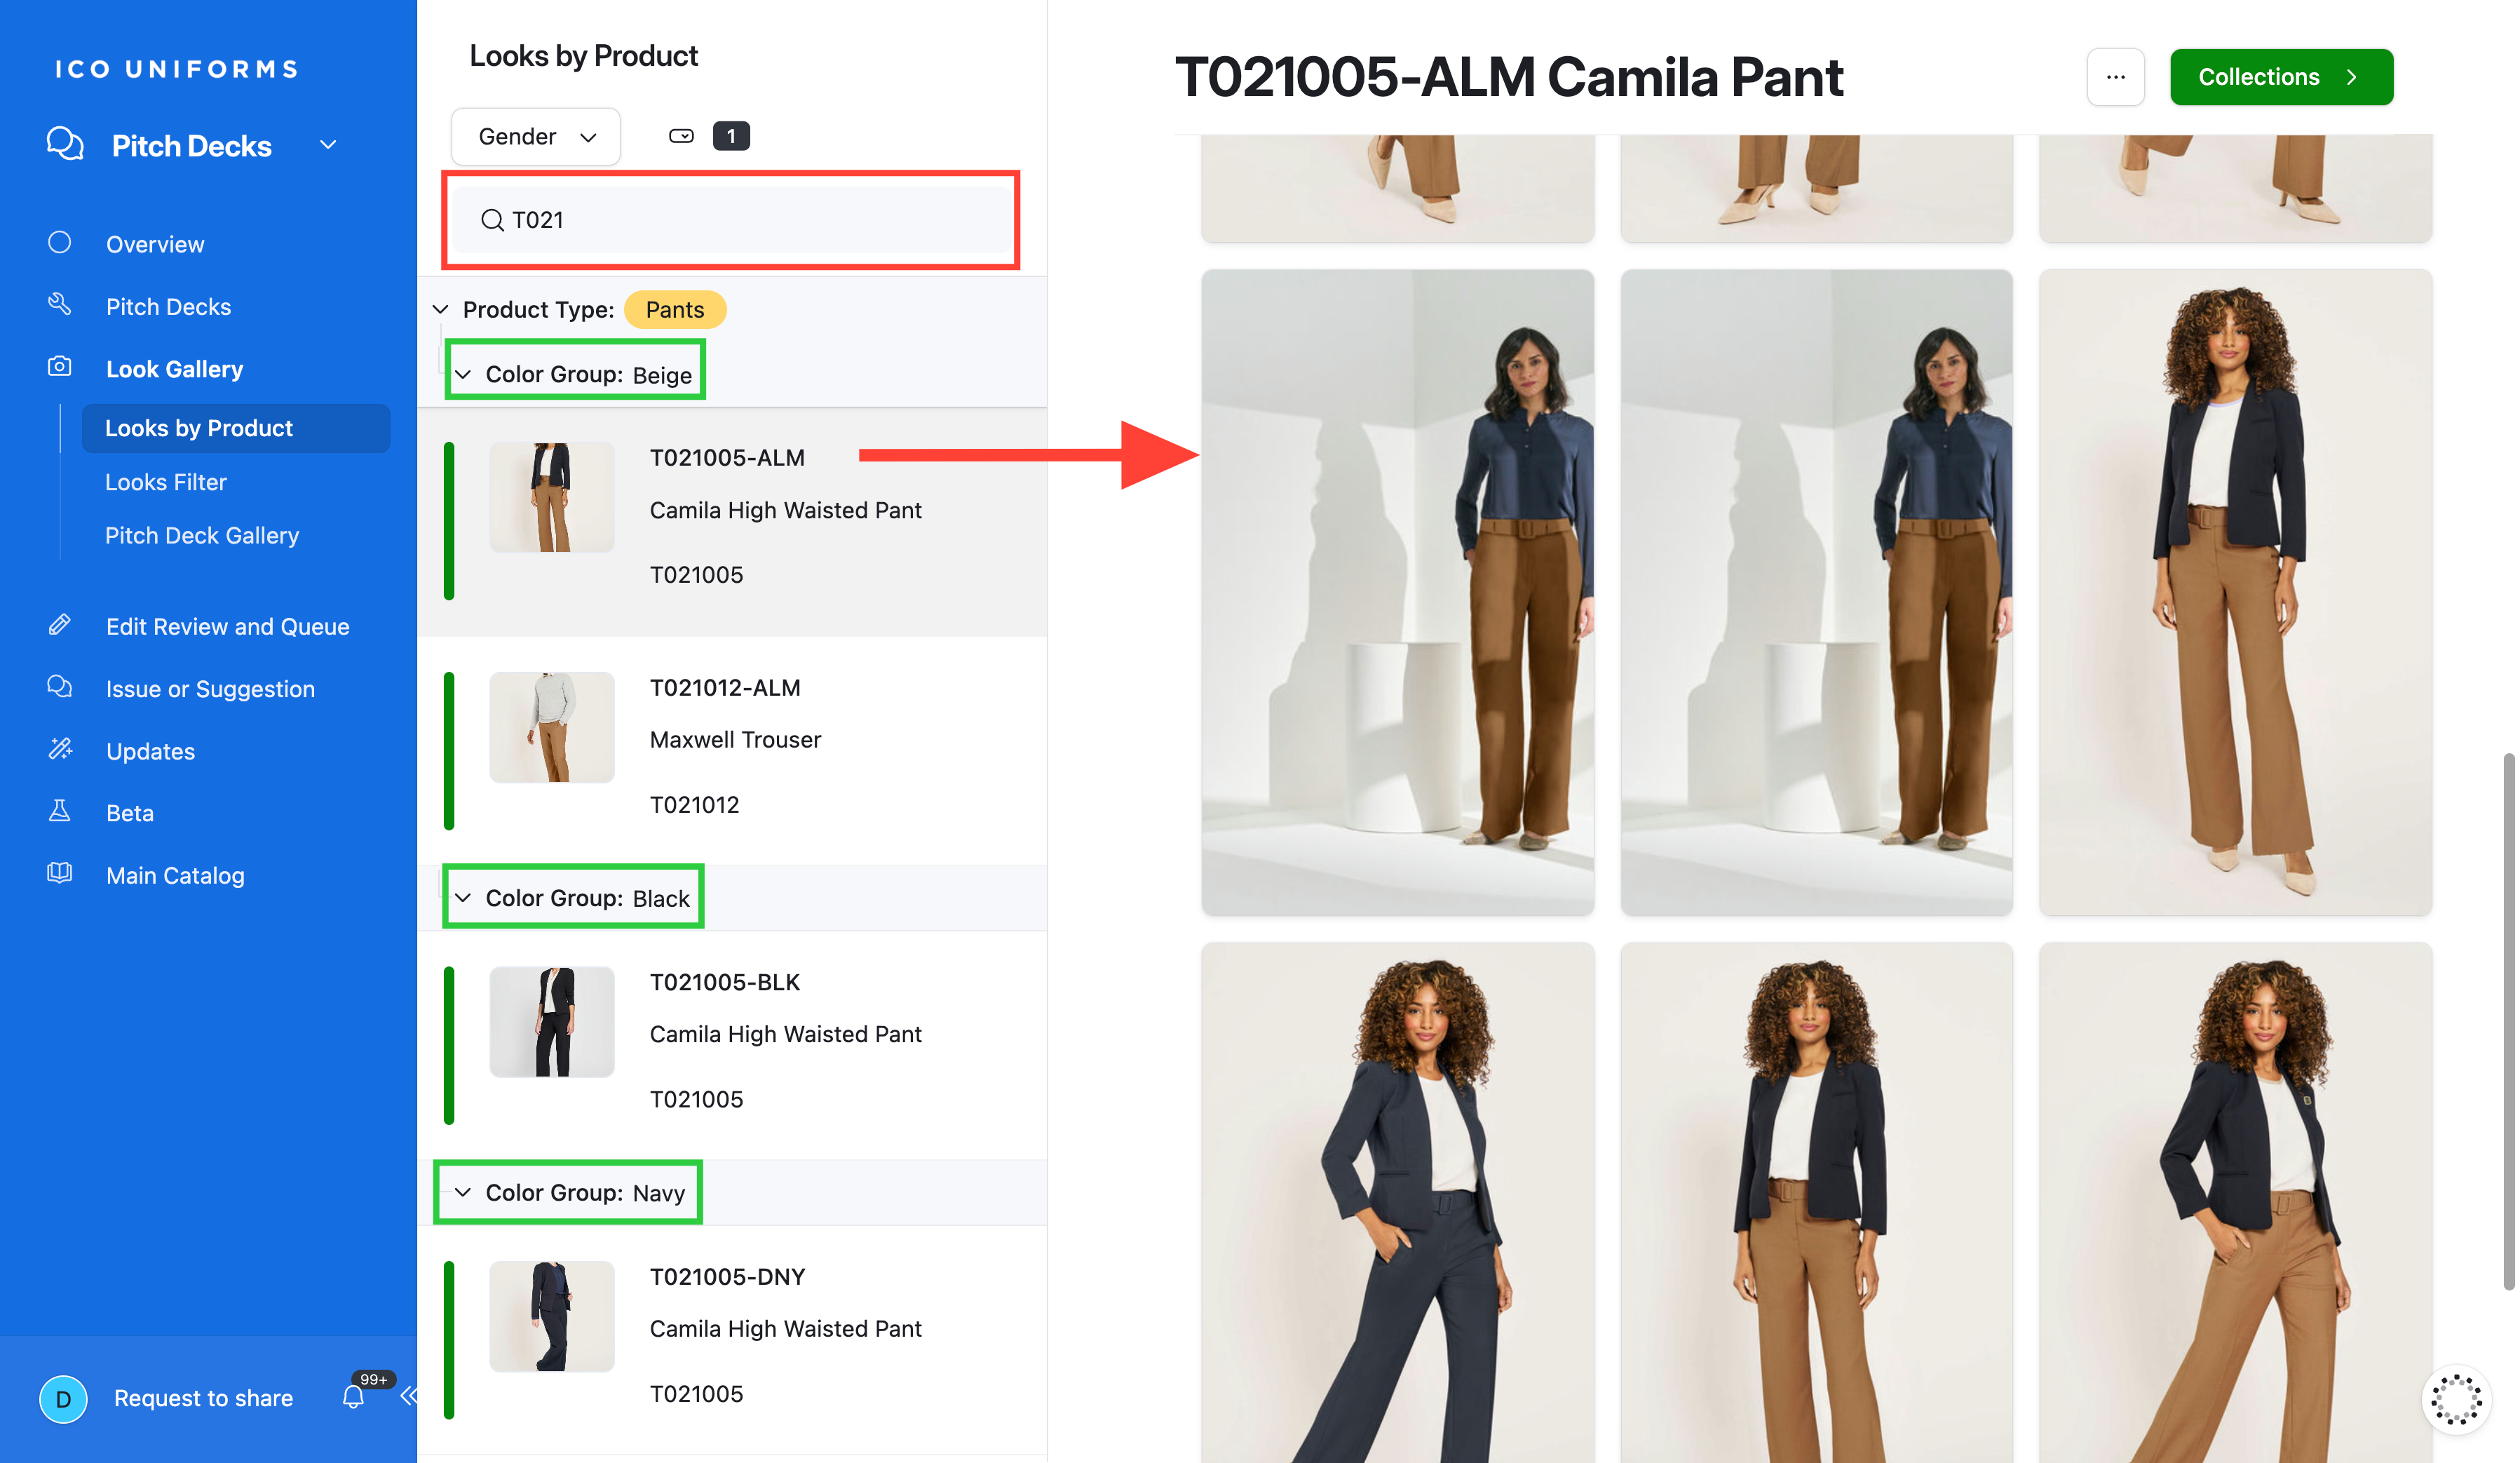
14
Type a Item Code in the Search Box and Click
Search by Color Group
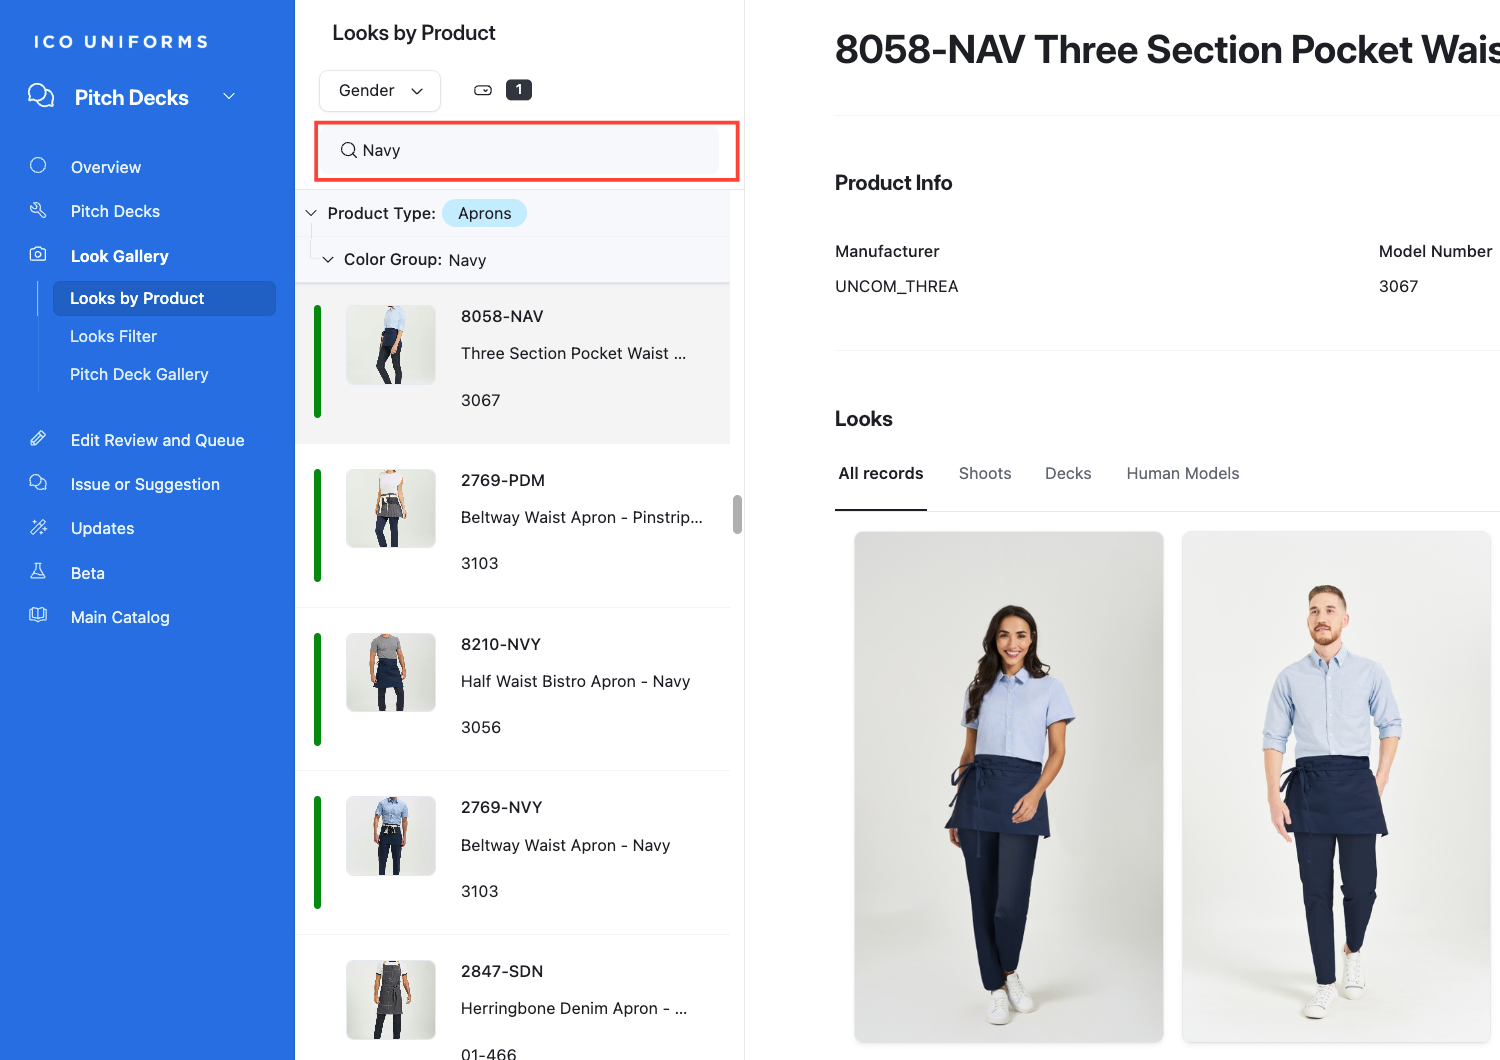
15
Type a Color in the Search Box
Search by Product Category
16
Type a Product Type in the Search Box
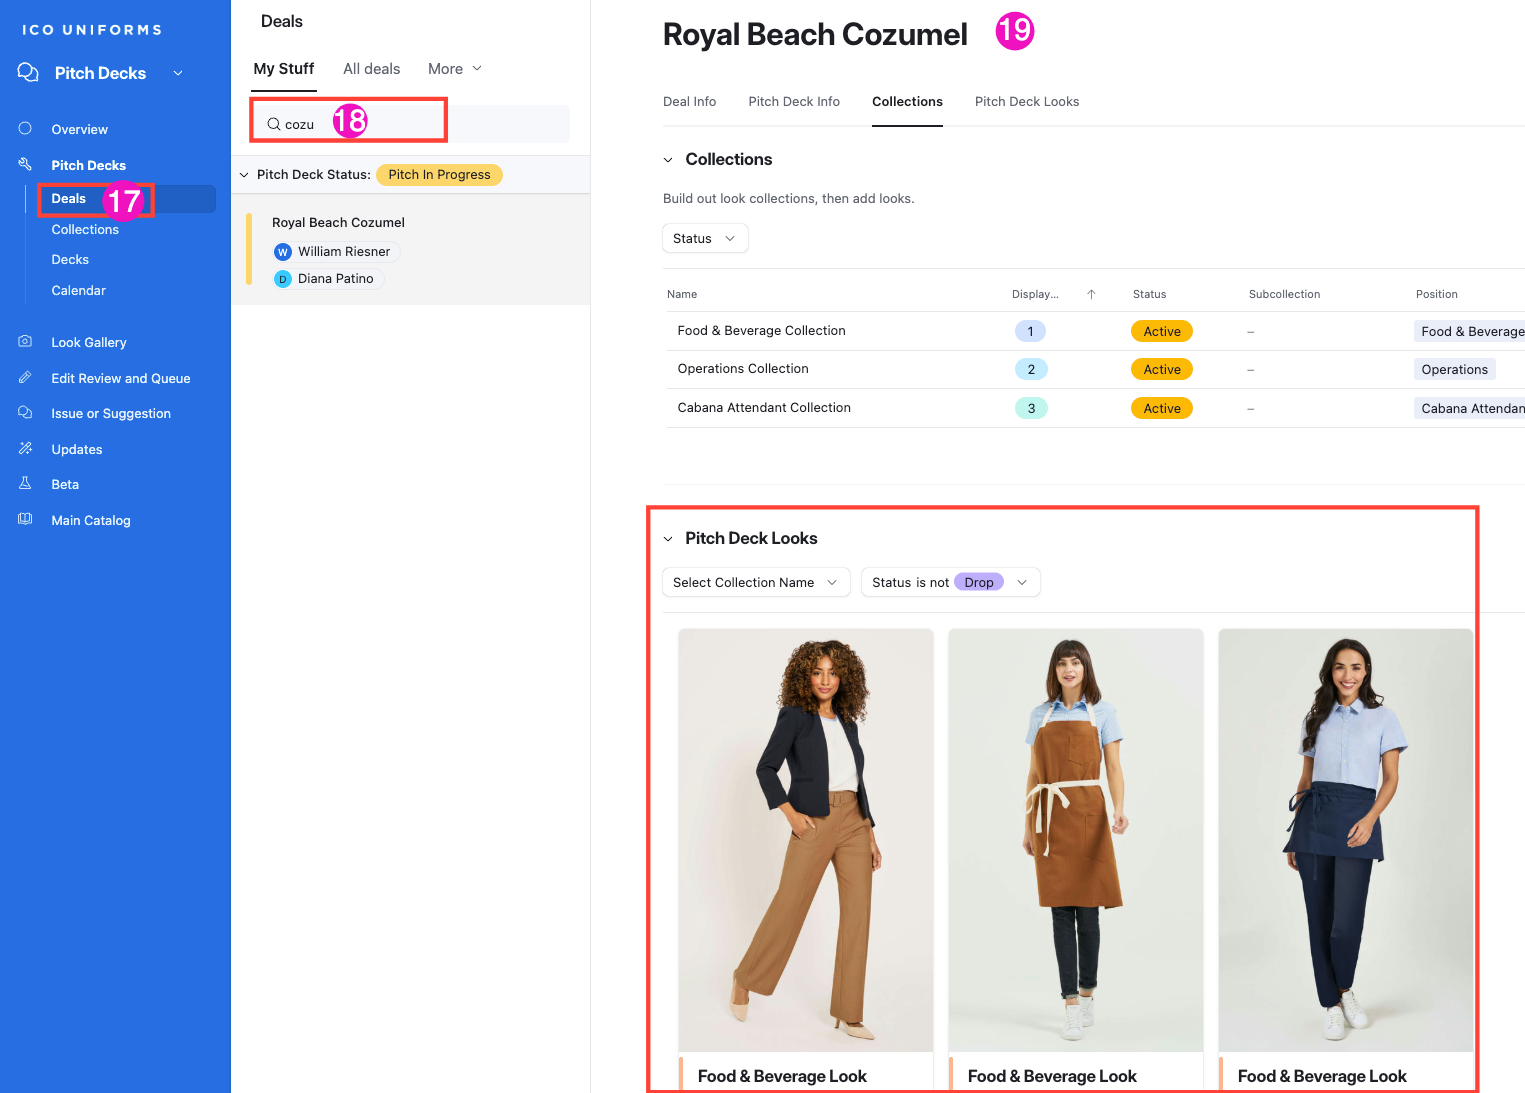
17
Select Deals under Pitch Decks
18
Start typing your Project/ Deal name
19
Click on the Collections Tab.
20
To focus on a Collection click on it.
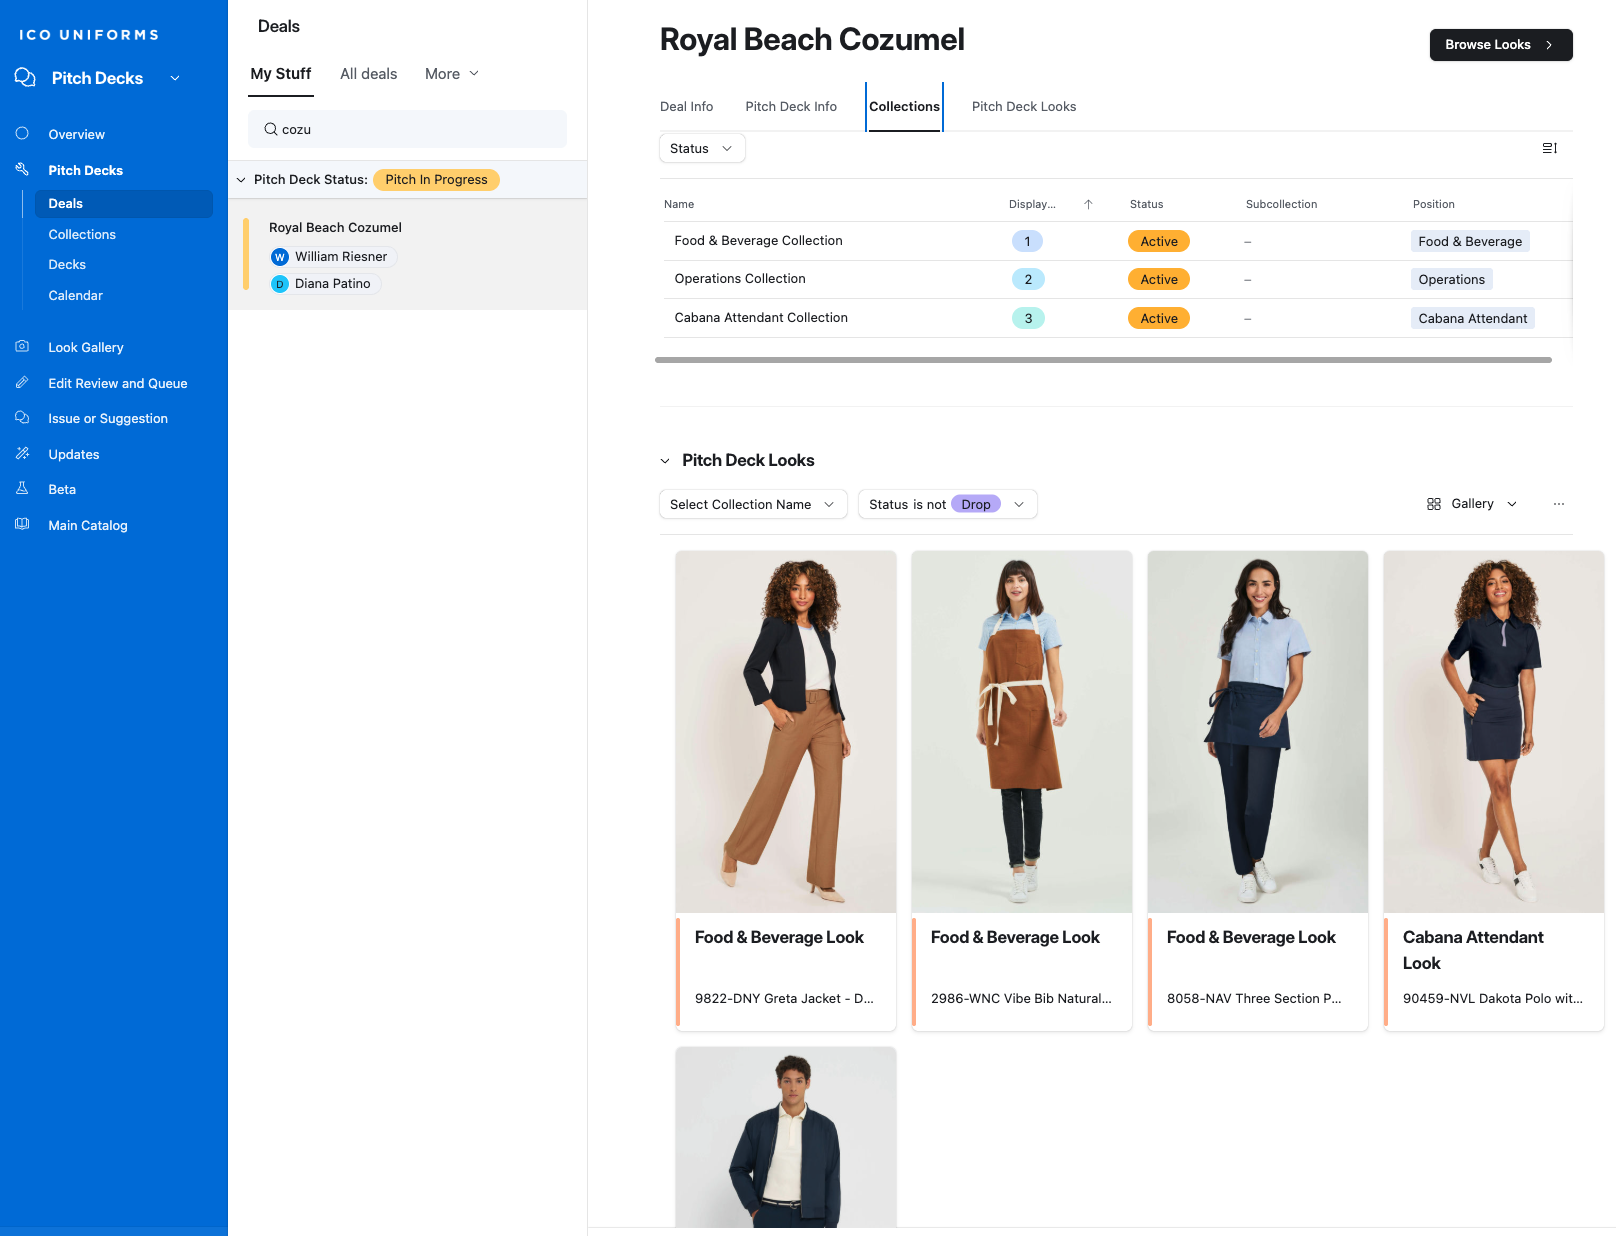
21
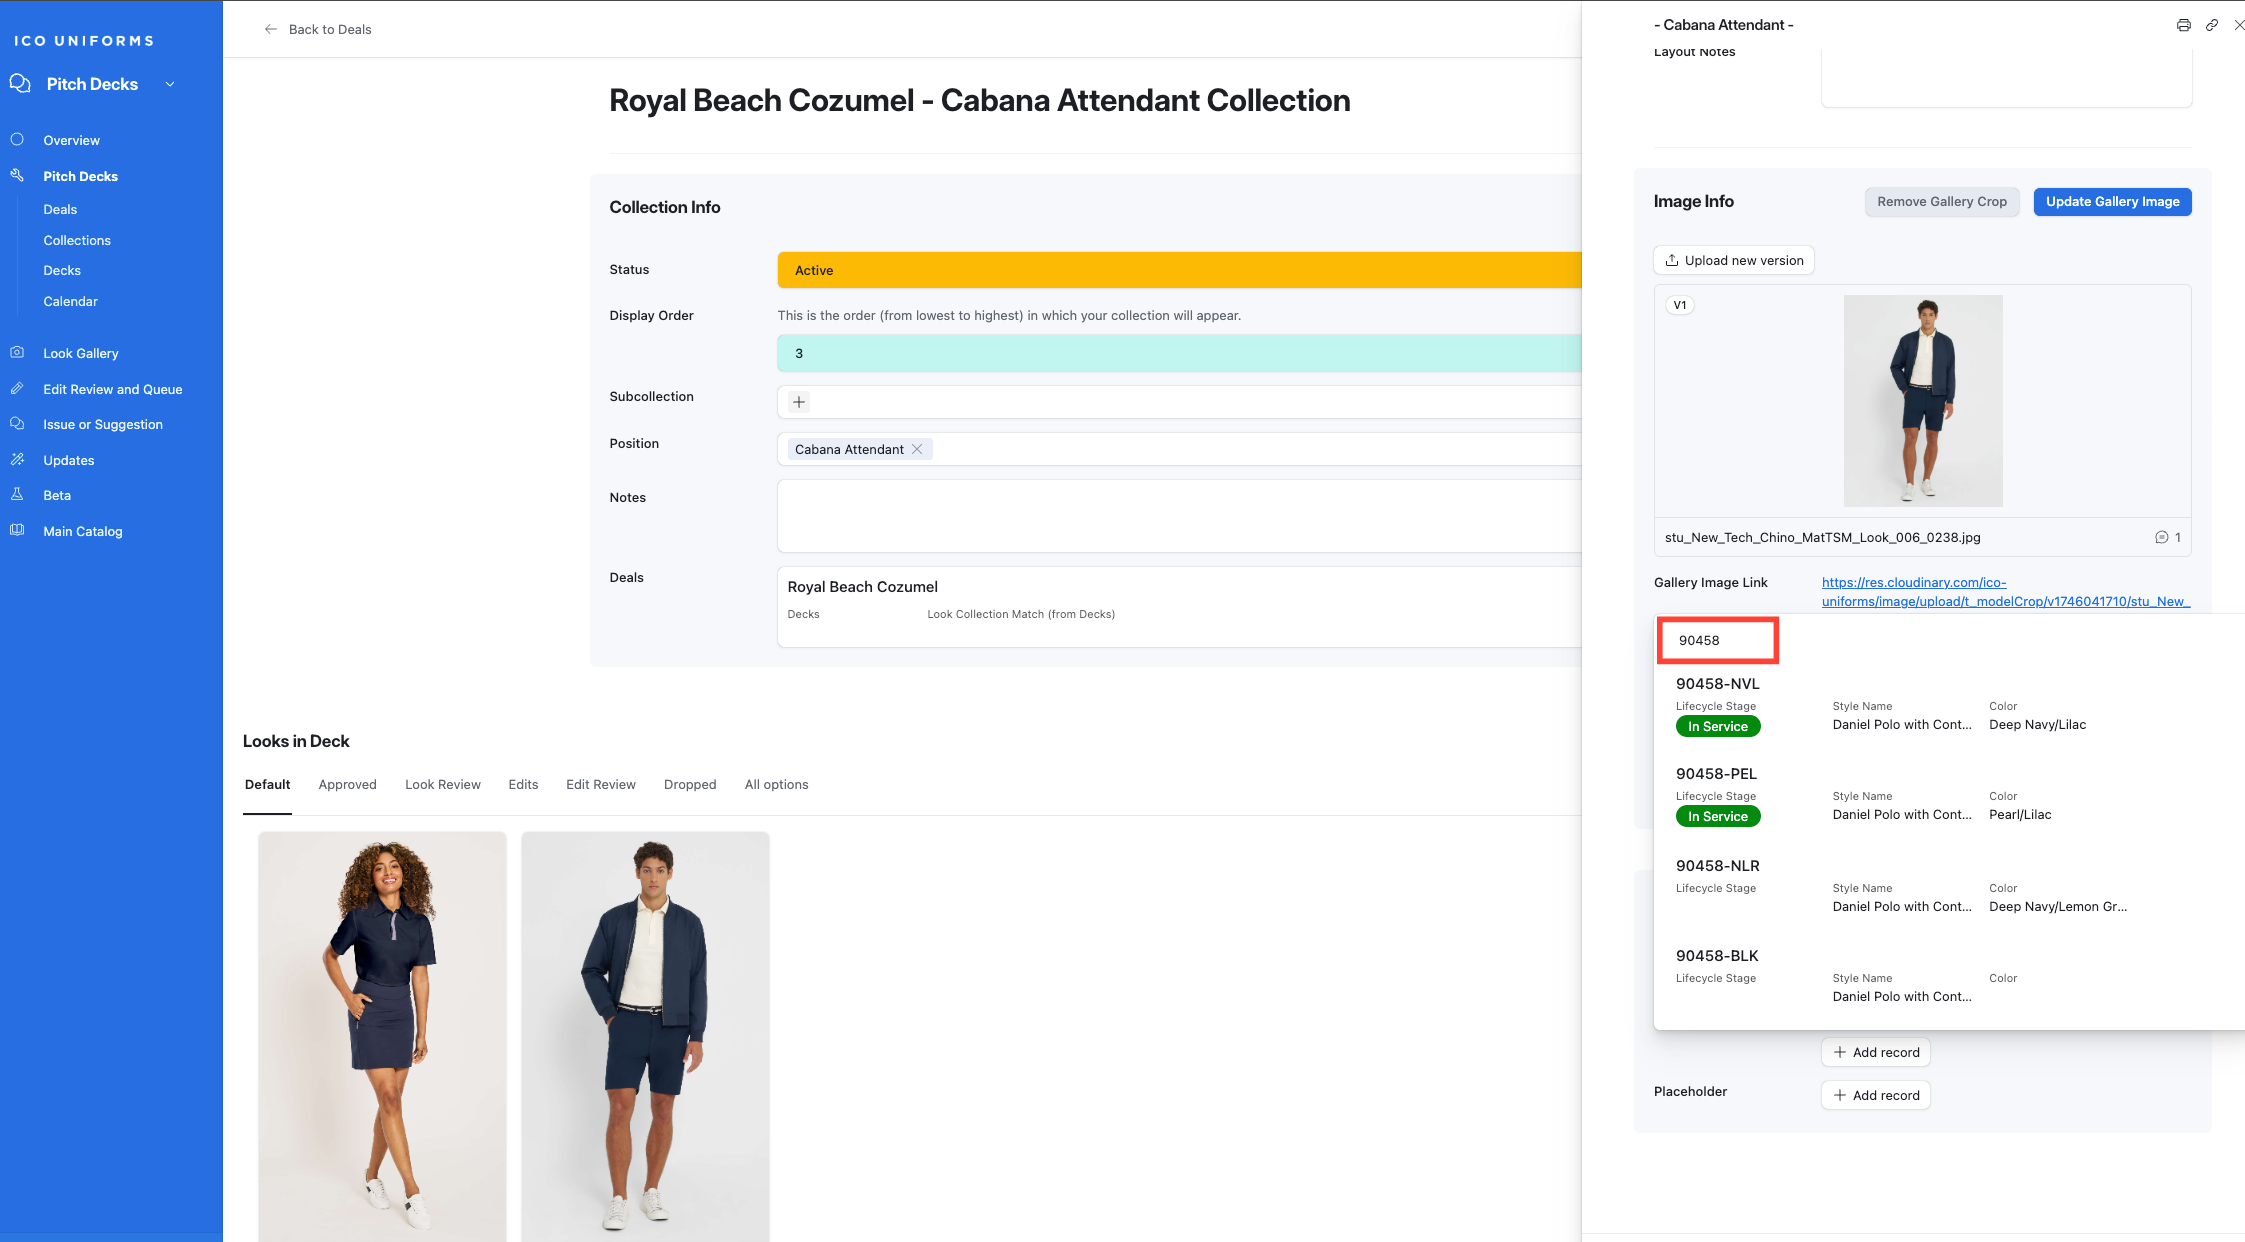
You may click on the Thumbnail to access more information about that look.
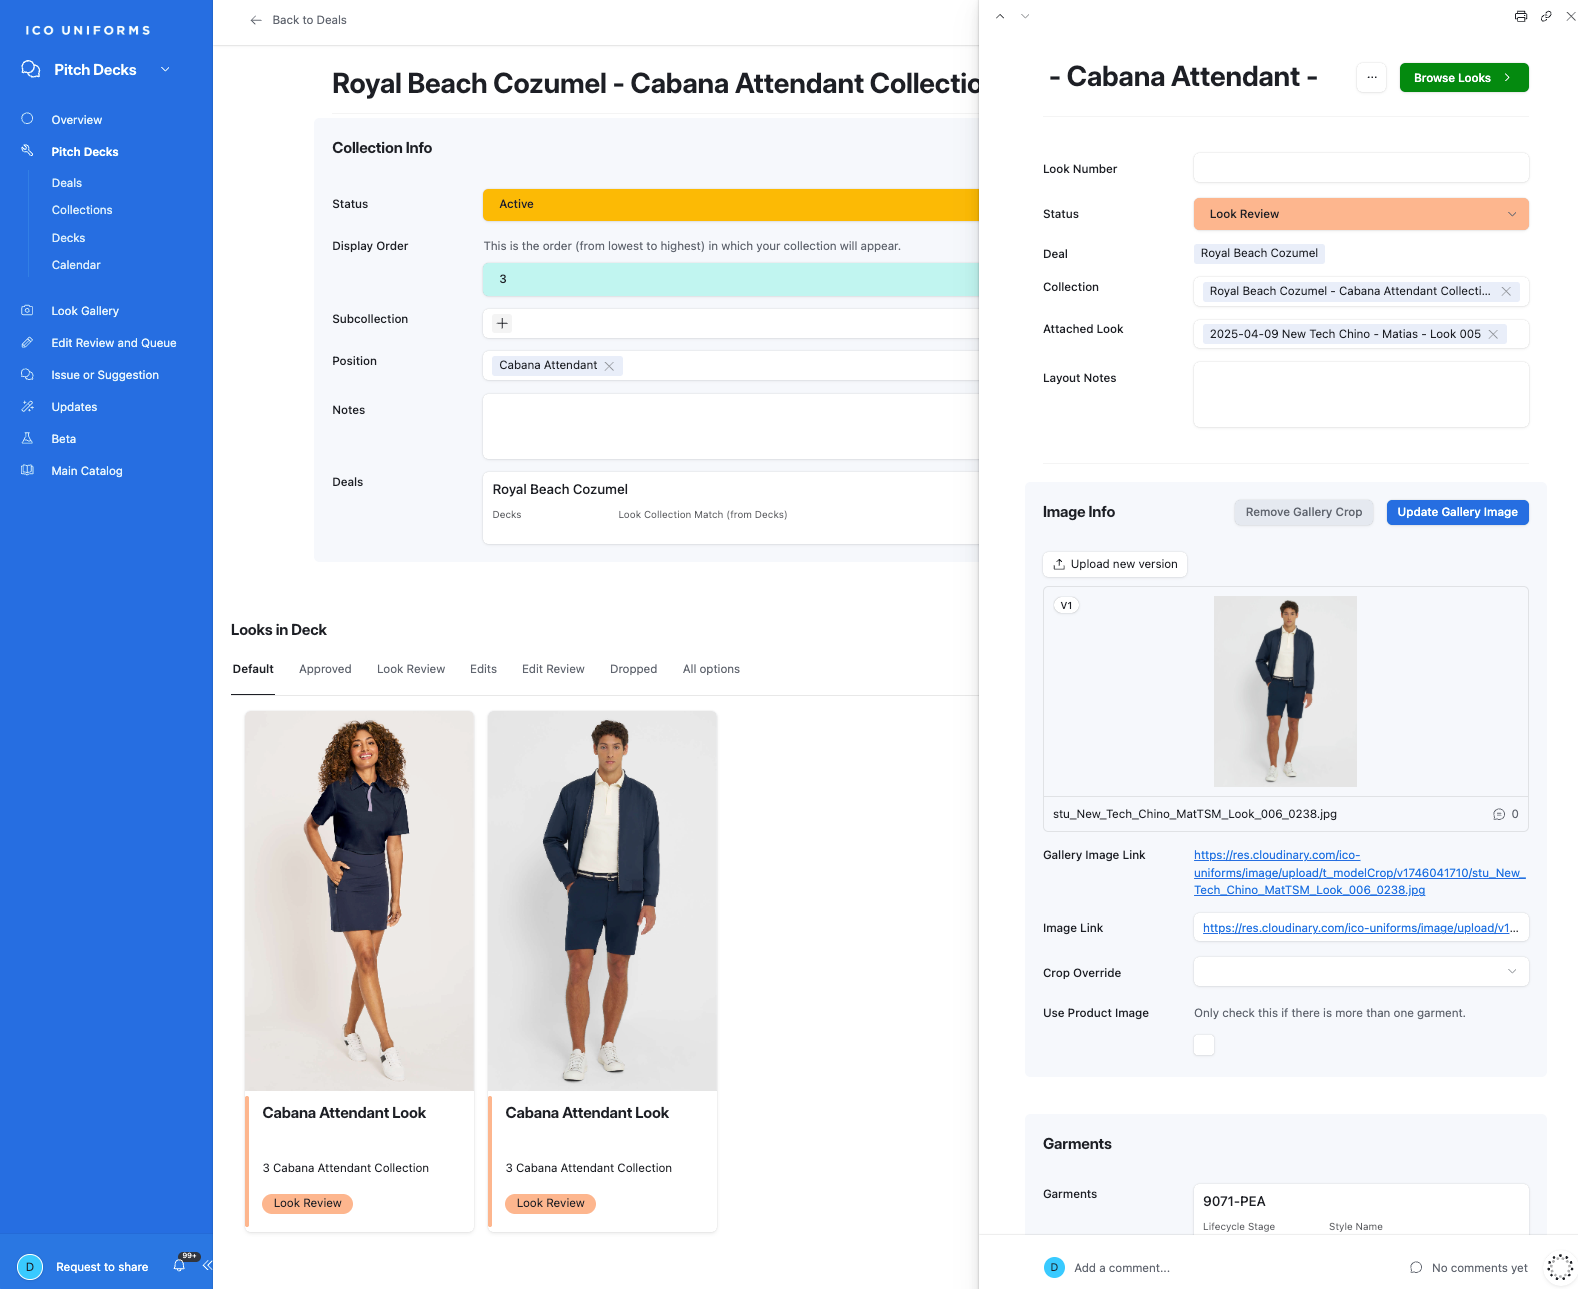
22
Here you can update the Look Number & Status.
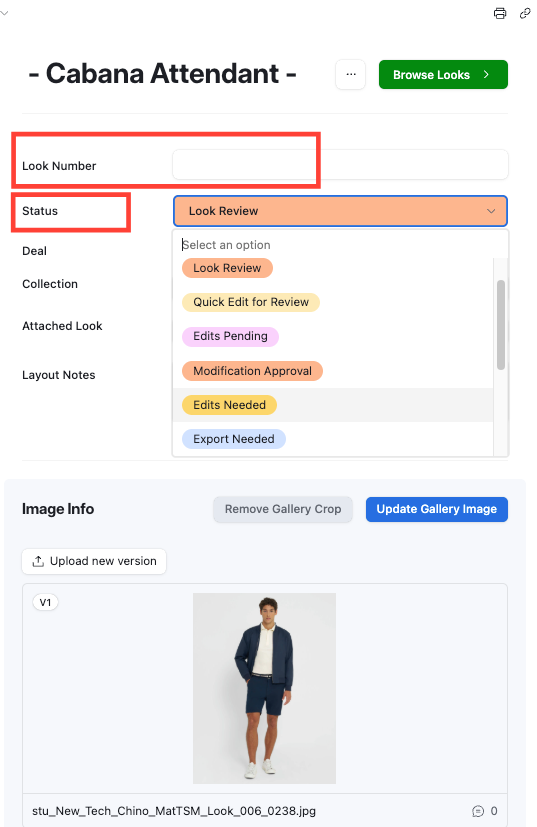
Status Definitions
23
Additional information can be viewed here.

Adding an Edit:
24
Click on the Image on the right-hand window.

25
A new Window will open up. Add your edit comment.
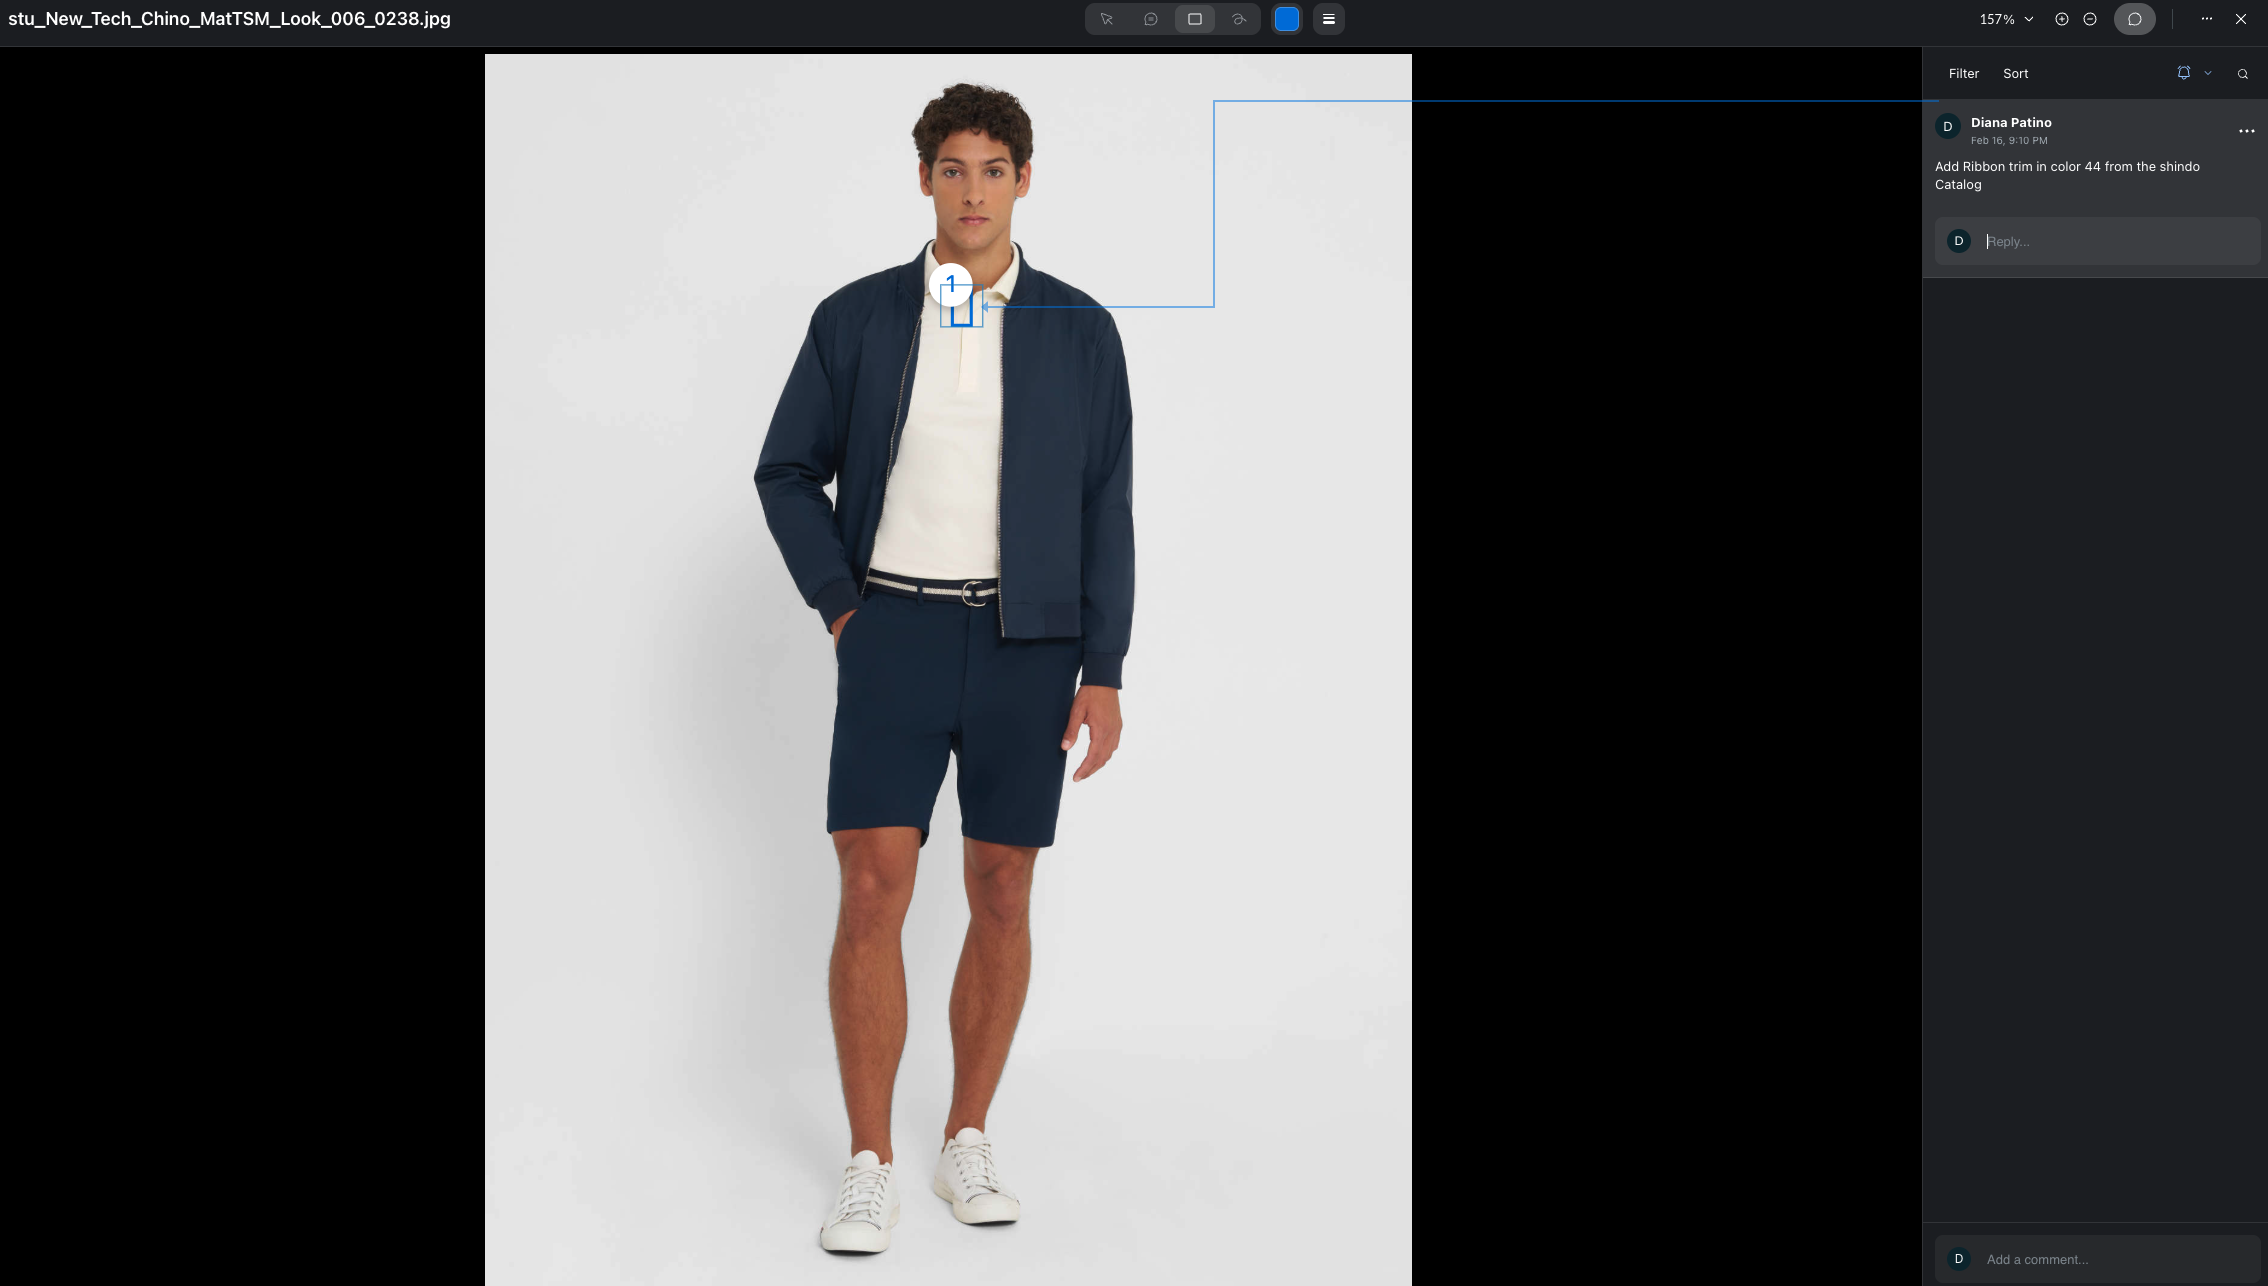
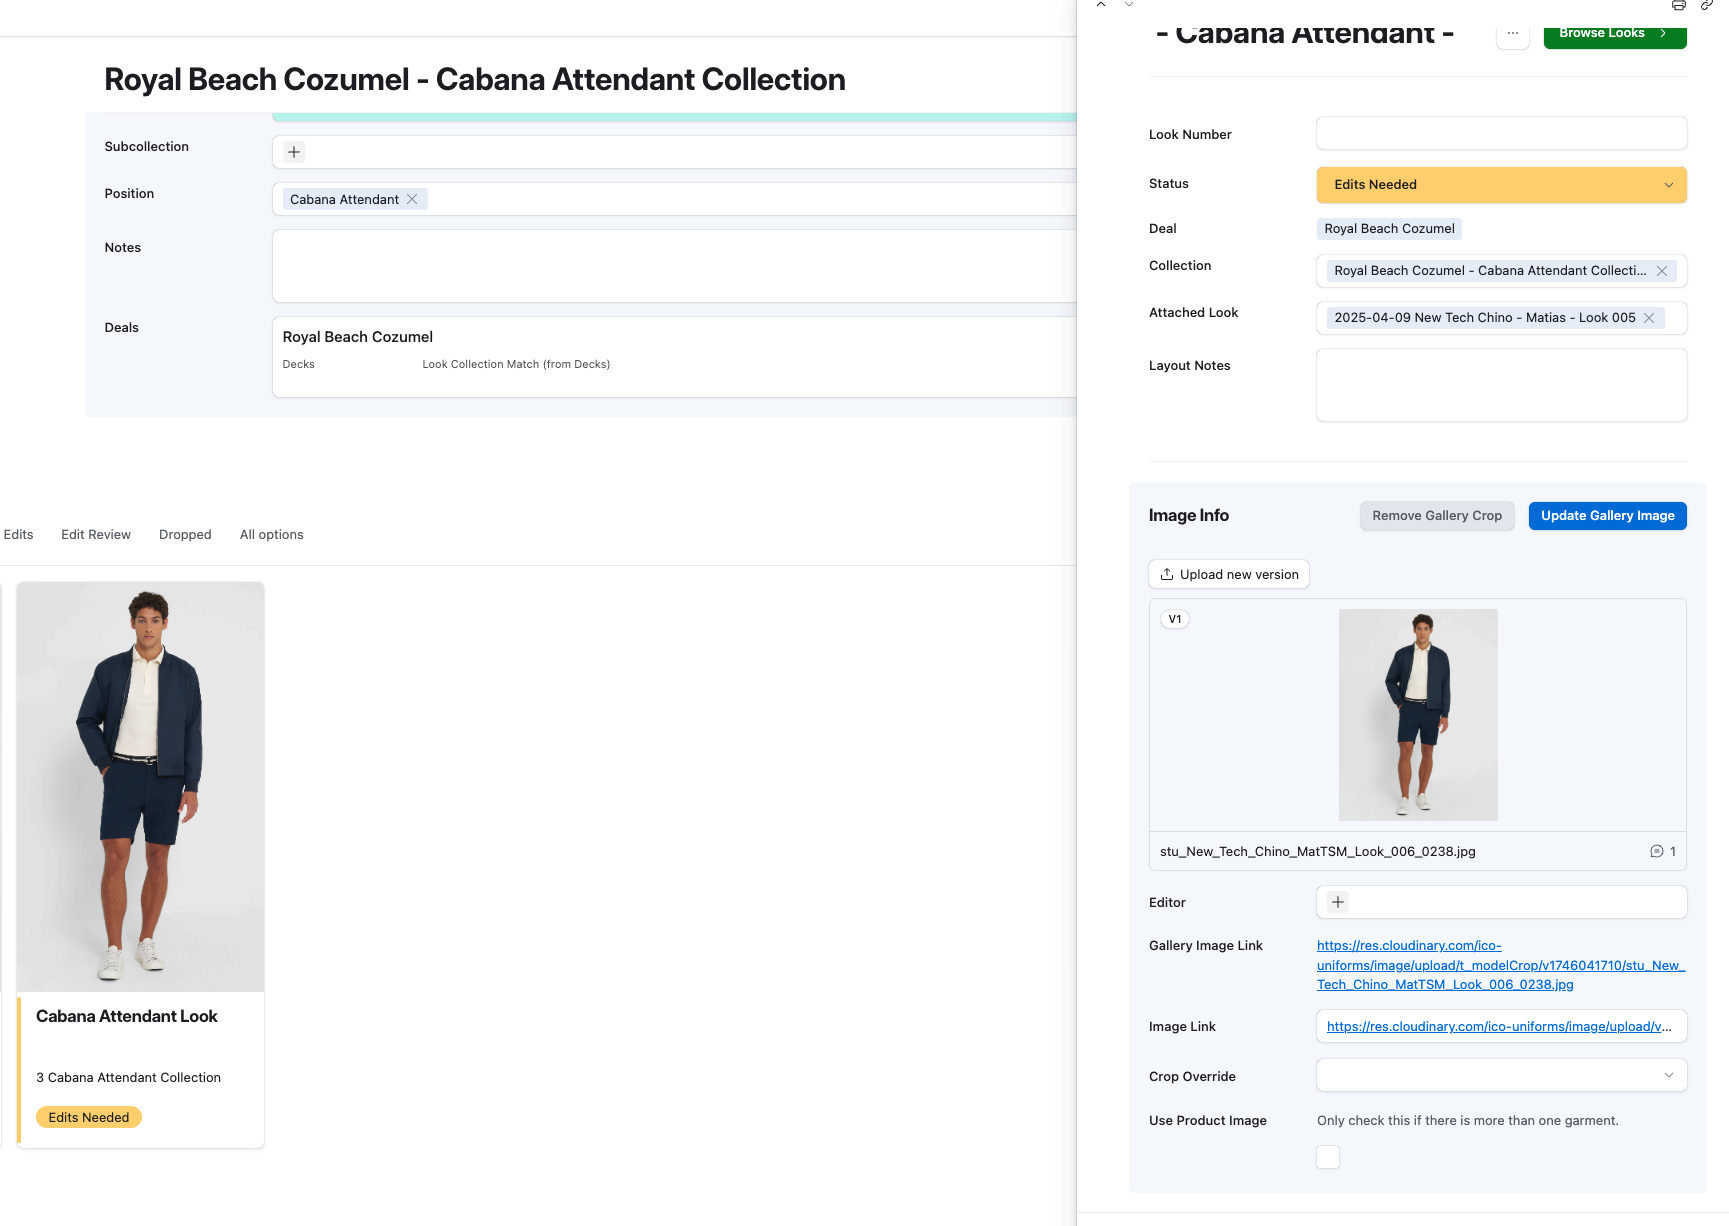
26
Change the Status: Edits Needed
27
To Unlink a Garment, simply Click on the X shown on the upper-right corner of the Thumbnail.
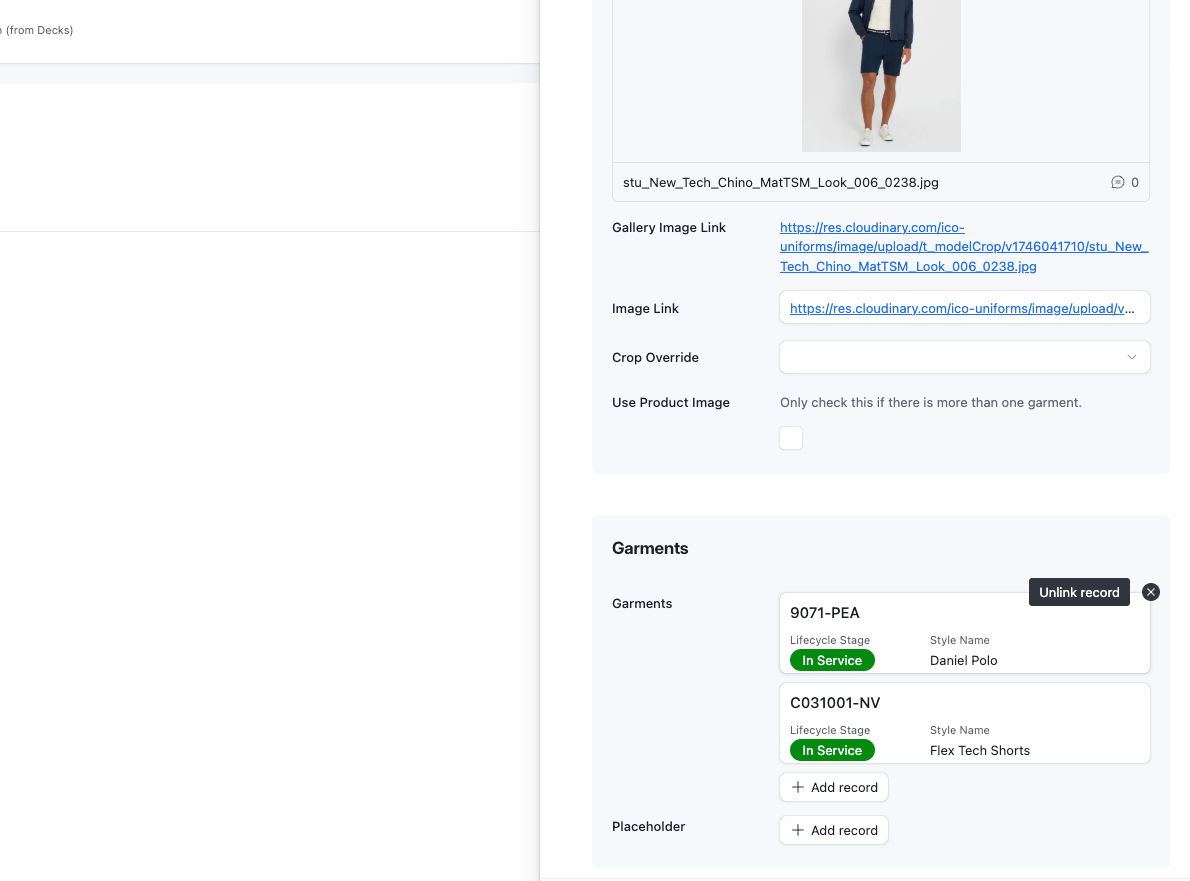
28
To update to the new Garment - Click on Add Record and start typing. Only works by Item Code search.