
How to Adjust In-Queue Data Tables and Configure Phone Numbers
Learn how to navigate to orchestration assets, find specific data tables, and configure phone number settings like customer identification in Genesys Cloud.
This guide demonstrates how to access and modify in-queue data tables. Completing this task allows you to efficiently update phone number settings, such as activating customer identification or adjusting IVR menus, without navigating away from your primary workflow.
This guide is intended for system administrators and contact center managers. Use this workflow when you need to update routing classifications or toggle features for specific inbound phone numbers.
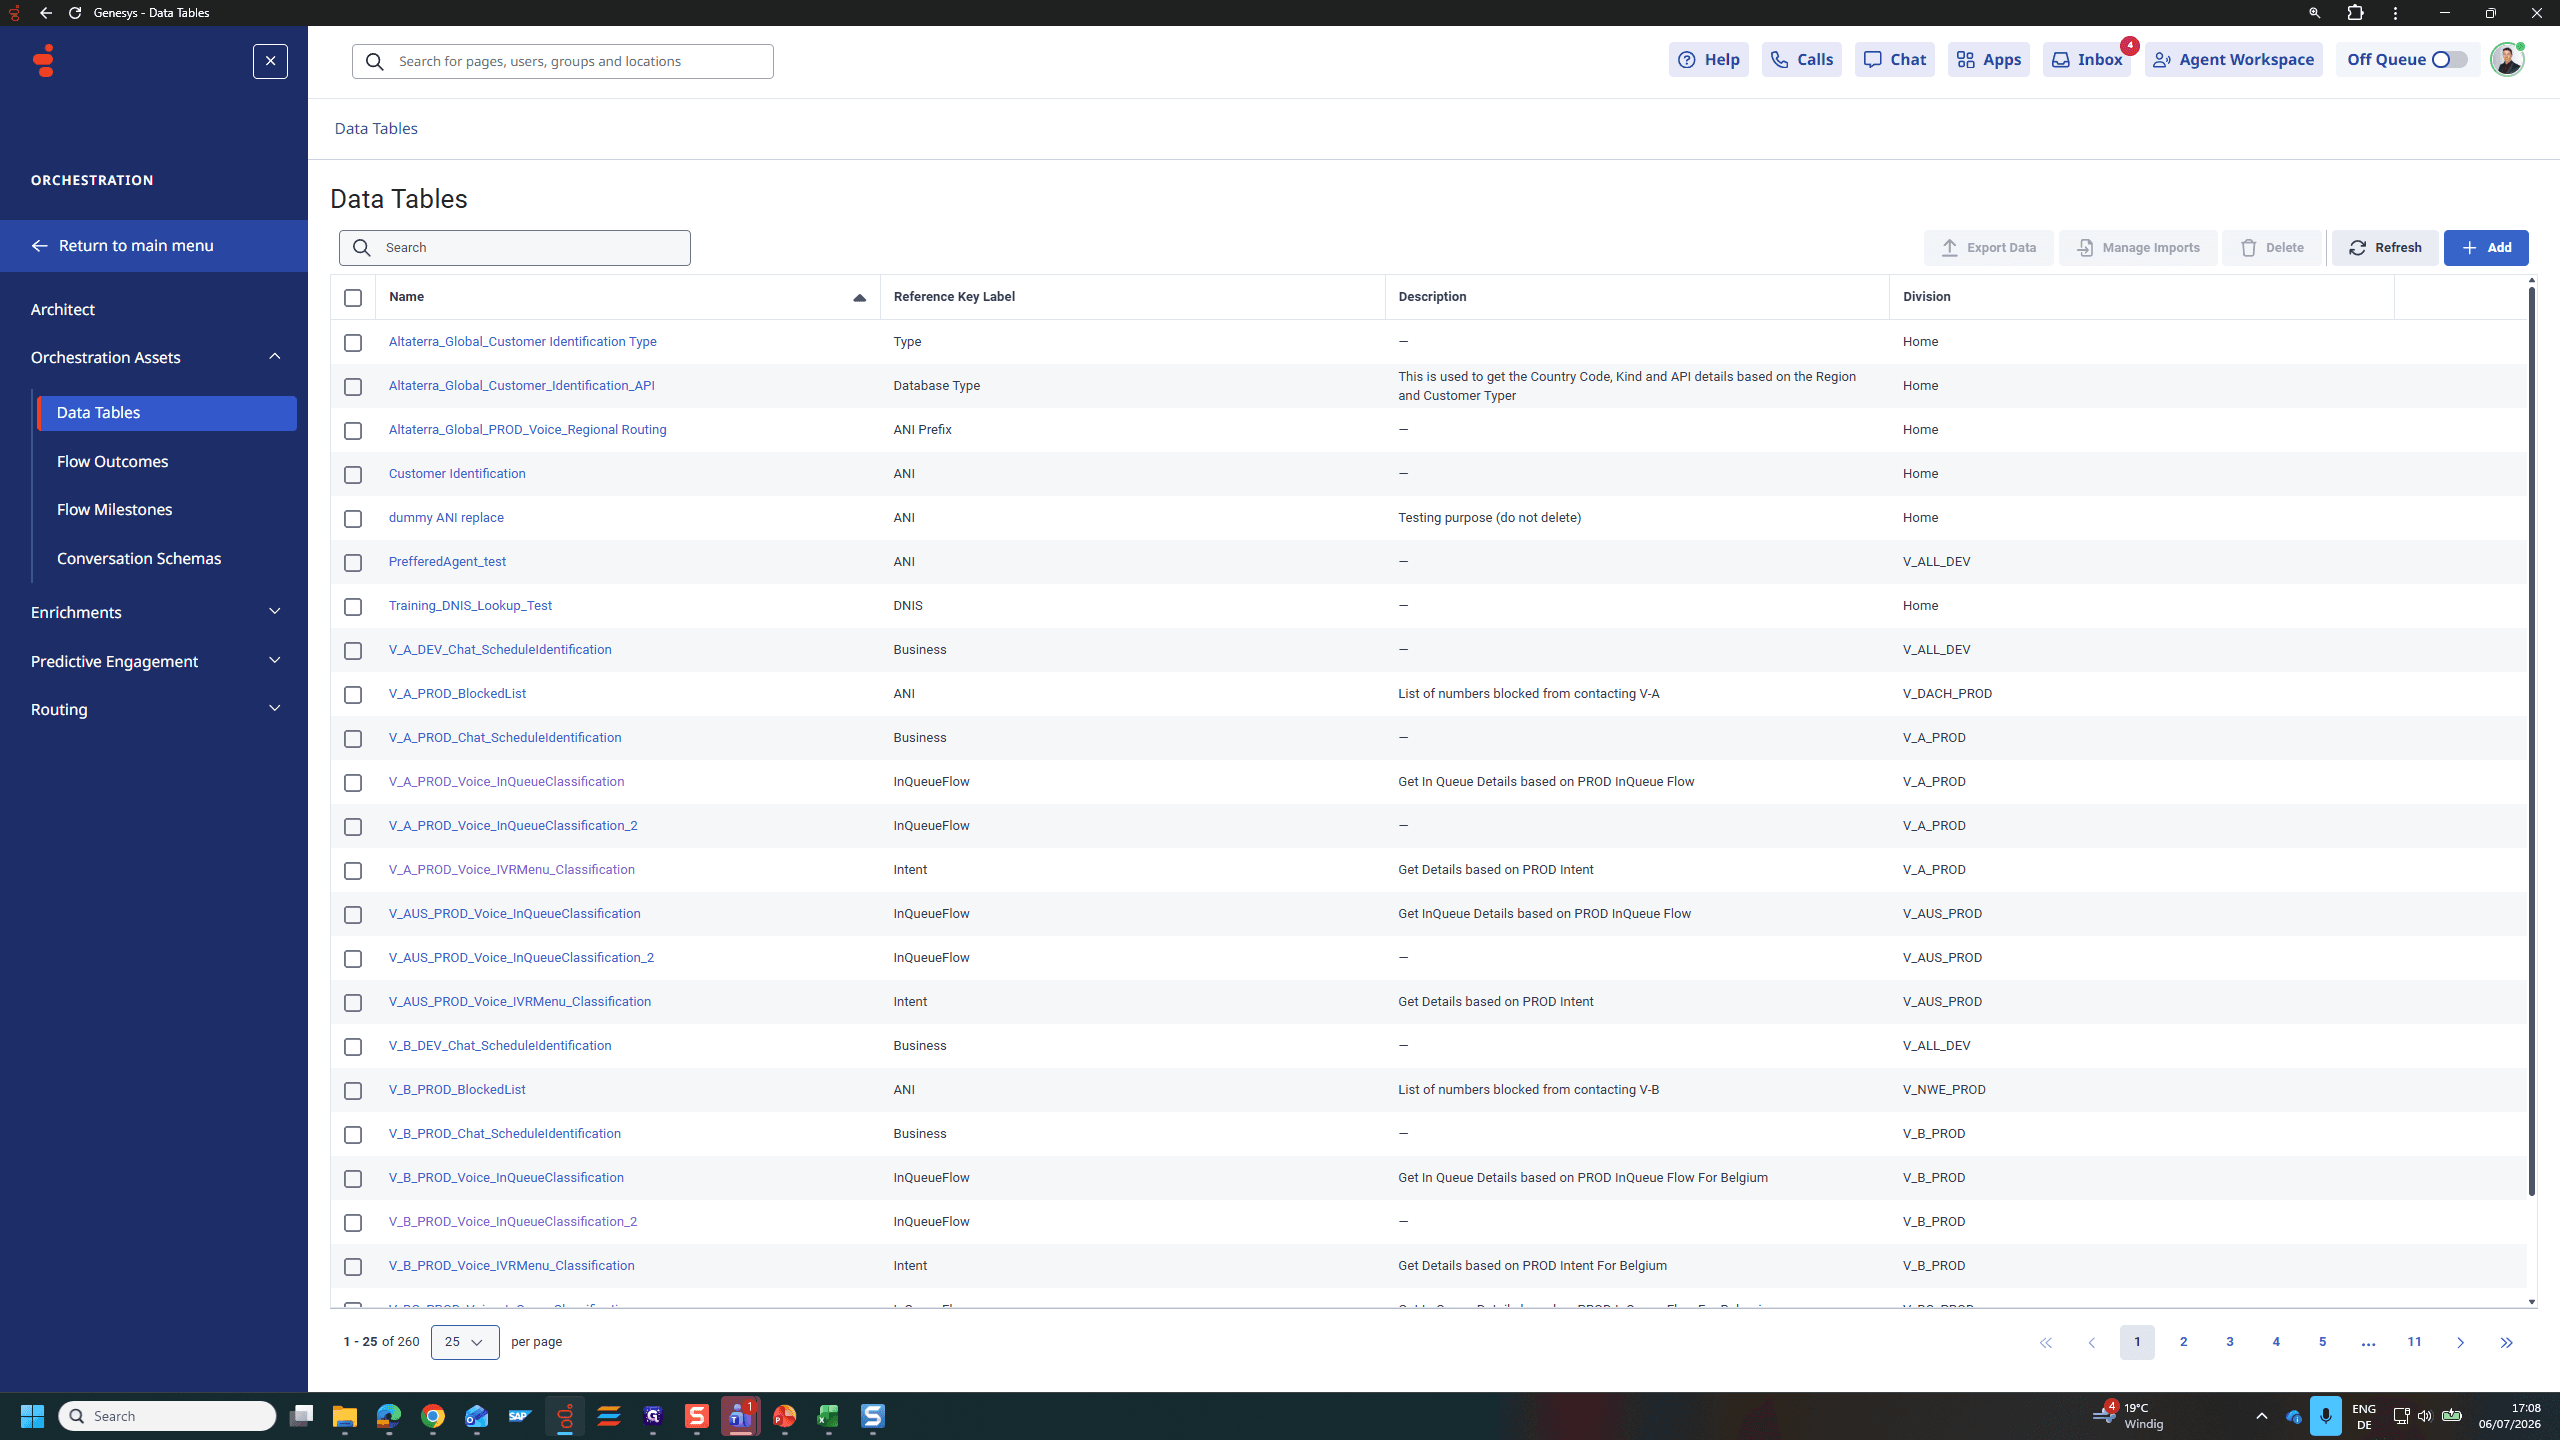
Navigate to Data Tables
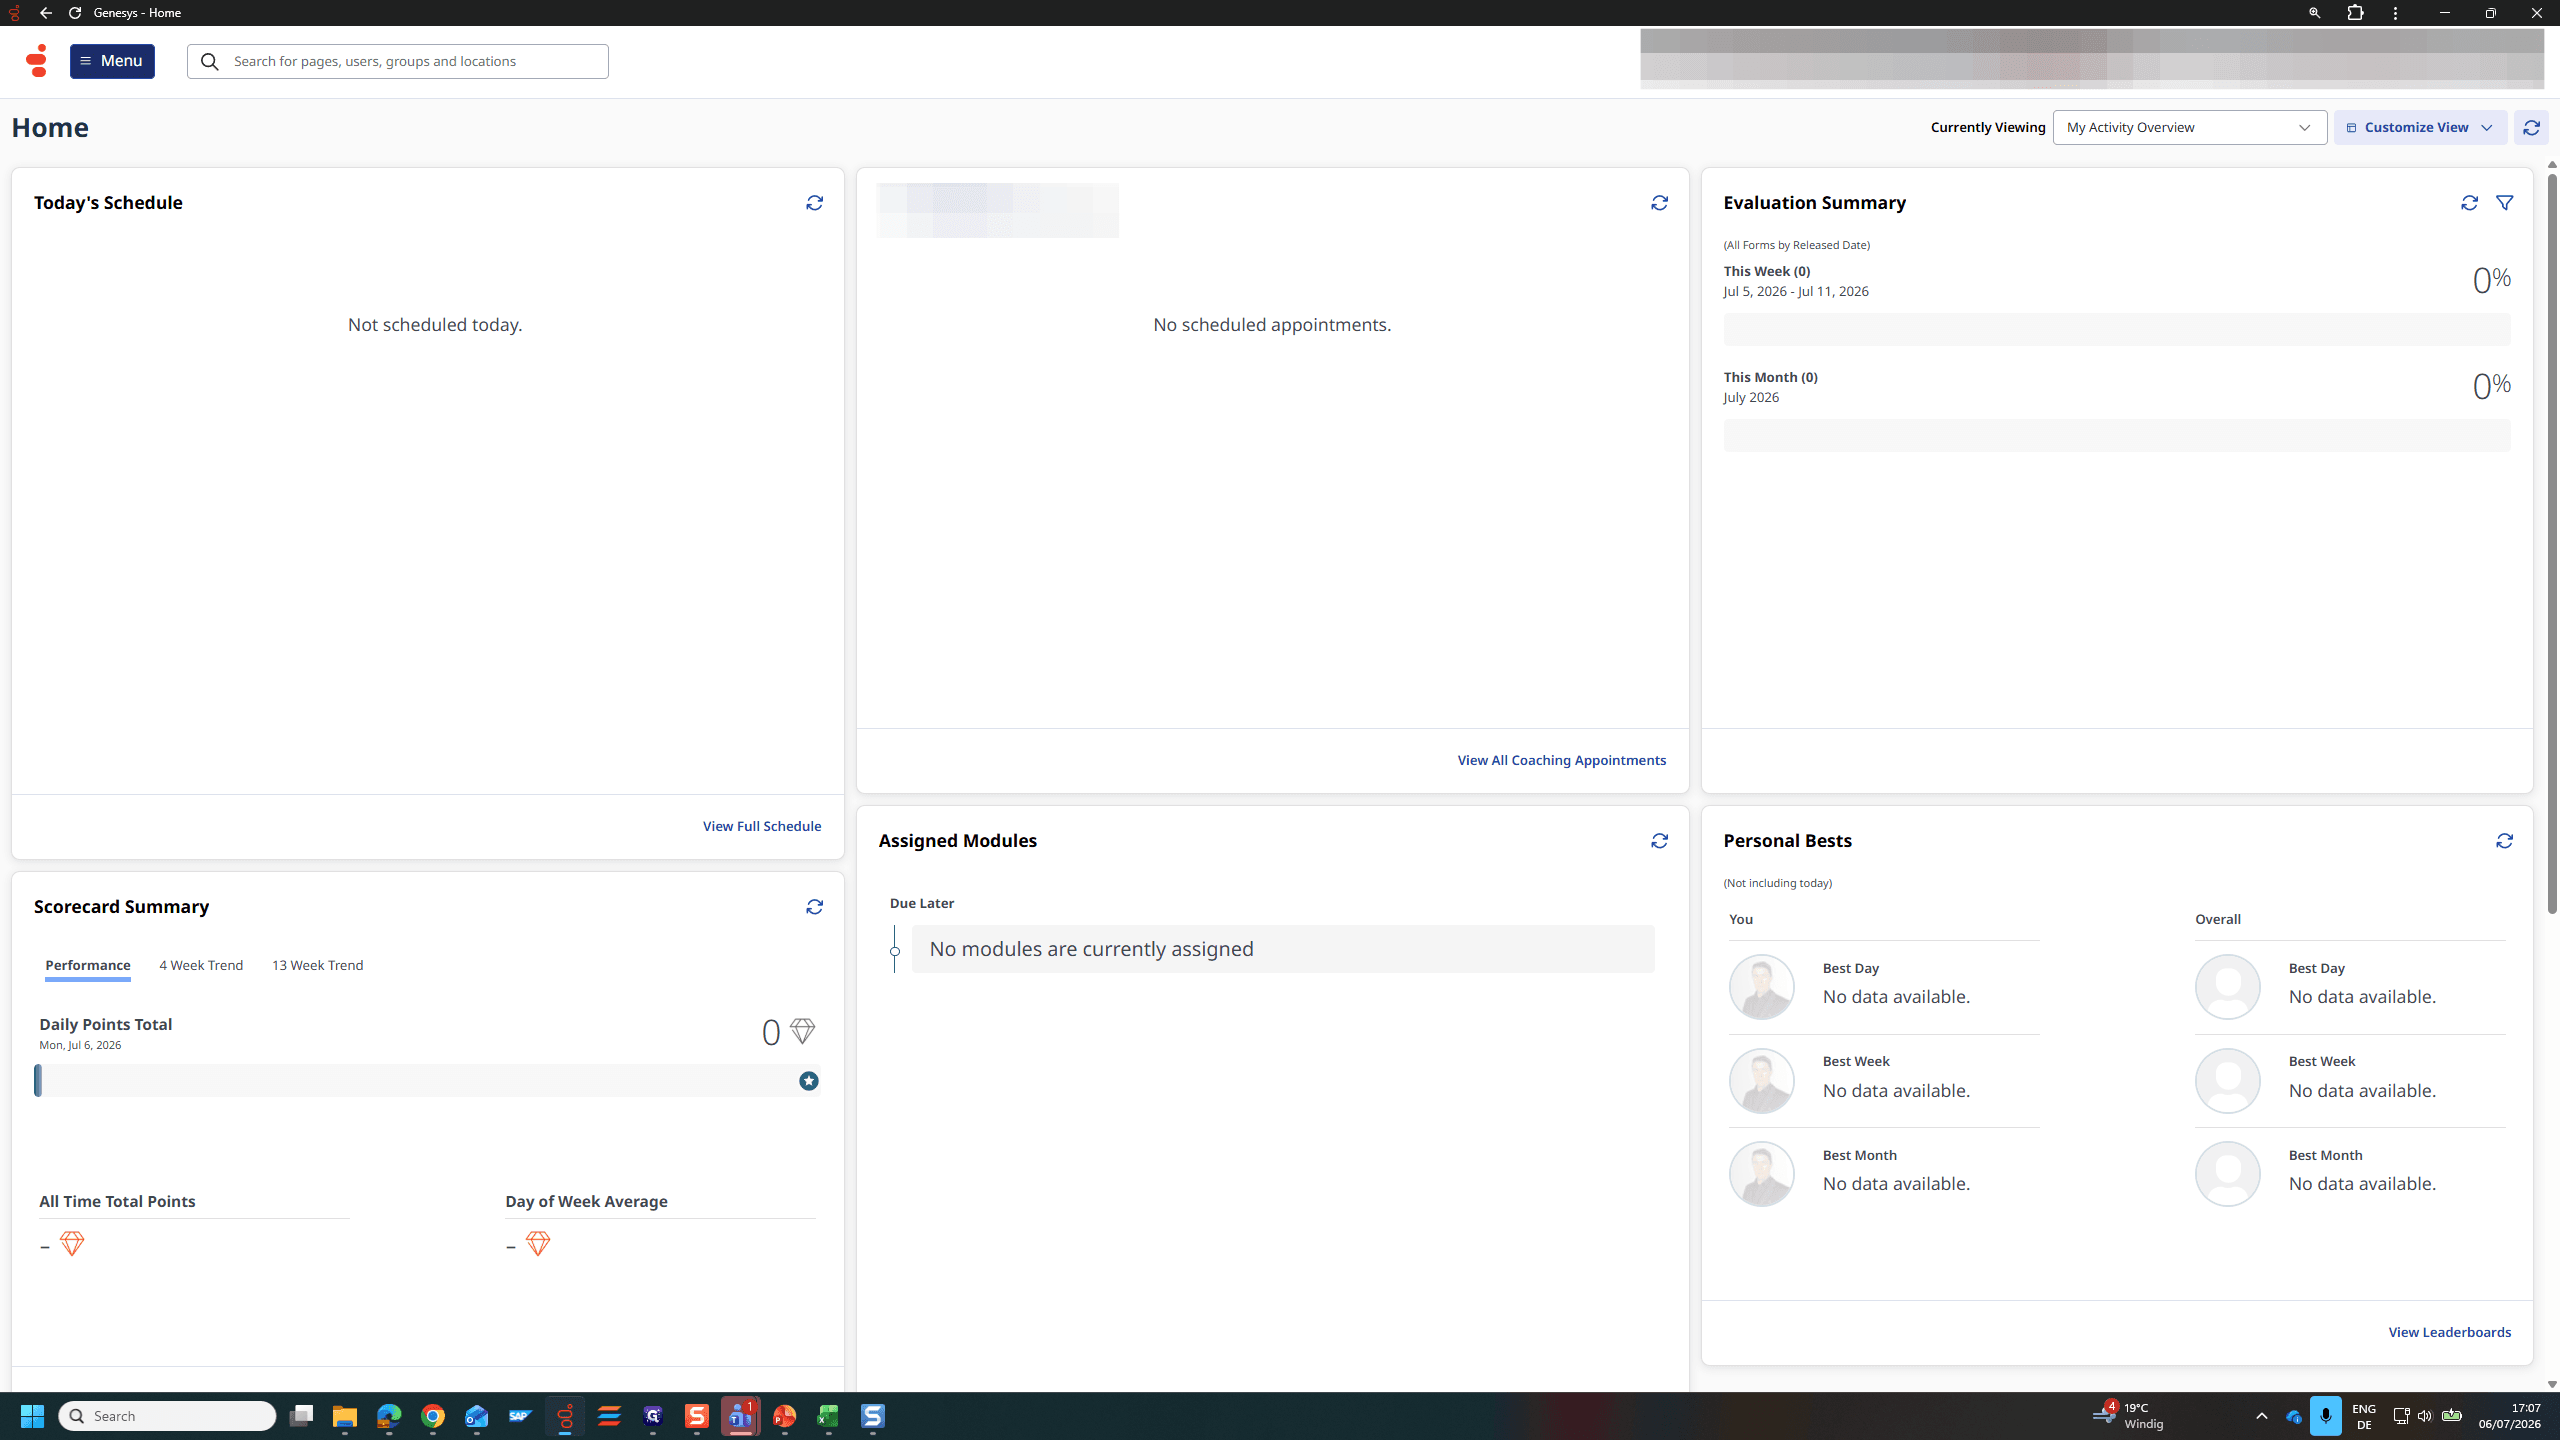
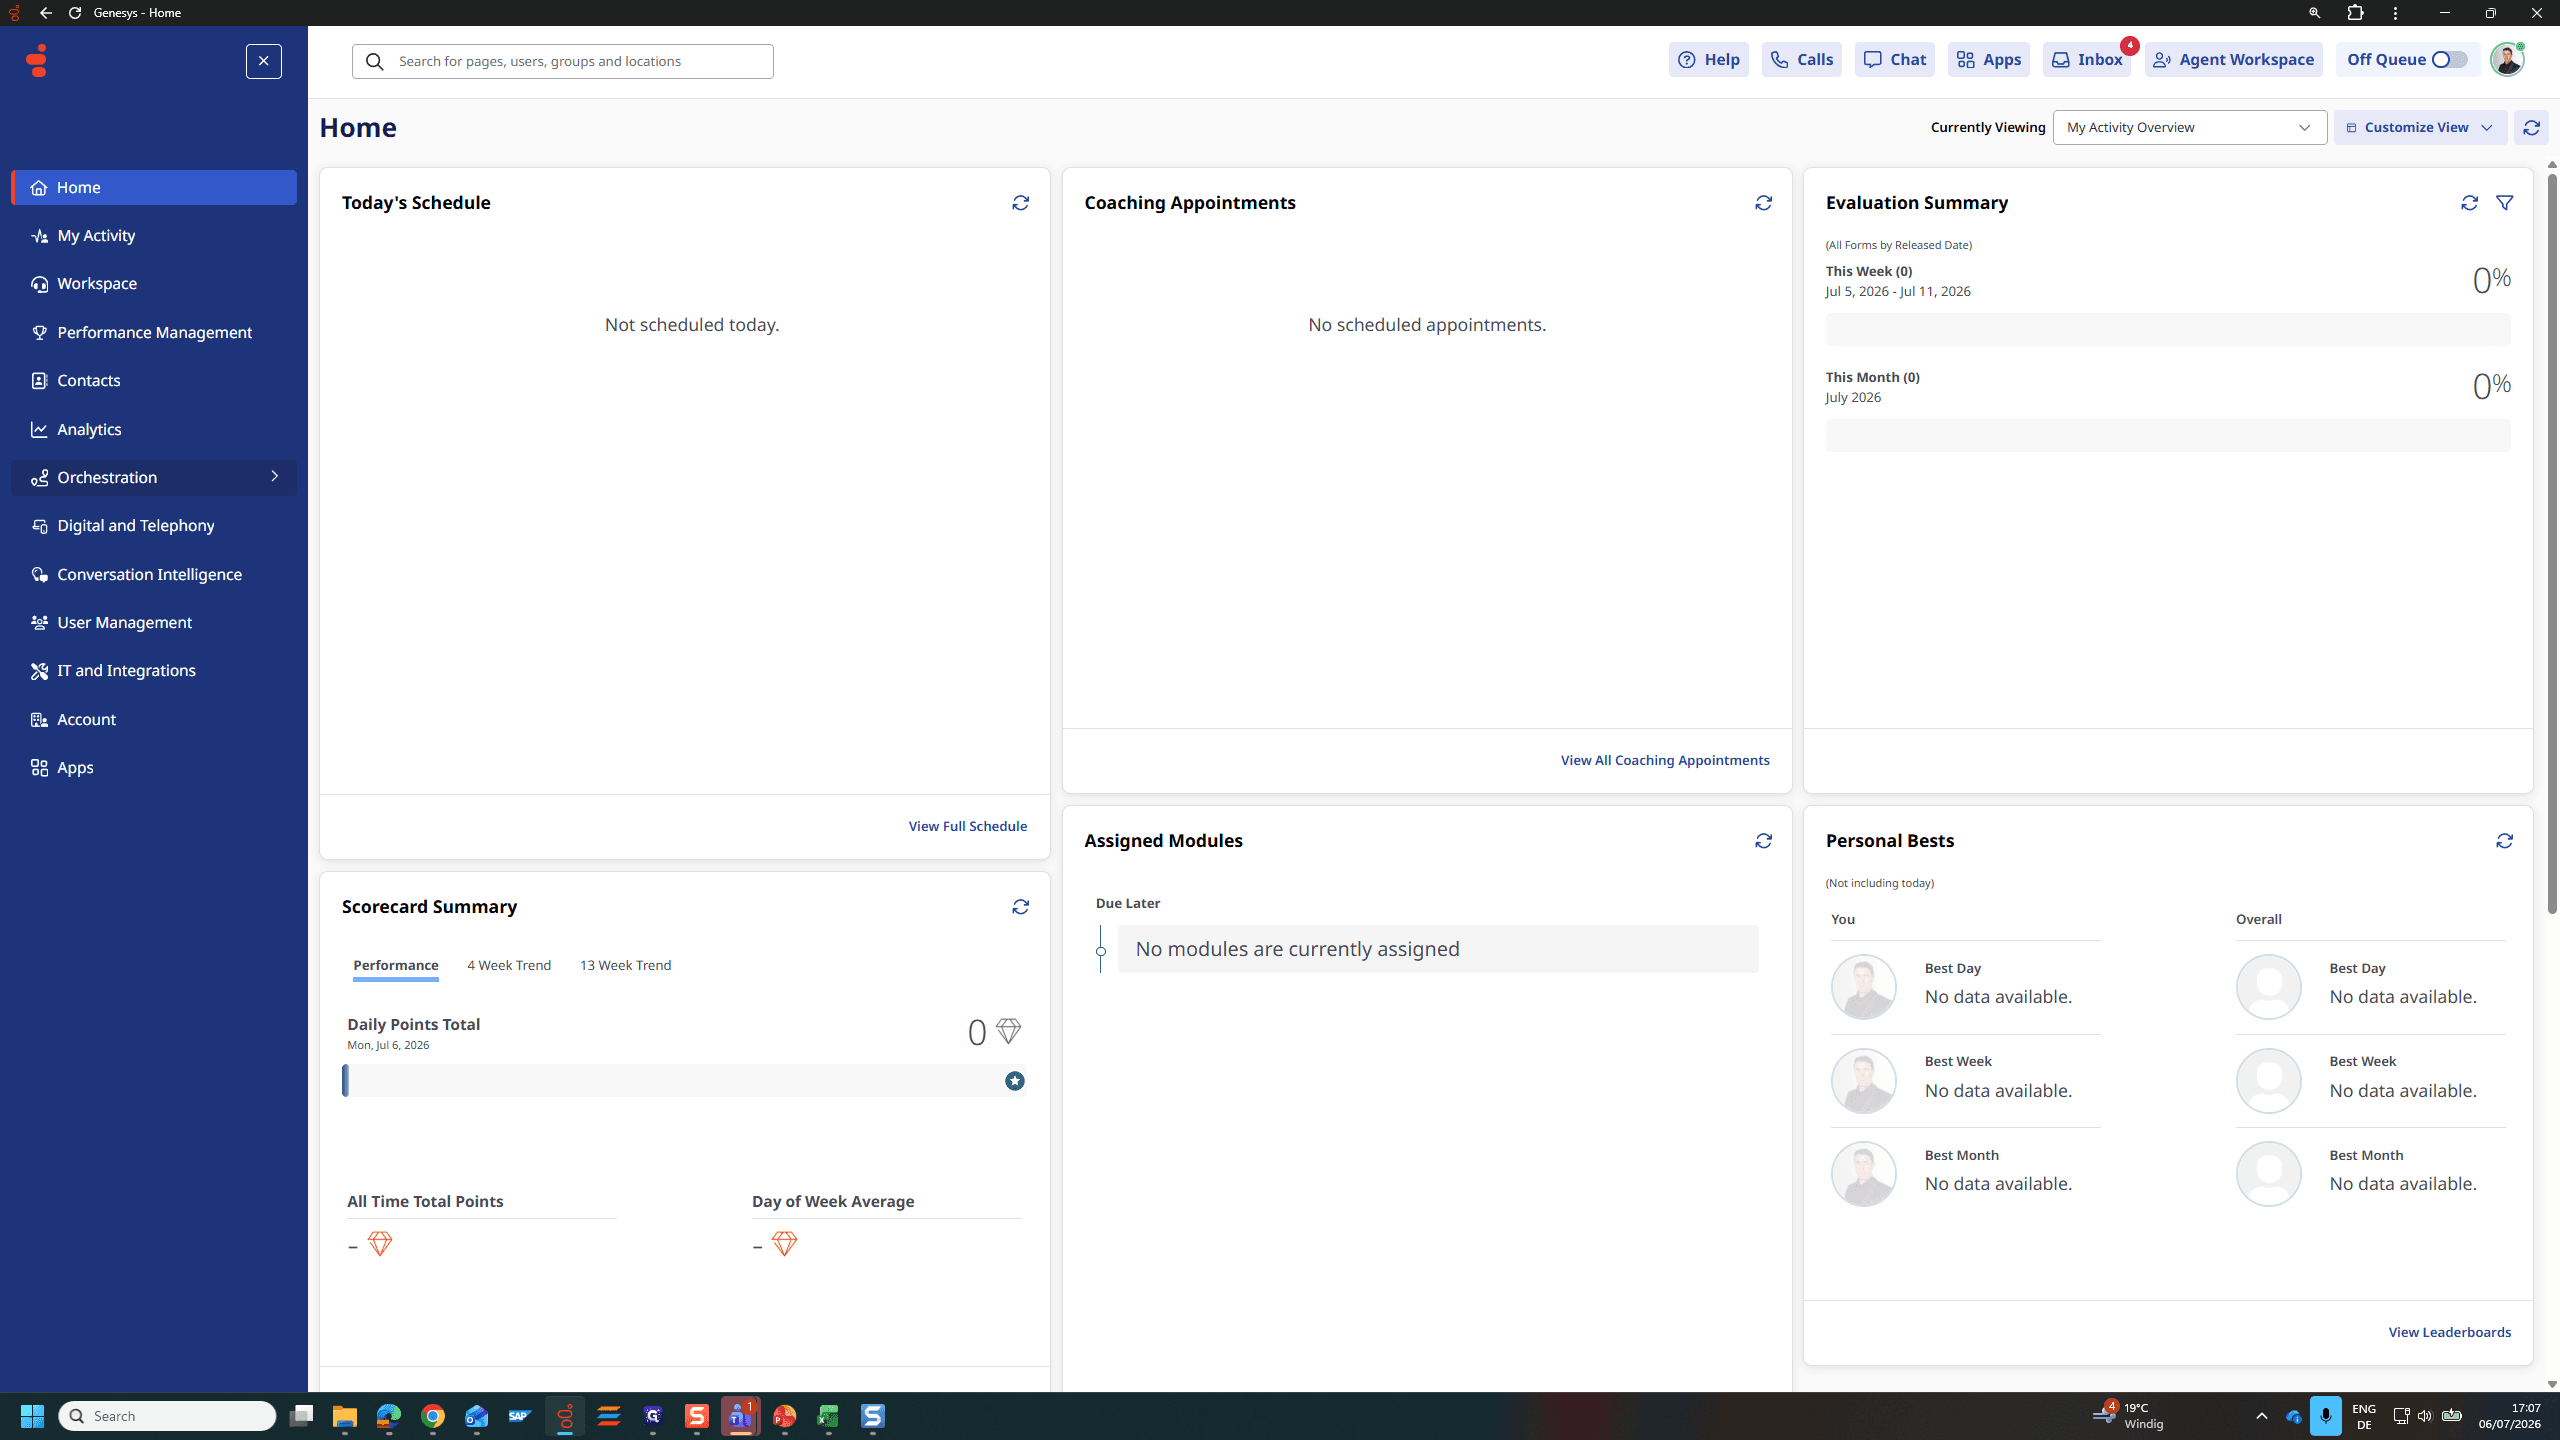
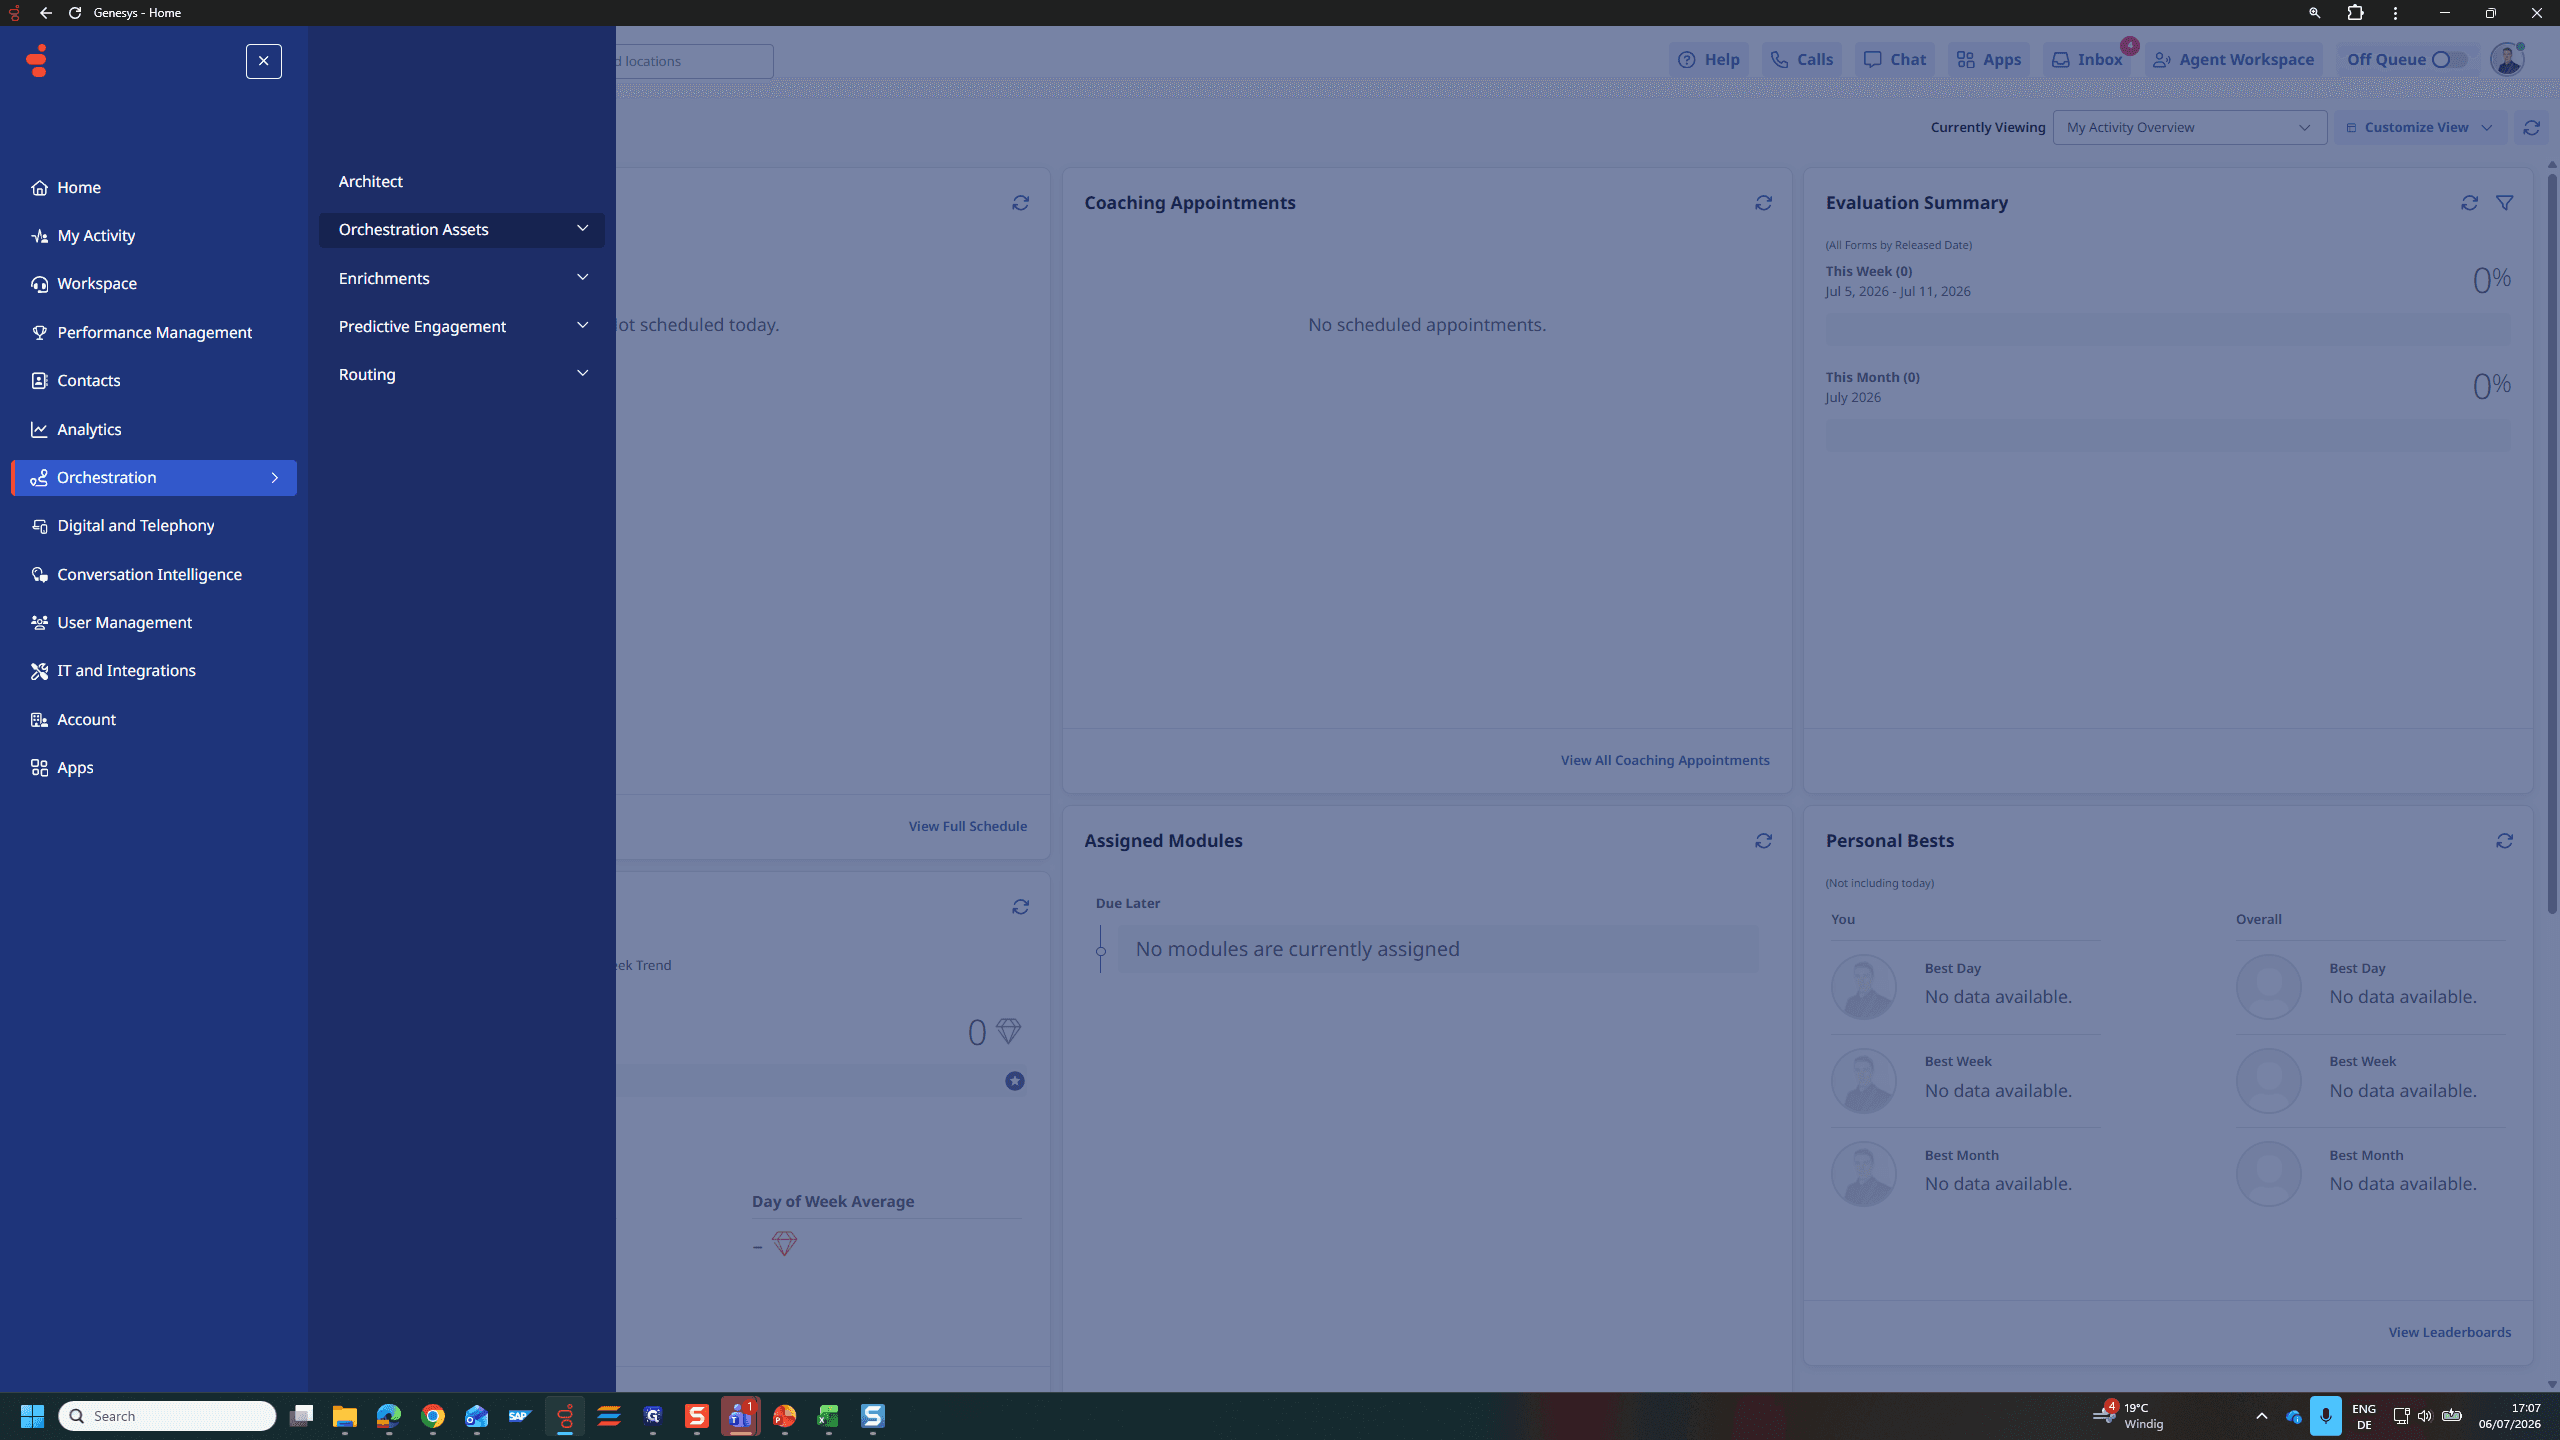
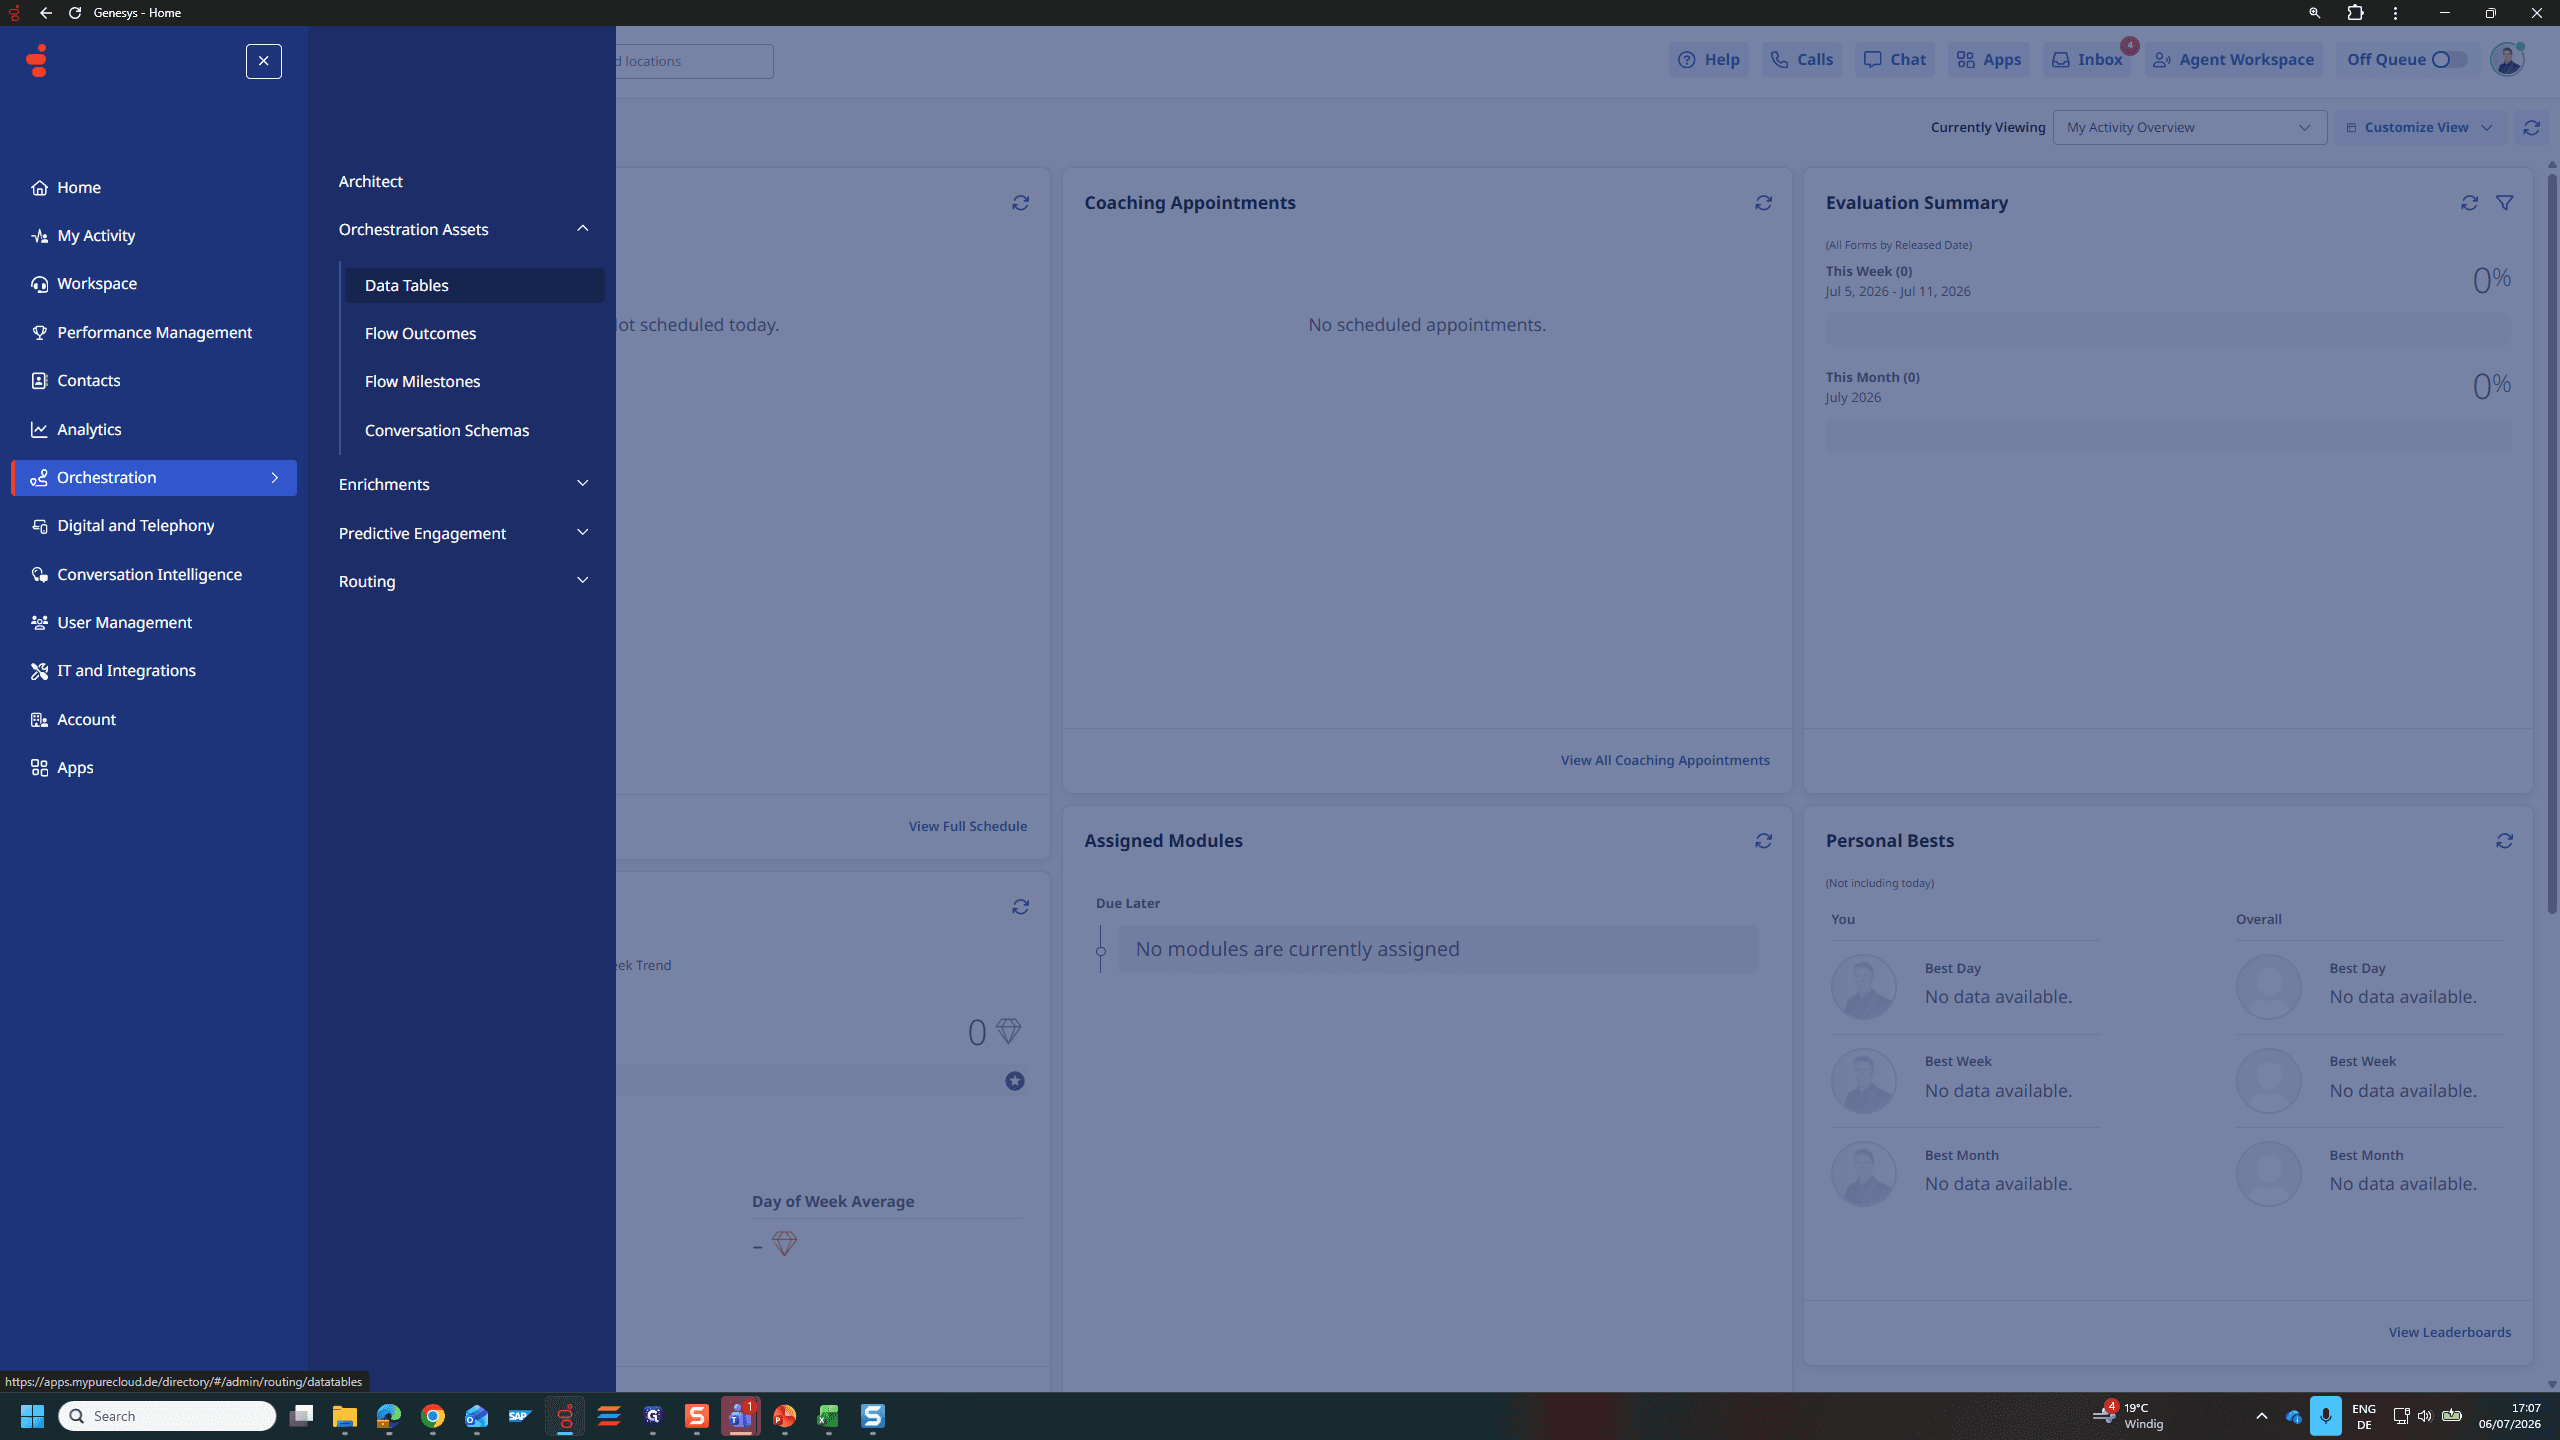
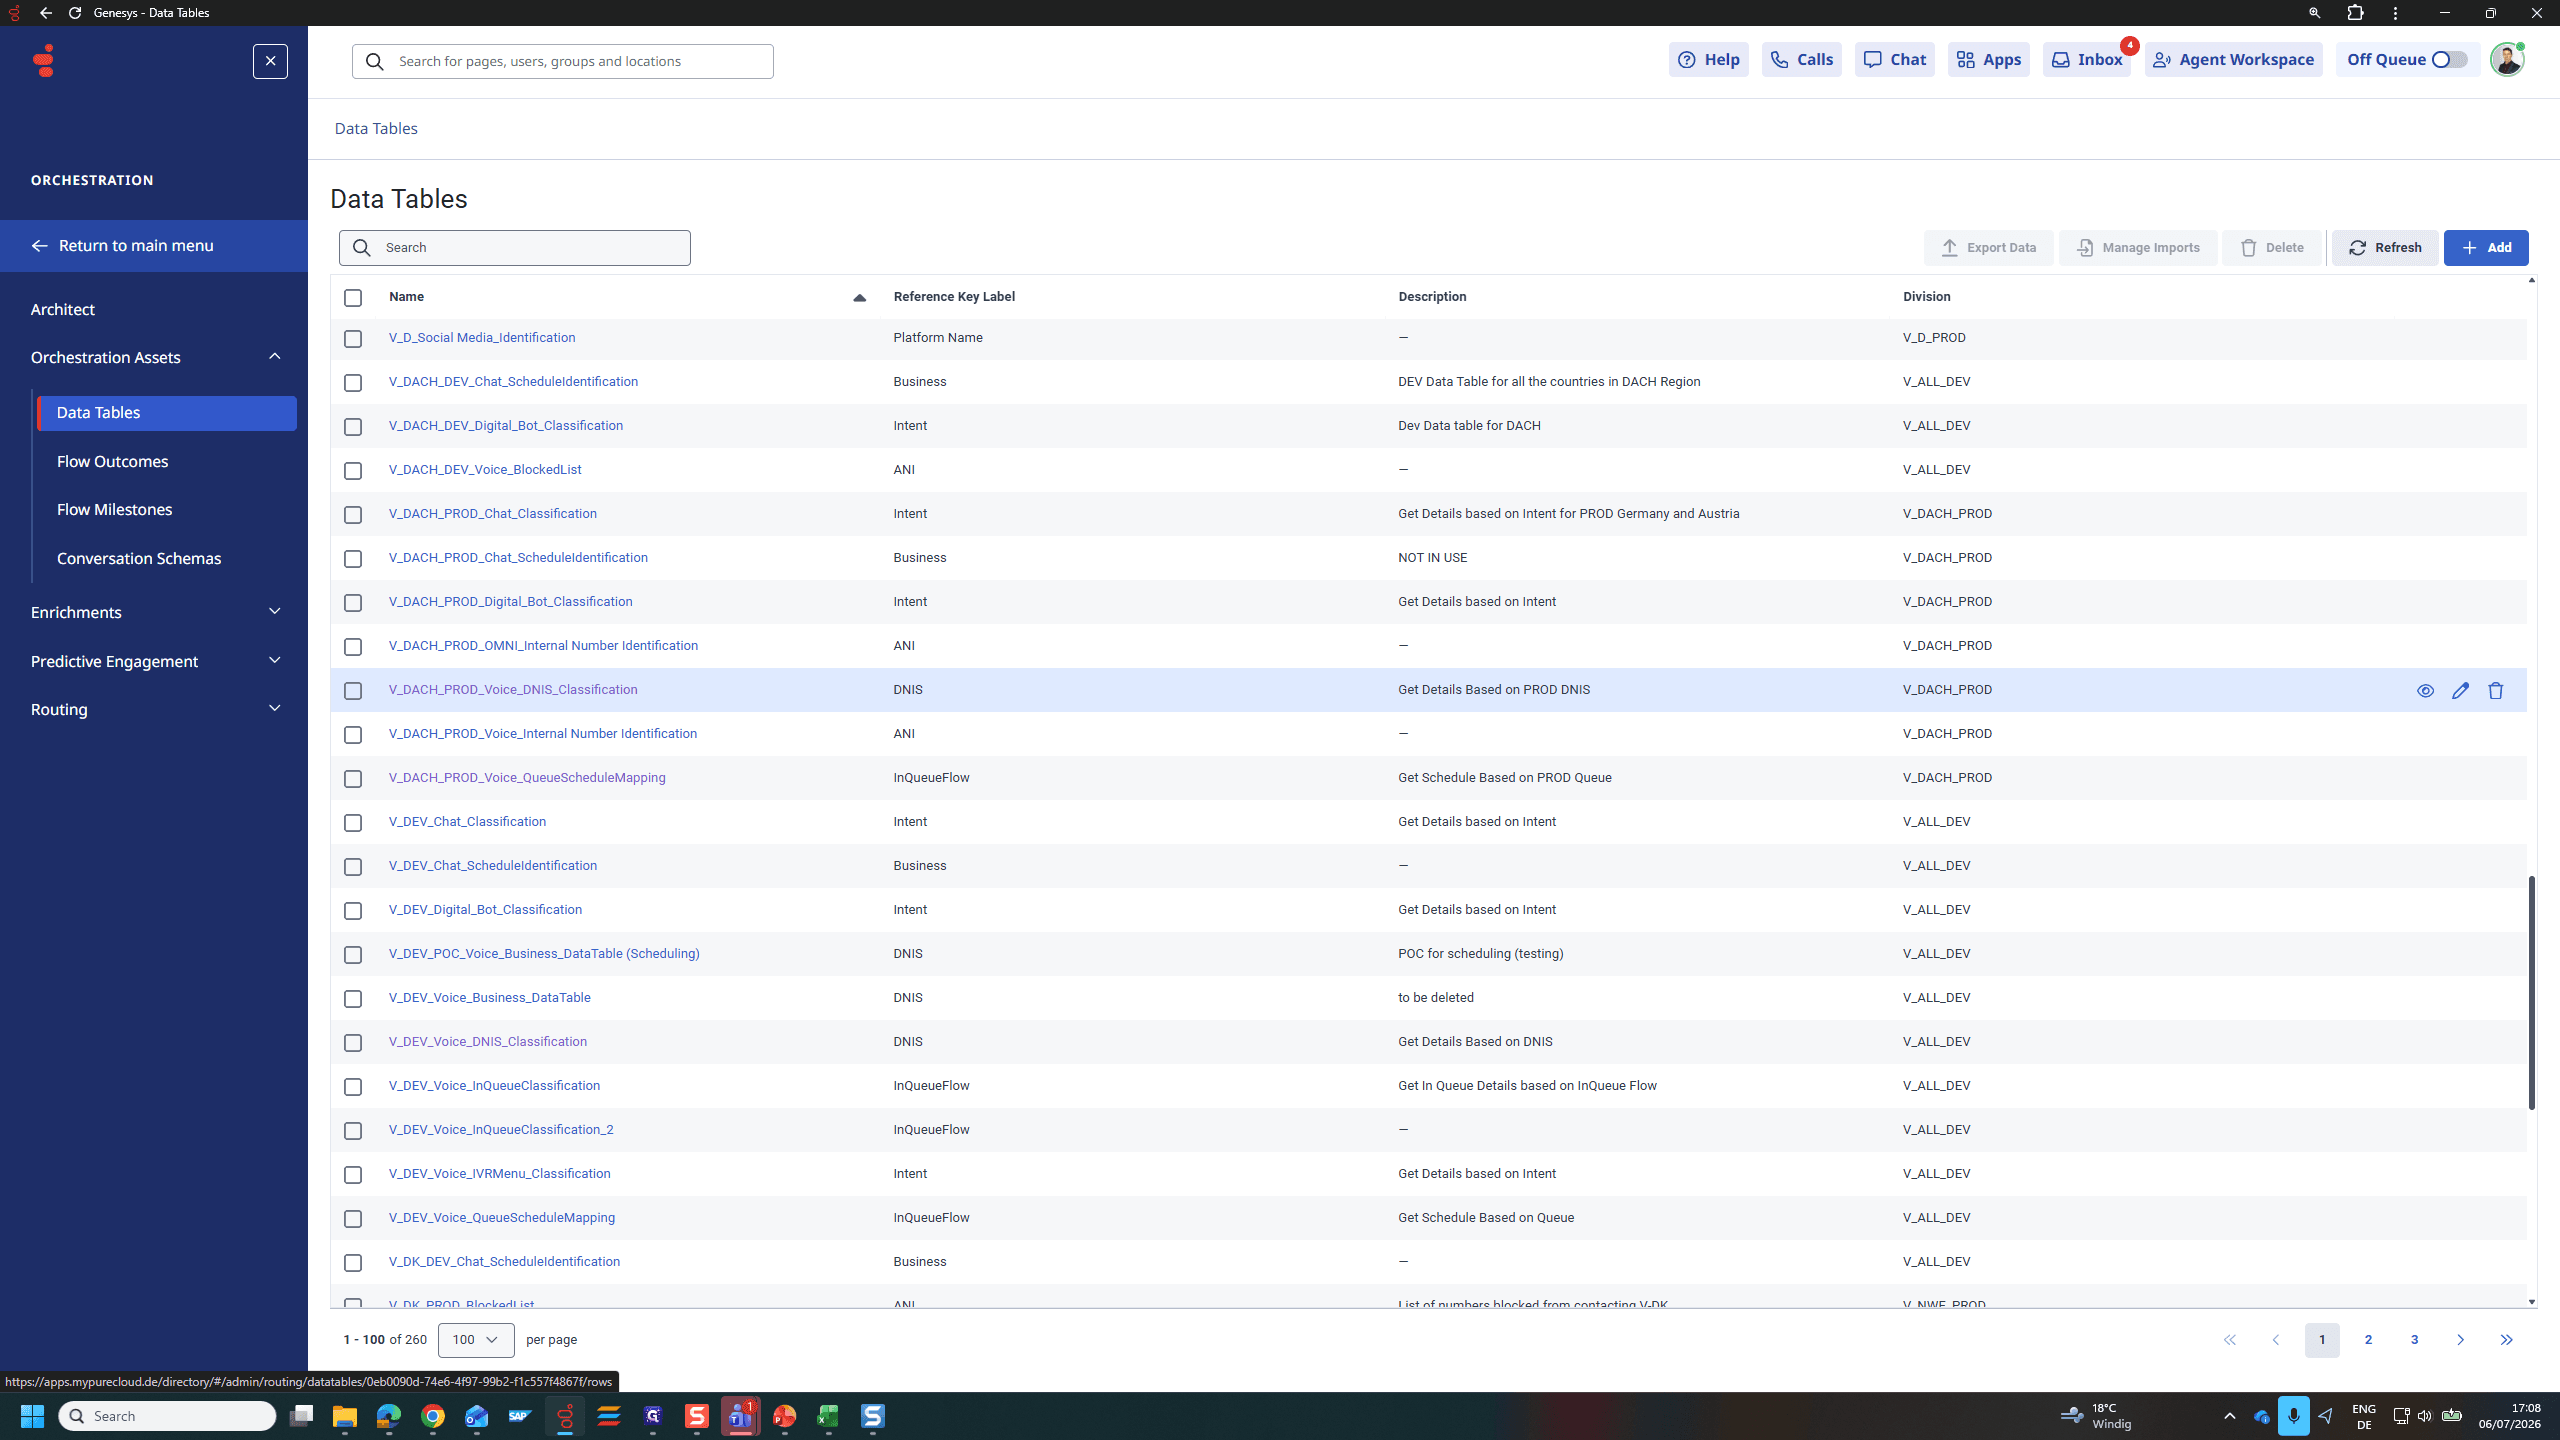
Locate the Target Phone Number
Test 123
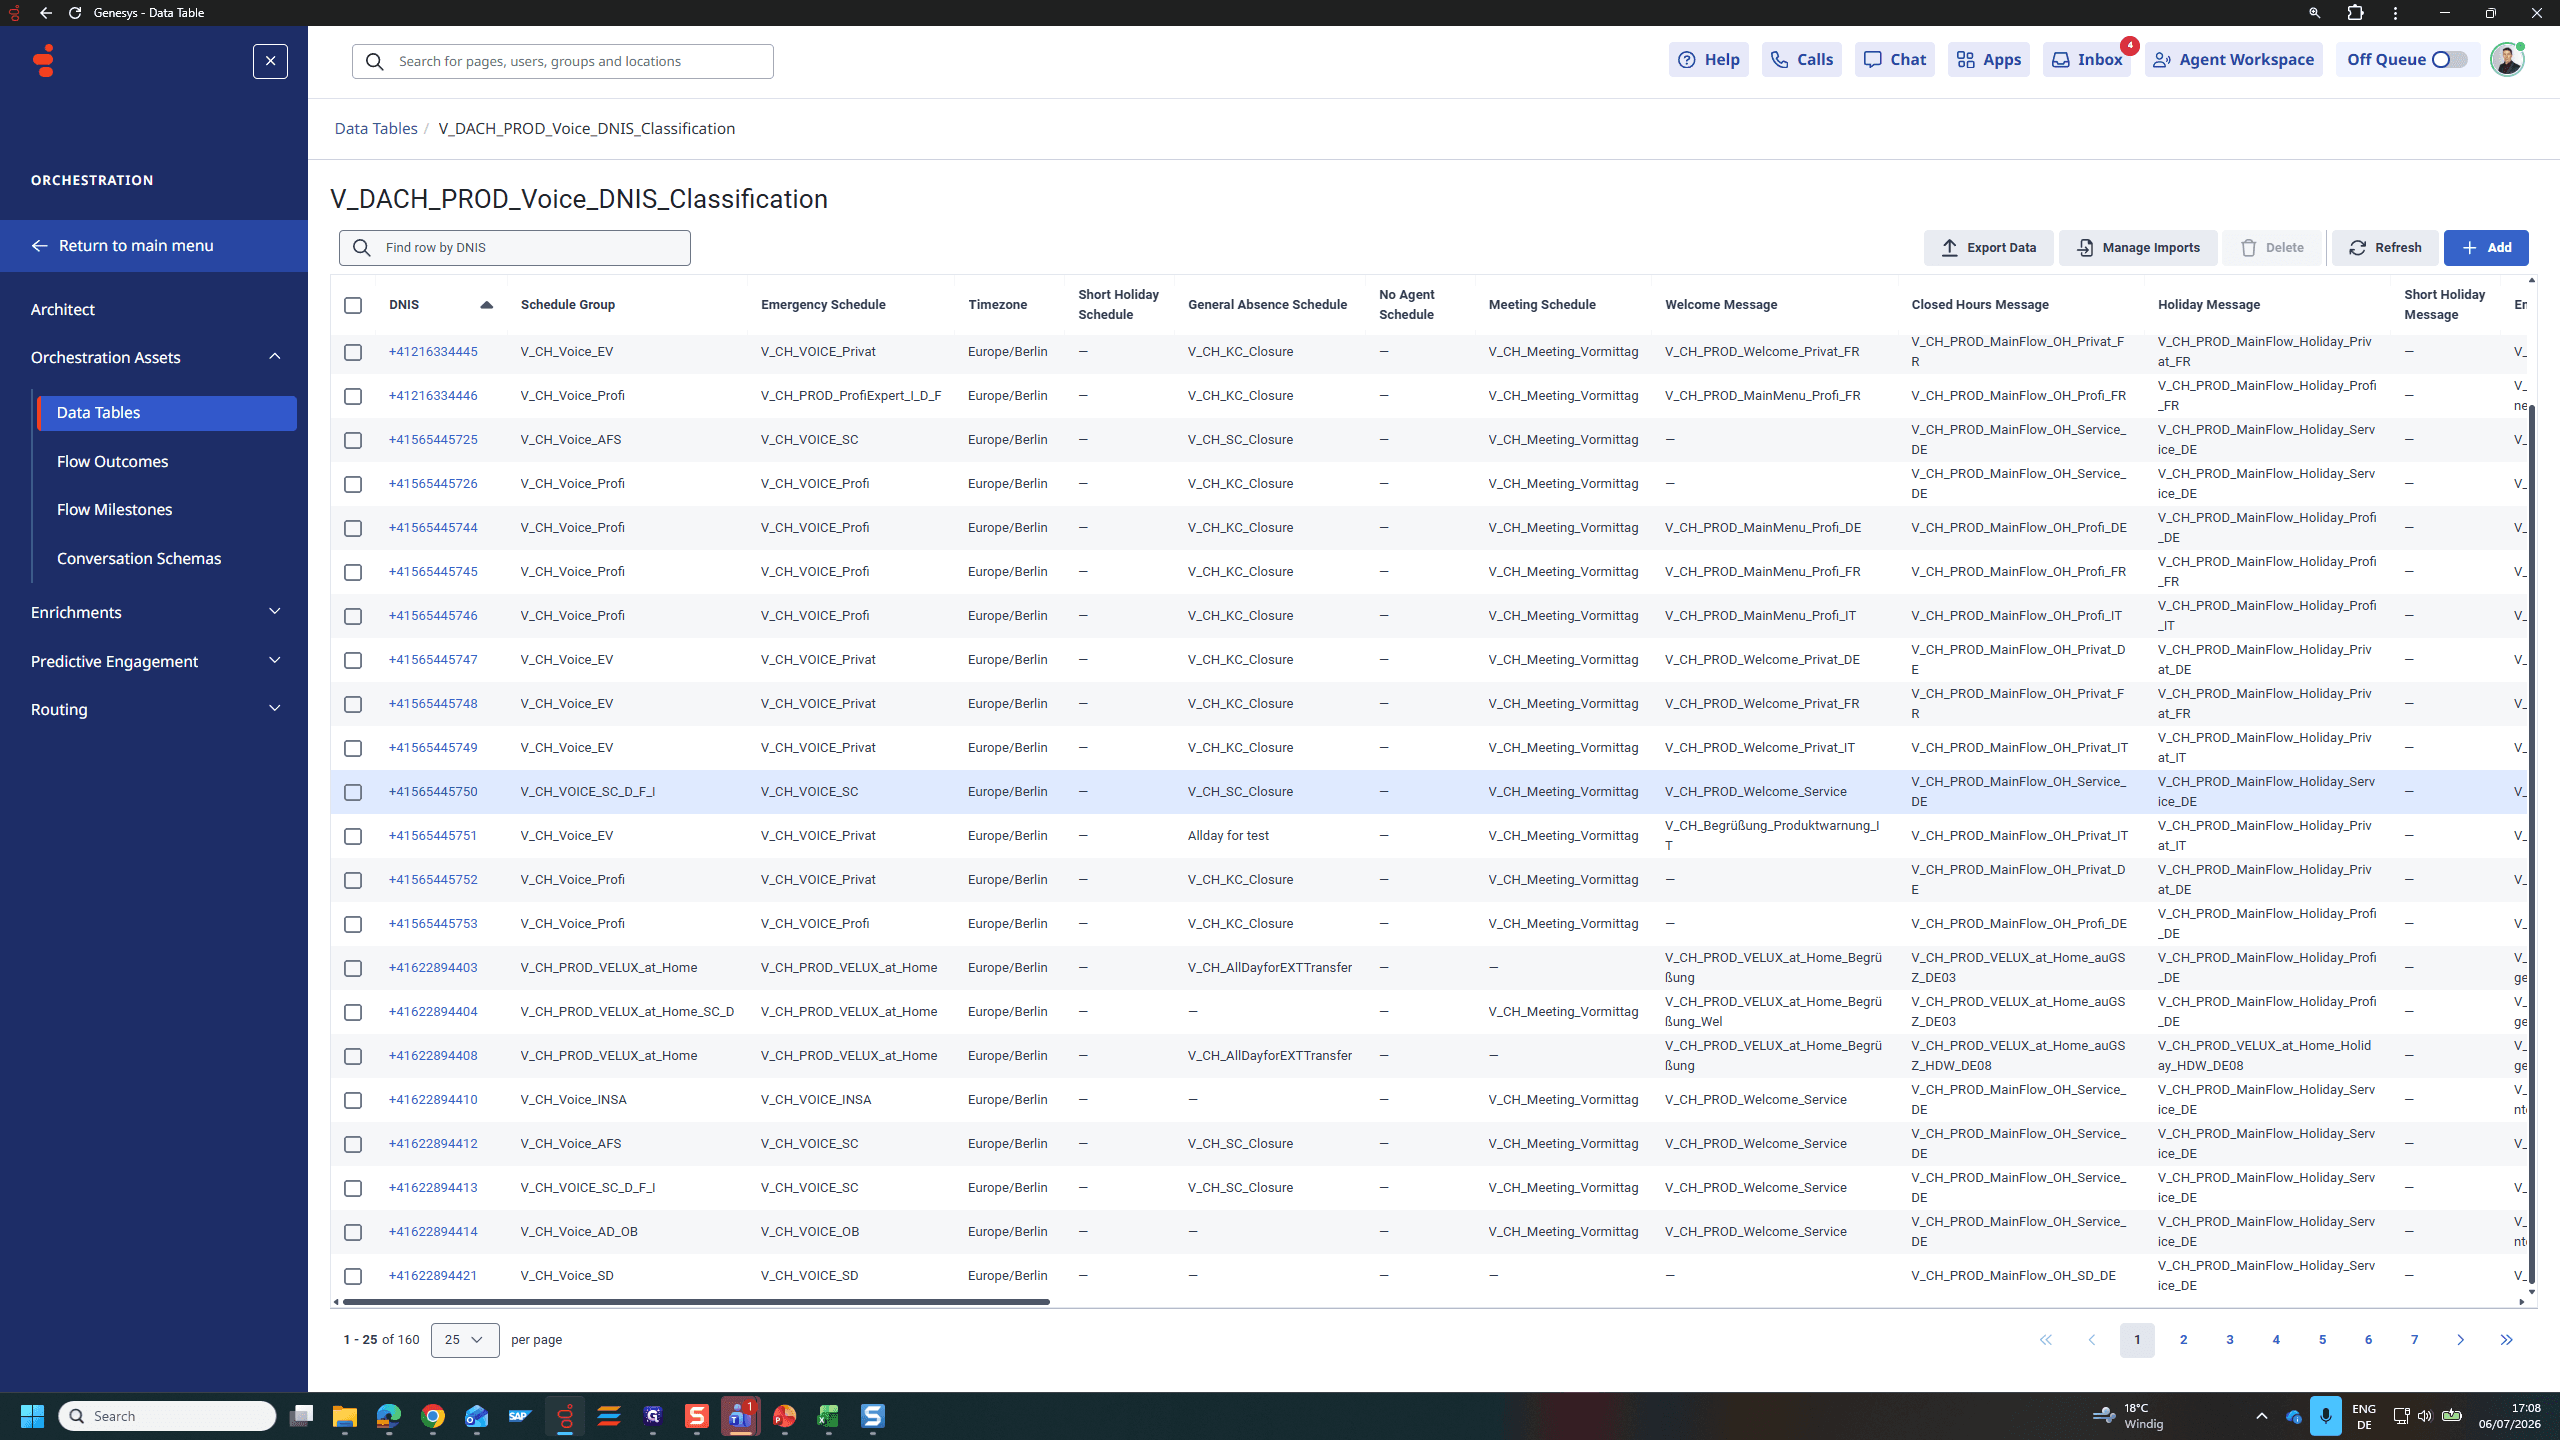
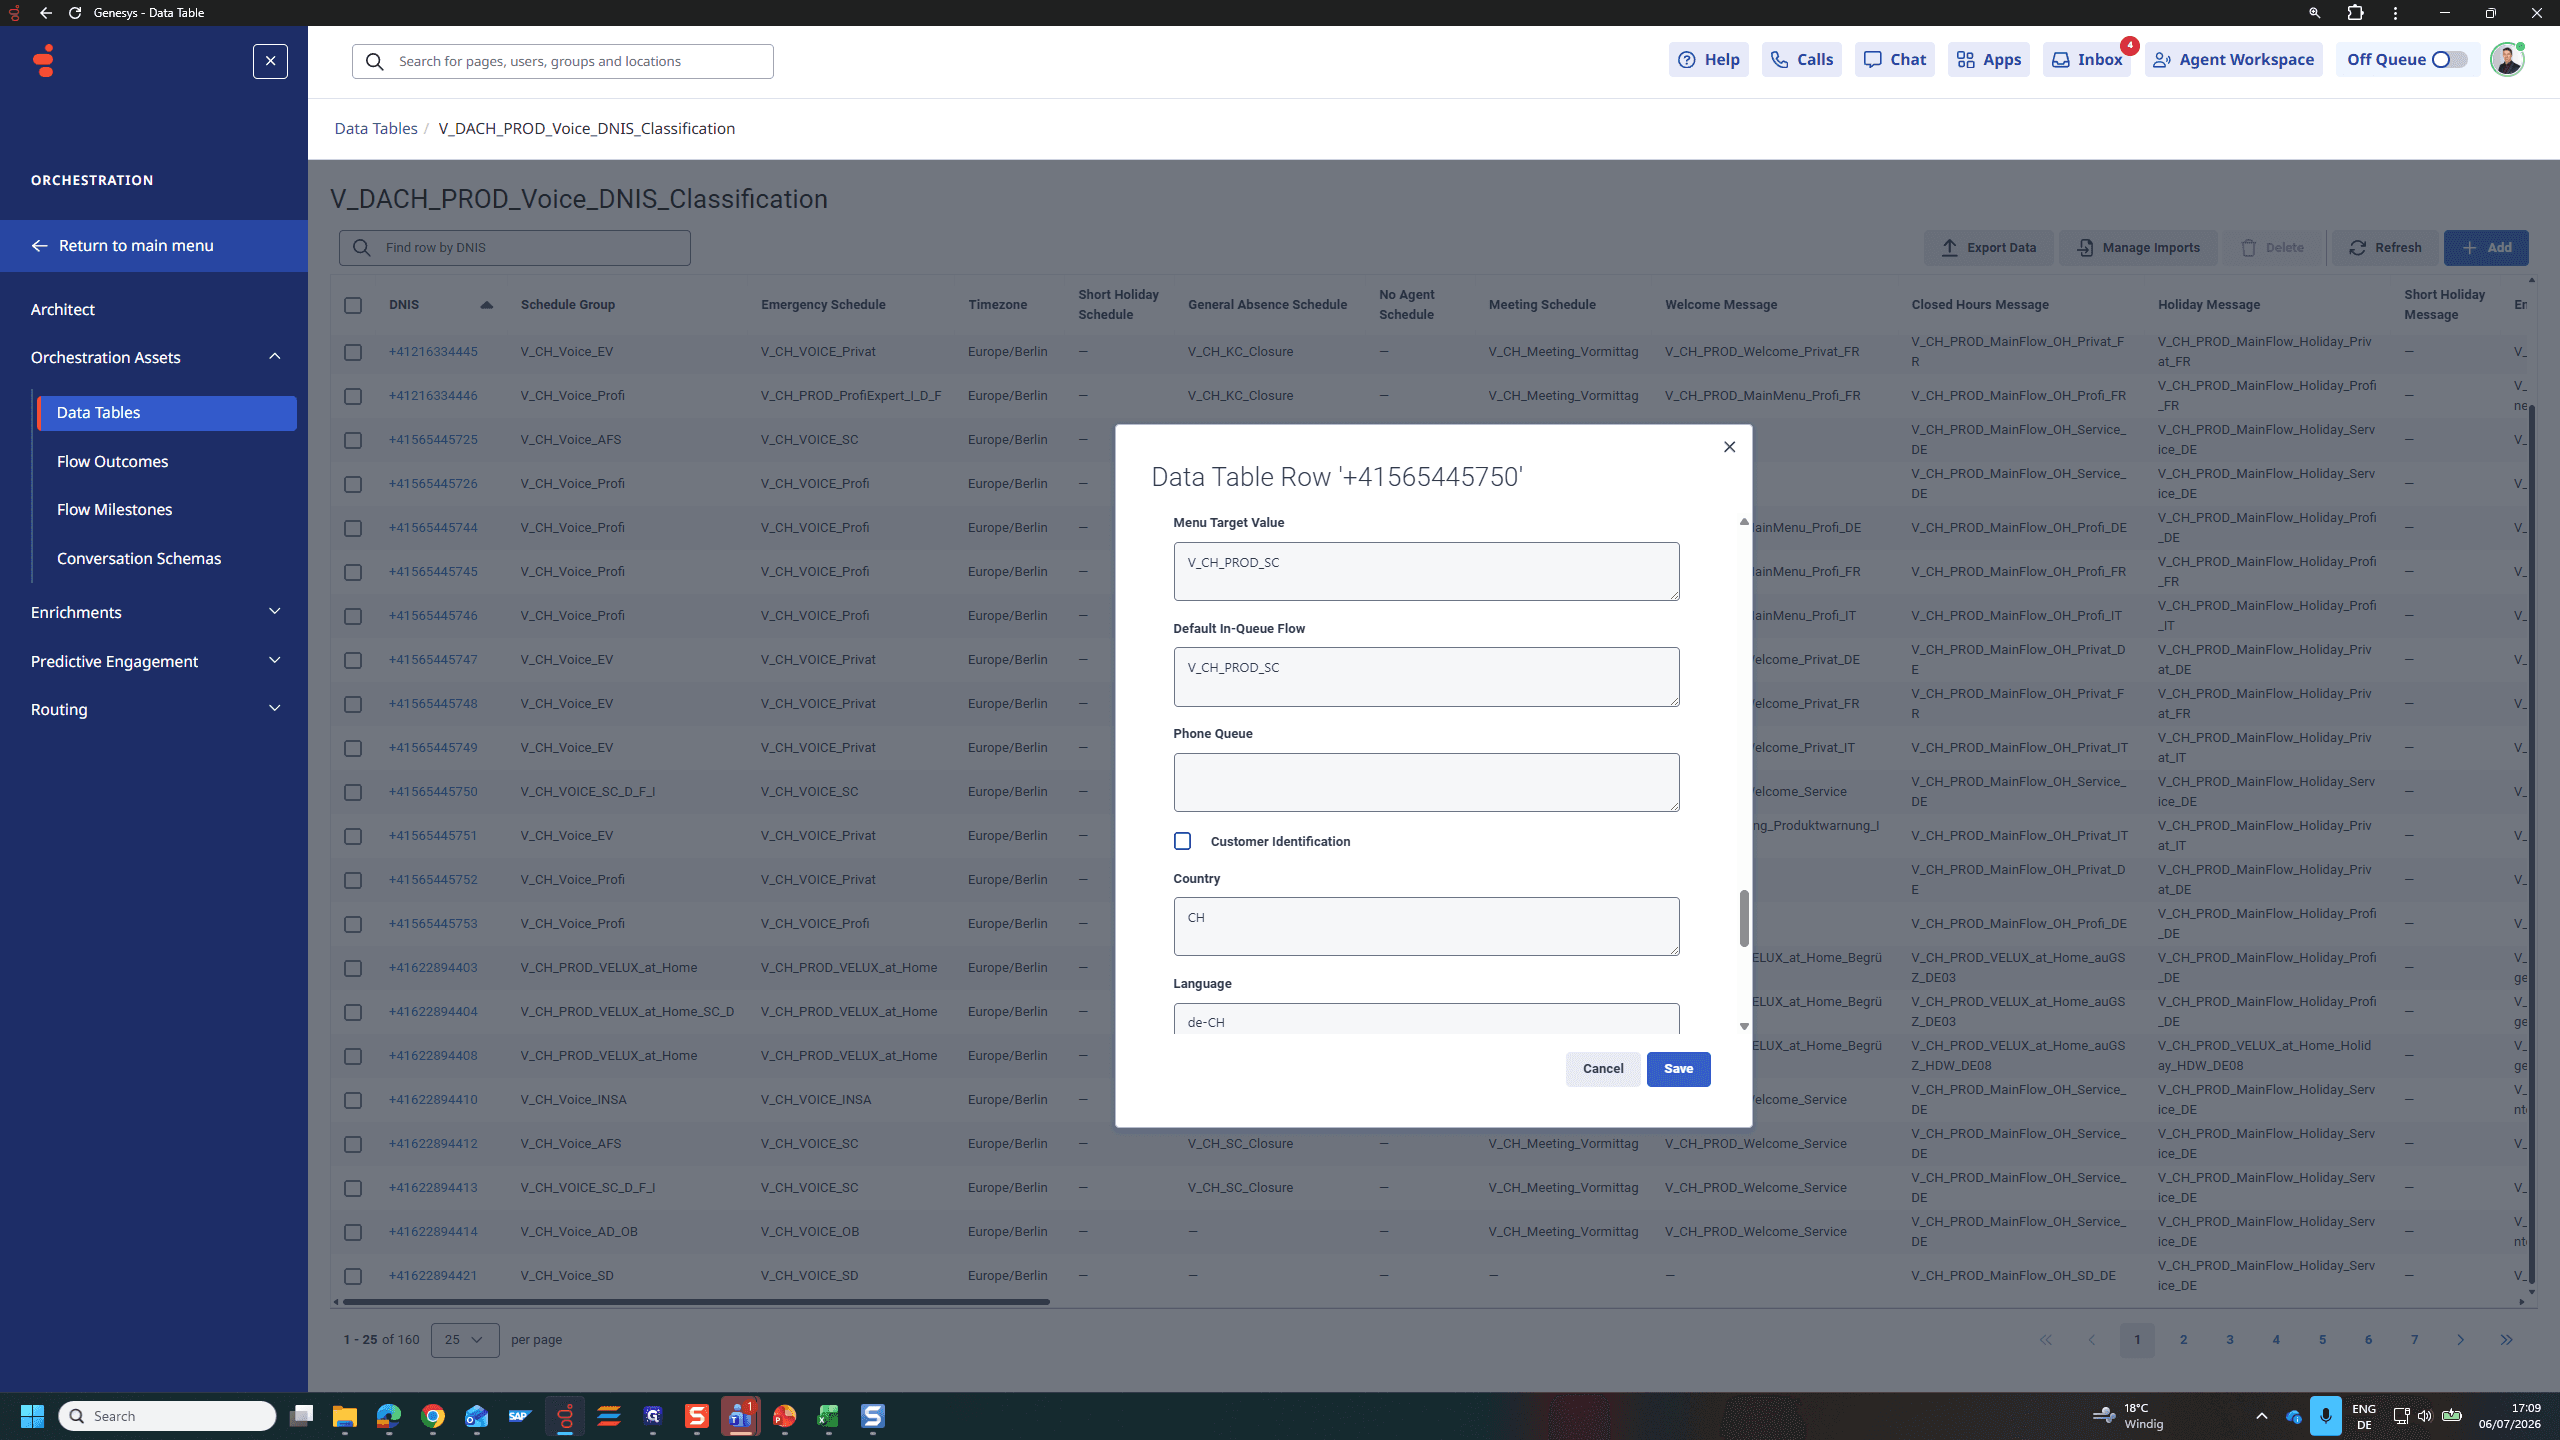
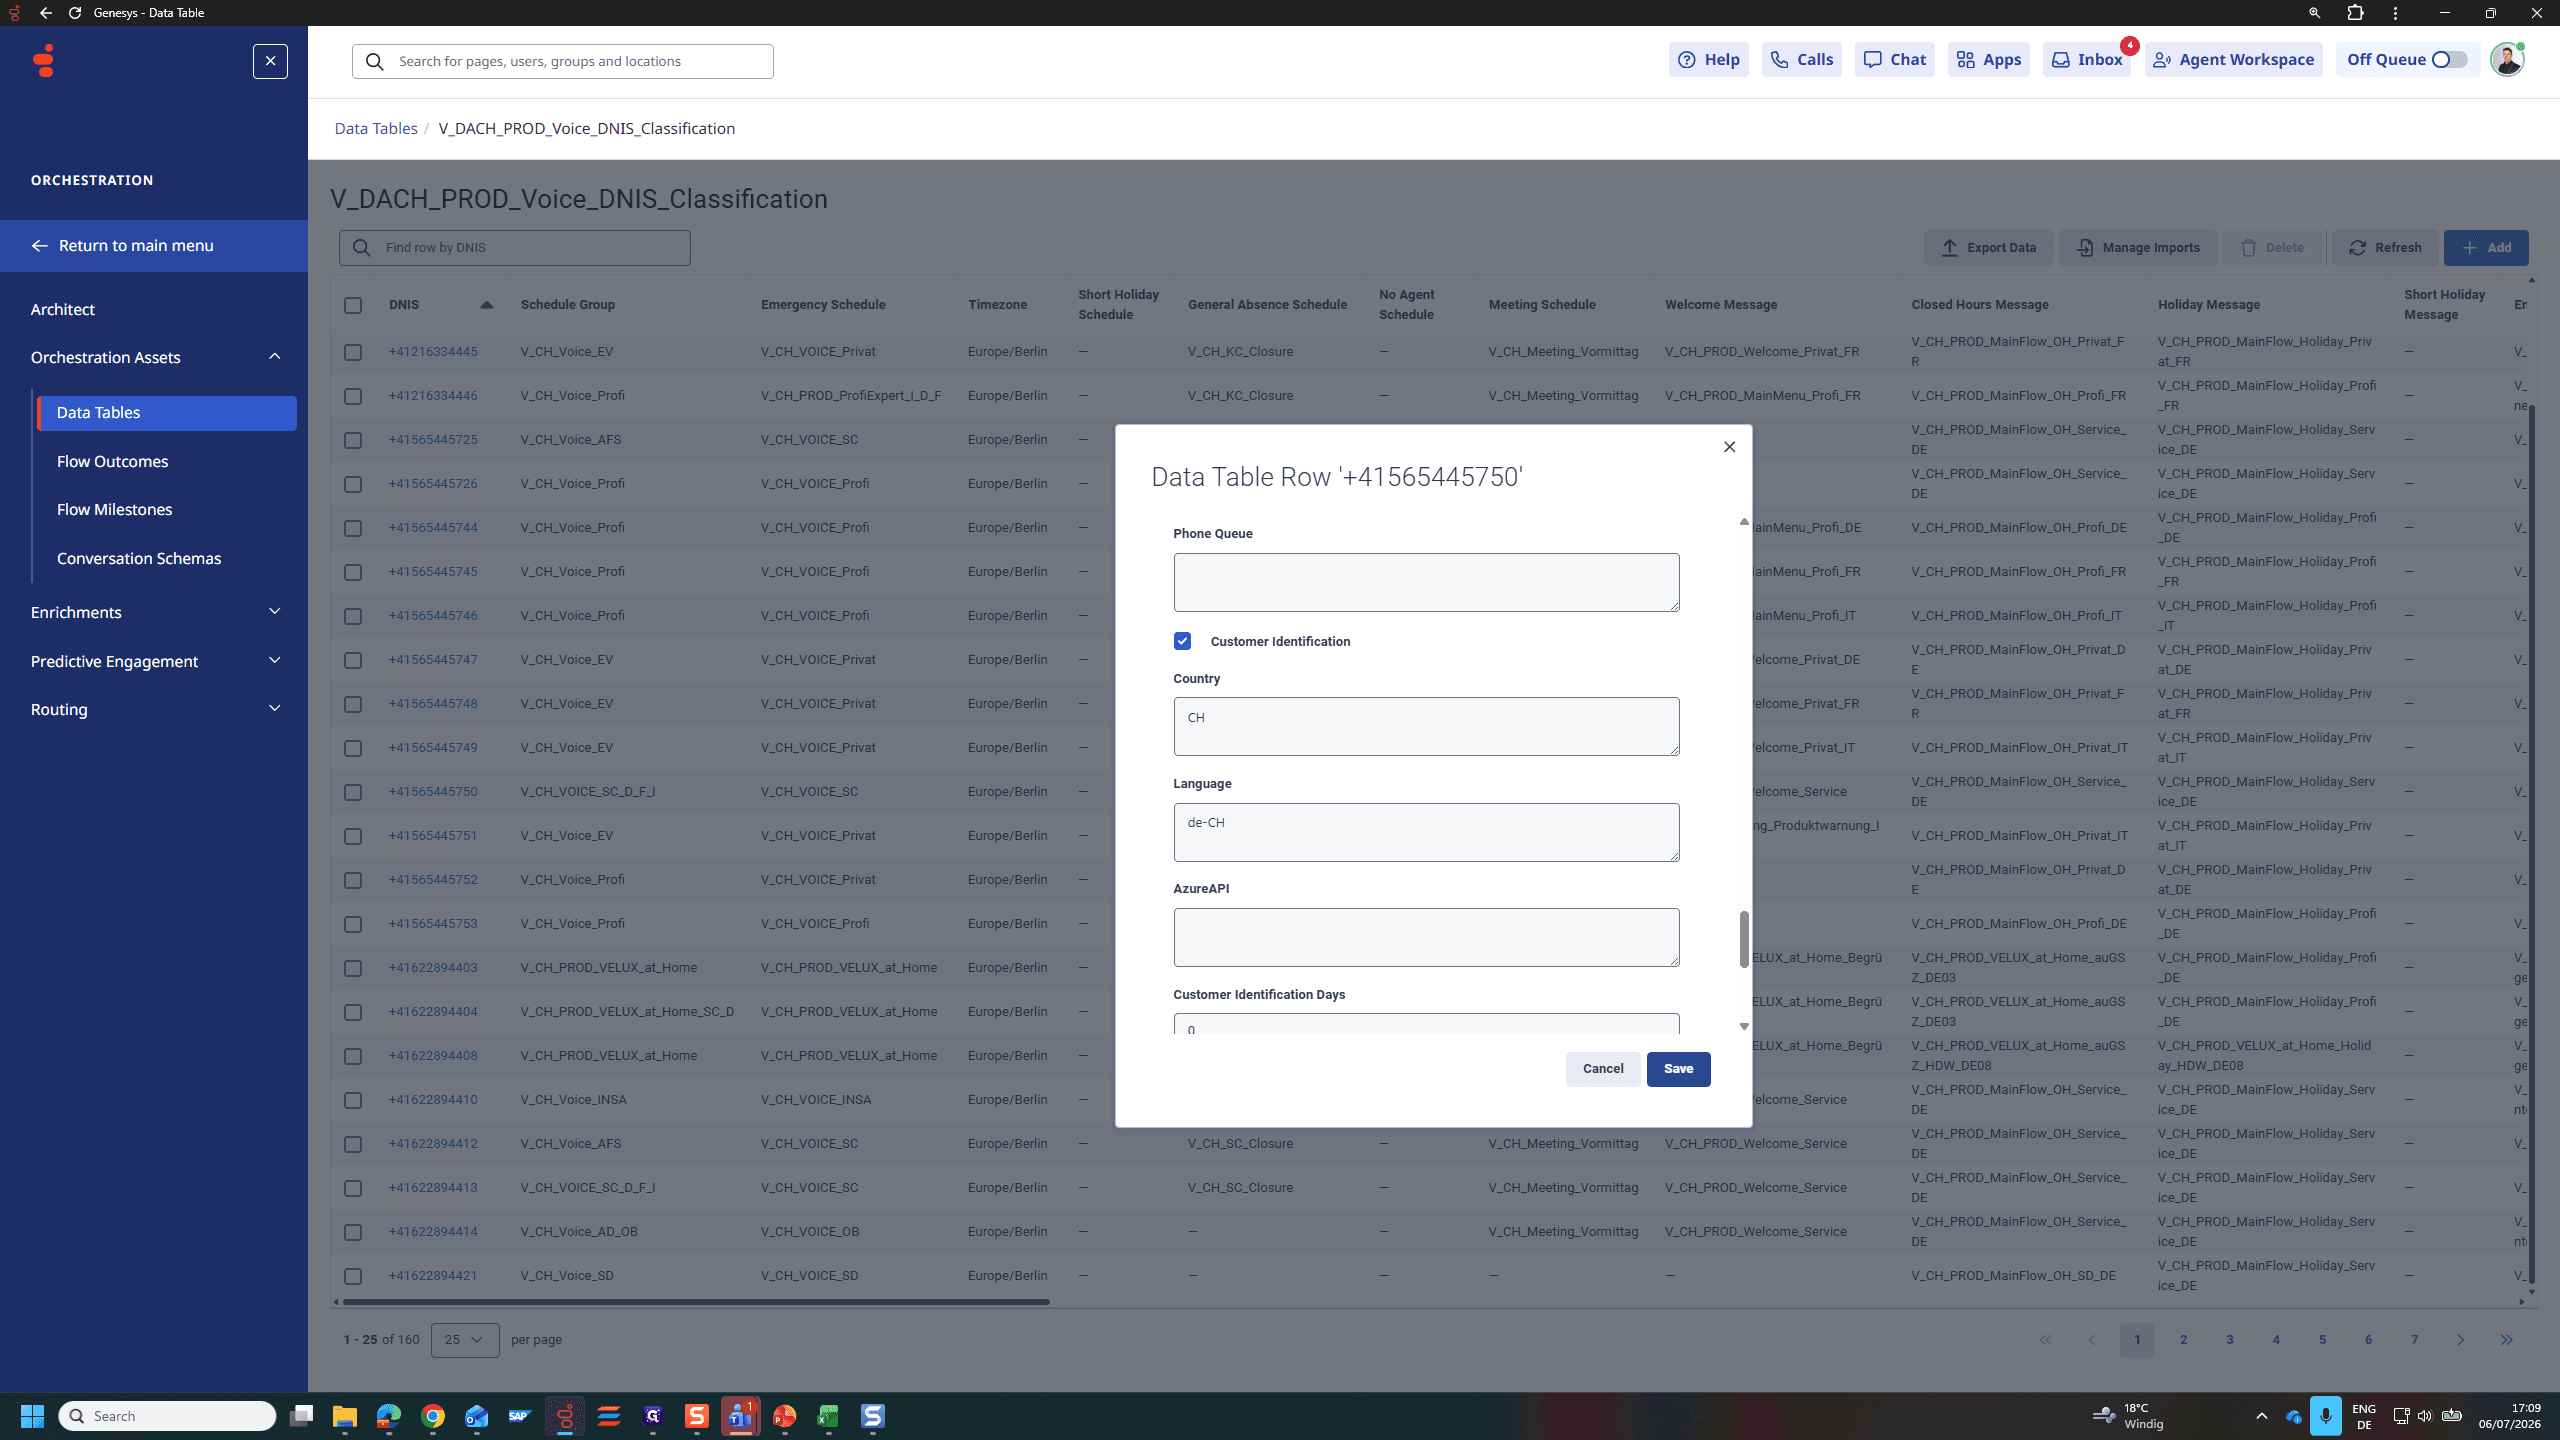
Configure Row Settings
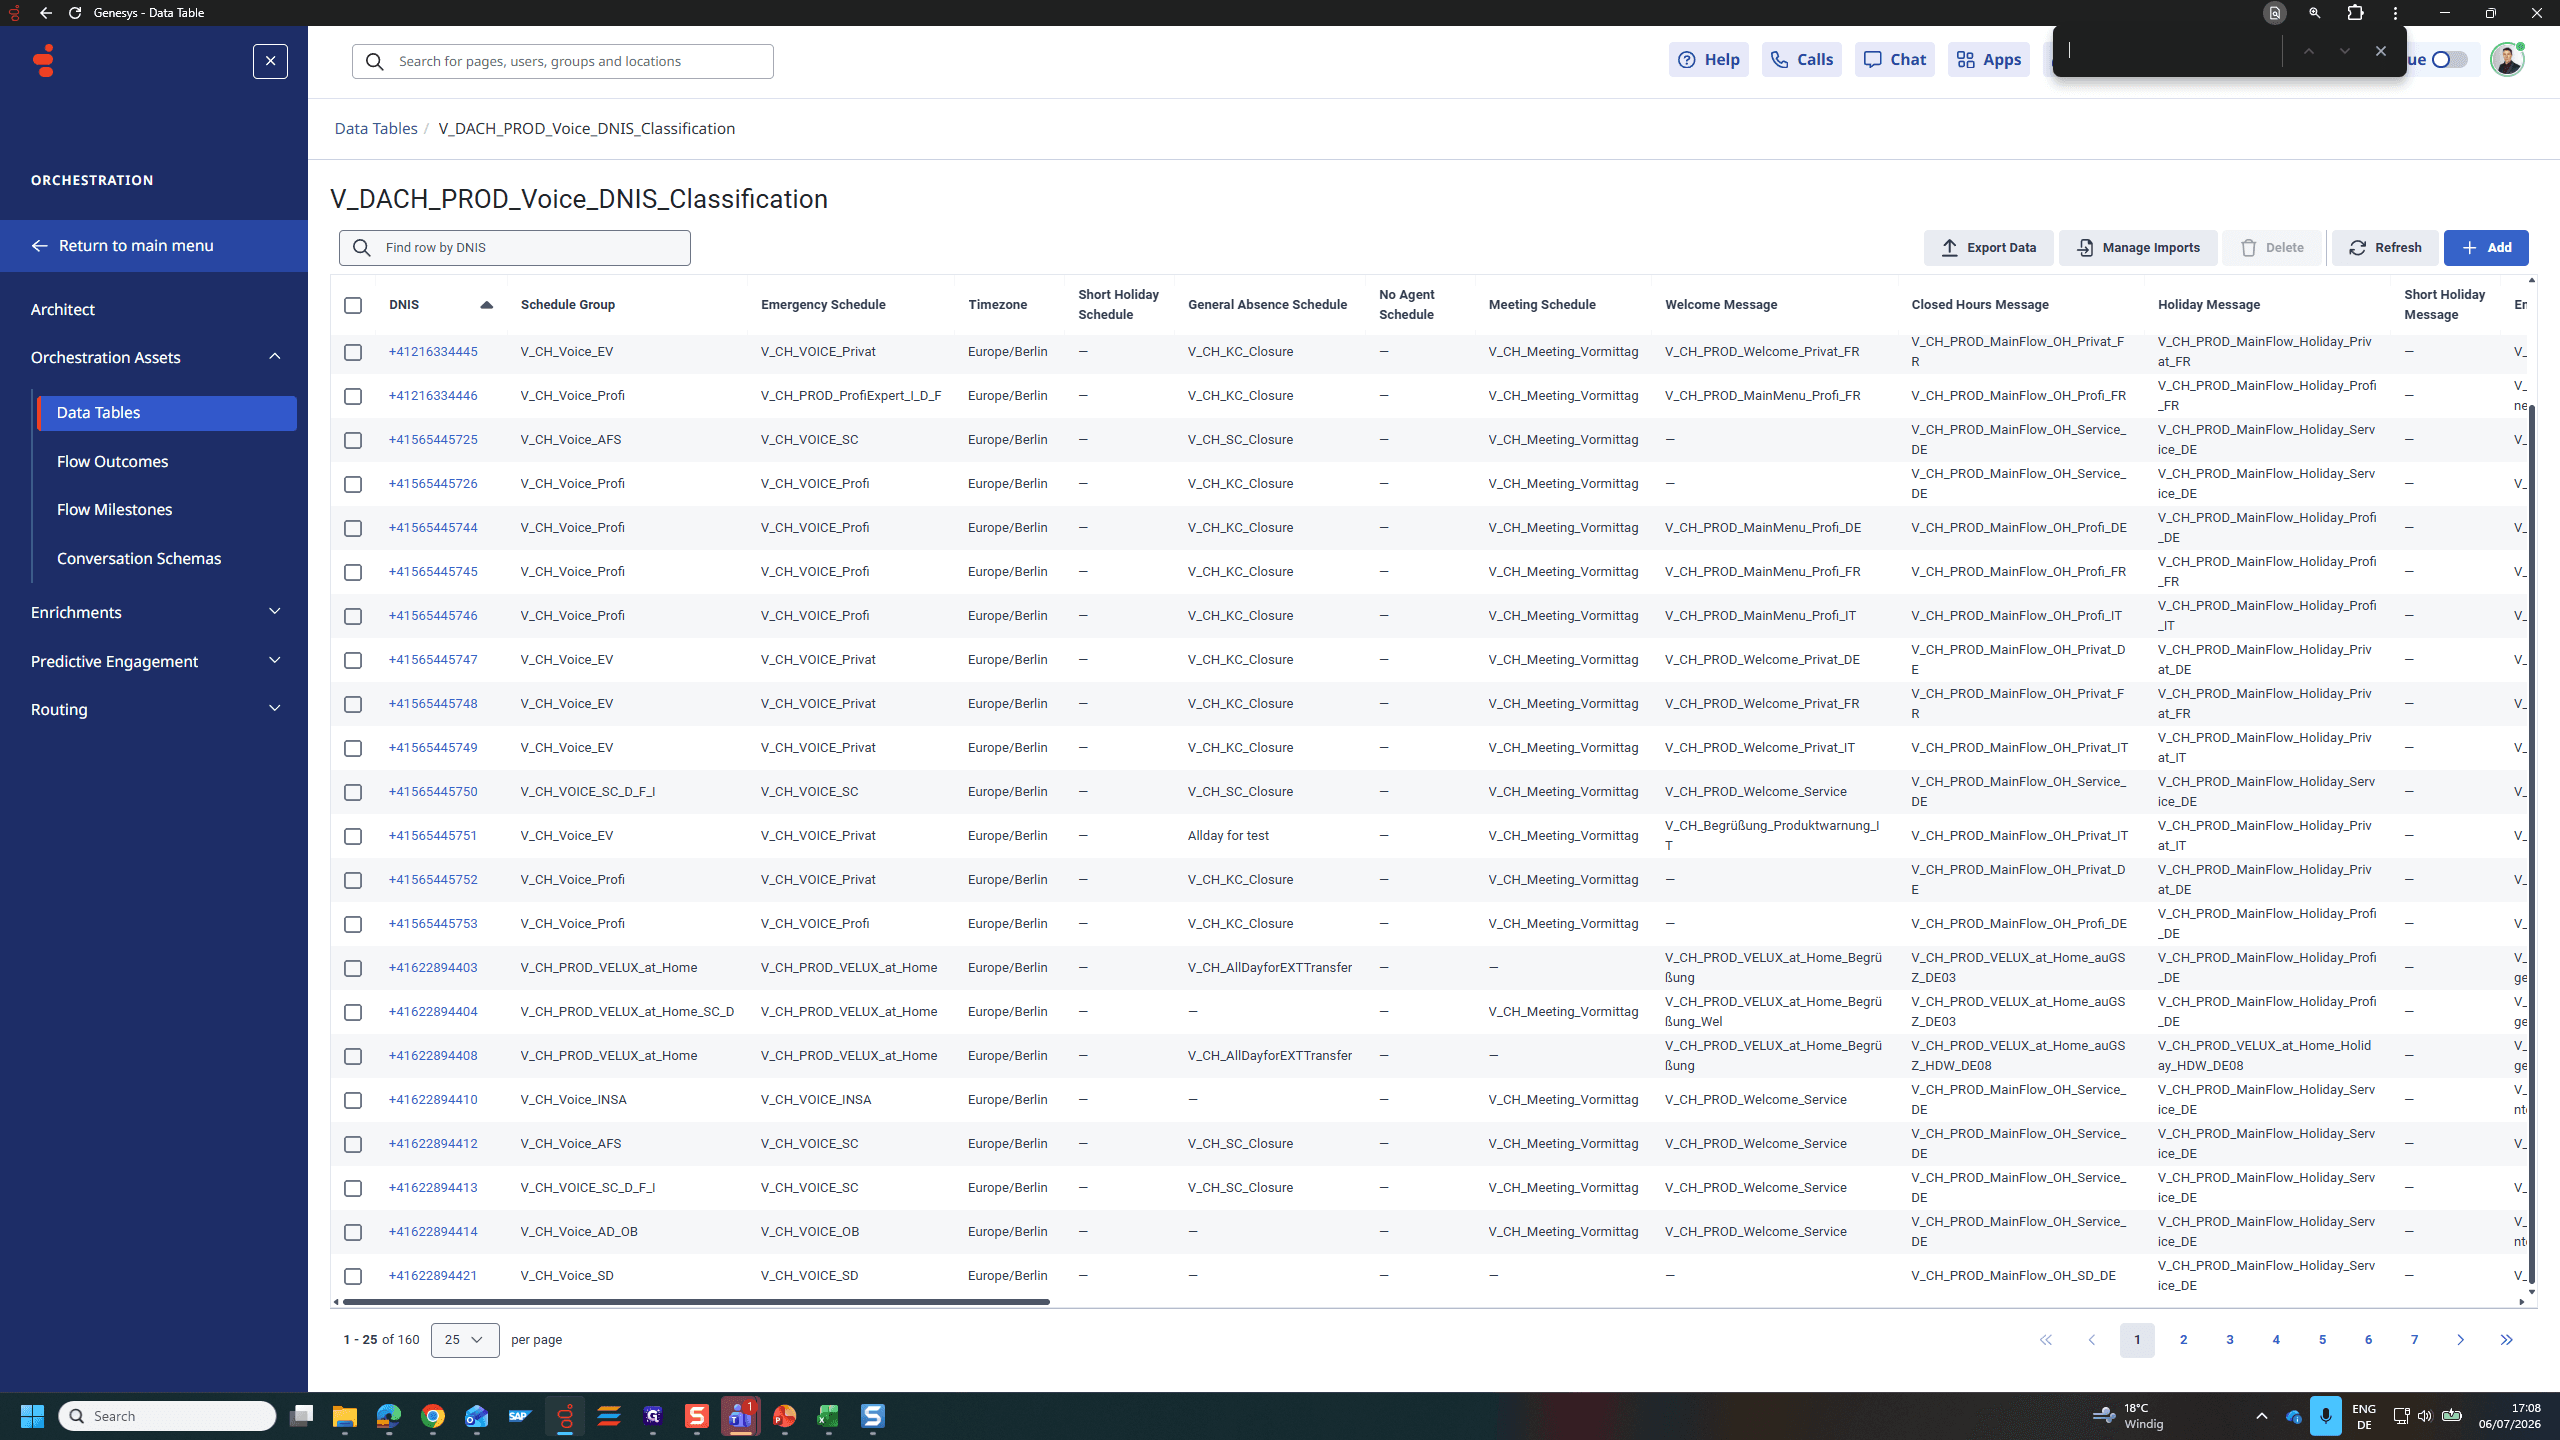
When you open a data table row, you have multiple configuration options available. Depending on your needs, you can modify any of the following settings:
Configuration Option | Action |
|---|---|
Adjust Messages | Modify the audio or text messages played to callers for a specific number. |
Place an IVR Menu | Direct the specific phone number to a designated Interactive Voice Response menu. |
Change Prompts | Update the voice prompts associated with the designated IVR menu. |
Enter a Code | Assign a specific routing or access code to the phone number. |
Activate Customer Identification | Toggle the system to automatically identify customers calling this number. |
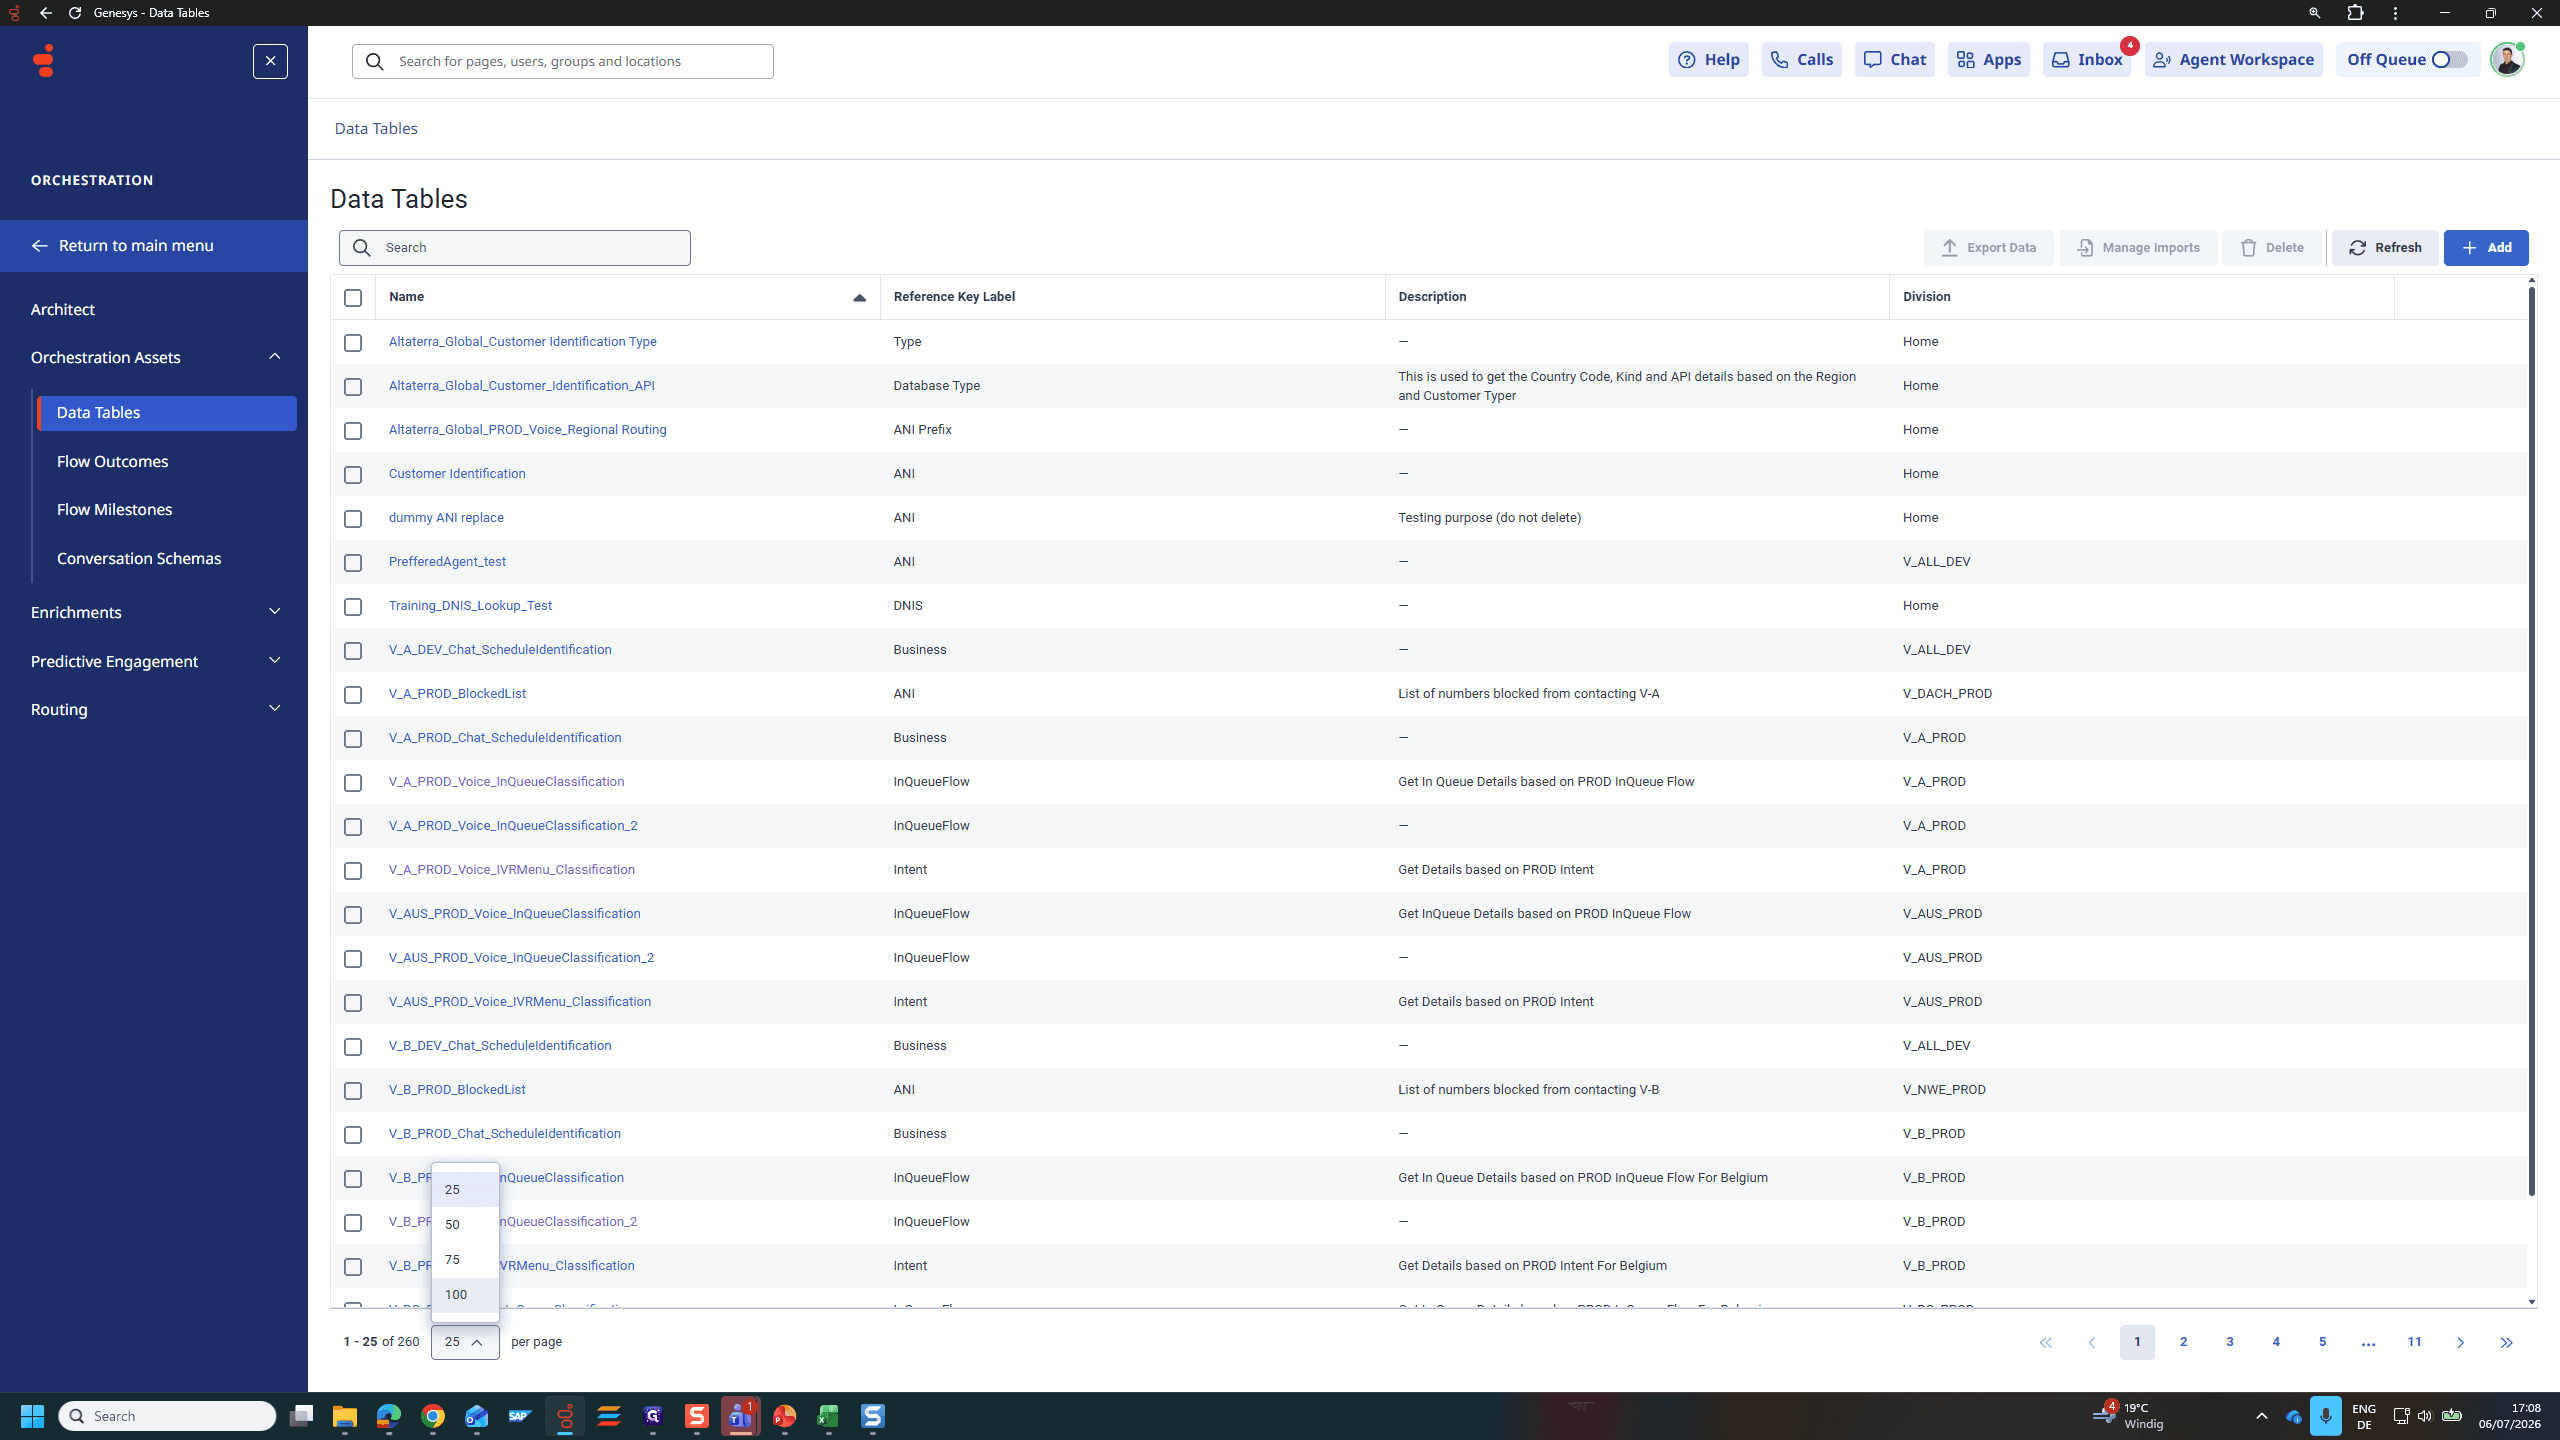
Q: How can I view more data table entries at once without clicking through multiple pages?
A: Adjust the items per page dropdown menu at the bottom of the data table screen to display up to 100 entries per page.
Q: What is the fastest way to locate a specific phone number in a large data table?
A: You can use the built-in search bar to look up a partial or full phone number. The system will filter the table automatically as you type.
Term | Definition |
|---|---|
Data Table | A structured set of data used to store and reference configuration variables like schedules, routing values, and prompts. |
DNIS | Dialed Number Identification Service; a feature that identifies the specific phone number the caller dialed. |
IVR | Interactive Voice Response; an automated telephony system that interacts with callers and routes them to appropriate menus or queues. |
Customer Identification | A system feature that attempts to match incoming caller details against a database to identify them prior to routing. |