Icon

How to Automatically Scrape LinkedIn Posts Using Make.com (Step-by-Step Guide)

Learn the easiest and most affordable way to automatically scrape LinkedIn posts using make.com and Apify. This step-by-step guide shows you how to collect LinkedIn posts into Google Sheets for competitor analysis, portfolio tracking, and more.

By Yuval Karmi

In this guide, we'll learn how to set up an automated system to scrape the latest LinkedIn posts from a list of profiles and save them to a spreadsheet using Make.com, Apify, and Google Sheets. This process can help you track updates from competitors, portfolio companies, or any LinkedIn profiles you want to monitor. You will see how to connect these tools and automate the collection and organization of LinkedIn post data.

Let's get started

Hello, everyone. Today, I will show you the best and likely cheapest way to automatically scrape LinkedIn posts using make.com. Here we go. Today, we will build a system that takes a list of LinkedIn URLs and scrapes each profile for their latest posts. All collected posts will be added to a spreadsheet.

1
The system will take a list of LinkedIn URLs as input.
2
Scrape the LinkedIn profiles for their latest posts.
Step #2: Scrape the LinkedIn profiles for their latest posts.
3
The scraped posts will be added to a spreadsheet.
Step #3: The scraped posts will be added to a spreadsheet.

I will use Google Sheets in this guide, but you can use Airtable or any system you prefer. You can see how a system like this could be very valuable to you in several ways.

4
This system allows you to monitor the latest LinkedIn posts from a list of specified company profiles.
Step #4: This system allows you to monitor the latest LinkedIn posts from a list of specified company profiles.

In this example, I will pretend to be an NFL fan who wants to keep up with my favorite team's latest LinkedIn posts. If you're in the finance industry and want to monitor 10, 20, 30, or even 100 of your top competitors, you can track what they're doing and posting on LinkedIn.

5
For example, you can use this automation to keep tabs on your competitors' LinkedIn activity.
Step #5: For example, you can use this automation to keep tabs on your competitors' LinkedIn activity.

You can run this automation weekly to collect all their latest posts in a spreadsheet. Then, you can organize and analyze the data as you prefer.

6
The automation can be run on a schedule, such as once a week, to automatically gather and save the latest posts.
Step #6: The automation can be run on a schedule, such as once a week, to automatically gather and save the latest posts.

Some companies use systems like this to track their portfolio companies. This helps them monitor what the companies they own are working on and stay updated. There are countless possible use cases here. I will show you a basic example that you can adapt to your business model as needed. Okay? Let's open make.com and start building.

7
Click the large plus button in the center to begin creating your scenario.
Step #7: Click the large plus button in the center to begin creating your scenario.

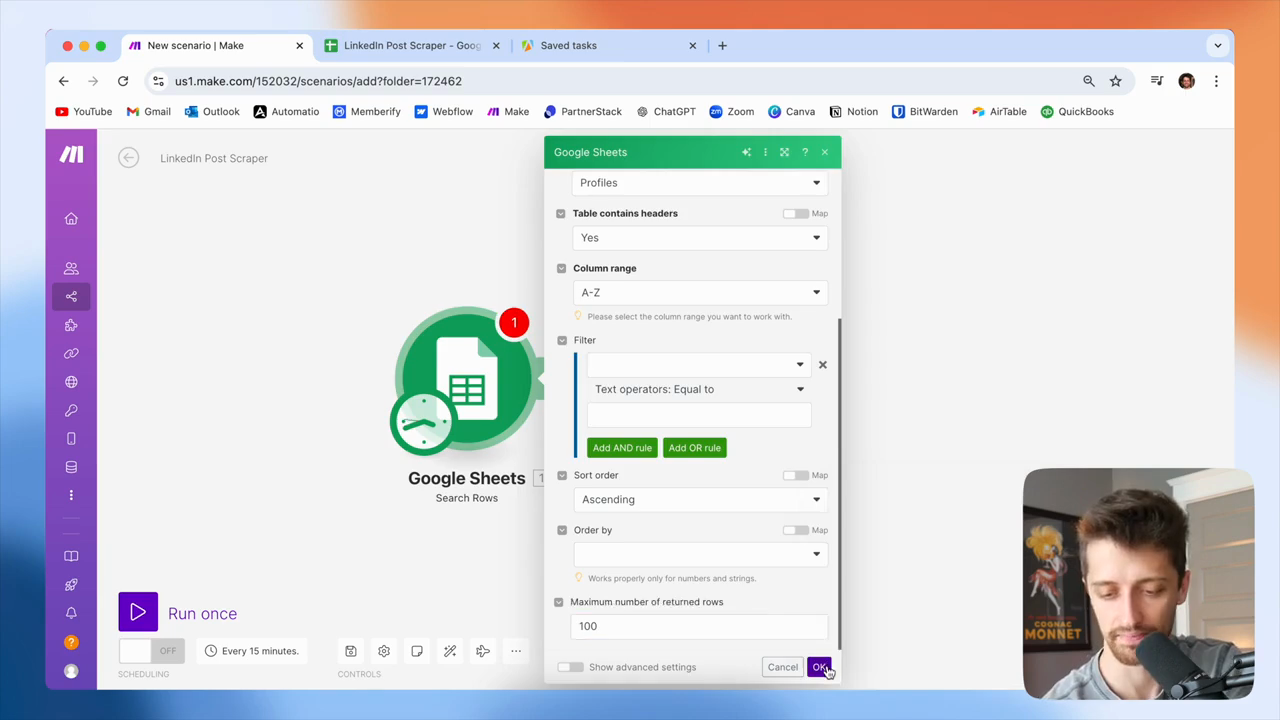
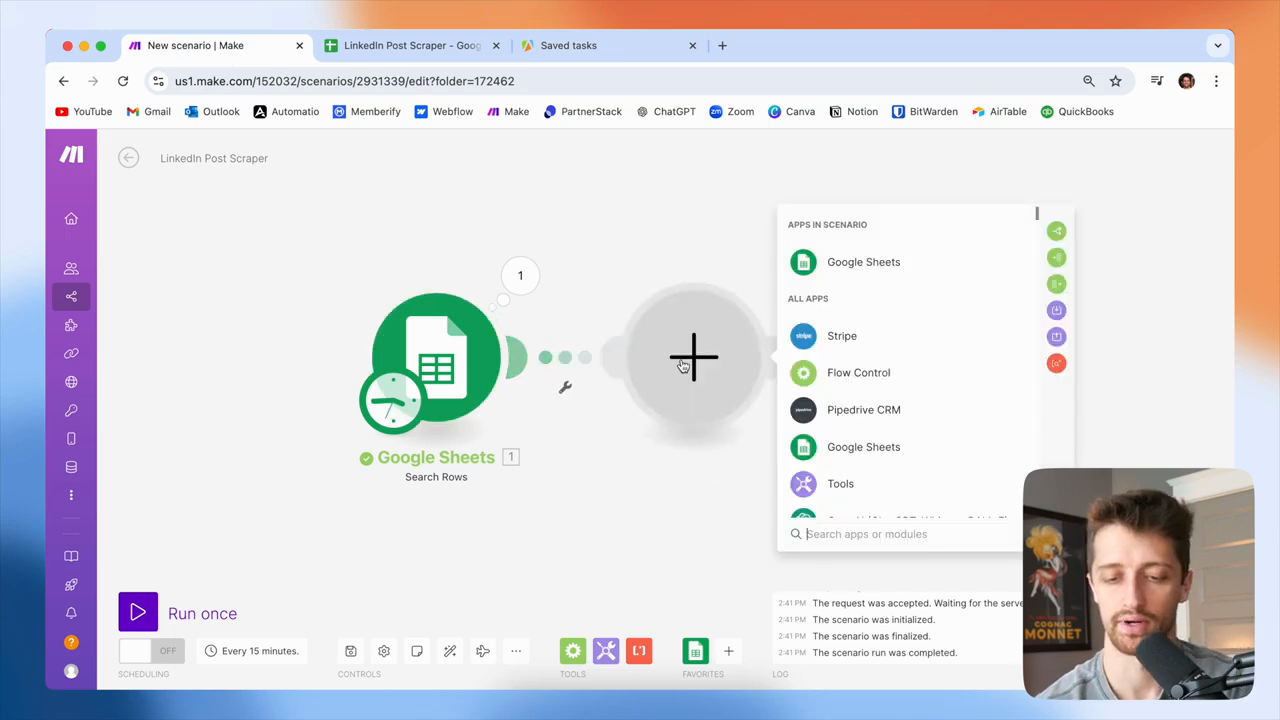
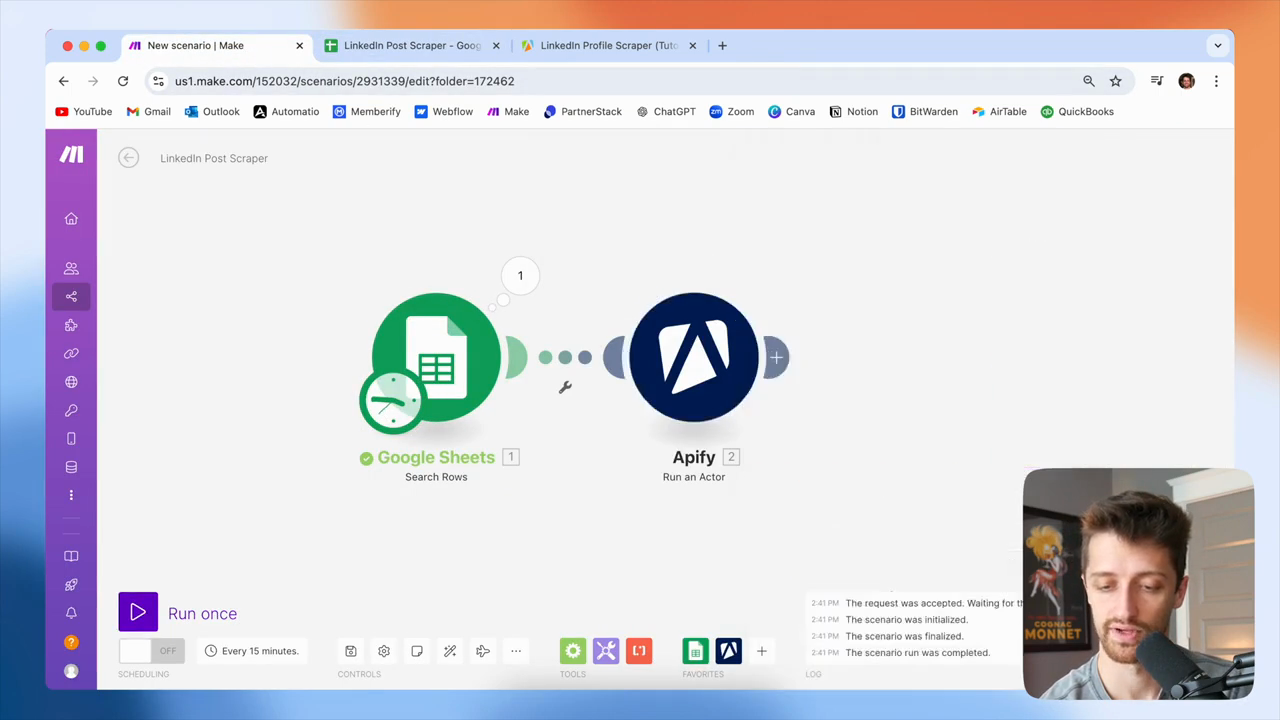
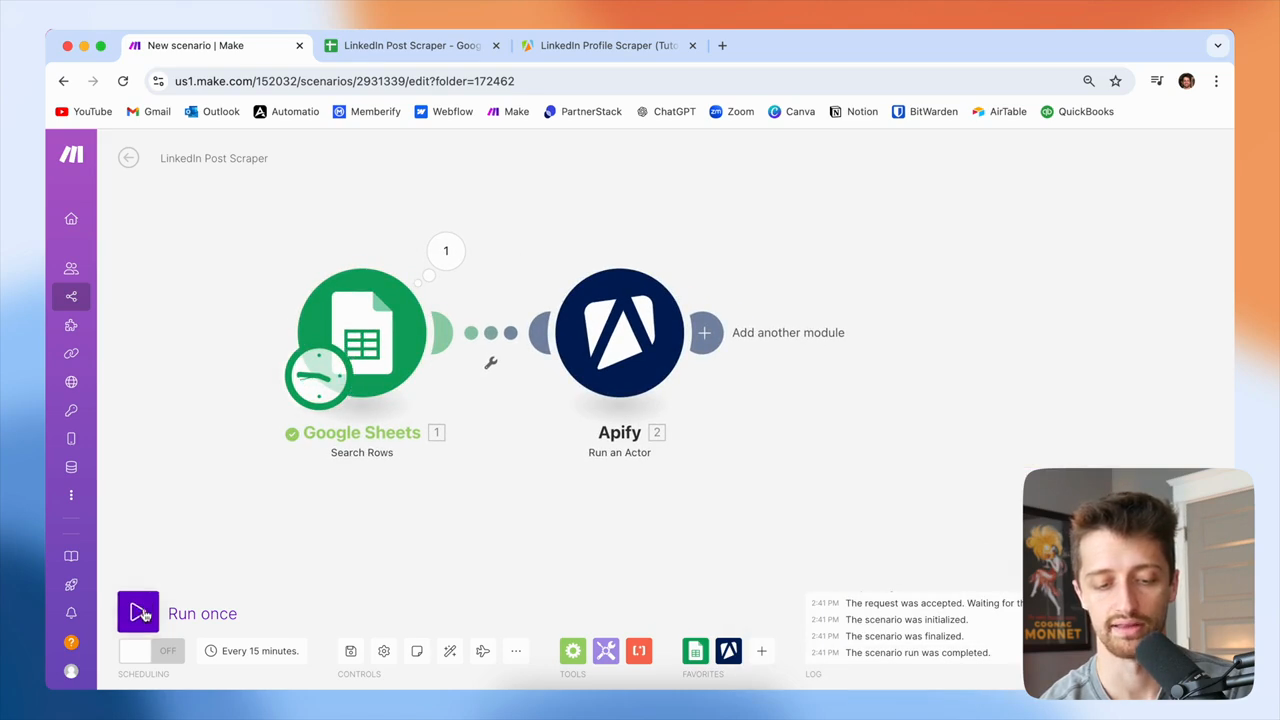
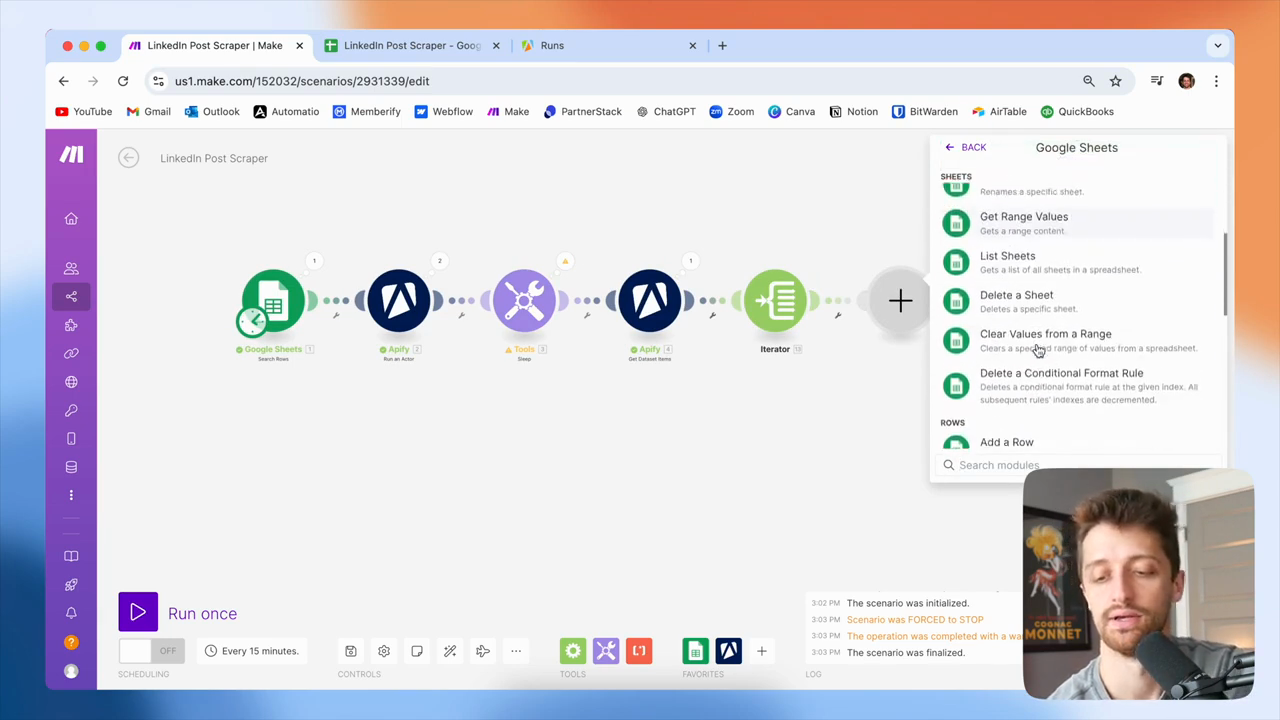
Today, we will be using Google Sheets.

8
Click the plus button.
Step #8: Click the plus button.
9
Click on Google Sheets.
Step #9: Click on Google Sheets.

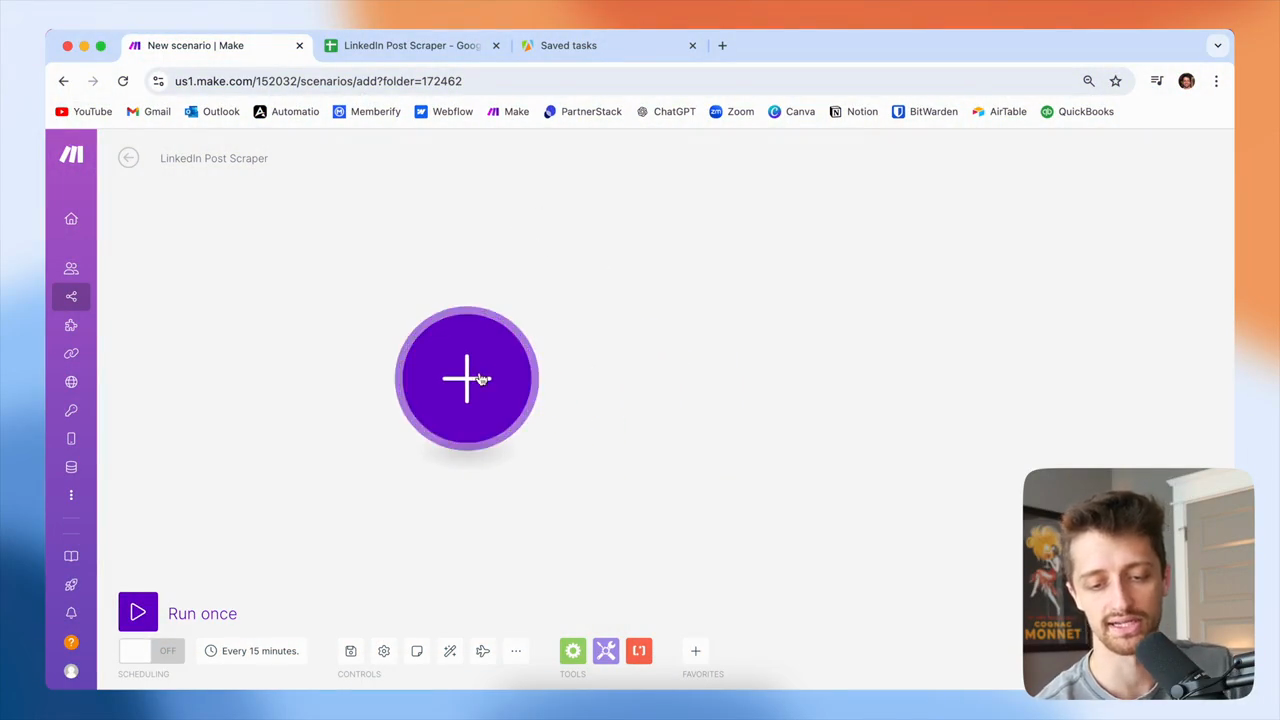
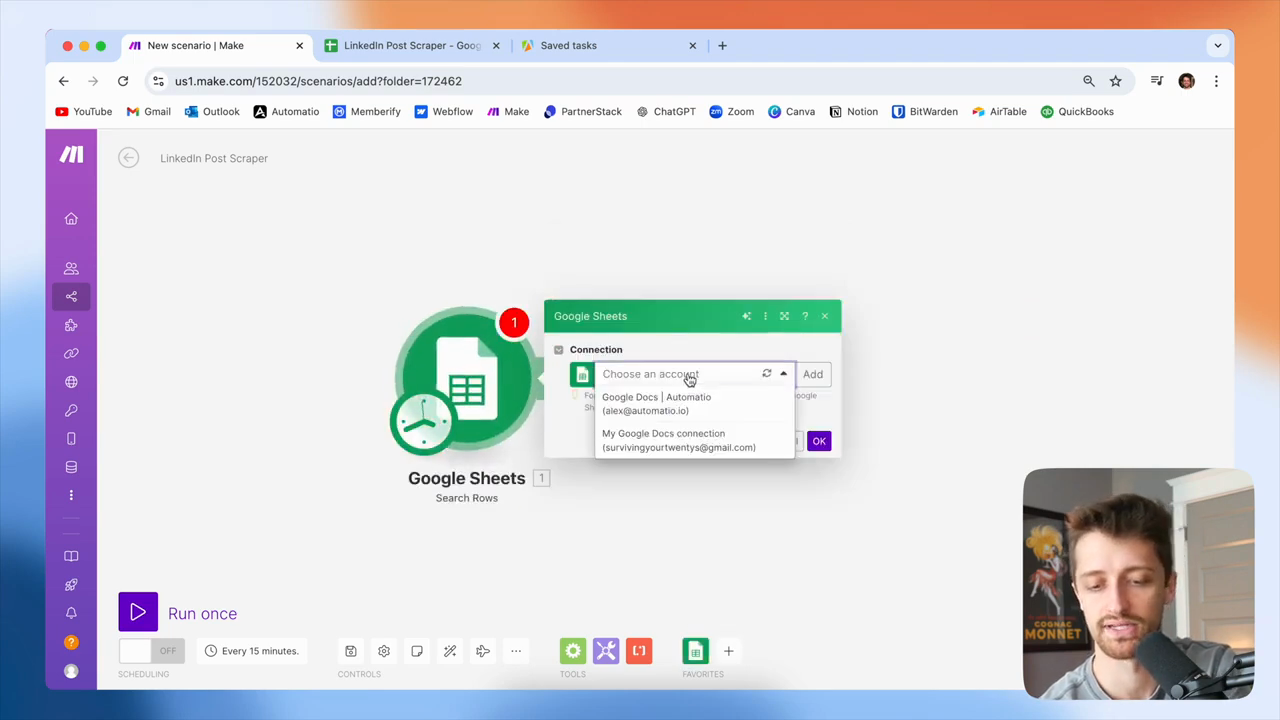
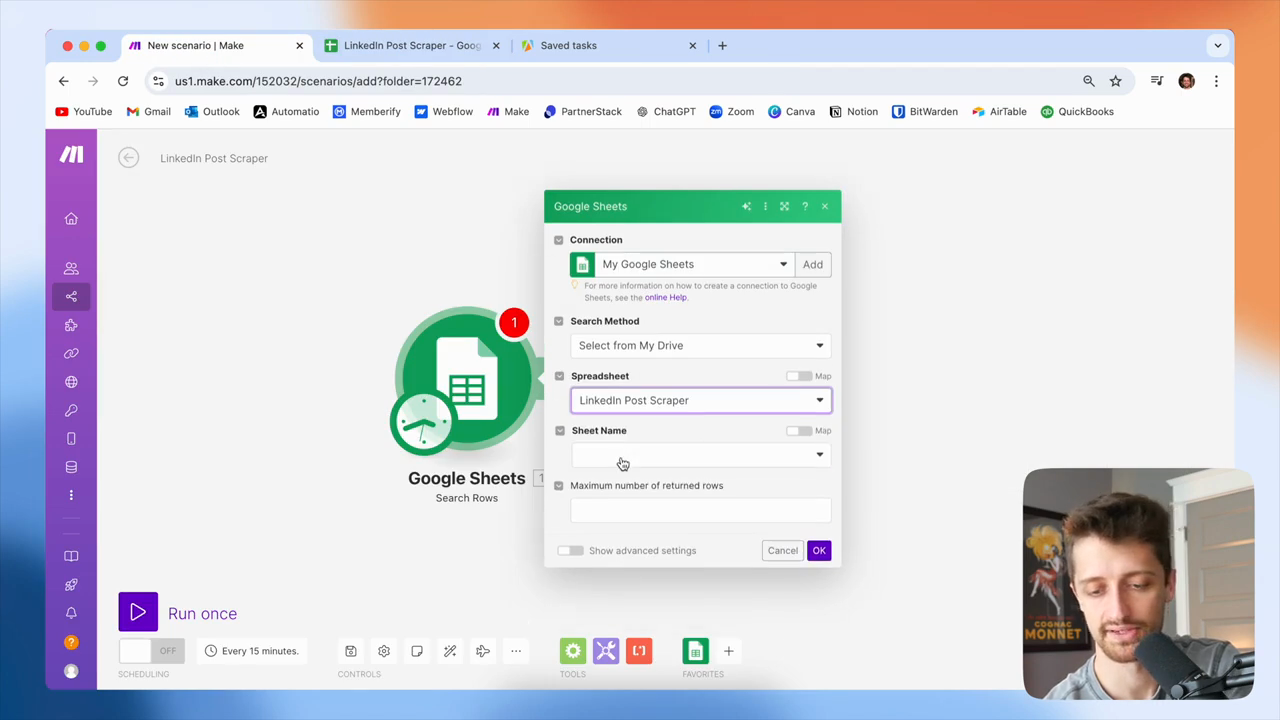
Google Sheets will be our trigger. We are going to search the rows.

10
Scroll down and click on Search Rows.
Step #10: Scroll down and click on Search Rows.

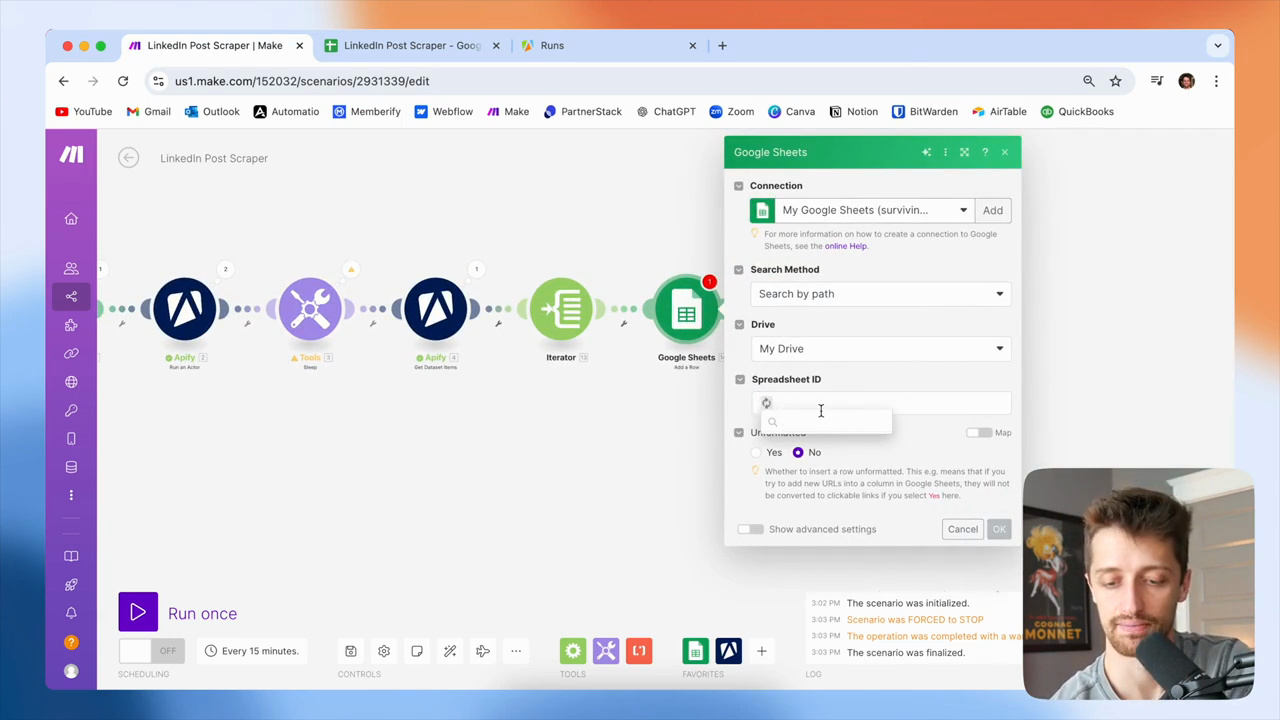
Then I'll use the link to my Google Sheets account.

11
Select your Google Docs account from the dropdown.
Step #11: Select your Google Docs account from the dropdown.

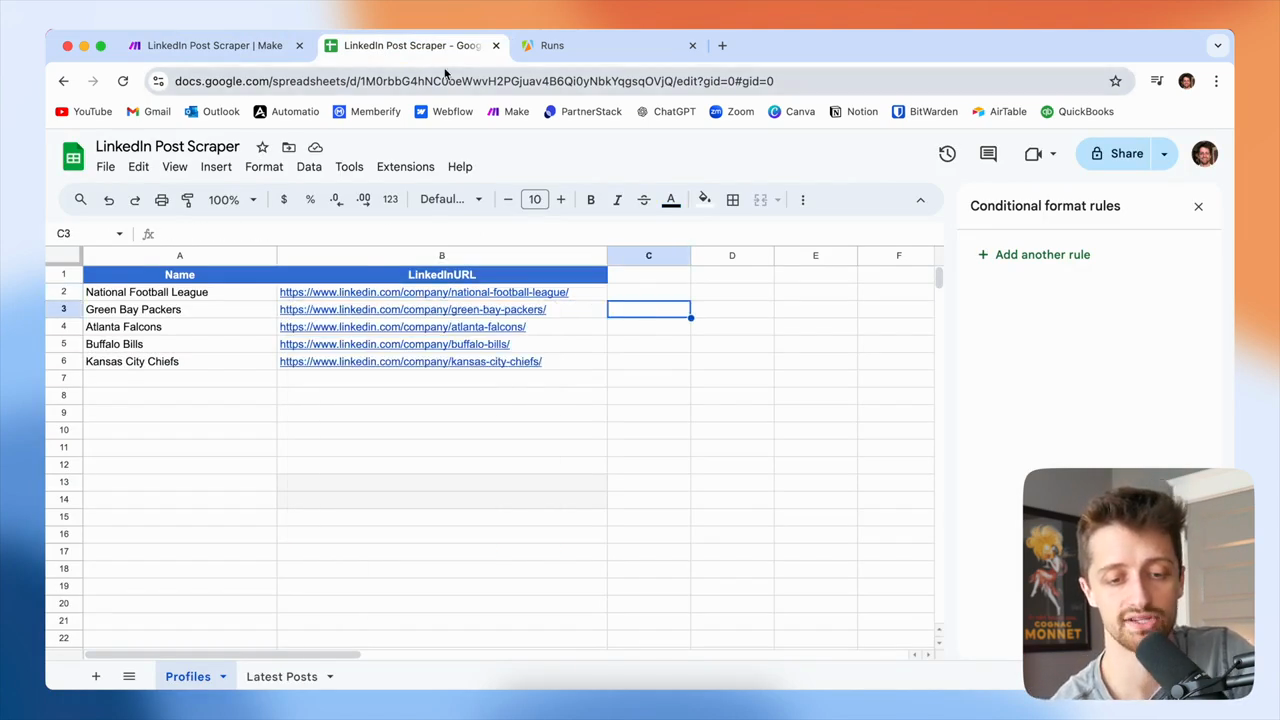
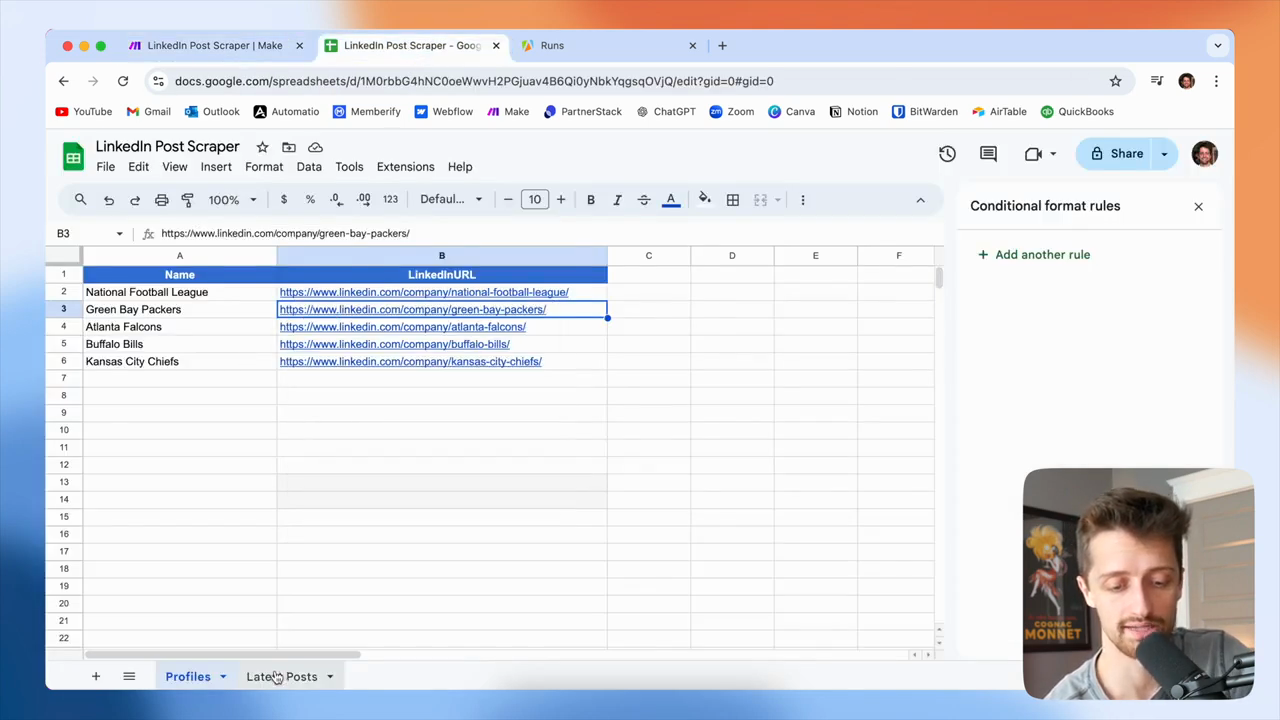
All right, now I'll search for this unique file—my LinkedIn post scraper file.

12
Click the Spreadsheet dropdown.
Step #12: Click the Spreadsheet dropdown.
13
Select the 'LinkedIn Post Scraper' spreadsheet.
Step #13: Select the 'LinkedIn Post Scraper' spreadsheet.

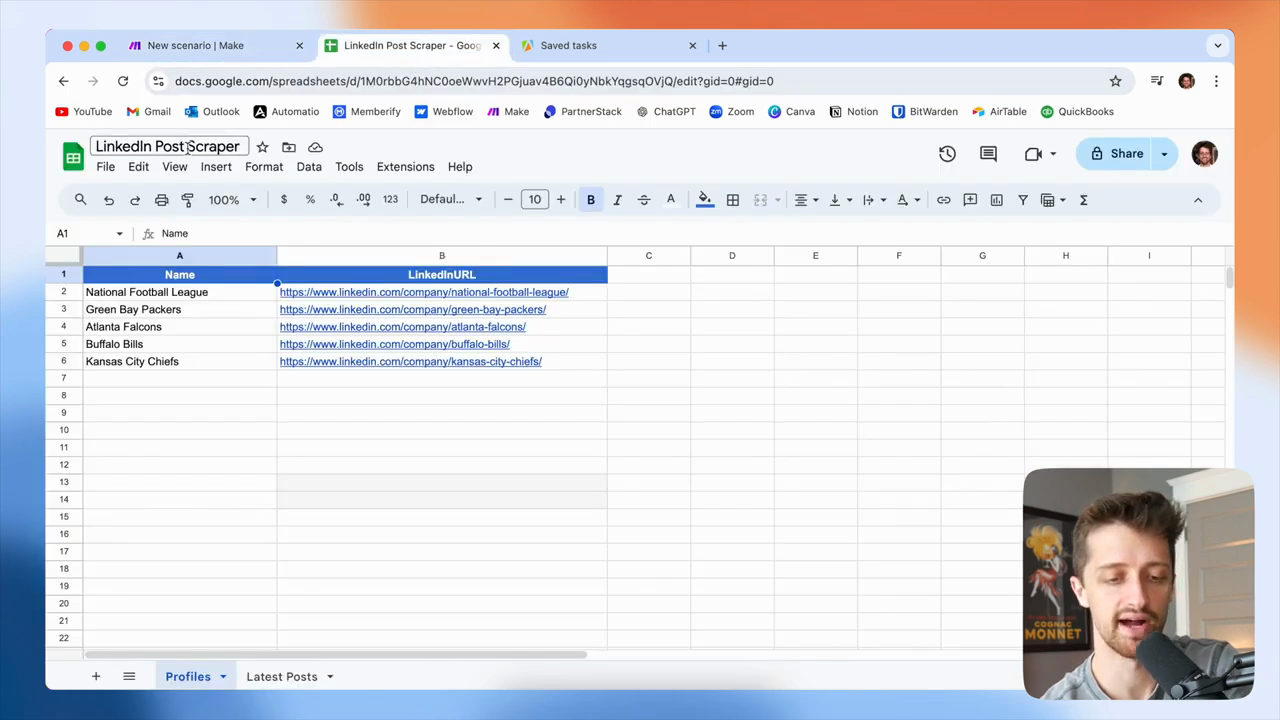
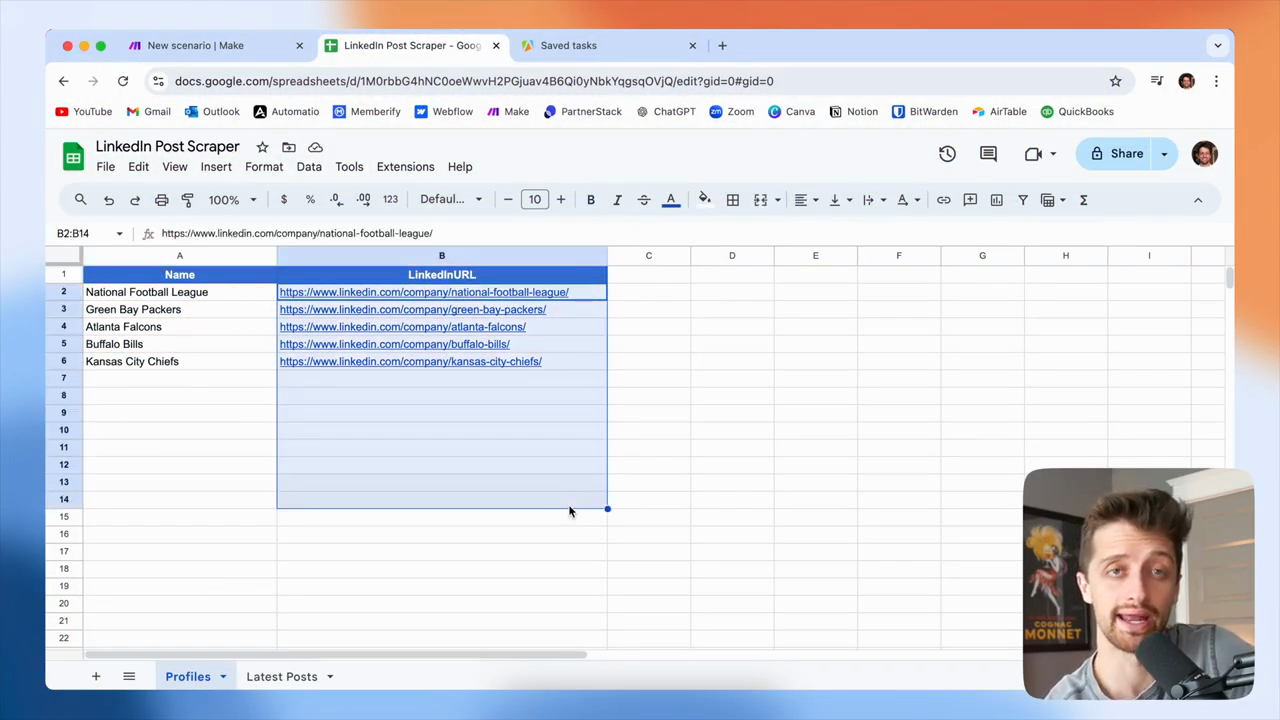
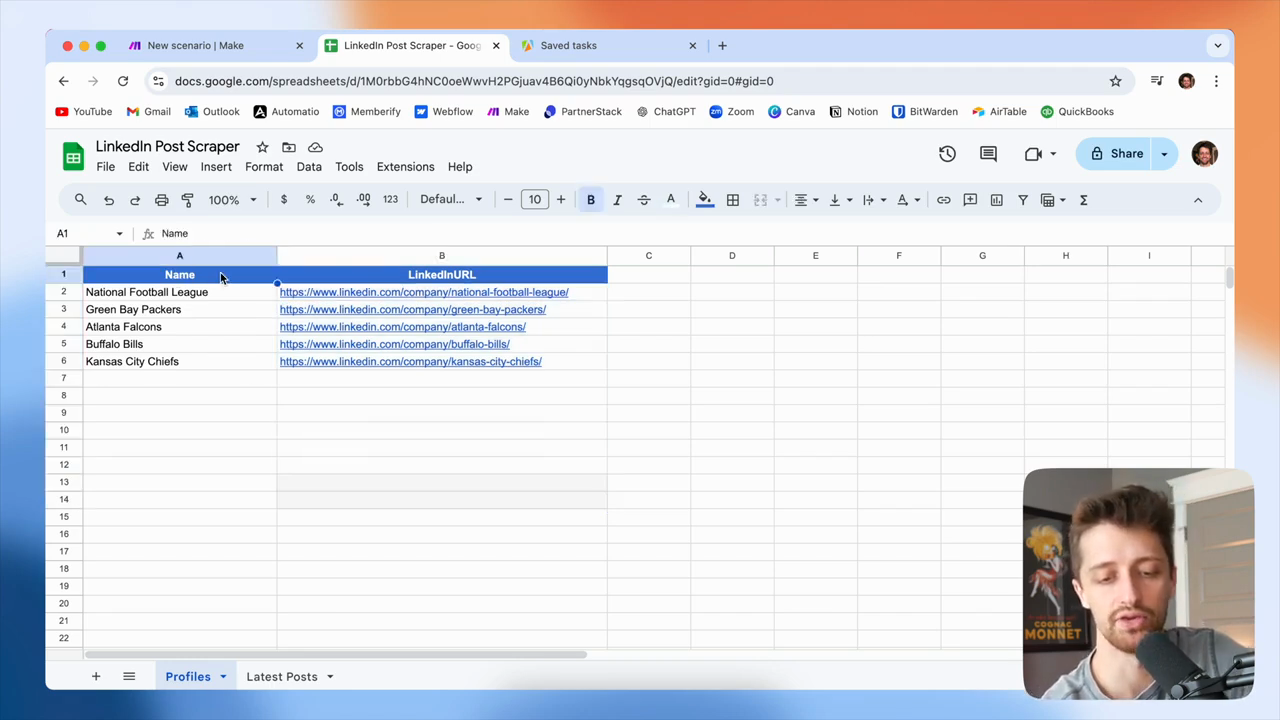
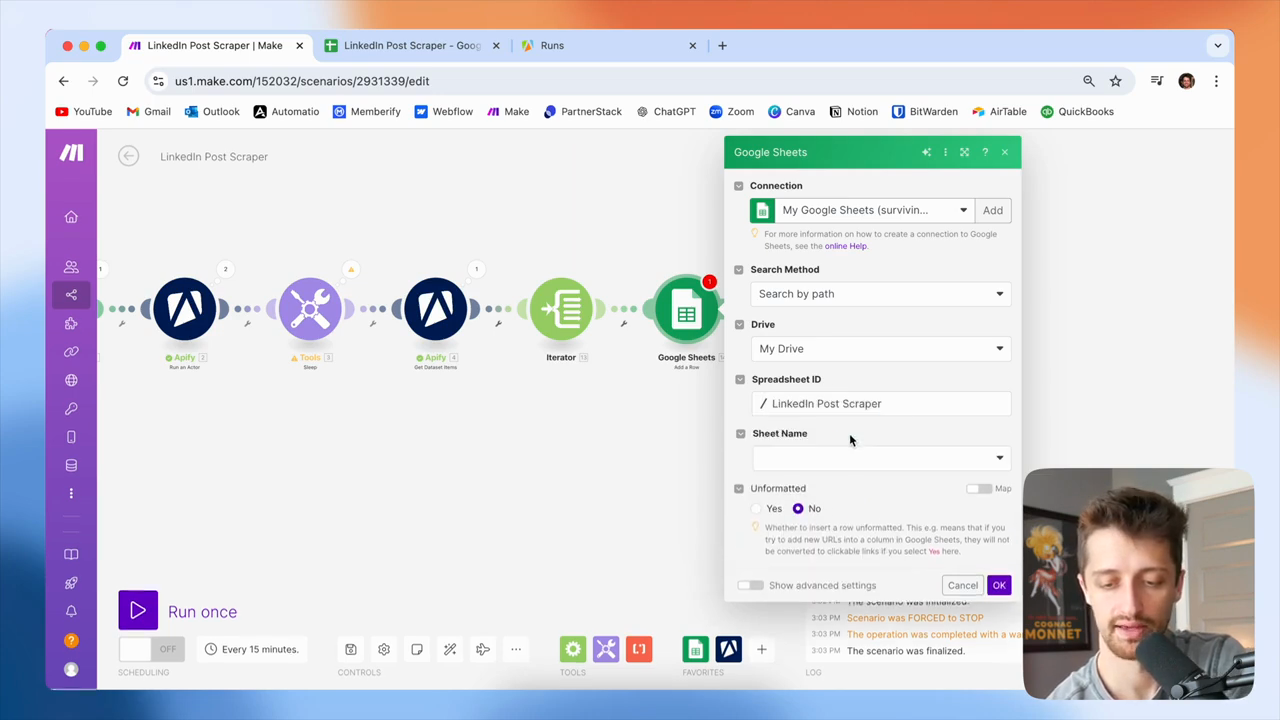
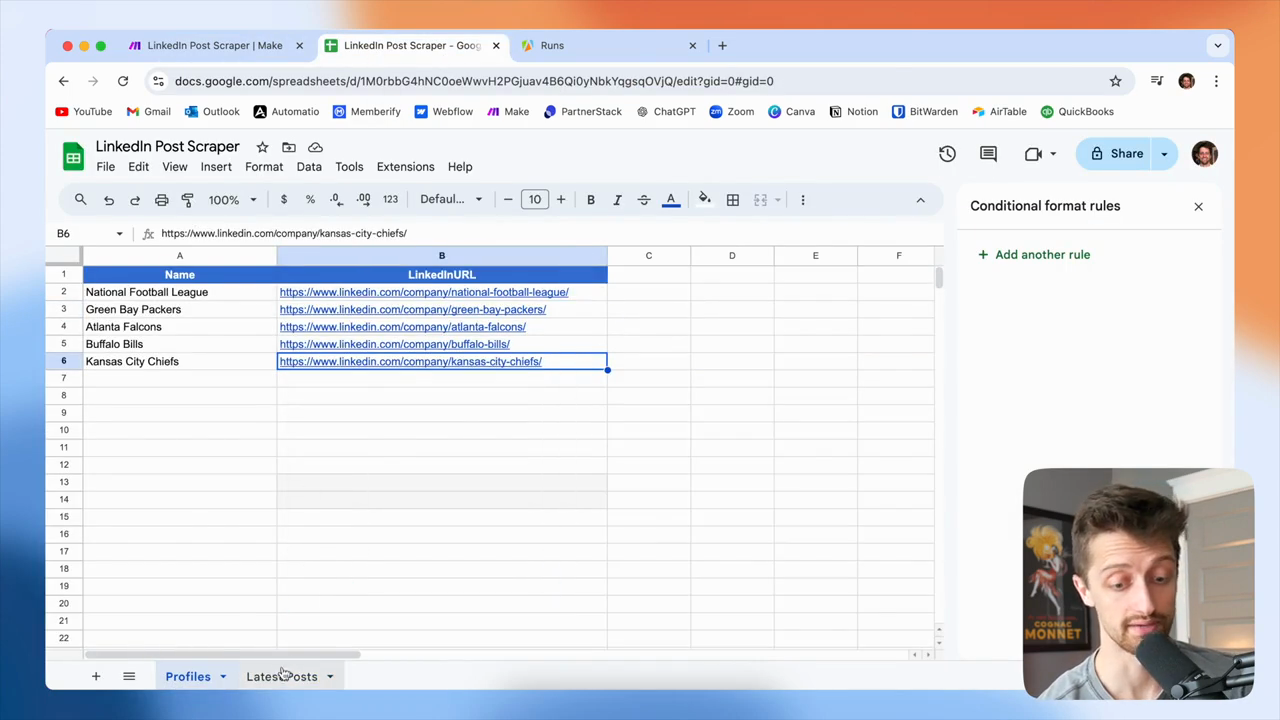
The tab I will use is called Profiles.

14
Click on the Profiles tab.
Step #14: Click on the Profiles tab.
15
Click the Spreadsheet dropdown and select 'Linkedin Post Scraper'.
Step #15: Click the Spreadsheet dropdown and select 'Linkedin Post Scraper'.

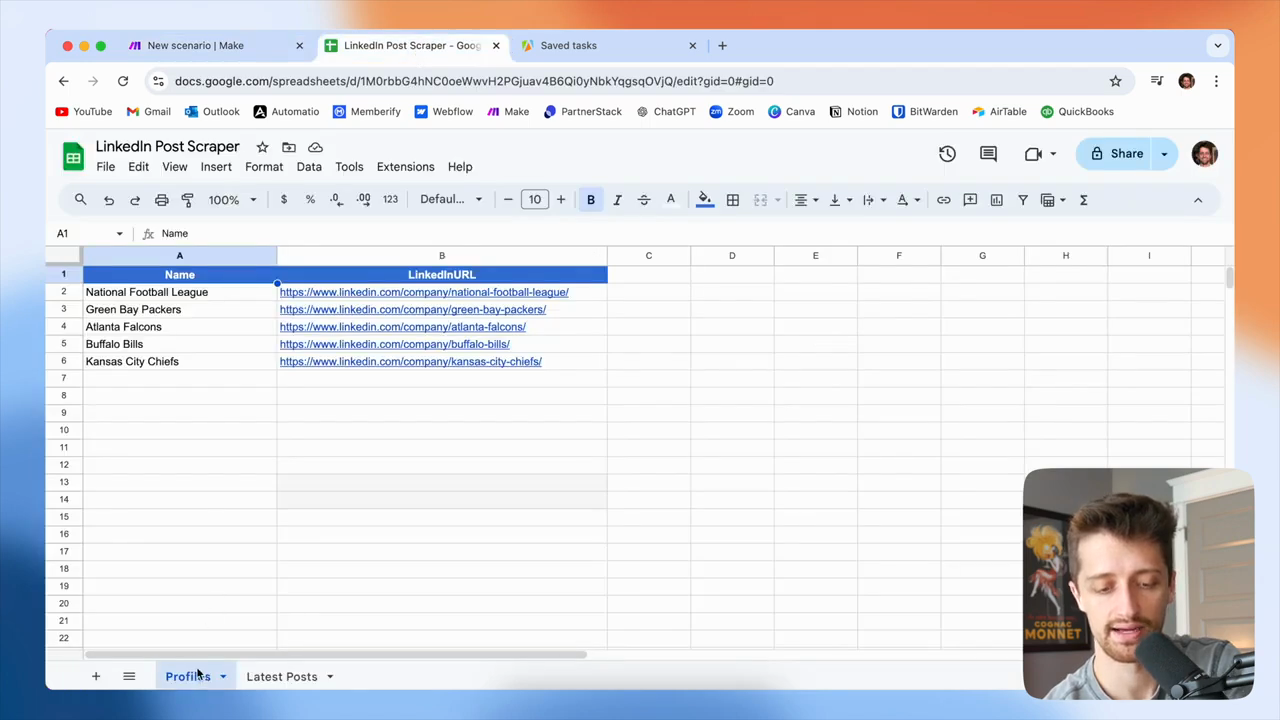
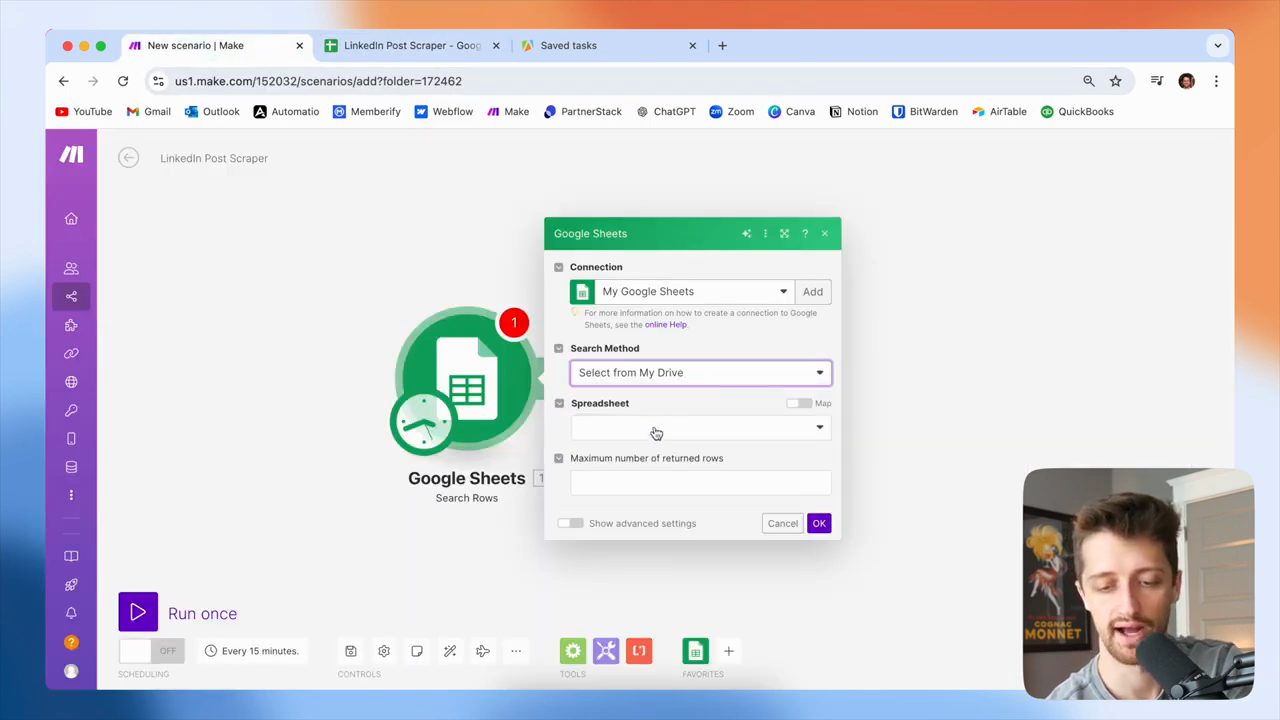
I'll find my sheet named Profiles.

16
Click the Sheet Name dropdown and select 'Profiles'.
Step #16: Click the Sheet Name dropdown and select 'Profiles'.
17
Select 'Yes' for 'Table contains headers'.
Step #17: Select 'Yes' for 'Table contains headers'.

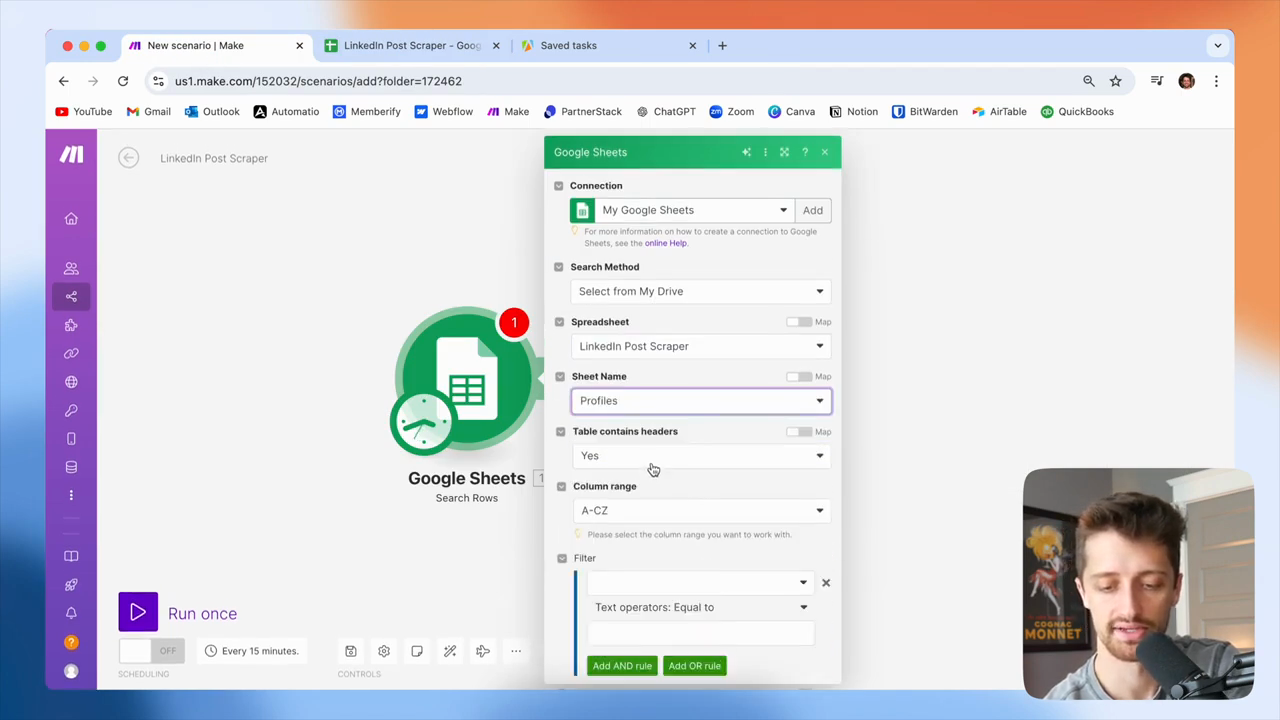
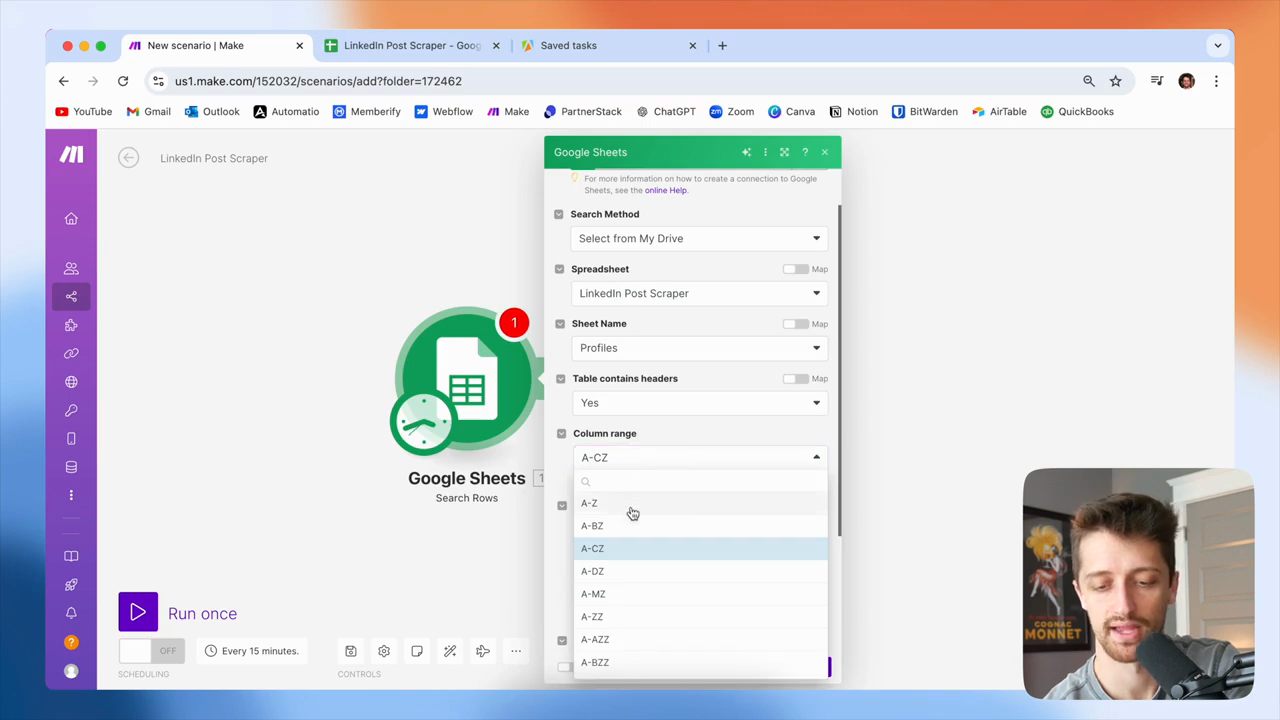
My table has headers. I only need A to Z. I will get a maximum of 100 rows.

18
Set the 'Column range' to 'A-Z'.
Step #18: Set the 'Column range' to 'A-Z'.
19
In the 'Maximum number of returned rows' field, type '100'.

You can change that to anything you want. Okay, so we'll click OK.

20
Click the 'OK' button.
Step #20: Click the 'OK' button.

So, I'll just go scrape...

21
Click the 'Run once' button.
Step #21: Click the 'Run once' button.

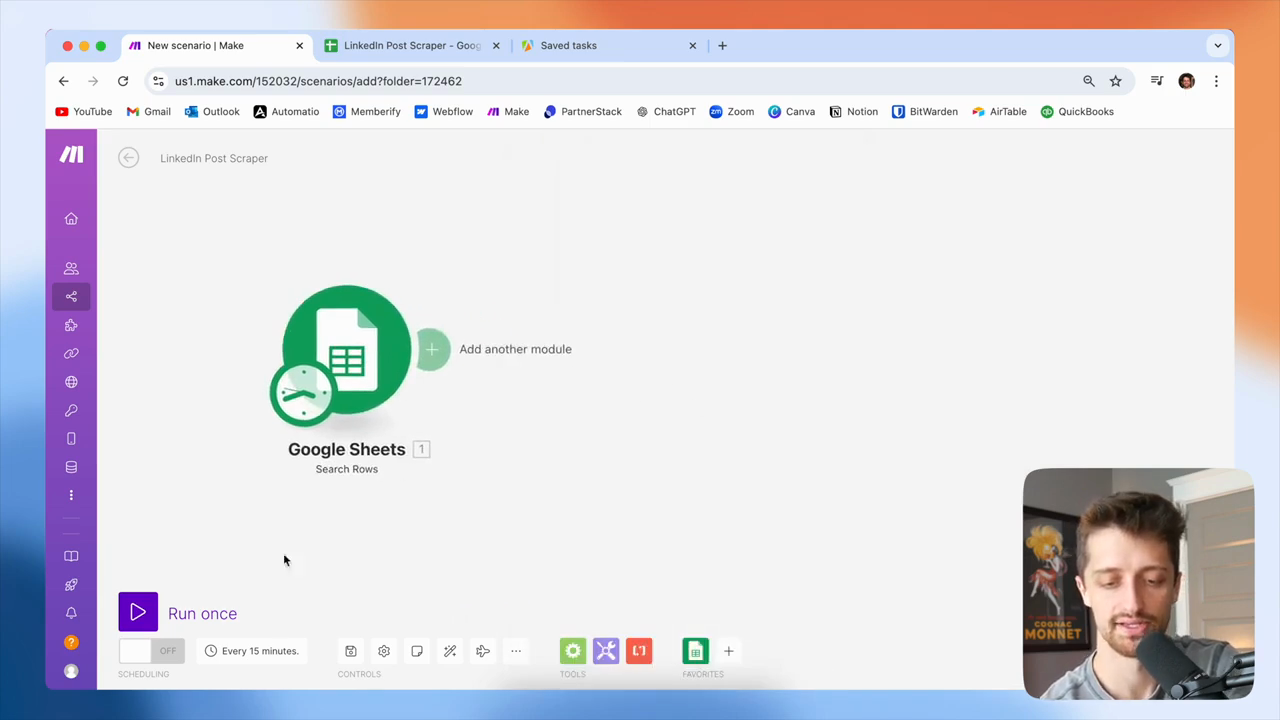
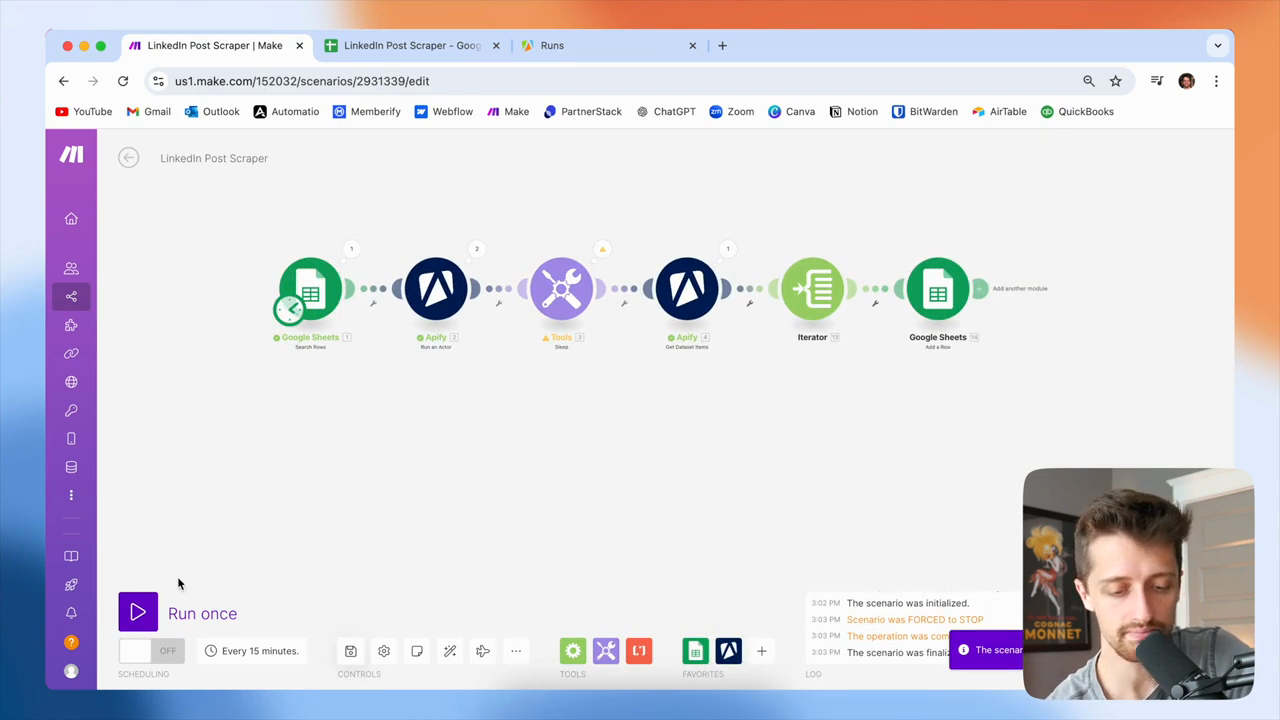
I'll show you how it will scrape all the different rows in this sheet into unique bundles.

22
Each row in the sheet is processed into a unique bundle.
Step #22: Each row in the sheet is processed into a unique bundle.

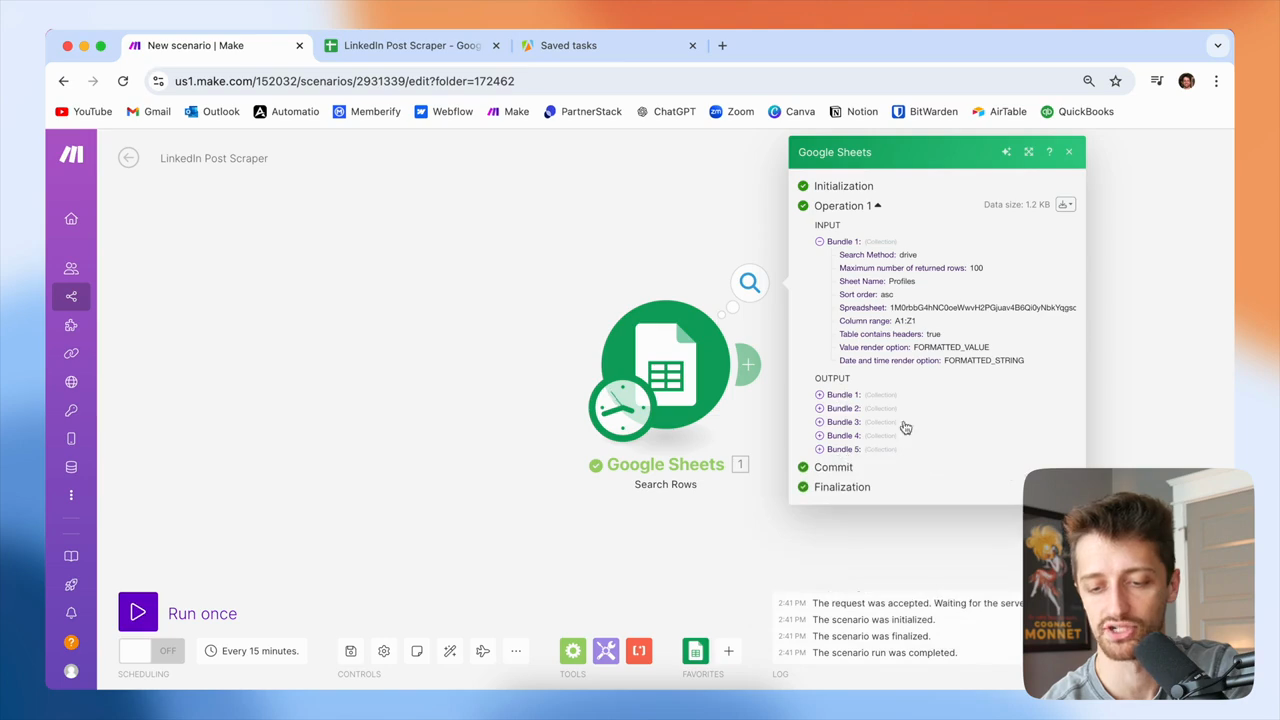
When a module in make.com outputs bundles, we don't need to use an iterator. We can use the Google Sheets module to automatically go through each of these bundles. We don't need to do anything special with iterators or array aggregators. Okay, that's great. All right, so how are we going to scrape LinkedIn?

23
Click the 'X' to close the Google Sheets module.
Step #23: Click the 'X' to close the Google Sheets module.

If you have tried to scrape LinkedIn before, you know it can be very technical, expensive, or both. I prefer to use a site called Apify, which offers various bots that can scrape data from different tools or websites.

24
Click 'Store' in the left sidebar.
Step #24: Click 'Store' in the left sidebar.

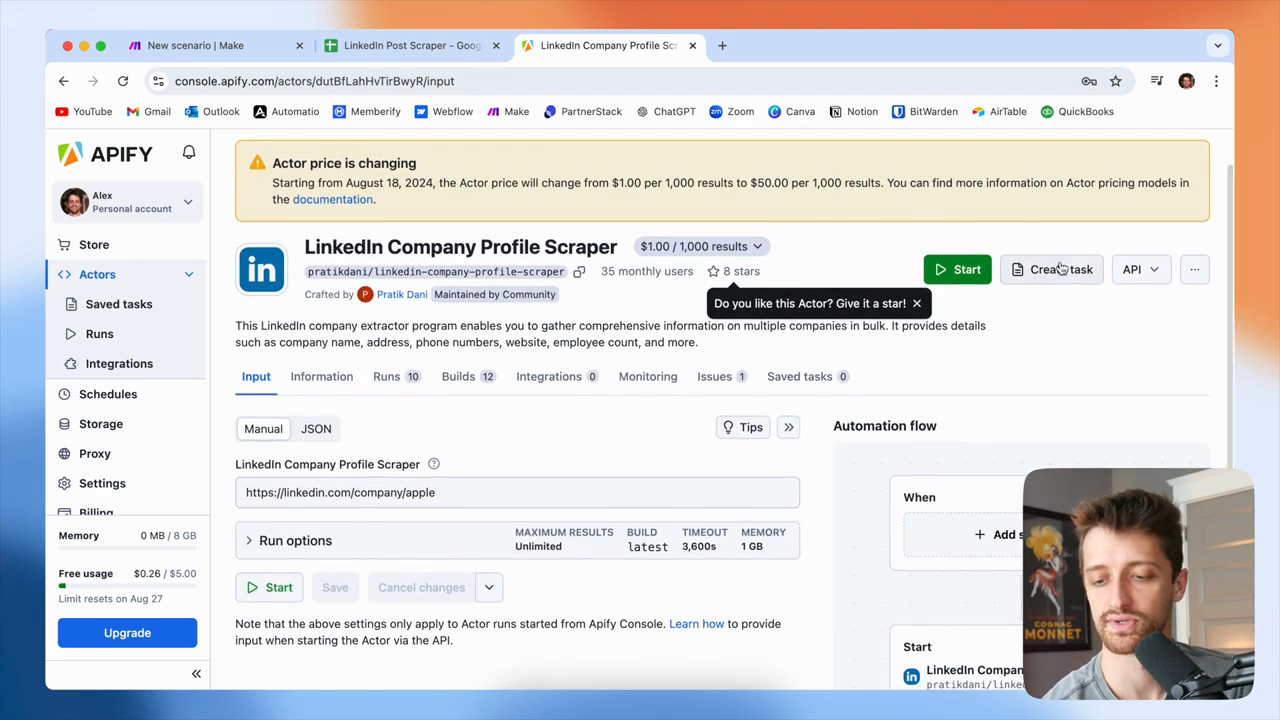
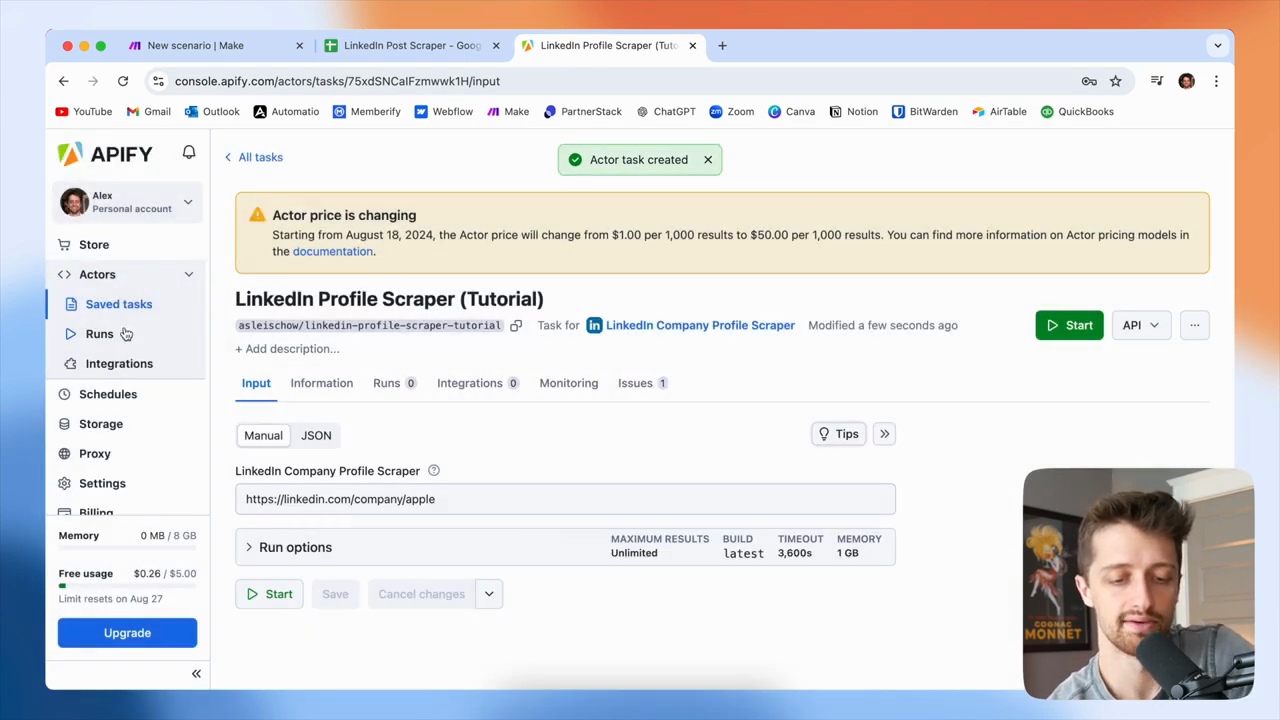
In this video, we will use a bot called LinkedIn Company Profile Scraper. This is the tool we will be working with.

25
Type 'linkedin company profile scraper' into the 'Search for Actors' field.
26
Click the 'LinkedIn Company Profile Scraper' link.
Step #26: Click the 'LinkedIn Company Profile Scraper' link.

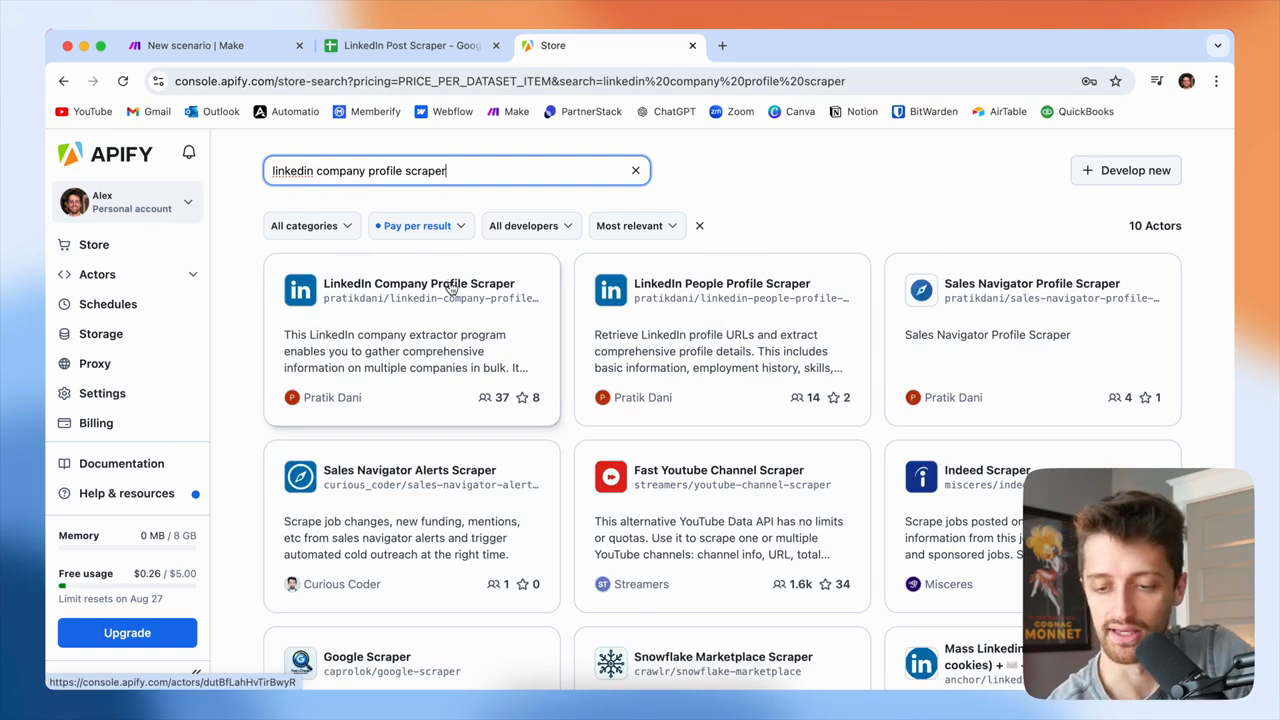
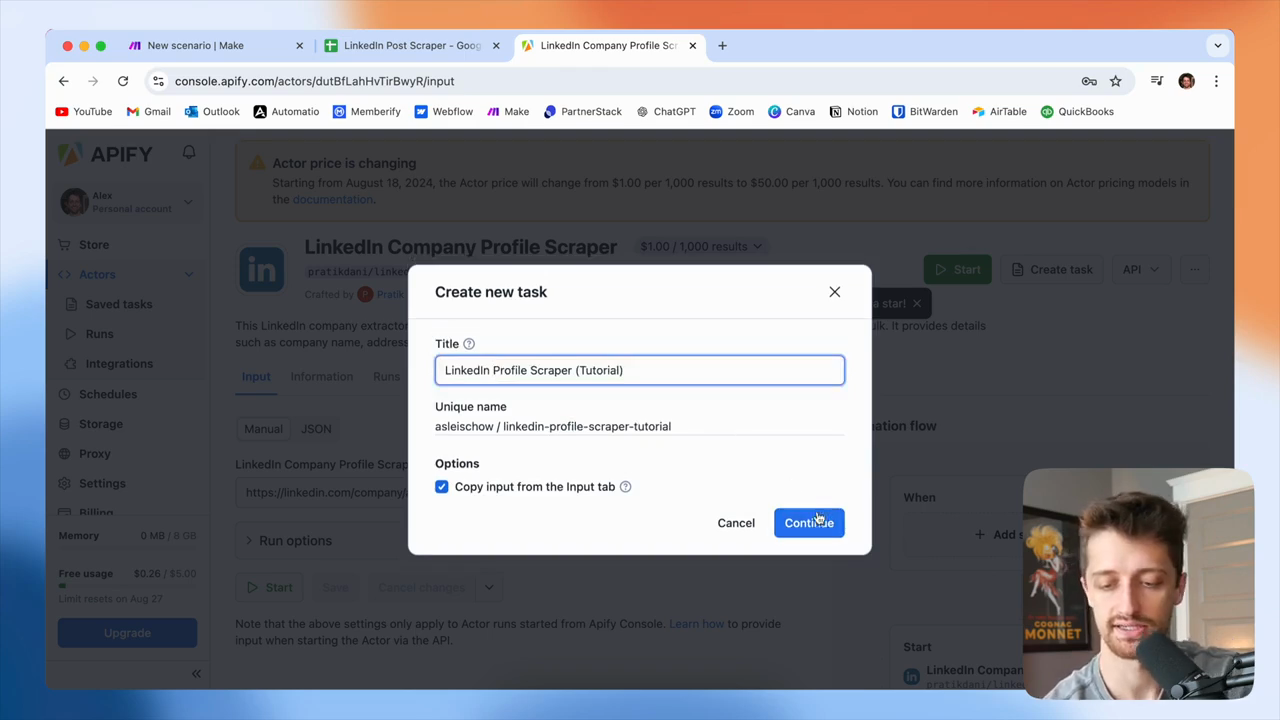
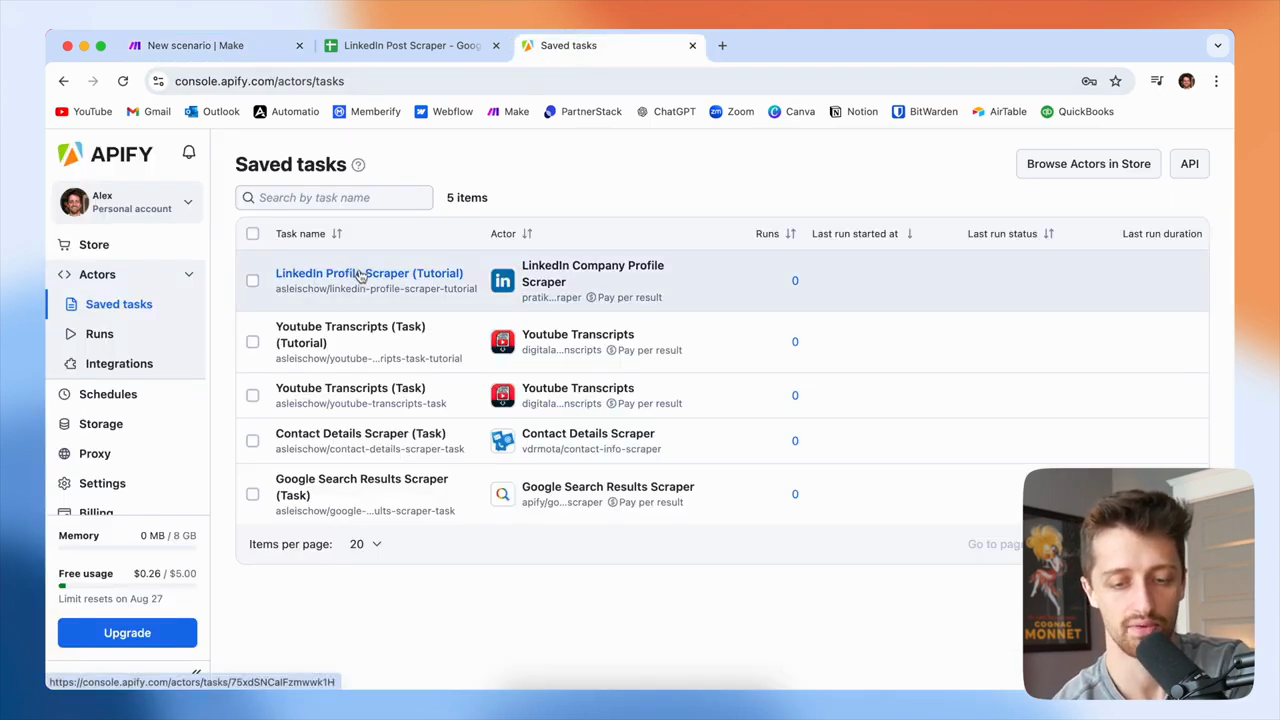
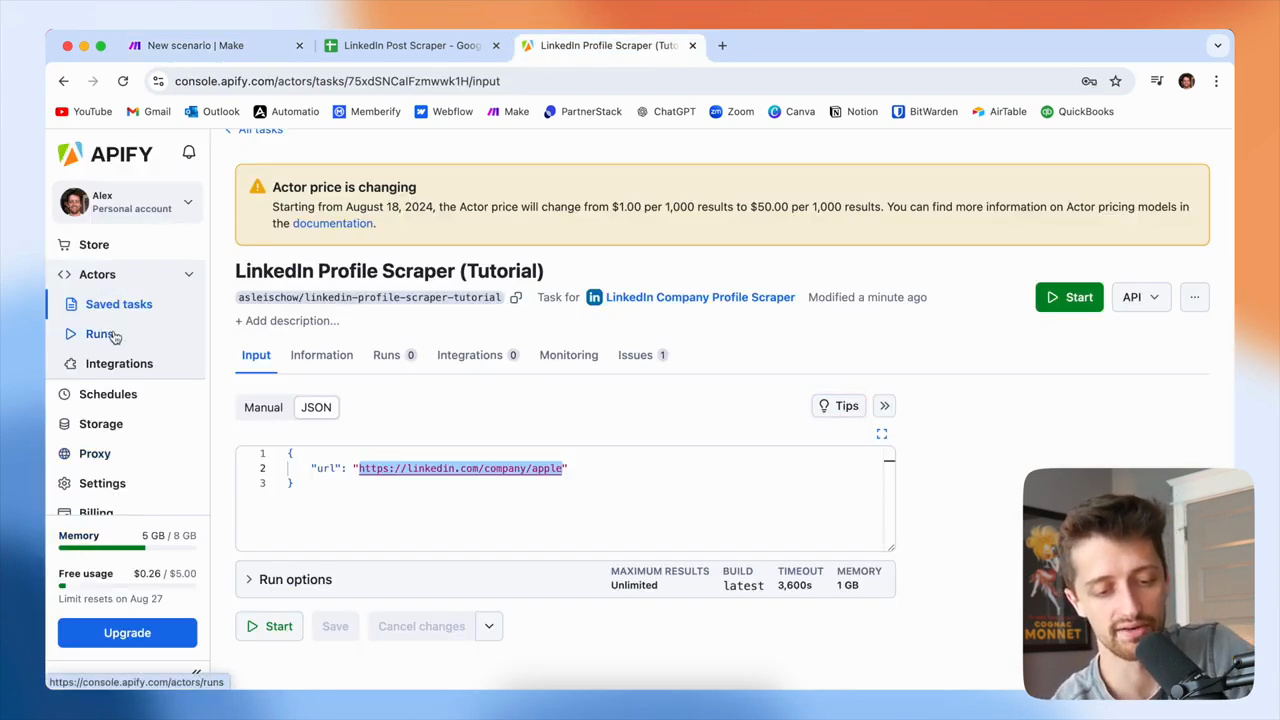
You can see it currently costs one dollar for every thousand results. It's essentially free. They will raise the price to $50 per thousand results. However, we receive $5 in free credits each month. Unless you process a large number of profiles each month, the free plan should be sufficient. However, remember that you pay per result with this bot. Next, create a task and give it a name. Click continue, make any necessary changes, then click continue again.

27
Click the Create task button.
Step #27: Click the Create task button.
28
In the Title field, type '(Tutorial)'.
29
Click the Continue button.
Step #29: Click the Continue button.
30
In the Title field, type 'LinkedIn Profile Scraper (Tutorial)'.
31
Click the Continue button.
Step #31: Click the Continue button.

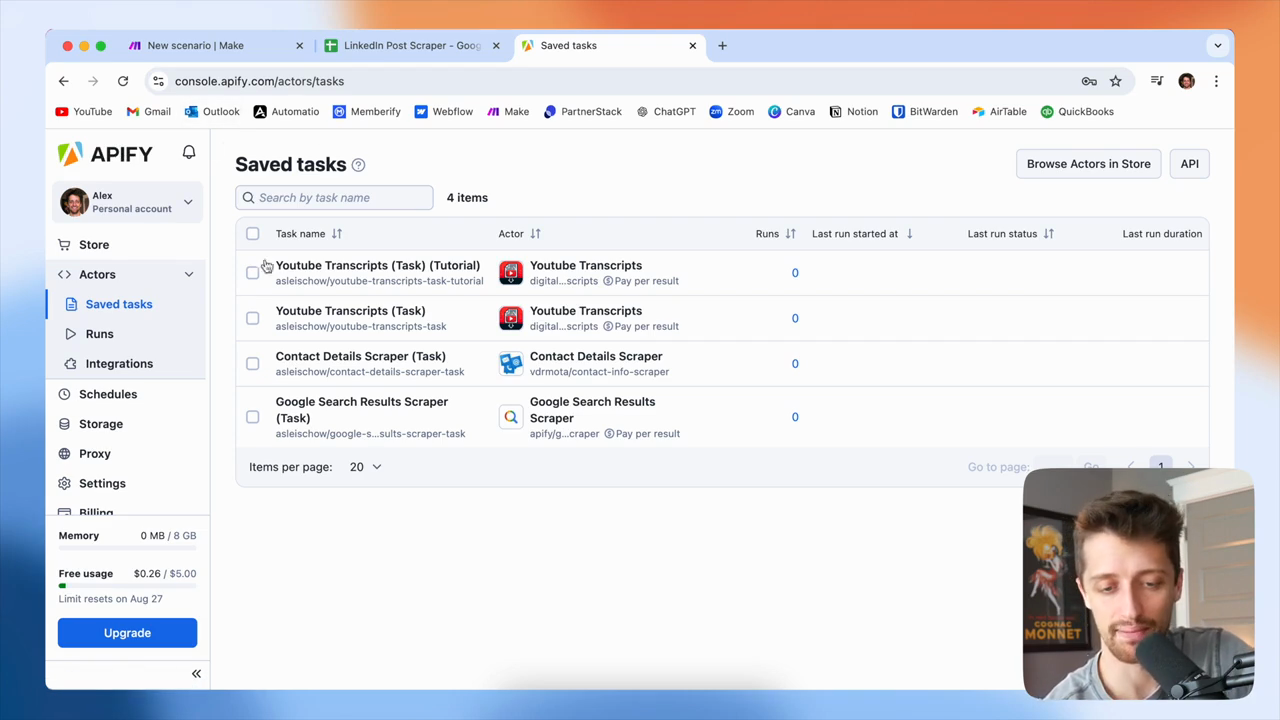
Once we have our task, it will appear here.

32
Click on Saved tasks in the left sidebar.
Step #32: Click on Saved tasks in the left sidebar.

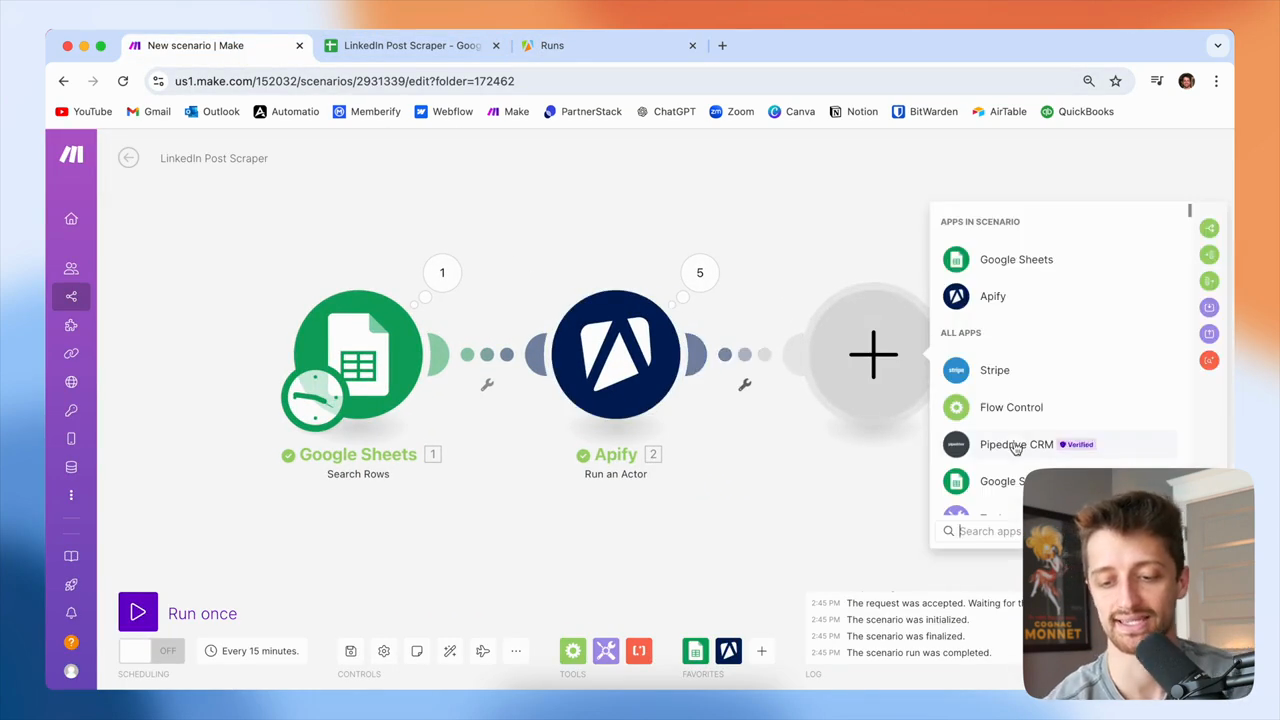
We will go into Make and add an Apify "Run Actor" module.

33
Click the plus button to add another module.
Step #33: Click the plus button to add another module.
34
In the search field, type 'Apify'.
35
Click on the 'Run an Actor' option from the Apify list.
Step #35: Click on the 'Run an Actor' option from the Apify list.

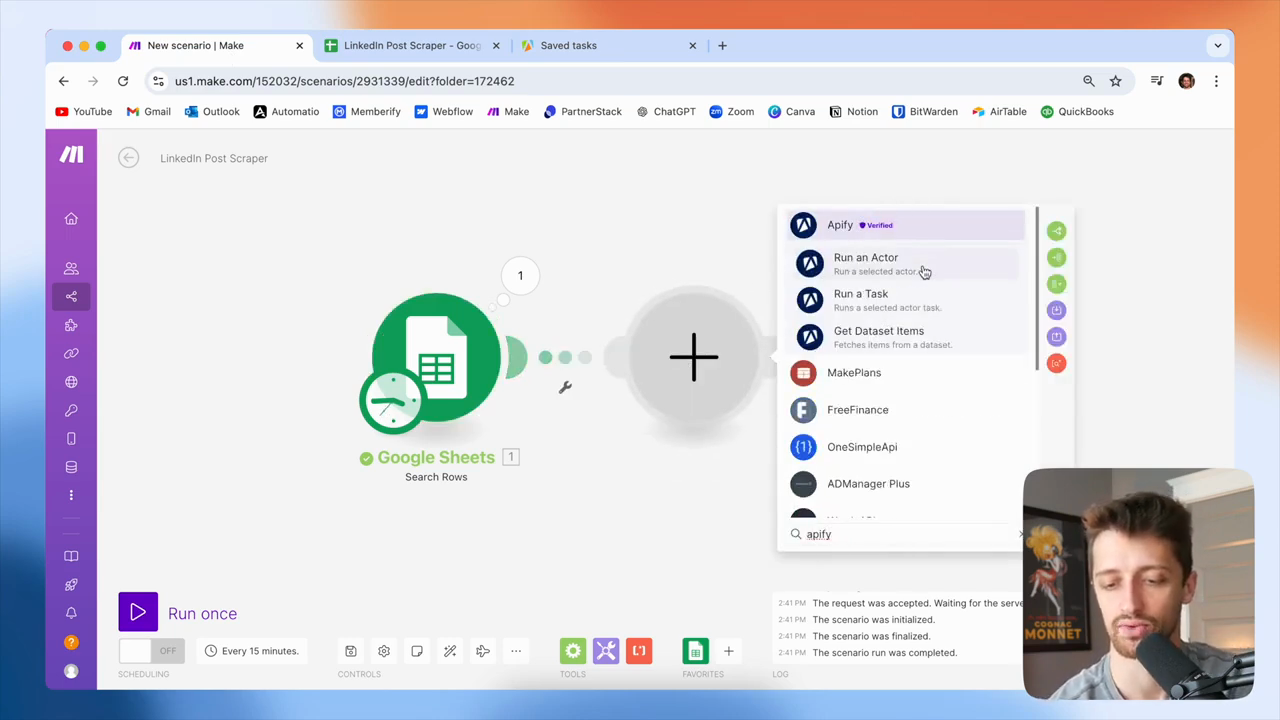
You want to connect to your Apify account. First, locate the specific actor you need.

36
Click on the 'Actor' dropdown menu.
Step #36: Click on the 'Actor' dropdown menu.

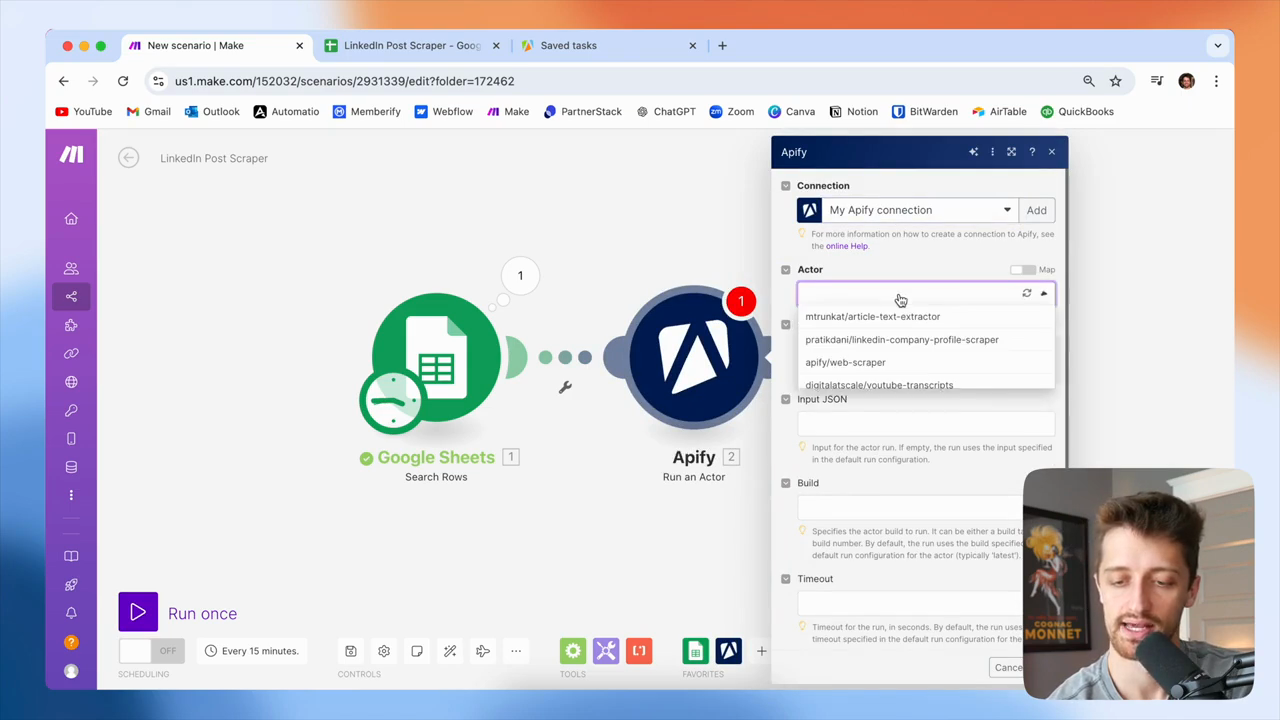
This will be the Prataki Dani LinkedIn company profile scraper.

37
Select the 'pratikdan/linkedin-company-profile-scraper' from the list.
Step #37: Select the 'pratikdan/linkedin-company-profile-scraper' from the list.

Sorry if I mispronounced the name. Okay, in this input JSON field, we will go back to Apify. Open the bot, switch to the JSON tab, and copy this in.

38
Click on the 'LinkedIn Profile Scraper' task.
Step #38: Click on the 'LinkedIn Profile Scraper' task.
39
Click on the 'JSON' tab.
Step #39: Click on the 'JSON' tab.
40
Click the JSON tab.
Step #40: Click the JSON tab.

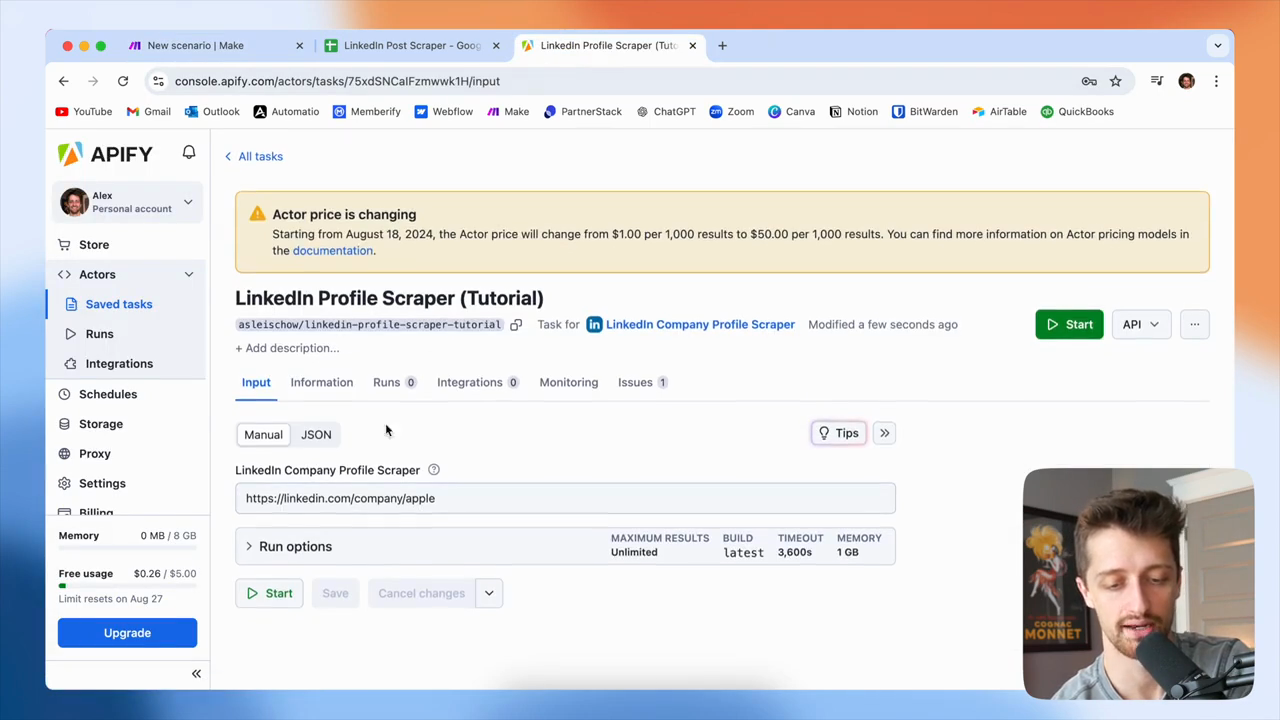
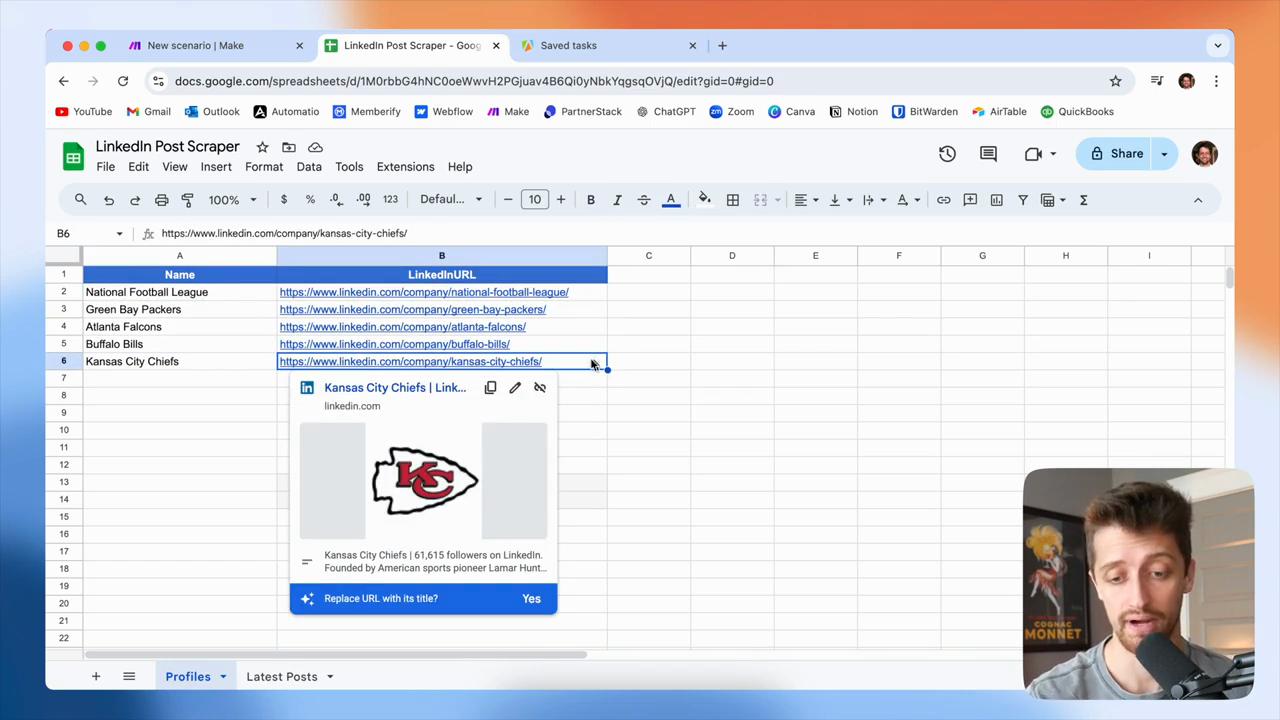
You can see we are just... Just enter the actual LinkedIn profile URL here. That’s all the bot requires. We'll paste that in here like this.

41
Paste the JSON into the Input JSON field.

Instead of searching for the Apple profile each time, we will dynamically use the LinkedIn URL from our first module or from this column.

42
Delete the static URL.
43
Click the LinkedInURL variable to map it to the URL field.
Step #43: Click the LinkedInURL variable to map it to the URL field.

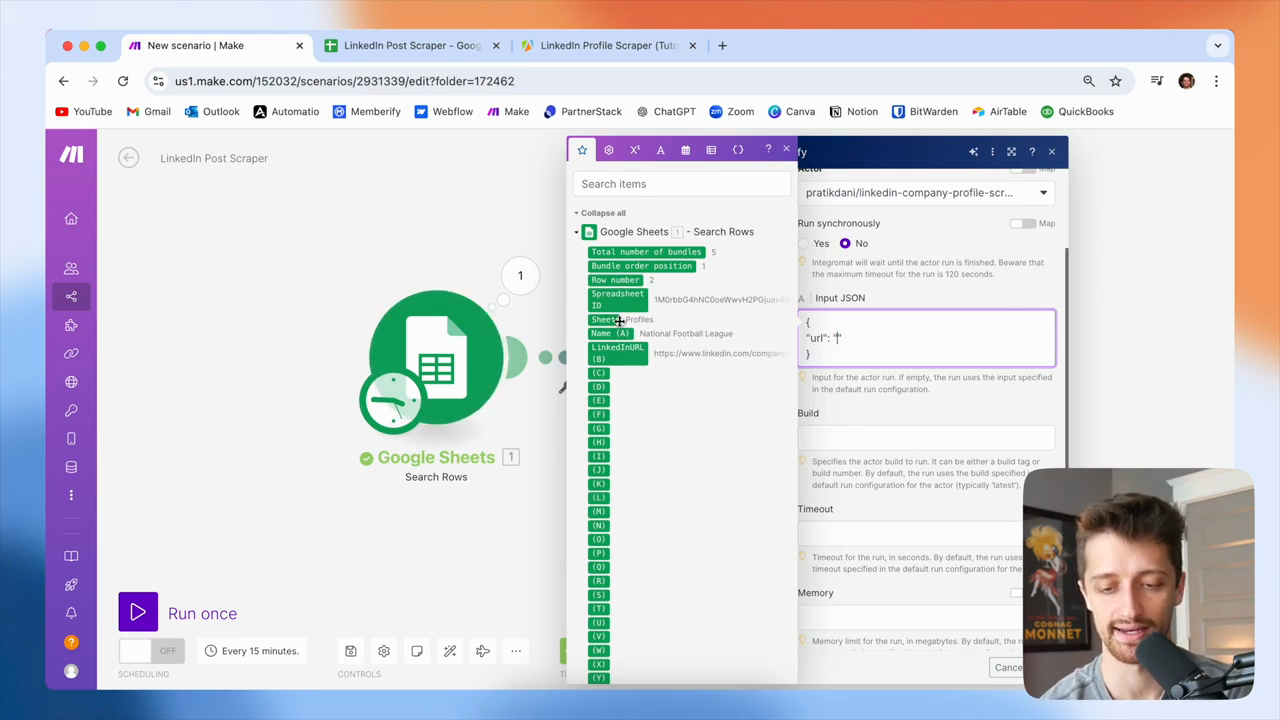
Okay? Just feed it in like that.

44
Map the LinkedInURL from the Google Sheets module into the url field in the Input JSON.
Step #44: Map the LinkedInURL from the Google Sheets module into the url field in the Input JSON.

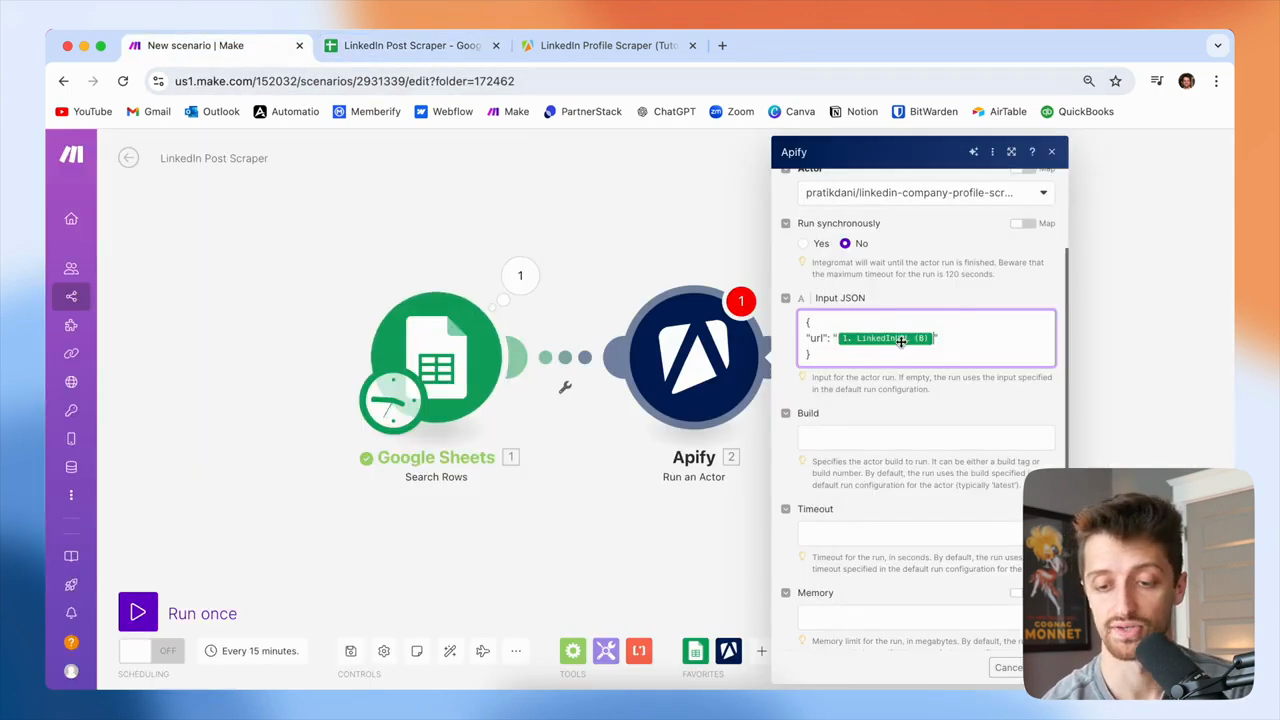
Click "OK," then run the program to test and ensure it works.

45
Click the OK button.
Step #45: Click the OK button.
46
Click the Run once button in the bottom-left corner.
Step #46: Click the Run once button in the bottom-left corner.

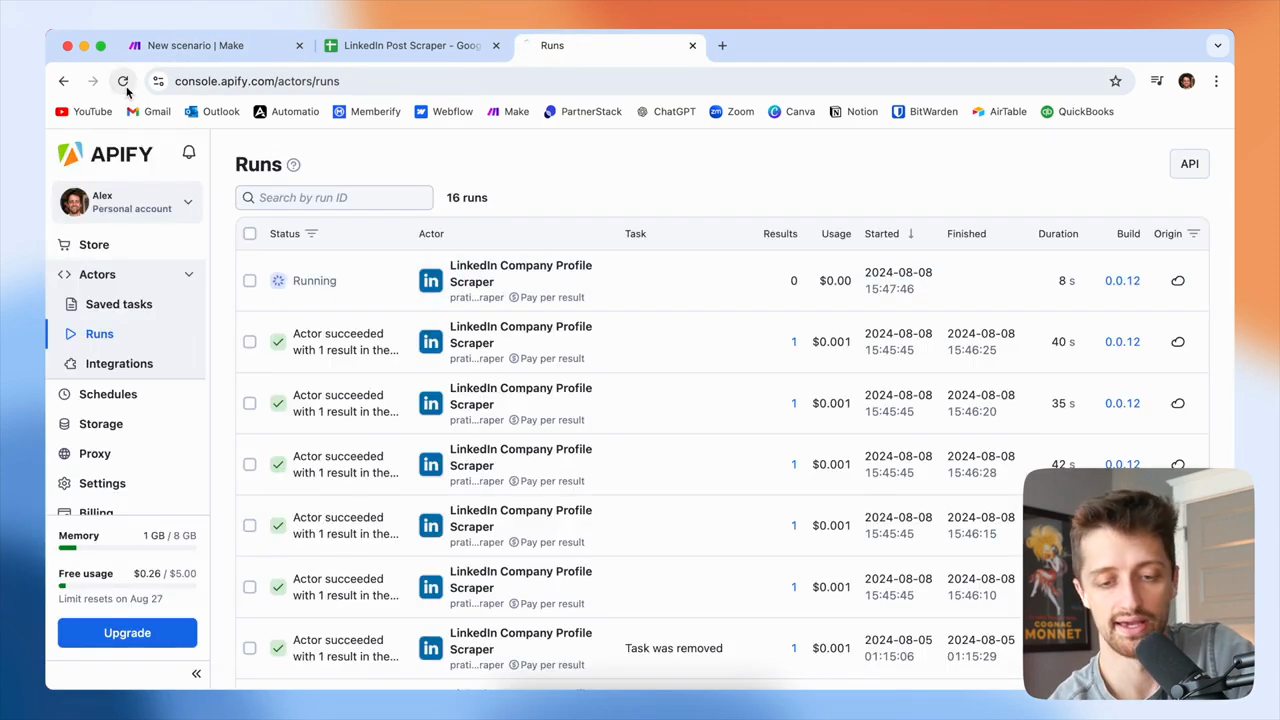
Okay, cool. It ran five times. If I go to Apify, I can see that we are now using memory. Now, we are running five different tasks simultaneously.

47
Click Runs in the left sidebar menu.
Step #47: Click Runs in the left sidebar menu.

That's not what we want to do, because many of these will take time to complete. Okay, it's gonna take... These have been running for 20 seconds and are still going. Sometimes, these may take a minute. Sometimes they take 45 seconds.

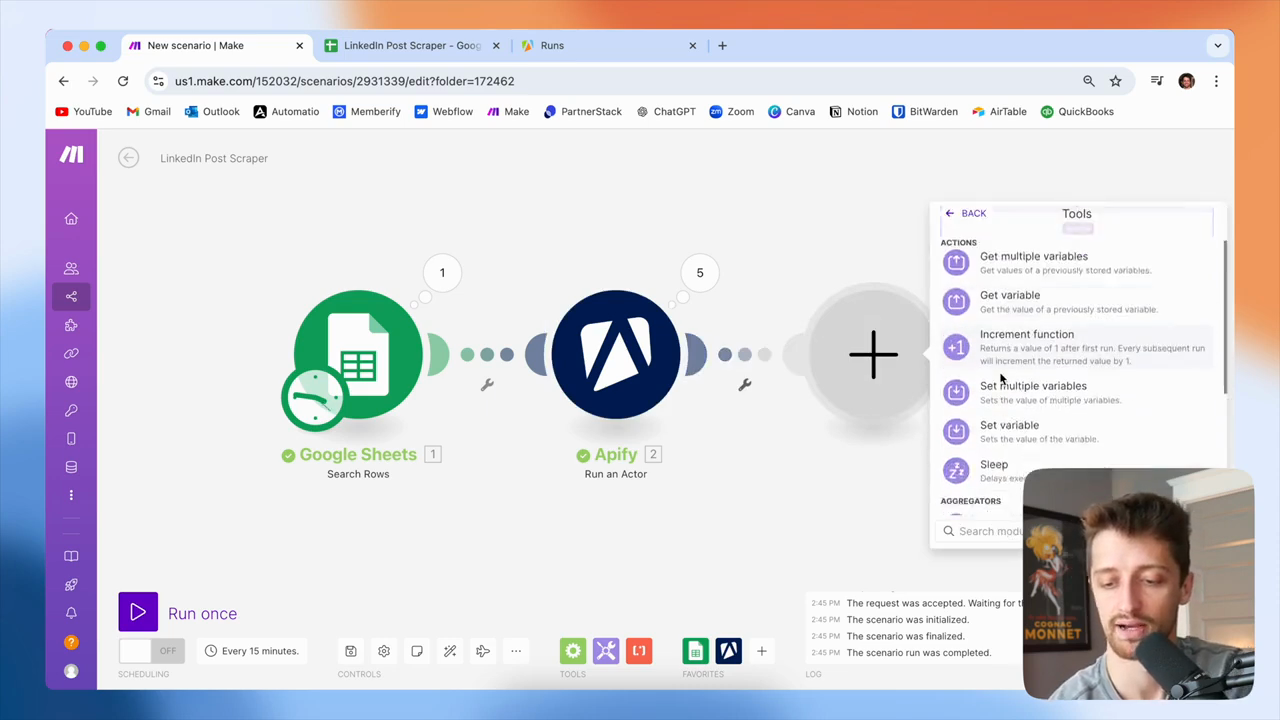
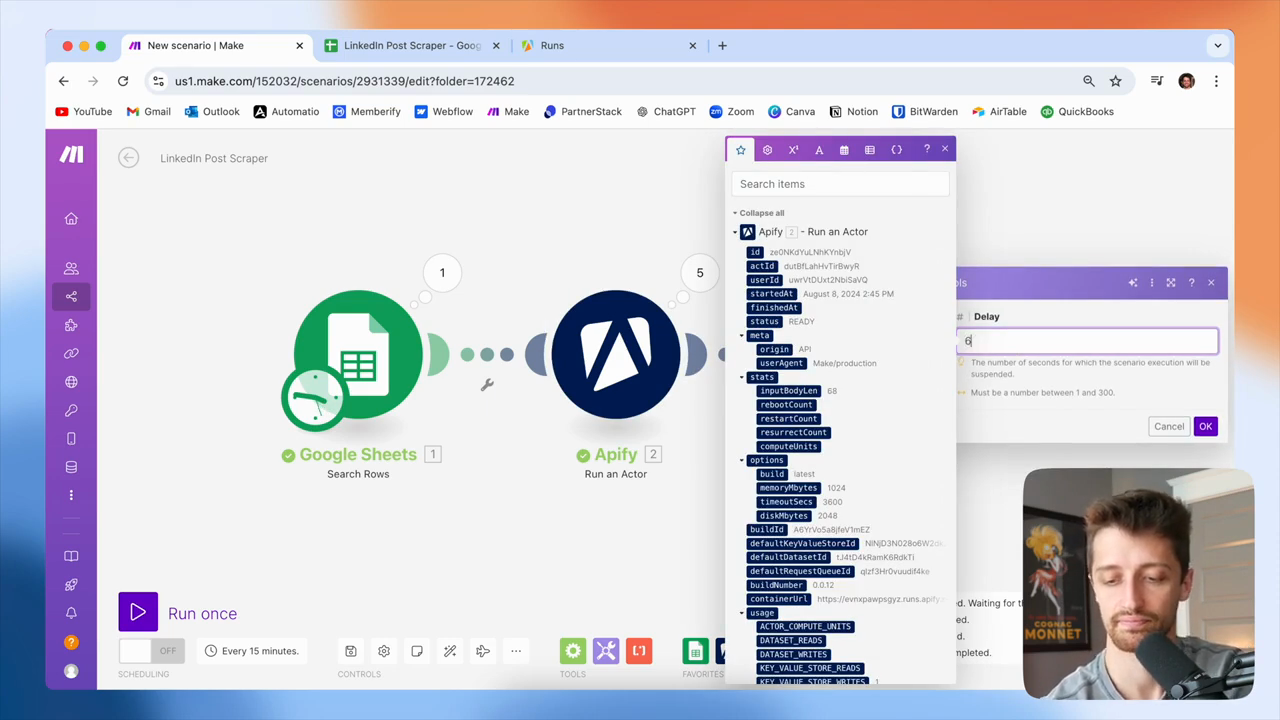
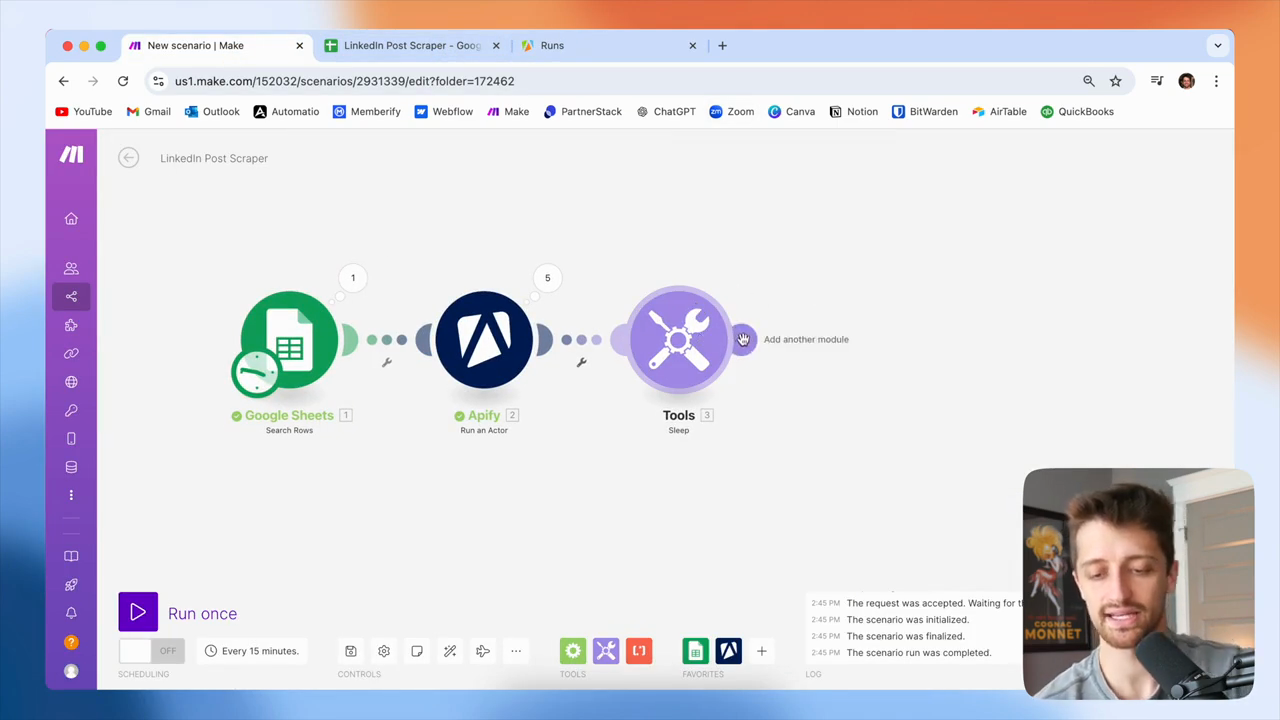
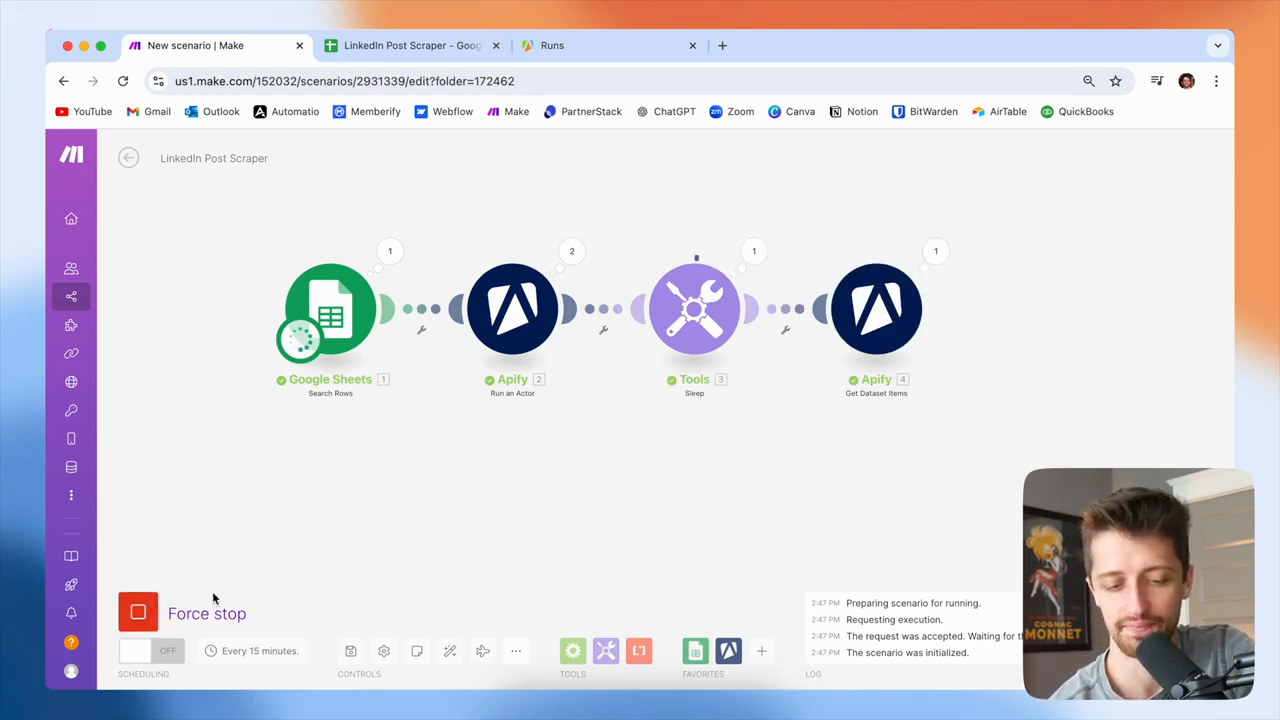
Okay, I usually take a short break here. After this module, I will add a sleep module and set it to pause for 60 seconds.

48
Click the 'Add another module' button.
Step #48: Click the 'Add another module' button.
49
Click on 'Tools' from the menu.
Step #49: Click on 'Tools' from the menu.
50
Click on the 'Sleep' option.
Step #50: Click on the 'Sleep' option.
51
In the 'Delay' field, type '60'.
52
Click the 'OK' button.
Step #52: Click the 'OK' button.

And that way, our... The small actor in Apify can scrape the LinkedIn profile we need. These all take about 30 to 40 seconds, so a minute should give us plenty of time. We're going to sleep. Next, we need to get the dataset that we will retrieve with these actors.

53
Click the Add another module button.
Step #53: Click the Add another module button.
54
From the list of apps, click Apify.
Step #54: From the list of apps, click Apify.
55
Under Searches, click Get Dataset Items.
Step #55: Under Searches, click Get Dataset Items.

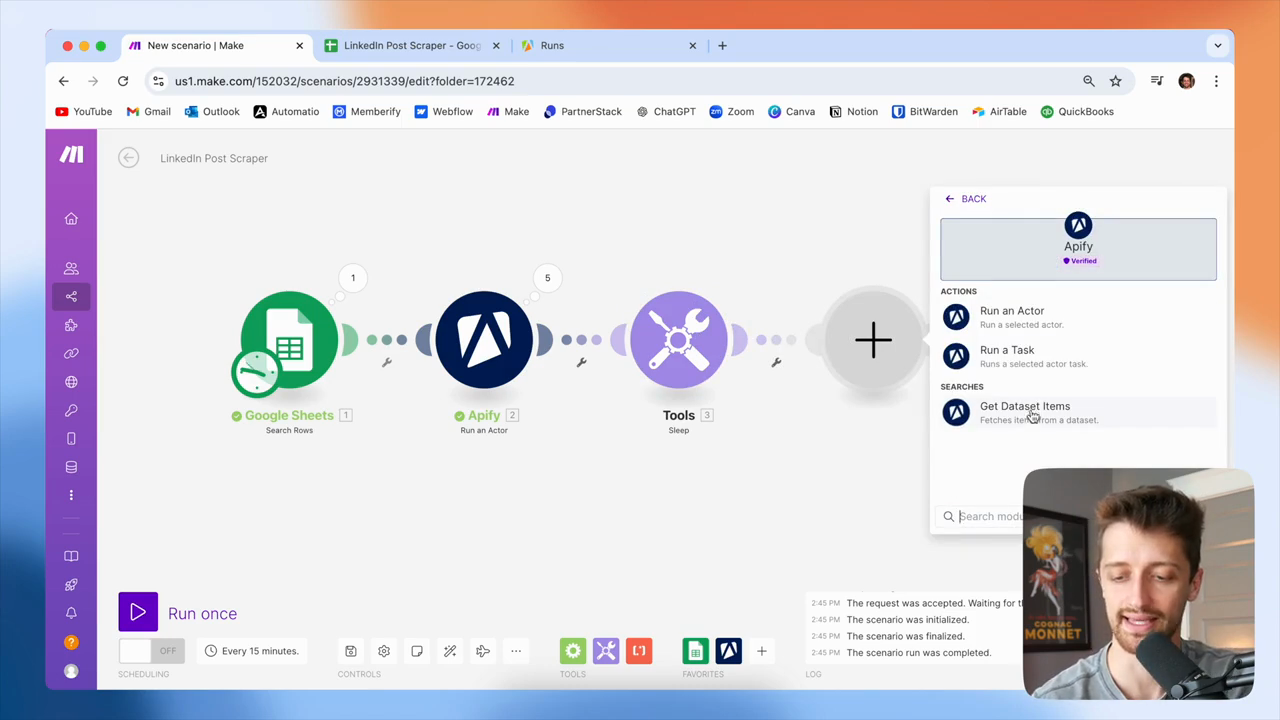
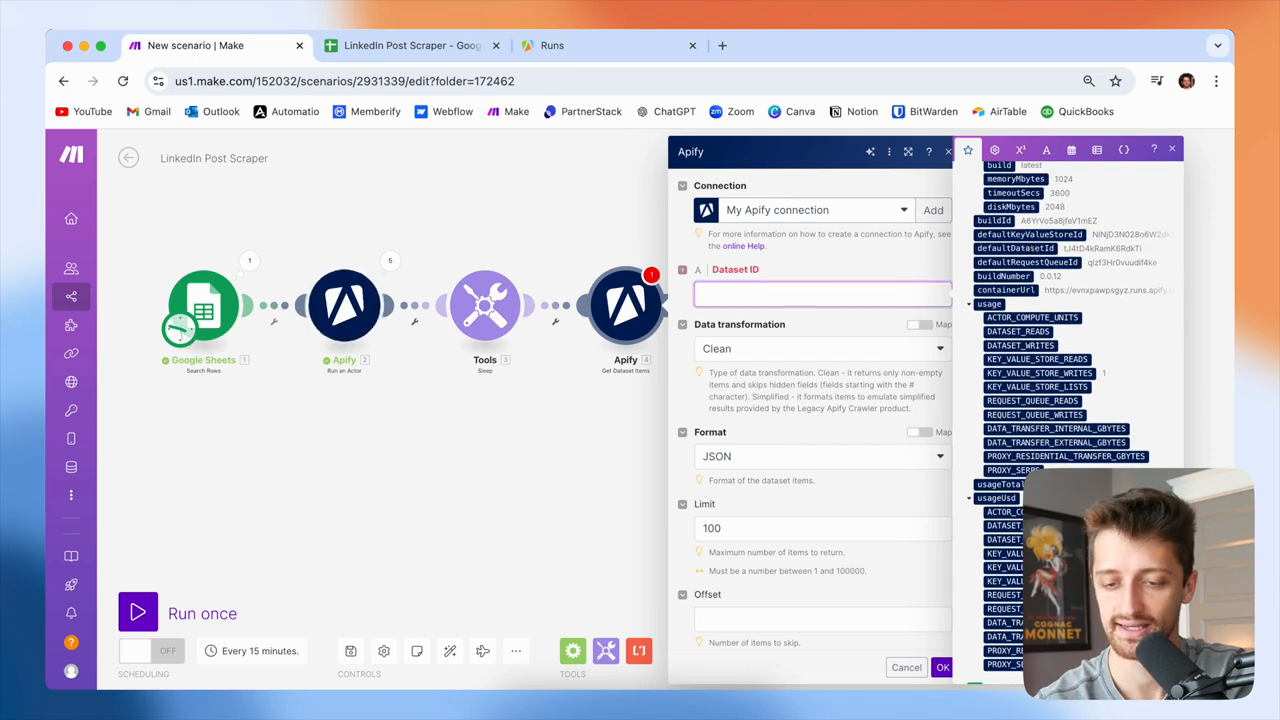
We launch the task or run the actors, which sends the bot to LinkedIn to collect the data. We need to retrieve the contents of the package they collect for us. This is the purpose of the fourth module. We need to provide a dataset ID so it can unpack and retrieve the contents for us.

56
Click into the Dataset ID field.
Step #56: Click into the Dataset ID field.

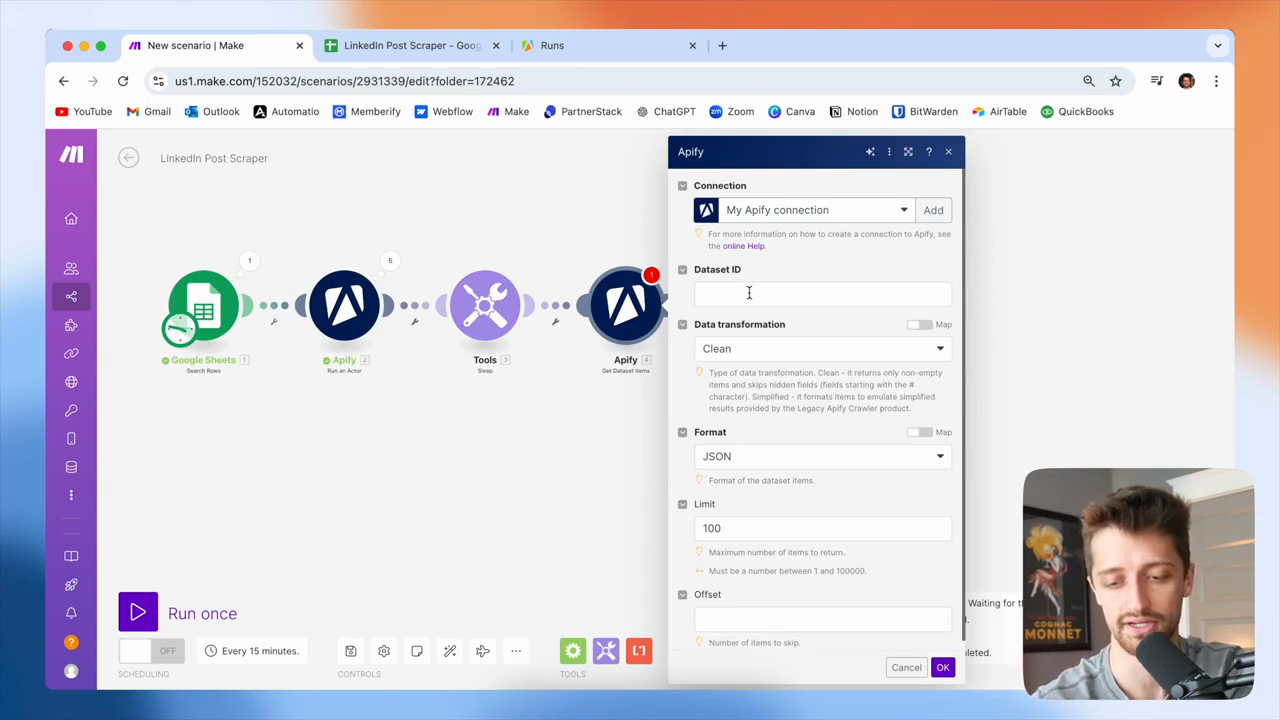
All right? We're going to feed it this. Where is it? Default dataset ID for our second module, okay?

57
Select 'defaultDatasetId' from the data mapping panel.
Step #57: Select 'defaultDatasetId' from the data mapping panel.

This will gather all the information and posts from LinkedIn, so we can use them now. We'll leave the limit at one hundred. That's fine.

58
Click the OK button.
Step #58: Click the OK button.

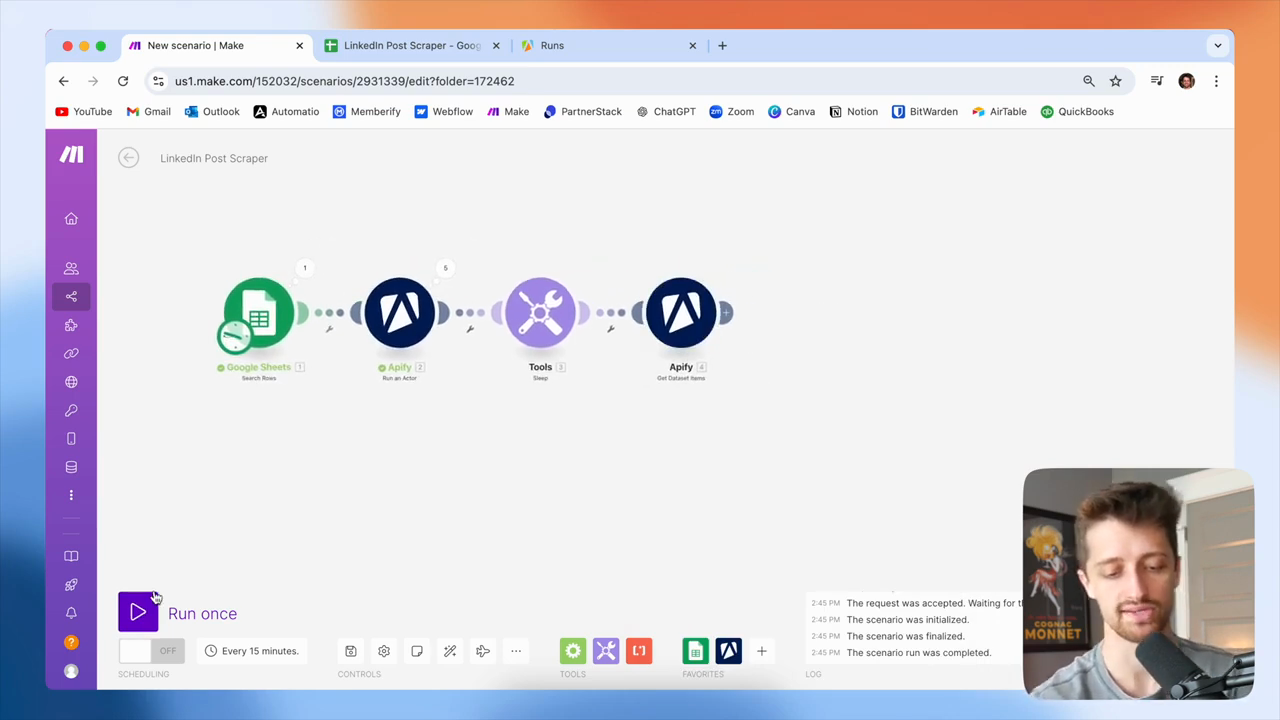
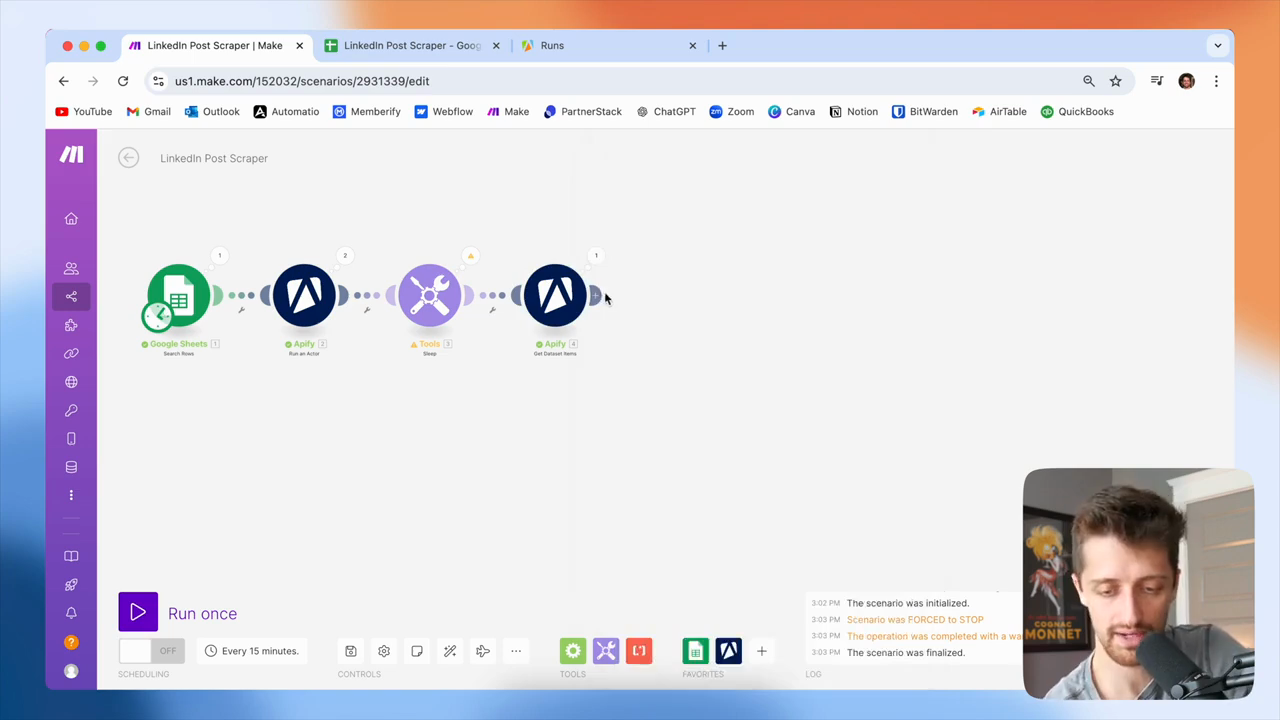
All right? Next, we'll run this again to check how it looks.

59
Click the Run once button in the bottom-left corner.
Step #59: Click the Run once button in the bottom-left corner.

Only one of our actors is running right now. We will now wait for 60 seconds while this runs. We need to do this because if we try to get data from our actor before it finishes running, we won't retrieve any results.

60
Click the refresh button in your browser.
Step #60: Click the refresh button in your browser.
61
Sleep for 60 seconds to allow the actor to complete its run before retrieving data.

We need to wait 60 seconds for this to finish. This one finished in 19 seconds. Once it's complete, we can use this module to retrieve the data. We'll wait another 30 seconds, then continue. Okay, that's done now.

62
Click the Stop button.
Step #62: Click the Stop button.

I'll stop here because I don't want to go through all of these. Now, we can see what we got from the get dataset item module.

63
Click the Run once button.
Step #63: Click the Run once button.
64
Click on the magnifying glass icon to view the operation details.
Step #64: Click on the magnifying glass icon to view the operation details.
65
Click on the Output section to expand it.
Step #65: Click on the Output section to expand it.

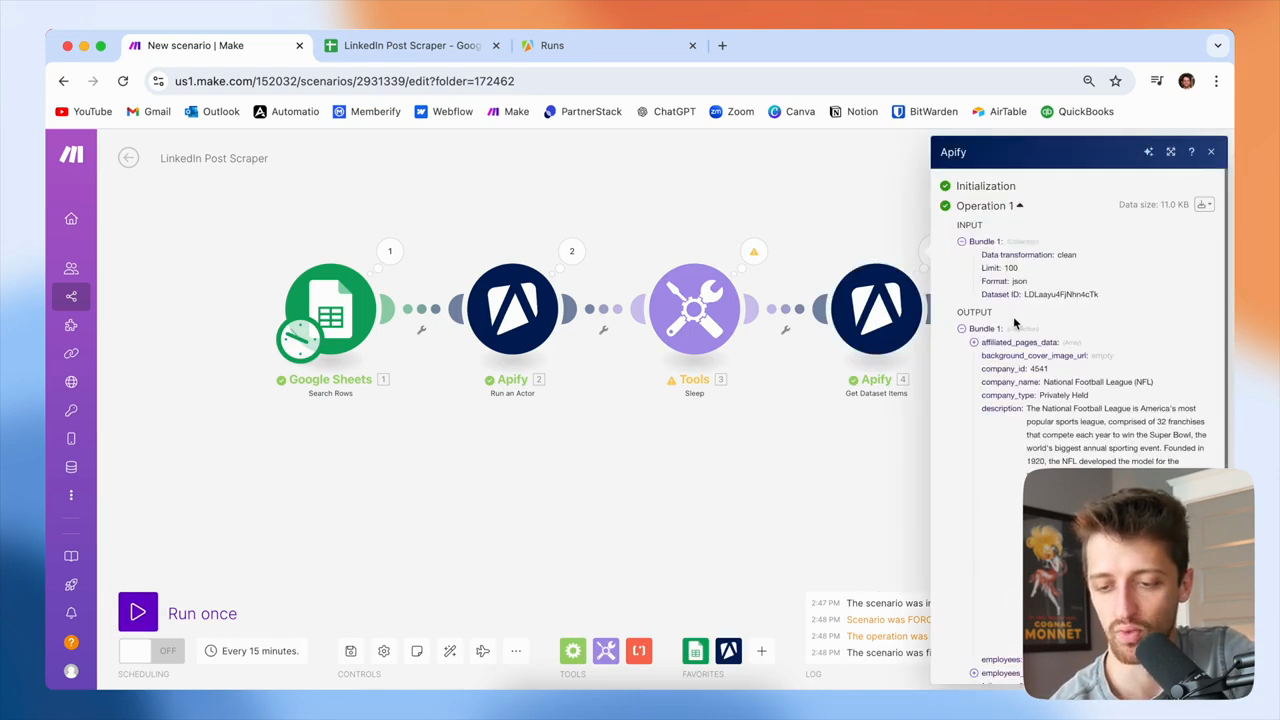
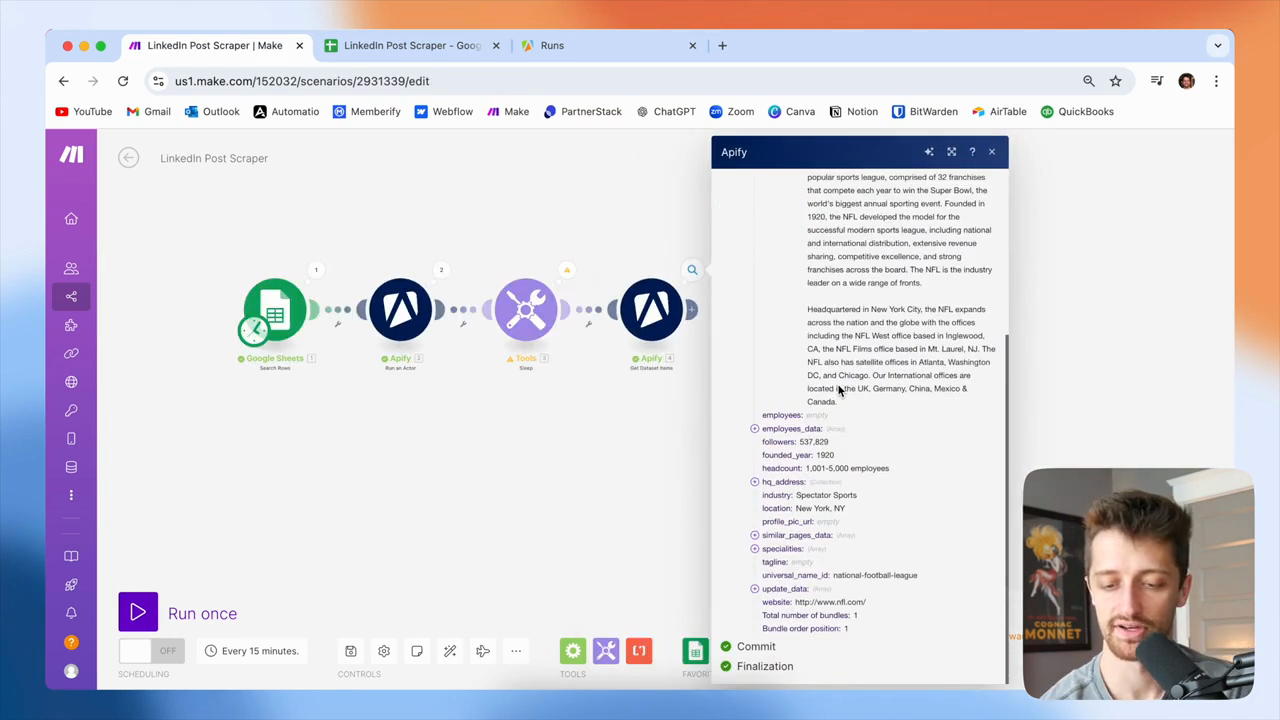
If I scroll down in my Apify module to the update data array, you can see that we now have the 10 latest LinkedIn posts from the NFL, all within this array.

66
Scroll down in the Apify module output.
Step #66: Scroll down in the Apify module output.
67
Locate the 'update_data' array in the output.
Step #67: Locate the 'update_data' array in the output.

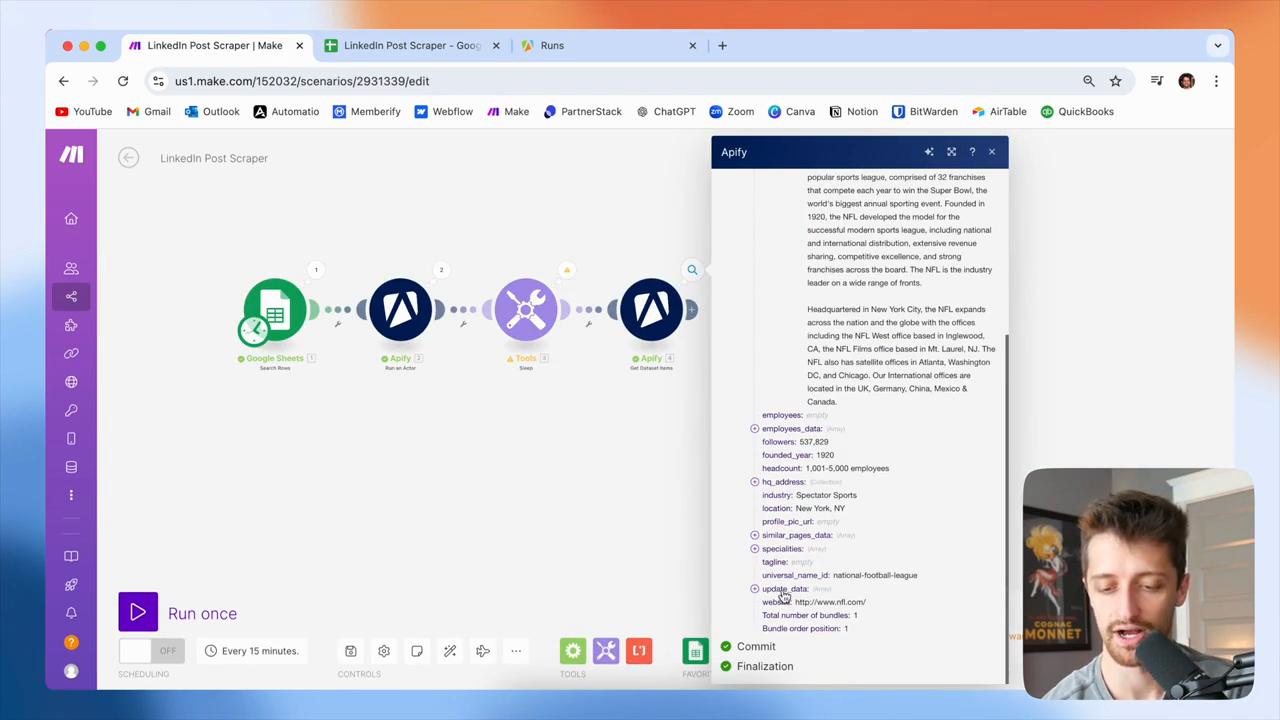
Okay? You can see them all here. I keep emphasizing that this is an array because it's very important. When you receive data as an array in make.com and want to perform an action on every item, not just the first one, you need to use an iterator. An iterator goes through each item in the array and, in our case, adds each item to our Google Sheet.

68
Click the plus button to add a new module.
Step #68: Click the plus button to add a new module.
69
Click on Flow Control.
Step #69: Click on Flow Control.
70
Click on Iterator.
Step #70: Click on Iterator.

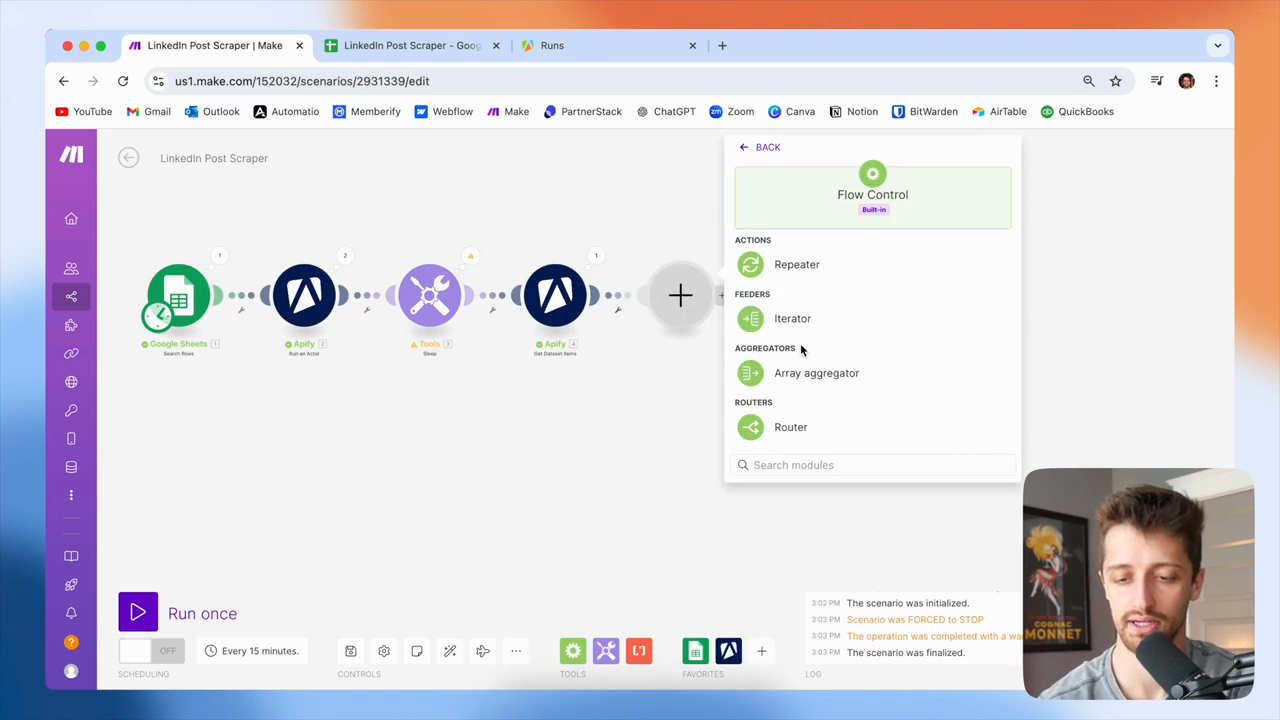
If we didn't do this, we would only add the first item in the array to our Google Sheet. We want to add all 10 posts to our Google Sheet. To do that, we need to iterate through this array.

71
Iterate through the array by dragging the 'update_data' array into the Array field.
Step #71: Iterate through the array by dragging the 'update_data' array into the Array field.

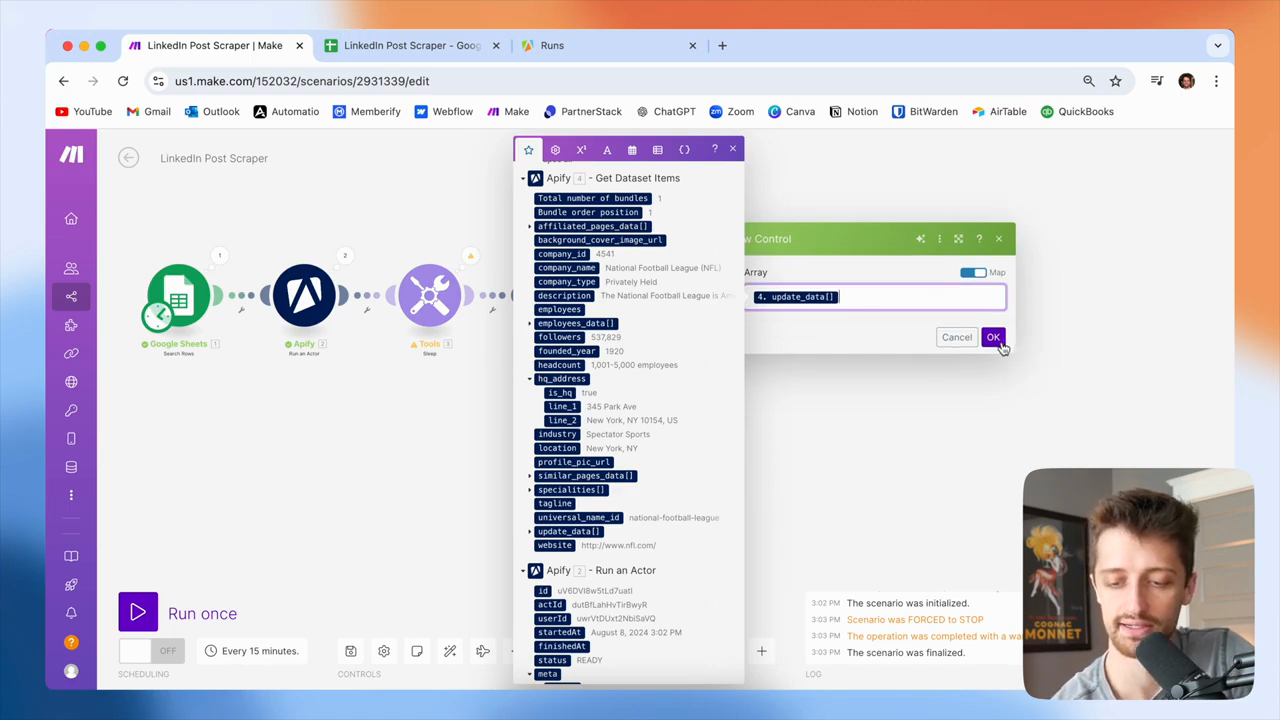
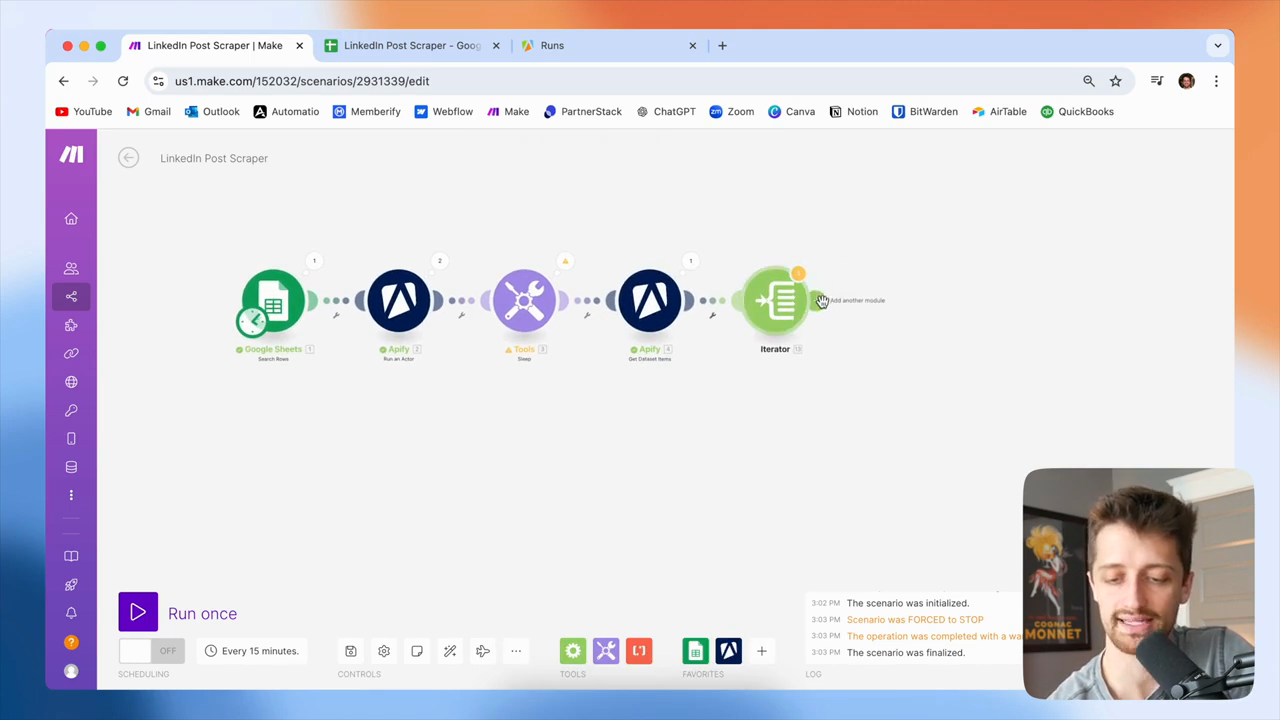
Okay? We will create an iterator and feed it the update data array. If you're new to make.com, you can identify an array by looking for two square brackets at the end.

72
Identify an array by looking for the two square brackets at the end of the data item.
Step #72: Identify an array by looking for the two square brackets at the end of the data item.

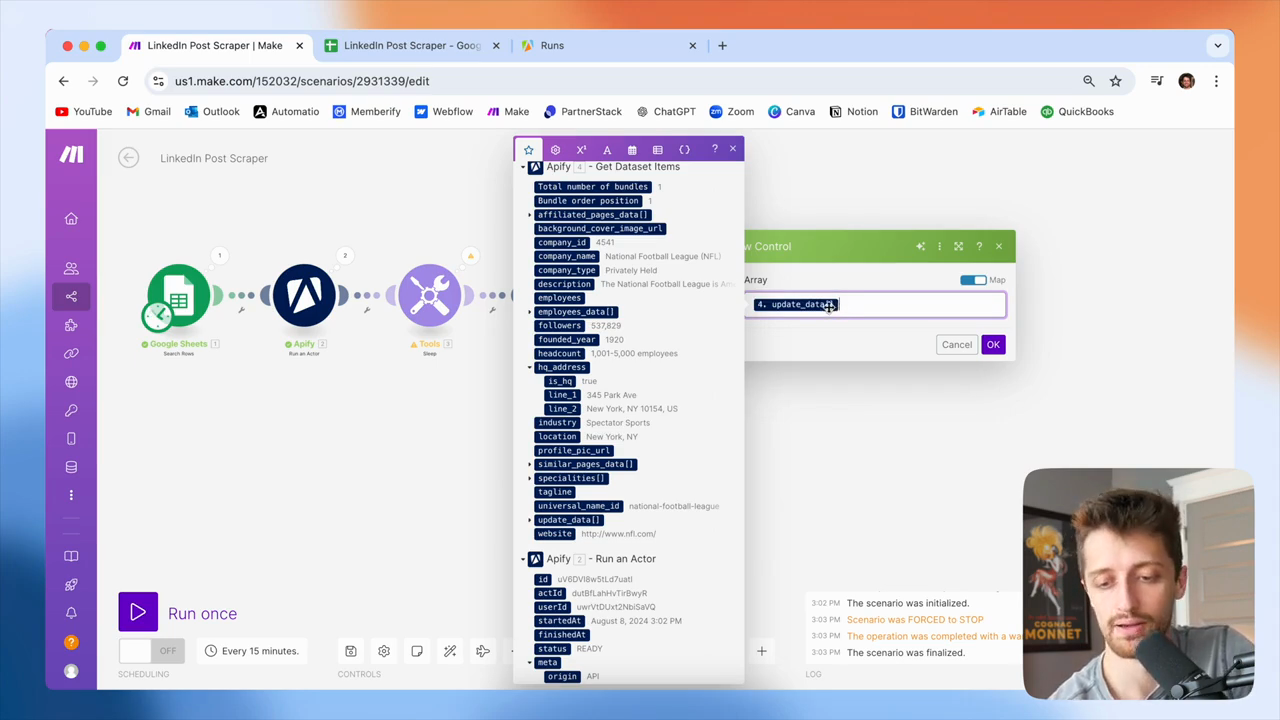
Okay? You can see here, these two square brackets indicate that this is an array. So, we could iterate through. Okay? Feed that into your iterator, then let's see.

73
Map the 'update_detail' array to the 'Array' field.
Step #73: Map the 'update_detail' array to the 'Array' field.
74
Click the OK button.
Step #74: Click the OK button.

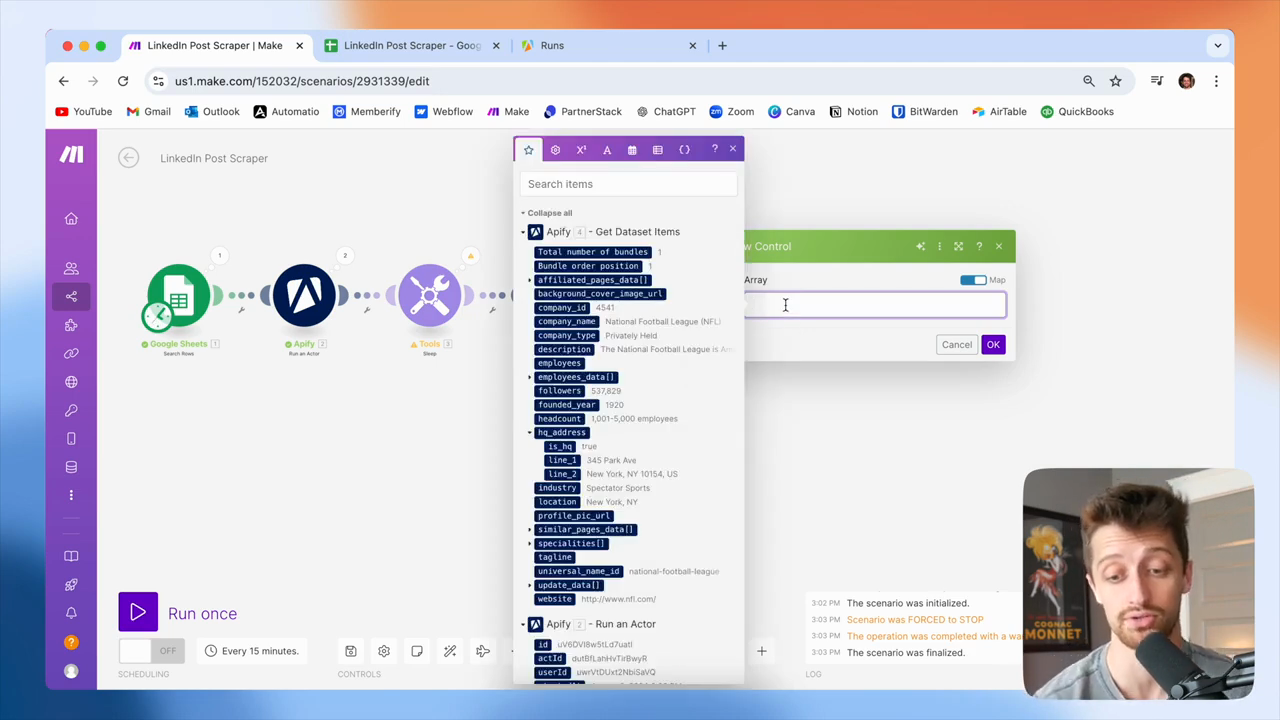
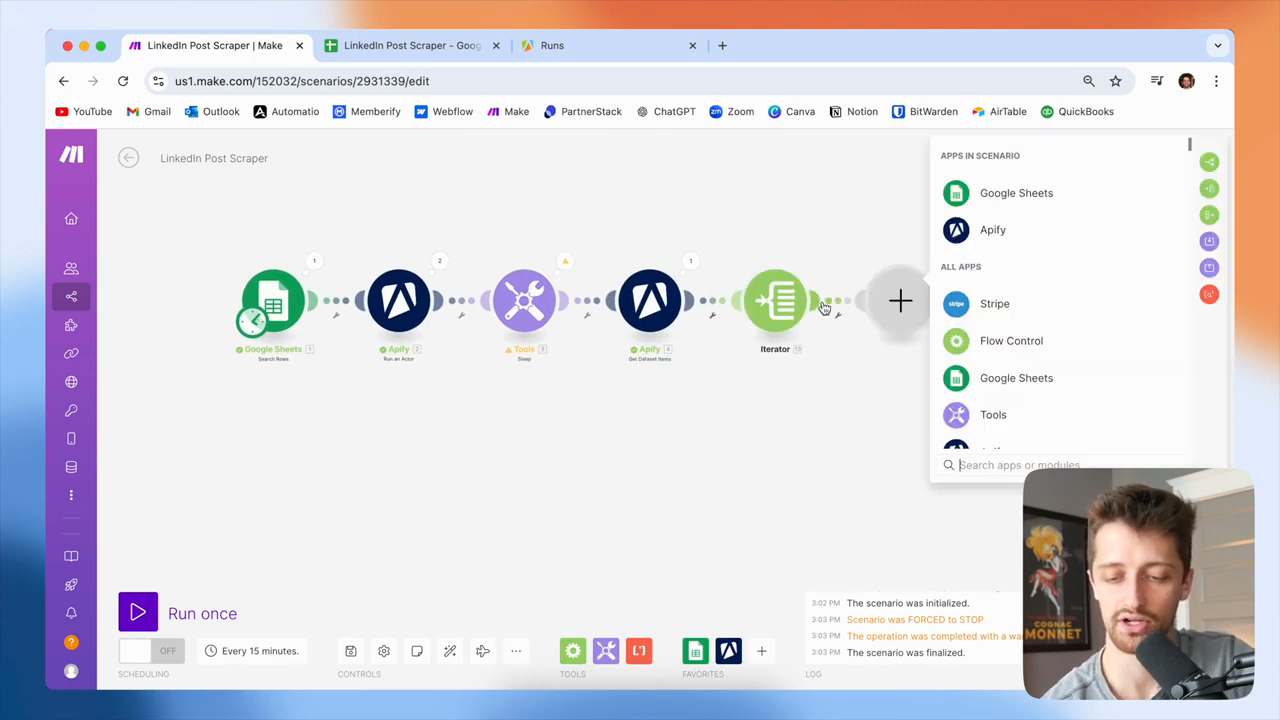
Next, I will add a Google Sheets module. We want to add each post as a new row to our Google Sheet.

75
Click the plus icon to add a new module.
Step #75: Click the plus icon to add a new module.
76
Click on the Google Sheets app.
Step #76: Click on the Google Sheets app.
77
Click the 'Add a Row' action.
Step #77: Click the 'Add a Row' action.

Okay? It will map to this file, like this.

78
Click into the Spreadsheet ID field.
Step #78: Click into the Spreadsheet ID field.
79
Select the 'LinkedIn Post Scraper' spreadsheet.
Step #79: Select the 'LinkedIn Post Scraper' spreadsheet.

I have my sheet name and my latest post. I will add them to this sheet, then map the fields.

80
Click into the 'Sheet Name' field.
Step #80: Click into the 'Sheet Name' field.
81
Select the 'Latest Posts' sheet.
Step #81: Select the 'Latest Posts' sheet.

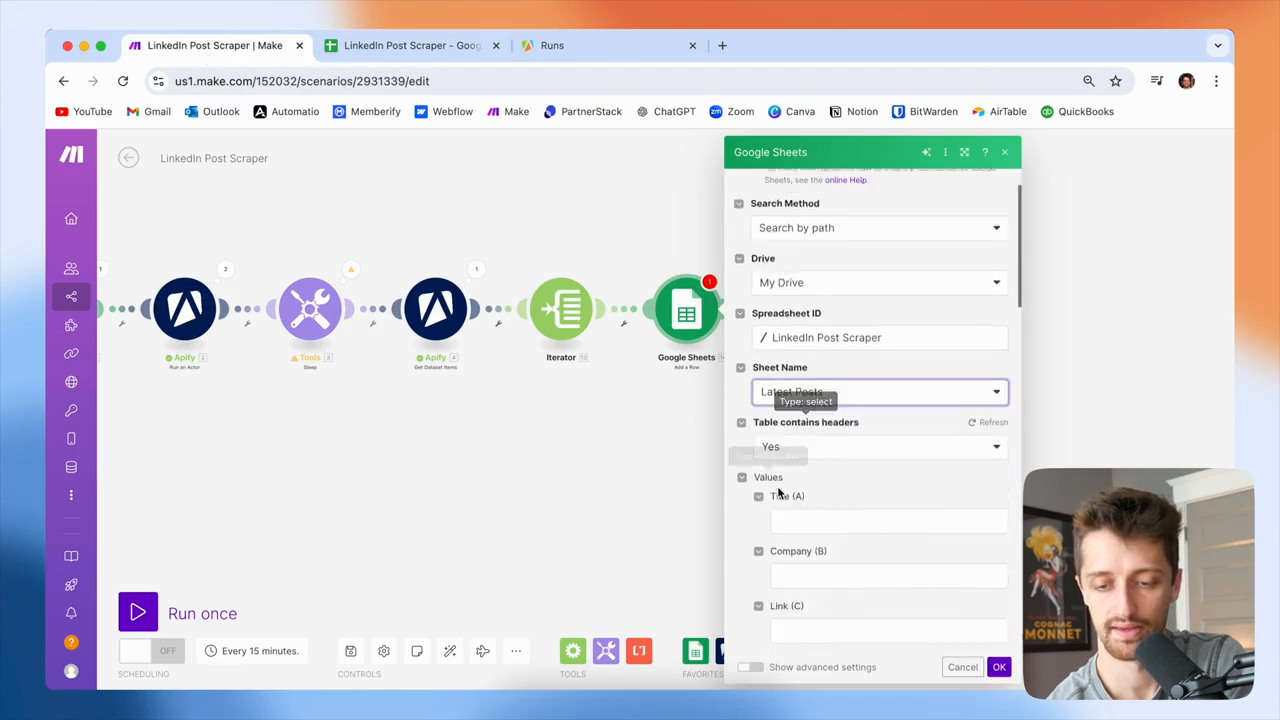
Okay? Importantly, I want to map the fields from my Iterator. Okay? So Title... I don't have a title from LinkedIn, but we do have the text of the post. I'll update my sheet accordingly.

I will add the post's text from my Iterator.

82
Map the text of the post from the iterator into the 'Title (A)' field.
Step #82: Map the text of the post from the iterator into the 'Title (A)' field.

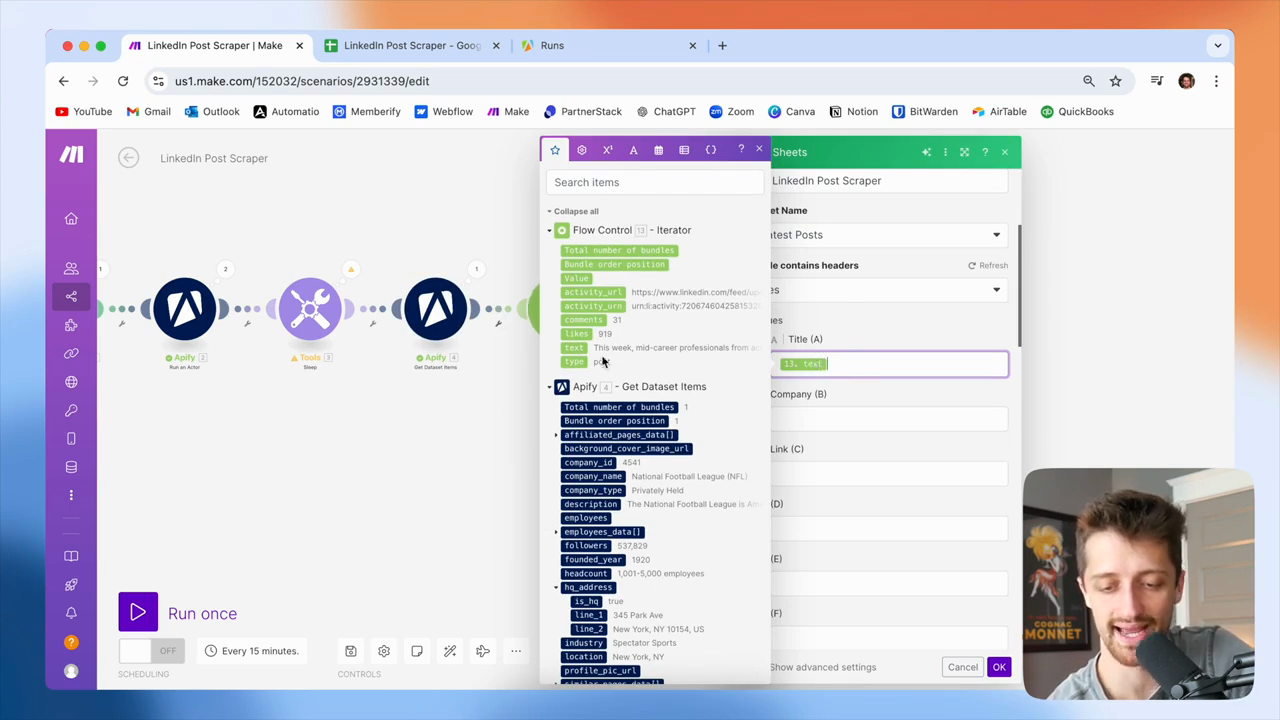
The company name, let's see. I can get that from my Google Sheet here—NFL.

83
Map the 'Name (A)' field from the Google Sheet into the 'Company (B)' field.
Step #83: Map the 'Name (A)' field from the Google Sheet into the 'Company (B)' field.

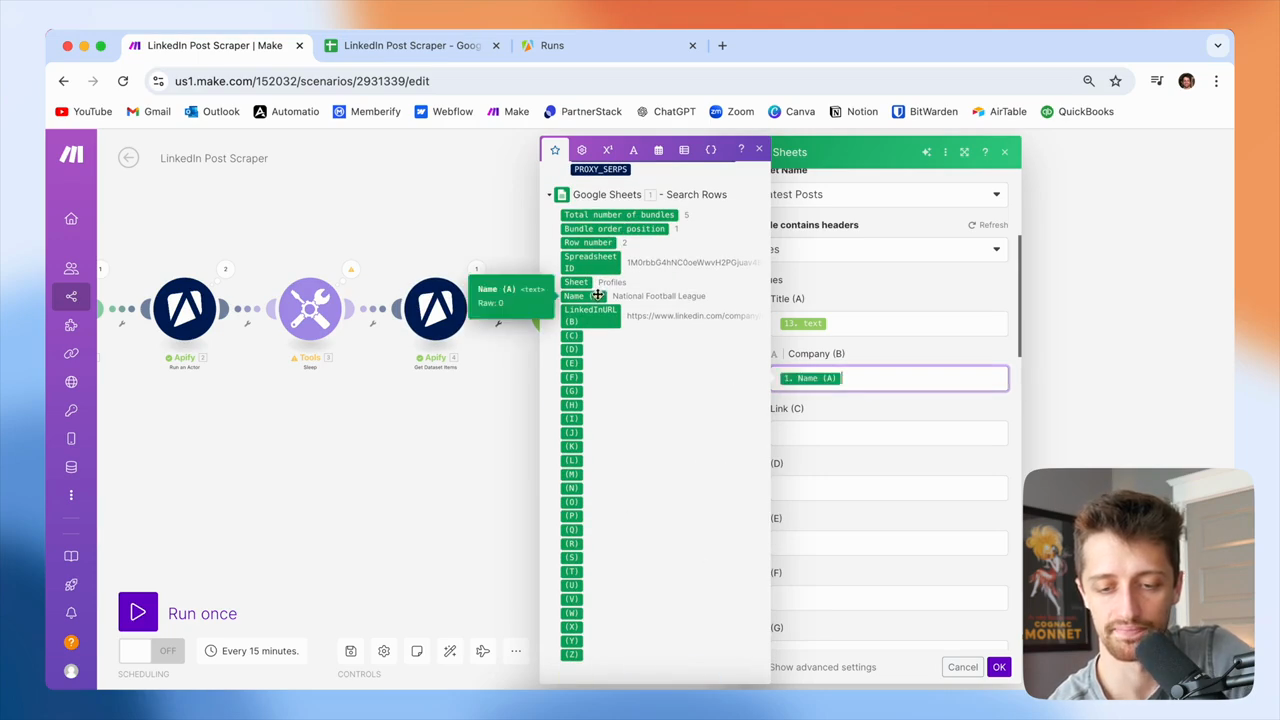
Perfect. Then I will get my link from my actual iterator.

84
Drag the activity_url from the Iterator to the Link (C) field.
Step #84: Drag the activity_url from the Iterator to the Link (C) field.

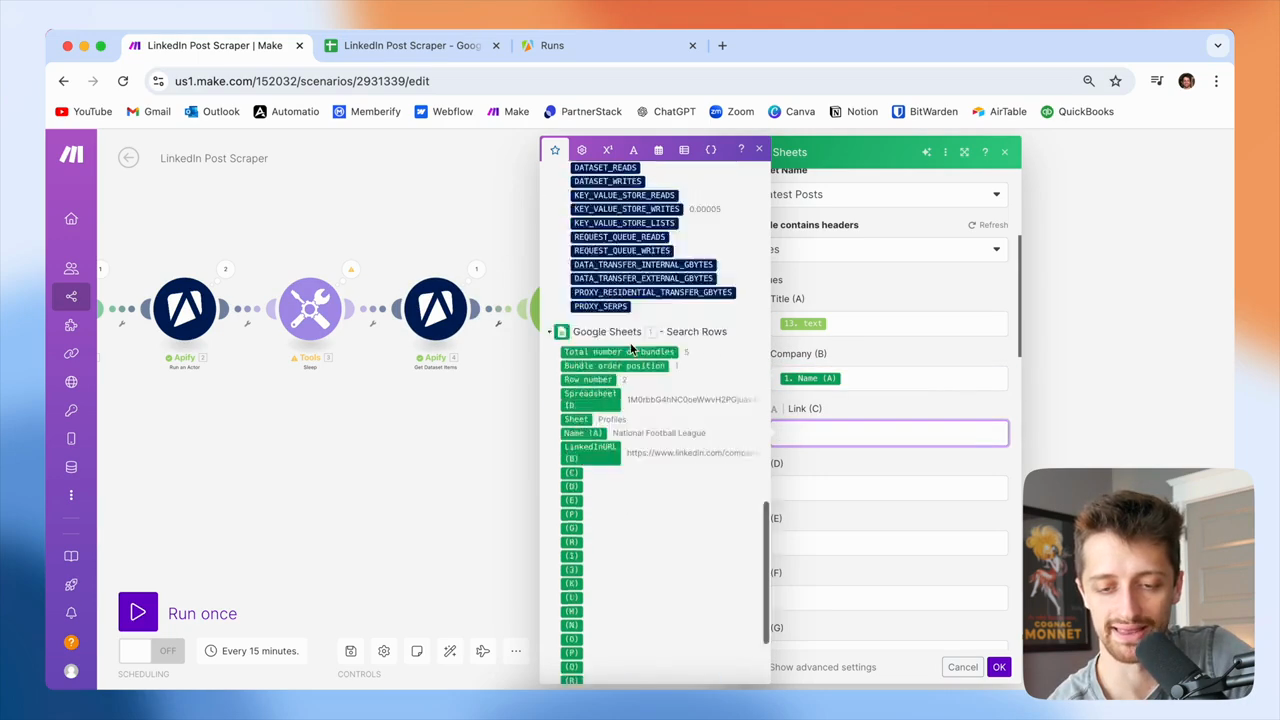
I'll include that in case I want to view the LinkedIn post directly on their page. We are mapping fields here. Then, click OK, save, and run the process to see how it works.

85
Click the OK button.
Step #85: Click the OK button.
86
Click the Save button.
Step #86: Click the Save button.
87
Click the Run once button.
Step #87: Click the Run once button.

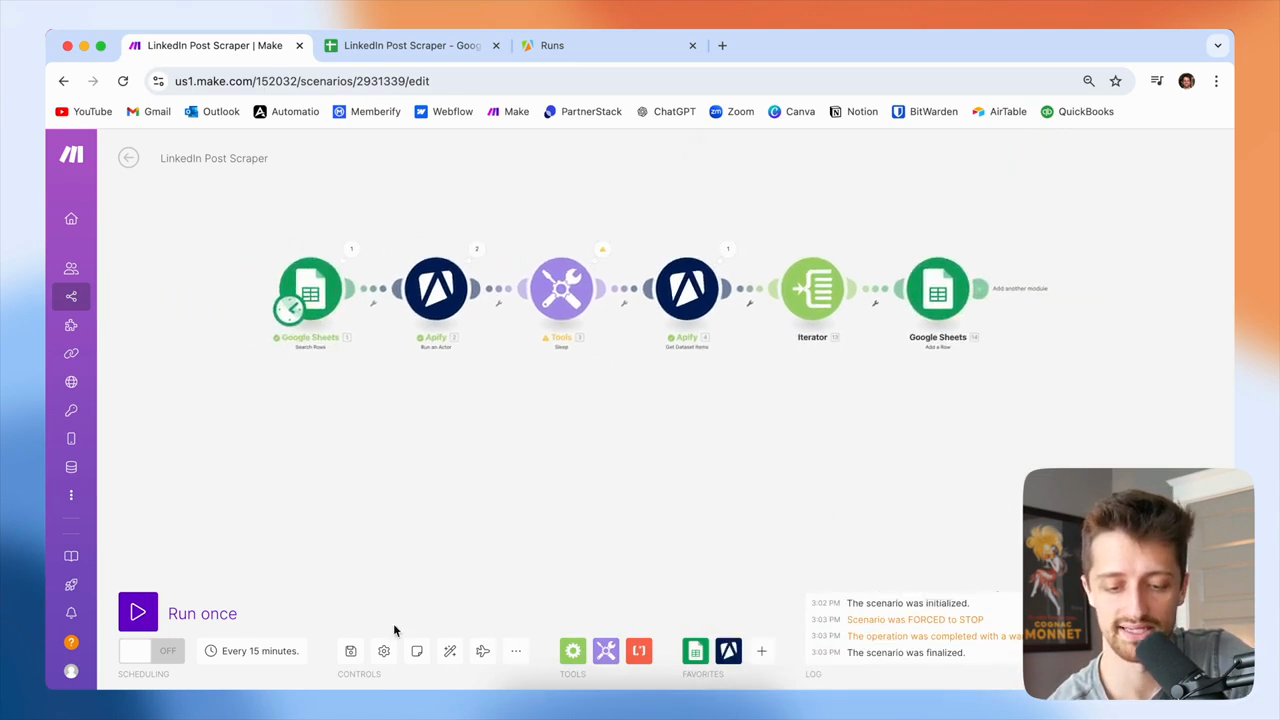
As this runs, I'll walk you through at a high level what we're doing.

88
Click the LinkedIn Post Scraper tab.
Step #88: Click the LinkedIn Post Scraper tab.

It's running now. We just sent the NFL's LinkedIn profile URL to our Apify profile scraper. Okay? Apify will take the URL and scrape it for the latest posts.

89
The workflow starts with a Google Sheets 'Search Rows' module to find the LinkedIn URLs.
Step #89: The workflow starts with a Google Sheets 'Search Rows' module to find the LinkedIn URLs.
90
An Apify 'Run an Actor' module is used to scrape the latest posts from the provided URL.
Step #90: An Apify 'Run an Actor' module is used to scrape the latest posts from the provided URL.

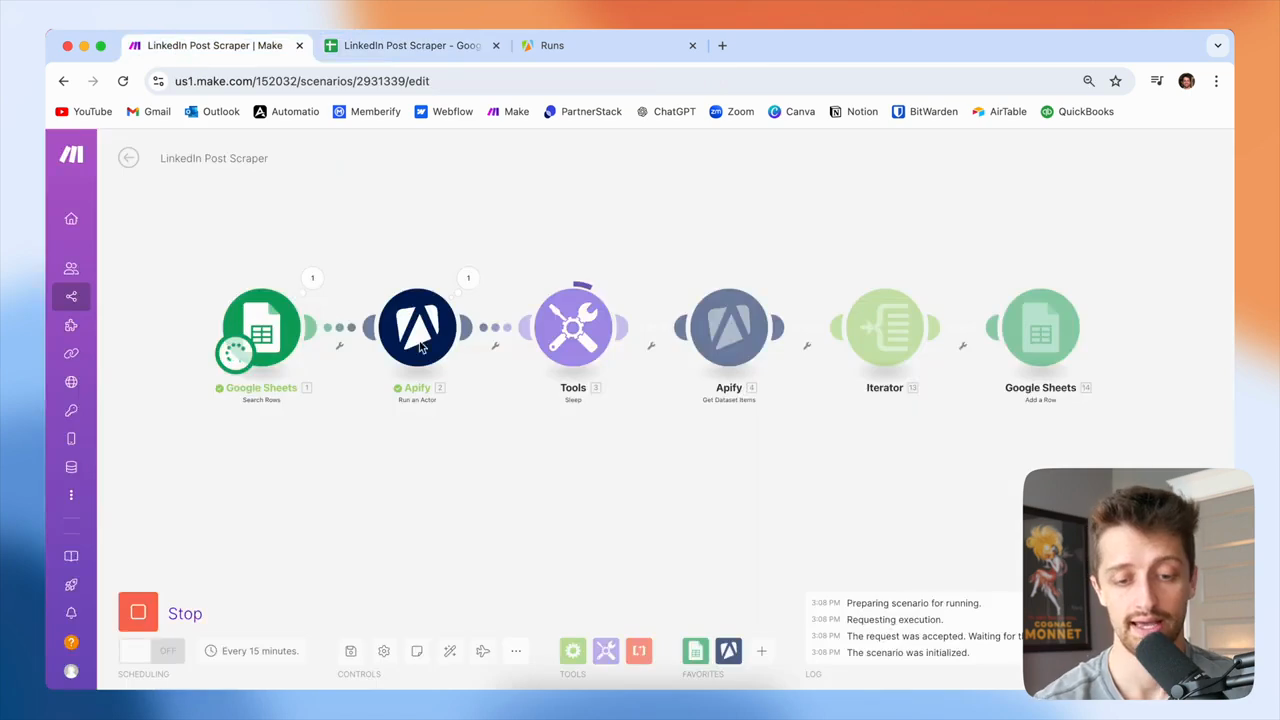
And normally, that takes... It seems to take less than 10 seconds each time. Okay? I will hold here in my scenario for 60 seconds.

91
A 'Tools' module is configured to sleep, pausing the scenario to allow the Apify actor to finish running.
Step #91: A 'Tools' module is configured to sleep, pausing the scenario to allow the Apify actor to finish running.

I can lower this to 25. It doesn't take long because I need to ensure this actor is finished and has retrieved the information before I can access it with my fourth module.

92
Once the actor has finished, an Apify 'Get Dataset Items' module retrieves the scraped information.
Step #92: Once the actor has finished, an Apify 'Get Dataset Items' module retrieves the scraped information.
93
An 'Iterator' module processes each scraped post individually.
Step #93: An 'Iterator' module processes each scraped post individually.
94
A Google Sheets 'Add a Row' module adds the data for each post into a new row in the sheet.
Step #94: A Google Sheets 'Add a Row' module adds the data for each post into a new row in the sheet.
95
The fourth module retrieves all data from the first Apify module, enabling access to the LinkedIn posts.

After the 60-second hold, this module retrieves all data from the first Apify module. This allows us to access and work with all the LinkedIn posts from the NFL. That happened perfectly on cue. Next, for each post in the array, we add them to our Google Sheet.

96
For each post in the array, iterate through and add it as a new row in the Google Sheet.

We used 10 operations to add all 10 posts to this Google Sheet.

97
Observe that 10 operations are spent adding all 10 posts to the Google Sheet.
Step #97: Observe that 10 operations are spent adding all 10 posts to the Google Sheet.

Once we do that, we loop back.

98
Note that the workflow loops back around to process the next item.
Step #98: Note that the workflow loops back around to process the next item.

We're still running because our Google Sheet has an auto iterator.

99
Understand that the Google Sheet module has a built-in auto-iterator, causing the scenario to run for each row.
Step #99: Understand that the Google Sheet module has a built-in auto-iterator, causing the scenario to run for each row.

All these sheets with URLs come in bundles. We do not need to iterate through bundles. They just iterate automatically. This is running again.

100
The scenario runs again, feeding the next profile URL from the sheet.
Step #100: The scenario runs again, feeding the next profile URL from the sheet.

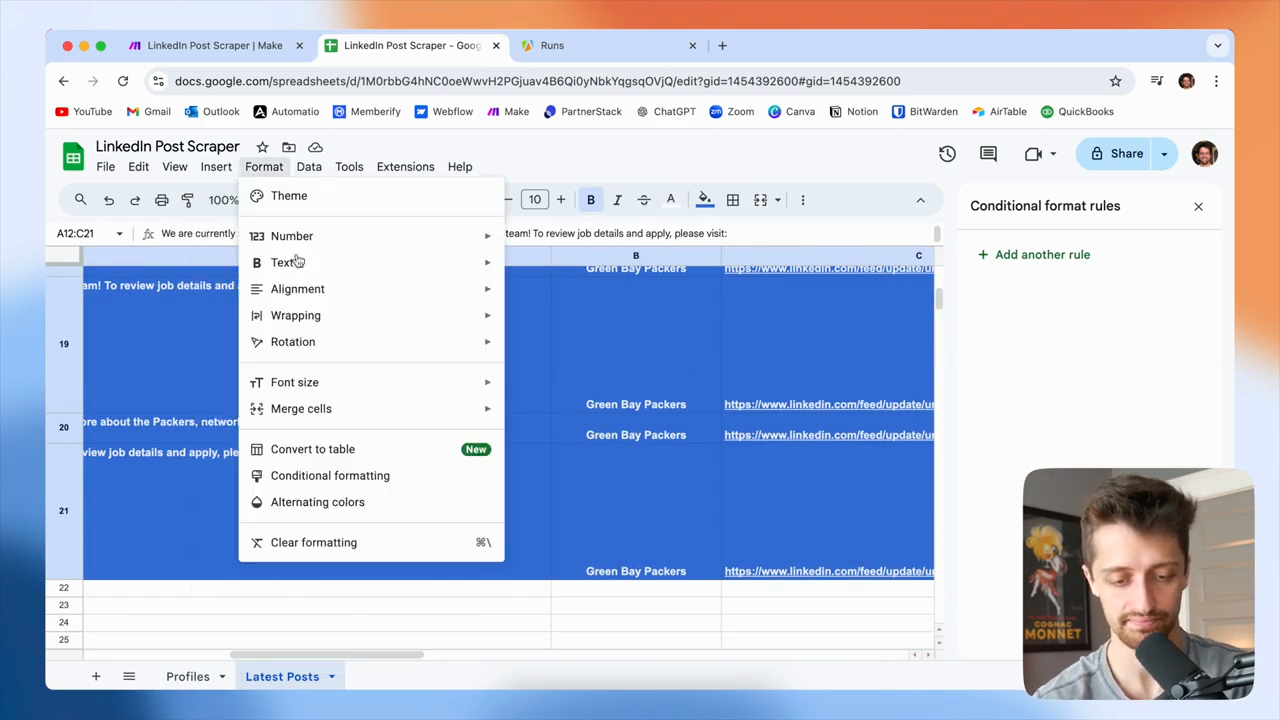
We entered the Green Bay Packers URL into our Appify bot. Hold for 60 seconds. Then, retrieve the latest Green Bay Packers posts and add them one by one to the Google Sheet. We'll let that go. In the meantime, we'll check out our latest posts here. I'll also format this to improve its appearance.

101
Click the "LinkedIn Post Scraper - Google" tab.
Step #101: Click the "LinkedIn Post Scraper - Google" tab.
102
Click the "Latest Posts" sheet tab.
Step #102: Click the "Latest Posts" sheet tab.
103
Select the range of cells from A2 to C71.
Step #103: Select the range of cells from A2 to C71.

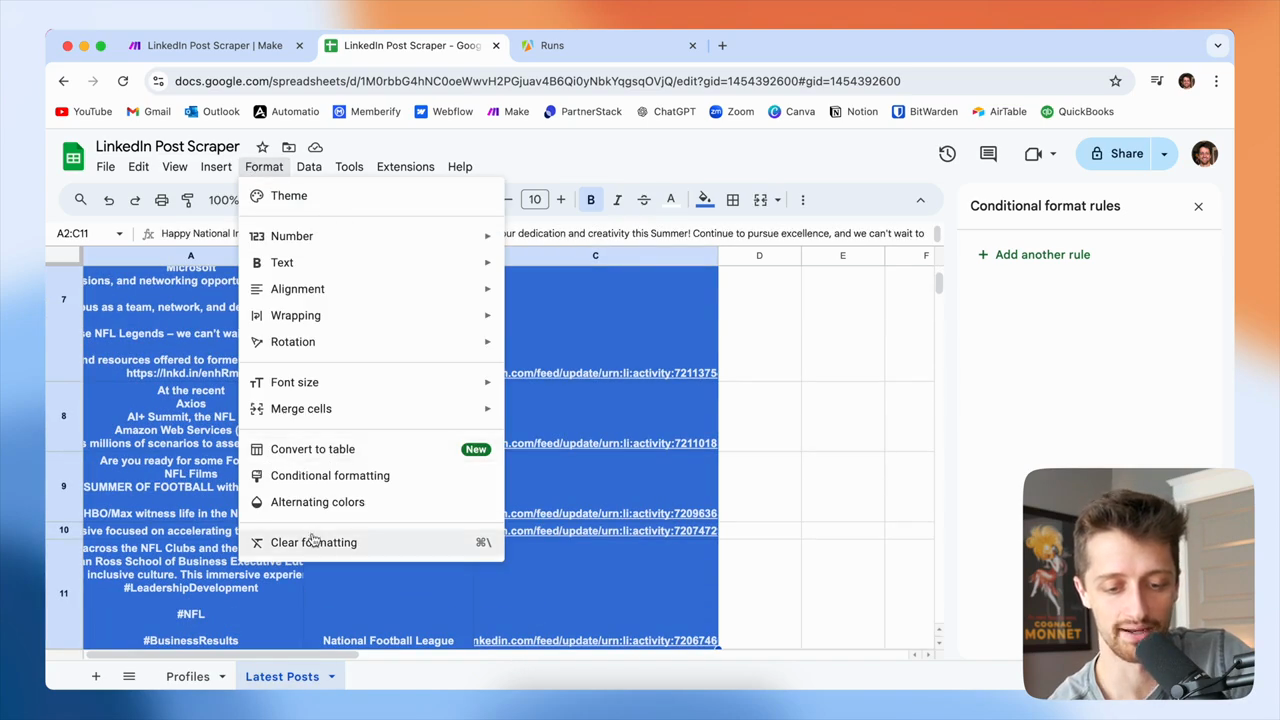
Give me a second here. Let me clear the formatting.

104
Click on "Format" in the menu bar.
Step #104: Click on "Format" in the menu bar.
105
Select "Clear formatting" from the dropdown menu.
Step #105: Select "Clear formatting" from the dropdown menu.

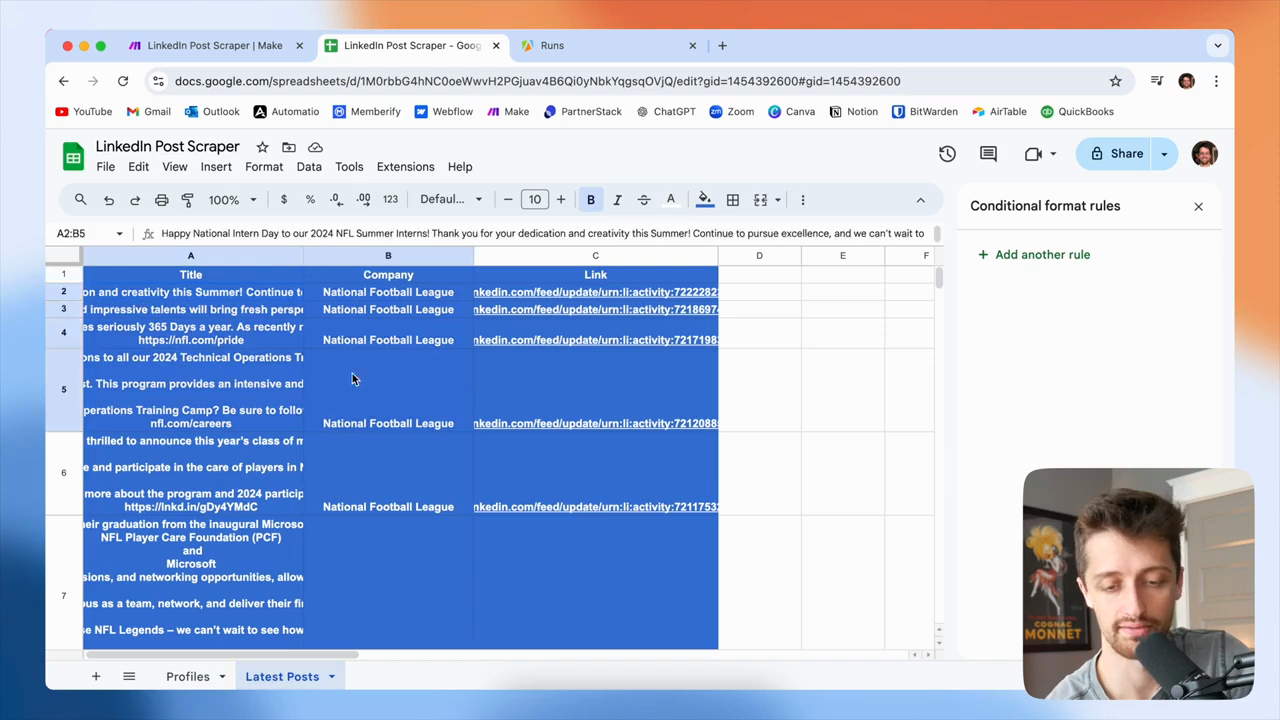
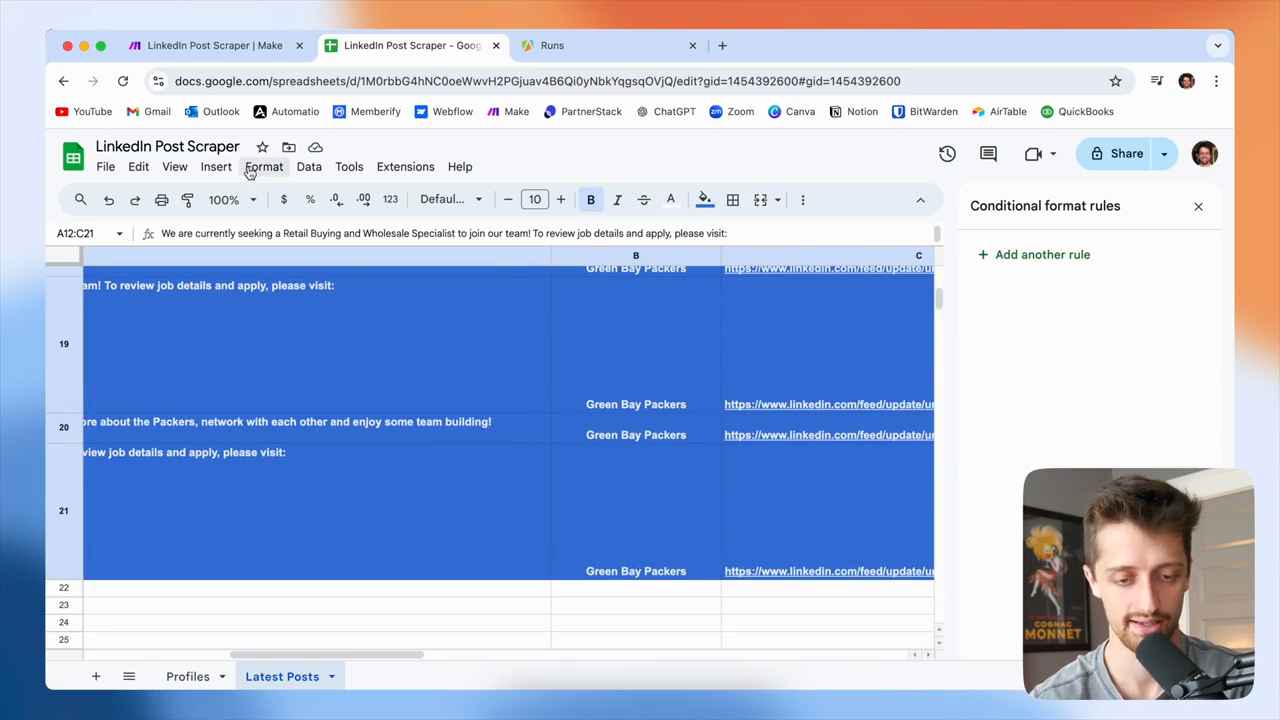
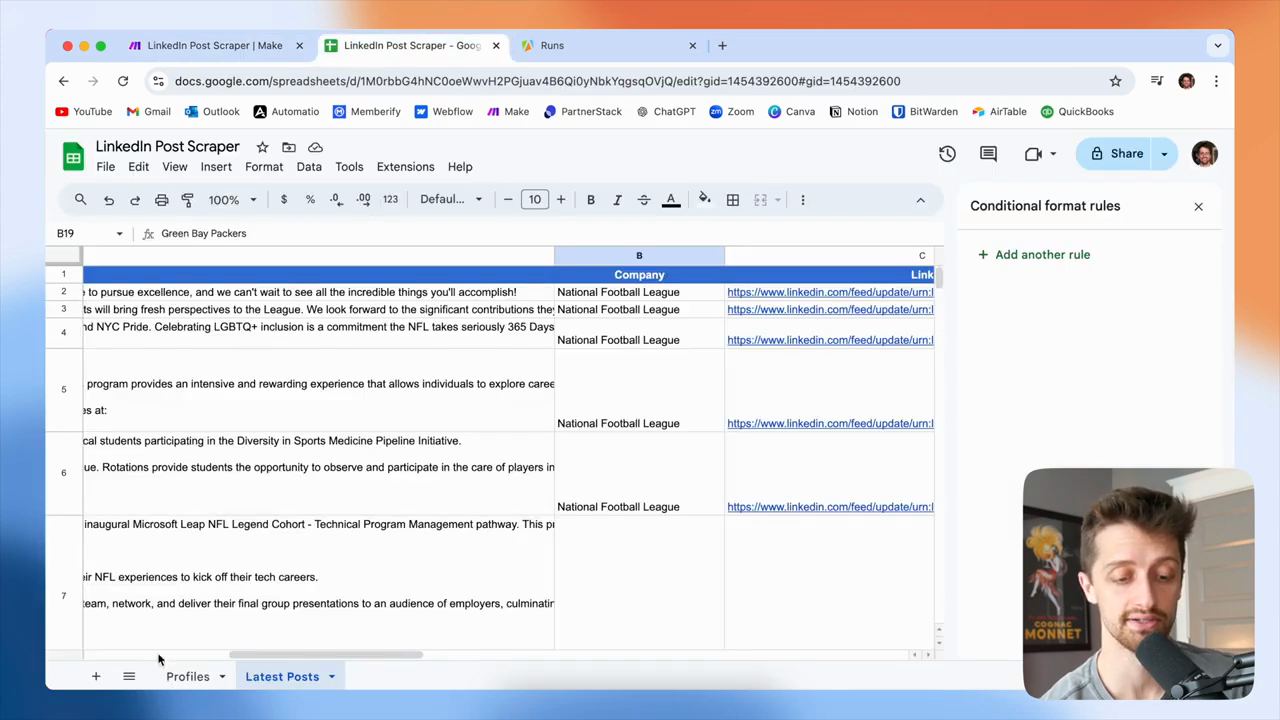
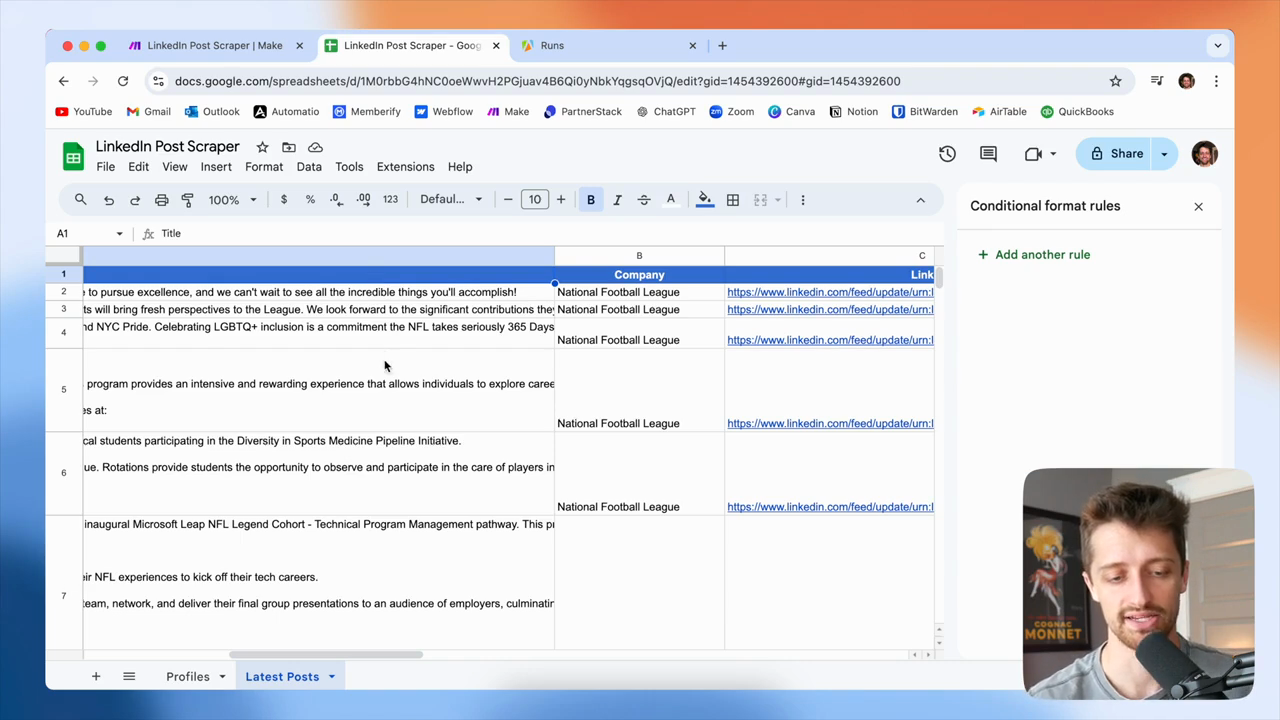
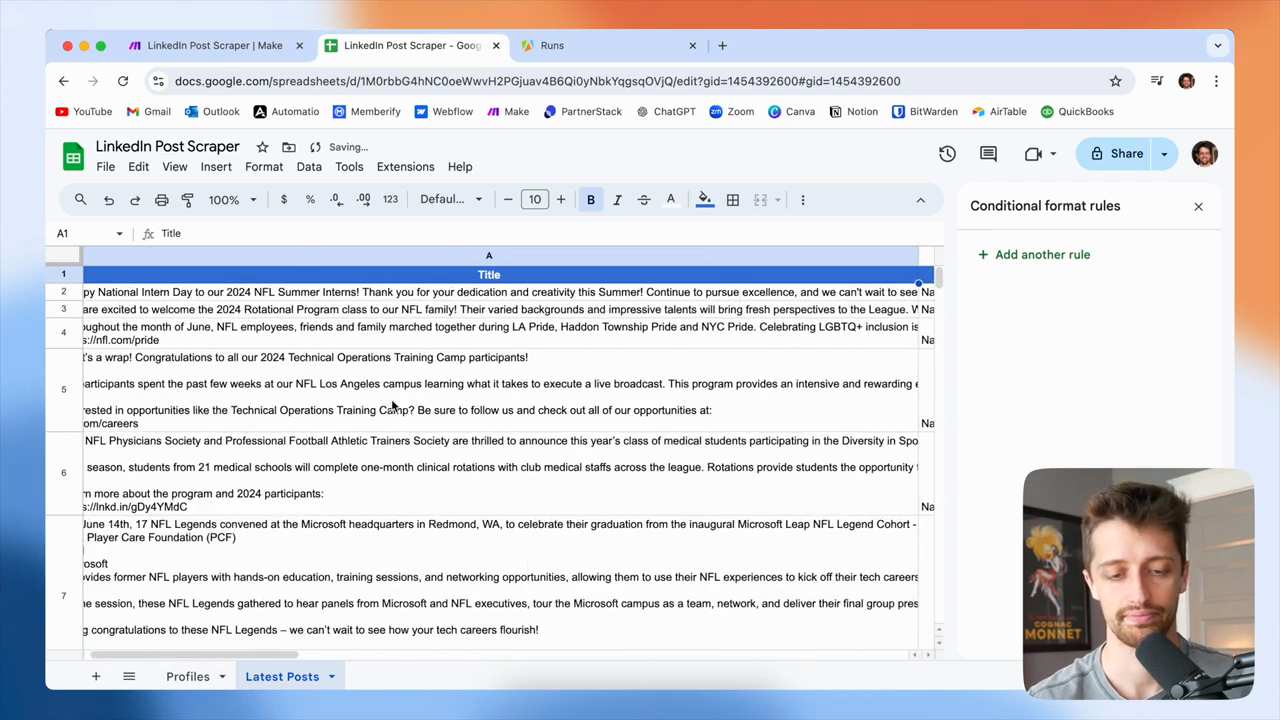
I have all 10 of the latest NFL LinkedIn posts. I have the text, the company name, and the link to each post.

106
Double-click the border between column A and B to autofit the column width.
Step #106: Double-click the border between column A and B to autofit the column width.
107
Double-click the border between column B and C to autofit the column width.
Step #107: Double-click the border between column B and C to autofit the column width.

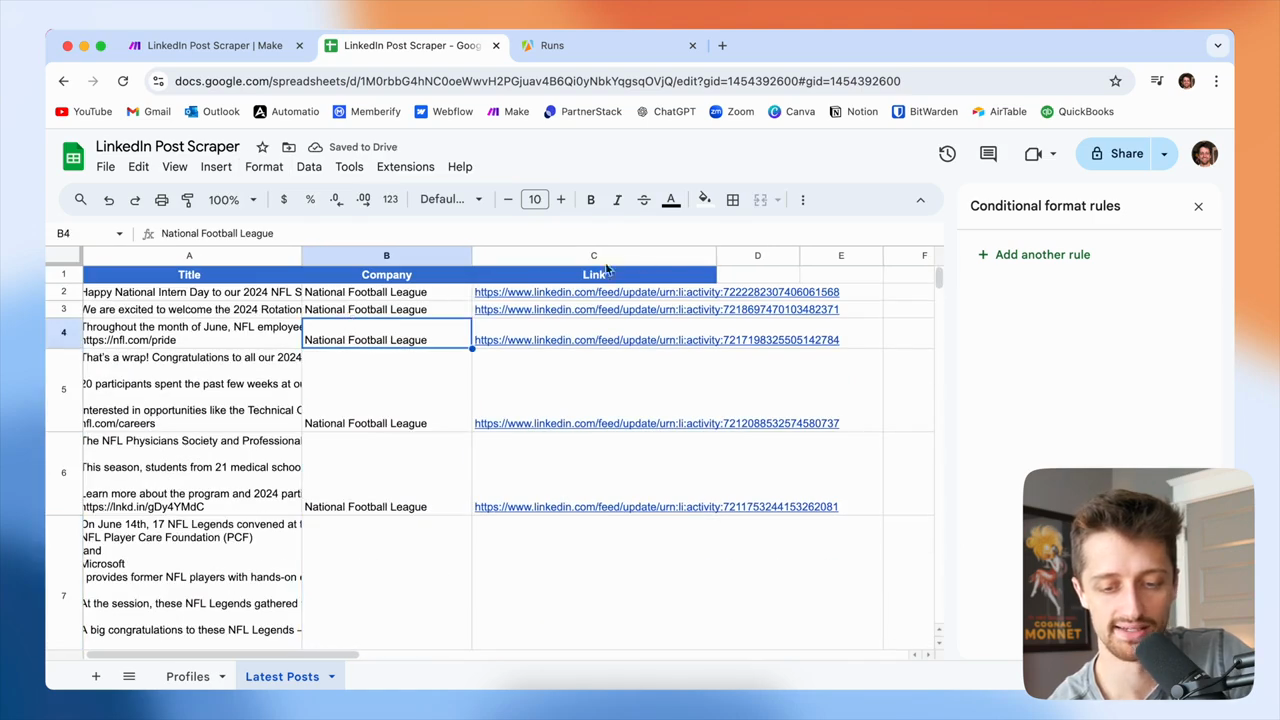
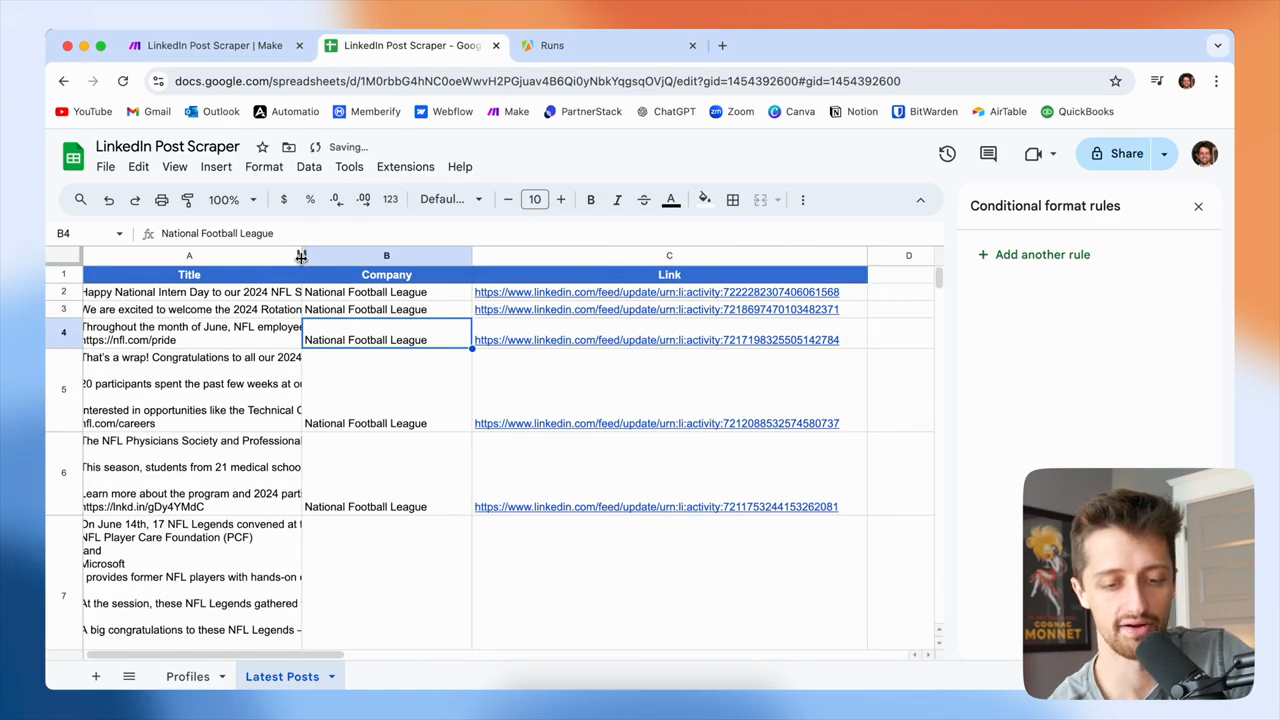
Soon, we'll have the Green Bay Packers added. You can see these are coming in as well. I just need to fix the formatting again. Now, we will retrieve the latest 10 posts for each company or profile in this list. After that, we can use the data however we want.

108
Click on Format in the menu.
Step #108: Click on Format in the menu.
109
Click on Clear formatting.
Step #109: Click on Clear formatting.
110
Click the Profiles tab at the bottom of the screen.
Step #110: Click the Profiles tab at the bottom of the screen.
111
Click the Latest Posts tab at the bottom of the screen.
Step #111: Click the Latest Posts tab at the bottom of the screen.

We can use it to write content in ChatGPT, or send it to our sales team and suggest they review what others are doing. Why aren't we doing this? Or something similar. You can use this to get a comprehensive list of valuable data from your competitors, portfolio companies, or favorite LinkedIn profiles.

112
Drag the right border of column A to expand it and view the full post text.
Step #112: Drag the right border of column A to expand it and view the full post text.
113
Scroll down the 'Latest Posts' sheet to view all the scraped data.
Step #113: Scroll down the 'Latest Posts' sheet to view all the scraped data.

This is the best and likely the cheapest way to automatically scrape LinkedIn posts using make.com. If you enjoyed this video, please click the like button. I would really appreciate it. If you want to see more videos like this in the future, consider subscribing. That would be great.

If you have any questions, please leave a comment and let me know as soon as possible. I'll get back to you as soon as I can. Thank you all so much for being here. I'll see you in the next video. Peace.