Icon

How to Back Up a Virtual Machine in Azure

Learn step-by-step how to back up a virtual machine in Azure, including selecting a vault and setting a backup policy.

By Gareth

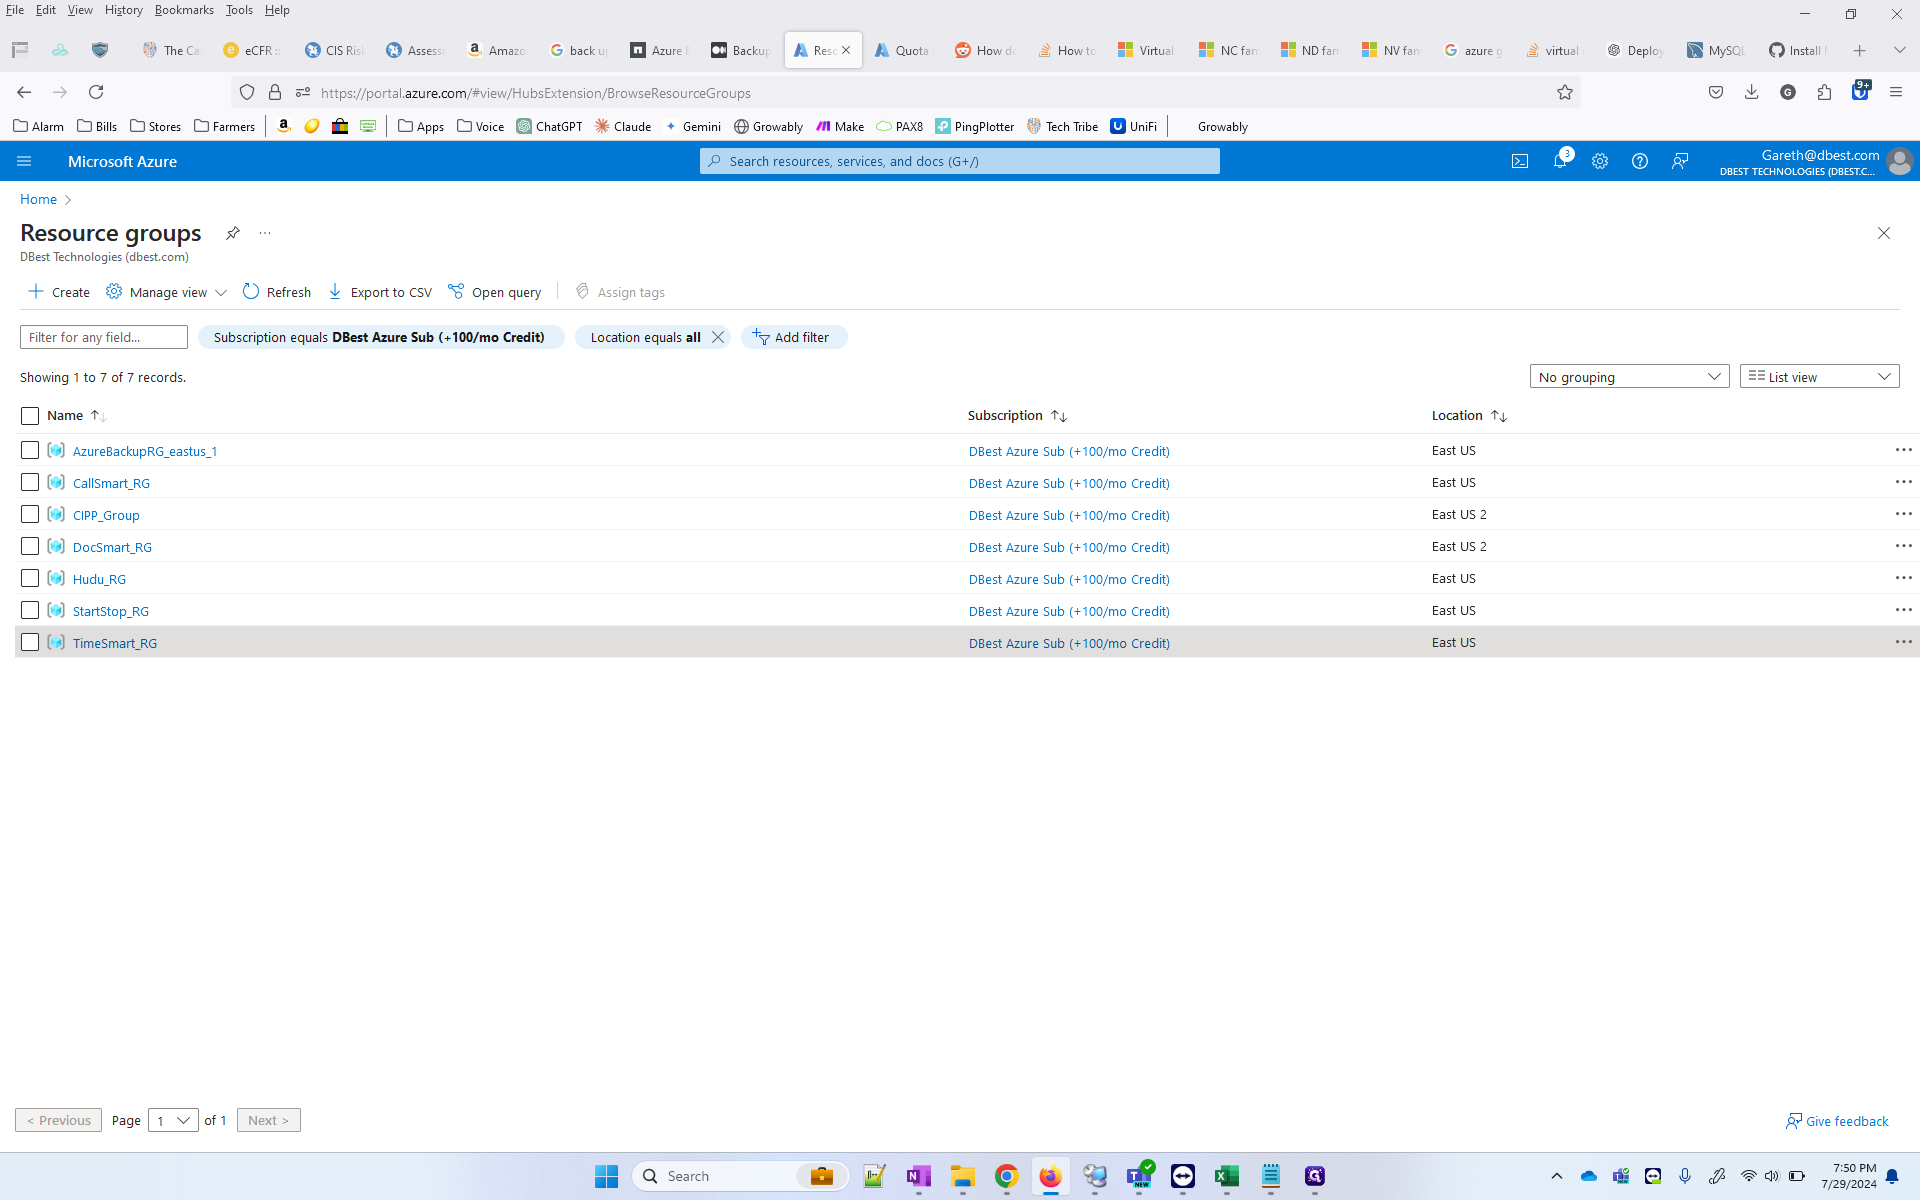
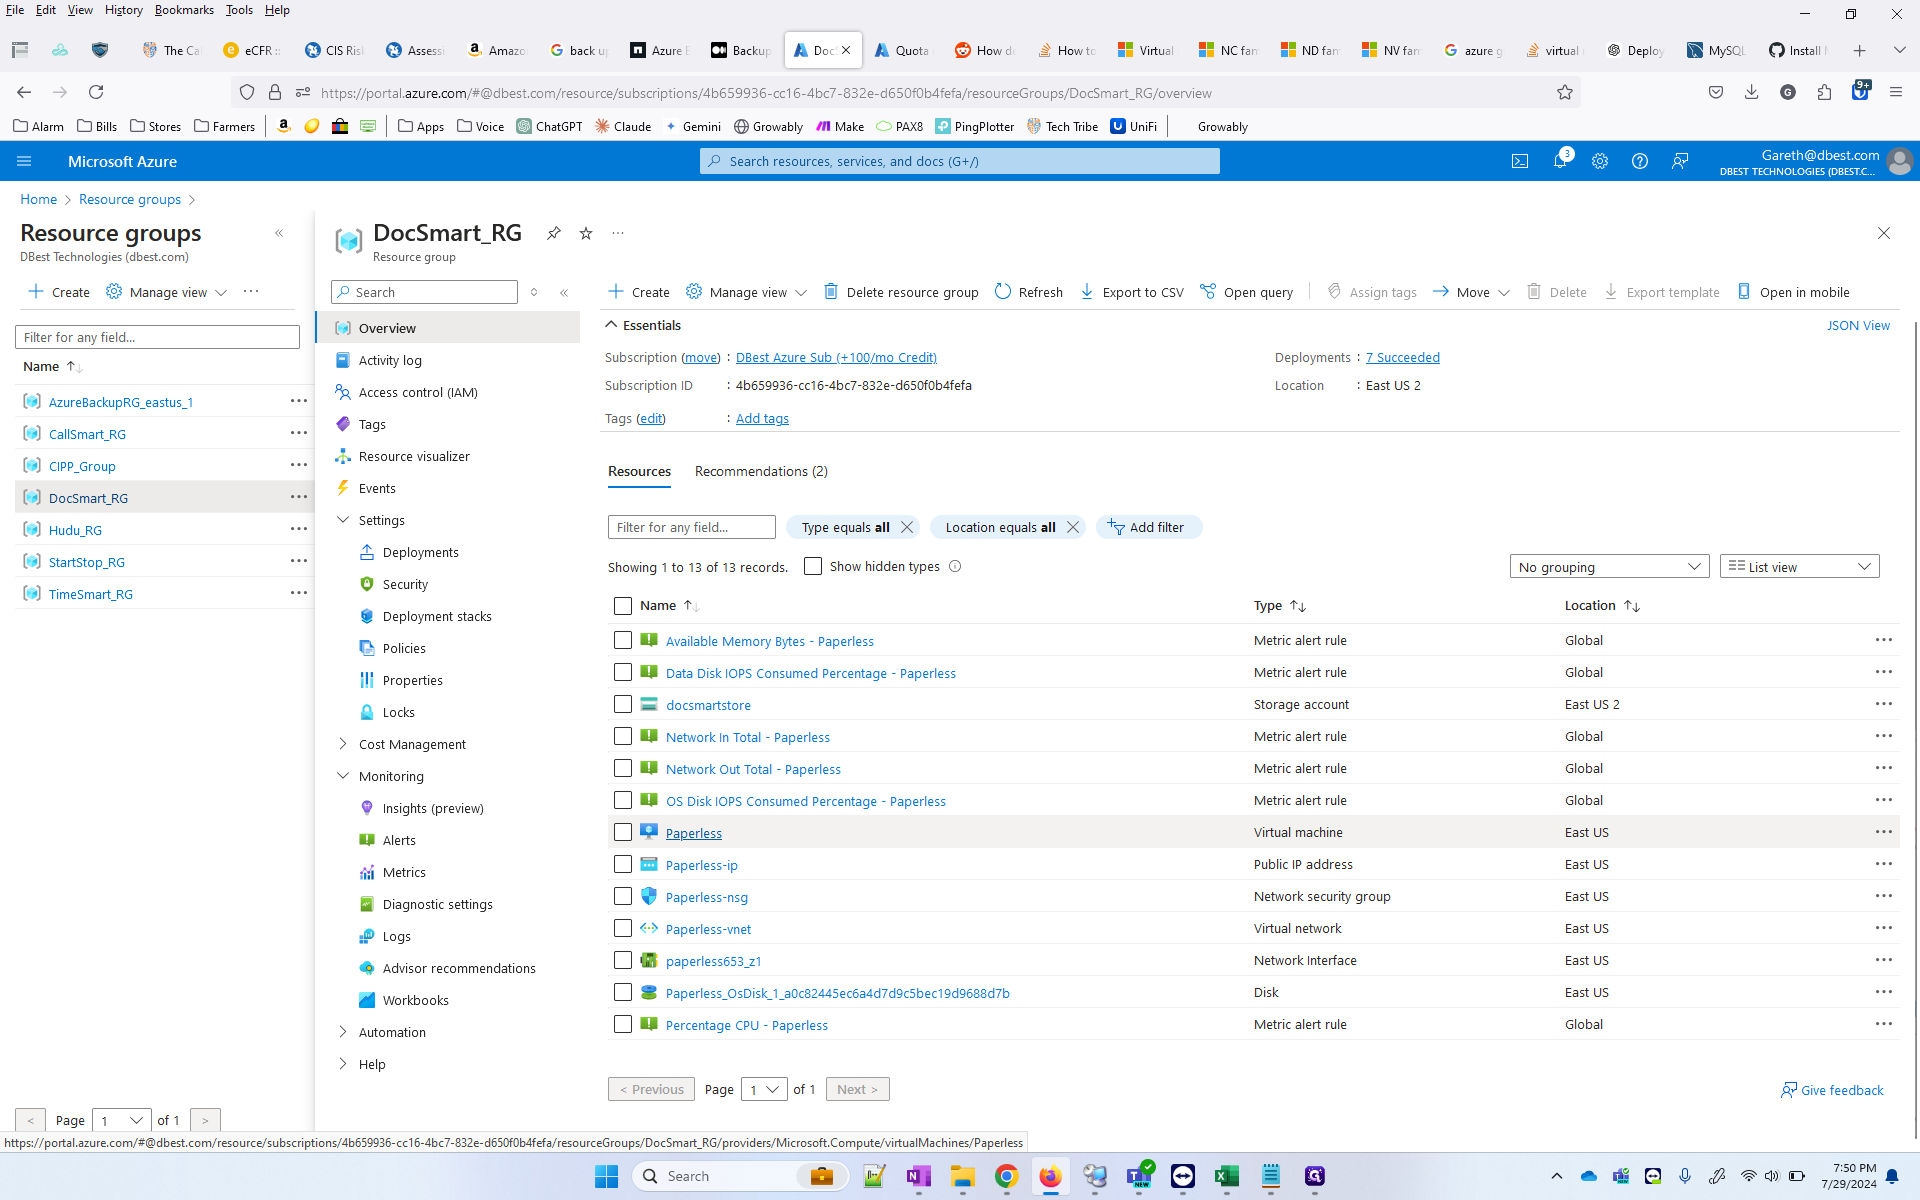
In this guide, we'll learn how to backup a virtual machine in Azure. Backing up your VM ensures that your data is safe and can be restored in case of any issues. We'll start by navigating to the resource groups, selecting the VM we want to backup, and then configuring the backup settings.

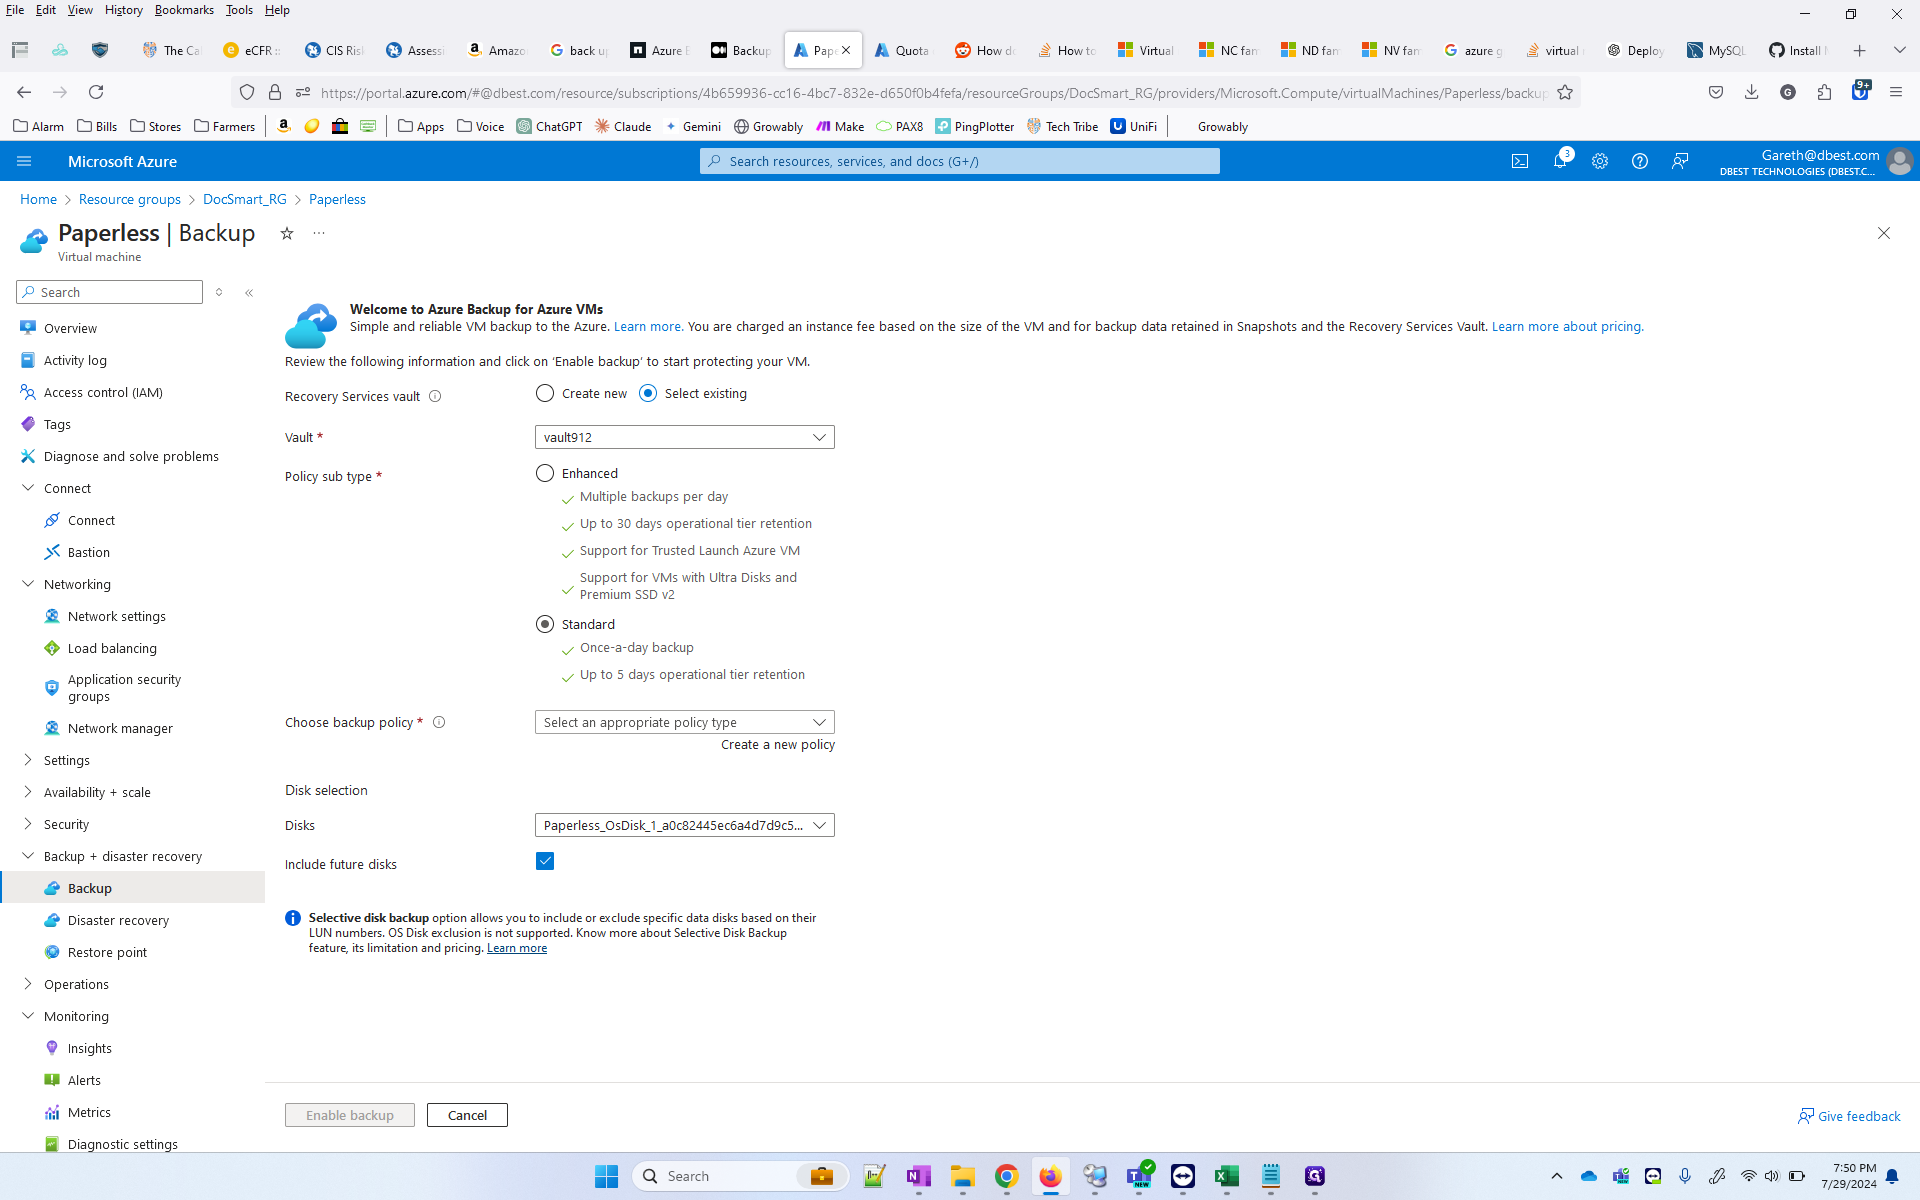
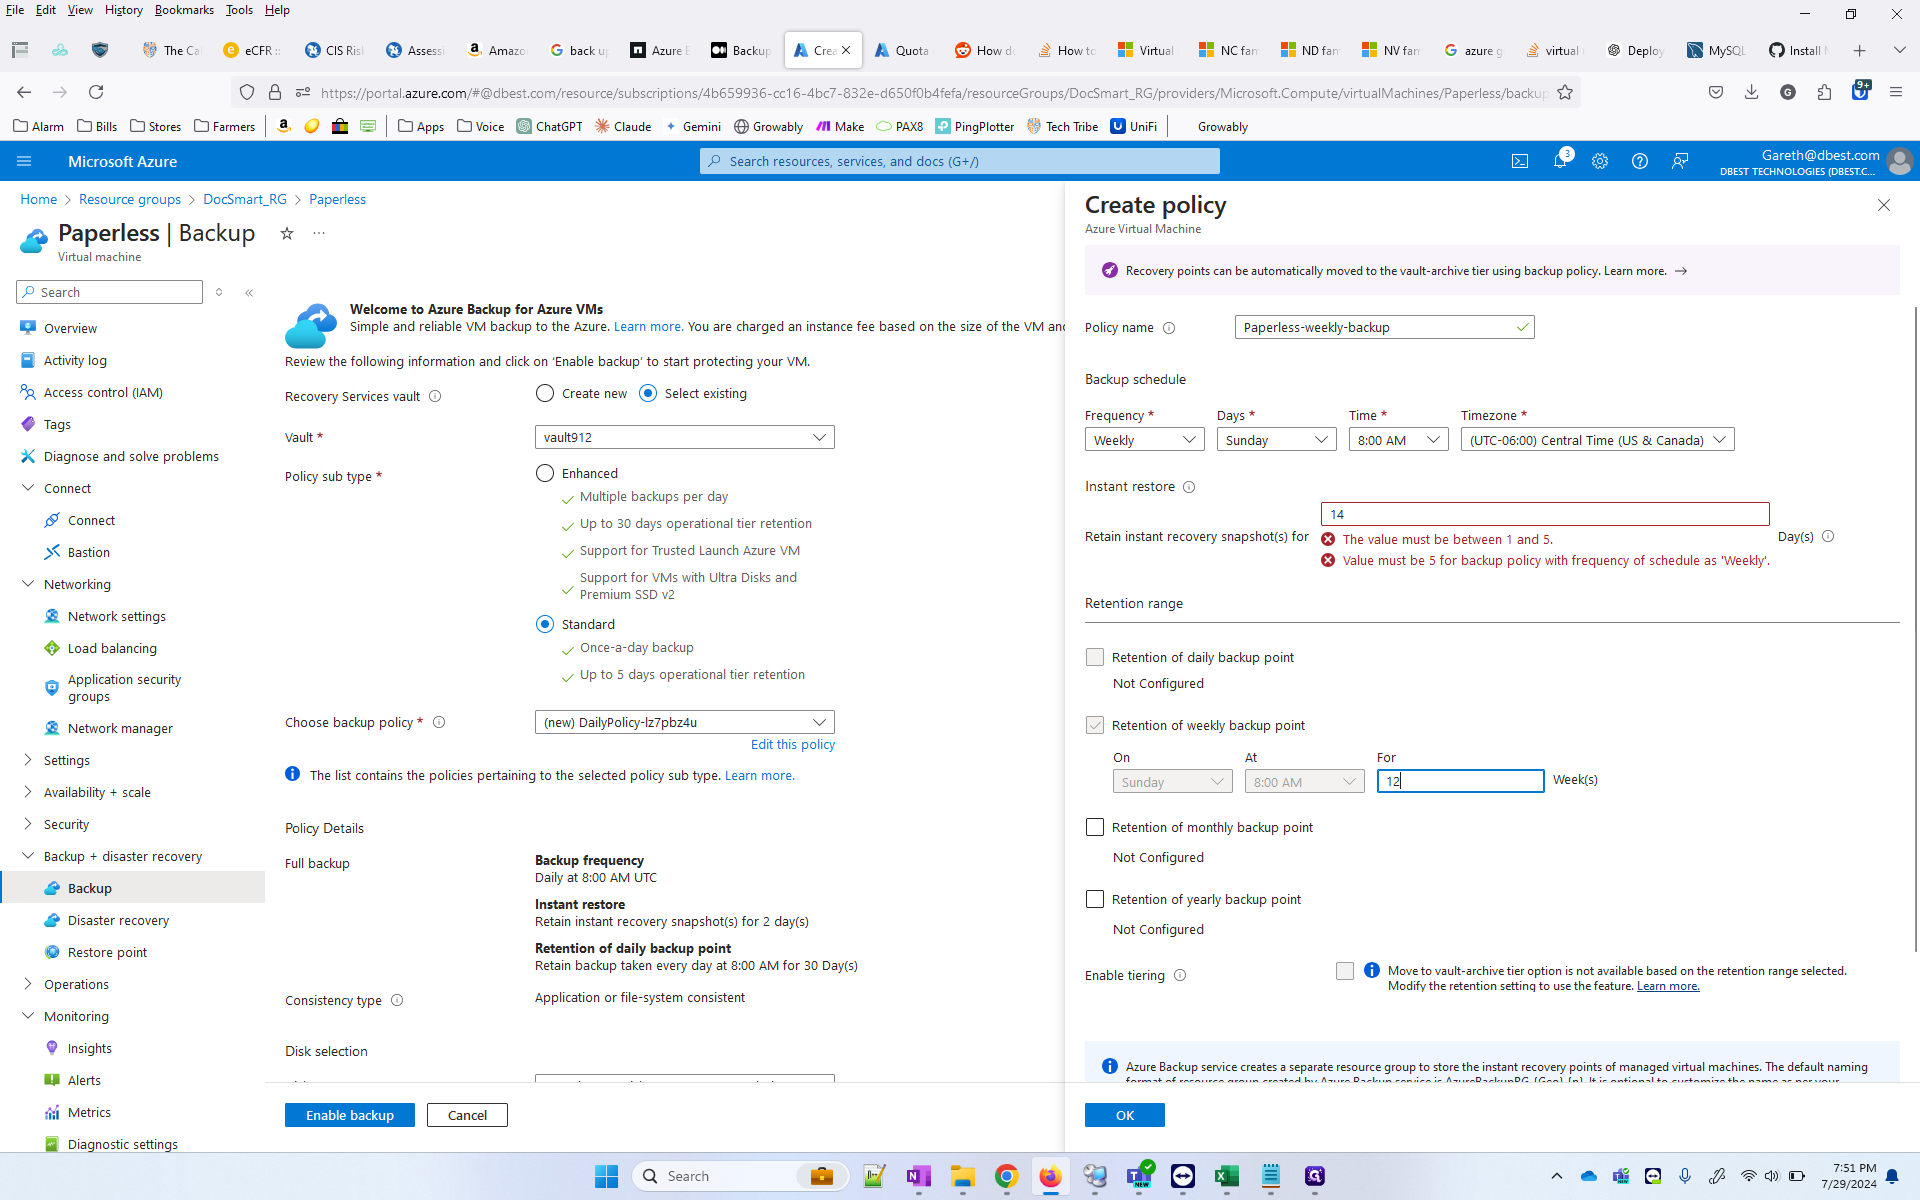
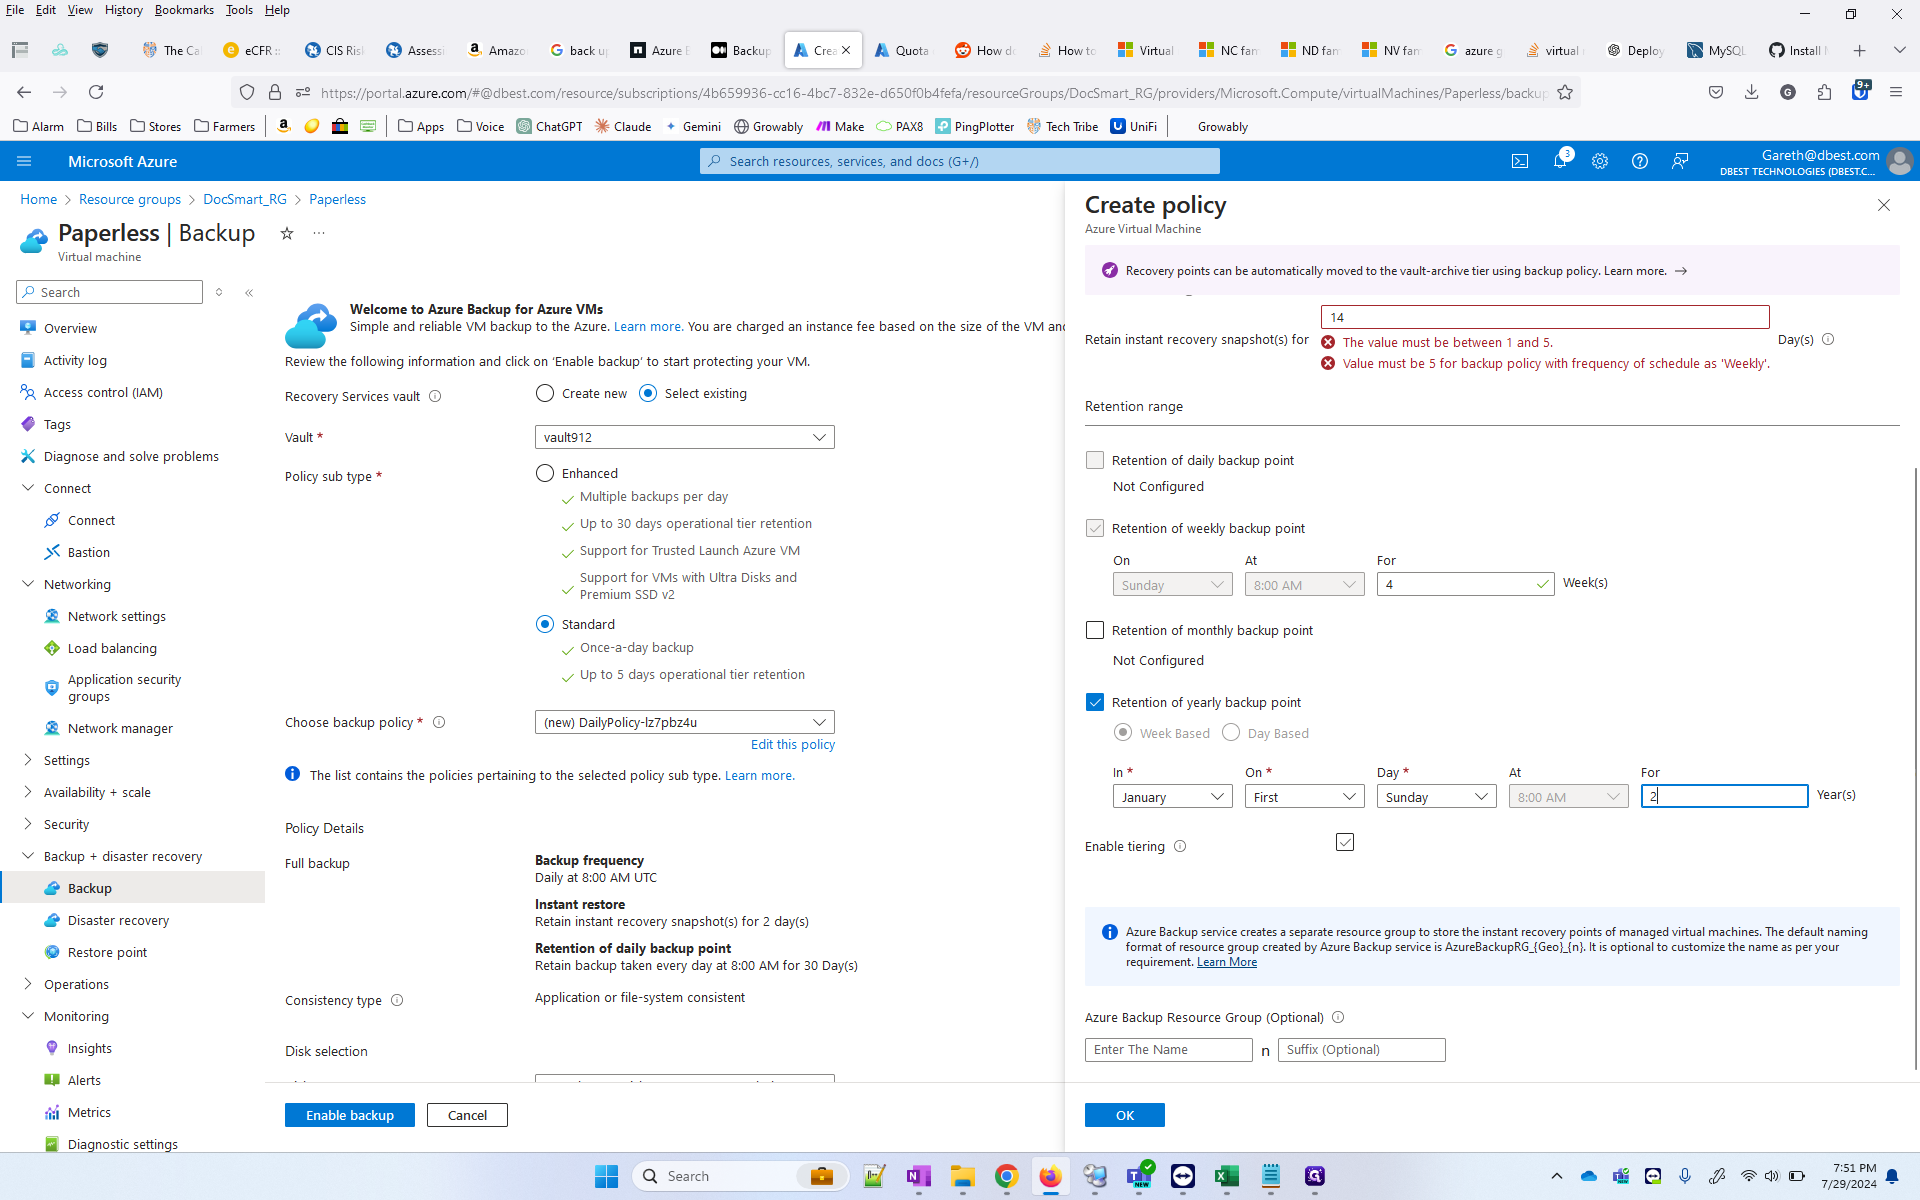
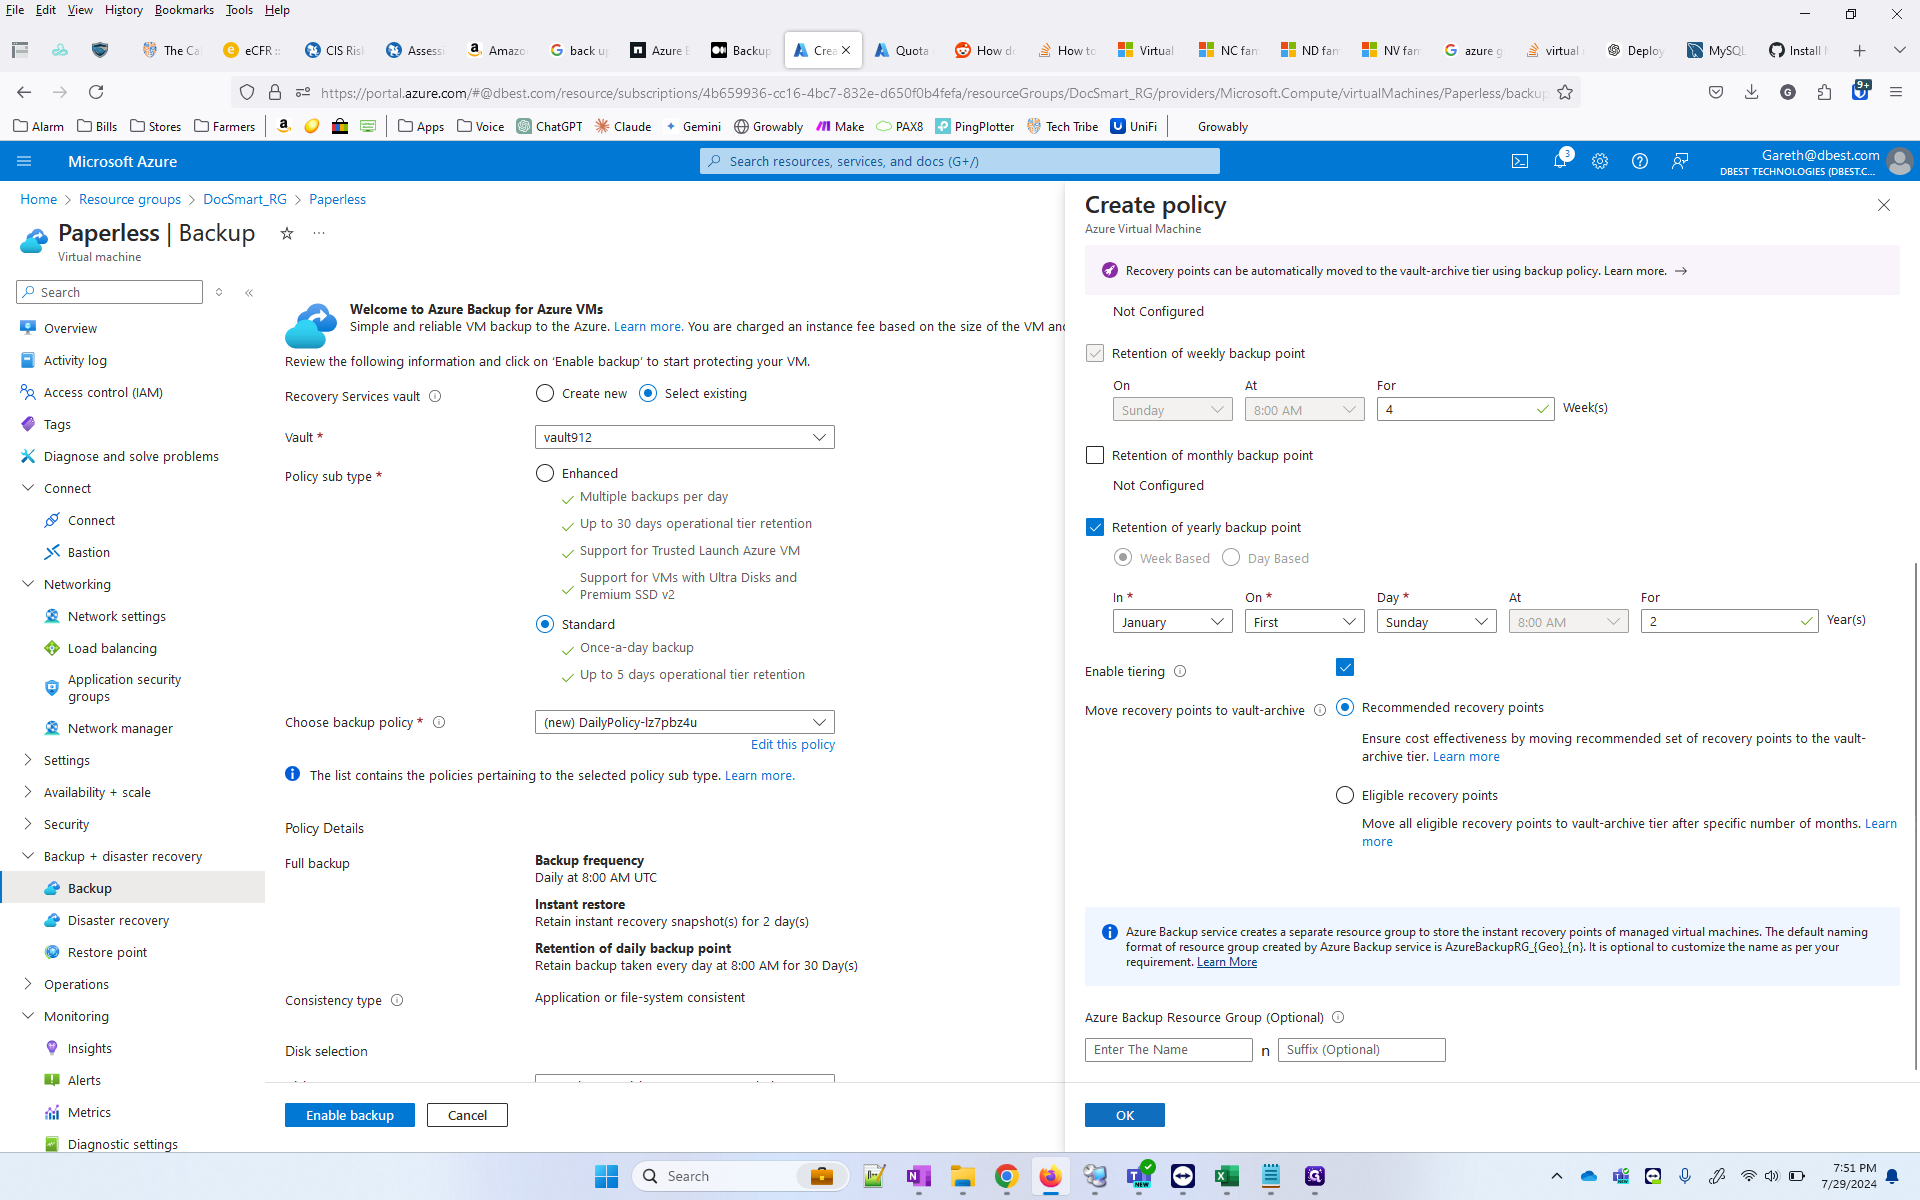
We'll choose an existing vault or create a new one, select a standard backup policy, and make necessary edits to the policy. This process will help you maintain a reliable backup strategy for your virtual machines.

Let's get started

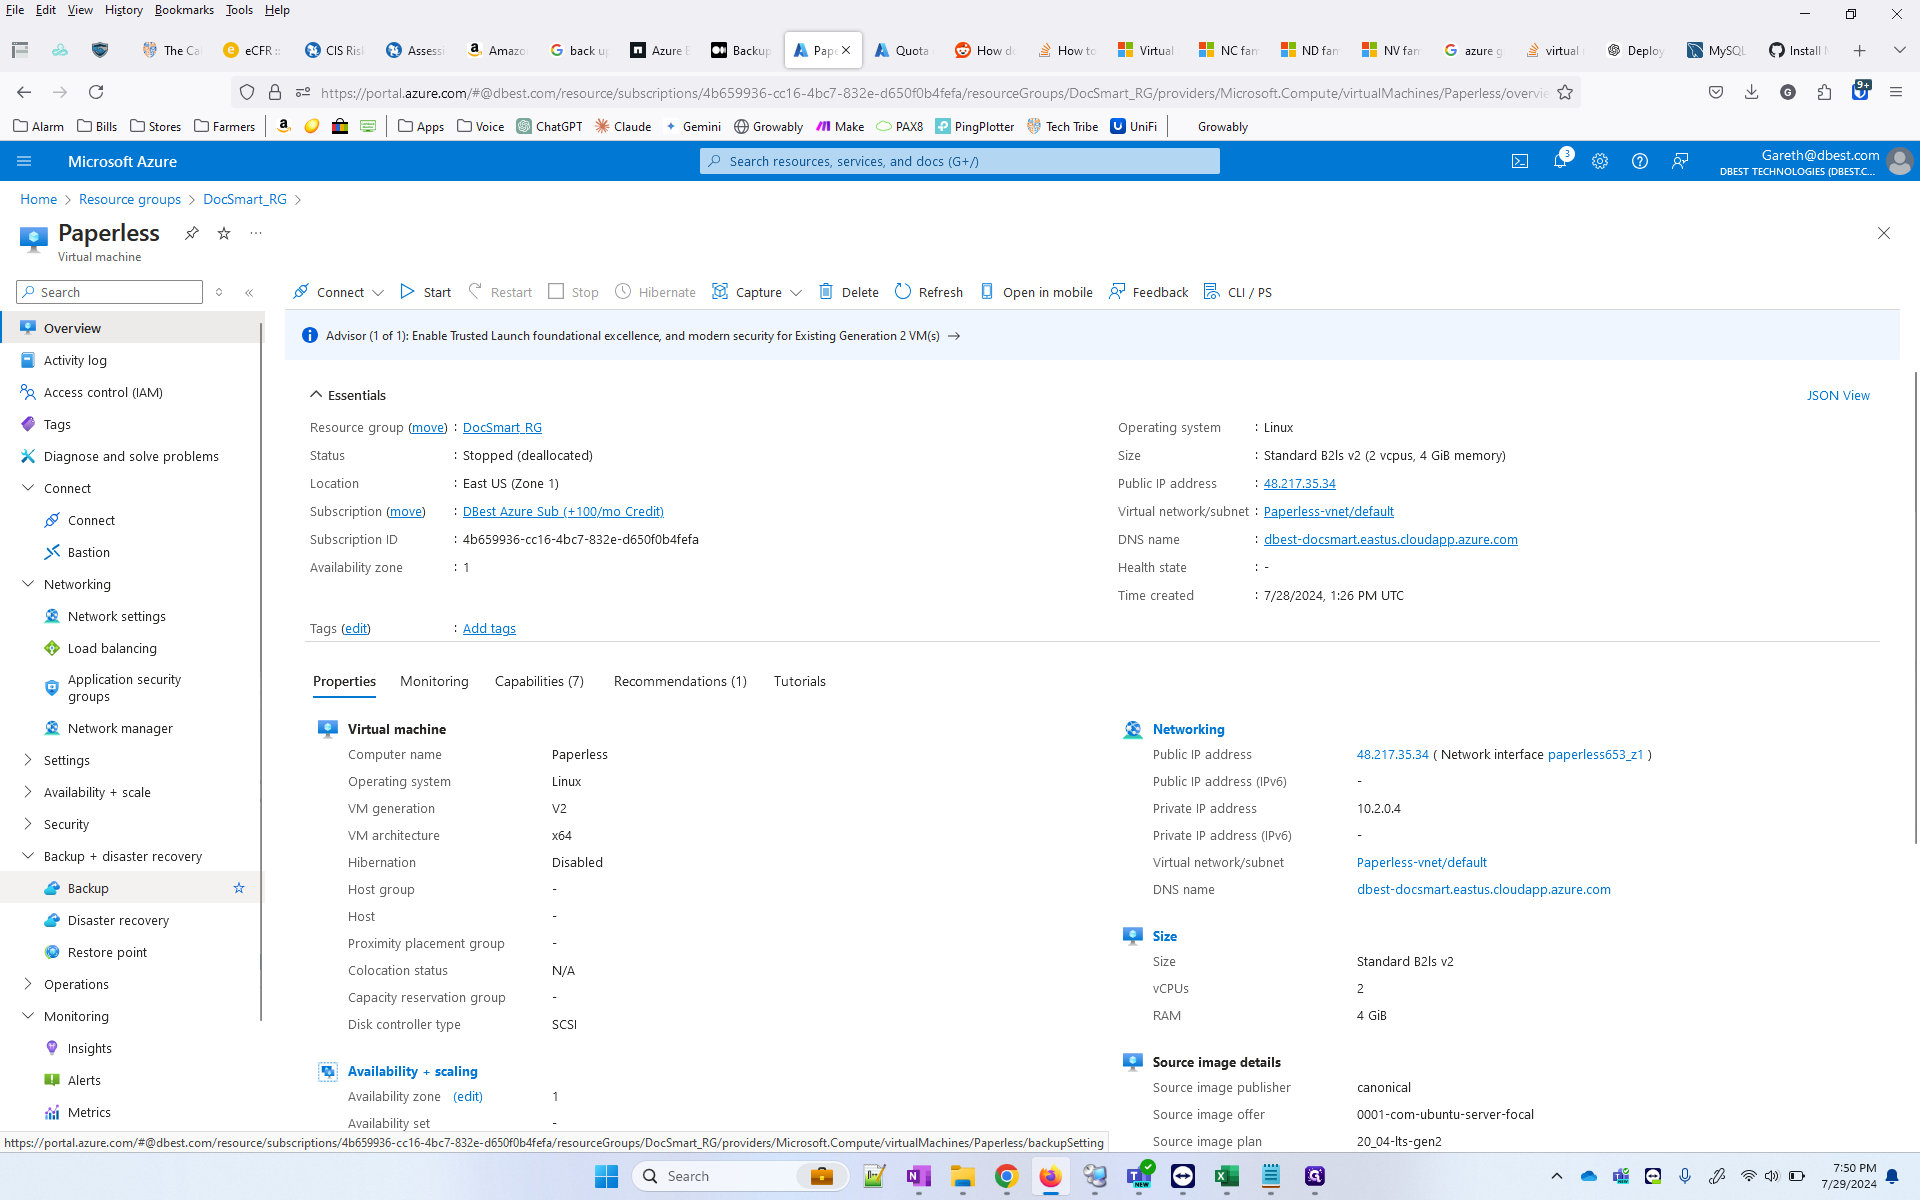
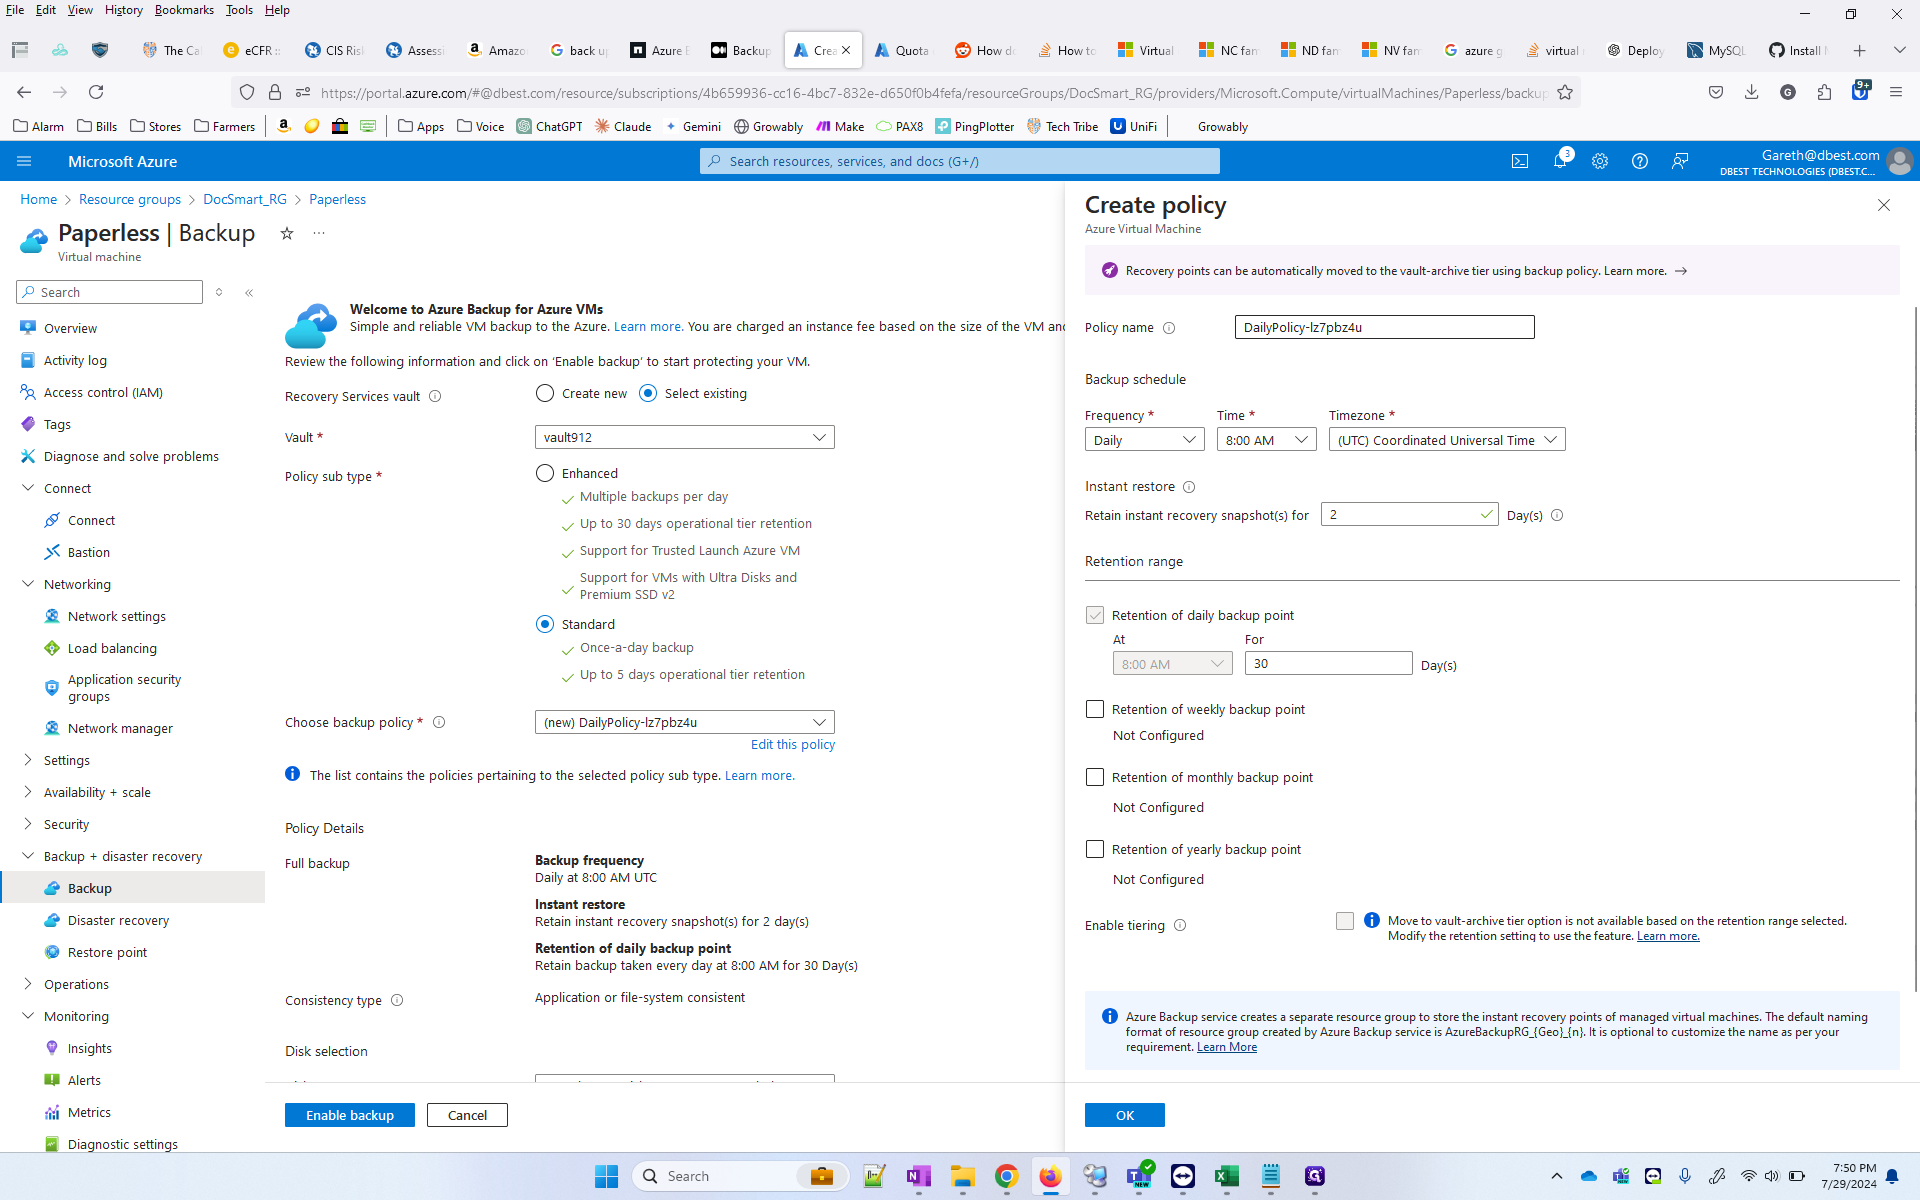
Let's learn how to back up a virtual machine in Azure. First, go to the resource groups and open a resource group. Next, open the VM you want to back up. Then, navigate to the backup tab. From here, you can select an existing vault or create a new one.

1
Click on a Resource Group
Step #1: Click on a Resource Group
2
Select a VM
Step #2: Select a VM
3
Click on "Backup"
Step #3: Click on "Backup"
4
You can create a new vault or select an existing vault.
Step #4: You can create a new vault or select an existing vault.

I will select an existing vault.
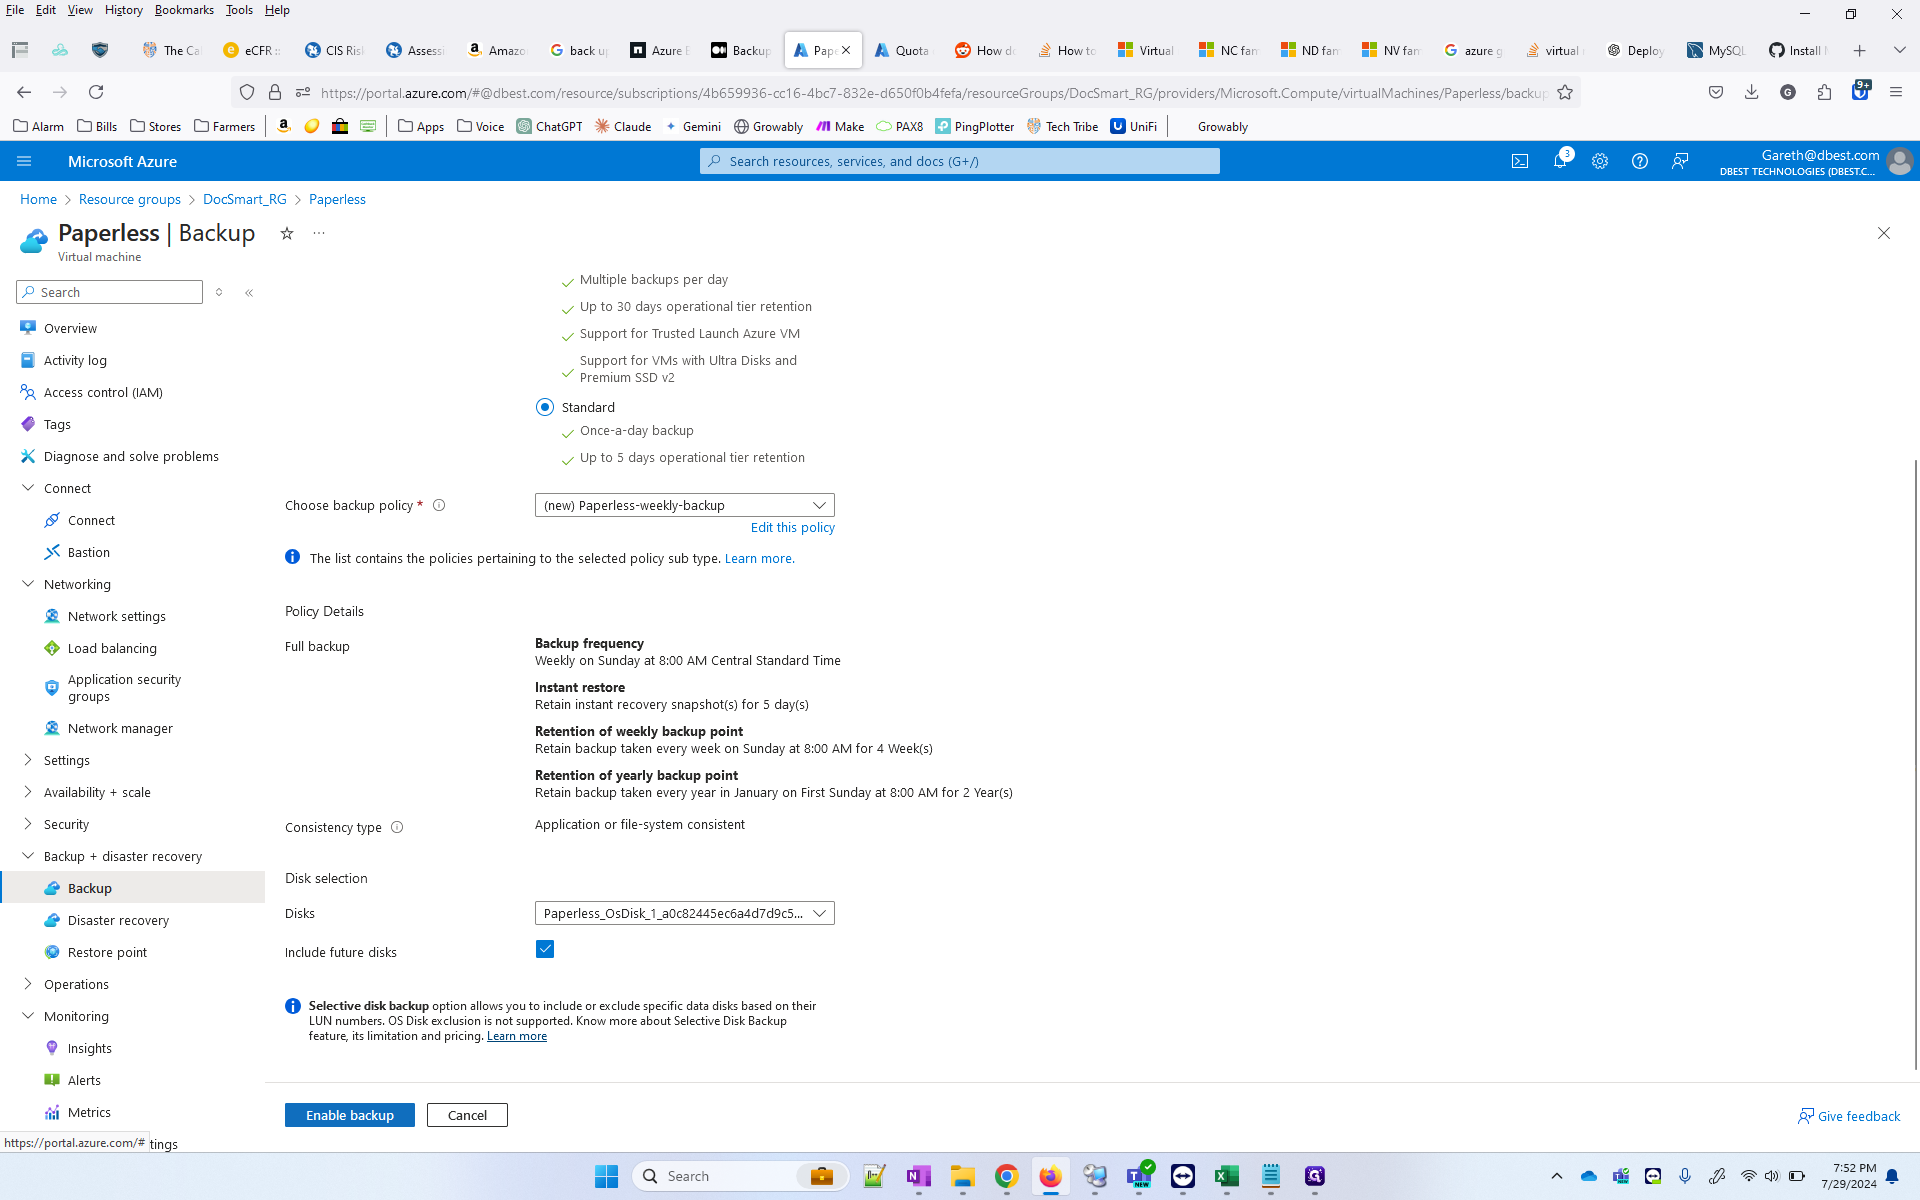
5
We can choose a standard backup policy.
Step #5: We can choose a standard backup policy.
6
Click on "Edit this policy"
Step #6: Click on "Edit this policy"
7
Name the policy something meaningful
Step #7: Name the policy something meaningful
8
Set the correct Time zone.
Step #8: Set the correct Time zone.
9
Set the frequency, weekly is much cheaper than daily but this would depend on how critical the data is.
Step #9: Set the frequency, weekly is much cheaper than daily but this would depend on how critical the data is.
10
Set a number of days for an instant recovery snapshot.
Step #10: Set a number of days for an instant recovery snapshot.
11
Set the number of weekly, daily, monthly, and yearly backups to keep. Note these all cost $$$. I typically do 4 weekly backups and then a yearly backup for compliance. Not everyone needs the yearly.
12
Double-click here
Step #12: Double-click here
13
Click here
Step #13: Click here
14
Click on "OK"
Step #14: Click on "OK"
15
Click on "Enable backup"
Step #15: Click on "Enable backup"

That's it.