How to Block or Remove Specific Dates From an Online Booking System
Learn step-by-step how to block or remove specific dates, such as Fridays, from your online booking system using internal settings.
By Reservety
In this guide, we'll learn how to block or remove specific dates from your Reservety online booking system. This is useful if you want to make certain days, such as Fridays, unavailable for booking. We will use Reservety's internal settings to apply these restrictions to your products or categories.
Let's get started
1
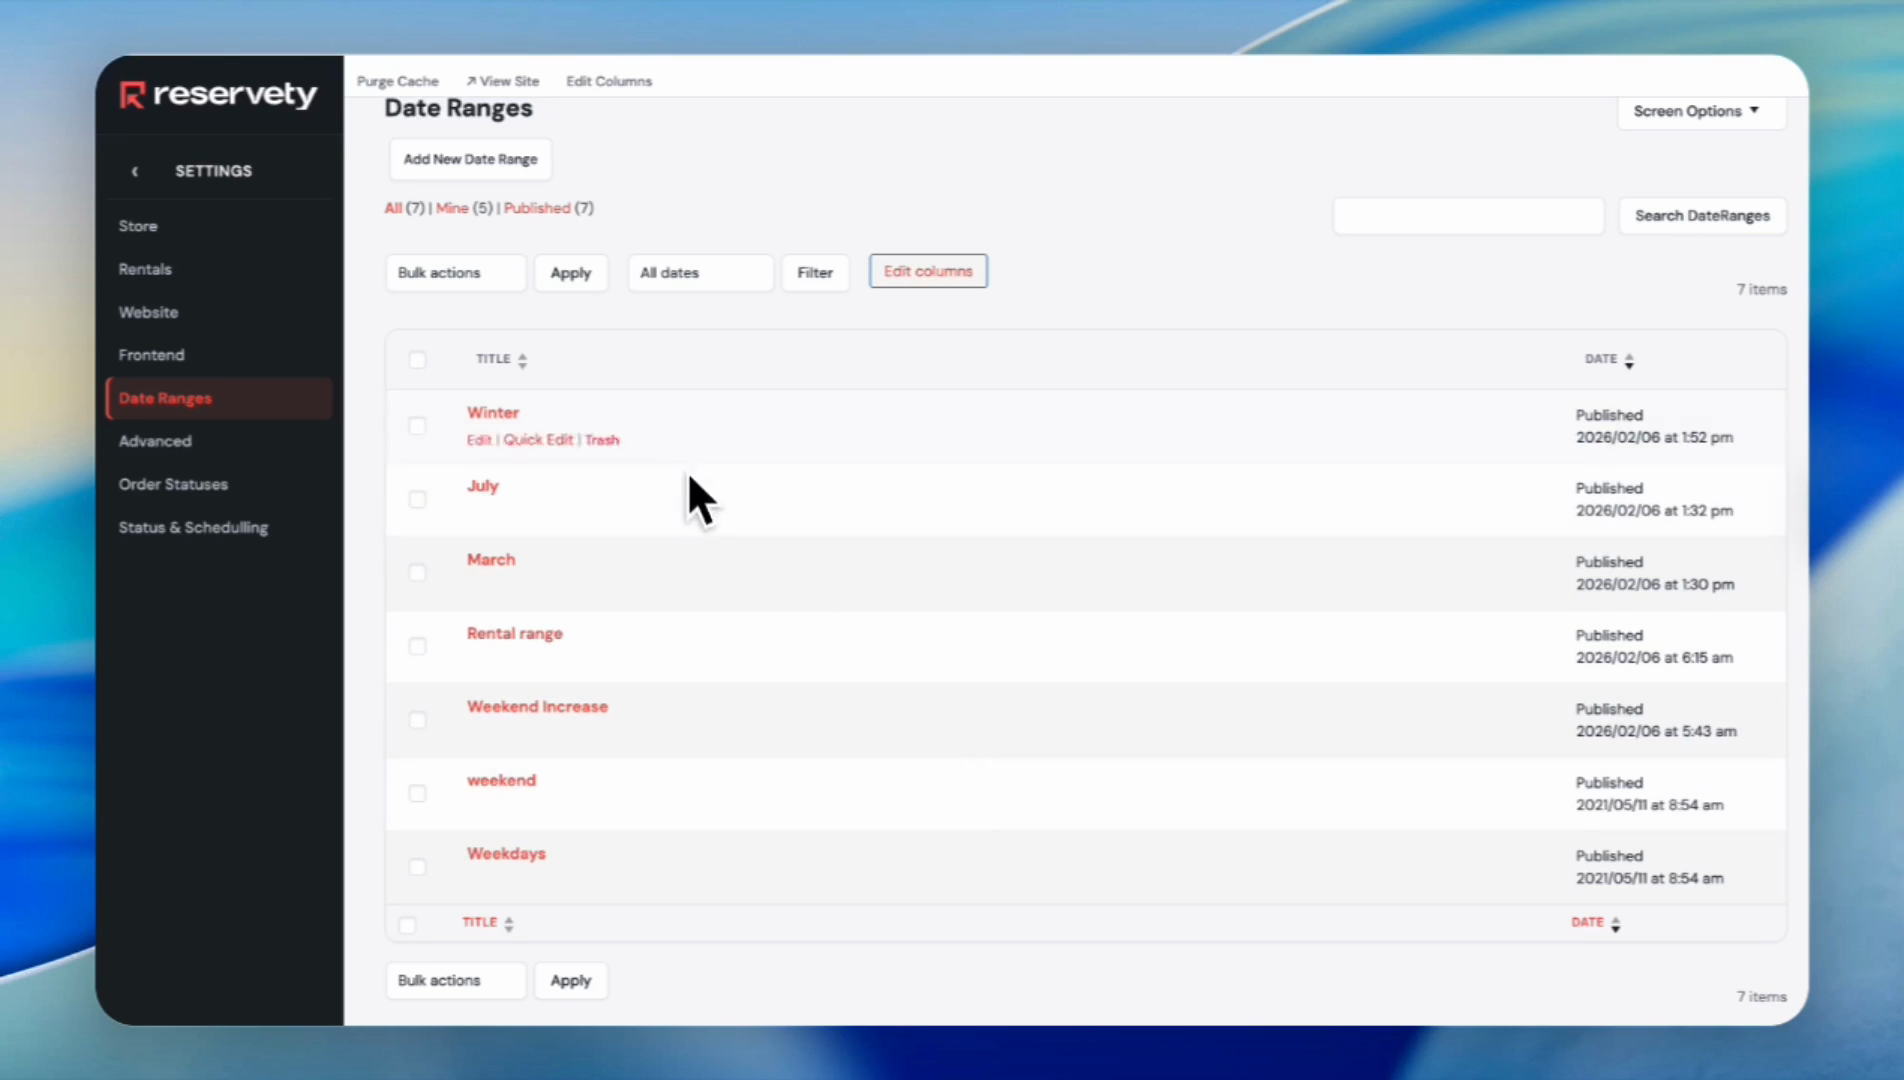
Click on Settings in the left sidebar.
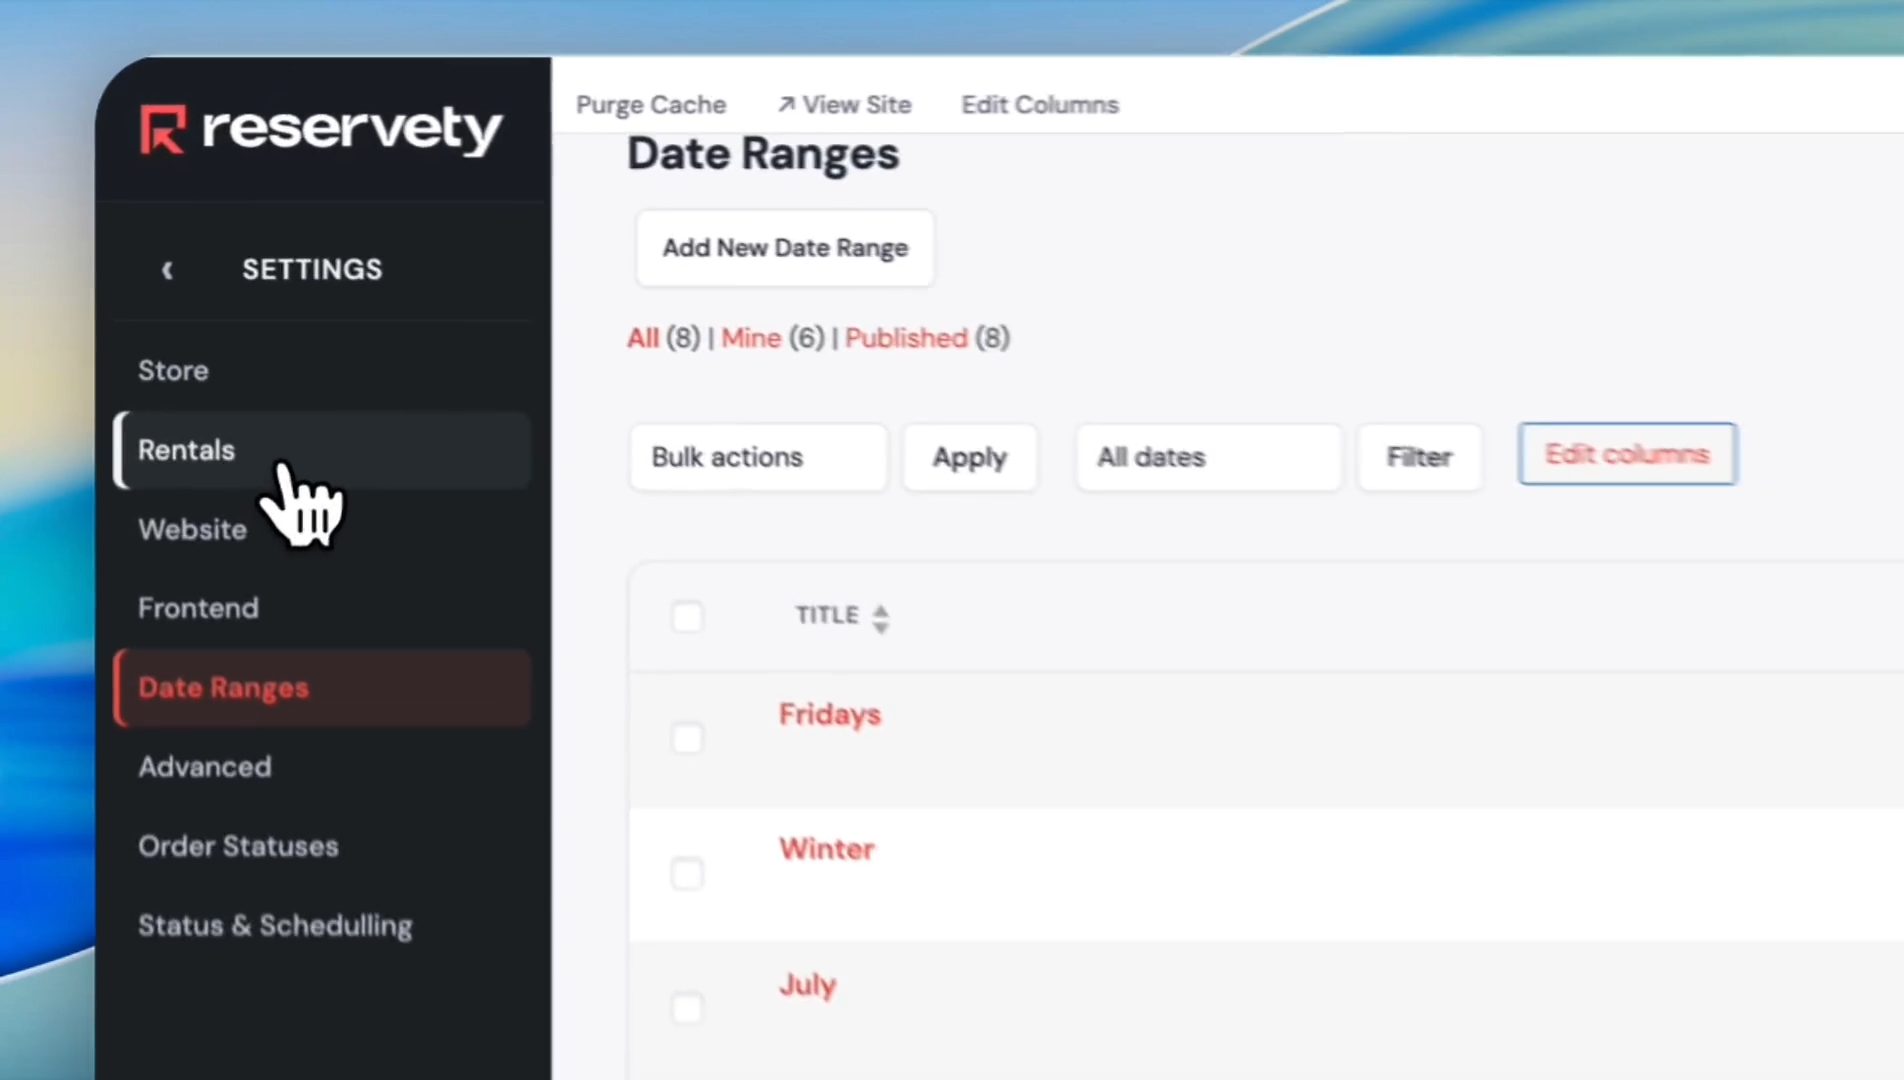
2
Click on Date Ranges.

If you want to block Fridays each week, create a date range that includes Fridays.
3
Click on Add New Date Range.
4
In the Add title field, type your title. In this case, we titled it as Fridays.
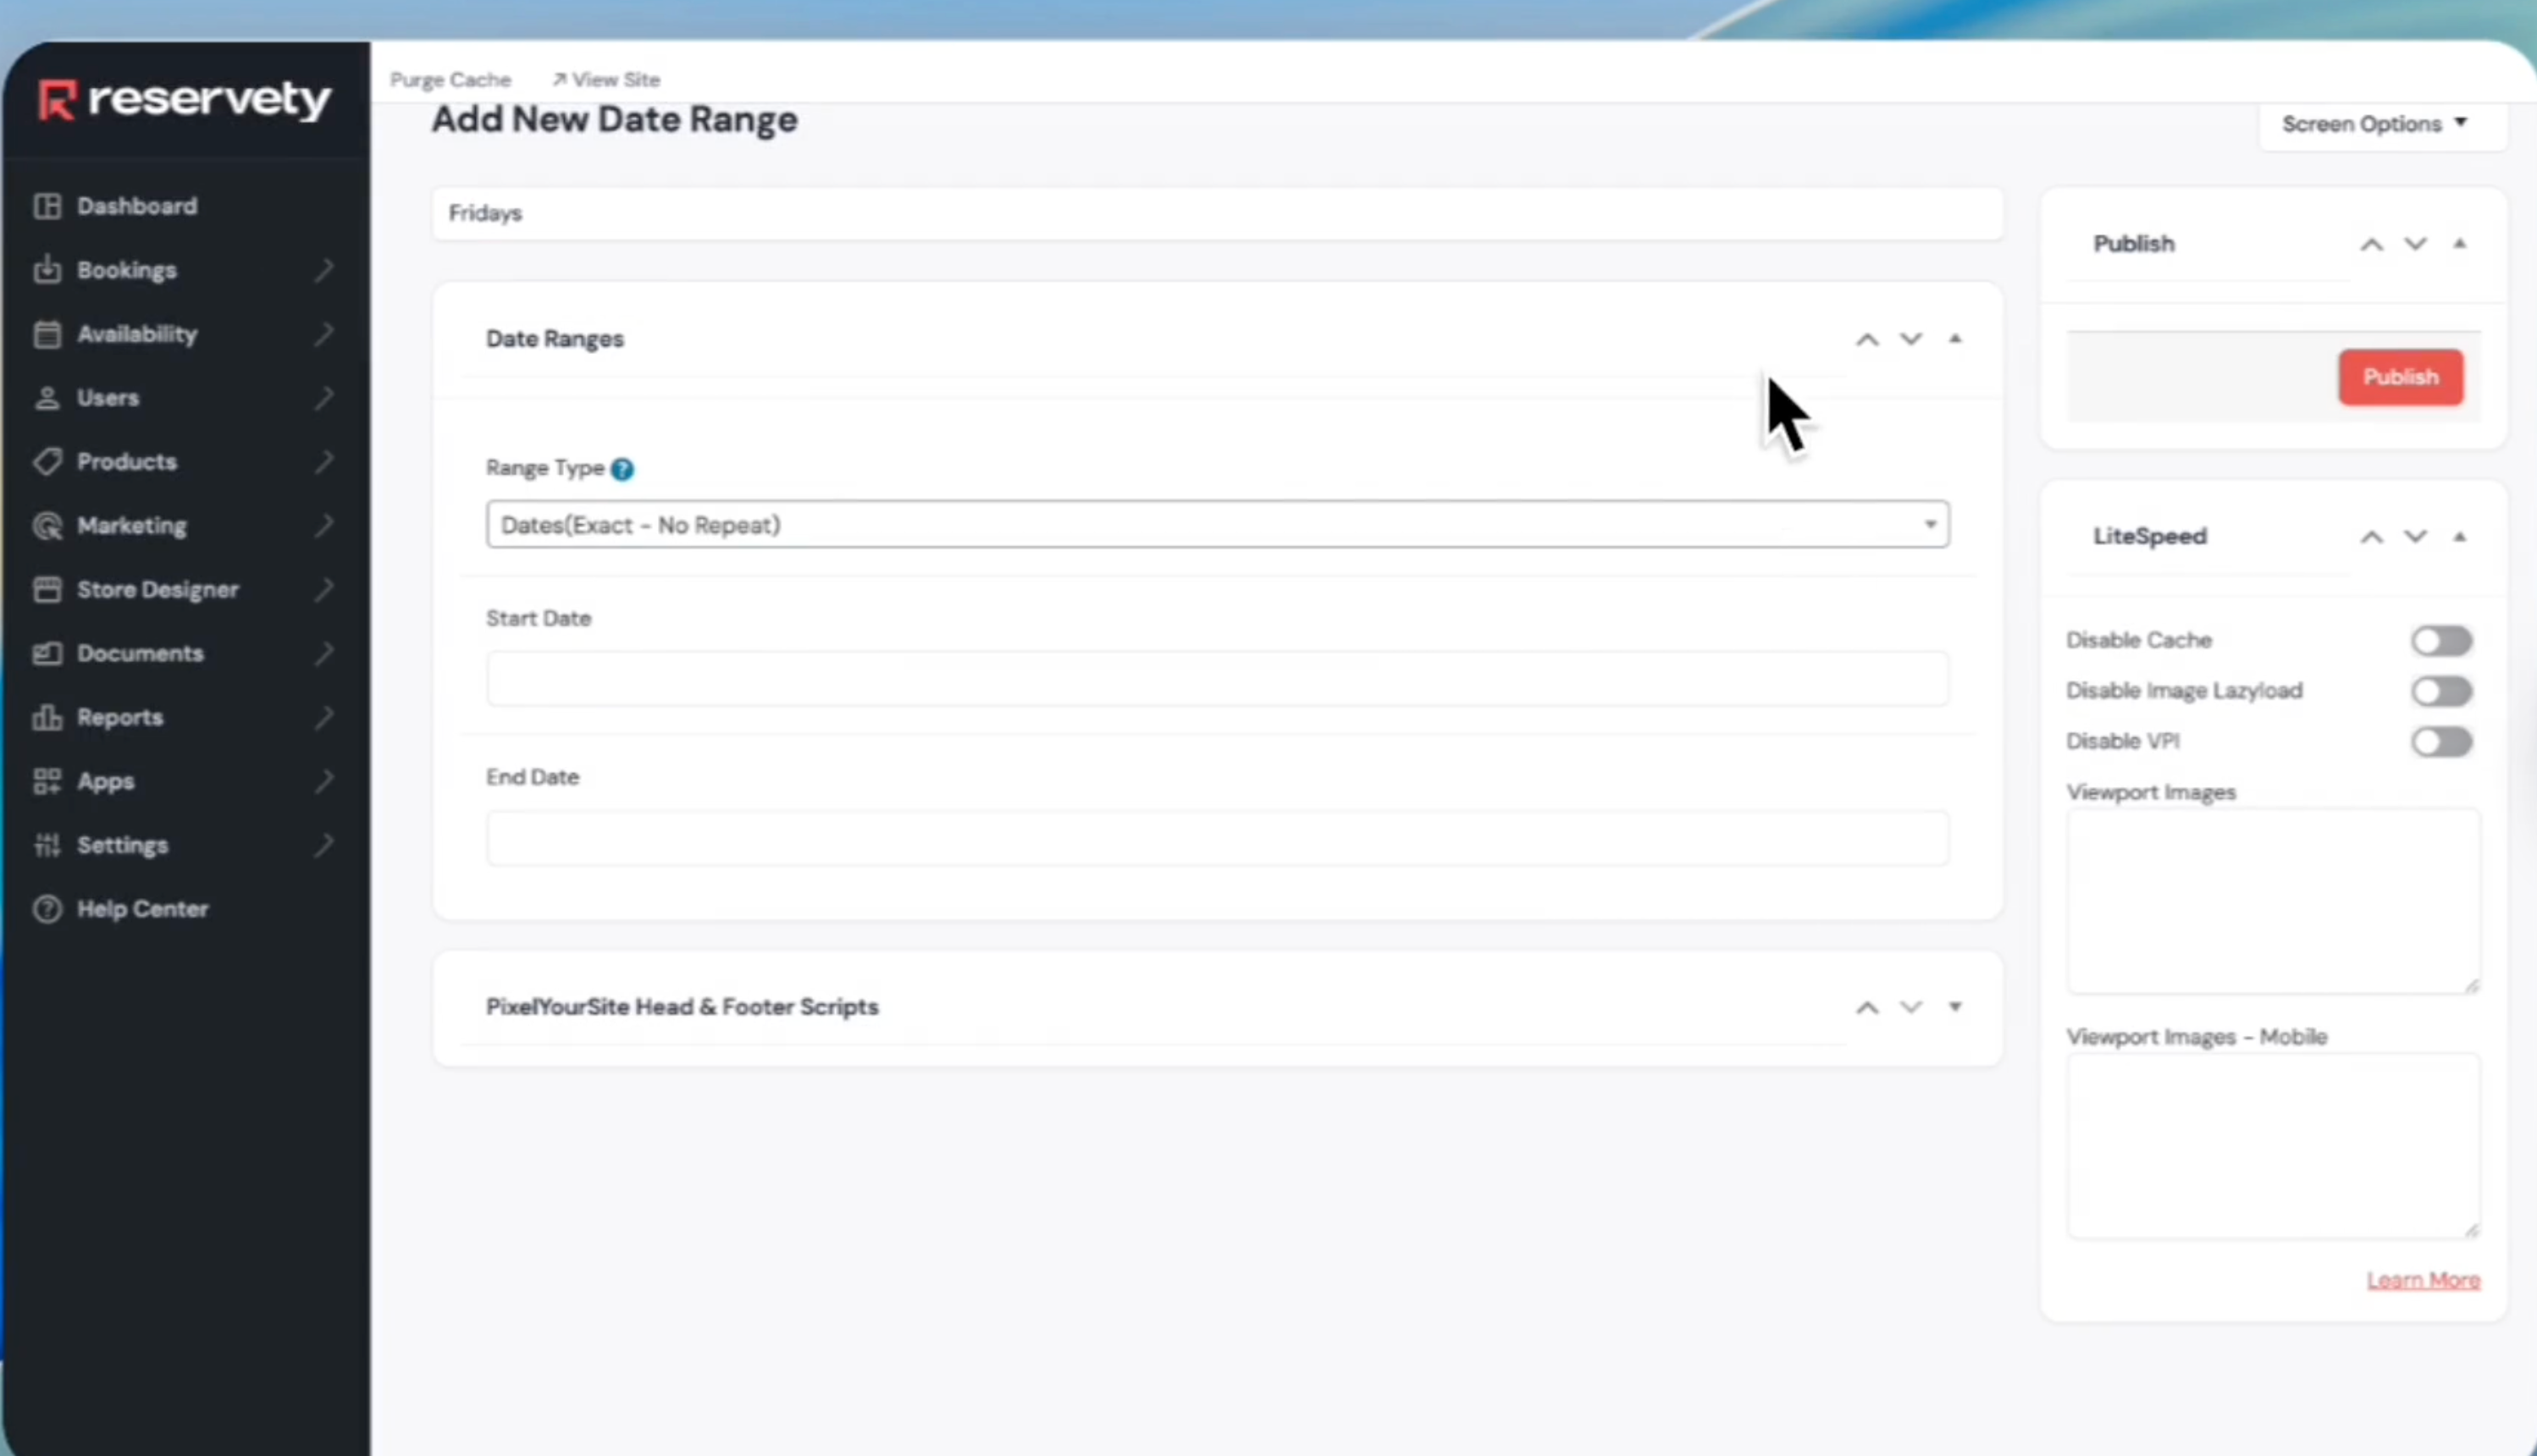
5
Click the Range Type dropdown.
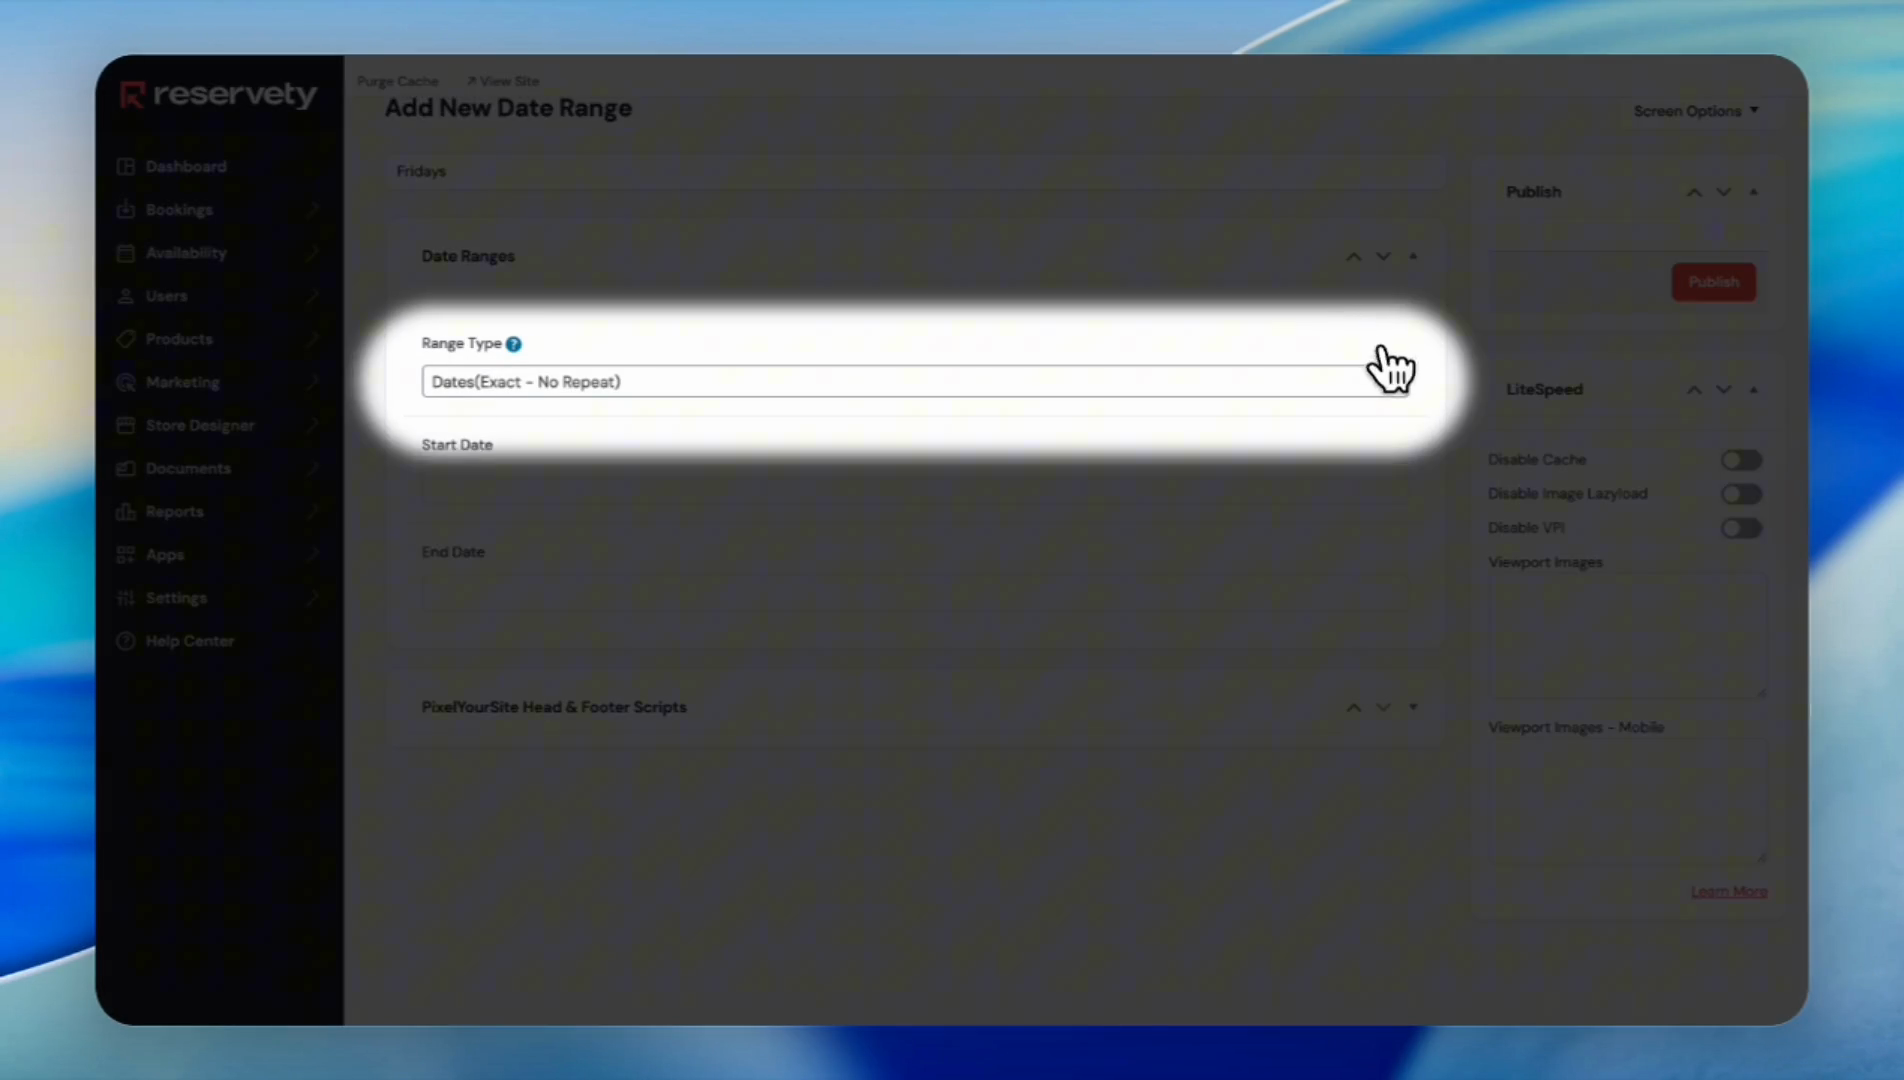
You have three choices. You can select "Dates," "Times," or "Weekdays."
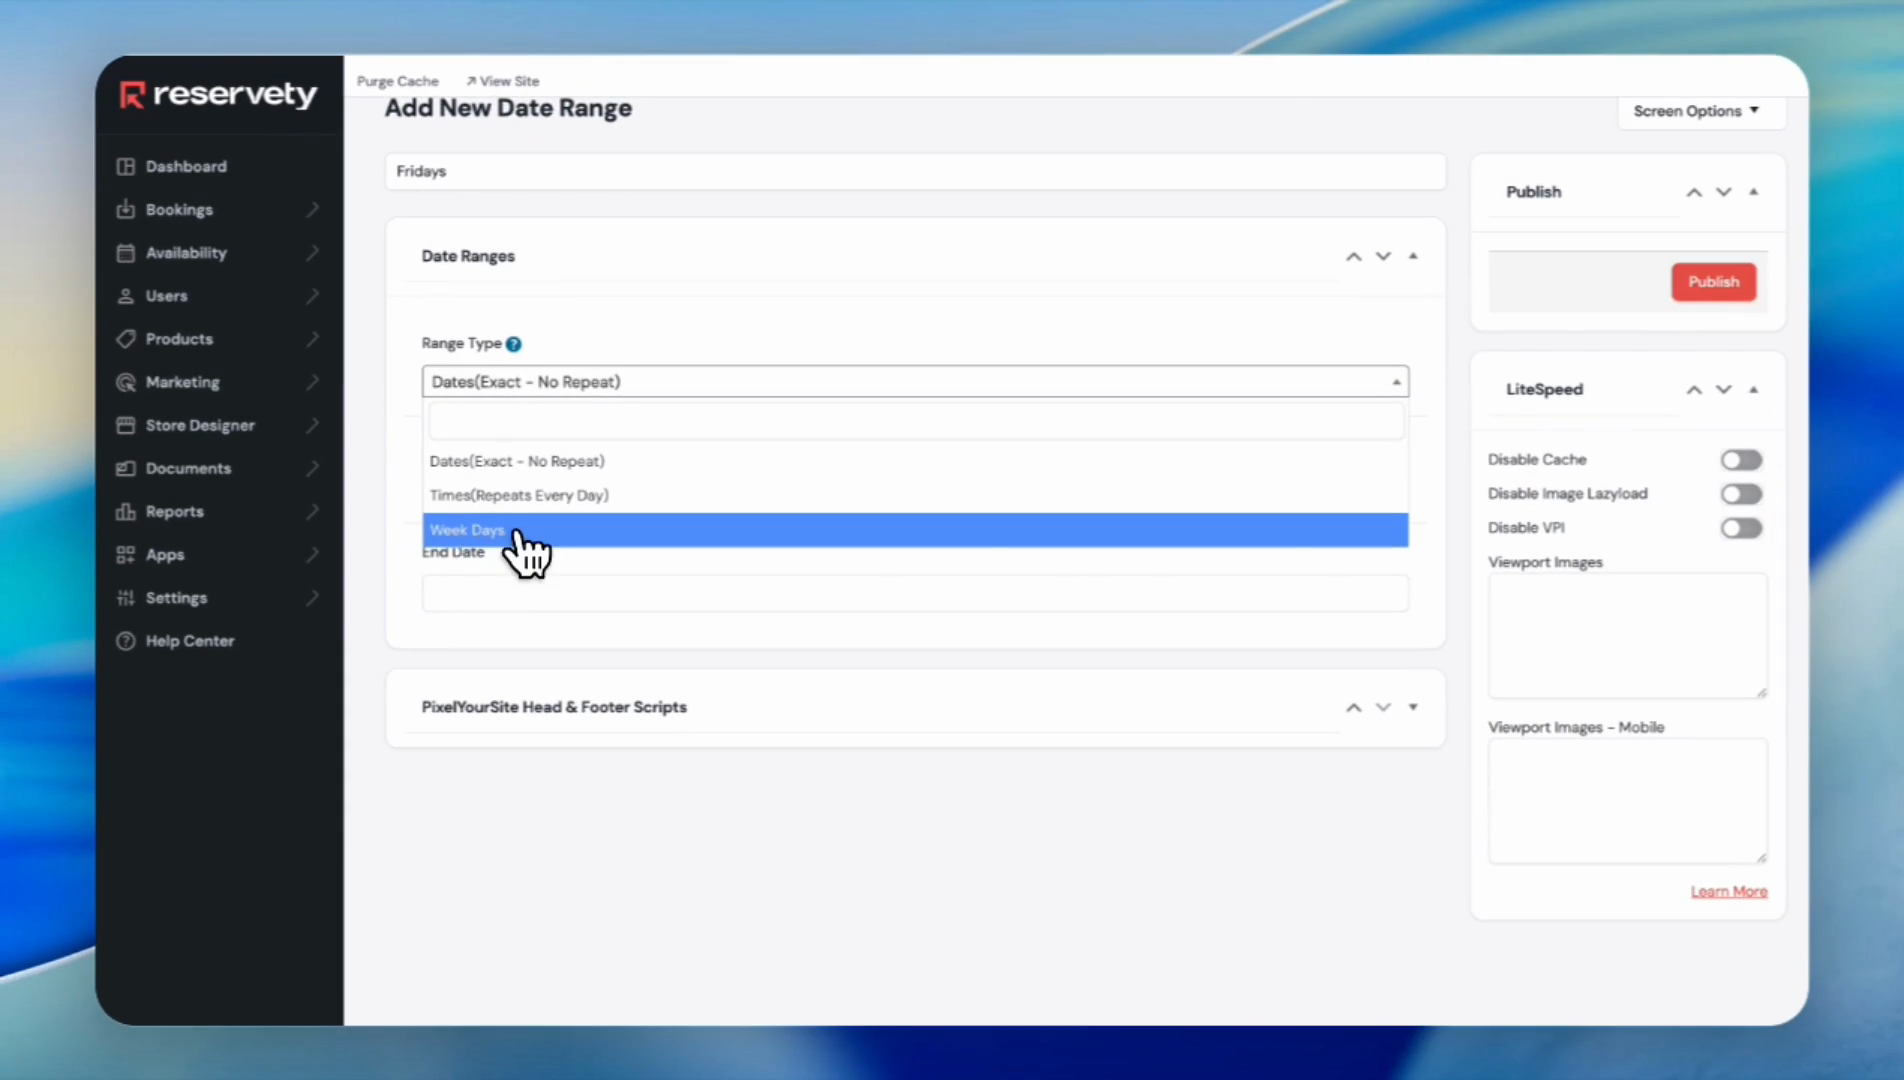
6
Select Weekdays because we want to block Fridays each week.
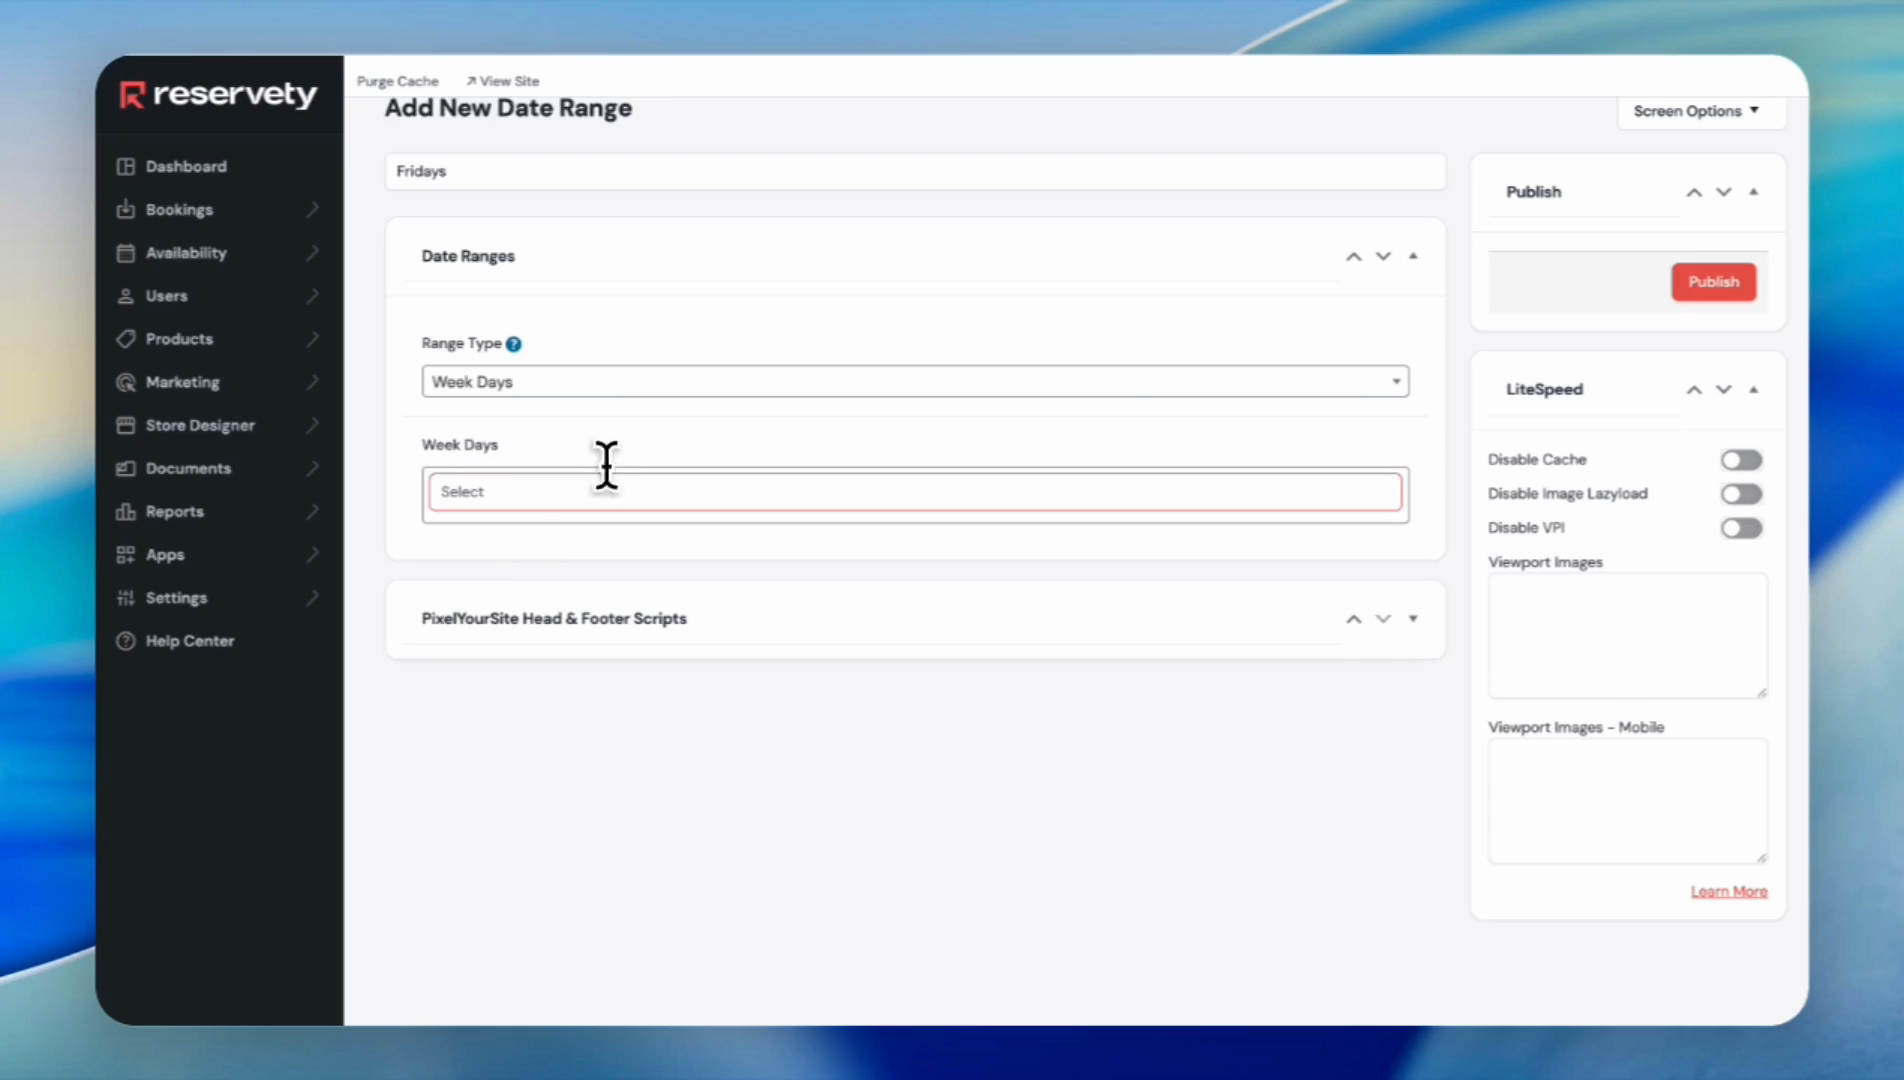
7
Click the Select dropdown under Week Days.
8
Click on Friday.
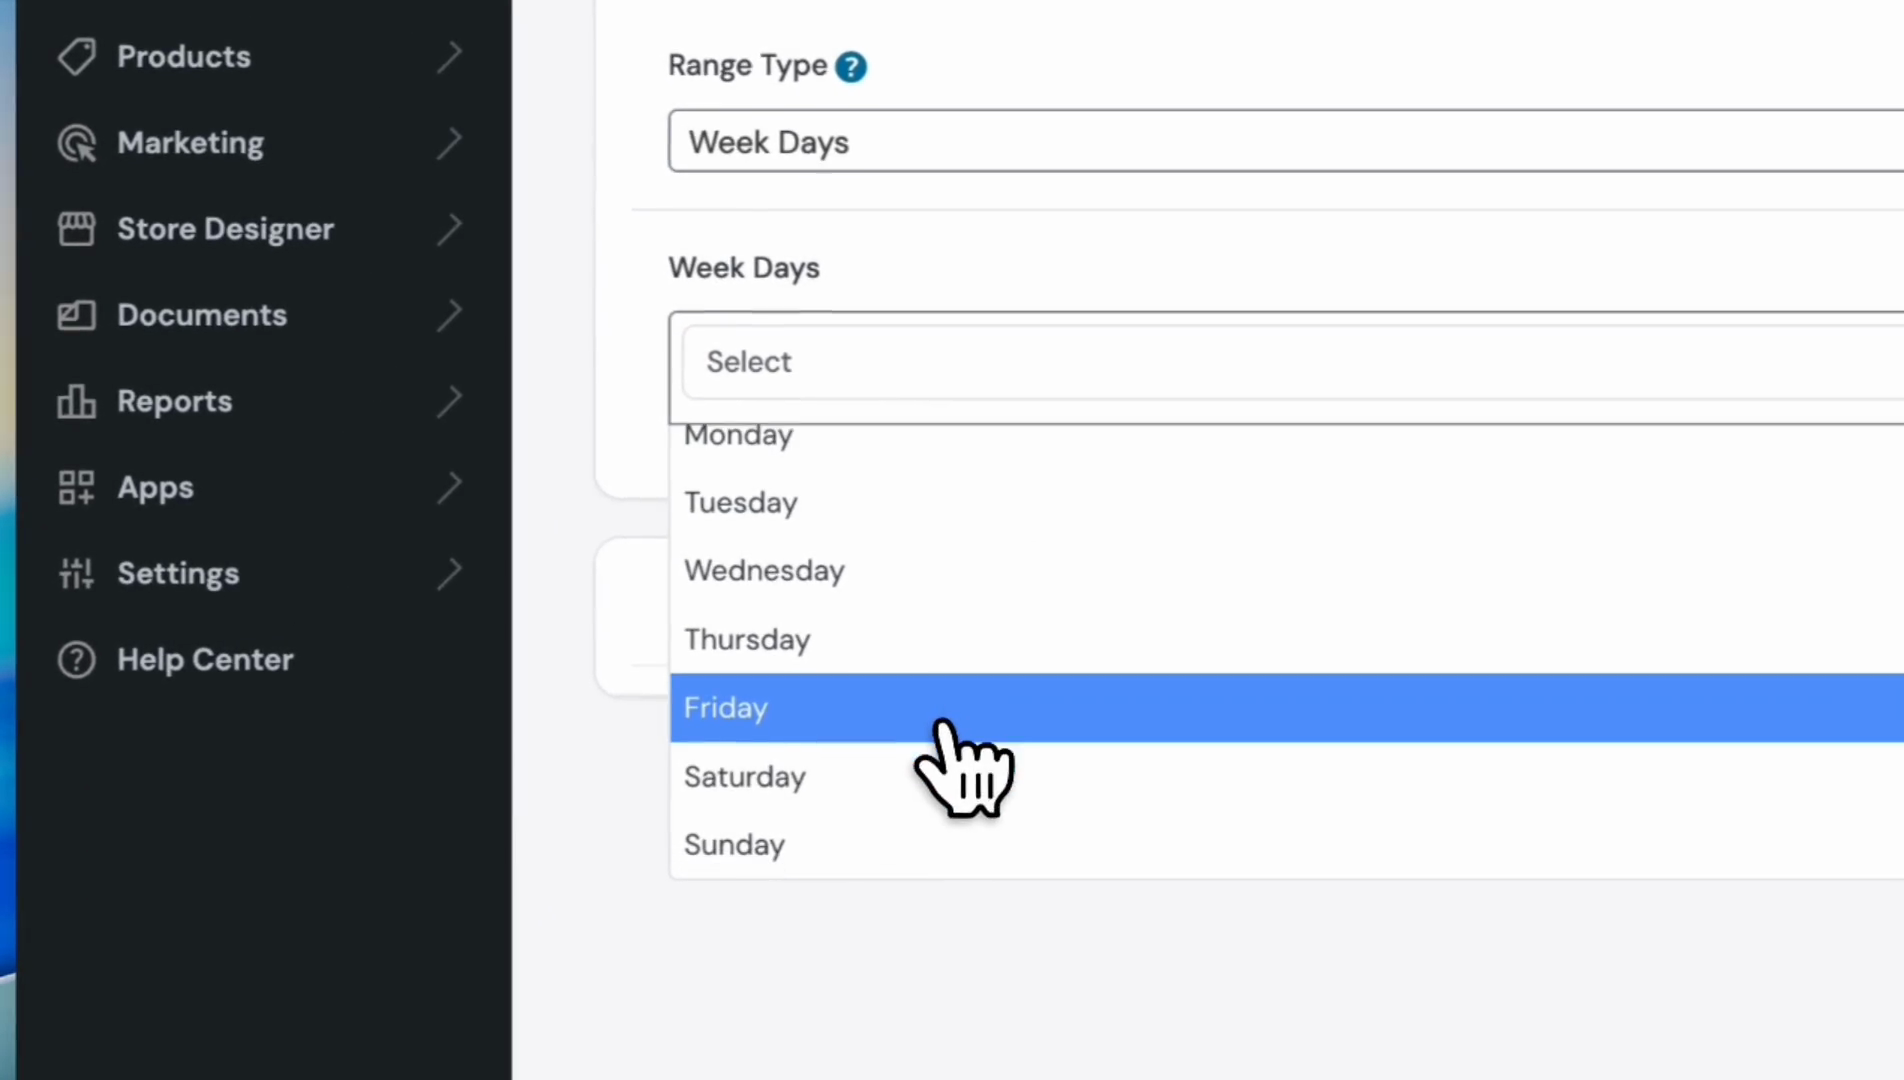
If you want to block other days, click here and select any day to block. In this case, we only want to block Fridays.
9
Click the Publish button.

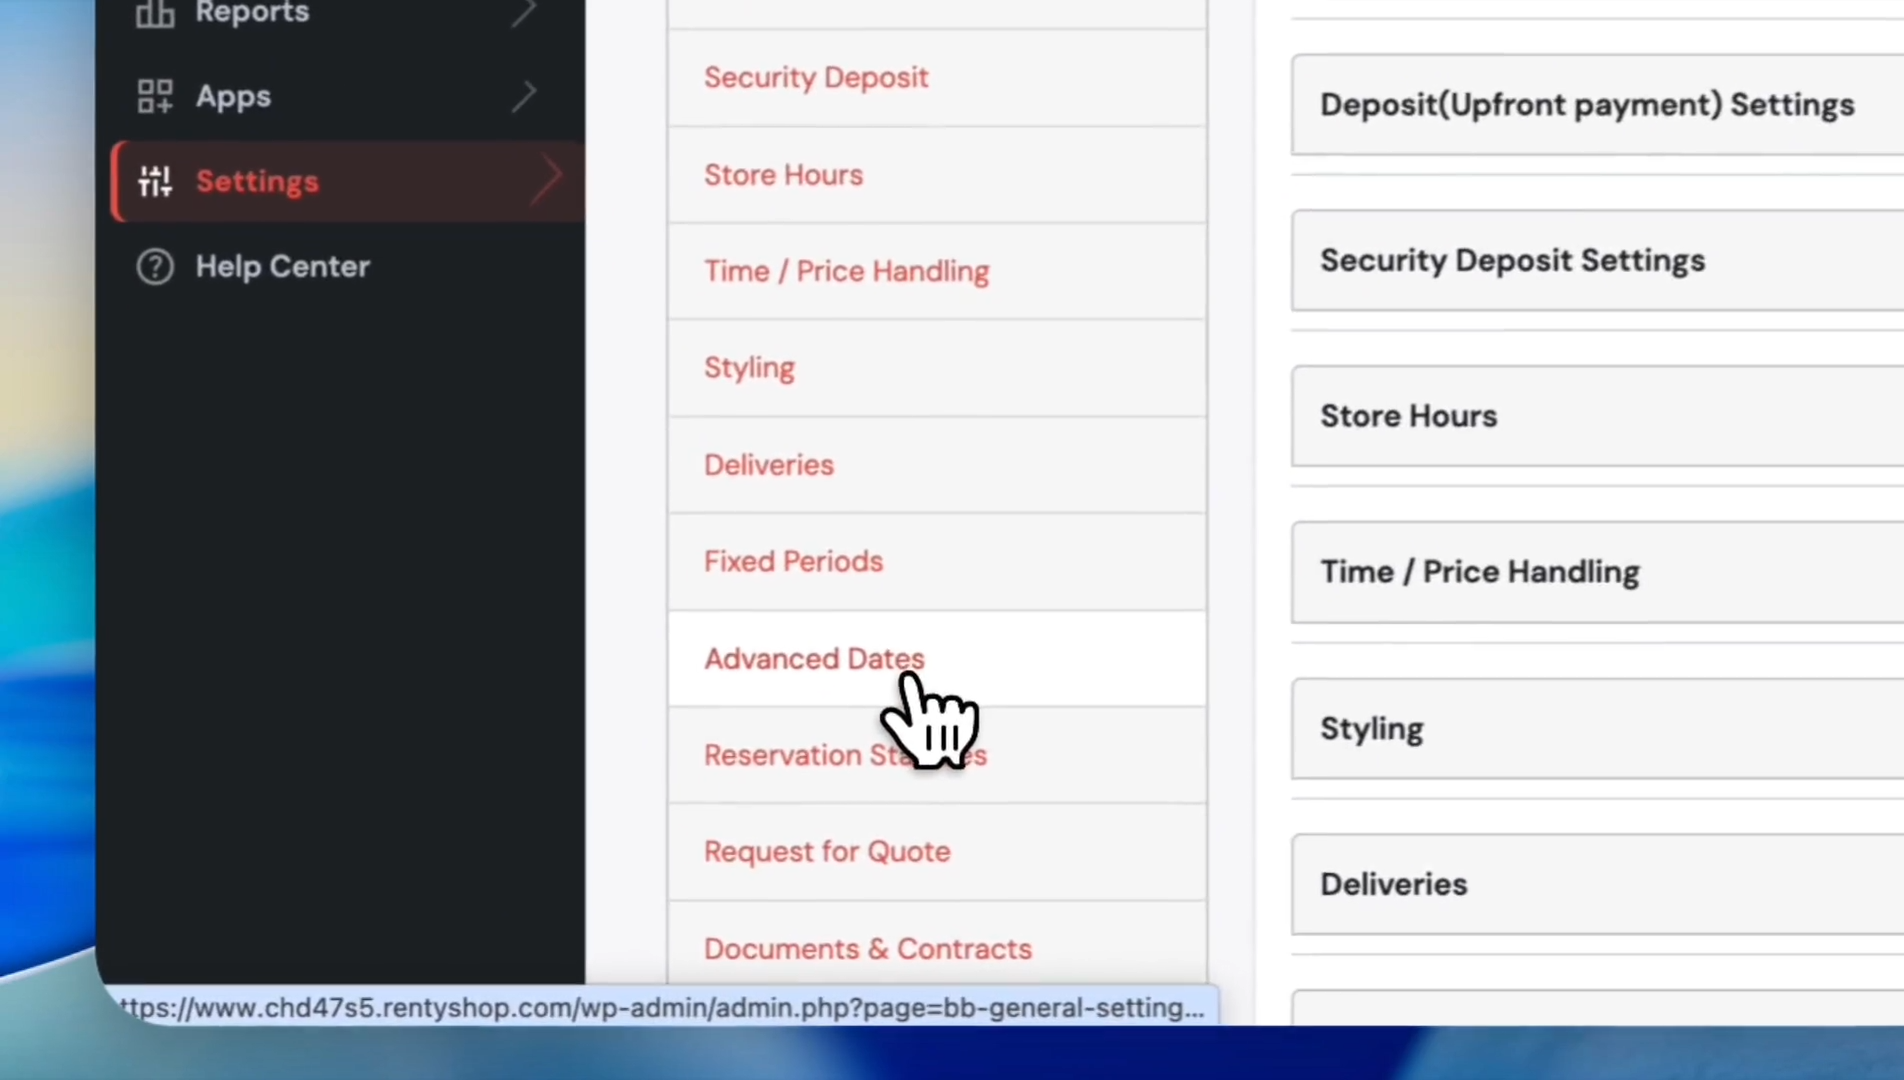
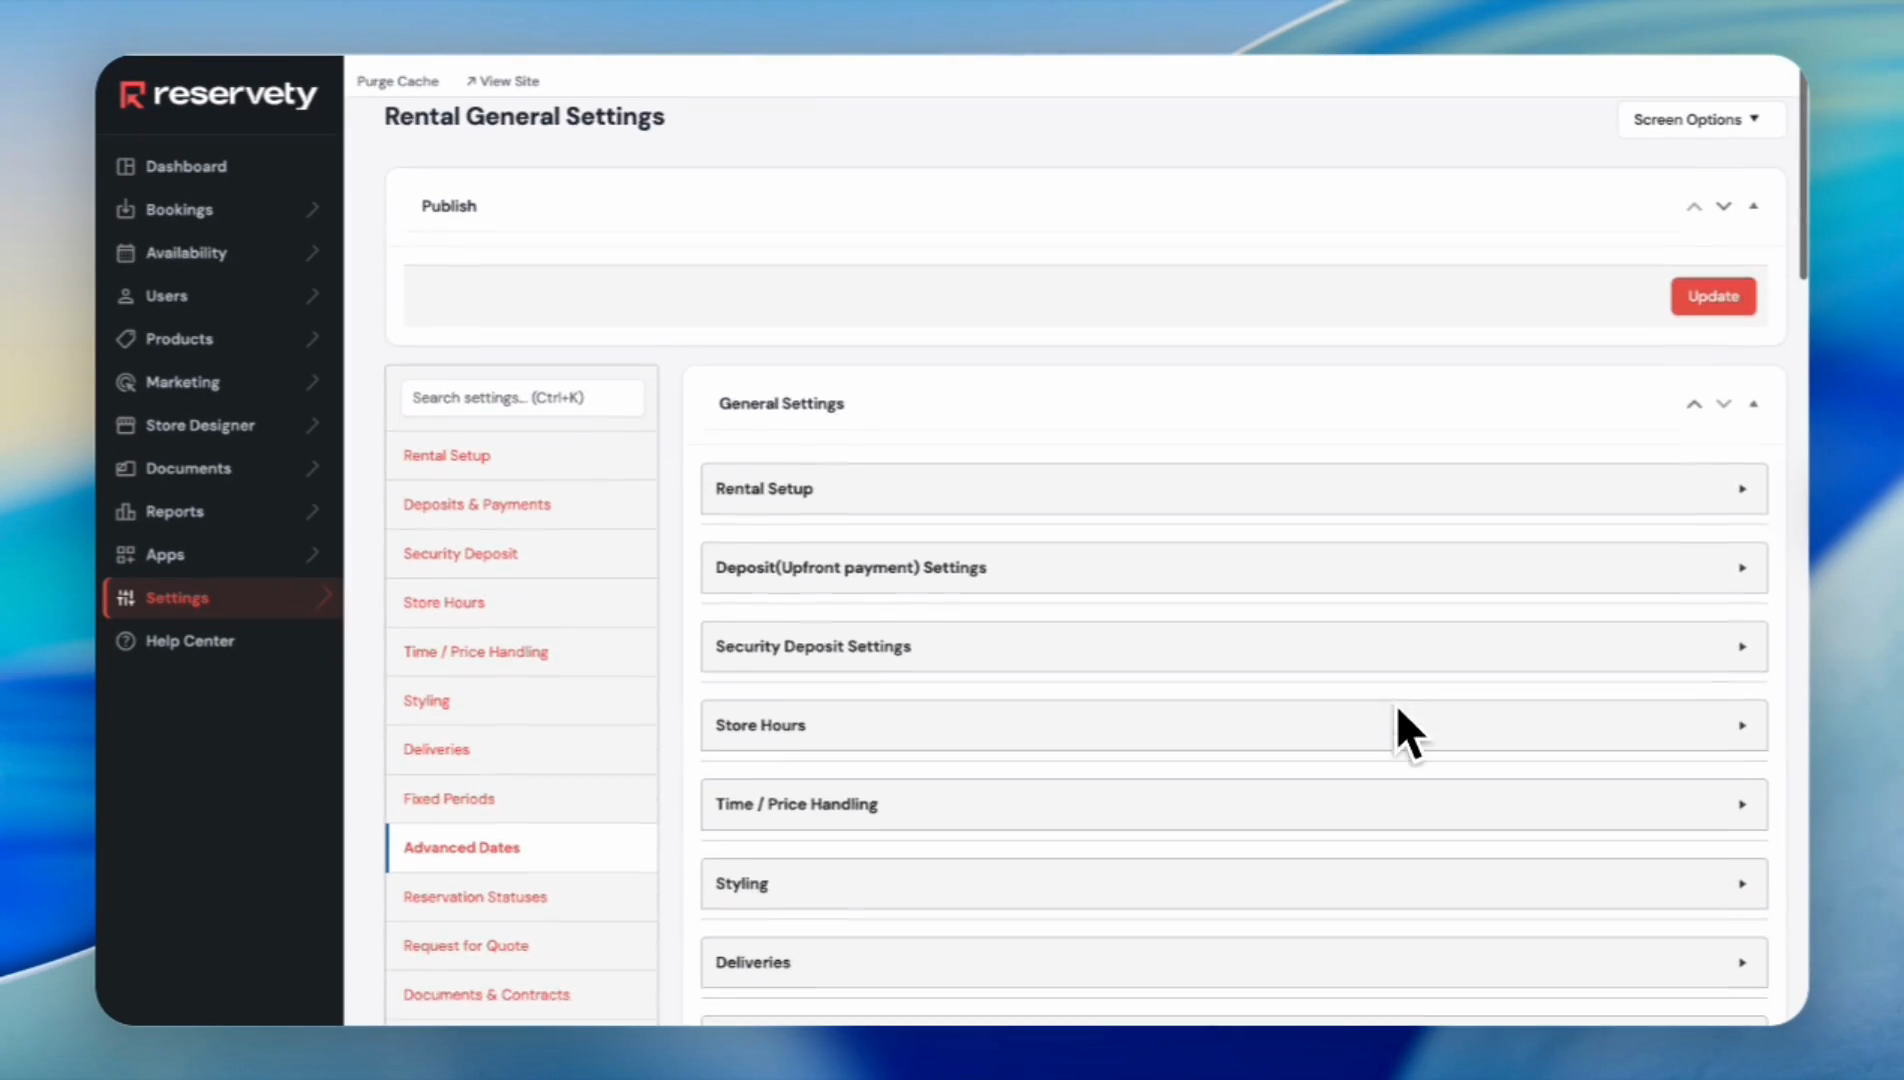
10
Under Settings, click on Rentals.
11
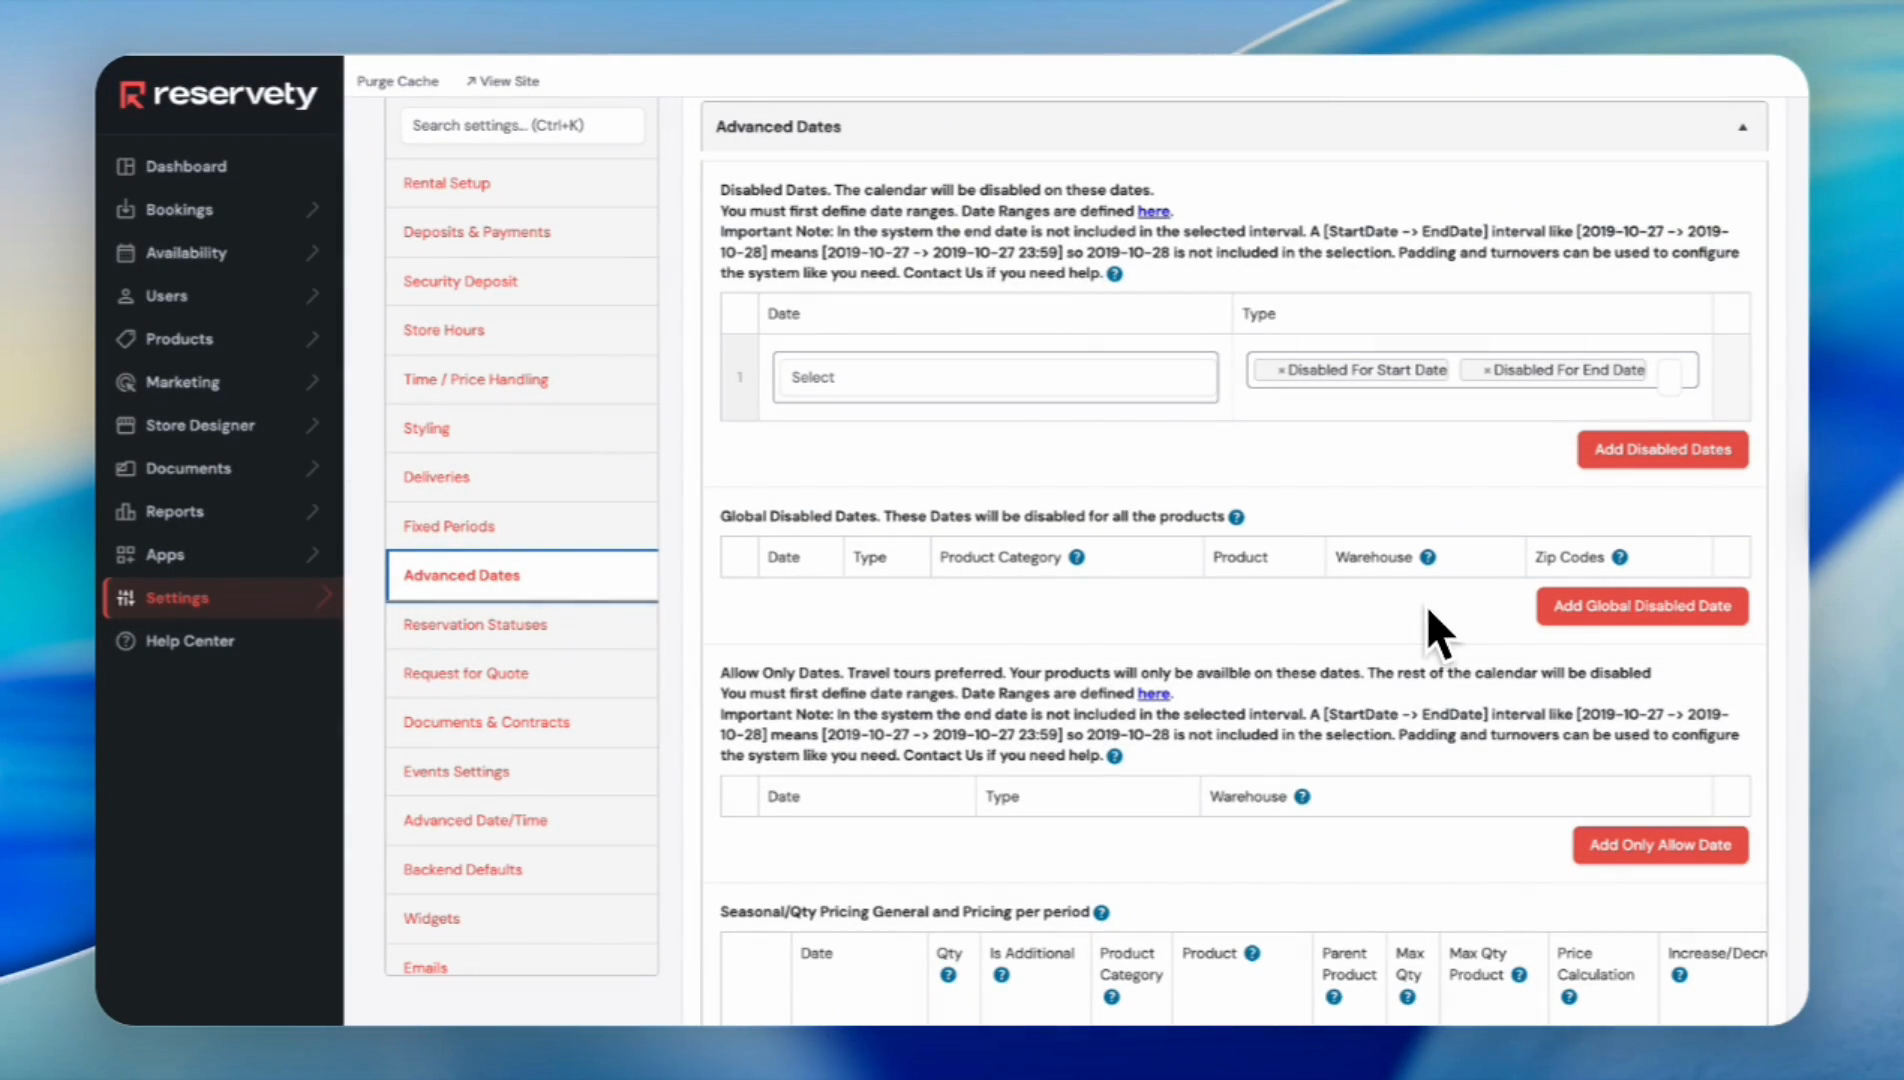
Click on Advanced Dates.
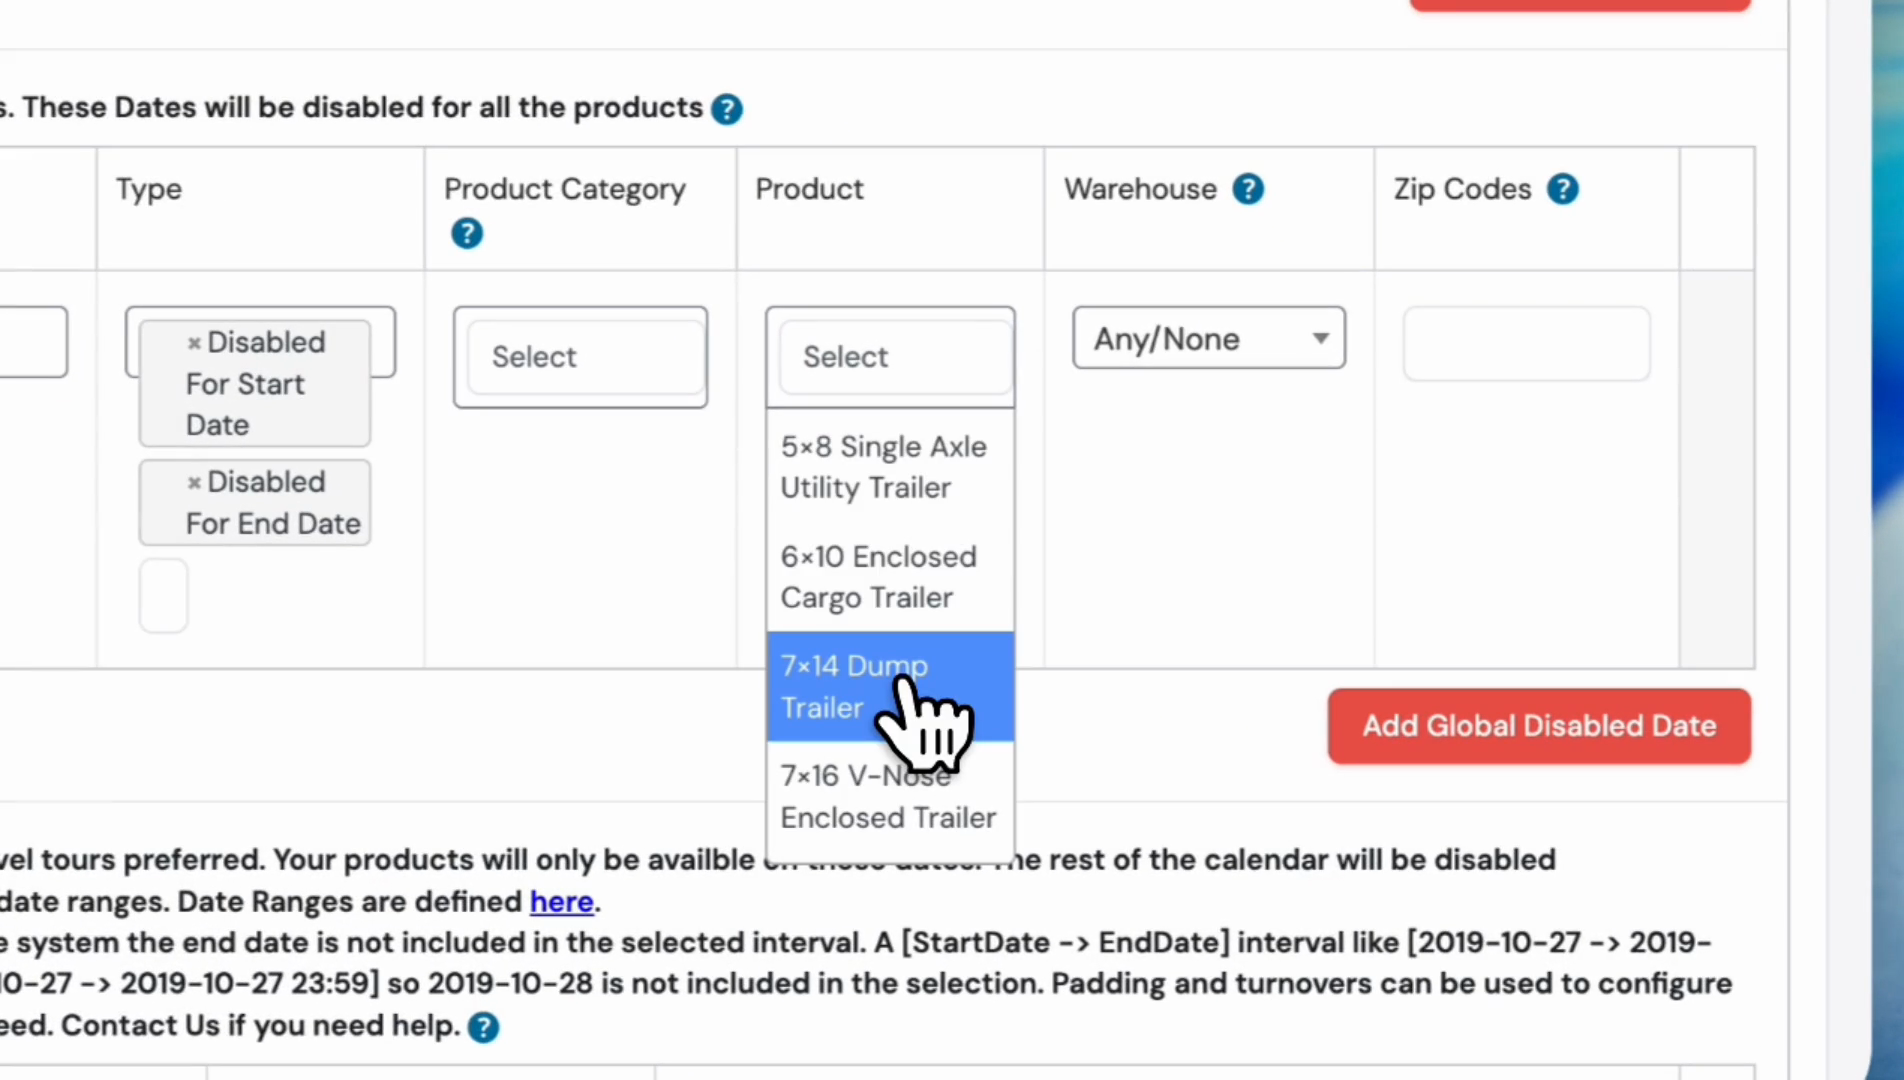
12
In the Global Disabled Dates section, click the Add Global Disabled Date button.
13
Click the Select dropdown under the Date column.

Next, select the product you want to apply the blocking date to, or choose the entire category.
14
For this tutorial, we will select the dropdown under the Product column.
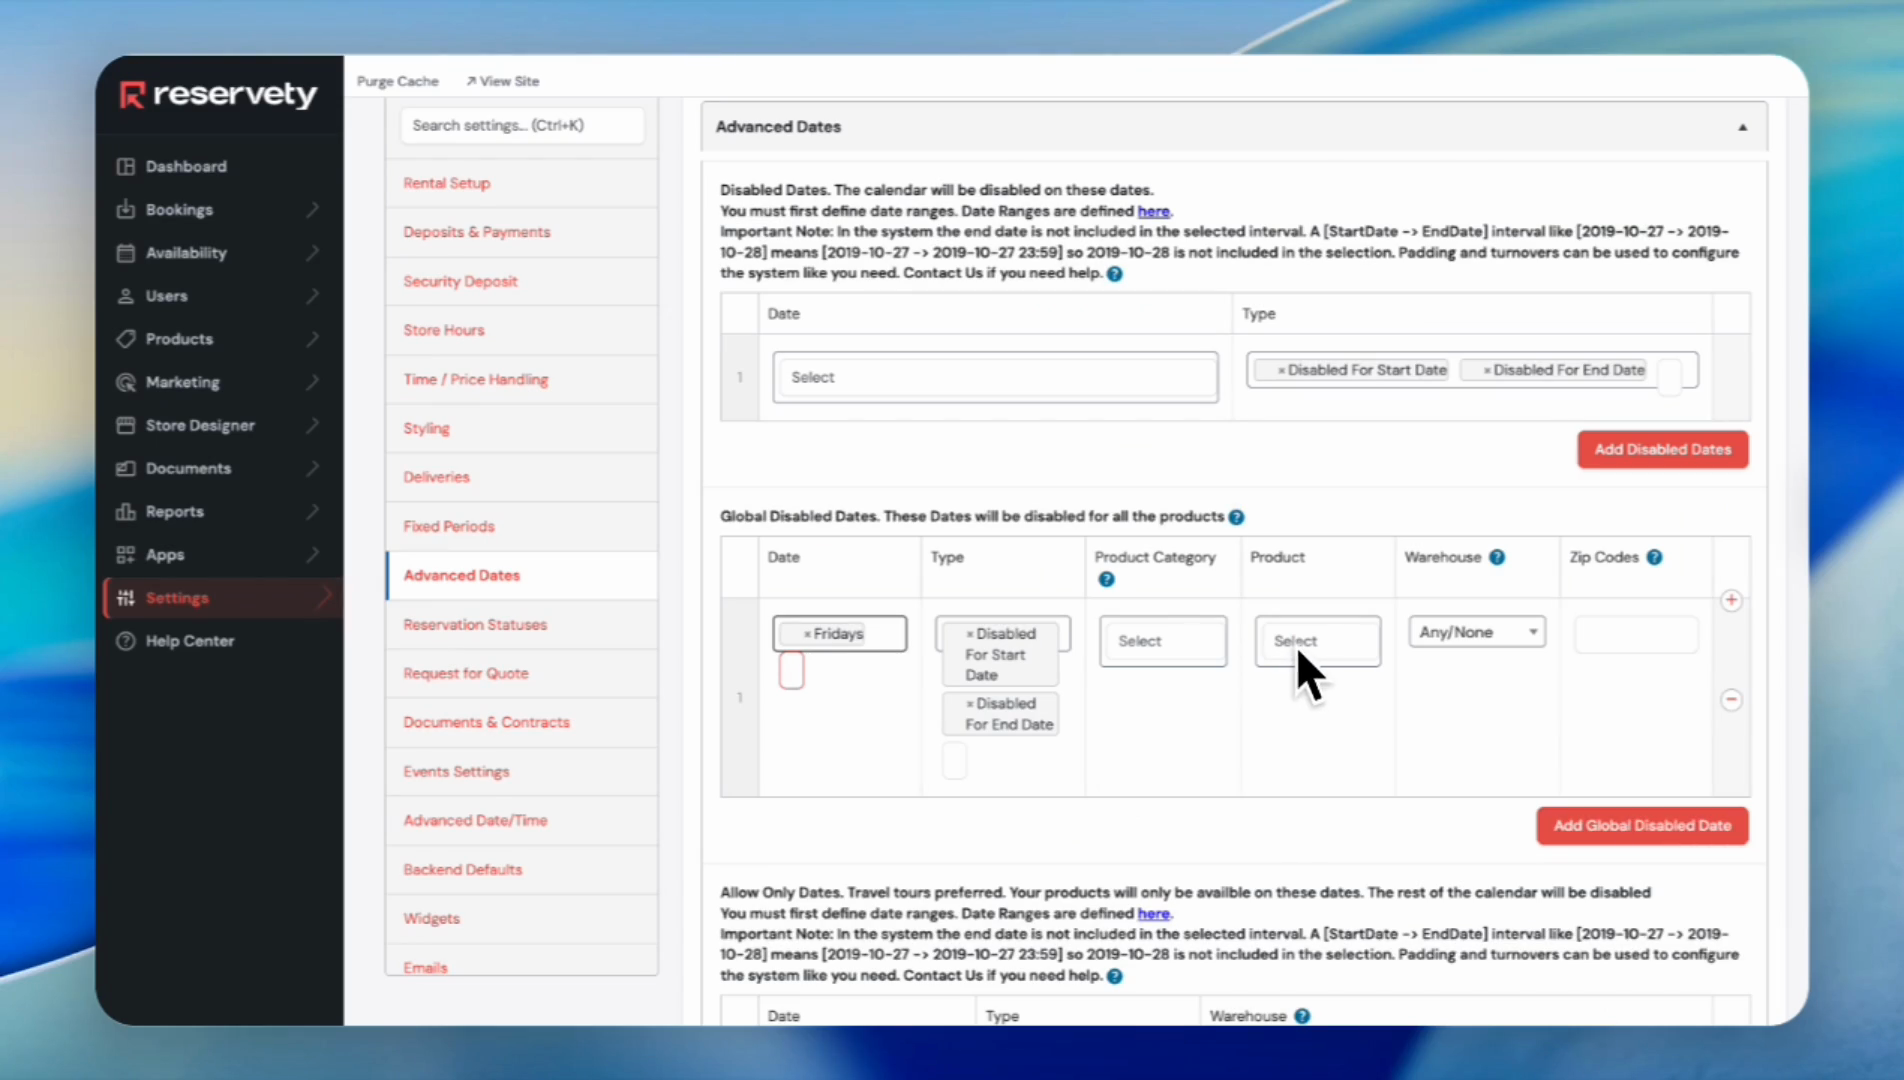
15
Click on '7x14 Dump Trailer' from the dropdown list, because that is the product we want to apply the blocking dates.
16
Click the Update button.
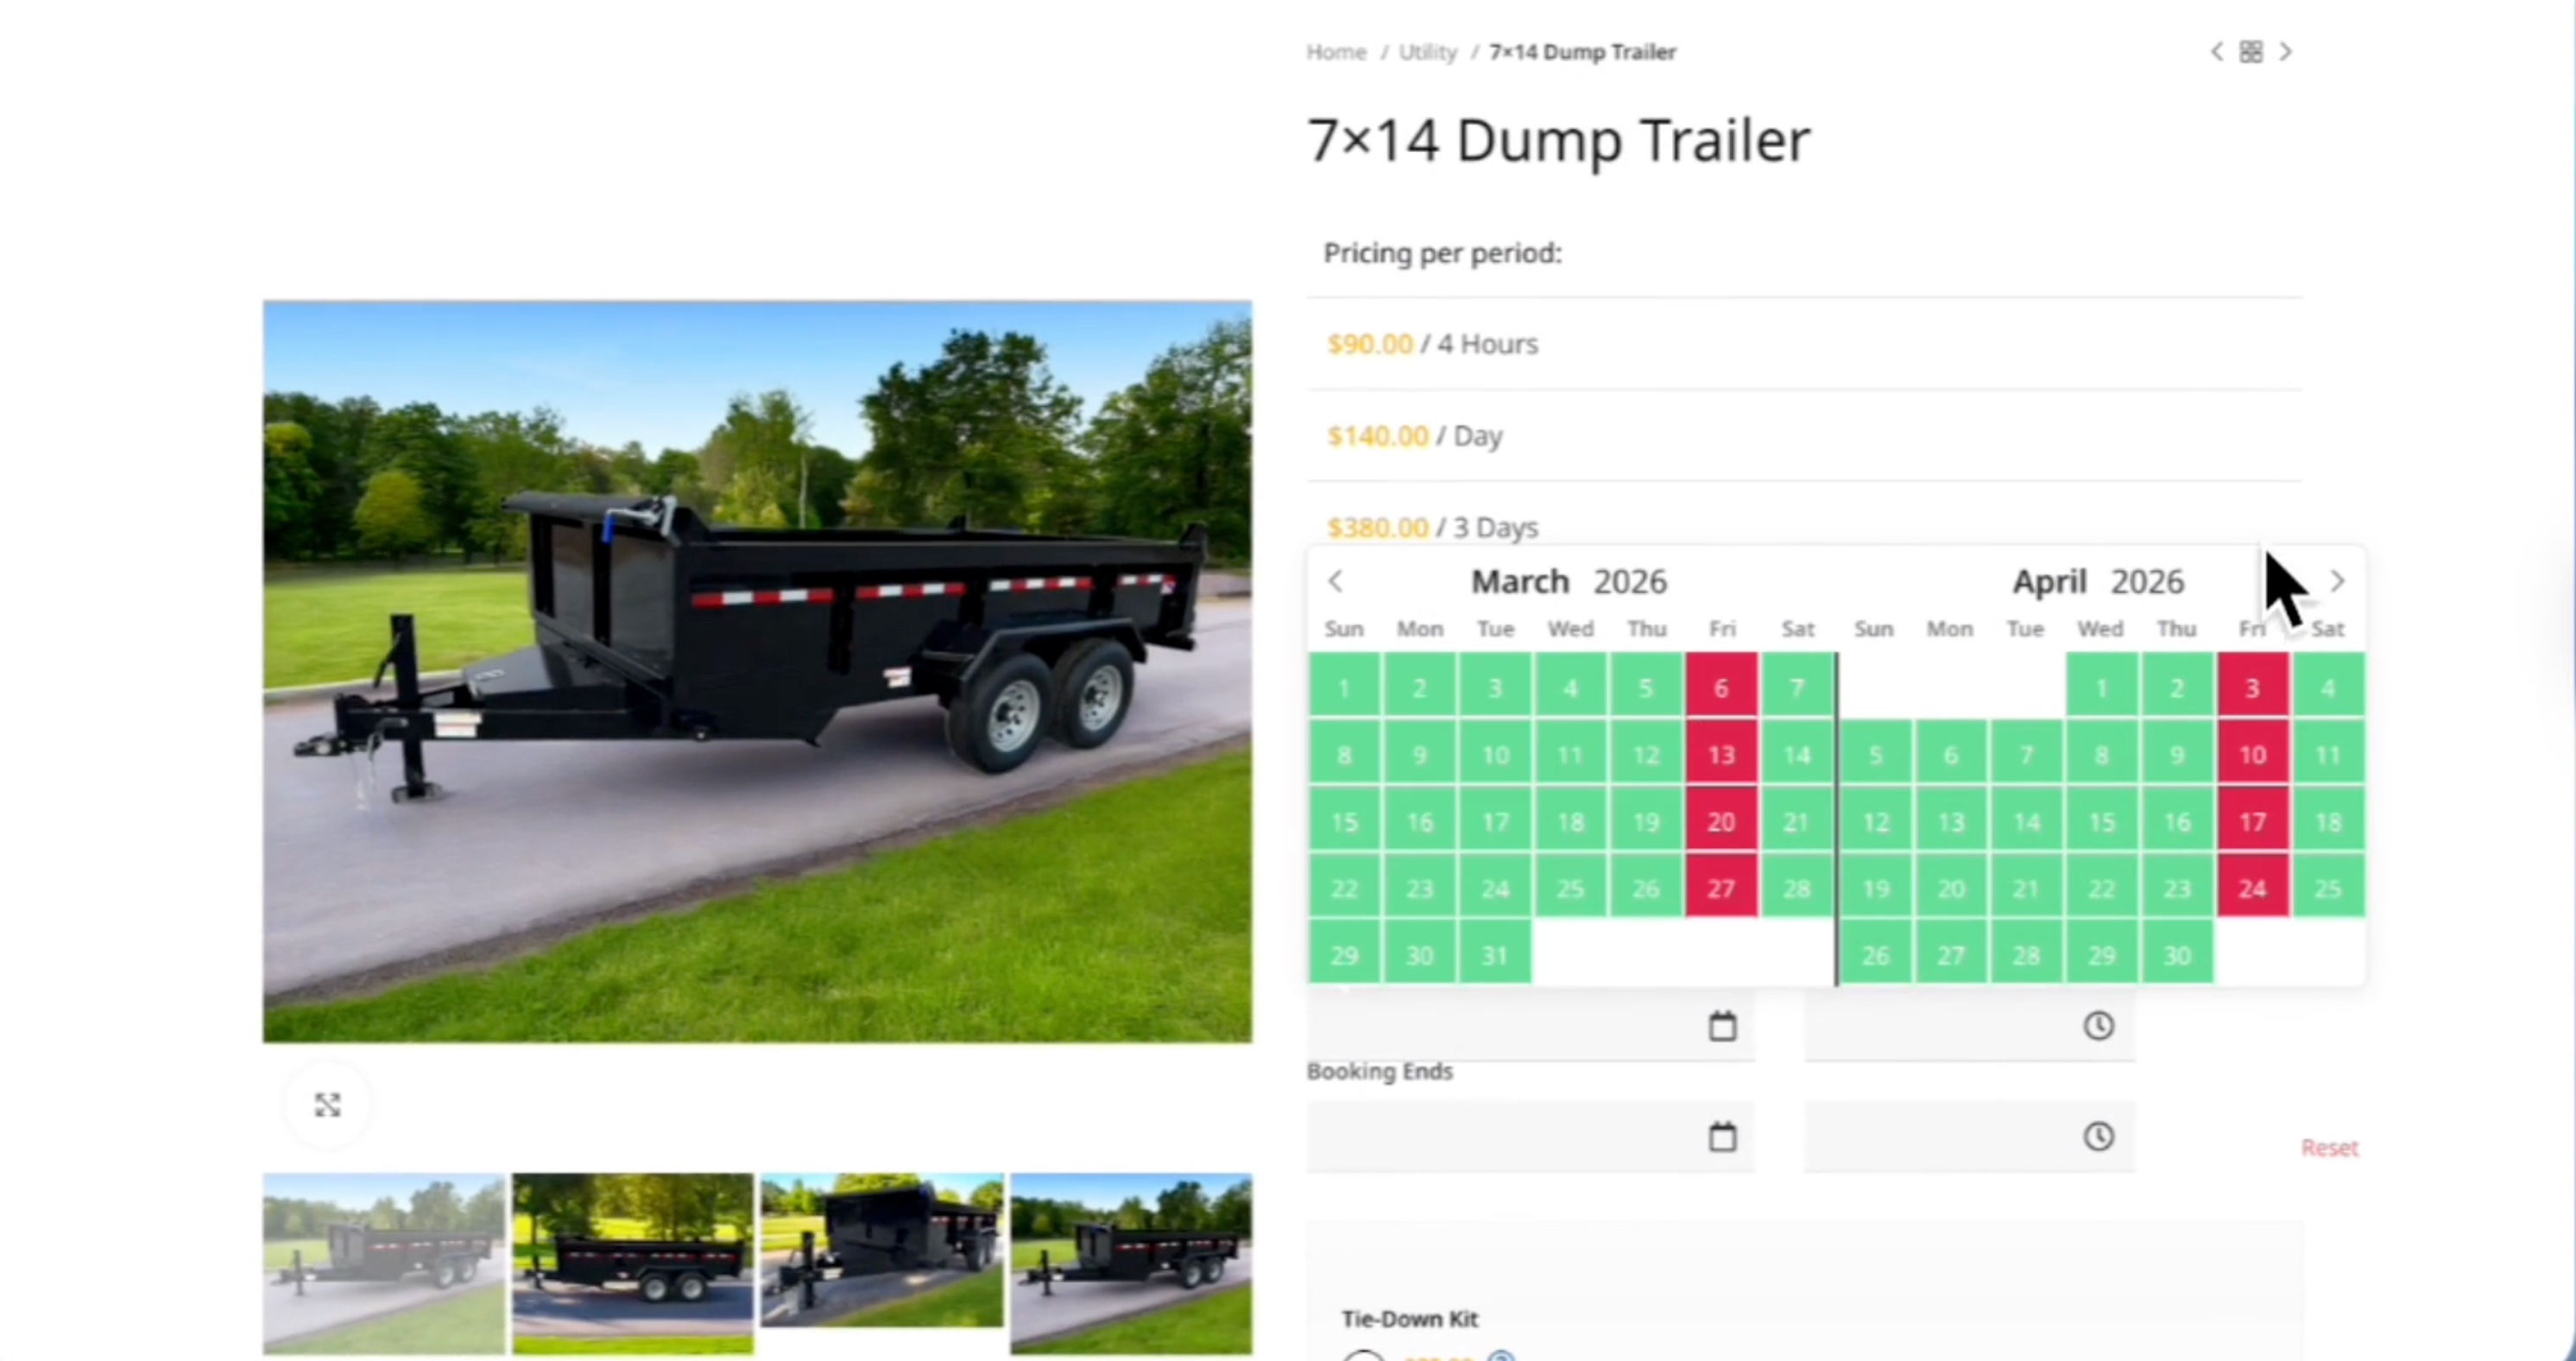
17
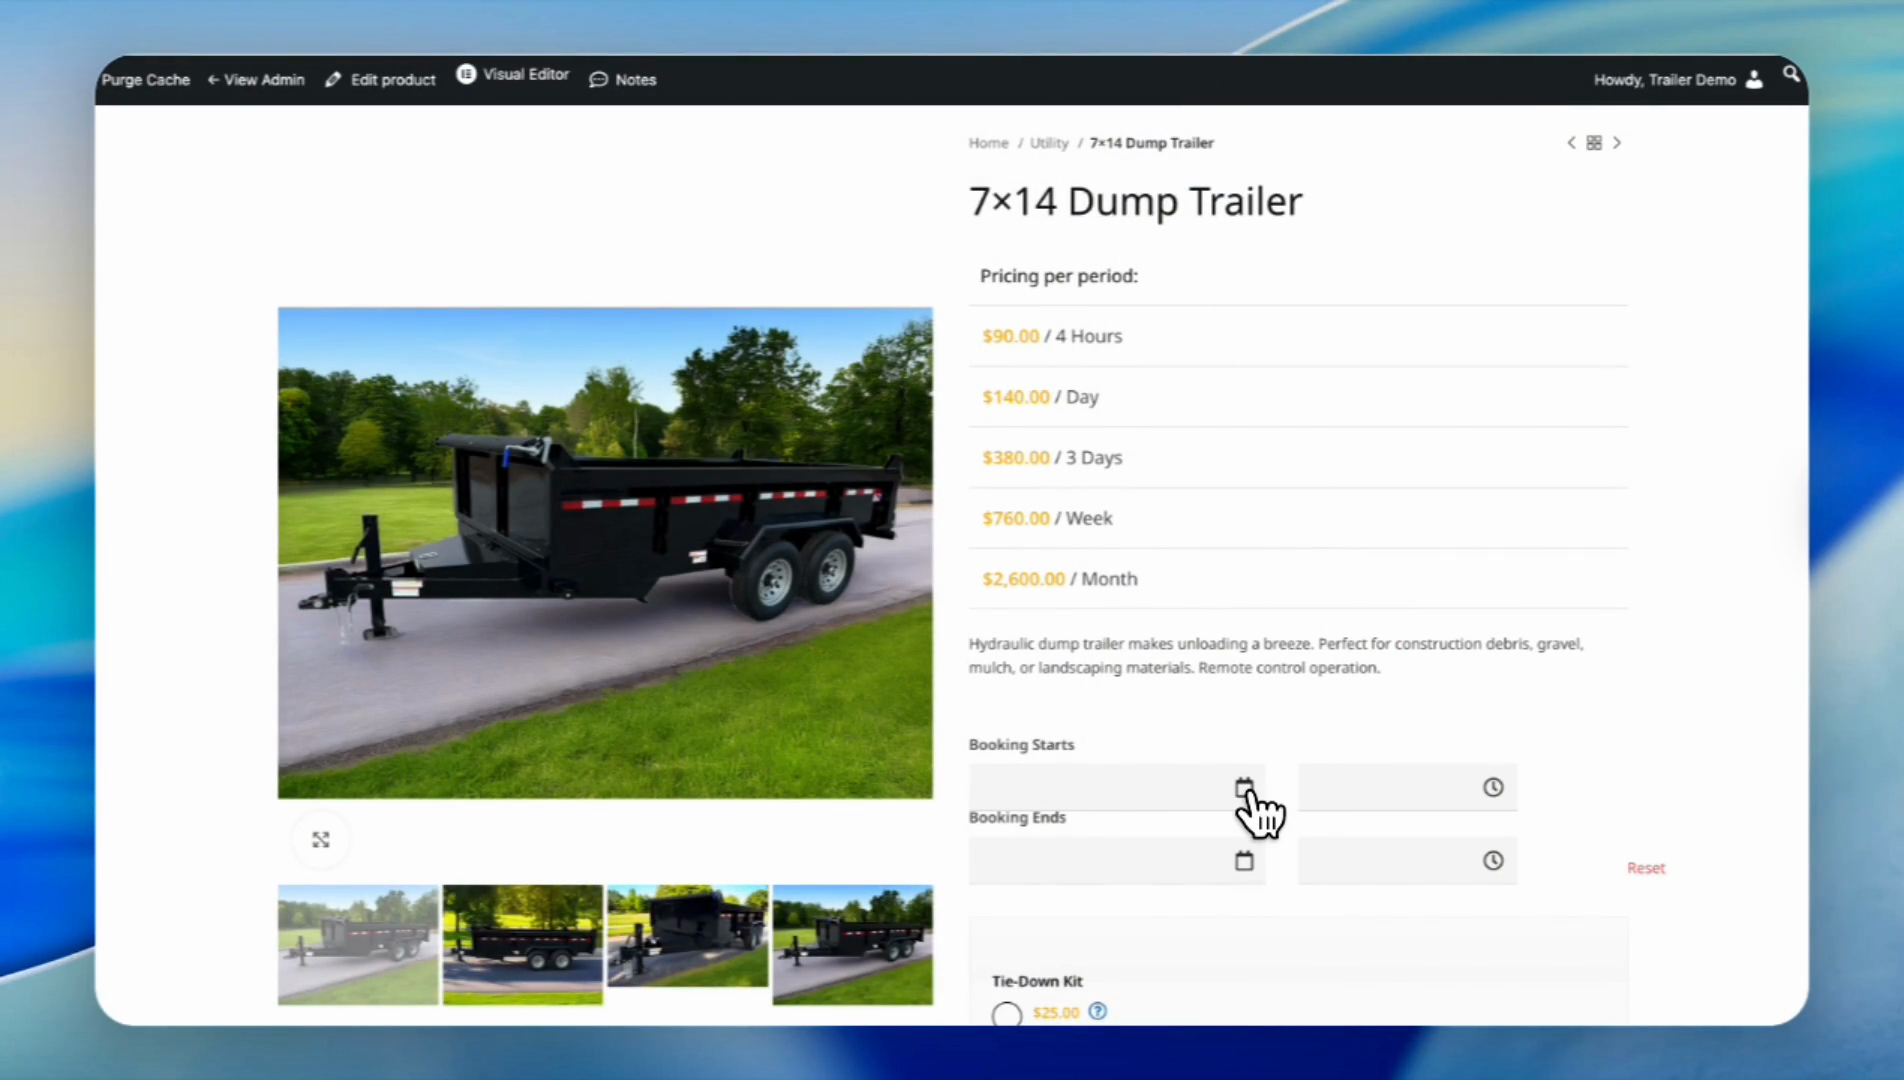
Click on the product to see the blocked dates. In this case, it is a '7x14 Dump Trailer'.

Let's try to book it for Fridays.
18
Click the calendar icon for 'Booking Starts'.
19
As you can see, the dump trailer is blocked for Fridays in all months.