How to Build Lighting Sequences from Scratch

Learn step-by-step how to create custom lighting sequences for kids' services or Vacation Bible School (VBS). Discover tips for smooth transitions, organizing scenes, and optimizing your lighting setup for engaging experiences.

By Chris Copeland

In this guide, we'll learn how to build a custom lighting setup from scratch for a kids service or VBS event. We'll cover how to create new presets, adjust lighting scenes, and organize them for smooth transitions. You'll also see how to use sequences for seamless changes and how to group your scenes for easy access.

Let's get started

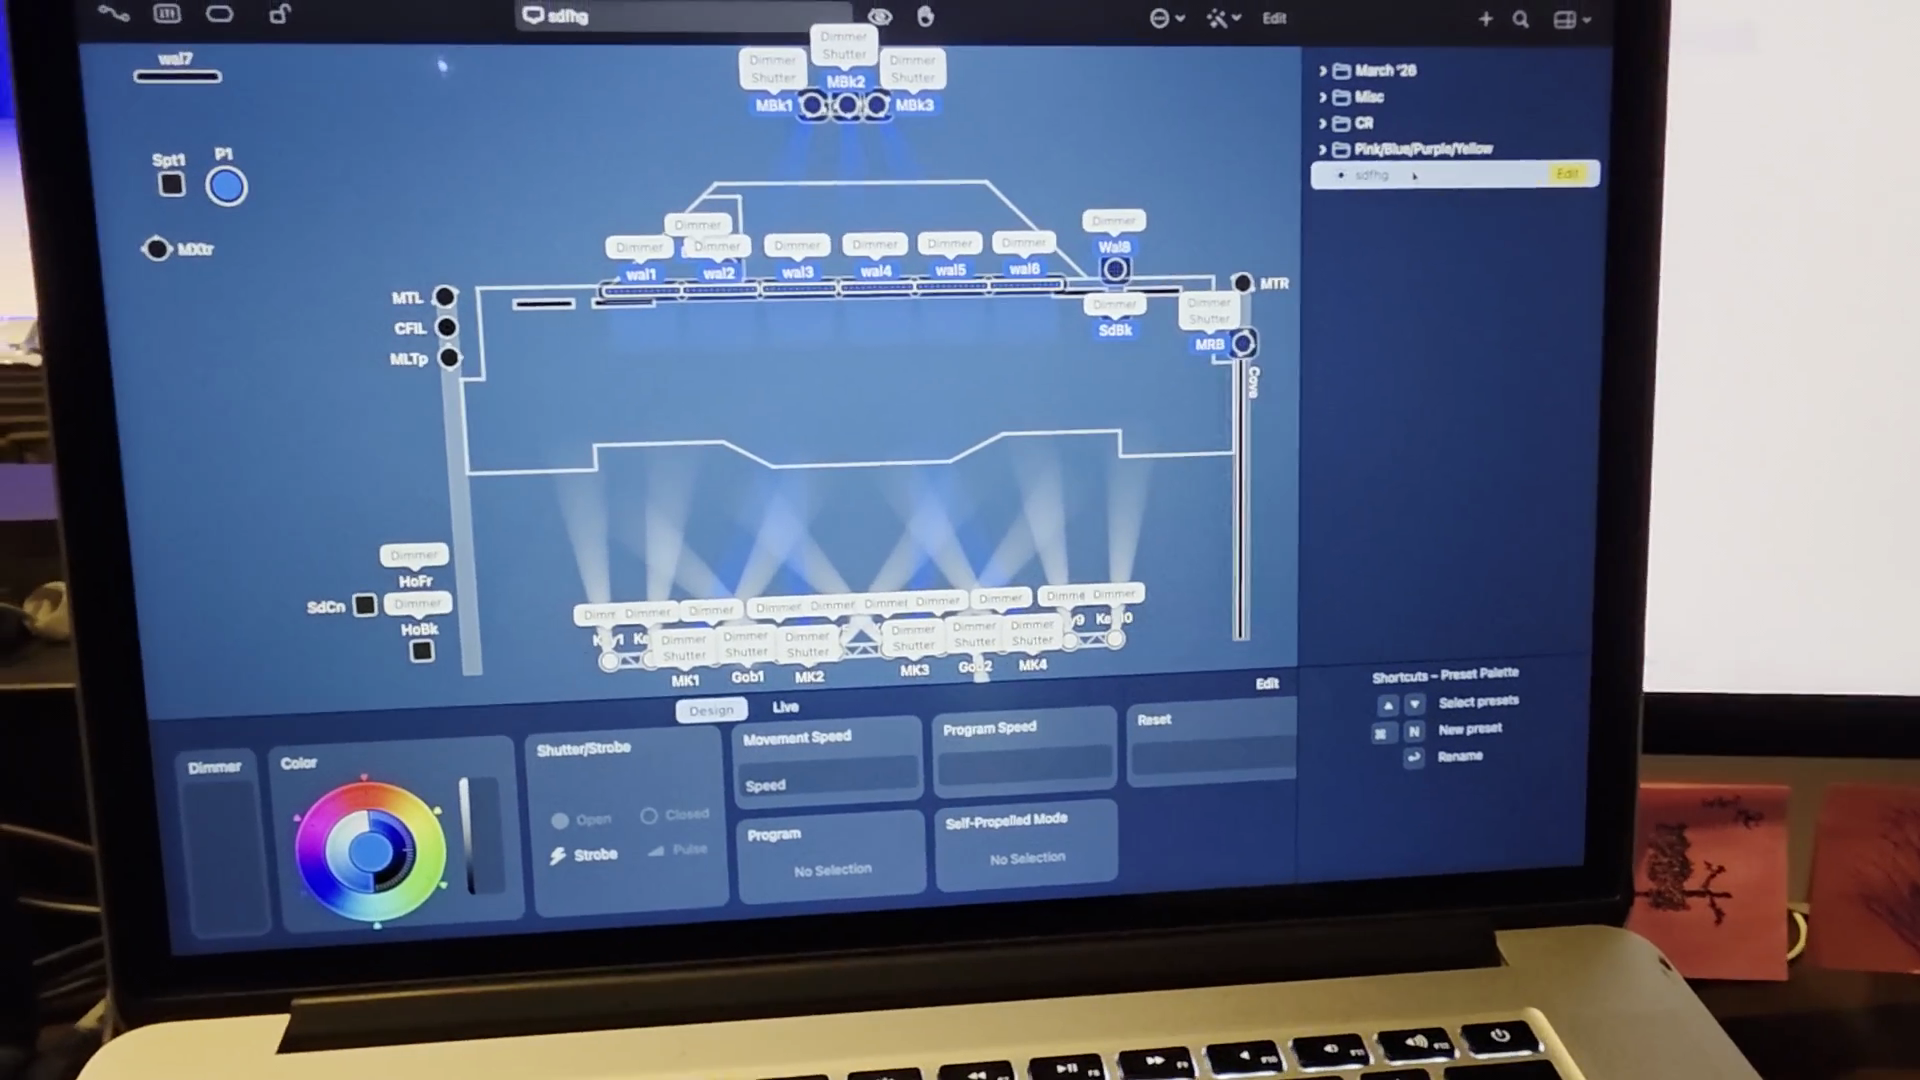
All right, say it's a kids' service or VBS, and you want to build something from scratch. You don't want to start from a service basis because the washes, house lights, and colors will be different. You may also need them in different locations, so it's best to start from scratch. Double-click the new preset, which looks like a Lego.

1
Right-click in the presets panel to open the context menu.
Step #1: Right-click in the presets panel to open the context menu.
2
Select 'New Preset' from the menu.
Step #2: Select 'New Preset' from the menu.

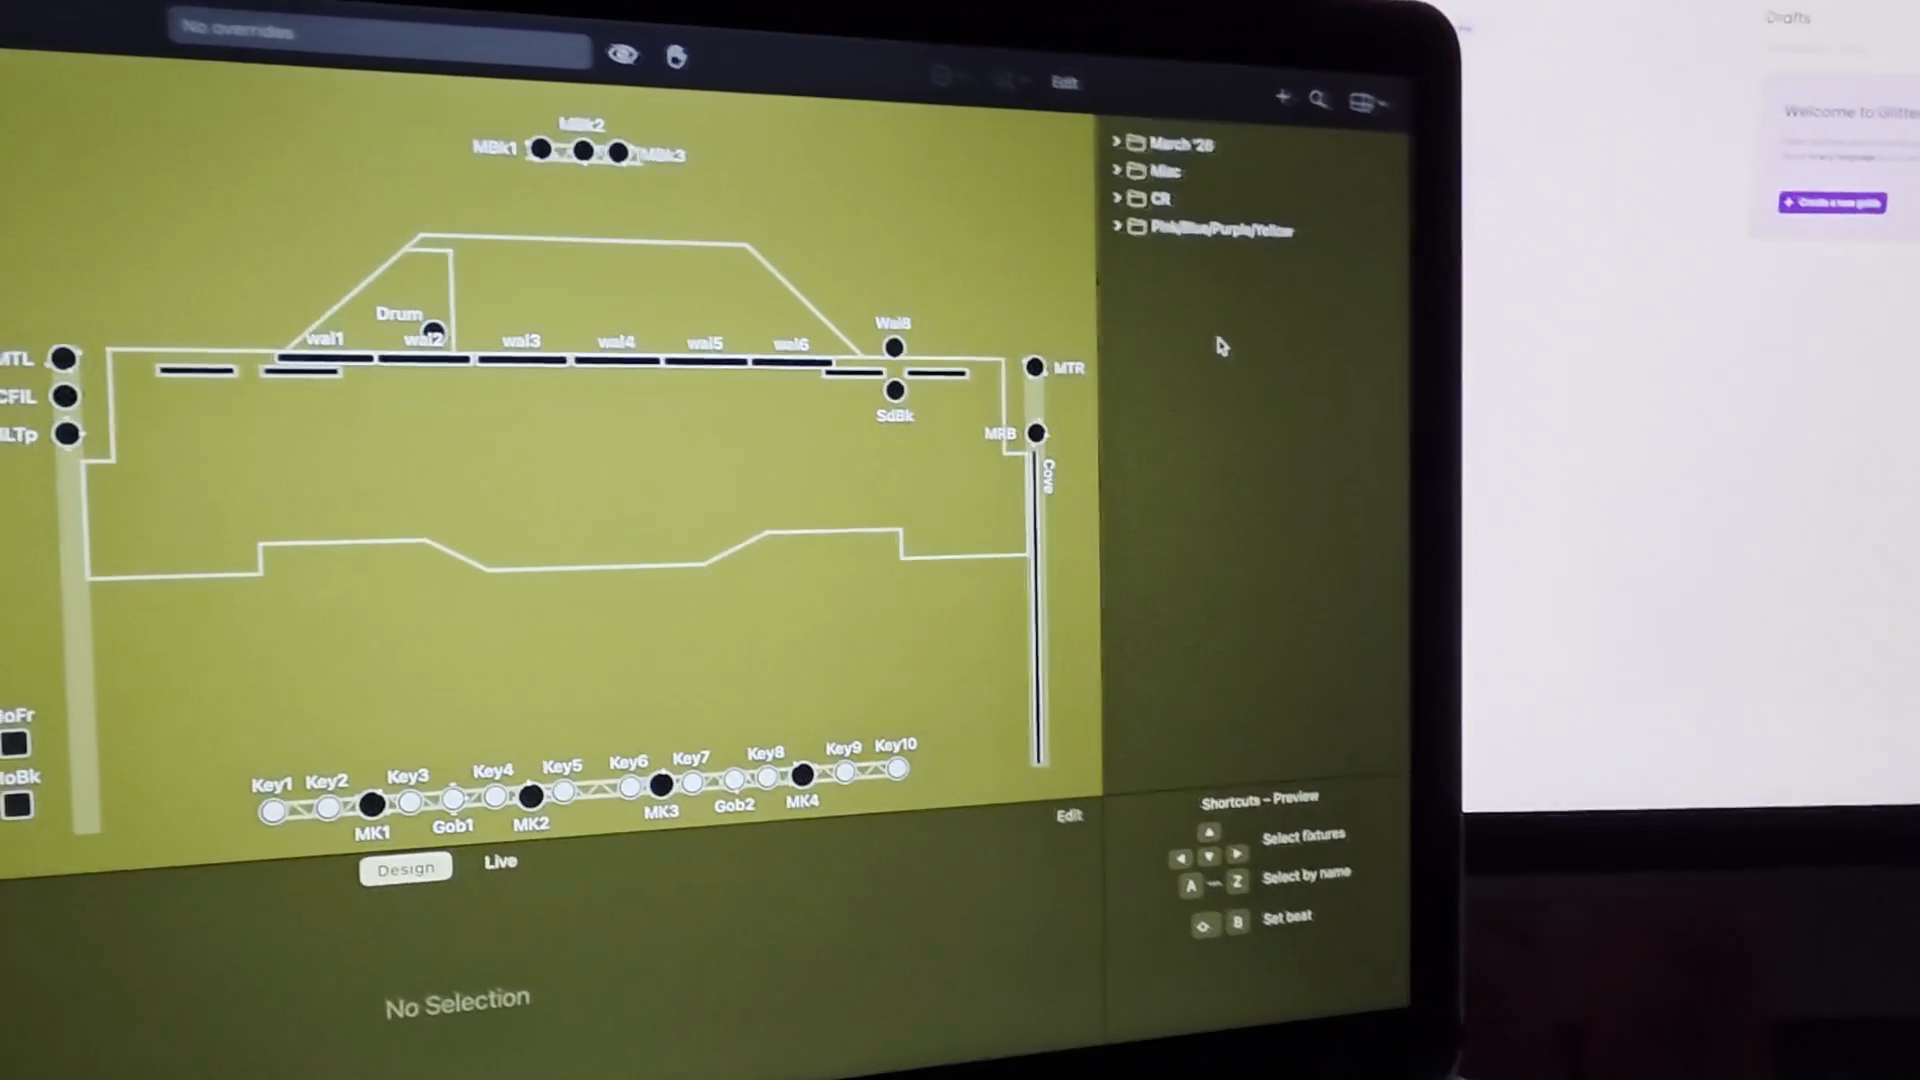
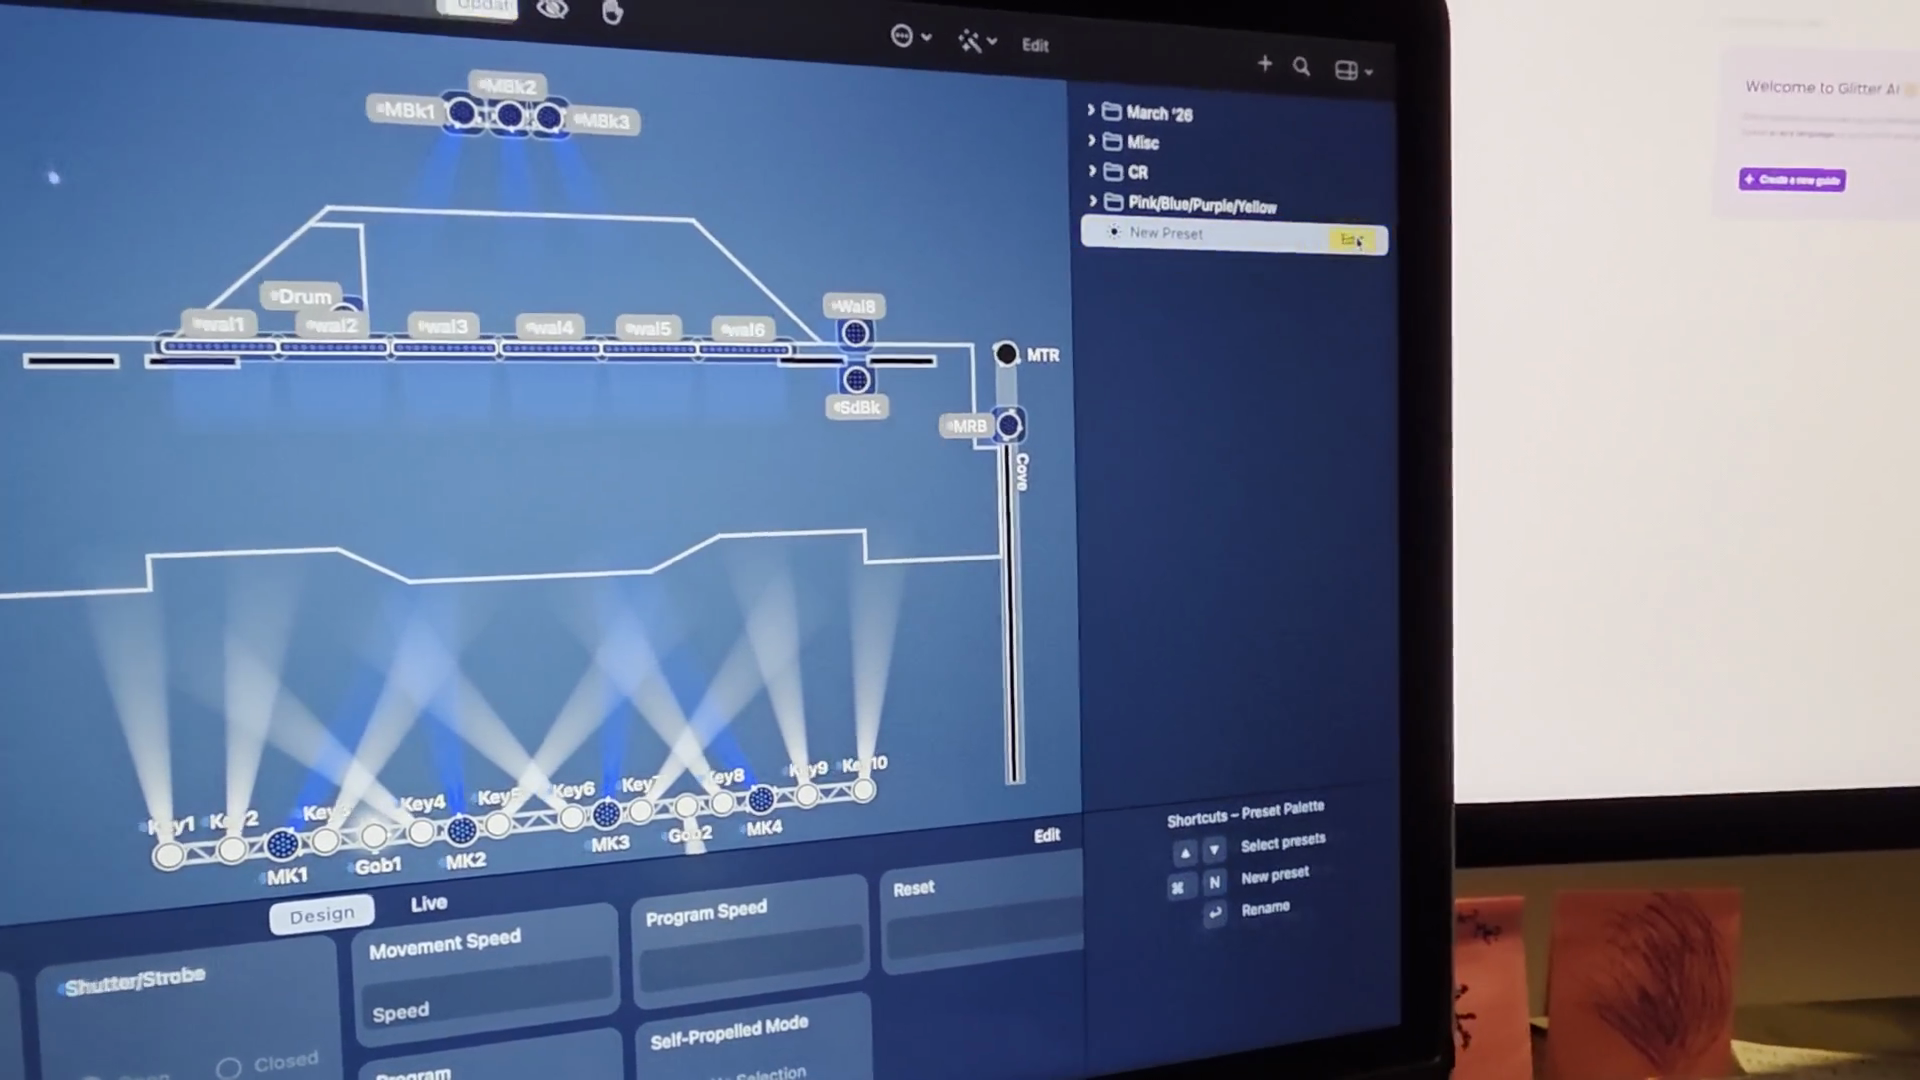
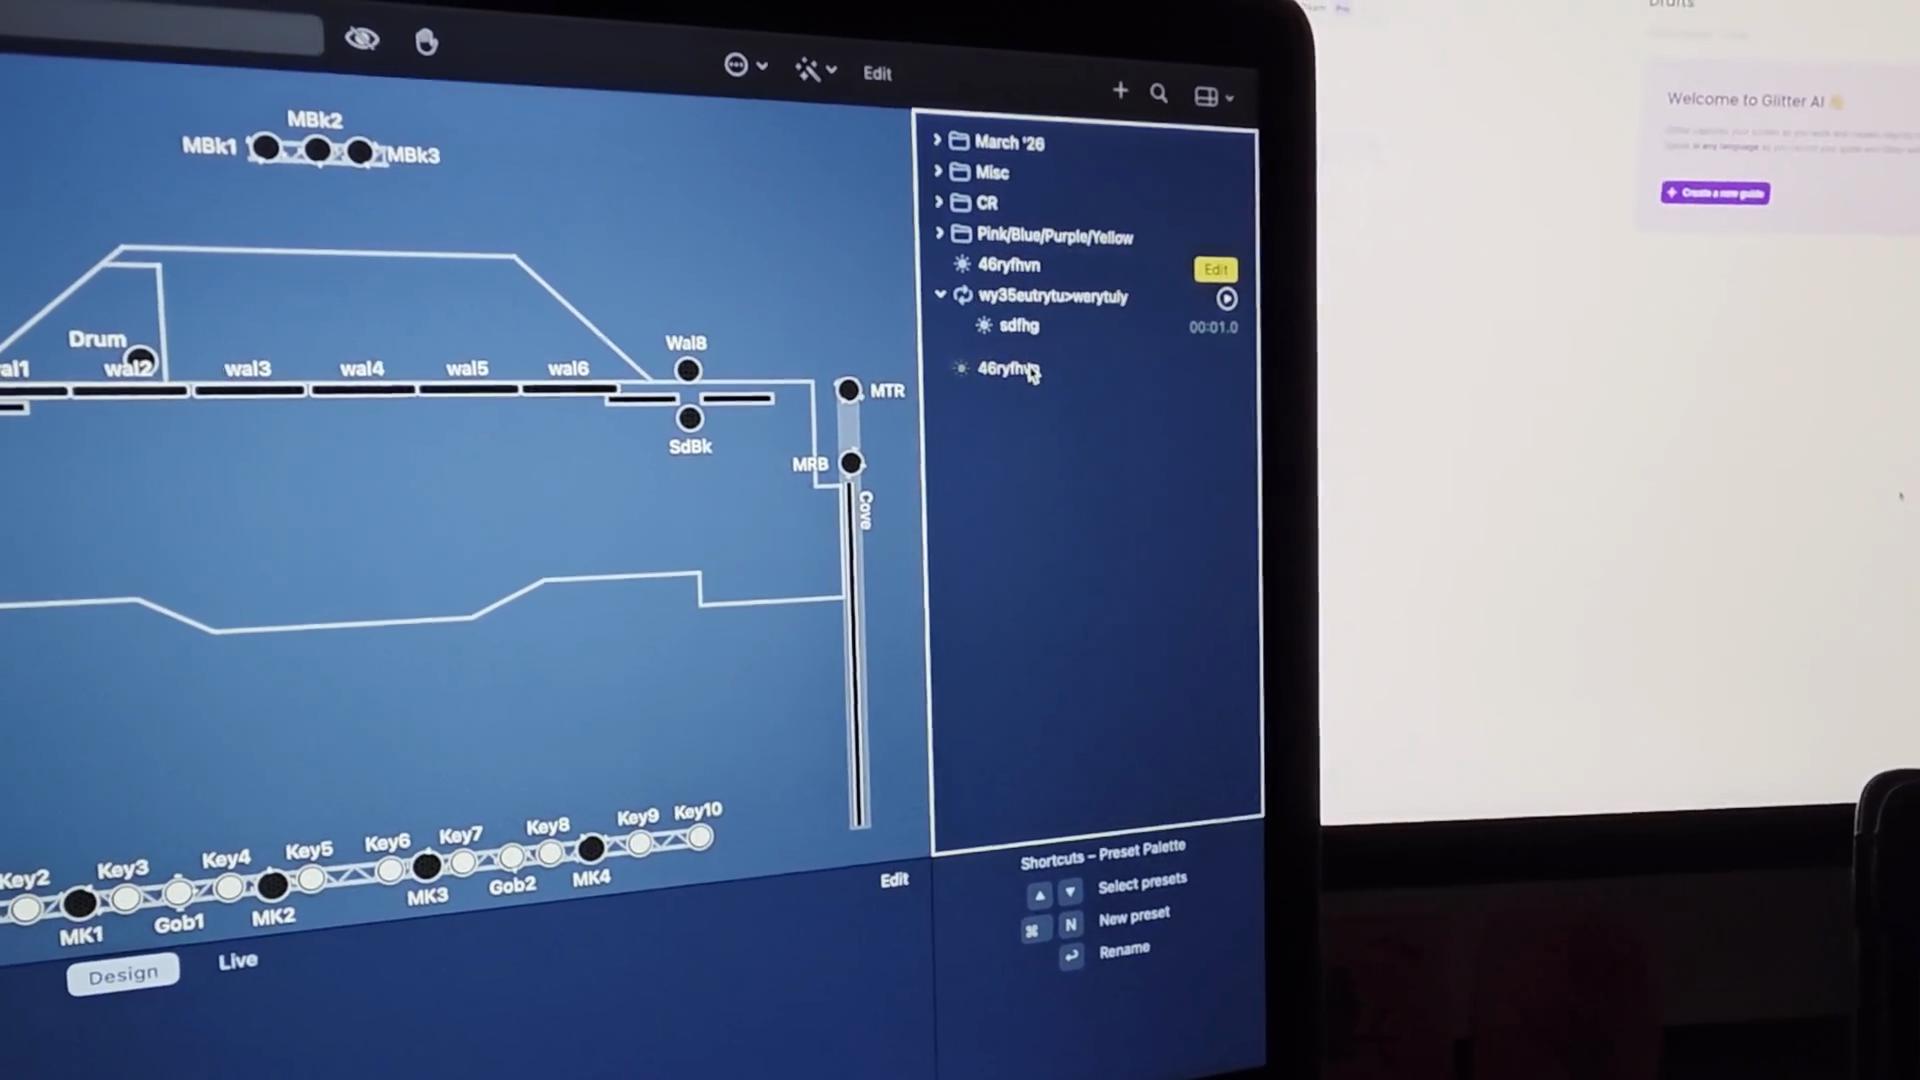
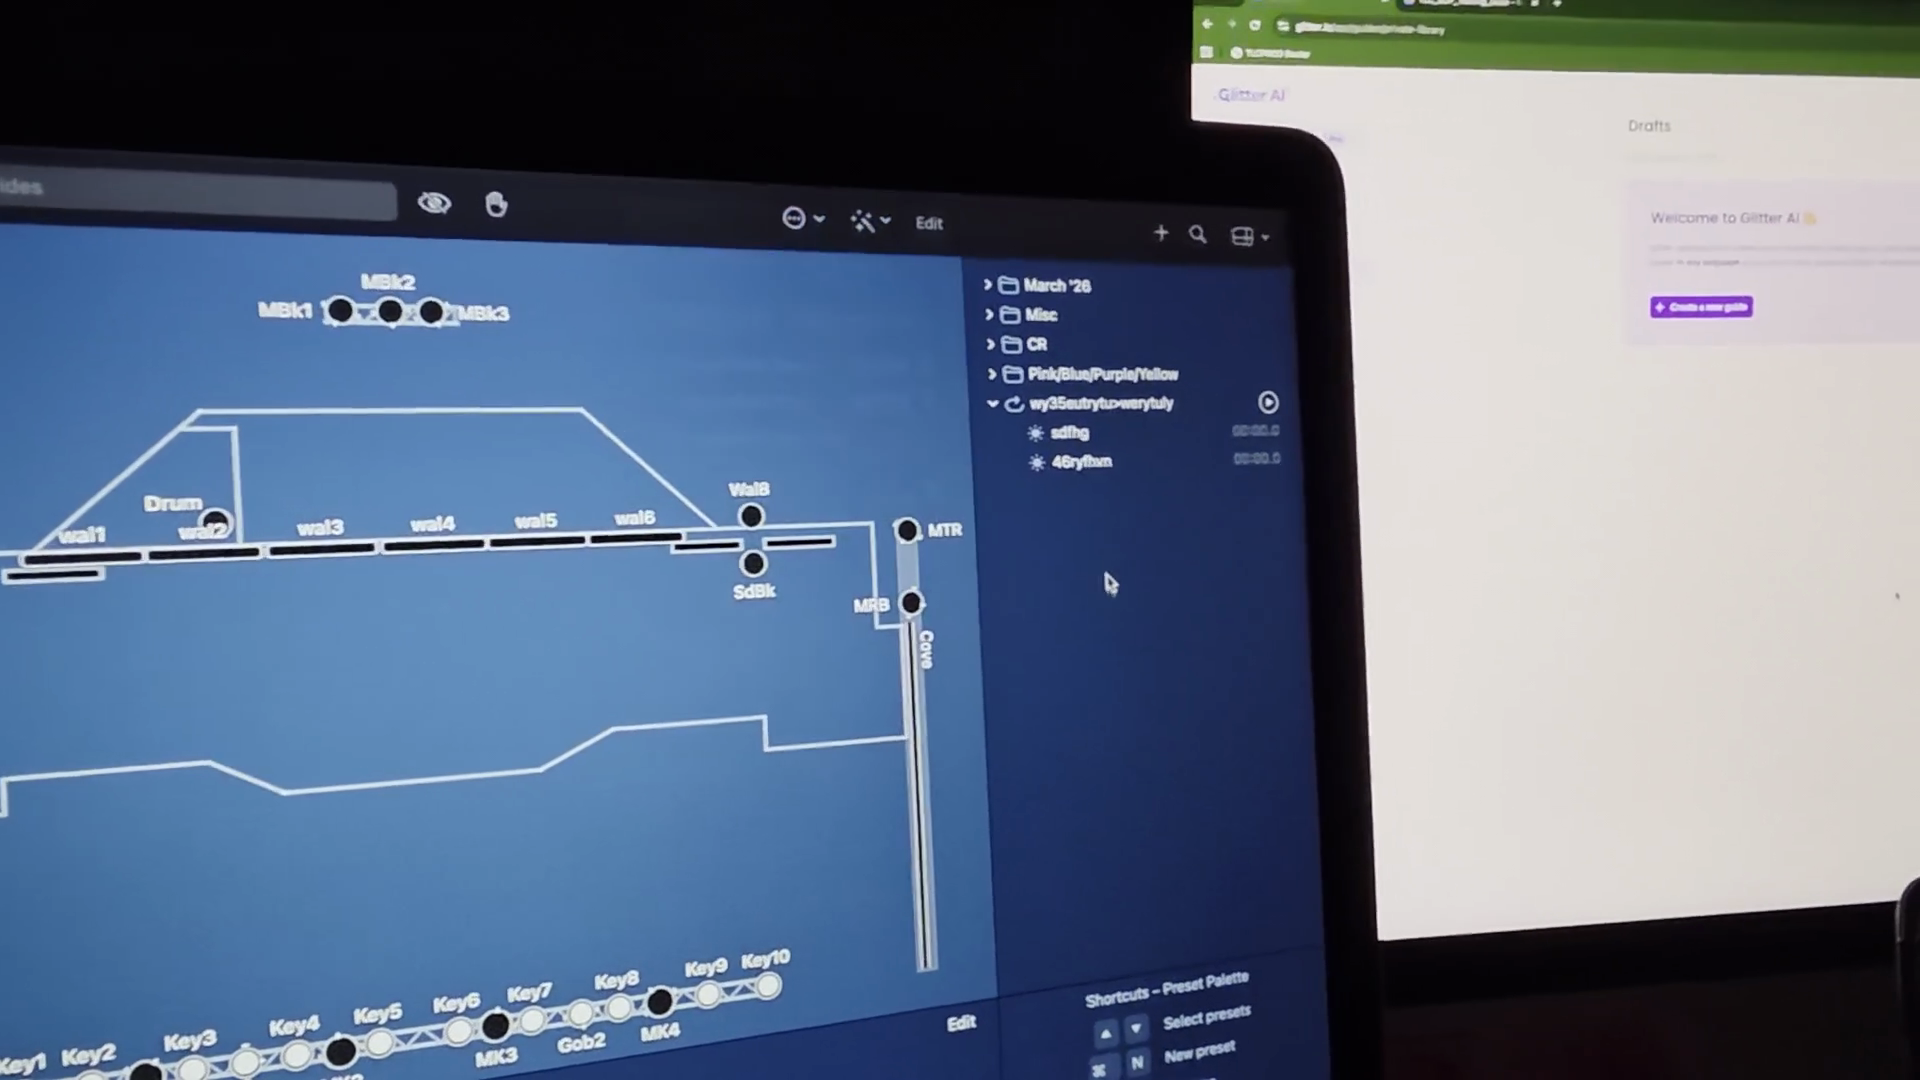
Those are the building blocks of your show. This preset is called Empty and it's yellow. I can adjust it. I can do whatever I want with it. For fun, we'll quickly turn some house lights up. I won't fully build anything here, but you can watch the other videos to learn how to build things.

3
Click the HoFr fixture.
Step #3: Click the HoFr fixture.
4
Click the HoBk fixture.
Step #4: Click the HoBk fixture.
5
Select the fixtures from Key1 to MK4.
Step #5: Select the fixtures from Key1 to MK4.
6
Adjust the Dimmer slider to change the intensity.
Step #6: Adjust the Dimmer slider to change the intensity.
7
Click the Strobe button.
Step #7: Click the Strobe button.

You can move items around as needed.
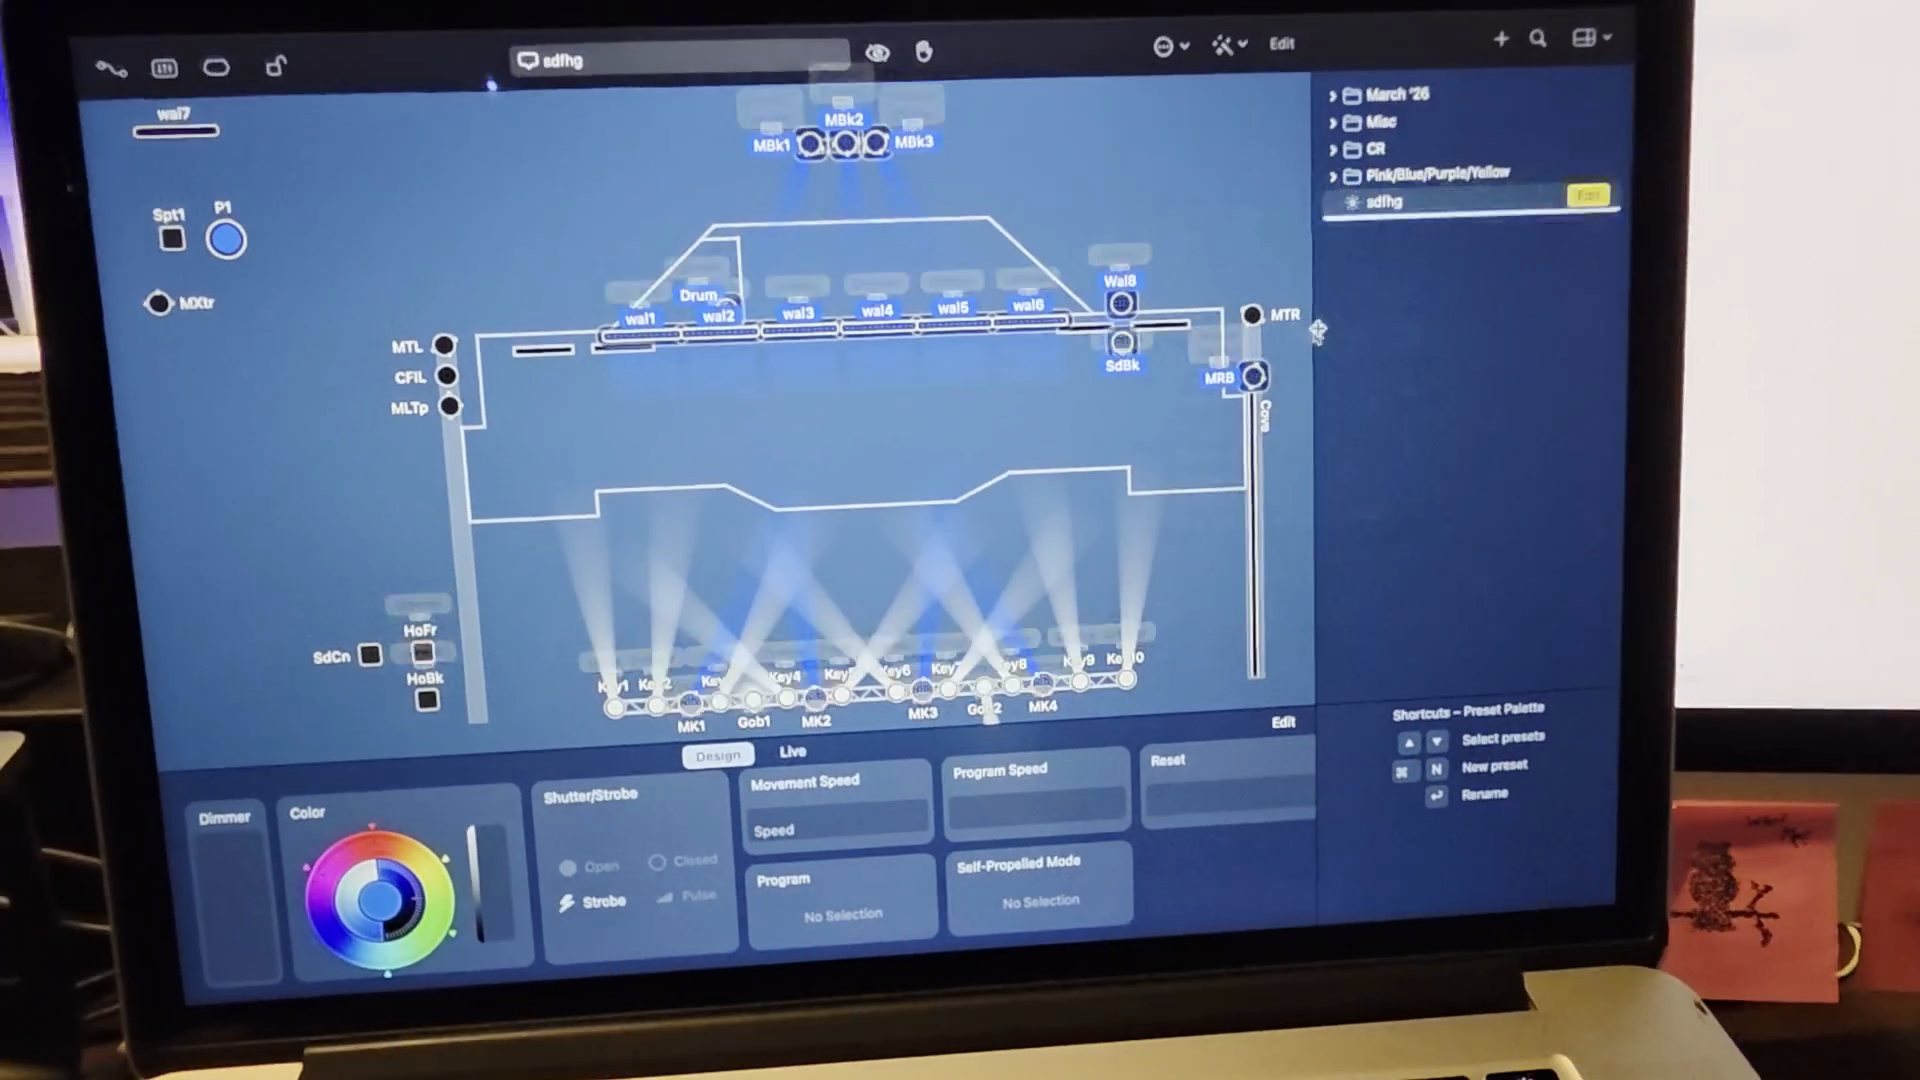
8
Click and drag the M8 fixture to a new position.
Step #8: Click and drag the M8 fixture to a new position.

"" There we go. Just for the moment. Great. Once I'm done, we update.

9
Click the Update button next to the preset name.
Step #9: Click the Update button next to the preset name.
10
Right-click on the preset you want to rename.
Step #10: Right-click on the preset you want to rename.

We rename it after updating.

11
Select Rename from the dropdown menu.
Step #11: Select Rename from the dropdown menu.

We're going to call it that.

12
Type the new name for the preset.

There's that. Here's the thing. You want to build a sequence. You want to create a smooth transition. Let me show you what happens if you don't.

13
Right-click on the preset you want to build a sequence with.
Step #13: Right-click on the preset you want to build a sequence with.

If I duplicate this and...

14
Select Duplicate from the dropdown menu.
Step #14: Select Duplicate from the dropdown menu.
15
Click and drag to select all light fixtures on the stage layout.
Step #15: Click and drag to select all light fixtures on the stage layout.

I will turn everything off.

16
Click the 'Dim.' button in the bottom left corner.
Step #16: Click the 'Dim.' button in the bottom left corner.
17
Drag the slider in the 'Dim.' panel down to turn off the lights.
Step #17: Drag the slider in the 'Dim.' panel down to turn off the lights.

Boom. Okay. This new one is Update, Rename.

18
Right-click on the 'sdfhg 2' preset in the list on the right.
Step #18: Right-click on the 'sdfhg 2' preset in the list on the right.
19
Click 'Rename' from the context menu.
Step #19: Click 'Rename' from the context menu.
20
Type 'dRyhm' to rename the preset.

That works. If I go from this and say, "All right, I'm in the middle of a service."

21
Click on the 'sdfhg' preset.
Step #21: Click on the 'sdfhg' preset.
22
Click on the newly named 'dRyhm' preset.
Step #22: Click on the newly named 'dRyhm' preset.

I'll go to the next one. If I click it directly, there's no smooth transition. None.

23
To get a smooth transition, you must use a sequence instead of directly clicking a preset.

To create a smooth transition, we need to use something called a sequence. You saw all the sequences from the previous videos. These are all sequences, and I have named them according to how each sequence goes. All right? From that to that. It will be a smooth sequence.

I'll show you how to build a sequence. I will right-click again.

24
Right-click in the presets panel.
Step #24: Right-click in the presets panel.

New Sequence.

25
Click New Sequence from the dropdown menu.
Step #25: Click New Sequence from the dropdown menu.

"" We’ll call it Boom2Boom.

26
Type a name for the new sequence and press Enter.

I know that's not the name. From there, I will drag my two scenes, or as many scenes as you want if you decide to add more.

27
Drag the first scene into the new sequence.
Step #27: Drag the first scene into the new sequence.
28
Drag the second scene into the sequence.
Step #28: Drag the second scene into the sequence.

Okay? If I press Play without adjusting the sequence, do you see what happens? It keeps repeating quickly. We do not want that. We want a smooth transition and a stop.

Right-click again.

29
Right-click on the sequence.
Step #29: Right-click on the sequence.

Go to Info on this sequence, then select Options.

30
Select 'Get Info' from the context menu.
Step #30: Select 'Get Info' from the context menu.
31
Click 'Options'.
Step #31: Click 'Options'.

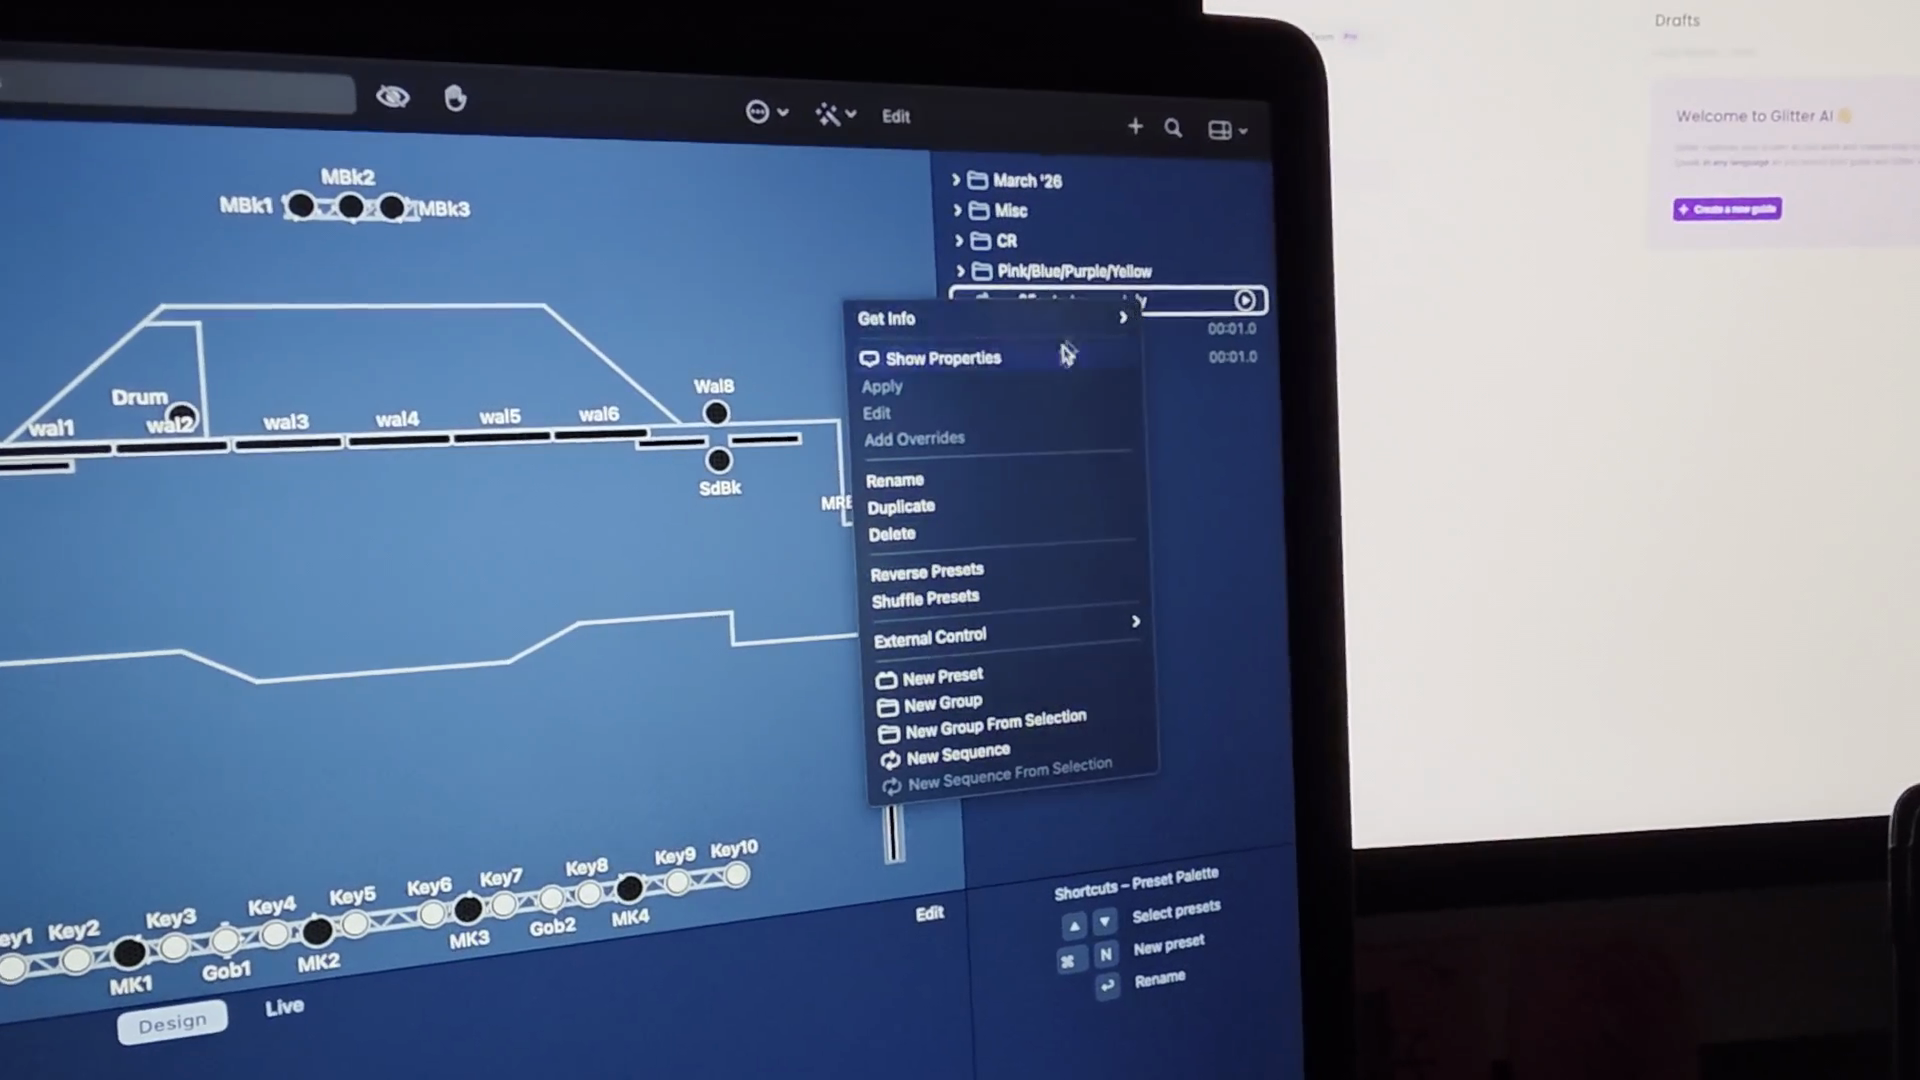
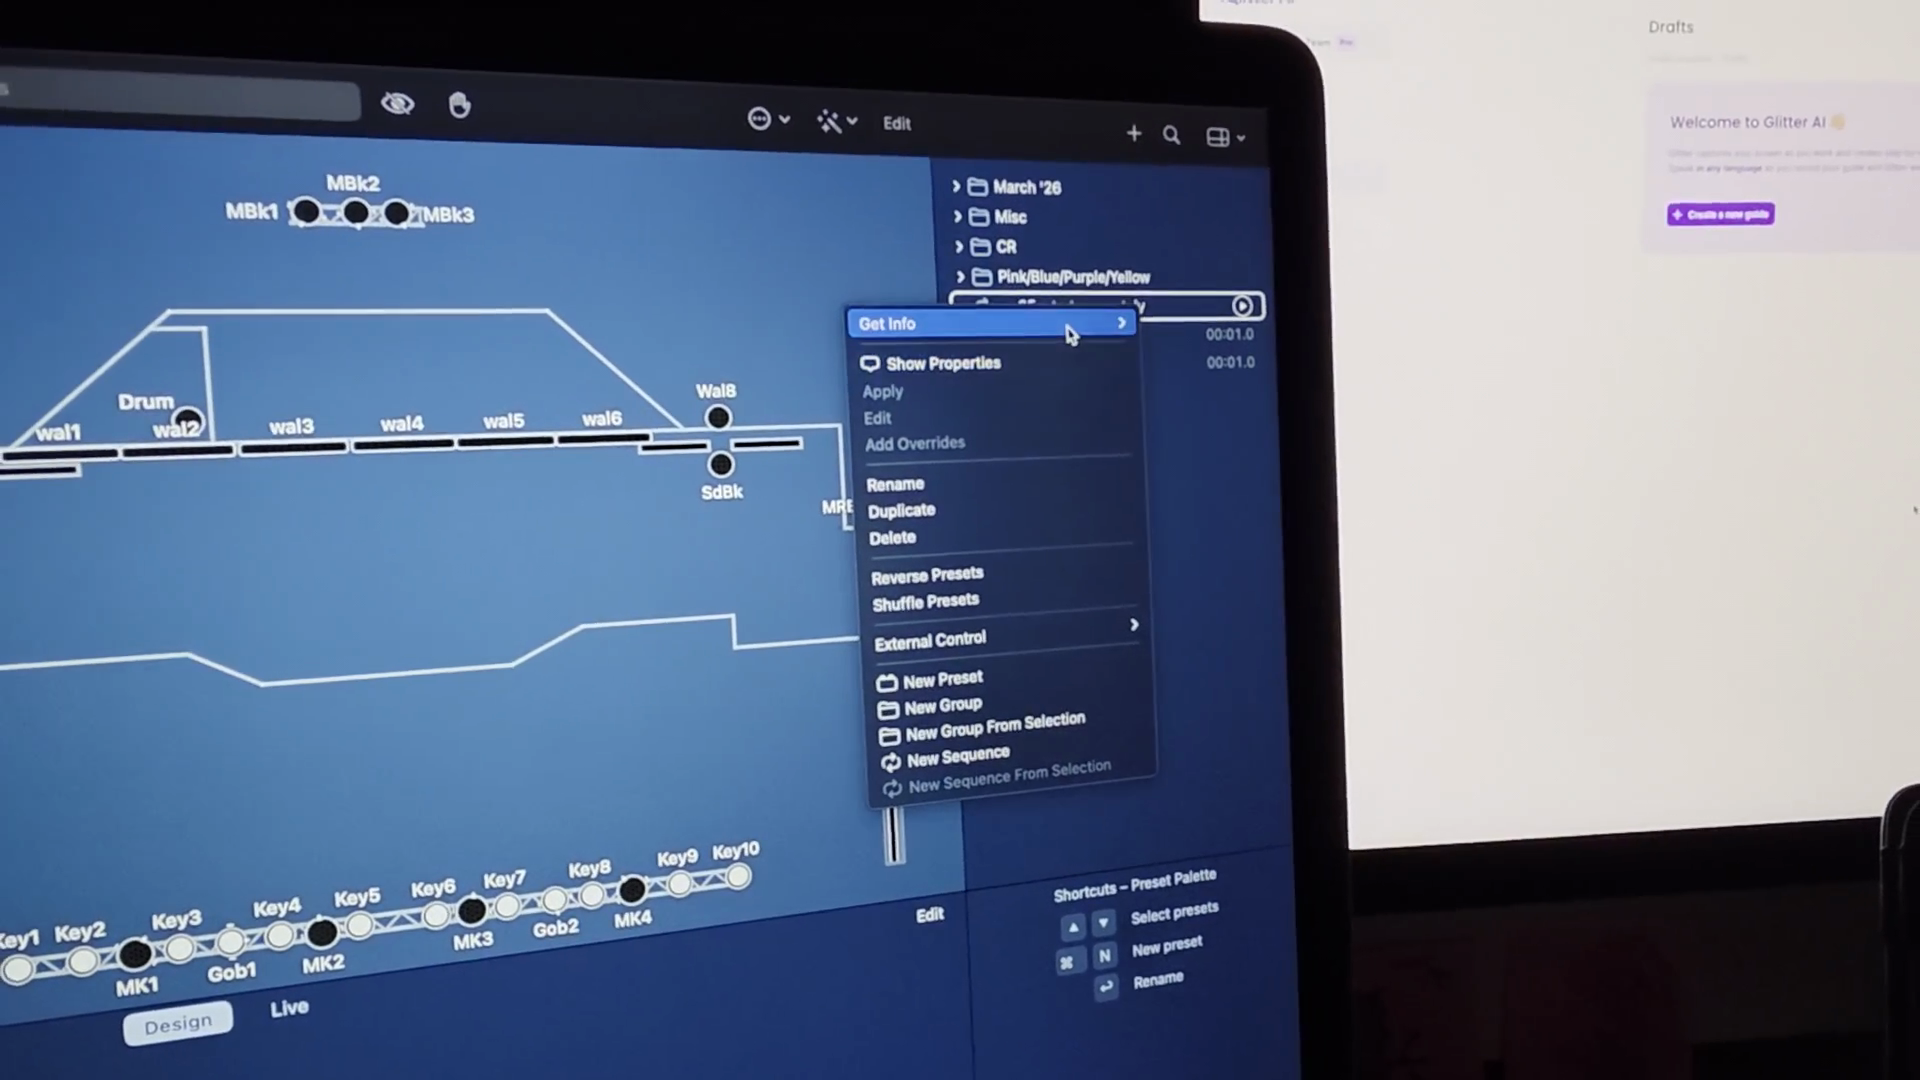
The reason it kept repeating was because Repeat was selected.

32
Deselect the 'Repeat' checkbox.
Step #32: Deselect the 'Repeat' checkbox.

Turn that off. You want to select Freeze on Completion.

33
Select the 'Freeze on completion' checkbox.
Step #33: Select the 'Freeze on completion' checkbox.

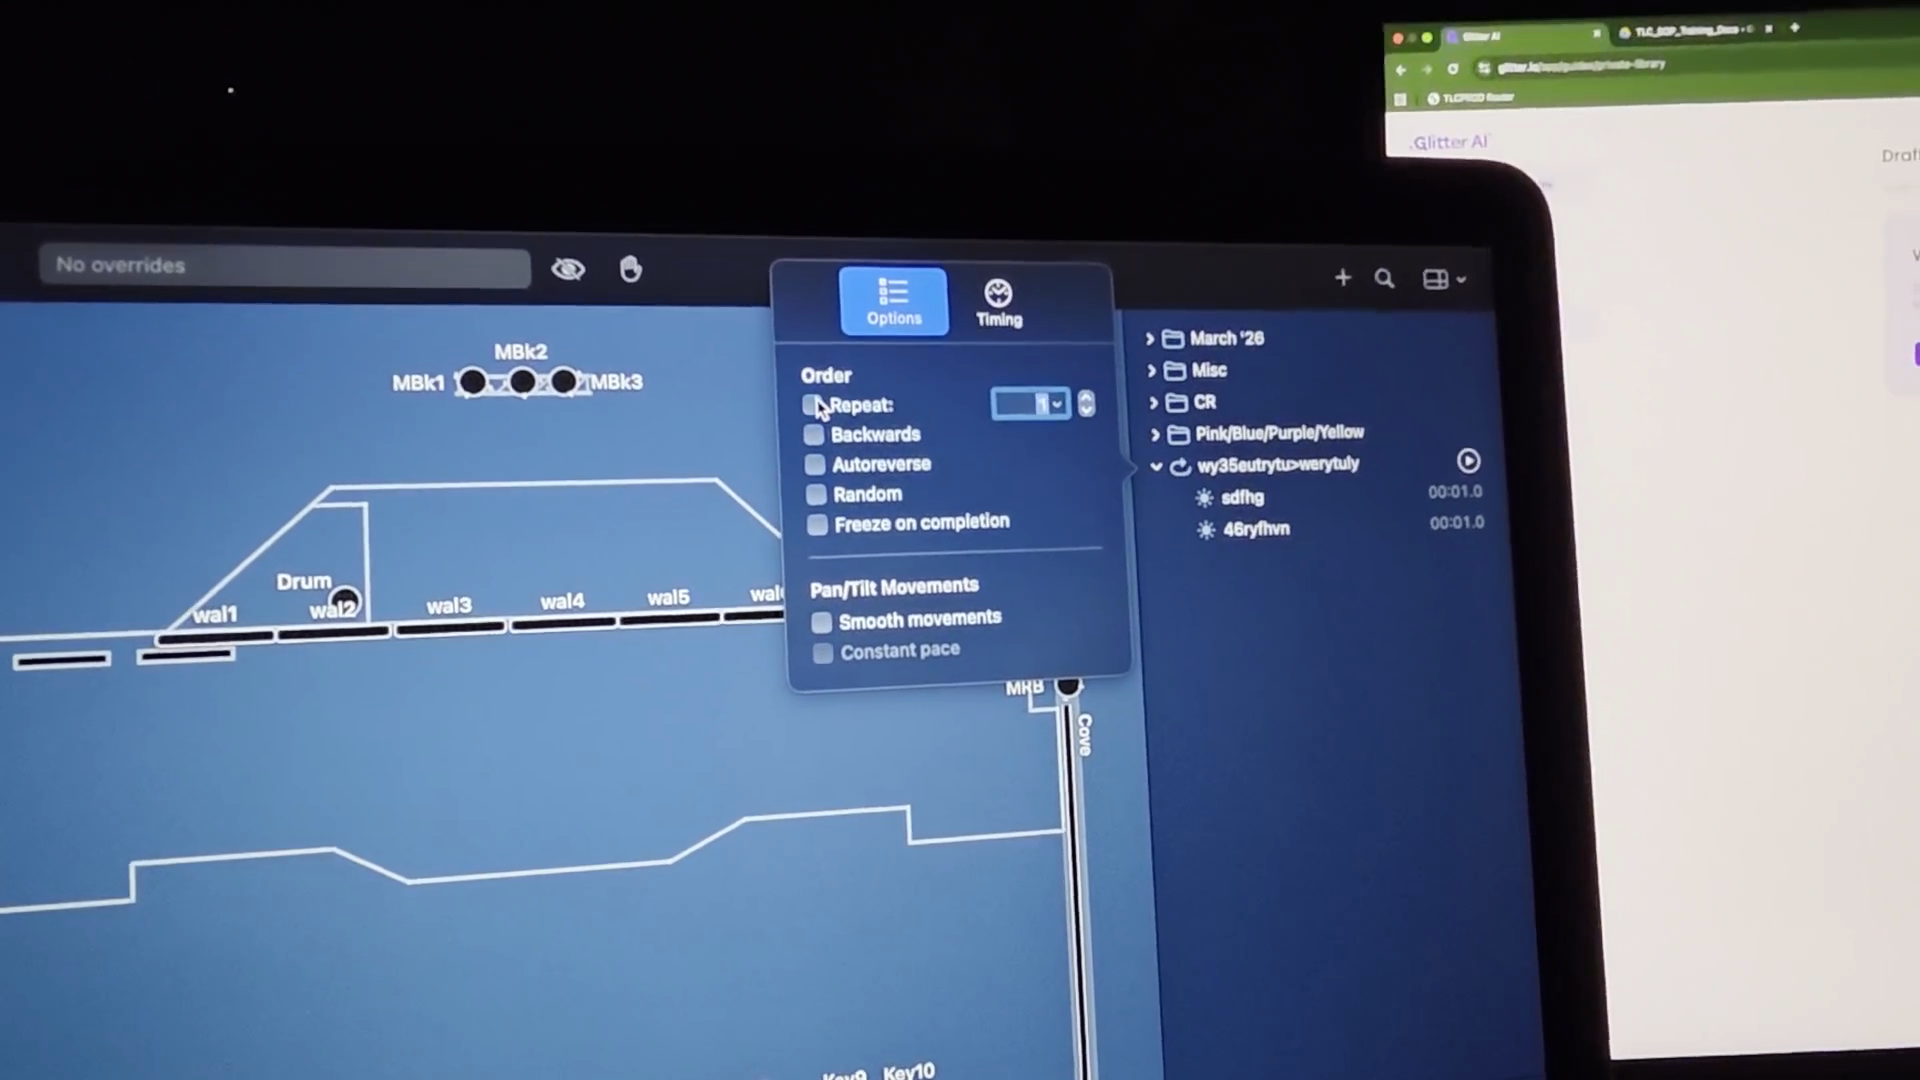
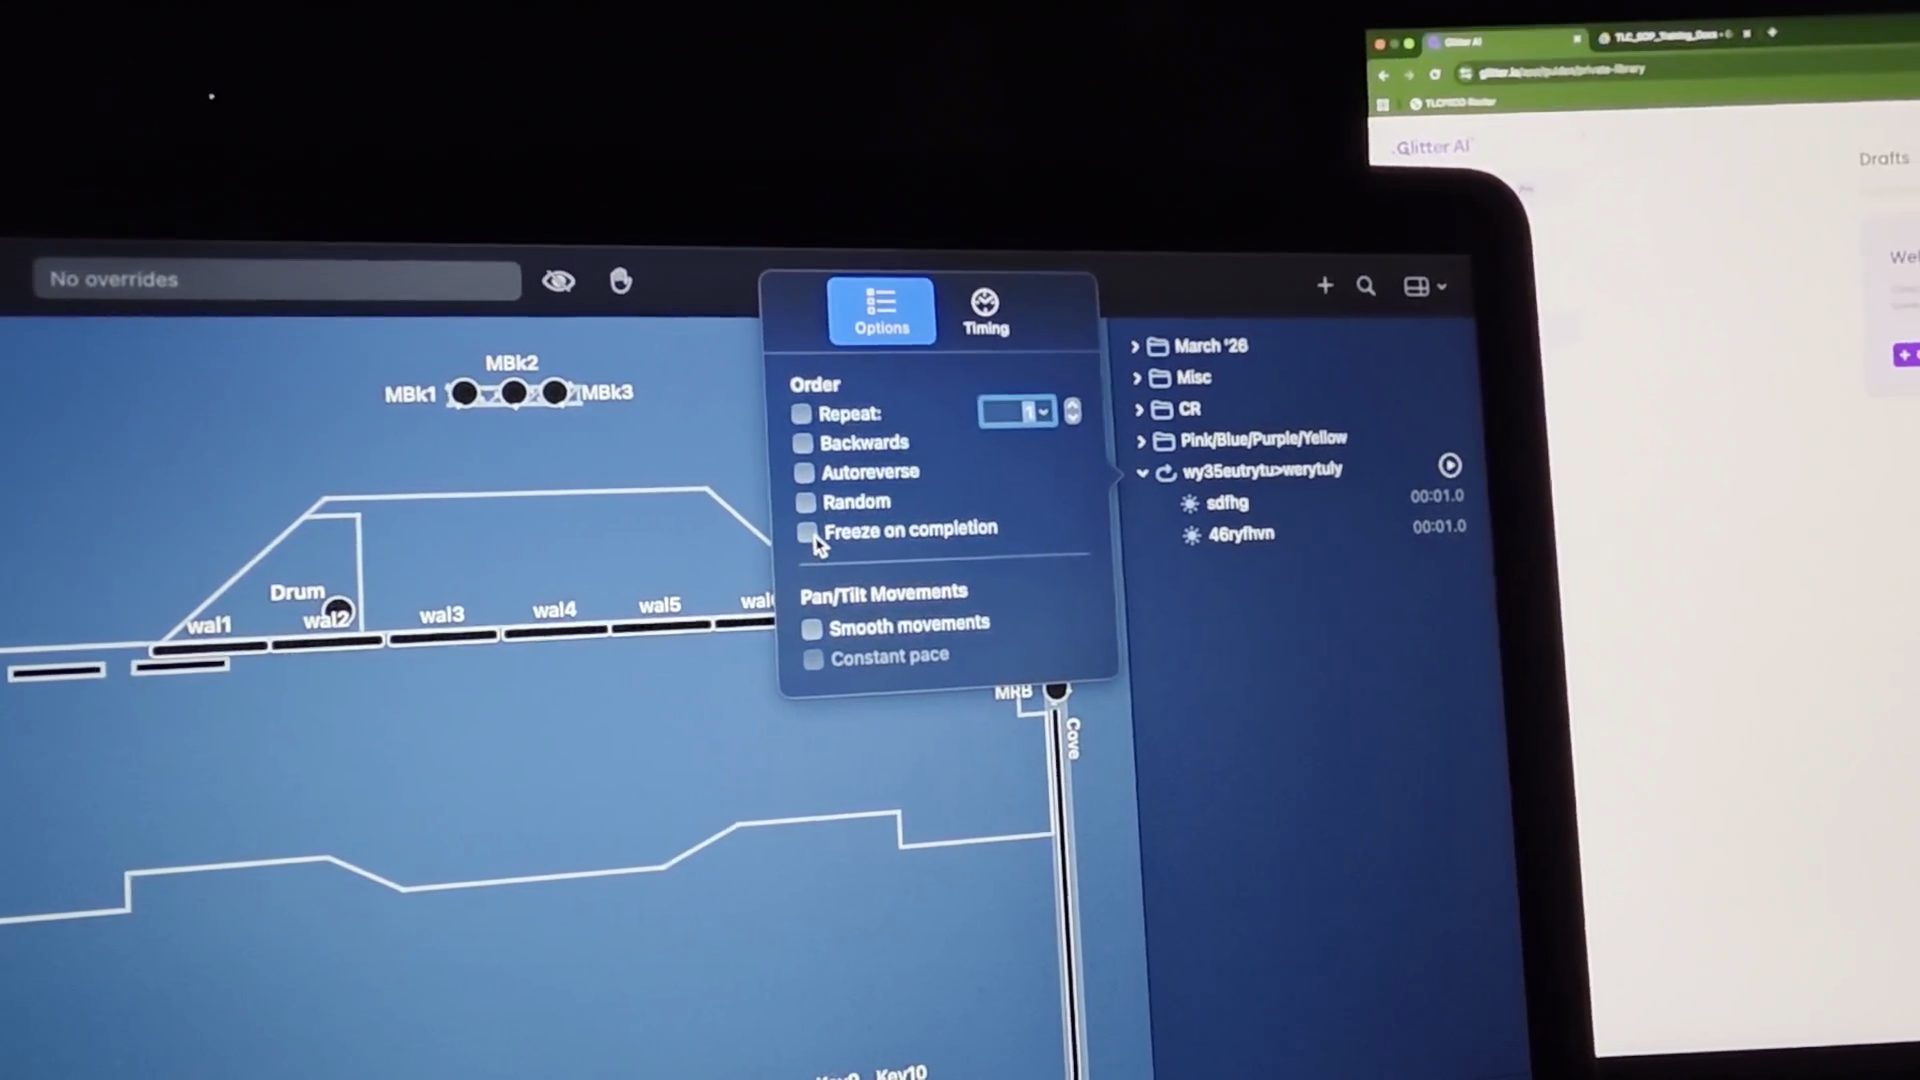
There are other functions available. If you want to get fancy with it, that's fine. Just make sure it's not something that will be overtly distracting or potentially cause issues for anyone in the audience. The purpose of lighting is to create ambiance and draw people into a scene. Okay?

34
Click the Timing tab.
Step #34: Click the Timing tab.

Next, I'll go to Timing. By default, the hold time is set to one.

35
Set the Default Hold Time to 00:00.0.

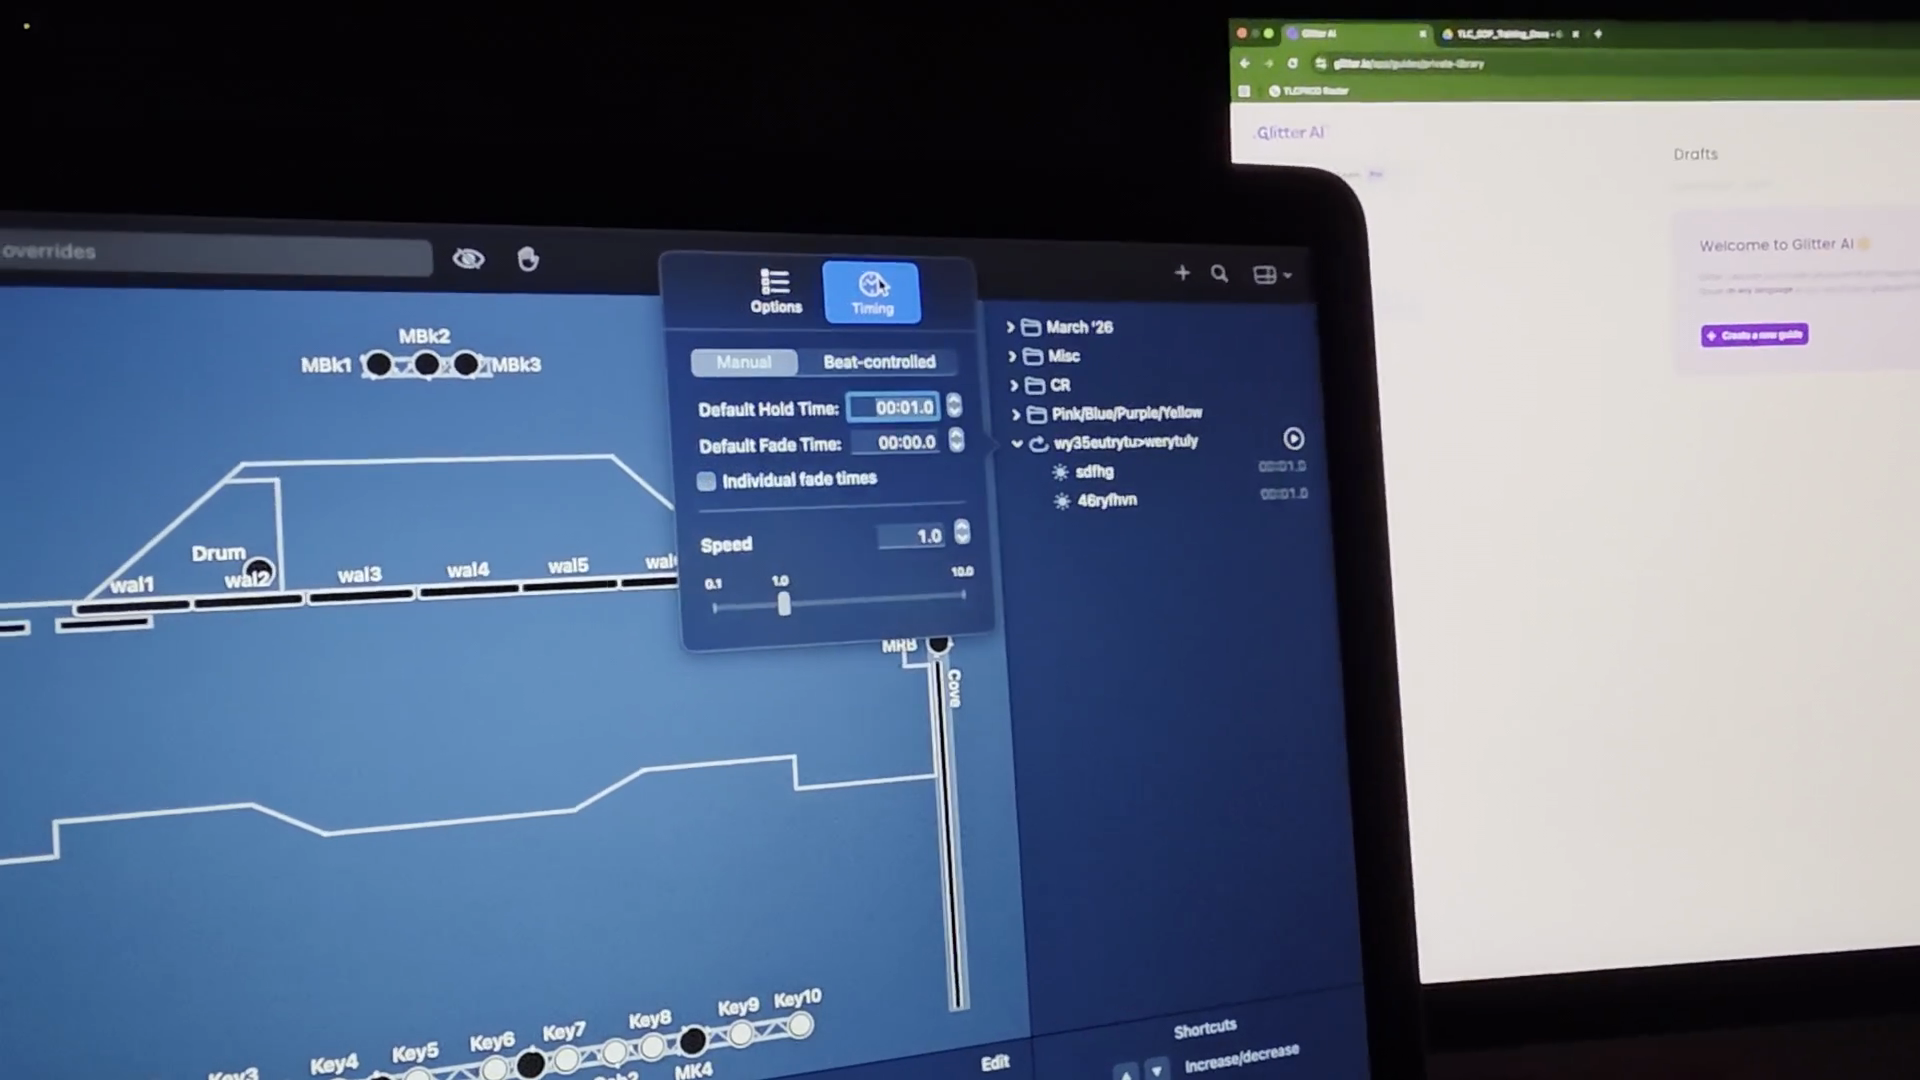
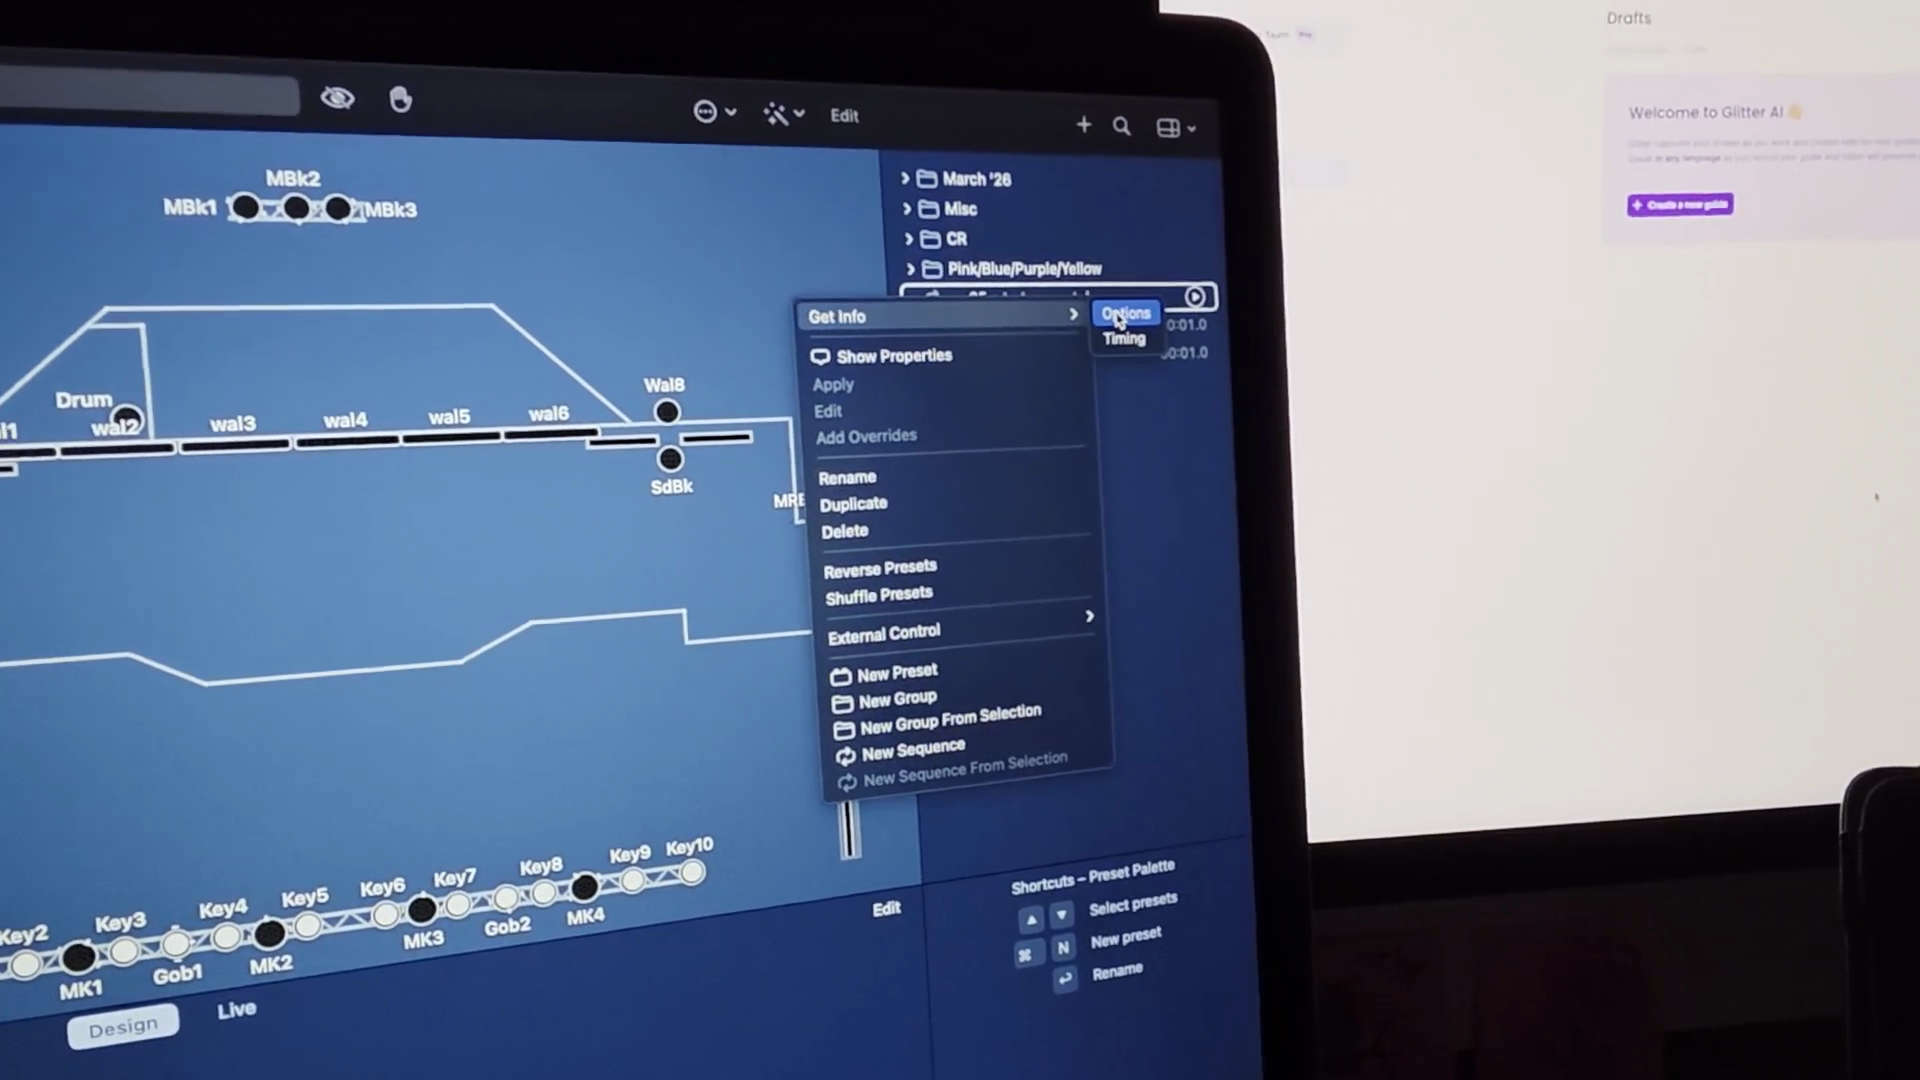
I set my hold time to zero because my default fade time works best for me.

36
Set the Default Fade Time to your desired value.

I'll set my default fade time to five seconds. Fading from bright to black in five seconds is actually quite fast, but adjust it as needed to see what feels right when you're building it.

37
Set the 'Default Fade Time' to 00:05.0.
Step #37: Set the 'Default Fade Time' to 00:05.0.

You can set individual fade times. I usually do not. You can set the speed. You can control it. The main function I use is increasing the fade time and ensuring it doesn't repeat.

With that, I can click off. Now, when I hit this, I start there.

38
Click outside the 'Timing' pop-up to close it.
Step #38: Click outside the 'Timing' pop-up to close it.
39
Click the play button next to the 'willydillyflowerjuly' preset.
Step #39: Click the play button next to the 'willydillyflowerjuly' preset.

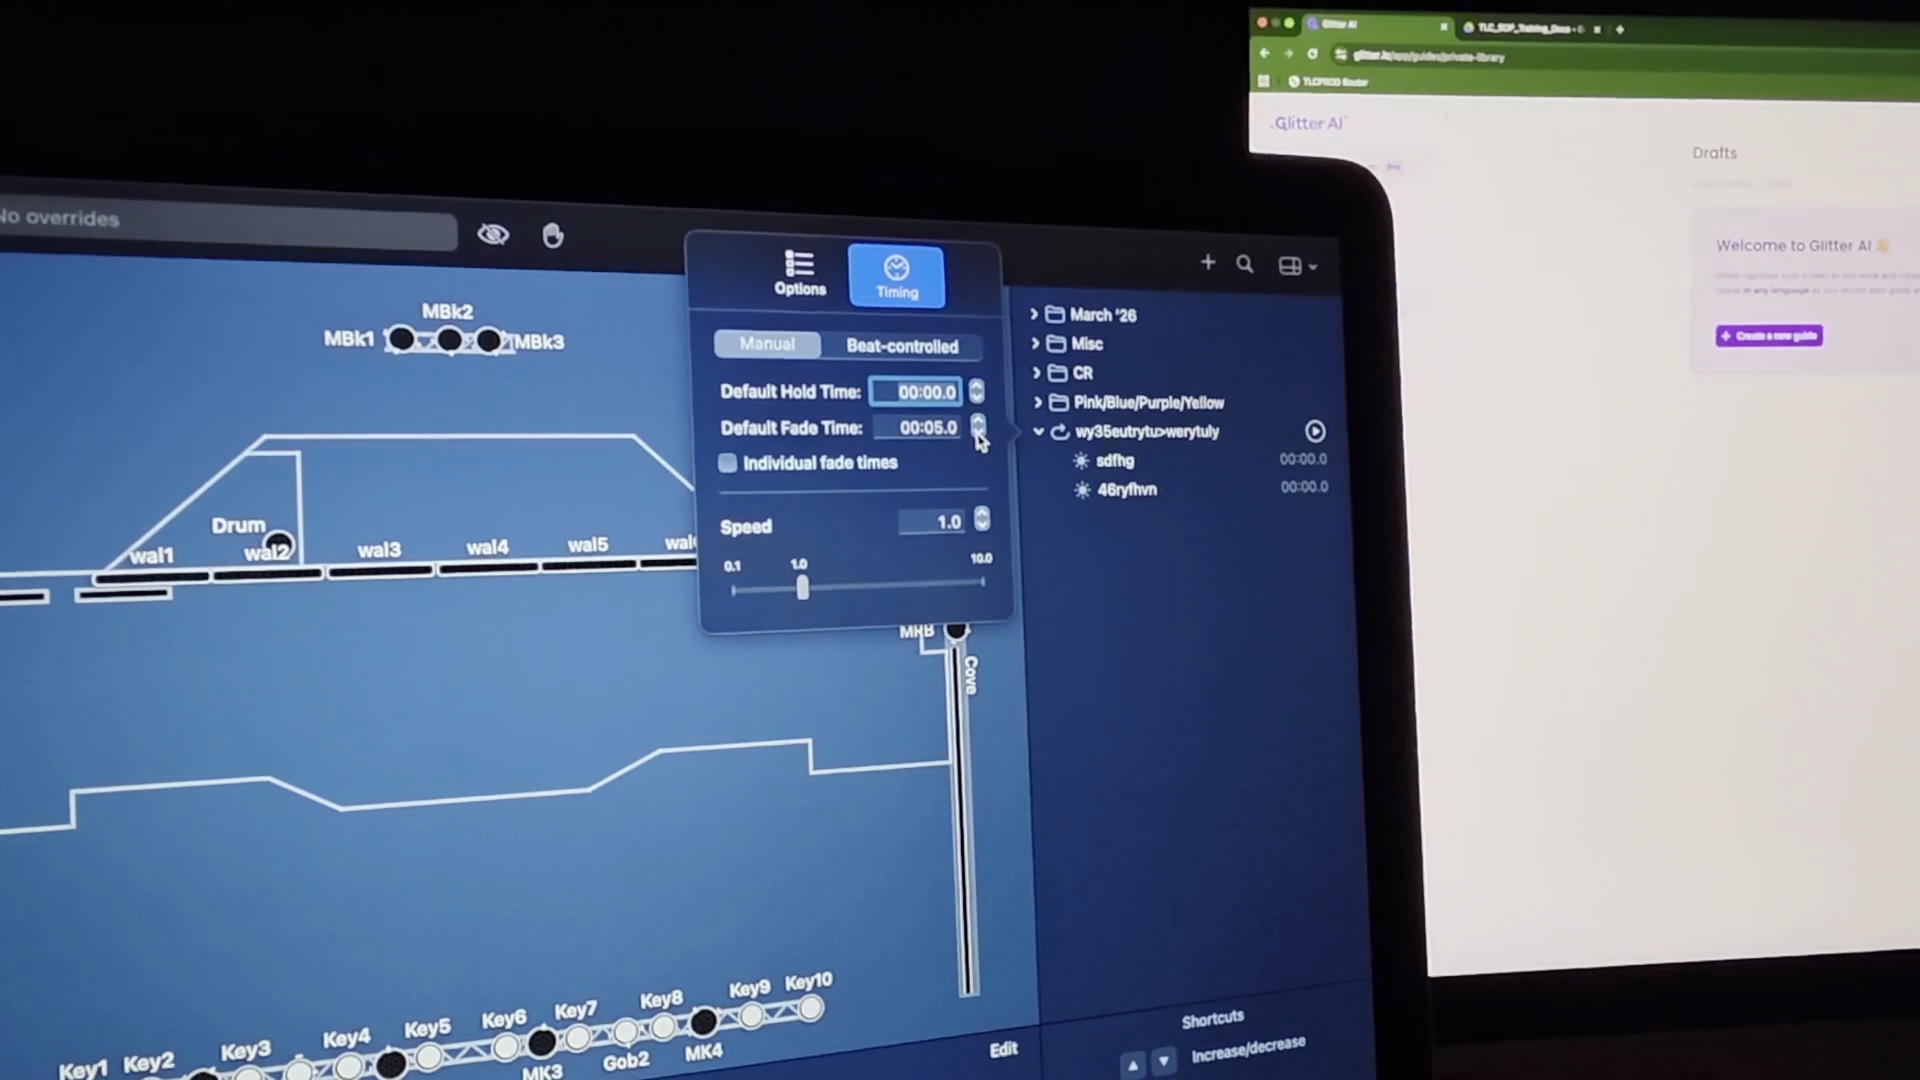
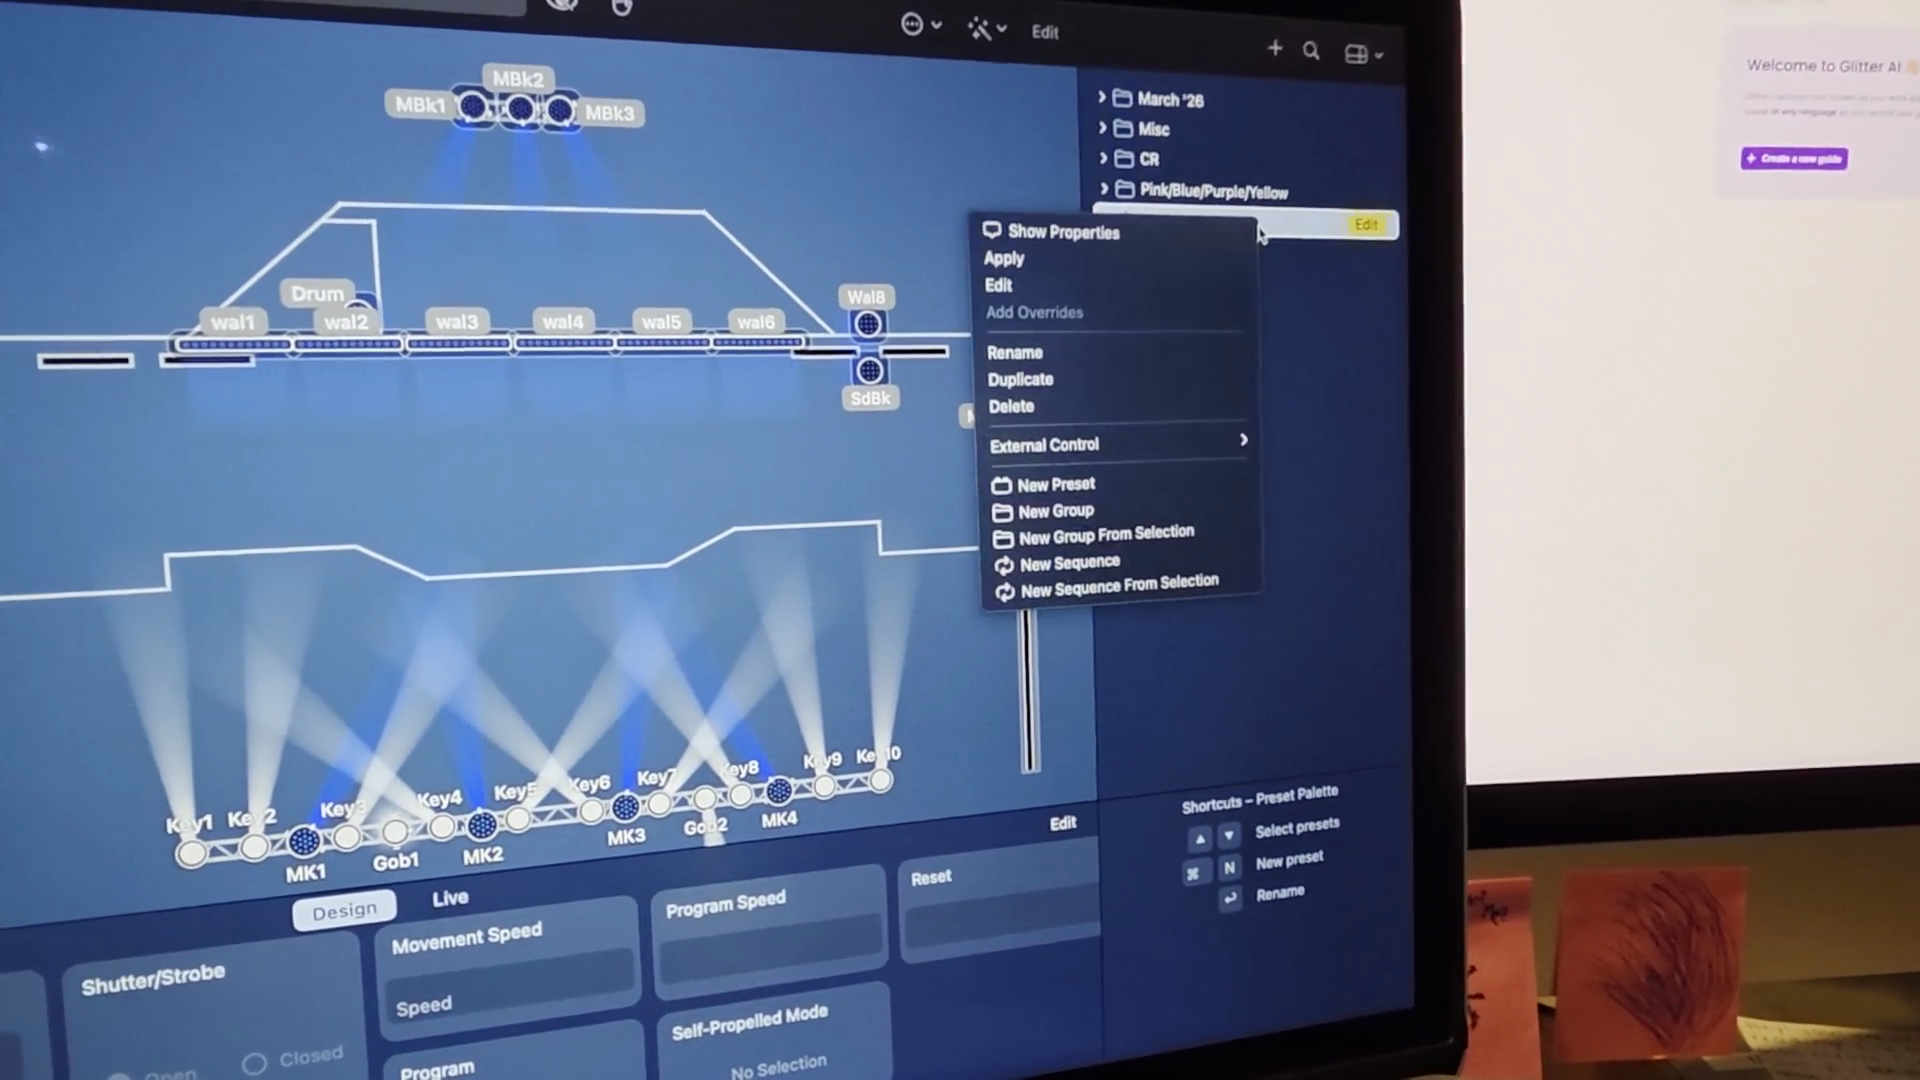
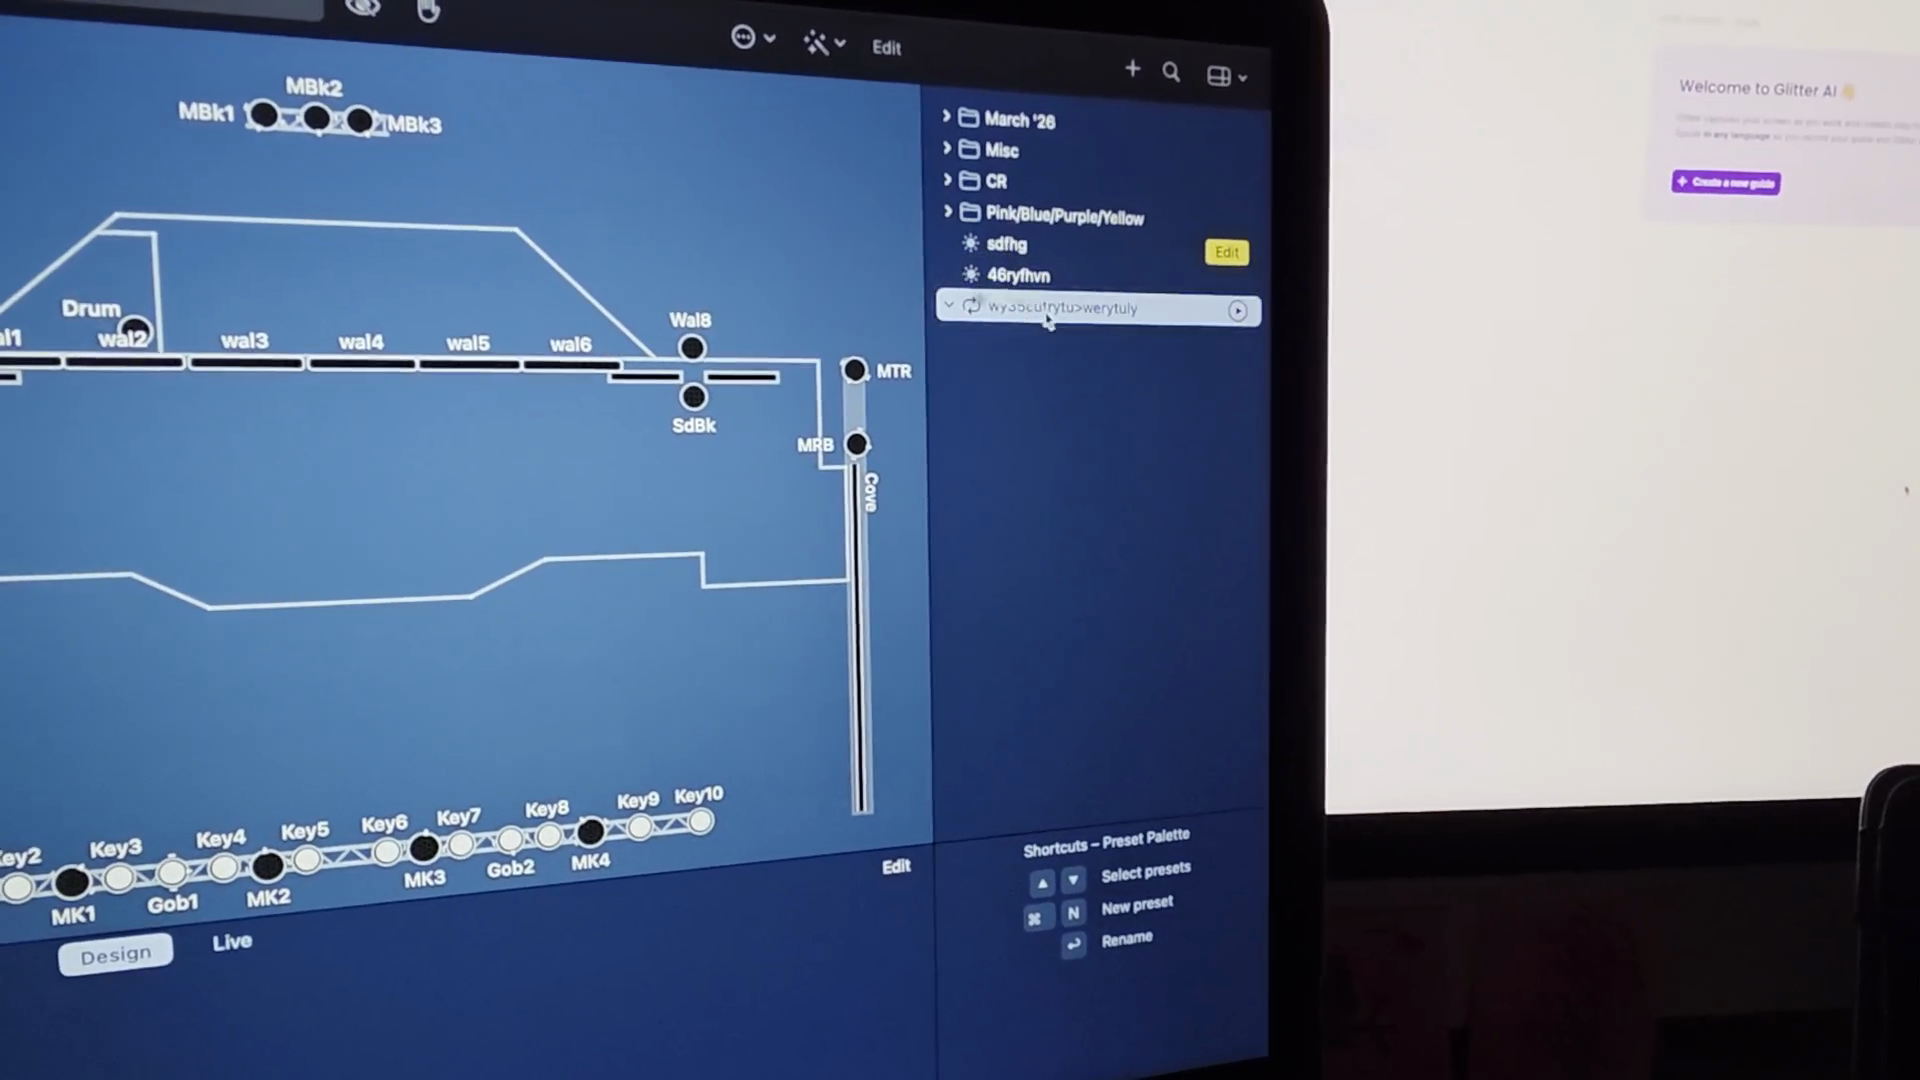
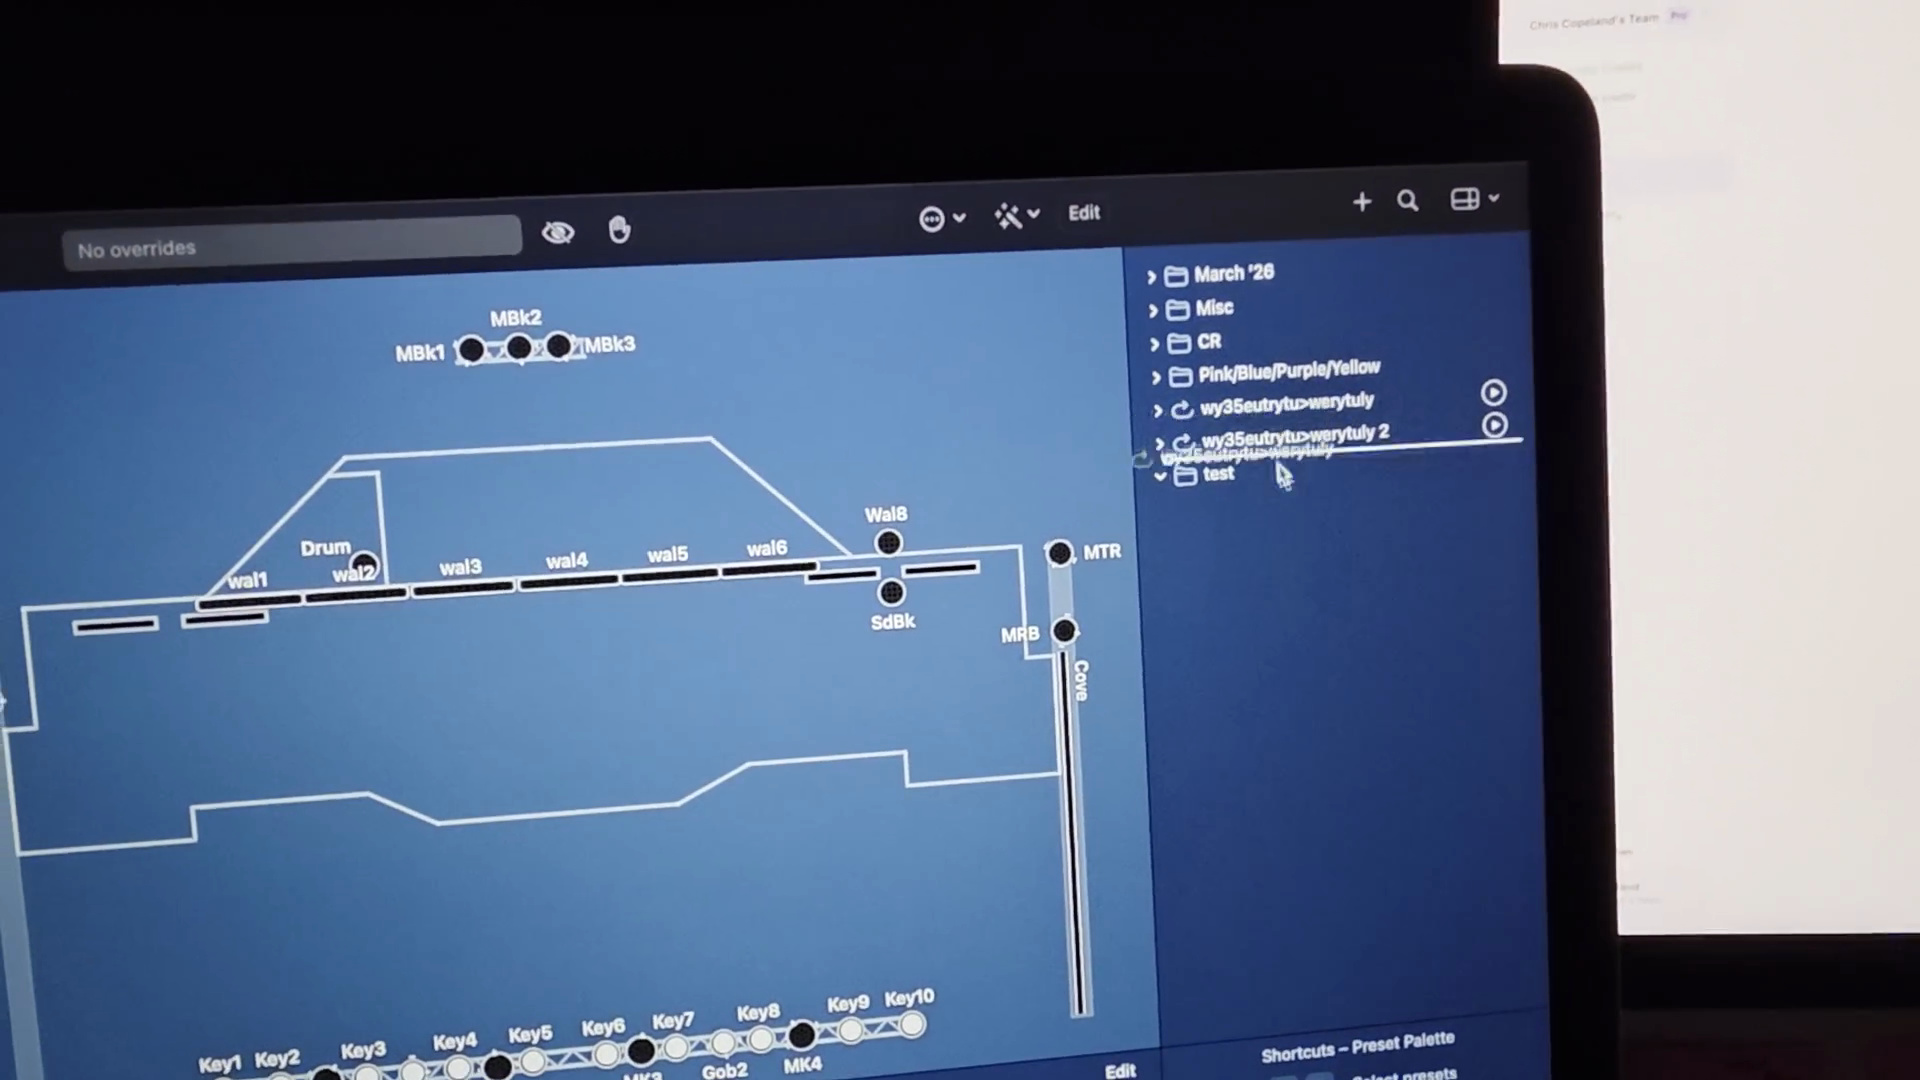
When I press this, you'll see it's much smoother, and then it stops. That's how you build a sequence. From there, if I have multiple sequences and want them in the same folder, I would group them together.

40
Right-click on the sequence you want to manage.
Step #40: Right-click on the sequence you want to manage.
41
Click the Duplicate option from the context menu.
Step #41: Click the Duplicate option from the context menu.

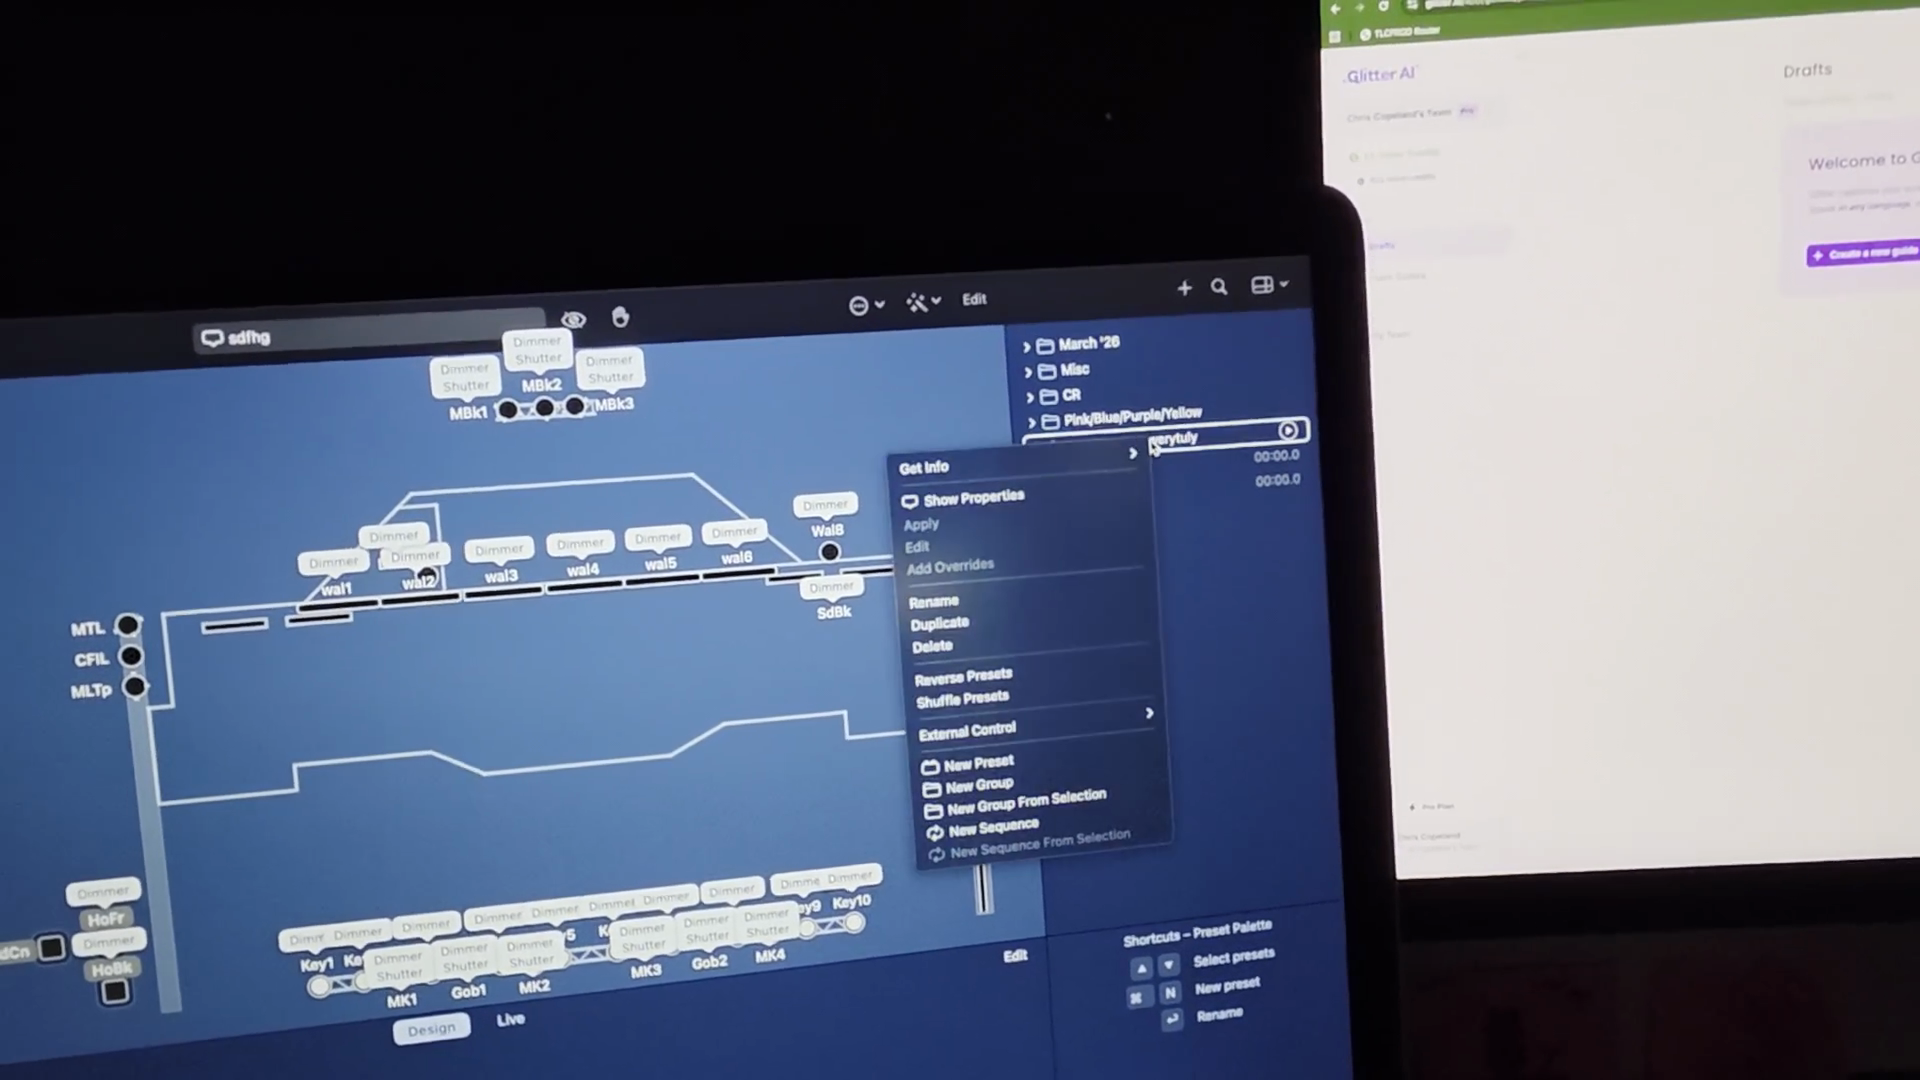
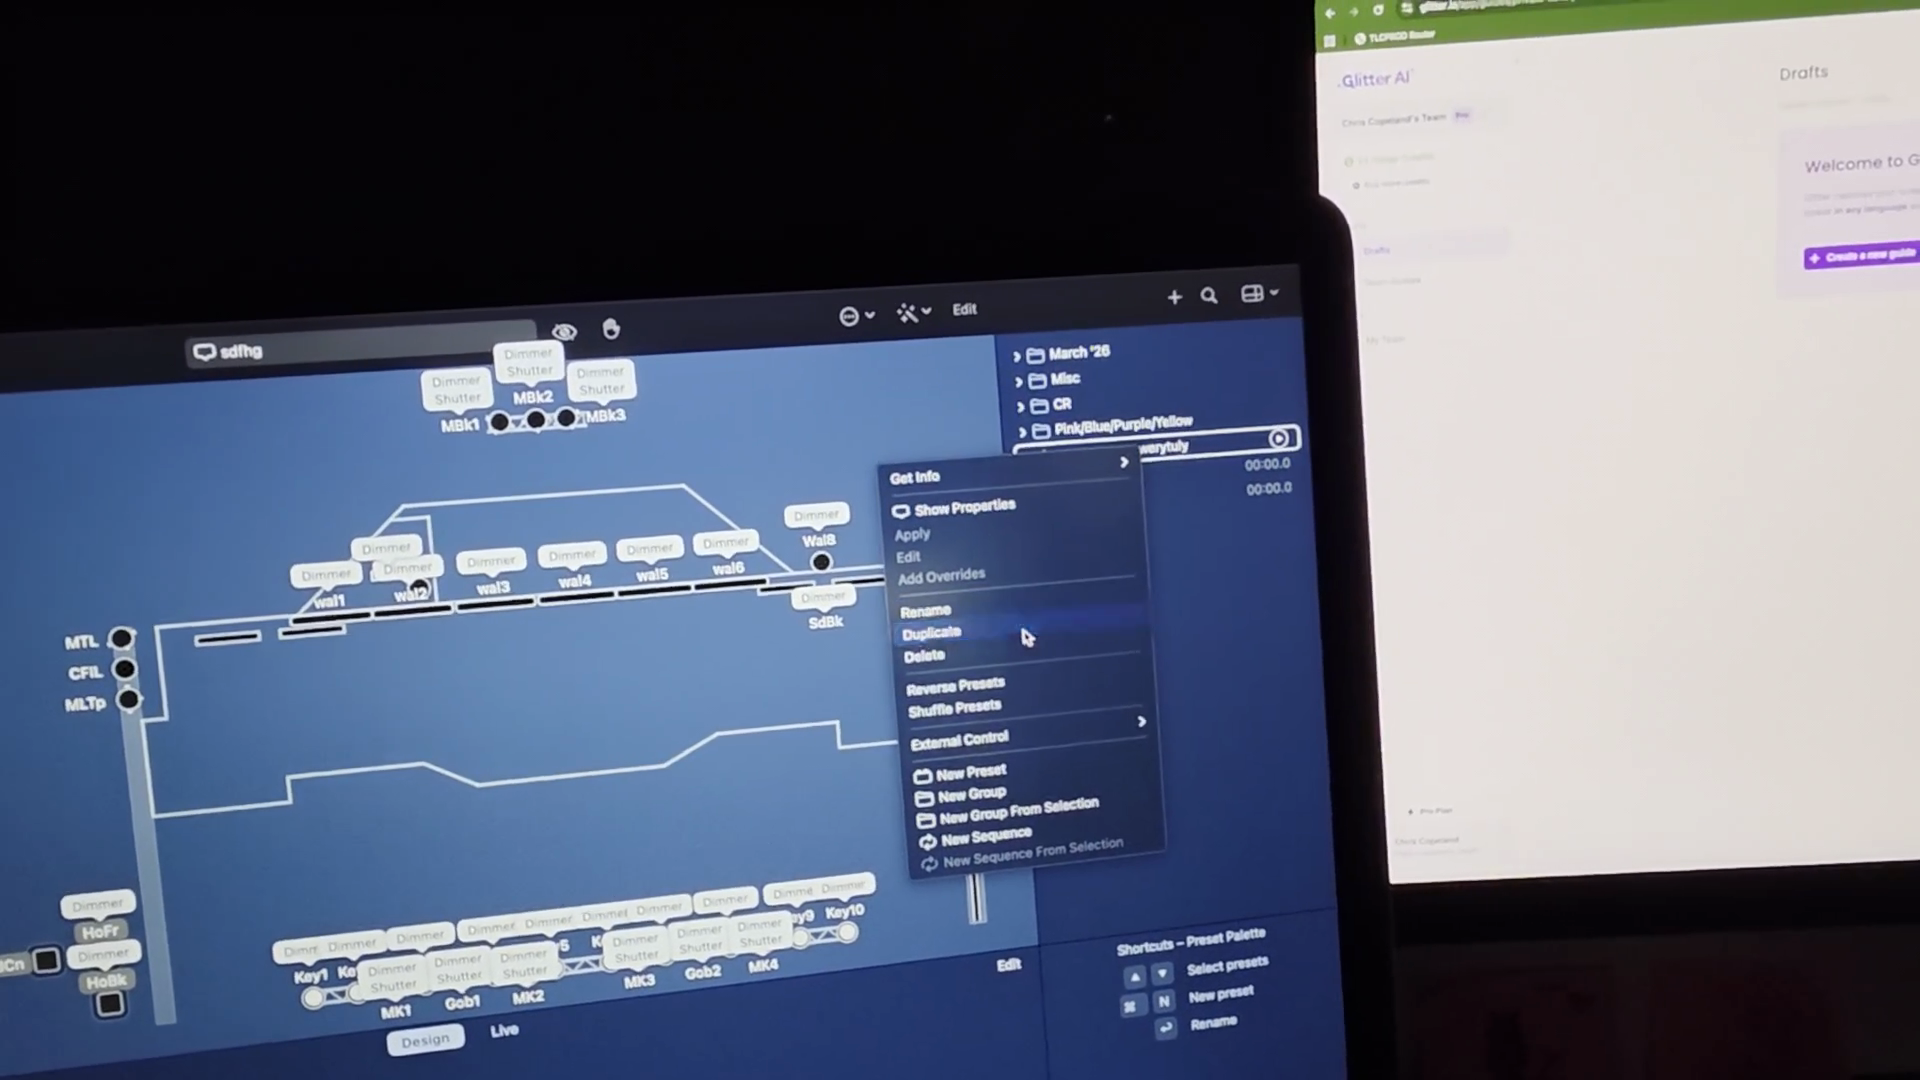
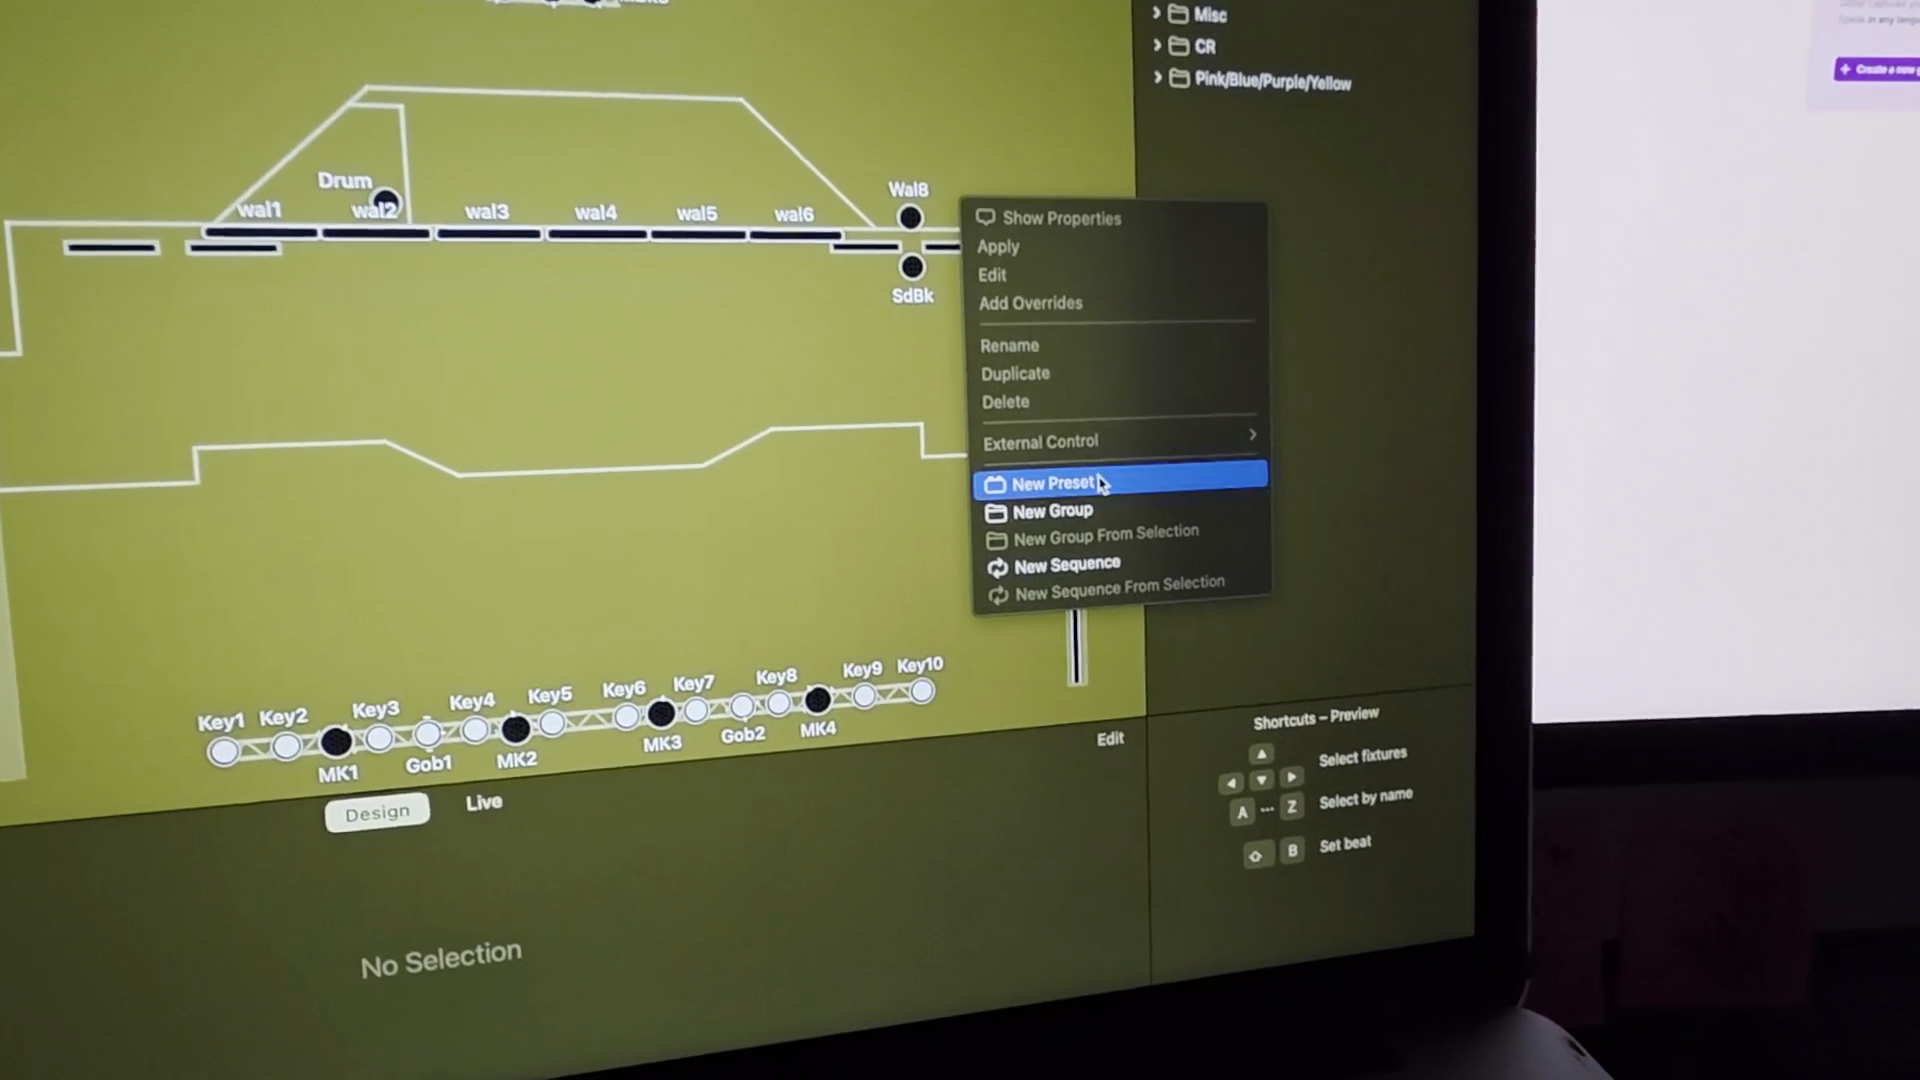
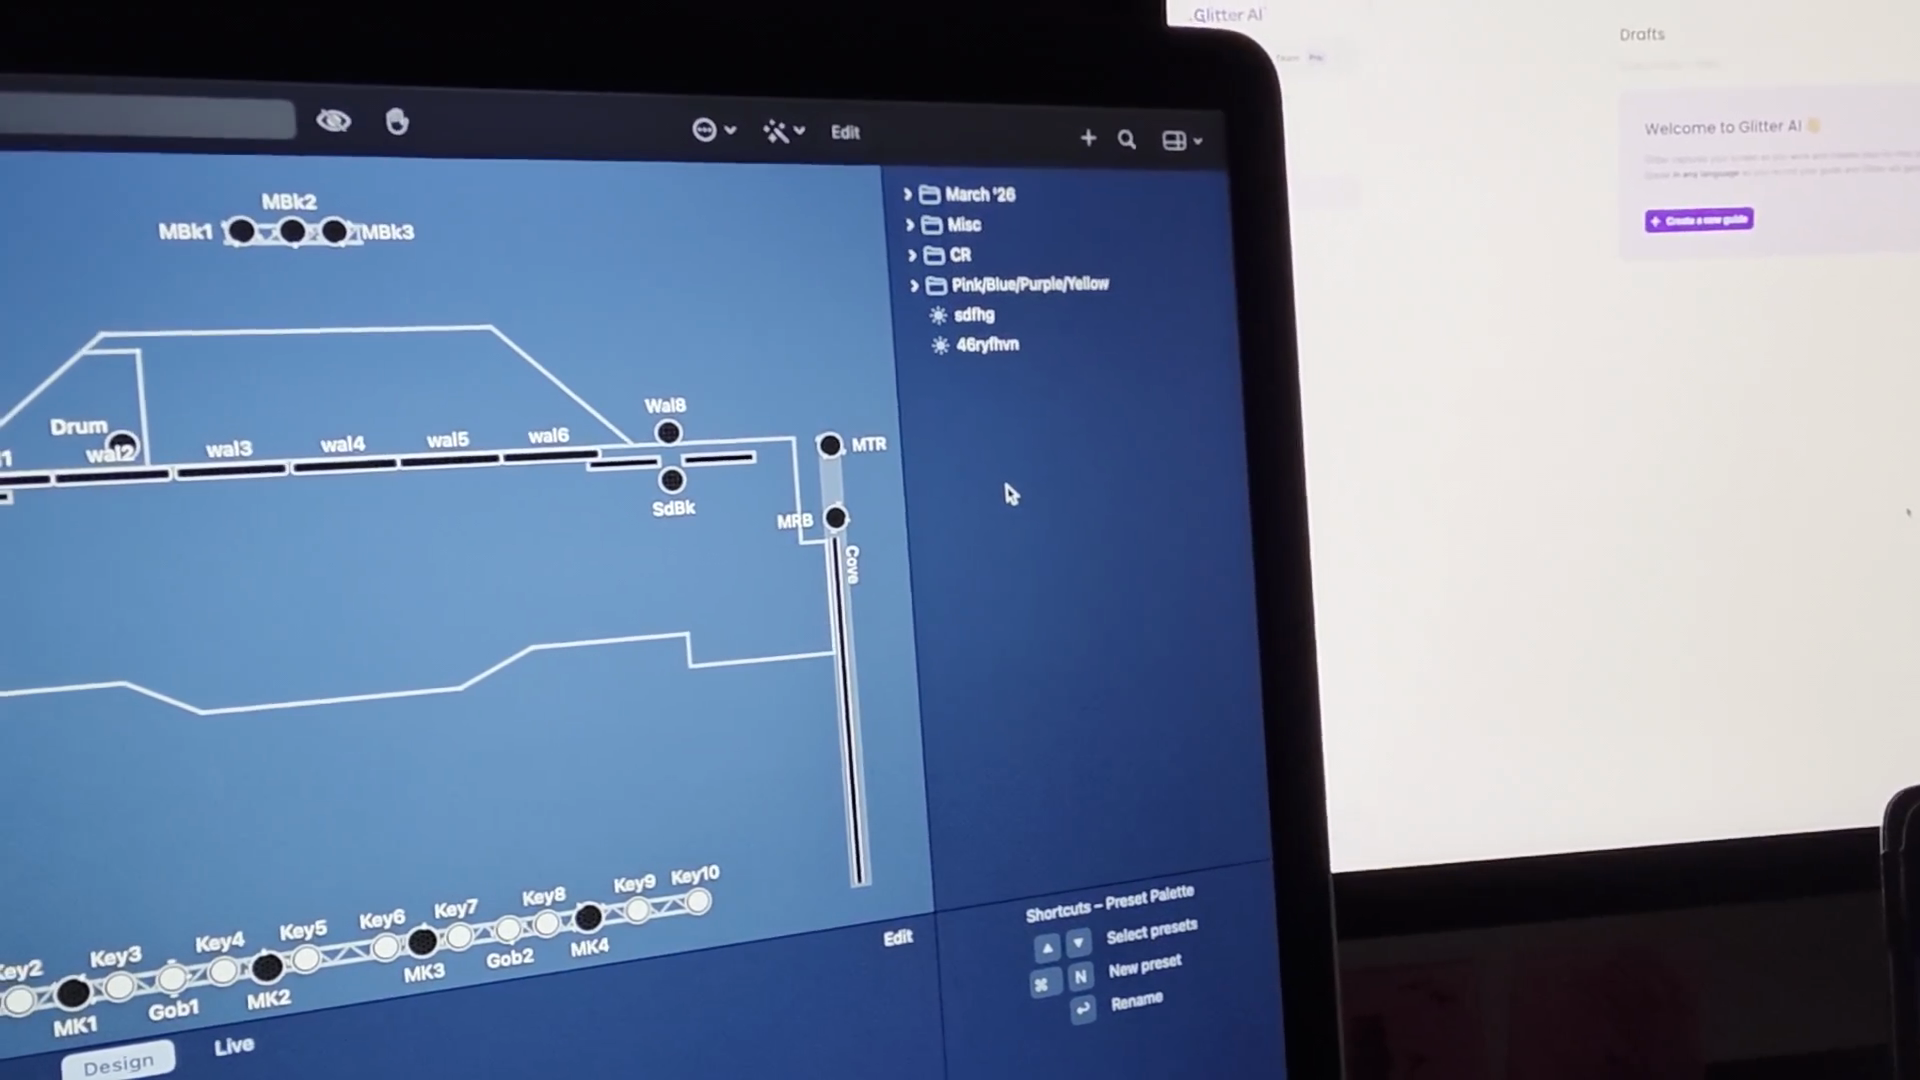
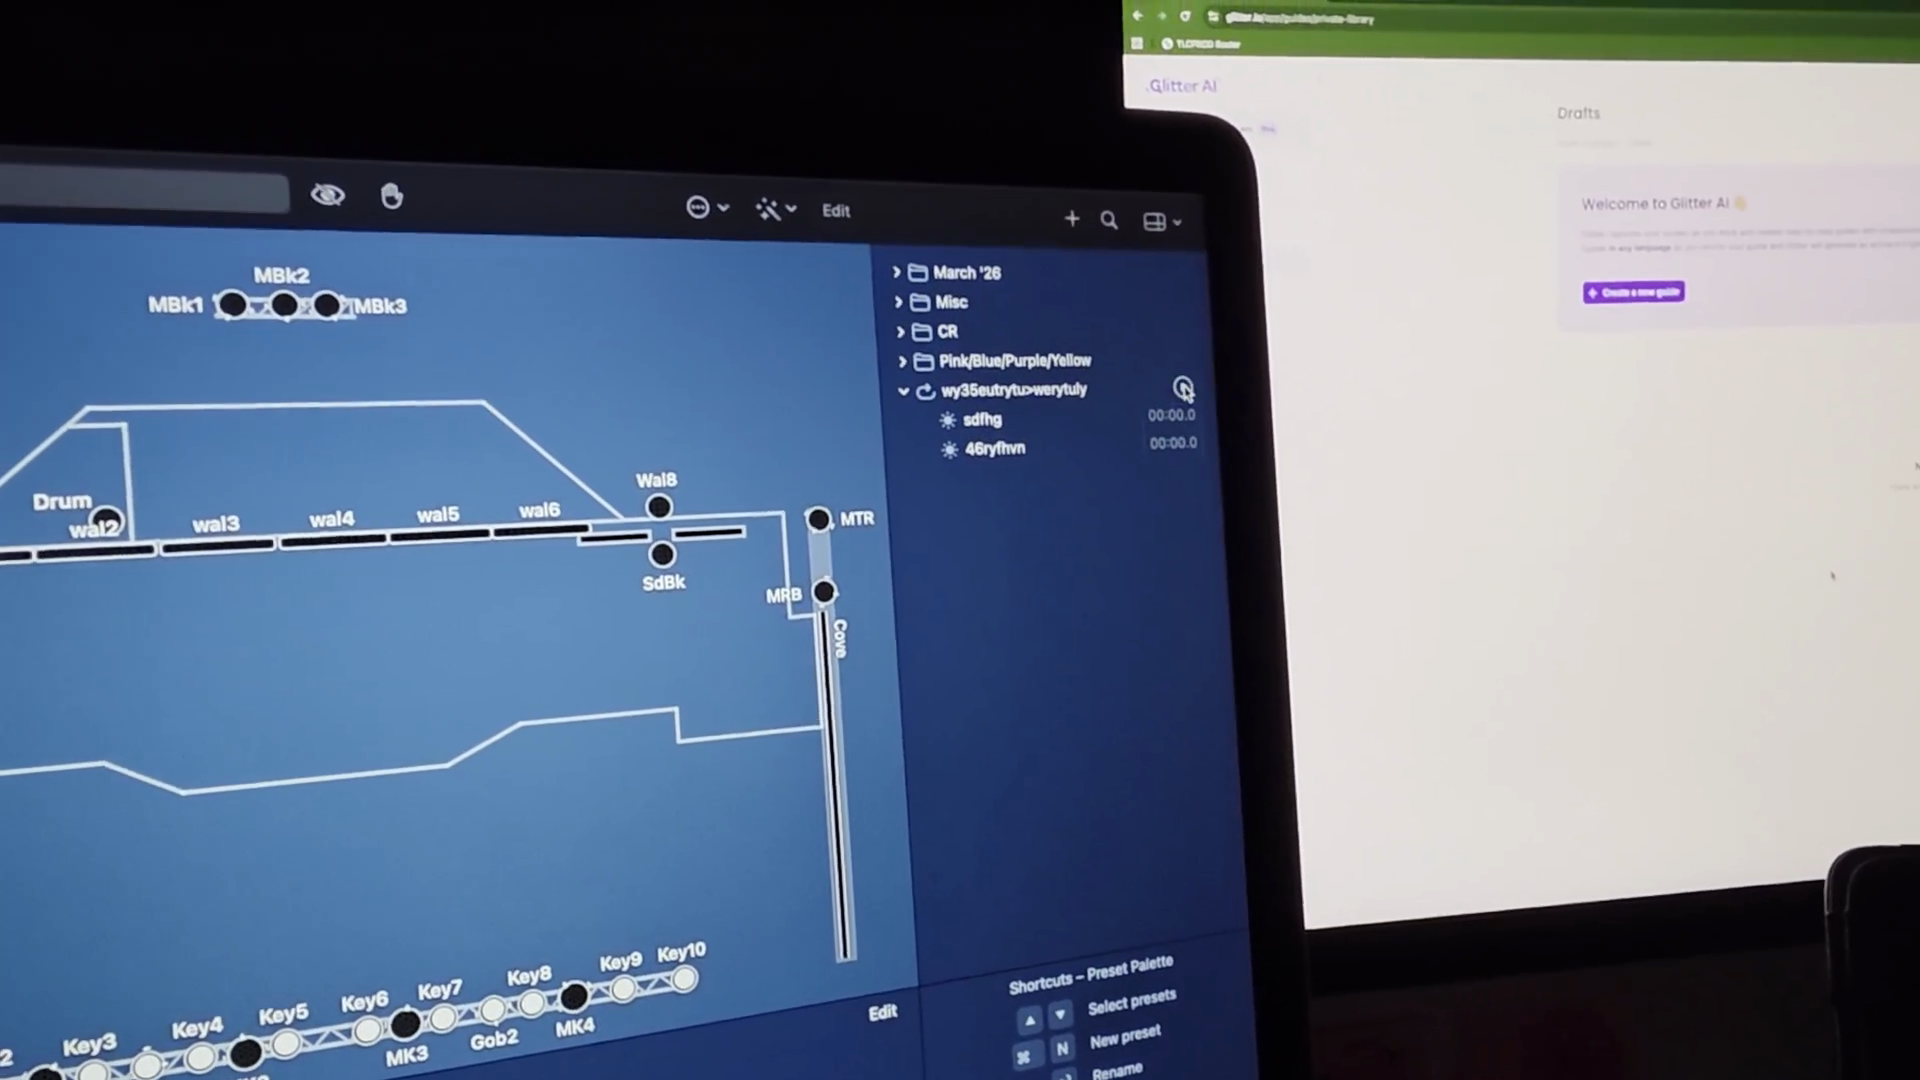
If you look closely at the icons, the arrow represents a sequence, this is a folder, and the scenes are like Legos. I could create a folder.

42
Right-click in the presets panel to open the context menu.
Step #42: Right-click in the presets panel to open the context menu.

You could say "New Group."

43
Click on 'New Group'.
Step #43: Click on 'New Group'.

We'll call it Test.

44
Type 'test' to name the new group.

I can add my sequences to that group by clicking, holding, and dragging.

45
Click, hold, and drag a sequence into the 'test' group.
Step #45: Click, hold, and drag a sequence into the 'test' group.
46
Click, hold, and drag the next sequence into the 'test' group.
Step #46: Click, hold, and drag the next sequence into the 'test' group.

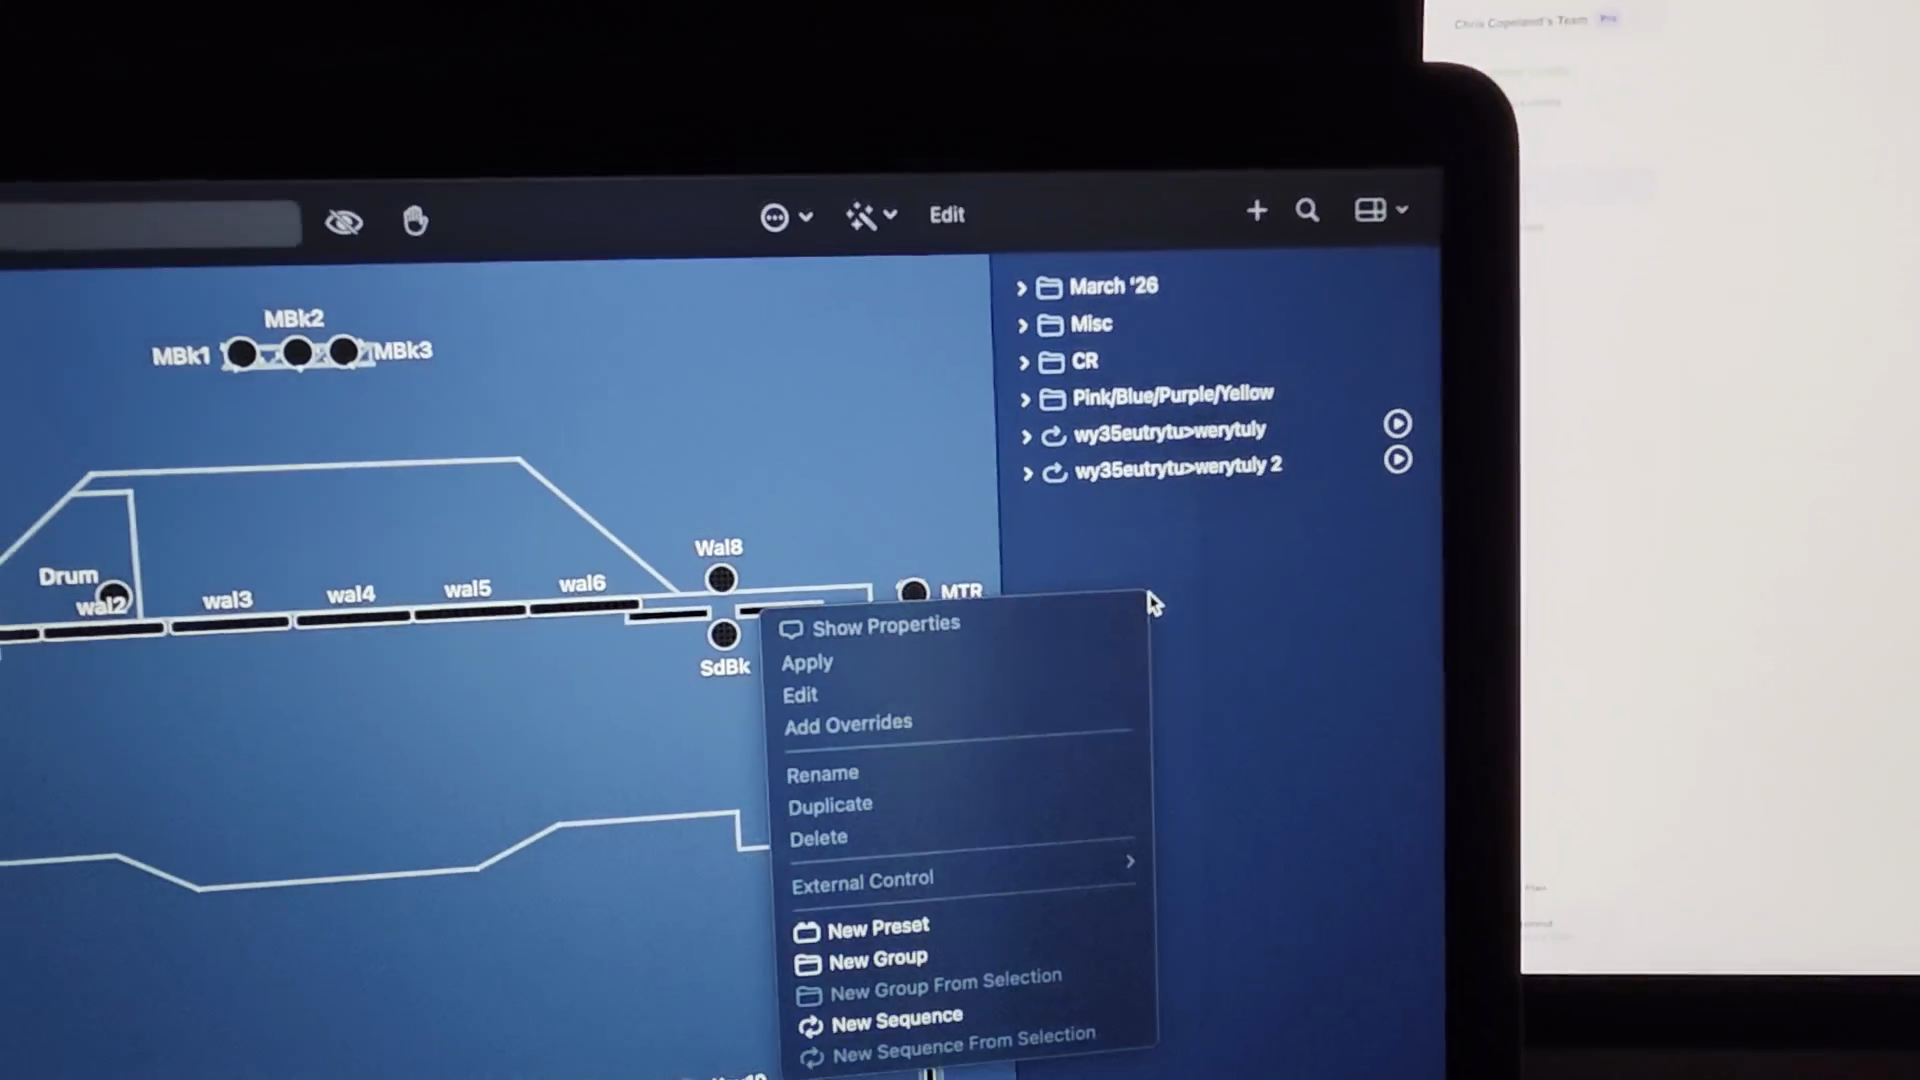
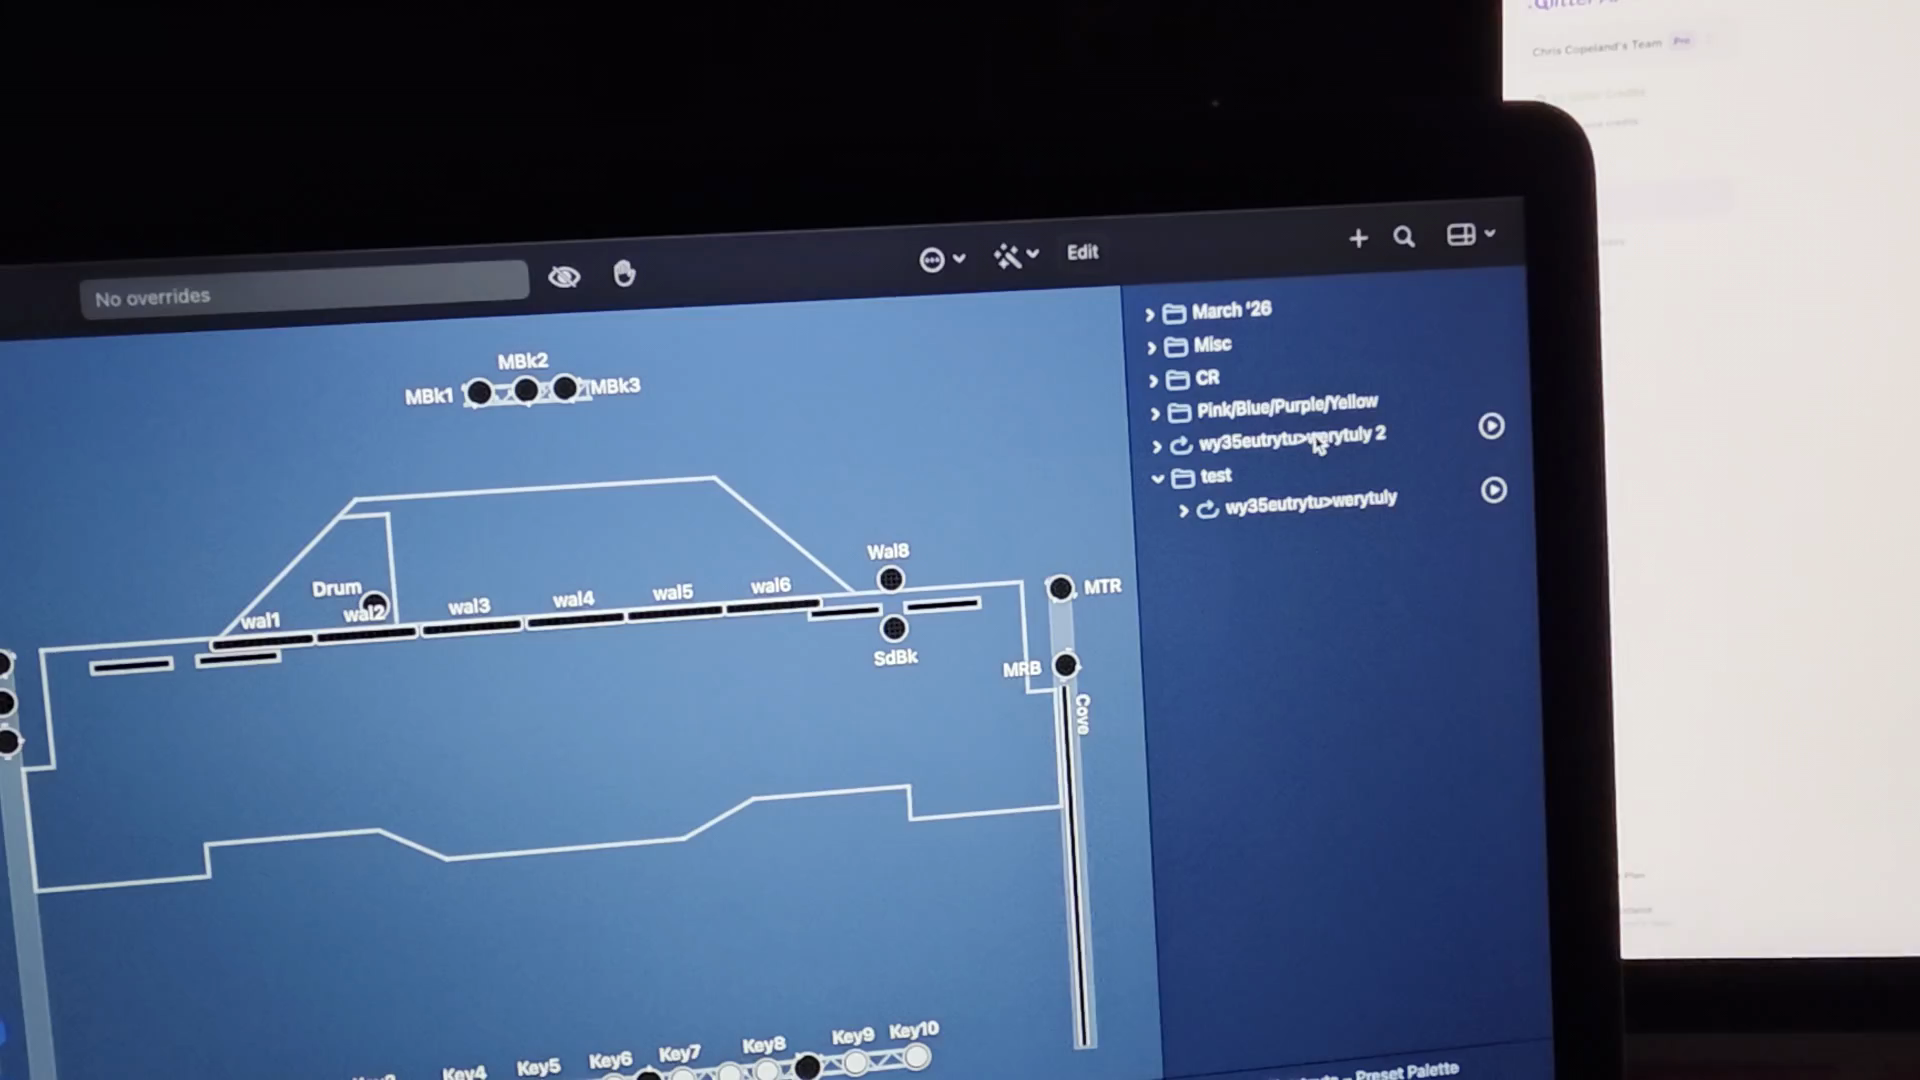
Now it's much cleaner, and everything I need is right here. Right?