
How to Bulk Assign Transactions: Step-by-Step Guide
Learn how to efficiently bulk assign transactions, including selecting customers, vendors, categories, and memos. Follow this step-by-step guide to streamline your transaction management process.
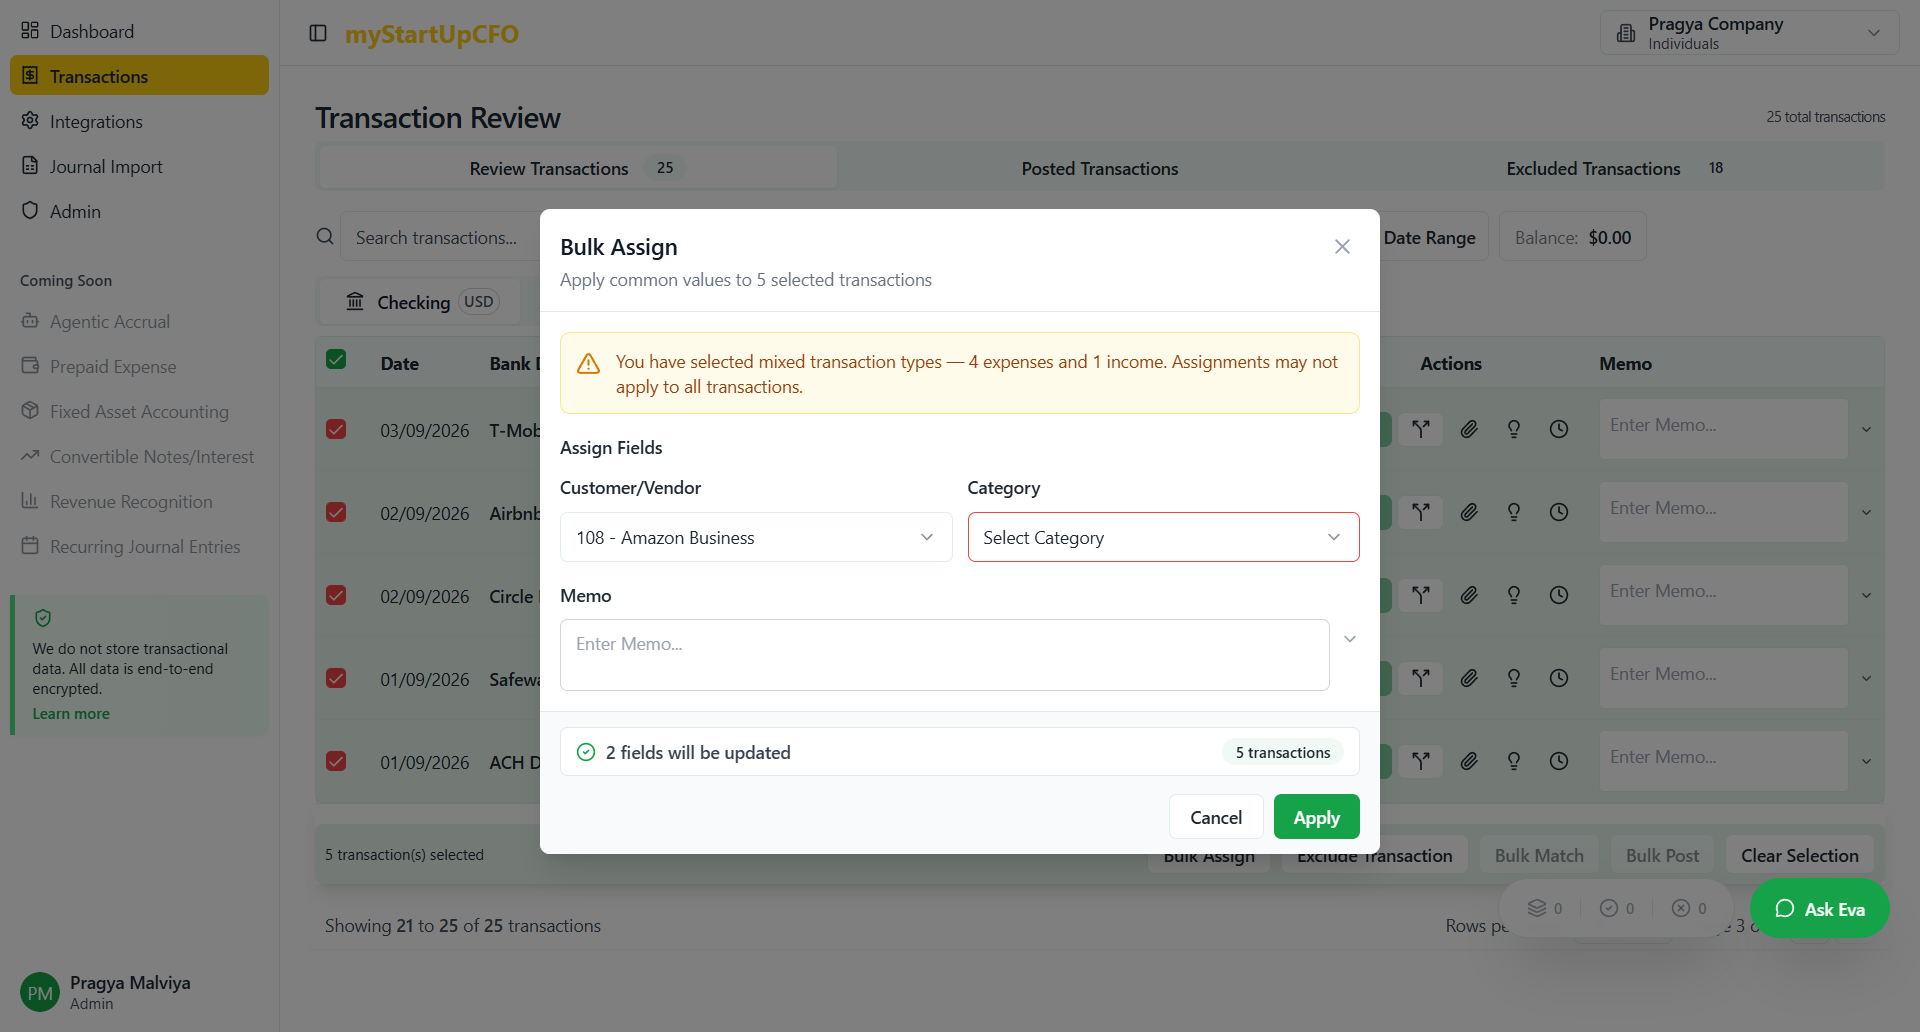
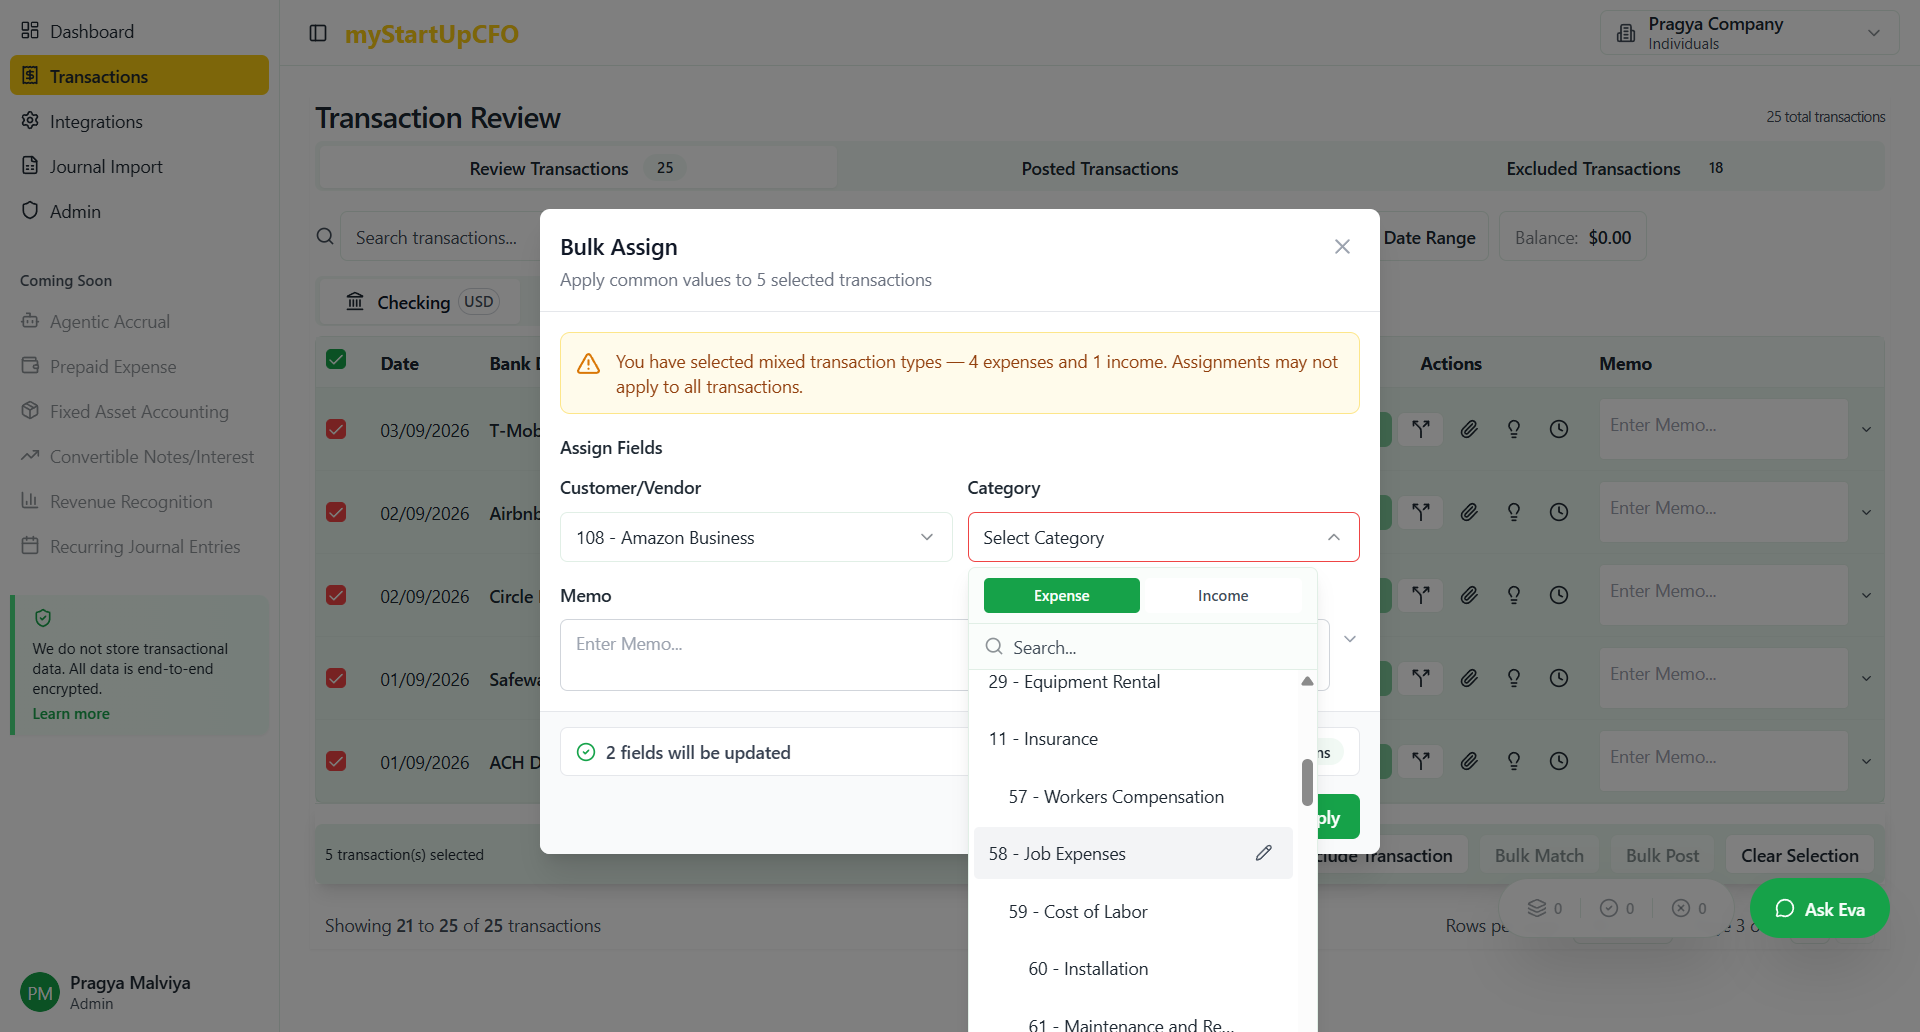
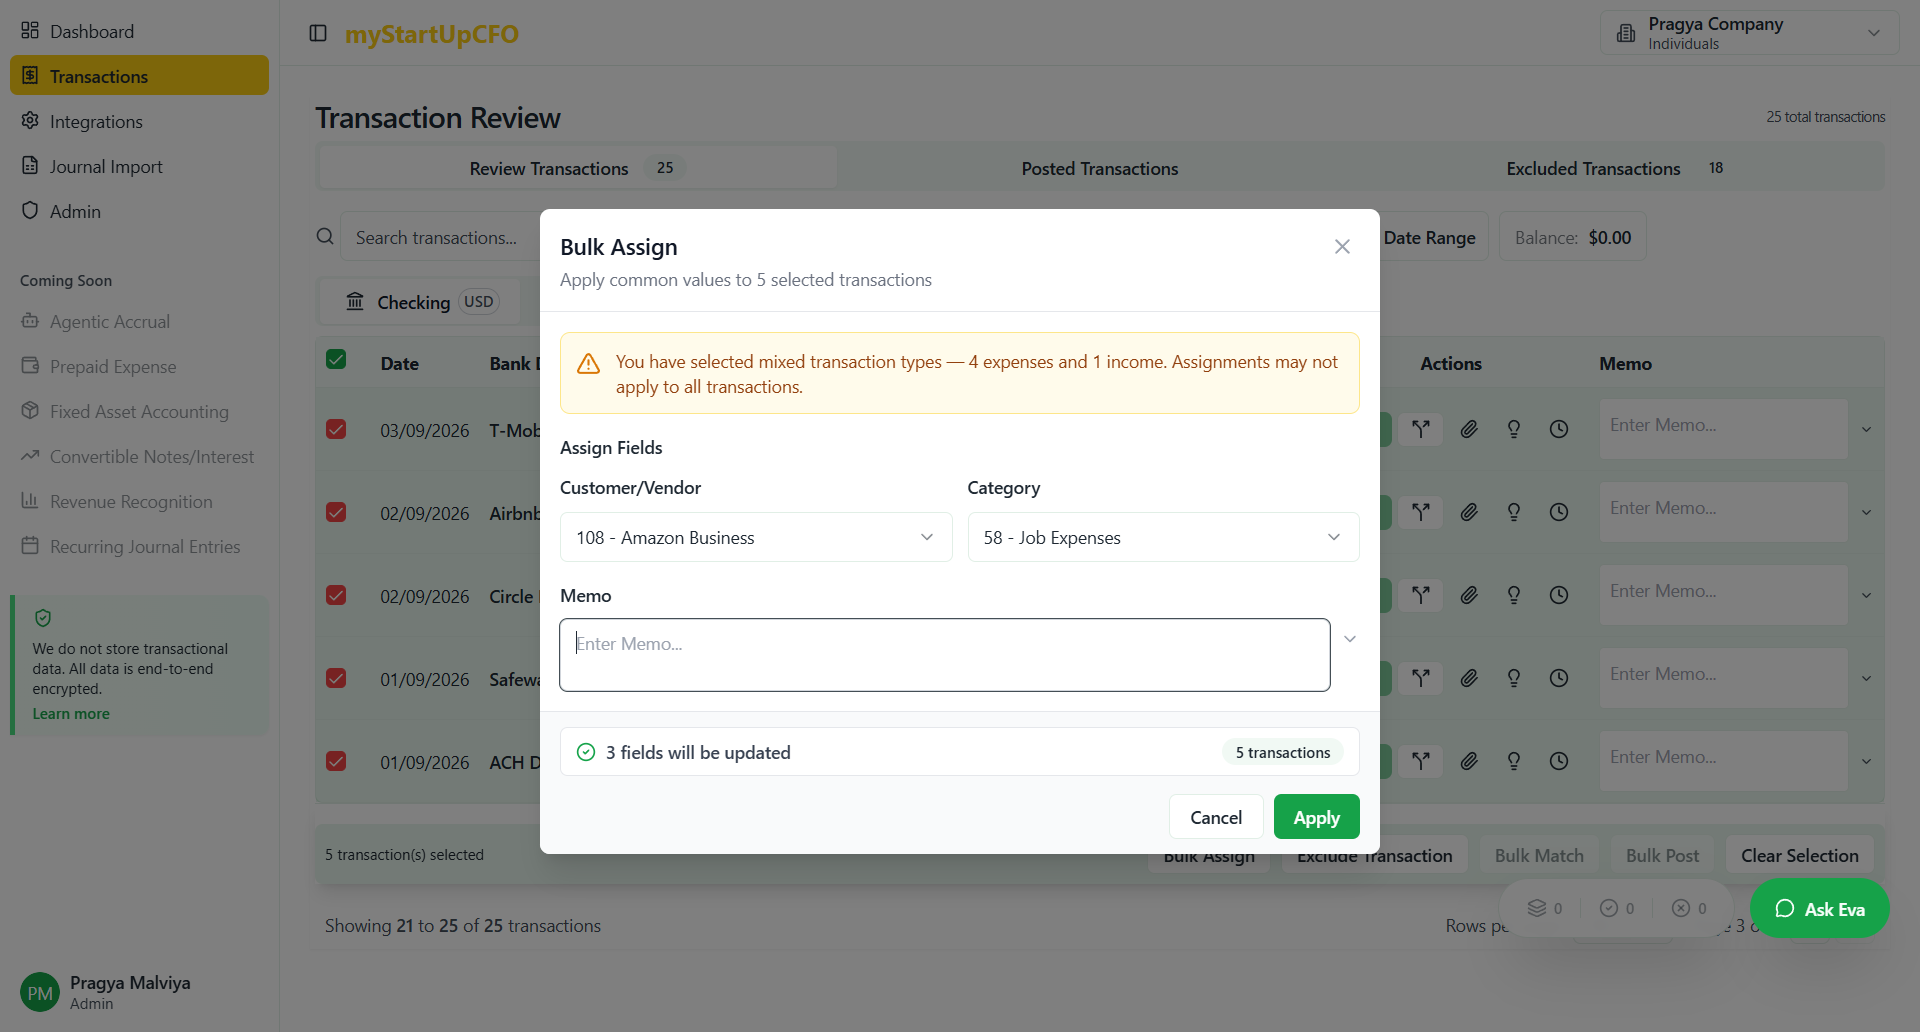
In this guide, you will learn how to bulk assign transaction details for efficient data management. This feature allows you to select multiple transactions simultaneously and apply common attributes such as customer, vendor, category, and memo. You can configure the bulk assignment to apply exclusively to expense transactions or to all selected transactions, providing flexibility based on your workflow requirements.
Let's get started
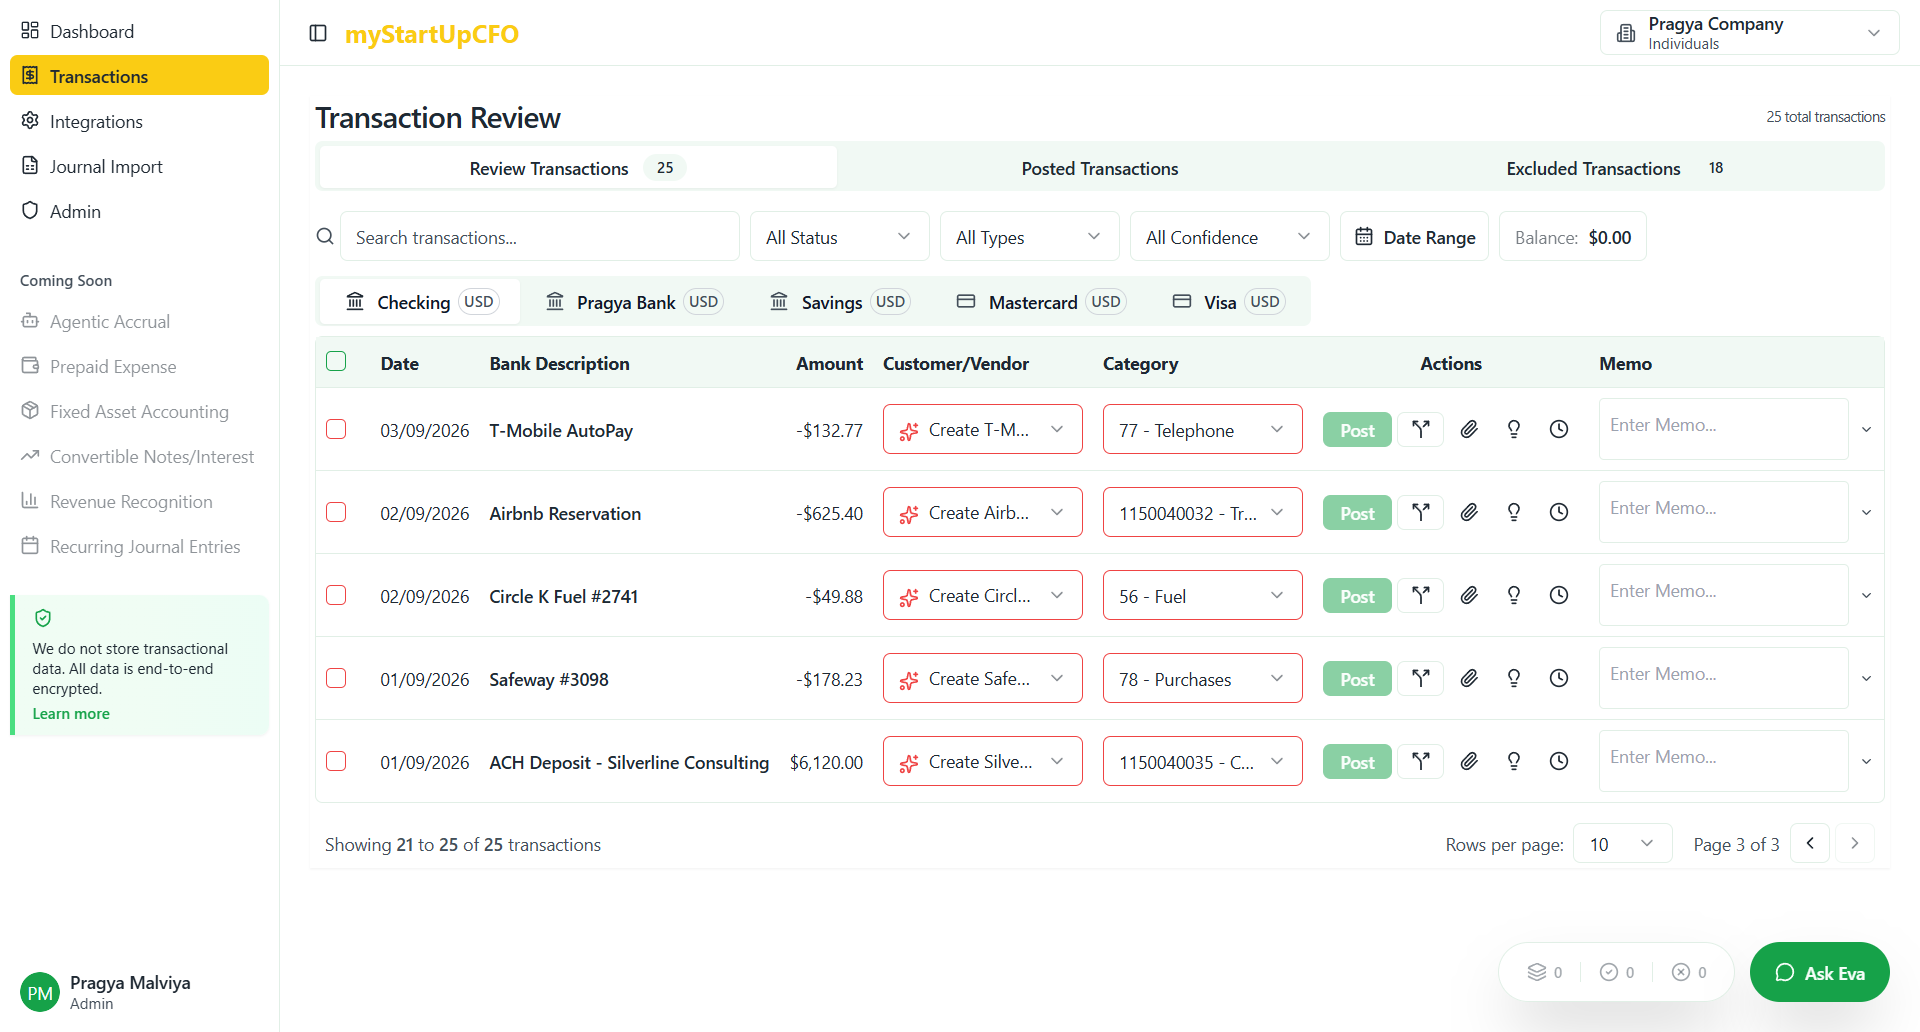
To initiate bulk assignment, click the bulk actions button and select "Bulk Assign" from the menu.
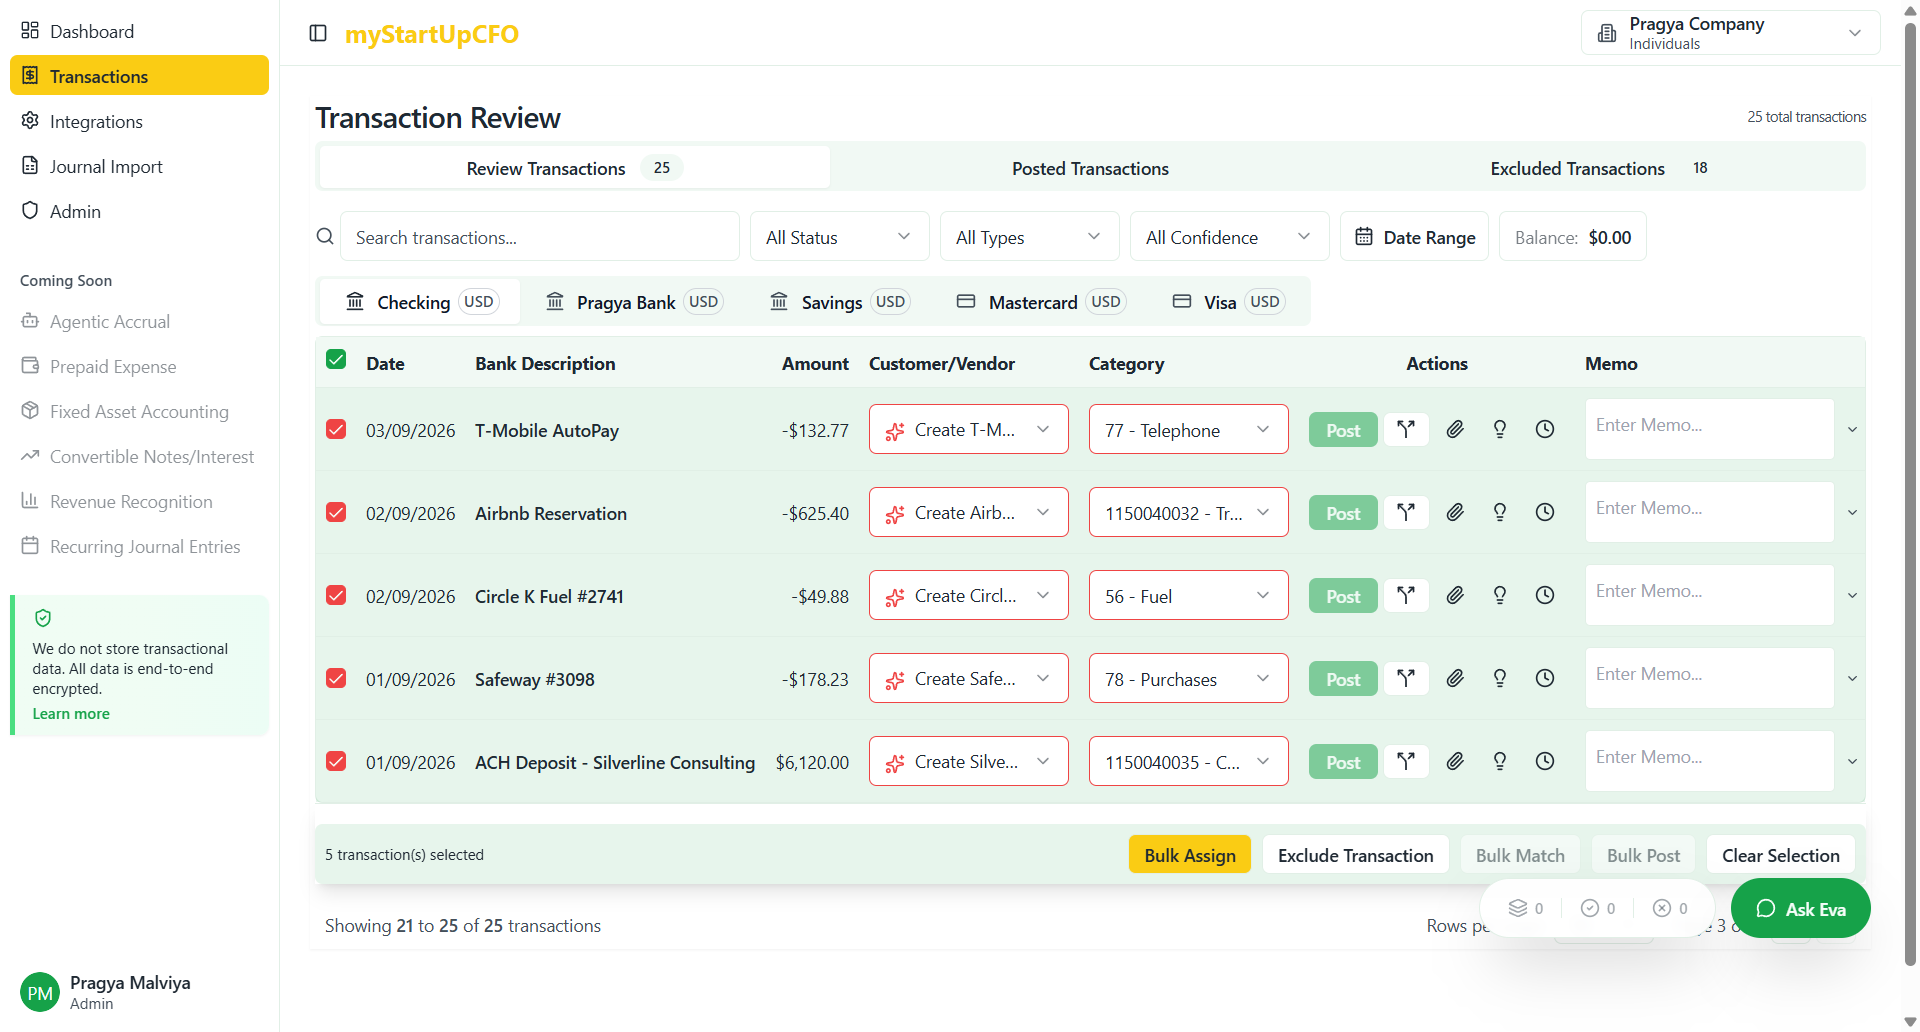
This opens the bulk assignment modal where you can configure customer and vendor assignments along with other transaction attributes.
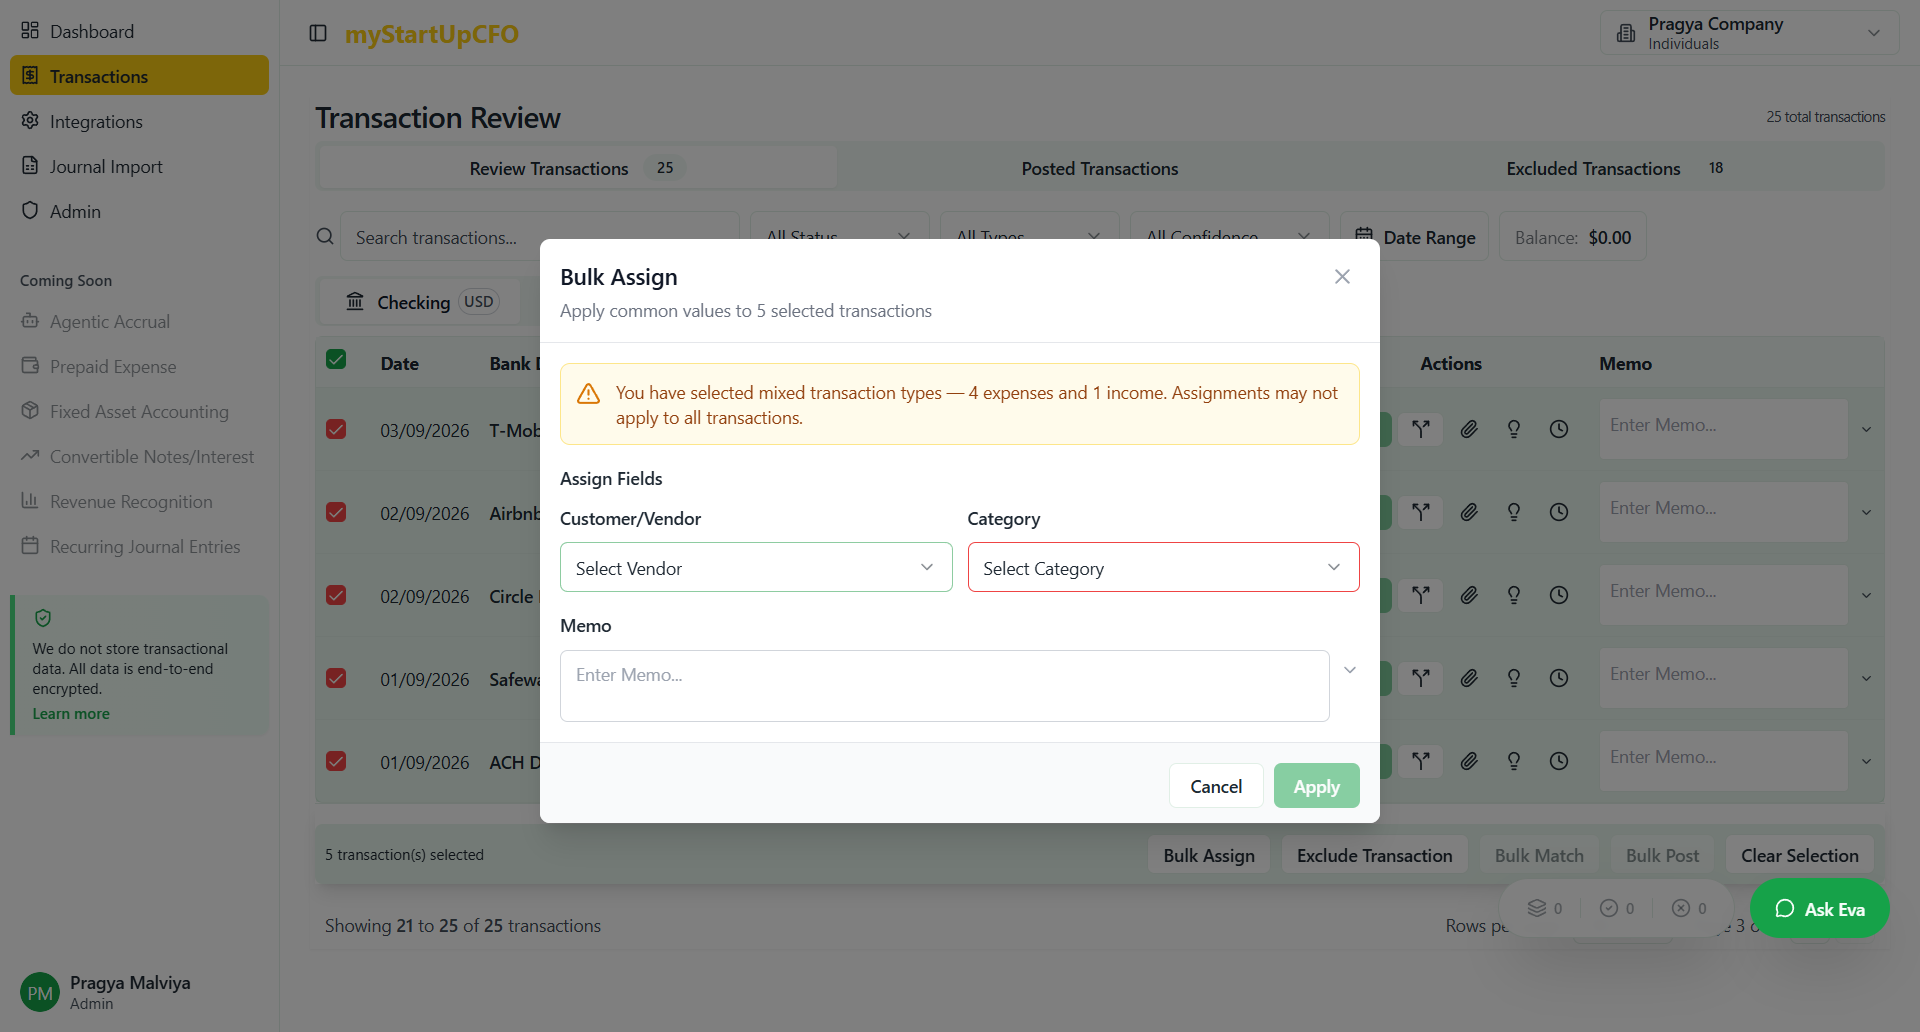
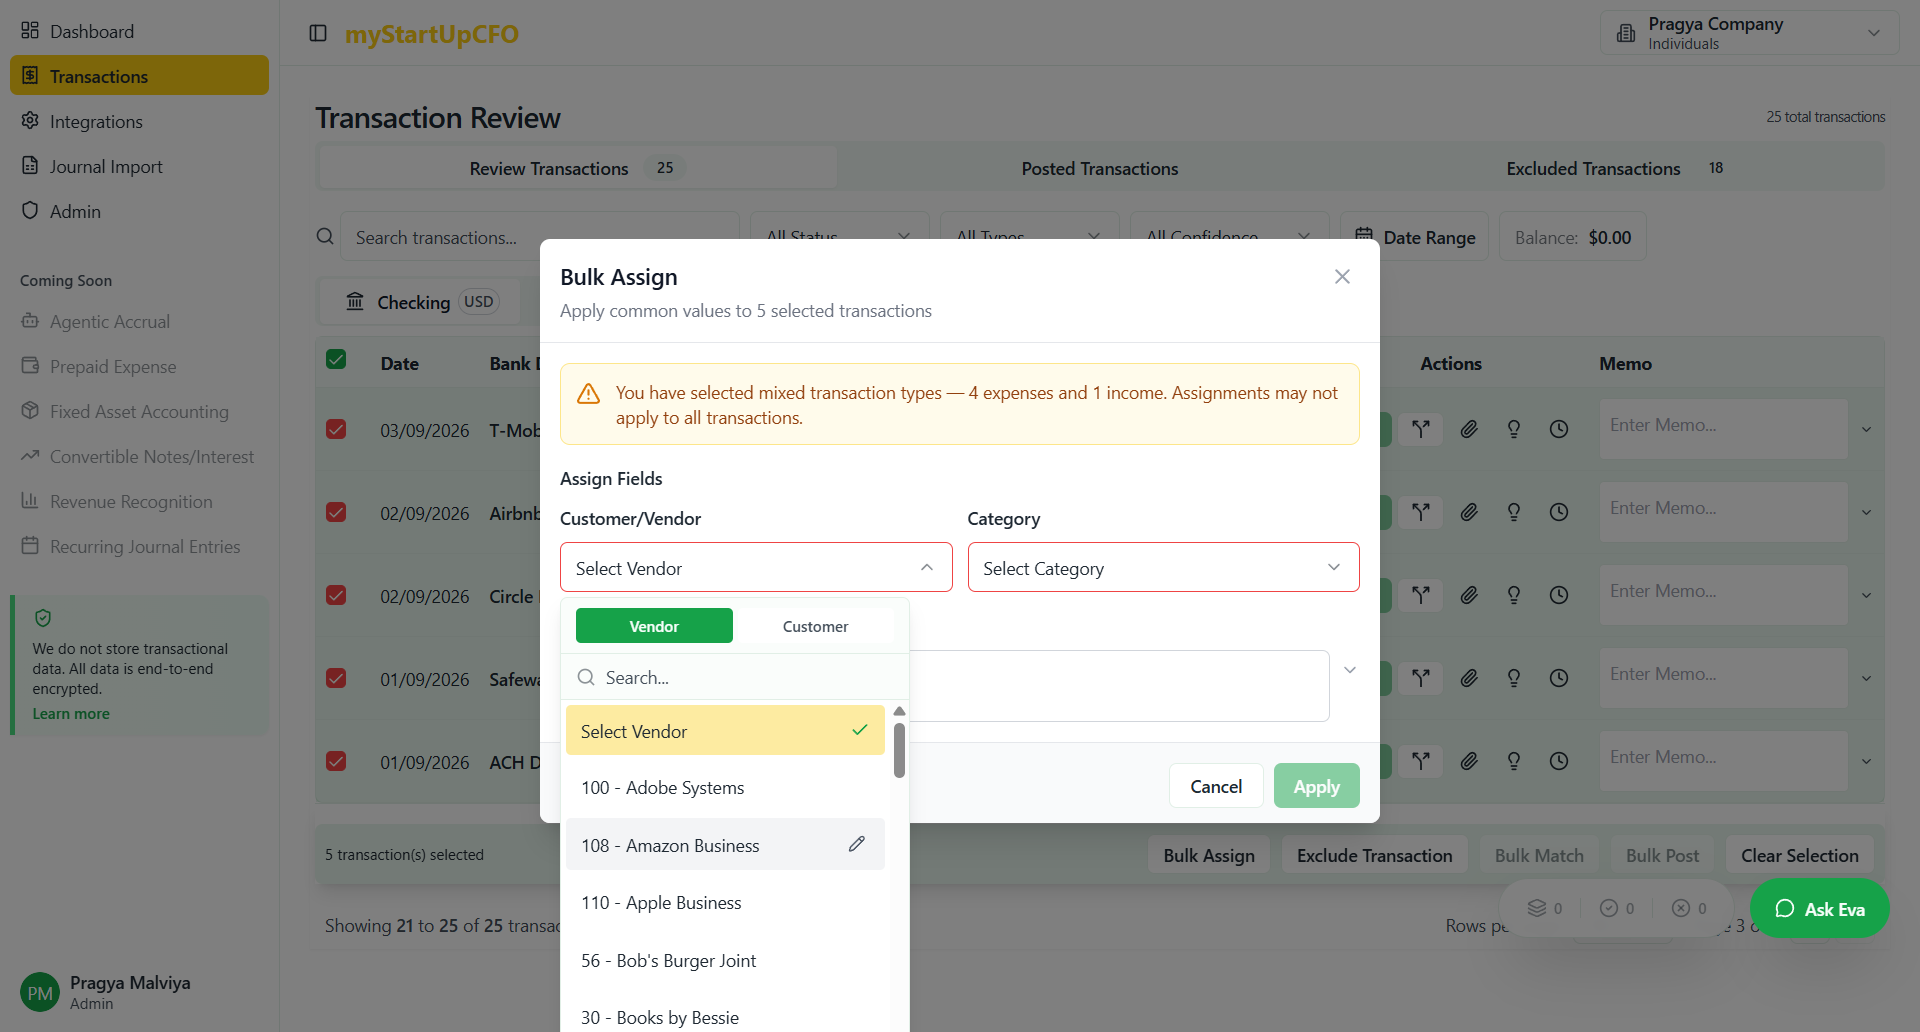

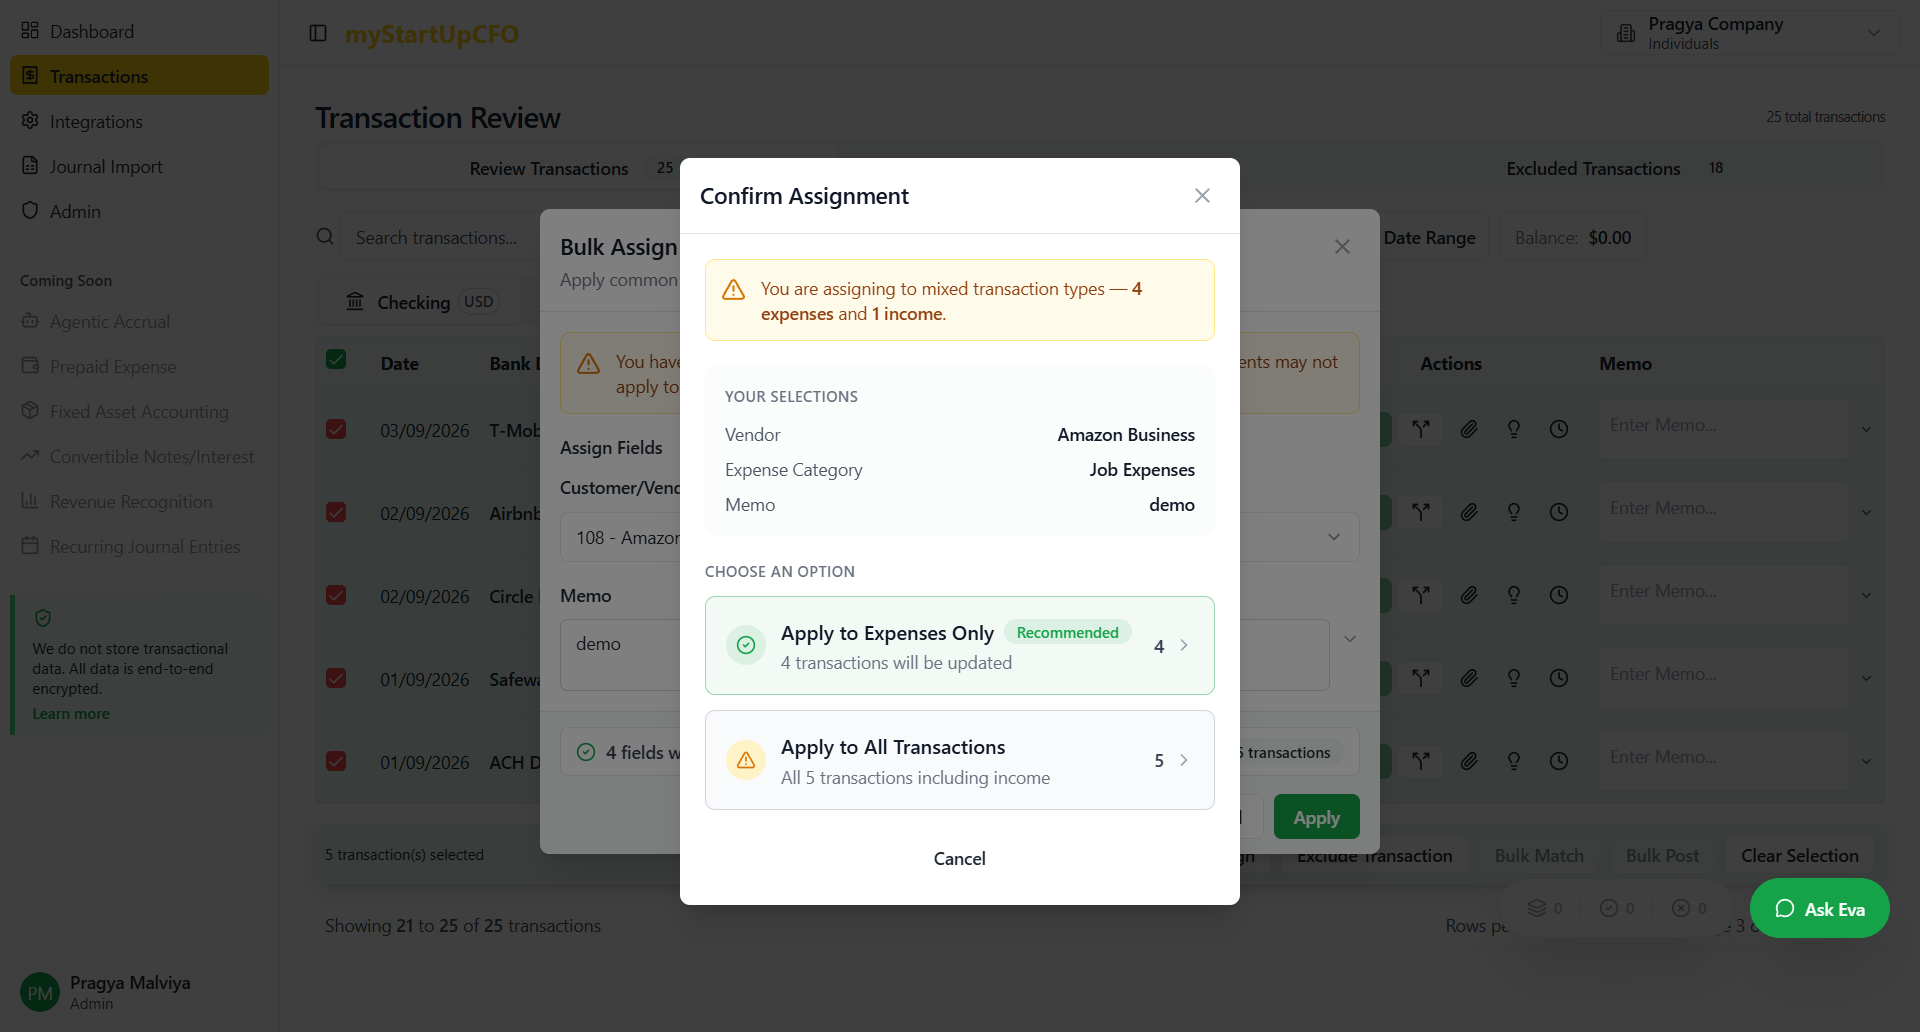
Select your application scope: "Apply to Expenses Only" to update only expense transactions, or "Apply to All Transactions" to update all selected records. The system displays a preview showing the number of transactions that will be updated, such as "Apply to Expenses Only (Recommended) - 4 transactions will be updated."
This is how the bulk assign feature works.