How to Capture and Upload Profiles on Keka for Recruiters
Learn the step-by-step process of capturing and uploading candidate profiles on Keka, including bulk uploads, screening, and interview scheduling.
In this guide, we'll learn how to manage the recruitment process using Keka, focusing on capturing and uploading candidate profiles. We'll explore how to utilize the Hire option to access job openings and handle candidate profiles, whether through bulk uploads or individual additions. The guide will also cover the steps for screening, scheduling interviews, and managing feedback. Additionally, we'll discuss how to archive or reject profiles and adjust the hiring setup, including adding recruiters and interview panel members. This process ensures efficient handling of candidates from sourcing to pre-boarding.
Let's get started
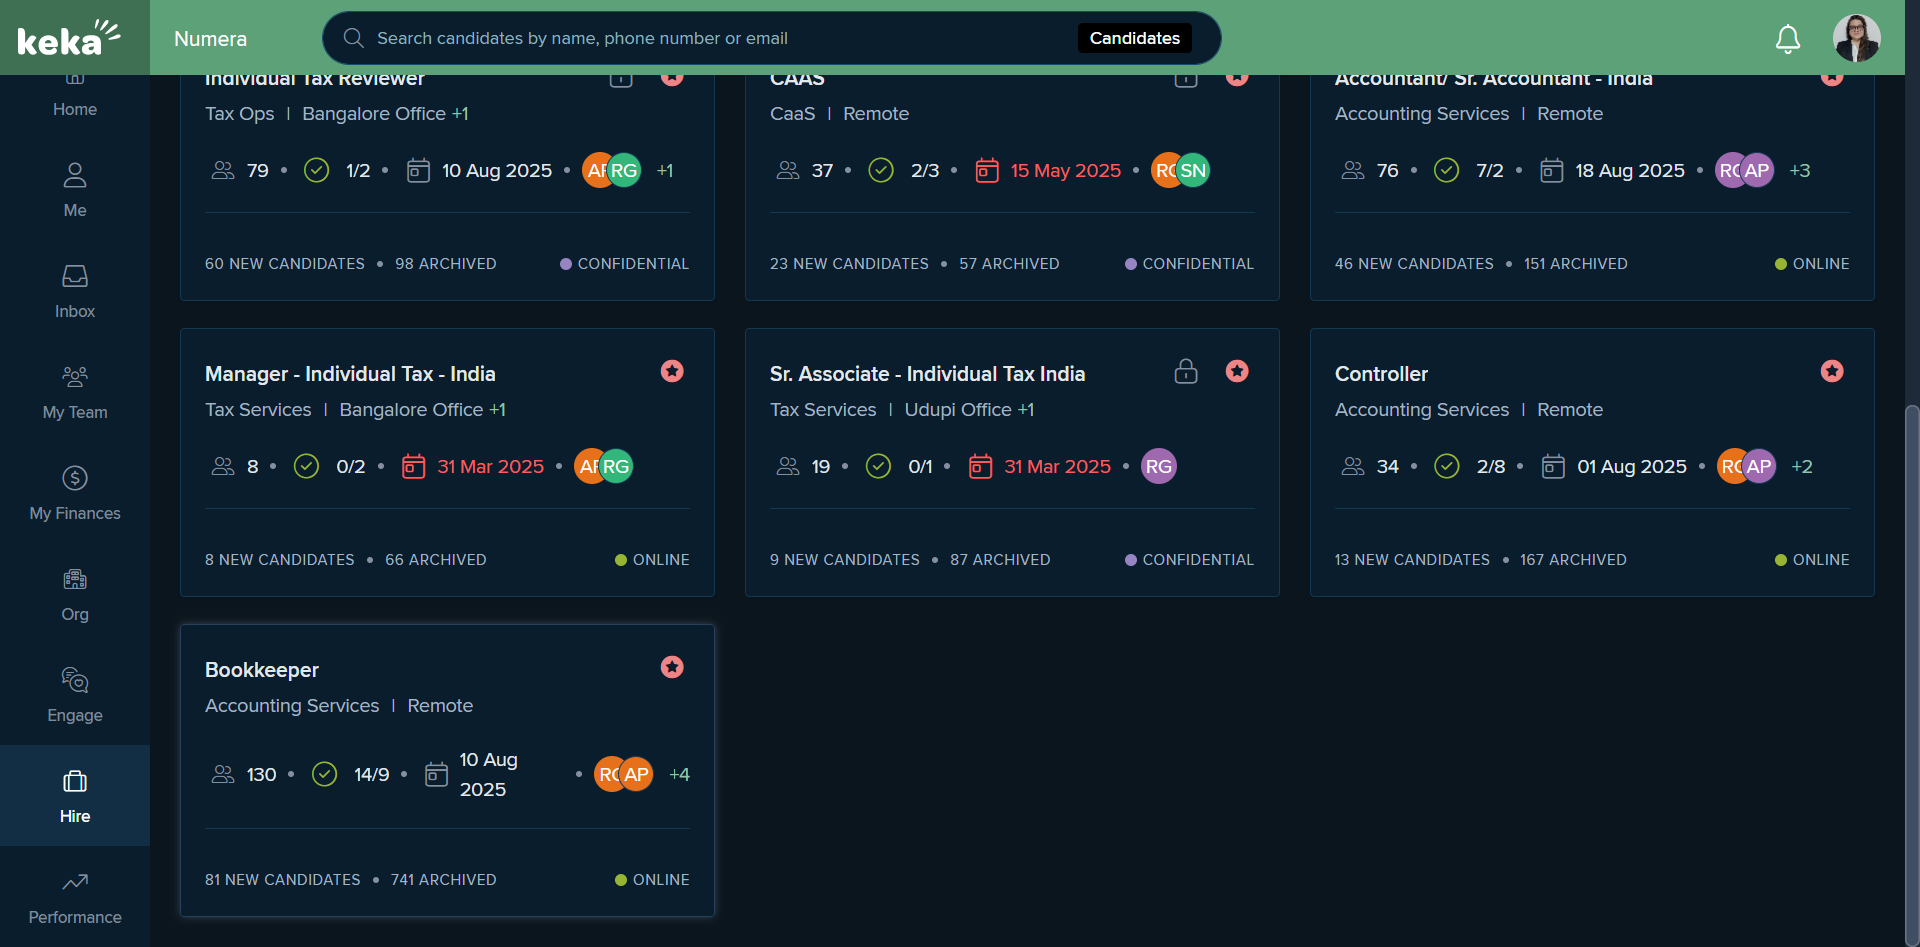
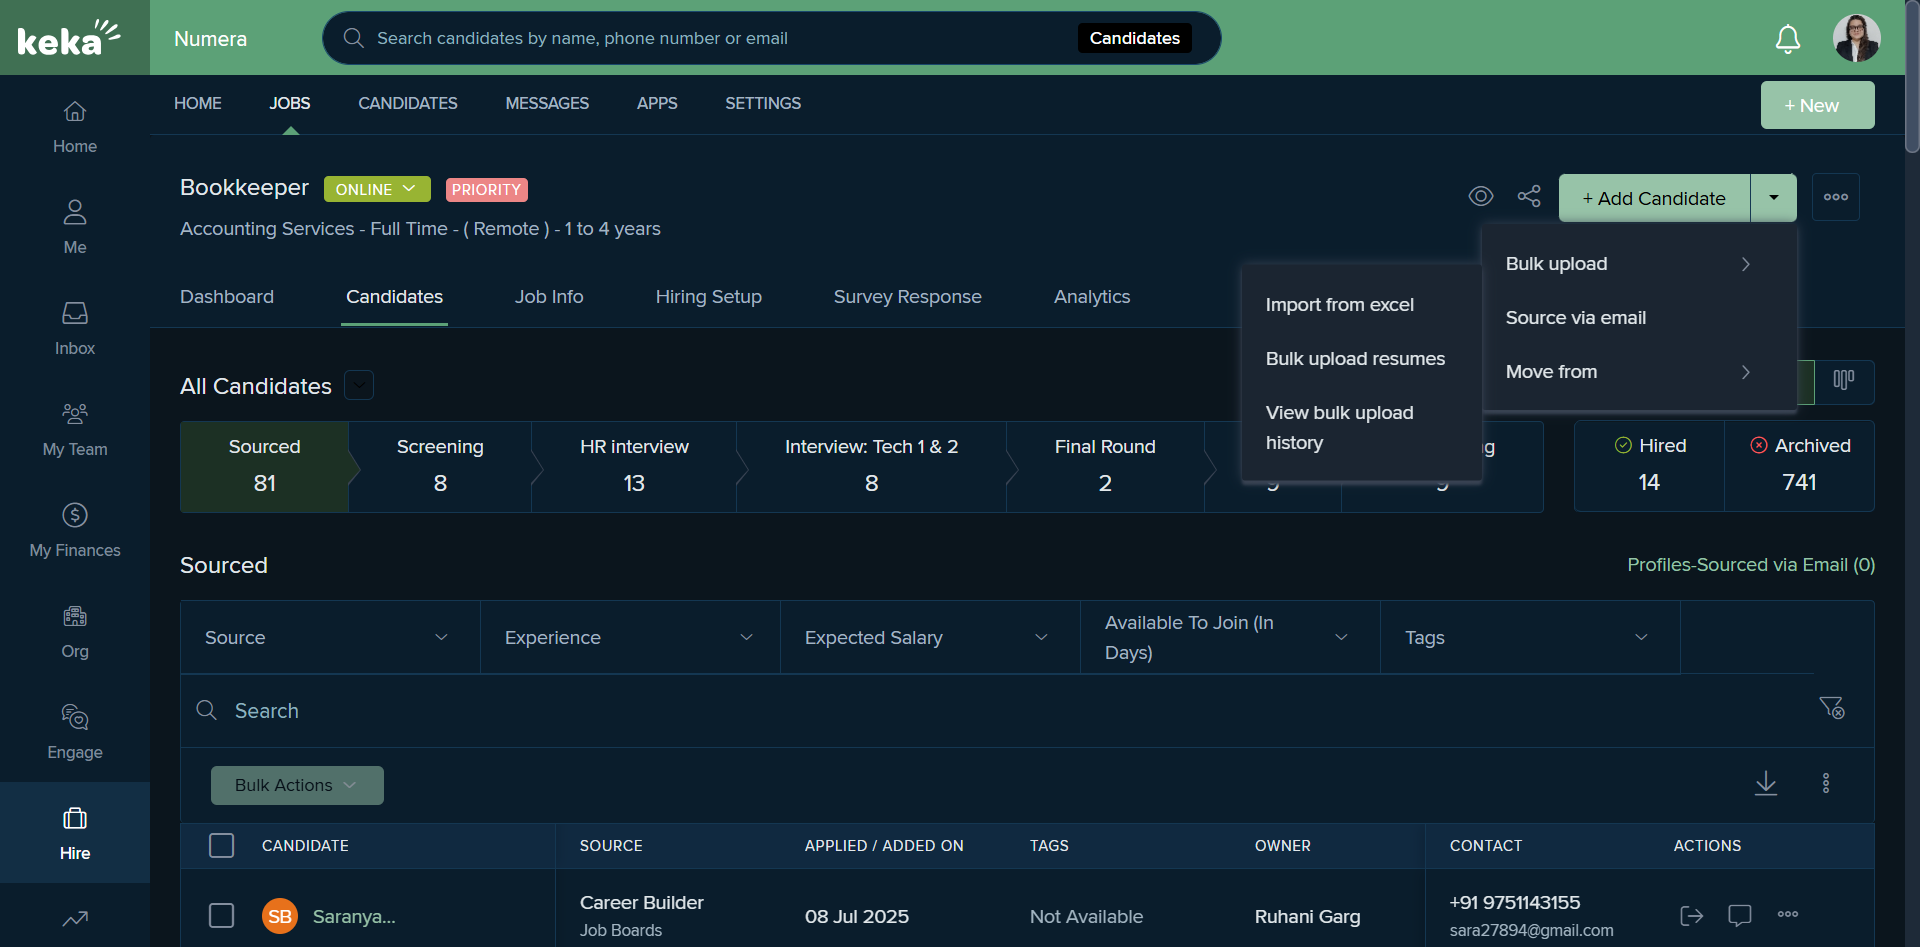
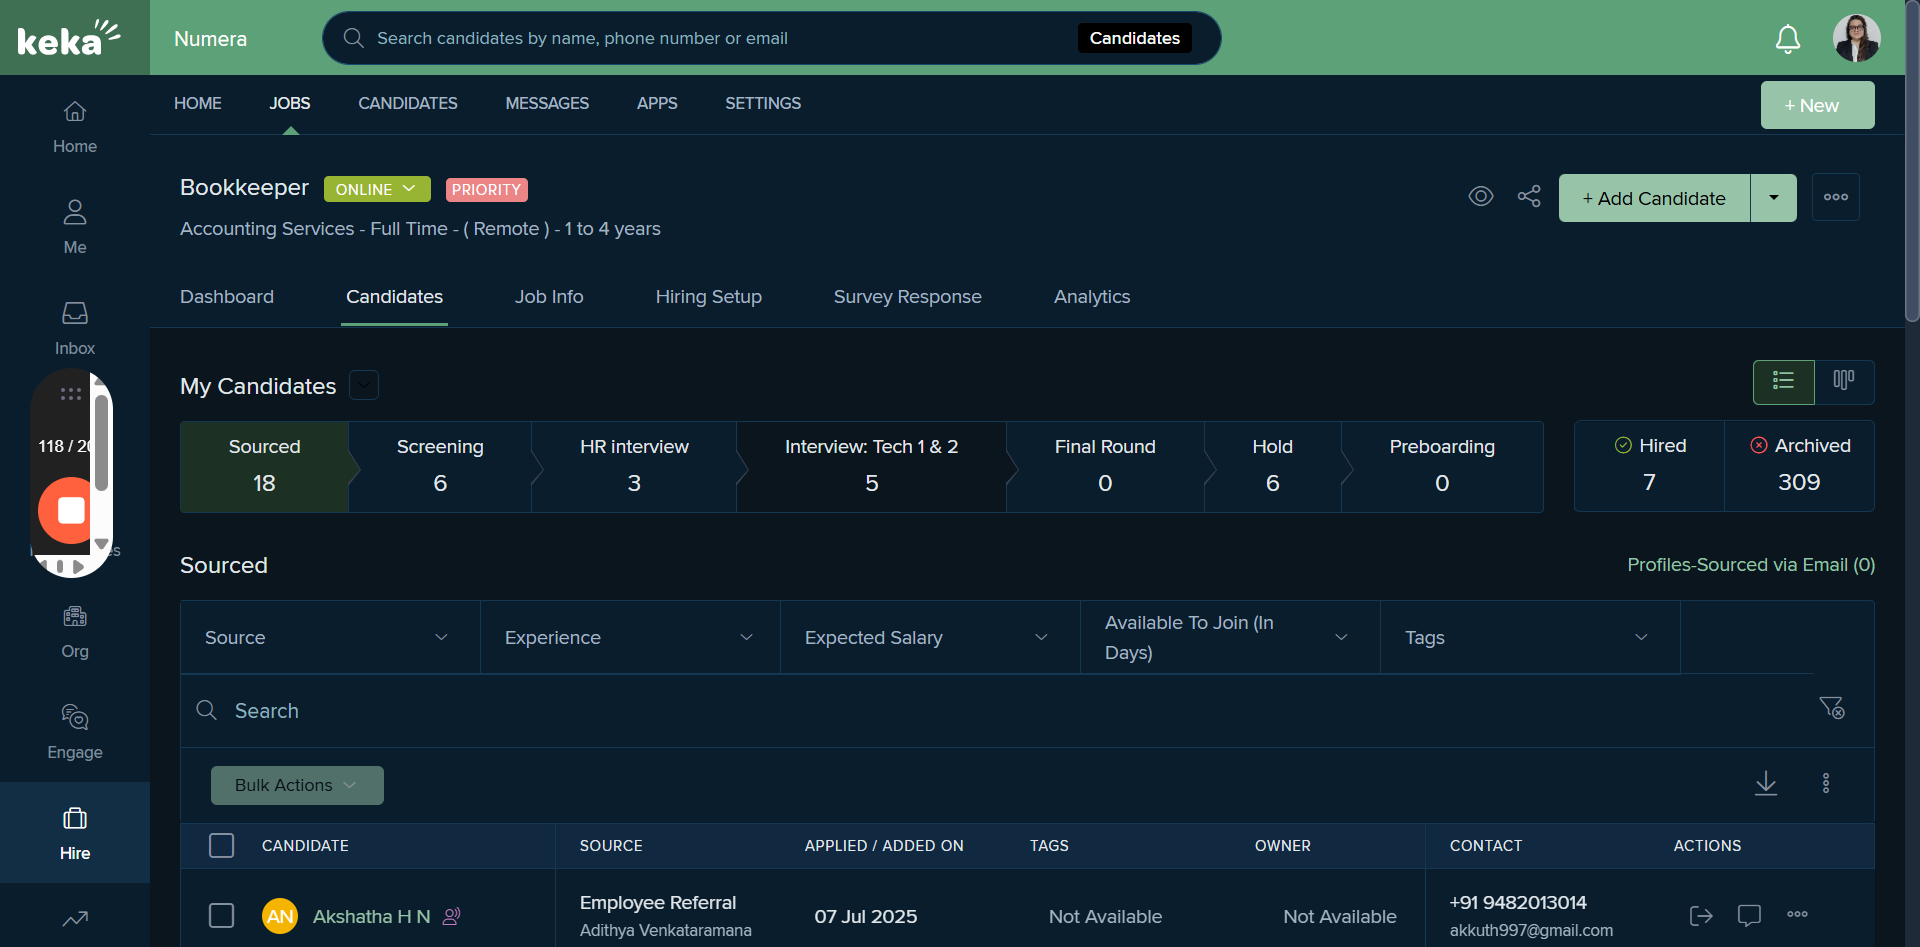
Hello, team. We will discuss how to capture a profile on Keka and how to upload it. The homepage remains the same for all employers at Numera. However, recruiters have access to the hire option. First, go to Hire, then select Jobs. Here, we see all the current job openings a particular recruiter is managing.
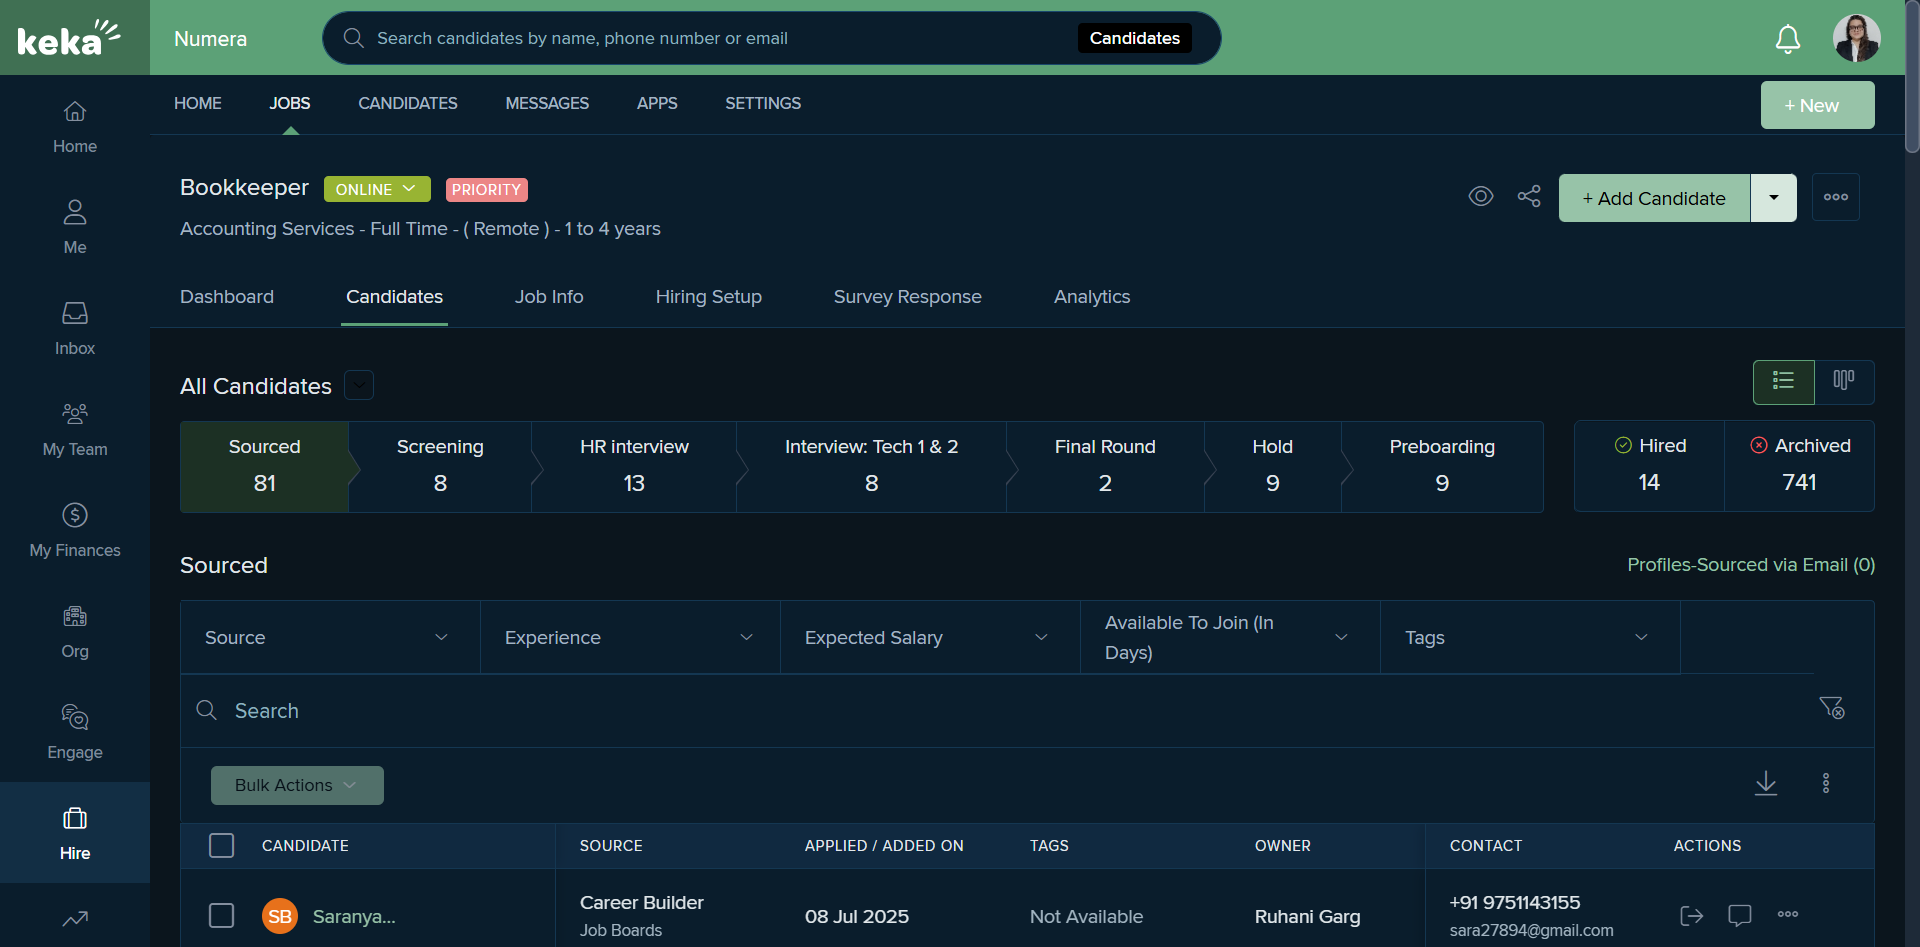
Let's consider a scenario where we are working with bookkeepers.
First, we have multiple options for uploading. Let's say I want to download 10 or 20 profiles from a particular source. Let's say Naukri. We have the option for bulk upload. First, create a file and convert it into a zip file to upload resumes in bulk.
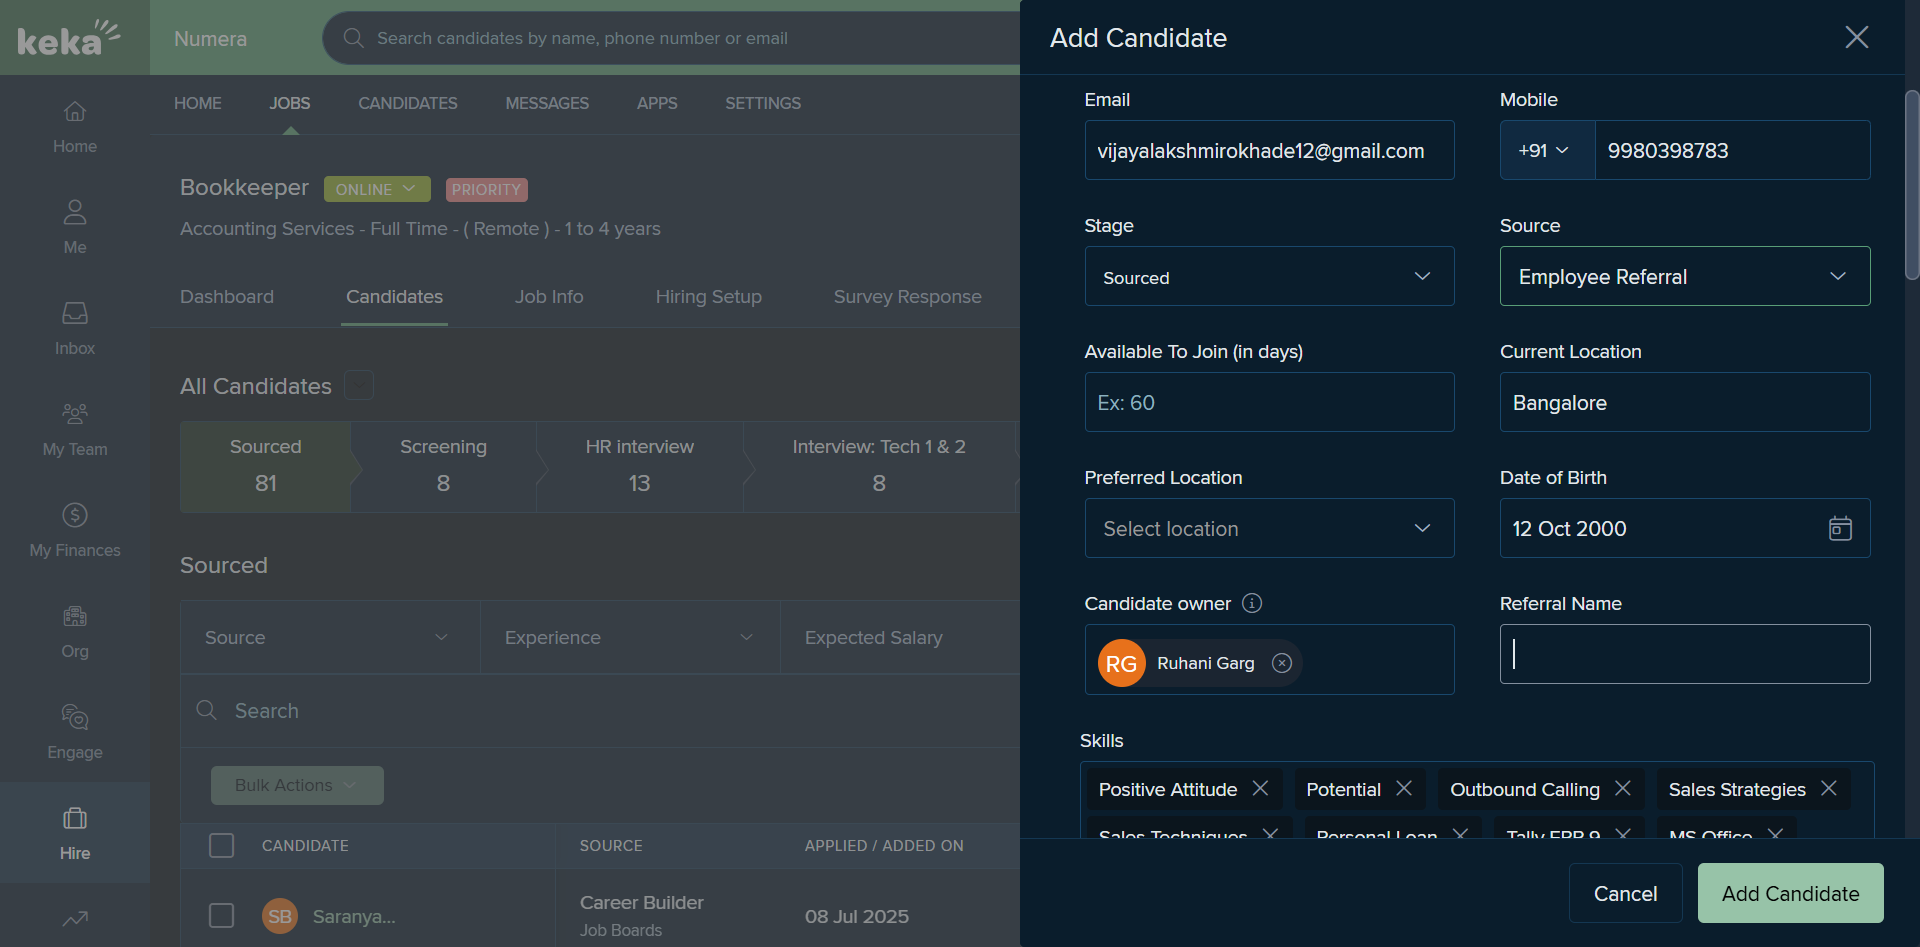
Next, if there's only one specific profile shared by an employee or sourced from another platform like Naukri or LinkedIn, we go to "Add Candidate" and select the CV from the computer.


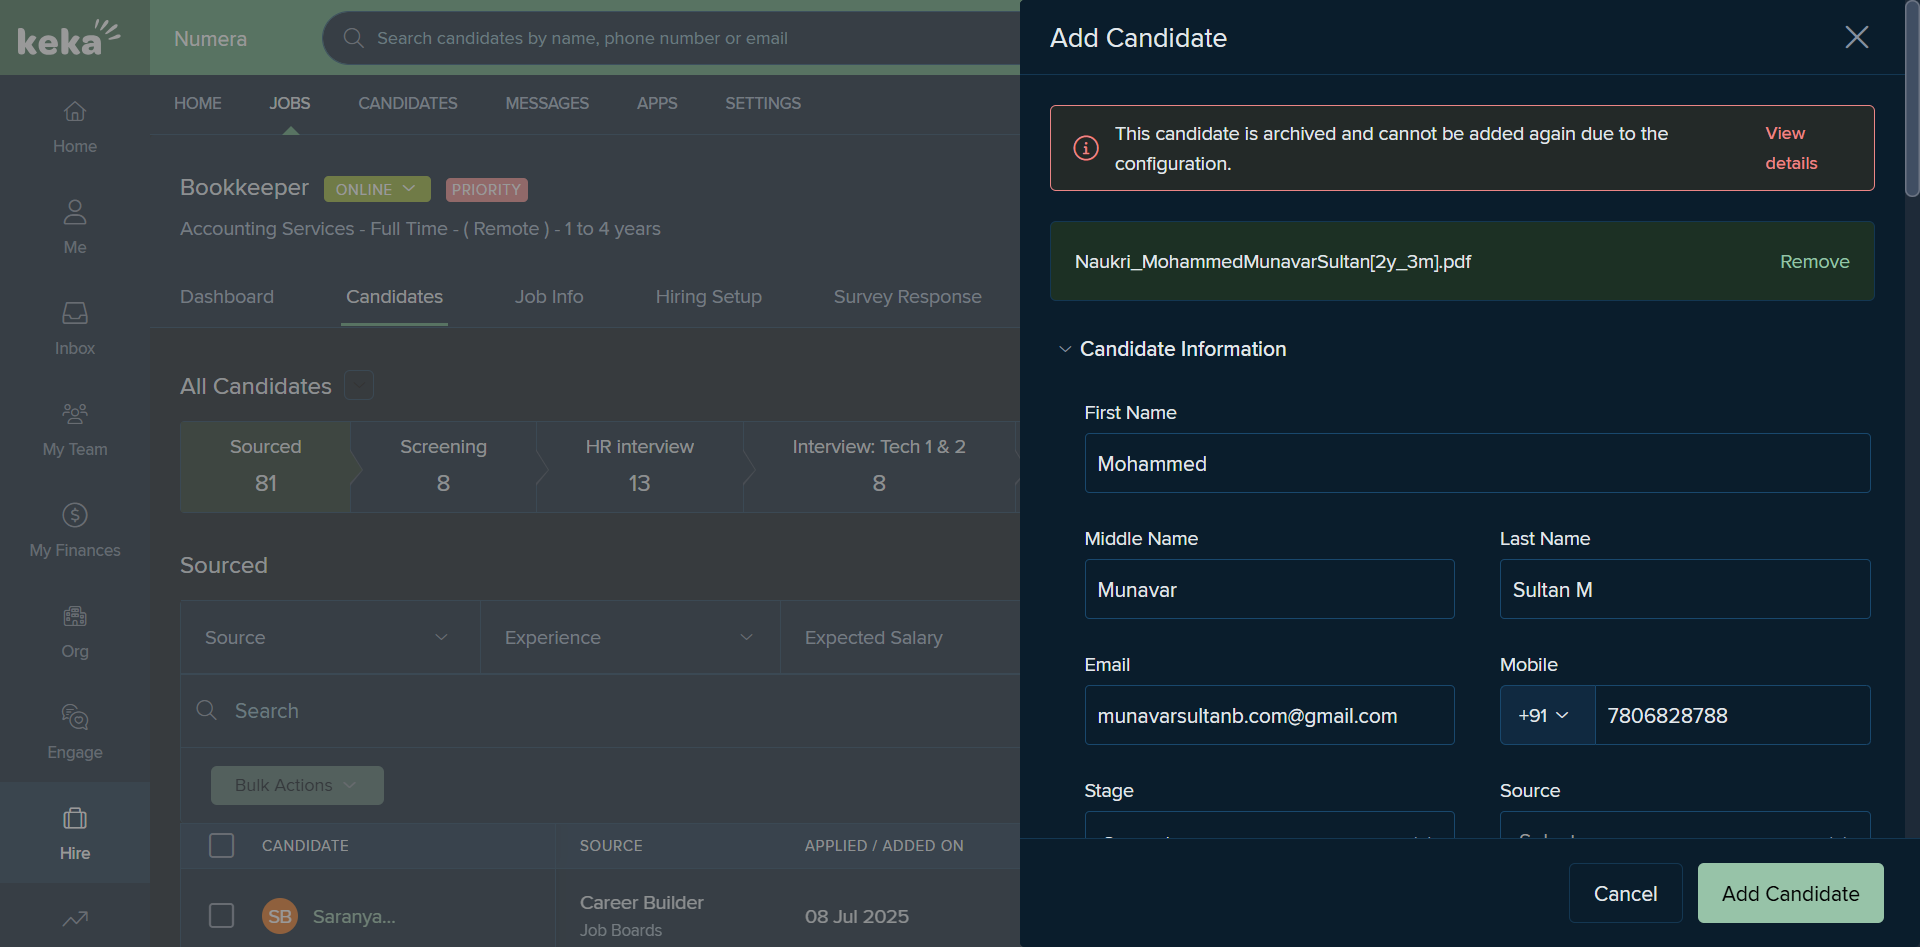
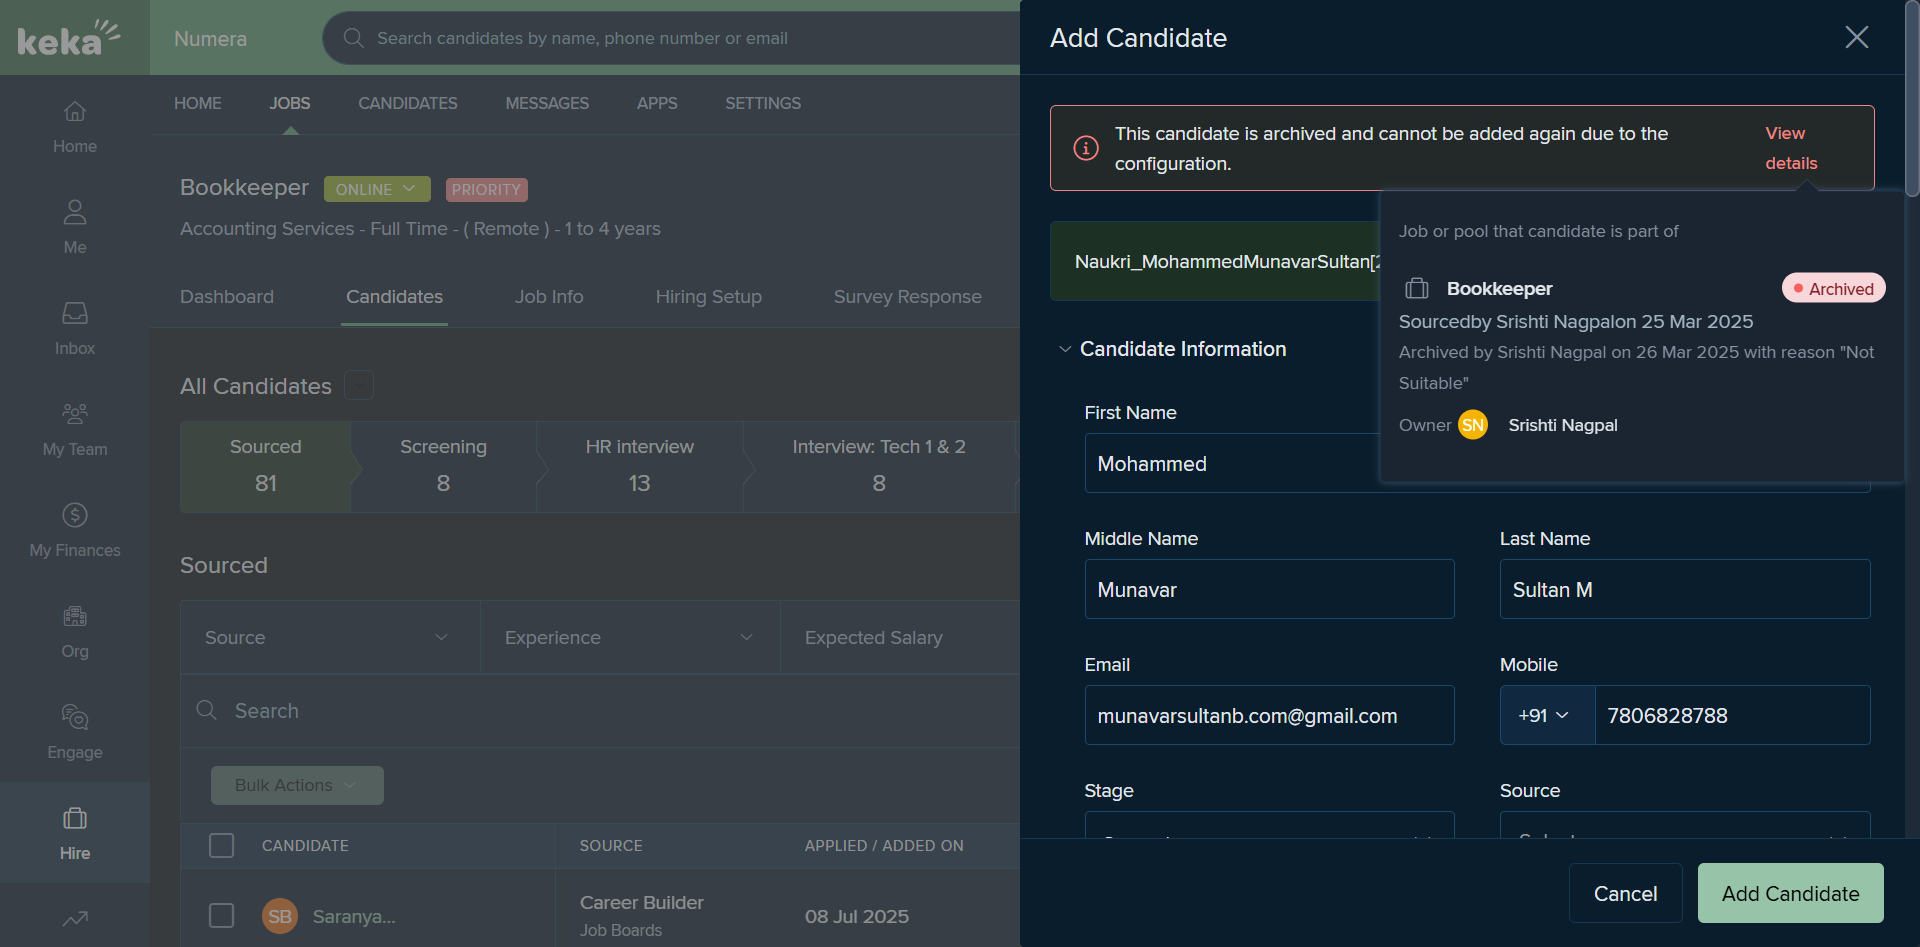
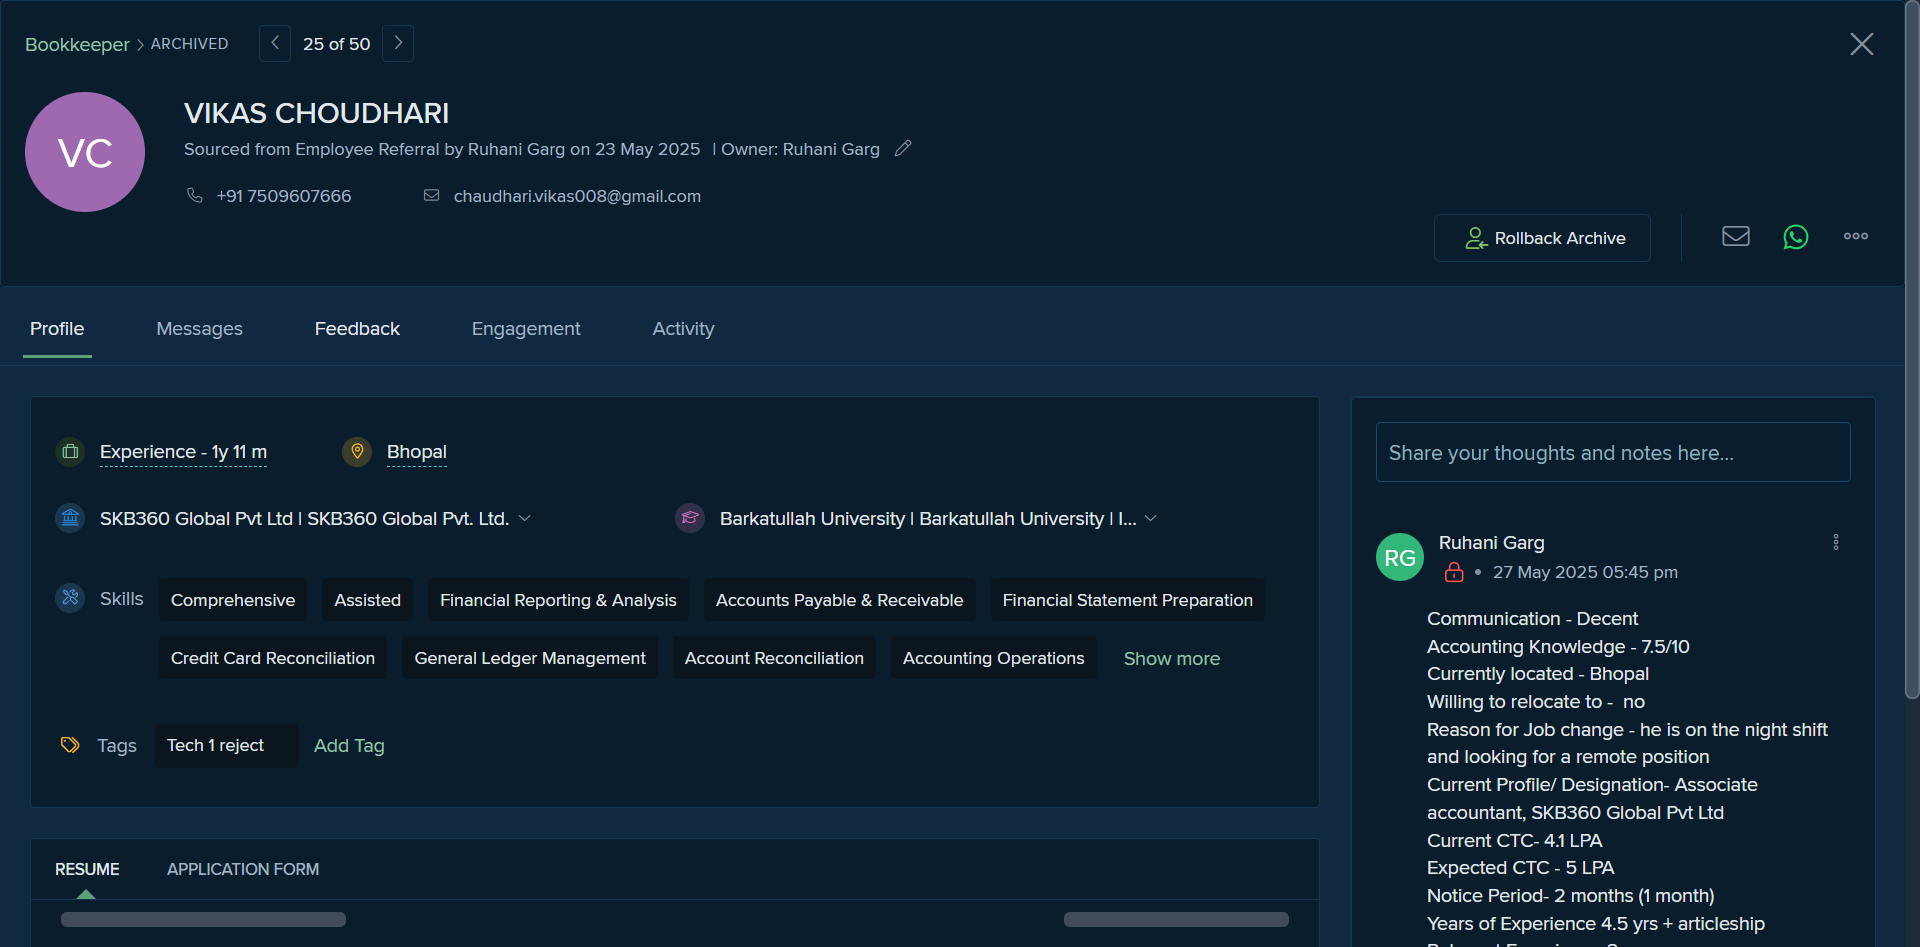
Let's consider a scenario where I've downloaded this specific profile. Keka automatically checks if any profile has been downloaded previously. This candidate has already been added. You can see under which recruiter or profile this has been downloaded. You can remove it and upload a different candidate's profile.
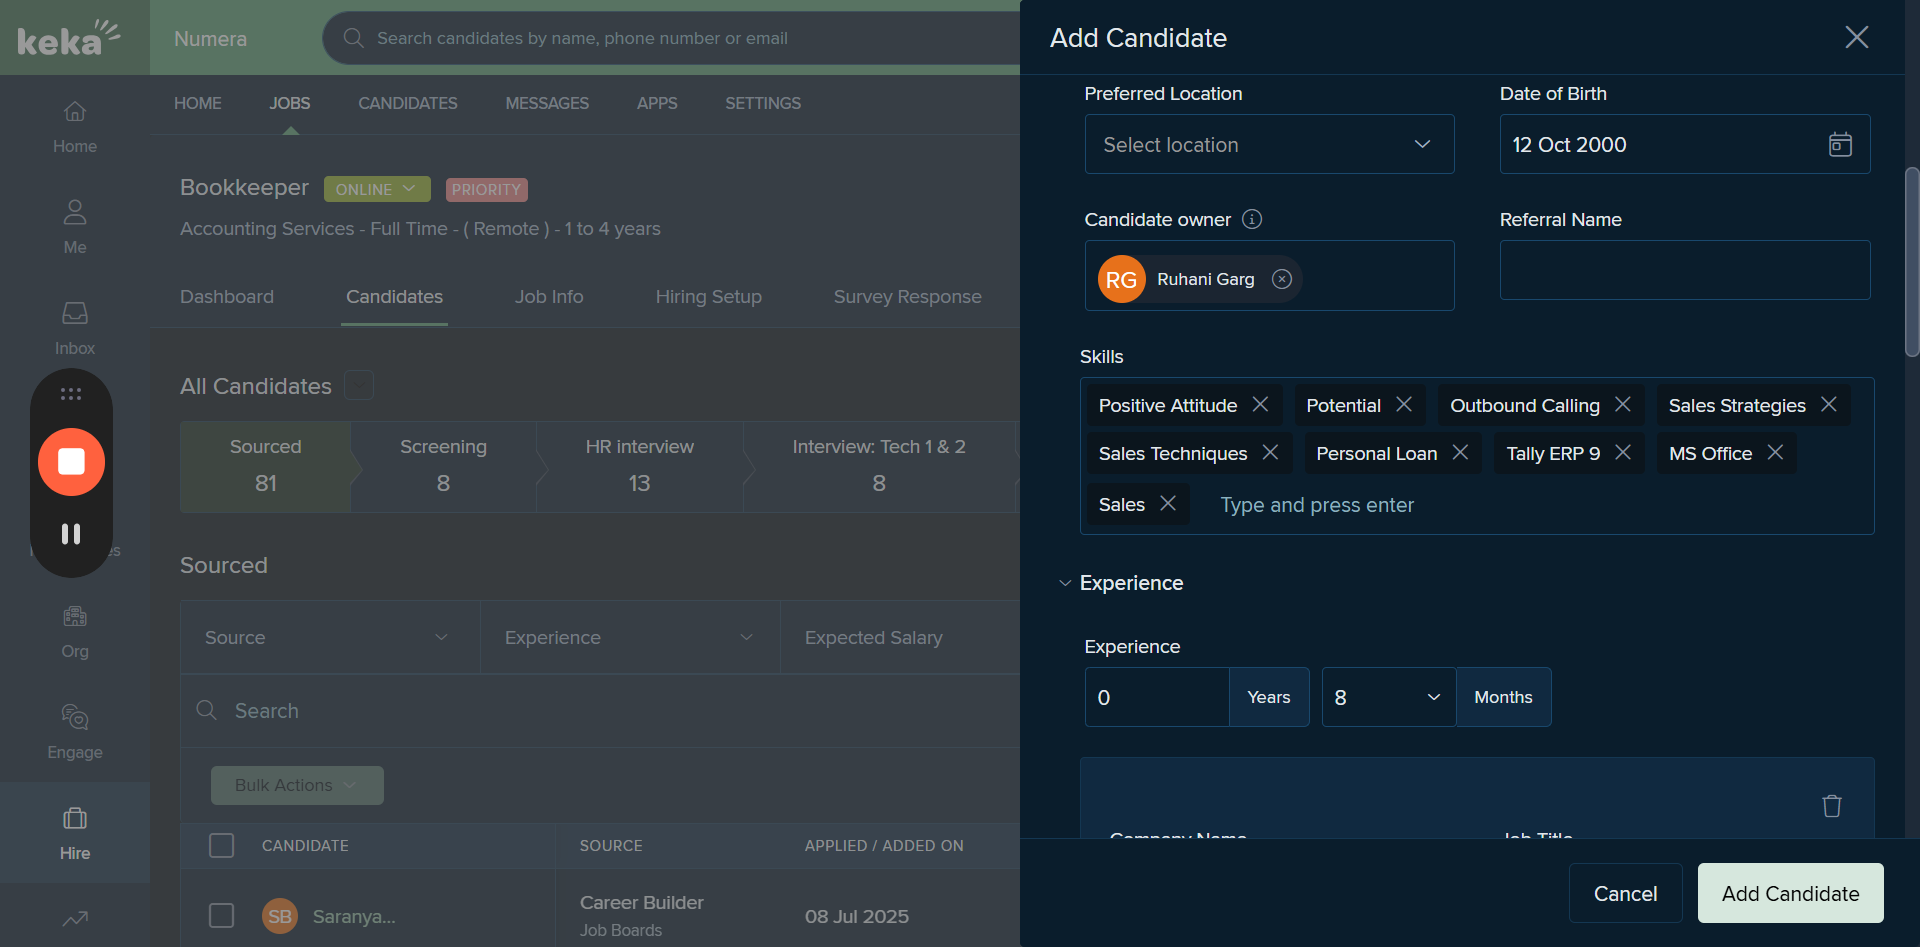
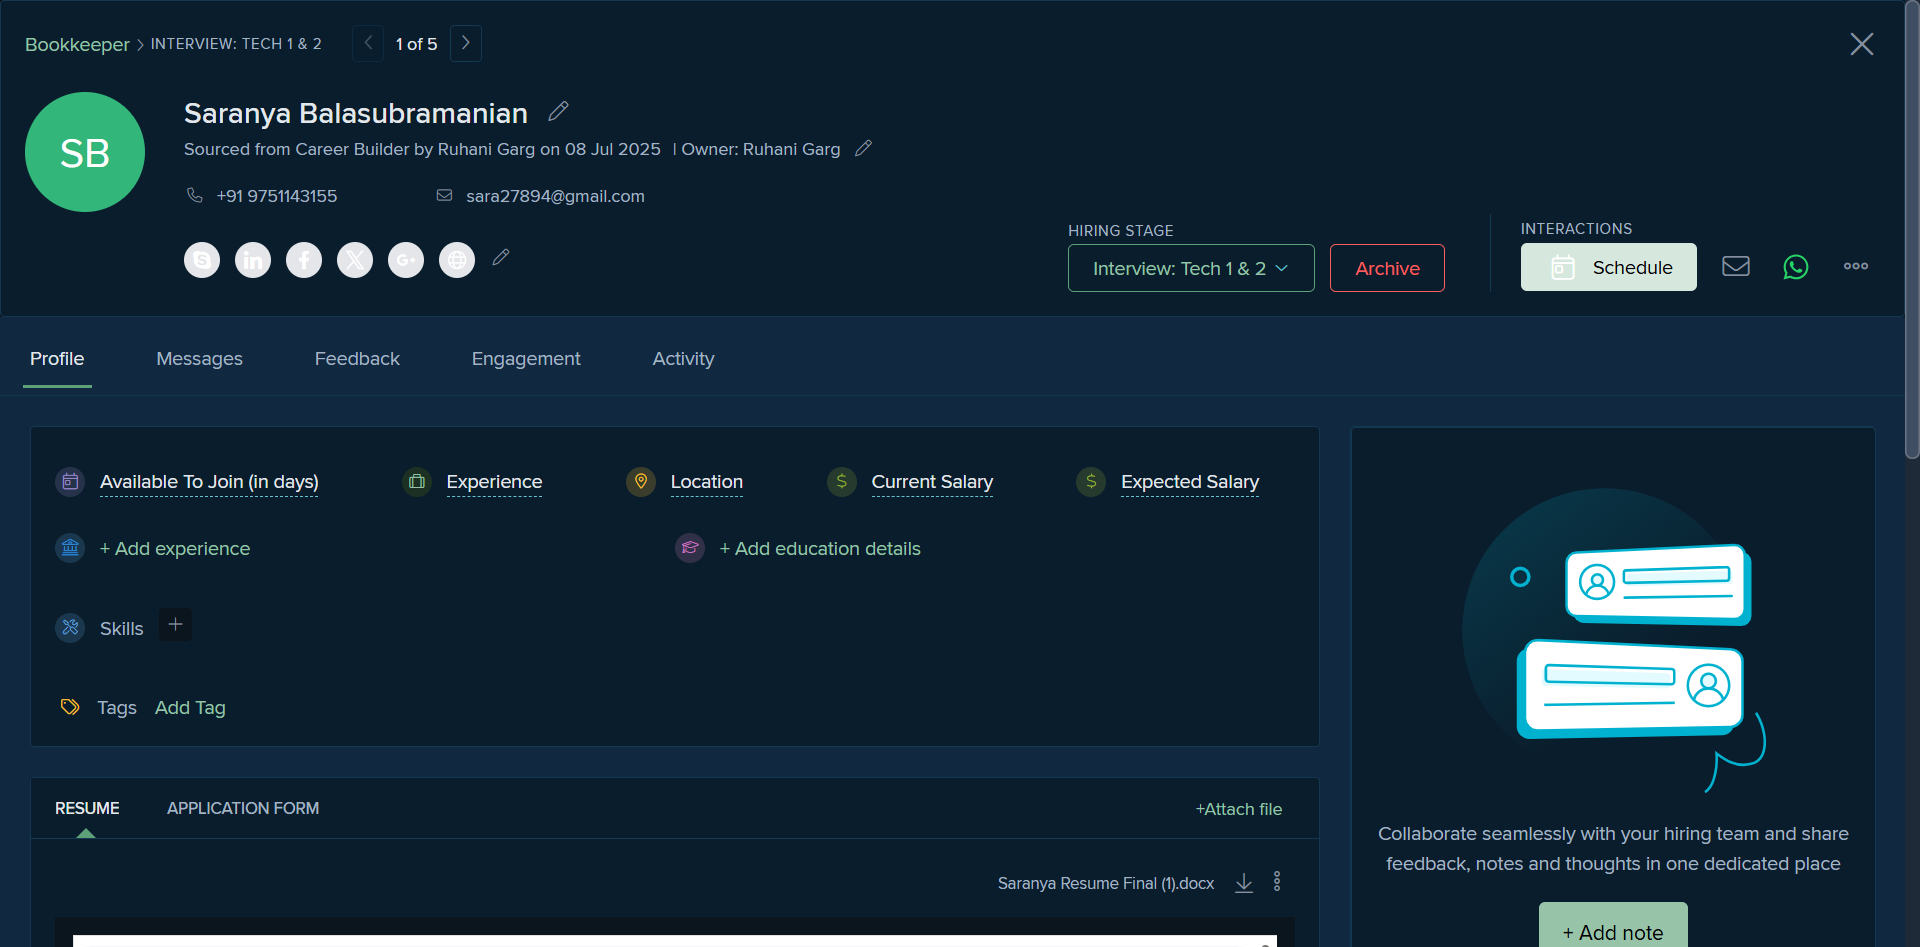
Keka has a feature that automatically captures most of the data.
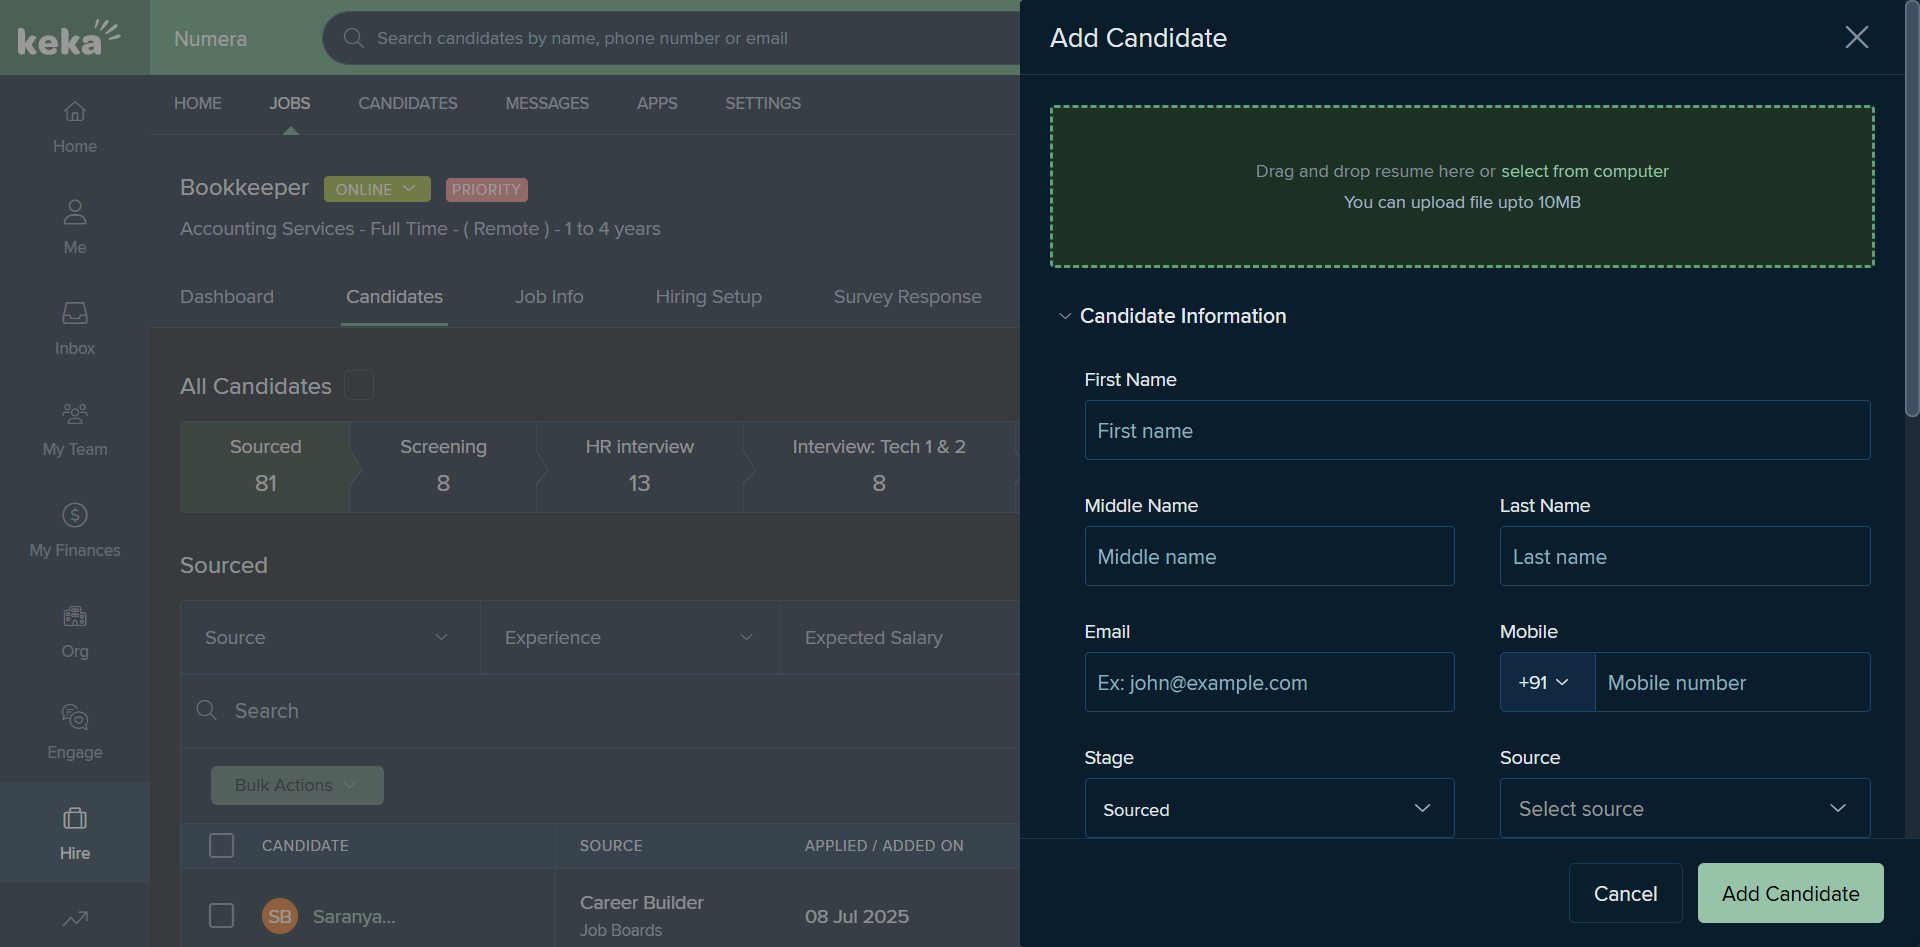
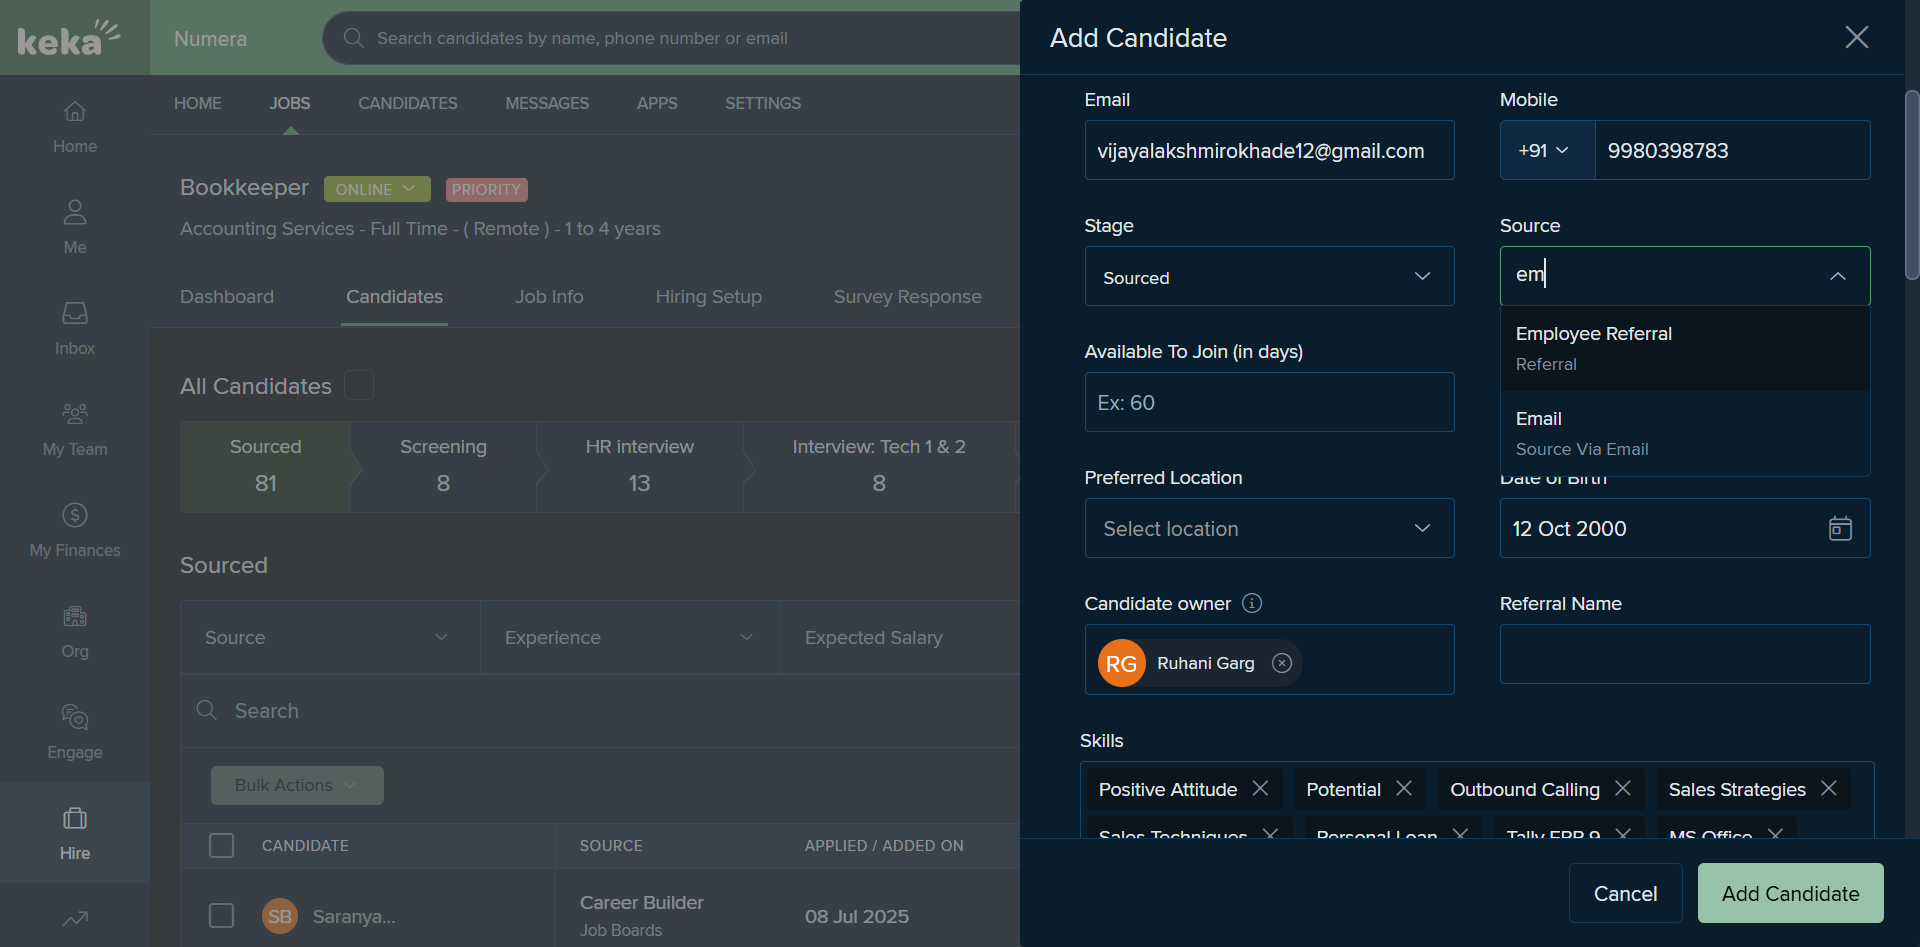
Sometimes you need to manually cross-check the data. For example, we have different sources: Naukri, Indeed, LinkedIn, and many others.
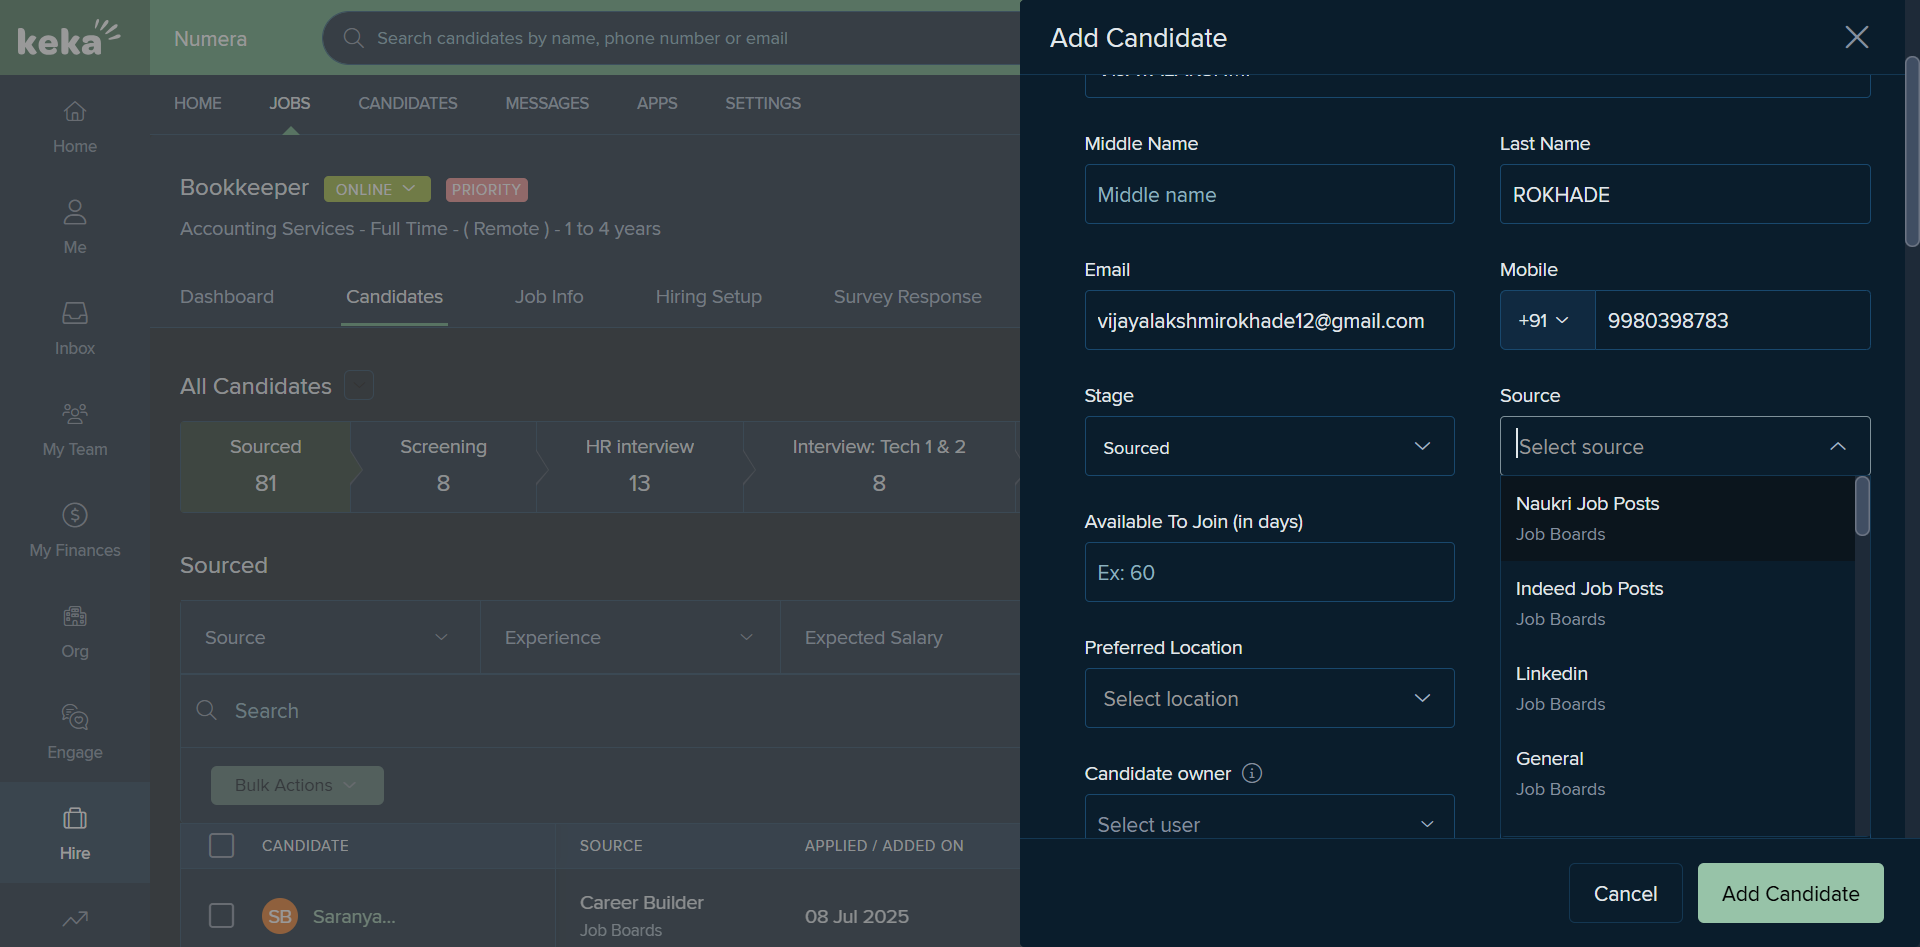
This profile, for example, is from Naukri.

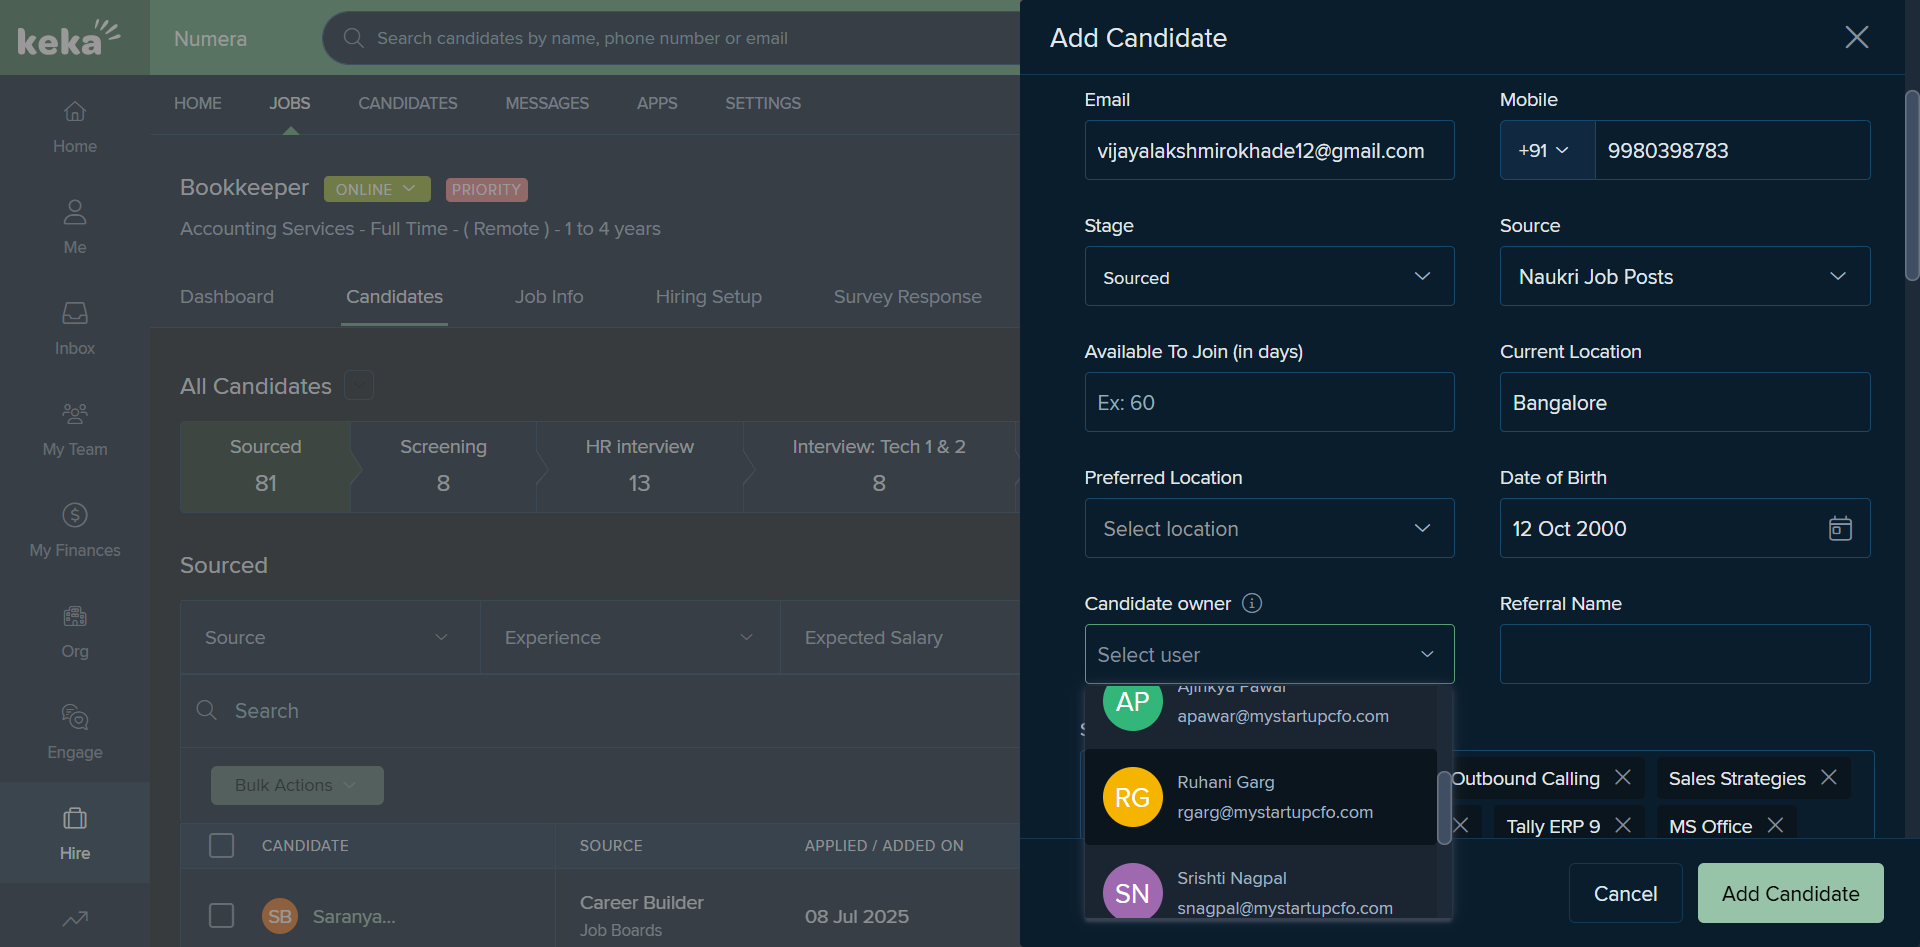
We put that. There are other options, such as preferred location and owner. Under Owner, we have various recruiters mentioned.
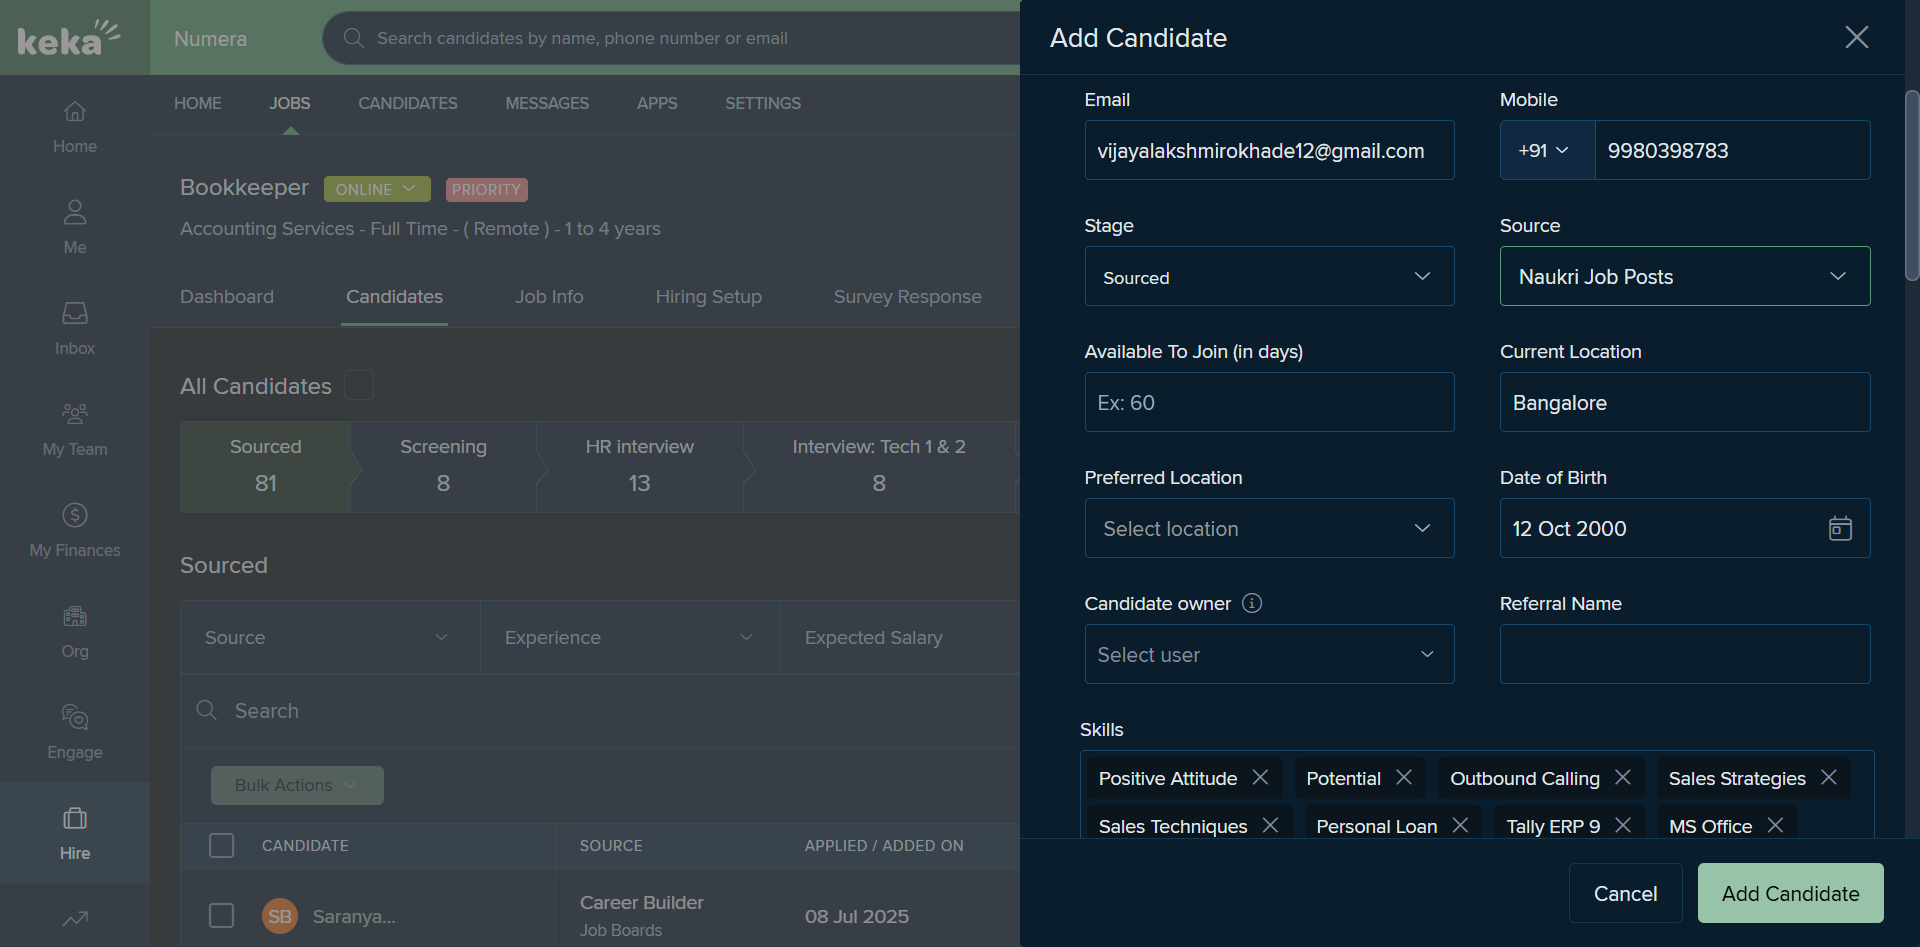
Let's say this profile is owned by me, Ruhani. We should include the recruiter's name.
If this profile was an employee referral we mention the employees name.
Select that option and enter the employee's name here.
And that is how we add a candidate on KEKA.
You can see the profile I just uploaded. It's visible here under the name Naukri, with the owner and recruiter's name displayed.
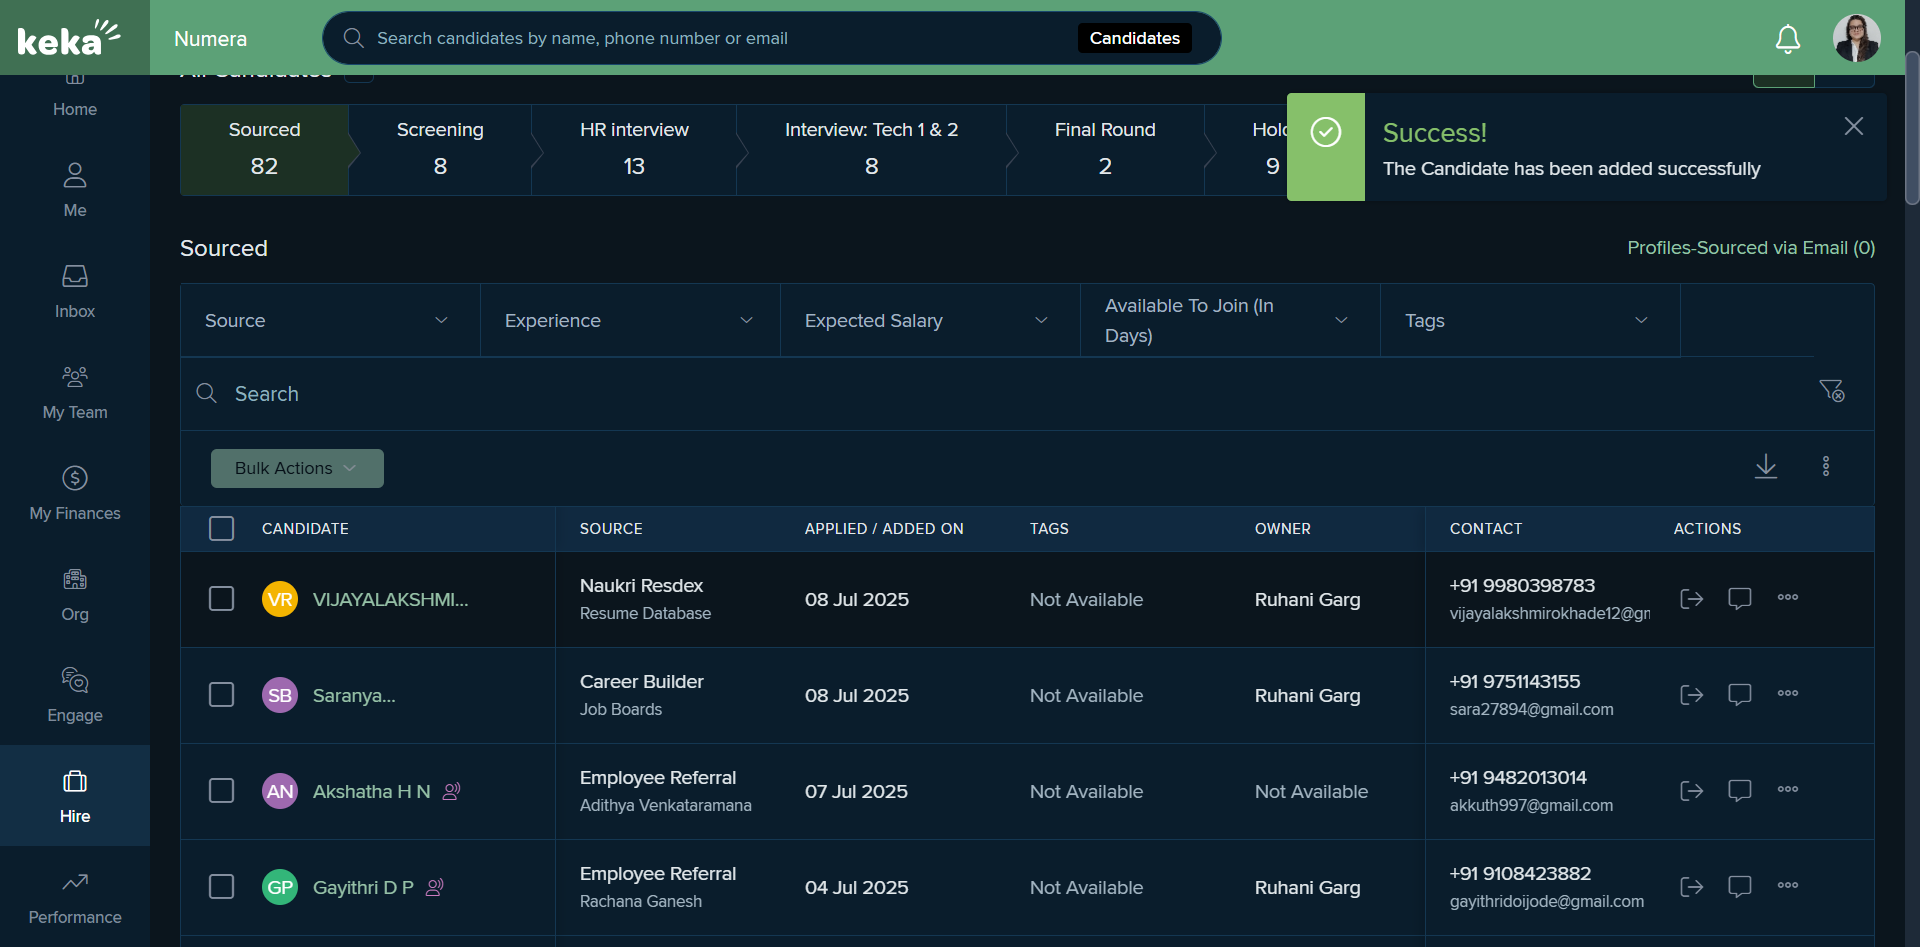
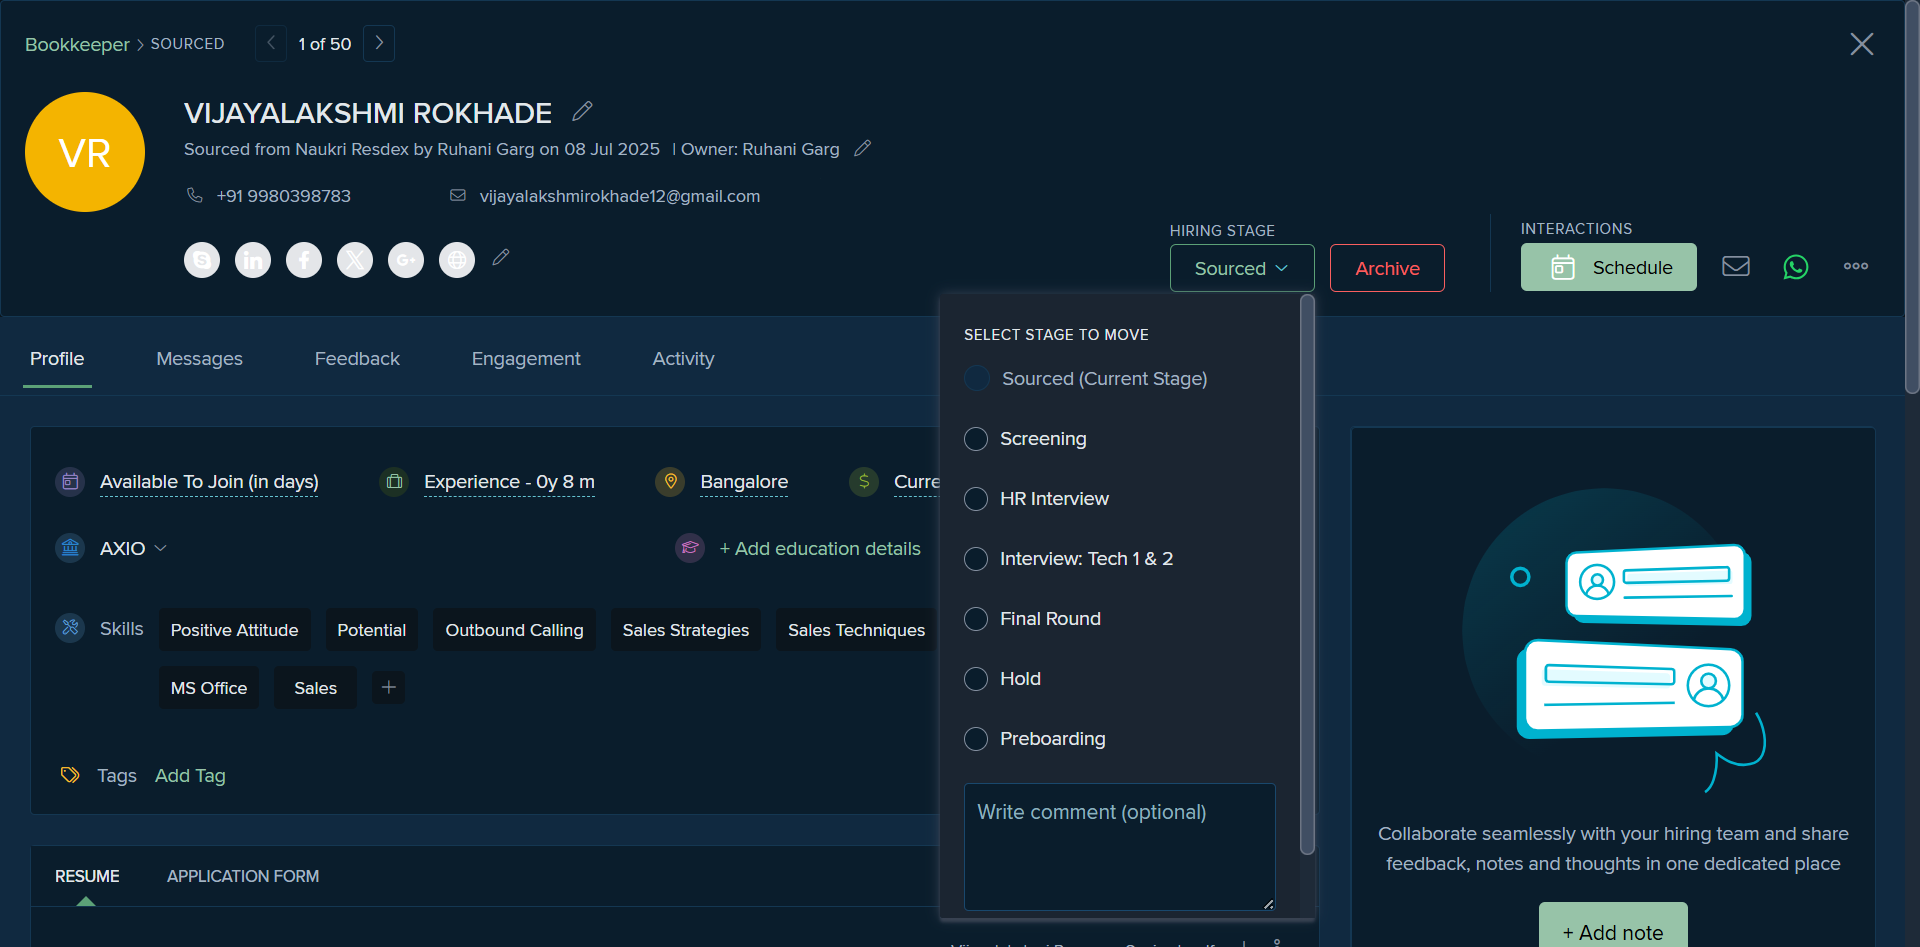
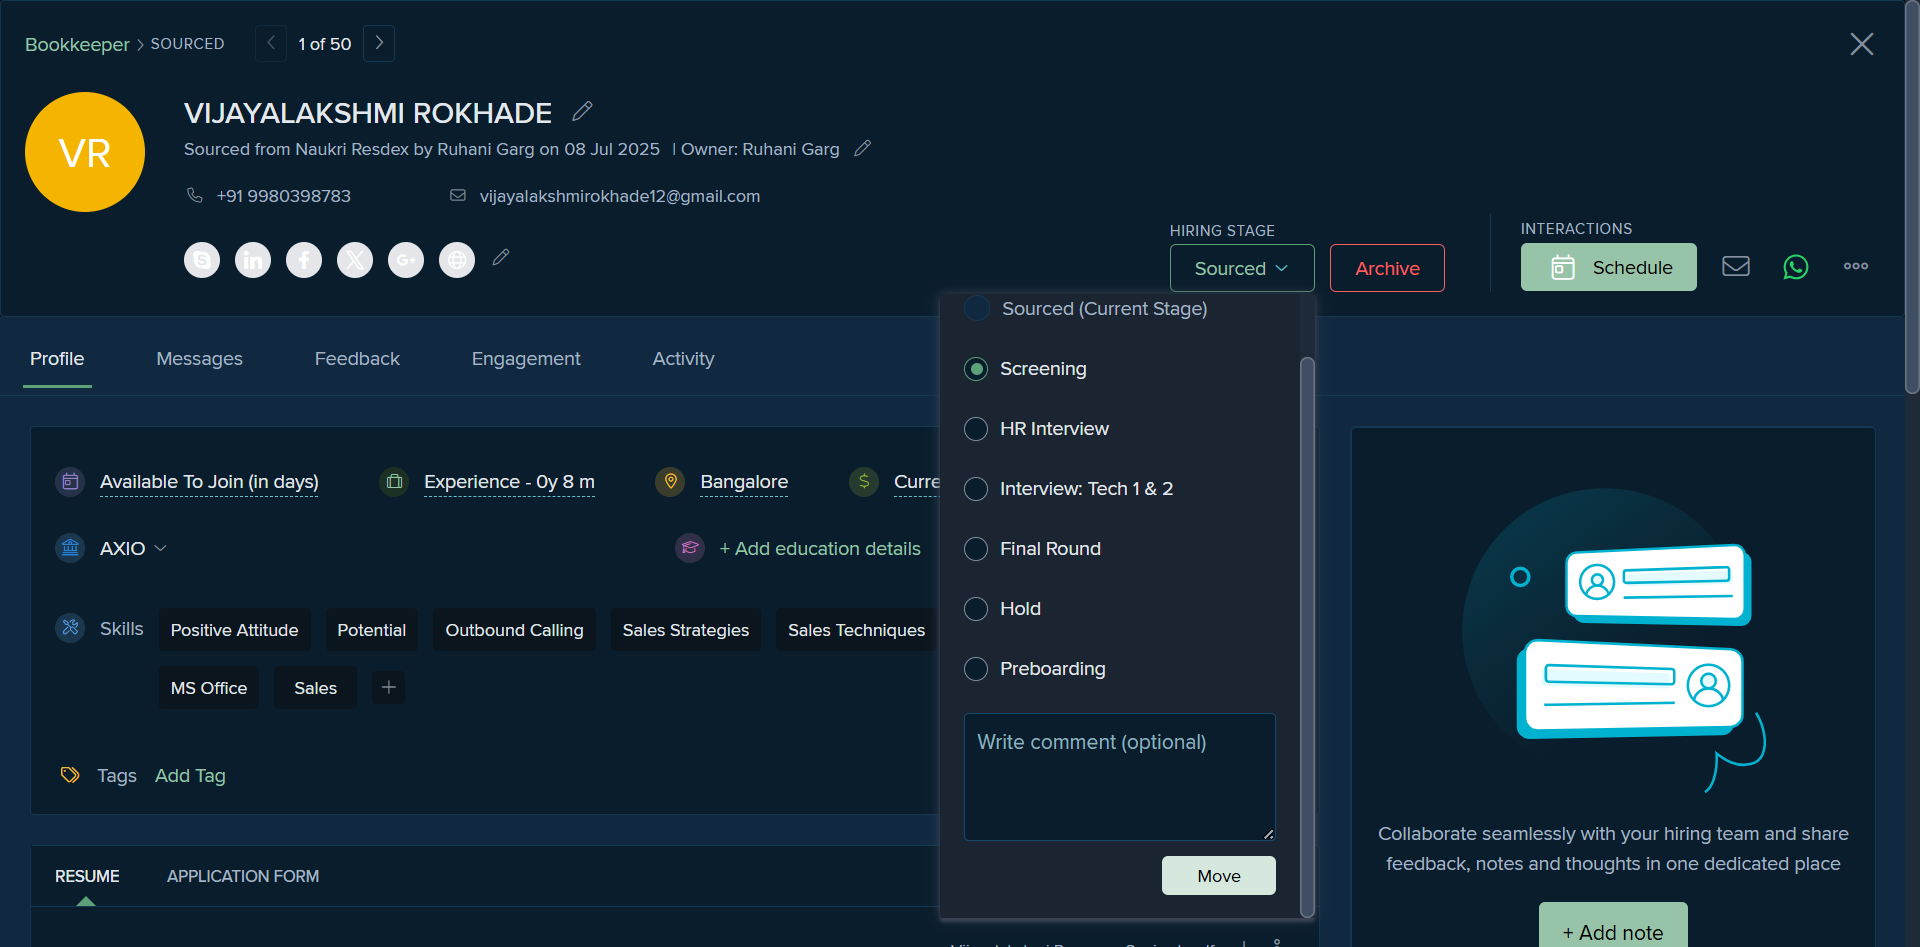
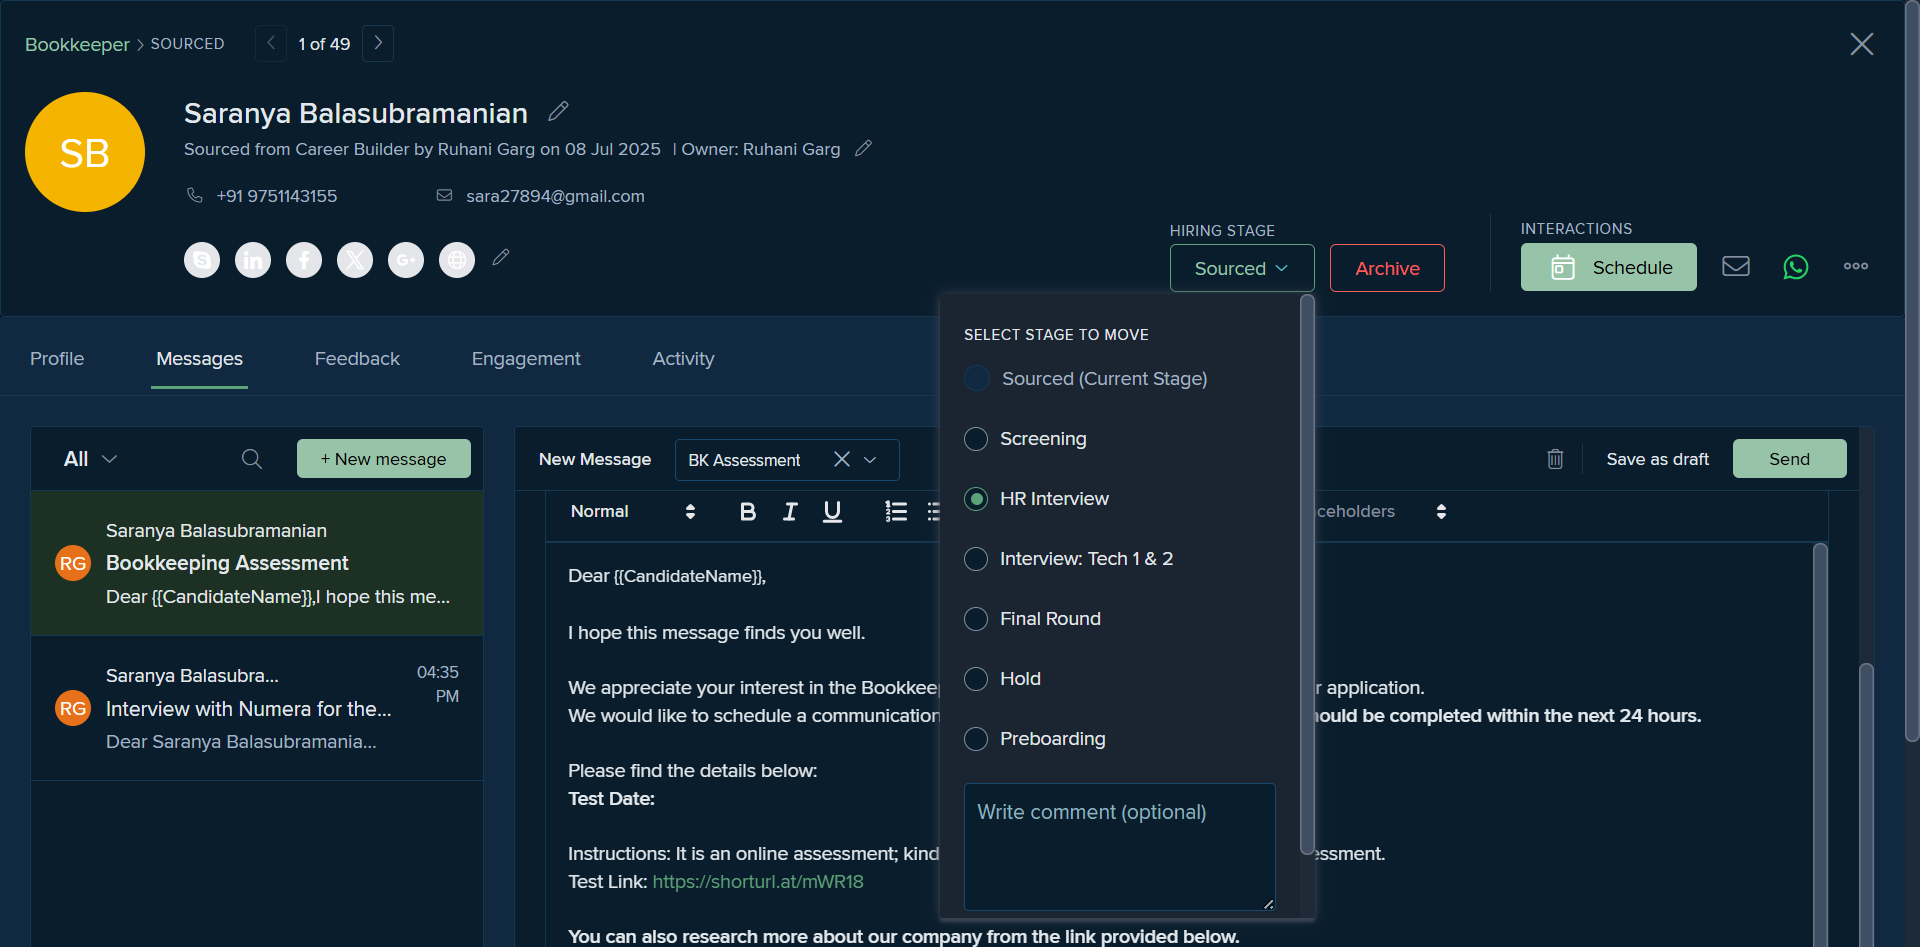
Once the profile is screened, we move to the next stage.

We move it to the screening stage.
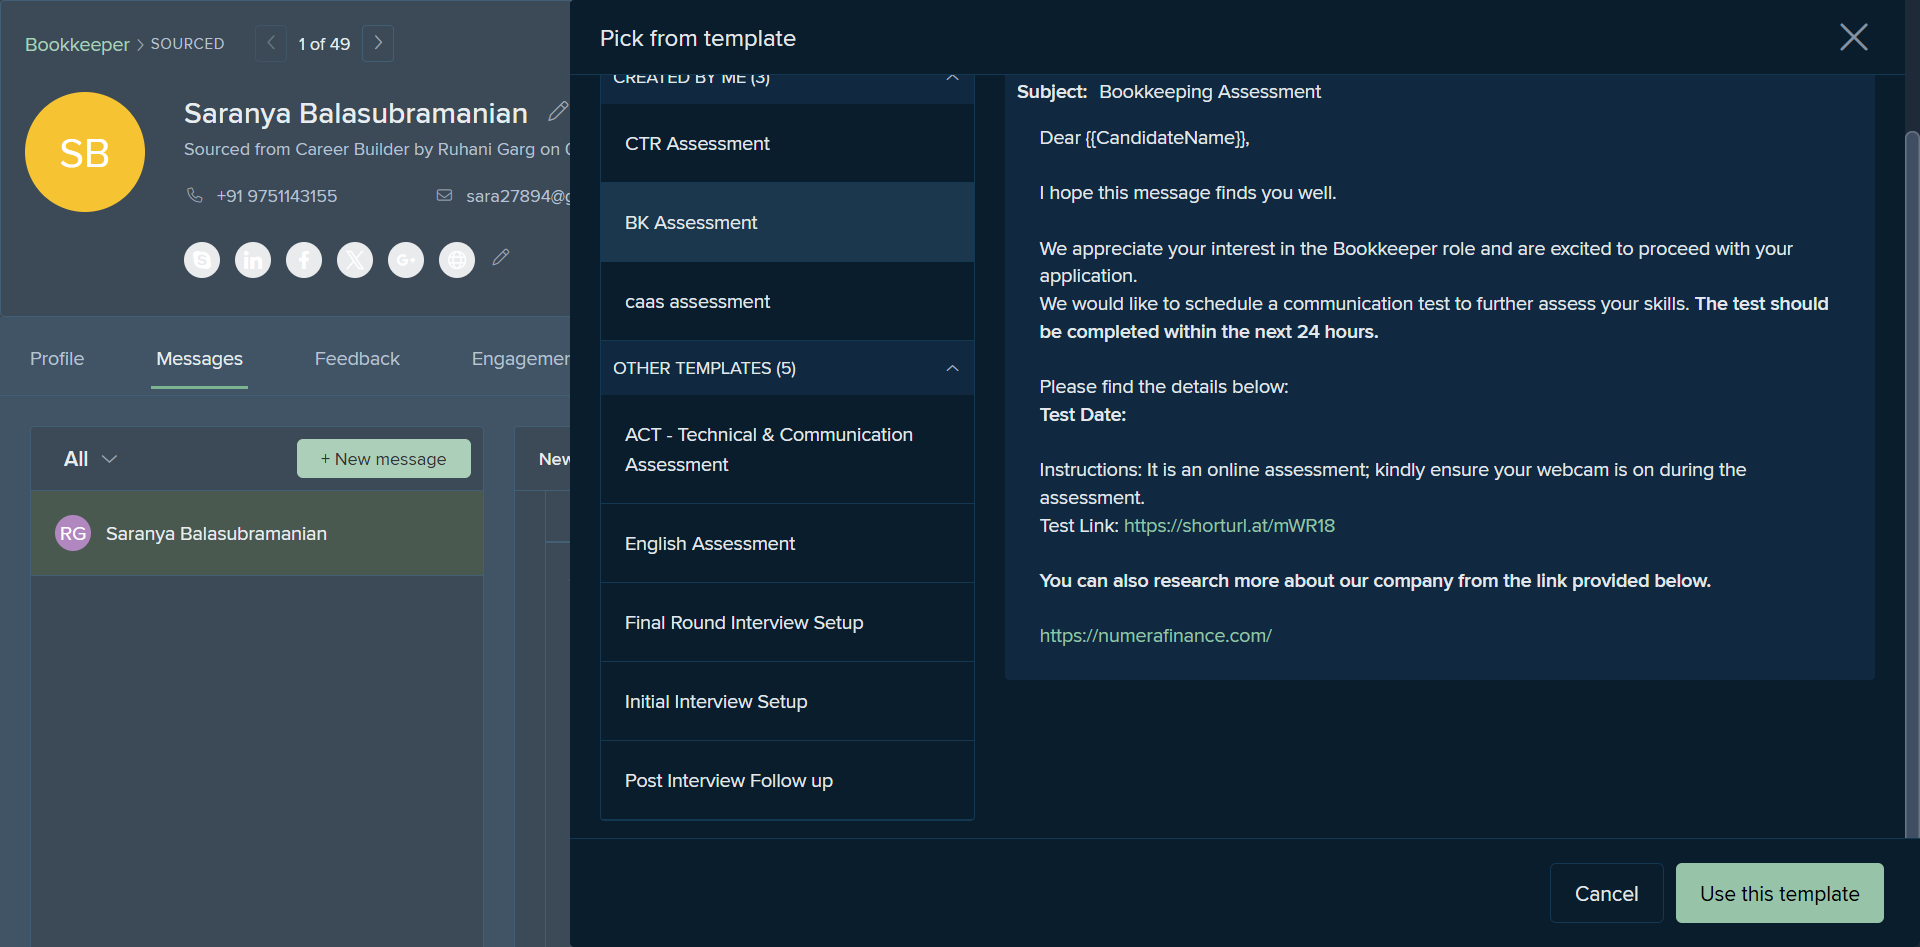
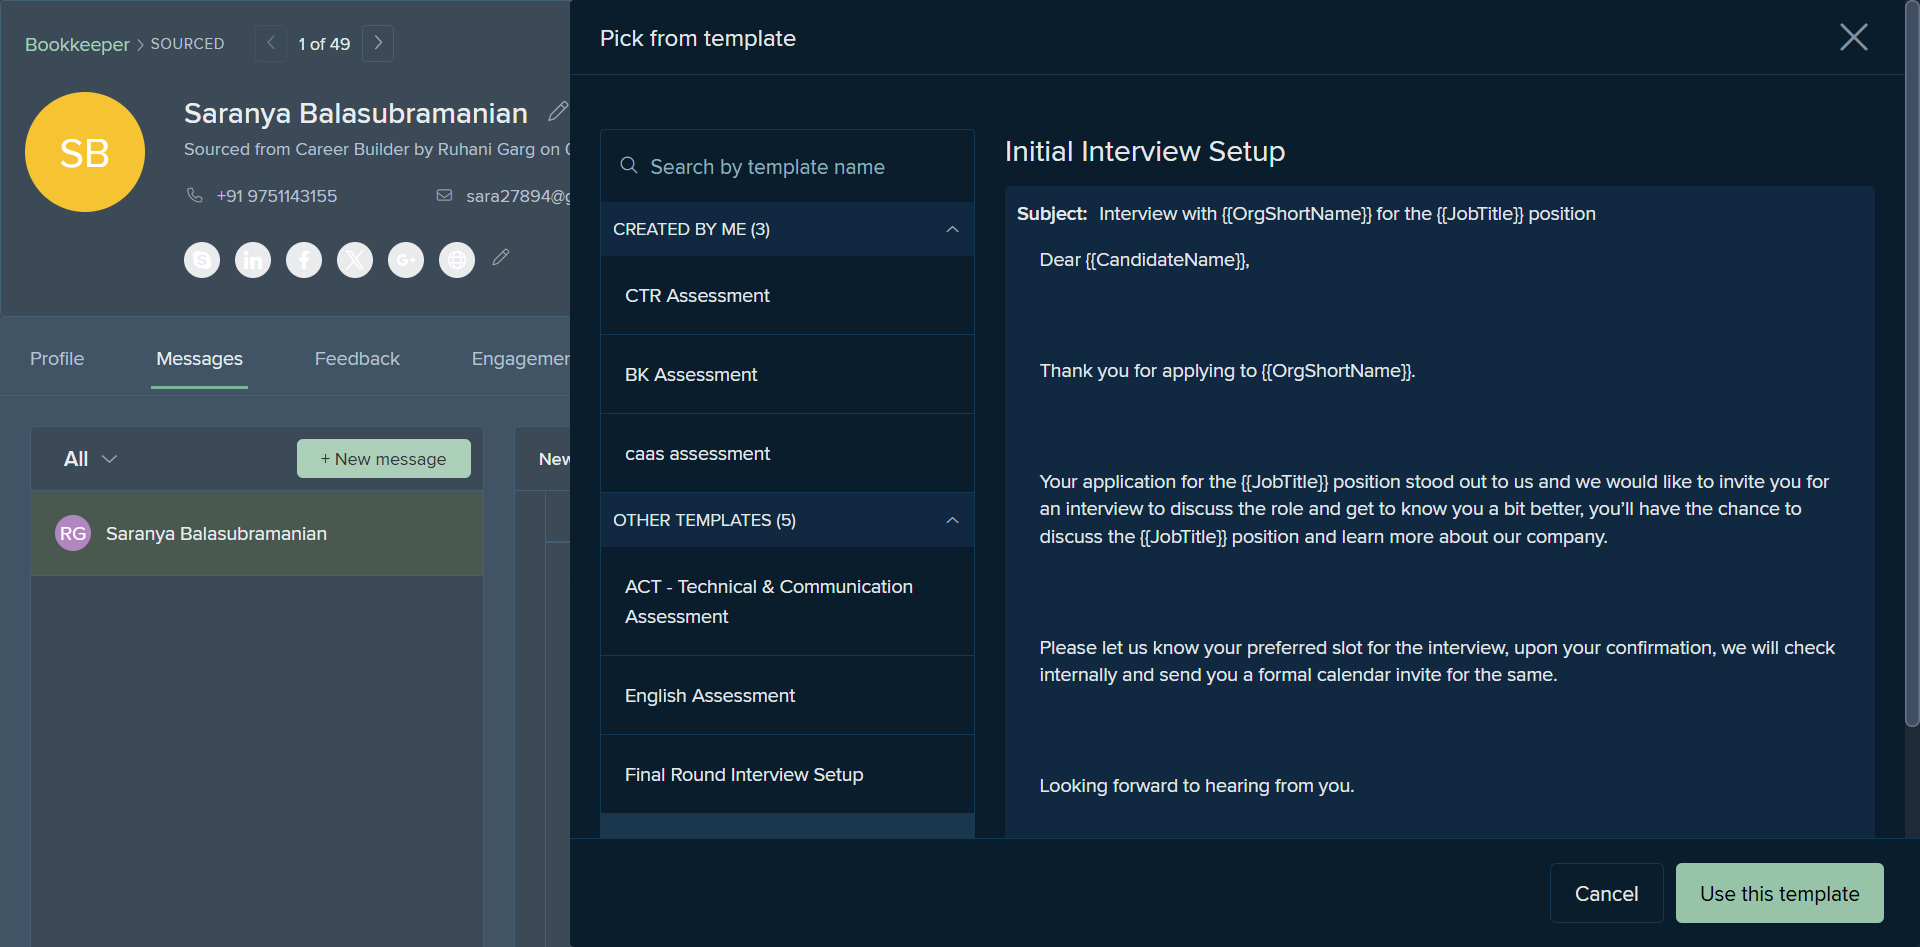
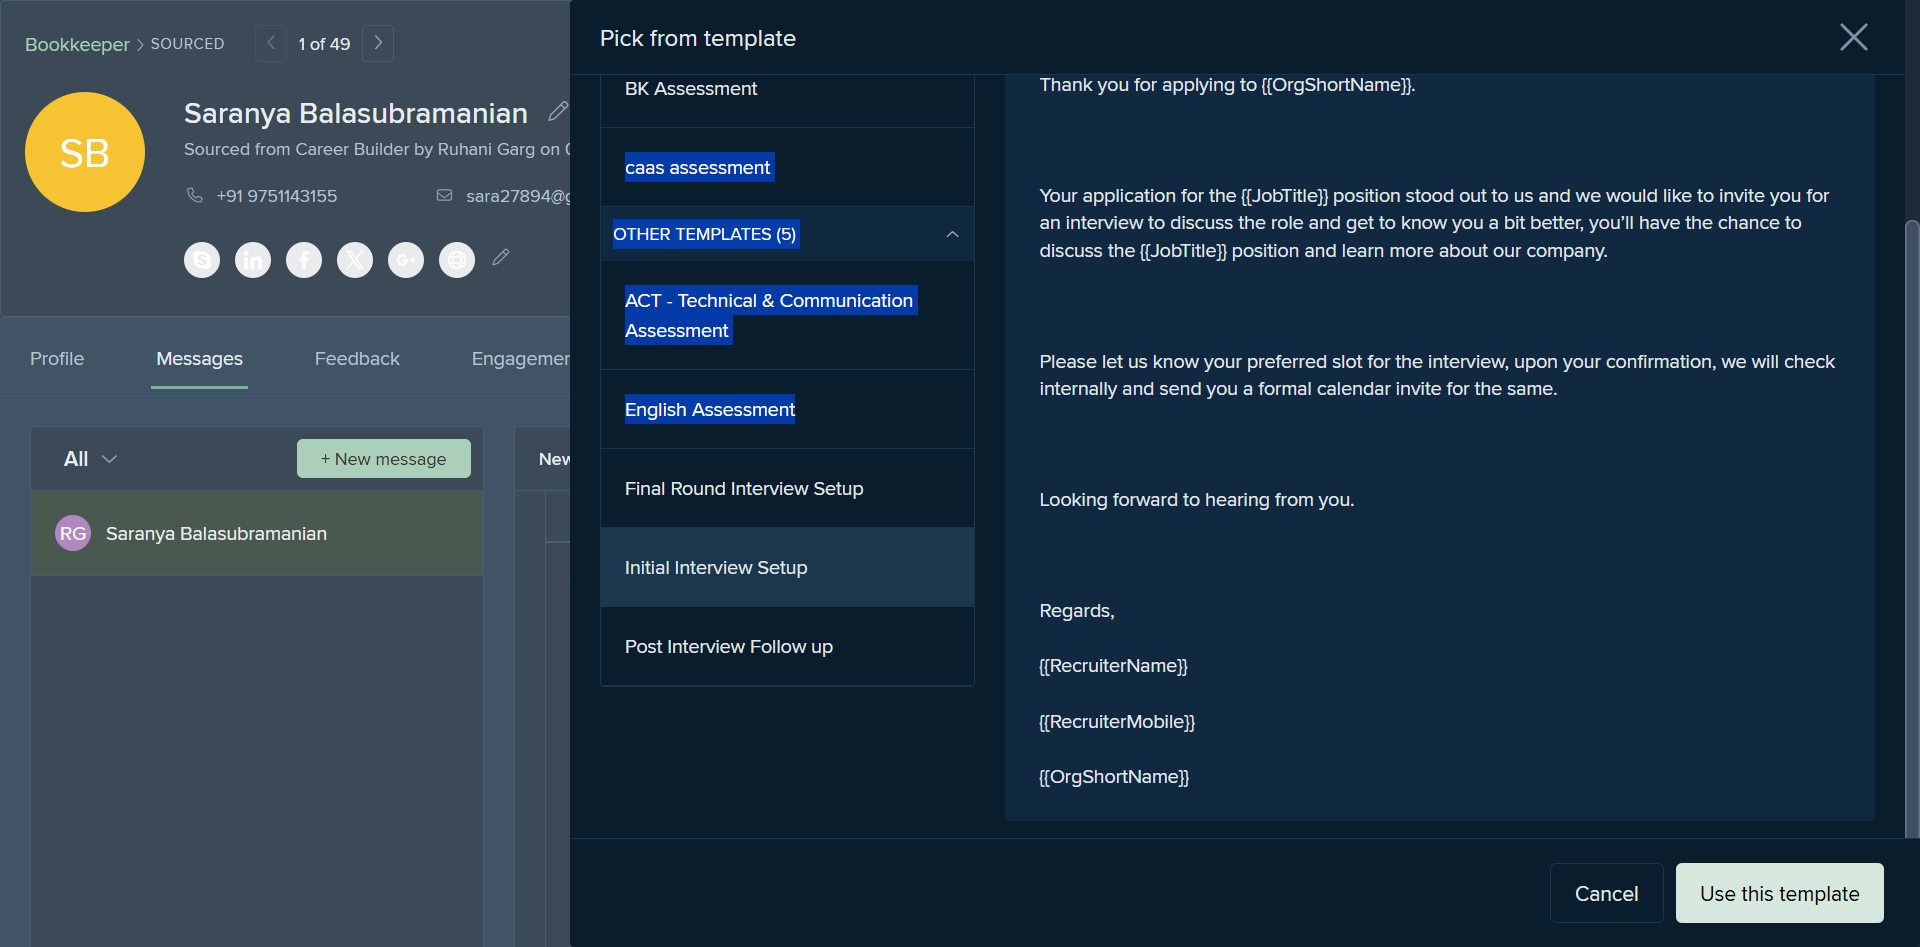
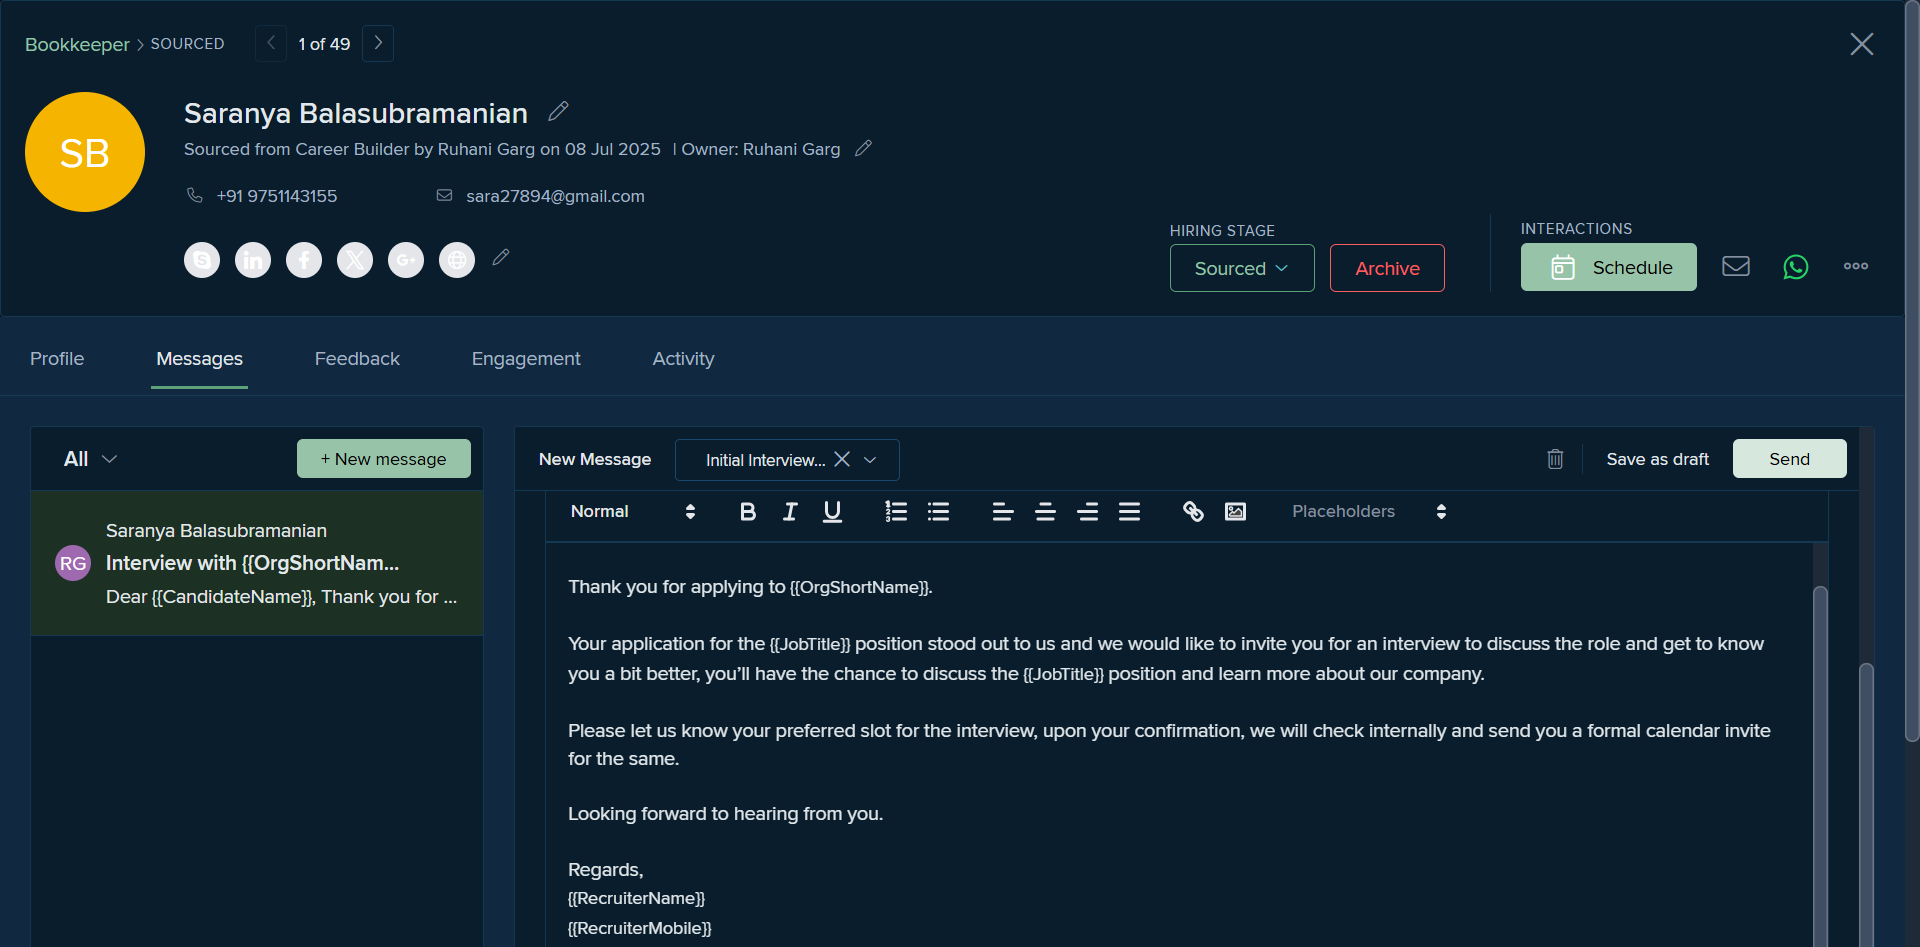
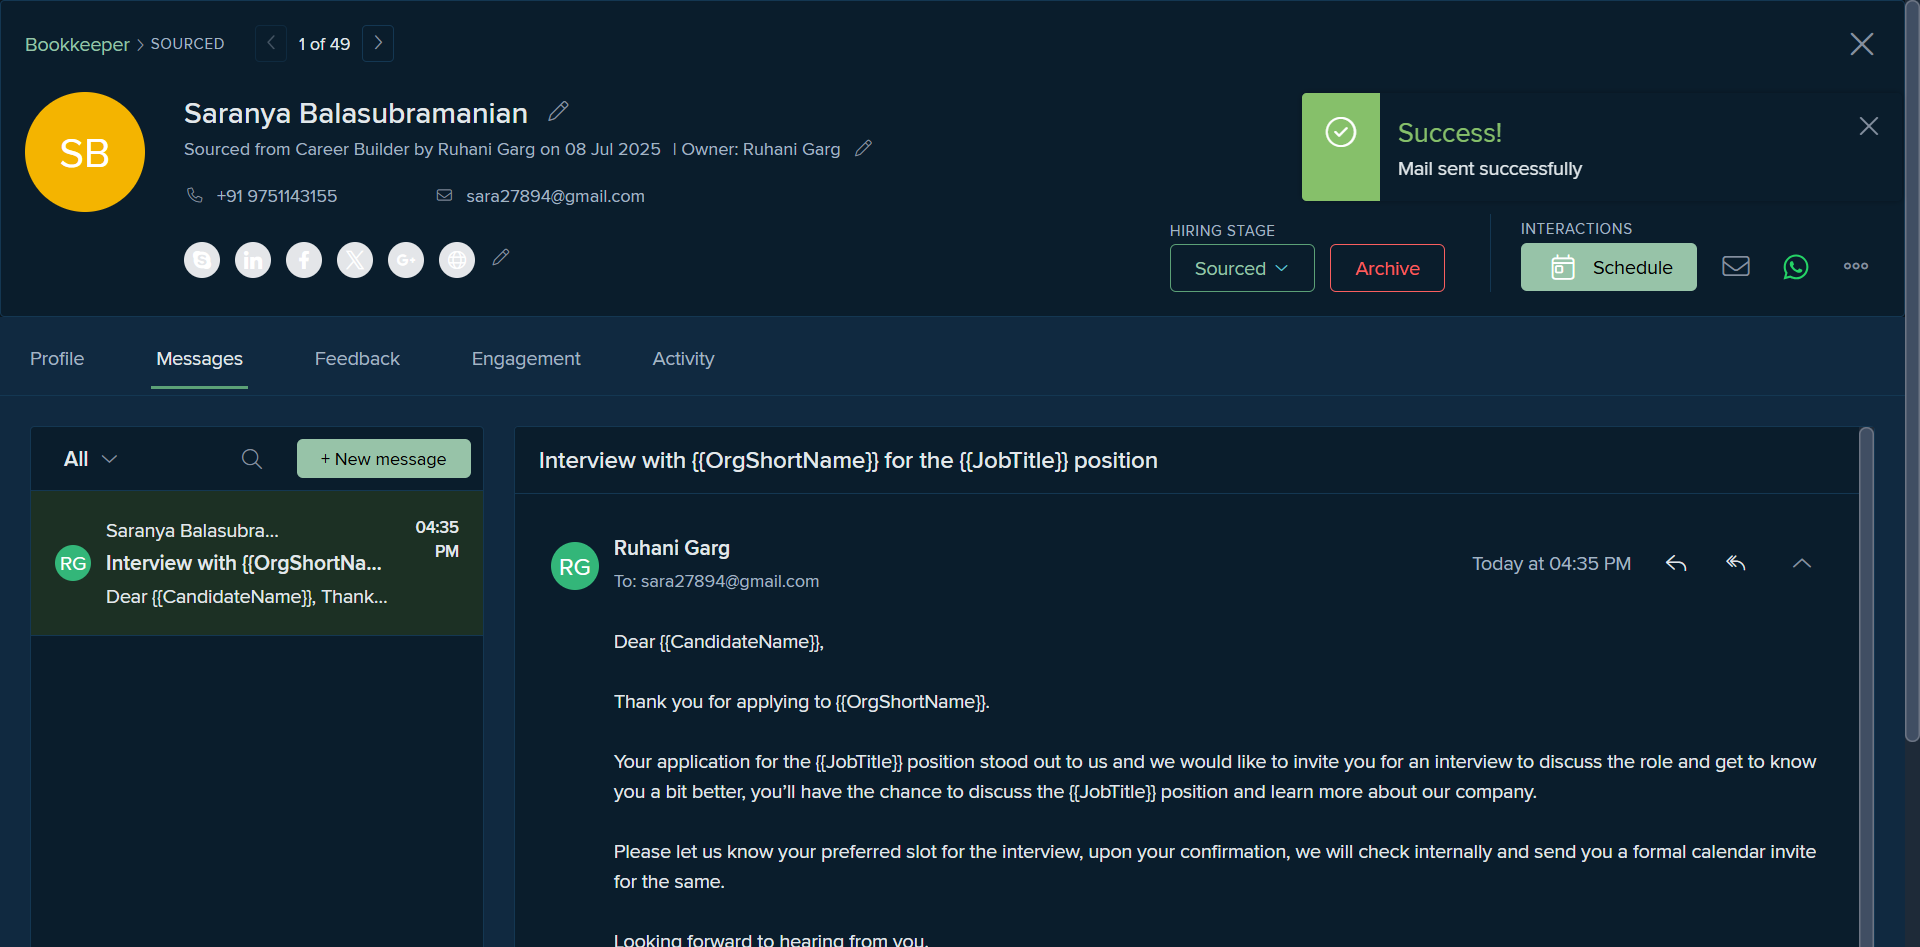
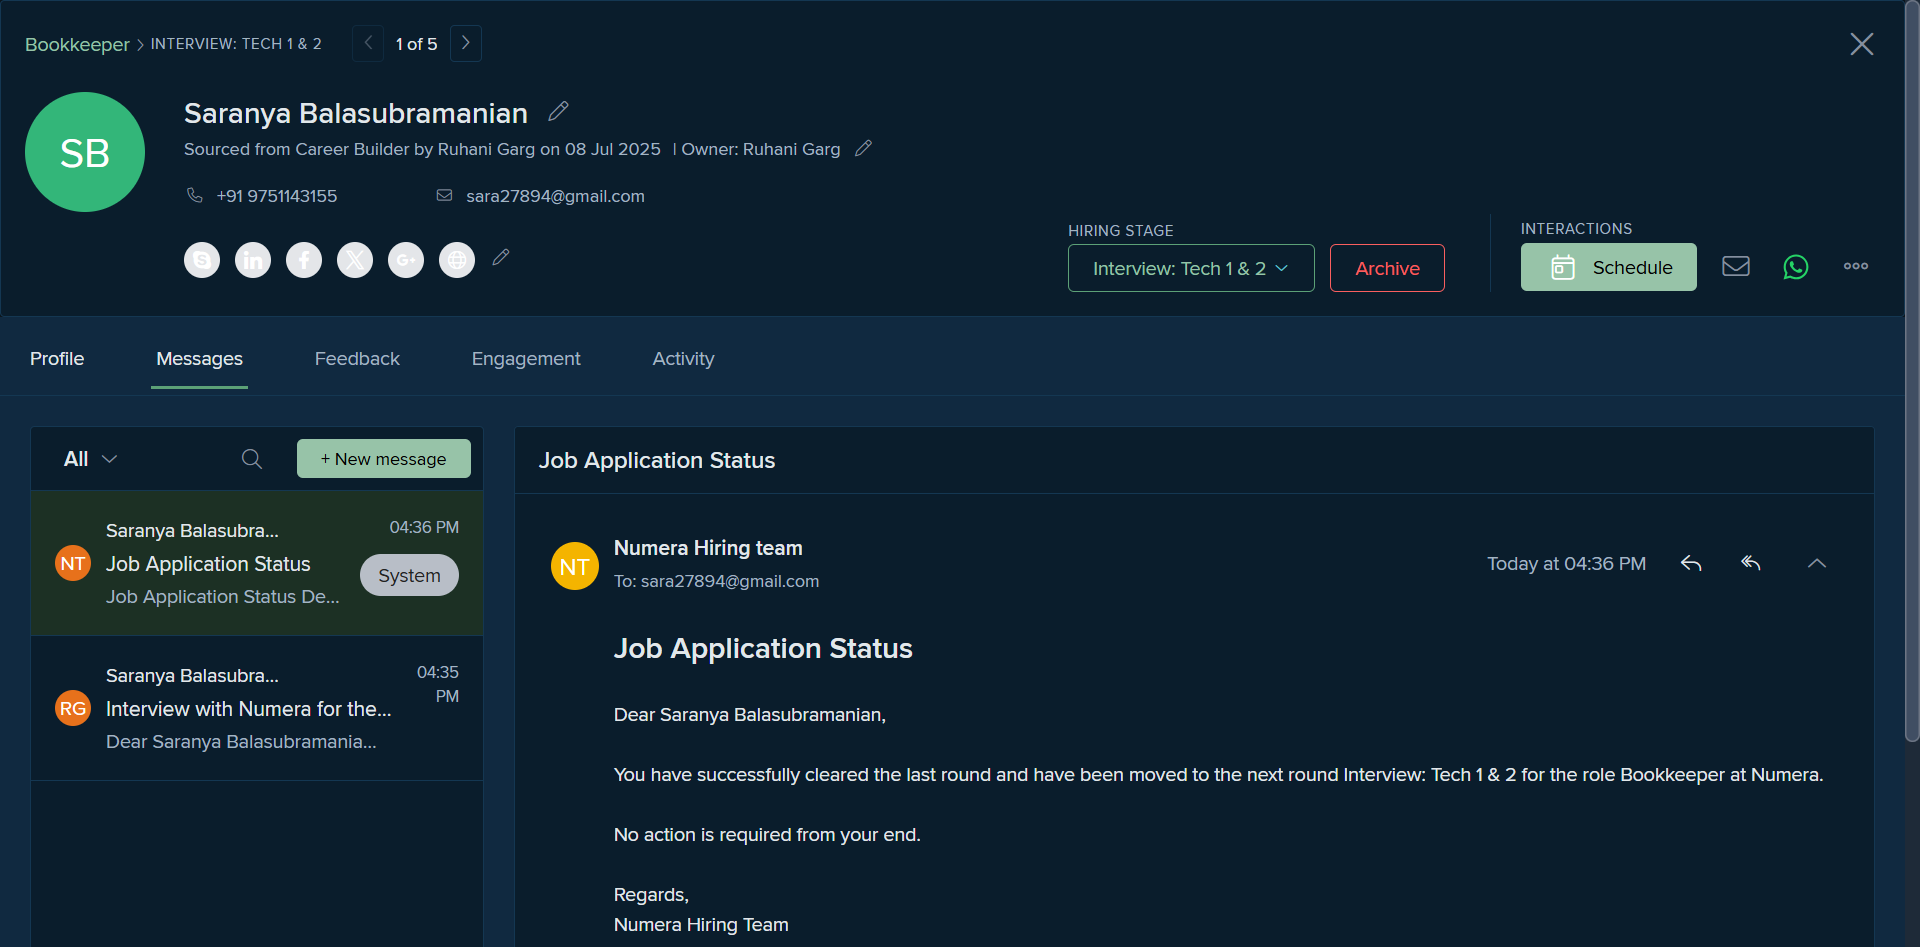
There is an option where, if the candidate is not responding, we have set templates to share assessment links. For example, we have the bookkeeping assessment and the initial interview setup email, which we can send to the candidate.
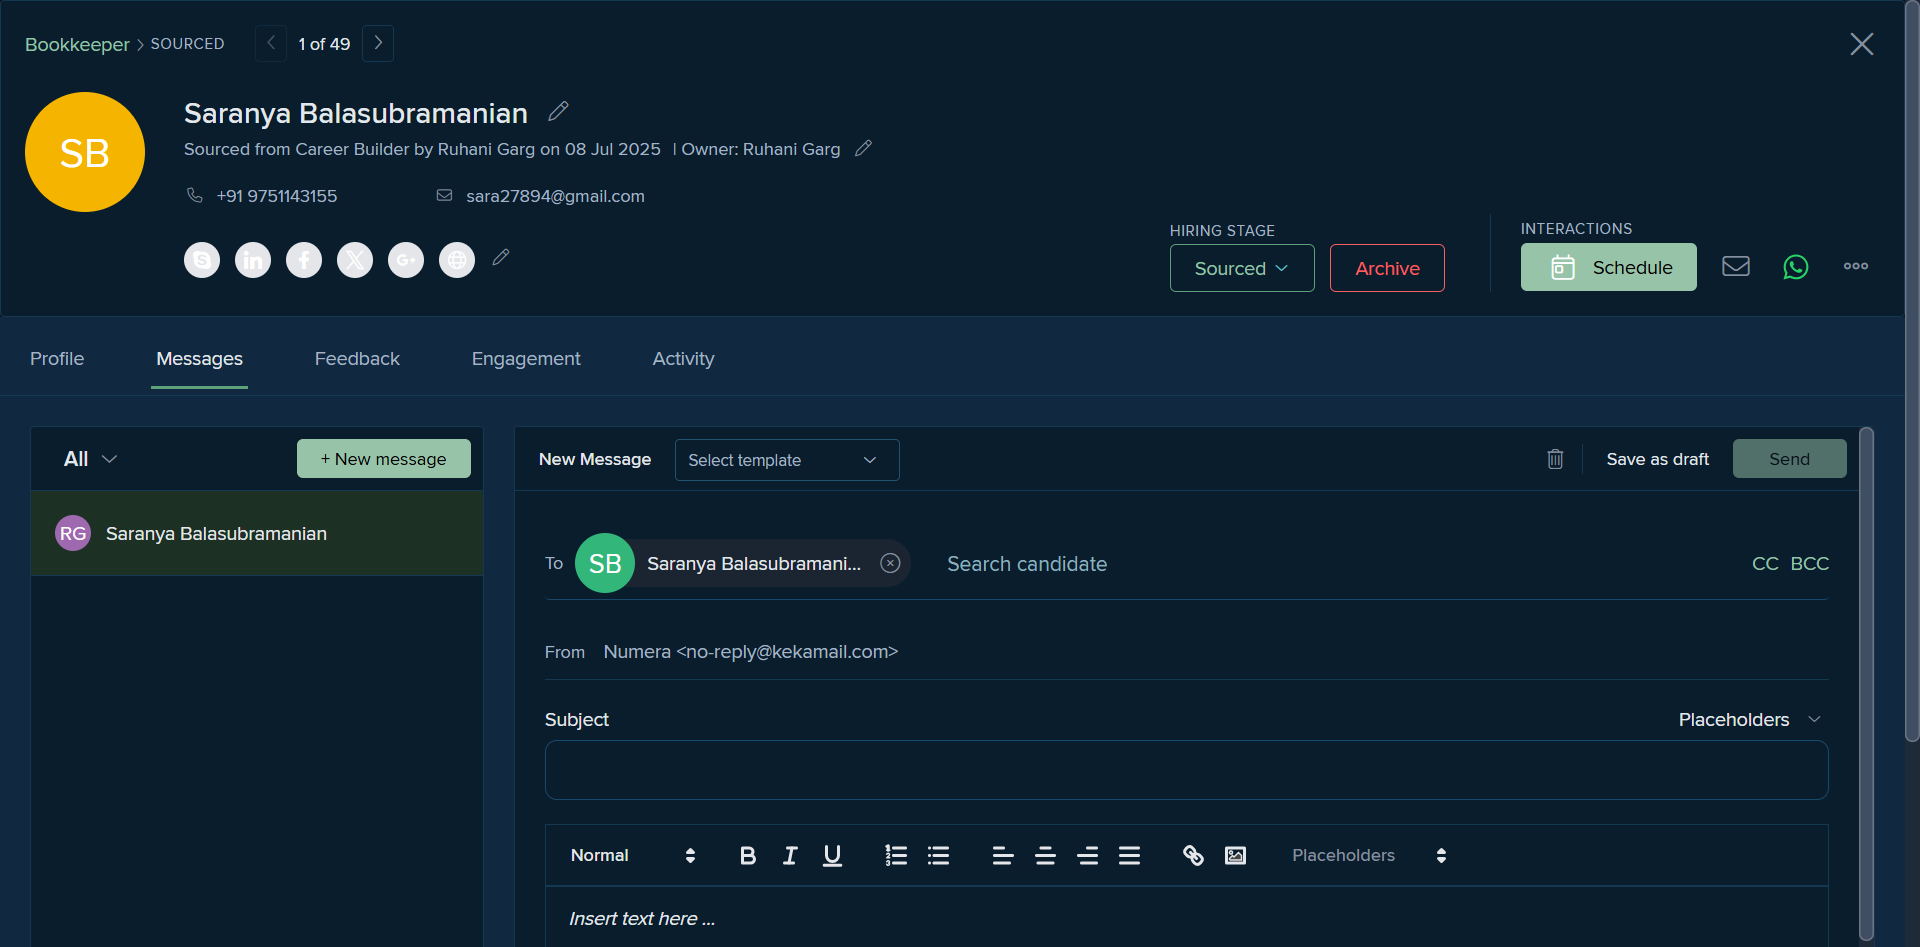
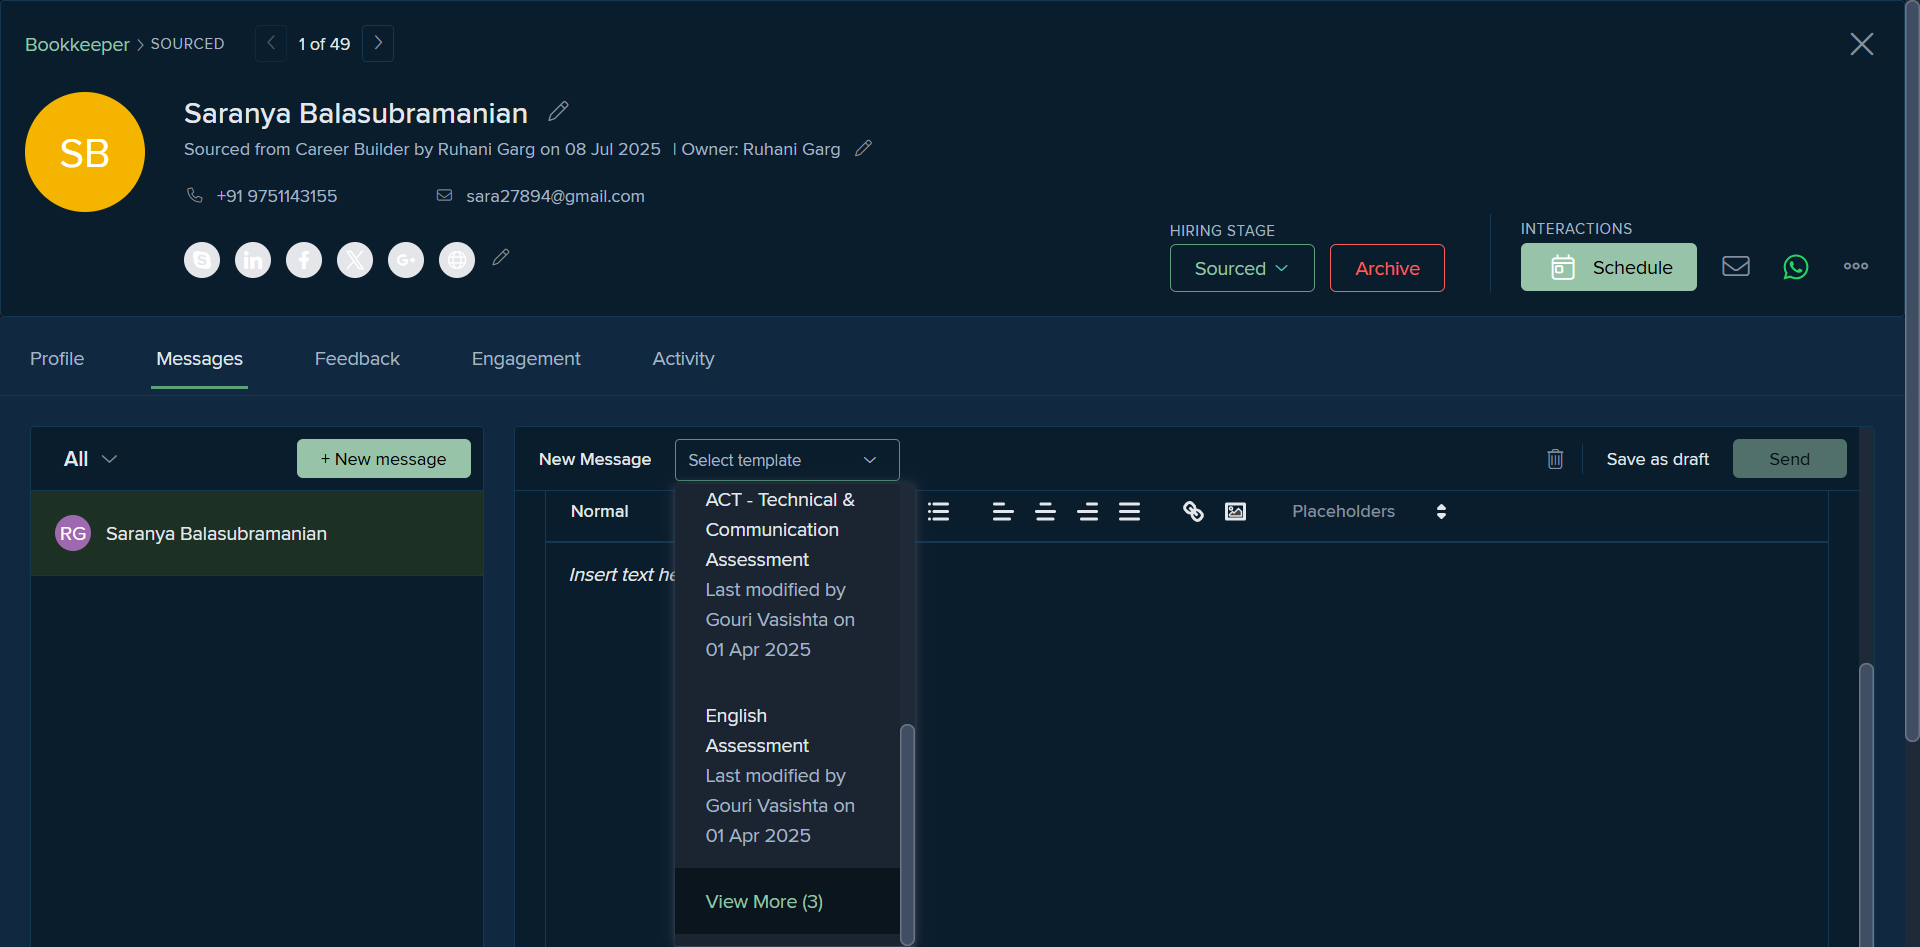

Once we press send, the message is sent to the candidate. We can also see the exact time it is sent to the candidate.
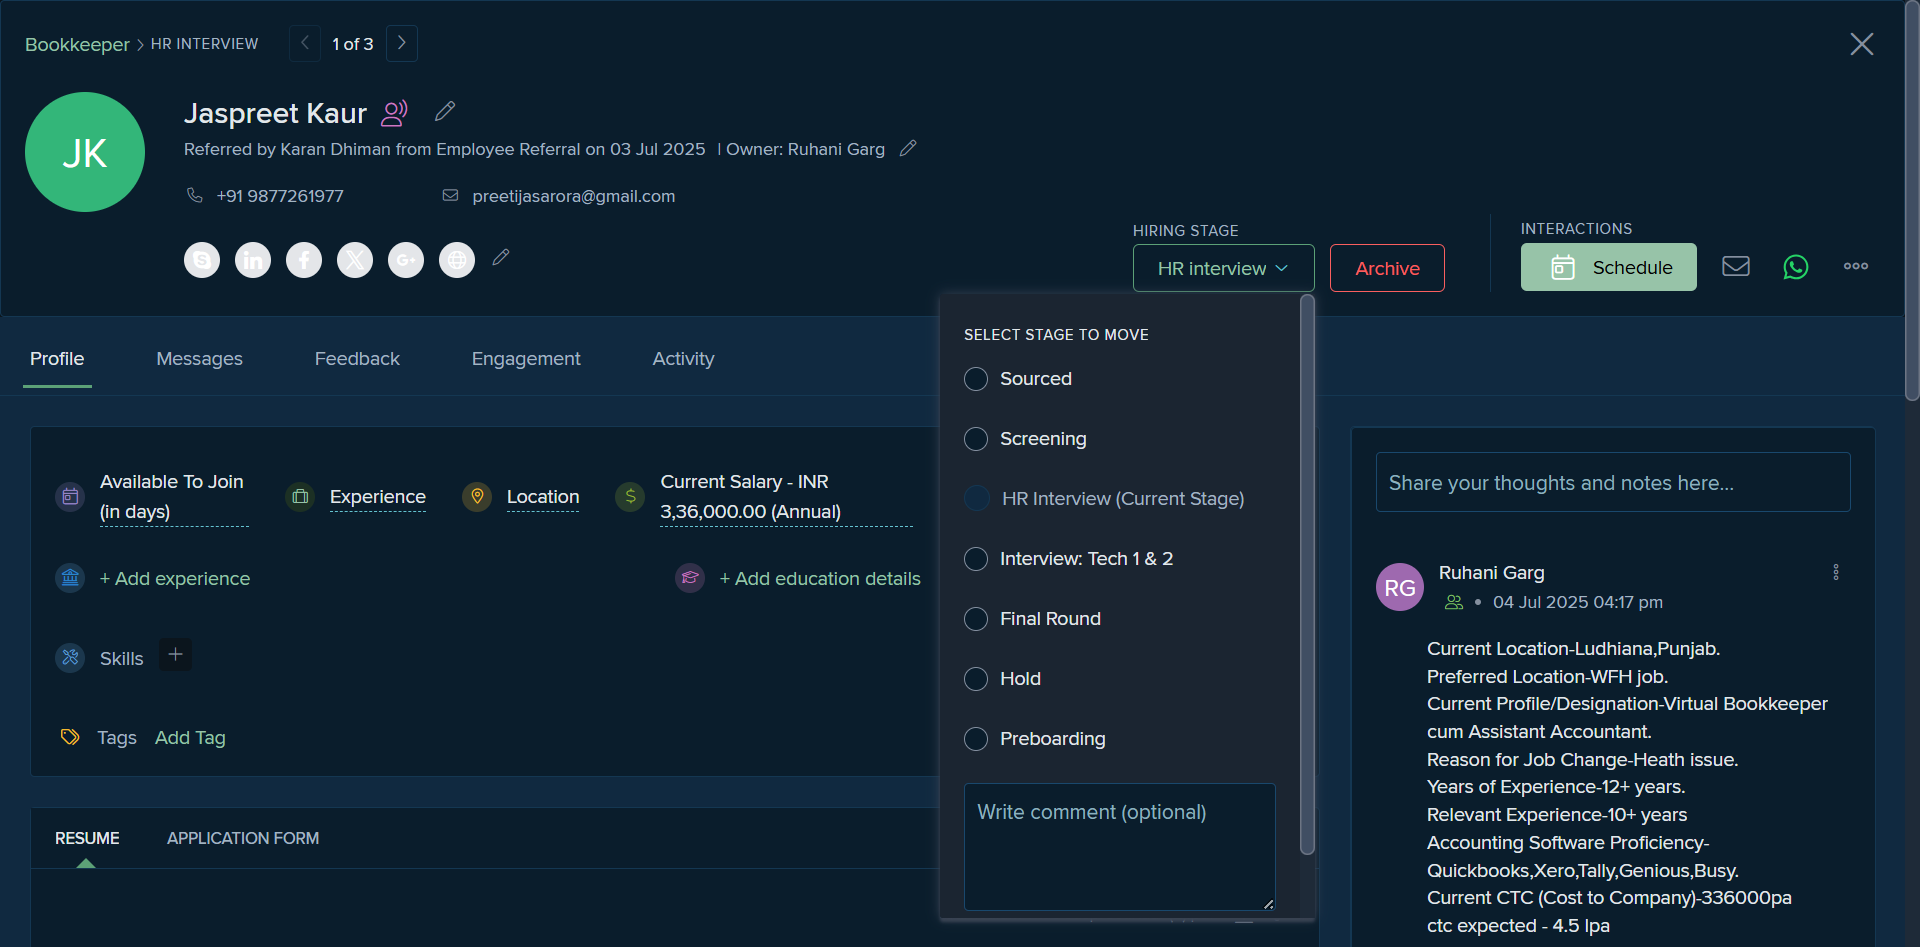
Before the screening, we need to conduct an HR interview if the candidate is advancing to the assessment stage. We move that profile to the HR screening stage.

Once the candidate completes the assessment and their scores meet our benchmark, we move their profile to the interview stage.

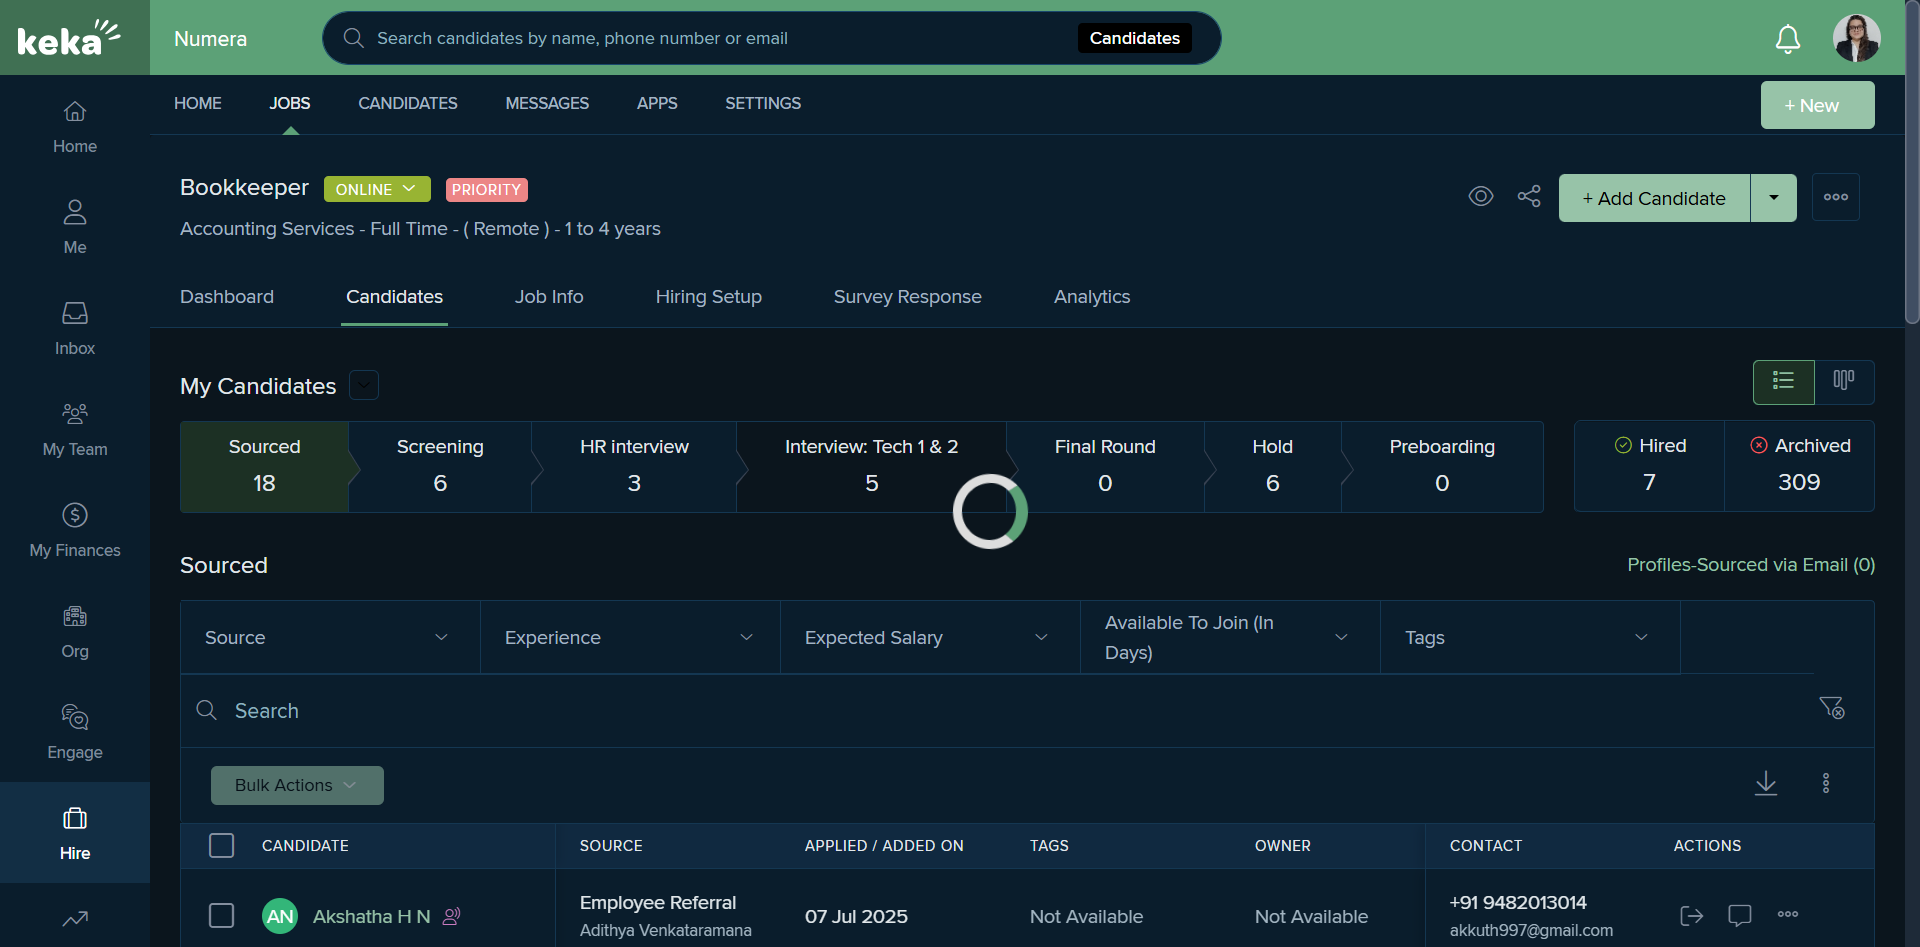
We also have the option to view candidates from a specific recruiter. For example, this bookkeeper profile is managed by multiple recruiters, so I can choose to see only my candidates.
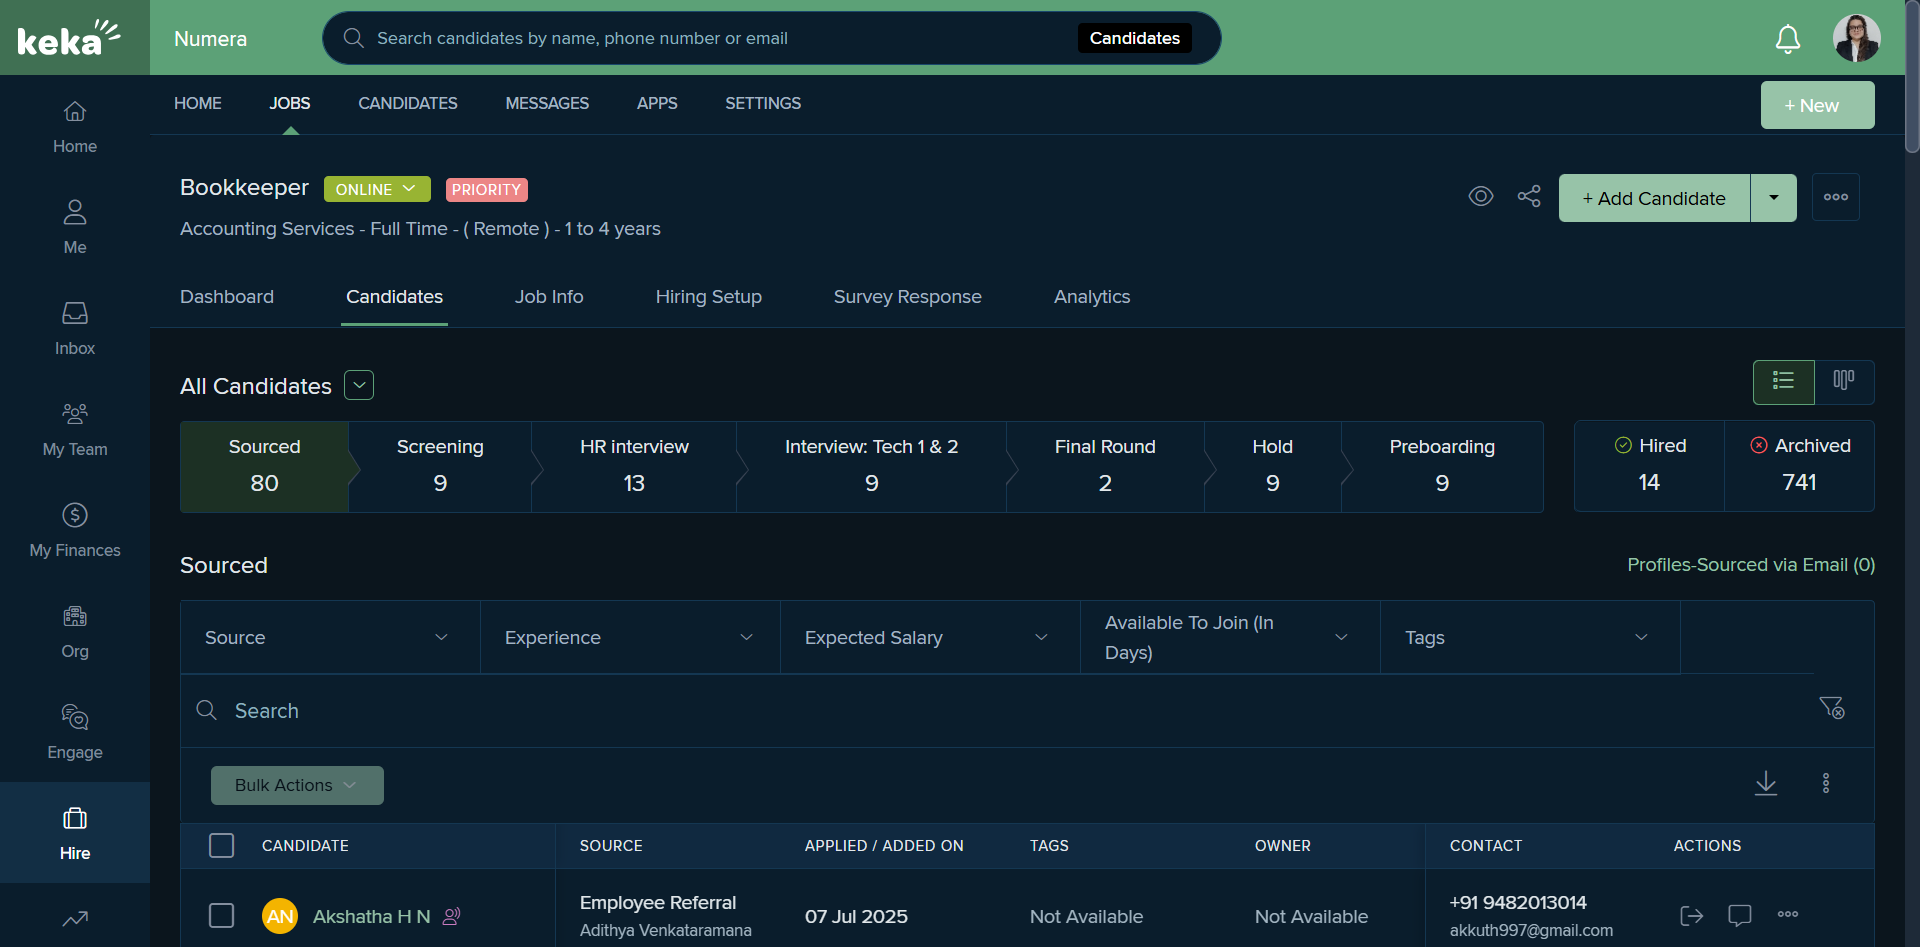
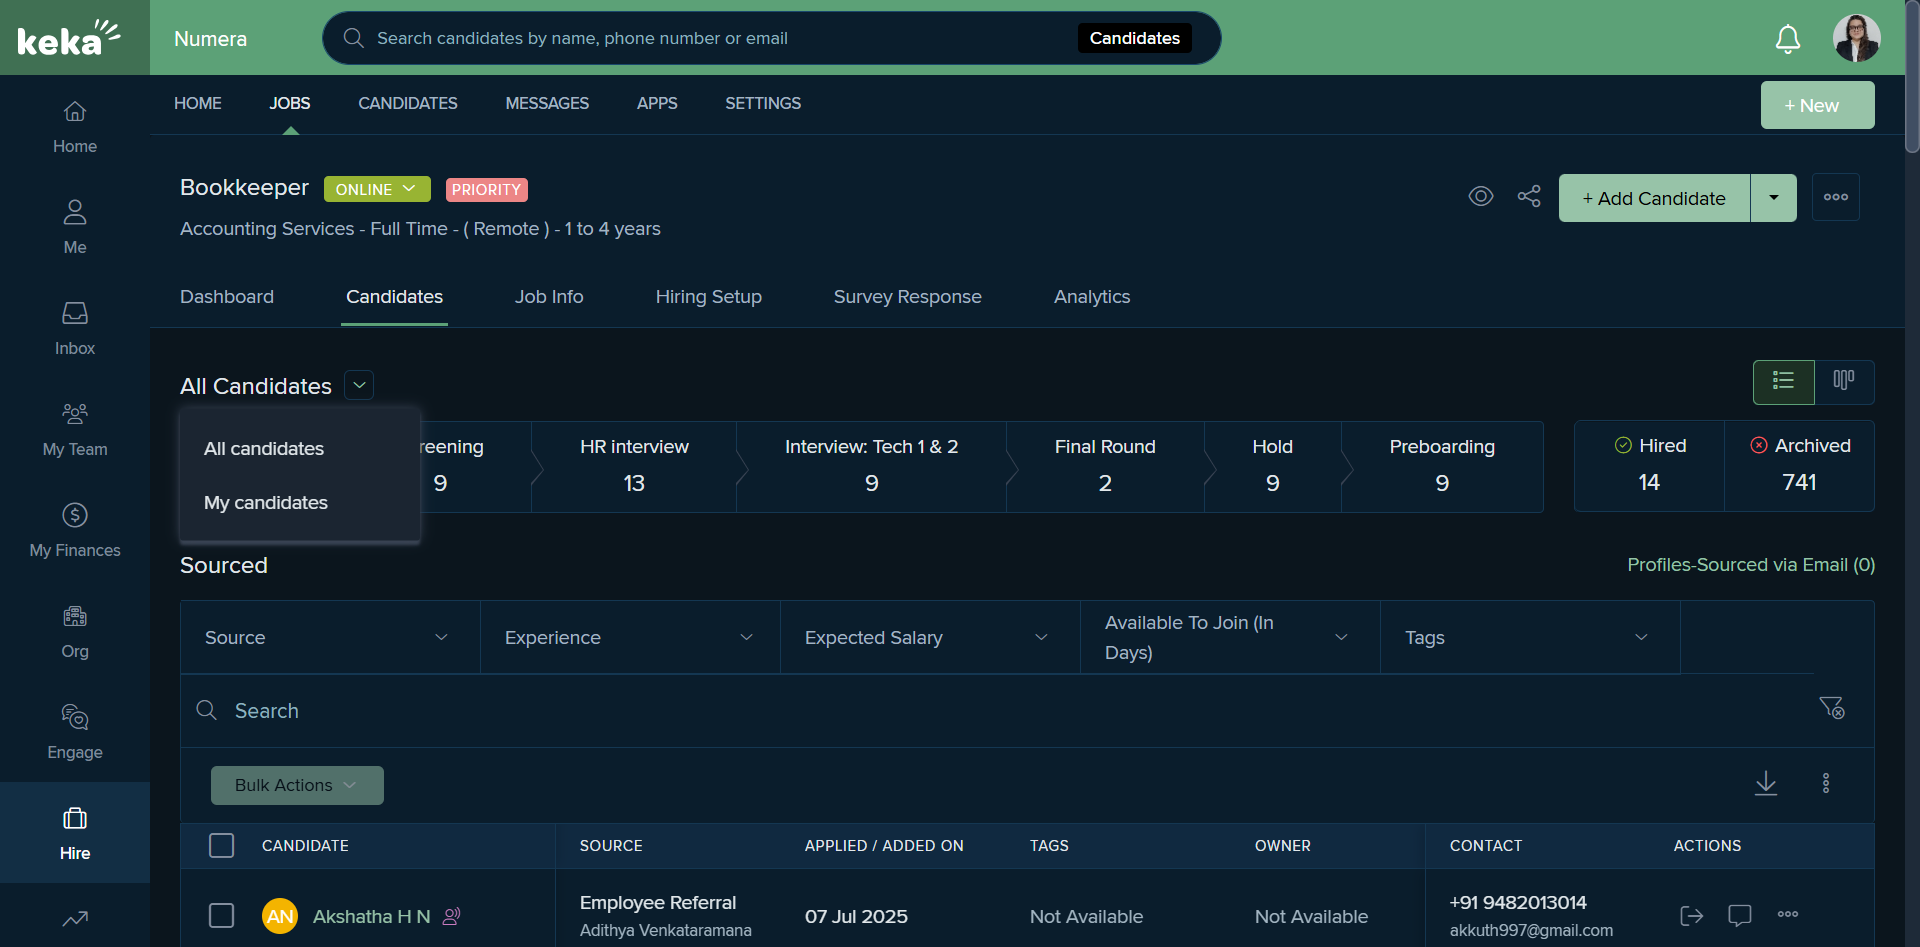
Here are my candidates.
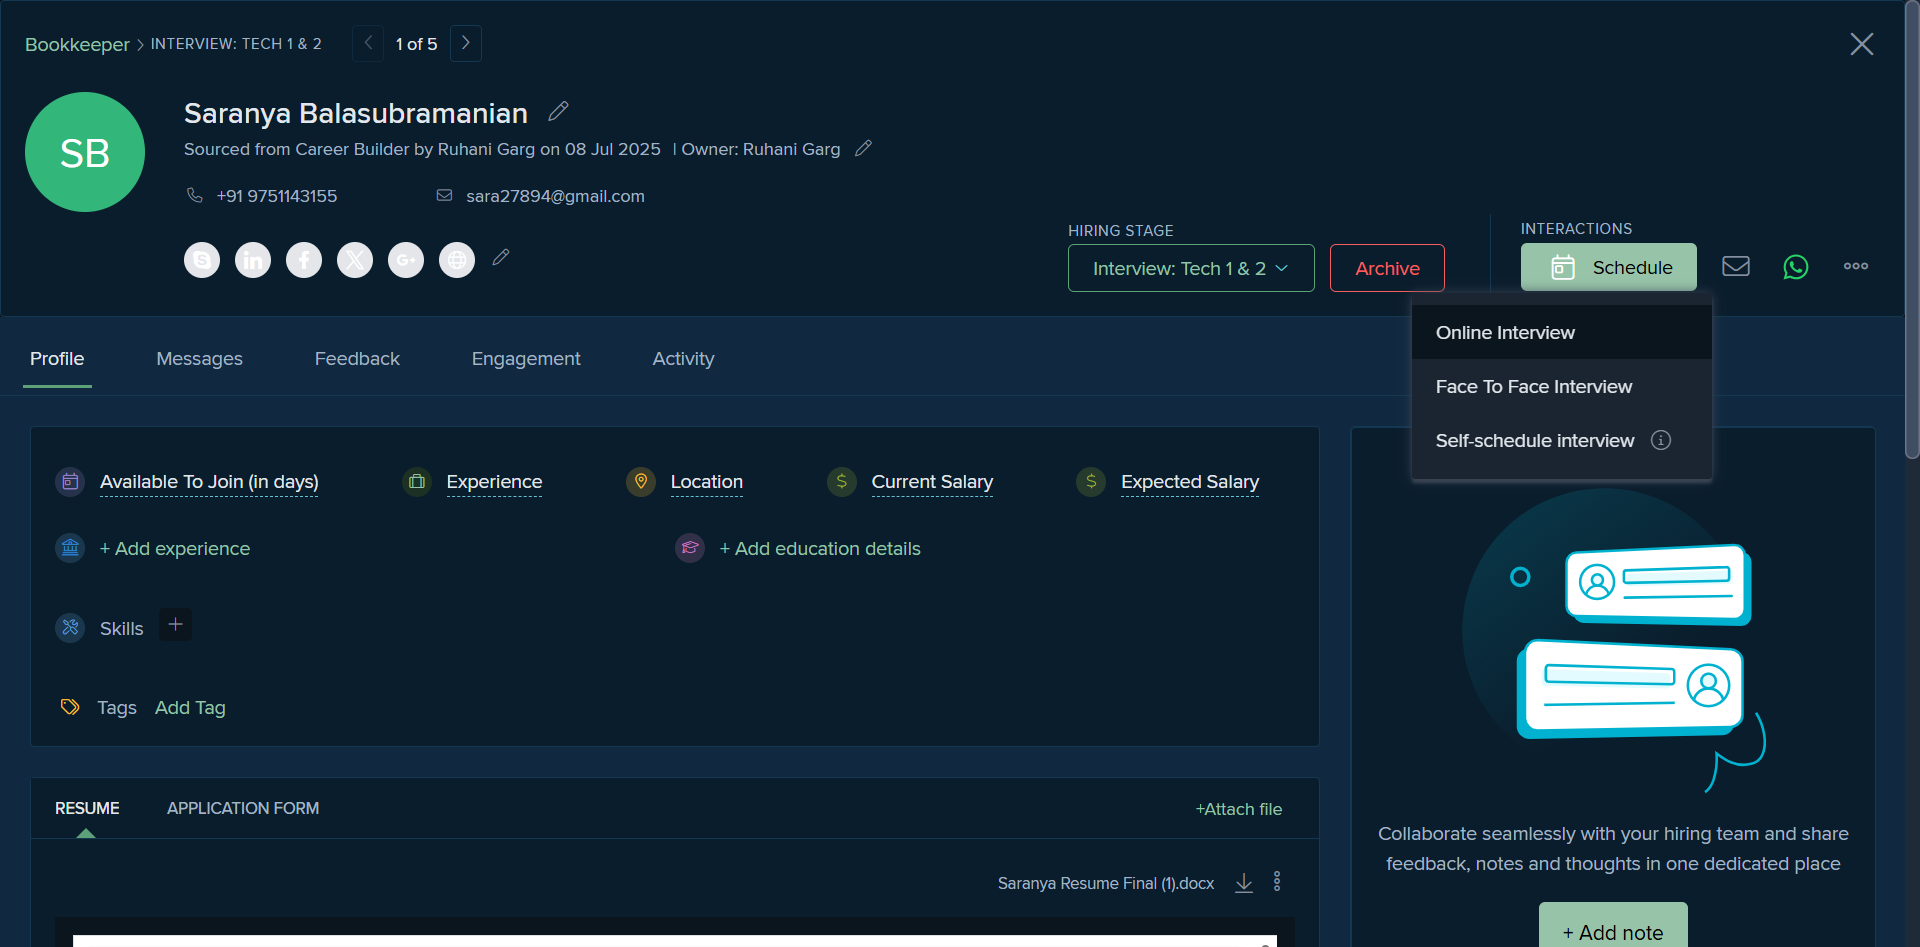
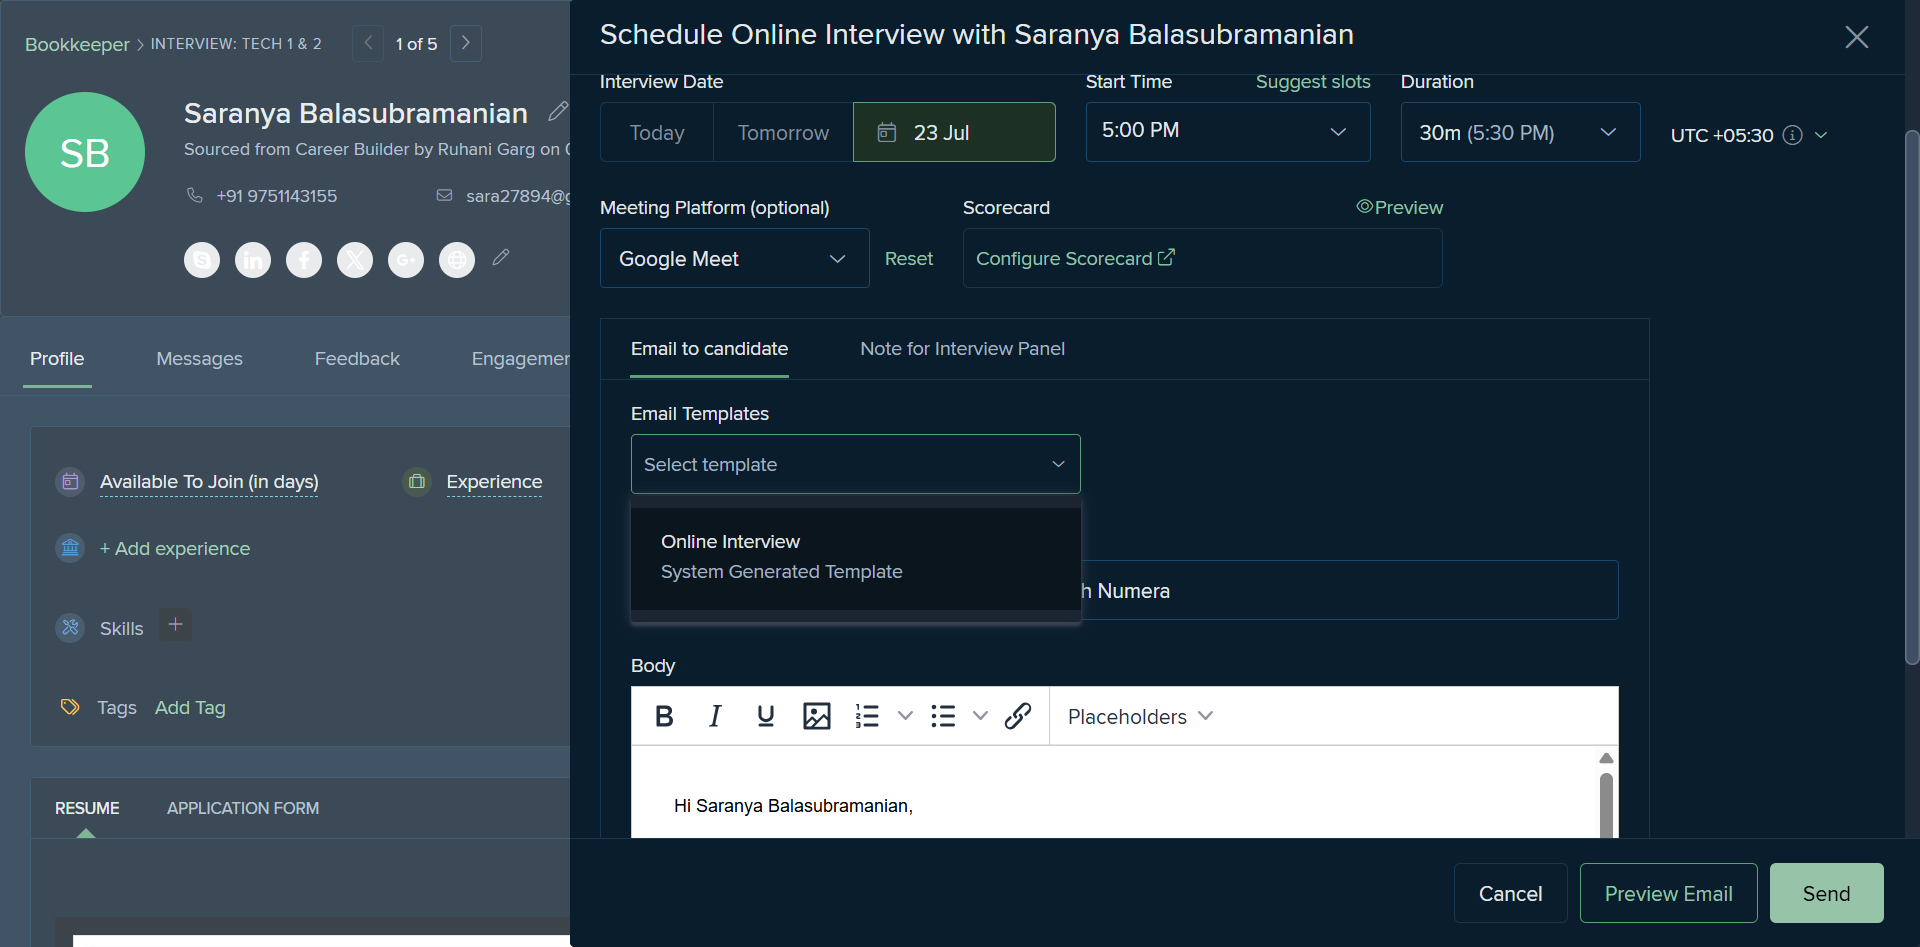
Next, we will cover how to schedule the interview. Let's consider a scenario with this specific candidate.
How to schedule the interview: Select the option for an online interview.
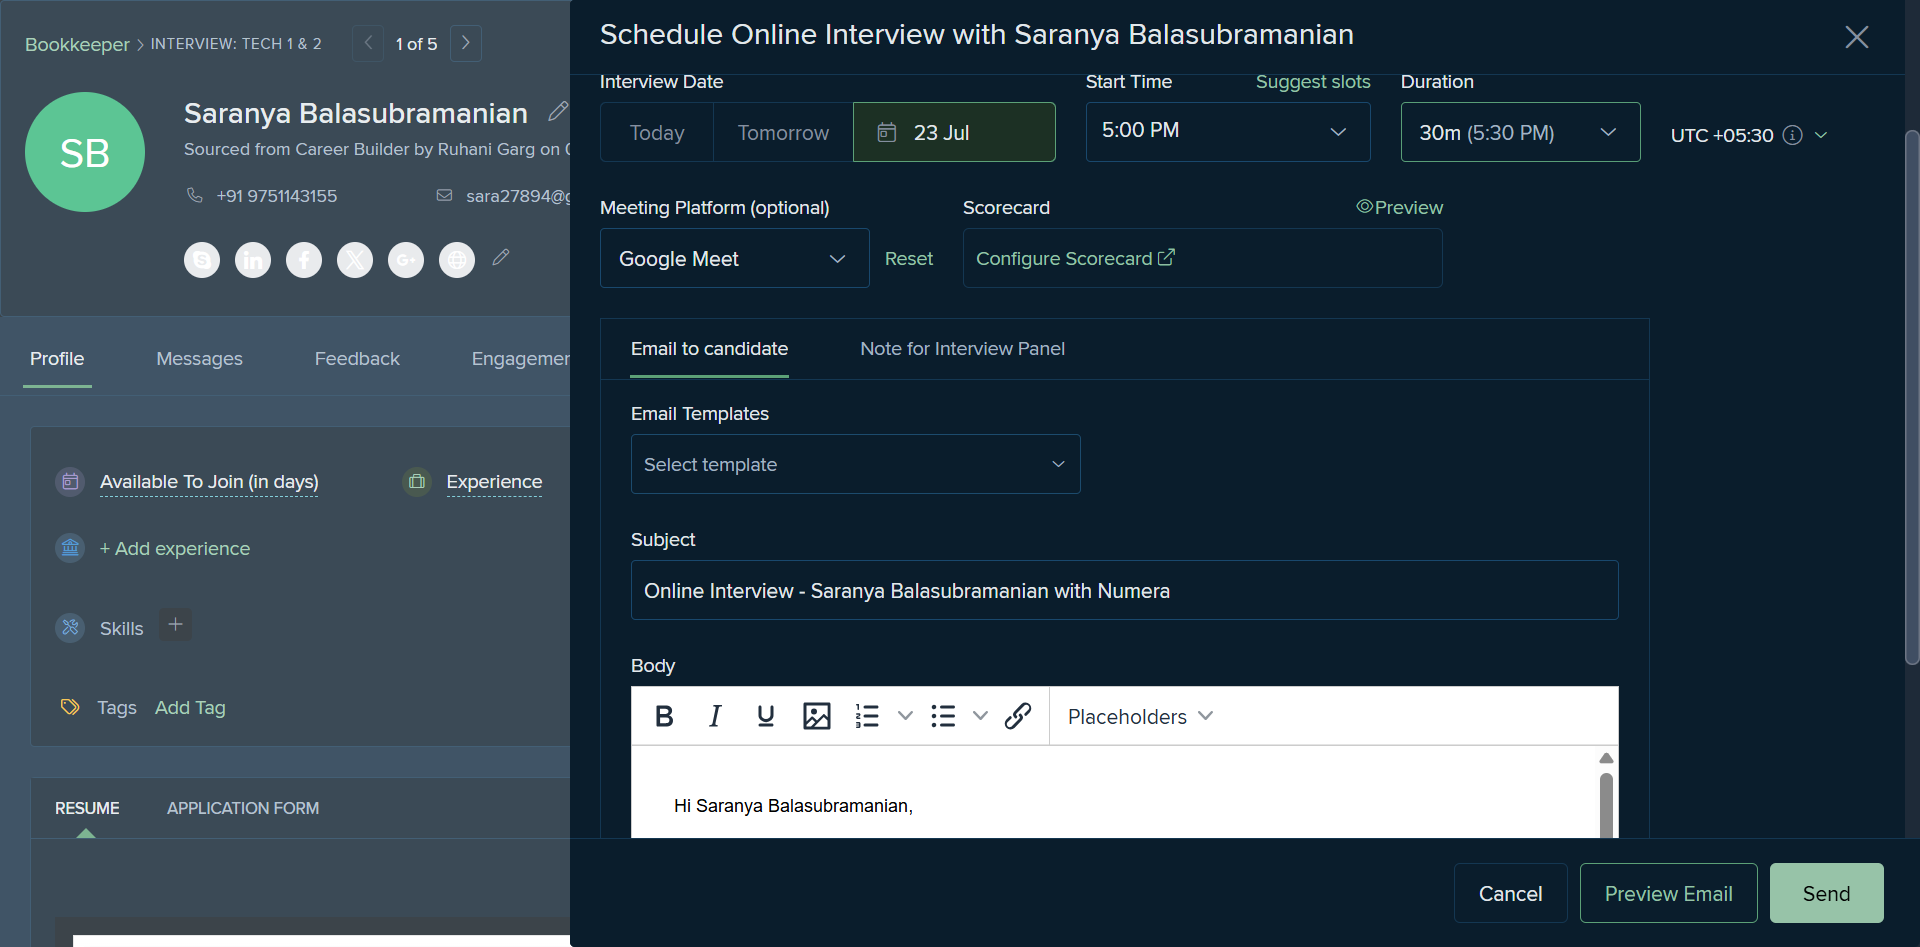
Schedule online interview and select relevant details.
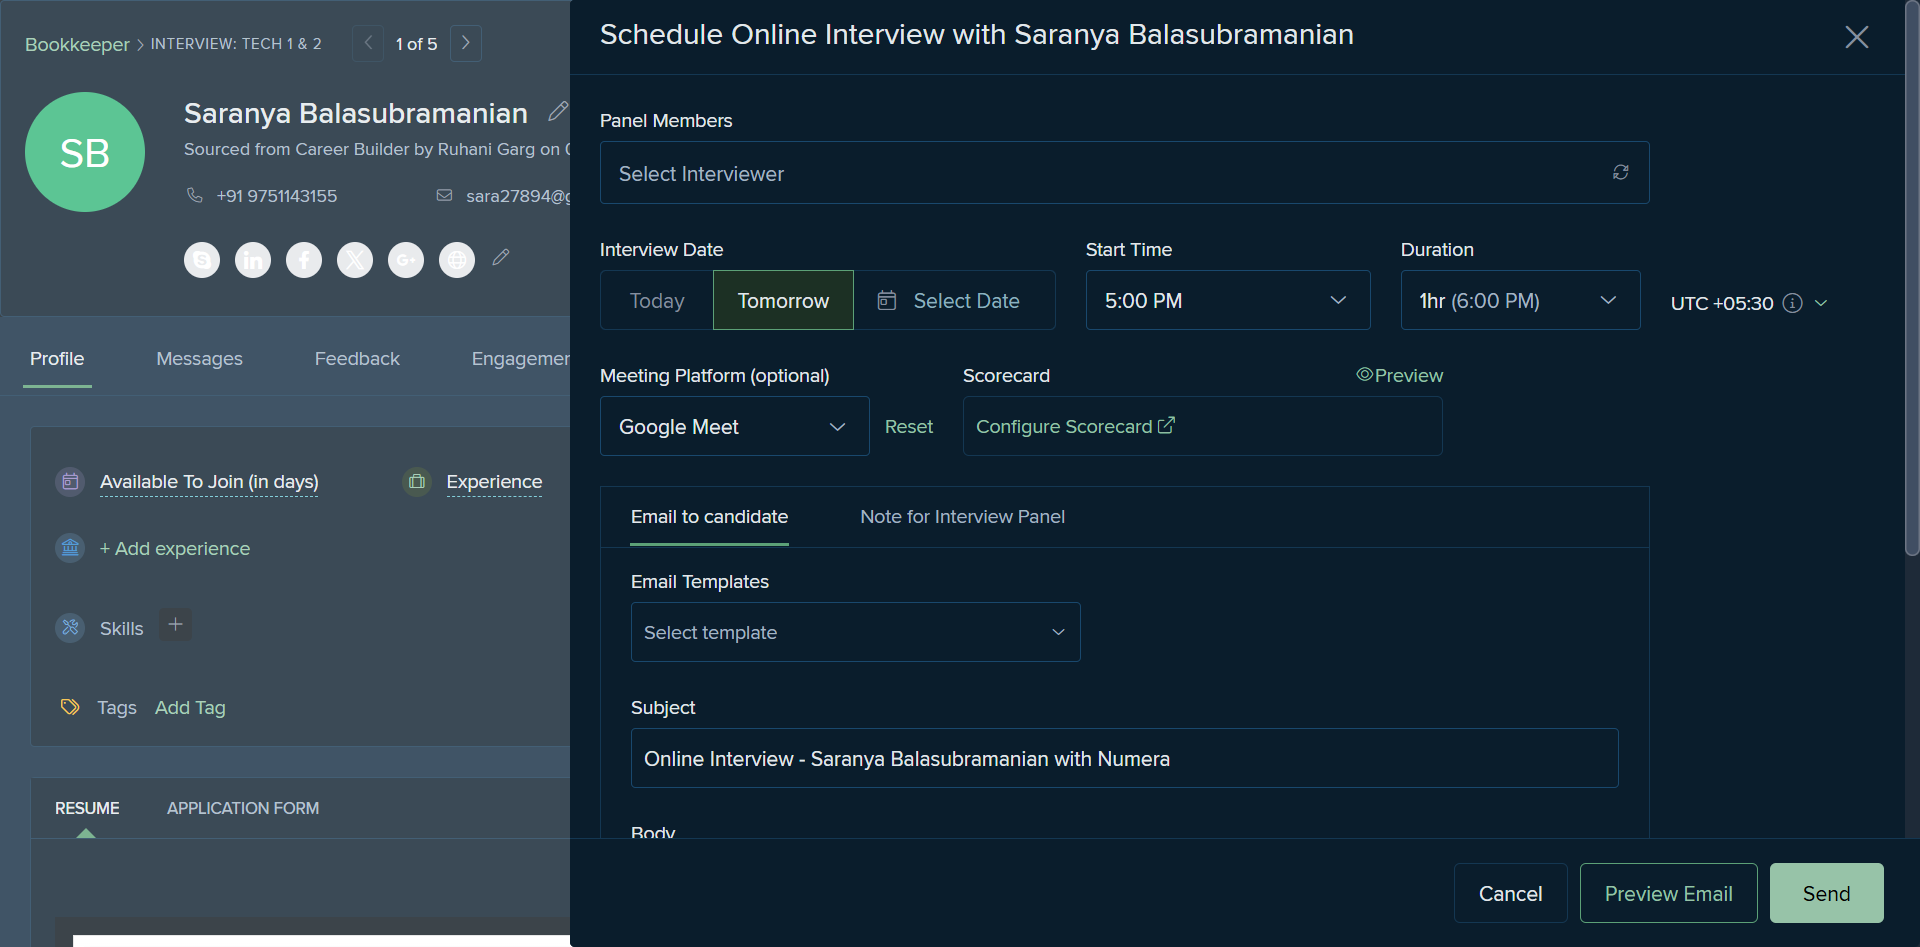
We have the names of multiple panels mentioned. For example, let's say we need to schedule an interview with one of the panels.
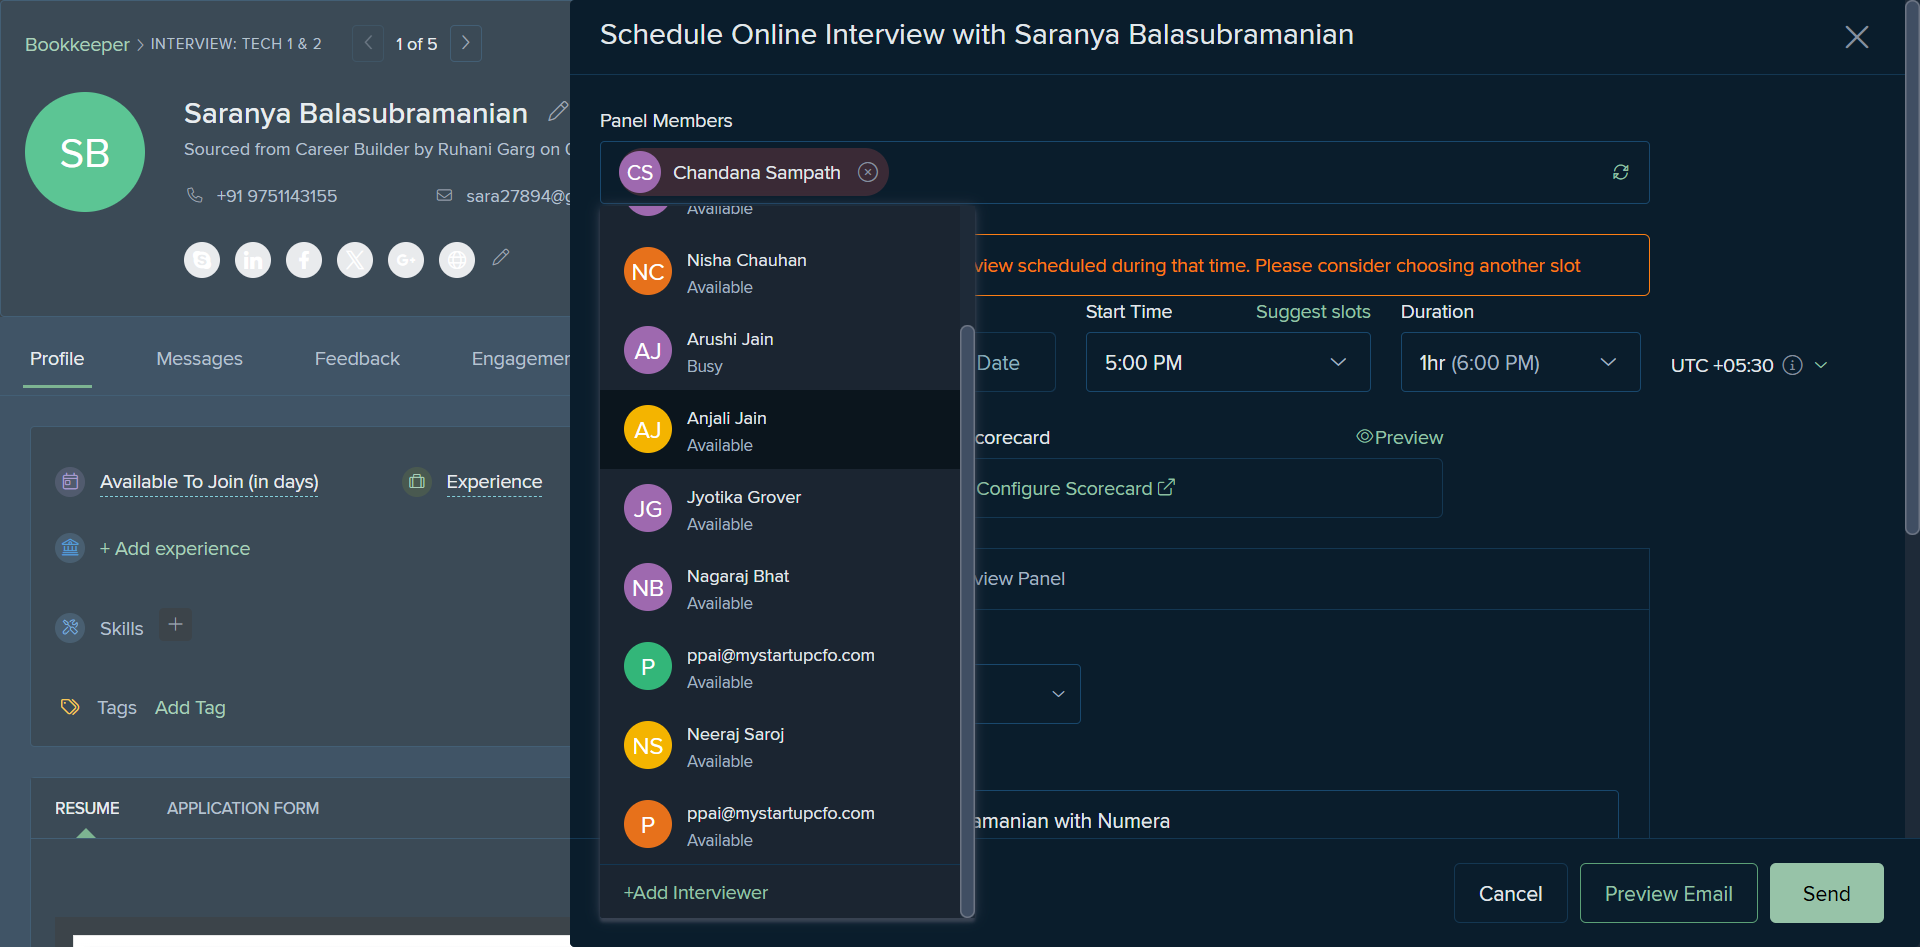
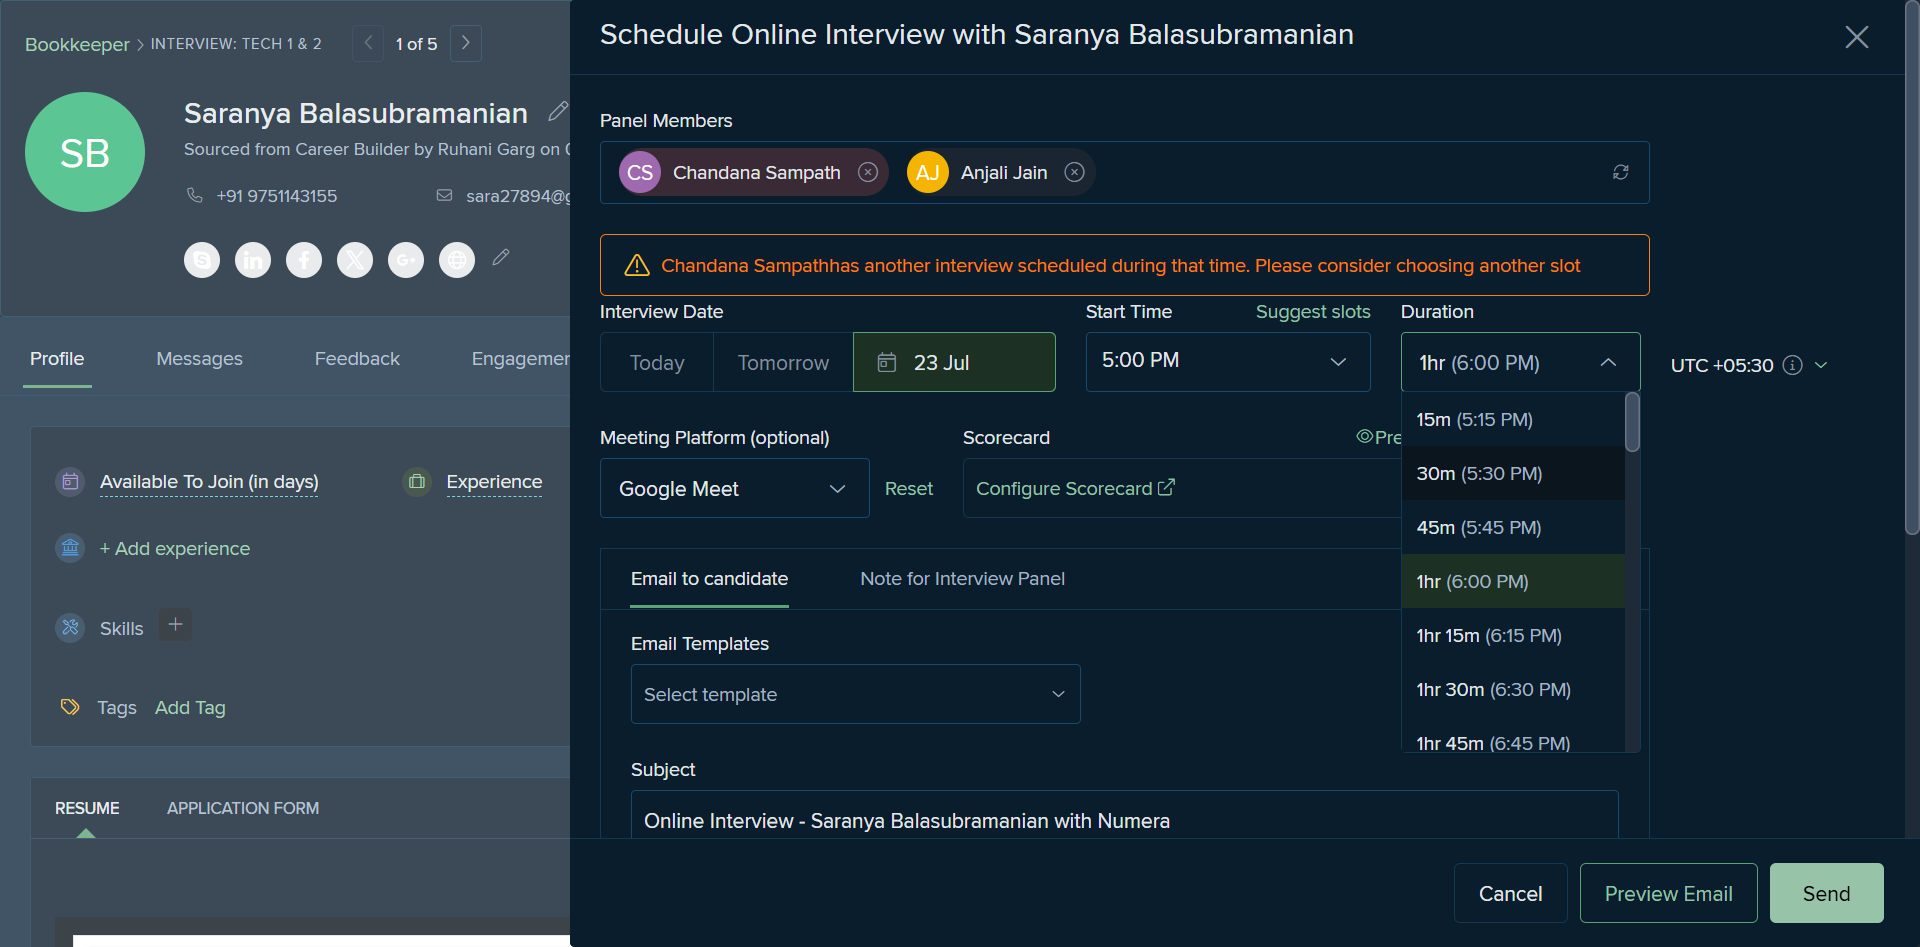
We select the date. We choose the interview time.
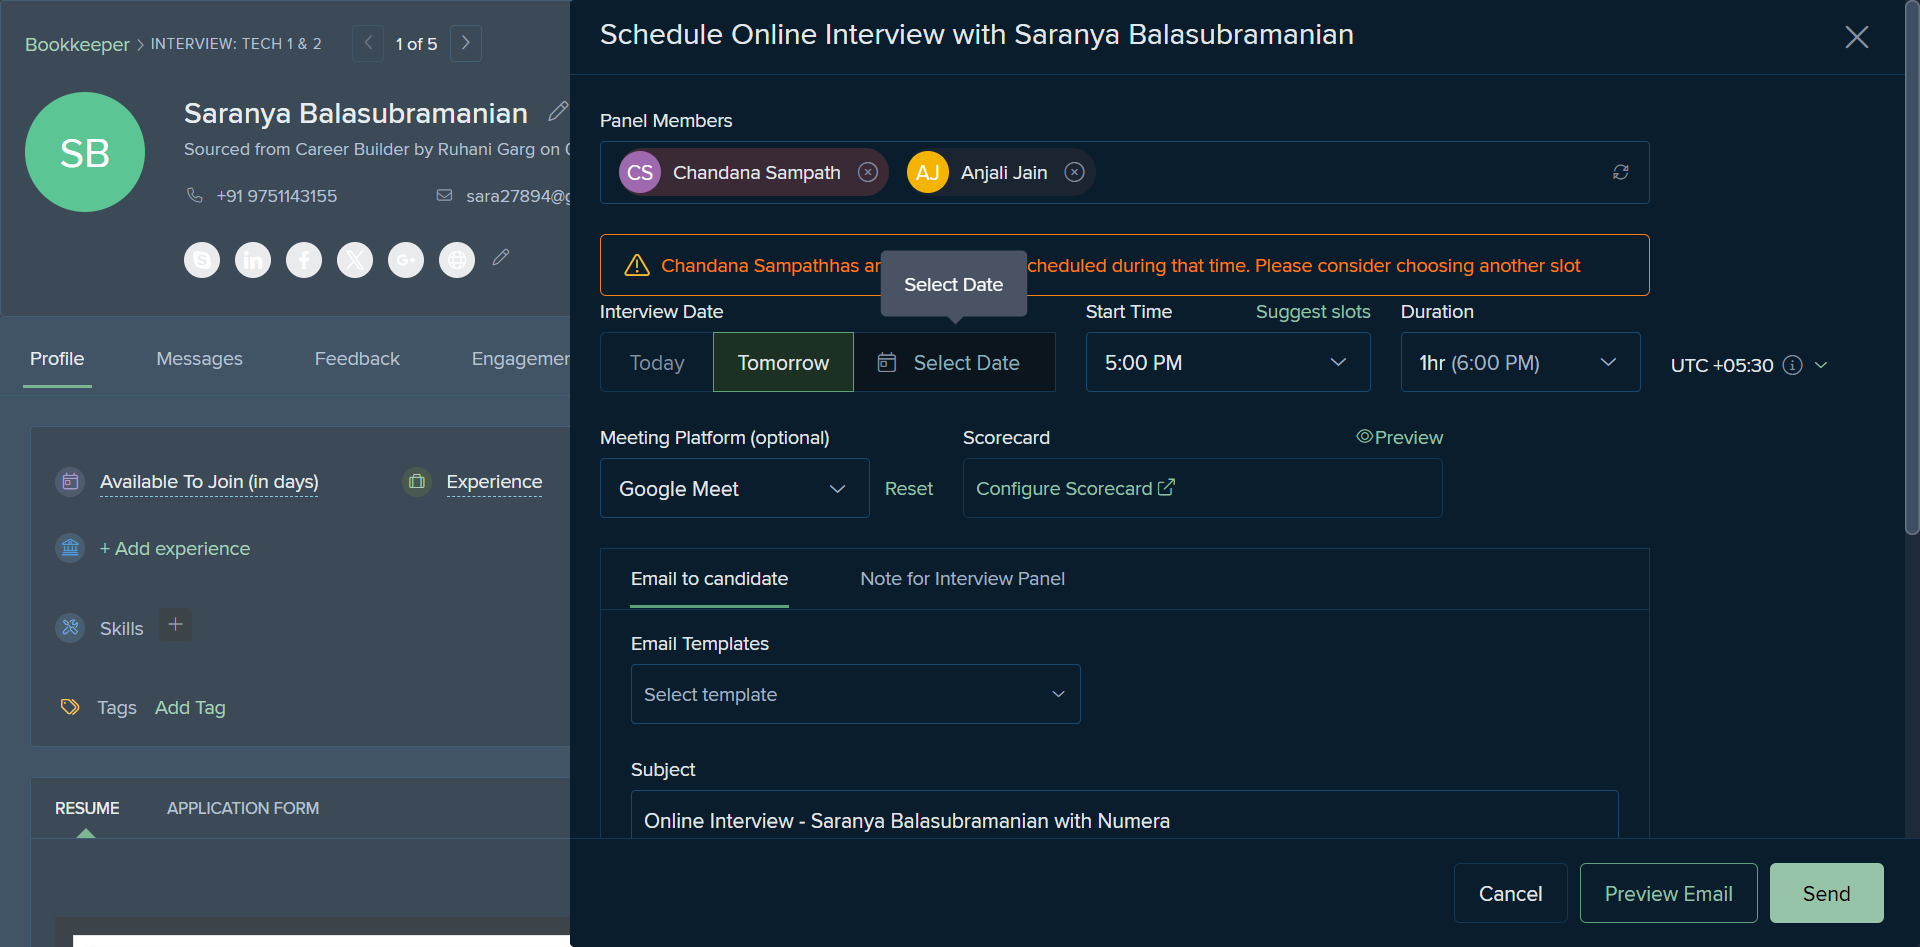
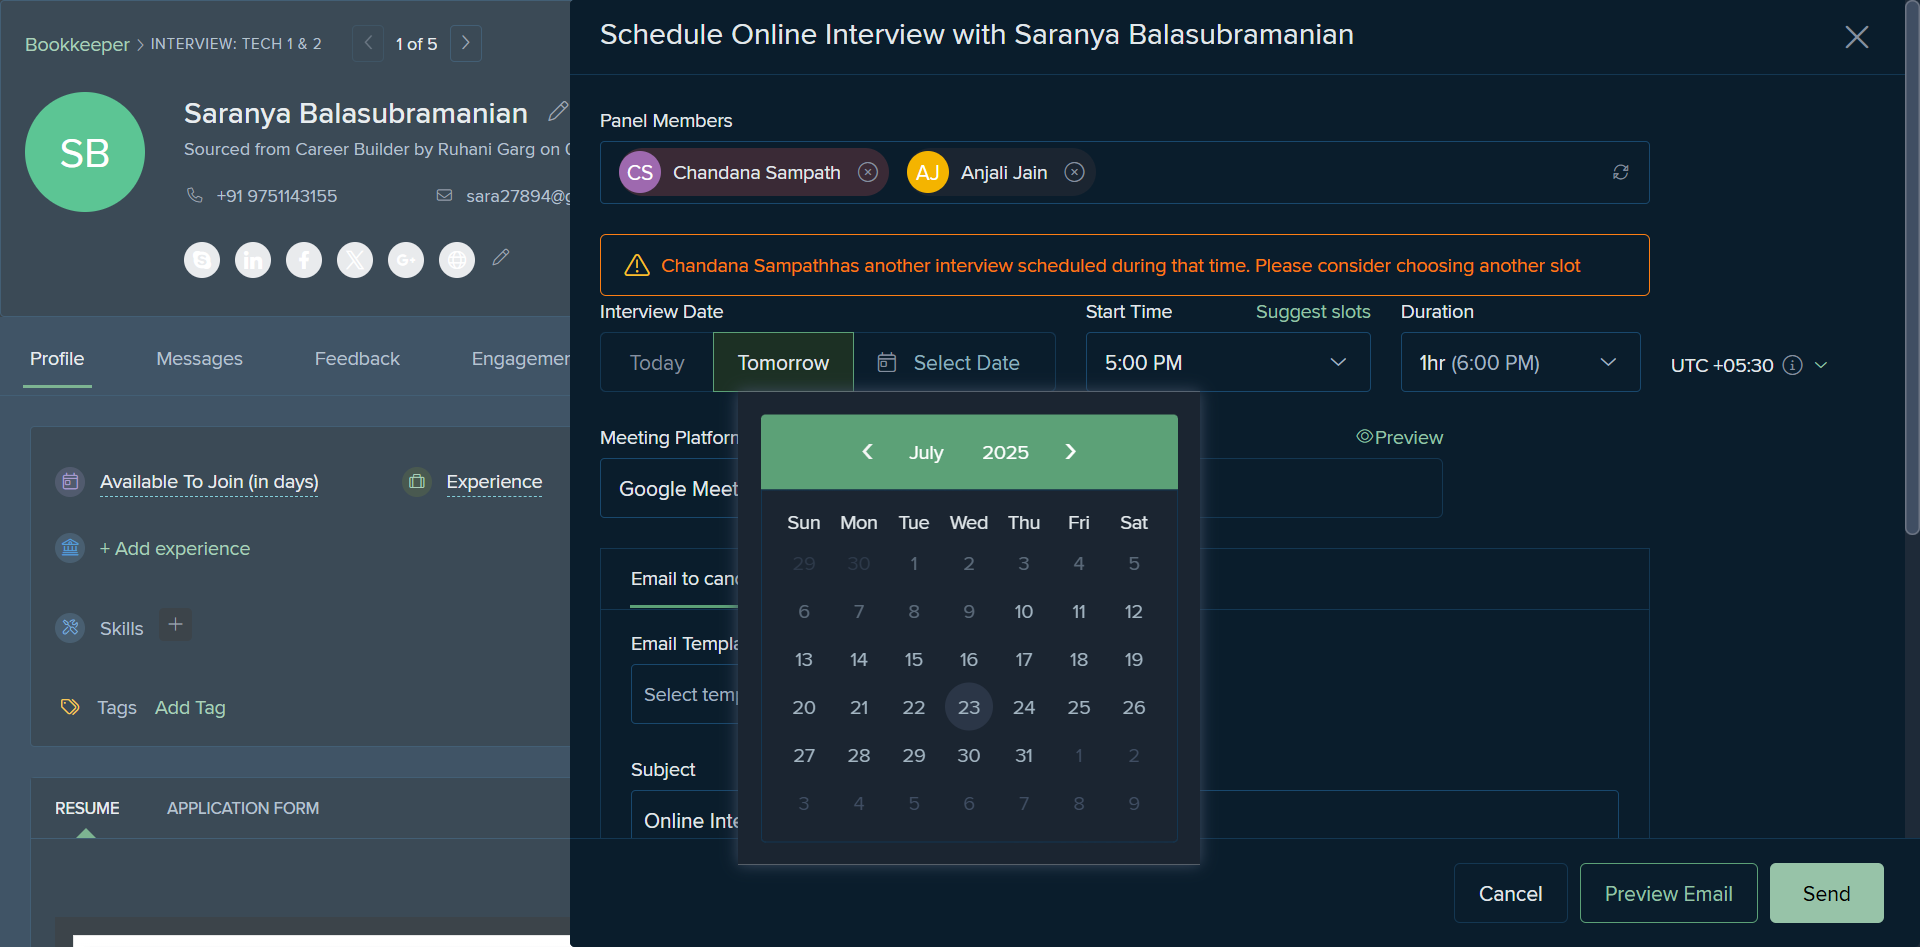
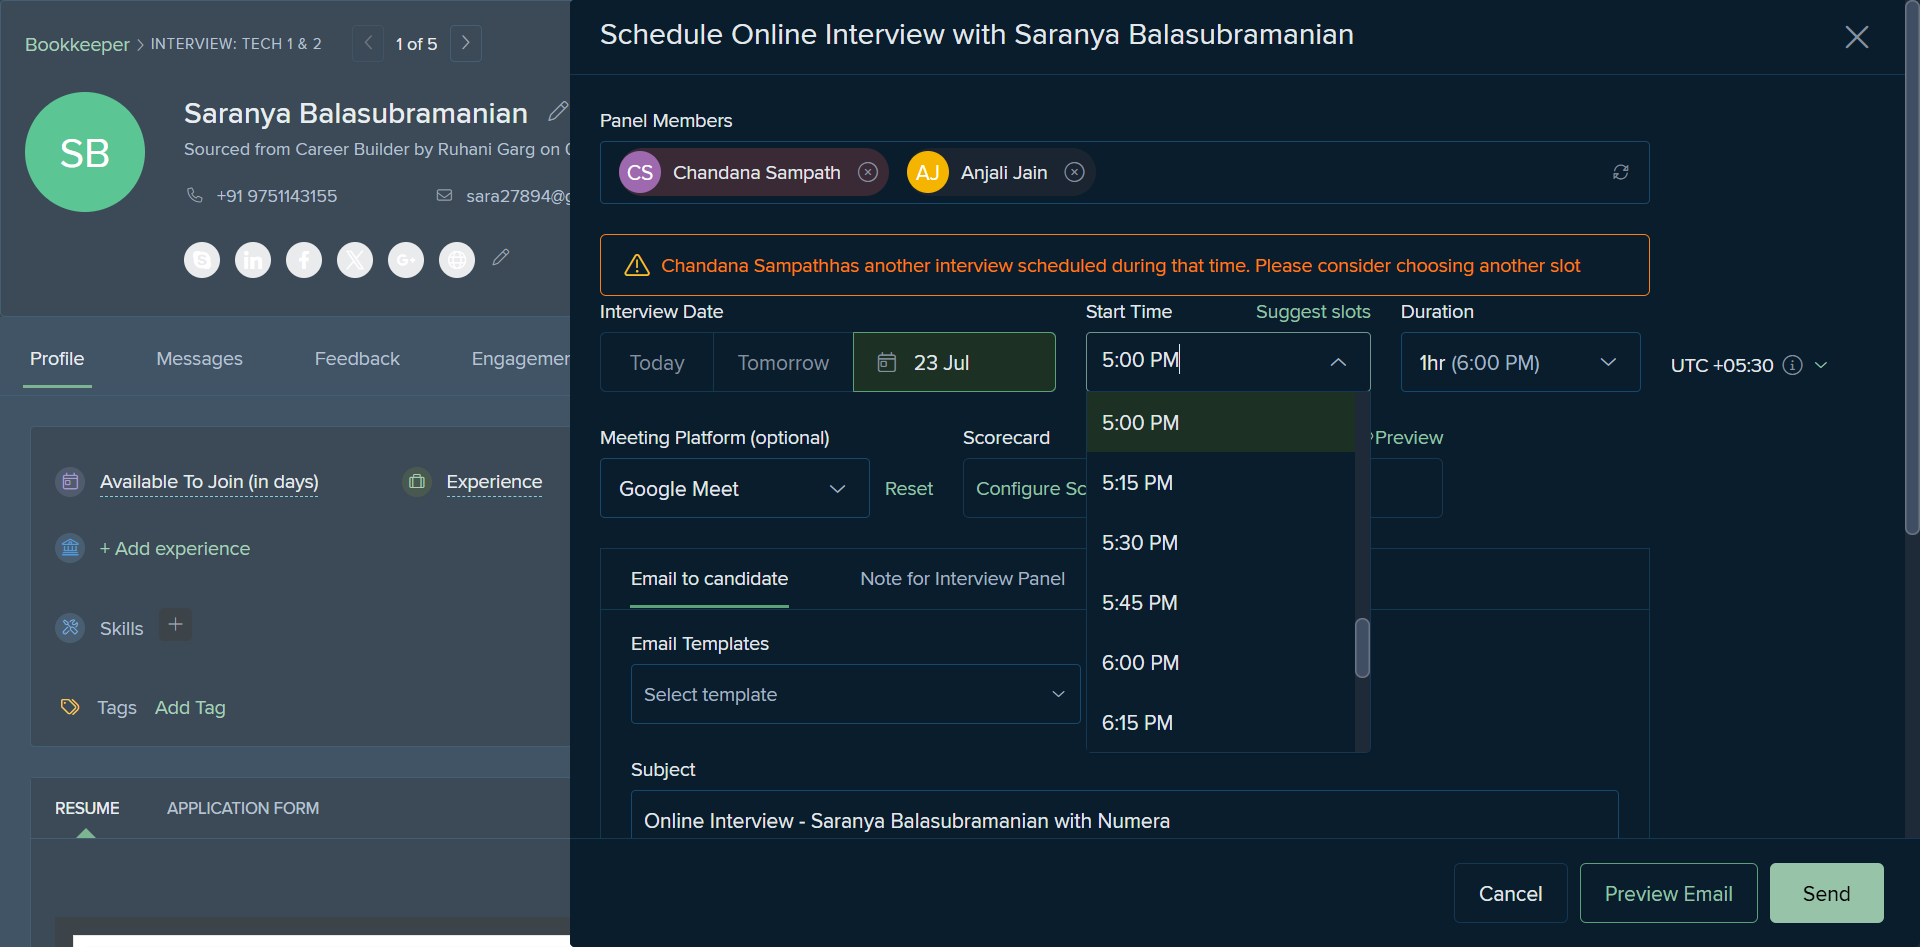
It usually takes 30 minutes.
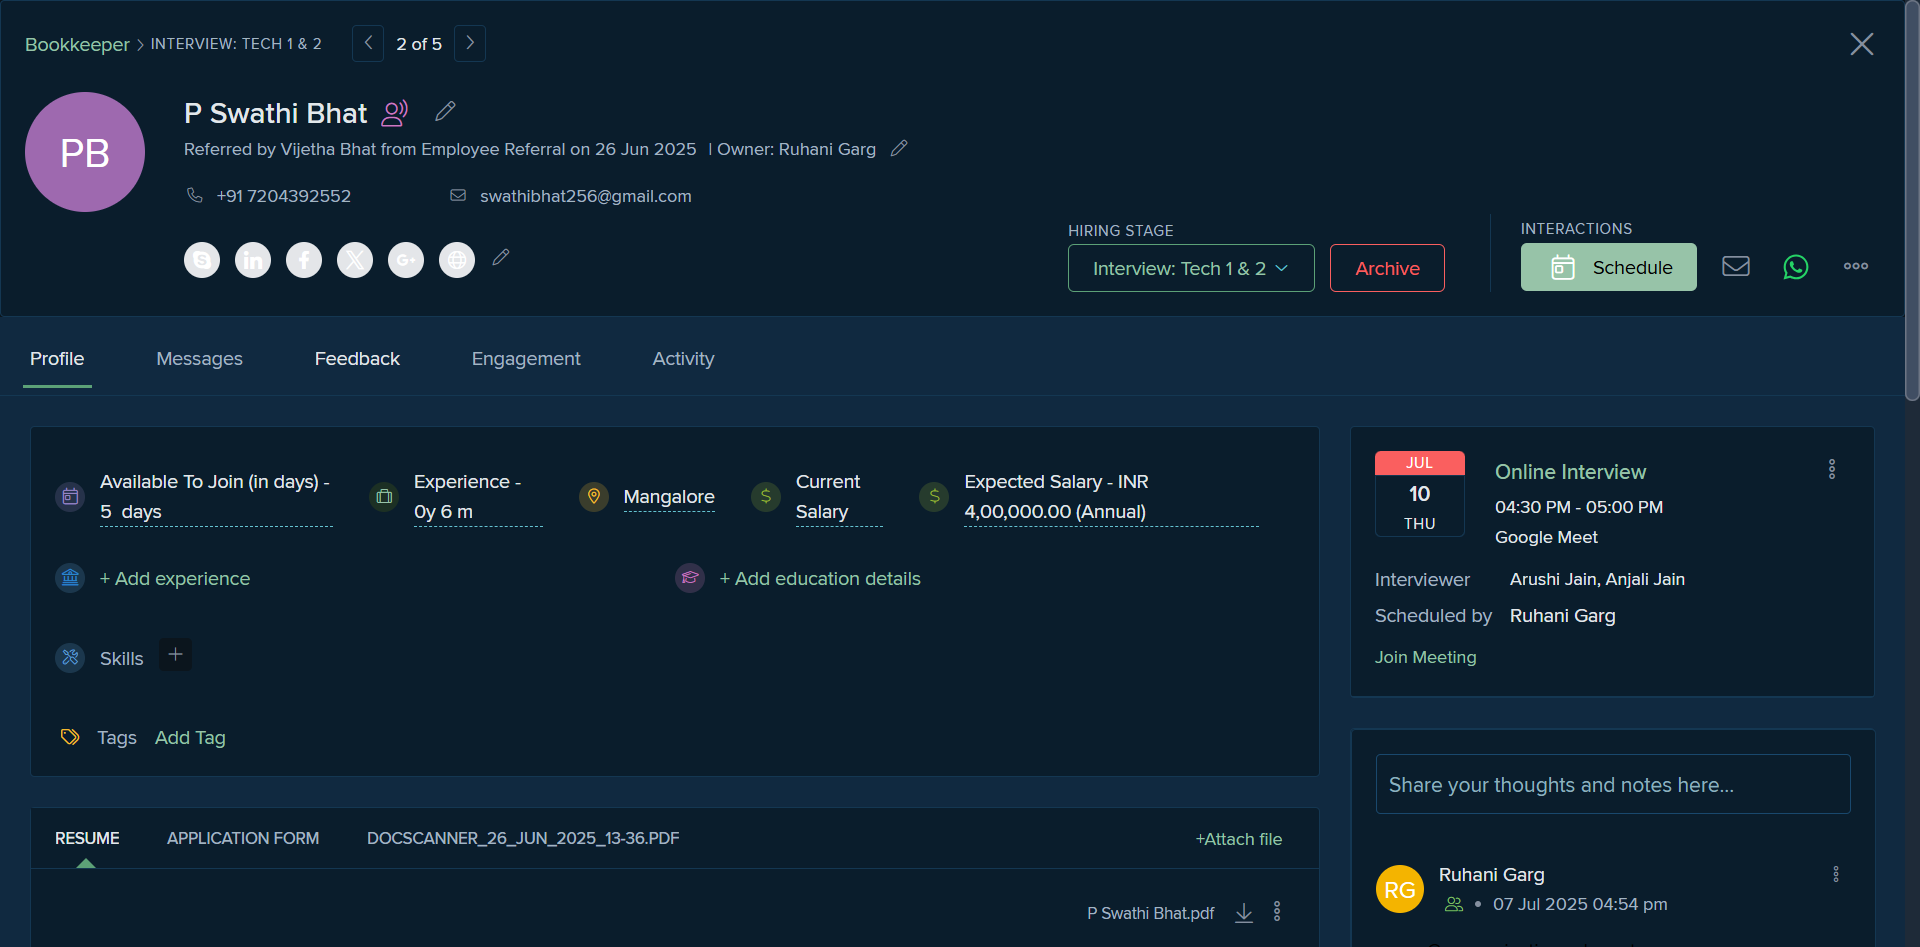
Once the interview is scheduled, you can view the candidate's interview details. This includes the interview panel name and the recruiter's name.
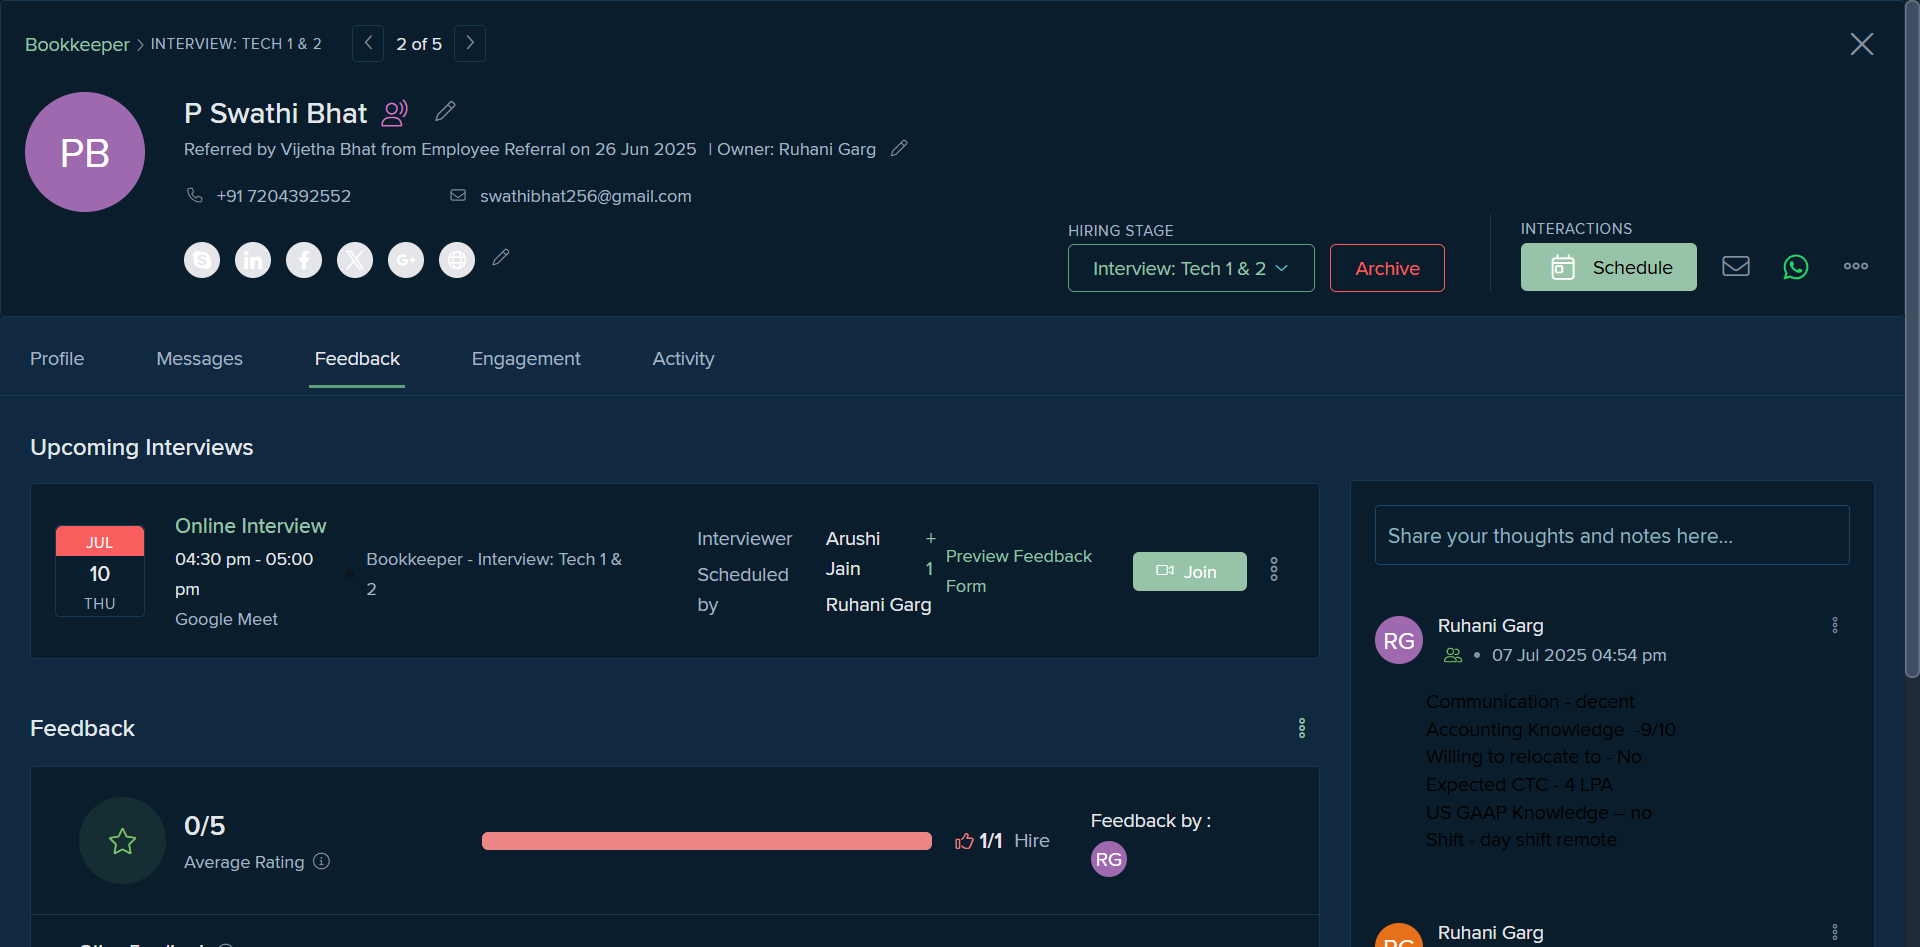
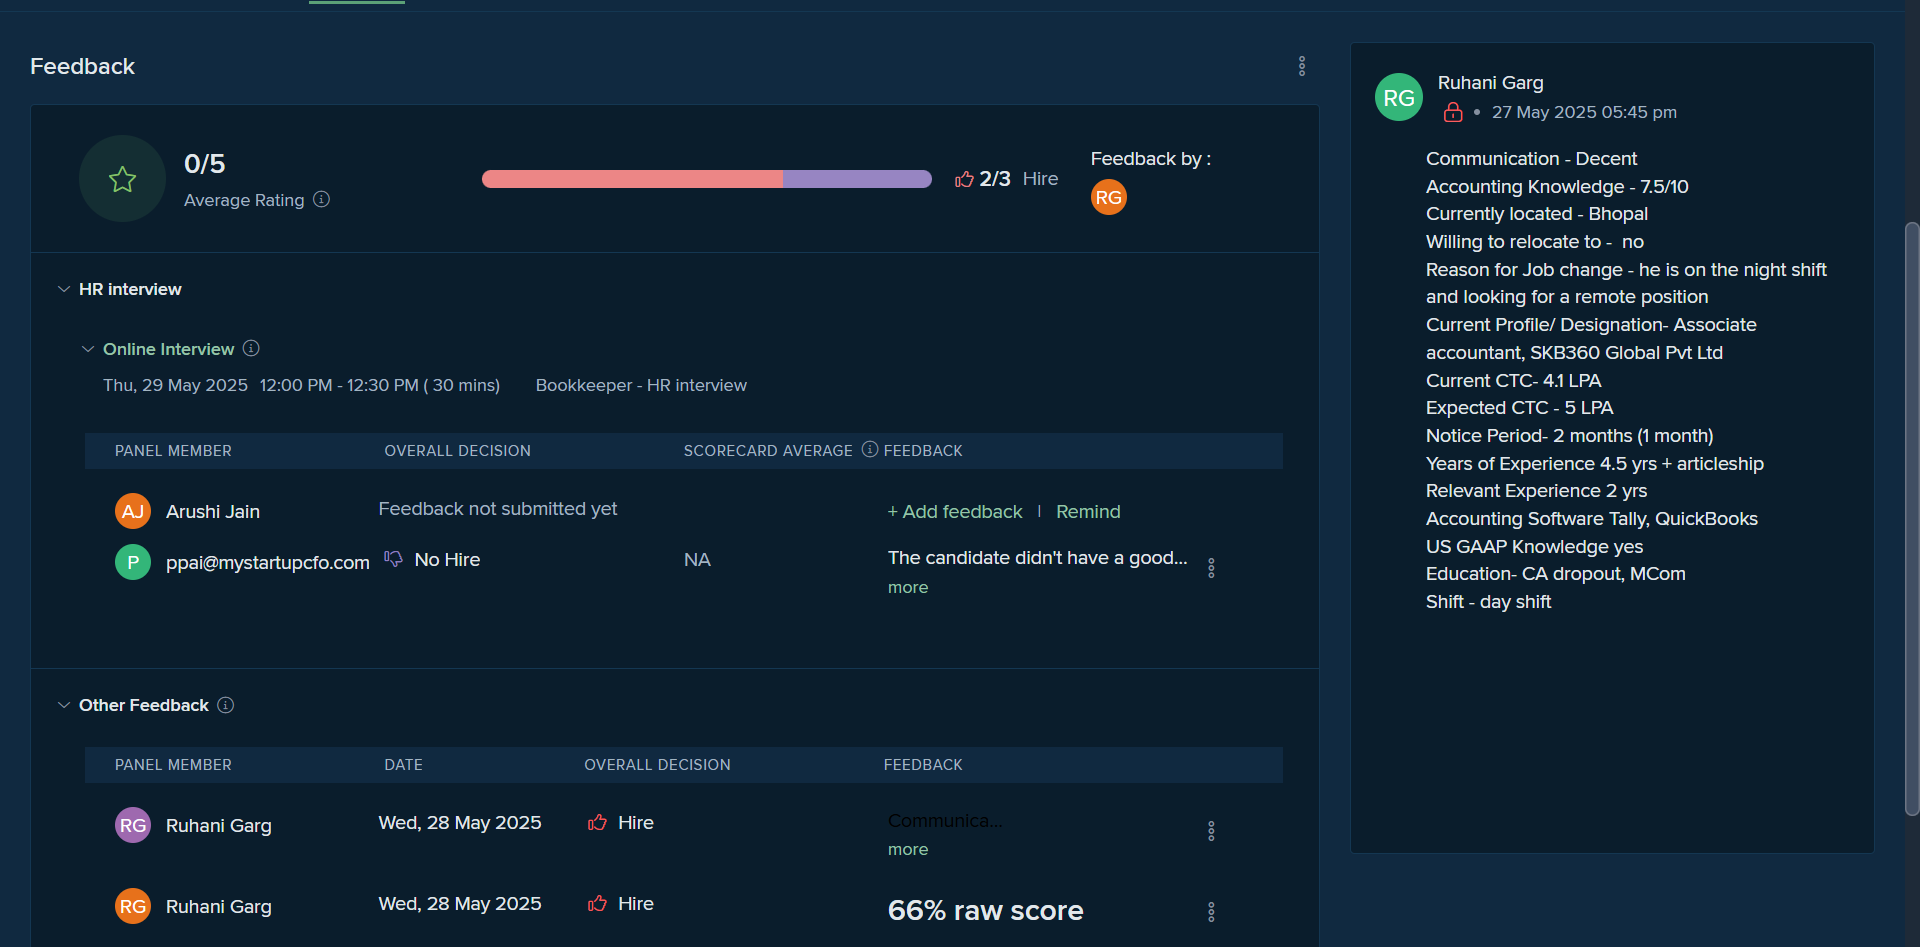
All feedback, from the HR round to TestGorilla, can be mentioned under this feedback column.
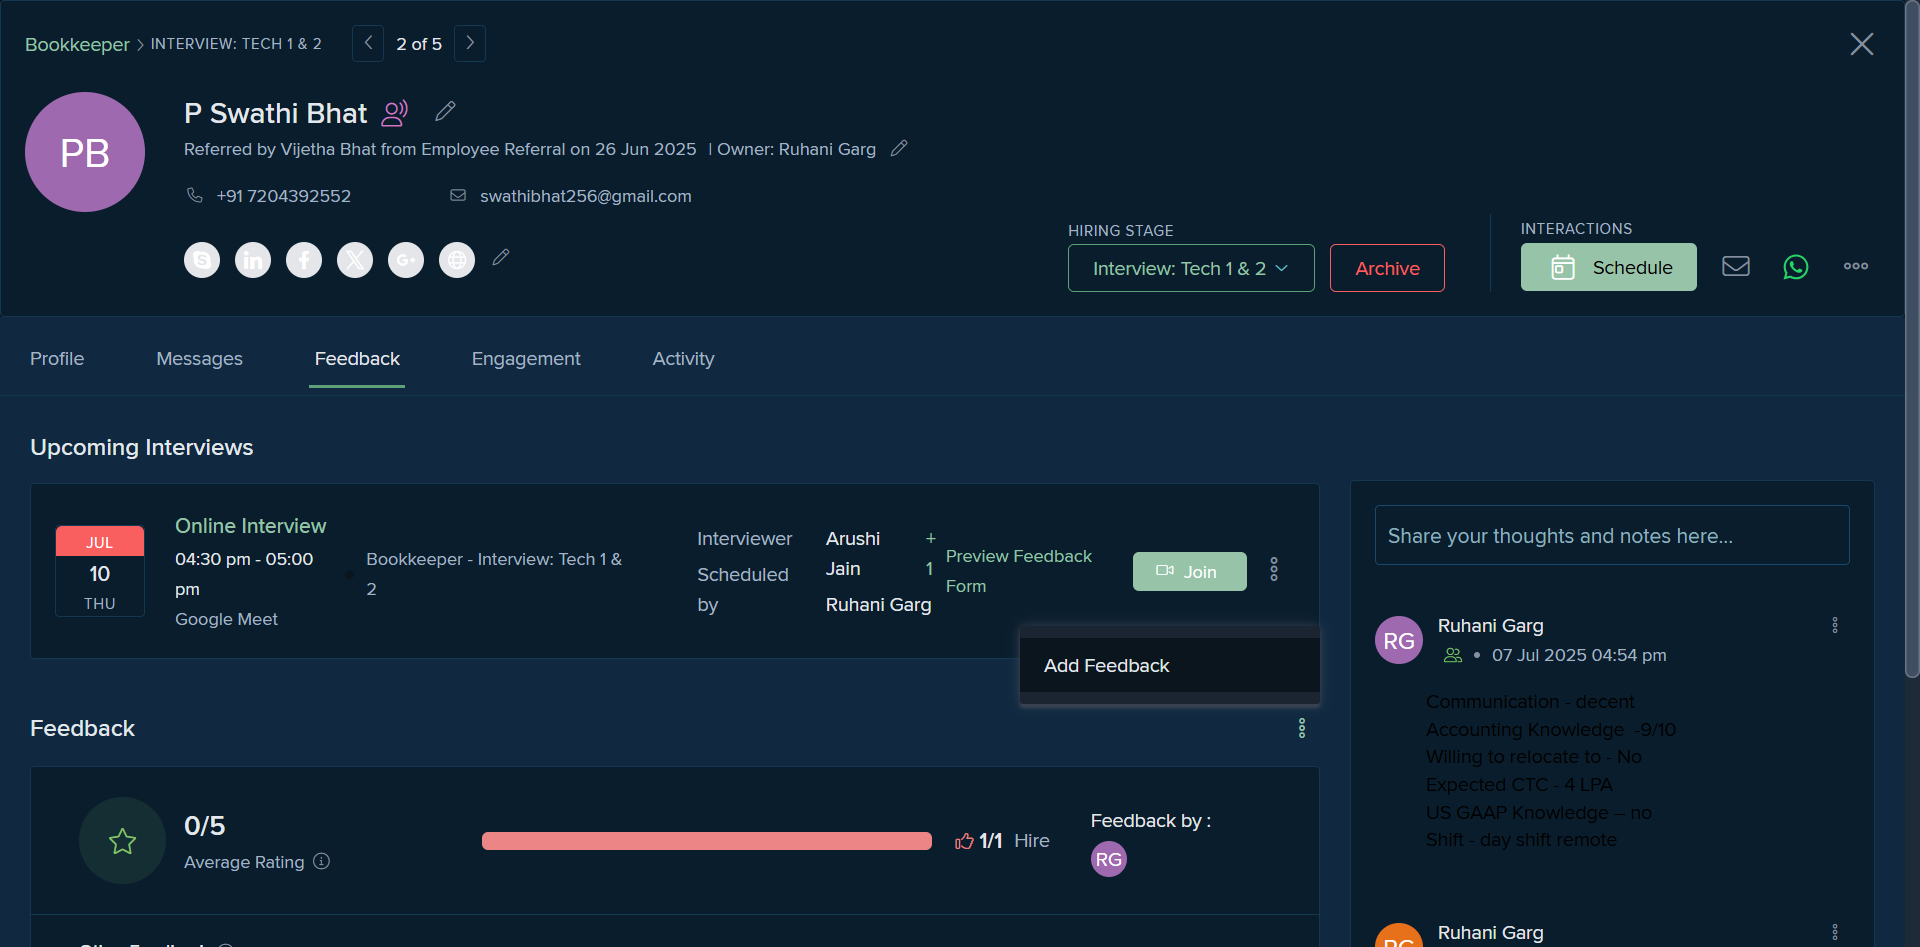
Click on the three dots.
We select "Add Feedback."
We have multiple options: Hire, Not Sure, Average, Must Hire, and we can manually enter any feedback we have.
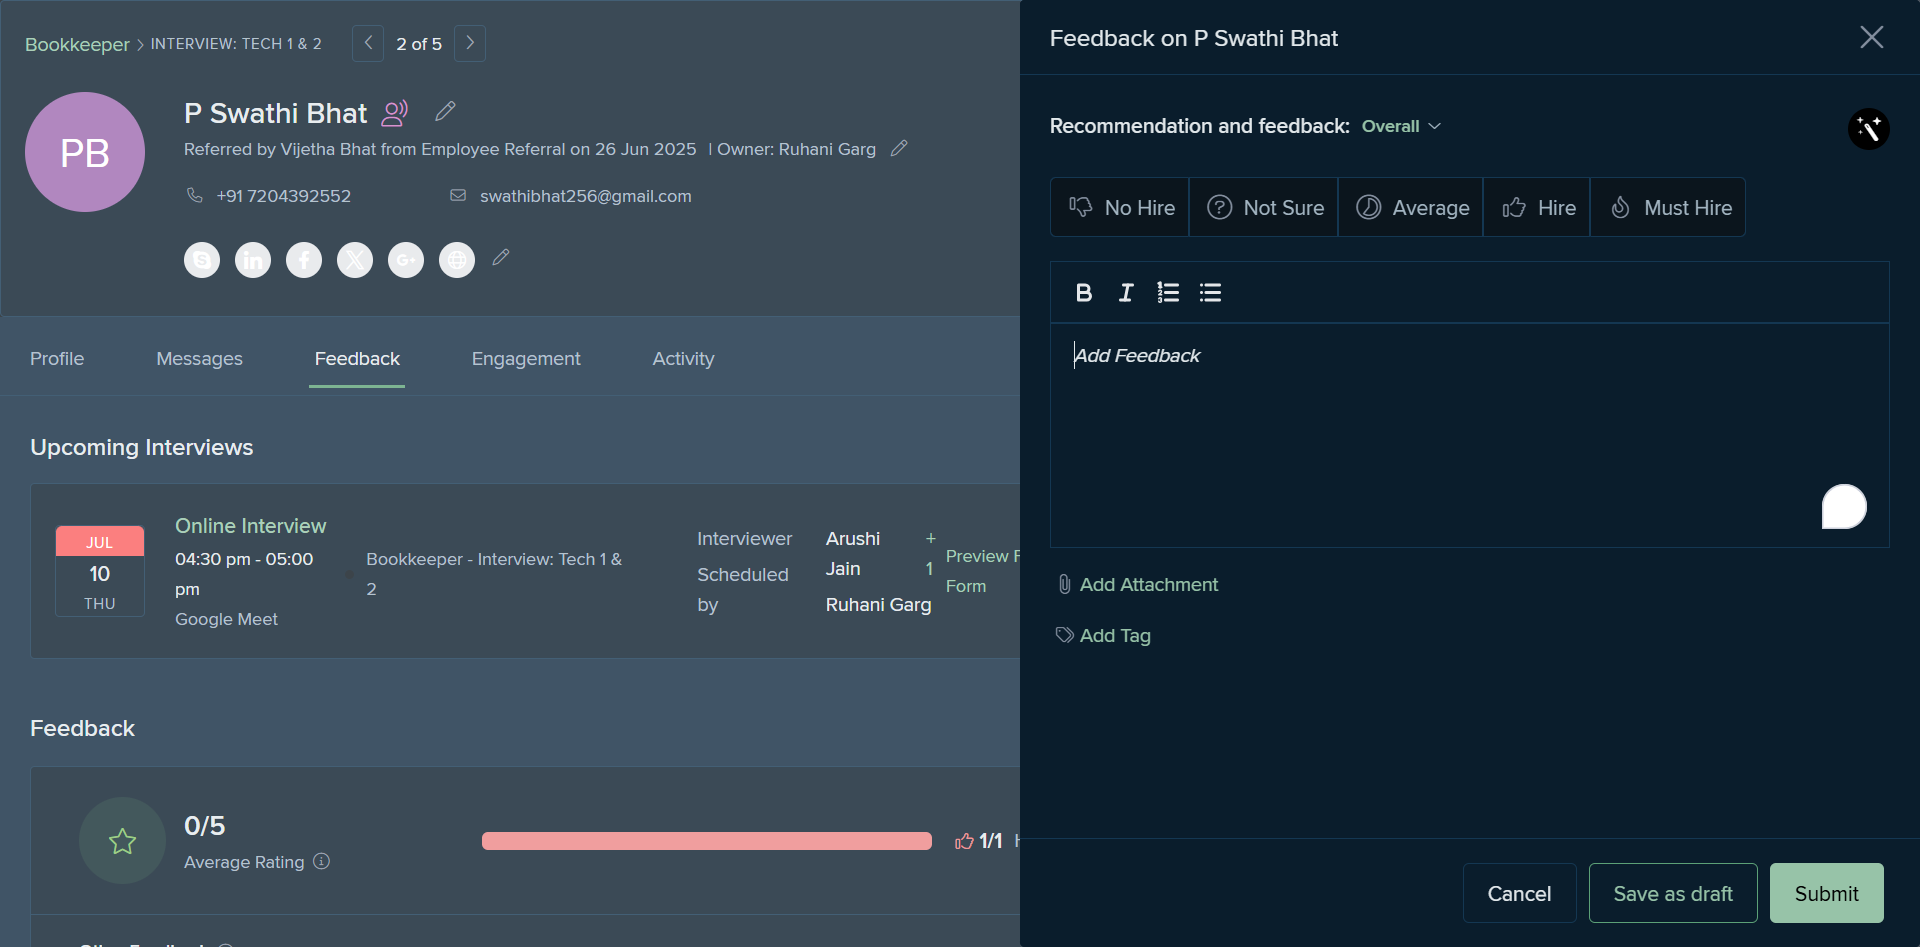
We have an additional attachment feature where you can attach any scores or necessary documents for this role, and then click Submit. Similarly, if the panel has already shared their feedback or the profile was previously rejected, you can address that as well.
You can see all the panel's interview feedback here.
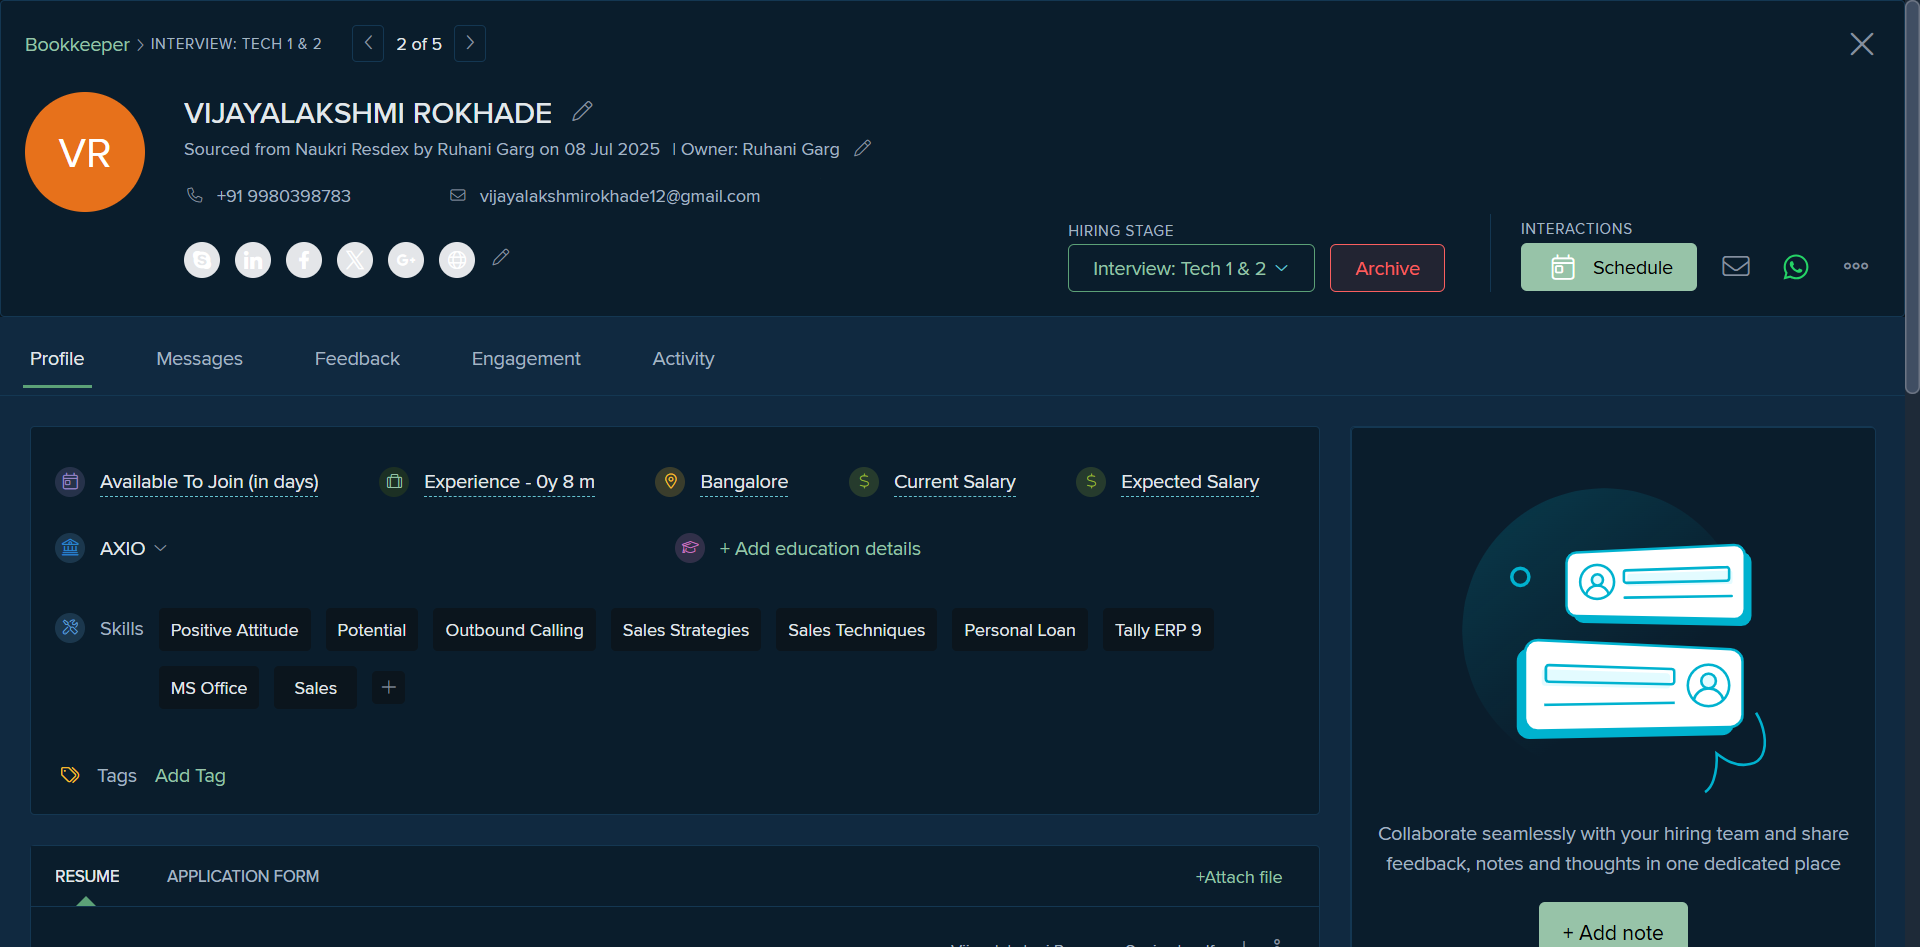
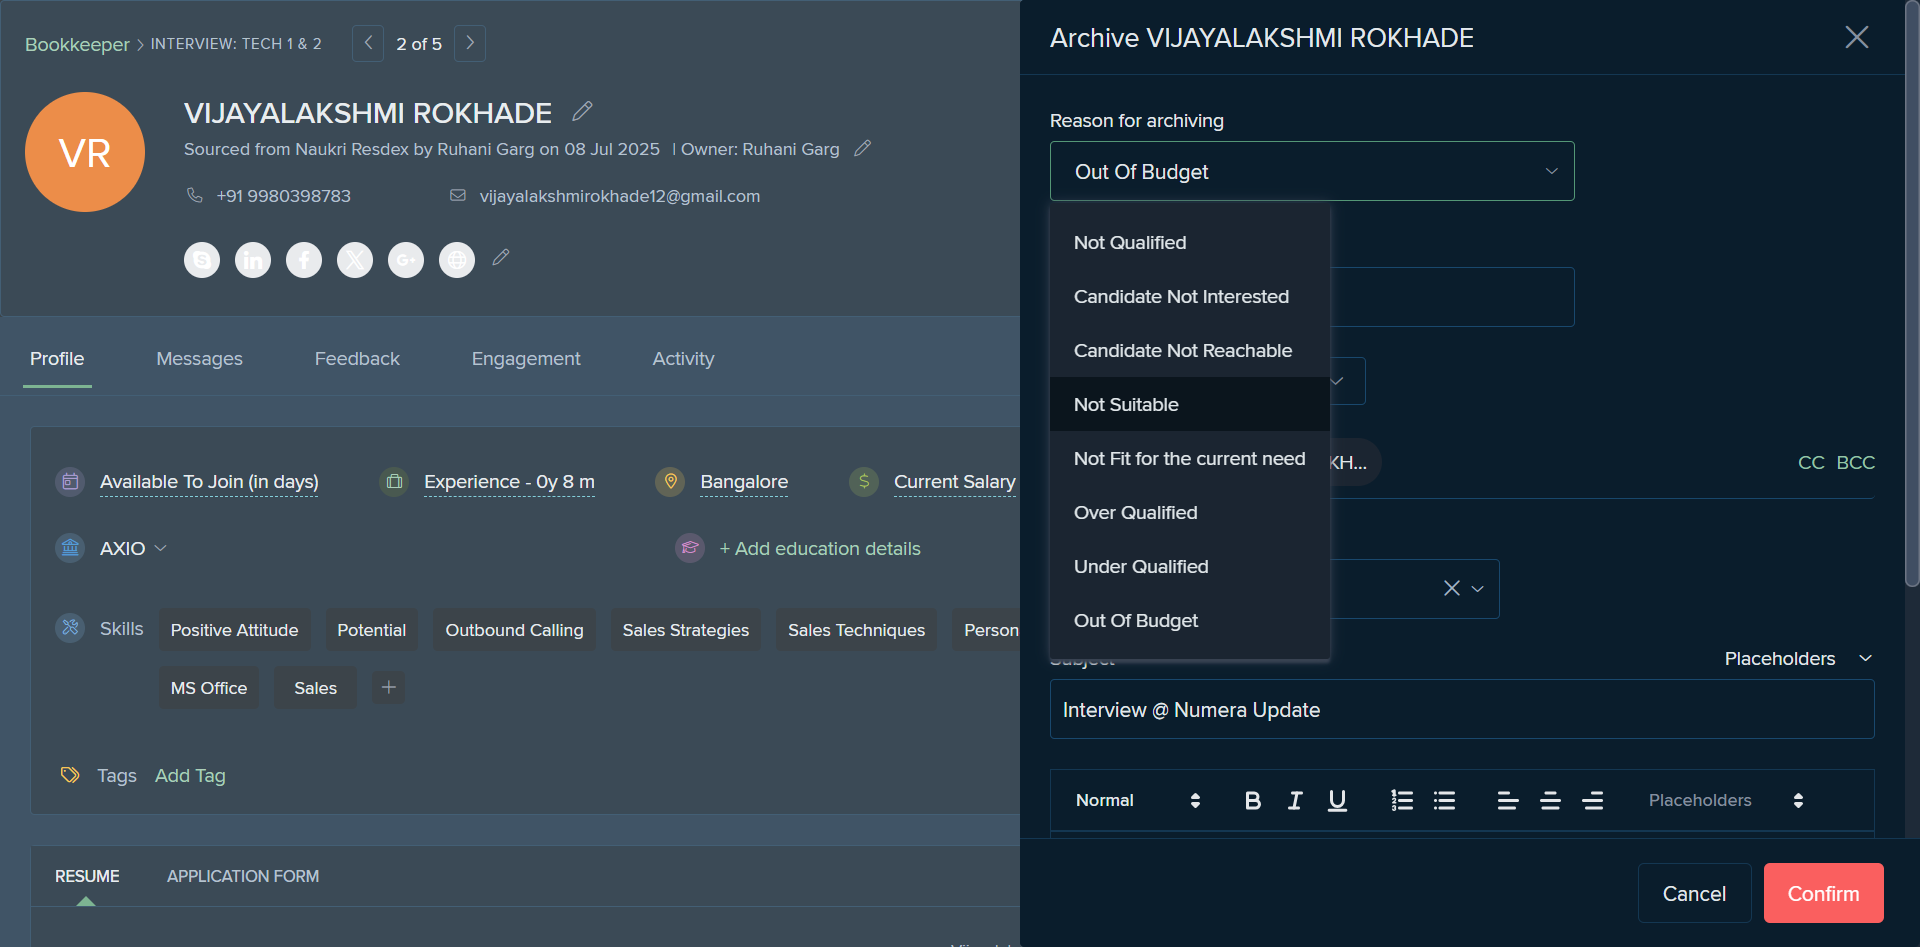
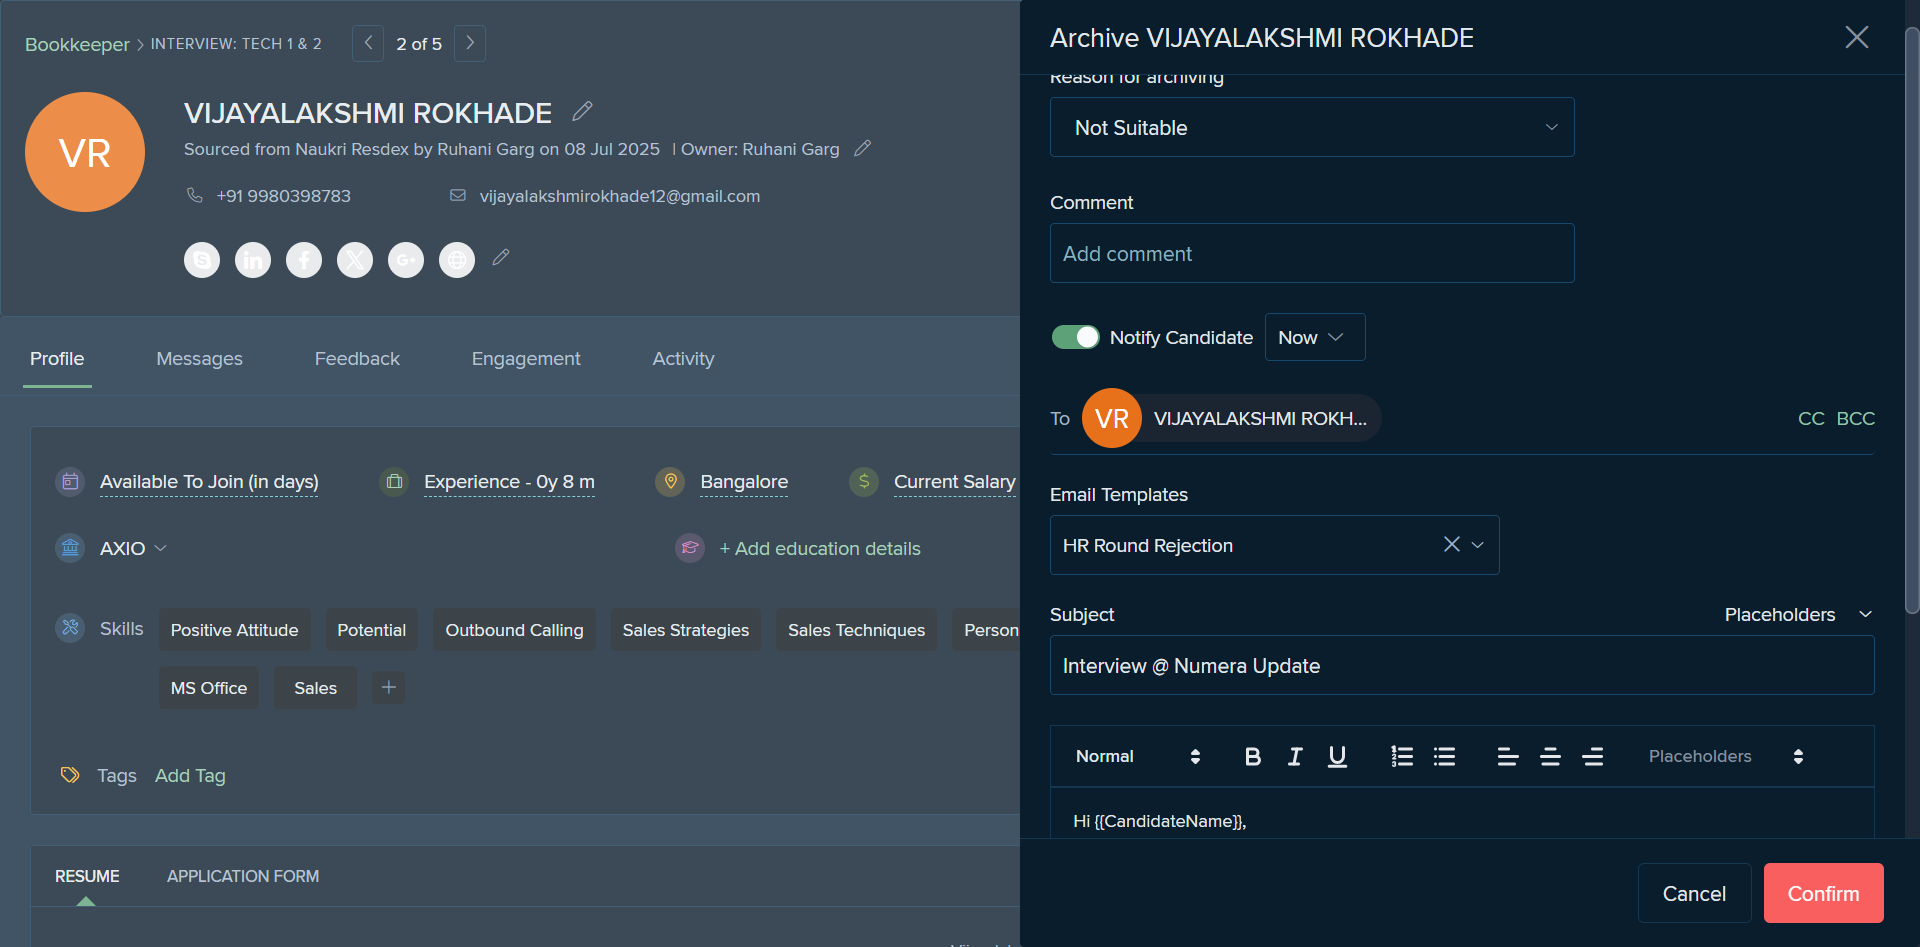
Let's consider the scenario where we need to reject this specific profile.
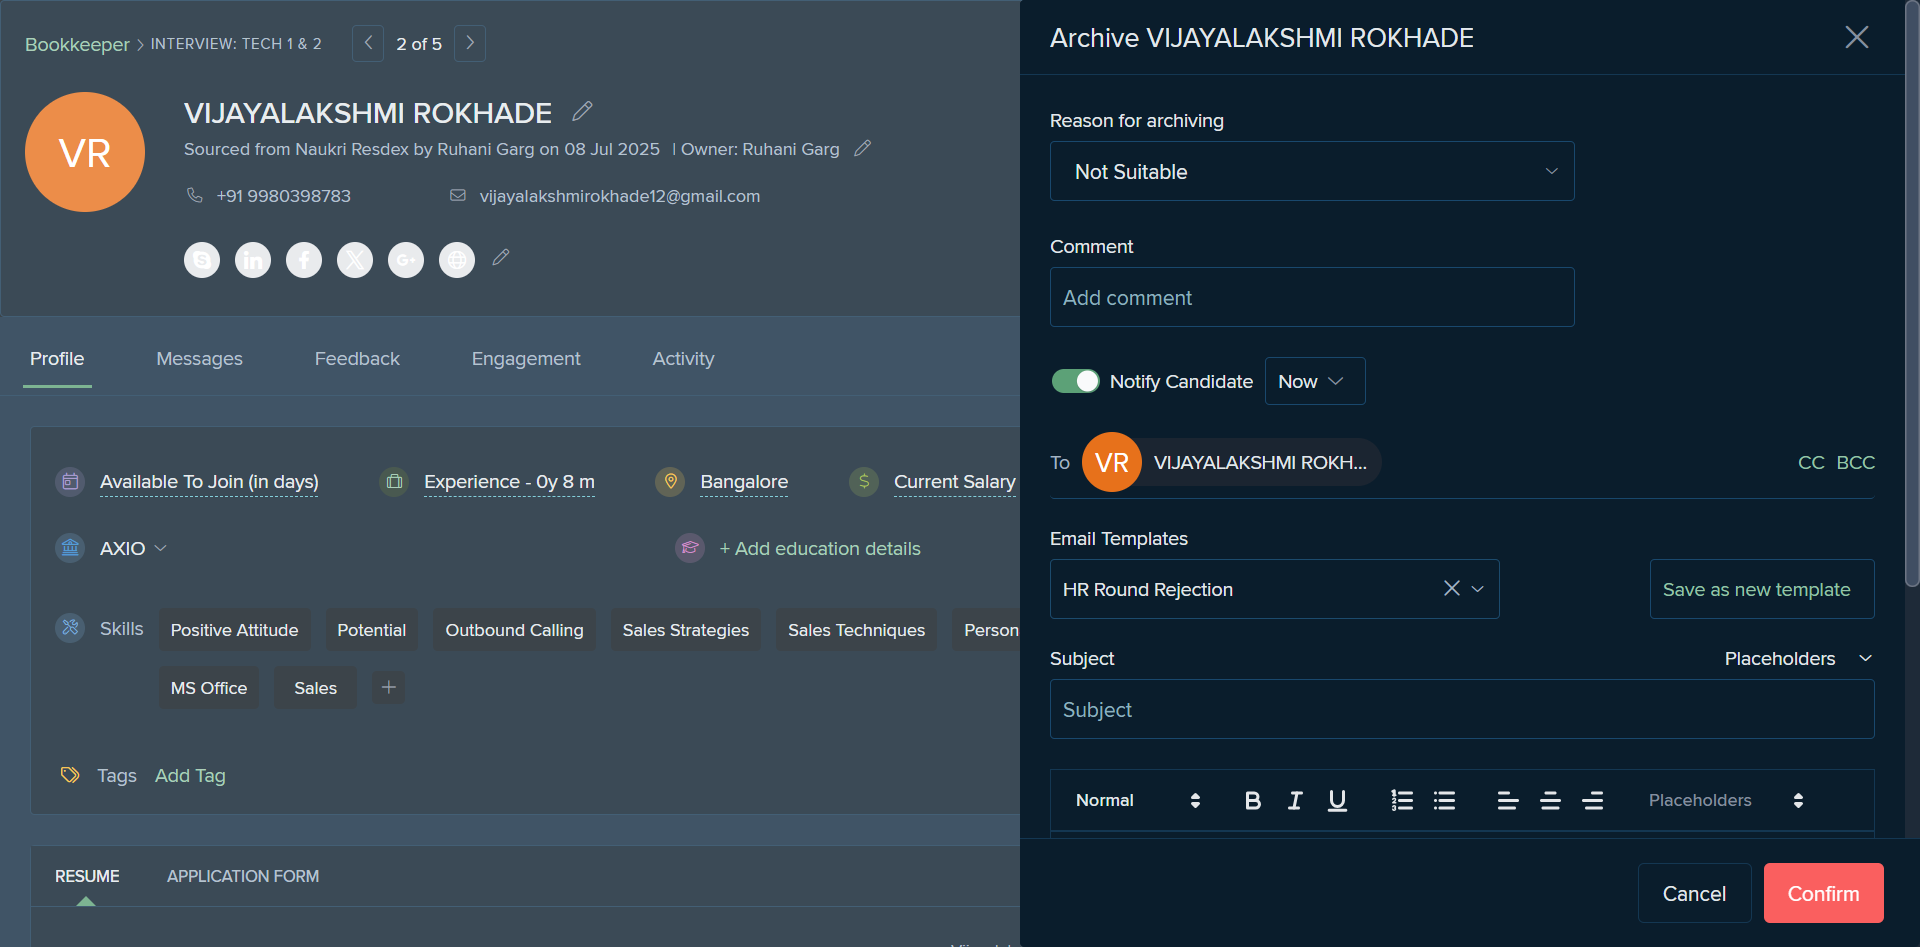
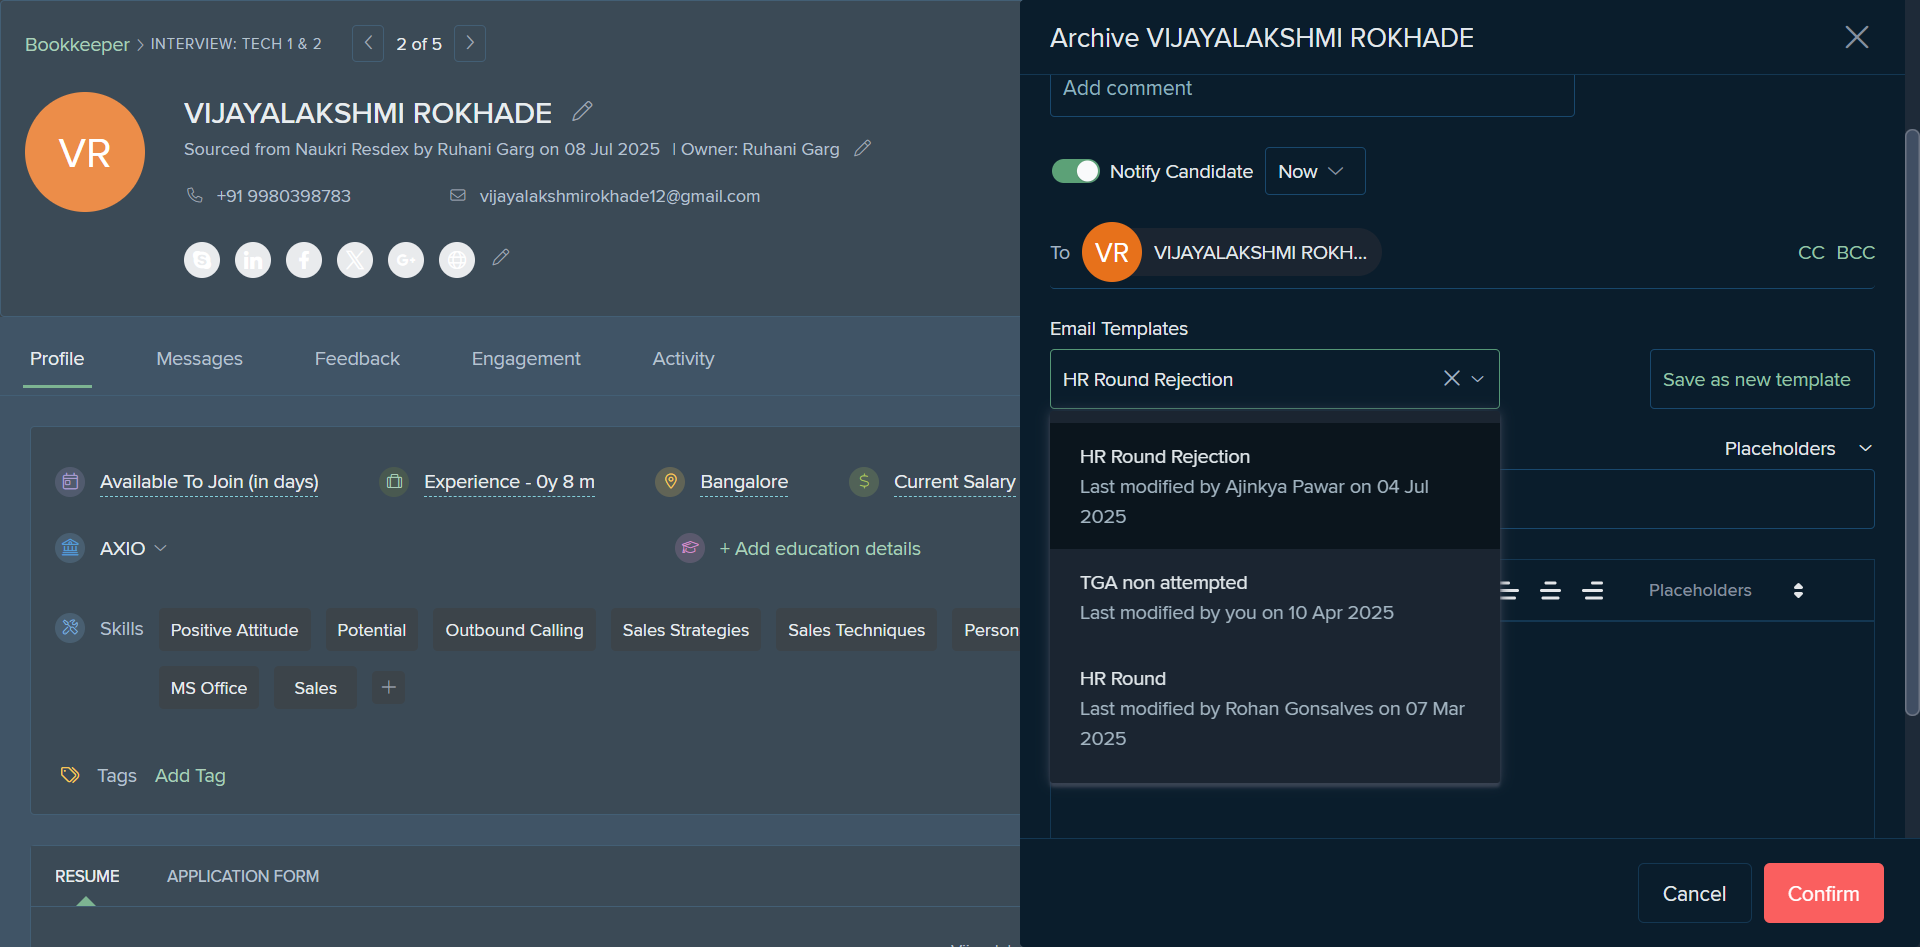
We have the option to Archive. Whether the reason is "Not Qualified," "Candidate Not Interested," or "Not Suitable," it should be clearly stated. We select that option, and here we have different templates: HR Round, Assessment Not Attempted, and HR Round Reject. We can select it, and it will be sent to the candidate. If you don't want to notify the candidate, you can deselect this option and confirm.
Let's consider a scenario where a specific profile has...
The feedback was average, and you're unsure if you want to move forward with this profile at this time. We also have a feature to put that specific profile on hold. If the candidate is selected, we move directly to the pre-boarding stage after the final round.
This is the basic process for progressing through the different stages of the interview.
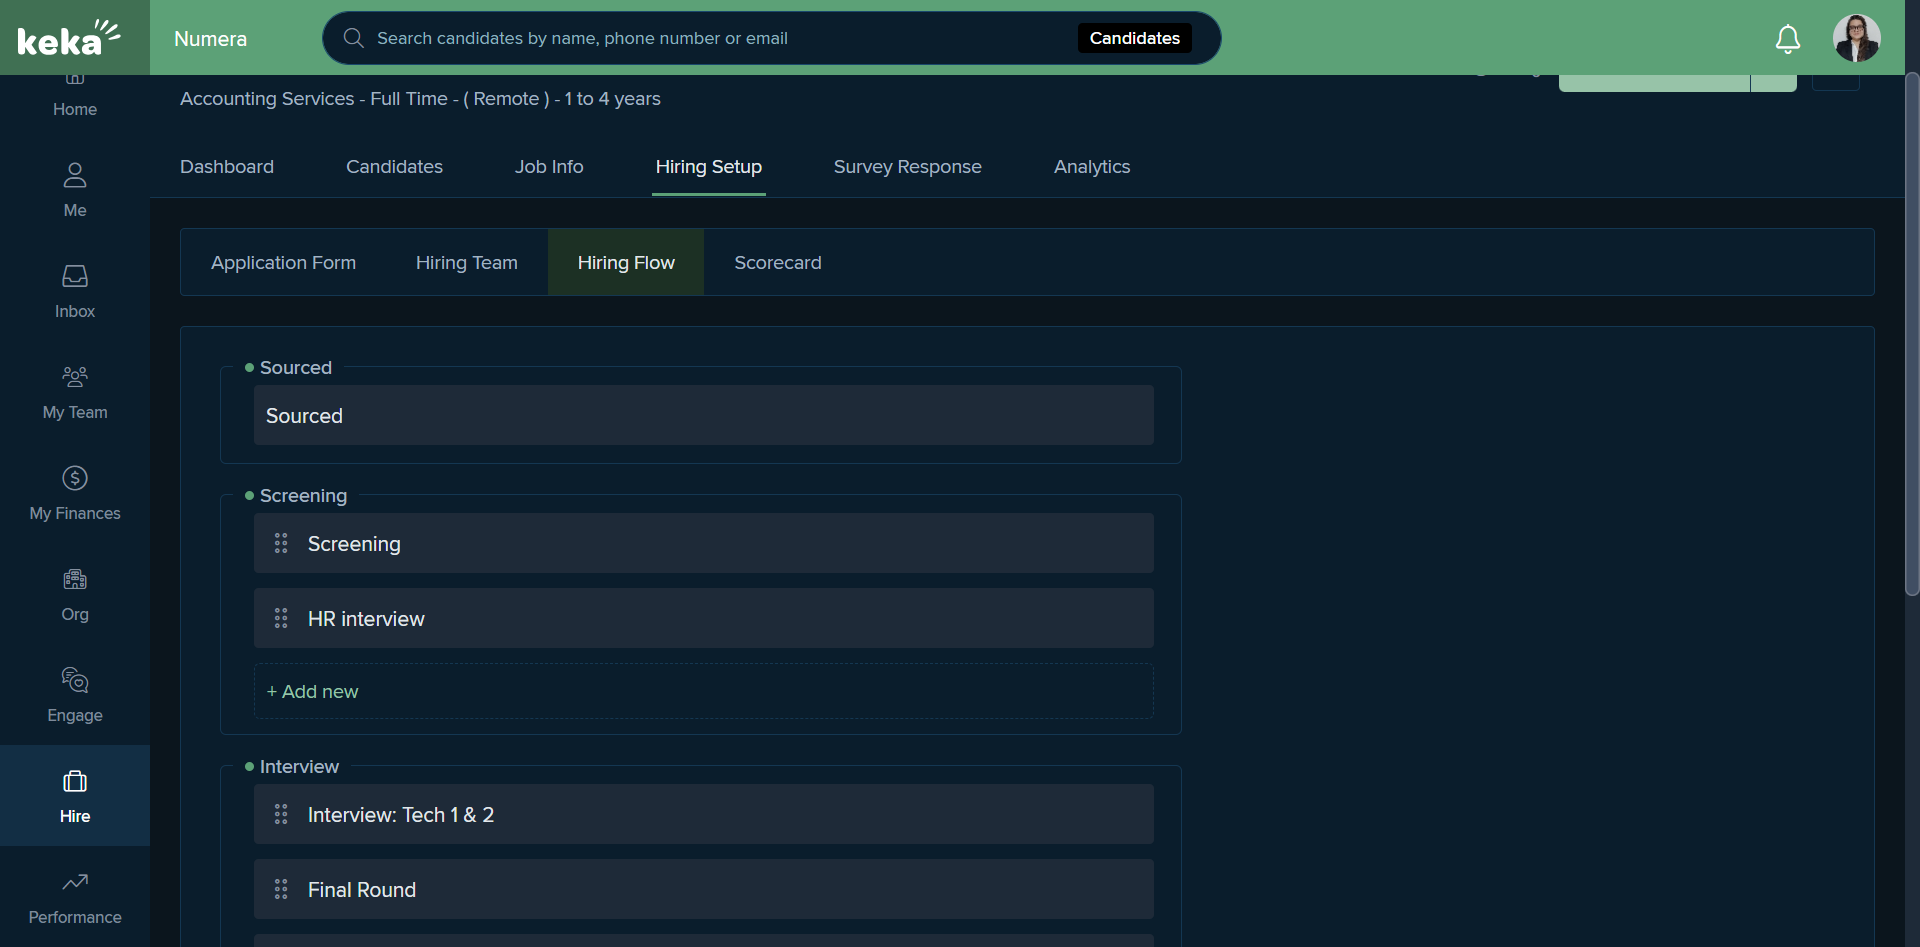
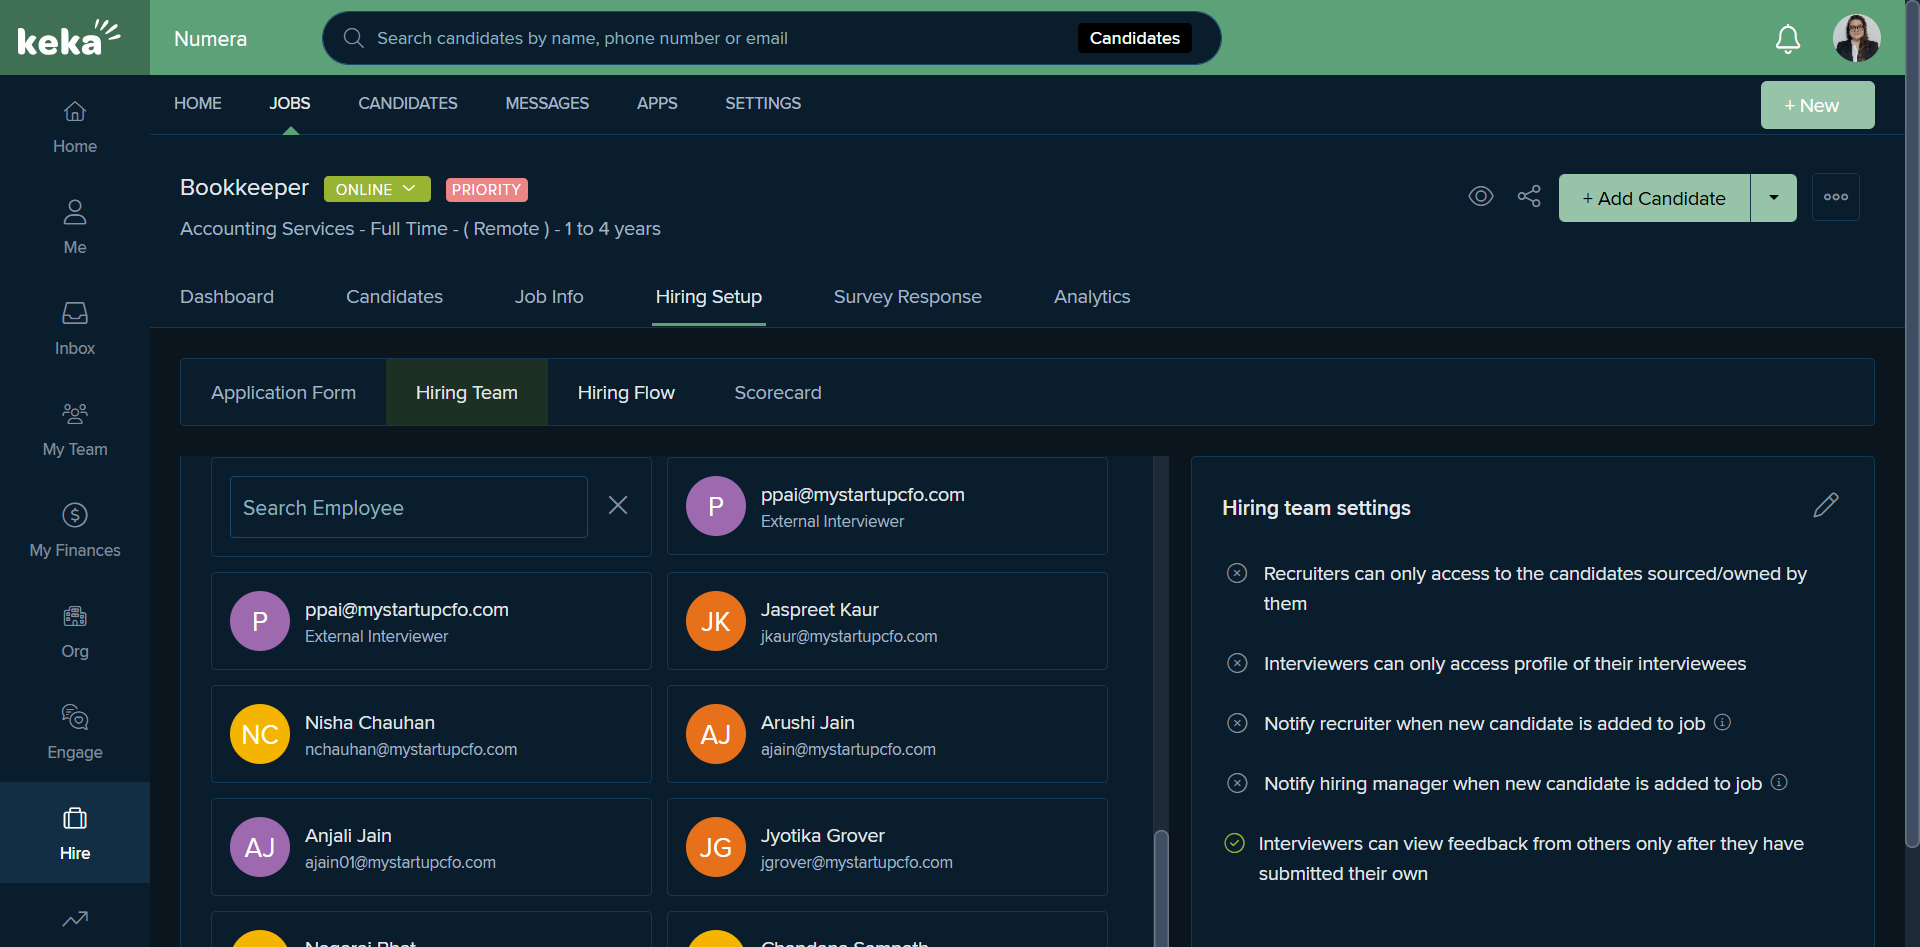
As a recruiter, we have various hiring setups and internal adjustments we can make. For example, if we need to change the hiring process or add a specific recruiter, here's what to do.

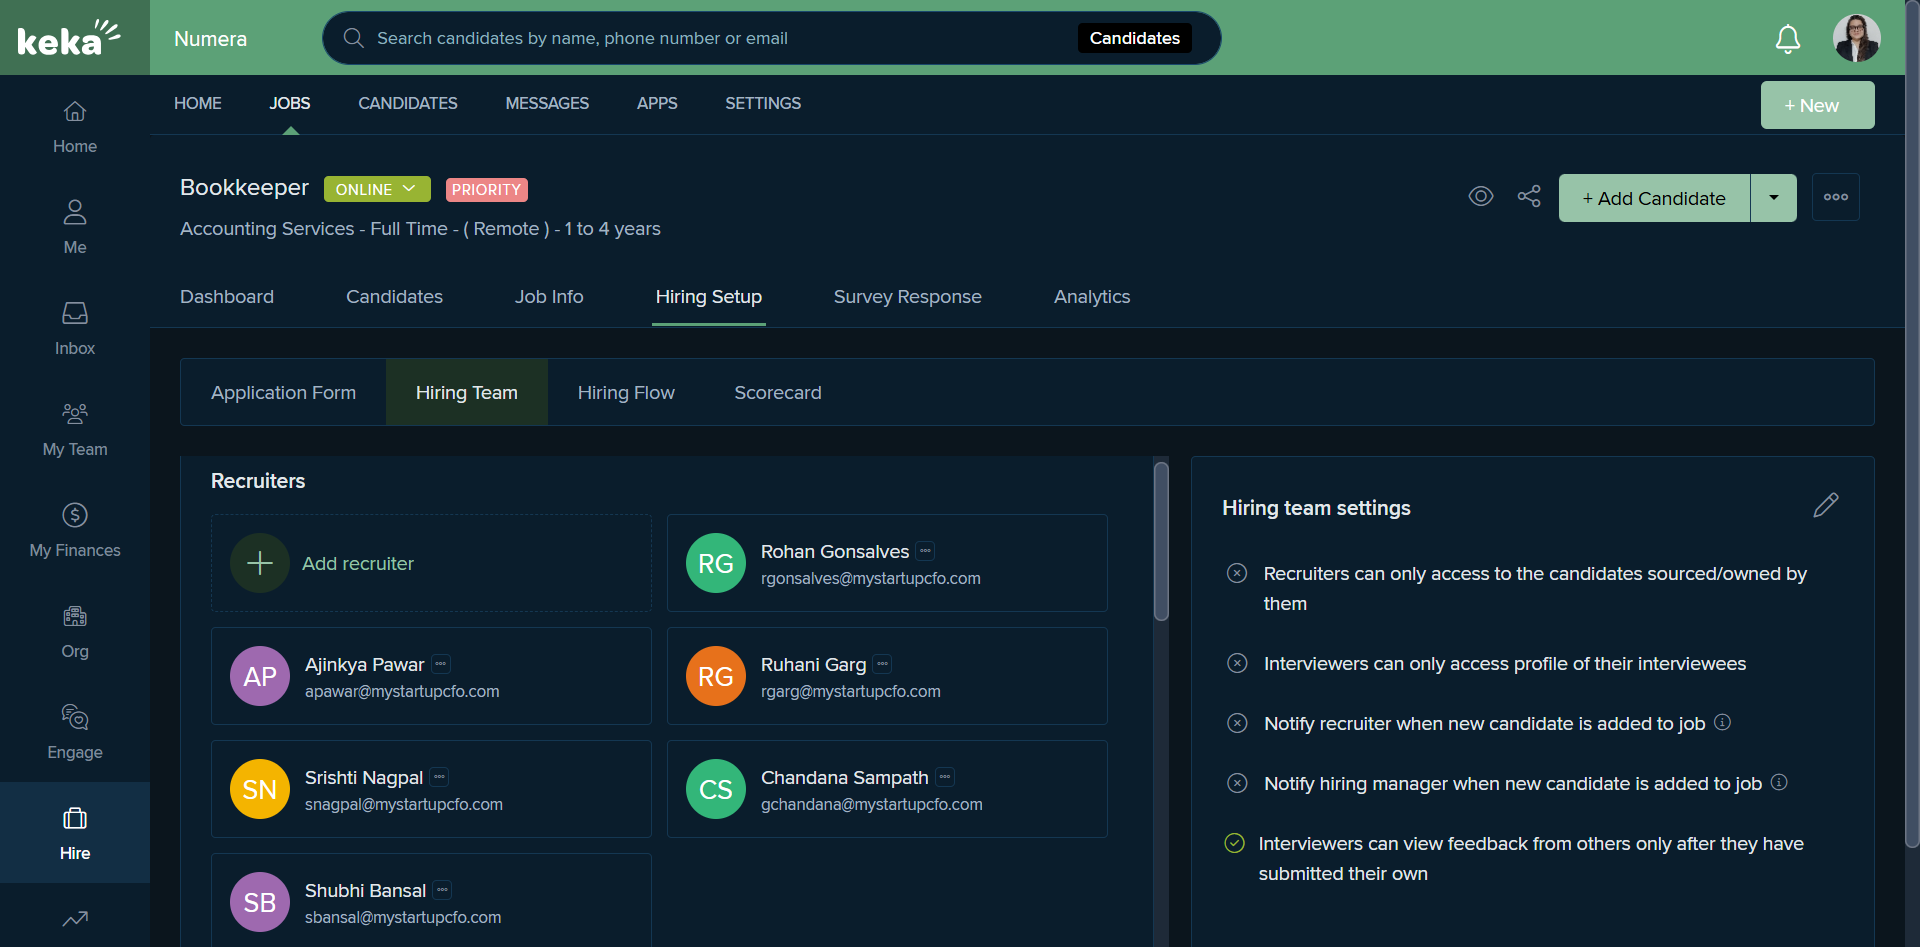
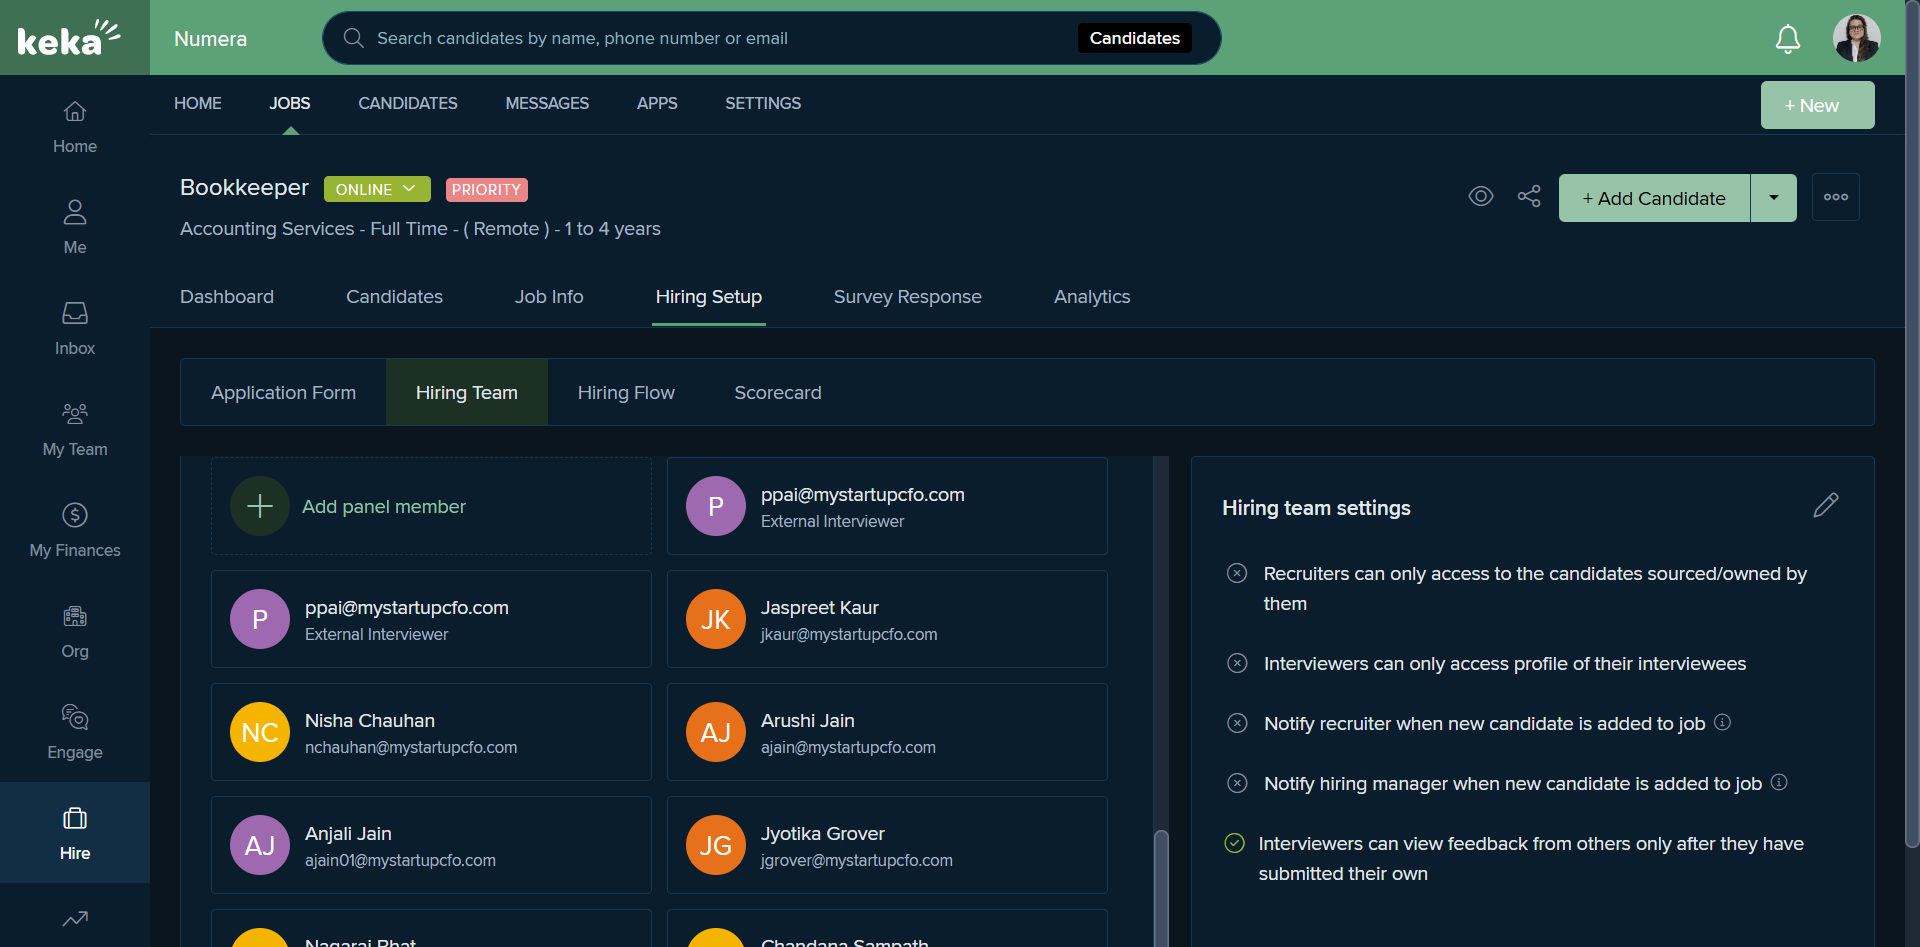
We can scroll and edit, add any position or stage, and delete as well.