
How to Filter Transactions by Status: A Step-by-Step Guide
Learn how to filter transactions by their status, including categorized, uncategorized and matched transactions. This guide explains how to view and differentiate transactions based on their status.
By Aasma Technology Solutions
In this guide, you will learn how to filter transactions by their status. You will see how to use status filters to view all transactions, uncategorized transactions, categorized transactions, or matched transactions. These filters help you quickly identify and manage transactions based on their current state.
Let's get started
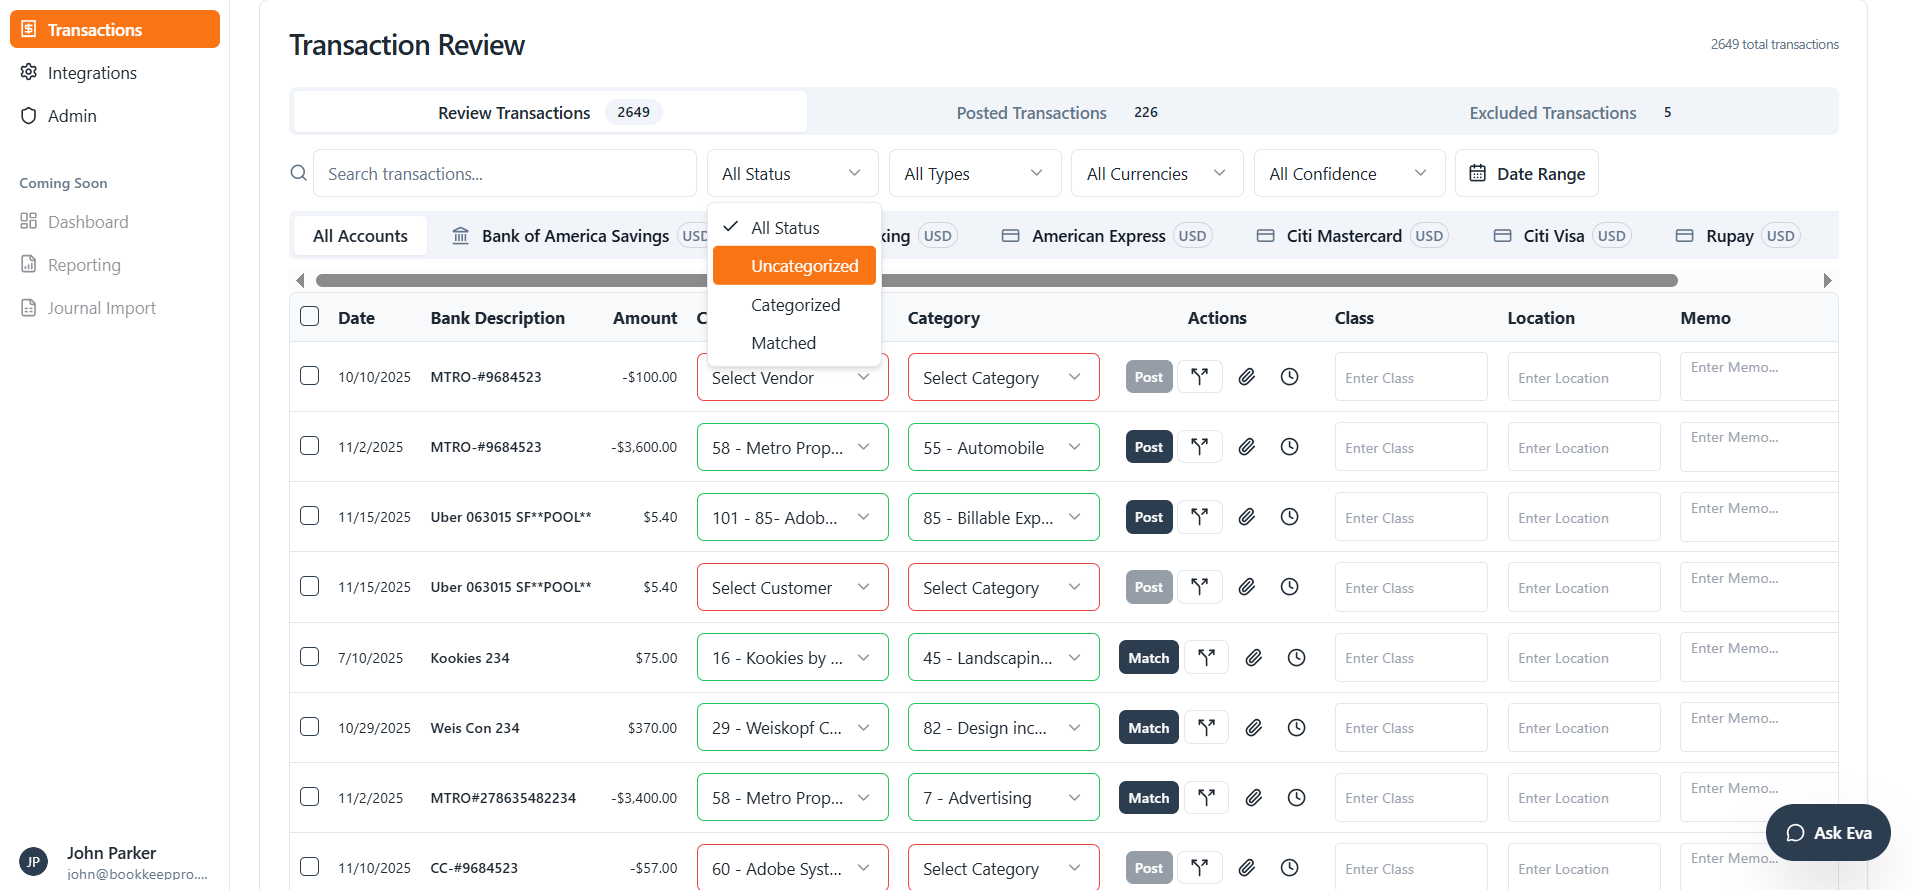
This guide explains how to categorize a transaction by its status. Clicking All Status reveals the full list of available statuses.
2
Clicking All Status reveals the full list of available statuses.
3
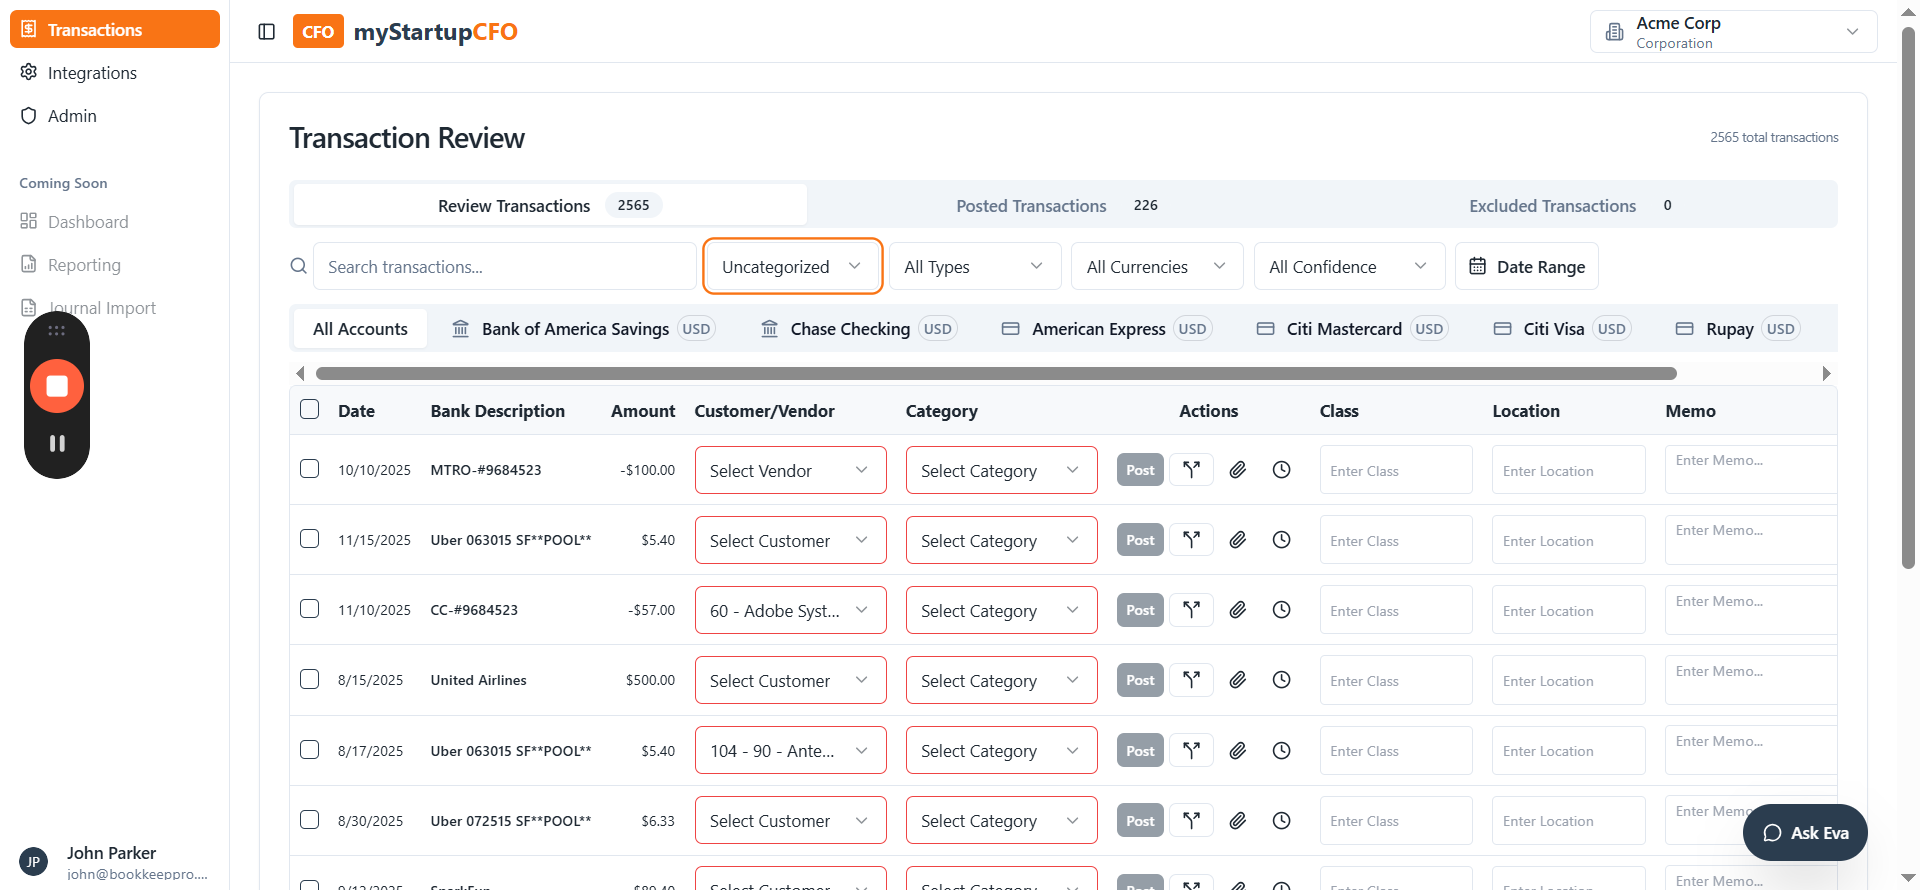
Uncategorized is selected, only transactions with the uncategorized status will be shown.
4
Categorized is selected, only transactions with the categorized status will be shown.

5
Matched is selected, only transactions with the matched status will be shown.
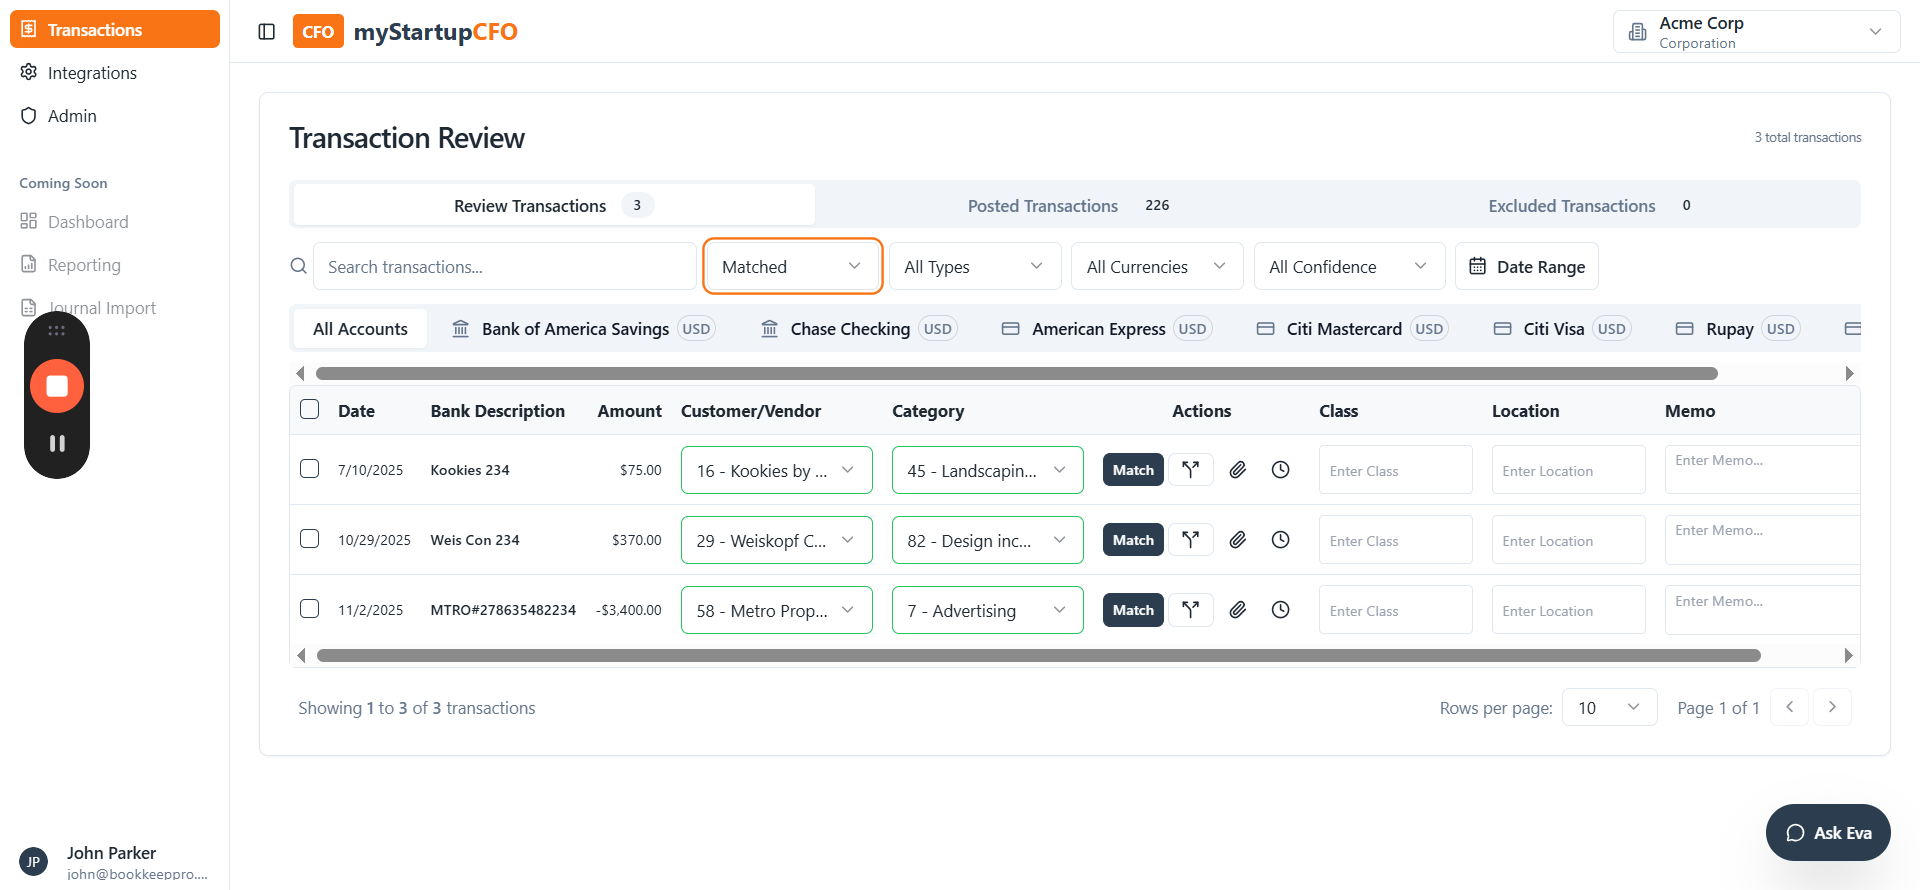
This is how you can differentiate your transactions based on their status—categorized, uncategorized, or matched. The status indicator makes it easy for users to identify each transaction at a glance.
Here, you can use the filter to view transactions by their specific status.