How to Clock In and Track Time in the Mobile App

Learn how to clock in, use the active timer for projects, and manually log past time entries in the mobile attendance dashboard.

By Asad Adams

This guide explains how to log your daily attendance, track active work time against specific projects(Activities), and manually record past time entries.

This process applies to all field and on-site employees responsible for tracking their hours during their shifts.

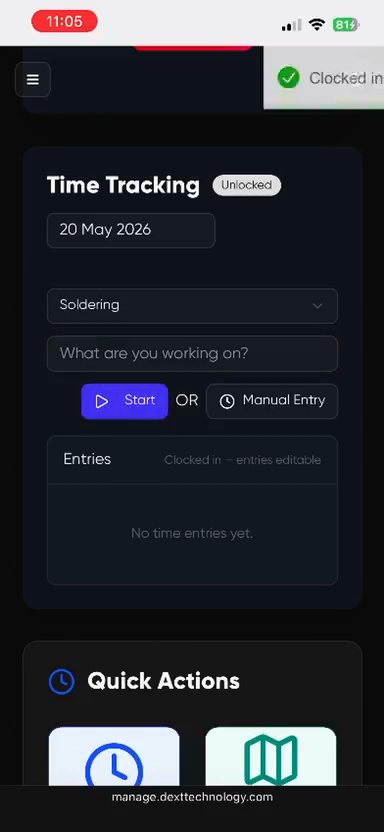
Time Tracking Options

Depending on your workflow, you can track time live or enter it after the fact.

Method

When to use

How it works

Where to find it

Active Timer

During your shift

Clocks you in and runs a live timer for your task.

"Clock In Now" dashboard

Manual Entry

After a shift

Allows you to backdate and log past hours.

Next to "Start" in the Time Tracking view

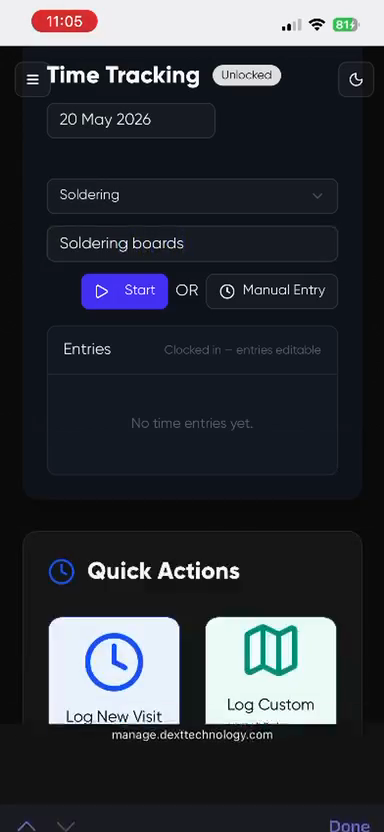
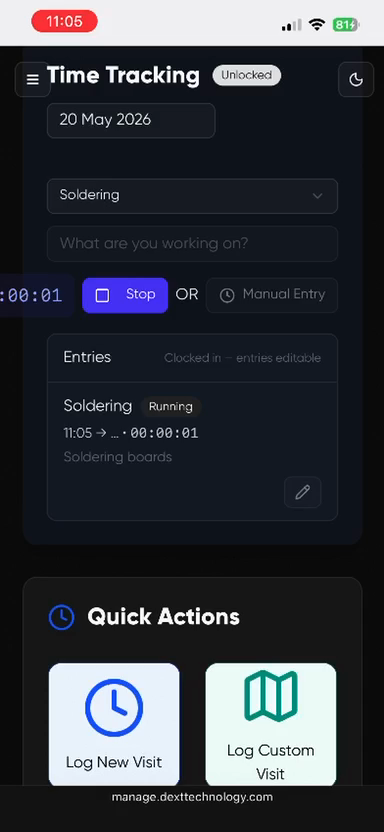
Clocking In and Using the Active Timer


NOTE: Time management is active in between clock in & clock out Times

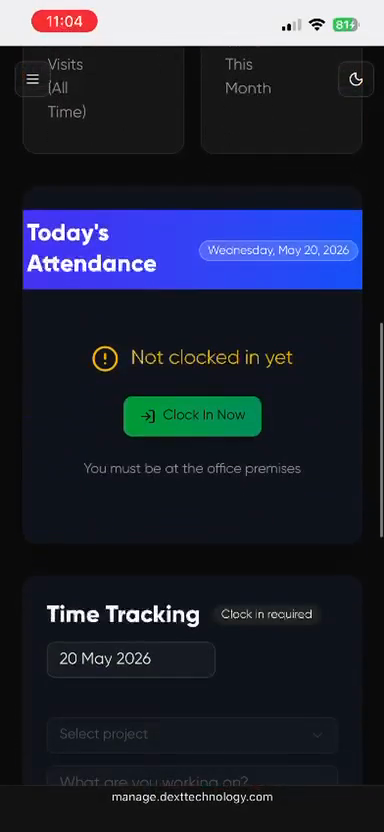
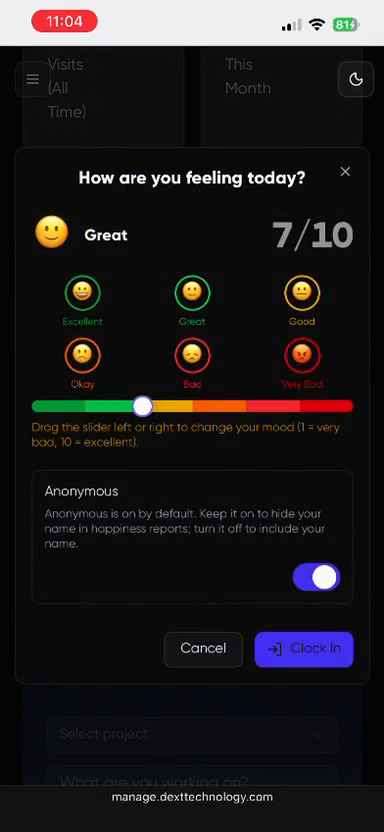
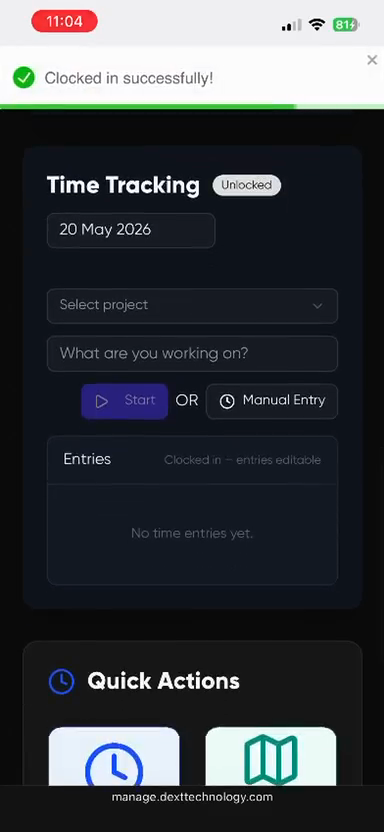
To start your day, use the main dashboard to clock in and begin tracking your first task.

1
Tap the Clock In Now button on the main dashboard.
Step #1: Tap the Clock In Now button on the main dashboard.
2
Optionally adjust the mood slider to share how you're feeling, then tap Clock In at the bottom of the modal.
Step #2: Optionally adjust the mood slider to share how you're feeling, then tap Clock In at the bottom of the modal.
3
Tap Allow if prompted by your device to grant location permissions.
Step #3: Tap Allow if prompted by your device to grant location permissions.
4
Tap the Select project dropdown and choose your assigned project (e.g., Soldering).
Step #4: Tap the Select project dropdown and choose your assigned project (e.g., Soldering).
5
Tap the What are you working on? field and type a brief description of your task, such as "Soldering boards".
Step #5: Tap the What are you working on? field and type a brief description of your task, such as "Soldering boards".
6
Tap the Start button to begin the live timer.
Step #6: Tap the Start button to begin the live timer.
7
When you finish the task or need to take a break, tap the Stop button.
Step #7: When you finish the task or need to take a break, tap the Stop button.

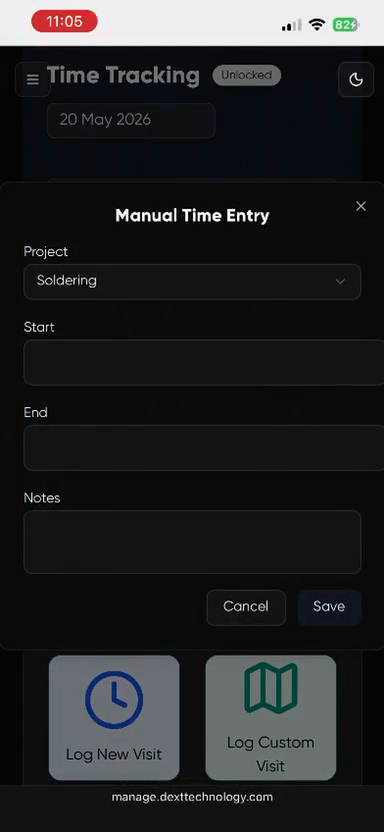
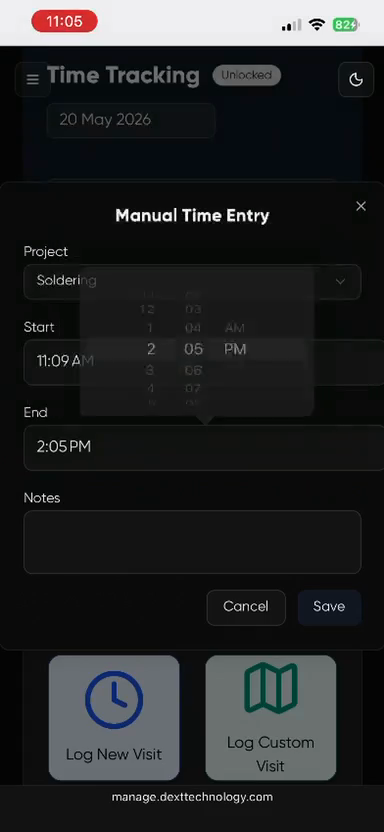
Adding a Manual Time Entry

If you forgot to start your timer or need to log hours retroactively, use the manual entry option instead.

8
From the Time Tracking interface, tap Manual Entry.
Step #8: From the Time Tracking interface, tap Manual Entry.
9
Tap Start, use the time picker to set your starting time, and tap Done.
Step #9: Tap Start, use the time picker to set your starting time, and tap Done.
10
Tap End, adjust the time dials (including the AM/PM toggle) to reflect when you finished, and tap Done.
Step #10: Tap End, adjust the time dials (including the AM/PM toggle) to reflect when you finished, and tap Done.
11
Review your project and notes, then tap Save to submit the manual entry.
Step #11: Review your project and notes, then tap Save to submit the manual entry.

FAQ

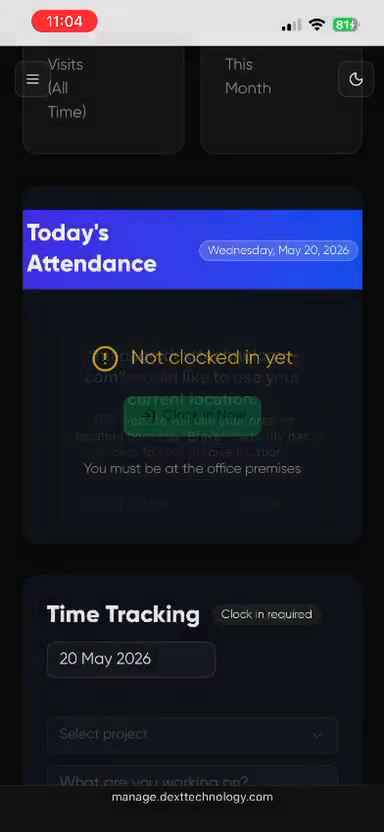
Q: Why am I prompted to allow location access?

A: The app uses geofencing to ensure employees are physically on-site when clocking in. Your location is only pinged at the moment of clock-in and is not continuously tracked.

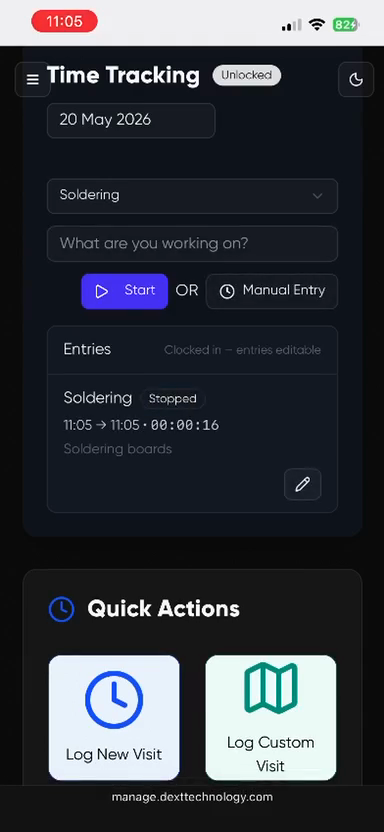
Q: What if I forget to stop my timer?

A: You can manually edit the time entry after the fact. Stop the timer, then edit the logged block or use the Manual Entry feature to log the actual time you stopped working.

How to Clock In and Track Time in the Mobile App