Icon

How to Configure the Glitter AI Zendesk Integration

Learn how to connect your Zendesk workspace and seamlessly publish your guides as help center articles with a single click.

By Yuval Karmi

This guide explains how to configure the Zendesk integration and publish your documented guides directly to your Zendesk knowledge base. Completing this ensures your support content remains seamlessly synced and accessible to your audience with a single click.

This workflow applies to support agents, technical writers, and team admins who manage customer-facing help center content. Use this process when you finish drafting a guide and are ready to distribute it to your Zendesk workspace.

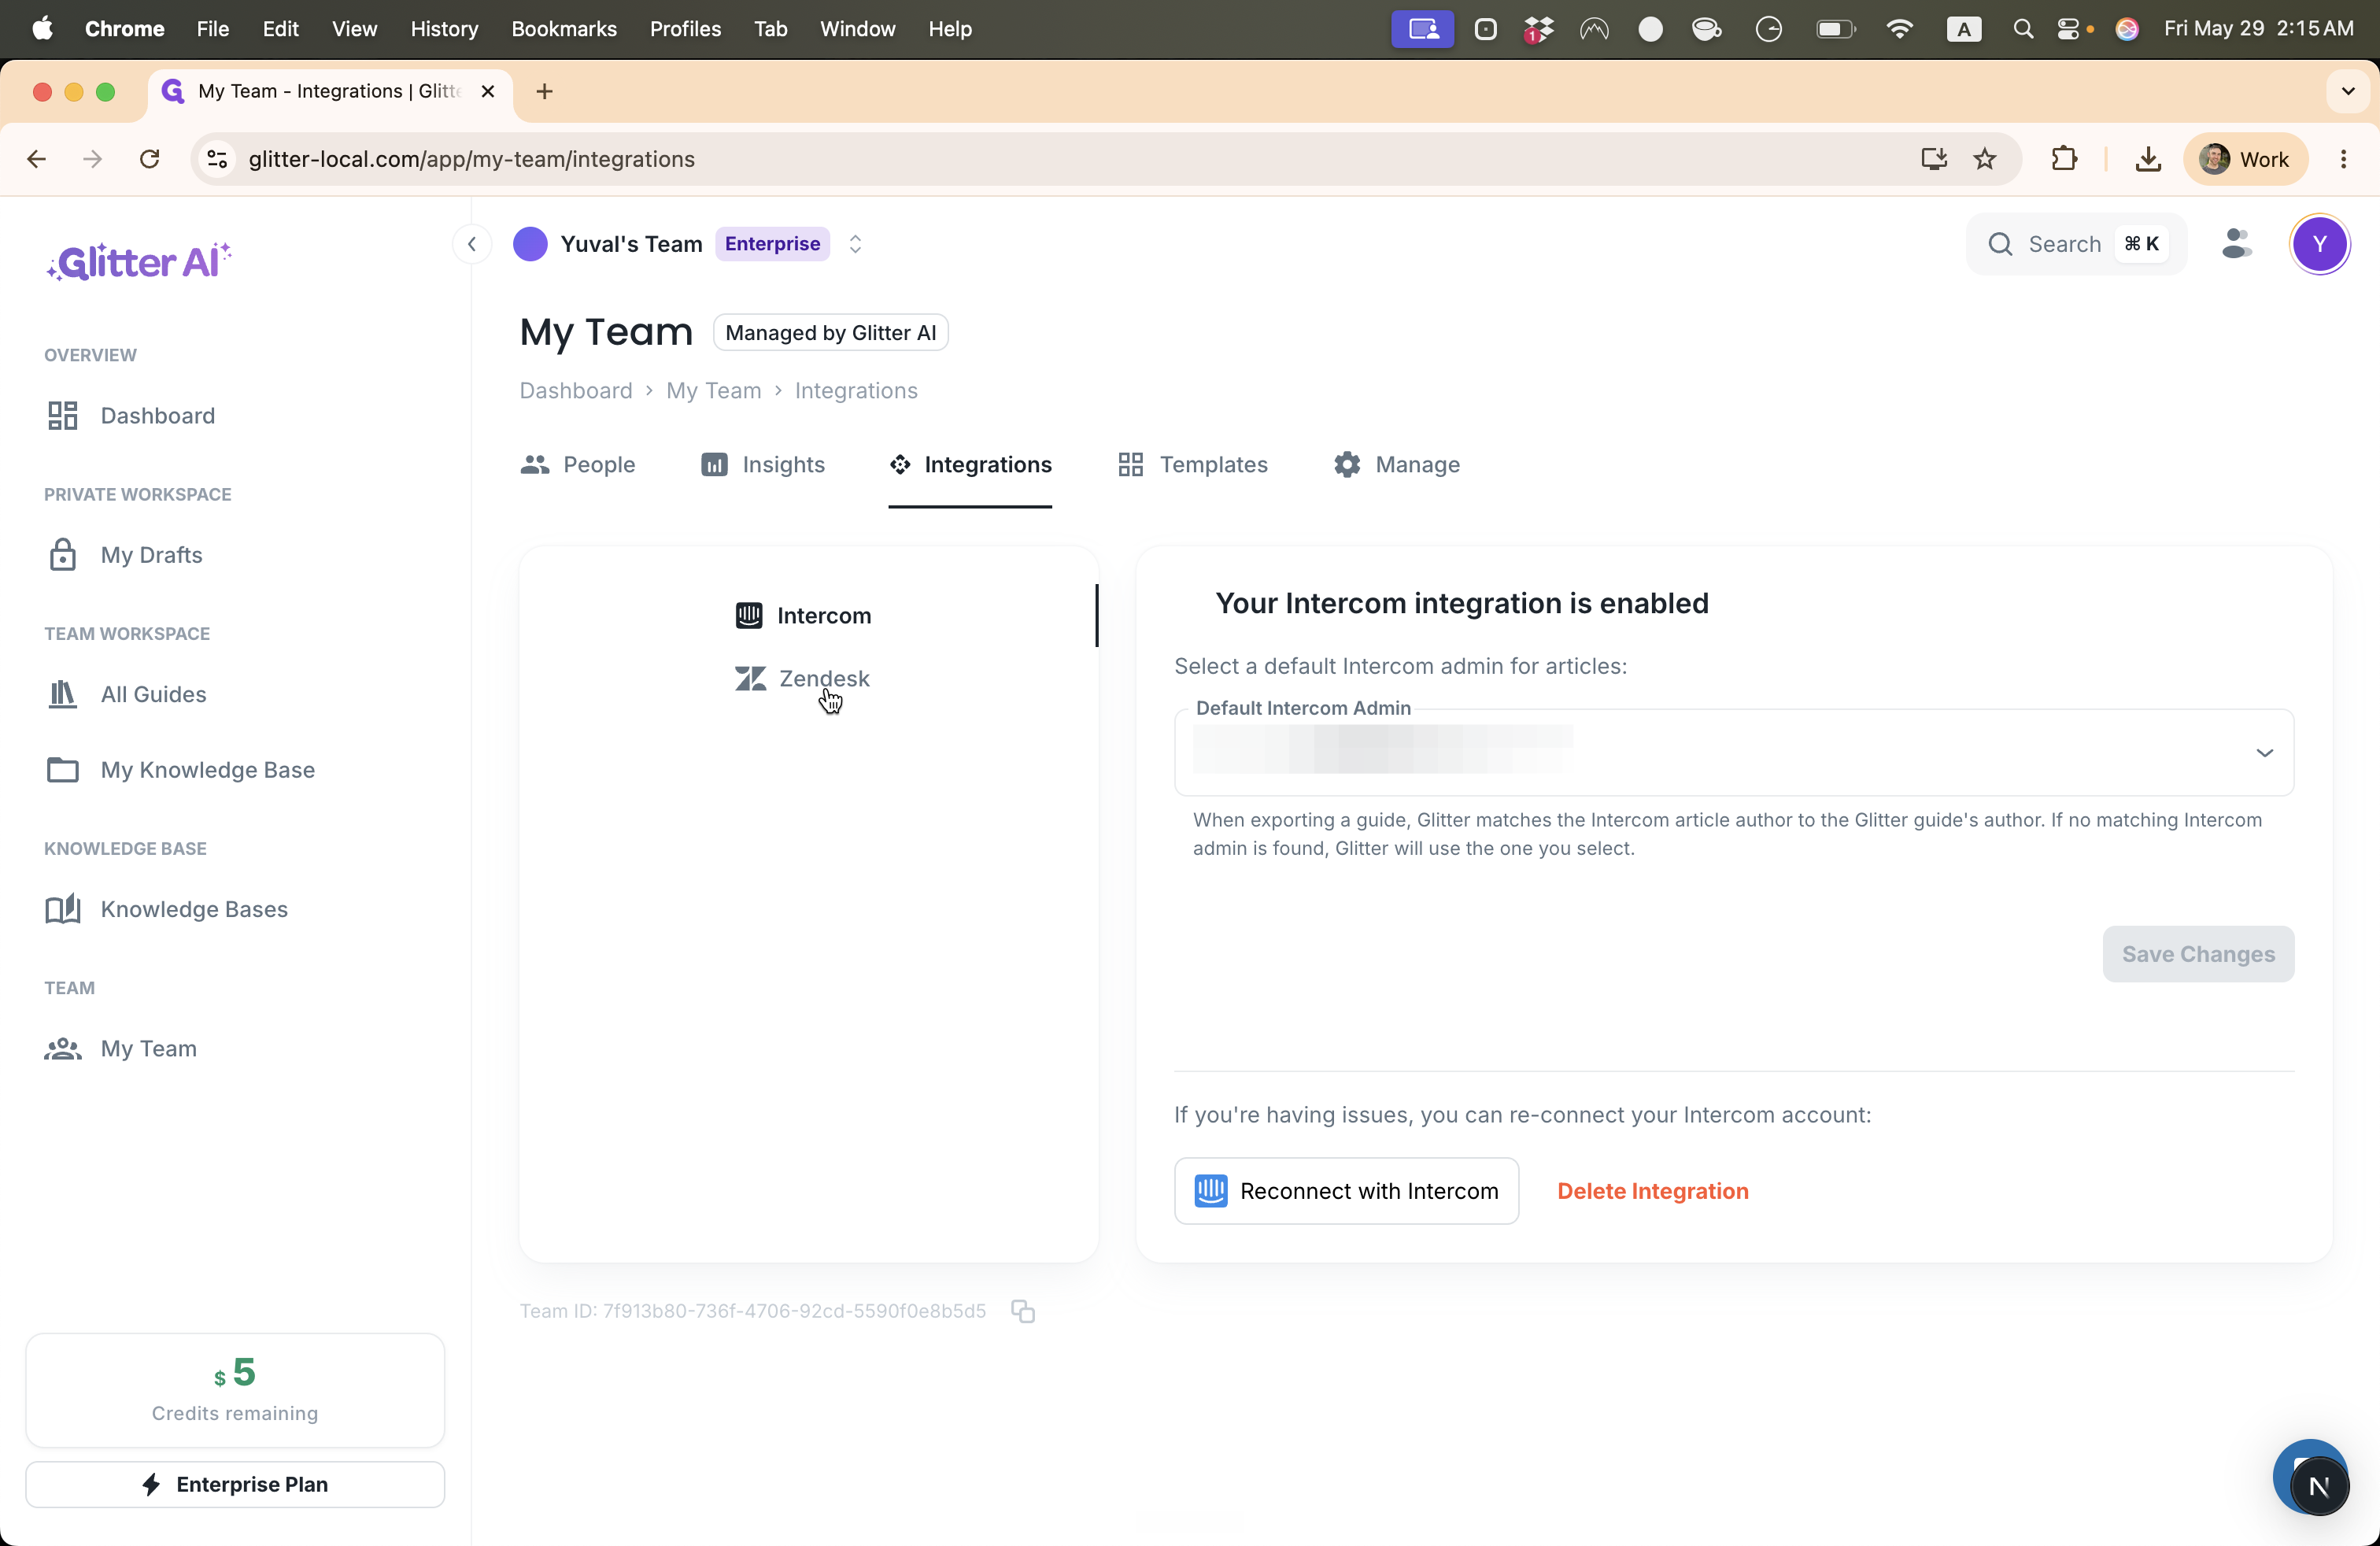
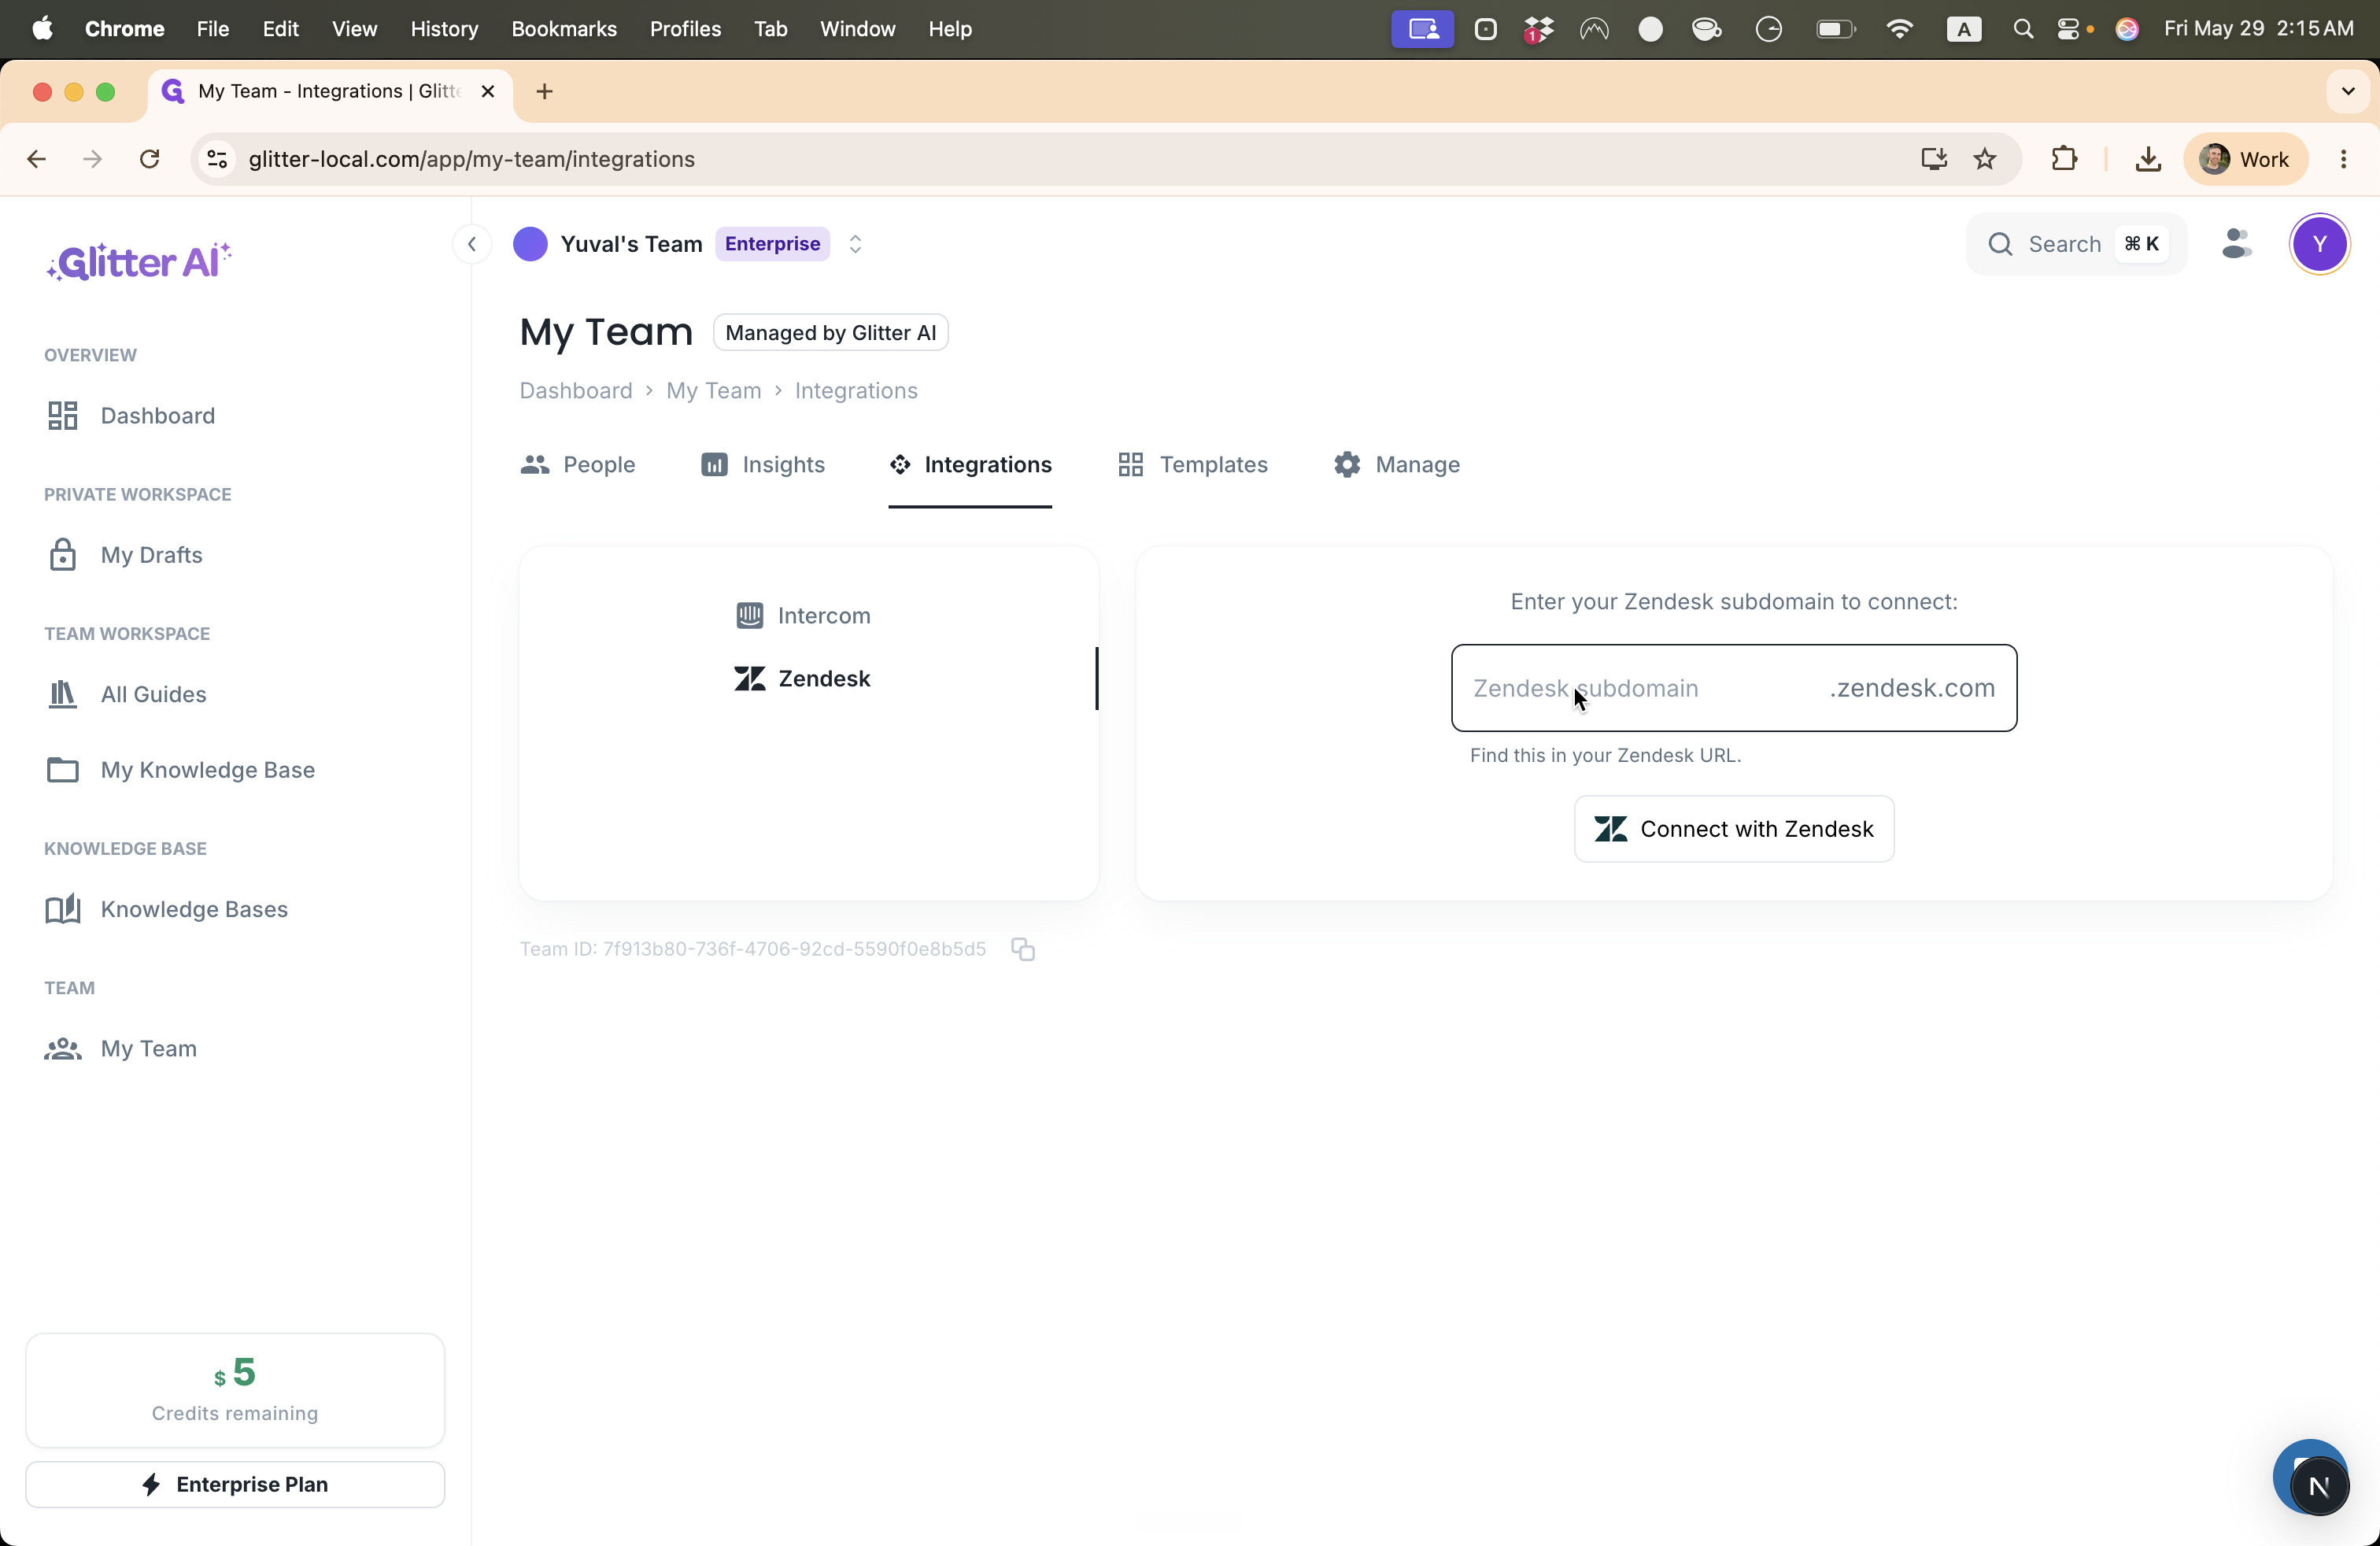
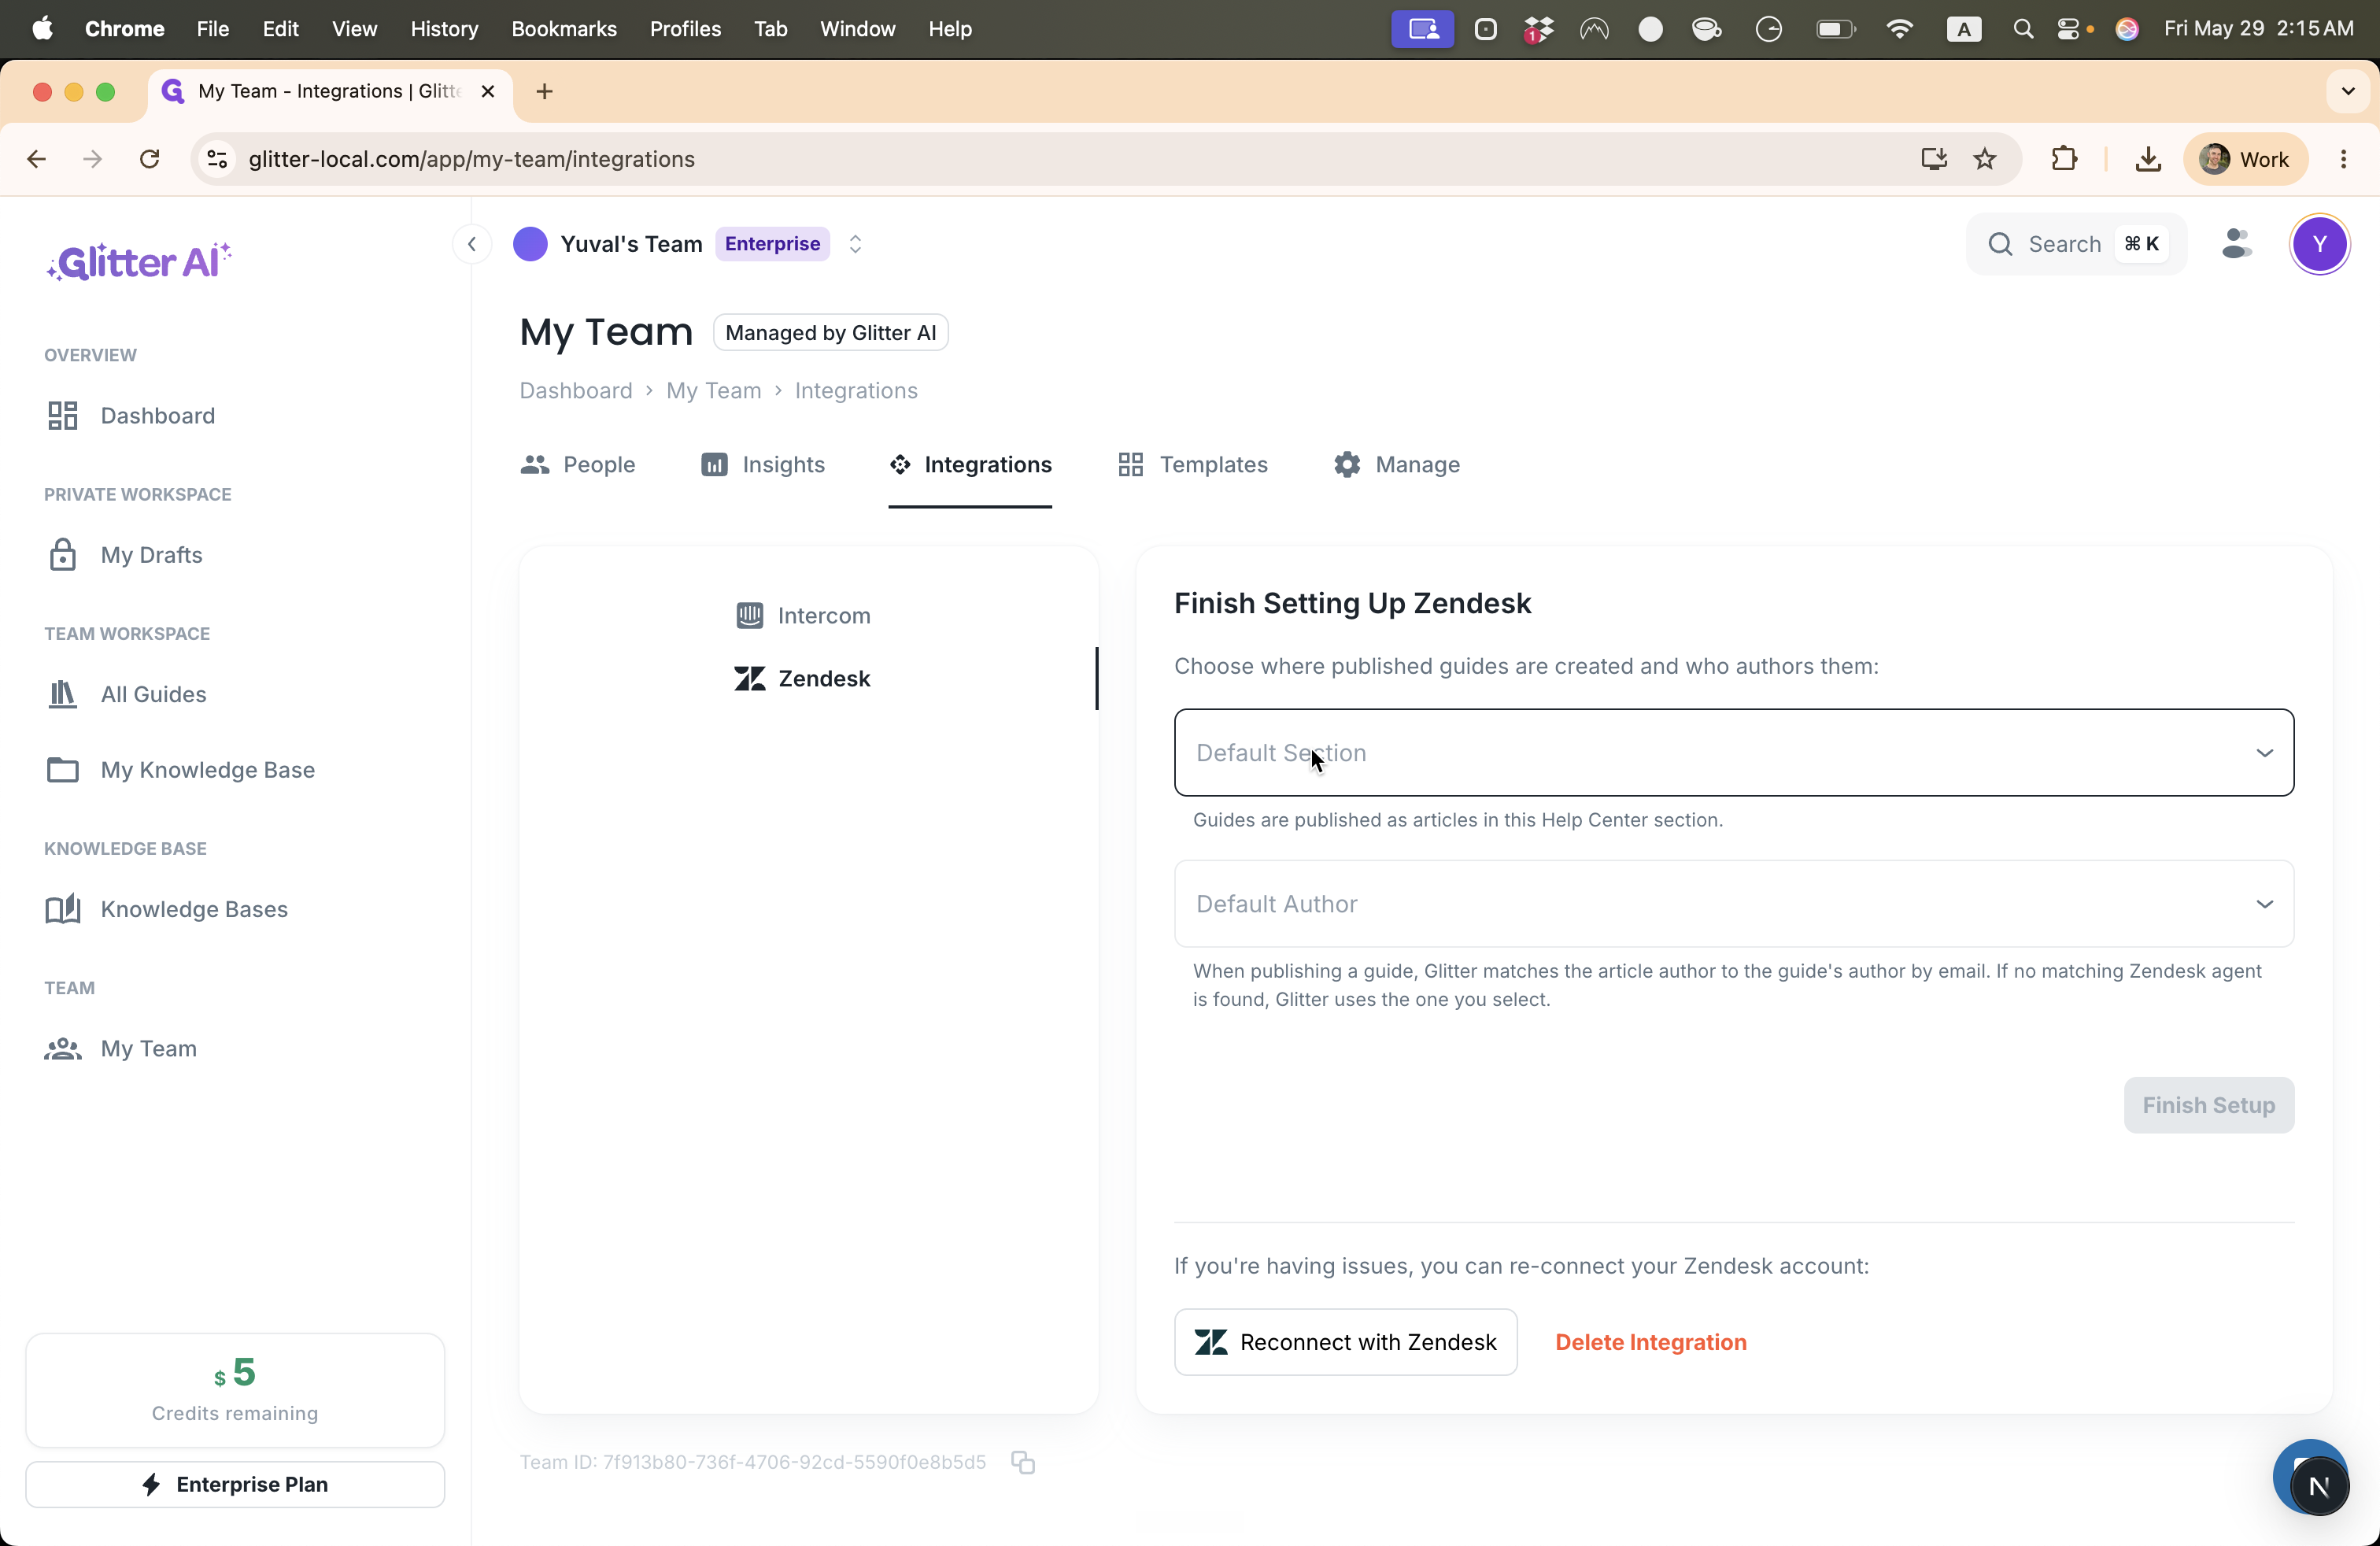
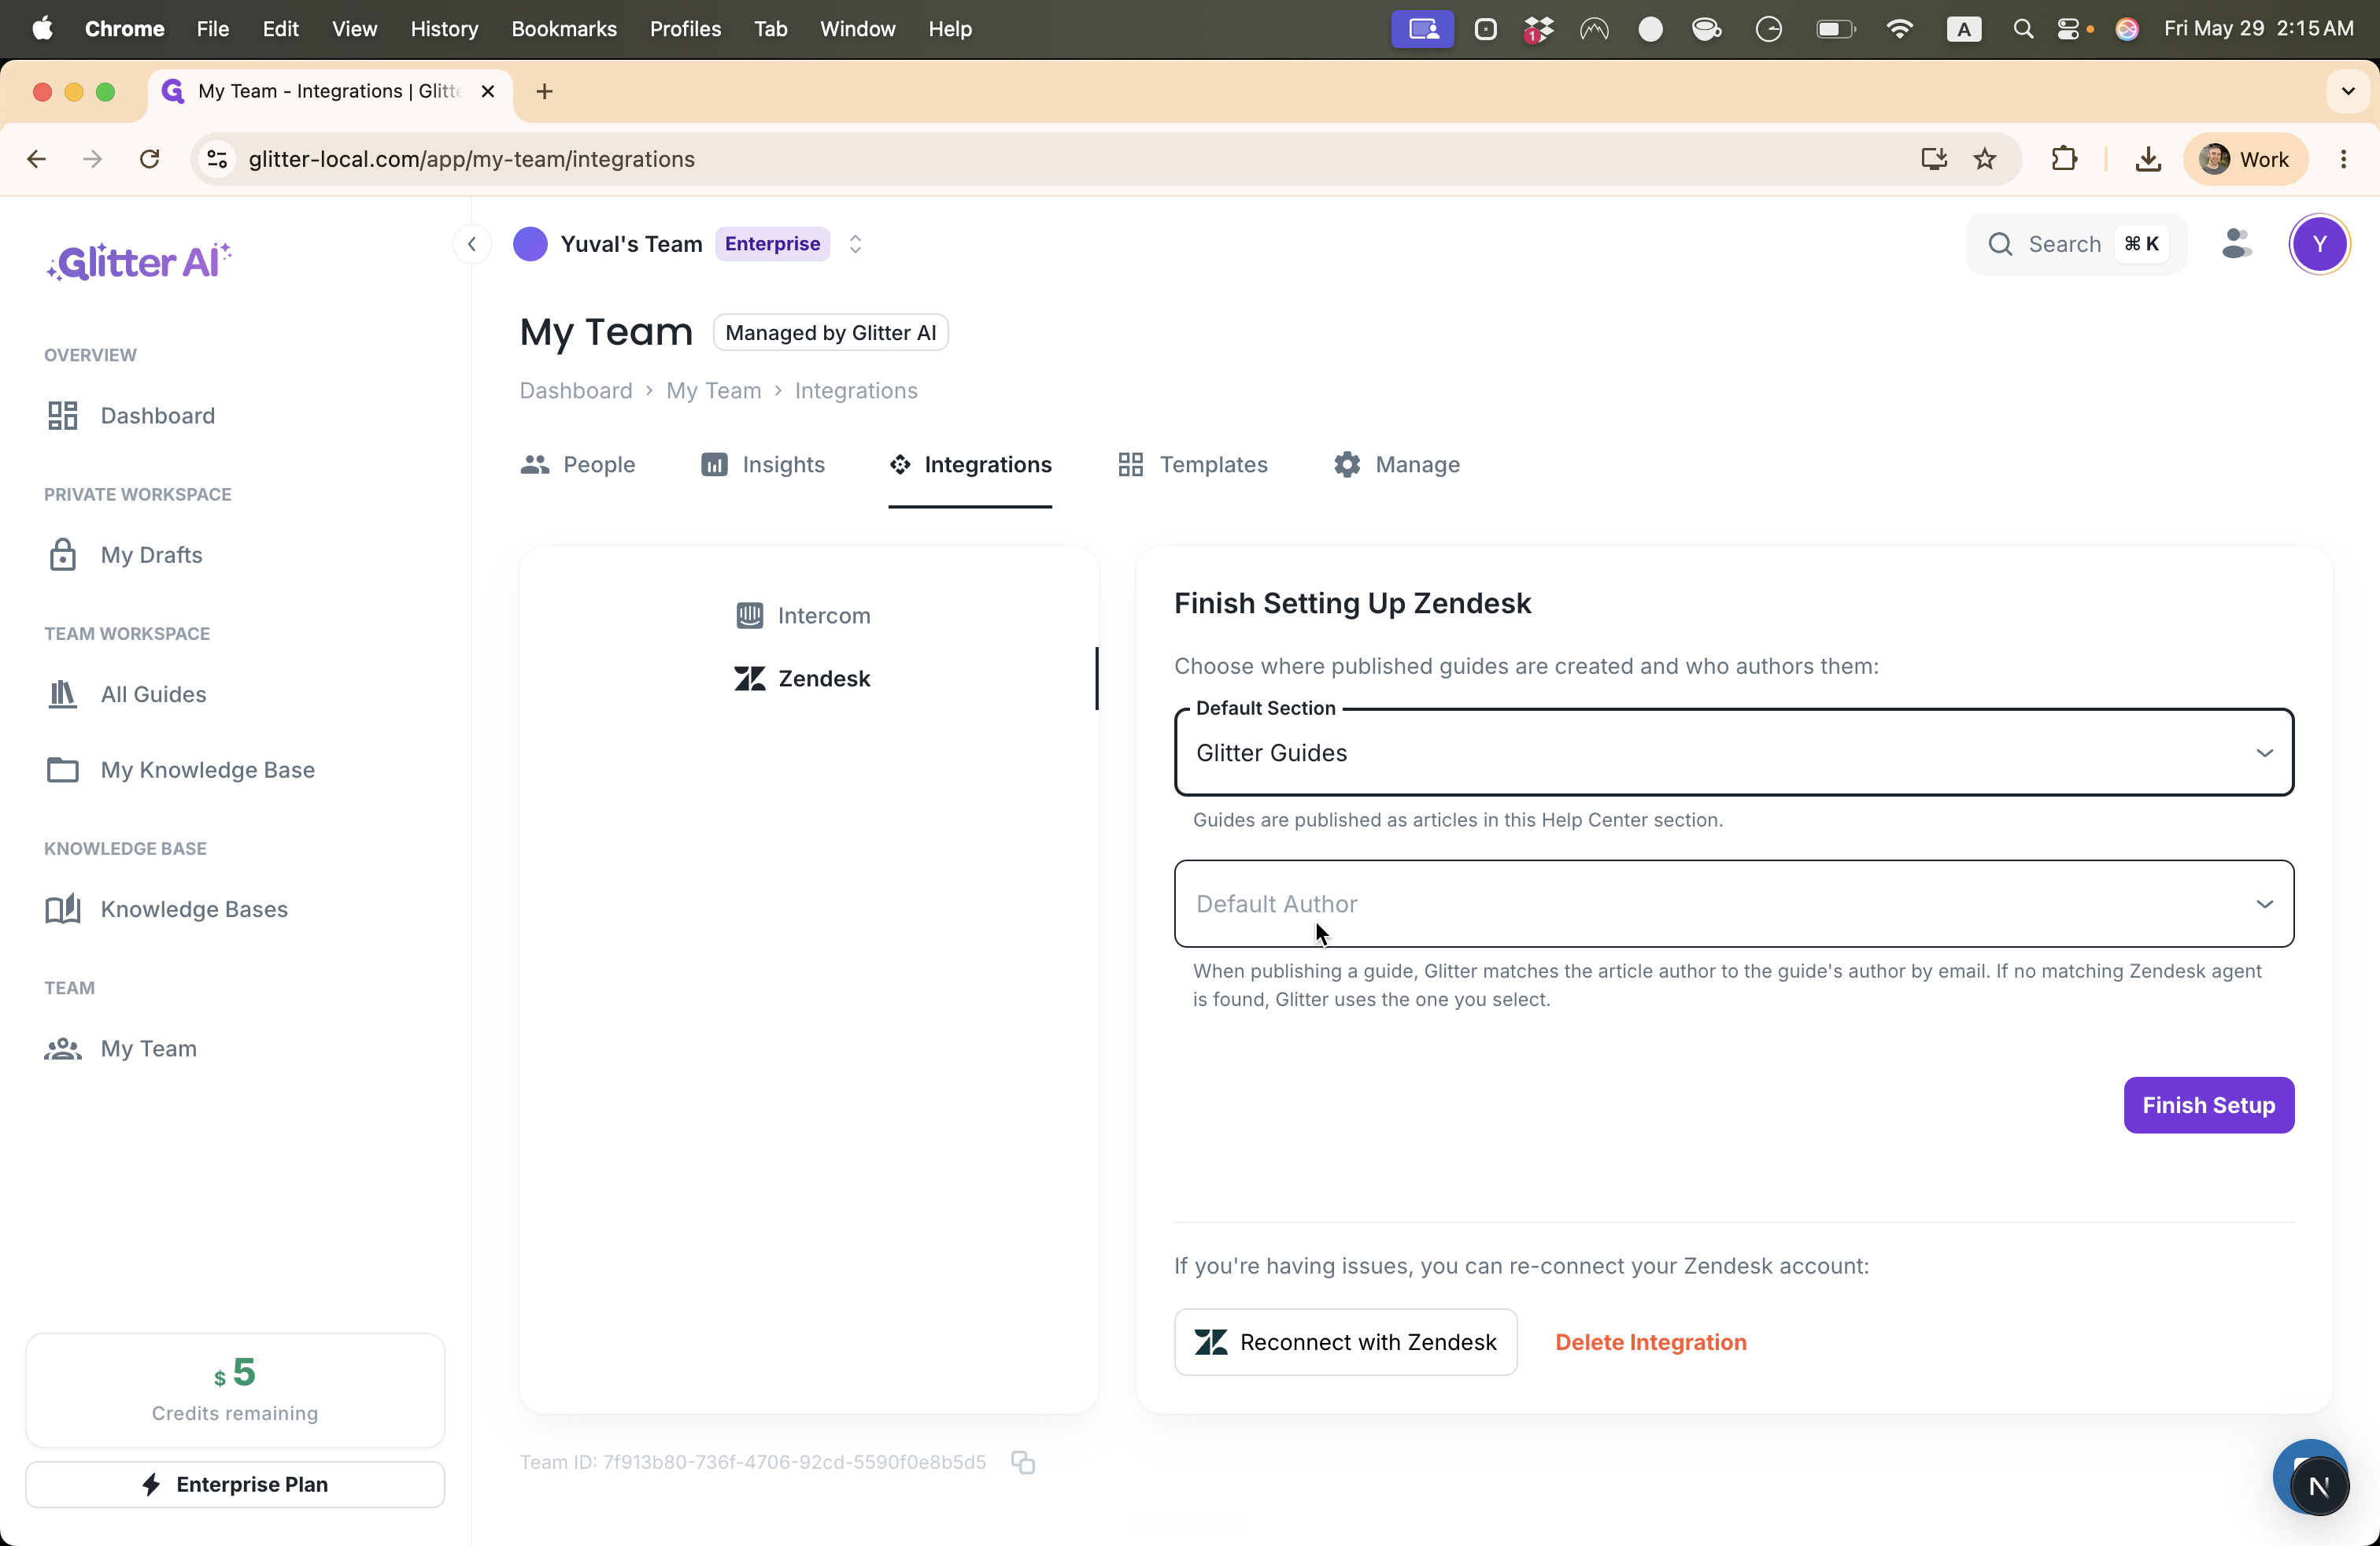
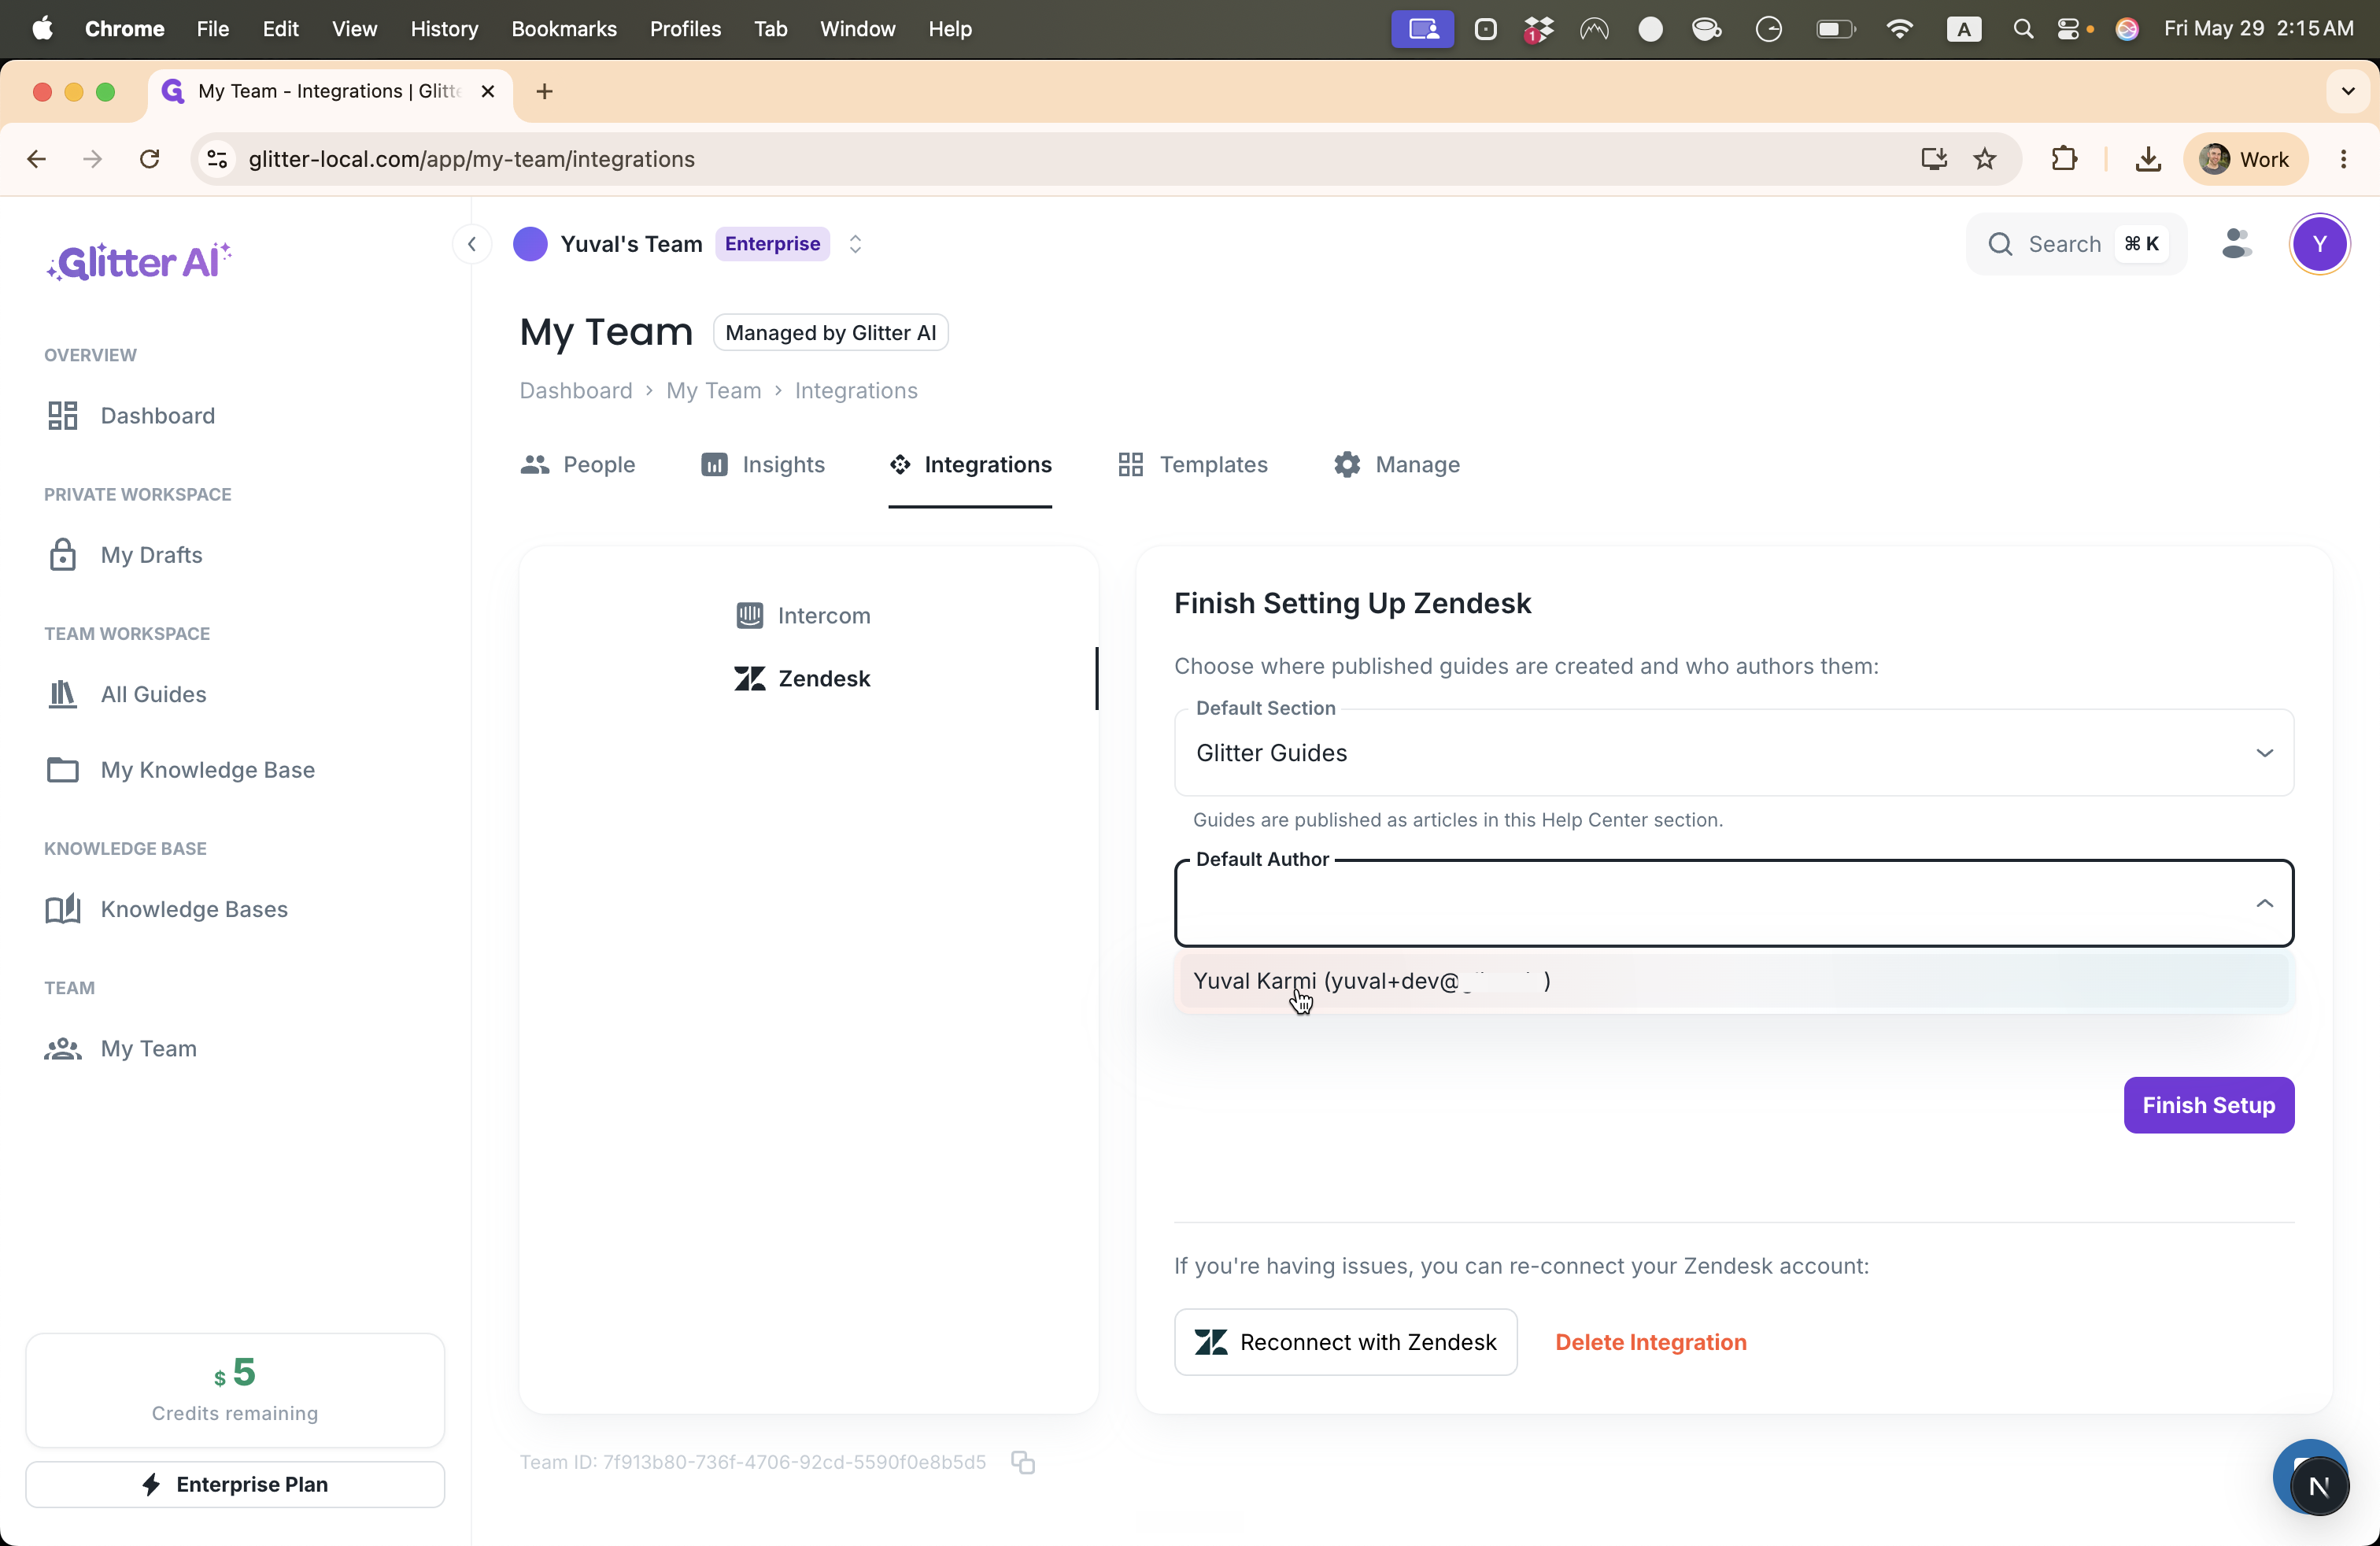
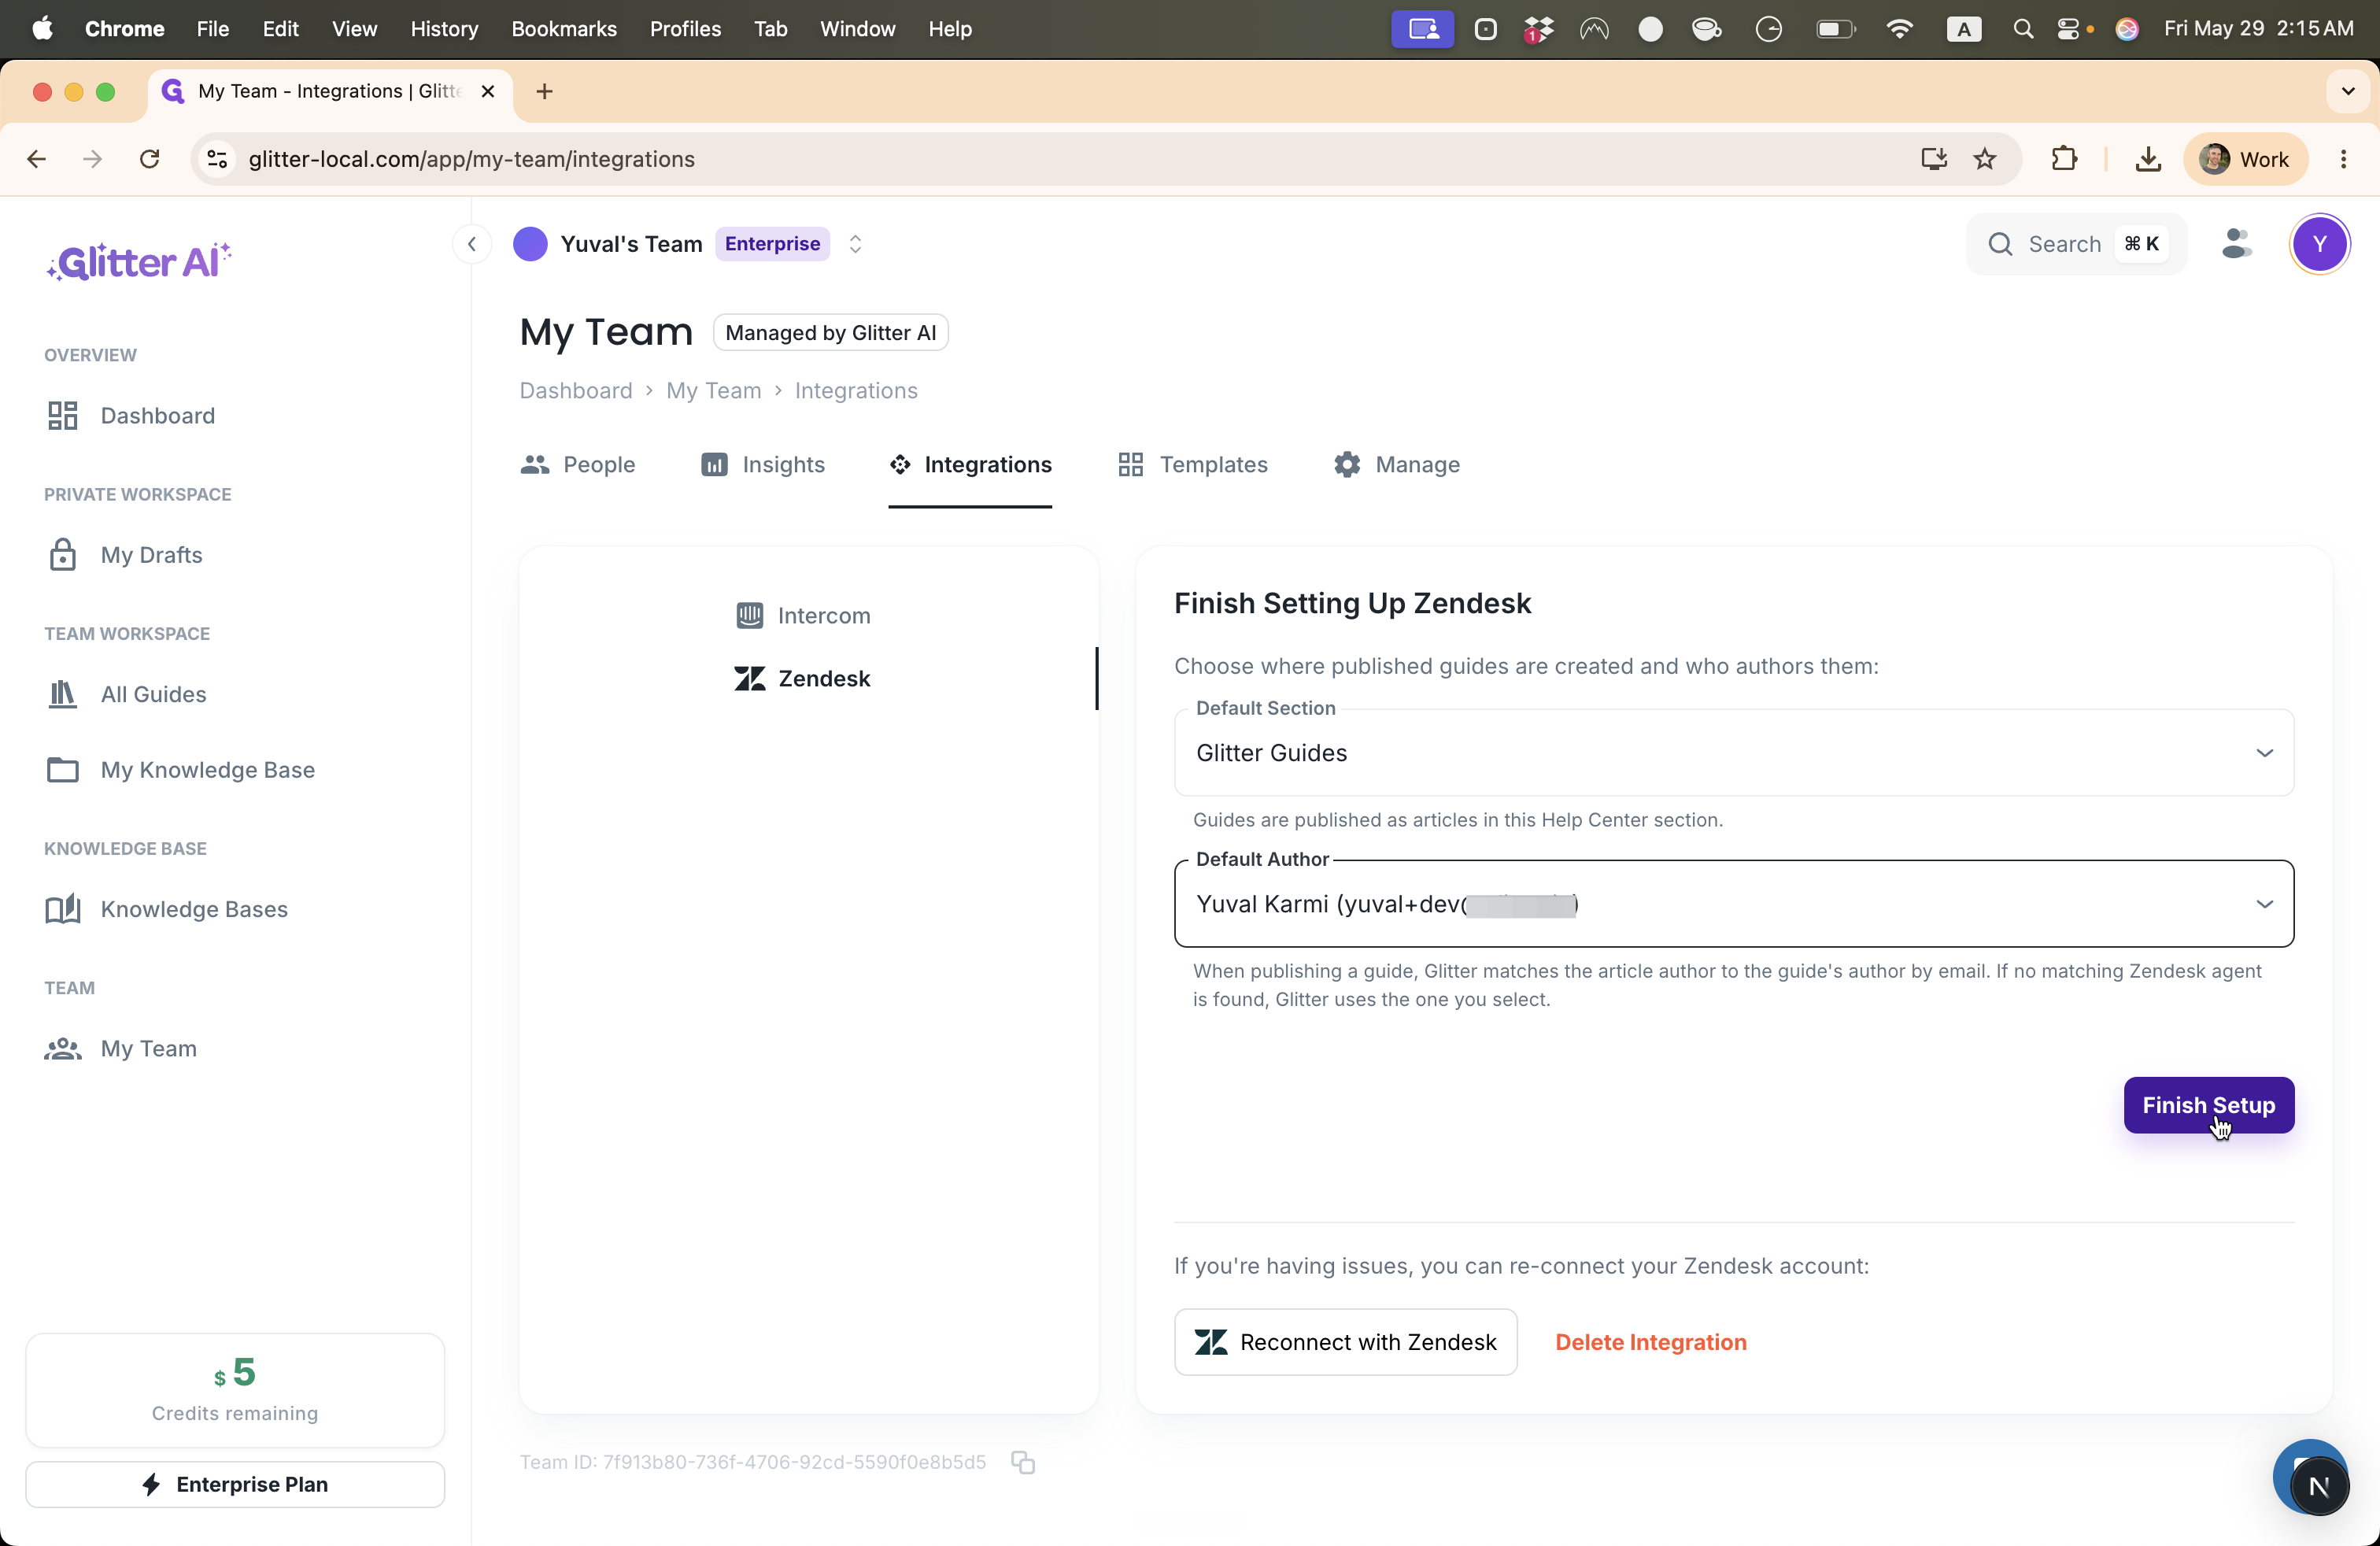
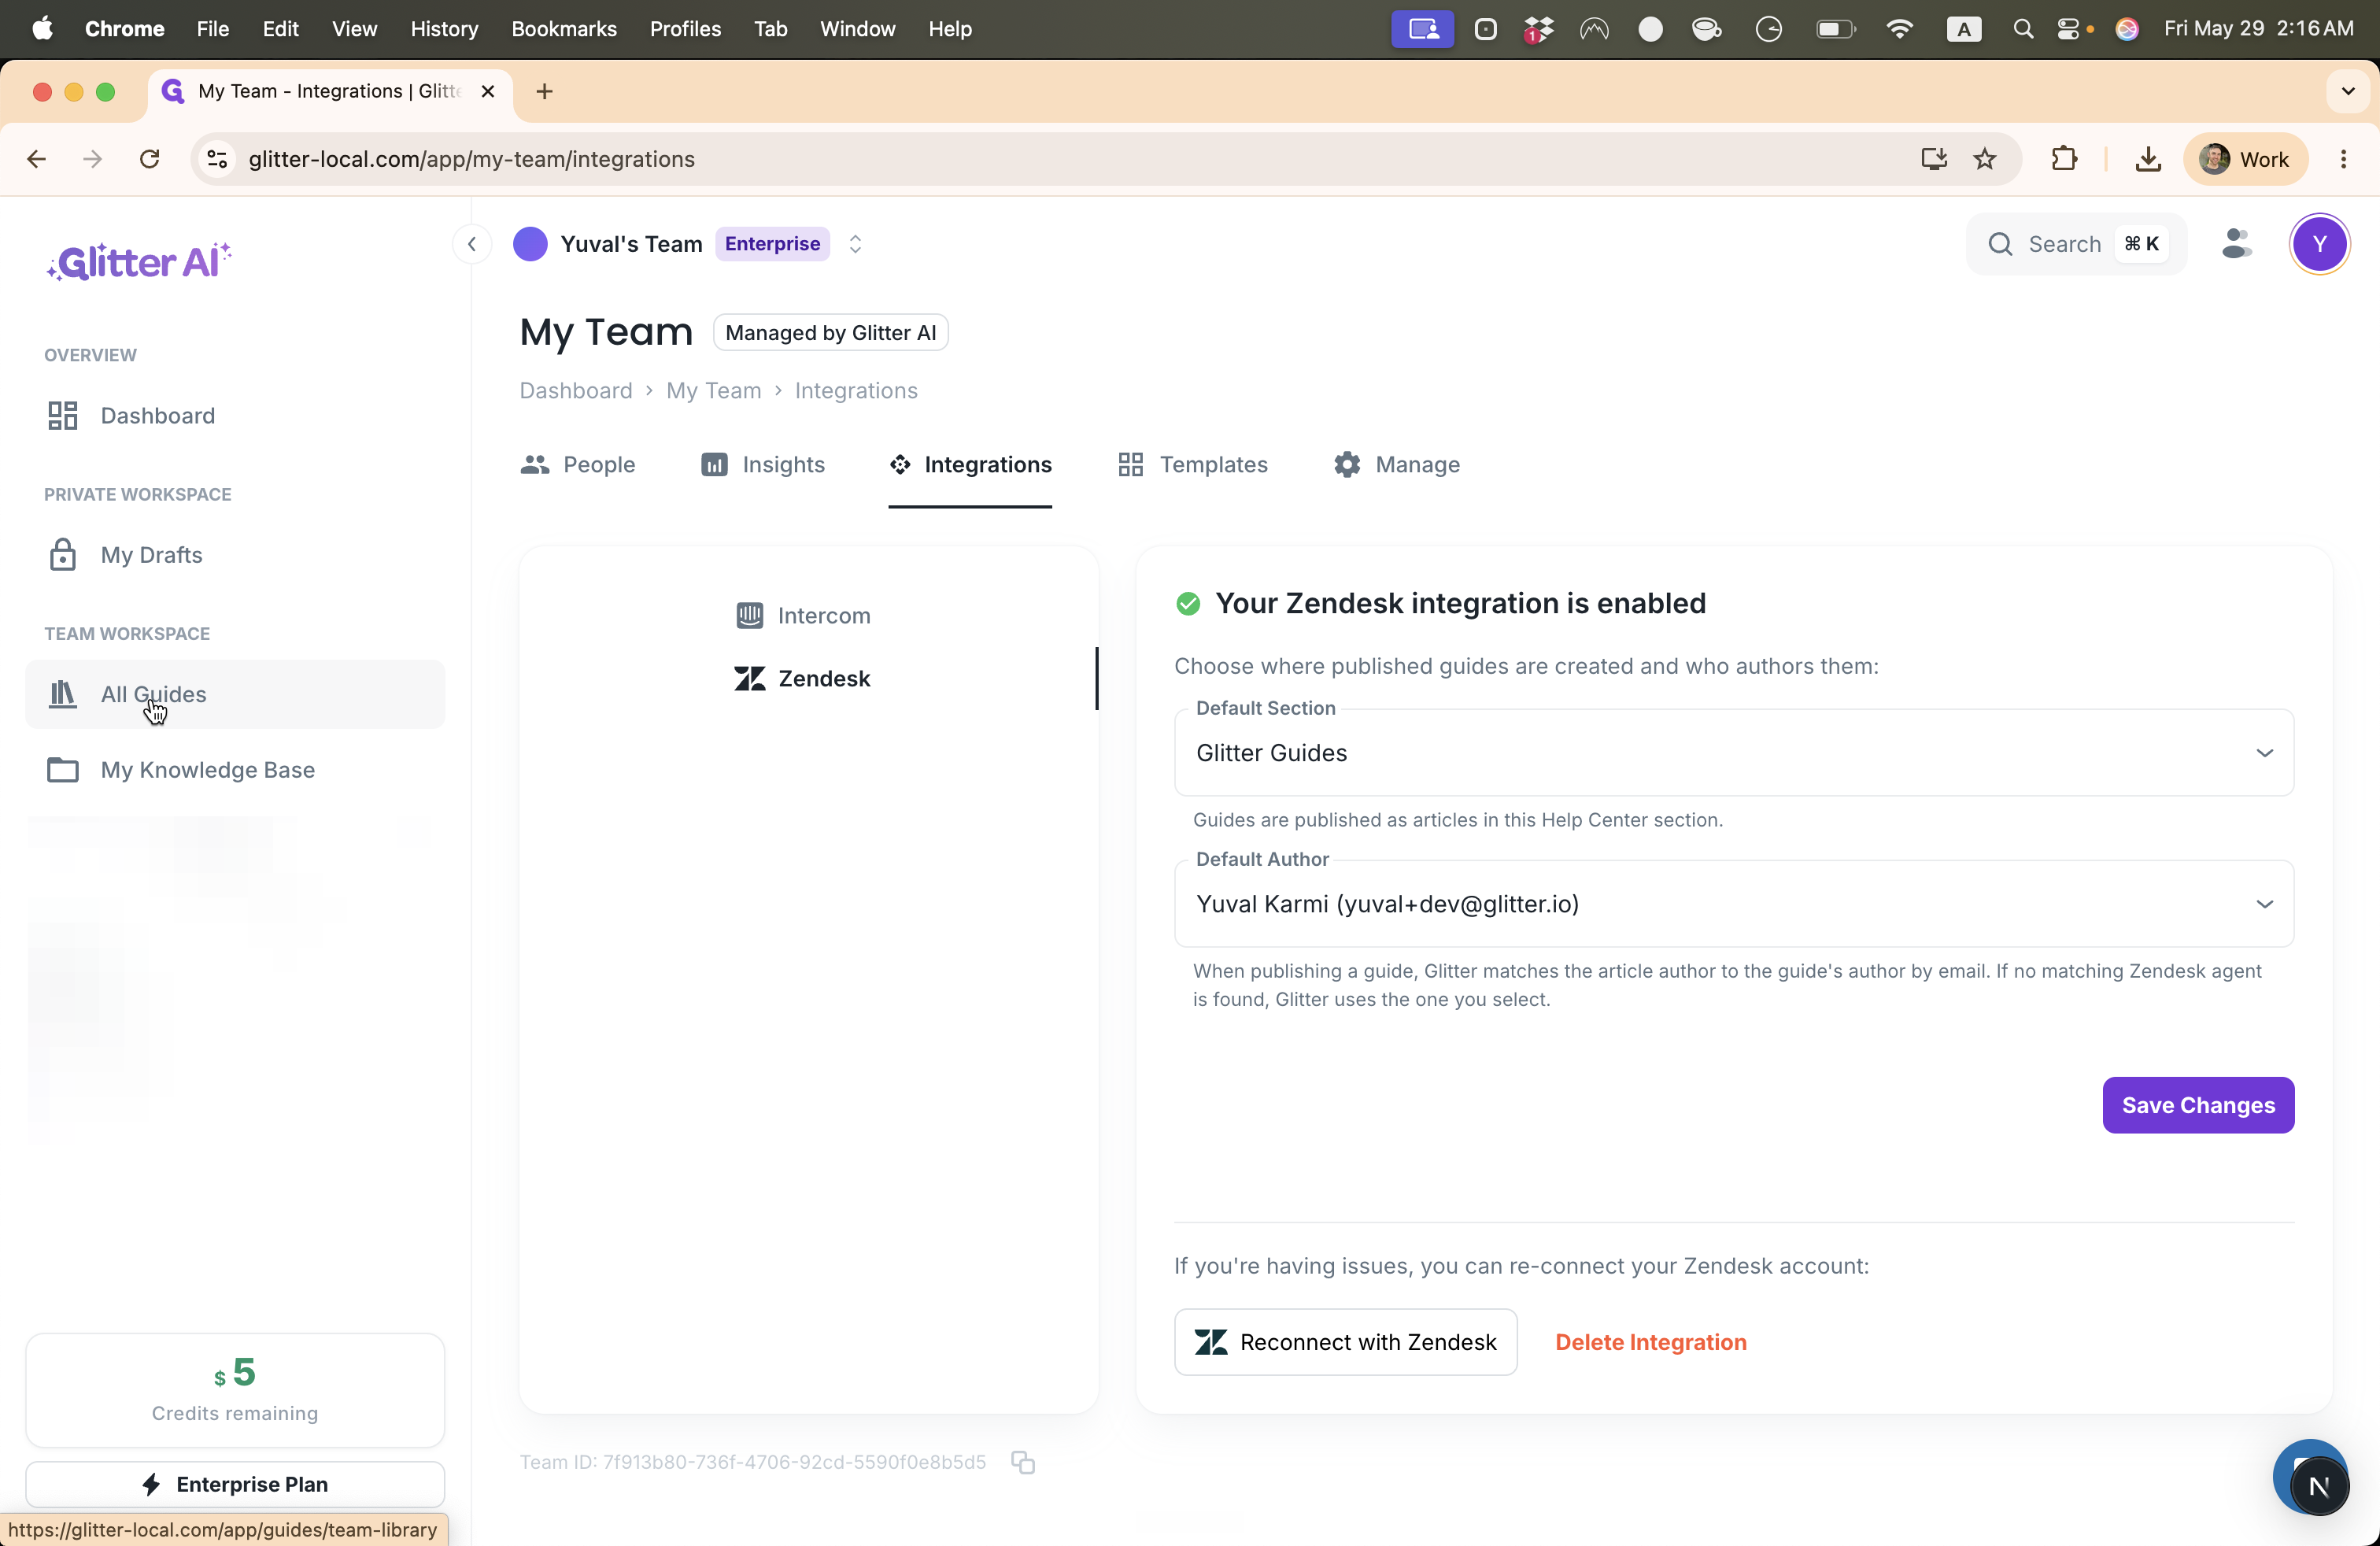
Configure the Zendesk Integration

1
Click My Team in the left sidebar.
Step #1: Click My Team in the left sidebar.
2
Navigate to the Integrations tab.
Step #2: Navigate to the Integrations tab.
3
Select Zendesk from the available integrations.
Step #3: Select Zendesk from the available integrations.
4
Click the Zendesk subdomain input field.
Step #4: Click the Zendesk subdomain input field.
5
Type your Zendesk subdomain (for example, "glitterai").
6
Click Connect with Zendesk and complete the standard OAuth authorization flow to link your workspace.
Step #6: Click Connect with Zendesk and complete the standard OAuth authorization flow to link your workspace.
7
Click the Default Section dropdown menu.
Step #7: Click the Default Section dropdown menu.
8
Choose the Zendesk section where your guides should be published
Step #8: Choose the Zendesk section where your guides should be published
9
Click the Default Author dropdown menu.
Step #9: Click the Default Author dropdown menu.
10
Select the user who should display as the author of the articles in your Zendesk help center.
Step #10: Select the user who should display as the author of the articles in your Zendesk help center.
11
Click Finish Setup to finalize the integration.
Step #11: Click Finish Setup to finalize the integration.

Publish a Guide to Zendesk

12
Navigate to Guides in the left sidebar.
Step #12: Navigate to Guides in the left sidebar.
13
Click the specific guide you want to publish to Zendesk.
Step #13: Click the specific guide you want to publish to Zendesk.
14
Click Share in the top-right corner of the editor.
Step #14: Click Share in the top-right corner of the editor.
15
Click the Send to icon in the share menu.
Step #15: Click the Send to icon in the share menu.
16
Select Zendesk from the dropdown options.
Step #16: Select Zendesk from the dropdown options.
17
Click Send or Overwrite Article to push the guide to your help center.
Step #17: Click Send  or Overwrite Article to push the guide to your help center.
18
Click View in Zendesk on the success confirmation to open your fully formatted article in your Zendesk workspace.
Step #18: Click View in Zendesk on the success confirmation to open your fully formatted article in your Zendesk workspace.

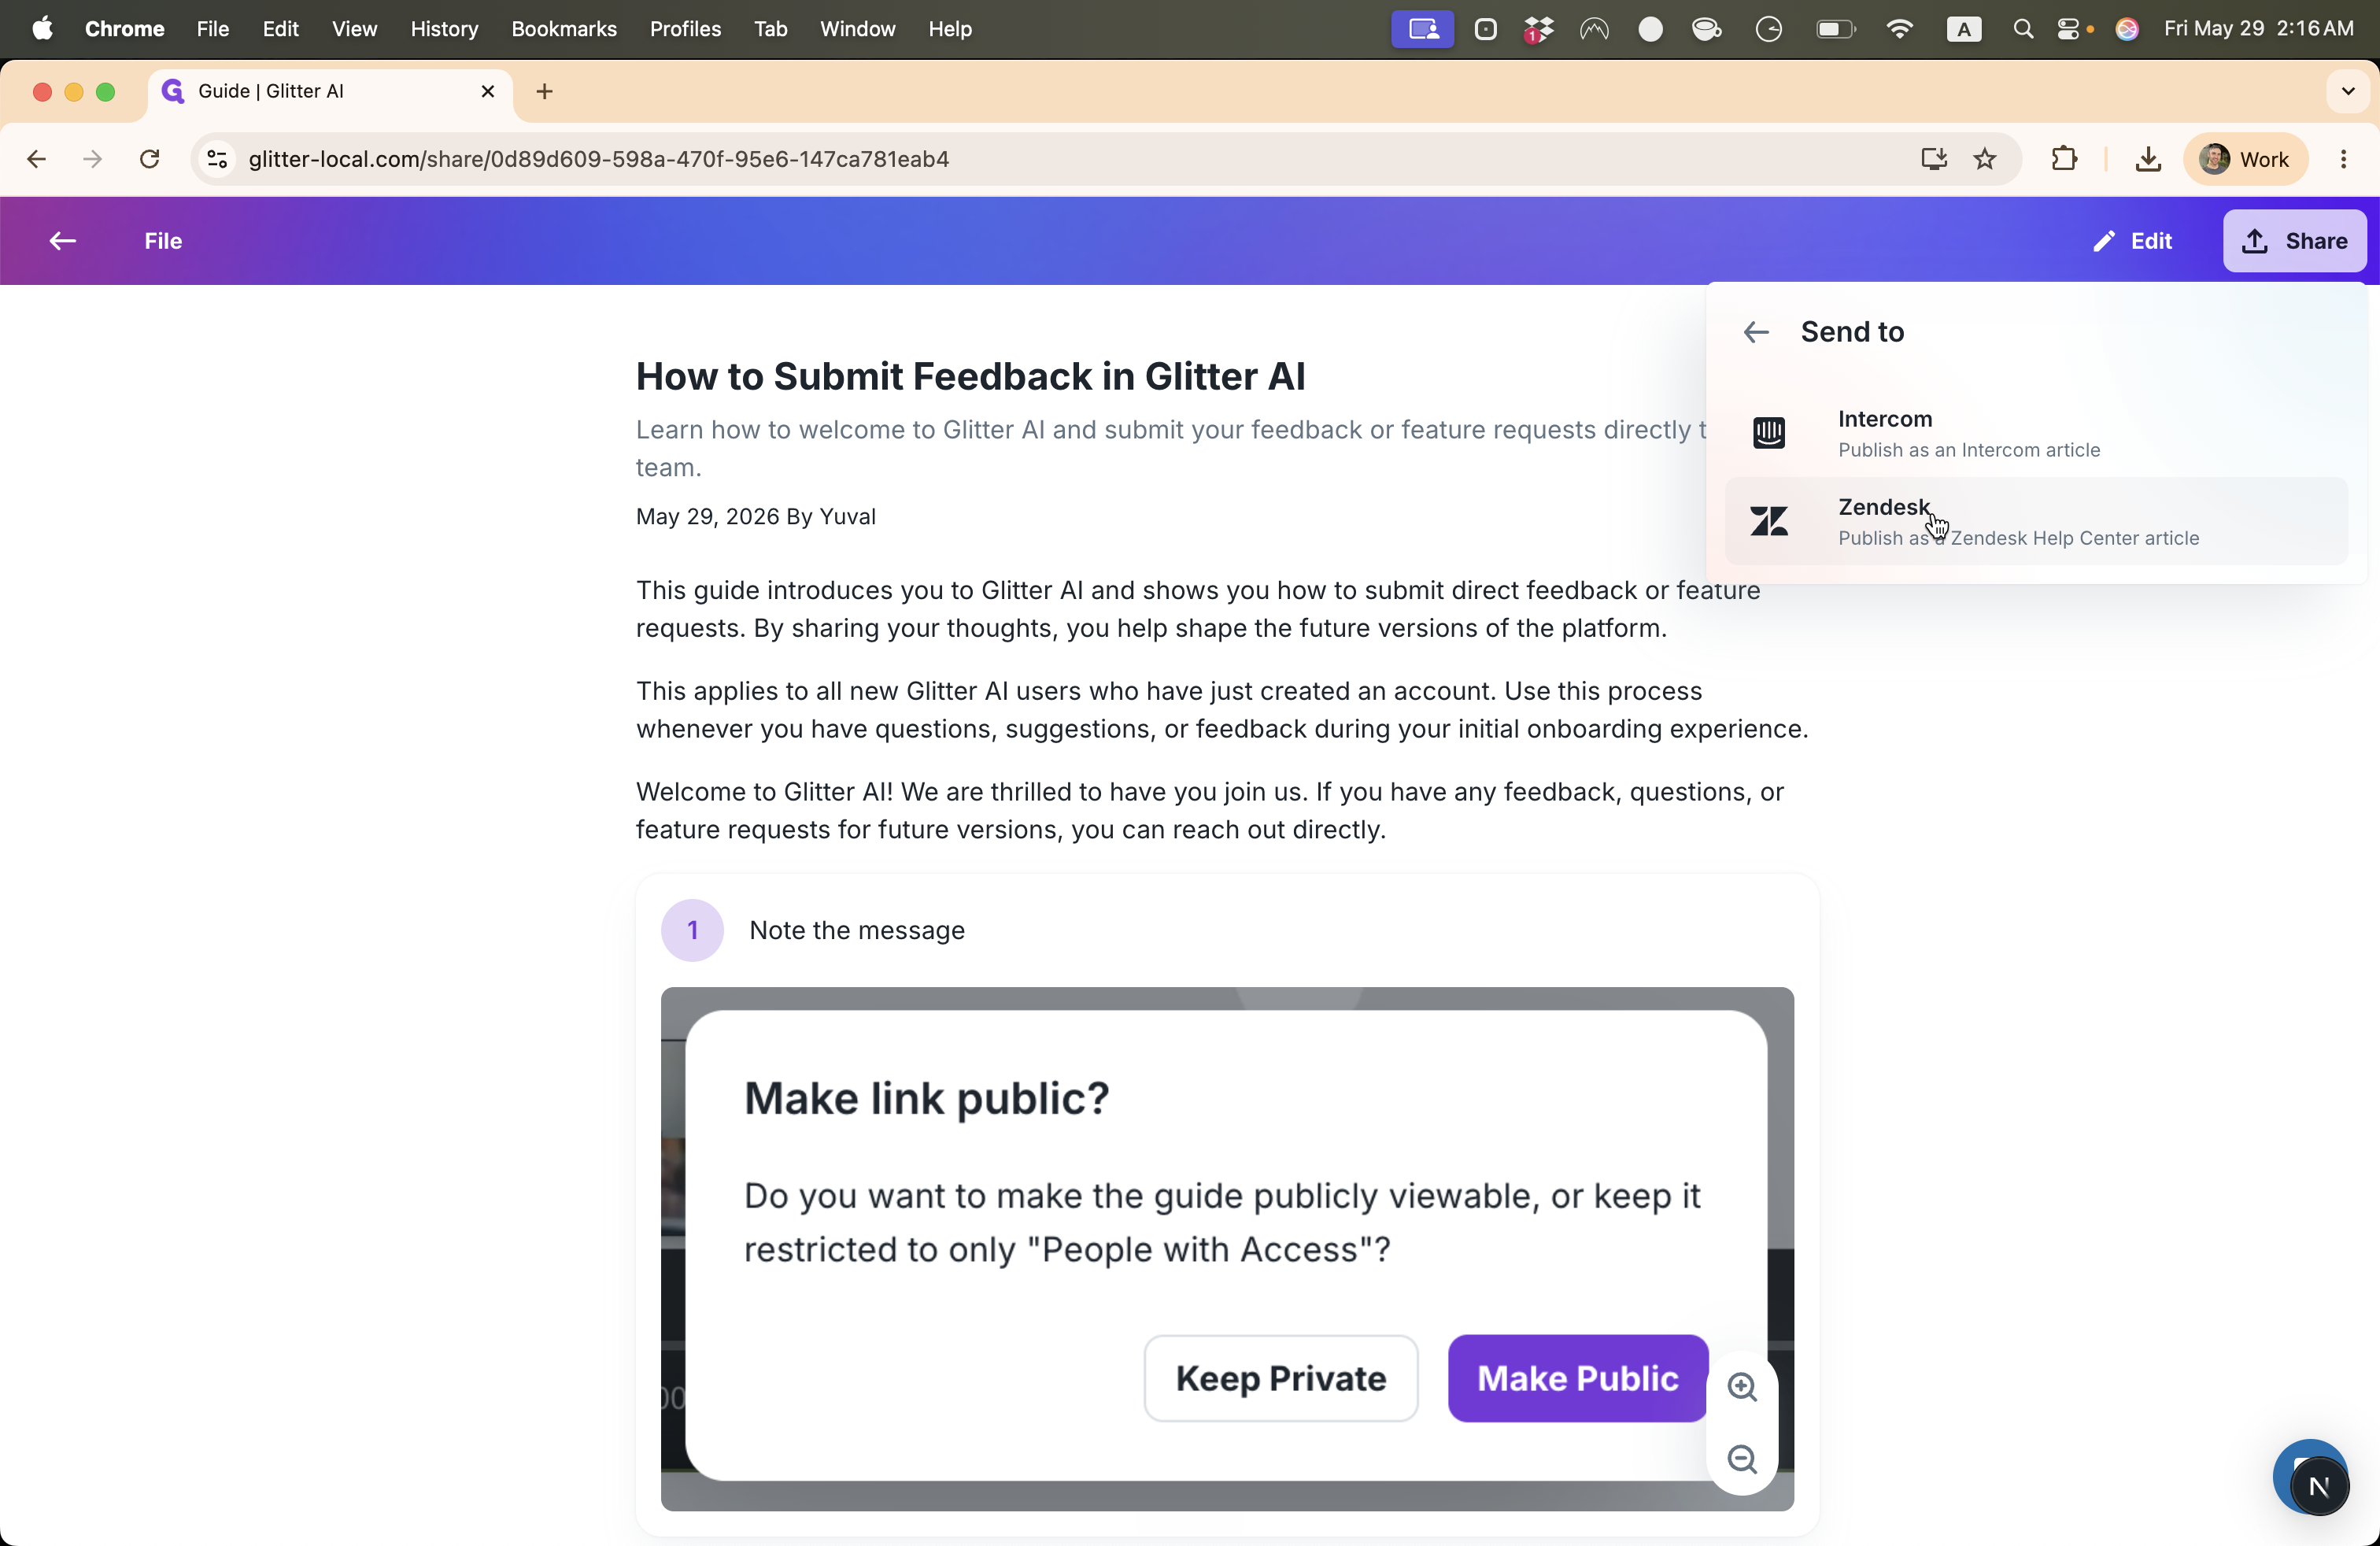
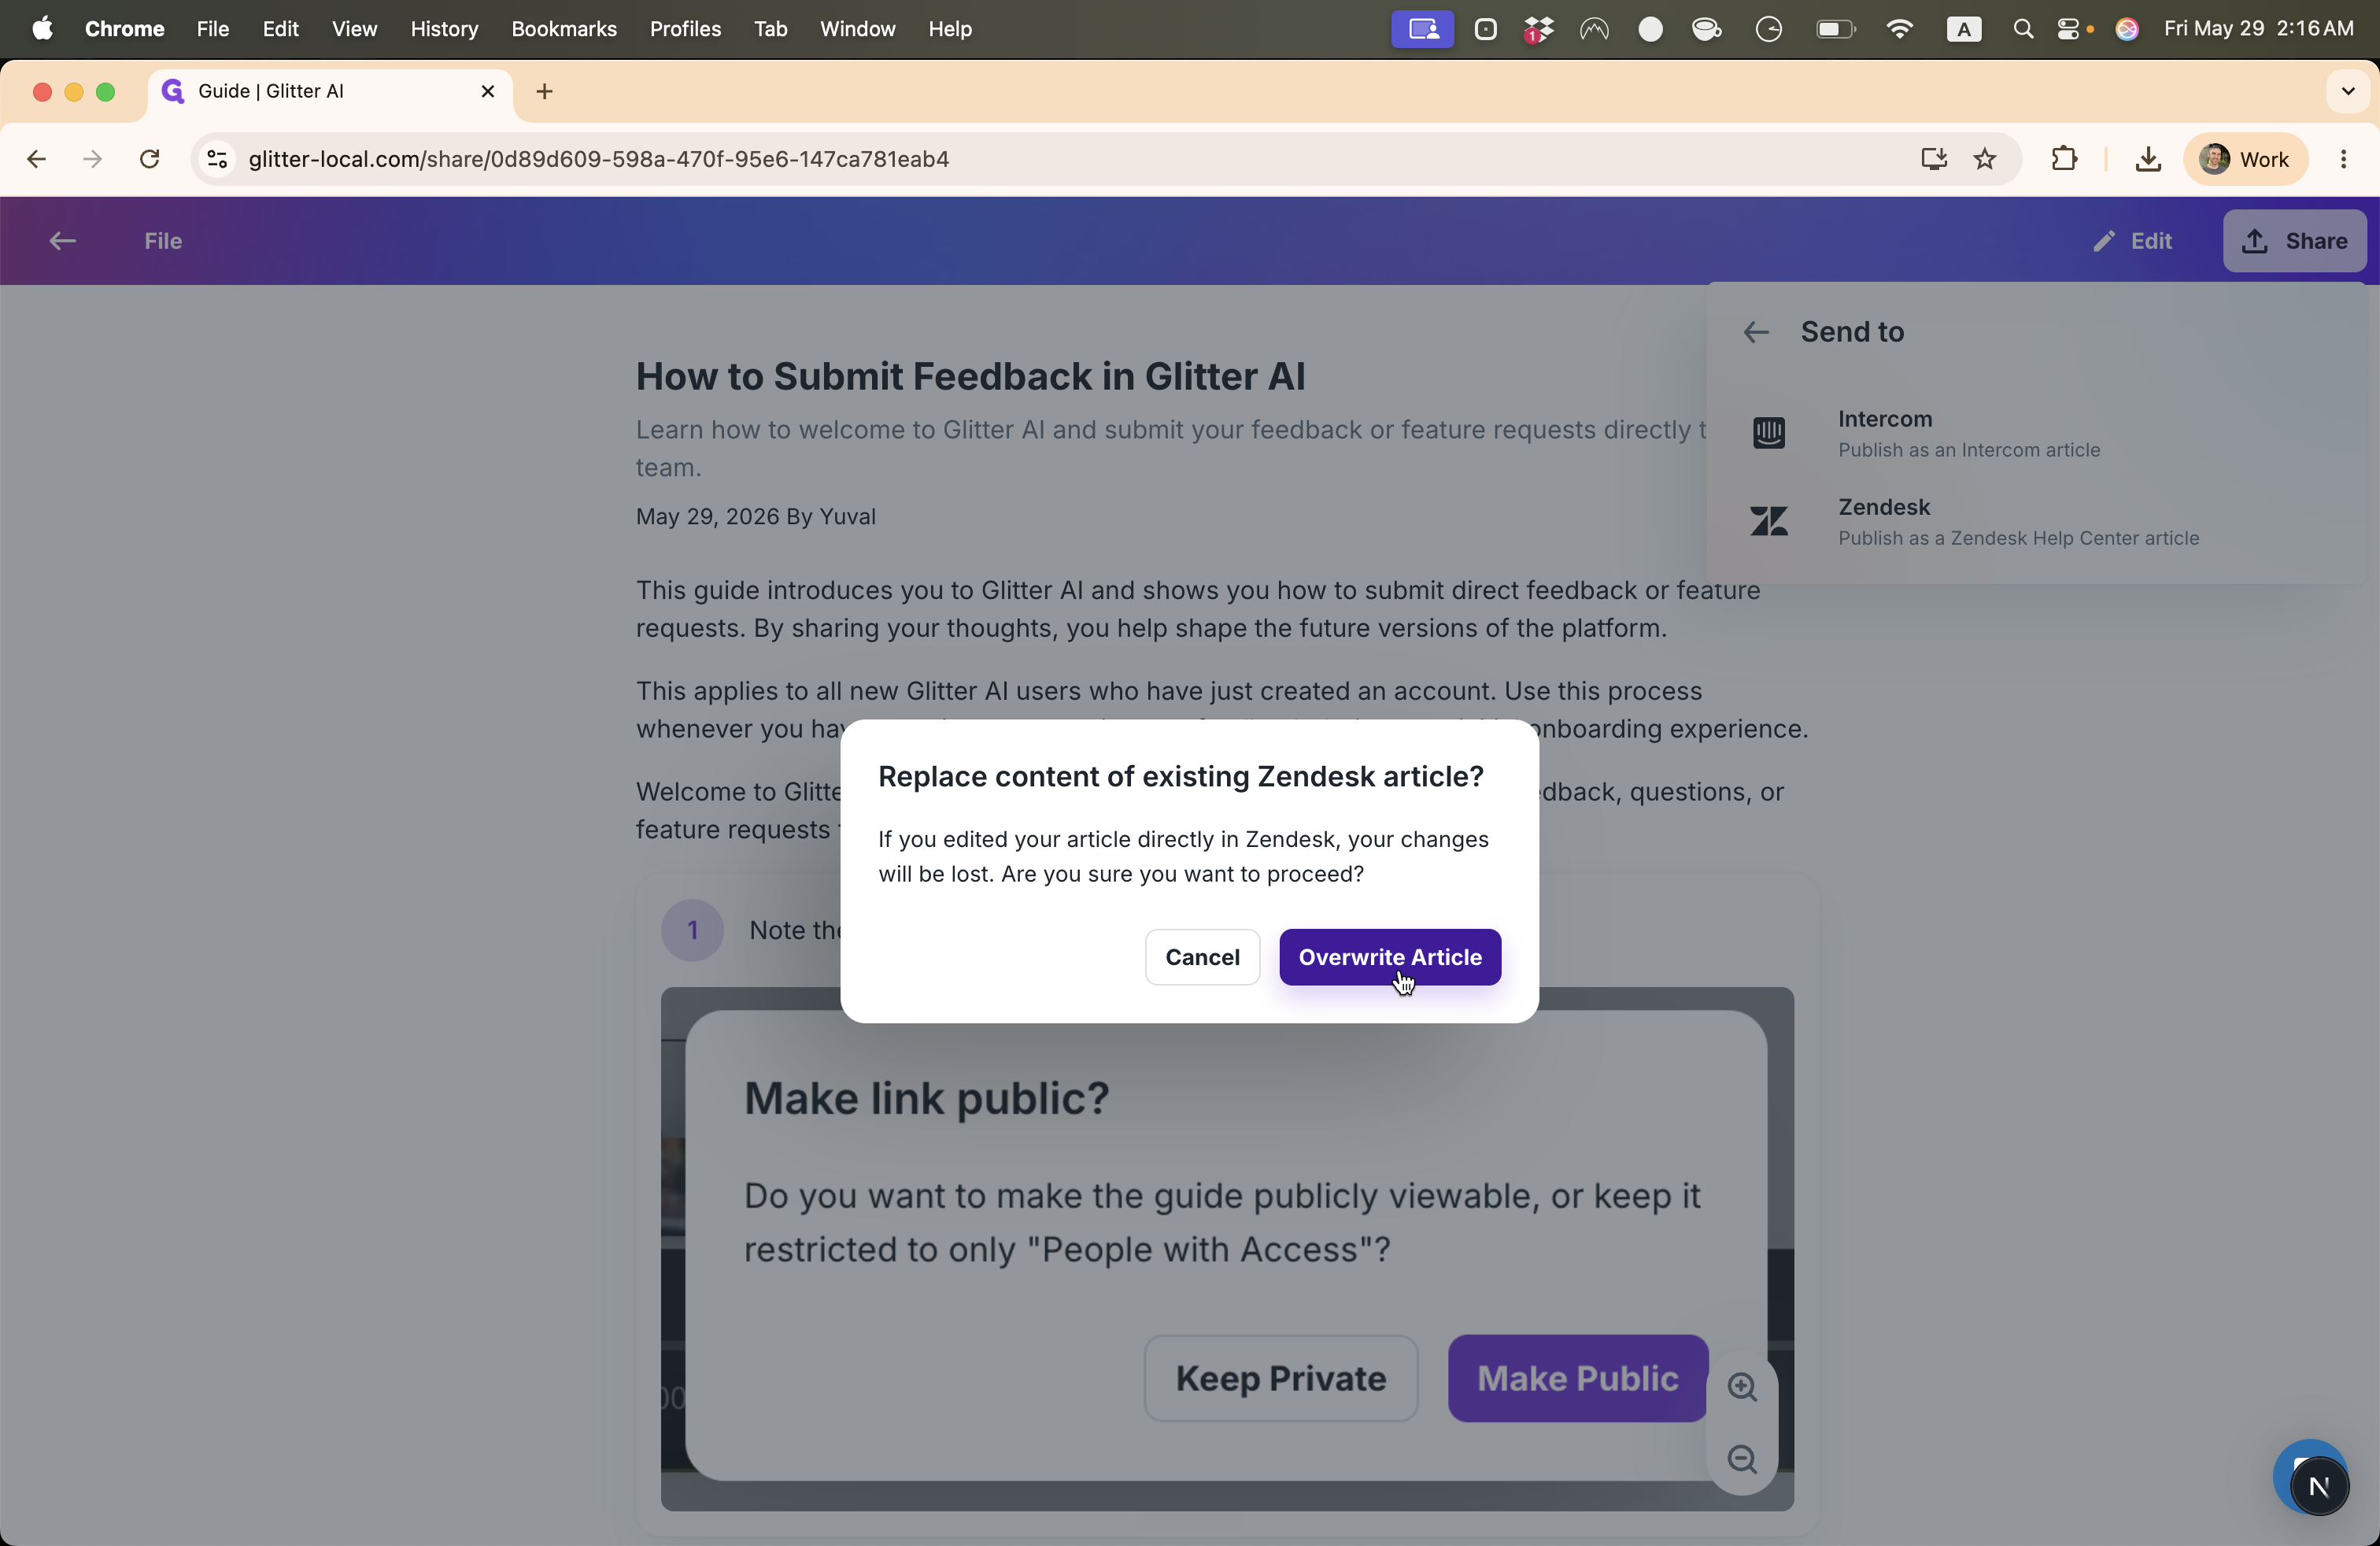
Q: What happens if I publish a guide that I've previously synced to Zendesk?

A: If an article has already been synced, the system will ask if you want to overwrite it. Confirming this ensures your Zendesk content stays completely synchronized with your latest edits.

Term

Definition

OAuth flow

A secure authorization process that allows third-party applications to connect to your account without needing your password.

Zendesk subdomain

The unique prefix in your company's Zendesk URL, required to establish the connection between the platforms.