Icon

How to Create a Calendar Event on ClubRunner for Rotary Club of Austin University Area

Learn how to create a calendar event on ClubRunner for the Rotary Club of Austin University Area with this step-by-step guide.

By Ivan Milman

In this guide, we'll learn how to create a calendar event on ClubRunner for the Rotary Club of Austin University Area. This process involves accessing the member area of the club's website and using the event planner tool. By following these steps, you can efficiently schedule and manage events for the club.

Let's get started

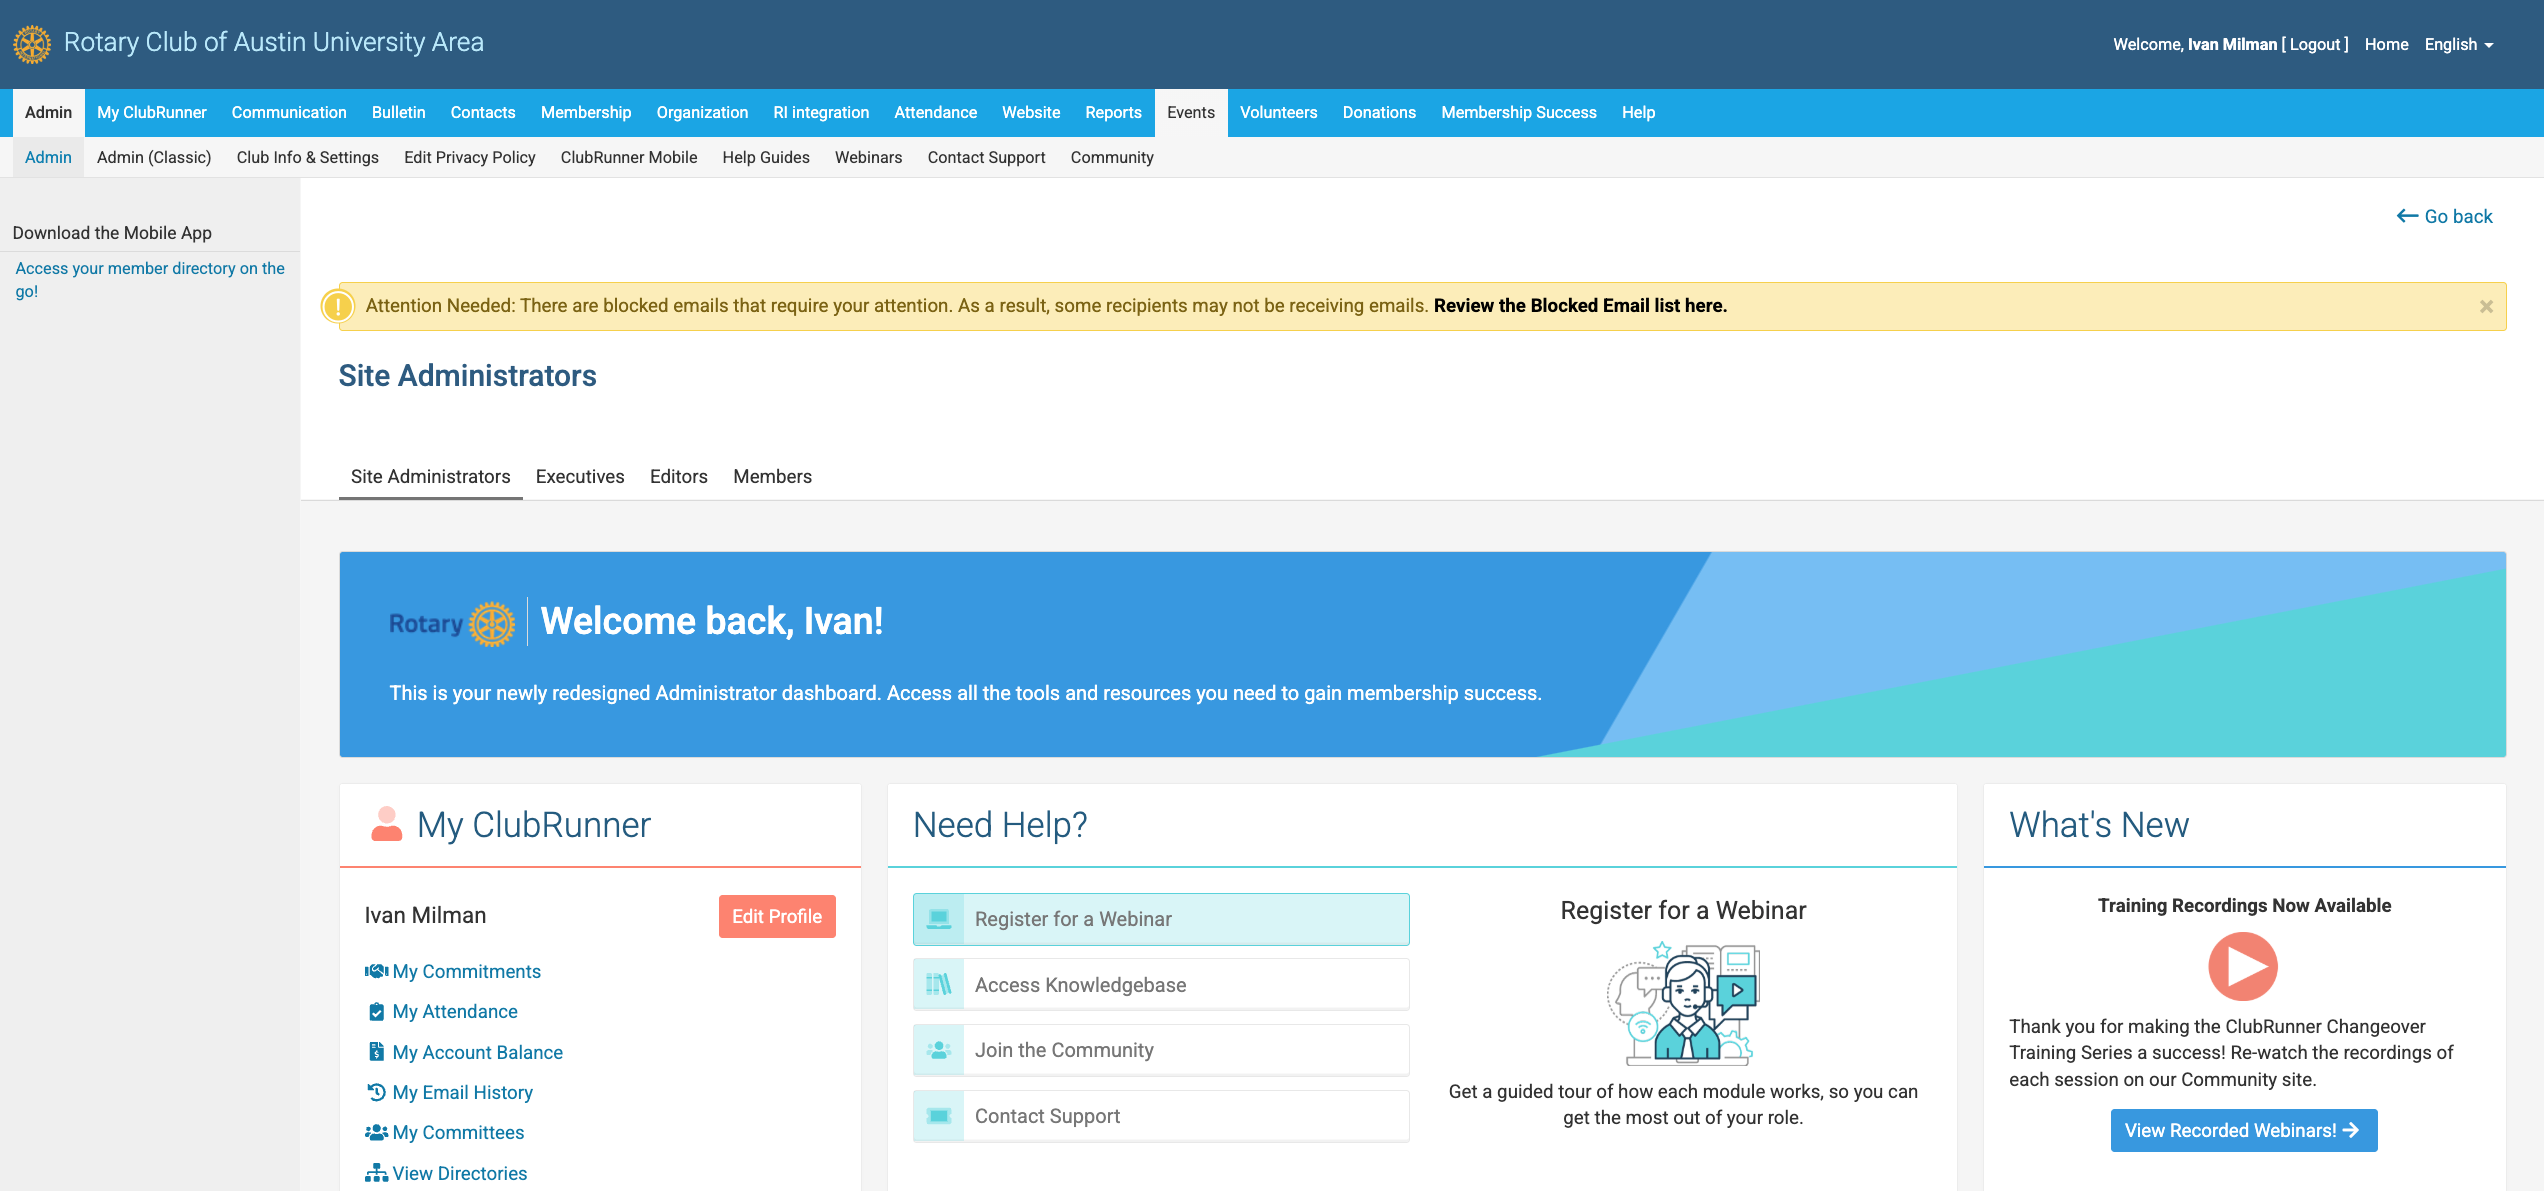
Hi, I'm going to guide you on creating a calendar event on ClubRunner for the Rotary Club of Austin University Area. It's straightforward. First, go to the website. At the top of our regular website, https://austinuniversityrotary.org, you'll see "Member Area."

2
Click on Member Area
Step #2: Click on Member Area

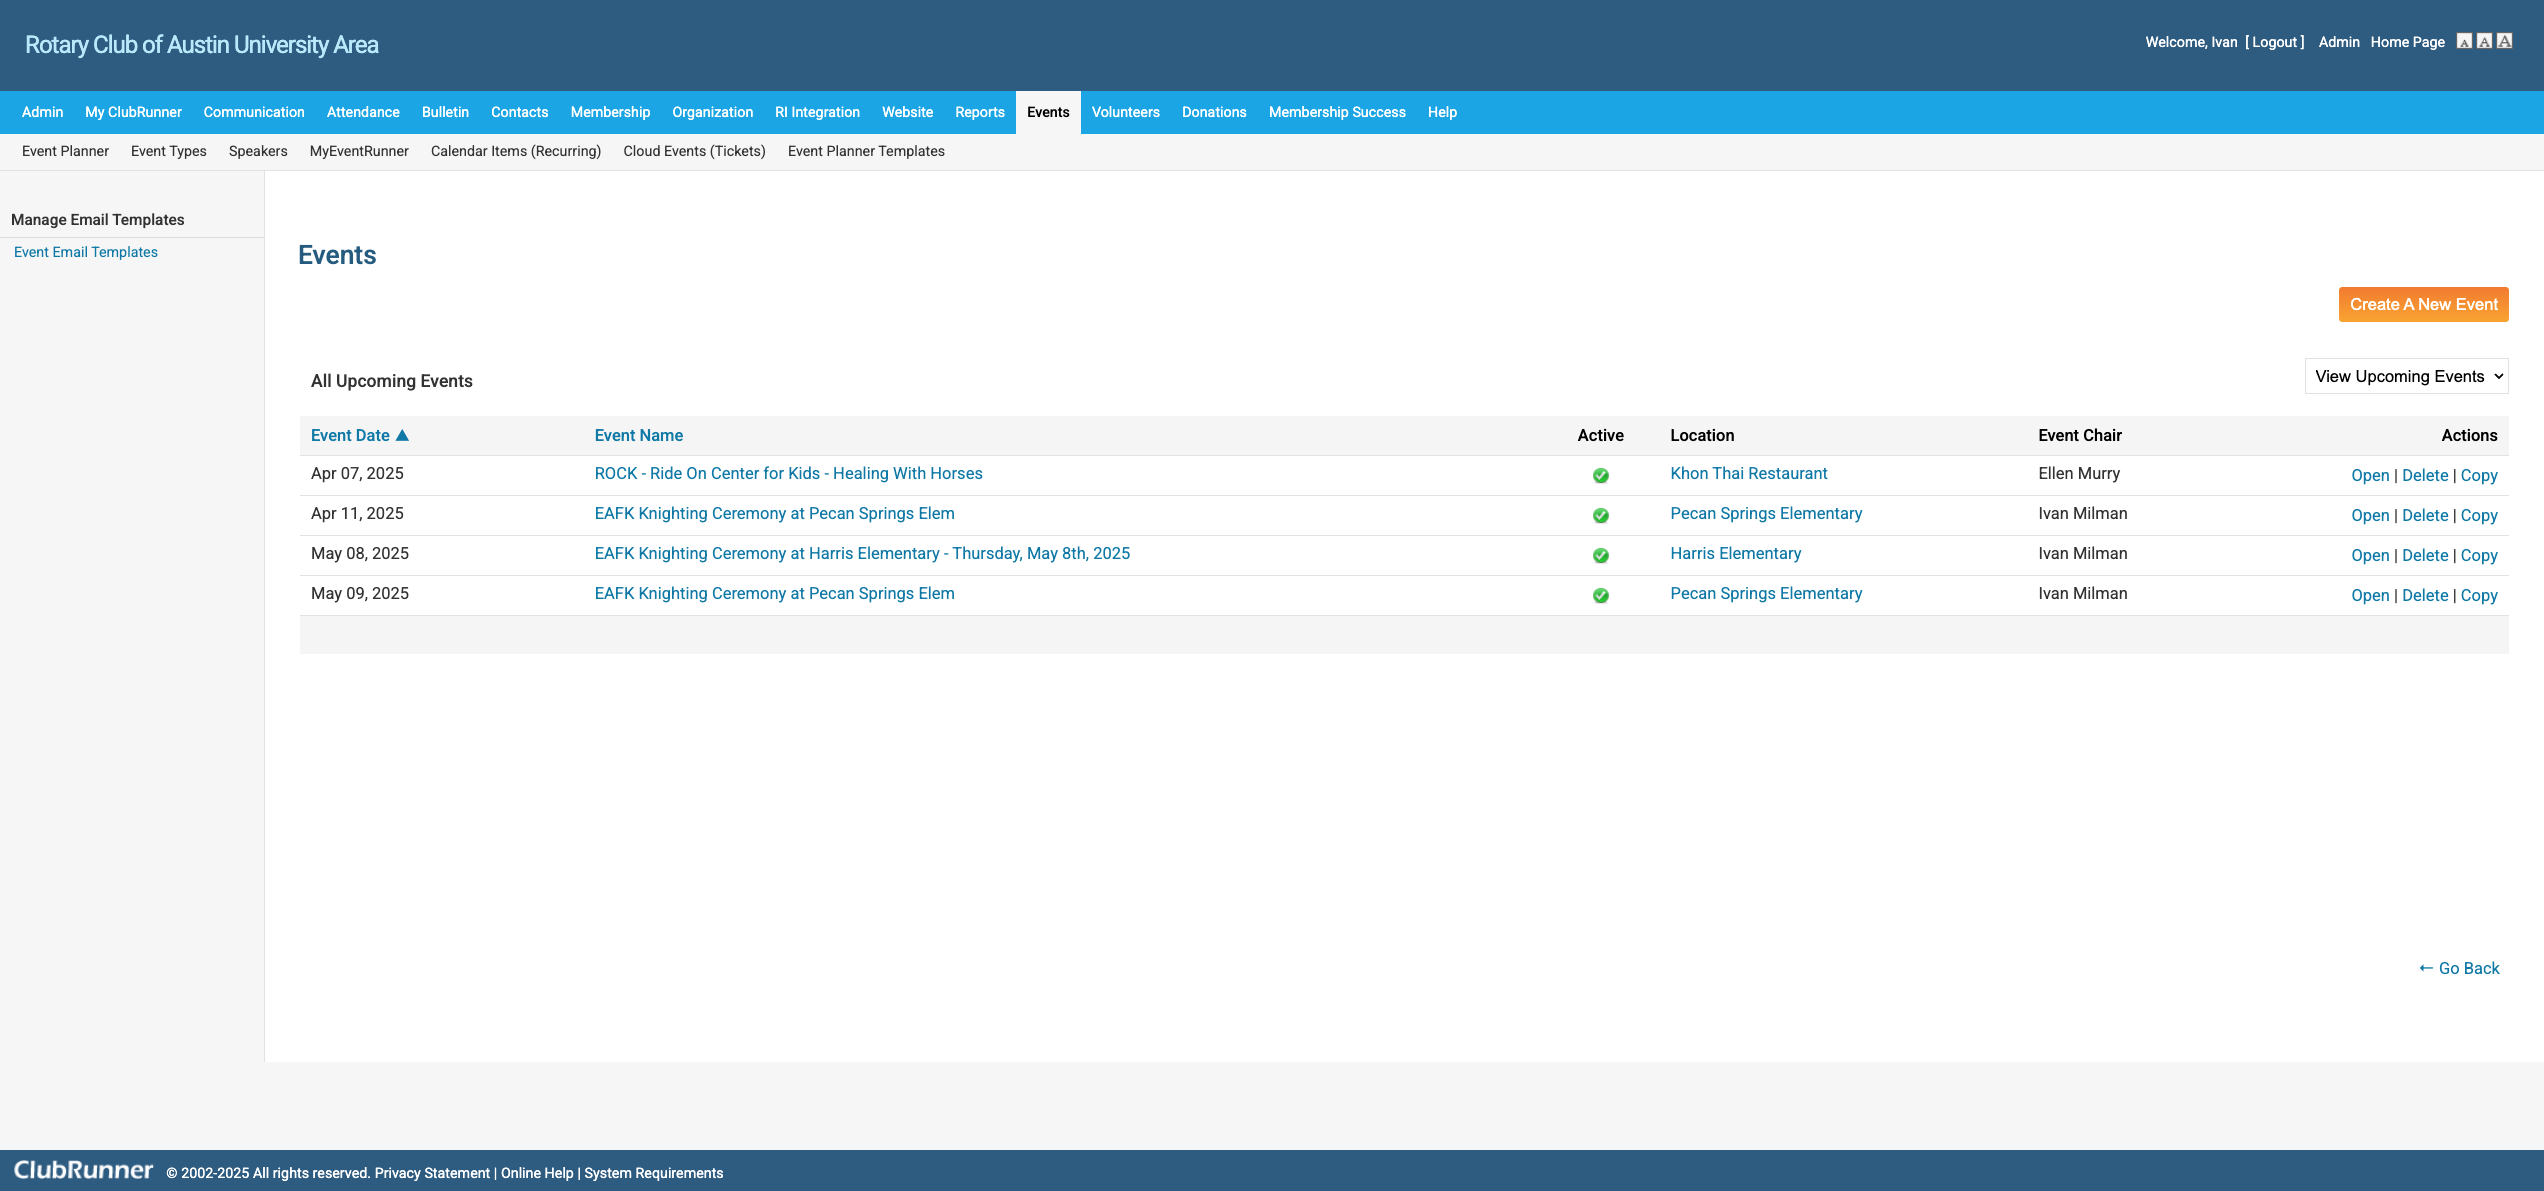
Clicking on that will take you to the internal club member page. Here, you can do more than just browse the website. Today we are just going to focus on events.

3
Click on "Events"
Step #3: Click on "Events"
4
From here, you'll click on "Event Planner". This is where you can create and modify most club events.
Step #4: From here, you'll click on "Event Planner".  This is where you can create and modify most club events.

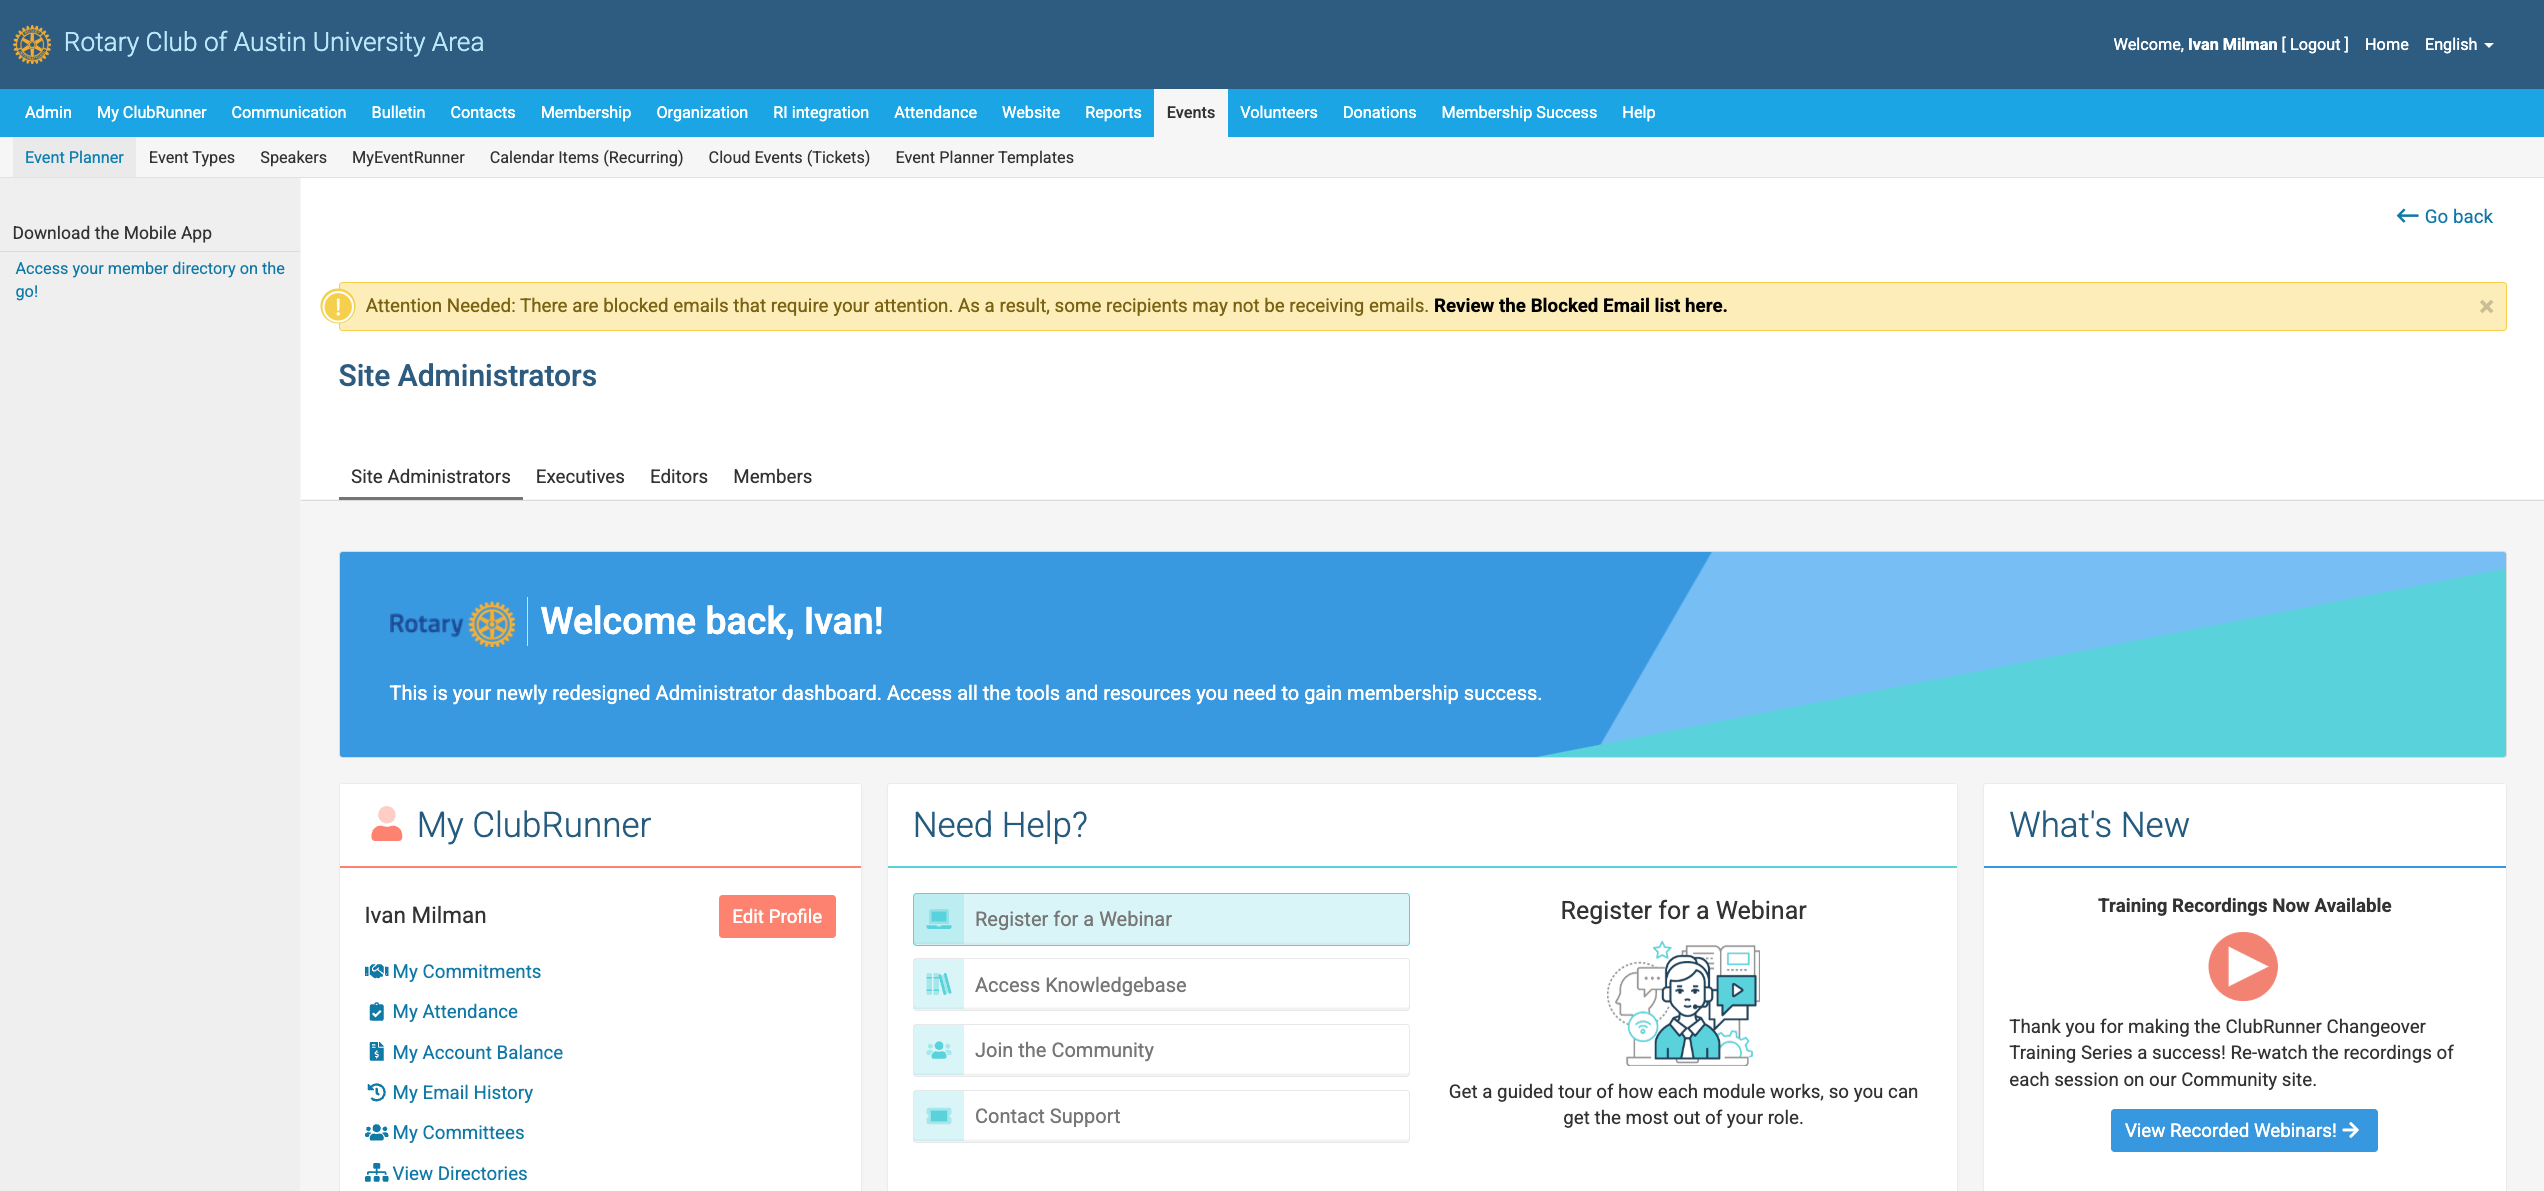
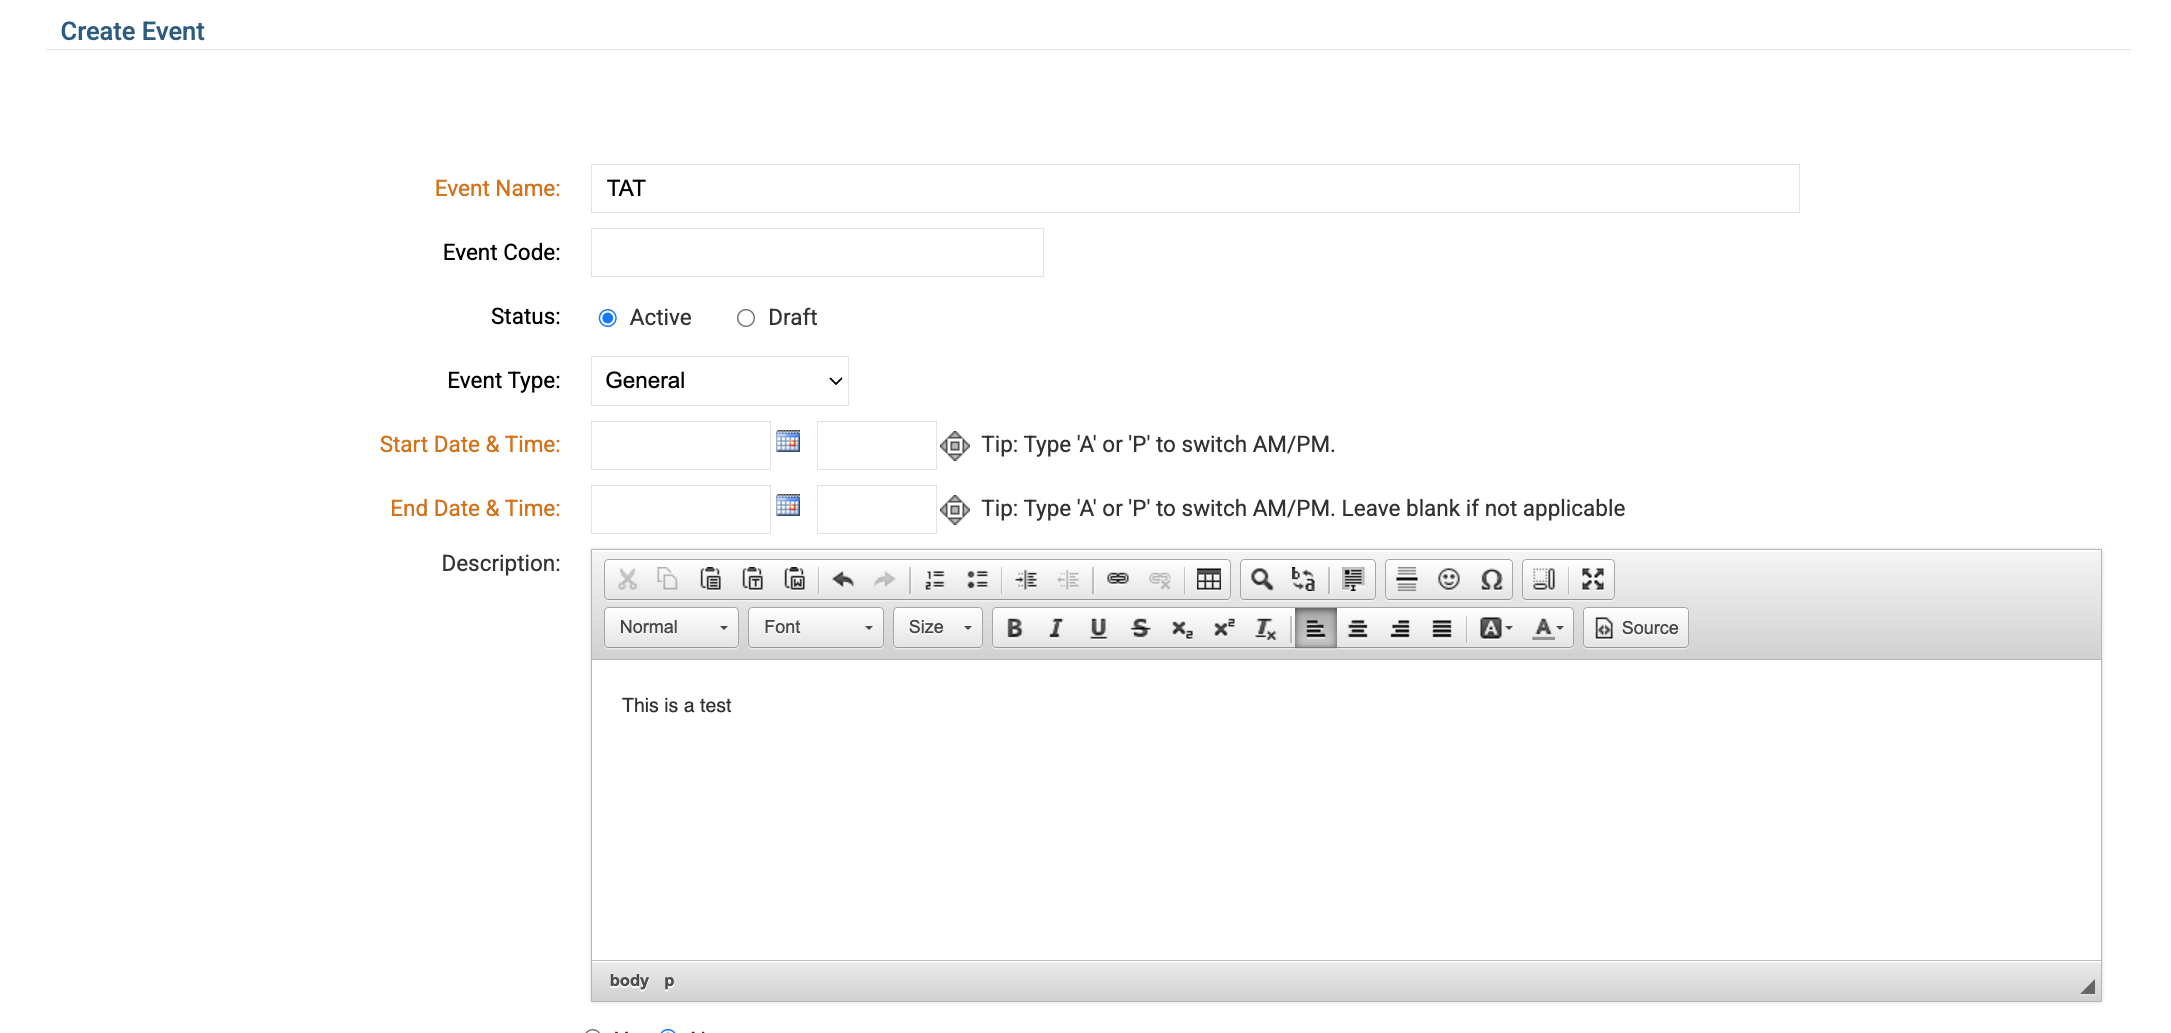
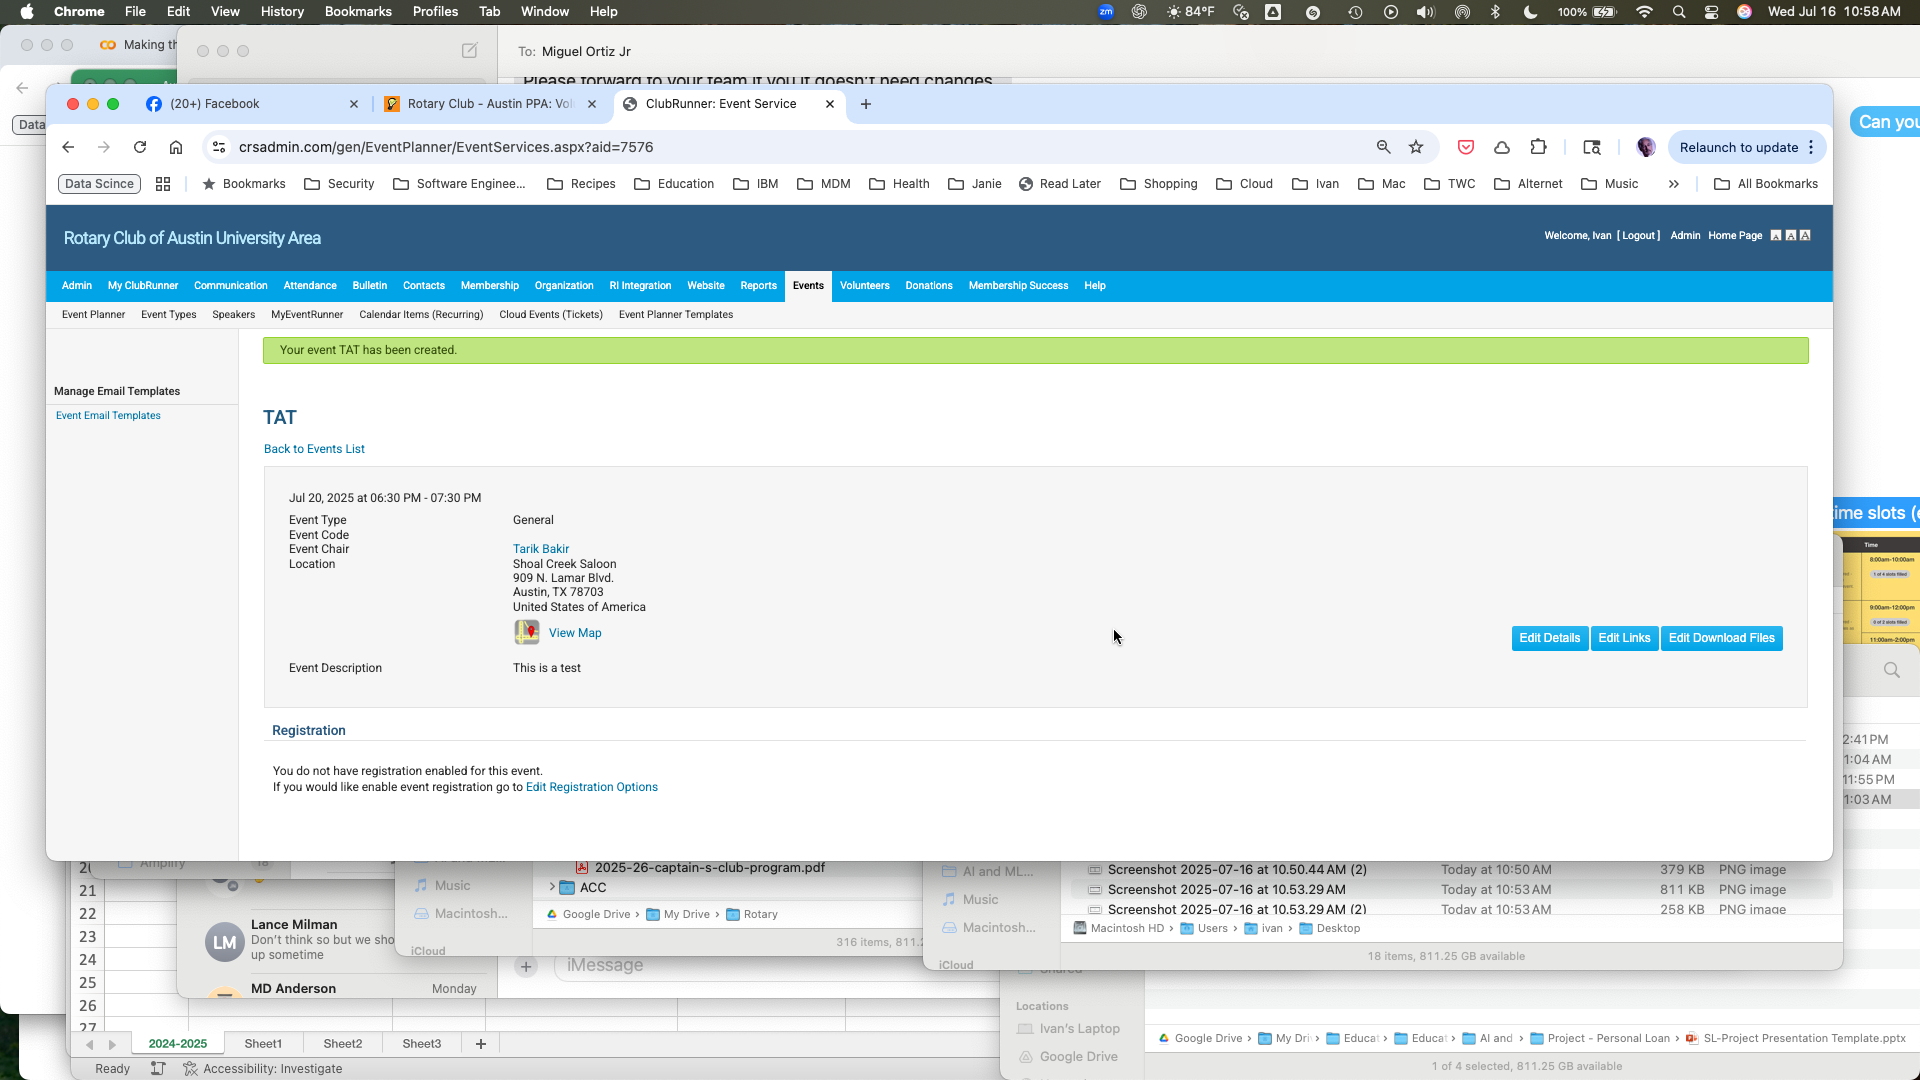
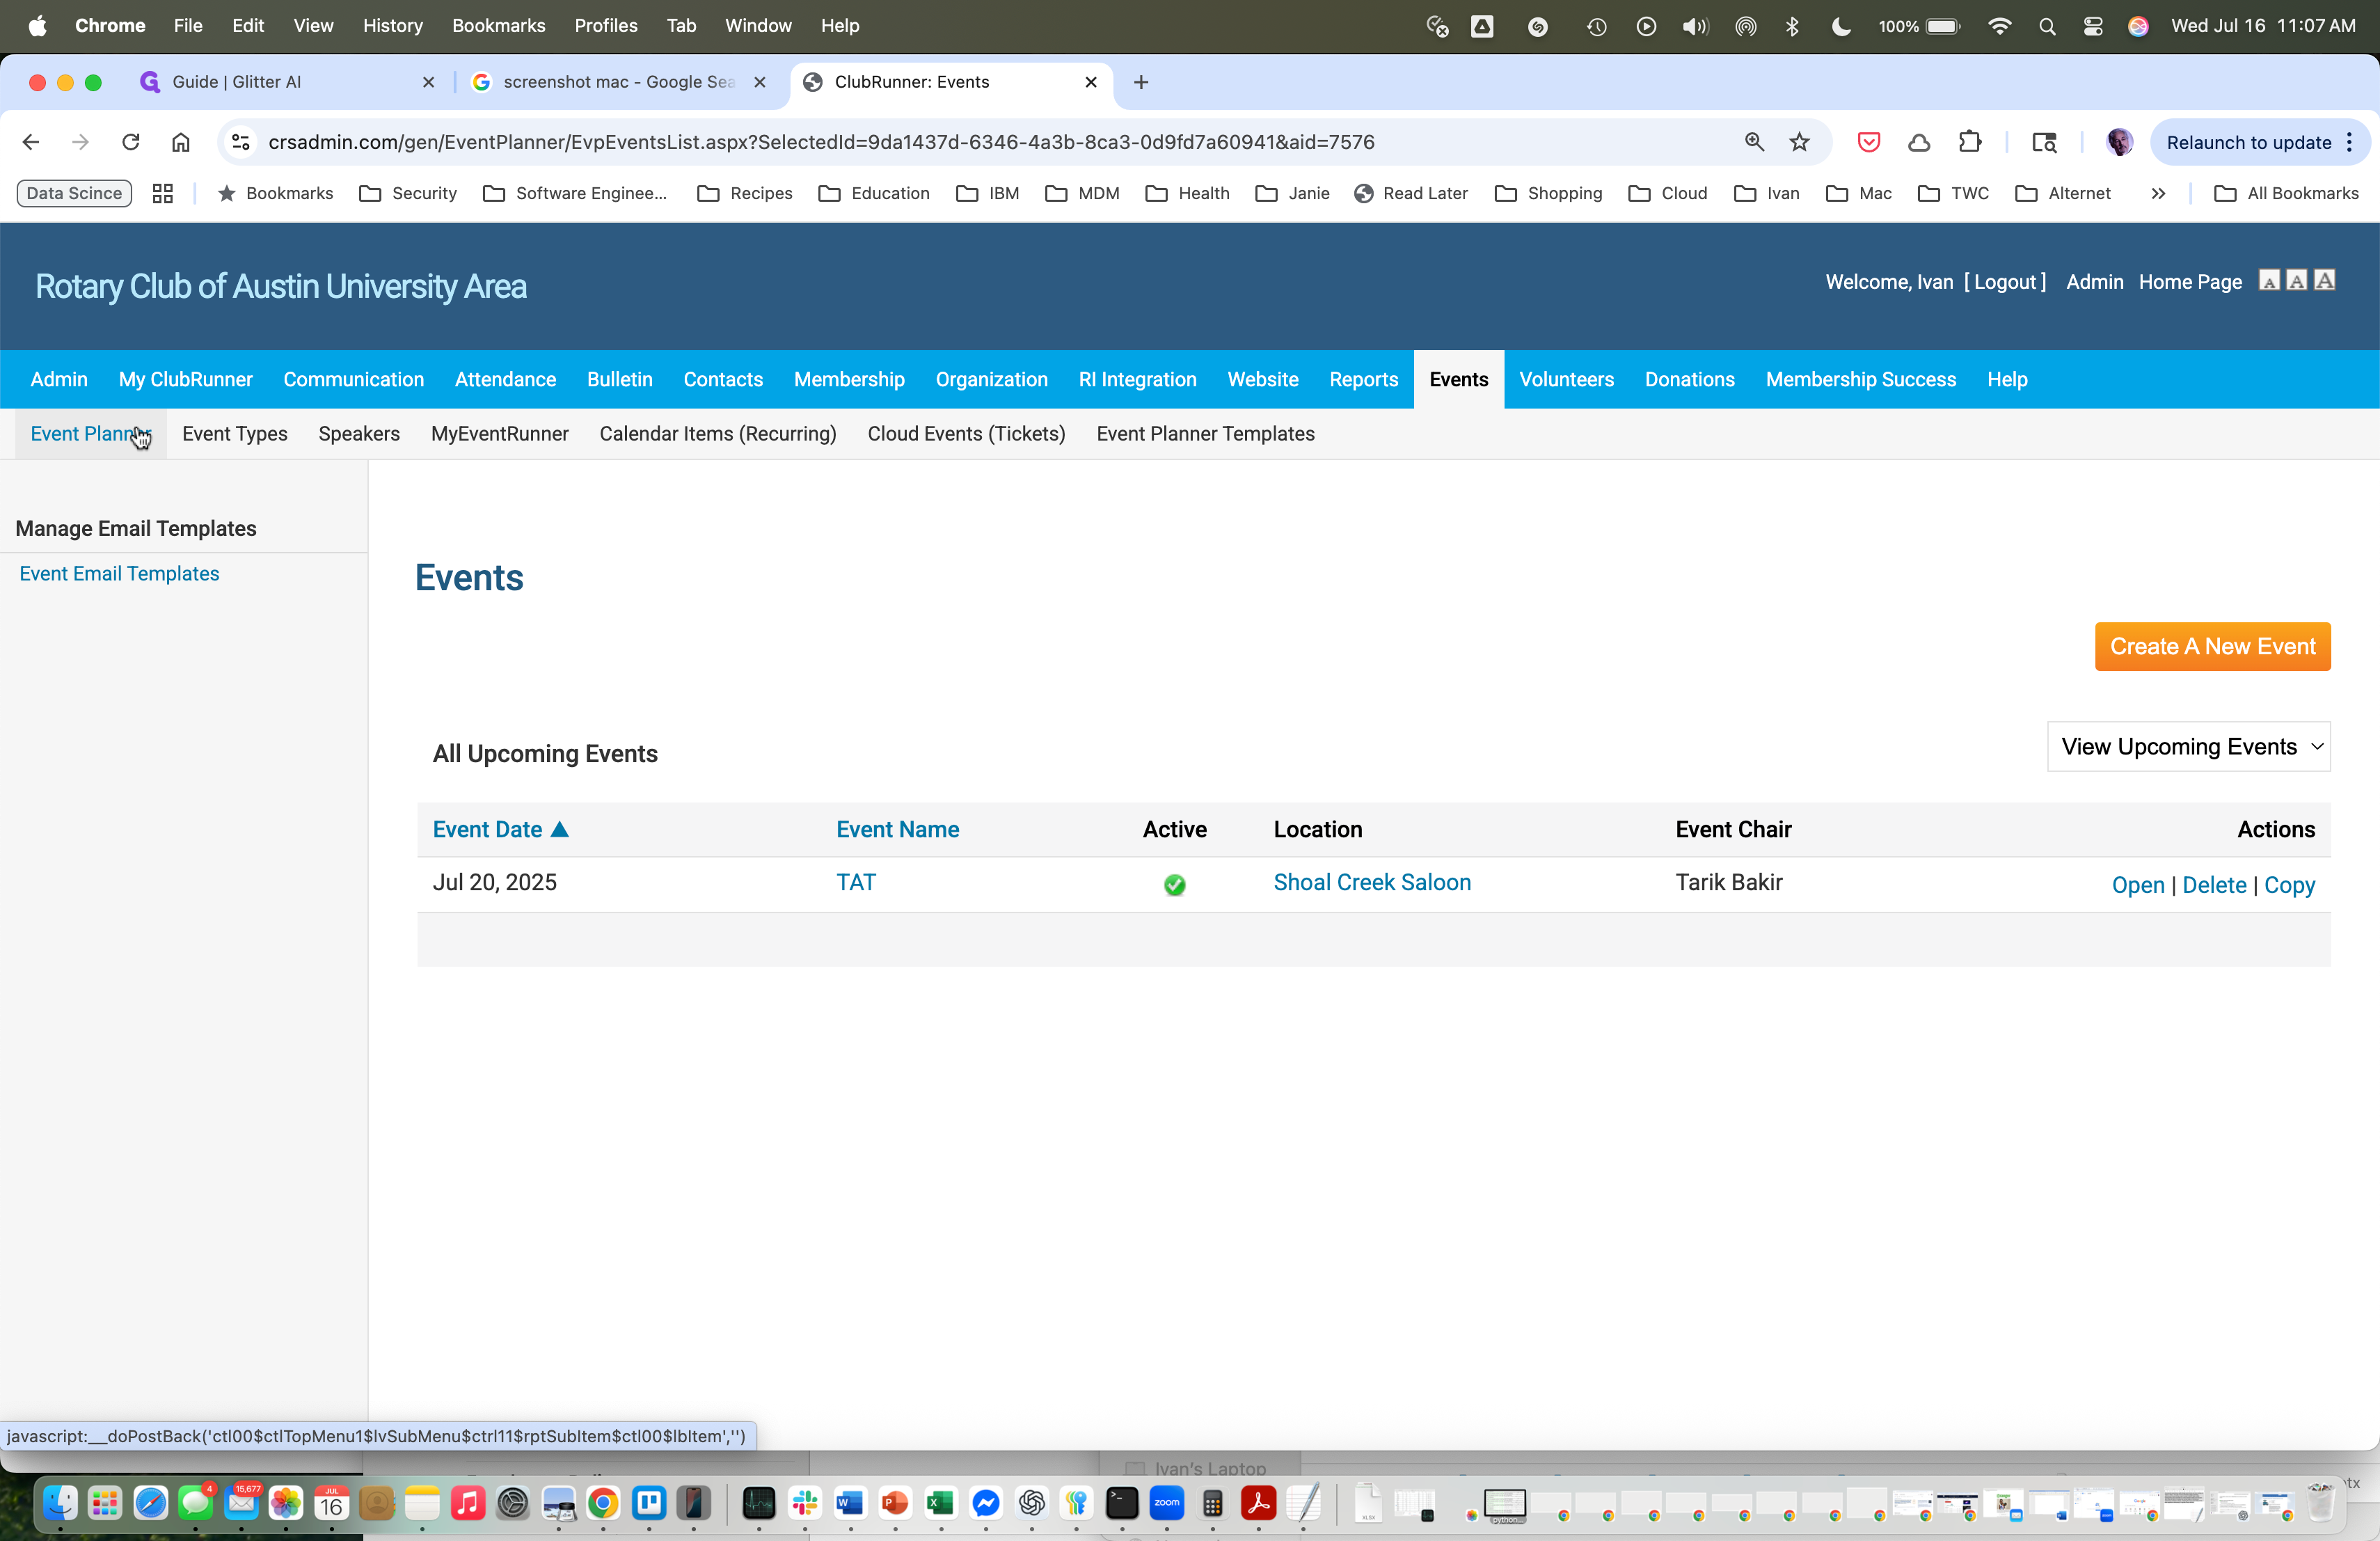
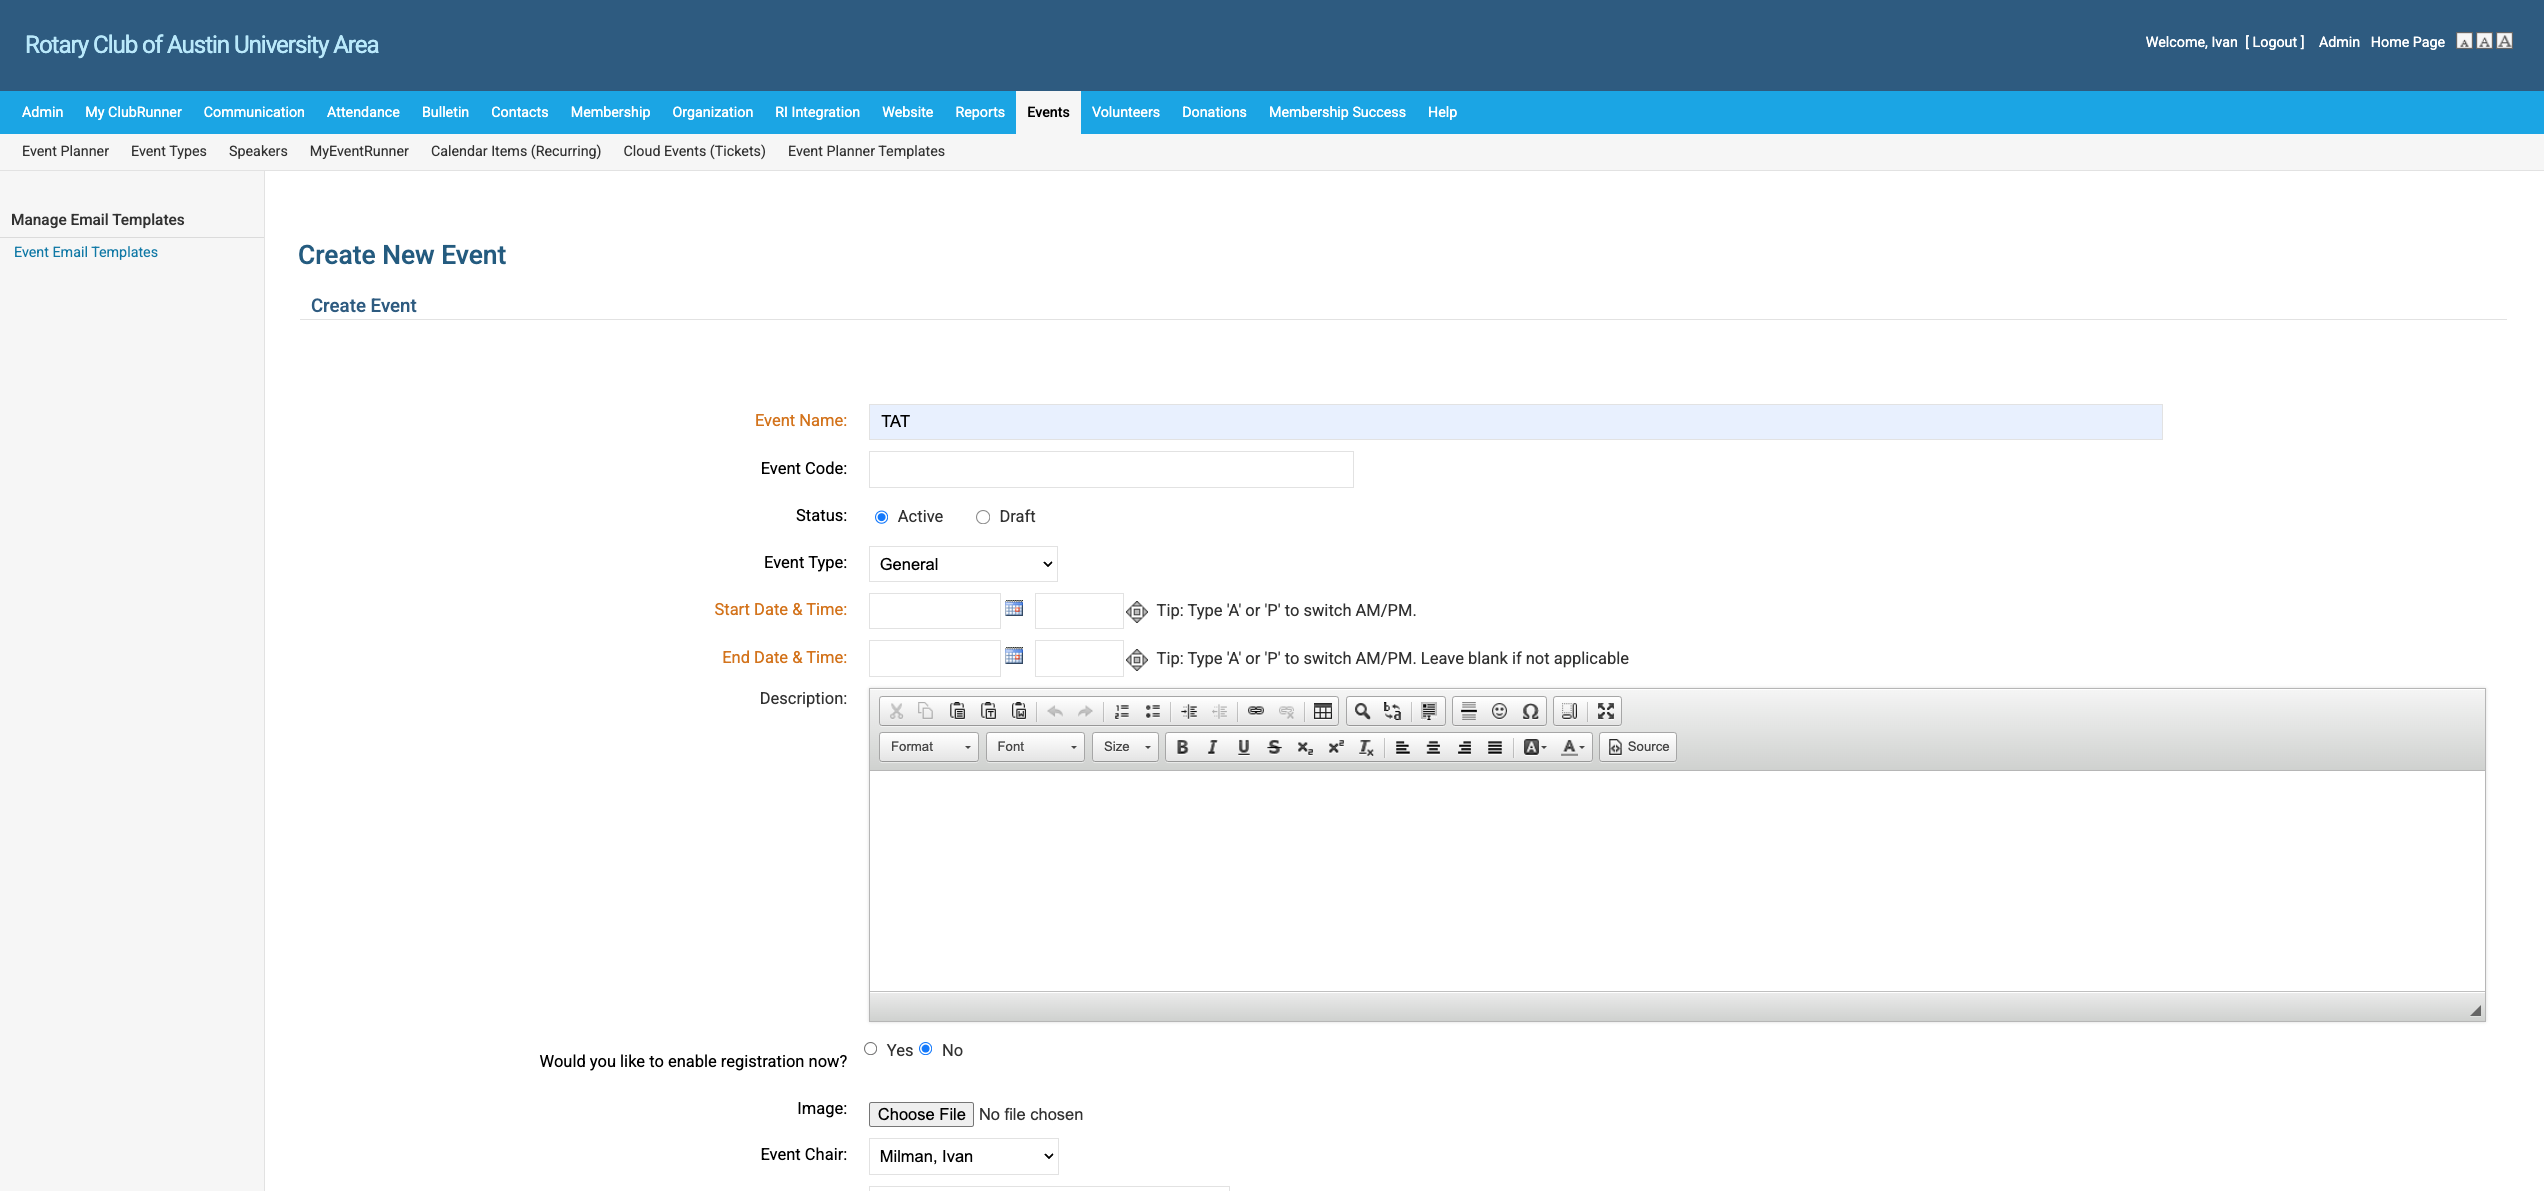
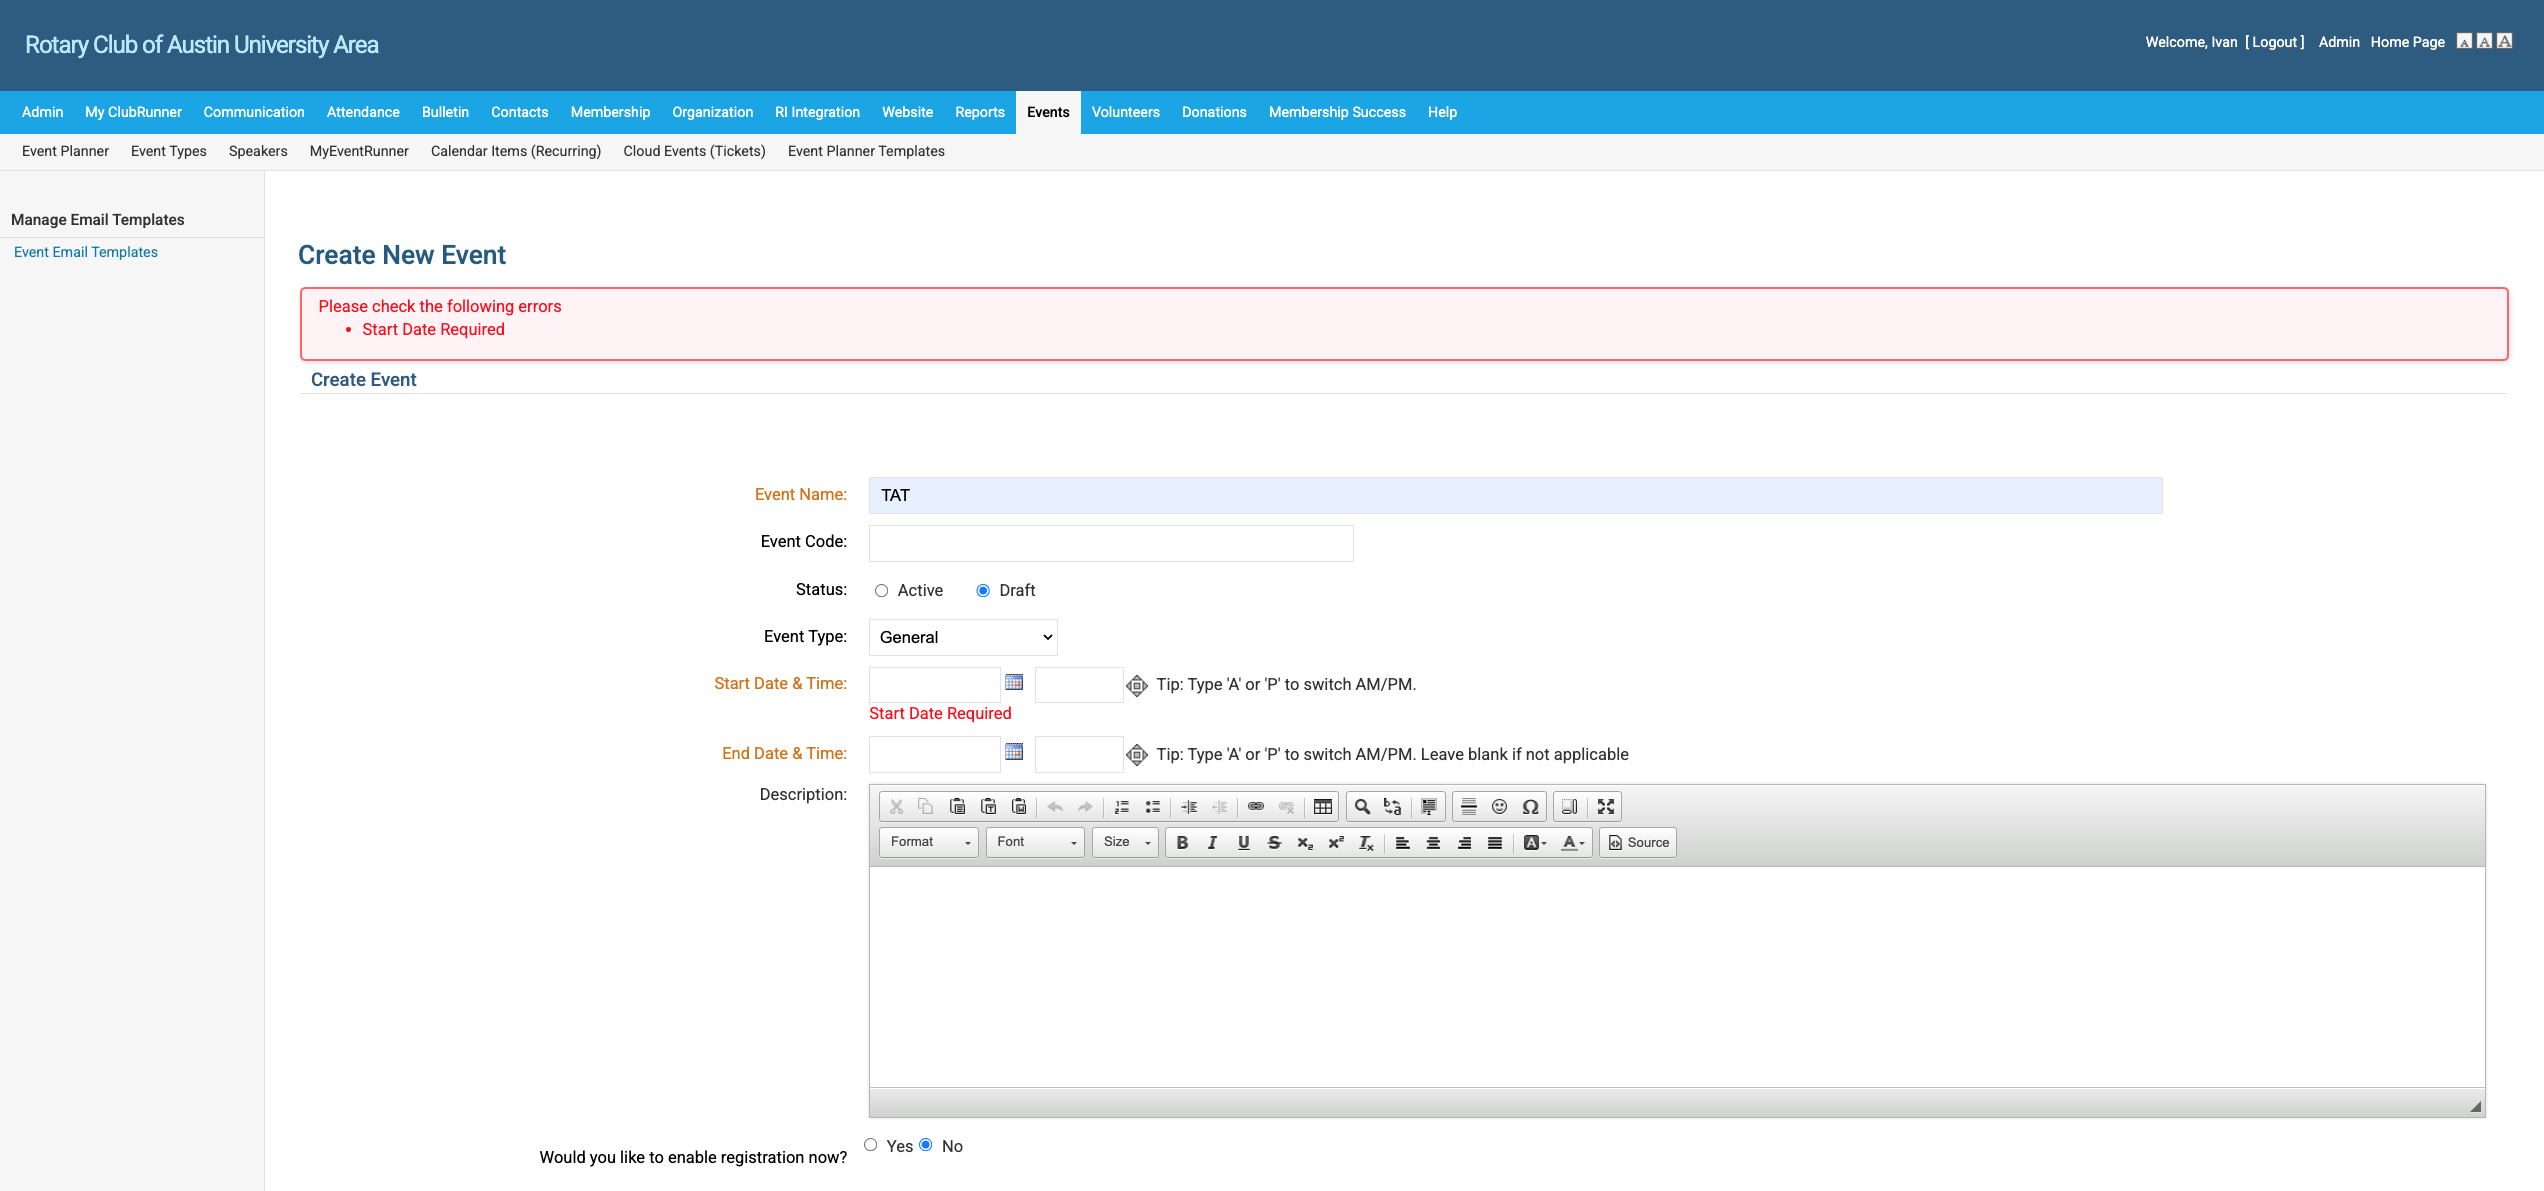
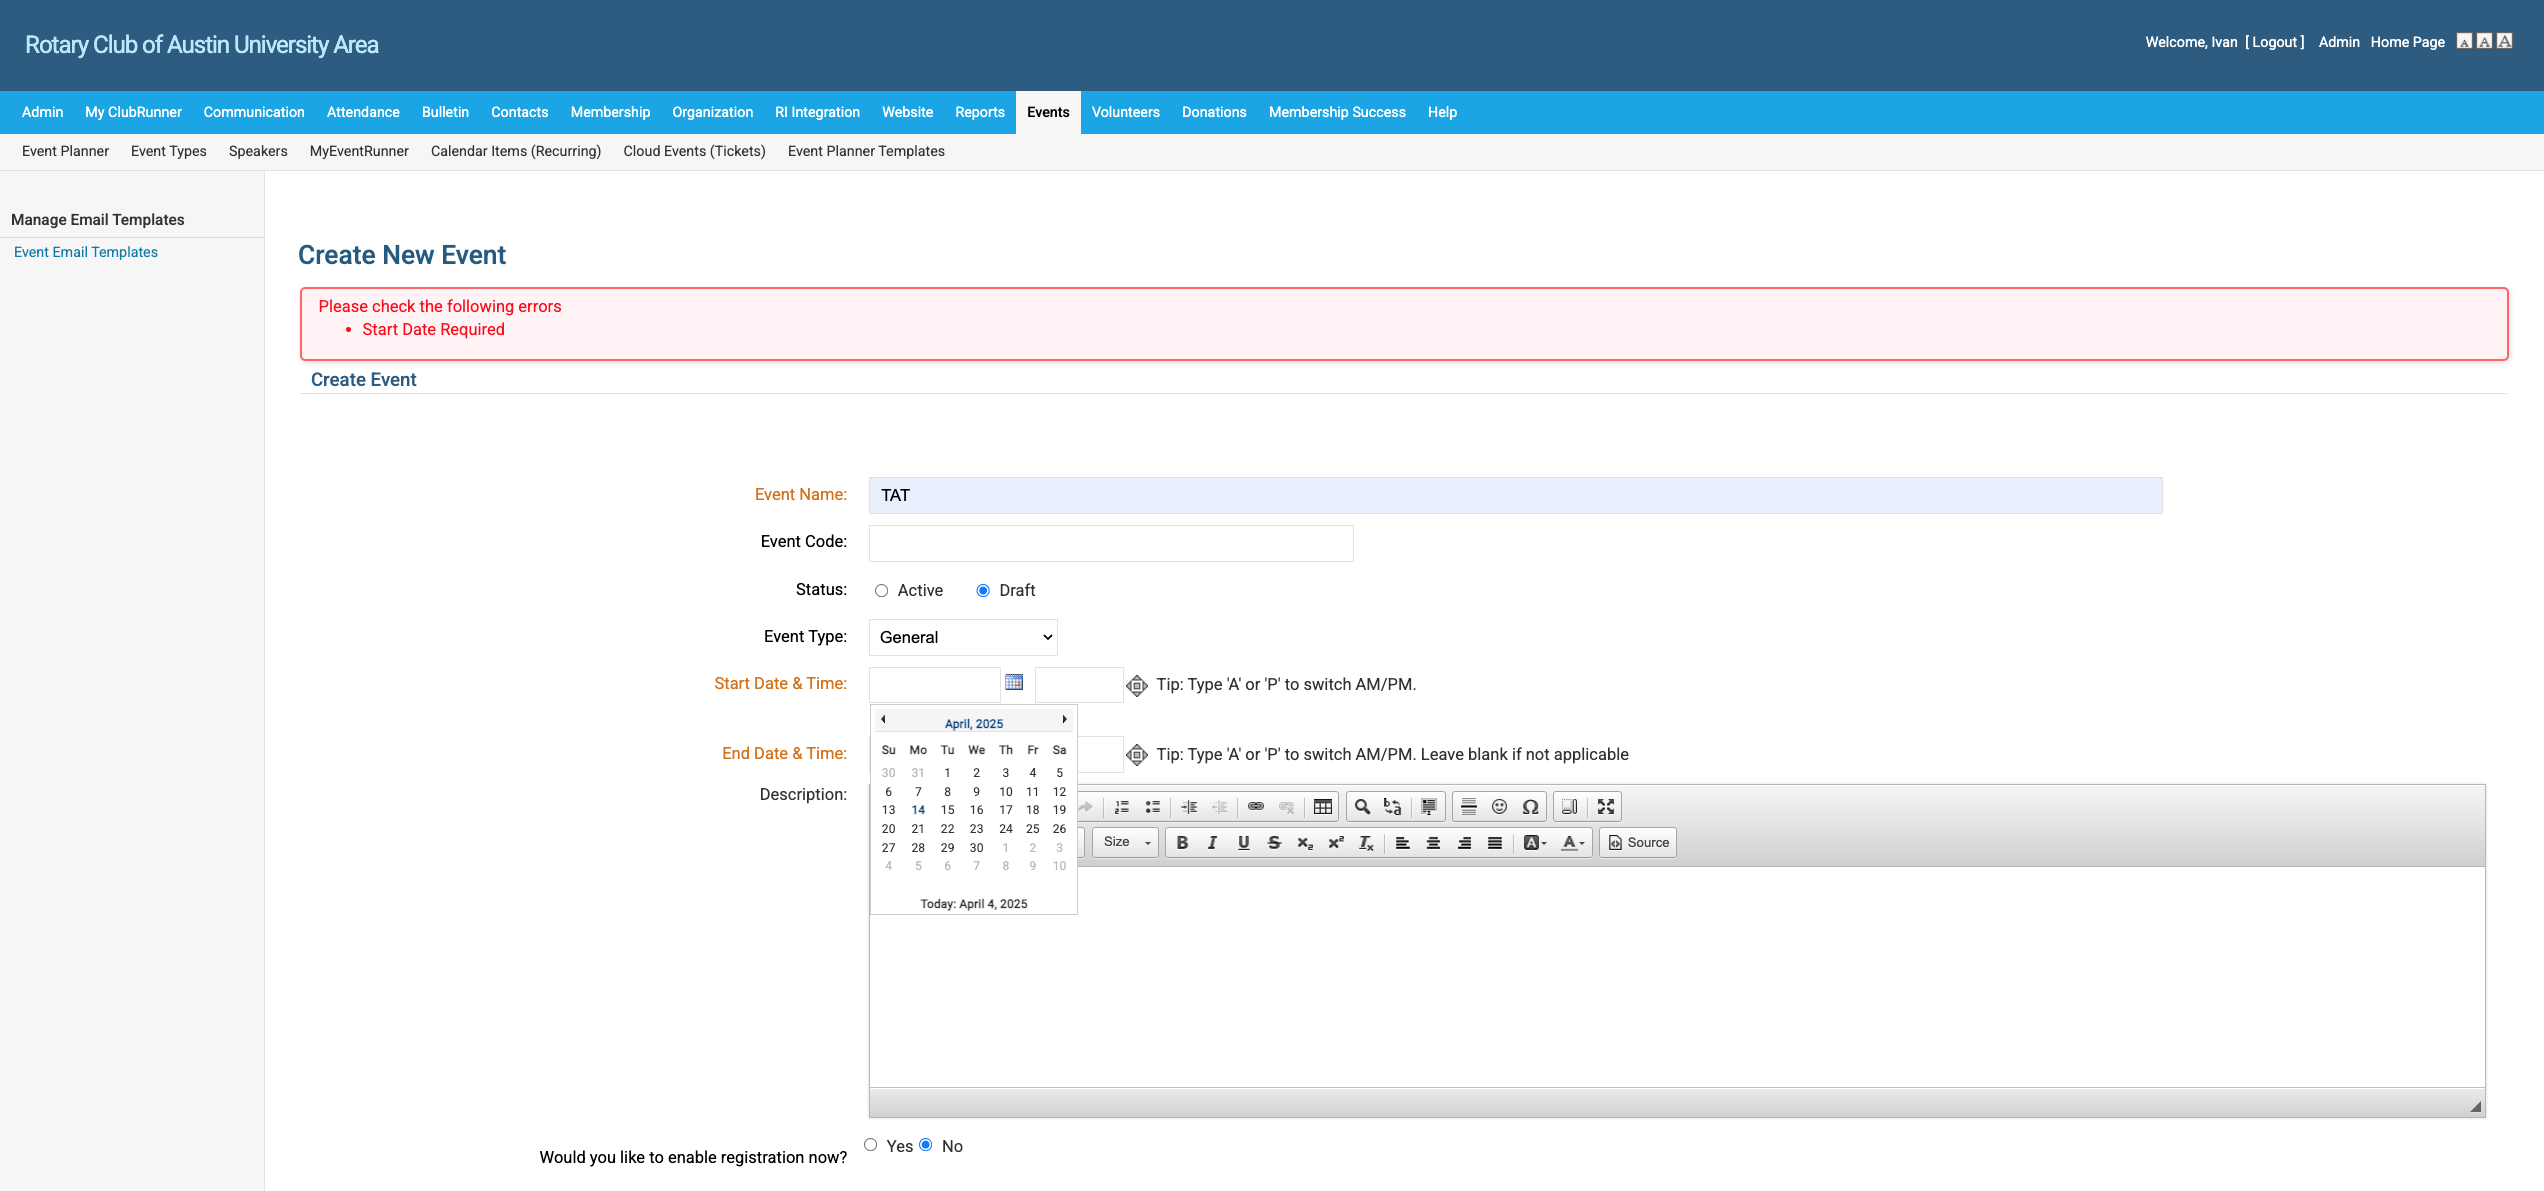
Once you click on event planner, you should see a button in the upper right to "create a new event", start by giving it a name. For example, "TAT (This is just a test)." Set it as a draft. If you save it, it might not work immediately.

5
Click here
Step #5: Click here
6
You will see the template for a new event. There are three things that are required for every event: an event name, a start date and time, and an end date and time. Type in the name of the event in "Event Name". In my example, I use "TAT" (This is A Test).
Step #6: You will see the template for a new event.  There are three things that are required for every event:  an event name, a start date and time, and an end date and time.  Type in the name of the event in "Event Name".  In my example, I use "TAT" (This is A Test).
7
You can also set the event to active (which will show on the club calendar) or draft (which won't). I often set it to active just so I can see it on the club calendar on our website.
Step #7: You can also set the event to active (which will show on the club calendar) or draft (which won't).  I often set it to active just so I can see it on the club calendar on our website.

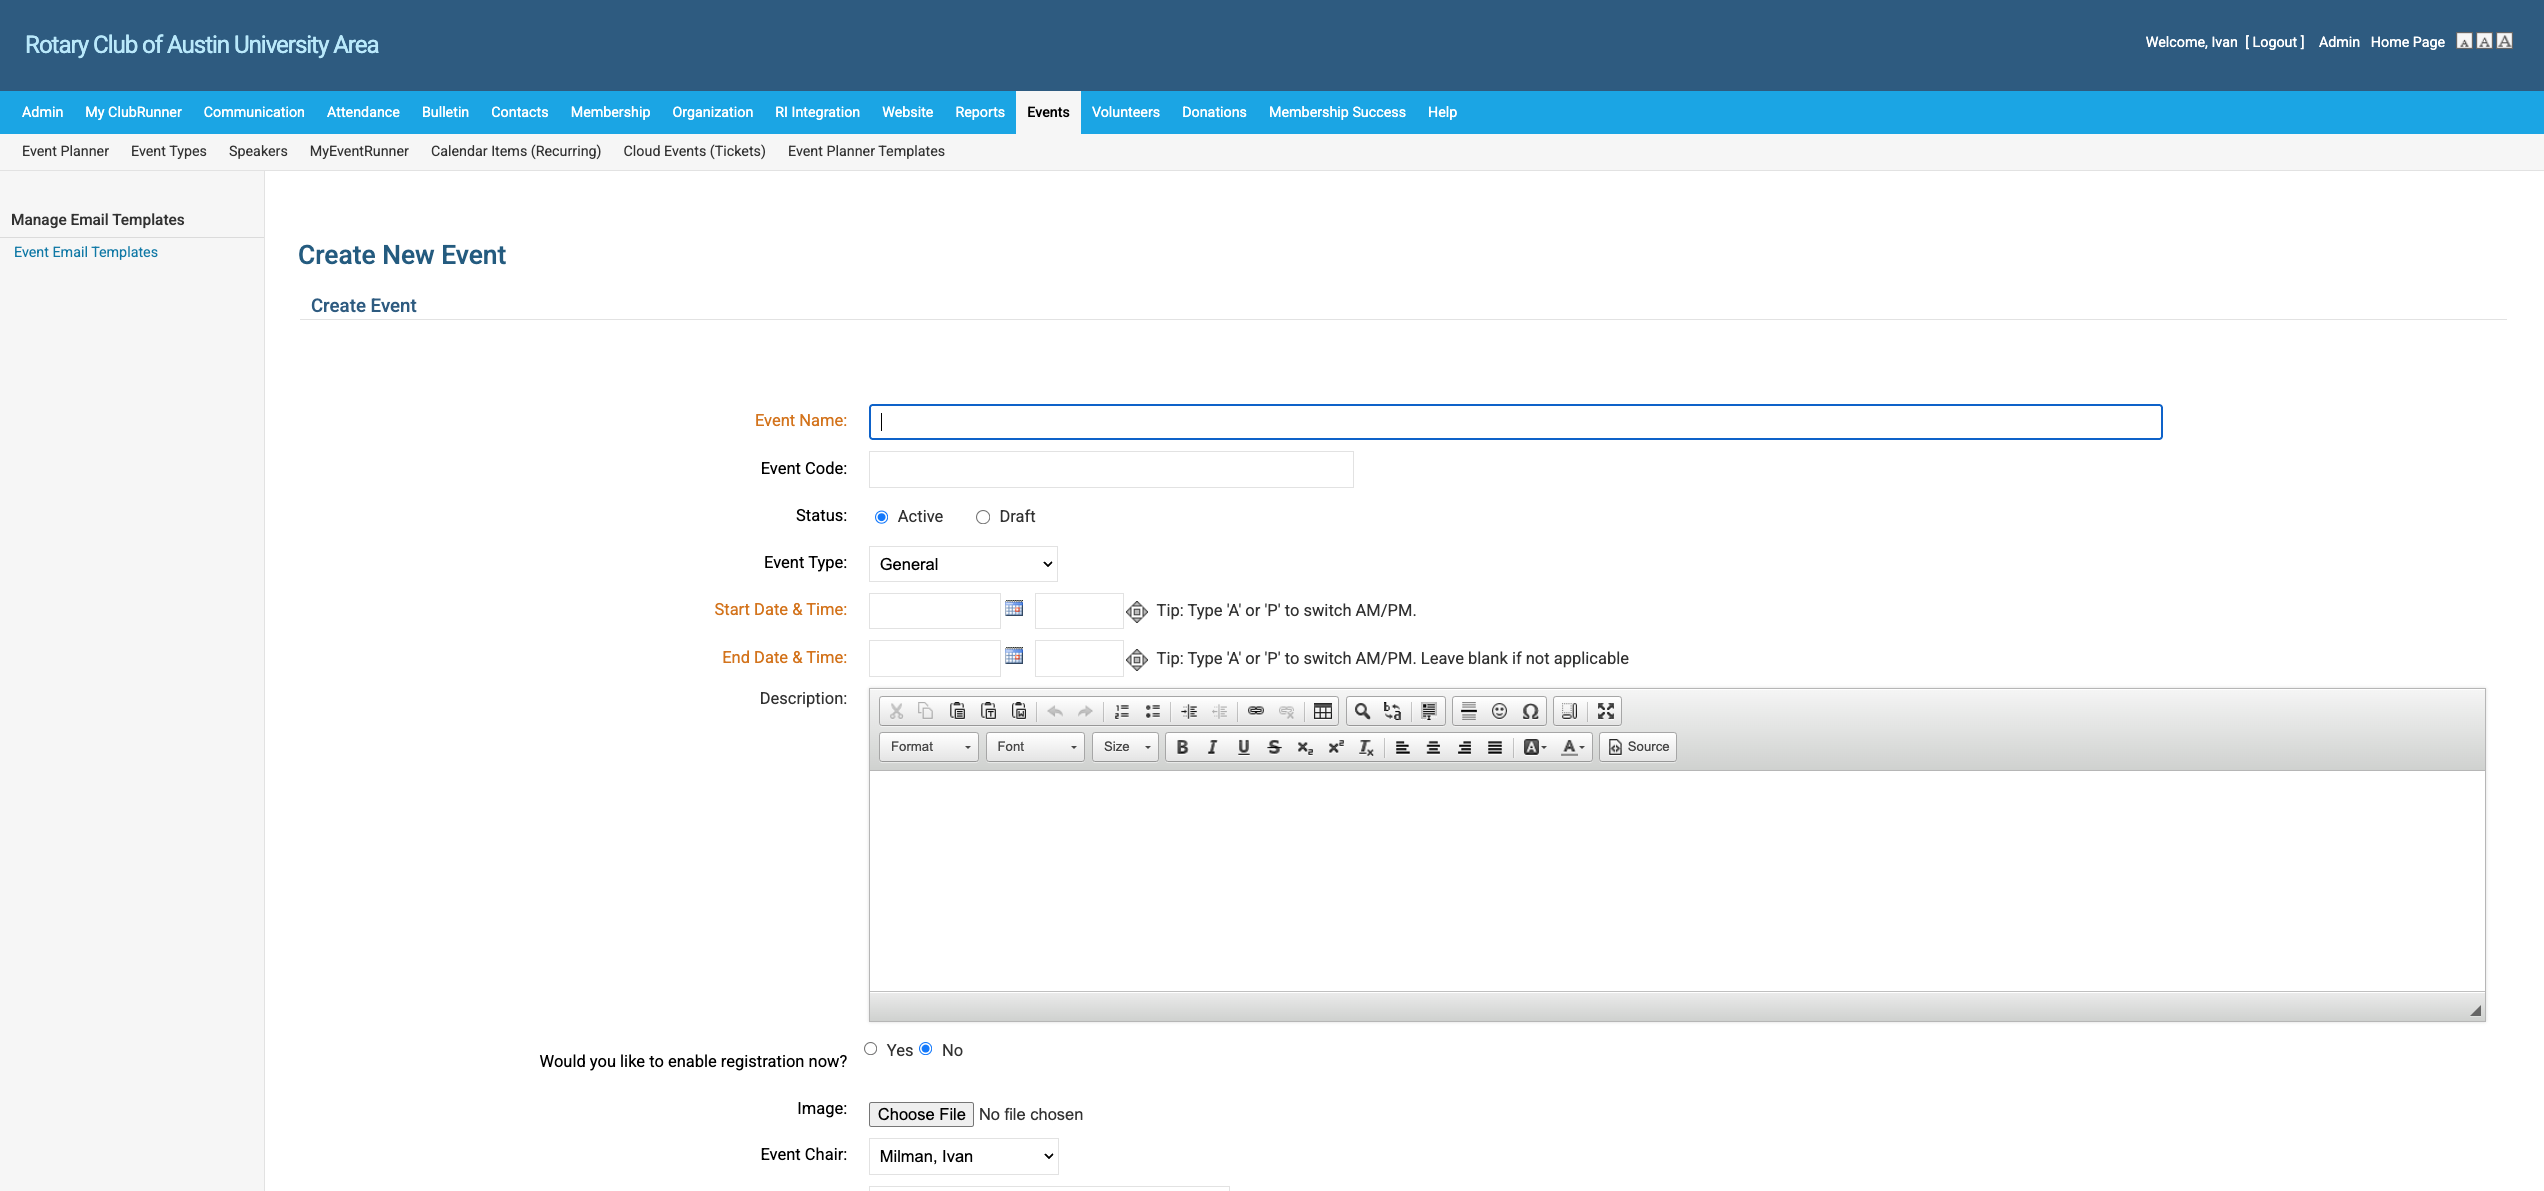
You need to include dates because it requires them. Let's use April 14th as an example. Then, save the changes.

8
First set the start date and time
Step #8: First set the start date and time
9
Click on "Start Date & Time :" If you pick the Calendar icon, it will pop up a calendar to set the date.
Step #9: Click on "Start Date & Time :"  If you pick the Calendar icon, it will pop up a calendar to set the date.

10
Next set the time. Don't forget to set AM or PM
Step #10: Next set the time.  Don't forget to set AM or PM

11
Repeat for End Date & Time
Step #11: Repeat for End Date & Time

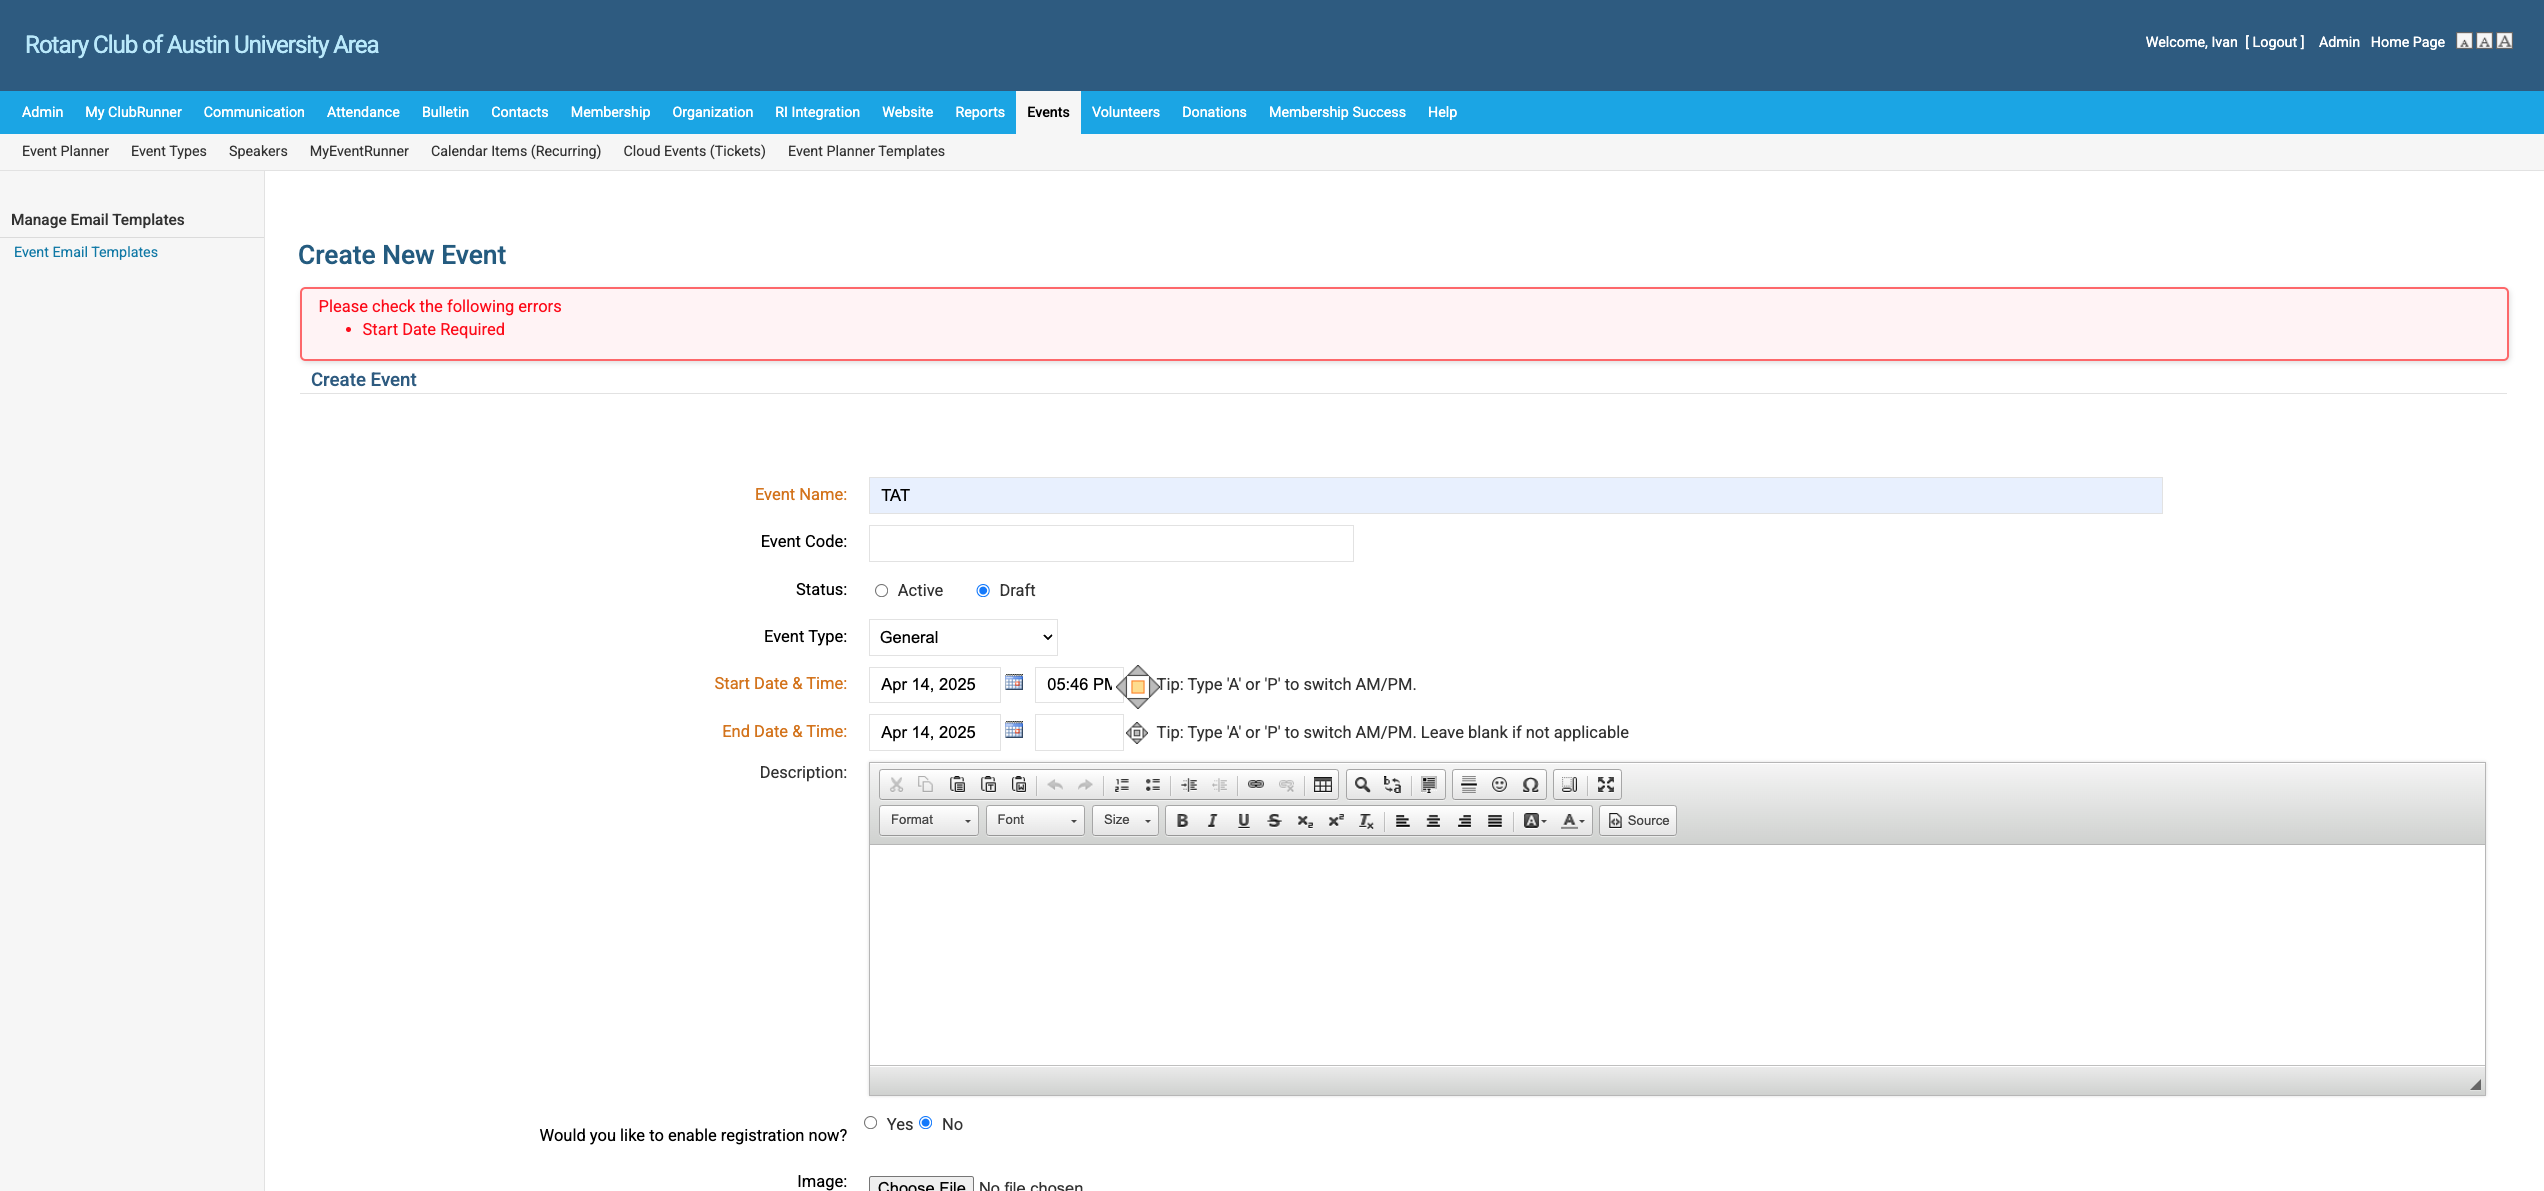
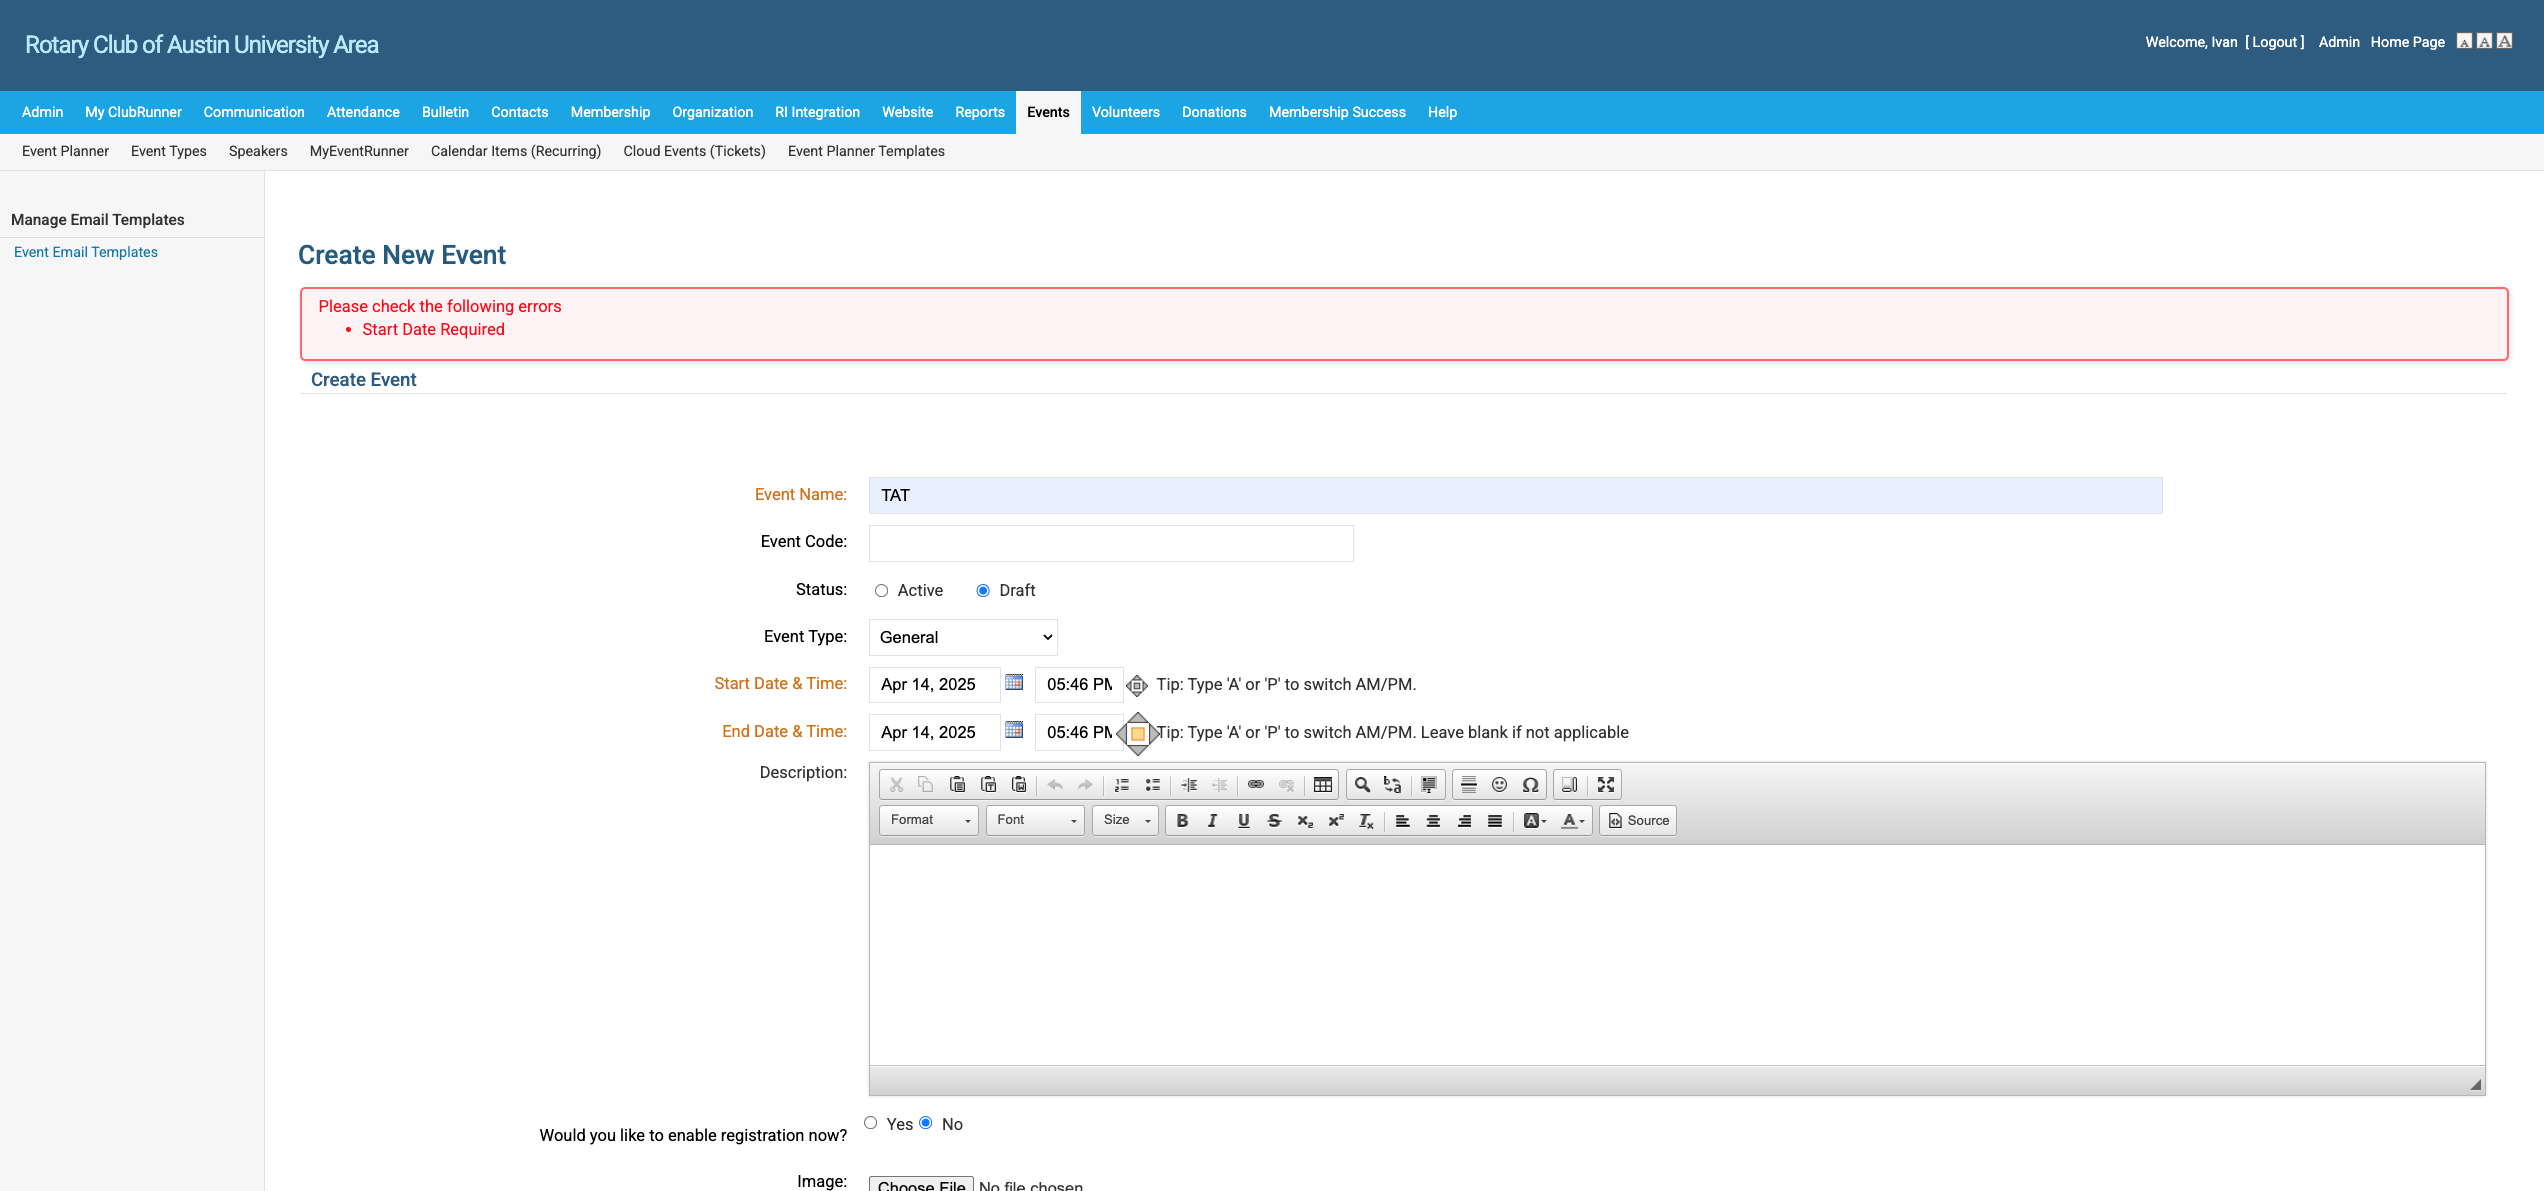
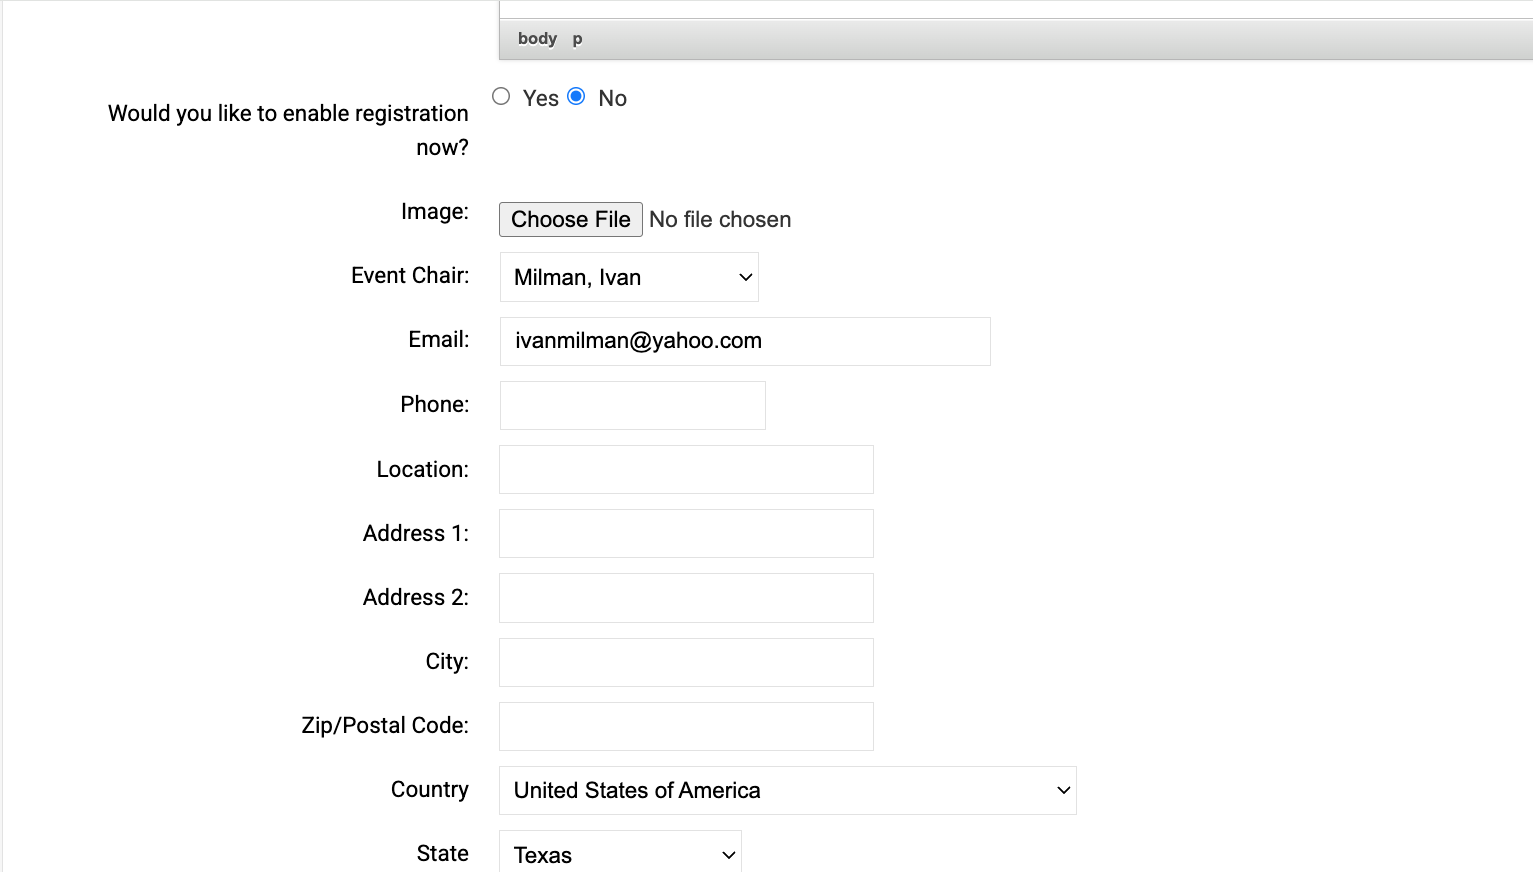
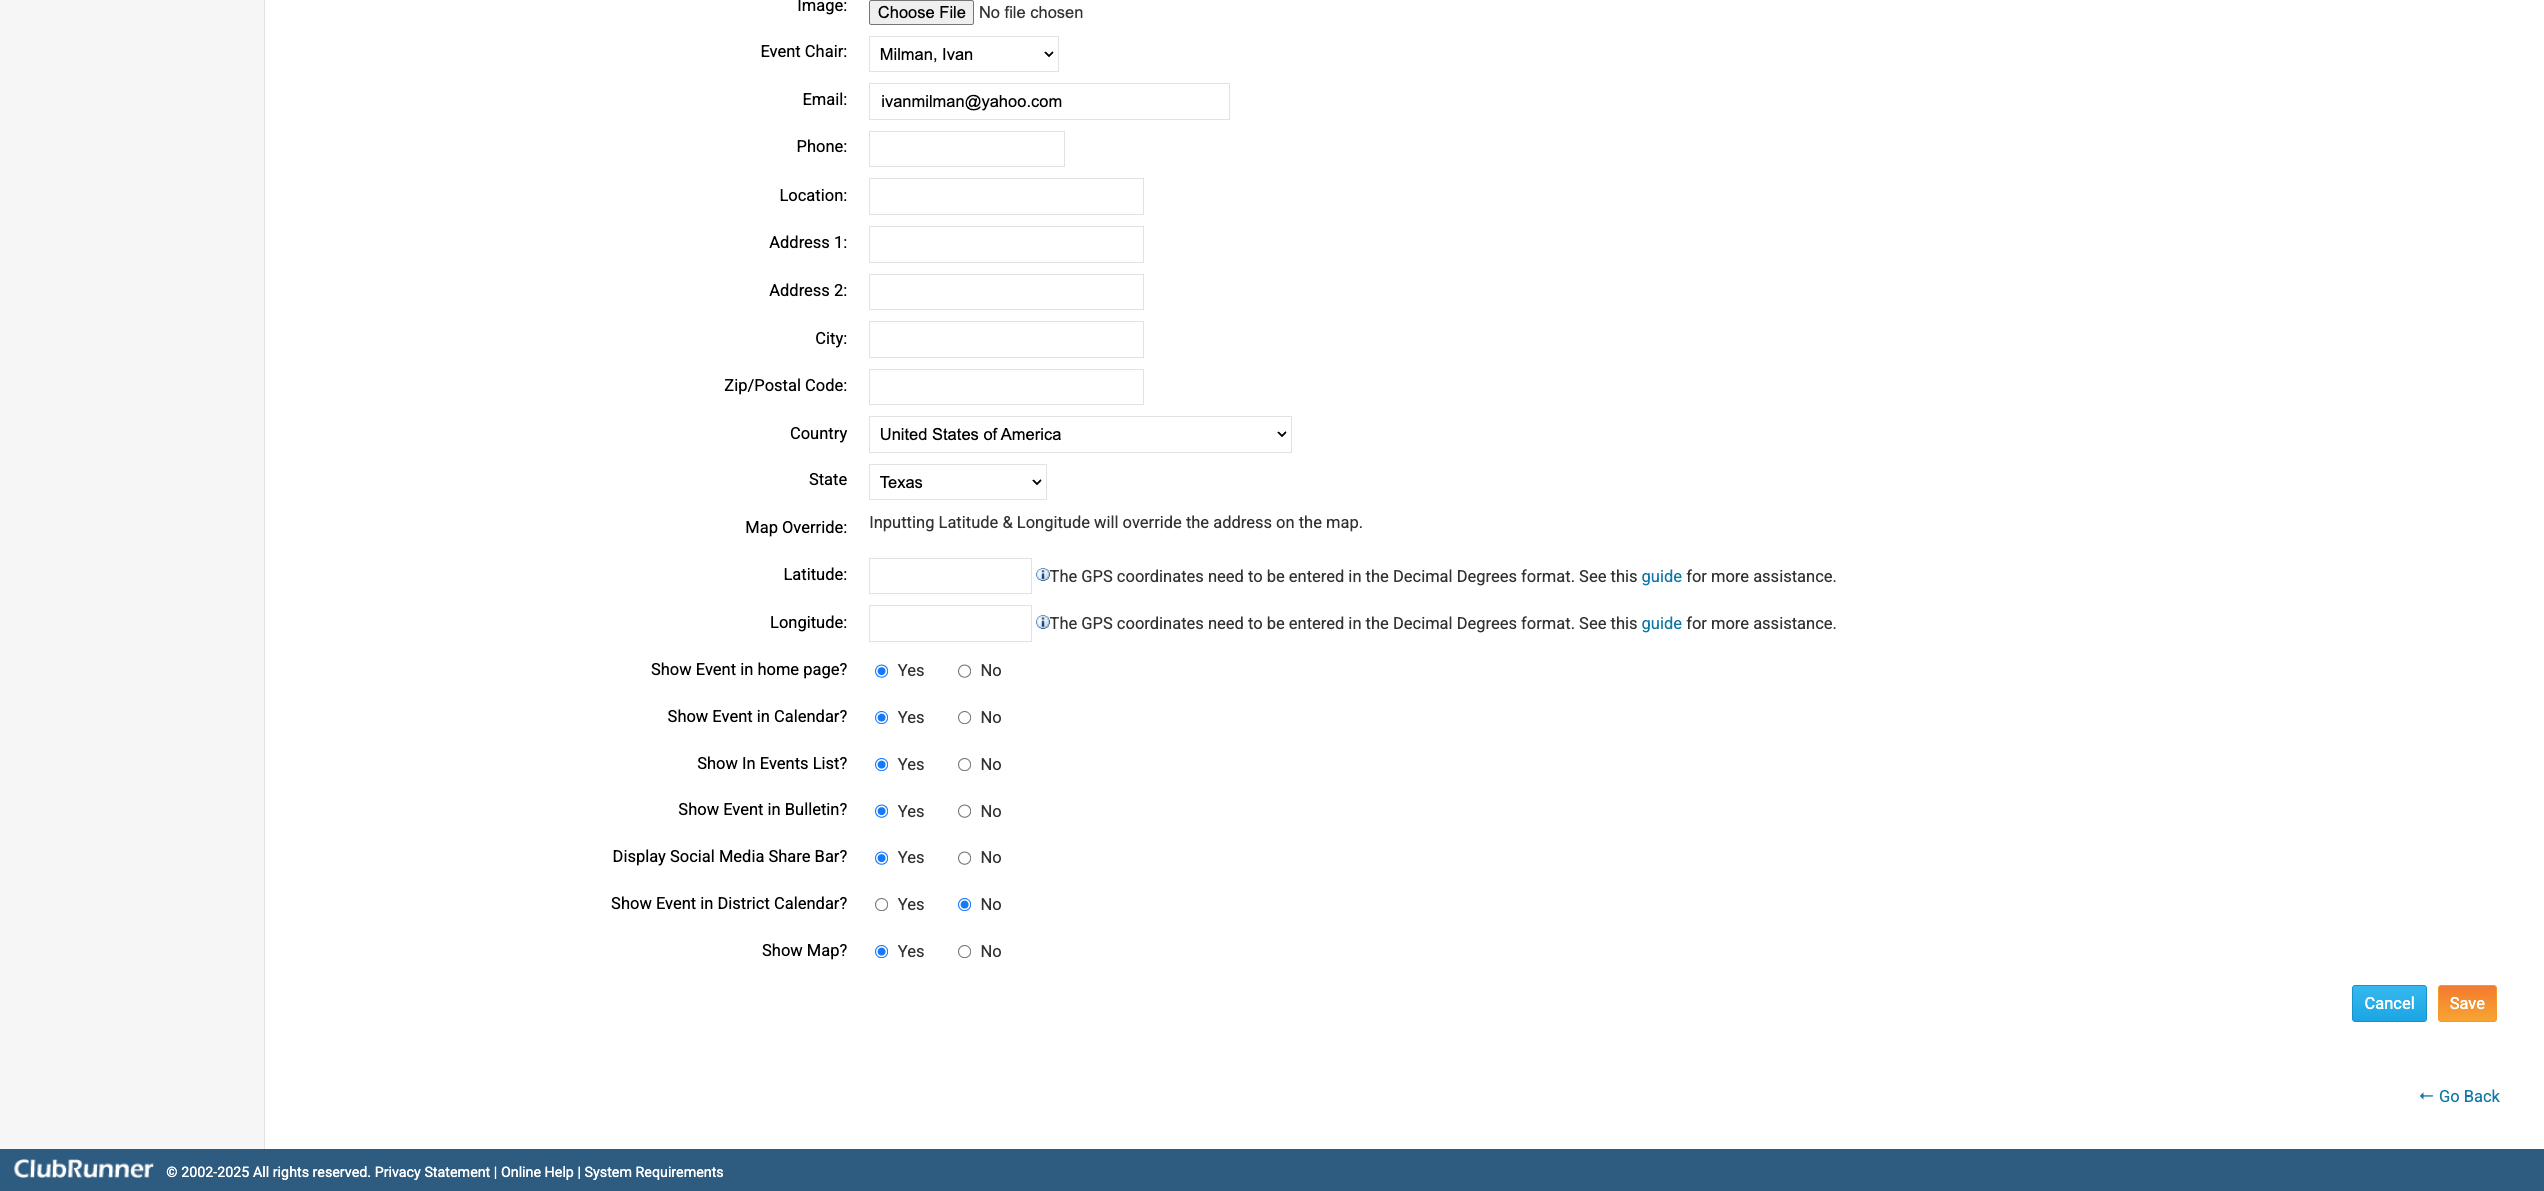
Now you can put in the description. Note thtat you can do things like bold, add hyperlinks and so on. Adding images in the description is tricky.

12
Step #12:

13
[OPTIONAL} We are going to skip the part where we add an image. That image shows up on top of the calendar entry on our website
Step #13: [OPTIONAL} We are going to skip the part where we add an image.  That image shows up on top of the calendar entry on our website
14
Next we set the event chair. This is not necessarily you - it is the person who is the contact for the event. In this case, we will set it to Tarik Bakir. When you click on the "Event Chair:" Dropdown it gives you a. list.
Step #14: Next we set the event chair.  This is not necessarily you - it is the person who is the contact for the event.  In this case, we will set it to Tarik Bakir.  When you click on the "Event Chair:" Dropdown it gives you a. list.
15
As you can see, it fills in Tarik Bakir, his email and phone number
Step #15: As you can see, it fills in Tarik Bakir, his email and phone number
16
You can set the name of the venue and address here.
Step #16: You can set the name of the venue and address here.

17
Click the Save Button on the lower right to save the event.
Step #17: Click the Save Button on the lower right to save the event.
18
That's great, now you can see the details of the event. You can next see the event in the even lsst by clicking on the Event Planner button
Step #18: That's great, now you can see the details of the event.  You can next see the event in the even lsst by clicking on the Event Planner button
19
And there it is in the list.
Step #19: And there it is in the list.
20
Now if you go back to the club home page, you should see the event in our calendar.
Step #20: Now if you go back to the club home page, you should see the event in our calendar.
21
And here it is
Step #21: And here it is

How to Create a Calendar Event on ClubRunner for Rotary Club of Austin University Area