
How to Create a Channel and Section in Slack: Step-by-Step Guide
Learn how to create a new channel and section in Slack with this easy step-by-step guide. Discover how to add members, manage tabs, and organize your workspace efficiently.
In this guide, we'll learn how to create a new channel in Slack and organize it within an existing section. This process helps you manage conversations and add members to specific channels for better collaboration.
We'll also look at how to view channel details and add files or tabs to your new channel.
Let's get started
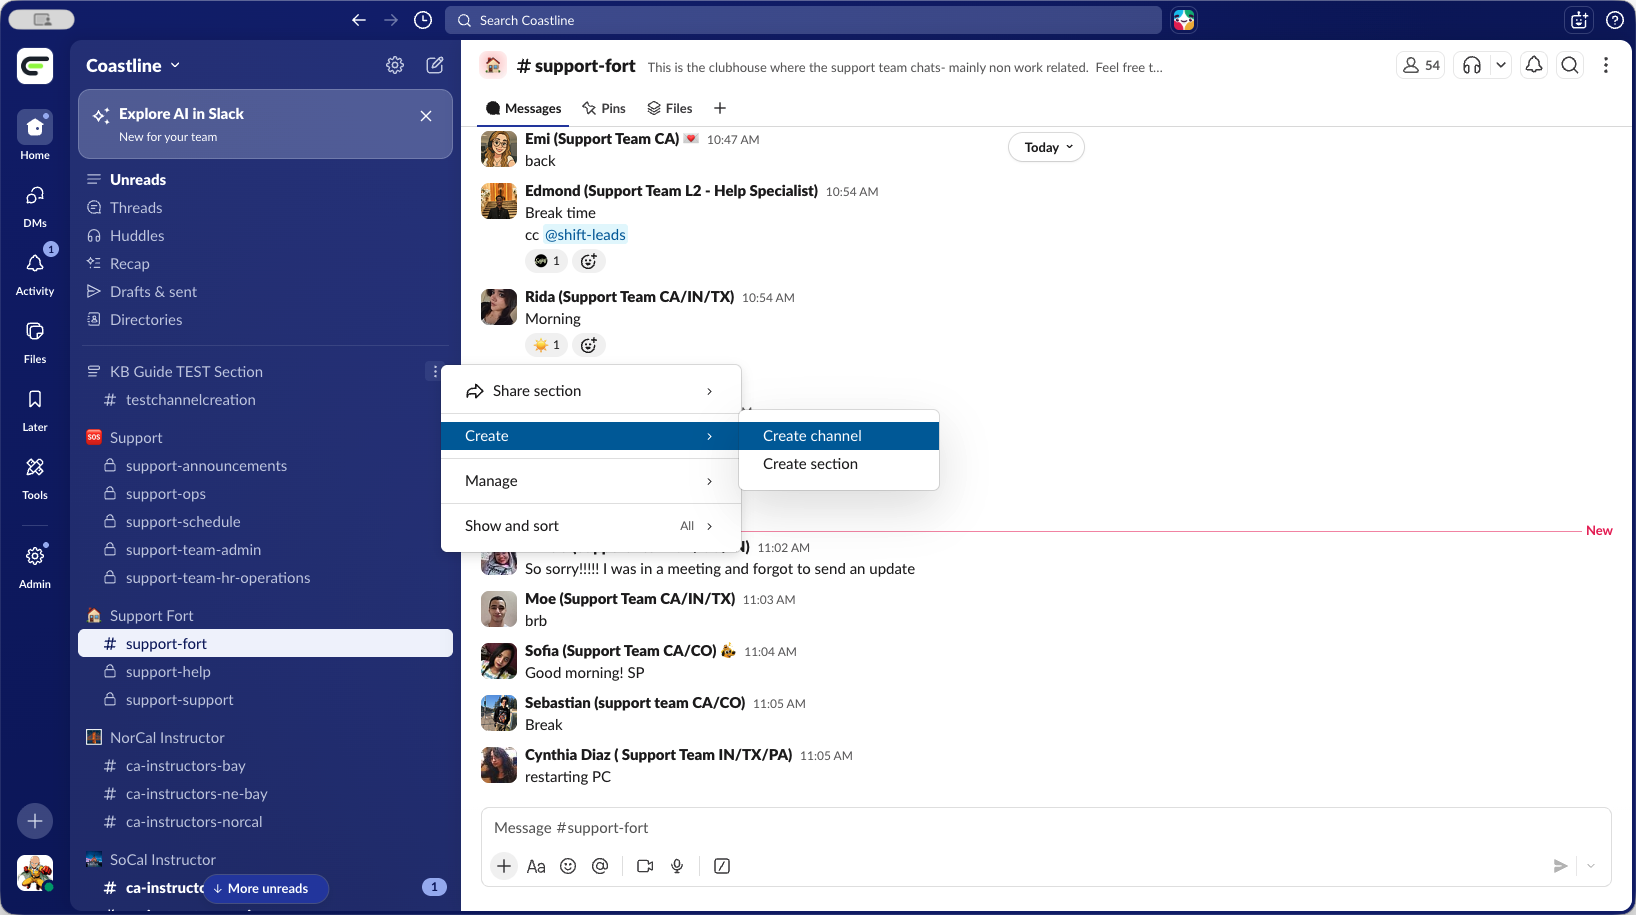
This is a test to see how Glitter AI works when creating something. We will create a new test channel section within the section we have already made. First, highlight the three dots. Then select Create, and choose Create a channel.
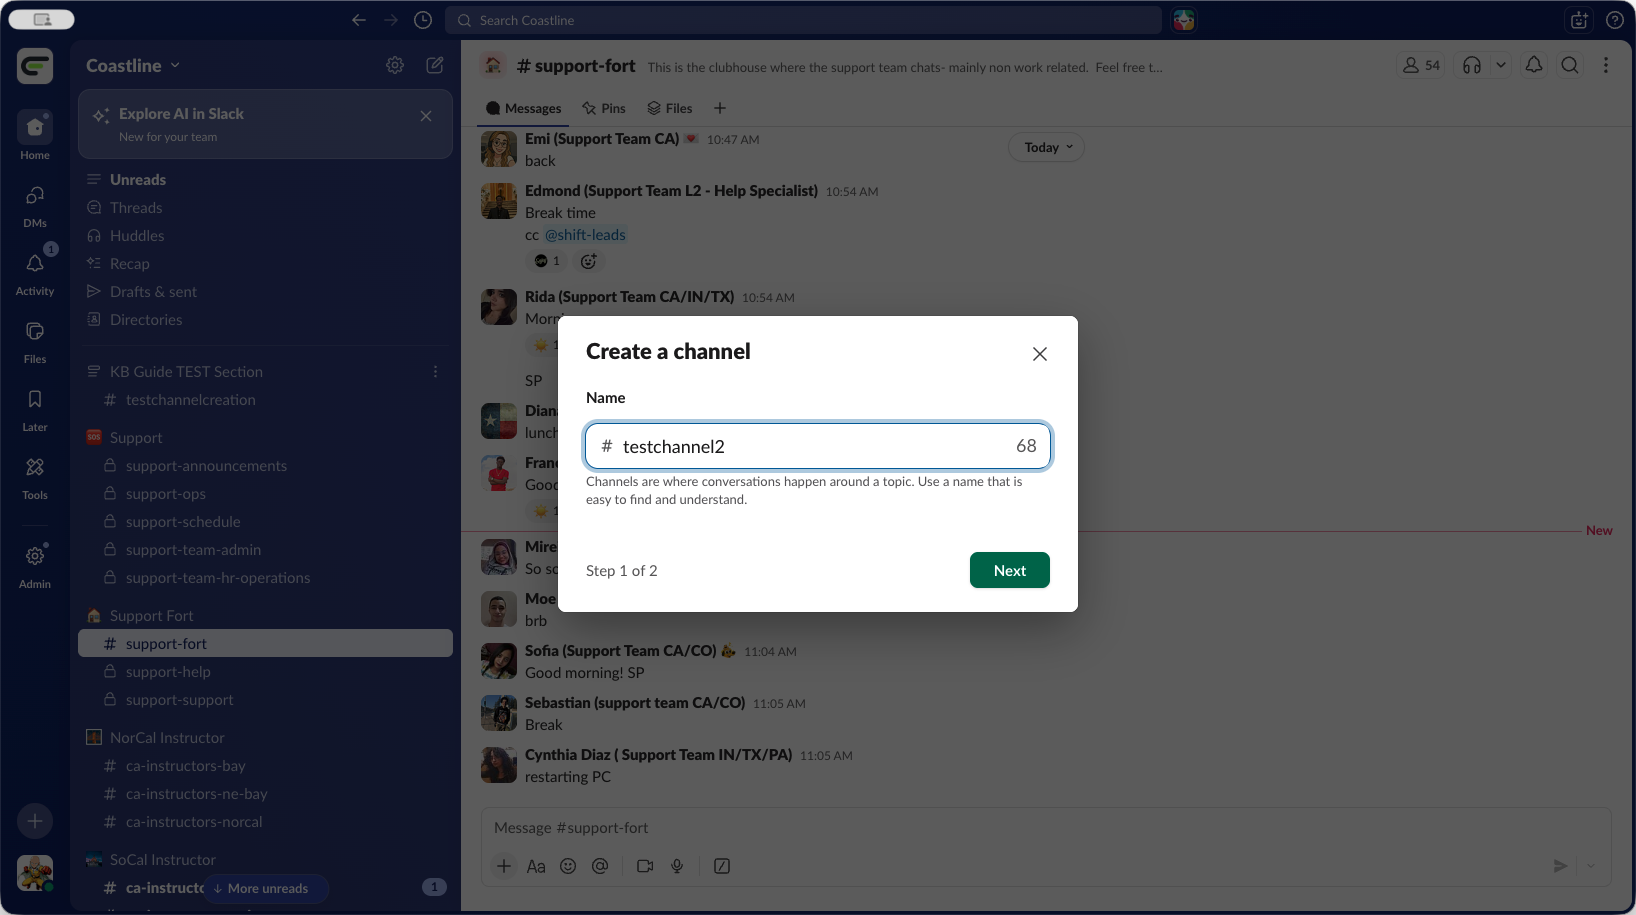
We will call this "Test Channel 2." Click Next.
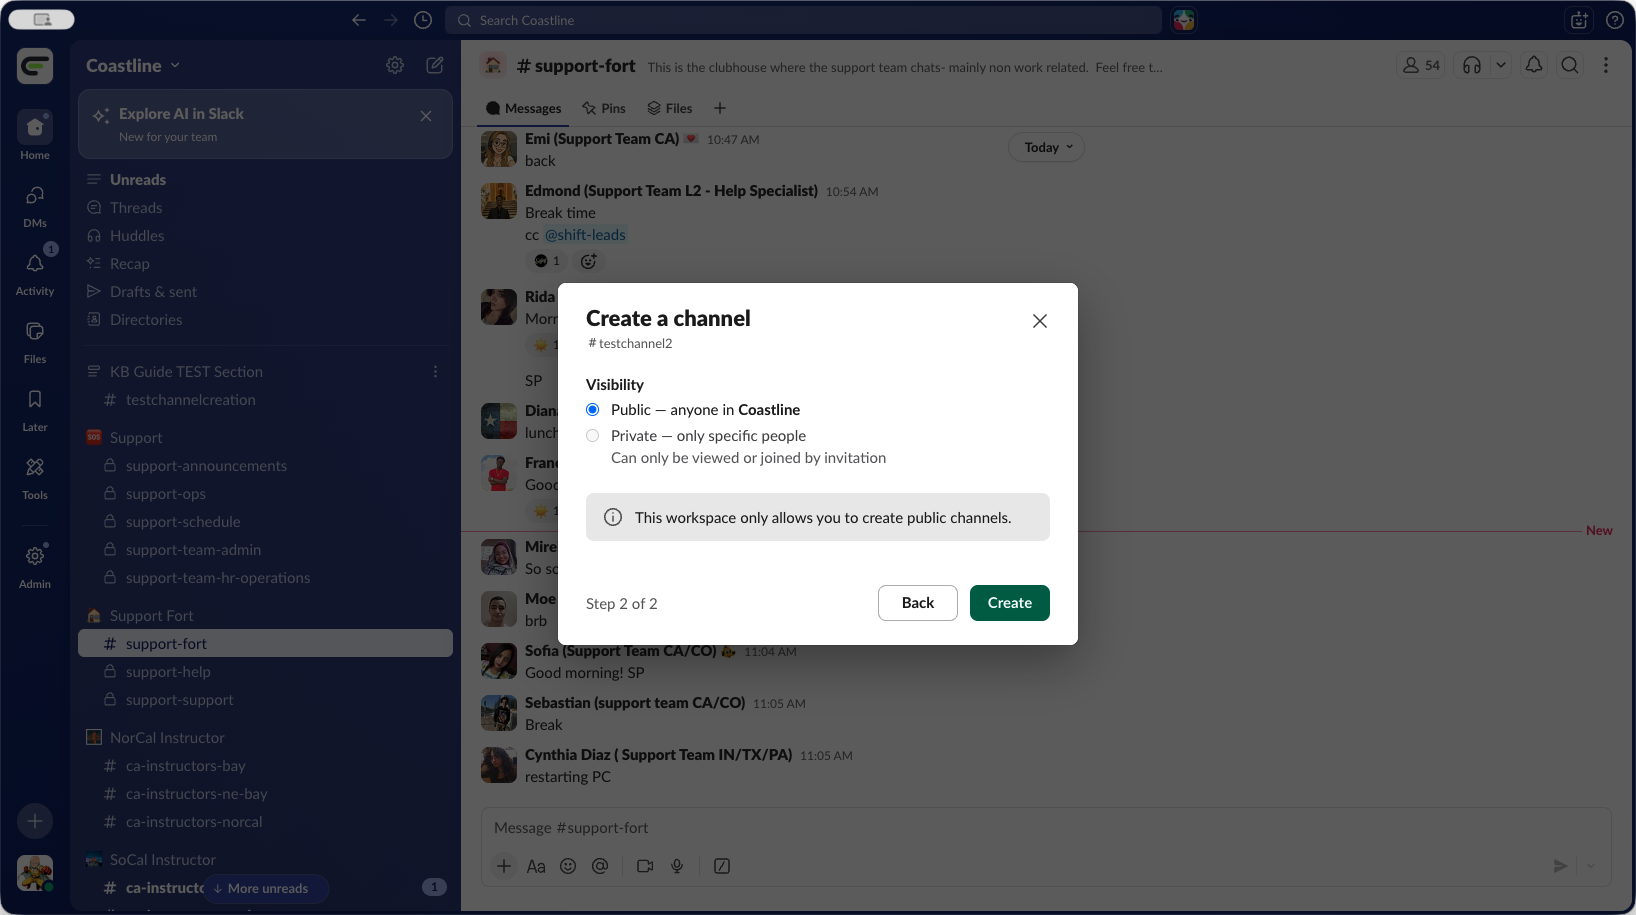
By default, all of these will be public channels.
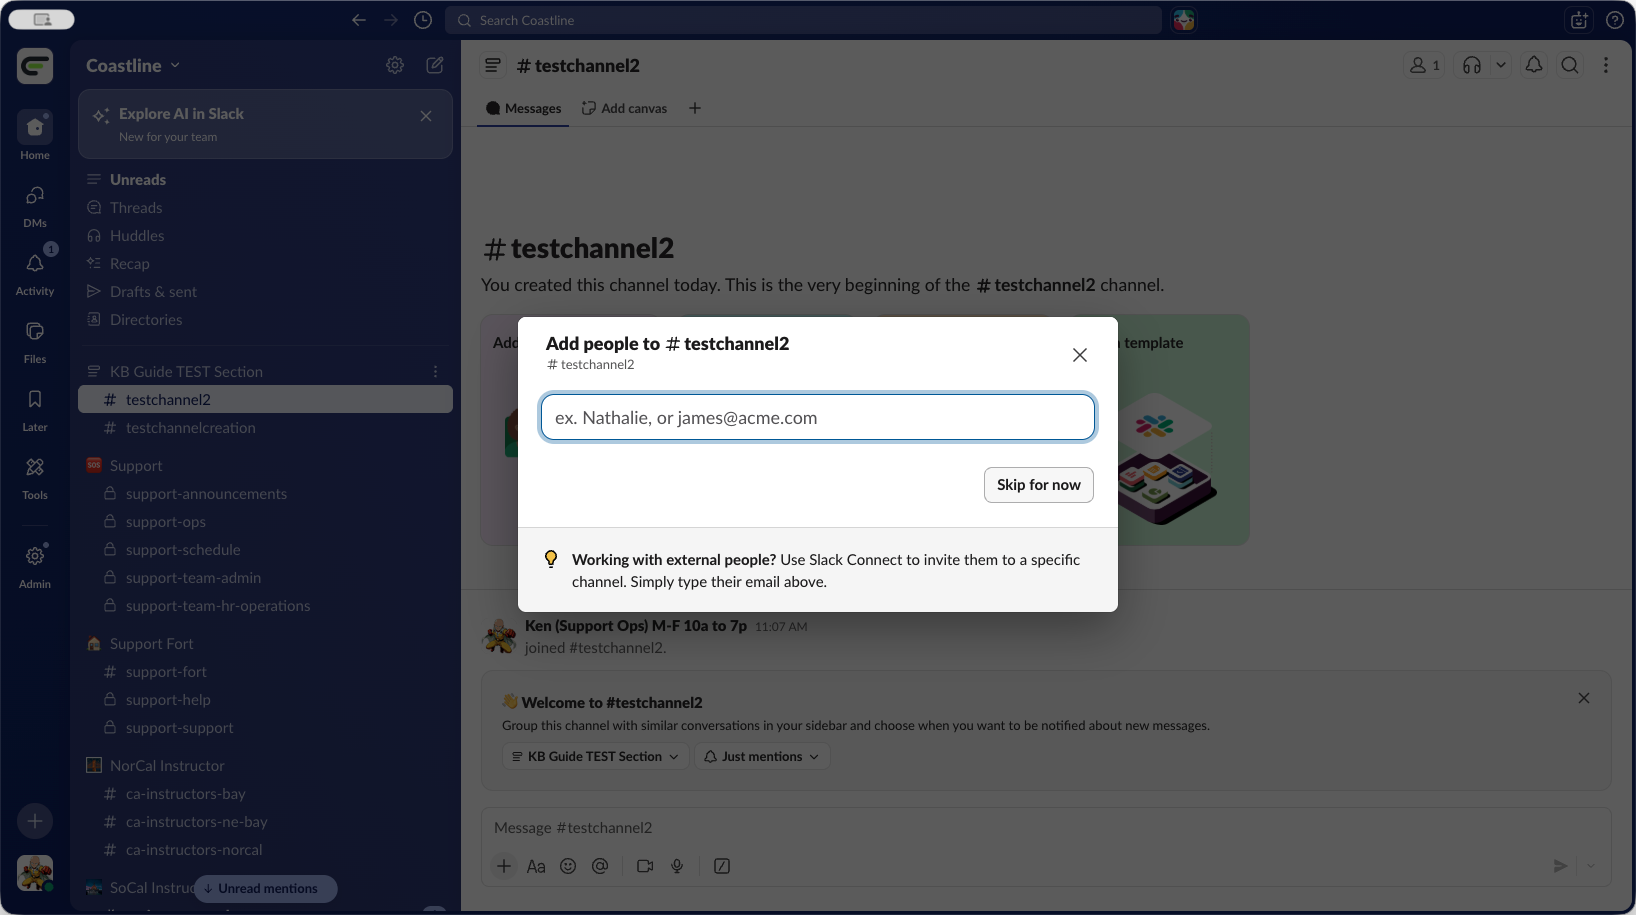
Add people to Test Channel 2. We can do that later. We'll select Skip For Now.
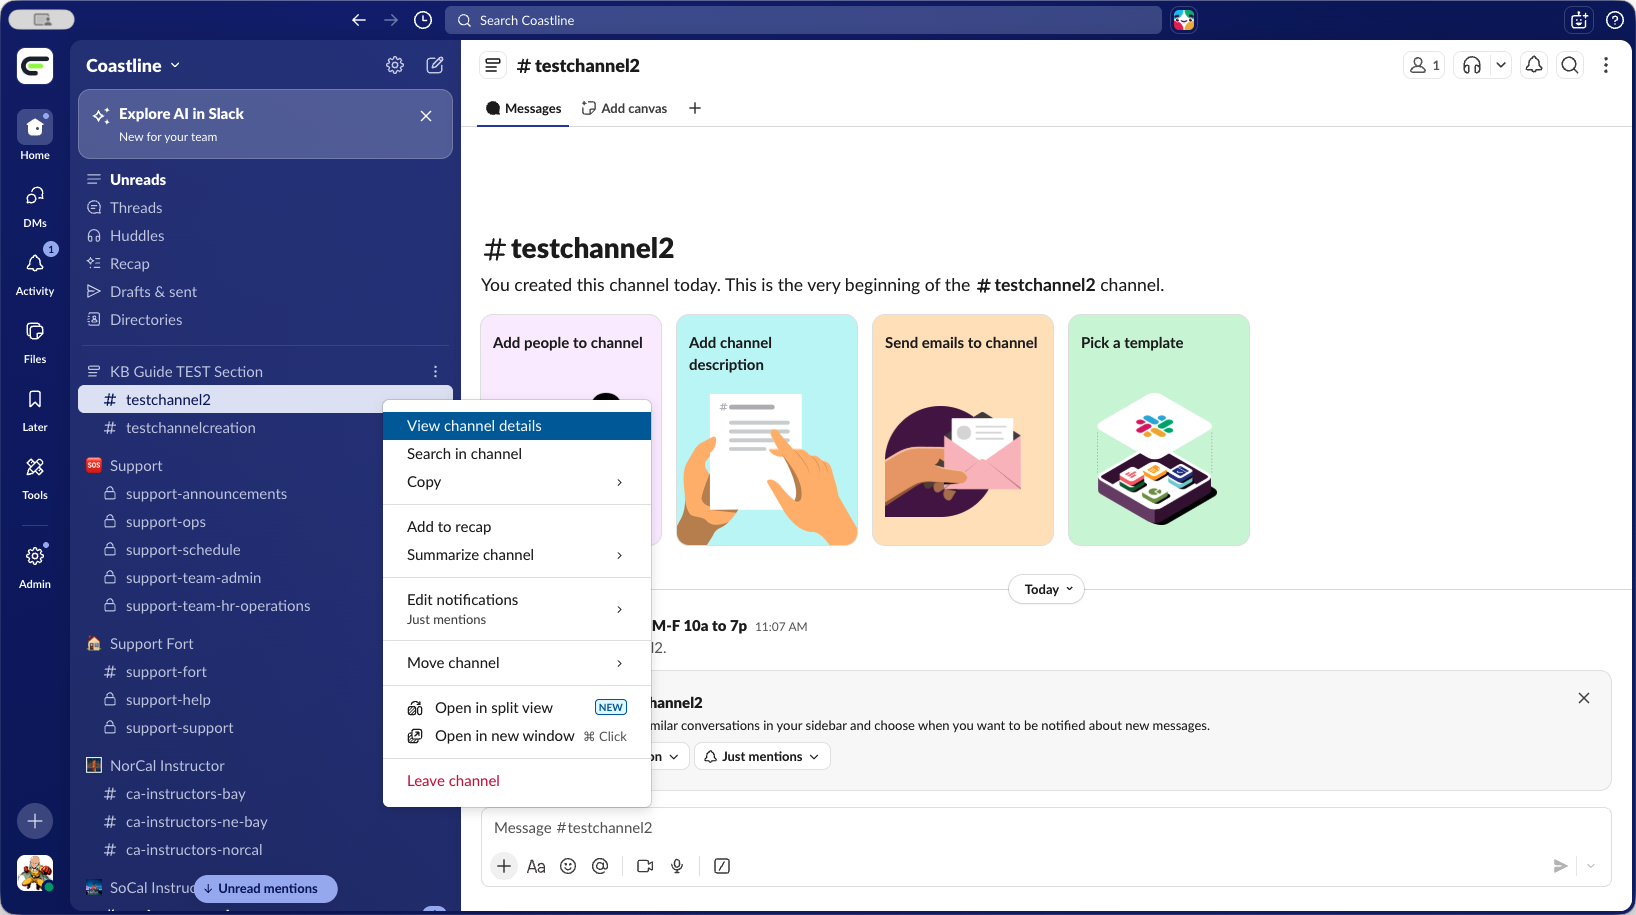
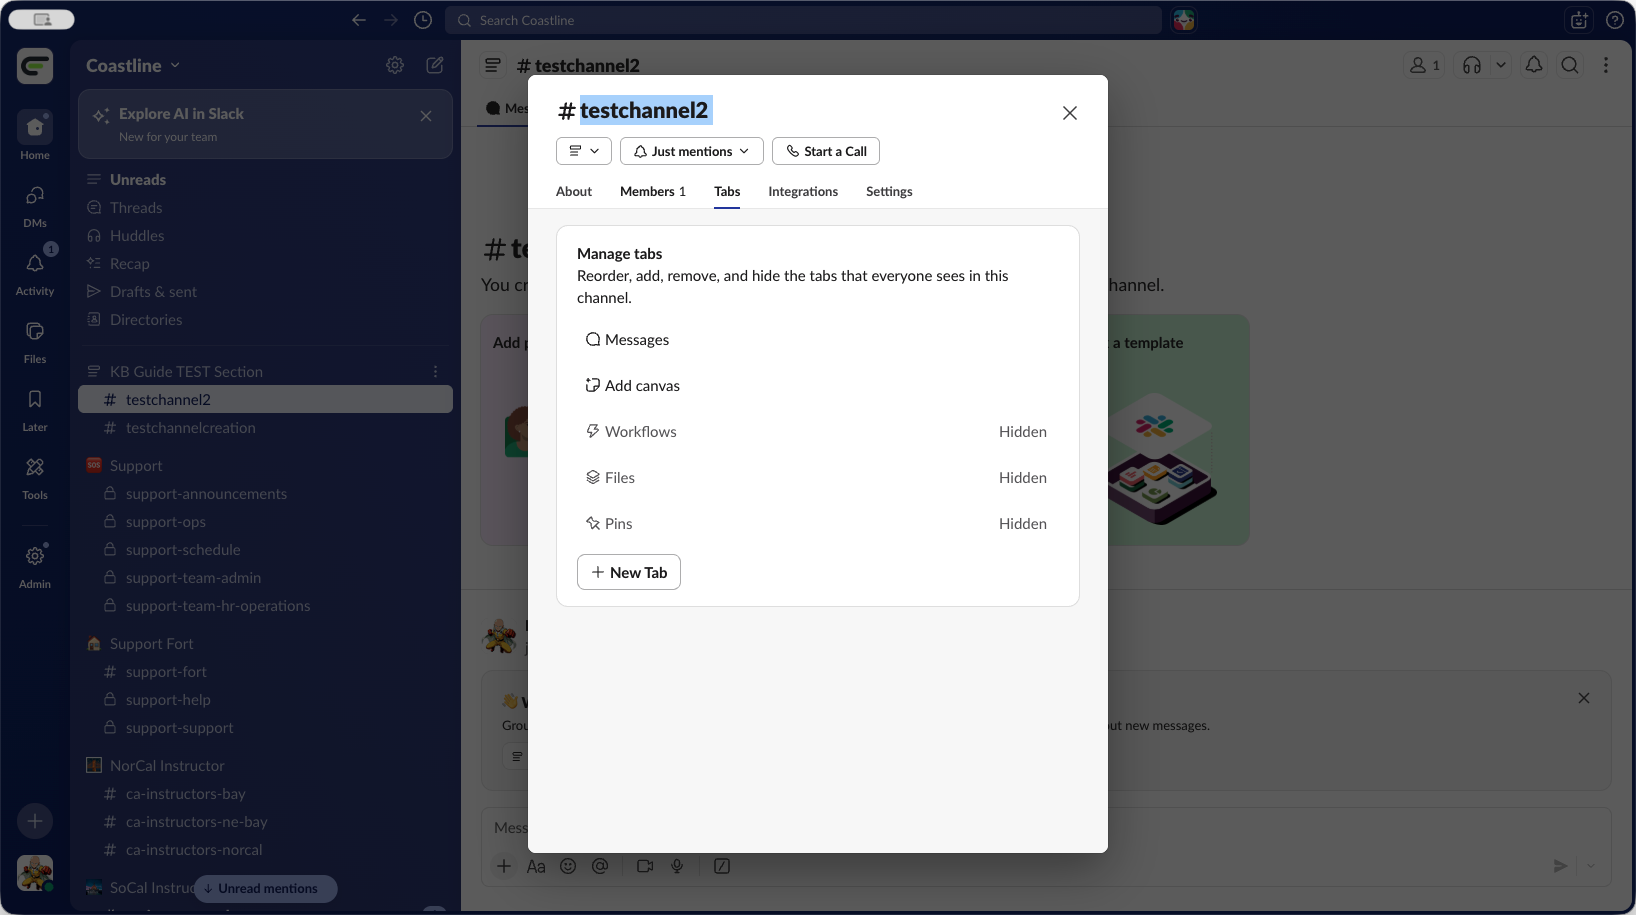
Then hover your mouse over Test Channel 2, right-click, and select View Channel Details.
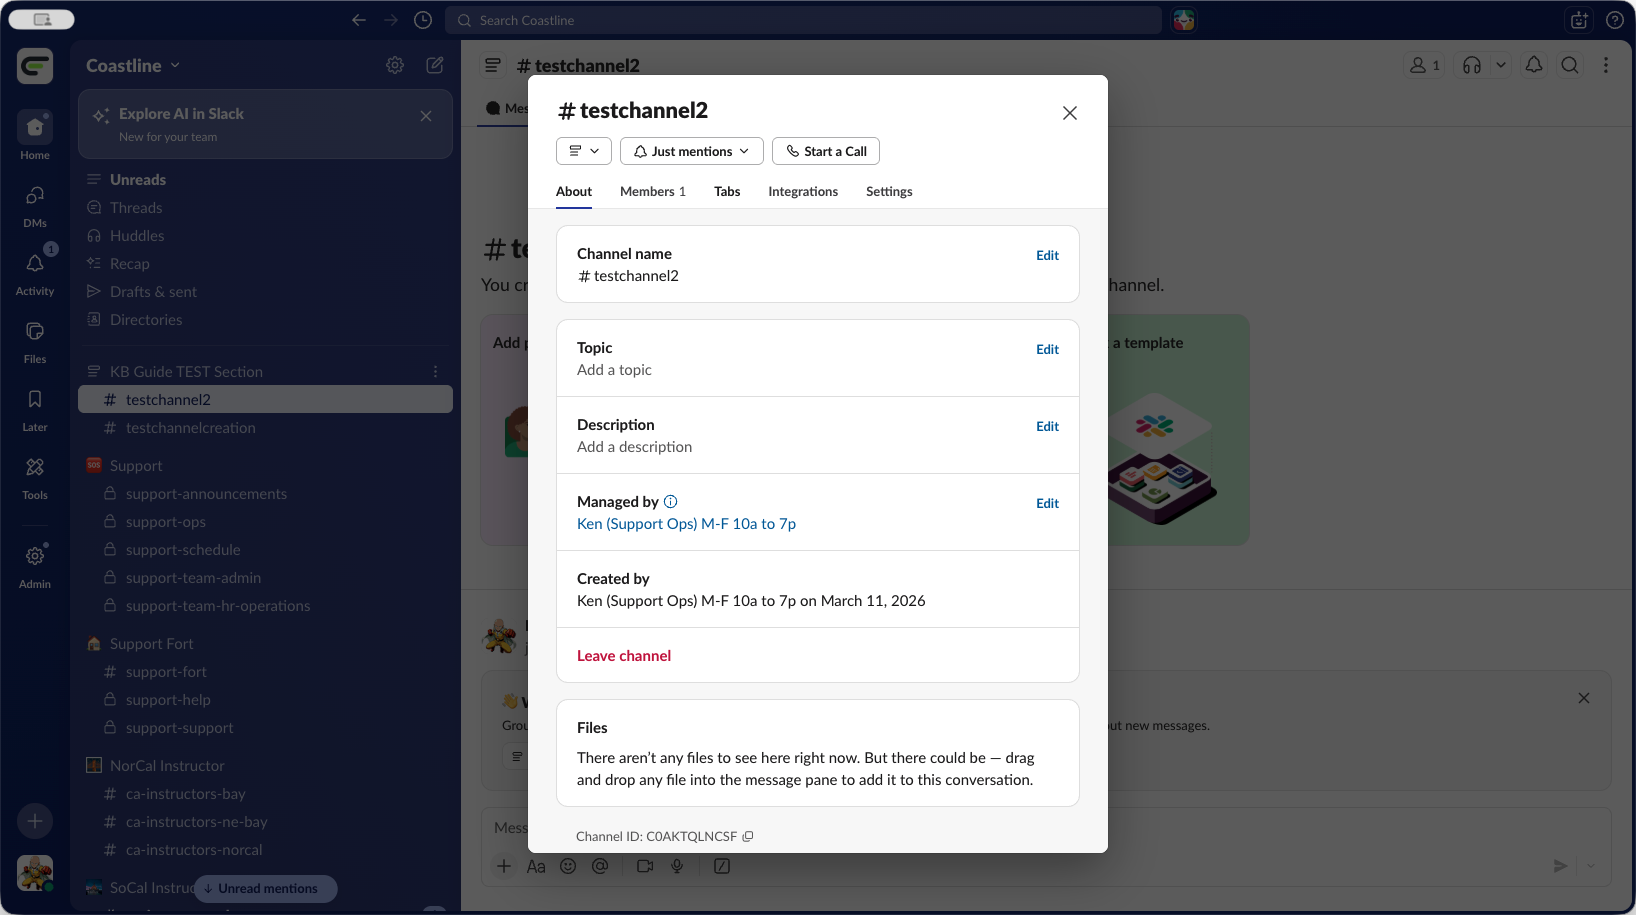
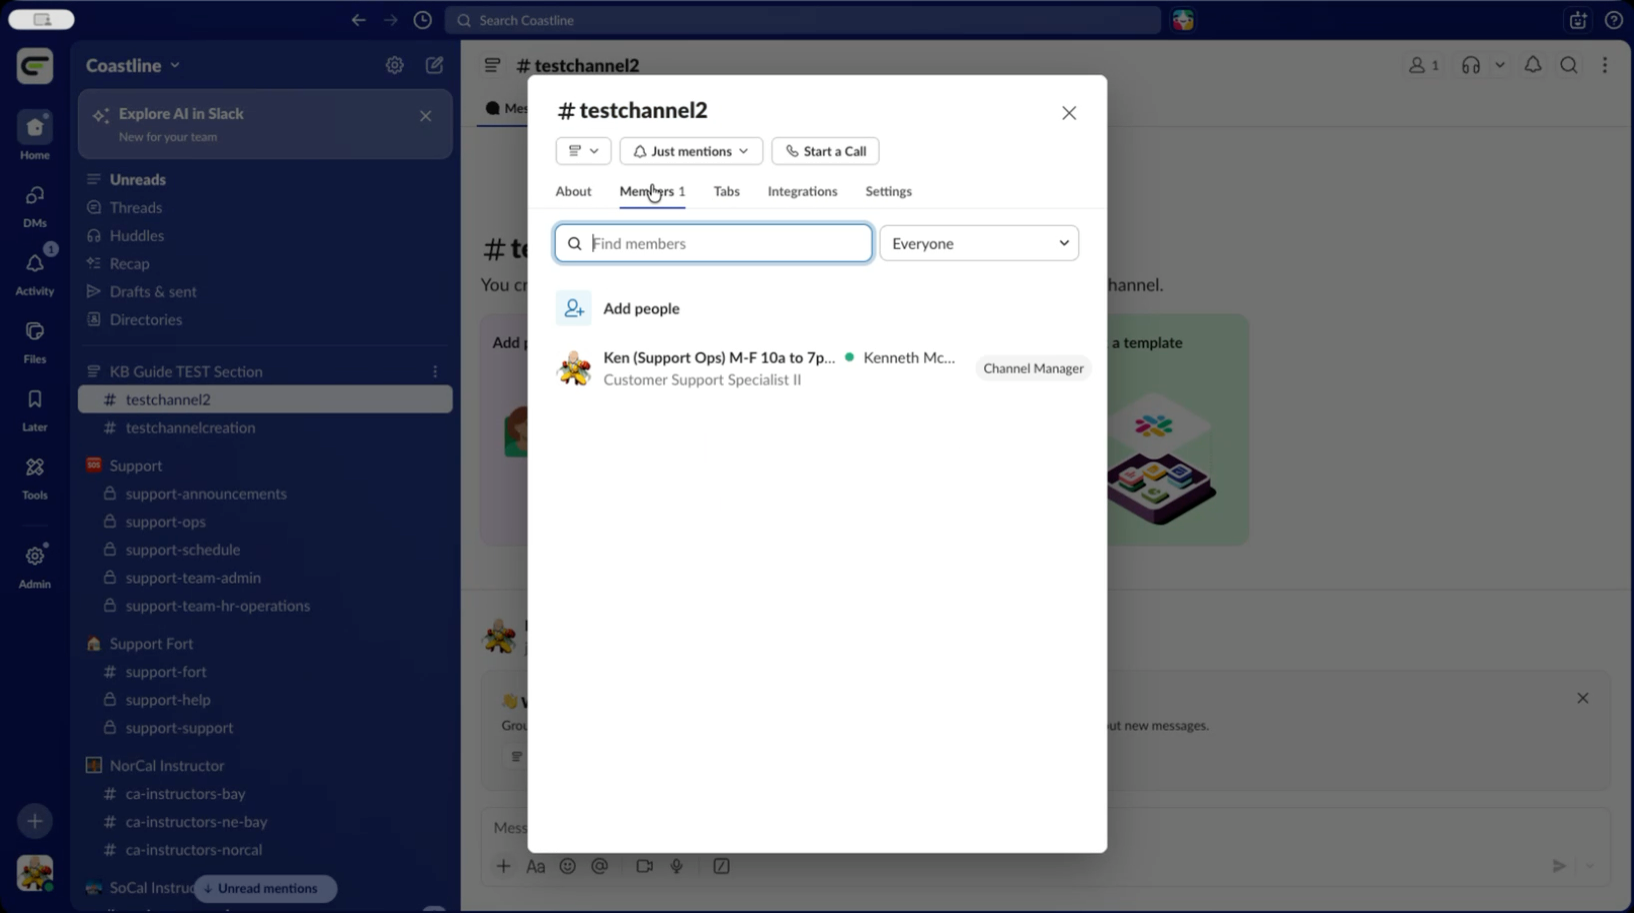
The most important thing is Members.

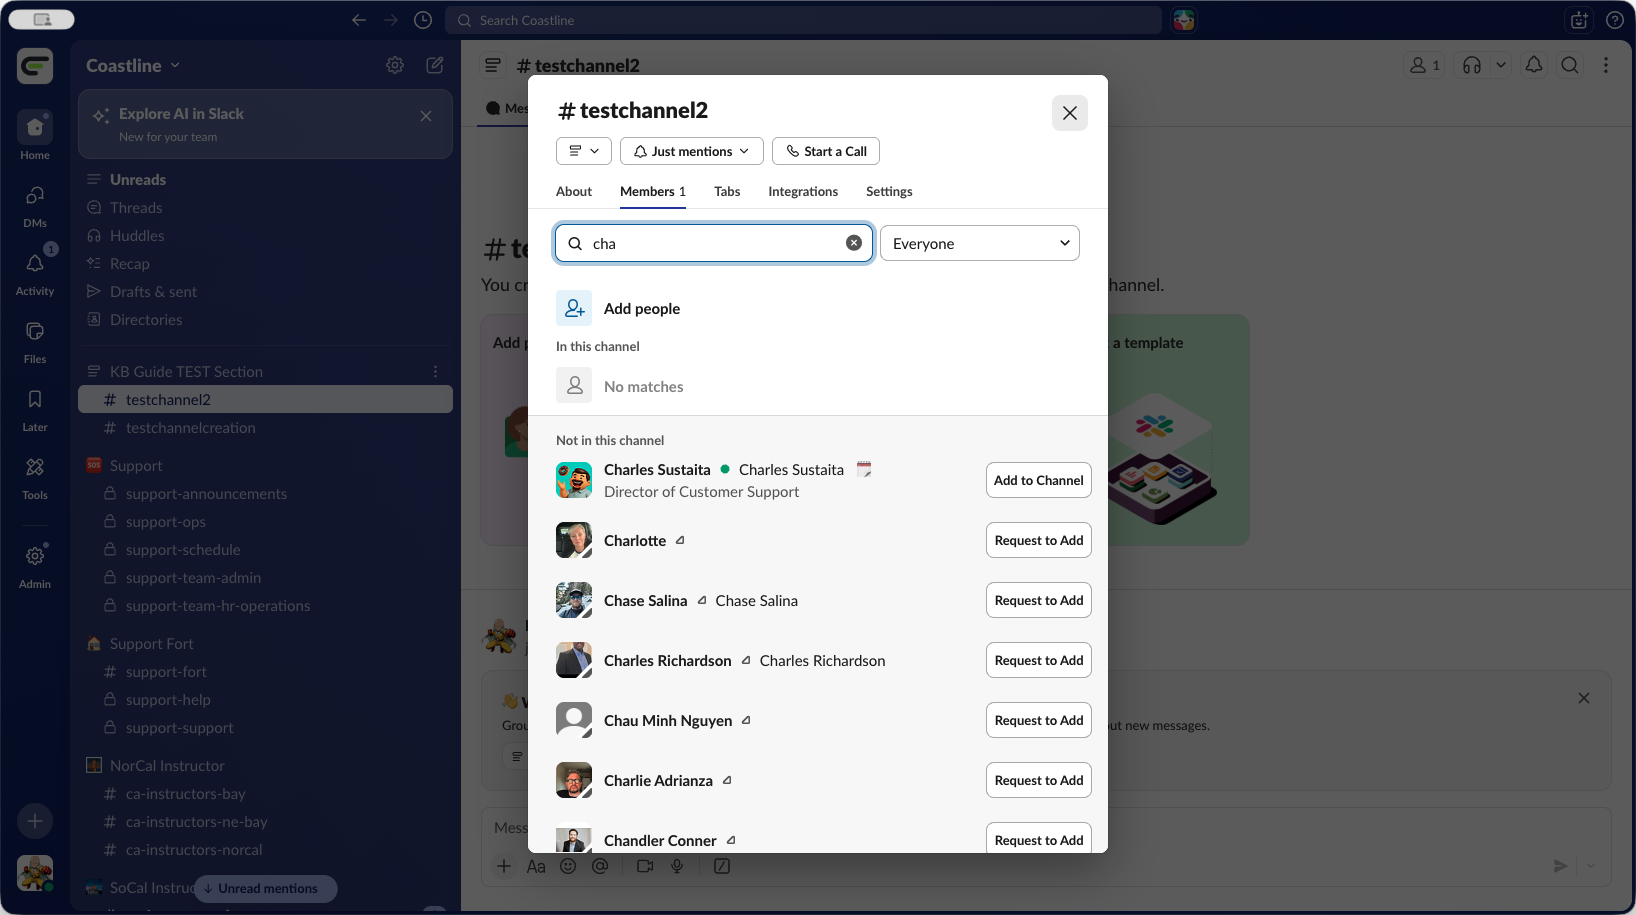
Start typing the first letters of a person's name. A list of possible matches will appear, and you can add anyone you want to the channel from there.
That's how you create a Channel inside of a Section in Slack.