
How to Create a Checklist in the Notes Application on a Macintosh
Learn how to create a checklist in the Notes application on your Mac. Follow these simple steps to organize your tasks efficiently.
By Shannon Falter
In this guide, we'll learn how to create a checklist in the Notes application on a Macintosh. Checklists can help you stay organized and ensure you don't forget important tasks. We'll walk through the steps to create a new note, add items to your list, and convert them into checklist items. This will allow you to easily track your progress and manage your tasks efficiently.
Let's get started
Today, we will learn how to create a checklist in the Notes application on a Macintosh.
First, open the Notes application on your Mac.
1
To create a new note, click the icon with a pencil writing on a piece of paper.
2
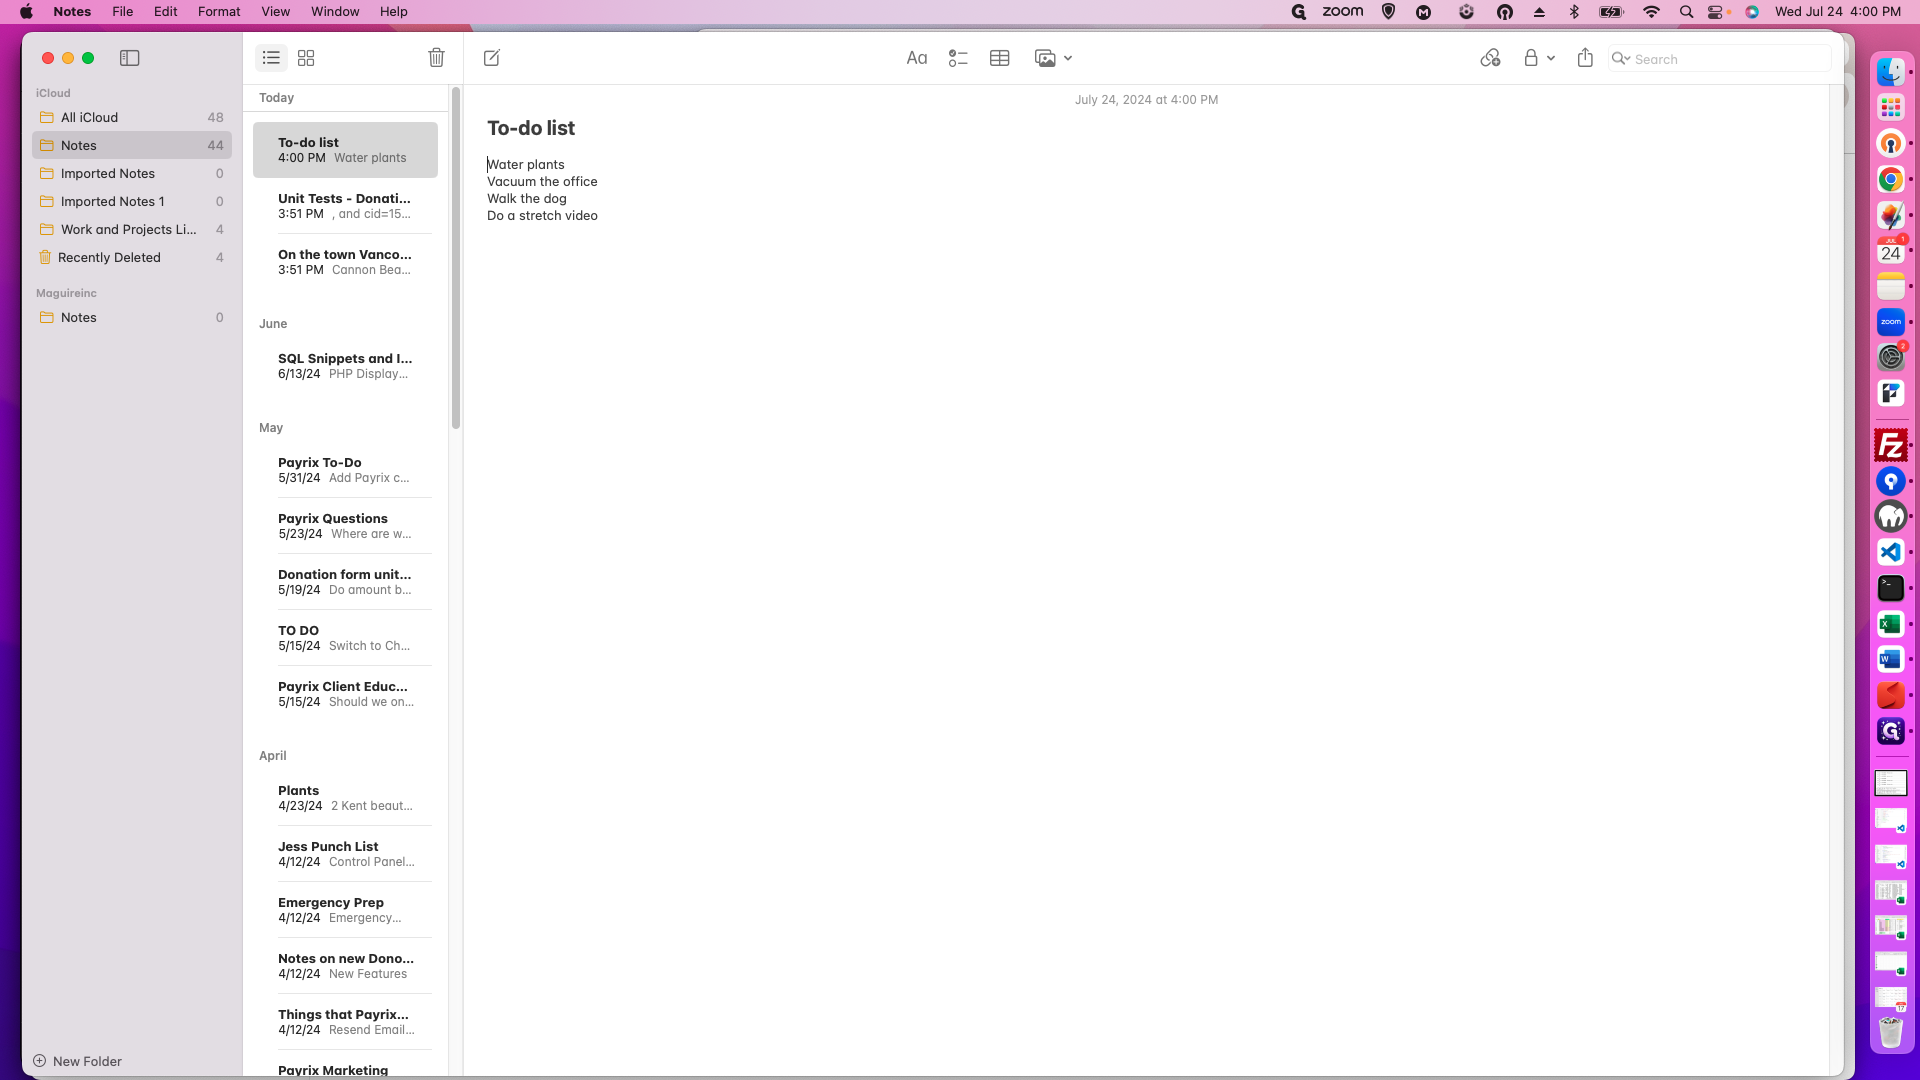
To start, give your note a title. I'm going to call mine "To-Do List." Move down two rows and type the items in your list.
3
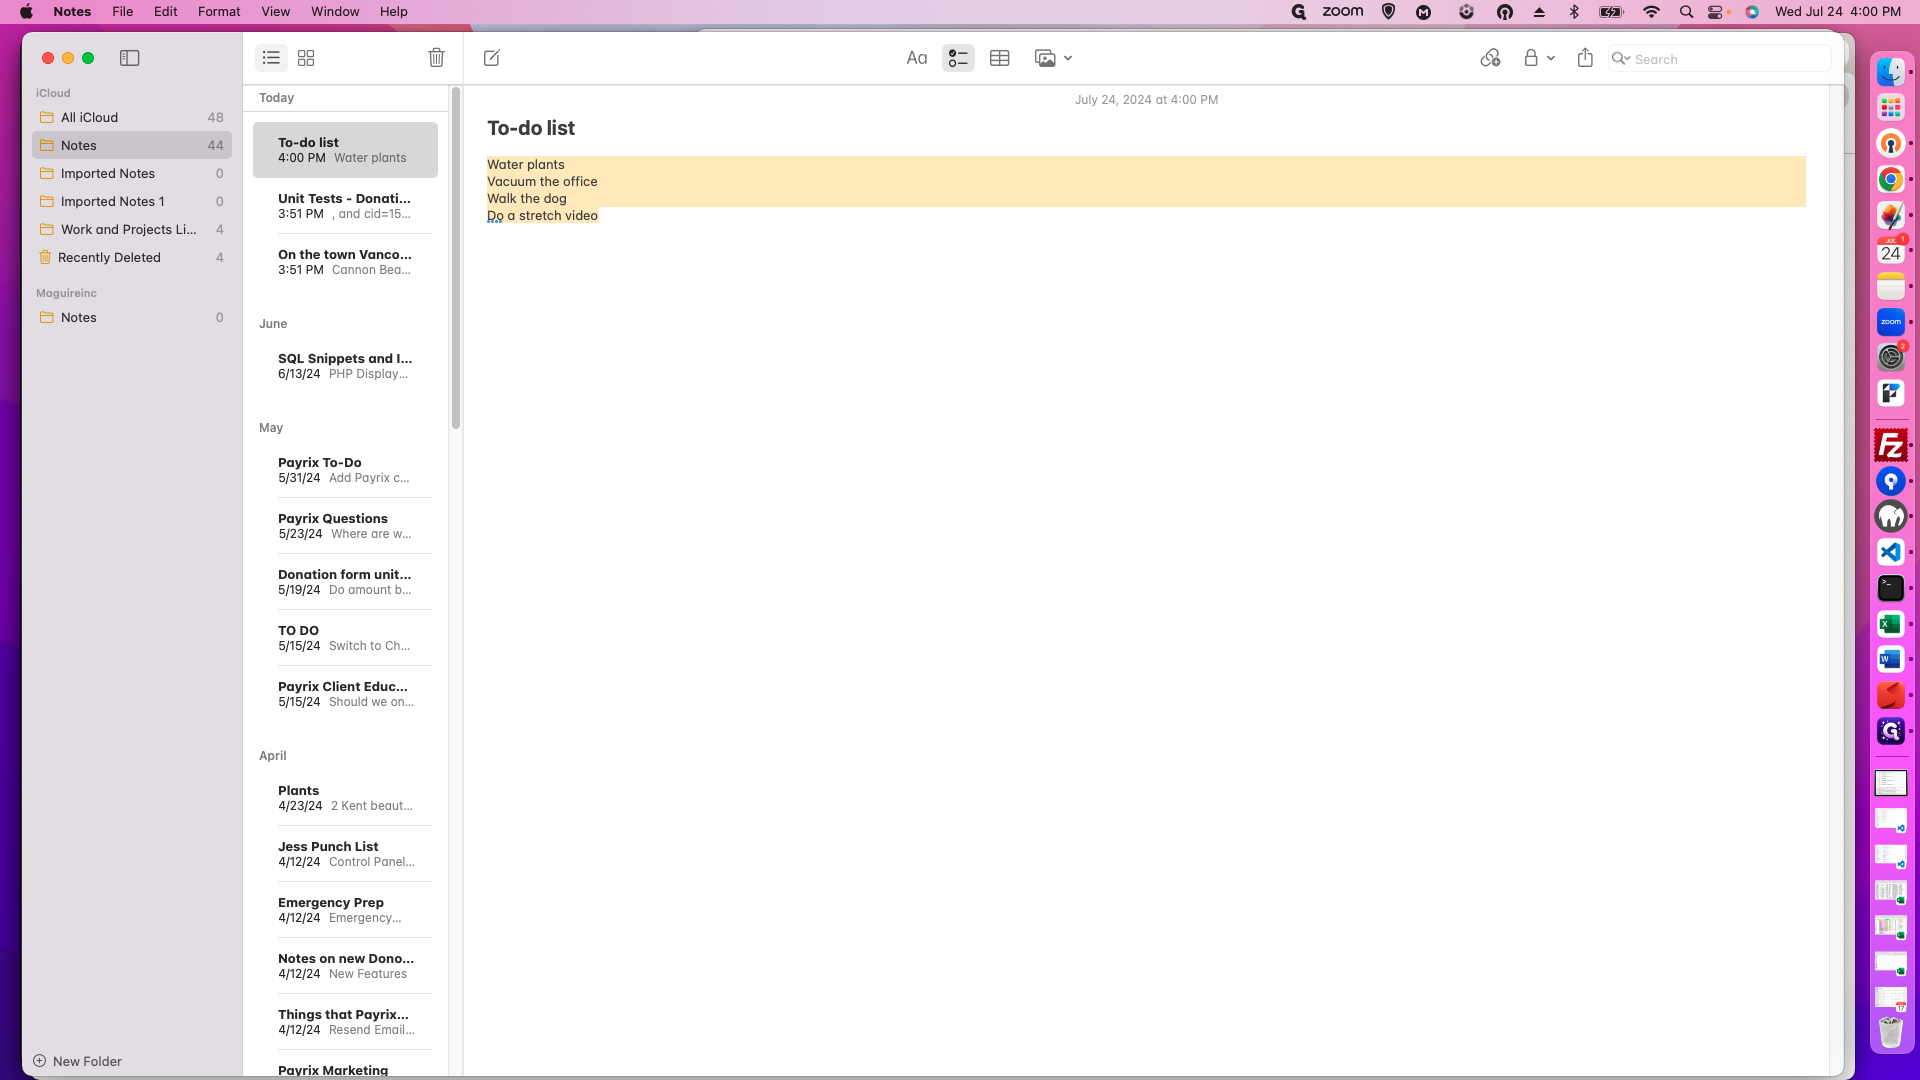
After creating your list, highlight all the items. Then, click the Checklist icon.
4
The items will automatically turn into checklist items.

5
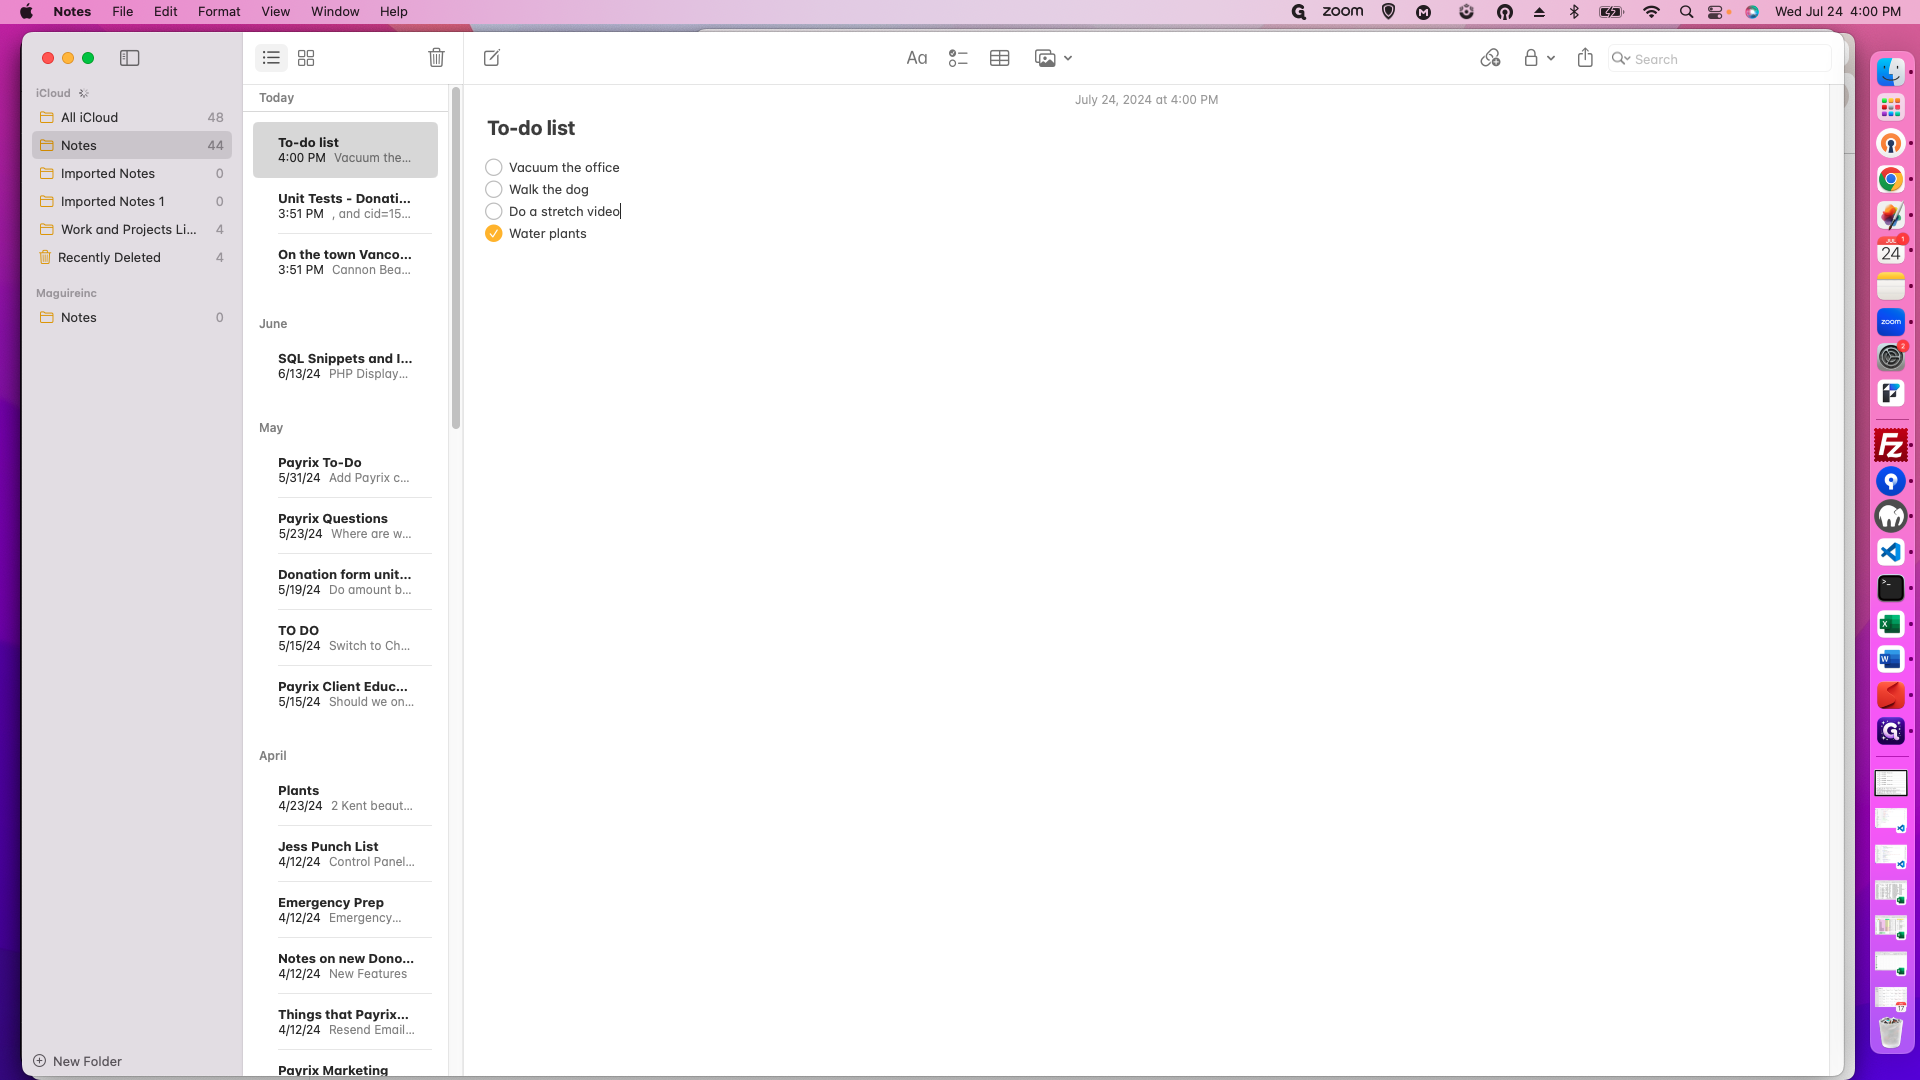
Once you have finished an item on your list, you can check it.

6
It moves to the bottom of your list, leaving the remaining items at the top.
7
And that's it!
