
How to Create a Customer and Vendor: Step-by-Step User Guide
Learn how to create a customer and a vendor with this easy step-by-step user guide. Follow the instructions to add vendors and customers efficiently.
By Aasma Technology Solutions
In this guide, we’ll learn how to create a customer and vendor. The process includes selecting the appropriate option, entering required details such as the display name, and saving the information. Following these steps makes it easier to manage your records.
Once created, the new customer or vendor will also appear in the dropdown list for selection.
Let's get started
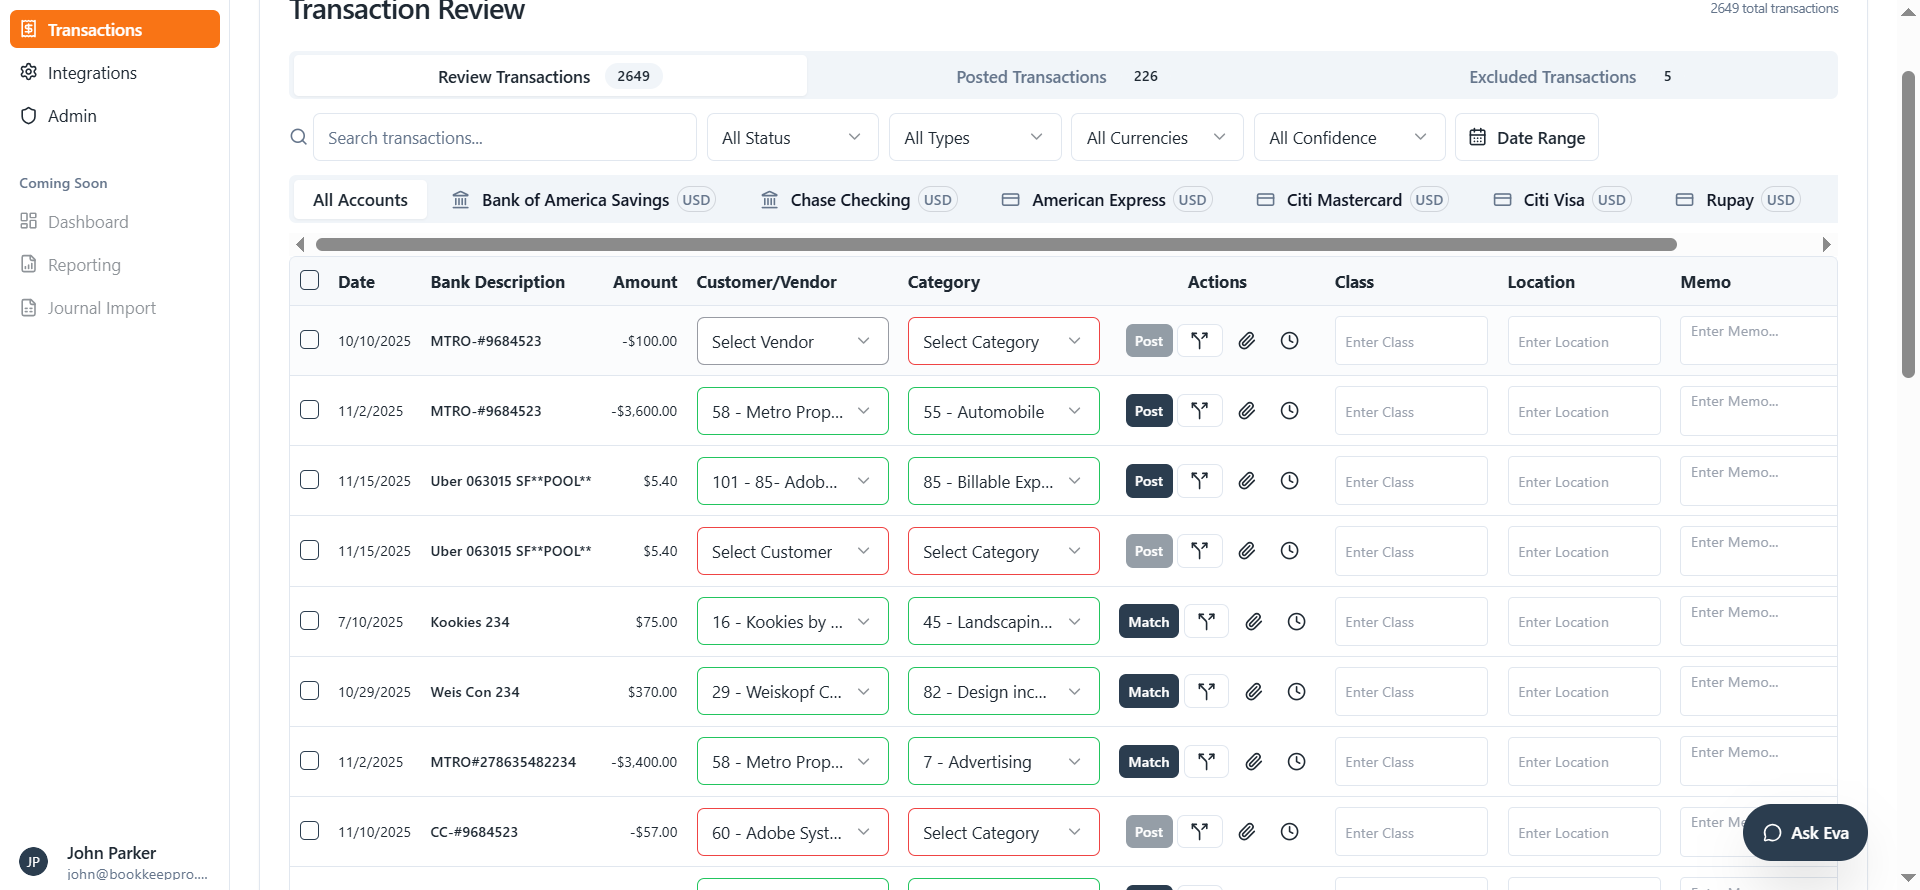
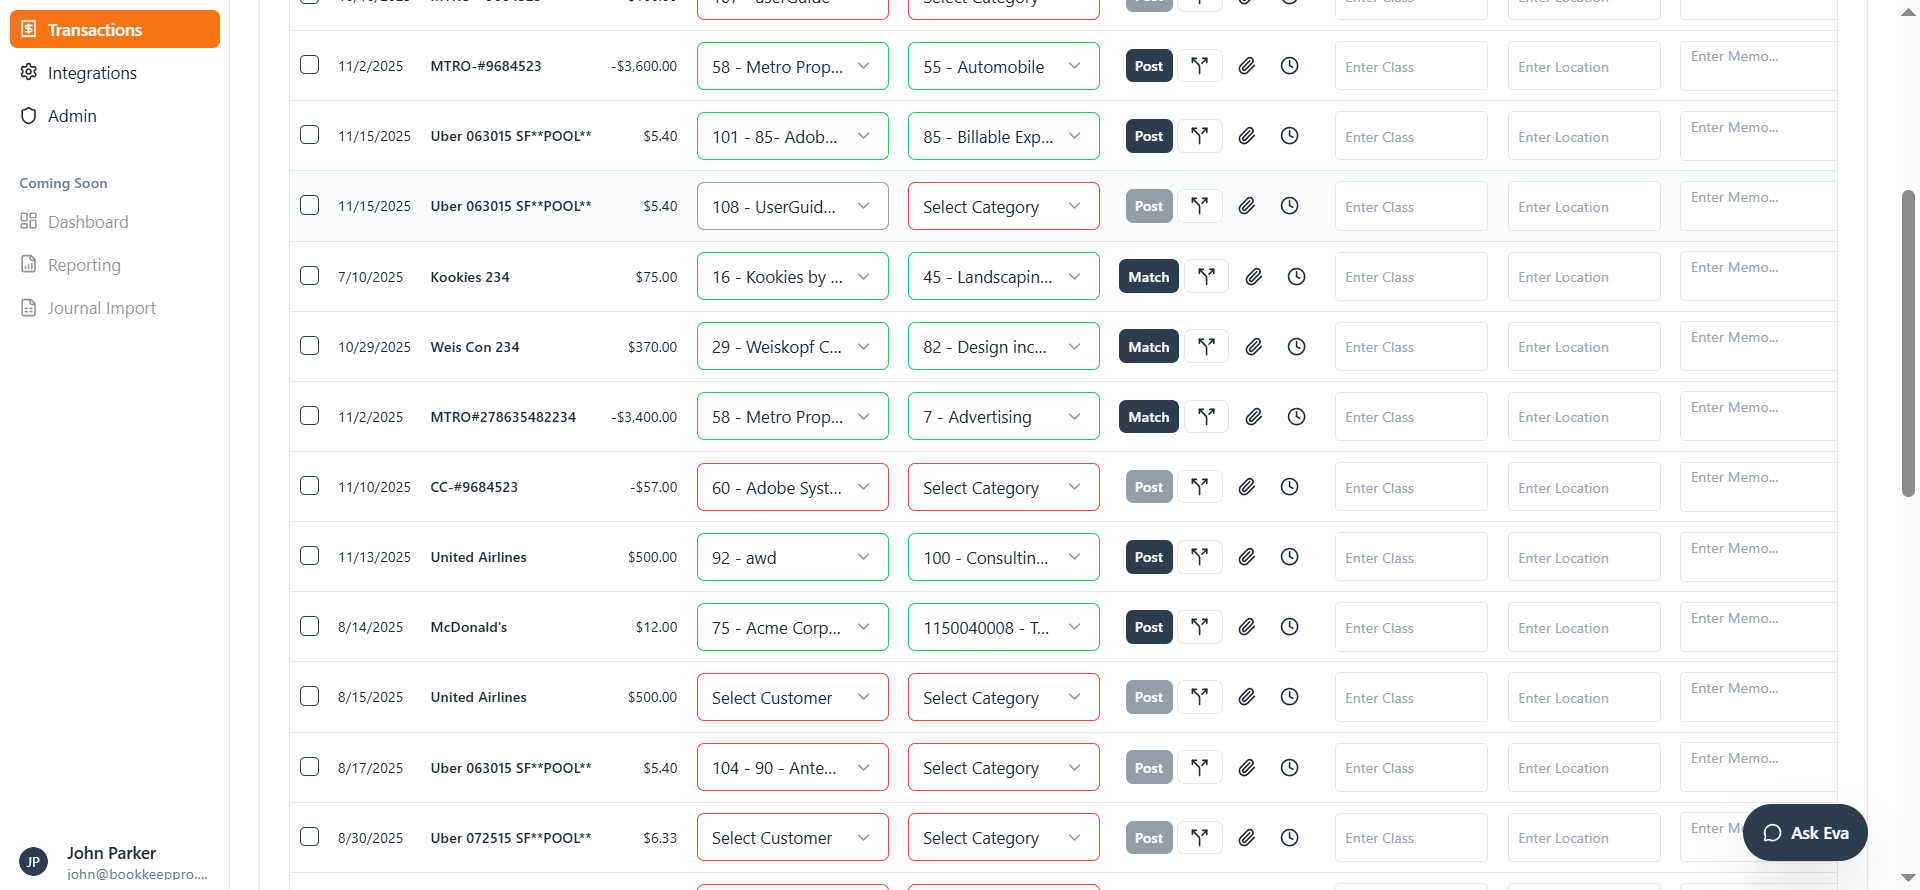
We will cover how to create a customer and a vendor.
2
Click on "Select Vendor"
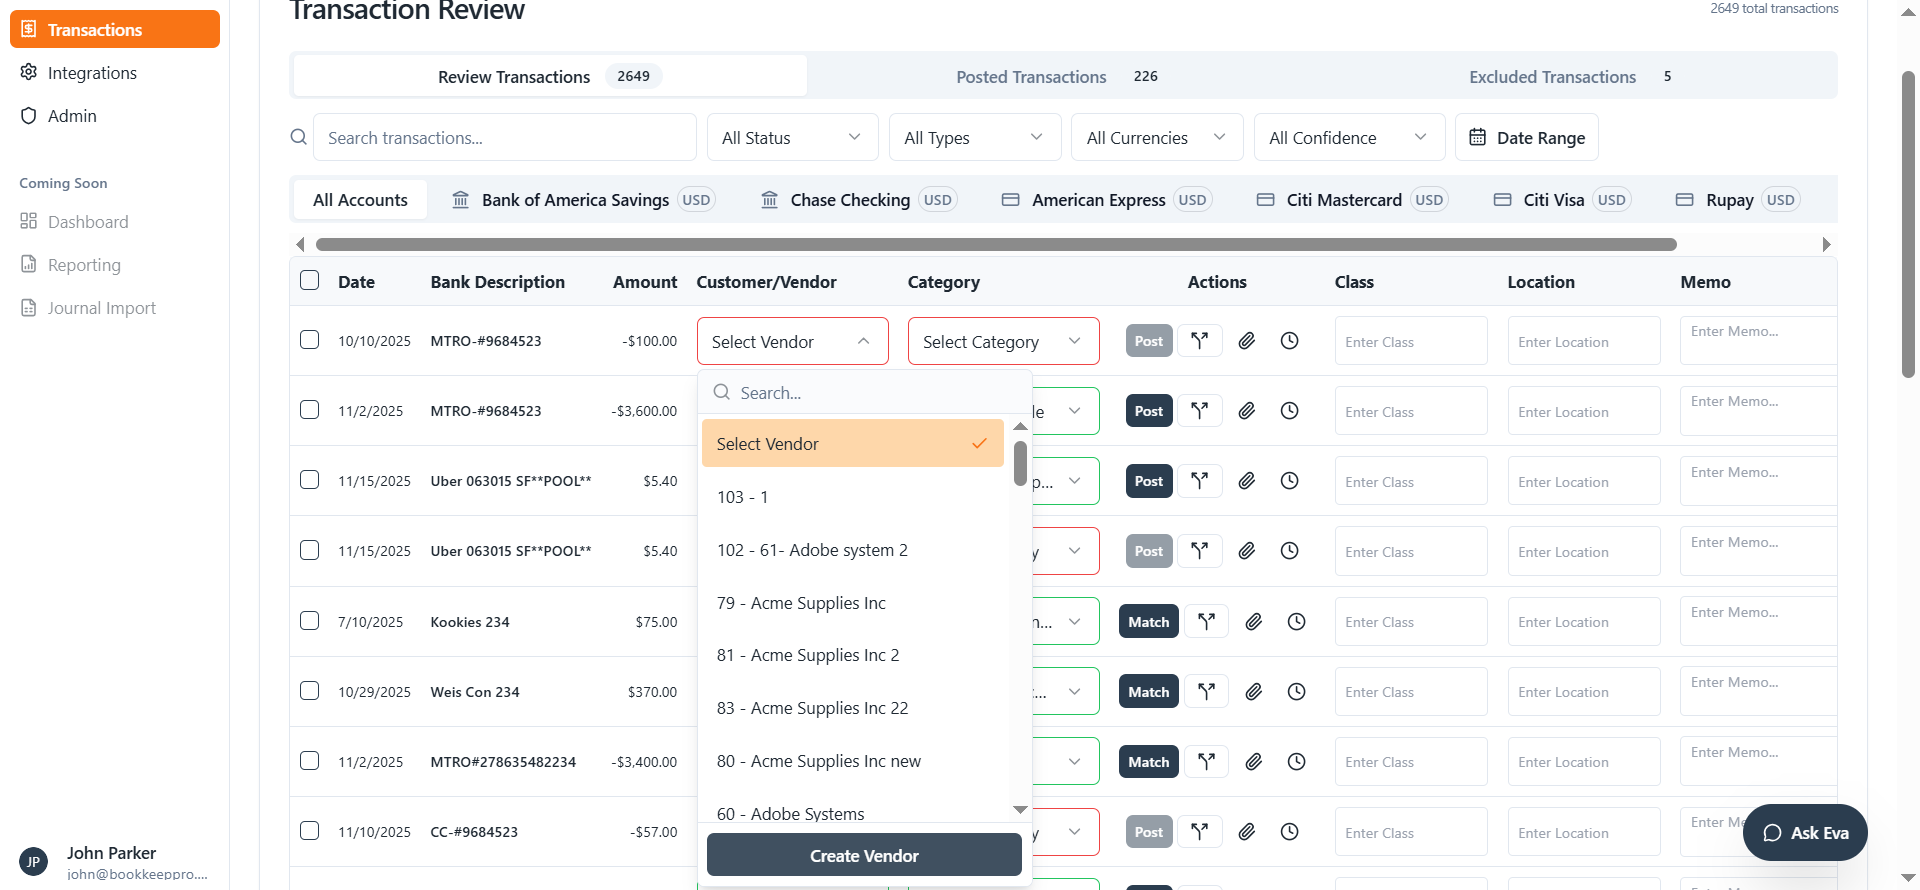
3
Click on Create Vendor
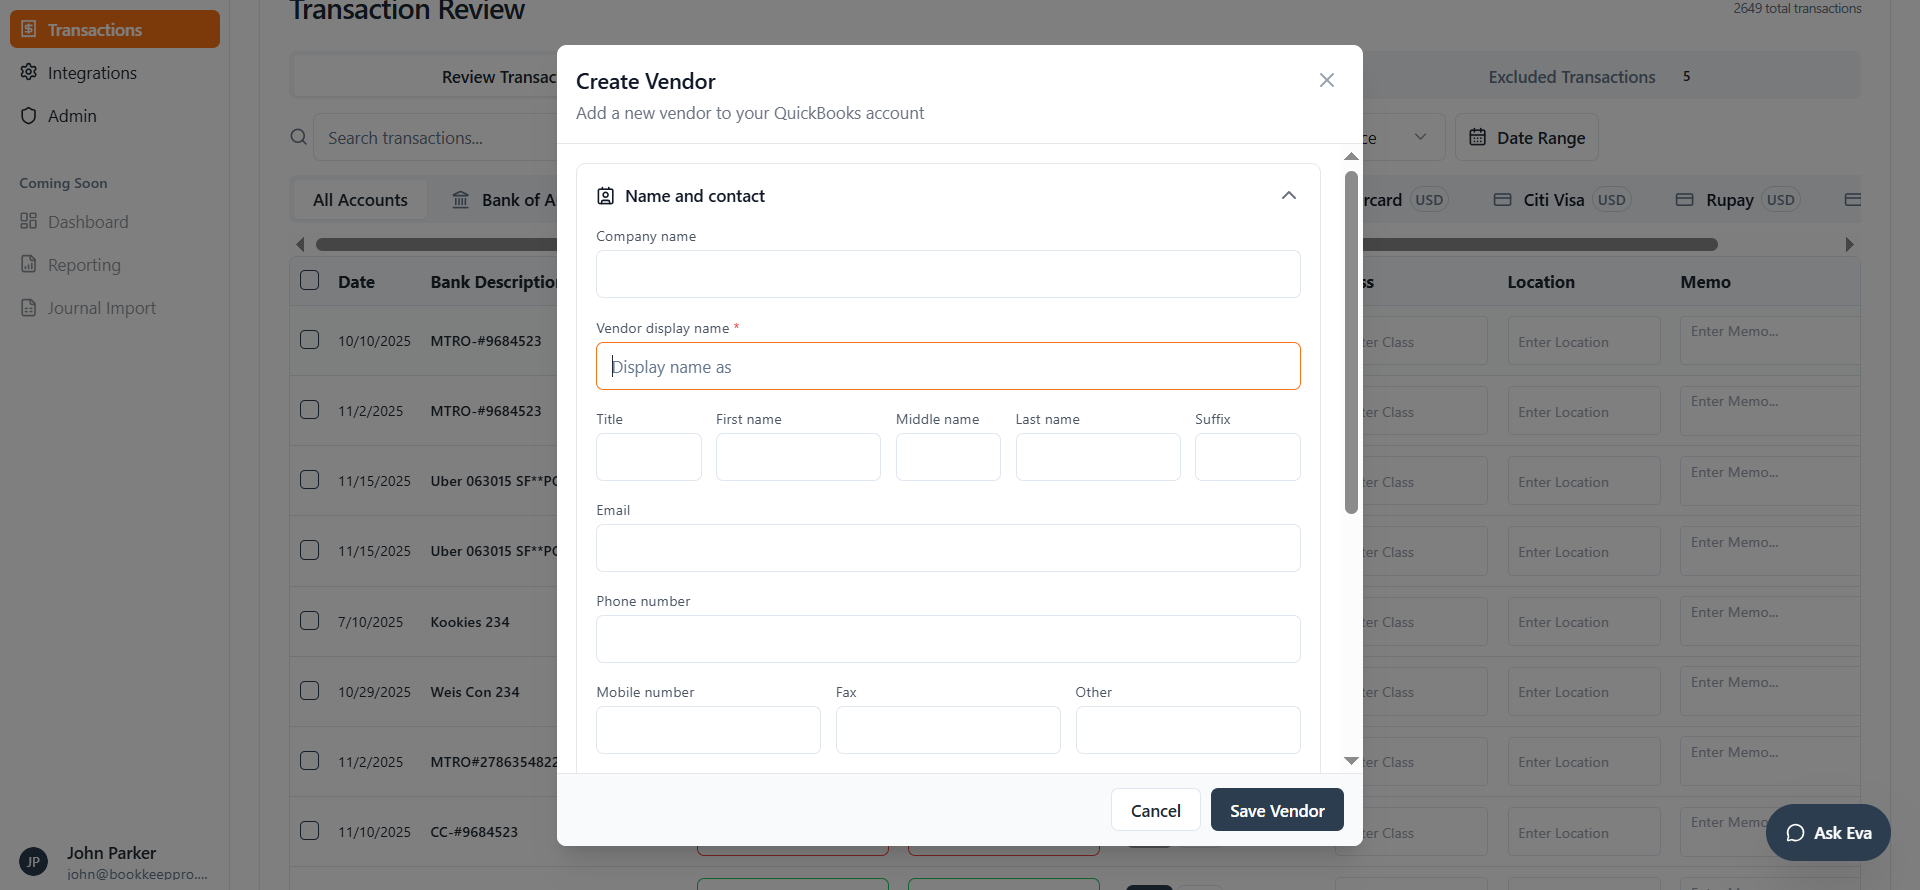
4
Fill out the required fields in the form.
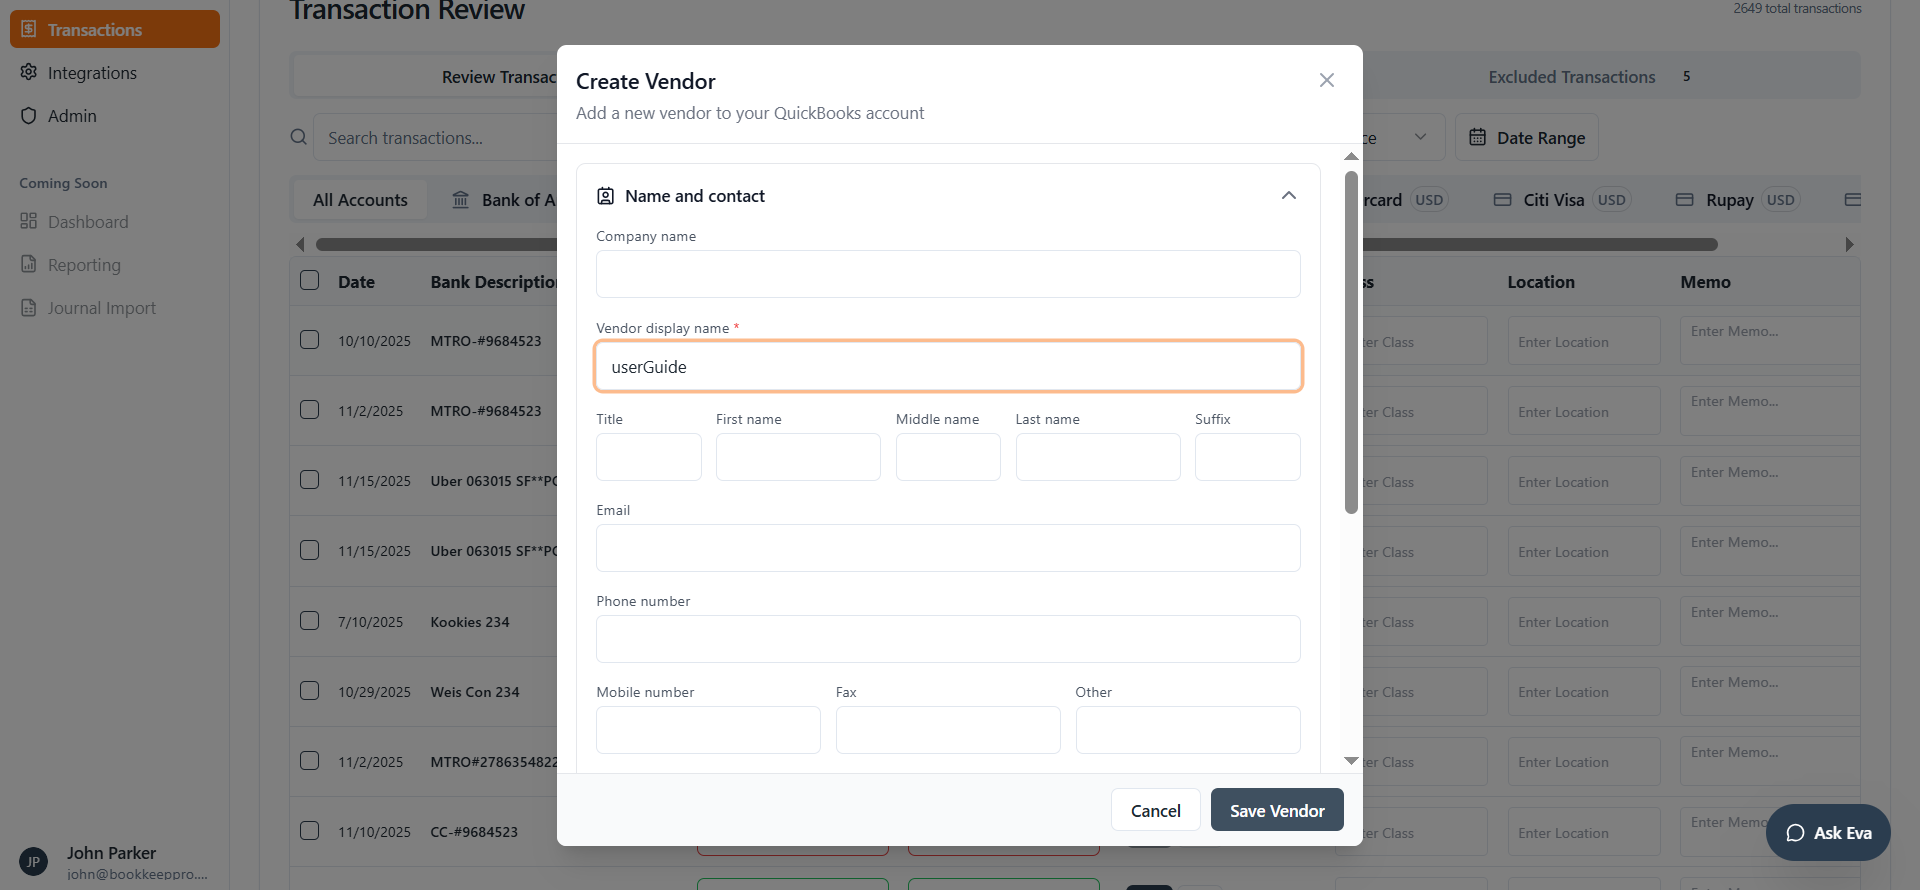
5
Click on Save Vendor button
6
The newly created vendor will be displayed in the selected field.

Create Customer
7
Click on Select Customer
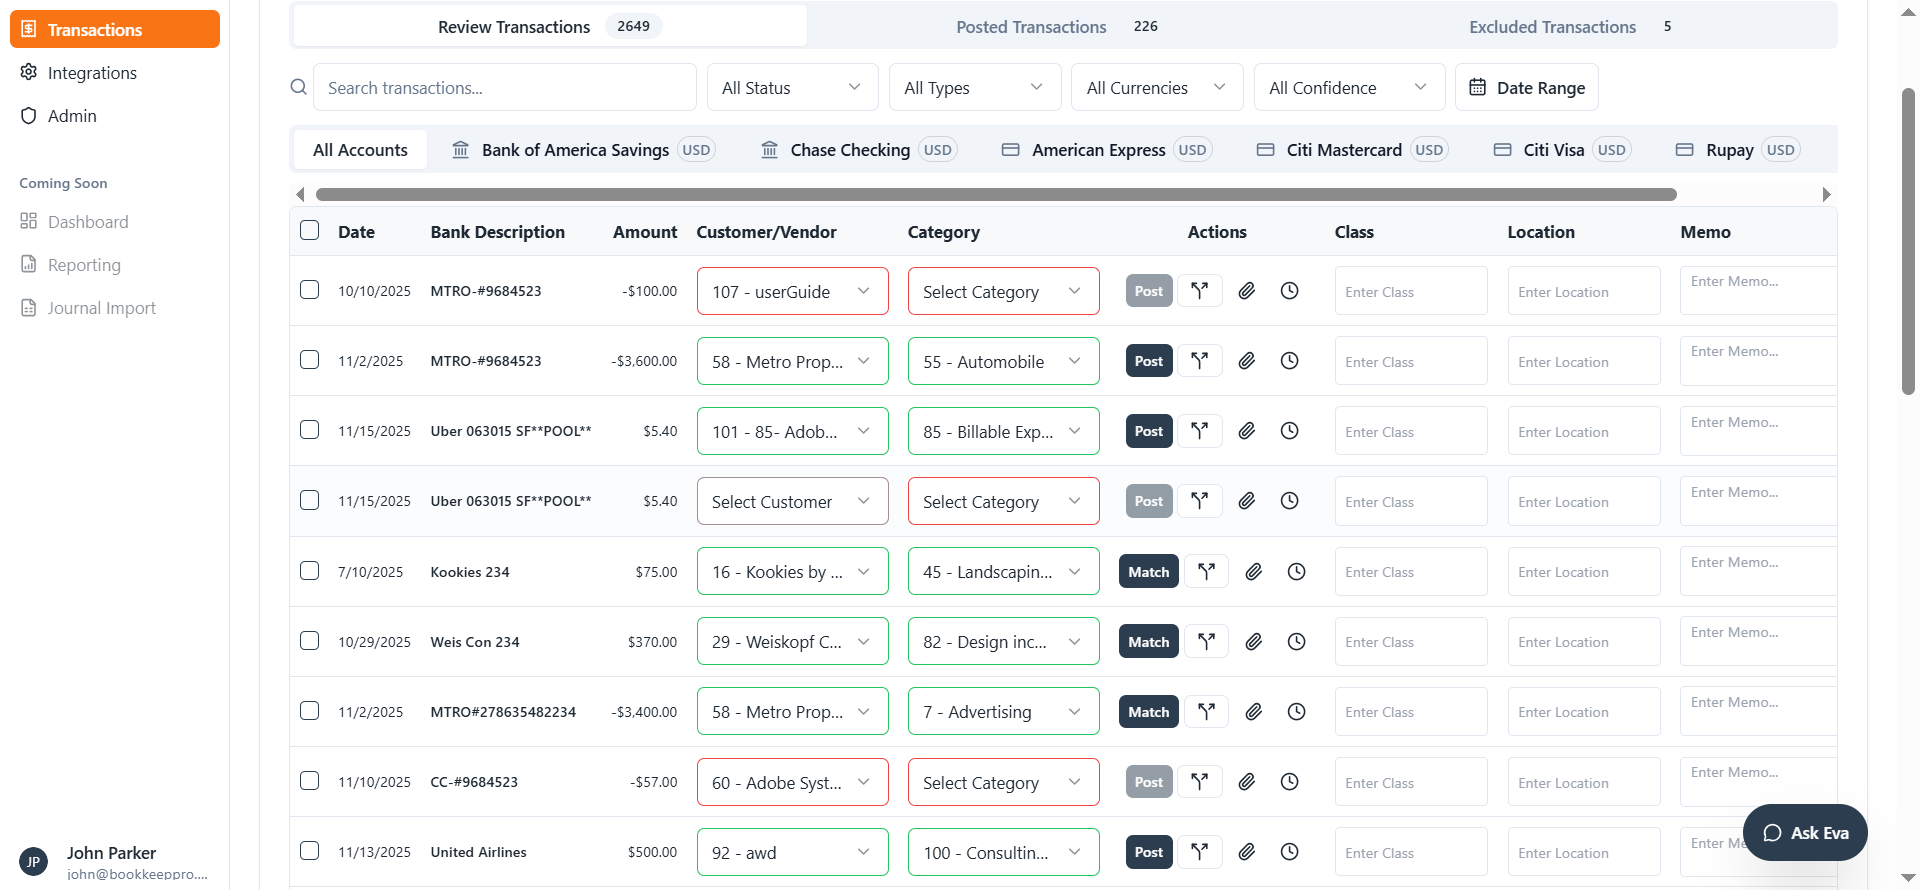
8
Click on Create Customer
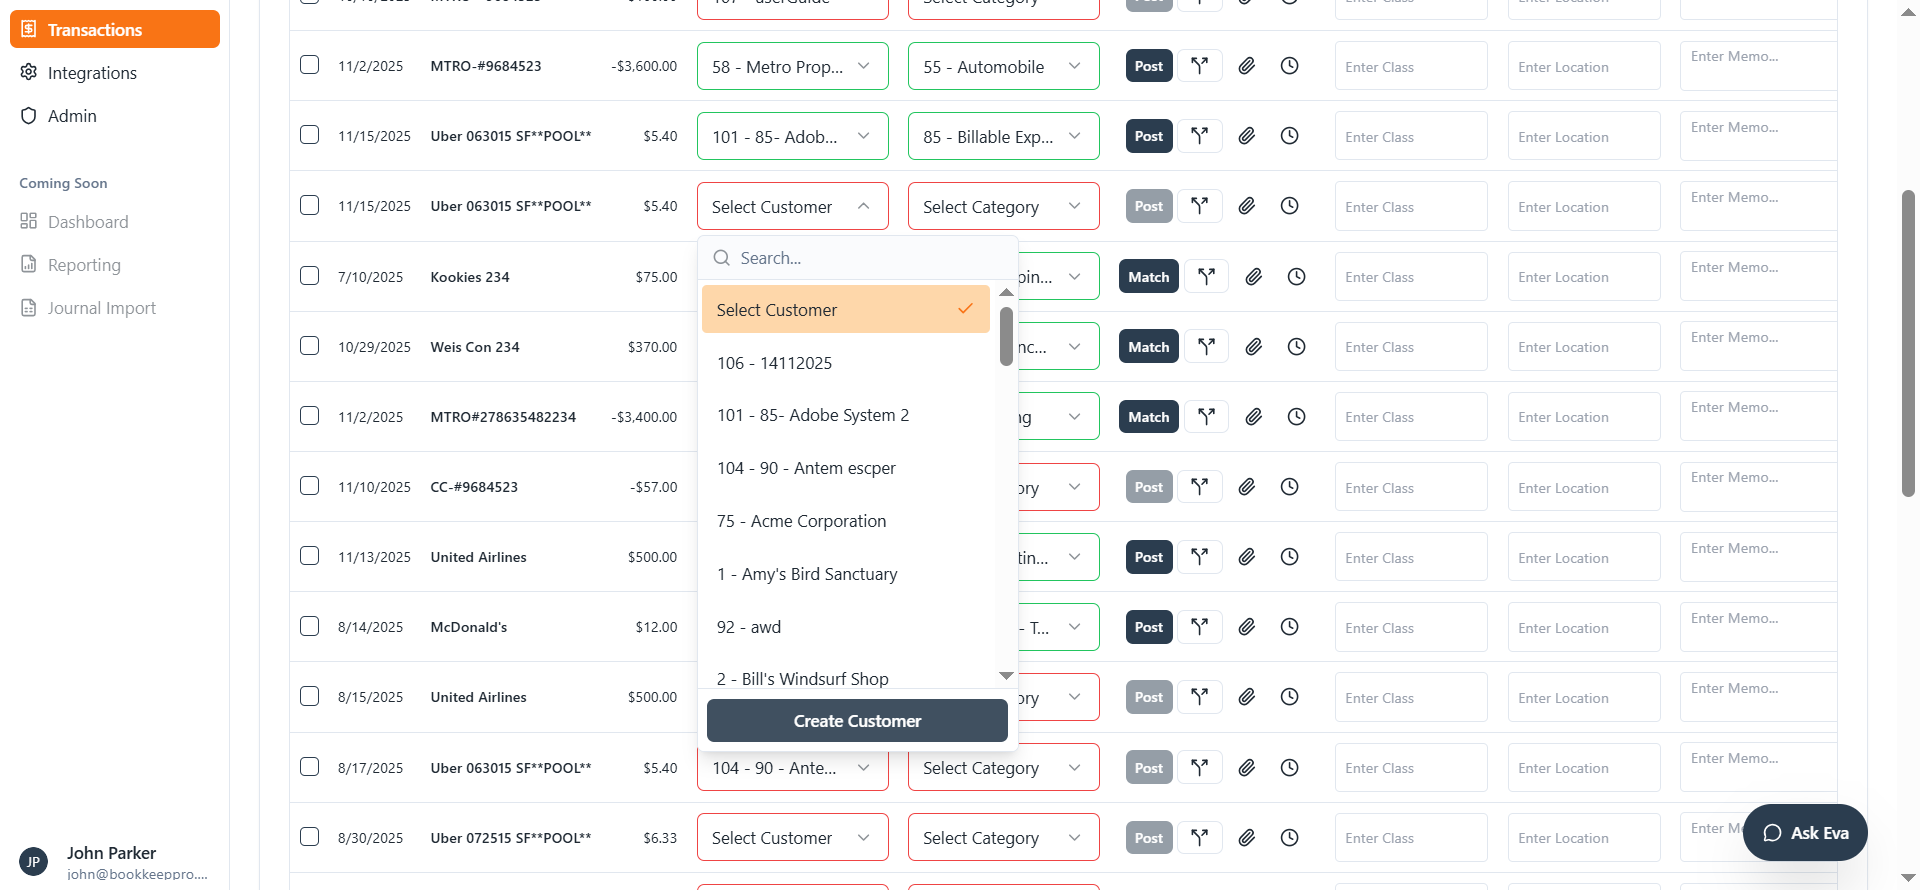
9
Fill out the required fields in the form.
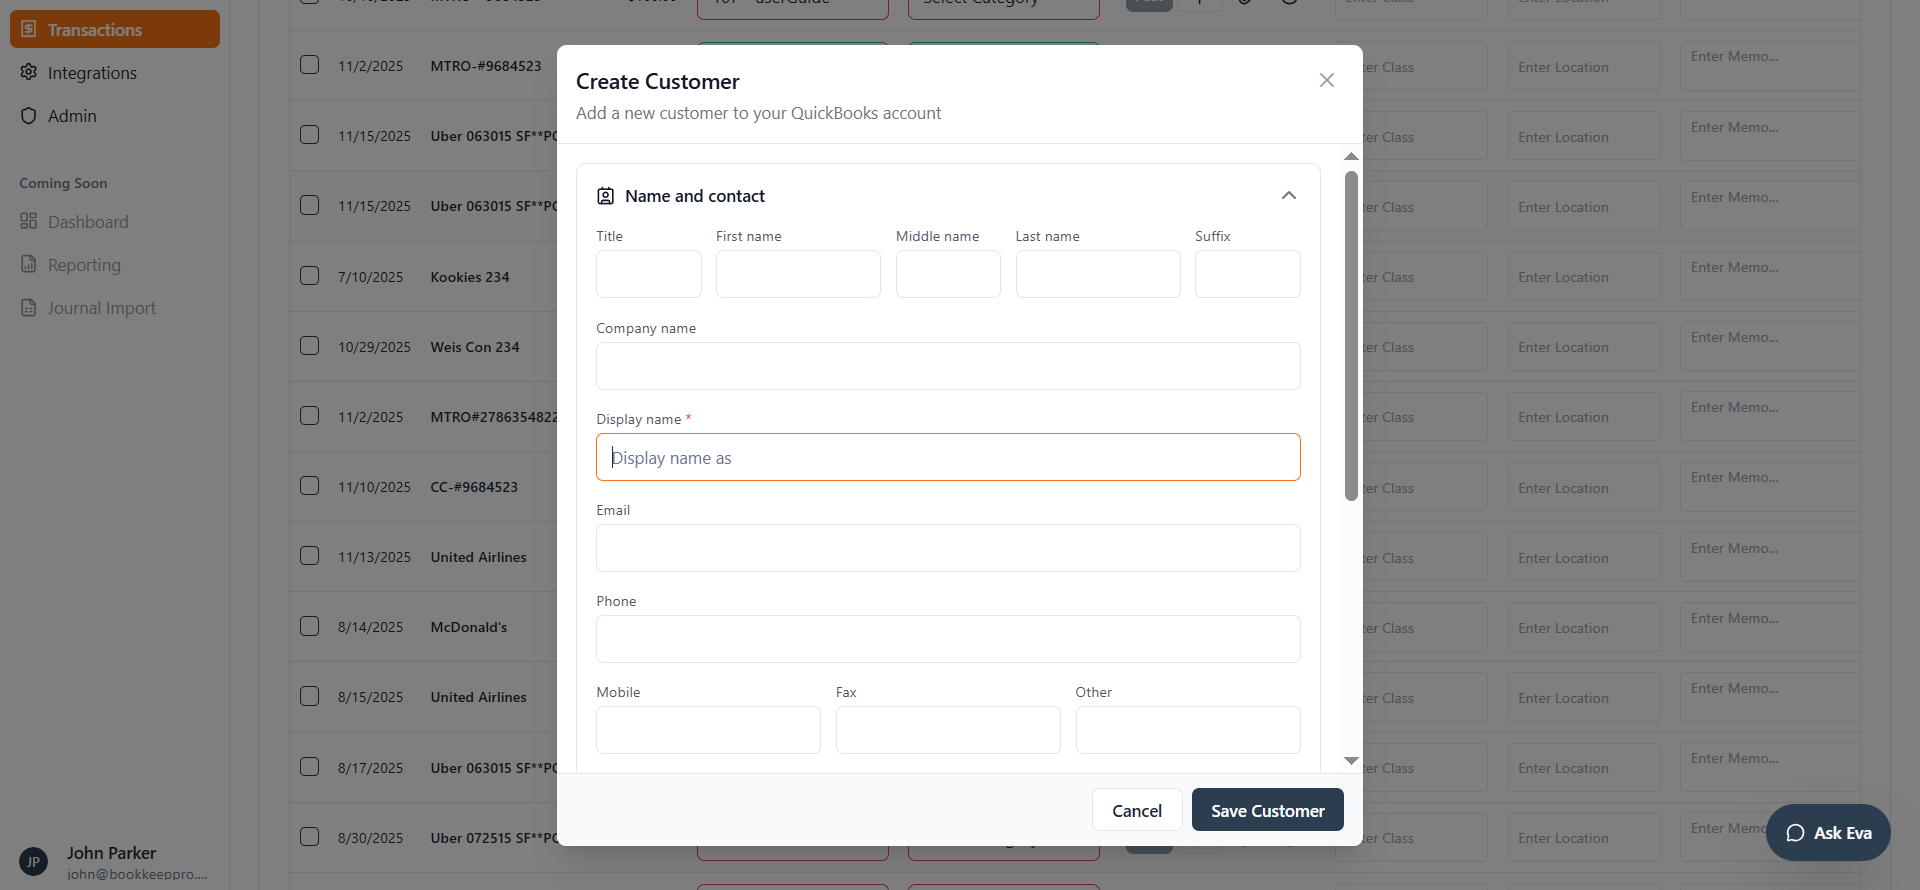
10
Click on Save Customer button
11
The newly created customer will be displayed in the selected field.
The following steps outline how to create a customer or vendor and post the transaction to QuickBooks.