Icon

How to Create a HAR File for Troubleshooting iCIMS Platform Issues

Learn how to generate a HAR file to troubleshoot network-related issues on the iCIMS platform. Follow these step-by-step instructions for Chrome, Firefox, and Edge.

By Yuval Karmi

In this guide, we'll learn how to produce a HAR file, a valuable tool for diagnosing network-related issues on platforms like iCIMS. A HAR file captures network activity, helping technical support engineers identify the causes of slowness or other performance problems. We'll cover the steps to generate a HAR file using different browsers, ensuring you can provide the necessary information to your support team effectively.

Let's get started

Hello. My name is Devin Sherman. I am an iCIMS technical support engineer, and today, I will guide you on how to create a HAR file. A TSE may request a HAR file from you if you're experiencing unusual slowness or other network-related issues on the platform.

1
Identify if you are experiencing slowness (e.g., during login, running reports) or other network-related issues on the platform, as a Technical Support Engineer (TSE) may request a HAR file for diagnosis.

A good example is experiencing slowness when logging in or running a report on the platform.

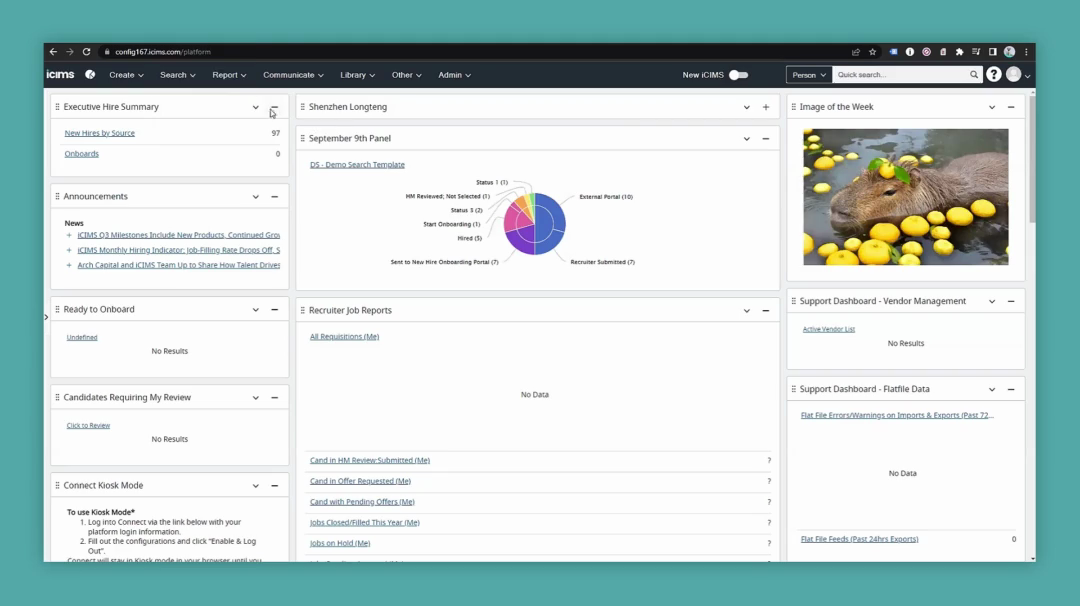
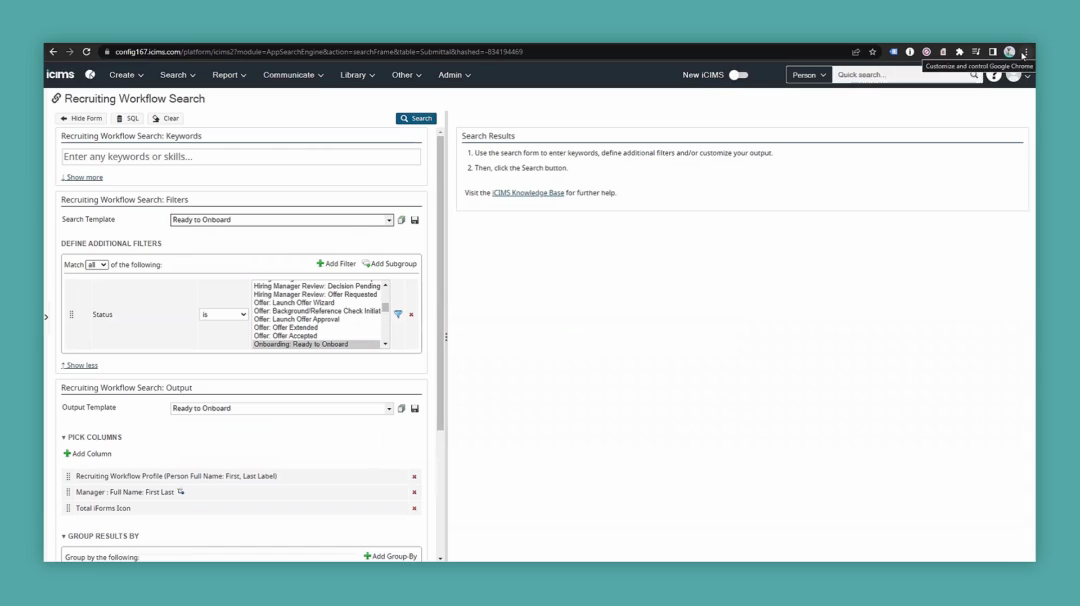
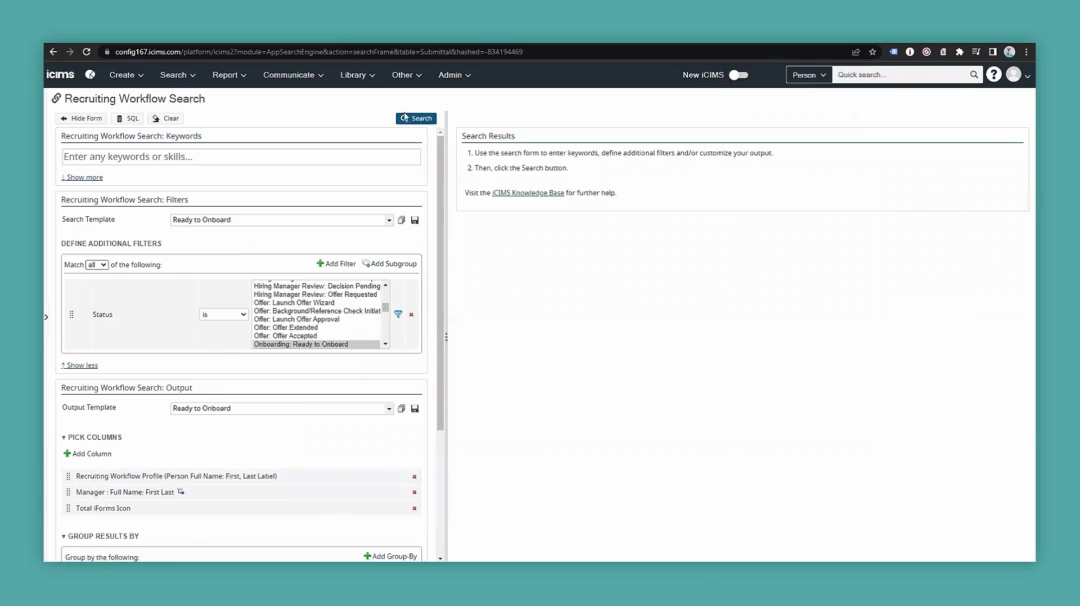
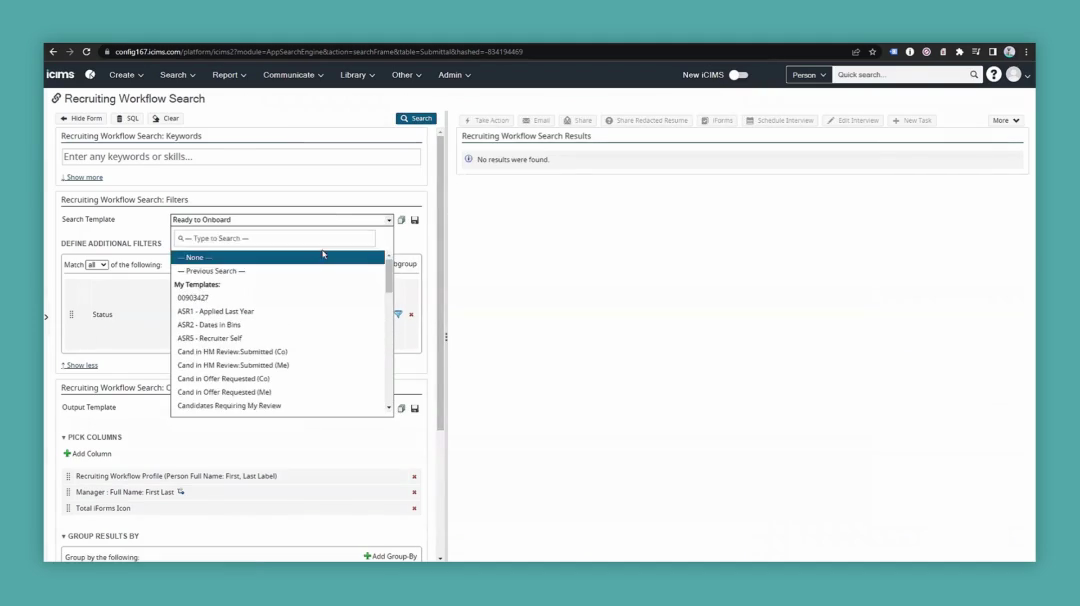
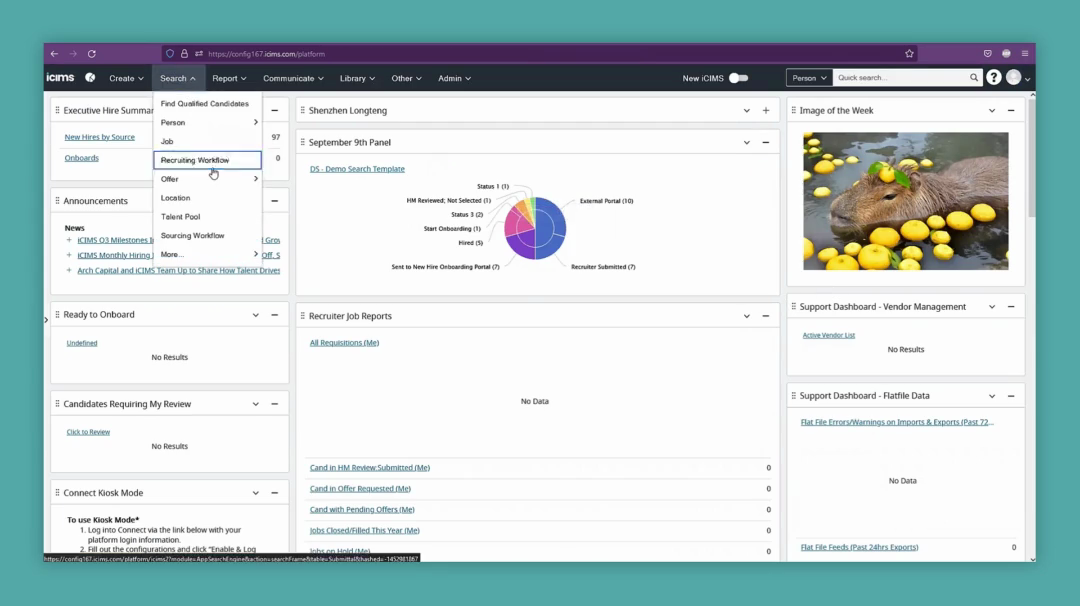
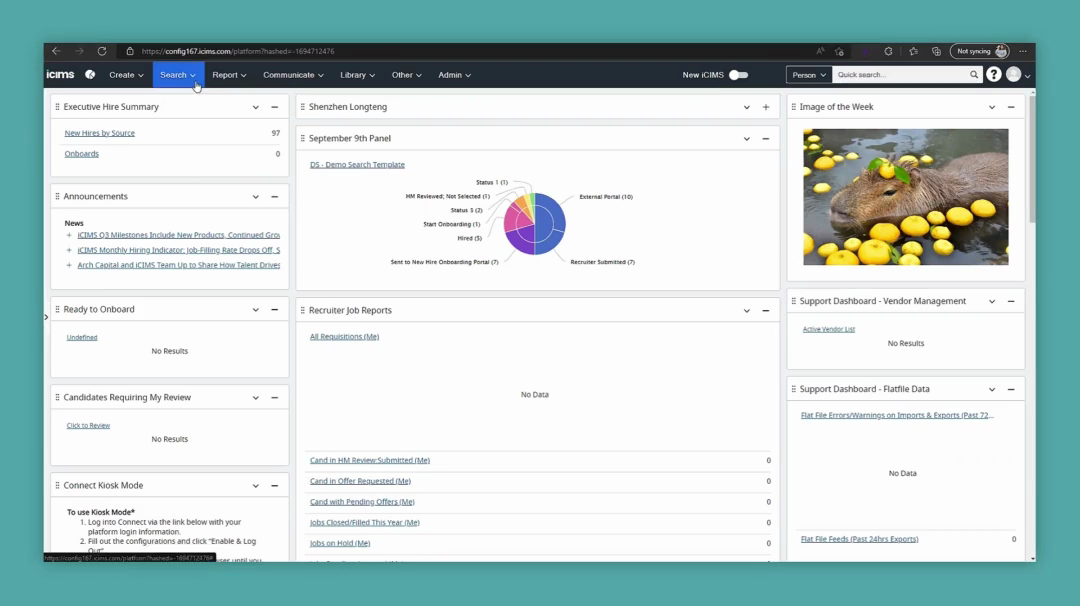
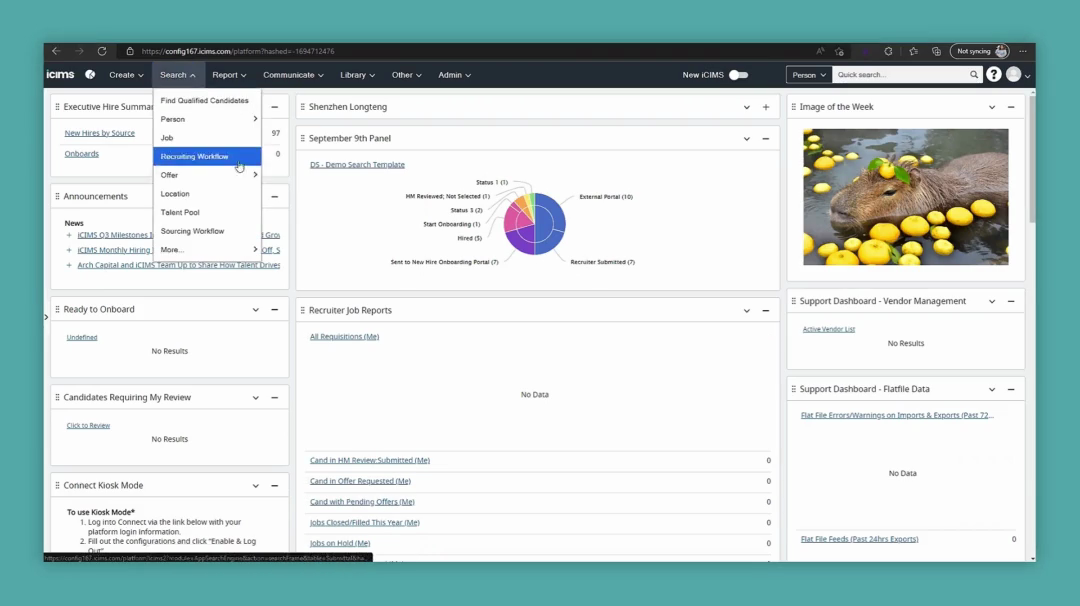
These HAR files help us understand what's happening on your side. They allow us to examine network response times and identify potential issues on your platform. To generate the HAR file, follow these easy steps. First, navigate to the area of the platform where you're experiencing the issue. If you're experiencing slowness when running a report, here's what you can do: Go to Search, then select Recruiting Workflow.

2
Click the 'Search' item in the top navigation bar.
Step #2: Click the 'Search' item in the top navigation bar.
3
Select 'Recruiting Workflow' from the 'Search' dropdown menu.
Step #3: Select 'Recruiting Workflow' from the 'Search' dropdown menu.

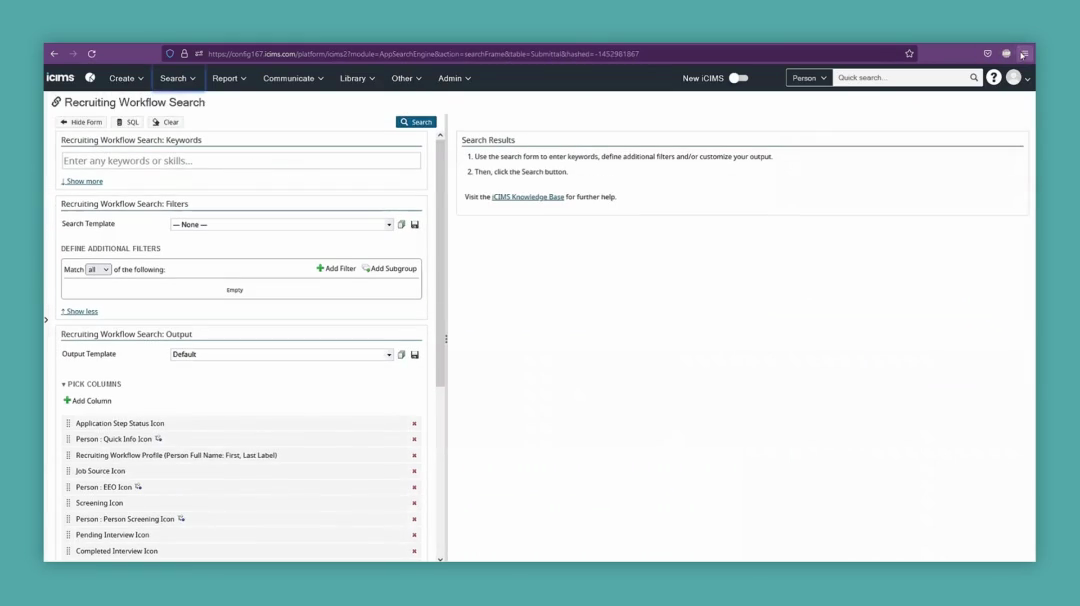
I would load the report where I usually encounter the issue.

4
Click the 'Search Template' dropdown menu located under 'Recruiting Workflow Search: Filters'.
Step #4: Click the 'Search Template' dropdown menu located under 'Recruiting Workflow Search: Filters'.
5
From the dropdown list, select the 'Ready to Onboard' template.
Step #5: From the dropdown list, select the 'Ready to Onboard' template.

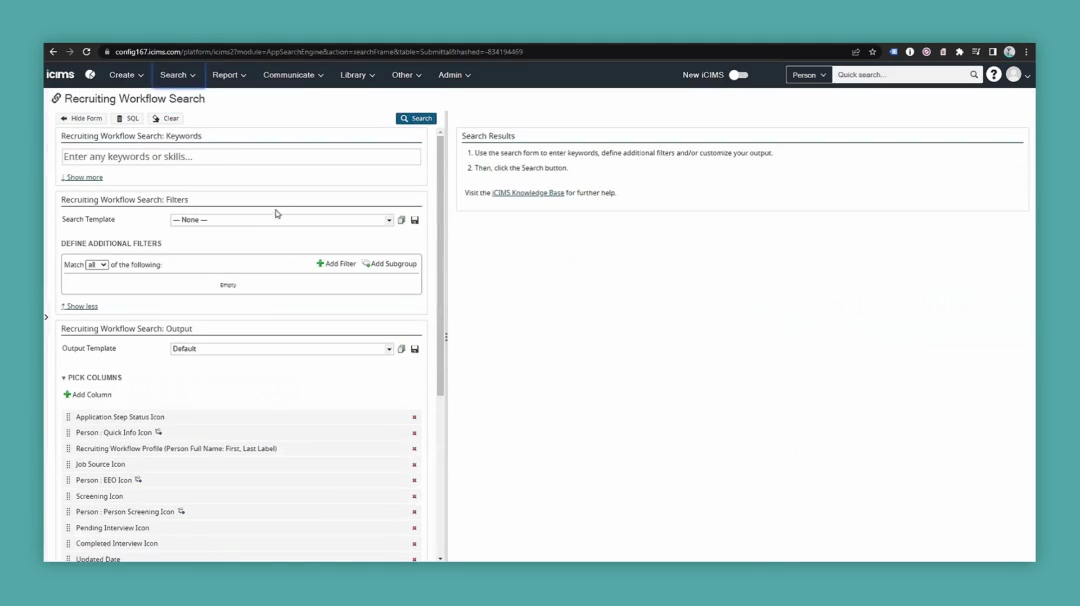
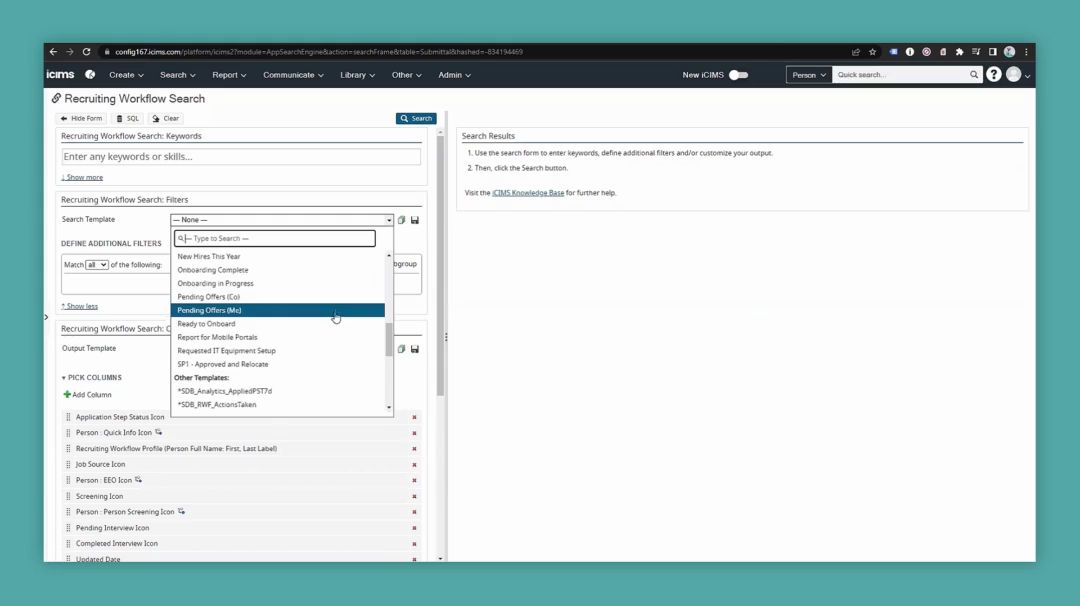
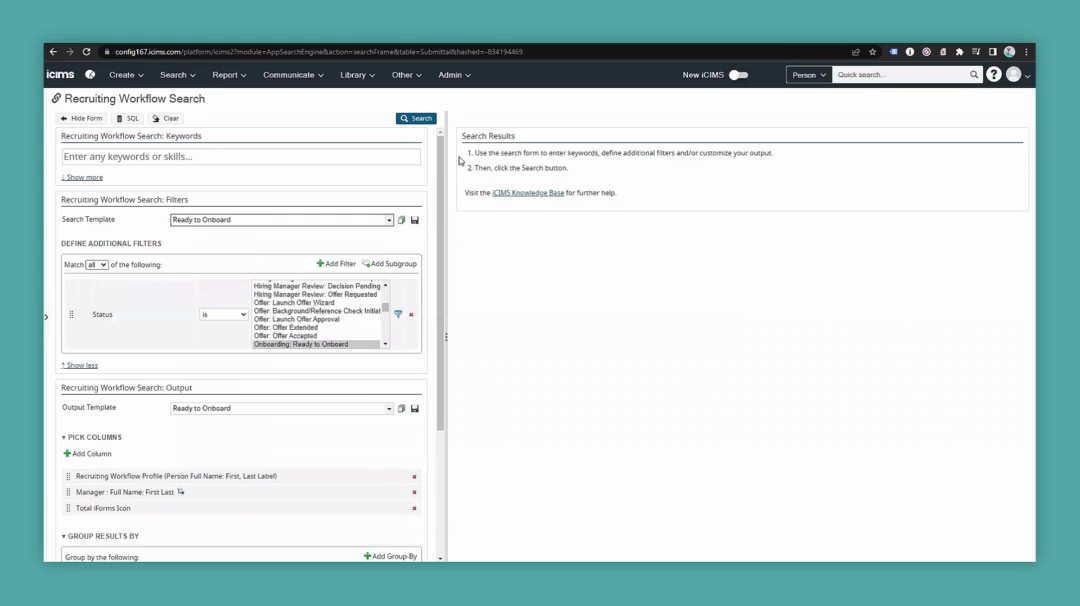
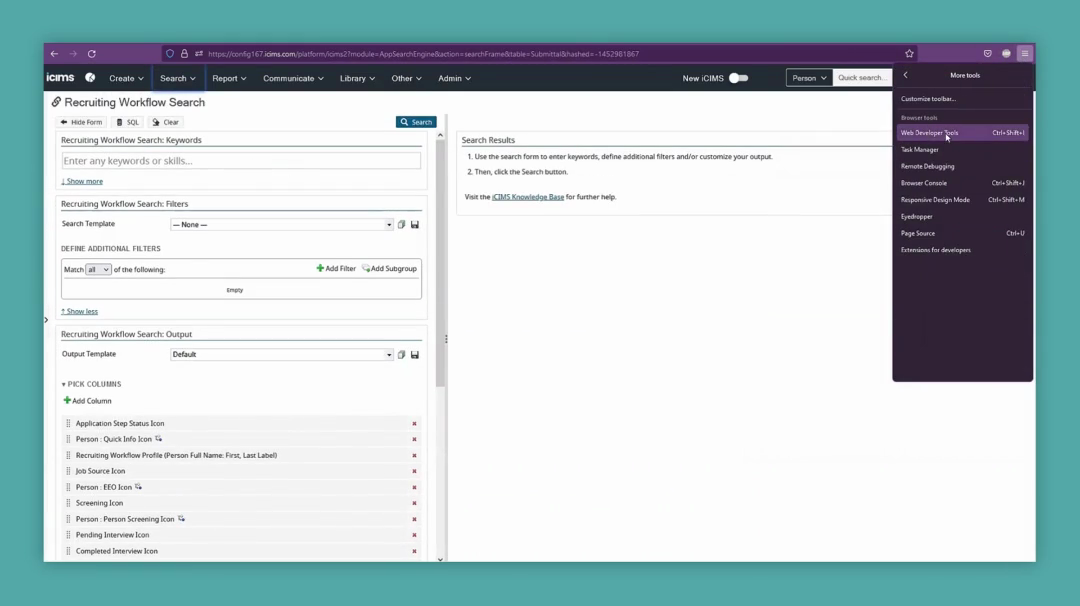
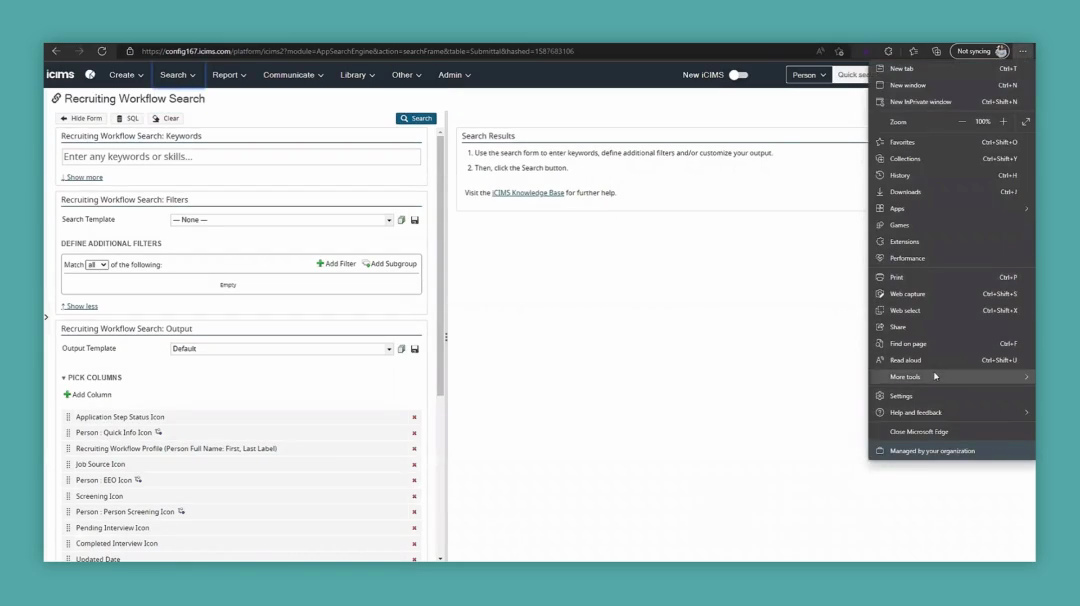
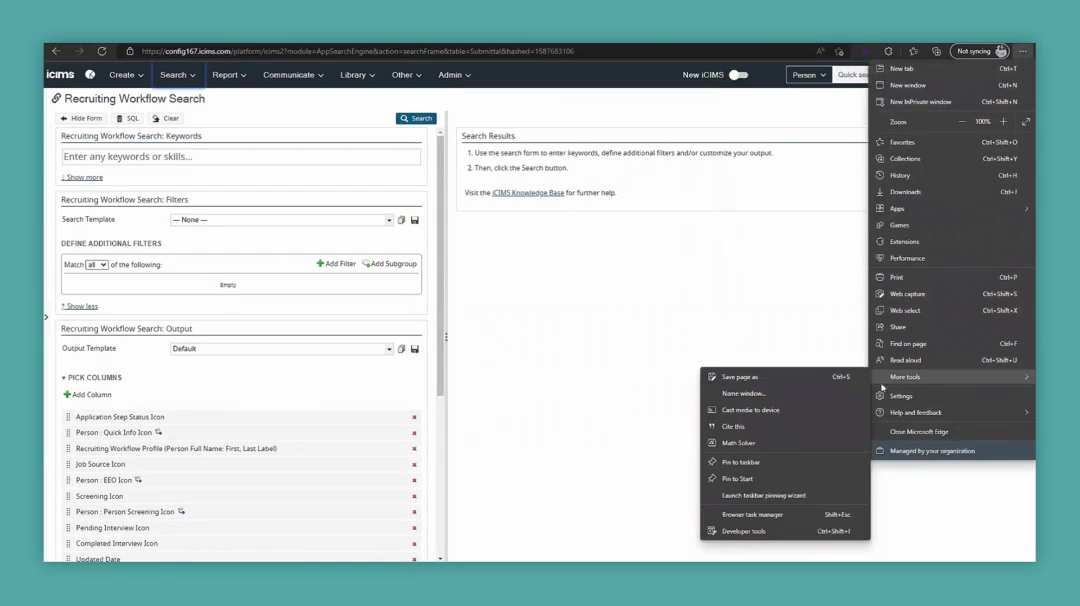
Here is my Ready to Onboard report. Go to the options in Chrome, select More Tools, and then Developer Tools.

6
Click the 'Search' button located at the top of the 'Recruiting Workflow Search' panel.
Step #6: Click the 'Search' button located at the top of the 'Recruiting Workflow Search' panel.
7
Click the three vertical dots icon (Customize and control Google Chrome) in the top-right corner of the Chrome browser window.
Step #7: Click the three vertical dots icon (Customize and control Google Chrome) in the top-right corner of the Chrome browser window.
8
In the Chrome menu, select 'More tools'.
Step #8: In the Chrome menu, select 'More tools'.
9
From the 'More tools' submenu, select 'Developer tools'.
Step #9: From the 'More tools' submenu, select 'Developer tools'.

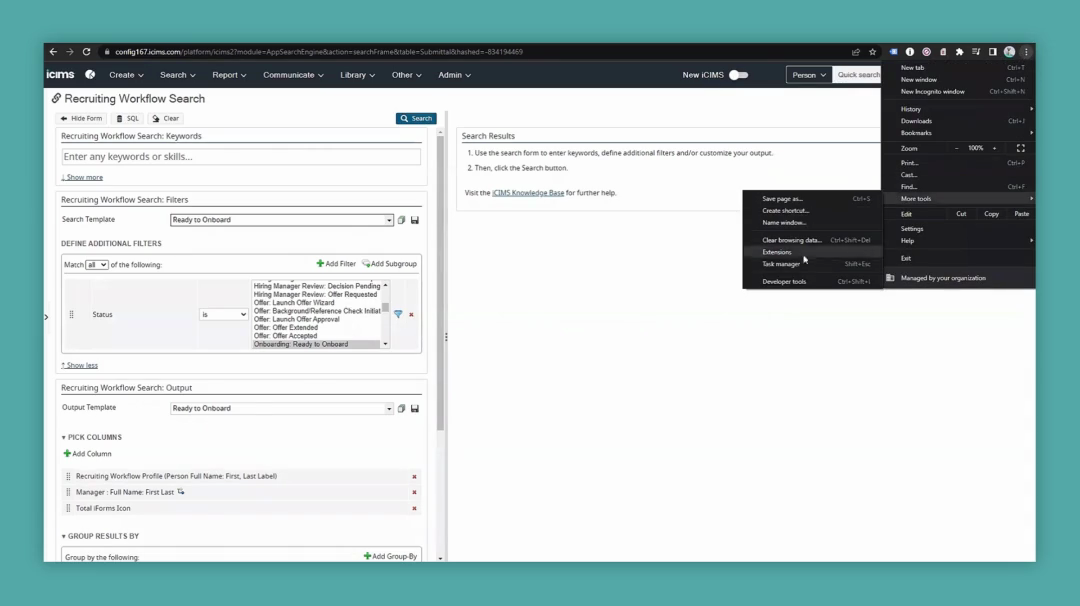
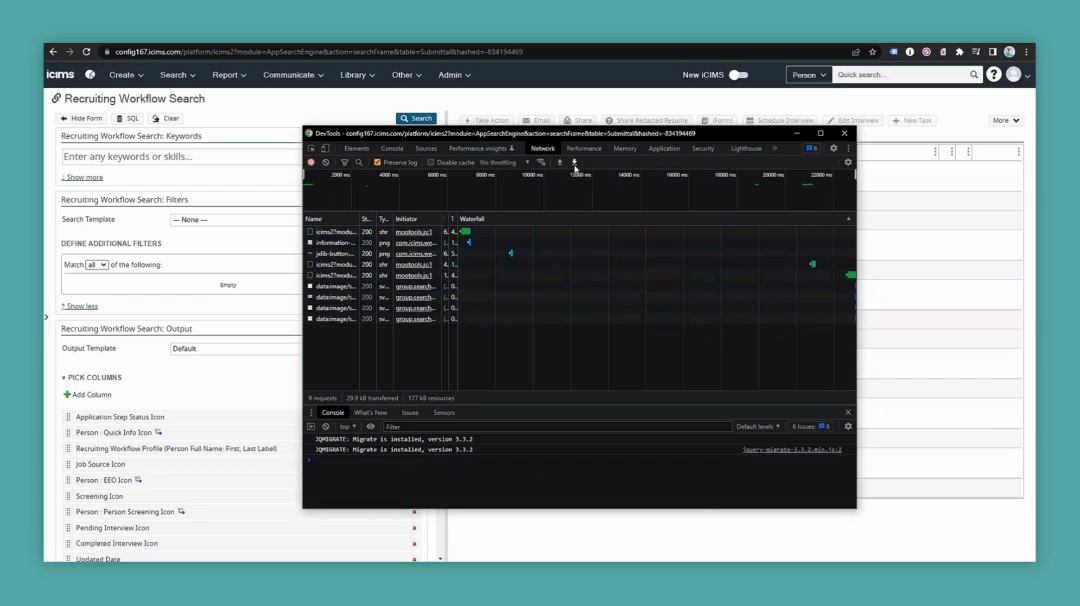
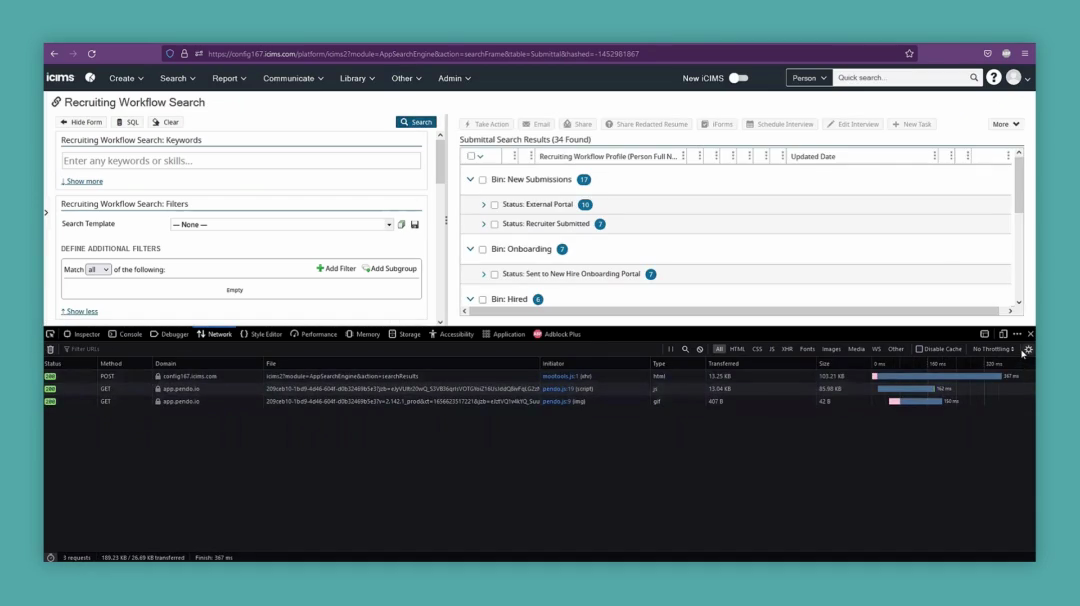
This pop-up provides various developer tools, but the only one you need is the Network tab.

10
Only one that you're gonna be interested: Network
Step #10: Only one that you're gonna be interested: Network

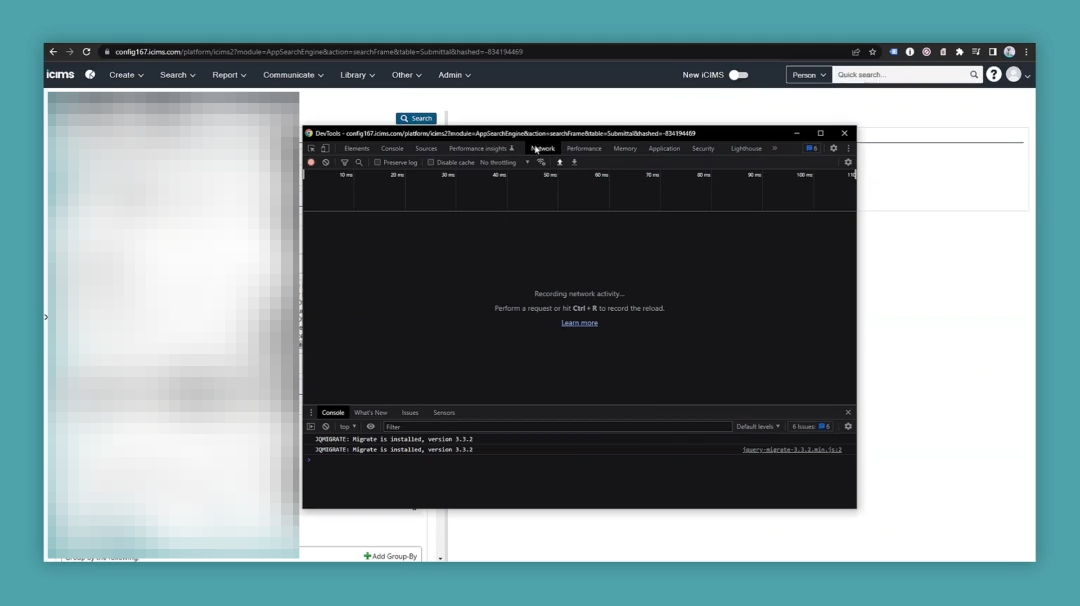
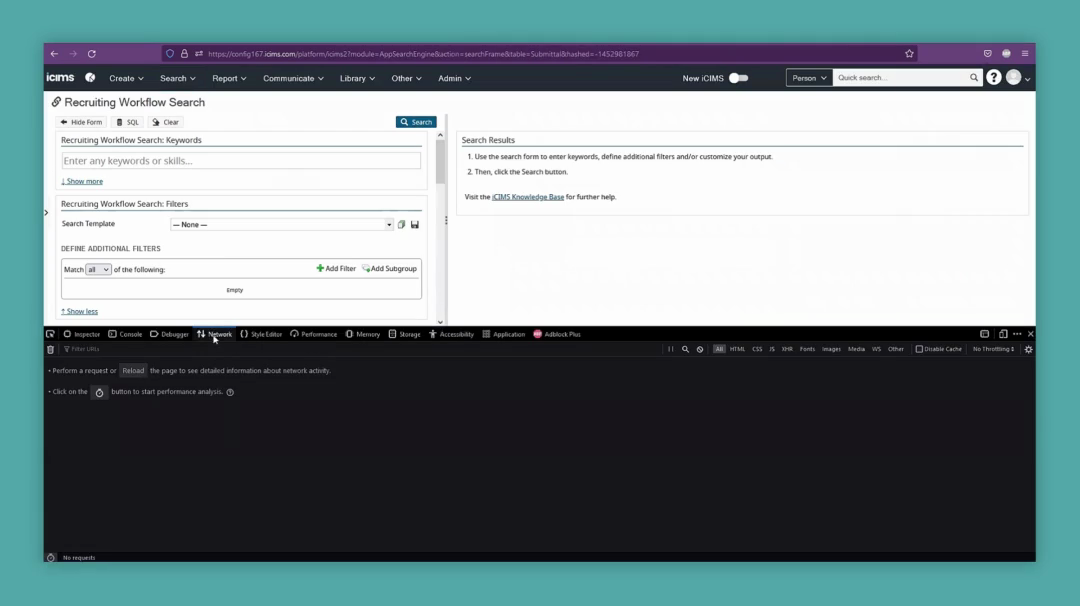
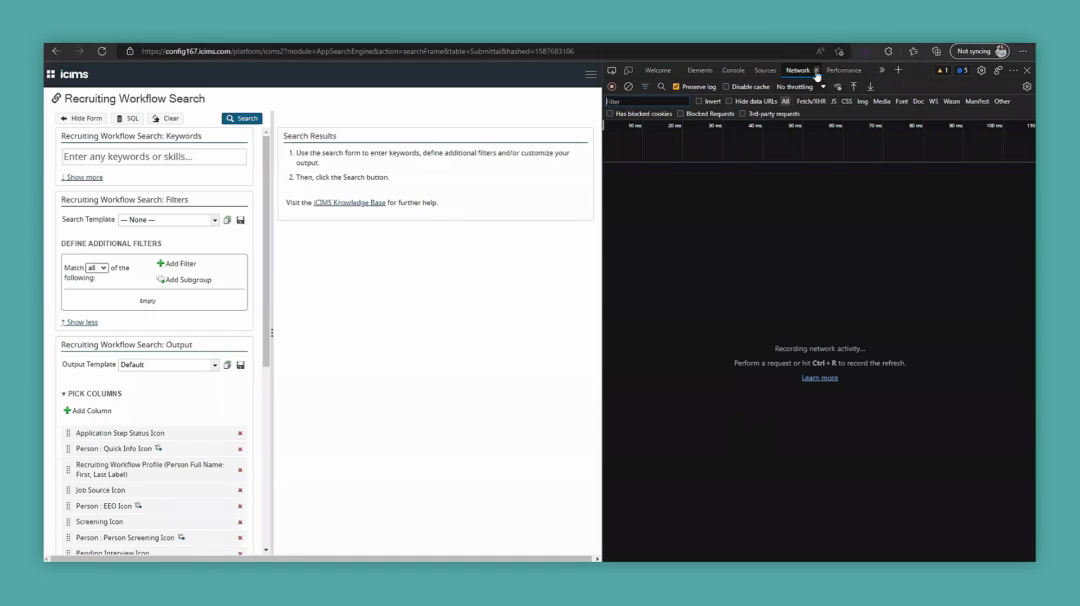
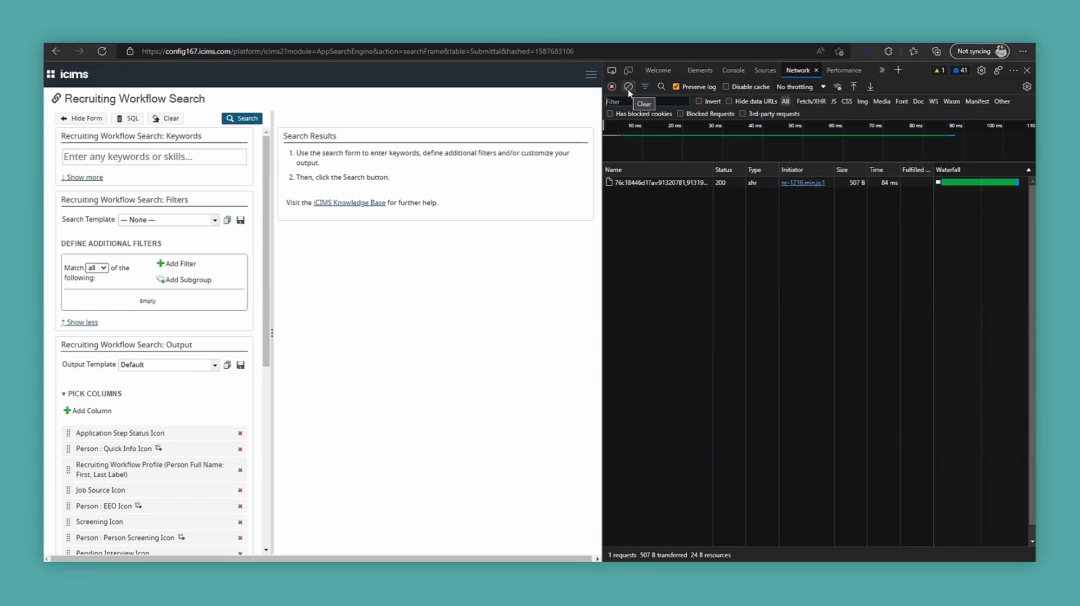
If you're on another tab, like Elements, click on Network. That's where we need to be.

11
Click the 'Network' tab in the Developer Tools panel.
Step #11: Click the 'Network' tab in the Developer Tools panel.

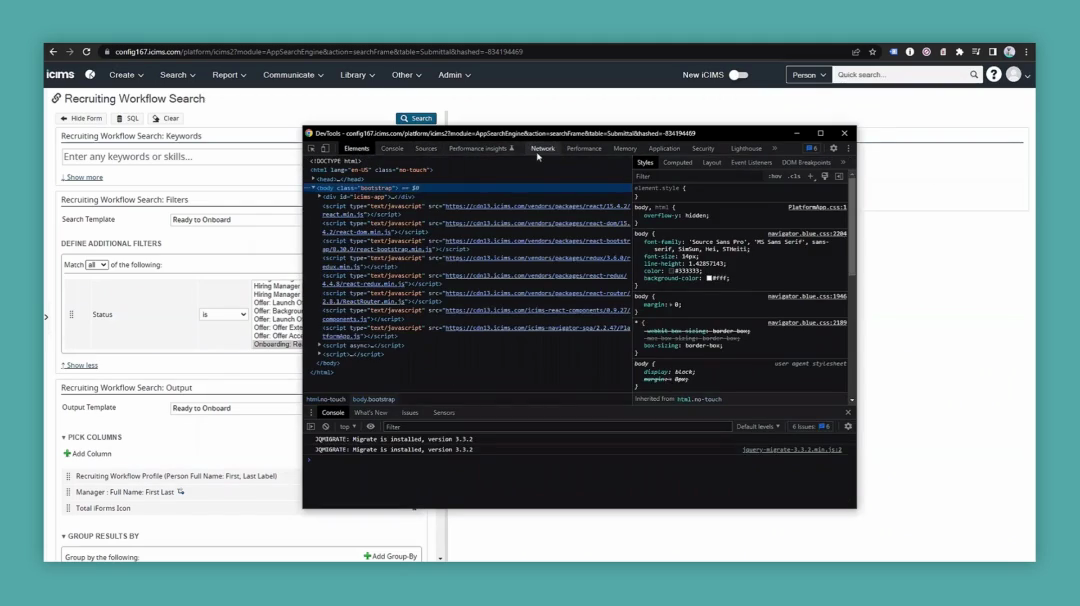
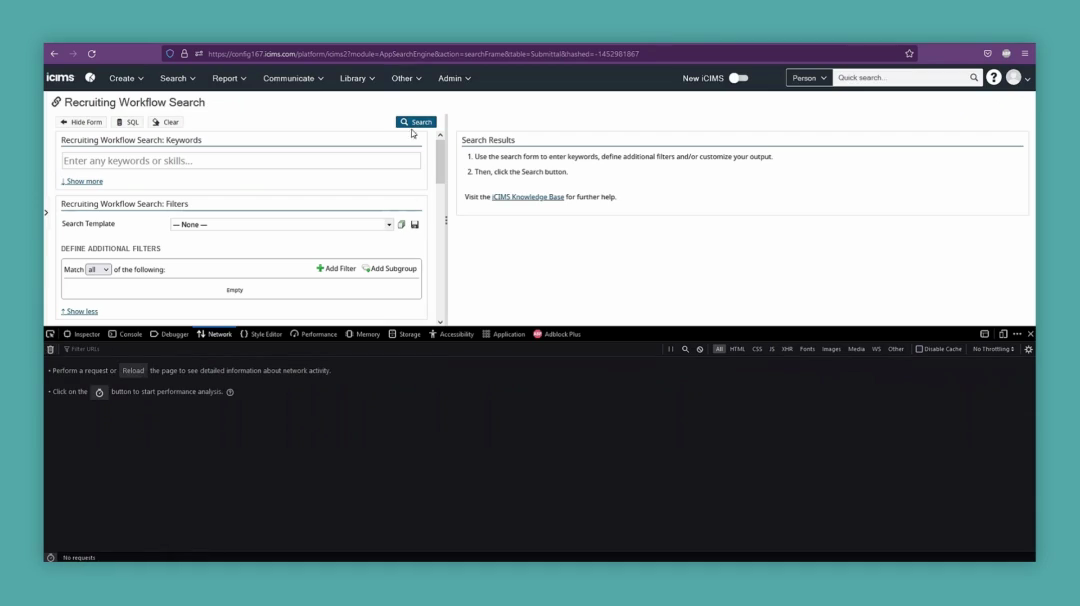
If there's anything there already, like what you're seeing now, click the Clear button. Then, turn on Preserve Log.

12
Click the 'Clear' button (icon resembling a circle with a line through it) in the Developer Tools Network tab.
Step #12: Click the 'Clear' button (icon resembling a circle with a line through it) in the Developer Tools Network tab.
13
Click the 'Preserve log' checkbox in the Developer Tools Network tab.
Step #13: Click the 'Preserve log' checkbox in the Developer Tools Network tab.

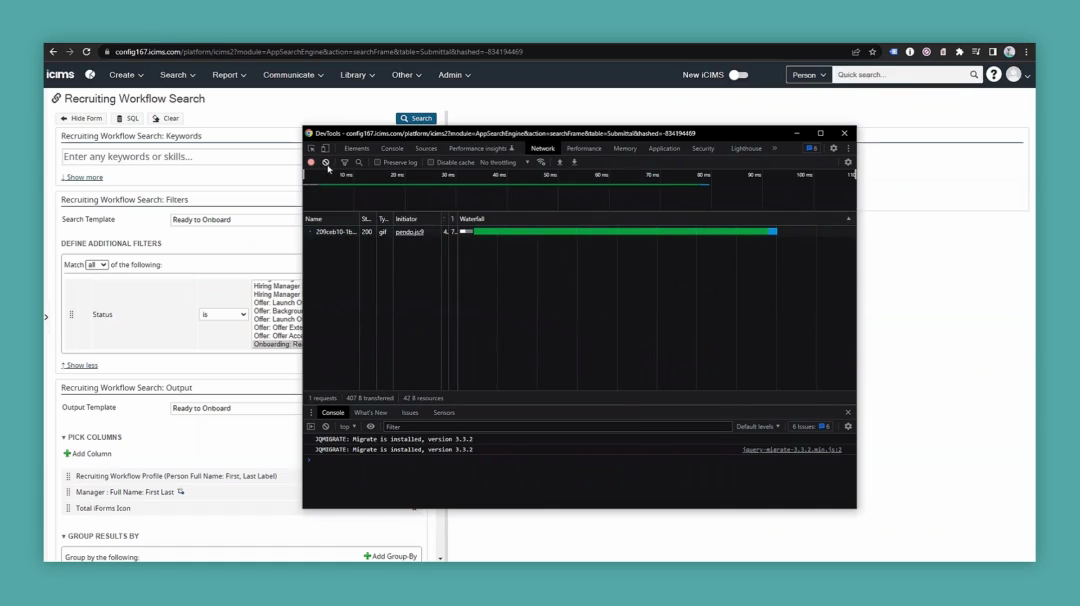
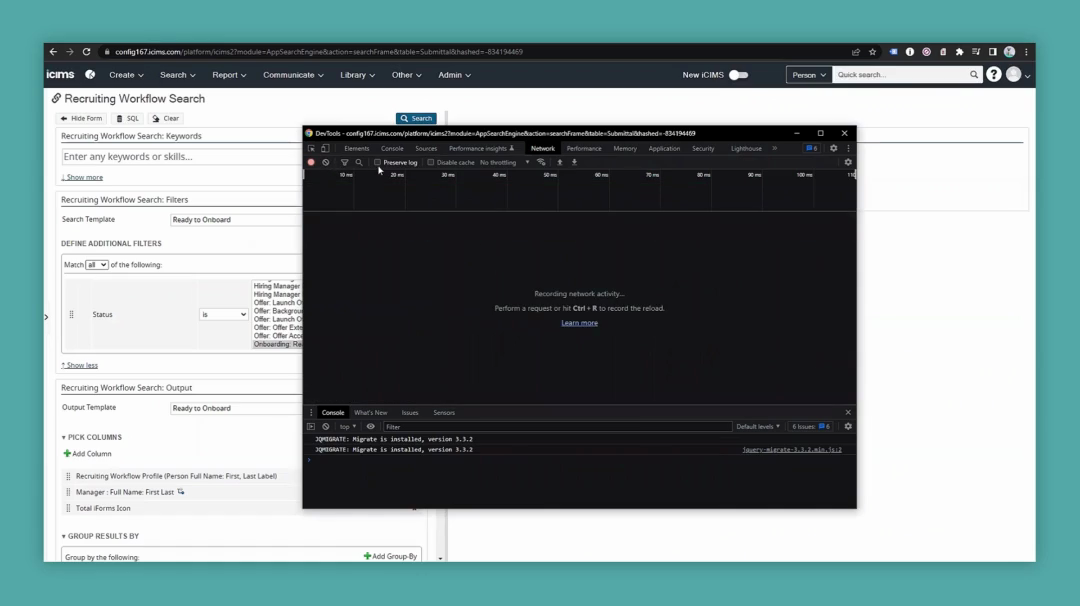
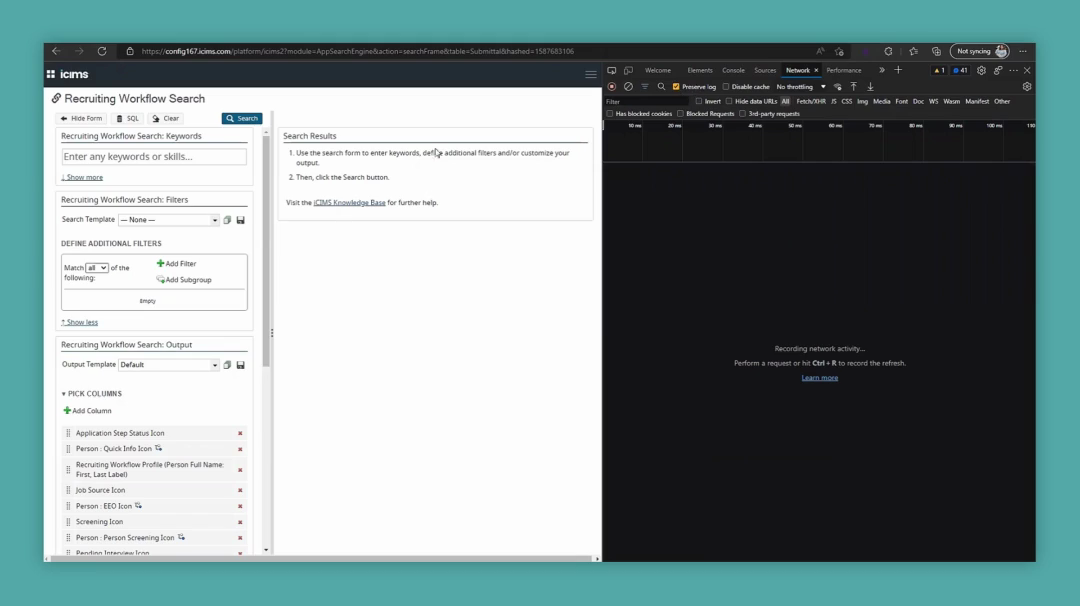
This will help ensure that everything we collect is saved, even in case of a refresh. Once everything is set up, perform the action that is causing the slowness.

14
Then, with that all set up, perform the action that's giving you the slowness. So with me, that'd be the report, so I'd press Search to run the report.

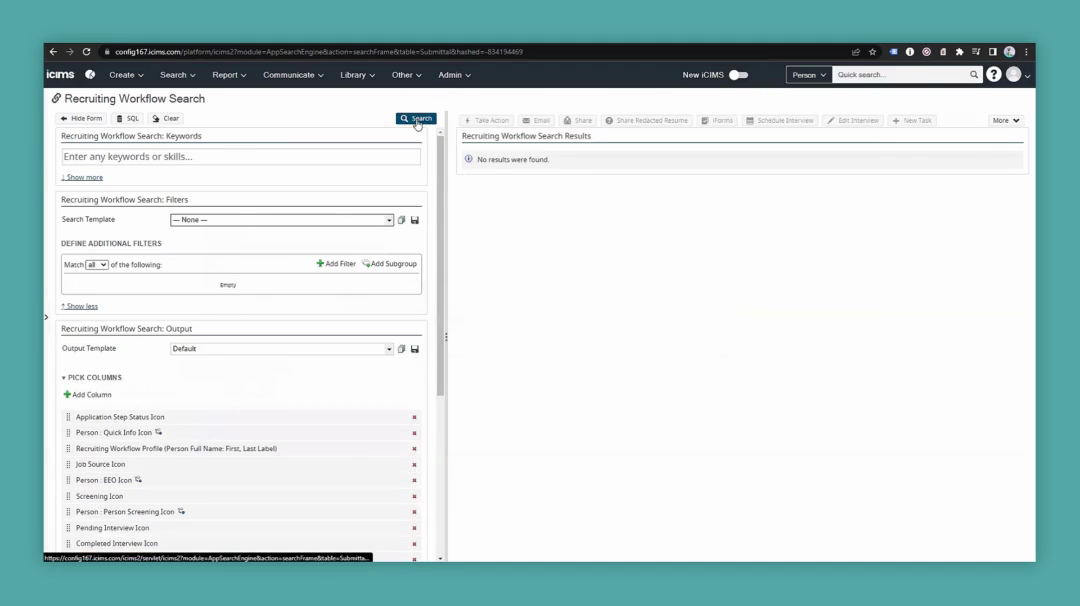
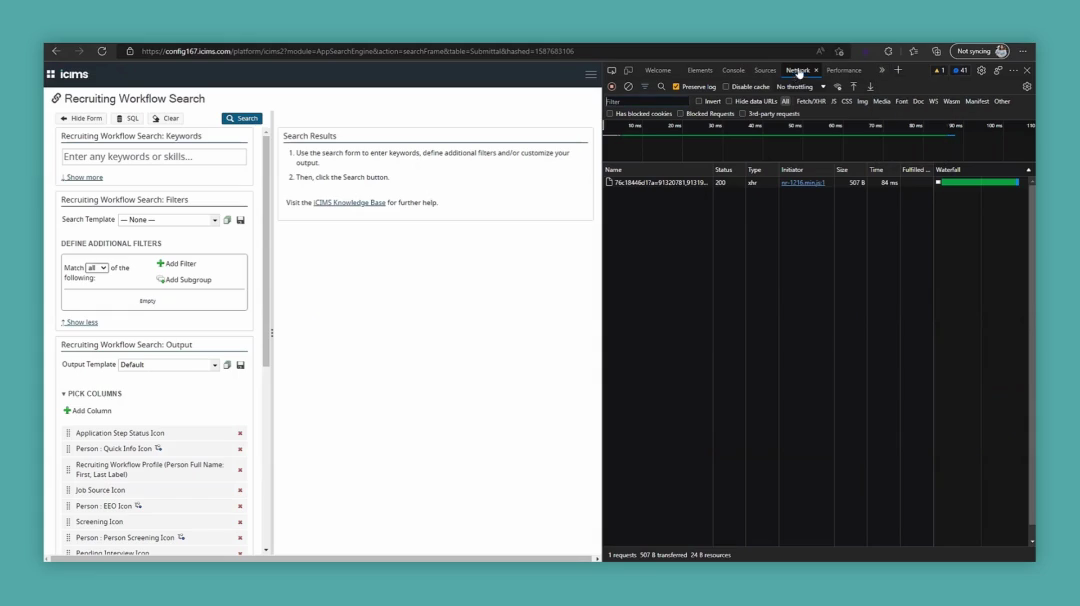
To run the report, I would press Search.

15
Click the 'Search' button on the main application page.
Step #15: Click the 'Search' button on the main application page.
16
Click the 'Search' button located at the top right of the 'Recruiting Workflow Search' panel to run the report.
Step #16: Click the 'Search' button located at the top right of the 'Recruiting Workflow Search' panel to run the report.

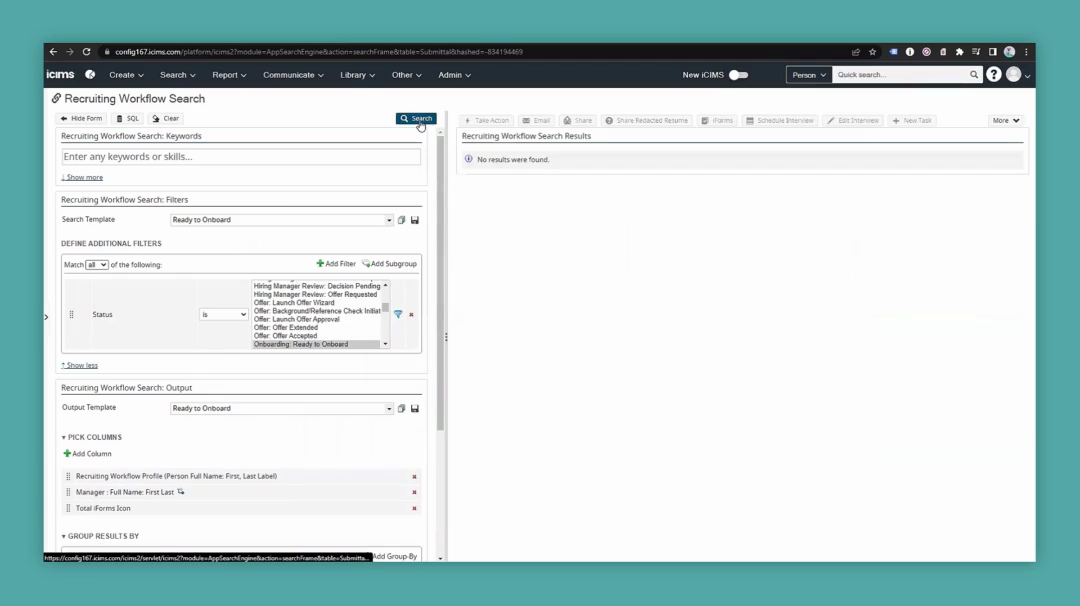
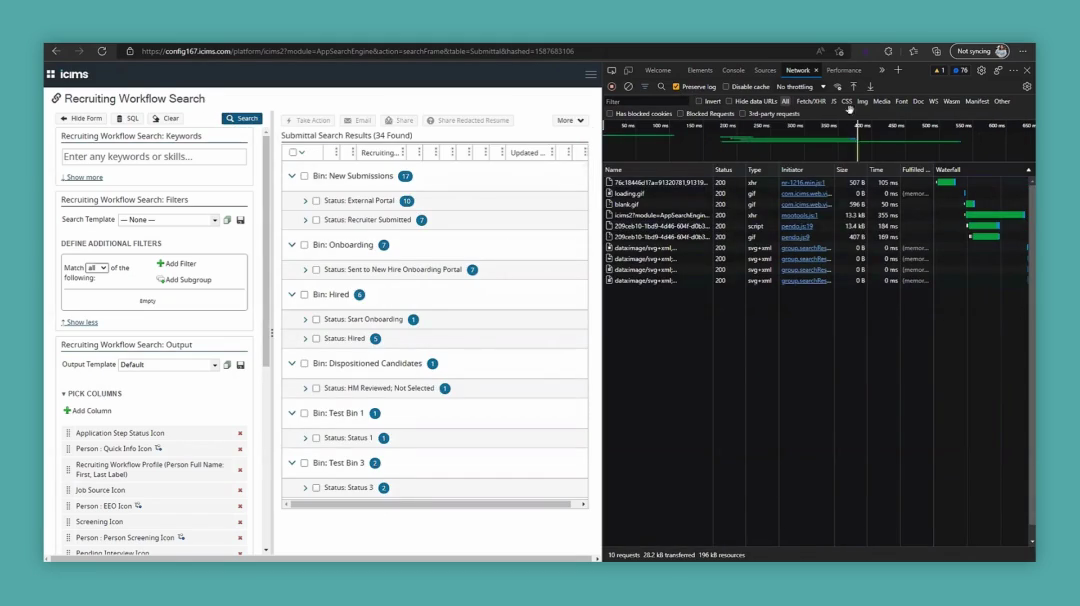
The network response information has been loaded into our log. This might be a bit of information since nothing appeared in my report.

17
Click the 'Search Document' dropdown menu, which currently displays 'Ready to Onboard', under 'Recruiting Workflow Search: Filters'.

If I perform a general search without filters and run it this way, pulling up everyone on the platform, you'll see more information is loaded.

18
From the 'Search Template' dropdown list, select '-- None --' to clear the current search template.
Step #18: From the 'Search Template' dropdown list, select '-- None --' to clear the current search template.
19
Click the 'Search' button again, located at the top right of the 'Recruiting Workflow Search' panel, to run a general search.
Step #19: Click the 'Search' button again, located at the top right of the 'Recruiting Workflow Search' panel, to run a general search.

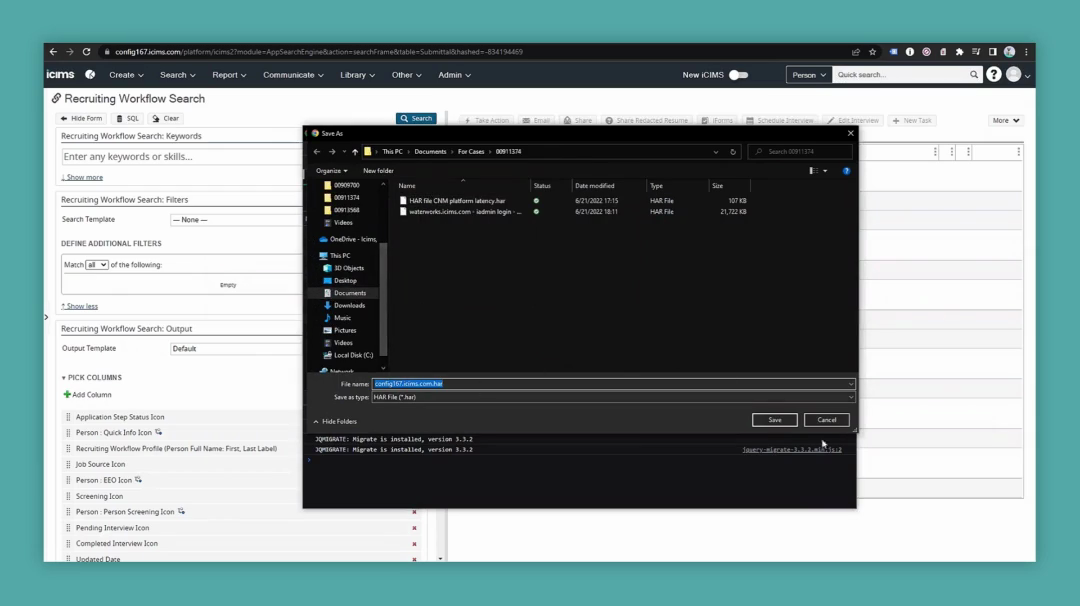
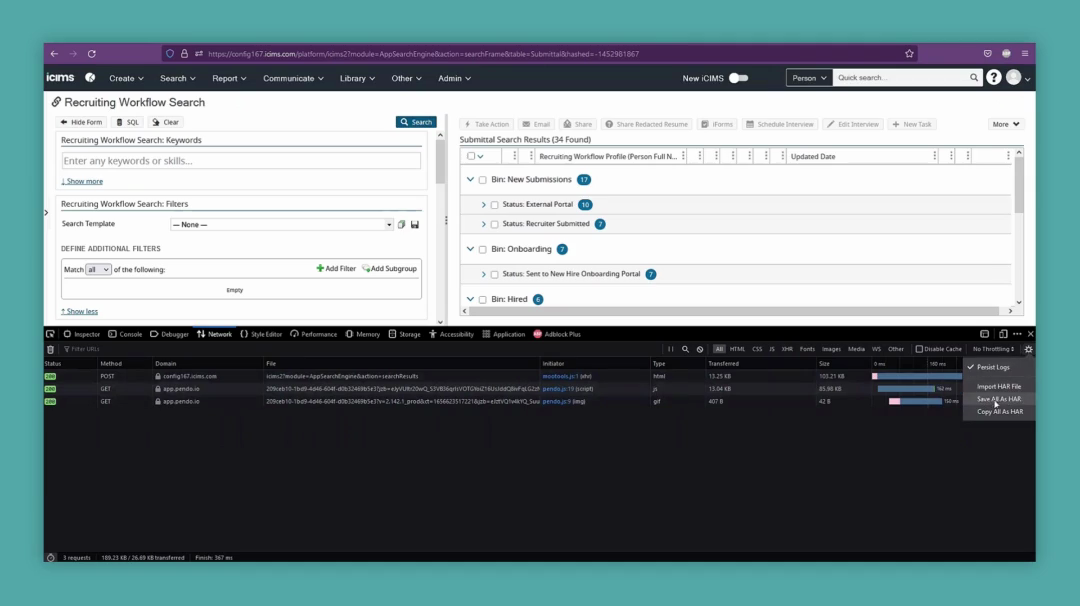
It doesn't matter how much information is present, as long as it is necessary to determine what we're looking for. Essentially, it's about addressing the issue as you normally would. Once you have all the information collected, press the Download button and select Export HAR.

20
Click the 'Export HAR' button (downward arrow icon) in the Developer Tools Network tab.
Step #20: Click the 'Export HAR' button (downward arrow icon) in the Developer Tools Network tab.

Click on that to access your download options and save the file.

21
Click the 'Save' button in the 'Save As' dialog window.
Step #21: Click the 'Save' button in the 'Save As' dialog window.

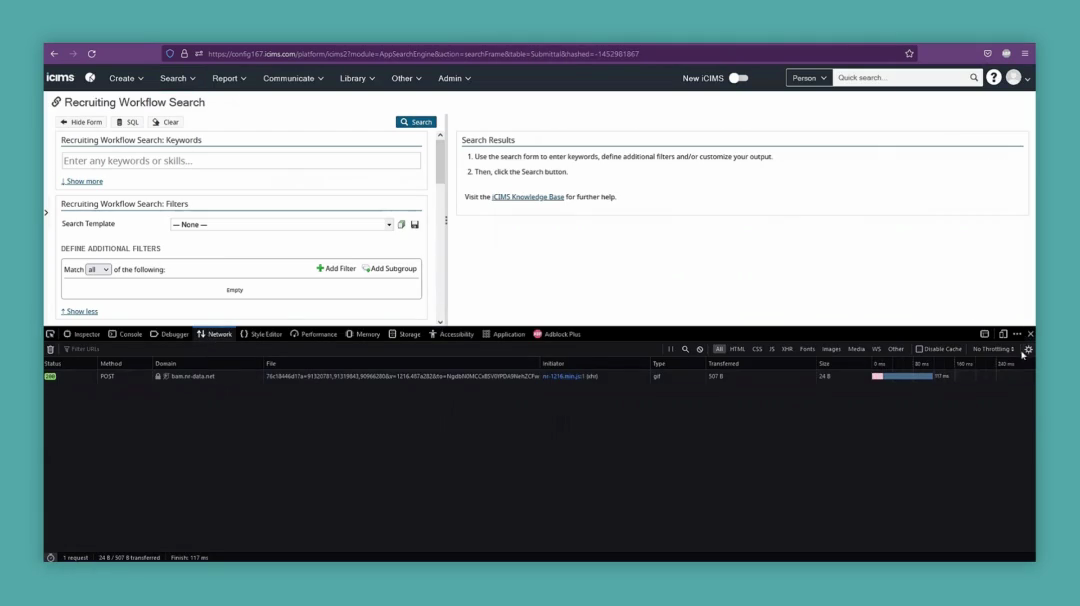
On Firefox, it's quite similar to what you would run on Google Chrome. Go to the area where you're experiencing the issue and open More Tools, then Web Developer Tools.

22
Click 'Search' in the application's top navigation bar.
Step #22: Click 'Search' in the application's top navigation bar.
23
Click 'Recruiting Workflow' from the 'Search' dropdown menu.
Step #23: Click 'Recruiting Workflow' from the 'Search' dropdown menu.
24
Click the 'Application menu' (three horizontal lines) icon in the top-right corner of the Firefox browser.
Step #24: Click the 'Application menu' (three horizontal lines) icon in the top-right corner of the Firefox browser.
25
Click 'More tools' in the browser's main menu.
Step #25: Click 'More tools' in the browser's main menu.
26
Click 'Web Developer Tools' from the 'More tools' submenu.
Step #26: Click 'Web Developer Tools' from the 'More tools' submenu.

Go to the Network tab. First, ensure that persistent logs are turned on. Click the small cog on the right and check that there is a checkmark next to it.

27
In the Developer Tools panel that appears, click the 'Network' tab.
Step #27: In the Developer Tools panel that appears, click the 'Network' tab.
28
In the 'Network' tab, click the settings cog icon located on the far right of its toolbar.
Step #28: In the 'Network' tab, click the settings cog icon located on the far right of its toolbar.
29
In the settings dropdown menu, click 'Preserve log' to ensure it is enabled.
Step #29: In the settings dropdown menu, click 'Preserve log' to ensure it is enabled.

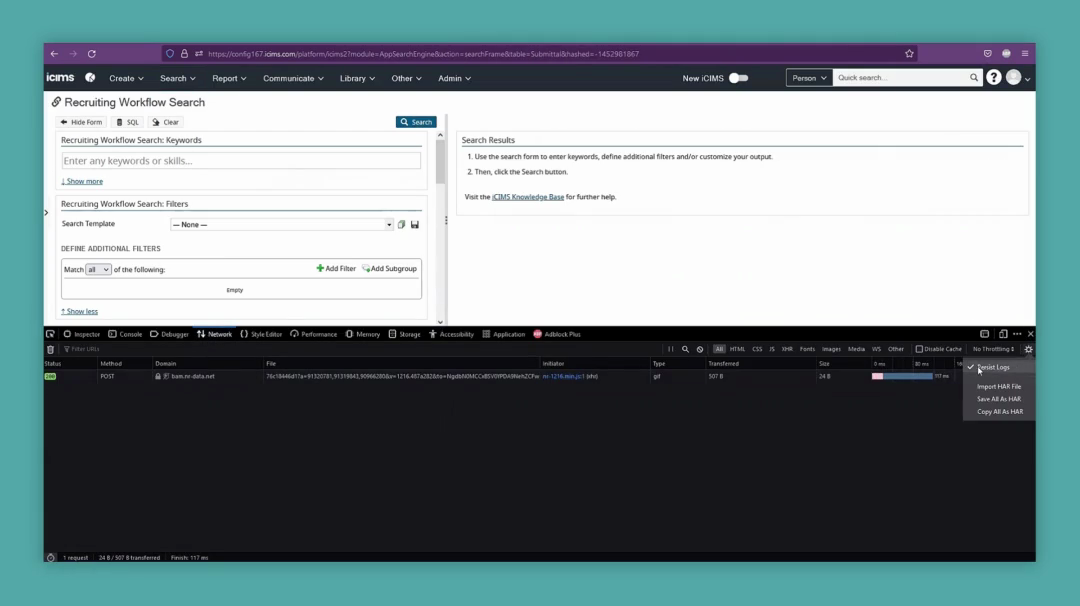
You can clear any existing data by selecting the trashcan on the left.

30
Click the 'Clear' icon (a circle with a diagonal line, referred to in audio as 'trash can') on the left of the Network tab's toolbar to clear existing data.
Step #30: Click the 'Clear' icon (a circle with a diagonal line, referred to in audio as 'trash can') on the left of the Network tab's toolbar to clear existing data.

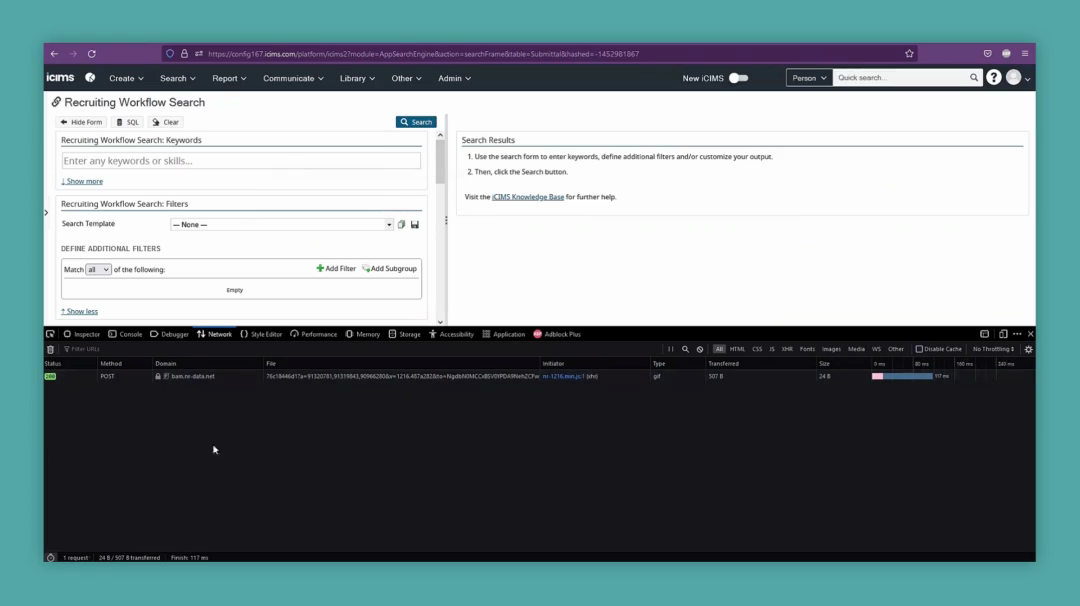
Just like in Chrome, run the search as usual.

31
On the 'Recruiting Workflow Search' page, click the 'Search' button to run the search.
Step #31: On the 'Recruiting Workflow Search' page, click the 'Search' button to run the search.

That provides us with everything we need. Return to the cog and select "Save All as HAR."

32
After the search results load in the main page and network requests appear, click the settings cog icon again in the 'Network' tab's toolbar.
Step #32: After the search results load in the main page and network requests appear, click the settings cog icon again in the 'Network' tab's toolbar.
33
Click 'Save All as HAR' from the context menu in the Developer Tools Network tab.
Step #33: Click 'Save All as HAR' from the context menu in the Developer Tools Network tab.

Microsoft Edge will function almost identically to Google Chrome. Go to your Recruiting Workflow search, open More Tools, and then Developer Tools.

34
Click the 'Search' menu option in the top navigation bar of the application.
Step #34: Click the 'Search' menu option in the top navigation bar of the application.
35
From the 'Search' dropdown menu, click 'Recruiting Workflow'.
Step #35: From the 'Search' dropdown menu, click 'Recruiting Workflow'.
36
Click the ellipsis icon (Settings and more) located in the top-right corner of the Microsoft Edge browser.
Step #36: Click the ellipsis icon (Settings and more) located in the top-right corner of the Microsoft Edge browser.
37
In the 'Settings and more' dropdown menu, hover over 'More tools' to reveal its submenu.
Step #37: In the 'Settings and more' dropdown menu, hover over 'More tools' to reveal its submenu.
38
From the 'More tools' submenu, click 'Developer tools'.
Step #38: From the 'More tools' submenu, click 'Developer tools'.

Ensure you navigate to the Network tab.

39
In the Developer tools panel, click the 'Network' tab.
Step #39: In the Developer tools panel, click the 'Network' tab.

It might be hidden under the "More Tabs" dropdown. If you don't see the Network tab, go to the Network section.

40
Click the 'Network' tab in the developer tools panel.
Step #40: Click the 'Network' tab in the developer tools panel.

Clear any existing information, ensure "Preserve Log" is turned on, and then run the search.

41
Click the 'Clear' icon (circle with a diagonal line) in the Network tab toolbar to clear existing network log information.
Step #41: Click the 'Clear' icon (circle with a diagonal line) in the Network tab toolbar to clear existing network log information.
42
Click the 'Preserve log' checkbox in the Network tab toolbar to ensure it is turned on.
Step #42: Click the 'Preserve log' checkbox in the Network tab toolbar to ensure it is turned on.
43
Click the 'Search' button in the 'Recruiting Workflow Search' panel on the left side of the screen.
Step #43: Click the 'Search' button in the 'Recruiting Workflow Search' panel on the left side of the screen.

Once you have that, click "Download" and then "Export HAR," just like in Google Chrome.

44
Click the 'Export HAR...' button (downward arrow icon) in the Network tab toolbar to download the network log.
Step #44: Click the 'Export HAR...' button (downward arrow icon) in the Network tab toolbar to download the network log.

For other browser types, I recommend consulting your IT team for guidance on generating the HAR file for those software applications.

45
For browser types other than Google Chrome, consult your IT team for information on how to produce the HAR file.

Once the file is saved, provide it to the TSE you are working with.

46
Provide the saved HAR file to the Technical Support Contact (TSC) you are working with.

We recommend posting the file as a comment by logging into the community site. Access your ticket, create a new comment, and include the HAR file as an attachment.

47
Log in to the community site to access your ticket.
48
Access your ticket within the community site.
49
Make a new comment on your ticket.
50
Include the HAR file as an attachment to your new comment.

If you're unable to do that for any reason, we recommend uploading the file to Google Drive or Microsoft SharePoint and providing us with the link.

51
As an alternative, upload the HAR file to a cloud storage service such as Google Drive or Microsoft SharePoint.
52
Provide the link to the uploaded HAR file.

You can send the file directly, but sometimes our firewall may accidentally remove it.

53
To ensure file receipt, post the file as a comment through the community site.
54
Alternatively, upload the file using Drive or SharePoint.
55
After uploading, provide the link to the file.

The best way to ensure we receive it is by posting it as a comment on the community site or uploading it to Drive or SharePoint and providing us with the link. Thank you for watching this video.

I hope you learned something and found this both helpful and informative.