
How to Create a Link Trigger and Tag Subscribers in Kit
Learn step-by-step how to set up a link trigger in Kit to automatically tag subscribers when they click a link. Perfect for launches, automations, and targeted email campaigns.
In this guide, we'll learn how to set up a link trigger that automatically tags subscribers when they click a specific link. This process helps you track actions, such as confirming interest or completing a step, by applying a tag to the subscriber's profile.
You can reuse and update this rule for different campaigns or launches by changing the tag or destination link as needed. This method is useful for managing subscriber engagement and organizing your email list.
Let's get started
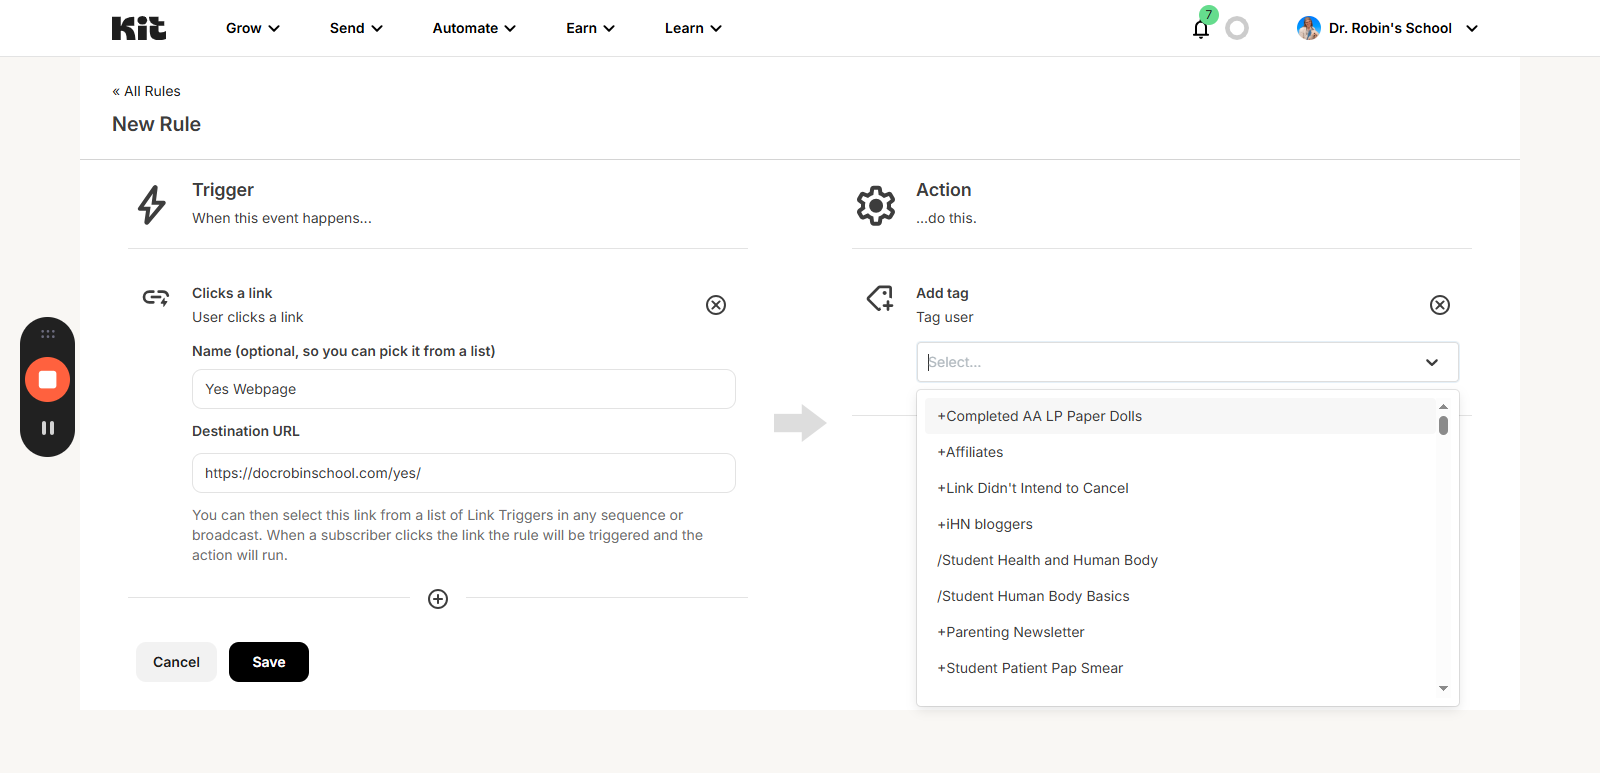
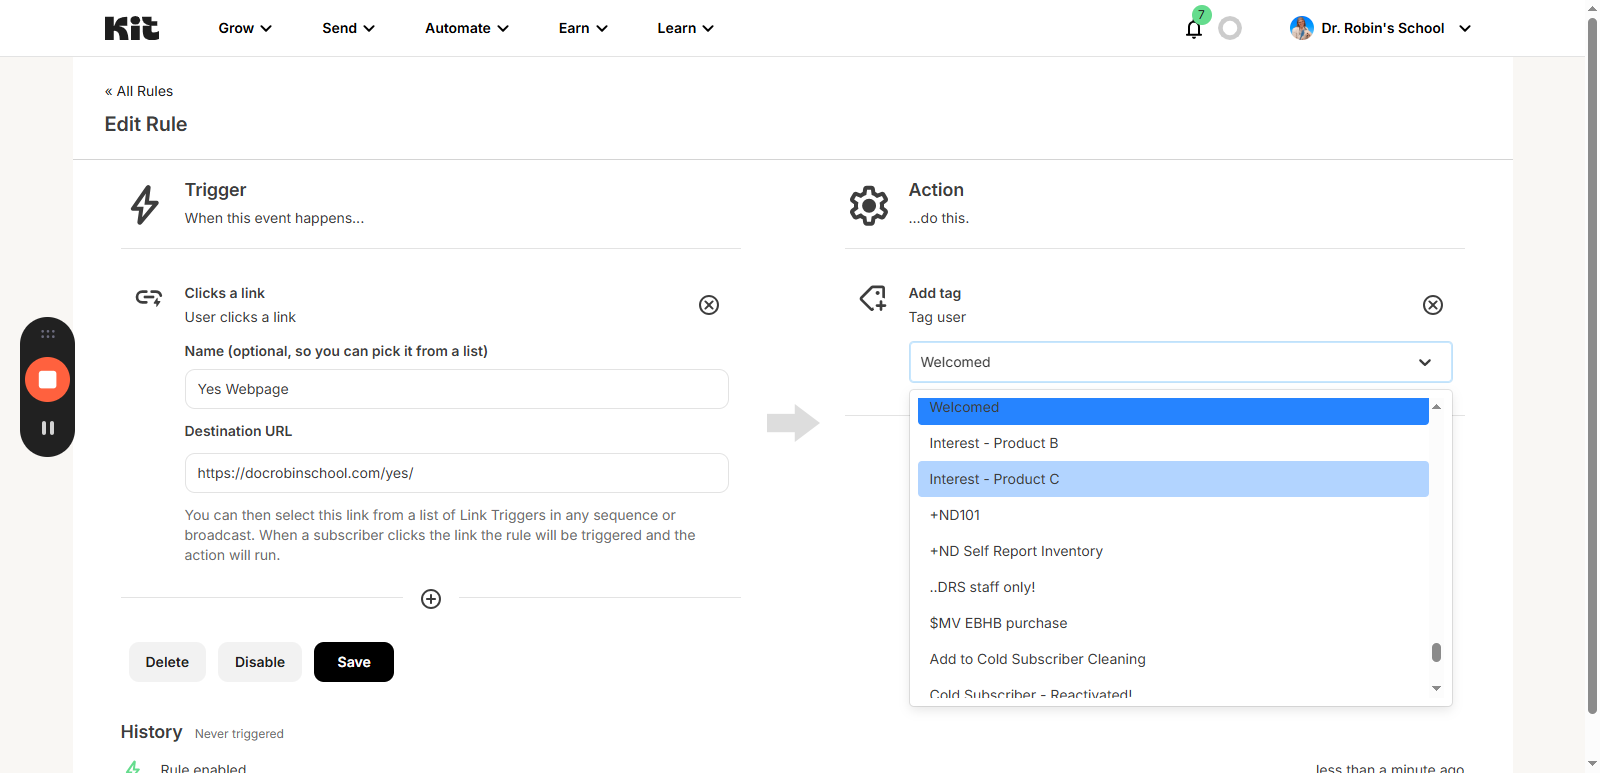
First, you need to have the tag you want to use.
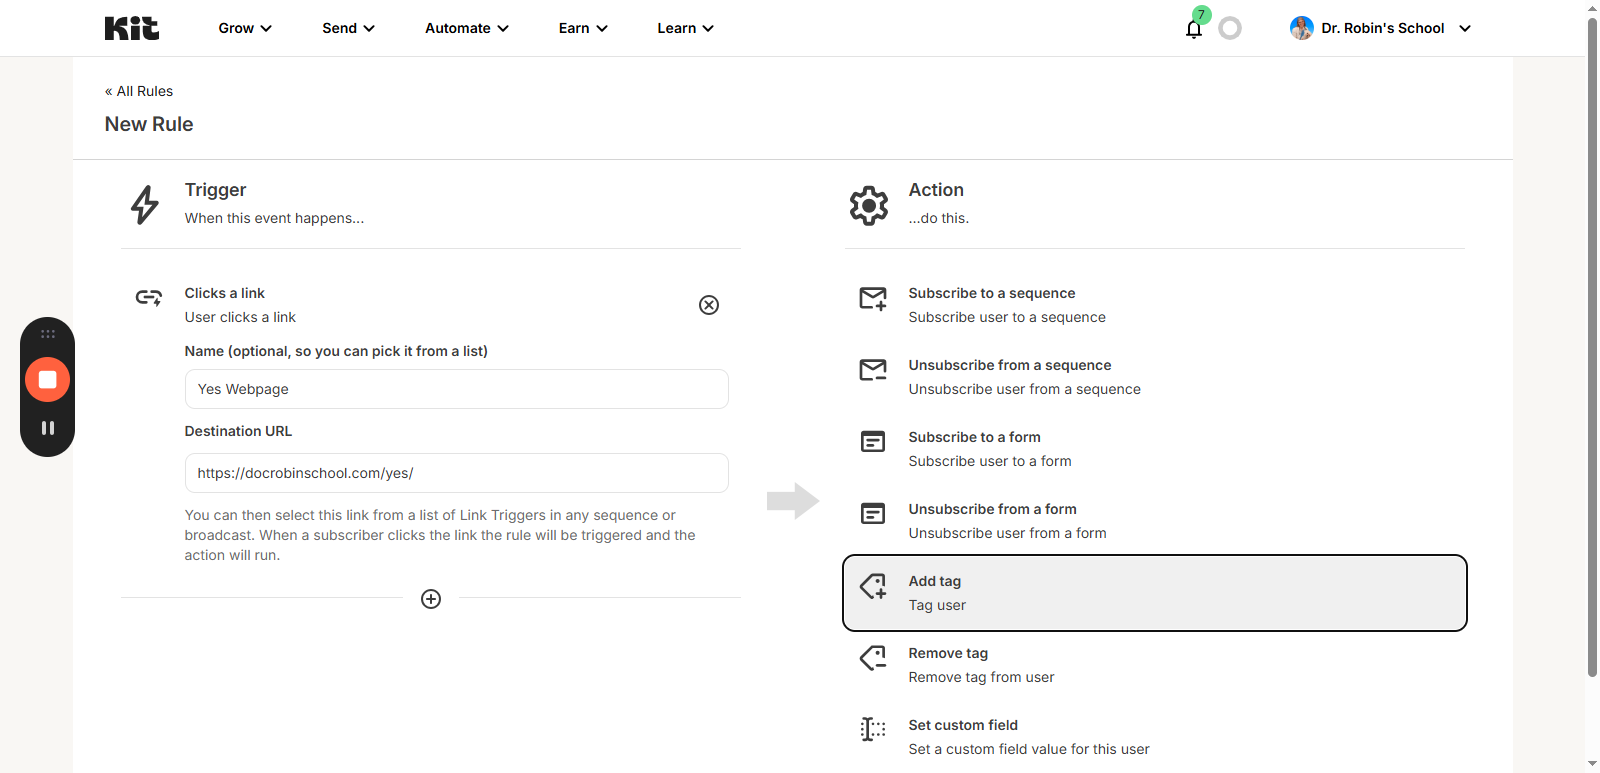
Next, get your link. https://docrobinschool.com/yes/
This is the one I made for you specifically for this purpose.
You can see the page simply says, "Consider it done. We have your details. Keep an eye on your inbox for what's next. It's really simple so you can reuse it.
That is going to be the page they will be directed to when they click the link.

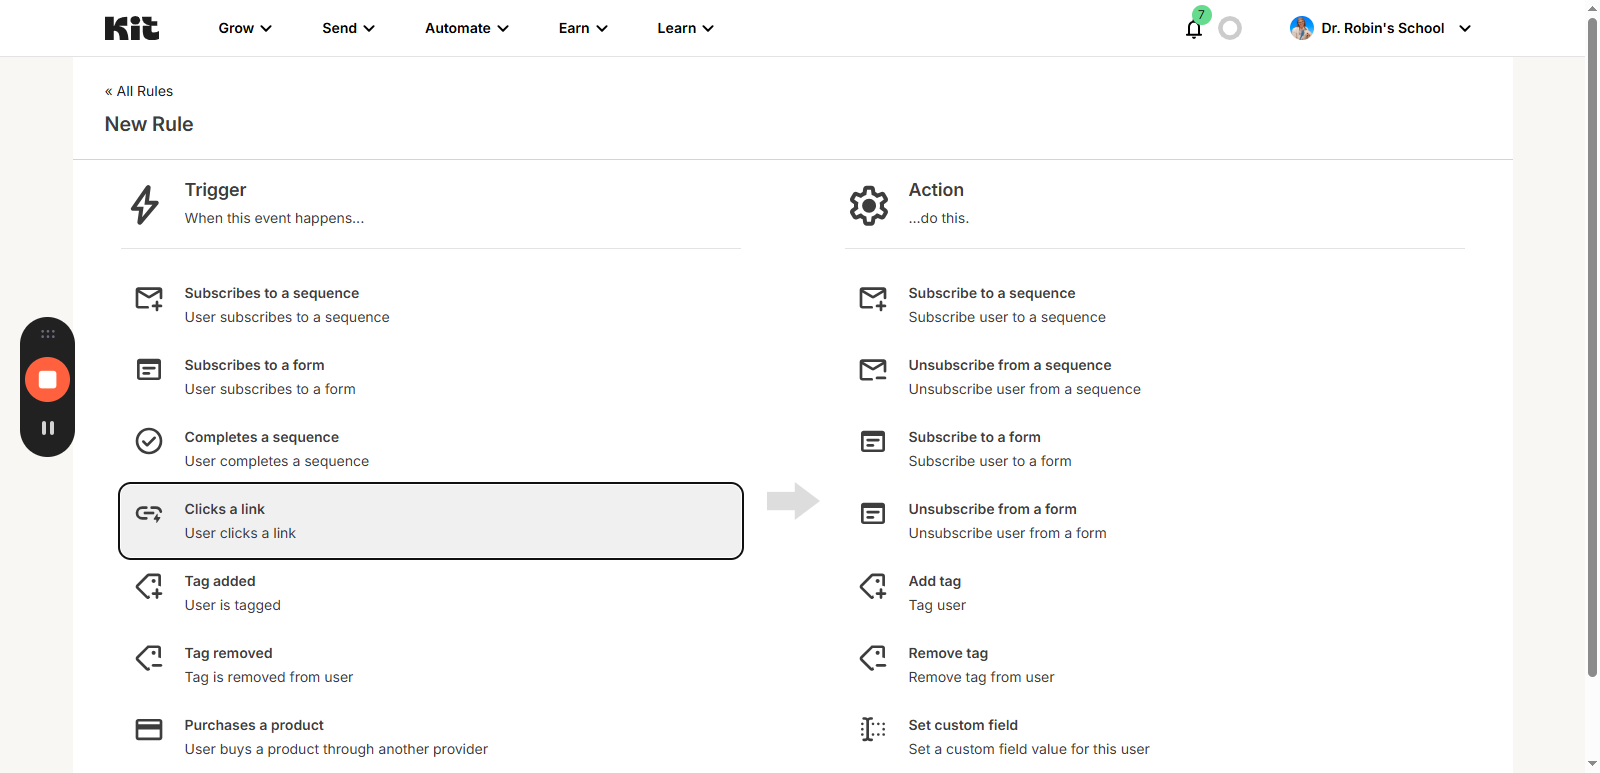
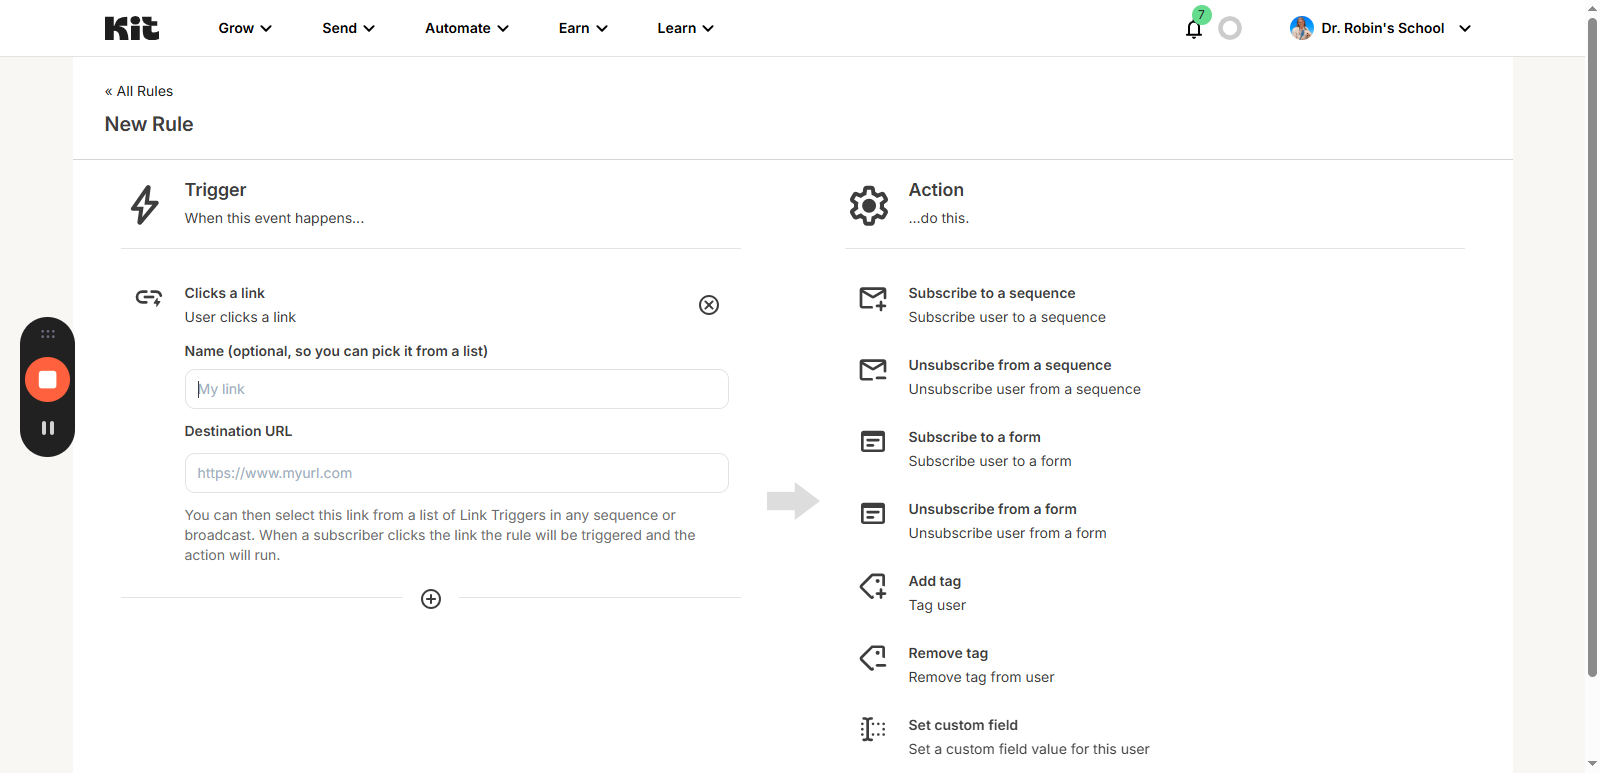
Add a new rule, and set the trigger to "Clicks a Link."


Now you can just use the link in an email and every time someone clicks it, they will be tagged. So if you had a button that said "I'm Interested" or "Sign Me Up" or whatever and then this link, they could just click it and get tagged.
When you have a different launch coming up, you can just change it to a new one.
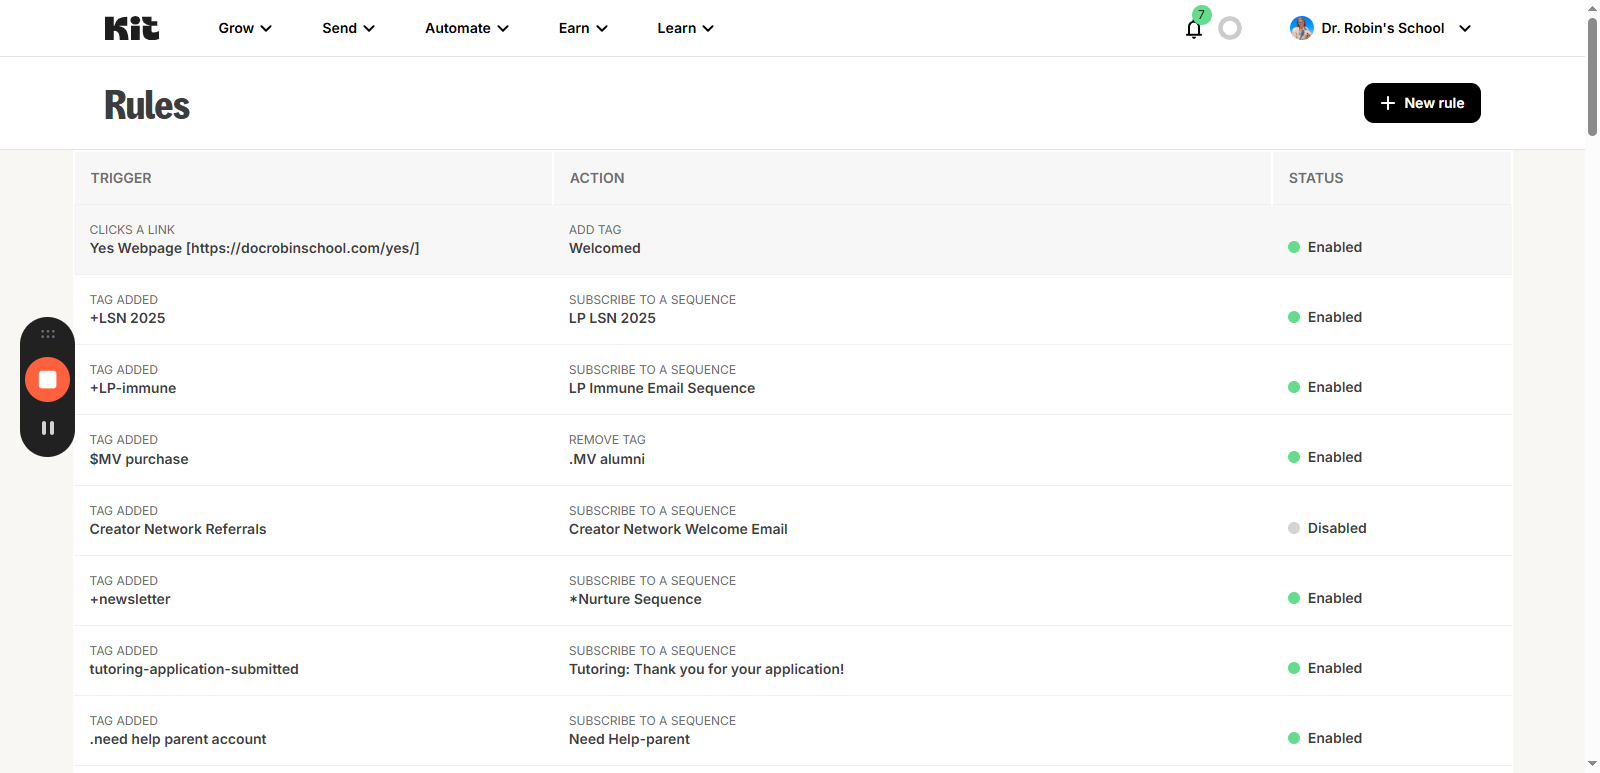

Now, it will add a different tag. You can use the same setup and the same rule repeatedly. For any launch we do, you can... As long as the page is relevant for users to land on, you can use it for a button. You can only use it for one purpose at a time.
Make sure you know exactly what you are using it for when you use it. As long as you are clear about which tag you are using, this will work for you.
If you need more information, there is a page explaining how to use link triggers for Kit. https://help.kit.com/en/articles/2502518-how-to-use-link-triggers