
OLD How to Create a Packager Purchase Order (PO) in Salesforce: Step-by-Step Guide
Learn how to create a packager purchase order (PO) in Salesforce, including detailed steps for entering line items, handling quotes, and generating documents for enclosure projects. Perfect for project managers and Salesforce users.
In this guide, we'll learn how to create a packager purchase order (PO) in Salesforce after completing your billing milestones and tasks for a project. This process helps ensure that your enclosure orders are accurately recorded and match your project budget. You will also see how to prepare and organize the necessary documents for your supplier.
Let's get started
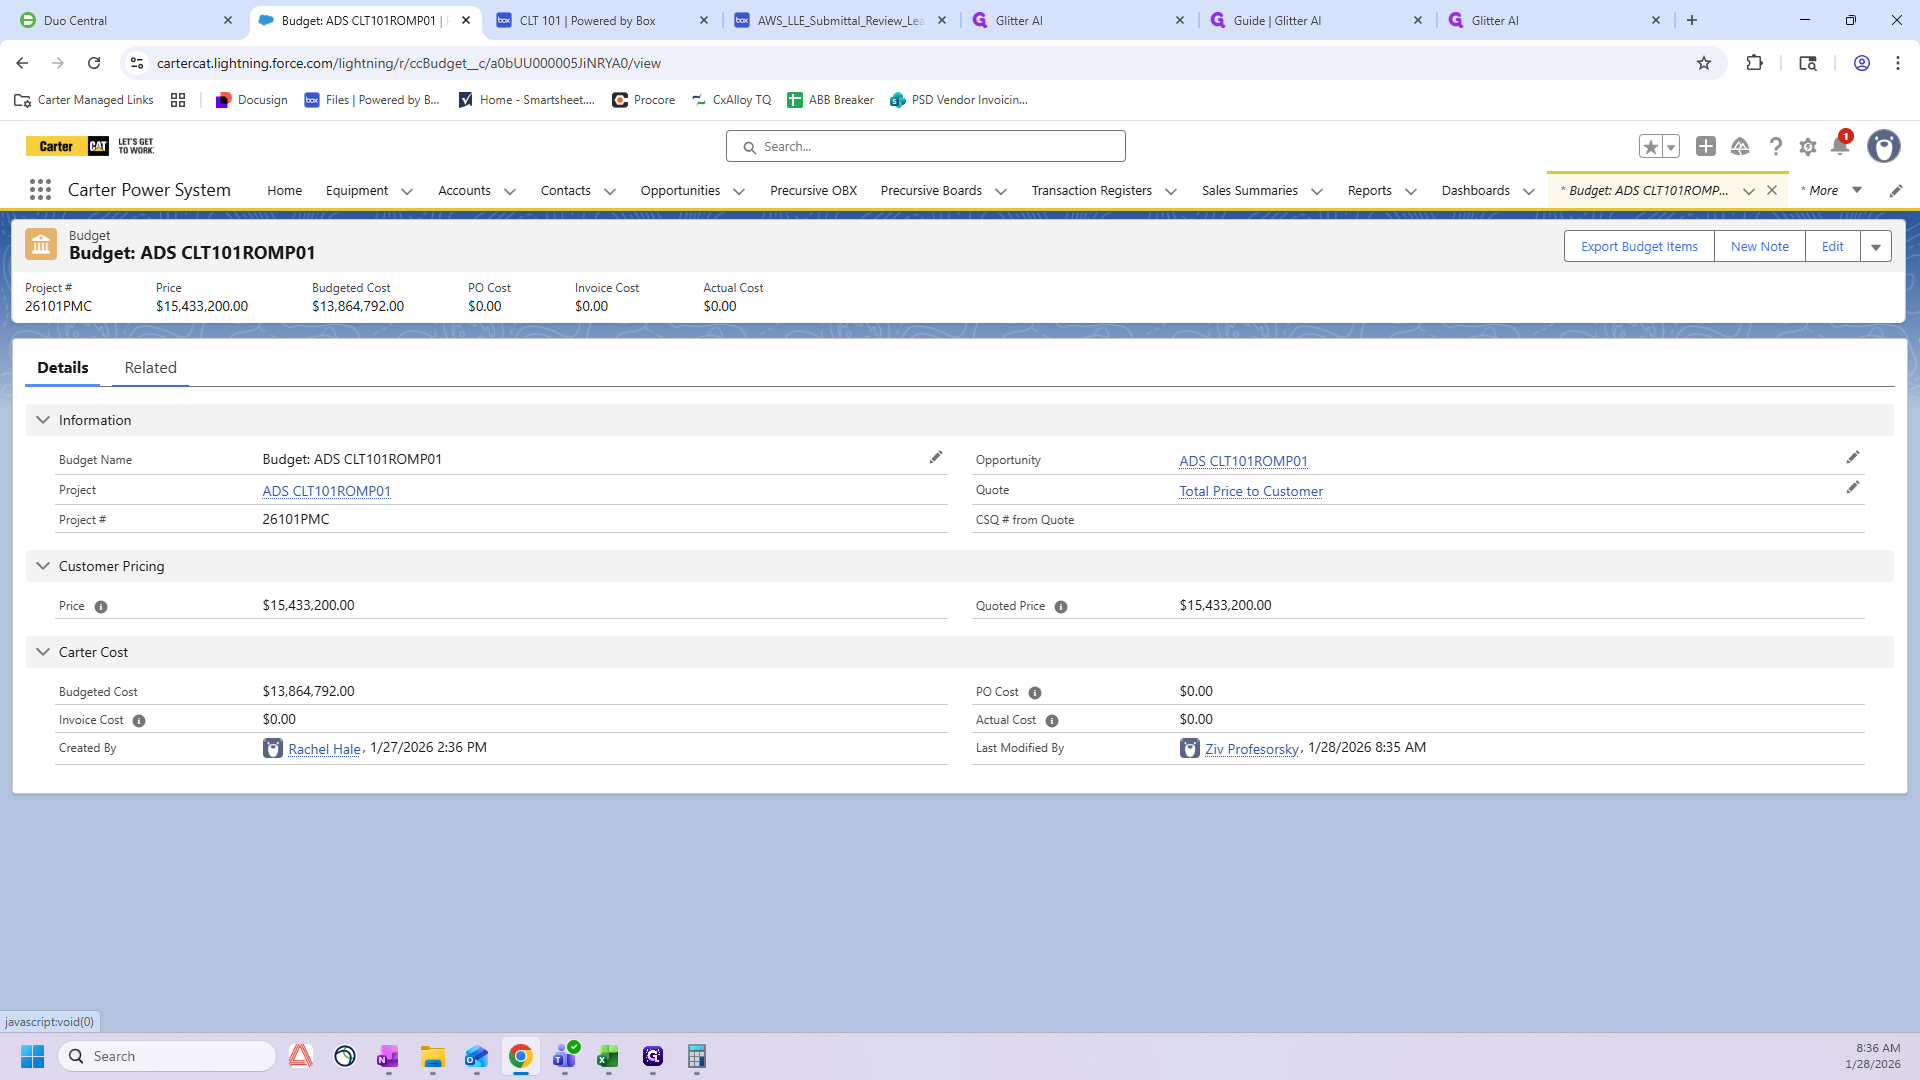
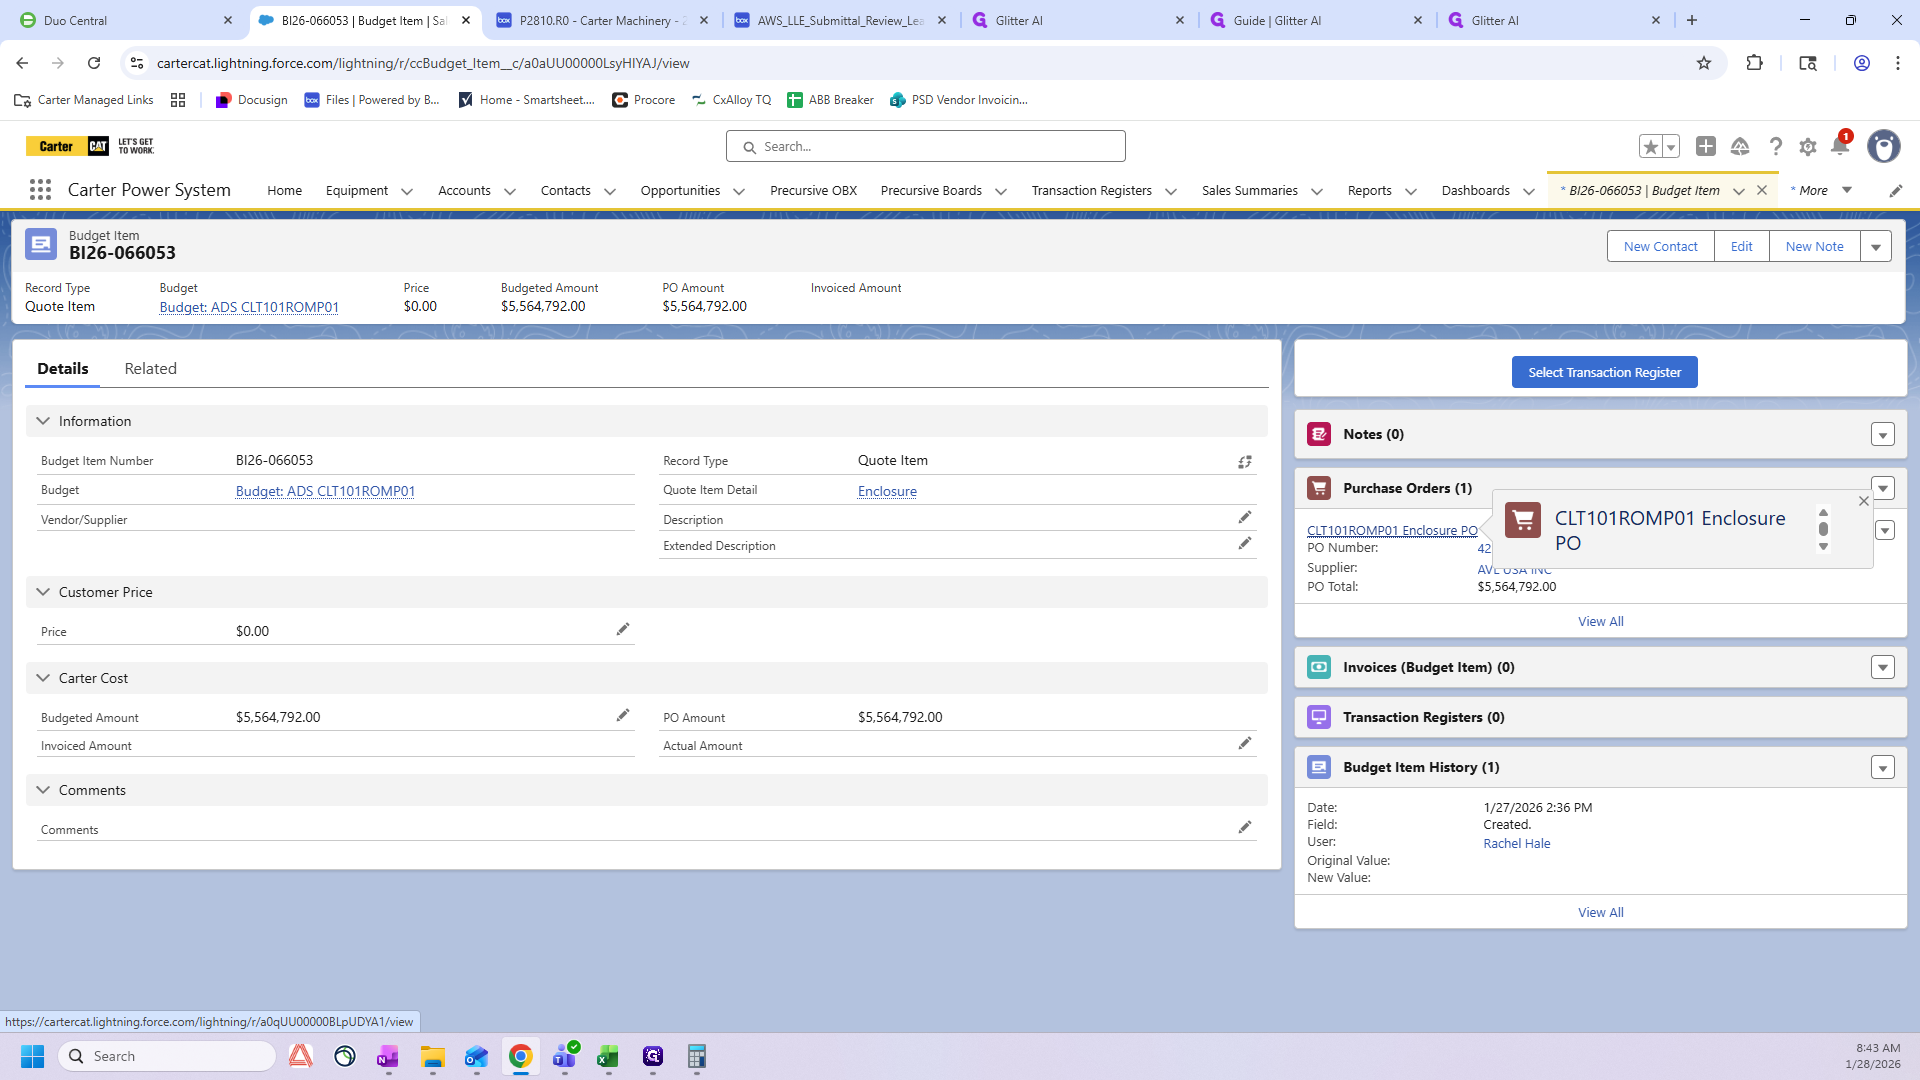
I will show you how to create a packager PO in Salesforce. After starting a project and completing your billing milestones and tasks, proceed to the next step. First, access the precursive board for your specific romp. Click on "Budget".
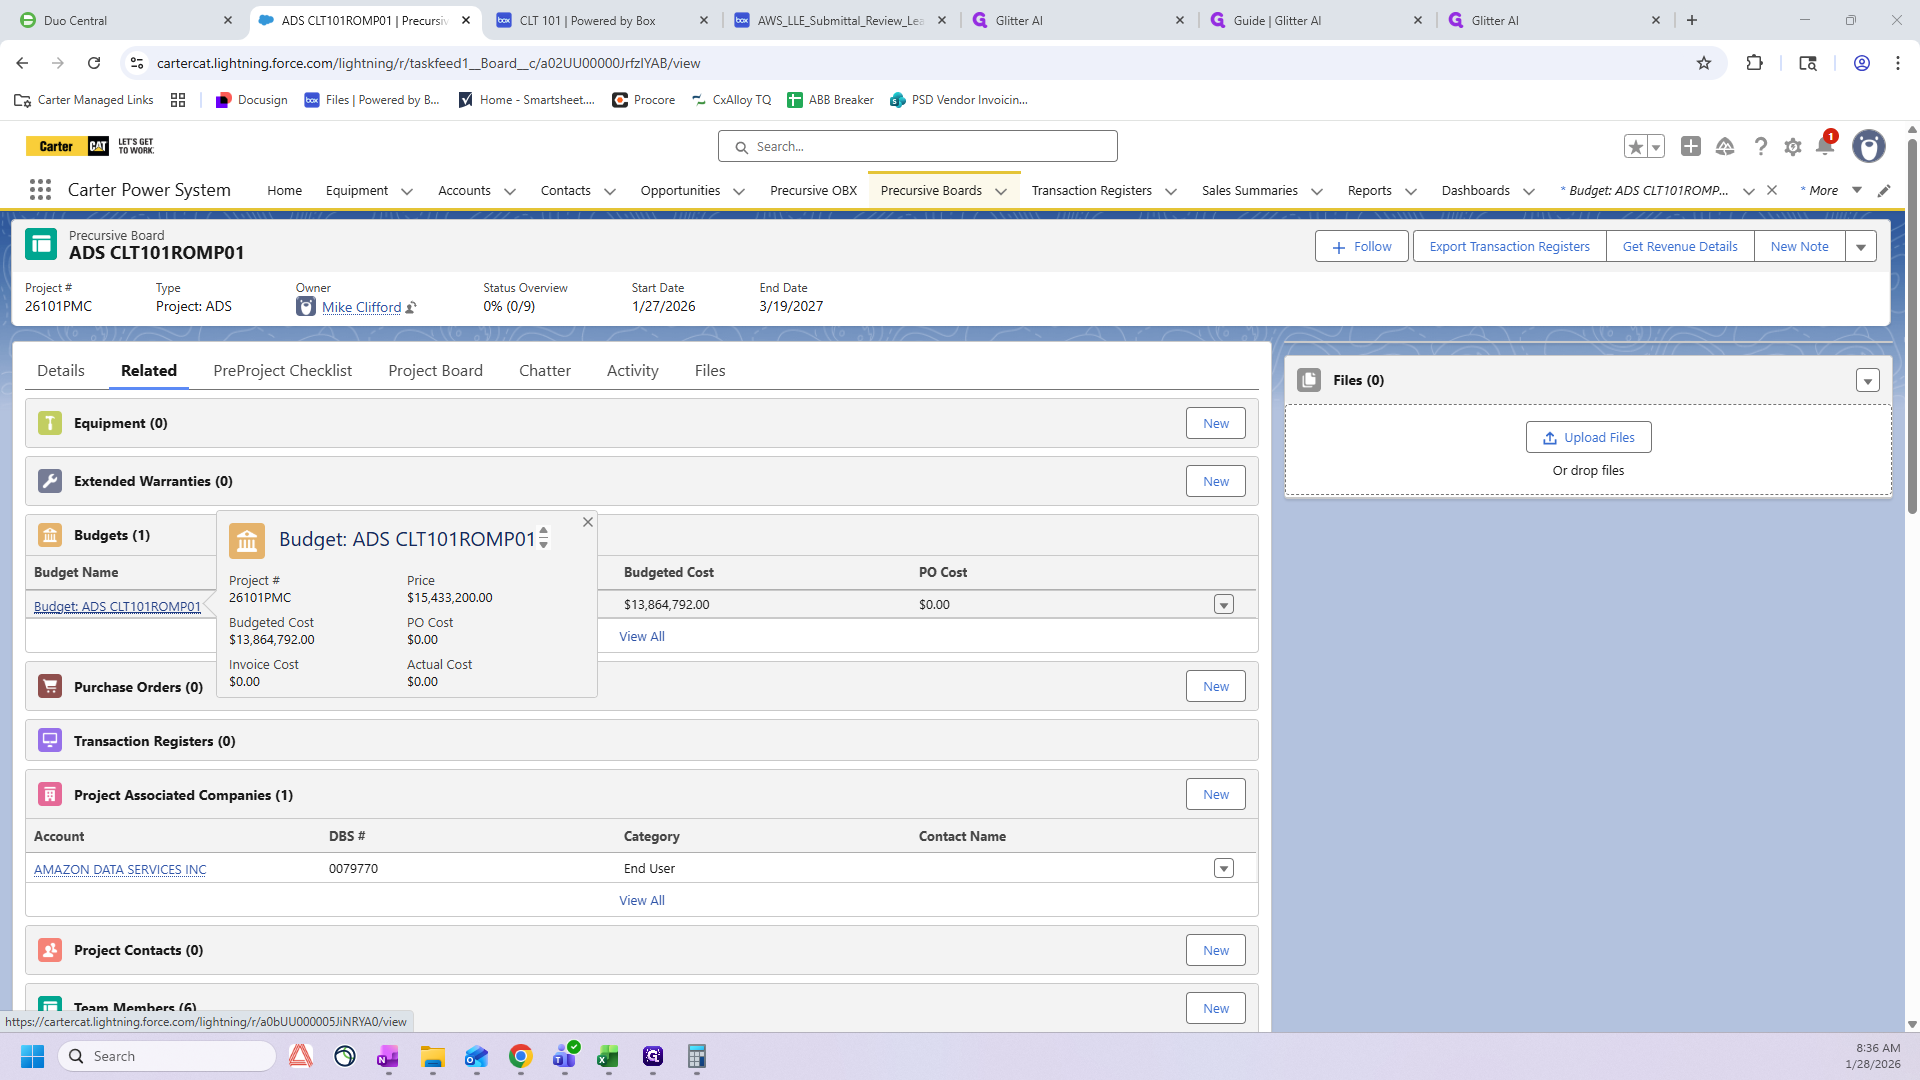
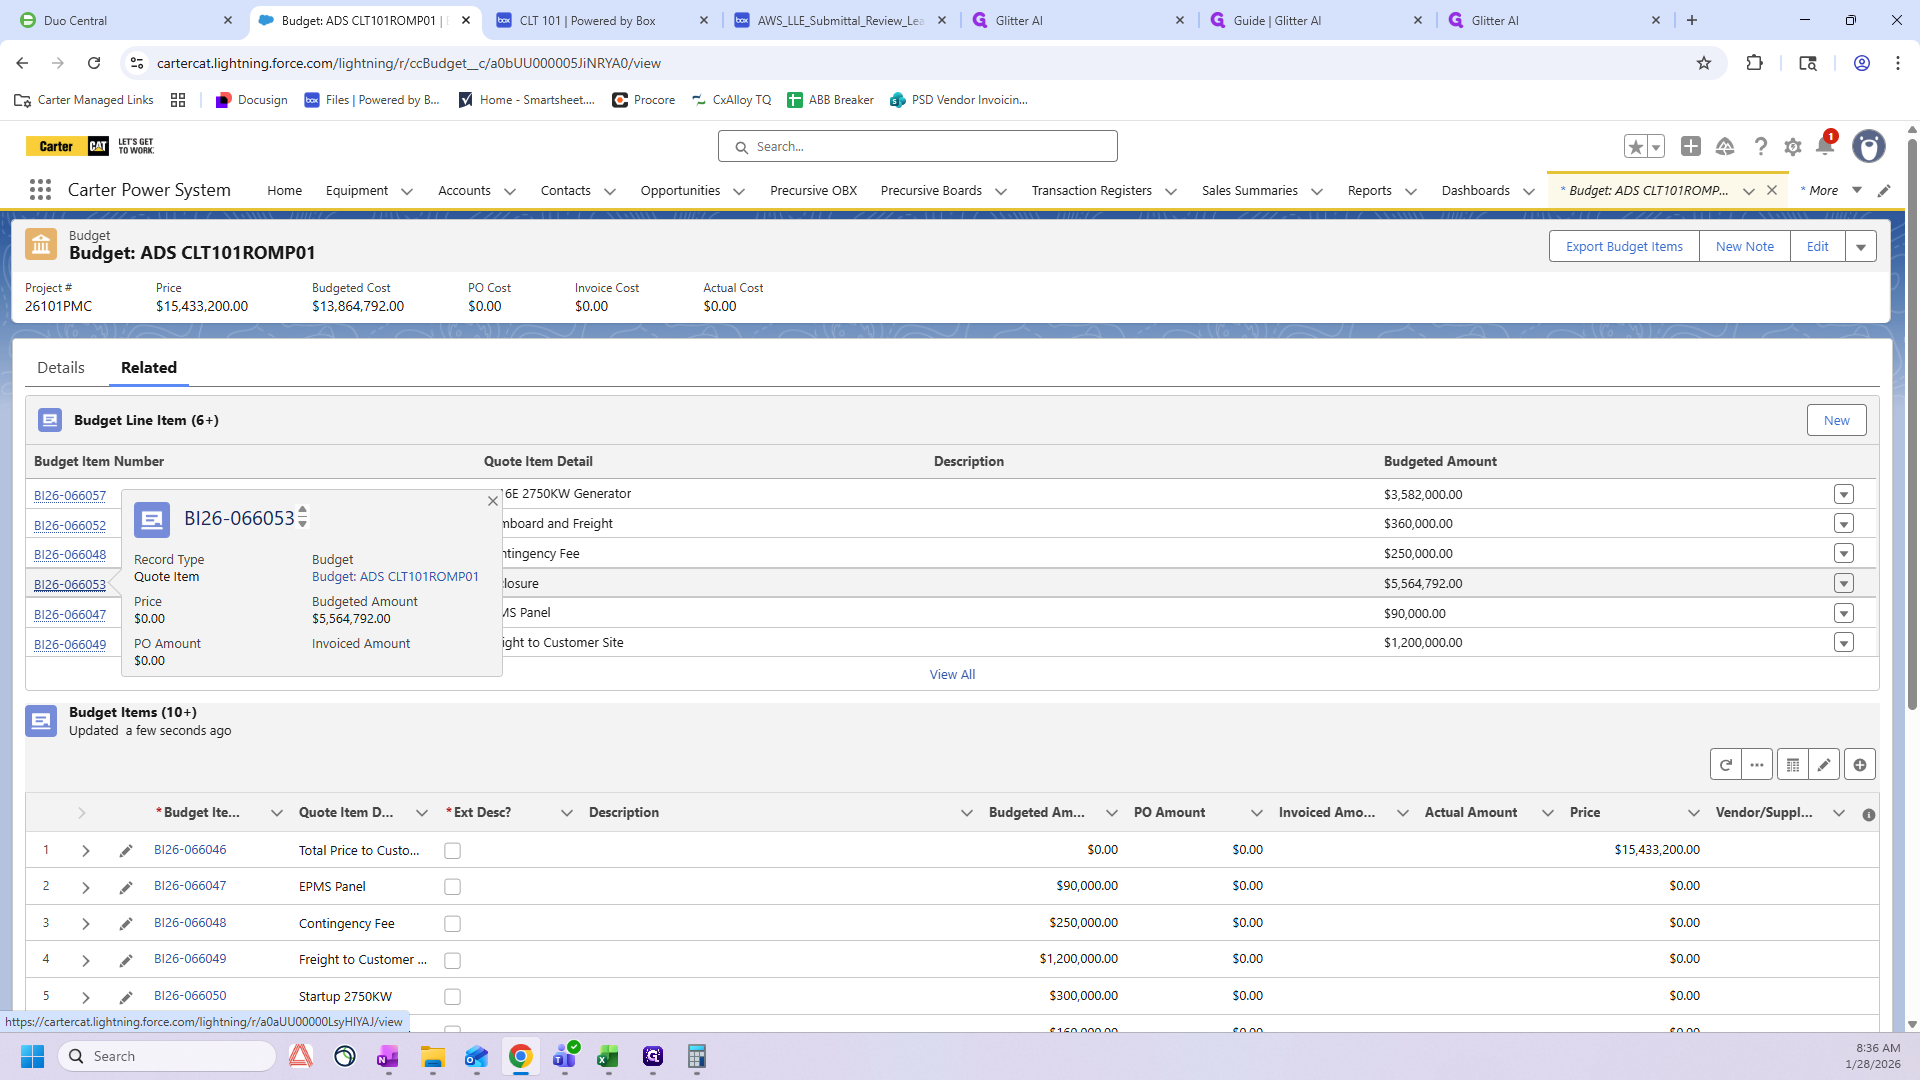
Click "Related" and look for the enclosure line item. We're going to select this item number here.
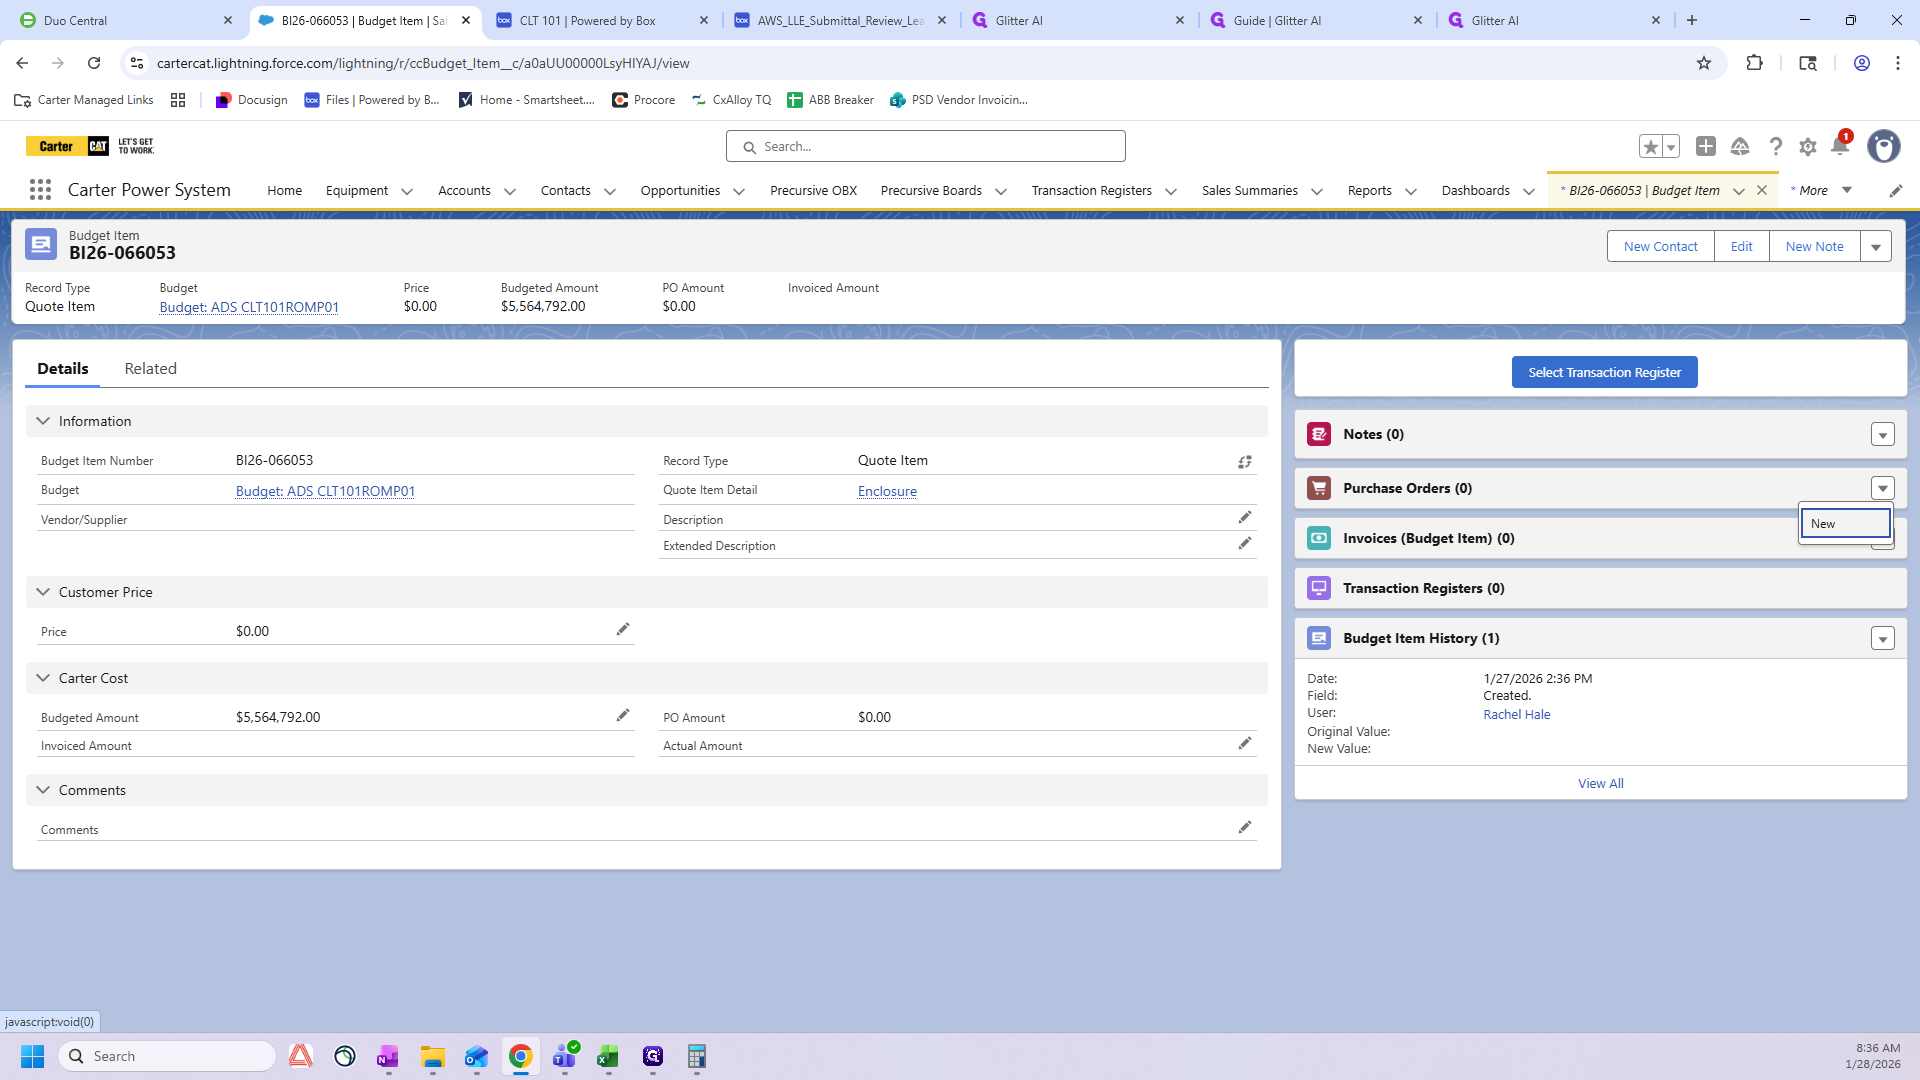
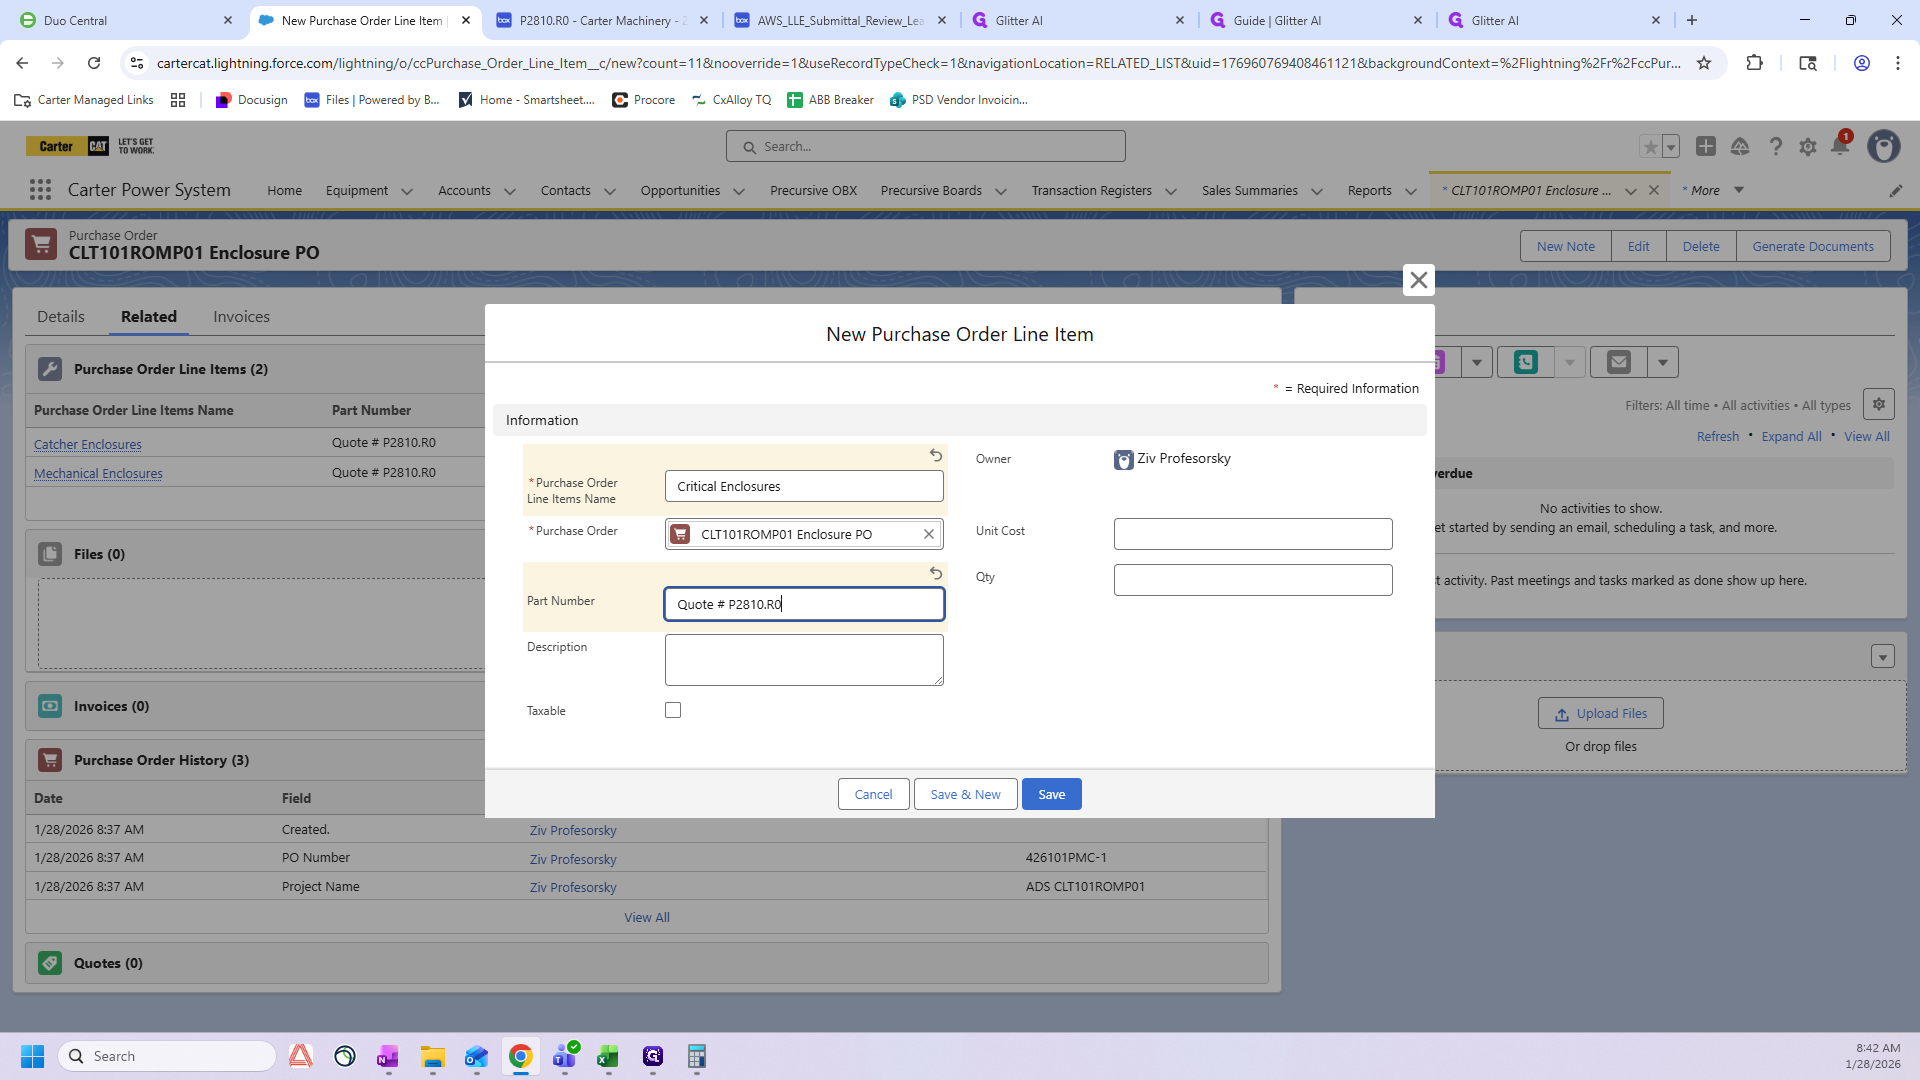
Now, you'll see here it says, "Purchase Order Zero." We want to create a new one, so we will click "New".

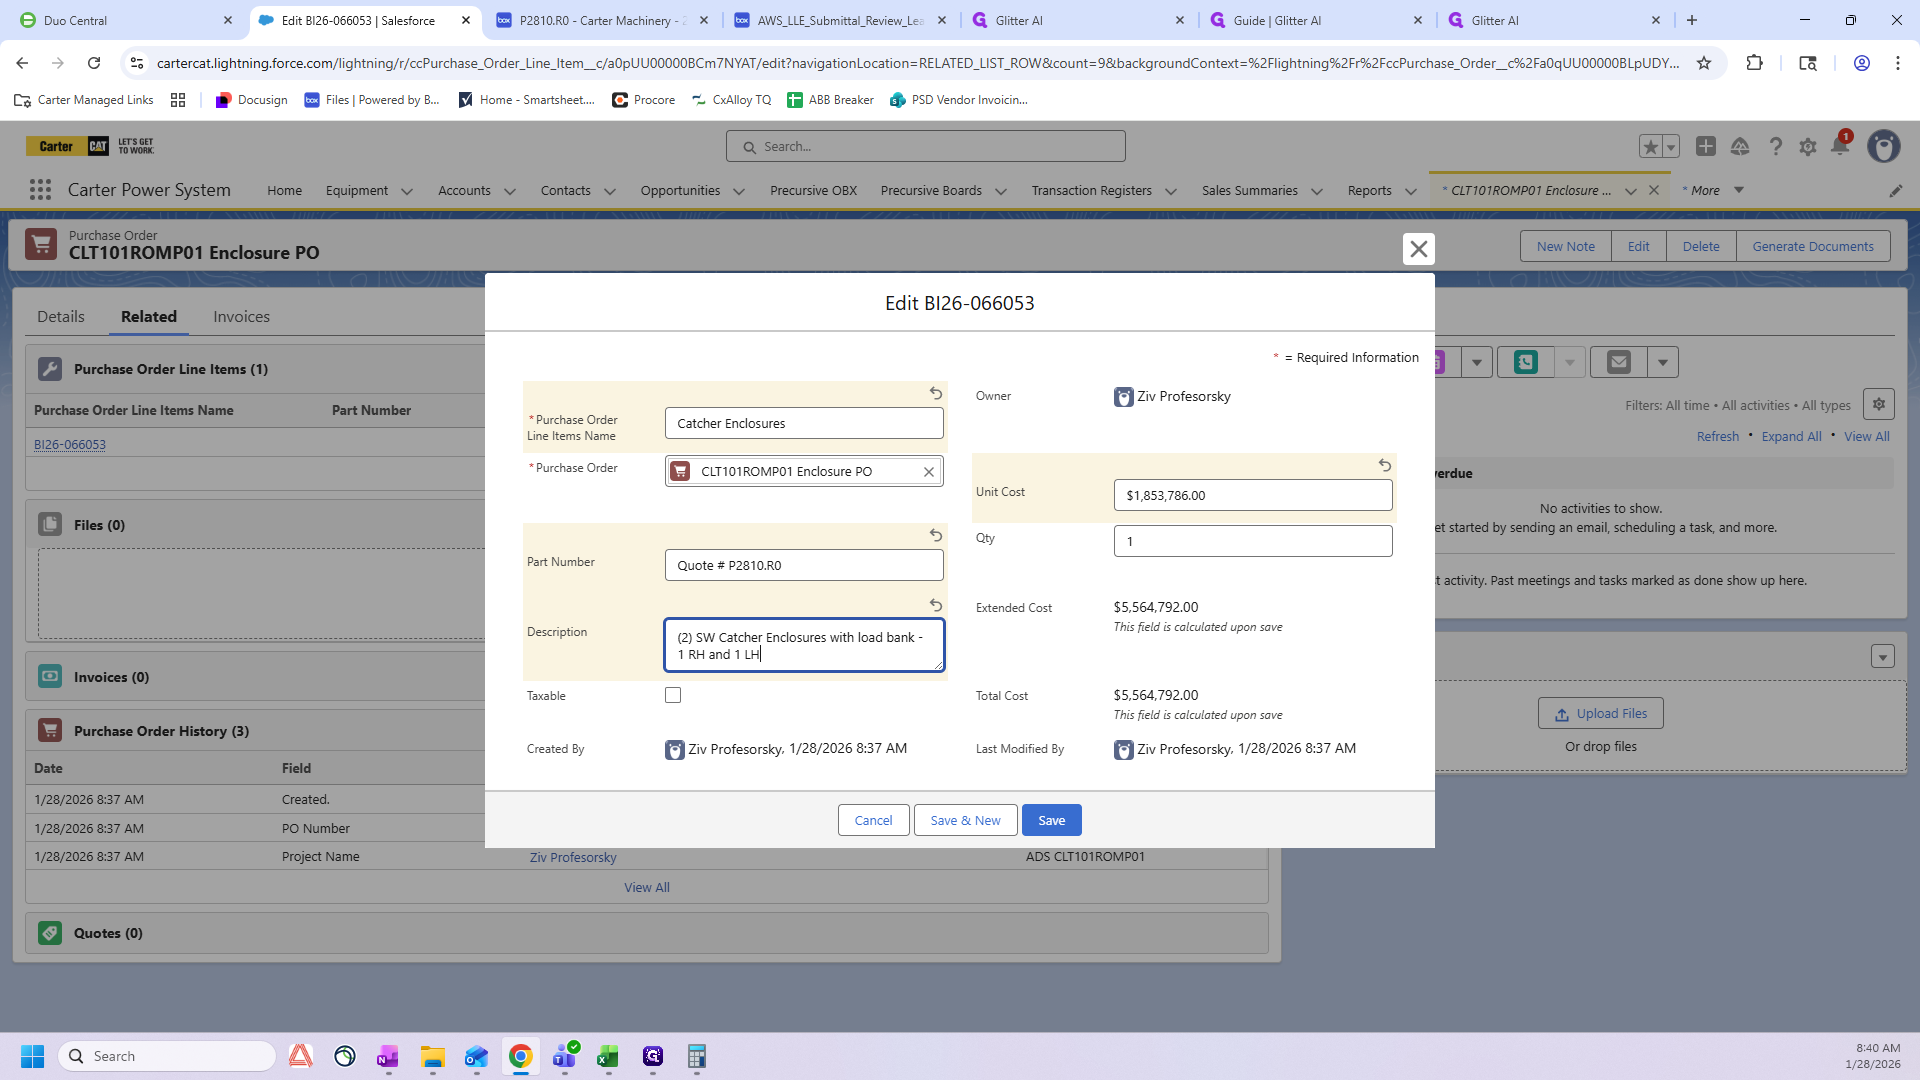
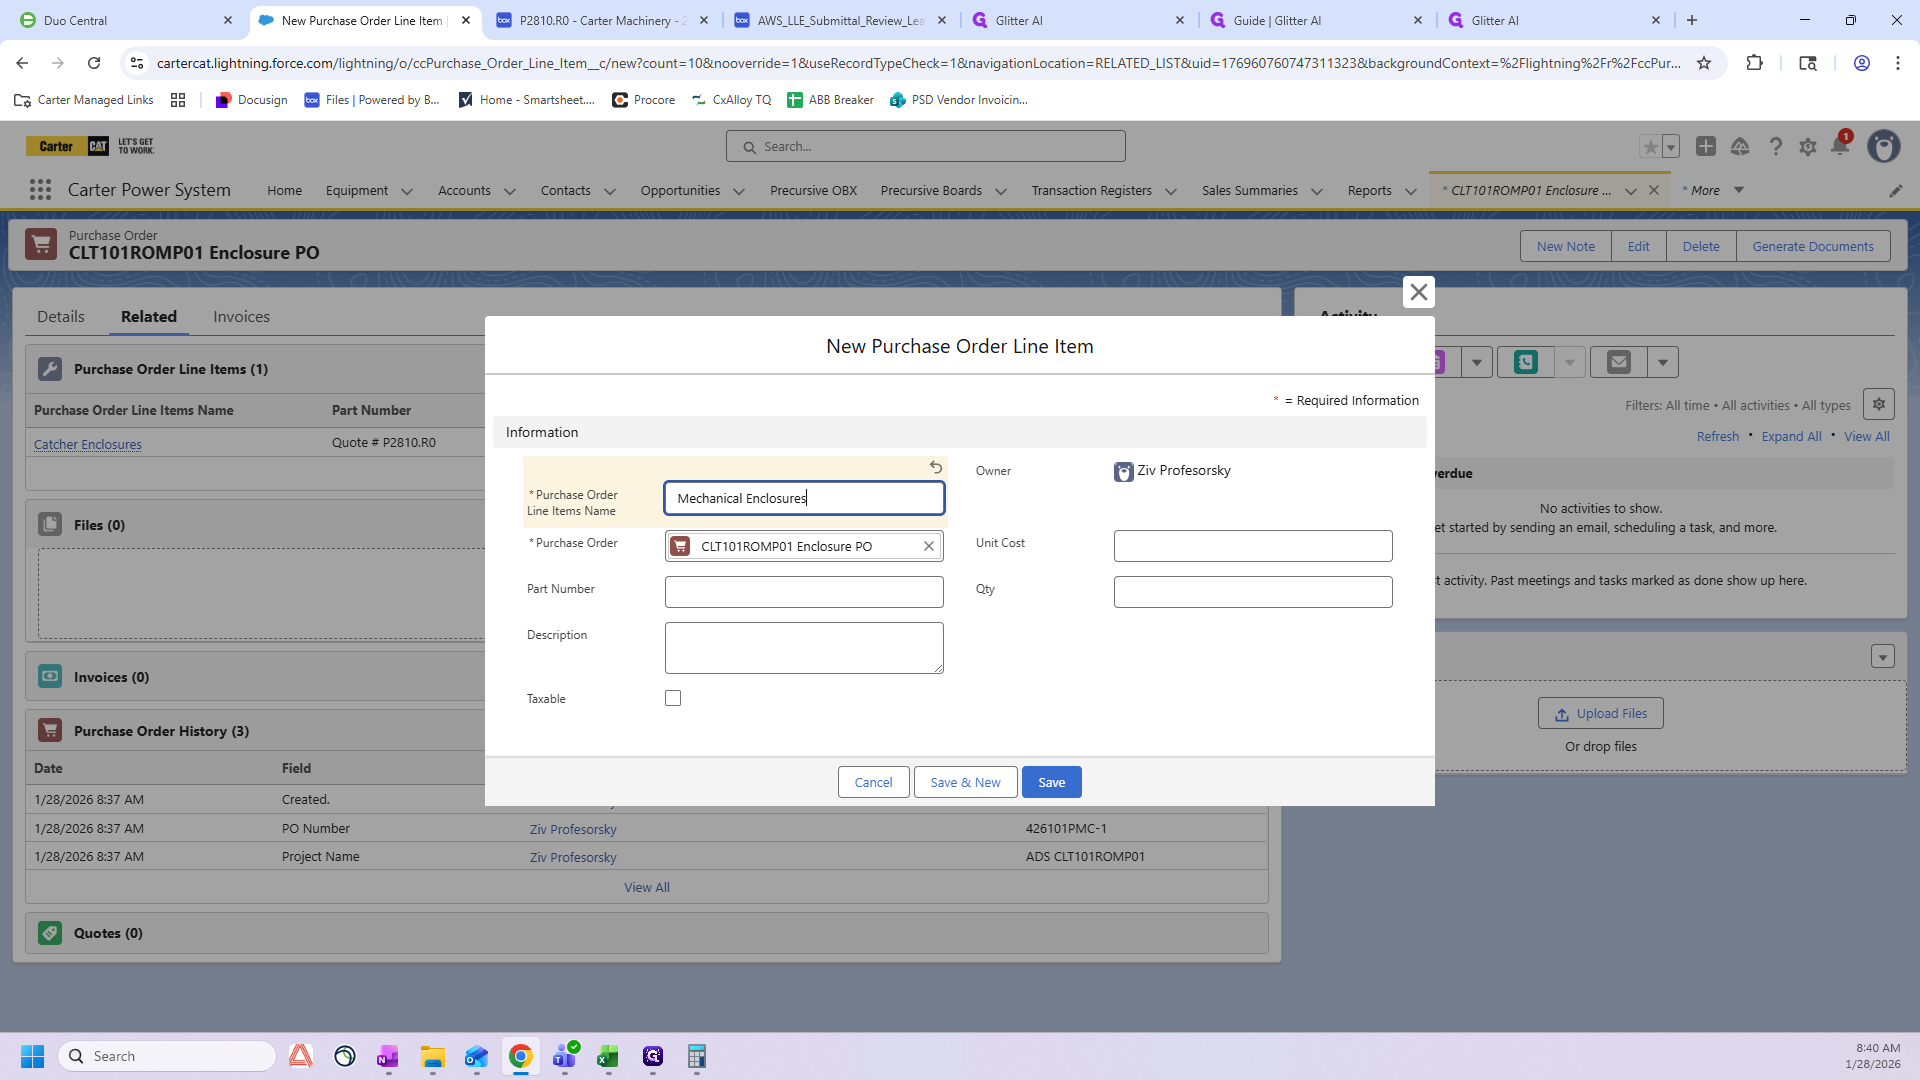
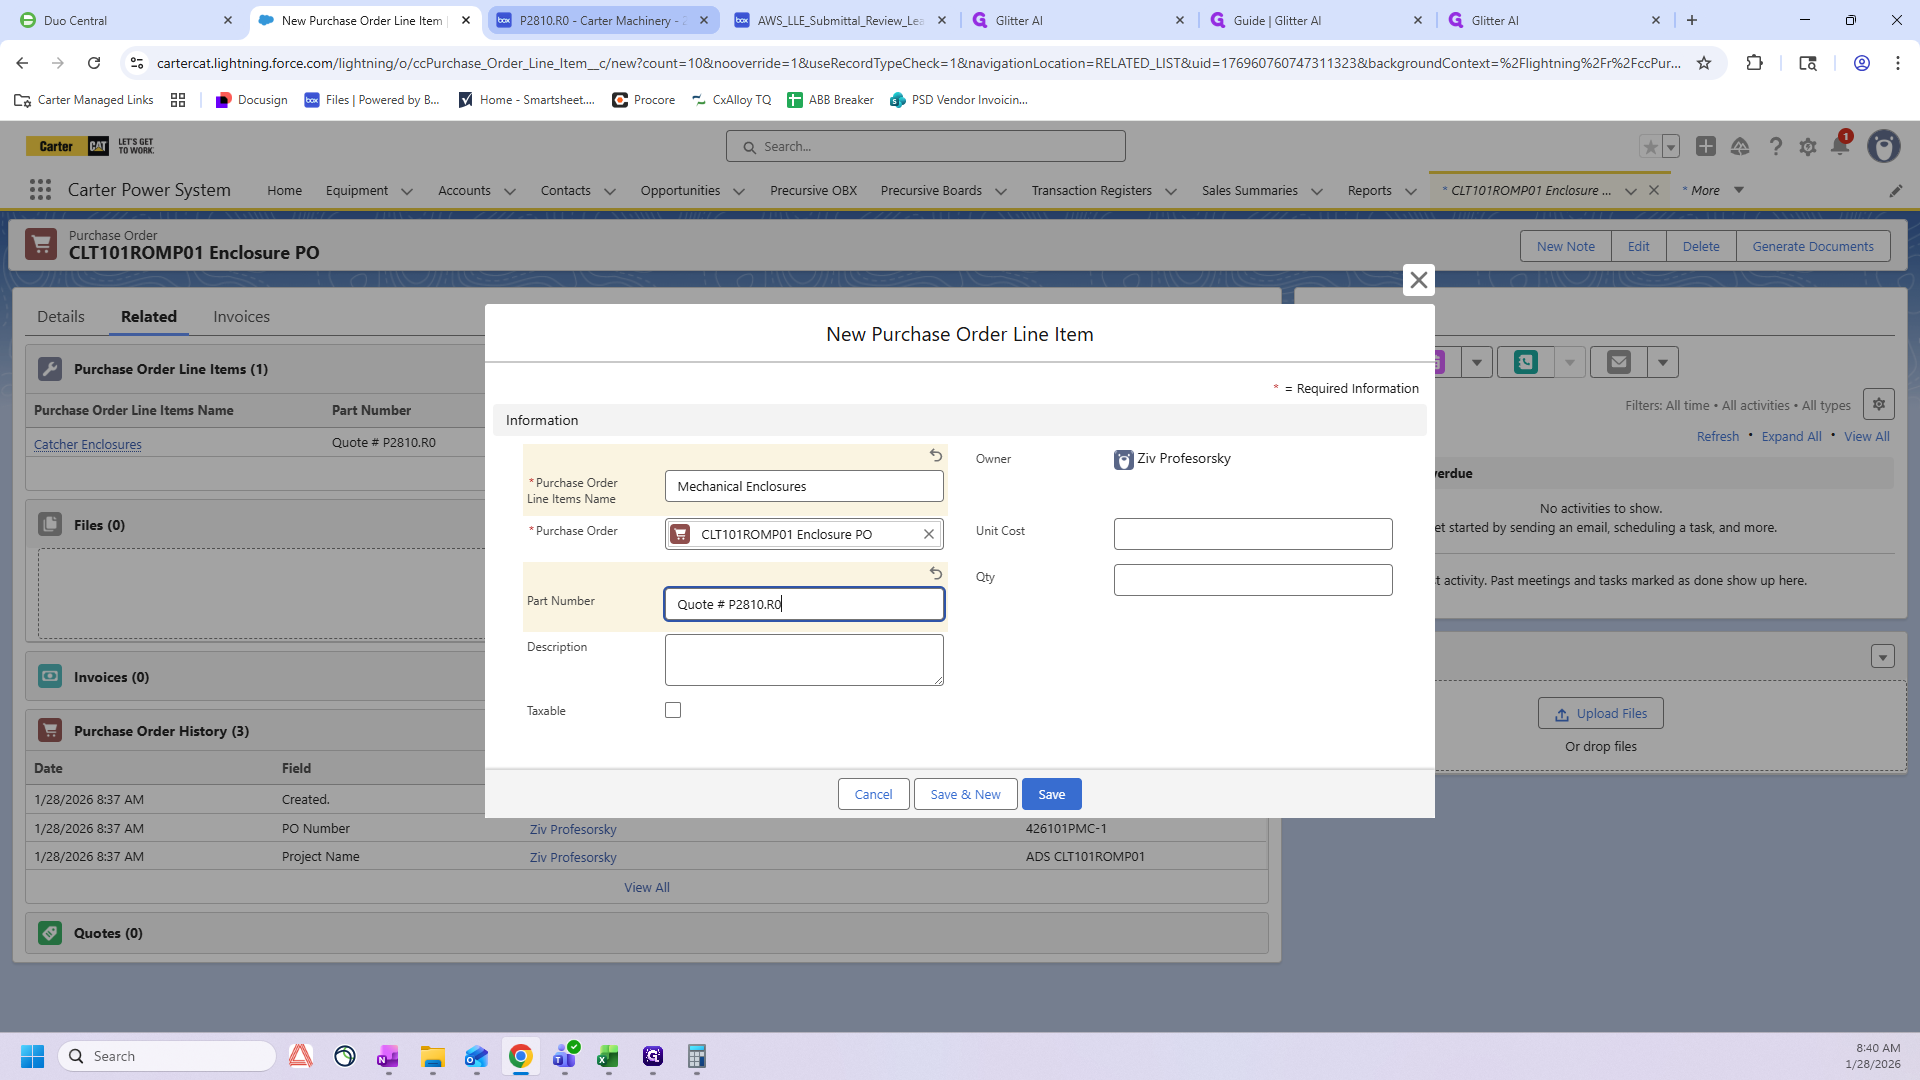
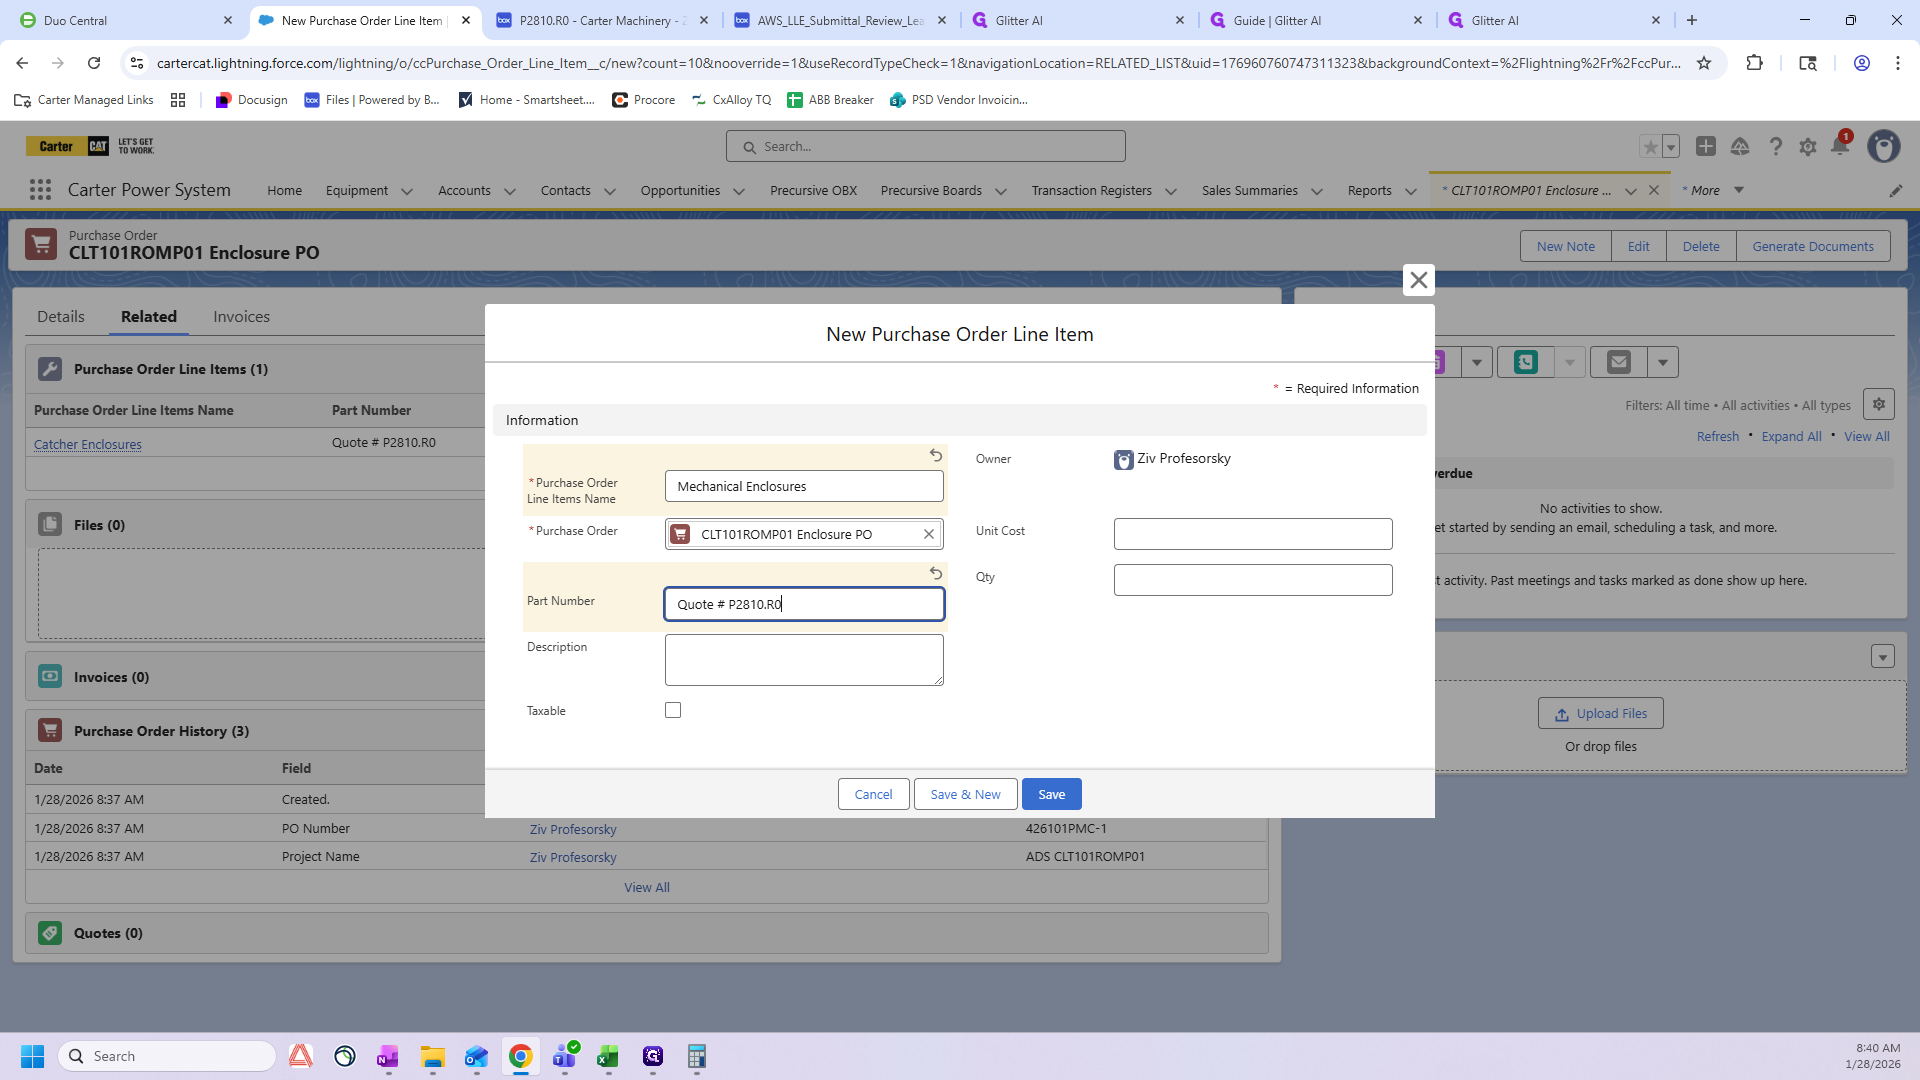
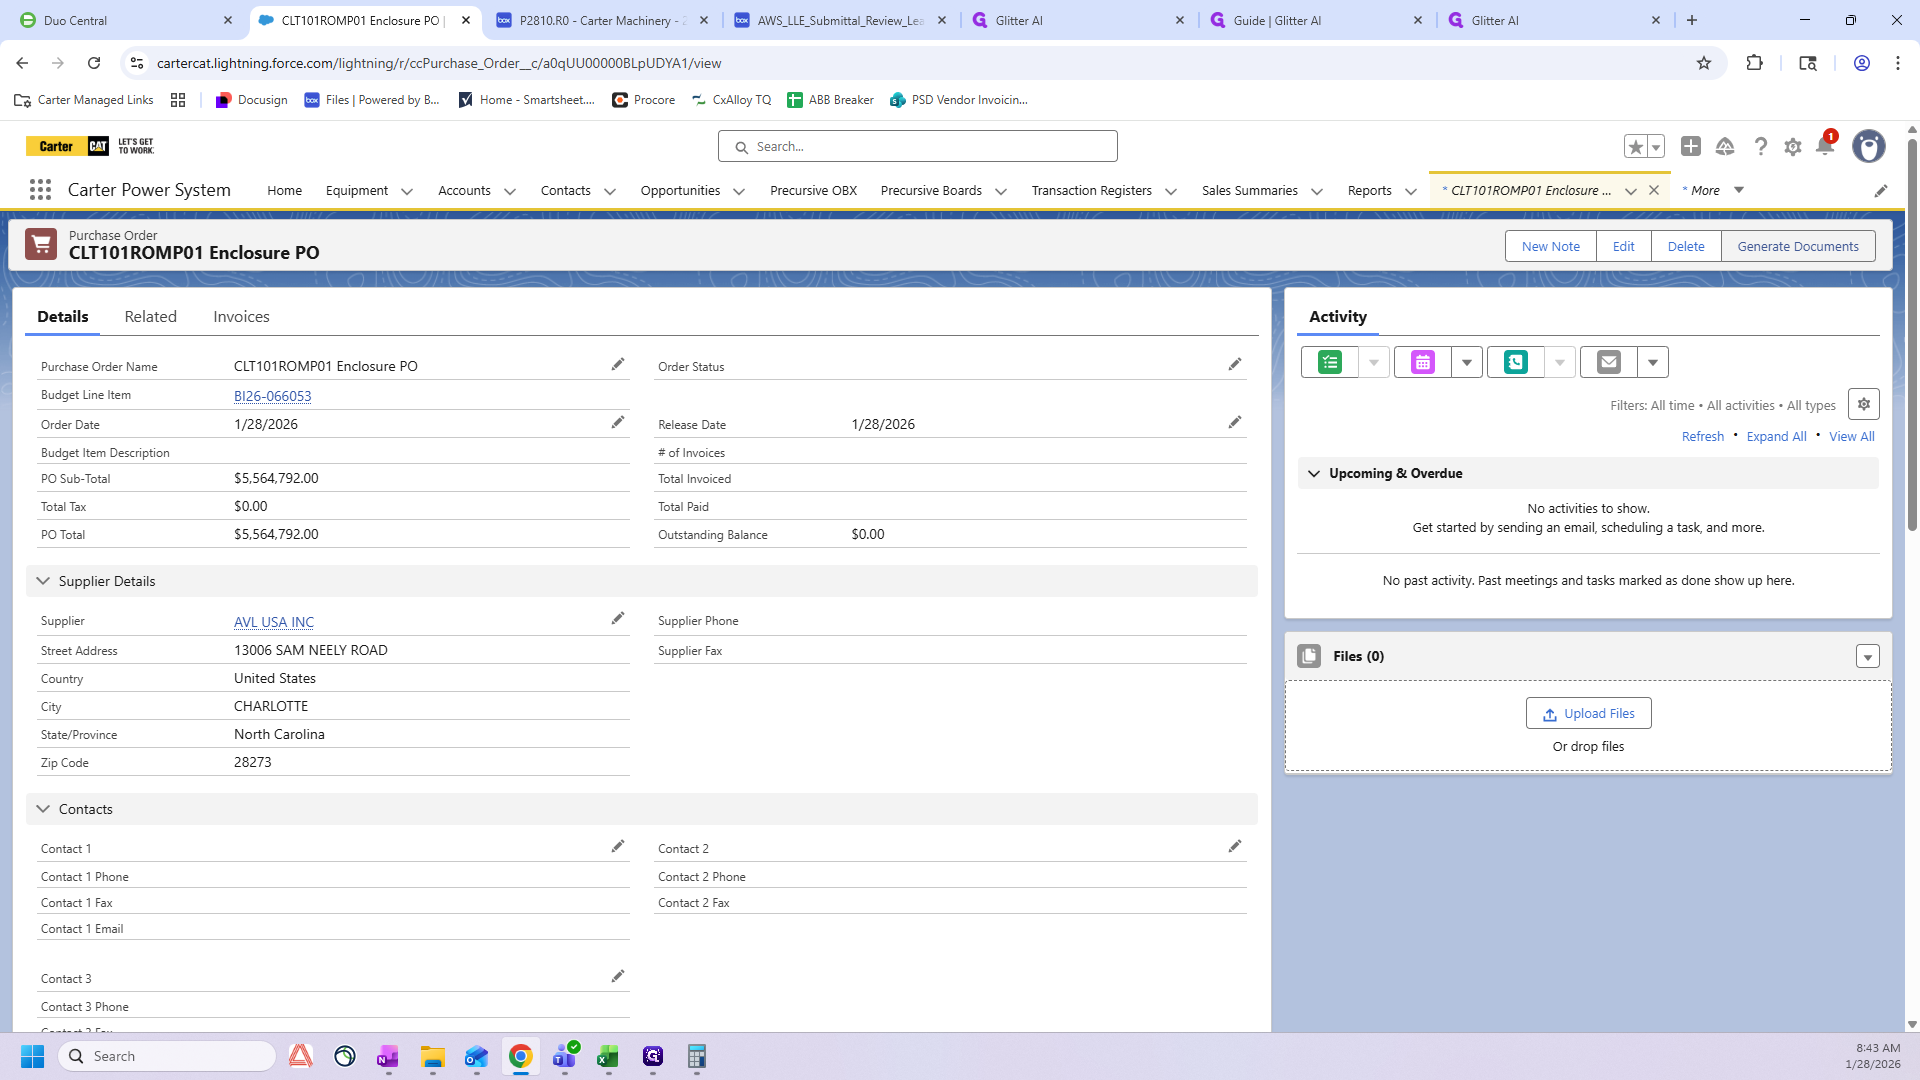
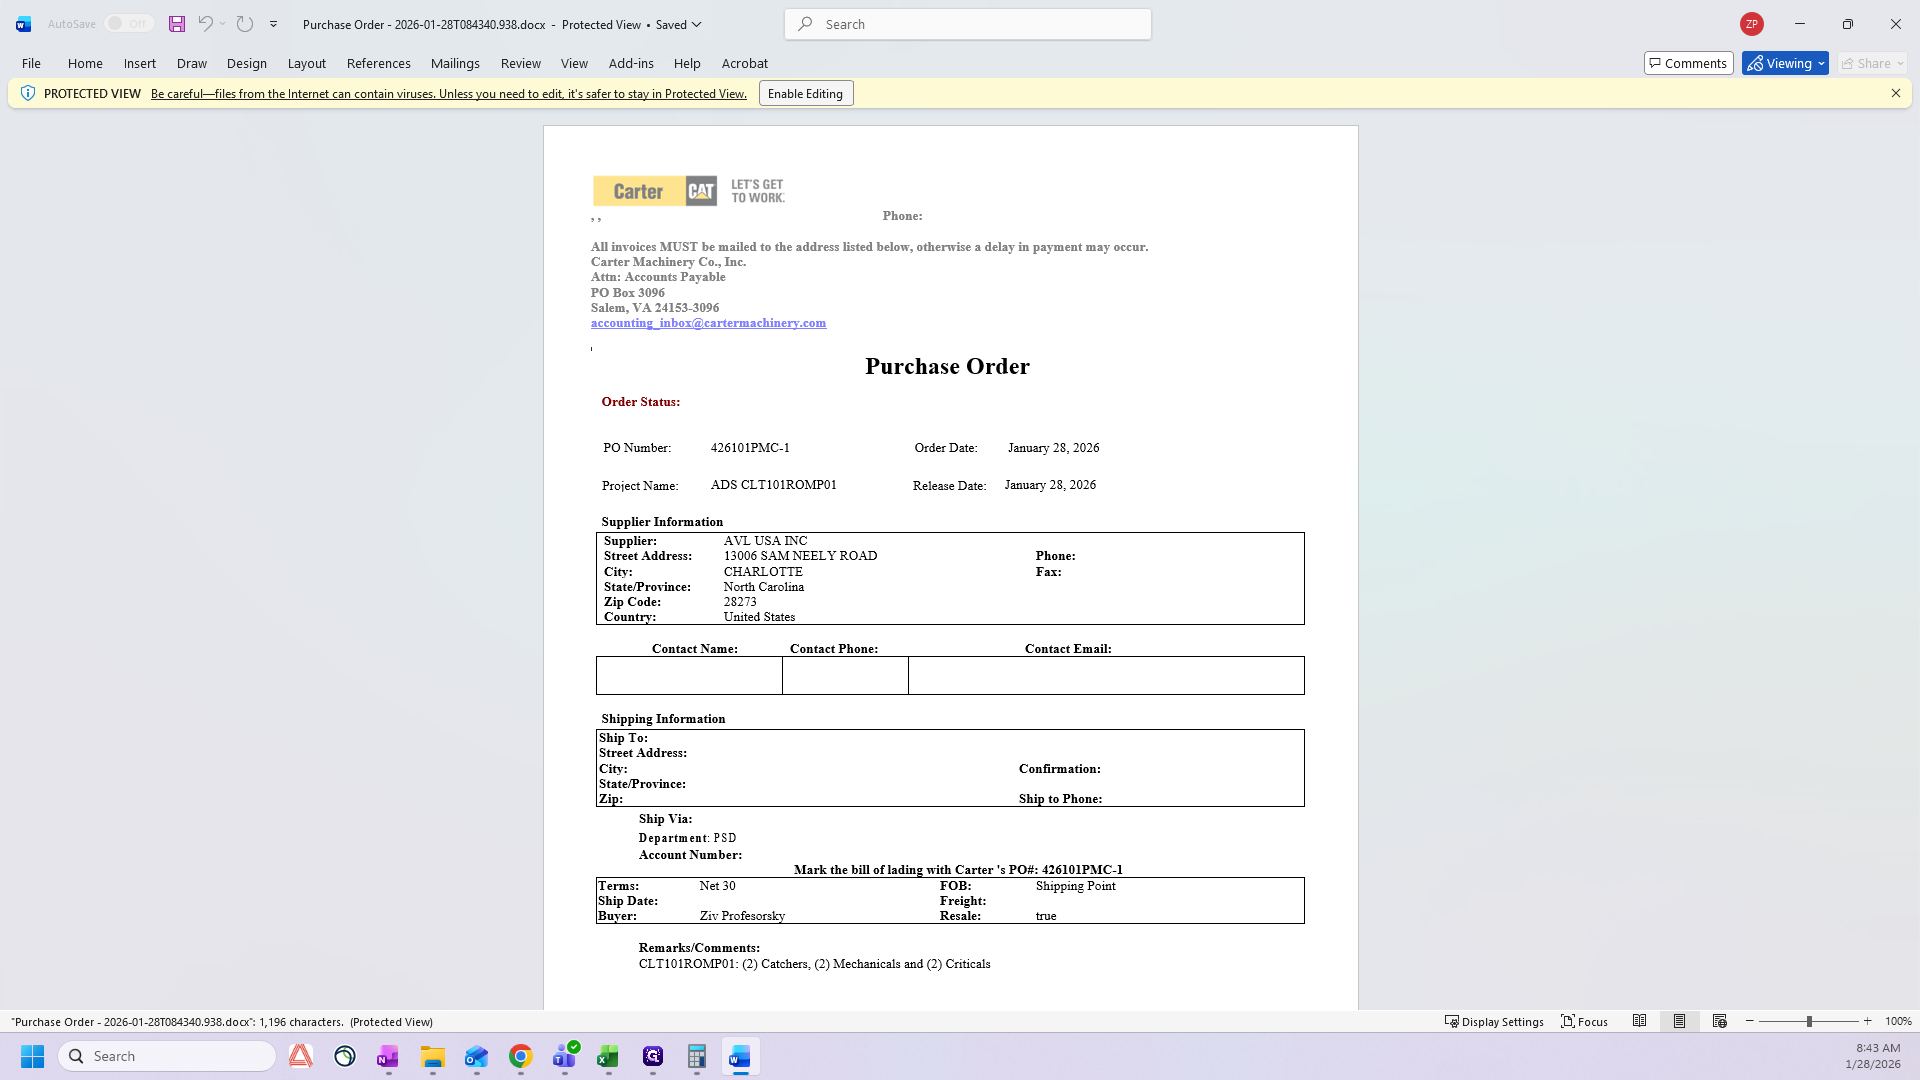
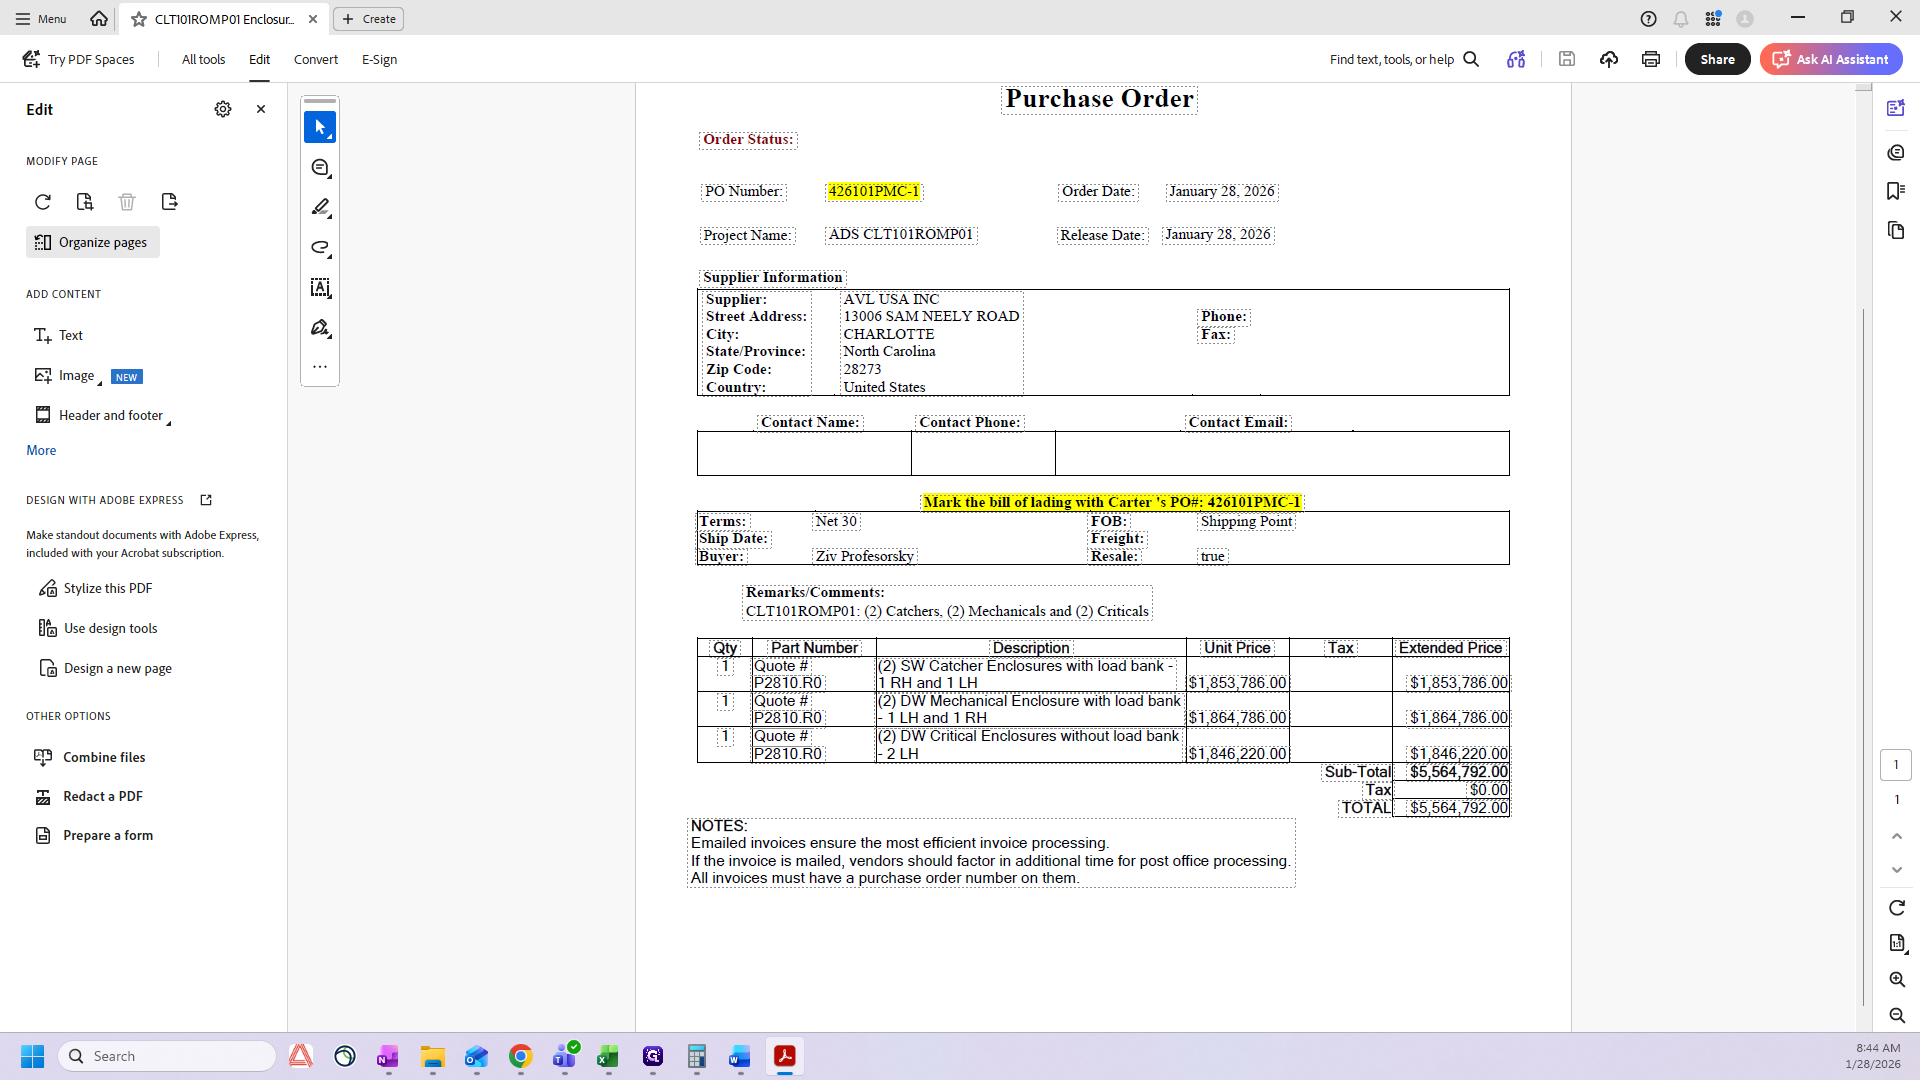
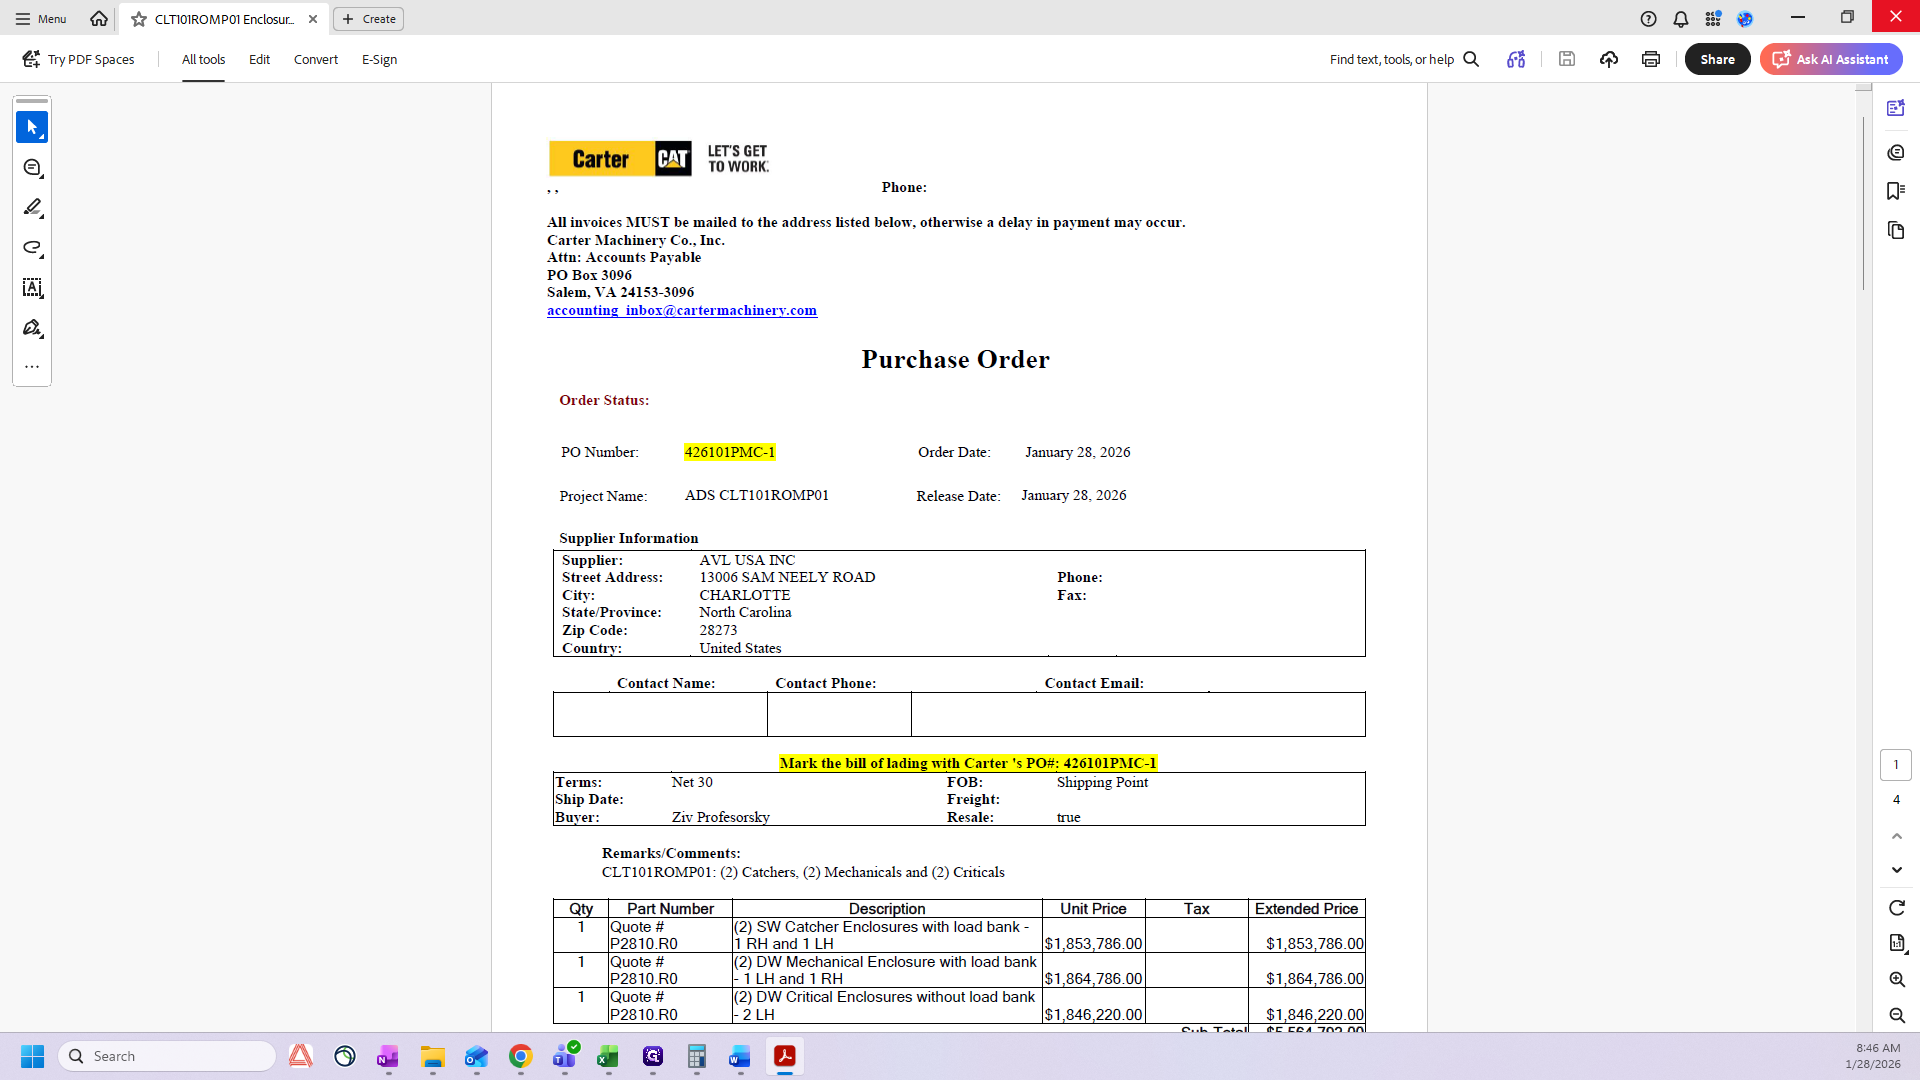
I will call this purchase order "CLT101 ROMP01 ENCLOSURE PO."
Your order status remains unchanged.
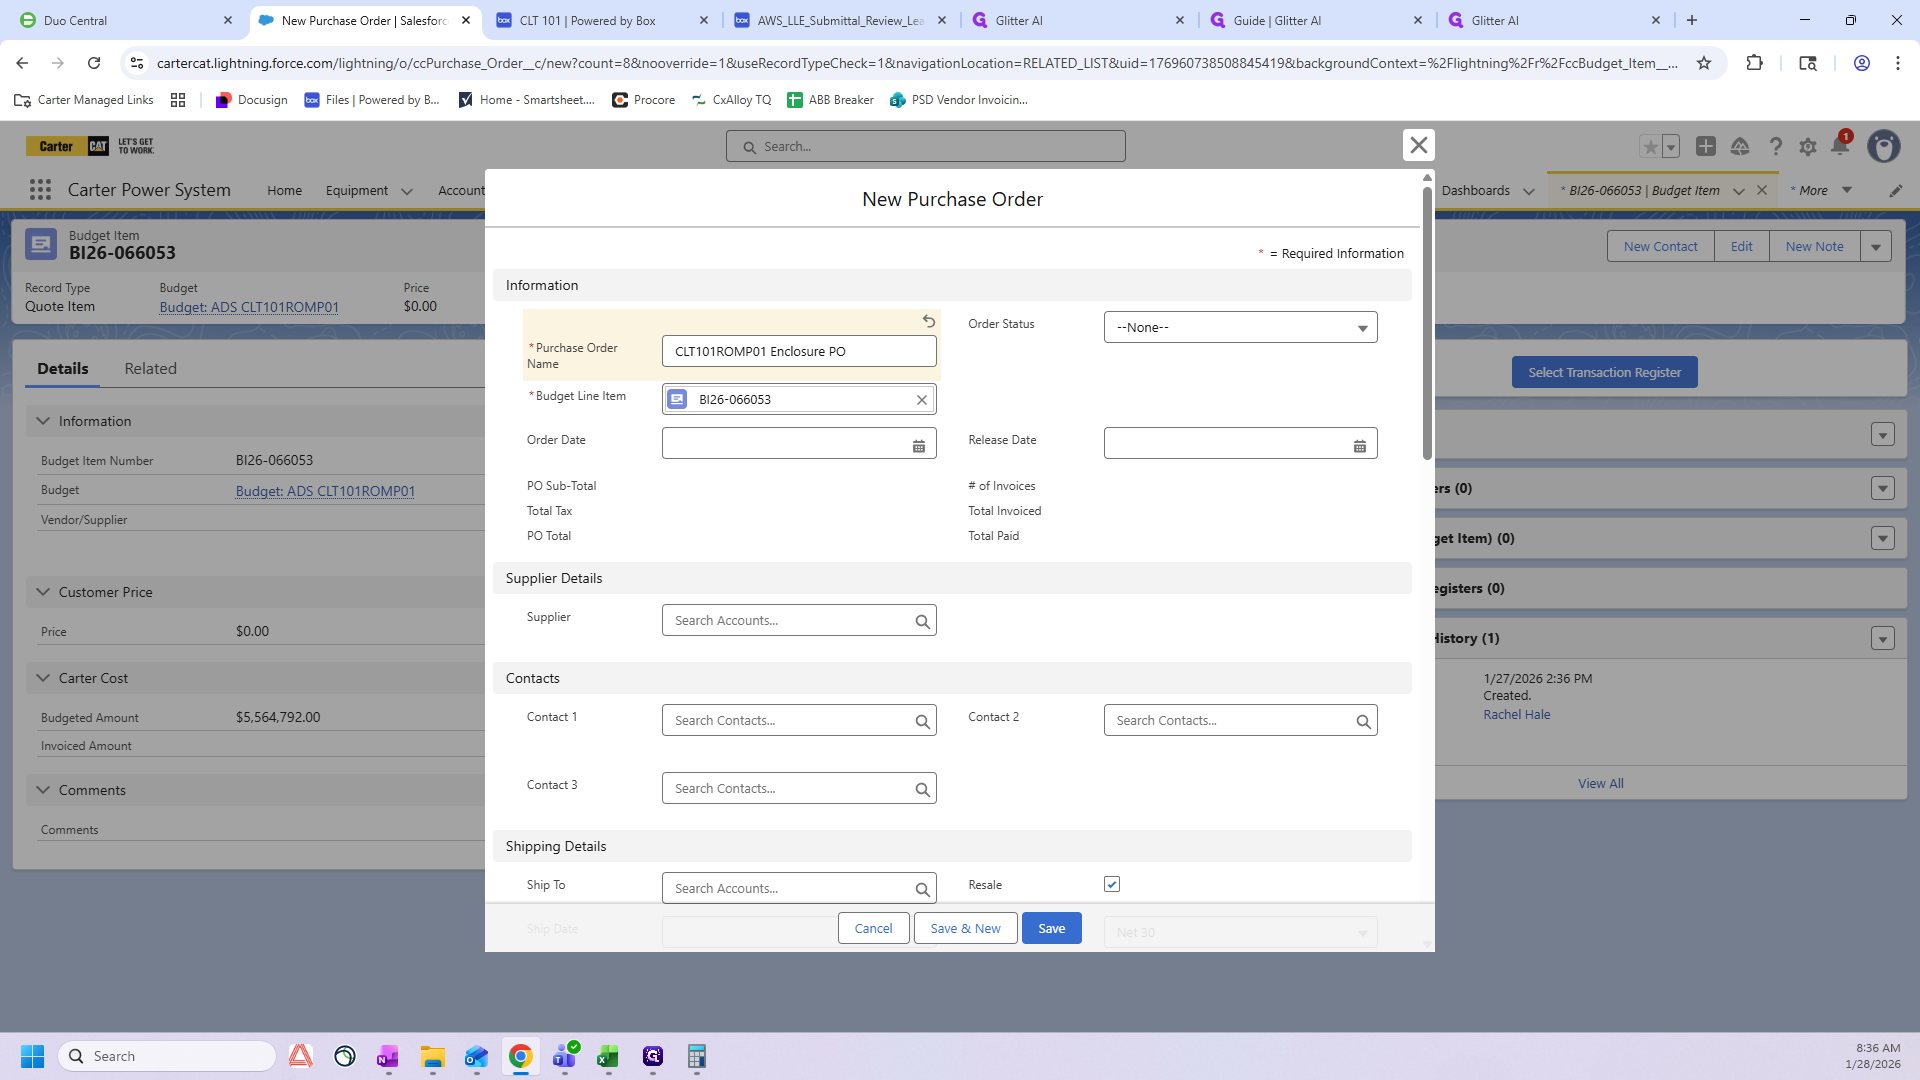
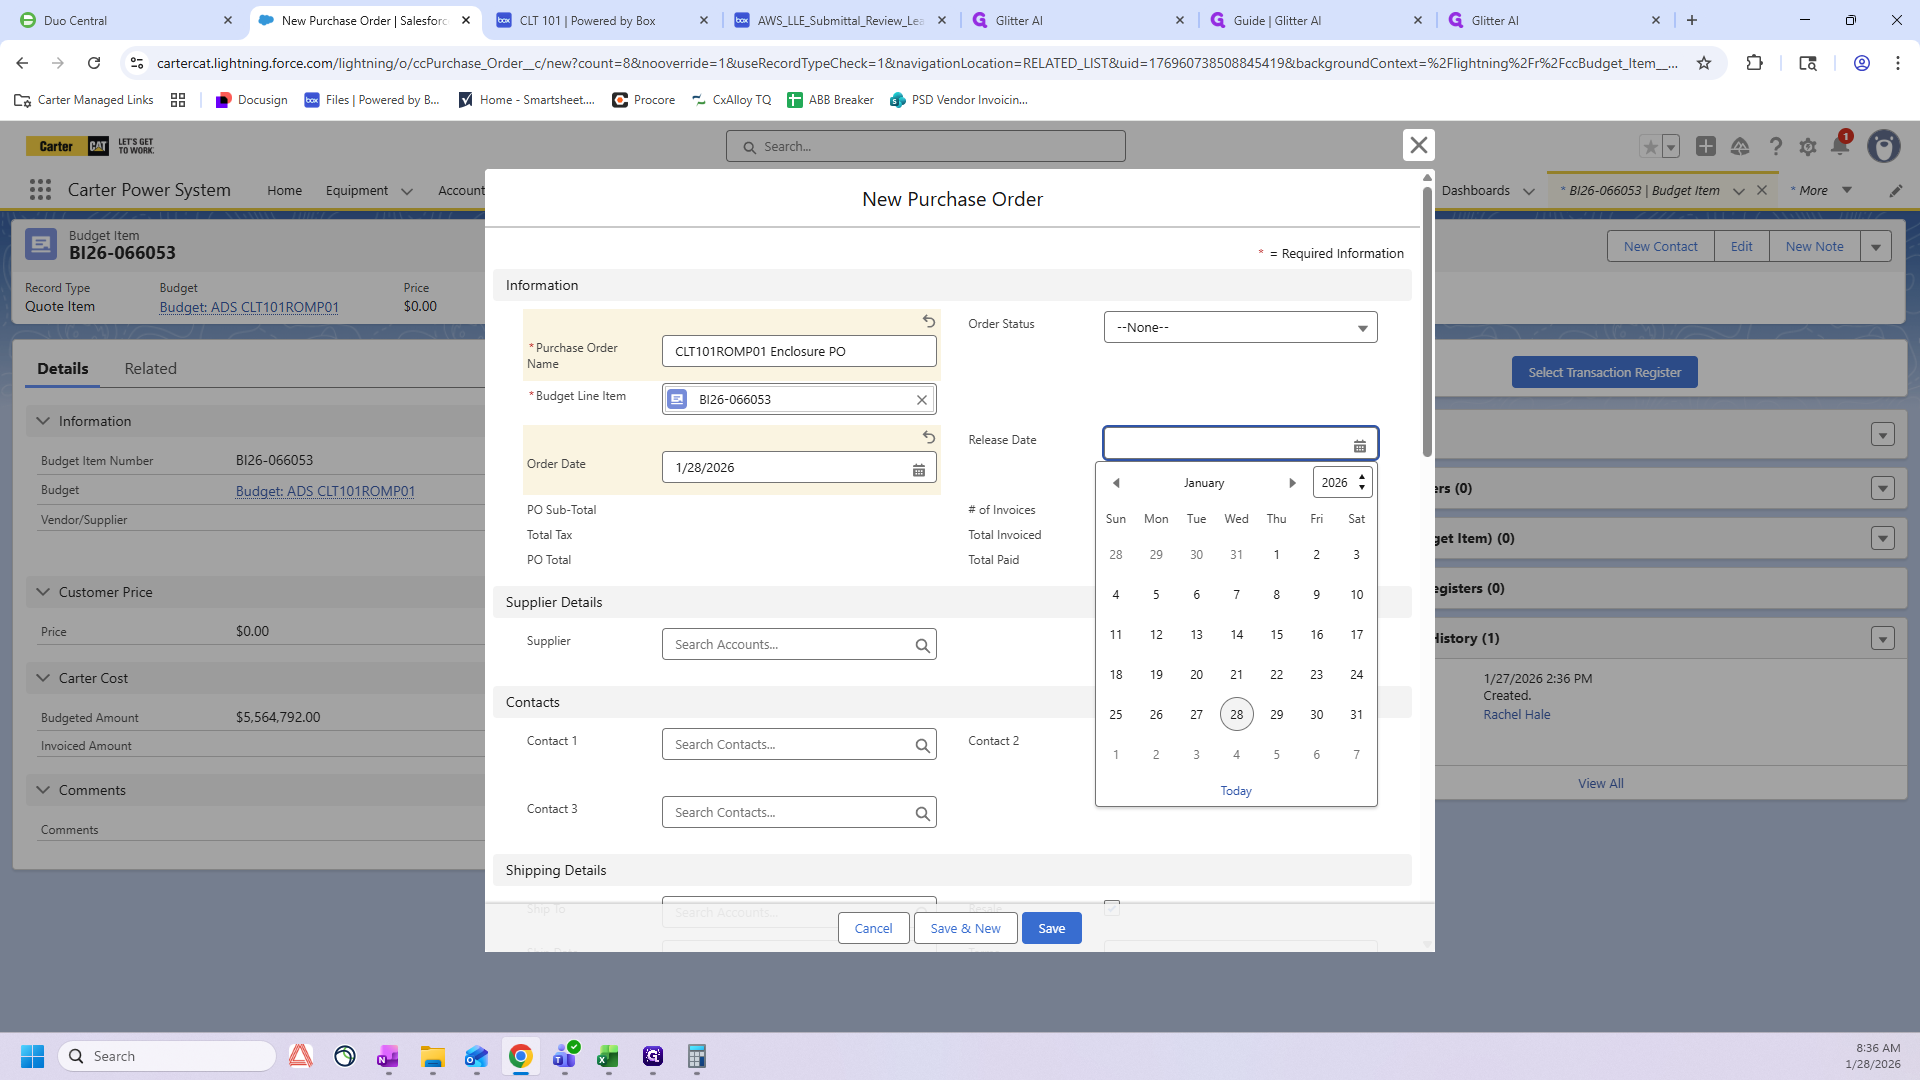
Your order date will be the day you are writing the PO.

Your release date should match today's date. Ensure both dates are the same.
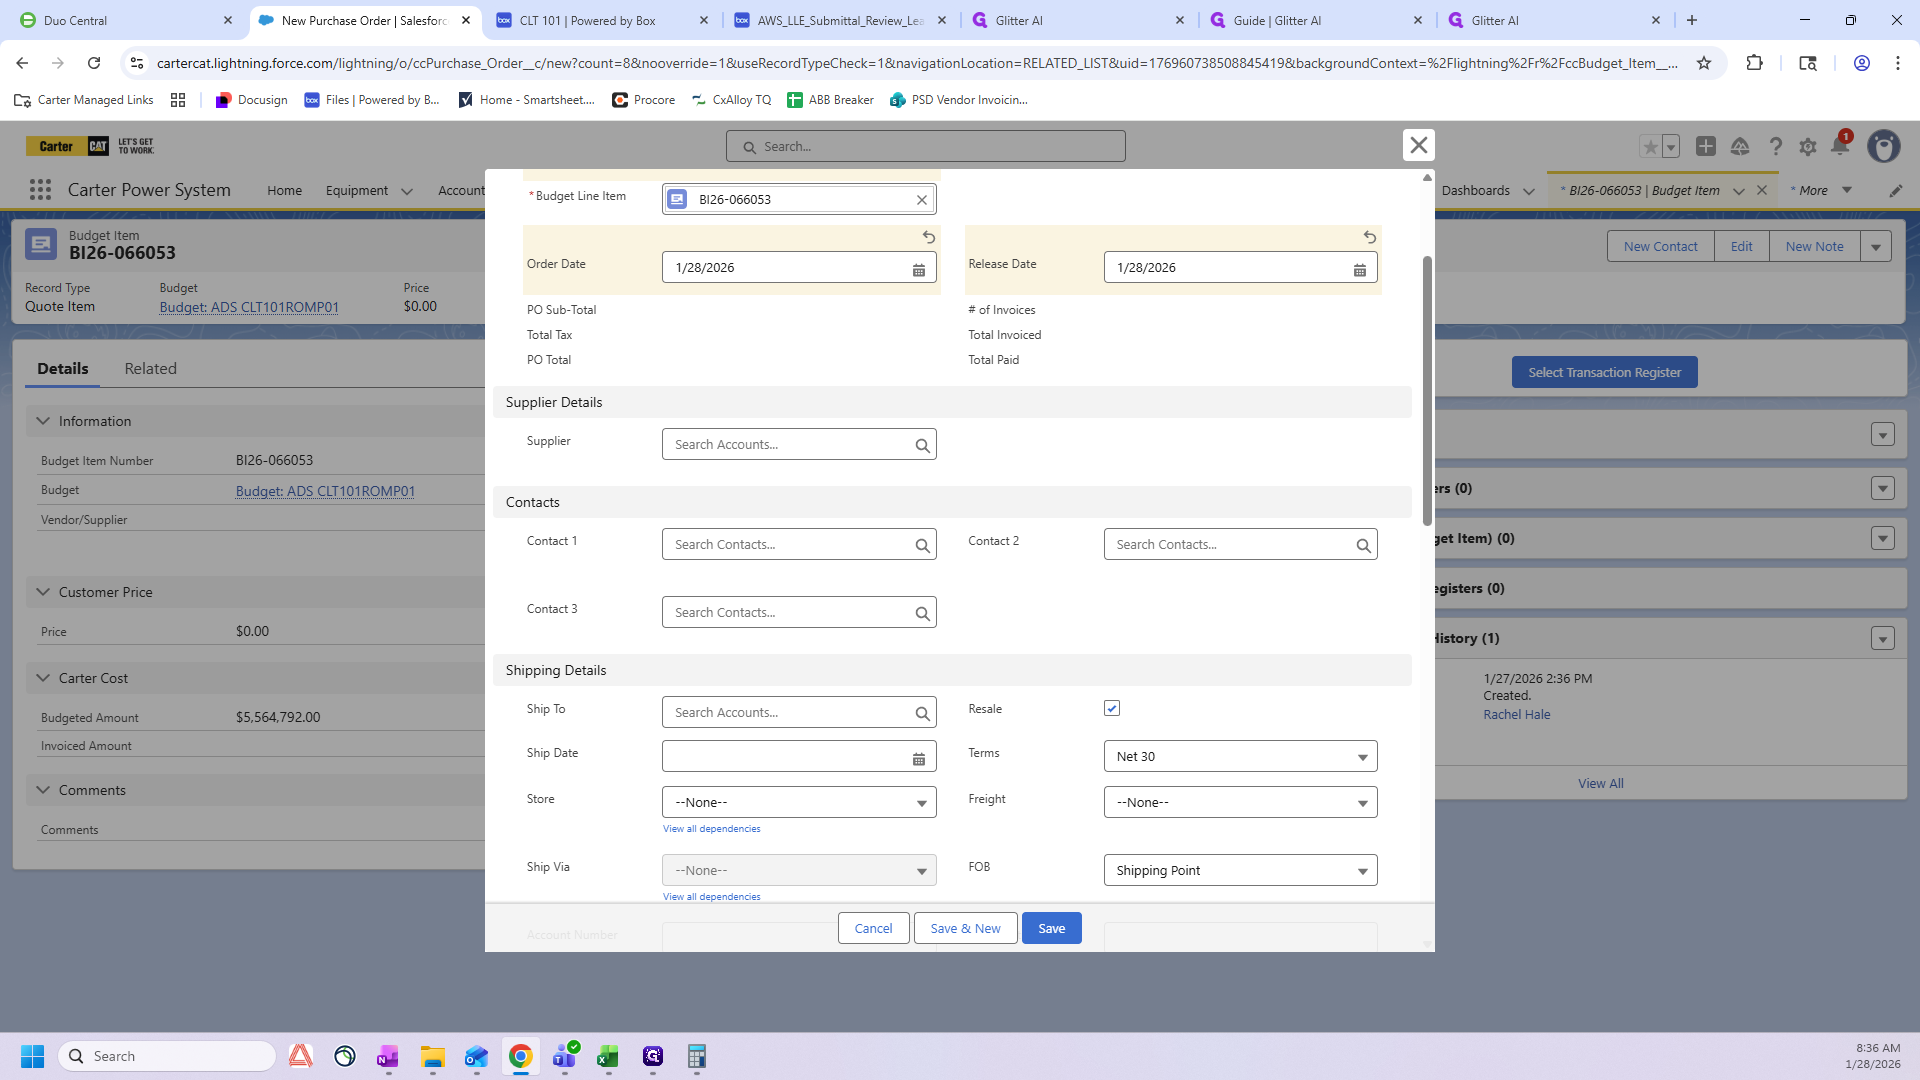
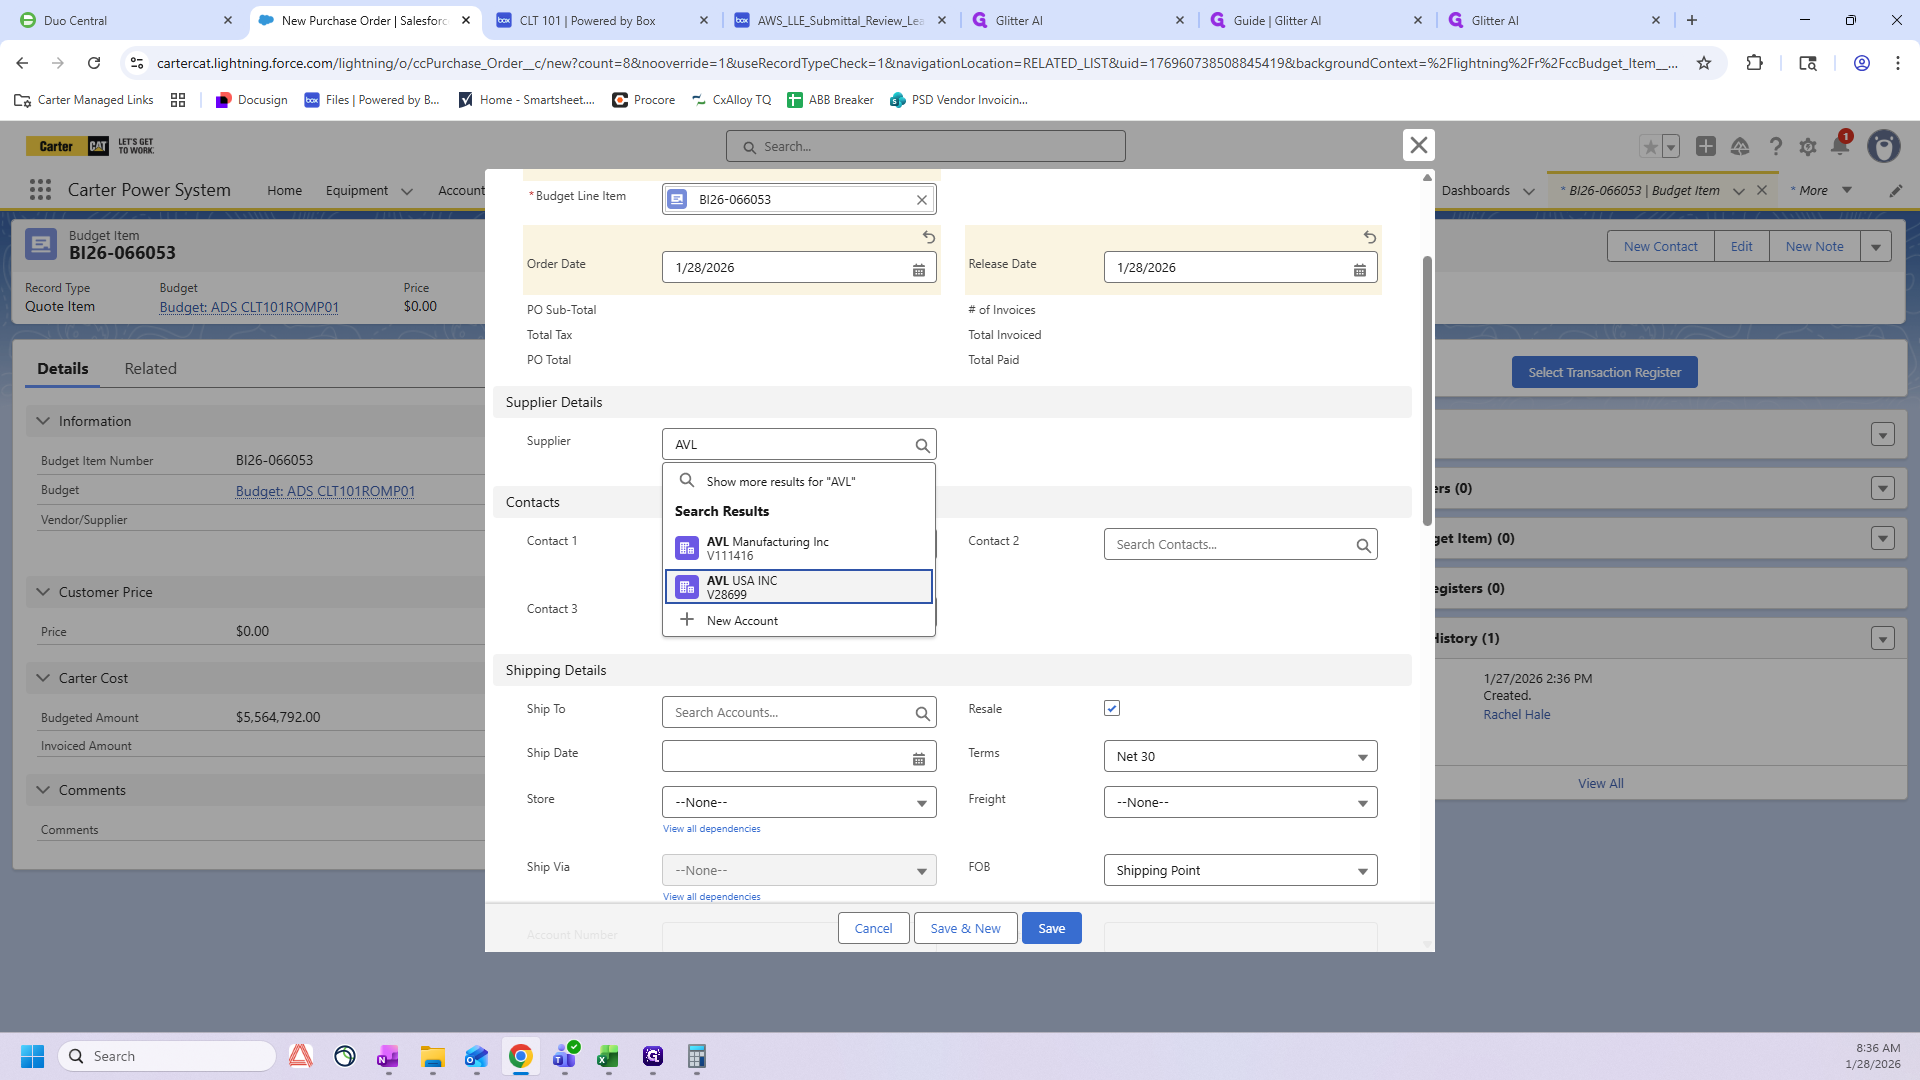
Your supplier is the packager. In this case, it is AVL.
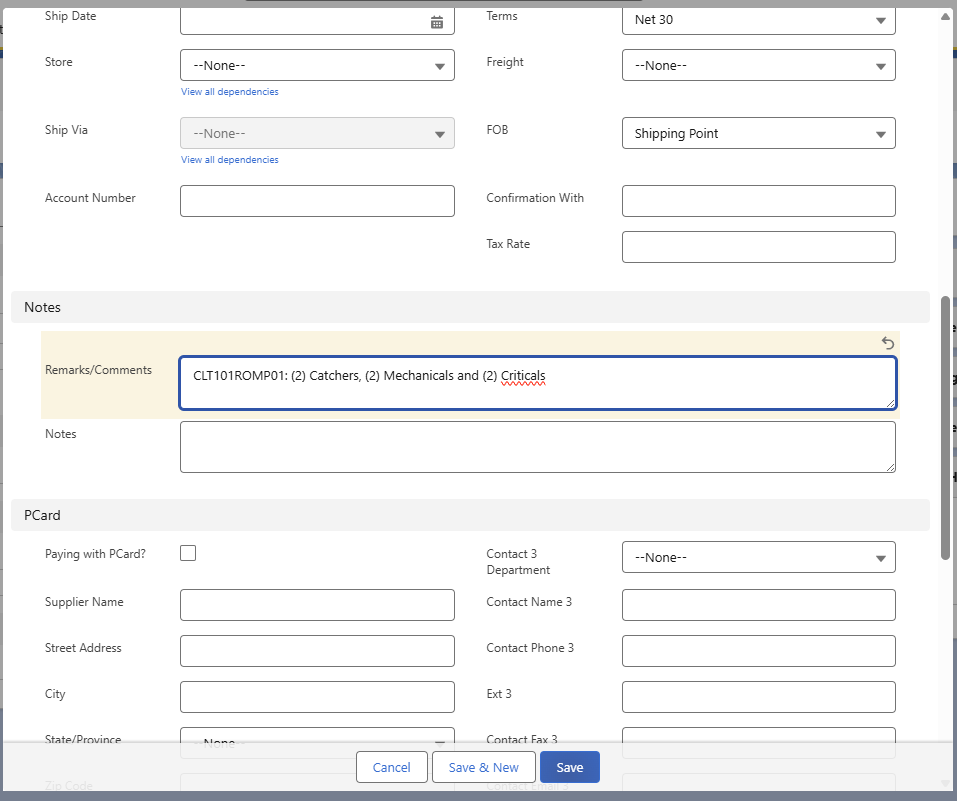
In "Remarks & Comments," I enter the romp again and note the number of enclosures or packages in this romp.

We have two catchers, two mechanicals, and two criticals for ROMP01.
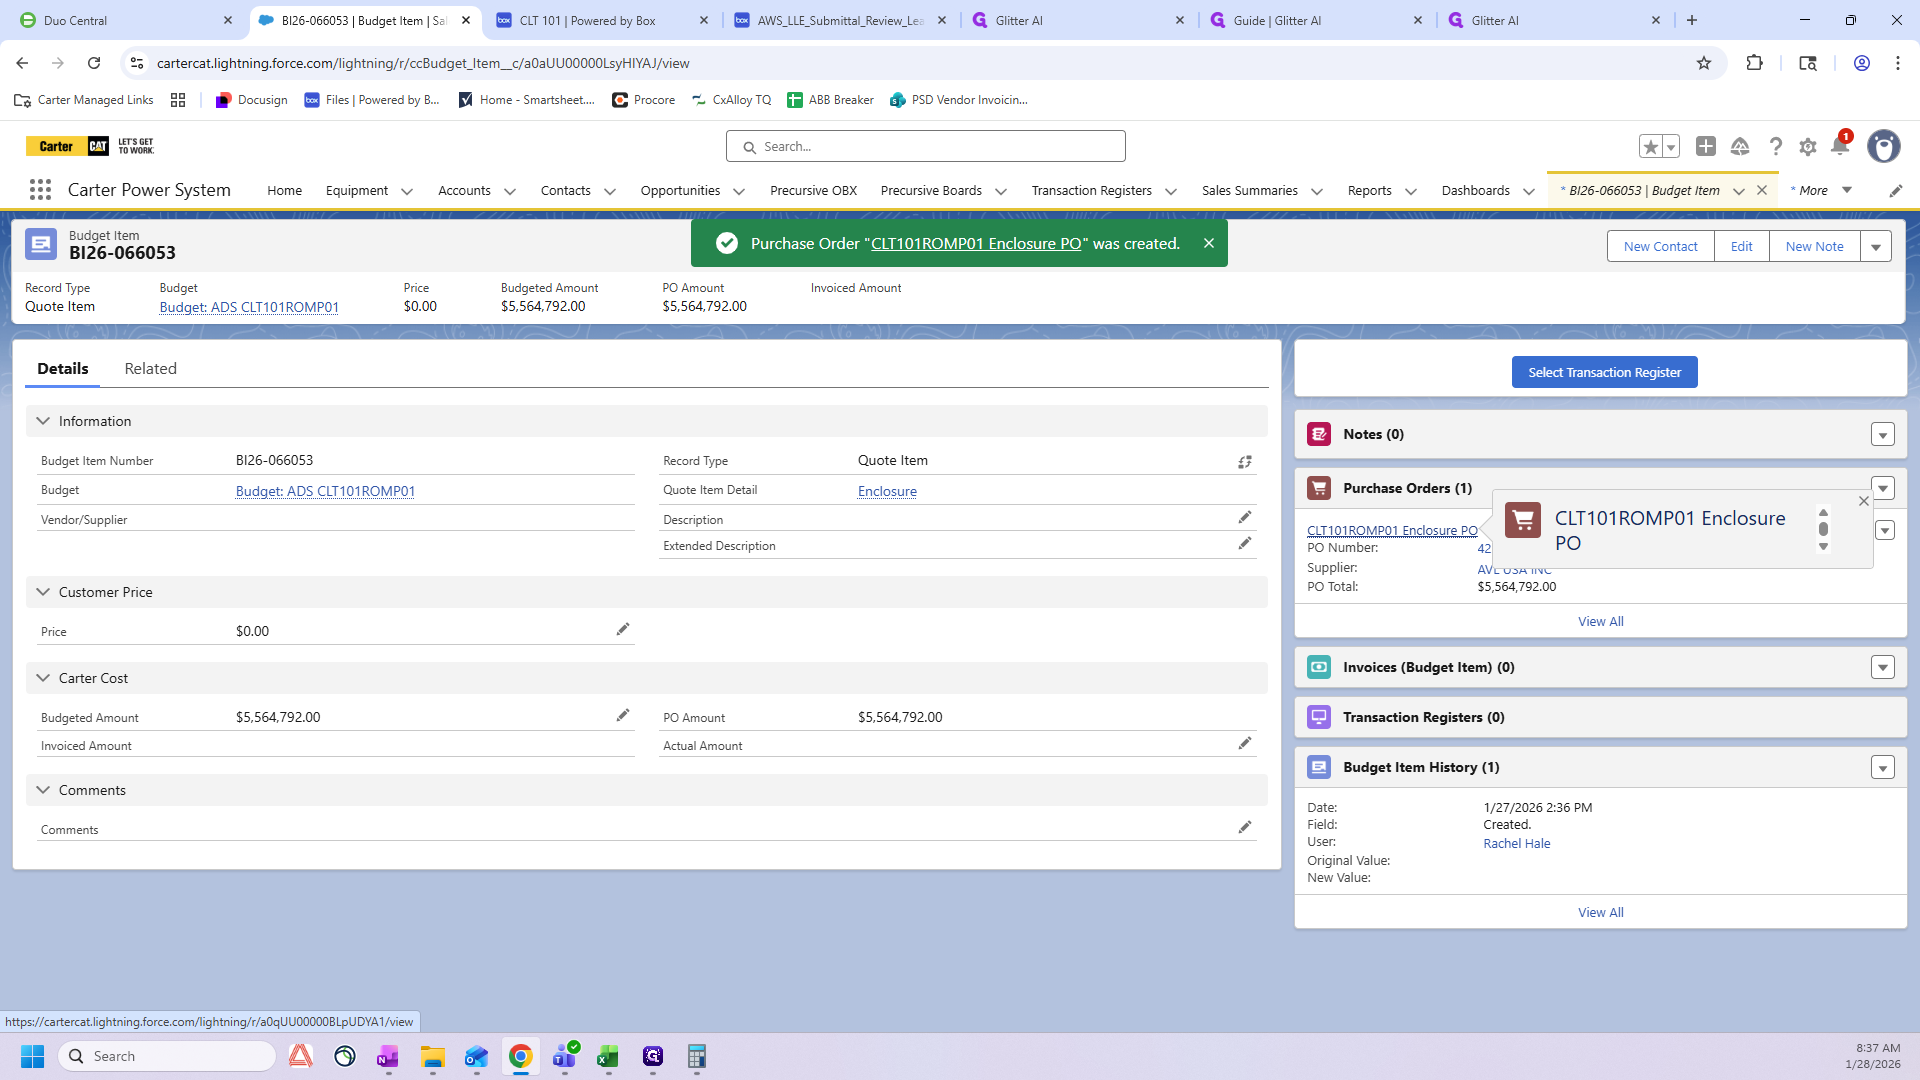
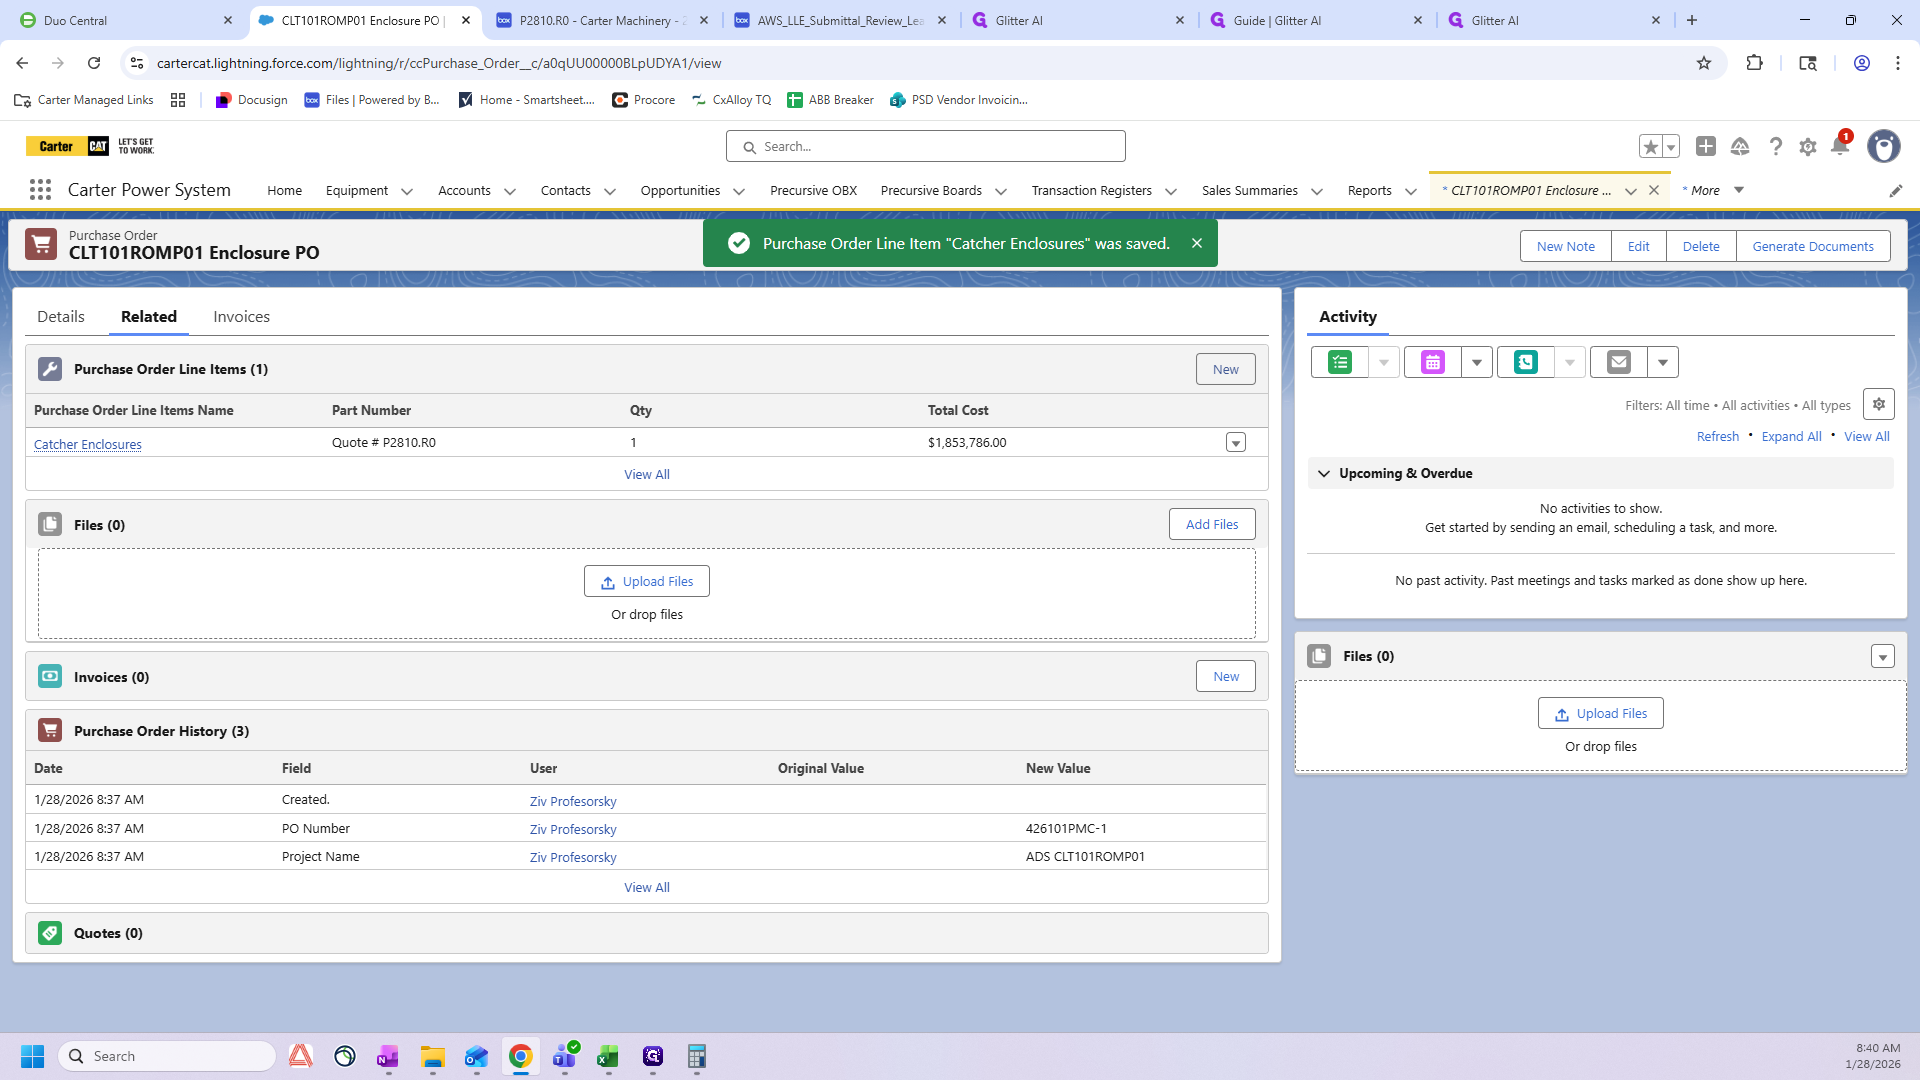
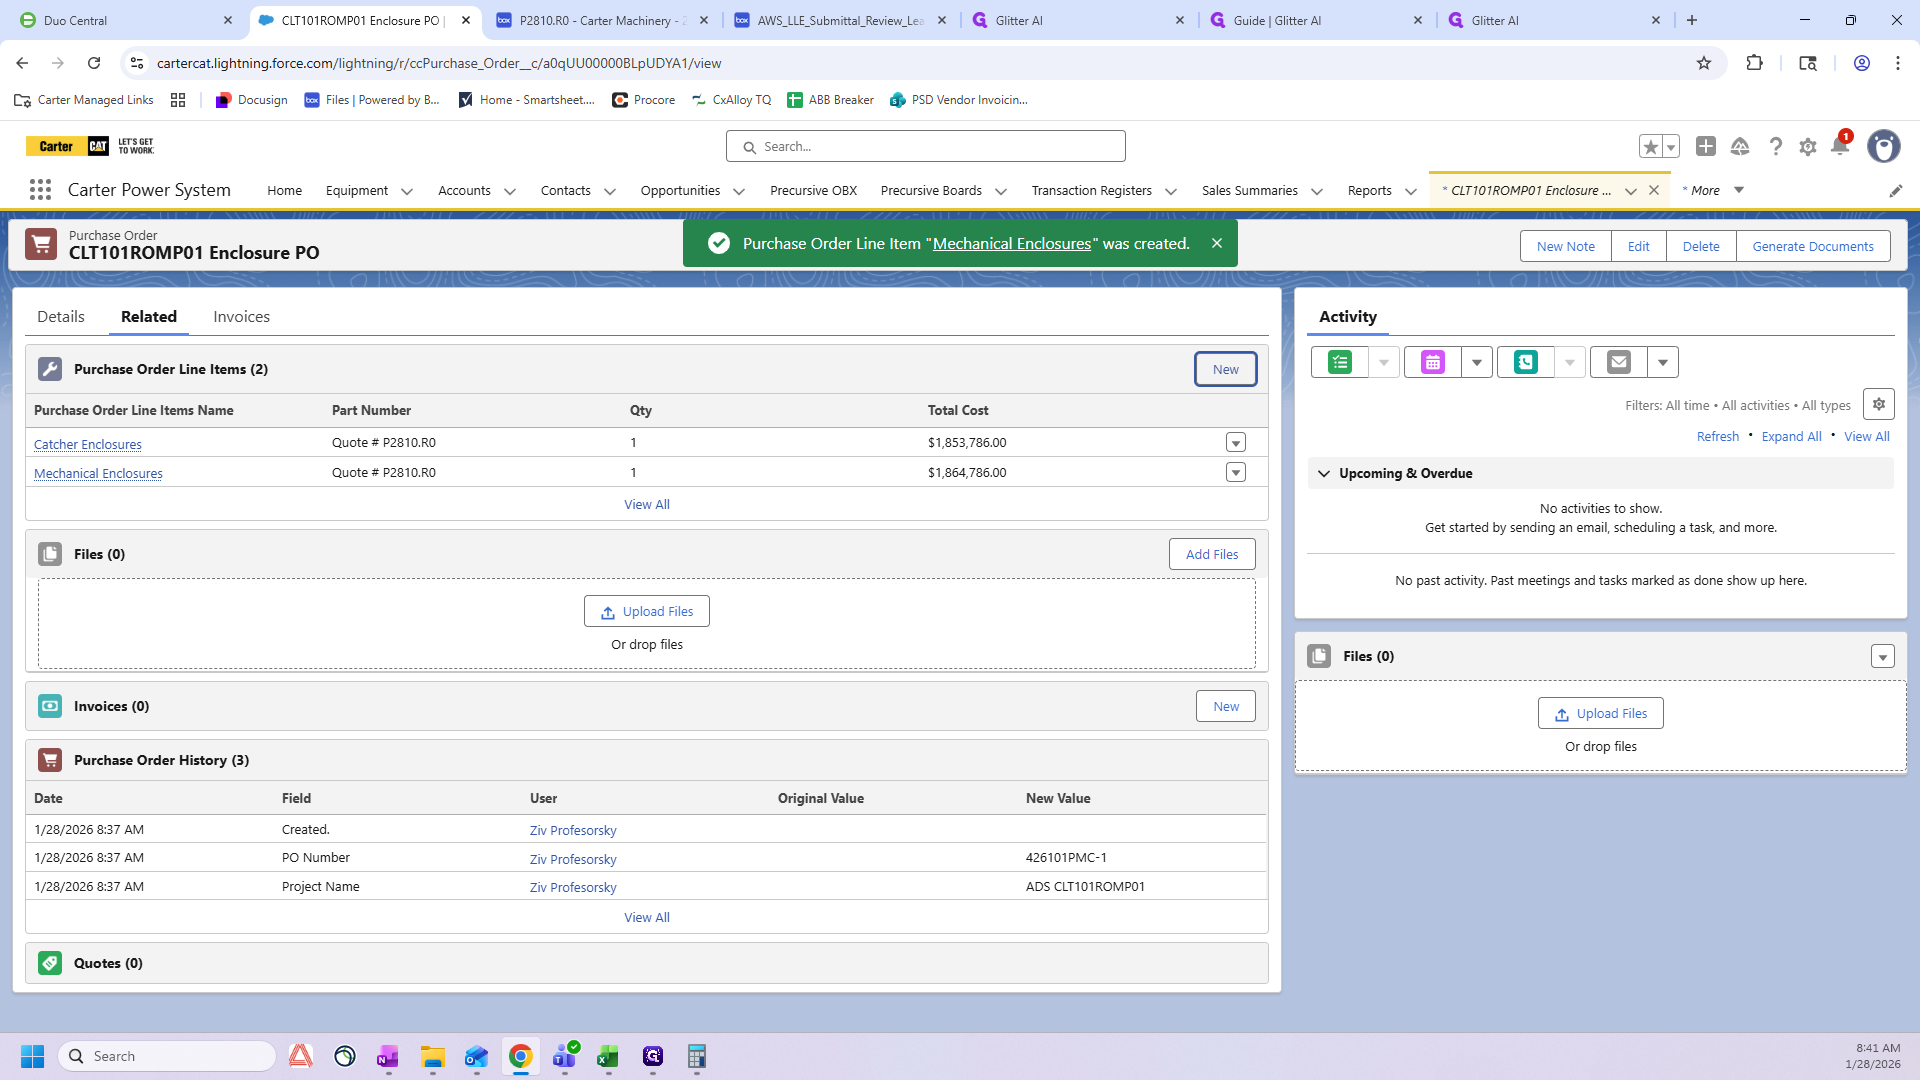
Click "Save." Now you can see the PO has been created. We will now go into the PO.
Here is all my data that I just entered. Now, I will click "Related".
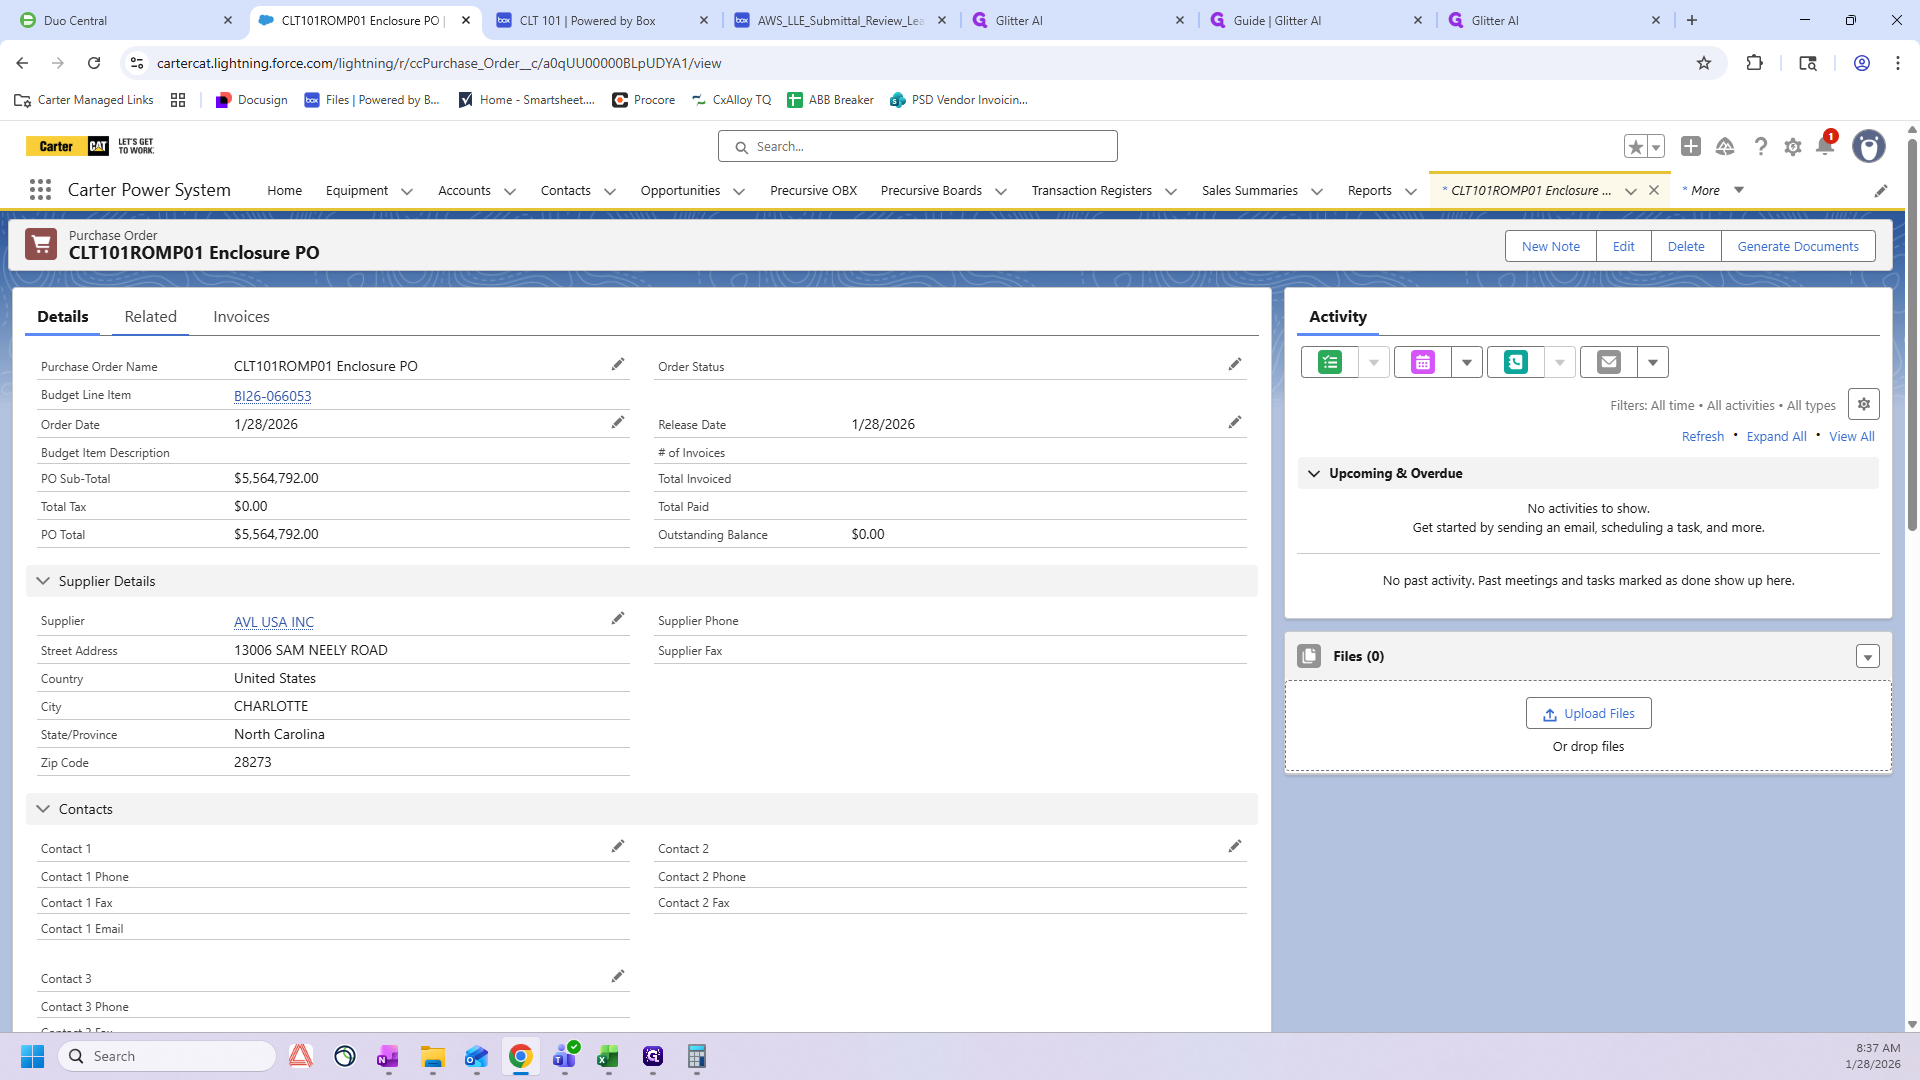
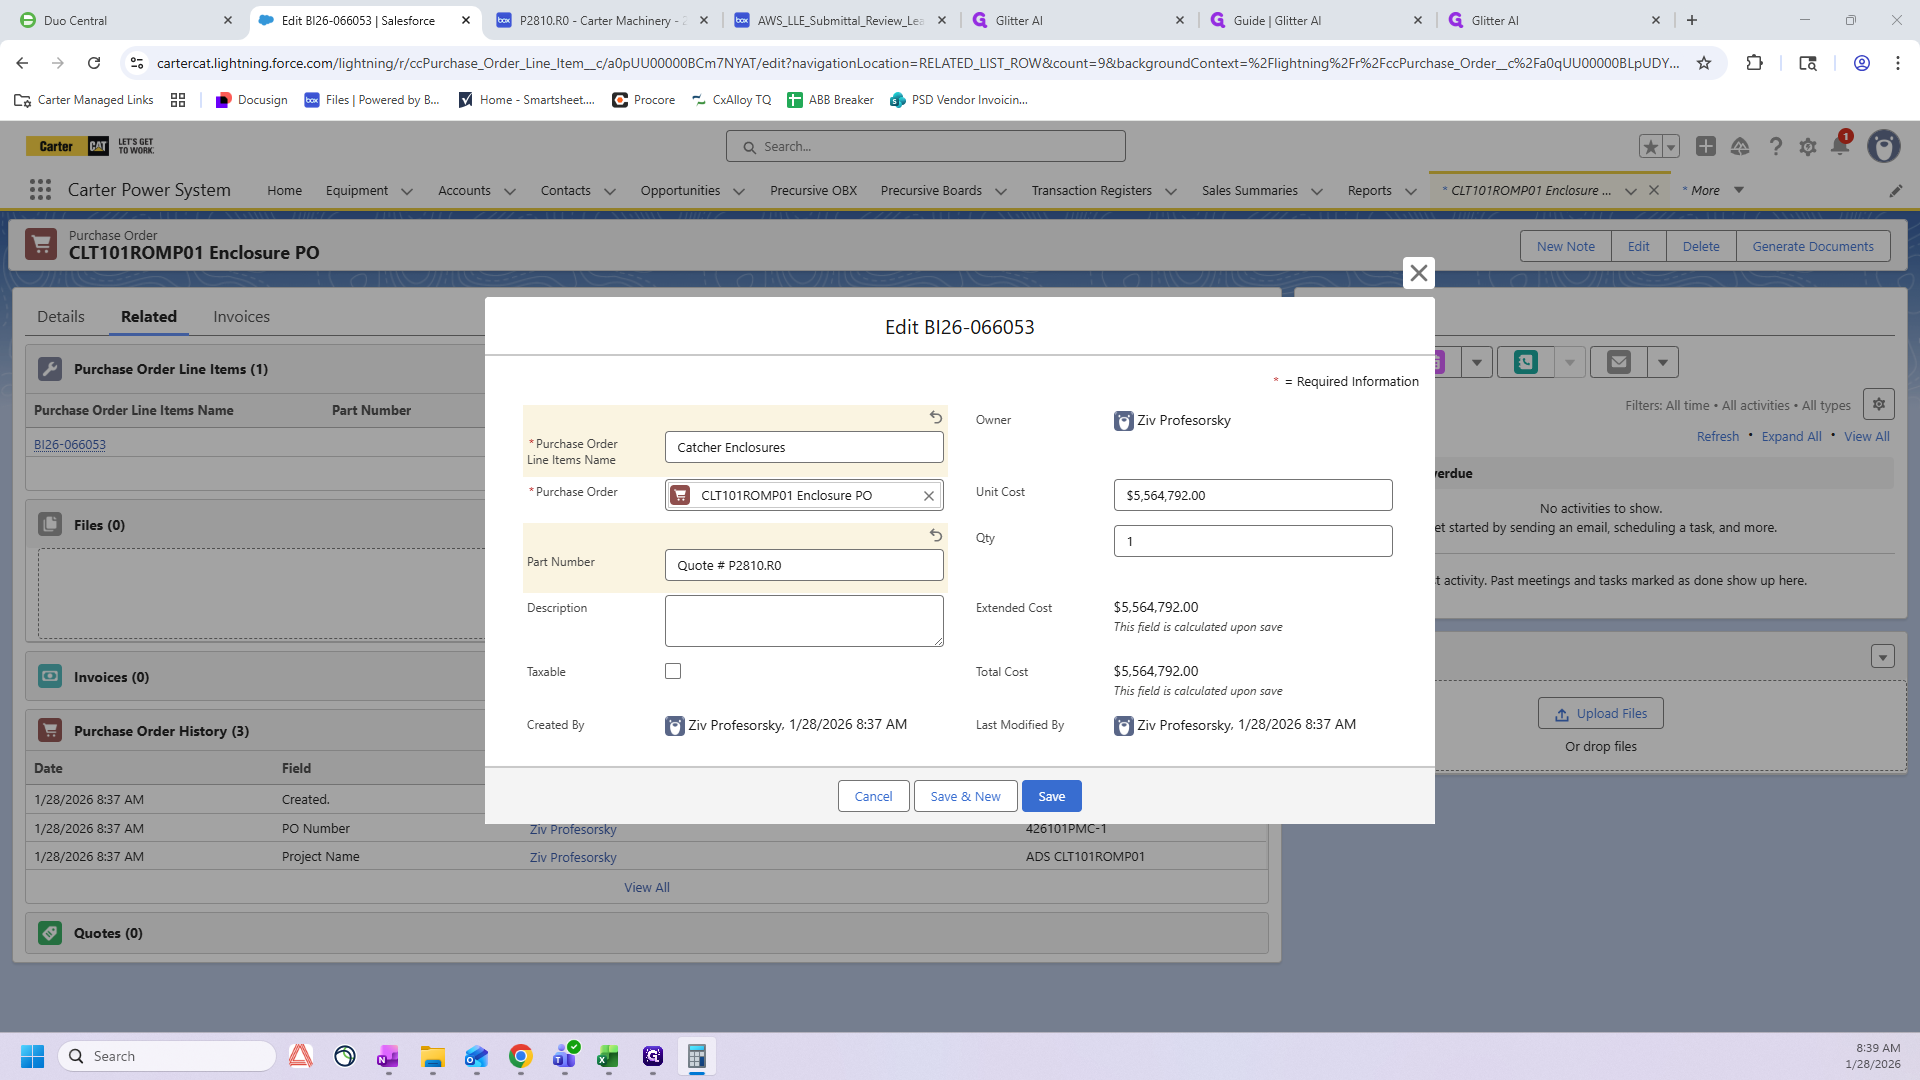
Here we have a line item that was already created. It shows the full value of the enclosure line item on the budget. We want to edit this, and we'll do just one.
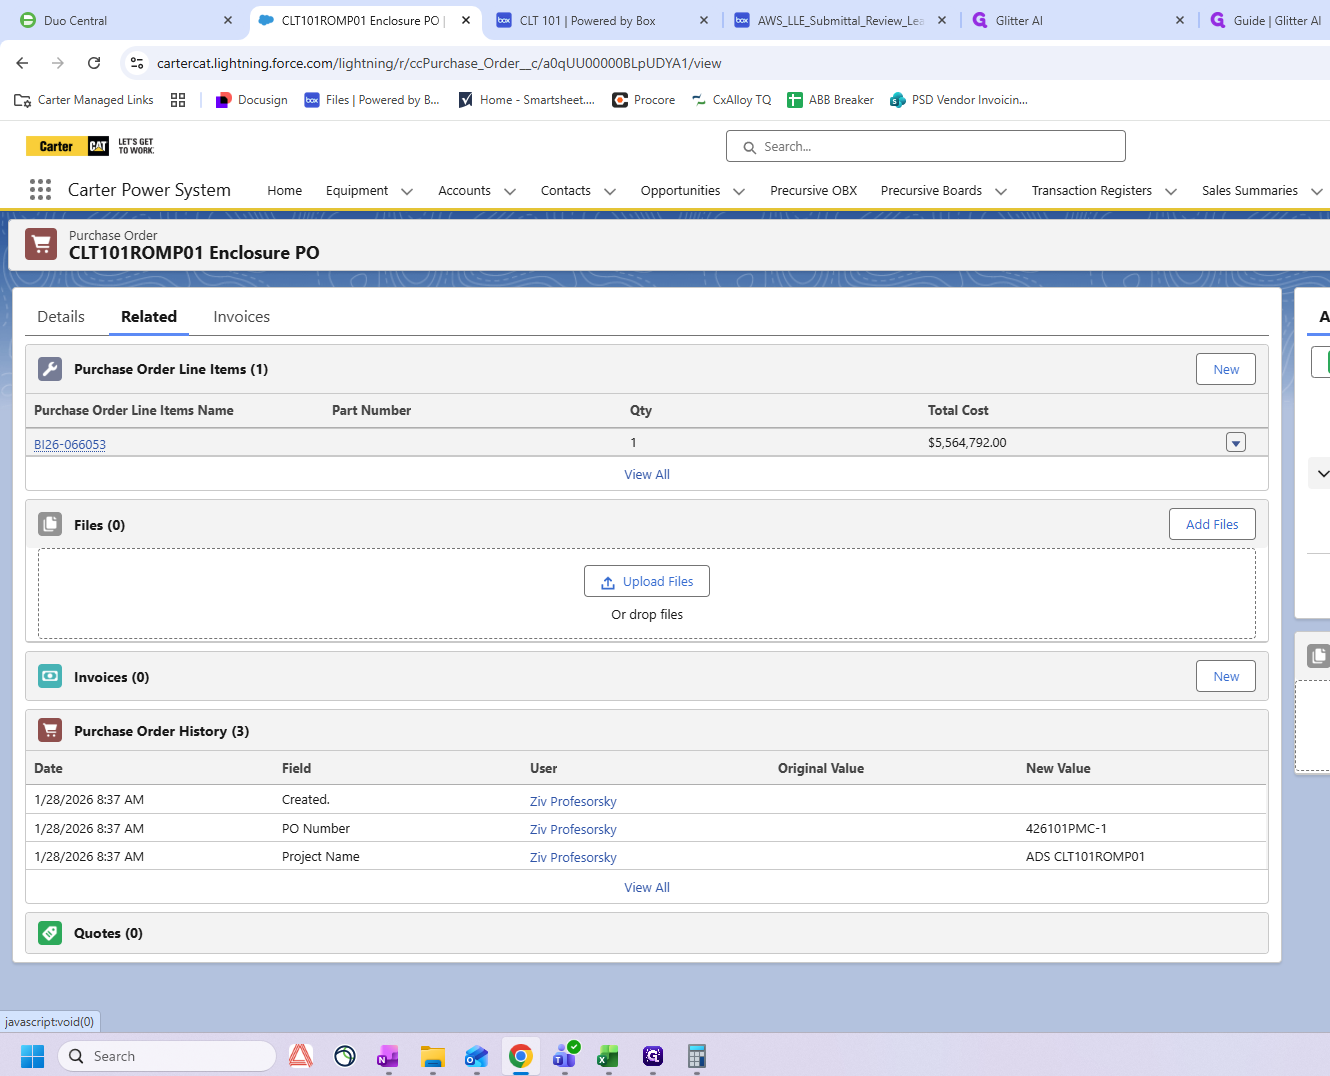

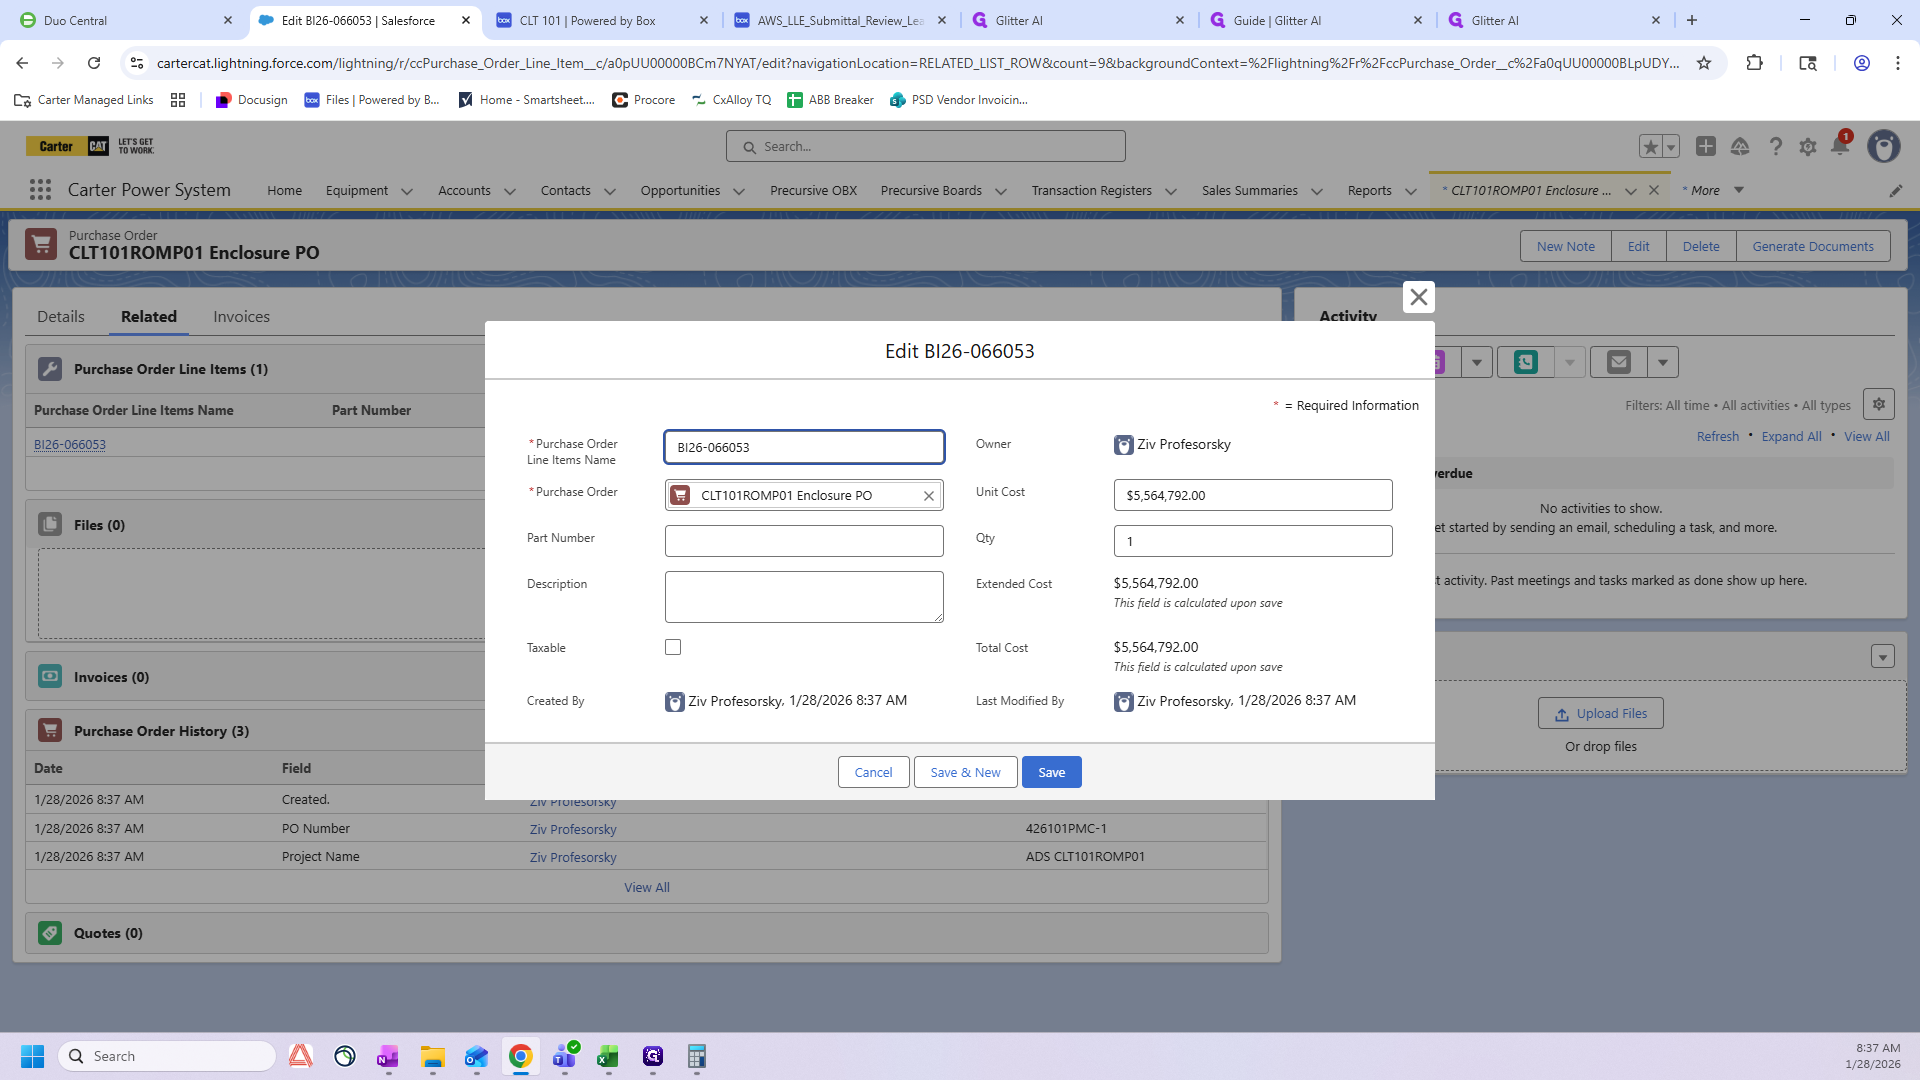
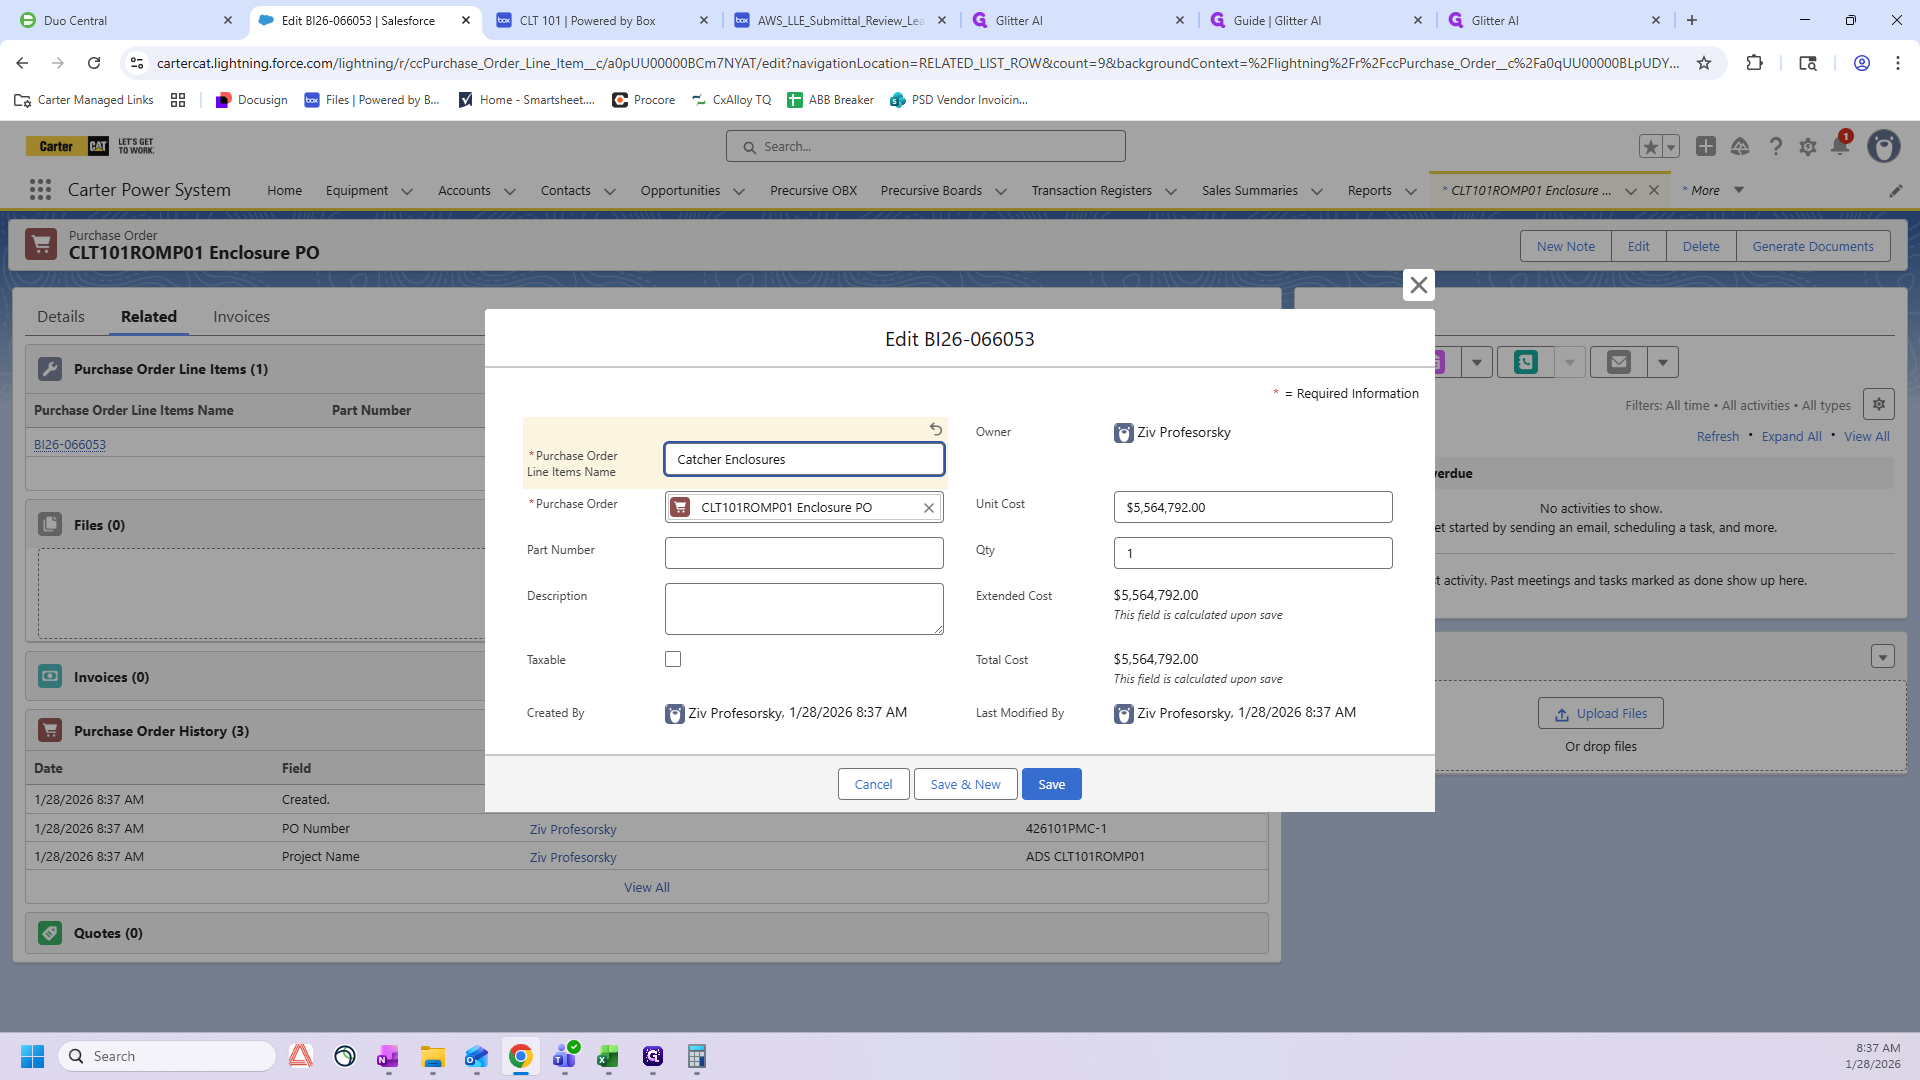
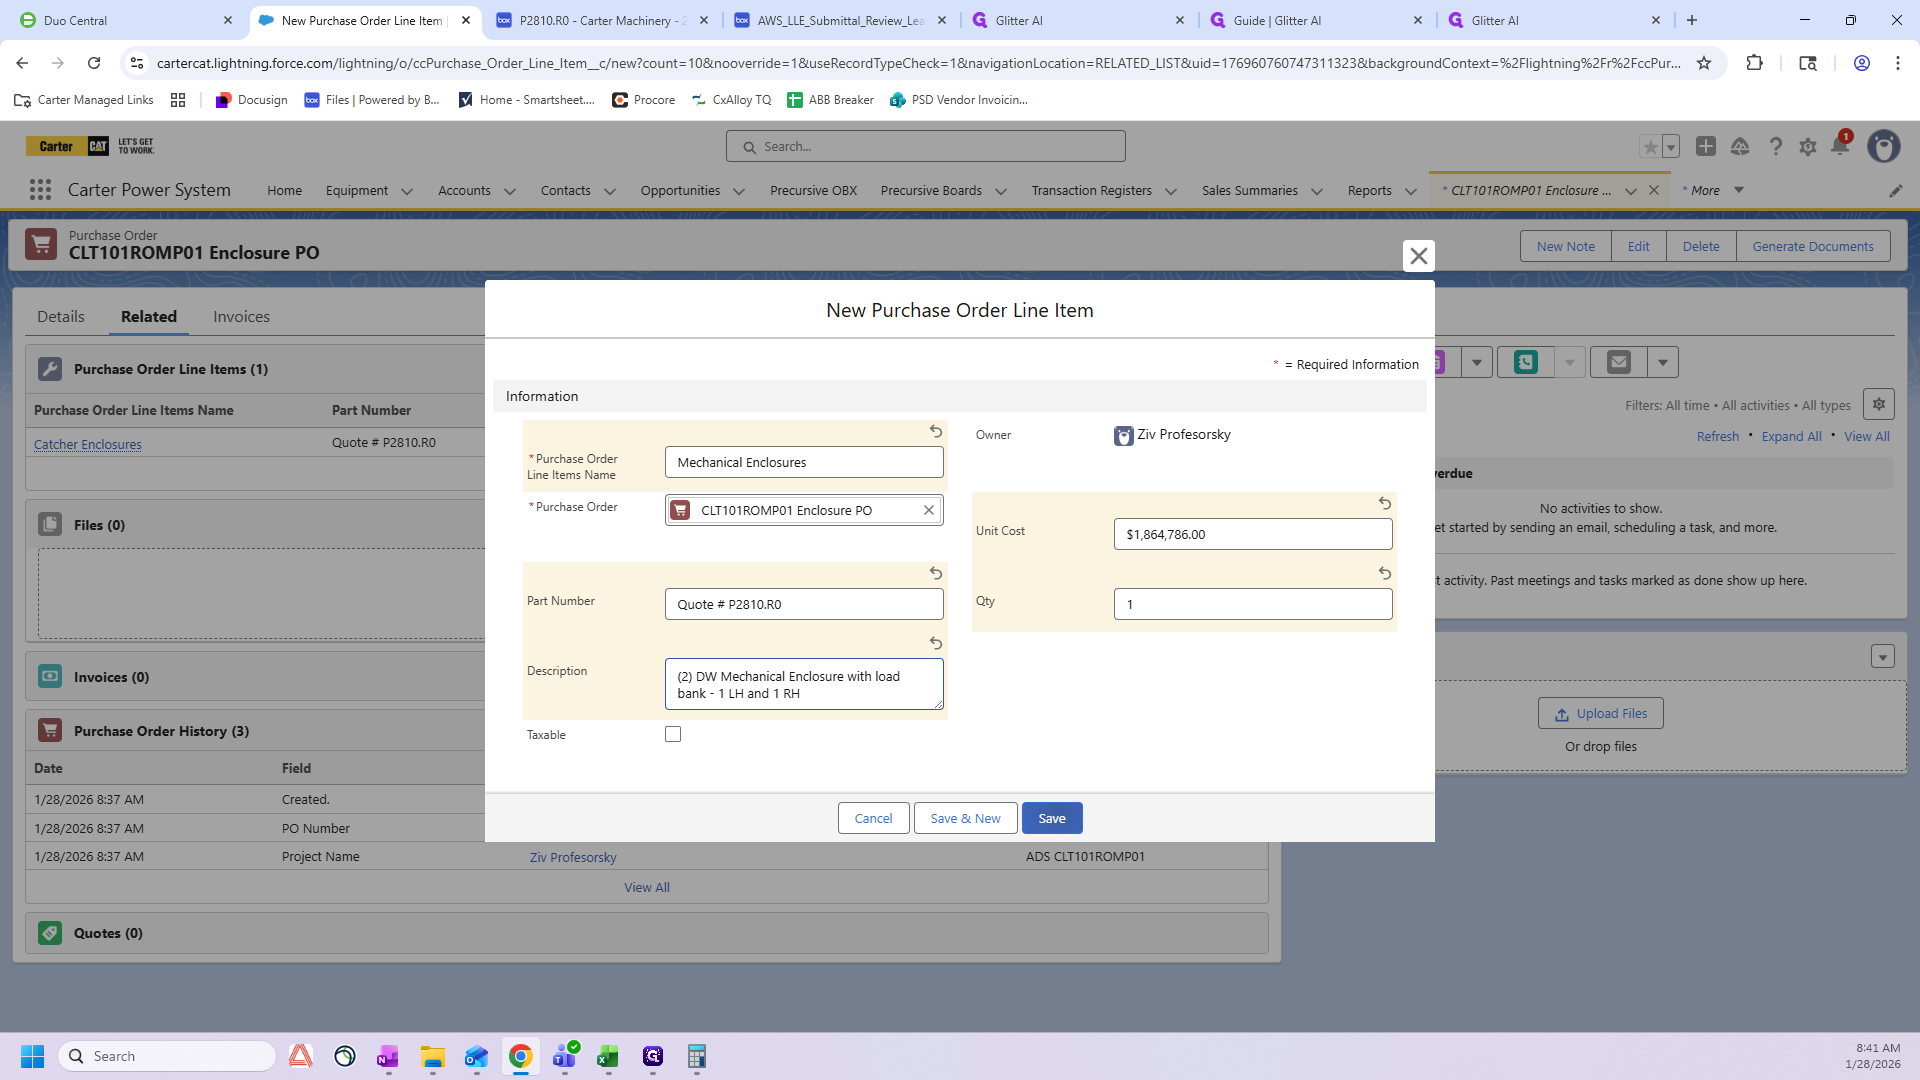
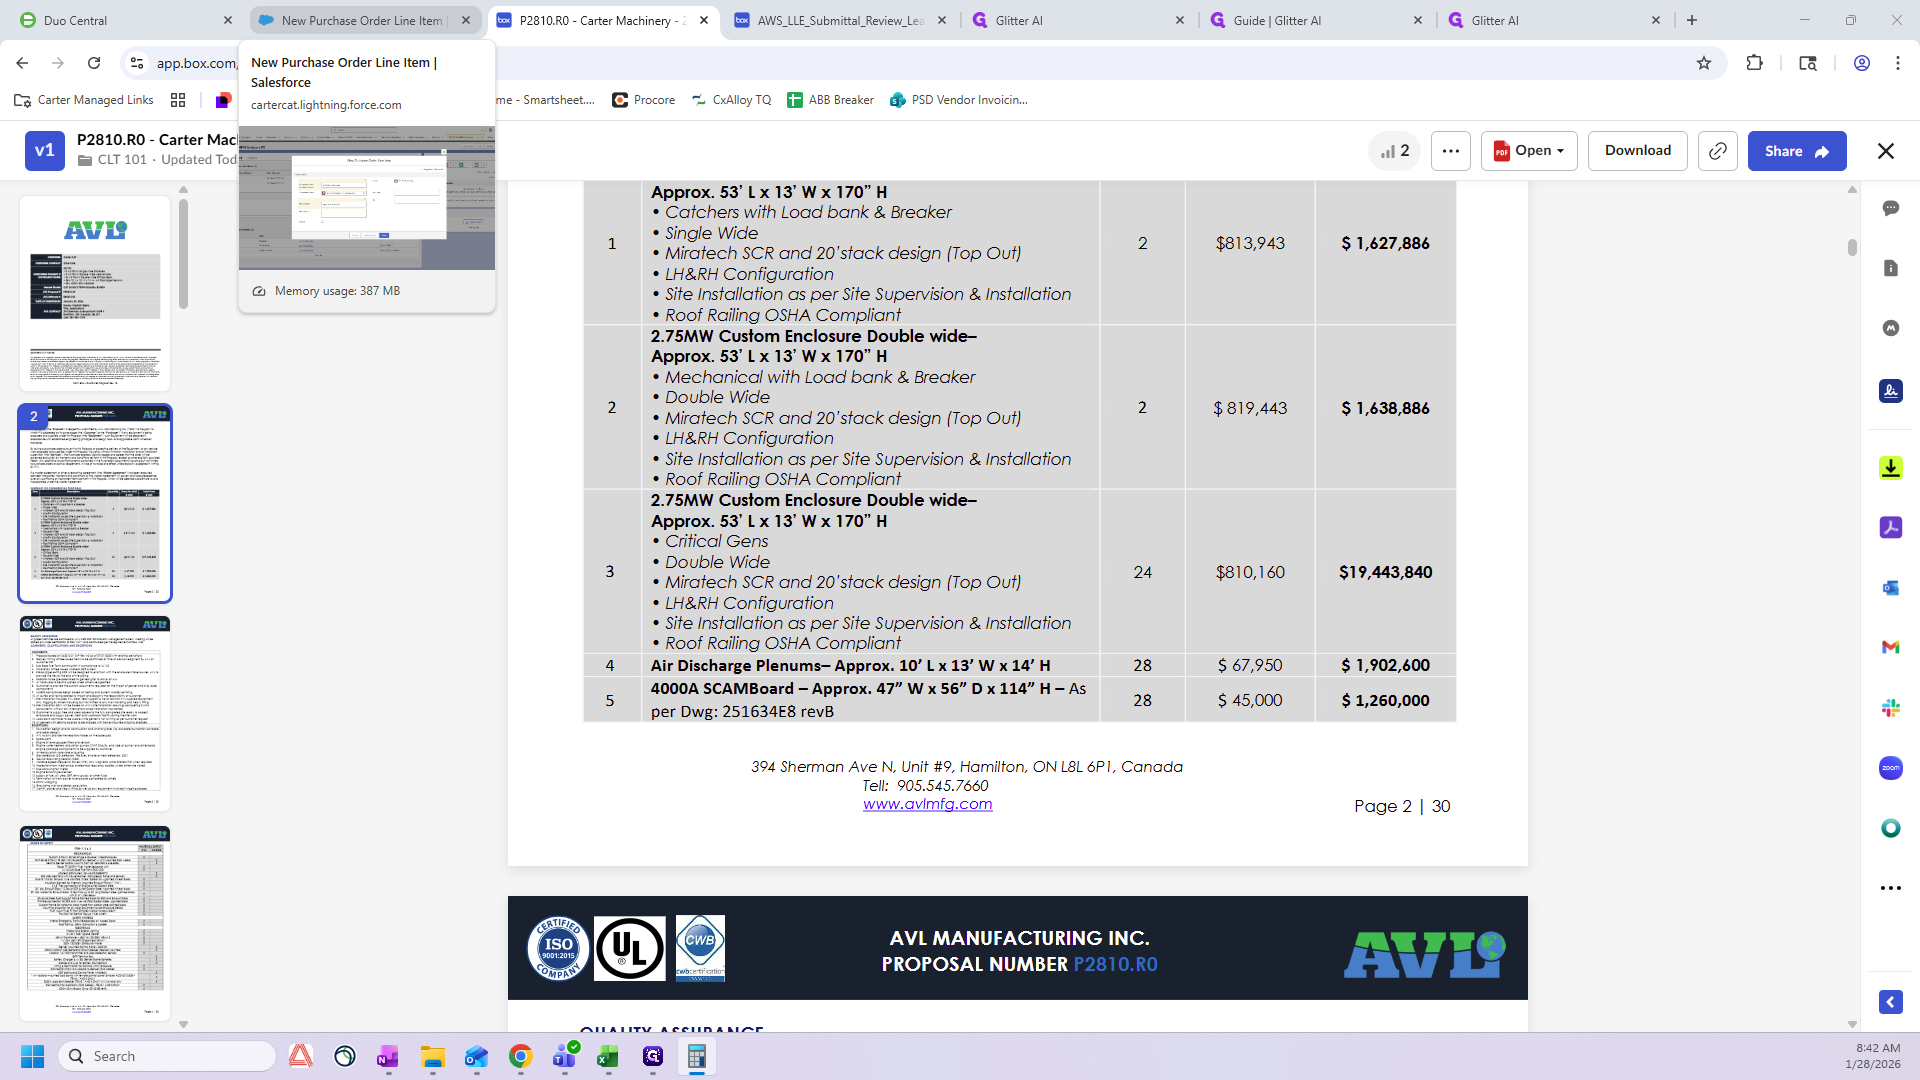
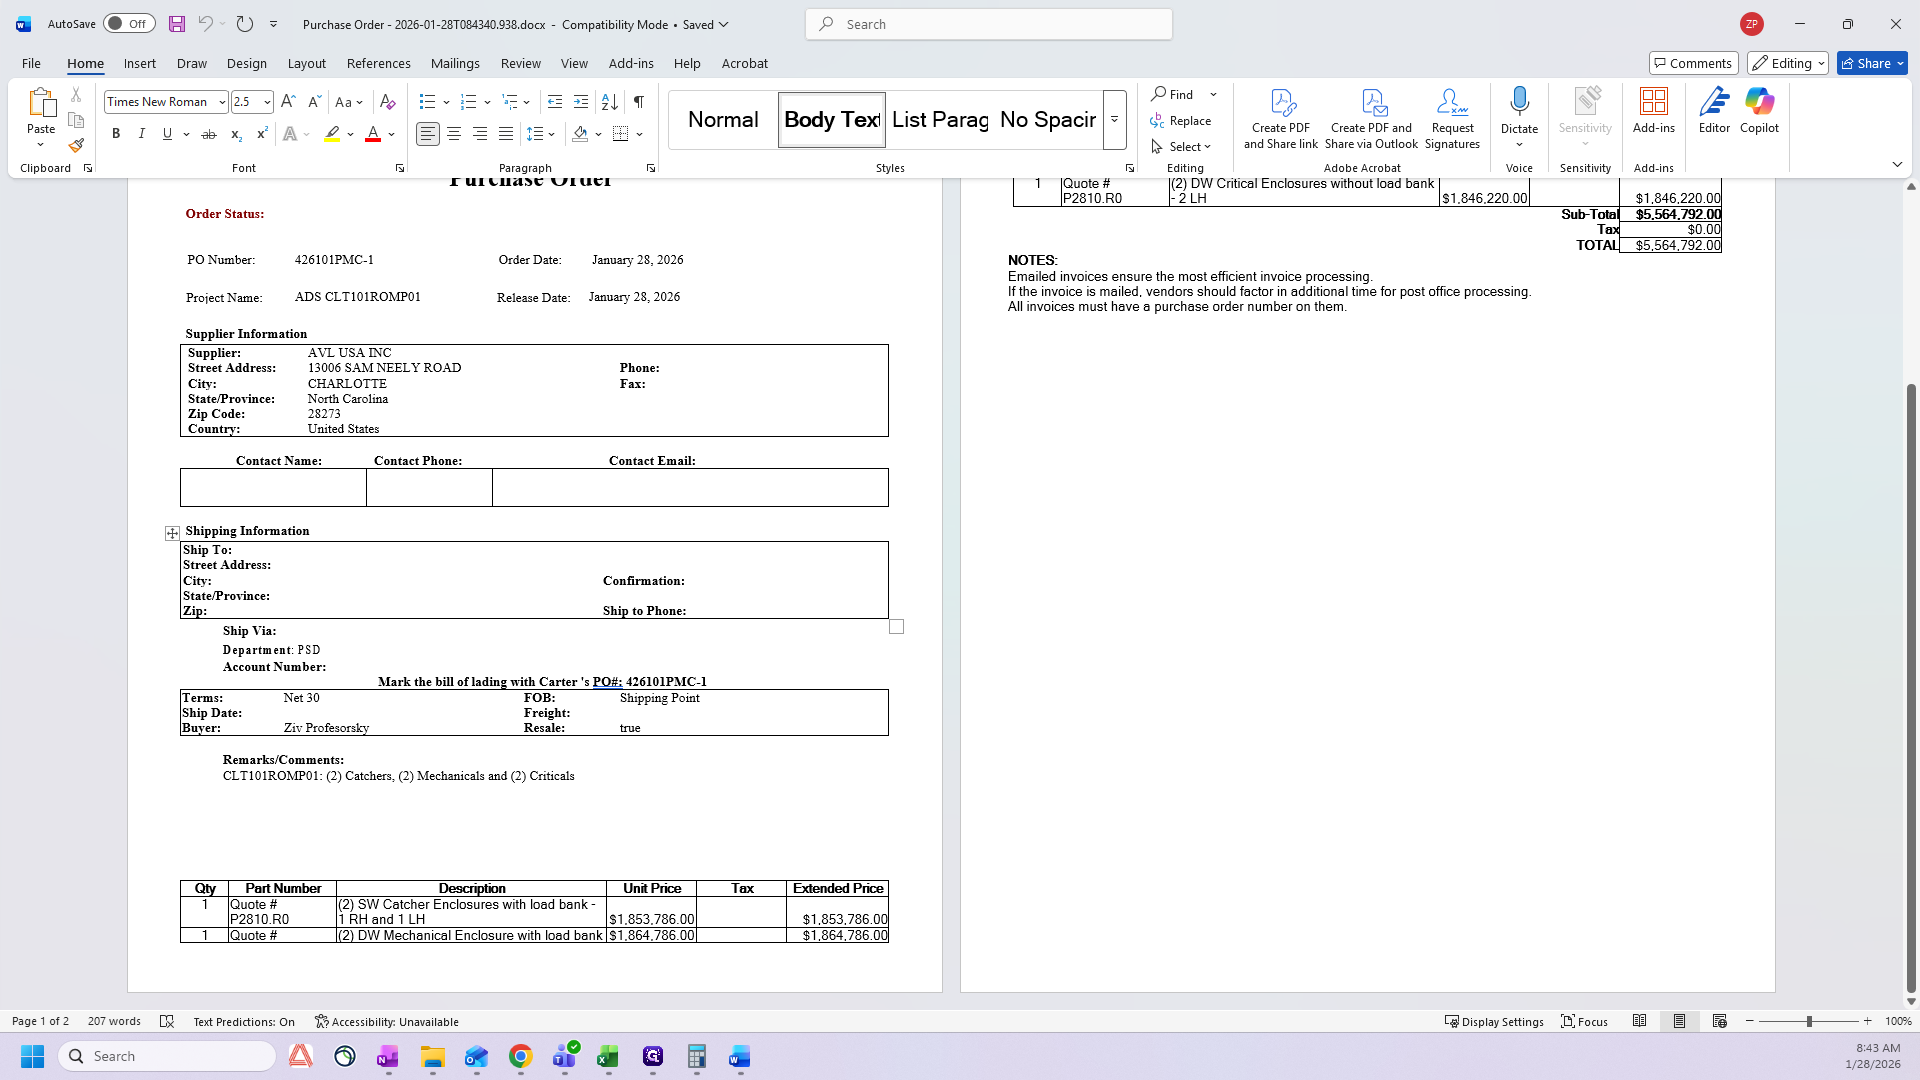
For now, we will focus on the catcher enclosures. We have a part number. The part number serves as your quote number.
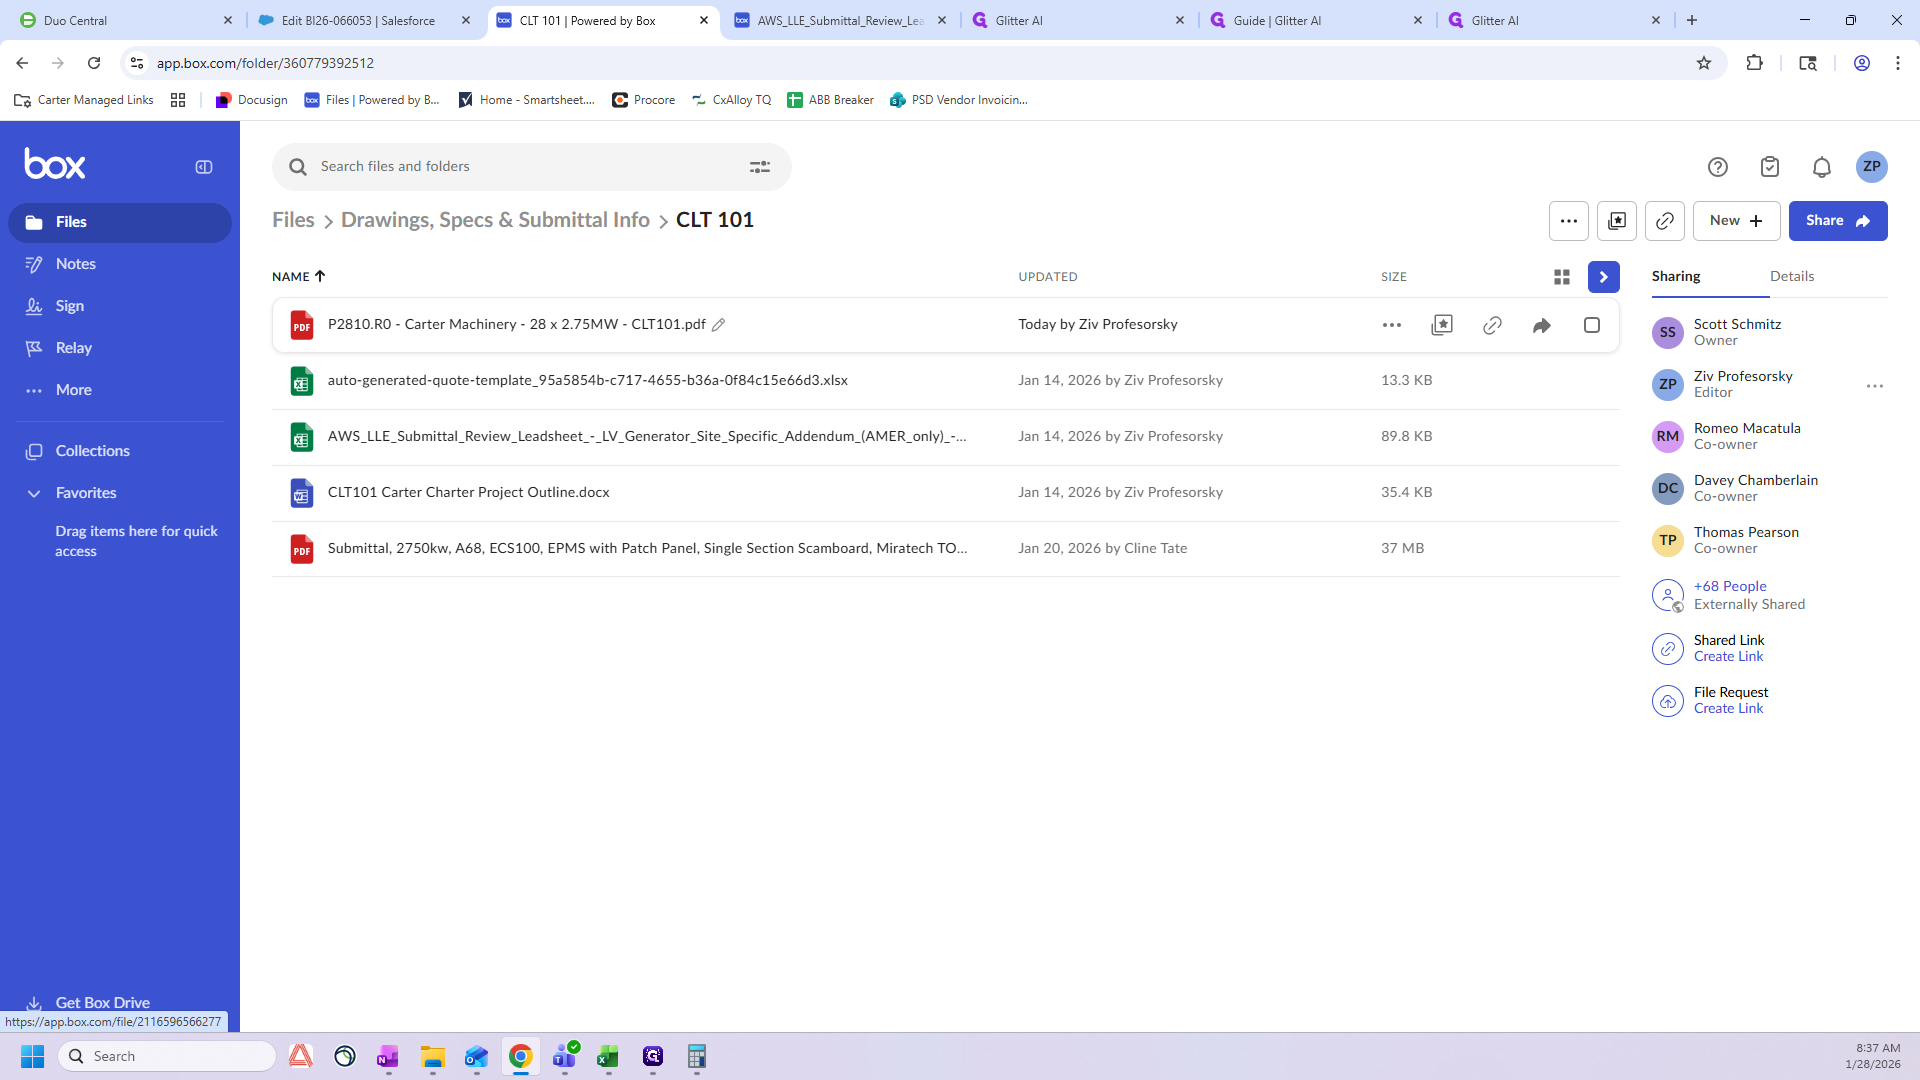
In this case, we'll go to Box.
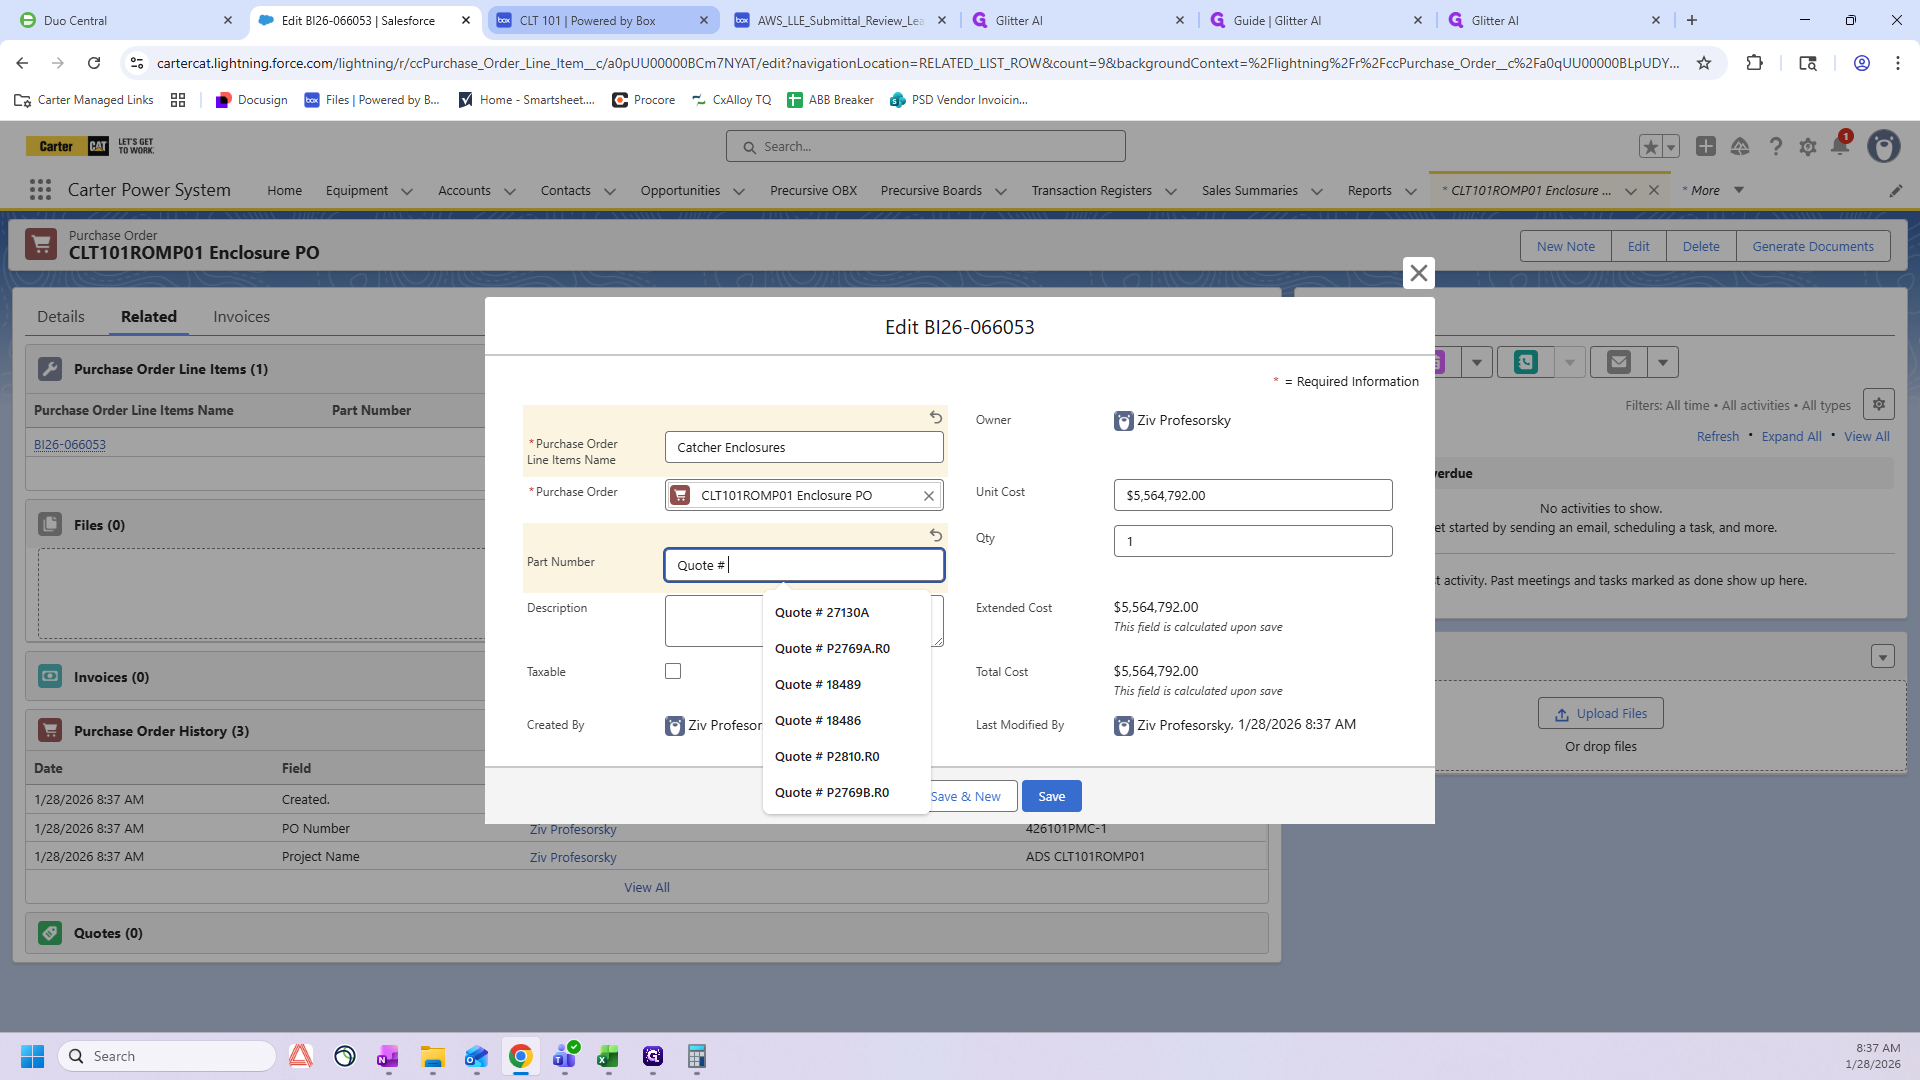
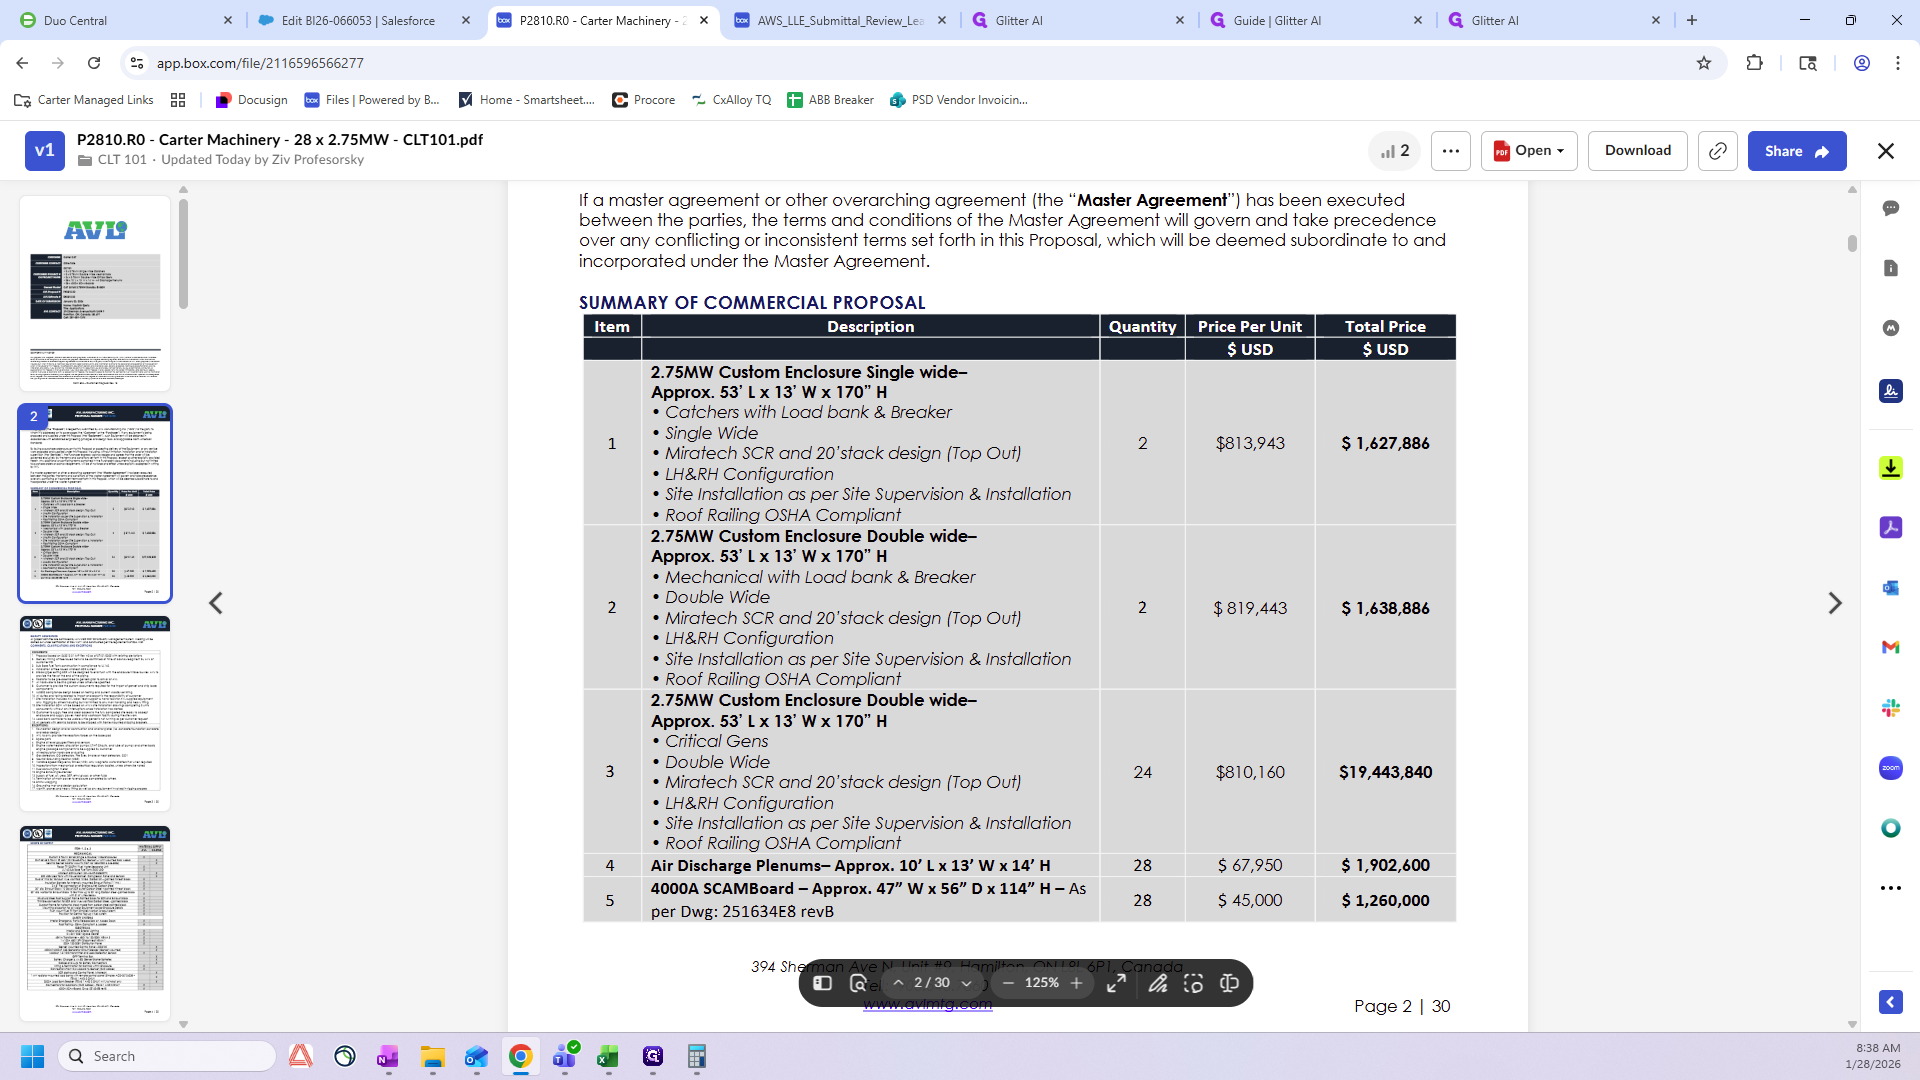
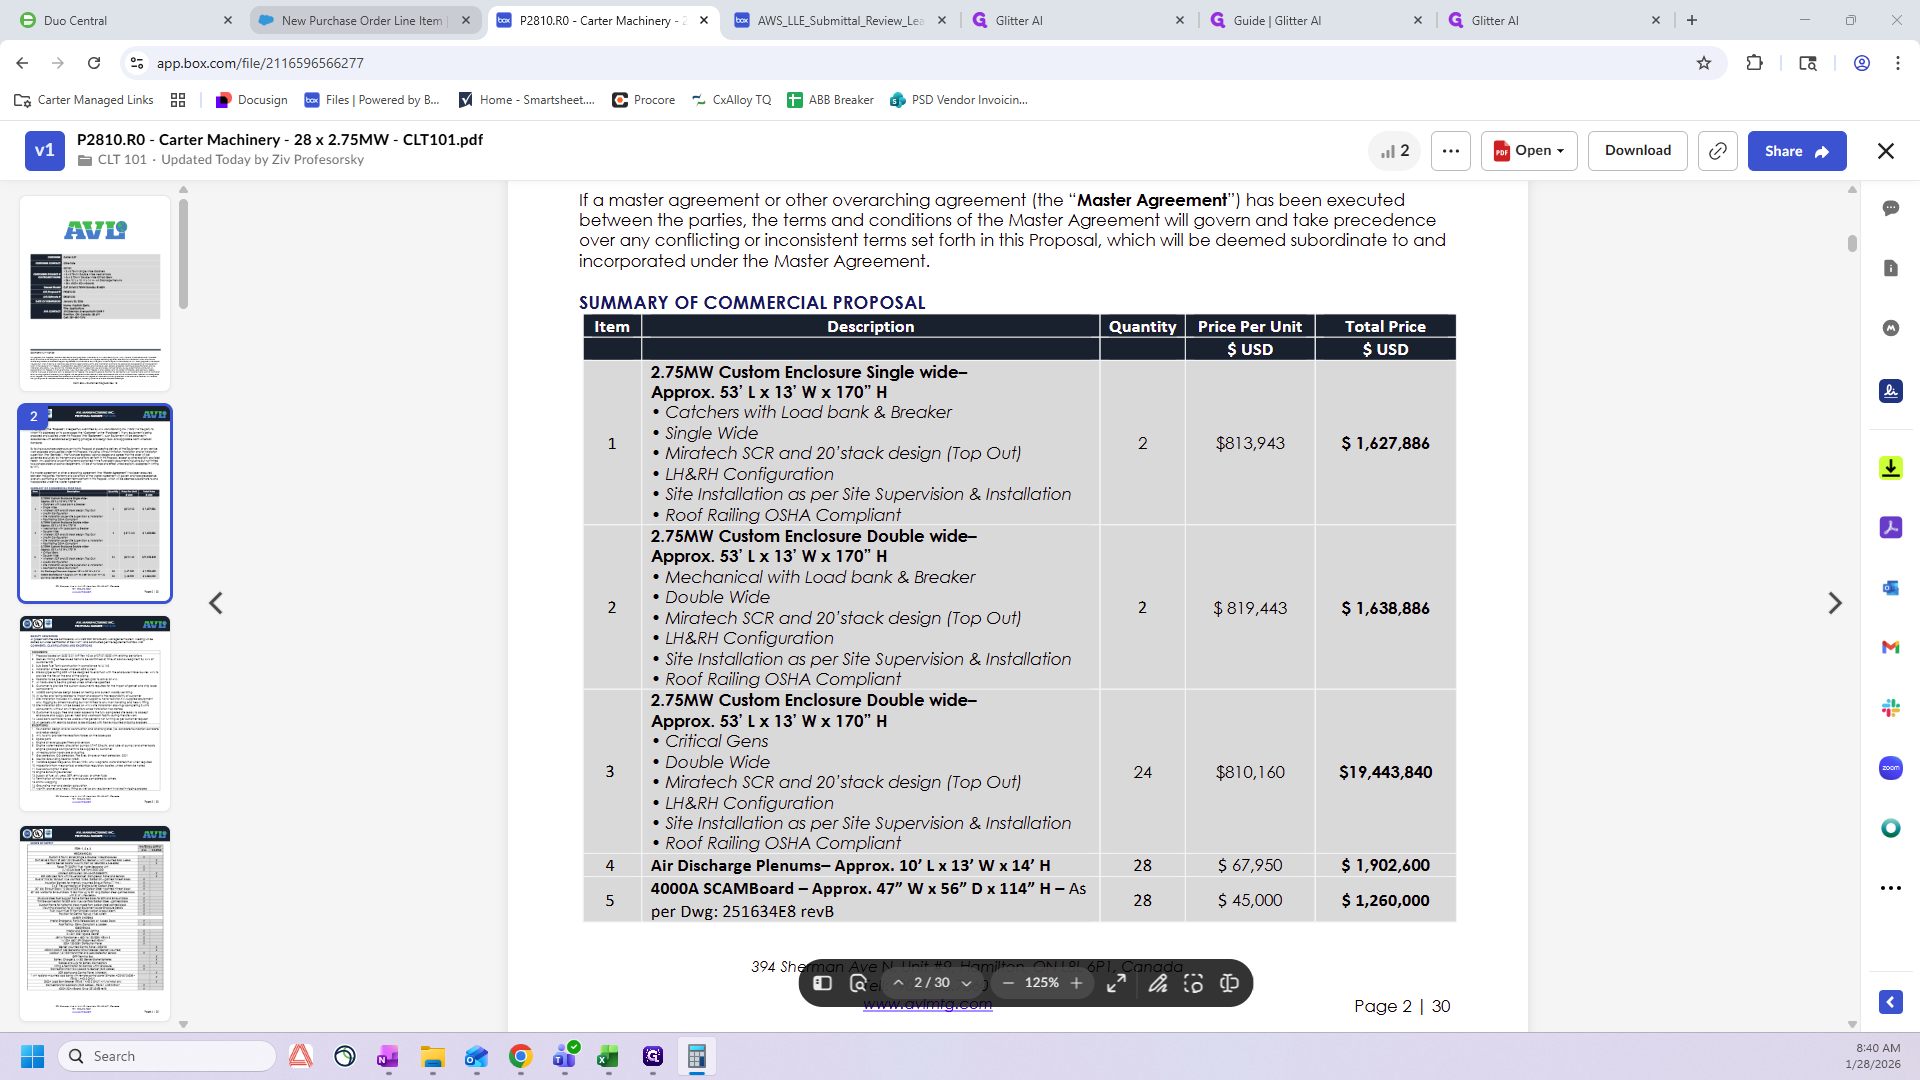
We'll find our quote here. We'll open that up. It looks like the quote number is P2810.R0.

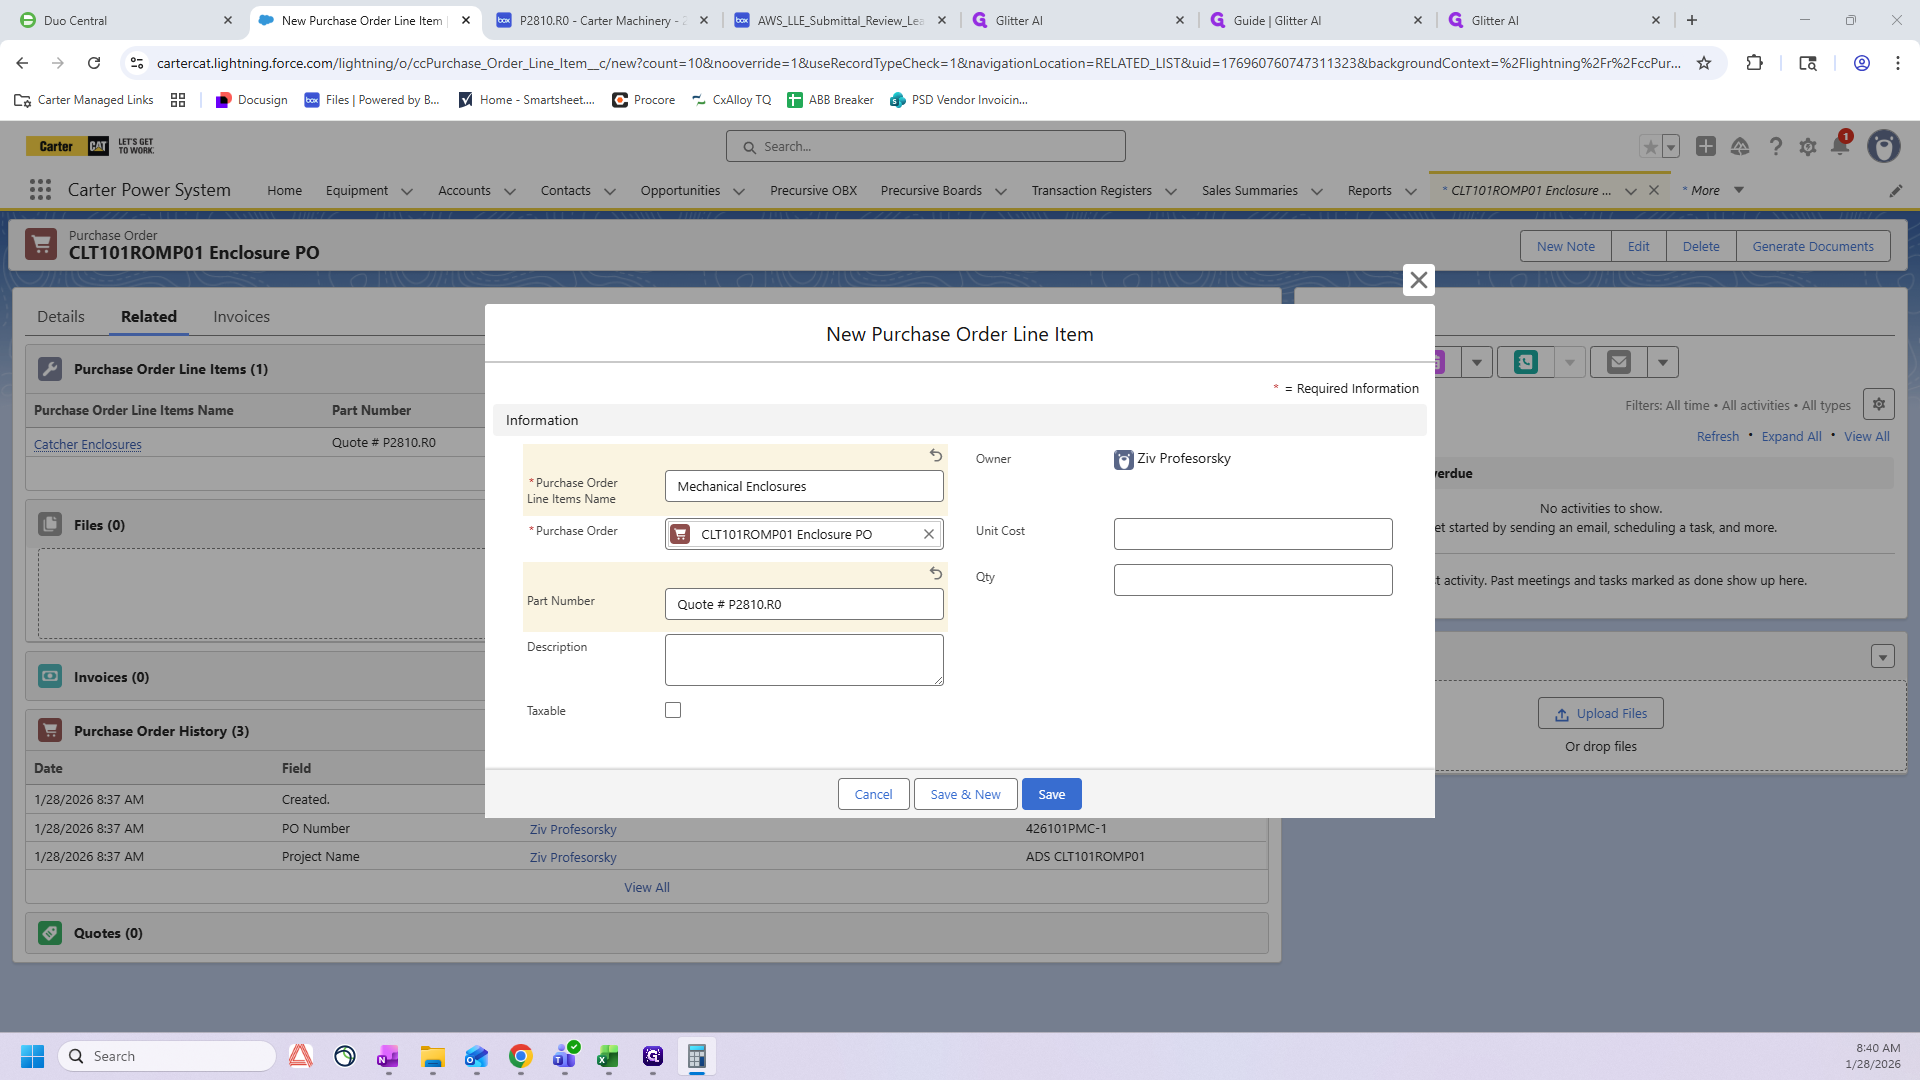
Input Quote # P2810.R0. Now we need the cost.
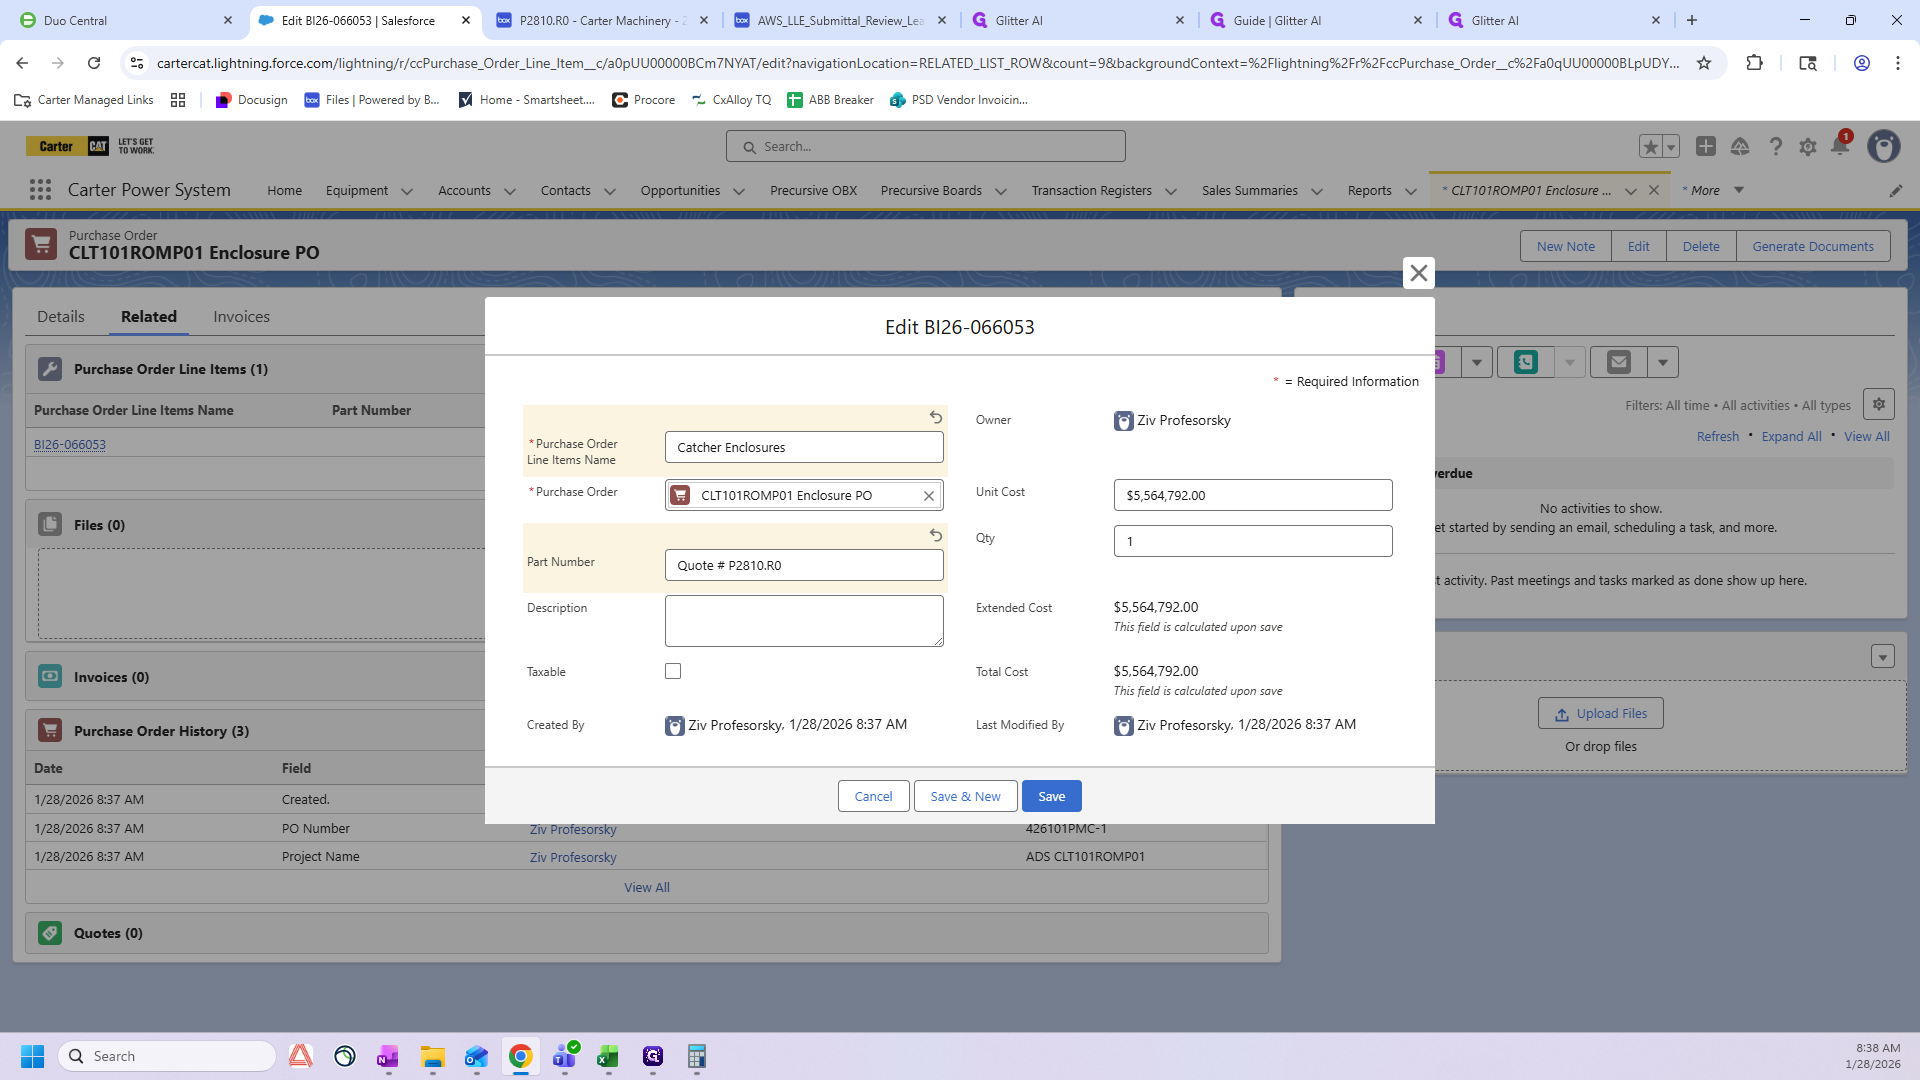
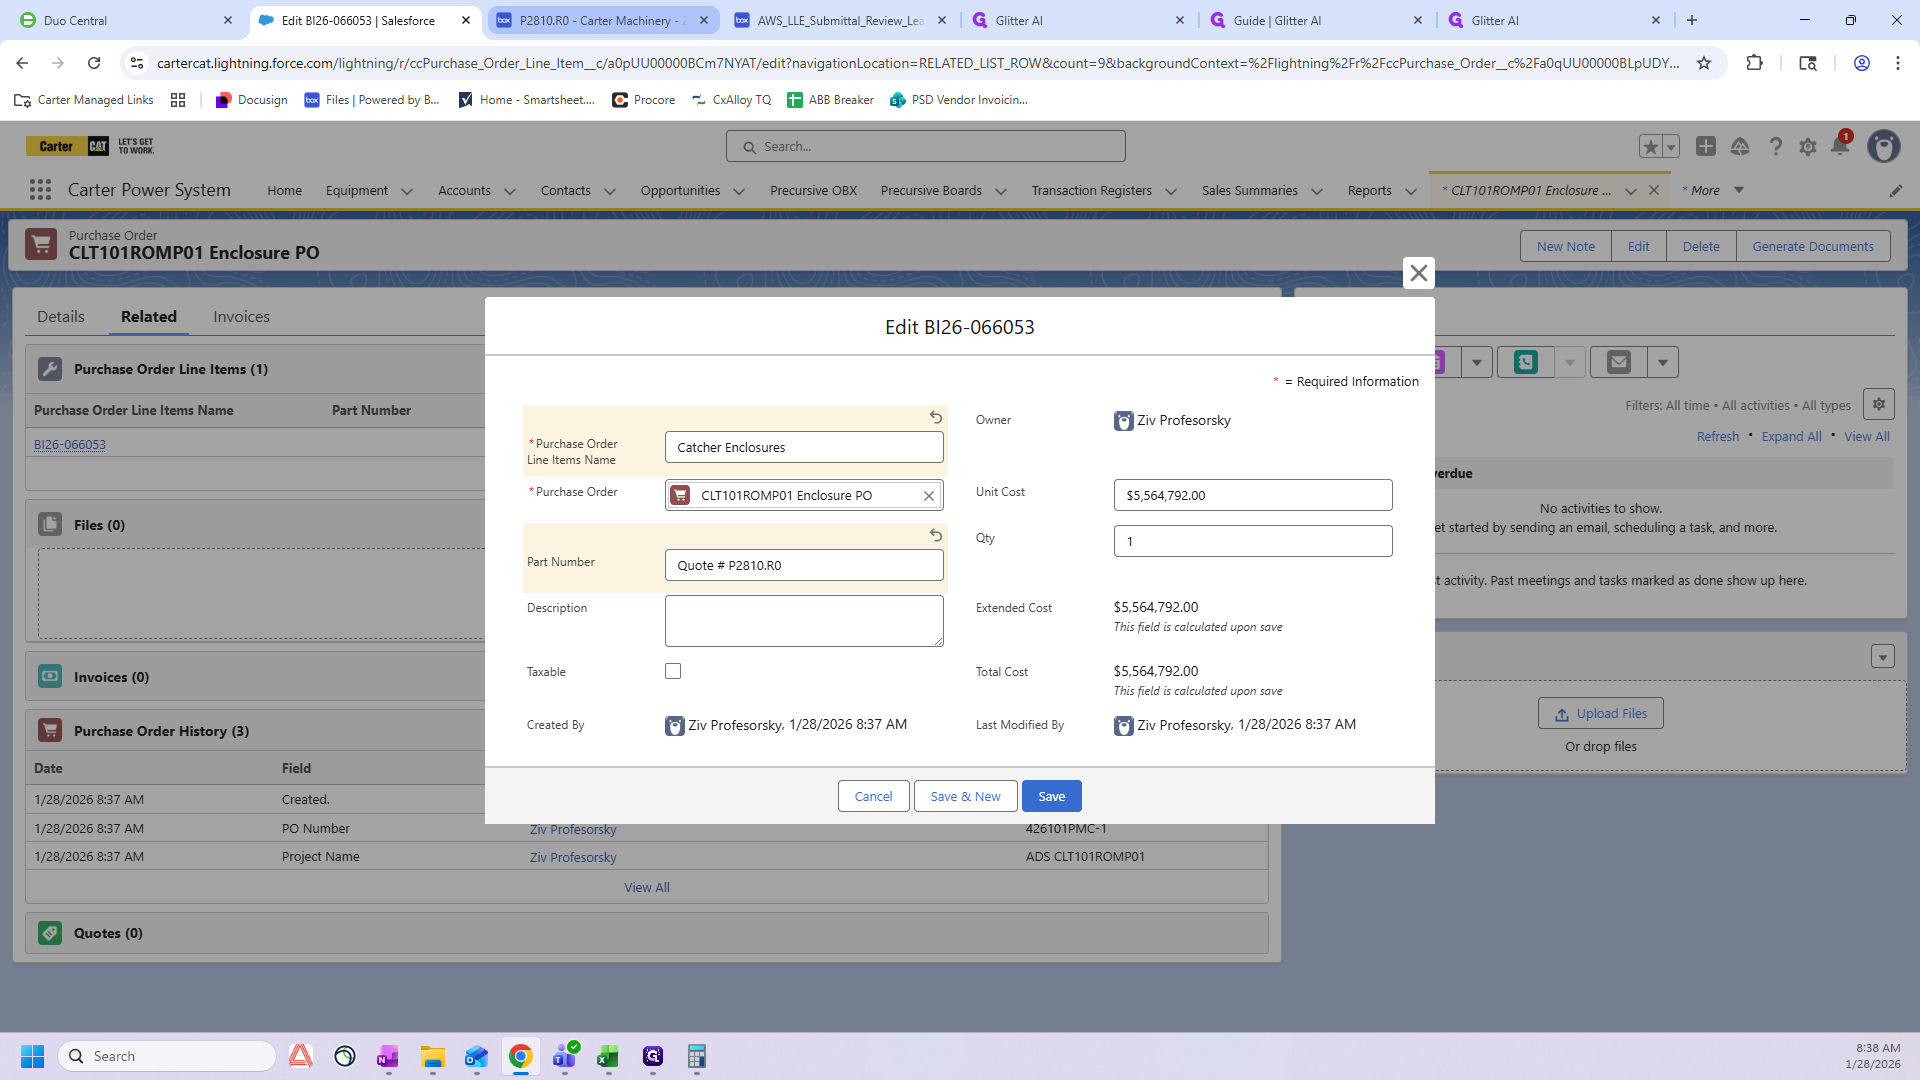
These are the catchers. Here, you can see "Catchers with Load Bank and Breaker."
We need our calculator because there is some math we need to do
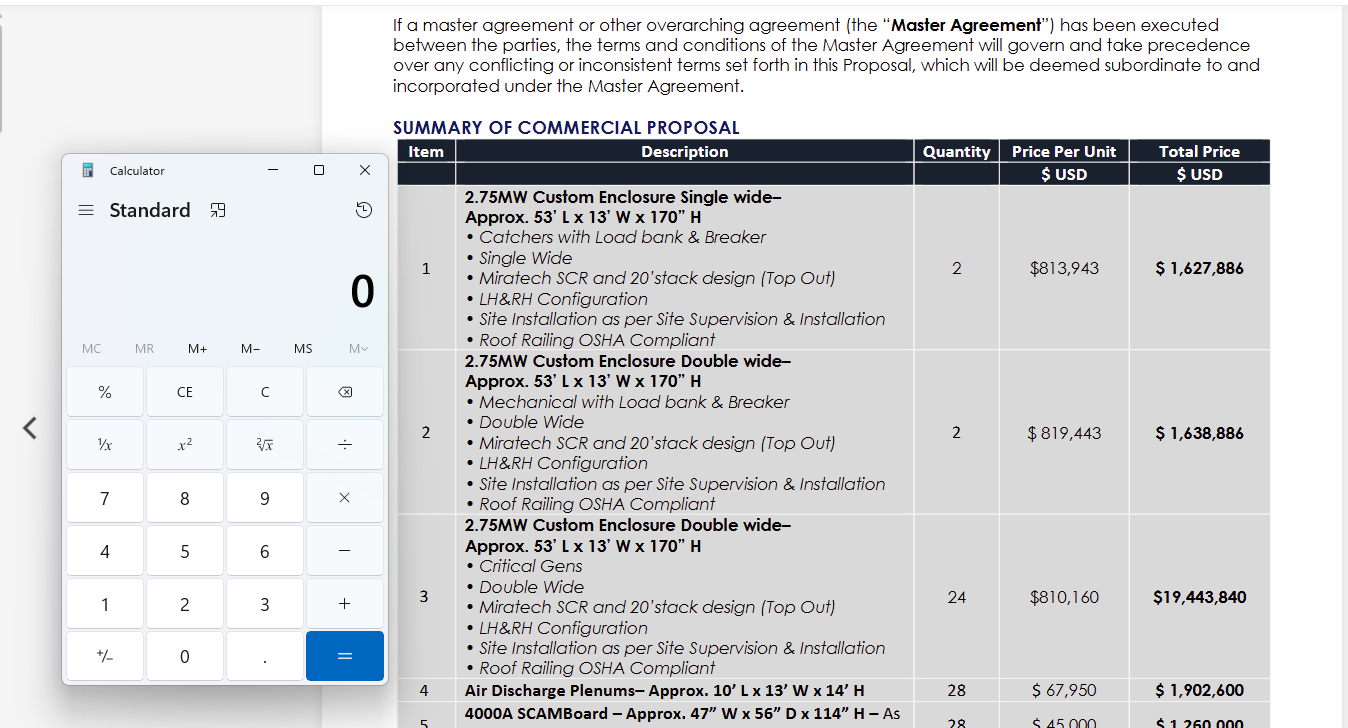
I will type in 1,627,886, since that's the one we need. Here you can see the plenums and the scamboard.
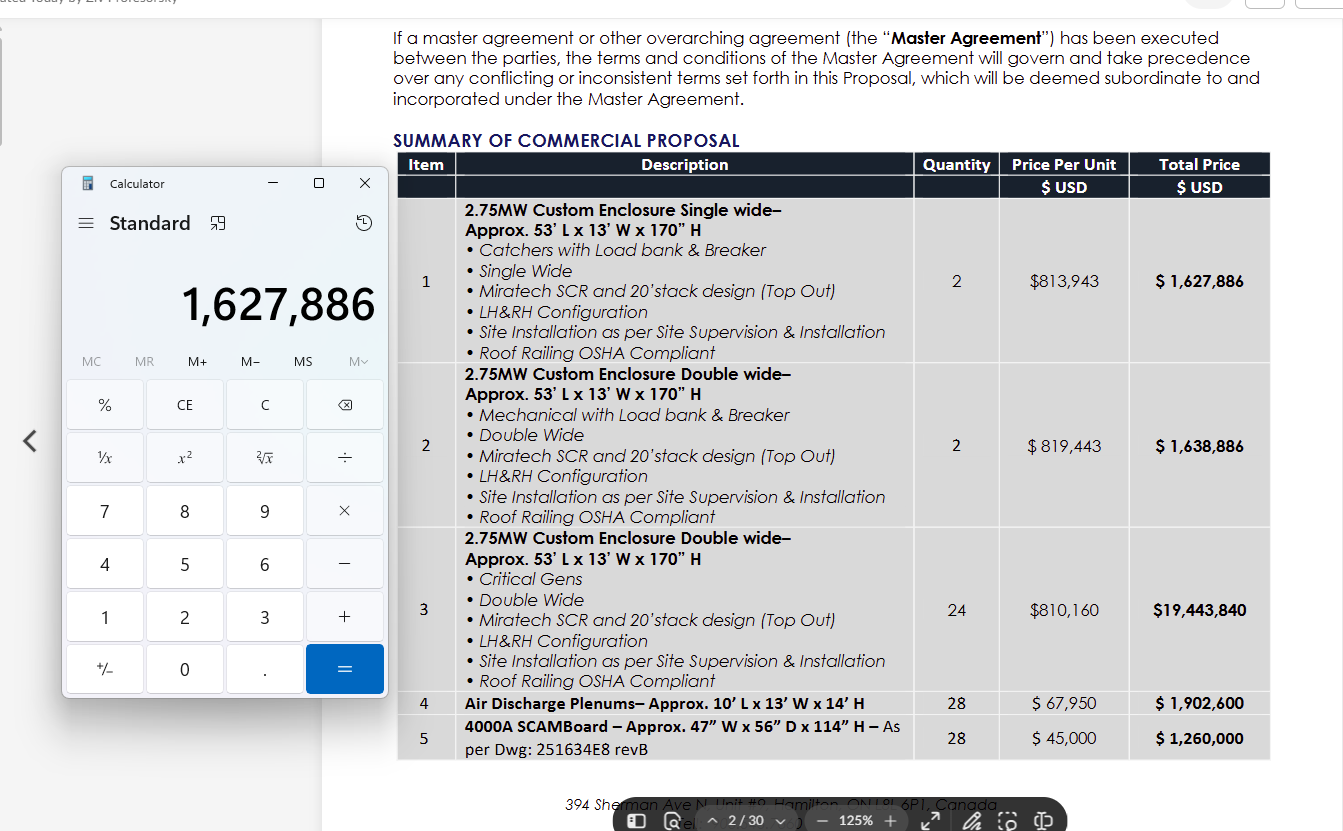
I need to add 90,000, which is for two 45,000 scamboards. Then, I add 67,950 twice. This gives me the total for just the catchers.
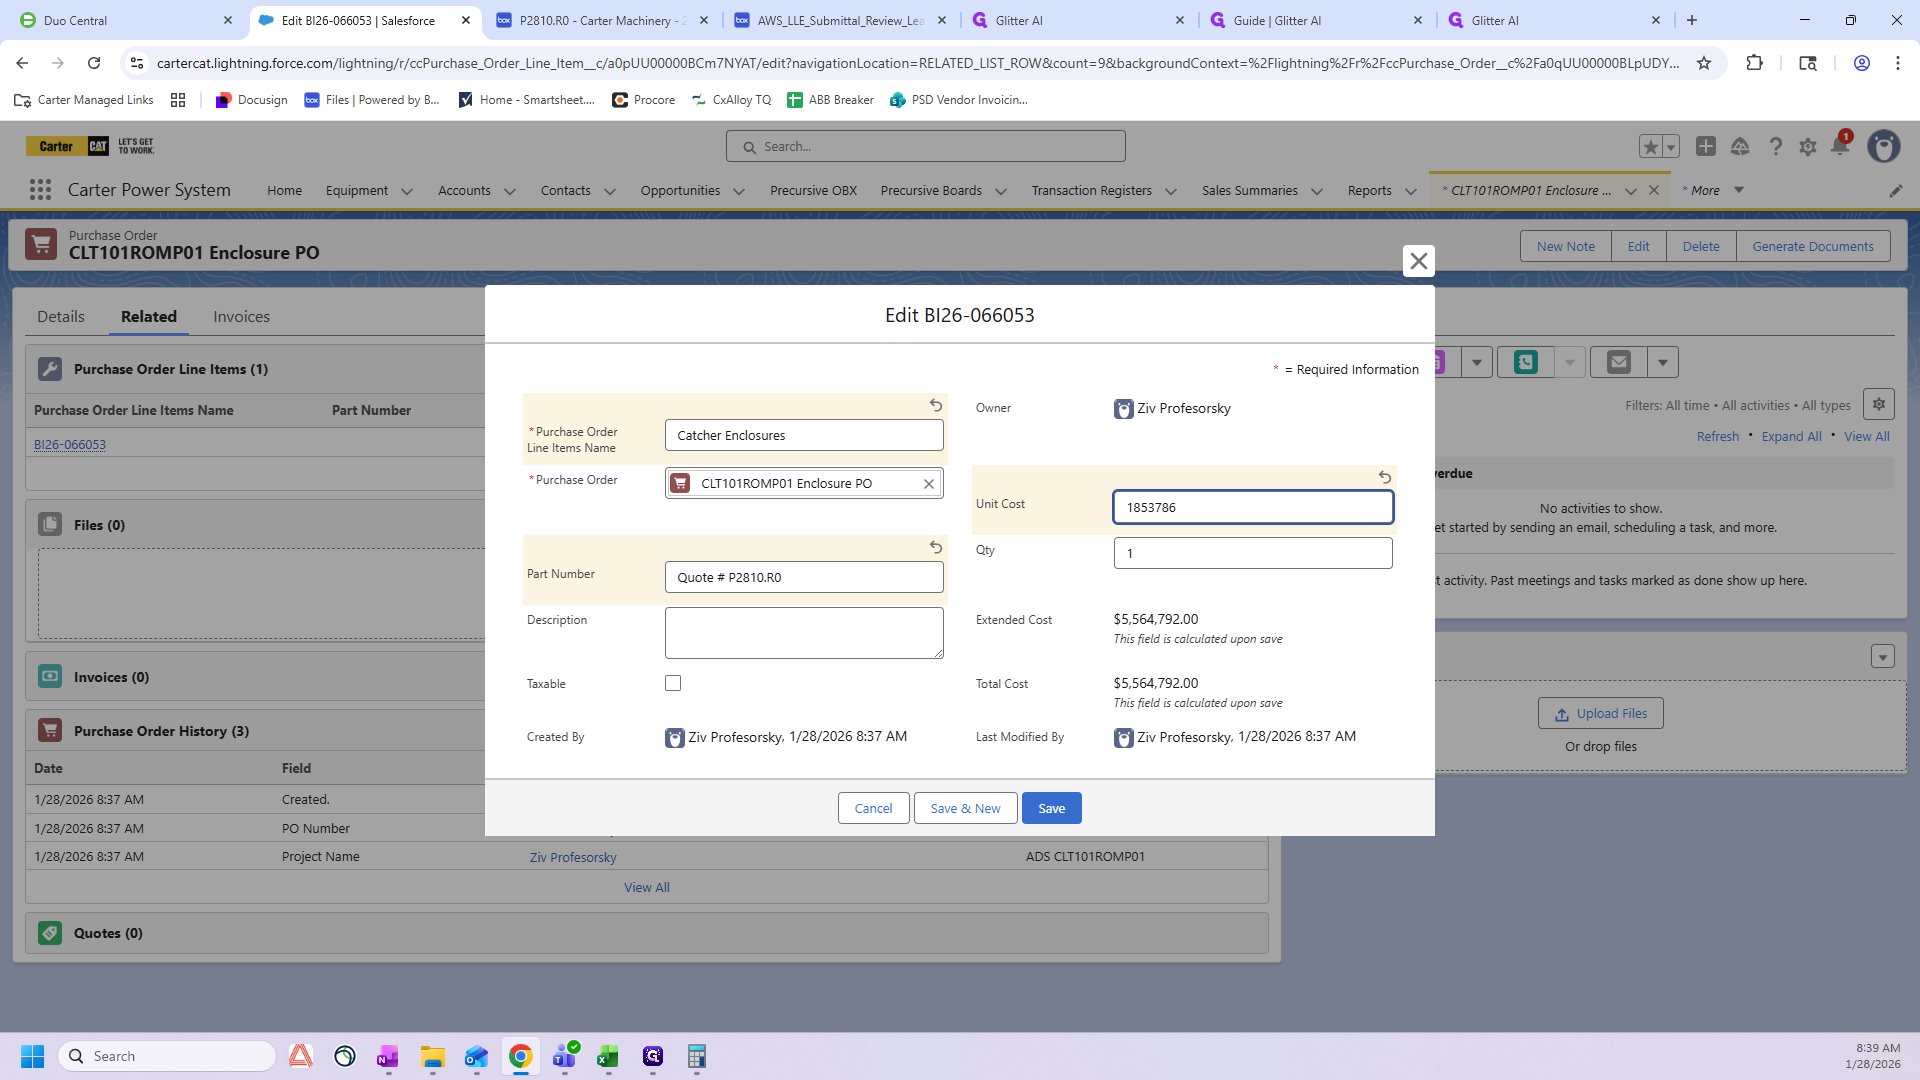
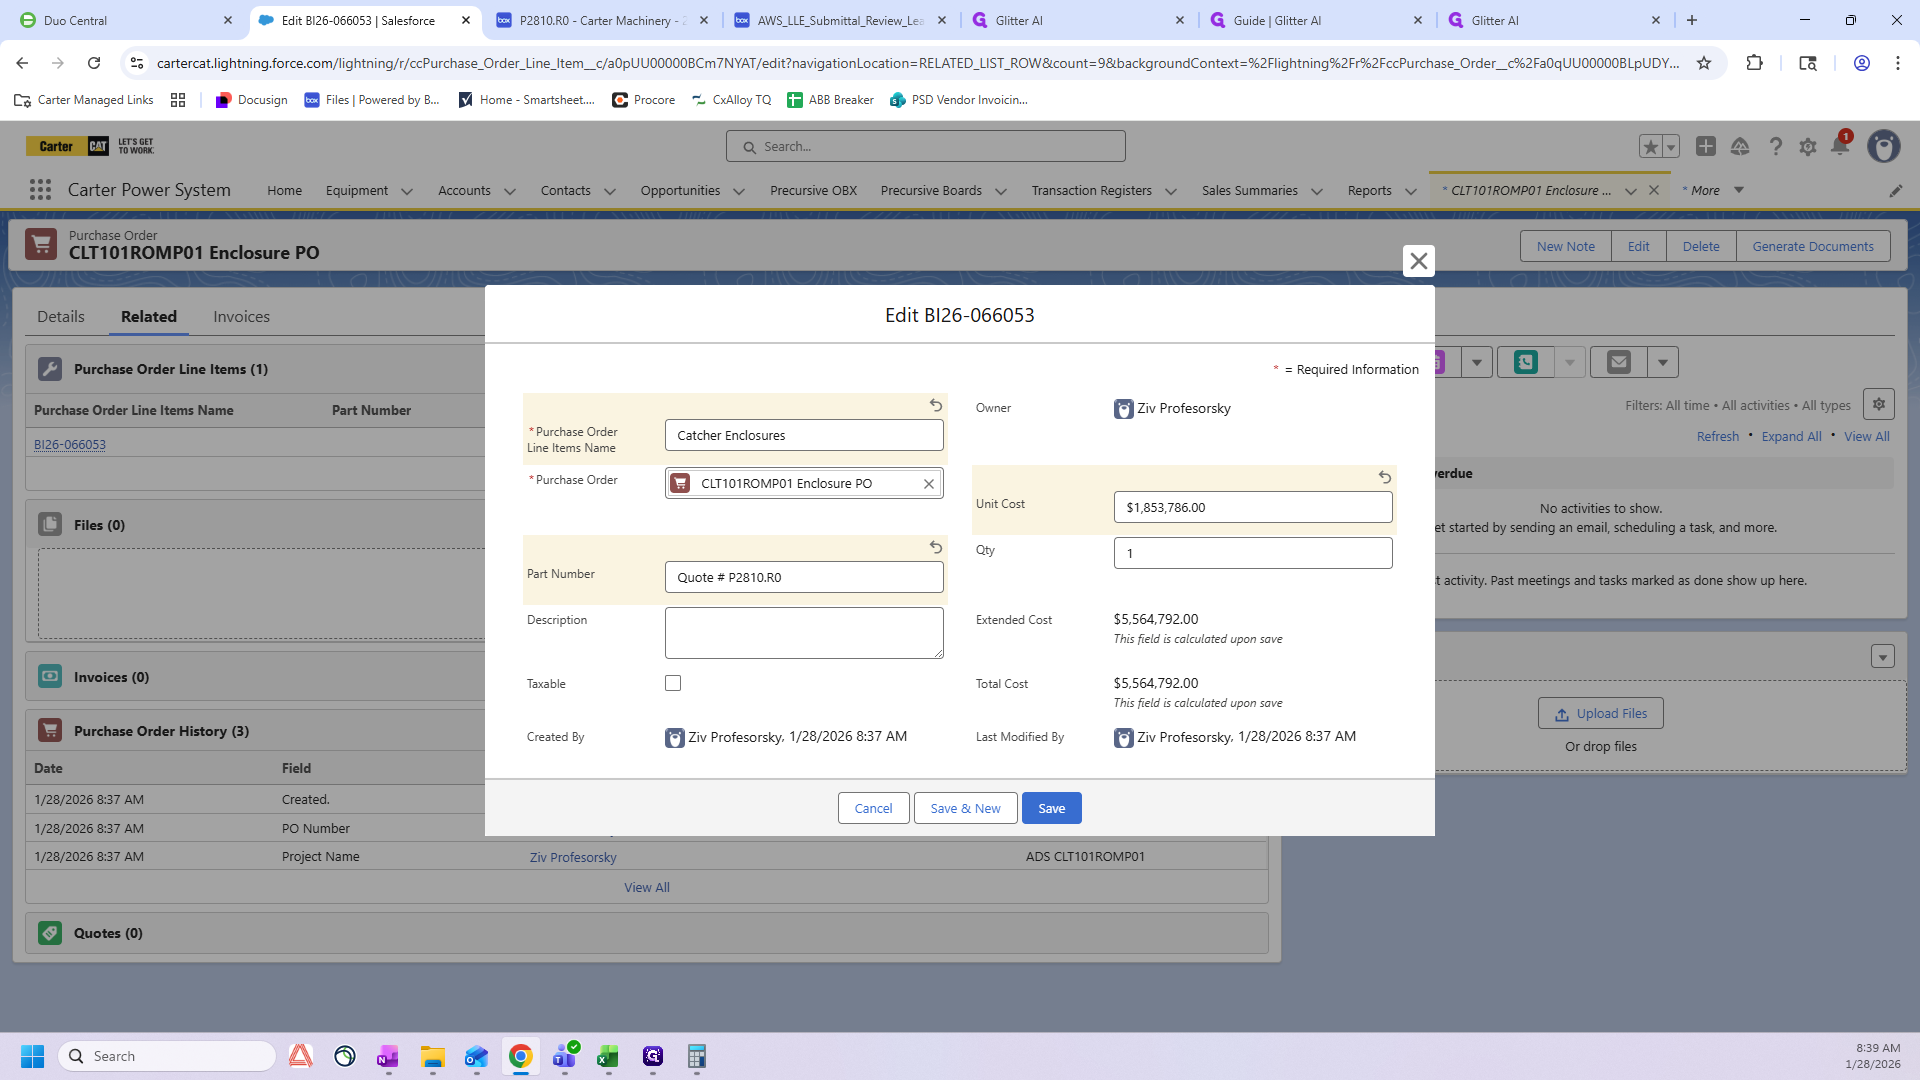
I'm going to enter 1,853,786 here.

1,853,786.
That's just one quantity because we added it all up together.
My description is: "Two catcher single-wide enclosures." I want to add that they have a load bank and specify the handing—left-hand, right-hand, both left-hand, or both right-hand.
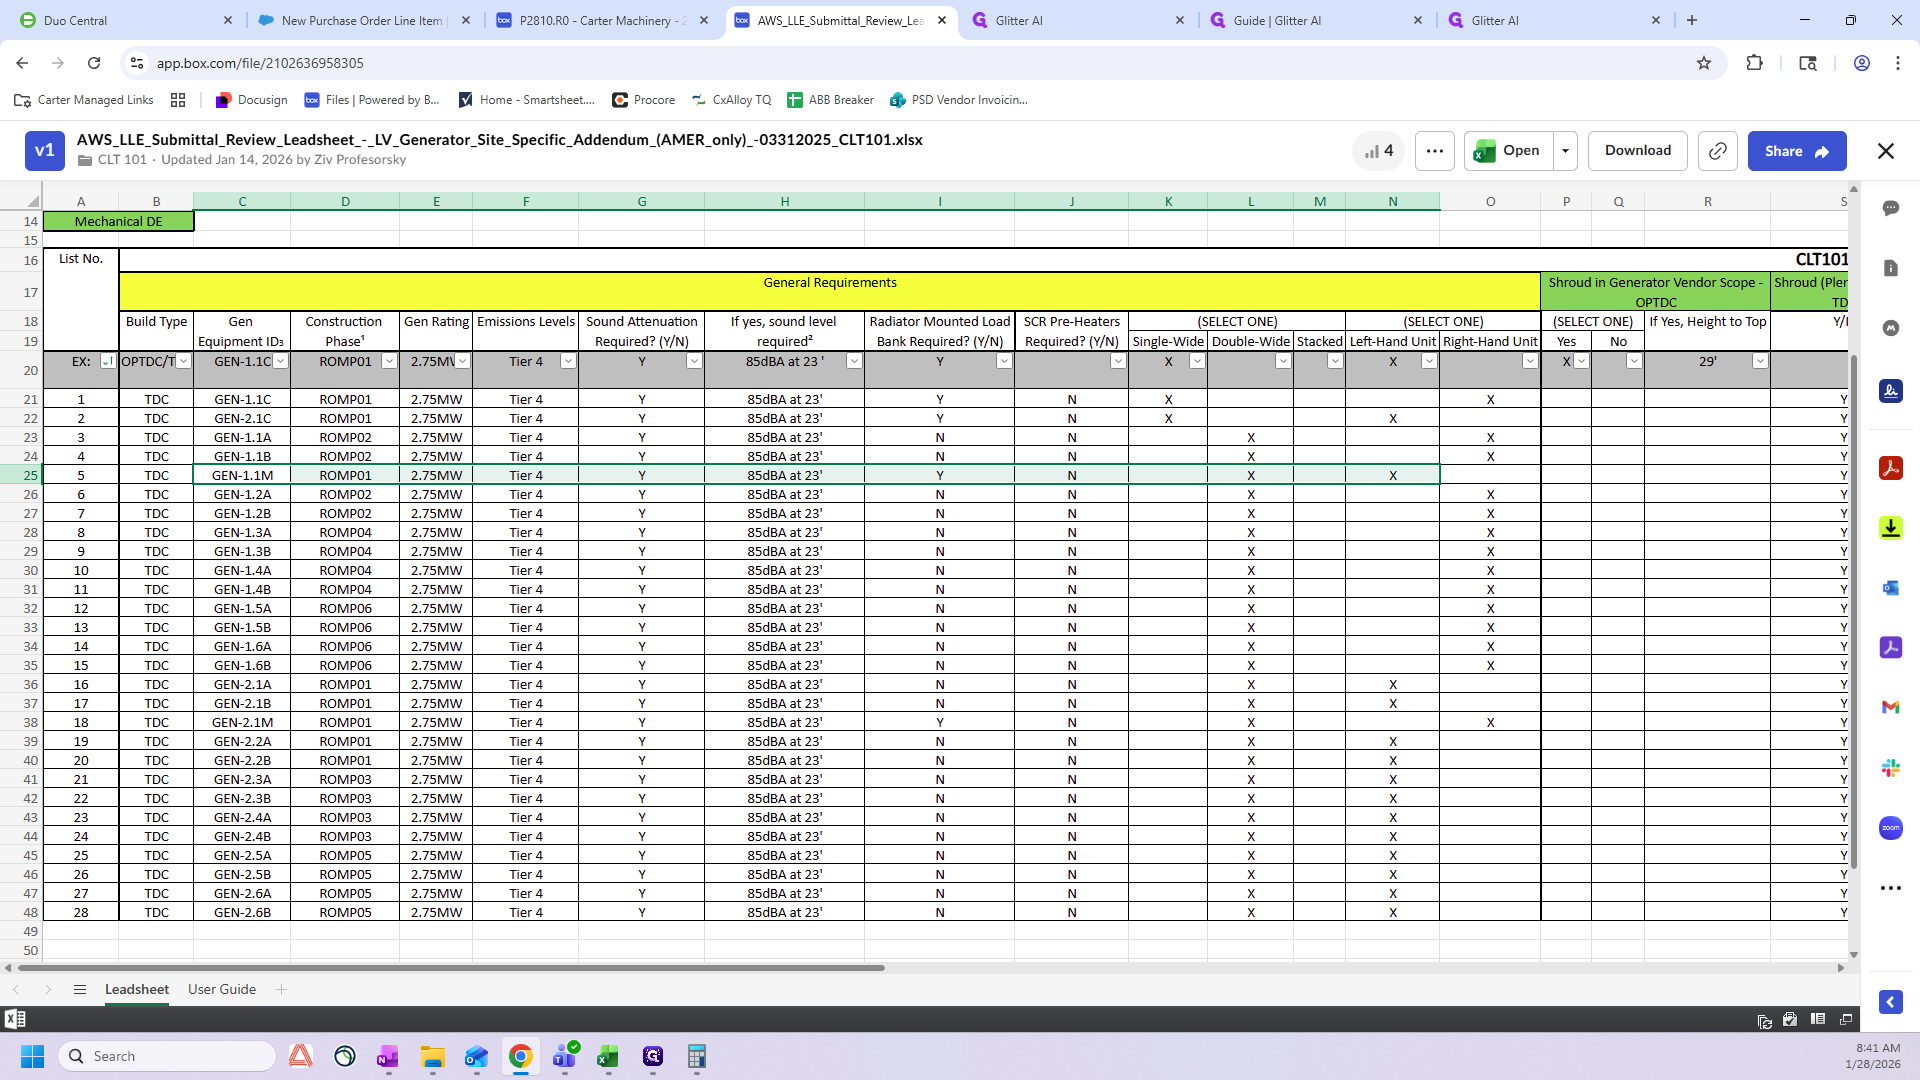
We will go to the lead sheet.

If you're in Box, select the AWS LLE Submittal Review Lead Sheet.
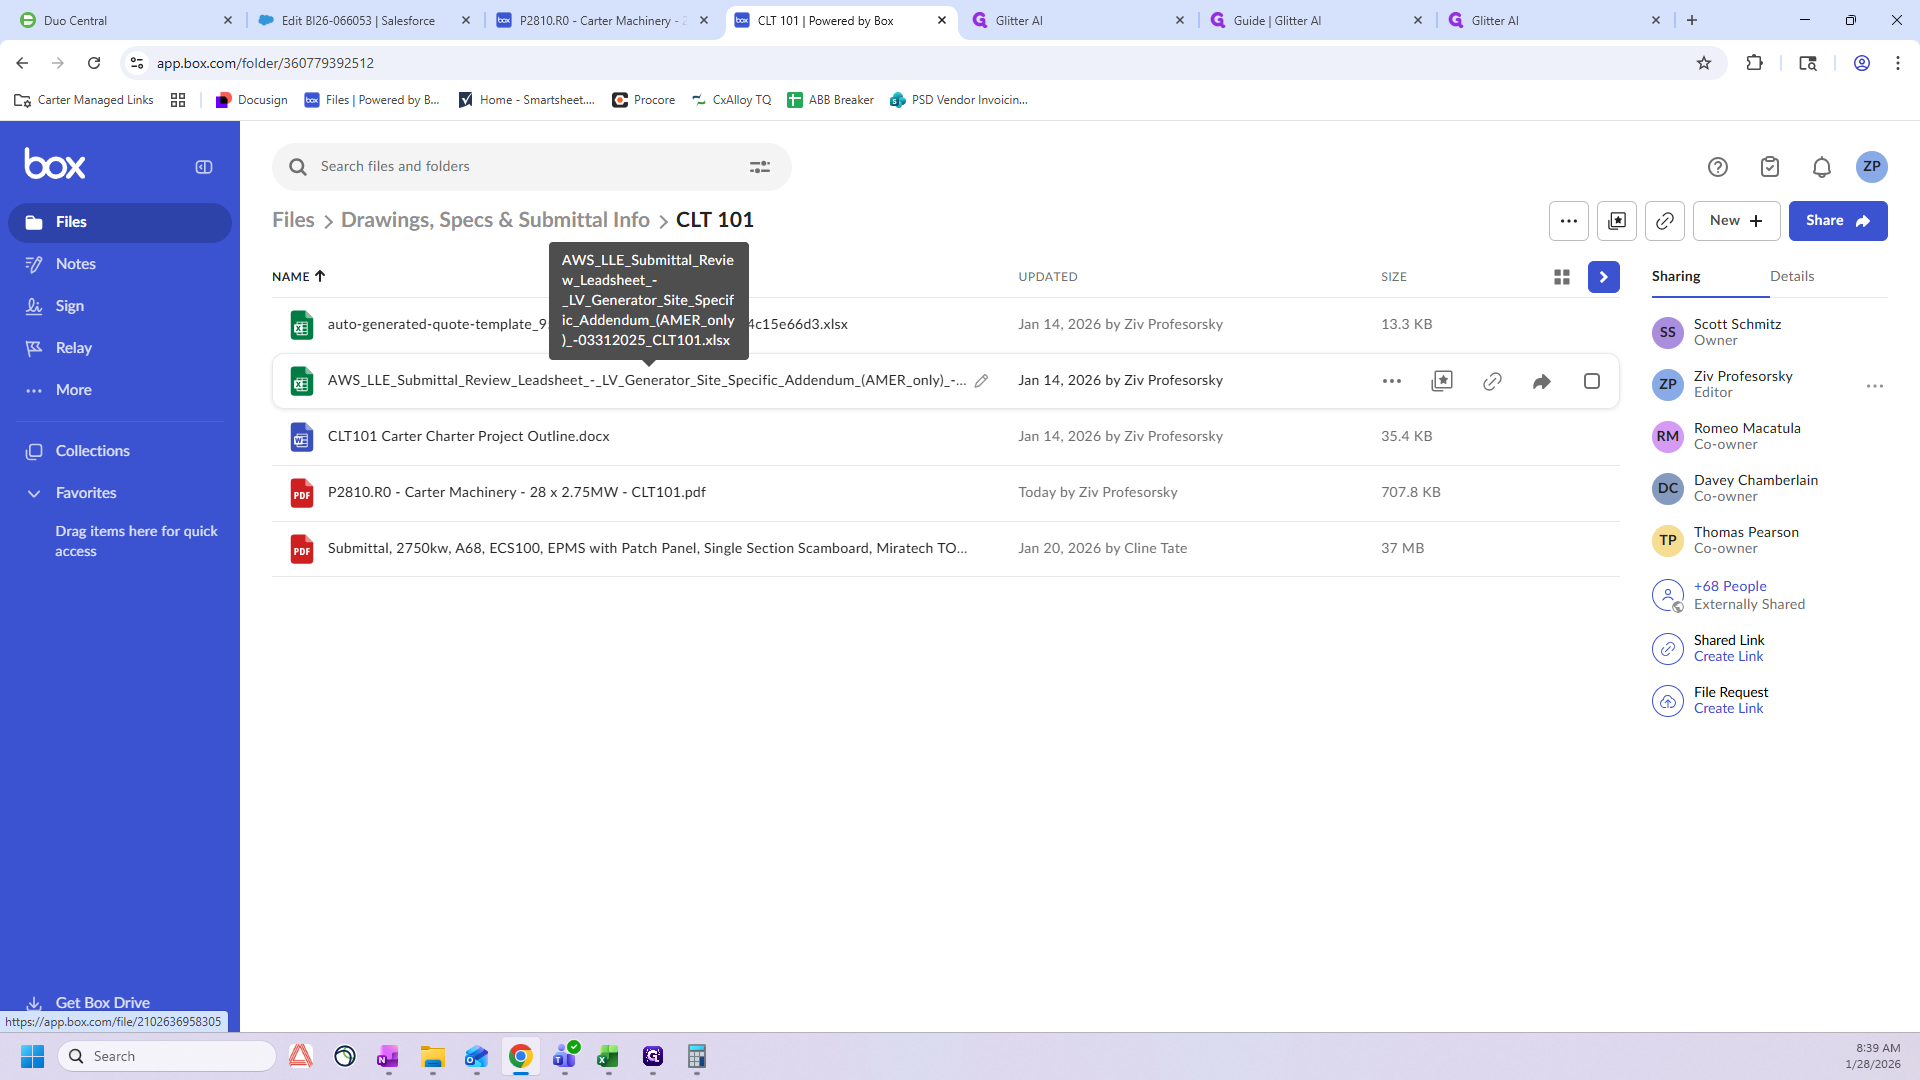
Next, look for this C here.
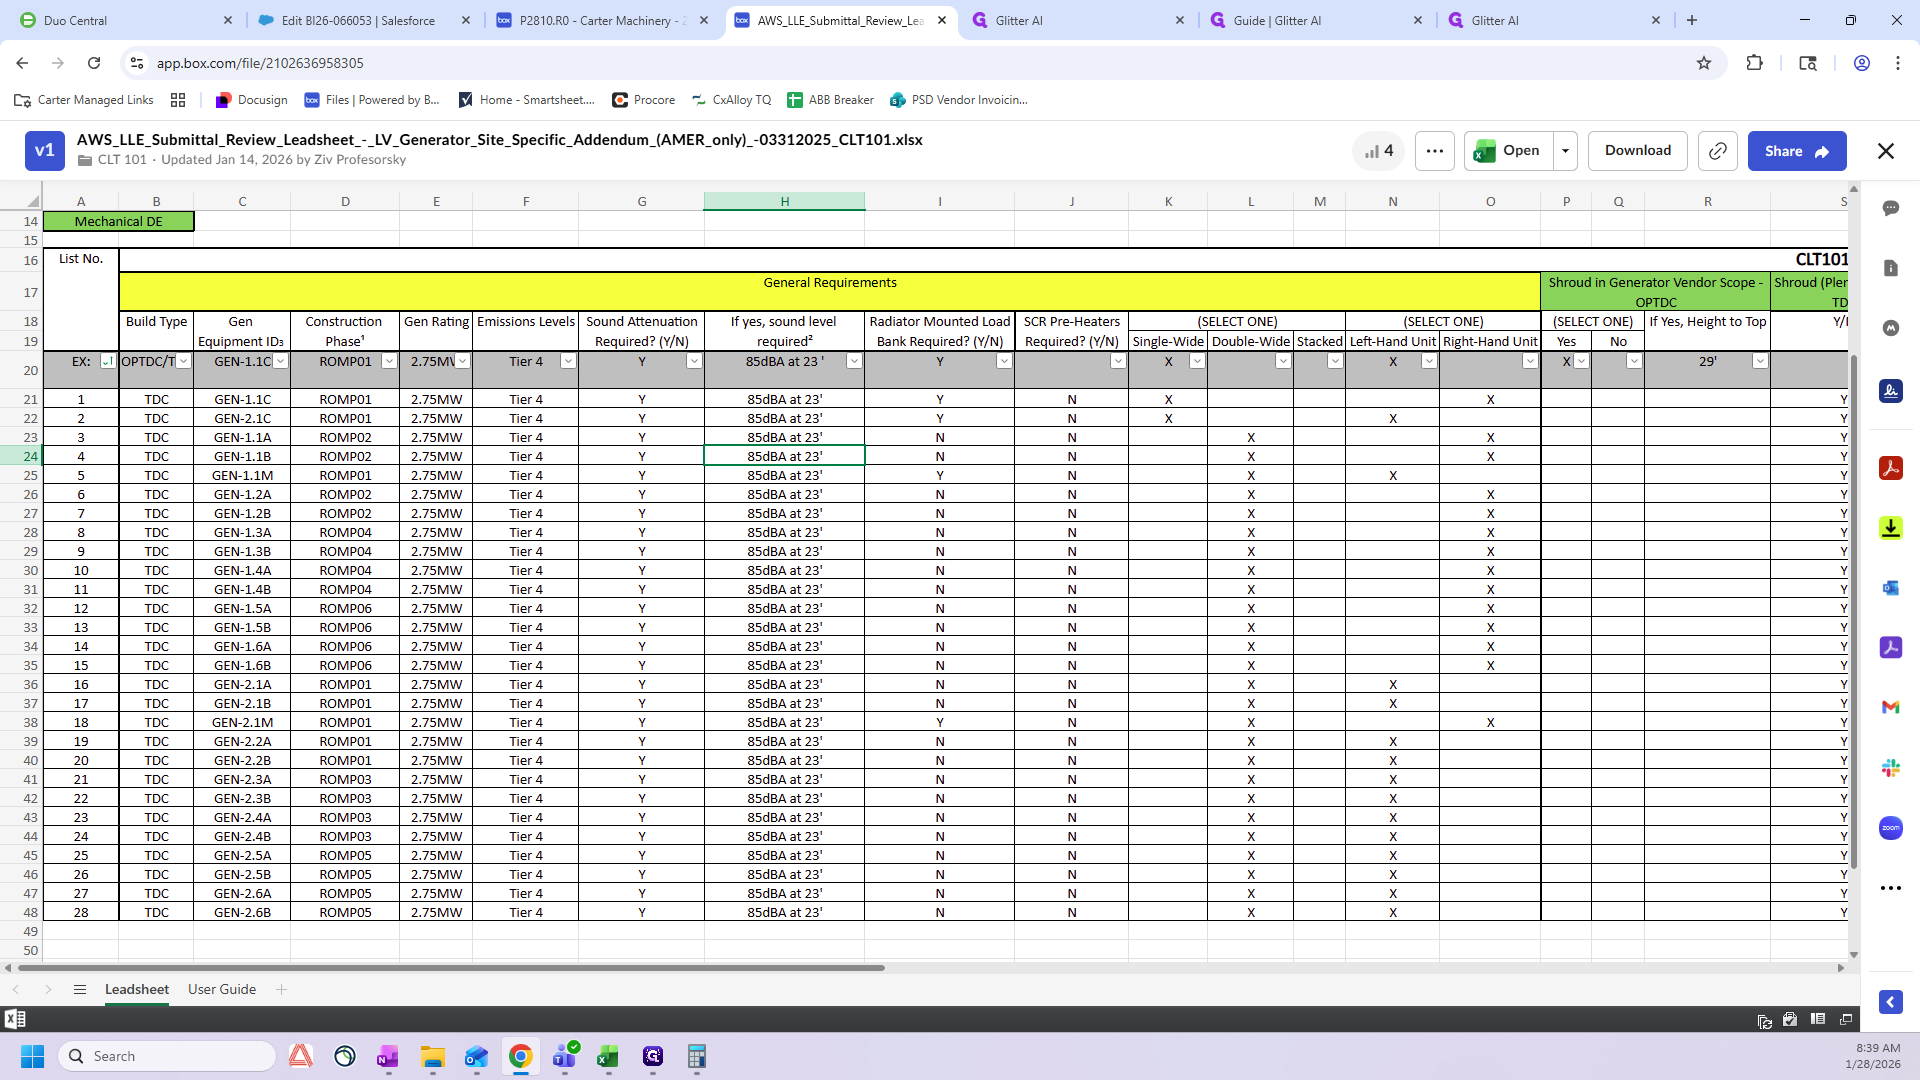
These are your catchers. We see that these are single-wides here. They have load banks. We also have the right hand and the left hand. We have one right hand and one left hand.

That's it.
We just click "Save".
Now I need to work on the mechanicals.
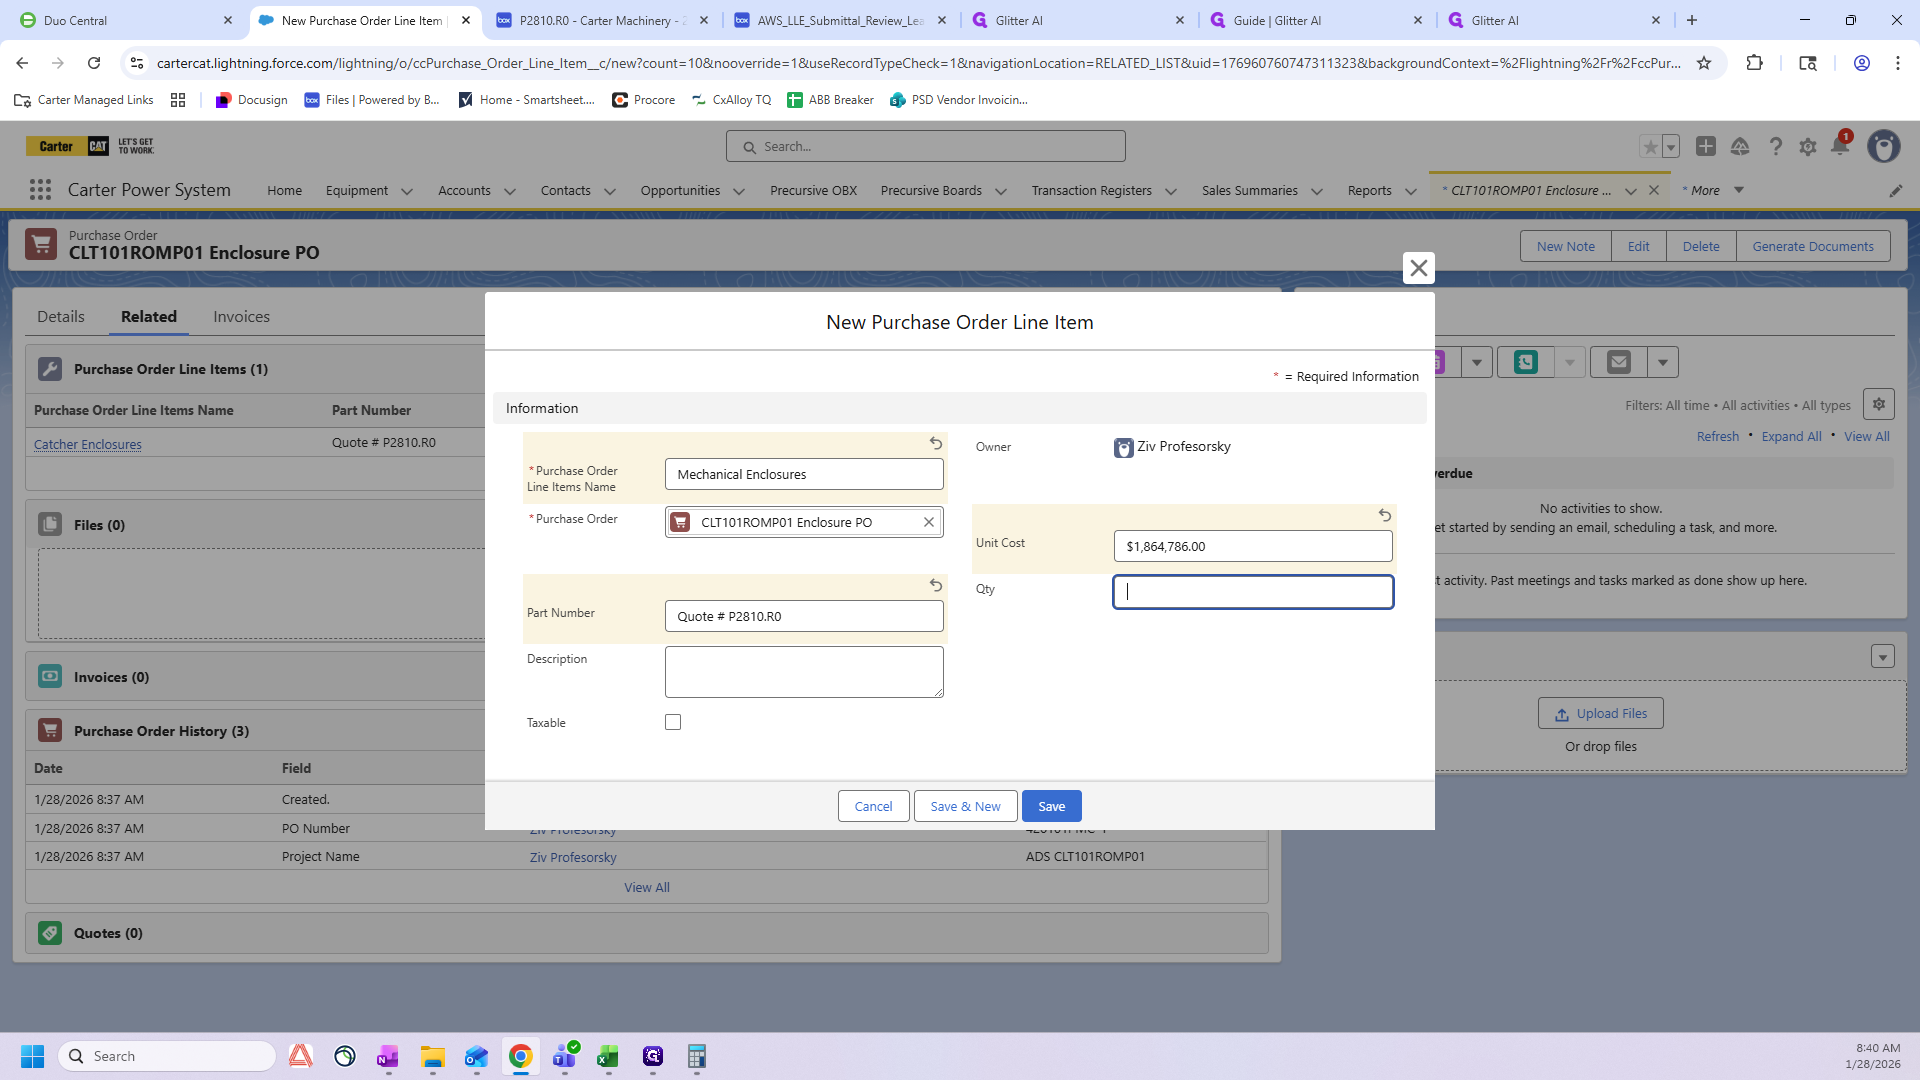
We have our mechanical enclosures with the same part number.
We have quote number P2810. Here it is, .R0. Now we need to return to the quote and repeat the same process.
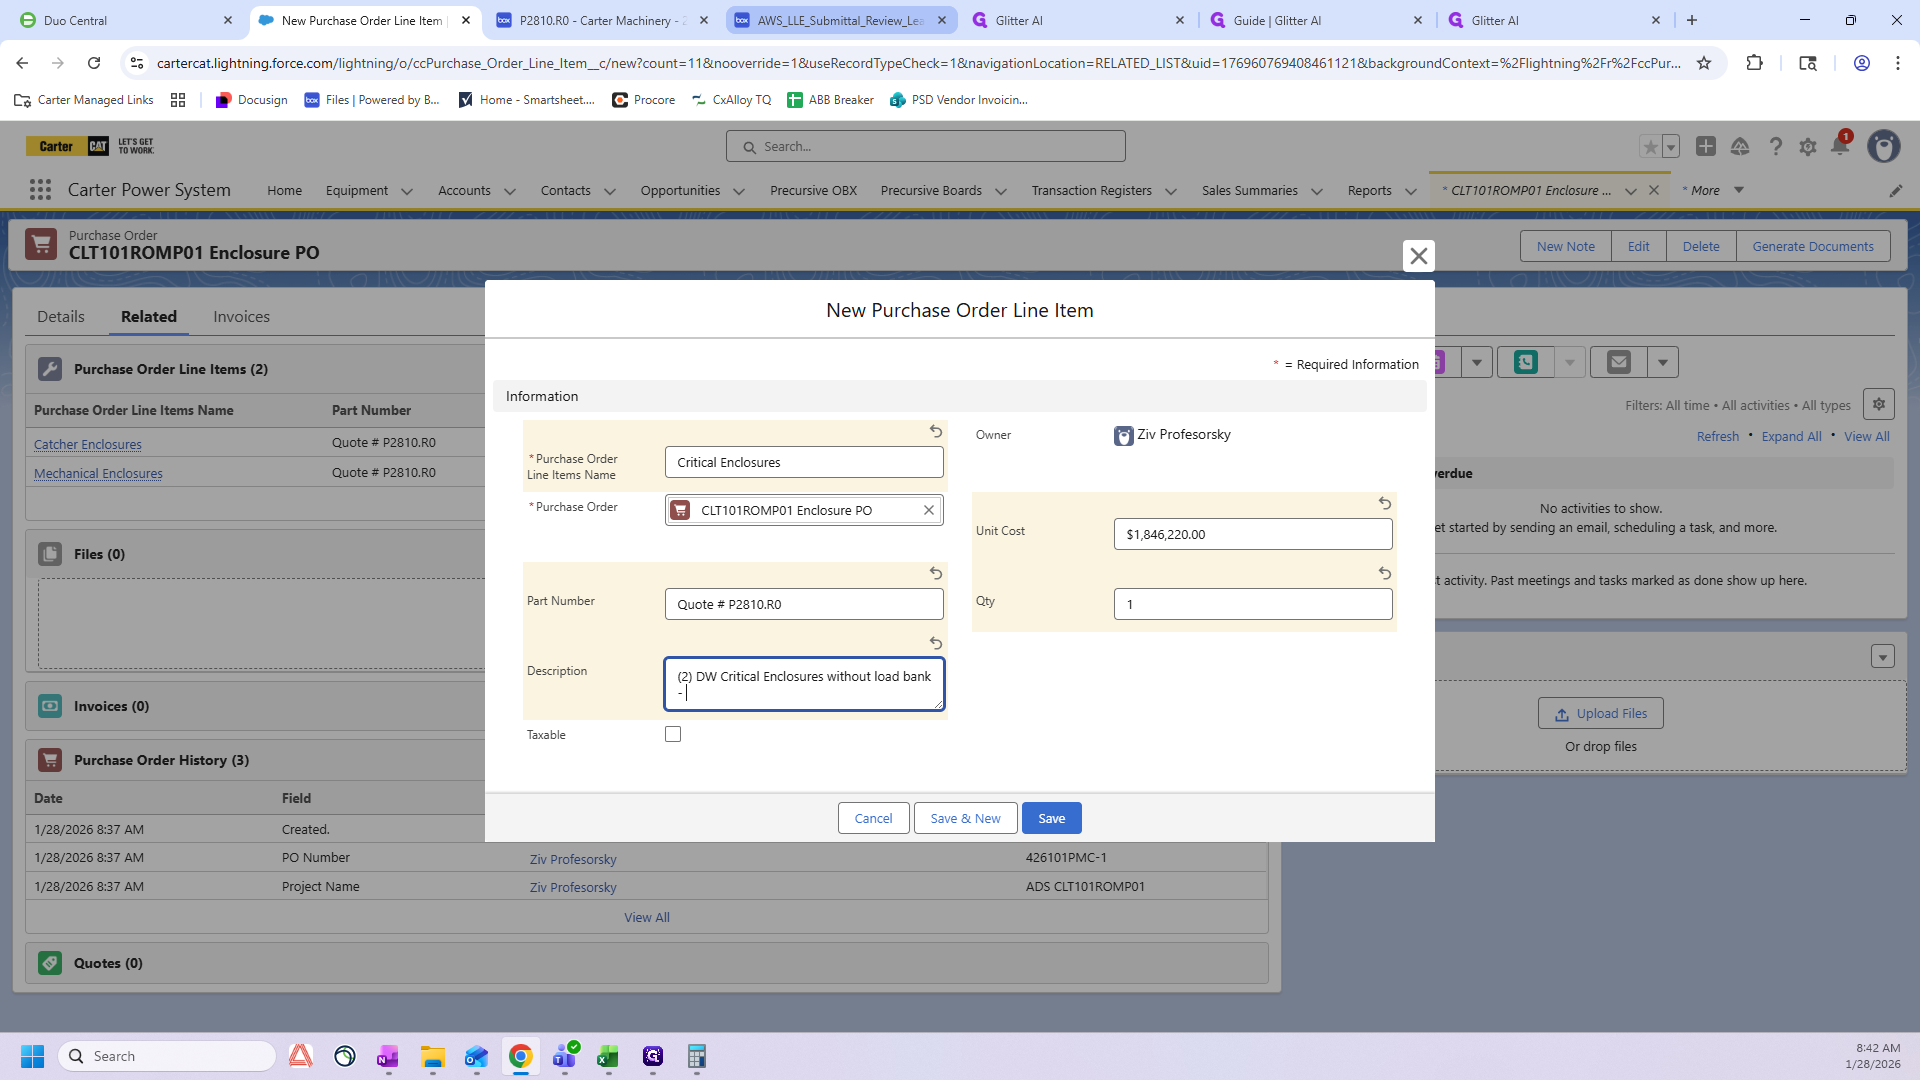
We have 1,638,886 as the total price for the two enclosures, plus 90,000 for the two scamboards. The plenums are 67,950 each, which gives the final total.
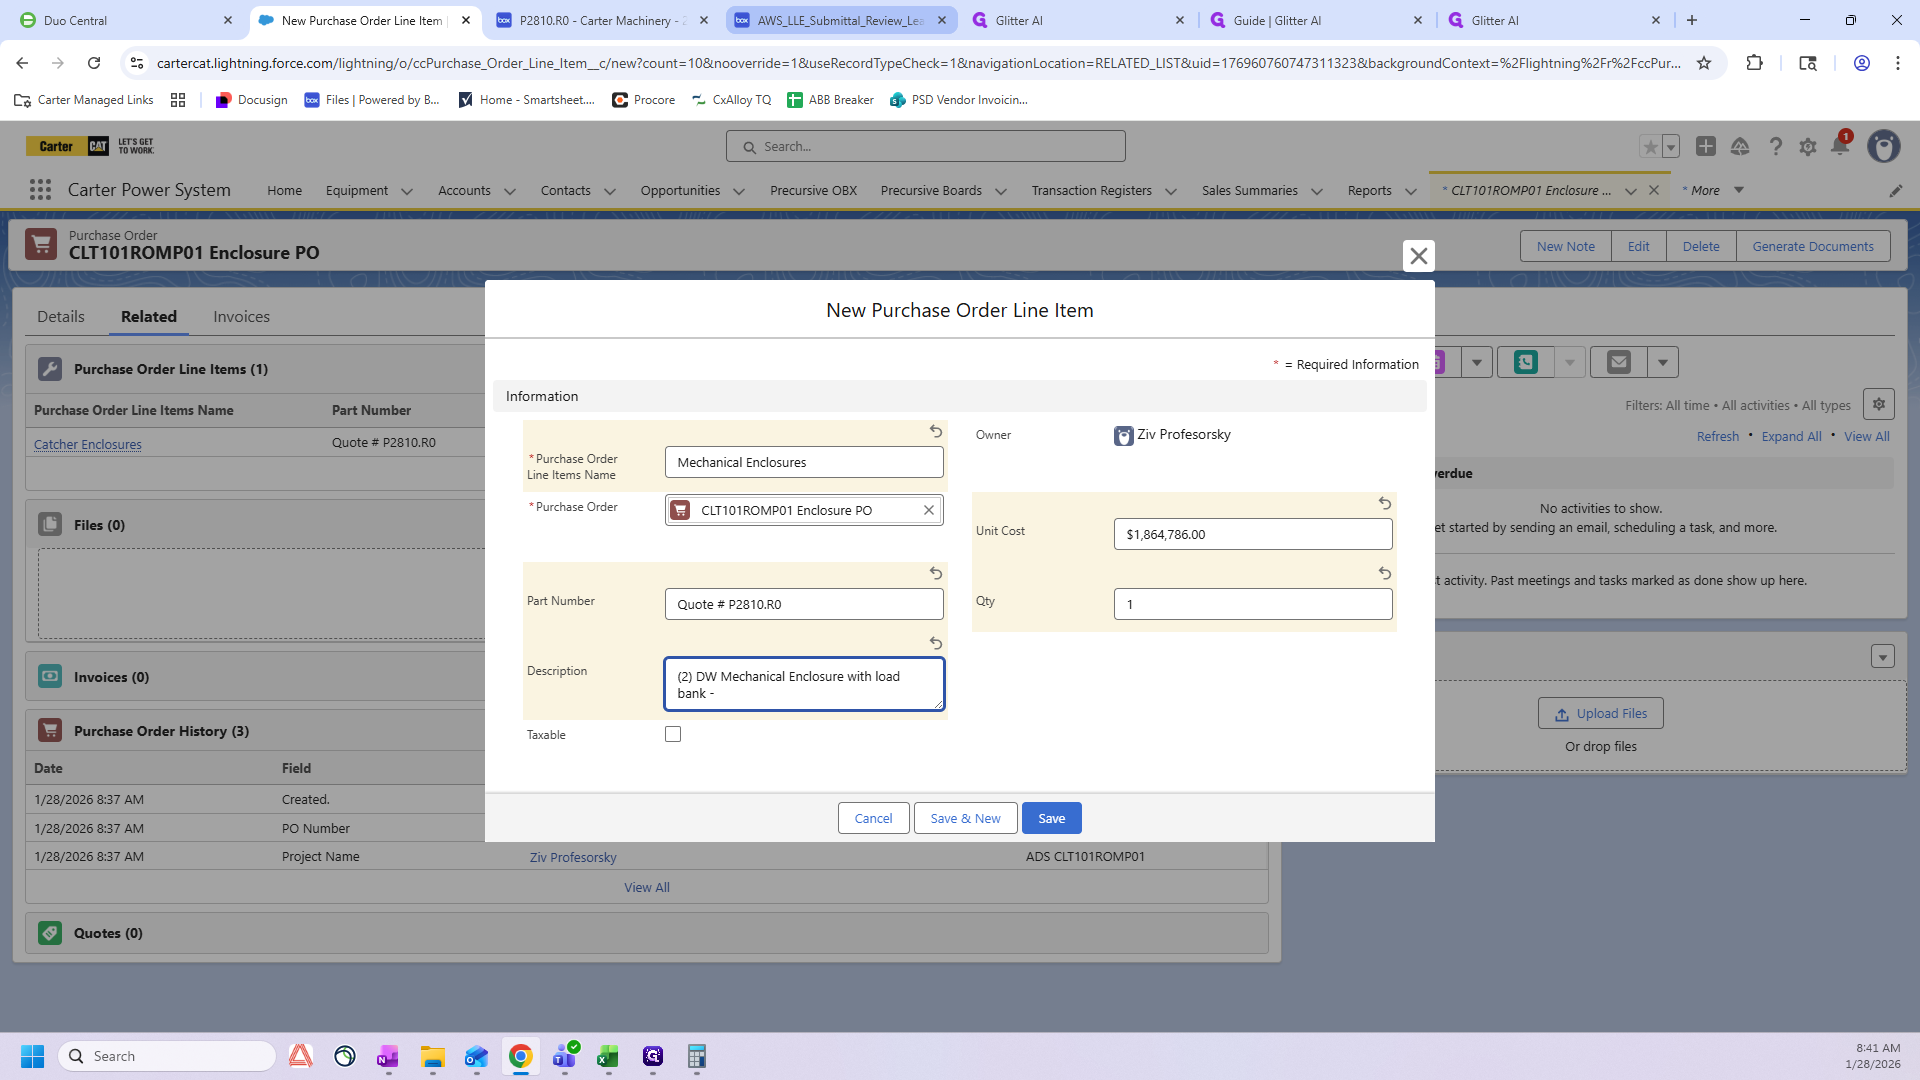
So, it will be 1,864,786.
My description will be very similar. It's a double-wide mechanical enclosure with a load bank. Let's check the handing again.
We are looking for these M's here.

These are your mechanicals. We see that it has a load bank. This is a double-wide. The first is left-hand, but they did not put them in order. The second mechanical is below, and it is right-hand.
We have one left hand and one right hand.
Now, go back to "New" and start the Criticals step.
So, the quote number remains the same: P2810.R0.

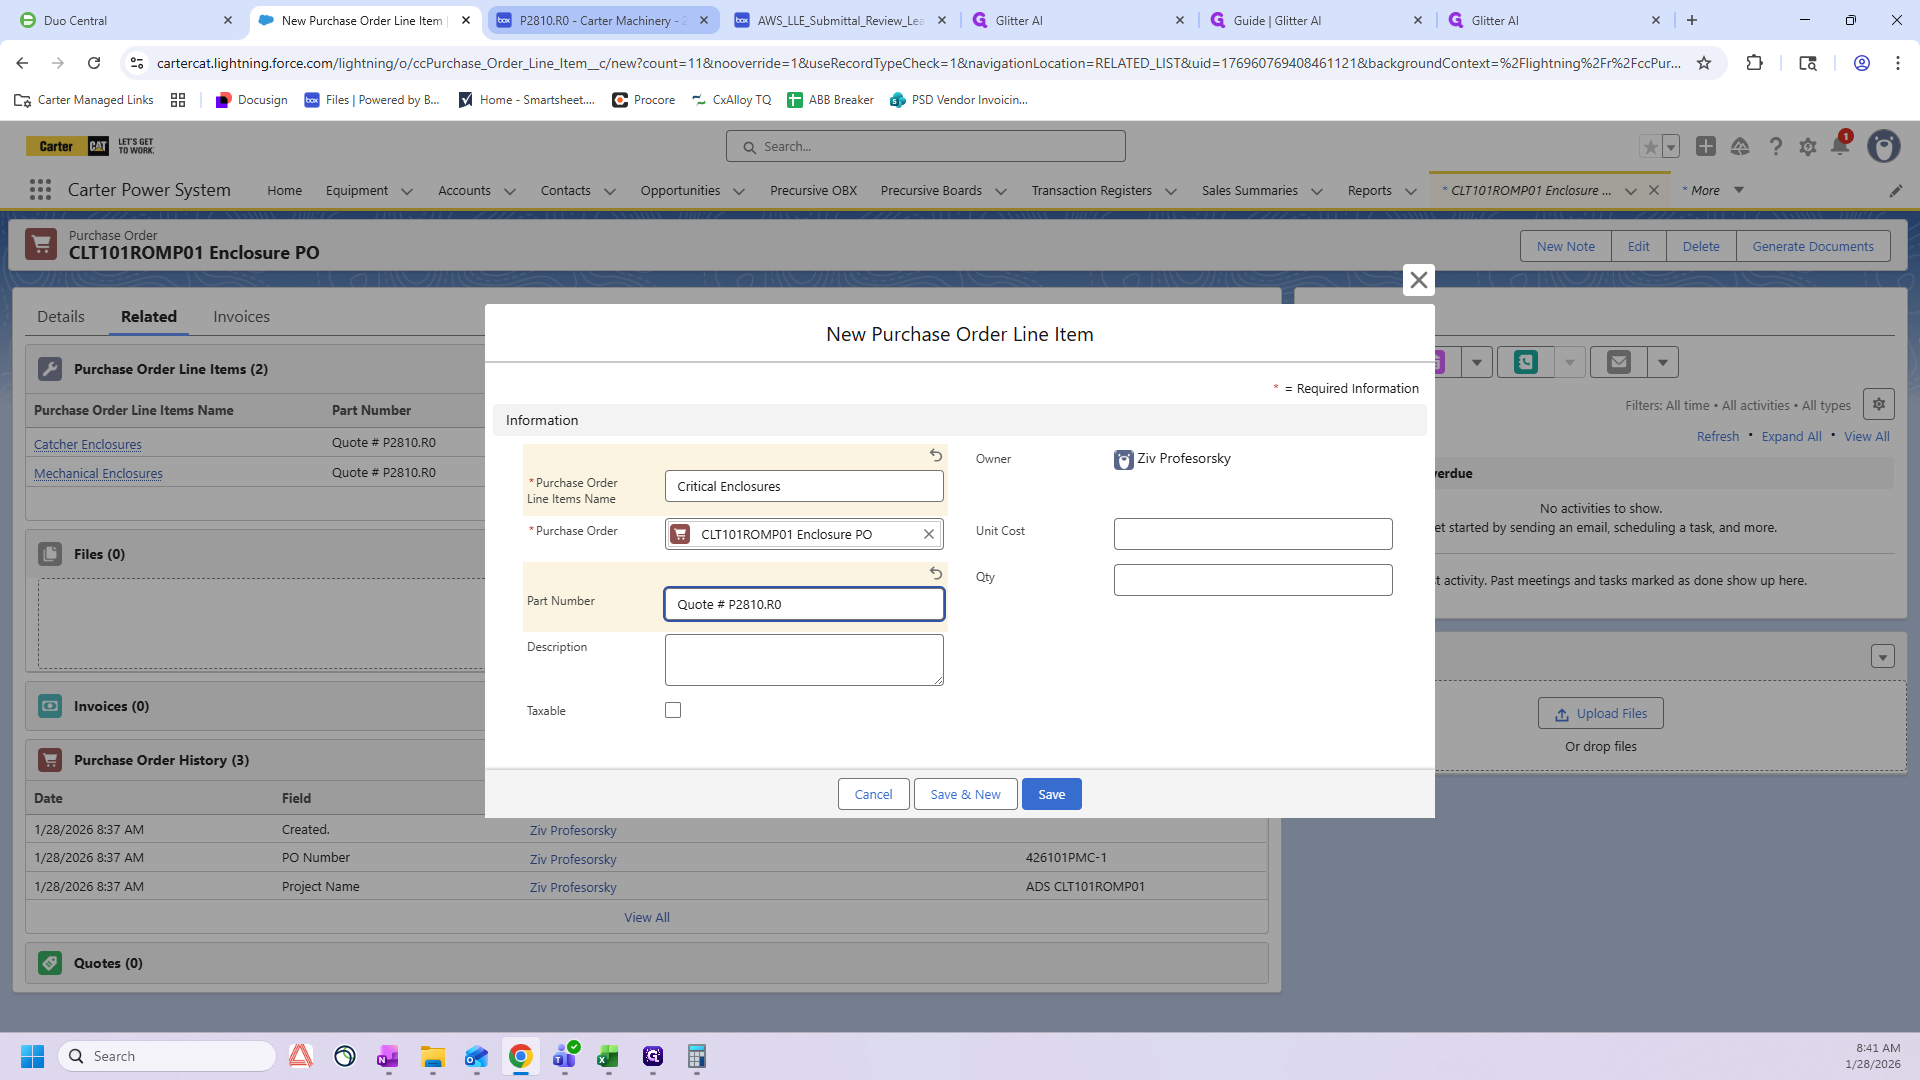

Here, I will write two double-wide critical enclosures without a load bank. There is no load bank here. Let's get our handling ready.
We are looking for ROMP1. Here it is: A and B.
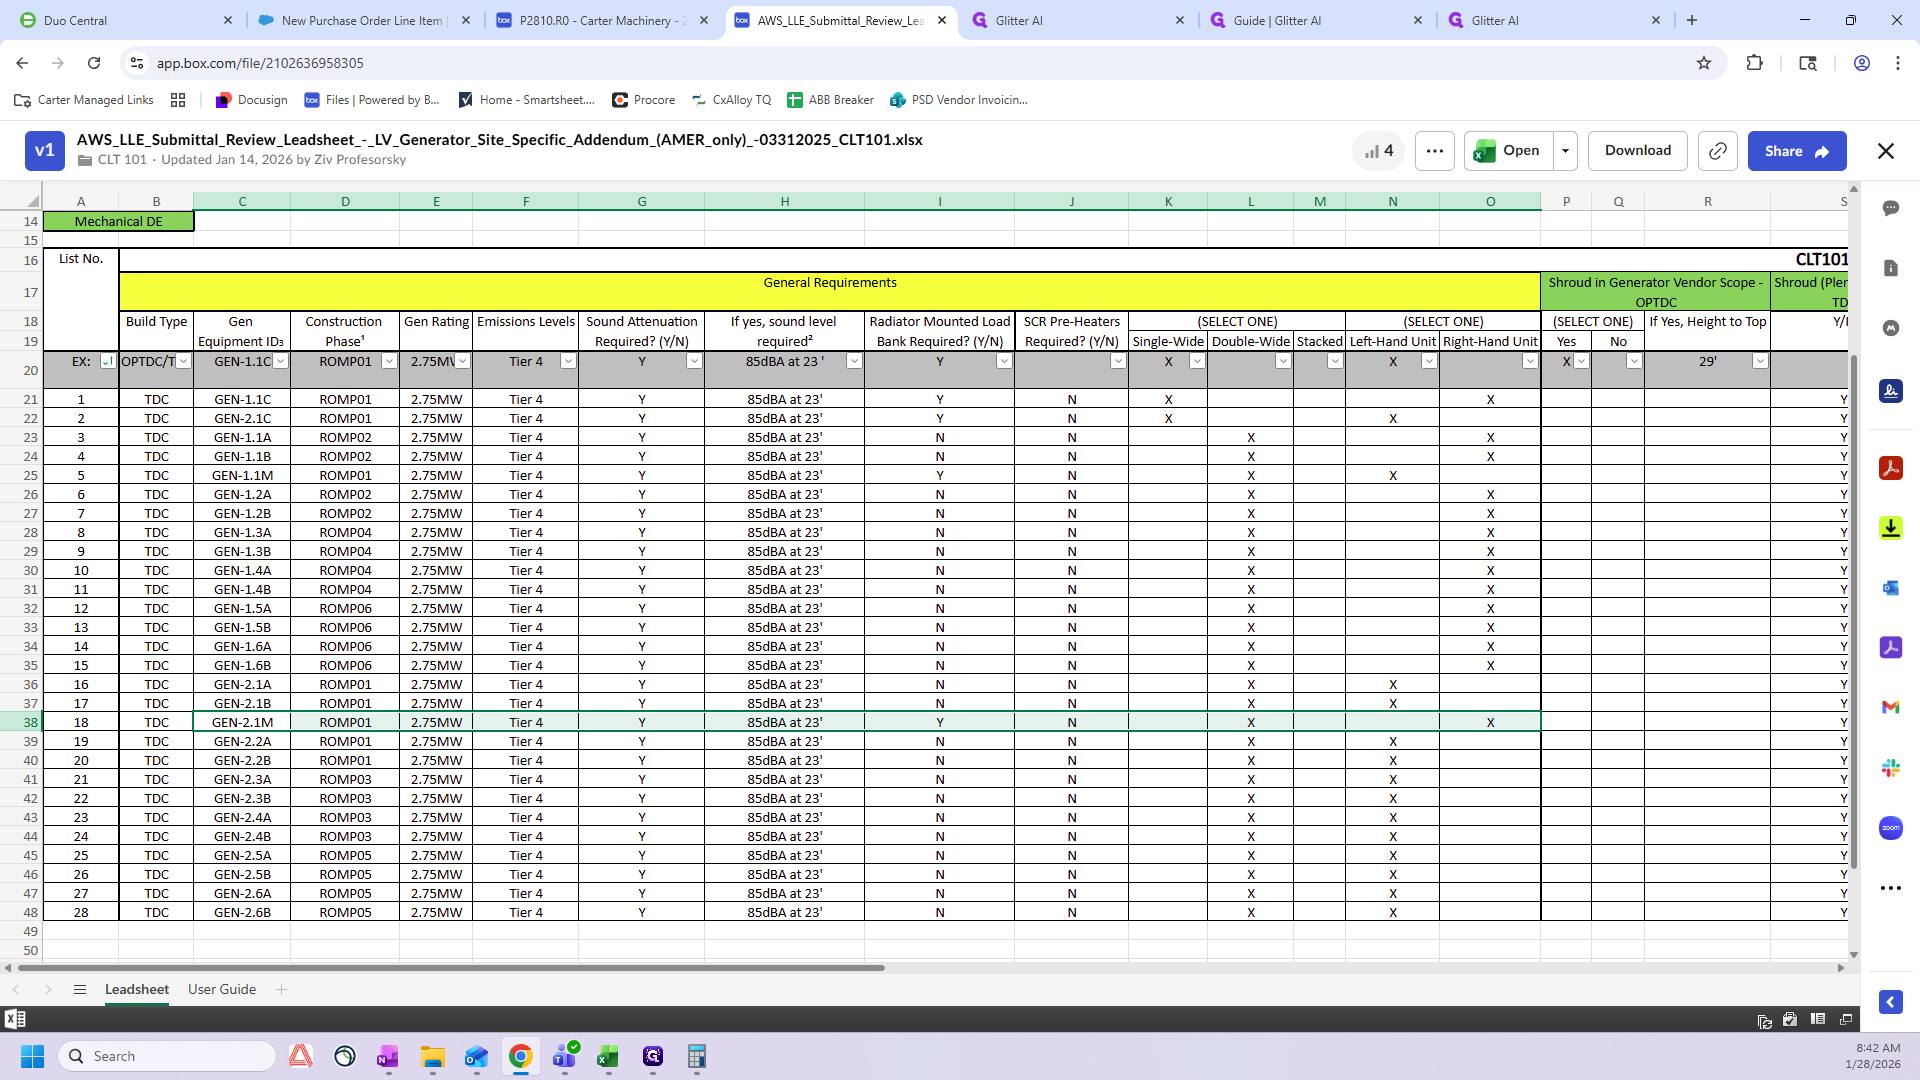
You can see they do not have load banks. They are double-wide and both left-hand.
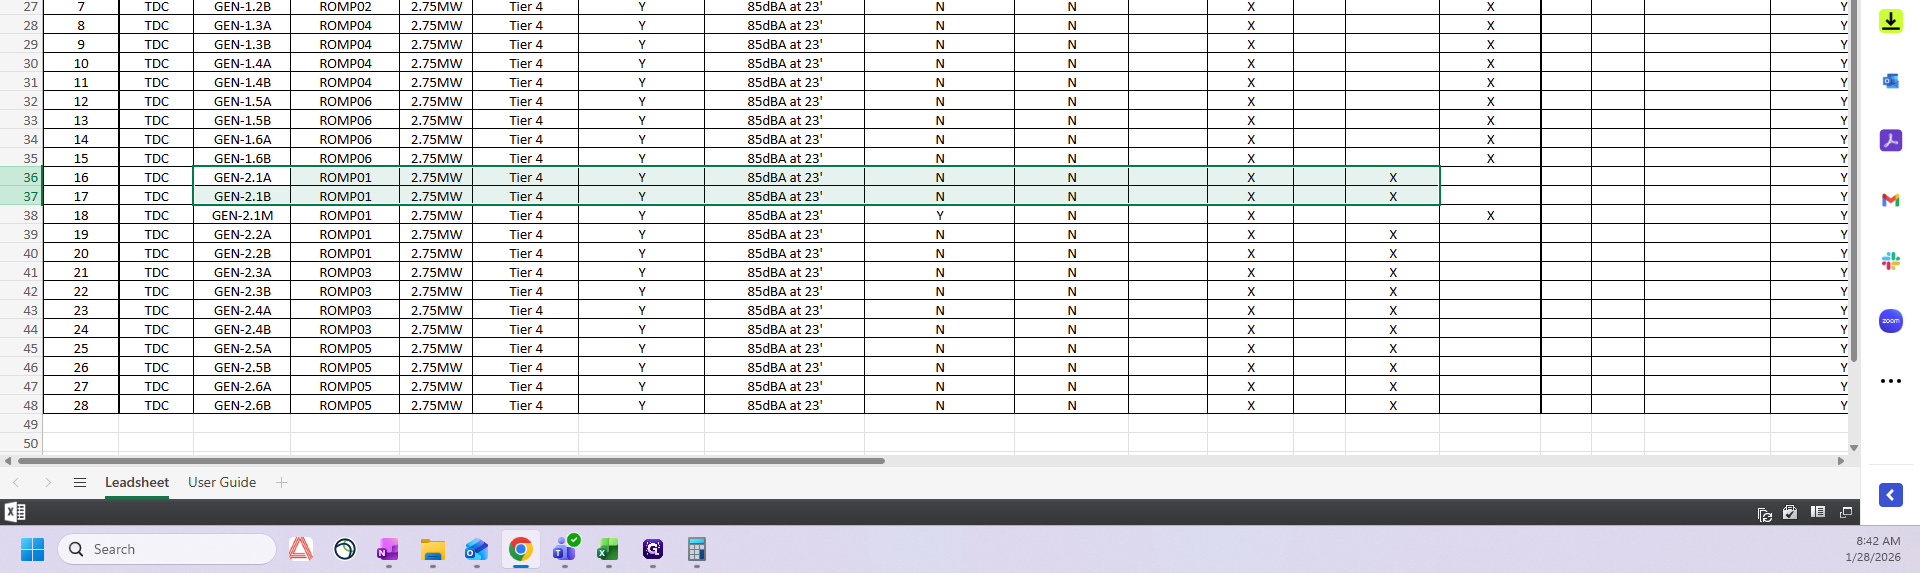
I've got two left hands.
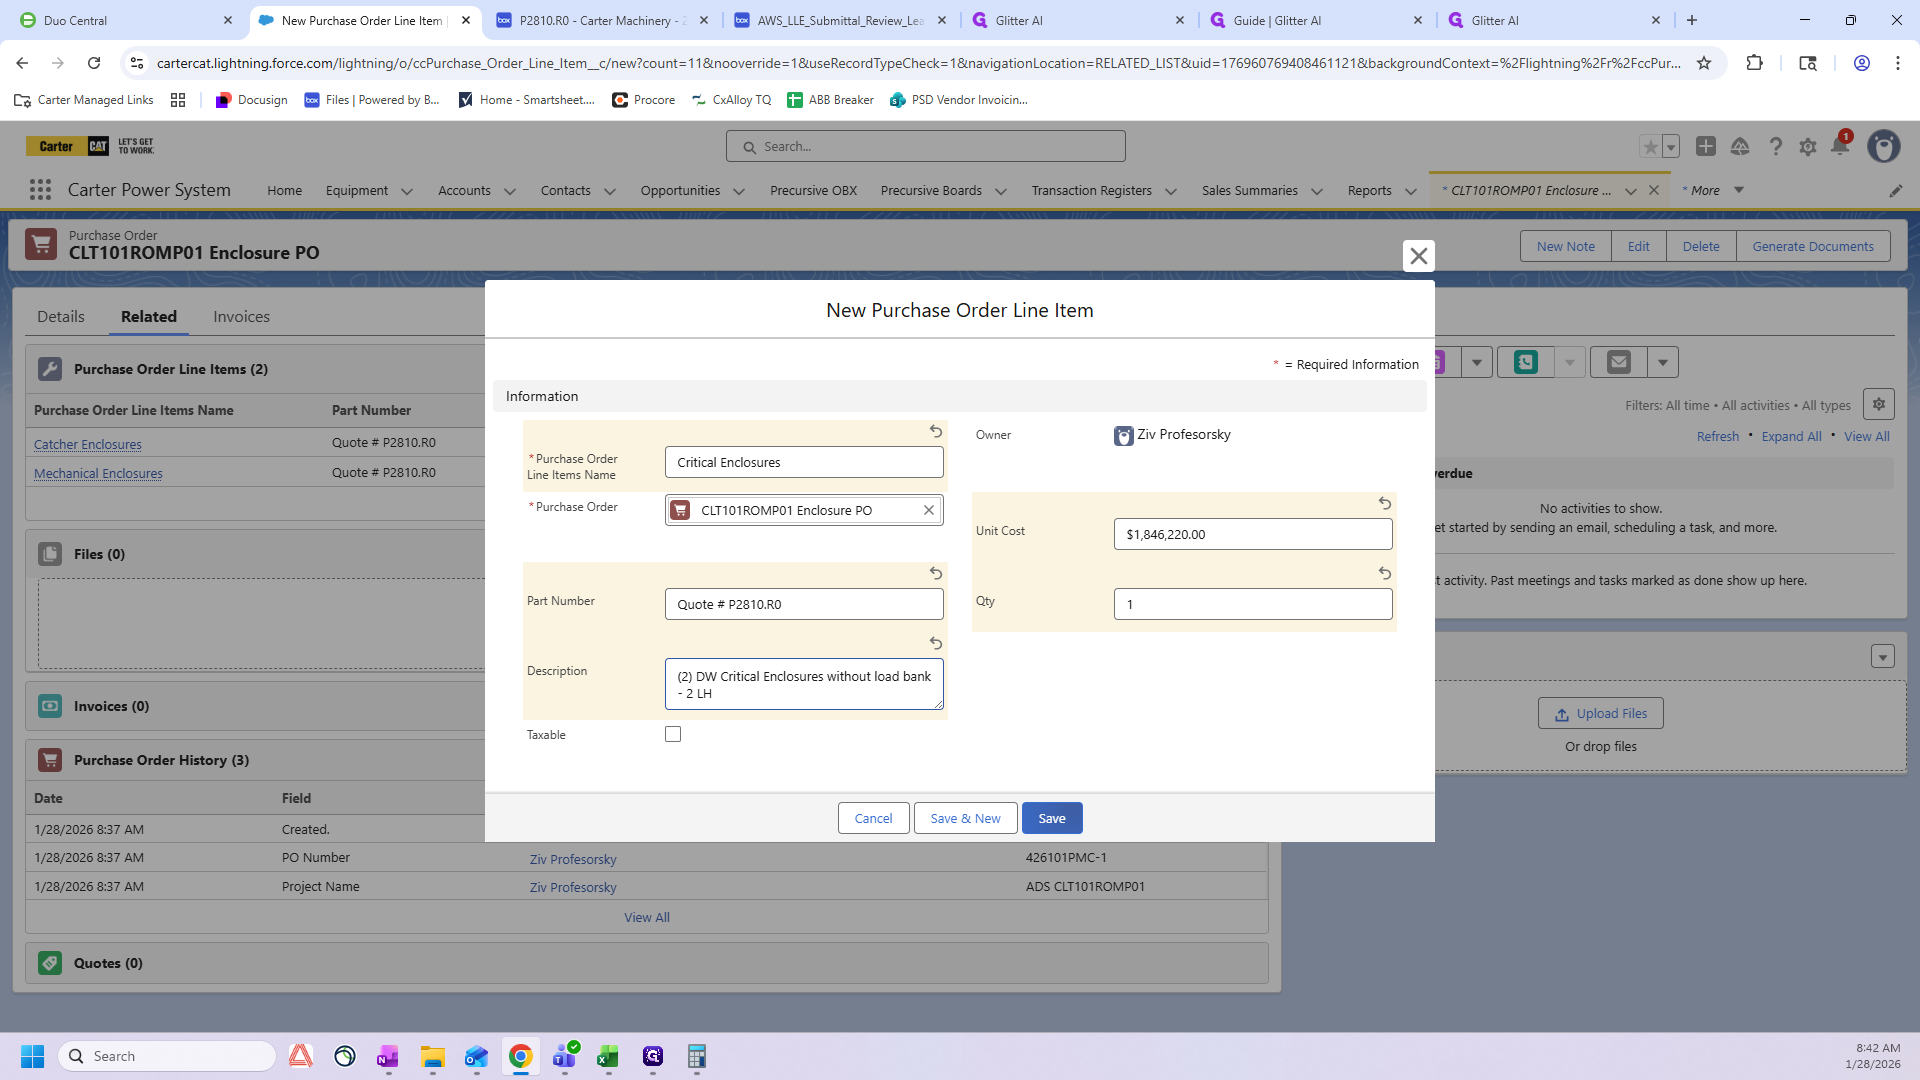
Finally, I double-check that my quote number and PO total, 5564792, match my budget total.
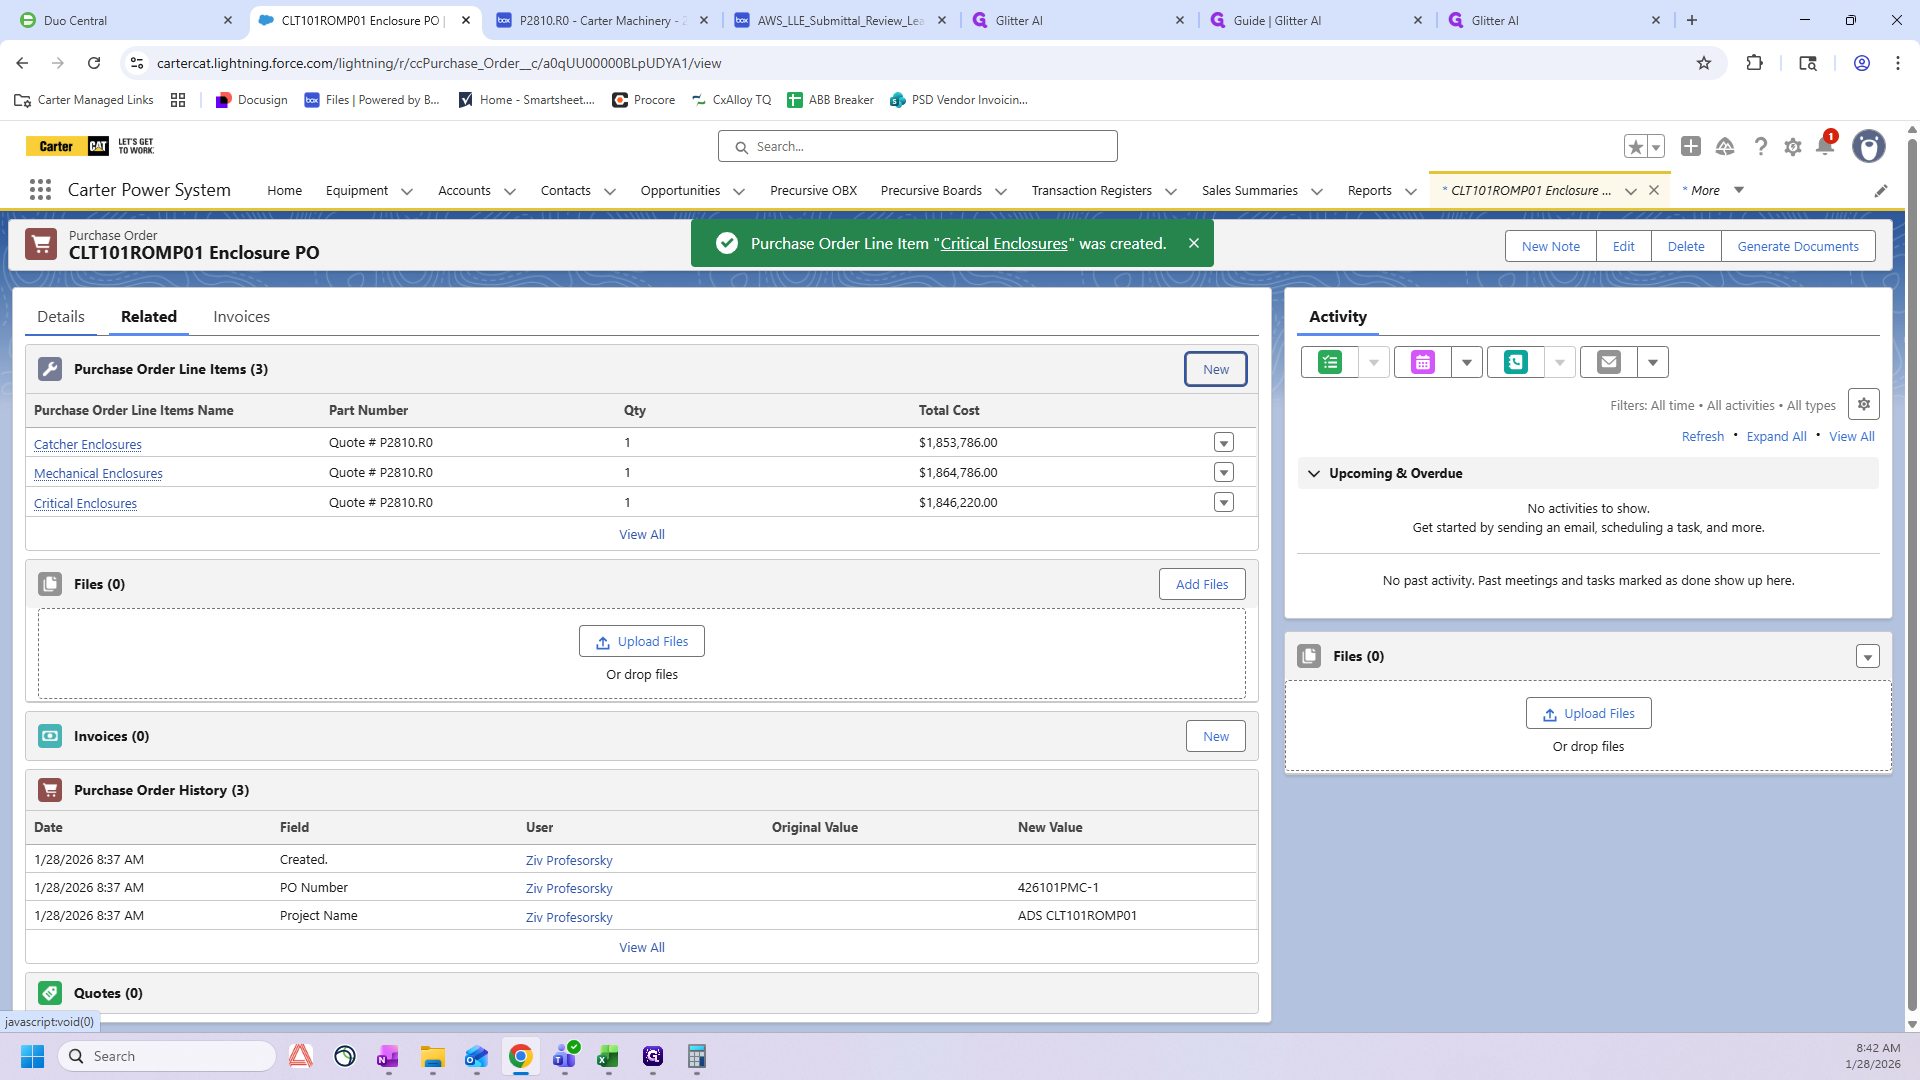
I want to go back to the budget, the number is 5,564,792. 5,564,792.
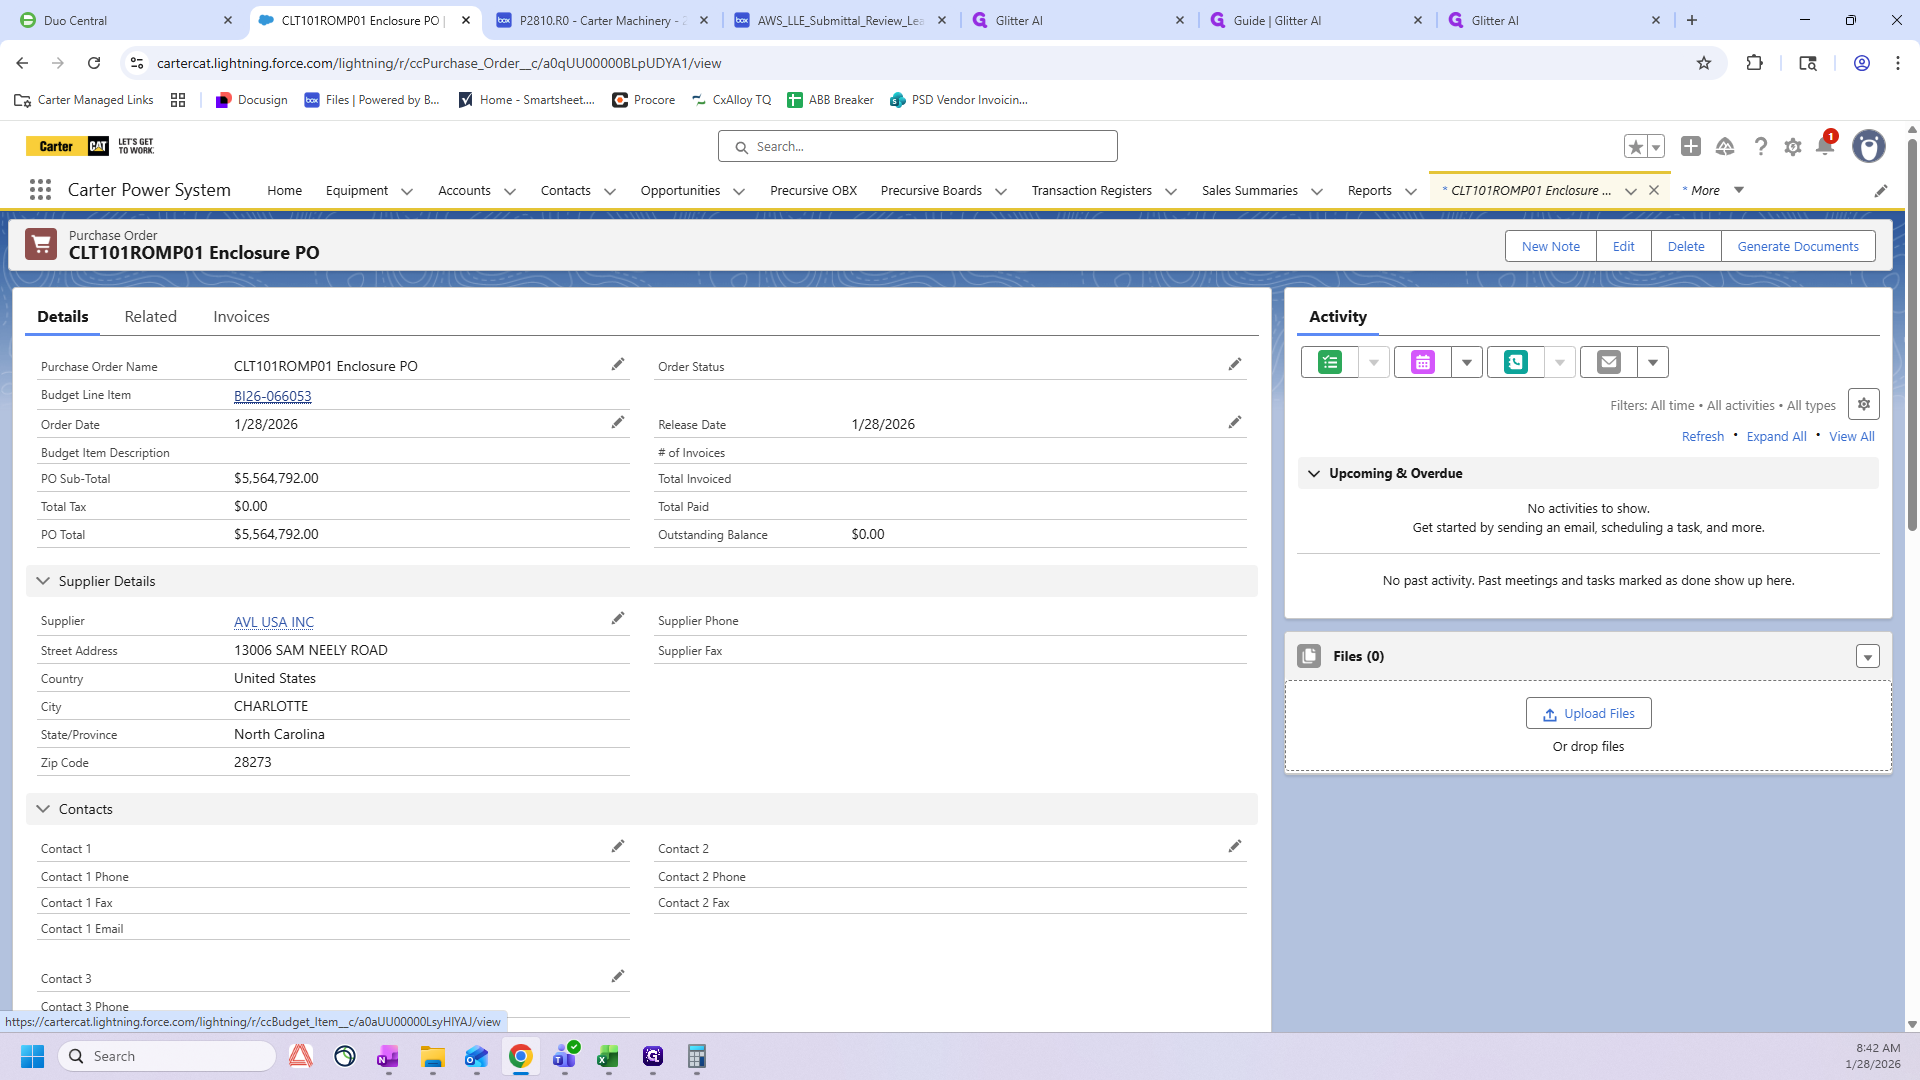
Those match, so we are good.
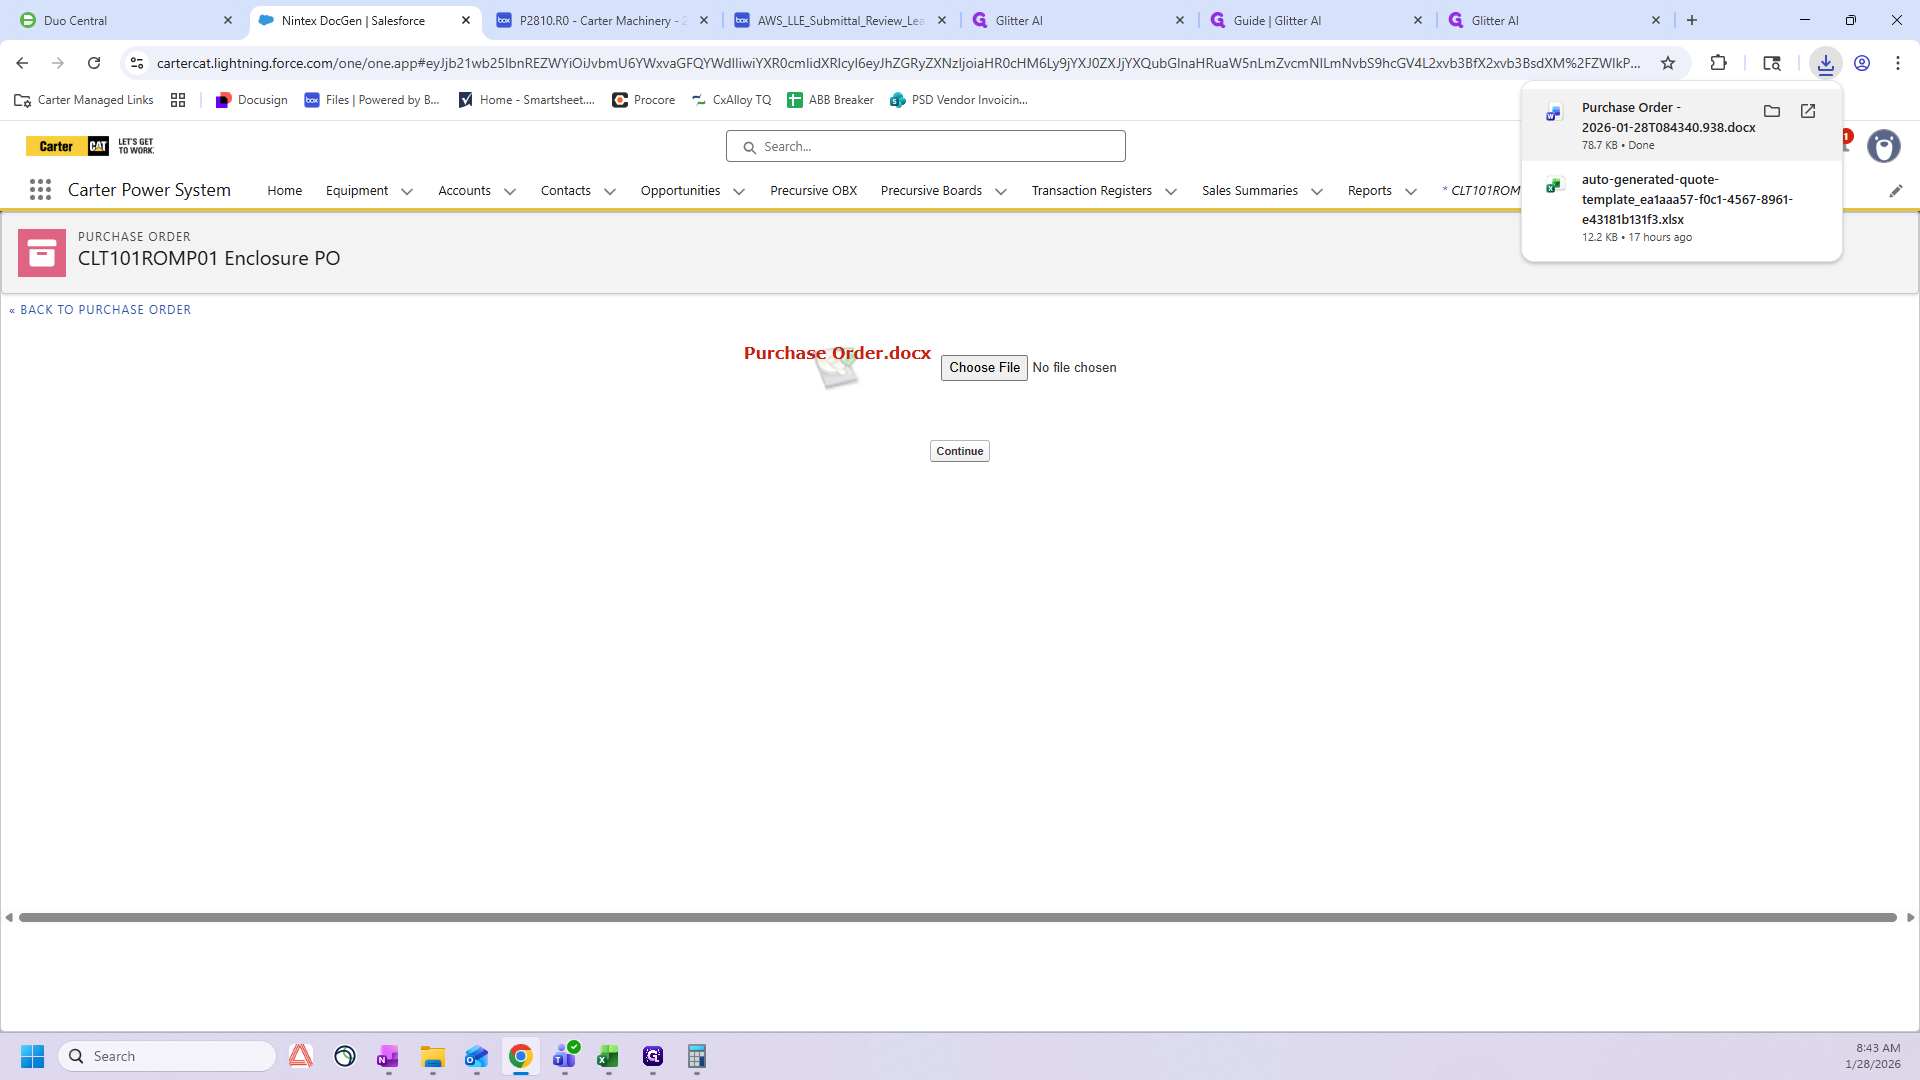
We have used the entire budgeted amount, which is our goal. Once you're in the PO, click Generate Documents, then click Run.
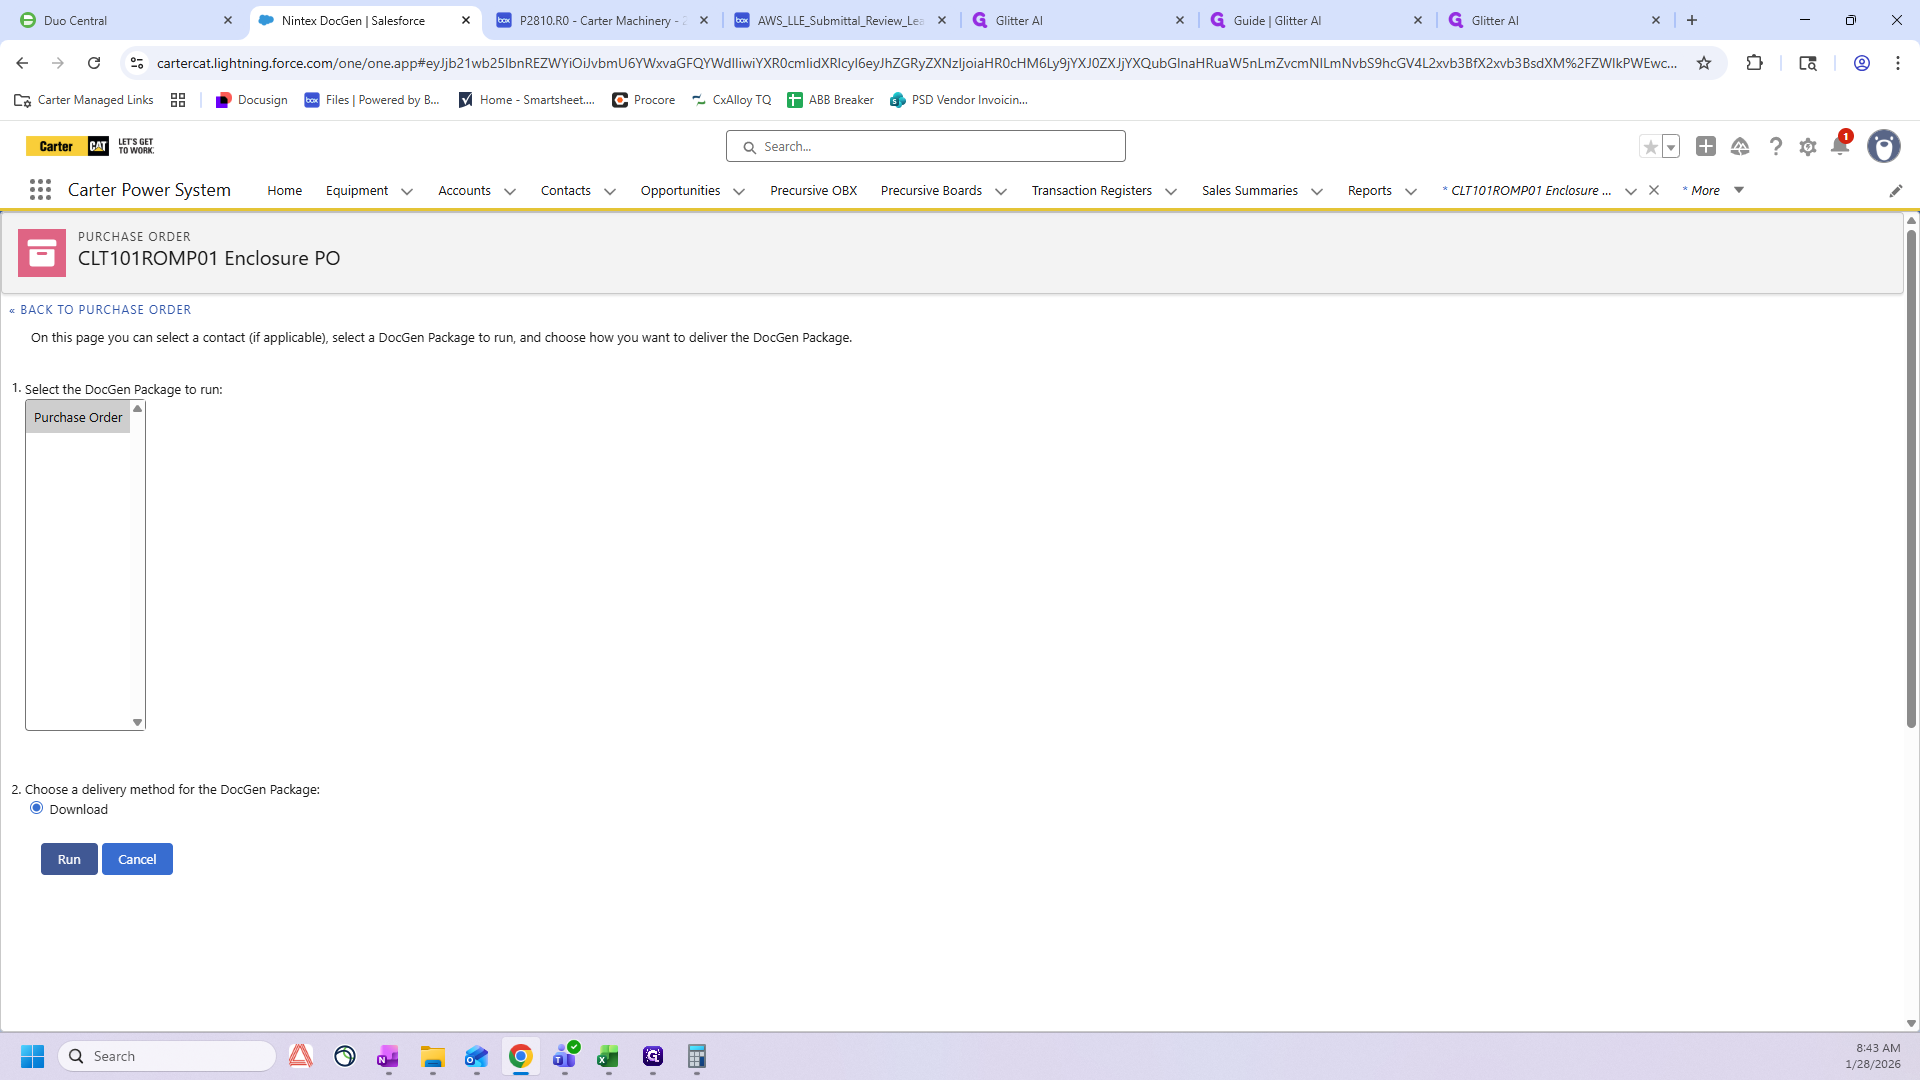
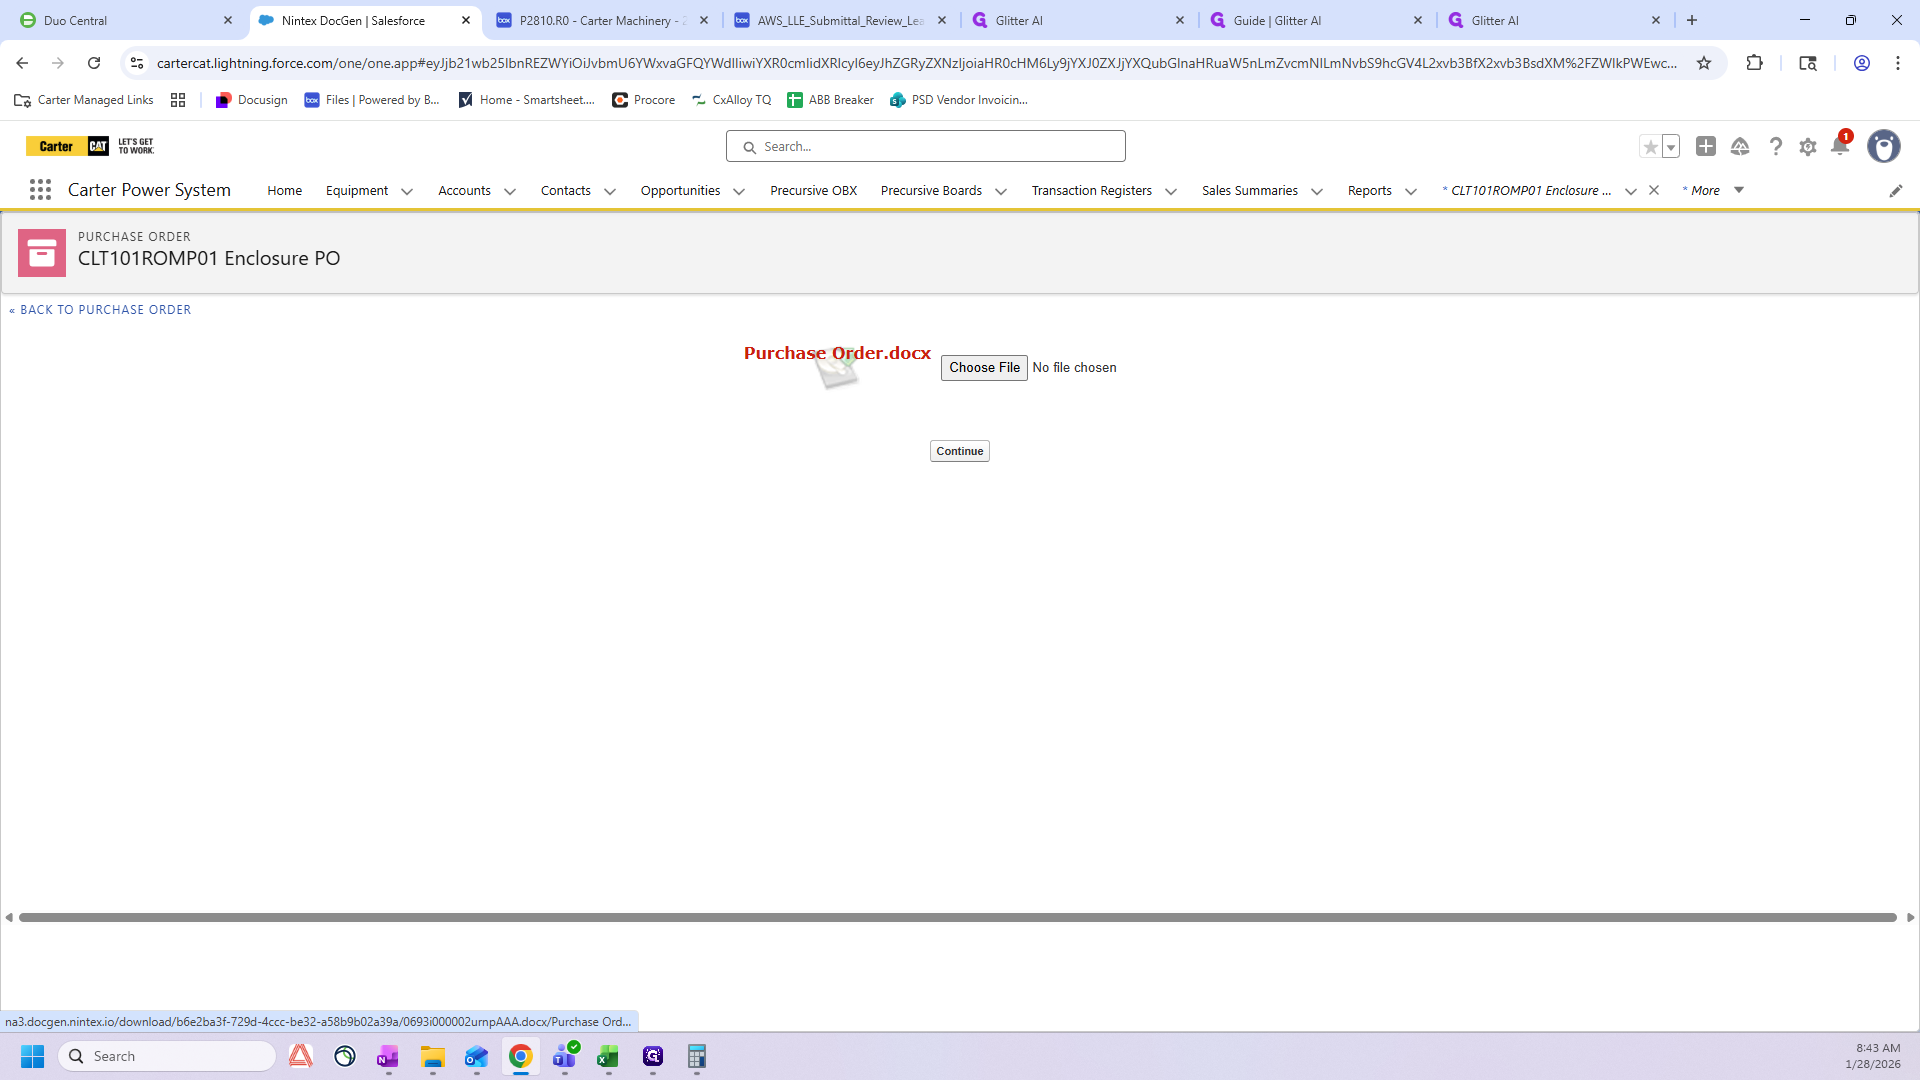
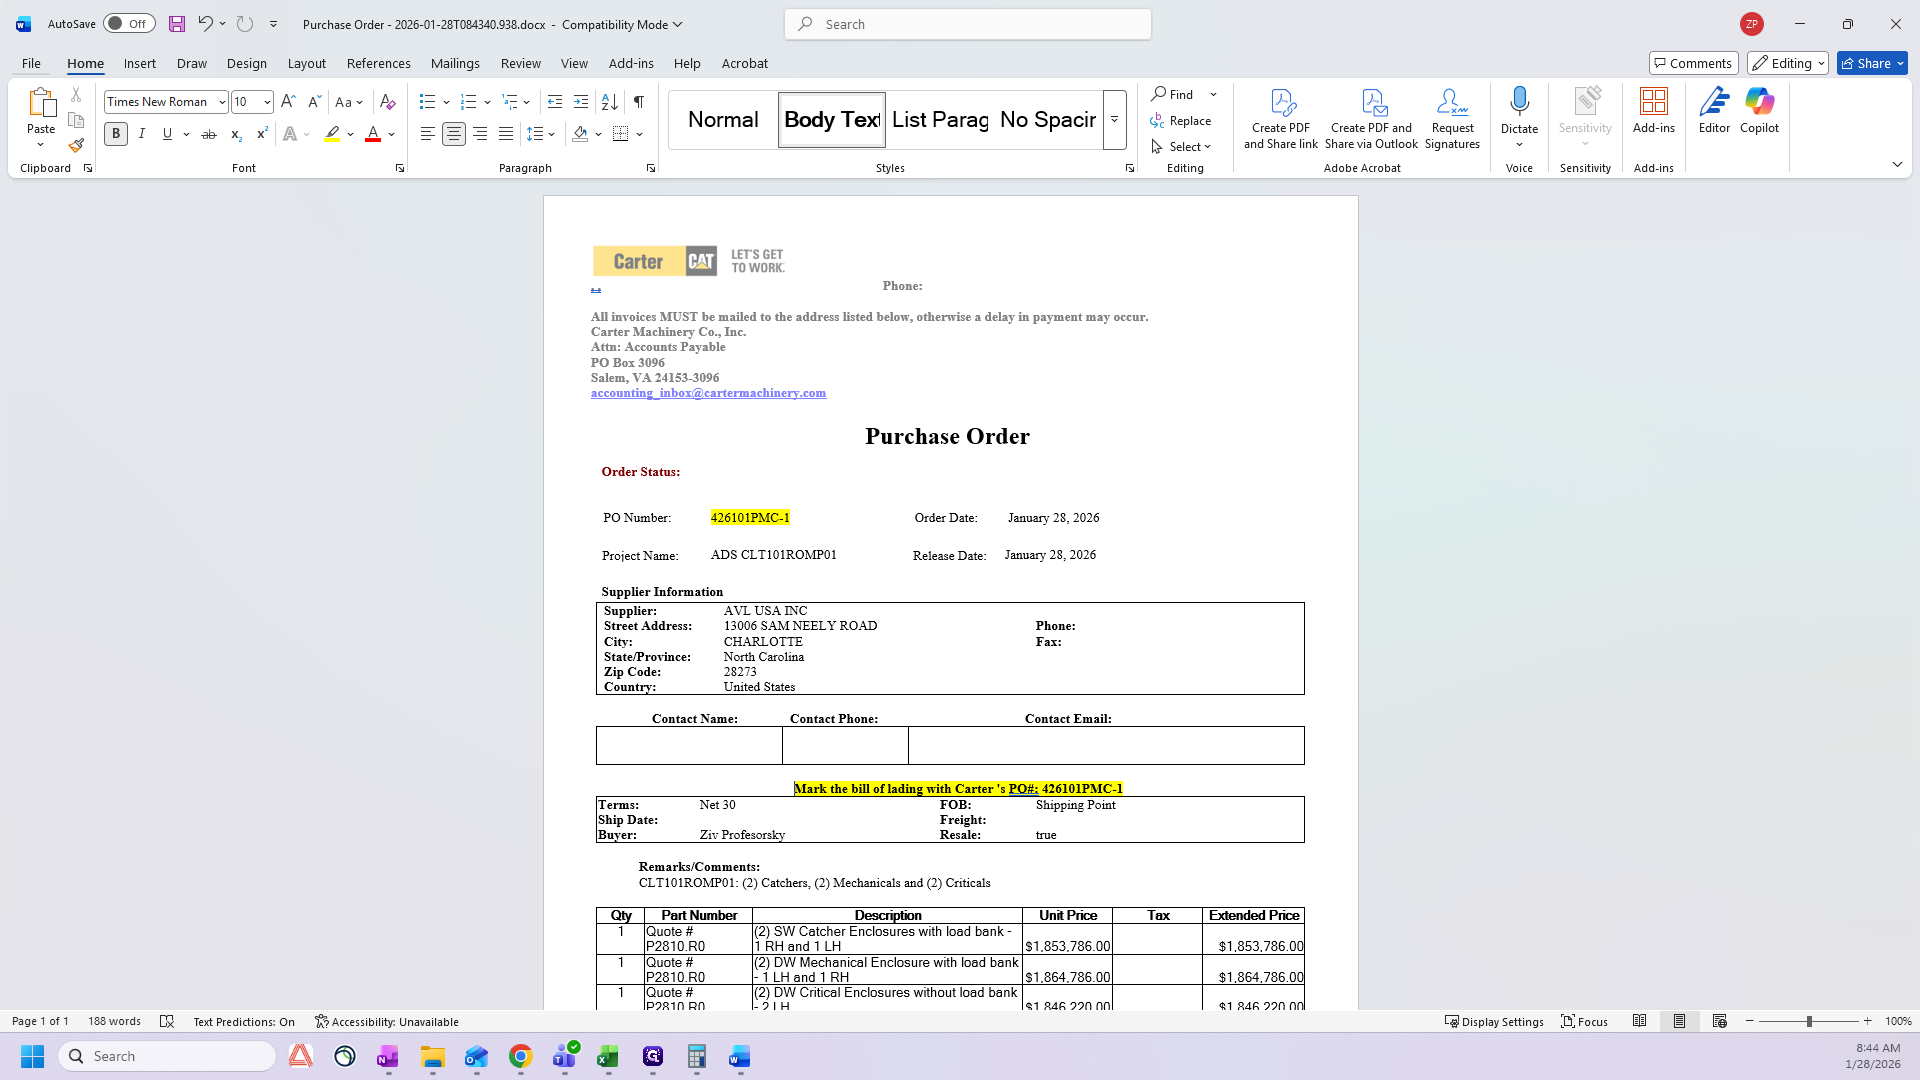
I'll wait for it to load. Now, I press this button. You can also click Continue. Continue adds the purchase order, the terms and conditions, and a combined version to your file. We prefer to edit it, so we click this button to download it into Word.
Click Enable Editing. First, you'll notice it's on two pages. There are some blank sections we don't need, so we'll delete the shipping information.

I'll delete this blank space to fit everything on one page.
You can adjust it however you want. I usually leave it like this. Then, I highlight the mark the bill of lading, and the PO number.
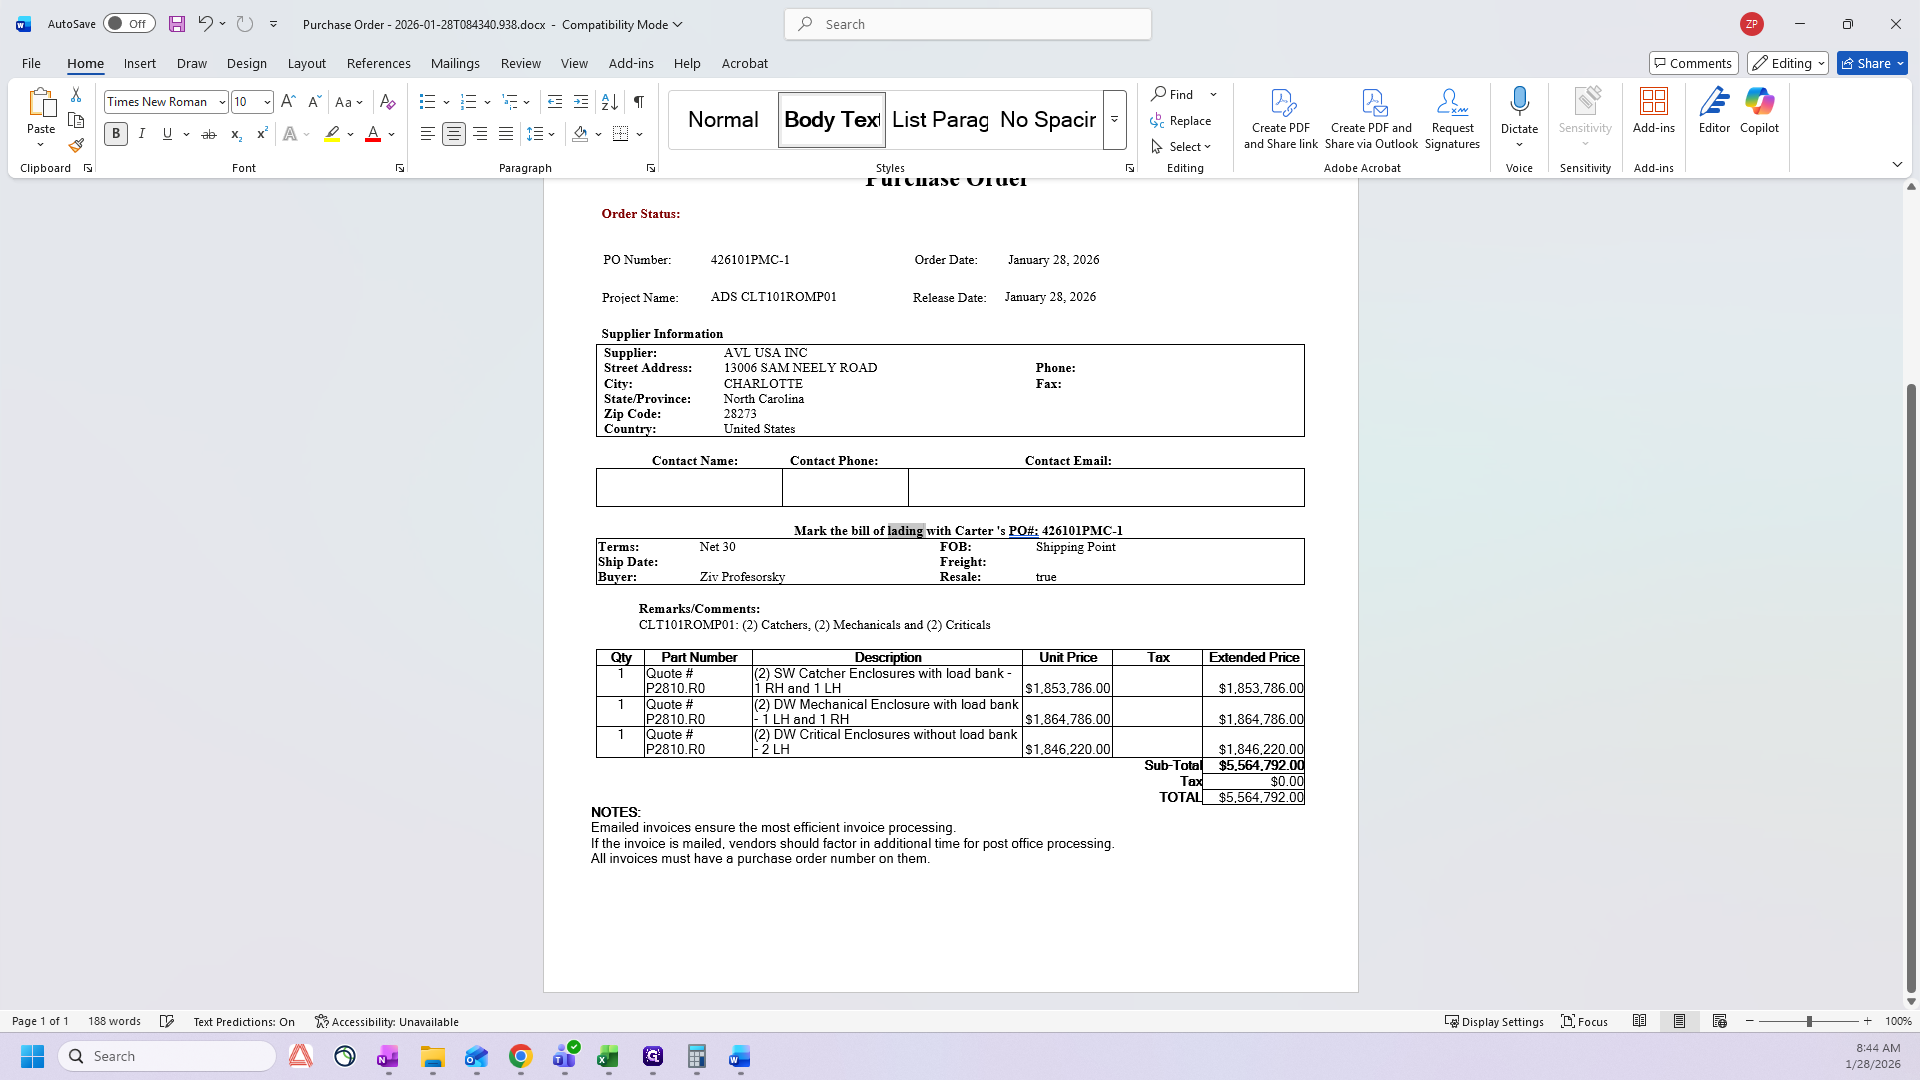
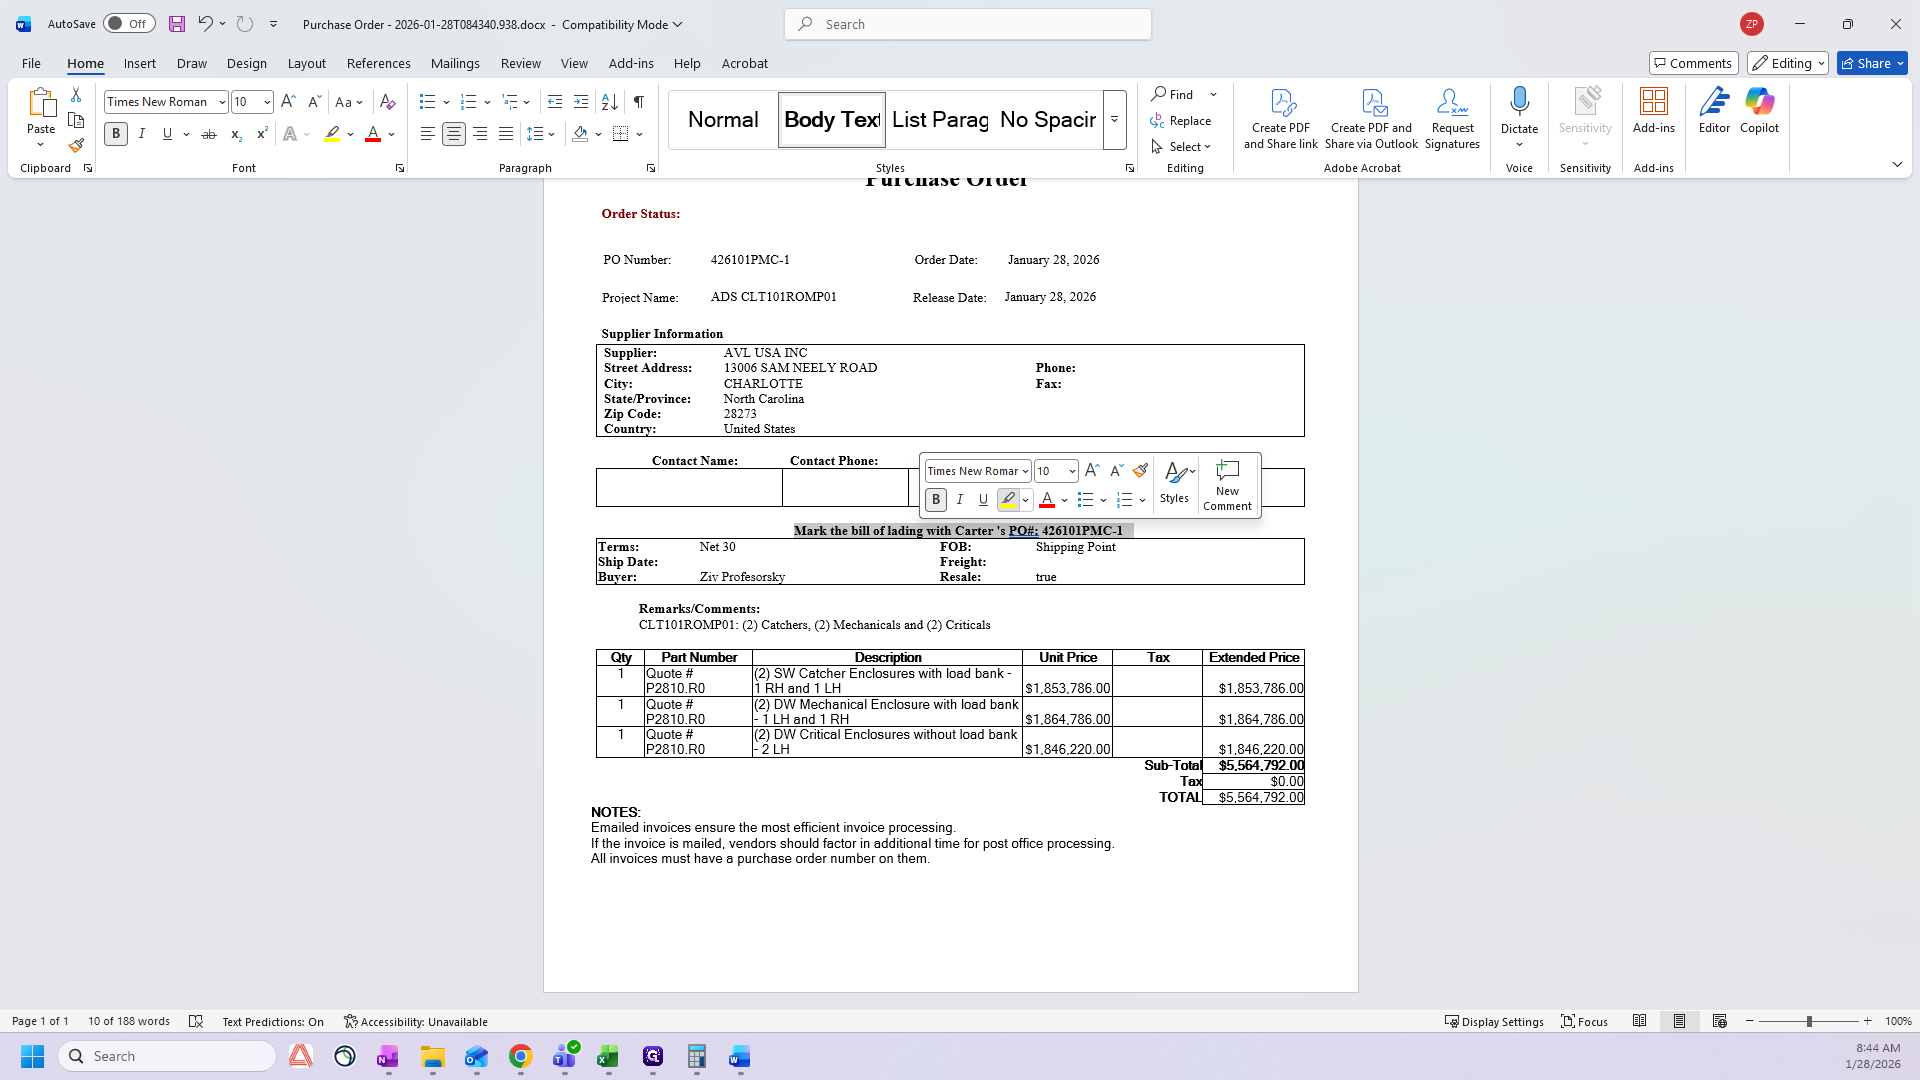

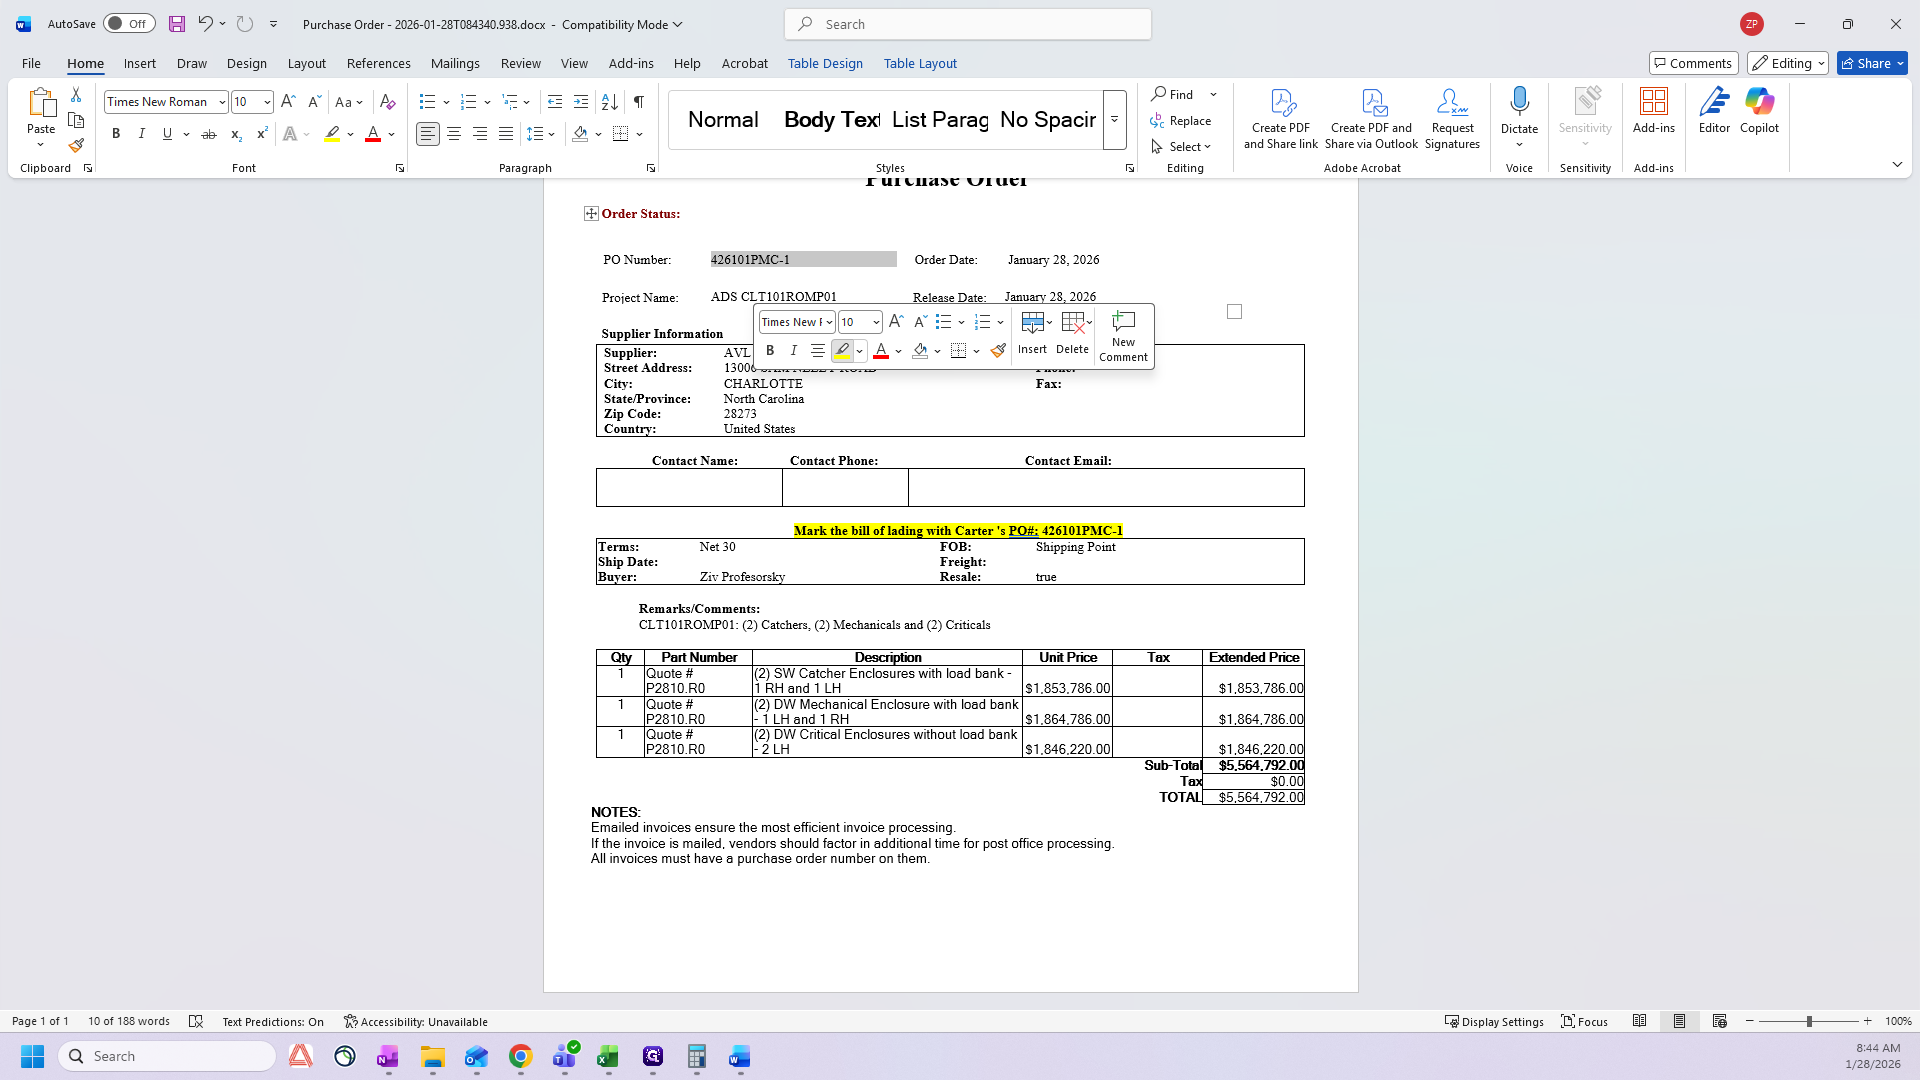
We highlight it to make it easy to find.
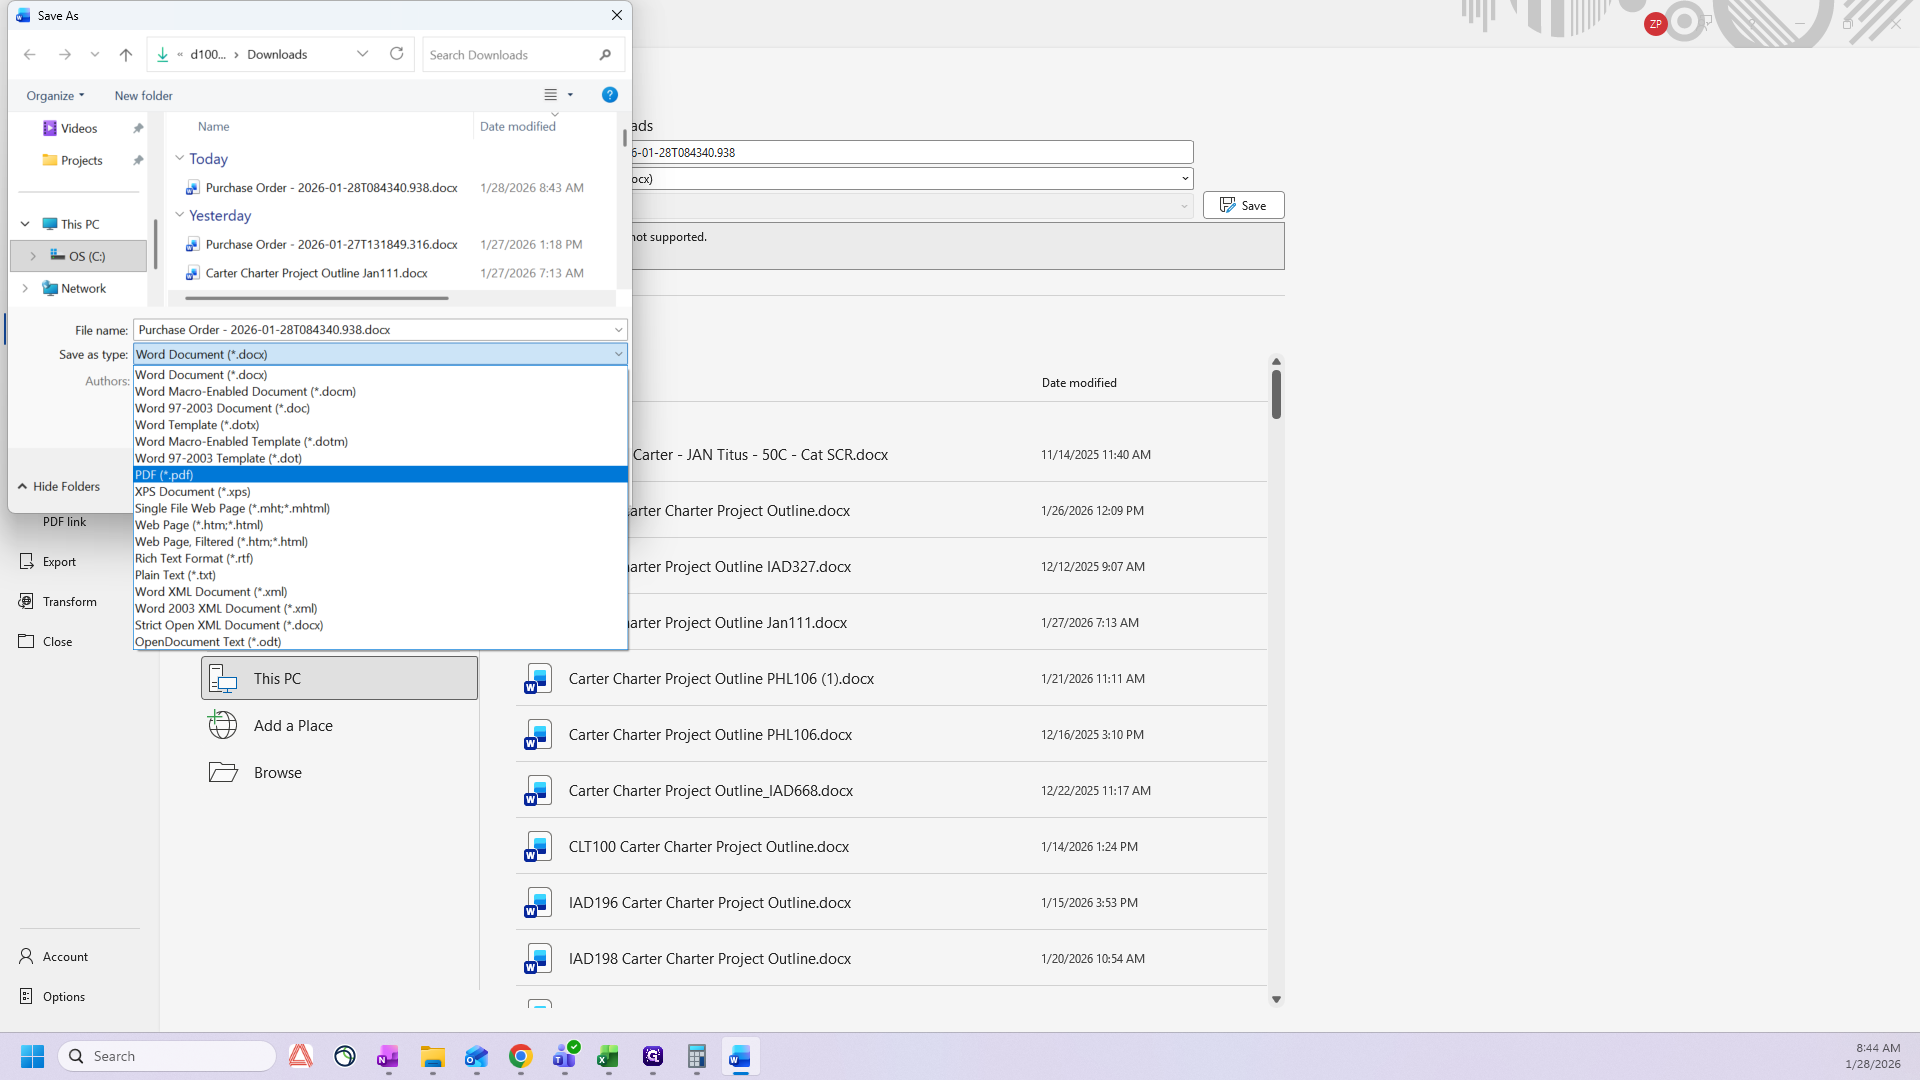
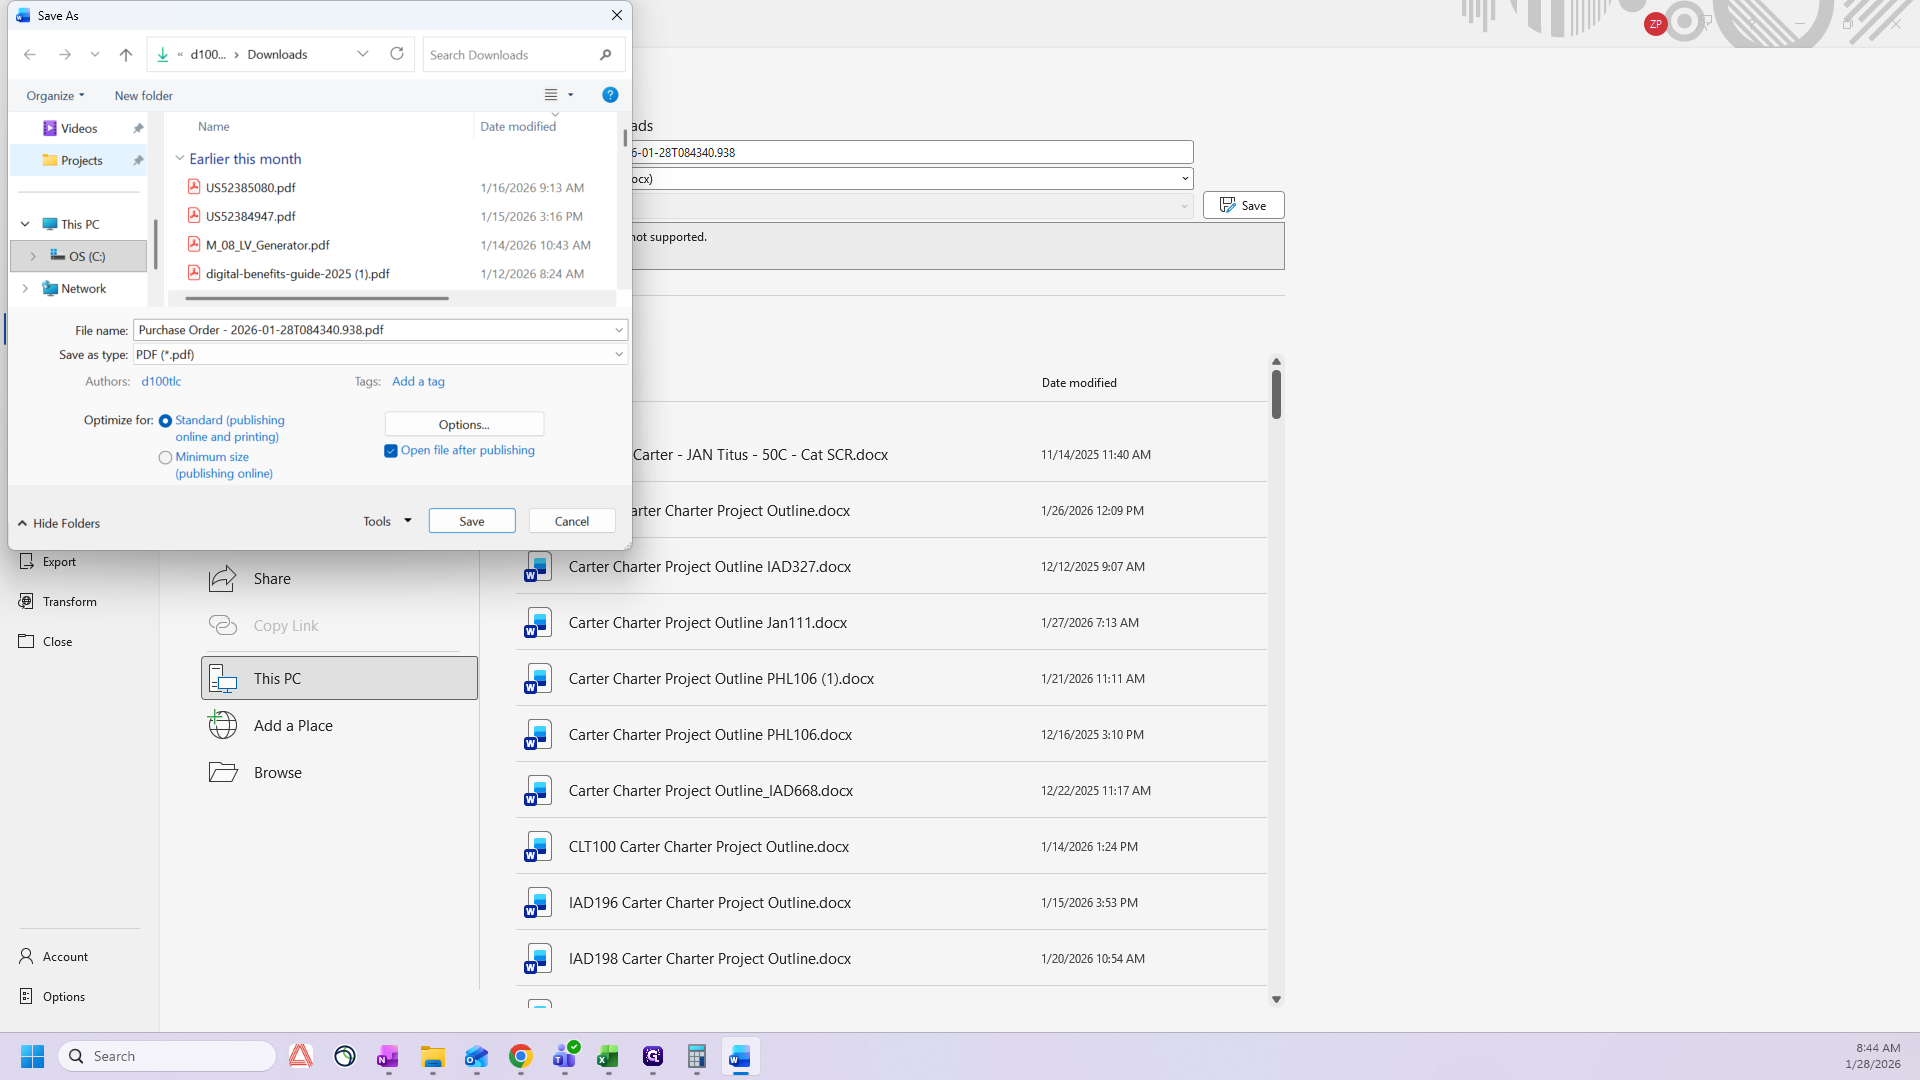
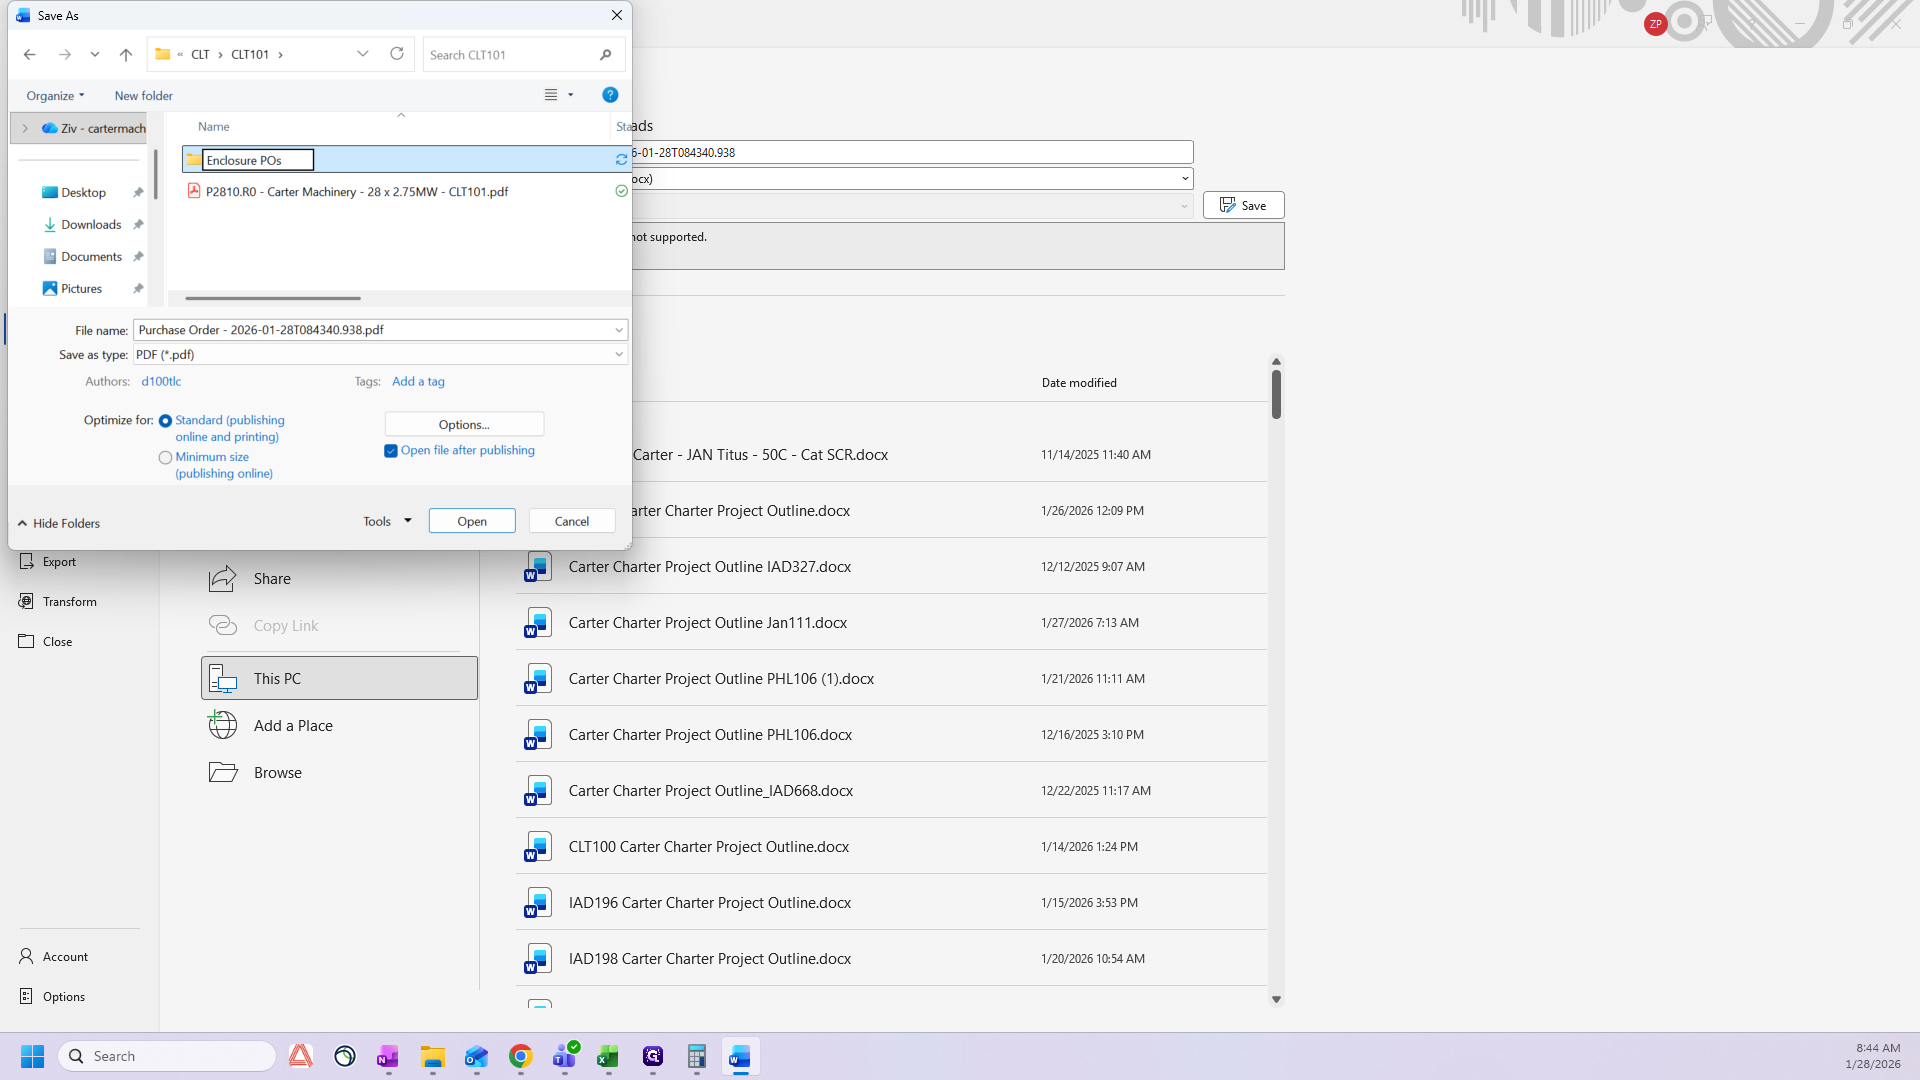
The final step is to create a PDF. Go to Save As and select PDF.
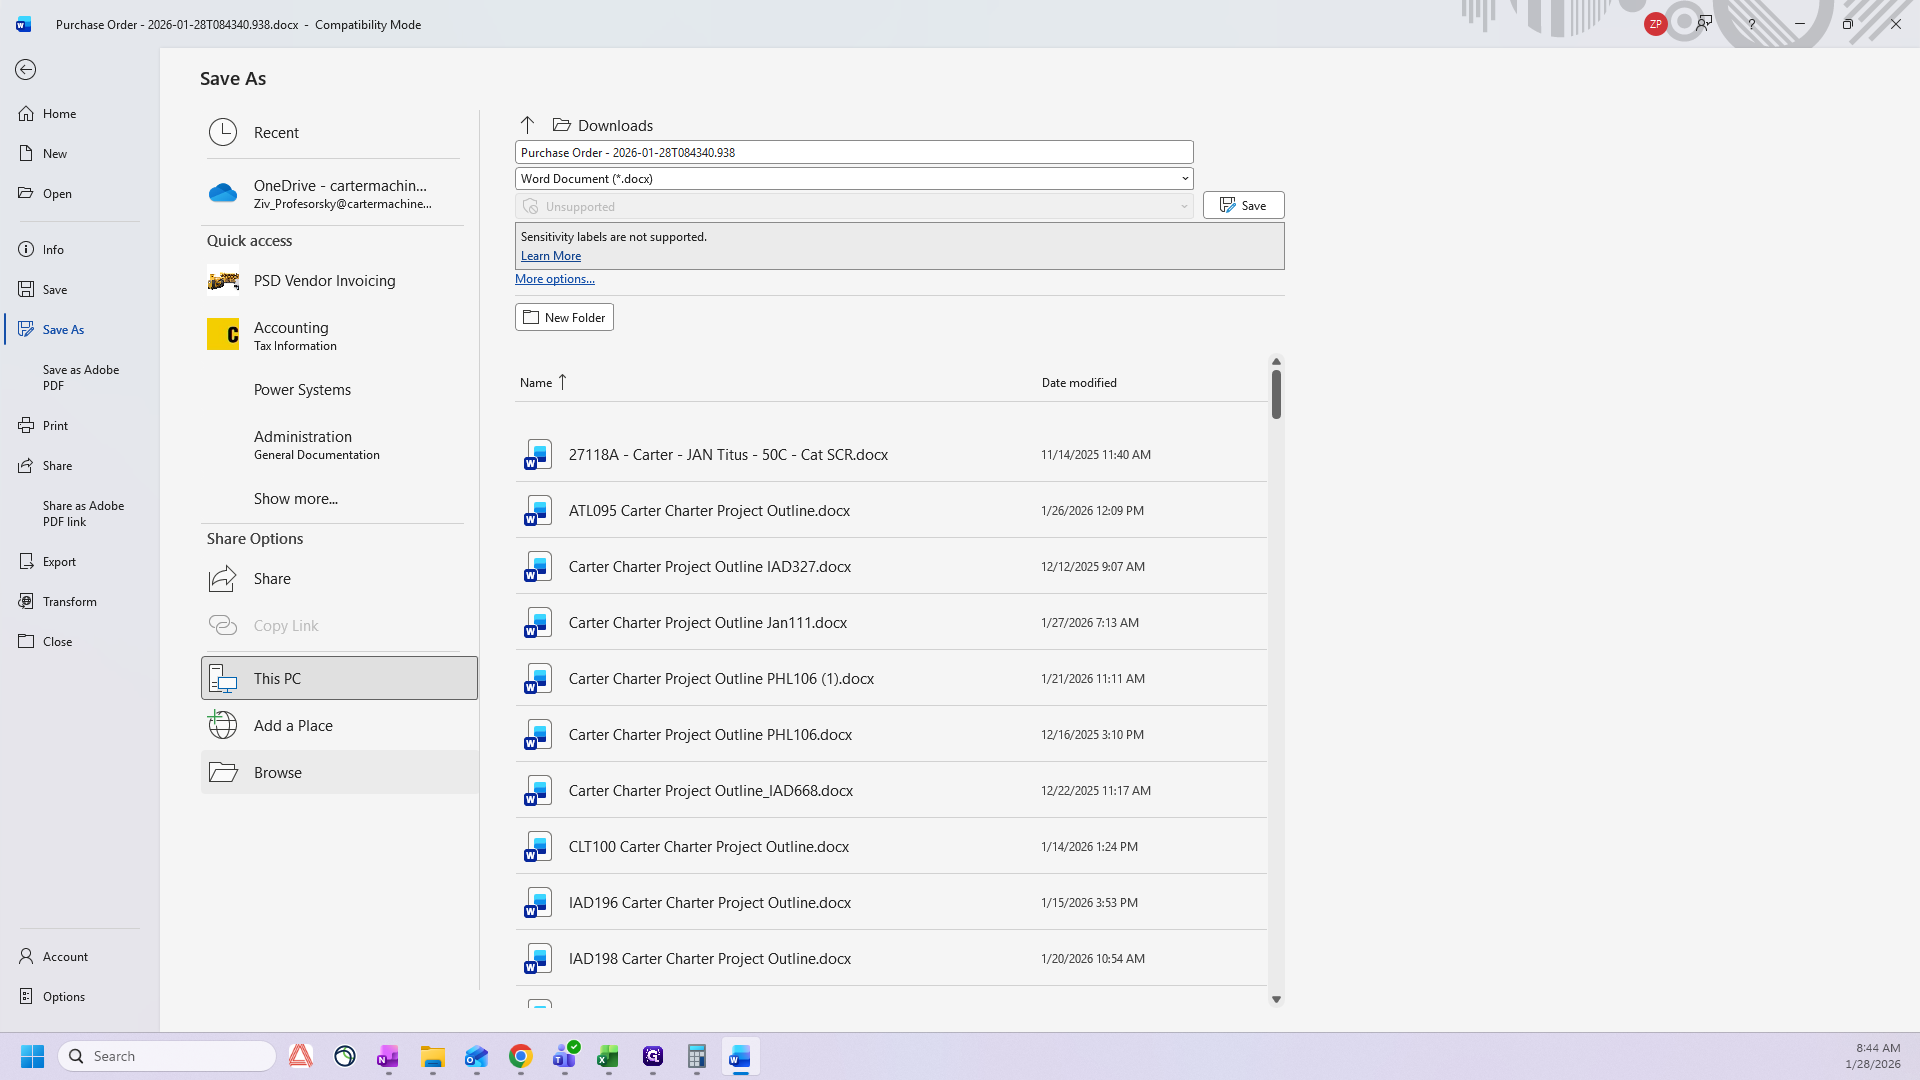
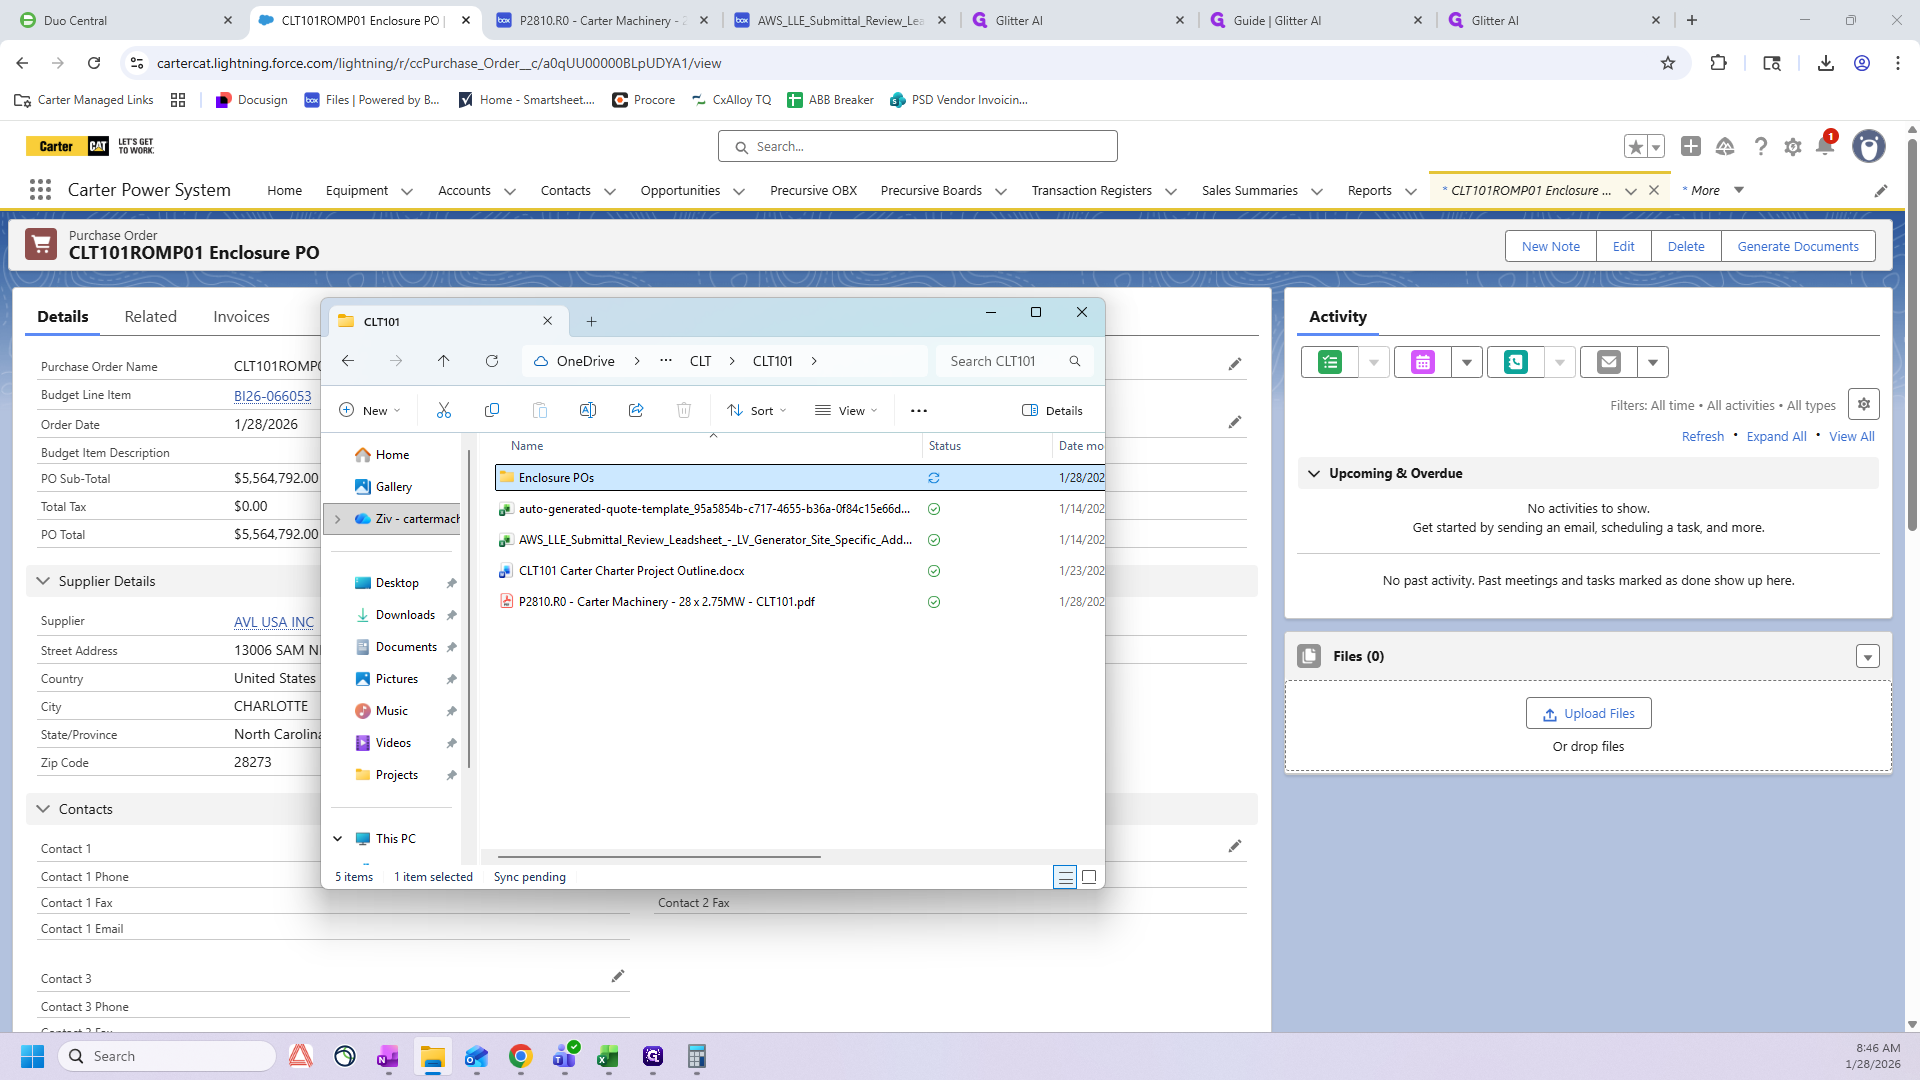
Then I'll find this folder/project in my documents
Now, it will appear as a PDF.
Make sure everything looks correct. Yes, I have my values. I will edit this, organize the pages, and add two items here.
I need to add the quote we used to obtain the values.
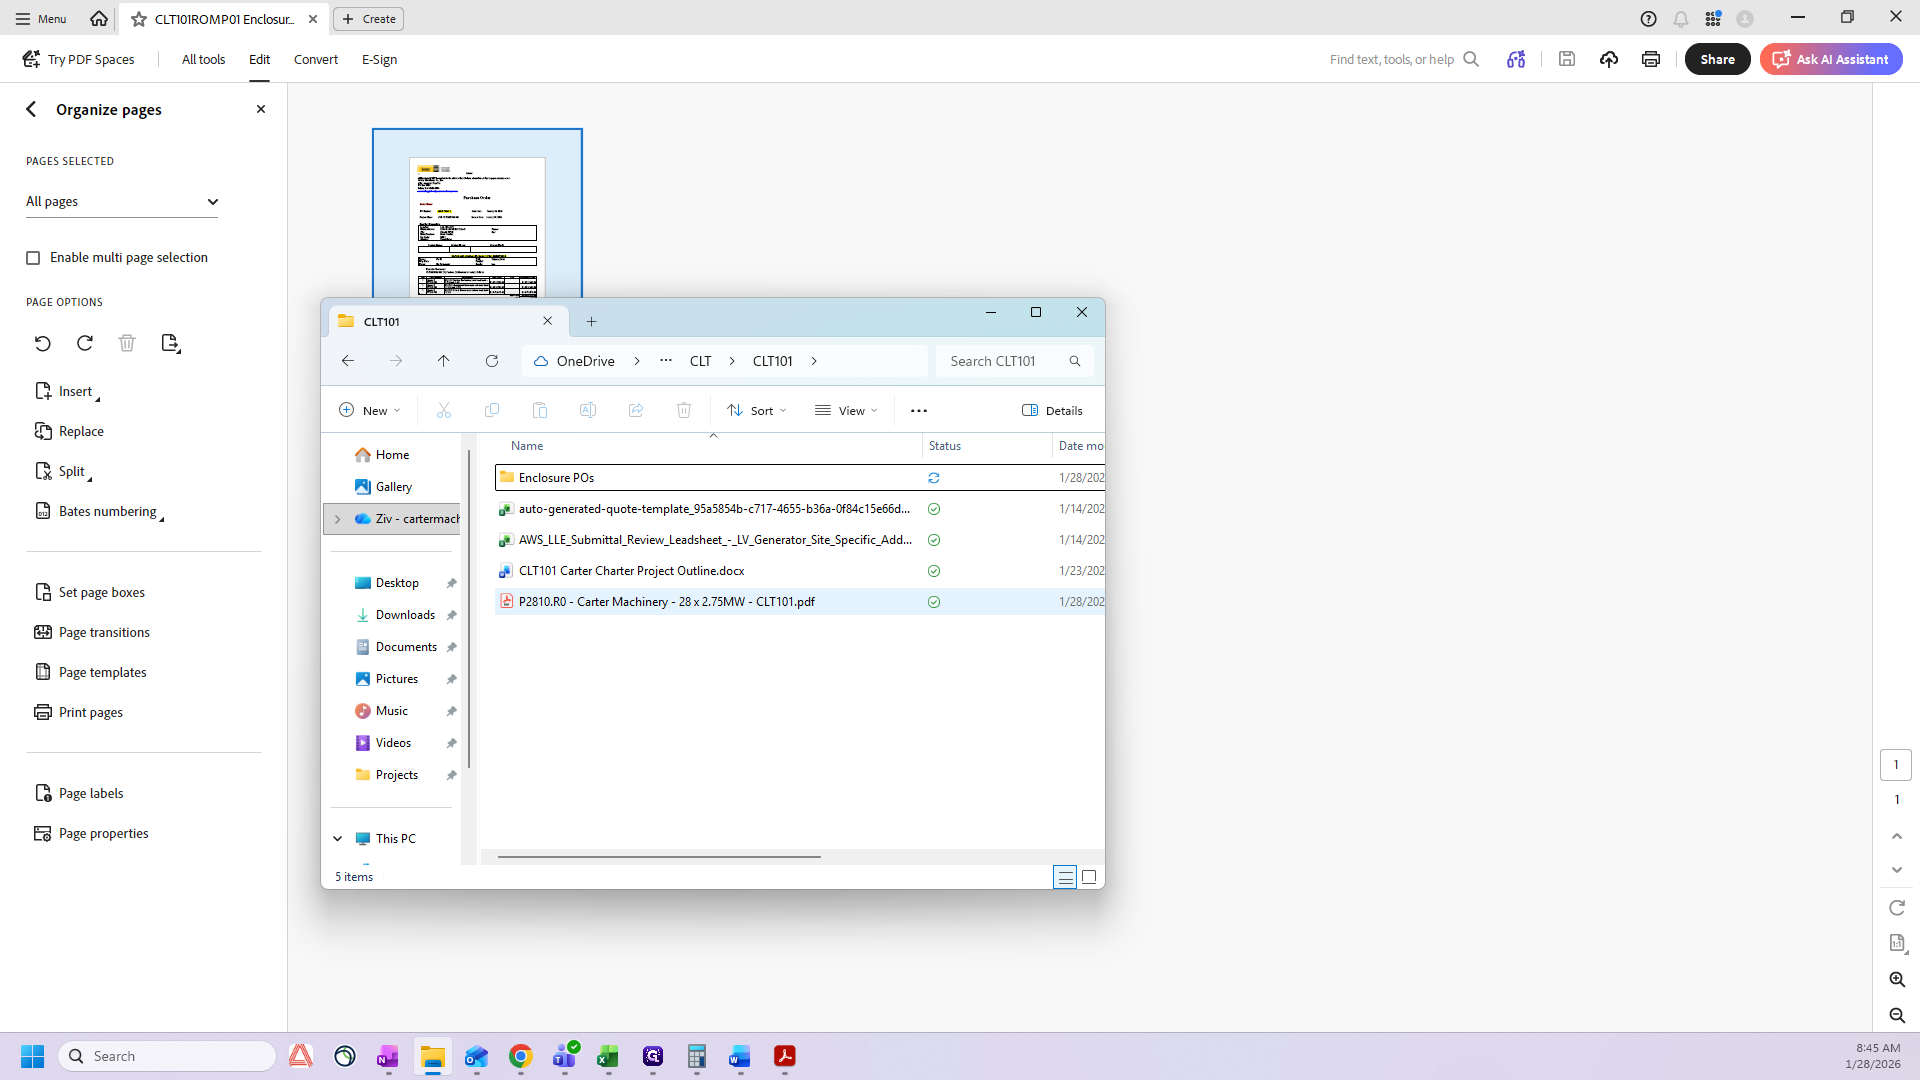
Yes, there are many pages.
In this case, I will delete all the pages that do not contain critical information.
I have the quote header, and the page with all the values.
The last thing I need is our terms and conditions for purchase orders. I keep this on my desktop.
There we go. It looks like this. I just push it in here, and it contains all our information about Carter machinery and how we handle POs.
Now that I have it, I click Save.

That's the PO completed.
We do not need the Word document. You want to click Back to Purchase Order
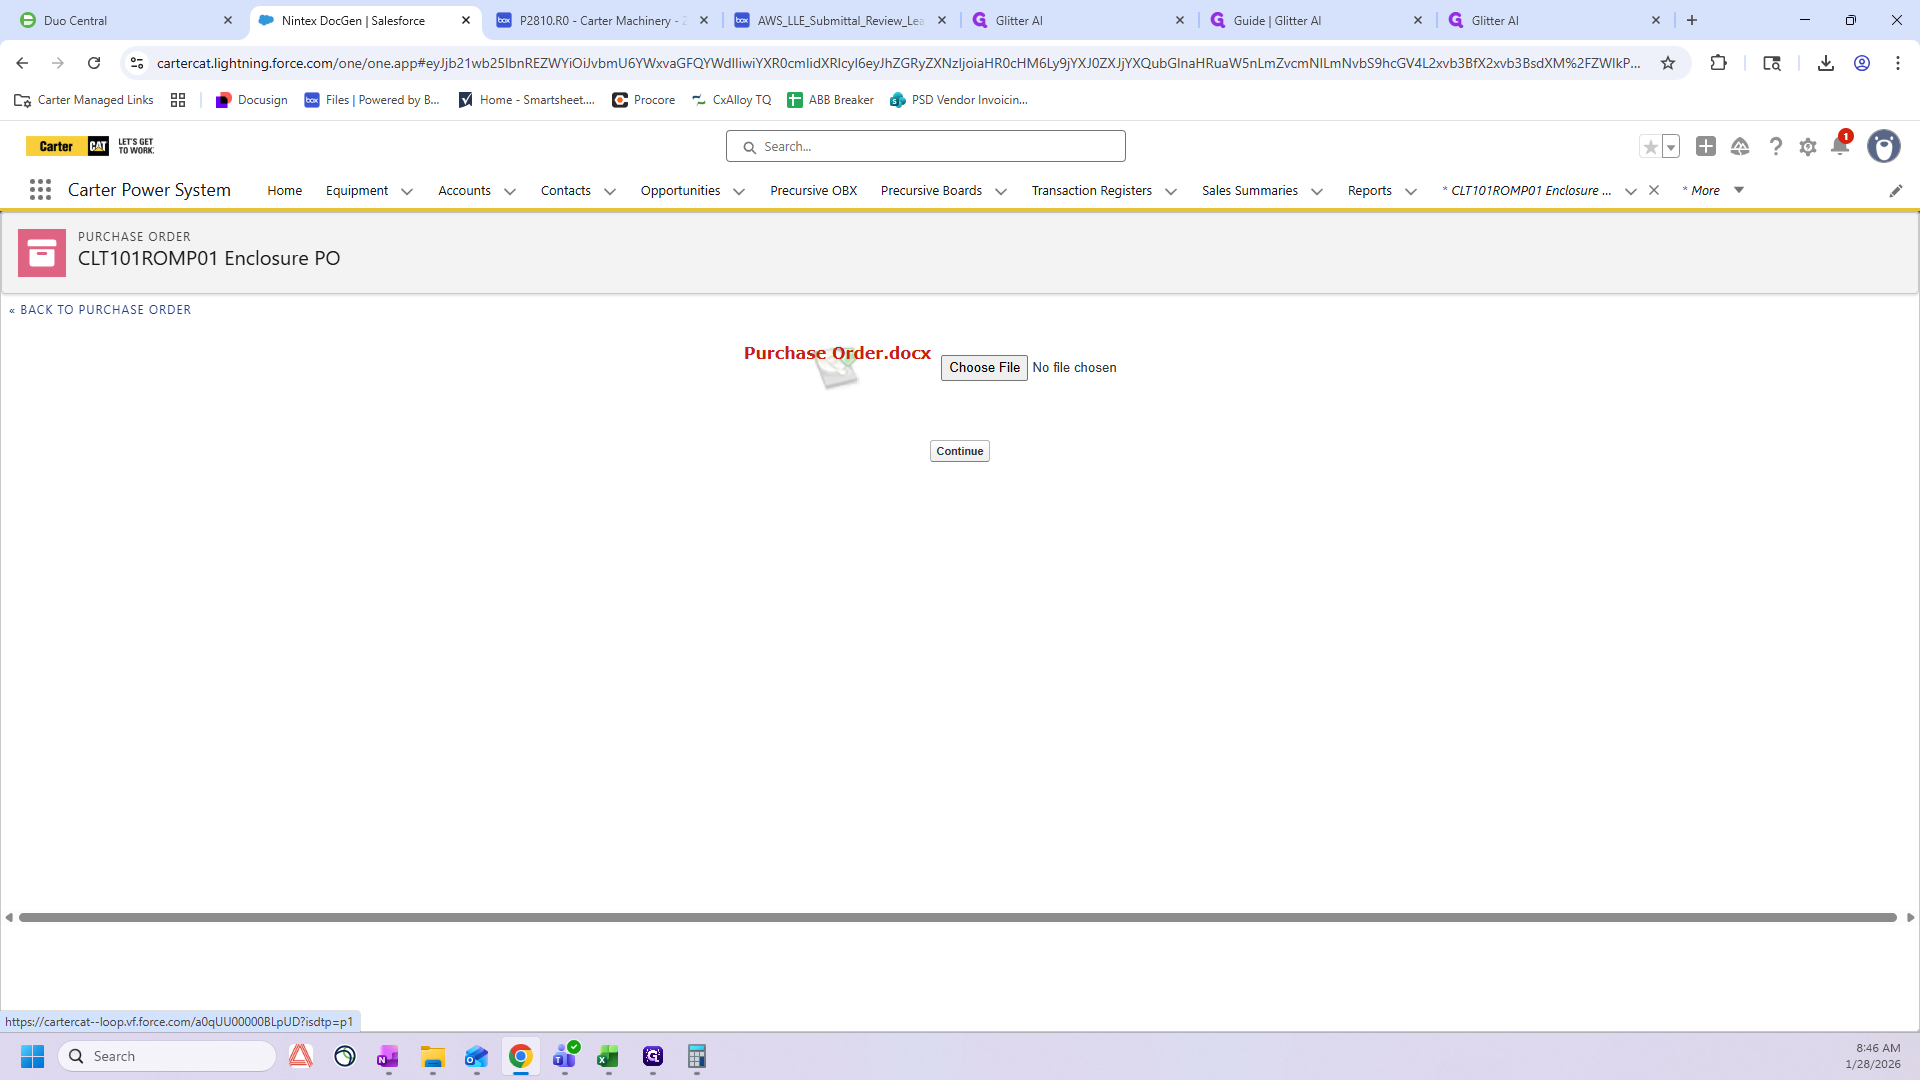
Do not click Continue, or it will add unnecessary documents here.
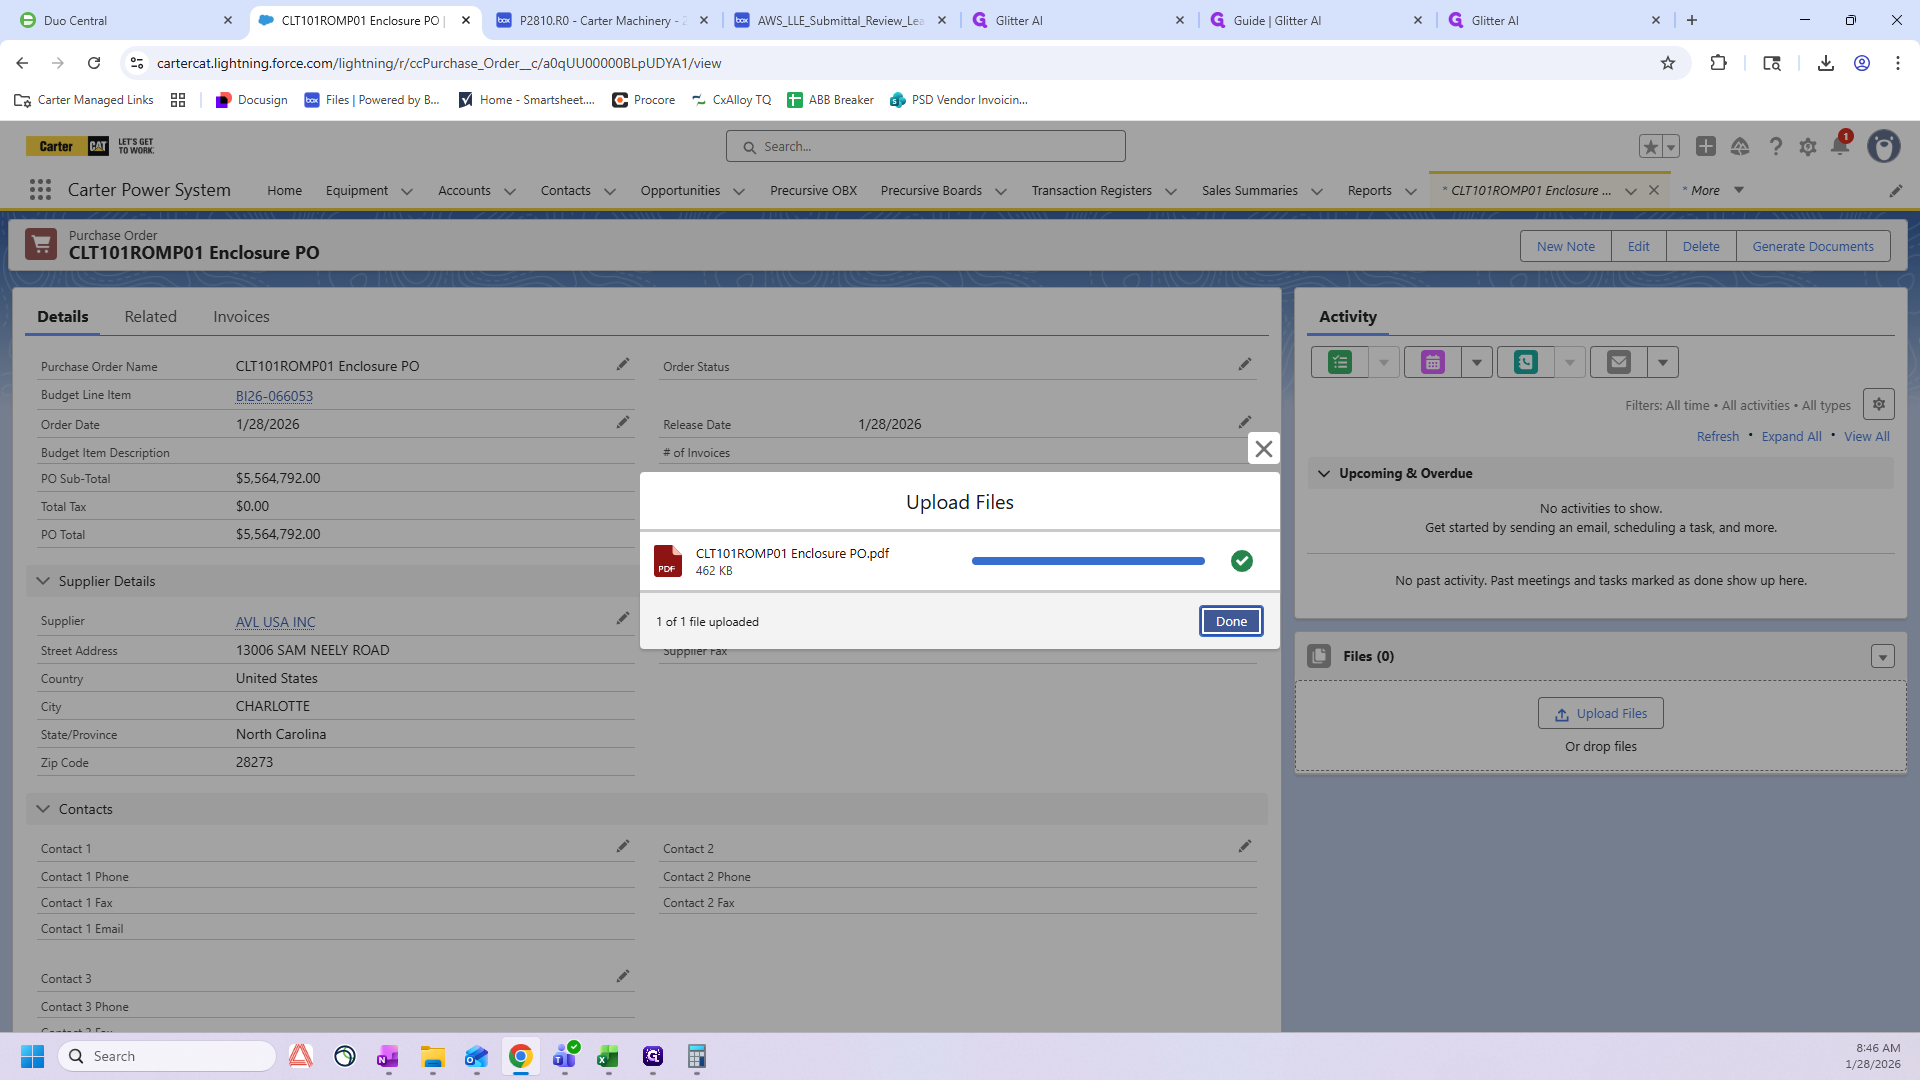
Go to your folder and drag it into Files.
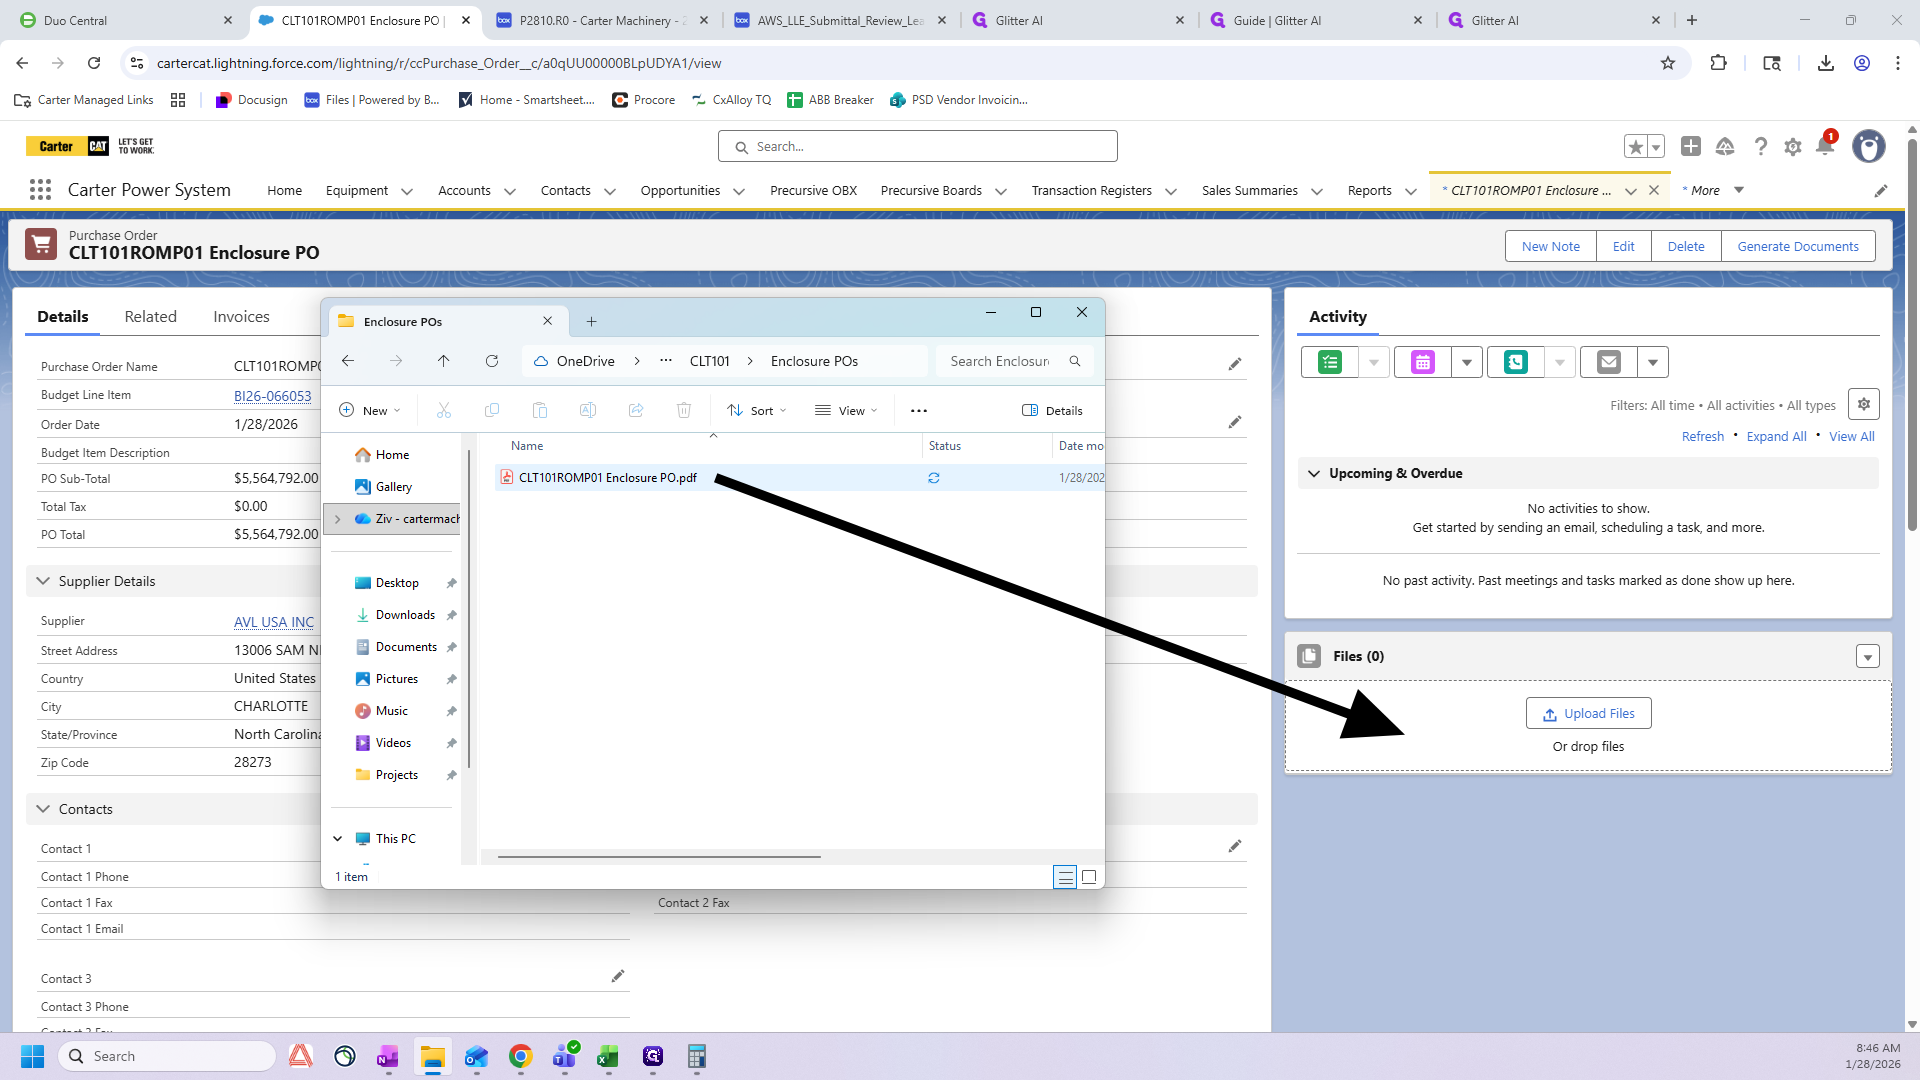
Wait for the green arrow, then click Done.
That is how you create an enclosure PO. Once you have completed all 10 or 12 ROMPs, send them to your enclosure manufacturer or your designated contact.