
How to Create a PLOW Sheet in Basecamp: A Step-by-Step Guide
Learn how to create a PLOW sheet in Basecamp to manage warranty issues, needed parts, and installation tasks effectively.
In this guide, we'll learn how to create a PLOW sheet within the Basecamp application. A PLOW sheet, or Punch List Open Work-order, is a tool used by installers to communicate with project management about warranty issues, necessary parts, and tasks required to complete installations. We'll start by accessing the client file in Basecamp, navigating to the PLOW area, and using a Google Sheets template to create a new PLOW. This process ensures that all relevant information is shared with the team, facilitating efficient project management and communication.
Let's get started
To begin, access a client file in Basecamp. Once there, navigate to the Documents and Files section and click on it.
Next, navigate to the PLOW section within Documents and Files subfolder. Enter that subfolder and click on it.
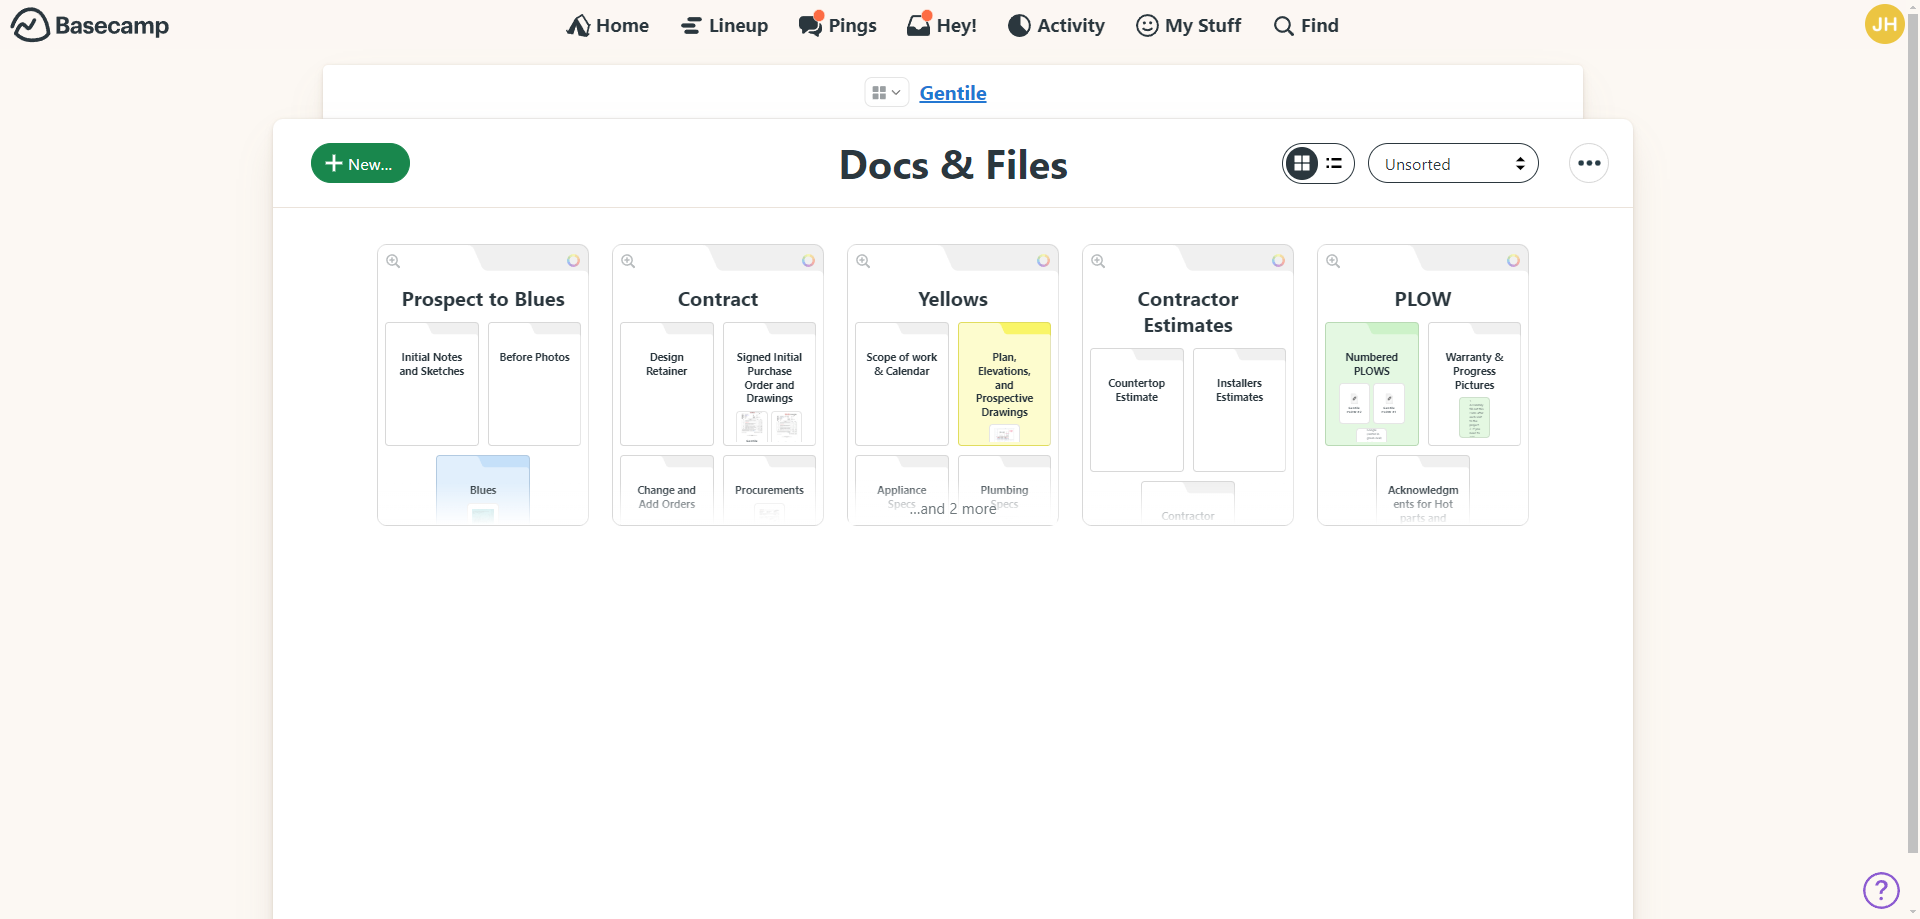
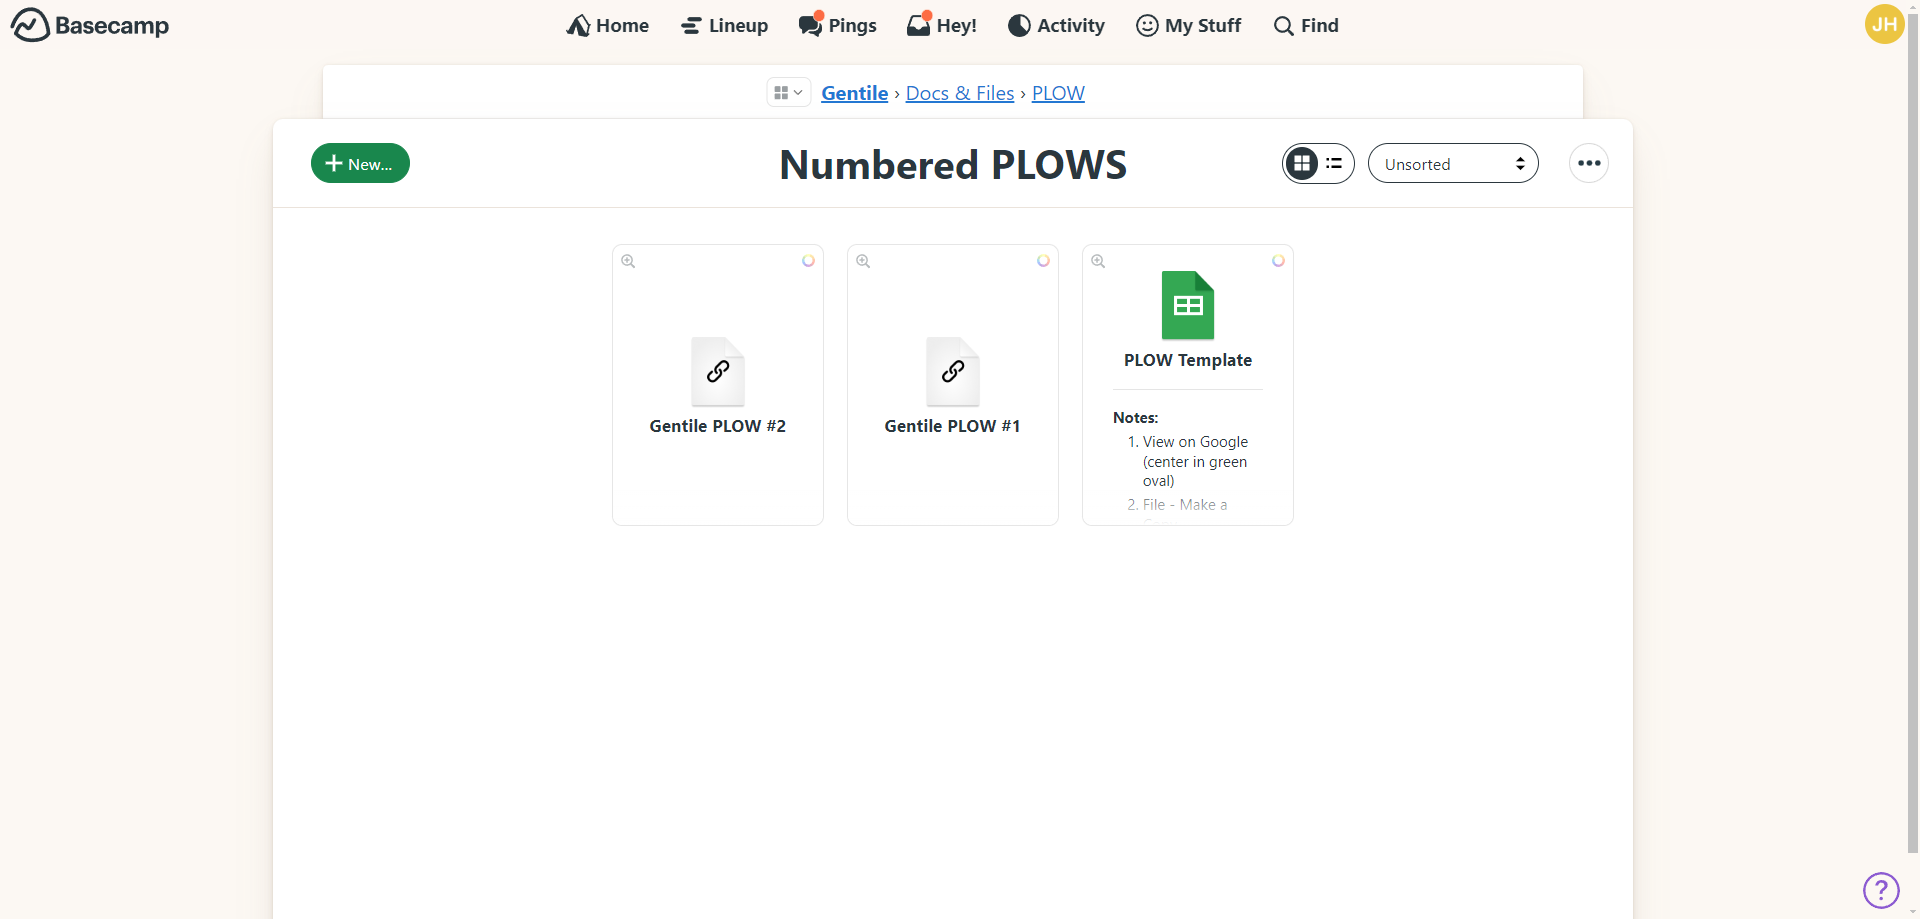
Within the PLOW folder, navigate to the numbered PLOWs. Click there, and if there are already numbered PLOWs, you can build from one of those.

If not, go to the PLOW template. Let's start a new PLOW by clicking on the PLOW template.
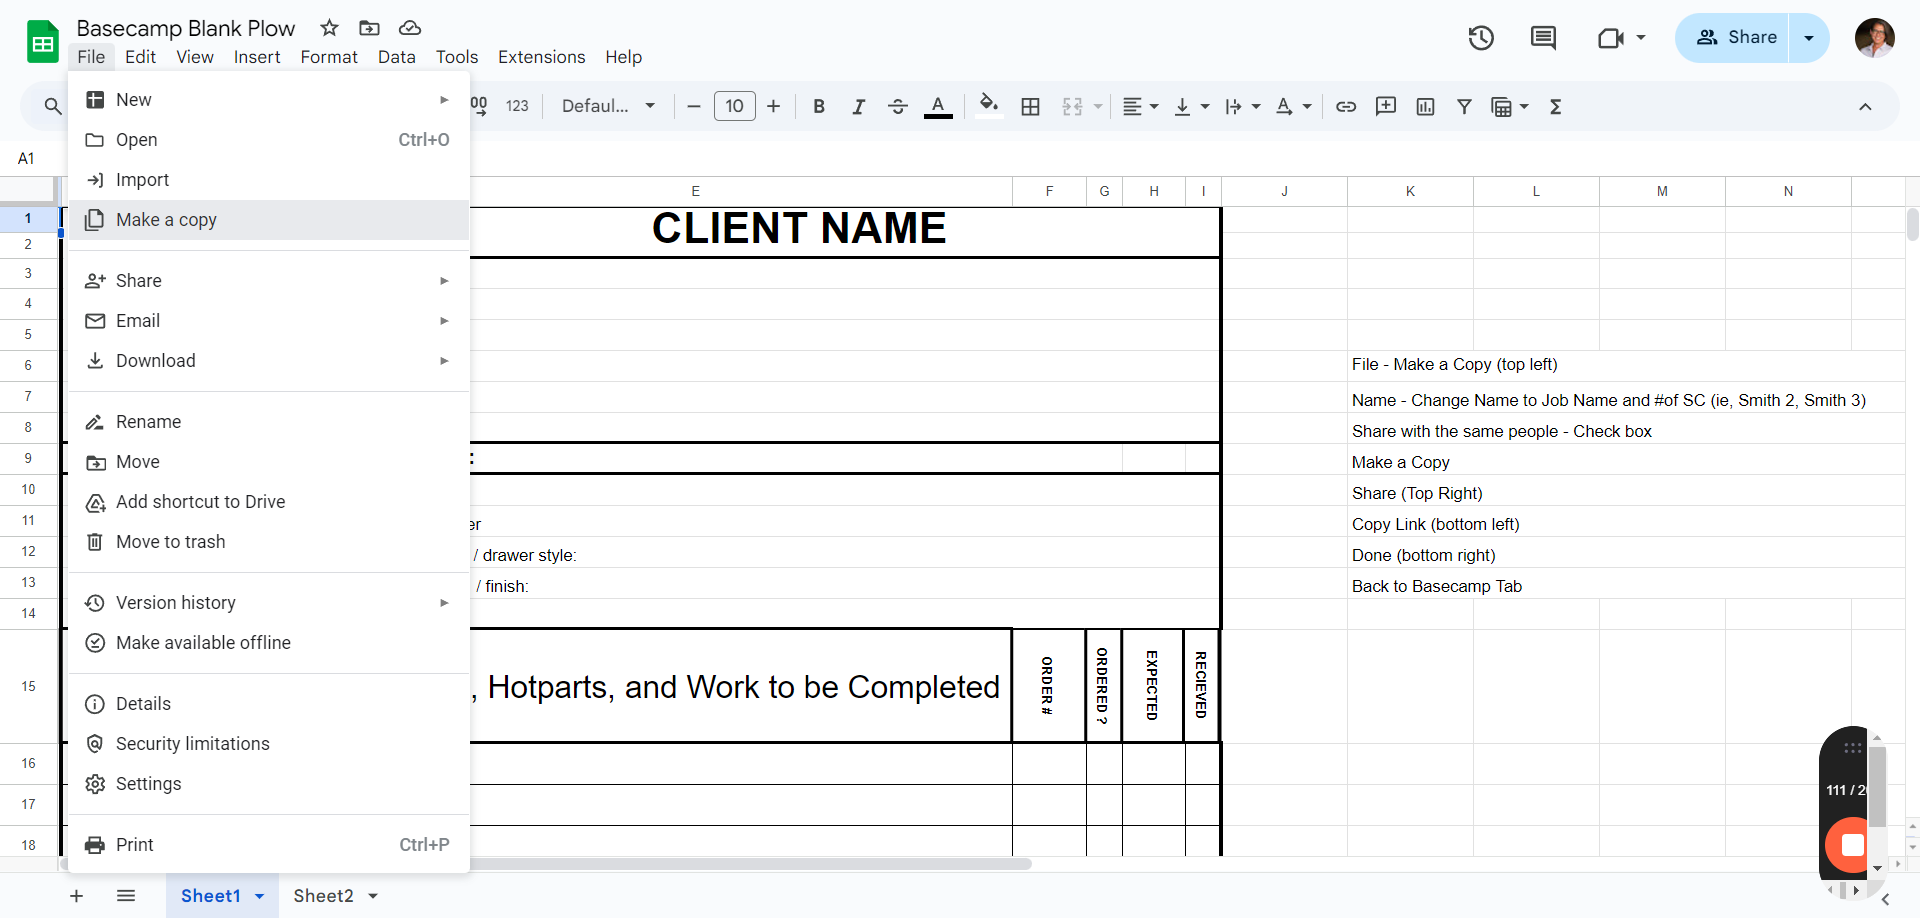
Instructions are listed here to help you make copies. This guide will show you how to copy the PLOW template to create a new one. First, click on "View Google PLOW Template."
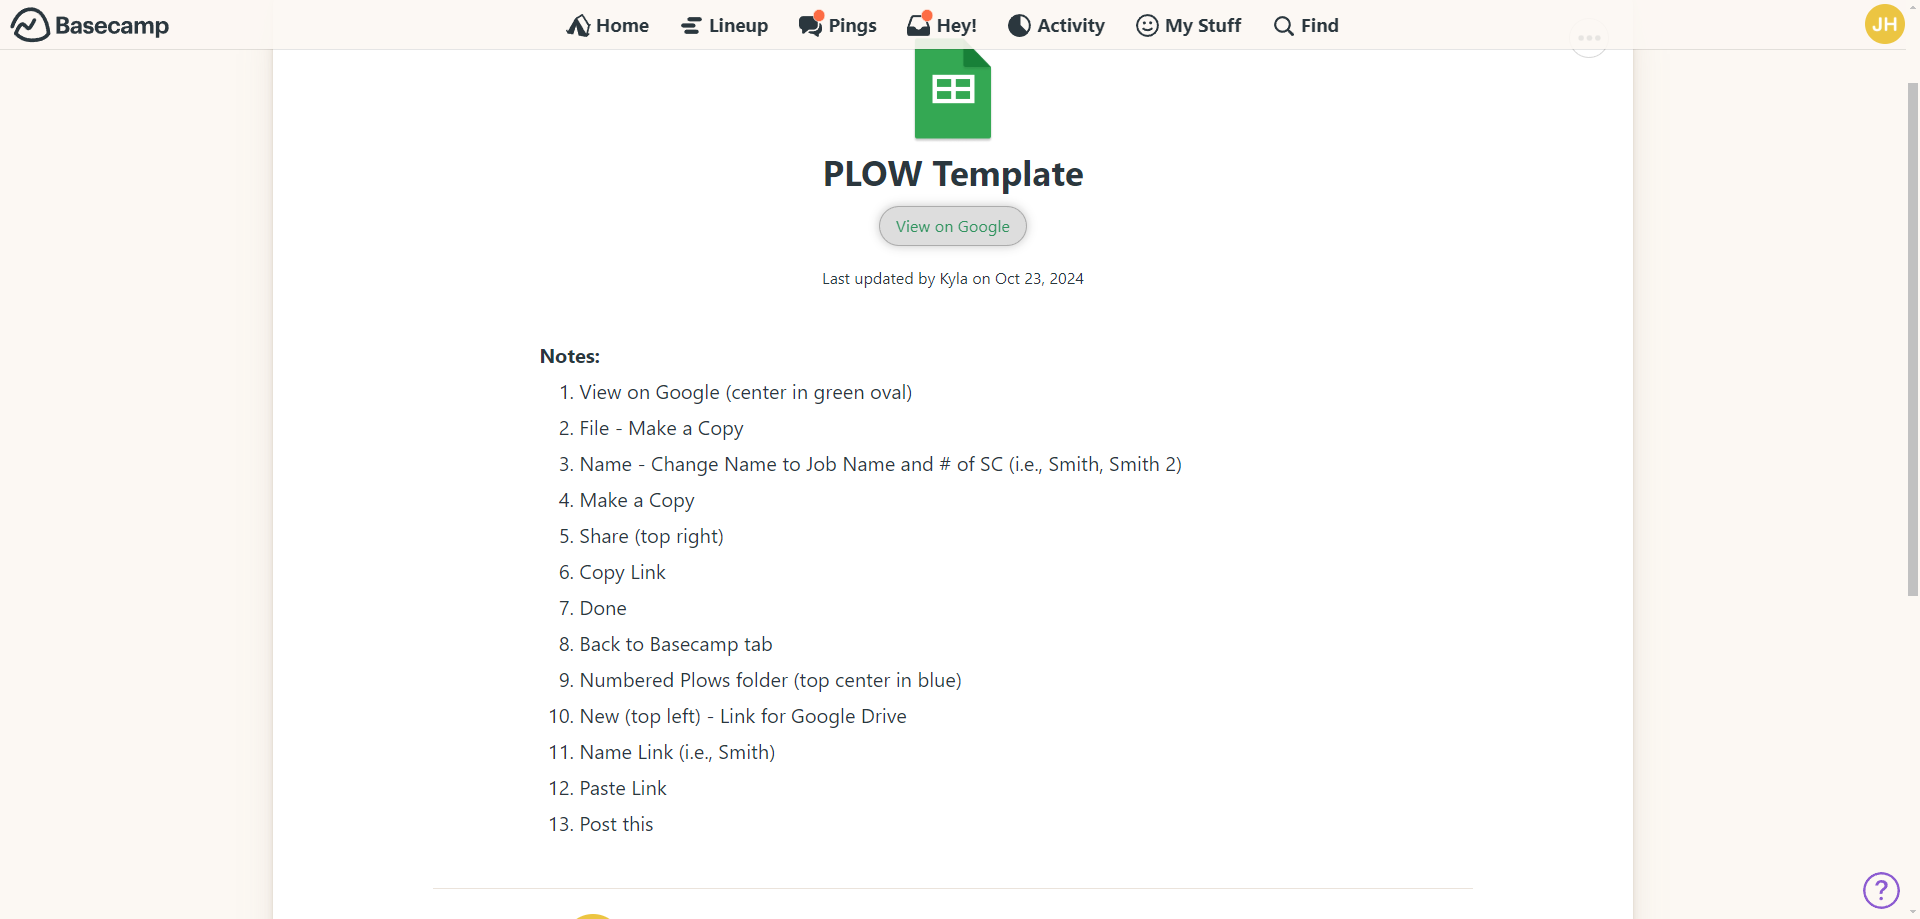
Once in the template, go to the File tab at the top left and click it.
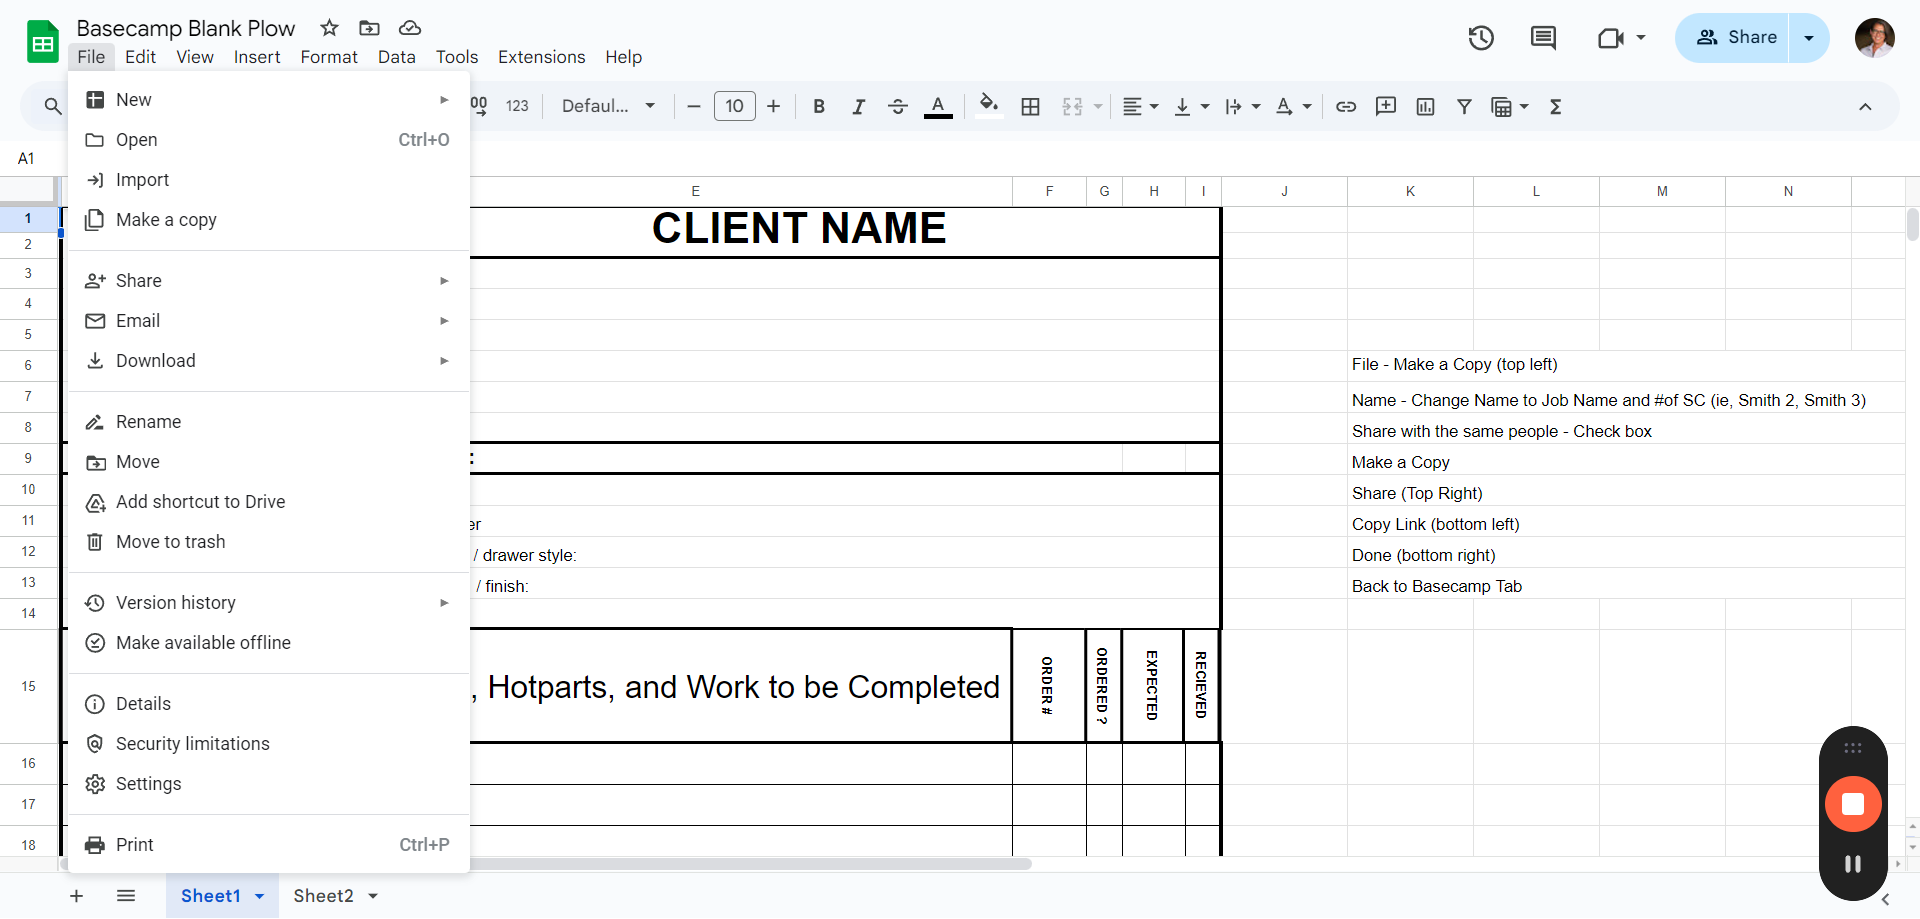
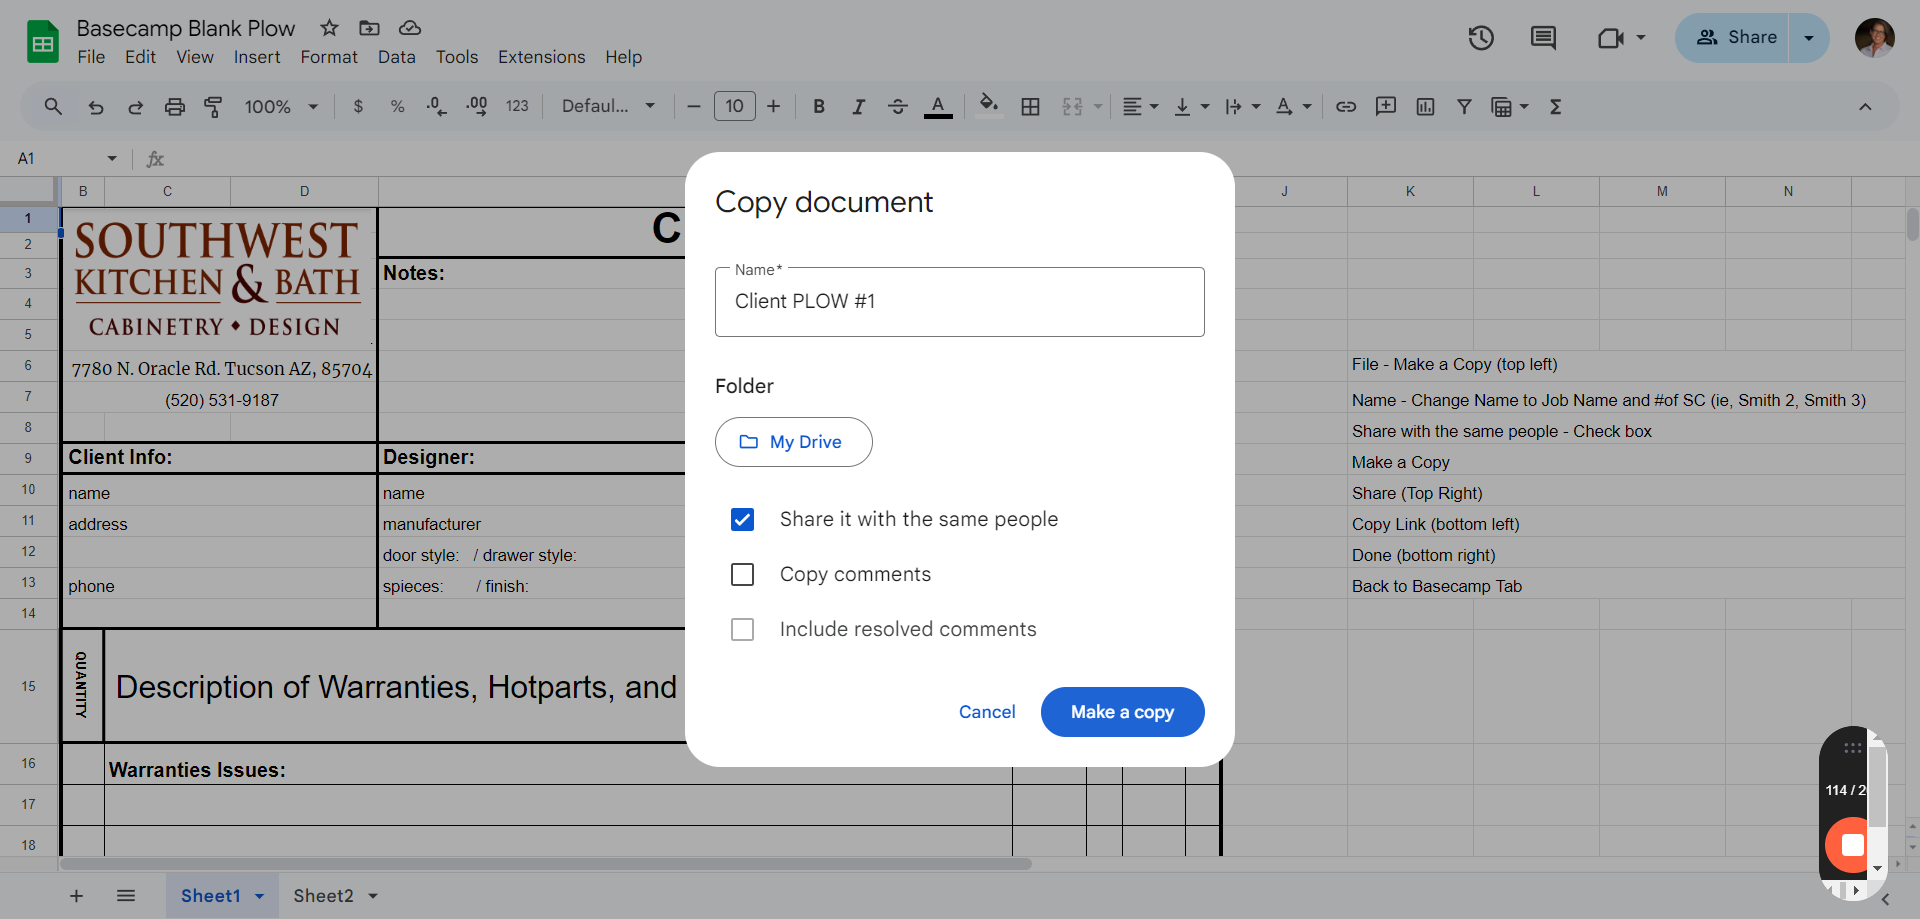
First, go to "Make a Copy" and click on it. When the pop-up menu appears, rename your PLOW.
Then you can enter the client's name and assign it a number based on the current sequence. For our purposes, we will use "Client PLOW #1."
It's important to click on "Share with the same people." This will allow the Google Sheet to be shared with everyone who already has access to the Basecamp client file.
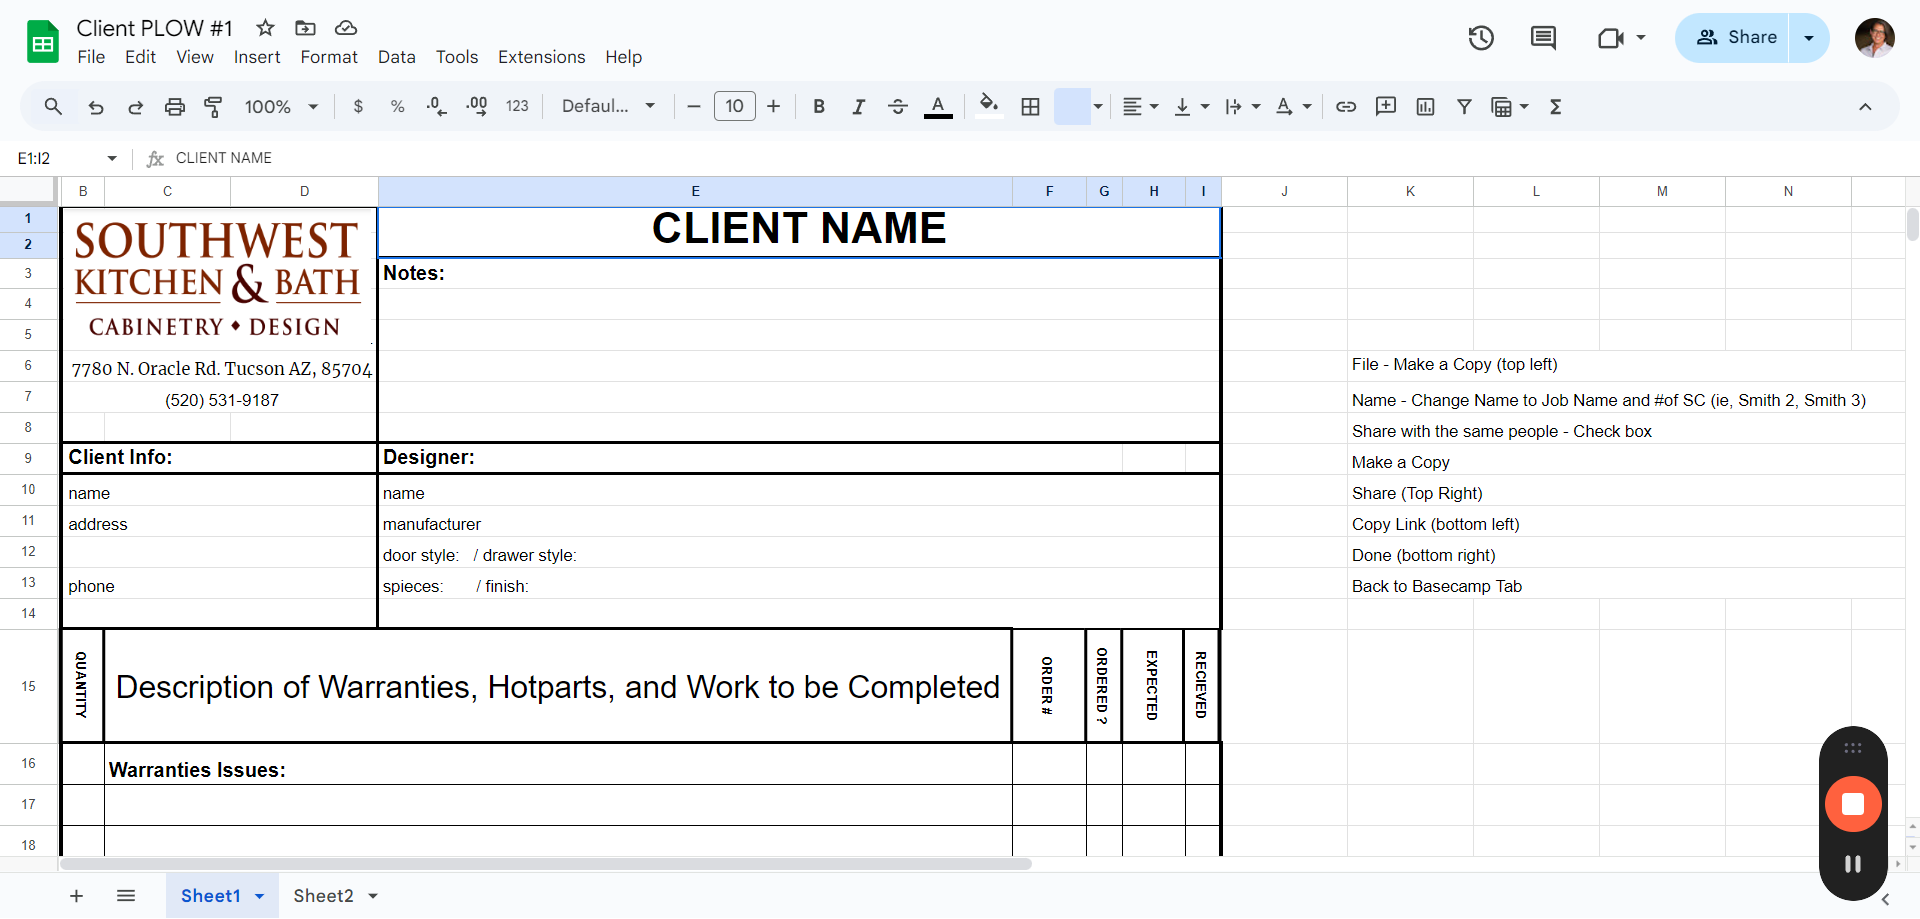
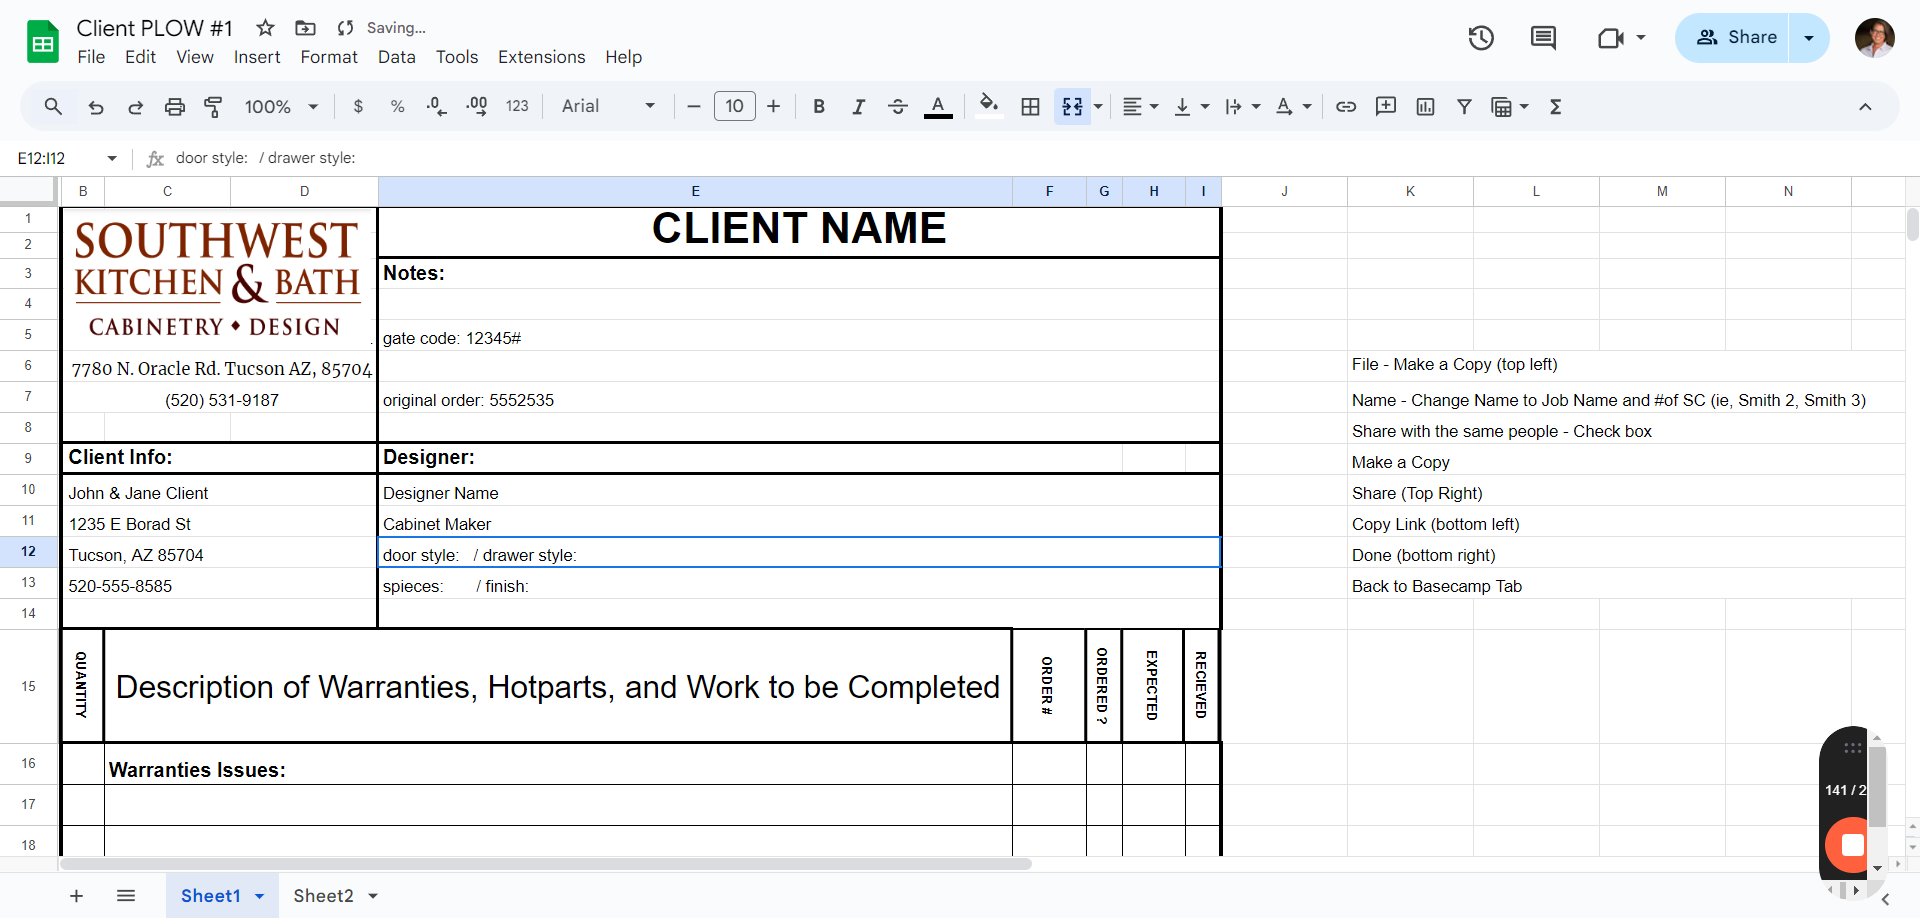
You will notice that we are now in a "Client PLOW #1", the renamed copy of the template. After this, go to your original template and exit to avoid altering it. Once in Client PLOW, the first step is to enter your client's name.
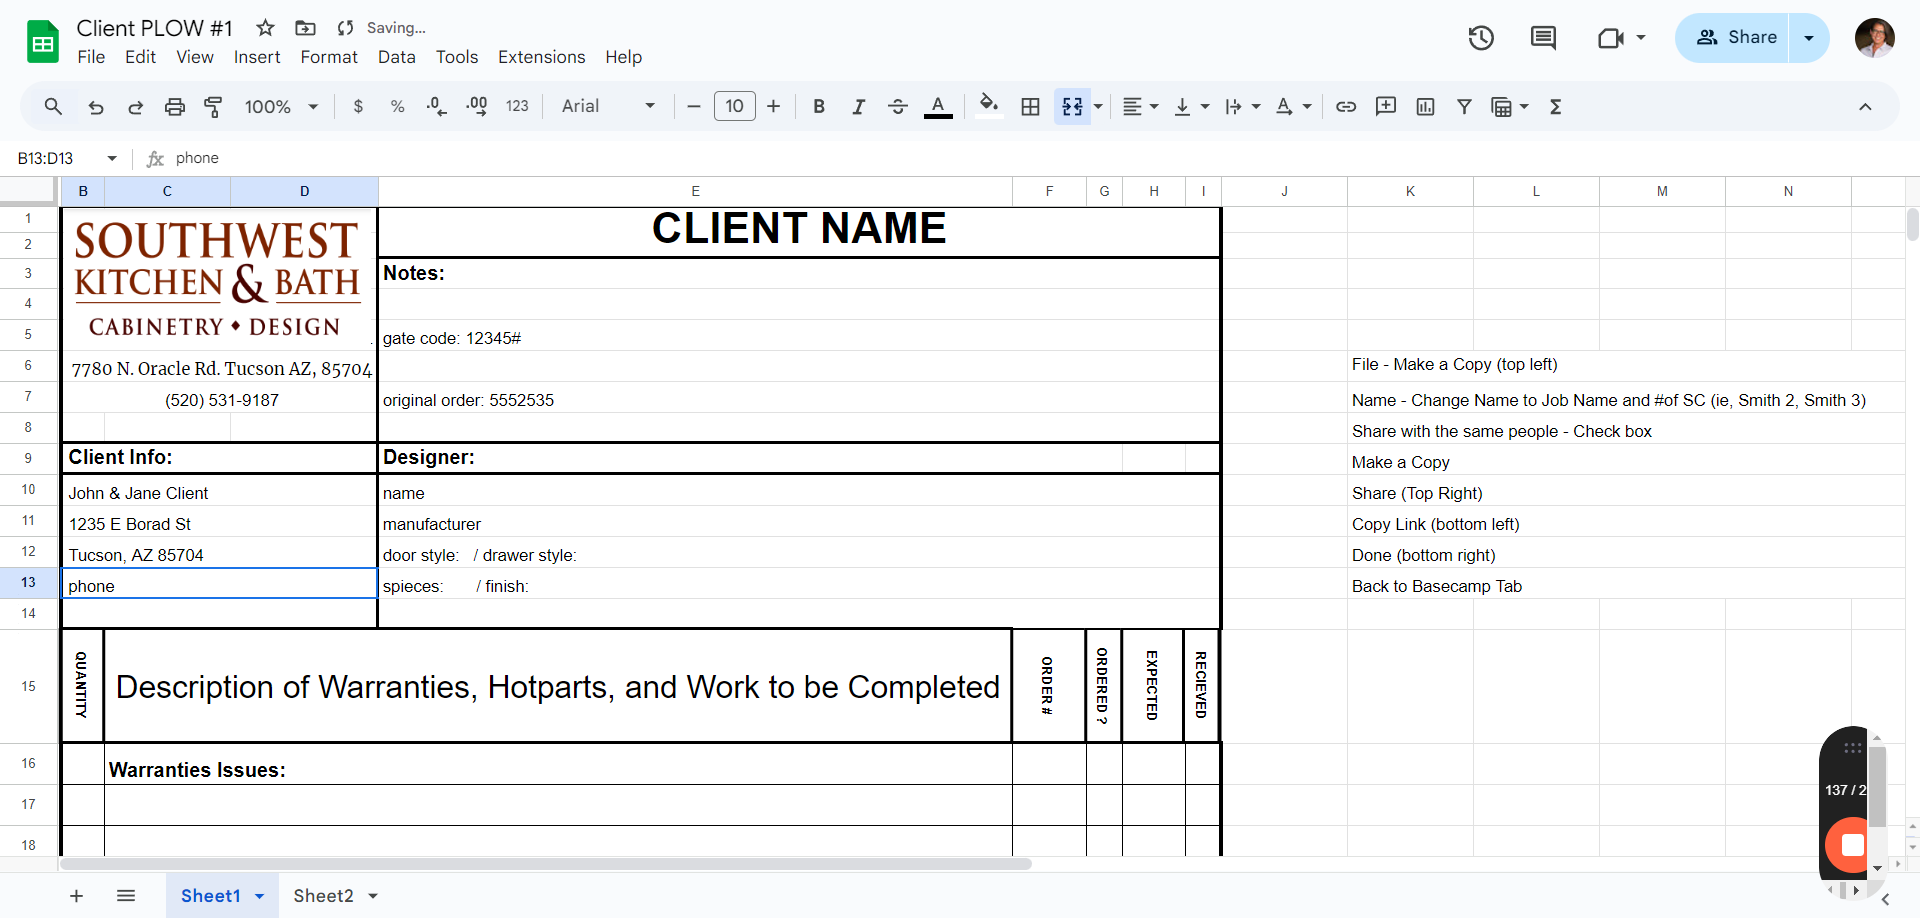
The Notes section is where we keep important information like gate codes or lockbox codes. Anything crucial for our installers to access the property and complete their installation should be placed here.
In this section its important to also include the original order numbers for the client's project. This allows anyone to quickly find and reference the original acknowledgment if there is a need to place warranty or hot part orders
Our Notes section is now complete.
After completing the Notes section, proceed to the Client Info area. Enter all the client's information, including their name, address, and phone numbers. If there are multiple phone numbers, include them all.
Once the client information is complete, we will enter the designer and design information.
Go to the "Designer:" box, where you'll find some prompts. Enter your designer's name, manufacturer, door style, drawer style, wood species, and wood finish of your cabinetry. It's crucial to take all this information from the signed contract or purchase order, as it contains the final agreed-upon design details. Ensure you input this information directly from those documents.
Once the designer's name, cabinet manufacturer, door style, drawer style, species, and finish are entered, we're almost done. If there are any warranty issues, hot parts needed, or other items to be completed, we list them in the appropriate areas of the form's lower section. Sometimes there are parts to note before we proceed, which can be entered at any time. For example, if there was a damaged part, you would enter that in the "Warranty Issues:" section
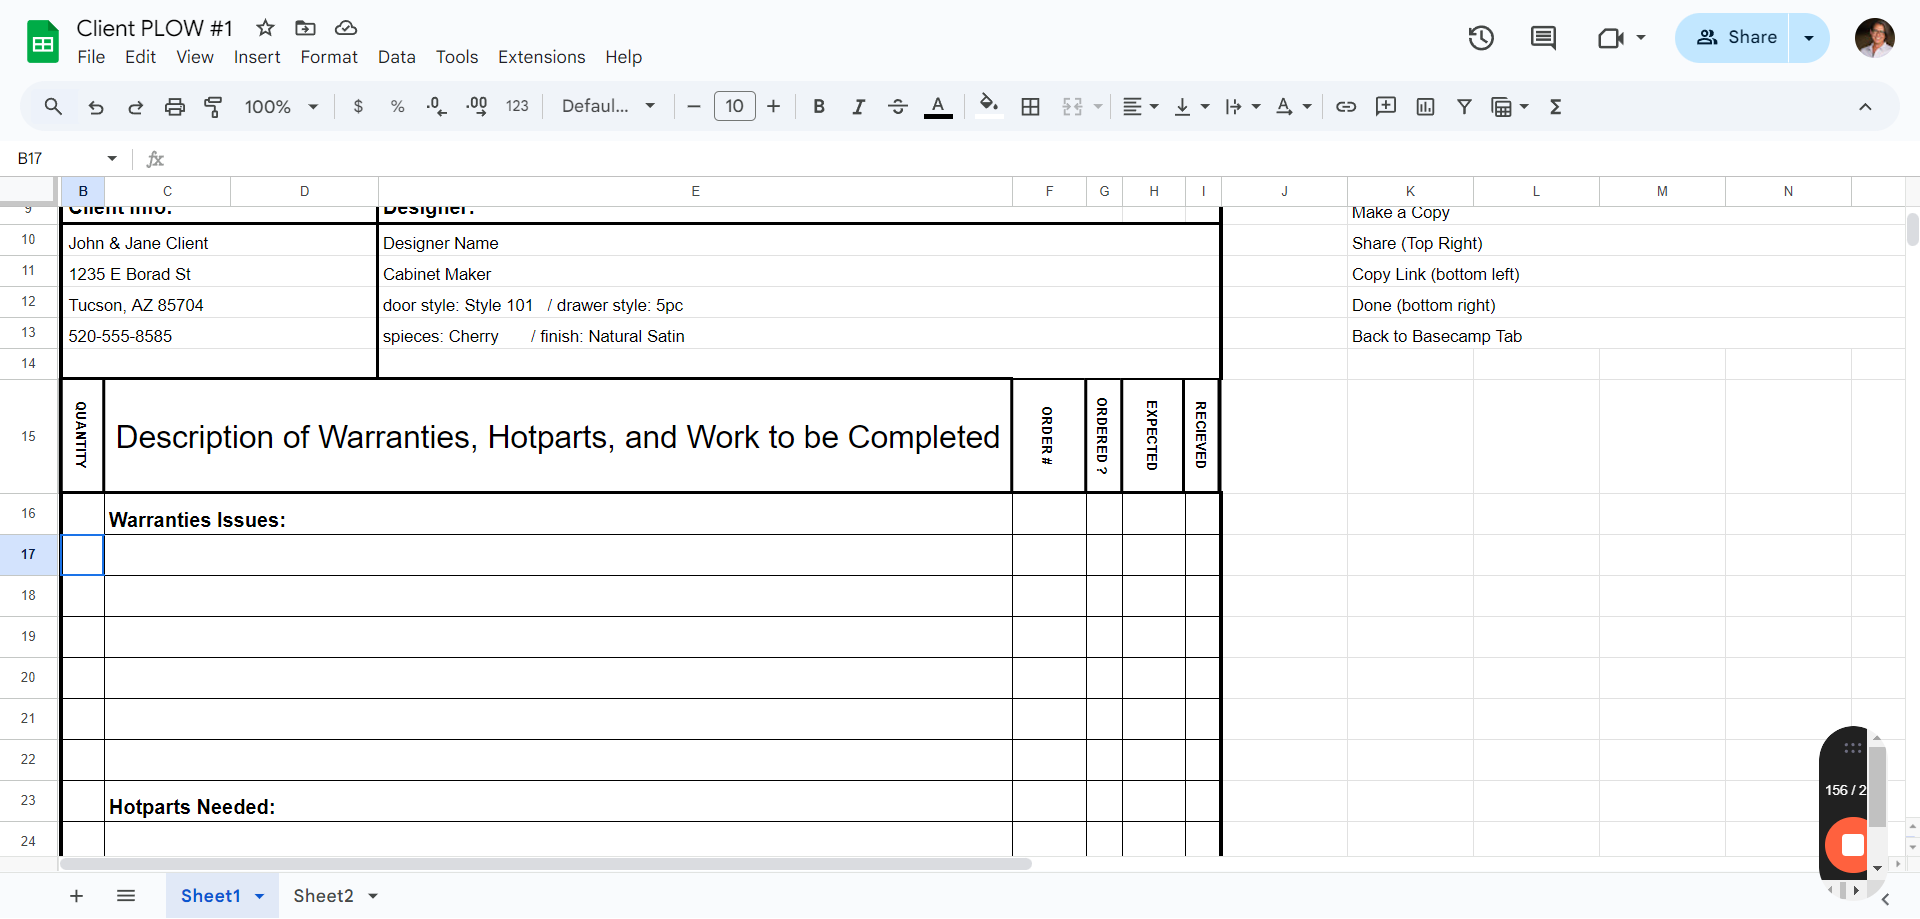
We would place the item description, quantity, and order number for the damaged item and indicate if it has been ordered. If we know the arrival date, we would note it. Once received, we would update the form with a "Y."
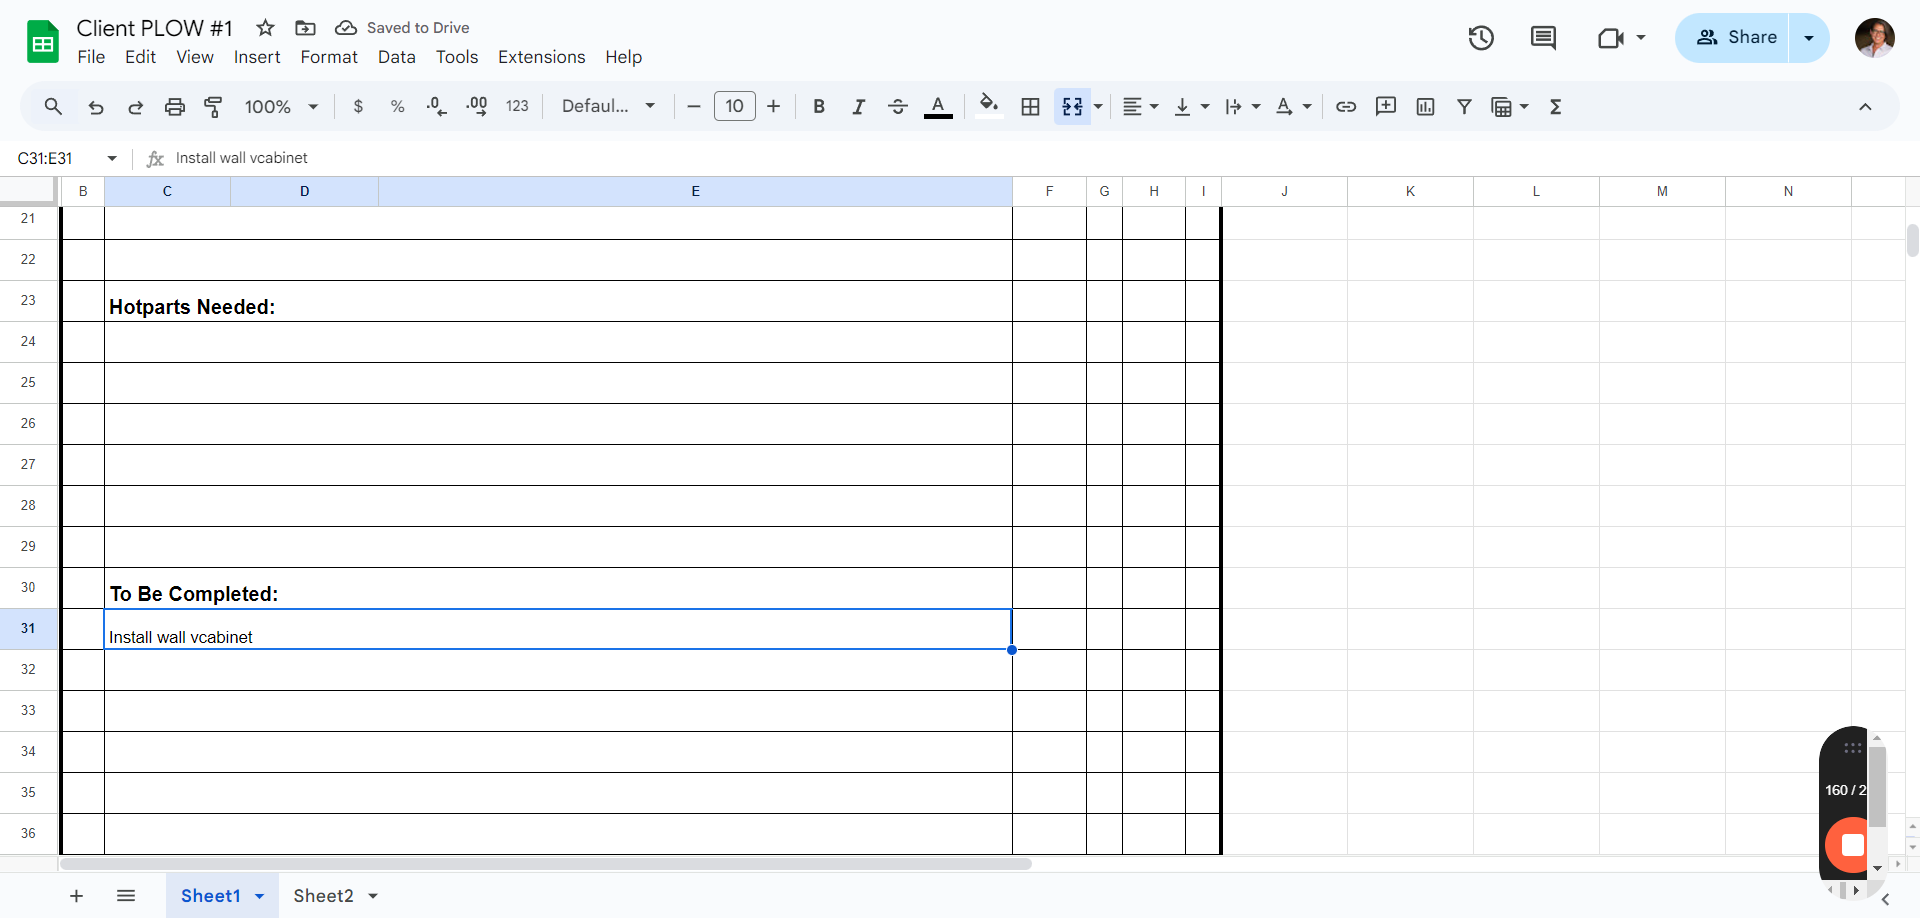
The same applies to Hot Parts. For any additional parts not in the original order that need to be ordered quickly, include that information here. Ensure you add the order number, whether it was ordered, the expected arrival date, and if it was received. Then provide instructions for installers in the "To Be Completed" section.
Our form is complete.
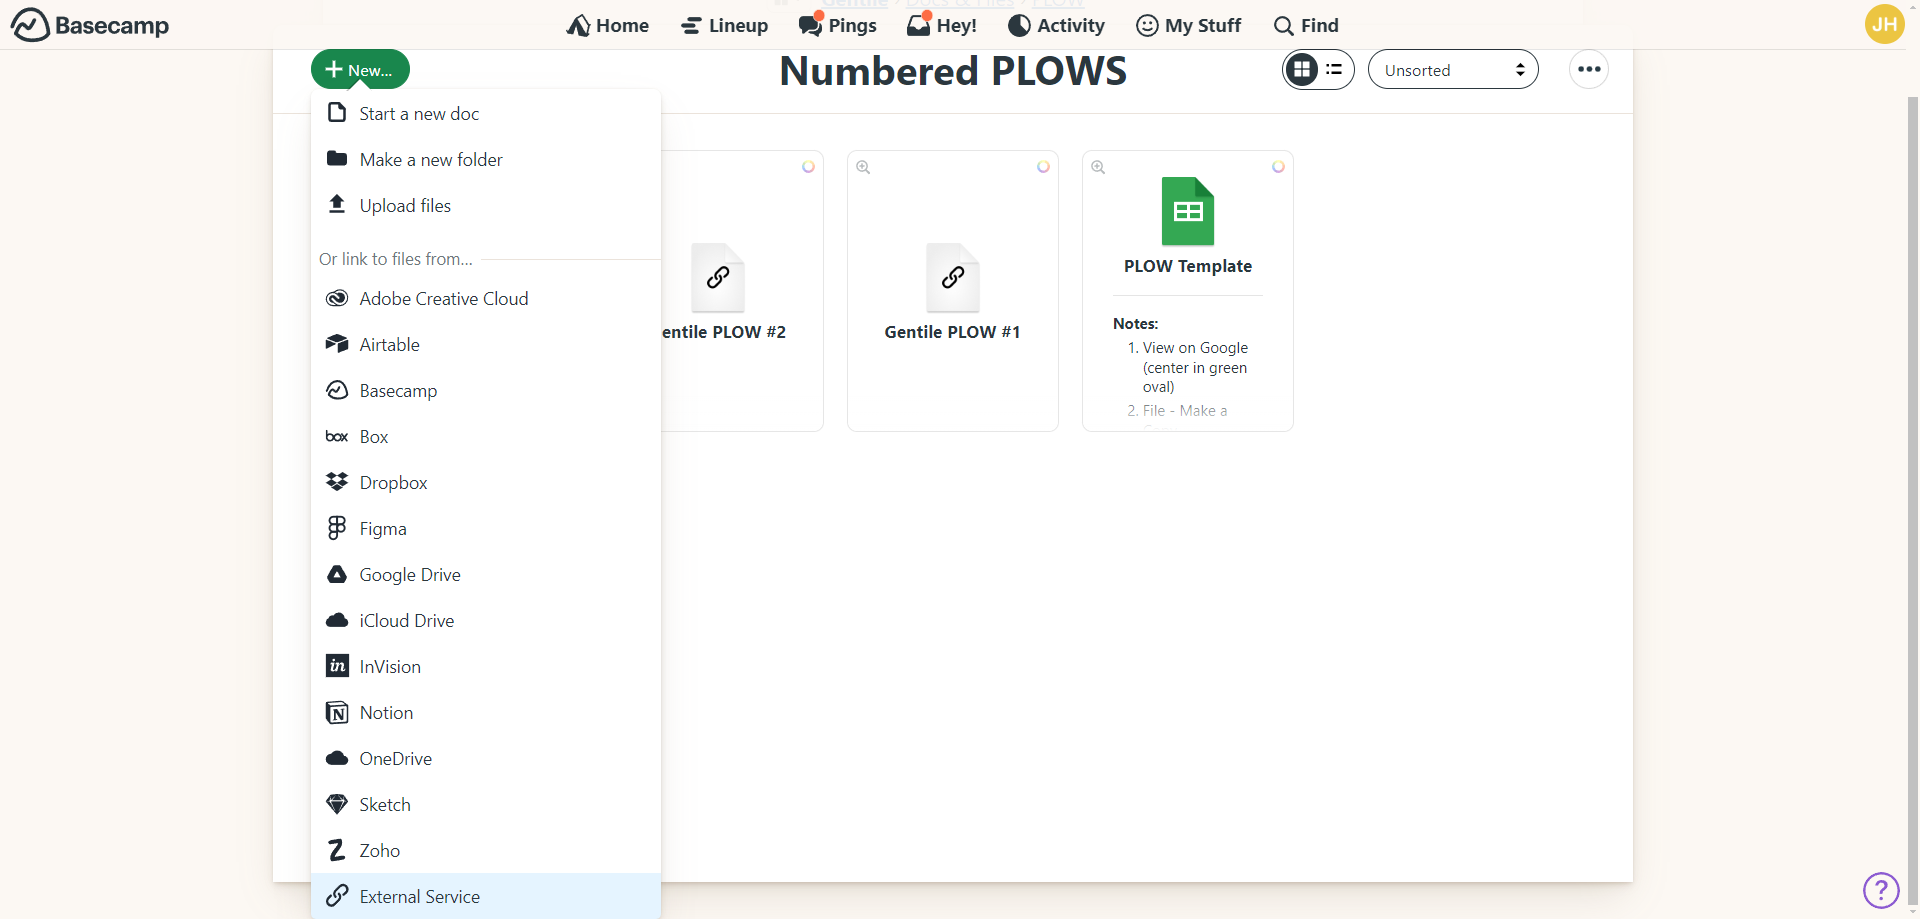
To post this into Basecamp, follow these steps: First, click the share button in the upper right. Within that pop-up window click on "Copy Link" then return to Basecamp. Next, go back to the Numbered PLOWS folder.
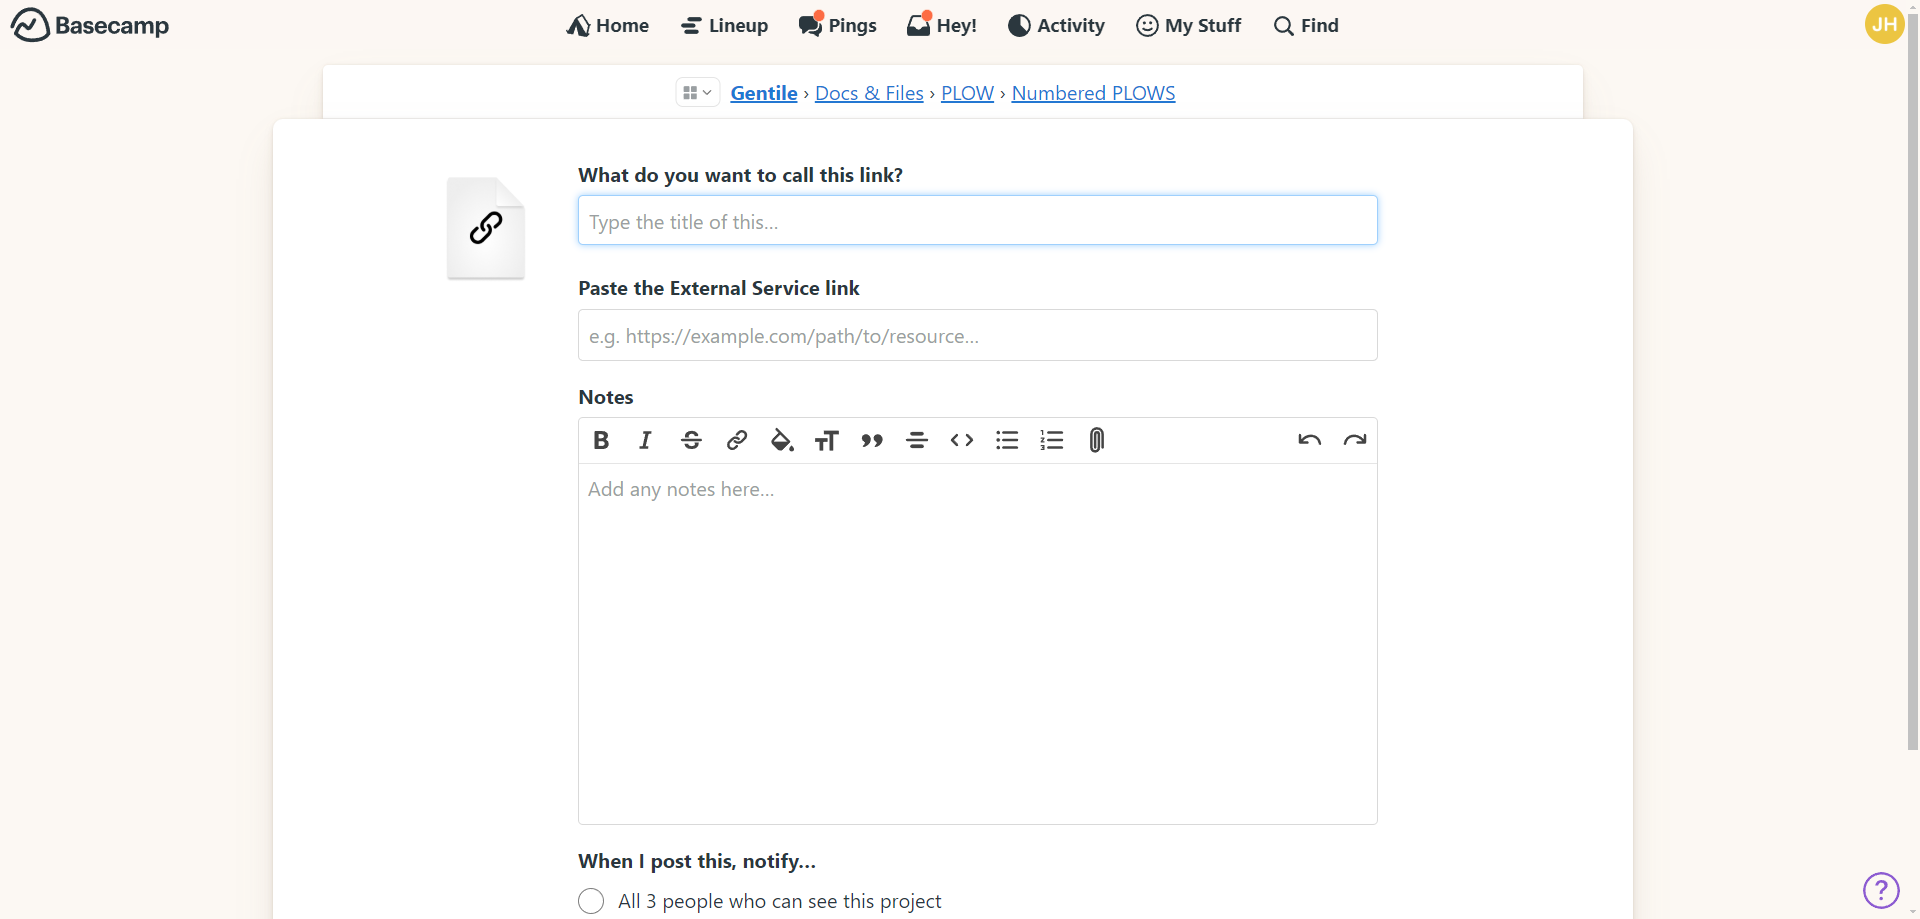
Go here to add our new numbered plow and Click "+ New" scroll to the bottom, and select "External Services."
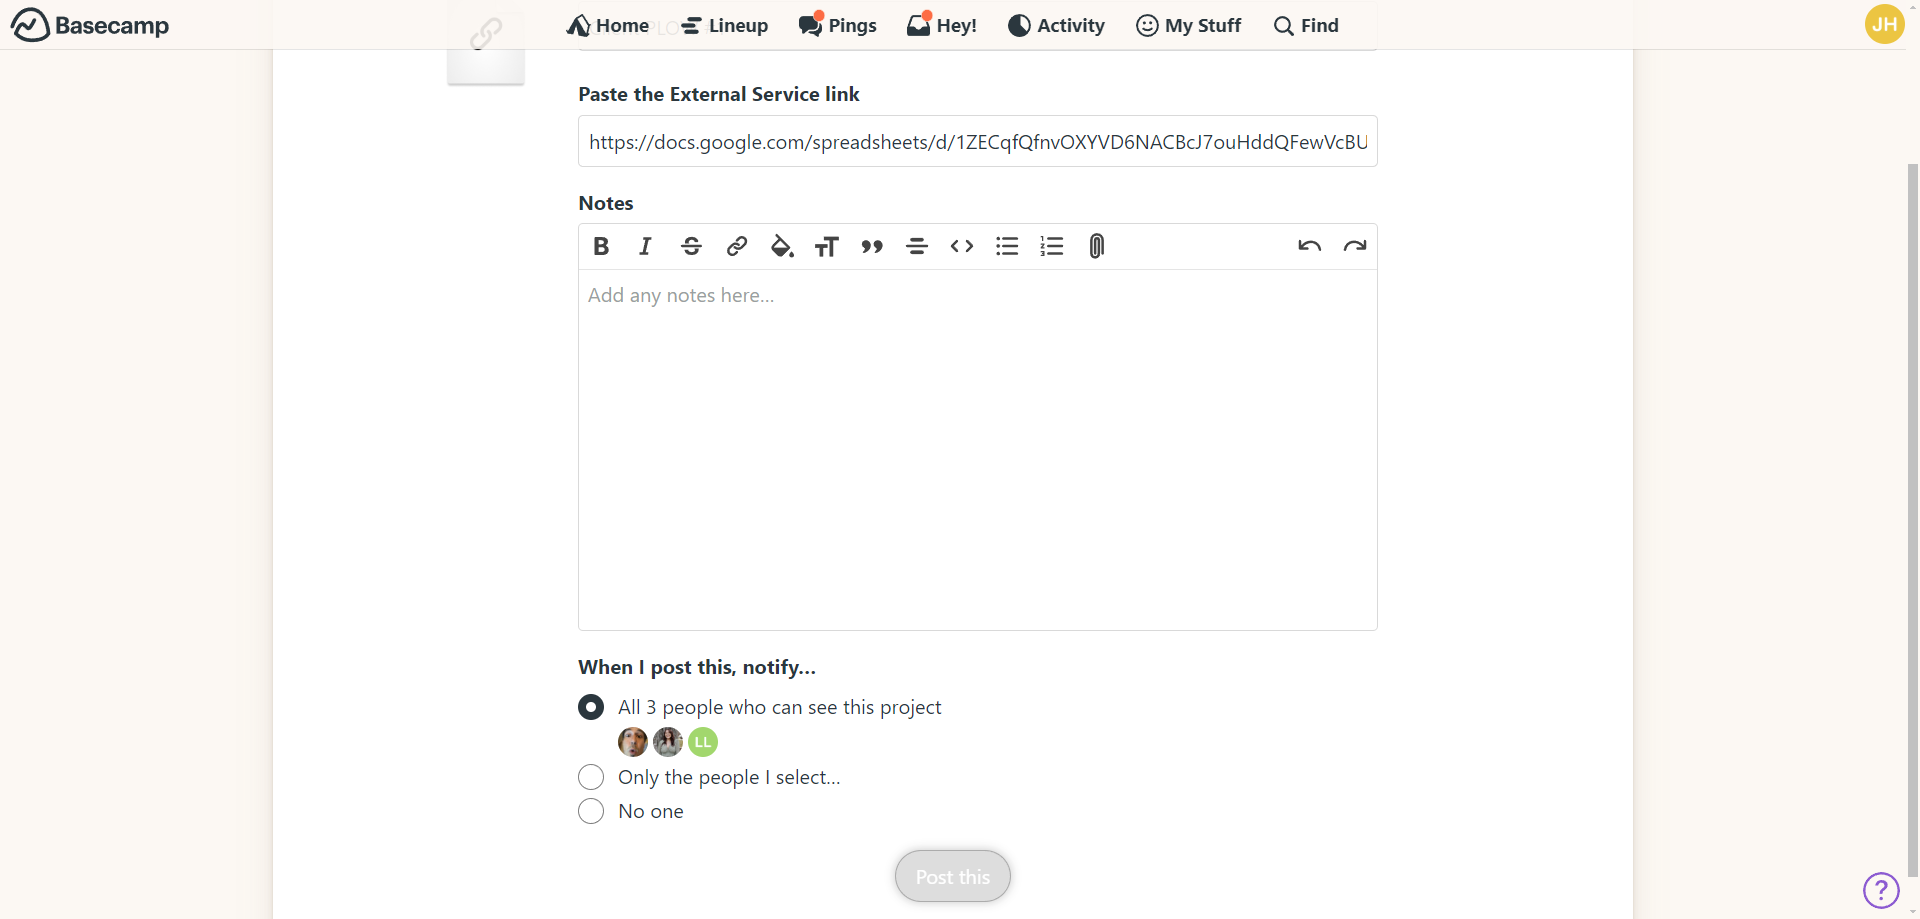
This allows us to link our Google Sheet to Basecamp. Click here, name the file, and paste the link in the space provided
Once you have named the file and pasted your link, it's important to share this link with everyone who has access to the account on Basecamp.
Click where it lists all the people who can see this project. Then, proceed to post it.
We're done.
It is now available for anyone to read at any time, whether in the field or in the office. That's all there is to it.