How to Create an API Key in Dentally for Aldense Integration
Learn step-by-step how to generate an API key in Dentally and integrate it with your Aldense account. This guide covers accessing settings, generating tokens, and selecting the right permissions for appointment bookings.
In this guide, we'll learn how to create an API key in Dentally. This is the first step to connect your Dentally account with Aldense for appointment bookings.
You will generate a personal token in Dentally, set the correct permissions, and save the key for later use. This process helps you prepare for integrating Dentally with Aldense.
Let's get started
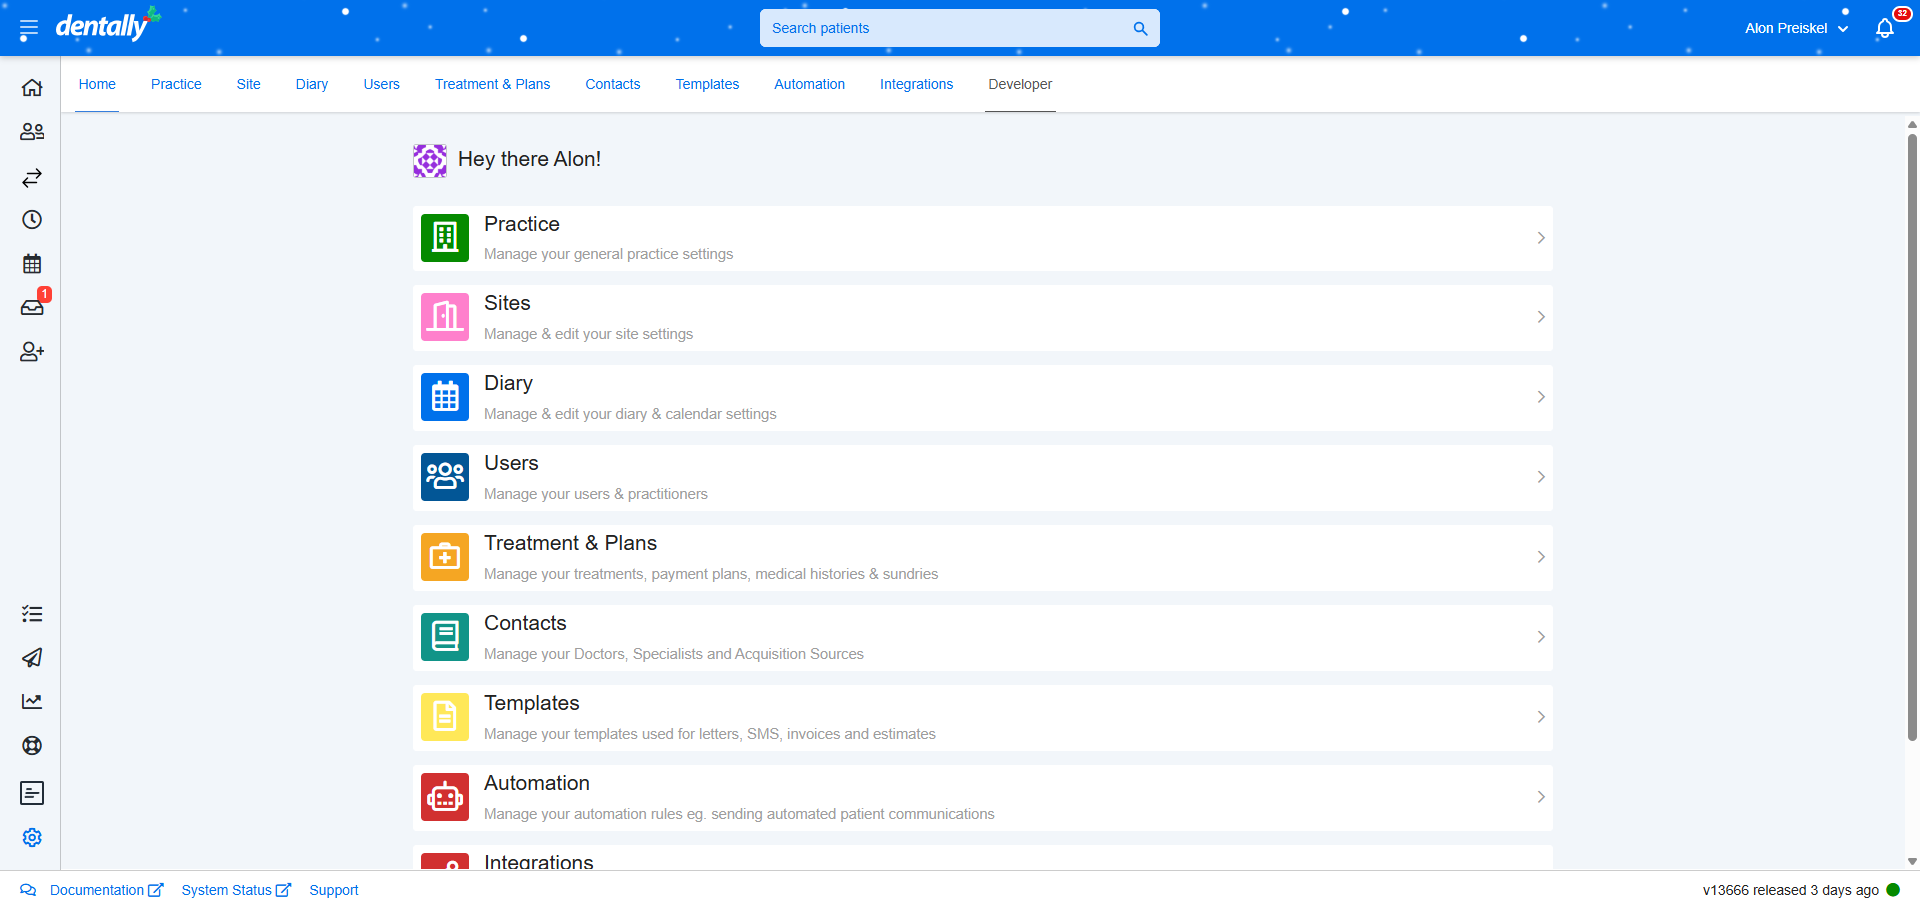
This guide explains how to create an API key in Dentally. The first step is to integrate Dentally with your Aldense account. On the Dentally homepage, look at the bottom left of the menu. At the very bottom, you'll see the settings cog. First, click on the settings cog.

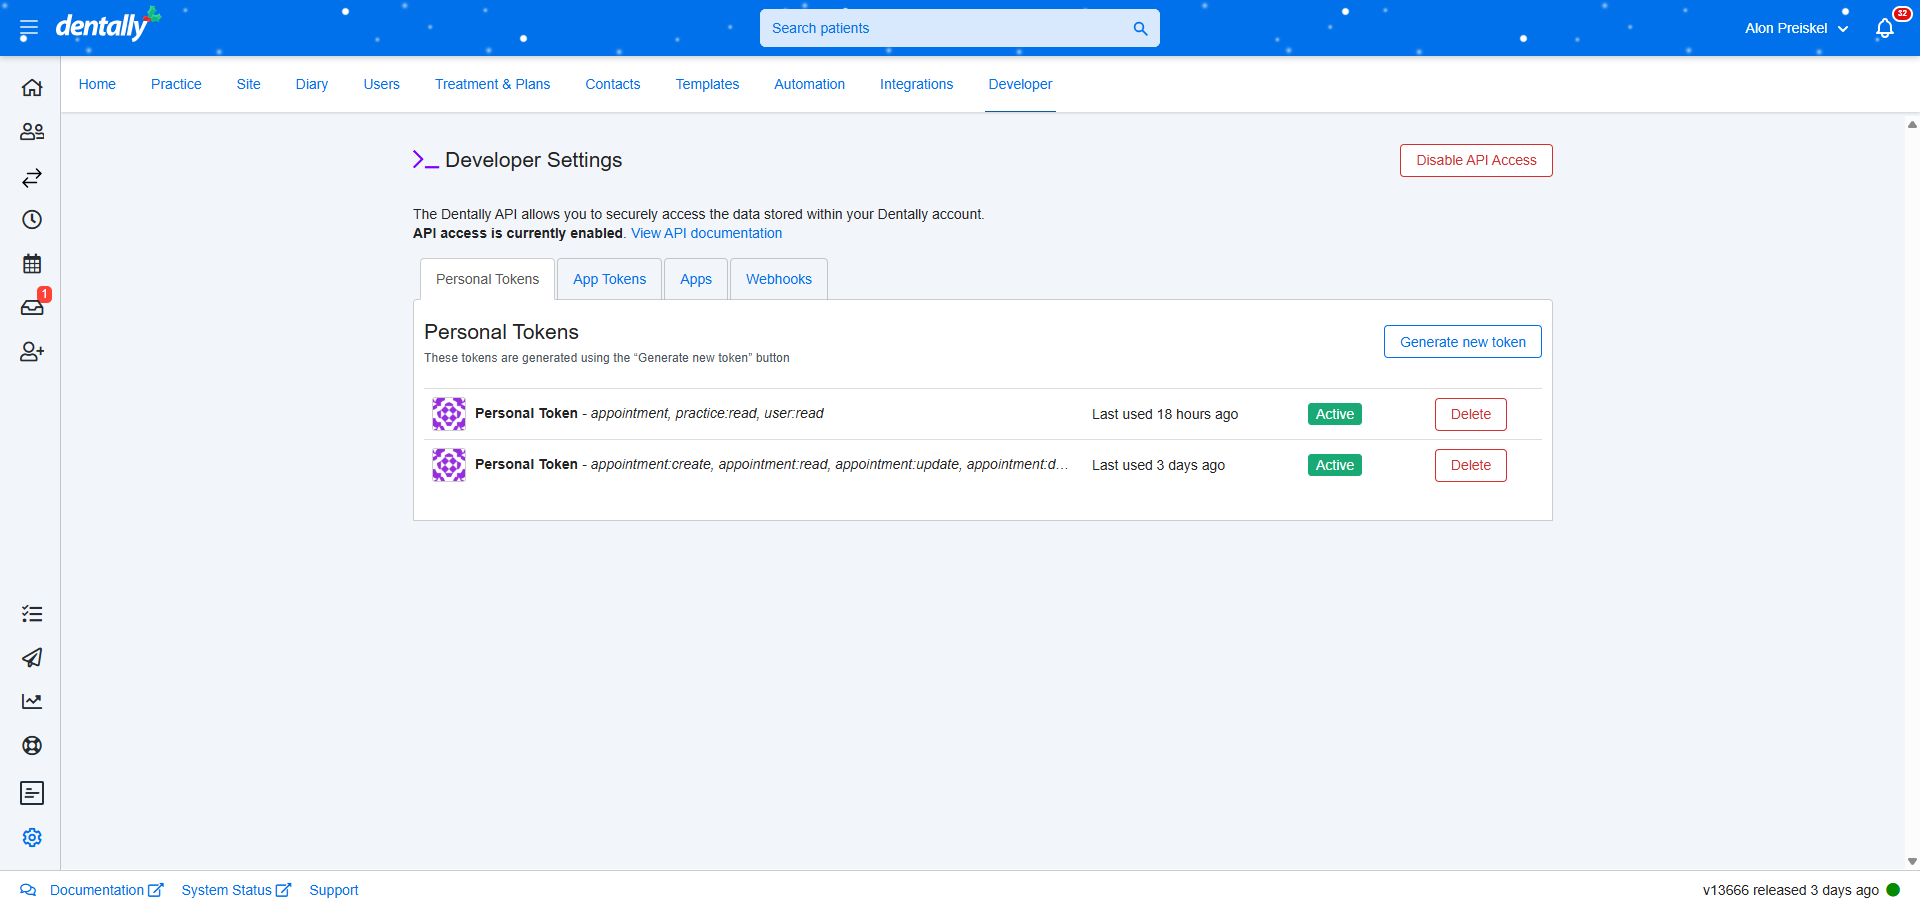
On the top menu, you will see a Developer tab at the far right.
Click the Developer tab. One option is personal options, such as personal tokens. The next step is to click on "Generate New Token."
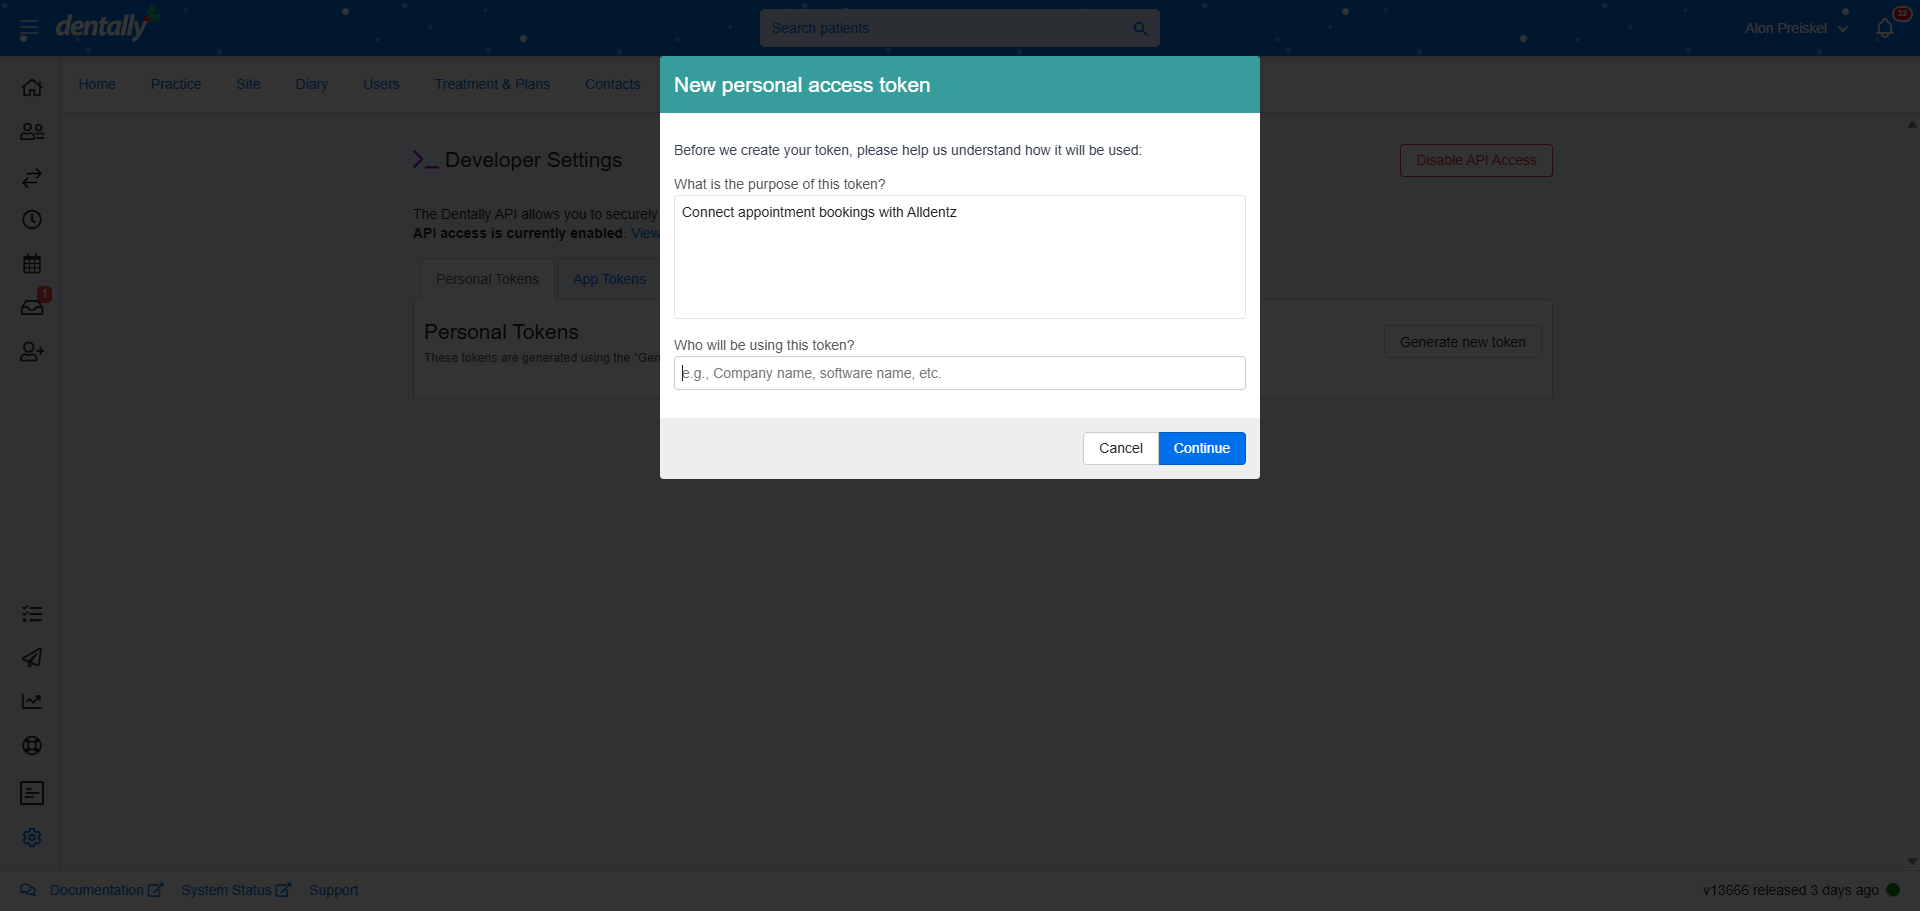
It will ask you for the purpose of this token. You can write that it is to integrate or connect your appointment bookings with Aldense.
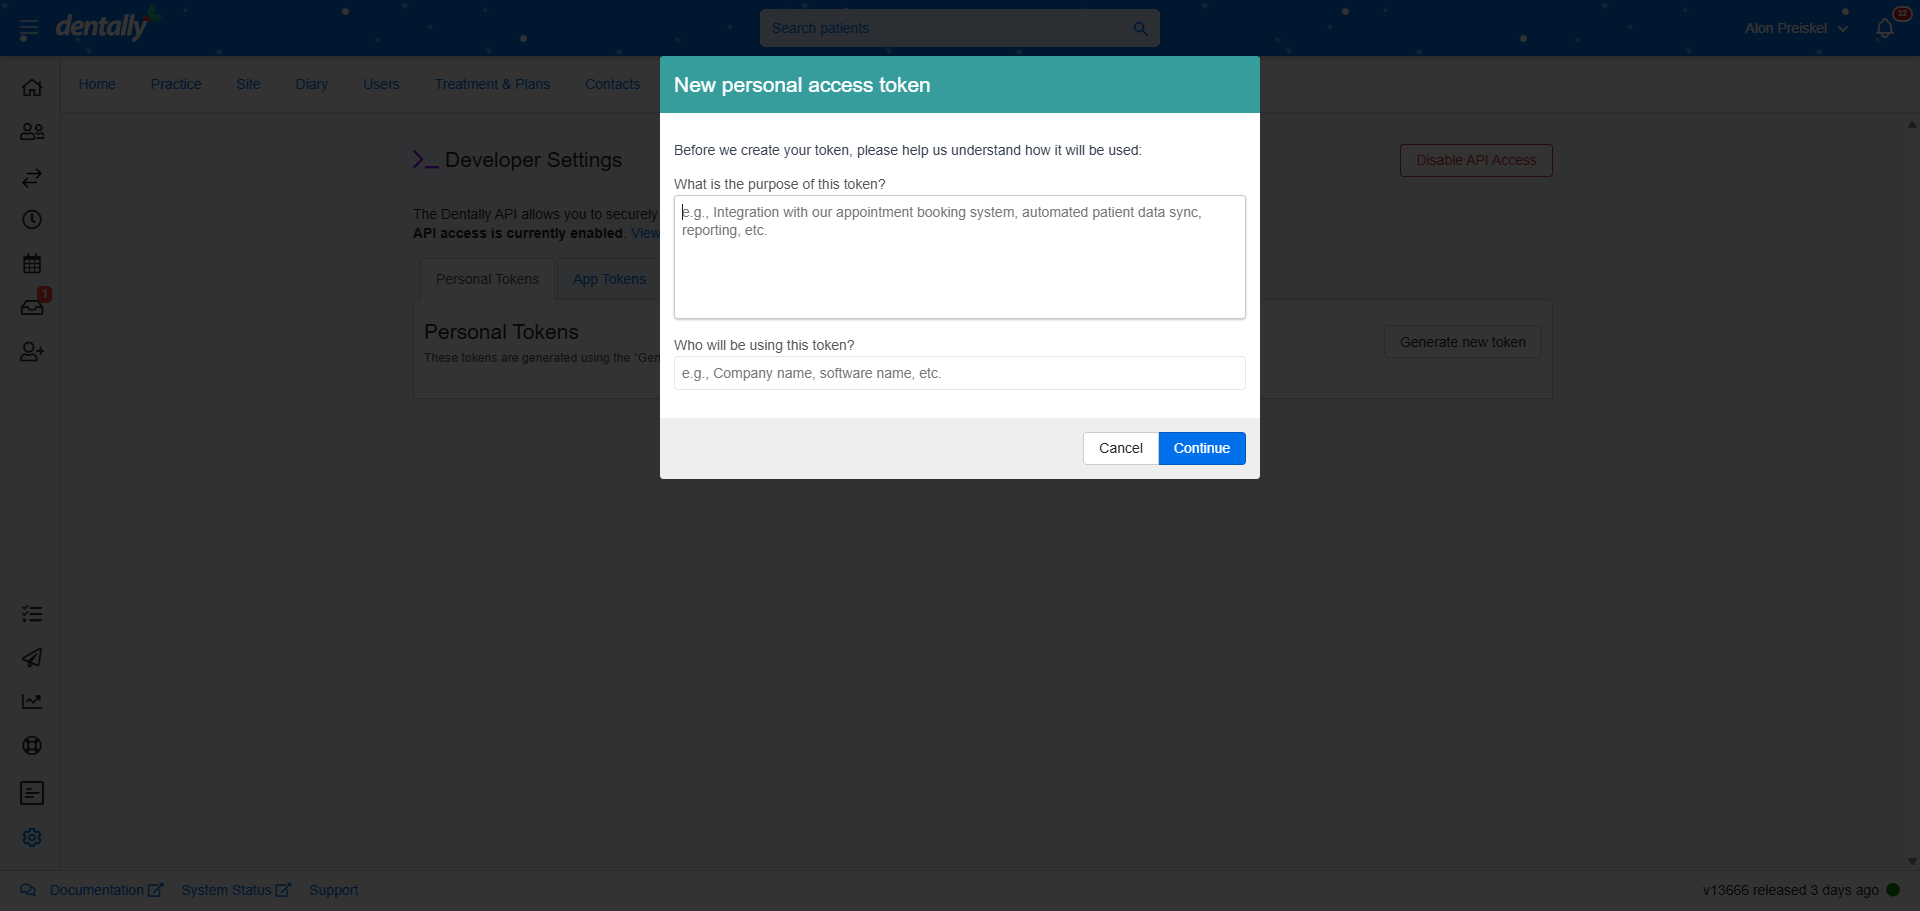
Connect appointment bookings with Aldense. Who will be using the token? That will be Aldense.
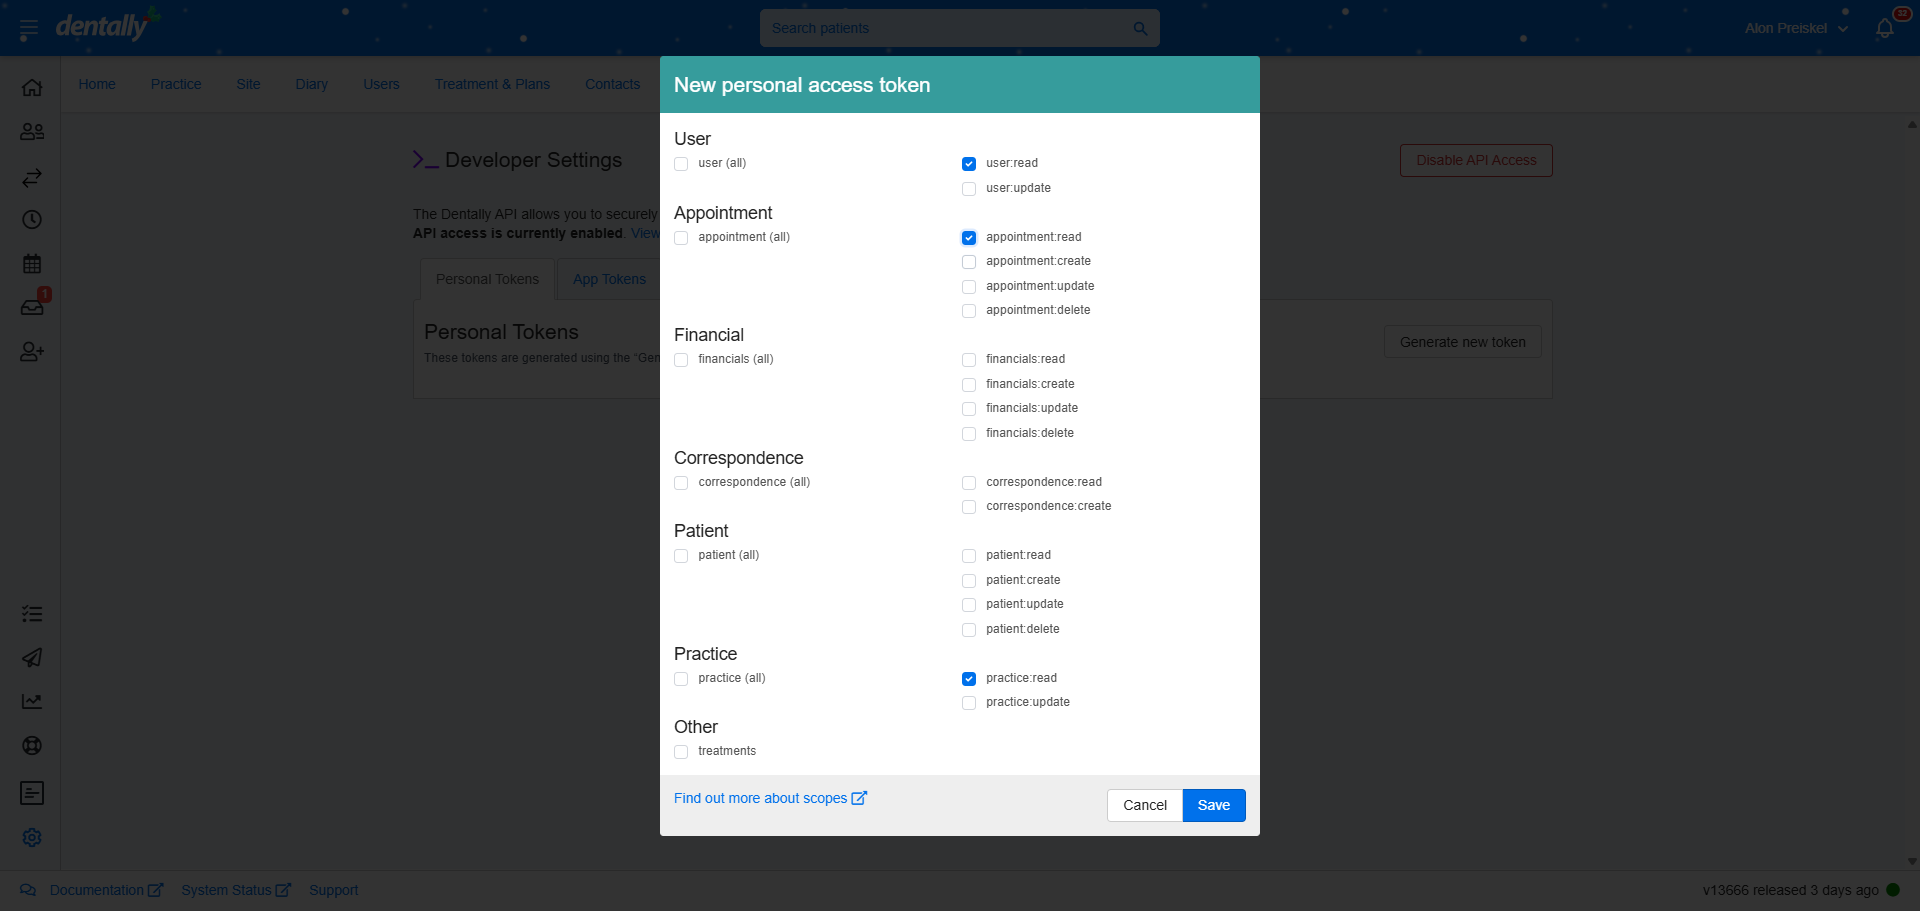
Then press Continue. Next, select the access tokens you want.

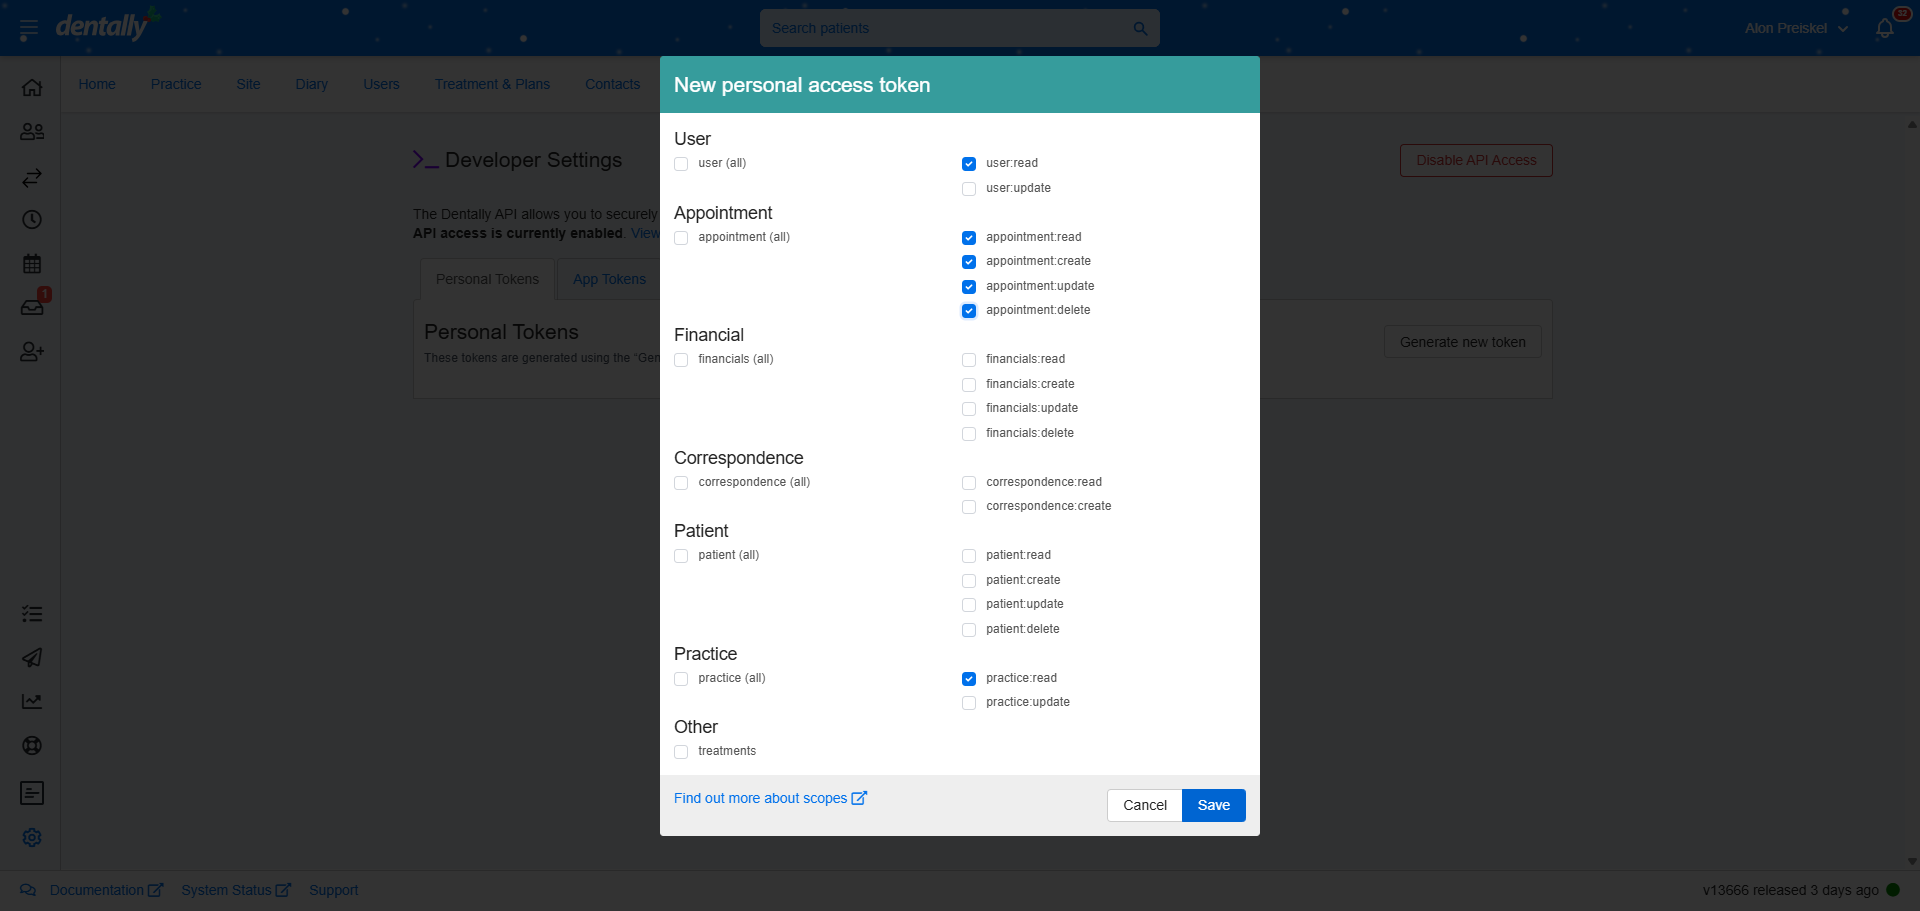
Select "User Read," then check all appointment permissions: "Appointment Read," "Create," "Update," and "Delete."


That's it. Then click Save.
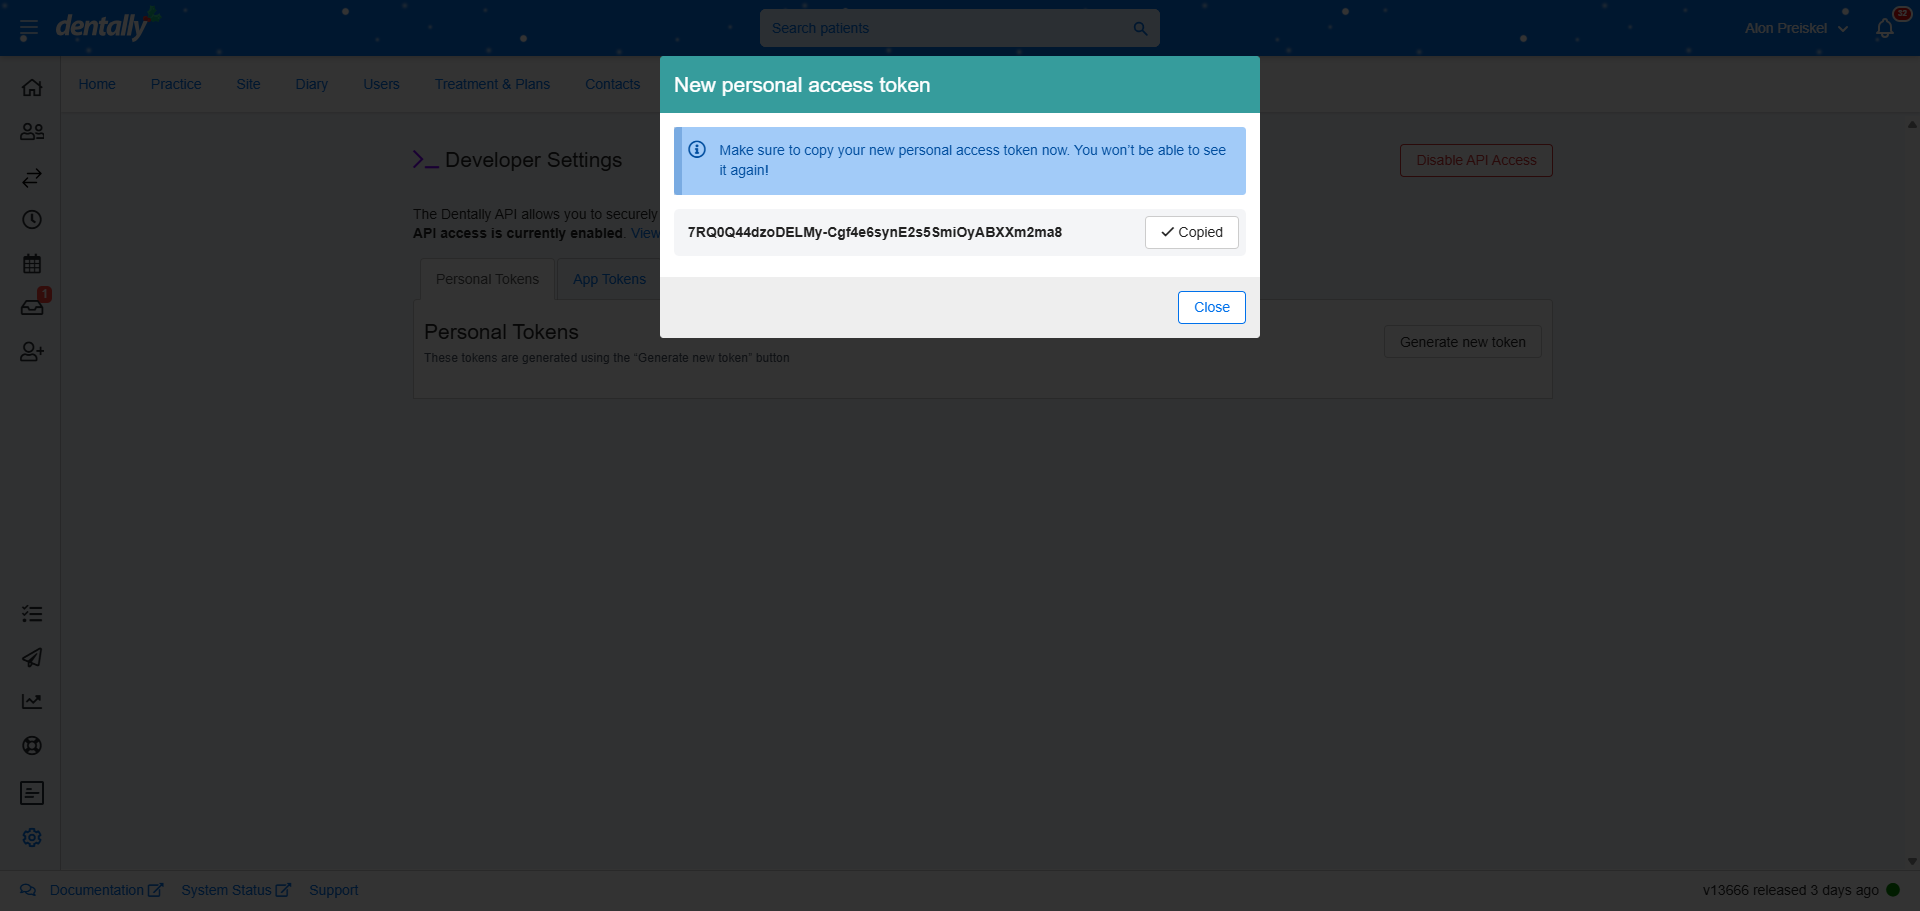
The actual API key will appear. Press "Copy."
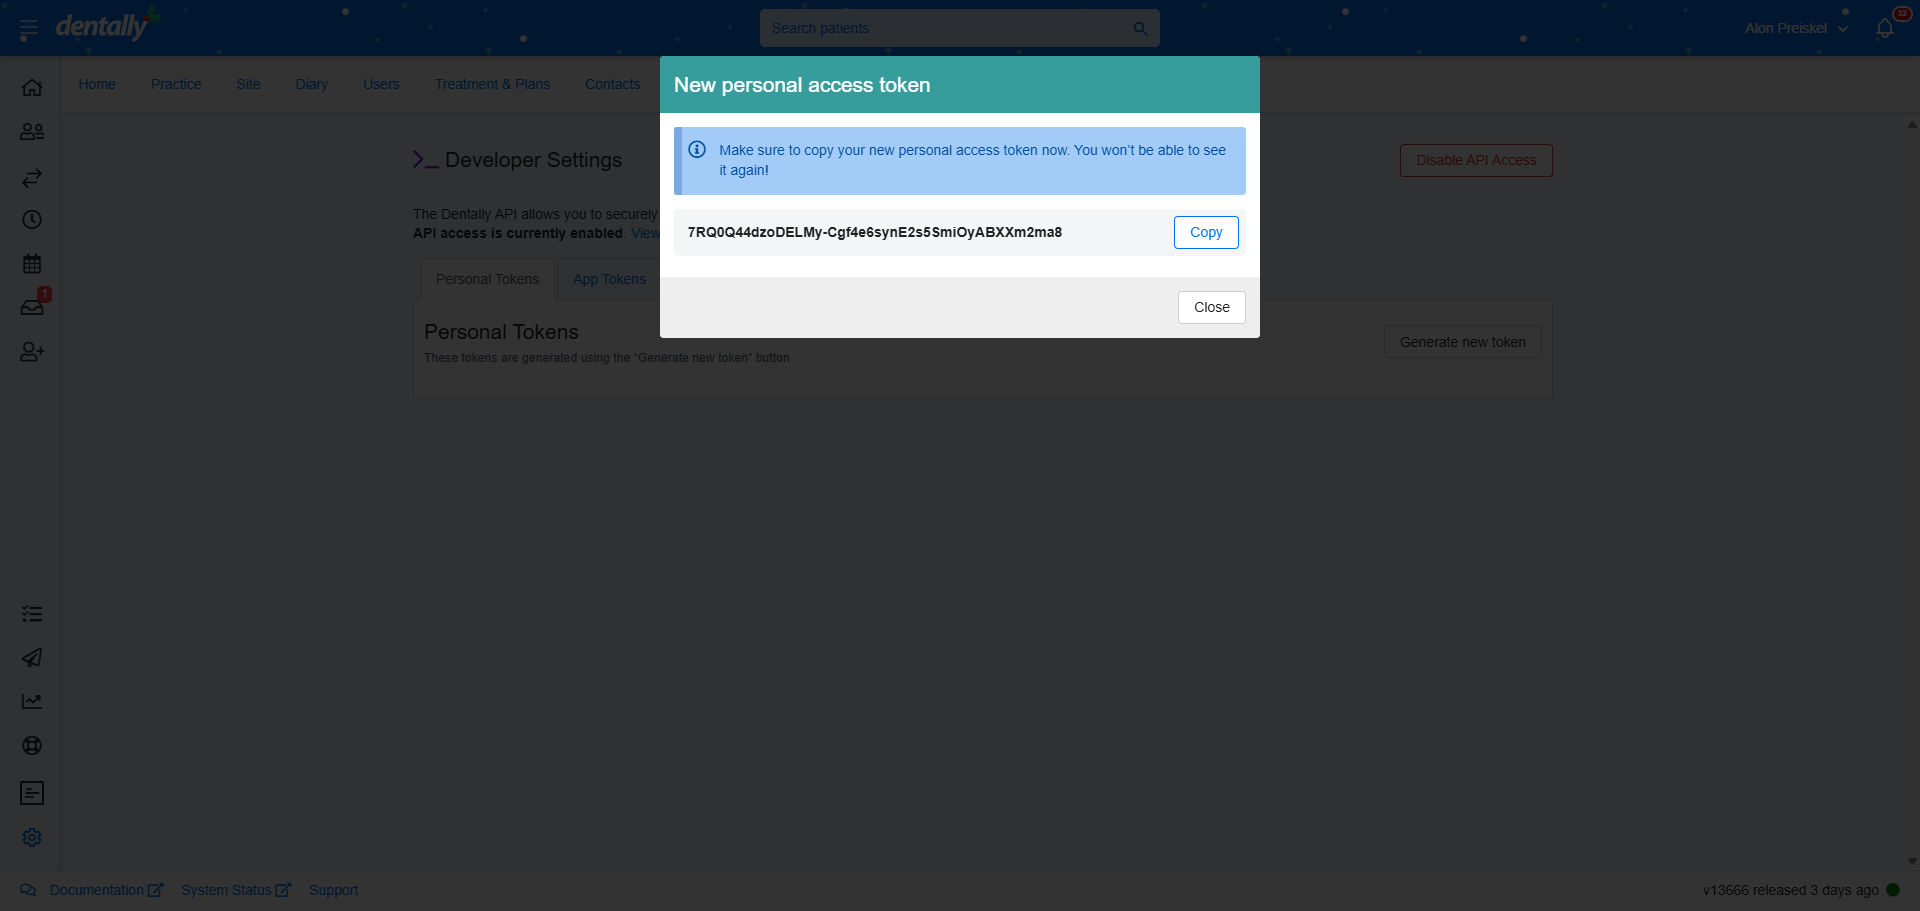
It's a good idea to paste that into a separate document. This way, you have a record of it. Click "Close." Then, refer to the follow-on guide to learn how to use the API to connect Dentally and Aldense.